Tag Archives: Last Minute

DIY Fast & Easy Mardi Gras Glittered Napkin Rings Craft Tutorial (+ Ribbon Votives, Centerpiece, Free Place-card & Invitation Printables)

012Leigh

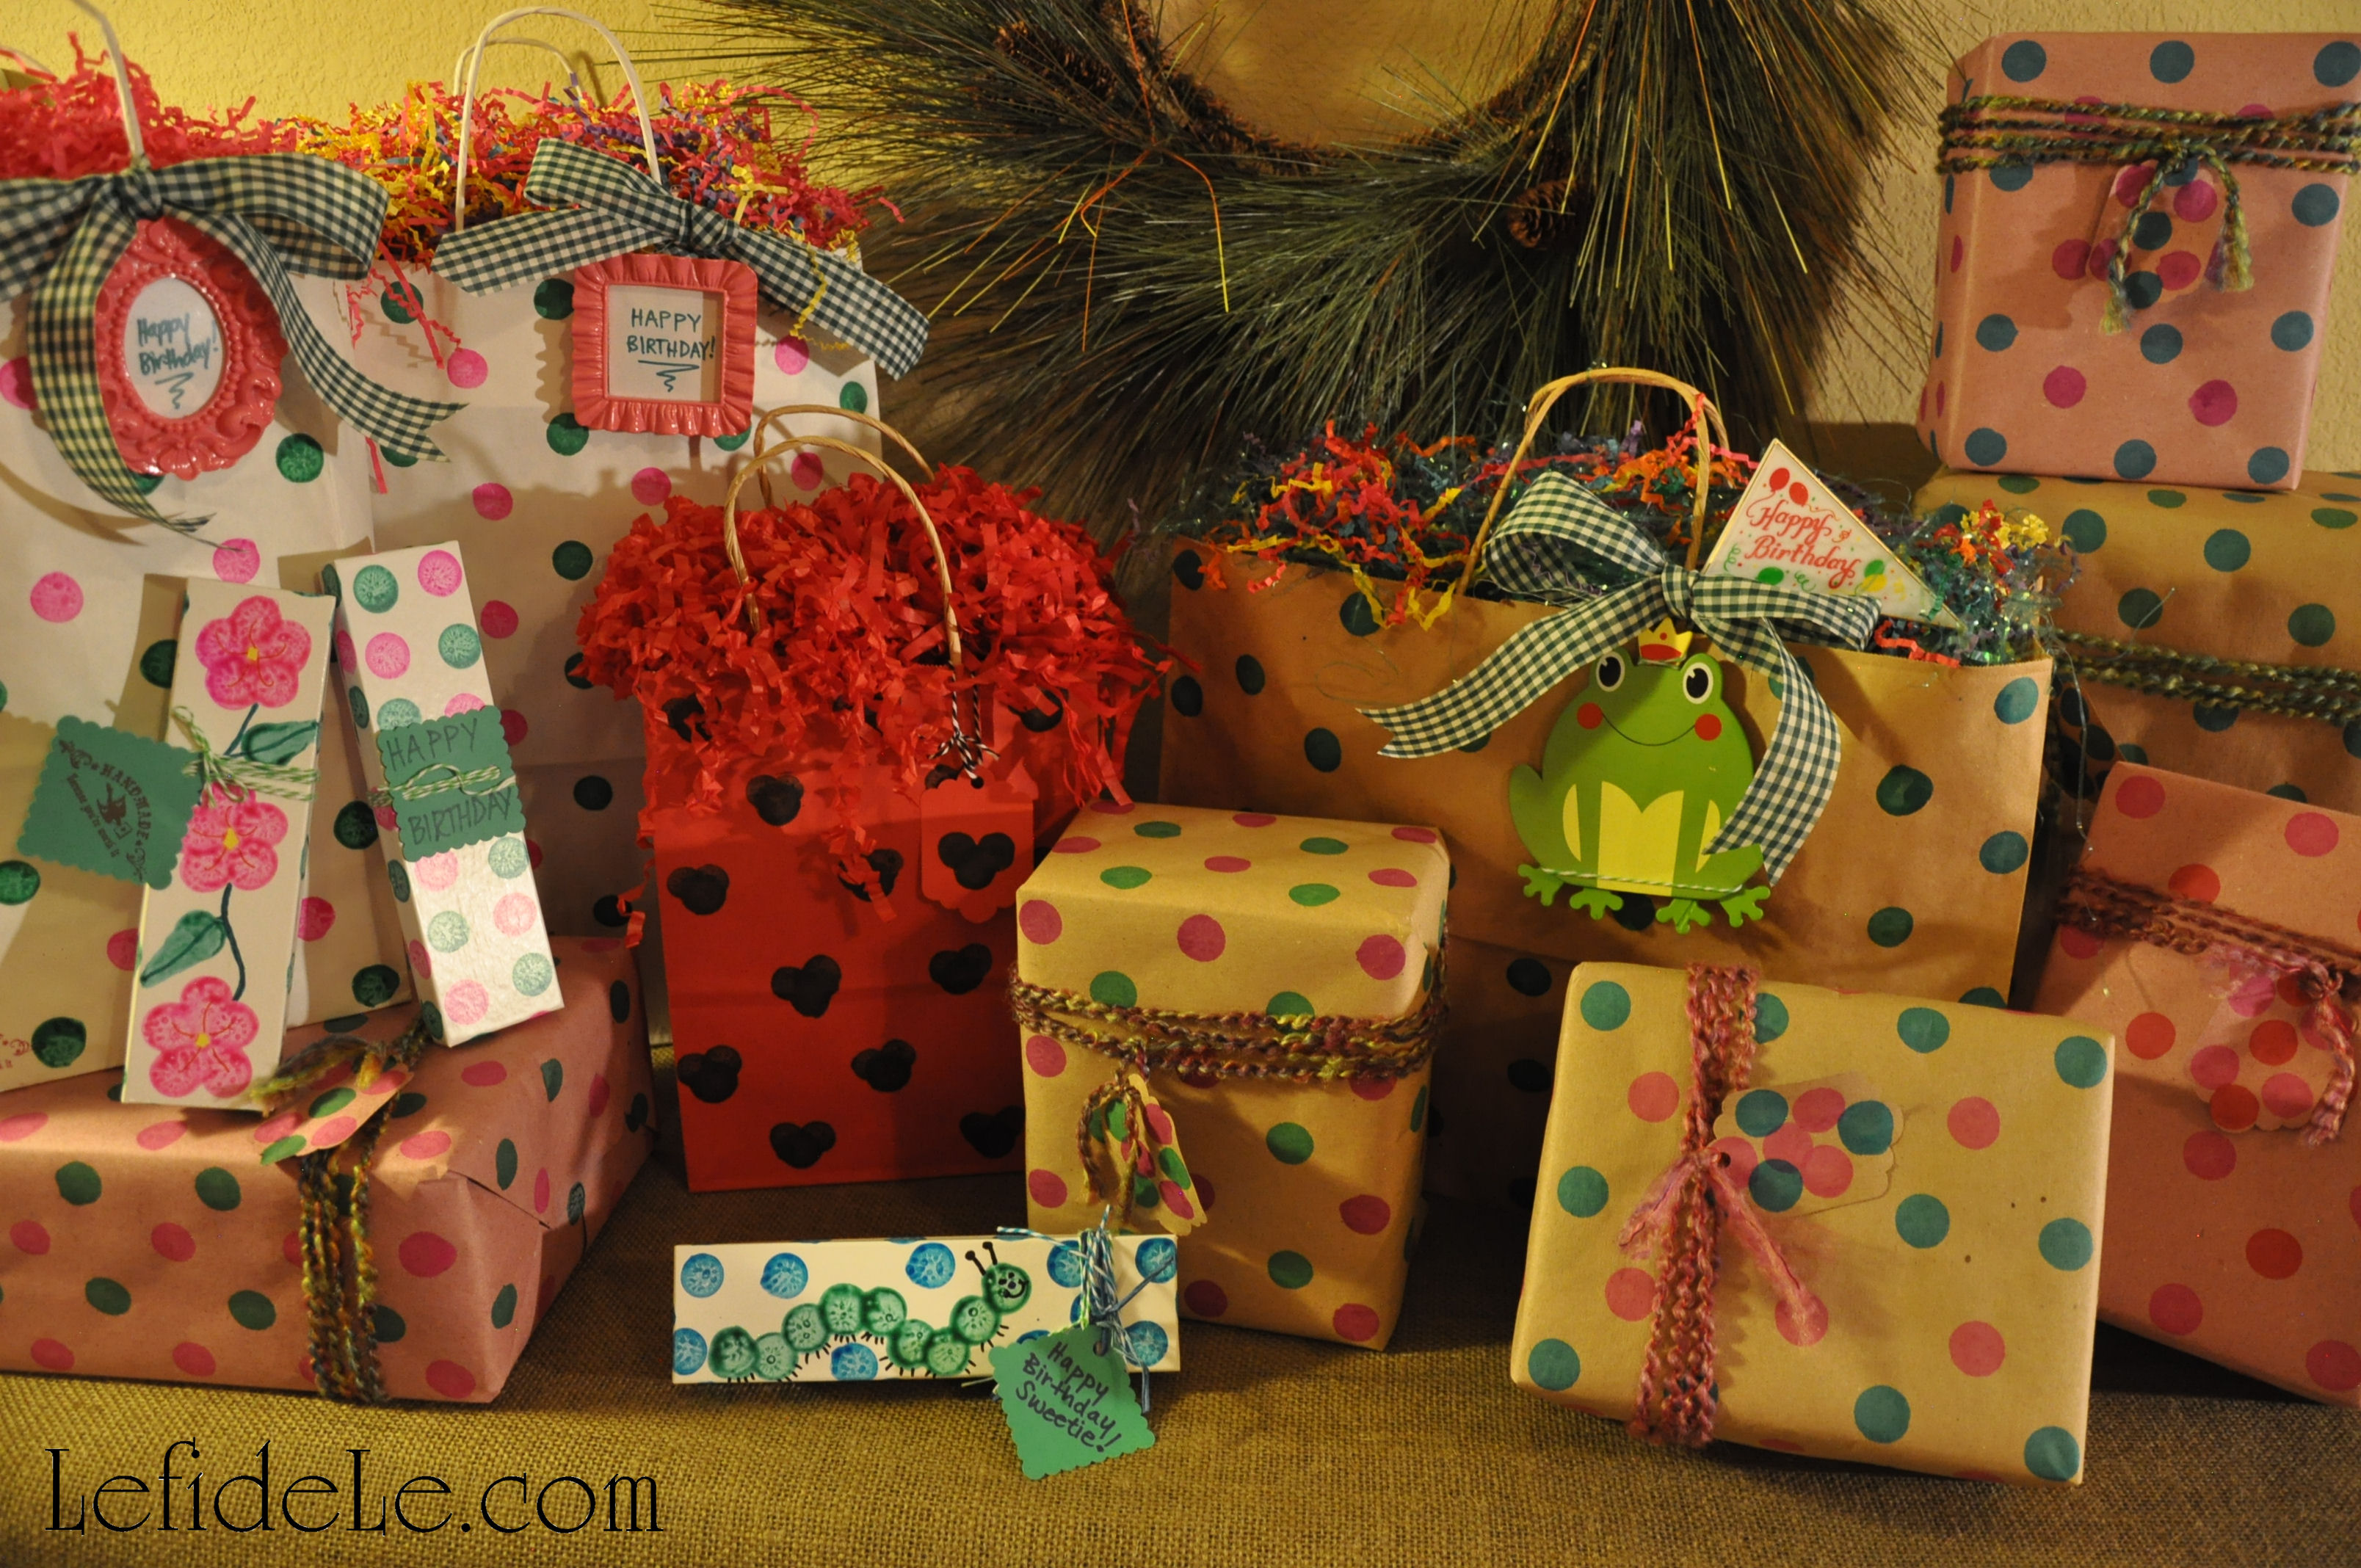
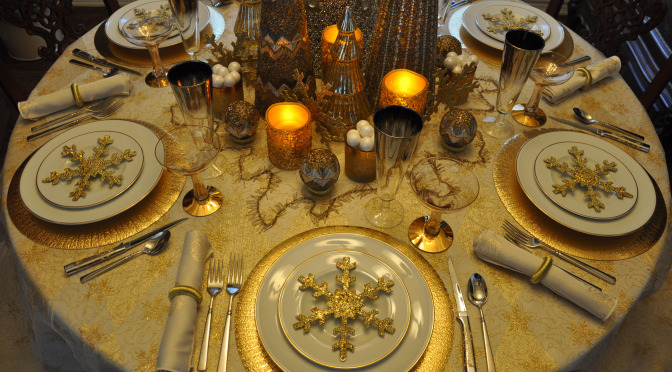
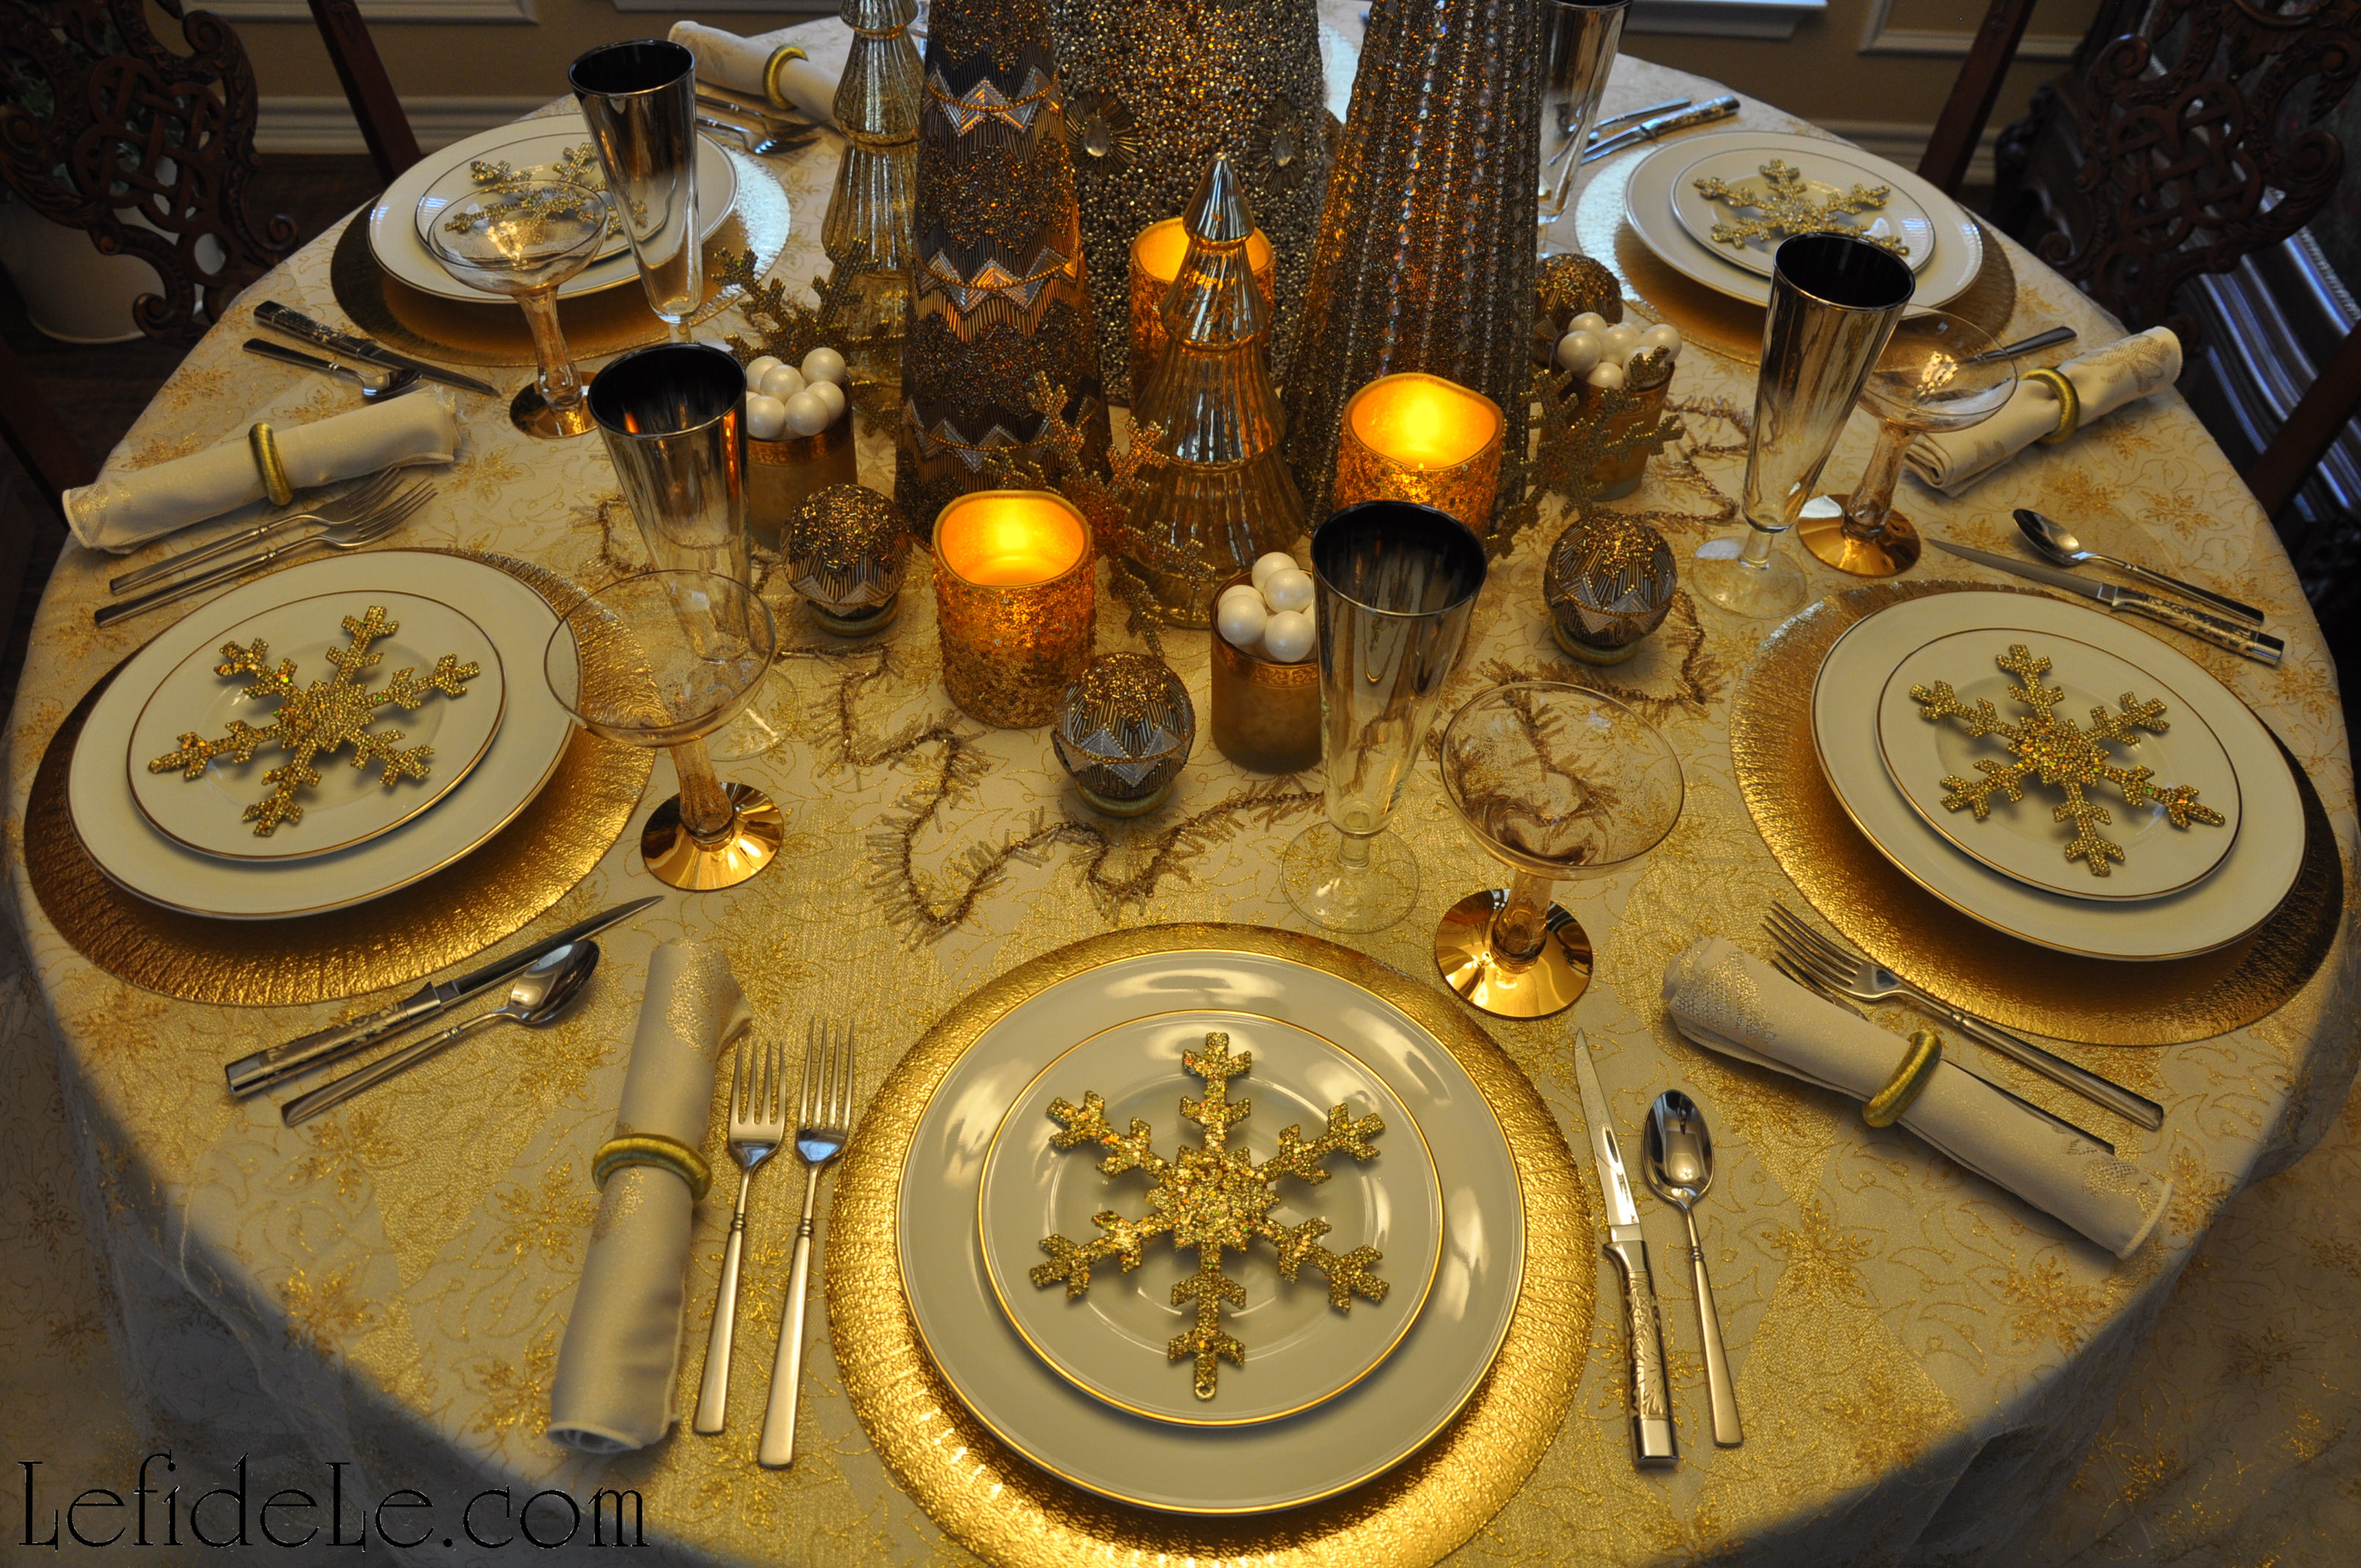
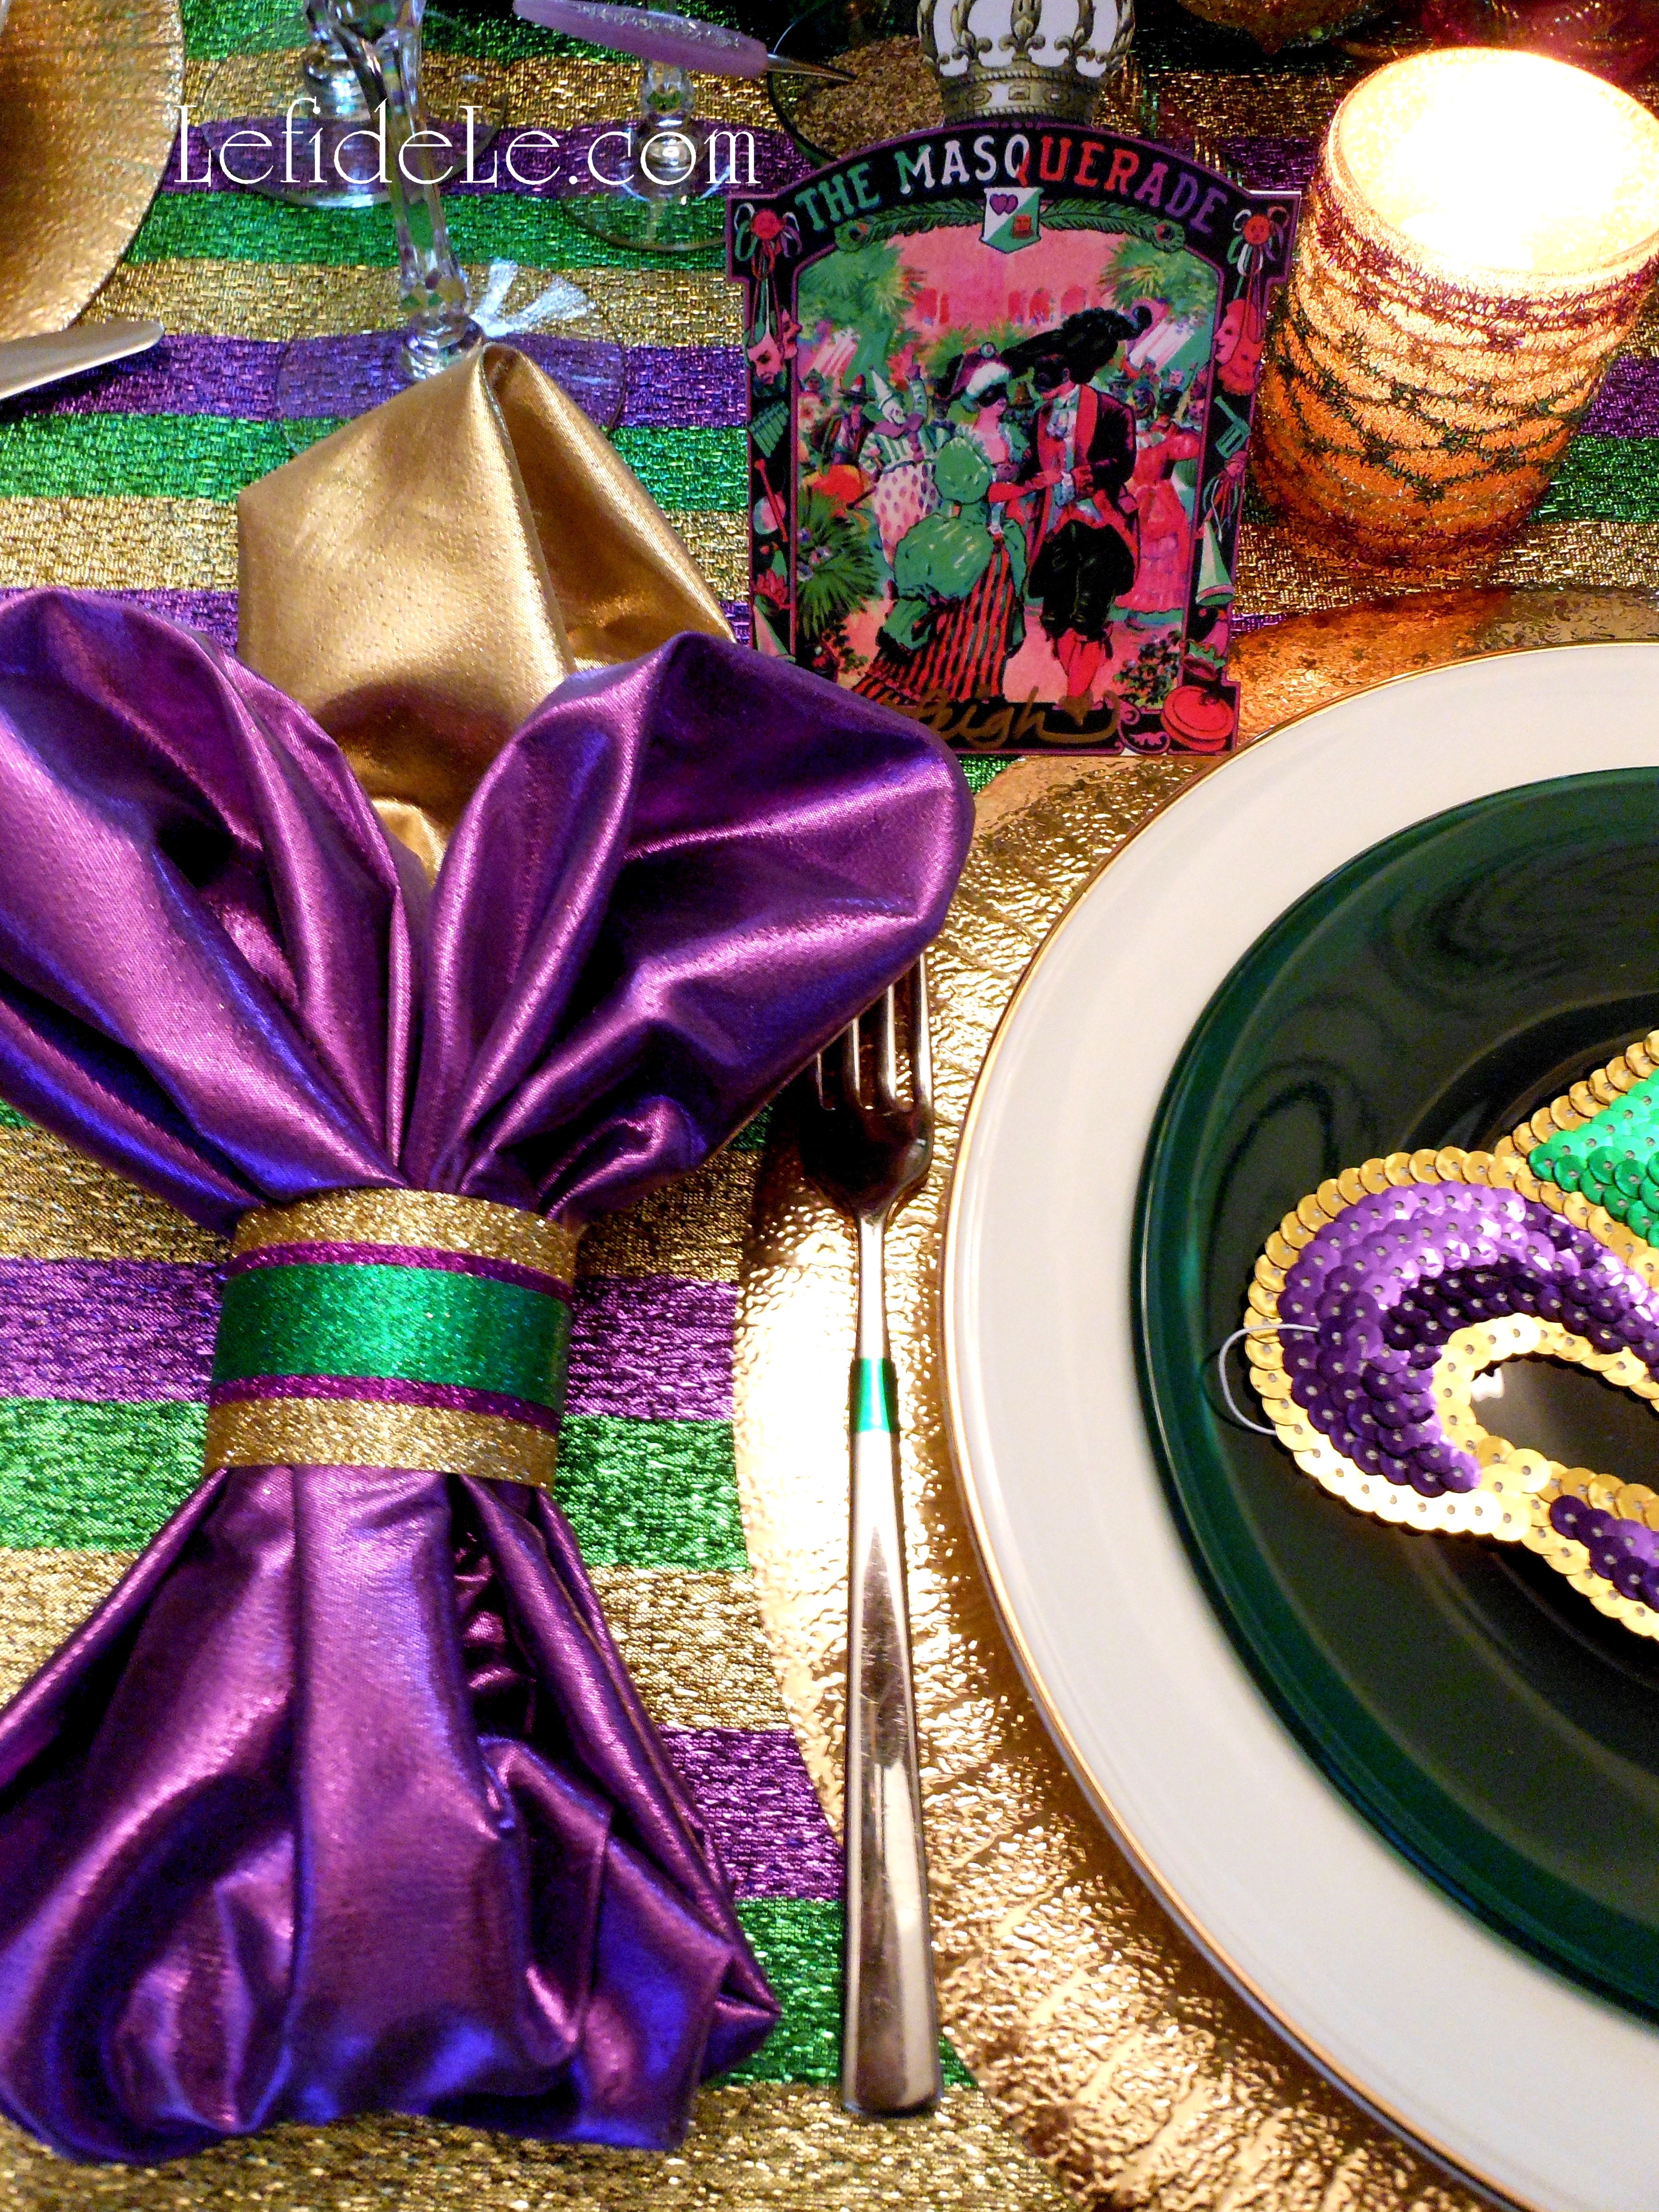
Create your own elegant Mardi Gras themed glittered napkin rings for mere pennies with this fast and easy craft. The tutorial includes how to embellish votives to match your theme, free masquerade place-card and invitation printables, plus more details on the centerpiece from the Mardi Gras Masquerade Themed “Fat Tuesday” Dinner Party Tablescape Décor Ideas. These DIY projects are an easy and inexpensive way to bring the look of an authentic Krewe’s fête to your own crew!

304Leigh

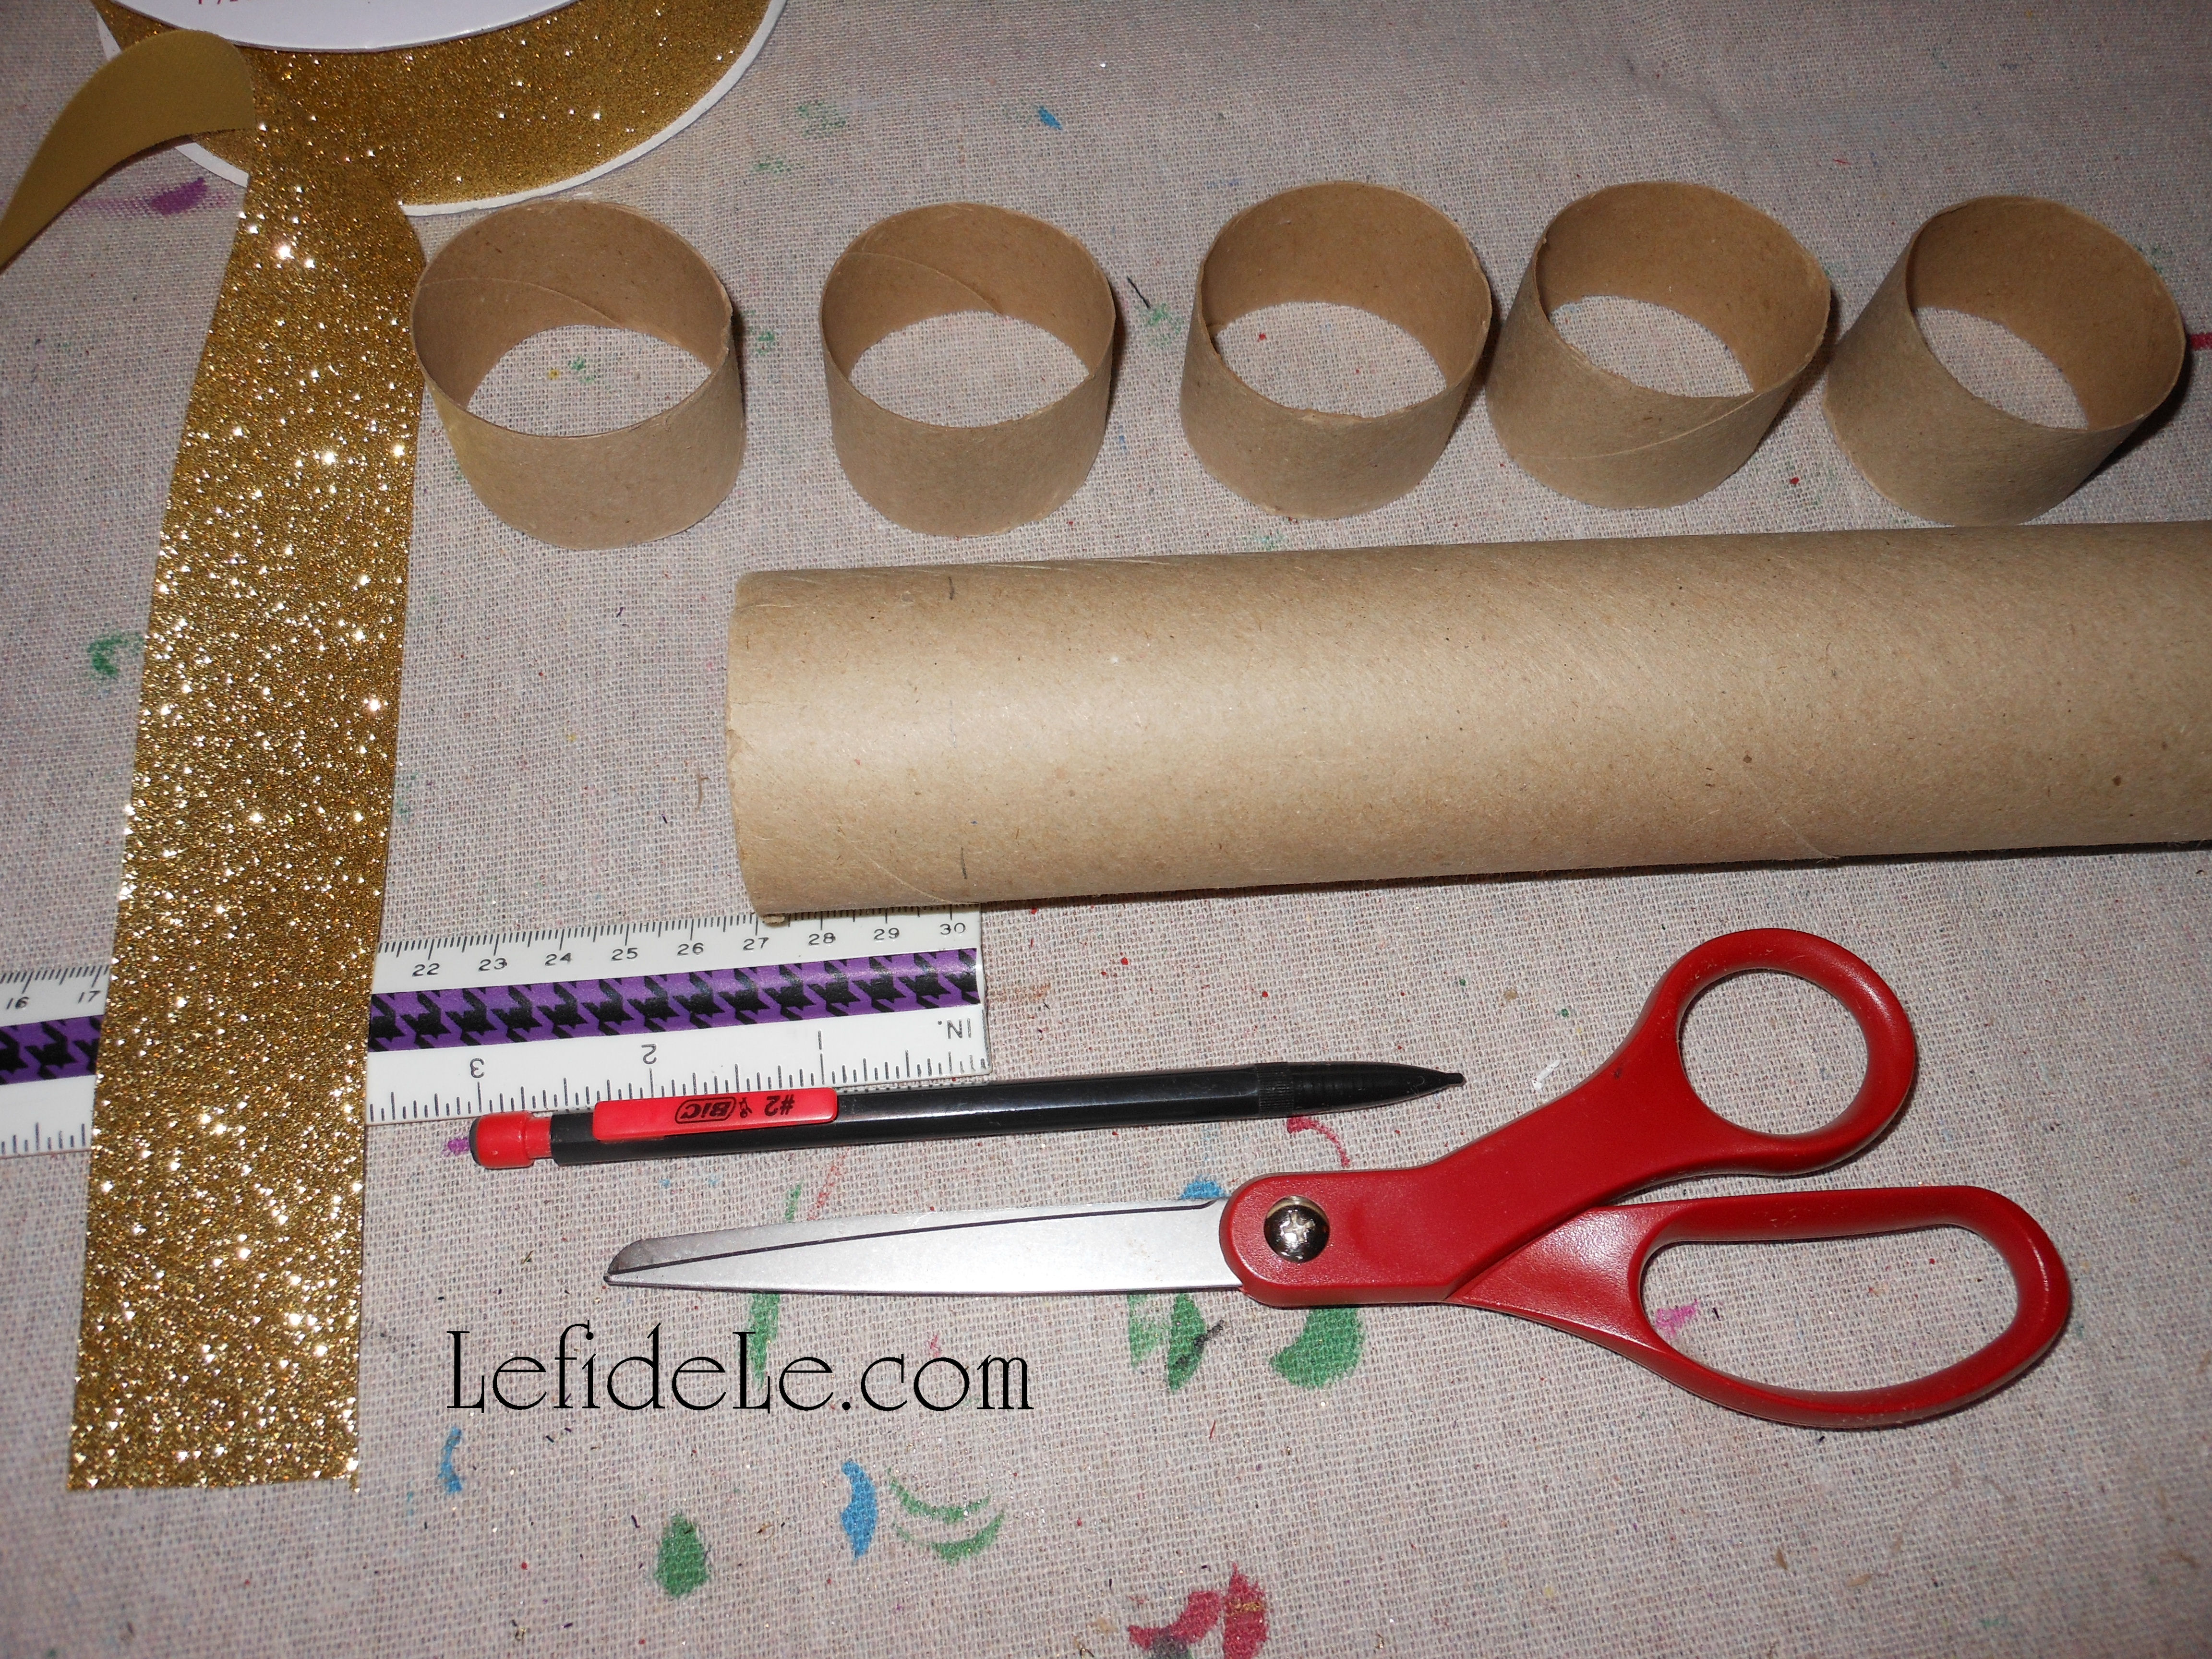
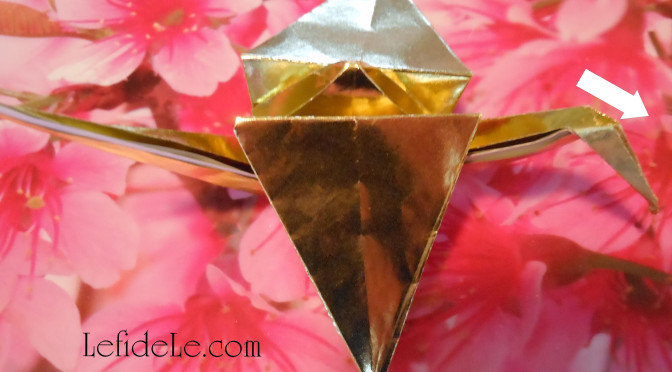
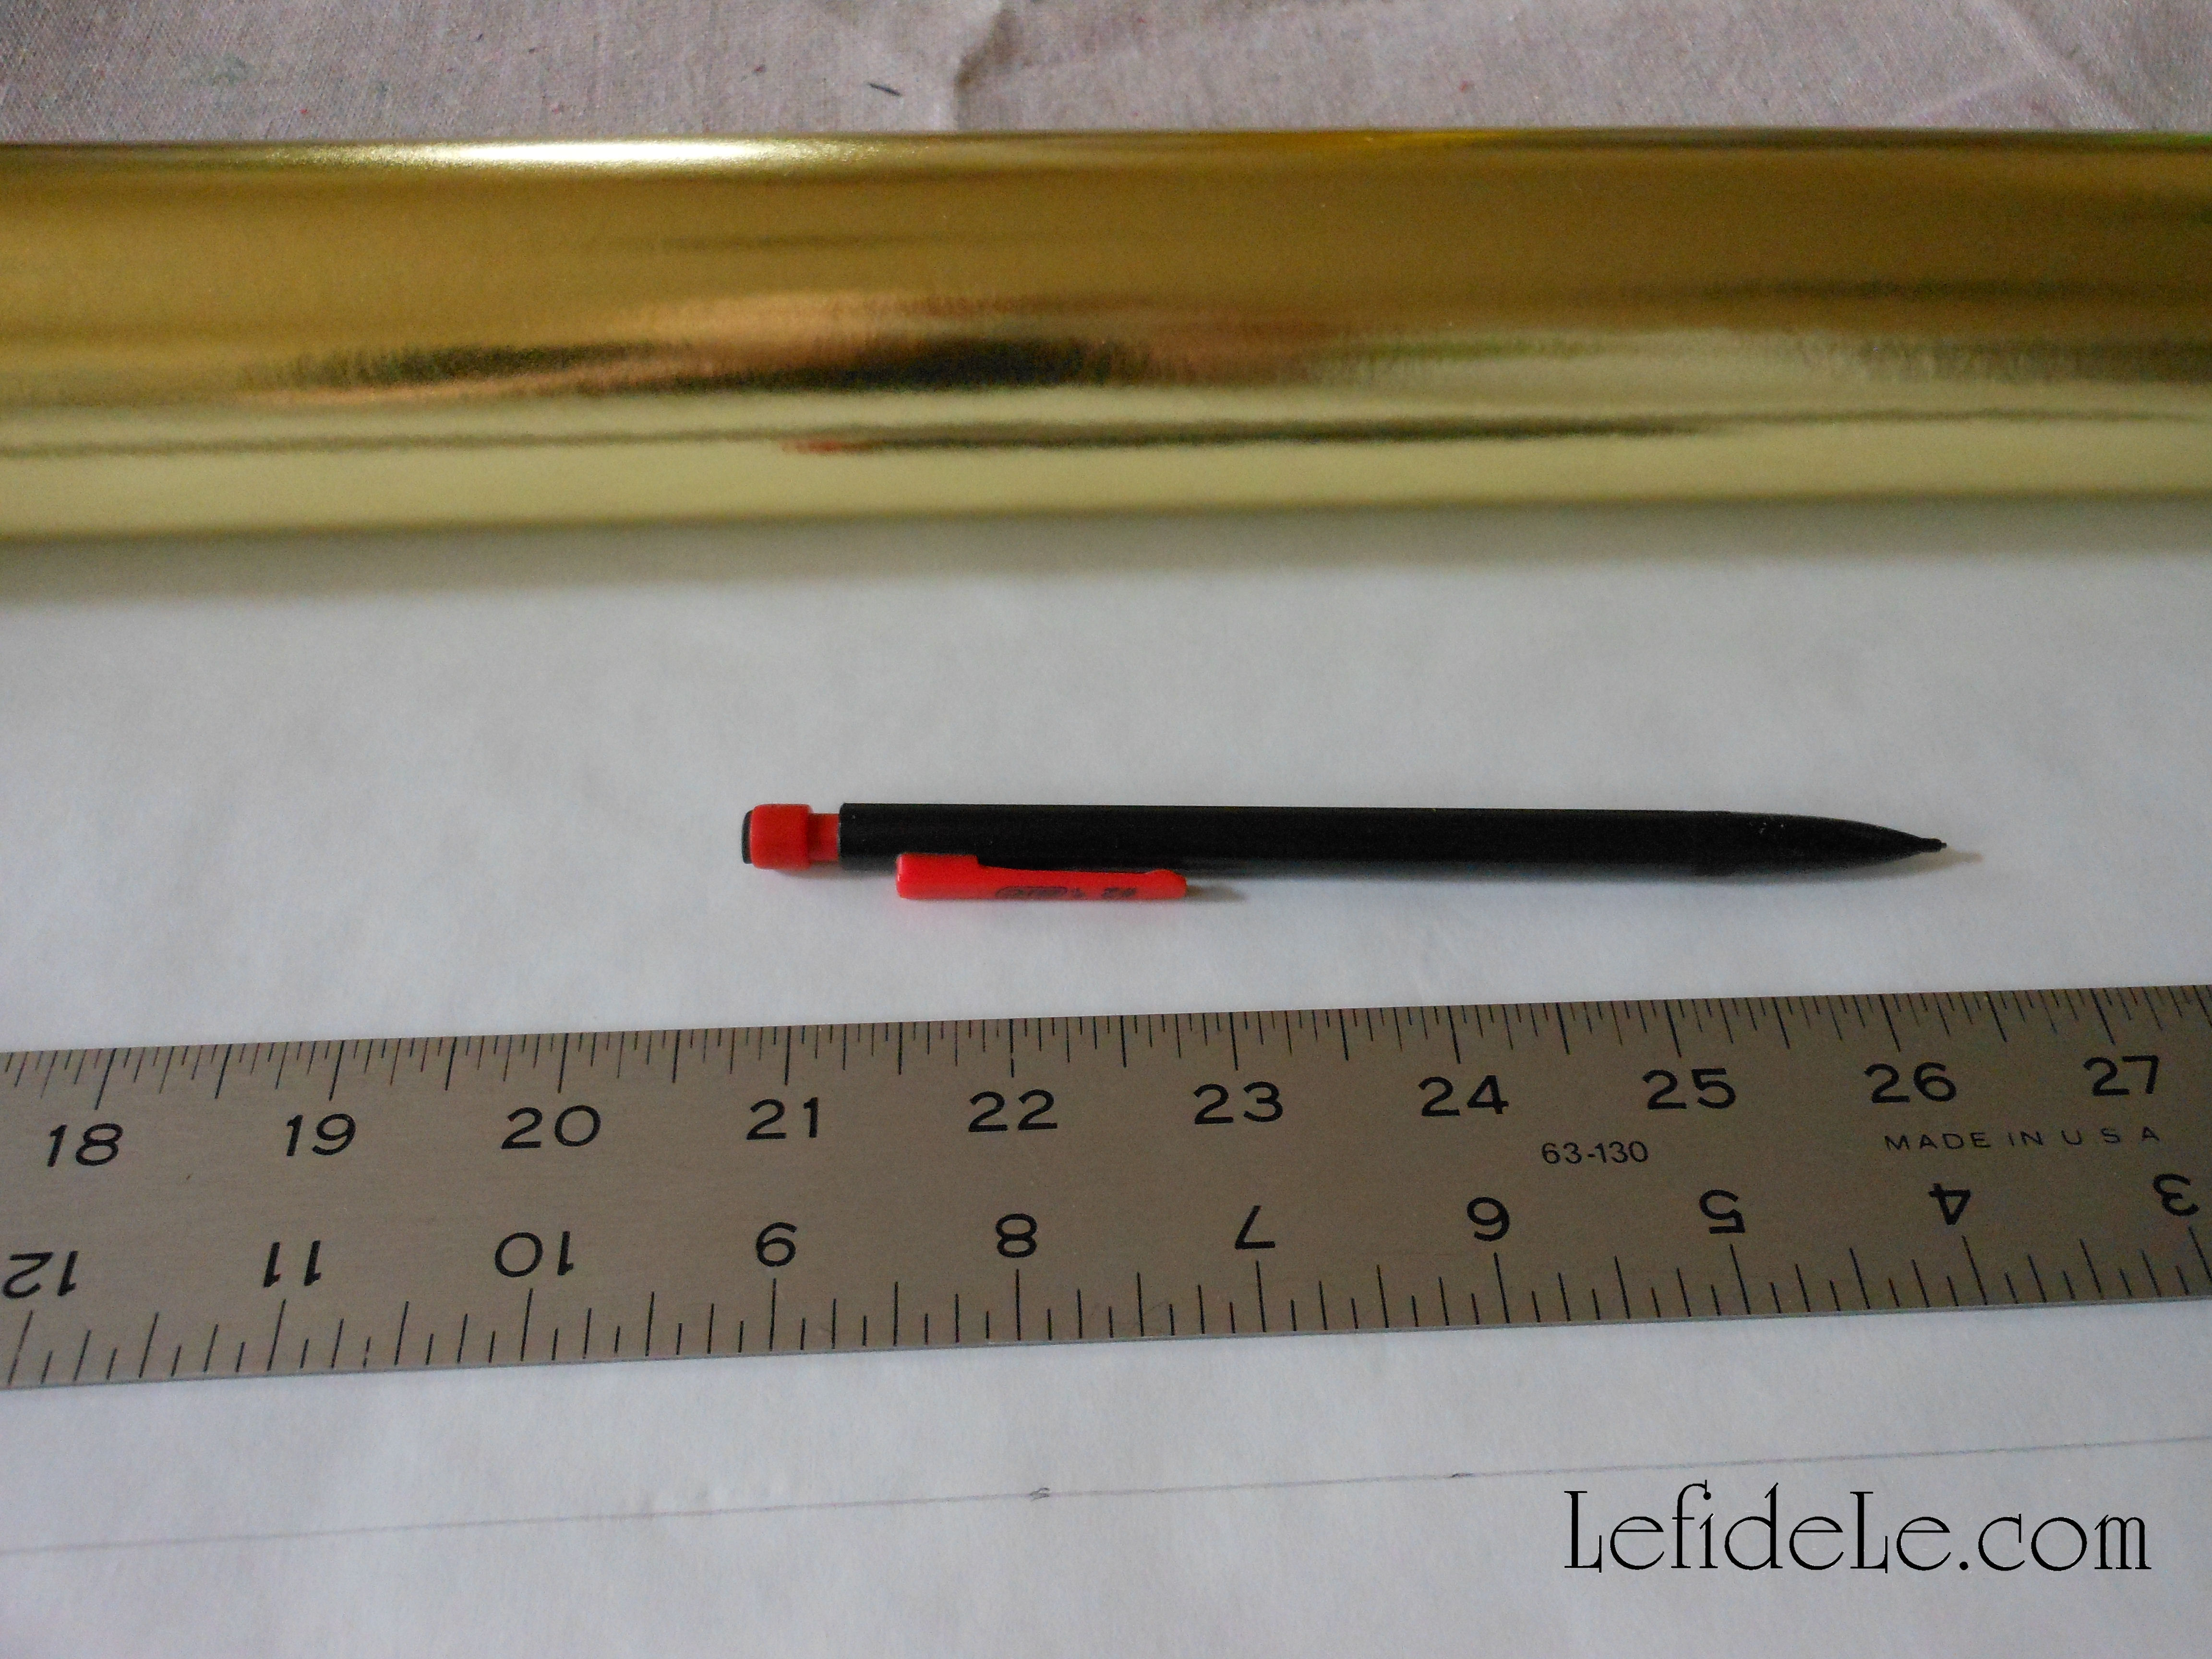
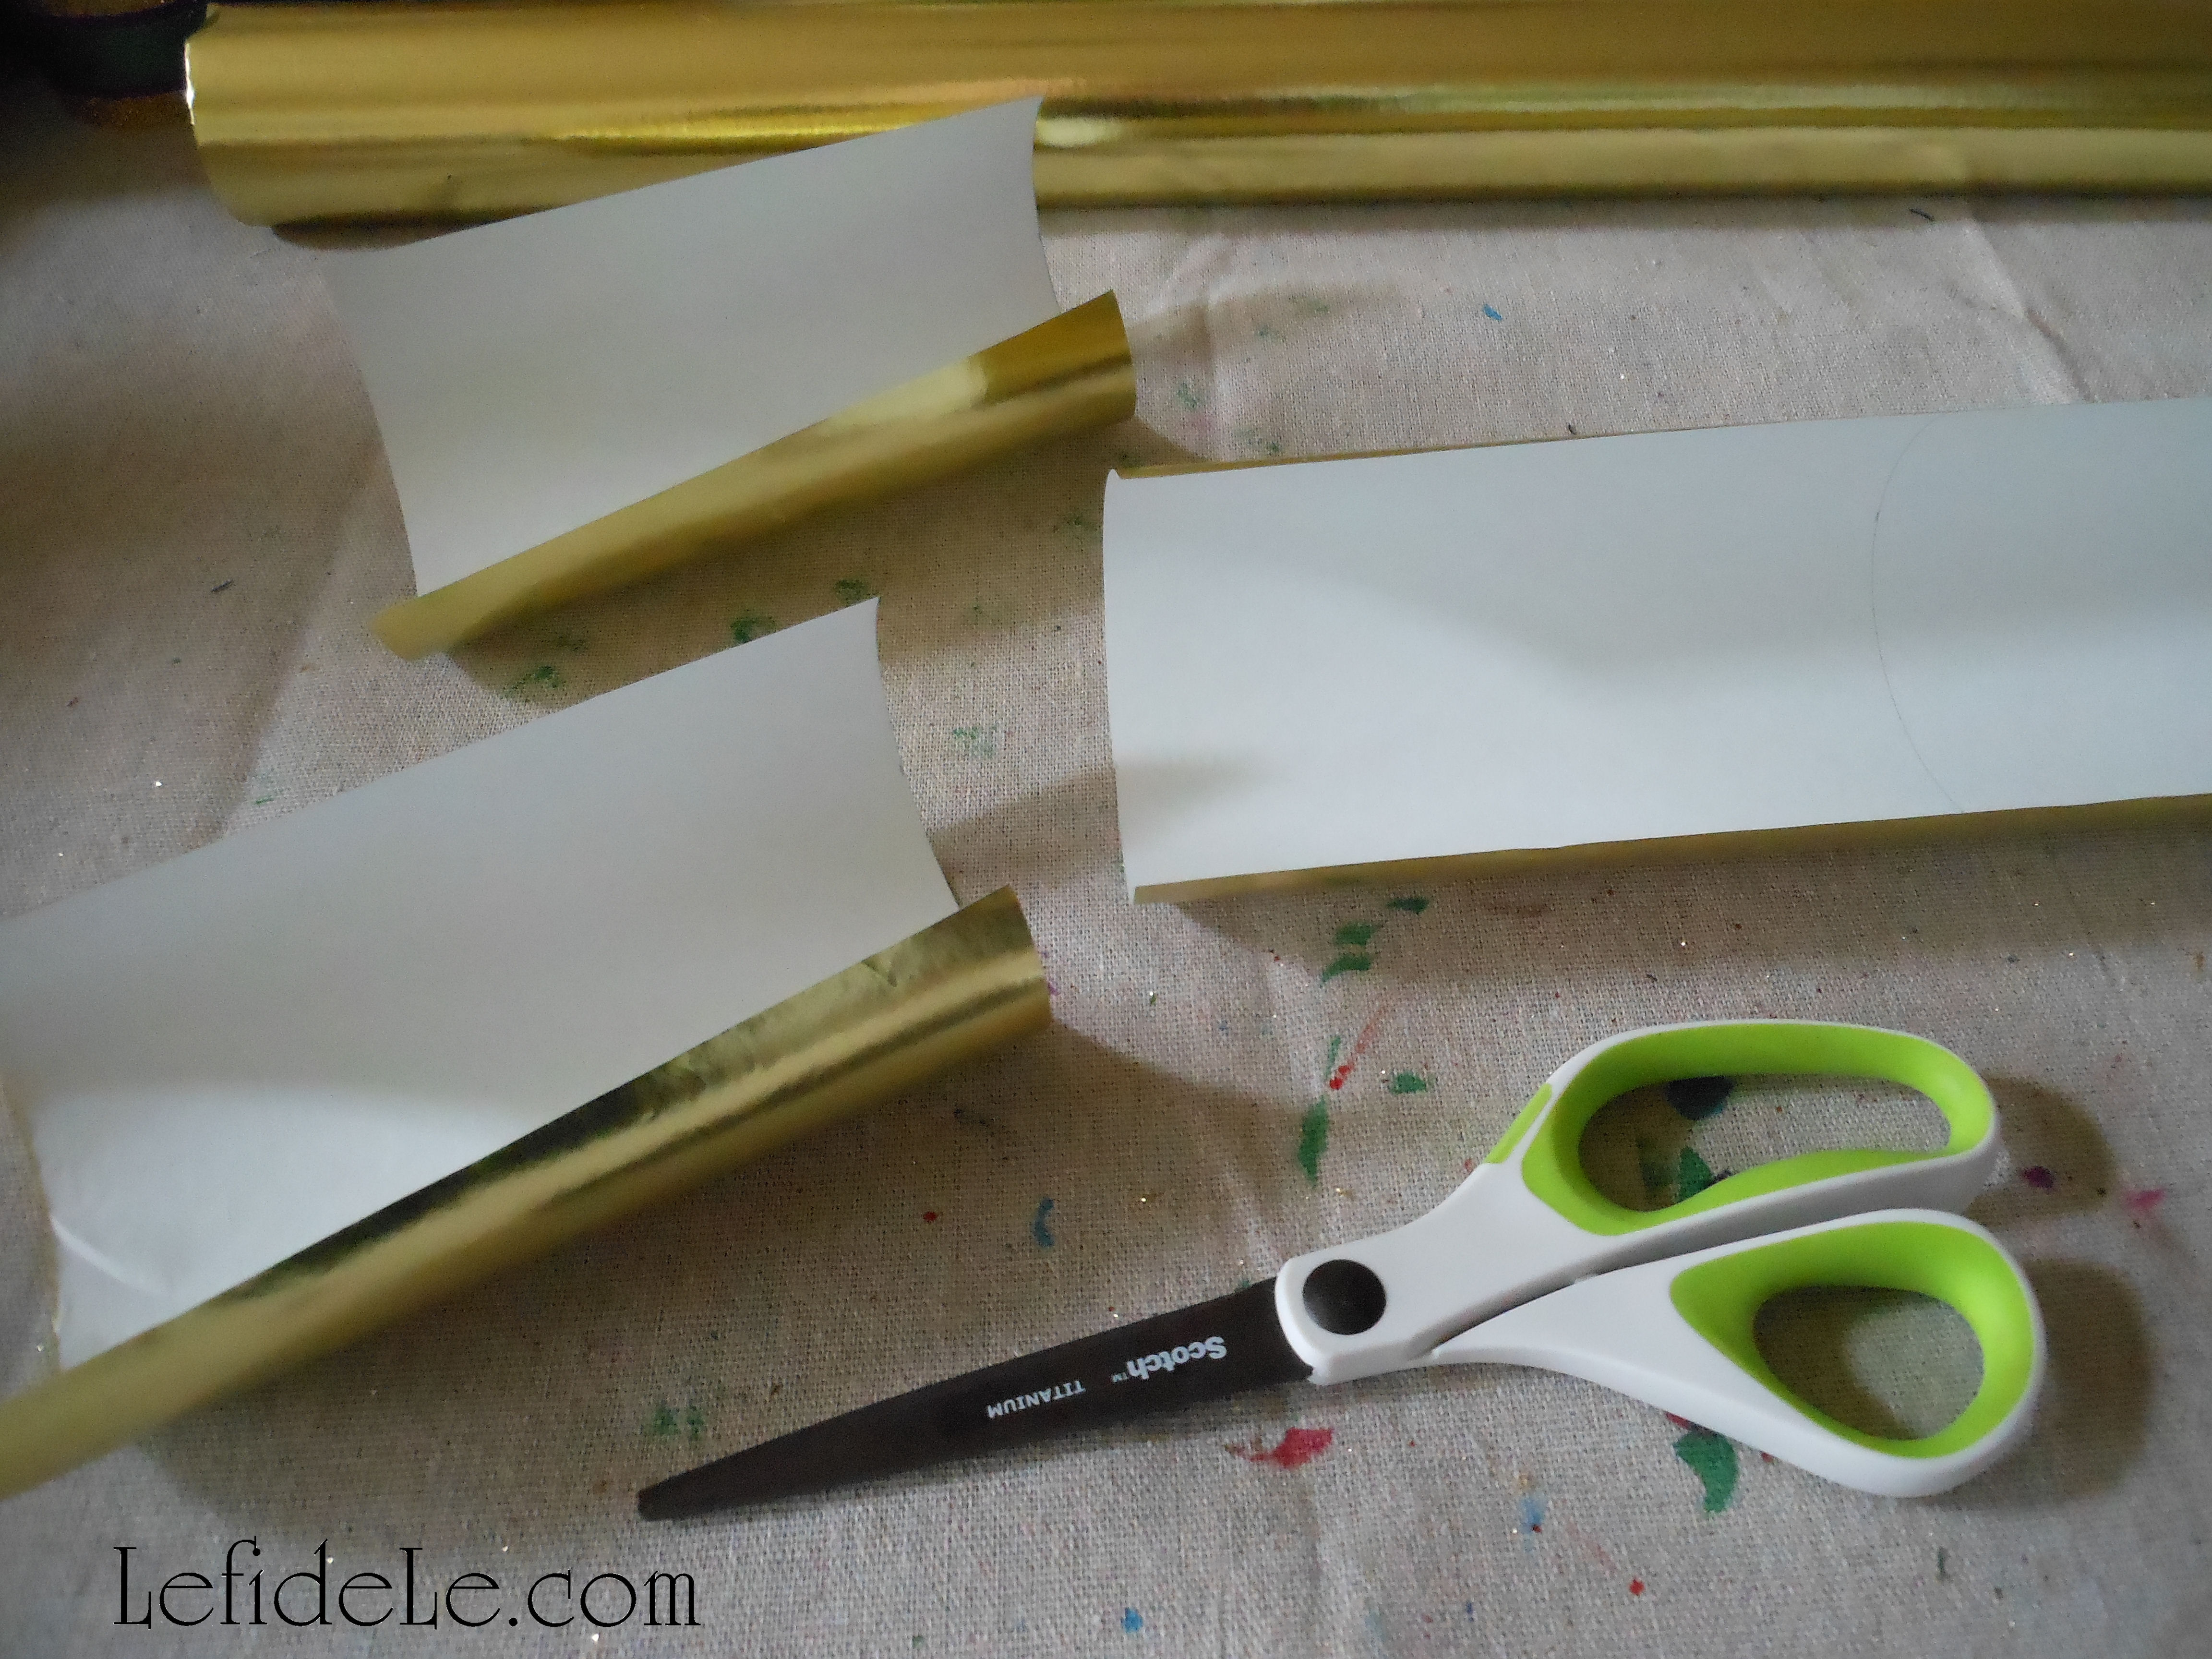
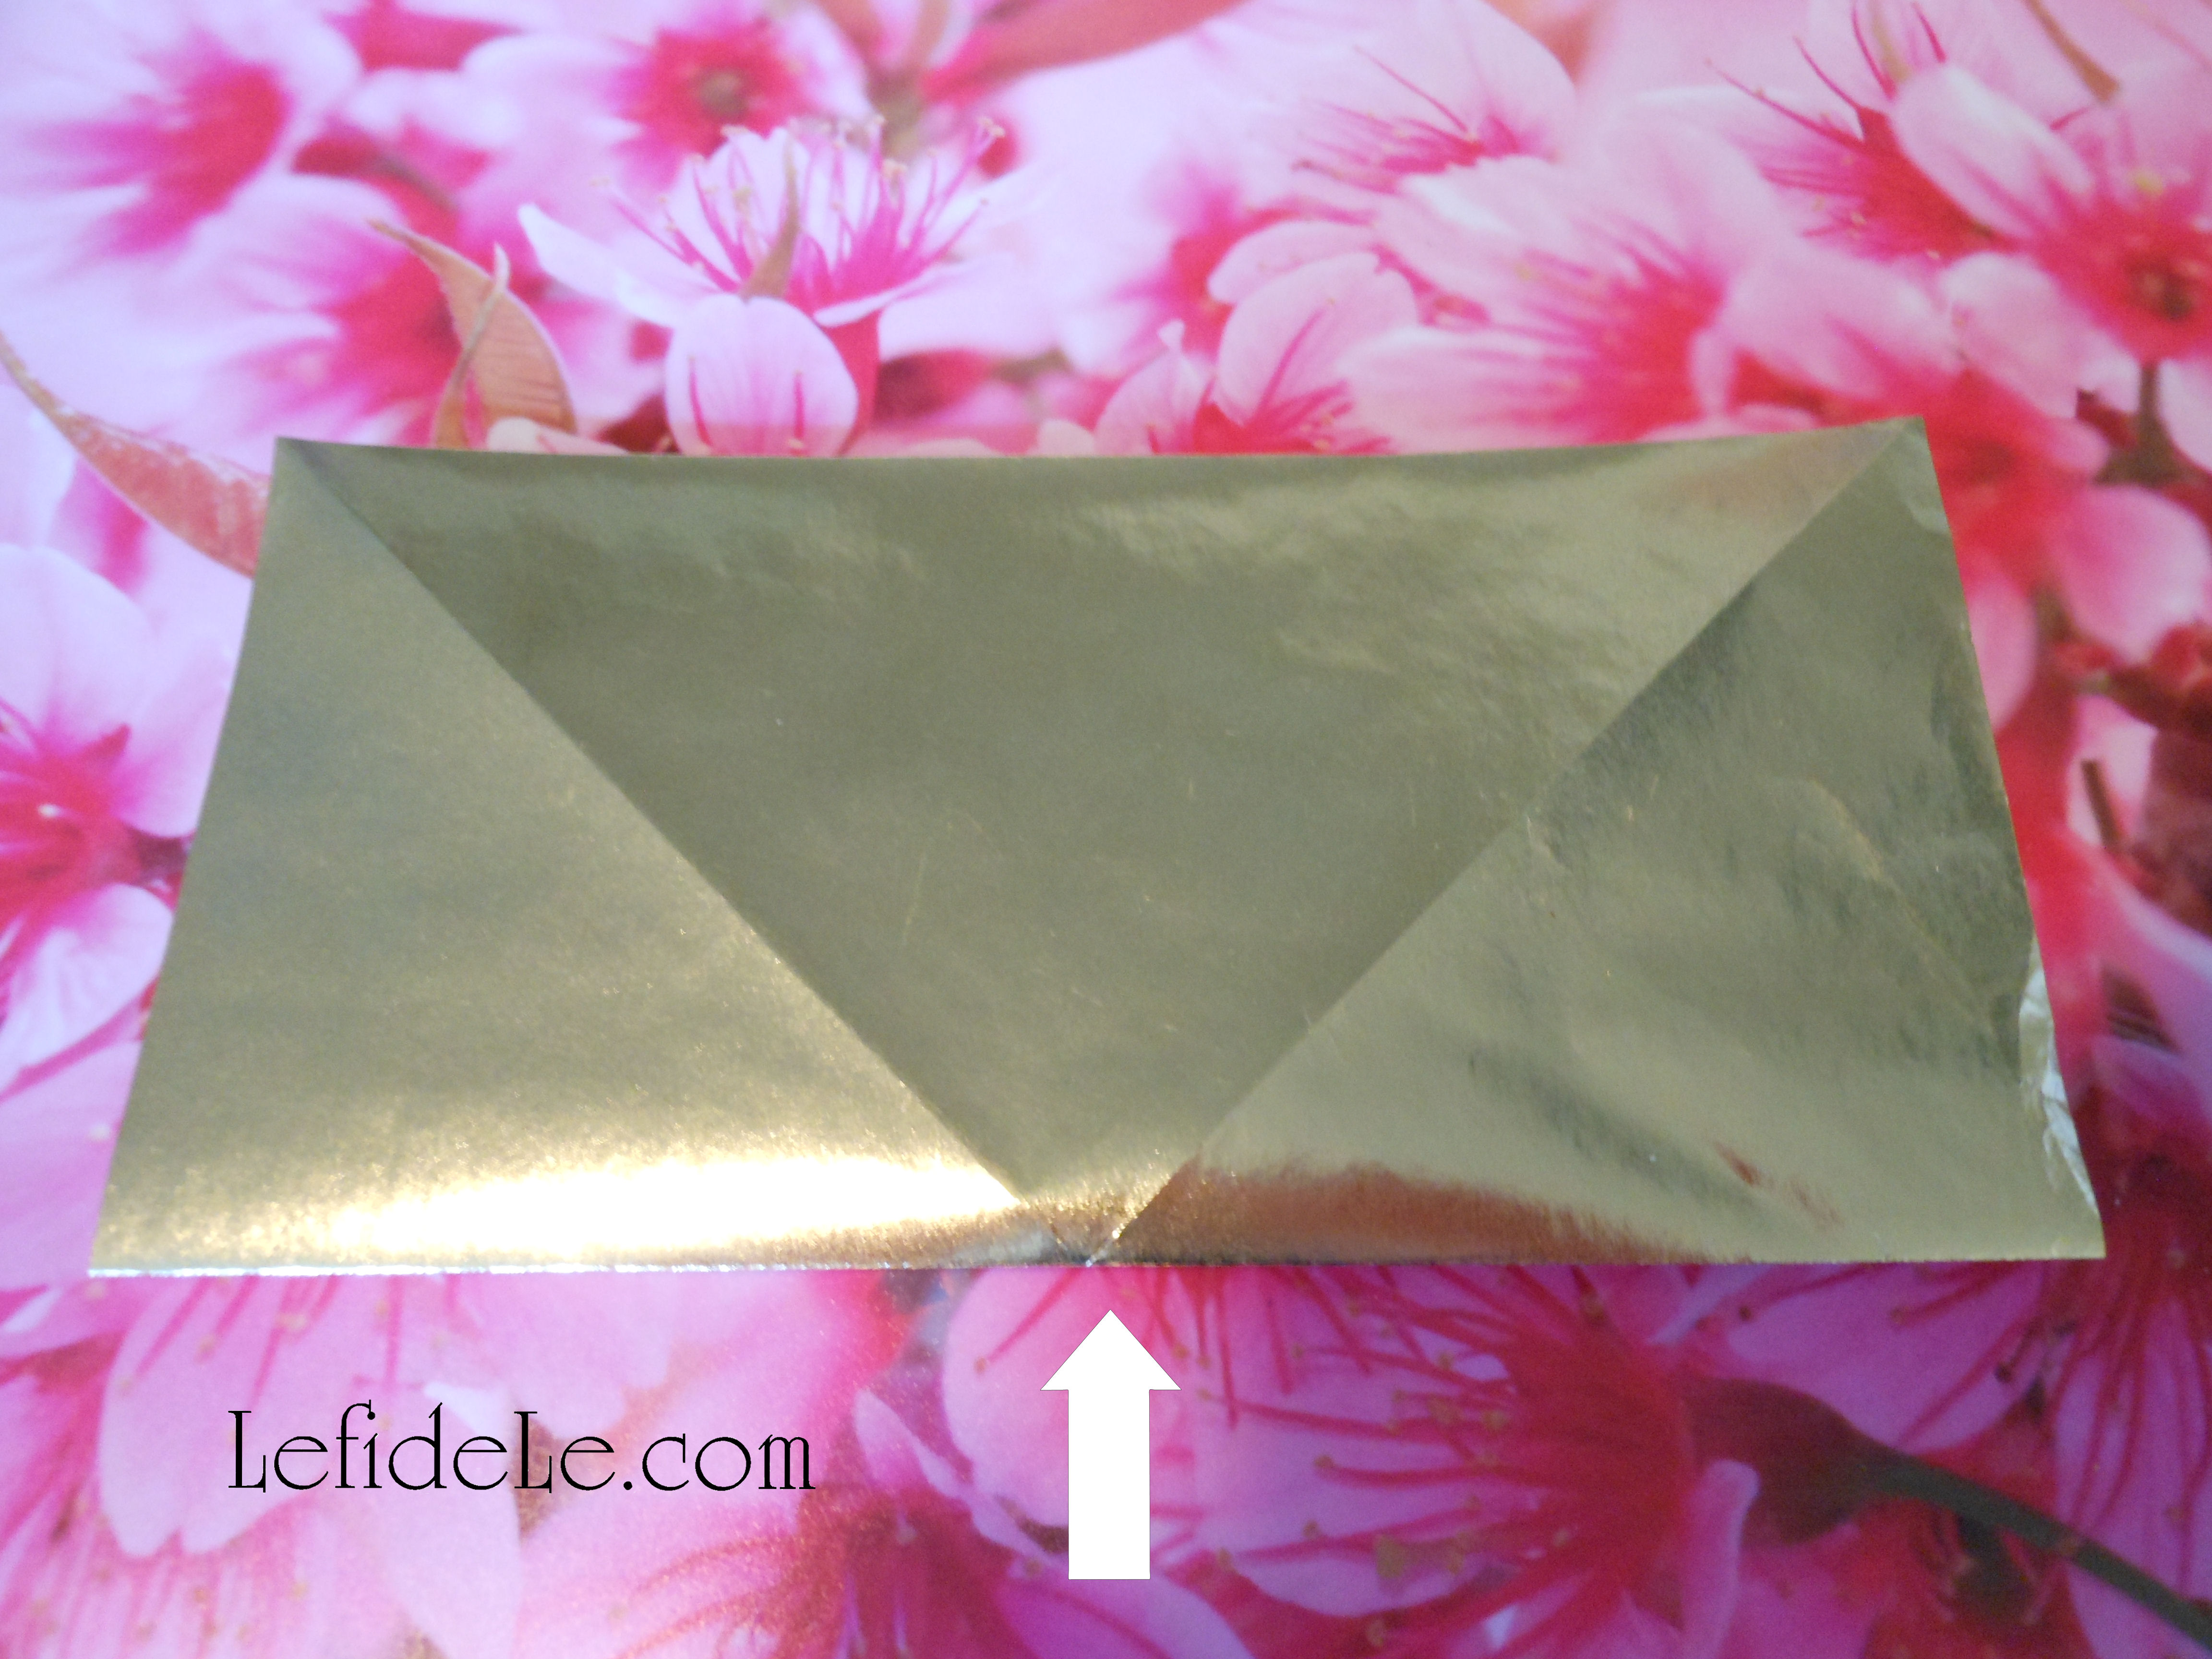
The secret element to an inexpensive napkin ring form is the core of a wrapping paper roll. You can’t do better than free! Mark and cut sections that are smaller than the ribbon you choose to cover it with.

308Leigh

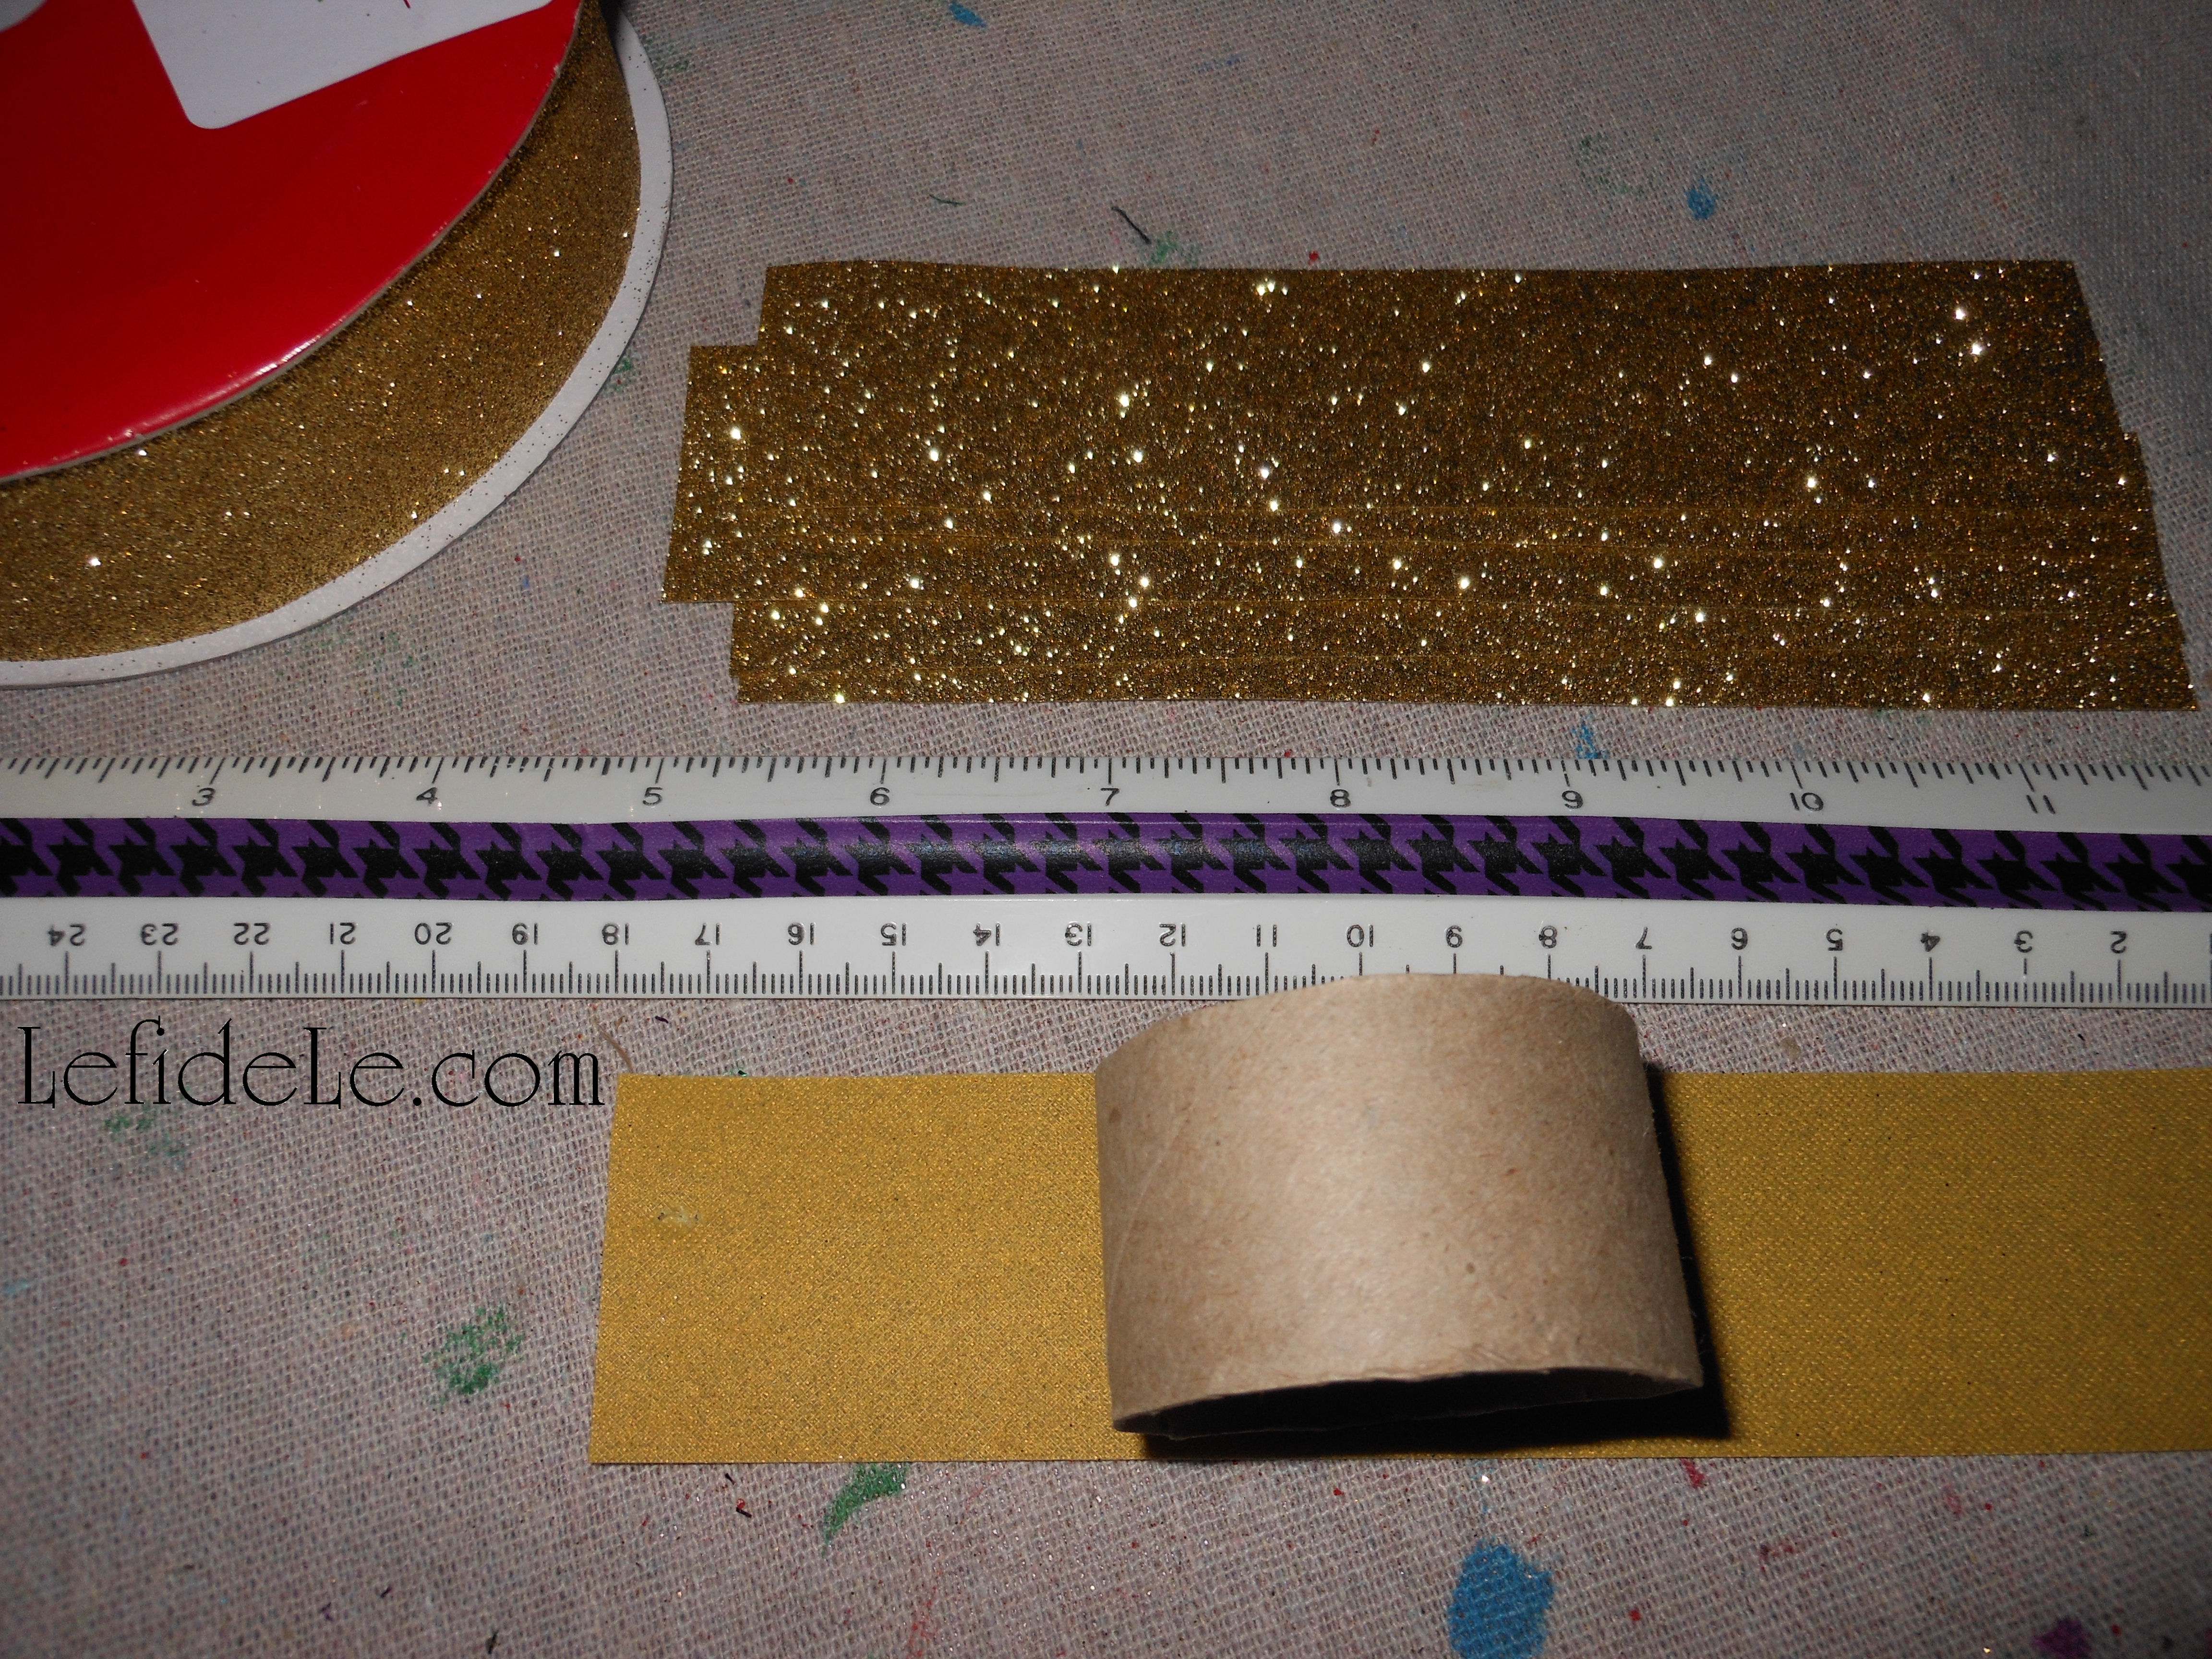
Then cut lengths of ribbon long enough to wrap around those cores.

309Leigh

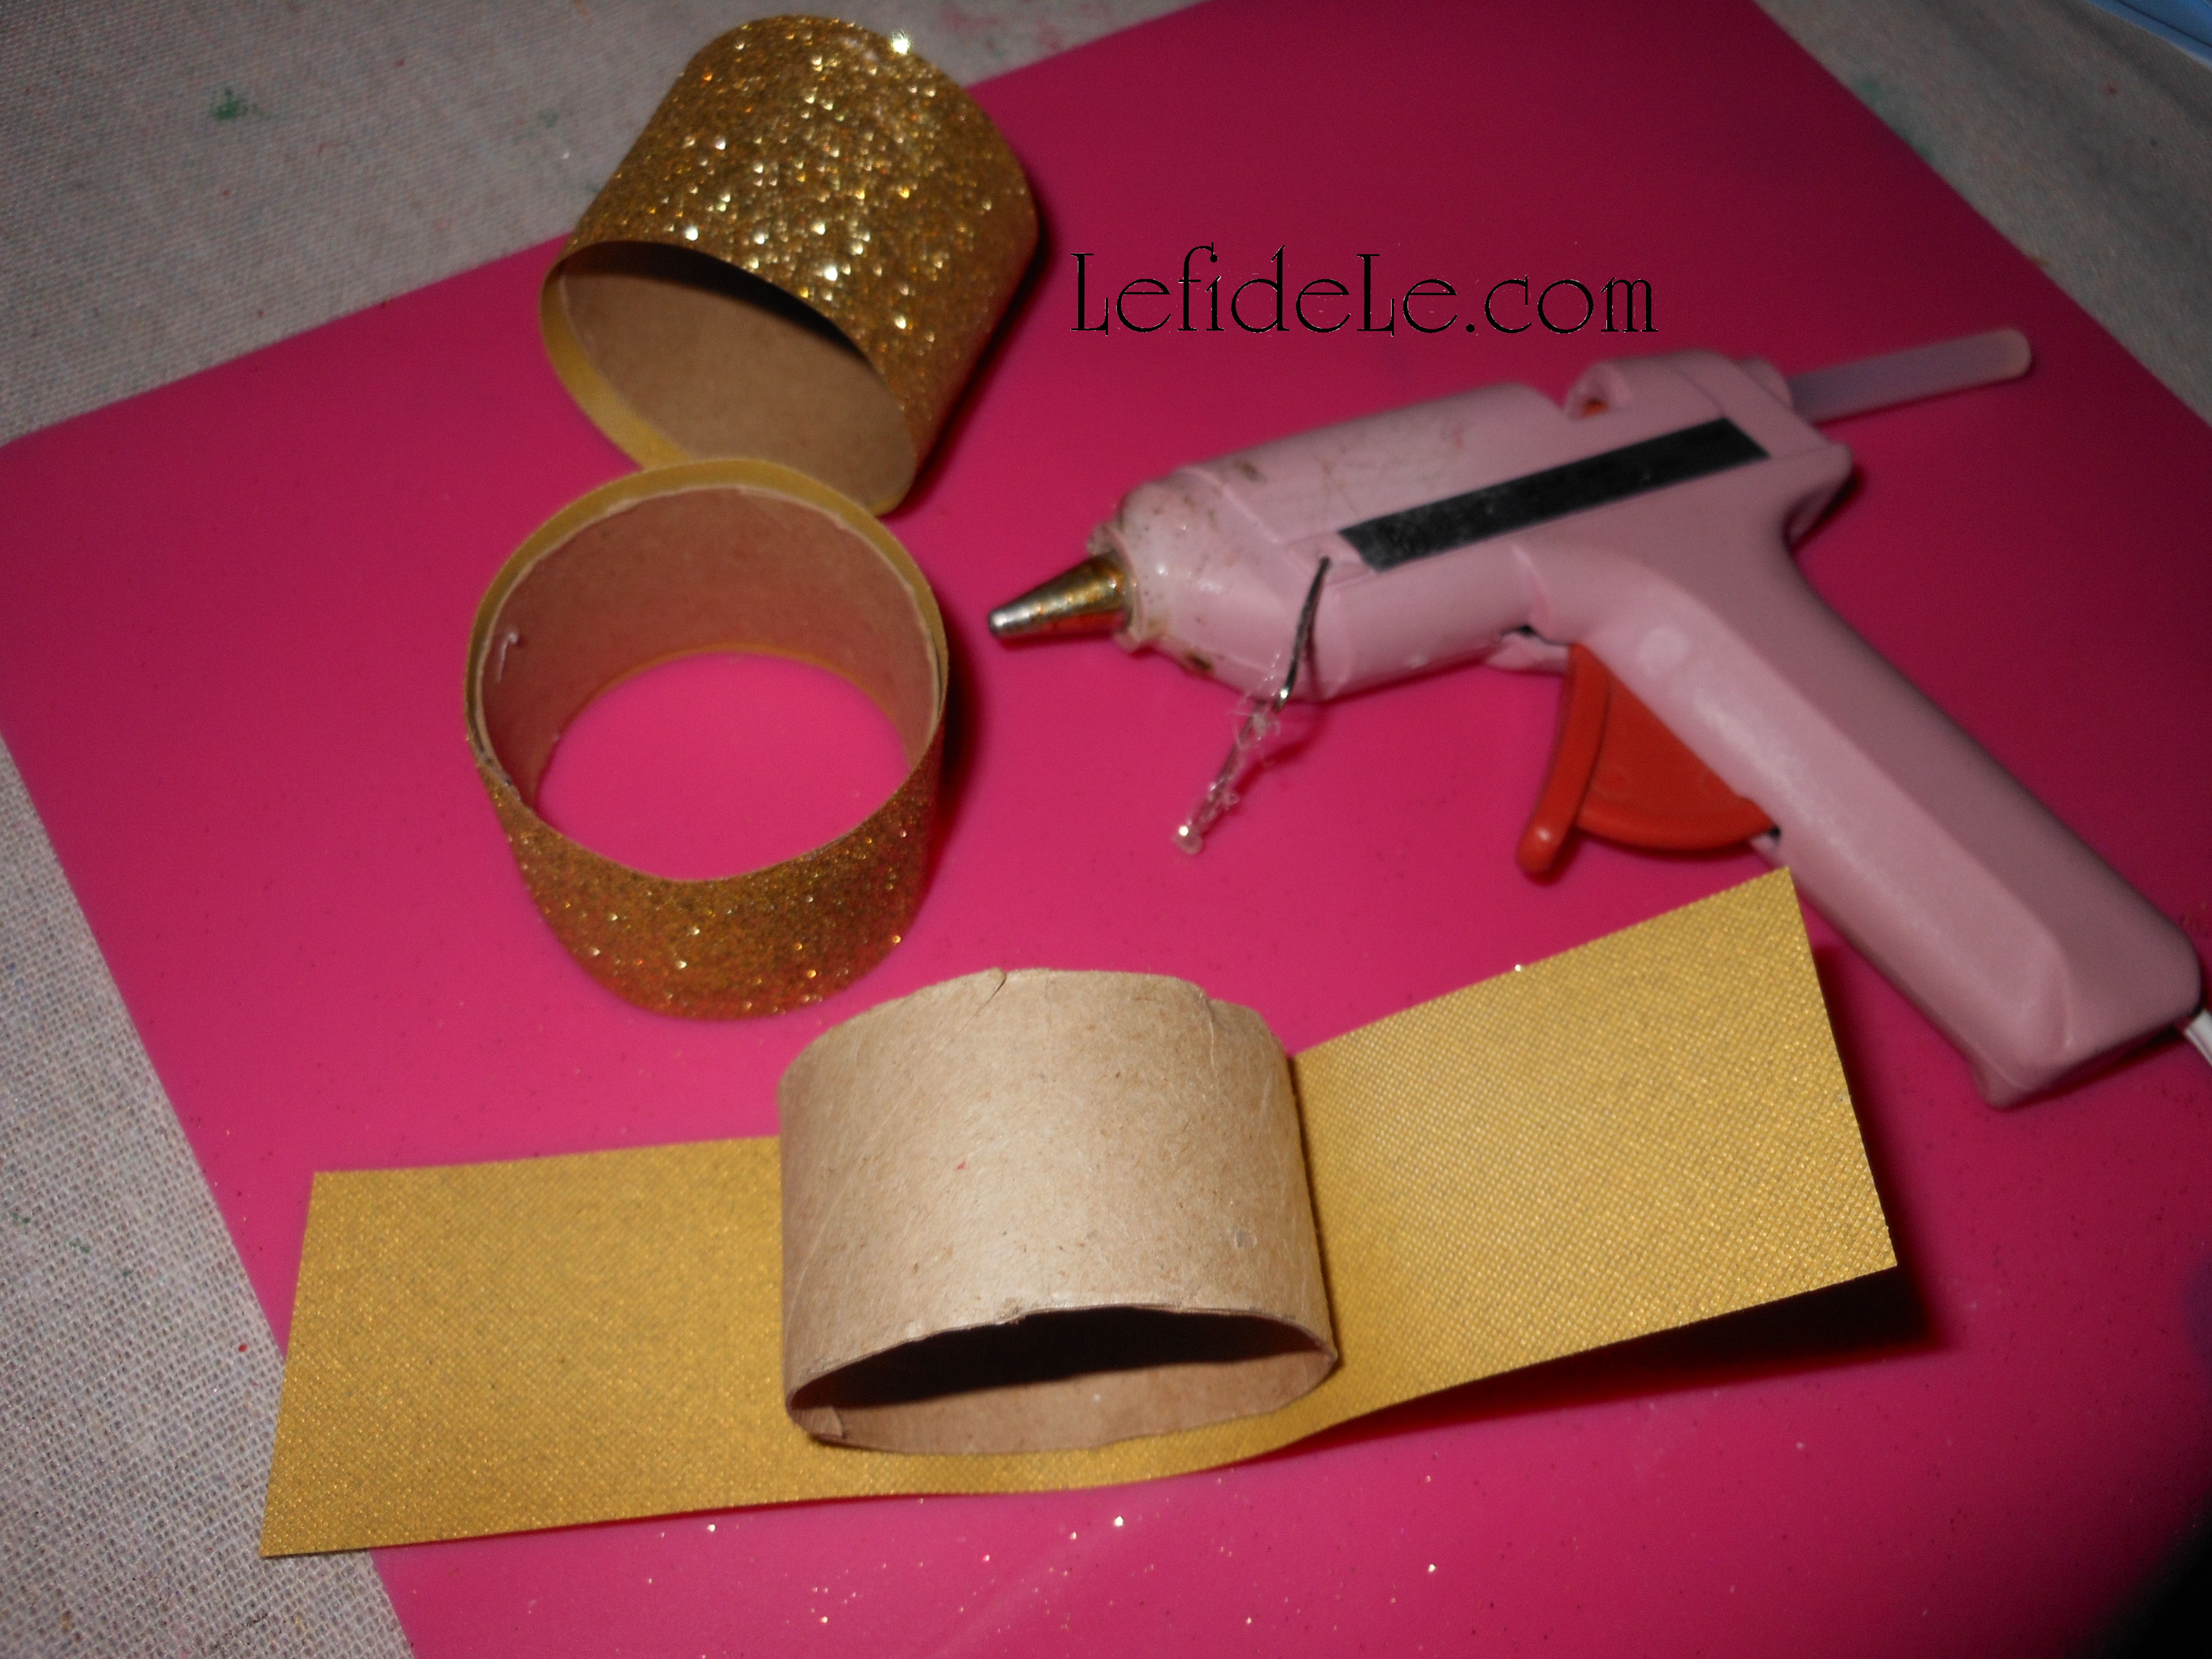
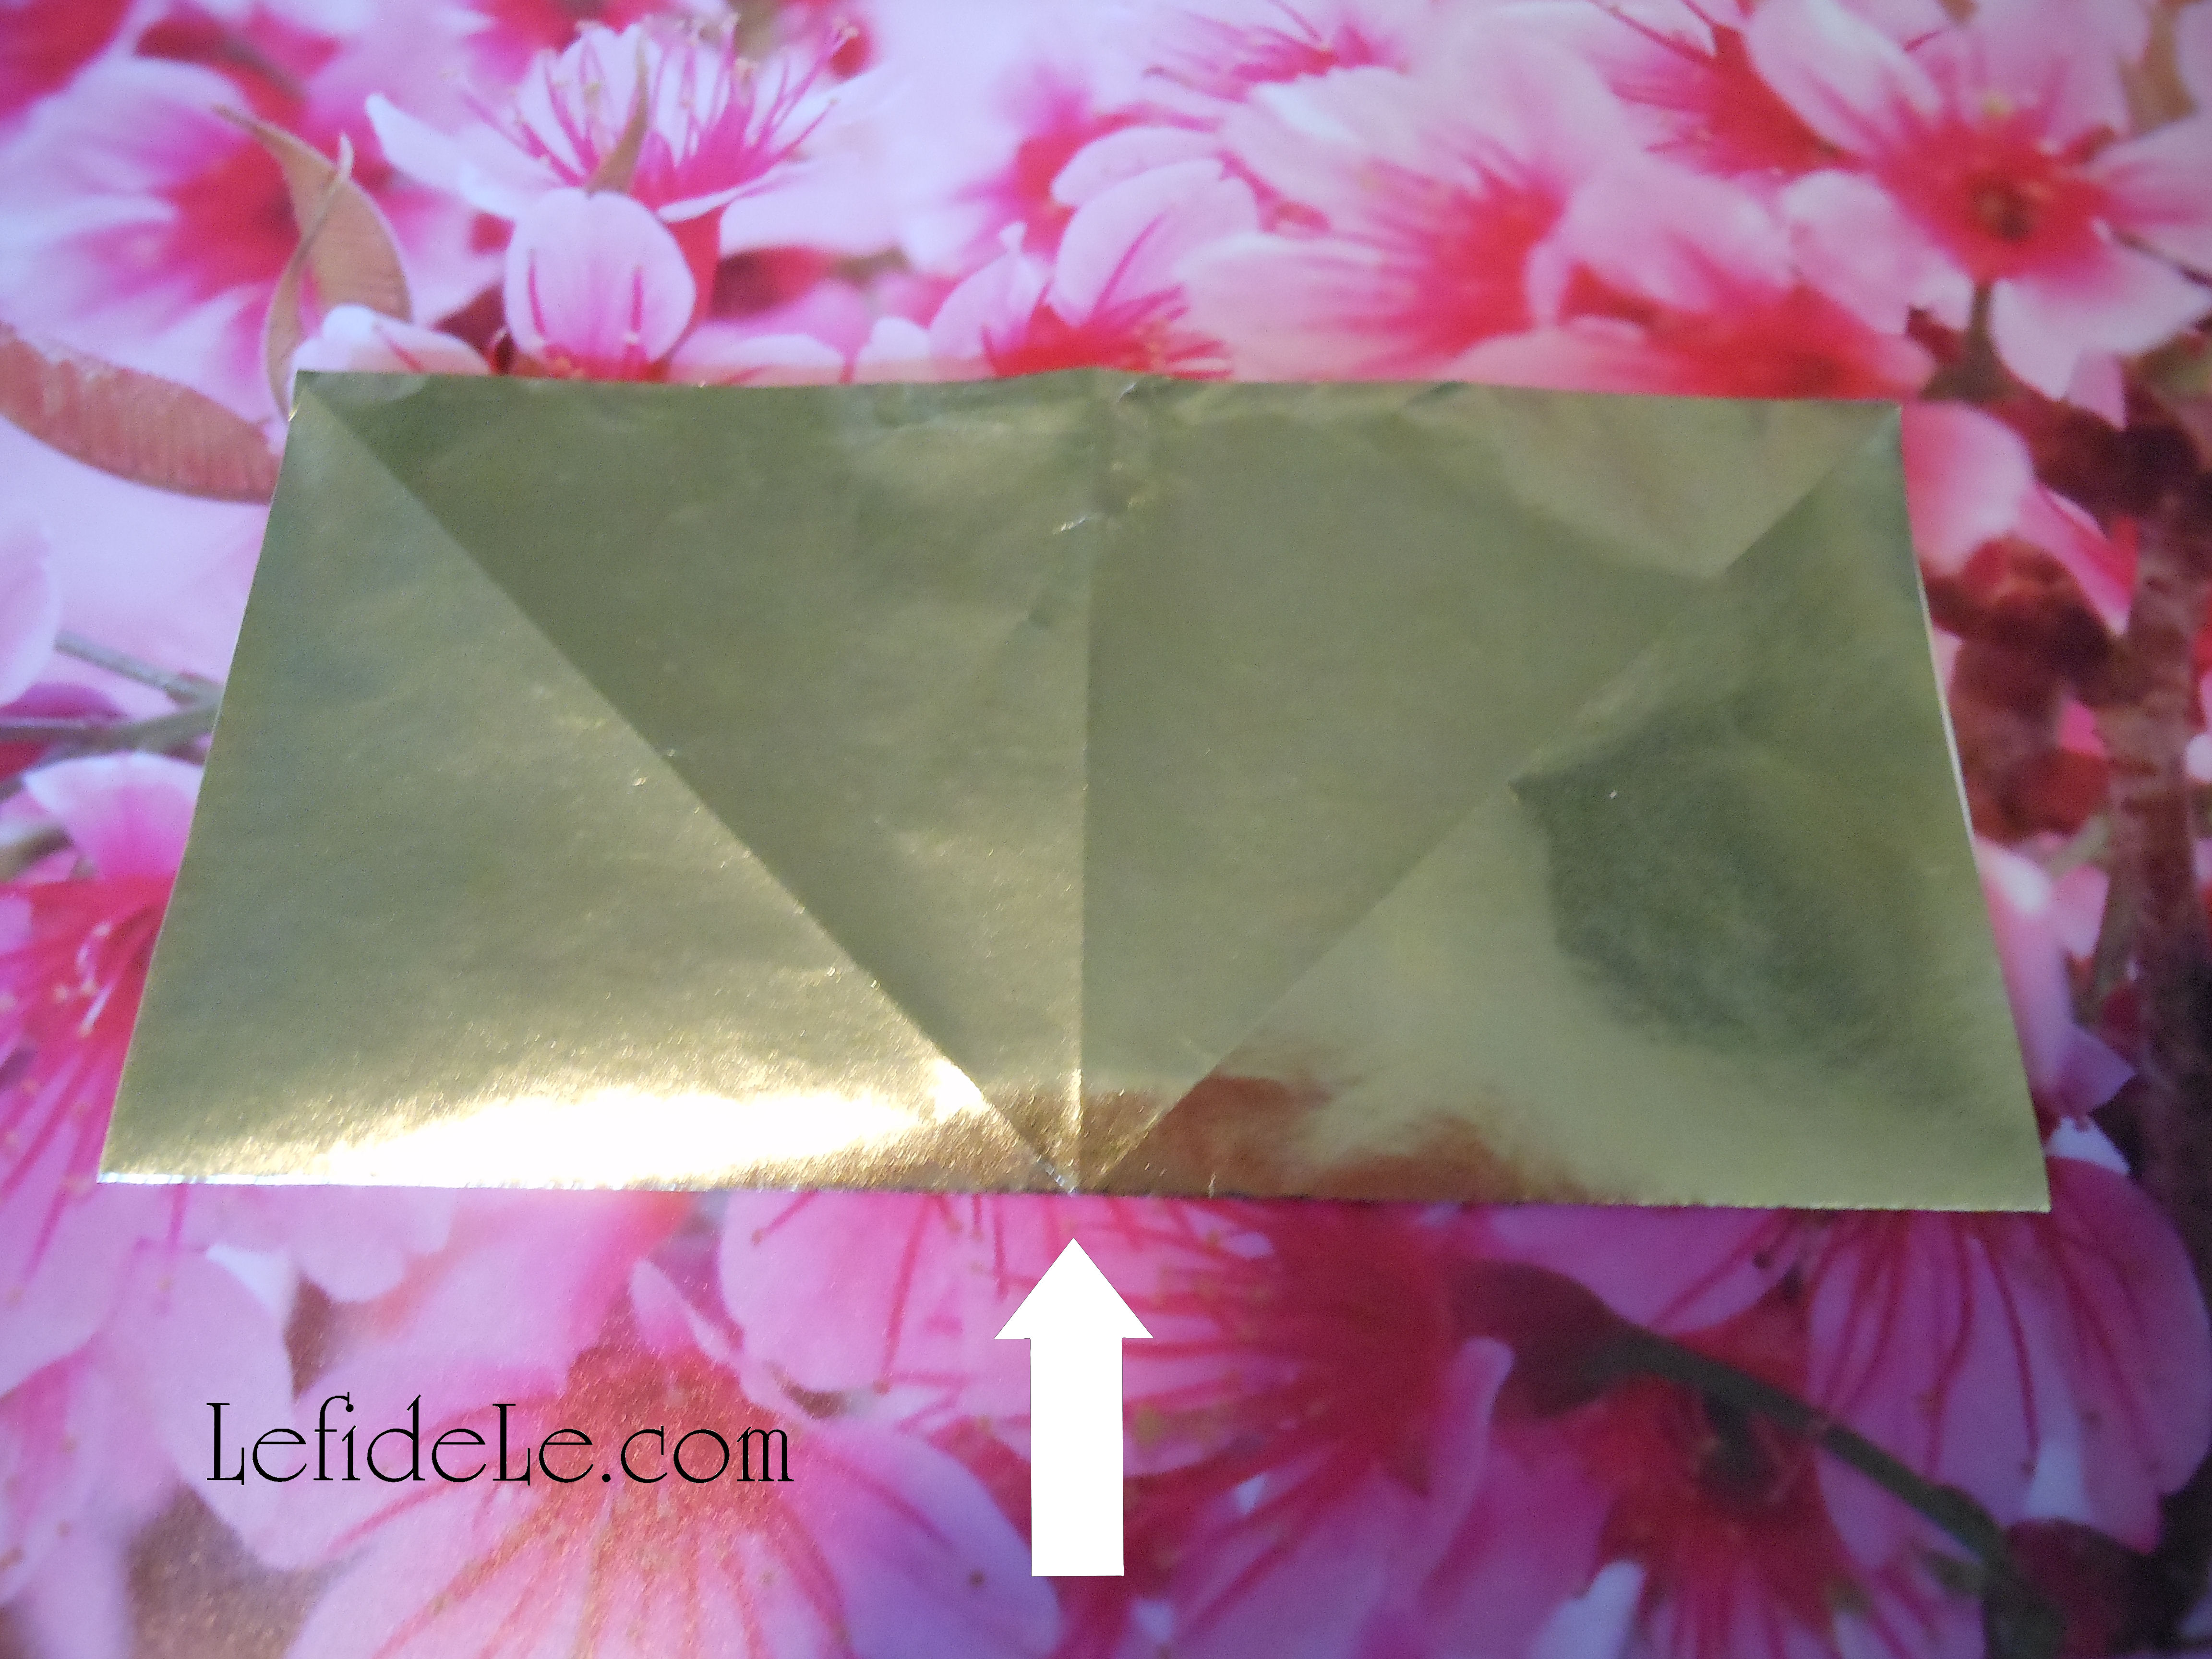
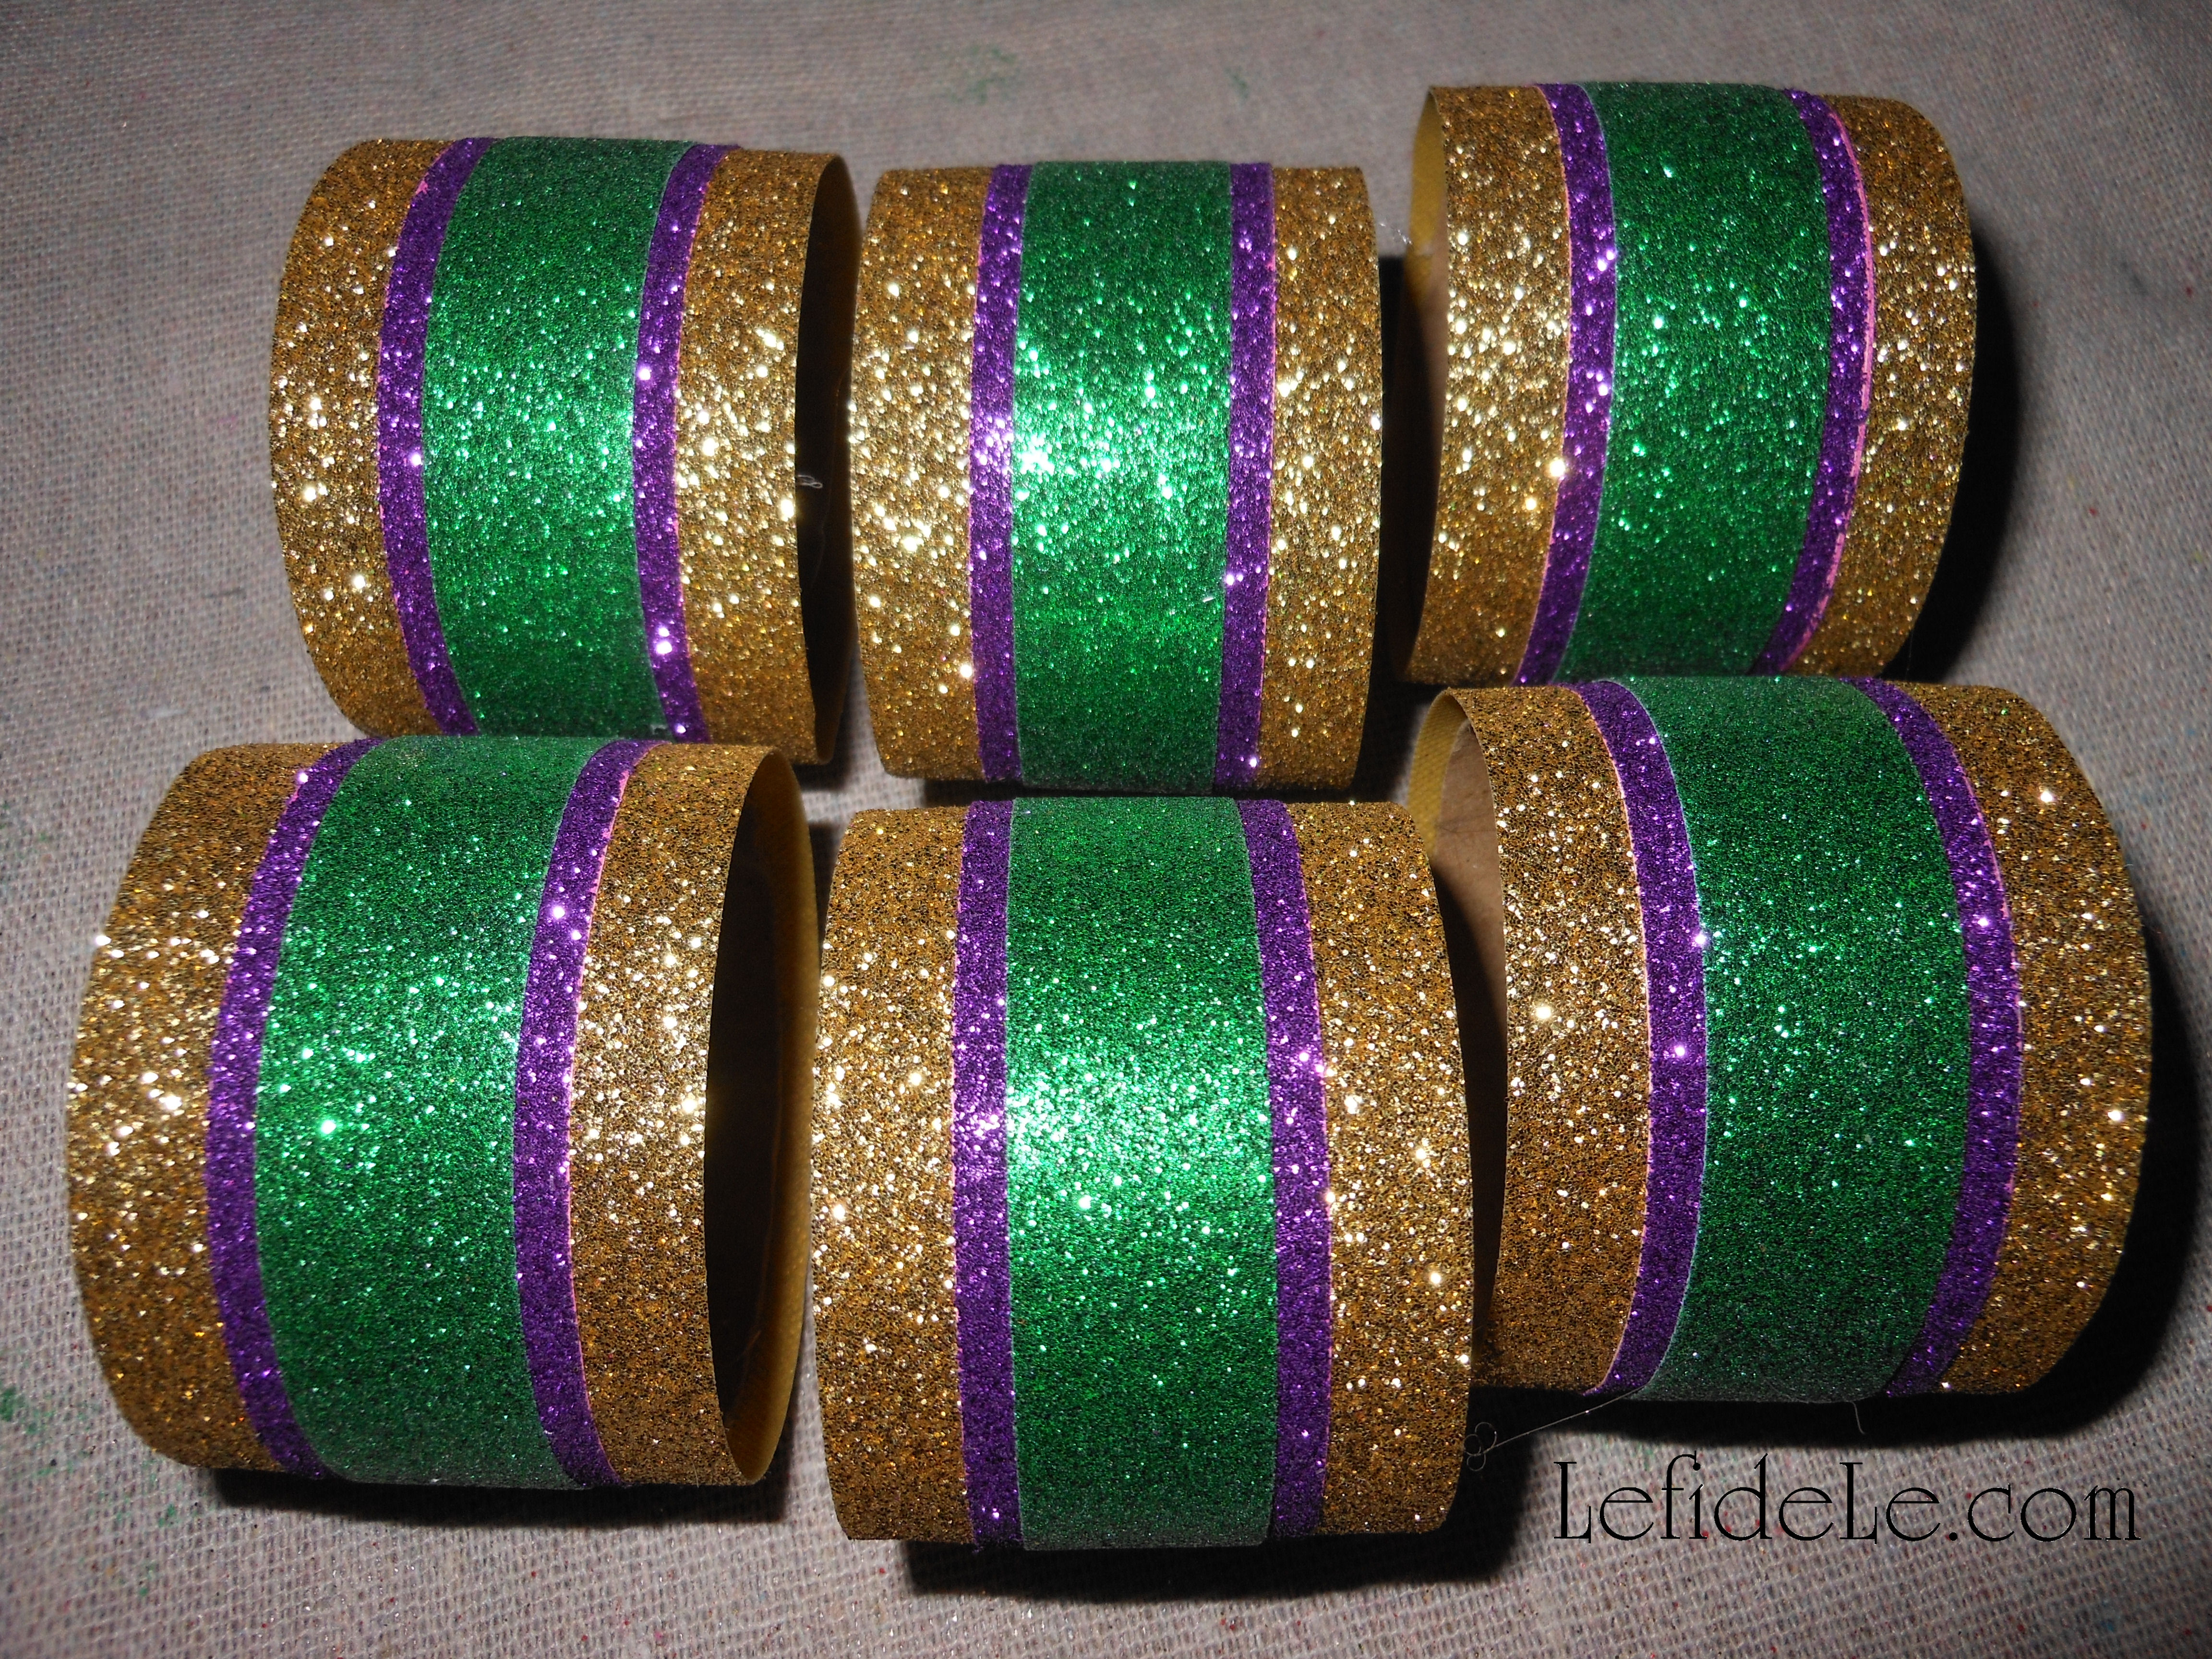
Use hot glue to adhere a strip of ribbon around each core. Here I’ve chosen gold glitter ribbon to coordinate with my Mardi Gras theme. (You can see the same technique used on the rings in my Herb Themed Luncheon by viewing the picture in the Upcoming Projects Gallery in the sidebar.)

311Leigh

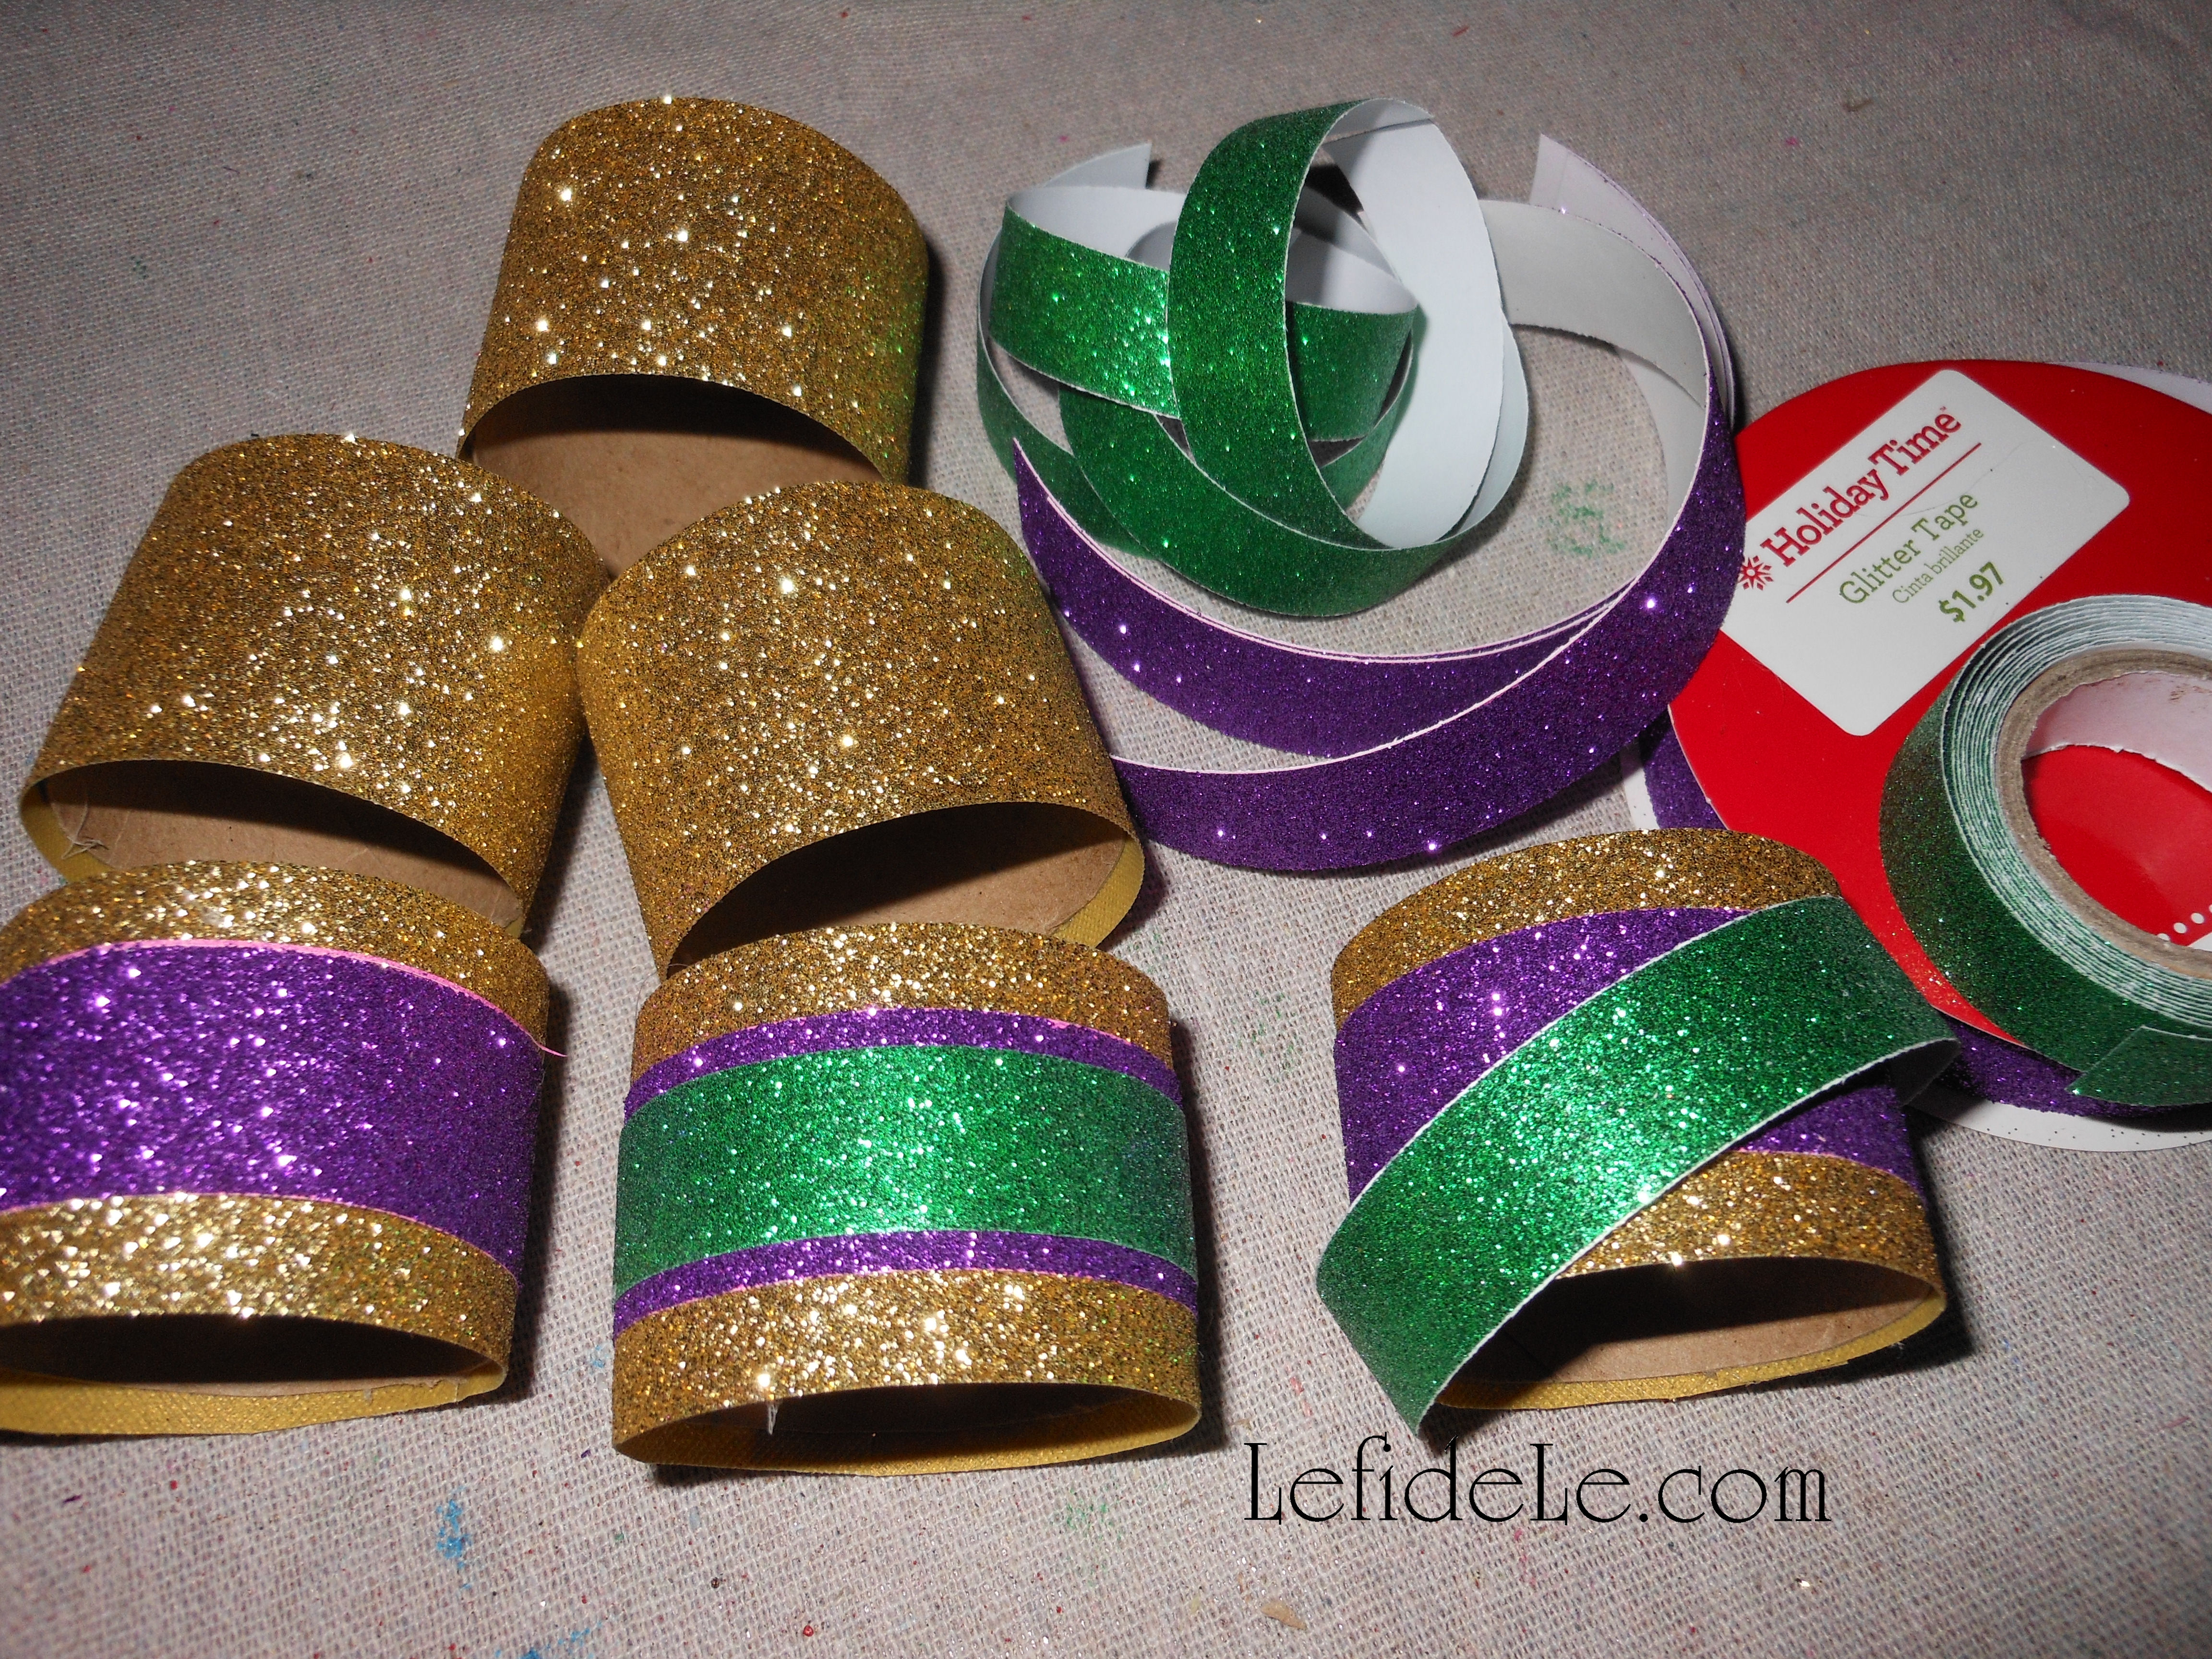
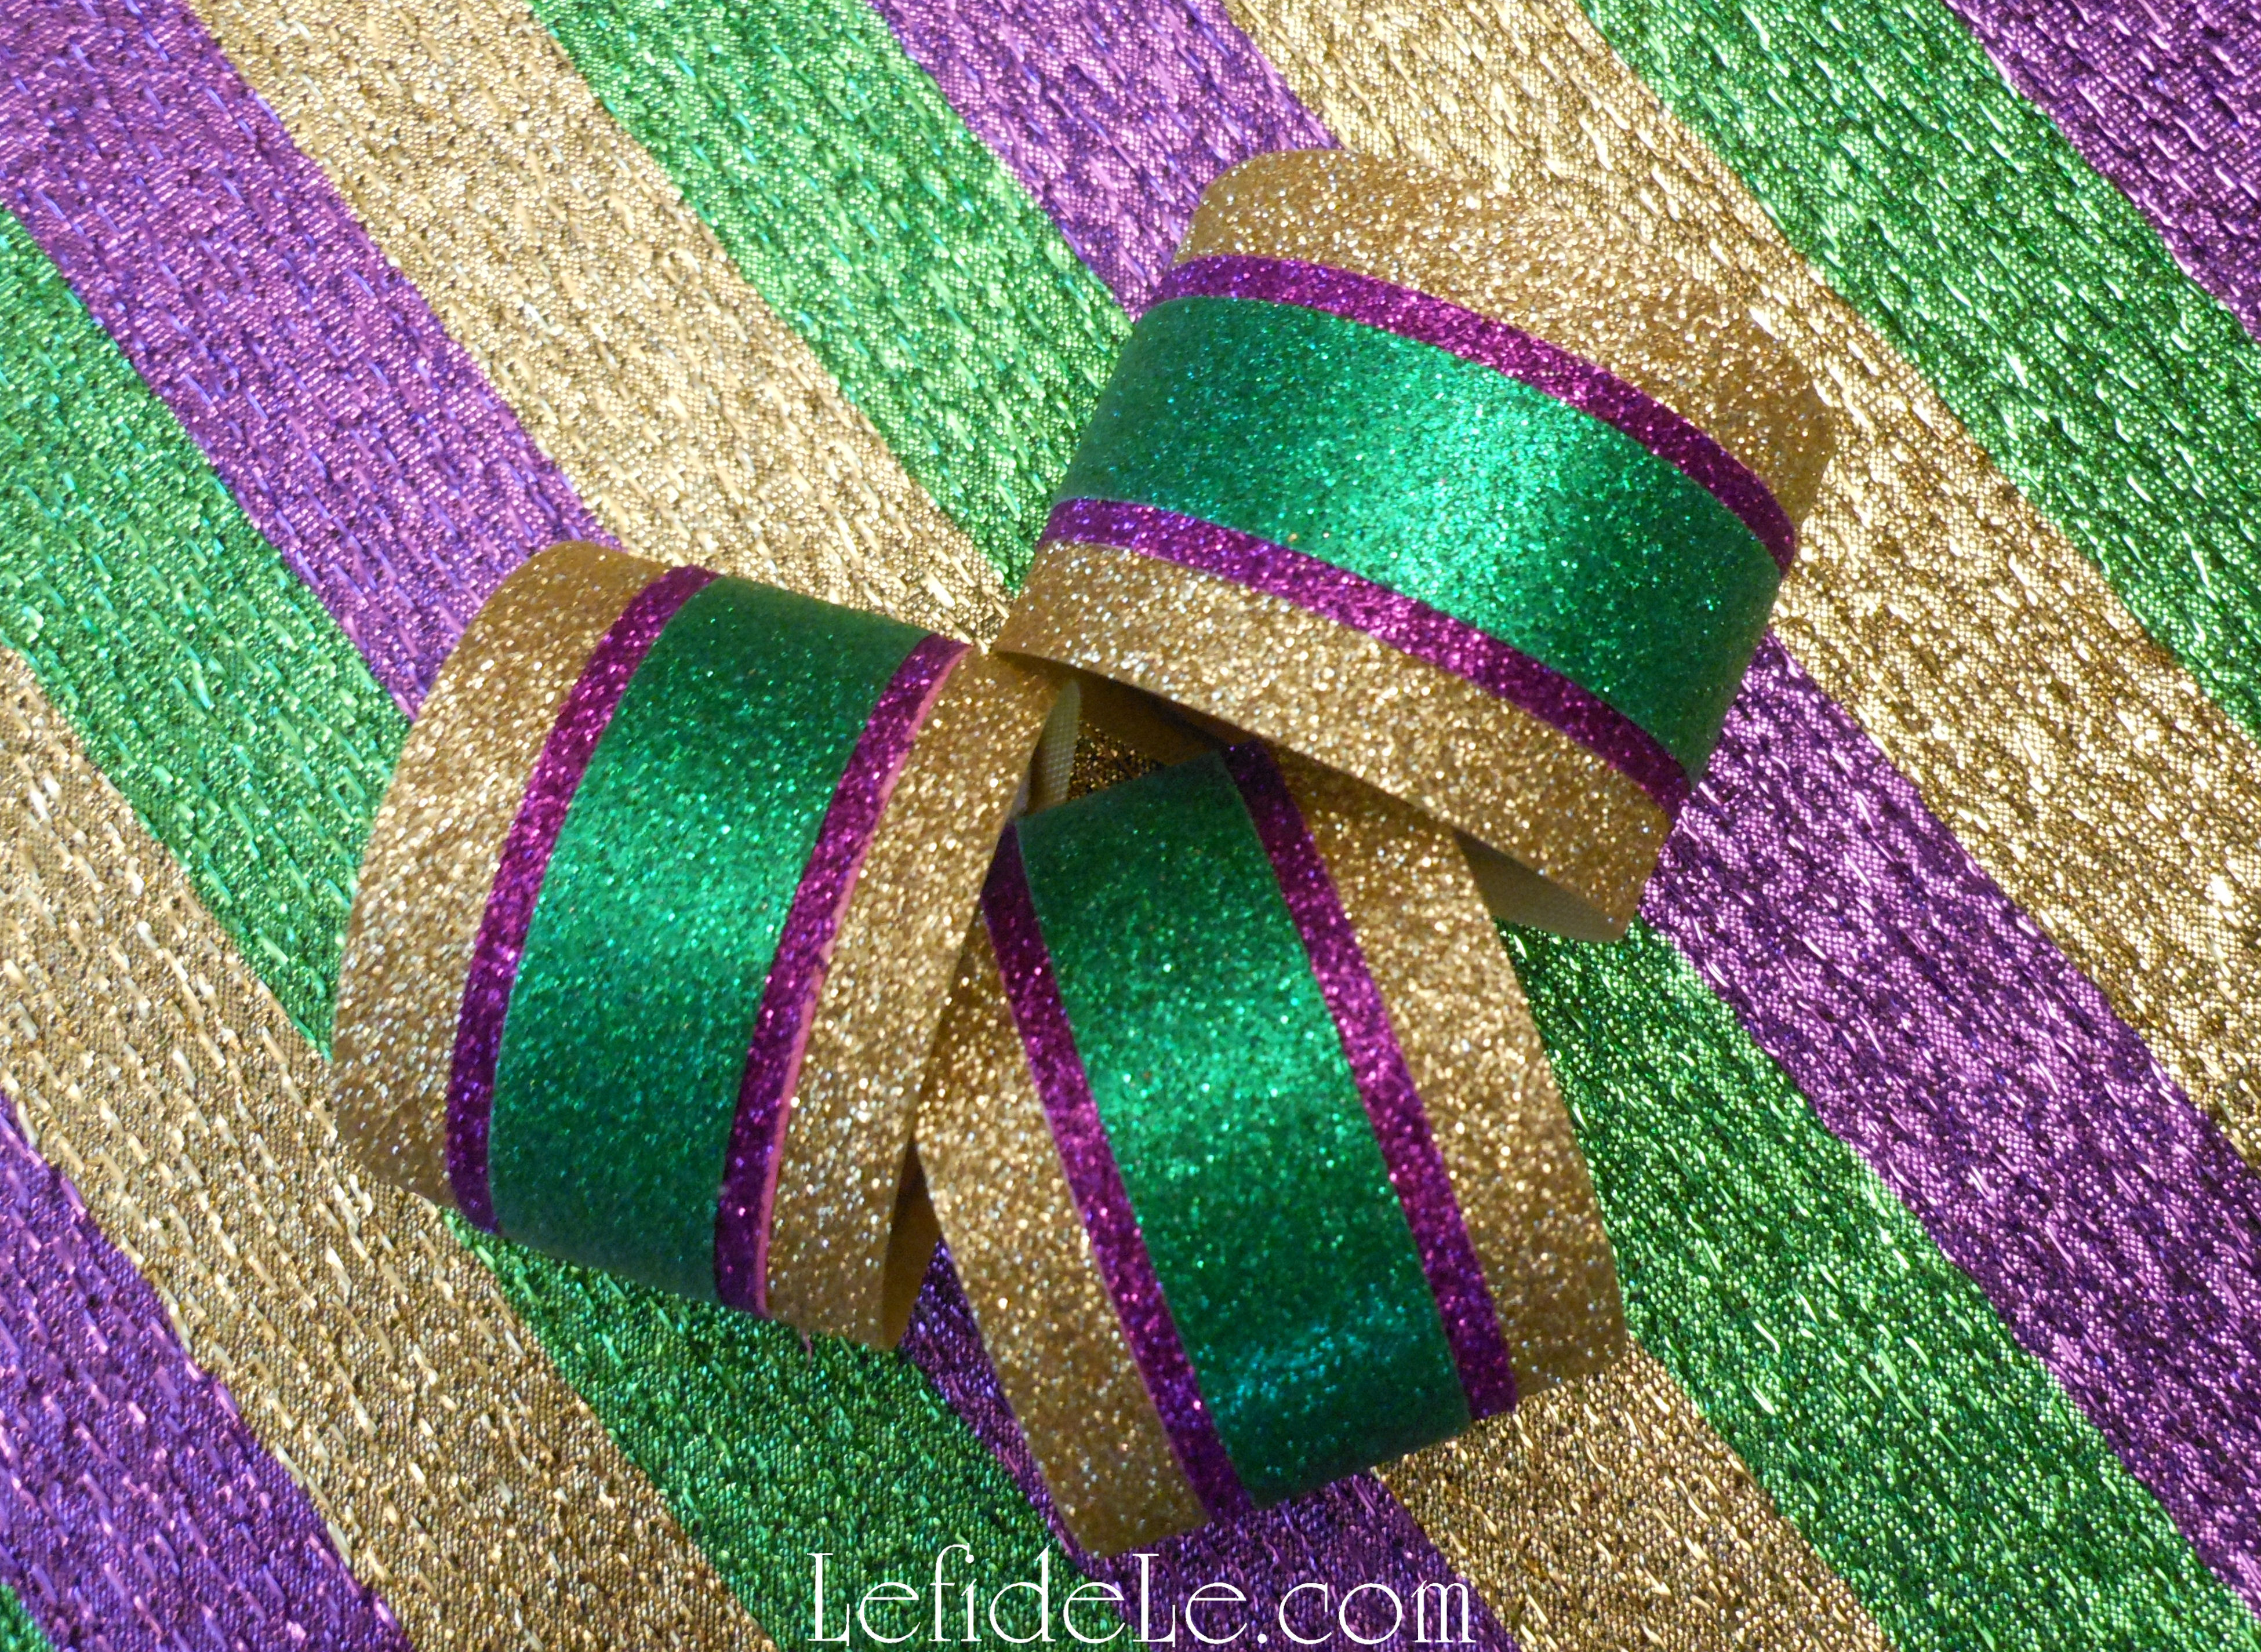
Next, I cut and attached layers of green and purple glitter washi tape in different widths atop the gold base. Layers of ribbon would have also worked well, but I already owned the perfect sized tape.

313Leigh

Read how to make your own fleur-de-lis shapes with napkins at the article on Mardi Gras Masquerade Themed “Fat Tuesday” Dinner Party Tablescape Décor Ideas.

024Leigh

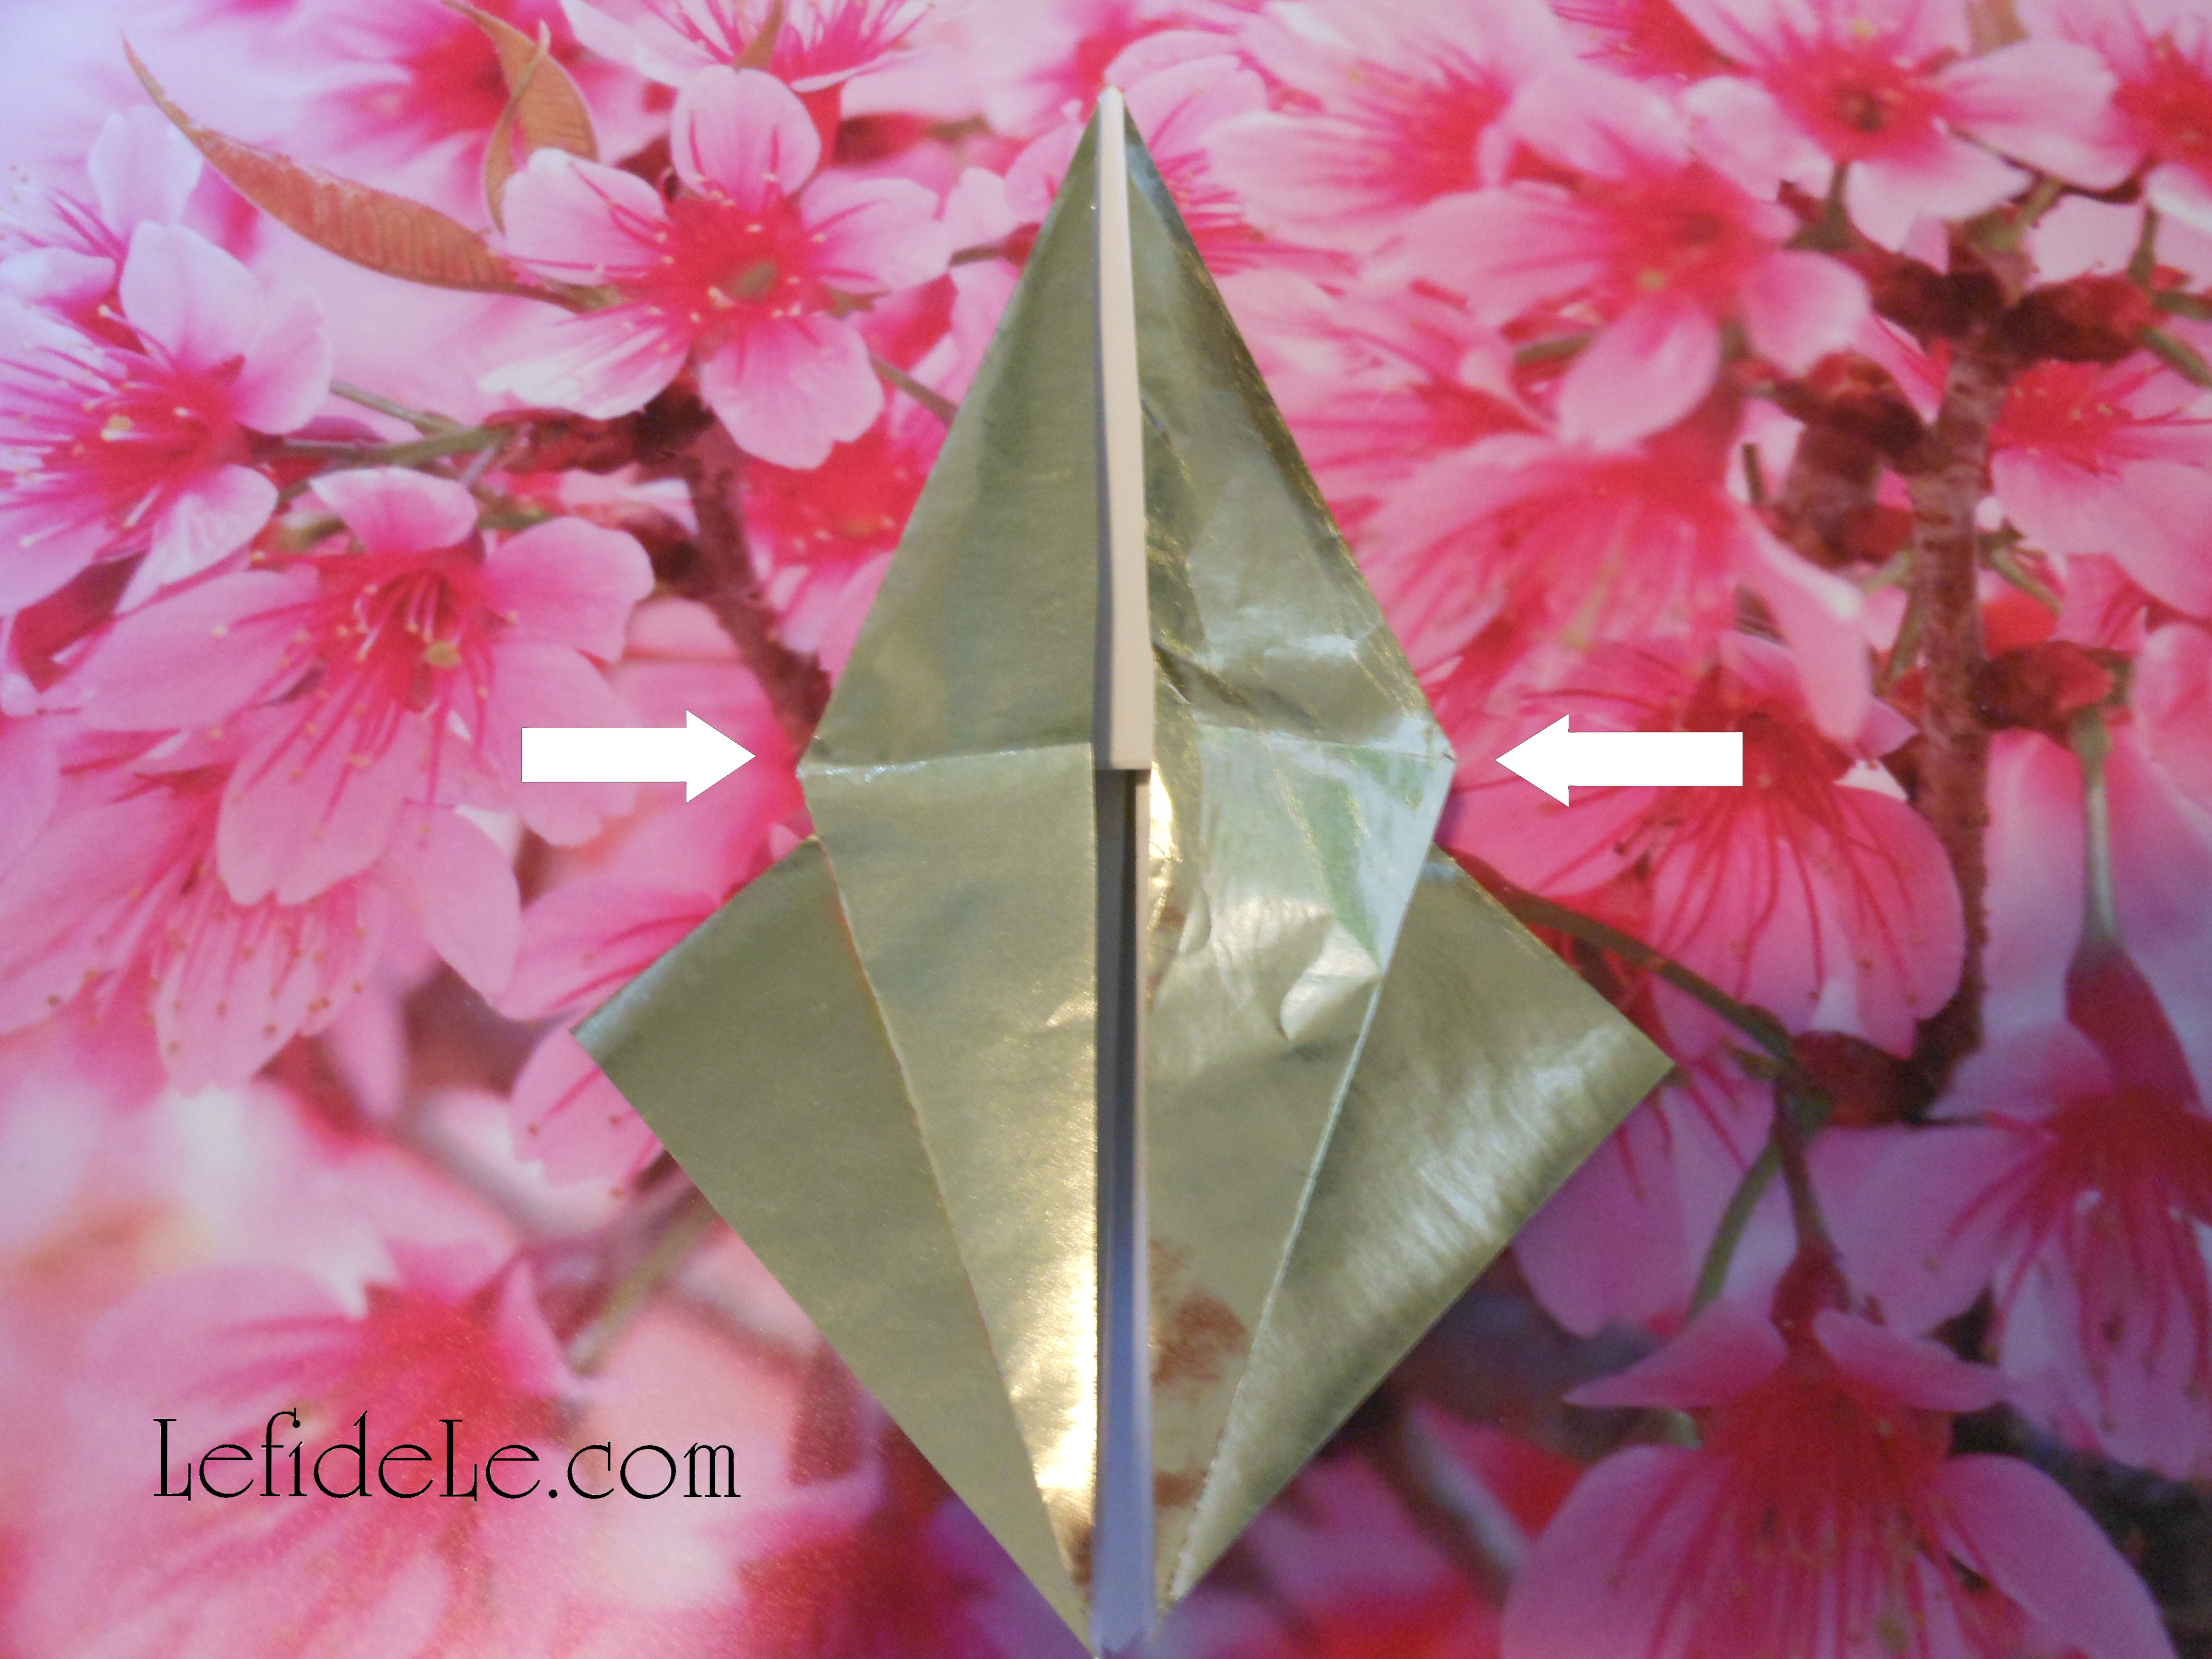
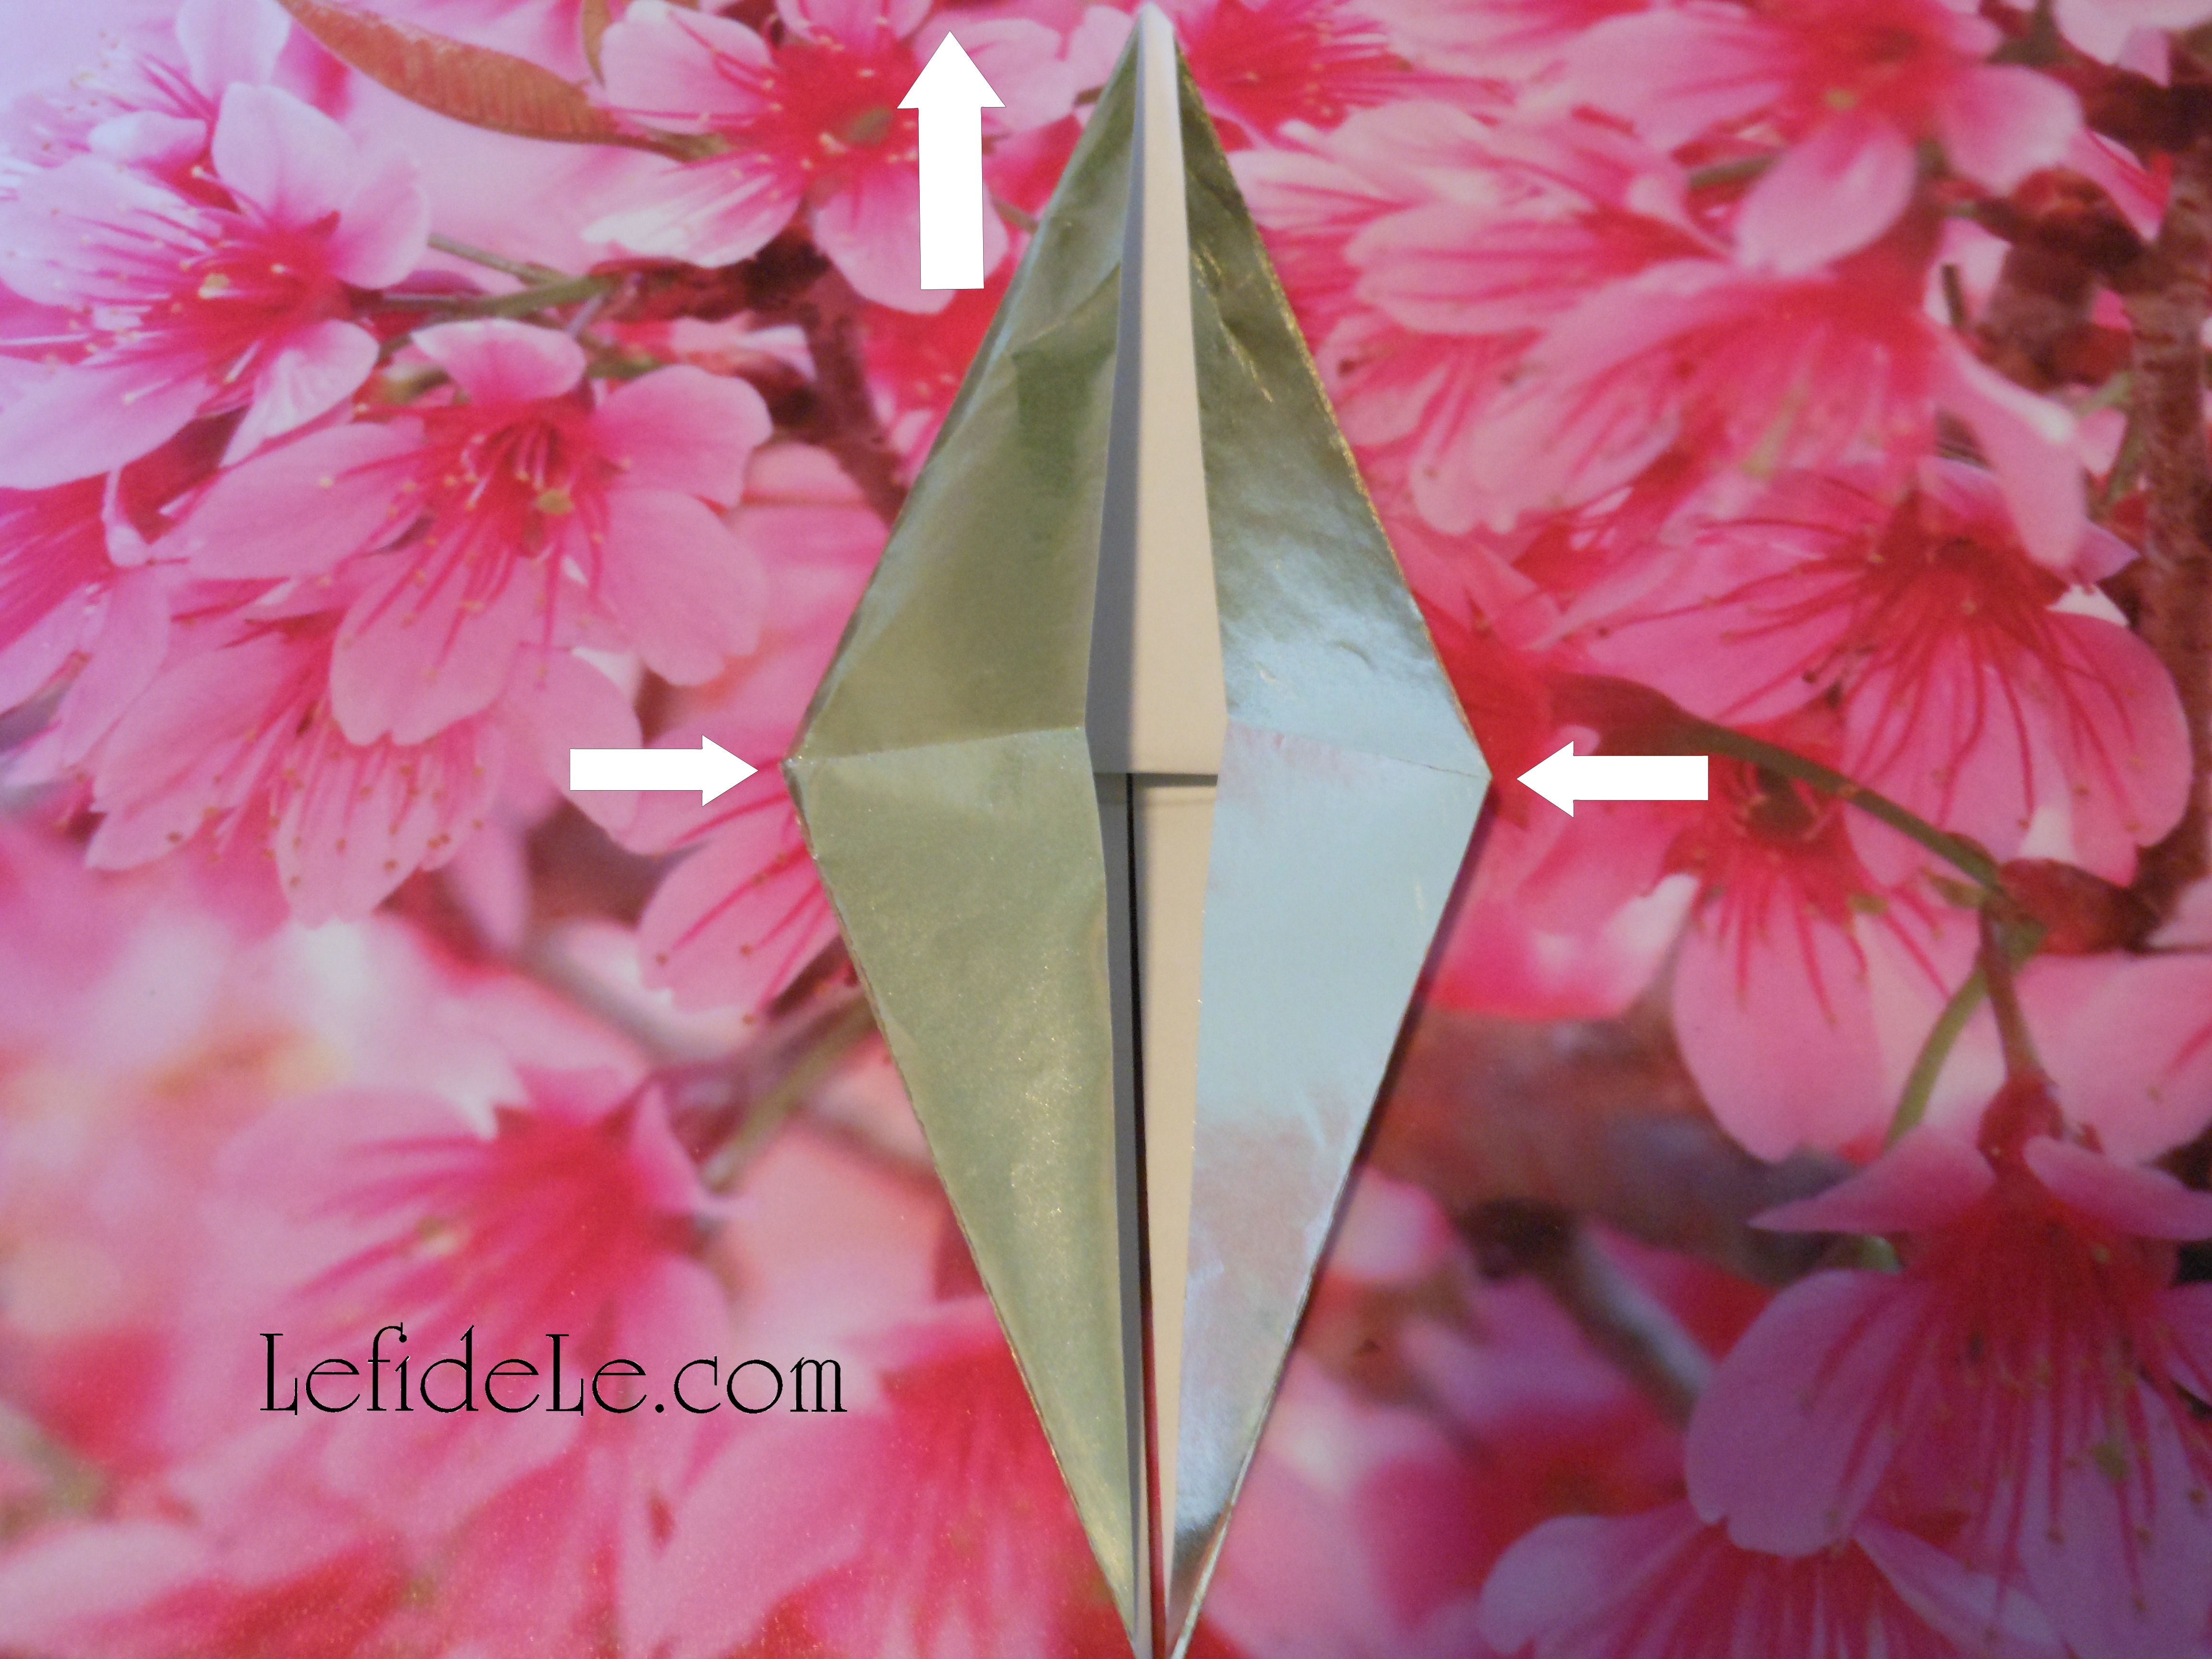
I made all six napkin rings for way less than a dollar, in a matter of minutes, and they coordinated perfectly with my theme’s décor… Awesome!

299Leigh

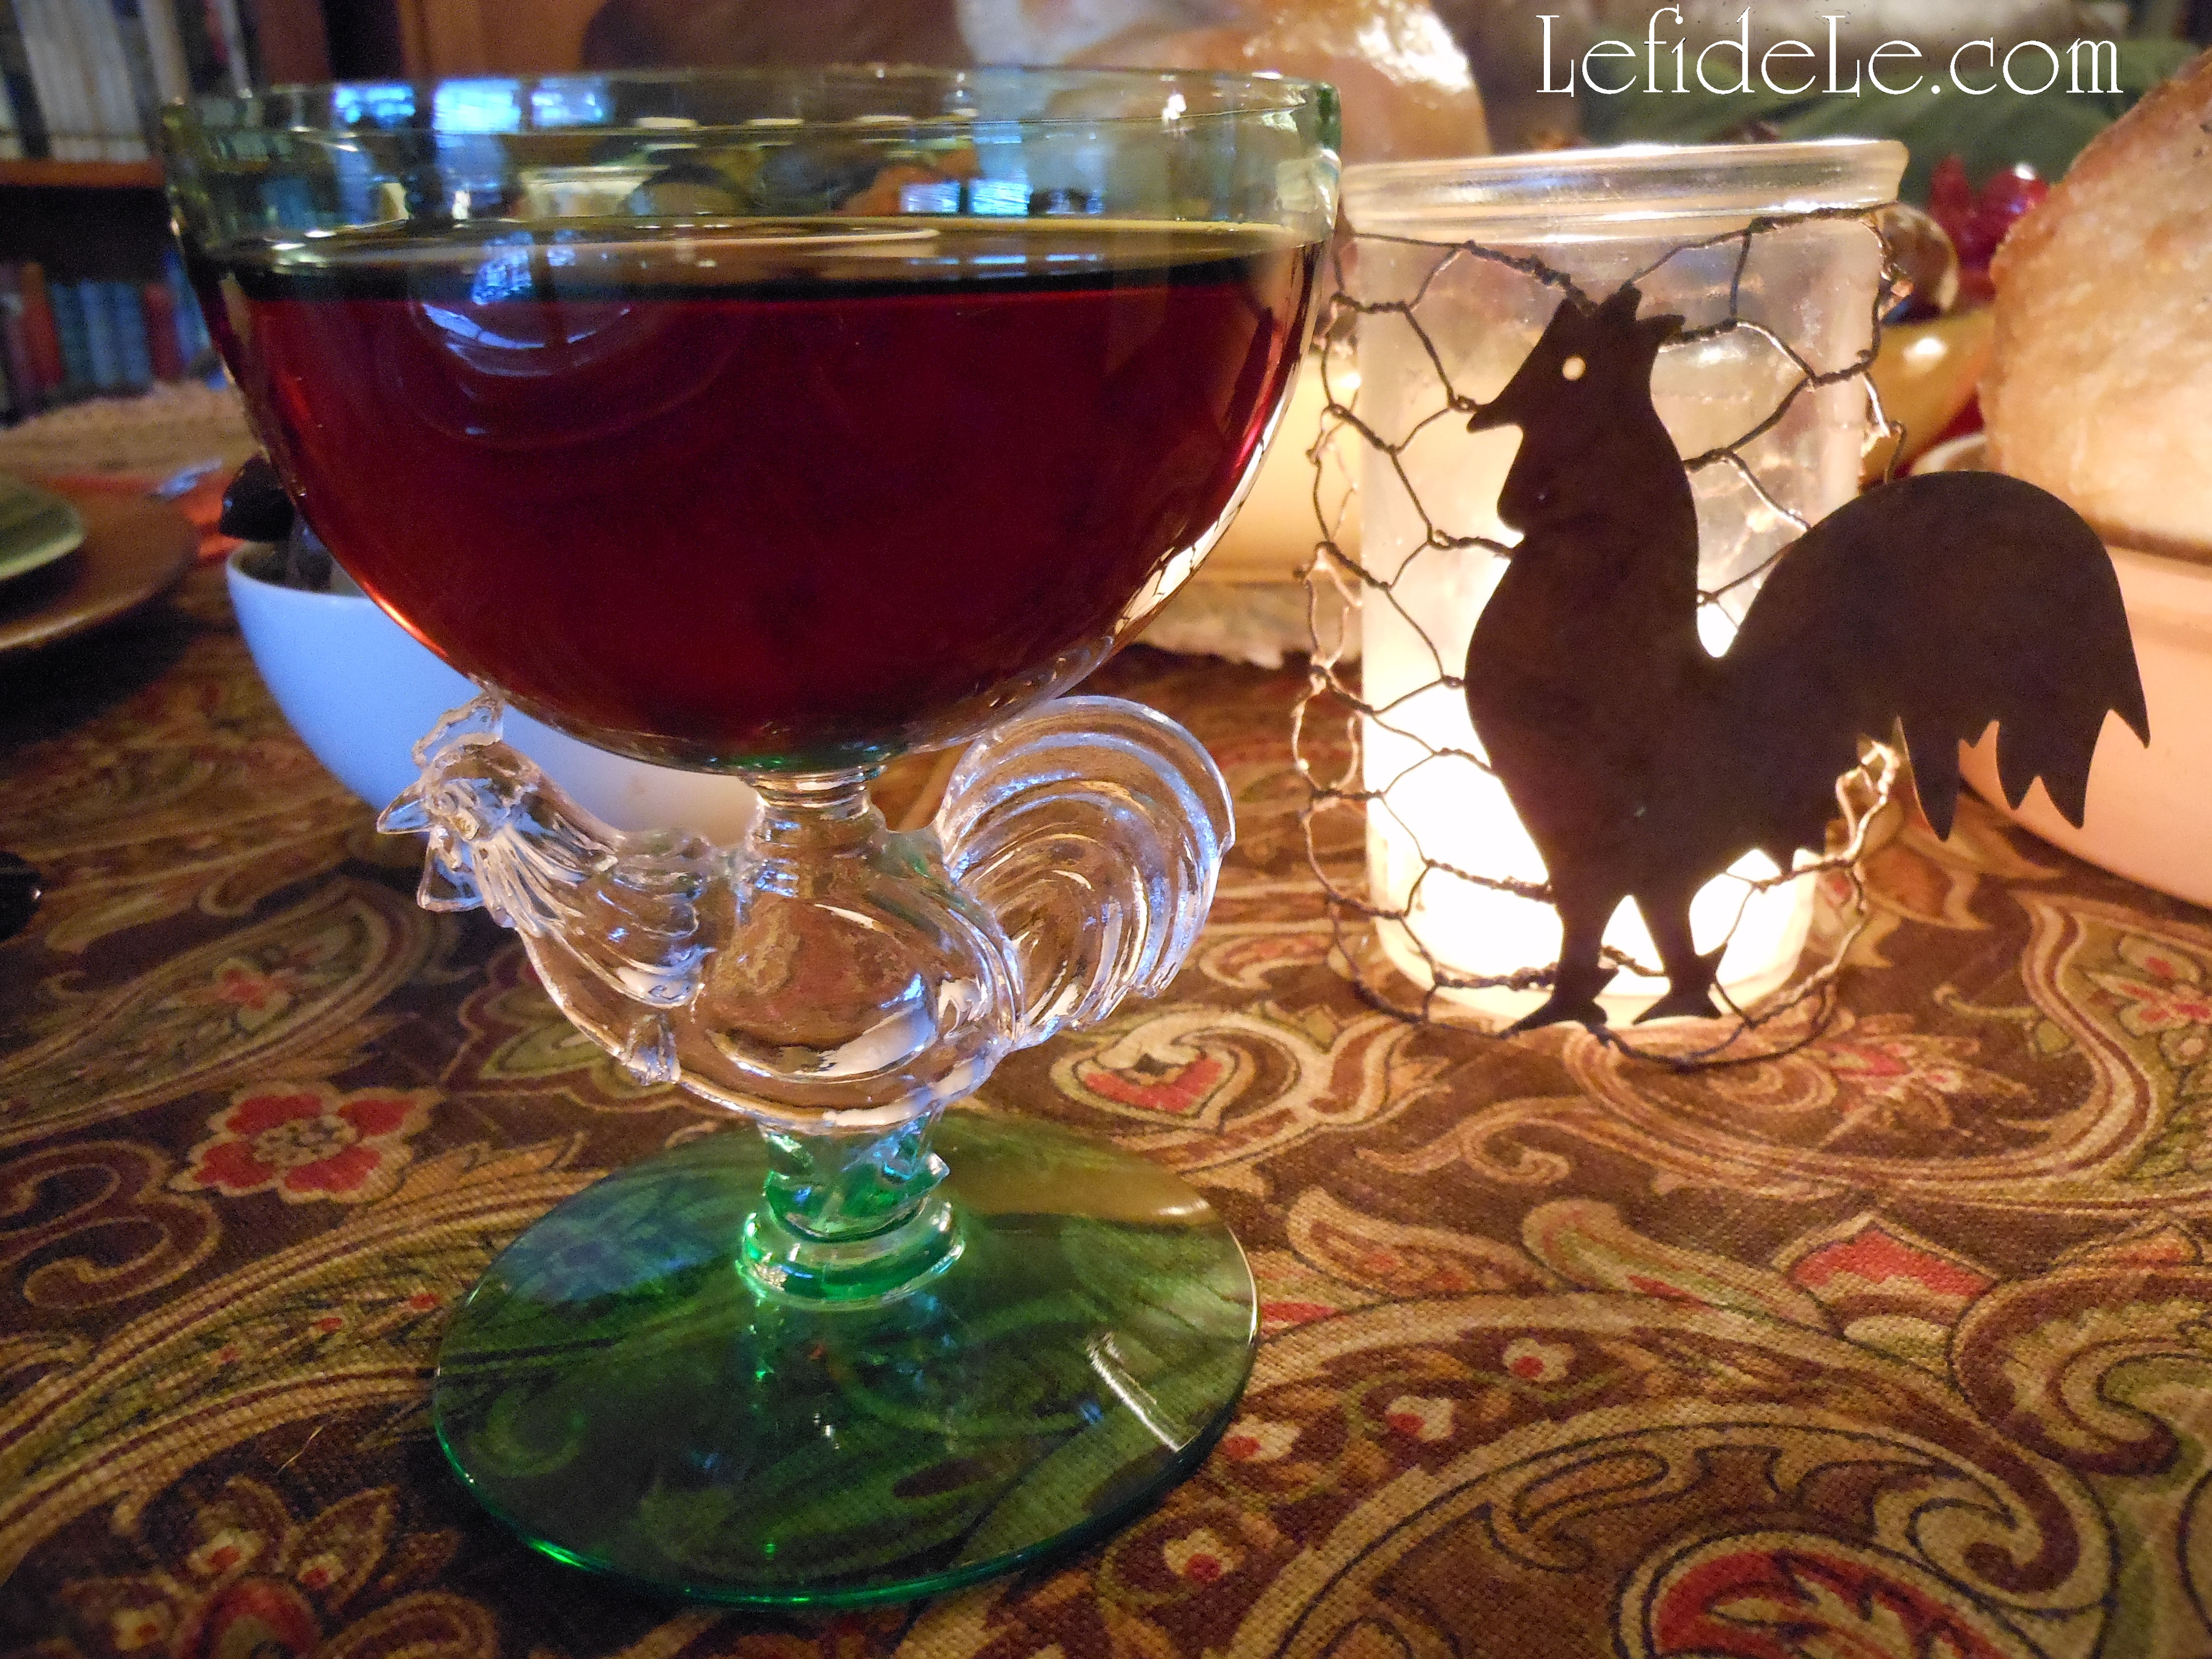
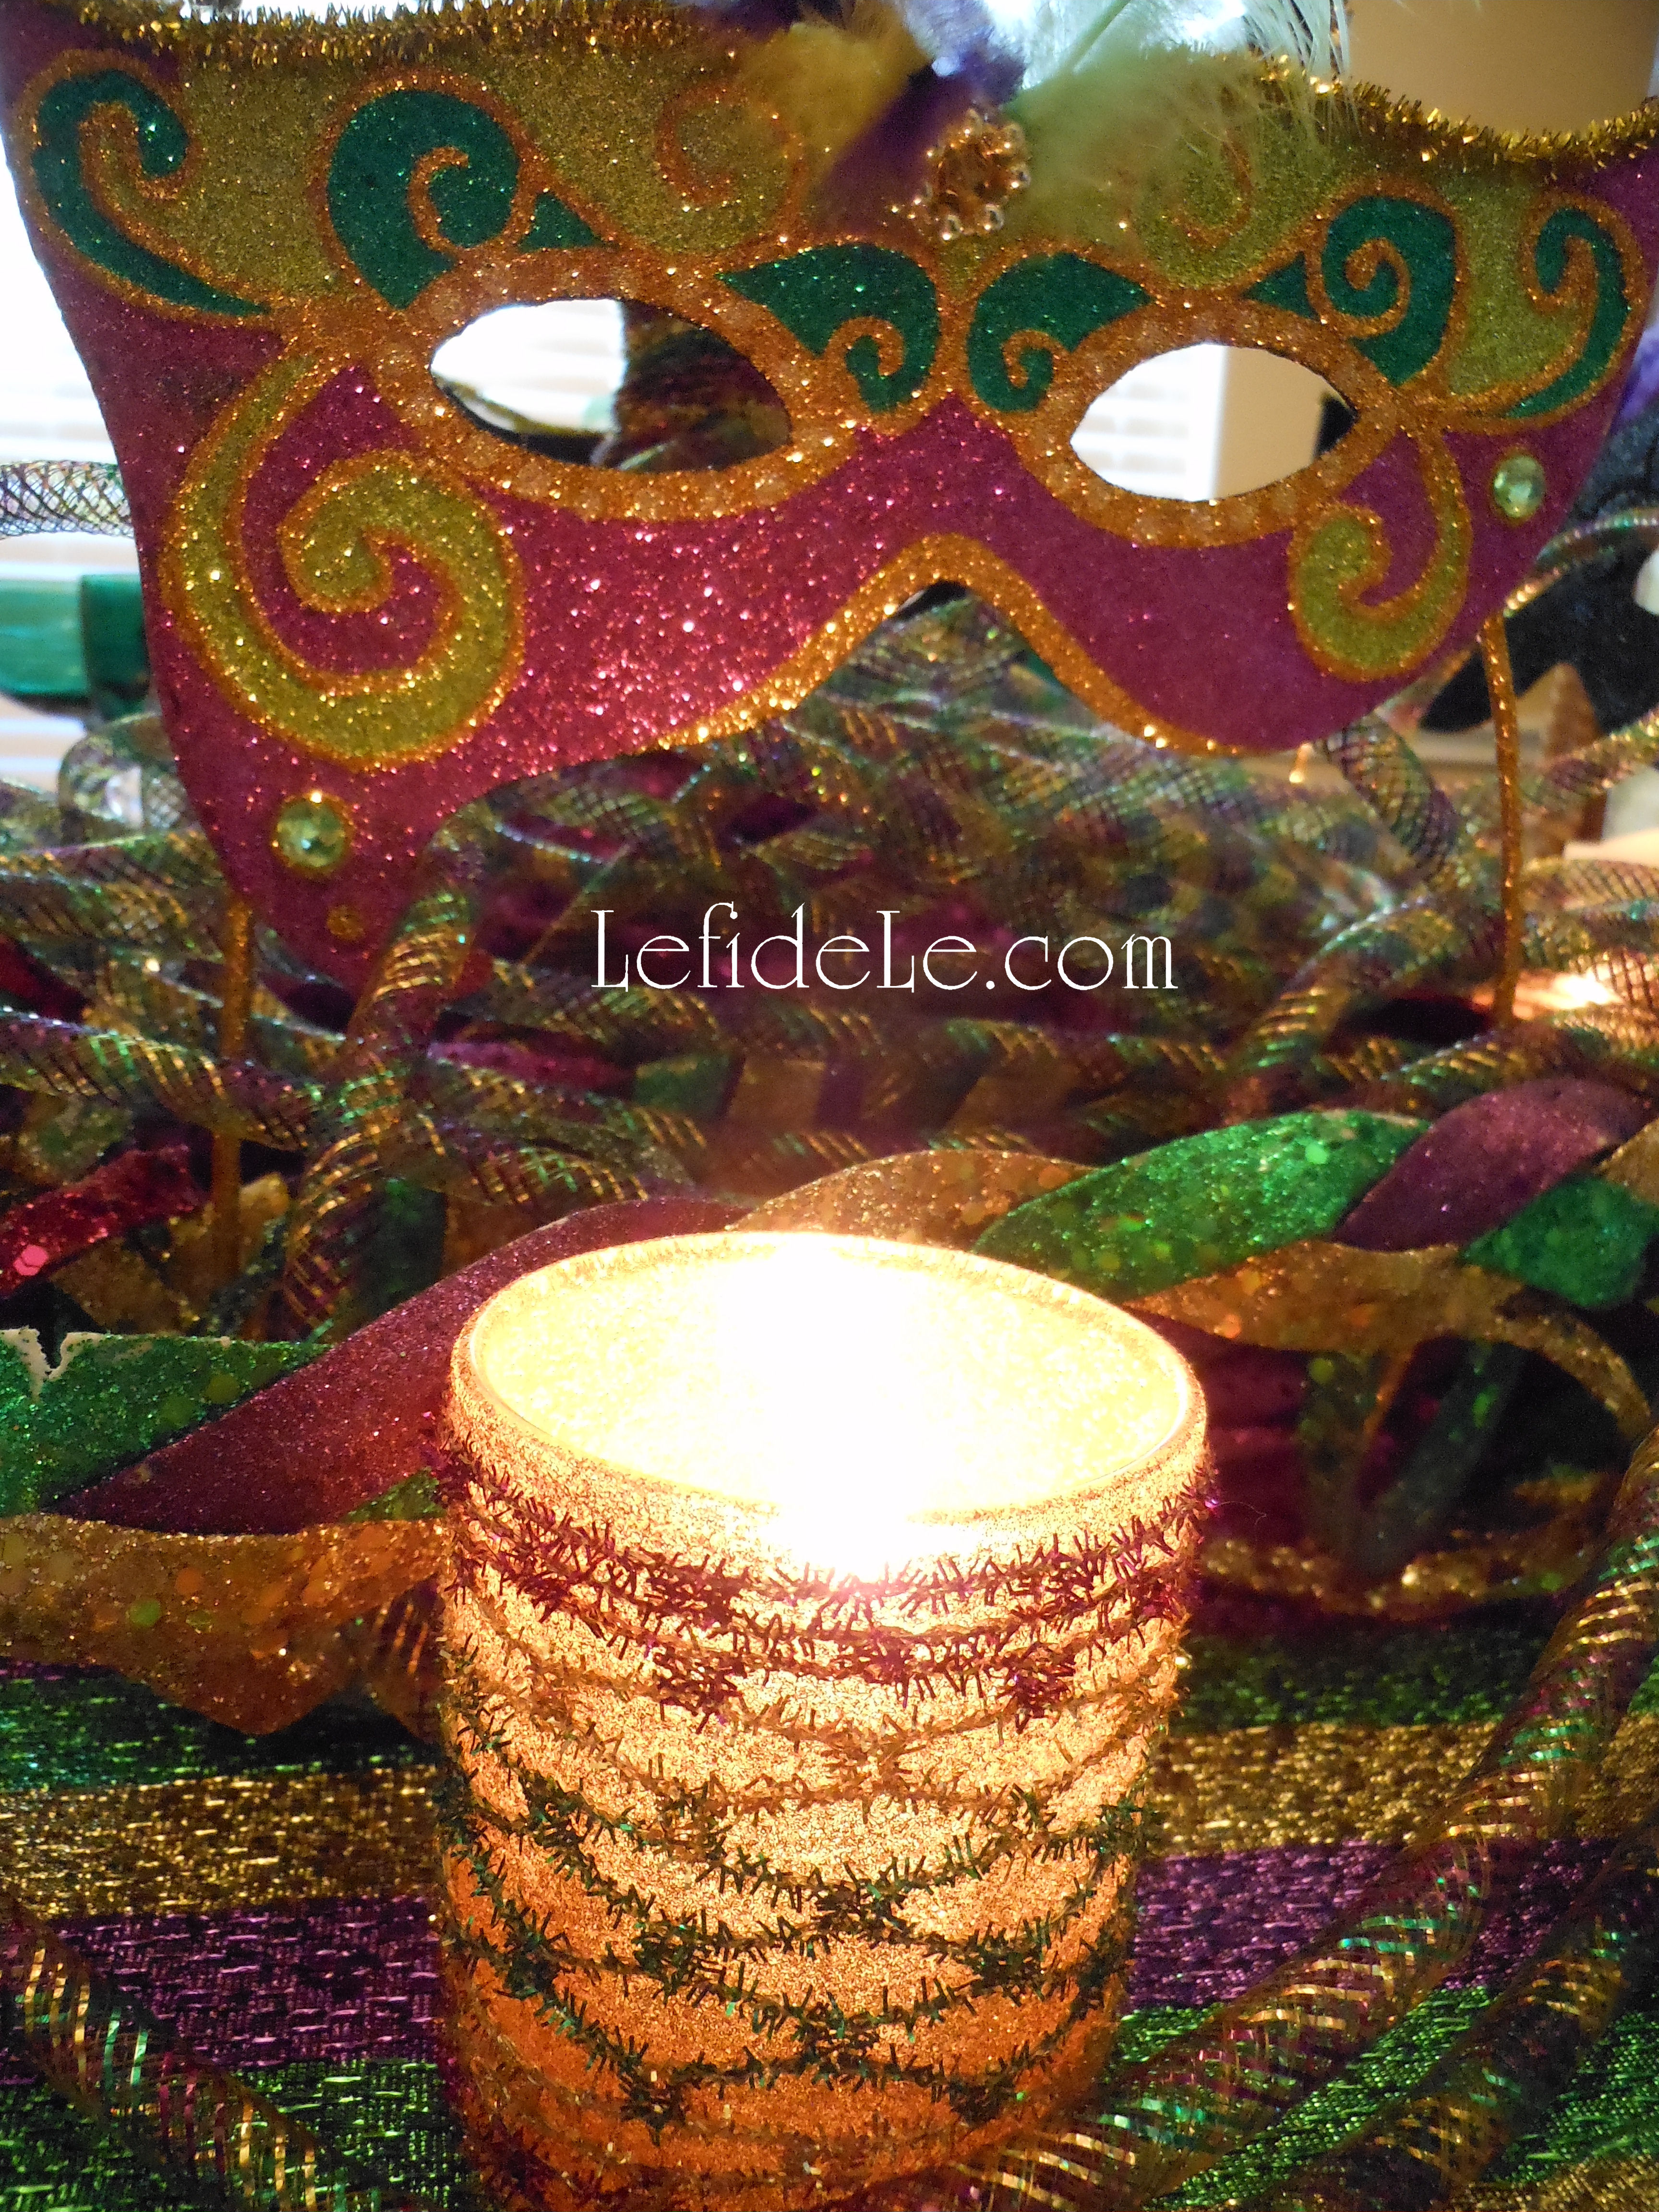
Now for those ribbon votives… simply start with any type of votive holder or small jar. You can leave them plain or apply glitter paint to them. I went with gold glittered glass. Cut lengths of coordinating ribbon long enough to wrap around them and overlap. You can attach one end to the other with a dot of glue or double stick tape. Because my ribbon was wired, I merely twisted one side over the other like a twist-tie. (See more twisty ribbon action here on my DIY Rusted Rooster Chicken Wire Votive Holder Craft.)

303Leigh

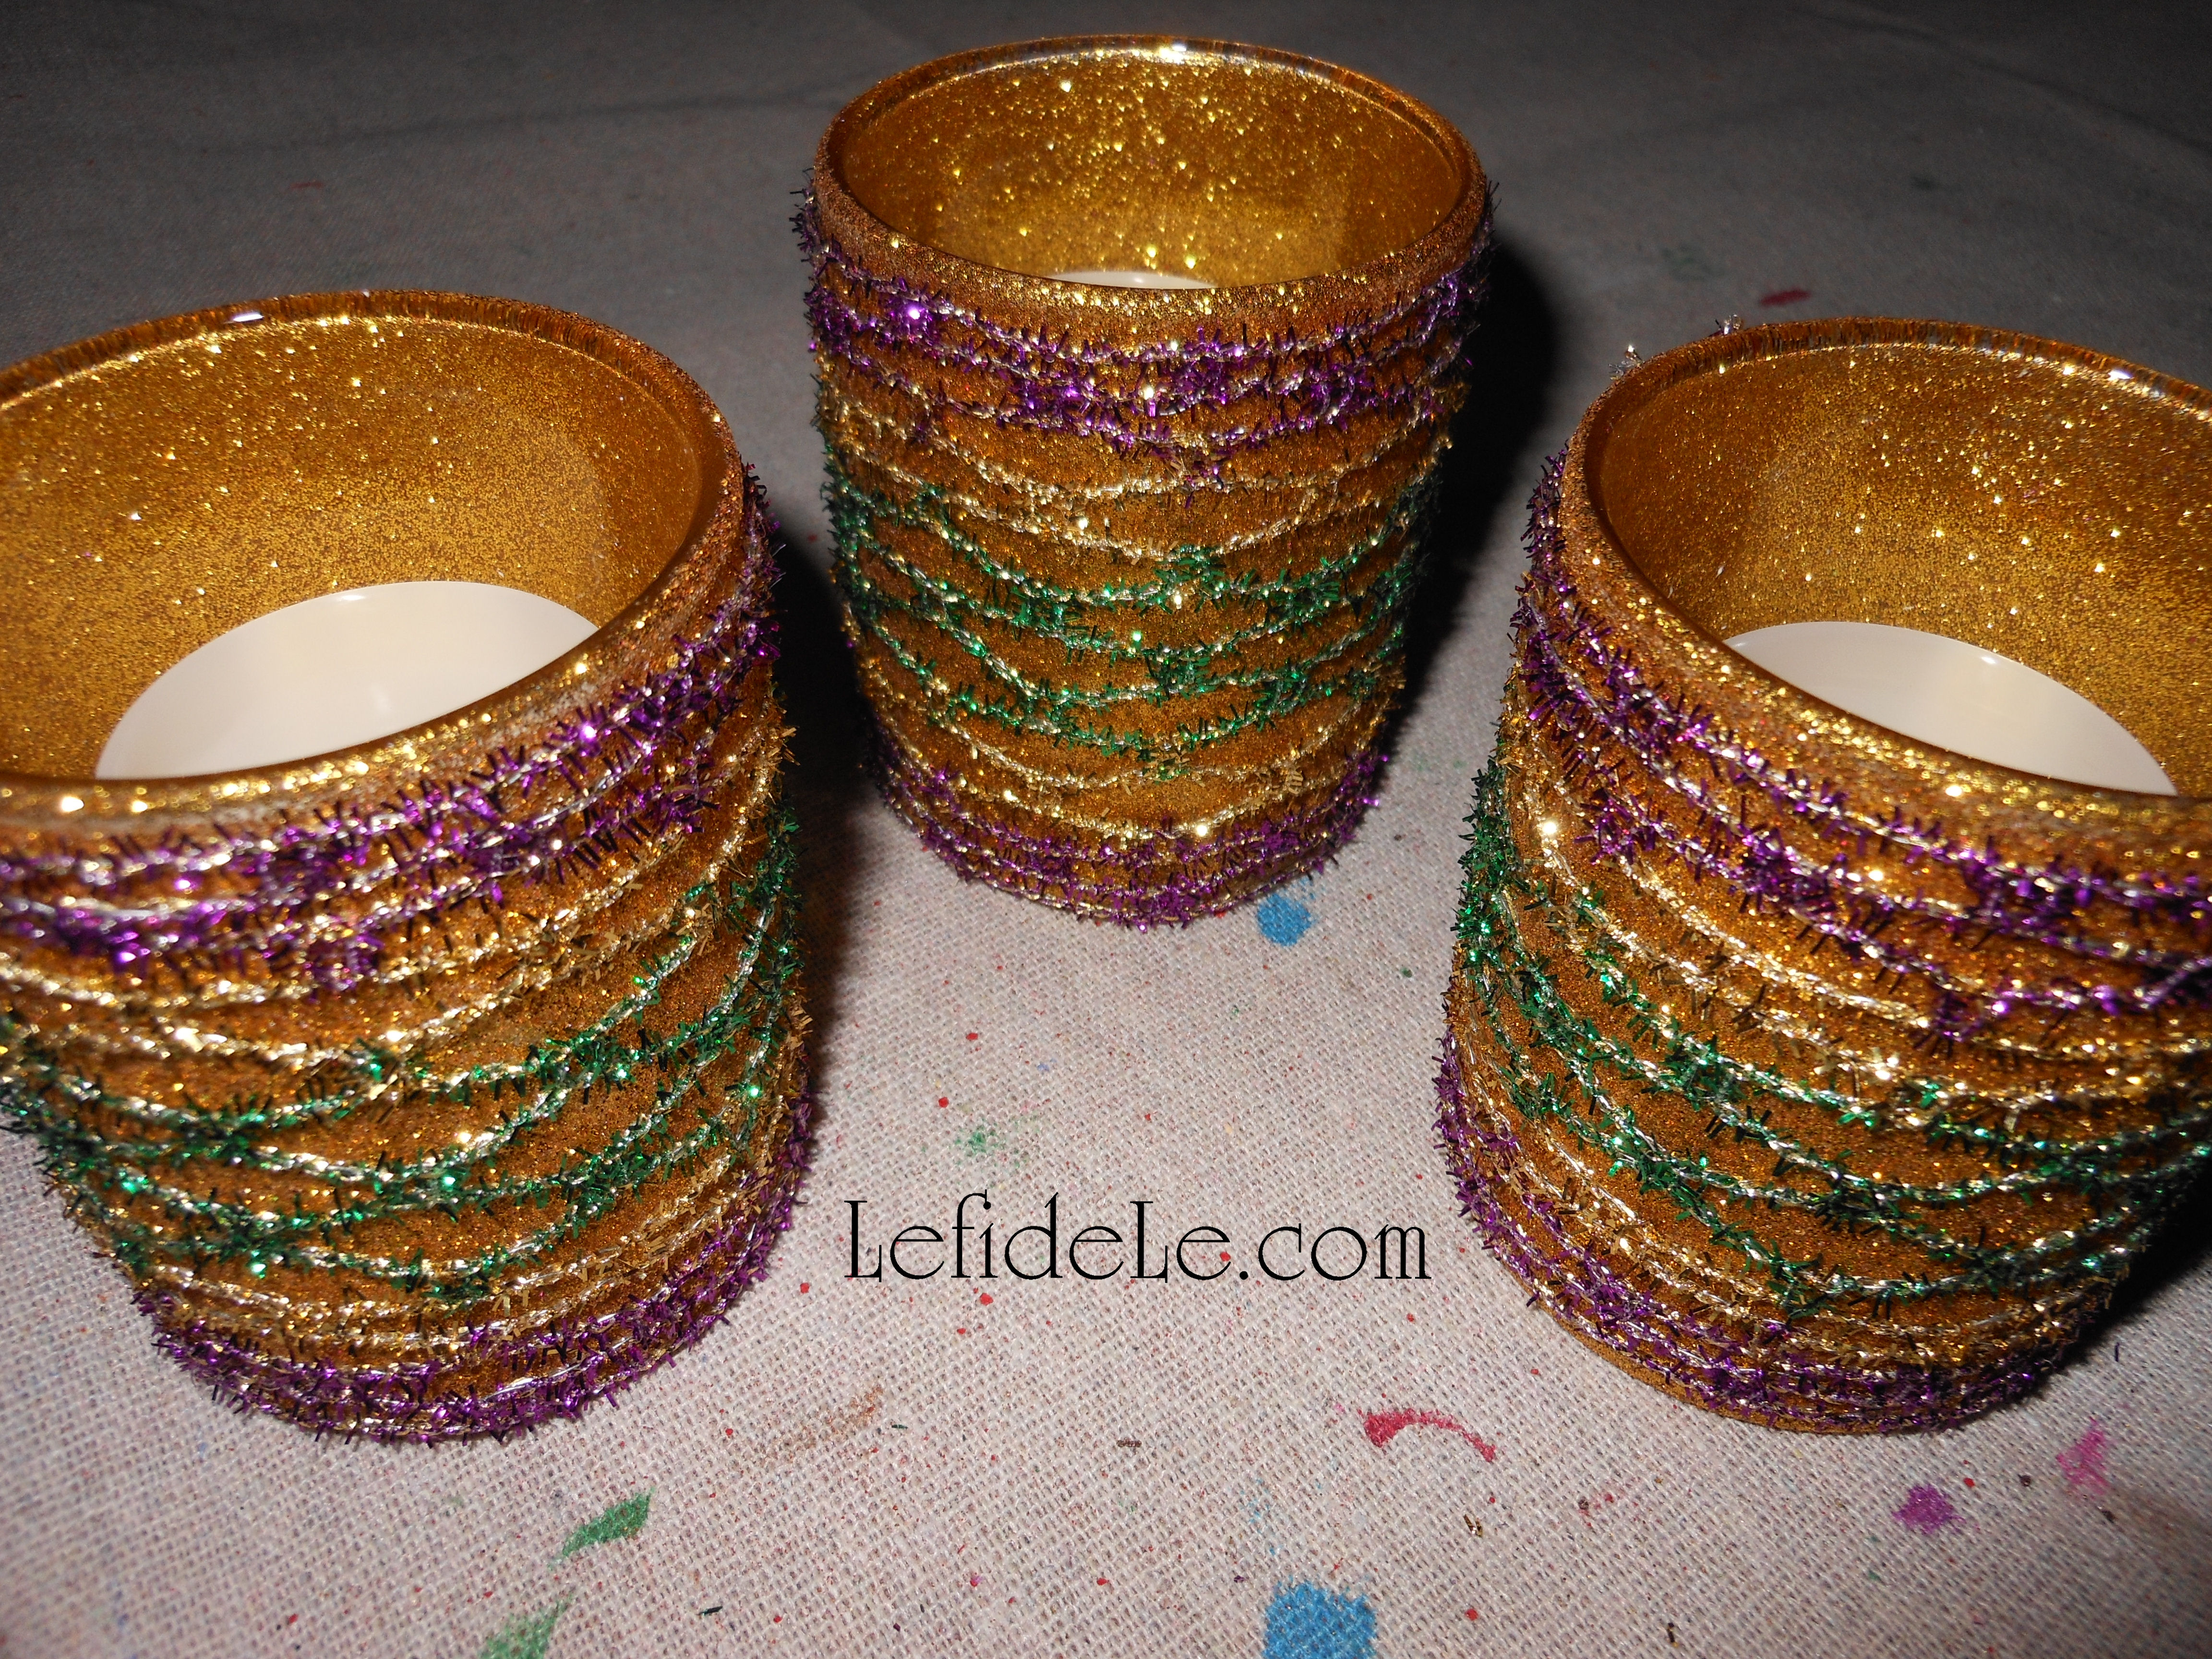
In this way, I can unwrap the ribbons and reuse both them and the votives for a future holiday in a different way. I think they turned out great, and they literally took me minutes to complete… Yea!

392Leigh

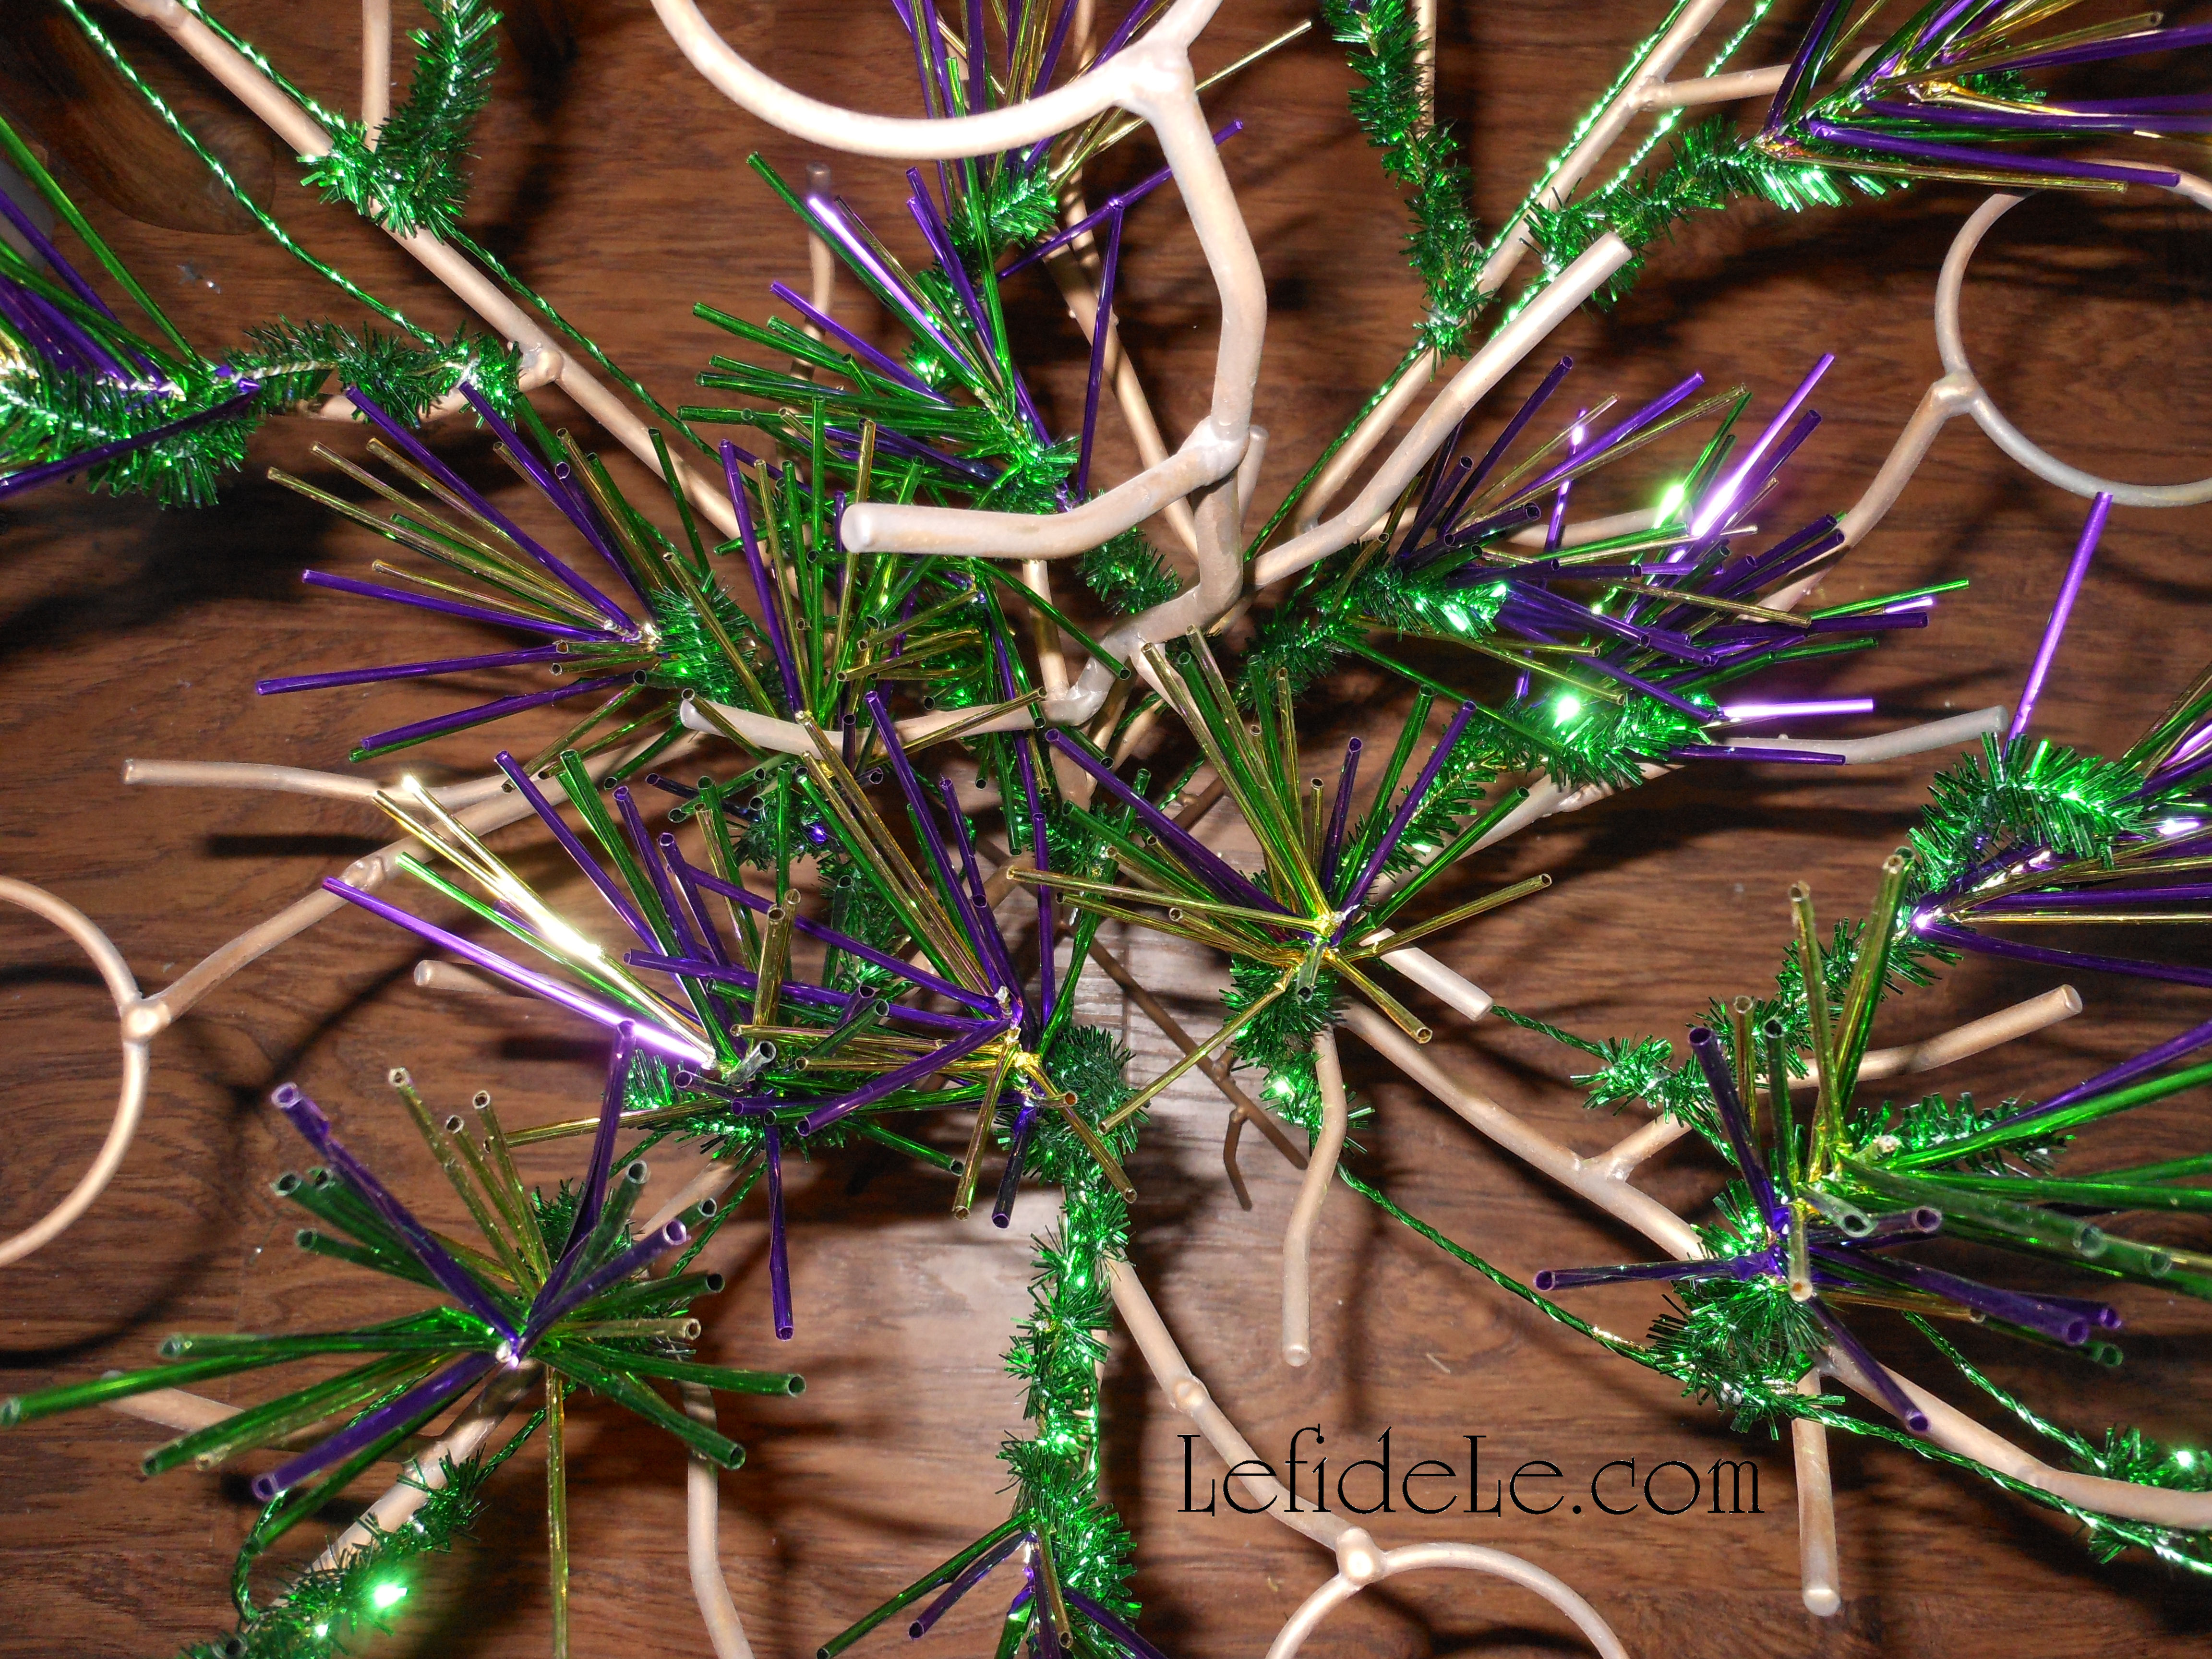
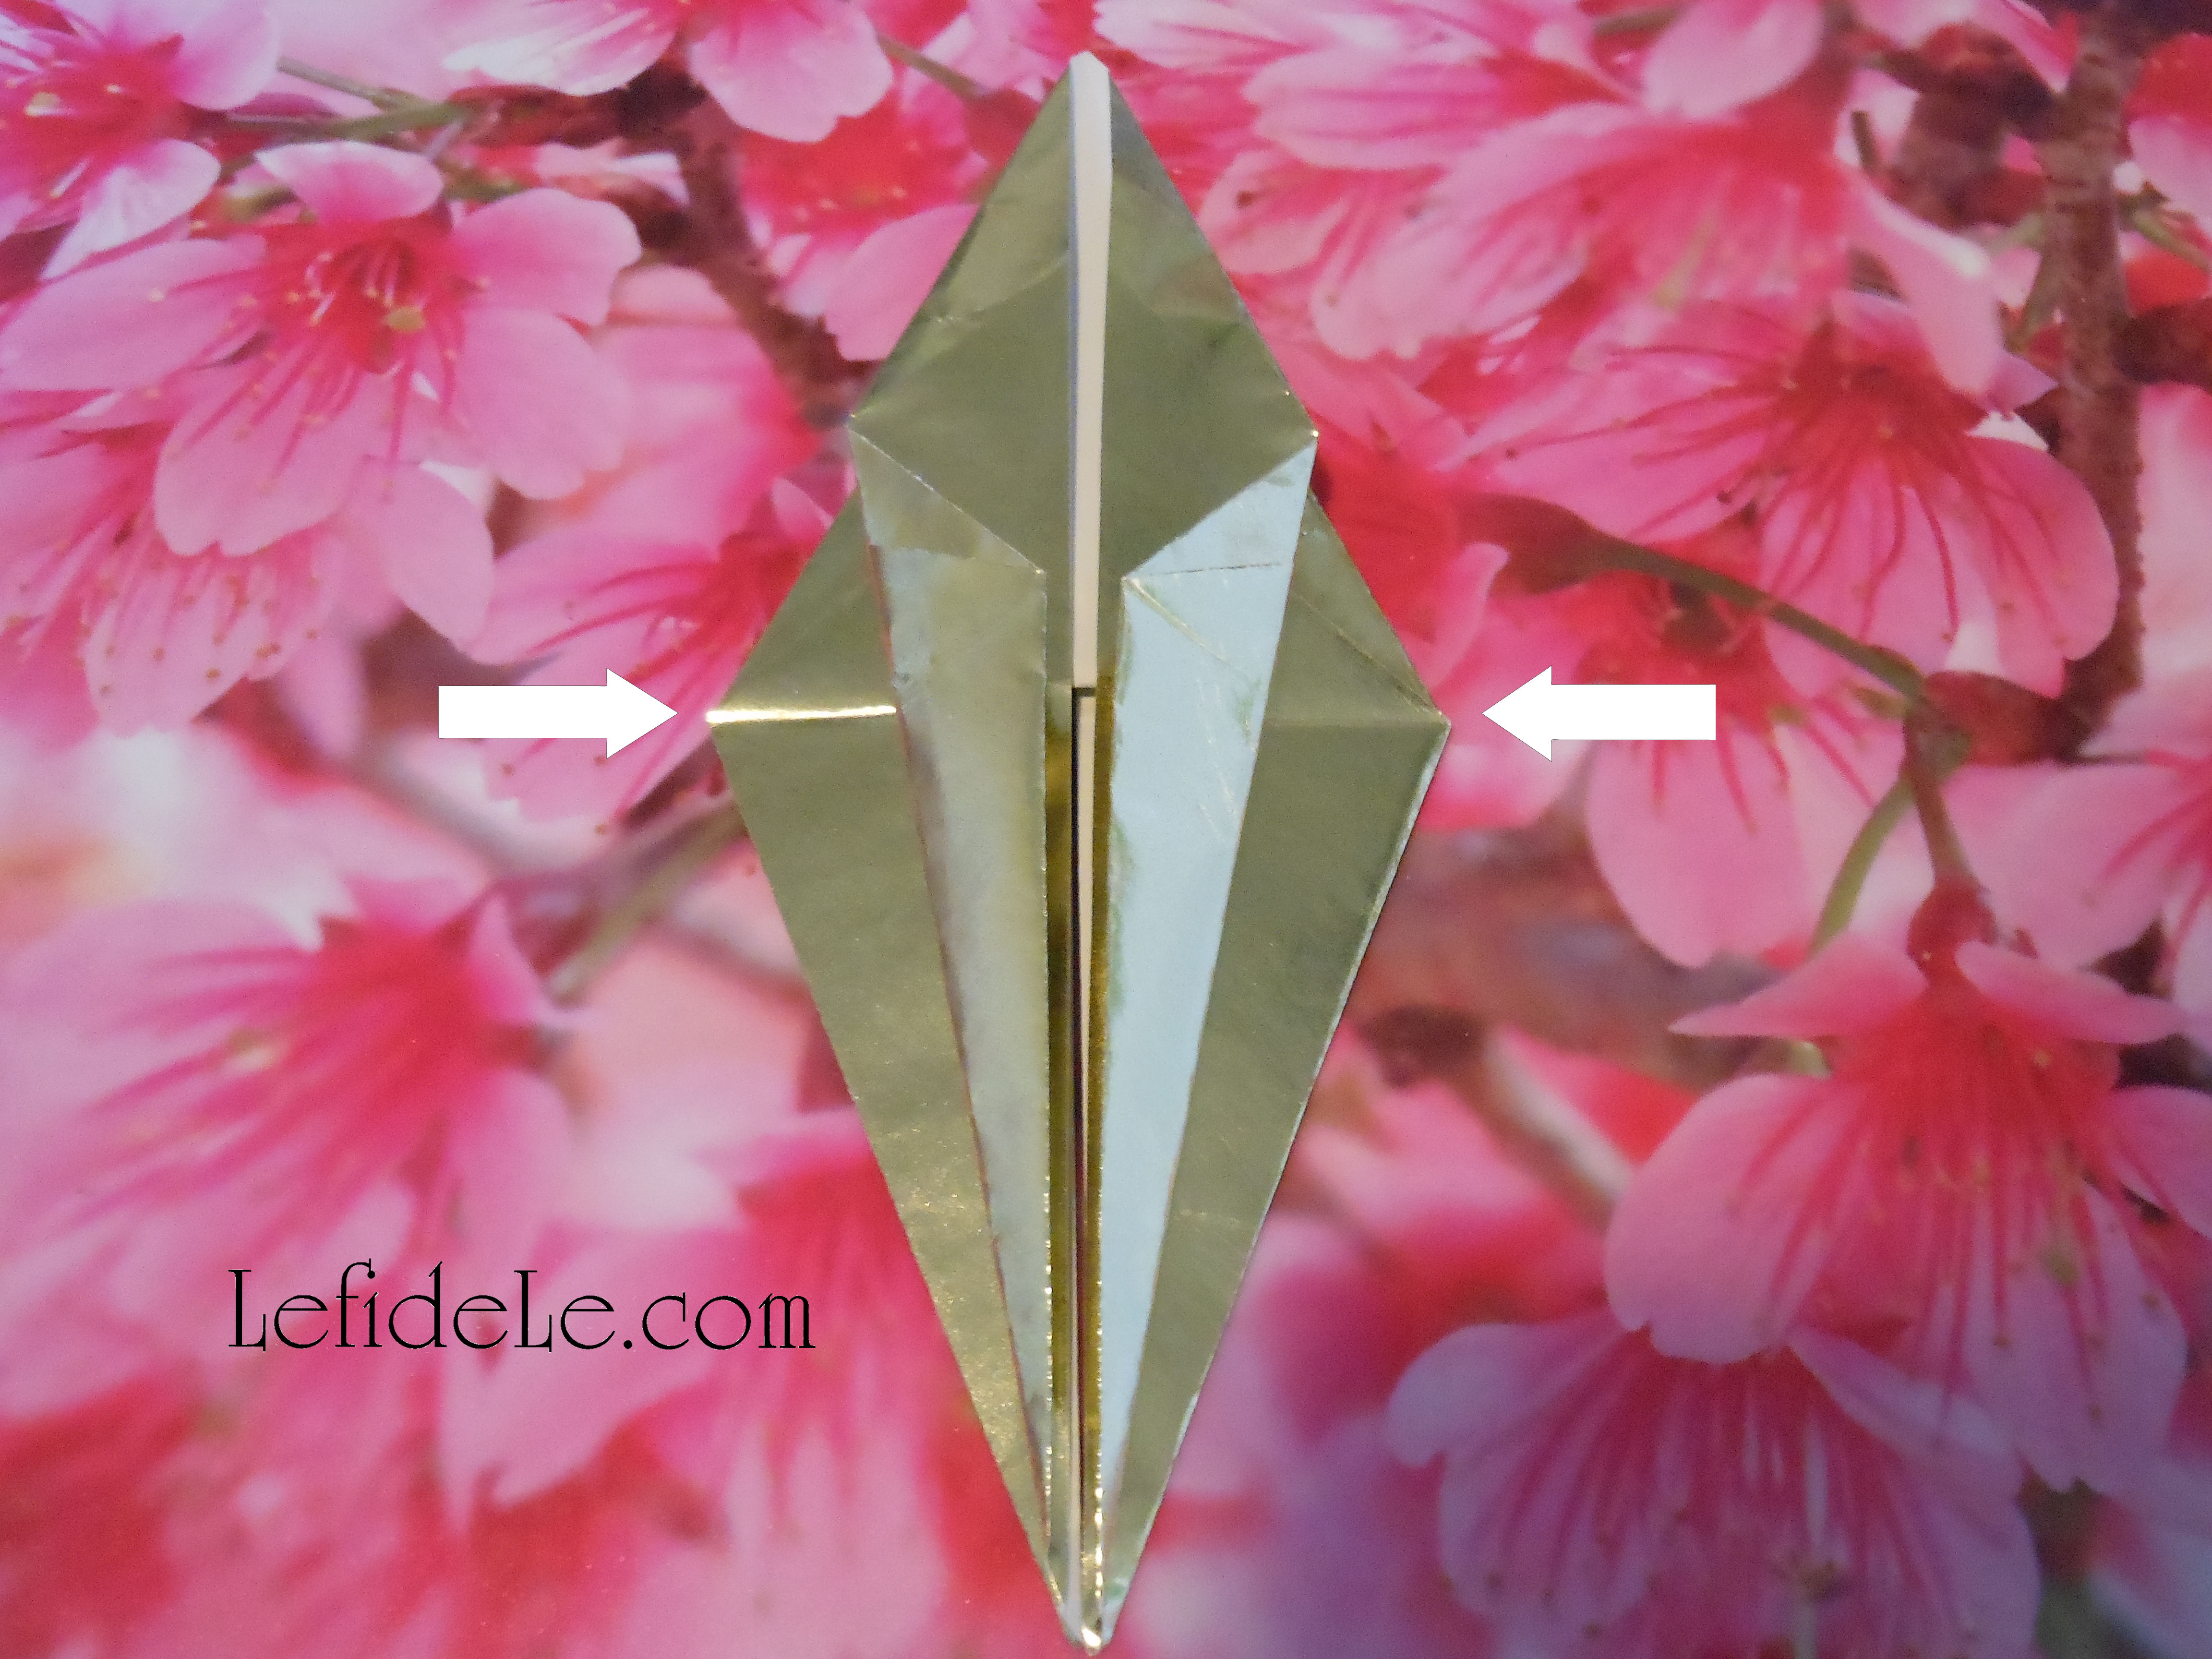
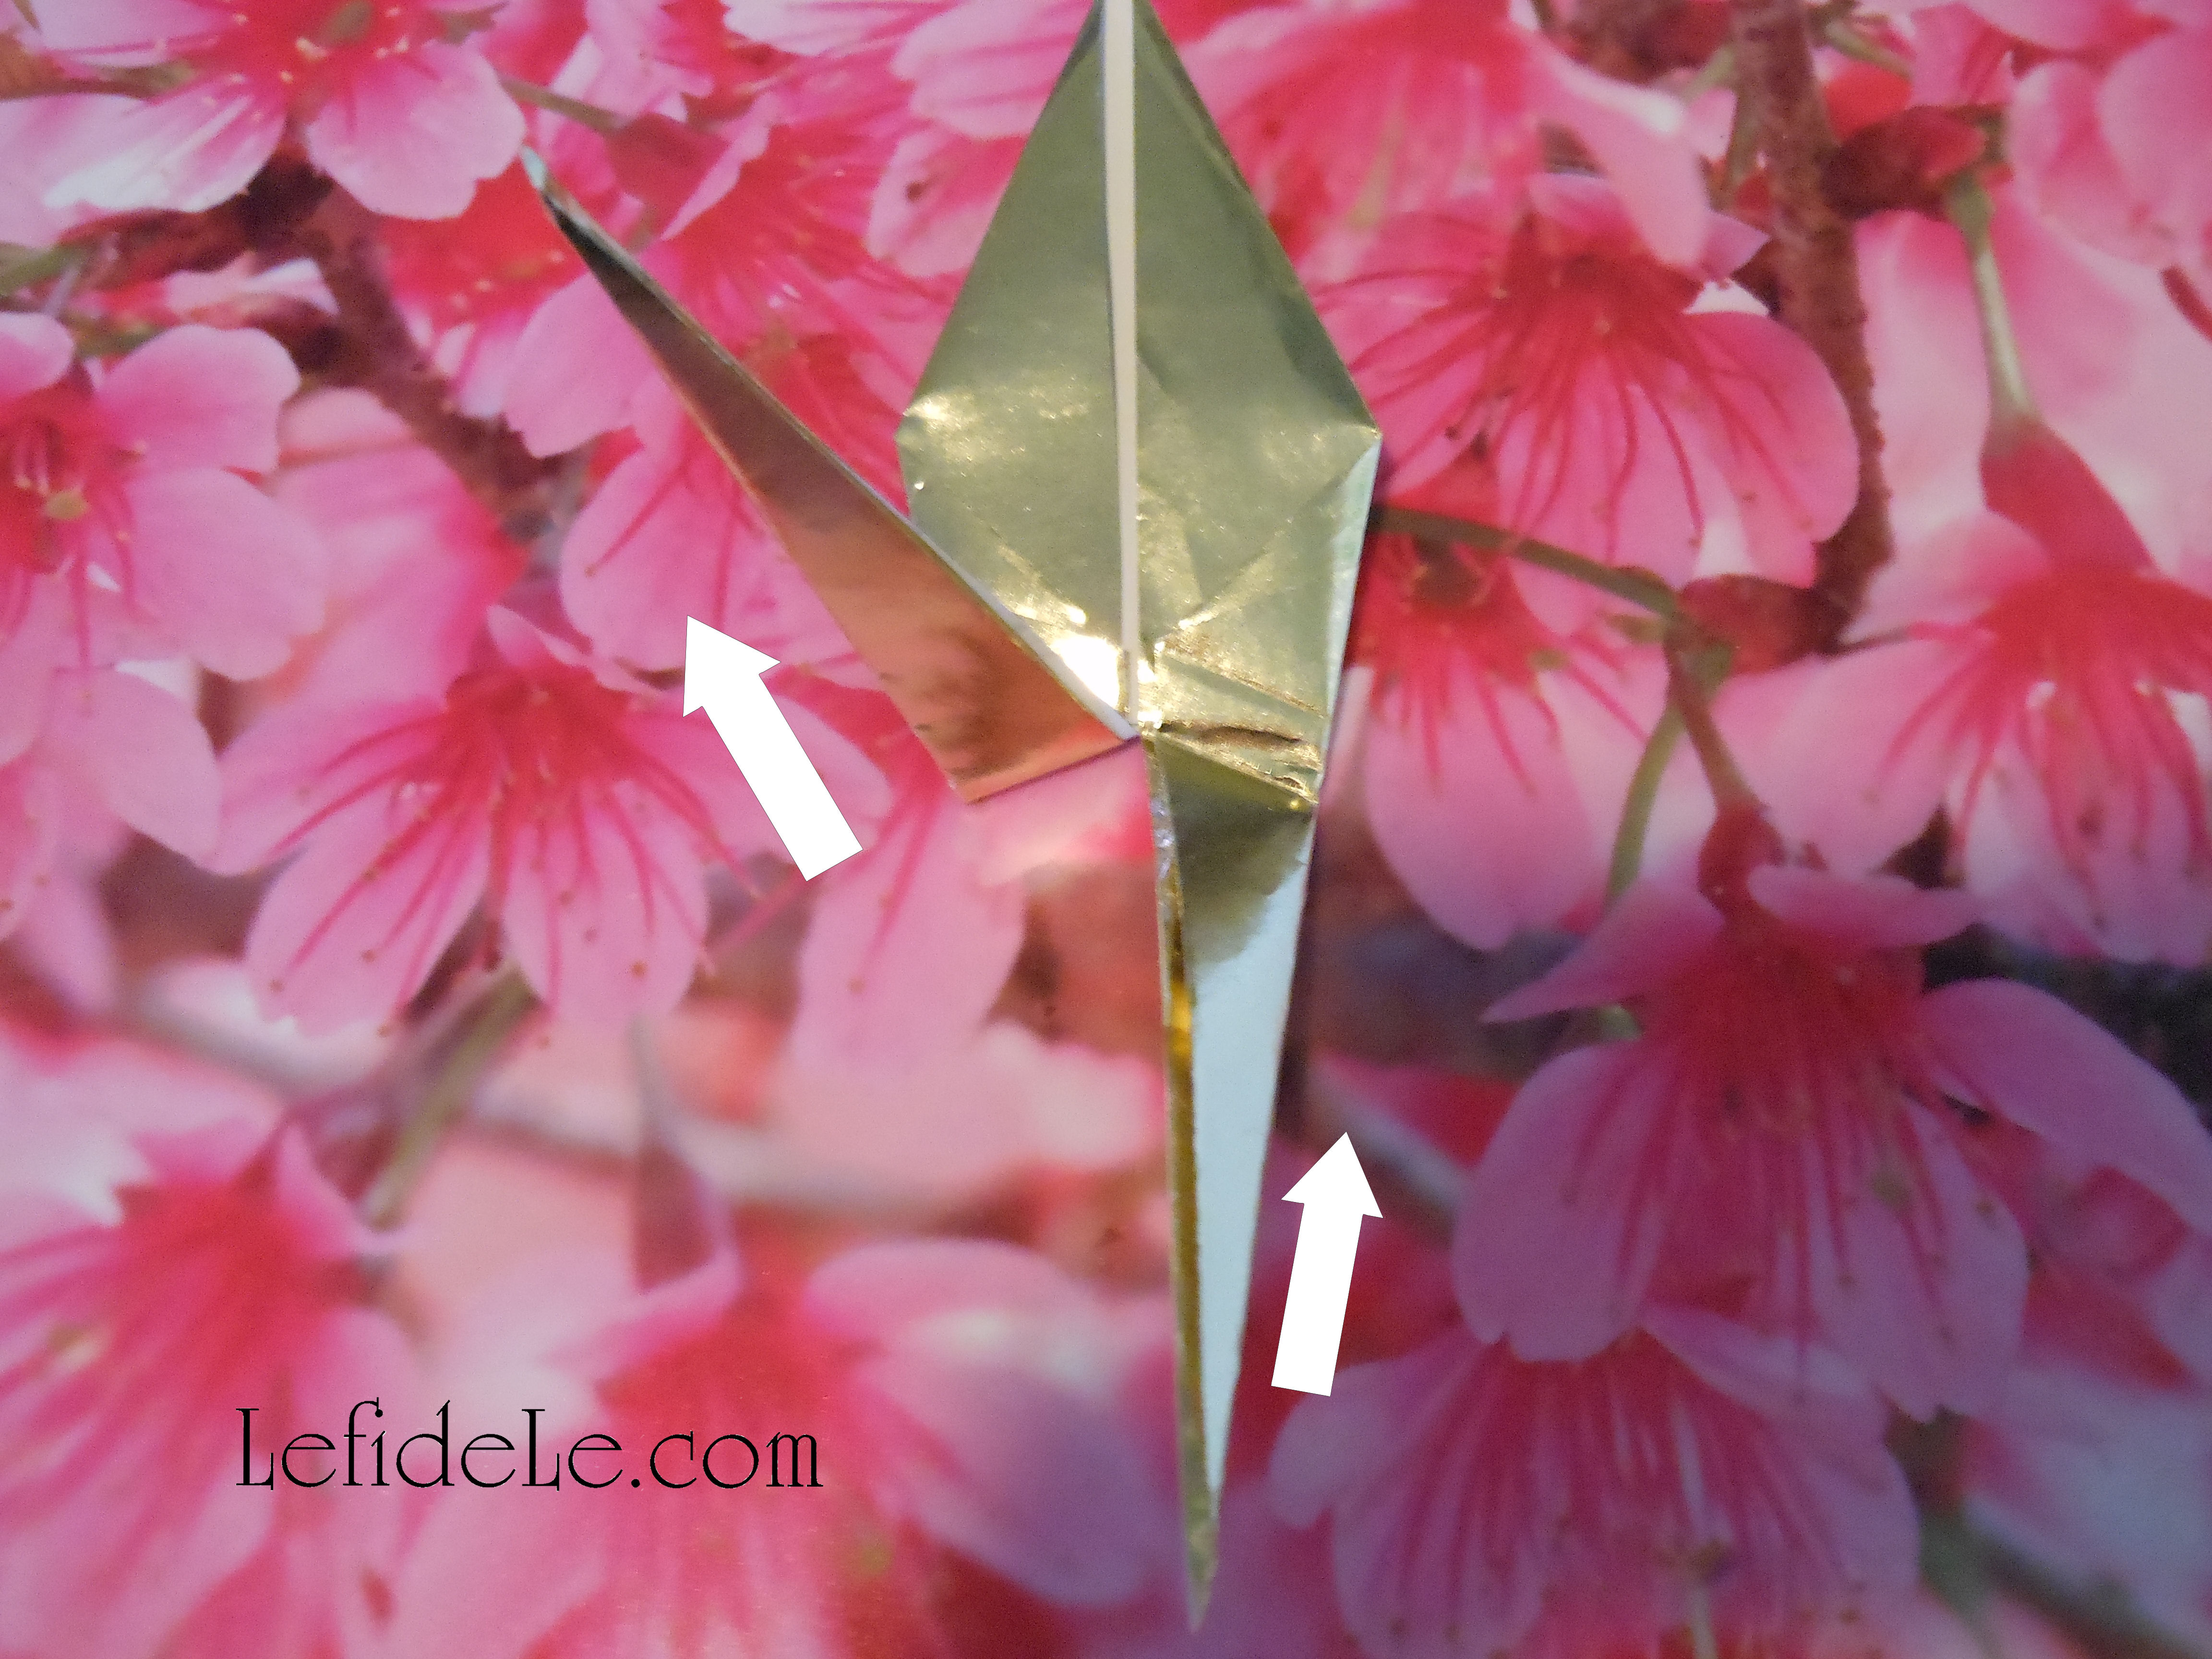
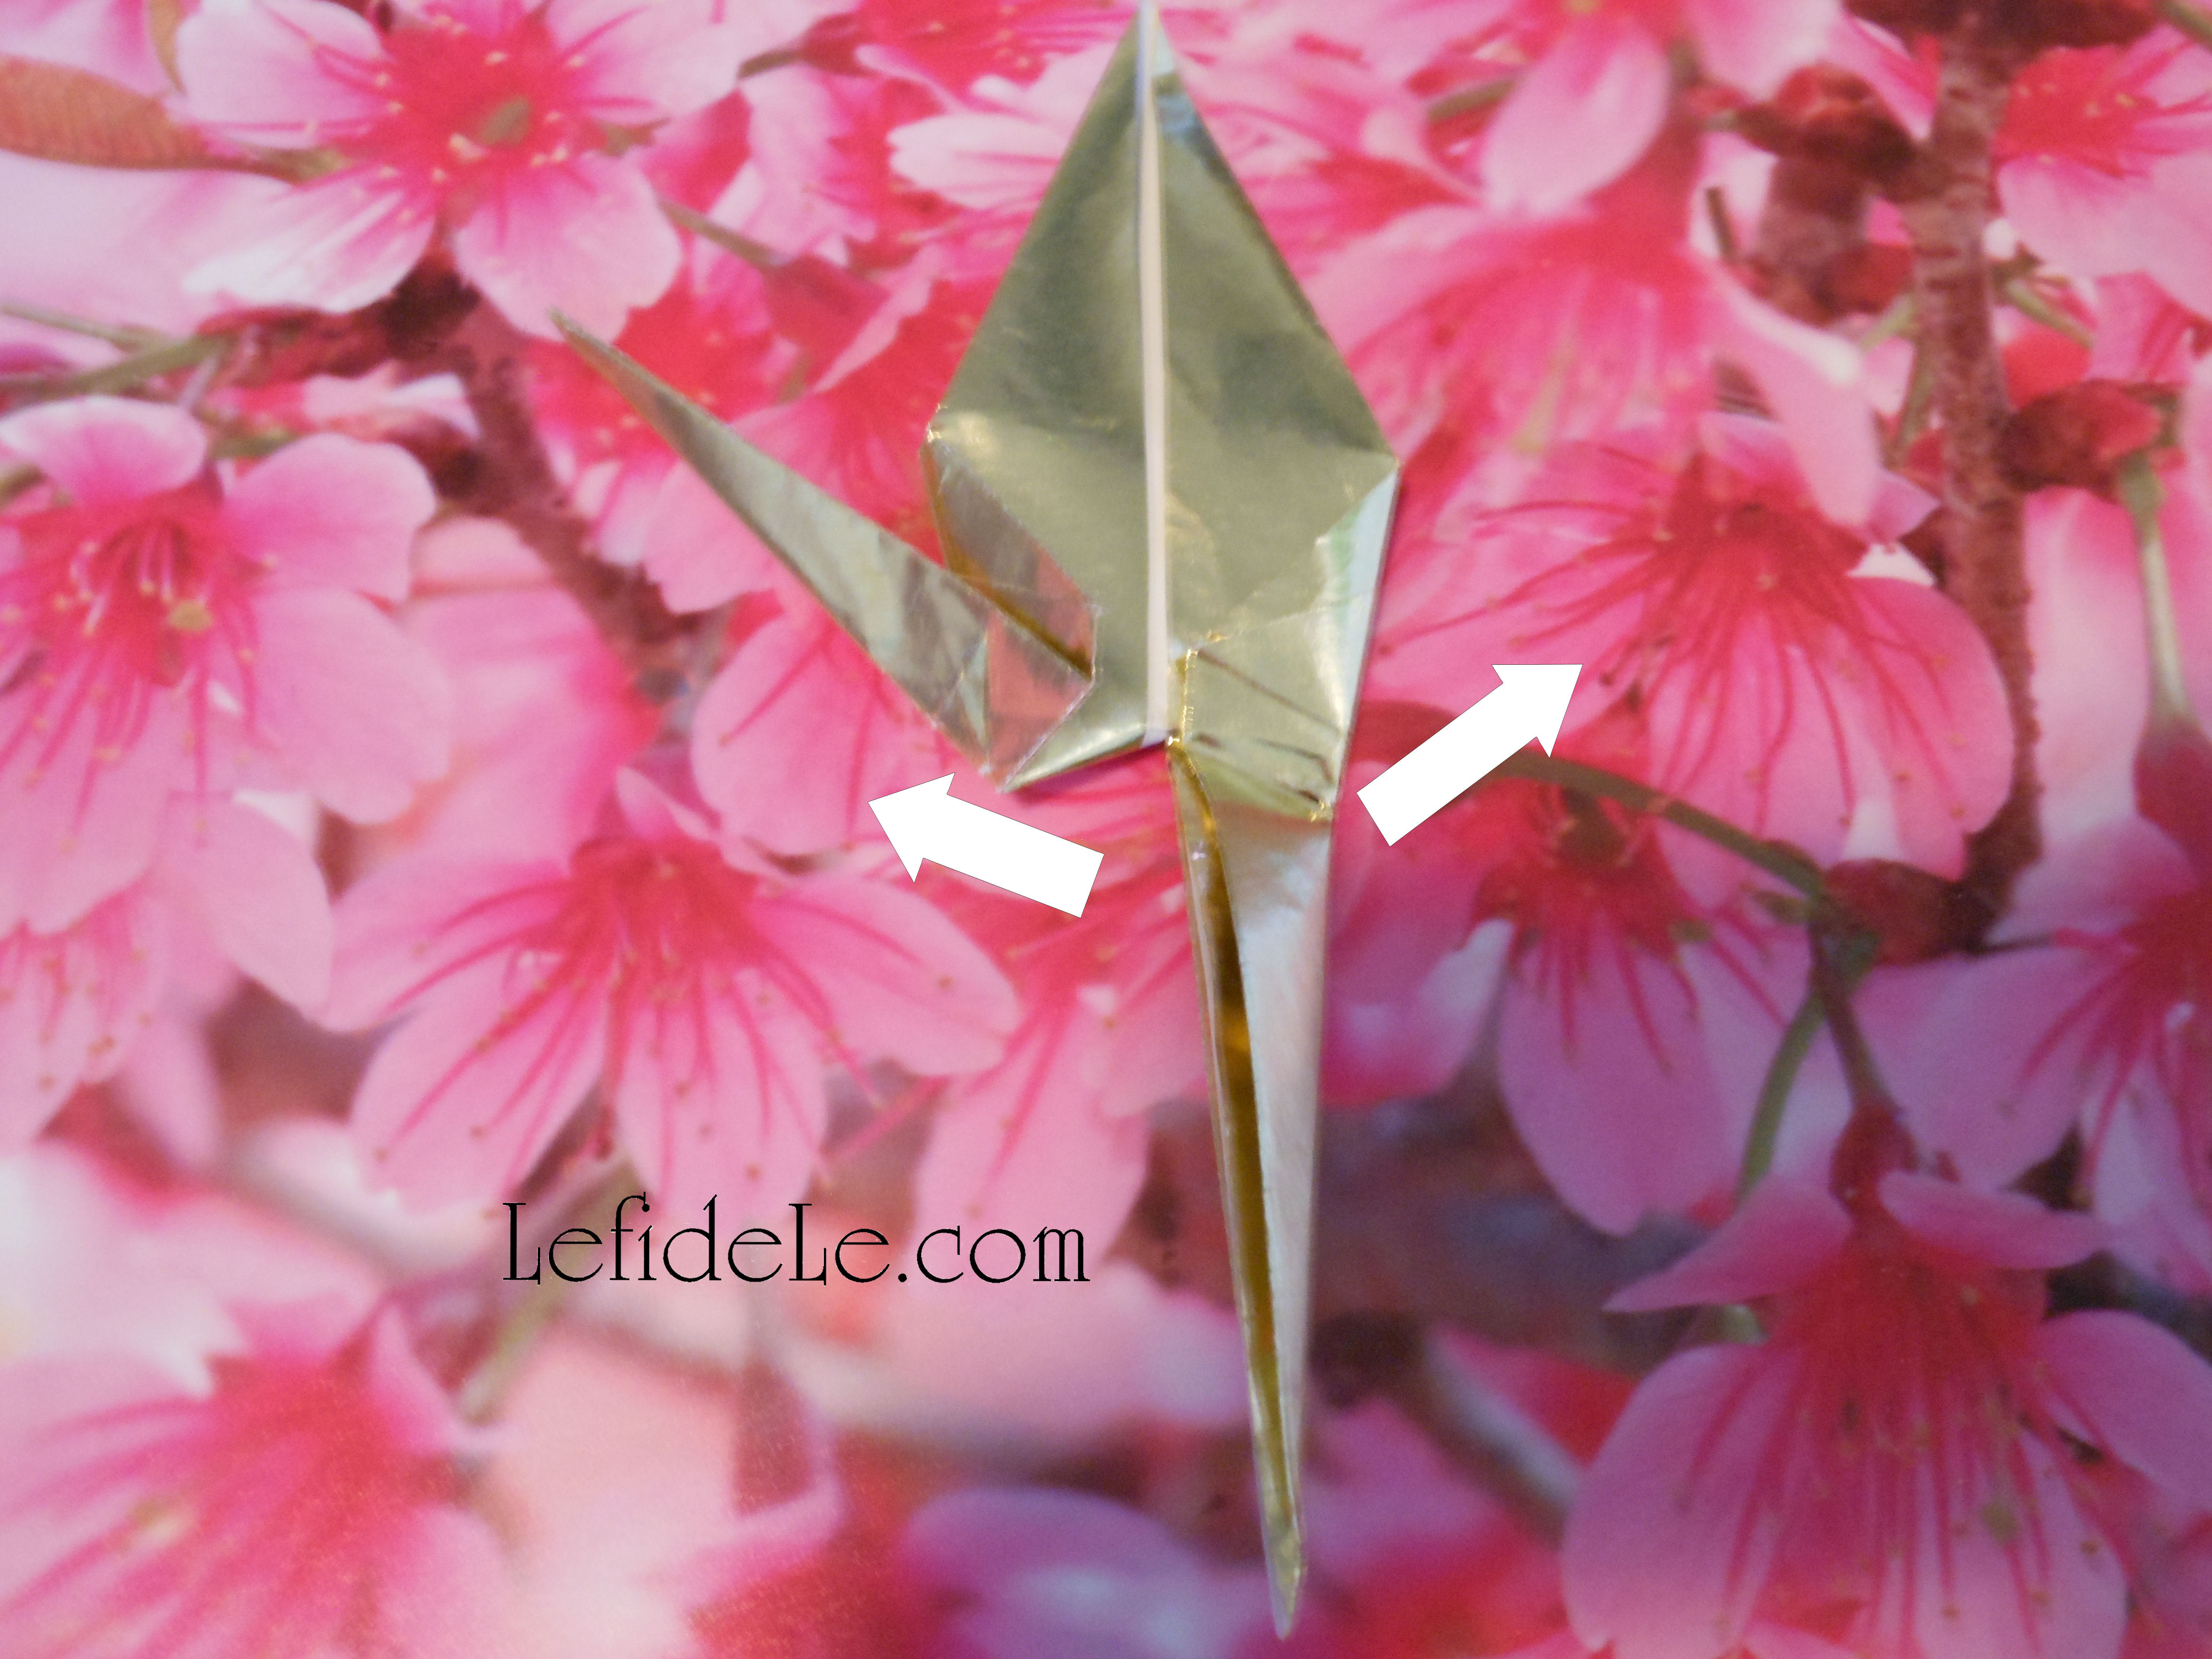
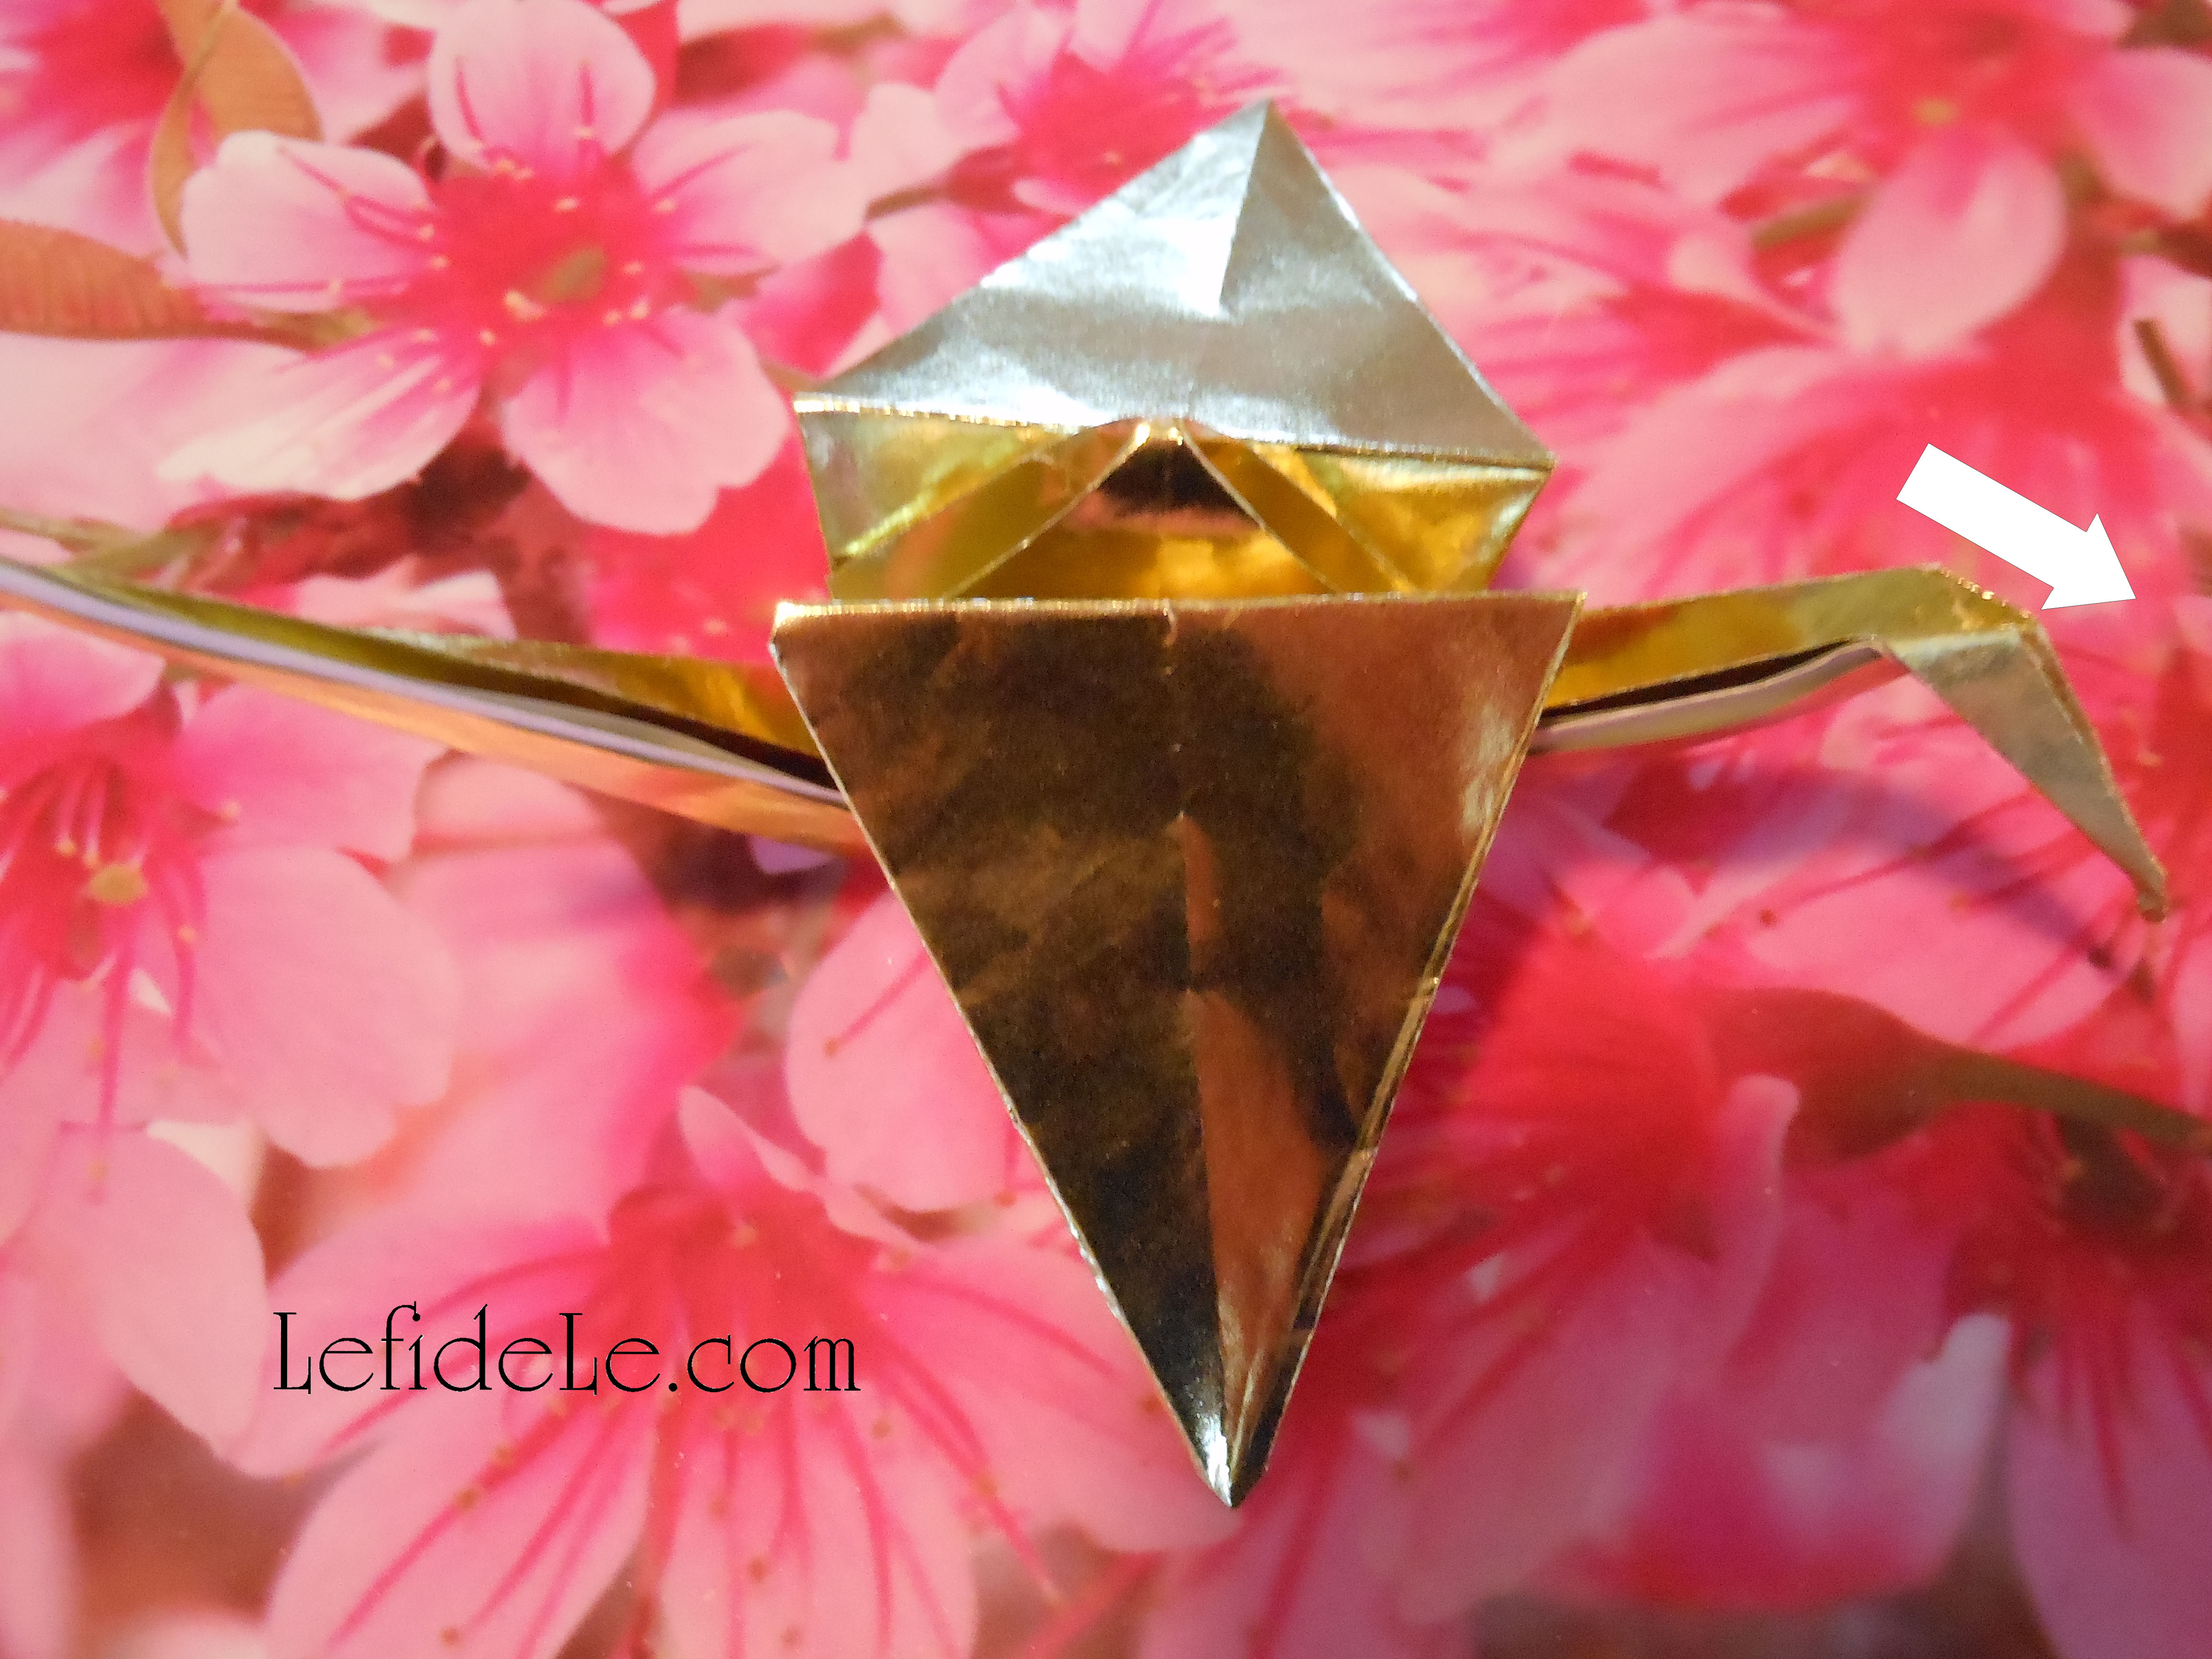
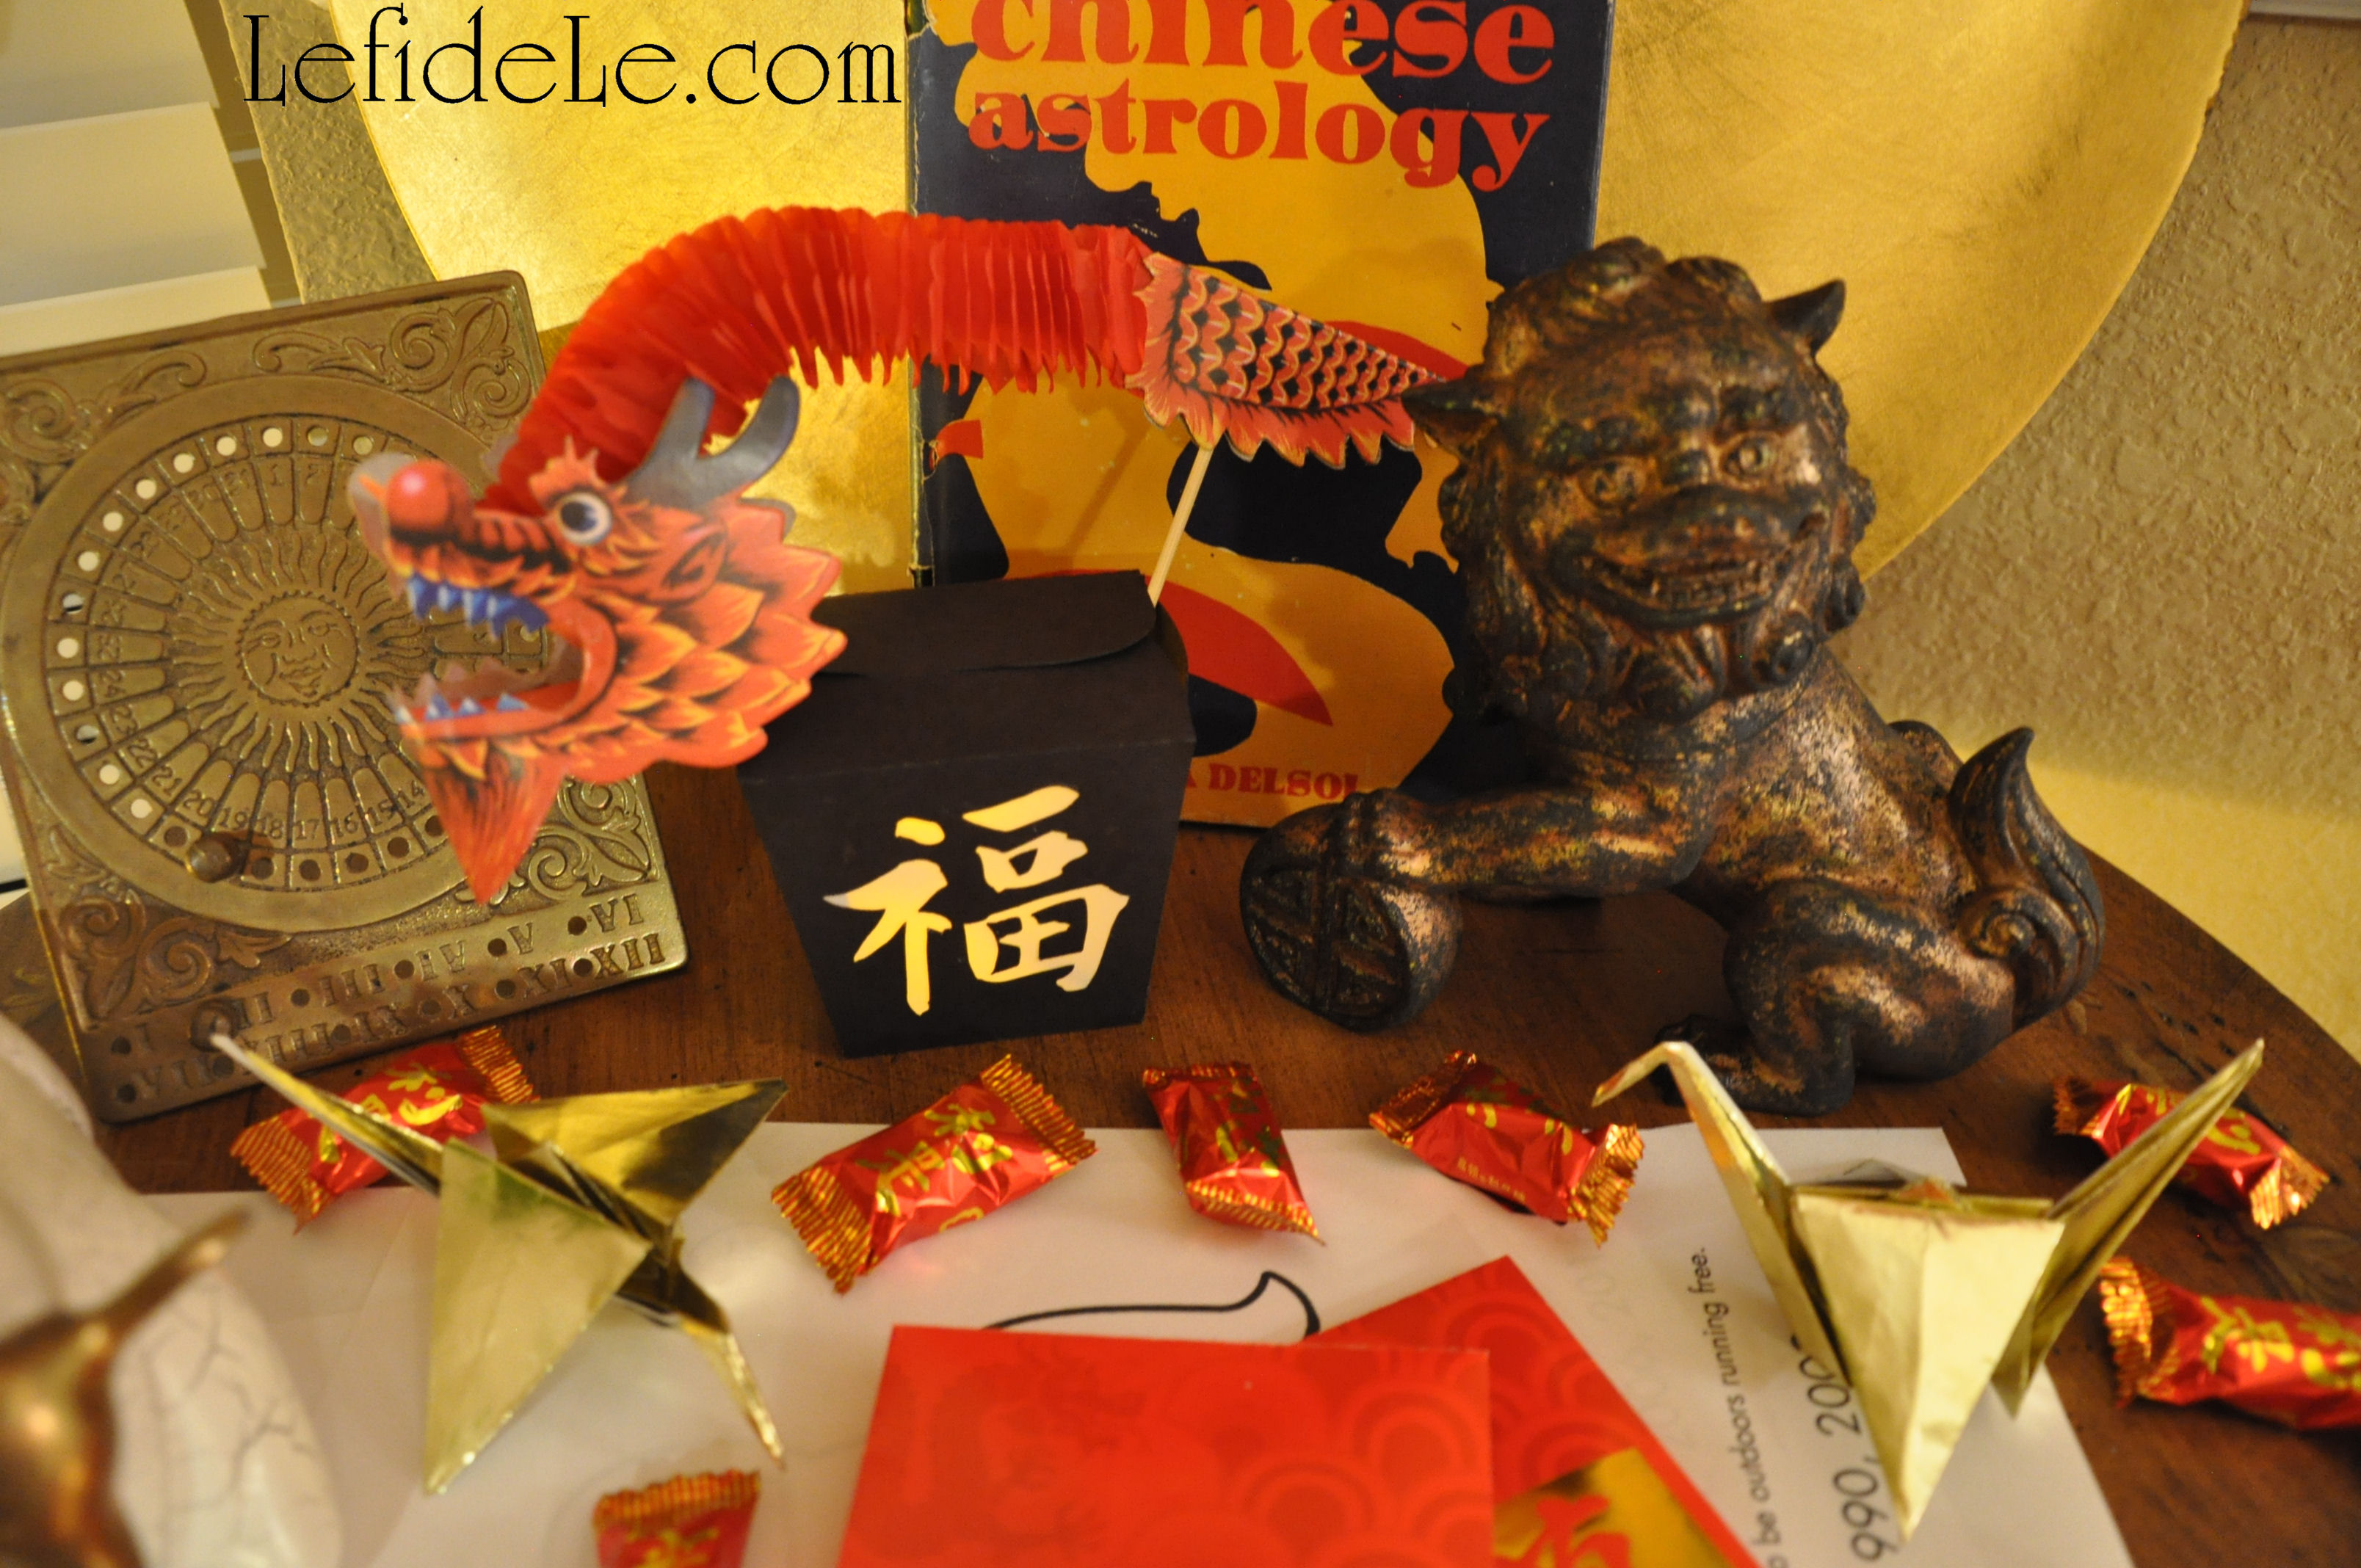
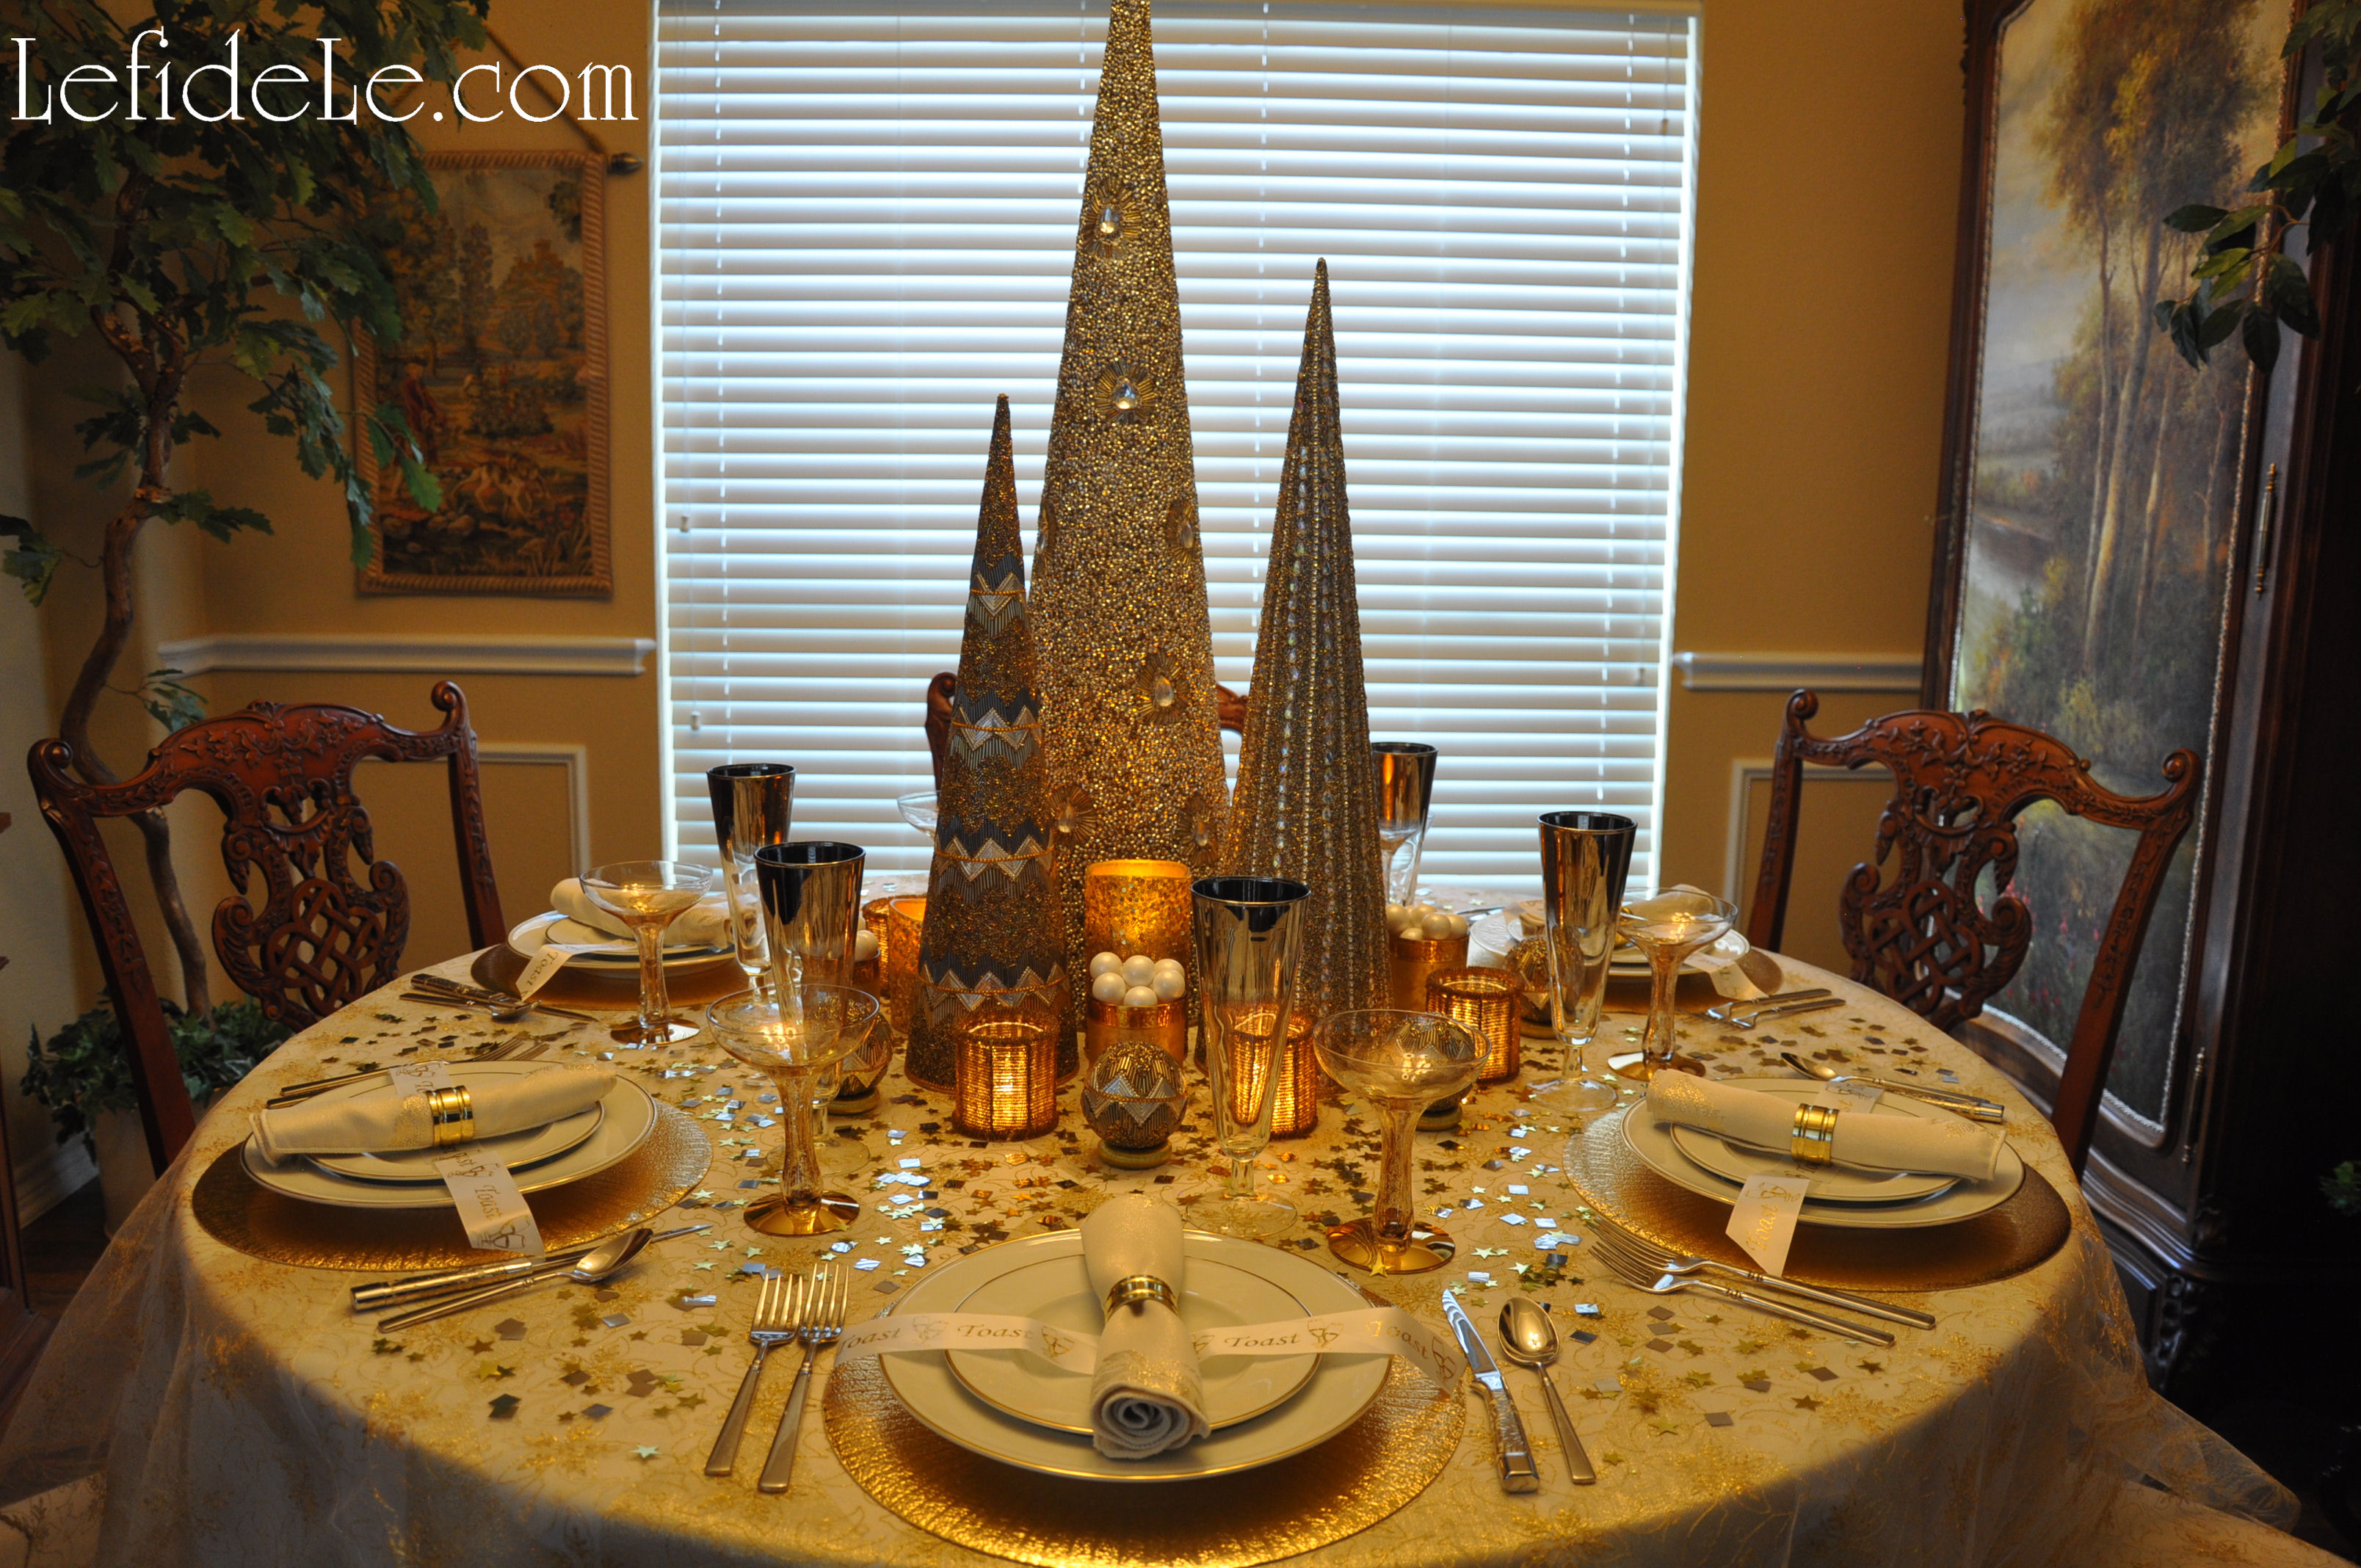
Create a dramatic centerpiece without a lot of drama by merely starting with a basic tree form from another holiday. (For example, use a black one from Halloween or a white one from Easter.) I used a metal votive holding tree that I had previously painted gold from its earlier pewter and bronze incarnations. (See how to use paint to change the color of metal and to age a piece in my upcoming lion fu-dog décor for Chinese New Year.)

393Leigh

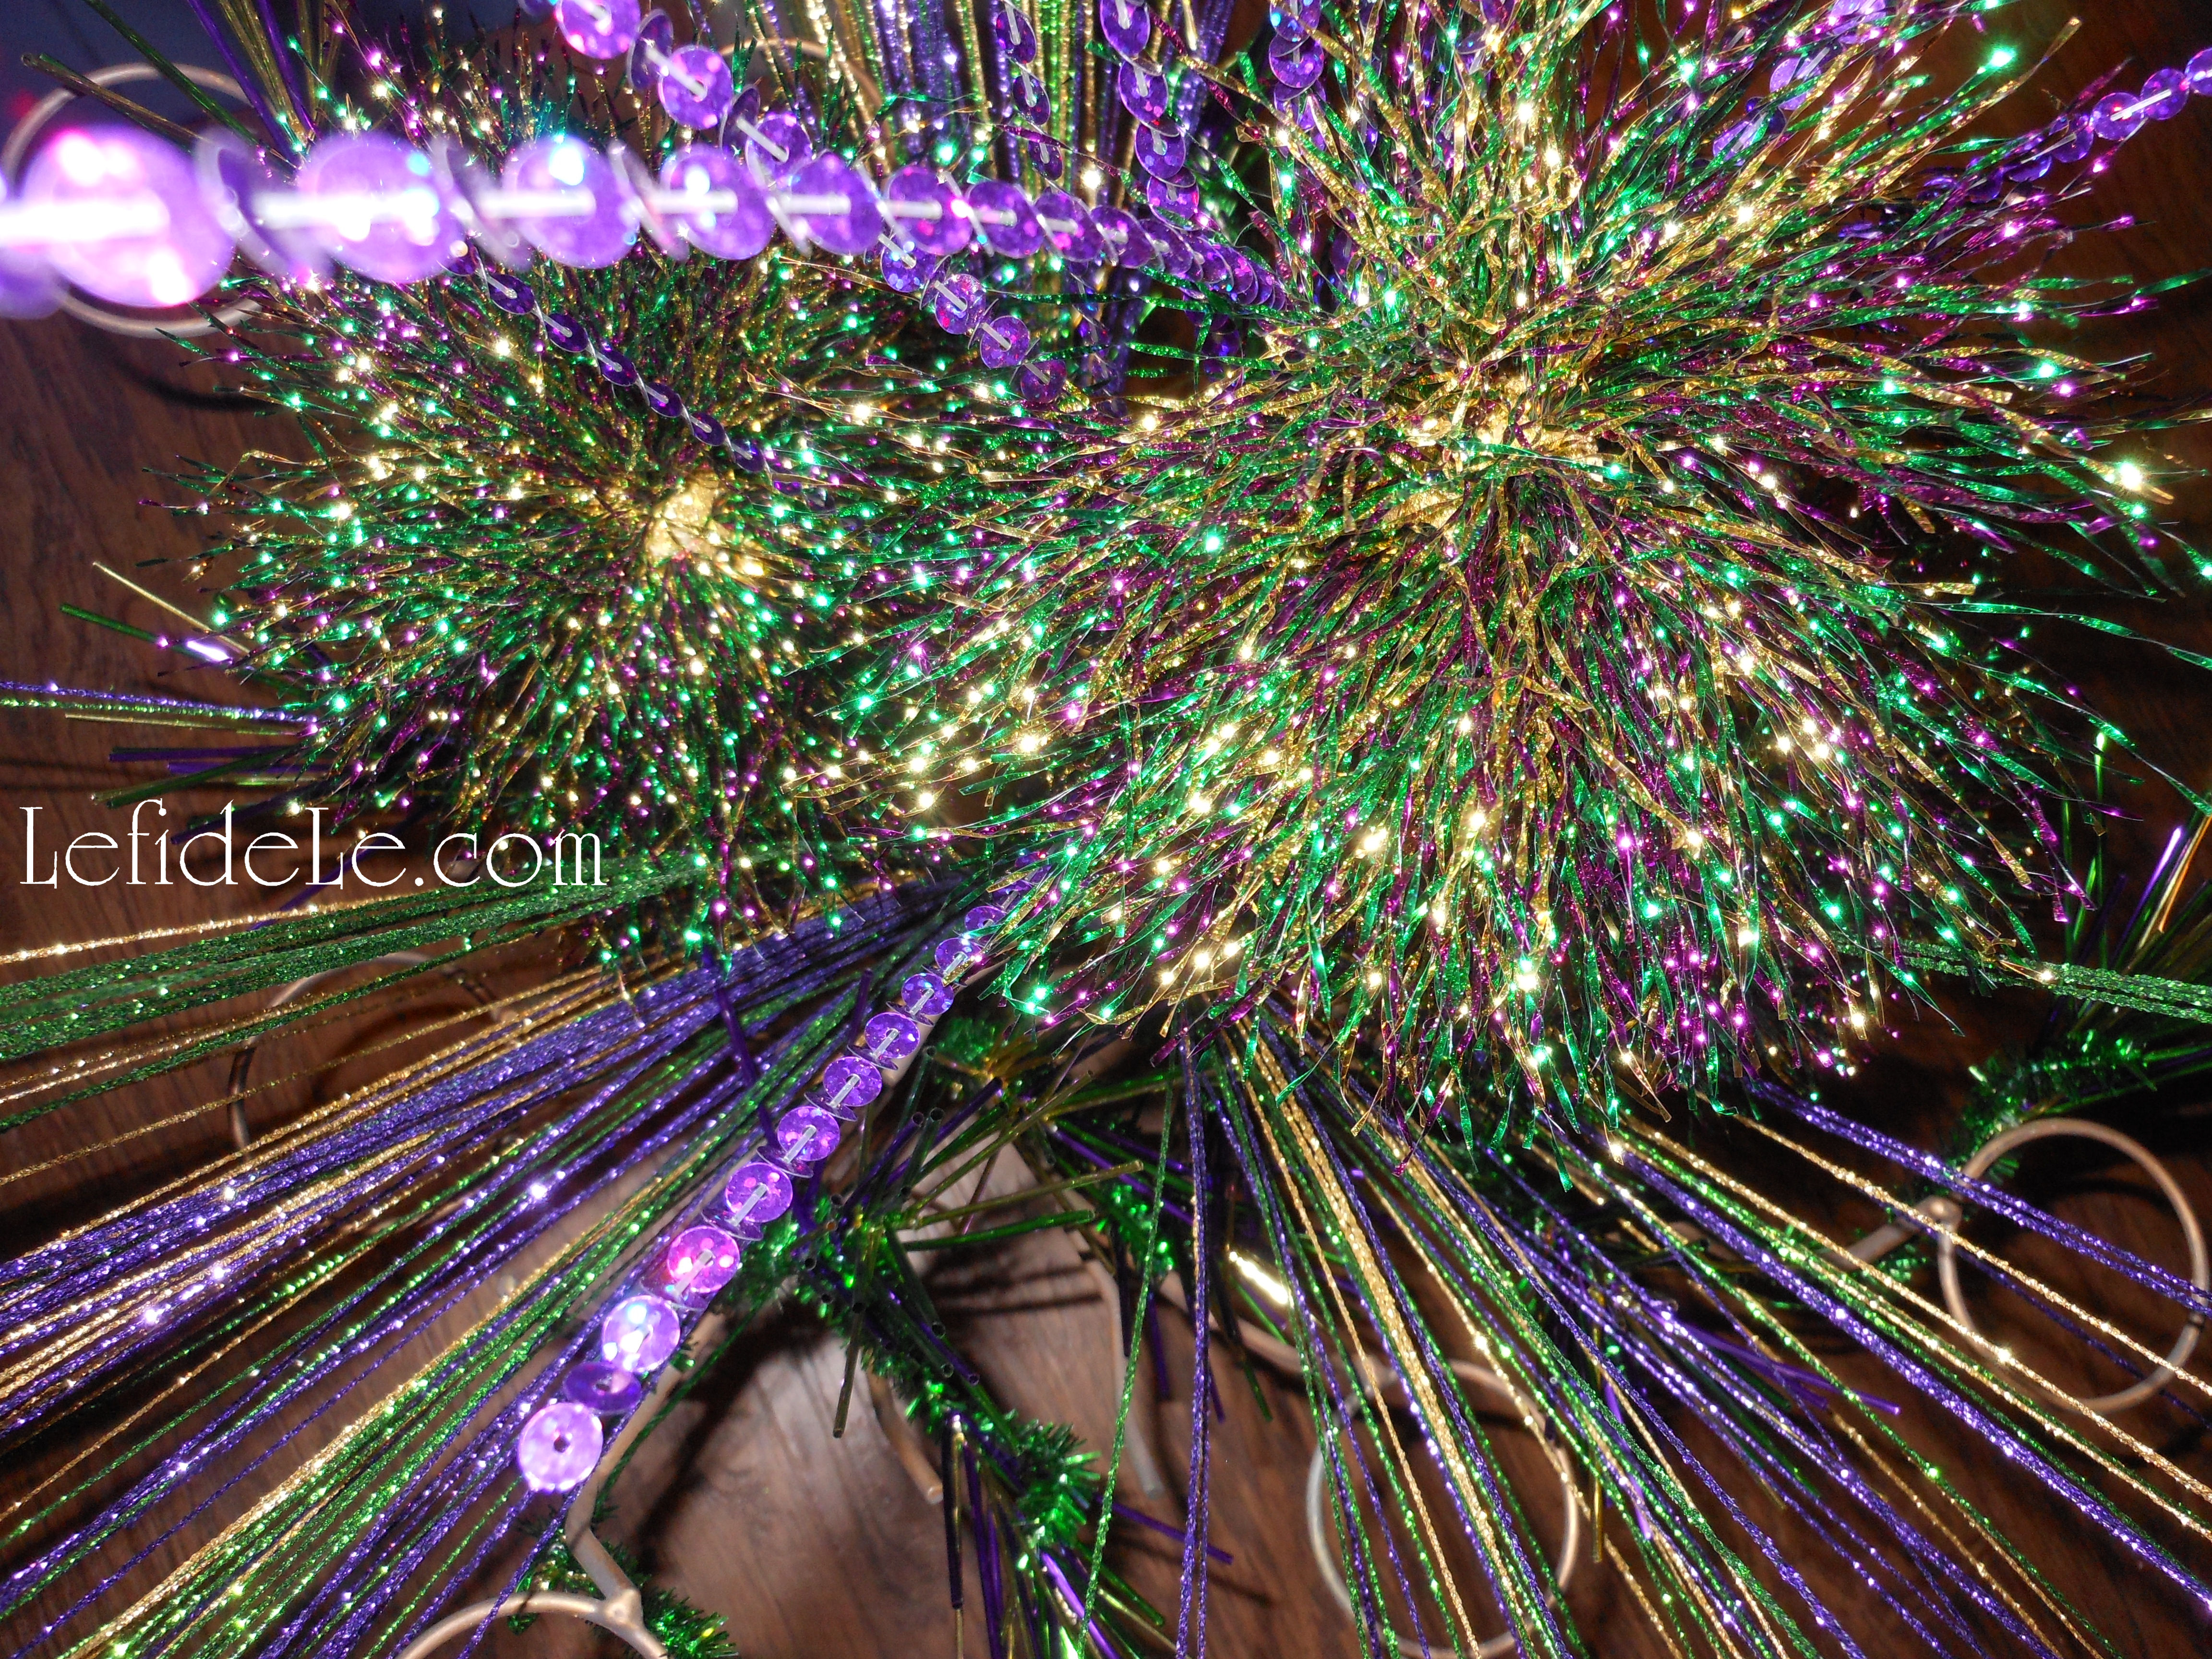
I wrapped it with trim from my Glitter-ween Party Décor (see it here) then added a few new sprigs.

235Leigh

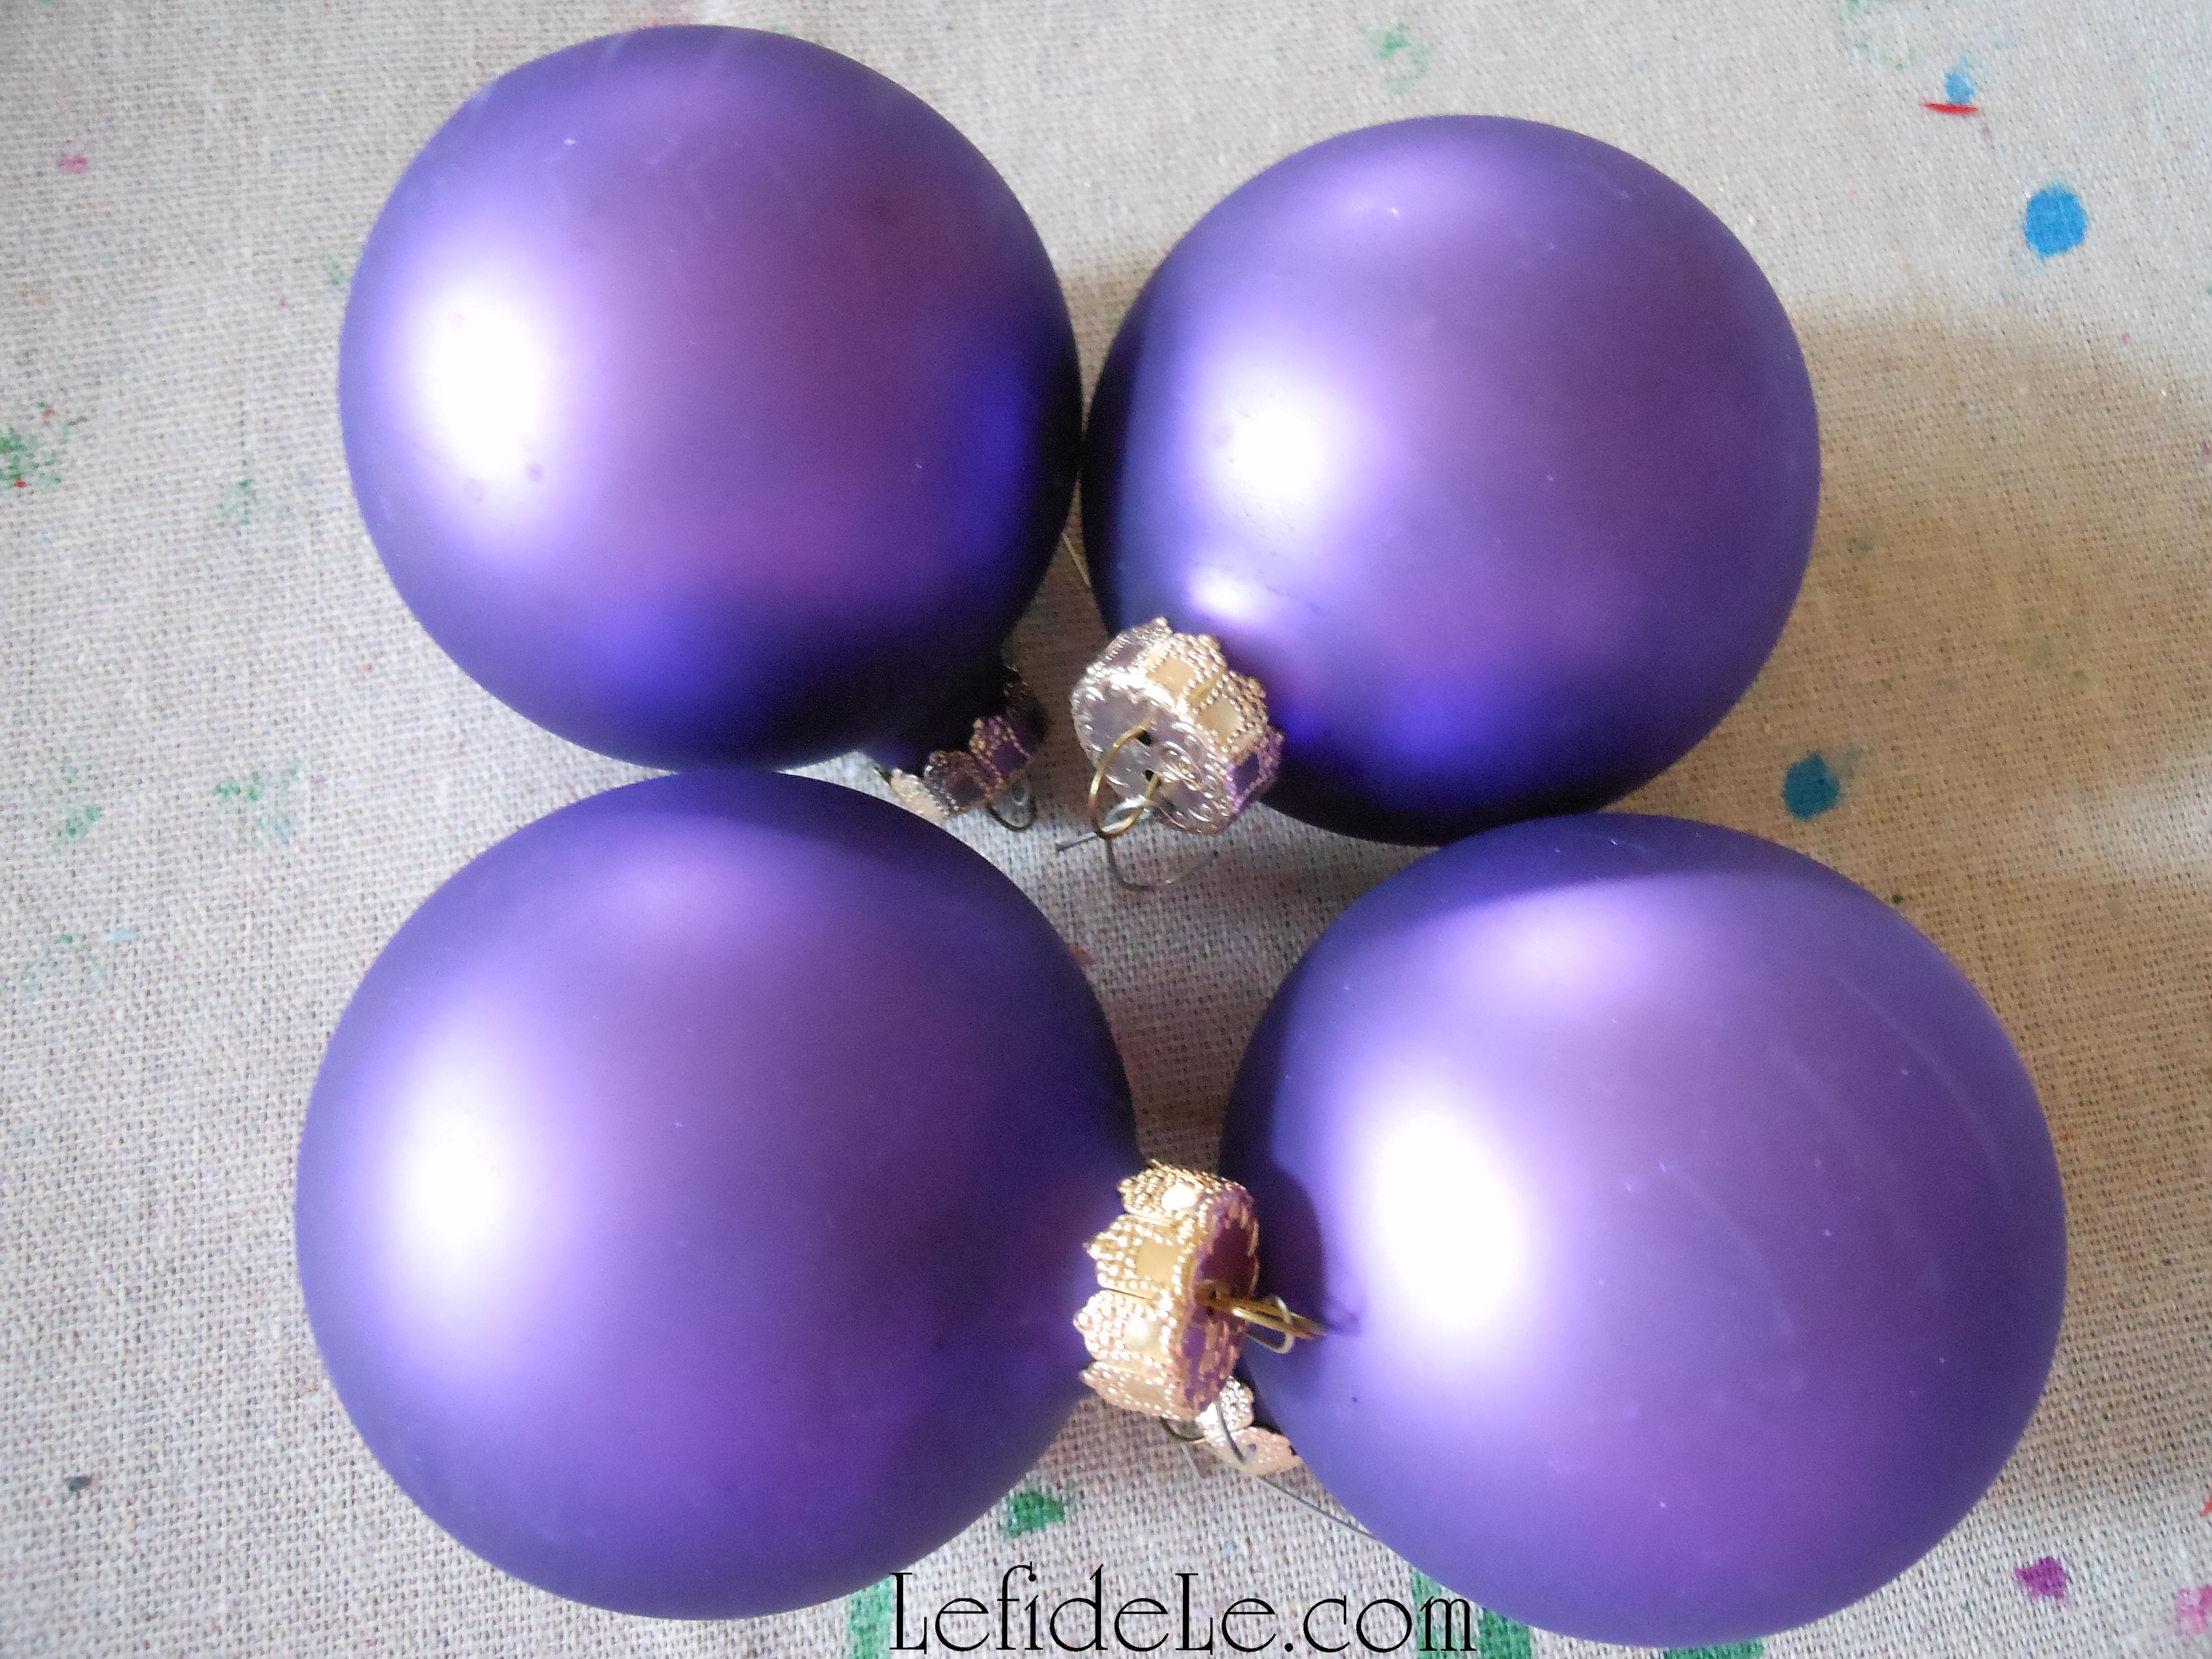
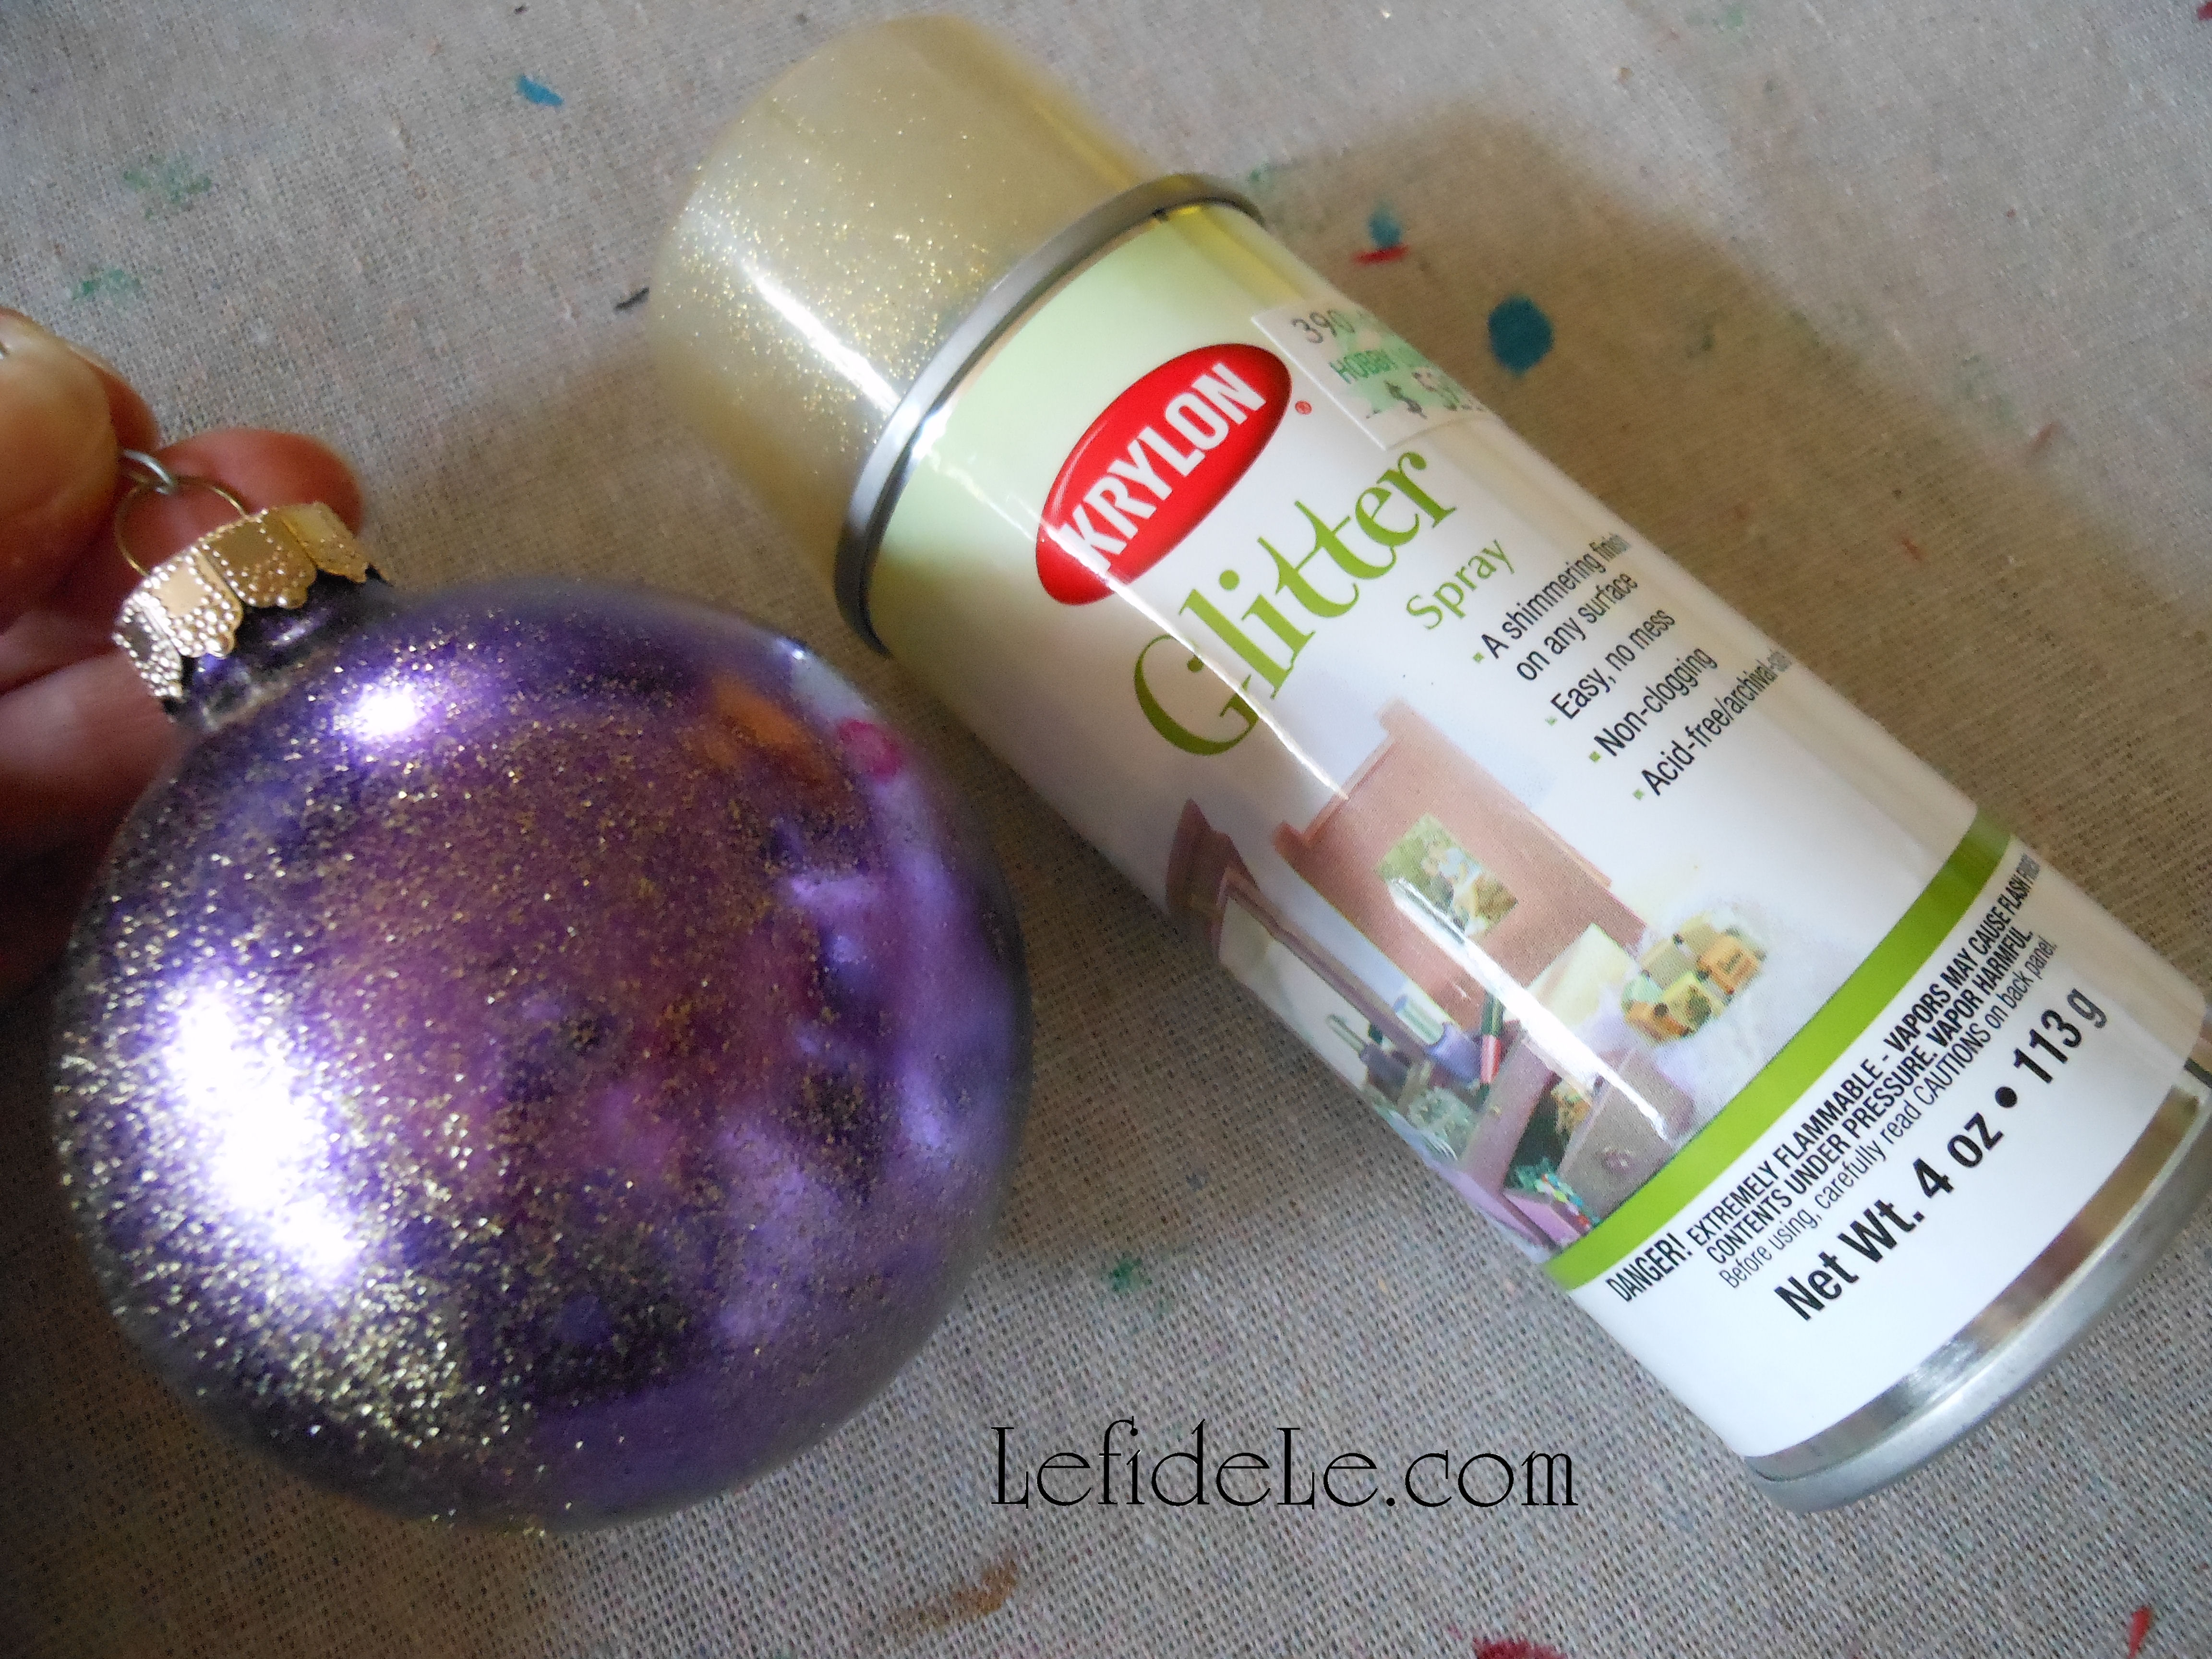
I painted simple purple ball ornaments with a glitter mist (not the blast variety) to impart both gloss and glitter shine to the previously satin sheen.

236Leigh

I set these onto the rings that would normally hold the votive holders. (You’ll likely see these in a future article.)

053Leigh

I hung embroidered Christmas crown ornaments, snapped up at 10 cent clearance, along with glittered musical instruments, green mirror balls, and a mask garland. I even hung the same sequin fleur-de-lis masks used at each table setting as ornaments. I try to plan all my holiday themes I advance of the after Christmas sales to snag a year’s worth of décor deals at 90% off. I keep my theme collections in labeled bins that I add to as I accumulate finds so that I’m ready to craft and decorate when each holiday arrives.

091Leigh

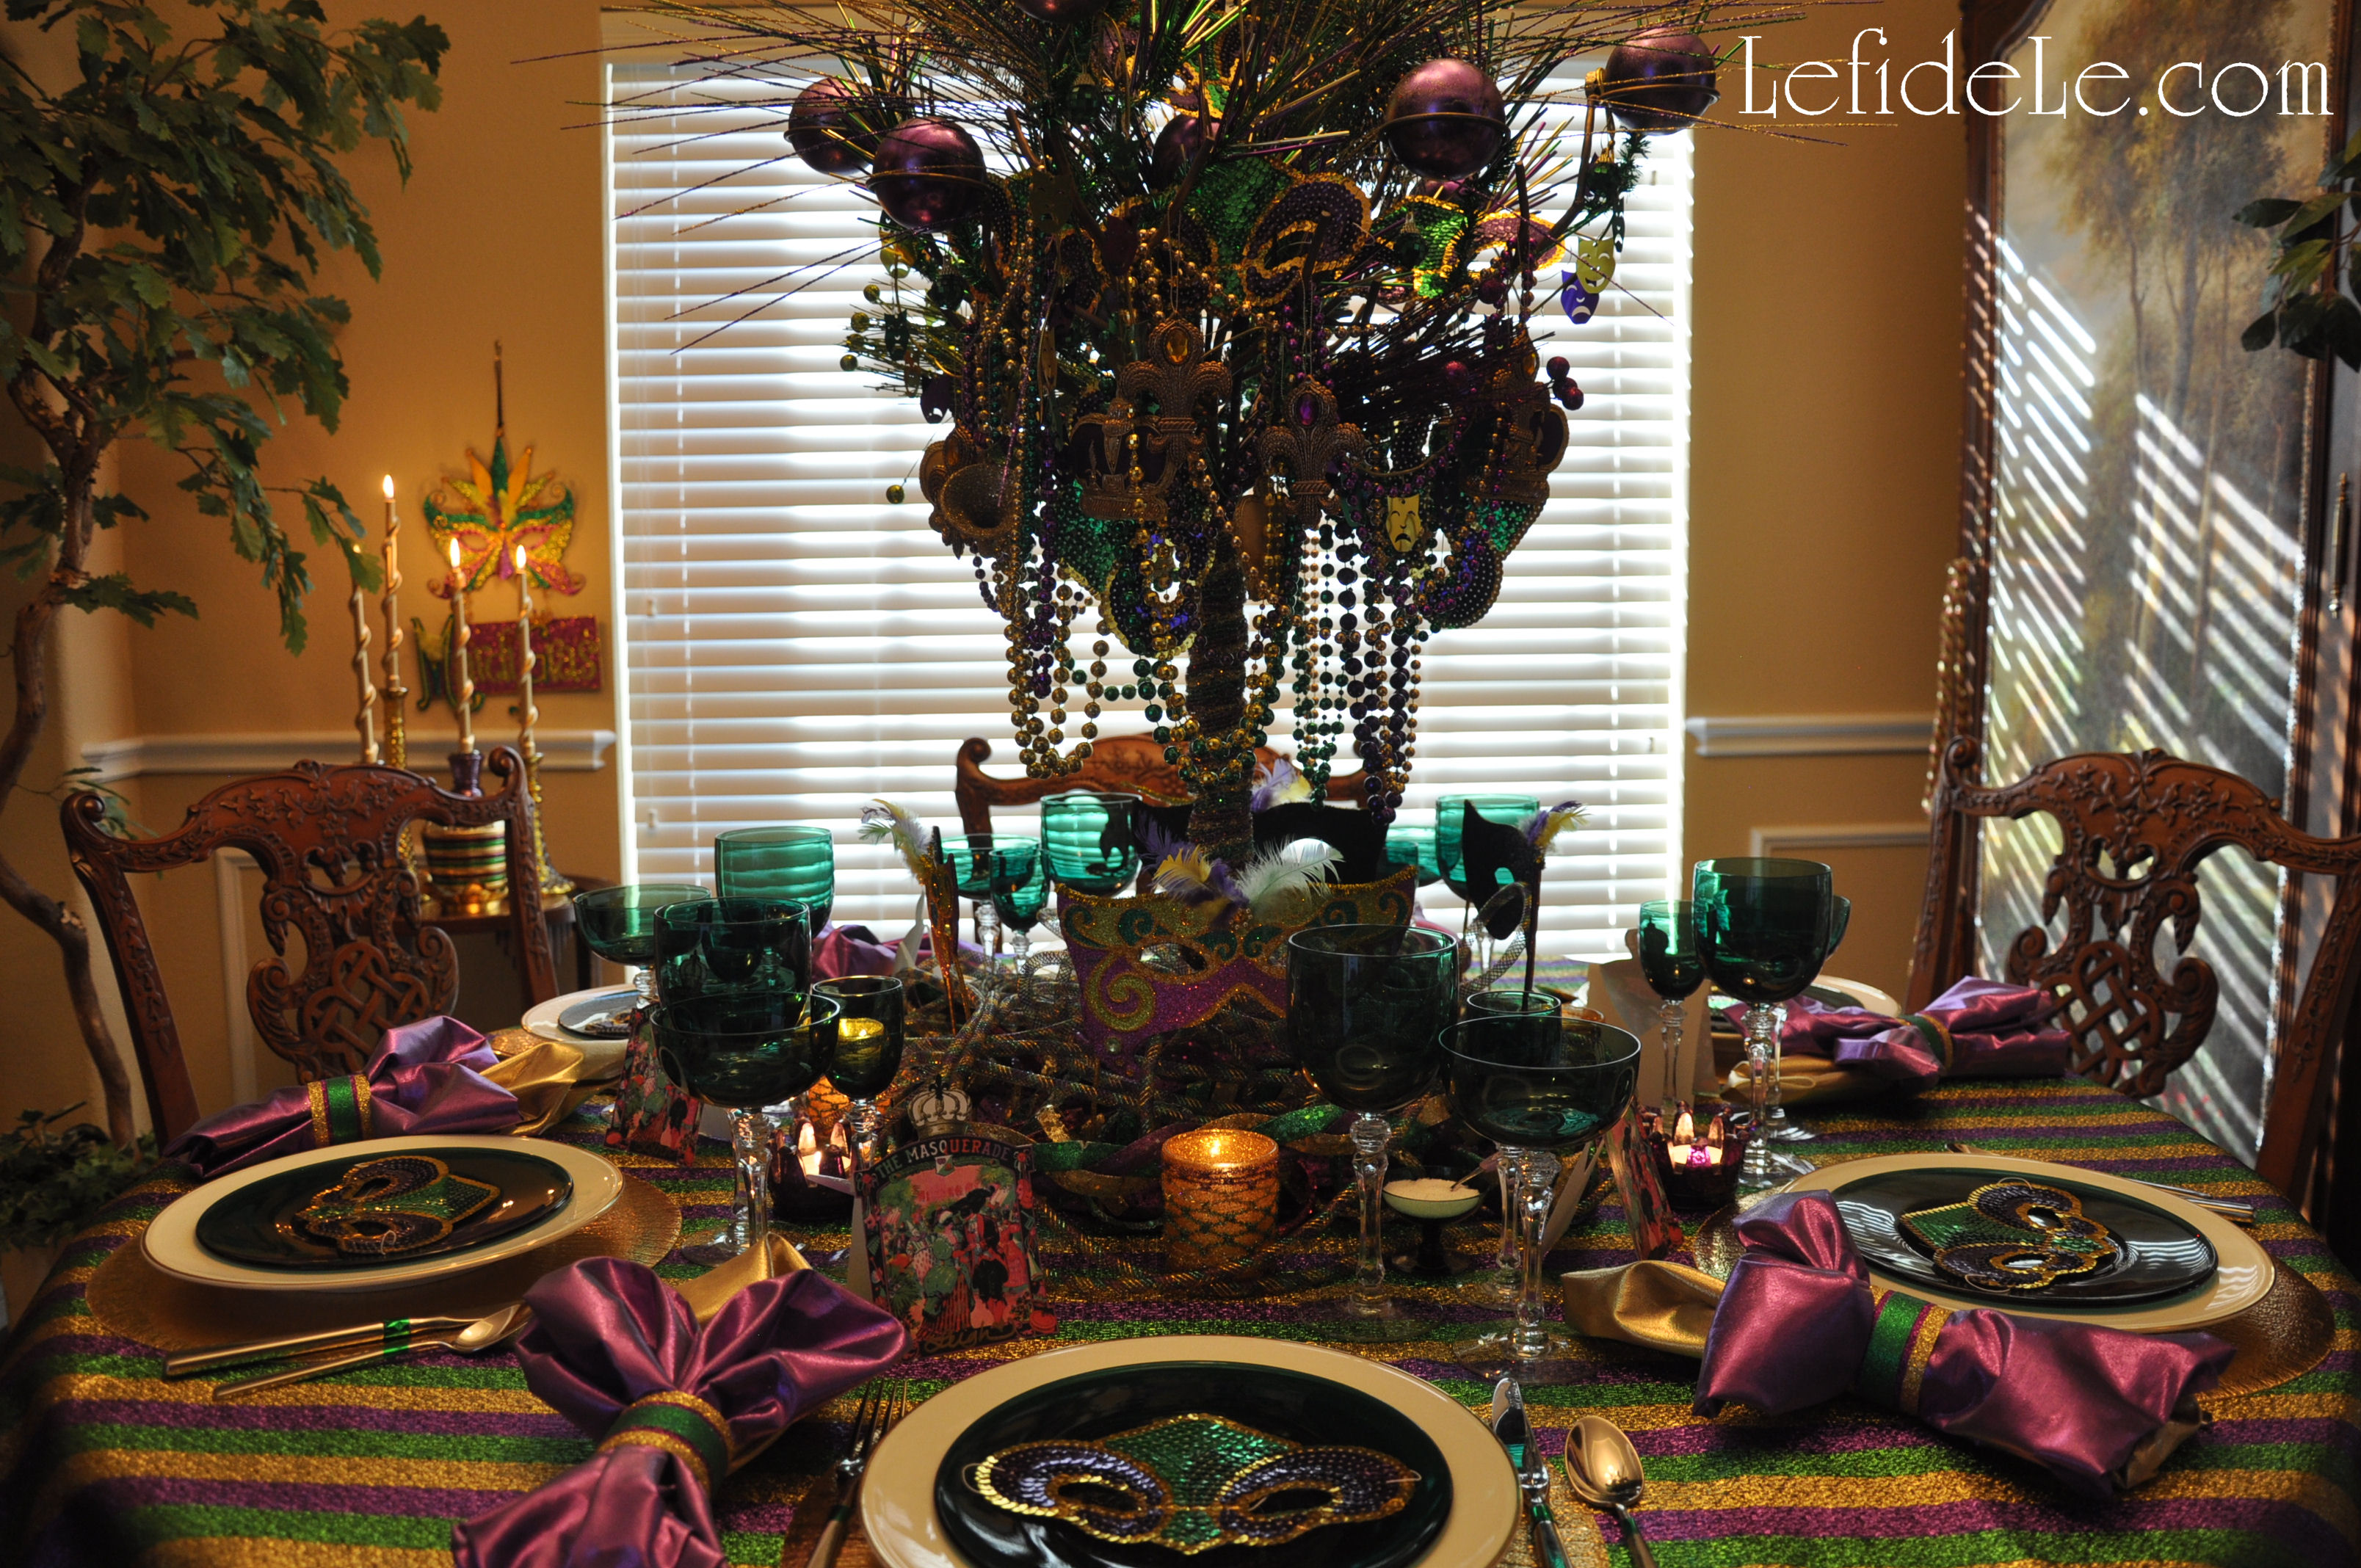
Though it’s hard to tell from the pictures, the tree centerpiece actually didn’t obstruct any person to person viewing. This is why I only draped the bottom with some Mardi Gras necklaces and wrapped the trunk with the same ribbon I used on the votive holders.

120Leigh

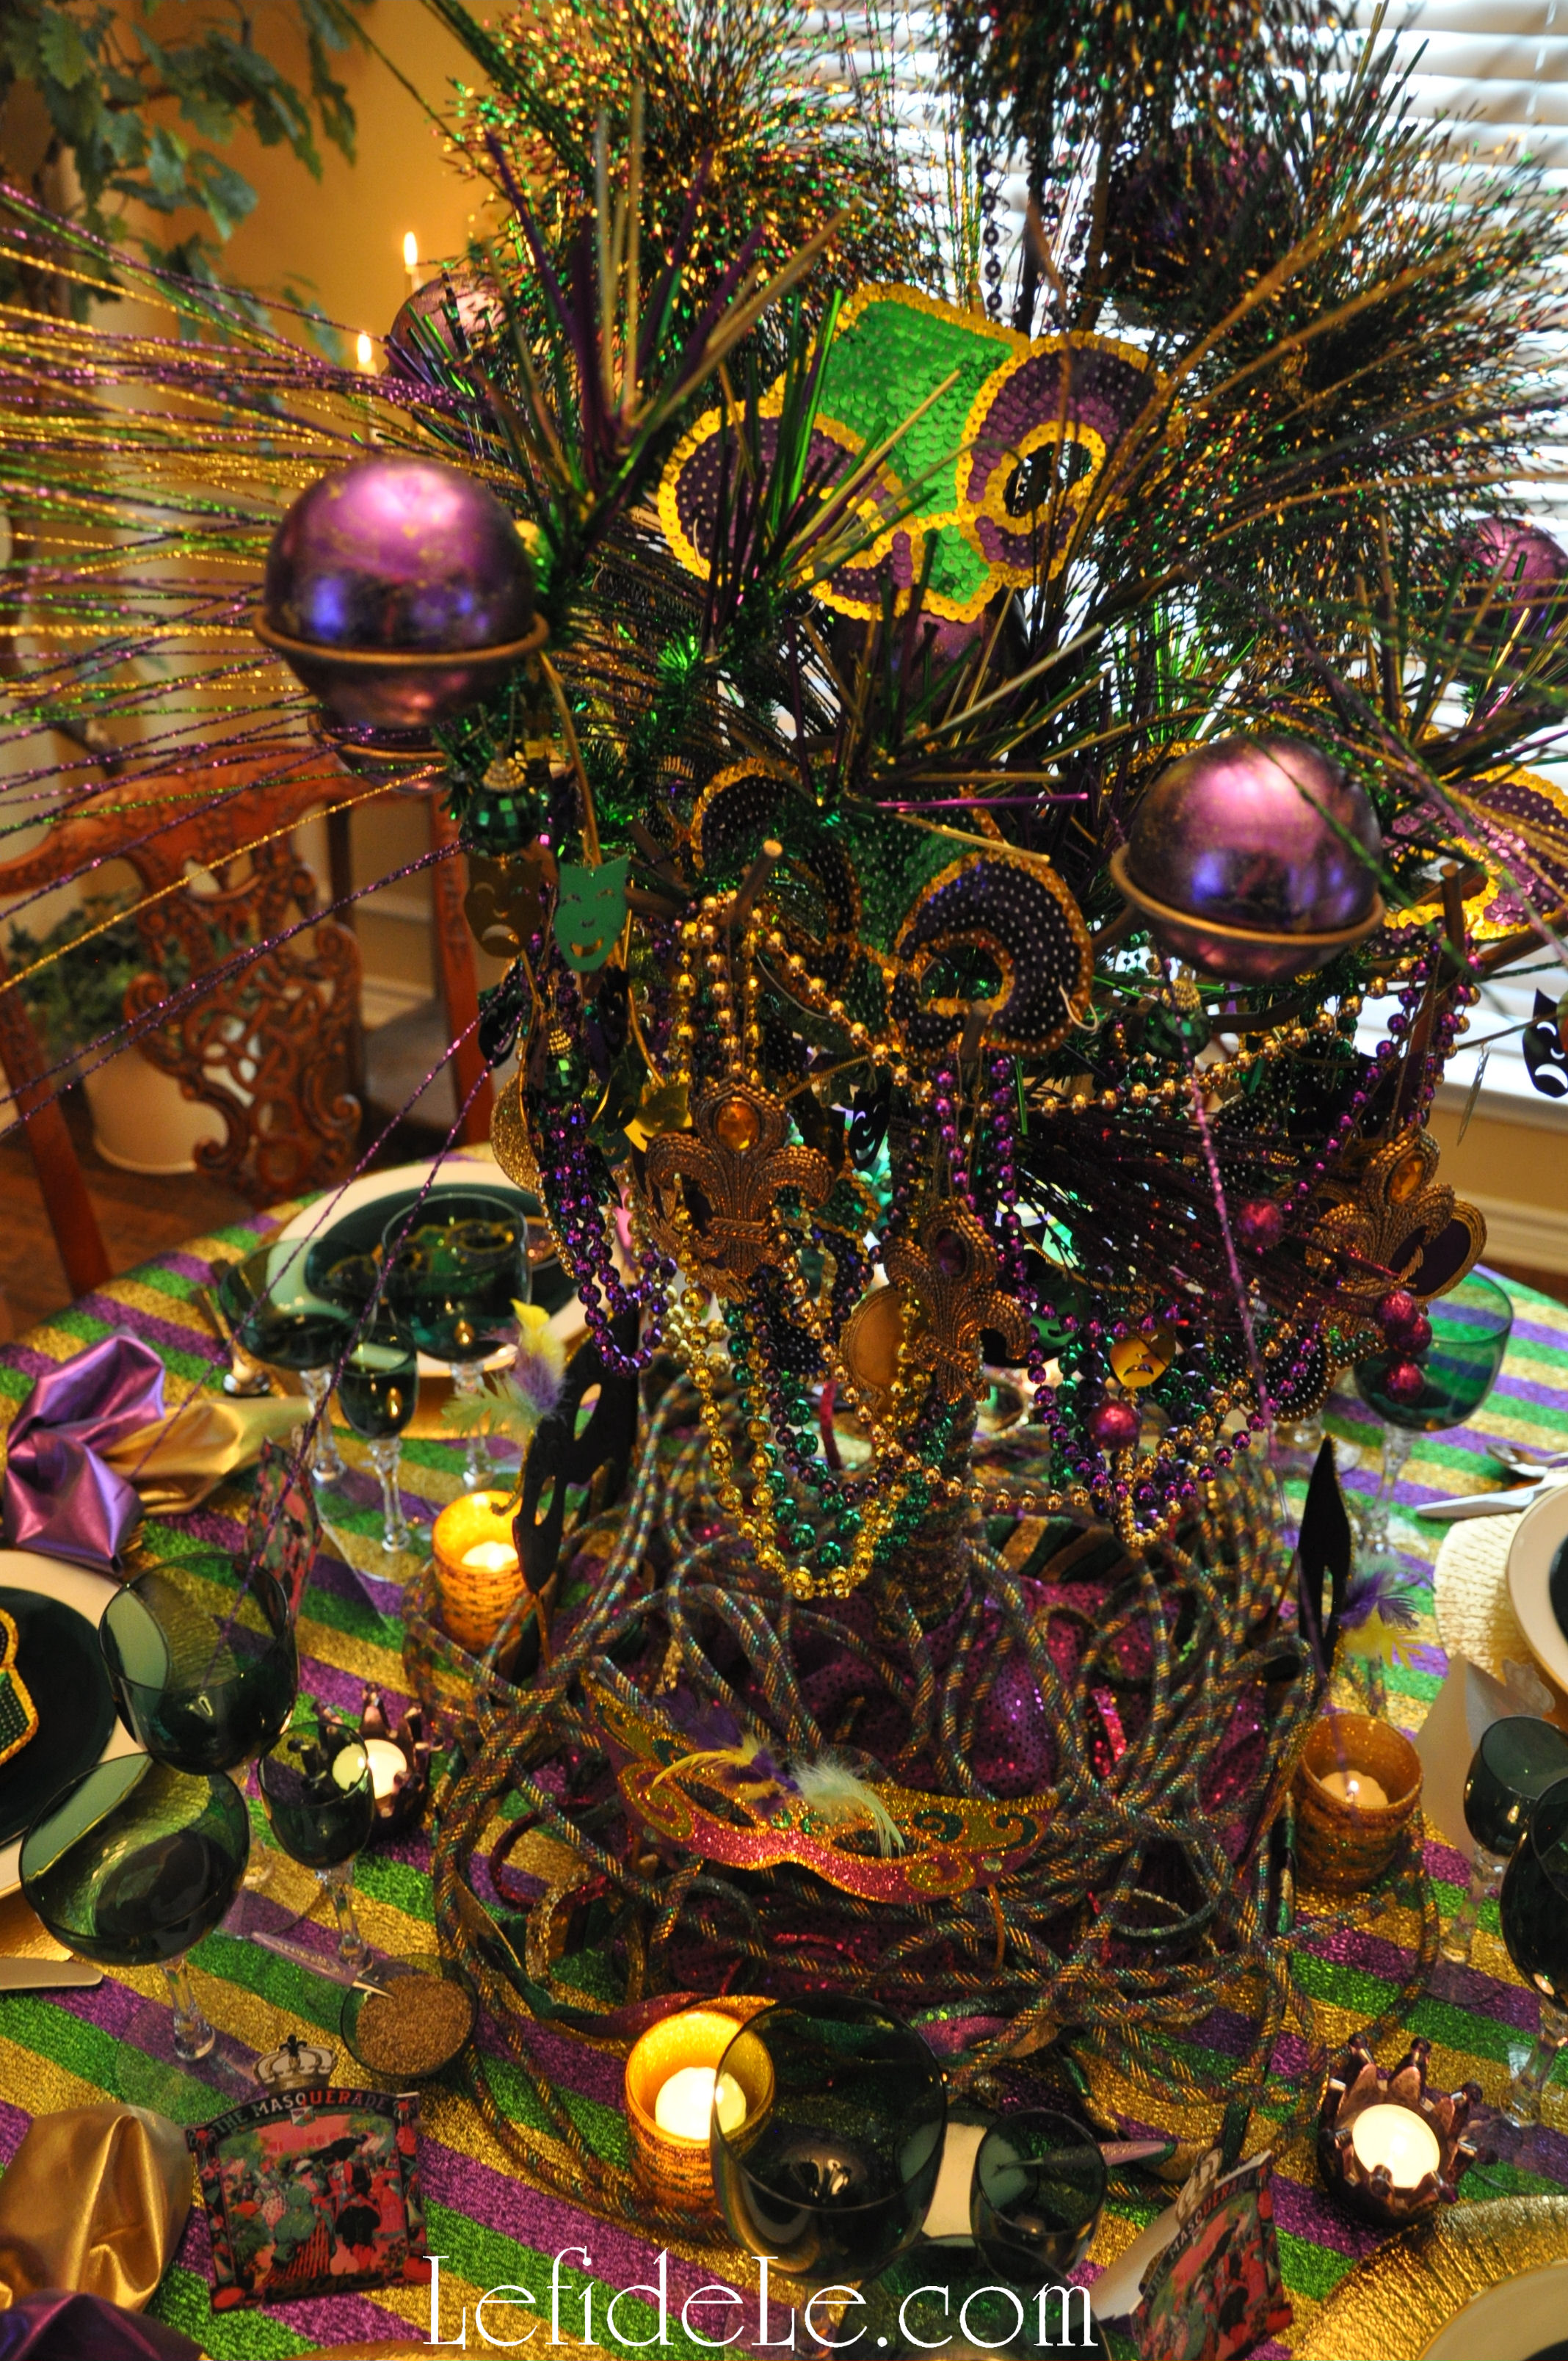
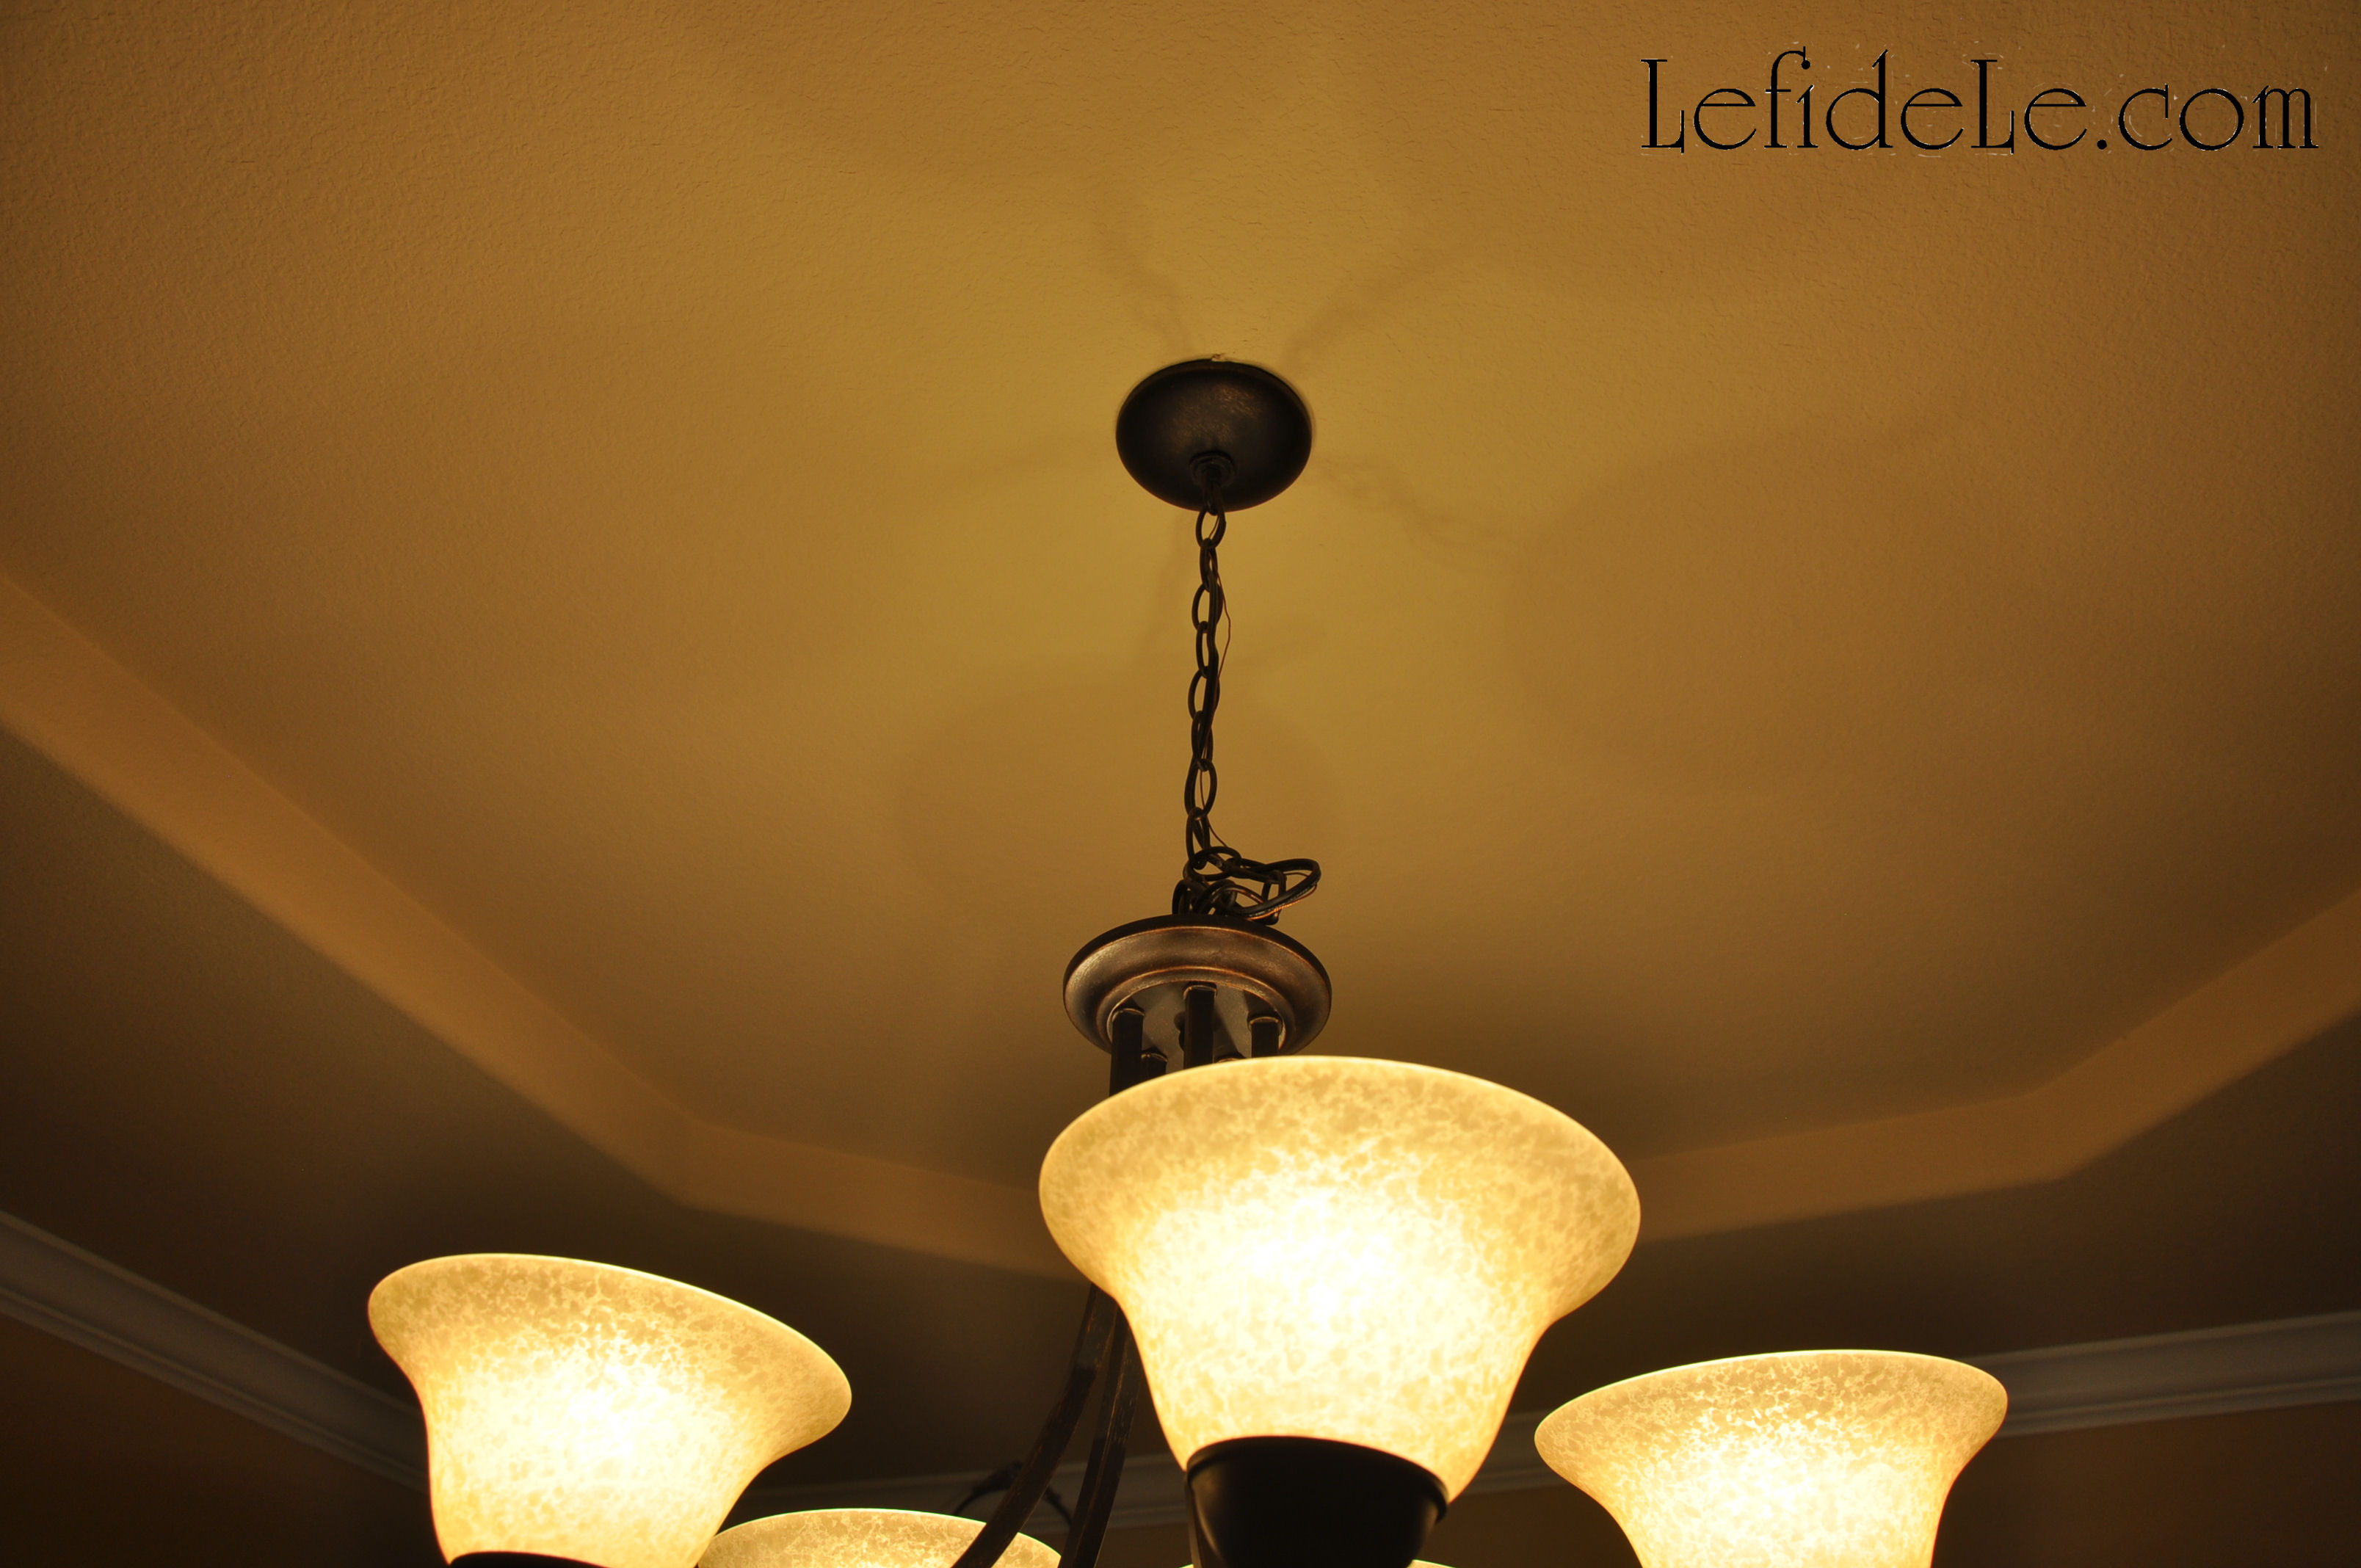
The base of the tree was then swathed in the same purple fabric remnant from Glitter-ween’s spooky tree and draped with yards of Mardi Gras trim. (See how to hike up a chandelier to accommodate a tall centerpiece here.)

043Leigh

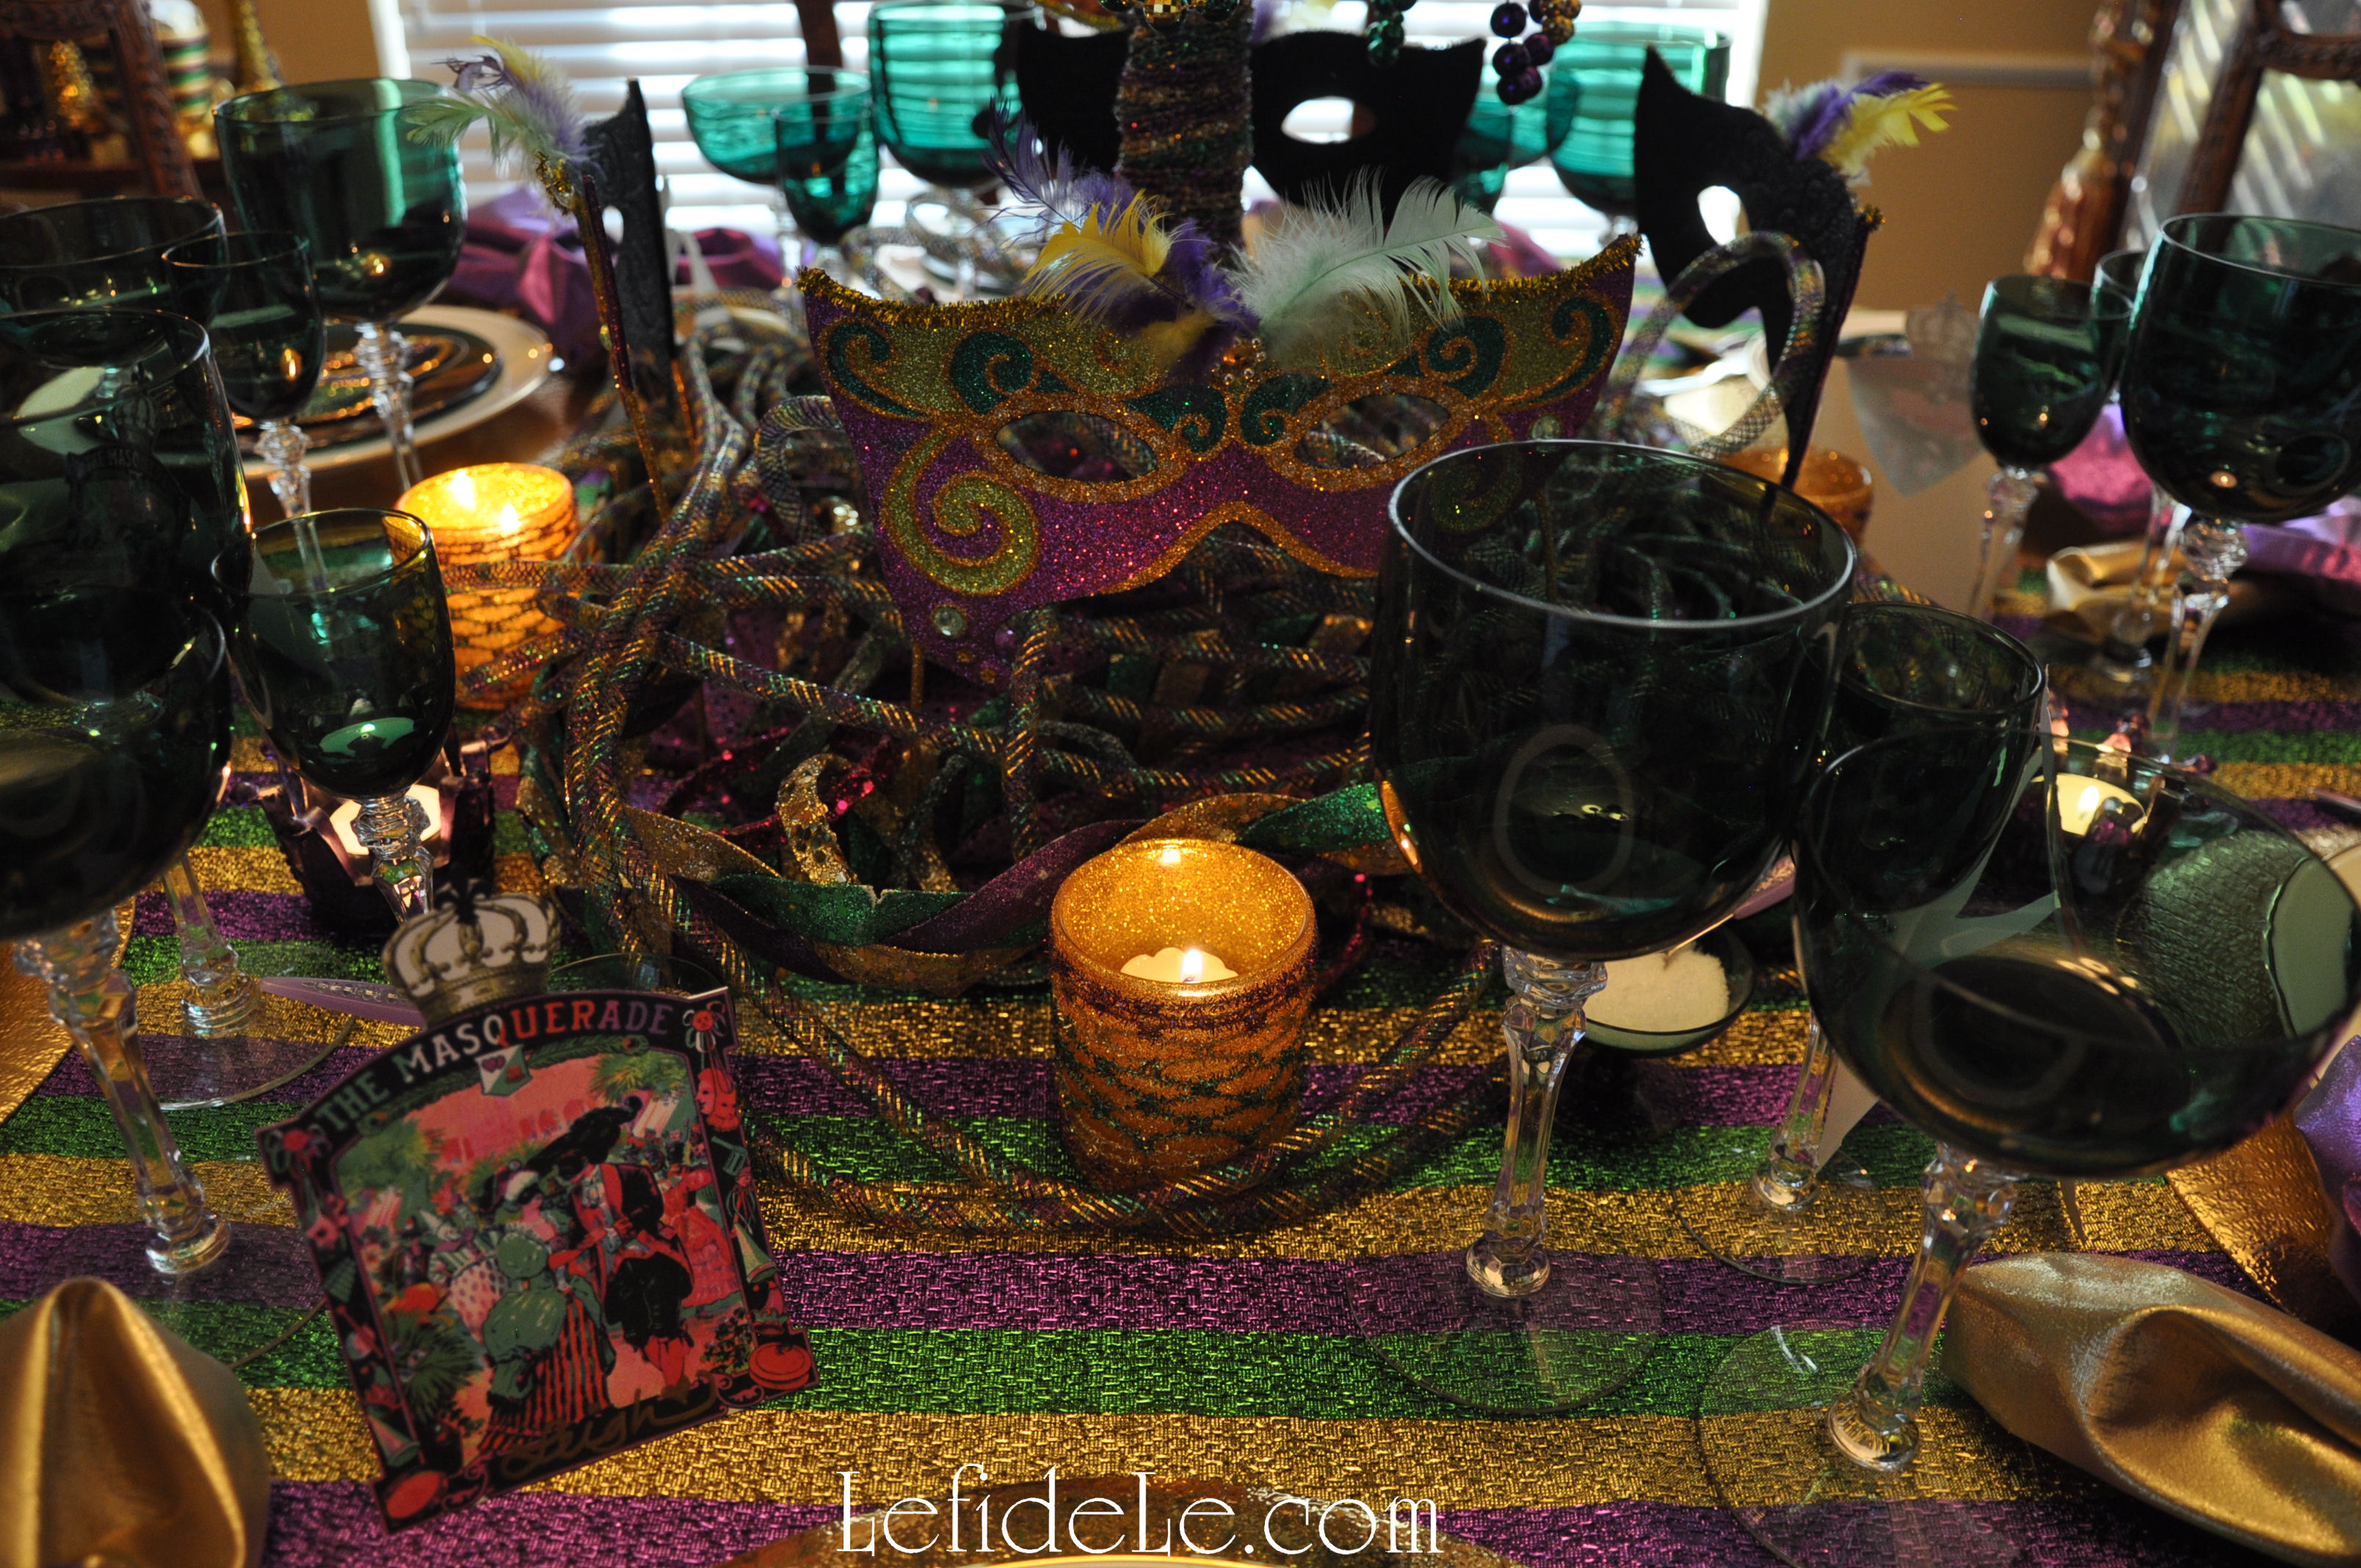
Surrounding that are 4 standing glittered metal masks that I scored at a post-holiday clearance sale for less than 2 dollars each… no kidding folks. I couldn’t have made them for less. To do as I did, scope out this year’s merchandise then pounce as soon as it gets marked down. The purple mercury glass crown votive holders were also found this way for less than a dollar for all 3… Score!

009Leigh

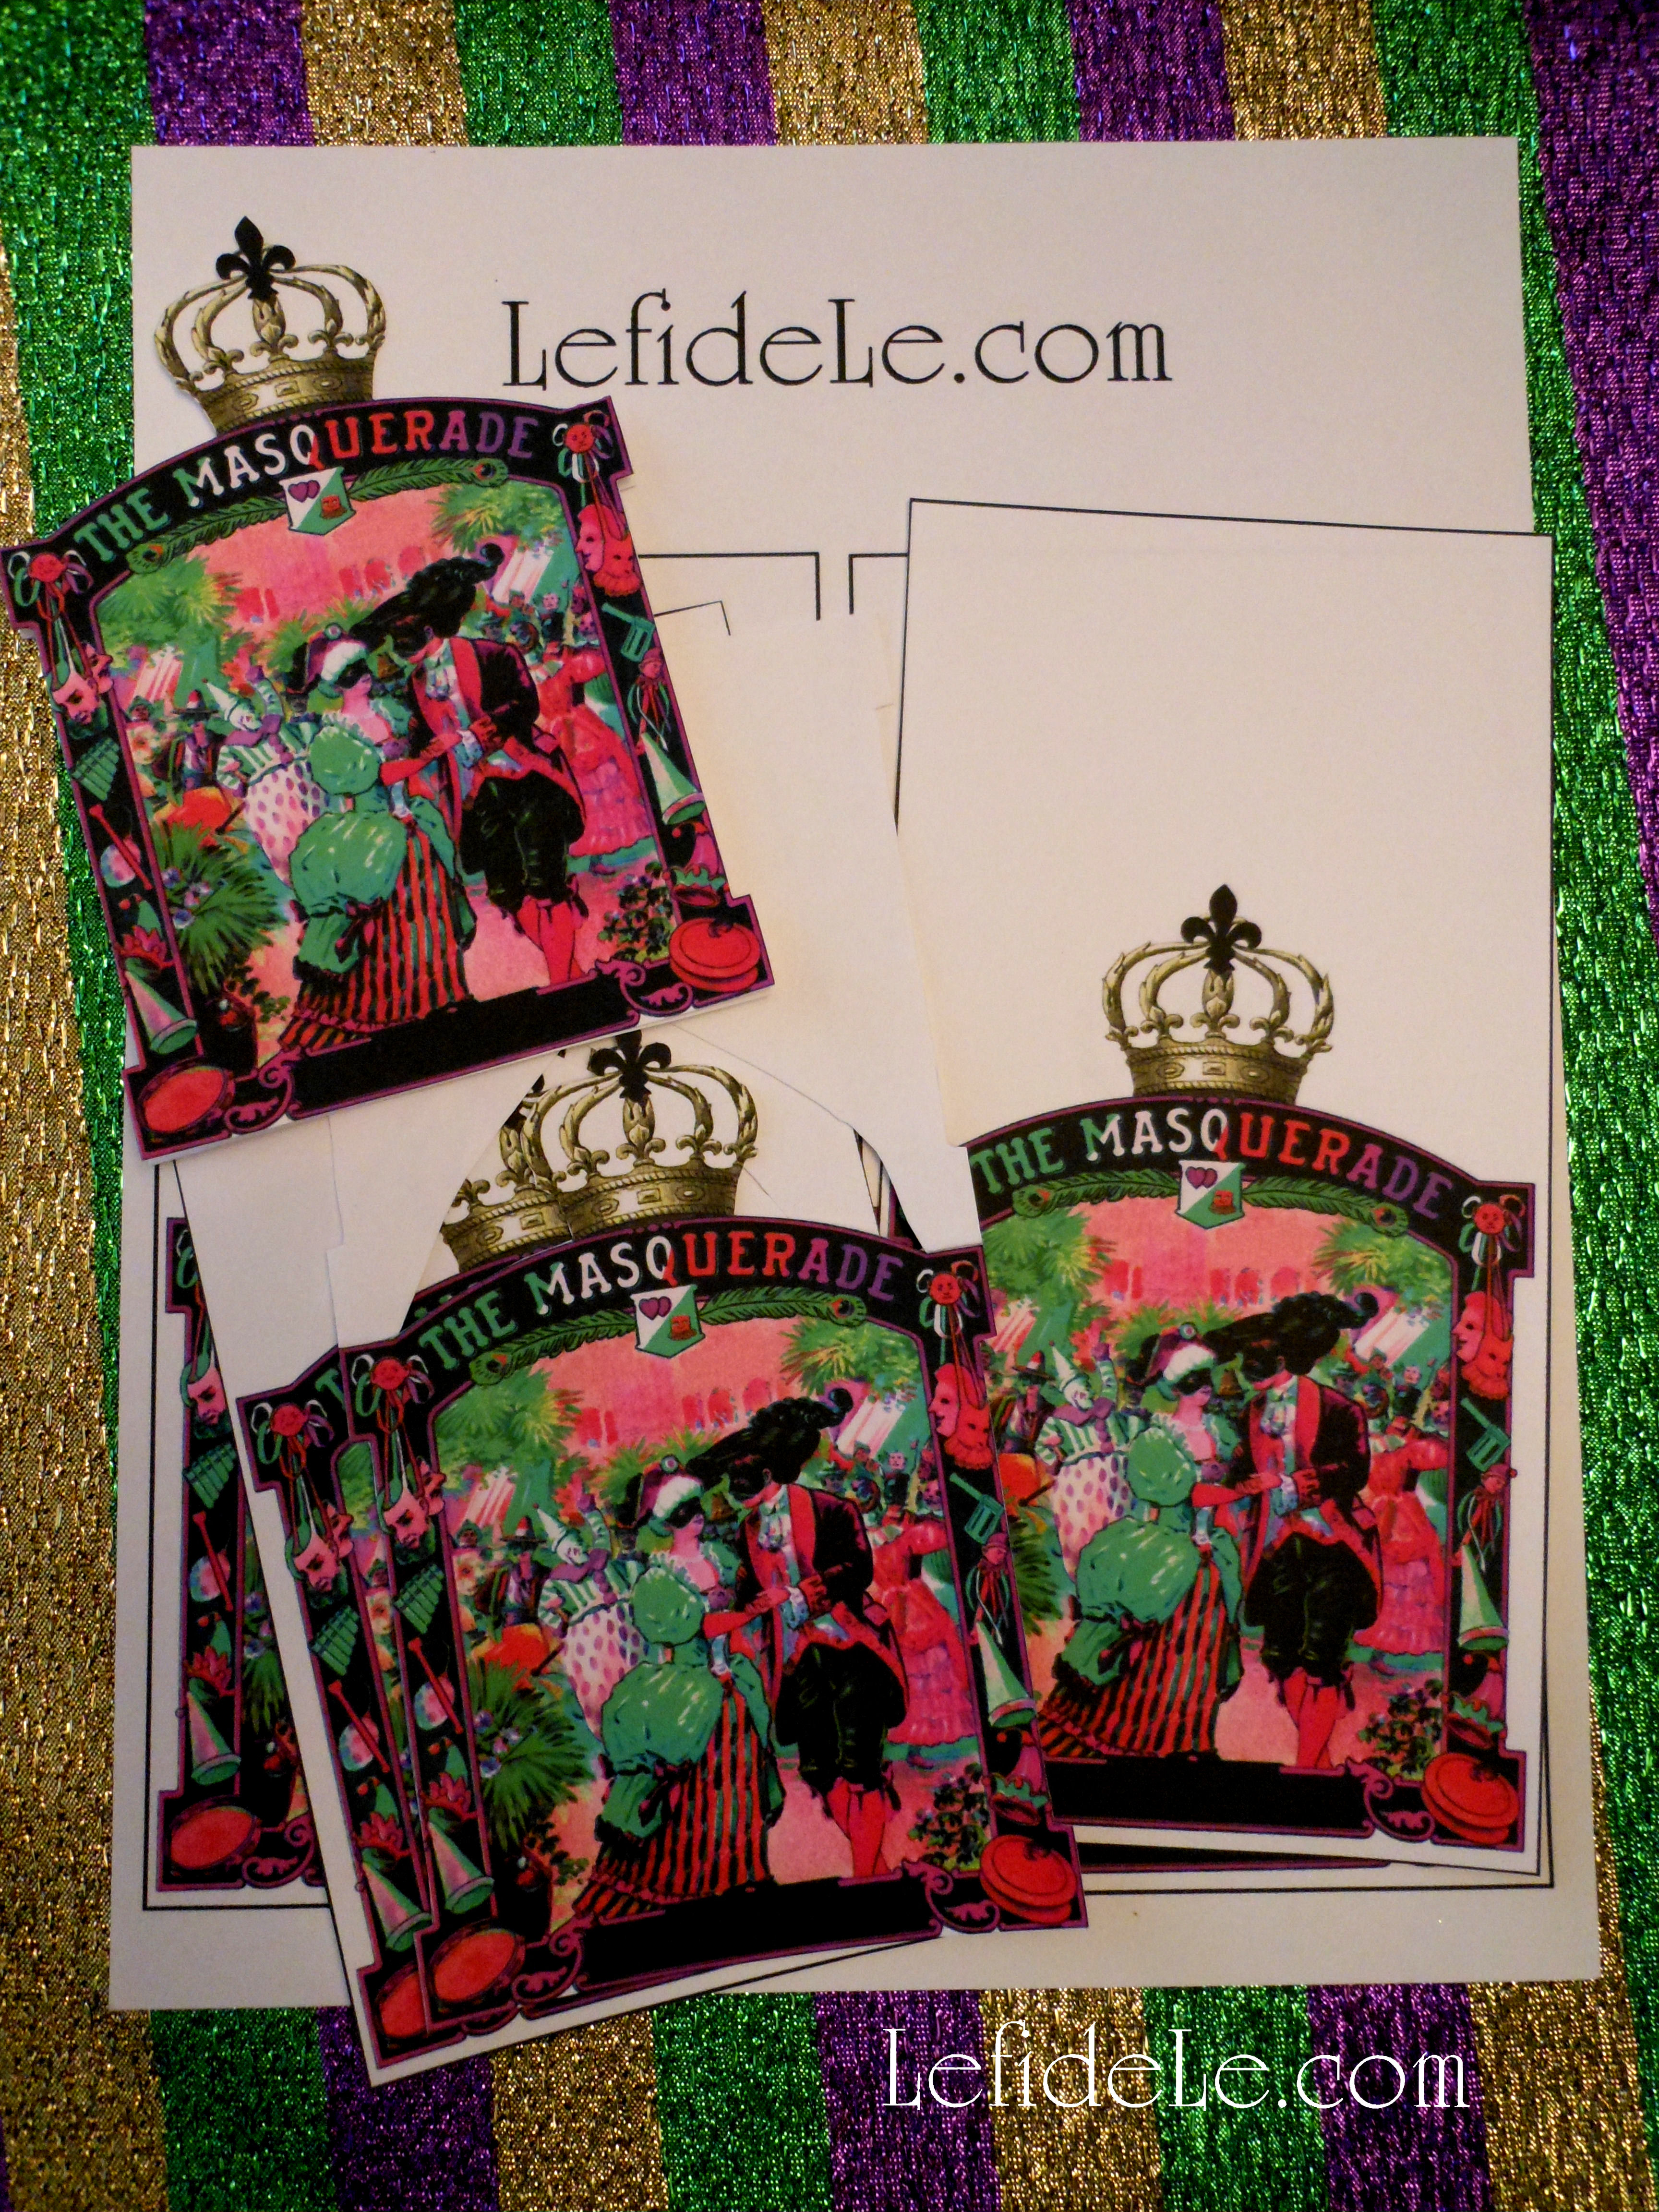
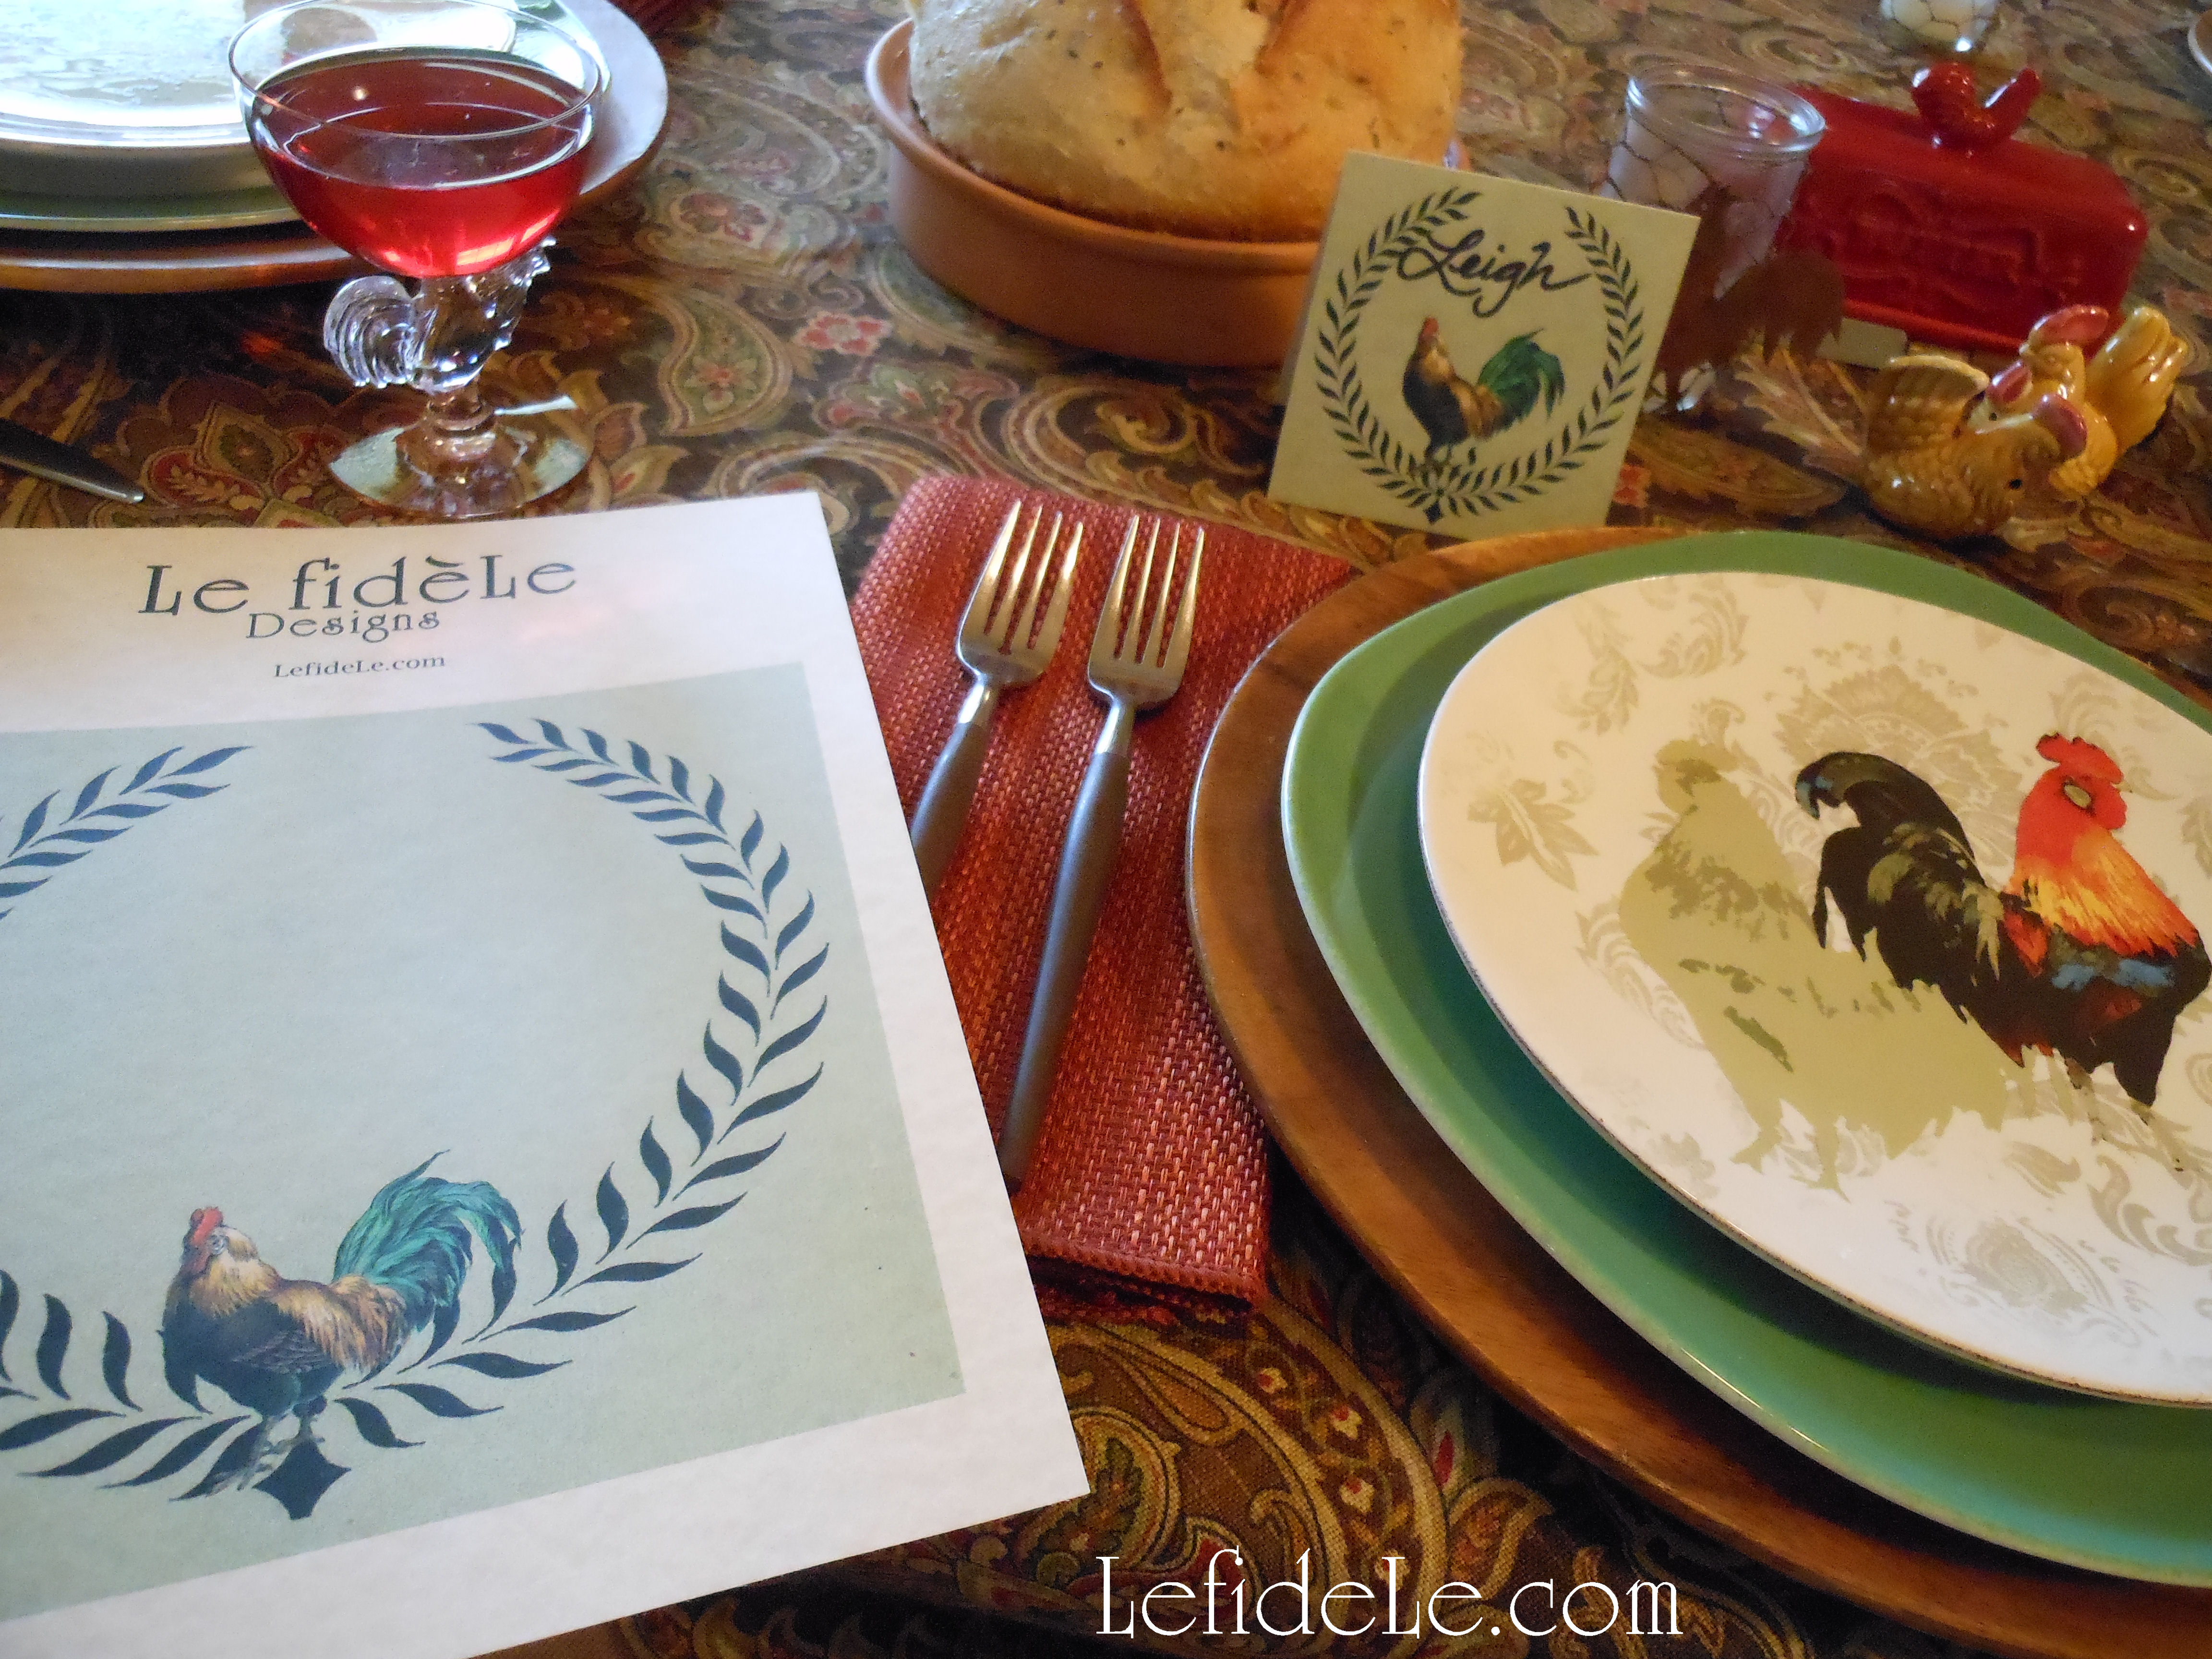
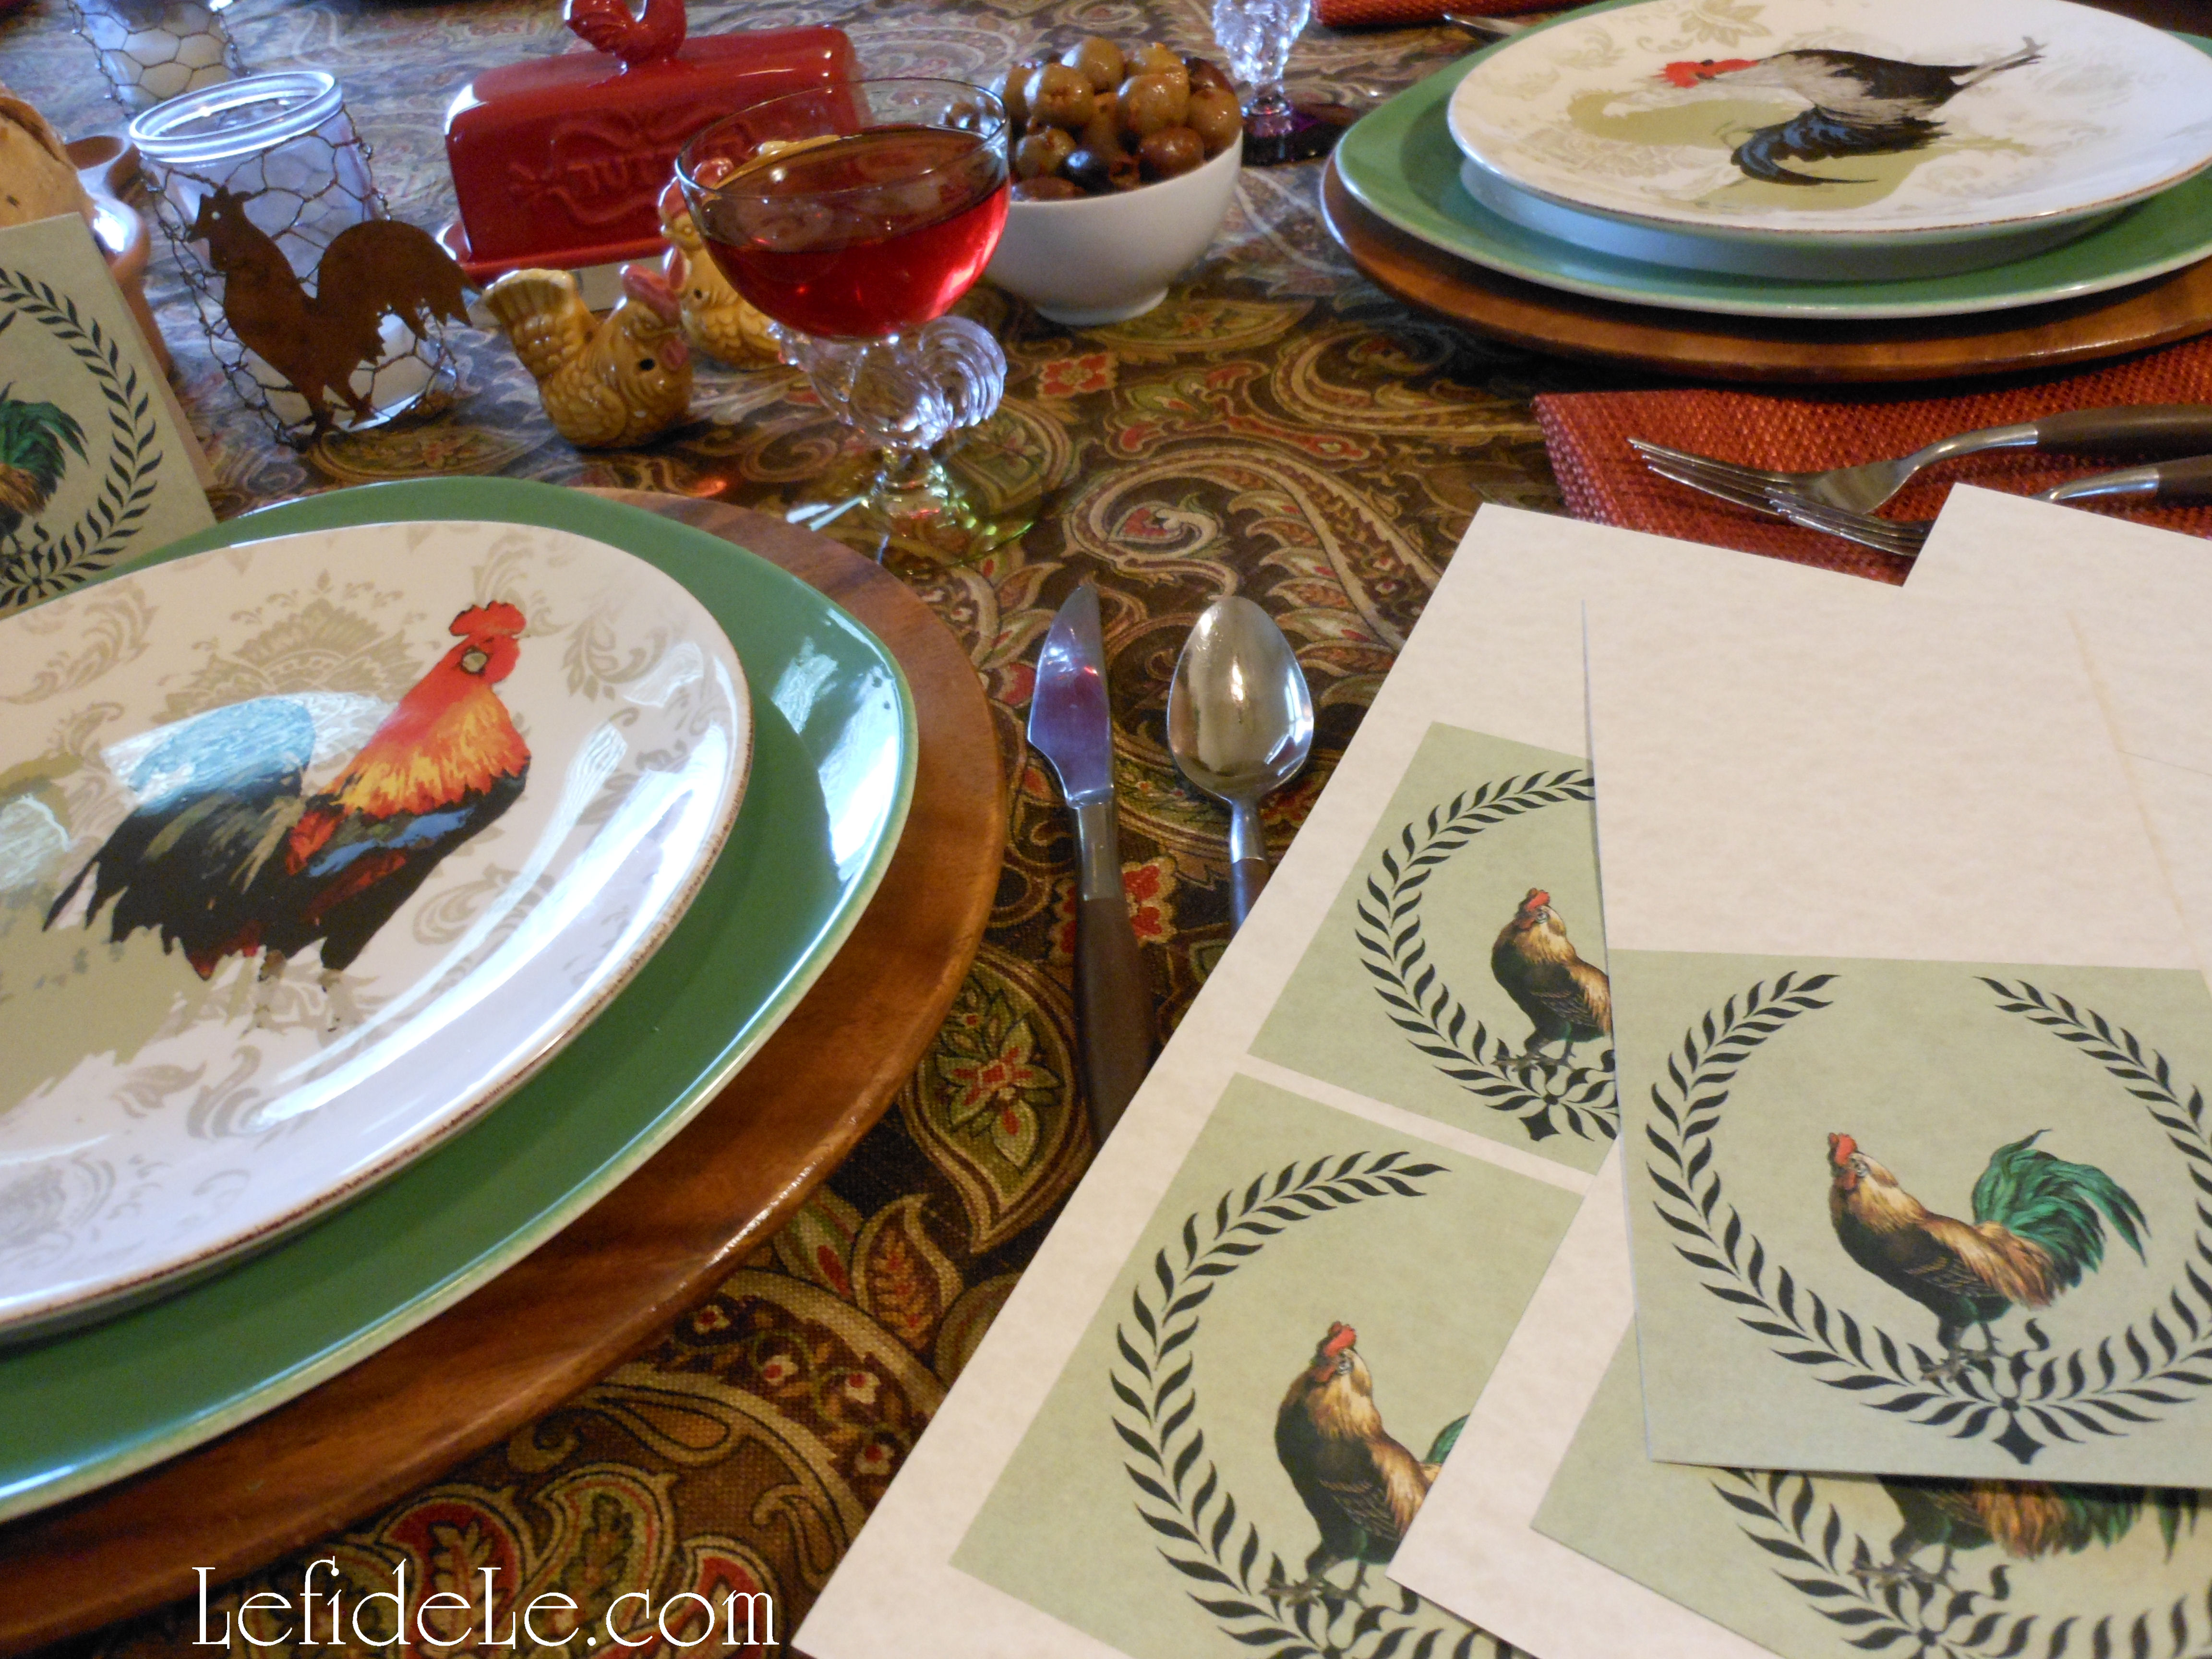
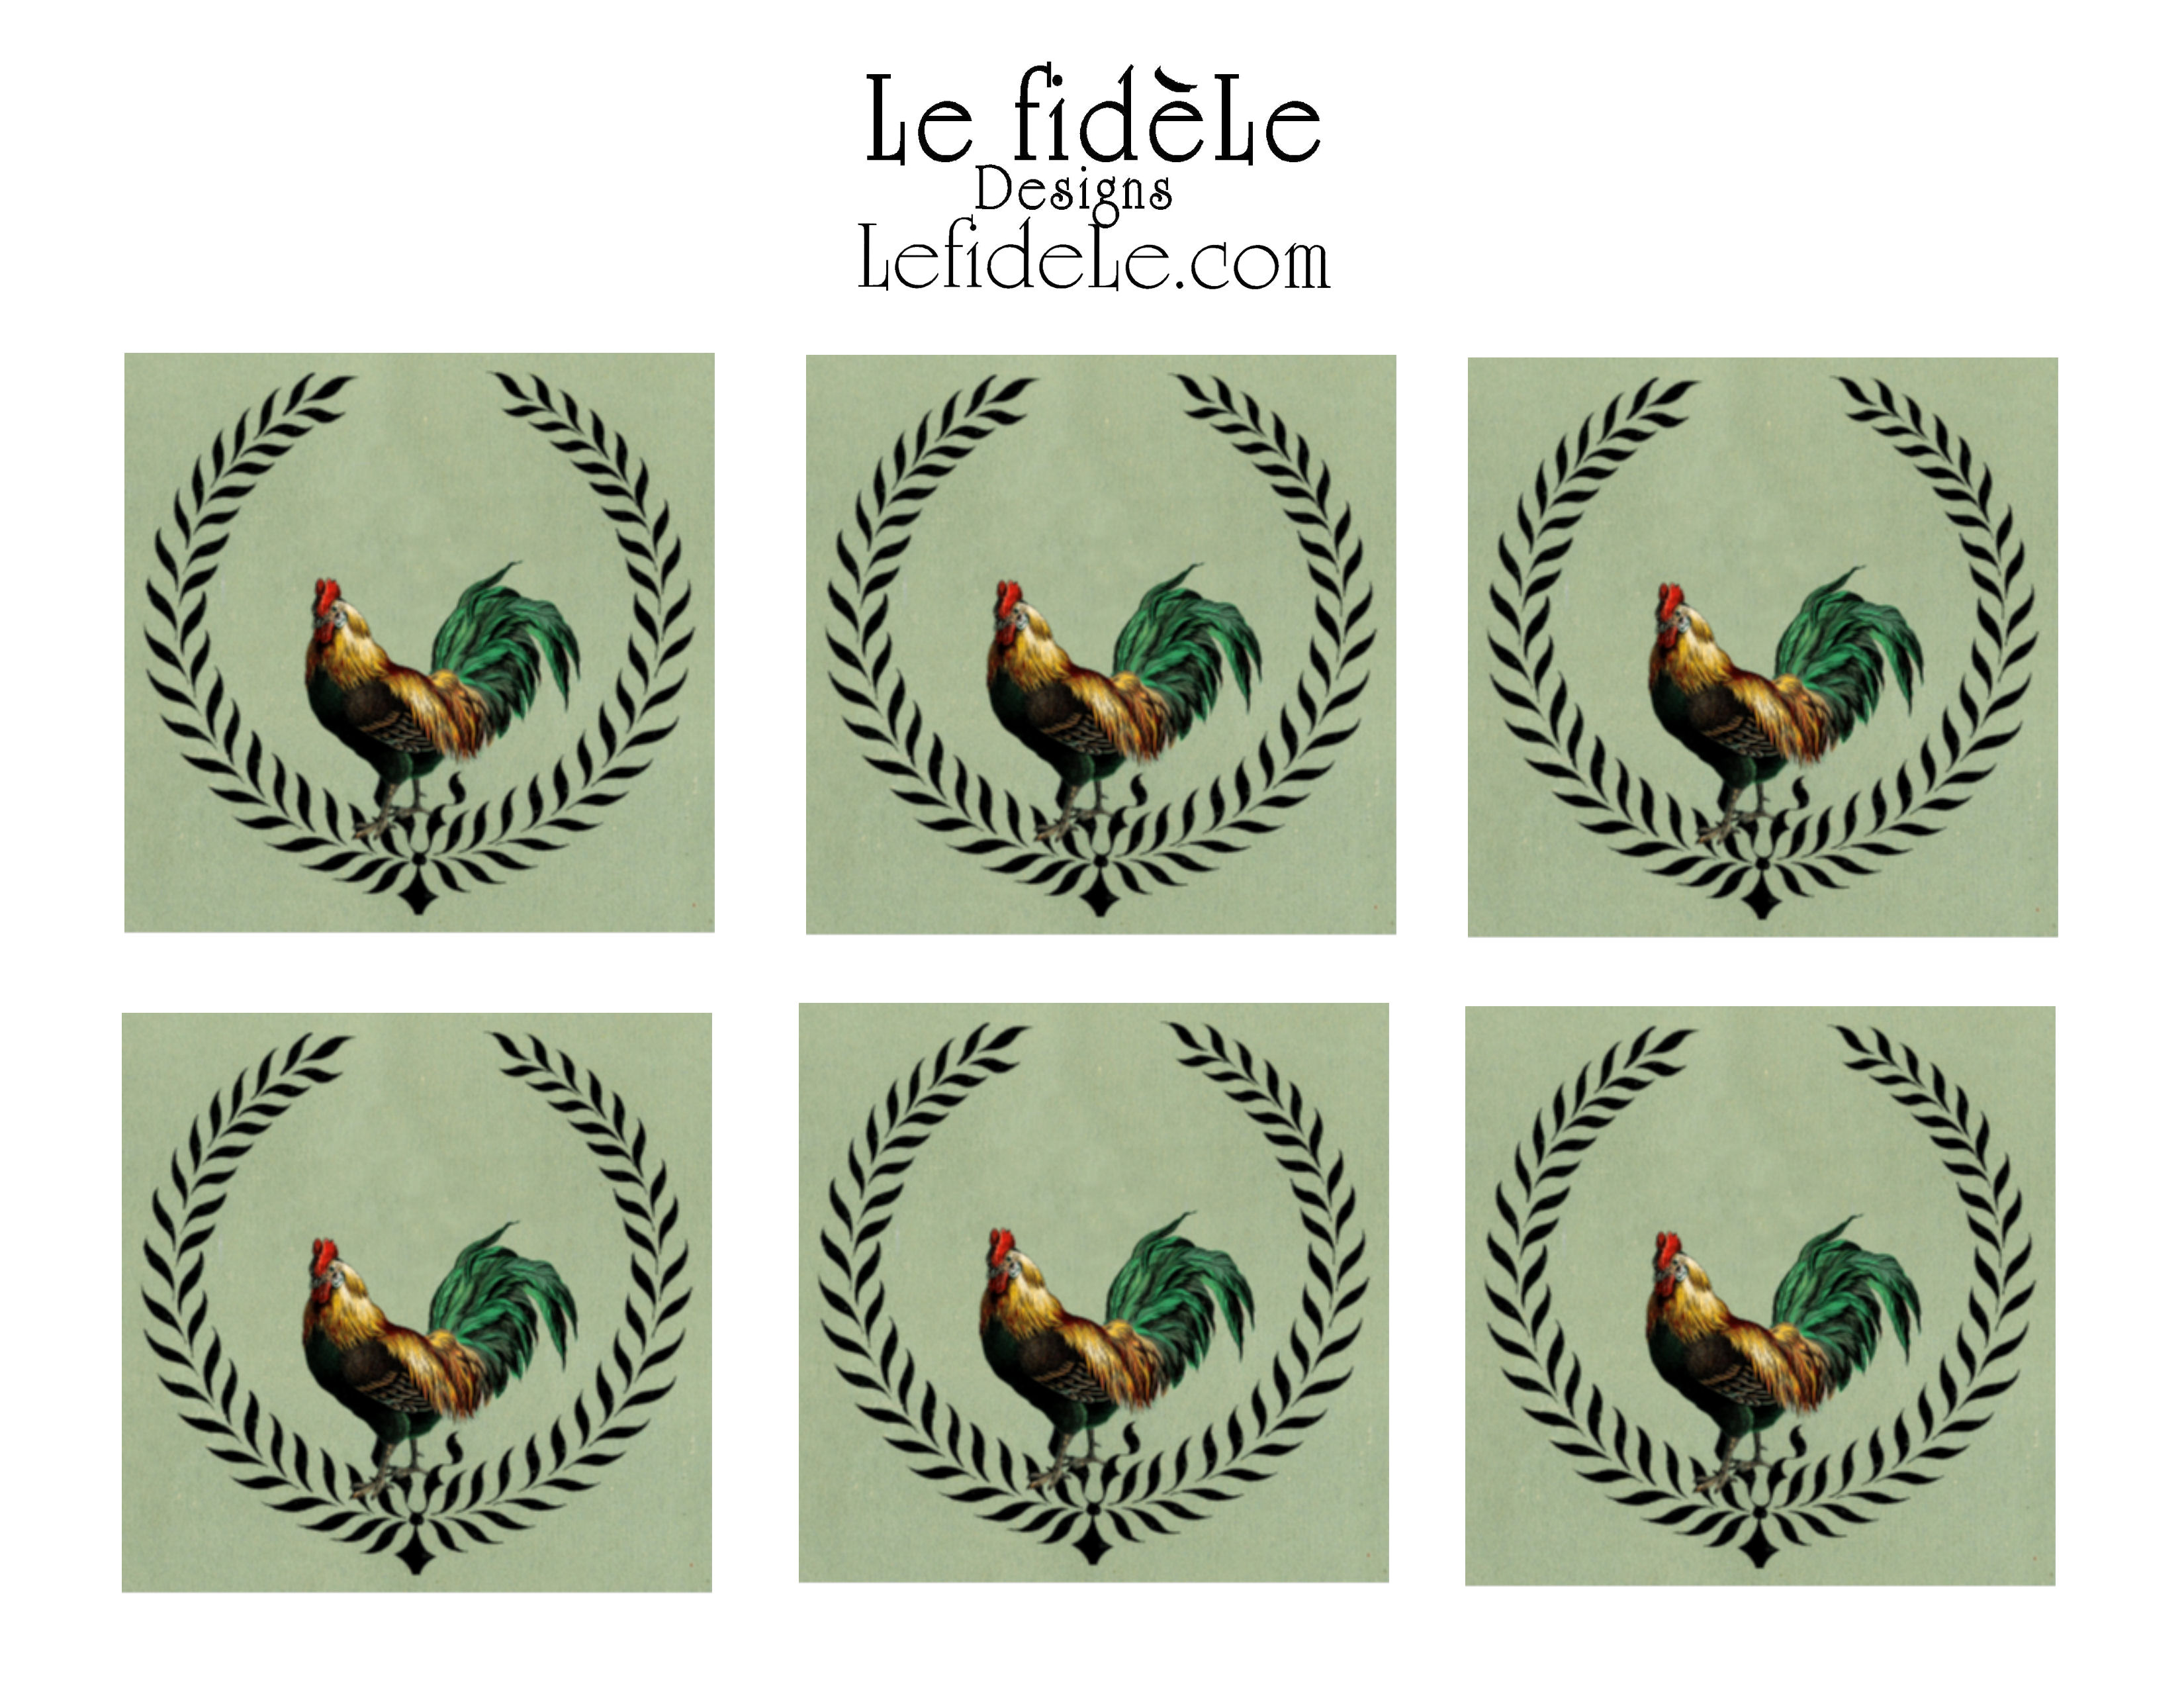
Last but definitely not least, are my free printable Mardi Gras masquerade place-cards which may also be used as invitation cards!

mardi-gras-placecards-leigh

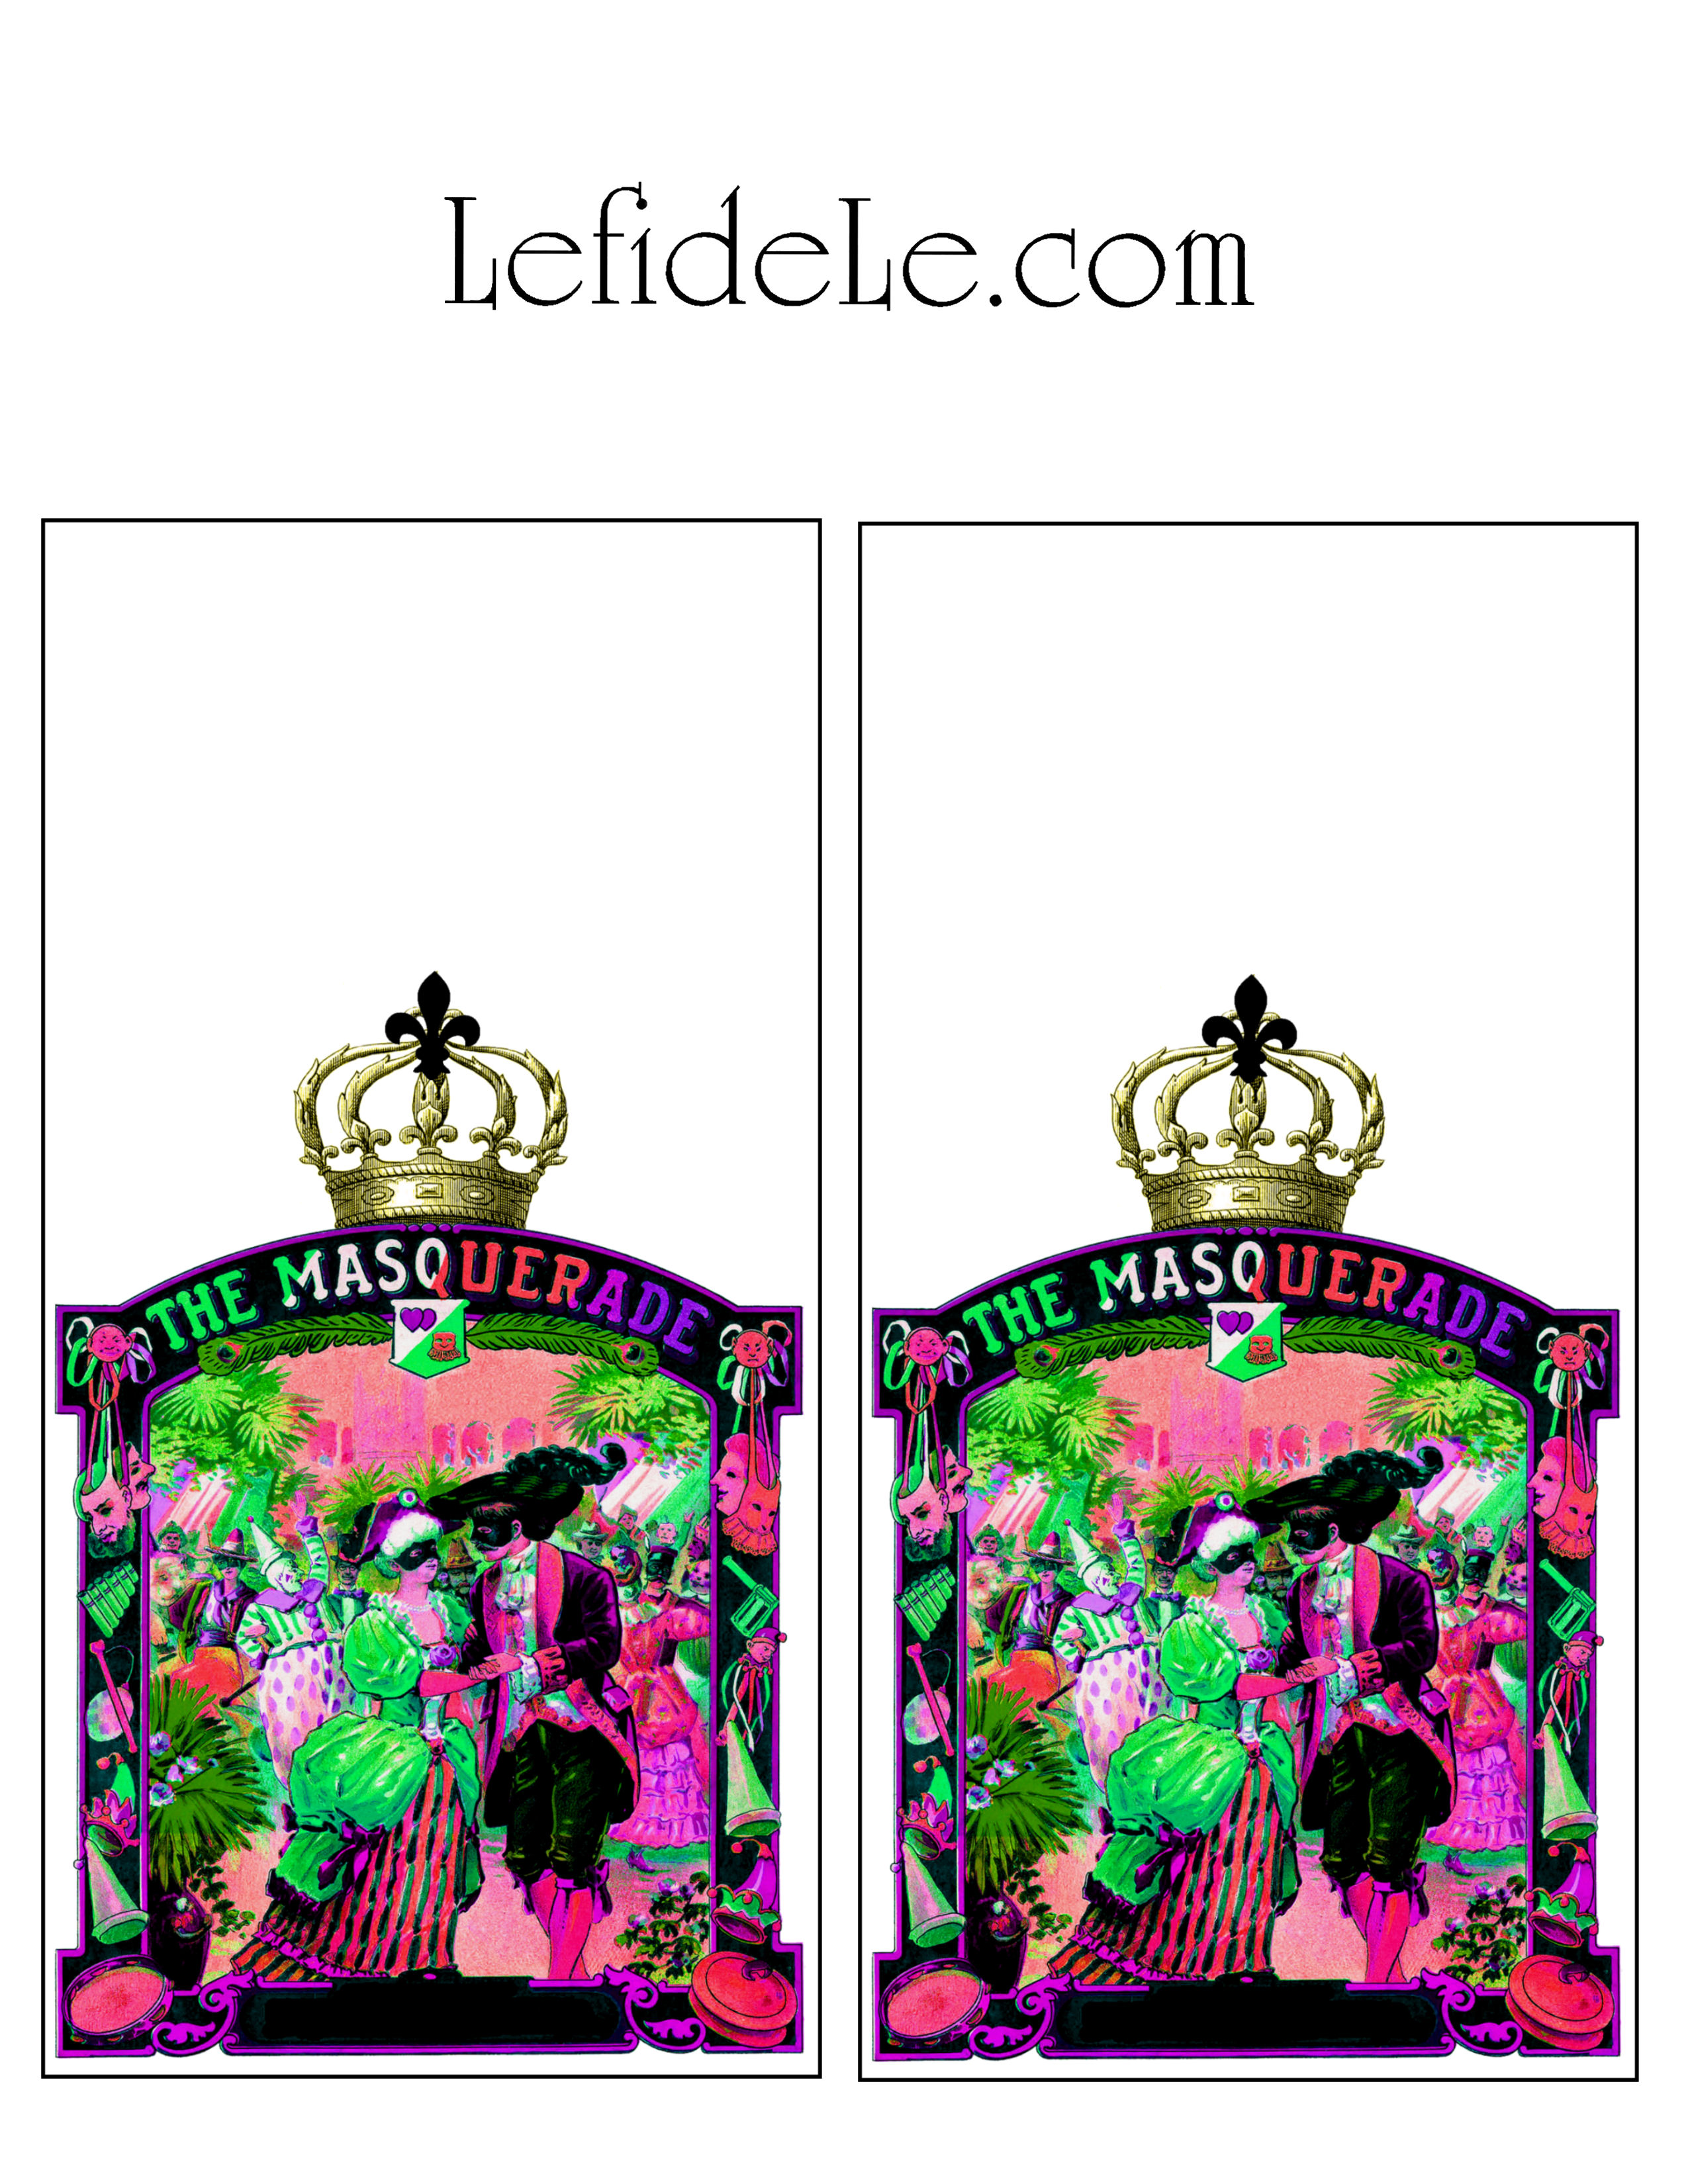
Simple right click on this small picture and select print. Print these in best color photo on thick cardstock.

004Leigh

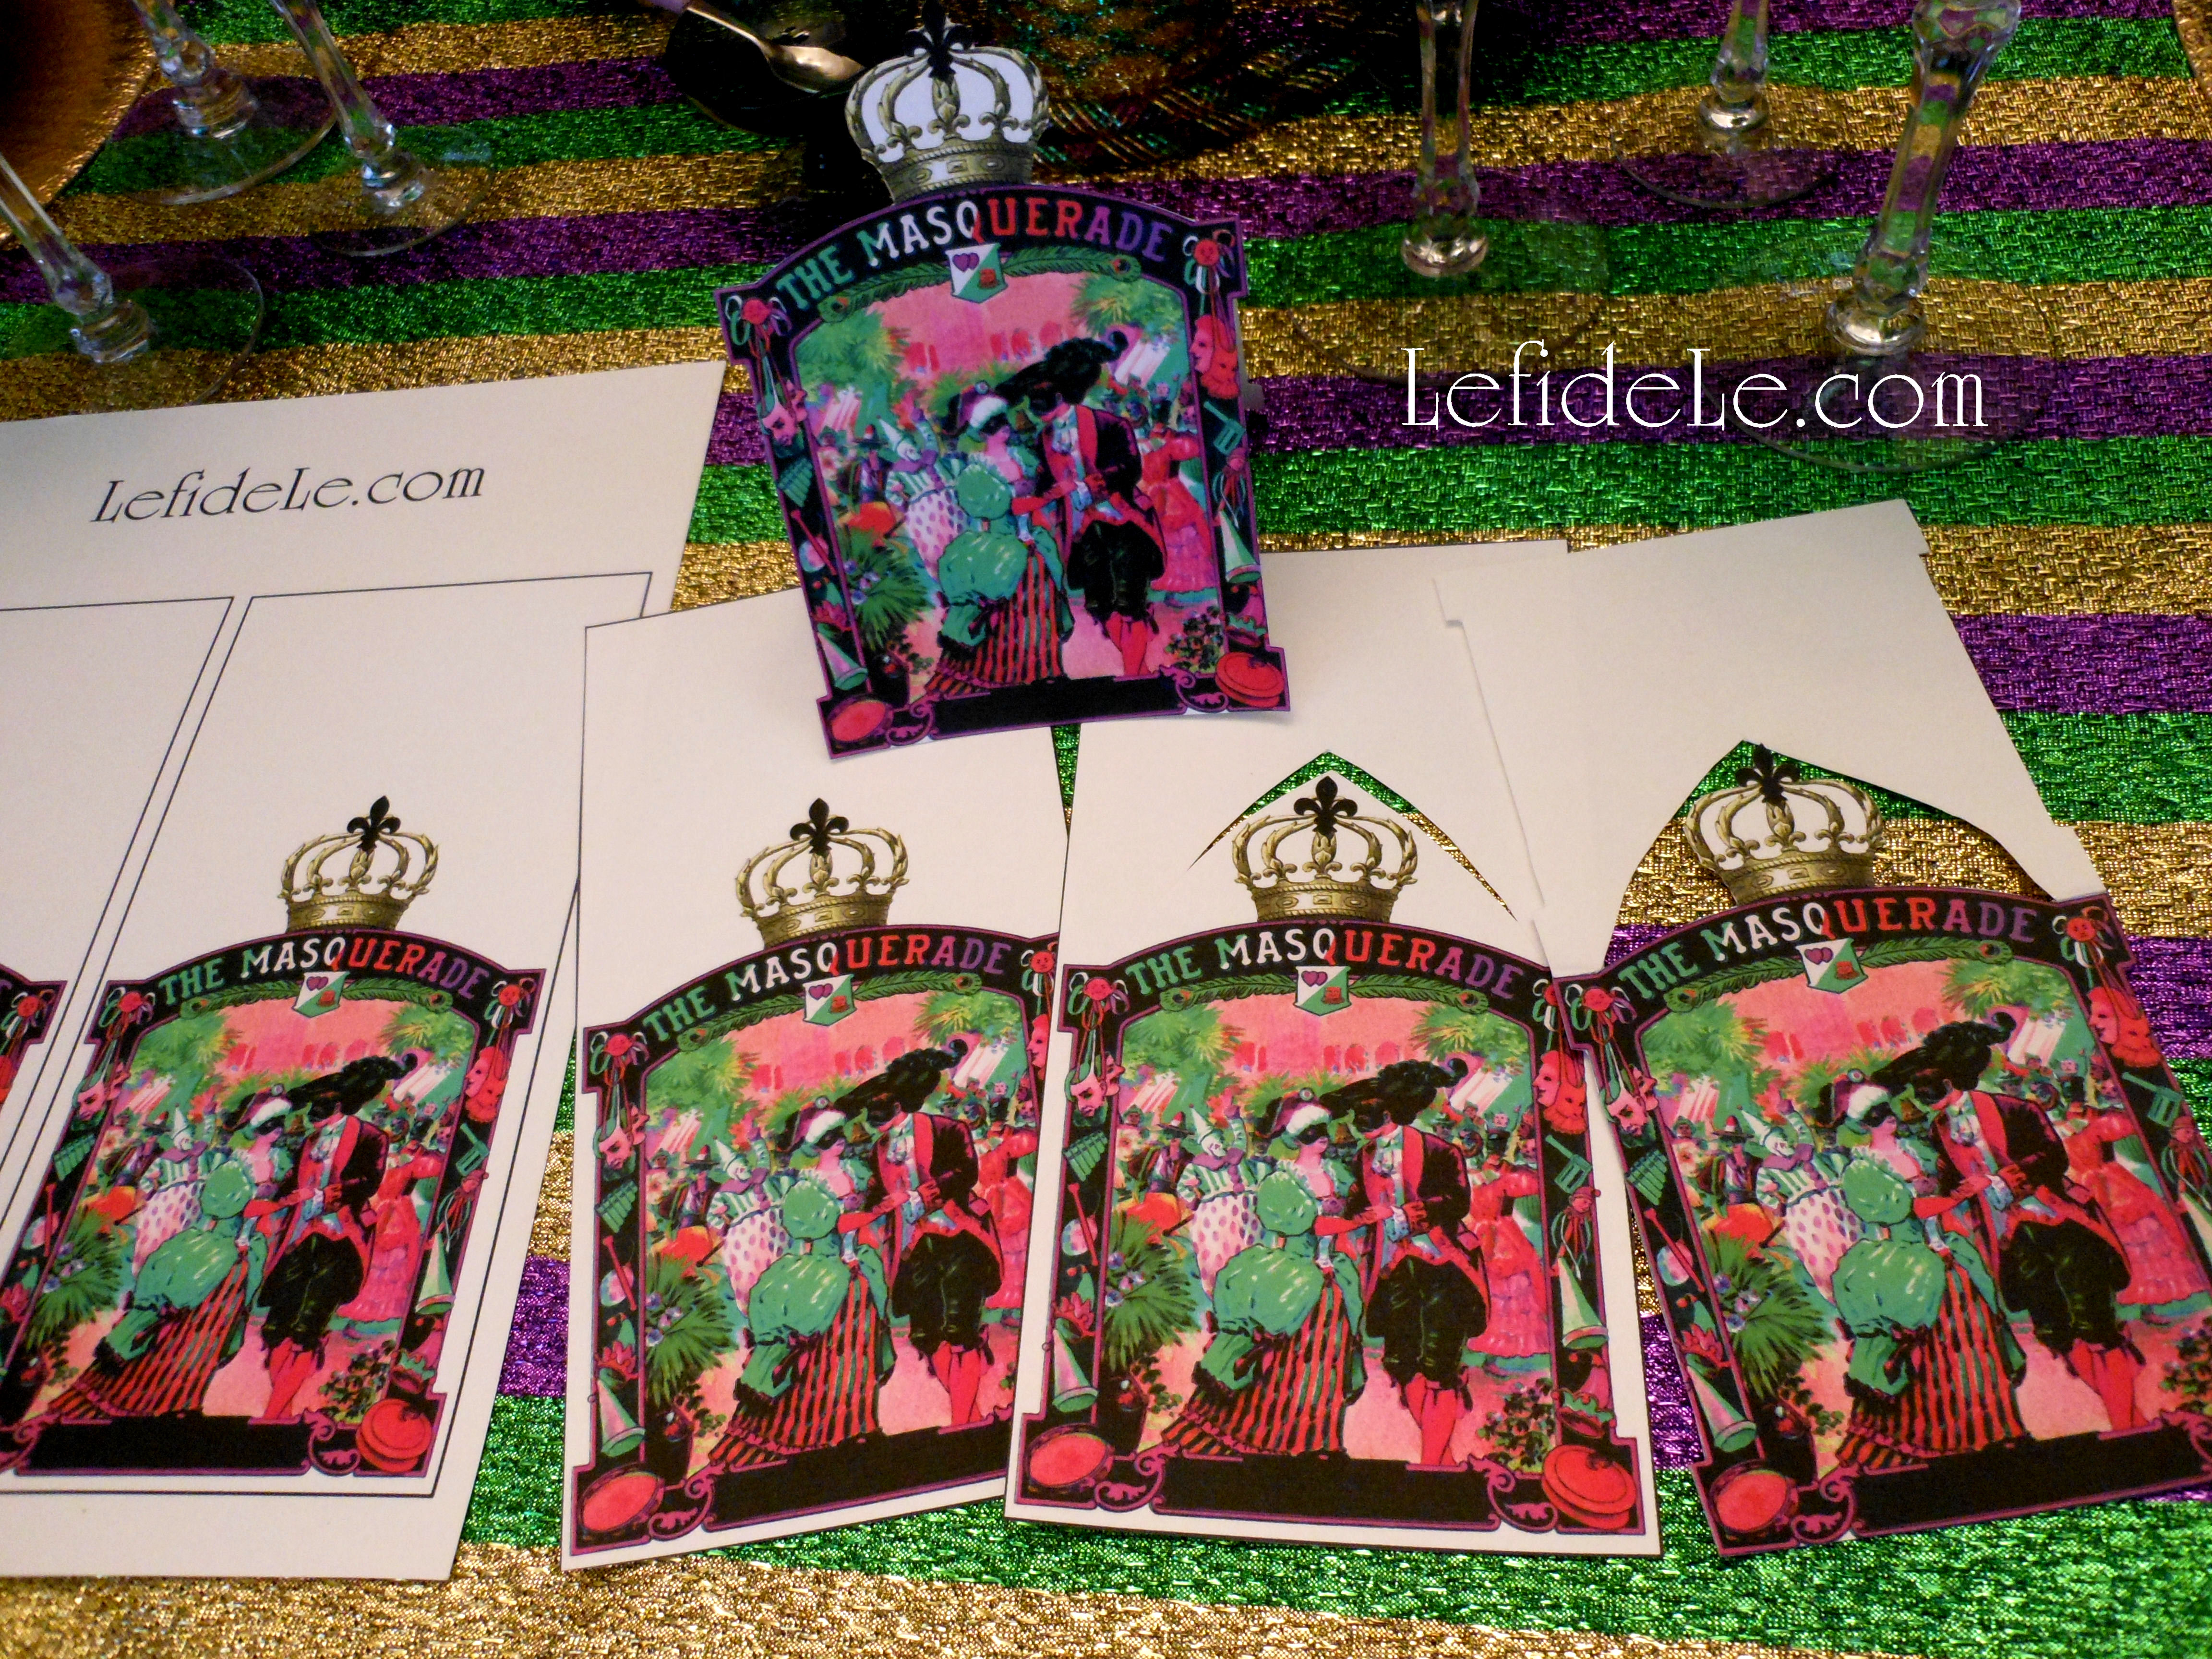
Then simply cut on the solid black lines to separate the images for invitations. For place-cards, use the pictures a guide for how to cut out the top and crown while still making a tent folding card that will stand upright.

039Leigh

Poke a point into the paper just above the crown with a pointy pen, or compass point, etc. Use that as a starting point for your scissors to cut a V shape above the picture. Then cut one side close to the top and crown next to the image. Don’t cut all the way to the ends. Stop where the curve meets the flat top. Those flat parts are what join the front and back together. Then fold it in half. Cut through both pieces around the image. Again, a picture speaks a thousand words… use it as a visual guide.

028Leigh

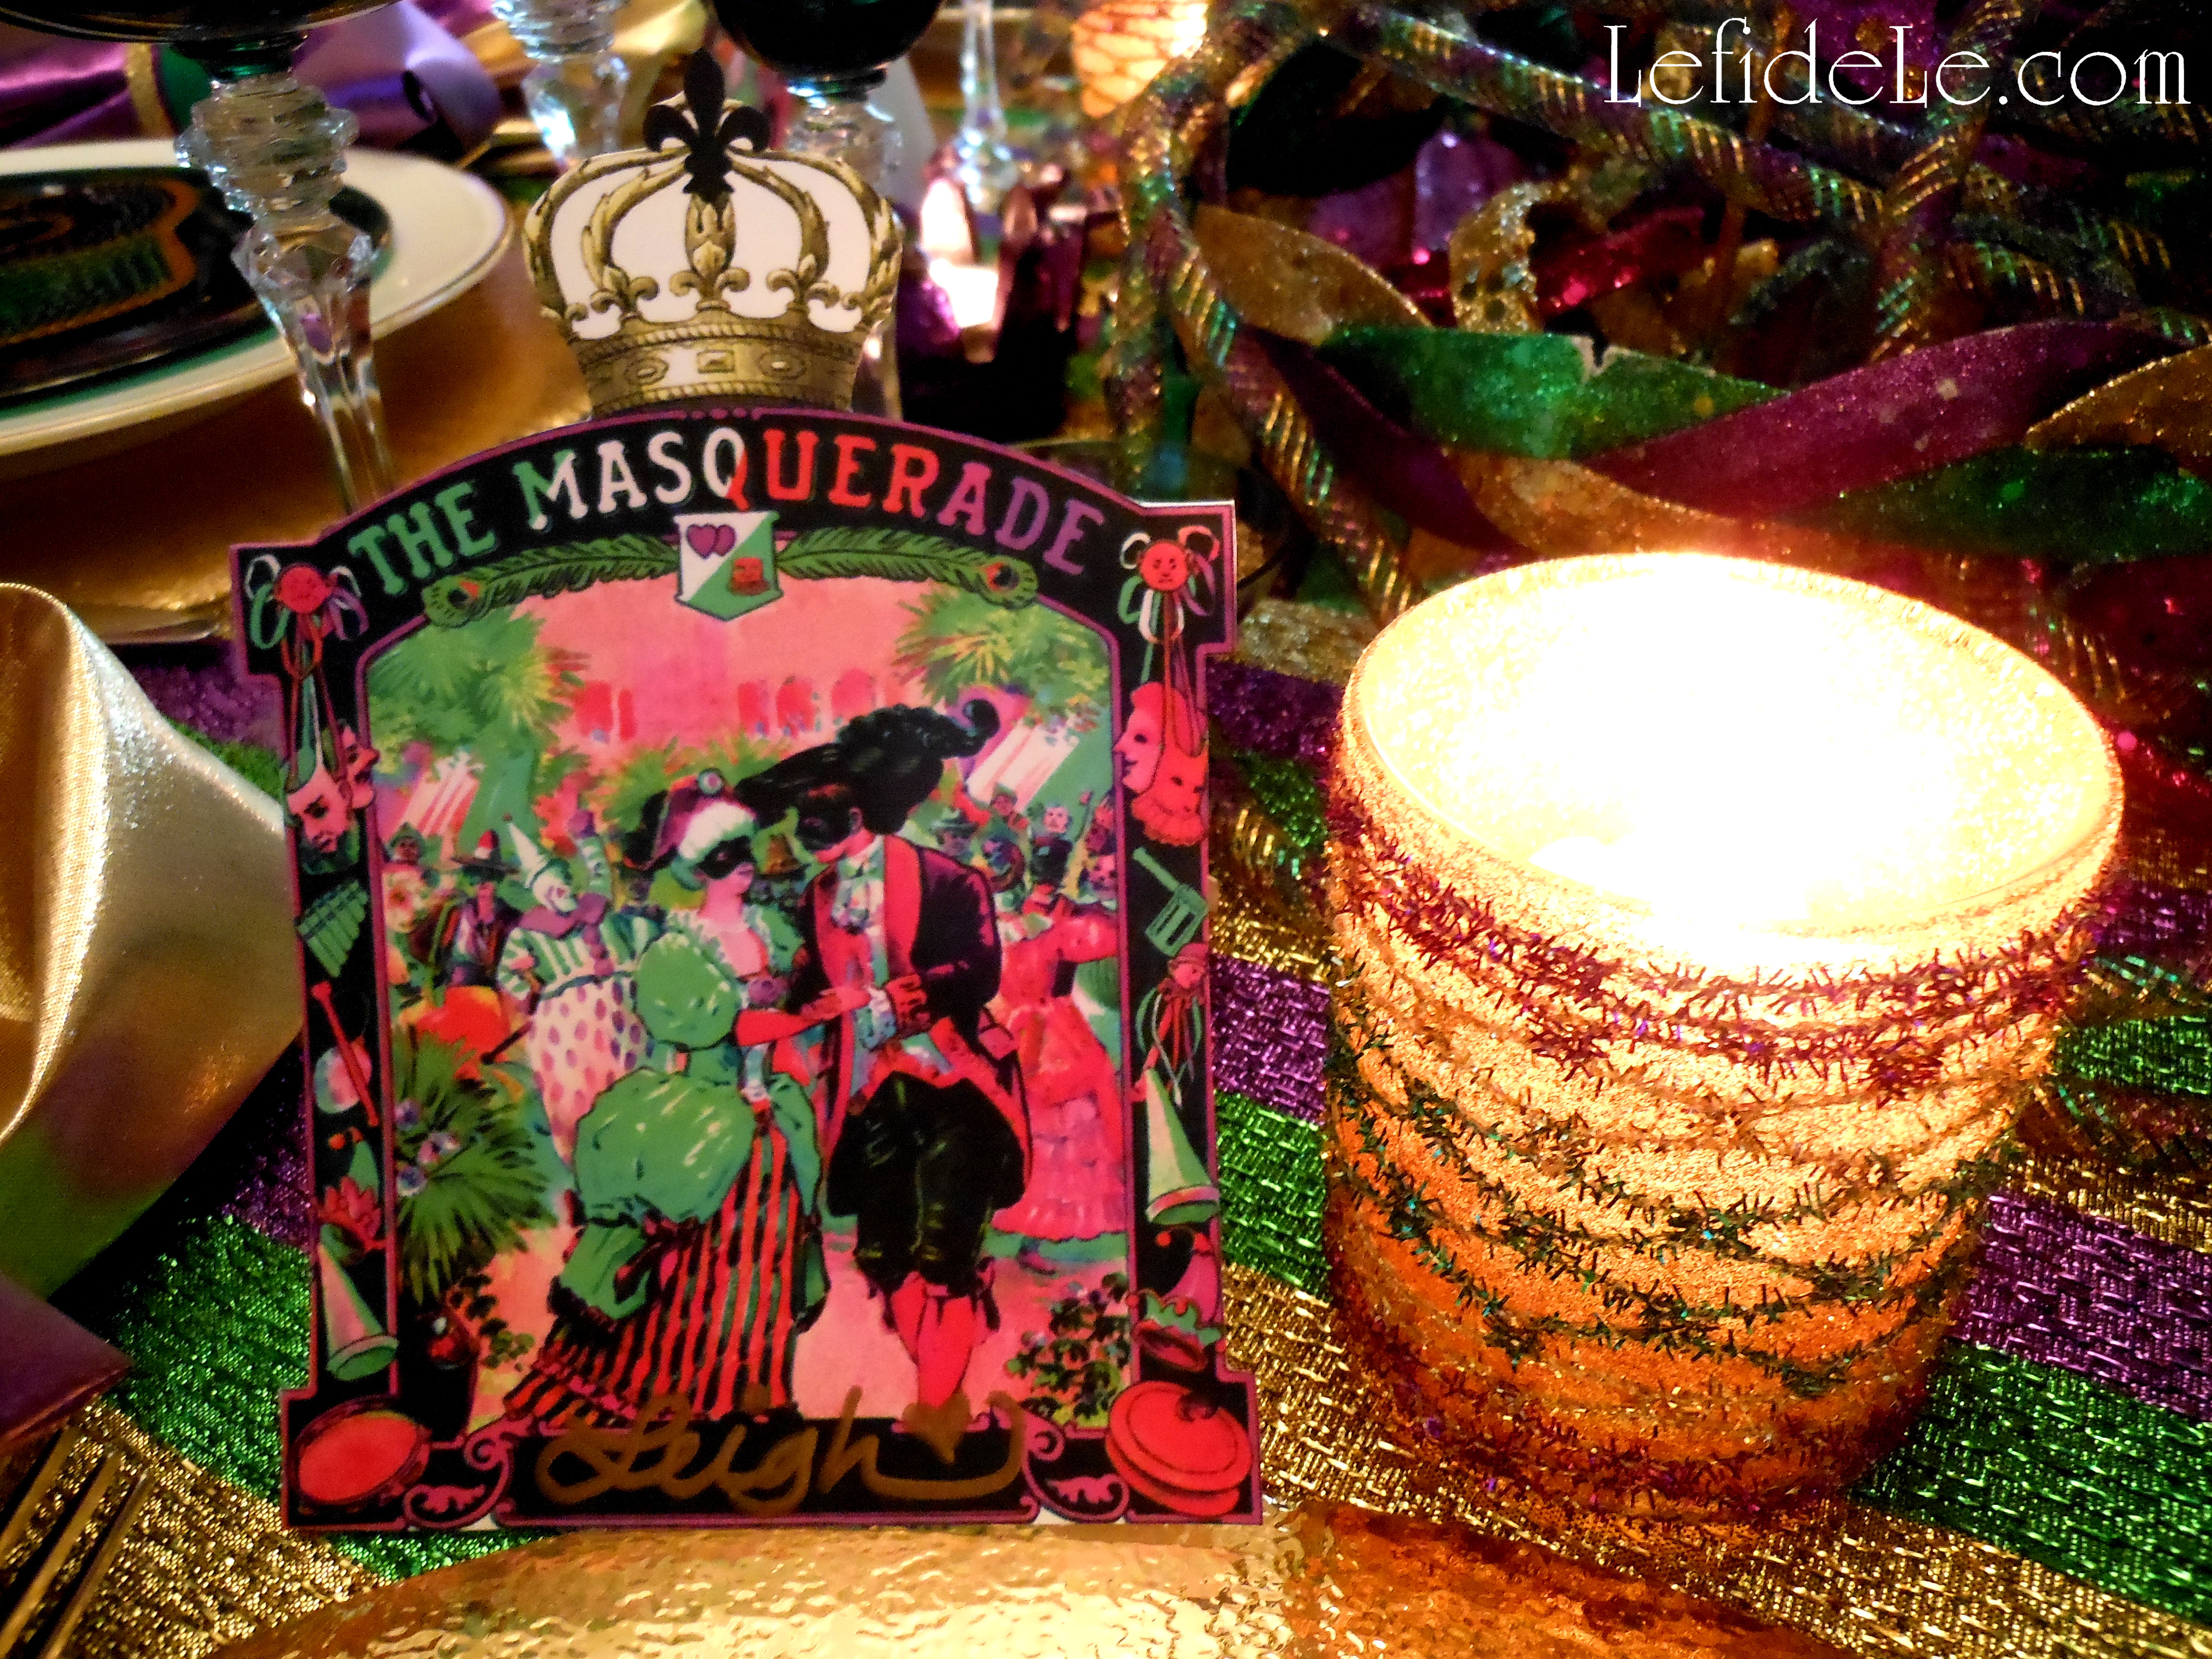
Simply write names on the bottom with a gold sharpie marker or paint pen… Voila!

104Leigh

See more of my Mardi Gras Masquerade Themed “Fat Tuesday” Dinner Party Tablescape Décor Ideas here for more holiday inspiration!

070Leigh

Let the good times roll!

Faithfully Yours,

Leigh

Origami Crane Paper Folding Instructions (for Get Well Wishes or Chinese New Year Party Décor)

The timeless art of origami paper folding is an easy and inexpensive way to decorate for a Chinese New Year Celebration. The project also provides a means for quality time in generational bonding. This tutorial for the historically traditional crane figure is an apropos symbol of hope for the coming year. The Japanese tradition of the Senbazuru folding of 1000 paper cranes is said to grant the maker a wish, such as healing for a loved one. (Why not fold and send one in lieu of a get well card?) The “Tsuru” (crane) is also said to denote happiness and luck, which is the same meaning of the “Fú” 福character of the Chinese New Year. My Take-Out Favor Box & Paper Lantern Craft Printable (Chinese New Year Party Décor) also utilizes the symbol which has graced the entrances of Chinese homes for many hundreds of New Year’s.

341Leigh

There are beautiful origami papers available, but it’s easy to make your own from any inexpensive paper. By cutting them yourself, you can make any sized piece you like… and if you’re a beginner, it’s much easier to fold a larger sheet. Here I’ve chosen gold metallic wrapping paper purchased at an after clearance sale years ago. I used a large T-square ruler to mark 6 x 6 inch sections, and then cut them out.

342Leigh

Begin by folding the paper in half diagonally then unfold it.

344Leigh

Repeat this on the other diagonal, thereby creating an X crease on the paper.

346Leigh

Next fold the paper in half, creating a rectangle, then unfold it.

348Leigh

Repeat this fold, of a half rectangle, to complete another X crease.

349Leigh

Now that you’ve made an asterisk * shape mark on the paper, turn a tip to point directly towards you. Take the remaining 3 tips, and pull them over the closest one. The 2 side points will meet in the middle, and the farthest tip will close over those.

353Leigh

Next take the 2 side points and fold them to meet in a line dissecting the middle of the piece, then unfold it.

355Leigh

Take the farthest point and pull it toward you to form a triangle, and then unfold it also.

357bLeigh

Pull the upper point away from you while pushing in the 2 side points so that they meet in the middle.

360Leigh

Push it all down to crease it flat.

362Leigh

Flip the piece over, and repeat the last step to form a diamond shape.

370Leigh

Once again, fold the 2 side points inward to meet in the center.

372Leigh

Flip it over, and repeat the last step to form a much pointier diamond.

374Leigh

There will be 2 pieces resembling legs that comprise the portion closest to you, take one and bend it up and out on a diagonal… as if it’s making a high kick. Do the same with the other leg then crease both well. Unfold them straight again.

376Leigh

The next step is the trickiest part, but it can be unfolded and retried until it works out. The legs need to be bent inward in what is called a “reverse fold”. The easiest way that I’ve found to do this is to use your thumbs to sort of pop in the center of the leg toward the center of the piece. The crease you made earlier will be the line it folds according to. Just study the picture and play with your piece until they look similar. Crease it flat once it’s in the correct position. Do this with both legs of the piece which will form the head and tail/feet of the crane.

378Leigh

Make the wings flap down by folding the farthest point of the upper flap towards you. Flip over and repeat for the other wing.

381Leigh

The last step is to form the bird’s head by performing a “reverse fold” downward on one of the former legs. Adjust it, if need be, by strengthening your creases and pushing up on the center portion until it sits upright on its own.

384Leigh

Now what to do with it… write a “Get Well Soon” or “Happy New Year” message on one of the wings and push the crane flat to enclose in an envelope, use a needle and thread to string and hang it, or just set it out on your table for an easy décor element.

031Leigh

May all your dearest wishes be granted this year!

Faithfully Yours,

Leigh

Fast & Easy Glitter Heart Wand Centerpiece, Foam Ornaments, & Faux Chalkboard Valentine’s Day Décor Craft Tutorials (+ Printable)

205Leigh

This mélange of fast and easy crafts were made to decorate a Valentine’s Day Party, but you can adapt them for any purpose you like. The faux chalkboard craft is an inexpensive way to decorate for the holiday, but also makes a quick Valentine for a love one. The chalkboard idea can also be extended to other favors quite easily. The glitter heart wands effortlessly gather into a dramatic centerpiece, and can be taken home as favors by each Valentine princess at the party. (Make these with foam hearts or my free printable from the Valentine’s Day banner craft.) Also, make Valentine ornaments with the kiddos in your life using foam Conversation hearts in a matter of minutes.

61Leigh

Let’s begin with the simplest project first, making Valentine ornaments out of foam conversation hearts from the craft store. (I used the white ones only, so as to coordinate with my theme colors, and reserved the other pastels for the candy-land themed party which will appear in an upcoming article.)

81Leigh

You can either glue the hearts back to back, sandwiching twine or thin ribbon between them, or simply tape twine loops to the heart backs. The latter is the quickest way to make them, and the easiest for a little one to help with.

80Leigh

(See these similarly on the How to Make an Assemblage Sculpture (= 3D Collage) for Your Valentine (Art Instruction / Craft Tutorial).)

168Leigh

The next project is a faux chalkboard sign, that also makes an inexpensive Valentine, using the unexpected material of a paper party plate. The square metallic disposable plates are lovely yet extremely budget friendly. Why not pick some up for the party and reserve one or two to fill in as décor.

45Leigh

Merely use dots of glue to layer square doilies onto the plates. Simply trim down the doilies to fit the smaller plate sizes.

47Leigh

Then cut a square of matte black cardstock to size, and glue atop the doily.

50Leigh

Use a white paint marker to write whichever sentiment, poem, or quote you wish.

55Leigh

Use a hole-punch to add 2 openings with which to slip a strand of coordinating ribbon through. Simply tie the two ends in a bow, which also serves to further decorate the sign.

21Leigh

Similarly, cut squares of black cardstock to adorn gift bags and boxes, using the same white paint marker to write your sentiment in “chalk”.  If the writing doesn’t seem clear enough, simply go over the letters until they do. The uneven edges make them look even more like chalk, but won’t come off on your clothing while delivering them to your recipient.

208Leigh

Moreover, in this way you can ride the chalkboard trend without spending as much on readymade tags, stickers, or chalkboard paint. (The bags I made were machine cut from construction paper then adorned.)

215Leigh

The last project is a centerpiece of glittery hearts meant to be taken home as party favors at the end of an event. You can even print, cut, and glue these onto tiny wooden dowels using my free printable at the end of the article.

34Leigh

I sandwiched a thin dowel between 2 glittered foam hearts with the aid of hot glue. The thinnest dowels are really easy to just snap in half where you want to section them. Trim with a bow of glitzy ribbon if you like. I used readymade glittered bows from an after Christmas clearance sale.

10Leigh

The open hearts were made from inexpensive styrofoam and red glitter blast spray. For the largest ones, I simply jabbed in a cut section of wire hanger as a handle, but a thin dowel would be better if gifting them. I added glittery bows to some of these as well. All of them will sit securely arranged in a vase filled with marbles. This way they can be easily pulled out one by one at the end of the celebration as favors. I just pilled on an unraveled skein of glittery red yarn atop the marbles to hide them.

206Leigh

♥ Happy Sweetheart’s Day!

213Leigh

Faithfully yours,

Leigh

V-dayHearts-Leigh

P.S. Here is the Glitter-Doily Heart Printable. Simply right click on the image and select Print. Print them in the best color photo setting.

2 Fast & Easy Valentine’s Day Banner Décor Craft Tutorials (Doily & Glitter Hearts + Printable)

229Leigh

These Valentine’s Day banner crafts are so fast and easy that even the busiest mama can make them with her little ones. The glitter heart and doily printable only needs the addition of letters to spell out any message you wish. The second banner is comprised of layered doilies and extra valentines. Both are so inexpensive yet add a lot of heartfelt sentiment and party atmosphere. Plus, they’re lightweight enough to stick in a big envelope and send to a loved one whose away for the holiday. You can even use the printables as stand-alone Valentine Cards!

176Leigh

First let’s make the doily valentine banner. This is a great project to use up any leftover schoolroom Valentine cards from your kiddo’s class. You can even save the received ones to make banners for next year’s celebration.

175Leigh

One only needs to add some low-cost paper doilies in varying sizes. I used leftovers from last year along with some Holly-Hobby Valentine Cards from my childhood.

51Leigh

Merely use dots of glue to layer the doilies and Valentines. Then add a ribbon bow for dimension.

54Leigh

Tie circles of twine, yarn, or ribbon through the holes in the doilies and knot together. Hang it up and enjoy!

171Leigh

The glitter heart and doily banner is one that can be easily made by two different methods. You can print and cut out all the glitter doily hearts you need, using my printable at the end of the article. You can also use inexpensive glittered foam hearts from the craft store, and use hot glue to layer white doily hearts onto them.

26Leigh

Either way, the next step is add letters spelling out any sentiment you’d like. I cut out letters with a machine from black card stock to coordinate with my chalkboard theme. You can also use a stencil to trace and hand cut them, or buy them readymade at the craft store. (Michaels has them in every color and texture you can think of. Click on the affiliate link in the side bar to snatch the latest coupons.) I added a knot of ribbon to each dip in the heart to further tie in with my theme’s color palette. Feel free to add any other elements you’d like from paper roses to stickers. (You can even skip the letters and let a kiddo color in pictures to use the printables as Valentine Cards.)

38Leigh

Next add holes to both sides of each heart with a hole-punch. Then use ribbon or twine to string them together. Add a loop at each end to hang the banners by. Voila!

224Leigh

♥ Happy Heart’s Day!

Faithfully yours,

Leigh

V-dayHearts-Leigh

P.S. Here is the Glitter-Doily Heart Printable. Simply right click on the image and select Print. Print them in the best color photo setting.

“Heartbeats” (Heart Shaped Beet Root Chips / Croutons) & “Lettuce Turnip the Beet” (Pink Savory Herbed Avocado Yogurt Dip / Salad Dressing) Recipe (Healthy, Gluten-Free, Dairy-Free, Vegan) AKA- Undercover Valentine Veggies!

056Leigh

This is the perfect Valentine savory snack for the picky eater who turns away from anything green or labeled as a healthy vegetable. Who can turn down trying an adorable hot pink heart chip, even if it is an undercover veggie! The avocado’s green is also disguised as pink and creamy yumminess thanks to a couple of healthy secrets, and the seasoning can be adjusted to any taste. It’s also easy to spoon out a bit of the dip into another bowl then turn up the flavor in the first one (hence the “let us turn up the beat” veggie pun in the title). Enjoy them as a healthy chip and dip combo, or make smaller “heartbeats” to use as croutons in a salad flavored by the dip as creamy dressing!

66Leigh


Heartbeat Chip Ingredients:

  • 3 beet roots (or as many as you’d like to make)
  • olive oil (enough to drizzle, & try any oil you prefer)
  • salt & pepper to sprinkle atop (or garlic salt, lemon pepper, no-salt seasoning, cinnamon & sugar, etc.)

Lettuce Turnip the Beet Dip Ingredients:

  • 1 ripe avocado
  • 8 ounces unsweetened vegan coconut yogurt (or any unflavored yogurt, but note that “unsweetened” is less sweet than “plain”)
  • 1 ⅟₂ teaspoons lemon juice
  • 1 tablespoon beet juice (or pomegranate juice)
  • herbs & spices according to taste, on this particular day I chose…

♥ ⅟₂ teaspoon ground white pepper

♥ ⅓ ground ginger

♥ ⅓ teaspoon ground coriander

♥ ⅓ teaspoon ground thyme

♥ 1 teaspoon granulated garlic

♥ ⅓ teaspoon salt

♥ + lots of cracked red peppercorns & black carbon sea salt for fiery garnish

… but you might want to omit the ginger, coriander, & thyme for a more traditional taste experience J


“Heartbeats” Chip Instructions:

1Leigh

First wash the beets roots thoroughly, and cut off the plant tops.

8Leigh

Then remove the tough outer part with a veggie peeler.

12Leigh

The best way to prepare beet chips is to use a mandolin kitchen tool to cut really thin slices. I have a beautiful stainless steel one that can be cleaned in the dishwasher, but I wanted to make sure that you could make these at home using a knife, cutting board, and old fashioned elbow-grease! It does take a little longer, but as you can see they turned out beautifully. They also took longer to bake because the slices were thicker. If you’re trying it this way, try to cut them as thin and uniformly as possible. You can also try cutting them with a food processor.

14Leigh

Once you have those cut, you can use cookie cutters to press shapes into the slices. I wanted hearts for Valentine’s Day, but you can choose any shape that will fit. Tiny flowers would make delightful pink chips and look lovely atop a spring salad like healthy croutons!Take the leftover bits and dice them further to spike another meal with vitamins. You can bake these into croutons for soup or salad, or steam them with some olive oil and seasoning to add to a pilaf or veggie mix.

26Leigh

Toss your cut out shapes (or plain slices) with olive oil in a bowl. Then spread out your lovelies on a parchment lined cookie sheet. Bake these in a 375ᵒ oven, to preserve the vitamins in your veggies, for 45 minutes to an hour. If you’ve cut these thicker, by hand, add cooking time. Thinner mandolin cuts will of course finish faster. Either way, I would advise checking on them often (by turning on the oven light, not opening the door).

33Leigh

About halfway through the cooking time, when the top side looks fairly done like this picture, take out the tray and flip them over before returning it to continue baking. If utilizing a dehydrator, cook them at 145ᵒ for 45 minutes then reduce heat to 115ᵒ for 24 hours until crunchy.

36Leigh

They’re done when crispy but not brittle. Blot these with a paper towel and sprinkle with your preferred seasonings. I used the same ones (cracked red peppercorns in a mill and black carbon sea salt) that I garnished the dip with. These not only showed up beautifully on the chips but also gave them an amazing fiery zing. You can even make sweet chips by sprinkling with cinnamon and sugar like a pink veggie buñuelo!

056Leigh

Enjoy the heartbeat chips by themselves or prepare this Avocado yogurt dip while they’re baking…


“Lettuce Turnip the Beet” Dip Instructions:

23Leigh

Wash and cut open a lovely ripe avocado. They’re best when just slightly softened to the touch. The easiest way to get the seed out is to whack it with a knife, twist, and pull it out in one motion. Slice the flesh into tiny crosshatch squares right in the shell, and then squeeze it into the bowl. (I do this all the time when making my “minute guacamole”, because it can then be smashed with a spoon into the side of the bowl very easily and quickly.)

18Leigh

Add the lemon juice and plain yogurt into the bowl along with your favorite mix of spices… or try my crazy combination. I love to cook by adding different flavors until it just tastes right… just remember to use different spoons with each tasting. No double dipping people! J If making this into a salad dressing, just add more yogurt, lemon juice… or both.

25Leigh

I used an immersion blender to completely emulsify and thicken the dip, but any good blender should be fine. Of course the “smash-against-the-side-of-the-bowl-with-the-back-of-a-big-spoon” method also works… it just burns more calories.

31Leigh

Spoon into a pretty dish and refrigerate until ready to eat. Garnish with a contrasting seasoning like these (cracked red peppercorns in a mill and black carbon sea salt) that also serve to turn up the flavor.

64Leigh

I have to admit that I enjoyed this recipe so much that I would have eaten the whole thing by myself (guilt-free) had I been alone. Next time, I will be making so much more!

42bLeigh

Happy Heartbeating!

Faithfully Yours,

Leigh

P.S. What are your favorite seasonings to add to dips & dressings? Tell me how you like to “turn up the flavor” in the comments section, and I may use them in a future recipe!

Quick & Easy Chocolate Bark & Dipped Strawberries with Toppings Recipe for Your Valentine (Gluten-Free, Vegan)

161Leigh

If you’re looking to make some sweets for your sweetheart but haven’t got a lot a time to get organized for a complicated recipe, then these Valentine concoctions are a sure bet. The fool-proof process is so quick and easy, that it really needs no hard-fast formula in order to turn out so delicioso! I tend to make both of the confections at the same time because they use identical shelf-stable ingredients (save one), but make two very different desserts that coordinate beautifully.  (If trying this, simply make the strawberries first then make bark out of the leftover ingredients.) Best of all, these are simple enough to be prepared by little ones, and can be made gluten-free and allergy-friendly for everyone to enjoy!

151Leigh


Ingredients:

  • 1 bag of semi-sweet or dark chocolate chips- preferably gluten-free vegan (or candy coating chips in any color)
  • 1 basket of fresh strawberries to dip (or try dried pieces to place into bark)
  • any toppings you like (oven-toasted coconut, chopped pistachios or walnuts, sugar sprinkles, dried fruit, crushed peppermints, even a contrasting colored chocolate chip, etc…)

Instructions:

77Leigh

Fill a heat-proof vessel with the chocolate chips of your choice. (Candy coating turns out a bit smoother, but isn’t as healthy or allergy-friendly as gluten-free vegan chocolate morsels. It really is a matter of personal preference.)

78Leigh

Either stir the chips in a pot on the stove (as I did at this link for Quick & Easy Chocolate Coconut Fondue Recipe (Vegan, Gluten-Free, Dairy-Free) where I write more about the available forms of chocolate) or microwave the chips in a bowl in 30 second bursts, stirring in between each.

83Leigh

I used the stove for the fondue and the microwave for the bark… again it’s up to you and how much time you have.


For the Chocolate Bark:

152Leigh

When the chips are completely melted to a liquid state, pour onto an aluminum lined cookie sheet.

154Leigh

Sprinkle your choice of toppings onto the still warm chocolate.

155Leigh

Gently press the larger toppings like coconut into the chocolate with the back of your fingers. (Smaller bits like sprinkles don’t need any pressing.) Either allow this to harden on the counter or in the refrigerator.

157Leigh

This is the fun part… when it’s solid to the touch, take one end and break it by attempting to fold it in half.

161Leigh

Repeat this with all sections until you’re left with decent sized chunks of yumminess then plate it for company… after reserving a few bites for immediate consumption!


For the Chocolate-Dipped Strawberries:

108Leigh

Wash the strawberries well, then let them air dry on a paper towel, or pat them dry completely before dipping.

148Leigh

When the chips are melted thoroughly with no chucky bits left, merely hold your strawberries by the green tops and dip into the chocolate. After completely enrobing it, turn the wrist to let the last drip catch back onto the fruit.

114Leigh

Then spoon chopped toppings or sprinkles over the still warm chocolate. Gently press any large chunks into place, and then set it aside to dry and harden.

139Leigh

You can either place the completed strawberries onto aluminum foil and transfer them to a pretty plate later, or do as I’ve done and save a step by dishing them immediately to dry on the platter they will be served on. I always begin with the prettiest of the berries, and when I find that the platter is full… eat the rest!

151Leigh


🙂 Happy Chocolate err… Valentine’s Day!

Faithfully Yours,

Leigh

P.S. A personal note on washing strawberries to dispel any old-fashioned notions regarding such… I promise that cleansing them of dirt and germs will in no way injure the fruit. In fact, they look even lovelier when truly clean. Wiping them with a towel only serves to redistribute bacteria. (The same can be said of mushrooms, which are often grown in actual manure.) For those of you who are thinking, “Well of course I wash my produce”… I’ve actually had this disagreement with a chef from a very popular up-scale restaurant that only reuses a towel on strawberries and mushrooms. (I hear they don’t wash the salad greens either, and never the lemons before cutting them.) So please forgive me, but with the recent listeria outbreak on caramel apples, I felt compelled to write a little about this now. Here are a few links for anyone who doesn’t want to take my word for it:

http://www.foodsafety.gov/keep/types/fruits/tipsfreshprodsafety.html

http://www.fsis.usda.gov/wps/portal/fsis/topics/food-safety-education/get-answers/food-safety-fact-sheets/safe-food-handling/washing-food-does-it-promote-food-safety/washing-food

http://www.fsis.usda.gov/wps/portal/fsis/topics/food-safety-education/get-answers/food-safety-fact-sheets/safe-food-handling/washing-food-does-it-promote-food-safety/washing-food

Fast & Easy DIY Hand-stamped Polka-dot Gift Wrap & Matching Gift Crafts

With all of the miles of commercially produced wrapping paper that stores seem to stock at every corner… why make your own? Well, it can be made super-fast and super-easy without looking like it! With my simple repurposing trick, you can make handcrafted gift wrap inexpensively in a matter of minutes. It’s really easy to stamp any type of package, paper, tag, card or box… even one that gets addressed and sent in the mail! It looks even more adorable on matching notebooks, craft letters, or any other gift that would accept inking. With stamping, you can match the colors to your décor for a catalog worthy Christmas, and delight loved ones with one-of-a-kind gifts at the same time. And, I don’t know about you, but I really love it when someone has cared enough to make something just for me.

94Leigh

My simple trick to easy and fast polka-dot making (ahem, drumroll please)… bingo markers! The idea was sparked about 15 years ago when someone gave me a few of these because she thought I might want the ink in them. Let me tell you, I made so many spotted cards with them! Everyone was always surprised when I told them what I had used.

49-2Leigh

You can find them in so many colors. I’ve used pink, green, blue, red, and purple as examples here. They even come in shapes like shamrocks or hearts, but I’m sticking with polka-dots for now because they are just so classic and chic!

46Leigh

You can use any kind of paper for the gift wrap or bags. Glossy paper will leave more of a watercolor look, while matte paper will dry to a solid flat color. Both have their merits. Just know that glossy surfaces take much longer to dry. It’s great to buy neutral colored bags in white or kraft paper color, and then stamp them into personalized colors as needed.

44Leigh

You can match your décors theme, go with traditional colors, or even pick a different color combo for each family member. Pink is my grandmother’s favorite color, so that’s just what she gets!

102Leigh

Blue and pink polka-dots are perfect for gender-neutral baby showers.

28Leigh

The paper I’m showing here is the best I’ve found for wrapping. It’s thick enough to hide the contents well. It won’t tear like the commercial variety in transit or mailing. It dries quickly and evenly so you can make a ton of it and just roll it back up. The tag in the picture has dry ink on pink paper, and it’s sitting atop tan with freshly applied ink.

39Leigh

The roll is really inexpensive for quite a lot, so it fits everyone’s budget. It’s so versatile because you can do anything with it (spray paint it, paint a scene on it, write messages on it, have kiddos draw on it, make gift tags or cards out of it, etc…) What is this amazing product? (Another drumroll please)… rosin paper from a hardware store! It’s actually used in homes during construction. I learned about it from my interior designer mother of course. It’s available in pink, green, white and tan like kraft paper in rolls that will last for years. I even use this stuff for covering the backs of framed artwork. (I’ll do a DIY tutorial for this in the future. It’s really easy and will save you so much money.)

30Leigh34Leigh

I try to stamp one color in a grid-like pattern, and then follow up in between those with a contrasting color. I have to admit though… sometimes it’s fun to just get stamp-happy all over the place! Do expect this when kiddos are involved. It’s fun to see the creations they come up with.

105Leigh

When making hand-stamped giftwrap for my Etsy store, I make long sections for wrapping purchased goods, and also package making kits complete with tag and twine.

74Leigh

I make my individual sheets much larger (36 x 30 inches) than others typically offer (20 x 30 inches) so as to fit larger packages. Each kit will definitely cover several small boxes.

27Leigh

If you want to make individual wrapping paper sheets for yourself, just use a T-square ruler to measure and mark straight distances before cutting.

25Leigh

Another idea, how fun would it be to have a holiday stamping and wrapping craft party with the gal-pals!

24-2Leigh

Here are traditional red and green packages for Christmas with added ornament decorations. You can see for yourself the differences between glossy, matte, box, bag, and wrapping paper.

53Leigh

I also used a stamp on them that says, “handmade for you, because you’re worth it,” as it really exemplifies what I’m trying to do… show that I care!

24Leigh

This is an idea for a friend celebrating Hanukkah. I realized I had no appropriate bag decoration for it, so I took a couple of minutes to make one. To make your own, run the matching bingo marker over 6 popsicle sticks to stain them. After they’re dry, hot glue 3 into a triangle. Repeat this with the last three, then glue one triangle on top of the other. Tie on with coordinating twine, yarn, or ribbon.

71Leigh

This would be a great type of Christmas craft for the little ones making ornaments for the family. The bingo markers don’t make a big mess and the ink washes off of skin. Adding a year and a name in permanent marker would make it even more precious.

91Leigh

Here are some birthday gift packages with tiny frames as bag décor.

87Leigh

I went ahead and stamped them ahead of time because I already had everything out, and I’m planning an upcoming green and pink polka-dot theme birthday party. It fit just too perfectly!

78Leigh

Also, I’ve made some critter themed wrap in blue and green. It seems like there is always a little one being born or having a birthday, so I make a point of finding theme items throughout the year for gift baskets. I can always find cute things in ducks, frogs, and ladybugs.

81Leigh

Here are some attempts at making shapes with the bingo markers. I’m sure it probably would have been smarter to practice before doing this on the bag and boxes. Oh well, at least you can get the idea.

42Leigh

The Mickey / Minnie Mouse bag appears to have black ink on it because green ink appears black on the red paper. I also stamped polka dots onto a length of red paper ribbon to demonstrate the endless possibilities of decorating with ink. The green Hungry Caterpillar box just as easily could have featured a blue Alice in Wonderland Caterpillar.

62-2Leigh

The hearts on the box aren’t great because it isn’t easy to make a V-point with a round stamp. Although I did get better at it by the time I made the leaves for the flowers. Just use a Sharpie to draw in details like arrows or a wavy lined stem. The peppermint candies were made by a foam stamp inked with the bingo marker. I thought it might work, and was delighted to find that it did! I will soon be posting a Winter Candyland Party that this type of stamp is perfect for, but here it’s used for a “sweetheart” gift box.

68Leigh

It’s really great to just stamp the outside of gift boxes, and not worry about wrapping at all! Here I’ve use some Christmas yarn… purchased with a coupon so that it was a fraction of the price of baker’s twine. I have enough quantity to be generous with it without worrying about running out… and it’s just really cute.

59Leigh

The Rudolph decoration was manufactured, but it would be really easy to draw a silly character on poster board in Sharpie markers and glue on a red pom-pom nose. That could be a fun way to get the kids involved as well. Another festive idea is to stamp the outside of a mailing parcel then write the recipient’s address in black Sharpie.

15Leigh

Don’t forget to make tags for your “presies”. I just used several large punches to cut them out of the same paper.

21Leigh

I then stamped them in assembly line fashion… proof positive that quick can be cute!

19Leigh

I used the handmade stamp and candy stamp on some. The star tag was stamped with a foam star and acrylic craft paint. This way you can see the difference between how ink and paint look. Use a Sharpie marker to write messages on any of these as pens just don’t show up well.

40-2Leigh

As for the gifts themselves, why not make super-quick stocking stuffers with matching polka-dots?

51Leigh

I took boring kraft paper notebooks, and raised the cuteness factor exponentially with a little ink stamping and twine wrapping.

45-2Leigh

I also added some washi tape to one whose top was peeling slightly. I personalized that one with my name in Sharpie.

54Leigh

There is one thing which will save you some length on twine brands that have a tendency to unravel easily… tie two knots before cutting in between them. I found that the yarn that looks like twine actually unravels less.

26-2Leigh

Here is a collection of my various colors of notebooks that will be made available at Le fidèLe Designs Etsy store.

42-2Leigh

Another stamping idea that’s super-easy and fast is making message holiday décor. I bought the only “J” left in 3 stores, so JOY must be popular for the holidays. Really, any letters using different colors can be made year-round. A name would make a terrific personalized gift for a little one’s nursery.

110Leigh

I simply stamped haphazardly with the red and green, because it was more fun that way!

116Leigh

I went ahead and inked the back as well, for versatility. In this way I can set them anywhere, even freestanding in the bar area.

121Leigh

Lastly, I found some holiday charms and bells to tie on with Christmas yarn. It was easy and done in a few minutes.

36-2Leigh

The best part of all of these projects is that I found people really want to reuse some of the stamped wrap. (I even had one request that I not to write on the tag next time, so that she could send it forward… not the gift, just the bag and tag!) By hand-making your own wrapping, you are not only demonstrating that you really cared enough to go that extra mile, but it’s also beneficial to the environment when others want to continue passing it along. Reusing is even better than recycling! It’s yet another way to give when we are good stewards for His majestic creation.

28-2Leigh

Faithfully Yours,

Leigh

Easy DIY Upcycle Décor or Personalized Toy Using Printable Craft Film

87Leigh

This DIY craft is a really easy way to personalize either a toy for a little one, or room décor for a love one using printable film. It can turn a lovely vintage find into something truly extraordinary, because of the care it takes to go that extra mile and upcycle a gift just to really suit someone. I think it’s that willingness to spend time and energy to deliver happiness is what makes crafting so special.

65Leigh

With all of that being said, I really must state that I can’t take the credit for the spark of this idea. My delightful neighbor and her daughter-in-law found a metal plane and wanted to personalize it for the piloting patriarch of the family. I was asked if I could help out… well of course I would!

66Leigh

I just needed to find something that would adhere to what appeared to be lacquered looking high shine industrial enamel paint. After doing some useless internet research, I decided to wing it. (Sorry, I couldn’t resist the pun.) I thought I’d try “Jewelry Attitude” which claims to adhere to a plethora of surfaces including metal. If it works on smooth shiny metal, why wouldn’t it stick to shiny paint?

69Leigh

I ordered a package online, and went to work on producing the requested moniker in a suitable typeface. I actually found a Star Trek font (at daFont) online for free. I typed out what I needed on a Word Document, imported it to a Corel Program to resize, and then mirror flip it so as to print in reverse. This is only necessary when printing words, in order to keep them legible after completion.

70Leigh

I also imported other images to print with it. There is no need to waste money by only printing one project at a time. Organize future projects and print them on the same sheet. You can just cut out the one you need now, and put aside the rest until you’re ready to undertake them. I have a bunch of fun jewelry projects planned with these which I’ll share with you in the future! I continued by organizing my images by moving them around on a print layout page so as to maximize every centimeter of space. I’m obviously big on getting big bang for my buck. I selected color photo printing on glossy paper. They suggest loading each sheet individually and also to avoid touching the glossy side. This is exactly what I did. It prints glossy side up, so I suppose lotion or oil from your hands might smear the inkjet ink being laid onto it. They also suggested doing a trial run by printing on paper before using up your film, which is actually a good idea if you’re unsure with your computer skills. I just didn’t want to waste any ink, so I flew by the seat of pants as usual. It looked great with all the words backwards. I was supposed to let it dry for 2 hours. I waited 4… just in case. I actually wished I had waited overnight because the ink appeared a tad smeared after I used the permanent glue-stick on it. That’s how you attach it, with a simple non-toxic glue-stick.

77Leigh

I cut out the words carefully, then applied glue to the ink side, and peeled off the backing as directed. I’m not sure why I couldn’t just peel it off after I stuck it the plane instead of before, but I did it the way it said since this was for someone else’s gift. Next time, I’m going to experiment a little… of course. If you try this yourself, be really careful not to let it flop onto itself. It really sticks hard! I smoothed them onto both sides of the tail section.

91Leigh

It sets immediately, so there is absolutely no repositioning. It stays where you put it whether you like it not. This actually reassured me that it wouldn’t get messed up later by handling. I decided to let it dry fully overnight before pronouncing my final judgment of the product though. And what do you know… it was successful!

99Leigh

Don’t be intimidated by the digital work, it really was easier than the directions make it seem. I’m sure my next try at it will surely be a breeze. And hey, if you do need help with the computer stuff… well, maybe you have a crafty neighbor too!

83Leigh

Merry Christmas to All Y’all!

Faithfully Yours,

Leigh

P.S. I just couldn’t resist dressing it up for Christmas and adding a gingerbread wing-walker for the photos.


Frozen Winter Wonderland Themed Christmas & New Year’s Eve Dinner Parties (+ Optional Crafts)

25FrozenChristmas-Leigh

With New Year’s Eve trailing behind Christmas so closely, I wanted to create a dinner party theme that could easily be converted from one to the other without spending any more money or time. I’ve seen all of the decorative components in variation at stores ranging from high end home goods to budget craft supply. I’ll even describe how you can craft your own easily and inexpensively. I’ve chosen a winter wonderland theme as a visual narration of the “Frozen” movie that celebrates family and friendship. It makes an enchanting setting for the adults, and provides an extra dose of holiday magic for the kiddos with frozen-fever. And, hey, you can always pick up items on sale this year to use the theme for next year’s festivities!

63Leigh

For each of the table-scapes, I set the base of the stage with a gold and ivory harlequin tablecloth found previously at an after Christmas sale. If you see something on your shopping trips that might work for next year’s theme… snap it up! This is how I manage to satisfy my high end taste while sticking to my tight budget. It’s really easy to fill in from there, just before the celebration. I did this with beautifully beaded cones in gold, silver, and pewter from Pier 1. (I have seen other versions of these at many of the stores I been to this year.)

26Leigh

If you’d like to make your own last minute, you have two easy options. One is to buy glitter wrapping paper and double-stick tape it into a cone shape. You can just cut different sizes of paper and wrap each into a tube shape, then tighten one end into a point and tape it down. This only takes a few minutes and is affordable for everyone. The best part is that the paper can be reused for gift wrap later! Another option is to spray inexpensive Styrofoam cones with Krylon Glitter Blast spray. (I really like this stuff. It comes in many colors and is so easy to turn out matching crafts out of very different materials. I’m planning on showing it in use for my next Valentine project.) If you’d really like to go all out with the “Frozen” movie theme, just set the table in aqua blues, silver and white. It would even make a fantastic birthday party for a fan of the film. I topped my harlequin tablecloth with an inherited vintage mesh cloth with golden embroidery. (This layered look is easy to emulate with all of the various sparkly mesh fabric available. I previously purchased some myself from Joann’s with a 40% off coupon.)

44Leigh

For each place setting, I used my grandmother’s ivory dishes with gold trim atop gilded round placemats that served as a form of plate chargers. I also made use of my daily Oneida silverware, but switched out the butter knife for vintage steak knives with ivory scrolled handles. I love mixing and matching seamlessly!

161Leigh

I already had two lovely sets of napkin rings that would work beautifully, so I decided to go with vintage brass ones for New Year’s, and those with golden threads for Christmas. I placed extras of these beneath beaded Christmas ball ornaments as tiny stands, with the metal eyelet hooks hidden inside the rings. (I’ve formerly employed this idea successfully with marble Easter eggs.)

75Leigh

In the New Year’s setting, I placed ivory satin ribbon emblazoned with gold foiled champagne flutes and the exclamation “Toast”. (This ribbon from Joann’s would be equally lovely for a wedding as well.)

176Leigh

For Christmas, I topped the salad plates with large gold glitter snowflakes. I set more of these vertically throughout the centerpiece. (These can be found at numerous stores or may be homemade with chipboard or wooden snowflakes glittered with spray.) Lastly, I added inherited vintage glassware with pewter and golden touches. (Clear vessels would also be lovely in their place.)

195Leigh

Both table-scapes had golden scrolled embossed glass votive holders lined with plastic wrap to safely contain white “snowball” candies. Each of the centerpieces also had LED candles covered in gold sequins.

70Leigh

I added further glow to the New Year’s version with real votives in gold beaded holders. This table was finished off with large foil confetti of silver squares and gold stars. (Another easy addition would be to include metallic noise makers to ring in the New Year.)

84Leigh

For Christmas, pale gold glass trees were nestled between the cones. (I’ve seen different types of metallic glass trees at both department and craft stores.)

29Leigh

All of this was surrounded by a chain garland with opalescent bead “icicles”. (This can be made by anyone with jewelry skills using eye-pins, seed beads, and bulk chain. For everyone else, I’ll probably demonstrate this in the future!)

27Leigh

If your chandelier dips too low (as mine did) to accommodate the center cones, there is a simple solution. Use a small S-hook from a hardware store to hitch up a lower link to a higher one in the chain. Start by setting the S-hook on a link at the height you prefer, then lift the chandelier up, and lastly set a lower link onto the hook. (The photo really illustrates this better than I can describe.)

42Leigh

You might wait to try this until you have help to lift it while you relink it. The linking isn’t noticeable in person, and it really looks better to not have the chandelier visually conflict with the centerpiece.

91FrozenNewYear-Leigh

Whether or not you choose one or both of these table-scapes for your next fête, for this year or the next… the idea of making simple changes to perfect your party for its holiday is a notable one if simply for its low cost and ease of transition. Most importantly, it leaves more time for family and friends. Have a very Merry Christmas and a New Year filled with blessings!

33Leigh

Faithfully Yours,

Leigh

P.S. Be sure to check out my Fast & Easy DIY Hand-stamped Polka-dot Gift Wrap & Matching Gift Crafts!

Last Minute Cocorico Rooster Theme Dinner Party Décor Ideas (+ Free Printables)

175Leigh With the winter season so turkey saturated for the holidays, I thought I’d utilize my overabundance of rooster décor and host a cozy dinner party by the fire. I used my Healthy “One-Pot” Cocorico Roasted Chicken (or Turkey) & Root Vegetables Recipe as a family-style centerpiece of food. And with my printable place-cards, it’s an easily emulated dinner party that offers a warm welcome for out-of-towners in for the holidays! 157Leigh I love the idea of taking dinner out of the dining room, especially in winter when there is a cozy fire available. So, my first task was to move the couches into a dining configuration. I have a large round antique coffee table that is mechanized to pop up to dining height. To accommodate more guests, I topped it with a $12 precut 4’ x 4’ plywood square from a chain hardware store. The edges of this were taped to avoid snagging the tablecloth. A card table is another easy option. 65Leigh Layering fabrics is a quick and easy way to add warmth to a gathering, so I draped layers of tablecloths over the square. The first layer was chocolate brown, then beige burlap with added trim, and a fall paisley print over the top. 106Leigh I exchanged the usual living room décor with various bits of rooster ephemera. I set a ceramic chicken on a side table next to cranberry colored candlesticks, and tucked feather tassels under the large candles. 49Leigh By the fireplace, I placed a rooster painting on an easel atop an old burgundy leather suitcase. Another served as a base for a spiral topiary. It was housed in an inexpensive and lightweight cranberry pot meant to simulate glazed pottery. In front of that, I positioned a small vintage brass rooster doorstop. I actually have many more roosters, but I was able to (somewhat) contain myself. 158Leigh I gathered sage and chocolate colored throw pillows to coordinate with the linens and dishes. These softened the deep chocolate leather sofas. Switching out small elements of your décor for an evening is an easy way to experience a change of scenery without breaking the bank. 143Leigh I set the table with wood-handled flatware and layers of dishware in various patterns. This included wooden plates as chargers, sage green bordered dinner plates, and a selection of chicken and rooster plates. Though completely untraditional, I figured these could be set to the side for bread later… they just looked too cute stacked this way! I actually found these little gems for $3 clearance at Dillards. Now they’re a part of my last minute rooster dinner party arsenal. 156Leigh My other go-to elements are antique chicken salt and pepper shakers from my grandmother, and vintage multicolor rooster stemmed glassware from my mother. 45Leigh It’s really great to have coordinating pieces that can be thrown together without much forethought, while having the appearance of effort. In this way, a simple chicken dinner is elevated to a special evening. Make a point of collecting what you like, and pull it out for your get-togethers. 44Leigh Another component which you can make for yourself is my DIY Rusted Rooster Chicken Wire Votive Holder Craft. Because they were so easy, I actually made many more than I used in the pictures. (These can be made with any shape you like, fall leaves for example.) They really added a beautiful glow to the table. 32Leigh I transformed, recolored, combined, and resized vintage images to make 3 free printables for invitations, labels, signs, menus, food tents, name place-cards, recipe cards, etc… (These are free for personal use only.)

  24Leigh These are available at the end of the article (simply right click on each image, and print in color and on photo settings on cardstock). Then just cut out your place-cards as needed… or enlist a significant other or kiddo to do it while you prep for dinner! 25Leigh The last step was to add the food… artisanal rosemary bread in terra cotta to compliment the Cocorico, compound butter in a rooster dish, mixed olives seasoned in flavored oil and spices, and the off-center centerpiece of roasted chicken and multi-colored root vegetables of carrots, beets, parsnips, radishes, and fingerling potatoes. 125Leigh Cocorico roasters are perfect “one-pot” wonders that deliver beautifully from oven-to-table. Root veggies may be peeled and seasoned the day prior to an after-work gathering if need be. Simply pick up bread and dessert to accompany your meal. Or, try out my Easy No Cook Layered (N)ice-Cream Pie with Nut Crust (Vegan, Dairy-Free, Gluten-Free) which may also be made with traditional ice cream, and can be made and frozen well in advance. 160Leigh Happy Fall Y’all! (…I couldn’t resist.) 168Cocorico-Leigh Faithfully Yours,

Leigh

Cocorico3x3labels-flatcards

Cocorico5x5cards-labelsLeigh

CocoricoTent-PlacecardsLeigh