Tag Archives: Mardi Gras

Mardi Gras Masquerade Themed “Fat Tuesday” Dinner Party Tablescape Décor Ideas

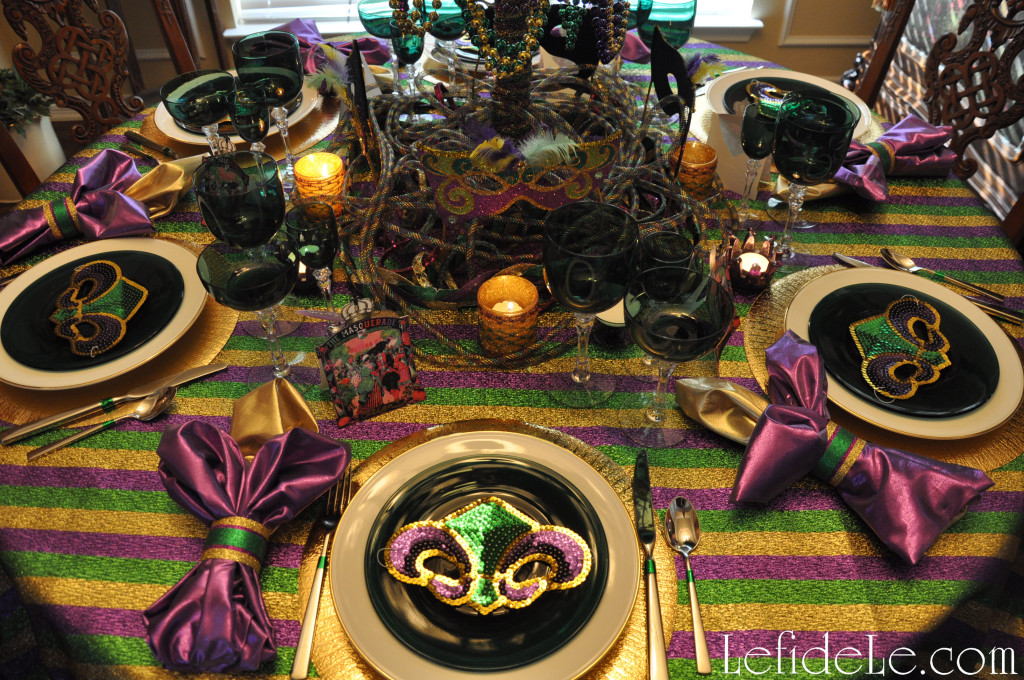
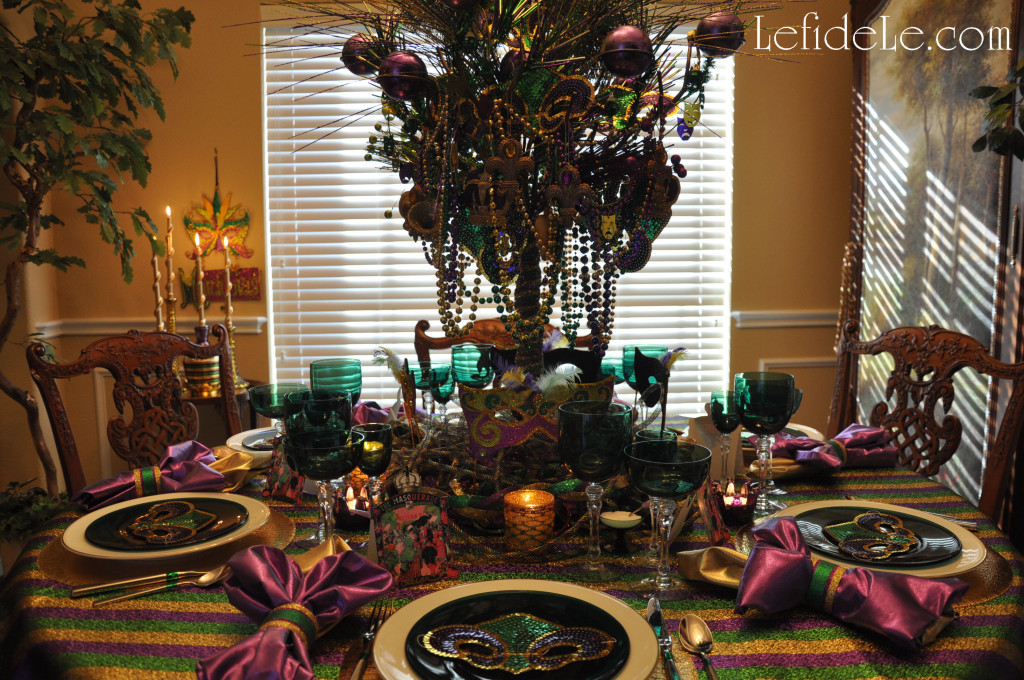
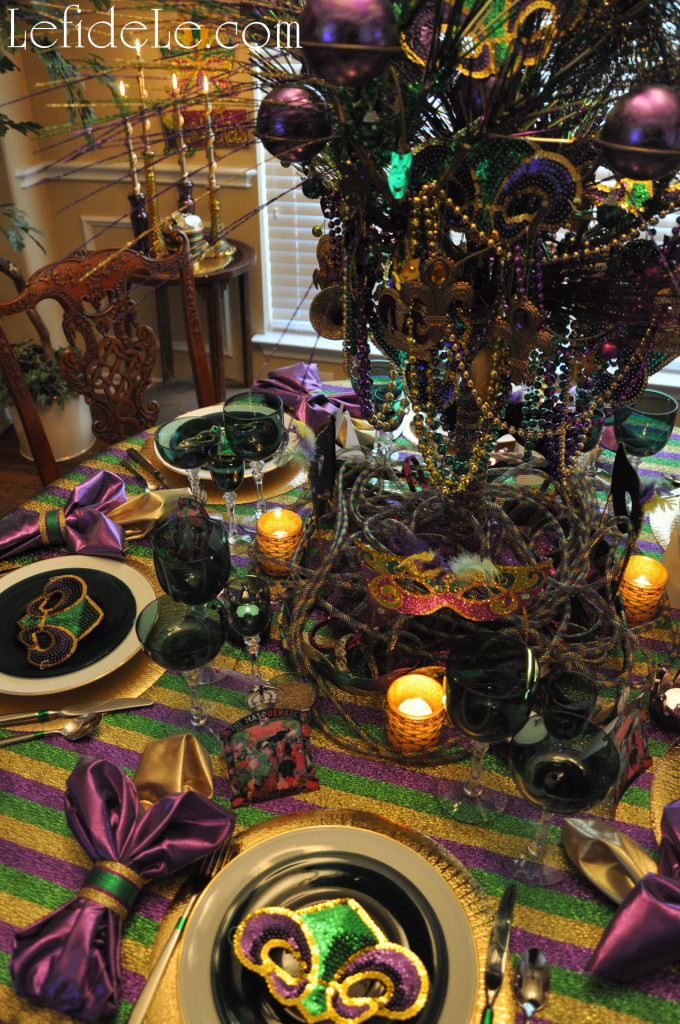
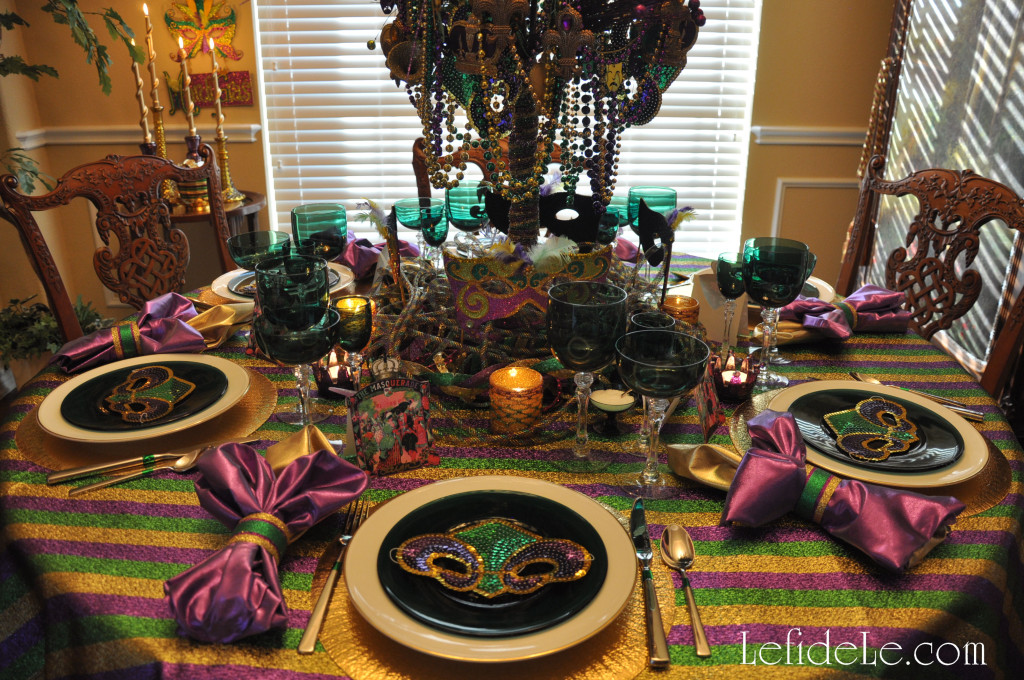
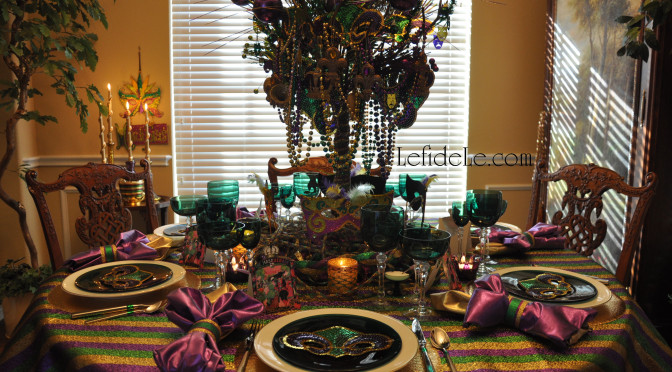
This Mardi Gras Masquerade themed tablescape for a “Fat Tuesday” dinner party was instigated by the desire to go all out like the big Krewe celebrations in Louisiana… but on a tiny budget! Not finding what I wanted in a suitable price range, I opted to remix what I already owned and make the rest. It turned out to be even more cost effective than if I had gone with paper and plastic… which was not only more elegant, but better for the environment too. Use some of these ideas as inspiration for your own festive fête, and read my other article… DIY Fast & Easy Mardi Gras Glittered Napkin Rings Craft Tutorial (+ Ribbon Votives, Centerpiece, Free Place-card & Invitation Printables)… for craft instruction and free printables.

096Leigh

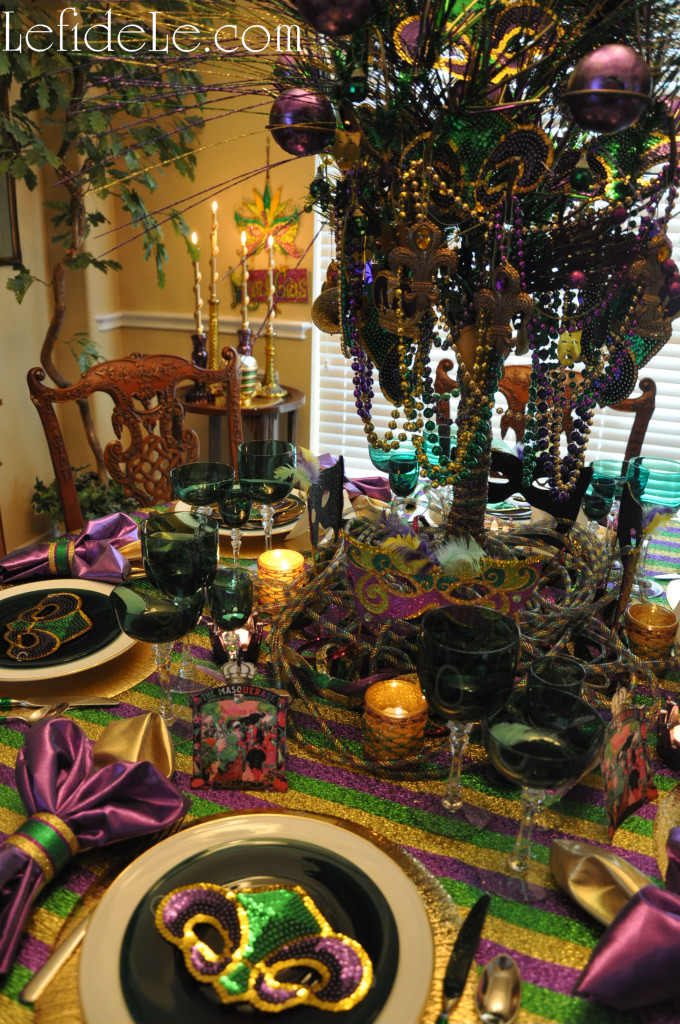
I organized my theme according to the traditional Mardi Gras colors of gold, purple, and green (representing power, justice, and faith respectively). Then I pulled out everything I had in glittery versions of those colors. I used a leftover fabric remnant as a festive table topper, and layered that with gold placemats and my grandmother’s gold-rimmed china (also seen here in my Christmas / New Year’s Eve tablescapes).

104Leigh

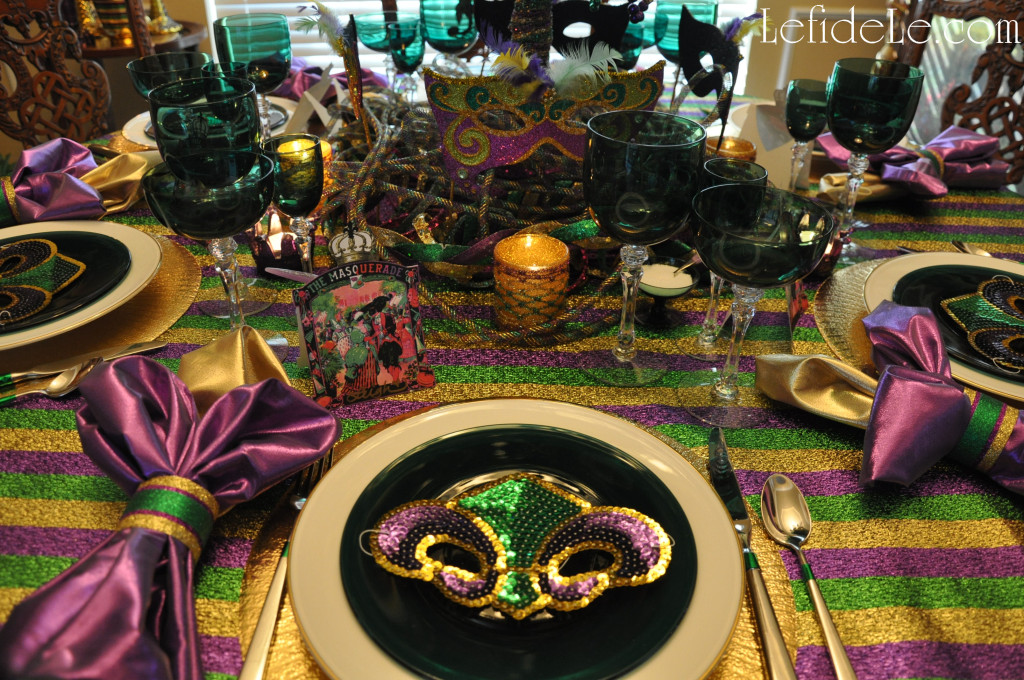
Atop that, I placed vintage green plates that matched my grandmothers crystal stemware. If there was ever a time to pull out fabulous drinking vessels… it would be for Fat Tuesday!

070Leigh

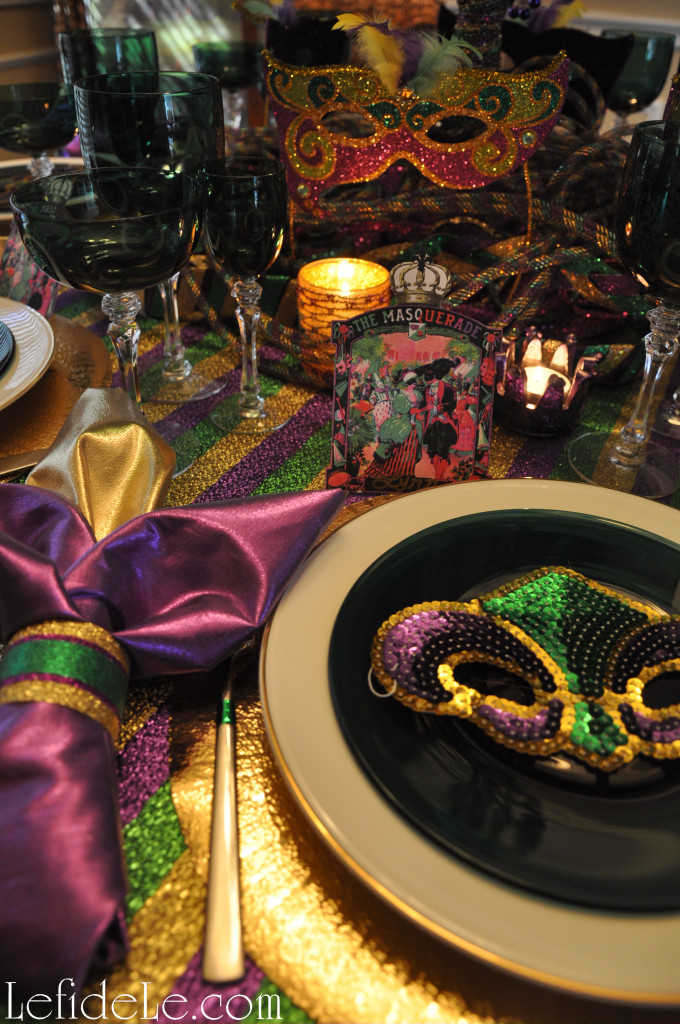
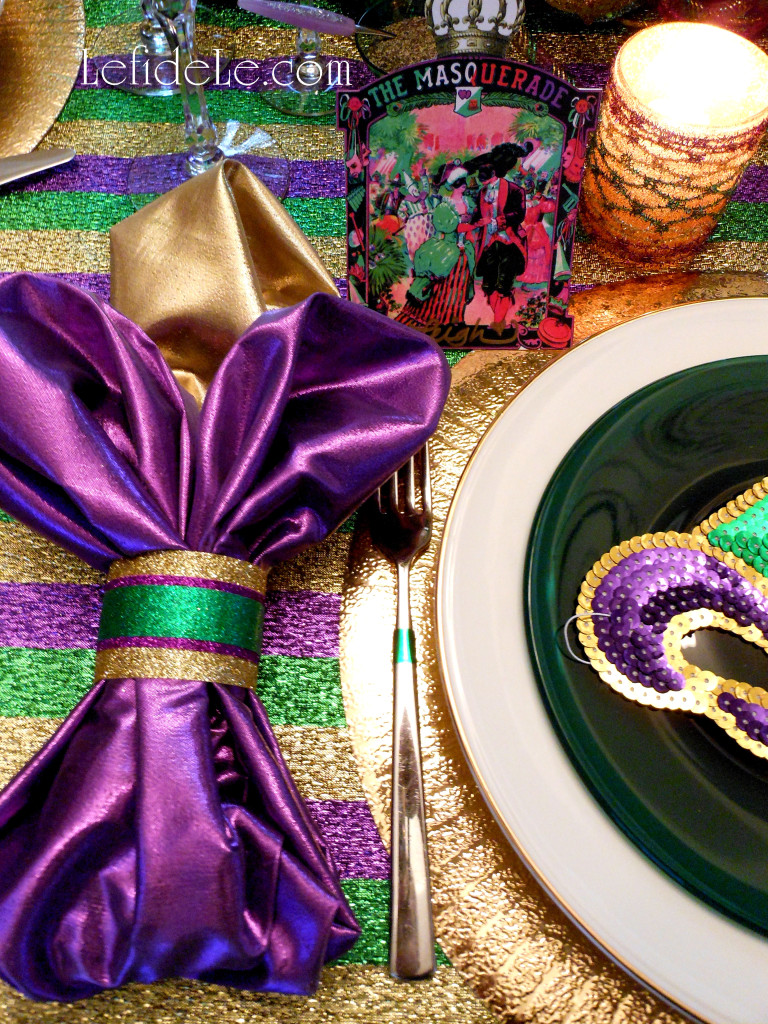
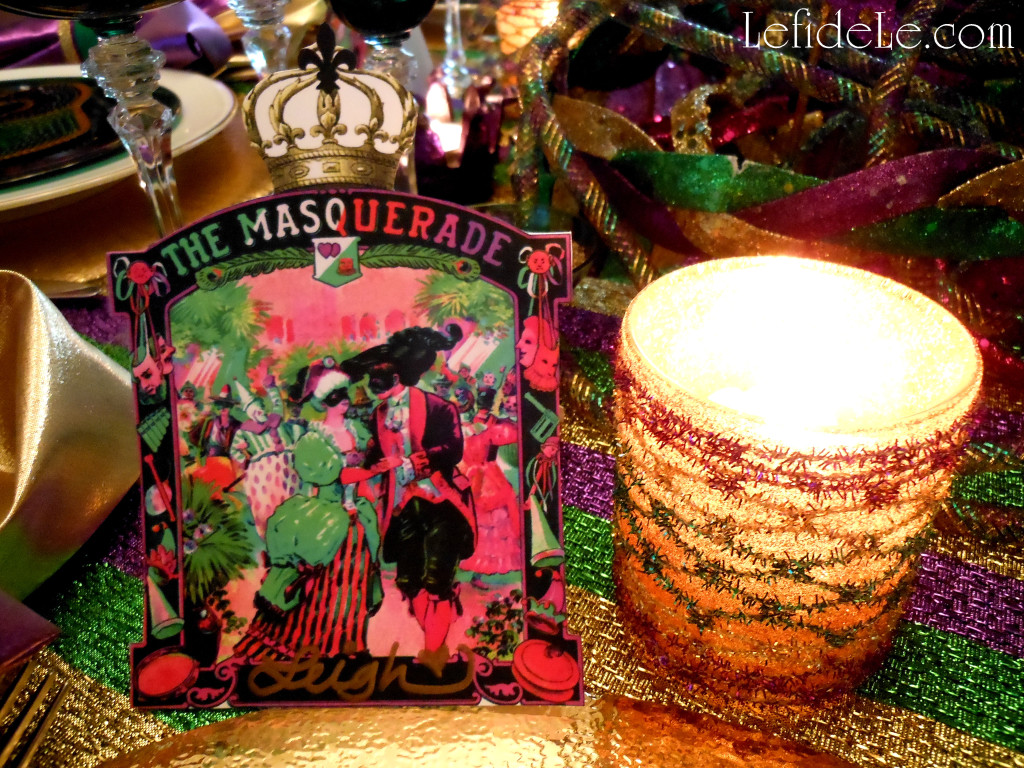
Echoing my printable Mardi Gras masquerade place-cards (which may also be used as invitation cards, get my free printable here) were sequin fleur-de-lis masks which were positioned on each setting, for reveler donning should the desire arise. I found an inexpensive set of 12 of these at Oriental Trading Company online. (Find a free shipping coupon from them at the link in the sidebar.) I added the 6 extra masks to the centerpiece as ornaments.

018Leigh

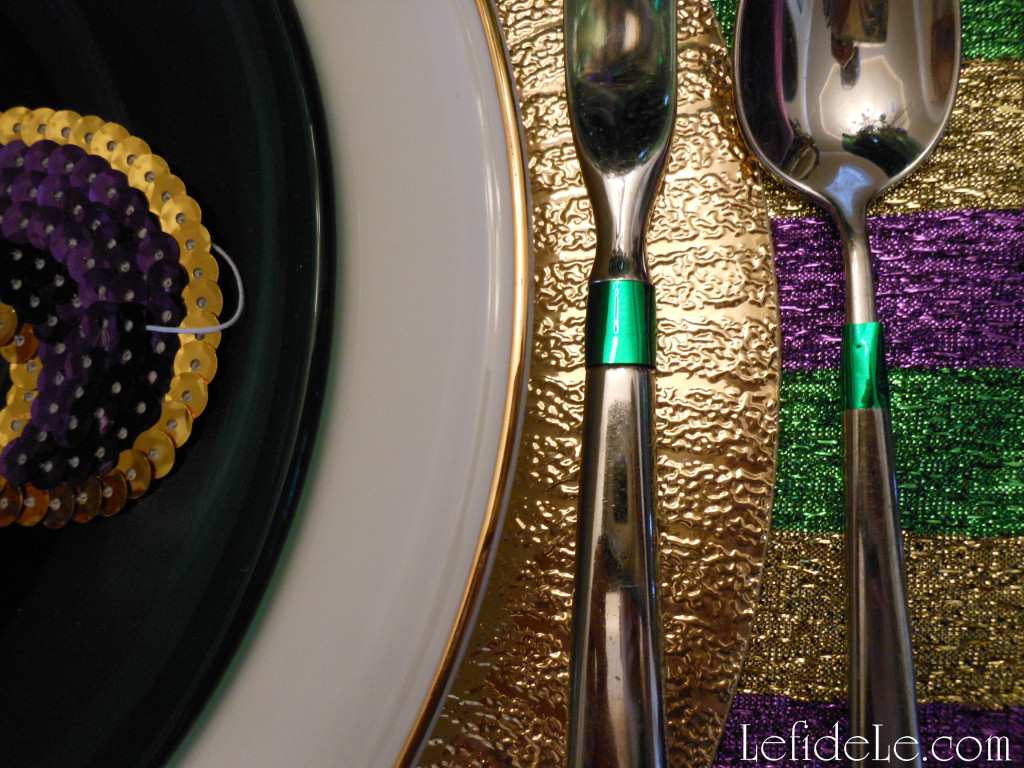
I wrapped green metallic washi tape across the decorative elements in my flatware to jazz them up for the occasion. Washi wrapping is an easy way to embellish your everyday utensils for a special occasion, and it is so much cheaper than buying a new set. (You can see the same technique used on the flatware in my Herb Themed Luncheon by viewing the picture in the Upcoming Projects Gallery in the sidebar.)

019Leigh

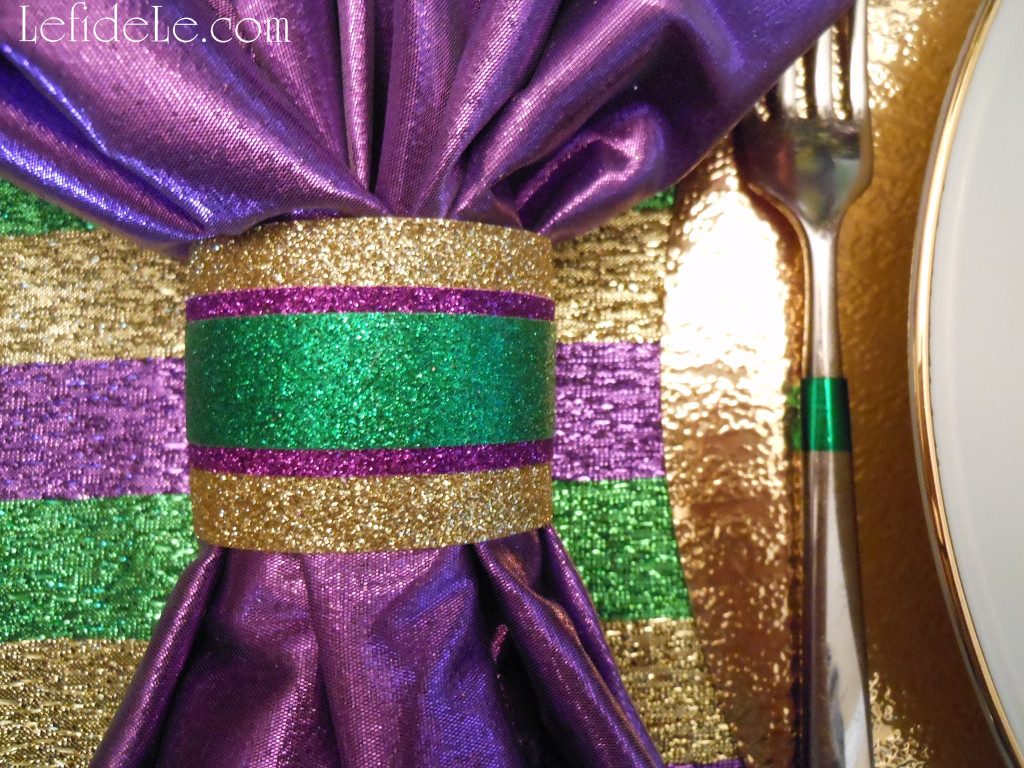
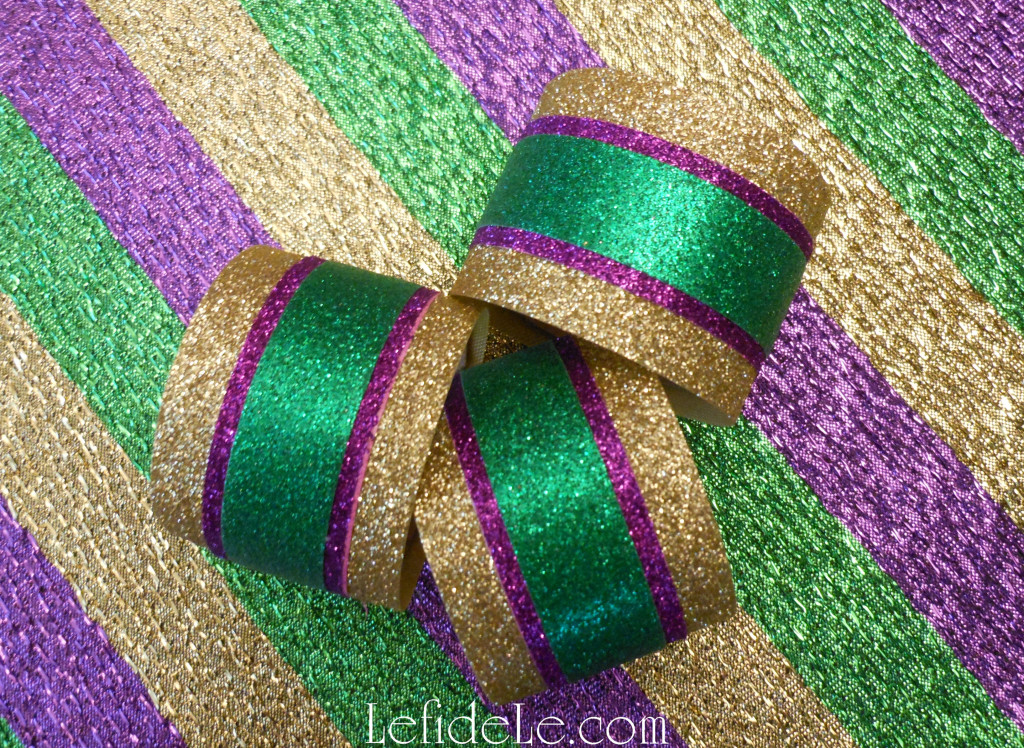
I didn’t have any napkin rings that would tie into my theme besides the gold varieties I had recently used this winter, so I made my own in a matter of minutes from glitter ribbon and washi tape. This is so much easier than it sounds! (Find my crafting instructions here.)

024Leigh

Squares of shiny fabric, purchased with a 40% off coupon, were used for napkins. A fleur-de-lis shape was achieved by first folding the gold square in half and pulling it through the ring forming a loop. I then folded the purple square in half and formed two loops which I subsequently pulled through the ring over the gold. Lastly, the uneven bottom edges were tucked under.

073Leigh

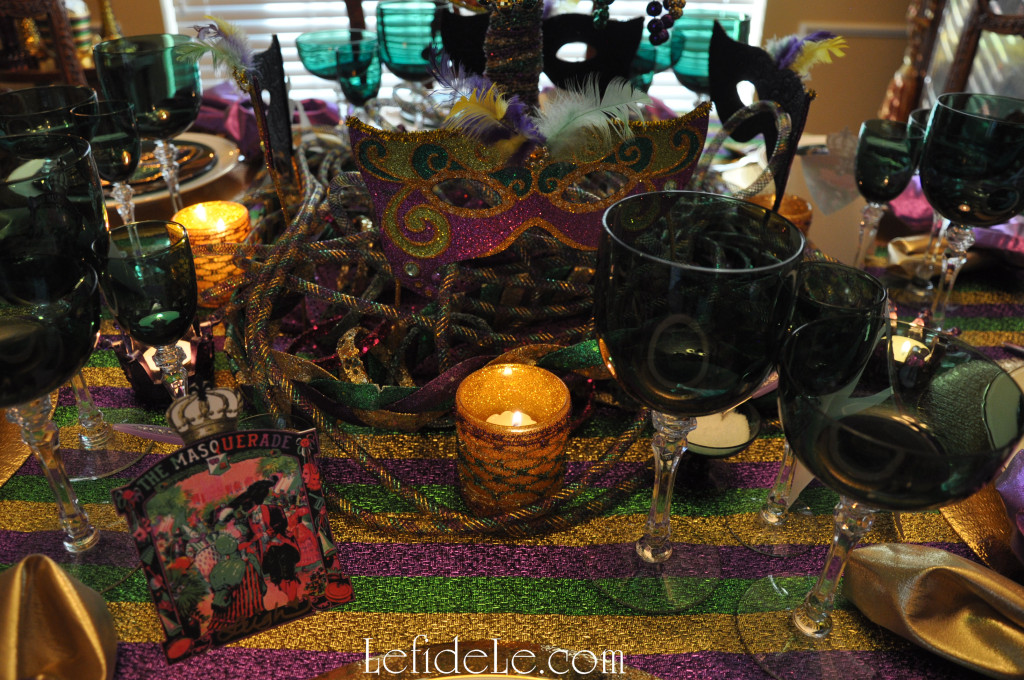
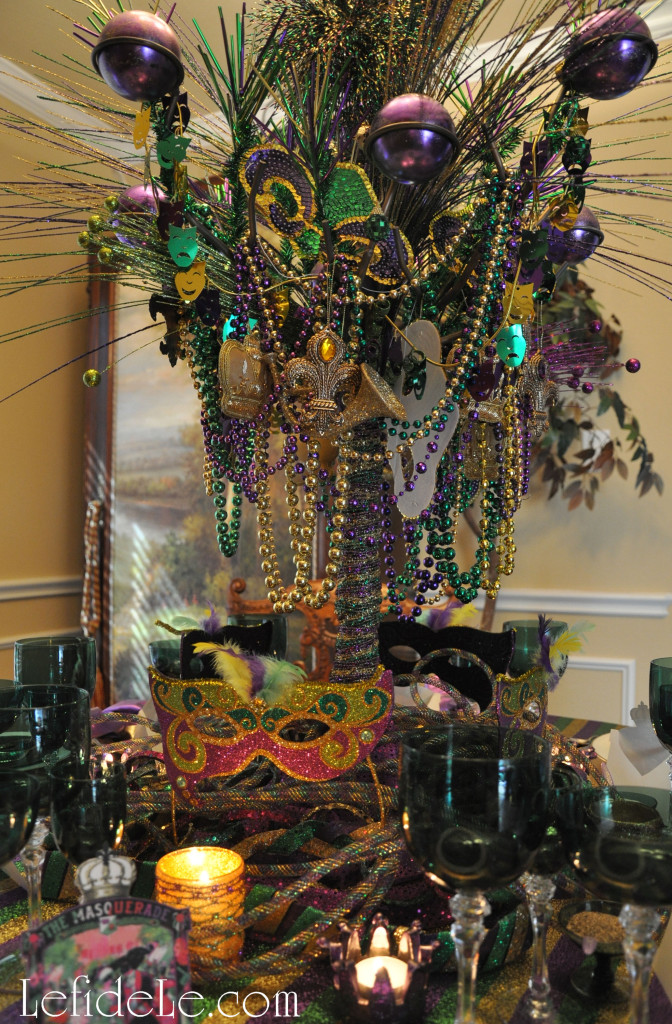
I made the centerpiece with trim from my Glitter-ween Party Décor (see it here) and a few new sprigs wrapped around a metal tree base. (Incidentally, I had previously painted this gold from its earlier pewter and bronze incarnations. (See how to use paint to change the color of metal and to age a piece in my upcoming lion fu-dog décor for Chinese New Year.)

120Leigh

The base of the tree was swathed in the same purple fabric remnant from Glitter-ween’s spooky tree, and then draped with yards of Mardi Gras trim. (See how to hike up a chandelier to accommodate a tall centerpiece here.)

053Leigh

Though it’s hard to tell from the pictures, the tree centerpiece actually didn’t obstruct any person to person viewing. This is why I only draped the bottom with some Mardi Gras necklaces and wrapped the trunk with ribbon.

091Leigh

I hung embroidered Christmas crown ornaments, snapped up at 10 cent clearance, along with glittered musical instruments, green mirror balls, and a mask garland. (See more on the centerpiece here.) I try to plan all my holiday themes in advance of the after Christmas sales to snag a year’s worth of décor deals at 90% off. I keep my theme collections in labeled bins that I add to as I accumulate finds so that I’m ready to craft and decorate when each holiday arrives.

078Leigh

Surrounding the tree are 4 standing glittered metal masks that I scored at a post-holiday clearance sale for less than 2 dollars each… no kidding folks. I couldn’t have made them for less. To do as I did, scope out this year’s merchandise then pounce as soon as it gets marked down. The purple mercury glass crown votive holders were also found this way for less than a dollar for all 3. I wrapped the other gold votive holders with the same ribbon as the tree trunk to customize them for the holiday. (See how easy it is to do that here.)

131Leigh

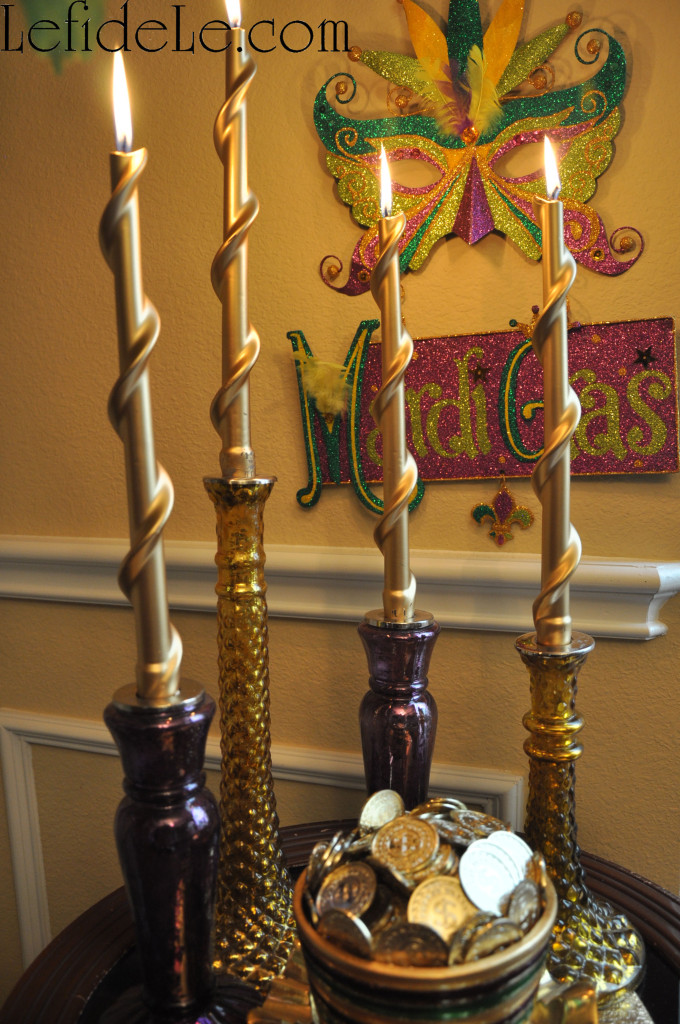
The side table has another clearance mask sign hanging near it on the wall. I placed a variety of my other mercury glass candlestick holders with swirling gold tapers to further accent the tablescape. A theme appropriate pot was filled with faux doubloons to add a dash of New Orleans to Texas. (These will reappear as pot-of-gold coins on St. Patrick’s Day.) All of this was set upon an extra placemat.

125Leigh

So you see, it’s really not difficult or expensive to celebrate Krewe-style with your own crew… just don’t forget to serve up that king cake!

095Leigh

Laissez les bon temps roules!

Faithfully Yours,

Leigh
DIY Fast & Easy Mardi Gras Glittered Napkin Rings Craft Tutorial (+ Ribbon Votives, Centerpiece, Free Place-card & Invitation Printables)

012Leigh

Create your own elegant Mardi Gras themed glittered napkin rings for mere pennies with this fast and easy craft. The tutorial includes how to embellish votives to match your theme, free masquerade place-card and invitation printables, plus more details on the centerpiece from the Mardi Gras Masquerade Themed “Fat Tuesday” Dinner Party Tablescape Décor Ideas. These DIY projects are an easy and inexpensive way to bring the look of an authentic Krewe’s fête to your own crew!

304Leigh

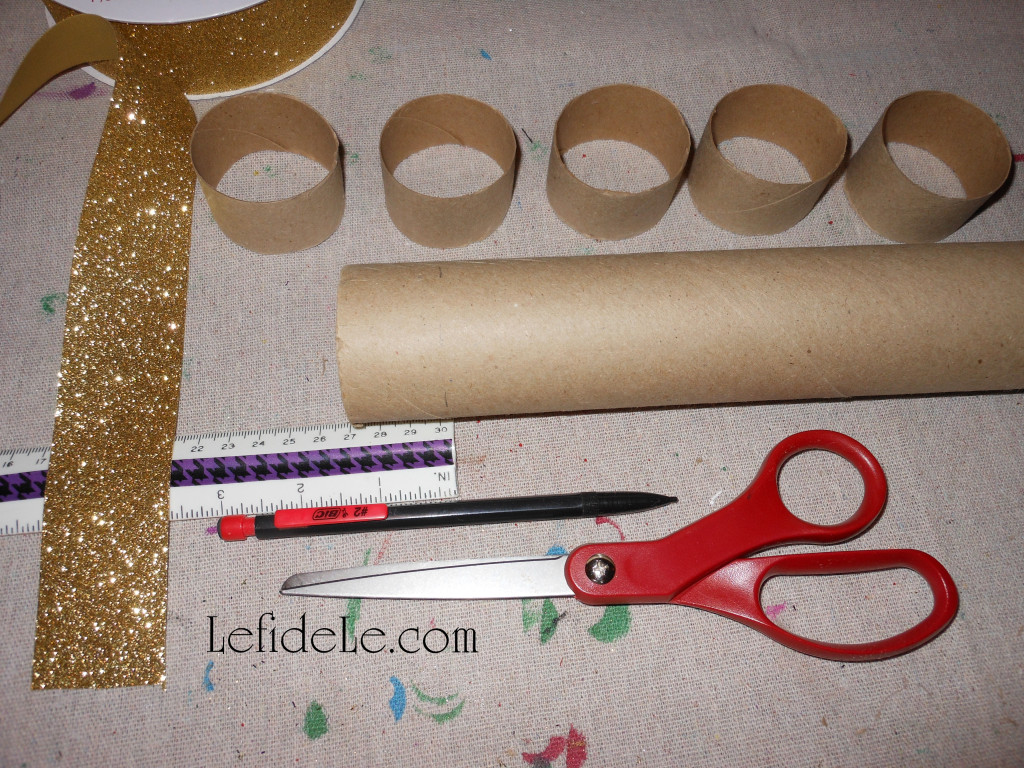
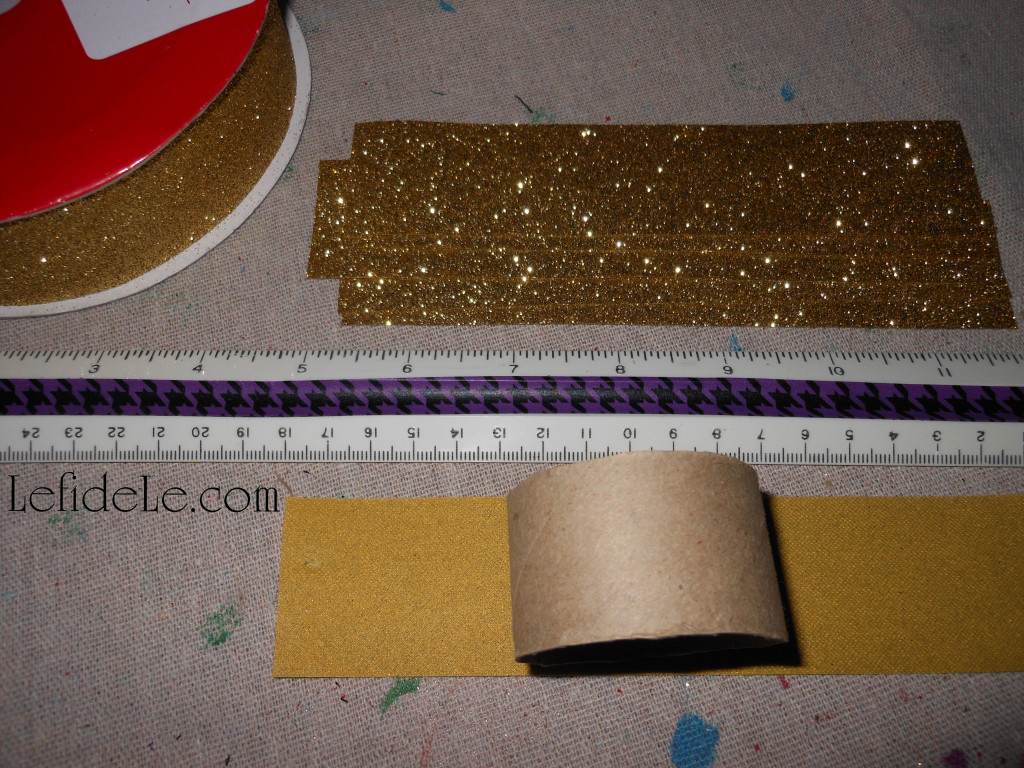
The secret element to an inexpensive napkin ring form is the core of a wrapping paper roll. You can’t do better than free! Mark and cut sections that are smaller than the ribbon you choose to cover it with.

308Leigh

Then cut lengths of ribbon long enough to wrap around those cores.

309Leigh

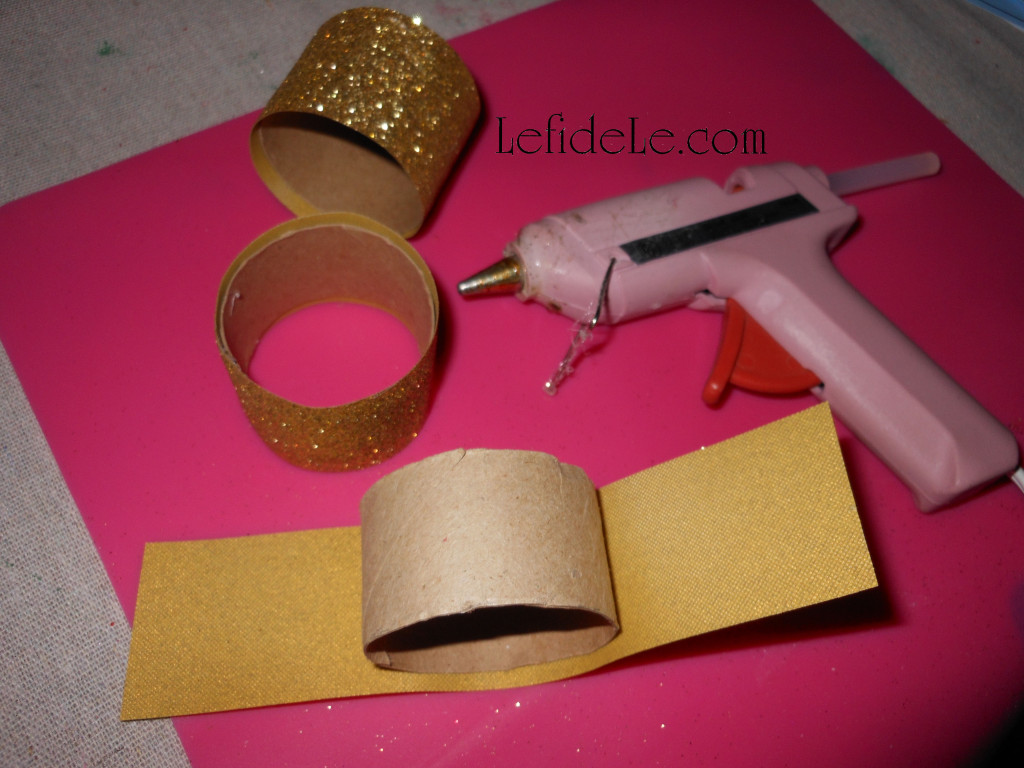
Use hot glue to adhere a strip of ribbon around each core. Here I’ve chosen gold glitter ribbon to coordinate with my Mardi Gras theme. (You can see the same technique used on the rings in my Herb Themed Luncheon by viewing the picture in the Upcoming Projects Gallery in the sidebar.)

311Leigh

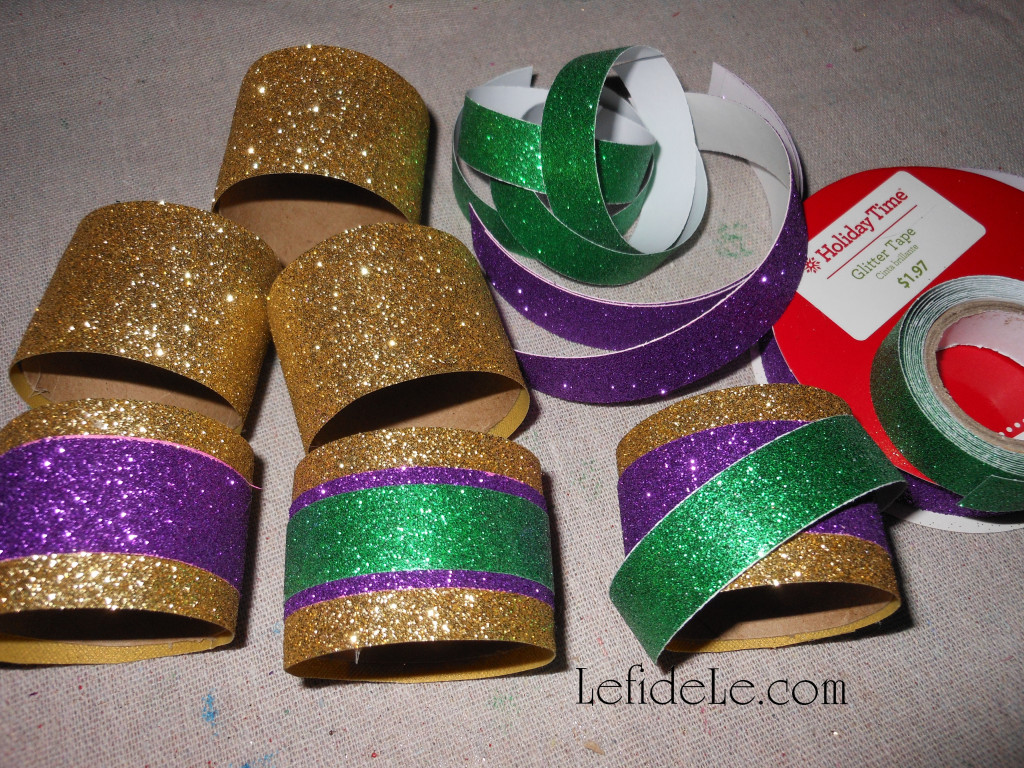
Next, I cut and attached layers of green and purple glitter washi tape in different widths atop the gold base. Layers of ribbon would have also worked well, but I already owned the perfect sized tape.

313Leigh

Read how to make your own fleur-de-lis shapes with napkins at the article on Mardi Gras Masquerade Themed “Fat Tuesday” Dinner Party Tablescape Décor Ideas.

024Leigh

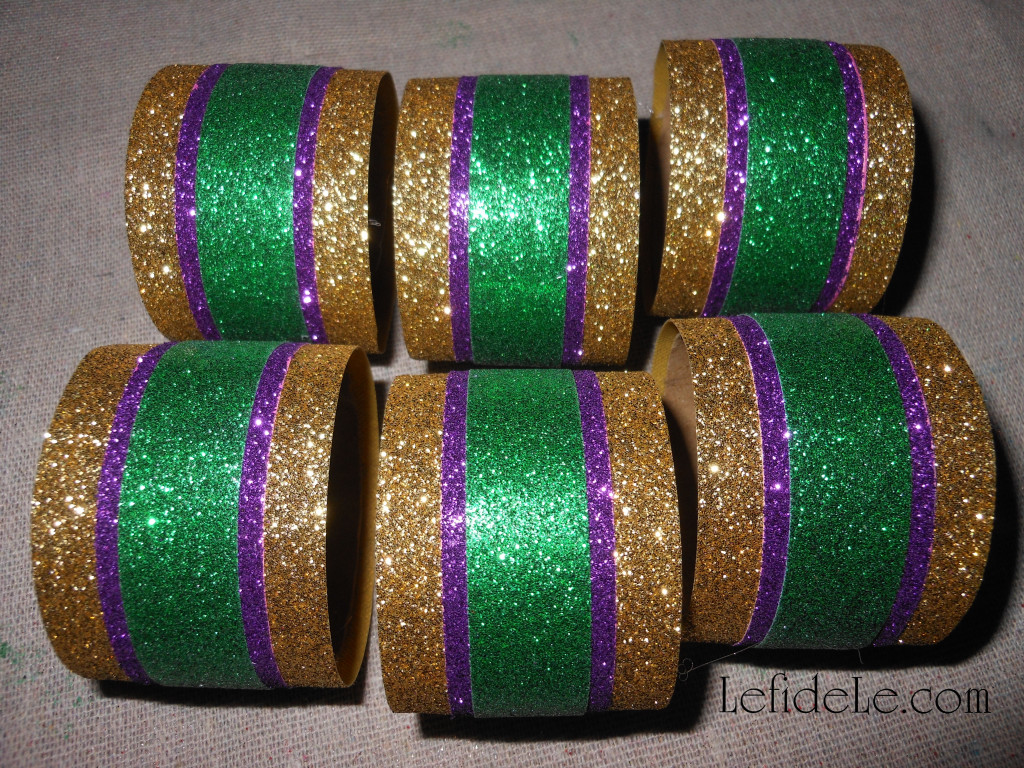
I made all six napkin rings for way less than a dollar, in a matter of minutes, and they coordinated perfectly with my theme’s décor… Awesome!

299Leigh

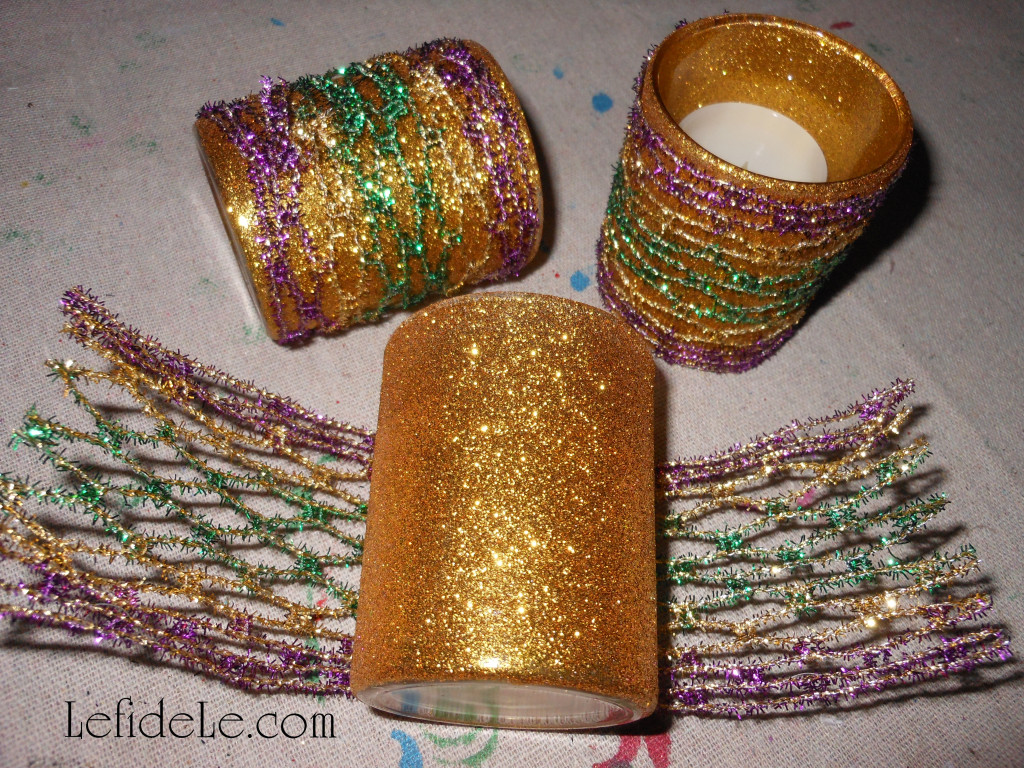
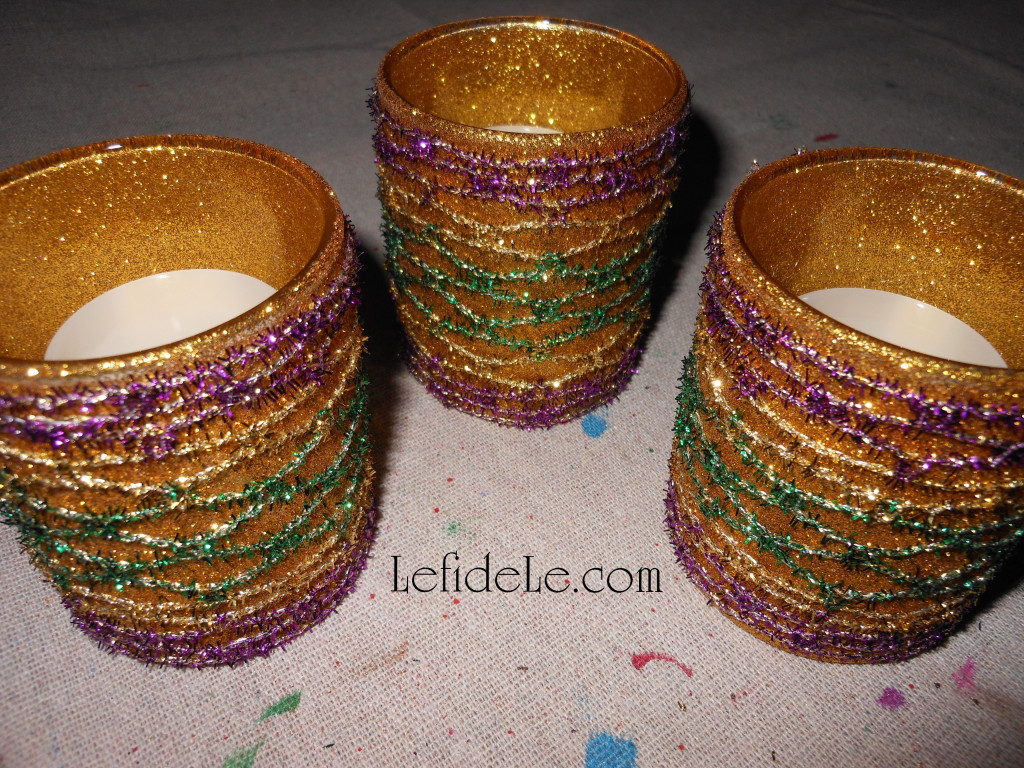
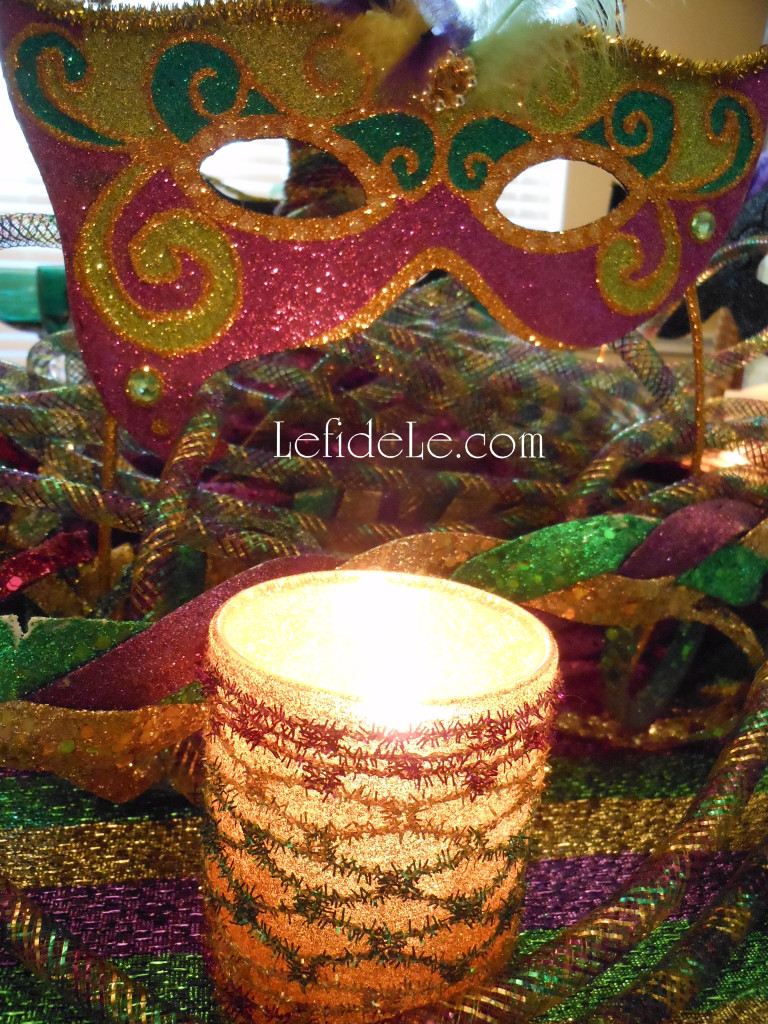
Now for those ribbon votives… simply start with any type of votive holder or small jar. You can leave them plain or apply glitter paint to them. I went with gold glittered glass. Cut lengths of coordinating ribbon long enough to wrap around them and overlap. You can attach one end to the other with a dot of glue or double stick tape. Because my ribbon was wired, I merely twisted one side over the other like a twist-tie. (See more twisty ribbon action here on my DIY Rusted Rooster Chicken Wire Votive Holder Craft.)

303Leigh

In this way, I can unwrap the ribbons and reuse both them and the votives for a future holiday in a different way. I think they turned out great, and they literally took me minutes to complete… Yea!

392Leigh

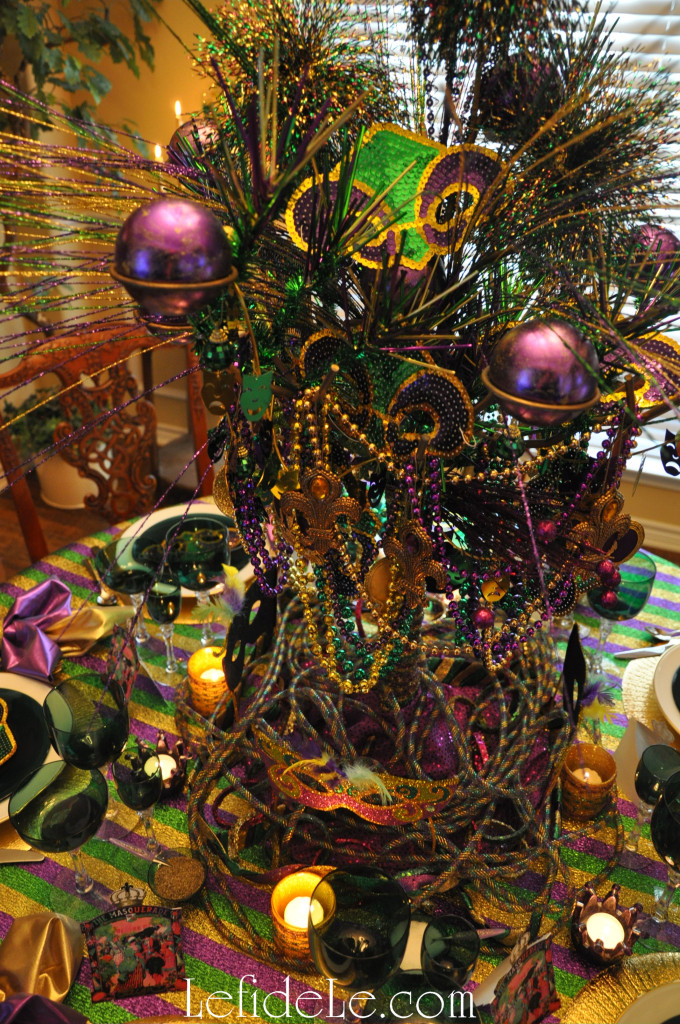
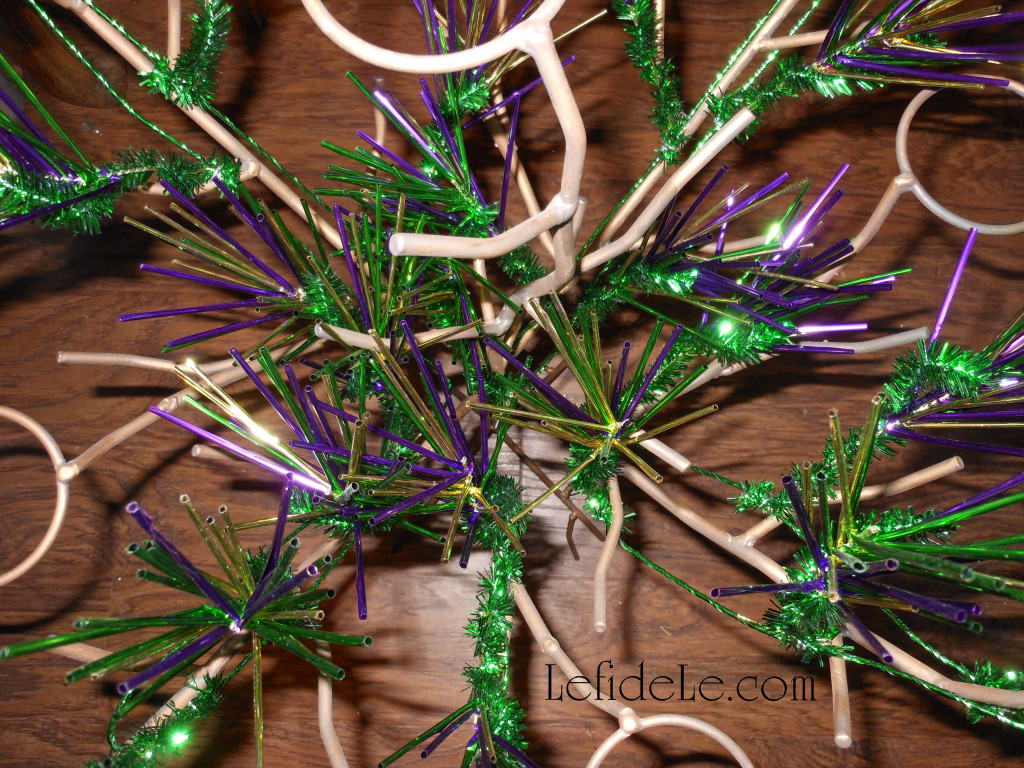
Create a dramatic centerpiece without a lot of drama by merely starting with a basic tree form from another holiday. (For example, use a black one from Halloween or a white one from Easter.) I used a metal votive holding tree that I had previously painted gold from its earlier pewter and bronze incarnations. (See how to use paint to change the color of metal and to age a piece in my upcoming lion fu-dog décor for Chinese New Year.)

393Leigh

I wrapped it with trim from my Glitter-ween Party Décor (see it here) then added a few new sprigs.

235Leigh

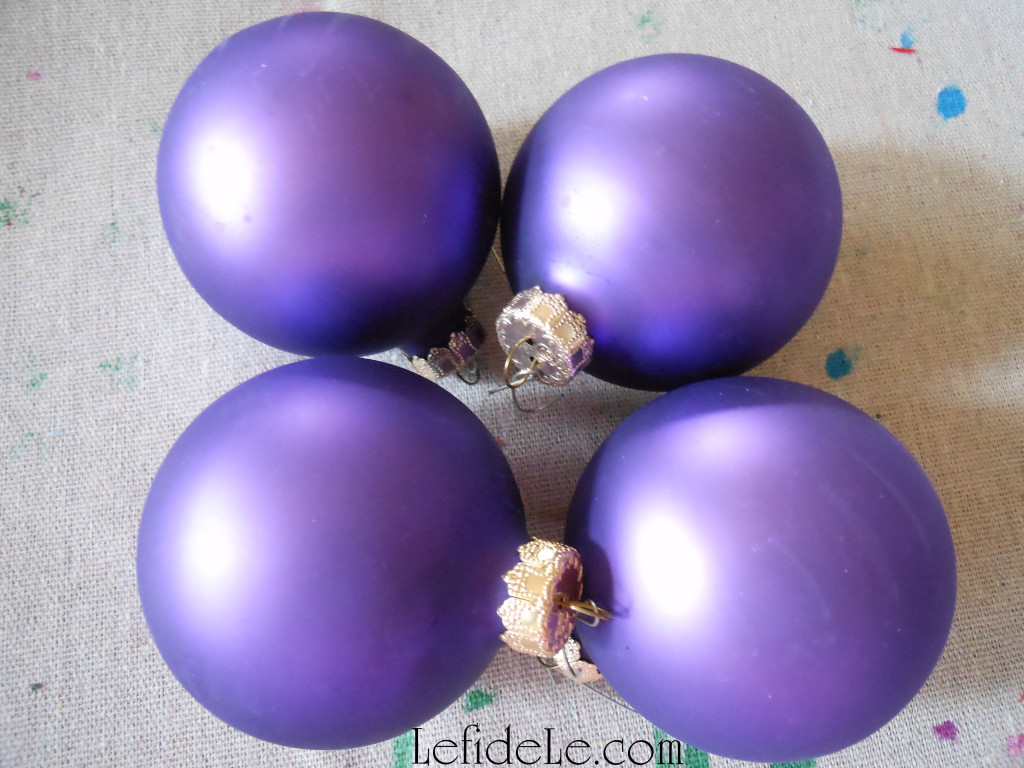
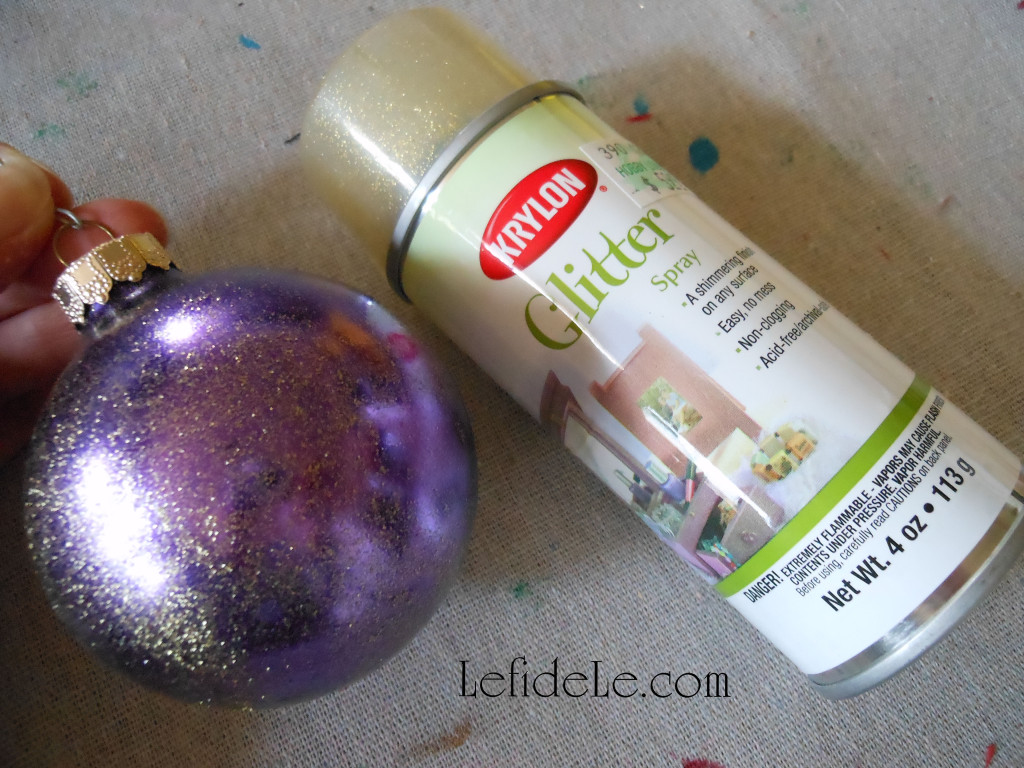
I painted simple purple ball ornaments with a glitter mist (not the blast variety) to impart both gloss and glitter shine to the previously satin sheen.

236Leigh

I set these onto the rings that would normally hold the votive holders. (You’ll likely see these in a future article.)

053Leigh

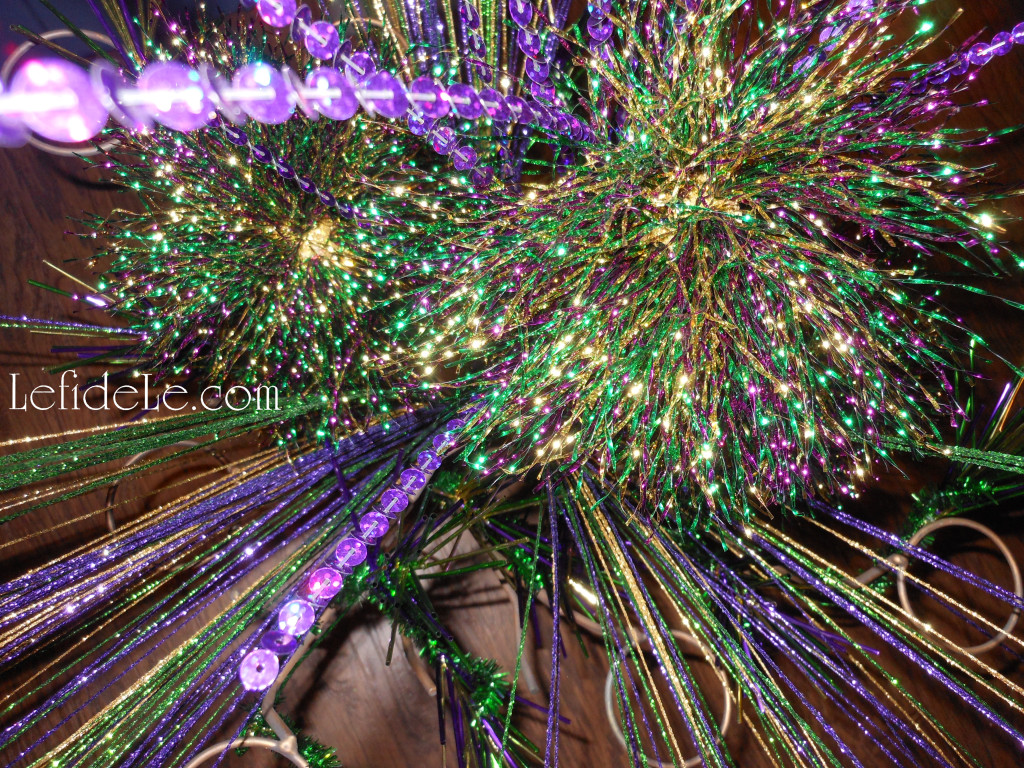
I hung embroidered Christmas crown ornaments, snapped up at 10 cent clearance, along with glittered musical instruments, green mirror balls, and a mask garland. I even hung the same sequin fleur-de-lis masks used at each table setting as ornaments. I try to plan all my holiday themes I advance of the after Christmas sales to snag a year’s worth of décor deals at 90% off. I keep my theme collections in labeled bins that I add to as I accumulate finds so that I’m ready to craft and decorate when each holiday arrives.

091Leigh

Though it’s hard to tell from the pictures, the tree centerpiece actually didn’t obstruct any person to person viewing. This is why I only draped the bottom with some Mardi Gras necklaces and wrapped the trunk with the same ribbon I used on the votive holders.

120Leigh

The base of the tree was then swathed in the same purple fabric remnant from Glitter-ween’s spooky tree and draped with yards of Mardi Gras trim. (See how to hike up a chandelier to accommodate a tall centerpiece here.)

043Leigh

Surrounding that are 4 standing glittered metal masks that I scored at a post-holiday clearance sale for less than 2 dollars each… no kidding folks. I couldn’t have made them for less. To do as I did, scope out this year’s merchandise then pounce as soon as it gets marked down. The purple mercury glass crown votive holders were also found this way for less than a dollar for all 3… Score!

009Leigh

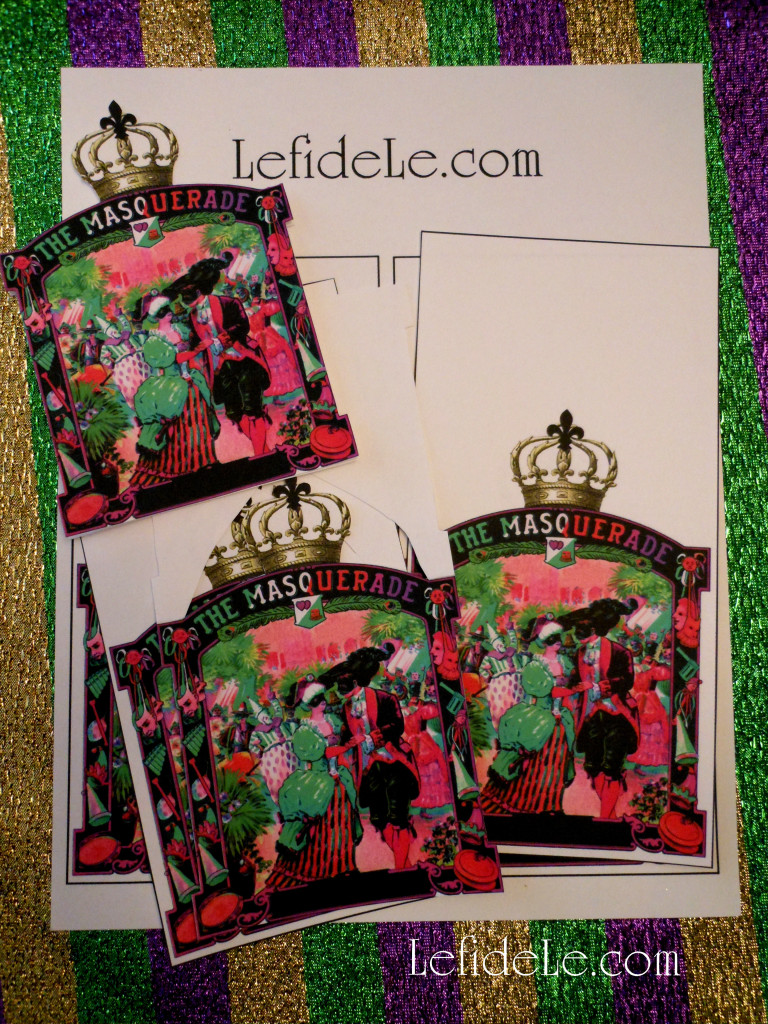
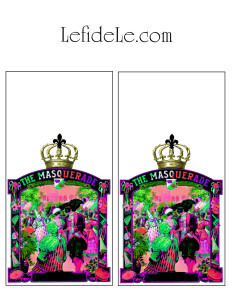
Last but definitely not least, are my free printable Mardi Gras masquerade place-cards which may also be used as invitation cards!

mardi-gras-placecards-leigh

Simple right click on this small picture and select print. Print these in best color photo on thick cardstock.

004Leigh

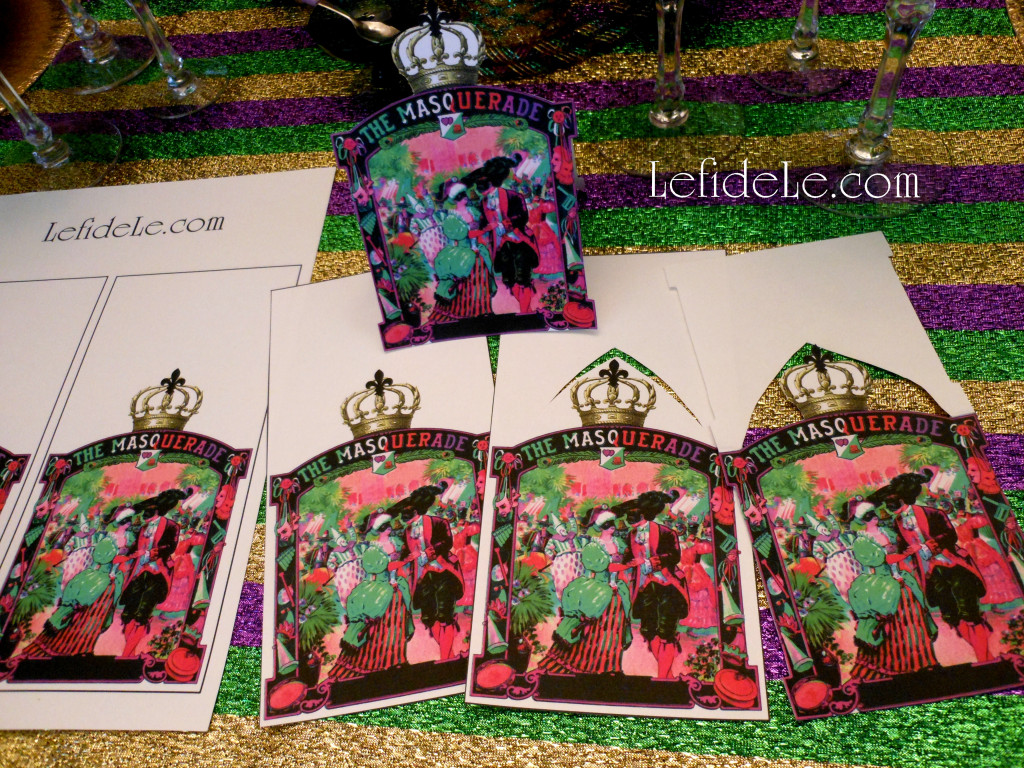
Then simply cut on the solid black lines to separate the images for invitations. For place-cards, use the pictures a guide for how to cut out the top and crown while still making a tent folding card that will stand upright.

039Leigh

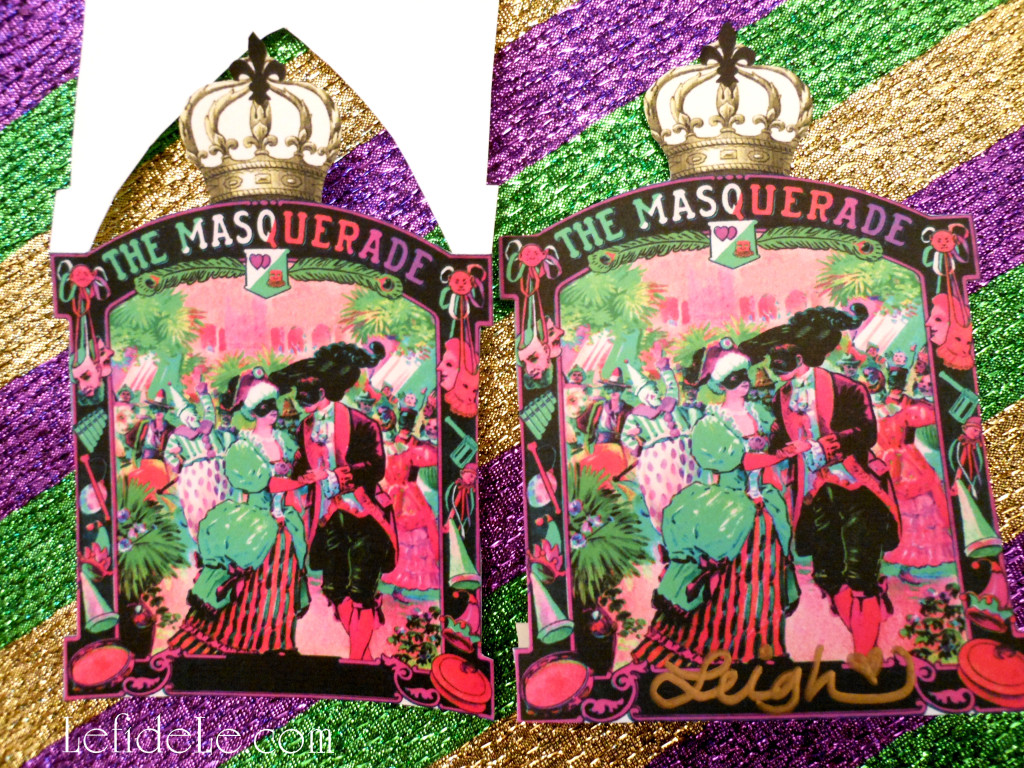
Poke a point into the paper just above the crown with a pointy pen, or compass point, etc. Use that as a starting point for your scissors to cut a V shape above the picture. Then cut one side close to the top and crown next to the image. Don’t cut all the way to the ends. Stop where the curve meets the flat top. Those flat parts are what join the front and back together. Then fold it in half. Cut through both pieces around the image. Again, a picture speaks a thousand words… use it as a visual guide.

028Leigh

Simply write names on the bottom with a gold sharpie marker or paint pen… Voila!

104Leigh

See more of my Mardi Gras Masquerade Themed “Fat Tuesday” Dinner Party Tablescape Décor Ideas here for more holiday inspiration!

070Leigh

Let the good times roll!

Faithfully Yours,

Leigh