Tag Archives: Garland

Chalkboard & Glitter Hearts Themed Valentine’s Day Party Buffet Décor Ideas (+ DIY & Printable Links)

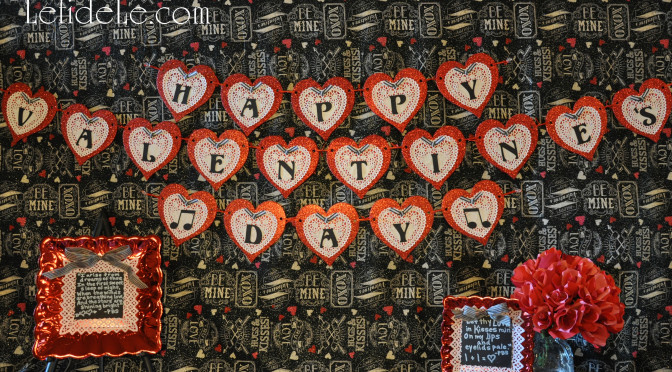
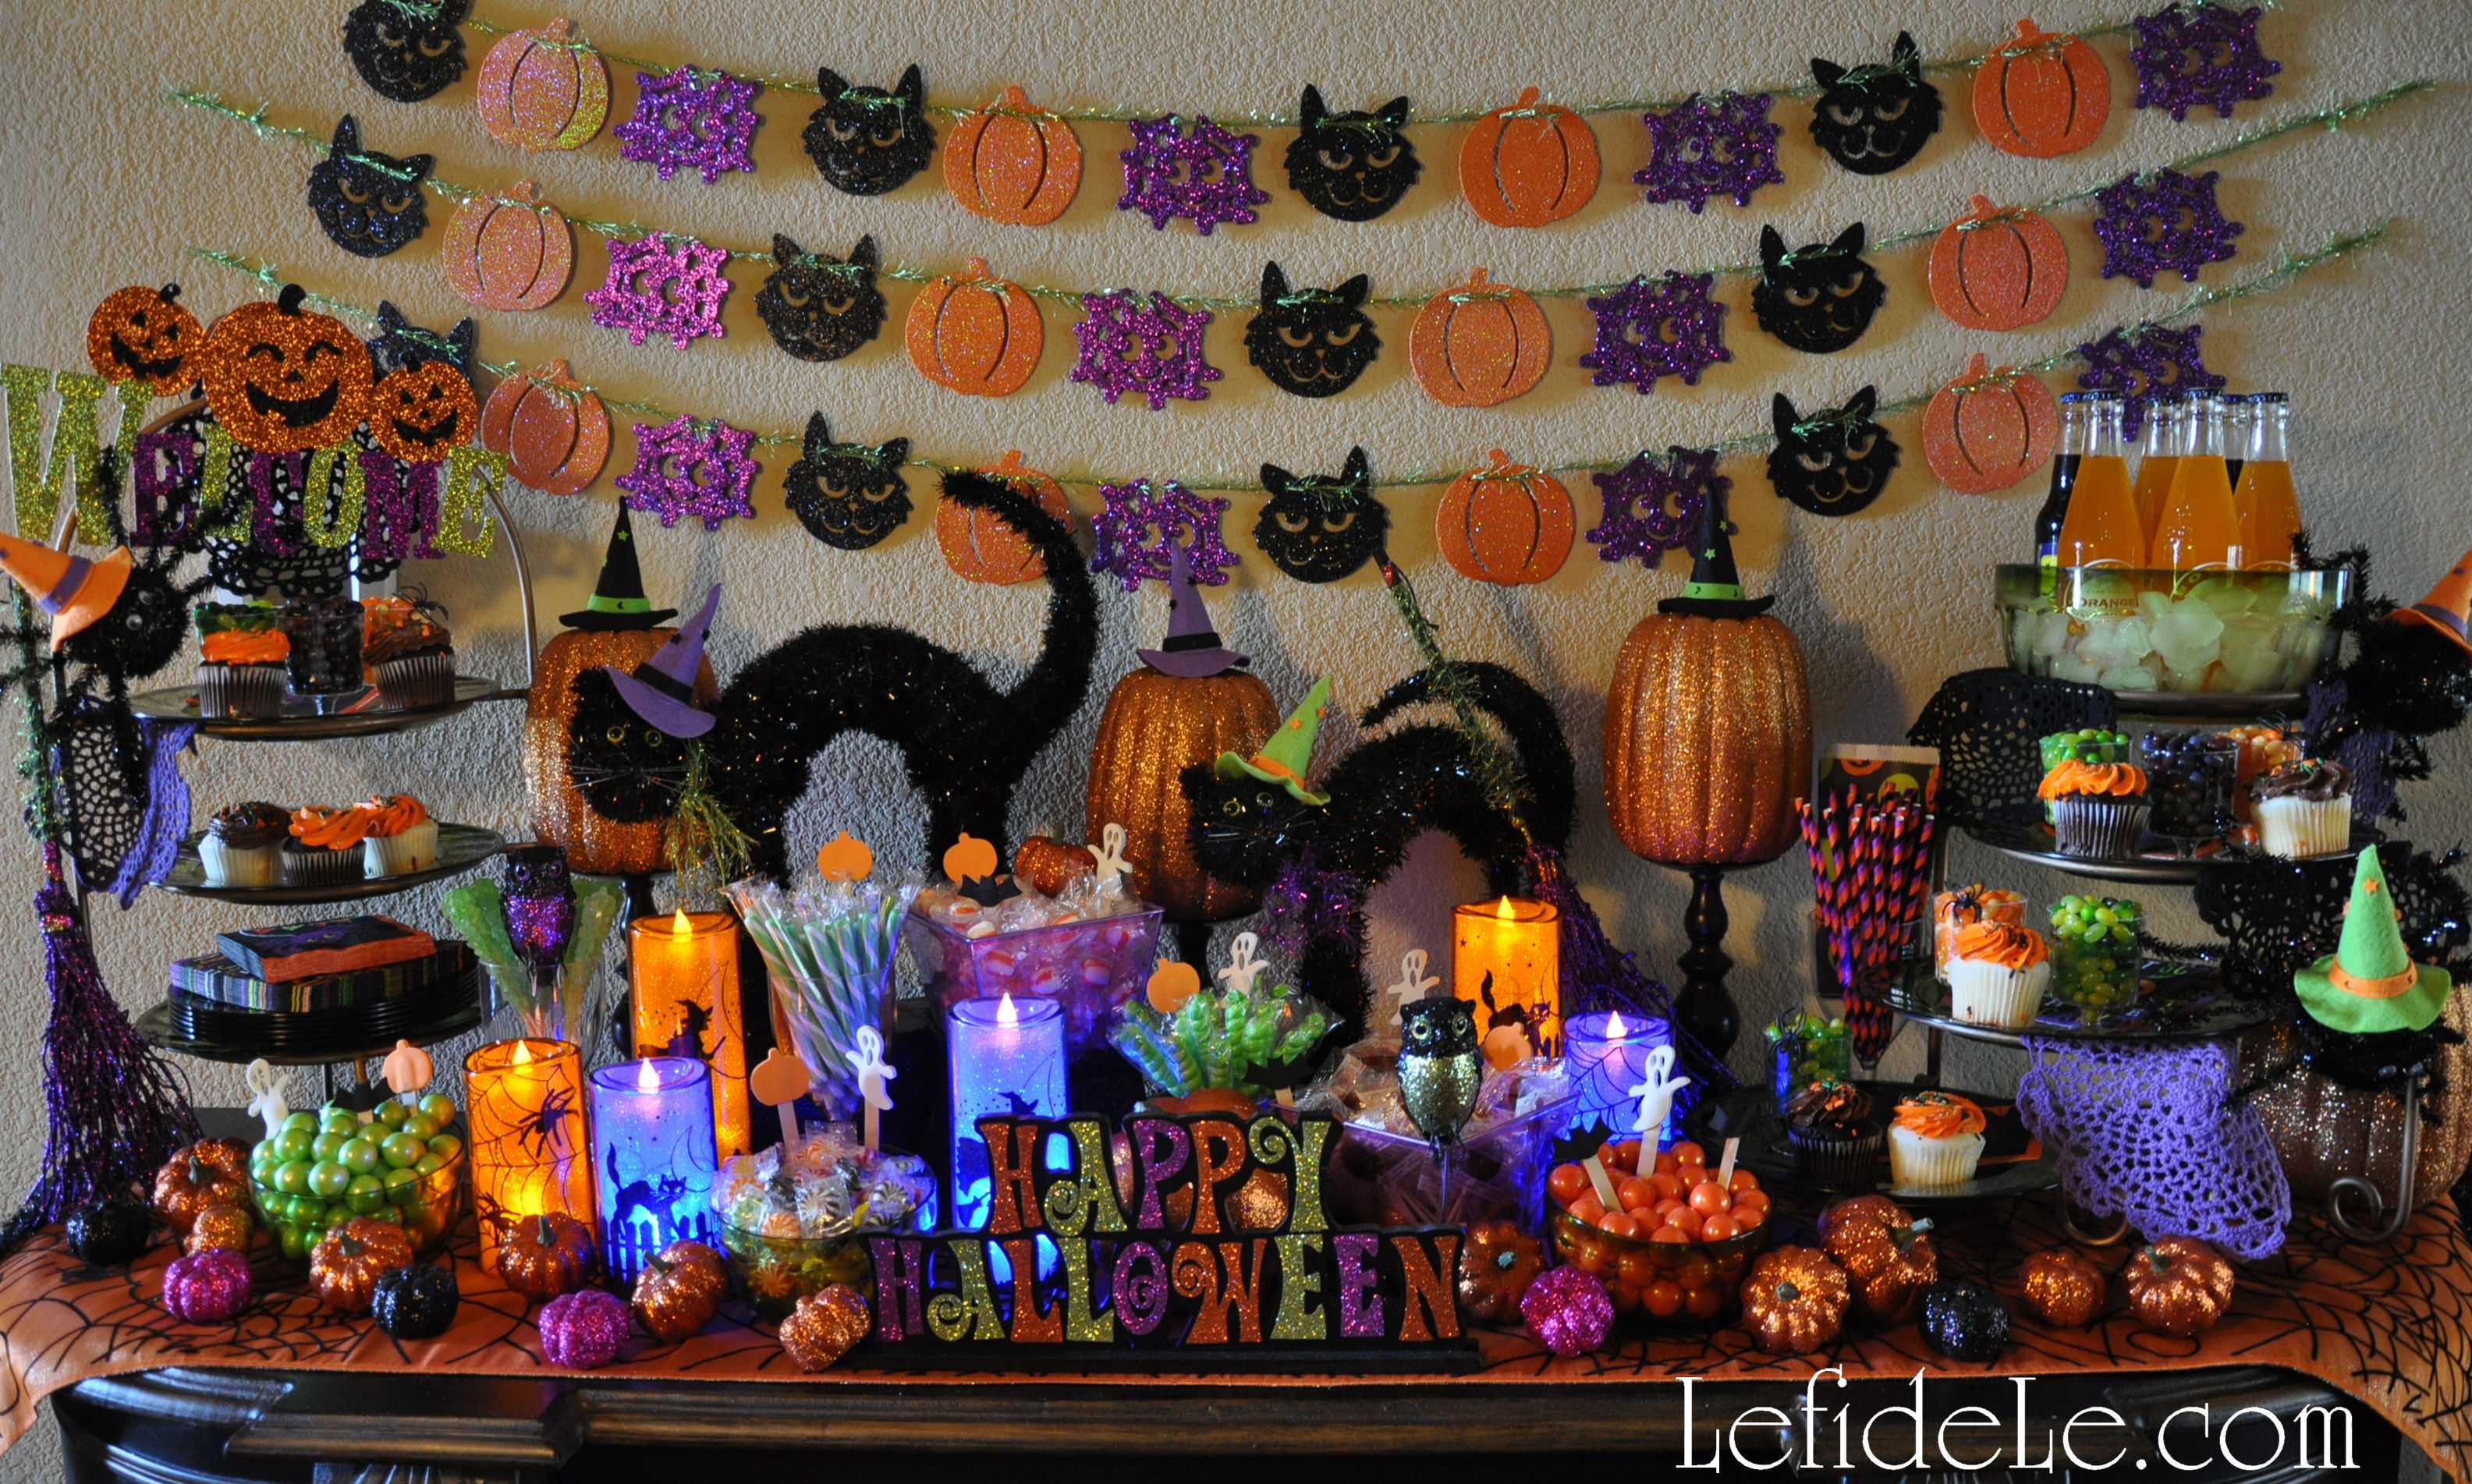
Running with the idea that opposites attract, I decided to make a Valentine’s Day Party theme that incorporated both matte black chalkboard and glittery red hearts. The elements actually coordinated beautifully for a party theme that would suit a variety of age groups, or even just serve as a surprise for that special someone. The whole shebang was actually quite inexpensive to pull off, though happily I believe that doesn’t appear to be the case. You can either follow the links to make the fast and easy crafts yourself, or go shopping with the theme in mind.

229Leigh

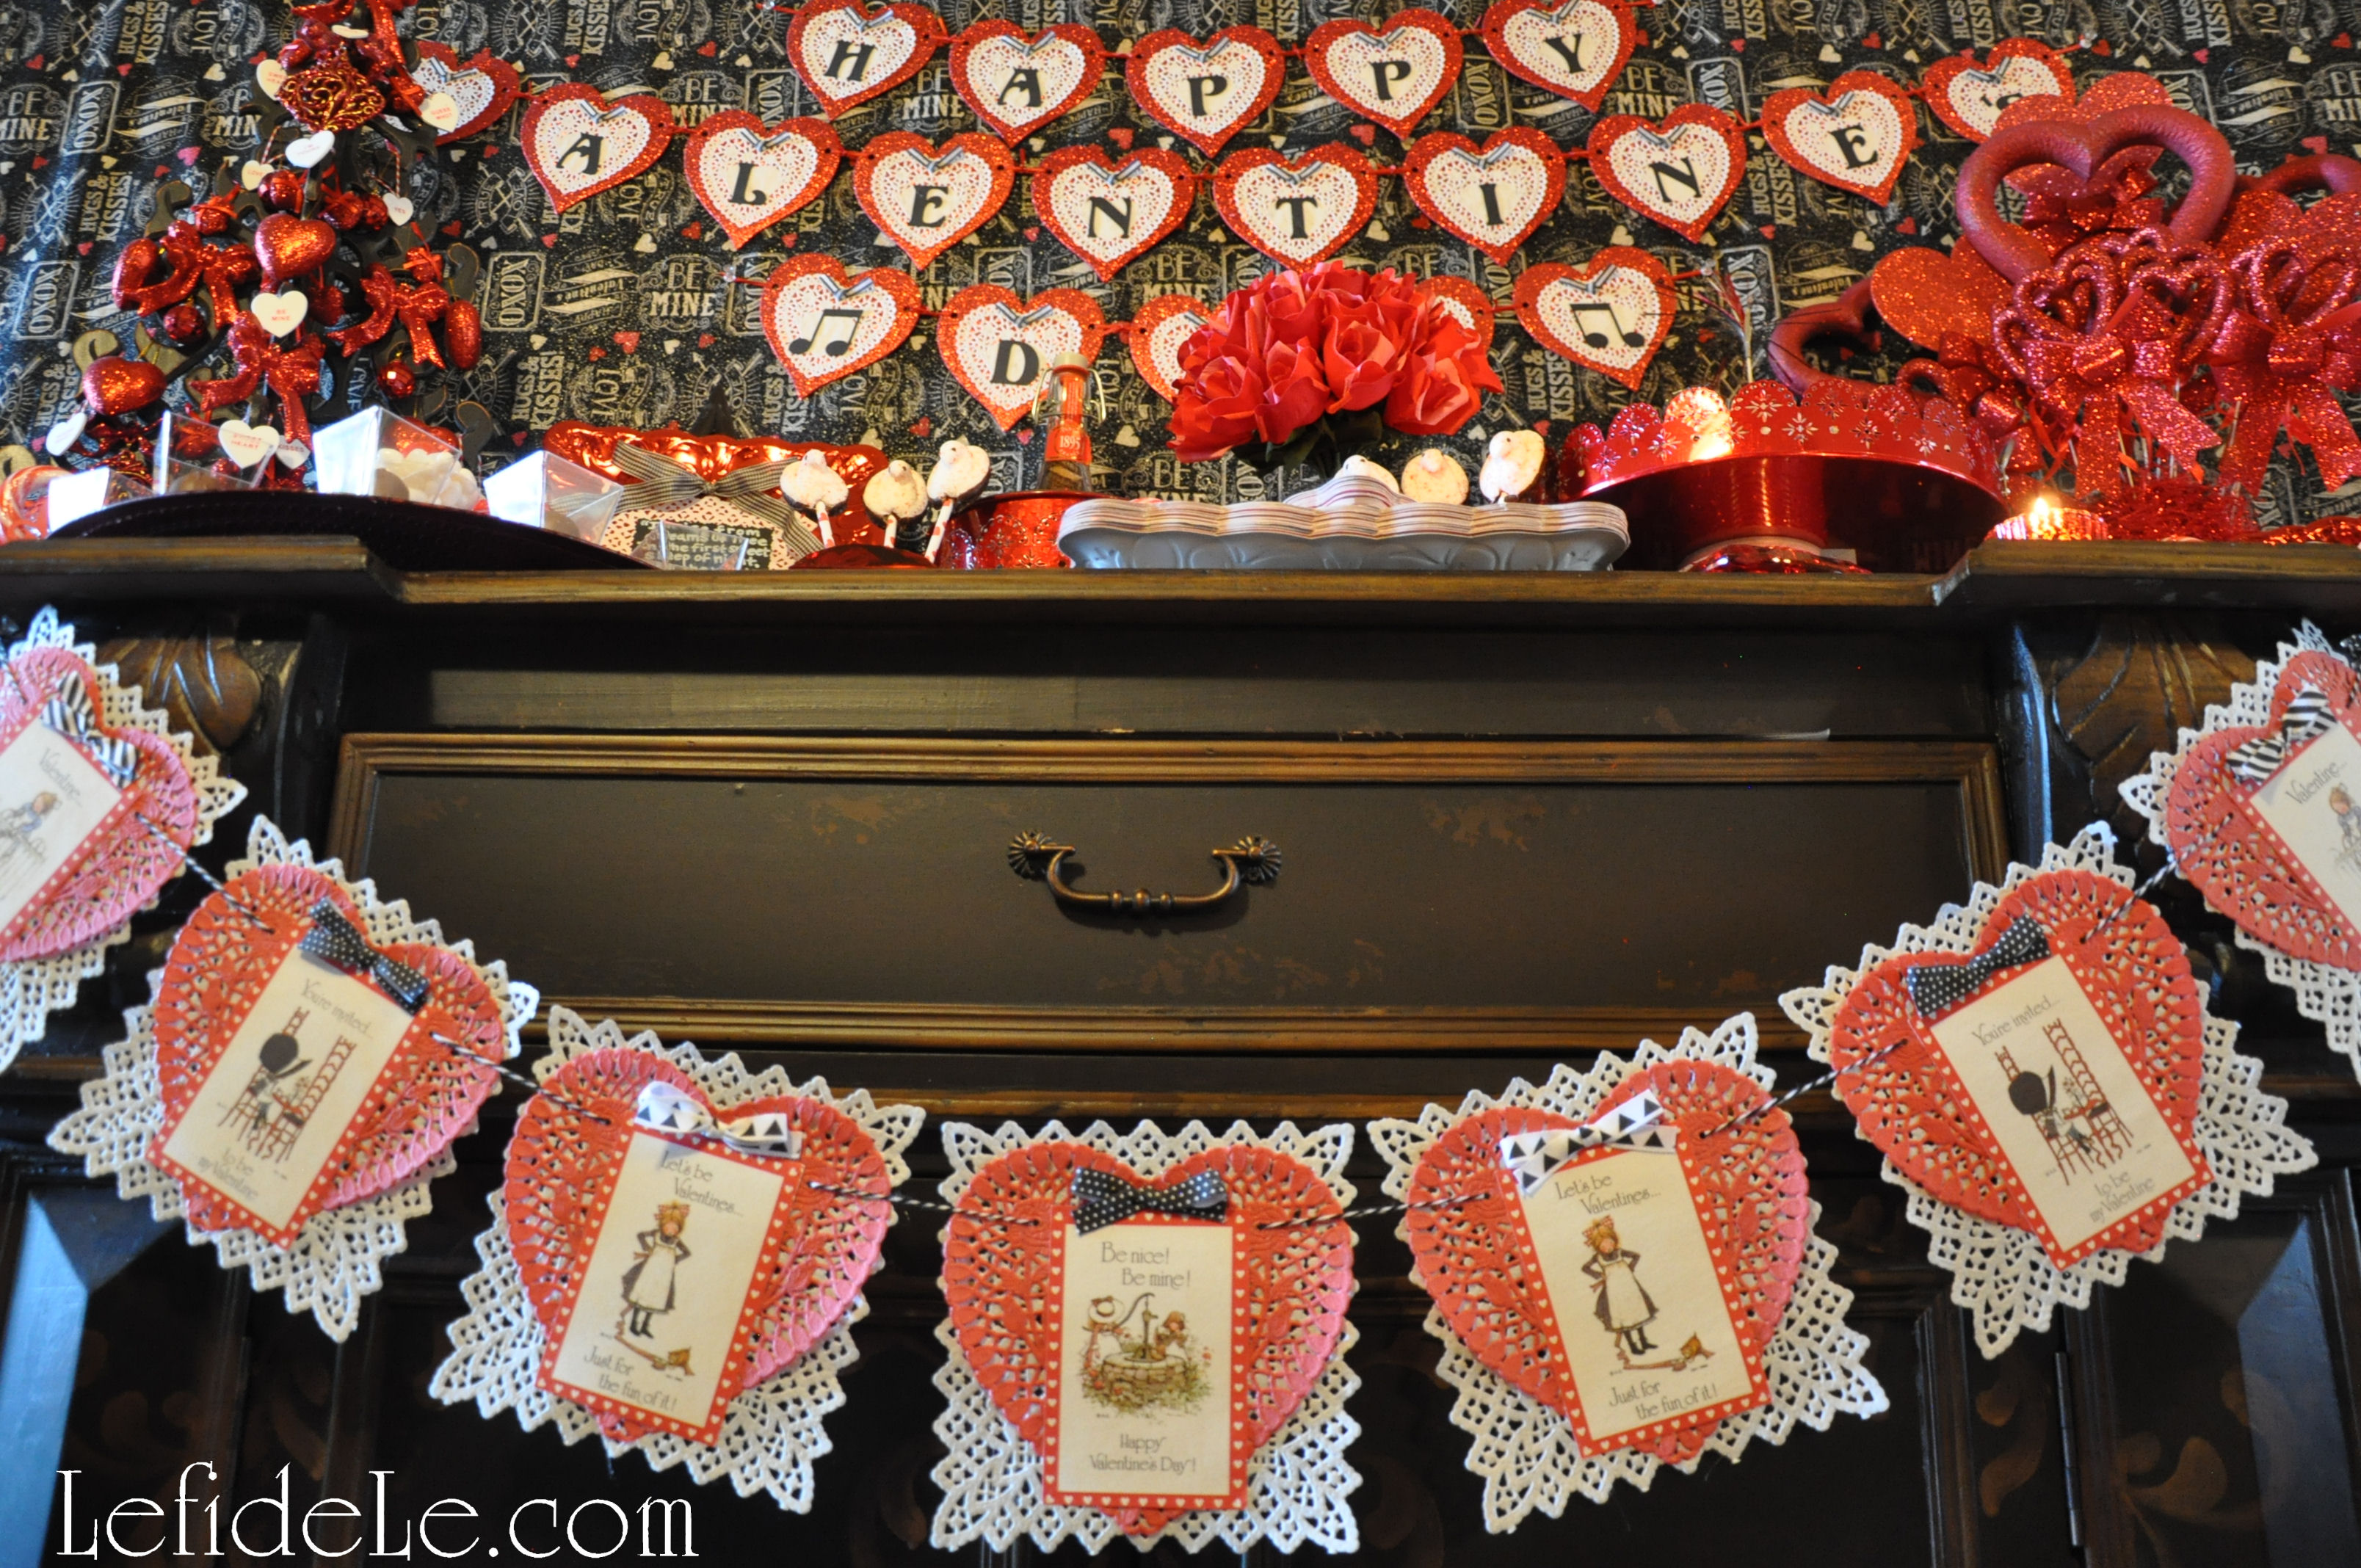
After deciding on my theme, I actually found this adorable chalkboard Valentine fabric that also had glitter hearts. (You can find some for yourself at Hancock Fabrics or Fabric.com using coupons from the affiliate links in the sidebar.) I hung this up with clear thumbtacks.

204cLeigh

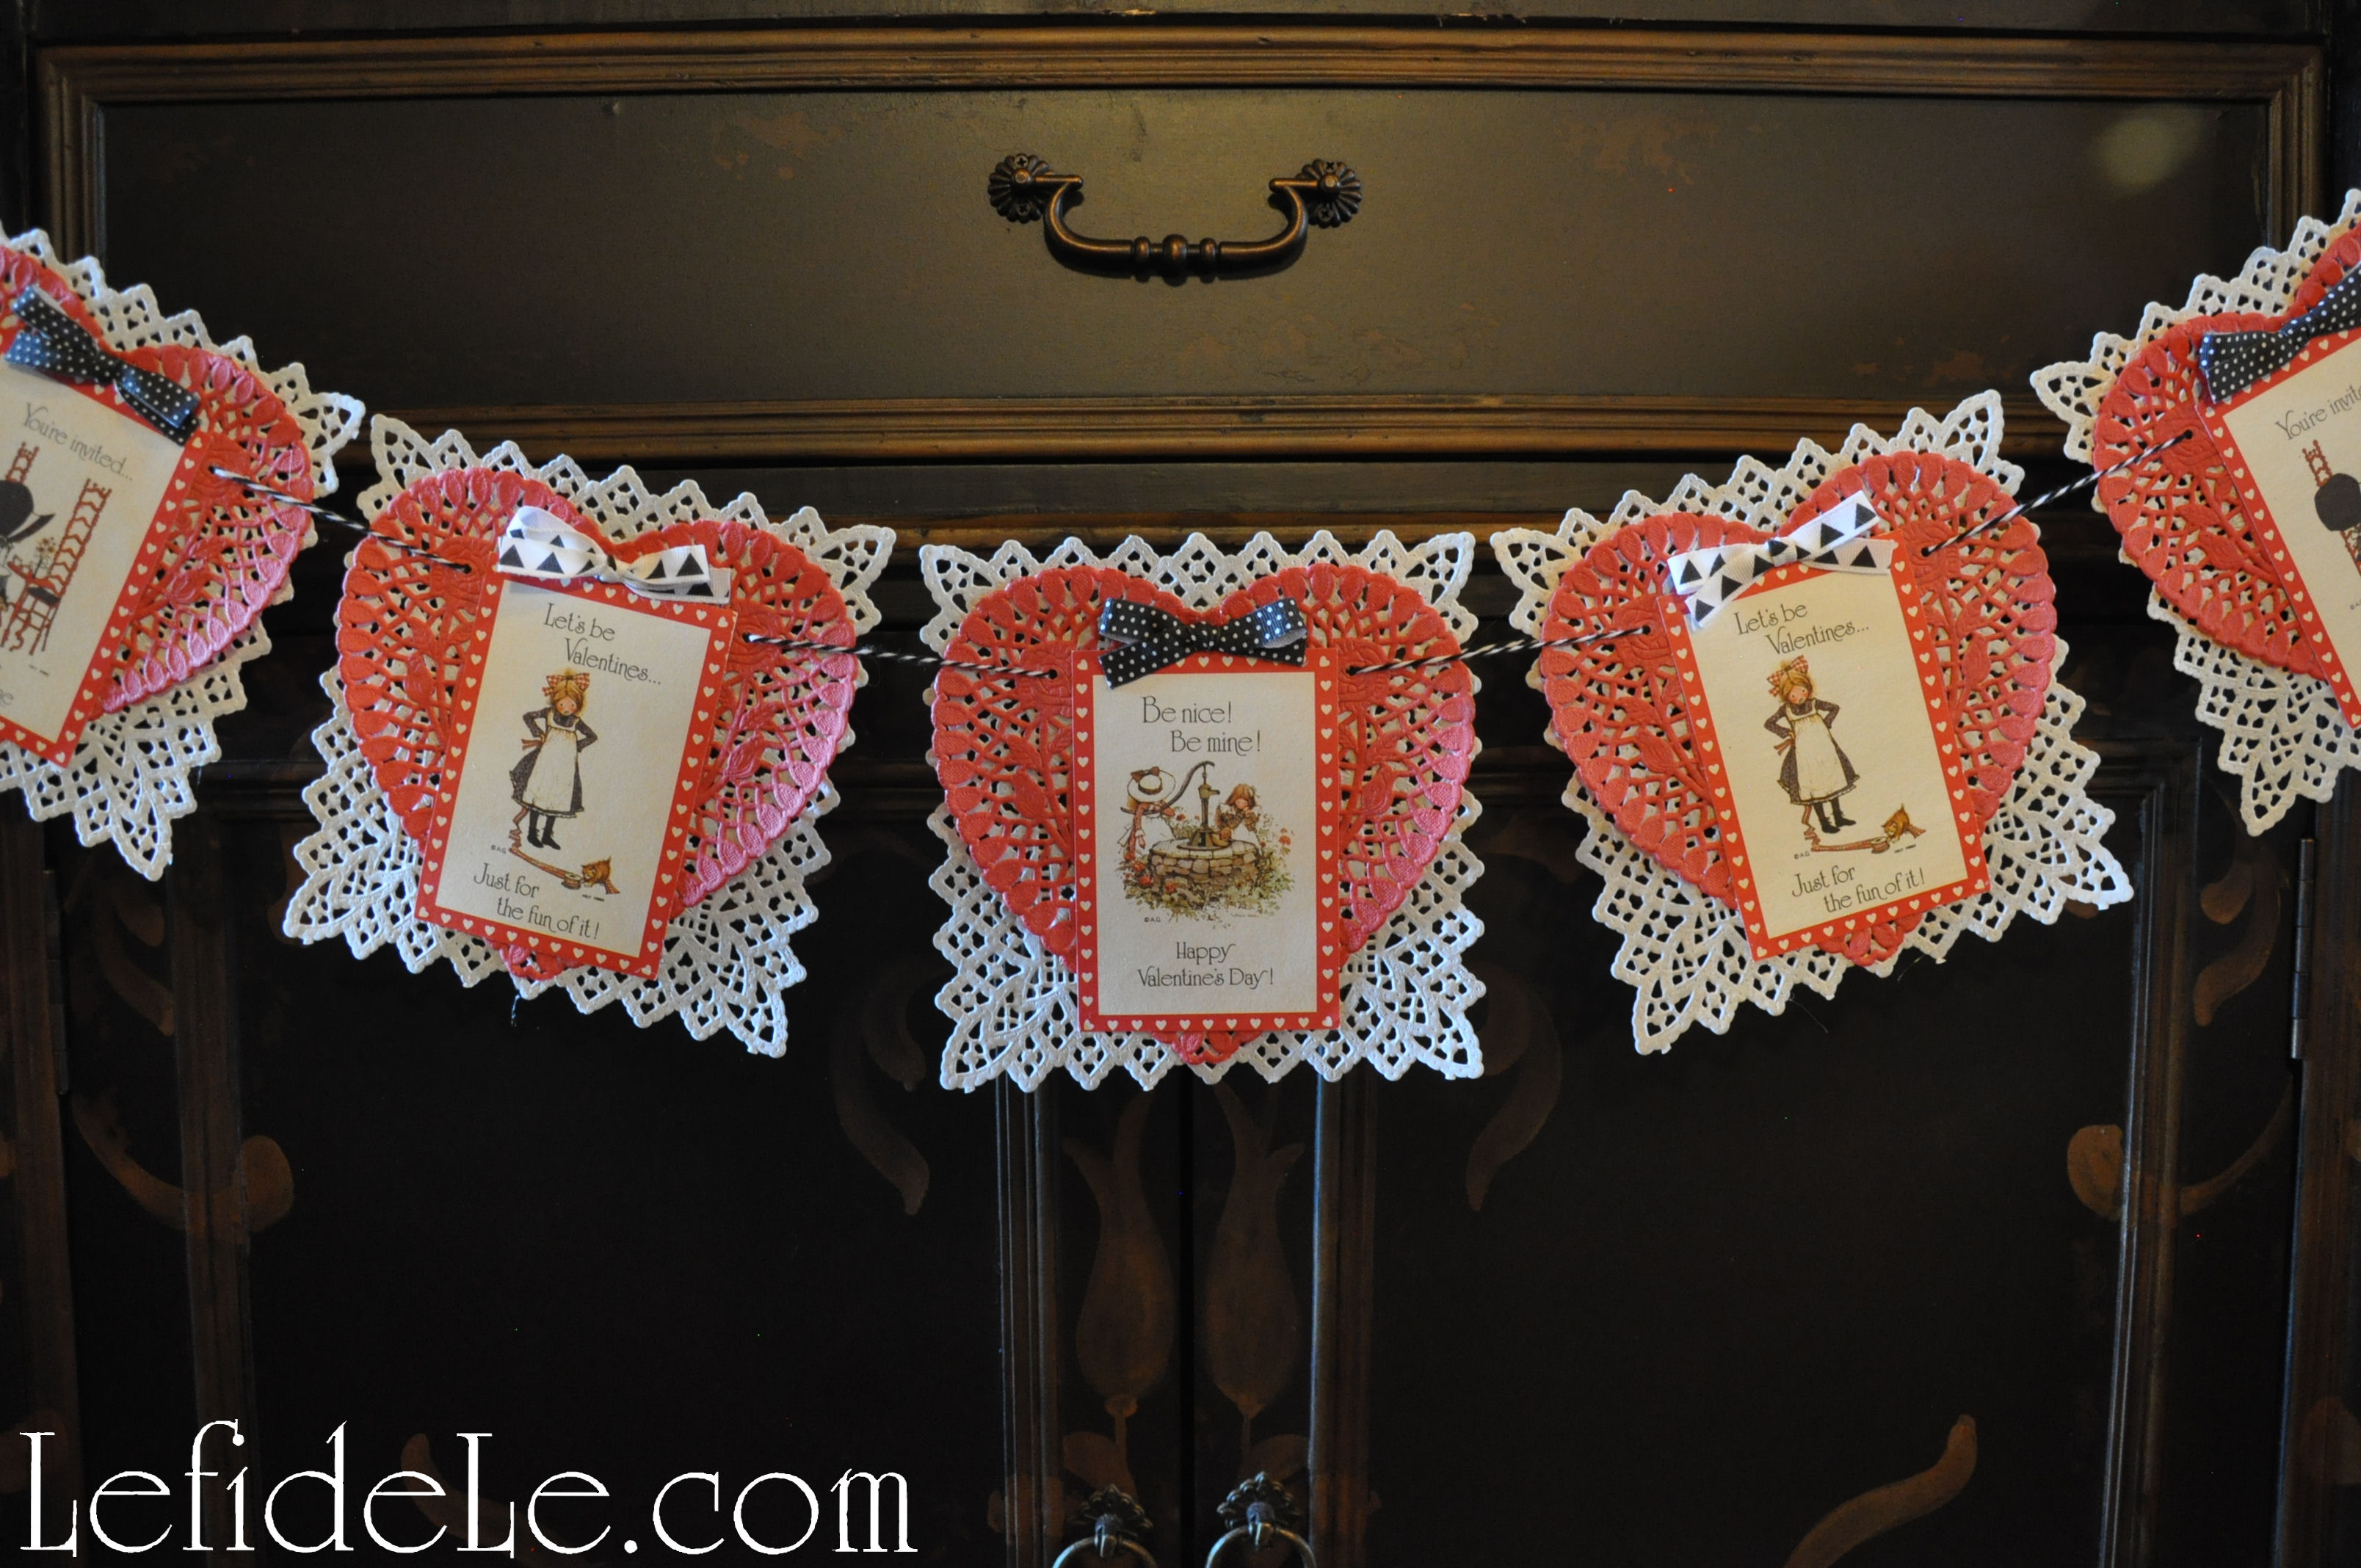
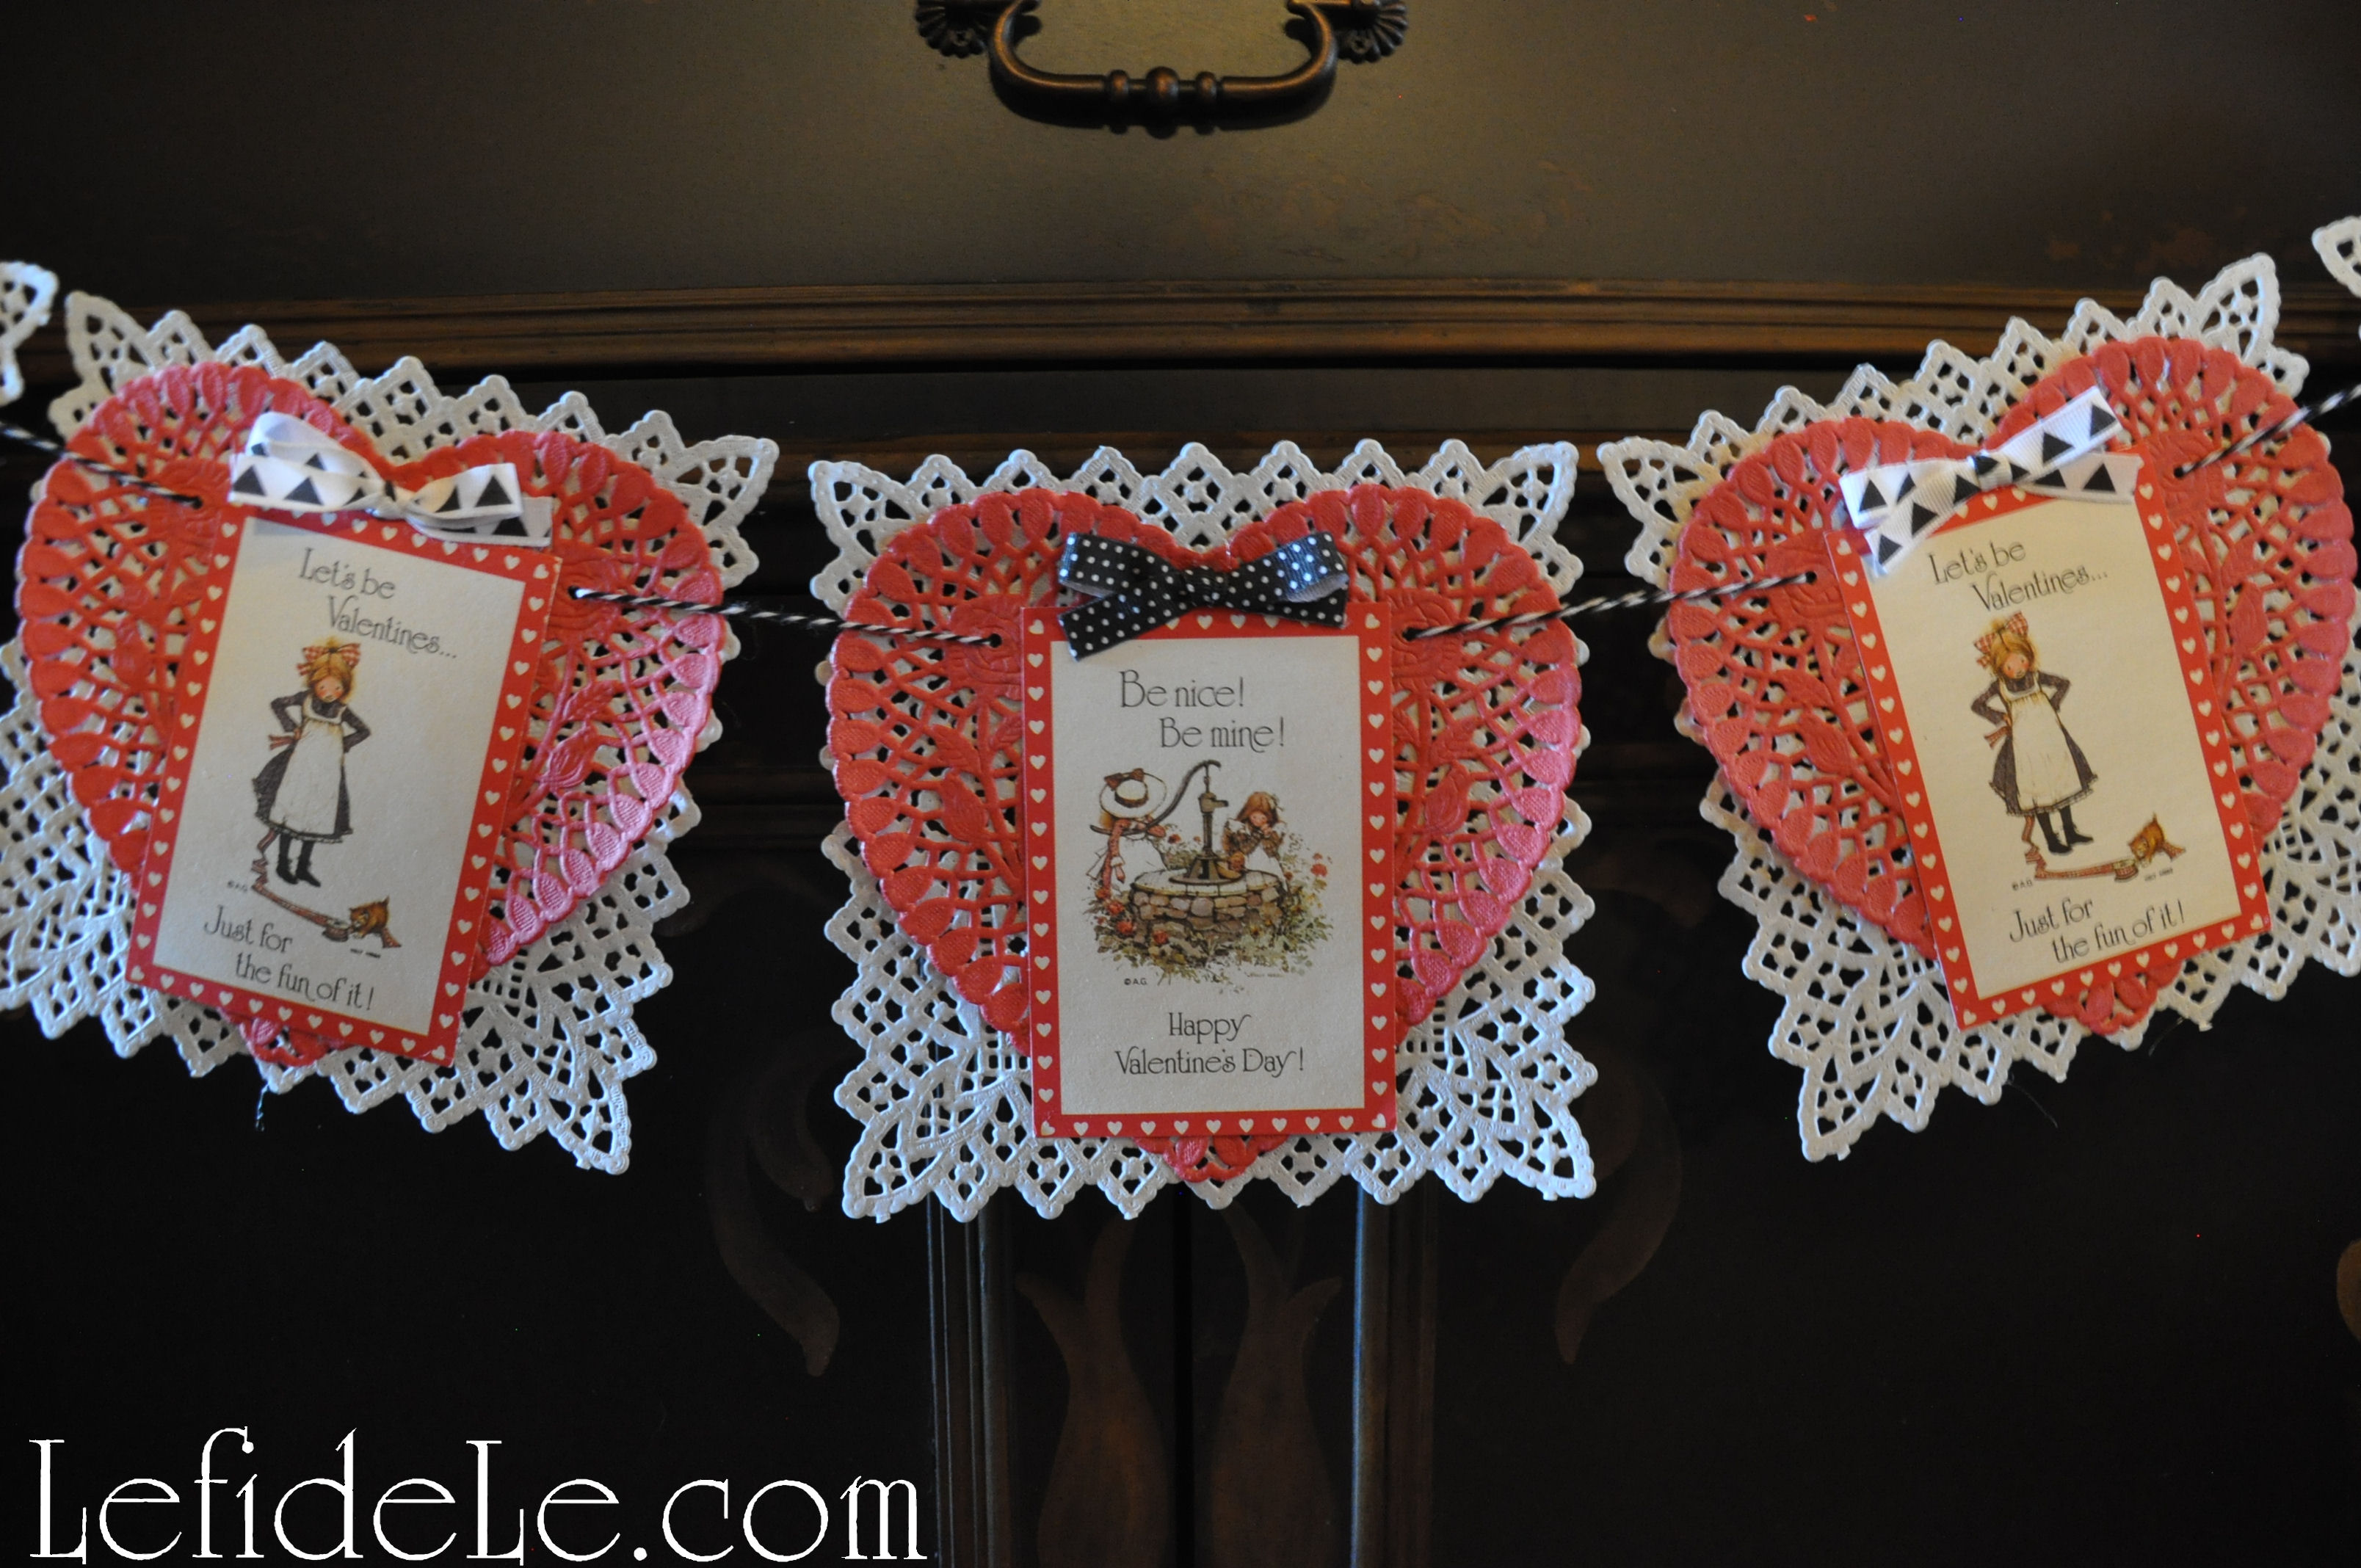
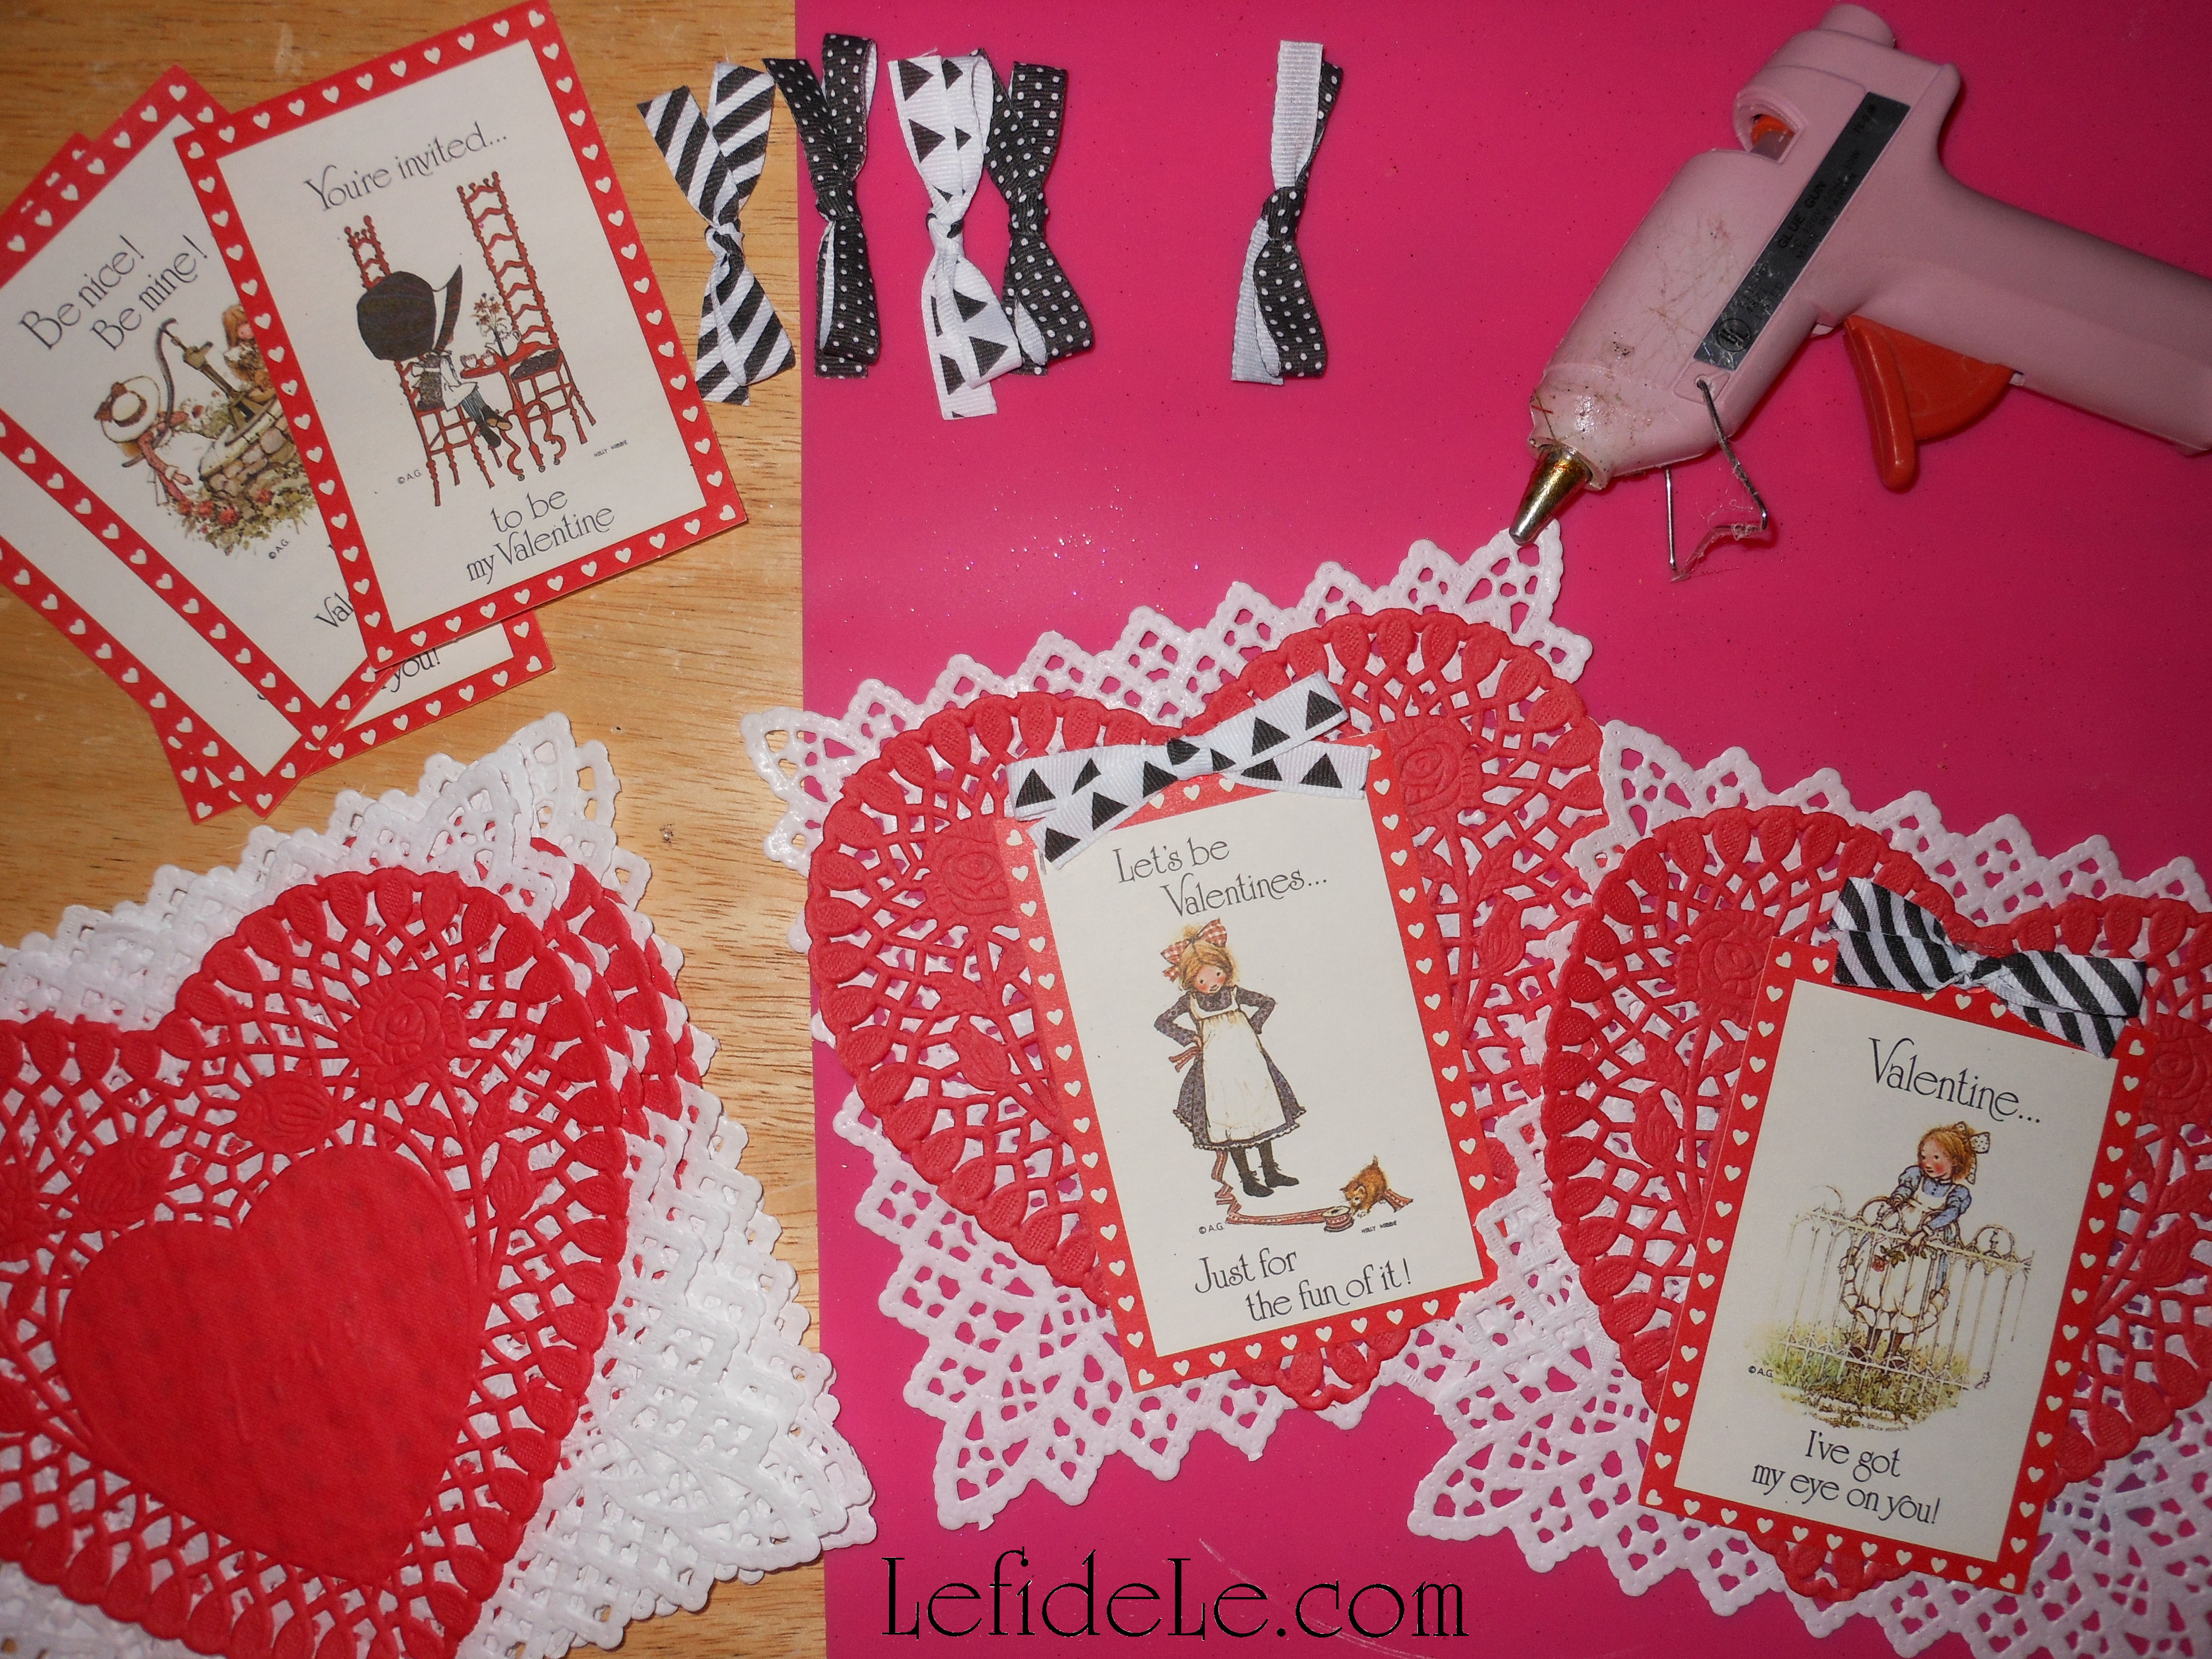
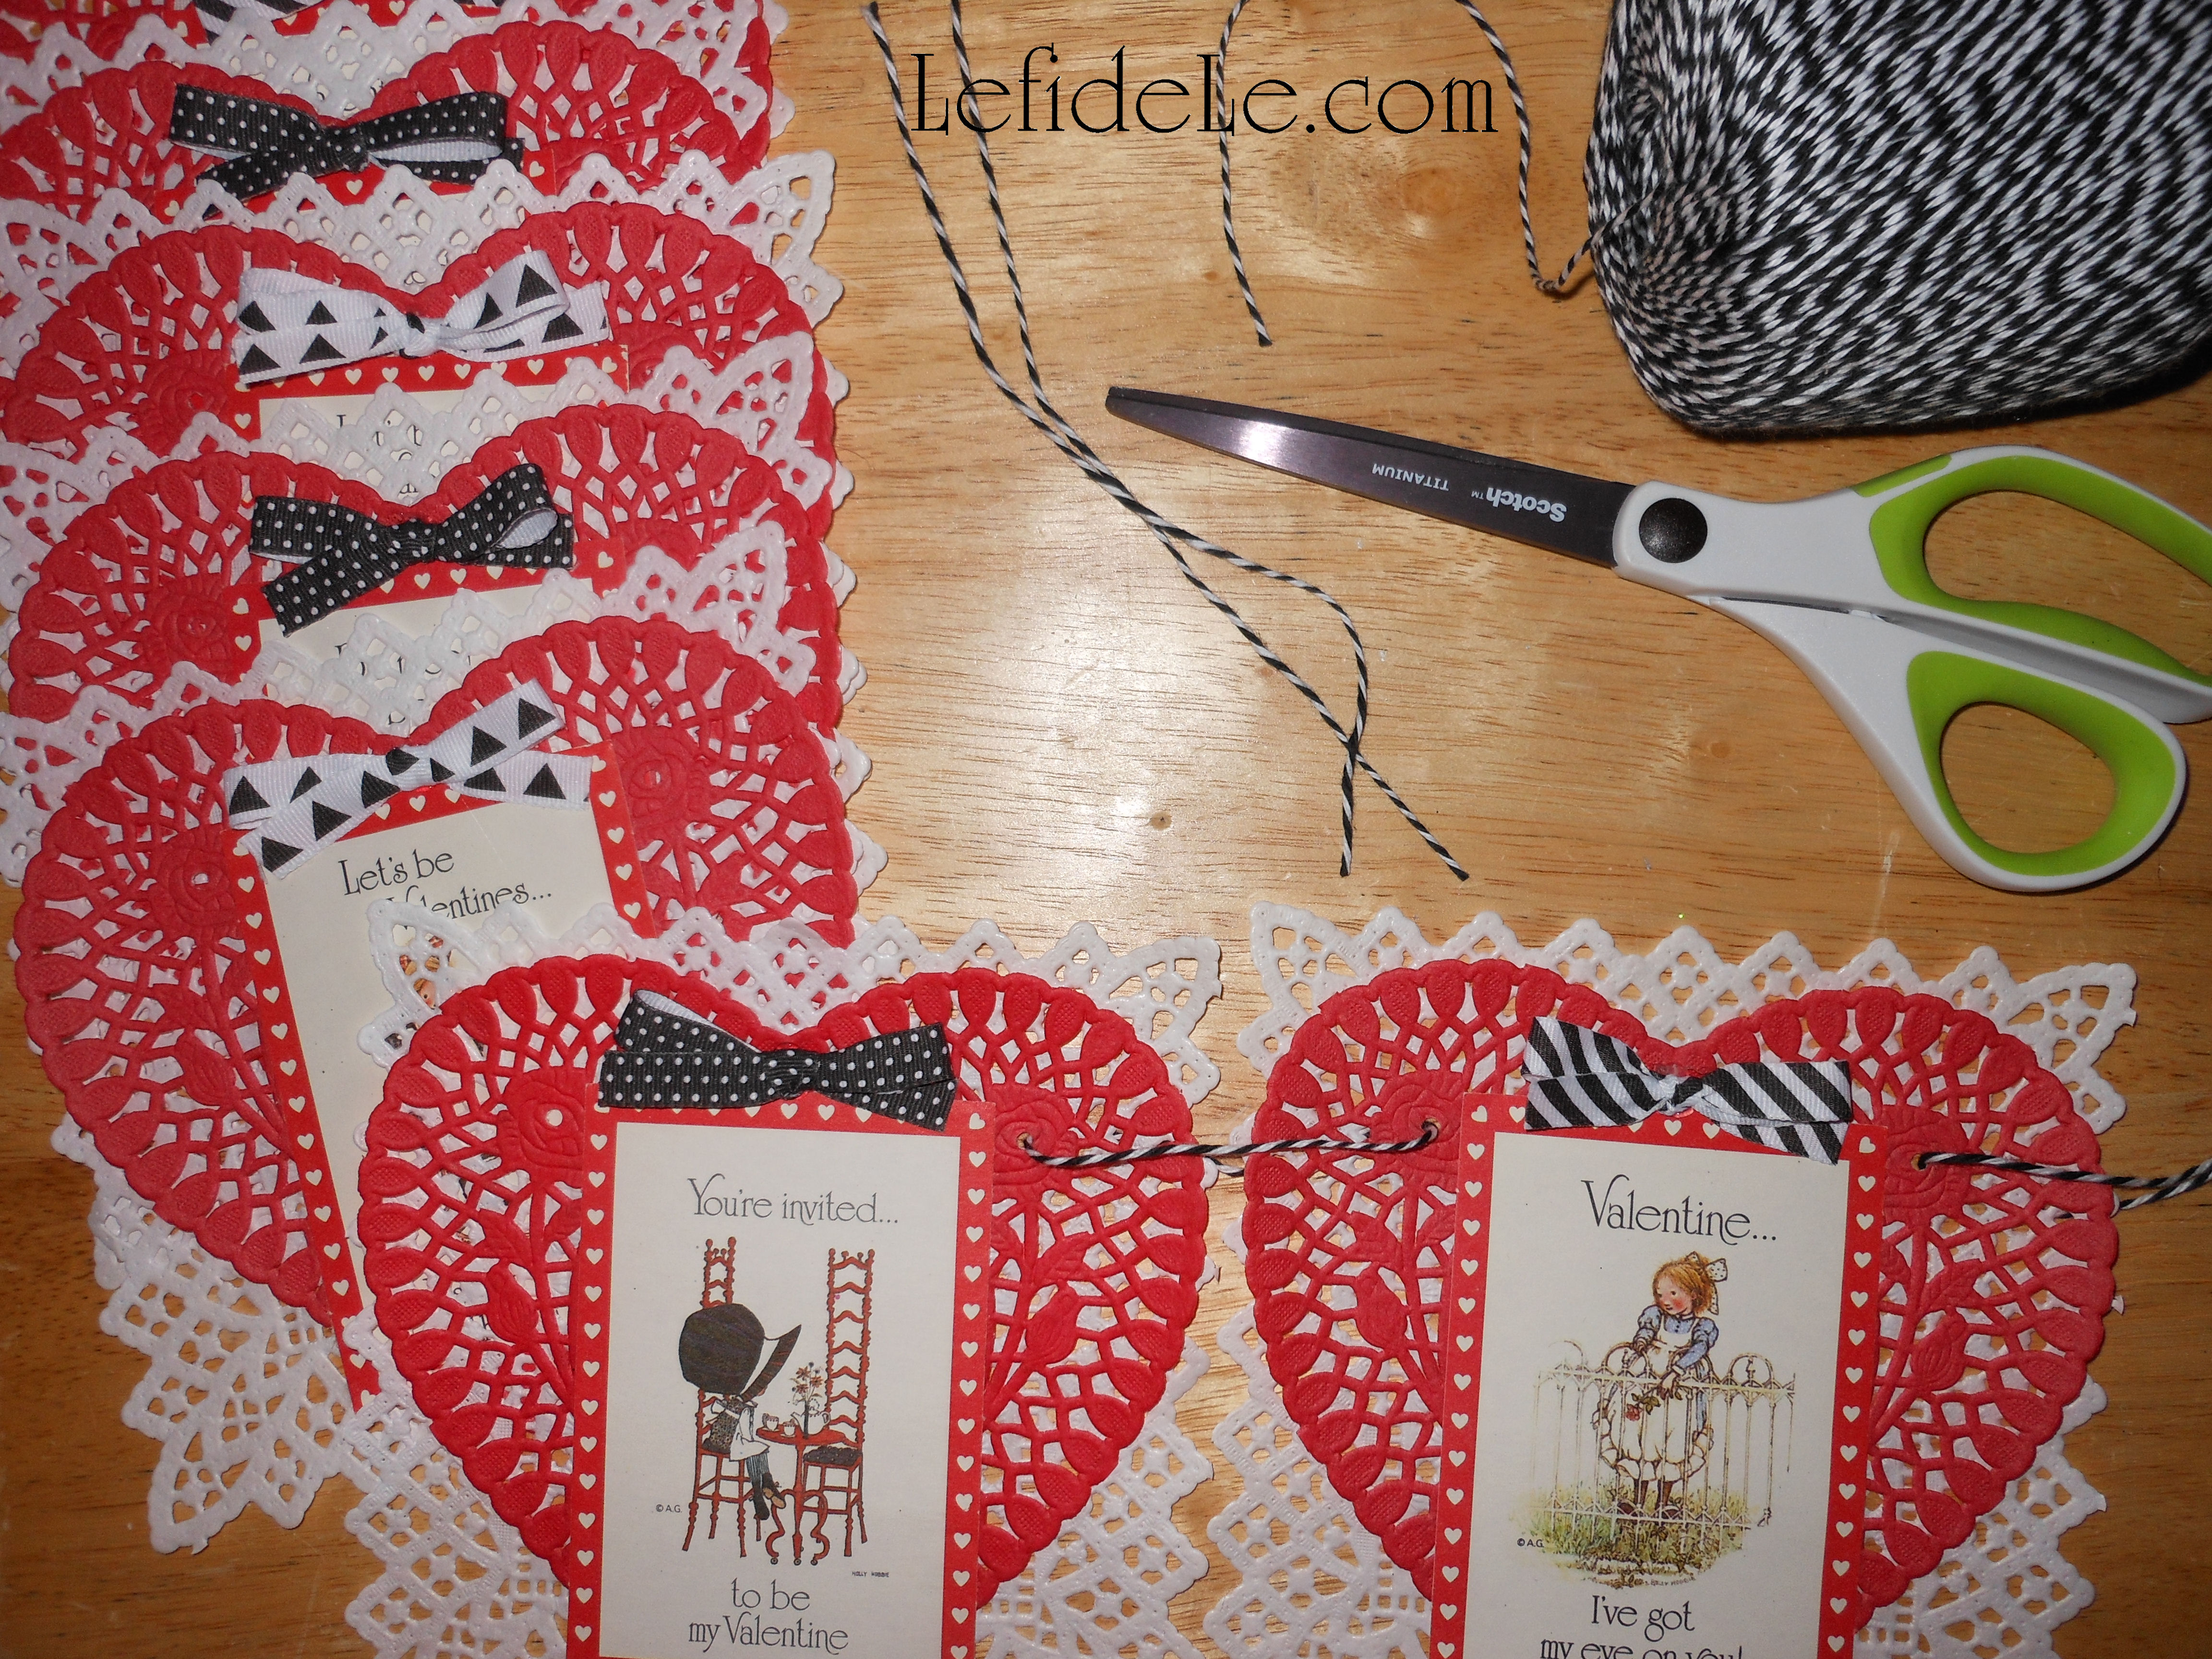
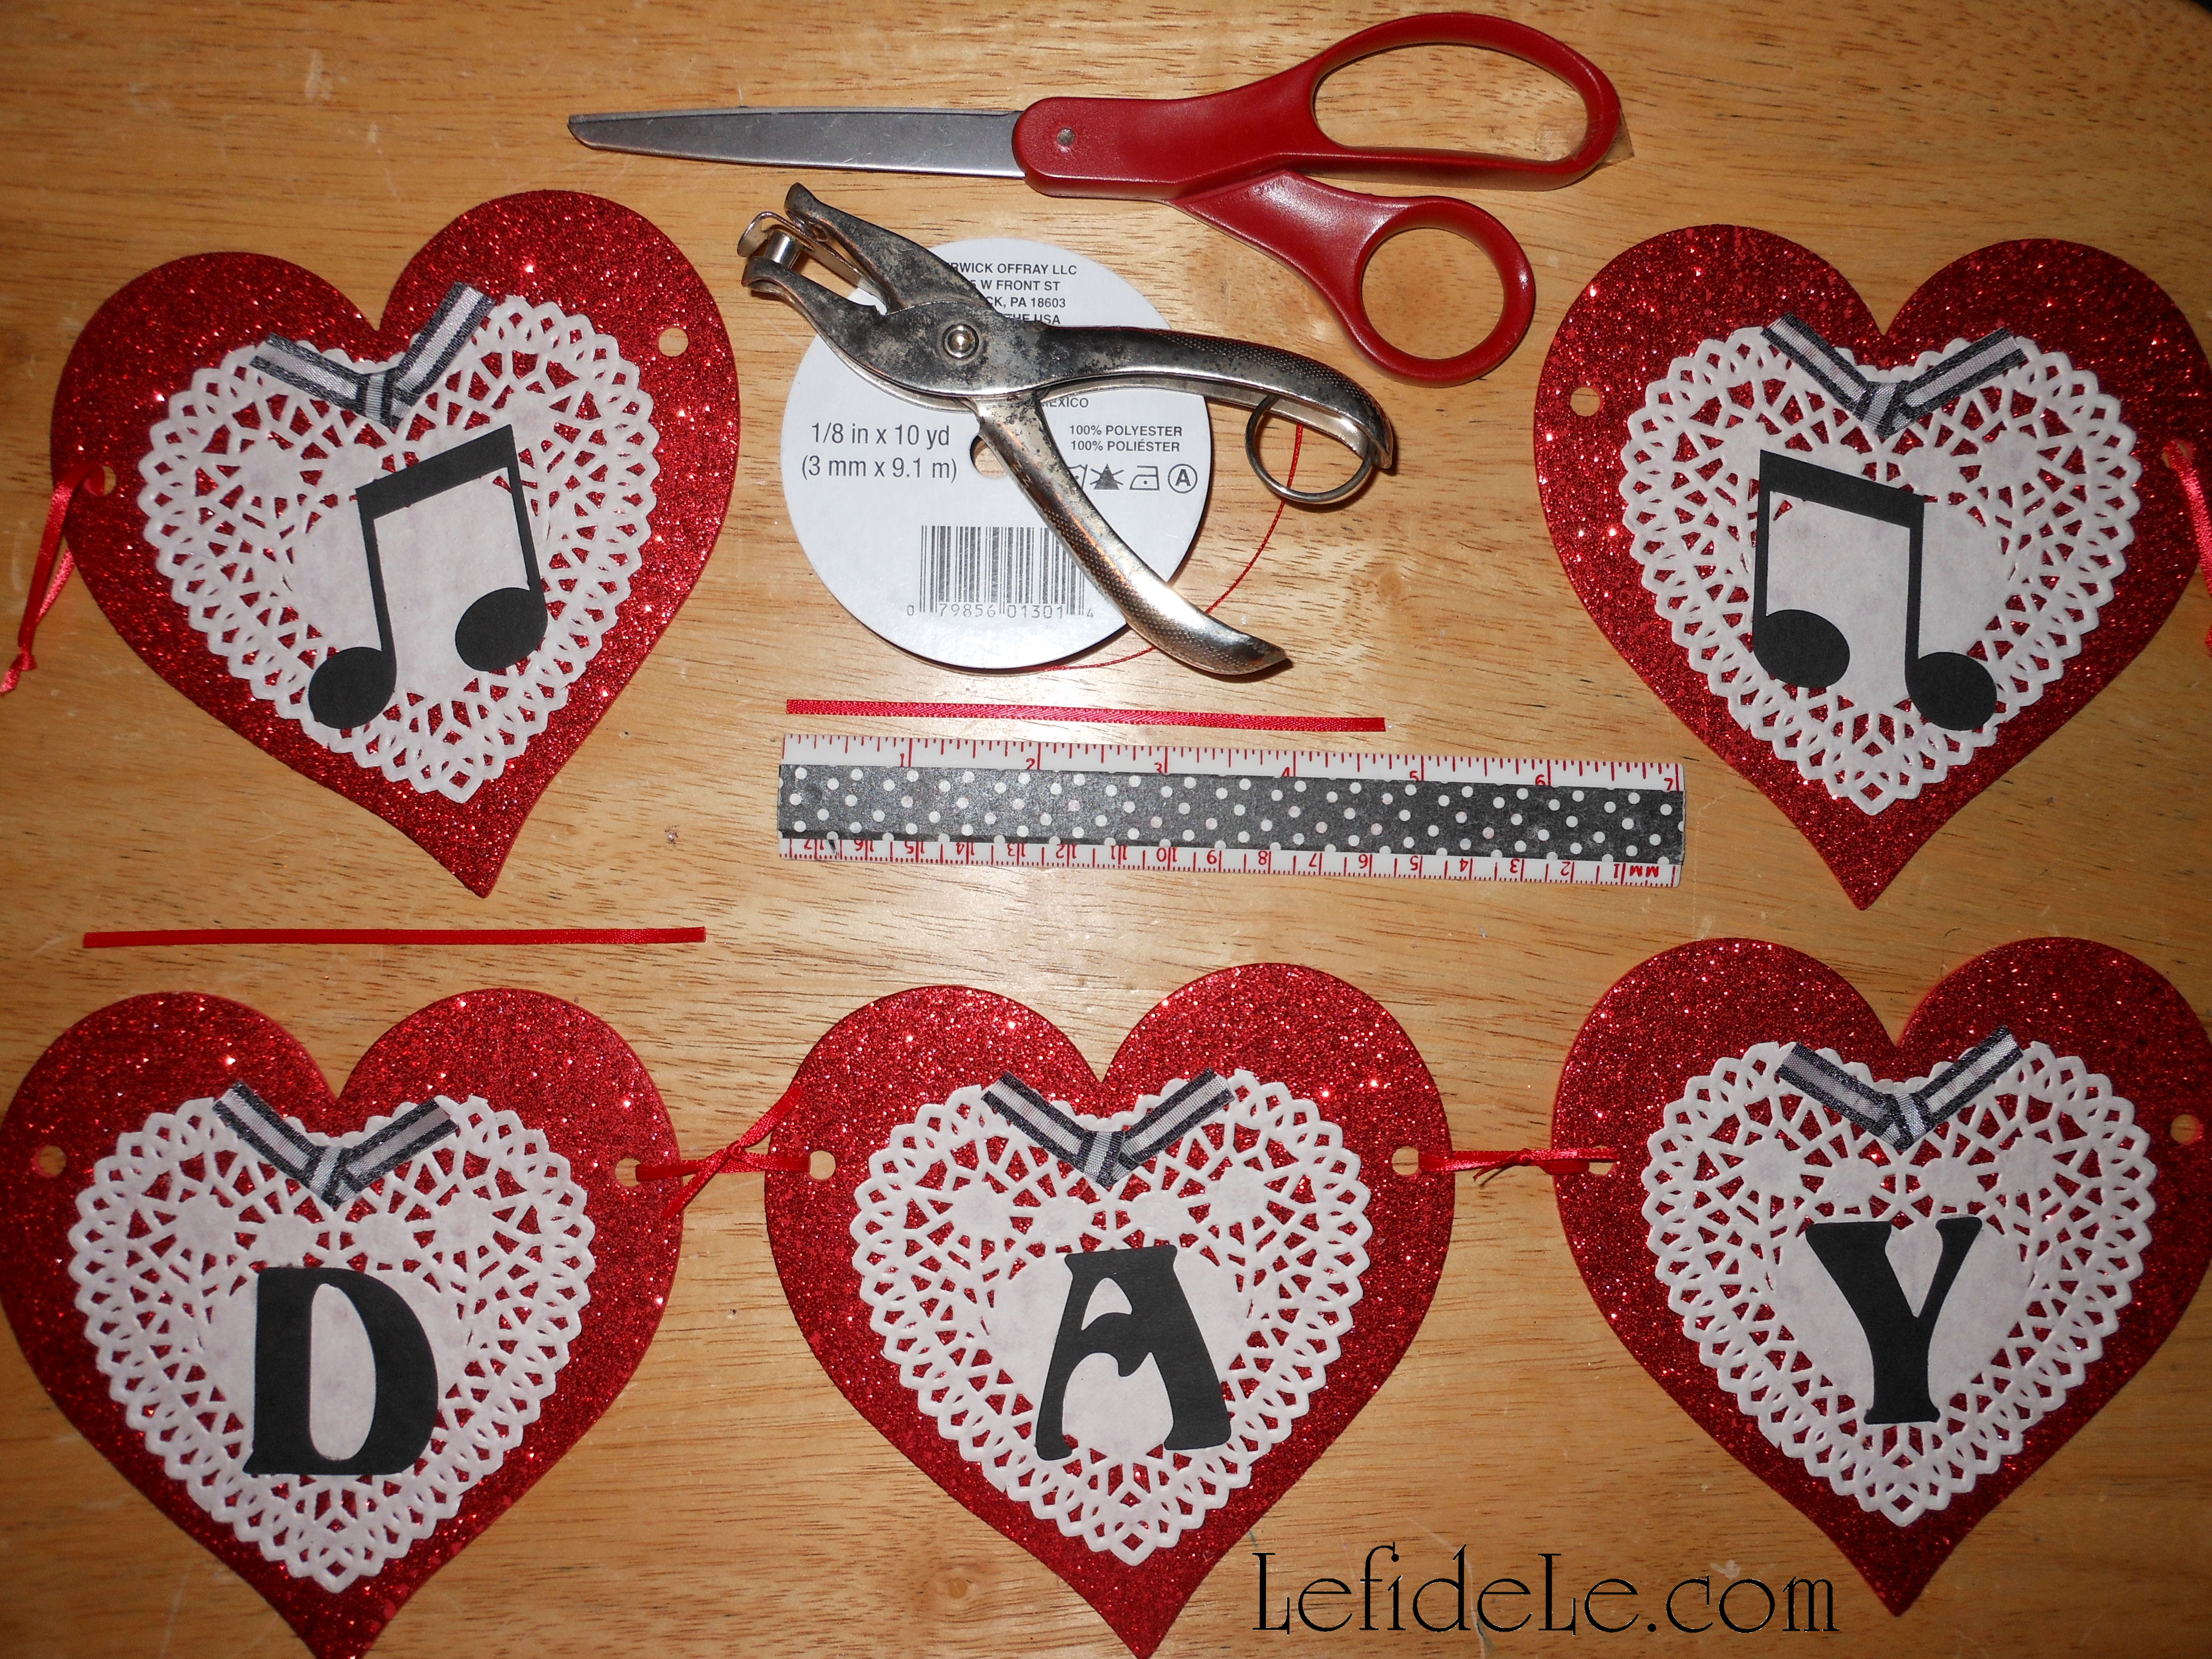
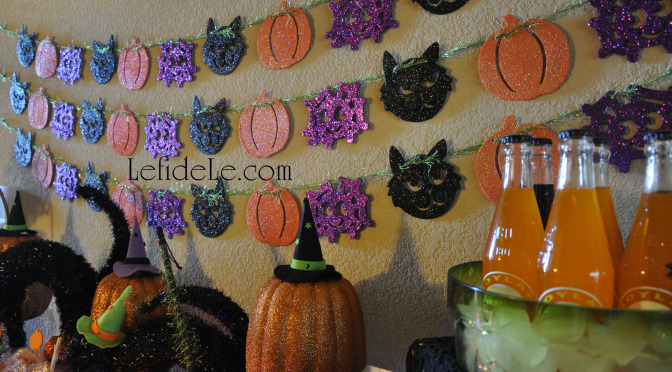
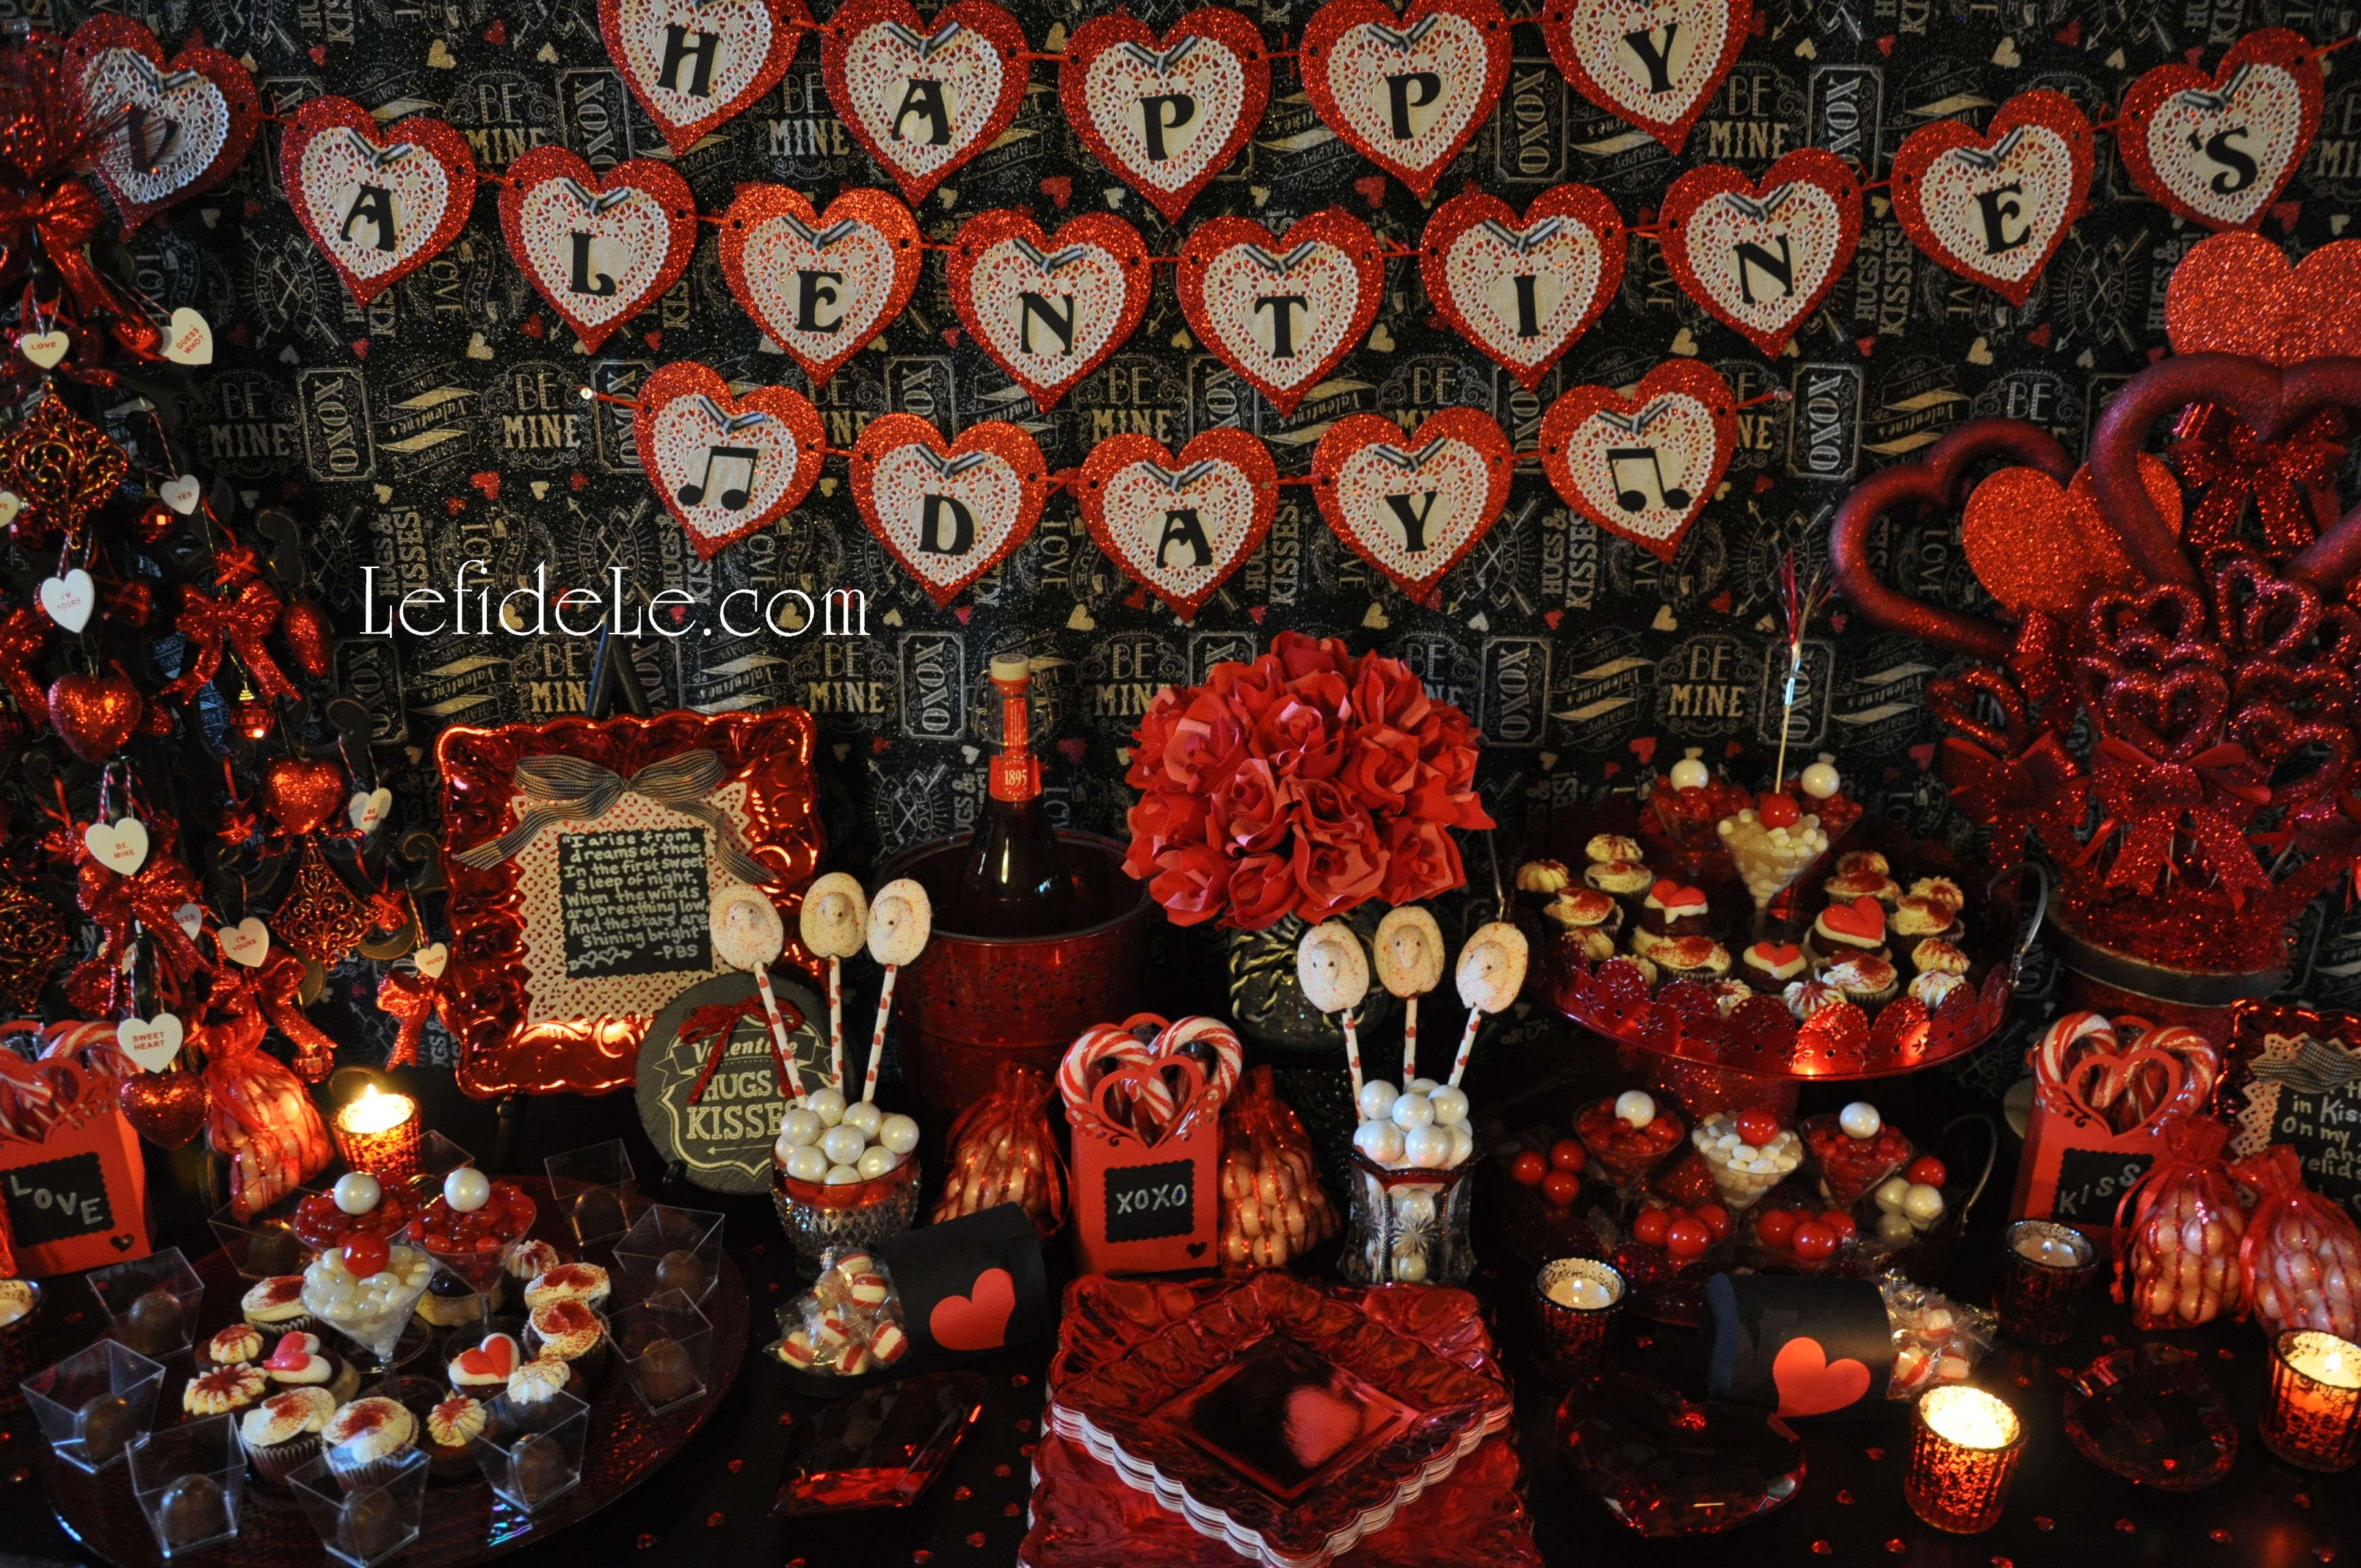
I then strung my glitter hearts Valentine’s banner atop of this. I also attached another doily banner to the credenza itself with tiny tack nails. (The printable and instructions for both banners may be found by clicking here.)

213Leigh

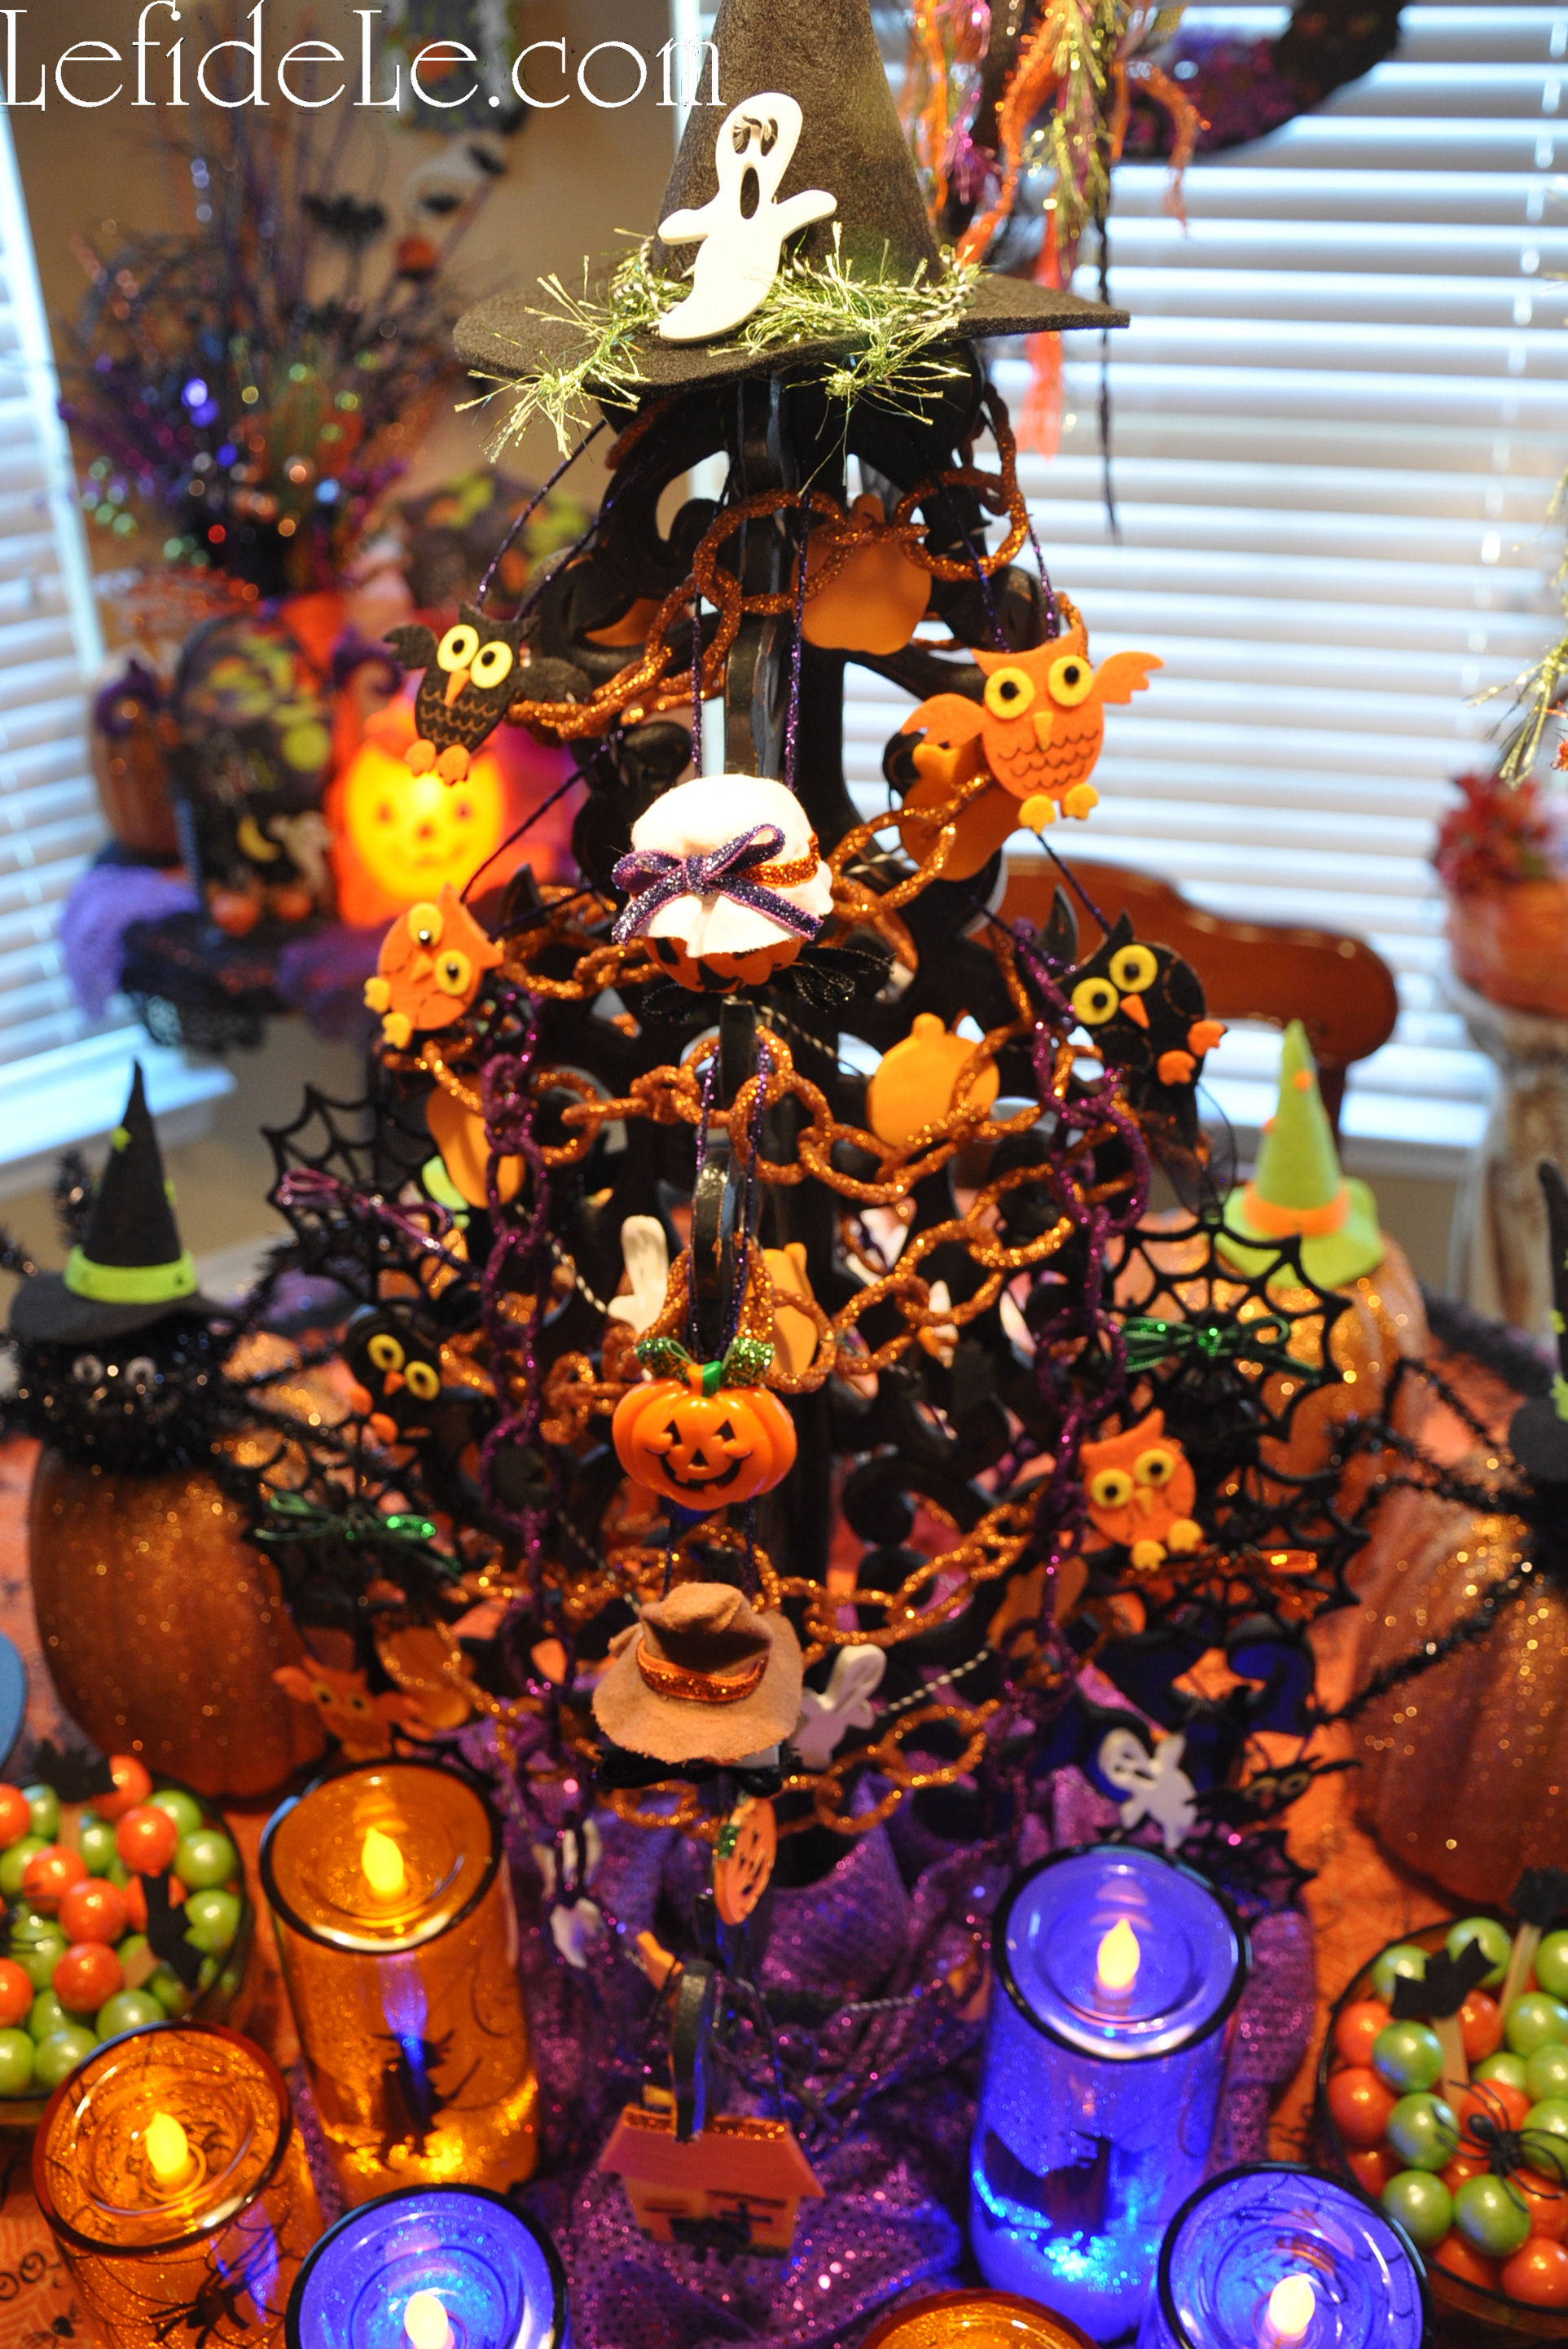
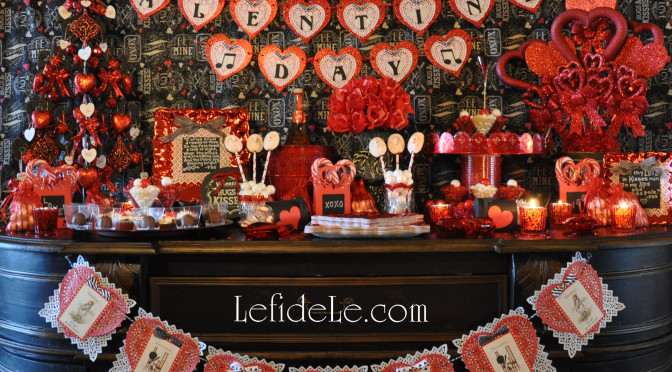
I love incorporating ornament filled trees into holidays besides Christmas. Valentine’s Day is especially easy to do this with because it falls so quickly after on the calendar so that one may really take advantage of all those deep after-Christmas clearance sales. Some of the baubles on this tree were marked 90% off which left the cost at mere cents. The topper is a glittered sprig of holiday pine.

205Leigh

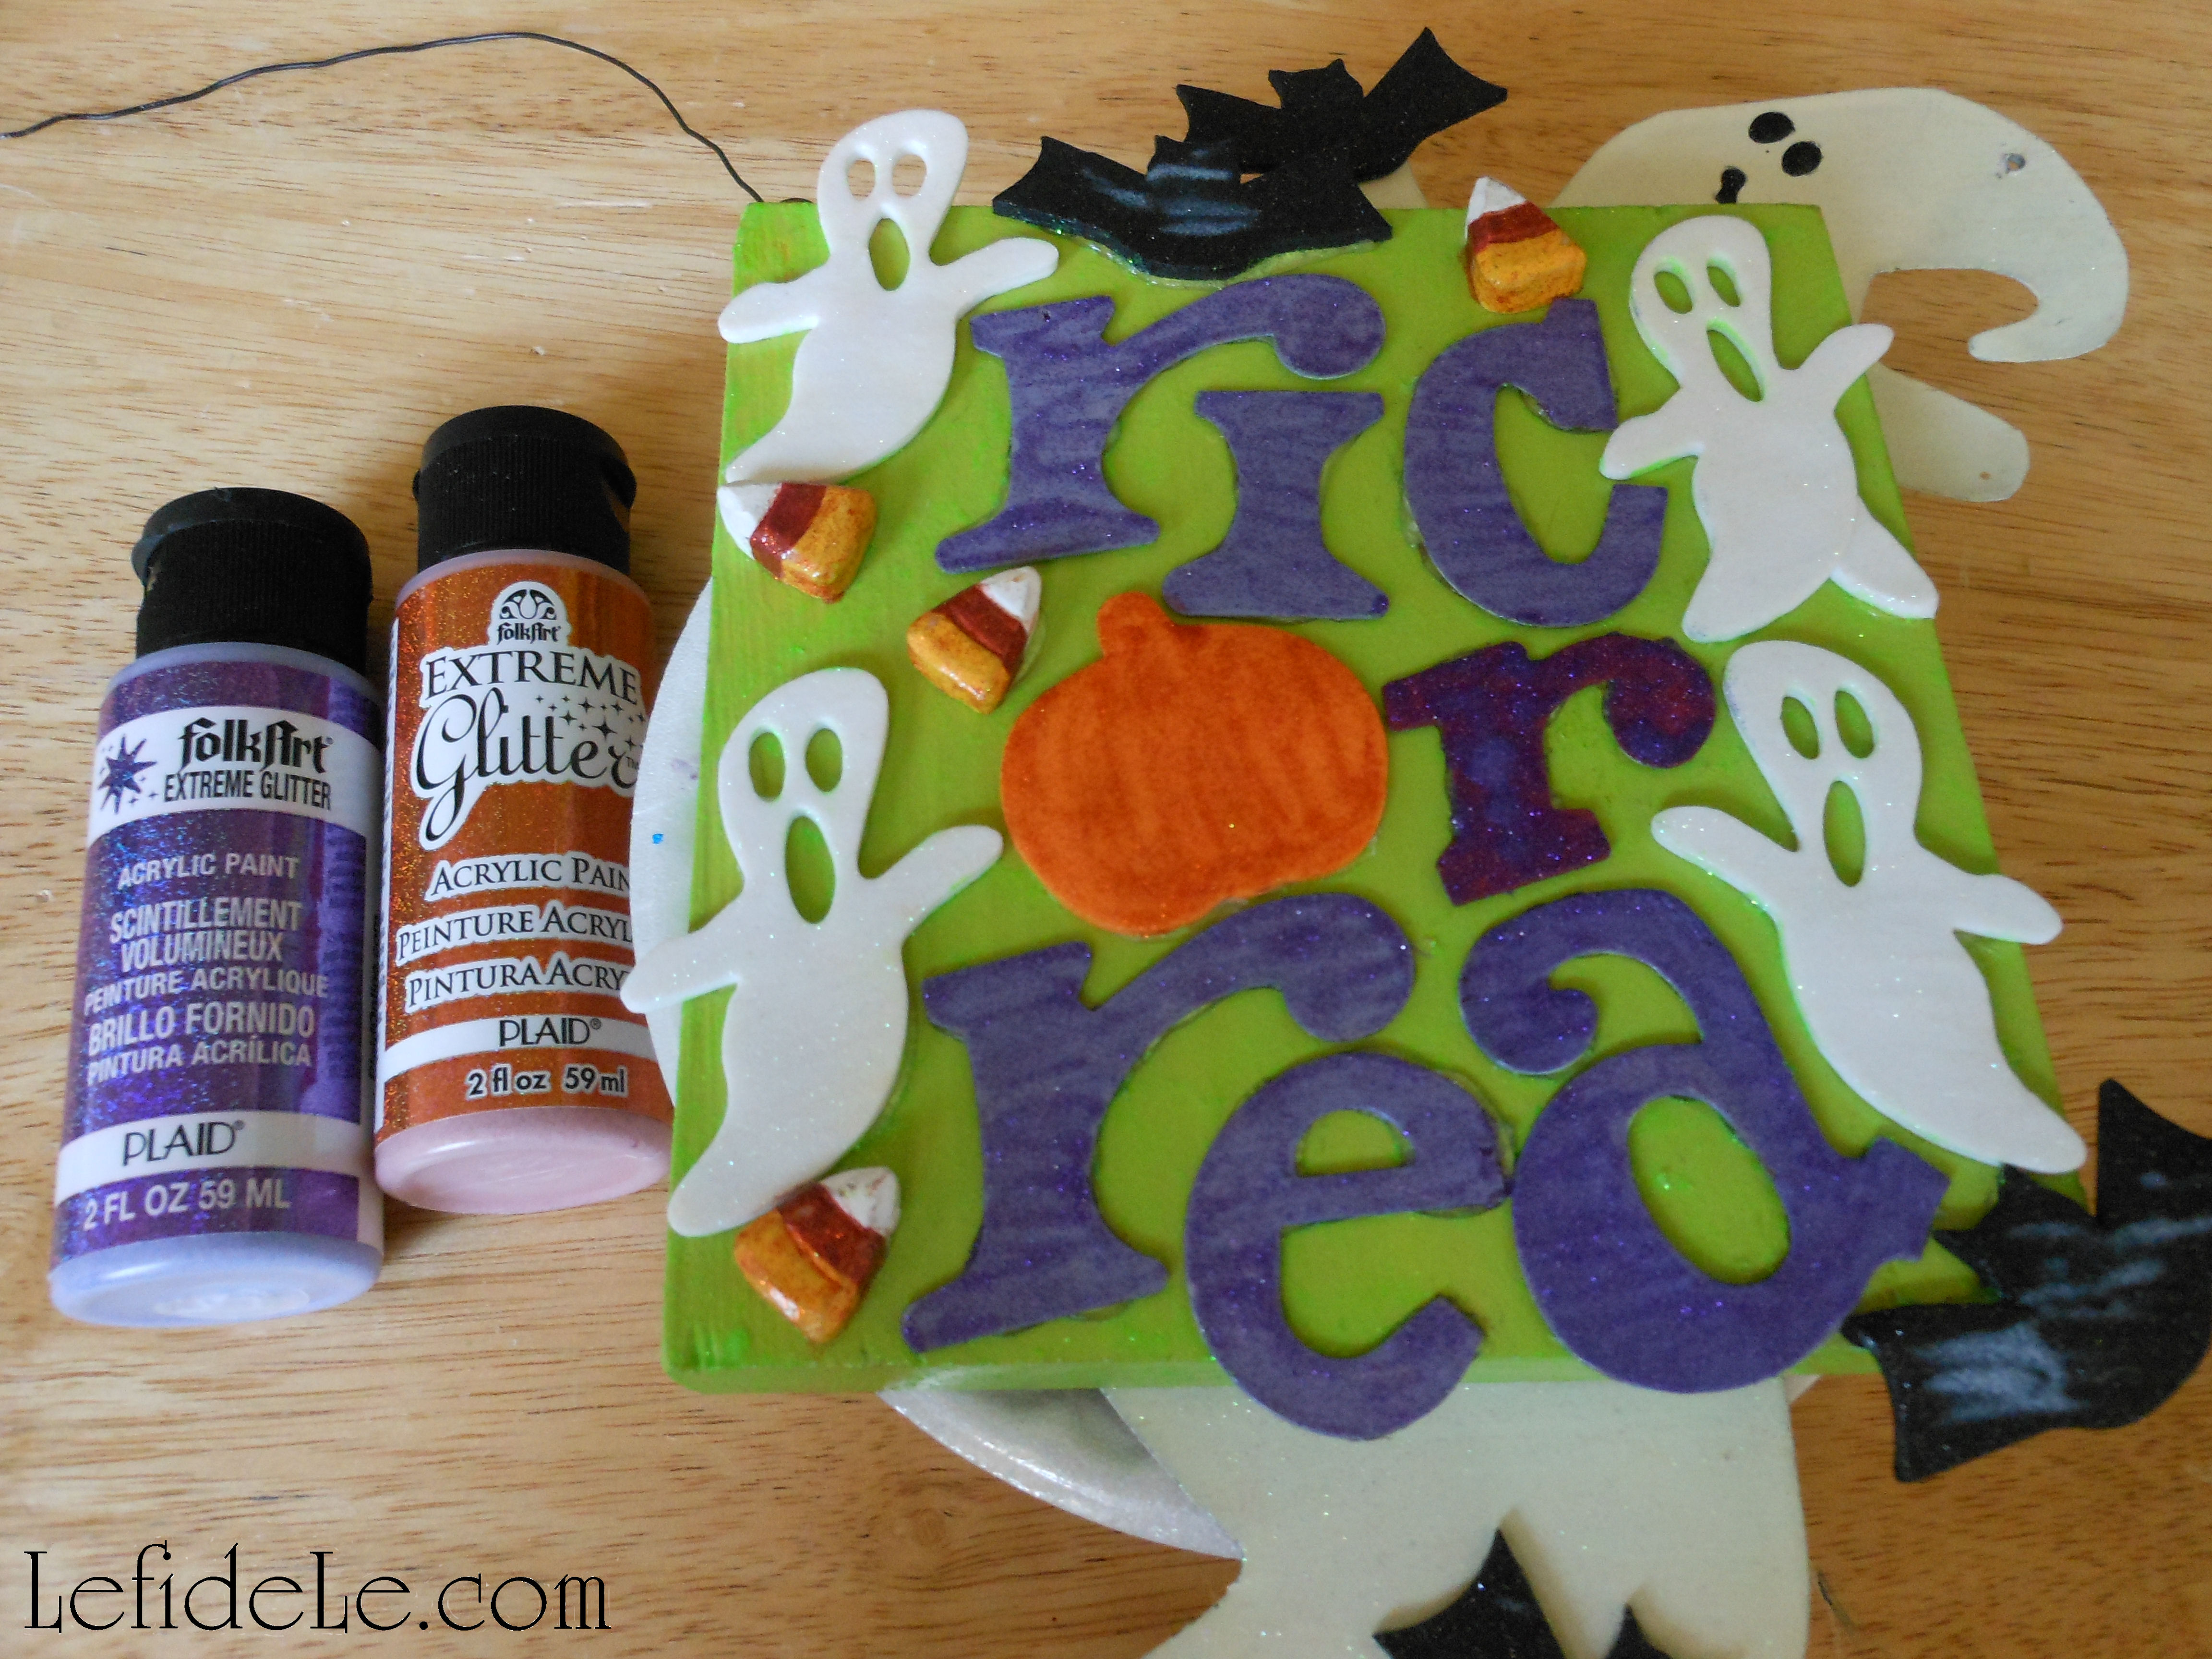
Some of you may recognize the black wooden tree from the Halloween Party. It looks really different when trimmed according to another theme. The conversation heart ornaments were made from white foam shapes (whose craft tutorial may be found here).

215Leigh

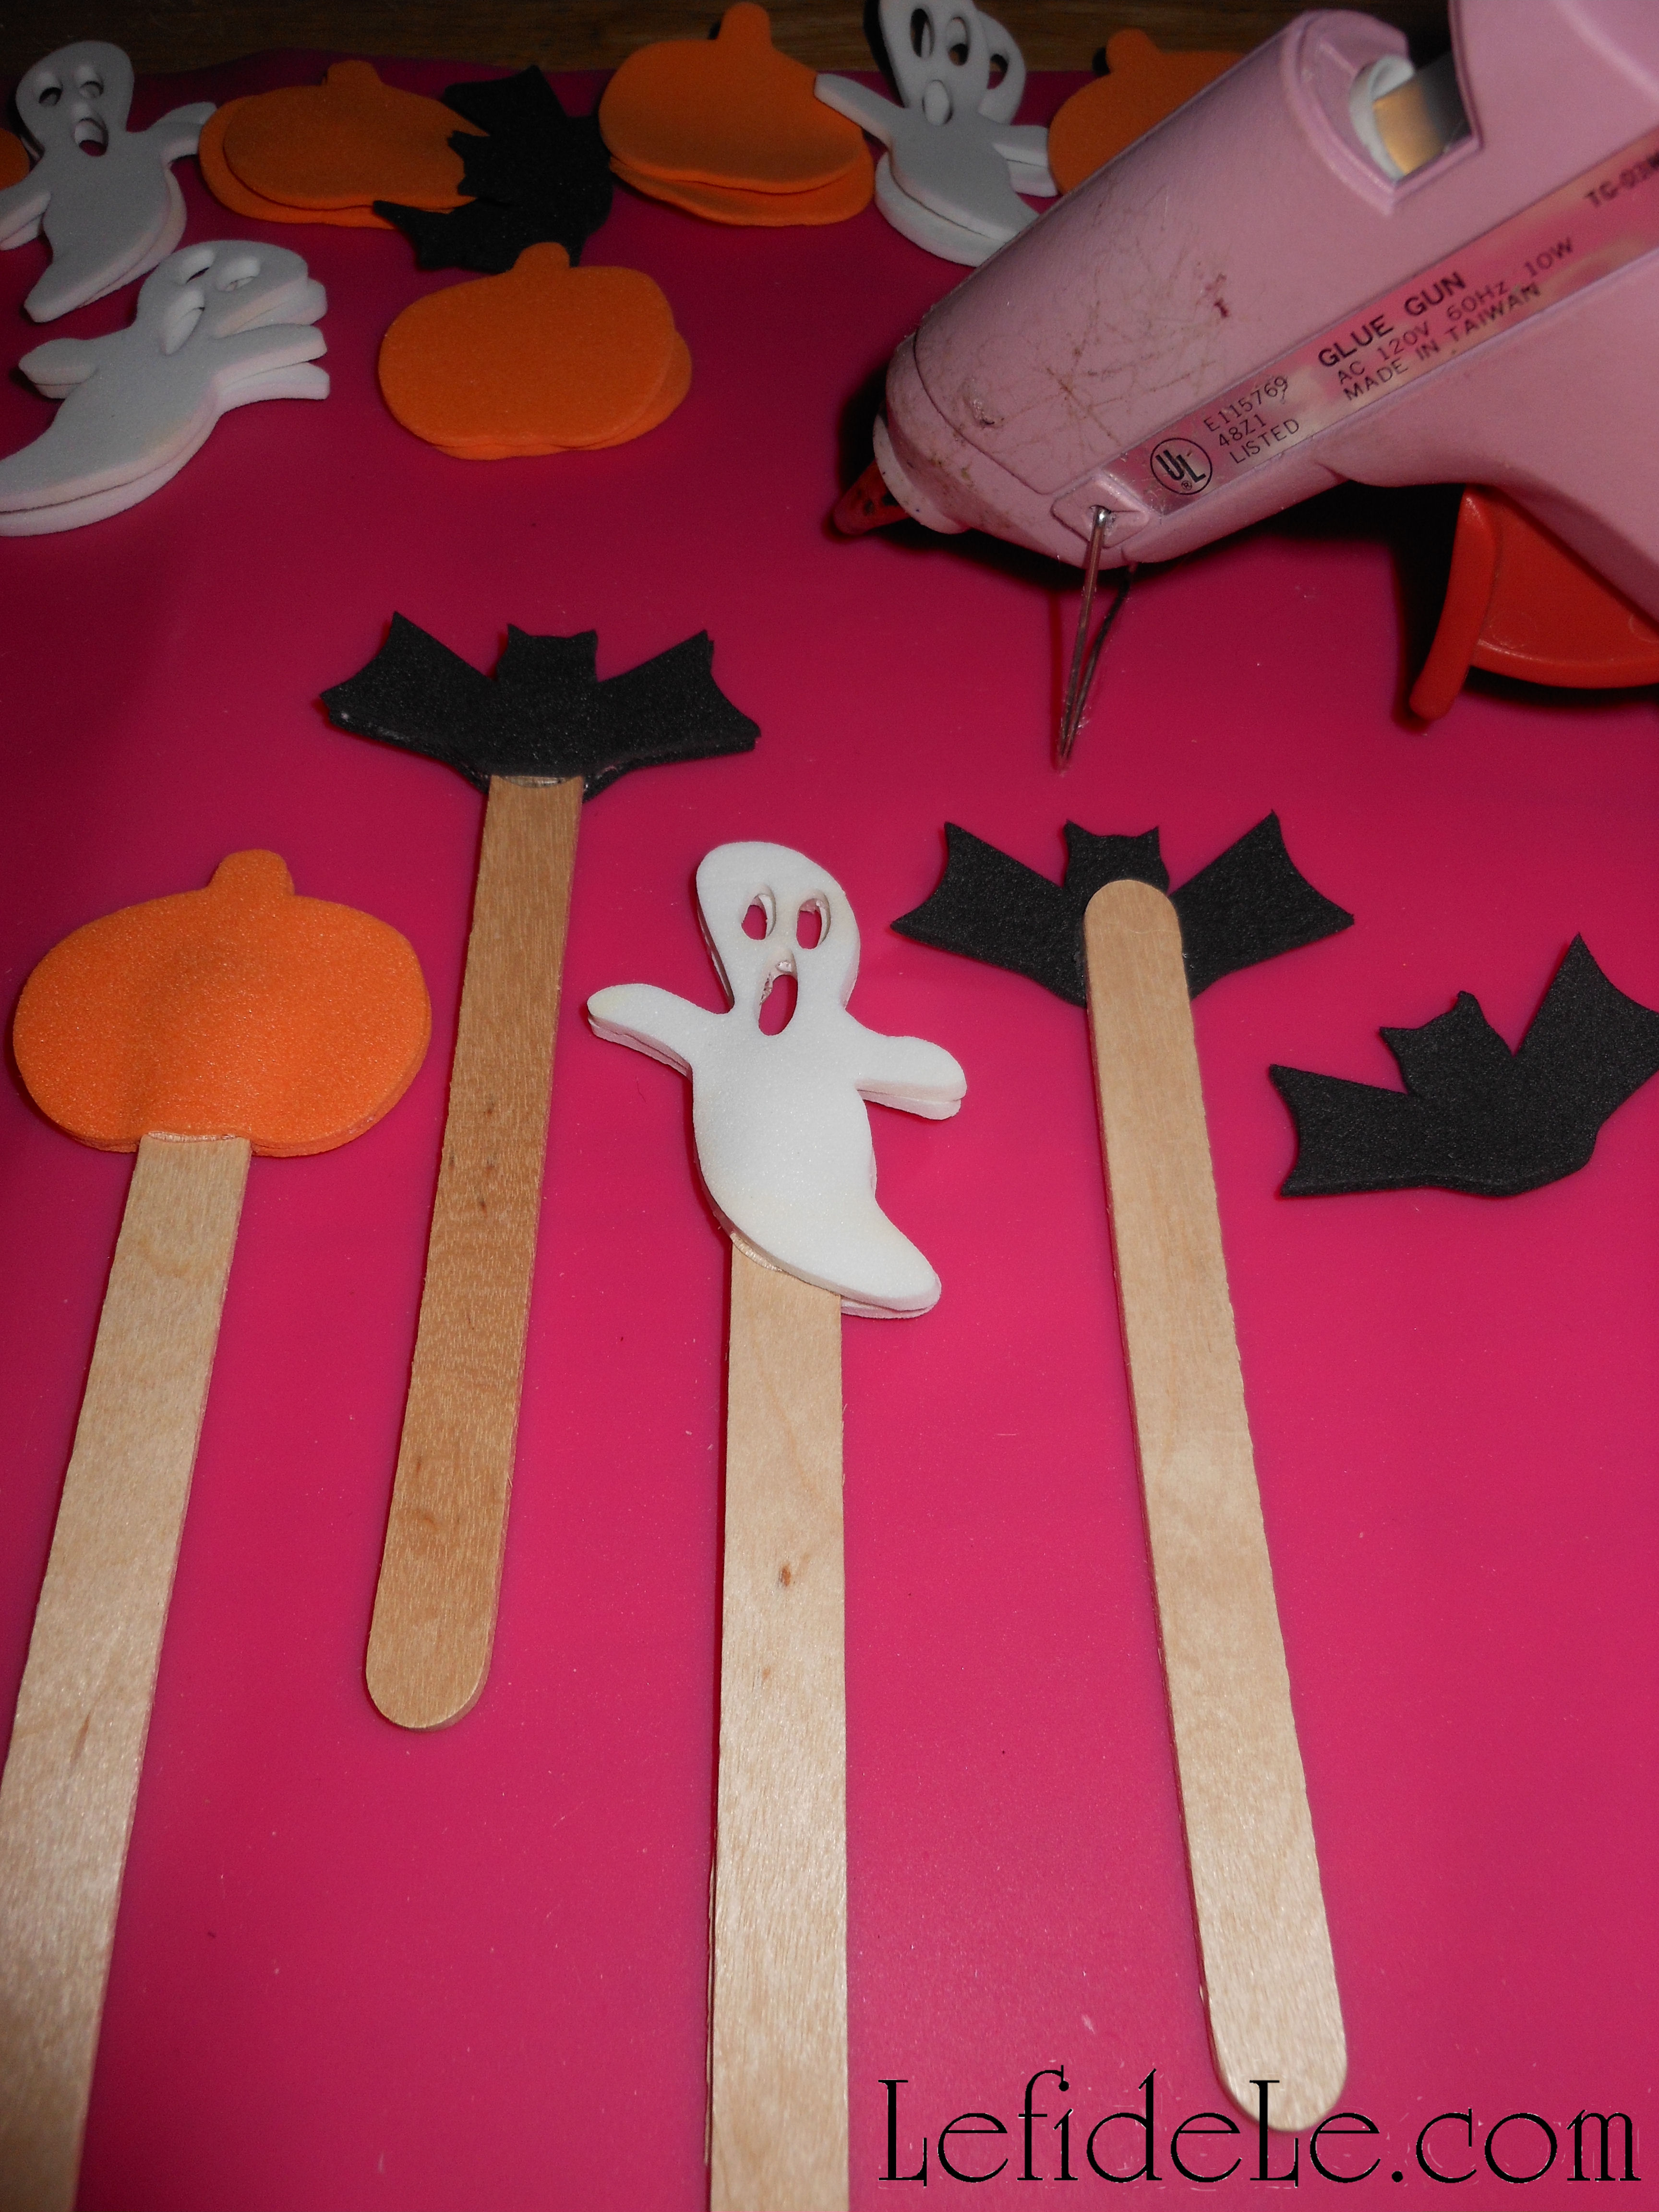
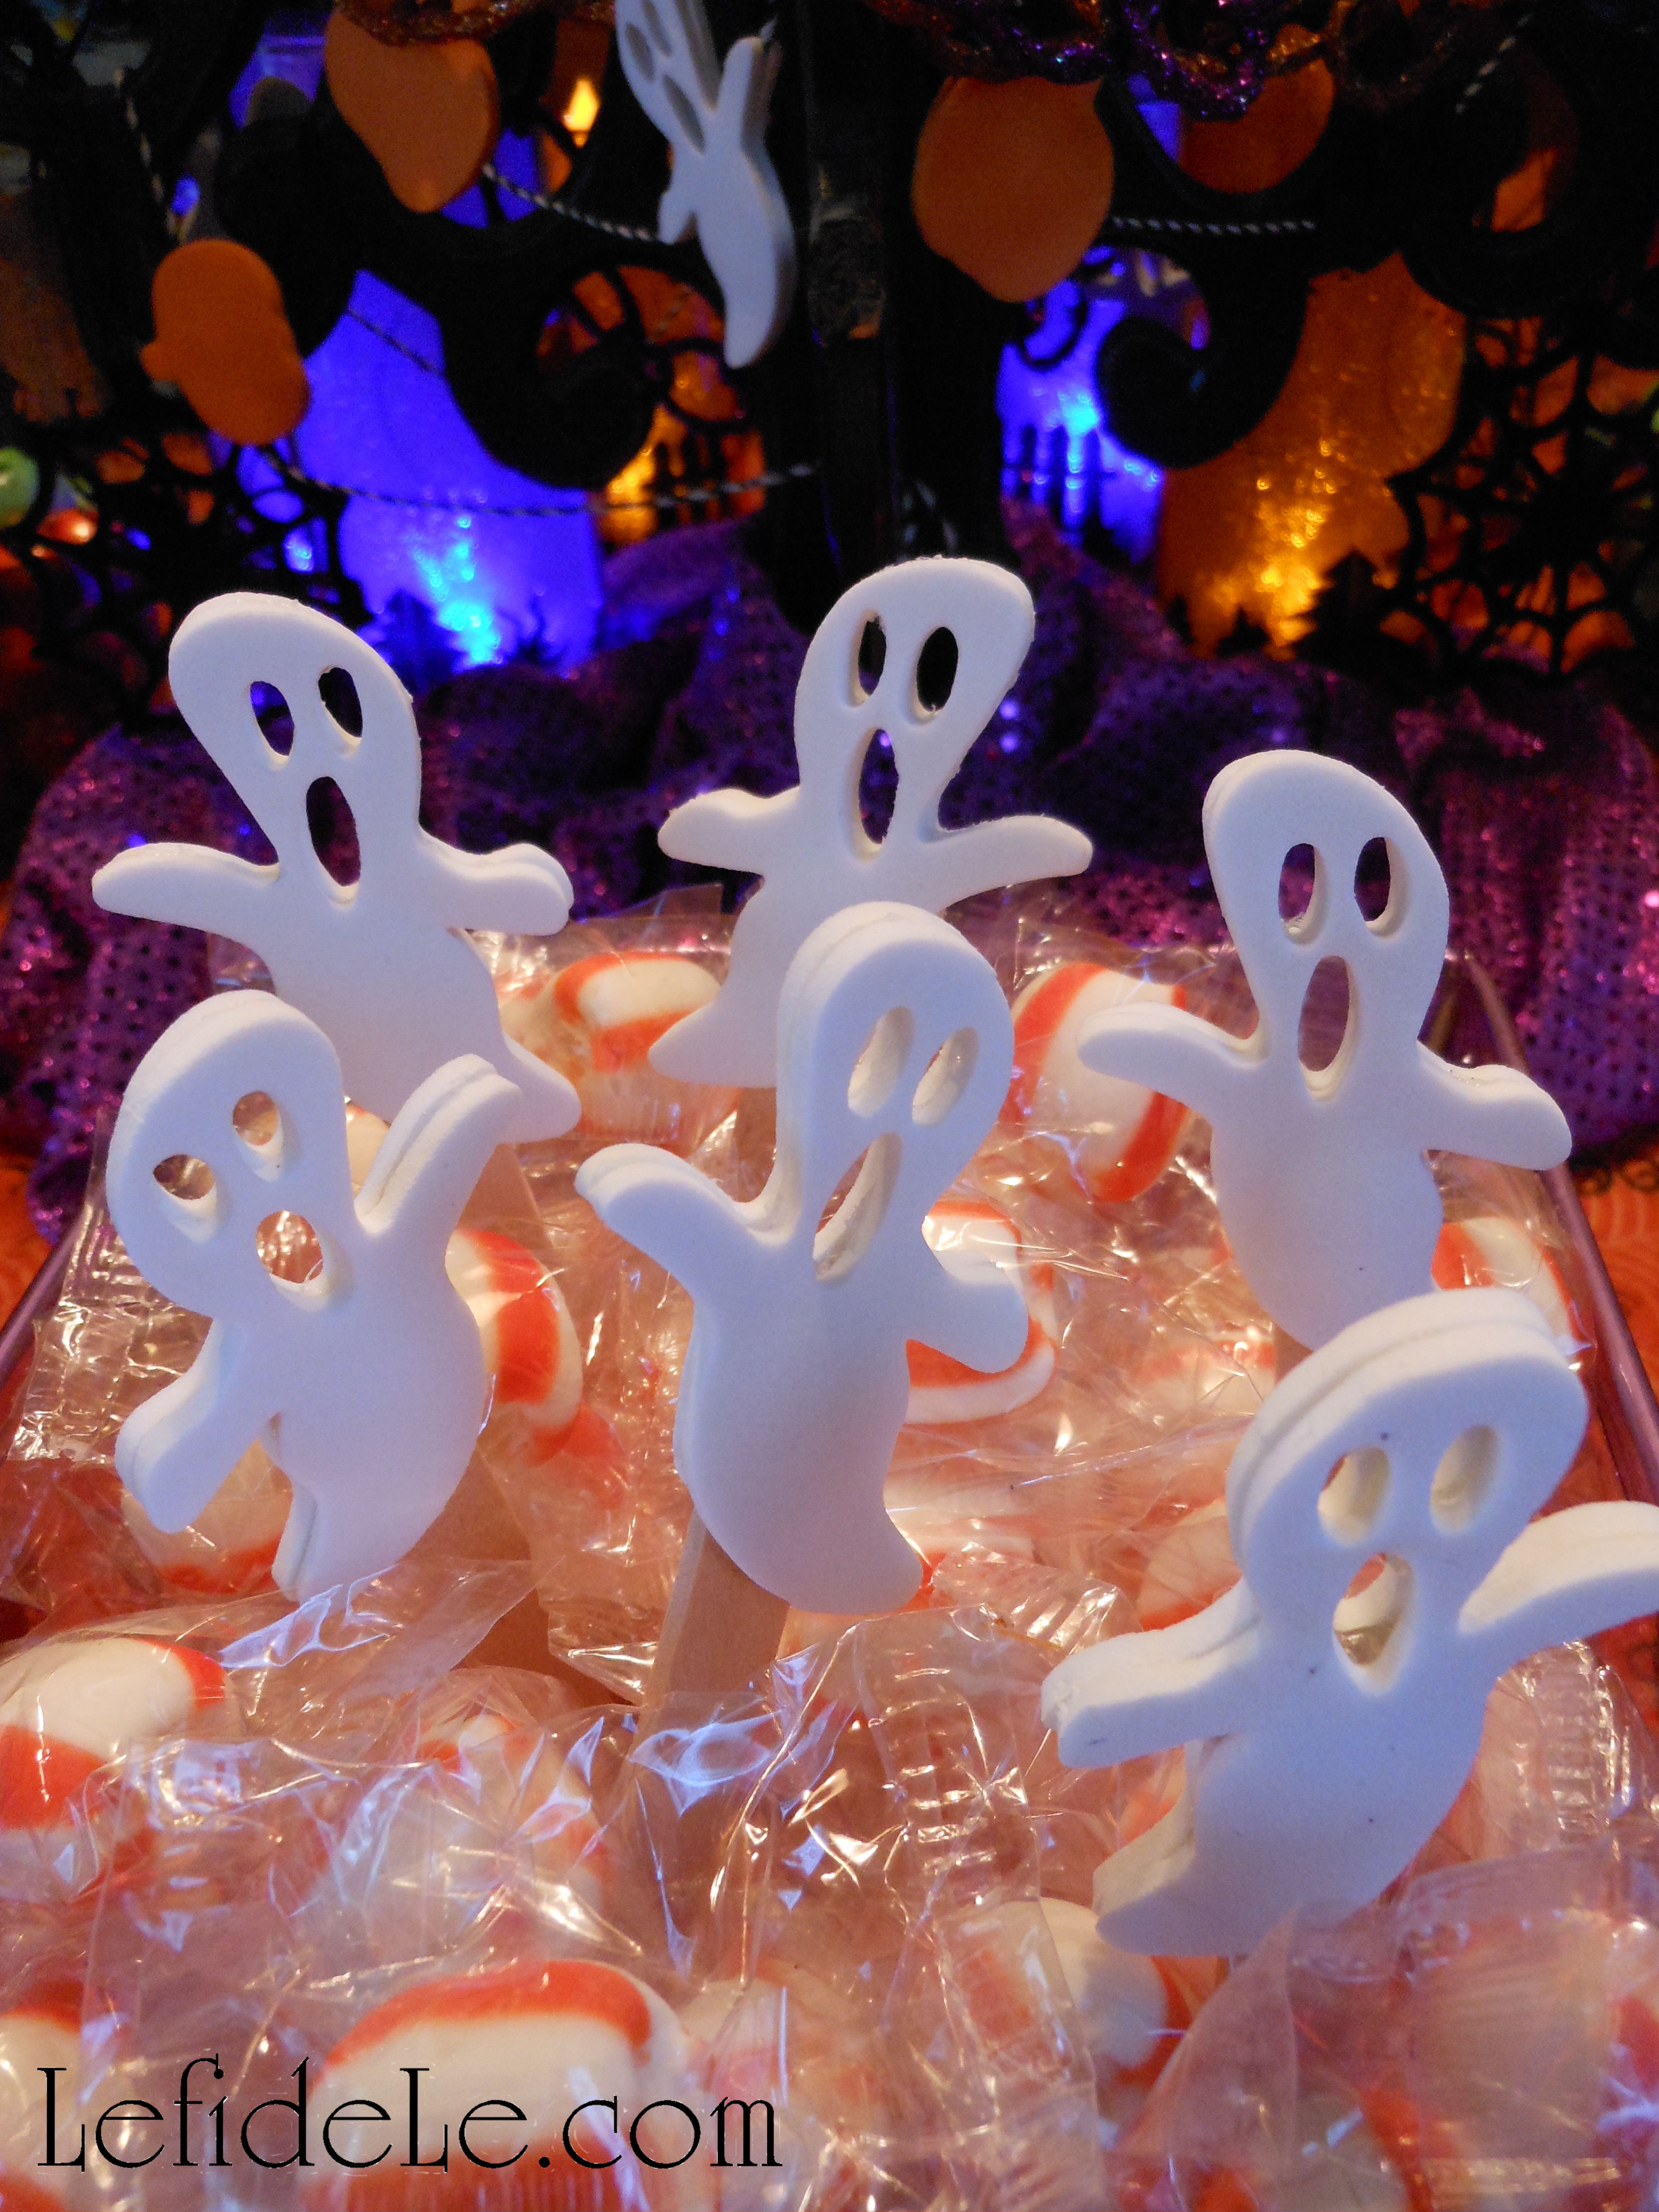
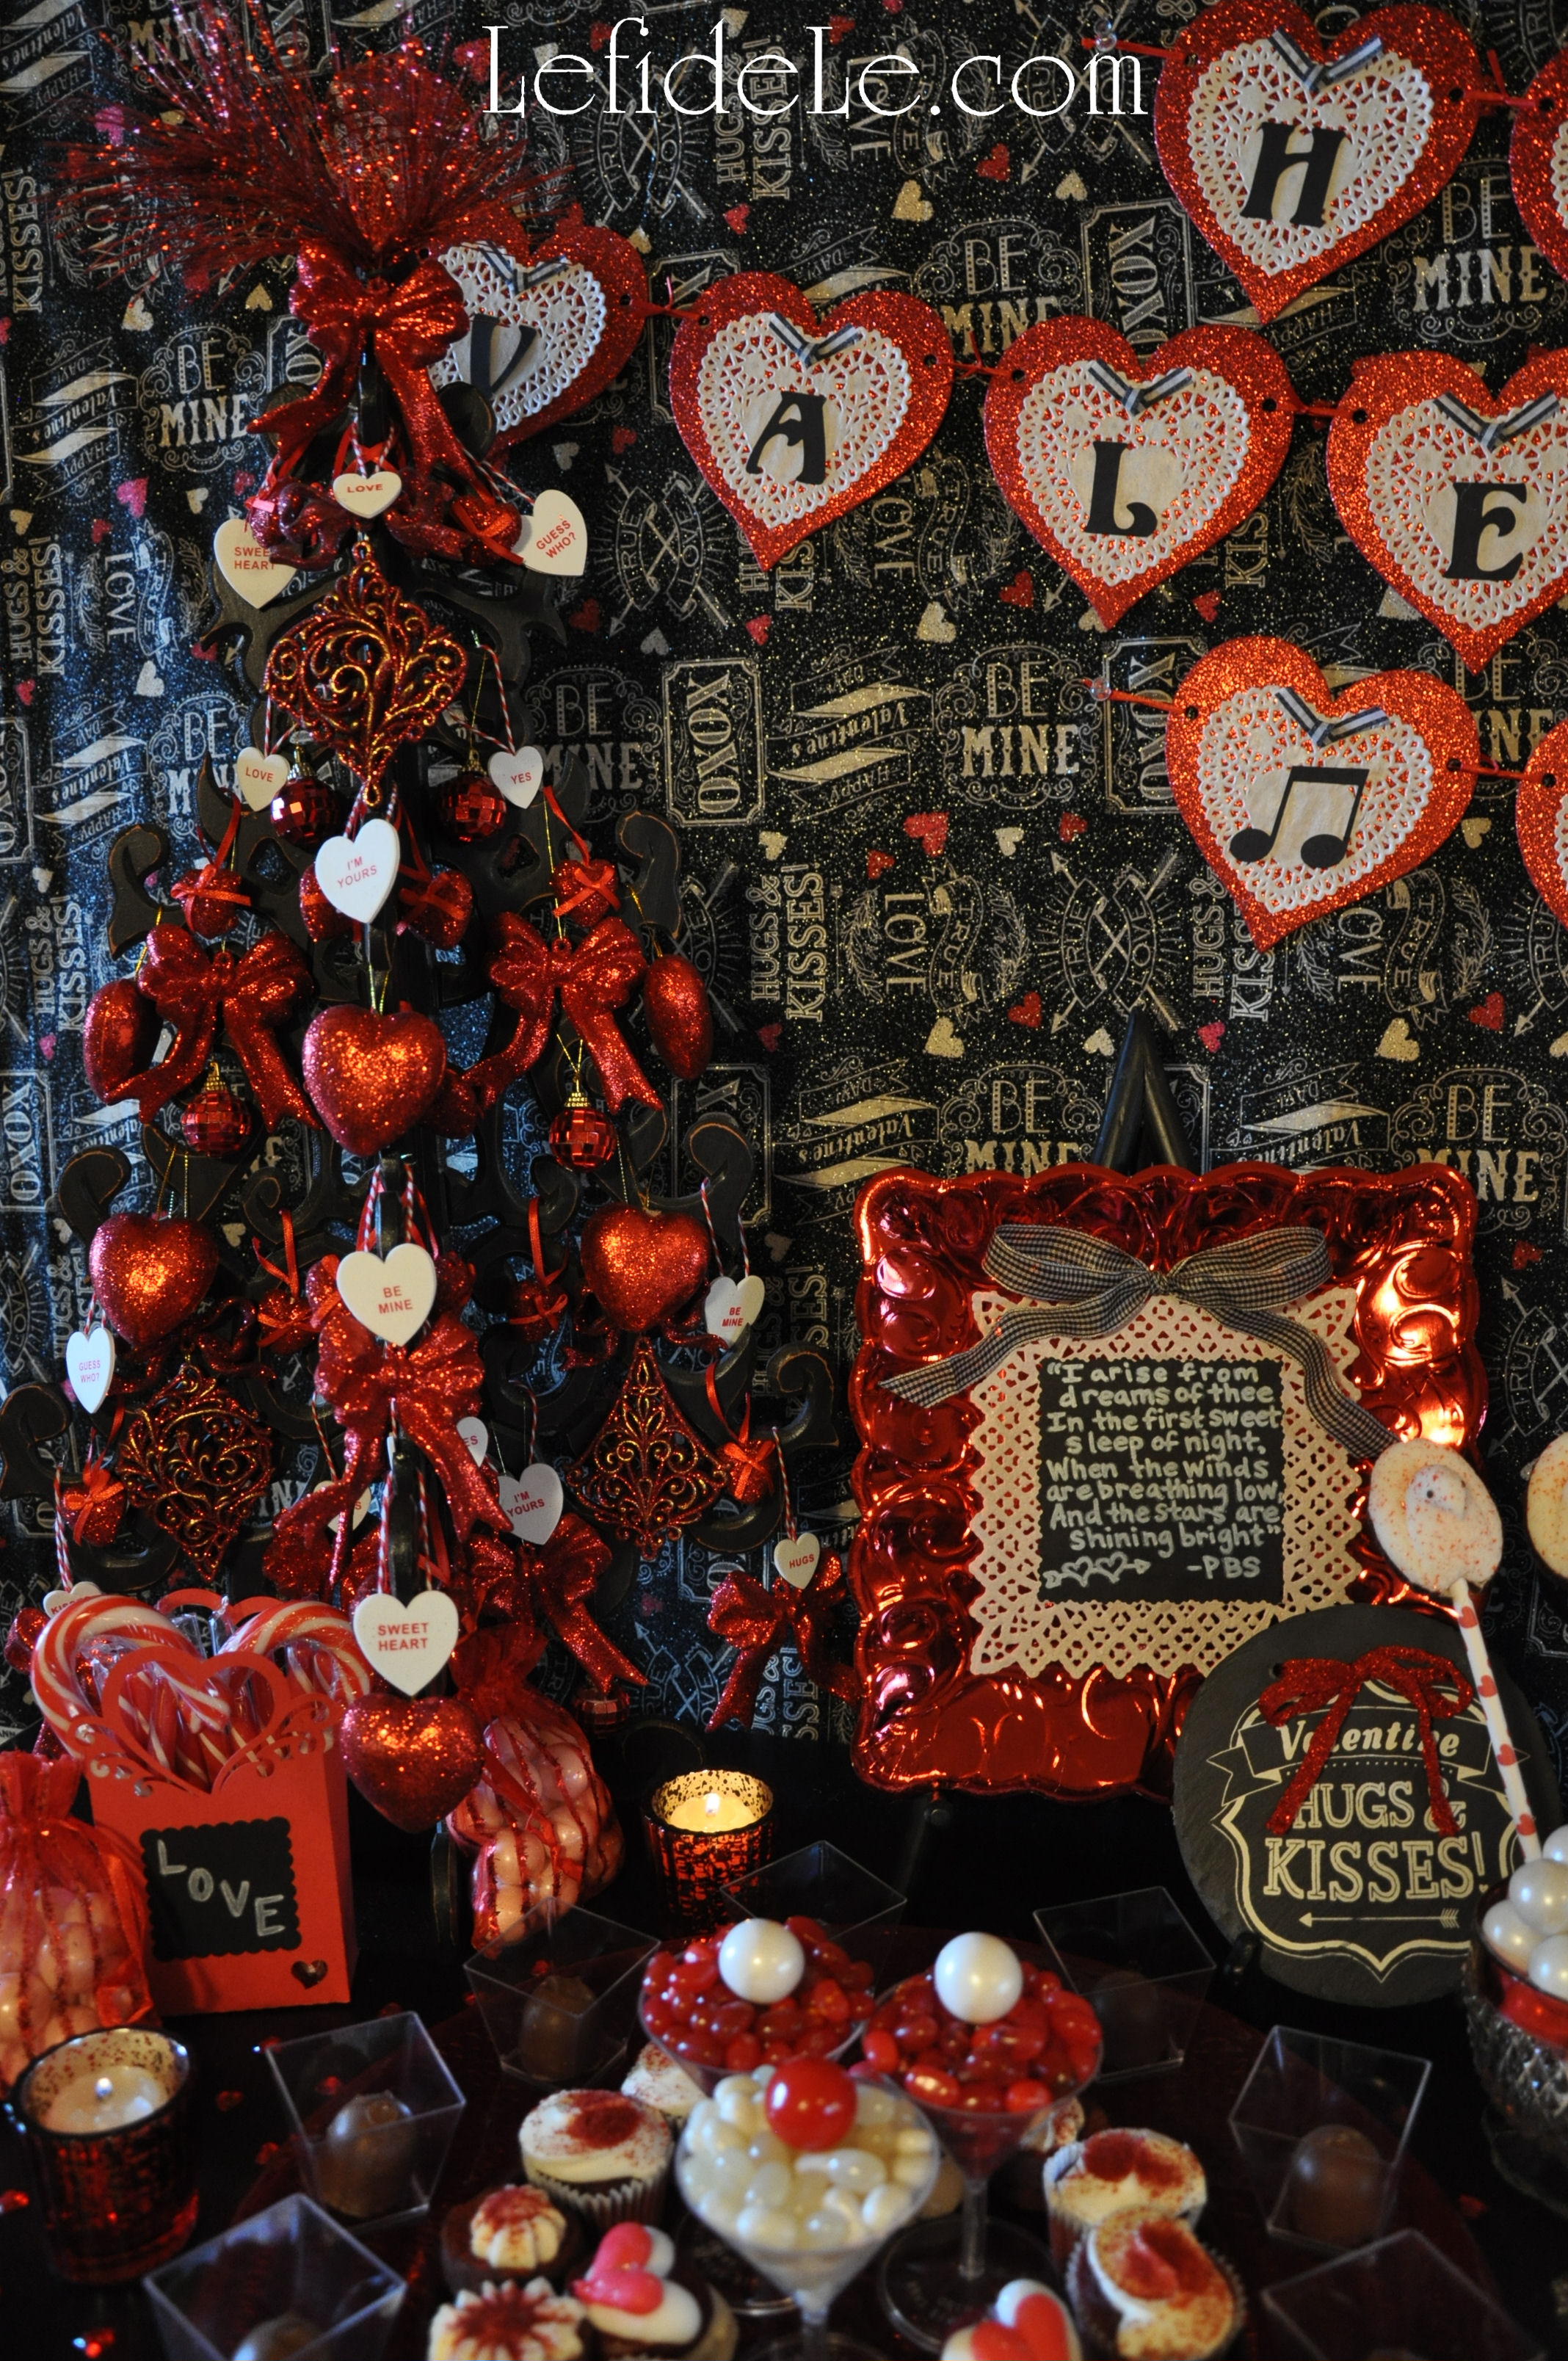
On the opposite side of the buffet, I made an arrangement that can be disassembled one heart wand at a time, to be given away as favors to departing guests. This is especially sweet when given as scepters to little Valentines princess party goers. (See the tutorial at the link here.)

206Leigh

I set all of these into a vase shaped like a thread spool twinned with glittery red flat yarn. It symbolizes the ties the bind… and is filled with hearts. Glass marbles contain the arranged wands yet allow for easy removal. These are topped with another variety of glittery yarn to conceal the marbles.

214Leigh

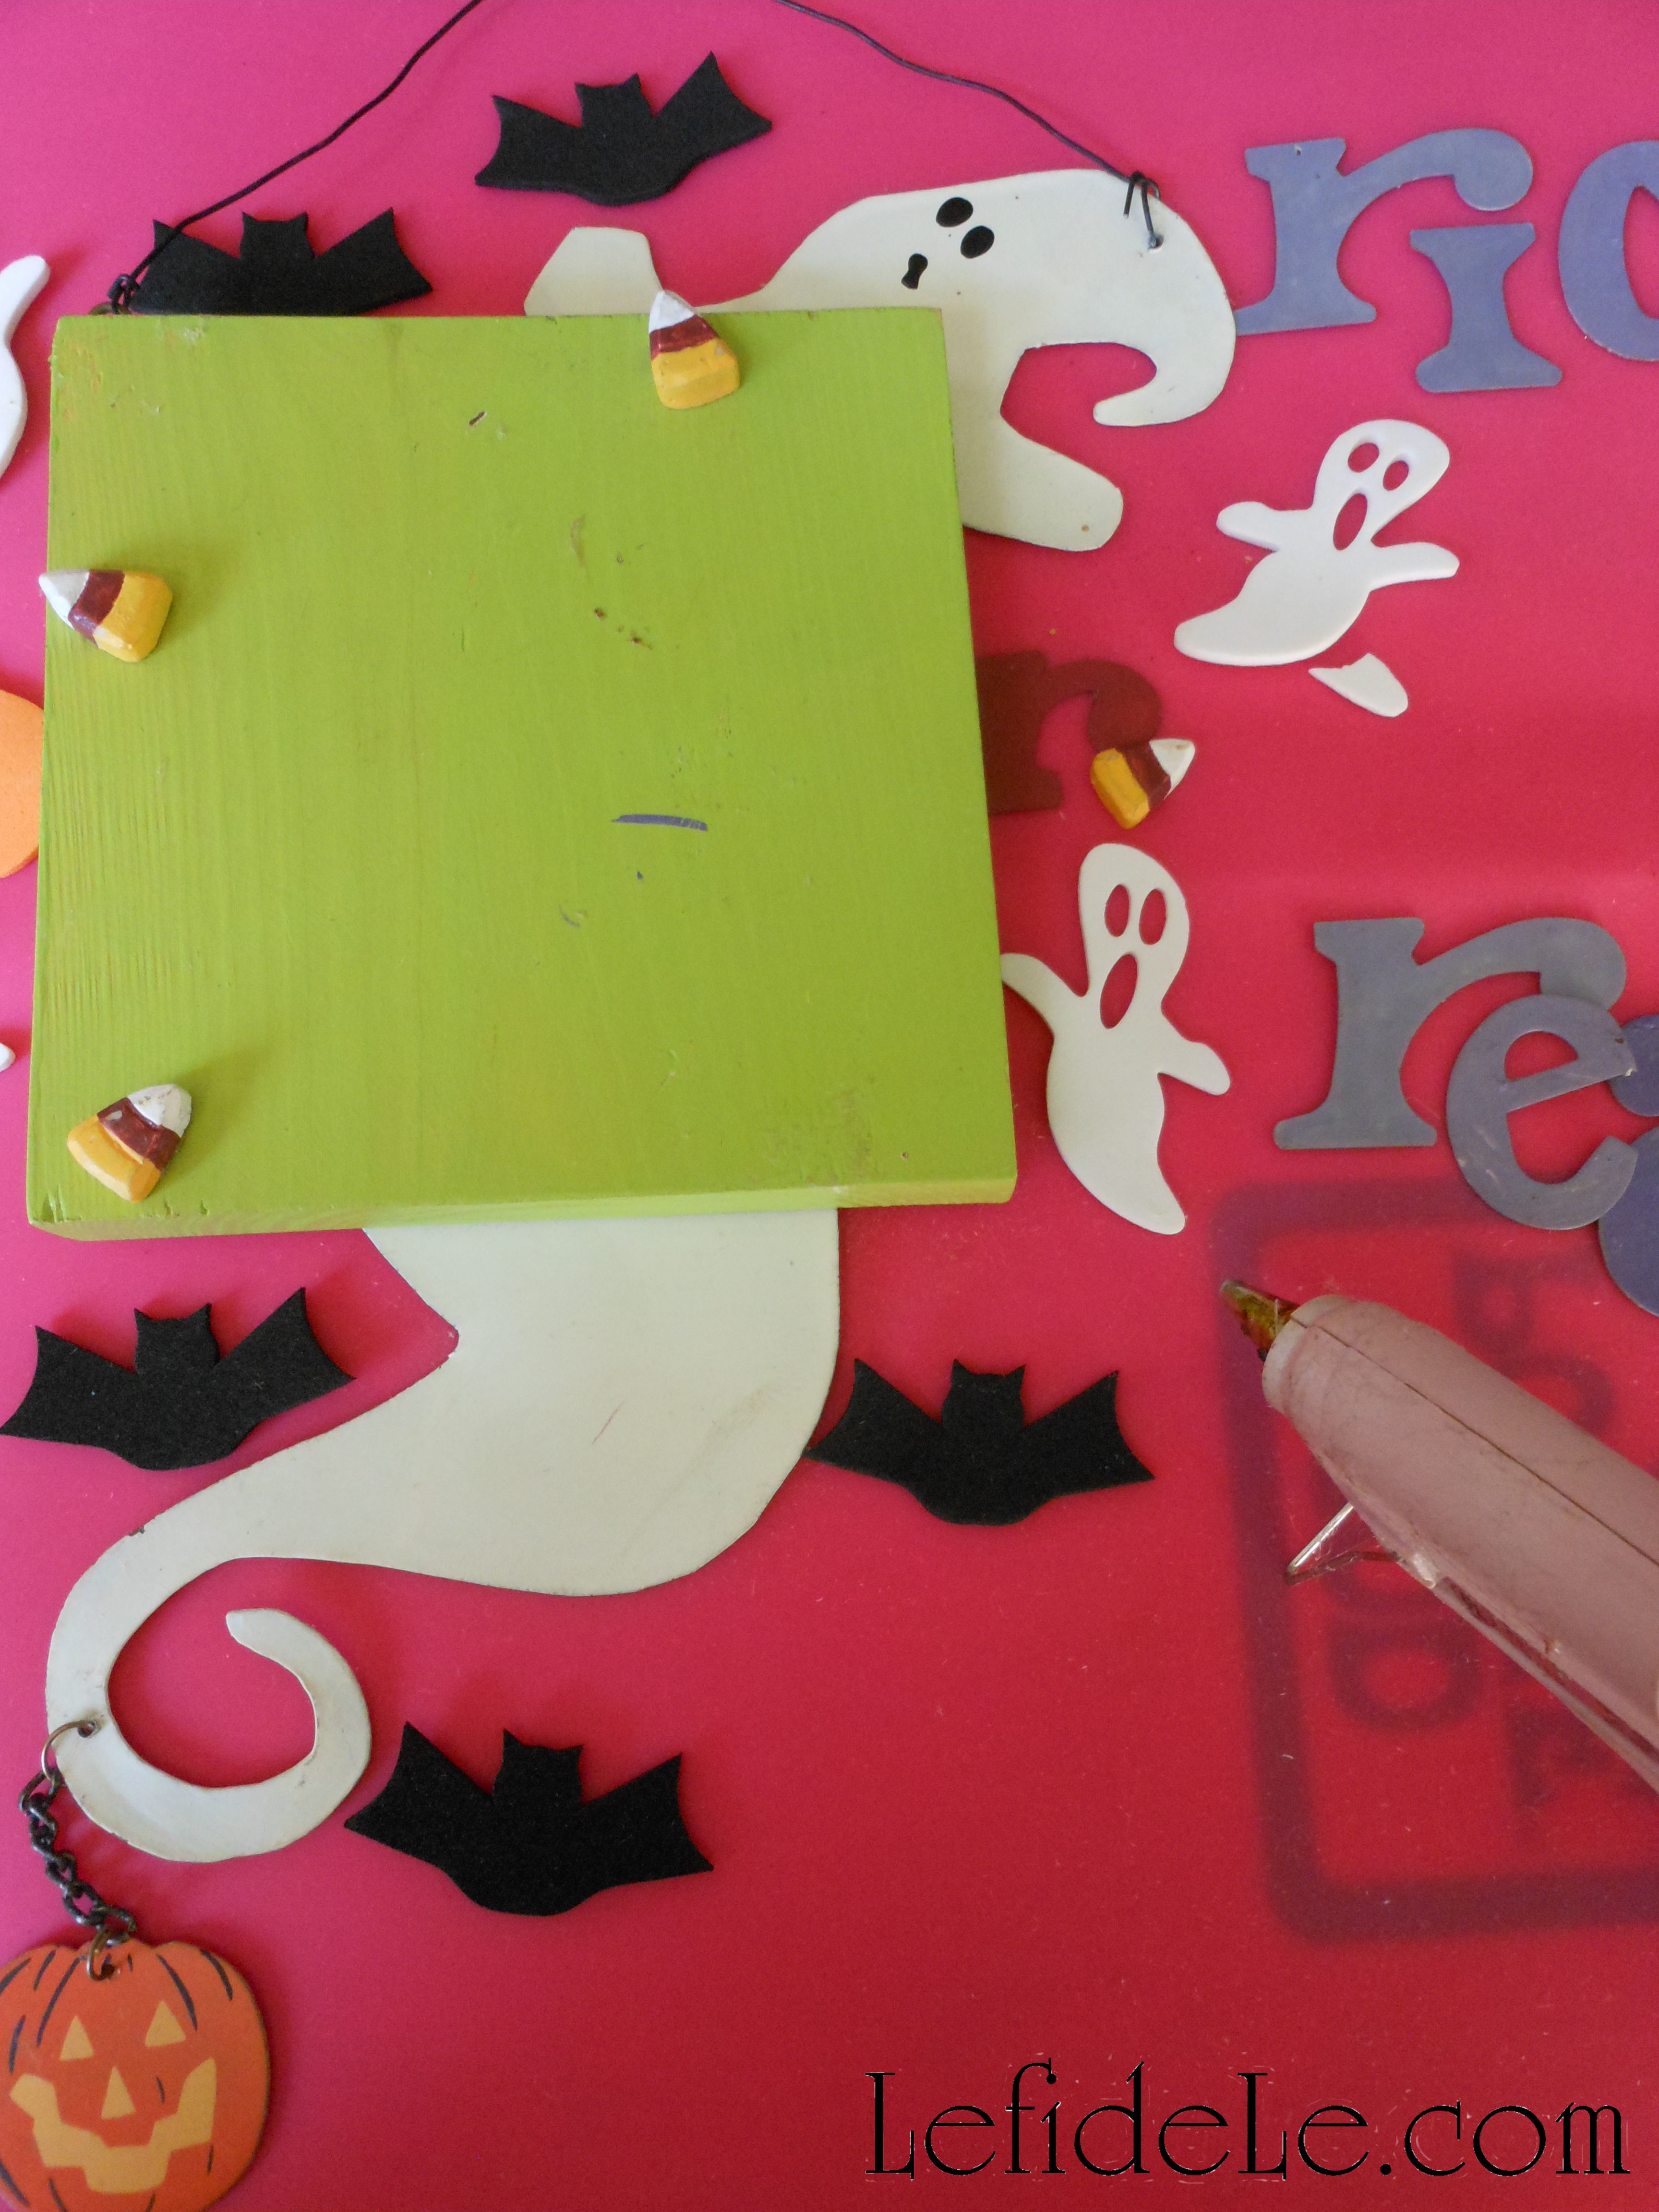
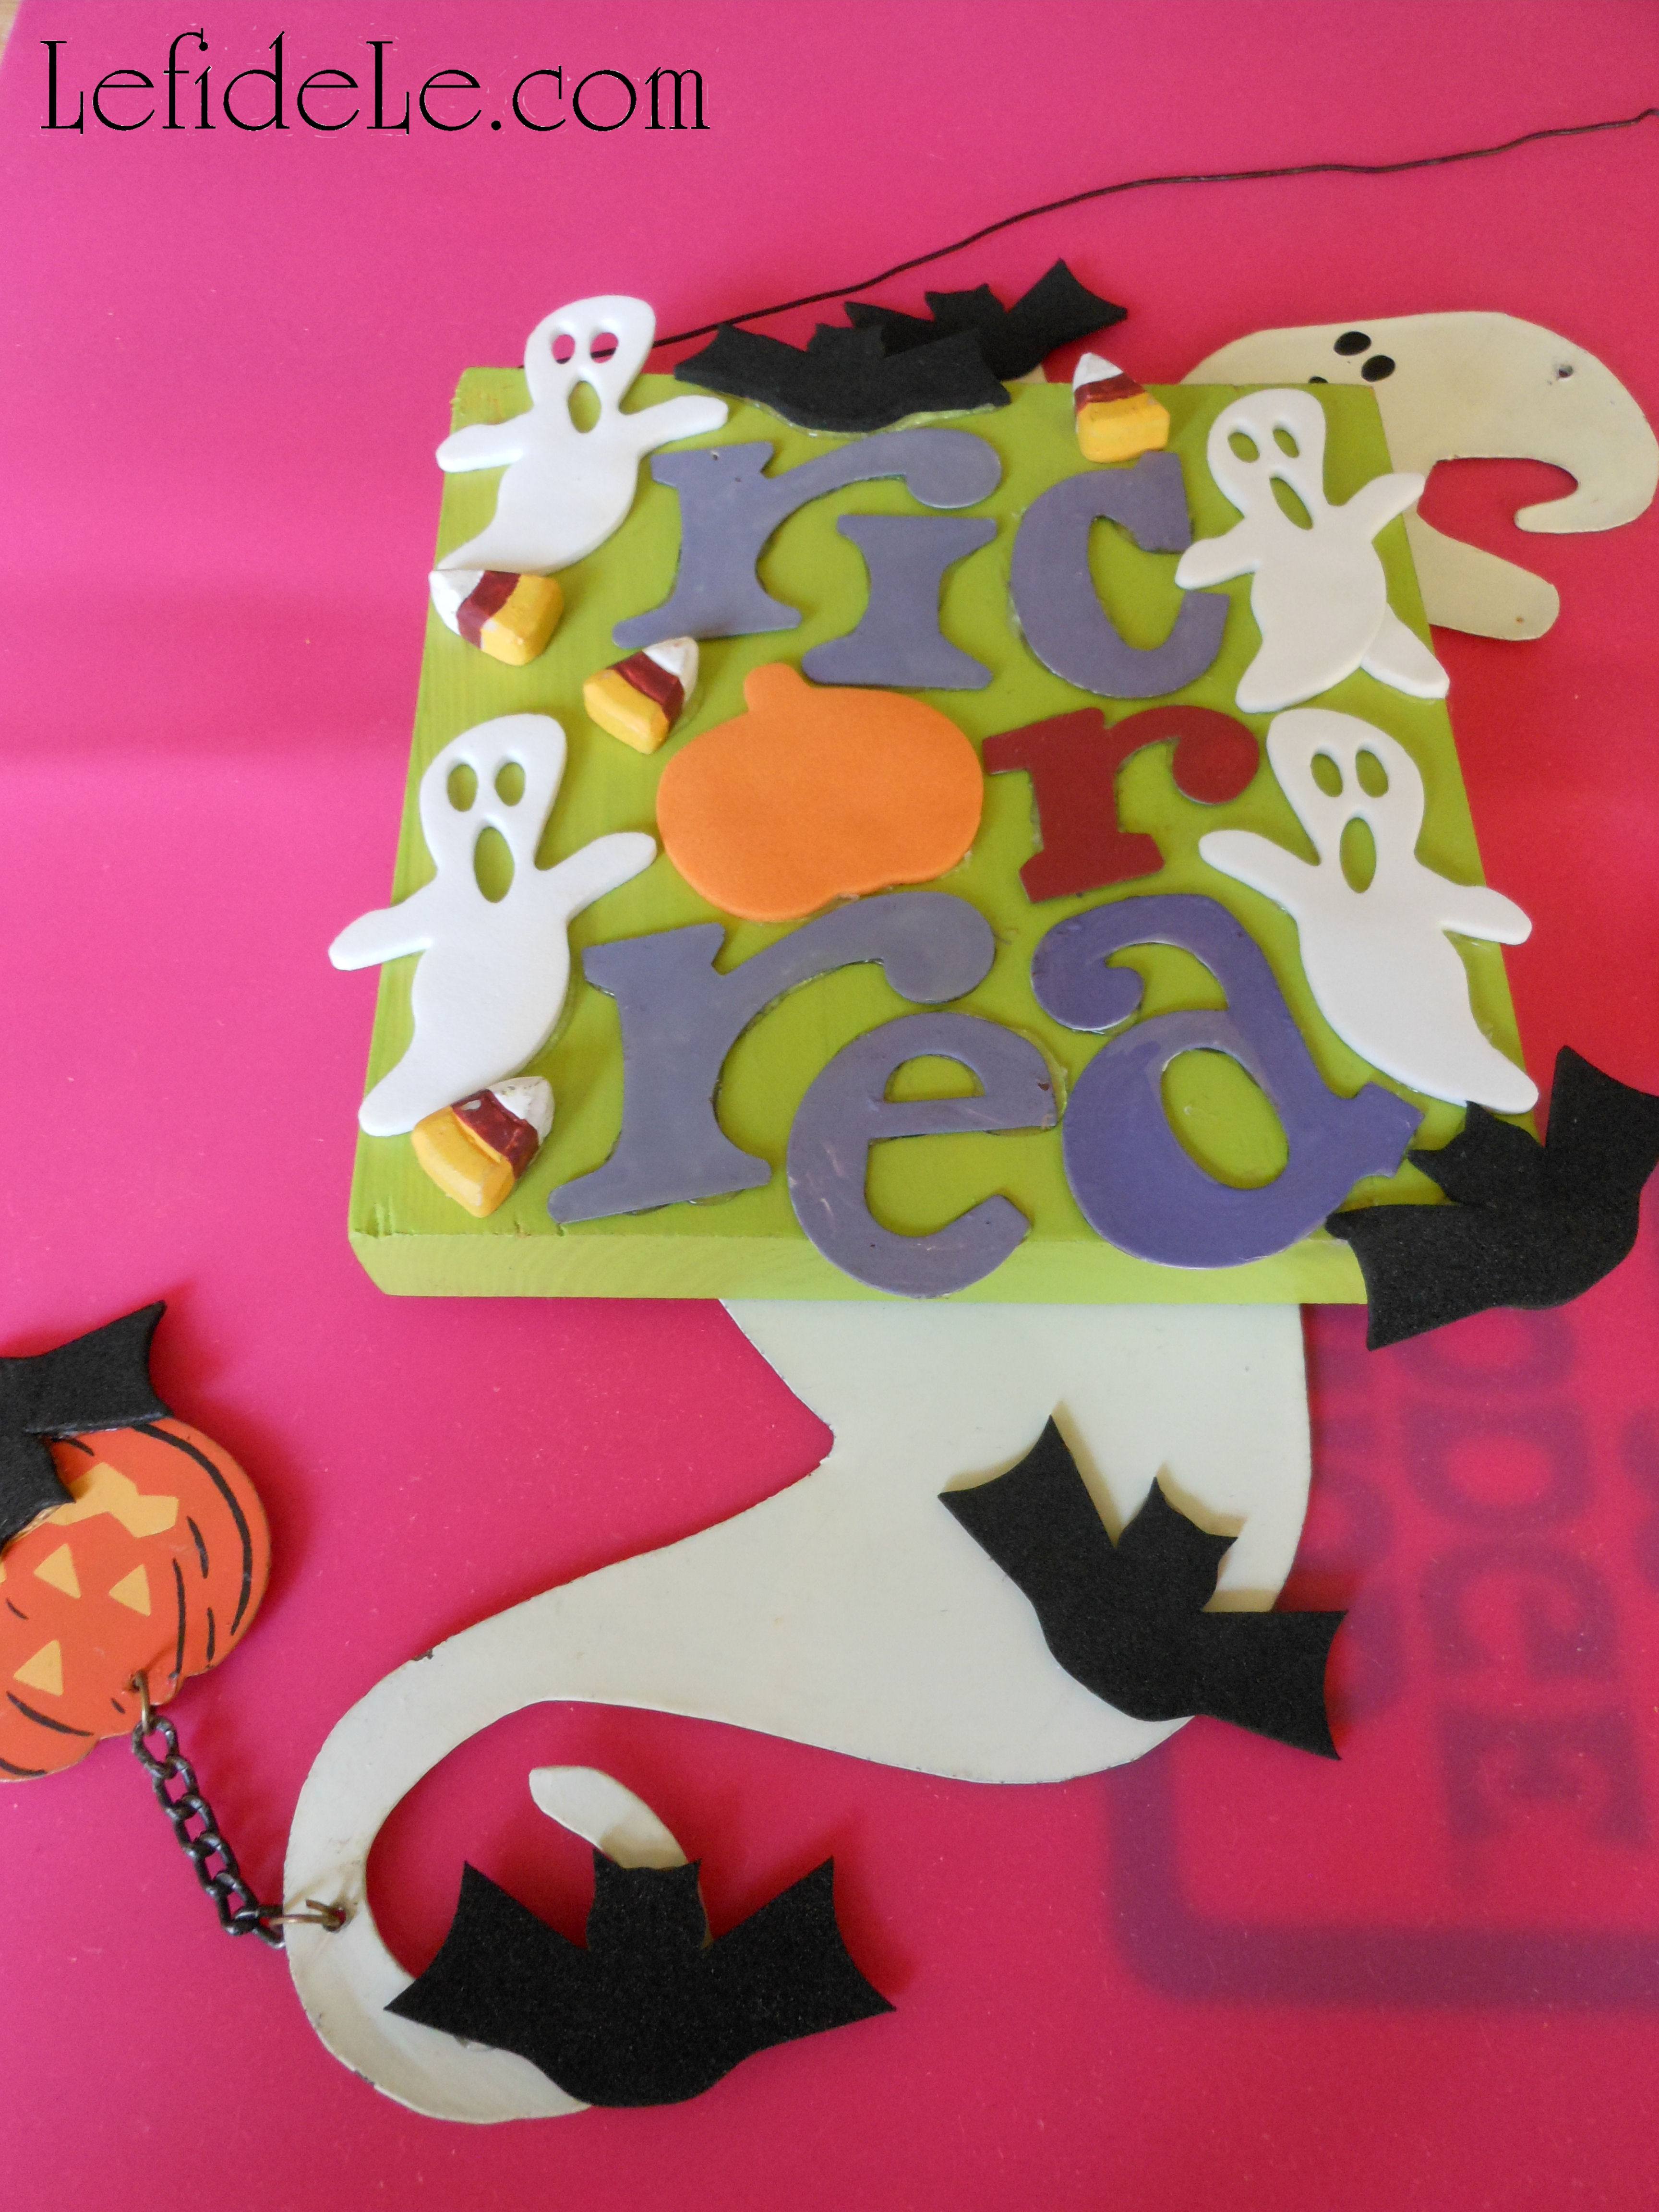
Other décor elements are the chalkboard sign crafts set onto easels (find tutorial here) alongside a store-bought slate that I was gifted with early. (Thanks Mom!)

209Leigh

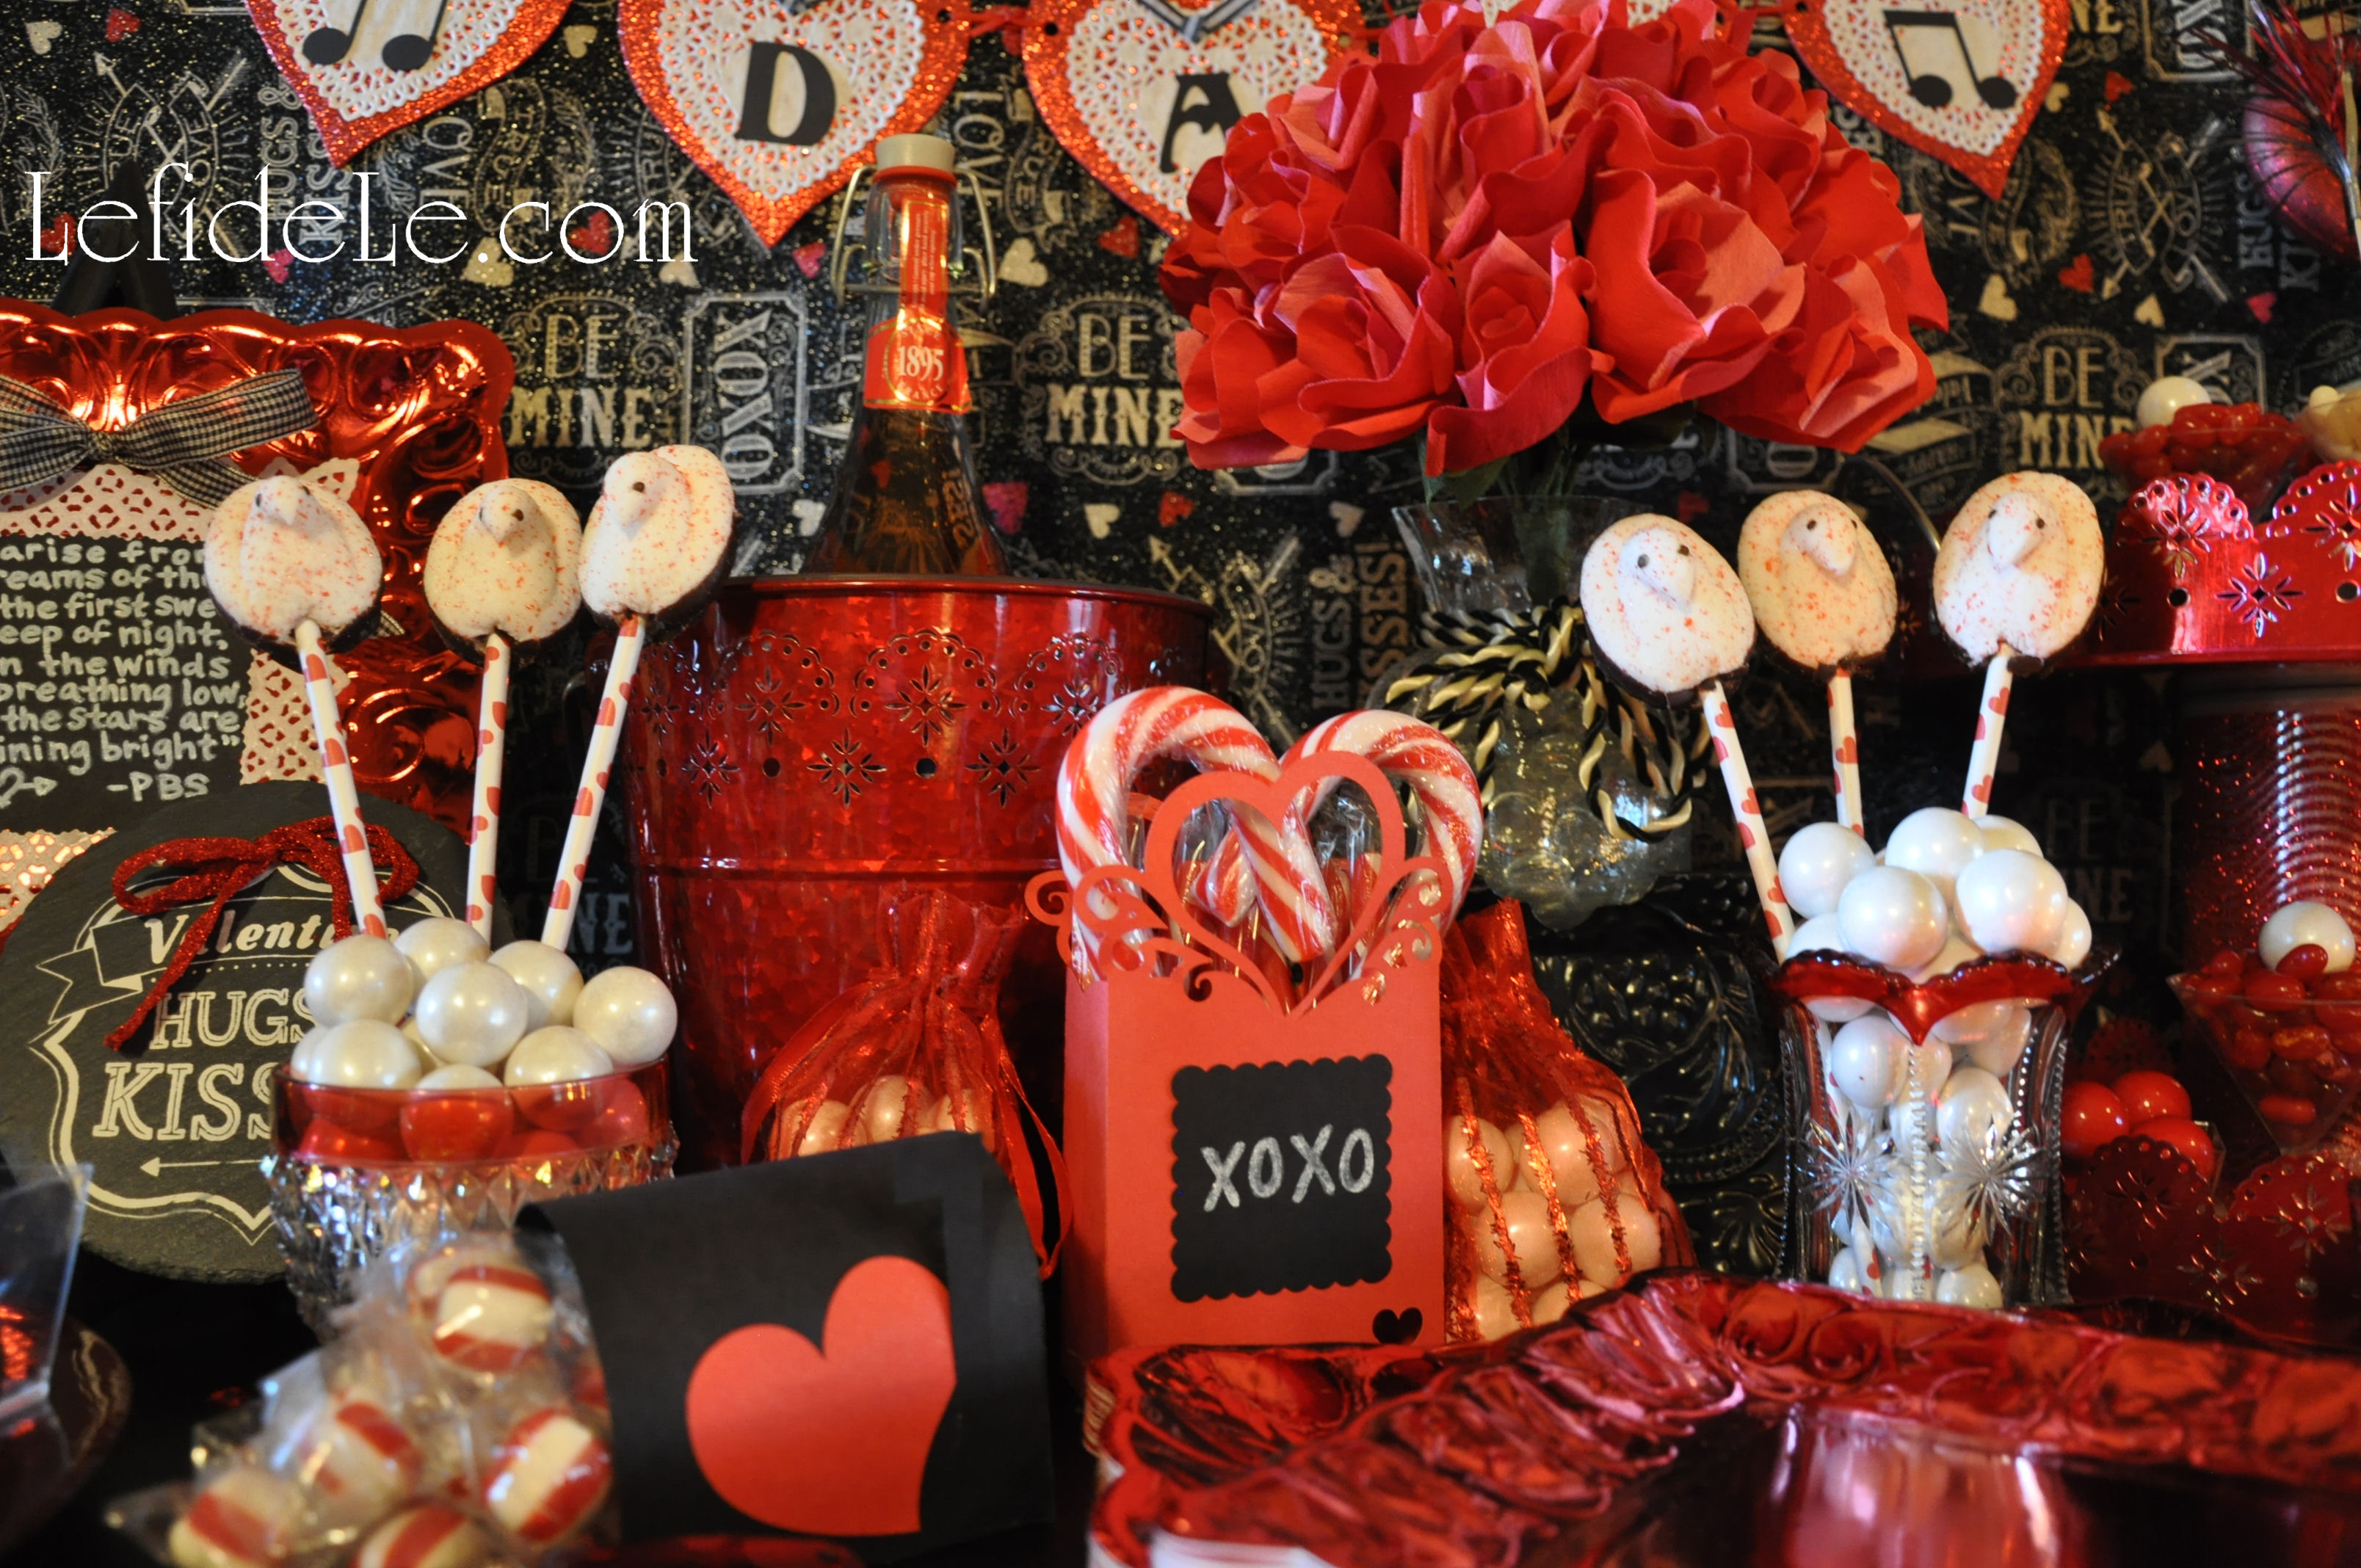
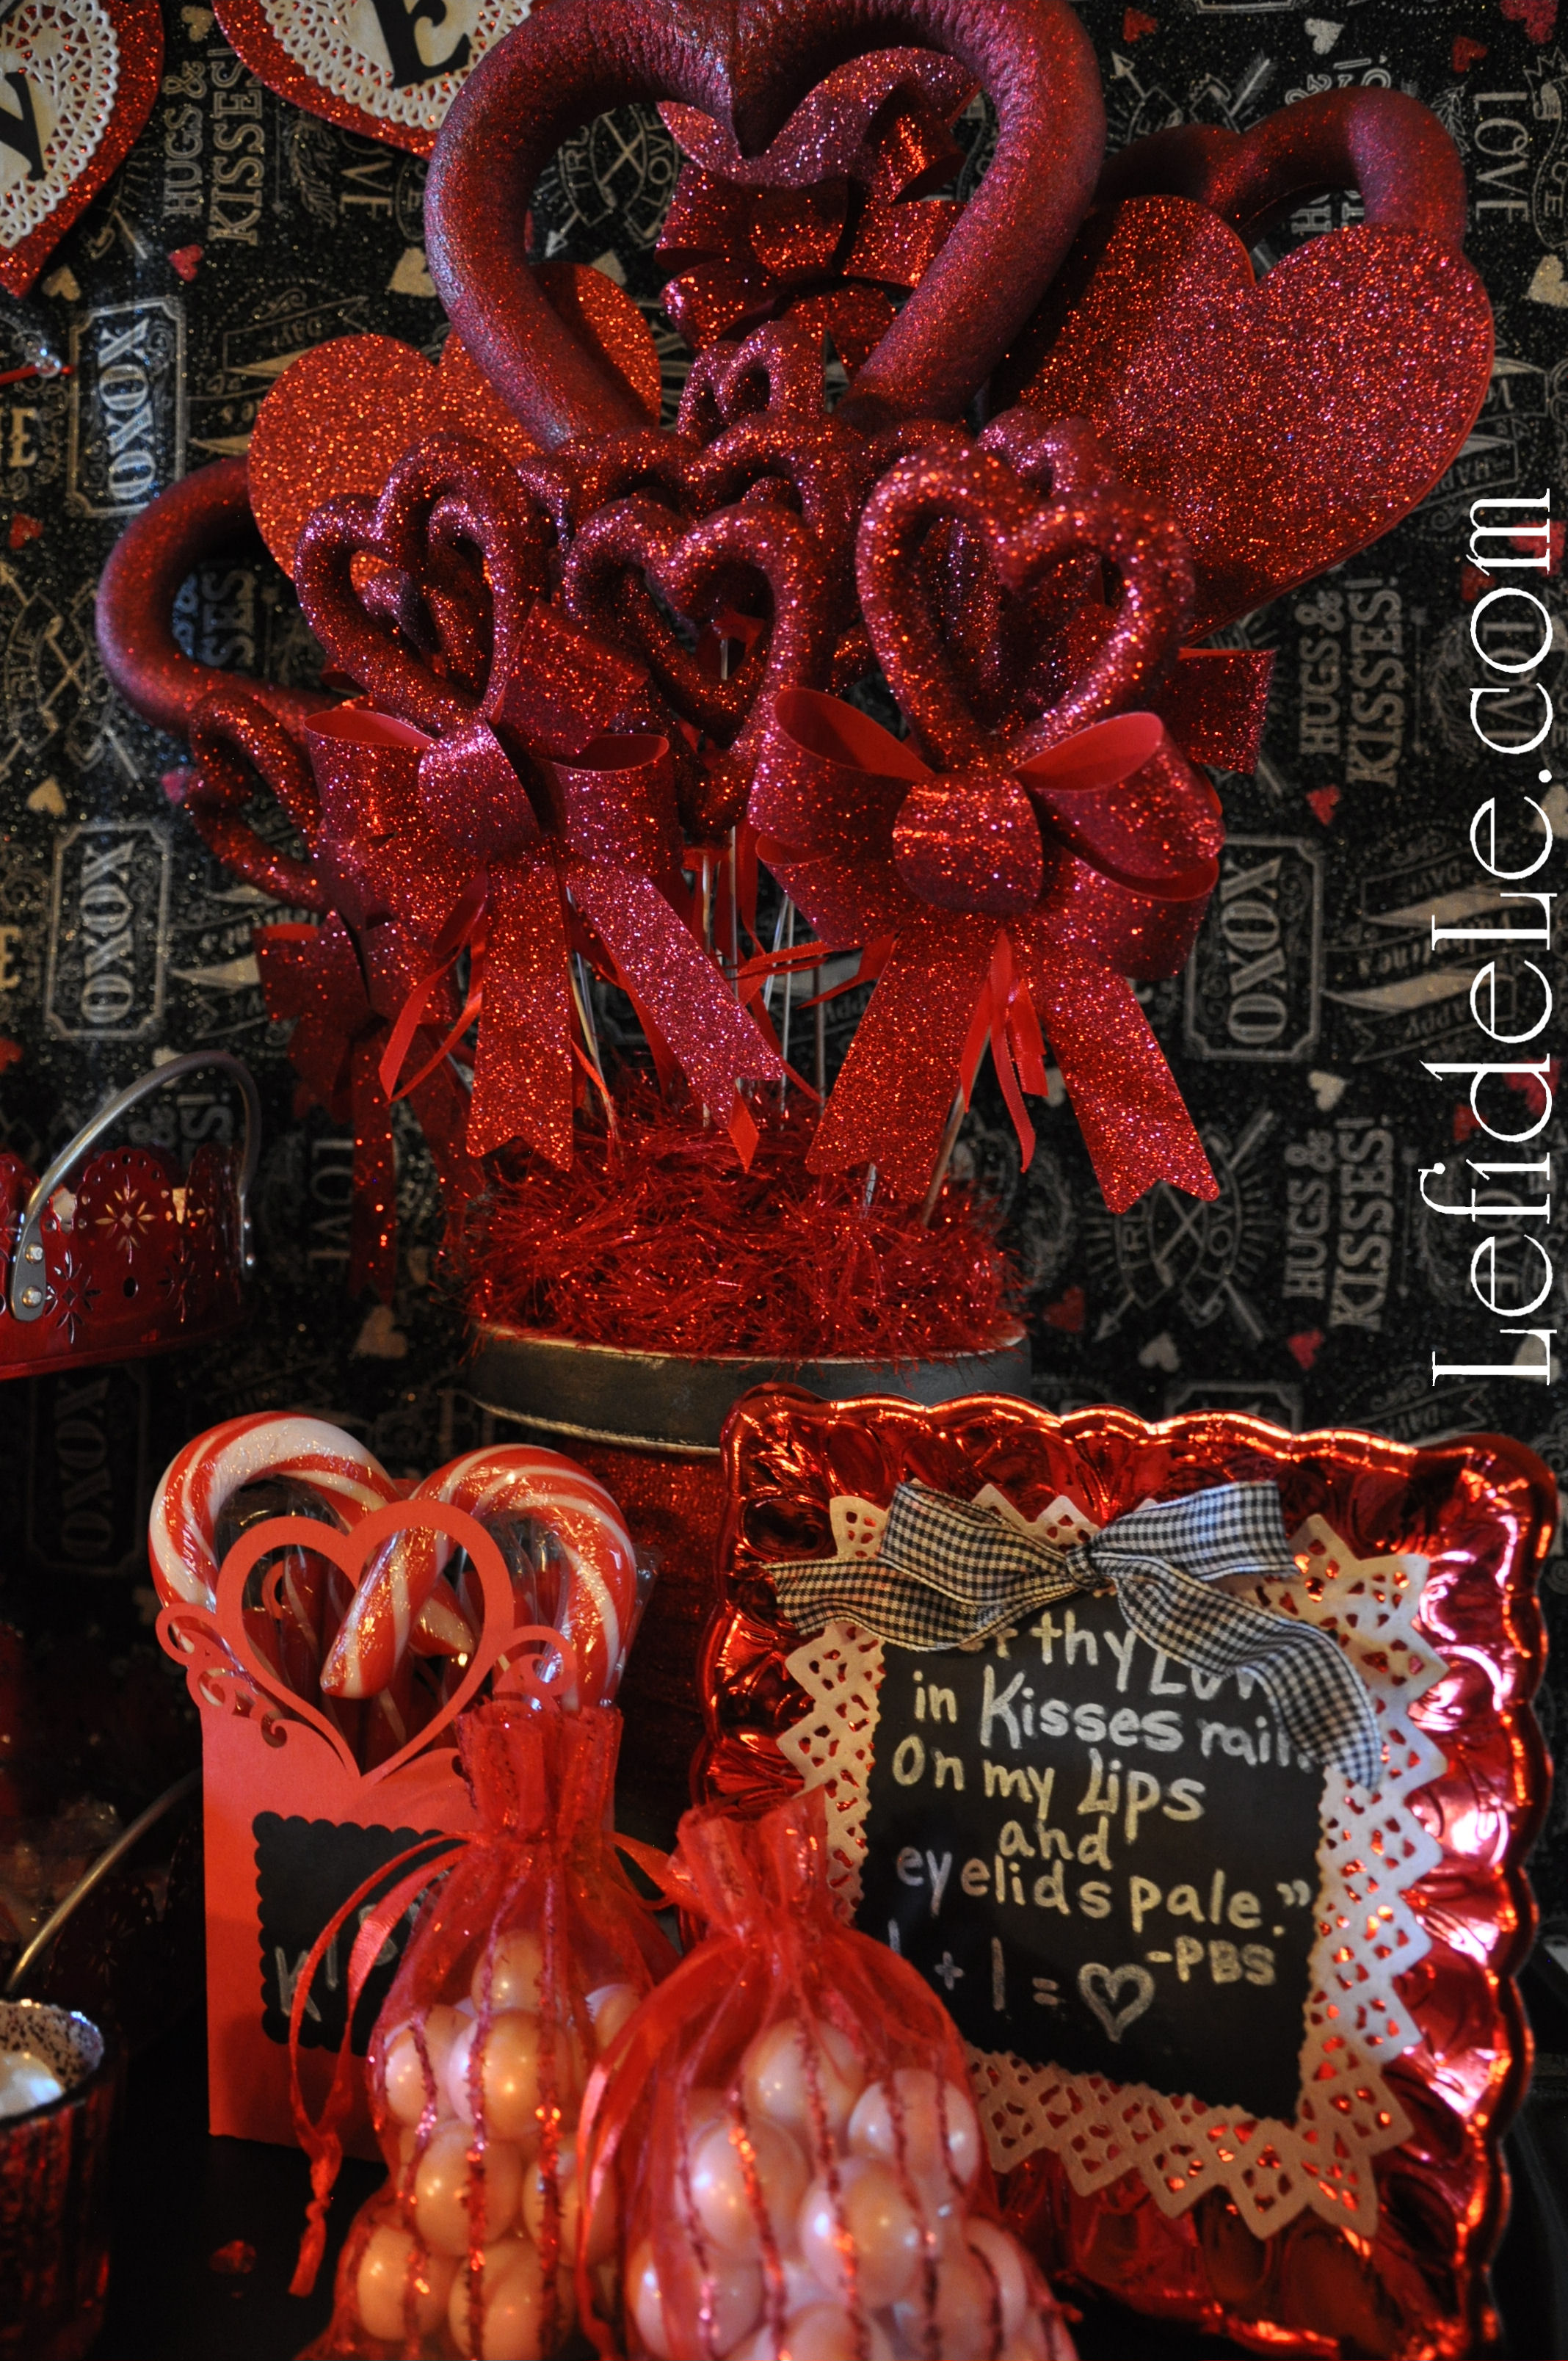
A variety of gift bags and boxes overflowing with candy were nestled into the ensemble. The heart bags and mail boxes were machine cut from construction paper.

238Leigh

I included both oversized gems and tiny crystal hearts to fill in the empty spaces. I borrowed a bouquet of crepe paper roses that I had actually made for my mother years ago, and set these into a marble filled vase. I wrapped it with some leftover rope trim that coordinated with the theme, and set it atop an upturned boxy metal vessel. It’s really easy to create lifts and levels when one starts to think out-of-the-box and repurpose items for that other than which they were intended for.

219Leigh

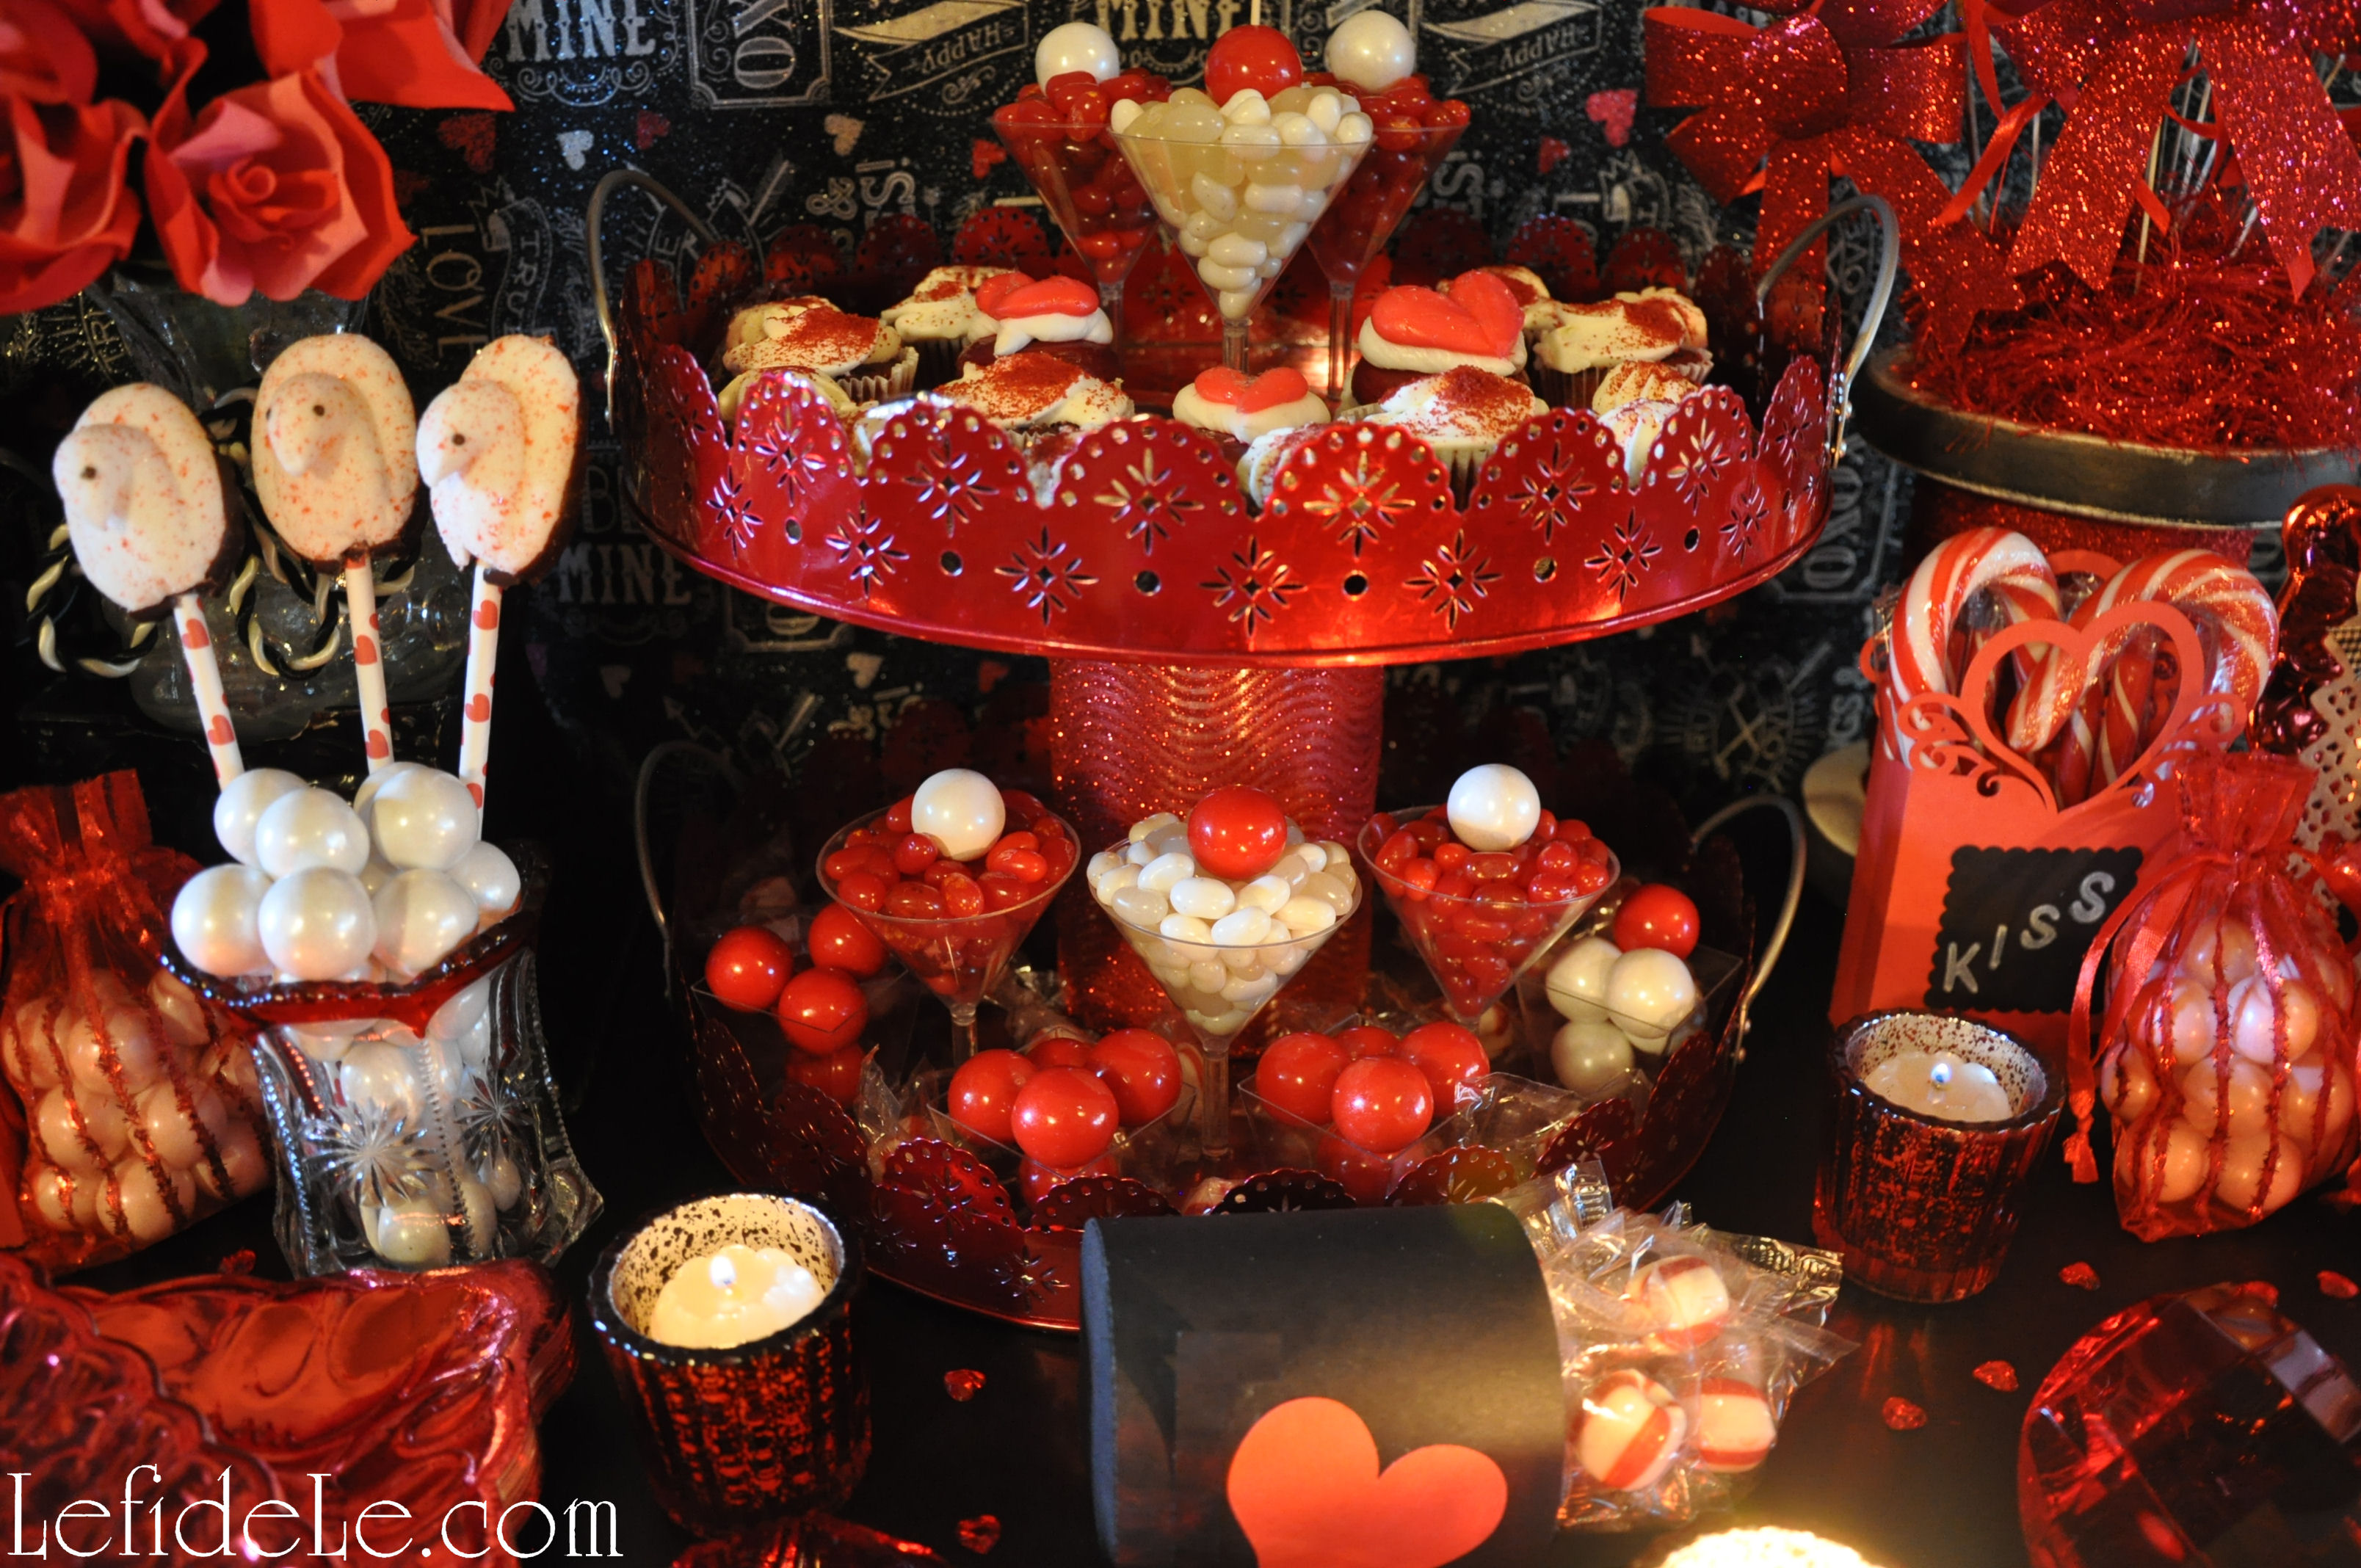
The treat tower is actually comprised of two metal trays that I found on after Christmas clearance years ago. I simply stacked these by using an empty drink mix container wrapped with glittery fabric.

17Leigh

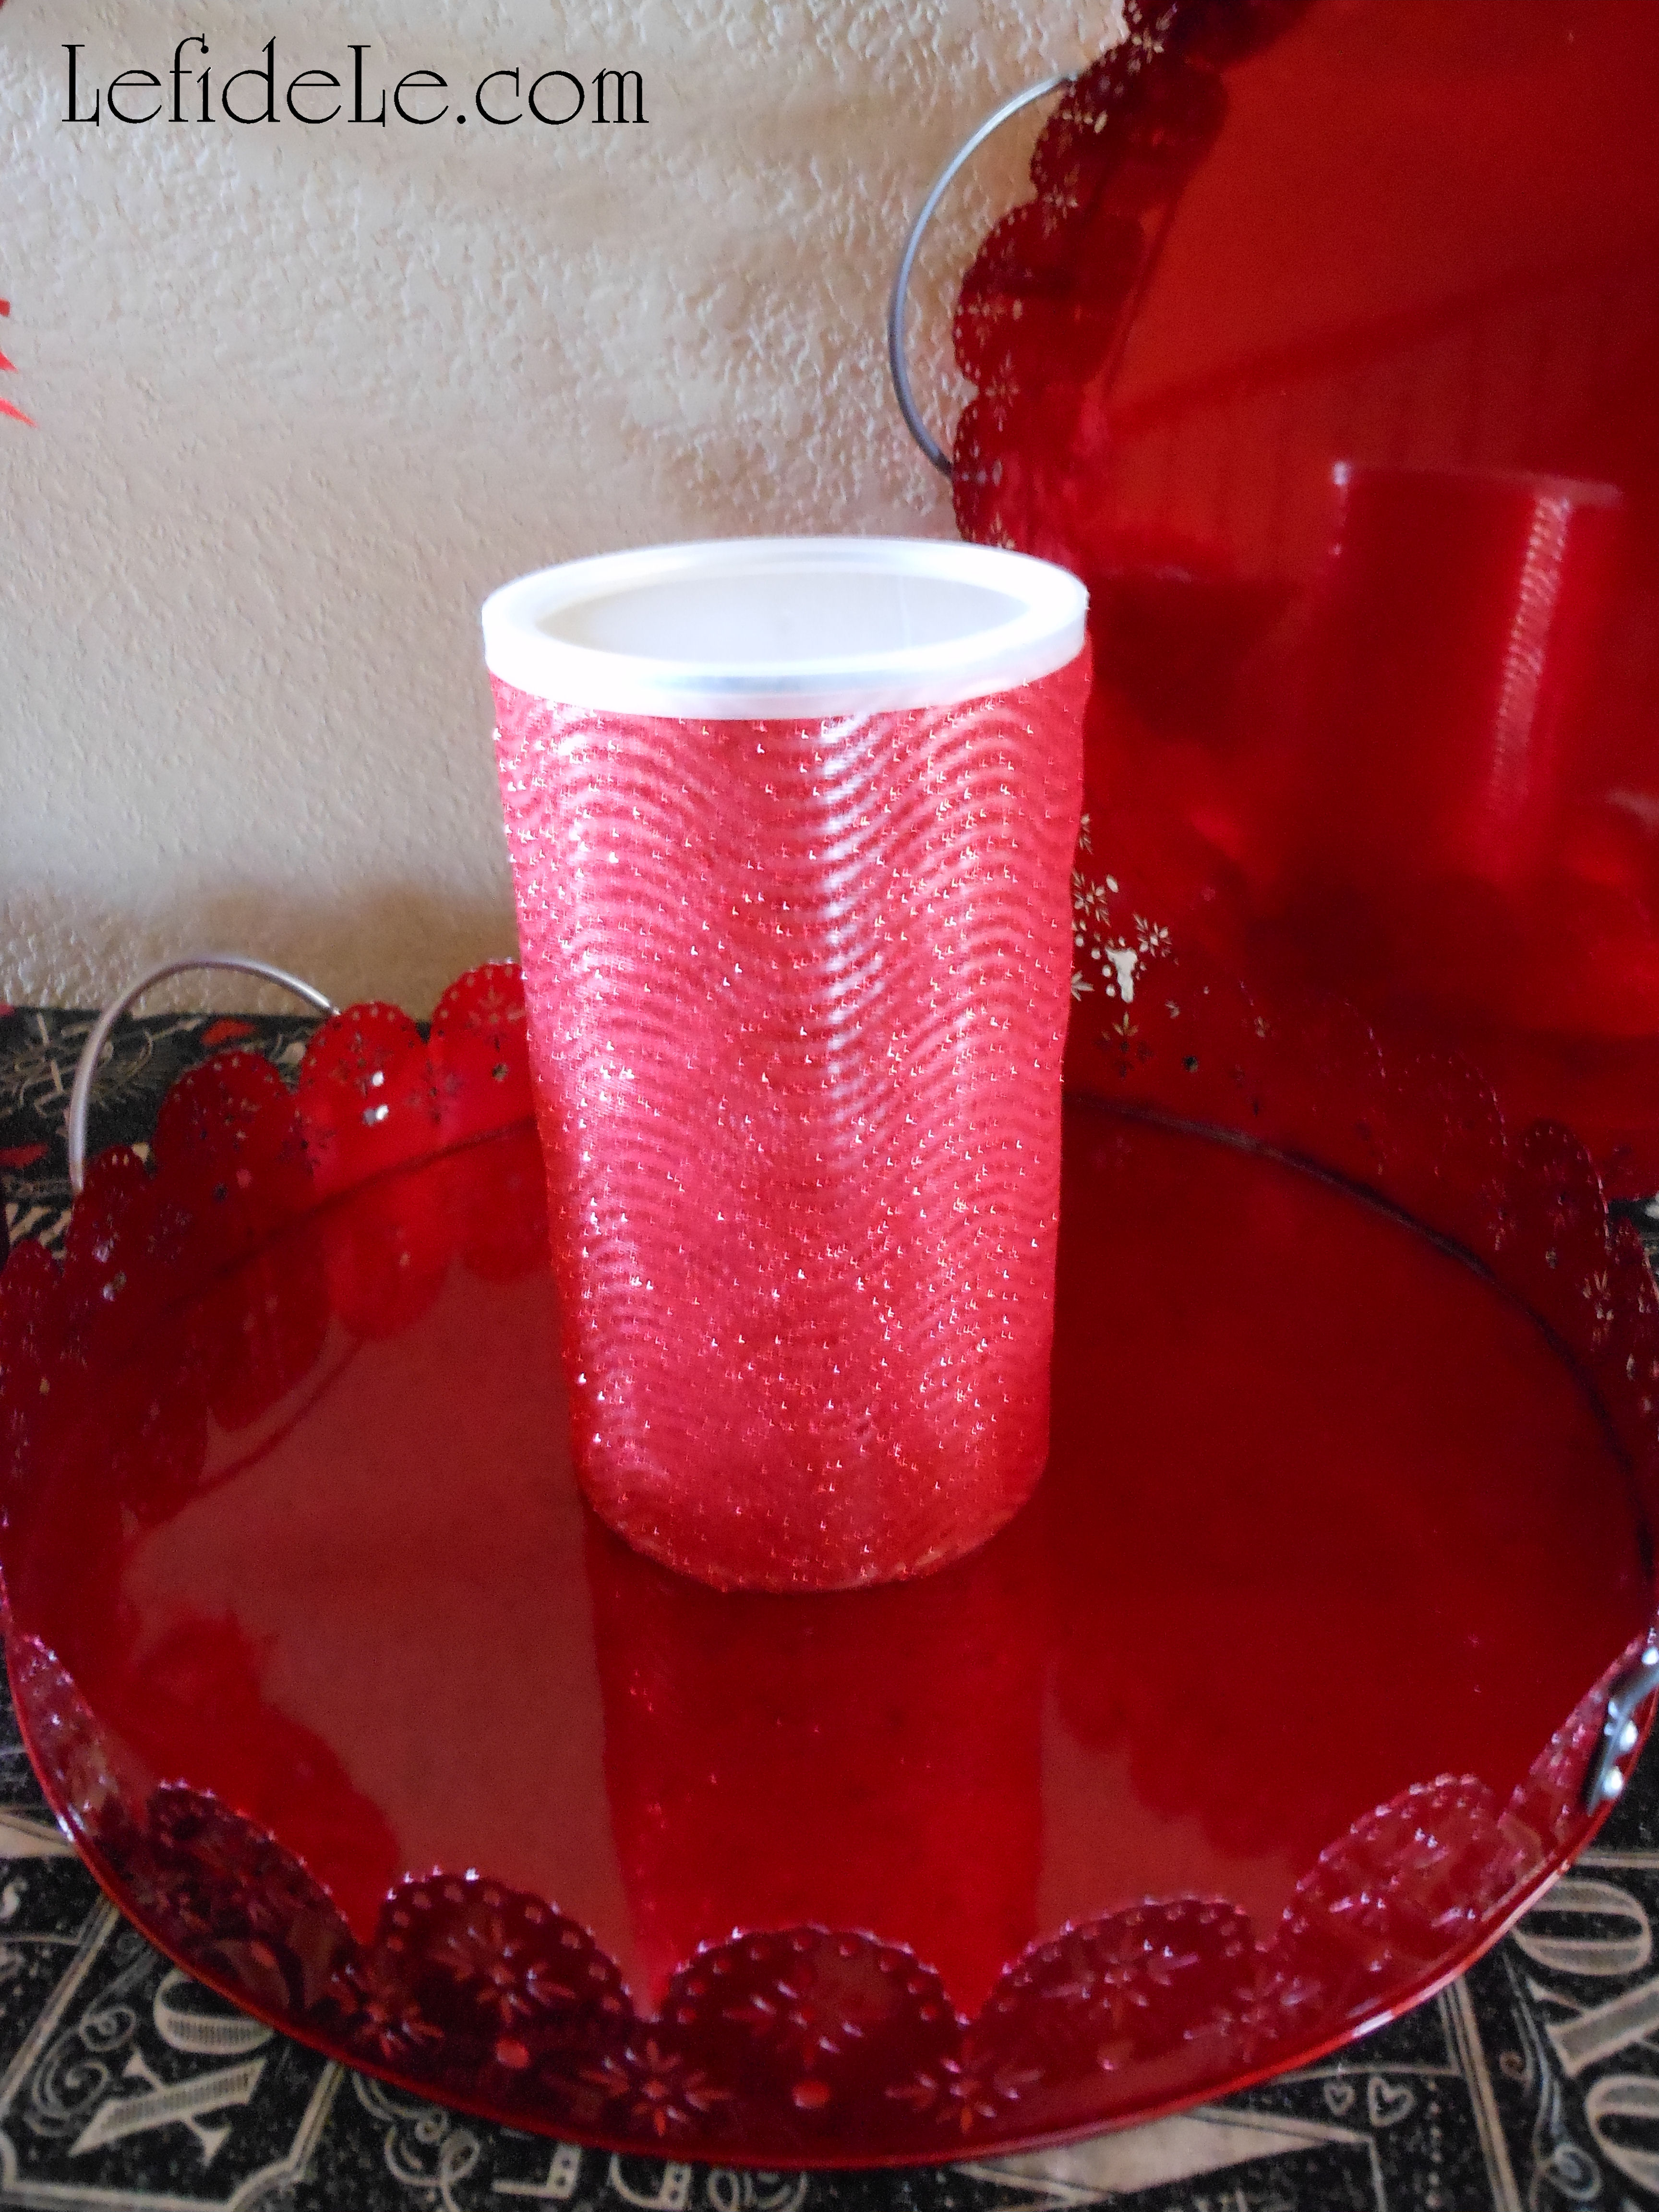
It was surprisingly stable, but you can add further assurance by hot gluing these for a temporary bond. A stronger adhesive would make the bond permanent. I stocked the tower with icing laden cookies, cupcakes, and candy cocktails.

208Leigh

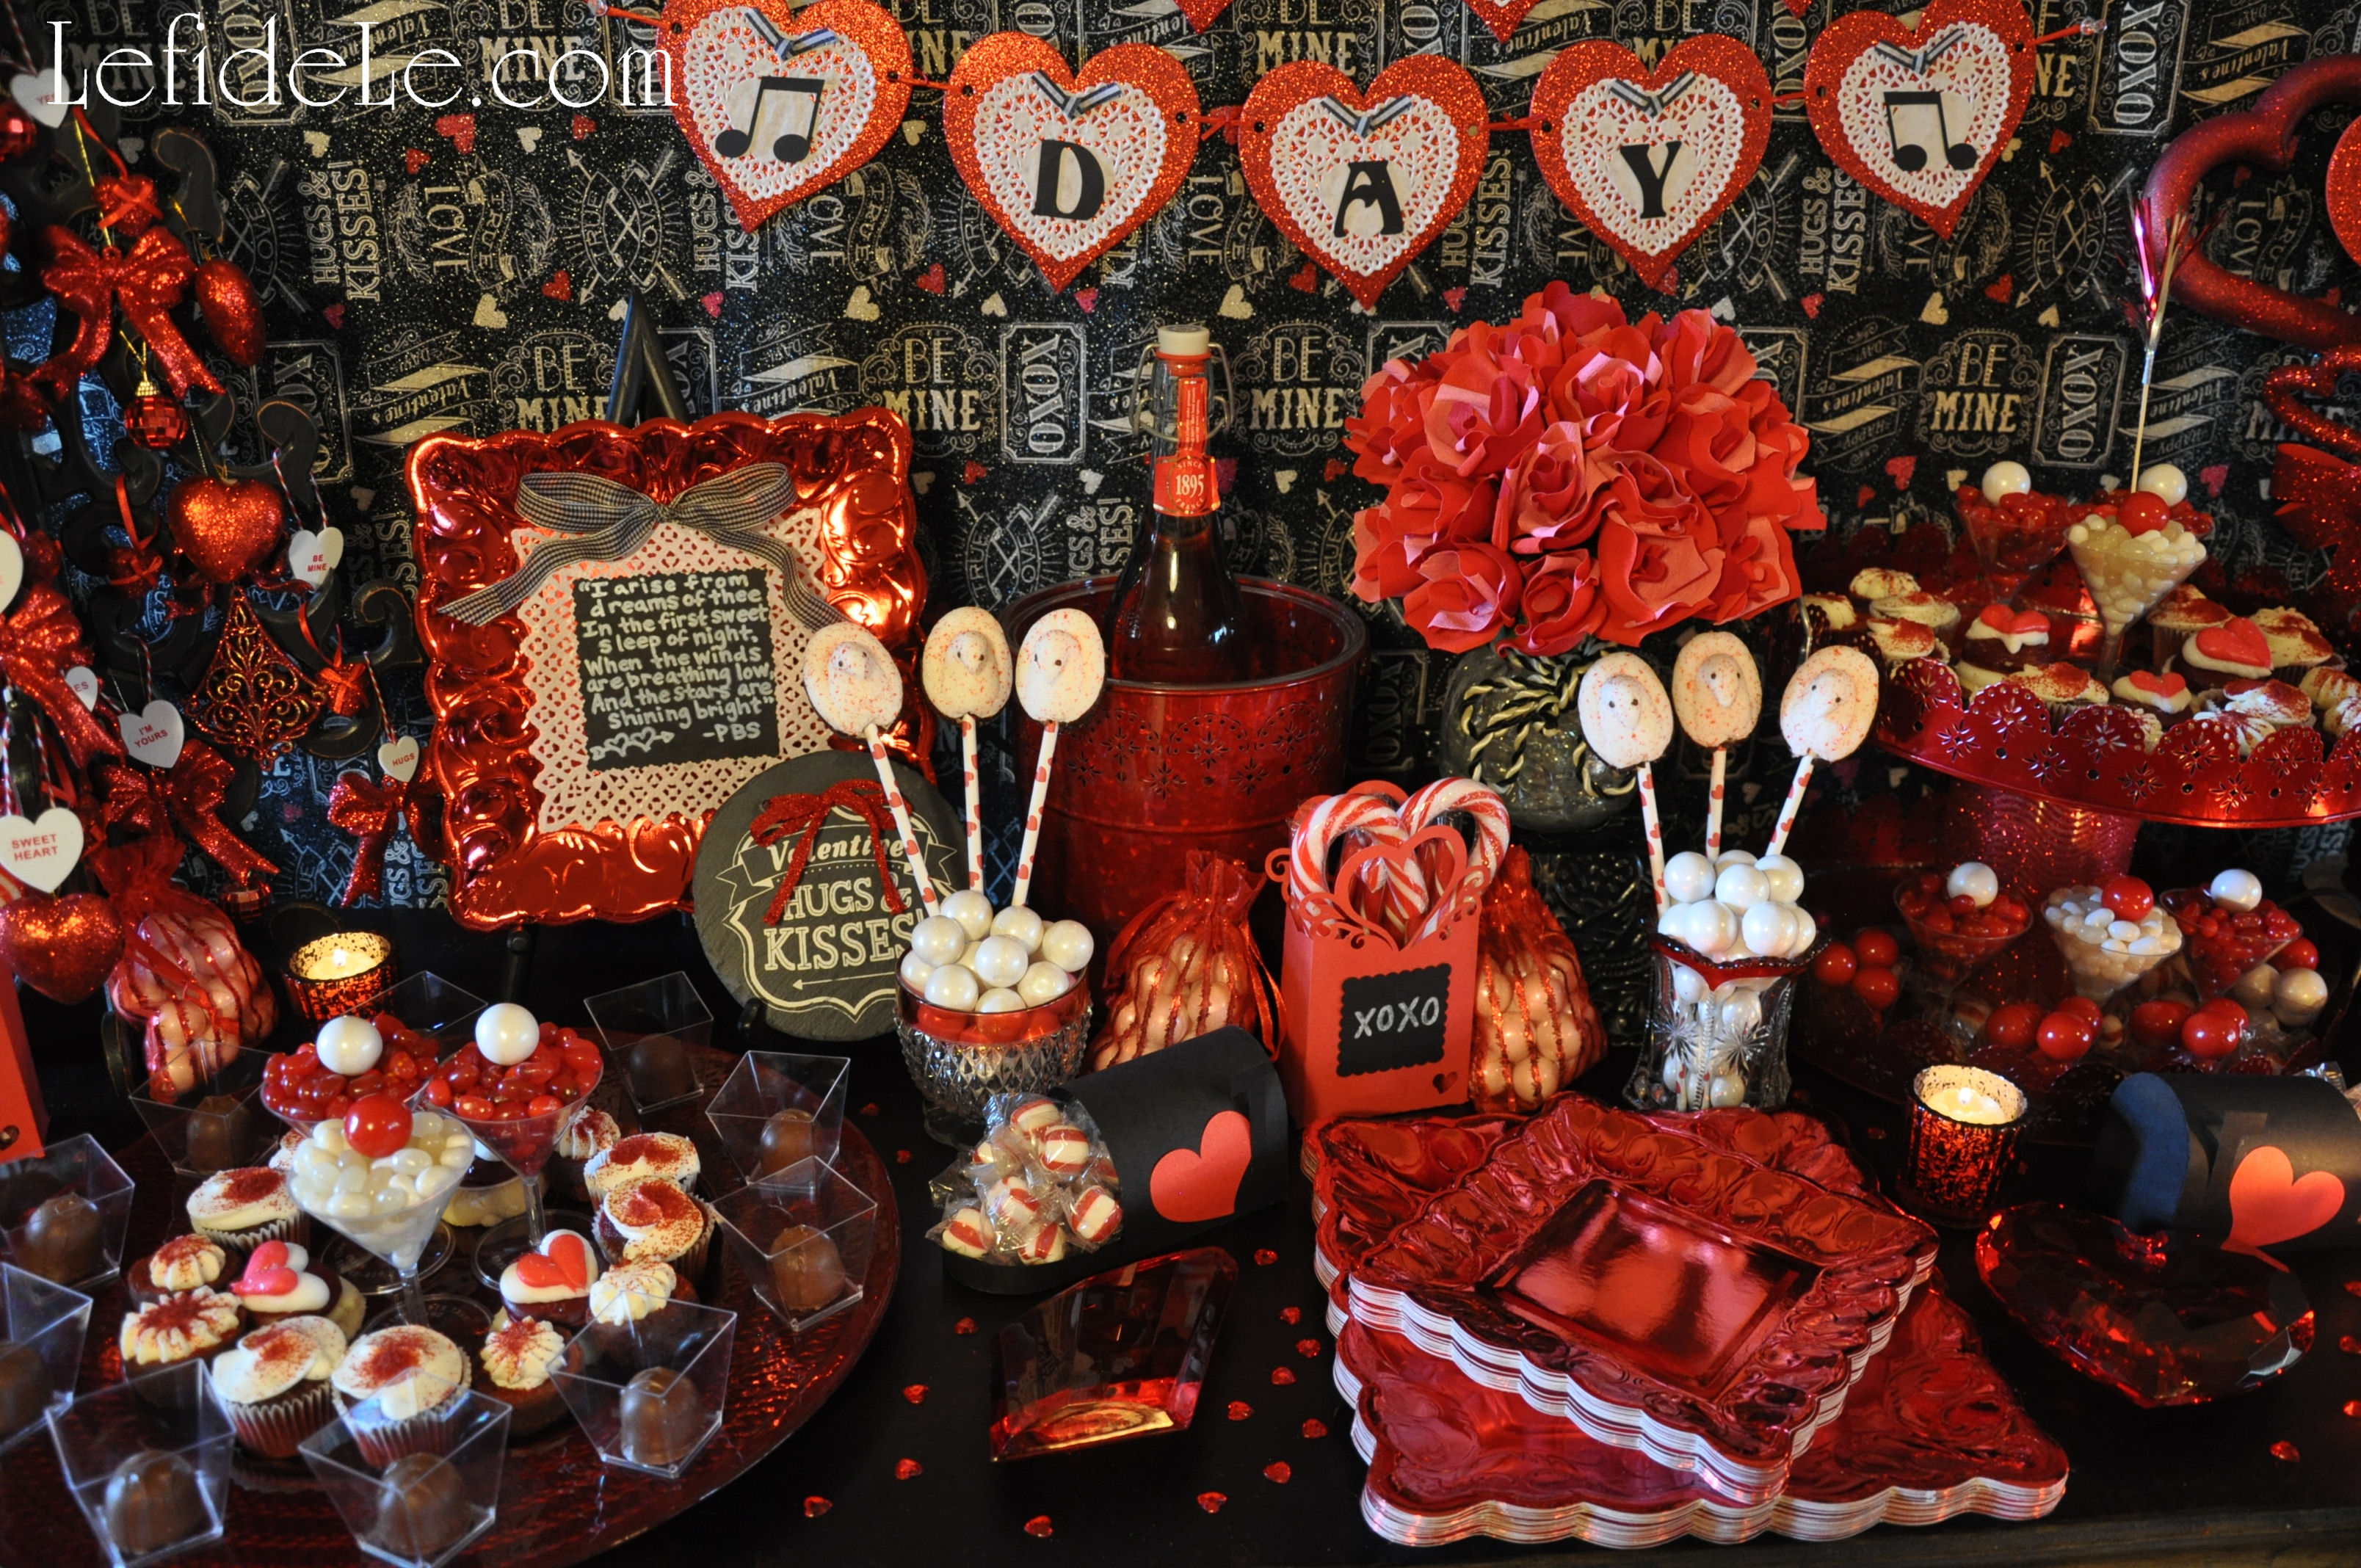
The other platter was another clearance gem from over a decade ago. It’s a lovely red metallic reverse painted glass. You can mimic this with a lovely red charger in either acrylic or glass. More of the same sweet treats topped the dish plus some delectable chocolate covered cherries set into their own treat cups. Try this with truffles or even upside down cake pops.

77Leigh

I made my own treat pops with Peeps red speckled white “love birds” with chocolate bases. To make your own, simply poke a pilot hole with a skewer or tooth pick then jab in a paper straw. I chose adorable heart covered ones, and then set these into gumball packed vintage crystal vessels. Any solid candy would serve as well.

250fLeigh

A non-alcoholic berry soda set into an ice bucket serves as equal-opportunity refreshment. The same red metallic plates that appear in the chalkboard sign crafts were placed front and center. Last but not least to complete the sweet buffet was the addition of candlelight. (Use LEDs if you fear sleeves catching fire or if you have young guests attending.) Red mercury glass votives were, you guessed it, purchased for mere cents post-Christmas. They really added to the ambiance of the whole setting.

202Leigh

♥ As you prepare for your own Valentine’s celebration… just remember to, “Keep calm & party on!”

Faithfully yours,

Leigh

2 Fast & Easy Valentine’s Day Banner Décor Craft Tutorials (Doily & Glitter Hearts + Printable)

229Leigh

These Valentine’s Day banner crafts are so fast and easy that even the busiest mama can make them with her little ones. The glitter heart and doily printable only needs the addition of letters to spell out any message you wish. The second banner is comprised of layered doilies and extra valentines. Both are so inexpensive yet add a lot of heartfelt sentiment and party atmosphere. Plus, they’re lightweight enough to stick in a big envelope and send to a loved one whose away for the holiday. You can even use the printables as stand-alone Valentine Cards!

176Leigh

First let’s make the doily valentine banner. This is a great project to use up any leftover schoolroom Valentine cards from your kiddo’s class. You can even save the received ones to make banners for next year’s celebration.

175Leigh

One only needs to add some low-cost paper doilies in varying sizes. I used leftovers from last year along with some Holly-Hobby Valentine Cards from my childhood.

51Leigh

Merely use dots of glue to layer the doilies and Valentines. Then add a ribbon bow for dimension.

54Leigh

Tie circles of twine, yarn, or ribbon through the holes in the doilies and knot together. Hang it up and enjoy!

171Leigh

The glitter heart and doily banner is one that can be easily made by two different methods. You can print and cut out all the glitter doily hearts you need, using my printable at the end of the article. You can also use inexpensive glittered foam hearts from the craft store, and use hot glue to layer white doily hearts onto them.

26Leigh

Either way, the next step is add letters spelling out any sentiment you’d like. I cut out letters with a machine from black card stock to coordinate with my chalkboard theme. You can also use a stencil to trace and hand cut them, or buy them readymade at the craft store. (Michaels has them in every color and texture you can think of. Click on the affiliate link in the side bar to snatch the latest coupons.) I added a knot of ribbon to each dip in the heart to further tie in with my theme’s color palette. Feel free to add any other elements you’d like from paper roses to stickers. (You can even skip the letters and let a kiddo color in pictures to use the printables as Valentine Cards.)

38Leigh

Next add holes to both sides of each heart with a hole-punch. Then use ribbon or twine to string them together. Add a loop at each end to hang the banners by. Voila!

224Leigh

♥ Happy Heart’s Day!

Faithfully yours,

Leigh

V-dayHearts-Leigh

P.S. Here is the Glitter-Doily Heart Printable. Simply right click on the image and select Print. Print them in the best color photo setting.

Frozen Winter Wonderland Themed Christmas & New Year’s Eve Dinner Parties (+ Optional Crafts)

25FrozenChristmas-Leigh

With New Year’s Eve trailing behind Christmas so closely, I wanted to create a dinner party theme that could easily be converted from one to the other without spending any more money or time. I’ve seen all of the decorative components in variation at stores ranging from high end home goods to budget craft supply. I’ll even describe how you can craft your own easily and inexpensively. I’ve chosen a winter wonderland theme as a visual narration of the “Frozen” movie that celebrates family and friendship. It makes an enchanting setting for the adults, and provides an extra dose of holiday magic for the kiddos with frozen-fever. And, hey, you can always pick up items on sale this year to use the theme for next year’s festivities!

63Leigh

For each of the table-scapes, I set the base of the stage with a gold and ivory harlequin tablecloth found previously at an after Christmas sale. If you see something on your shopping trips that might work for next year’s theme… snap it up! This is how I manage to satisfy my high end taste while sticking to my tight budget. It’s really easy to fill in from there, just before the celebration. I did this with beautifully beaded cones in gold, silver, and pewter from Pier 1. (I have seen other versions of these at many of the stores I been to this year.)

26Leigh

If you’d like to make your own last minute, you have two easy options. One is to buy glitter wrapping paper and double-stick tape it into a cone shape. You can just cut different sizes of paper and wrap each into a tube shape, then tighten one end into a point and tape it down. This only takes a few minutes and is affordable for everyone. The best part is that the paper can be reused for gift wrap later! Another option is to spray inexpensive Styrofoam cones with Krylon Glitter Blast spray. (I really like this stuff. It comes in many colors and is so easy to turn out matching crafts out of very different materials. I’m planning on showing it in use for my next Valentine project.) If you’d really like to go all out with the “Frozen” movie theme, just set the table in aqua blues, silver and white. It would even make a fantastic birthday party for a fan of the film. I topped my harlequin tablecloth with an inherited vintage mesh cloth with golden embroidery. (This layered look is easy to emulate with all of the various sparkly mesh fabric available. I previously purchased some myself from Joann’s with a 40% off coupon.)

44Leigh

For each place setting, I used my grandmother’s ivory dishes with gold trim atop gilded round placemats that served as a form of plate chargers. I also made use of my daily Oneida silverware, but switched out the butter knife for vintage steak knives with ivory scrolled handles. I love mixing and matching seamlessly!

161Leigh

I already had two lovely sets of napkin rings that would work beautifully, so I decided to go with vintage brass ones for New Year’s, and those with golden threads for Christmas. I placed extras of these beneath beaded Christmas ball ornaments as tiny stands, with the metal eyelet hooks hidden inside the rings. (I’ve formerly employed this idea successfully with marble Easter eggs.)

75Leigh

In the New Year’s setting, I placed ivory satin ribbon emblazoned with gold foiled champagne flutes and the exclamation “Toast”. (This ribbon from Joann’s would be equally lovely for a wedding as well.)

176Leigh

For Christmas, I topped the salad plates with large gold glitter snowflakes. I set more of these vertically throughout the centerpiece. (These can be found at numerous stores or may be homemade with chipboard or wooden snowflakes glittered with spray.) Lastly, I added inherited vintage glassware with pewter and golden touches. (Clear vessels would also be lovely in their place.)

195Leigh

Both table-scapes had golden scrolled embossed glass votive holders lined with plastic wrap to safely contain white “snowball” candies. Each of the centerpieces also had LED candles covered in gold sequins.

70Leigh

I added further glow to the New Year’s version with real votives in gold beaded holders. This table was finished off with large foil confetti of silver squares and gold stars. (Another easy addition would be to include metallic noise makers to ring in the New Year.)

84Leigh

For Christmas, pale gold glass trees were nestled between the cones. (I’ve seen different types of metallic glass trees at both department and craft stores.)

29Leigh

All of this was surrounded by a chain garland with opalescent bead “icicles”. (This can be made by anyone with jewelry skills using eye-pins, seed beads, and bulk chain. For everyone else, I’ll probably demonstrate this in the future!)

27Leigh

If your chandelier dips too low (as mine did) to accommodate the center cones, there is a simple solution. Use a small S-hook from a hardware store to hitch up a lower link to a higher one in the chain. Start by setting the S-hook on a link at the height you prefer, then lift the chandelier up, and lastly set a lower link onto the hook. (The photo really illustrates this better than I can describe.)

42Leigh

You might wait to try this until you have help to lift it while you relink it. The linking isn’t noticeable in person, and it really looks better to not have the chandelier visually conflict with the centerpiece.

91FrozenNewYear-Leigh

Whether or not you choose one or both of these table-scapes for your next fête, for this year or the next… the idea of making simple changes to perfect your party for its holiday is a notable one if simply for its low cost and ease of transition. Most importantly, it leaves more time for family and friends. Have a very Merry Christmas and a New Year filled with blessings!

33Leigh

Faithfully Yours,

Leigh

P.S. Be sure to check out my Fast & Easy DIY Hand-stamped Polka-dot Gift Wrap & Matching Gift Crafts!

DIY Easy Last Minute Halloween Ornament Décor Remade From Scraps Craft

Is your spooky Halloween tree décor looking a tad too bare, and your budget’s already blown on candy and costumes? Then do what I did and use ribbon scraps, felt stickers, plastic rings, $1 felt garland, cupcake picks, and felt from a card found around the house to craft cute ornaments! So easy that it can be done last minute, and it makes an interesting artistic scavenger hunt for the kiddos… “Find as many things as you can, in 10 minutes, to turn into ornaments.”

109Leigh

Take a dollar bin felt garland, and cut the ribbon joining the shapes into sections. Tie a knot to form a hanging loop. You can stop there, or add bows made from glittery ribbon (also from the dollar bin) or from leftover pieces from your other crafts. Cut the ring part off the plastic spiders (that outnumber those treat bags).

0112Leigh

Hot glue those elements, at various angles, onto your new one-of-a-kind ornaments.

0117Leigh

Remove felt decorations (in this case a house shape) from cards. Cut the spikes off of leftover plastic cupcake picks. Pull the sticks out of floral arrangement decorations (the pumpkin people in the picture). Cut lengths of ribbon or tinsel twine to serve as hanging loops. These don’t stick into tiny fingers like hooks would, and they pack better too!

206Leigh

Hot glue the ends of the ribbons to the back of the shapes to make loops. Glue any decorations to the front sides. Then take fabric or ribbon (or in this case the thick orange paper that came with a floral arrangement) and glue the ornaments onto it. (The stickers will obviously just stick to it.)This makes for a prettier back that hides the hanging loop ends.

207Leigh

Hang your newly crafted ornaments as proof positive that cute doesn’t have to mean expensive or time intensive!

75Leigh

Happy Halloween!

Faithfully Yours,

Leigh

DIY Easy Last Minute Halloween Décor Kid Friendly Foam Shape Crafts

This project began with the question, “What on earth do I do with that sack of foam shapes that didn’t get used up in that last project?” My answer was to make holiday signs, spooky garlands, not-so-scary ornaments, favor necklaces, and puppet favor / food picks! So without further ado, here are some quick and easy kid friendly craft ideas that are great for last minute fill-ins for your décor this Halloween.

112Leigh

Glue colored twine in between two foam shapes to make any length garland you chose. Adults can use hot glue and a ruler as a distance guide. Kiddos can use foam glue and make it as crazy as they like!

297Leigh

Drape it along a spooky Halloween tree, or loop the ends and hang them on the wall with tacks.

291Leigh

Using the same technique, make favor necklaces for the little ones. Wrap them around mini felt witch hats for party hat dress up that doubles as décor. A barrette turns them into a grown-up witchy fascinator.

113Leigh

Glue the shapes back to back with a new popsicle sticks in-between.

79Leigh

Stick those little puppet favors into candy stashes for an extra dose of Halloween fun.

327Leigh

Some shapes can double as letters for a thrifty but cute holiday sign.

115Leigh

A block of wood or small canvas backed with a ghost cut-out, may be topped with eyehooks for a wire handle.

117Leigh

Glue on small letters plus pumpkins for O’s, armed ghosts for T’s and K’s (when an arm is cut and added as the kick in the K). Bats can just swarm the whole project!

118Leigh

A coat of glitter paint (or glue) unifies the whole project, making the foam indistinguishable from other materials. The whole thing can actually dry on the wall (so long as wee fingers are out of reach).

121Leigh

Thread an intentionally random mix of seed beads to a thick wire handle, and twist securely into a hole or eyehook.

56Leigh

Voila, super-cute… super-cheap… super-fun!

253Leigh

Happy Halloween!

Faithfully yours,

Leigh


Superfast Glitter Halloween Shapes Garland Remade Craft

This superfast Halloween project is so easy that I more than hesitated to call it a craft. It’s more like a… remake something bland into something beautiful endeavor. Hence the name “remade craft”. I had three inexpensive pre-manufactured garlands that had cute shapes, but were boring in that they just contained one image and color per strand of generic ribbon. I just had to mix them up. I’m writing this as encouragement to look for the creative possibilities in everyday materials… but if you like the look of the completed piece, why not buy some glittered shapes and string them in the same way that I restrung these glittered wooden ones.

337Leigh

I always see glittered foam shapes like these in the craft stores, but if you’re feeling really crafty you can buy precut wooden shapes and glitter paint them yourself.

339Leigh

Remove all traces of cheap and twisted dull generic ribbon. Find some pretty sparkly yarn in a contrasting color that coordinates with your party color scheme.

340Leigh

Arrange the shapes in a pleasing order, and string them along. (But set aside some shapes to use on a Halloween wreath, article will follow.)

341Leigh

That’s just so much better.

343Leigh

I draped them along the staircase railing, using green floral wire to tie them on. See the Easy DIY Kid Friendly Bat Halloween Décor Craft from an earlier article.

105HalloweenStairs-Leigh

I think they made a terrific backdrop for my “Glitter-Ween” Party!

202cGlitterween-Leigh

Faithfully Yours,

Leigh