Tag Archives: Chinese New Year

Elegant Chinese New Year of the Monkey Dinner Party Décor Tablescape Ideas

22Leigh

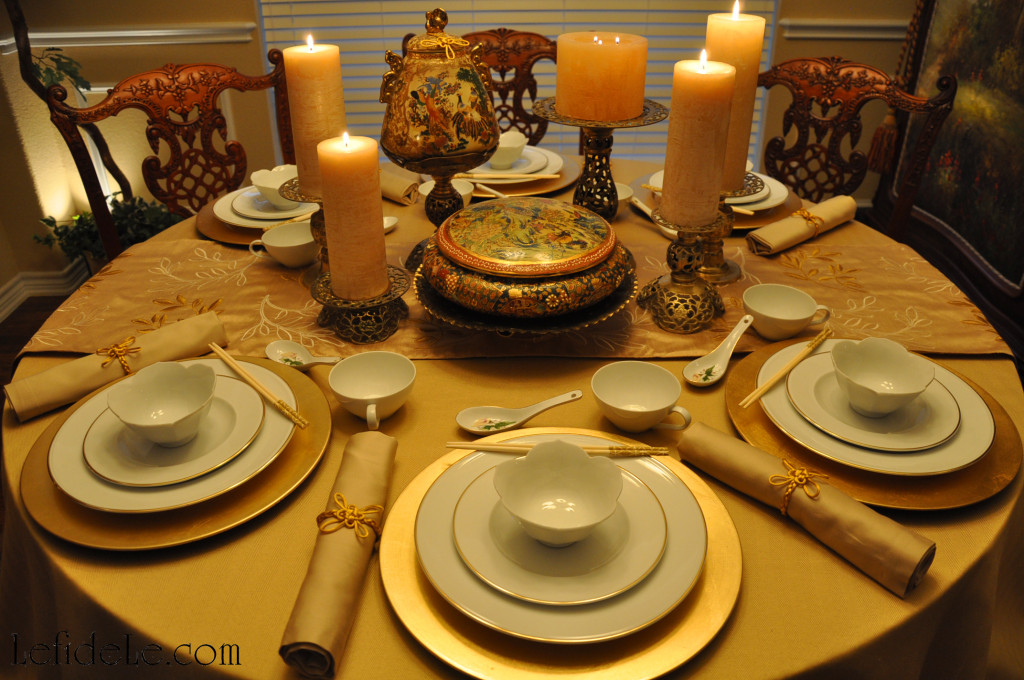
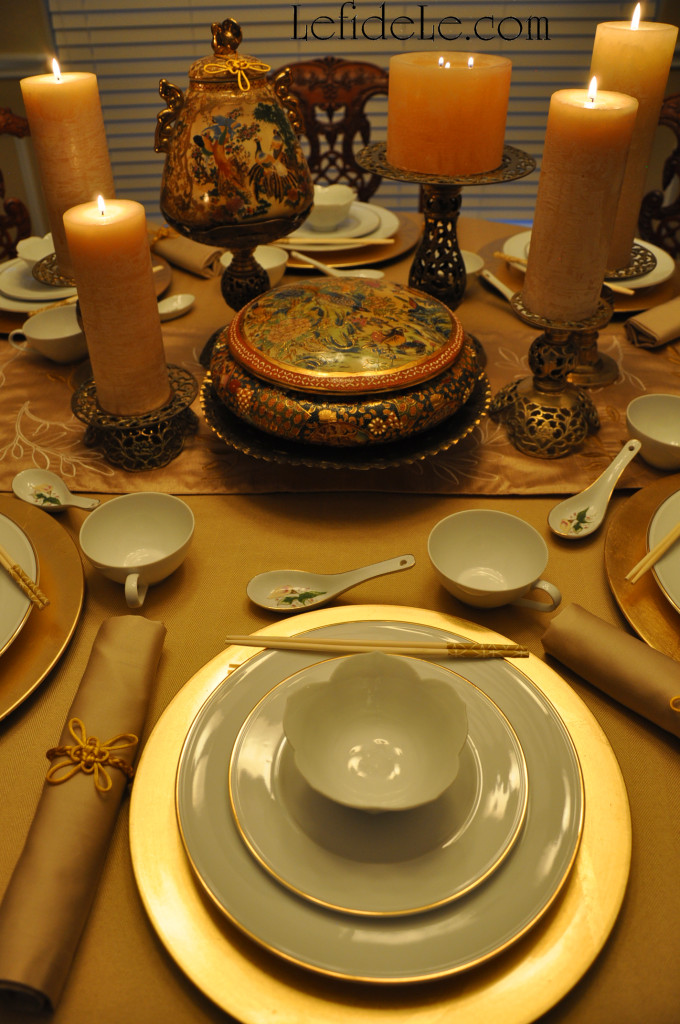
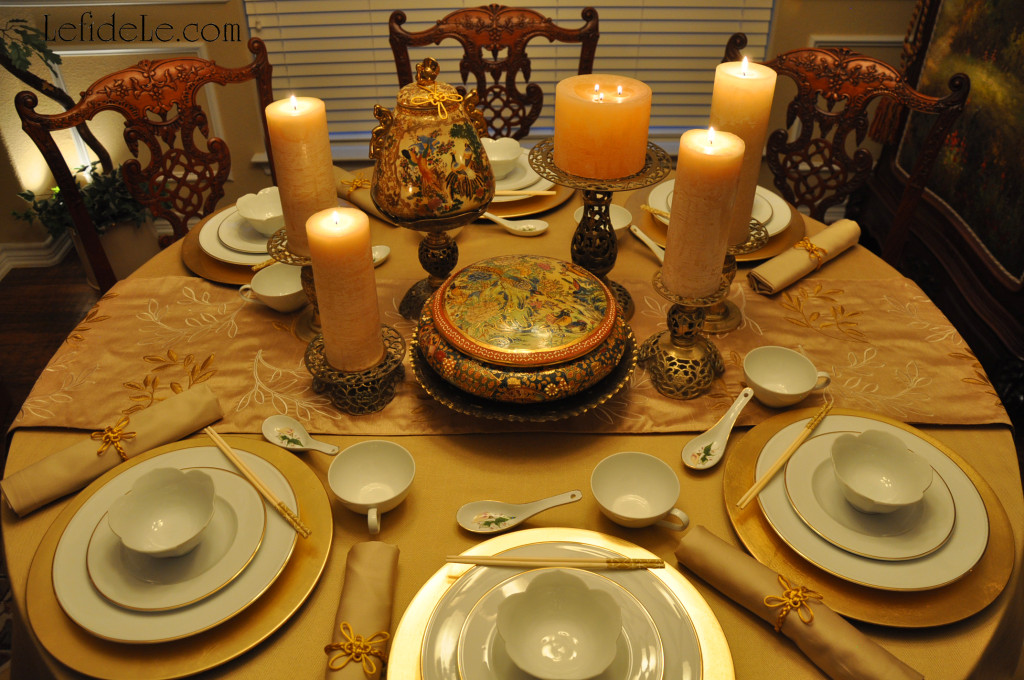
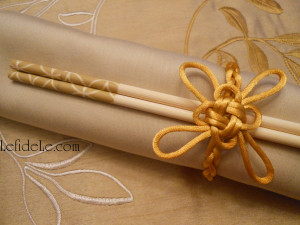
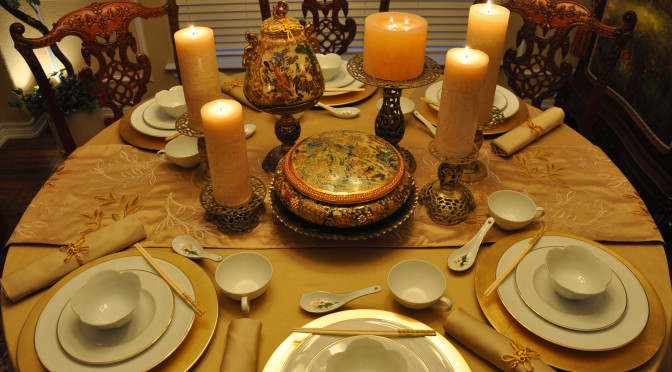
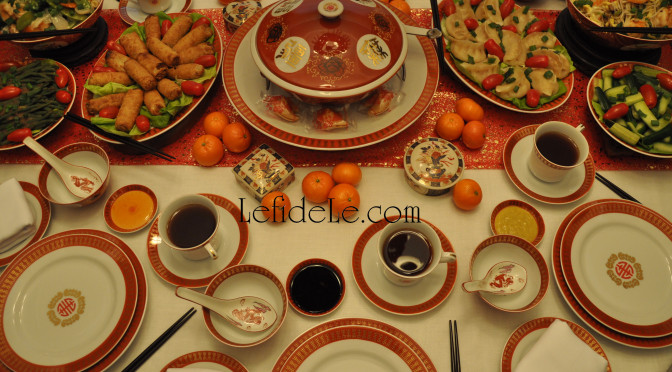
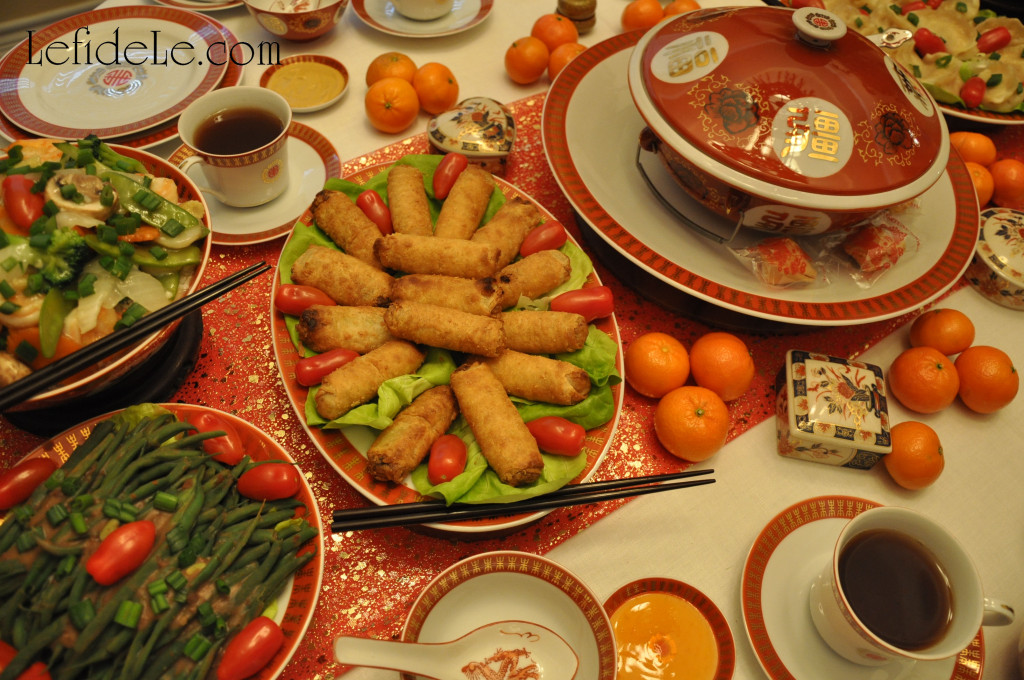
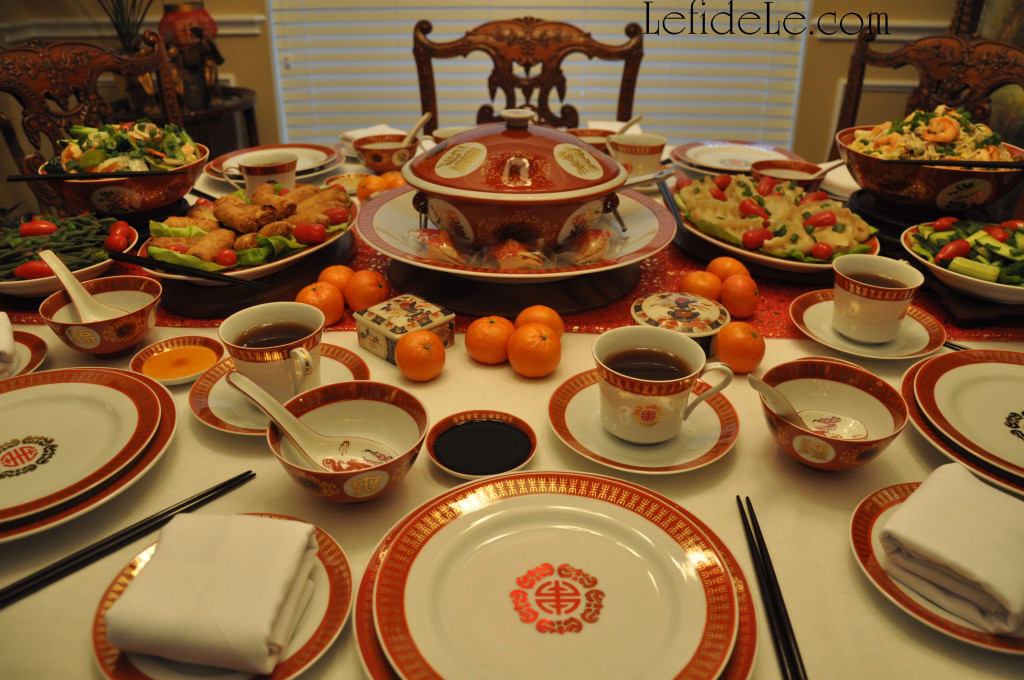
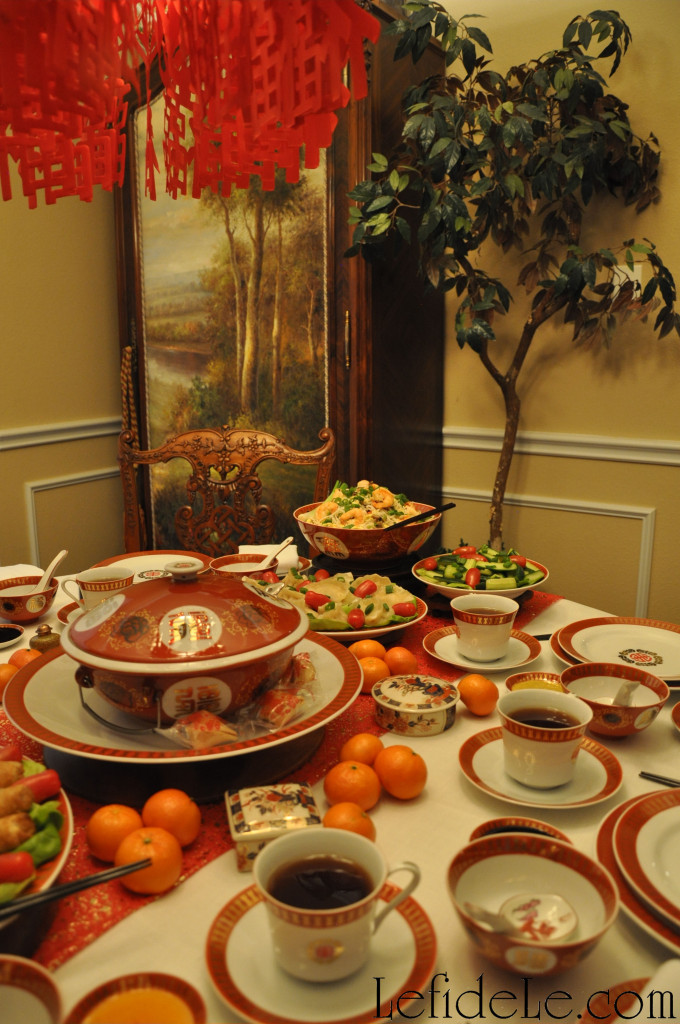
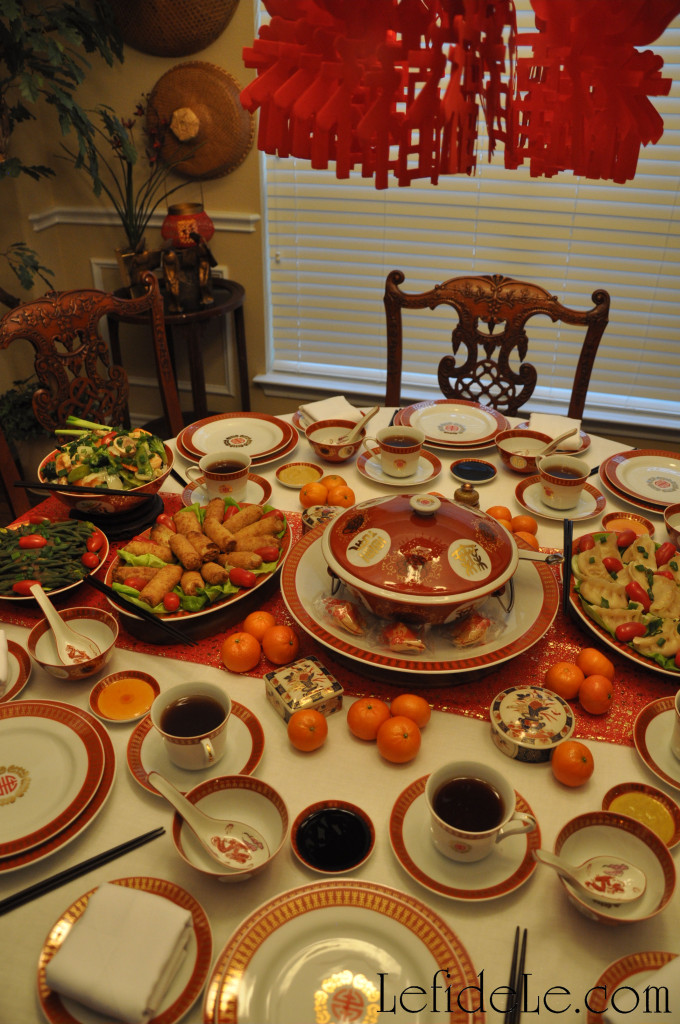
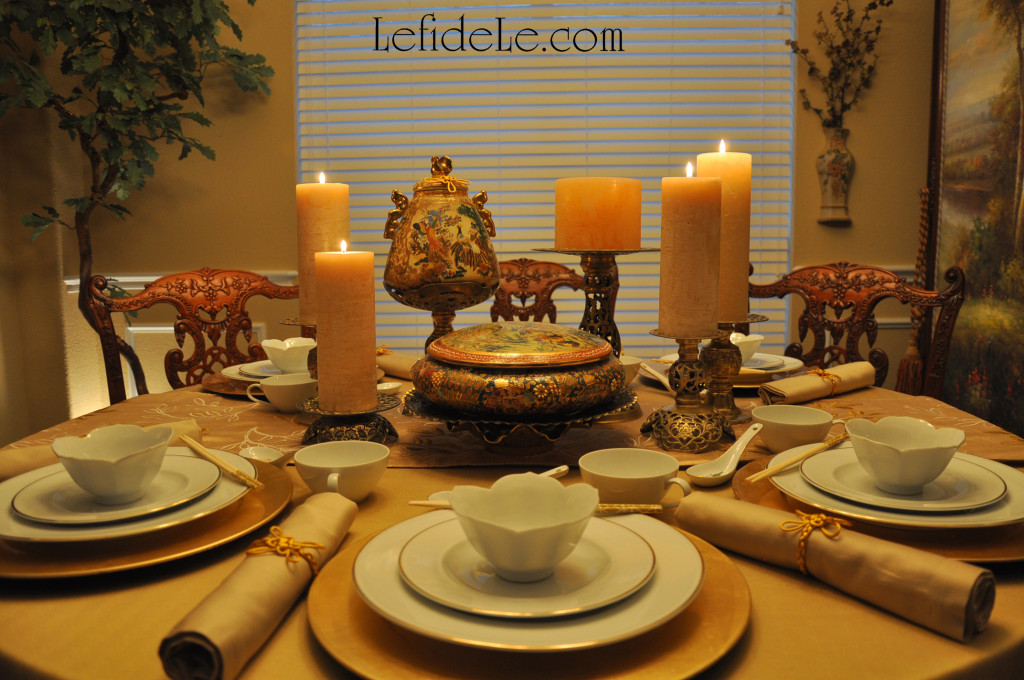
This Chinese New Year of the monkey dinner party contains many ideas for elegant tablescape décor with which to inspire your own celebration. As this is a time for provoking good fortune, customary New Year colors where replaced with those which are luckiest for the monkey sign. Favorable shades are white, gold, and blue while the traditional red is regarded as inauspicious. The typically shunned white funerary color is actually a propitious one for the primate, so it is utilized in the dishware. There are touches of blue in the ceramic vessels, and many shades of gold are included in the setting. Further yellow toned gold cording was selected for the napkin rings, as yellow is also regarded as a lucky royal color as it was once reserved only for use by the emperor. The handcrafted napkin rings were fashioned with traditional Chinese good luck knots, each with 8 petal-like loops. This is auspicious as the numbers 1, 7, and 8 are also providential for the monkey. There are 8 chairs in room, though some are off camera. 7 brass candle holders elevate candles with 7 lit wicks, and there are actually 7 good luck knots when the 6 rings are added to the one looped onto a ceramic lid. Of course, the table, table runner, tablecloth, and wall vase are each numbered as one. The Asian wall vase contains blossoming branches which are a prosperous theme repeated in the ceramics. Additionally, little lotus bowls bloom with blessings. Only chopsticks and ceramic spoons are included for dining, because knives unfortunately represent the cutting of relationship ties… and this is a holiday for flourishing connections in the burgeoning of a thriving new year! “Gung Hay Fat Choy, Gung Hay Fat Choy. Sing Happy New Year, Gung Hay Fat Choy.”

61Leigh

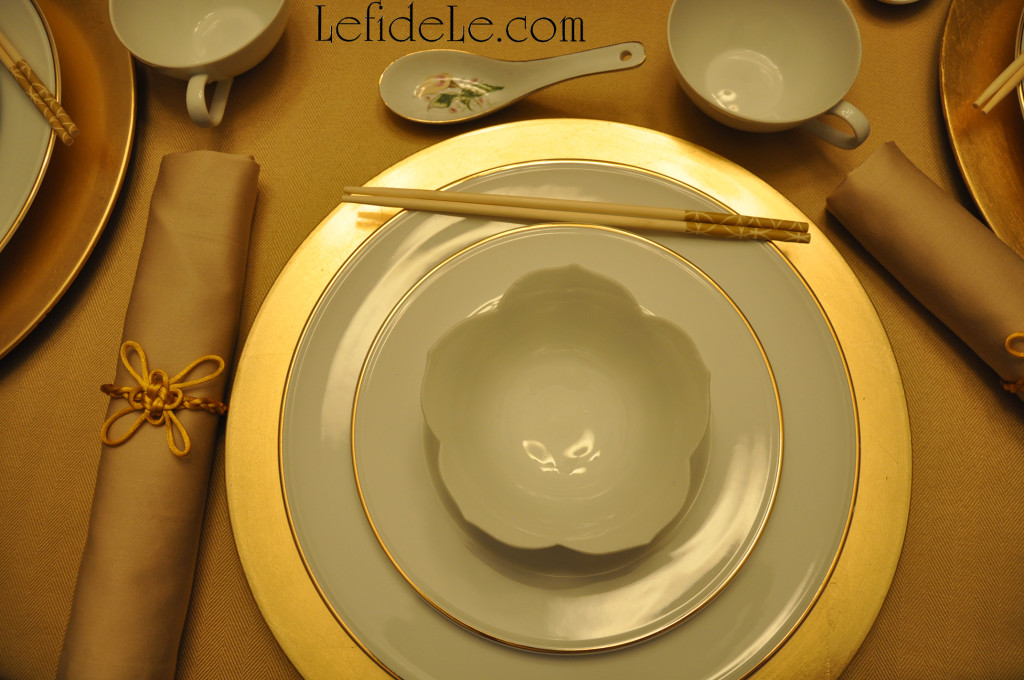
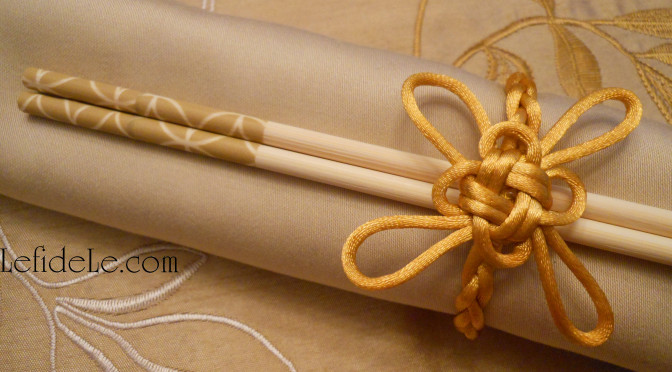
“The new moon tells us, exactly when to celebrate with family and friends.” Gold leaf chargers shine as the full moon beneath gold edged plates and propitious lotus blossom bowls. Delicate teacups accompany vintage ceramic spoons bordered also with gold. Bamboo chopsticks display adornment with patterned paper washi tape.

10Leigh

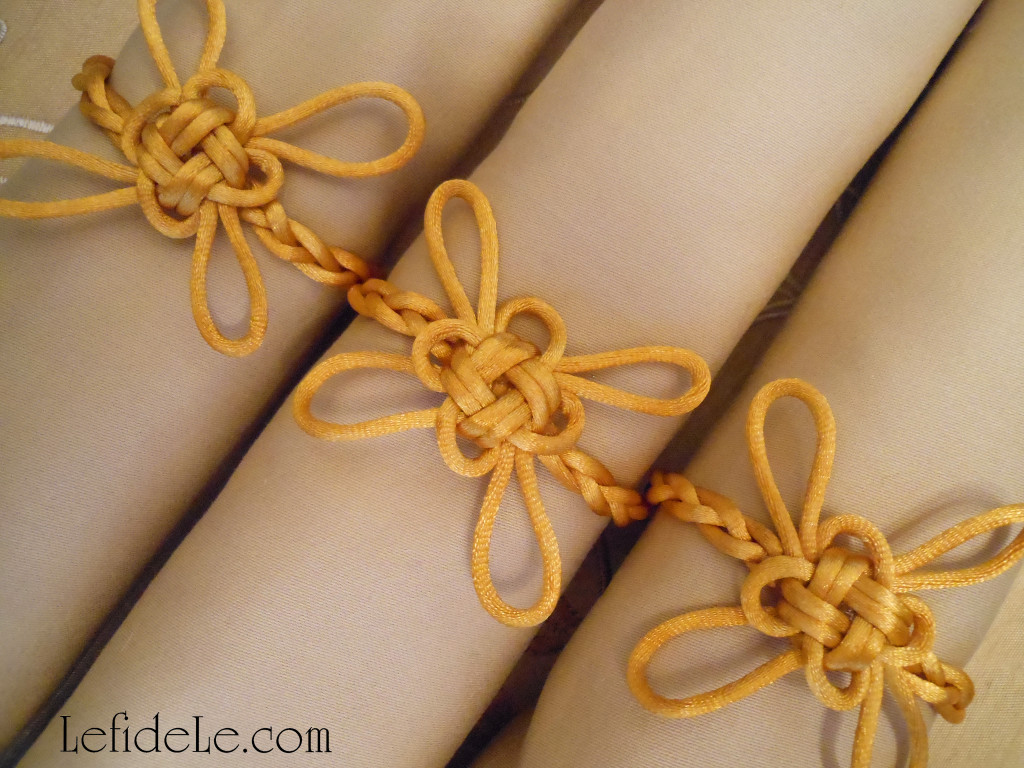
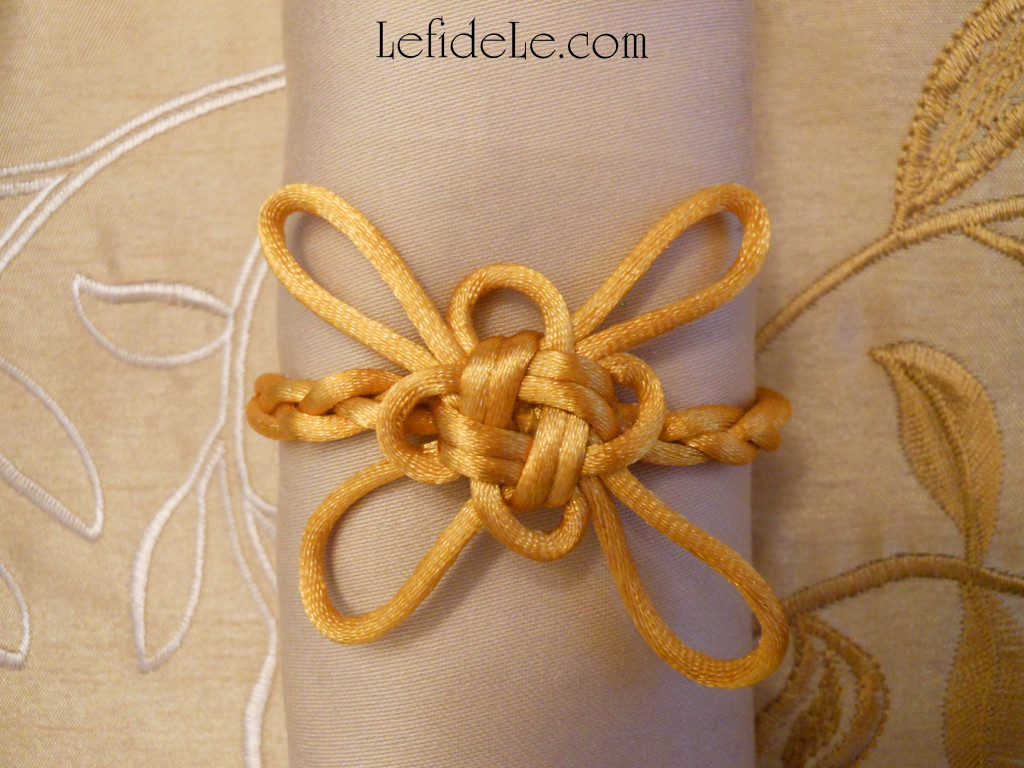
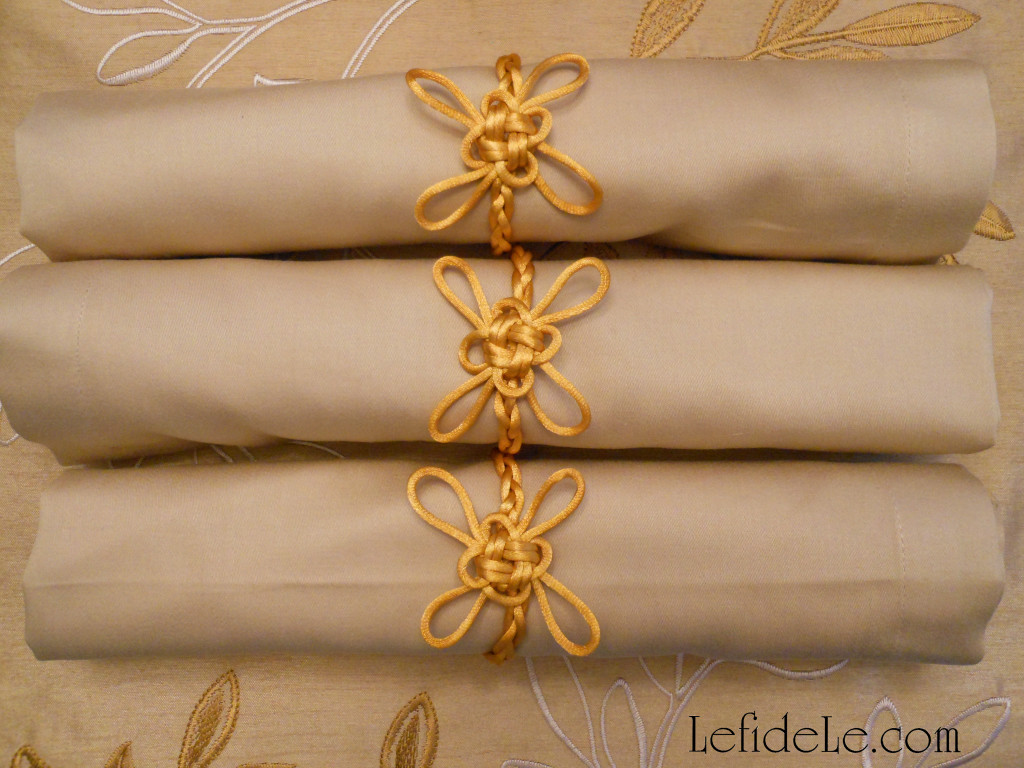
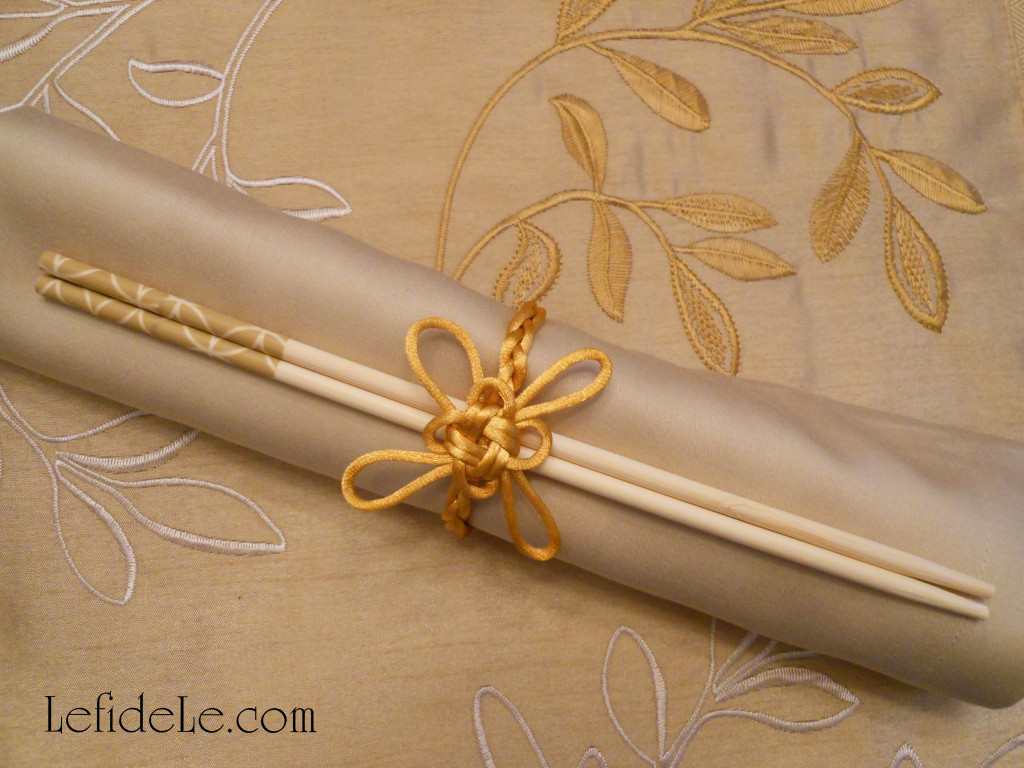
“Clean up the house and get out the broom. Sweep out the old year, bring in the new.” A pristine new tablecloth of muted gold matches cloth napkins encircled by plaited rings embellished with opportune good luck knots.

36Leigh

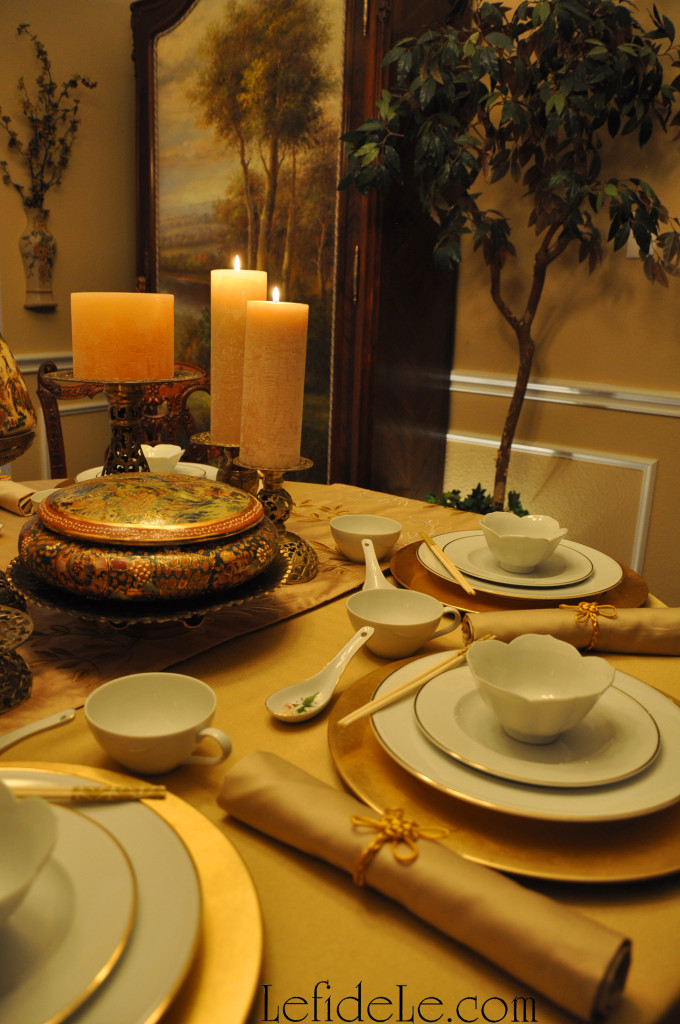
“Bring out the apples, the oranges too. Their colors bring us joy and good luck too.” Auspicious branches bloom from an Asian wall-mounted vase. Trees neighboring the tablescape are echoed by the table-runner embroidered with leaf filled branches.

55Leigh

“The dragon dances, the lanterns light. The firecrackers light up the night.” Illuminating pillar candles stand eminently upon vintage scrolled brass candle holders embossed with tiny lotus blossoms. Traditionally made Chinese ceramic vessels lavishly depict scenes of lush bird filled paradises, which are decorated further by dimensional gold paint.

78Leigh

Gung Hay Fat Choy… Best wishes & congratulations! Have a prosperous and good year!

Faithfully Yours,

Leigh

P.S. The quoted Gung Hay Fat Choy children’s song lyrics are by Nancy Stewart.

f1721Leigh

P.P.S. Learn how to make the traditional Chinese Good Luck knots seen here and how to turn them into napkin rings as well as decorating chopsticks with washi tape in my crafting article by clicking HERE!

183Leigh

P.P.P.S. Read more about traditional Chinese New Year celebrations in my article from last year by clicking HERE!

Traditional Chinese Good Luck Knot Craft Tutorial with DIY Plaited Napkin Rings & Washi Tape Decorated Chopsticks for Chinese New Year

1735Leigh

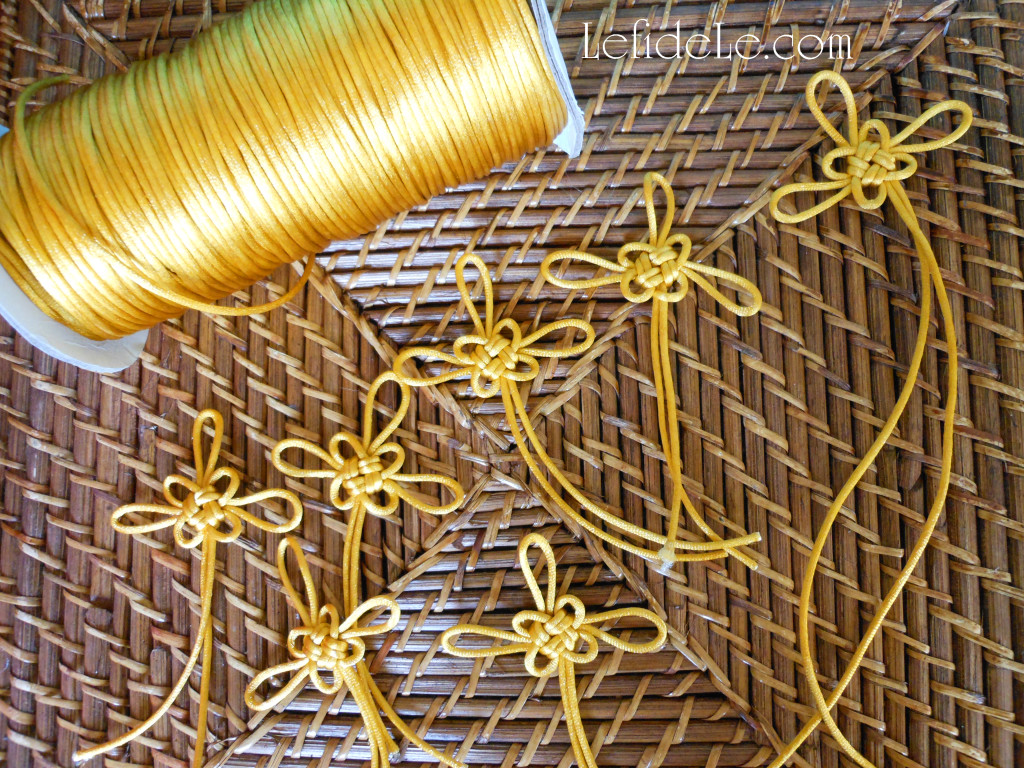
This craft tutorial for traditional Chinese good luck knots makes the perfect adornment for DIY plaited napkin rings which set an elegant tone for Chinese New Year along with quick washi tape decorated chopsticks. The knot demonstrated here is known by various names among diverse Asian cultures… Good Luck, Auspicious, Chrysanthemum, and One Mind. As a traditional Chinese folk art, decorative knots have been made in the same manner for well over a thousand years, though they originated in prehistoric times. These creations have been used to decorate homes, jewelry, clothing, and have functioned as stand-alone gifts as good luck charms. Knot, 中国结 or Jie in Chinese, translates as vigor, harmony, and unification. Therefore, they have been regarded as a token of blessing when gifted for friendship or love and for special occasions like weddings. This sentiment has led to many being passed down through the generations. As the Chinese New Year is a time for provoking good fortune, and yellow is regarded as a lucky royal color as it was once reserved only for use by the emperor, a yellow gold cording was chosen for the napkin rings so that guests will dine as royalty in the burgeoning of a prosperous year.

1508Leigh

Begin by purchasing enough cord in silk or satin (in a “rattail” width) to complete the project. You’ll need 21 inches for each plaited ring (126” for 6) and 26 inches for each good luck knot (156” for 6)… totaling 47 inches for each ring with knot (almost 4 feet) or 182” for 6 (23½ feet). (I got mine inexpensively in bulk size from Fire Mountain Gems, whose sale link is in the sidebar, which is a great source for all types of cording in varying quantities.)

1748Leigh

I’m demonstrating the good luck knot here by pinning the cords to a cork plant saucer, because it makes clear photography of the process easier. You may find it easier to make a symmetric knot this way, but it can be easily made without pinning anything down. Don’t get discouraged if your first knot looks askew, just untangle the cord and try again. It will get easier with each knot you make. Practice does indeed make perfect!

1576Leigh

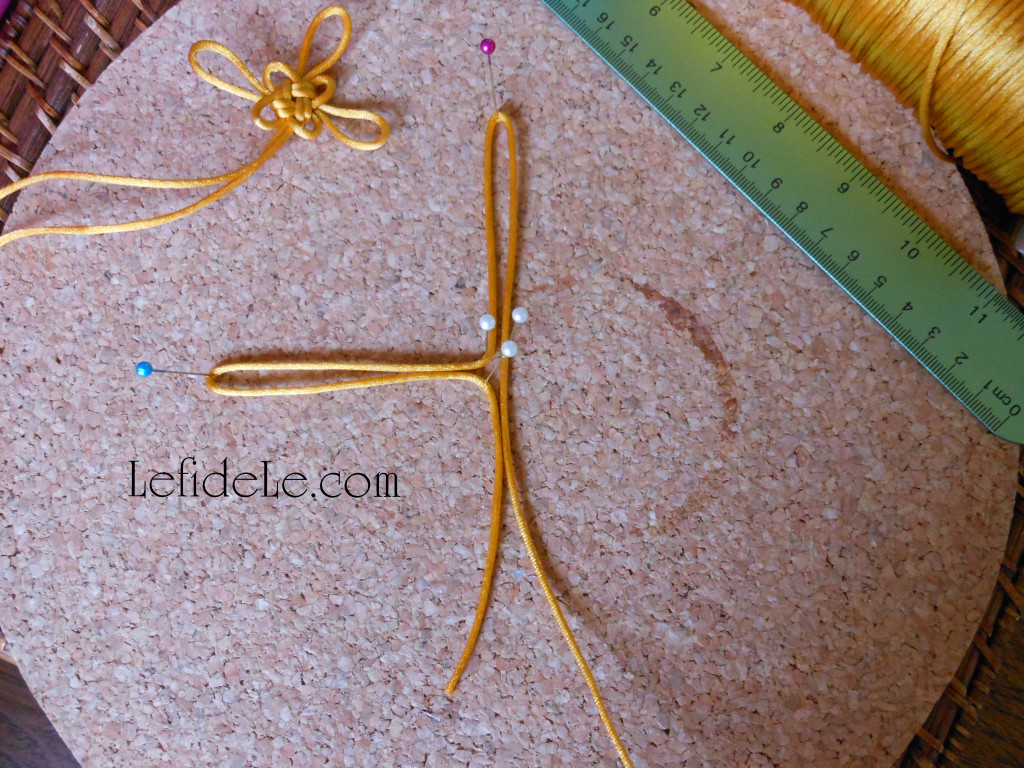
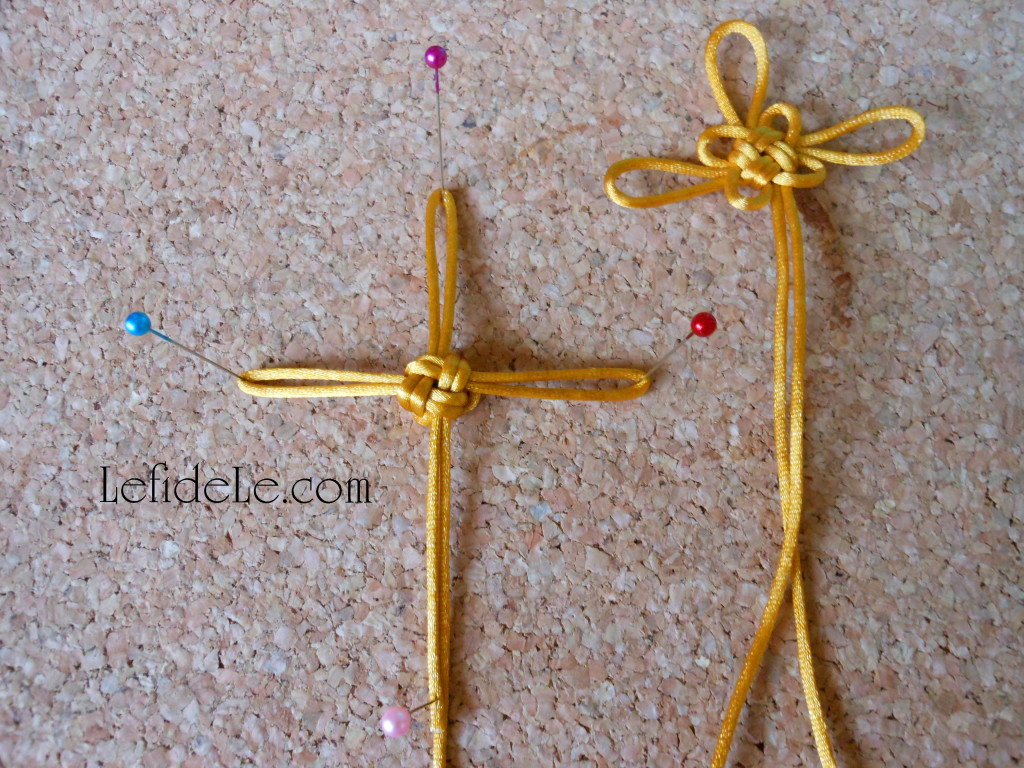
Start by cutting a 26 inch length of cord with sharp scissors to prevent fraying. Fold this in half to find the center point, which becomes the middle of the top loop (pinned in purple). Fold the left strand to find its center which becomes the middle of the left loop (blue pin). Repeat this on the right strand (red pin in the next picture). Note that I’ve pinned the very center in neutral white to keep the central points flat. The cording should resemble a cross at this point.

1579Leigh

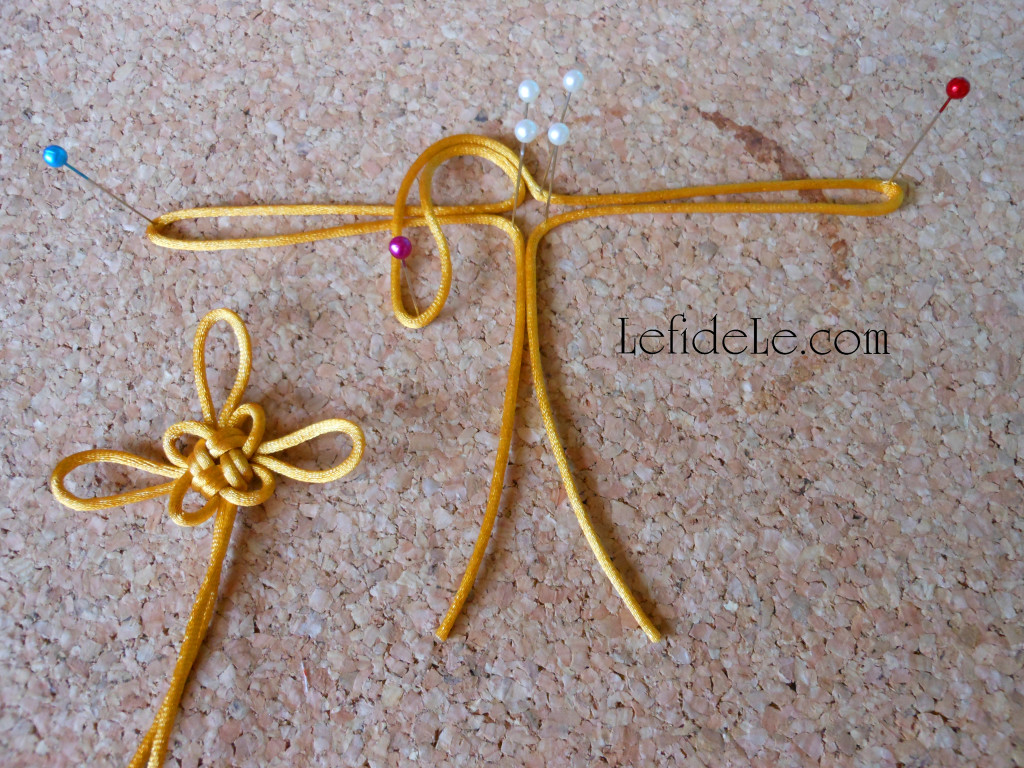
Next, fold the top (purple pin) loop over the left side (blue pin). It should now appear as a person with bowed head and outstretched arms.

1580Leigh

Then, take the right loop (red pin) and slip it under the top fold-over (purple pin). It should now give the impression of a windswept girl with arms down at sides.

1585Leigh

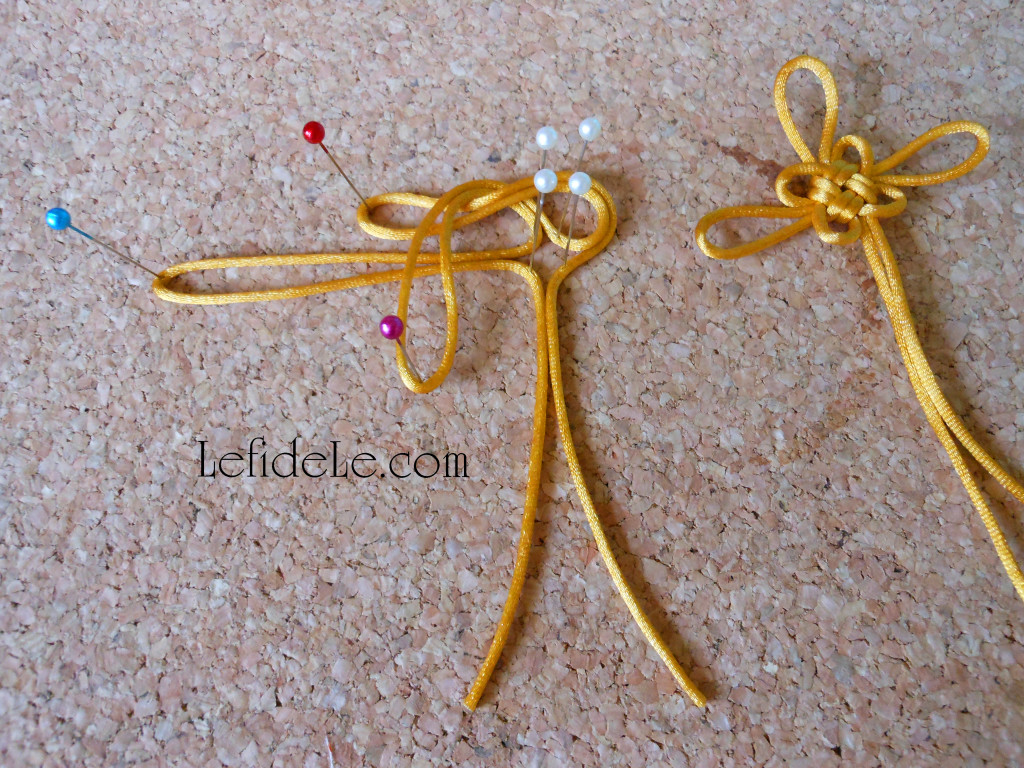
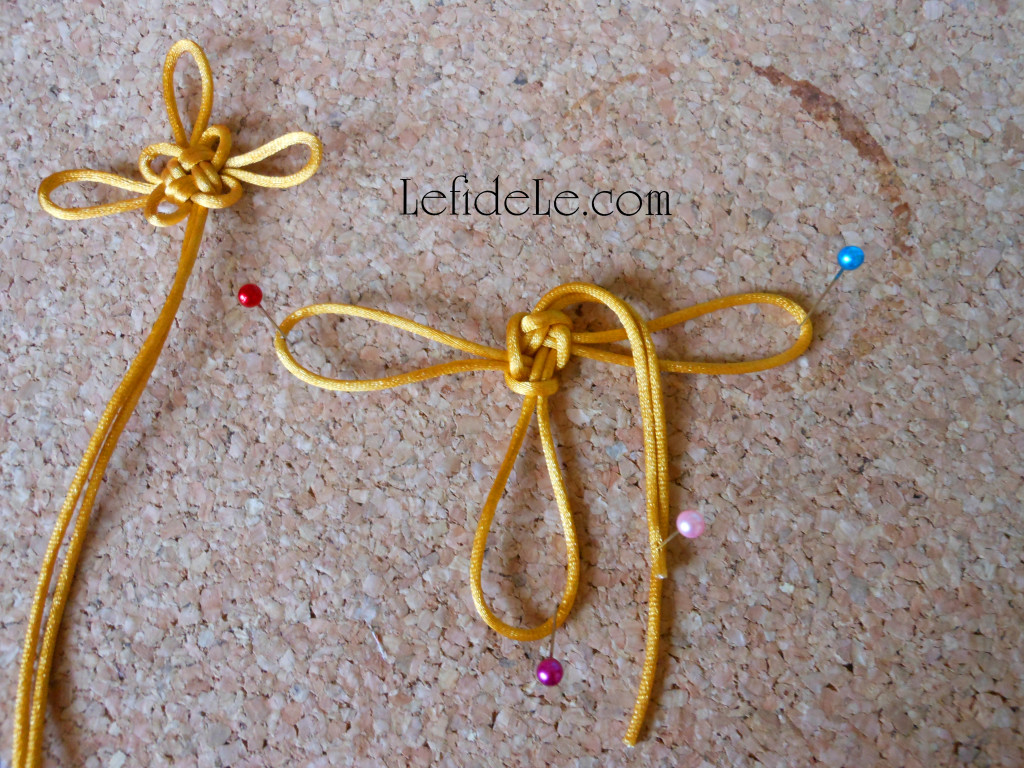
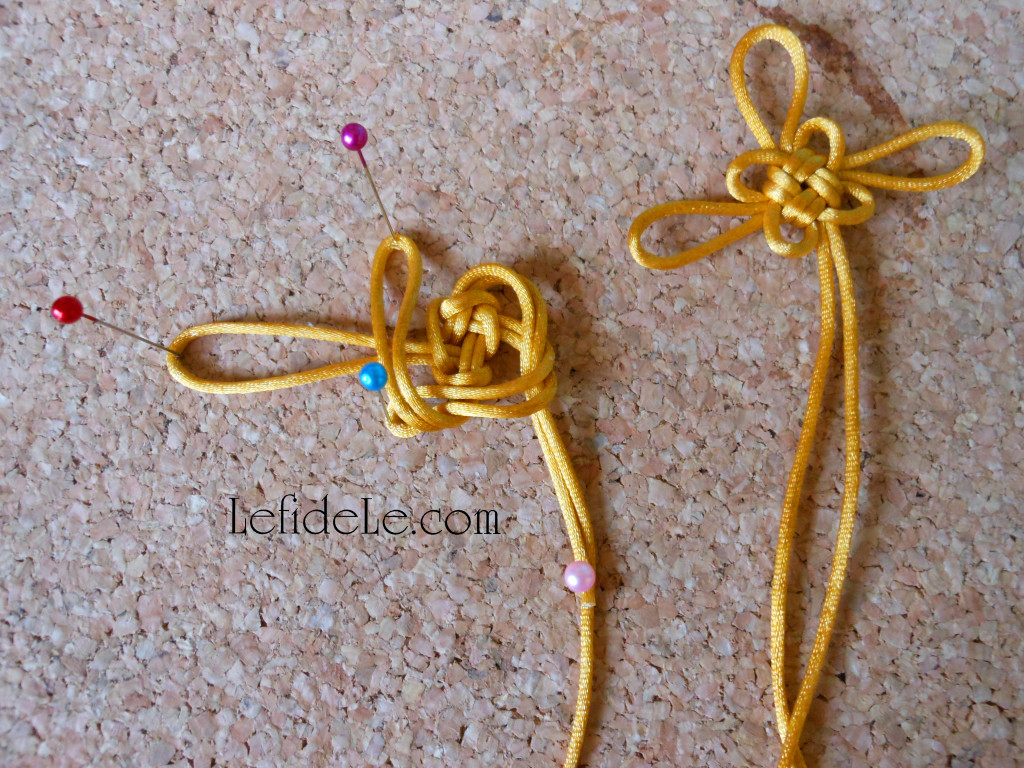
Now take the bottom two straight strands (no pin yet) and slip them under the fold-over above it (red pin). It should look a bit like a yoga contortion at this point.

1588Leigh

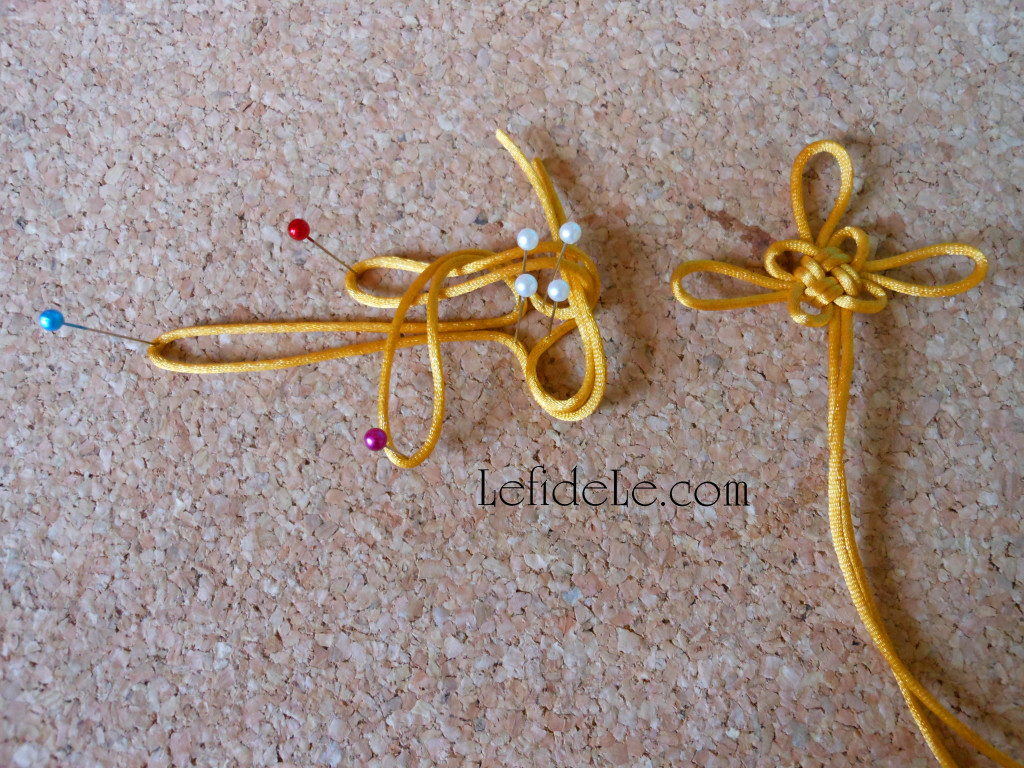
Next, fold the left loop (blue pin) over what was once the top loop (purple pin), and then slip it under what was previously the bottom strands (no pin yet). It should now bring to mind a game of twister.

1589Leigh

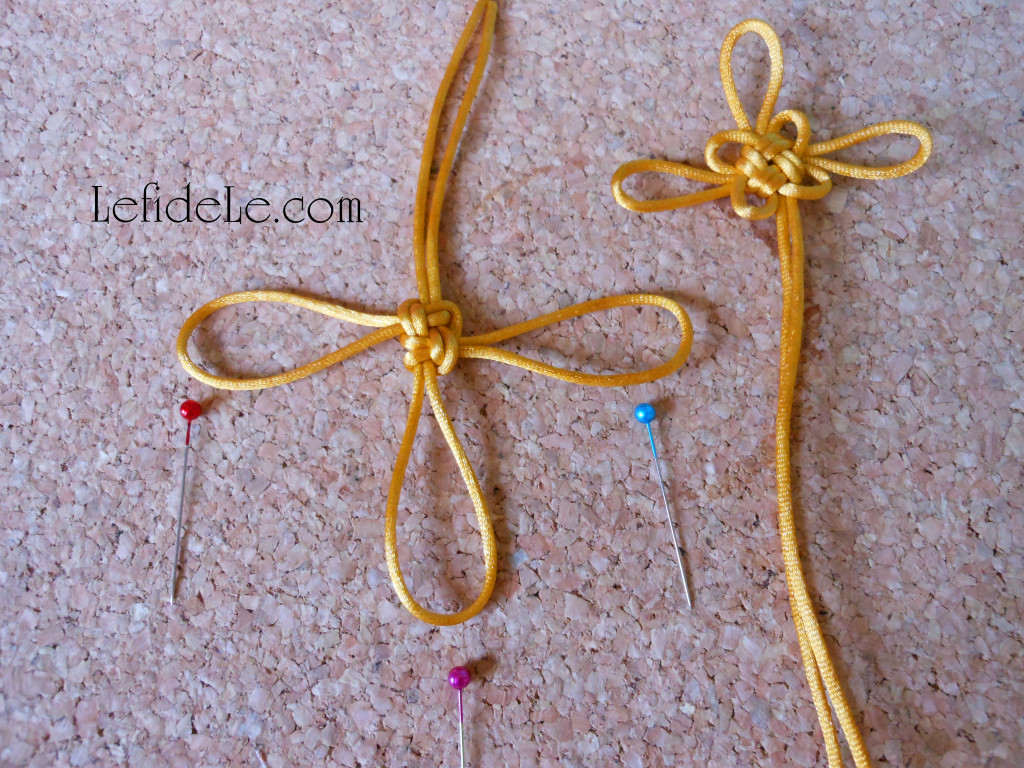
Pull all of the outside loop ends outwardly, a little at a time, until the center is taut. It should look like an upside down cross.

1594Leigh

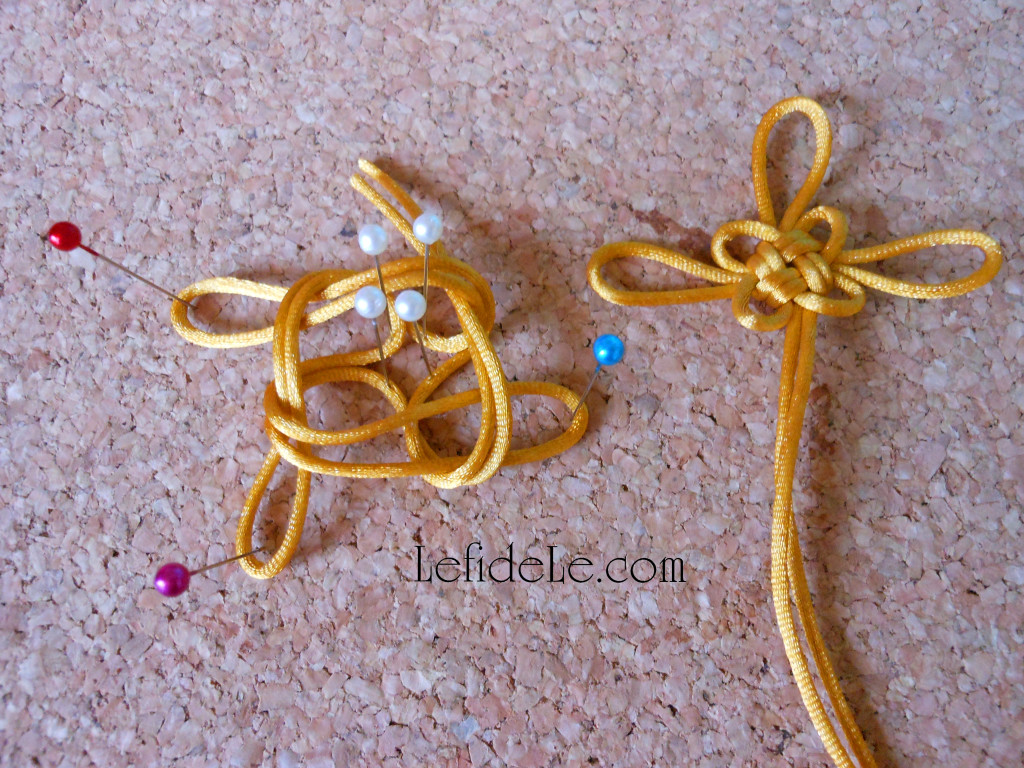
Repeat the previous fold-overs going clockwise. Fold the top loose strands (now a pink pin) over the right loop (blue pin). It should give the idea of a girl with really long hair.

1598Leigh

Next, fold the right loop (blue pin) over the loose strands (pink pin). It should bring to mind a girl with really long hair, bowing with one arm outstretched and one crossing the abdomen.

1600Leigh

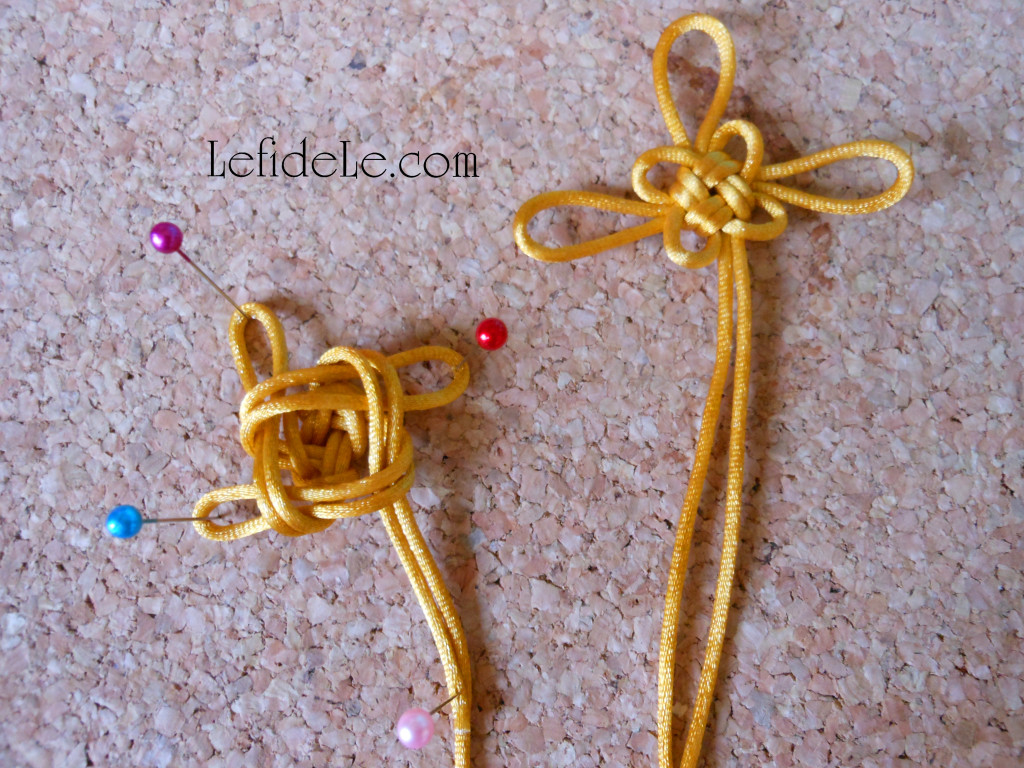
Now fold the bottom loop (purple pin) over the left loop (red pin). It should appear similar to a squashed bug.

1607Leigh

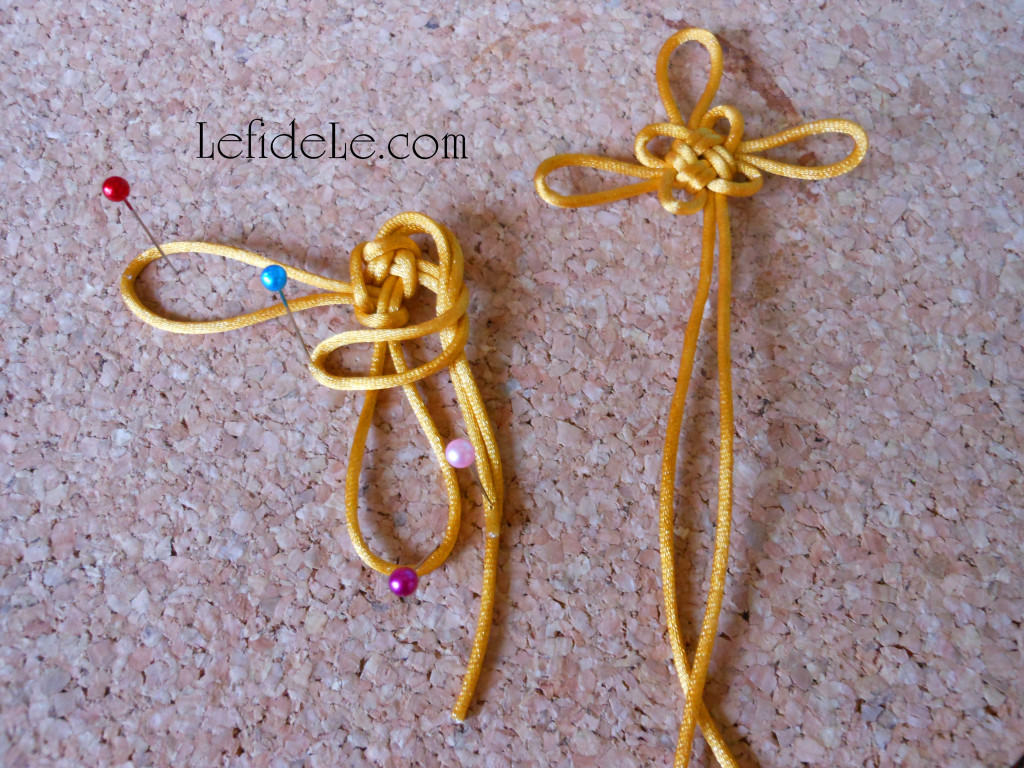
Take the left loop and fold it over what was once the bottom loop (now the top, purple pin) and slip under what was once the top strands (now the bottom, pink pin).It should bear a resemblance to an unfortunate wad of hair matted in bubble gum.

1610Leigh

Pull the ends straight out from the center. It should form another upright cross.

1611Leigh

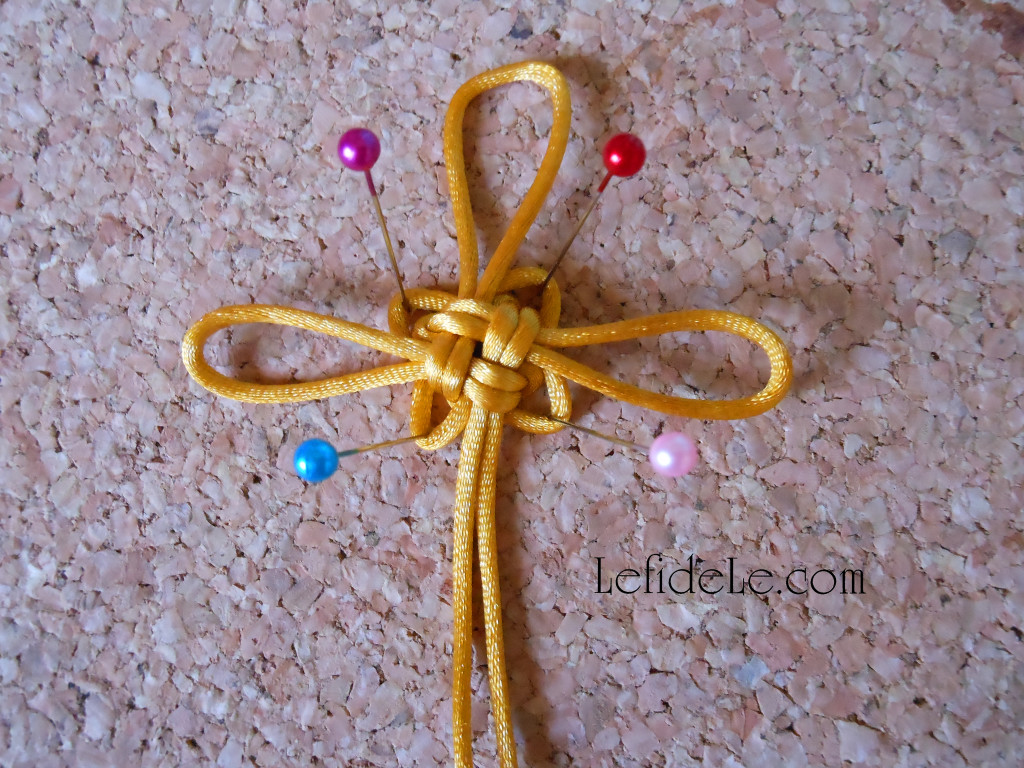
Lastly for the knot, pull the smallest loops outwardly until it forms petal-like structures of equal size. It should now seem more like a Celtic cross. (If it doesn’t look right to you, just pull the whole thing apart and try again. No harm done!)

1518Leigh

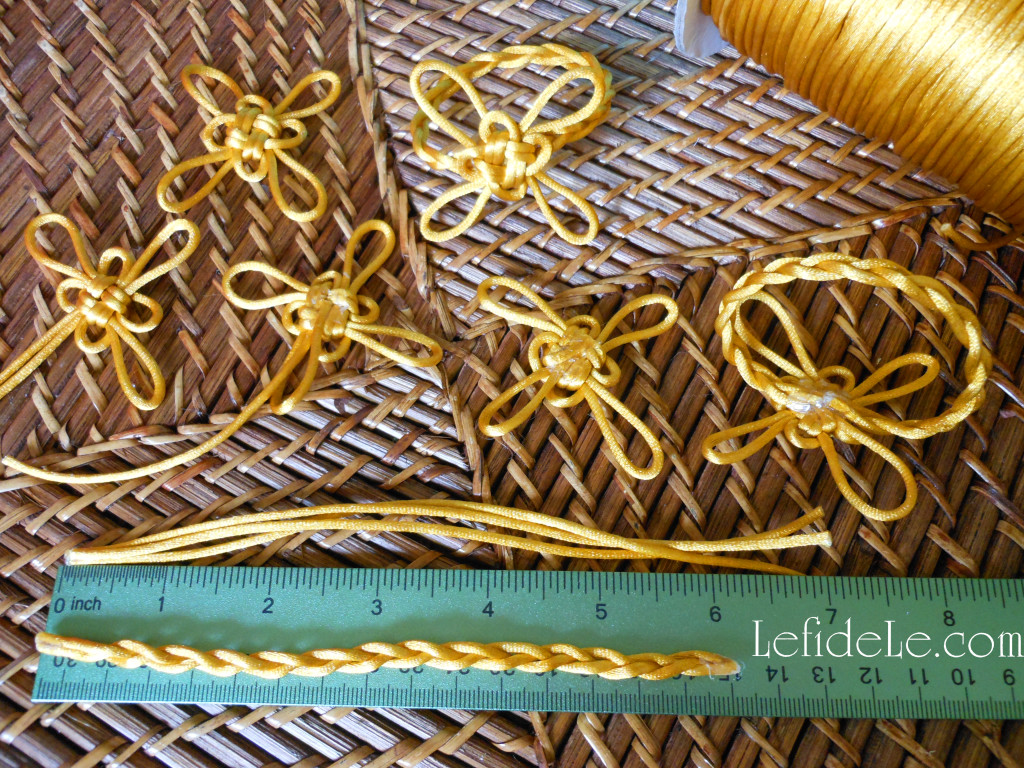
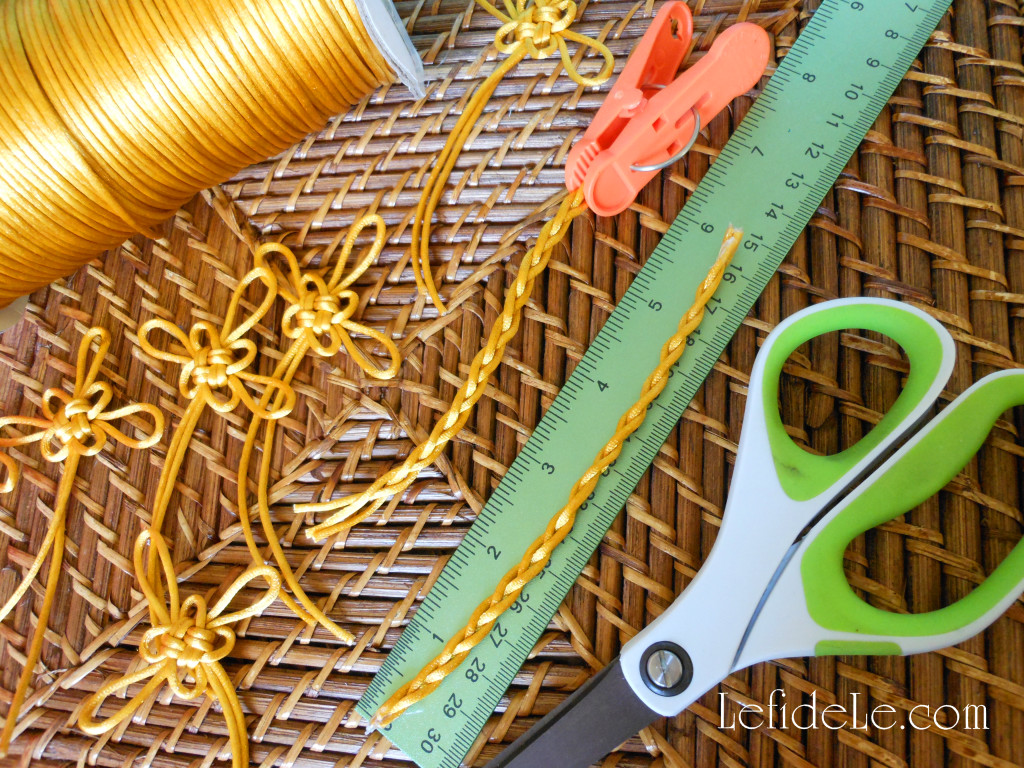
For the plaited napkin rings, cut 3 pieces of cord (7 inches long) for each ring. Hot glue one end of each piece together like a tripod.

1517Leigh

Clip the glued end onto something sturdy for easier braiding (like a small pail full of pens). Make a classic 3 part braid, and then glue the ends together forming a strand. (A classic 3 part braid is like a simple hair braid… made by folding the left strand over the center, then the right strand over the new center, then the new left strand over the new center, then the new right strand over the new center… over and over again until you get to the end.)

1521Leigh

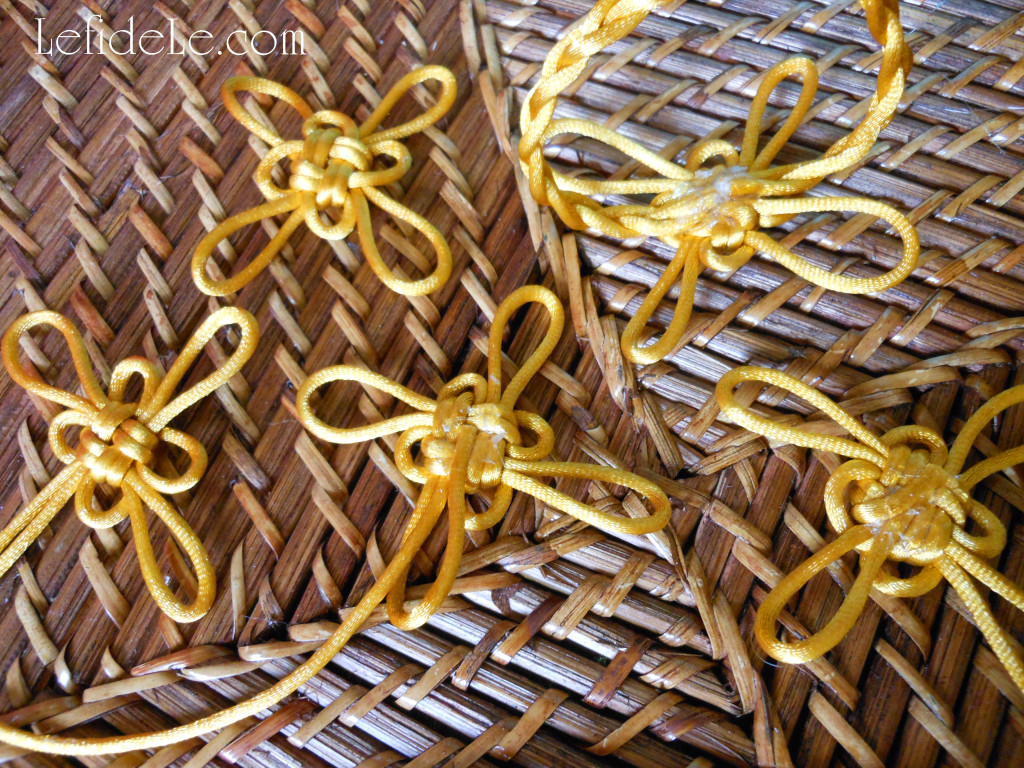
For these napkin rings, the knots will need 4 equal loops. To easily do this, just fold one loose strand over to the underside center until it forms the right size. Cut it to the center of the knots back, and then glue it down. Next, take the last loose strand and fold it over tightly against the knot without any gaps. Also cut this strand at the center-point and glue it down. Now take a braided strand and glue each end to this same gluey underside of the knot (without overlapping the ends).

1724Leigh

Finally, flip it over and look at your amazing creation!

1701Leigh

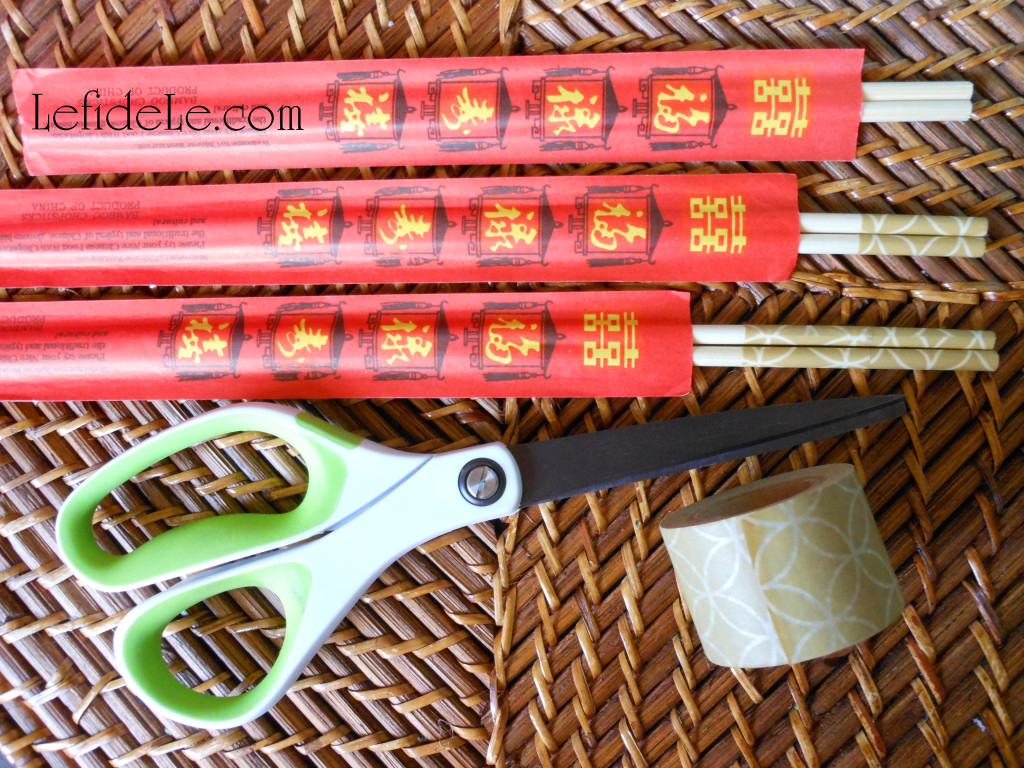
I saved the easiest project for last. Any inexpensive chopsticks can be made beautiful in a just few seconds with the addition of washi tape. You can even take some extra chopsticks home for free along with your takeout. (These came from the grocery store sushi counter.) They are disposable like plastic utensils, but are so much more environmentally friendly.

1563Leigh

Simply adhere the top corner of a piece of the paper tape to the top of the stick. Wrap it around until it overlaps, and then cut it. Press it down hard to make sure it doesn’t unwrap at the dinner table. Use as many layers of it in as many styles as you like. (I used thick neutral tape twice over which matched my table runner.)

61Leigh

See more of these projects in action in my Elegant Chinese New Year of the Monkey Dinner Party Tablescape Décor Ideas Article.

Kung Xee Fa Chai… Congratulations & may you be prosperous!

Faithfully Yours,

Leigh

Chinese Steamed Dumplings Recipe (Allergy Friendly, Gluten-Free, & Soy-Free)

184Leigh

Steamed Dumplings are an absolute must serve “lucky” dish for the Chinese New Year, but unfortunately they were also a dish I must not have… and I know I wasn’t the only unlucky one. Different restaurants have varied recipes for them, but nearly all make them with allergens. So I decided to make my own recipe that played on the basics but omitted the soy sauce, pig lard, pork, shellfish, mushrooms, etc. Plus, by using my optional substitutions, just about everyone can enjoy these delightfully delicious dumplings!


Shell Ingredients: (note that ~ means approximately)

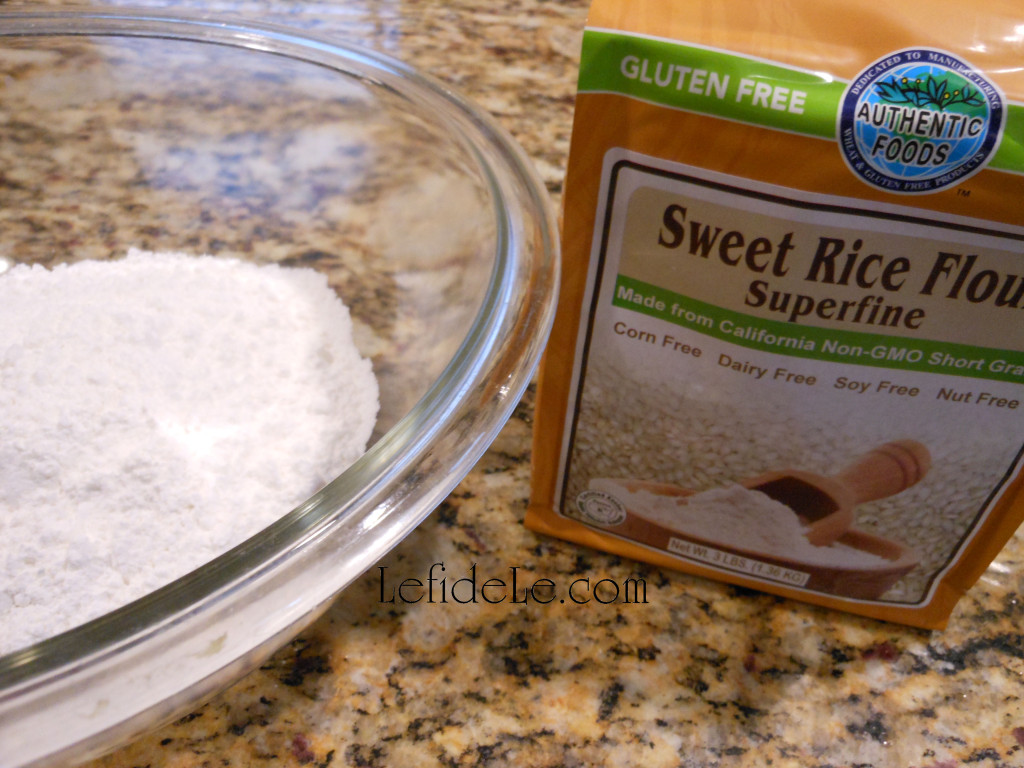
  • ~ 3½ cups sweet rice flour + a good bit more for rolling (a.k.a. glutinous rice flour… that is 100% gluten free!)
  • ~ ⅔ cup boiling water
  • ~ ⅓ cold water

Filling Ingredients:

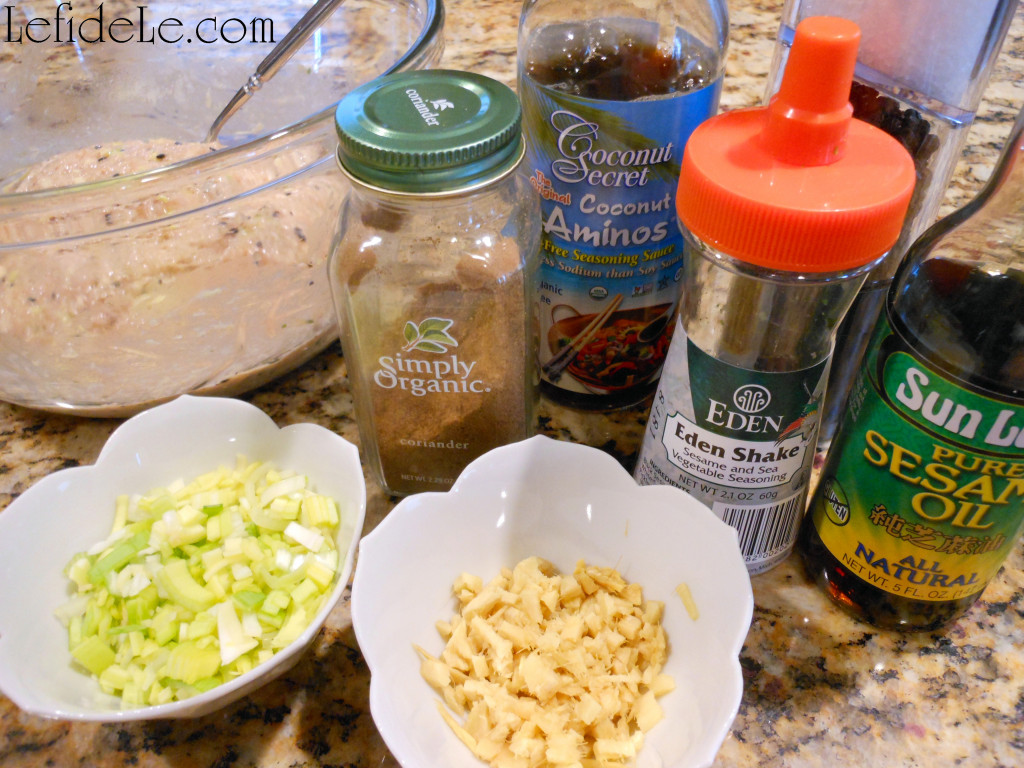
  • ~ ¾ pound ground chicken (or turkey… or minced water chestnuts/mushrooms/tofu for vegan)
  • 3 tablespoons sesame oil (or another flavored oil of your choice)
  • 2 tablespoons Coconut Aminos (a.k.a. soy sauce that is 100% soy free… or soyu if you like)
  • 2 teaspoons minced ginger root (or garlic)
  • ¼ cup minced leeks (or spring onions, bamboo shoots, shredded cabbage, etc.)

Filling Seasoning: (I used these, but add whatever you like adapting it to your tastes.)

  • 2 teaspoons sea salt
  • 1 teaspoon ground coriander (try adding 1 tsp. ground ginger if not using minced)
  • 3 teaspoons of Eden Shake + more for garnish (a.k.a. black & white sesame seeds plus pickled redshiso leaf… Anyone with sesame allergies can use hemp seeds which are the perfect high protein substitute.)

162Leigh

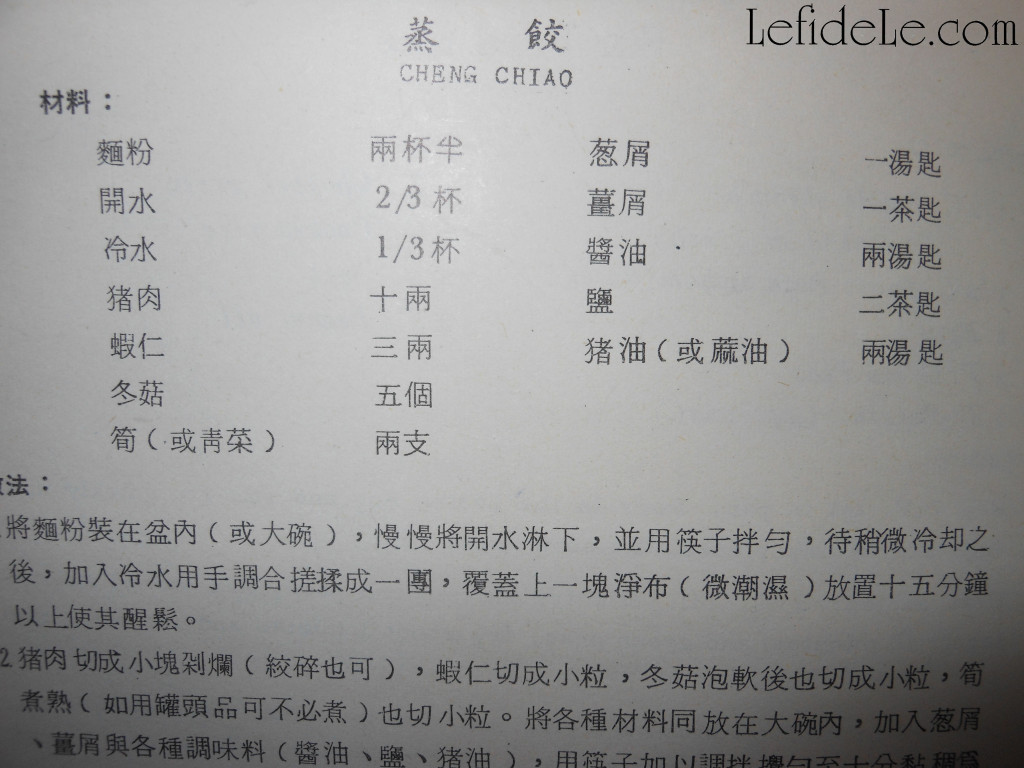
↑ This is a picture from my grandmother’s old recipe book that called for pig lard, soy, and the other things I spoke of earlier. I’m sure it was a tasty recipe, but I changed every ingredient but the rice flour… which I increased the portion of because the dough was too sticky to roll as it was. Note that even more flour than this will be needed as you roll.


Instructions:

168Leigh

First mince the ginger and leeks. Then mix all of the filling ingredients well.

172Leigh

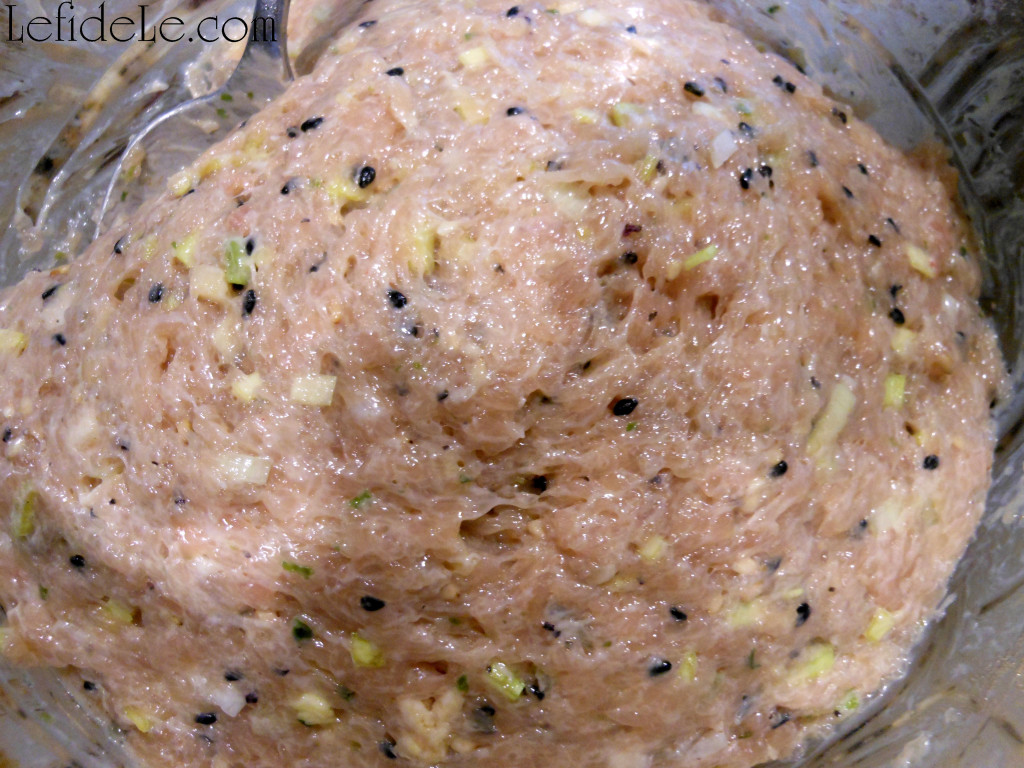
The ground meat will absorb all of the liquids, but you can tell when it is well mixed when the minced ingredients seem well dispersed. Let this marinate in the refrigerator until you’re ready to fill the dough.

174Leigh

Place your measured rice flour into a larger mixing bowl.

177Leigh

Boil about a cup of water then use just a ⅔ cup of it. This is the easiest way to ensure the right amount. Mix it into the flour well, making a gooey paste. Then add the other portion of water, and mix it well. Let this sit about 15 minutes while you get everything else ready for your dumpling preparation… rolling pin, pastry mat, steamer, dumpling mold if you have one, etc.

180Leigh

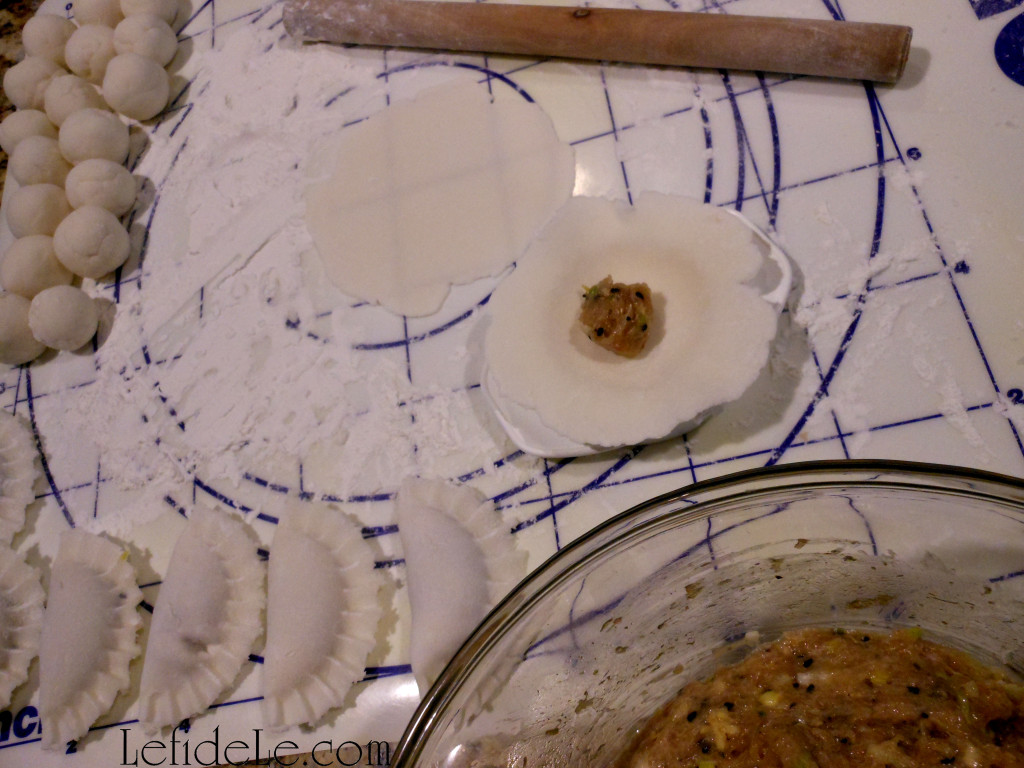
Mix the dough again by hand and see if it’s the right consistency for rolling. Note that it will be much stickier than any wheat based dough, but you should be able to dust your hands with sticky rice flour and roll little 1 inch balls of dough in your palms. Mix in more flour if you need to. Take each ball and smash it flat with a floured palm into a floured surface. You will be making little pancakes. Then roll them out with a floured rolling pin into about 3 inch diameter circles, like tiny tortillas. In fact, this is exactly how I would make wheat based tortillas growing up. Working gluten-free is admittedly a bit trickier though.

192Leigh

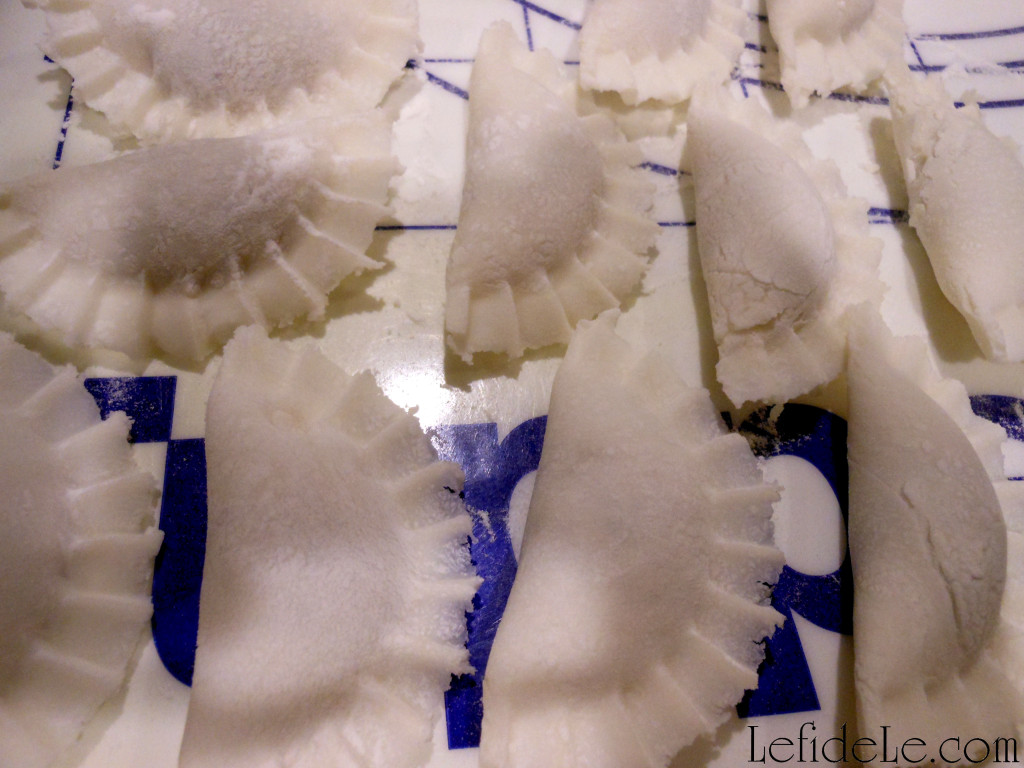
Use the smallest size dumpling mold, if you have one. Molds are a speedy way to make perfect portions, but don’t fret if you don’t own one. Either way, you just spoon about a teaspoons worth of filling into the center of the circle. Close the mold tightly and remove the excess dough… or close the circle by hand into a half moon shape over the filling, and pinch pleat the rounded edges together. You could even use a fork to press the edges like you would a pie crust.

184Leigh

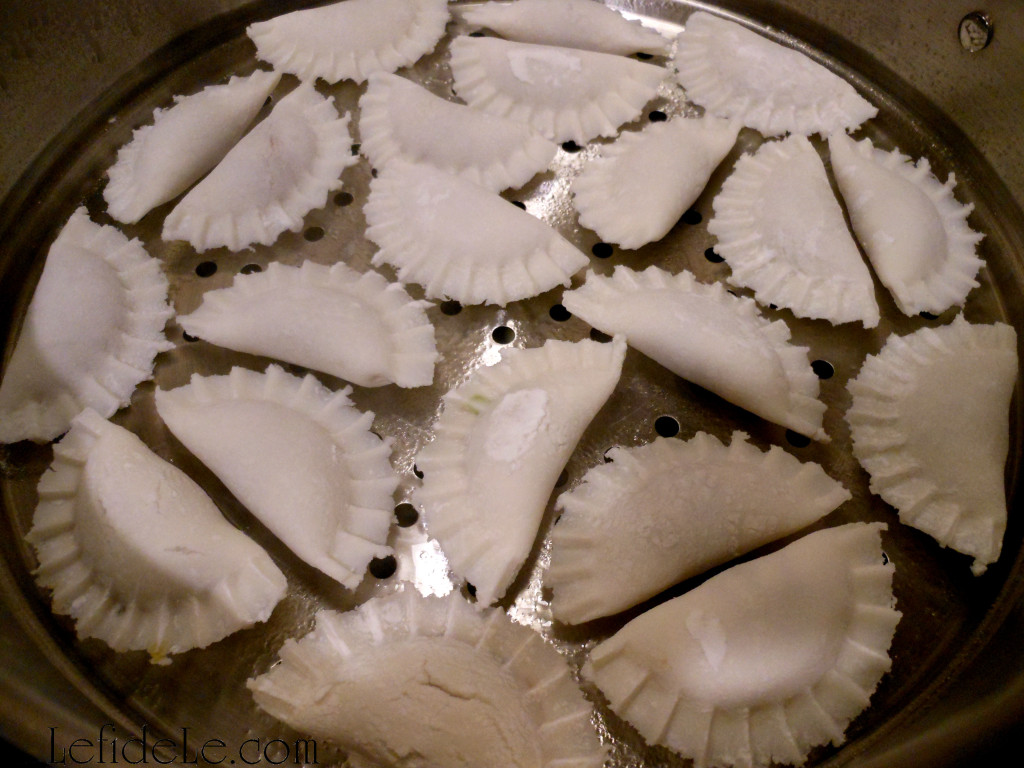
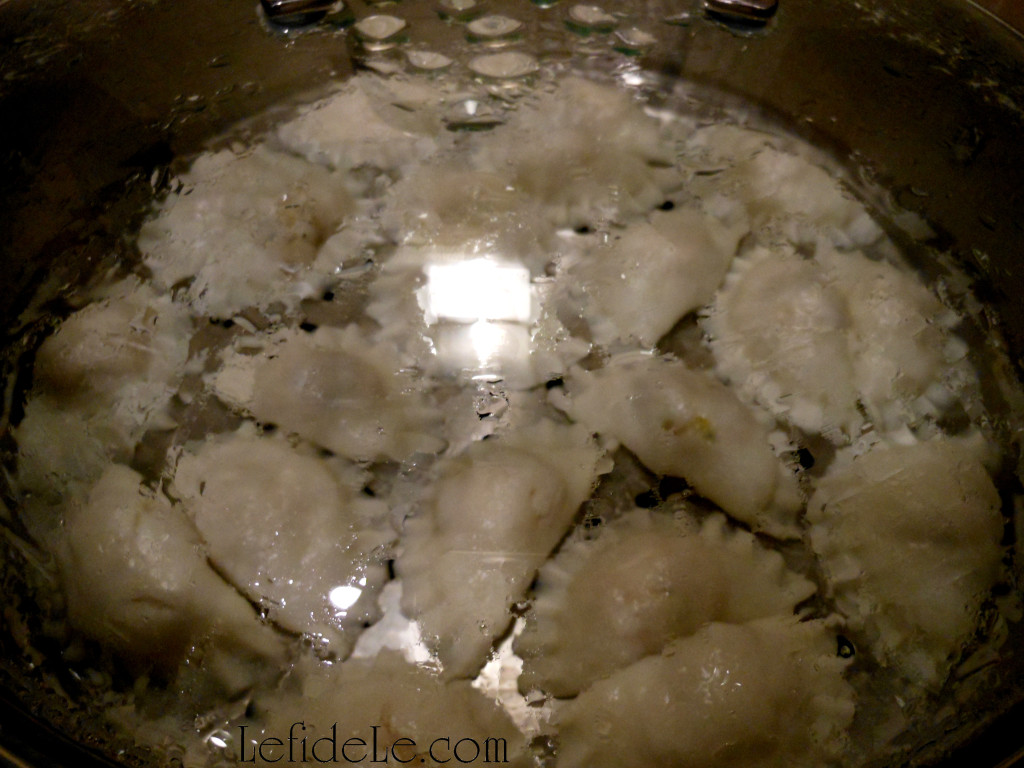
Inexpensive bamboo steamers are widely available, but here I’ve used a stainless one that sets onto my wok base. I love this thing! I actually made enough dumplings to fill it twice with this recipe. If using metal, use cooking spray on the top portion that the dough will rest on. If using bamboo, the Chinese recipe advises lining the bottom with a cloth.

194Leigh

Place the dumpling portion over already boiling water set on high. The Chinese recipe advises 15 minutes steaming, but I intentionally overcooked mine because I left the chicken filling out a good while during rolling… and no one wants salmonella. I actually left the second group on almost 30 minutes and they were fine, so just use your judgment.

189Leigh

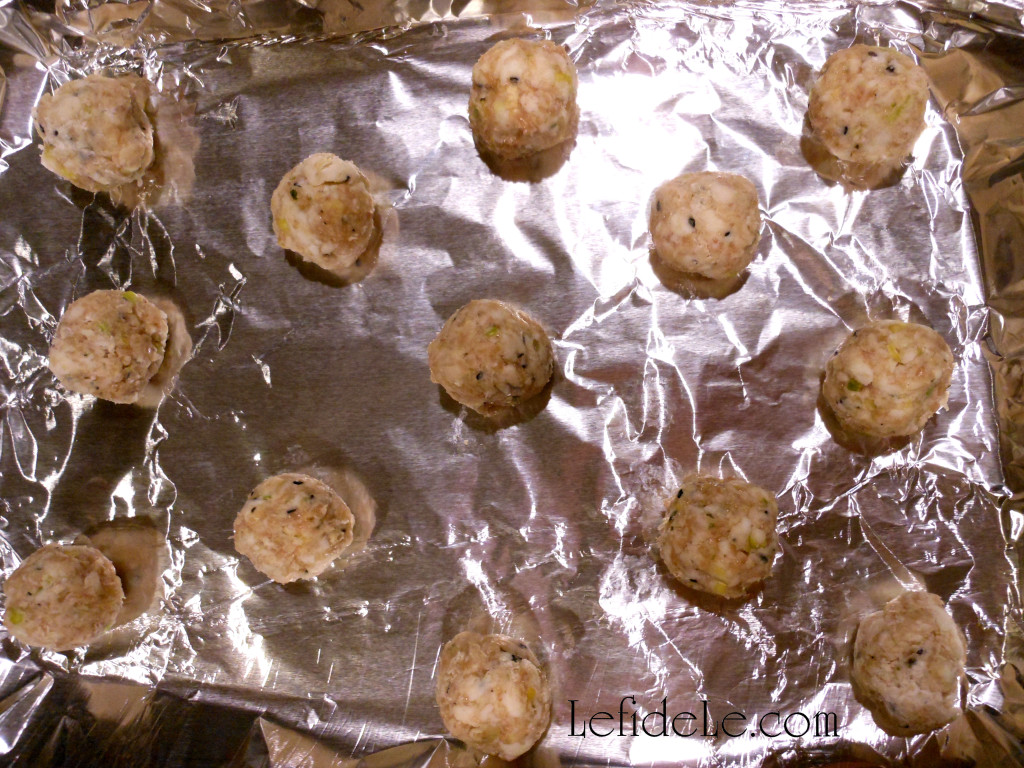
Any leftover dough and filling can be combined into meatballs (like these that are uncooked), and baked at 325° for about 30 minutes.

197Leigh

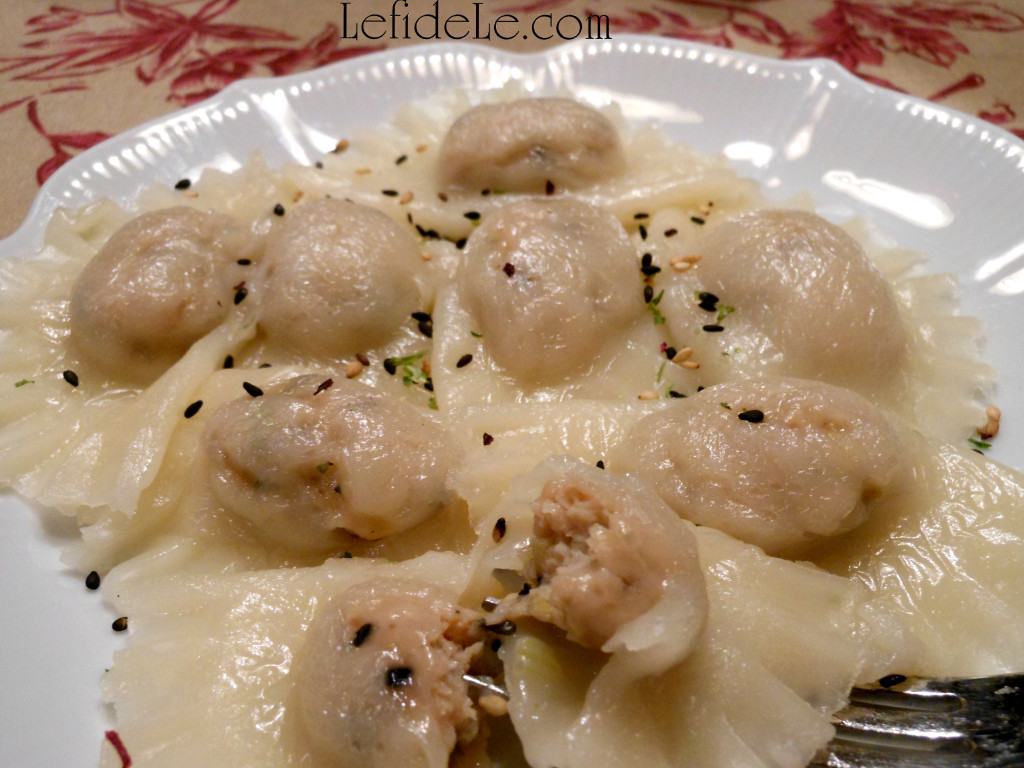
Use two forks to plate your dumplings, or just bring a bamboo steamer to the table. Next time, I think I’ll roll mine out thicker and use a bit less filling. They seemed to expand as they cooked. I garnished these with more Eden shake because I love the flavor, but you can serve them with any sauce.

201Leigh

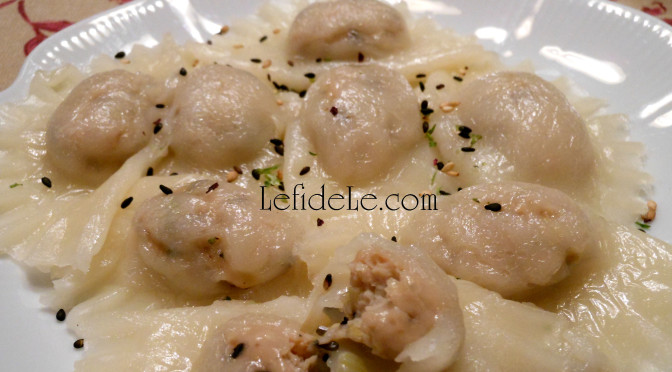
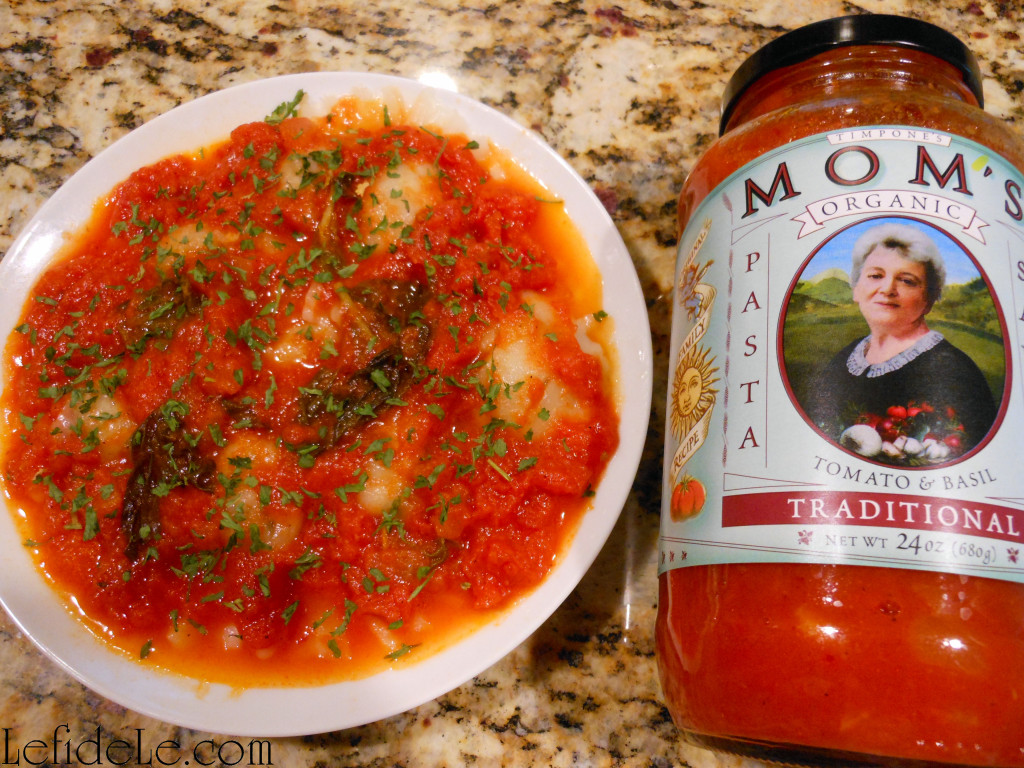
Here are the leftovers reheated in the microwave with marinara to morph them into an Italian ravioli fusion! They were fantastic this way! I just garnished them with parsley. You can even try adding rice based parmesan if you avoid dairy.

132Leigh

See more pictures of dumplings from my Chinese New Year of the Sheep / Ram Party here. Those I garnished with diced spring onion and small tomatoes and set over a bed of Bibb lettuce. The Quick Pickled Cucumber Recipe can be seen here.

175Leigh

Though more work than an everyday food, these little dumplings are worth the effort… especially when other family members help by making a chatty assembly line. It’s a great way to gather for a holiday!

Faithfully Yours,

Leigh

Chinese New Year of the Sheep / Ram Party Décor Ideas (With Formal Table Setting & Kid’s Table)

063Leigh

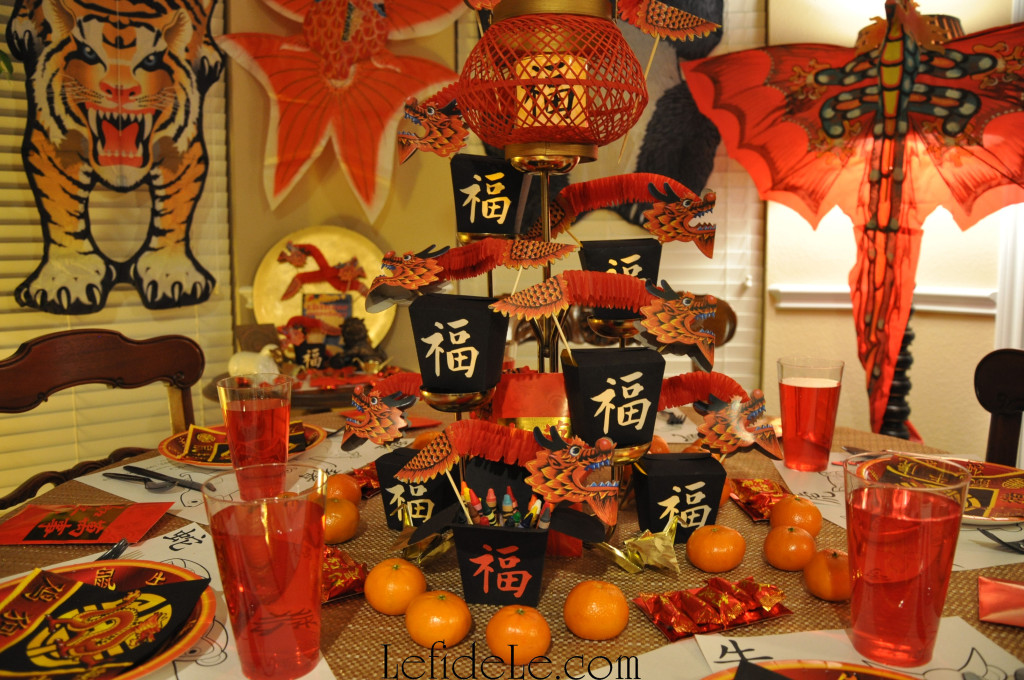
Celebrating Chinese New Year is always fun as each year comes with a new built-in theme to accompany the vibrant traditional colors and motifs. In this way, it’s easy to build on the previous event by adding a few new décor elements each year. Use the elegant formal table setting or the fun and playful Kid’s Table… or a combination as ideas for your own celebration. Spend as much or as little as you like, making the evening a complete spectacle or a simple affair. It’s a wonderful opportunity to celebrate the beauty of another culture, and the Year of the Ram will only return in twelve years… and well, it’s a really good excuse for having a great time!
039Leigh

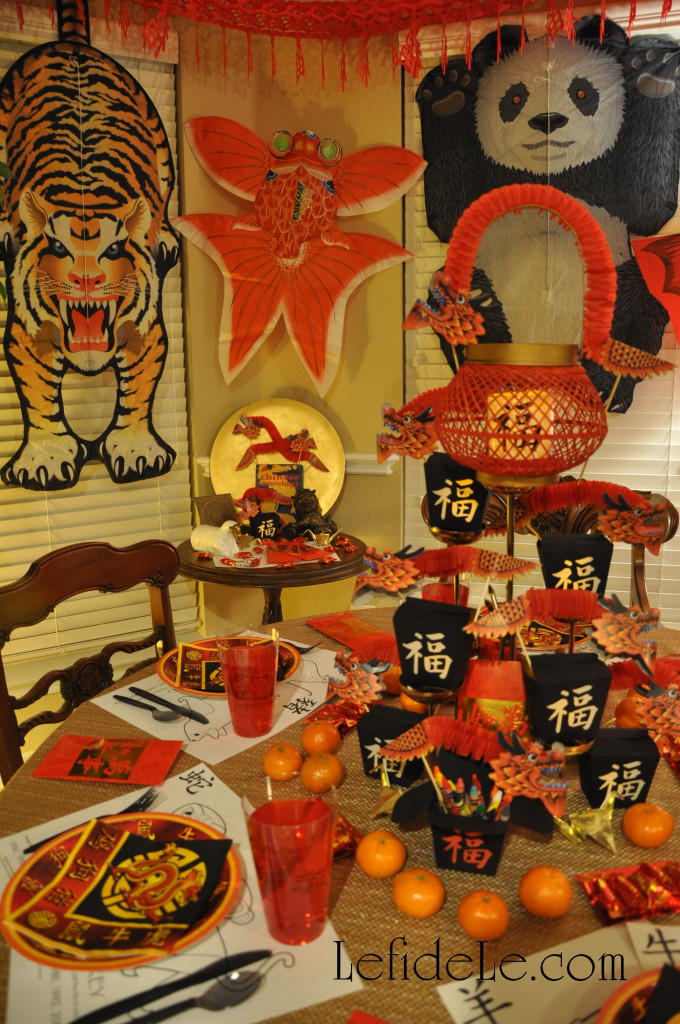
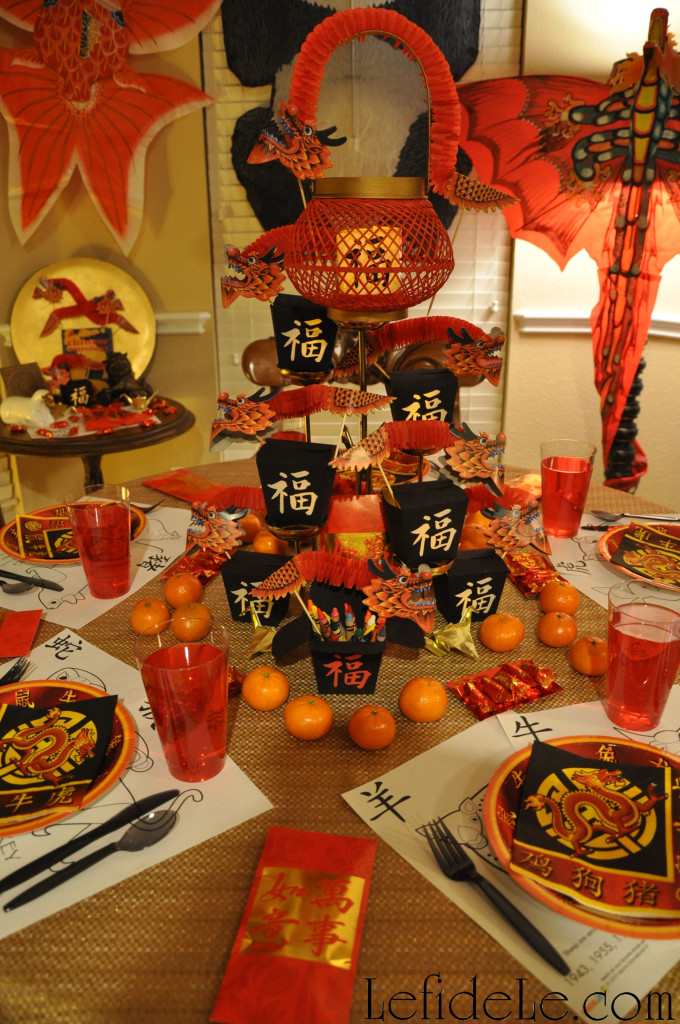
The kids table utilized printables and crafts from my recent articles (Origami Crane Paper Folding Instructions -for Get Well Wishes or Chinese New Year Décor) & (Take-Out Favor Box & Paper Lantern Craft Printable + Bamboo Lantern + Paint to Antique a Lion Fú-Dog -DIY Chinese New Year Party Décor Crafts). The projects are a quick and easy way to decorate while leaving your budget available for all the wonderful food.
066Leigh

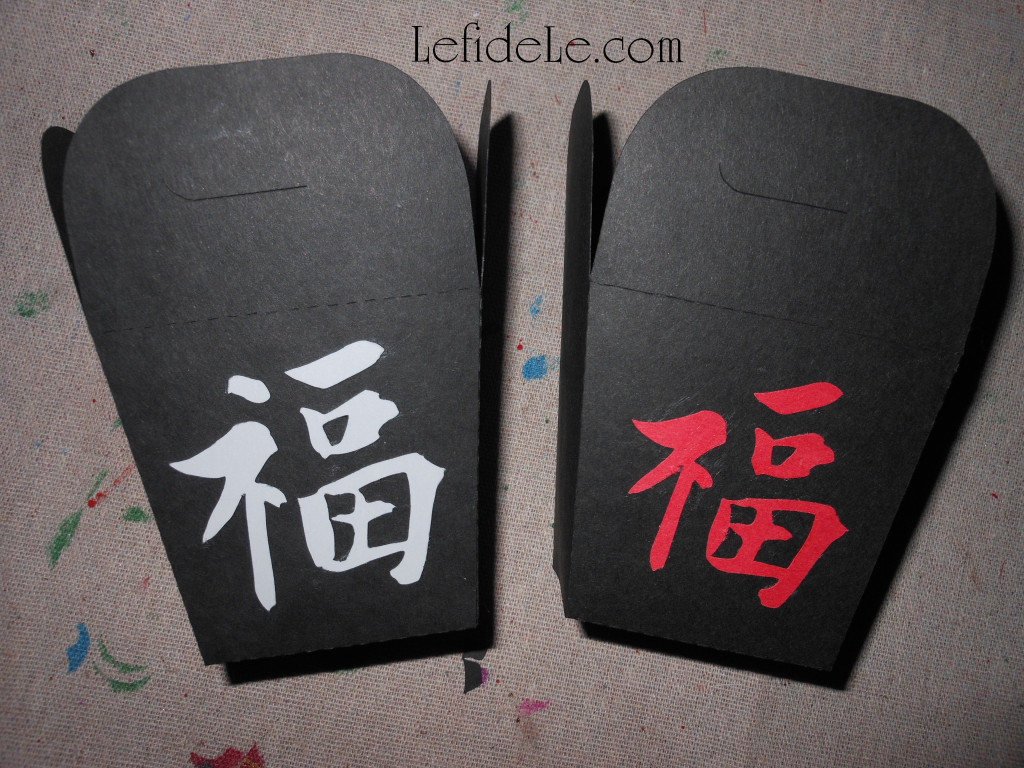
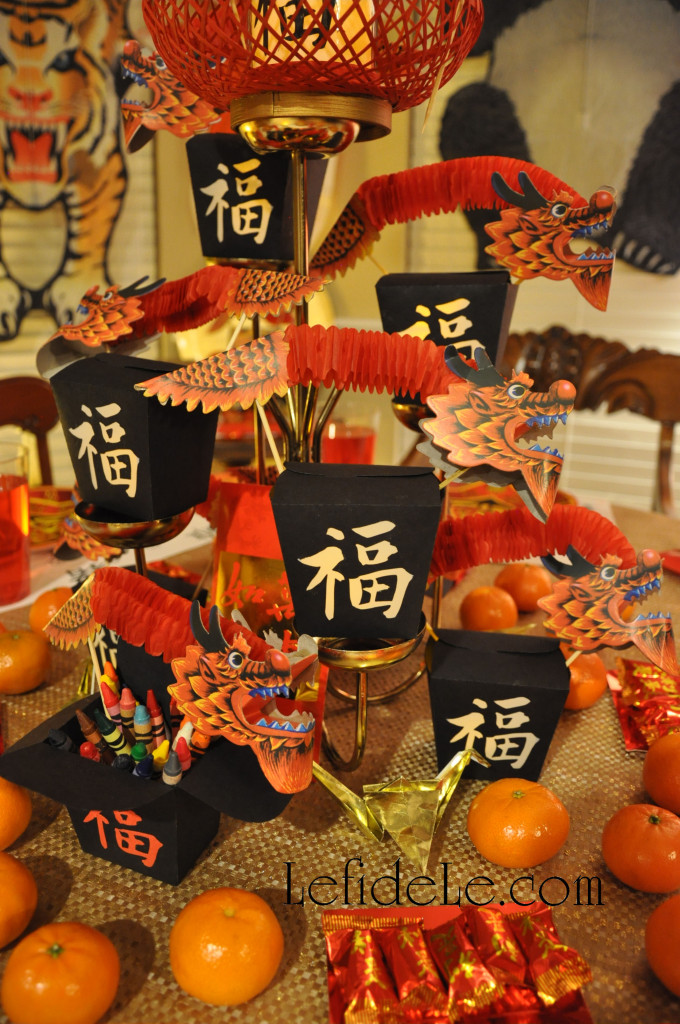
Lanterns are a traditional element of the Chinese New Year because the last day of it is the start of the lantern festival. My printables are an easy way to employ that tradition in your own home. They only need printing, cutting, and gluing. The “Fú” 福 characters, decorating the boxes, have graced the entrances of Chinese homes for many hundreds of New Year’s. It is said to have originated, not just for its meaning of happiness and luck, but also because “upside down” and “to arrive” sound alike when spoken in Chinese, thus making an upside down Fú equate to “good luck arrives”. (For some, however, hanging the Fu upside down is bad luck, so I’ve decided to make the character right side up on my printable boxes!)
096Leigh

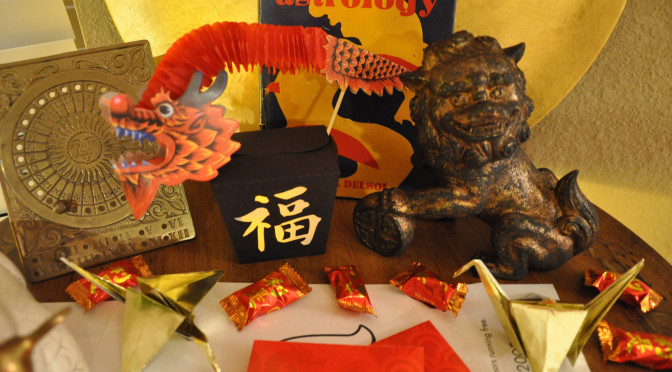
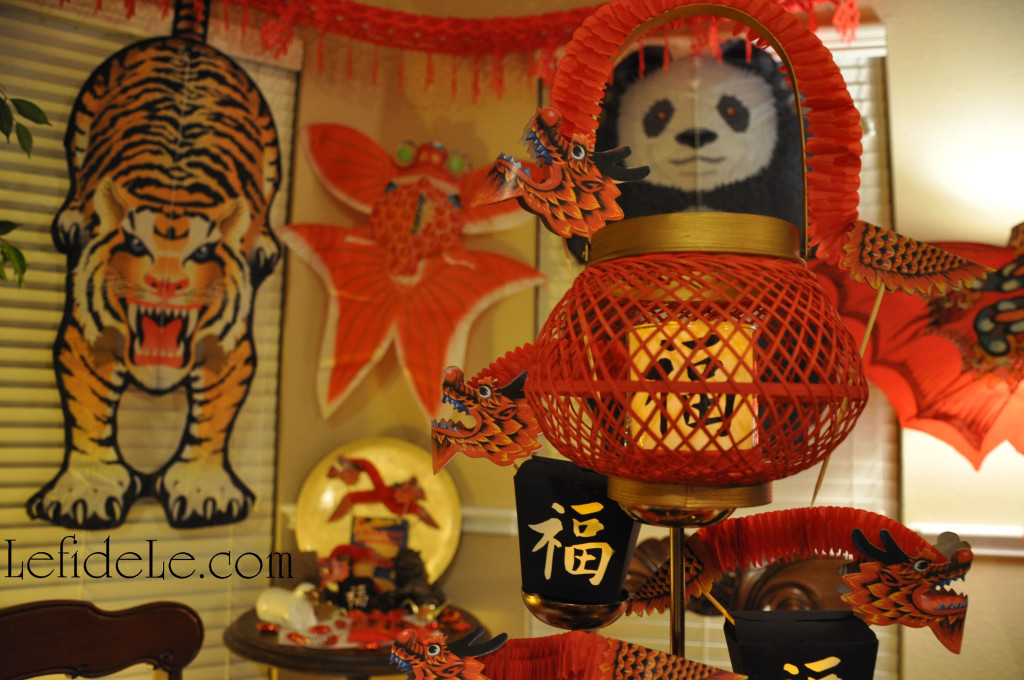
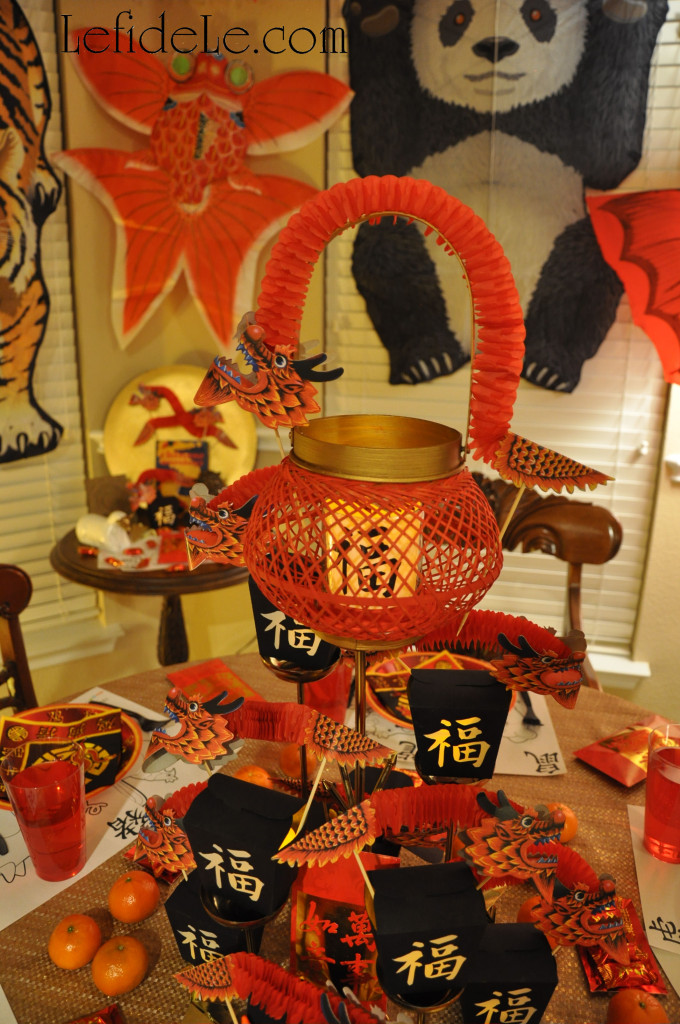
Use the printables as favor containers, table crayon corrals, or cut out the character to make an LED lantern or luminaria. I stacked some of them onto a vintage brass tea-light holder and stuck in paper dragon favor puppets to heighten the spectacle… with no expectation that the centerpiece would stay intact long! Using LED lights insures that no fire will catch the paper, even if knocked over… so they are super kid and pet safe. It’s also easy to use the cut-out character to embellish a bamboo lantern like those I’ve painted in the pictures. (See my tutorial for the instructions on how to complete your own.)
031Leigh

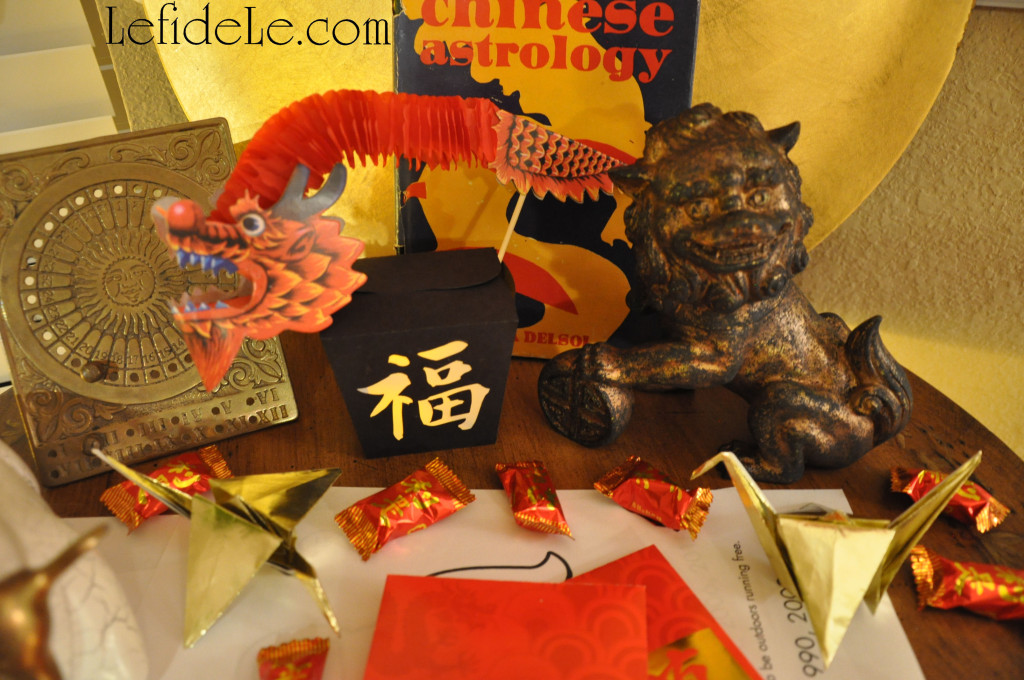
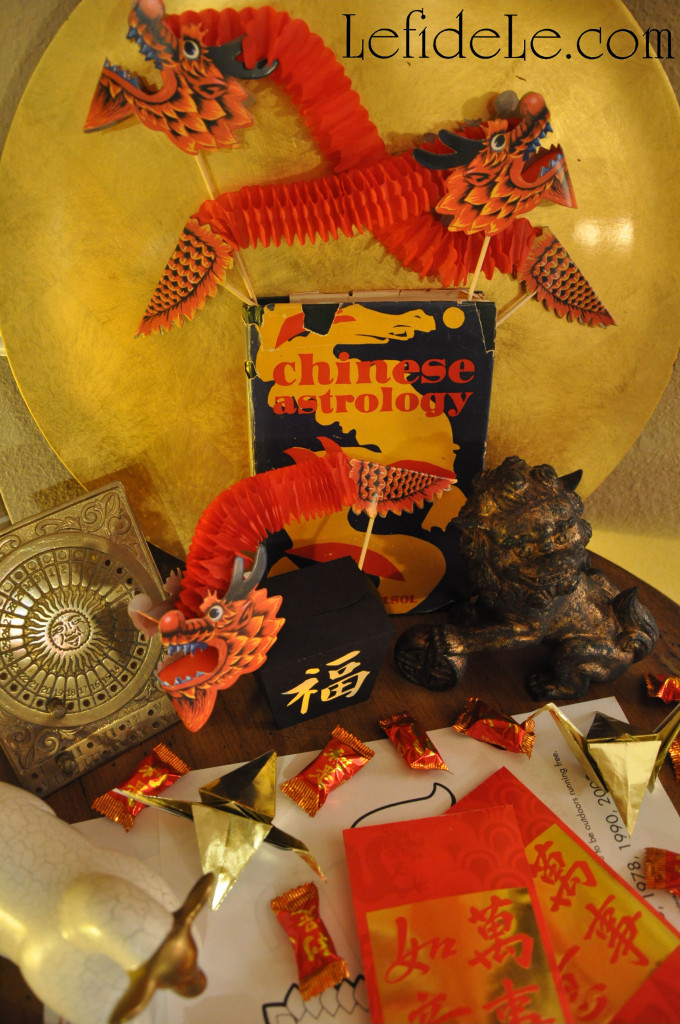
Origami cranes are a lovely way to bring the kiddos into the party planning while teaching a timeless art to another generation. The historically traditional crane figure is an apropos symbol of hope for the coming year. The Japanese tradition of the “Senbazuru” folding of 1000 paper cranes is said to grant the maker a wish, such as healing for a loved one. The “Tsuru” (crane) is also said to denote happiness and luck, which is the same meaning of the “Fú” 福 character. These can easily be made with anything from wrapping paper to typing paper (see my tutorial for instructions with a picture for each step).
032Leigh

The powerful guardian lion Fú-dog is a traditional Chinese figure of protection. The one seen here is male because he’s resting a paw on a ball that represents the earth. Usually they are presented in pairs, but I only had one in a bright lime green color. I took this statuette from modern lime lion to antique guardian in a few simple steps (detailed in my tutorial). You can do the same with any accessory that doesn’t quite match your décor. Also set on the side table was a small sheep figure as a traditional way to represent the year. The gilded platter (non-breakable) symbolized the land of the rising sun. A book with more dragon puppets (from Oriental Trading Company, see the side bar for discount links) extra coloring pages, and lucky candy completed the picture.
025Leigh

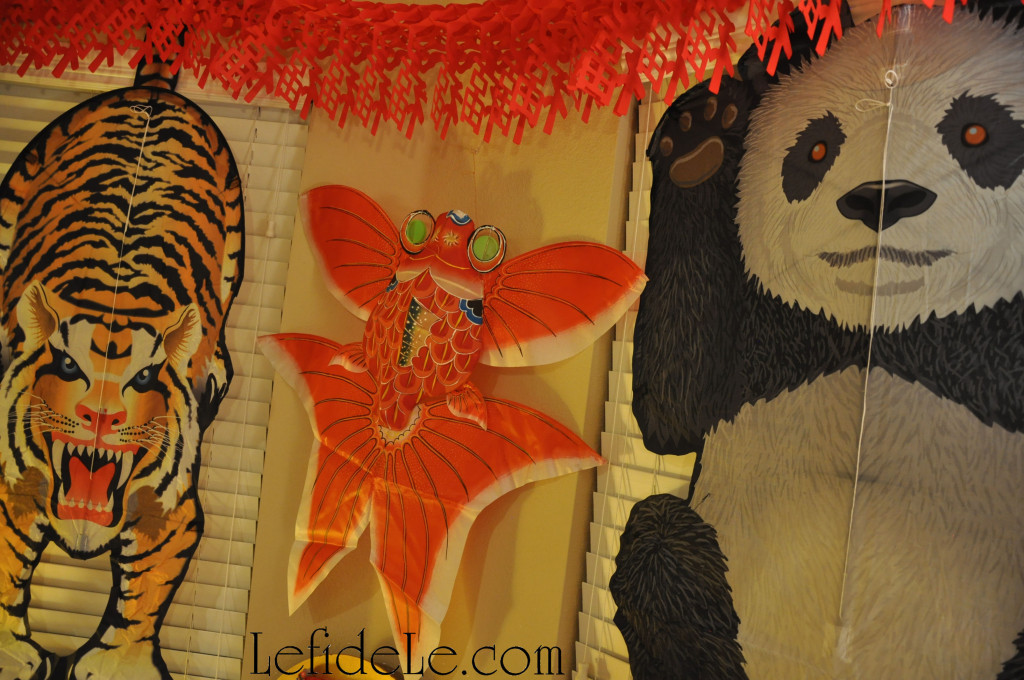
Decorating the background were a mix of traditionally made bamboo kites (red phoenix bird and orange karp / goldfish) and modern kites (tiger and panda). Extend the New Year’s celebration to the weekend by letting your decorations fly freely. Having something else to look forward to is a nice way to ease the post-party let down that kiddos sometimes feel. (All of these were found on clearance for a few dollars each at Cost Plus World Market.) Above them hung an inexpensive yet lovely Chinese banner (again from Oriental Trading Company) suspended on simple pushpins.
052Leigh

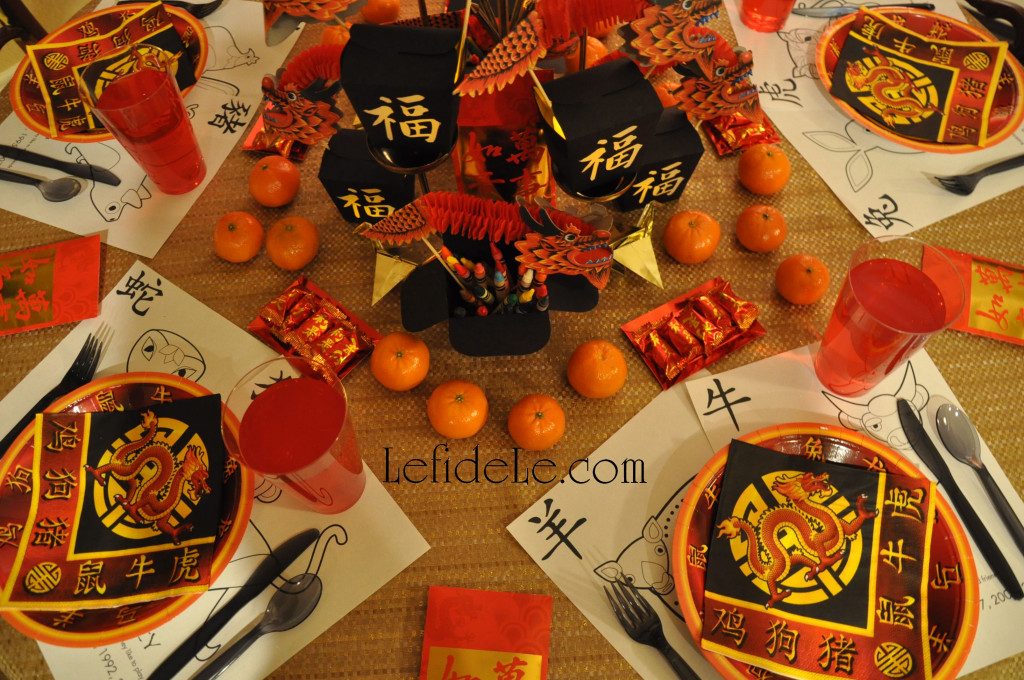
Decorative paper plates and napkins were set onto printed coloring pages depicting all of the animals in the Chinese zodiac. Red envelopes containing coin money in even numbers are a traditional gift for children. Colorful punch, lucky candy, paper cranes, crayons, and mandarin oranges completed the setting.
183Leigh

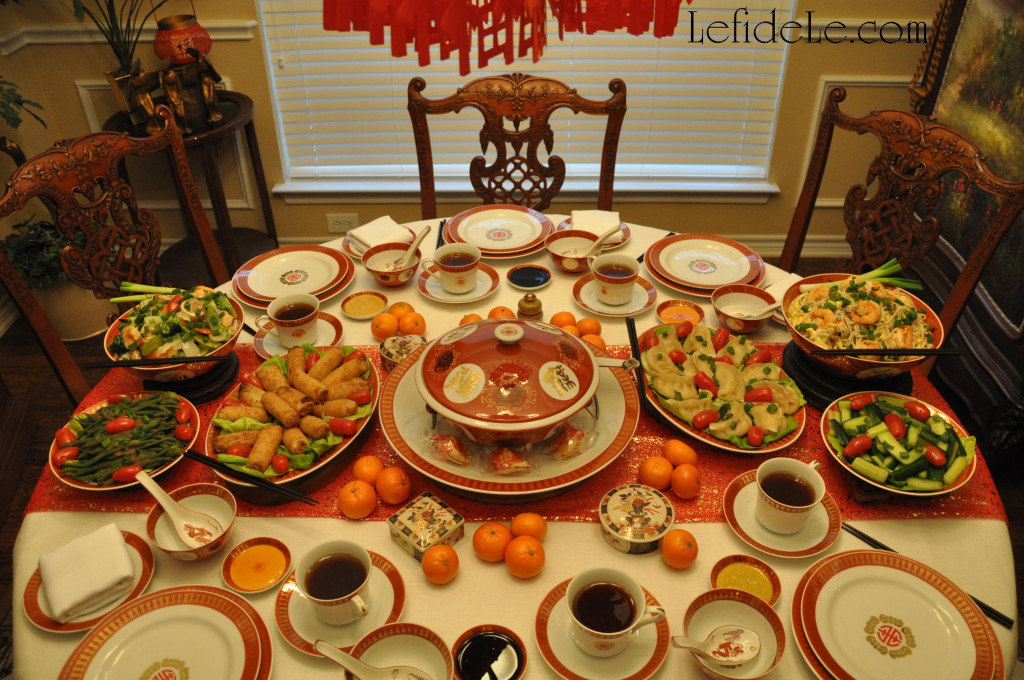
Orange fruit is another traditional element of the Chinese New Year, so I included them in both tablescapes. It’s an easy way to add color without the trouble or expense of a formal centerpiece. It allows the gorgeous food to remain the center of attention.
132Leigh

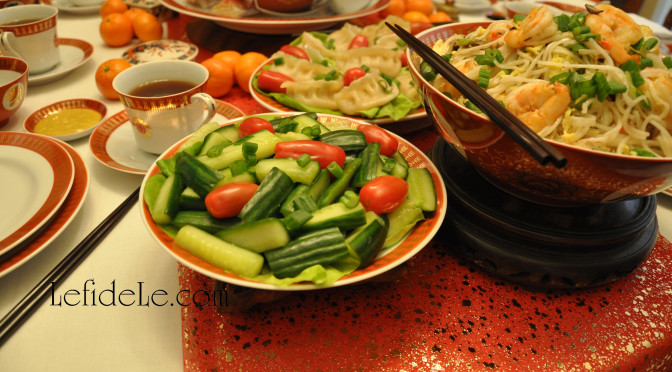
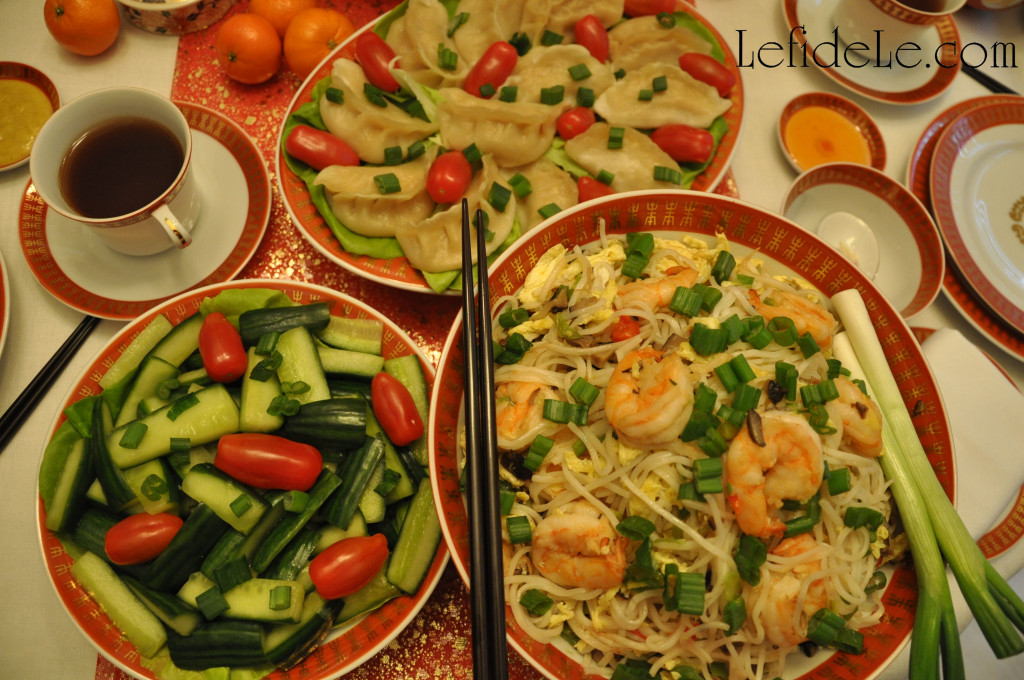
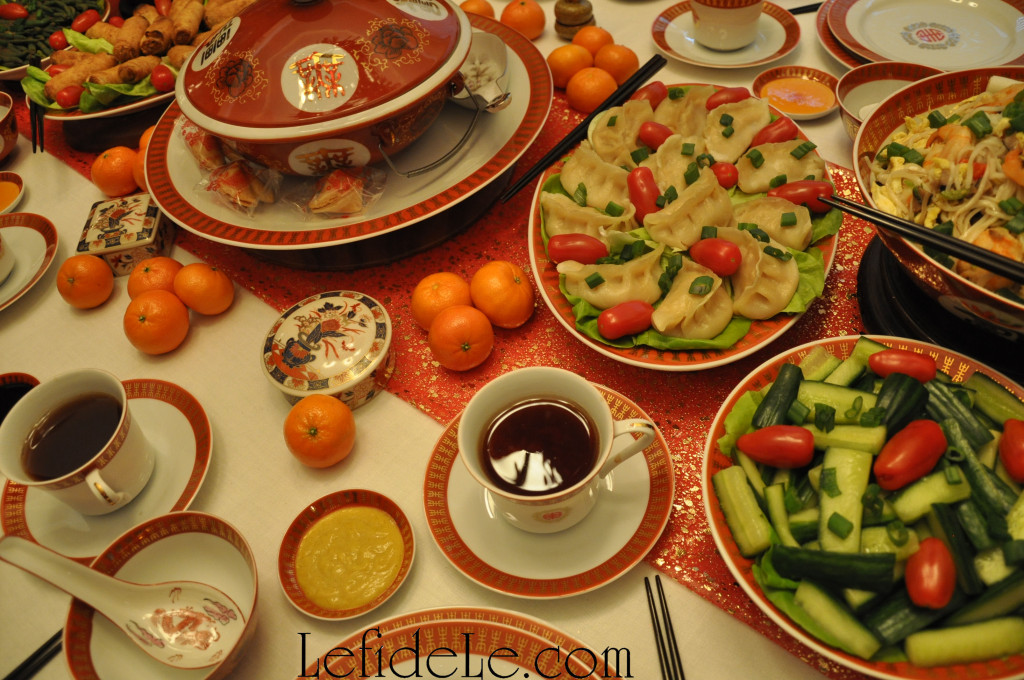
My Quick & Easy Overnight Pickled Cucumbers Recipe was another colorful element to complement the other traditional dishes. (I will be posting more Asian inspired recipes from time to time in the future.)
175Leigh

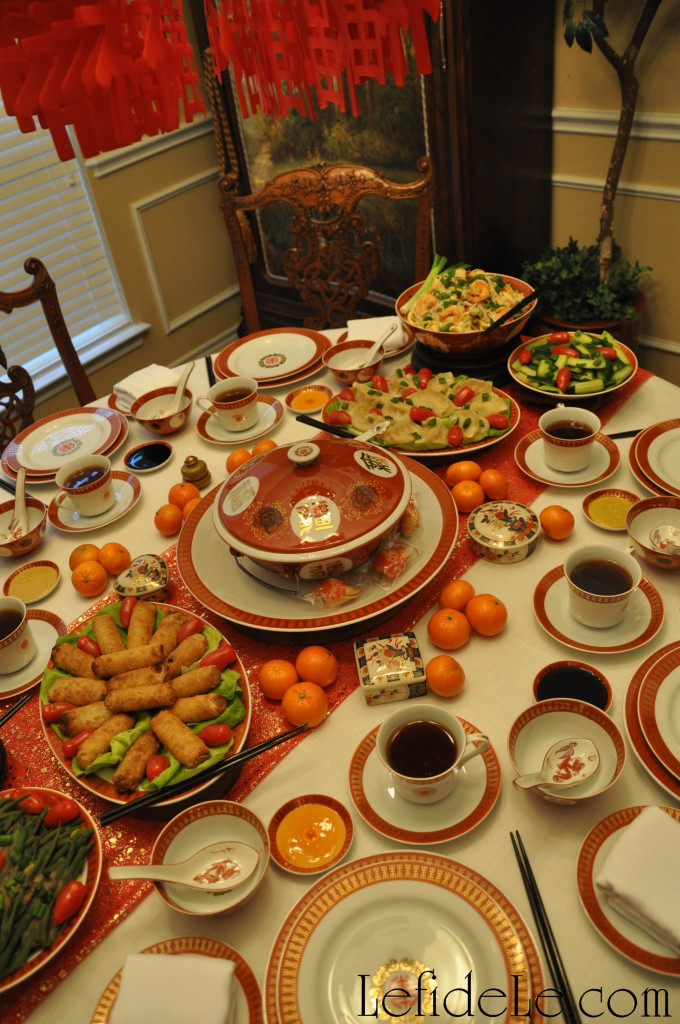
Next to it were longevity noodles which symbolize long life when uncut. The dish was topped with prawns because seafood is a Chinese New Year must have. (Just make sure no guest has a shellfish allergy.) A whole fish pointed in the direction of the guest of honor would have been more traditional, but I was out-voted on that menu choice.
161Leigh

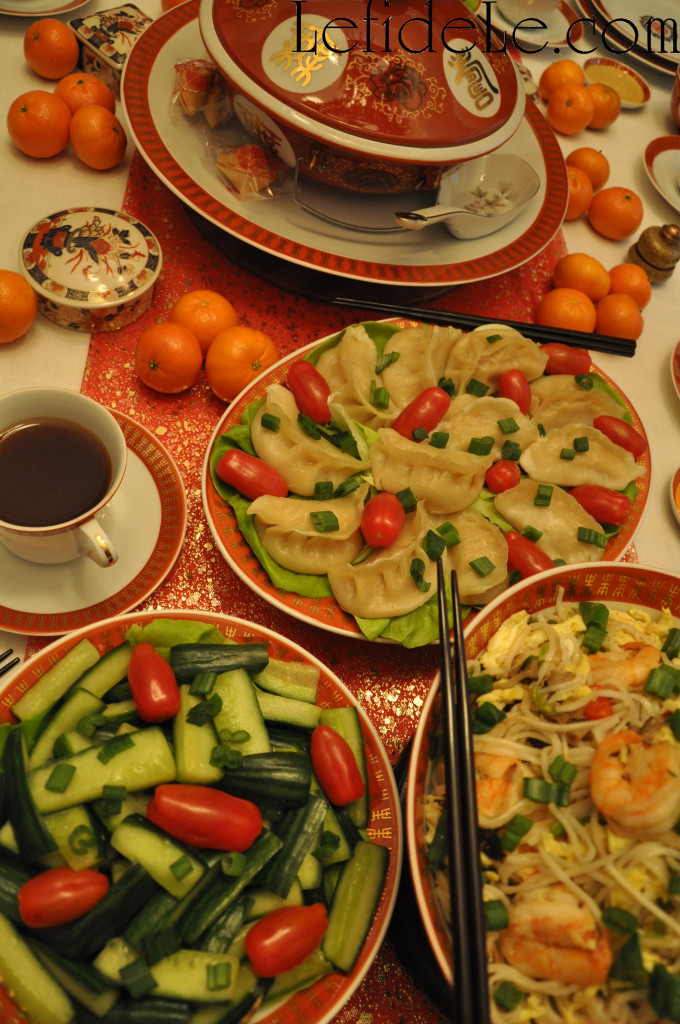
Half-moon shaped steamed dumplings are another necessity for the year’s celebration. (The round shaped variety depicts a life that goes around in circles never completing any goals, so those are considered bad luck!) Check out my allergy-friendly recipe for steamed dumplings here.
211Leigh

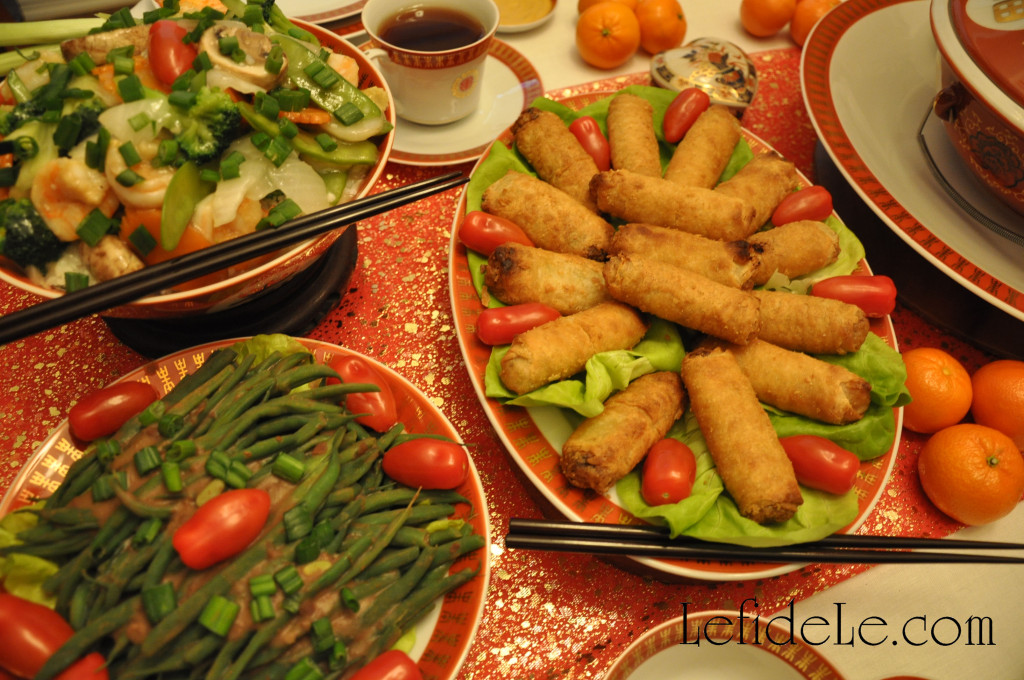
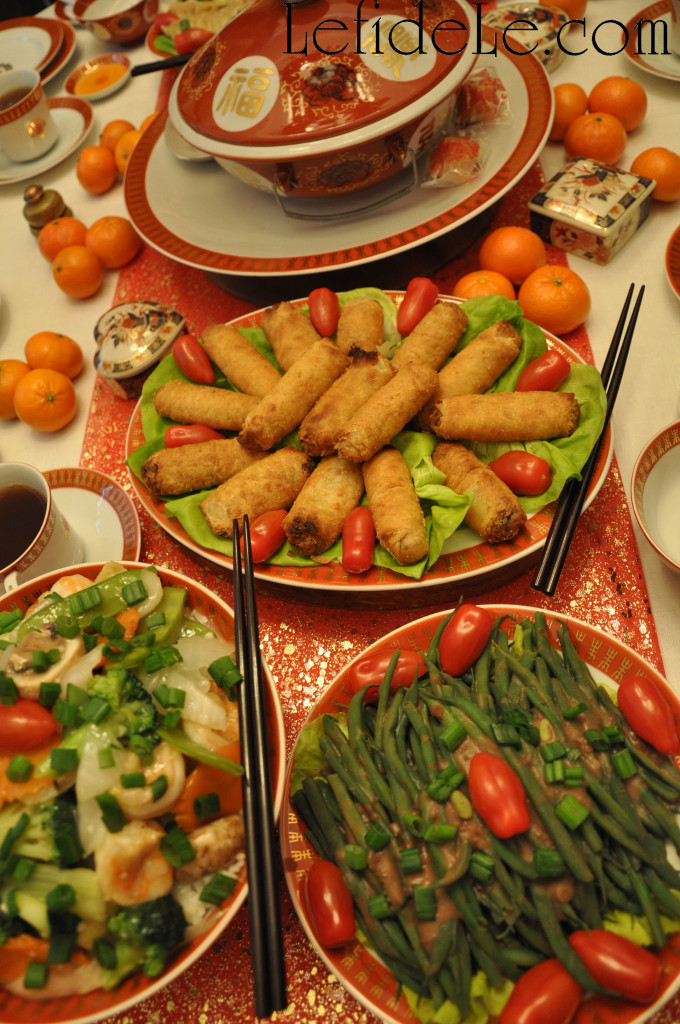
Fried springs rolls are practically required New Year’s fare! Adjacent to those were long beans with a black bean sauce and a prawn vegetable dish served over rice.
162Leigh

Some of the dishes were set onto wooden stands to both protect the table and elevate the vessels to different heights.
179Leigh

Each platter should have its own set of chopsticks or spoon. Serving chopsticks are typically longer and more decorative than those one eats with, but I only had one set of that type.
200Leigh

A lovely soup tureen was set into another platter to catch spills. This also contained a serving spoon and a few fortune cookies… an American tradition only, but why not celebrate the blending of beautiful cultures. Scattered around the center were some vintage boxes containing lucky candy.
210Leigh

Many Chinese tables are fitted with “lazy susan” turntables at the center so that everyone can reach each dish. I have a couple of these, but opted for a different style of arrangement this year. Hanging in a circle from the chandelier, was another red banner like the one in the other room.
189Leigh

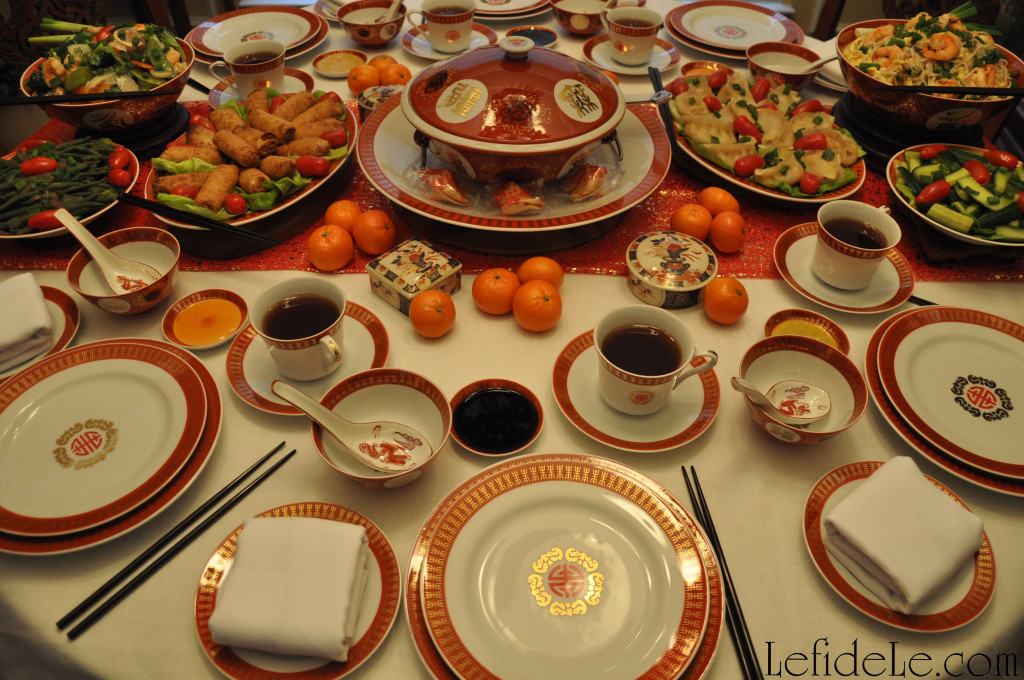
Down the center of table ran a length of metallic sprayed mesh fabric to coordinate with my grandmother’s china. She actually purchased the tableware when she lived in Taiwan for a time. A simple white tablecloth anchored it all. I was hesitant to use white, because it can be considered a funerary color (yikes), but it was the only thing I had that suited the china… which was incidentally made the year of a ruler’s death, thus the color of the teacups were made white instead of the normal red (according to my grandmother).
122Leigh

Tea is the drink of choice for such a celebration, and its cup is placed to the right just as in a Western table setting. The bowl for soup or rice goes to the left where a Western bread plate would sit. The flat bottomed spoon is set into that if there is no double rest for spoon and chopsticks. At the top and center is a small rimmed plate for dipping sauce. Usually only one variety is served universally, but I served 3 kinds from which guests could choose from.
221Leigh

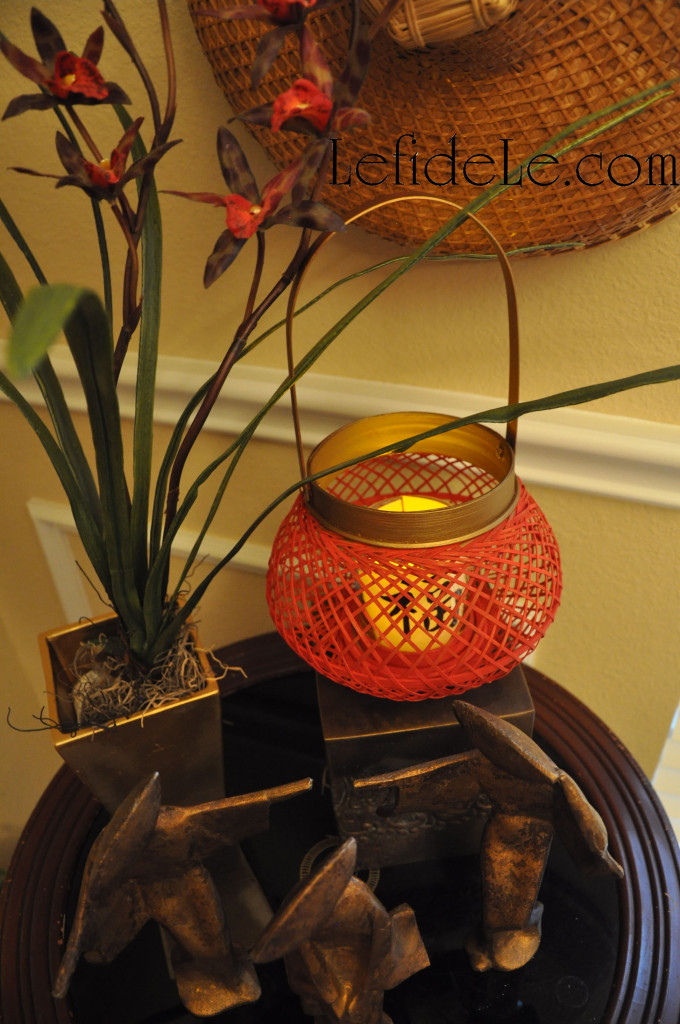
Seated on the side table in the background were three of my grandmother’s dancing statues, an orchid, and one of my painted lanterns.
212Leigh

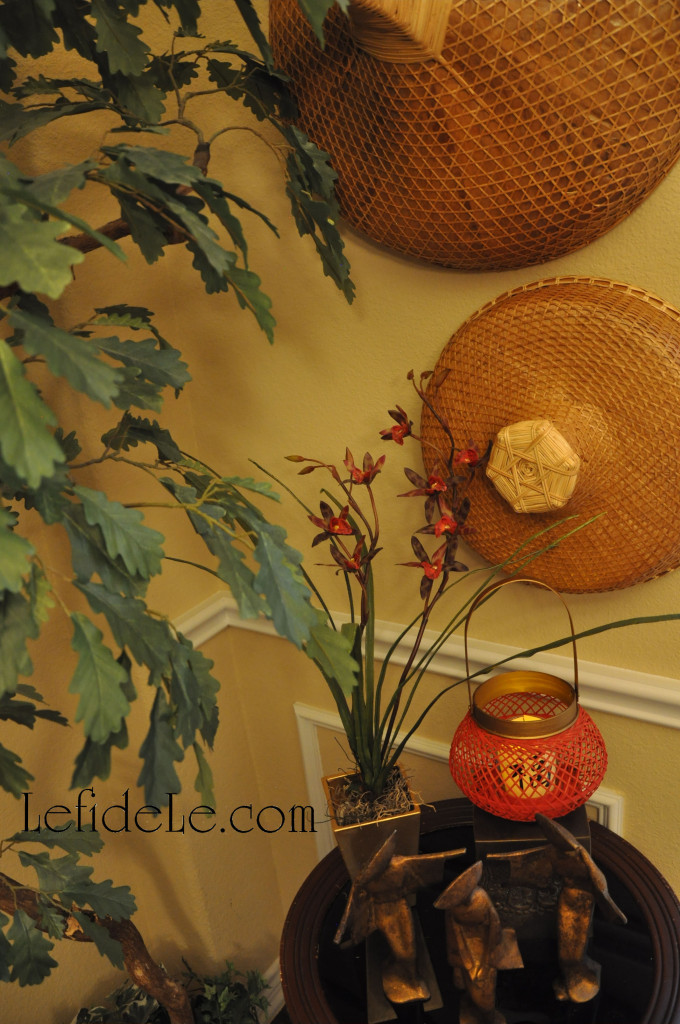
Above that were two of her woven hats that she requested I hang on the wall as décor. There really was something here for everyone.
180Leigh

In celebrating this Chinese New Year (slightly early so that I could post it for y’all), I tried to incorporate traditions and symbols while adding some playful American touches. In this way, I believe we can pay special recognition to the beauty of our blended cultures.
059Leigh

Faithfully Yours,

Leigh

P.S. If any of you live near Frisco, Texas… be sure to check out “Tasty Garden Chinese Restaurant” whose kind individuals would love to make your party preparations easier by adding a beautiful dish or two to complete the setting. Who says you have to make every recipe at the table? They’ve said they would be happy to work with individuals to avoid allergens… which is always appreciated! http://www.tastygardenonline.com/
121Leigh


Take-Out Favor Box & Paper Lantern Craft Printable + Bamboo Lantern + Paint to Antique a Lion Fú-Dog (DIY Chinese New Year Party Décor Crafts)

059Leigh

The “Fú” 福 character has graced the entrances of Chinese homes for many hundreds of New Year’s. It is said to have originated not just for its meaning of happiness and luck, but also because “upside down” and “to arrive” sound alike when spoken in Chinese, thus making an upside down Fú equate to “good luck arrives”. (For some, however, hanging the Fu upside down is bad luck, so I’ve decided to make the character right side up on my printable boxes!) Use them as favor containers, table crayon corrals, or cut out the character to make an LED lantern or luminaria. Use the cut-out character to easily embellish a bamboo lantern. I’ll demonstrate this along with how to paint a modern lion Fú-dog statuette to make it look like an antique.

HappinessBox-Leigh

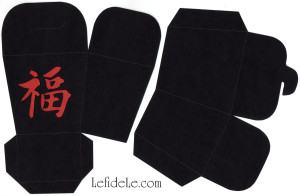
To make your own favor take out boxes or lanterns, simply right click on the small image and select print. Print them on a photo and color setting. One page makes one box, so just print as many copies as boxes you need.

267Leigh

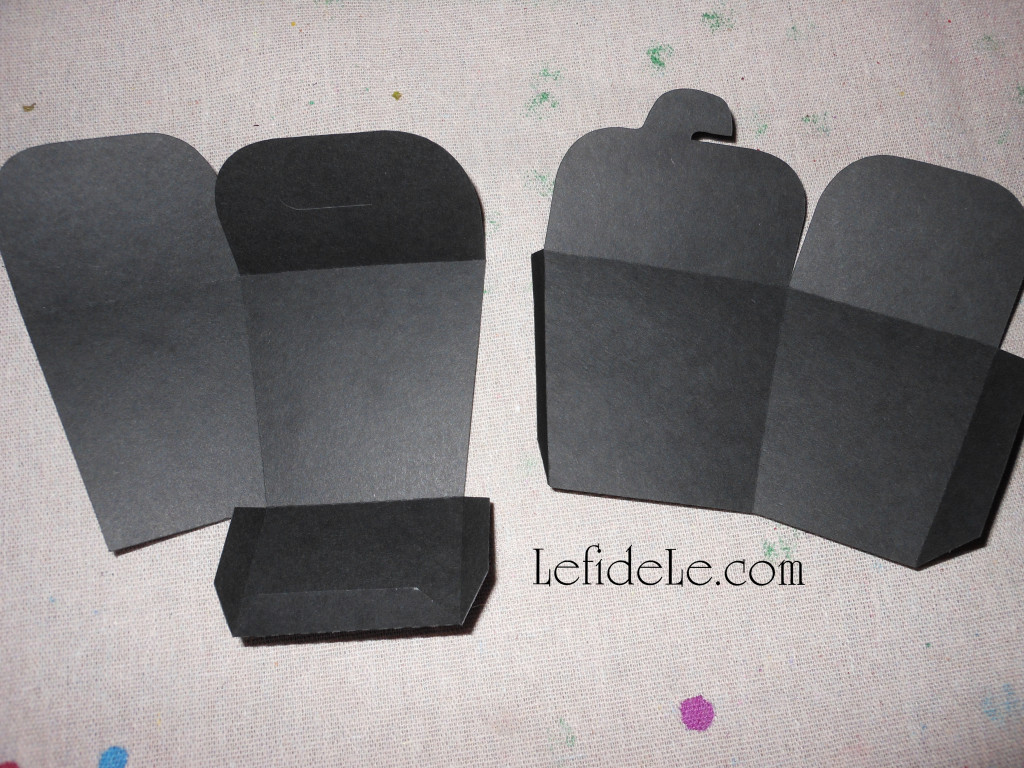
Next you need to cut out the black boxes… this is a great time to enlist help from the family!

269Leigh

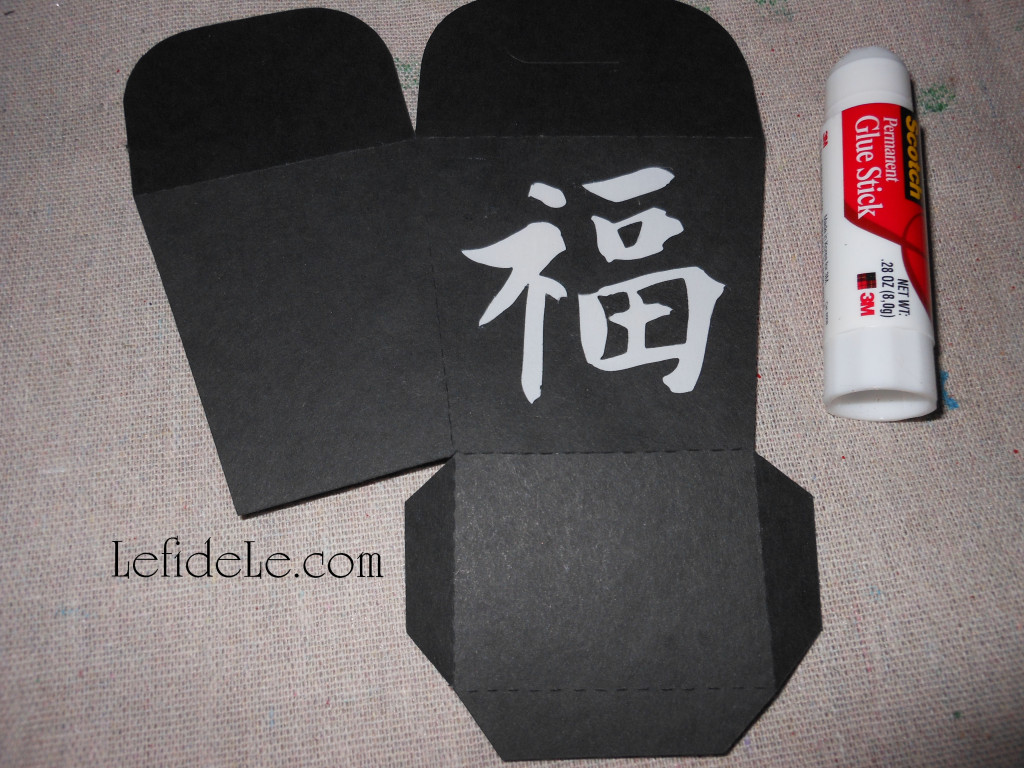
To make the paper lanterns, you will want to cut out the Chinese character before gluing the box together. Use an x-acto knife if you’re brave… I always seem to slice my thumb with these so I opt for rougher cuts using scissors. Simply poke a little hole with the pointy tip of a pen, compass point, or scissor tip then use it as a pilot hole to begin cutting each section of the character out. (If you’re short on time, just skip the cutting + vellum part and place an LED tea-light inside an open box. They still look adorable this way.)

268Leigh

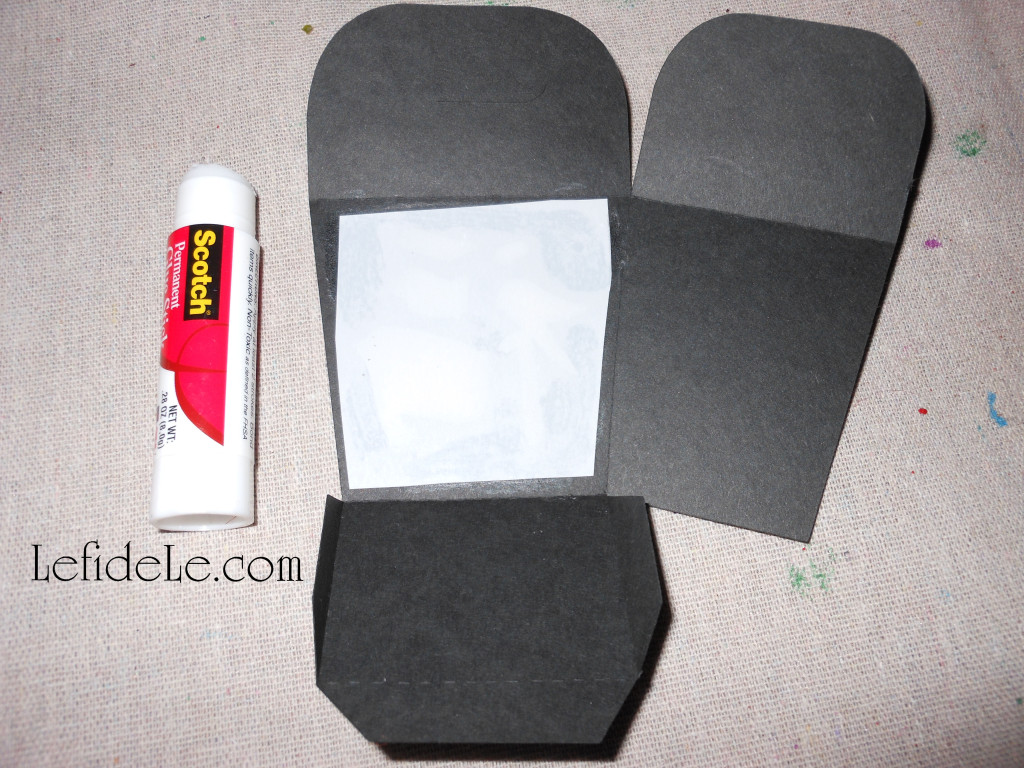
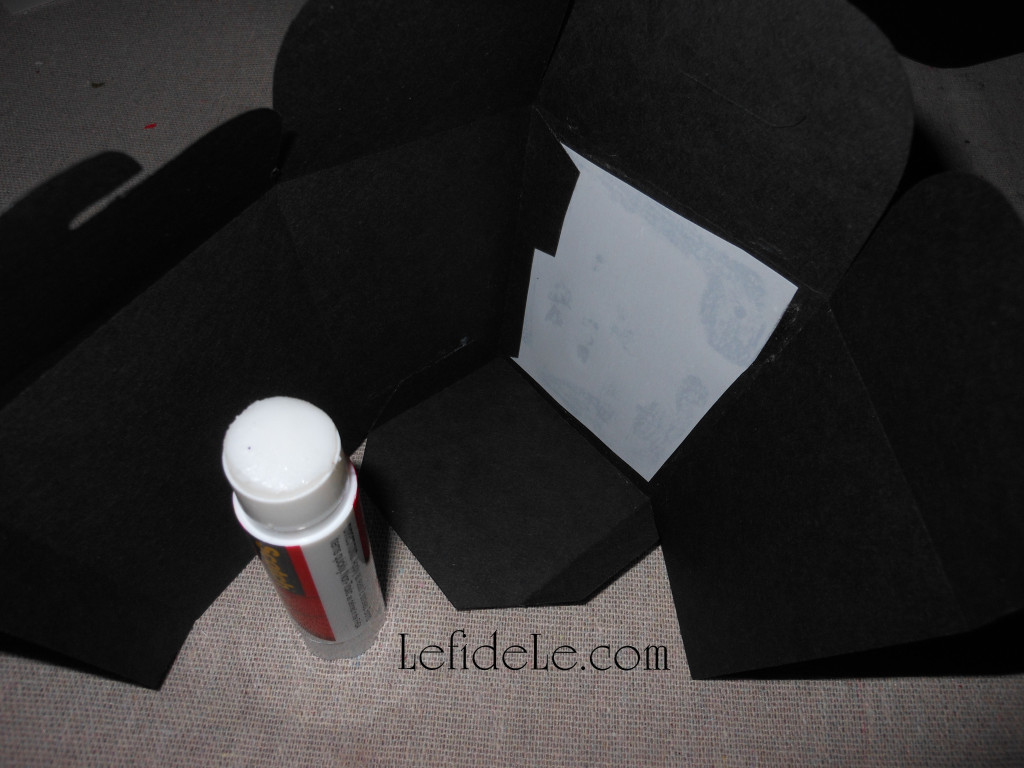
The paper lanterns, with the cut out characters, glow when little squares of vegan vellum are glued to the underside/inside of the boxes. Use the photo to check how the “Fú” 福 character is supposed to look like from the outside, and place that outside edge down onto your working surface. Cut a piece of vegan vellum to fit the box’s side and cover the character completely. Use a permanent glue stick along the edges of the vellum and place it over the character face down. Press it down flat to adhere it fully.

272Leigh

To make both the favor boxes and the paper lanterns, glue the tabs to the sides with a permanent glue stick. Use the photos as visual reference for how to do this. Note that 2 sides will be wider than the others. These should be glued opposite to each other, so that a narrow side is in between each.

279Leigh

Glue all of the sides, and leave the top free to be filled with crayons, good luck candies, fortune cookies, LED tea-lights, or even small condiment bowls for sauces… just let your creativity run with these! Just try to let them dry well before loading them up with goodies. I let mine sit overnight, and they became super sturdy.

096Leigh

I stacked some of the paper lanterns onto a vintage brass tea-light holder and stuck in paper dragon favor puppets to heighten the spectacle… with no expectation that the centerpiece would stay intact long! Crayon filled favor boxes sat at the base of the structure to be used on Chinese New Year coloring pages. (See more from the Chinese New Year of the Sheep / Ram Party Décor Ideas (With Formal Table Setting & Kid’s Table.)
081Leigh

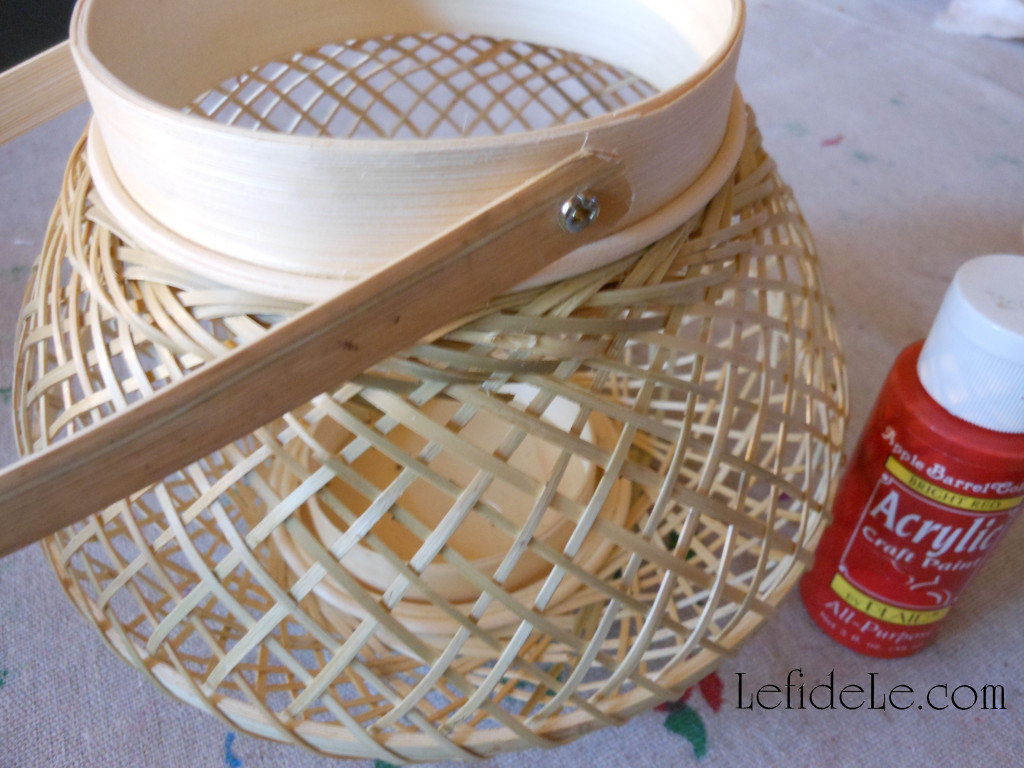
The top of the tower held an inexpensive bamboo lantern that I painted to coordinate with the theme’s colors.

246Leigh

Simple red acrylic craft paint covered the whole structure well.

250Leigh

Gold paint made the handle and base appear as a richer metallic surface.

253Leigh

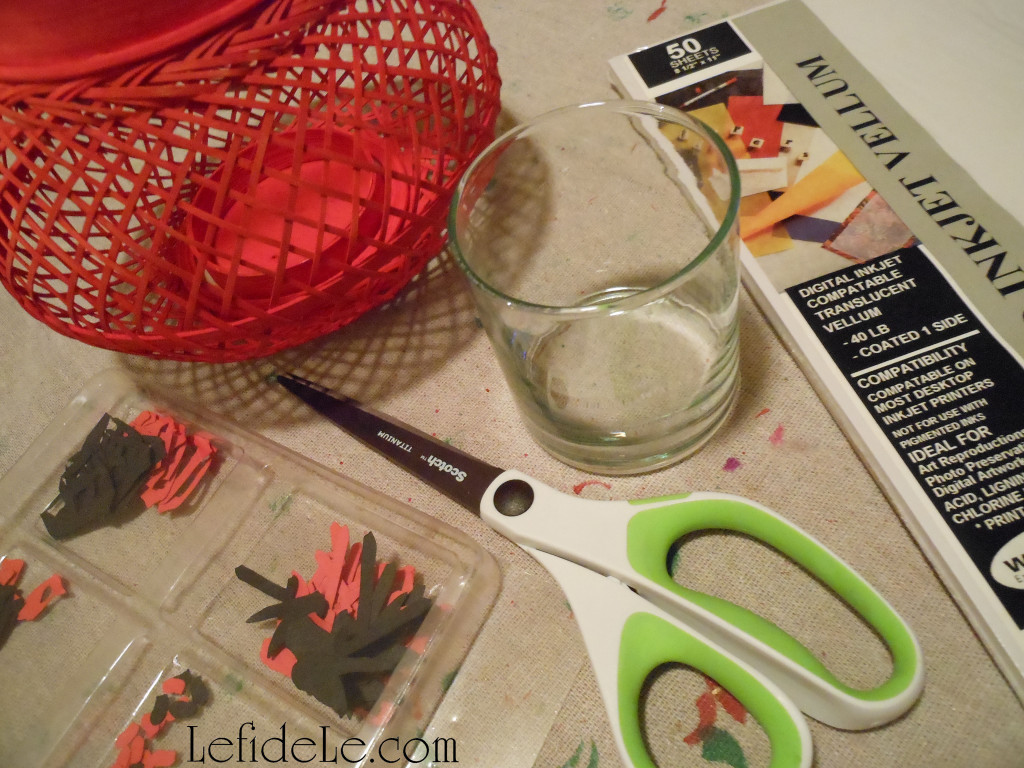
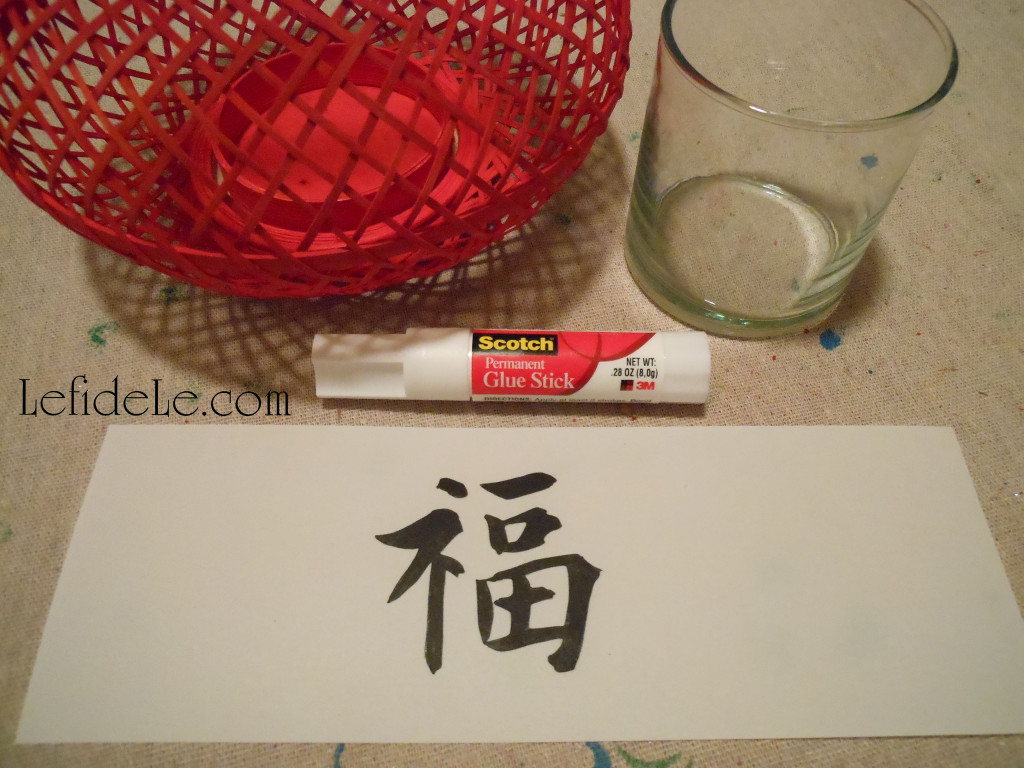
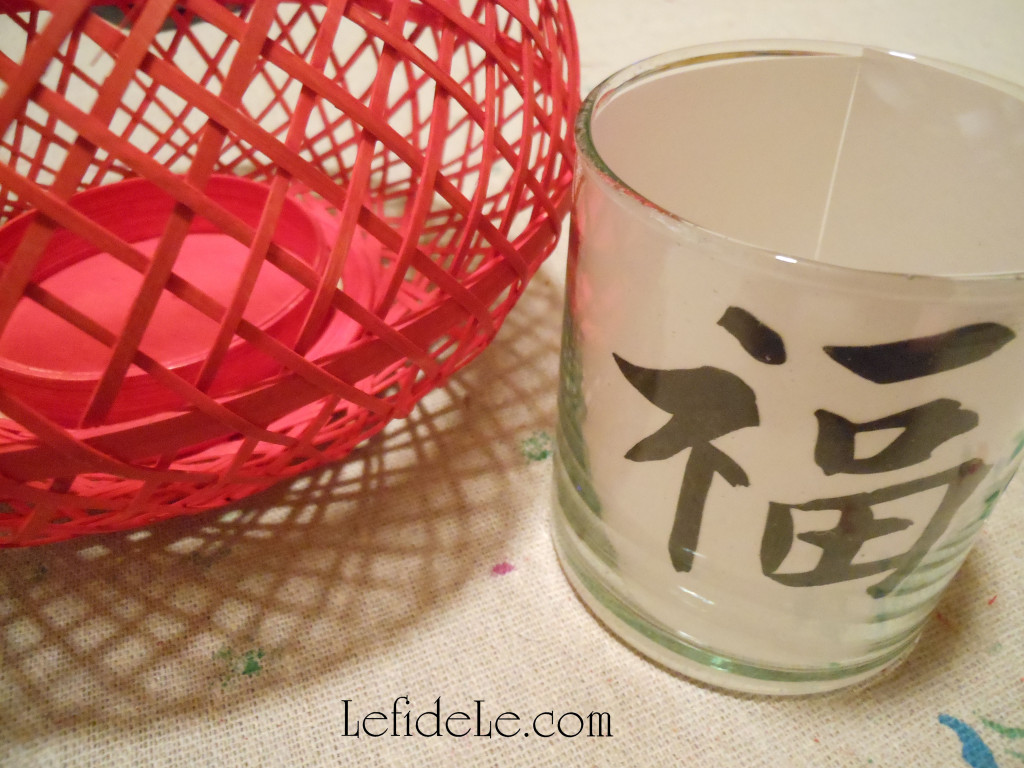
I glued a cut out “Fú” 福 character to a strip of vegan vellum with a permanent glue stick. You may use the red symbol cut from the printable, or just use it as a template to draw by with black marker, or cut out a black character from cardstock.

254Leigh

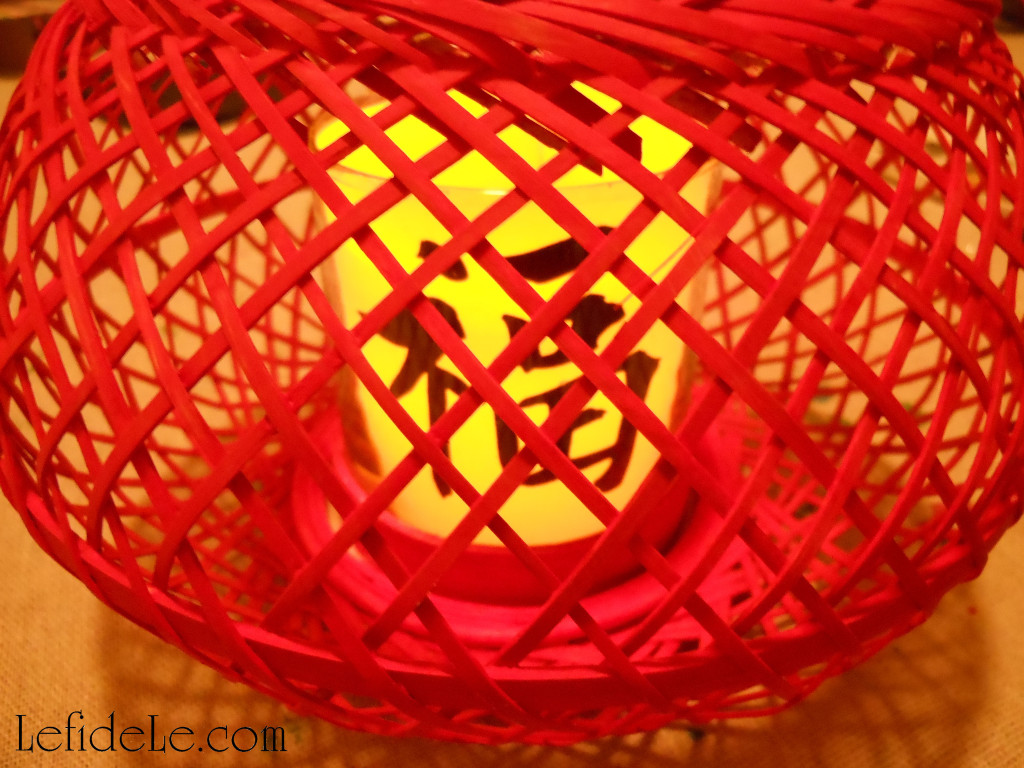
This strip can then be set into any clear votive cup… lantern or not! It doesn’t even need to be glued or taped. The vellum just expands to fit the glass securely. Using LED lights insures that no fire will catch the paper, even if knocked over… so it’s super kid and pet safe.

258Leigh

The best part is that I retain the option of removing the vellum strip and repainting the lanterns for a new color scheme in the future. I just love redoing and reusing… it’s so much better than merely recycling!

221Leigh

I also set a lantern onto the side table of the formal tablescape. (The bamboo lanterns originally came from Cost Plus World Market for a few dollars on clearance. See the sidebar for coupons and free shipping links.)

229Leigh

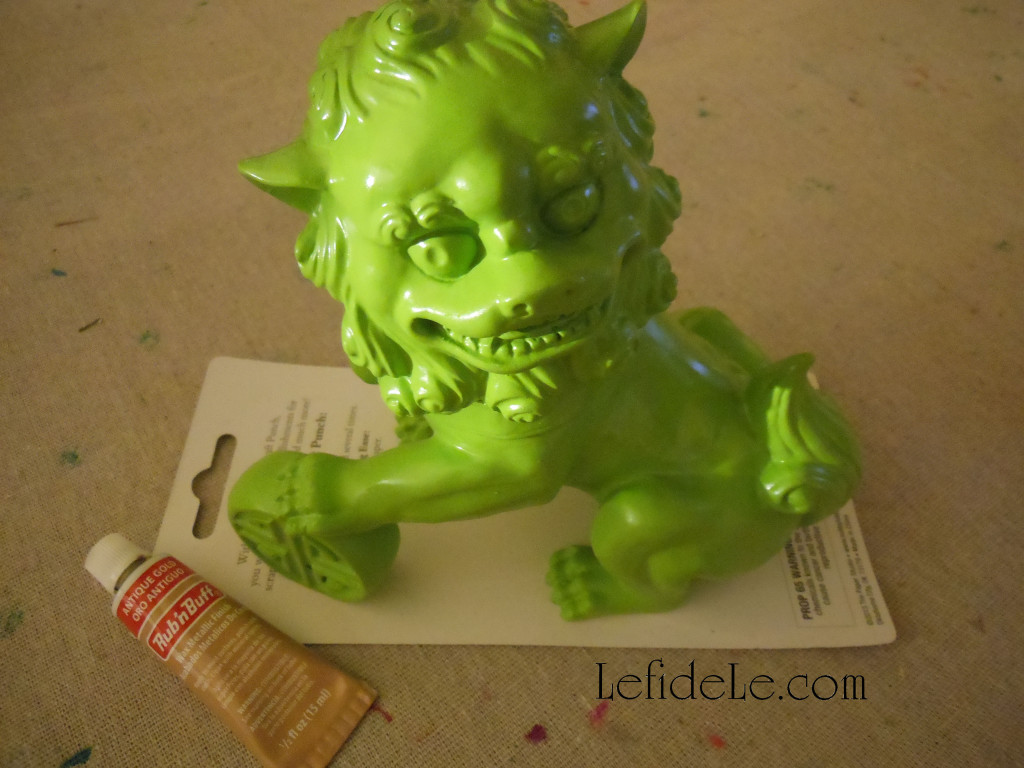
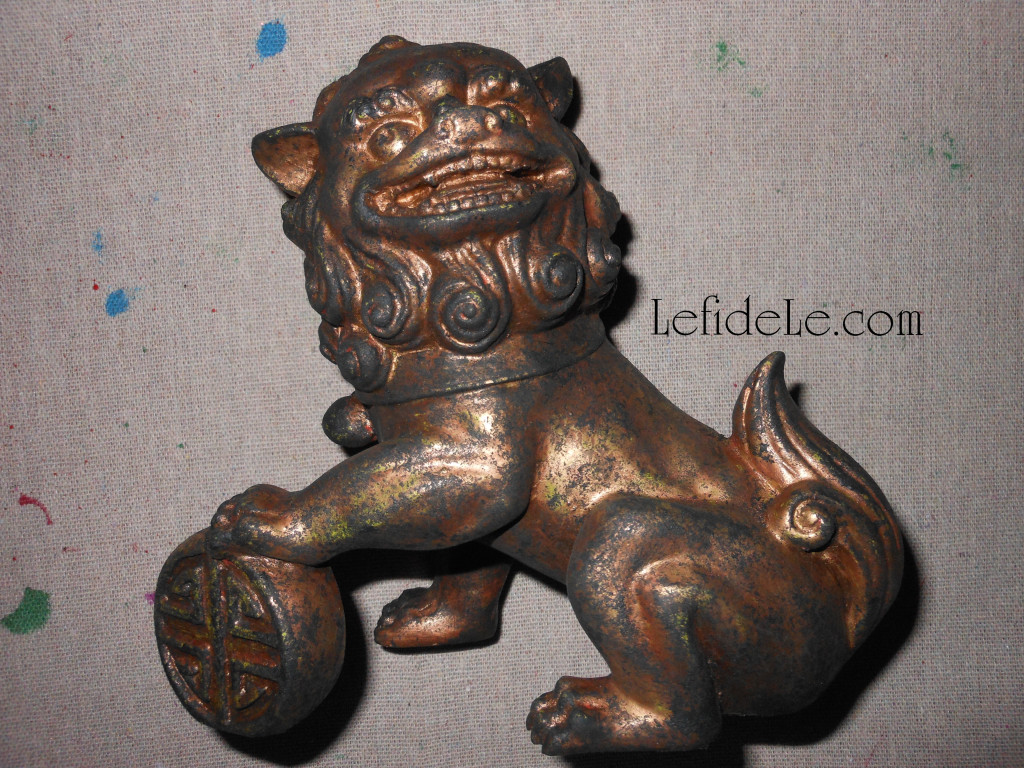
The powerful guardian lion Fú-dog is a traditional Chinese figure of protection. The one seen here is male because he’s resting a paw on a ball that represents the earth. Usually they are presented in pairs, but I only had one in a bright lime green color. I simply had to antique it!

231Leigh

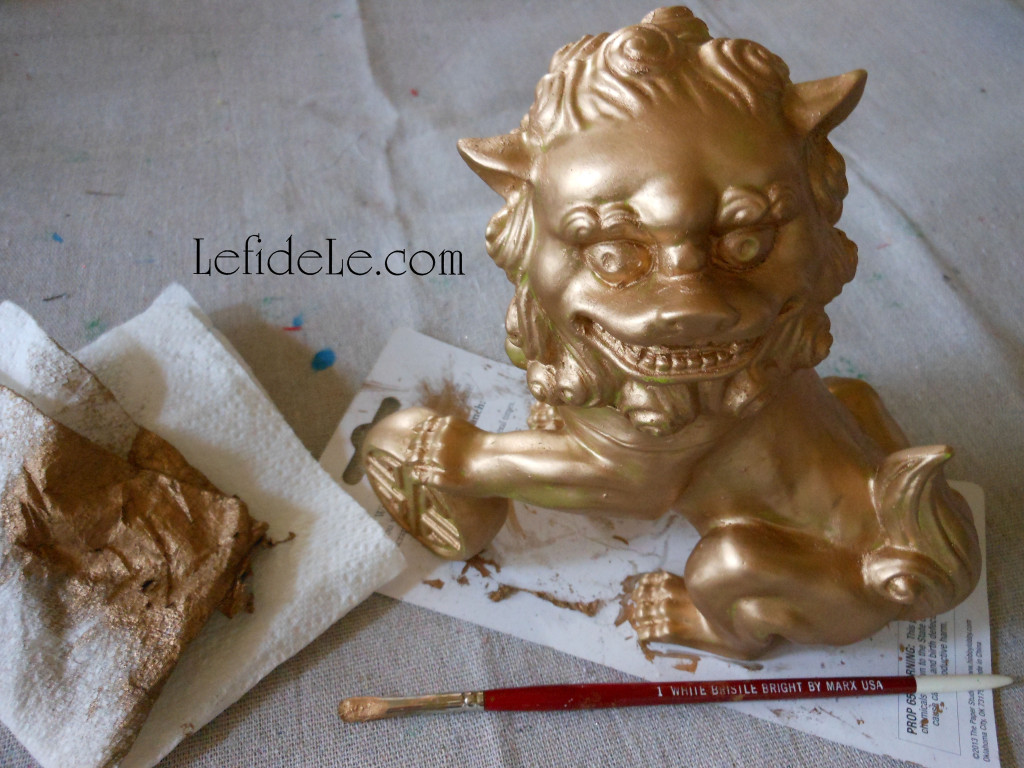
I began to turn the resin into metal by first using a gold Rub-n-Buff paint all over its surface. I gently wiped away the excess and let it set for a couple of days. Then I used a paper towel to rub/shine it up.

242Leigh

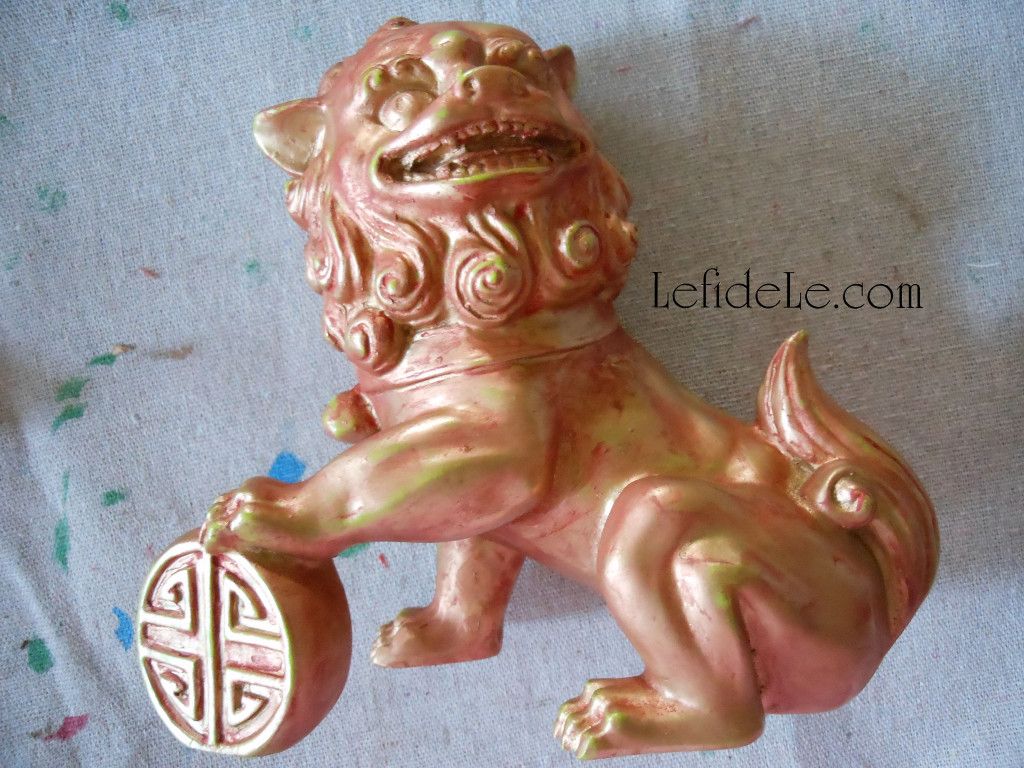
Next I coated that layer with the same red acrylic craft paint that I used on the lantern. I gently wiped off the excess, leaving an interesting pattern of color… green, gold, and red.

259Leigh

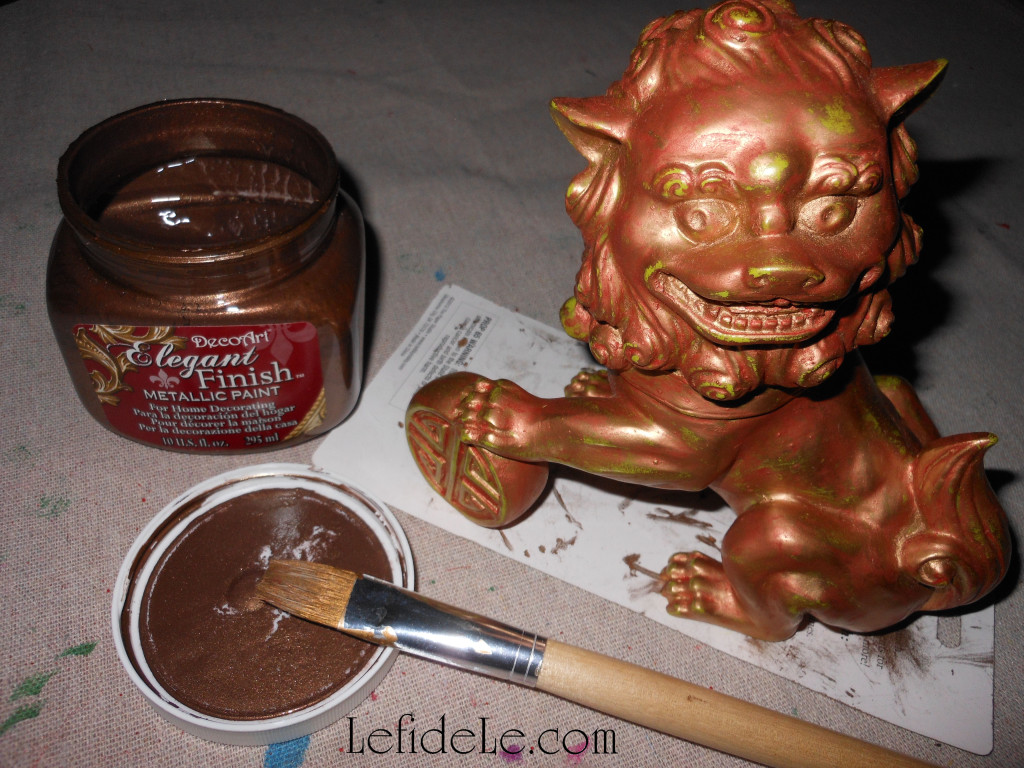
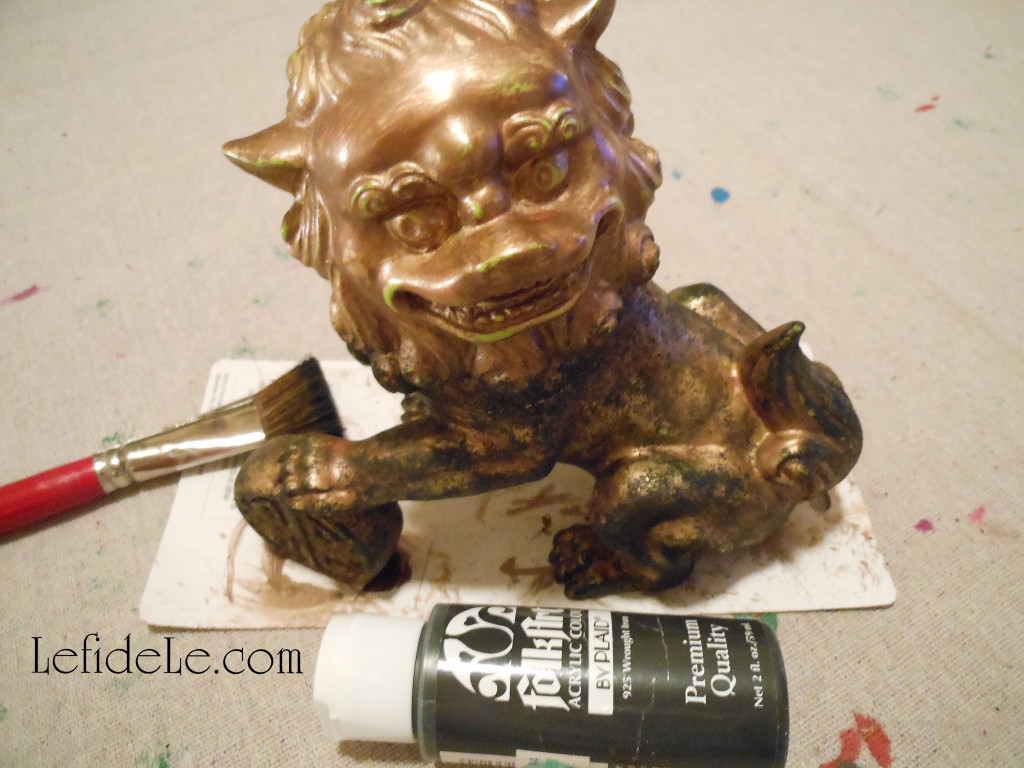
I let that dry overnight, then took some bronze glazing paint (called Elegant Finish by Deco Art) and coated the whole piece. I really gently dapped at the piece in spots to lightly remove some of the paint. For any of you who have ragged a wall, this is similar to that technique. I let that dry for another night.

284Leigh

The last layer is the one you actually have to pay attention to. It requires plain old black acrylic craft paint and a really messed up “scruffy brush”. Never throw away those brushes that your loved ones mess up, don’t wash well, and leave in a horrible condition… they are your new besties. They’re great if you barely dip them into paint, pounce off the excess onto a paper towel, then “stipple” paint onto your surface. This is a sort of haphazard pouncing of the brush perpendicularly to the piece. It’s the easiest way to paint an antique looking surface… and it’s actually a lot of fun.

290Leigh

I took this statuette from lime lion to antique guardian in a few simple steps. You can do the same with any accessory that doesn’t quite match your décor, or looks a bit cheaper than you’d like. This is especially great to do when you see a fantastic find on clearance that just has a ding or two… paint it up! You will have created your own one-of-a-kind upcycled beauty that will have people thinking it’s an antique.

032Leigh

Happy crafting in the New Year!

Faithfully Yours,

Leigh

Quick & Easy Overnight Pickled Cucumbers Recipe (for Chinese New Year or Anytime)

This quick and easy recipe was inspired by a Chinese Travel Website that described the traditional foods of various regions. I was delighted to see that pickled cucumbers were listed… because who in the world doesn’t love a good pickle? Quick pickling makes this a great side dish for any occasion because it can be prepped overnight, and everyone really needs a good last minute dish. Just change up the spices, acids, and sweetener to suit your taste or event theme. It’s perfect for a Chinese New Year Celebration because it’s a light and green food to add to all the traditionally starchy New Year’s foods like longevity noodles, moon cakes, spring rolls, and dumplings. What’s more is that you can control the amount of sodium and sugar you put into it… so that family member with high blood pressure can still enjoy a good pickle without cheating with the jarred stuff!

132Leigh


Ingredients:

  • 2 cucumbers (I used the English hothouse variety because no peeling is needed.)
  • 1 tablespoon sea salt (Adjust the amount according to taste & dietary needs.)
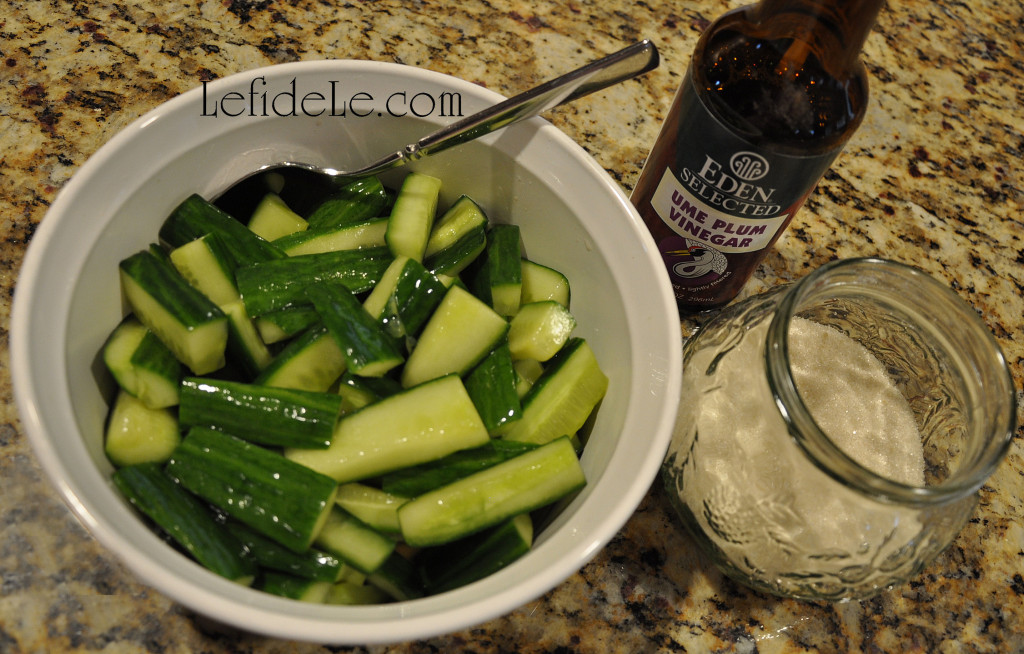
  • 3 tablespoons Ume plum vinegar (Use any type of vinegar or lemon juice.)
  • 1 tablespoon turbinado sugar (Use any sweetener such as honey, agave, stevia, etc.)
  • ~ 1 teaspoon each of various spices (Try ground peppercorns, coriander, marjoram, ginger, etc.)

Instructions:

101Leigh

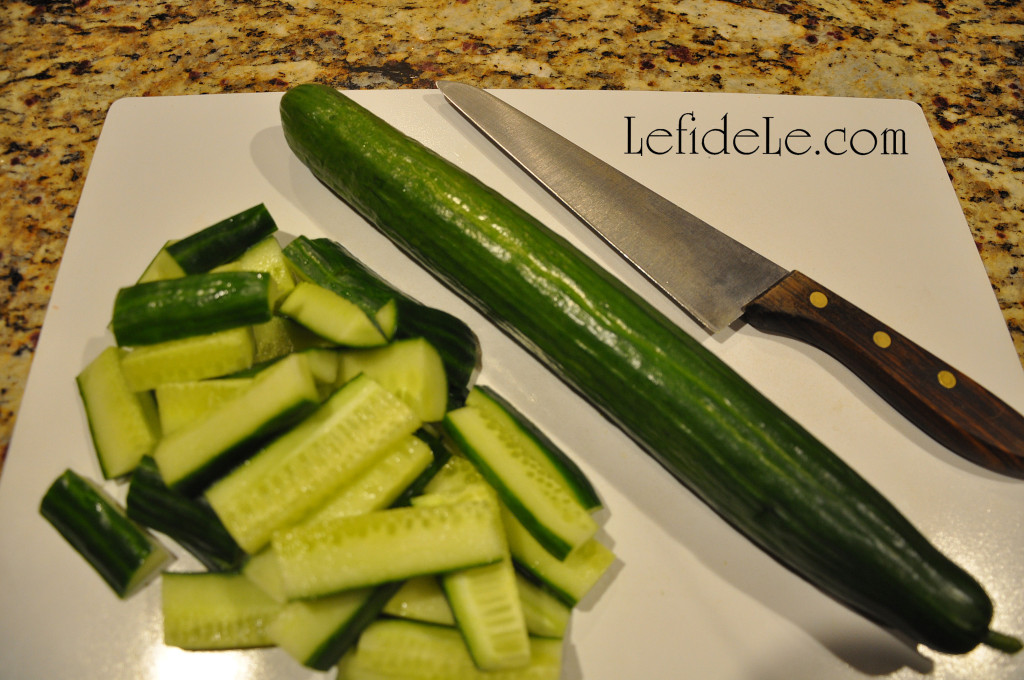
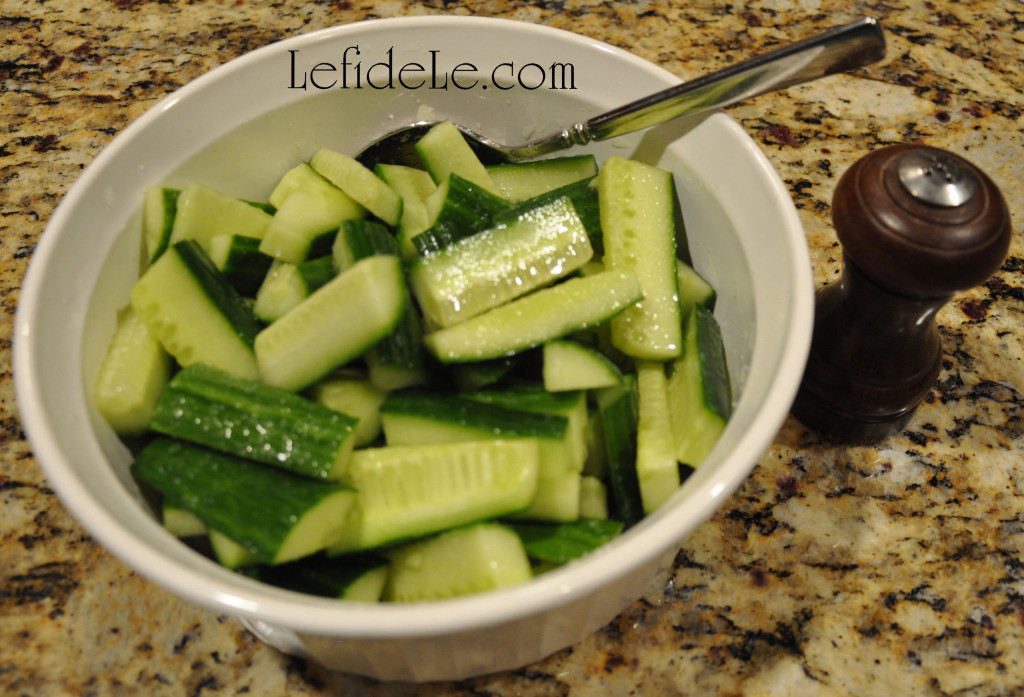
Wash your cucumbers well. There is no need to peel English Cucumbers, as pictured here, but the traditional waxed variety can have a bitter peel so it’s better to remove it. (The hothouse types are prettier with the 2 green tones, and we are making quick pickles… so the quicker the better, right?) A traditional looking dish has “cukes” that are split down the middle twice, so that you’re left with 4 long sections. Then cut these into approximately 2 inch chunks.

105Leigh

Salt the cucumber chunks, and stir them well. Refrigerate them covered overnight.

109Leigh

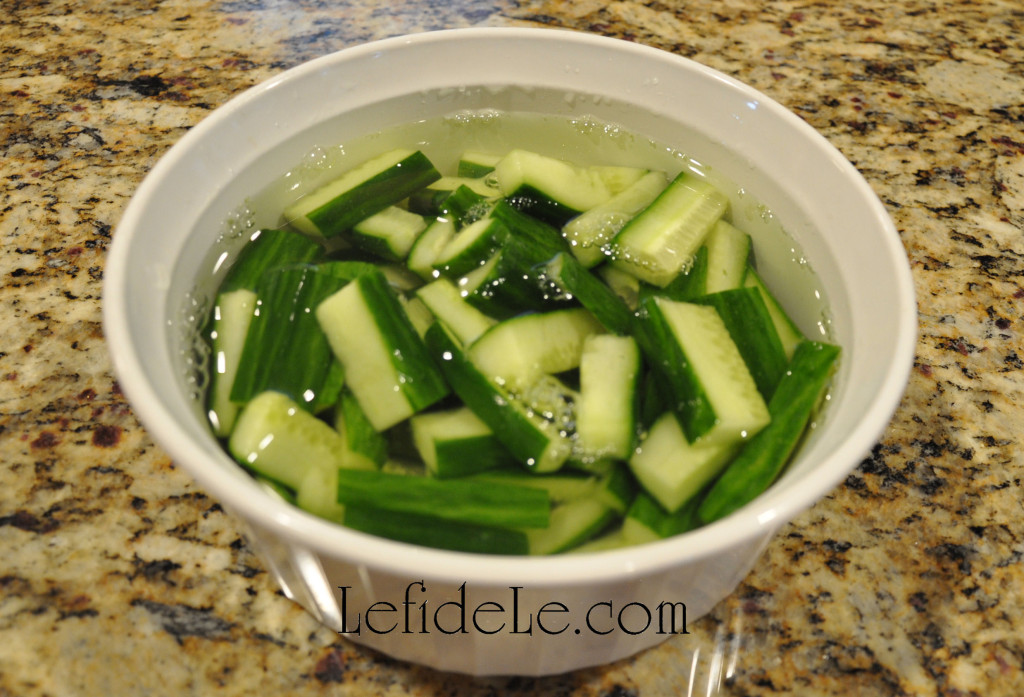
Rinse the cucumber chunks several times in water to remove excess sodium. (I just run water right into the casserole dish they’re already in, and place the top back on. I hold the top and bottom together, and turn them to the side letting the water drain out, leaving the washed cucumbers behind. Not having to wash a colander makes quick pickles even quicker!)

116Leigh

Add your acidic liquid such as lemon juice or vinegar. (I chose Ume plum vinegar because its flavor was a perfect complement for the other Chinese New Year dishes being served.) Also mix in your choice of spices. (After reading through about a dozen of my grandmother’s vintage Chinese cookbooks, I’ve come to the conclusion that there is no such thing as a traditional recipe. Everyone has their own spin, which means that you should feel free to make up your own concoction too!)

175Leigh

Mix your flavored cukes well, and refrigerate until it’s time to plate and garnish for serving. (The pickles pictured here are garnished with diced spring onions and whole roma tomatoes. Click here to see more of the Chinese New Year Party of the Sheep/Ram.)

161Leigh

I hereby confess that I don’t actually measure anything when preparing these little gems. I just go with my creative cooking instincts and prevailing mood to judge the flavor… which is exactly what is fun about this. They always seem to turn out just right. I do, of course, use less salt when making them for my grandmother, and less spice for my mother’s bland preferences. So, those pictured here were decidedly less flavorful than what I typically produce, yet they still tasted fantastic. The take home message is this, don’t be afraid to experiment with flavor. Have fun and enjoy not only the end result but the process as well!

Faithfully Yours,

Leigh

Origami Crane Paper Folding Instructions (for Get Well Wishes or Chinese New Year Party Décor)

The timeless art of origami paper folding is an easy and inexpensive way to decorate for a Chinese New Year Celebration. The project also provides a means for quality time in generational bonding. This tutorial for the historically traditional crane figure is an apropos symbol of hope for the coming year. The Japanese tradition of the Senbazuru folding of 1000 paper cranes is said to grant the maker a wish, such as healing for a loved one. (Why not fold and send one in lieu of a get well card?) The “Tsuru” (crane) is also said to denote happiness and luck, which is the same meaning of the “Fú” 福character of the Chinese New Year. My Take-Out Favor Box & Paper Lantern Craft Printable (Chinese New Year Party Décor) also utilizes the symbol which has graced the entrances of Chinese homes for many hundreds of New Year’s.

341Leigh

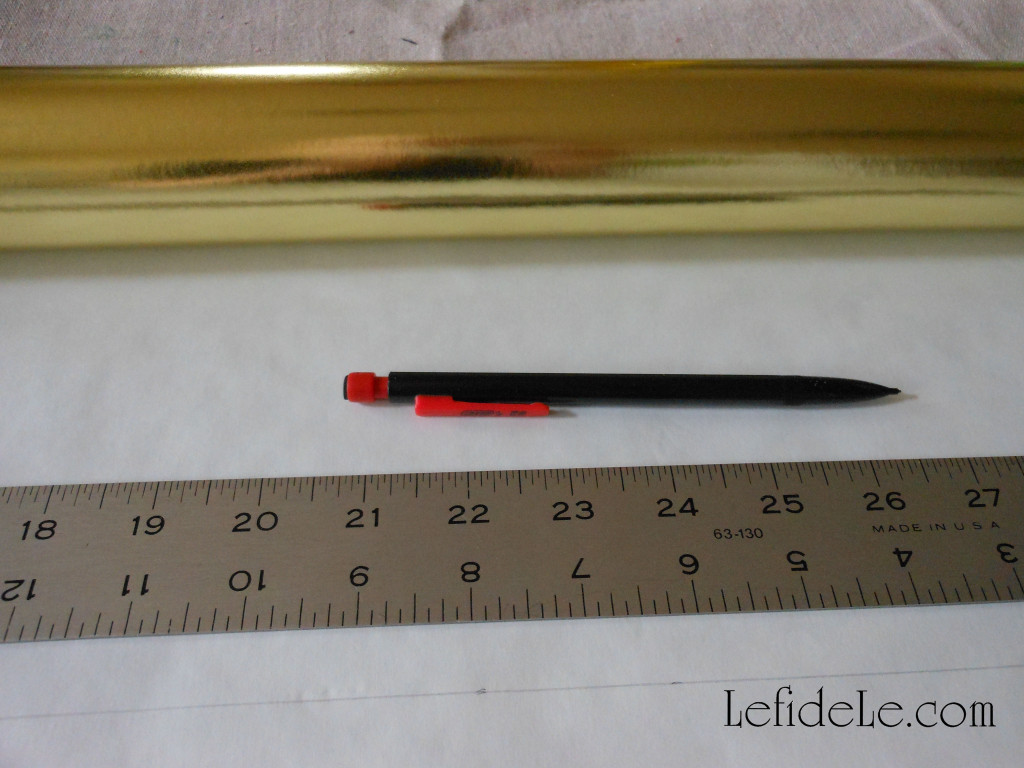
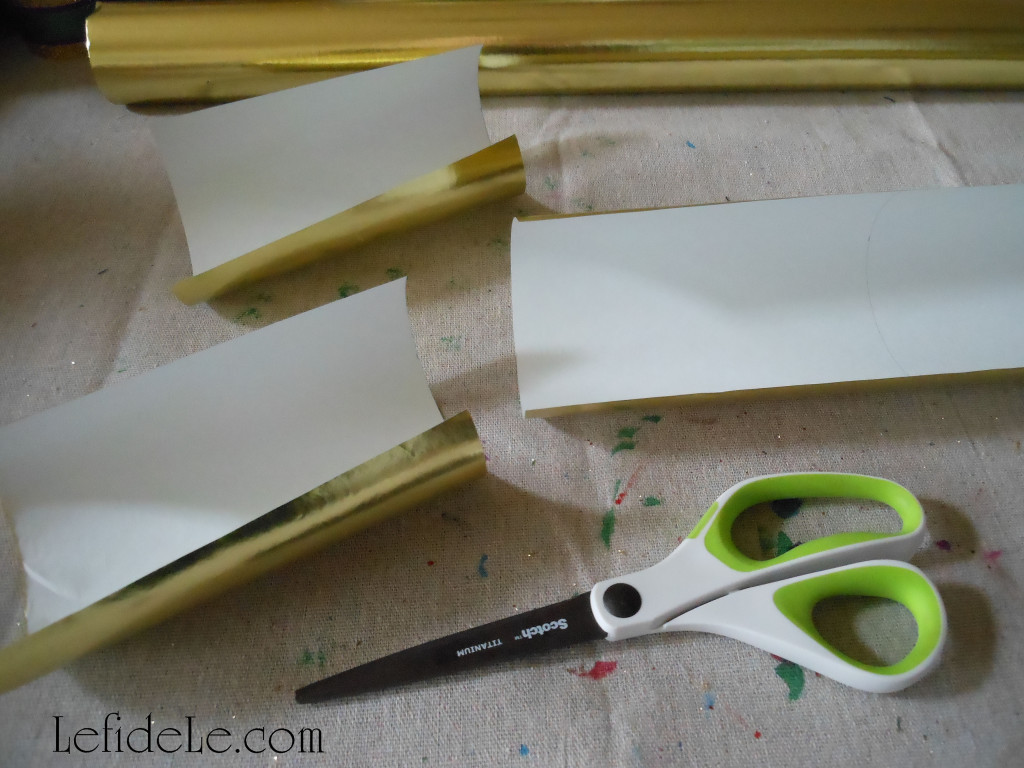
There are beautiful origami papers available, but it’s easy to make your own from any inexpensive paper. By cutting them yourself, you can make any sized piece you like… and if you’re a beginner, it’s much easier to fold a larger sheet. Here I’ve chosen gold metallic wrapping paper purchased at an after clearance sale years ago. I used a large T-square ruler to mark 6 x 6 inch sections, and then cut them out.

342Leigh

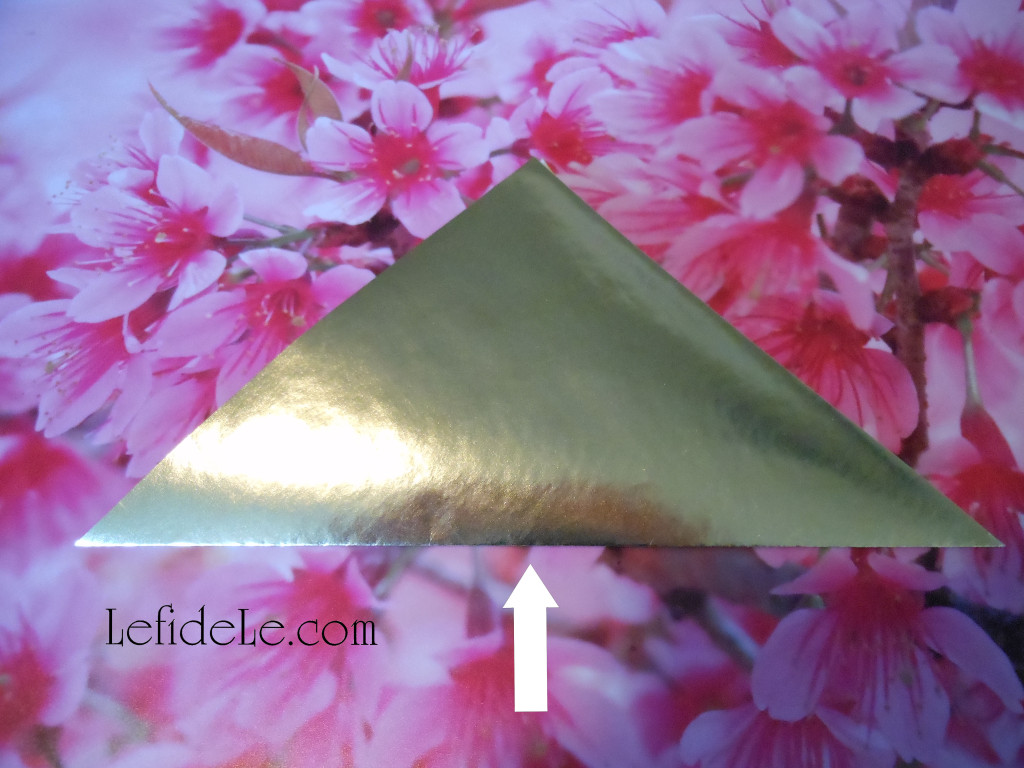
Begin by folding the paper in half diagonally then unfold it.

344Leigh

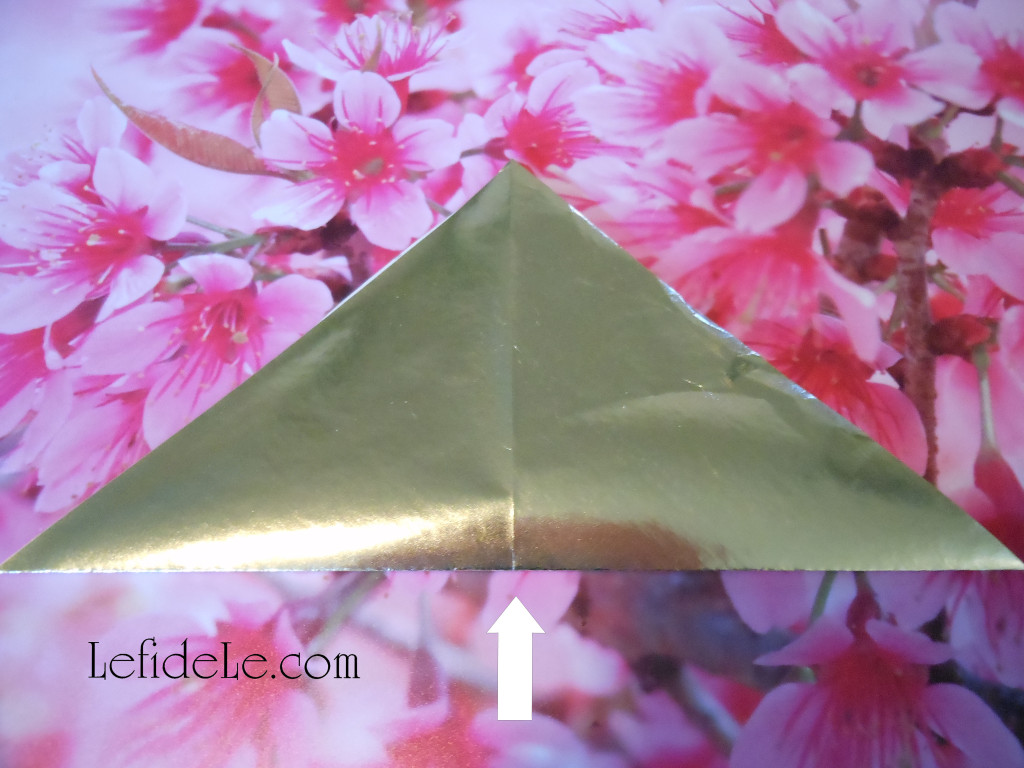
Repeat this on the other diagonal, thereby creating an X crease on the paper.

346Leigh

Next fold the paper in half, creating a rectangle, then unfold it.

348Leigh

Repeat this fold, of a half rectangle, to complete another X crease.

349Leigh

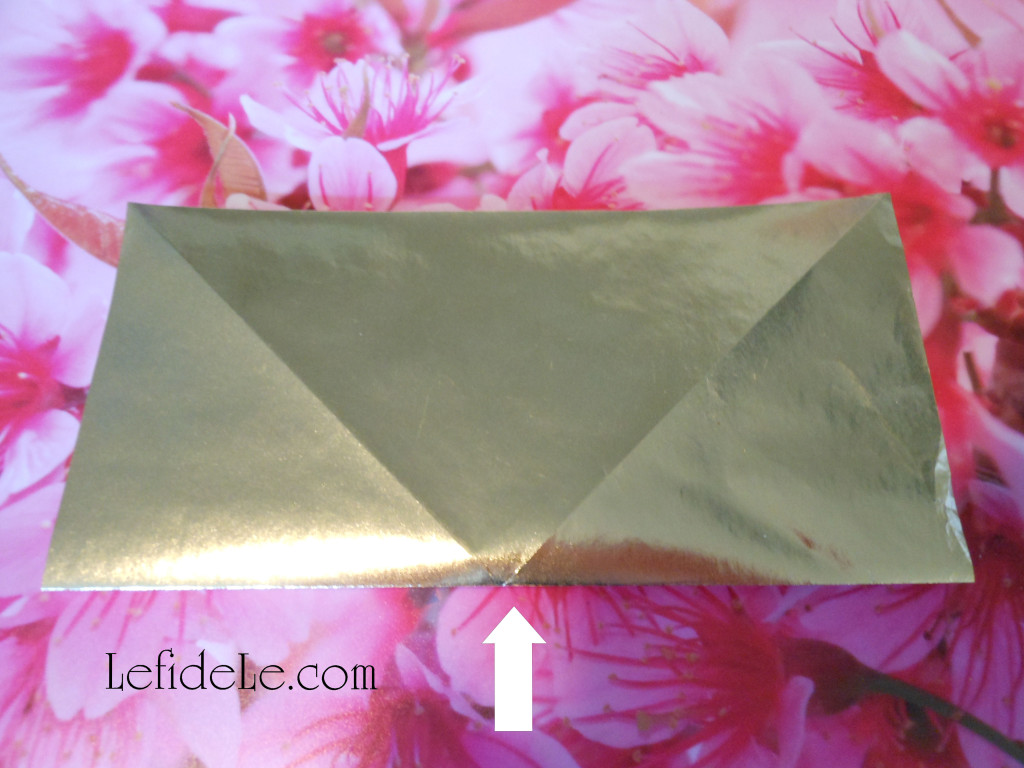
Now that you’ve made an asterisk * shape mark on the paper, turn a tip to point directly towards you. Take the remaining 3 tips, and pull them over the closest one. The 2 side points will meet in the middle, and the farthest tip will close over those.

353Leigh

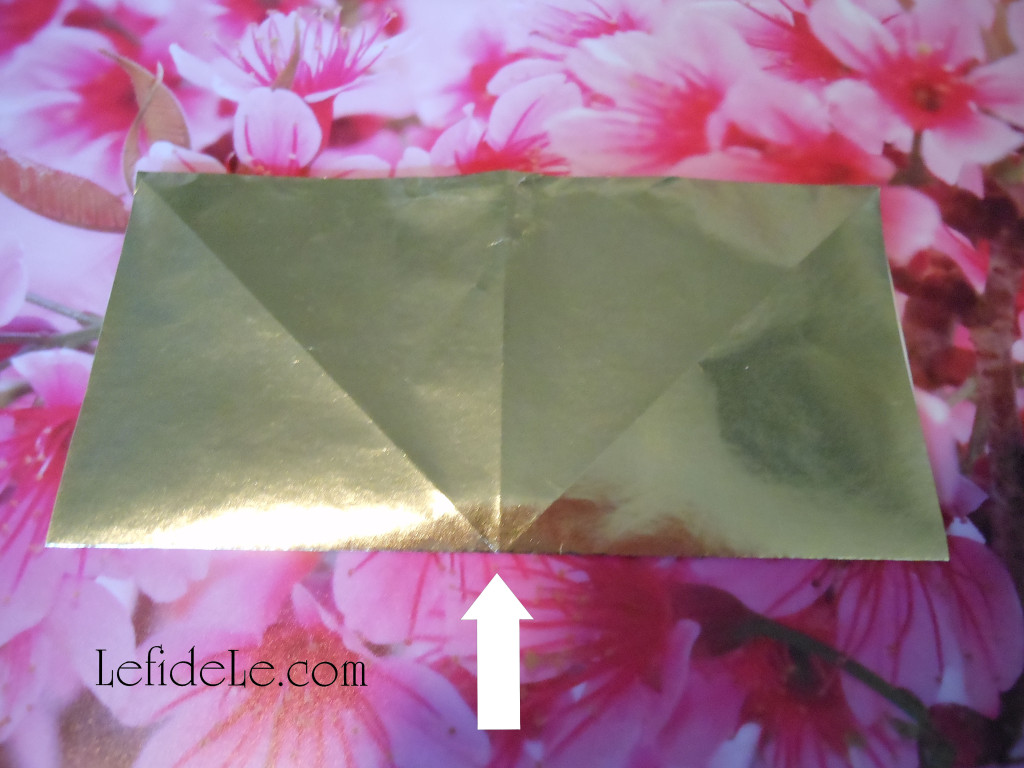
Next take the 2 side points and fold them to meet in a line dissecting the middle of the piece, then unfold it.

355Leigh

Take the farthest point and pull it toward you to form a triangle, and then unfold it also.

357bLeigh

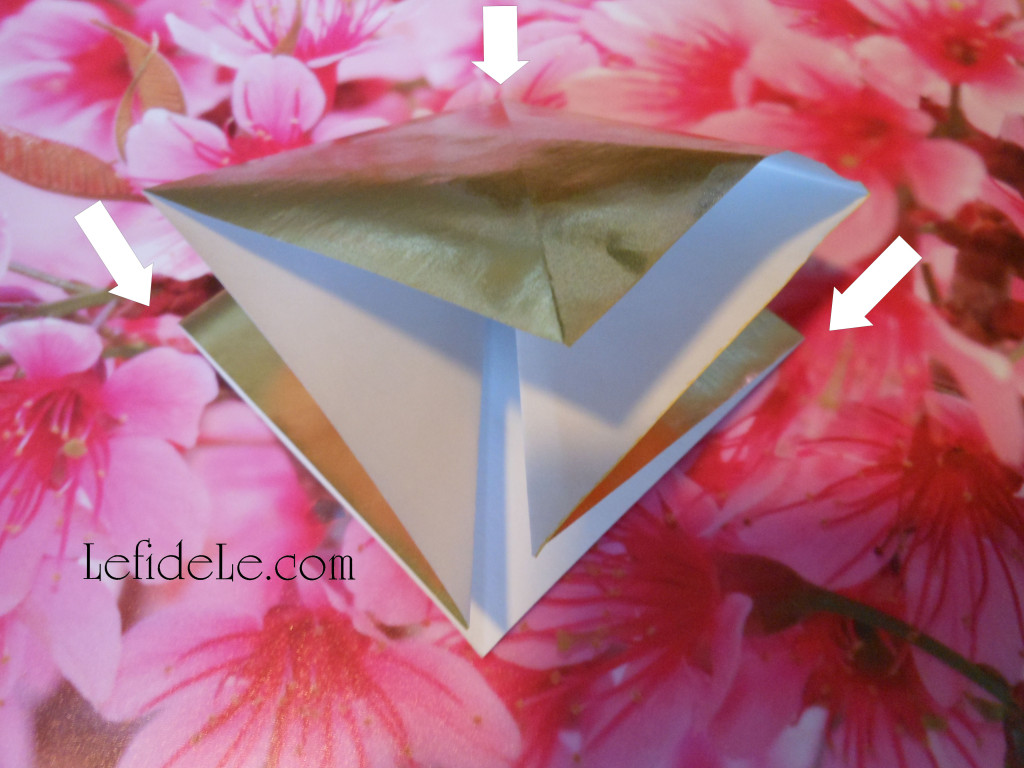
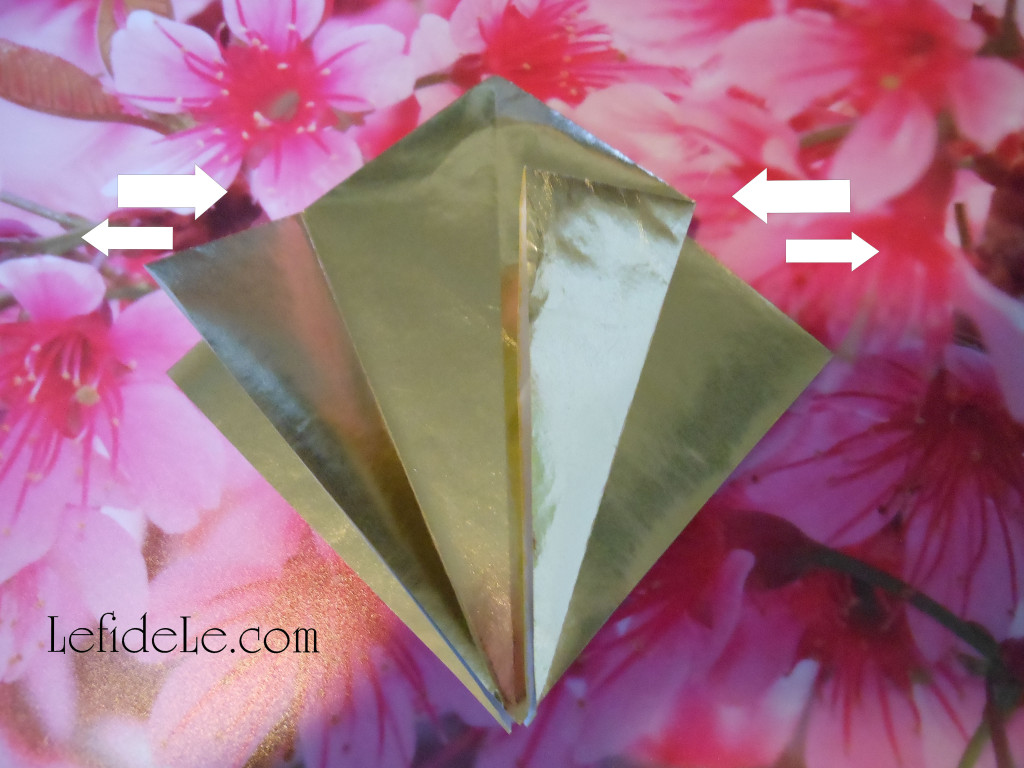
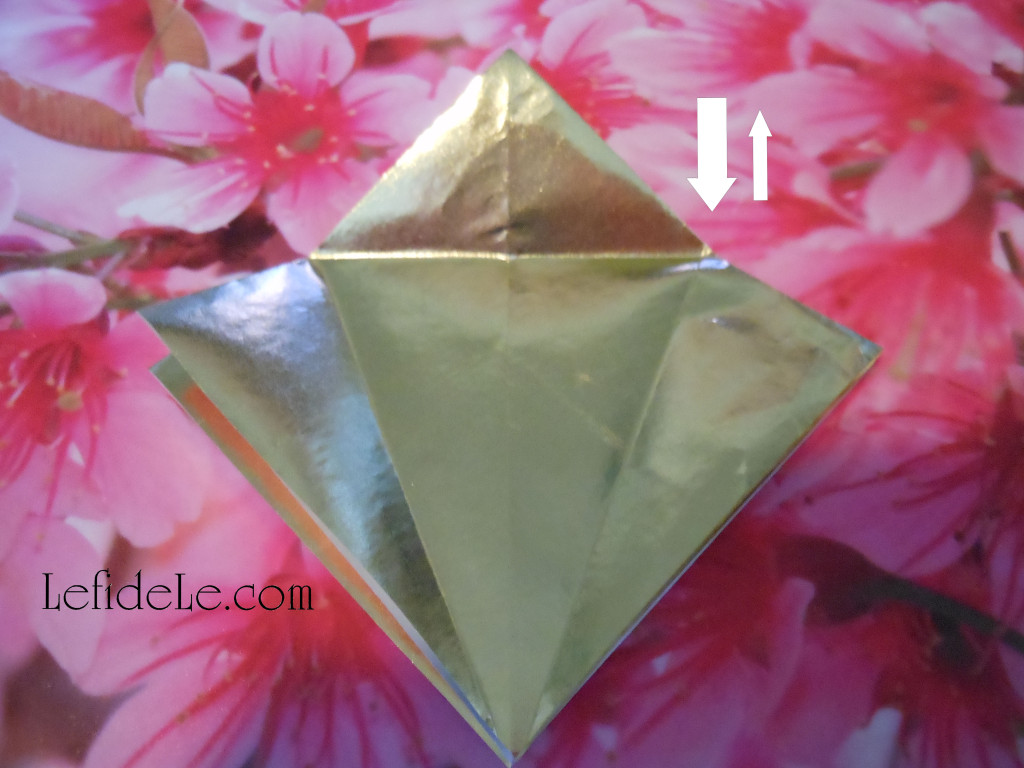
Pull the upper point away from you while pushing in the 2 side points so that they meet in the middle.

360Leigh

Push it all down to crease it flat.

362Leigh

Flip the piece over, and repeat the last step to form a diamond shape.

370Leigh

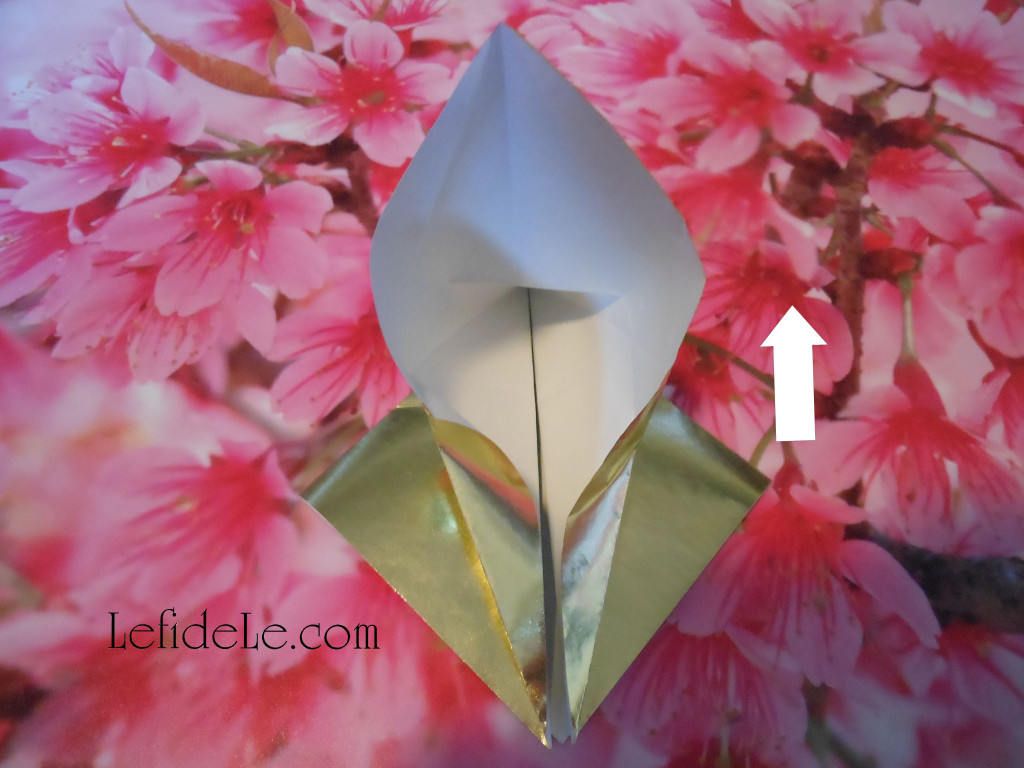
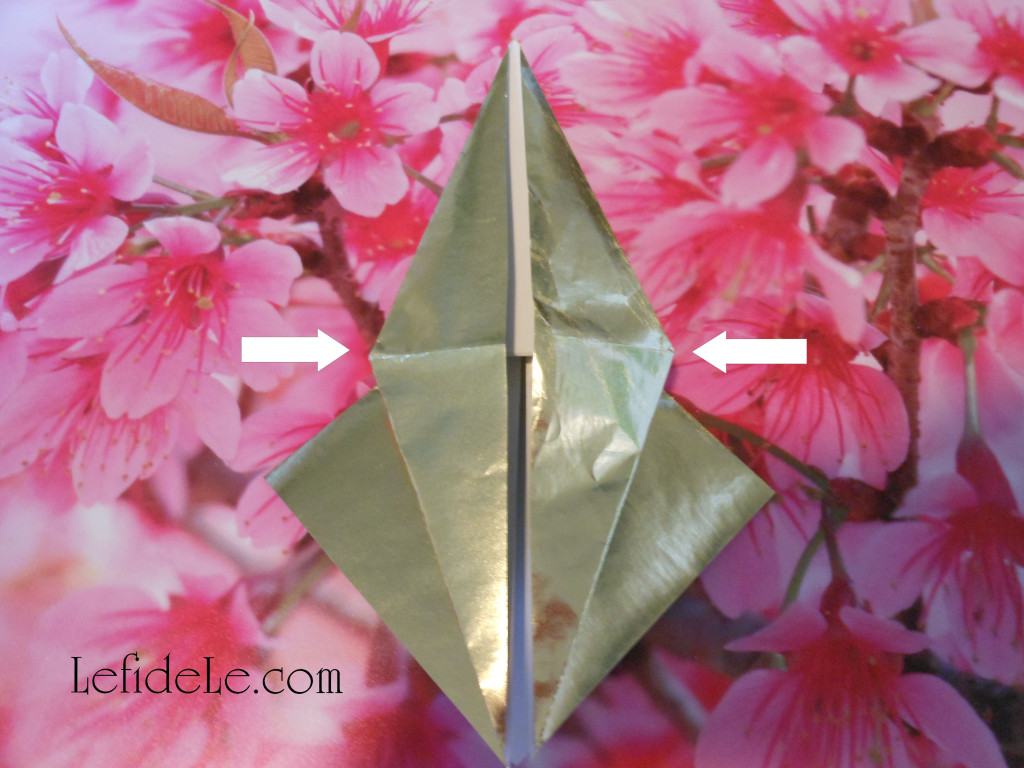
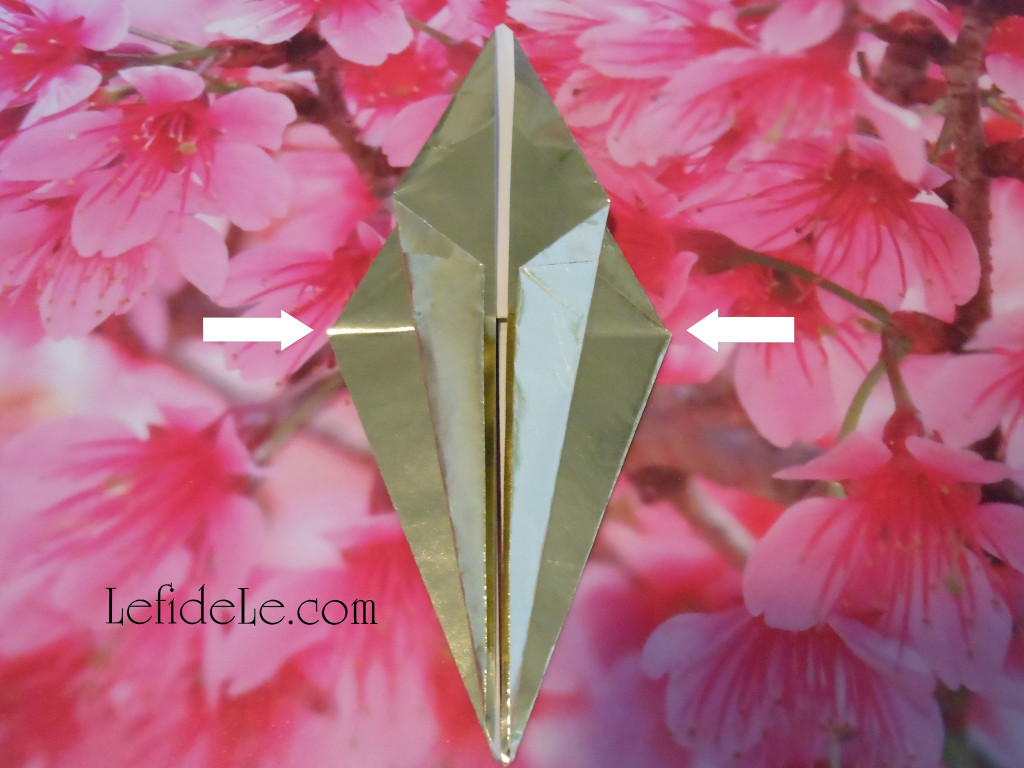
Once again, fold the 2 side points inward to meet in the center.

372Leigh

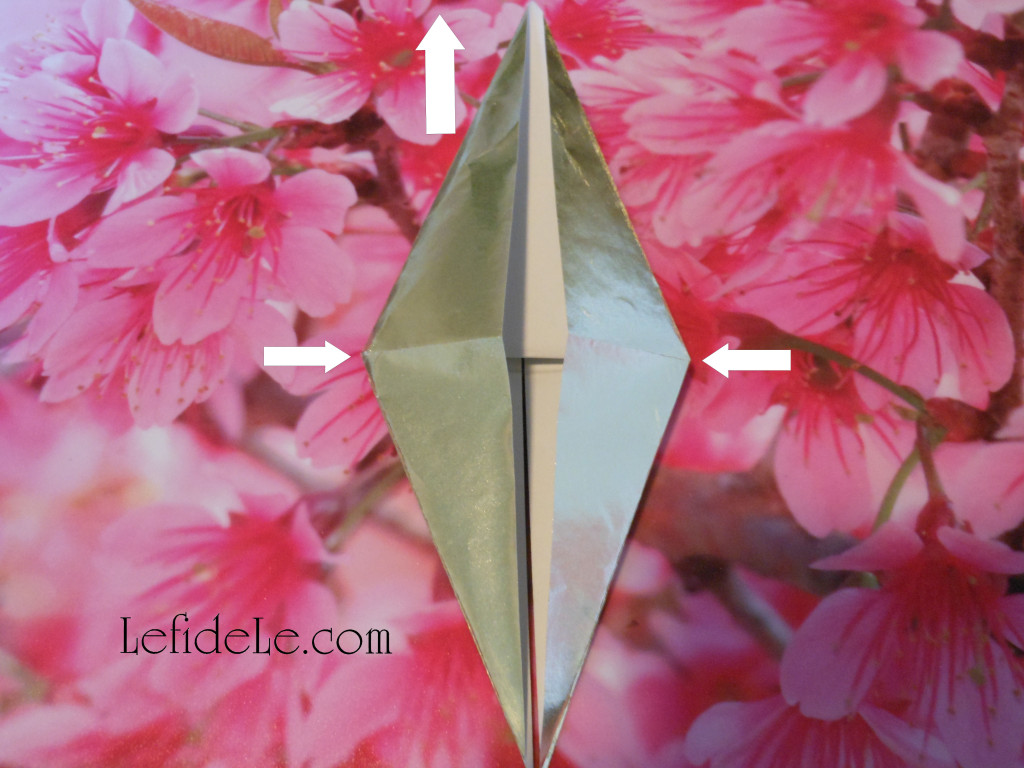
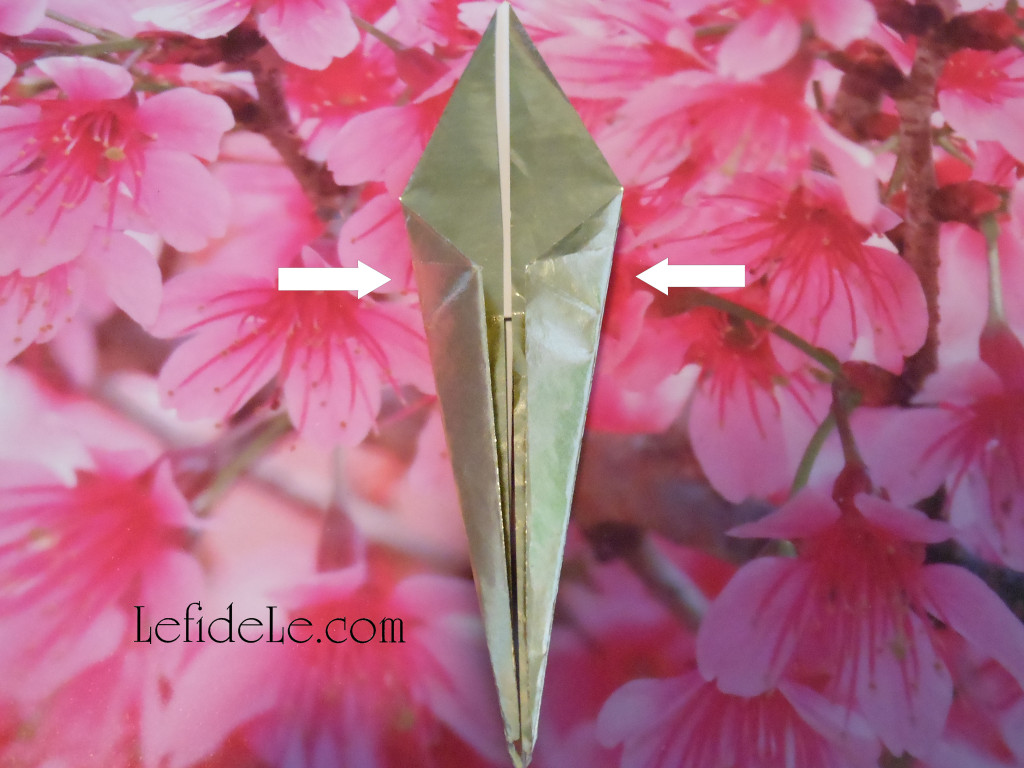
Flip it over, and repeat the last step to form a much pointier diamond.

374Leigh

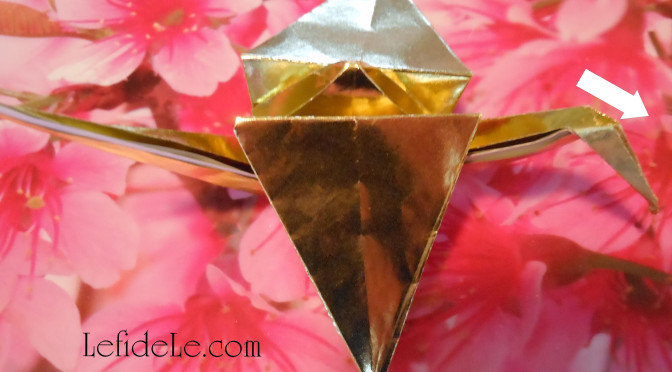
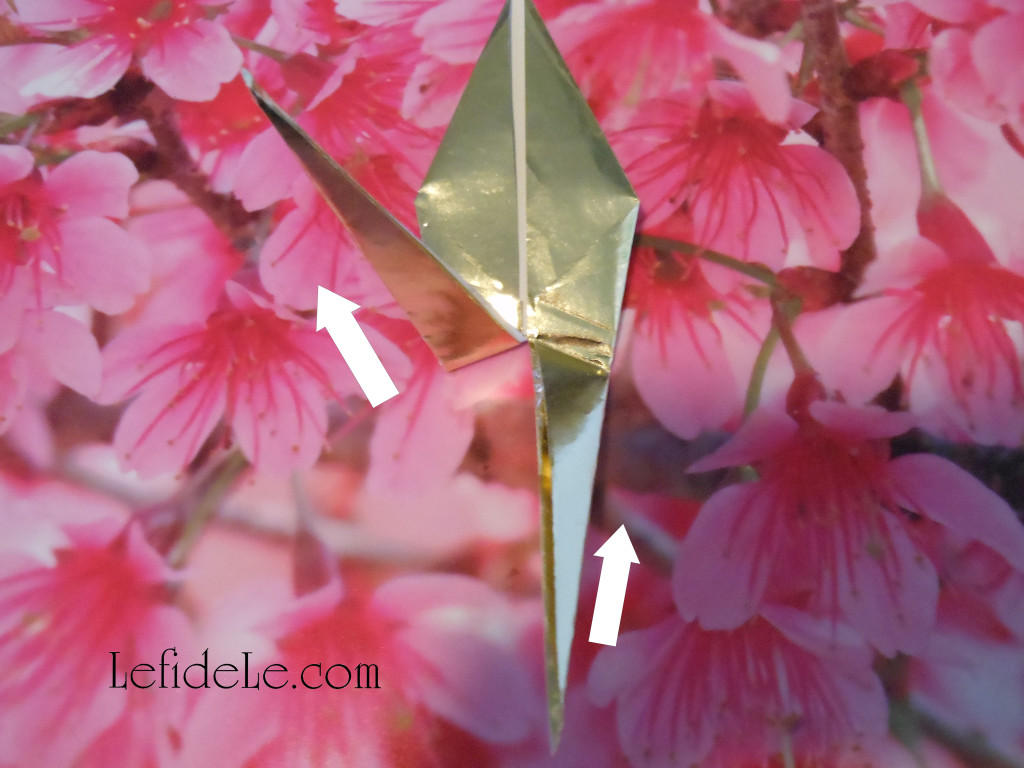
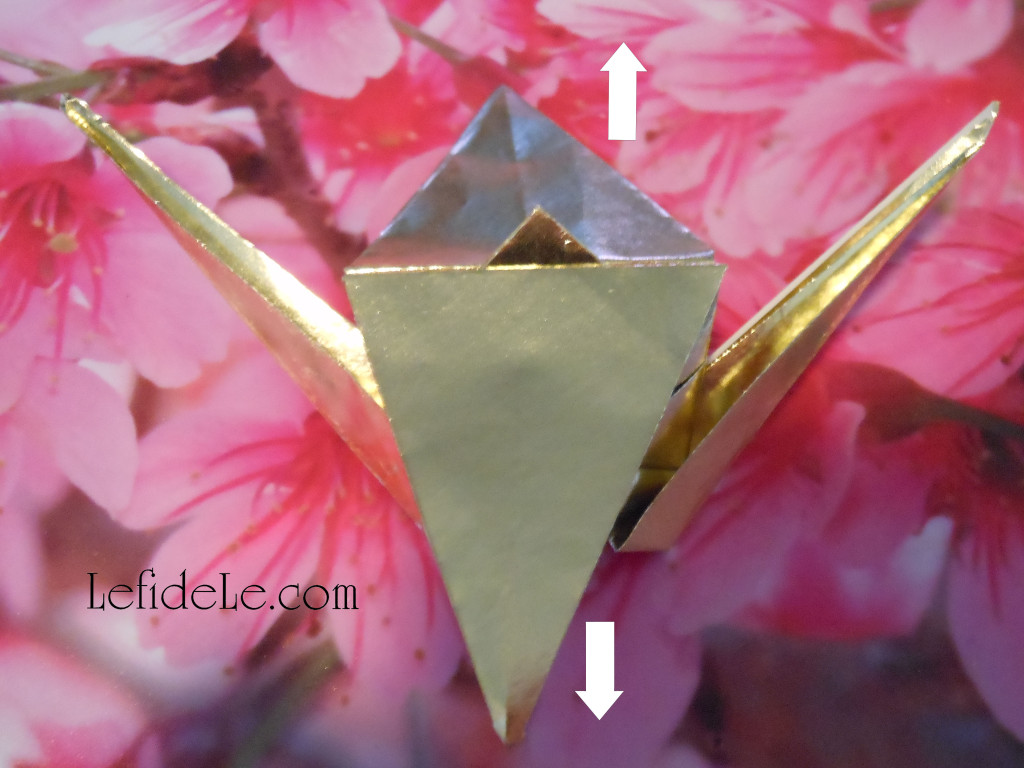
There will be 2 pieces resembling legs that comprise the portion closest to you, take one and bend it up and out on a diagonal… as if it’s making a high kick. Do the same with the other leg then crease both well. Unfold them straight again.

376Leigh

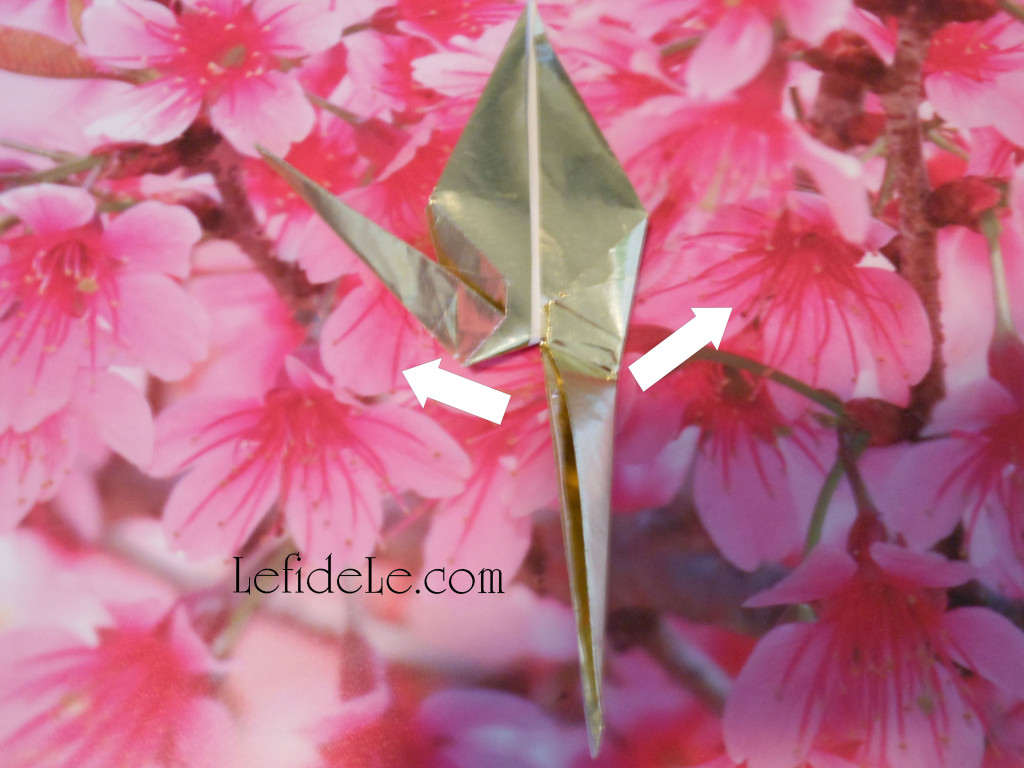
The next step is the trickiest part, but it can be unfolded and retried until it works out. The legs need to be bent inward in what is called a “reverse fold”. The easiest way that I’ve found to do this is to use your thumbs to sort of pop in the center of the leg toward the center of the piece. The crease you made earlier will be the line it folds according to. Just study the picture and play with your piece until they look similar. Crease it flat once it’s in the correct position. Do this with both legs of the piece which will form the head and tail/feet of the crane.

378Leigh

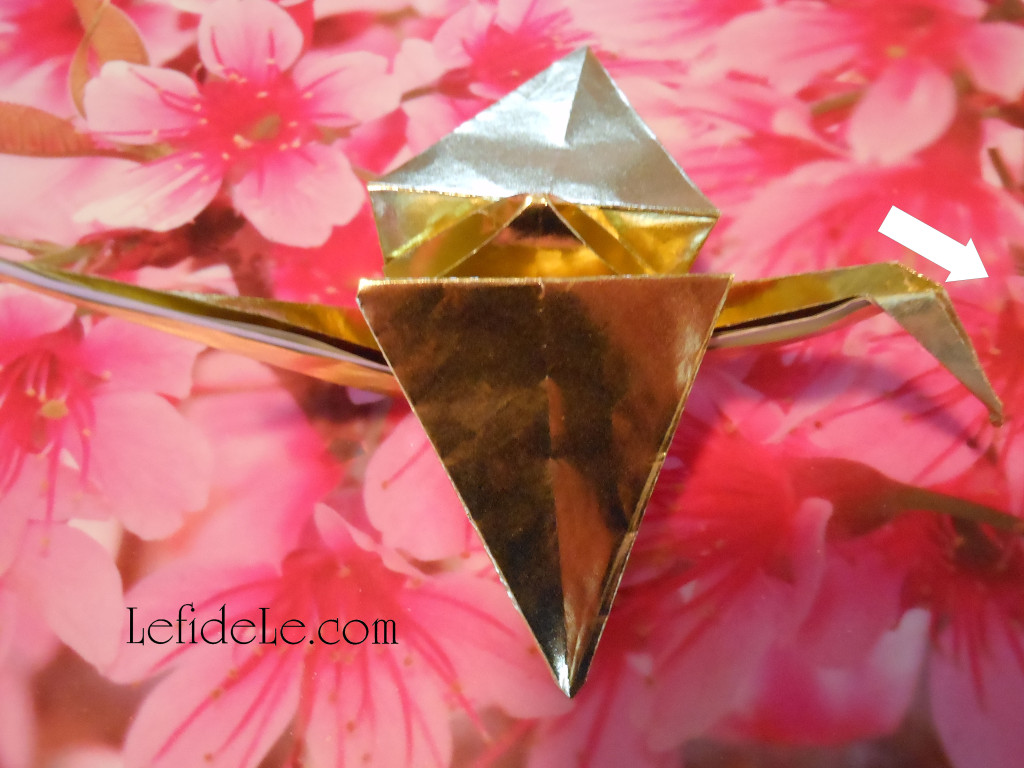
Make the wings flap down by folding the farthest point of the upper flap towards you. Flip over and repeat for the other wing.

381Leigh

The last step is to form the bird’s head by performing a “reverse fold” downward on one of the former legs. Adjust it, if need be, by strengthening your creases and pushing up on the center portion until it sits upright on its own.

384Leigh

Now what to do with it… write a “Get Well Soon” or “Happy New Year” message on one of the wings and push the crane flat to enclose in an envelope, use a needle and thread to string and hang it, or just set it out on your table for an easy décor element.

031Leigh

May all your dearest wishes be granted this year!

Faithfully Yours,

Leigh