Tag Archives: Last Minute

DIY Candyland Party Themed Craft Tutorial: Game Board Treat Tower & Easy Buffet Display

308Leigh

Craft your way to classic Candyland cuteness befitting birthdays, baby showers, and Christmas décor.  This tutorial for a game board treat tower and easy buffet display are part three of a DIY party decorating series with easy projects and free printables. Using some or all of the ideas, you’ll be sure to delight the inner-child in all of your guests. Sweet!

179Leigh

These simple crafts all utilize the same teacher’s bulletin board banner strips in a licensed Candyland board-game pattern. I made two towers, wrapped six pots, covered two milk corrals and a bunch of food picks… and I still have many strips left over! All of this is from one package of super-cute and inexpensive banners that could not fit my theme more perfectly.

7(2)Leigh

To cover food crates, all you need to do is measure the front width and cut a length off. Double a piece of tape onto itself to hold the cardstock in place during the party. Remove it to reuse later for another craft. One idea is to let the kiddos make thank you cards out of it.

6(2)Leigh

Wrap a length of the banner to coordinate a plain metal bucket to your theme. Simply cut and tape the ends together.

351Leigh

These can be used to hold candy and prop up Gingerbread Peep Pops (see the Candyland Confections article here).

120Leigh

Make food picks by simply cutting the leftover banner end bits into colored squares.

122Leigh

Tape toothpicks or popsicle sticks behind them. These can also be used for place-cards if you like.

109Leigh

My treat towers begin with ordinary cupcake stands that are transformed into darling 3-D gaming creations.

069Leigh

To make your own, first find a commercially packaged stand in a matching color palette.

394Leigh

Cut the teacher’s border into two sections (so that they’re small enough to allow food to be placed once it’s completed).

117Leigh

I just followed the natural curve of the game path pattern.

072Leigh

Put the stand together as per the package instructions.

105Leigh

Hot glue the underside if you really want it to be super-sturdy.

095Leigh

Hot glue a strip to the outside rim of each level. Cut off the excess length.

099Leigh

If your ends don’t match up perfectly, just trim off the top edge to make them appear seamlessly adjoined.

101Leigh

These are what the towering creations look like when laden with sweet treats galore! (See my allergy-friendly Spicy Guacamole Shooters Recipe here.)

317 (2)Leigh

Check out the rest of my Candyland craft series: Gingerbread People Banner, Treat Gift Boxes, & Printables and Hard Candy Lanterns, Candy Ornaments, & Conversation Heart Garland as well as the final party post on Candyland Themed Party Décor Ideas.

302Leigh

Faithfully Yours,

Leigh

DIY Candyland Party Themed Craft Tutorial: Hard Candy Lanterns, Candy Ornaments, & Conversation Heart Garlands

409Leigh

Craft your way to classic Candyland cuteness befitting birthdays, baby showers, and Christmas décor.  This tutorial for hard candy lanterns, candy ornaments, and conversation heart garlands are part two of a DIY party decorating series with easy projects and free printables. Using some or all of the ideas, you’ll be sure to delight the inner-child in all of your guests. Sweet!

049Leigh

Old-school paper lanterns may easily evolve into supersized hard candy confections with a few simple steps. Begin with any variety of sizes and colors (but choose lighter versions if you wish to light them). You can even find some in a candy swirl pattern like these red and white striped kinds in graduated sizes… or just start with white and add your own stripes. Craft paint is quicker, but marker works as well. Tie a loop of twine, ribbon, or fishing line to the top of each lantern to hang them by later.

039Leigh

Use a theme coordinating color of gift basket cellophane to wrap around each lantern. Be sure the ends overlap before cutting. I used opalescent pink so that the red stripes would show through as hot pink. This way I can reuse the lanterns later with a clear wrap as peppermint candies or without wrapping as striped beach balls in summer.

042Leigh

Tie a length of twine or ribbon to gather the cellophane at the lantern’s base. I actually used a pink and white yarn that mimics baker’s twine but is less expensive.

043Leigh

Pull the hanging cord straight out from the top of the lantern, and gather the cellophane around it. Pull the wrap taut around the sphere (like you would make a ponytail). Tie another bow around this end to secure it. (Note that you can now throw in some lit LED tea-light candles before closing it, but read on to find an easier way to light them.)

045Leigh

Cut off the excess cellophane from the “candy” ends so that it appears to be the right proportion.

381Leigh

You can set these on a table, integrate them into a display, or hang a grouping of various sizes to make a hanging centerpiece. I opted to hike up the chain of my chandelier with an S-hook to shorten it. (See a picture of how to do this here: Frozen Winter Wonderland Themed Christmas & New Year’s Eve Dinner Parties.) Then I attached the twine loops with a couple inches of wire to the chandelier at different levels. I turned the light on, and was immediately awash in a pink candy glow as the light filtered through the lanterns and cellophane. A plug-in up-light aimed squared at the lanterns will also cause them to glow in any location of your choosing. It’s much easier to do this rather than wait to light, close, and then hang your lanterns at the last minute. Of course, another option would be to purchase a light kit for each lantern then plug all those cords in… but who needs more trouble and expense?

232fLeigh

The exact same method was employed to craft the hard candy ornaments using, well… ball ornaments.

062Leigh

The only difference was that I didn’t tie on twine hangers, because I elected to use them for table display instead. They would have been lovely hanging though. I can always add twine to string them on a tree or centerpiece later, because I intentionally left the round hanging eye stick out of the gathered wrap. It’s visually concealed by the cellophane.

384Leigh

I made “big rock candy mountains” out of lit white Christmas trees that appeared to glow from within. I then placed the “candy”ornaments on and around them.

393Leigh

Ribbon candy ornaments are another simple décor craft that can utilize bits of leftover ribbon or even old package wrapping for an eclectic mix. I used a portion of a giant roll from Costco that is actually reserved for another project. Real ribbon candy doesn’t have glitter and has stripes facing the other way, but I thought they were adorable anyway.

124Leigh

To make these, just hot glue a line onto the ribbon’s end, and tap it down to form a loop.

130Leigh

Keep repeating this action, forming more and more loops, until you reach a size that seems proportionate to a candy dimension.

126Leigh

Cut off the end, and glue it down to form the last loop.

137Leigh

Next, add a hanger if you’d like to. I used the same thin ribbon as the banner in part one of the Candyland craft series. Make a loop through one loop end of the “candy” and tie a knot. (This seems to be a much safer option, than metal hooks, around small children and pets.)

388Leigh

Hang these from Christmas trees, add them to a candy lantern display, or set them around a centerpiece like my “big rock candy mountains”. The “icing” bases in the picture were comprised of blankets of buffalo snow batting.

057fLeigh

The last craft for the tree is a conversation heart garland that would serve equally as well as a banner for a Valentine’s celebration.

054Leigh

It’s so simple and inexpensive because it utilizes foam craft hearts and yarn (or thin ribbon, or baker’s twine if you like).

064Leigh

Begin by simply setting out your hearts according to color, so that you can string them in a pleasing order.

067Leigh

Use a ruler (or just “eyeball” it) in order to hot glue them back to back spaced 3 inches apart, sandwiching the yarn in-between.

386Leigh

Cut the yarn after the last “foamie”, and knot the ends to prevent fraying. (Click here to see the same method used on my kid-friendly “Glitter-ween” garland.)

395 (2)Leigh

Check out the rest of my Candyland craft series: Gingerbread People Banner, Treat Gift Boxes, & Printables and Game Board Treat Tower & Easy Buffet Display as well as the final party post on Candyland Themed Party Décor Ideas.

Faithfully Yours,

Leigh

DIY Candyland Party Themed Craft Tutorial: Gingerbread People Banner, Treat Gift Boxes, & Printables

295Leigh

Craft your way to classic Candyland cuteness befitting birthdays, baby showers, and Christmas décor.  This tutorial for gingerbread people banners and treat gift boxes are part one of a DIY party decorating series with easy projects and free printables. Using some or all of the ideas, you’ll be sure to delight the inner-child in all of your guests. Sweet!

179Leigh

Every Candyland village needs to be populated with gingerbread people, and it can be accomplished by more than just the menu. Gift your guests with take-home treat boxes that also serve to decorate your buffet.

260Leigh

Begin with readymade gingerbread people shaped paper maché boxes. These are widely available in stores beginning in the fall, and may be purchased online the remainder of the year. (Find discounts for online craft merchants in the side bar from Le fidèLe Design’s affiliates.) I found mine on sale at half off, making them 50 cents each. Use an acrylic paint color in a shimmery brown so that a top coat is unnecessary. (I used DecoArt’s elegant finish espresso metallic paint, because I already owned it, and it coordinated with my banner.)

277Leigh

Separate the tops from the bases, and paint the little guys. I set them rim side down onto a plastic bag, so that I could just peel them off when they dried. (On other surfaces, the paint sometimes acts as glue.)

318Leigh

Allow them to dry overnight, then use hot glue to adhere tiny pom-poms. They make the cutest dimensional eyes, nose, and buttons! I chose colors that would coordinate with my other décor elements, and tried to intentionally randomize the combinations on each “gingie”.

356Leigh

Fill your goodie boxes with candy, tiny toys, or even candy flavored lip gloss and intersperse them in your treat town.182Leigh

Another idea is to fill them with numbered papers that correspond to larger gifts or game elements.

353Leigh

Make a banner of gingerbread people adjoined in jubilant Candyland solidarity, using one of the two following methods.

2Leigh

Foam gingerbread people shapes may be located at just about every craft store in the fall and winter, and may be purchased online the rest of the year. You can choose from many sizes in matte and glitter. I wanted to use the glitter guys to match my houses.

3Leigh

Glue on tiny pom-poms that coordinate with your décor. Use hot glue in the same eyes, nose, and button pattern with which you made the treat boxes.

6Leigh

Punch a hole in each hand of the “gingies” in order to string it into a banner.

9Leigh

Make a loop of thin ribbon through holes in two “gingies”, and tie a knot to connect them. I alternated between three different colors from the same spool of clearance ribbon.

193LeighWM


The second method is to right click on my printable image above (free for noncommercial use), and select print. Then print them in color and photo settings on sturdy cardstock (so that they don’t curl when strung). Cut them out, and punch holes into the white circles in the arms. Choose to leave them as is, or add more glitter to the images. Then tie on ribbons to join them (as in the previous method). You can also glue pom-poms over the images in the prints to add dimension to your project.

193singleWMLeigh


Use the gingerbread person image without white holes for other décor or signage. Simply adjust your printing sizes to make smaller “gingies”. Do this by printing at a smaller percentage (i.e. at 50%) or by printing them as photos (i.e. wallet size). Or… you can get Kinko’s to do it for you! These little guys also make cute kid’s craft puppets when taped to a popsicle stick, so you can utilize them as a party activity for the little ones.

361Leigh

Check out the rest of my Candyland craft series: Hard Candy Lanterns, Candy Ornaments, & Conversation Heart Garlands and Game Board Treat Tower & Easy Buffet Display as well as the final party post on Candyland Themed Party Décor Ideas.

341Leigh

Faithfully Yours,

Leigh

Spicy Guacamole Shooters / Avocado Appetizers Recipe (Allergy-Friendly & Nightshade Free = No Red Pepper or Tomatoes)

318 (2)Leigh

This allergy-friendly guacamole recipe has no nightshades like red pepper or tomatoes, but it still has a spicy kick which makes is the perfect party appetizer that everyone can enjoy. It contains my secret Tex-Mex trick for adding creaminess, which also serves to keep the avocado from browning during the festivities. Serve it rustically in chunky form or blend it into creamy perfection. I can be served with any variety of veggies, chips, or even as a sauce for a meal. Think beyond taco pairings, and embrace it as dressing for your veggies. The heart-healthy avocados make this a guilt-free food, even though it tastes like a special treat, so enjoy!

170Leigh


Ingredients:

  • 3 large avocados (add more if using small ones)
  • 3 tablespoons lemon juice (or lime juice)
  • 2 heaping tablespoons unsweetened coconut yogurt (or use plain yogurt, or mayonnaise, or veganaise)
  • 1 diced leek (or use onion or spring onions)
  • 2 teaspoons dried cilantro (add more if using fresh)
  • 1 teaspoon ground ginger
  • 2 teaspoons ground black peppercorns
  • 1½ teaspoons sea salt (or no salt seasoning)
  • Dipping Foods: veggies for crudité or chips (pictured are pomegranate potato chips)

Instructions:

144Leigh

First, gather all your ingredients. Using bottled citrus juice is perfectly acceptable, just make sure that it is pure juice and not the fake variety… or else your guacamole will brown. I’ve used Haas avocados for this recipe. Ensure that they’re ripe by gently squeezing the outside. If they give in a bit, then they’re ready to eat. If not, then store them on the counter until they are.

078Leigh

Wash the outside of the leeks, cut off the excess green tops, and then slice them in half. Wash the insides of the two halves, and then dice them. (I really like the flavor leeks add to the mixture, and they won’t make you cry!)

148Leigh

Mix all of the herbs into the lemon juice to allow them time to soften while preparing the avocados. Adding yogurt or mayo is the secret Tex-Mex trick to making smooth and creamy guacamole. Both this and the lemon juice will keep the guacamole a lovely shade of green during your party.

145Leigh

Wash the outsides of the avocados before cutting into them to avoid transferring bacteria. Whack the avocado seed with a knife, then twist it a half turn to remove it. Slice a grid pattern into the green flesh. Use a spoon to scoop out it out, or just squeeze the rind to squish it into the bowl.

150Leigh

Mash and mix everything together. I use the back of a serving spoon to smash the avocado against the side of the bowl. You can serve it in a bowl rustically like this…

154Leigh

…or you can use a blender to smooth the guacamole into a perfect concoction. (Find a powerful one at Le fidèLe Design’s affiliate Blendtec at the link in the side bar.) Made in this way, there are no chunks of leeks or clumps of herbs, but all of the flavors are equally distributed. (I grew up making traditional guacamole with a molcajete, but I used an immersion blender here… which I admit is much faster and easier.)

157Leigh

Spoon the spicy guac into shot glasses or individual serving cups.

196Leigh

Add any variety of veggies or chips, from matchstick cut carrots (for Easter) to Fritos (for Cinco de Mayo).

214Leigh

On this day, I used pink pomegranate potato chips from Simply 7 to coordinate with my Candyland party theme. They are so yummy by themselves, but are really amazing when combined with the spiciness of the guacamole.

188Leigh

The little avocado shooters fit perfectly into the treat towers I crafted to match my theme. (I’ll be posting the tutorial on this very soon.)

183Leigh

You can also serve my Heartbeats Veggie Chips made from beet root with the guacamole, or try the Lettuce Turnip the Beet Dip I made to accompany it. It is a pink savory herbed avocado dip that I made for Valentine’s.

42bLeigh

Faithfully Yours,

Leigh


Quick & Easy Candyland Confection Ideas: Pink Almond Milk Juice “Recipe”, Cotton Candy “Cream” Sodas, & Gingerbread Peep Pops

219Leigh

These Candyland party confections are so simple that I thought I’d just combine them into one article… if only to pass along a few easy ideas that can be prepped at the last minute. The versatile juice milk is a great way to colorize and disguise calcium while adding a flavorful kick, which is great for anyone with a picky eater. While sugary cotton candy isn’t known for its health benefits, it is a yummy once in while party-treat that looks adorable when served as ice cream sodas. And Peep pops are the fastest pop you can prop into a candy buffet! Just look for the sugar-free varieties if diabetic or avoiding corn syrup. They’re still just as yummy and cute!

341Leigh


Pink Almond Milk Juice Ingredients:

  • ½ gallon Silk almond milk (or any variety of milk like cashew, hemp, rice, oat, soy, or even cow’s)
  • 17 ounce bottle lingonberry juice concentrate (or any pink juice like pomegranate, black cherry, raspberry, cranberry, etc… or try blueberry, grape, or even orange for a liquid creamscicle!)
  • Optional: agave to taste… if needed to sweeten the more acidic juices, because it mixes well into cold liquids & is low glycemic

136Leigh135Leigh133Leigh127Leigh

Pink Almond Milk Juice Instructions:

Gather any variety of pink juices and your choice of milk to test which combination you like best in a small glass. I quickly realized that I preferred the lingonberry and pomegranate juices with the original 60 calorie per cup Silk almond milk. Though I typically love the black cherry concentrate, I did not care for it when combined with milk. I also didn’t care for the combo with the 30 calorie Silk, but it’s a fantastic option if you’re looking to cut the numbers. Use your own taste buds to discern your favorite, and let me know what you came up with!

137Leigh

Mix a crowd sized amount in a jug, and test the flavor before pouring into individual servings. The easiest one to one ratio was the Silk’s half gallon and Ikea’s 17 ounce lingonberry concentrate, but I realize this taste profile isn’t for everyone. The most liked version does seem to be the orange creamscicle.

179Leigh

For the Candyland theme, I served the juiced milk in these super cute jugs with washable reusable straws. Another adorable option would be to use trendy jars as drinking vessels. (Find some at Le fidèLe Design’s affiliate Ball Fresh Preserving Store at the link in the side bar.)


Cotton Candy “Cream” Sodas Ingredients:

  • 1 package of readymade cotton candy (with sugar & not corn syrup that color coordinates with your theme)
  • small vessels that resemble soda glasses or ice cream dishes
  • 1 package of theme coordinating paper straws (or thick half straws as pictured)

366Leigh

Cotton Candy “Cream” Sodas Instructions:

This is the cutest and easiest way to serve cotton candy to a crowd… which is the perfect last minute fill-in for a Candyland theme. Find the yummy stuff packaged anywhere from convenience stores to grocery marts. (You can even find some at Le fidèLe Design’s affiliate Cost Plus World Market at the link in the side bar, they even have solid colors like a green in watermelon flavor.)

159CottonCandySodasLeigh

Starting with clean and well dried hands, pinch sections of cotton candy large enough to fit into the base of each dish. Keep layering until you reach the top, and stick a straw (or one cut in half) into the side of it. Take a section of cotton candy and gently ball it into a rounded mound to set on top. Gently tap it into place. (Your hands will be coated in spun sugar… but I’m thinking that’s where the phrase “finger lickin’ good” came from!)

183Leigh

These are especially adorable when perched atop a treat tower, like this one I crafted for the Candyland theme.


Gingerbread Peep Pops Ingredients:

  • 1 package of gingerbread peeps (or any theme coordinating variety, note that the sugar-free varieties don’t have corn syrup)
  • 1 package of color coordinated paper straws

338Leigh

Gingerbread Peep Pops Instructions:

It literally takes 2 seconds to make a Peep Pop, so it’s a last minute treat that looks absolutely precious. You can find so many varieties of the darling confections just about anywhere (and online year round), so it’s easy to add them to any candy buffet.

77Leigh

Simply poke a hole in each peep base with a skewer or toothpick, and wiggle it side to side to widen that hole. Slowly push in a straw until it feels securely held, yet doesn’t disfigure the peep.

356Leigh

Prop it into a cake pop holder or vessel filled with non-sticky candy like gumballs or jellybeans.

209Leigh

See more Peep Pops in action from another themes by clicking the following link: Chalkboard & Glitter Hearts Themed Valentine’s Day Party Buffet Décor Ideas (+ DIY & Printable Links)

214Leigh

For a tasty yet healthy snack to add to your Candyland theme, try my Spicy Guacamole Shooters / Avocado Appetizers Recipe (Allergy-Friendly & Nightshade Free = No Red Pepper or Tomatoes).

Faithfully Yours,

Leigh

Sautéed Kale, Spinach, Chard & Pine Nuts with Herb Roasted Chicken Option (Allergy-Friendly Recipe)

268Leigh

This sautéed greens with chicken recipe makes an easy but elegant weeknight meal, yet is worthy to set before a table full of guests. The kale, spinach, chard and protein packed pine nuts make a lovely side dish or even a delicious meal by themselves. Succulent herb roasted chicken may left off vegan plates and extra pine nuts added instead. This makes it easier for families of mixed preferences to adapt peaceably… and peace is the perfect ingredient for a family gathering!


Ingredients:

  • ~1 pound of greens (I used baby kale, baby spinach, & baby chard)
  • ½ cup pine nuts (or any nut you prefer)
  • ¼ cup olive oil (or another healthy flavorful oil, adjust amount as desired)
  • ½ orange (or use another citrus juice)
  • 1 teaspoon dried marjoram (add more if using fresh)
  • 1 teaspoon dried thyme (add more if using fresh)
  • sea salt & ground peppercorns (to taste, or use a salt substitute)
  • Optional: chicken breasts (1 for each person, + extra herbs & olive oil)

Instructions:

253Leigh

If opting for the roasted chicken, prepare that first so it may be cooking while you fix the greens. Drizzle olive oil over the chicken breasts and sprinkle marjoram, thyme, salt and pepper over them. Roast them in a 375ᵒ oven for about 45 minutes. (Adjust the cooking time to the size of your portions and your oven’s temperament… the pieces I cooked were huge!)

249Leigh

Wash your greens well in a colander. (I chose baby varieties not merely for their tenderness, but also to save time in preparation. They don’t need to be chopped or have hard core stems removed.)

255Leigh

Heat the pine nuts and olive oil in a pan on the stove. (I actually used my big wok because the sloped sides prevent the greens from overcooking.) When they are bit browned, add the greens.

260Leigh

Also add in the herbs and seasoning, and toss to cook down. (The volume of the greens will shrink as it’s cooked, so you can add smaller portions a little at a time until all of it fits in.)

261Leigh

Off of the heat, squeeze in the citrus juice and mix well. (Heat negates the vitamin C benefit.)

269Leigh

Serve them whole, or slice the roasted chicken breasts for presentation.

274Leigh

Add more herbs, pine nuts, or even a new element as garnish. (I used leeks in the pictured dish… because I adore them.)

280Leigh

Bon appétit y’all!

Faithfully Yours,

Leigh

P.S. If you like kale, check out my Irish Colcannon / Herbed Kale Mashed Potatoes St. Patrick’s Day Recipe (Allergy-Friendly, Gluten-Free, Dairy-Free, Vegan).

111Leigh

Quick & Easy Metal Napkin Rings, Money Tree, + Rainbow & Shamrock Crafts for St. Patrick’s Day Party Décor

058Leigh

Celebrate St. Patrick’s Day with rainbow filled party décor. Make pots of gold for a centerpiece to prove that money does grow on shamrock laden trees! These colorful crafts are quick and easy to achieve with inexpensive materials like metal ribbon for napkin rings and crepe paper for rainbow arches and votive holders. Find my free printable card & invite at the article for St. Patrick’s Day Party Tablescape Décor Ideas, along with how to complete the rest of the celebration.

133Leigh

Top o’ this morning’s question is how to fill a party with rainbows without breaking the bank. The answer is with crepe paper streamers in a rainbow print… 2 dollars will purchase 81 feet of decorating power! The trick is to use it in the same way you would utilize ribbon.

140Leigh

It only took a few inches of crepe streamer to adorn each of the slim handles of glittered baskets, taking them from Christmas to St. Pat’s in a flash. They only needed a few dots of glue to adhere each underside edge to the other, and it only takes a tug to remove the paper and reuse the baskets for the next theme. “Gold” coins atop gold gift bag stuffing complete the pots at the ends of the rainbow.

146Leigh

Some of you may have seen my last Mardi Gras Party article where I wrapped gold glitter votive holders with an amazing tri-color tinsel ribbon. I used those very same glittered holders and wrapped them with crepe rainbows for St. Pat’s. A tiny piece of transparent tape makes them reusable for another celebration, because nothing is attached that will pull the glitter off. A final touch is to add a piece of shamrock confetti using tape that’s been doubled over.

155Leigh

I purchased the confetti at half-off for 50 cents, and had more than enough to spread around, so I decided to decorate little Halloween cauldrons as pots of gold. I took a hole-punch to the shamrocks, and then I attached them with strips of two-toned green Christmas clearance ribbon. All they needed to complete them was a bit of green gift bag stuffing and some more gold coins… yes, those are the same ones that functioned as doubloon décor at Mardi Gras.

142Leigh

Some of these little pots dotted the table, and some sat perched in the shamrock leaved money tree.

152Leigh

Also gracing the glowing tree were rainbow arches made with the same crepe paper used earlier. I just cut a corresponding length of floral wire and taped it to the center of the underside. This provided a posable structure with which to bend the rainbow to my decorating will… which happened to be filling in some empty space between the branches.

156Leigh

The tree is the same gilded metal one I used for Mardi Gras, but was filled this time with different branches, lights, and shamrock ornaments. I used holographic branches that were 34 cents each, from last year’s St. Pat’s clearance sale. I filled in with a mylar leaf studded vine that I cut into sections. I found it along with the gold and green lights after Christmas for 90% off.

116Leigh

The holographic shamrock ornaments were dollar bin finds, but the glittered wooden varieties were made from a party store sign for a few dollars.

151Leigh

All I needed to do was cut them apart and add ribbon loops as hangers. For a future holiday, I can add rainbows or coins for a completely new look.

154Leigh

This metal tree has been painted different colors and adorned with a complete range of décor to suit every holiday.

121Leigh

For this one, I just wrapped the trunk in more rainbows and laid a green feather boa at its base. This too was found post St. Pat’s for less than 2 dollars.

067Leigh

If you plan your theme a year ahead, it’s easy to gather all the material you need for the cost a burger out. Then you can spend your cash on quality ingredients for a fabulous dinner menu!

208Leigh

The last, and most fabulous, craft is how to make your own metal napkin rings. These aren’t just for St. Pat’s but will work beautifully for any occasion. This is because you can find its base of decorative metal ribbon in a wide variety of styles and colors. For this party, I wanted to use the green glittered variety to encircle my rainbow colored napkins. Because I found the material on clearance, I made all 6 of them for only 50 cents.

149Leigh

First I needed to cut 6 inch metal strips. If you have any trouble cutting though yours, just cut a line into the metal with clippers, and then bend each side of it back and forth until it breaks free. This is much easier on the wrists than brute force. Then bend each strip into as much of a rounded circle as you can get it, and overlap the 2 edges a wee bit. Then glue those edges with E6000 in a well ventilated space.

095Leigh

Just let them cure a couple of days before sliding your pretty little napkins through them!

163Leigh

May all your crafting days be filled with the luck of the Irish!

135Leigh

Faithfully Yours,

Leigh

Get your Paw Patrol Party On With Birthday Express!

**This post contains affiliate links and I will be compensated if you make a purchase after clicking on my links

Paw Patrol birthday party supplies
No job is too big, no pup is too small!

The Party of the Month is Paw Patrol! And, of course, Birthday Express has all paws on deck to help you plan the pawww-urfect Paw Patrol-themed party. Here are some fun ideas that are sure to get your tail waggin’!

Invitations – Get your guests into the Paw Patrol party spirit with these Paw Patrol Invitations! The package includes 8 invitations (with envelopes) and features all of the Paw Patrol team.

Party Decor – With Birthday Express’ Paw Patrol Scene Setter and Swirl Decorations, your guests will be transported to Adventure Bay with Ryder, Chase, Marshall, Rubble, Rocky, and the rest of the gang! You could provide each guest their own Paw Patrol Paper Mask when they walk in the door, and there’s even Paw Patrol Ribbons and Medals that can be given away as prizes with your Paw Patrol Party Games.

Food & Drink – The possibilities are endless for food and drink at a Paw Patrol Party. In addition to Paw Patrol Party Games, you could get various-sized dog bowls and use them for chips, dip, candy, and other snacks. You could also make dog bone-shaped sandwiches or cookies! And the birthday boy or girl will love the Party Patrol Birthday Cake Candle Set.

As Marshall says … I’m fired up!!!!! about Birthday Express’ new Paw Patrol theme!
Get 20% Off entire purchase with no minimum through 3-23-15 with Coupon Code: oneday20BX


PAW Patrol Party in a Box – Deluxe – 8 Guests

PAW Patrol Party Favor Box

Dog Bone 18″ Pinata

Take-Out Favor Box & Paper Lantern Craft Printable + Bamboo Lantern + Paint to Antique a Lion Fú-Dog (DIY Chinese New Year Party Décor Crafts)

059Leigh

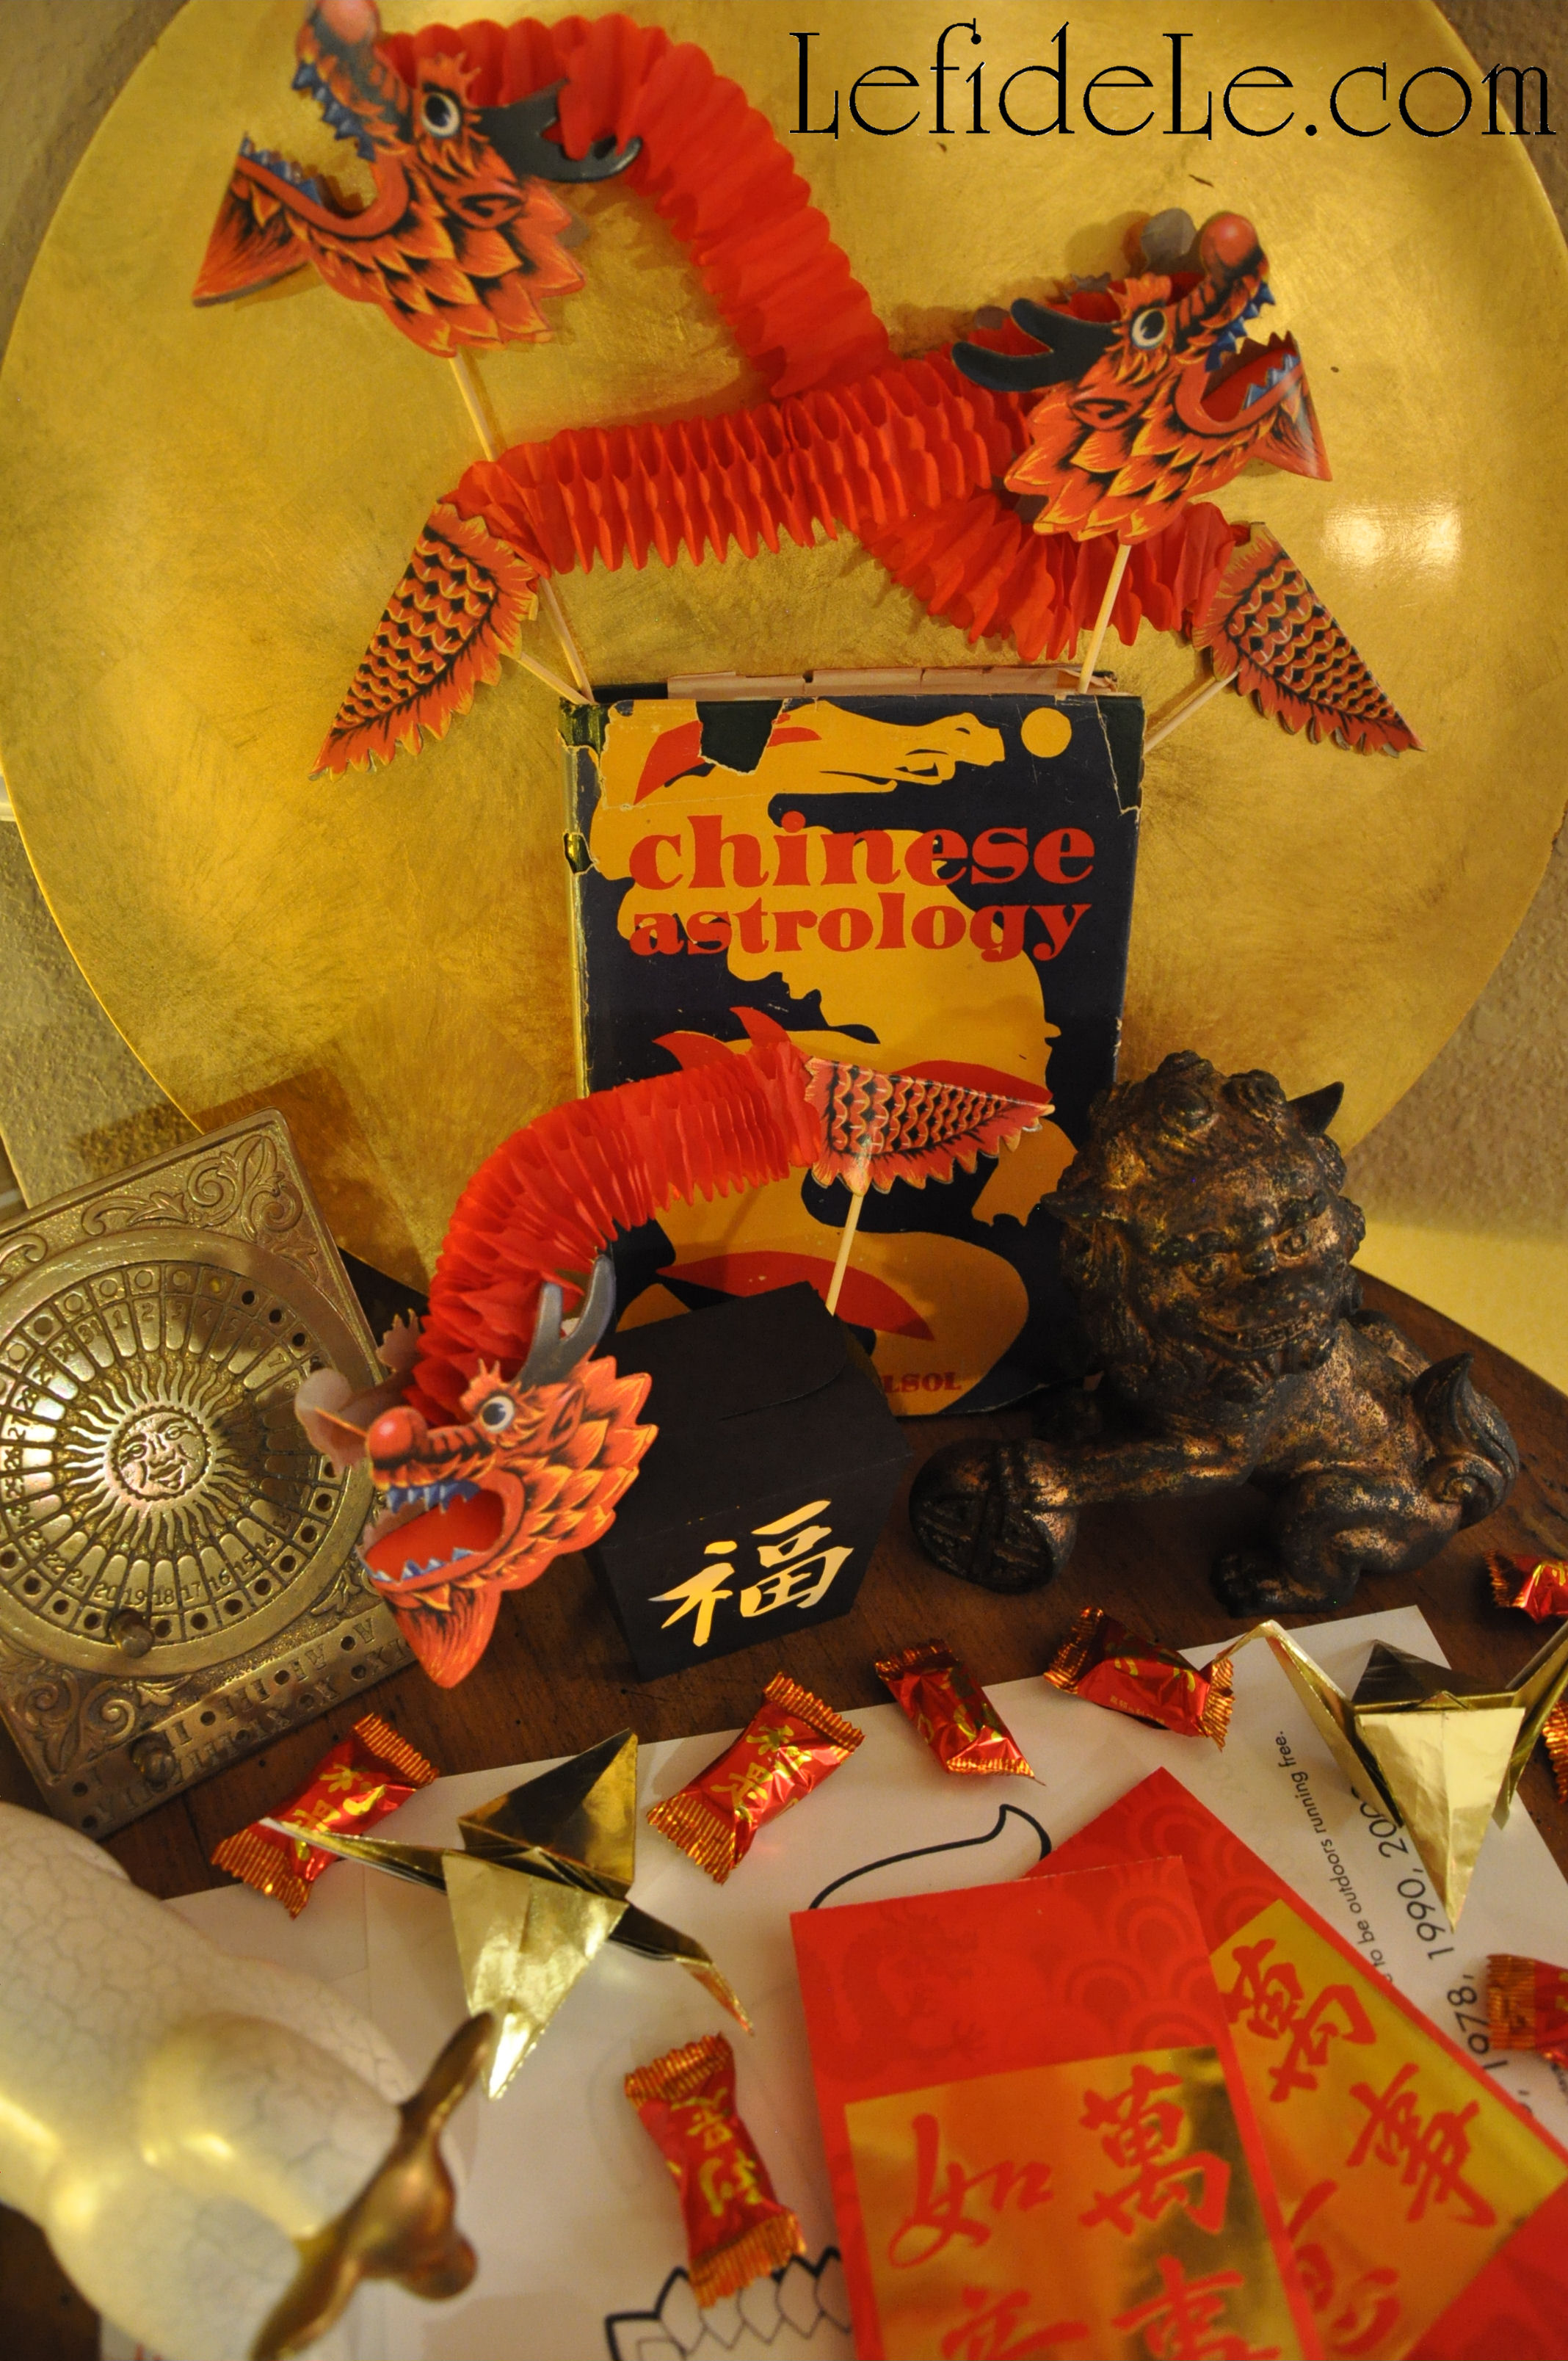
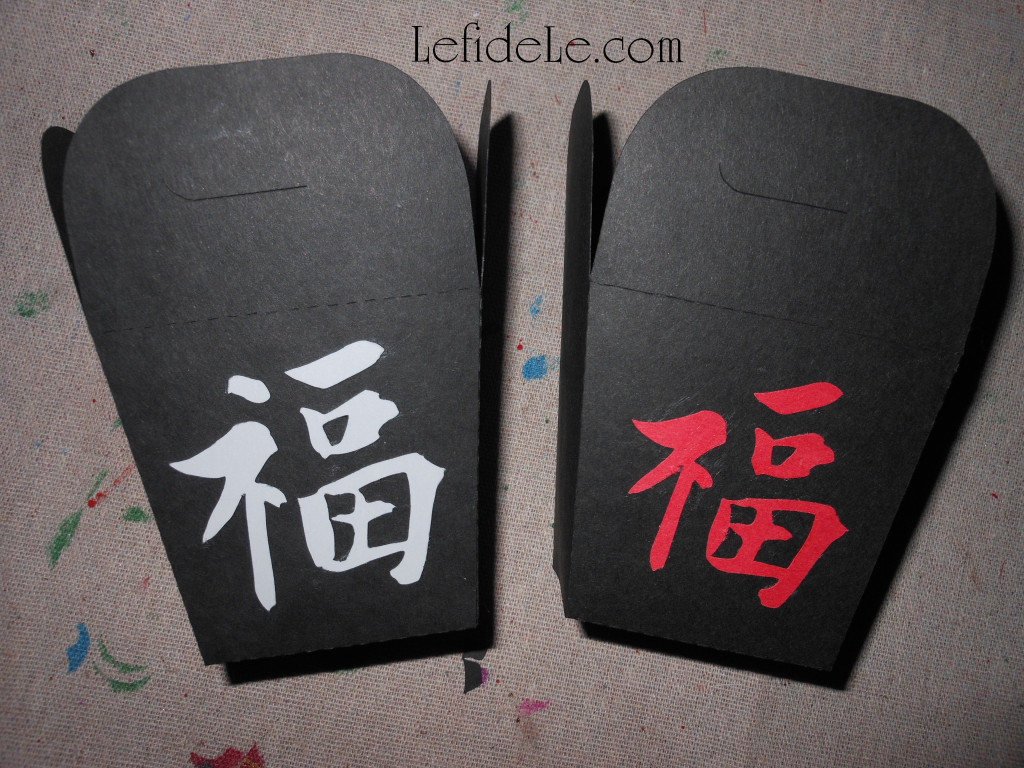
The “Fú” 福 character has graced the entrances of Chinese homes for many hundreds of New Year’s. It is said to have originated not just for its meaning of happiness and luck, but also because “upside down” and “to arrive” sound alike when spoken in Chinese, thus making an upside down Fú equate to “good luck arrives”. (For some, however, hanging the Fu upside down is bad luck, so I’ve decided to make the character right side up on my printable boxes!) Use them as favor containers, table crayon corrals, or cut out the character to make an LED lantern or luminaria. Use the cut-out character to easily embellish a bamboo lantern. I’ll demonstrate this along with how to paint a modern lion Fú-dog statuette to make it look like an antique.

HappinessBox-Leigh

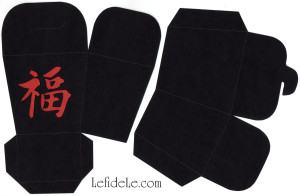
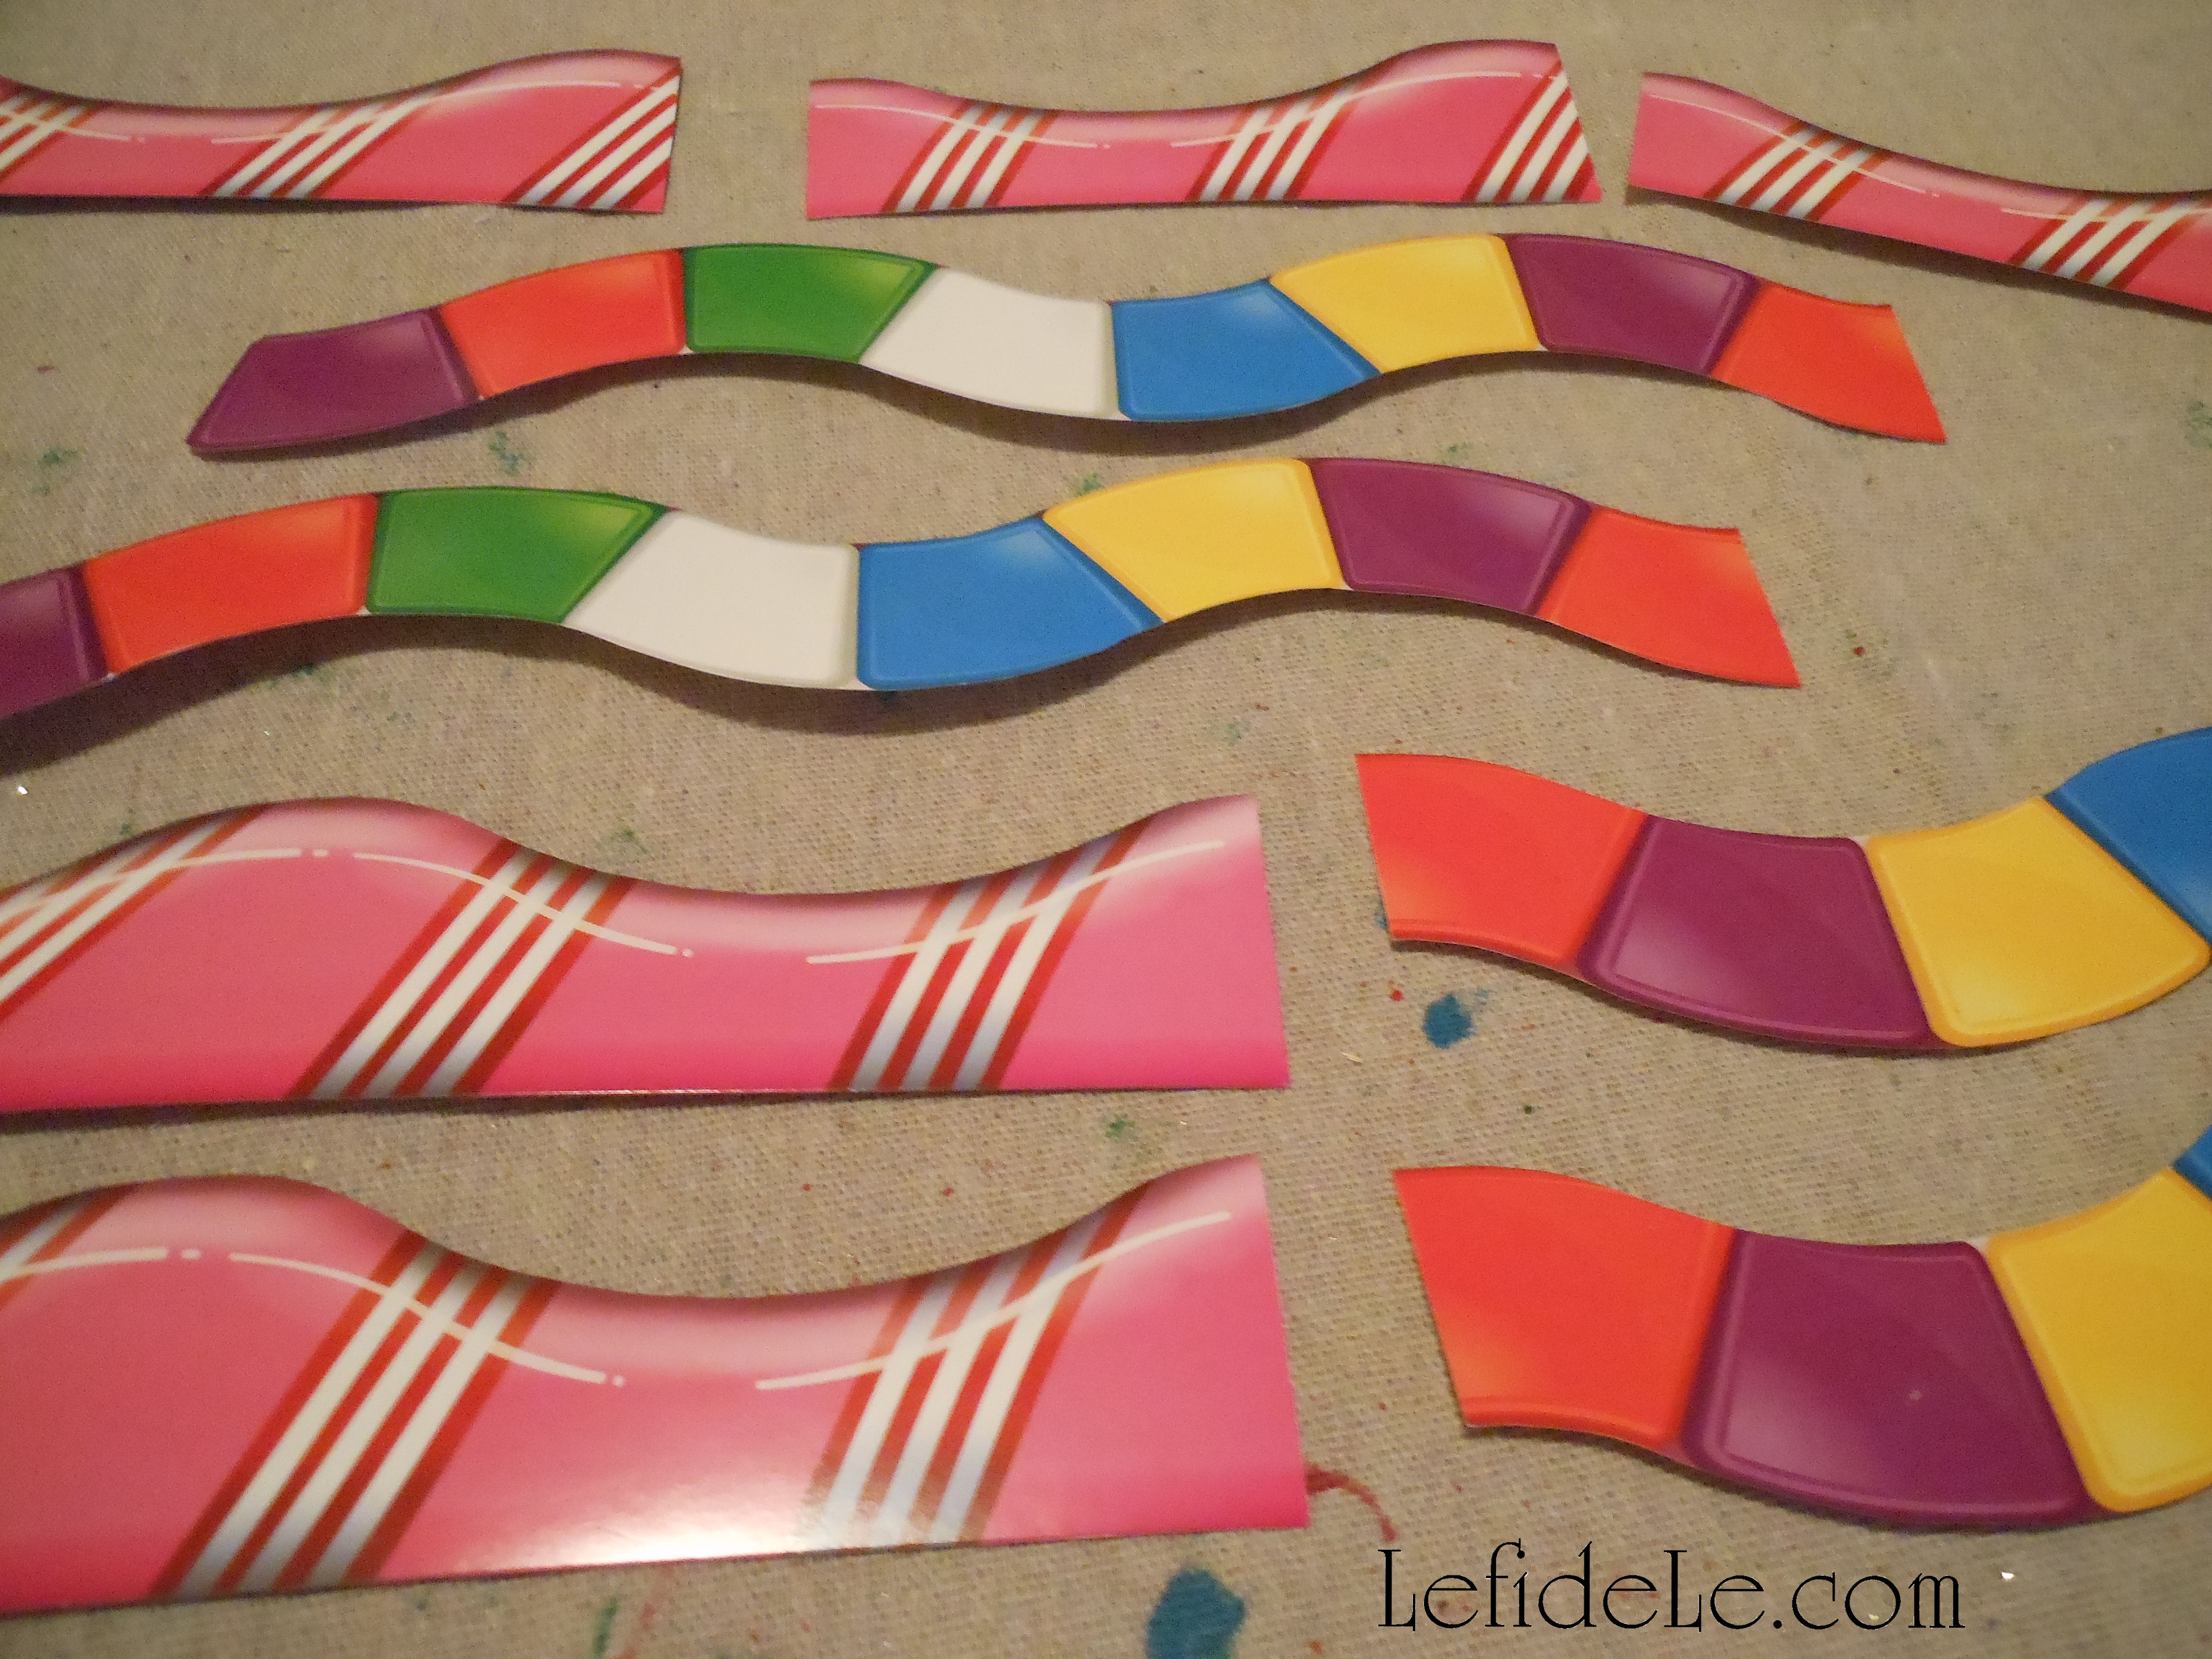
To make your own favor take out boxes or lanterns, simply right click on the small image and select print. Print them on a photo and color setting. One page makes one box, so just print as many copies as boxes you need.

267Leigh

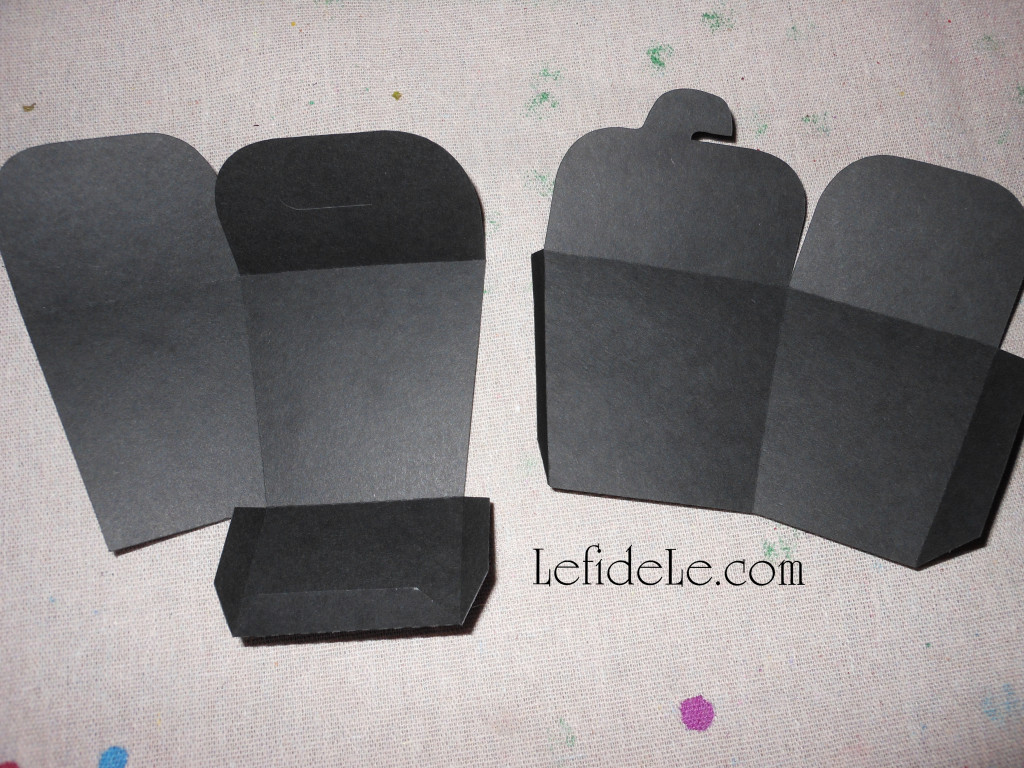
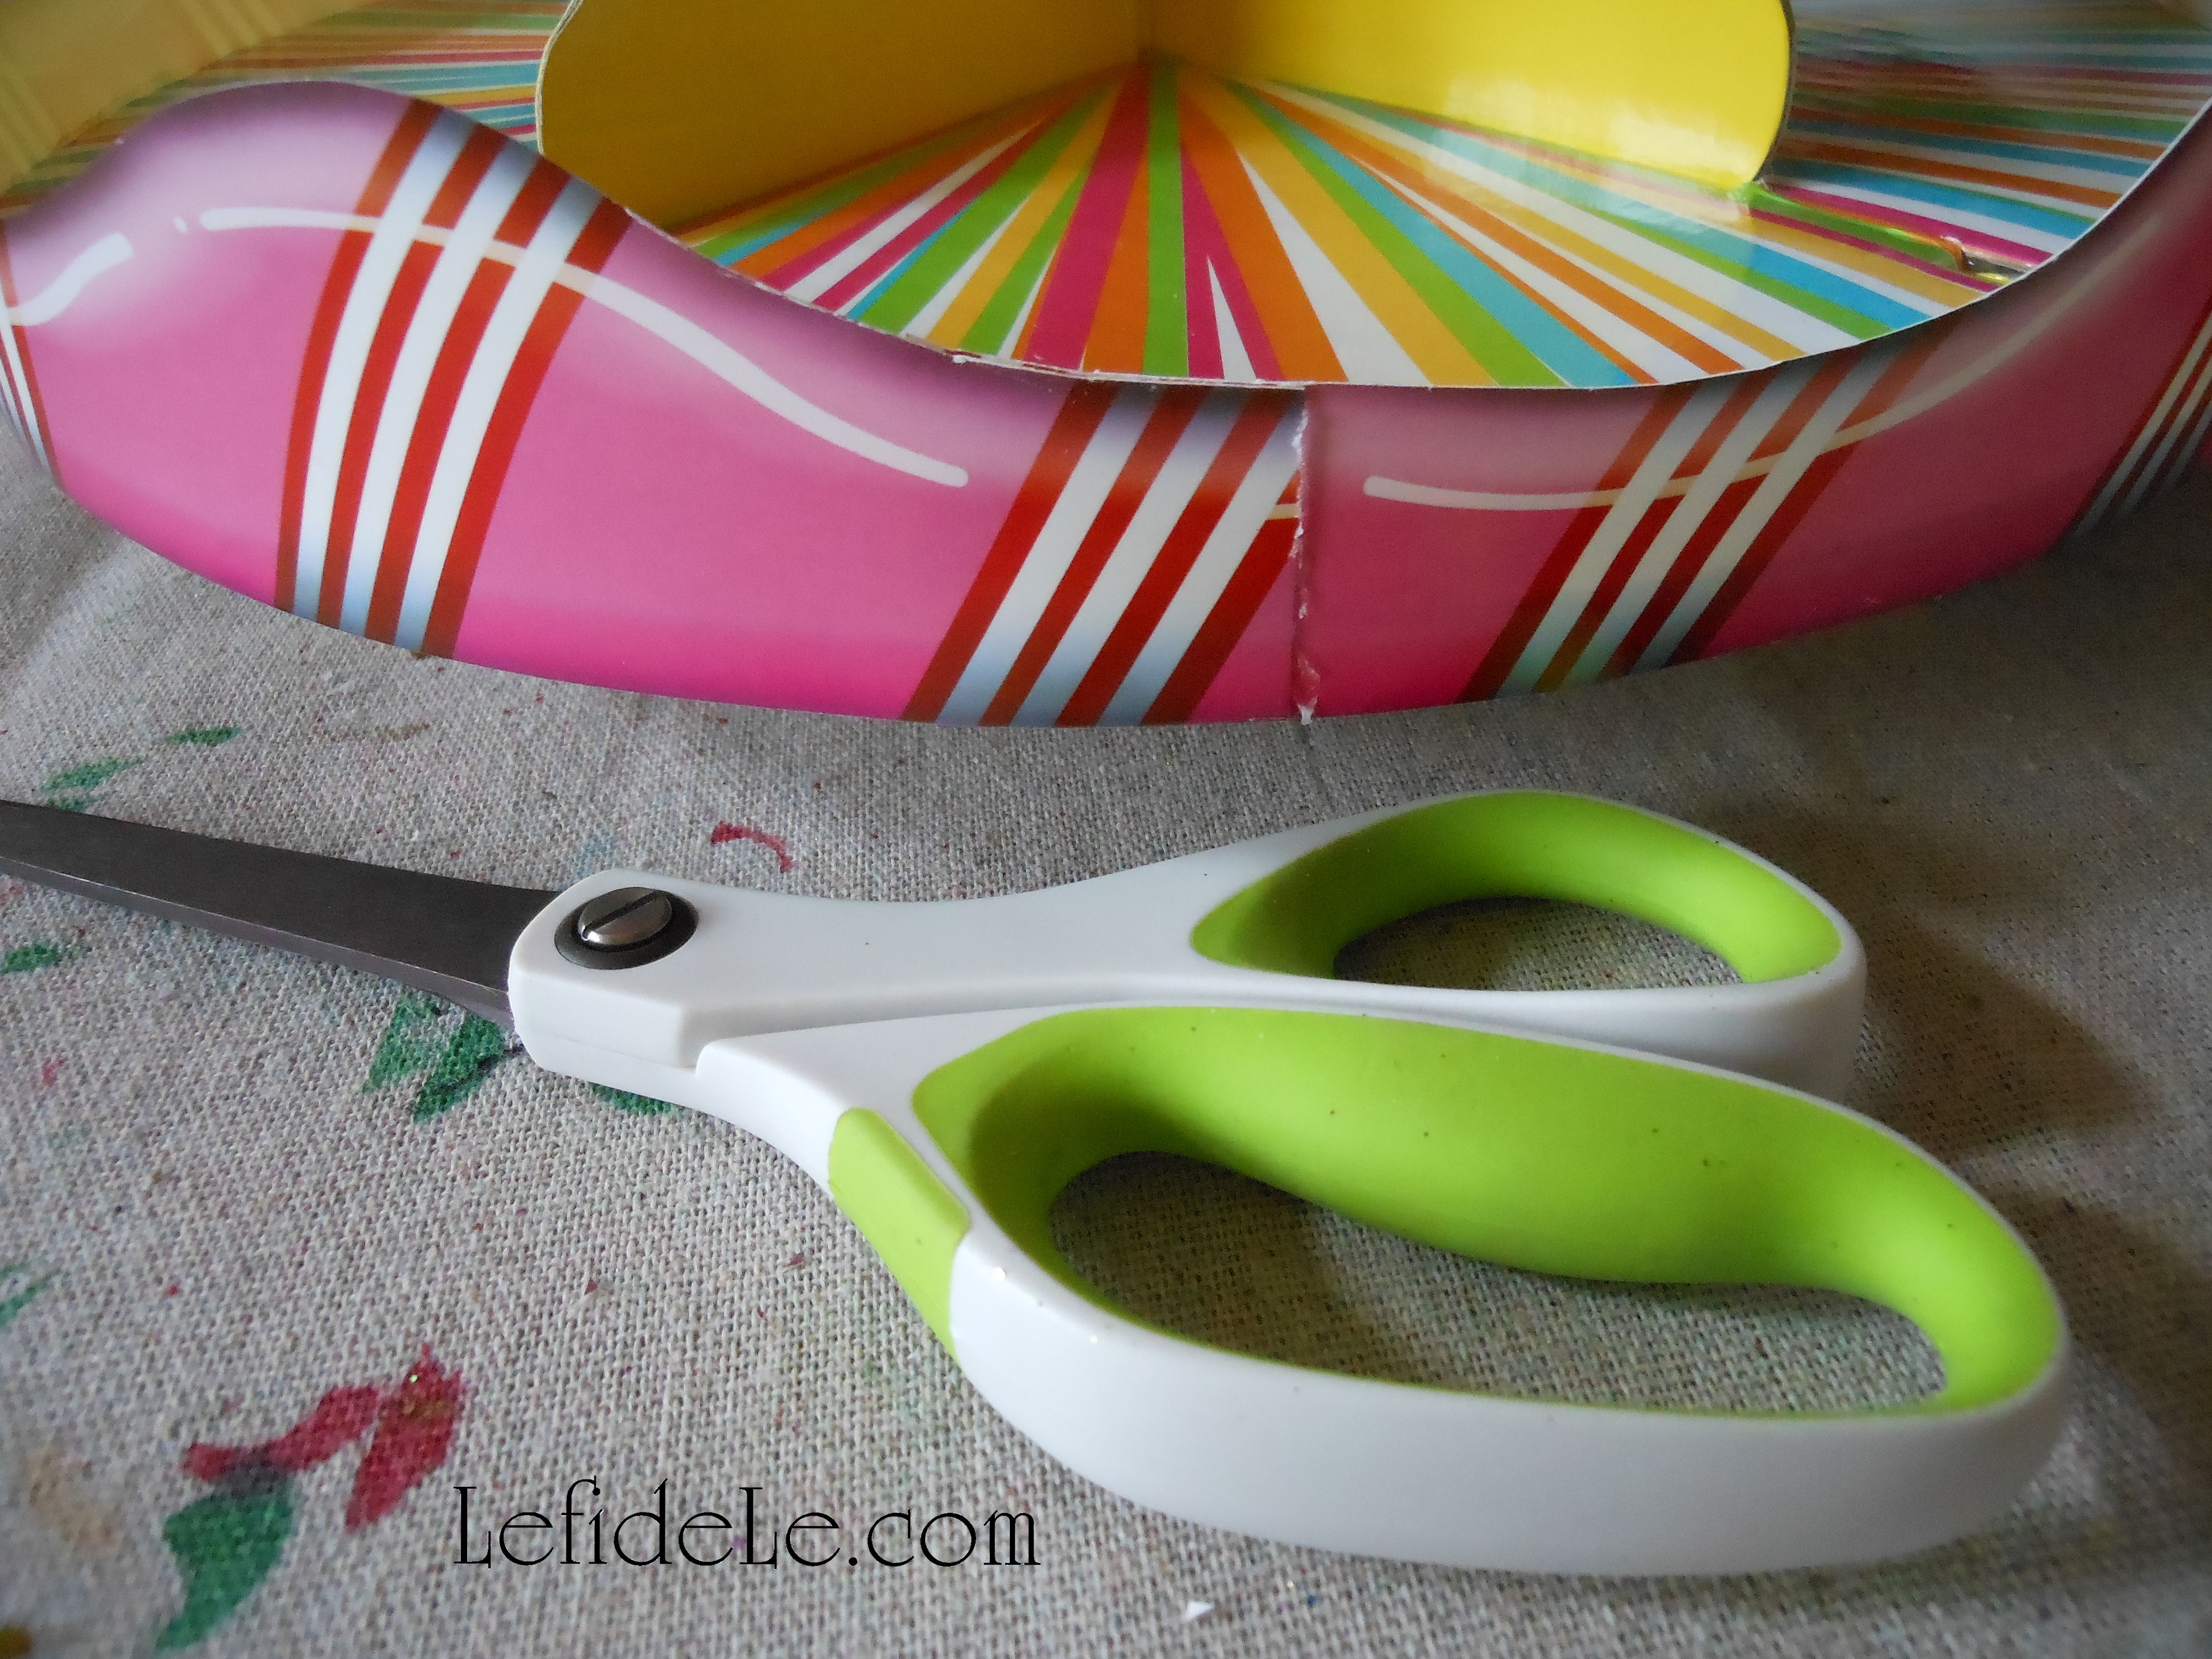
Next you need to cut out the black boxes… this is a great time to enlist help from the family!

269Leigh

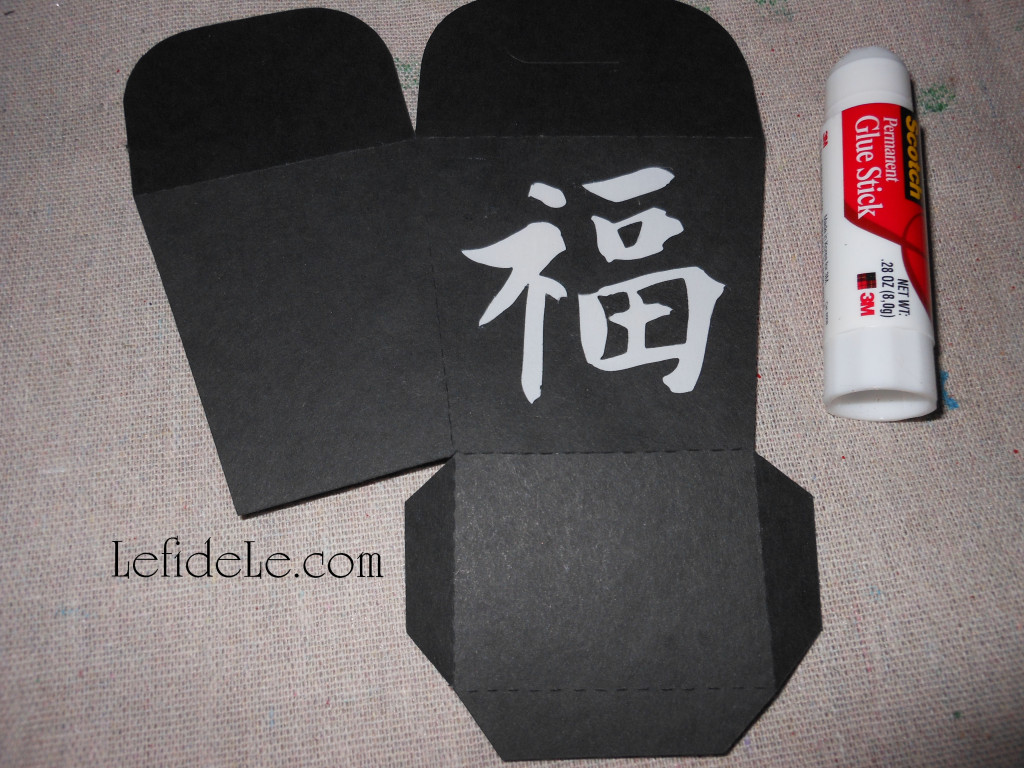
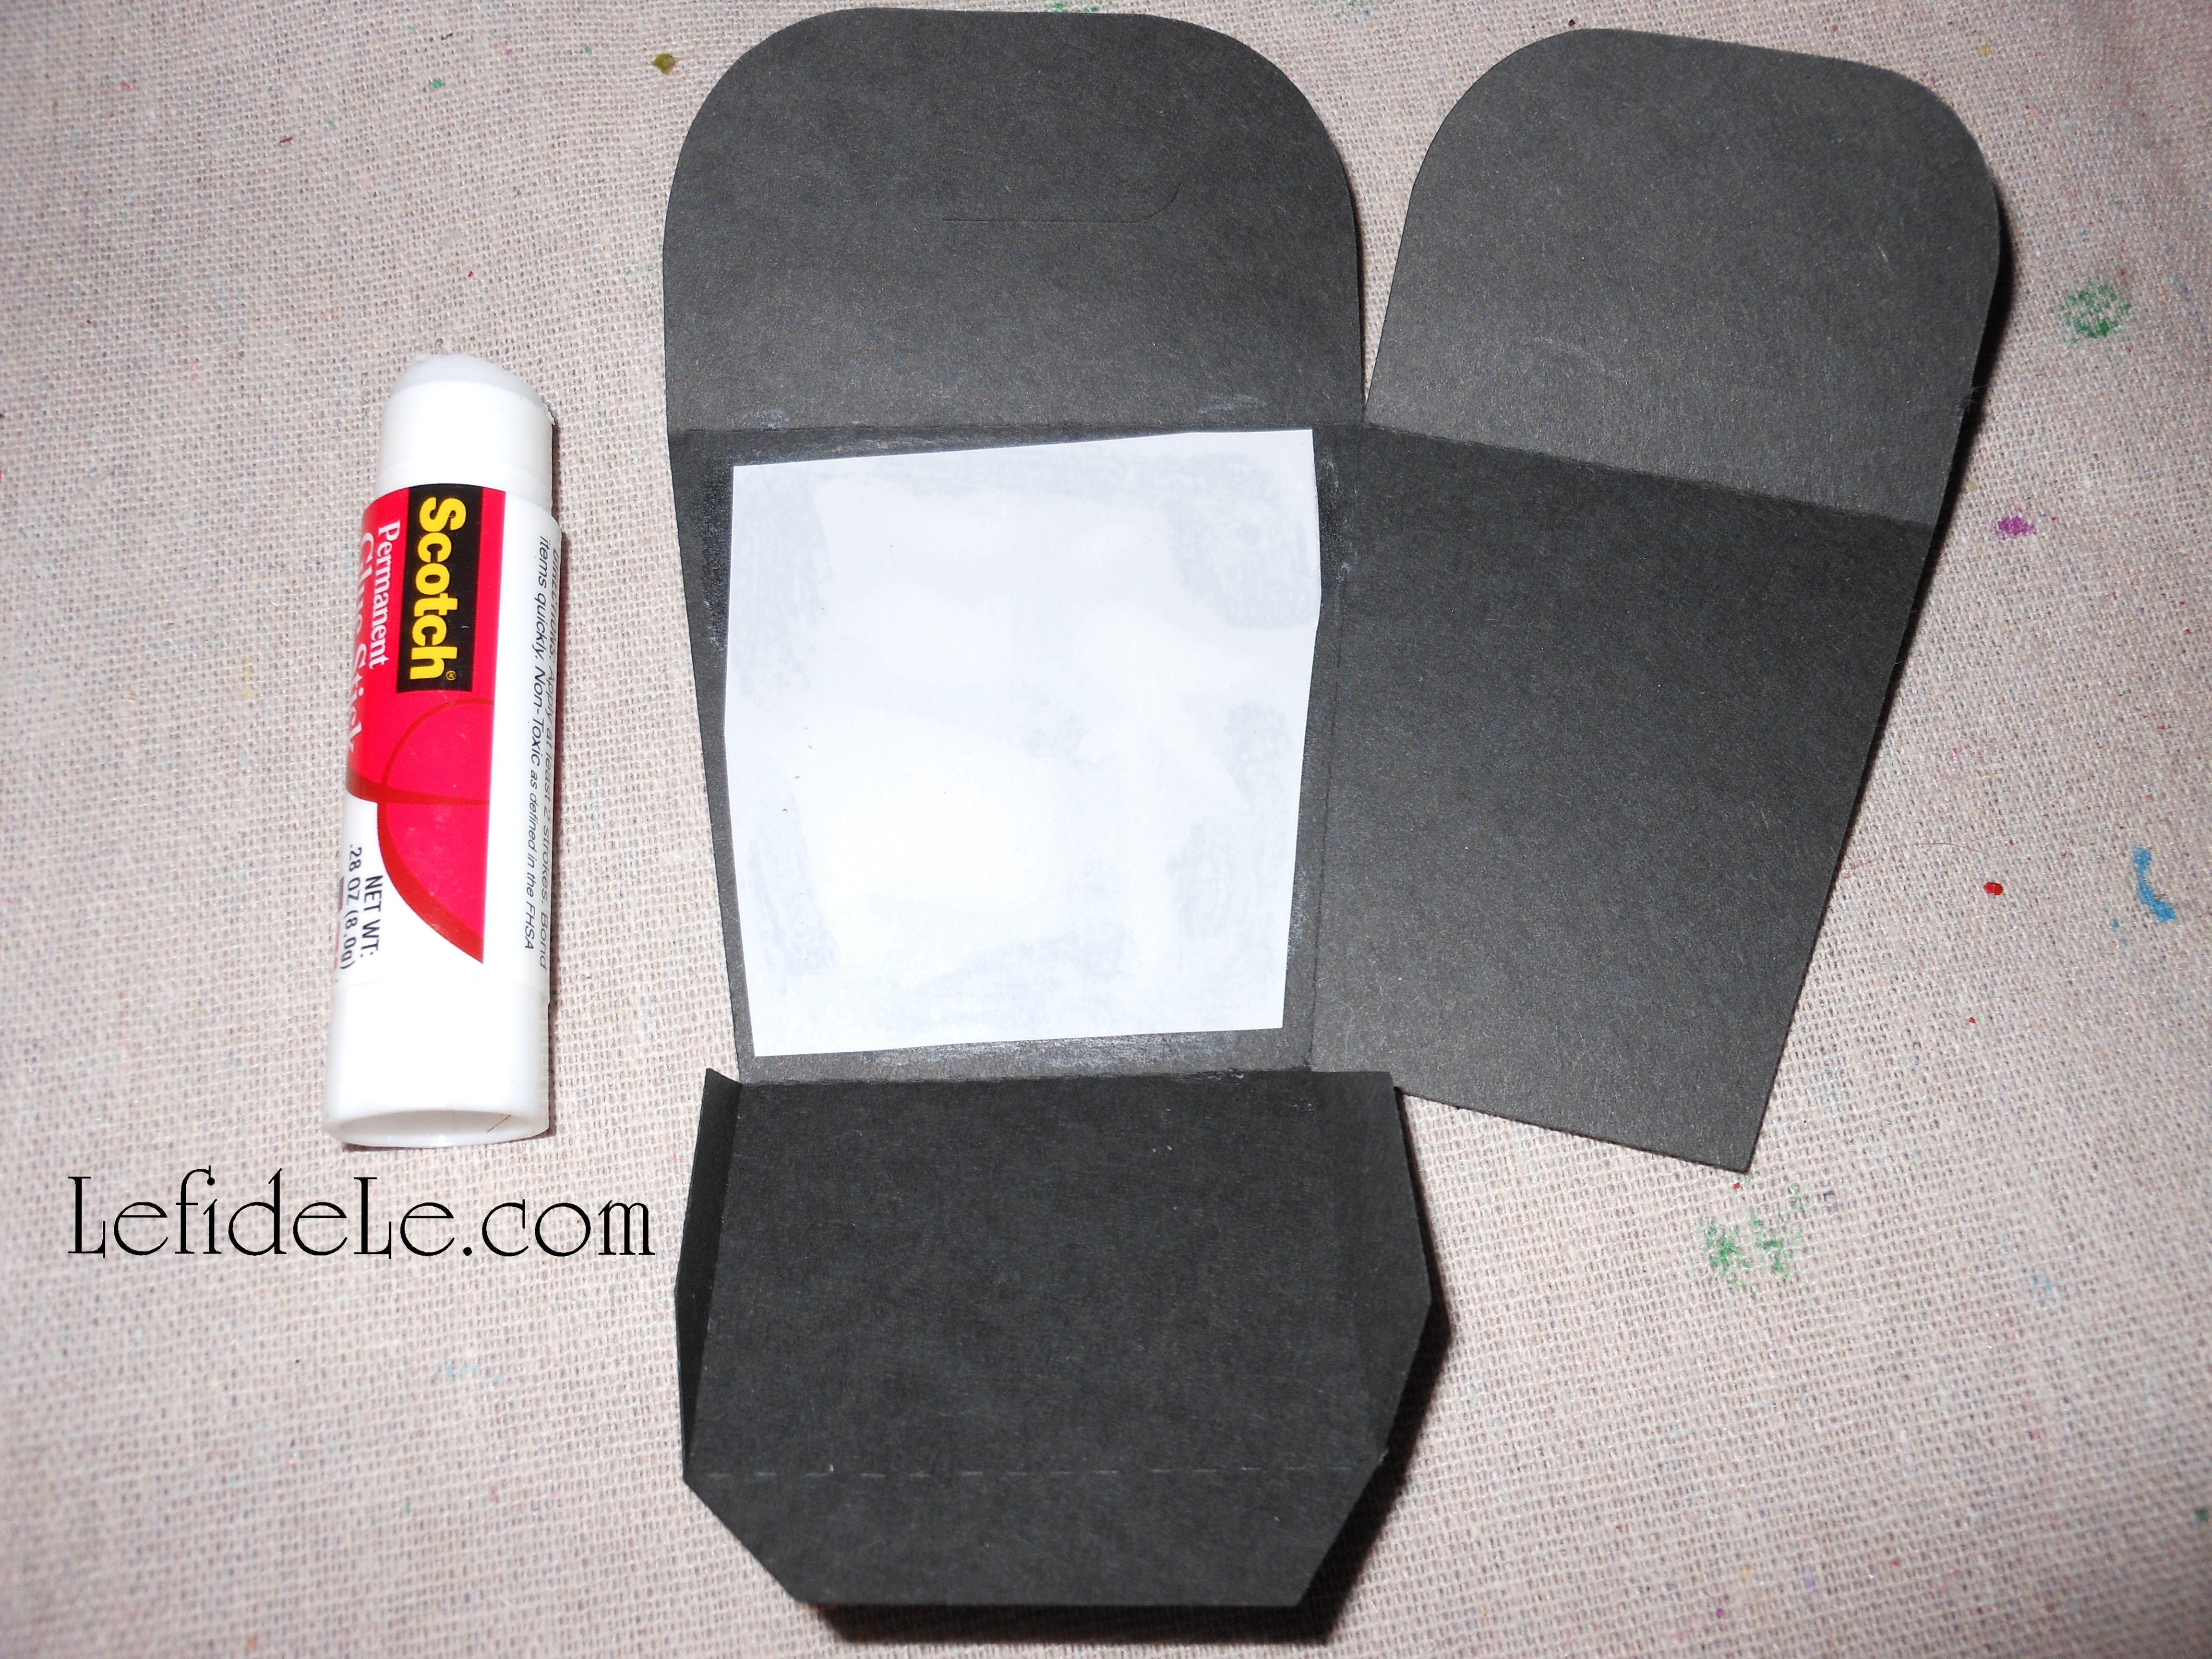
To make the paper lanterns, you will want to cut out the Chinese character before gluing the box together. Use an x-acto knife if you’re brave… I always seem to slice my thumb with these so I opt for rougher cuts using scissors. Simply poke a little hole with the pointy tip of a pen, compass point, or scissor tip then use it as a pilot hole to begin cutting each section of the character out. (If you’re short on time, just skip the cutting + vellum part and place an LED tea-light inside an open box. They still look adorable this way.)

268Leigh

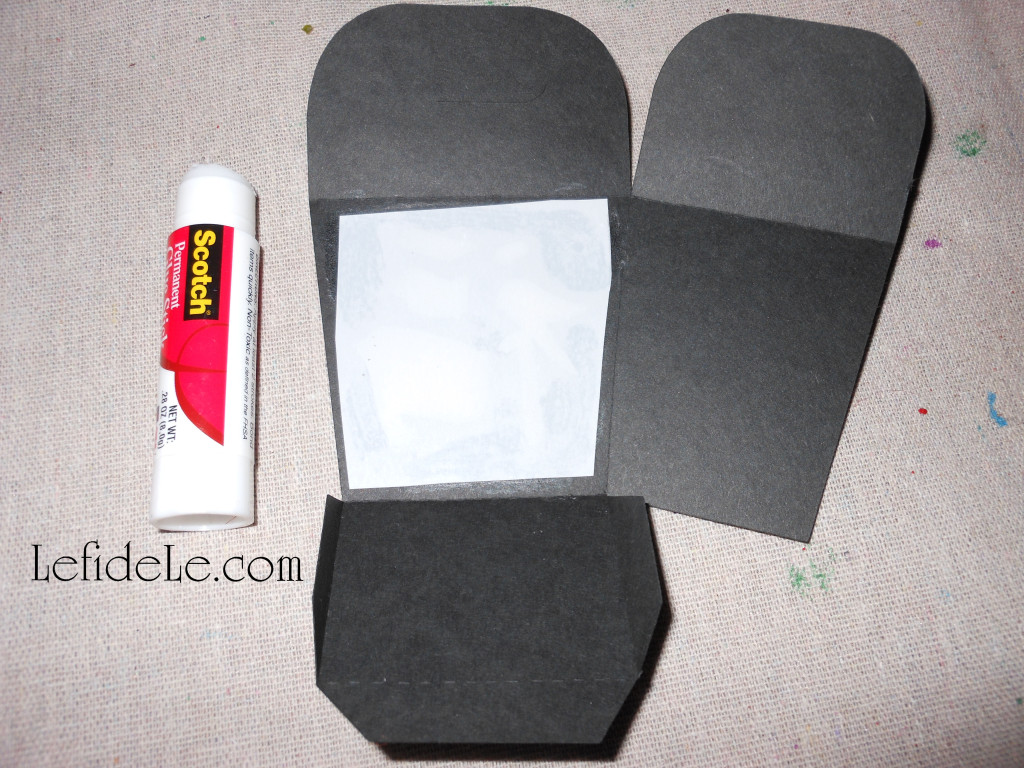
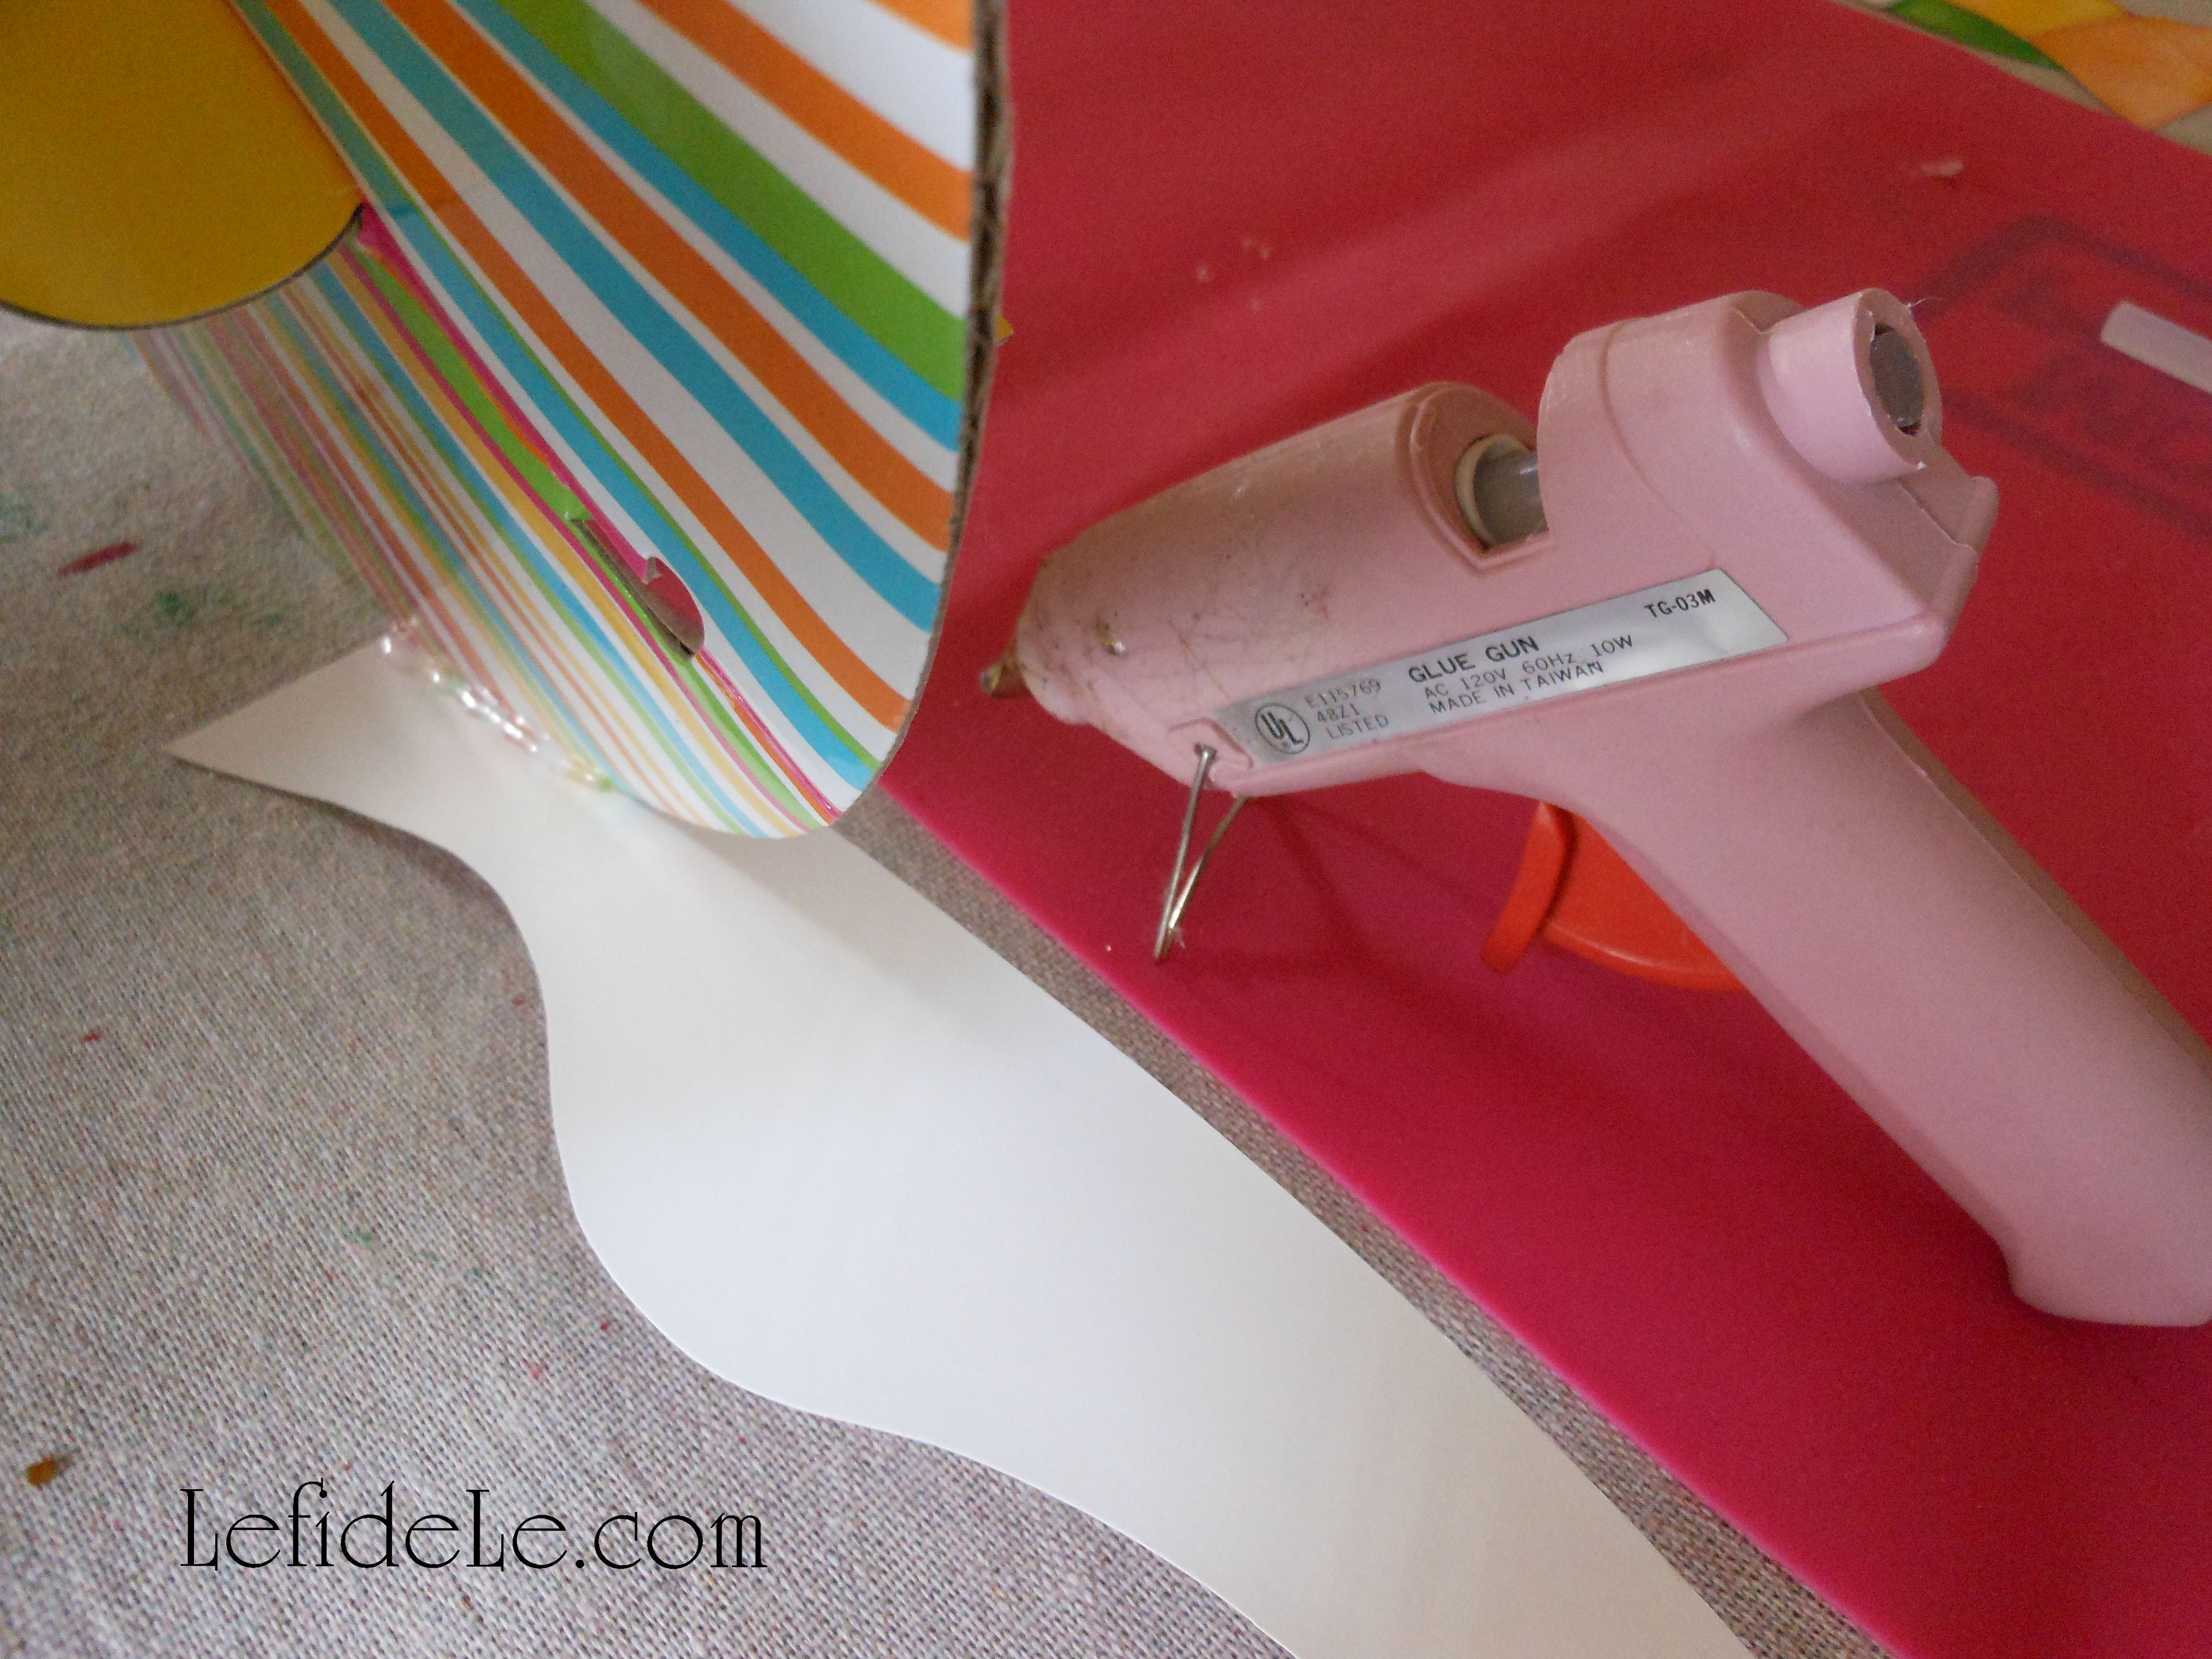
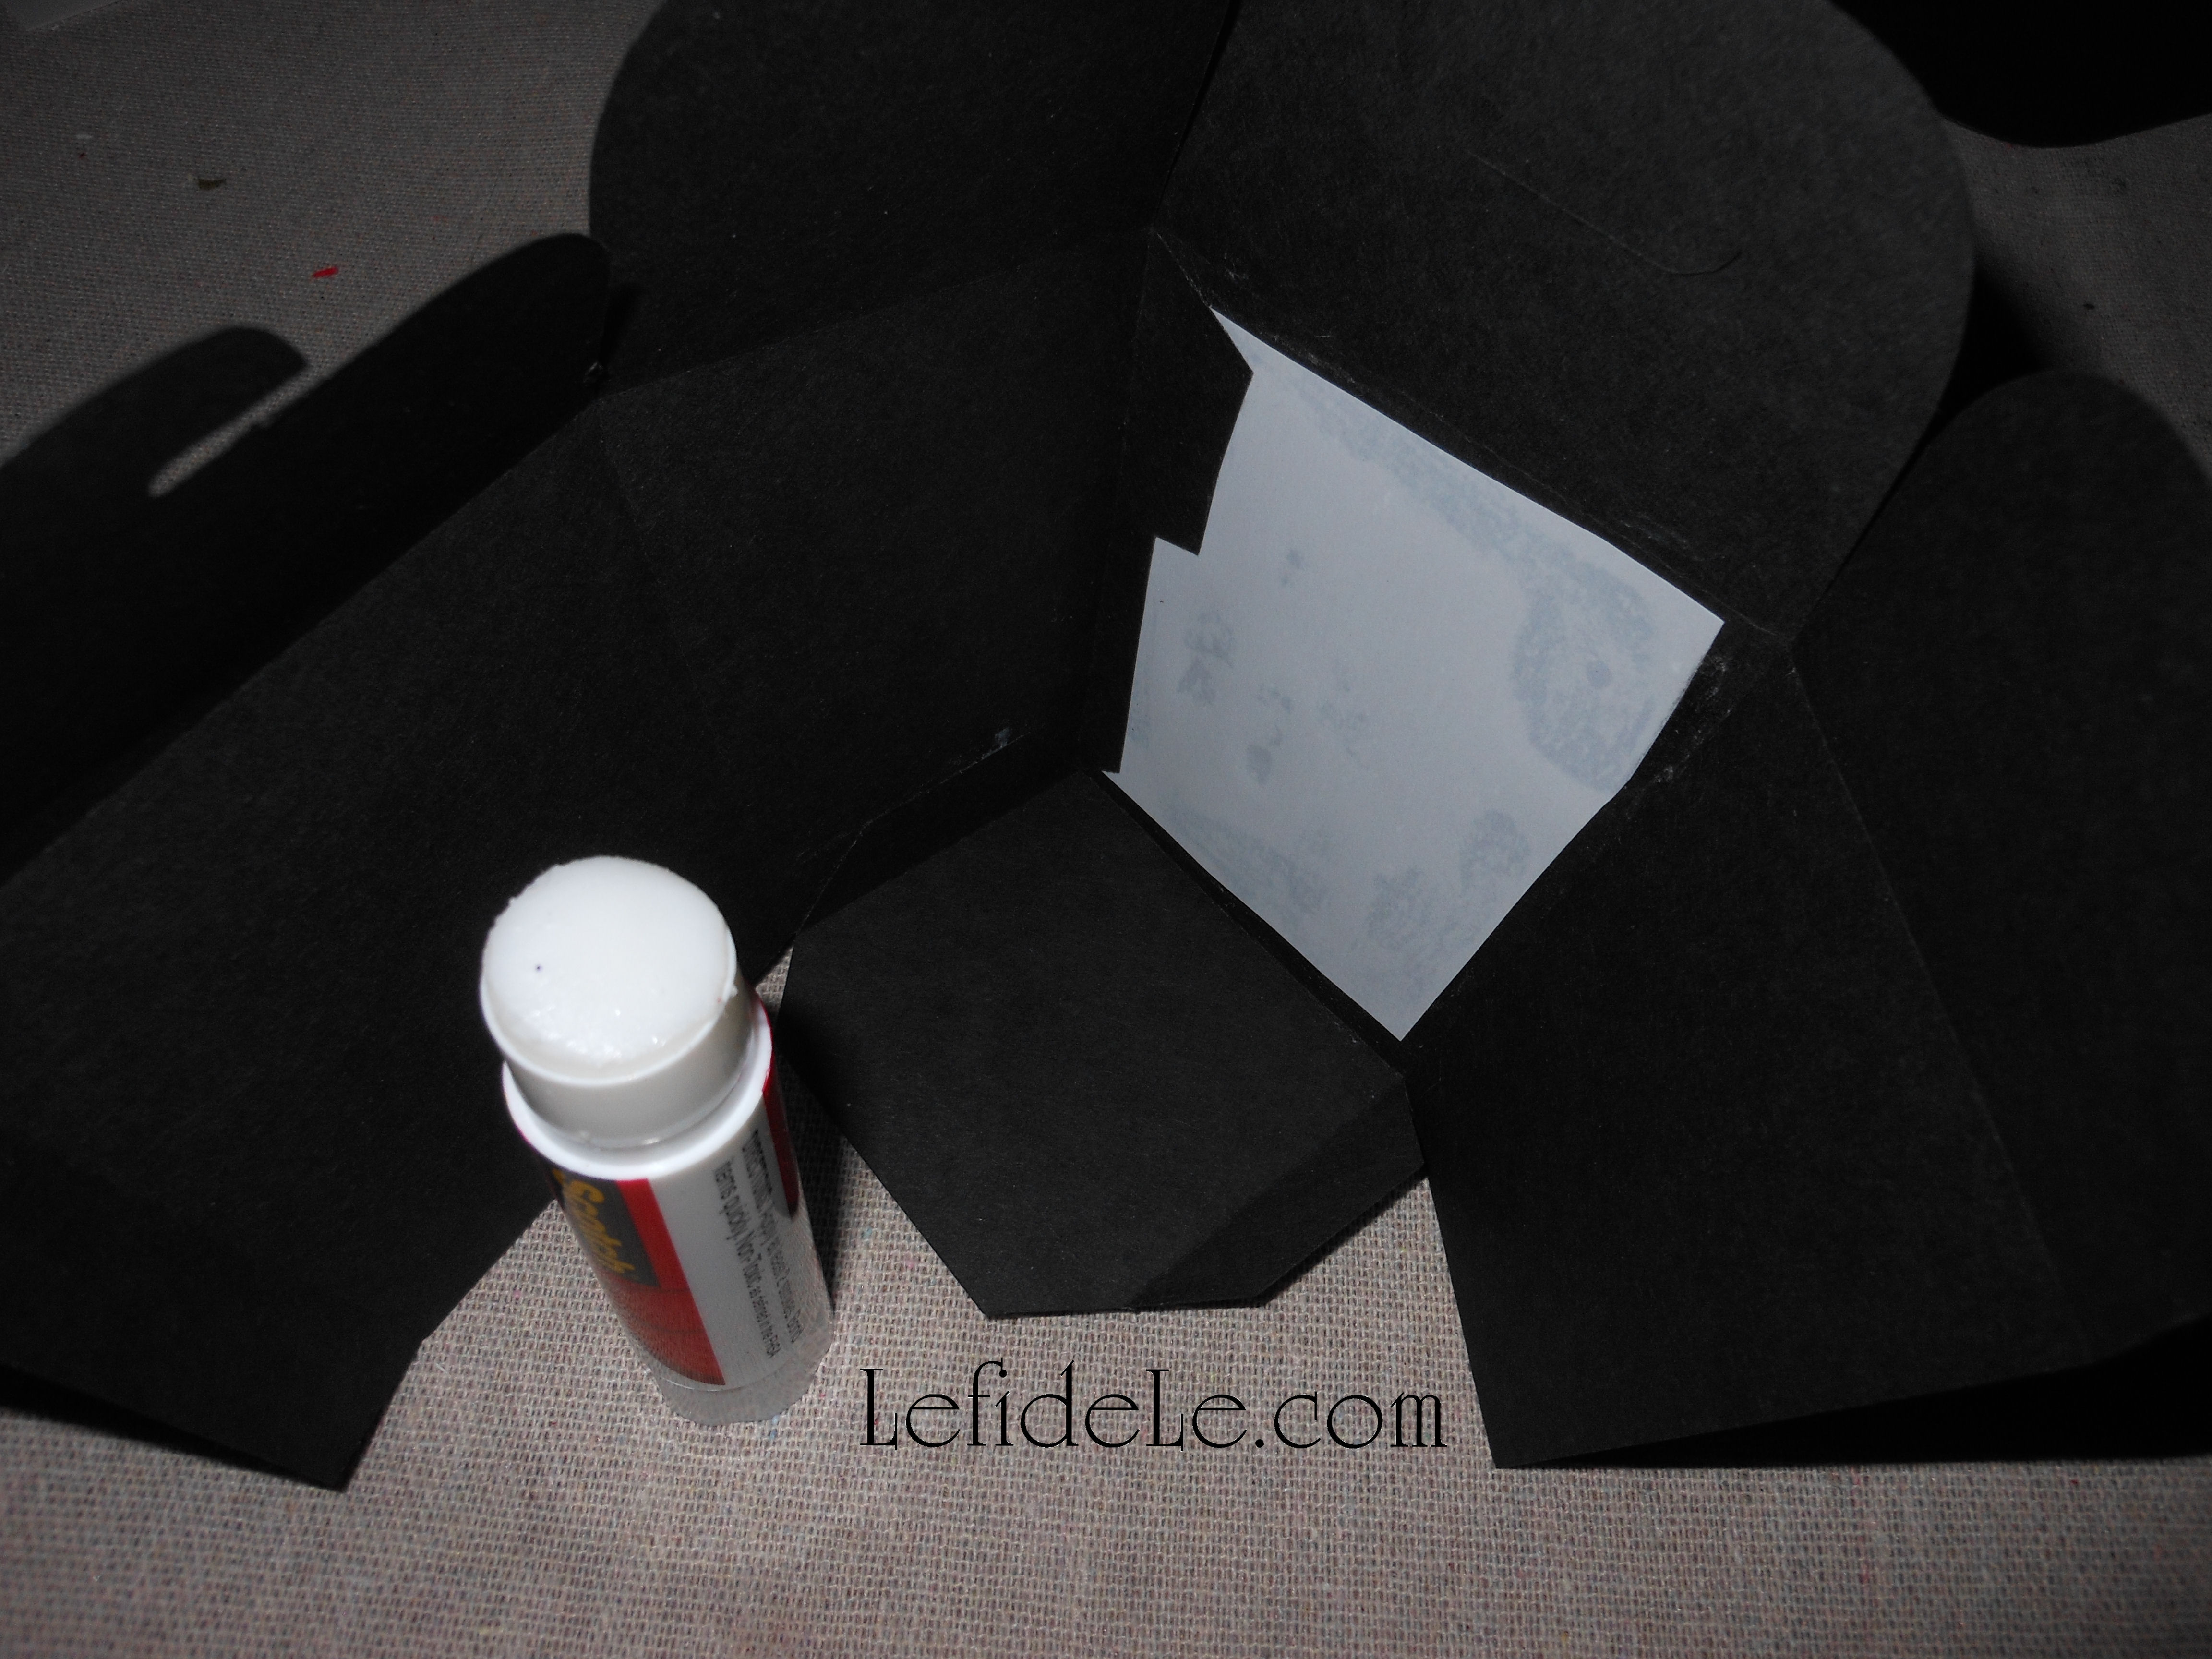
The paper lanterns, with the cut out characters, glow when little squares of vegan vellum are glued to the underside/inside of the boxes. Use the photo to check how the “Fú” 福 character is supposed to look like from the outside, and place that outside edge down onto your working surface. Cut a piece of vegan vellum to fit the box’s side and cover the character completely. Use a permanent glue stick along the edges of the vellum and place it over the character face down. Press it down flat to adhere it fully.

272Leigh

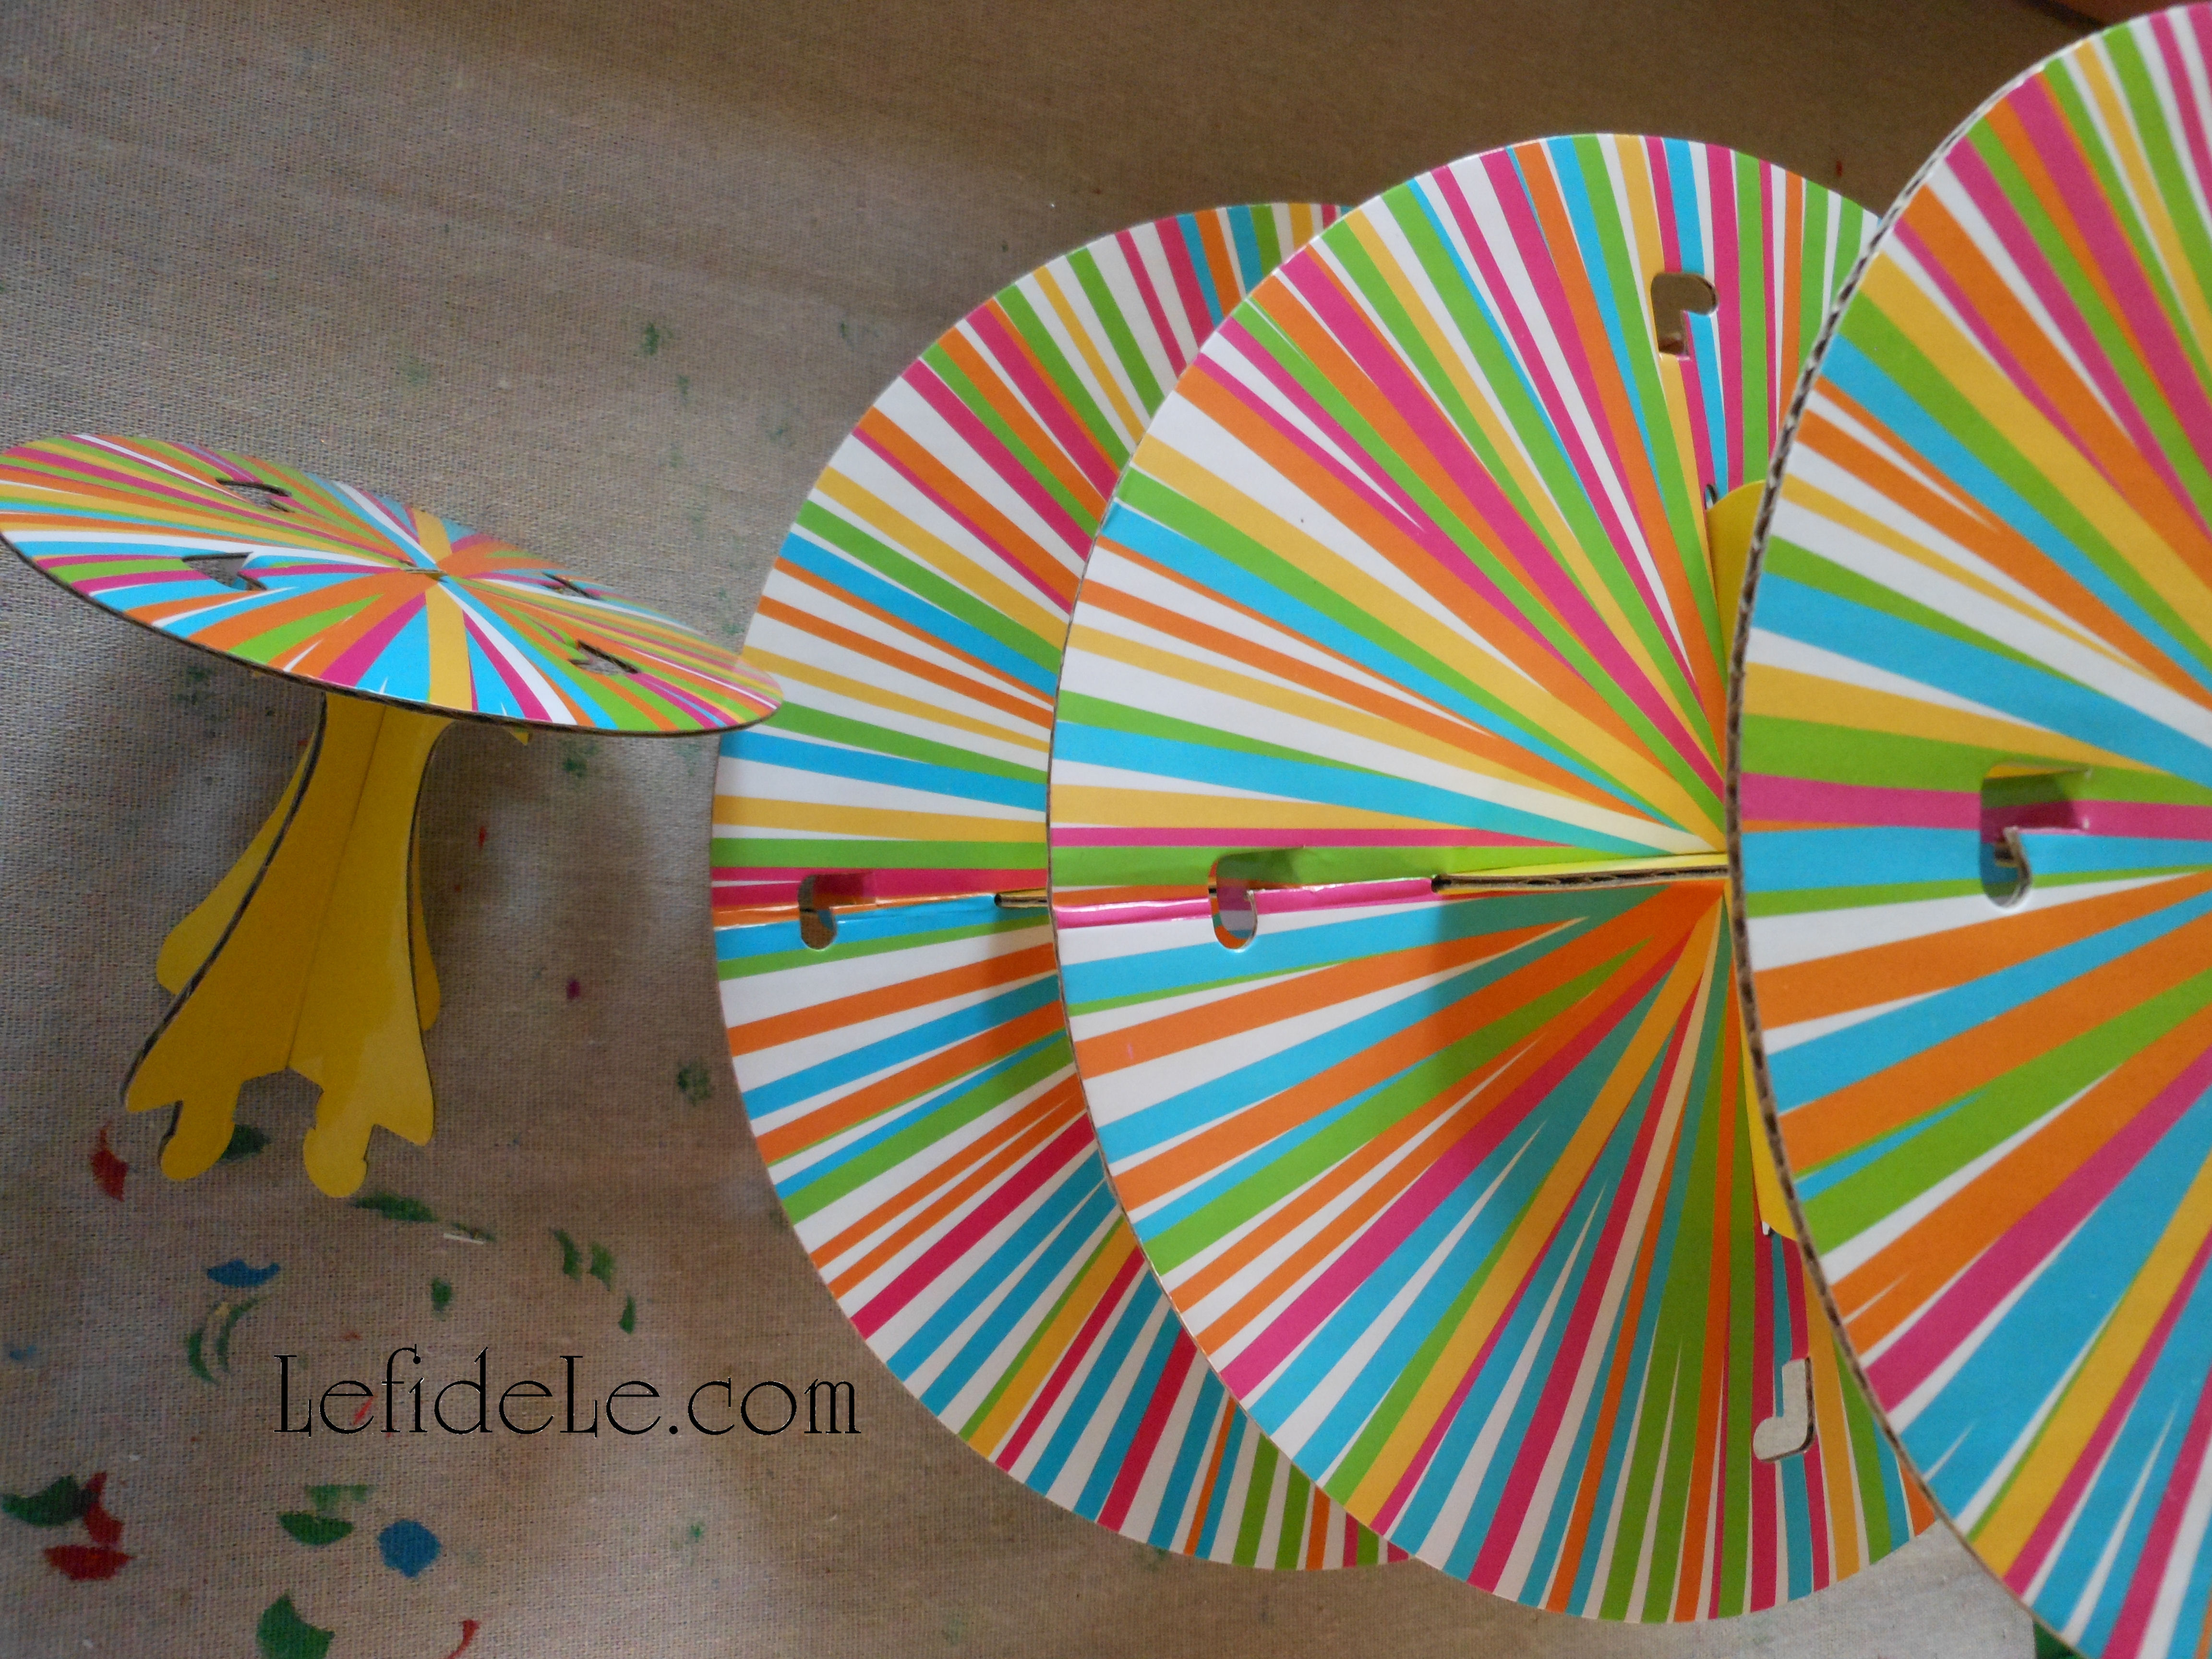
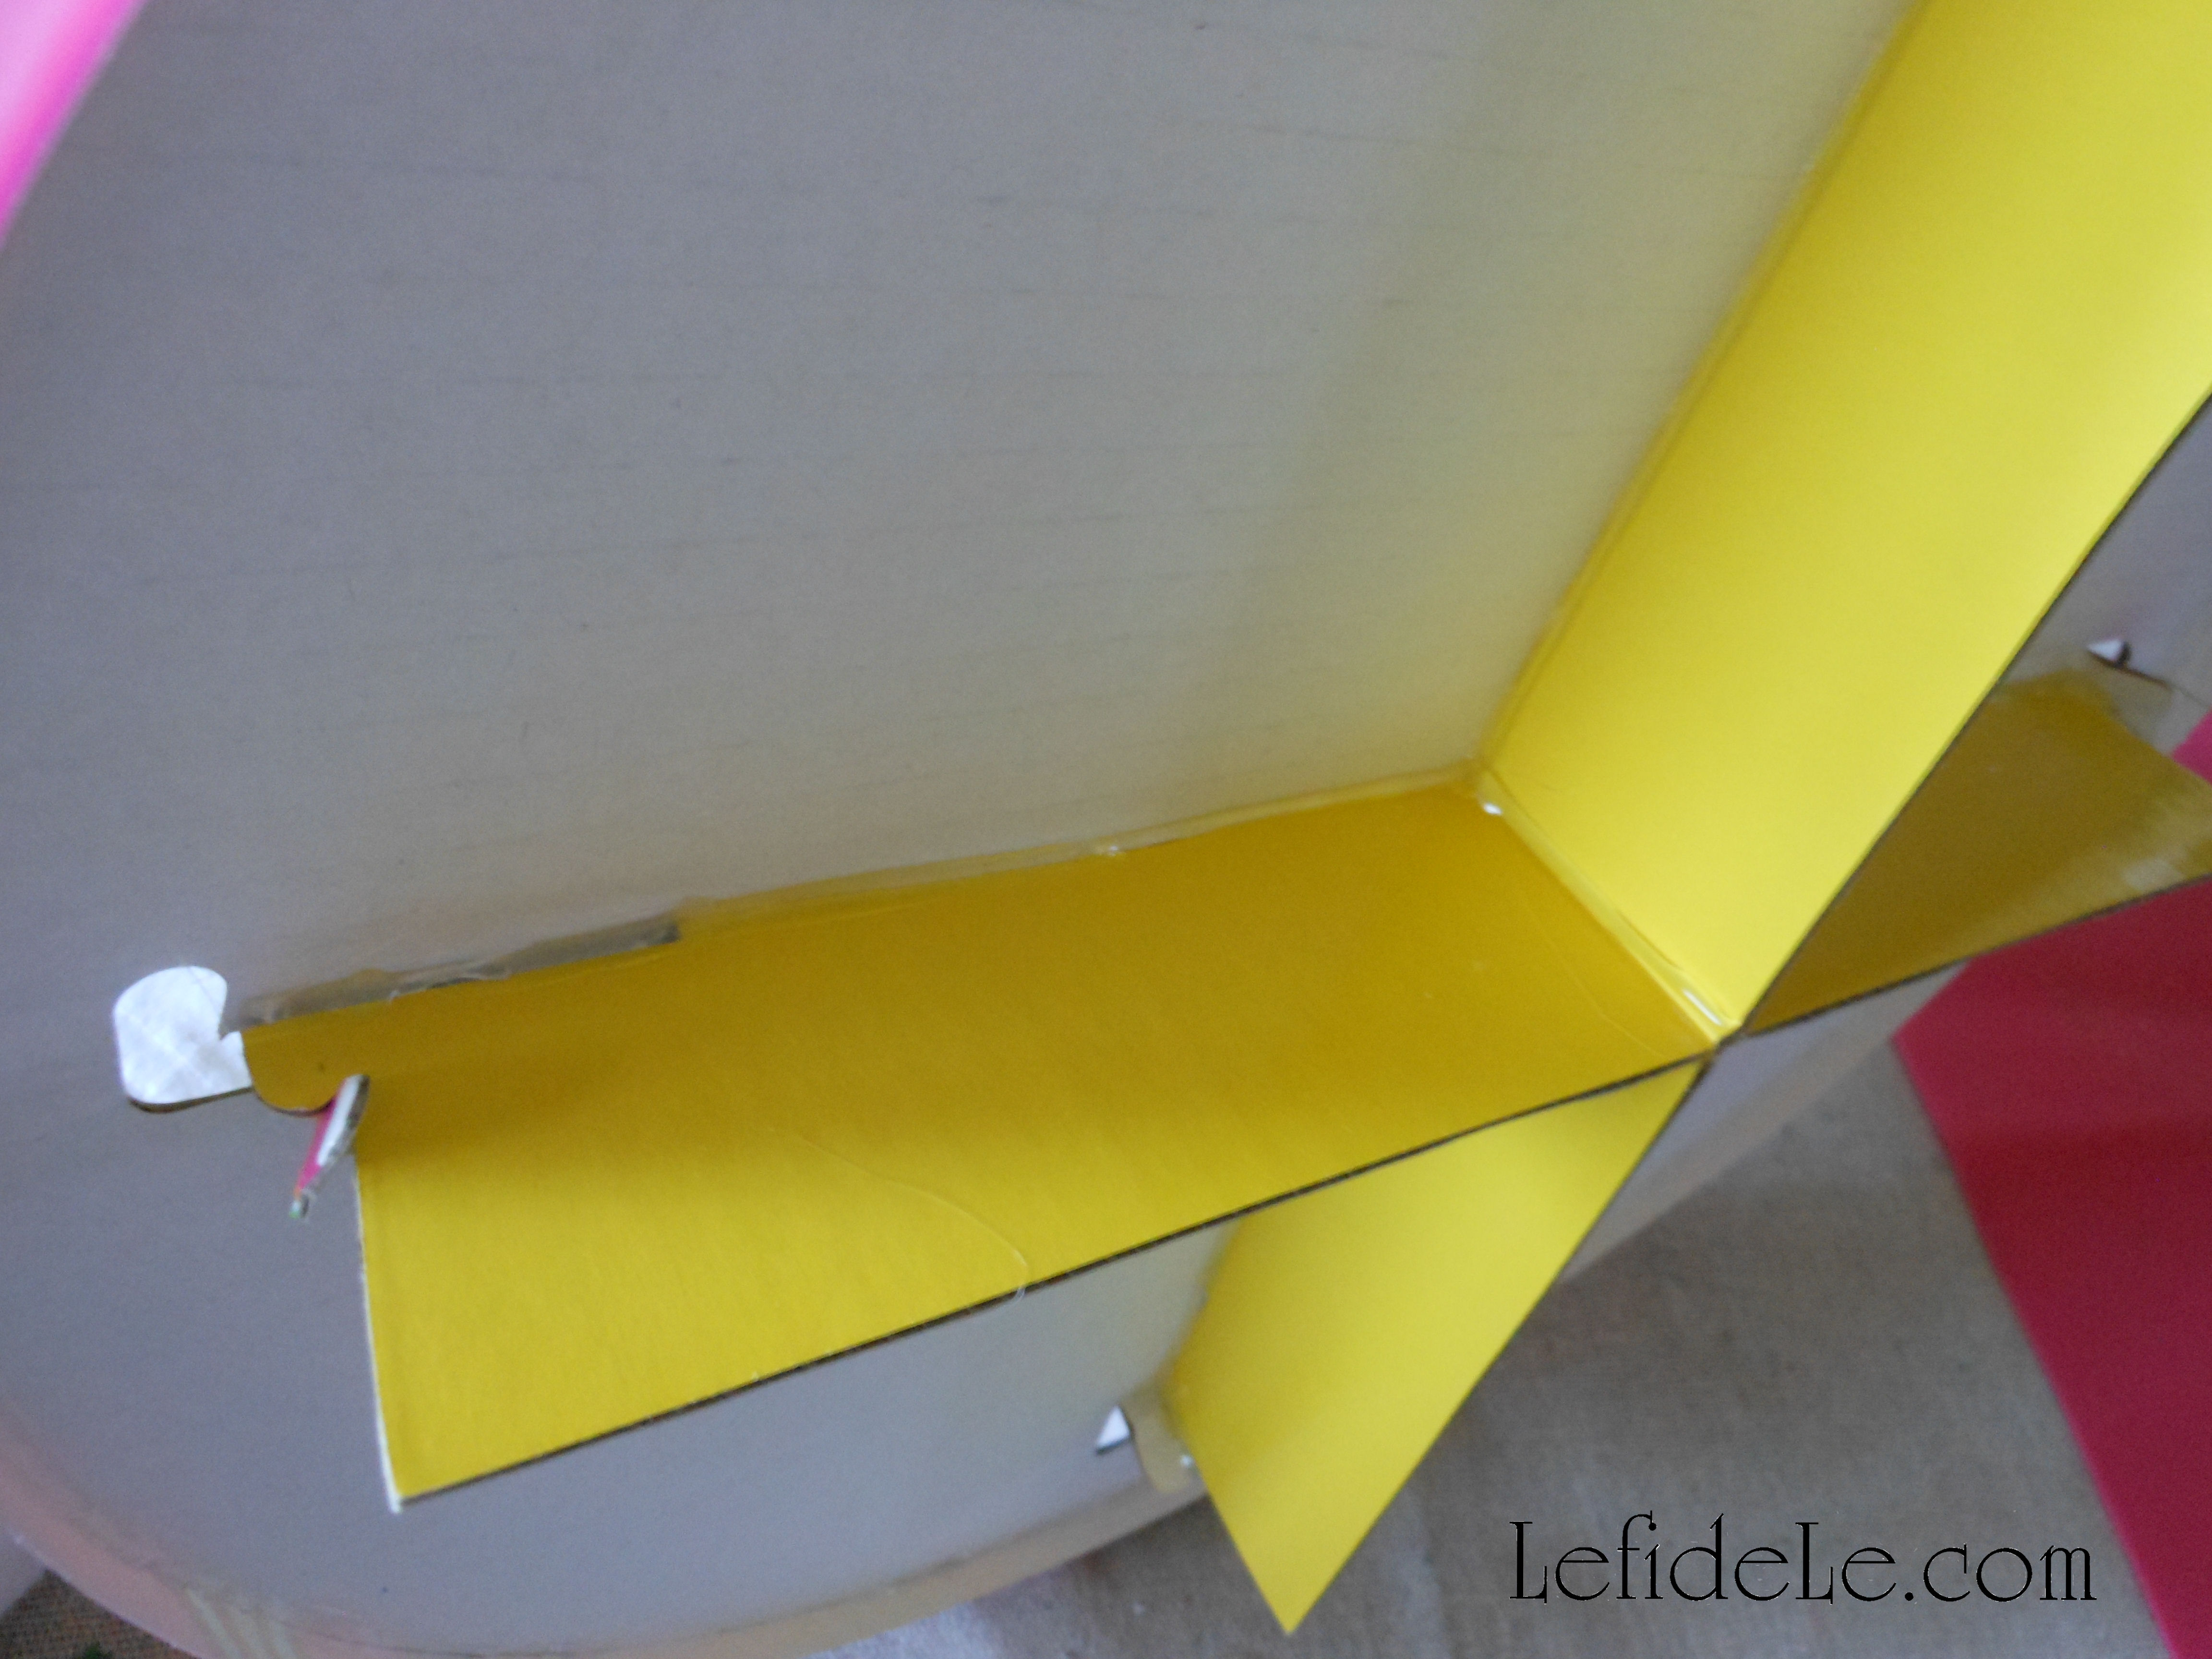
To make both the favor boxes and the paper lanterns, glue the tabs to the sides with a permanent glue stick. Use the photos as visual reference for how to do this. Note that 2 sides will be wider than the others. These should be glued opposite to each other, so that a narrow side is in between each.

279Leigh

Glue all of the sides, and leave the top free to be filled with crayons, good luck candies, fortune cookies, LED tea-lights, or even small condiment bowls for sauces… just let your creativity run with these! Just try to let them dry well before loading them up with goodies. I let mine sit overnight, and they became super sturdy.

096Leigh

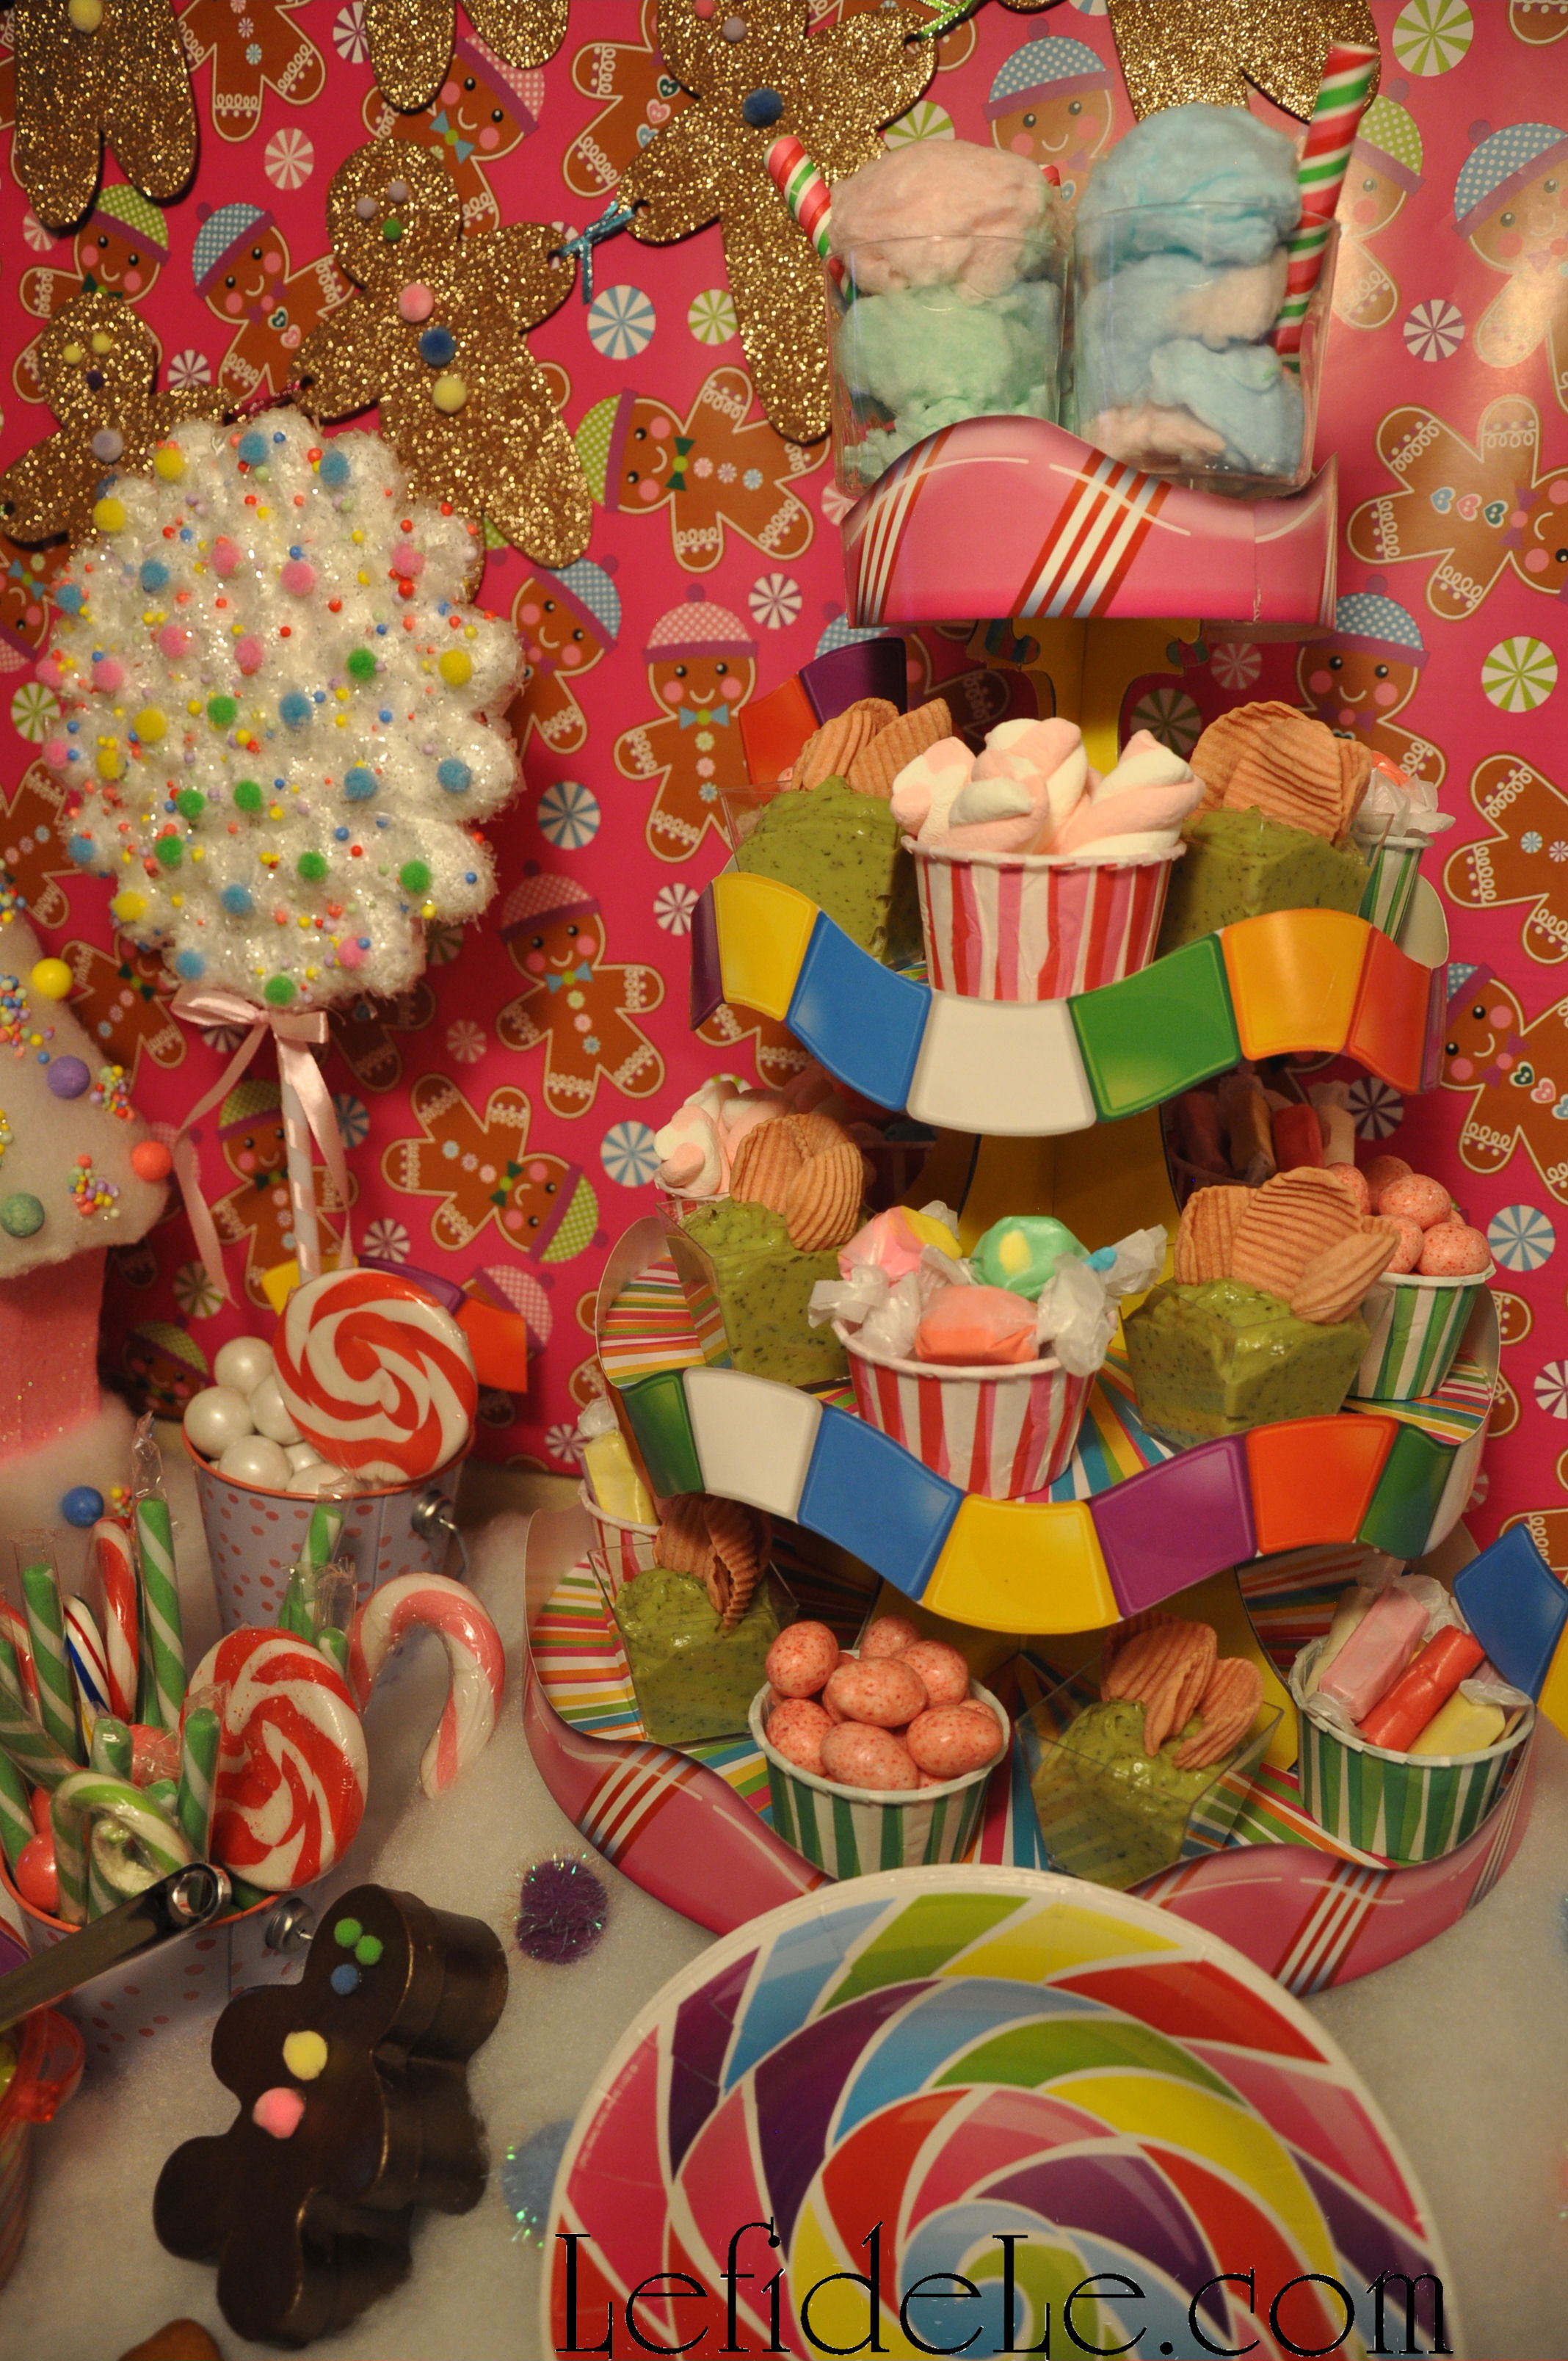
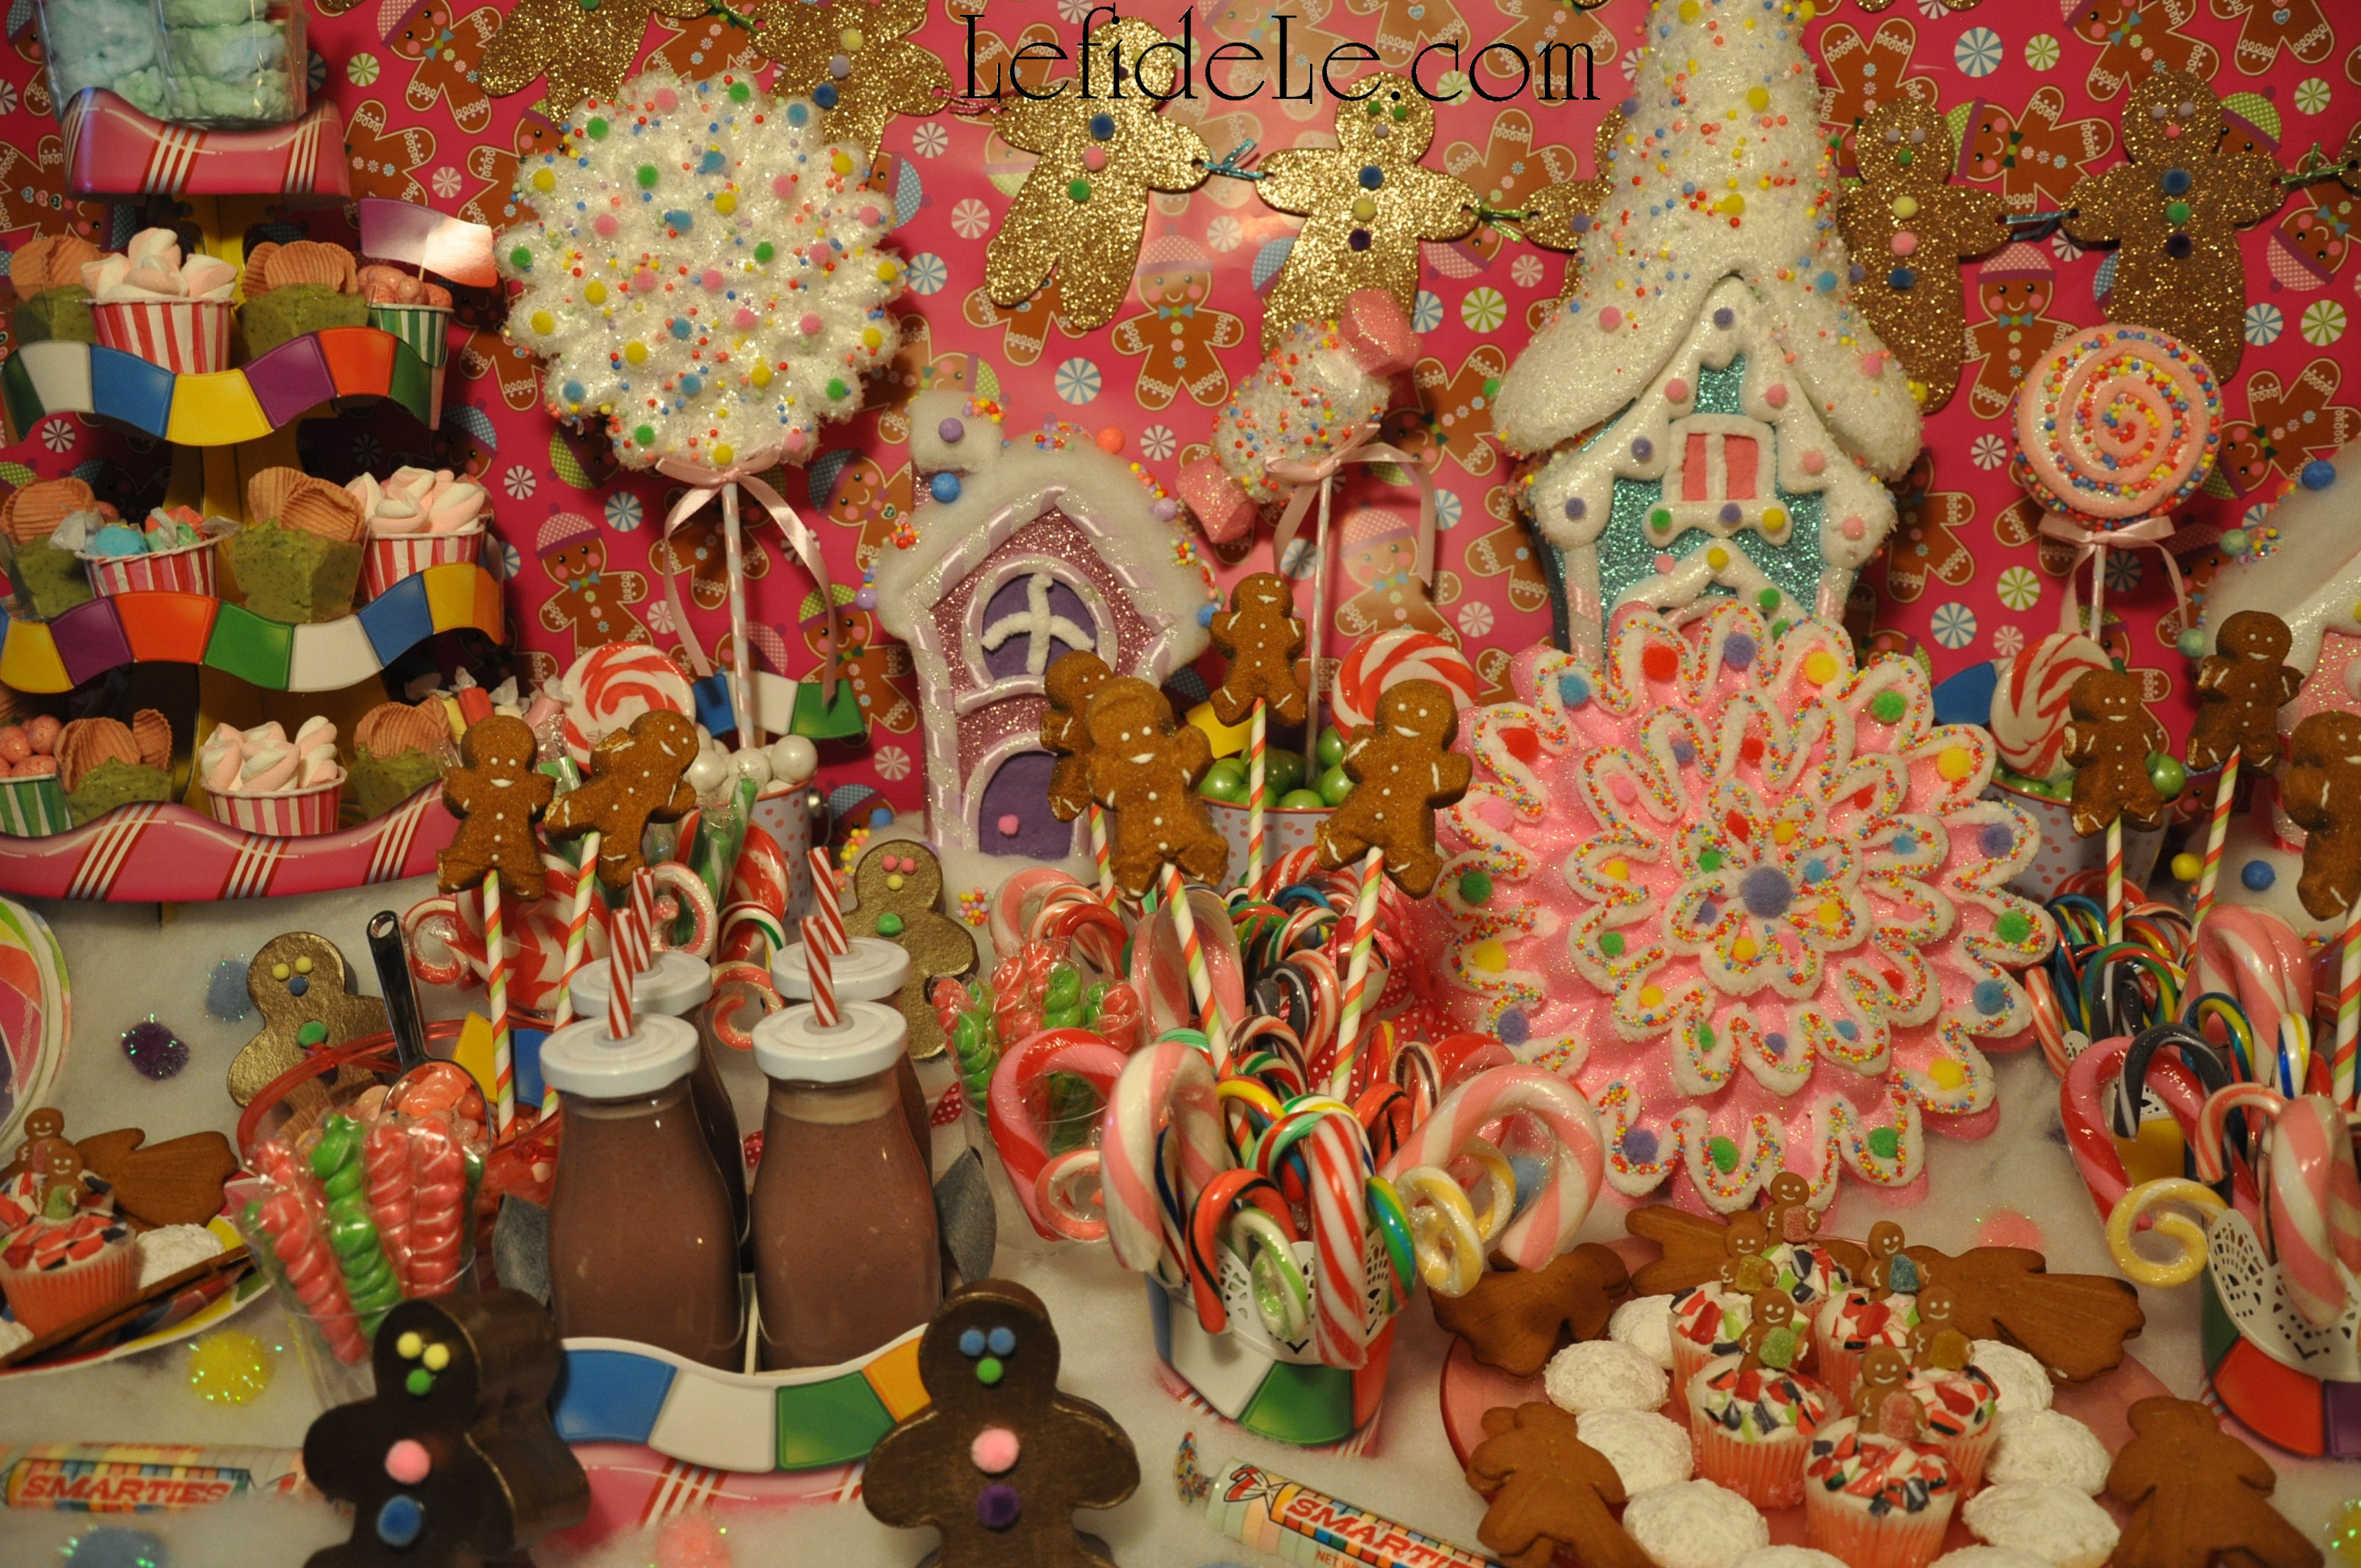
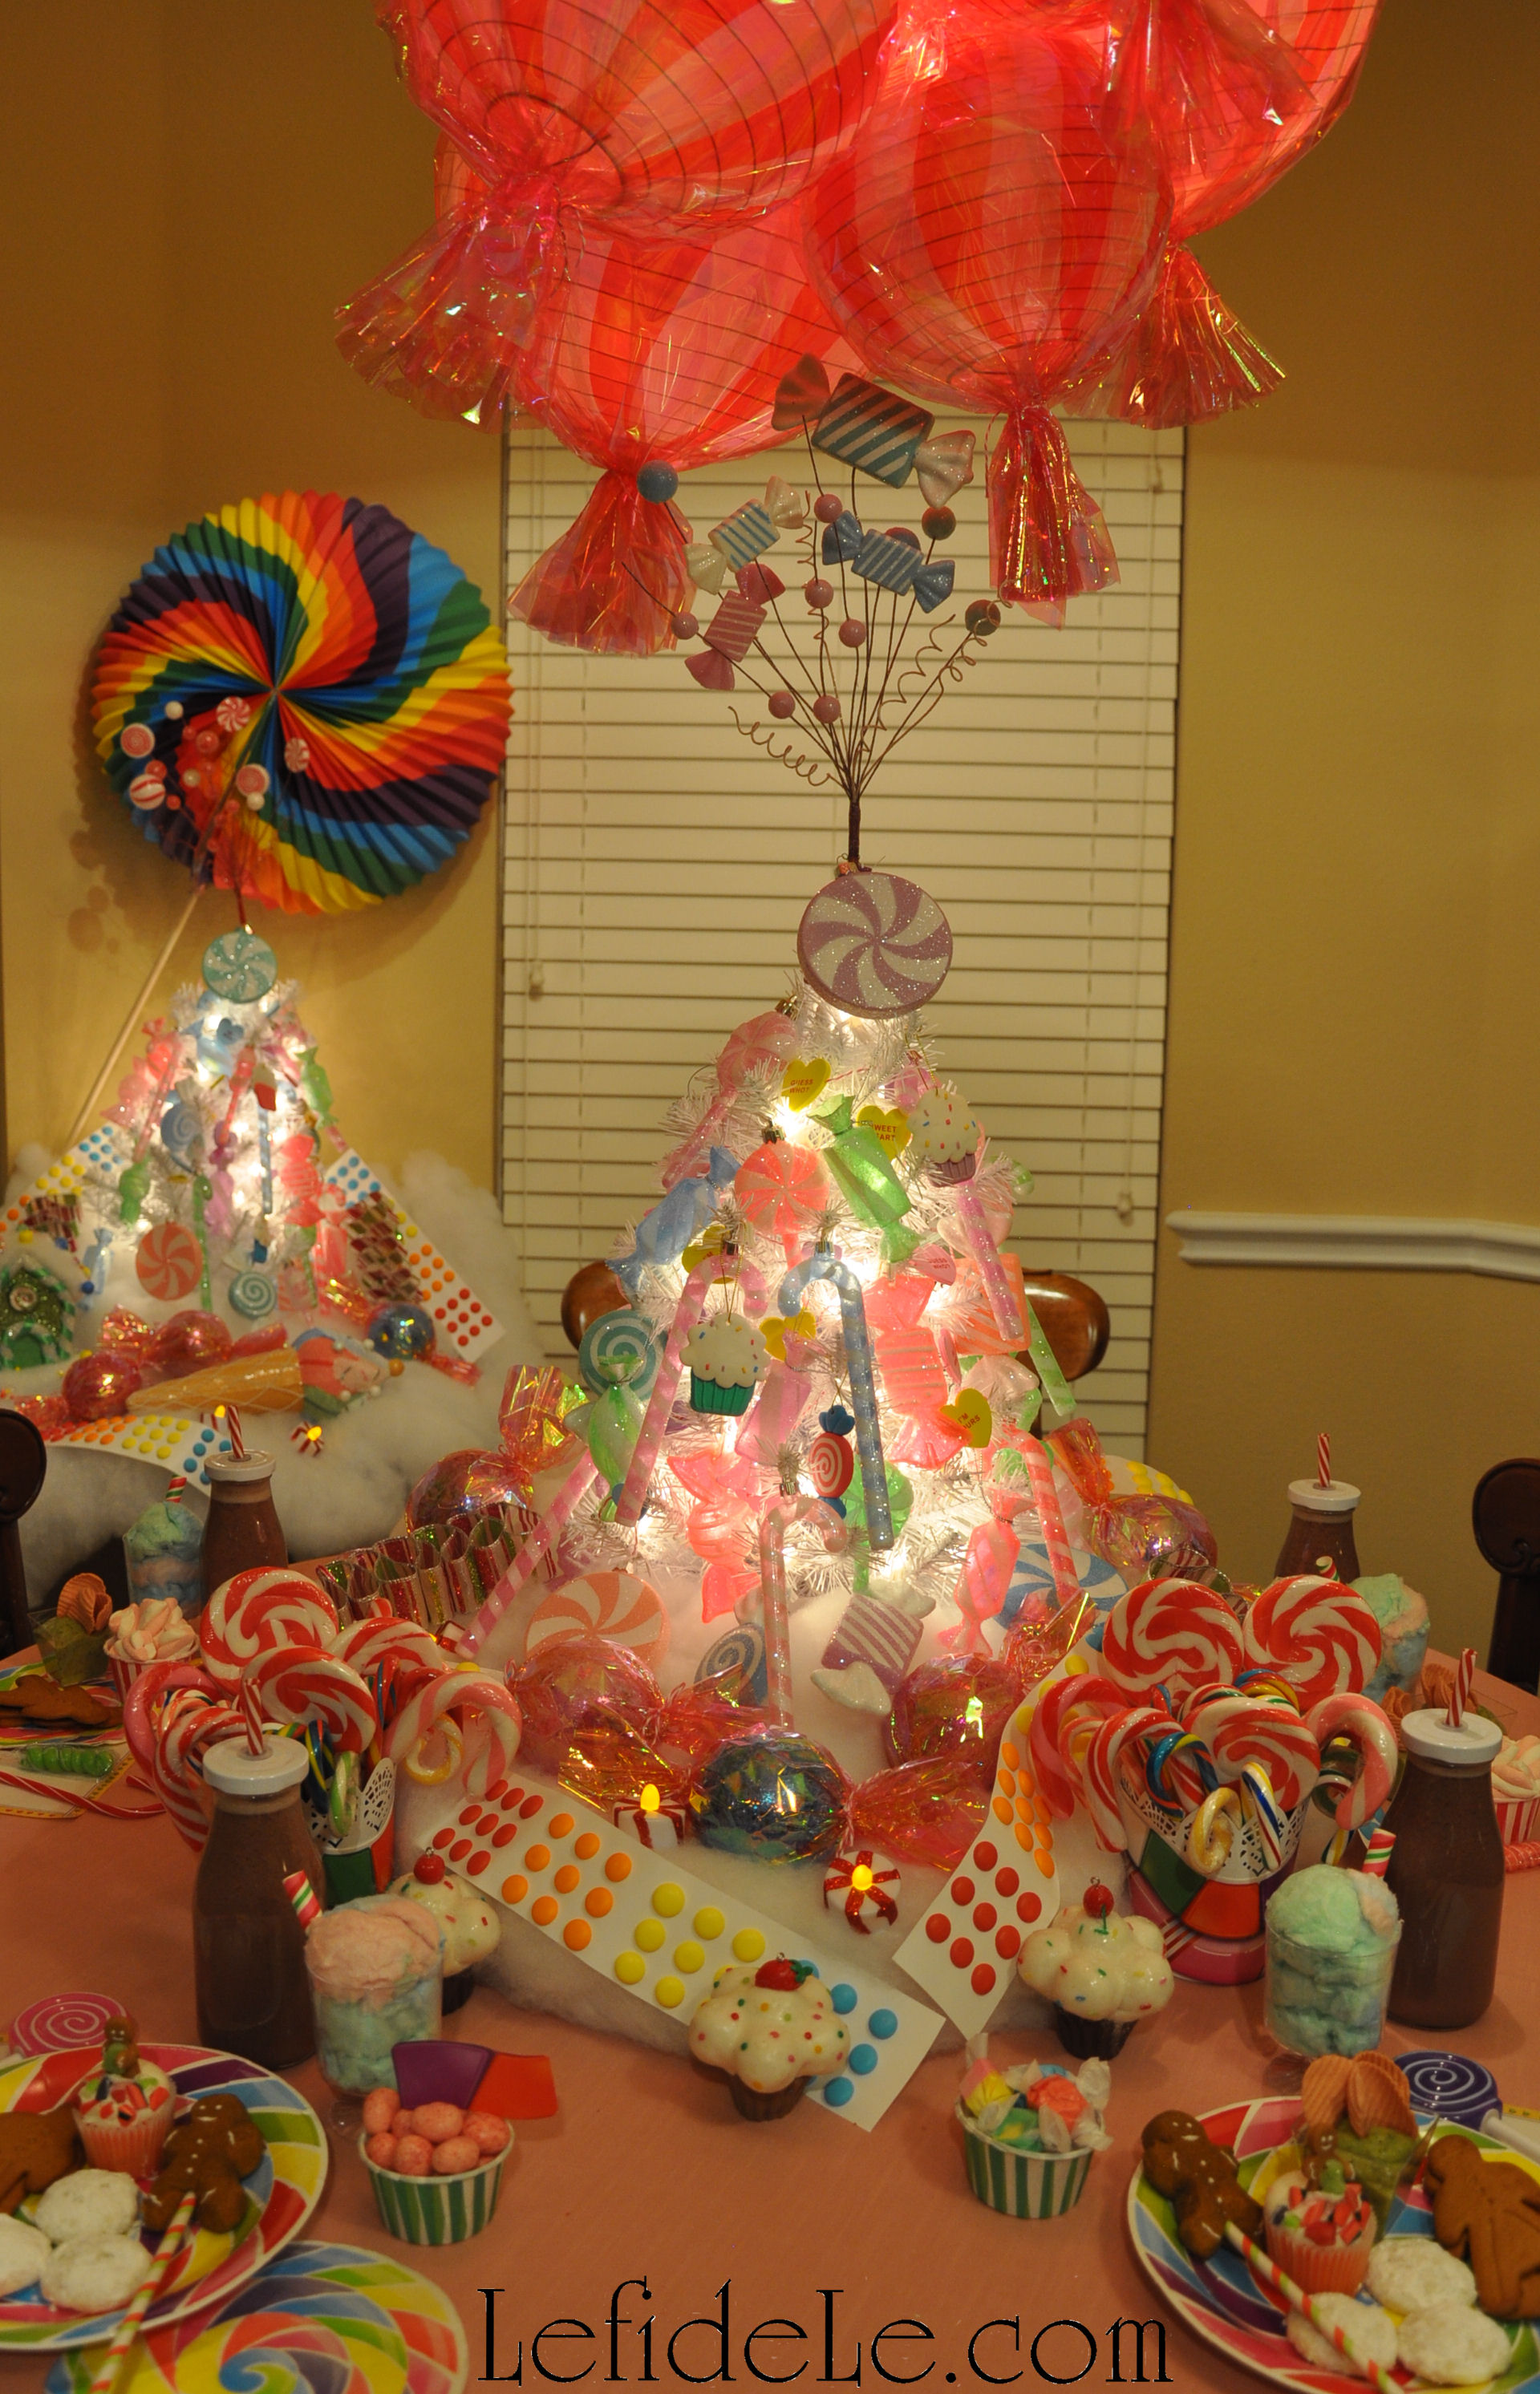
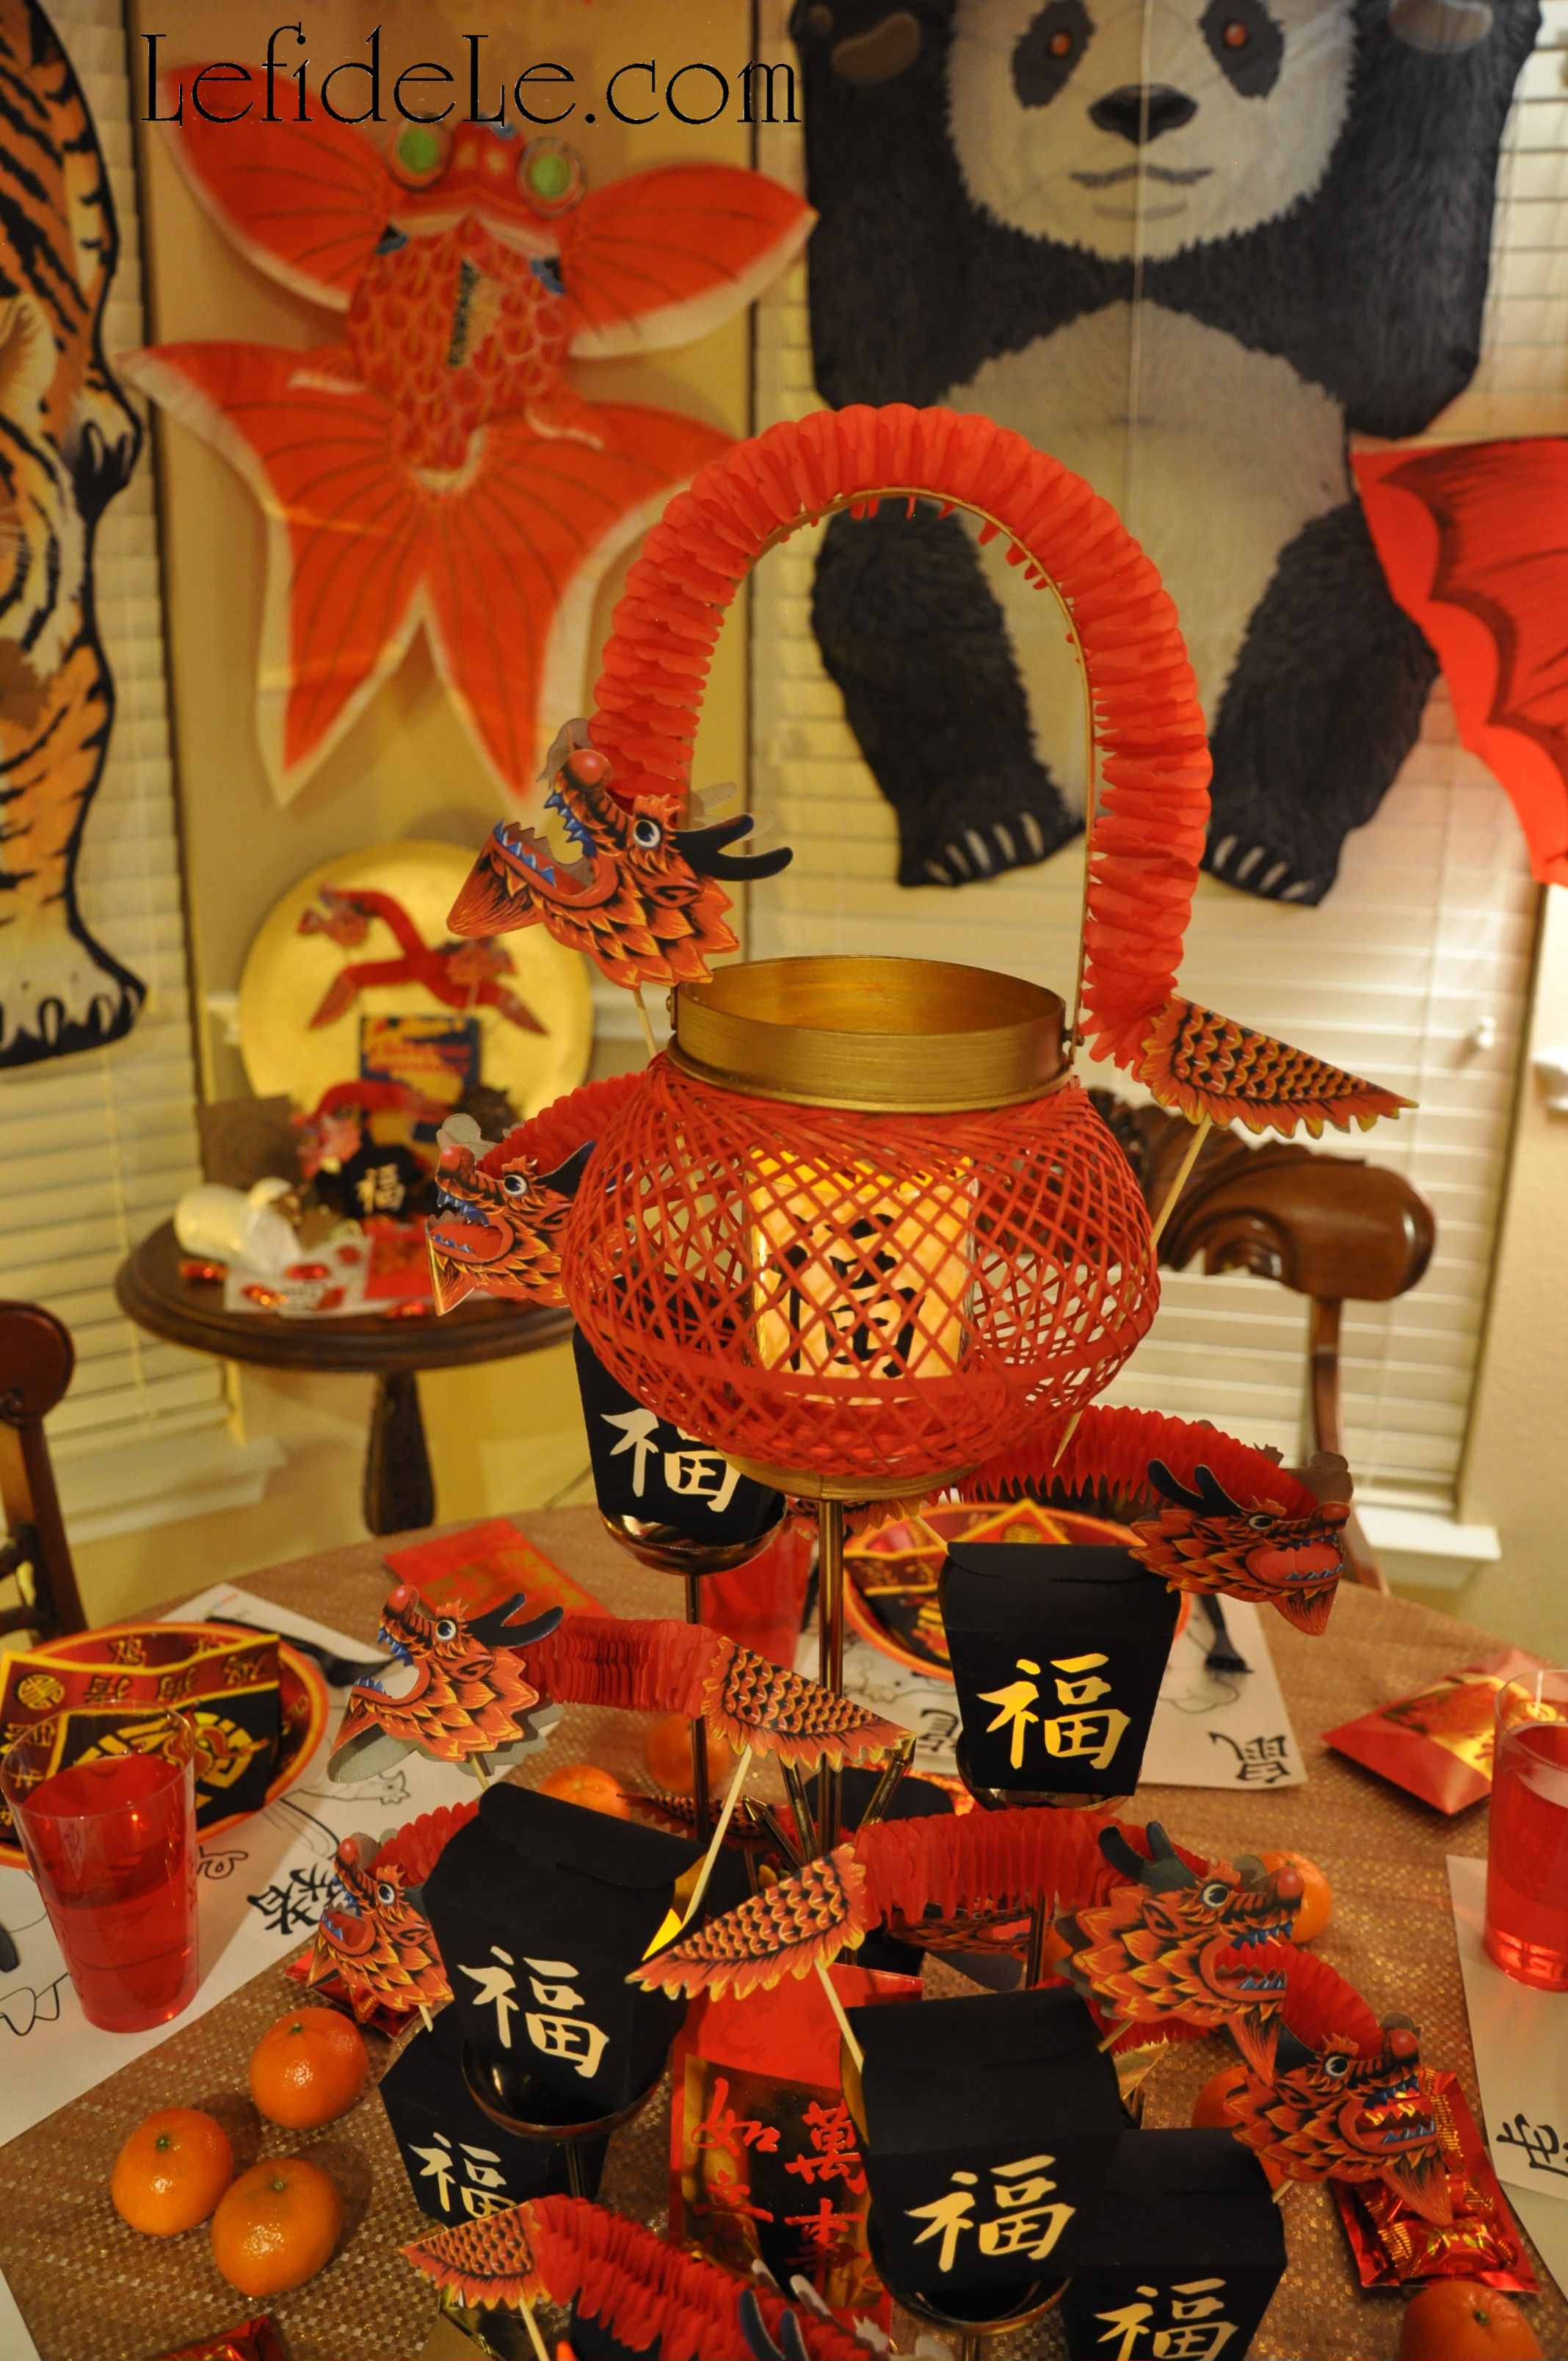
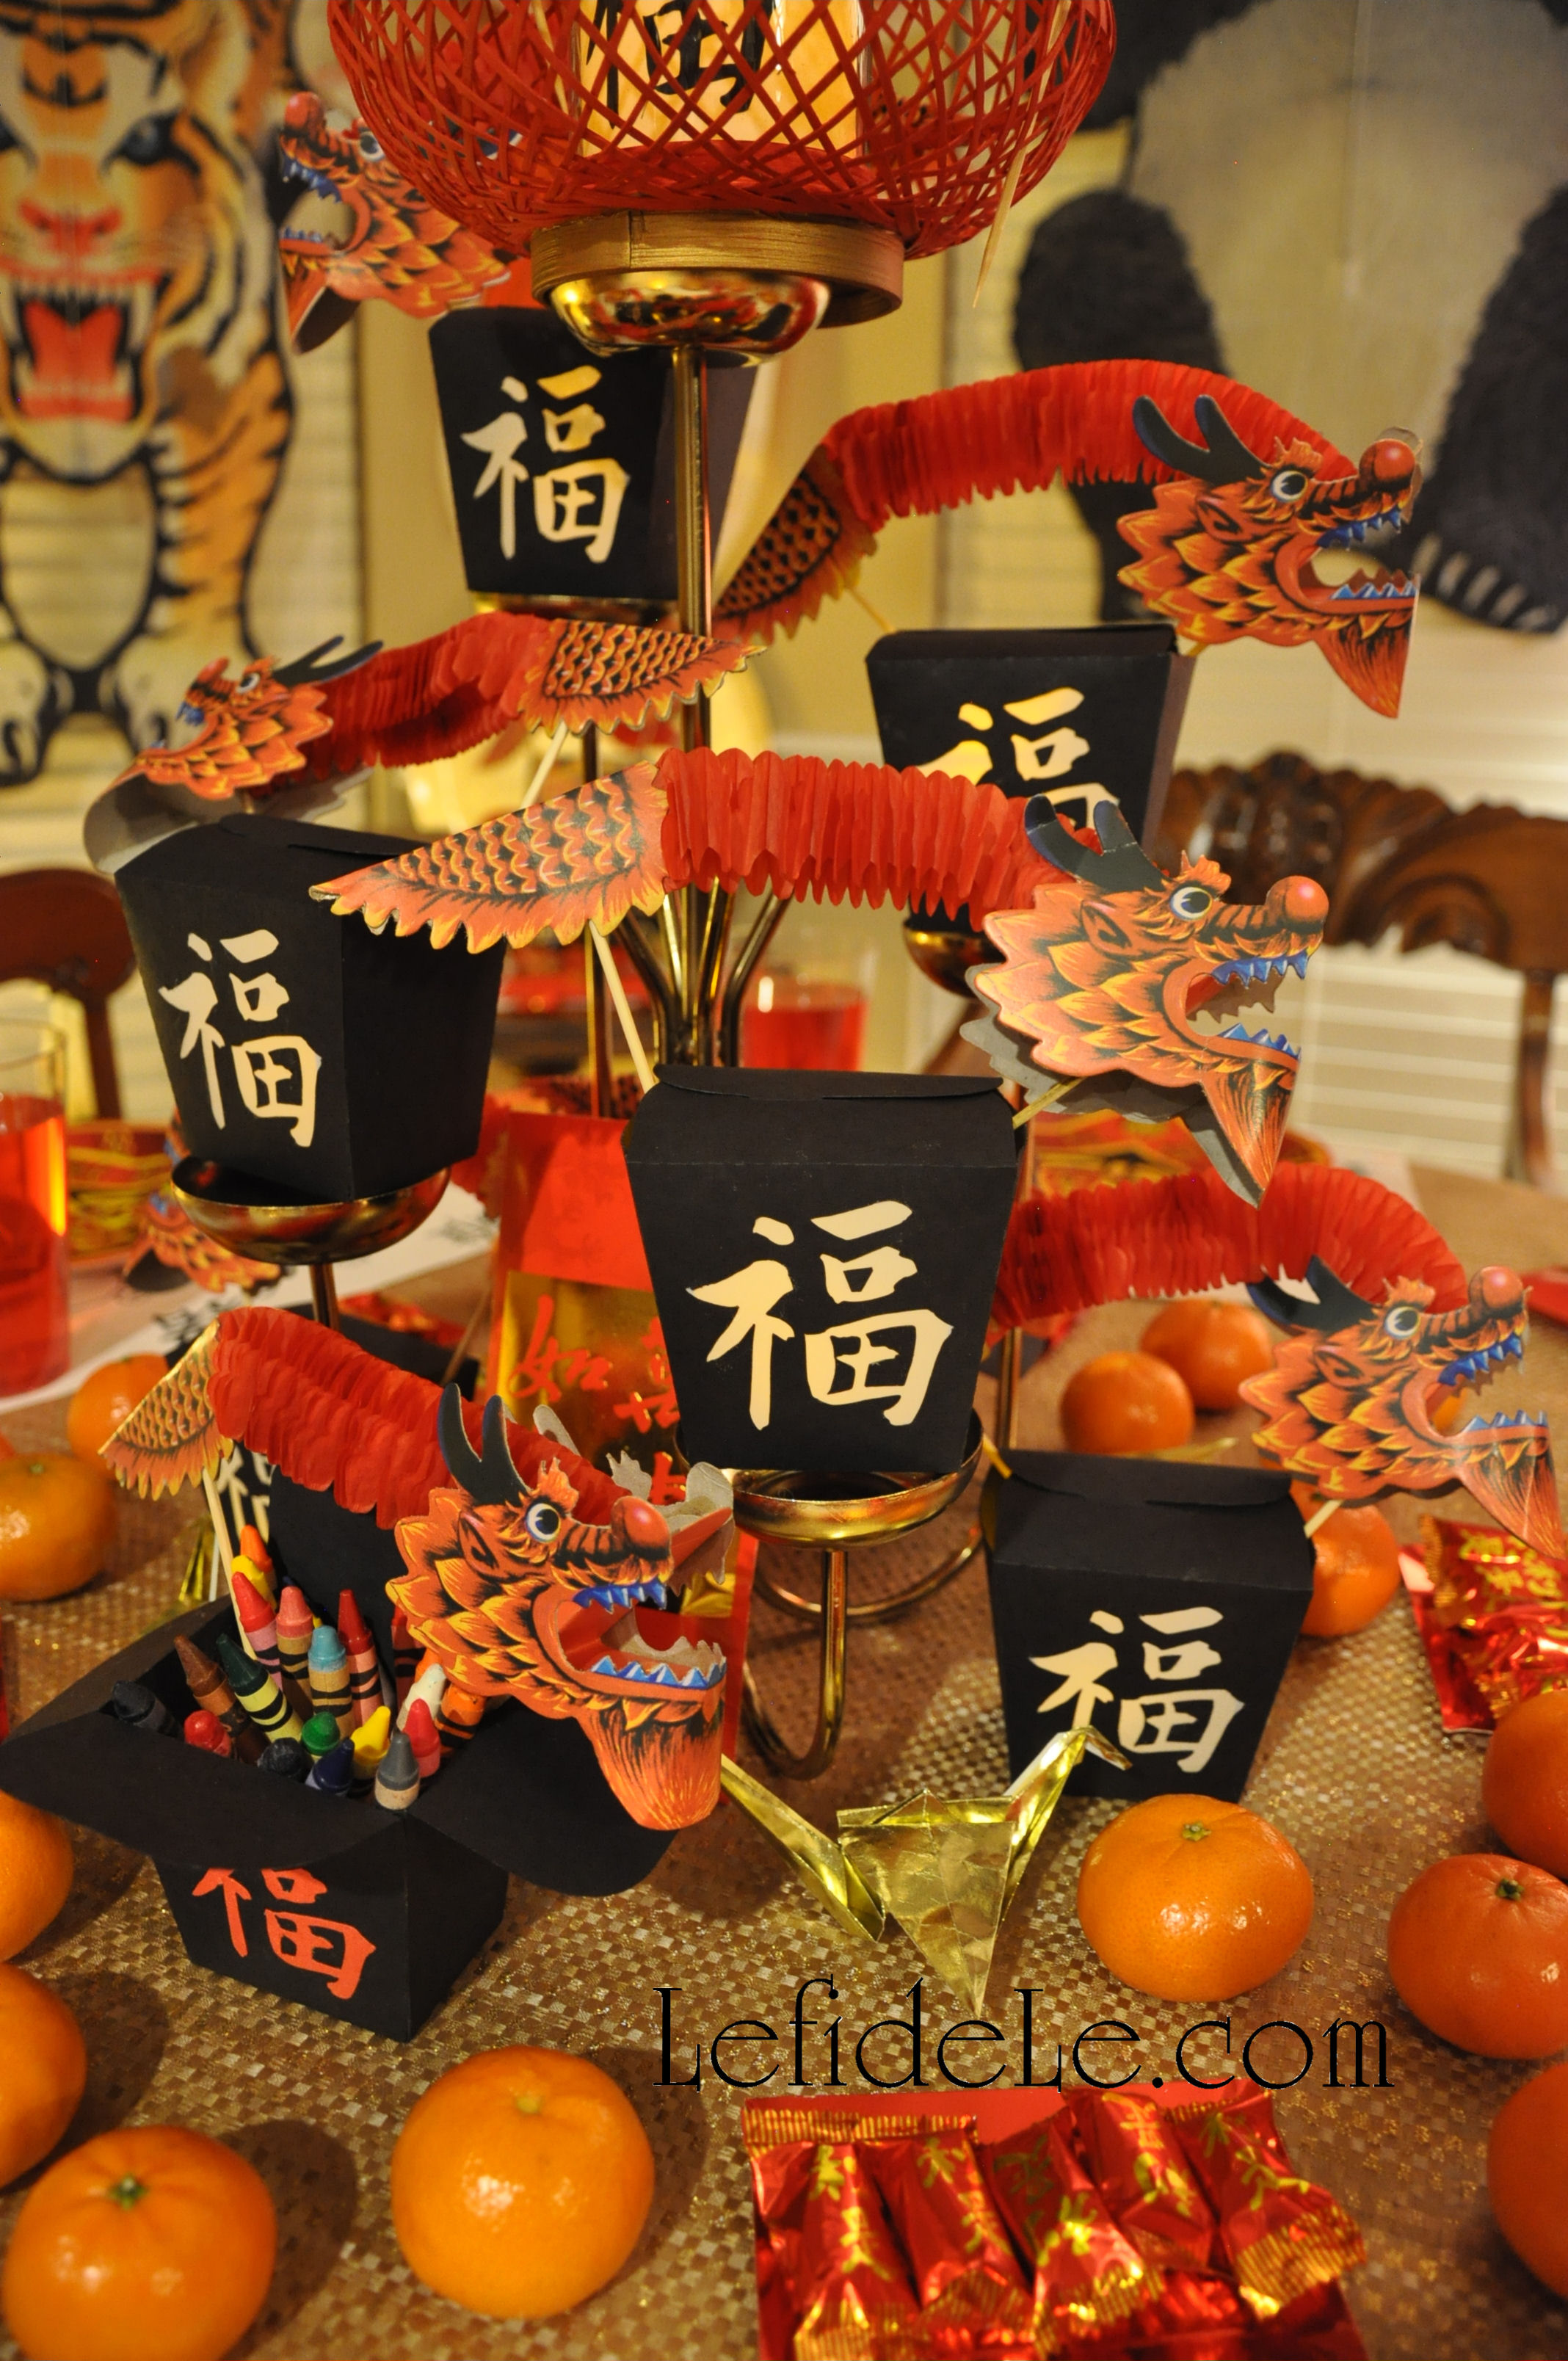
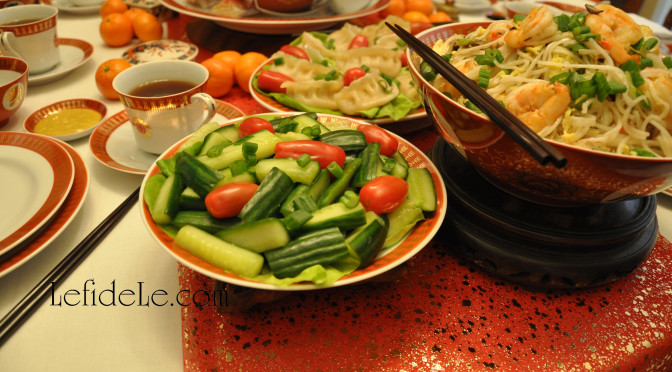
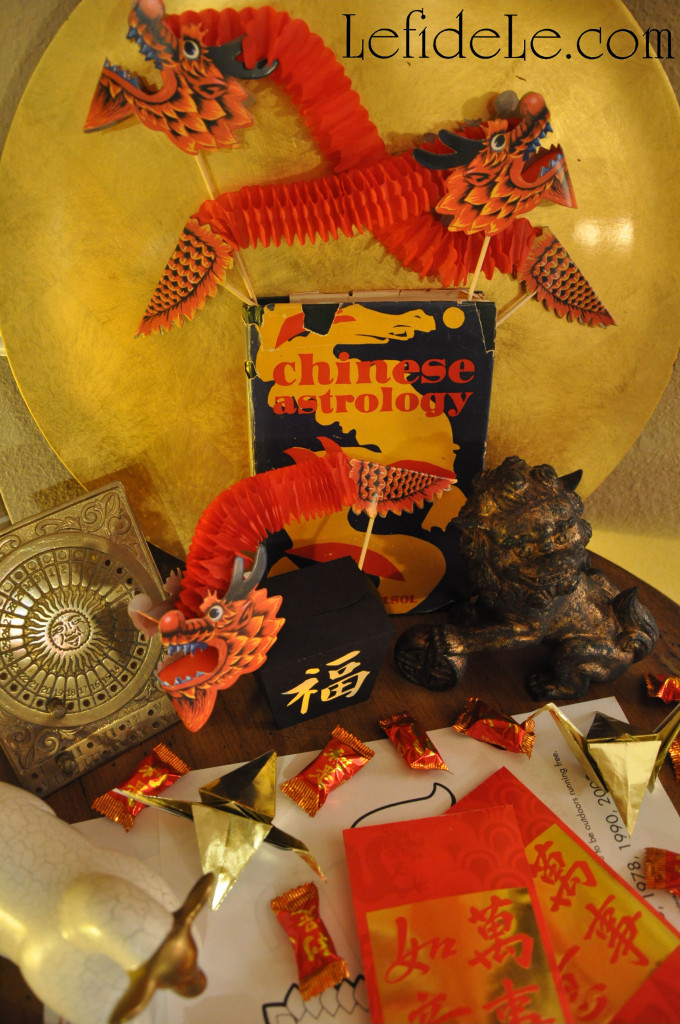
I stacked some of the paper lanterns onto a vintage brass tea-light holder and stuck in paper dragon favor puppets to heighten the spectacle… with no expectation that the centerpiece would stay intact long! Crayon filled favor boxes sat at the base of the structure to be used on Chinese New Year coloring pages. (See more from the Chinese New Year of the Sheep / Ram Party Décor Ideas (With Formal Table Setting & Kid’s Table.)

081Leigh

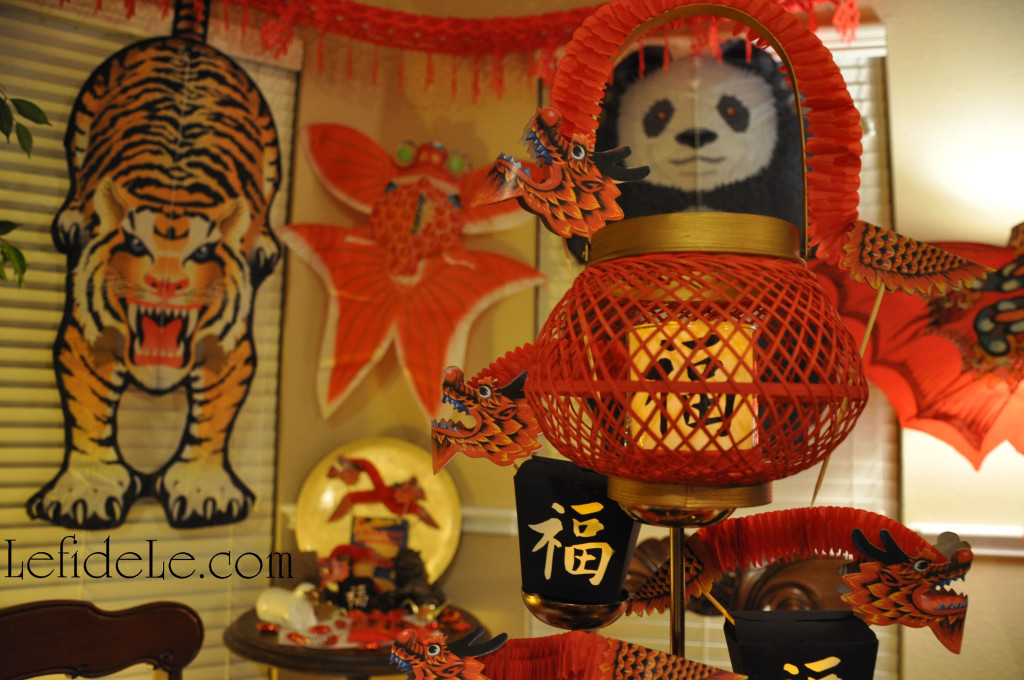
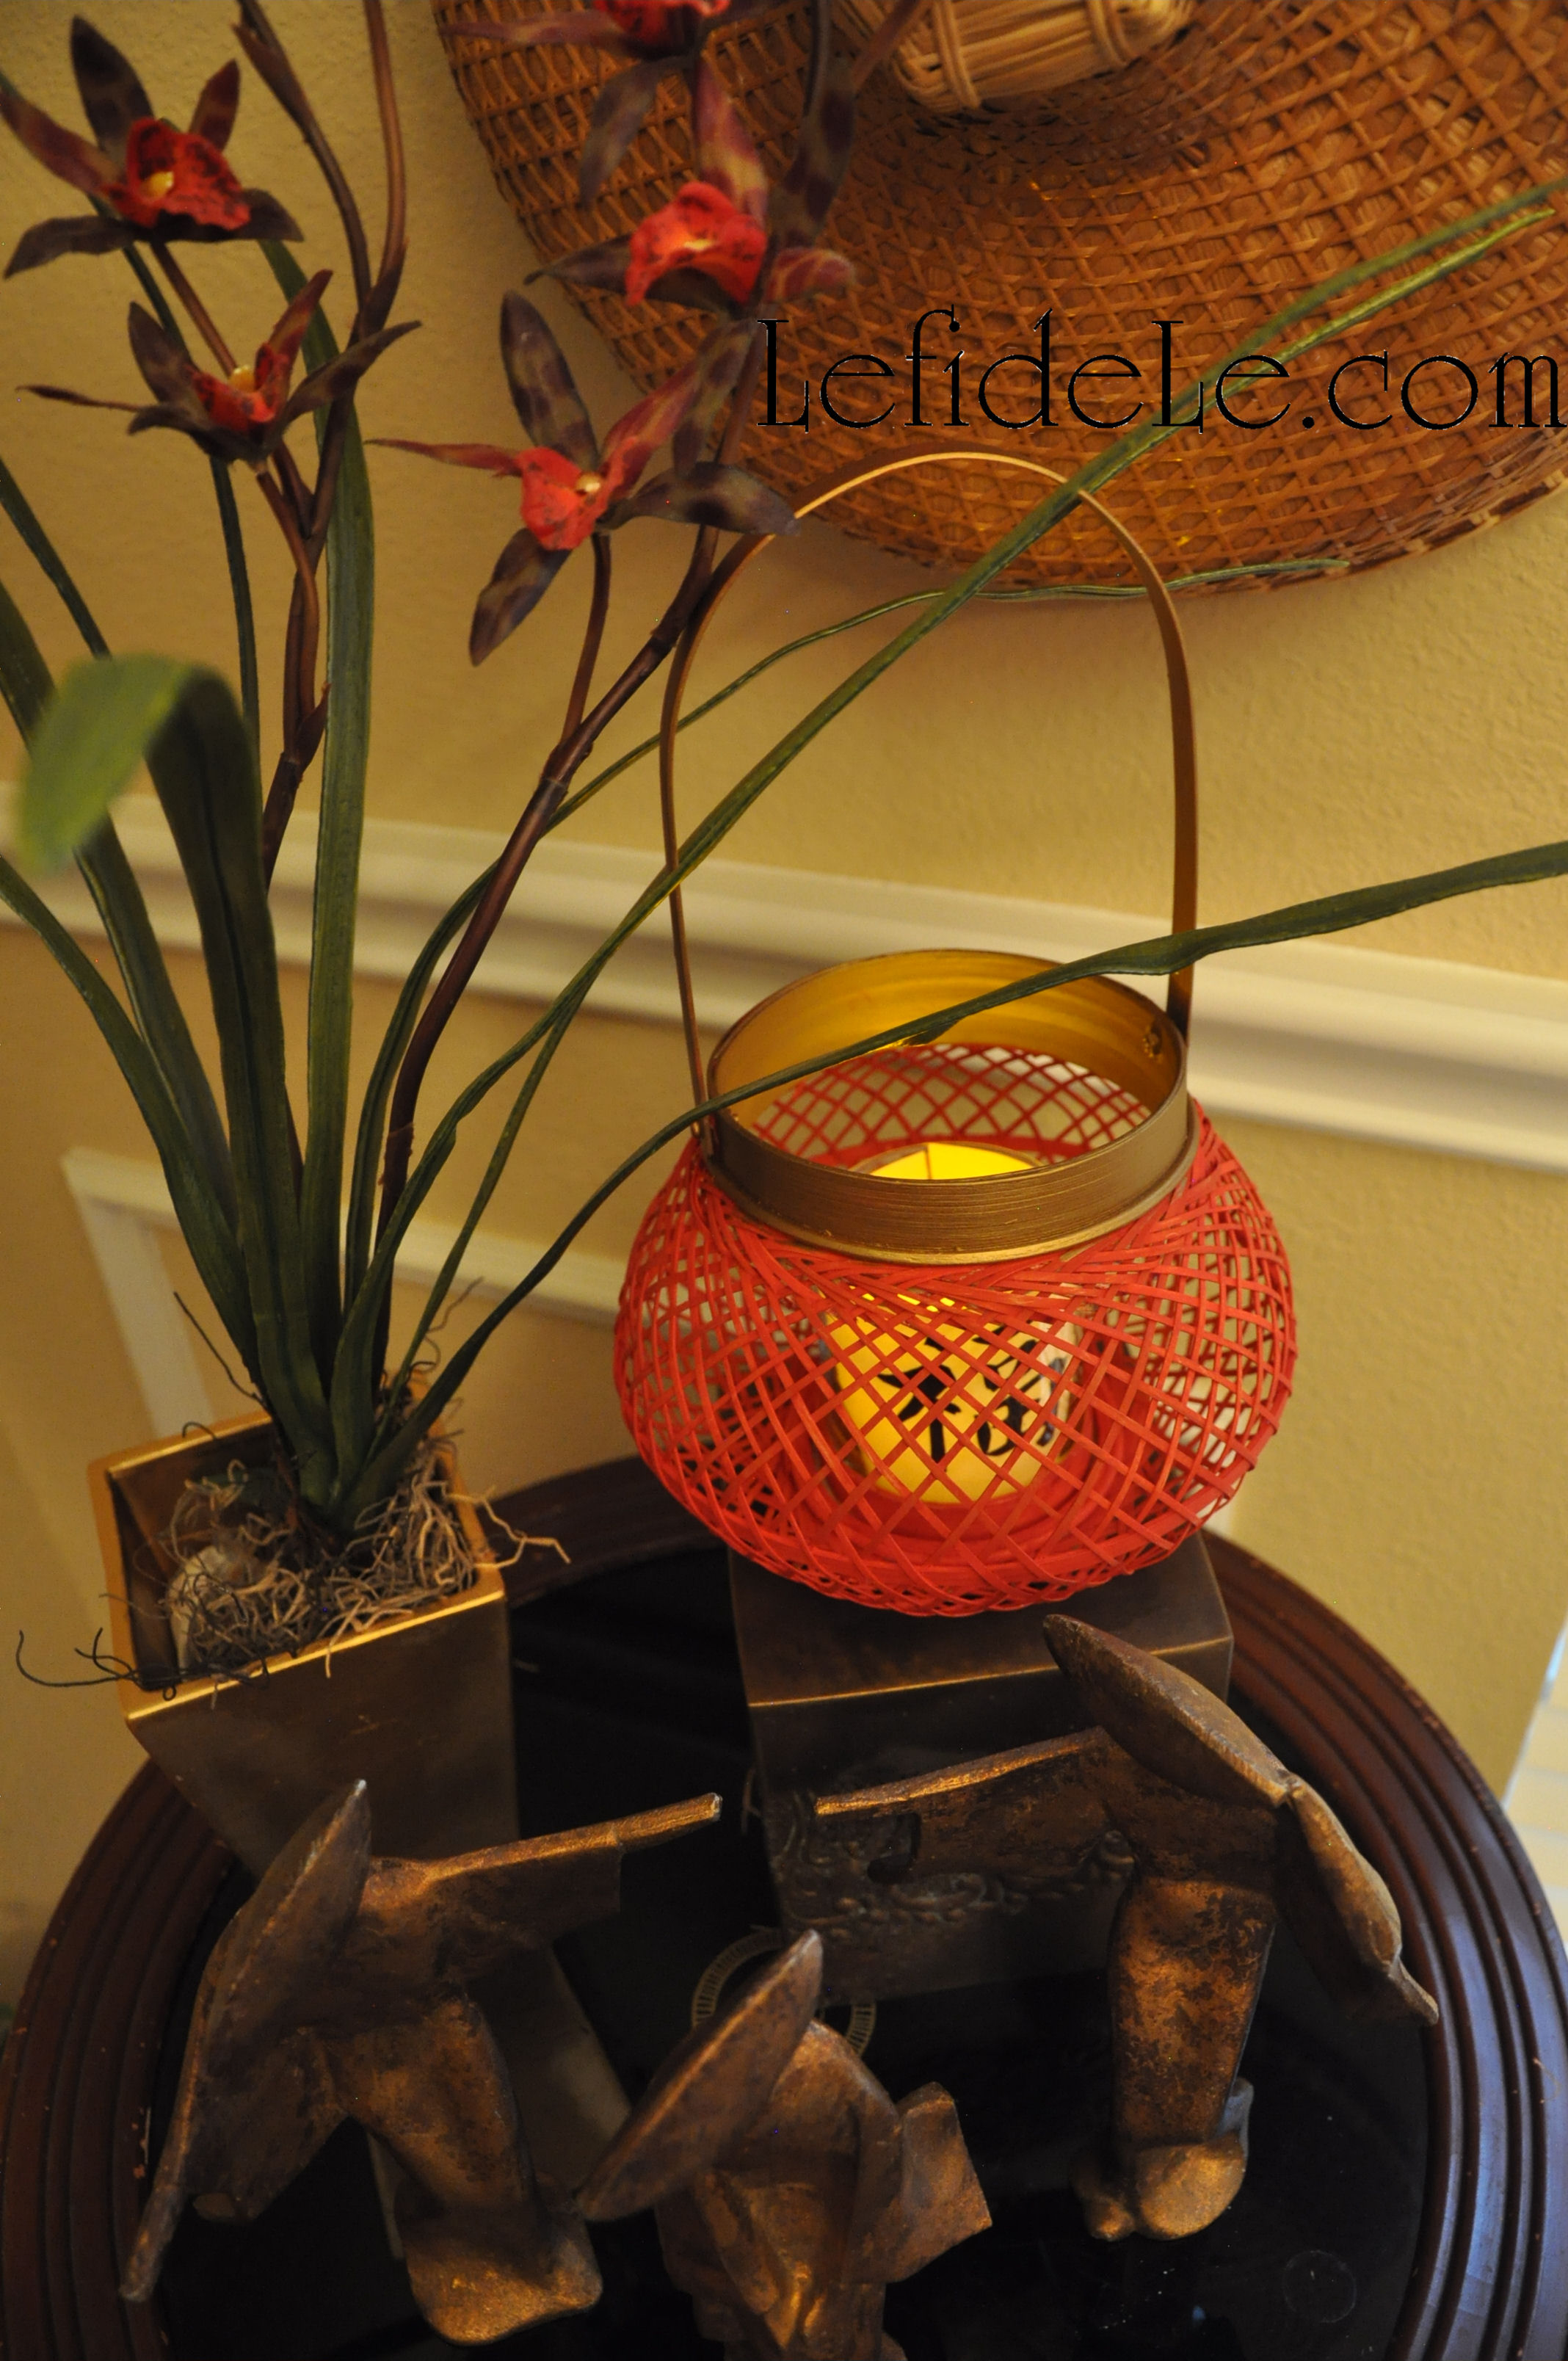
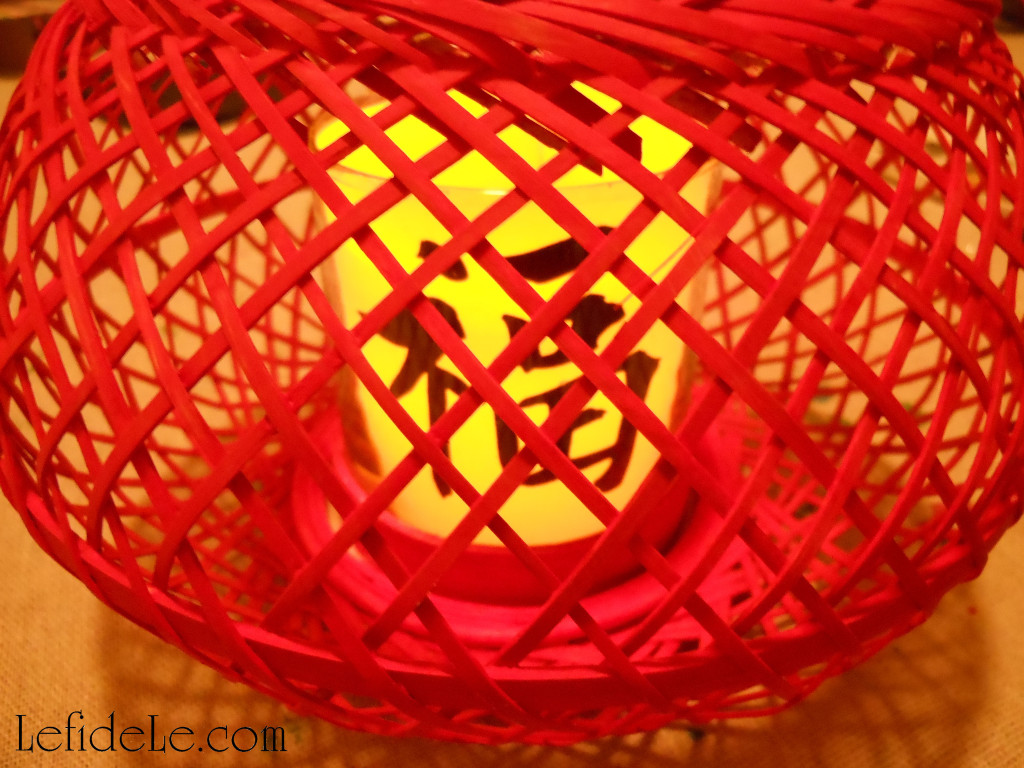
The top of the tower held an inexpensive bamboo lantern that I painted to coordinate with the theme’s colors.

246Leigh

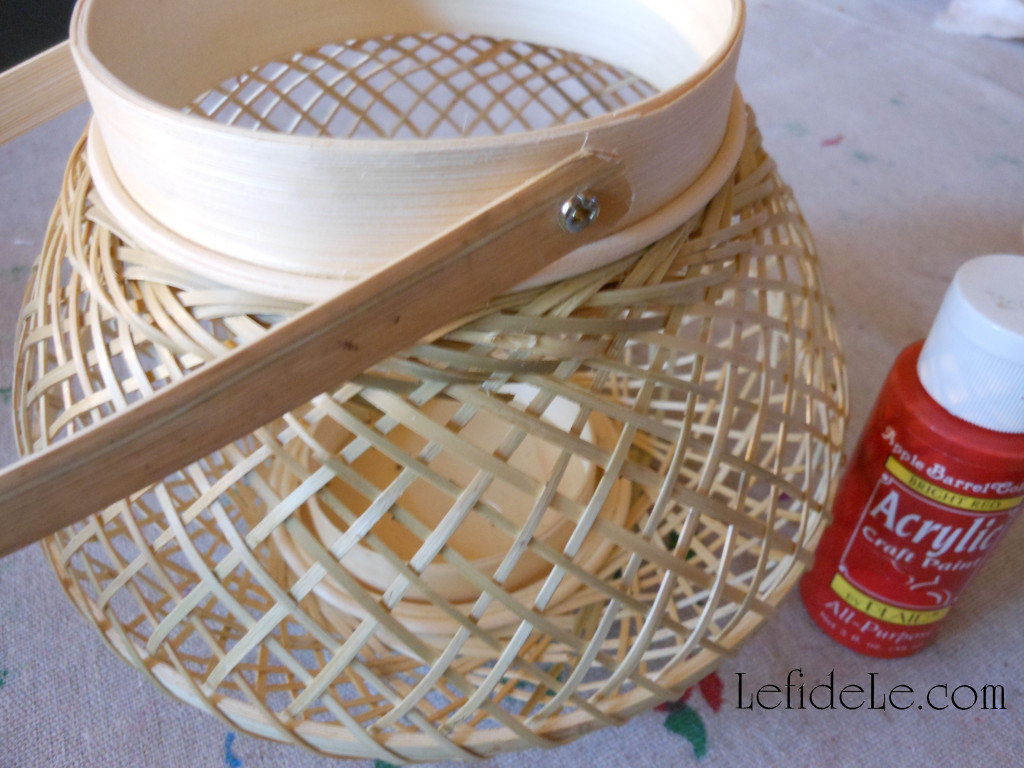
Simple red acrylic craft paint covered the whole structure well.

250Leigh

Gold paint made the handle and base appear as a richer metallic surface.

253Leigh

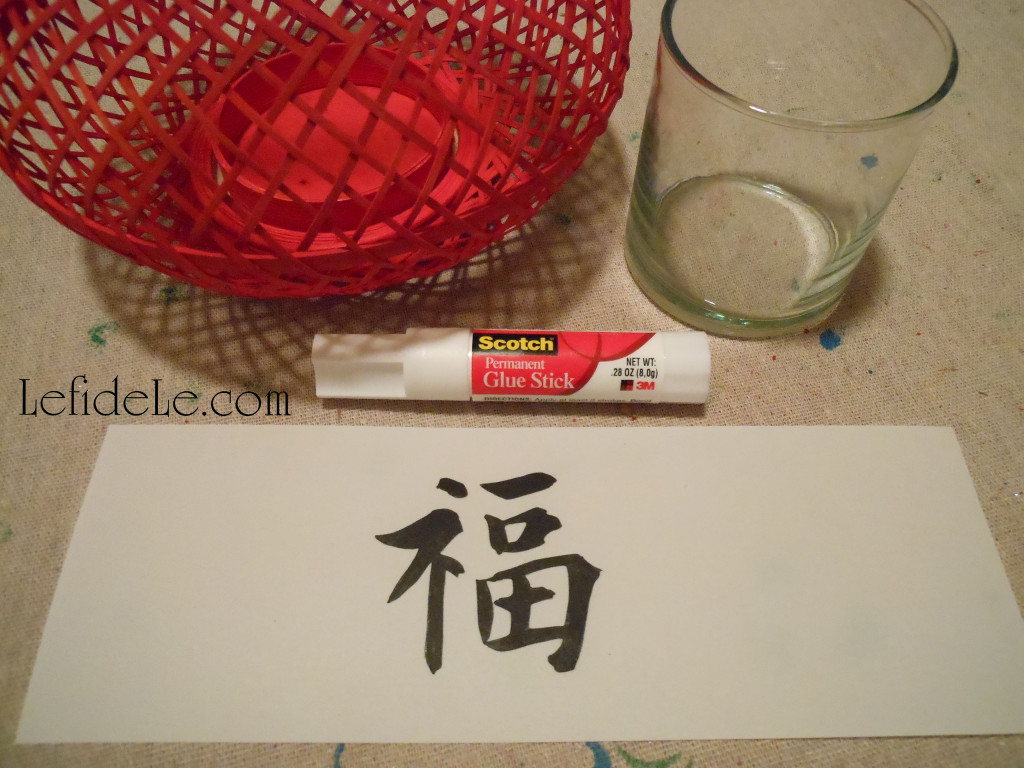
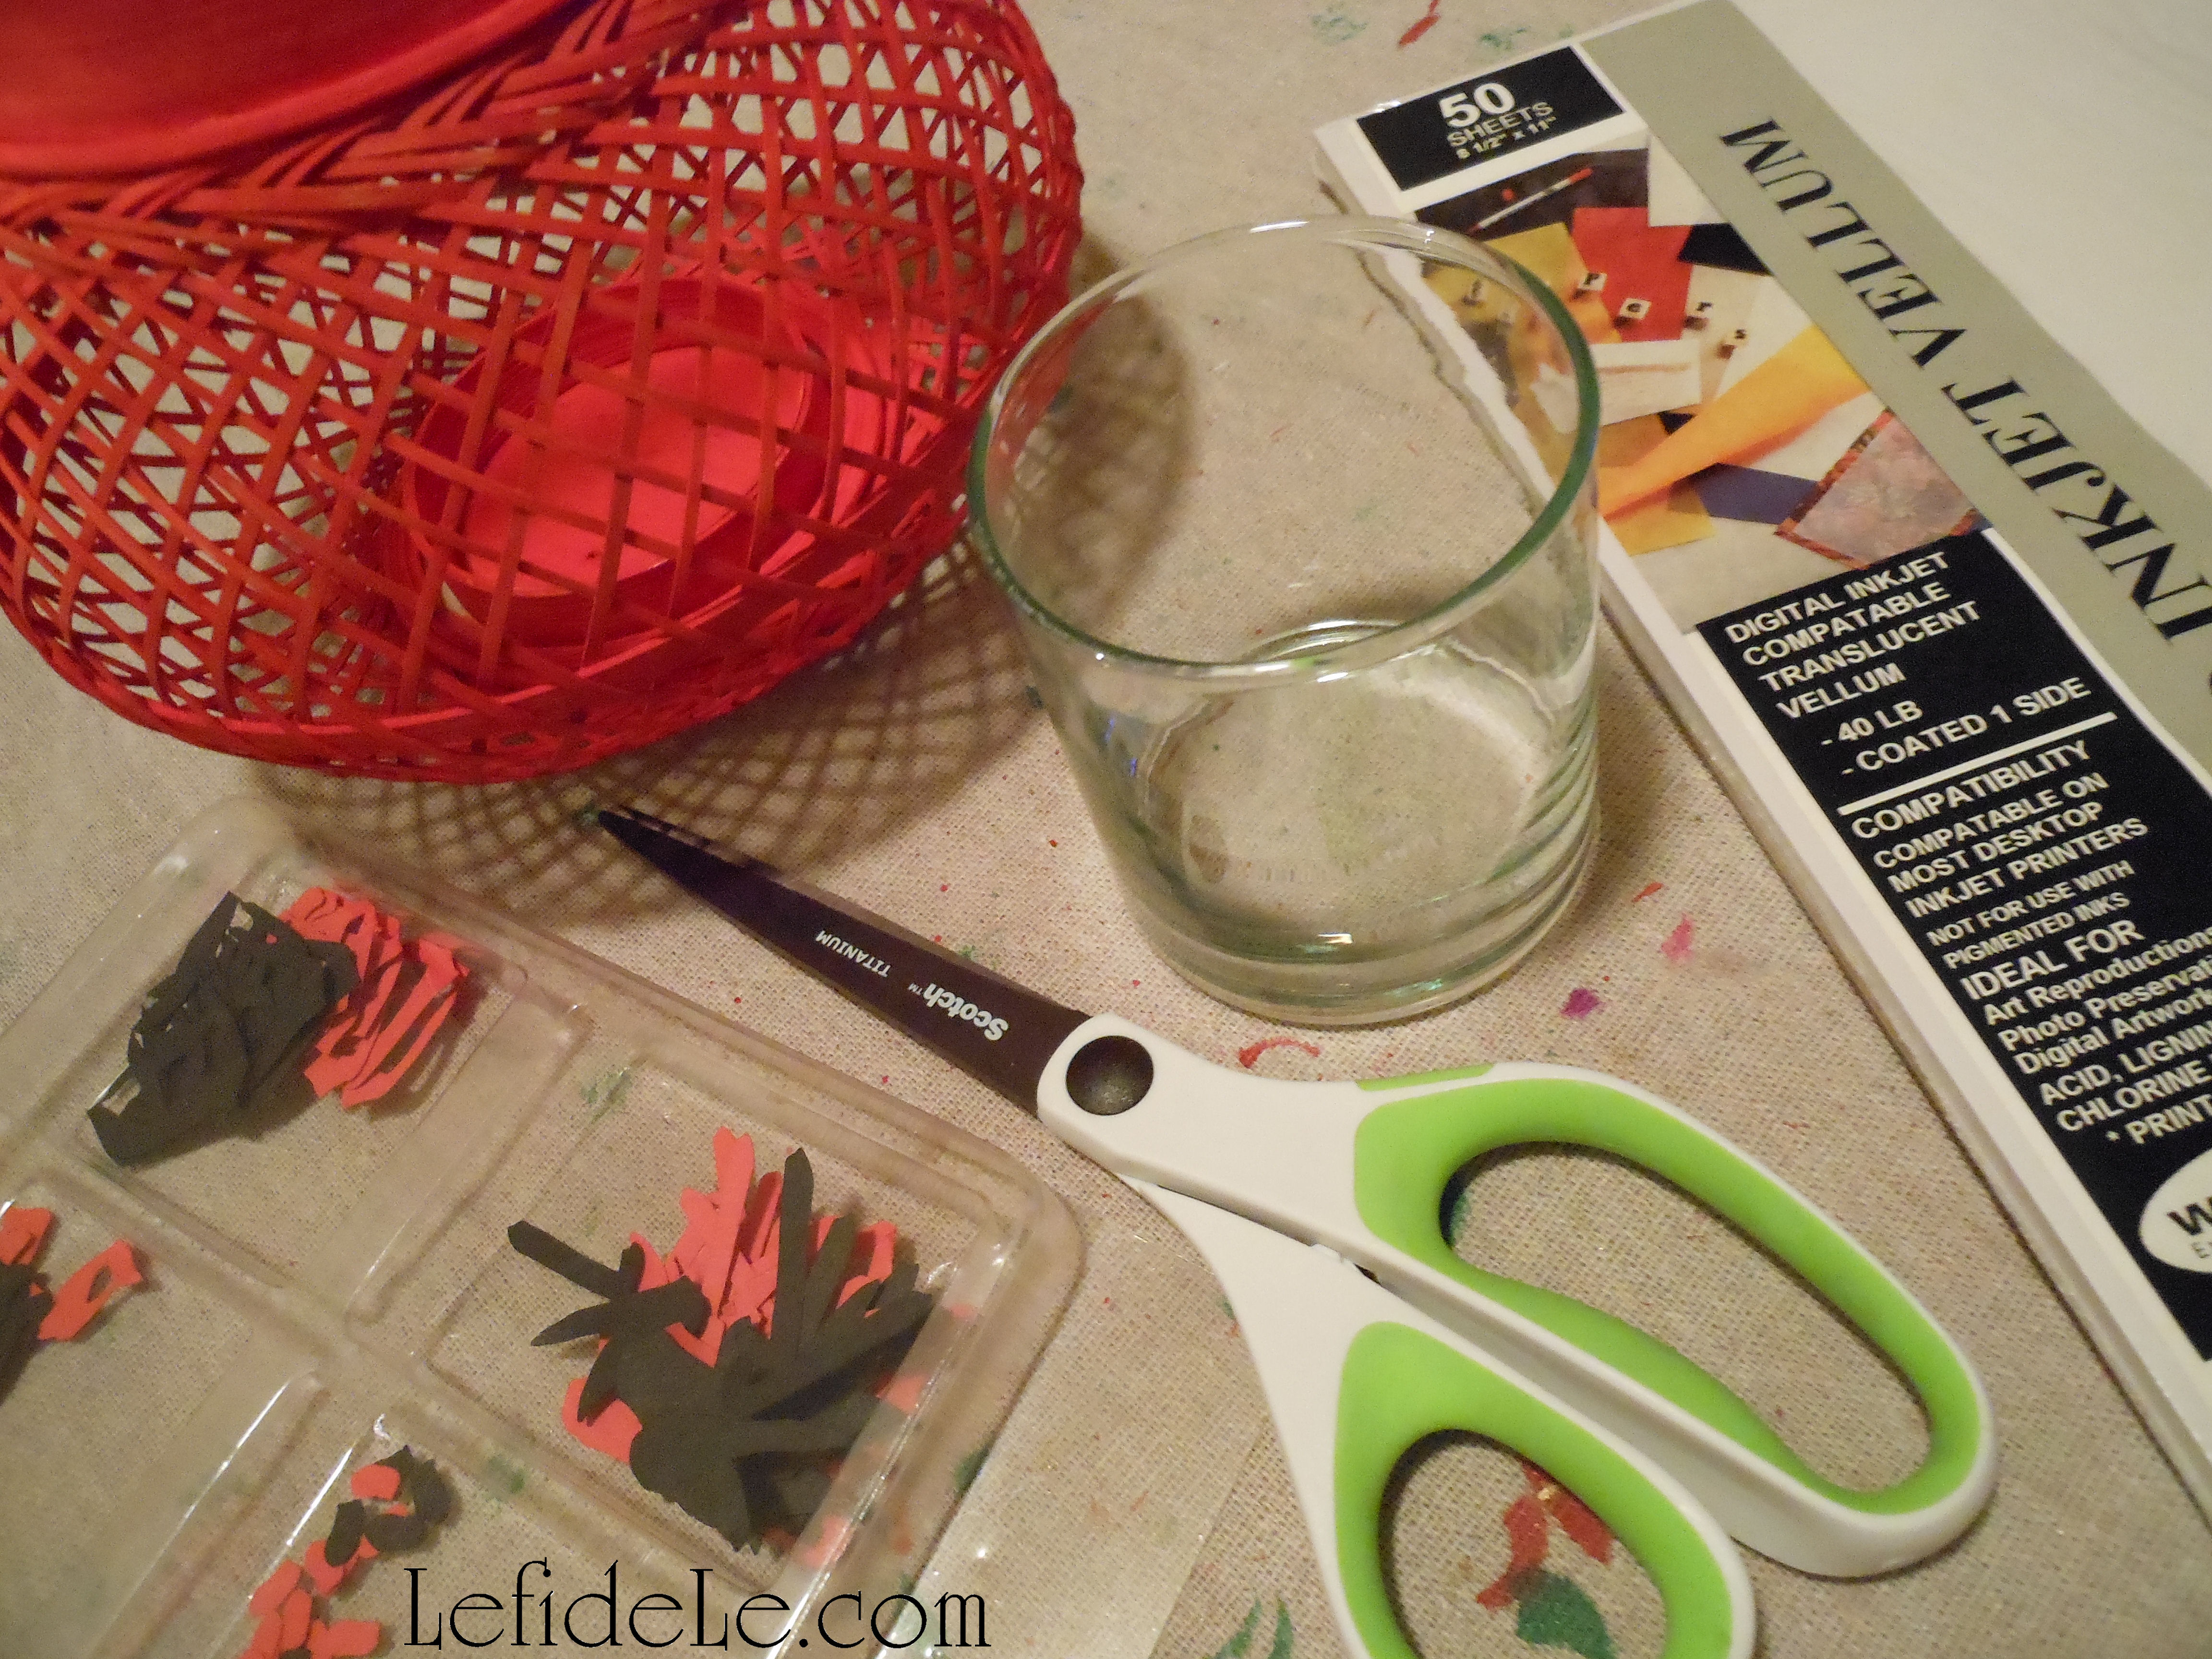
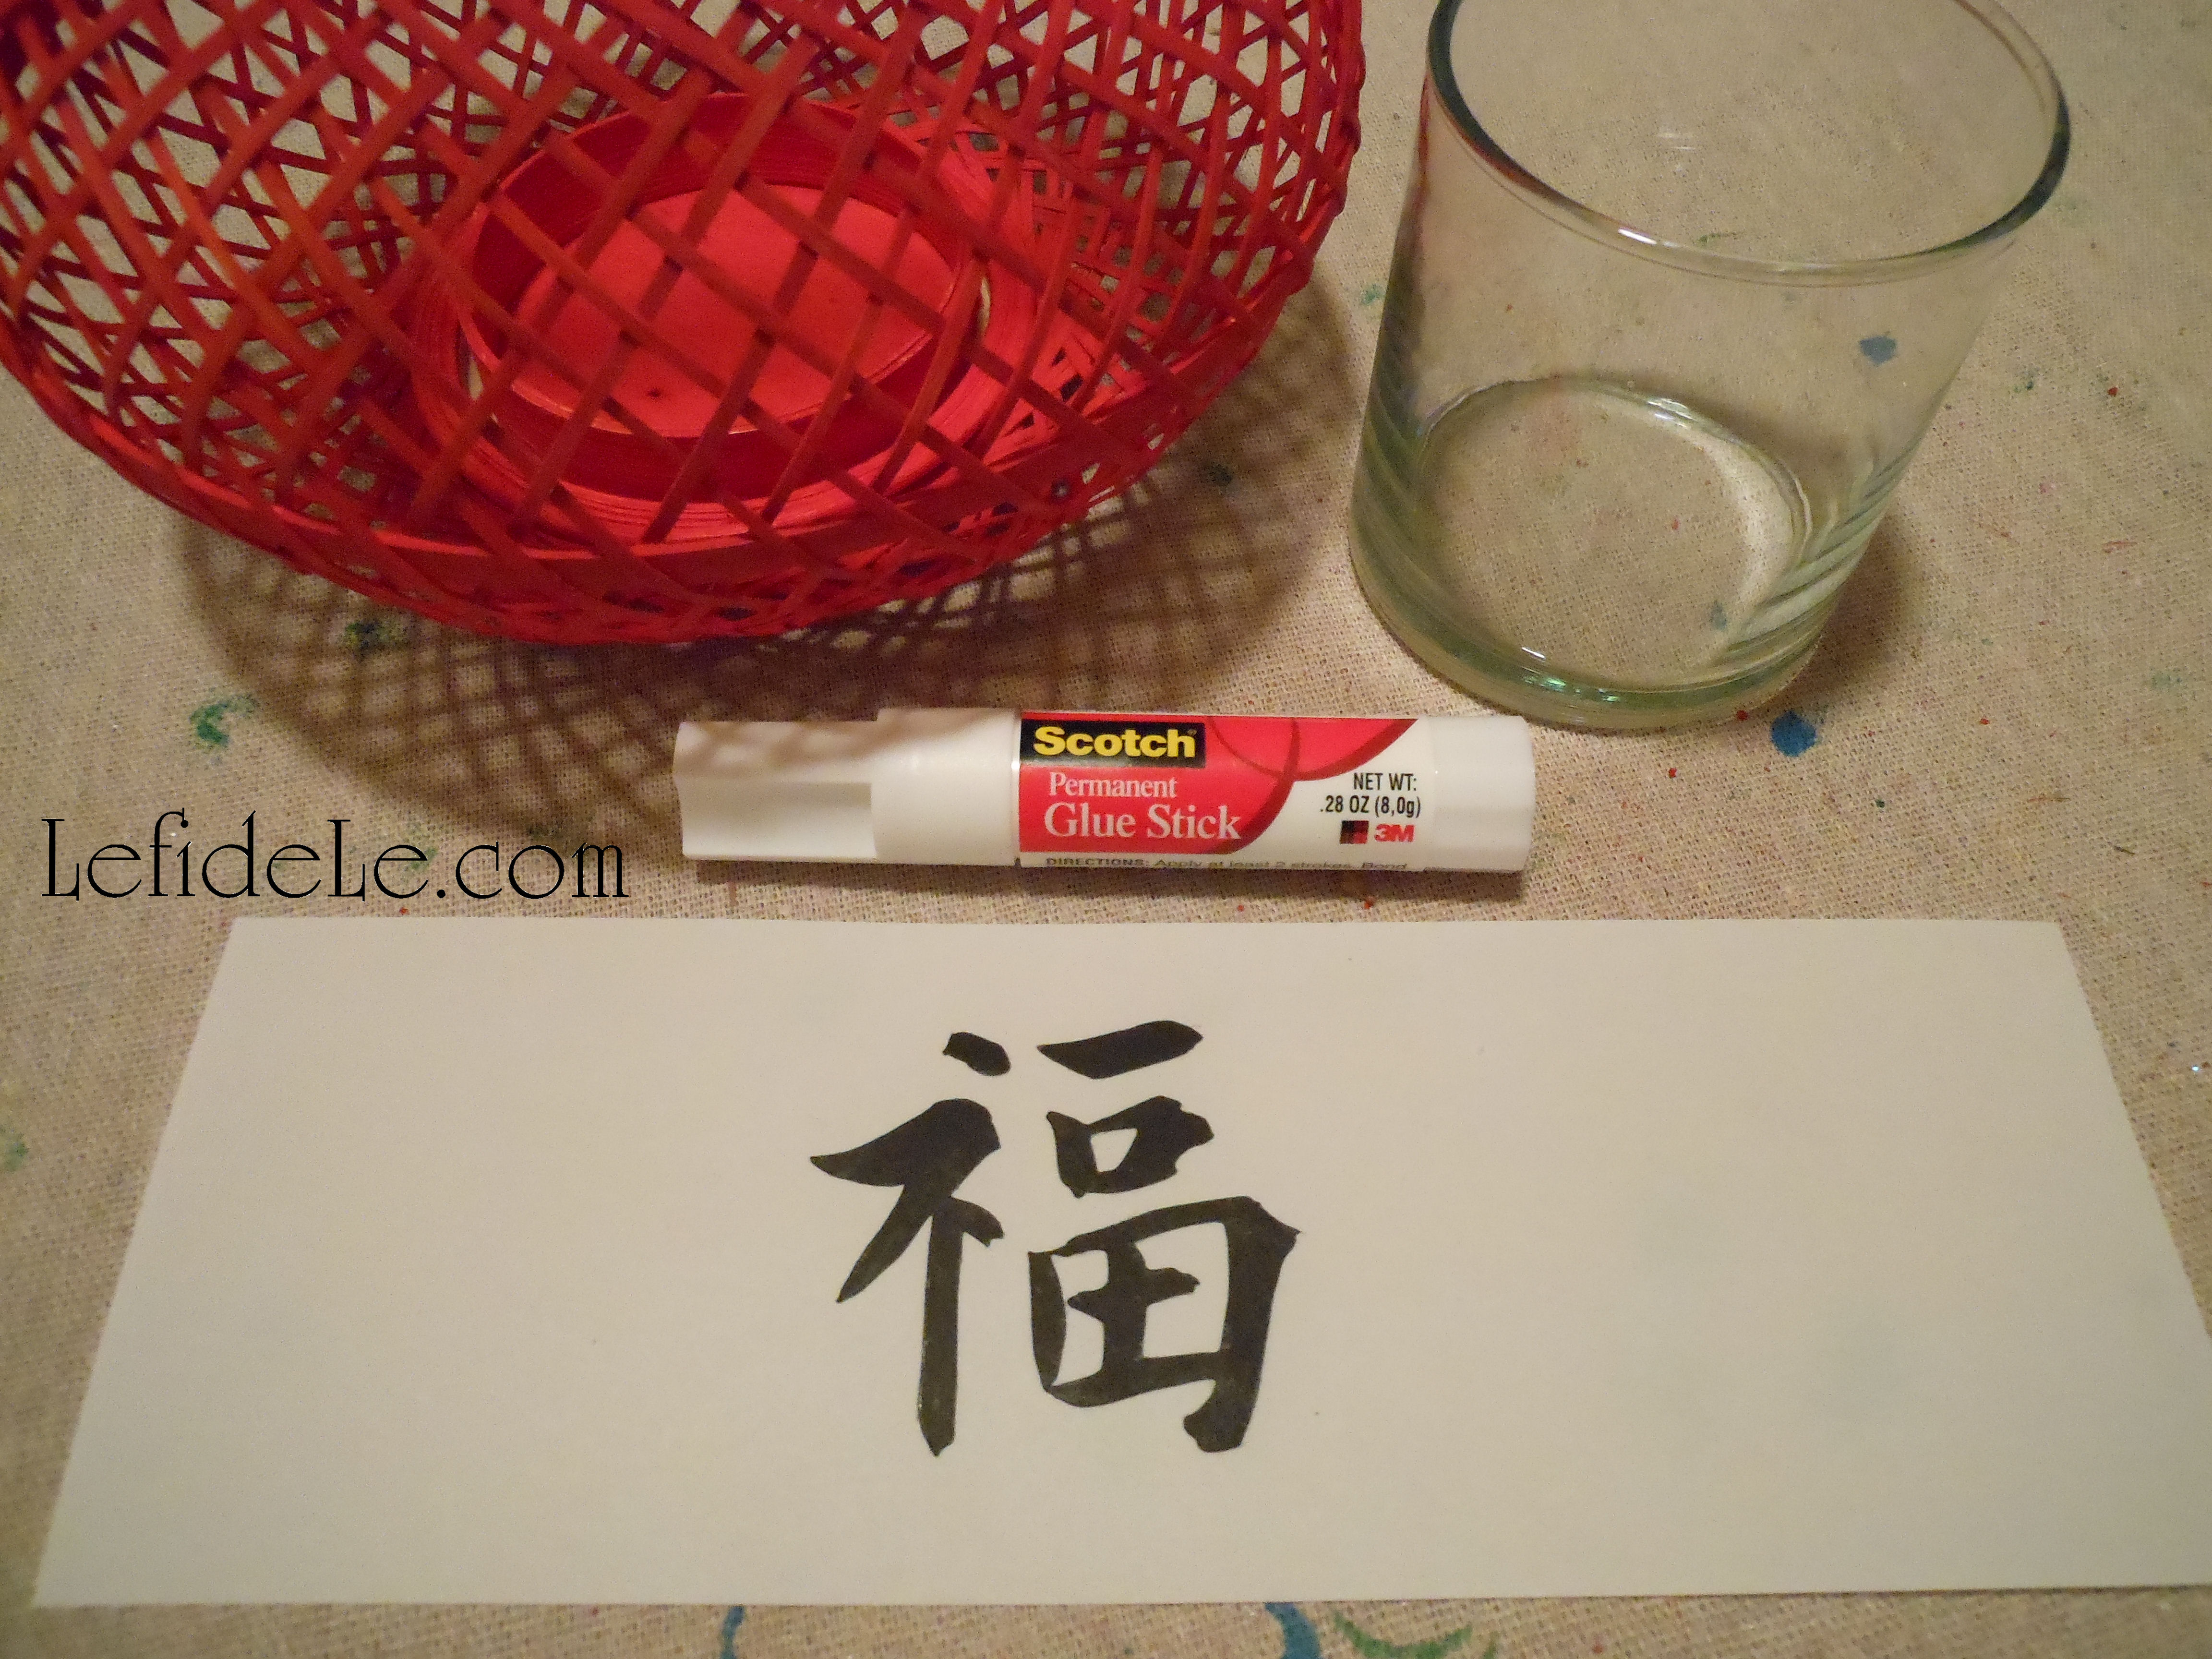
I glued a cut out “Fú” 福 character to a strip of vegan vellum with a permanent glue stick. You may use the red symbol cut from the printable, or just use it as a template to draw by with black marker, or cut out a black character from cardstock.

254Leigh

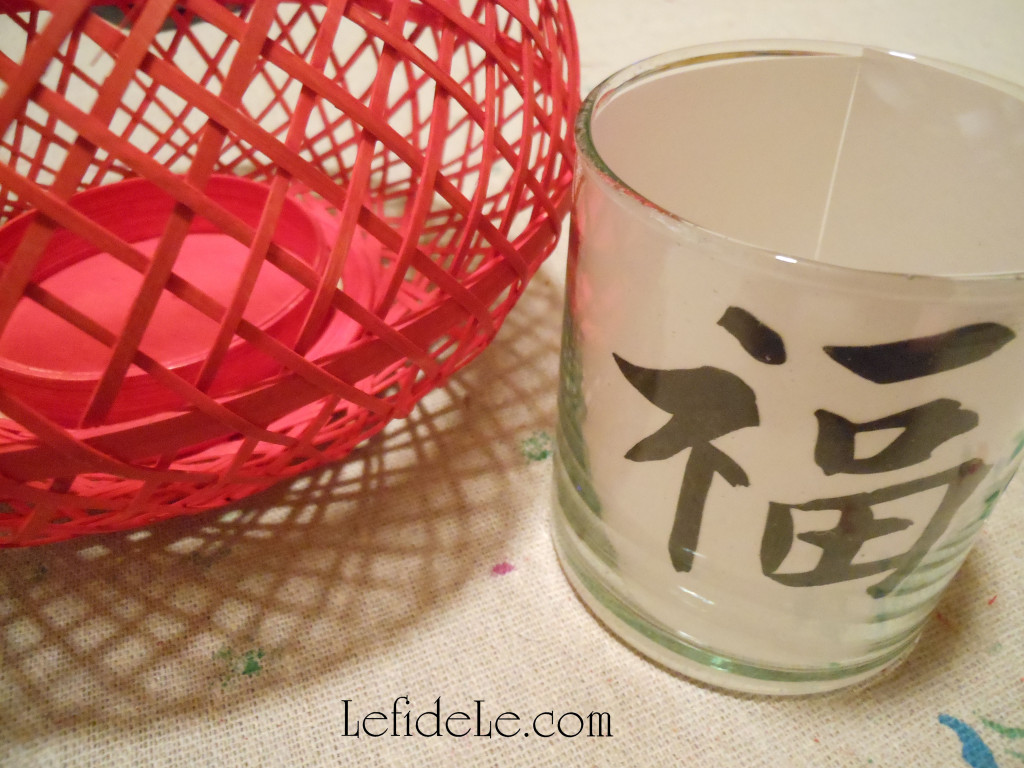
This strip can then be set into any clear votive cup… lantern or not! It doesn’t even need to be glued or taped. The vellum just expands to fit the glass securely. Using LED lights insures that no fire will catch the paper, even if knocked over… so it’s super kid and pet safe.

258Leigh

The best part is that I retain the option of removing the vellum strip and repainting the lanterns for a new color scheme in the future. I just love redoing and reusing… it’s so much better than merely recycling!

221Leigh

I also set a lantern onto the side table of the formal tablescape. (The bamboo lanterns originally came from Cost Plus World Market for a few dollars on clearance. See the sidebar for coupons and free shipping links.)

229Leigh

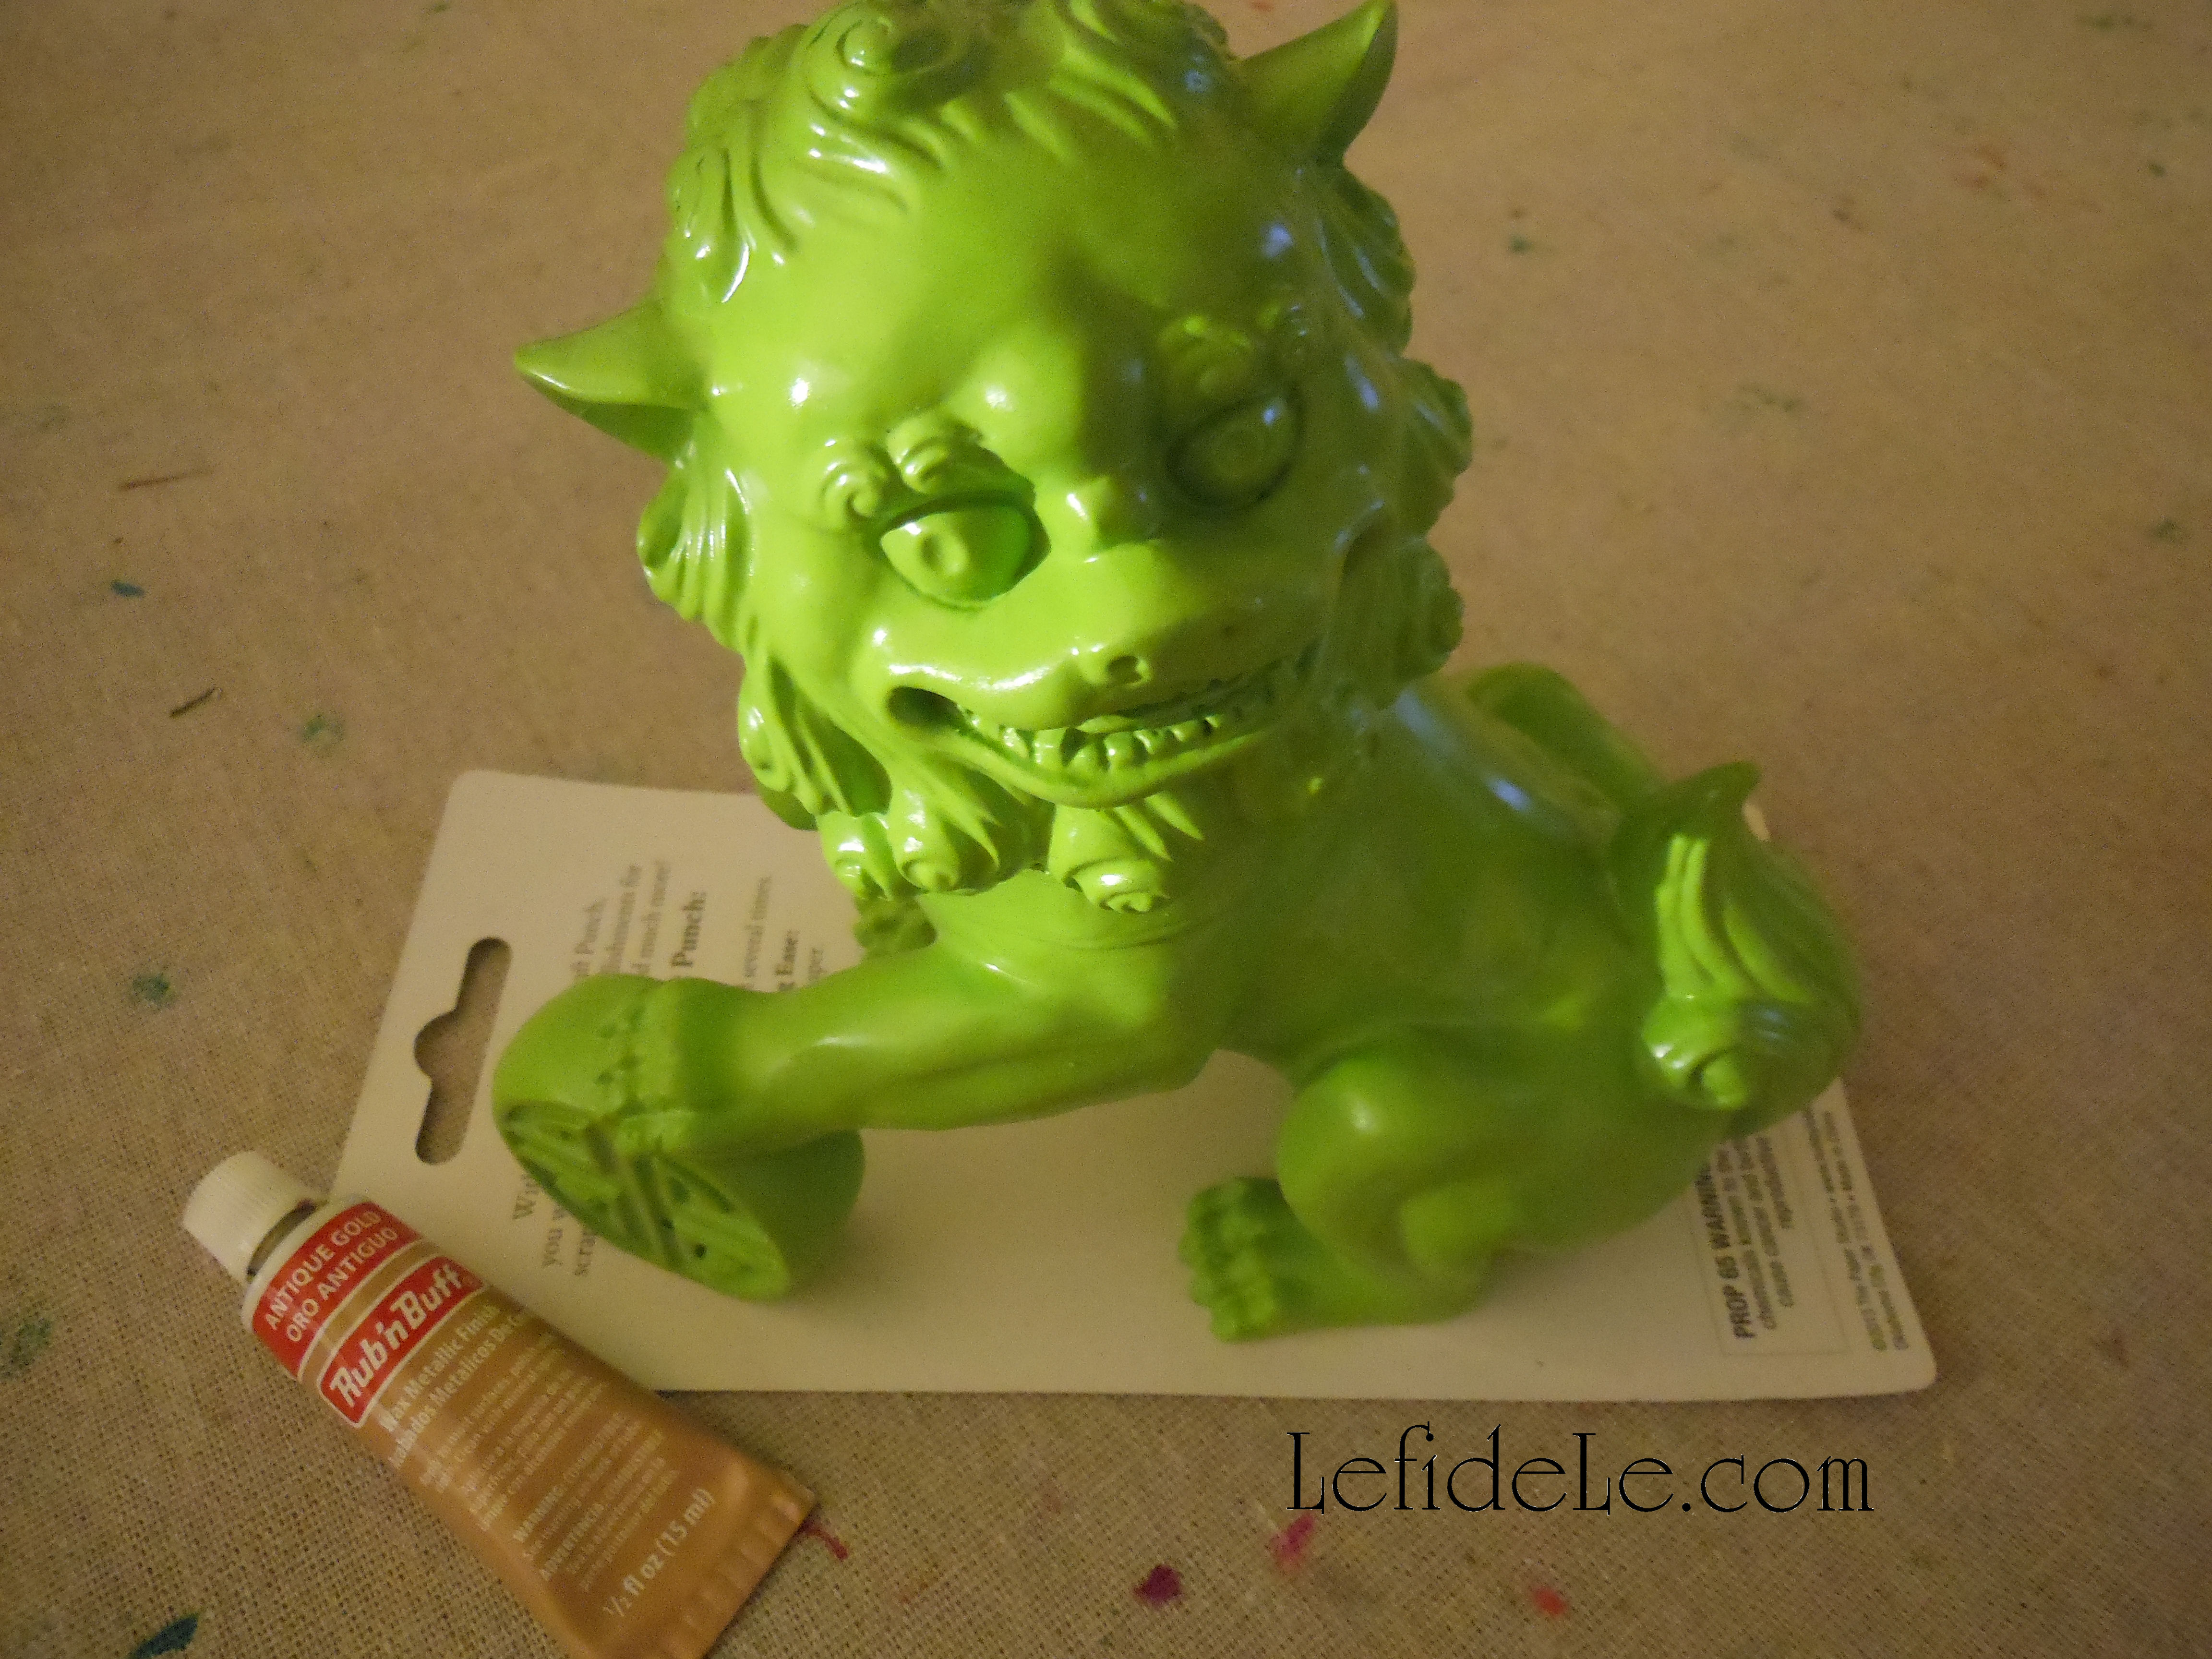
The powerful guardian lion Fú-dog is a traditional Chinese figure of protection. The one seen here is male because he’s resting a paw on a ball that represents the earth. Usually they are presented in pairs, but I only had one in a bright lime green color. I simply had to antique it!

231Leigh

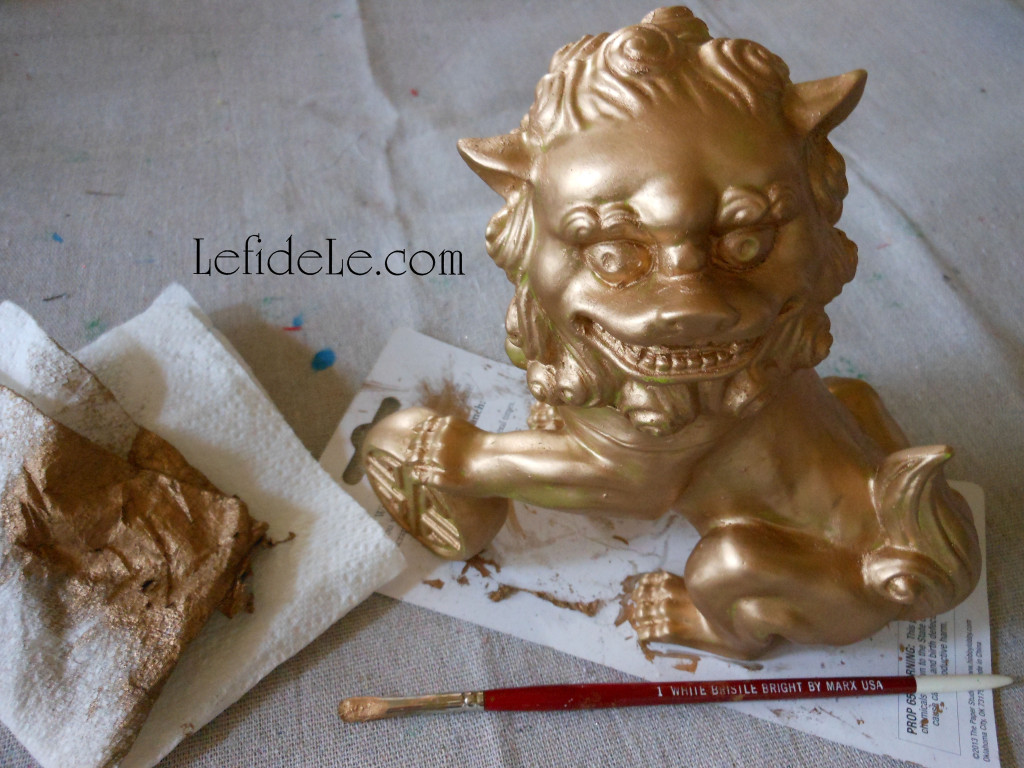
I began to turn the resin into metal by first using a gold Rub-n-Buff paint all over its surface. I gently wiped away the excess and let it set for a couple of days. Then I used a paper towel to rub/shine it up.

242Leigh

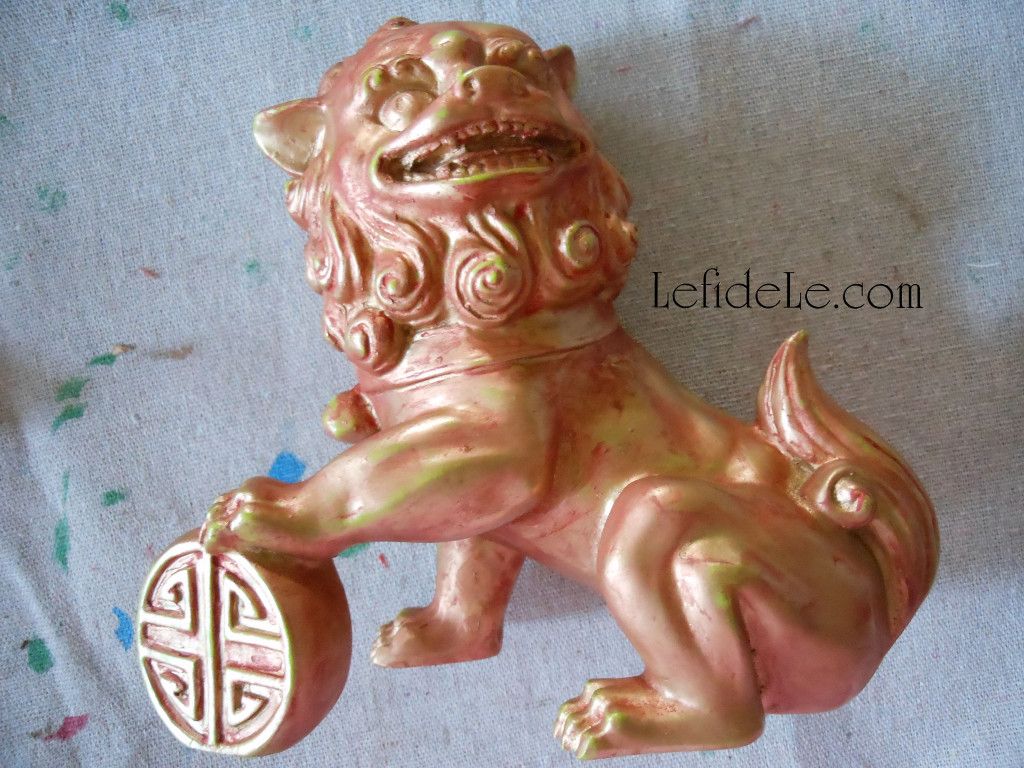
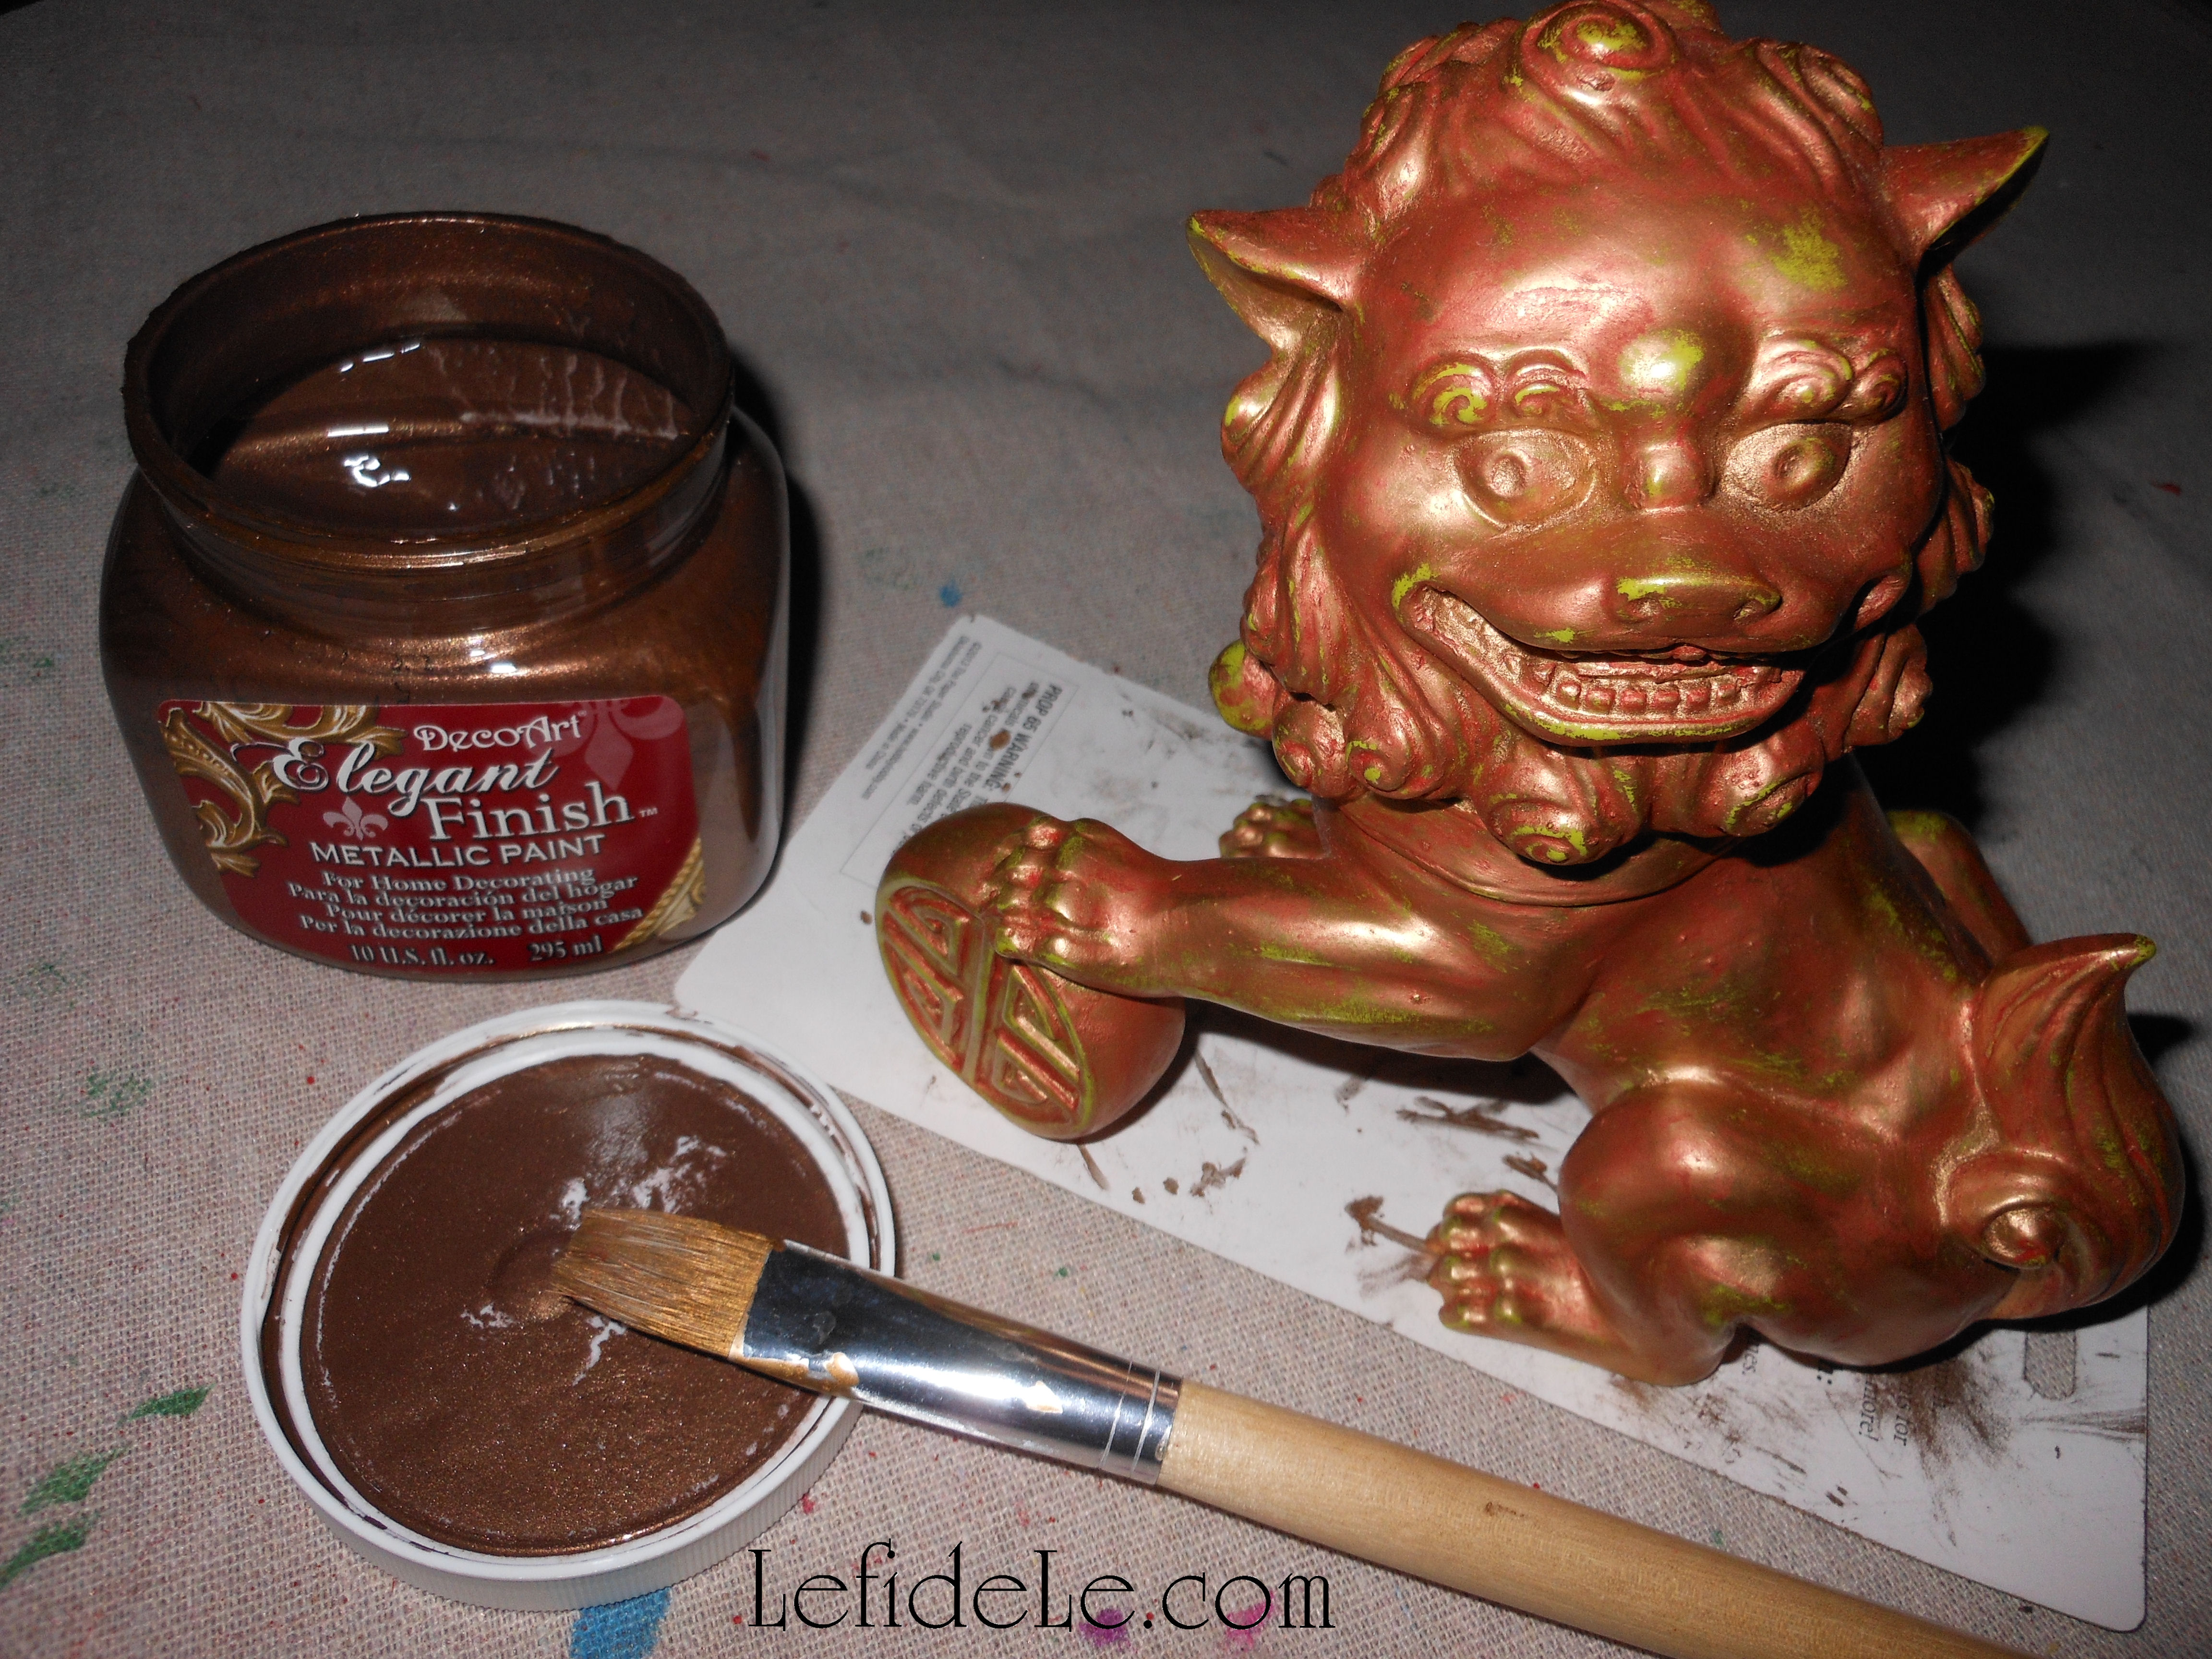
Next I coated that layer with the same red acrylic craft paint that I used on the lantern. I gently wiped off the excess, leaving an interesting pattern of color… green, gold, and red.

259Leigh

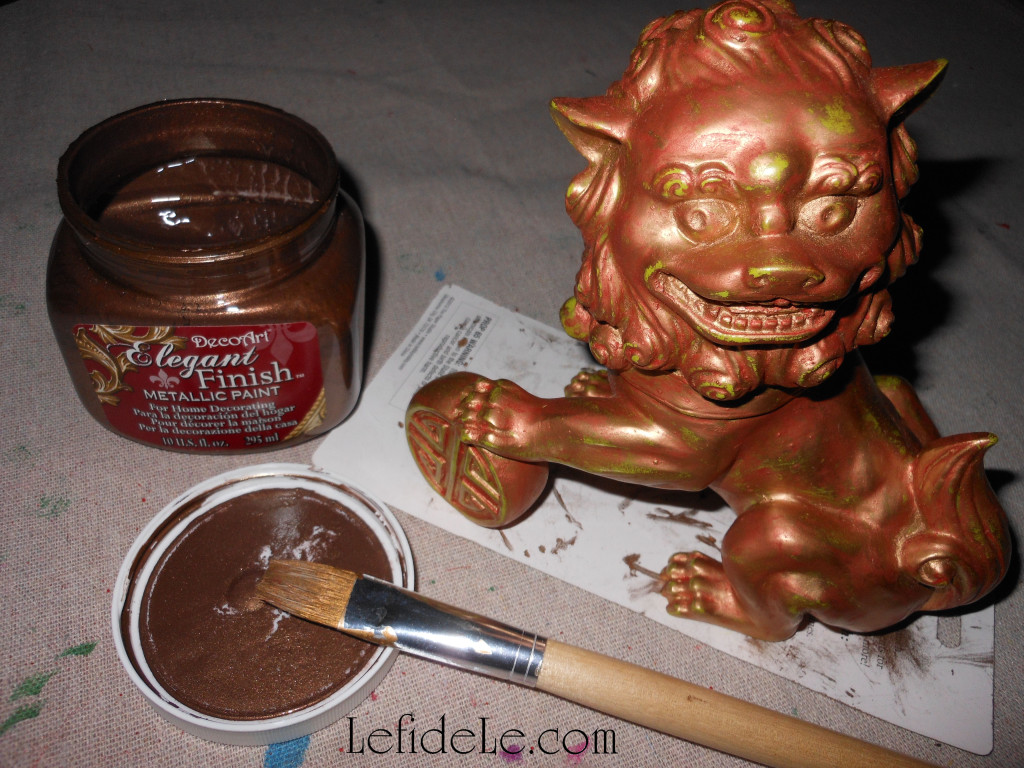
I let that dry overnight, then took some bronze glazing paint (called Elegant Finish by Deco Art) and coated the whole piece. I really gently dapped at the piece in spots to lightly remove some of the paint. For any of you who have ragged a wall, this is similar to that technique. I let that dry for another night.

284Leigh

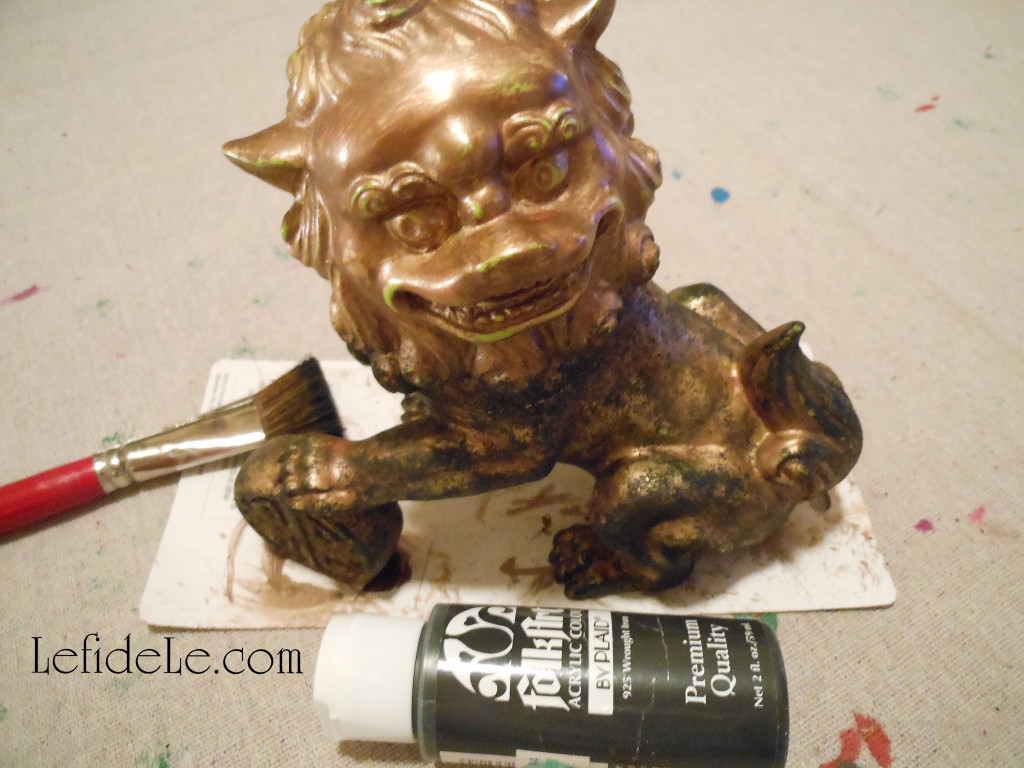
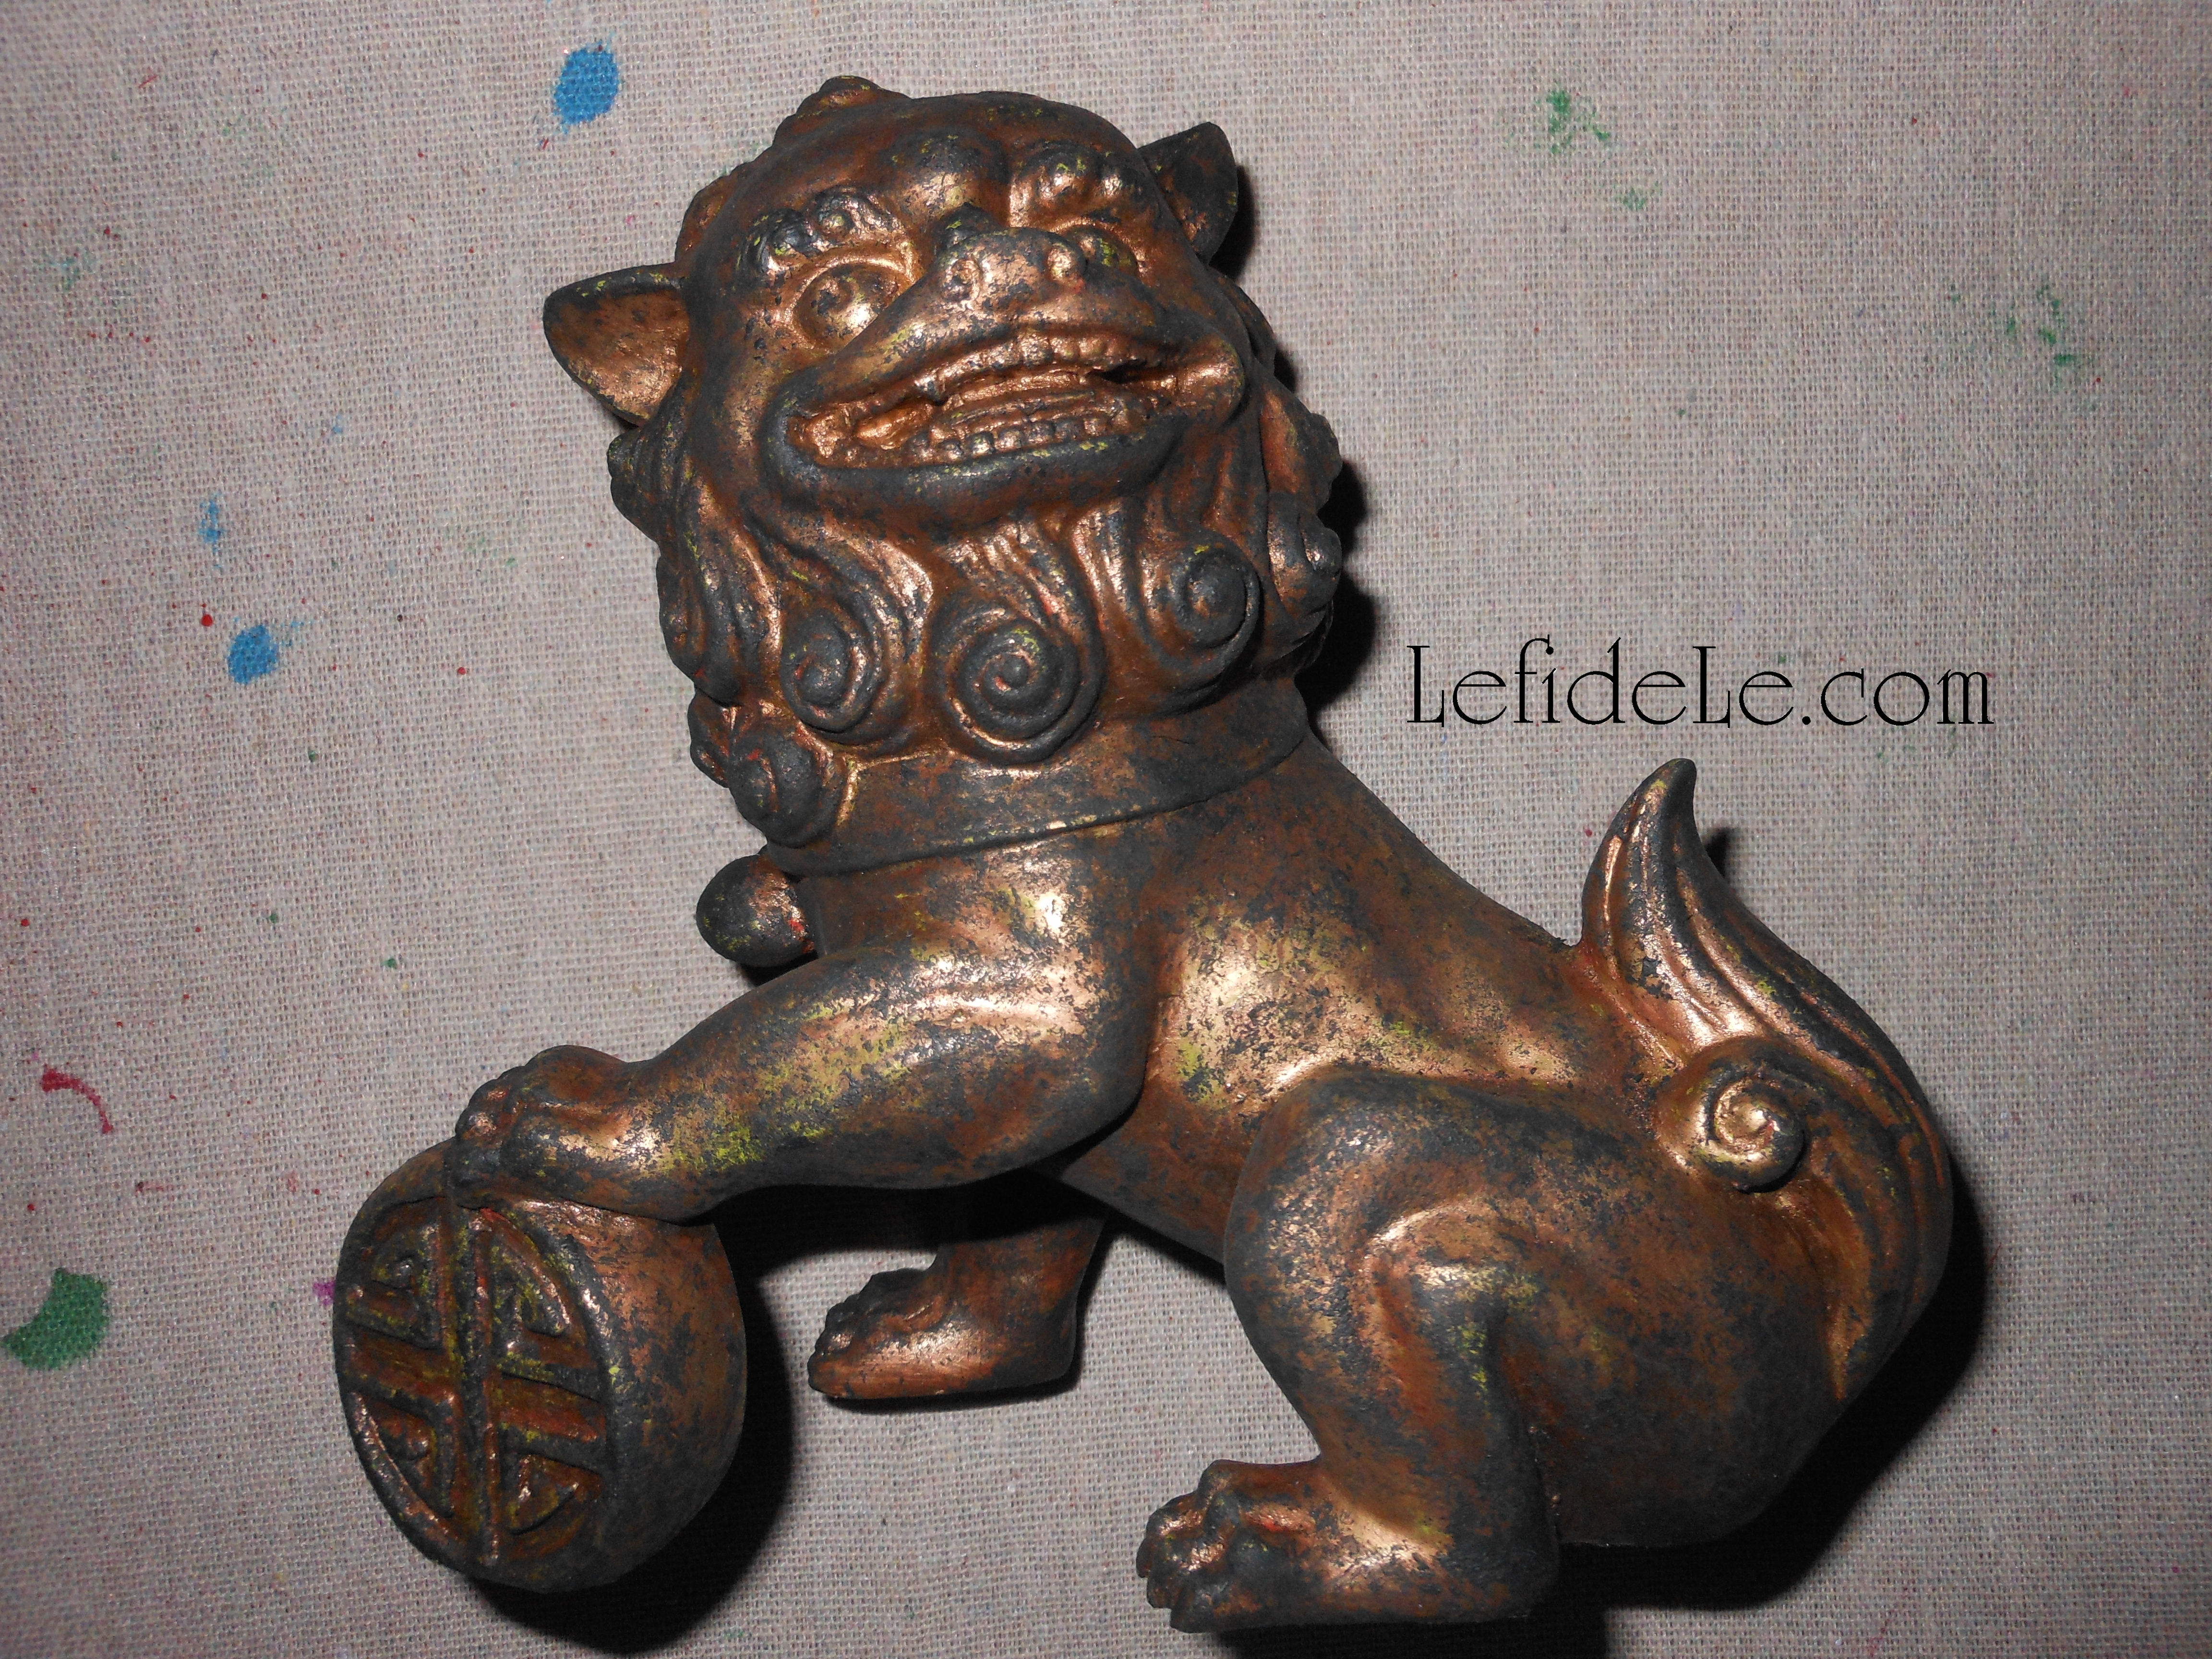
The last layer is the one you actually have to pay attention to. It requires plain old black acrylic craft paint and a really messed up “scruffy brush”. Never throw away those brushes that your loved ones mess up, don’t wash well, and leave in a horrible condition… they are your new besties. They’re great if you barely dip them into paint, pounce off the excess onto a paper towel, then “stipple” paint onto your surface. This is a sort of haphazard pouncing of the brush perpendicularly to the piece. It’s the easiest way to paint an antique looking surface… and it’s actually a lot of fun.

290Leigh

I took this statuette from lime lion to antique guardian in a few simple steps. You can do the same with any accessory that doesn’t quite match your décor, or looks a bit cheaper than you’d like. This is especially great to do when you see a fantastic find on clearance that just has a ding or two… paint it up! You will have created your own one-of-a-kind upcycled beauty that will have people thinking it’s an antique.

032Leigh

Happy crafting in the New Year!

Faithfully Yours,

Leigh

Quick & Easy Overnight Pickled Cucumbers Recipe (for Chinese New Year or Anytime)

This quick and easy recipe was inspired by a Chinese Travel Website that described the traditional foods of various regions. I was delighted to see that pickled cucumbers were listed… because who in the world doesn’t love a good pickle? Quick pickling makes this a great side dish for any occasion because it can be prepped overnight, and everyone really needs a good last minute dish. Just change up the spices, acids, and sweetener to suit your taste or event theme. It’s perfect for a Chinese New Year Celebration because it’s a light and green food to add to all the traditionally starchy New Year’s foods like longevity noodles, moon cakes, spring rolls, and dumplings. What’s more is that you can control the amount of sodium and sugar you put into it… so that family member with high blood pressure can still enjoy a good pickle without cheating with the jarred stuff!

132Leigh


Ingredients:

  • 2 cucumbers (I used the English hothouse variety because no peeling is needed.)
  • 1 tablespoon sea salt (Adjust the amount according to taste & dietary needs.)
  • 3 tablespoons Ume plum vinegar (Use any type of vinegar or lemon juice.)
  • 1 tablespoon turbinado sugar (Use any sweetener such as honey, agave, stevia, etc.)
  • ~ 1 teaspoon each of various spices (Try ground peppercorns, coriander, marjoram, ginger, etc.)

Instructions:

101Leigh

Wash your cucumbers well. There is no need to peel English Cucumbers, as pictured here, but the traditional waxed variety can have a bitter peel so it’s better to remove it. (The hothouse types are prettier with the 2 green tones, and we are making quick pickles… so the quicker the better, right?) A traditional looking dish has “cukes” that are split down the middle twice, so that you’re left with 4 long sections. Then cut these into approximately 2 inch chunks.

105Leigh

Salt the cucumber chunks, and stir them well. Refrigerate them covered overnight.

109Leigh

Rinse the cucumber chunks several times in water to remove excess sodium. (I just run water right into the casserole dish they’re already in, and place the top back on. I hold the top and bottom together, and turn them to the side letting the water drain out, leaving the washed cucumbers behind. Not having to wash a colander makes quick pickles even quicker!)

116Leigh

Add your acidic liquid such as lemon juice or vinegar. (I chose Ume plum vinegar because its flavor was a perfect complement for the other Chinese New Year dishes being served.) Also mix in your choice of spices. (After reading through about a dozen of my grandmother’s vintage Chinese cookbooks, I’ve come to the conclusion that there is no such thing as a traditional recipe. Everyone has their own spin, which means that you should feel free to make up your own concoction too!)

175Leigh

Mix your flavored cukes well, and refrigerate until it’s time to plate and garnish for serving. (The pickles pictured here are garnished with diced spring onions and whole roma tomatoes. Click here to see more of the Chinese New Year Party of the Sheep/Ram.)

161Leigh

I hereby confess that I don’t actually measure anything when preparing these little gems. I just go with my creative cooking instincts and prevailing mood to judge the flavor… which is exactly what is fun about this. They always seem to turn out just right. I do, of course, use less salt when making them for my grandmother, and less spice for my mother’s bland preferences. So, those pictured here were decidedly less flavorful than what I typically produce, yet they still tasted fantastic. The take home message is this, don’t be afraid to experiment with flavor. Have fun and enjoy not only the end result but the process as well!

Faithfully Yours,

Leigh