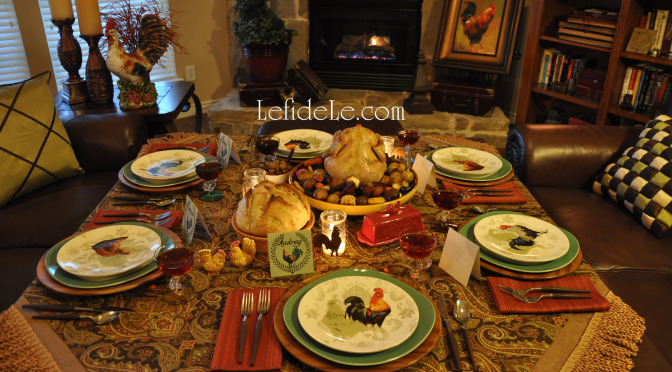
 With the winter season so turkey saturated for the holidays, I thought I’d utilize my overabundance of rooster décor and host a cozy dinner party by the fire. I used my Healthy “One-Pot” Cocorico Roasted Chicken (or Turkey) & Root Vegetables Recipe as a family-style centerpiece of food. And with my printable place-cards, it’s an easily emulated dinner party that offers a warm welcome for out-of-towners in for the holidays!
  I love the idea of taking dinner out of the dining room, especially in winter when there is a cozy fire available. So, my first task was to move the couches into a dining configuration. I have a large round antique coffee table that is mechanized to pop up to dining height. To accommodate more guests, I topped it with a $12 precut 4’ x 4’ plywood square from a chain hardware store. The edges of this were taped to avoid snagging the tablecloth. A card table is another easy option.
 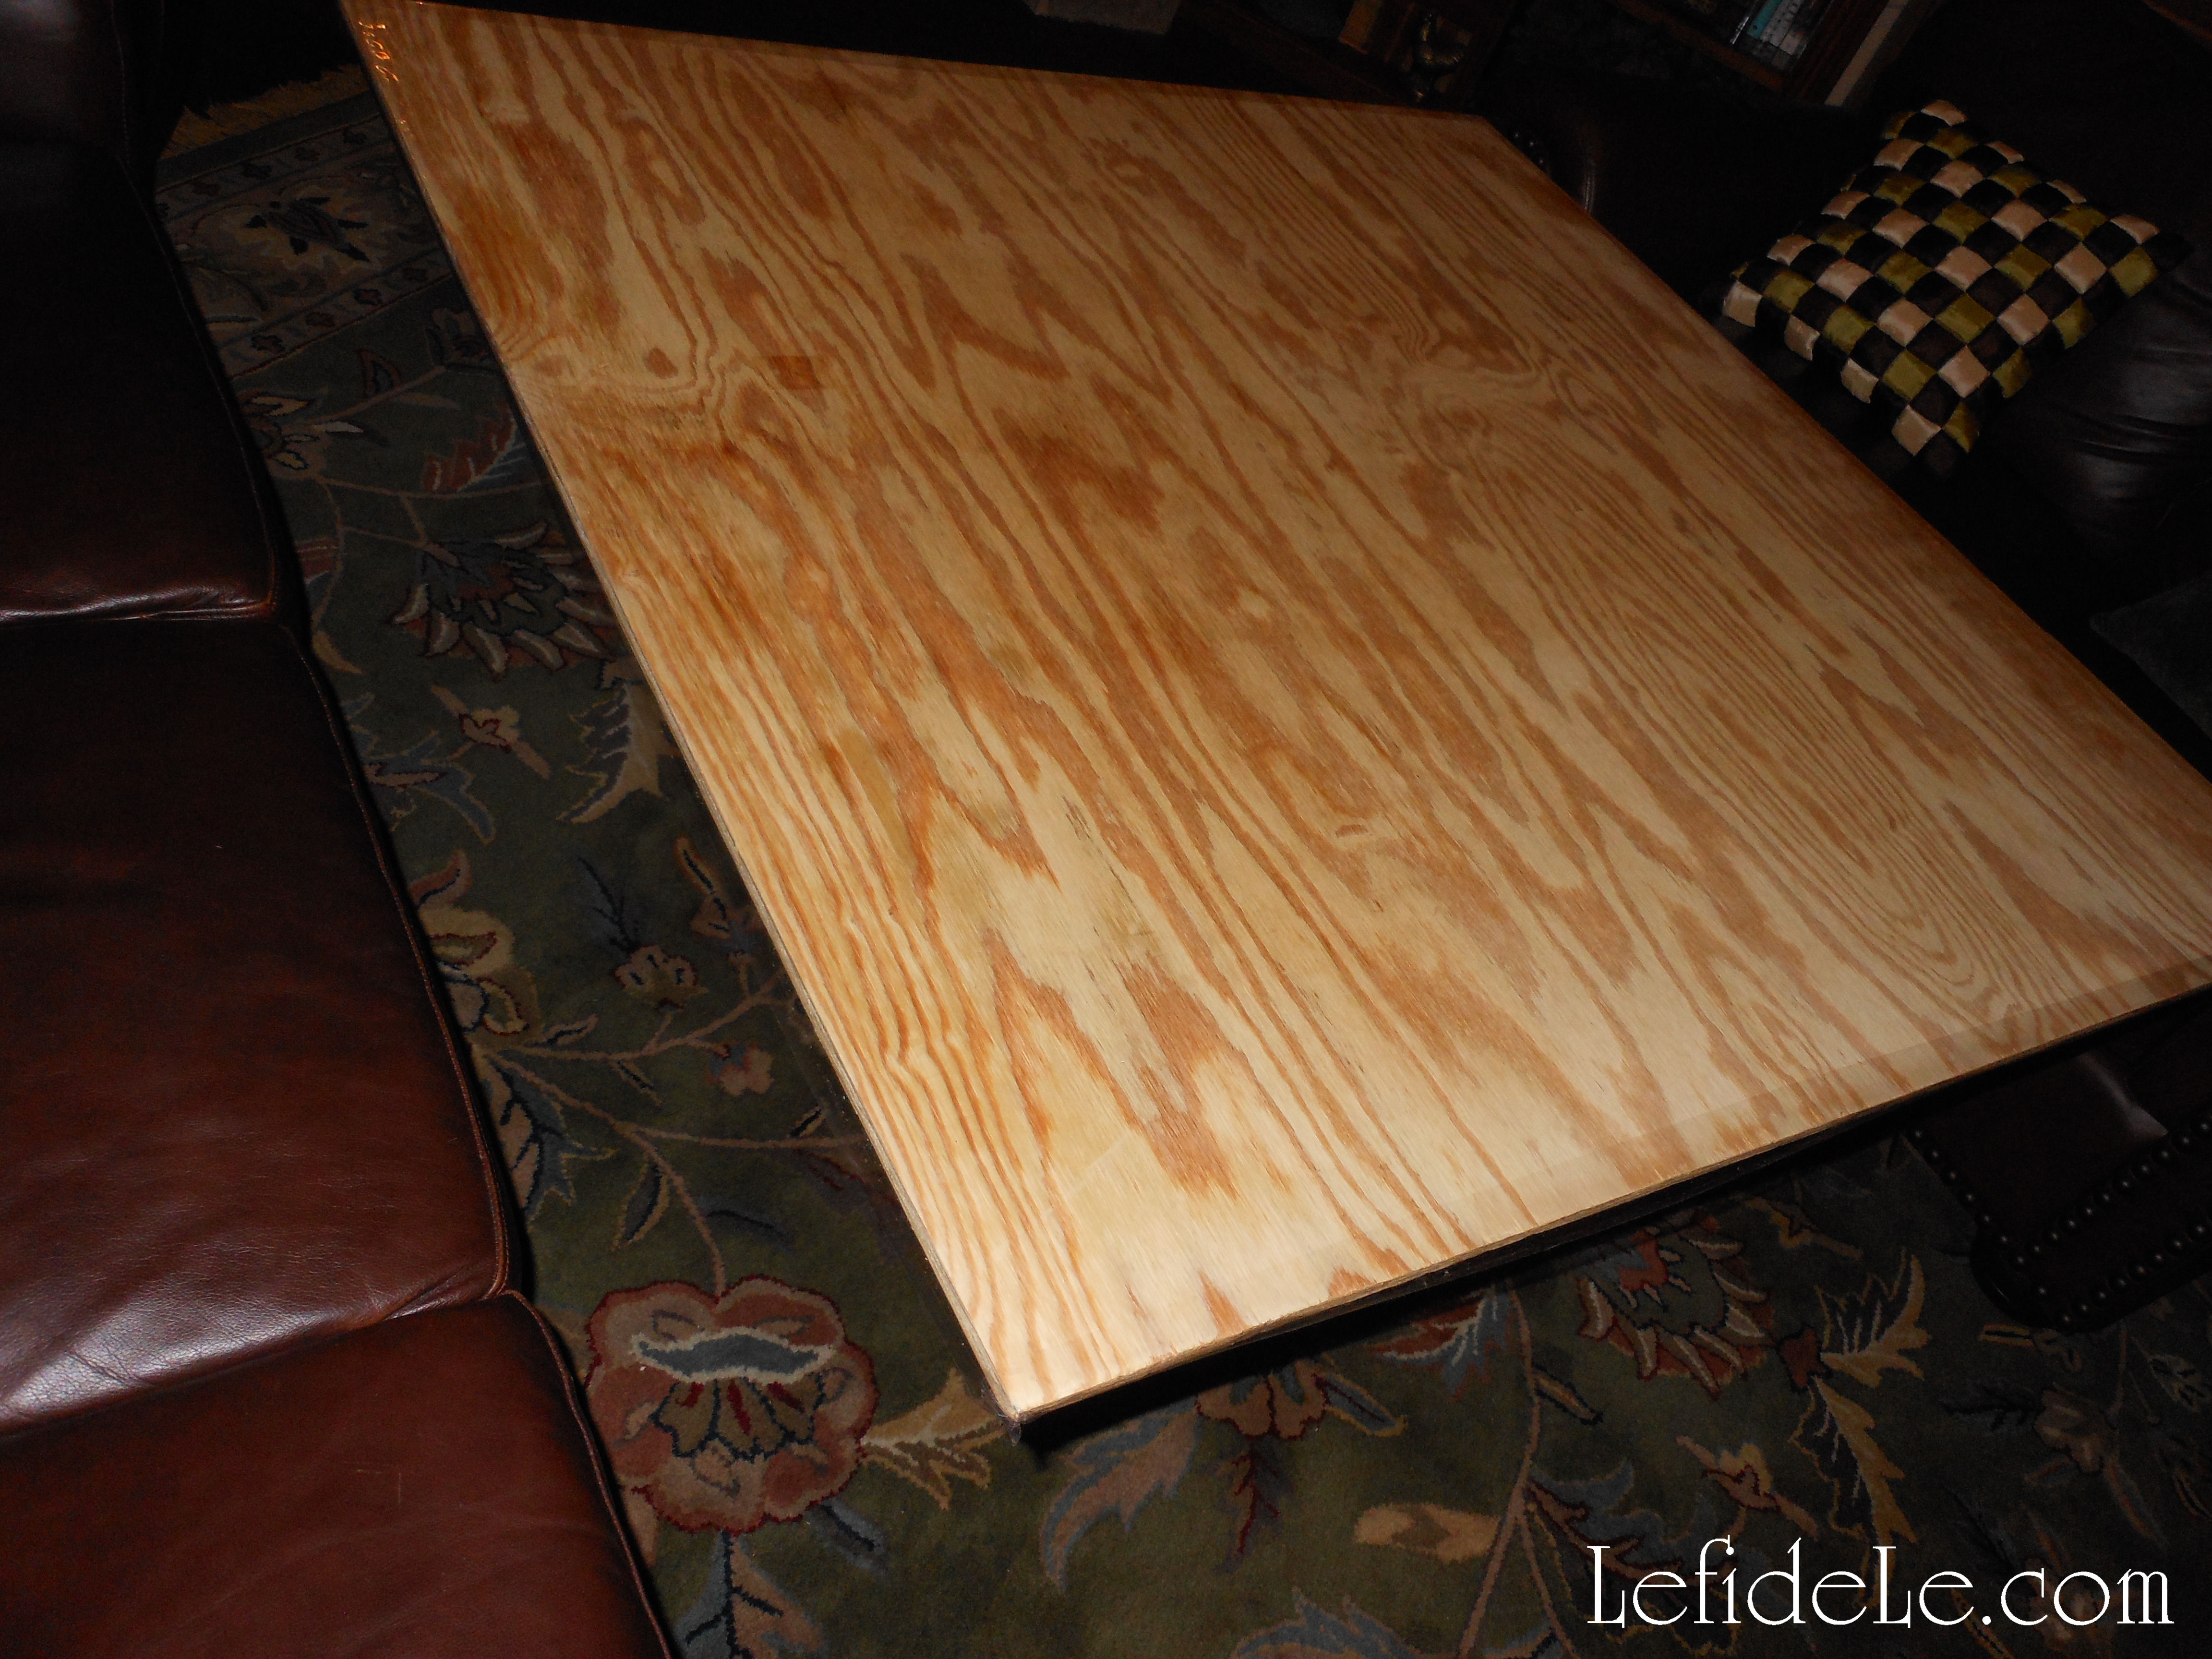 Layering fabrics is a quick and easy way to add warmth to a gathering, so I draped layers of tablecloths over the square. The first layer was chocolate brown, then beige burlap with added trim, and a fall paisley print over the top.
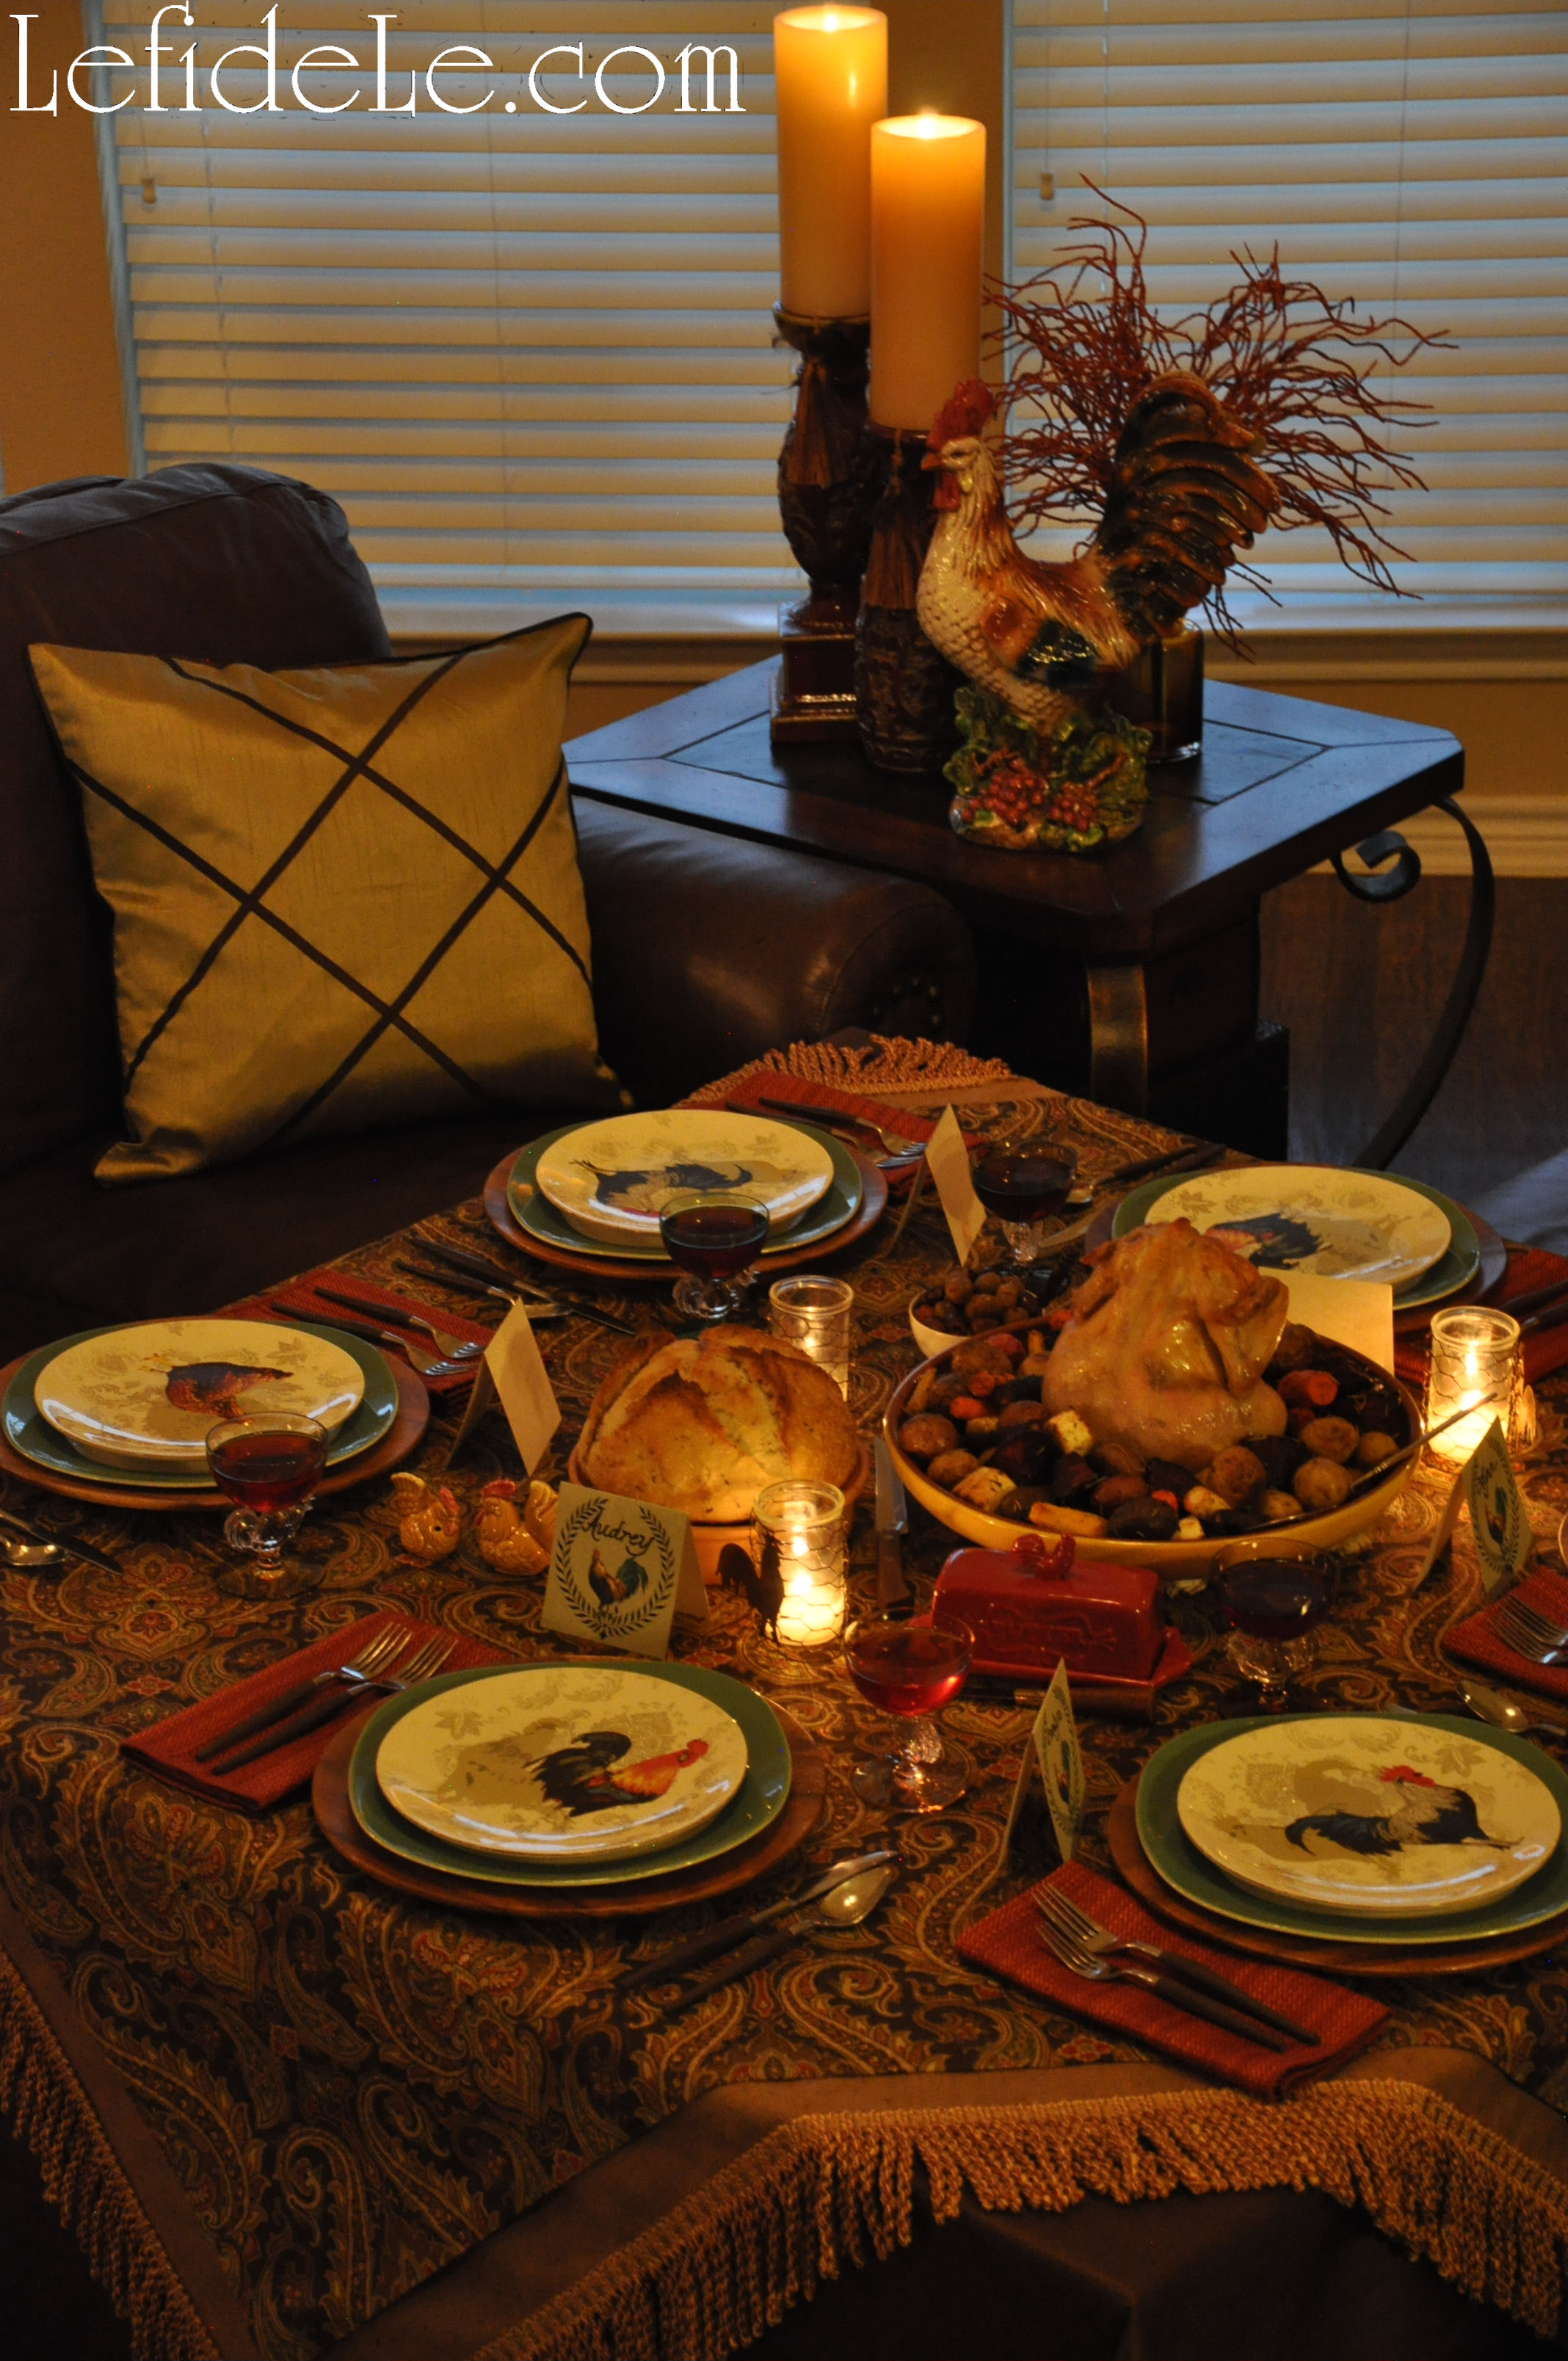
 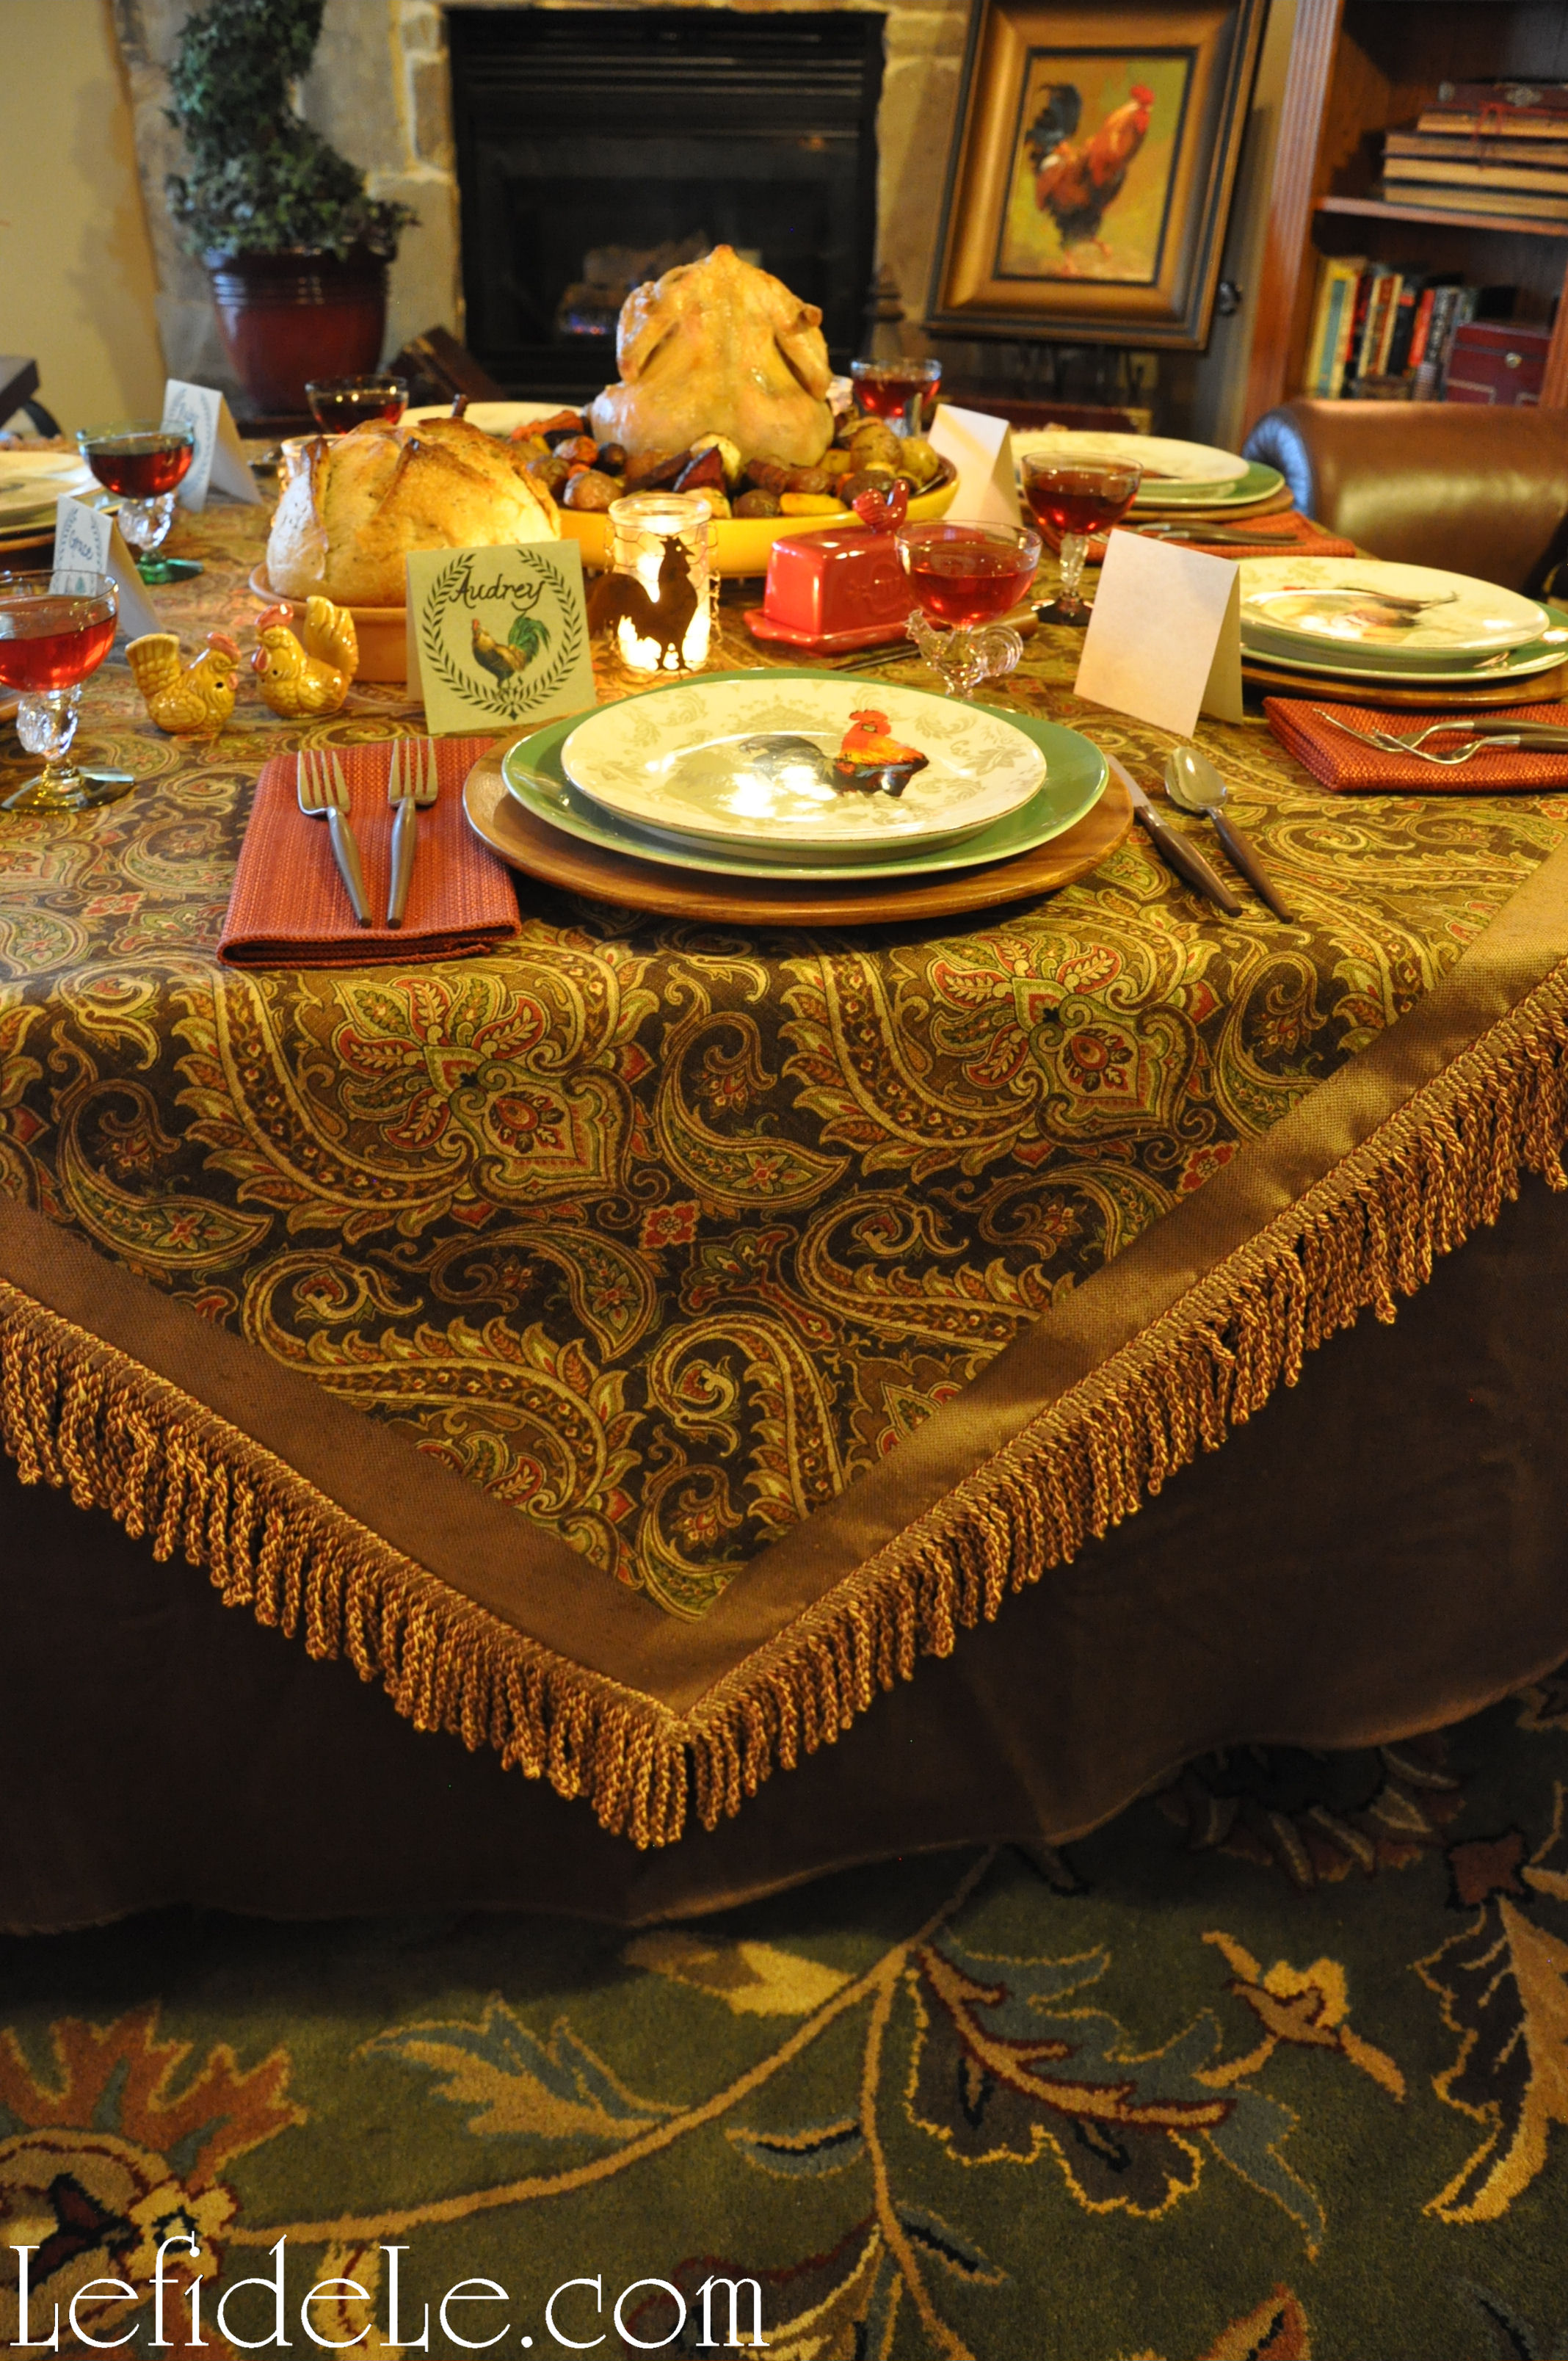 I exchanged the usual living room décor with various bits of rooster ephemera. I set a ceramic chicken on a side table next to cranberry colored candlesticks, and tucked feather tassels under the large candles.
 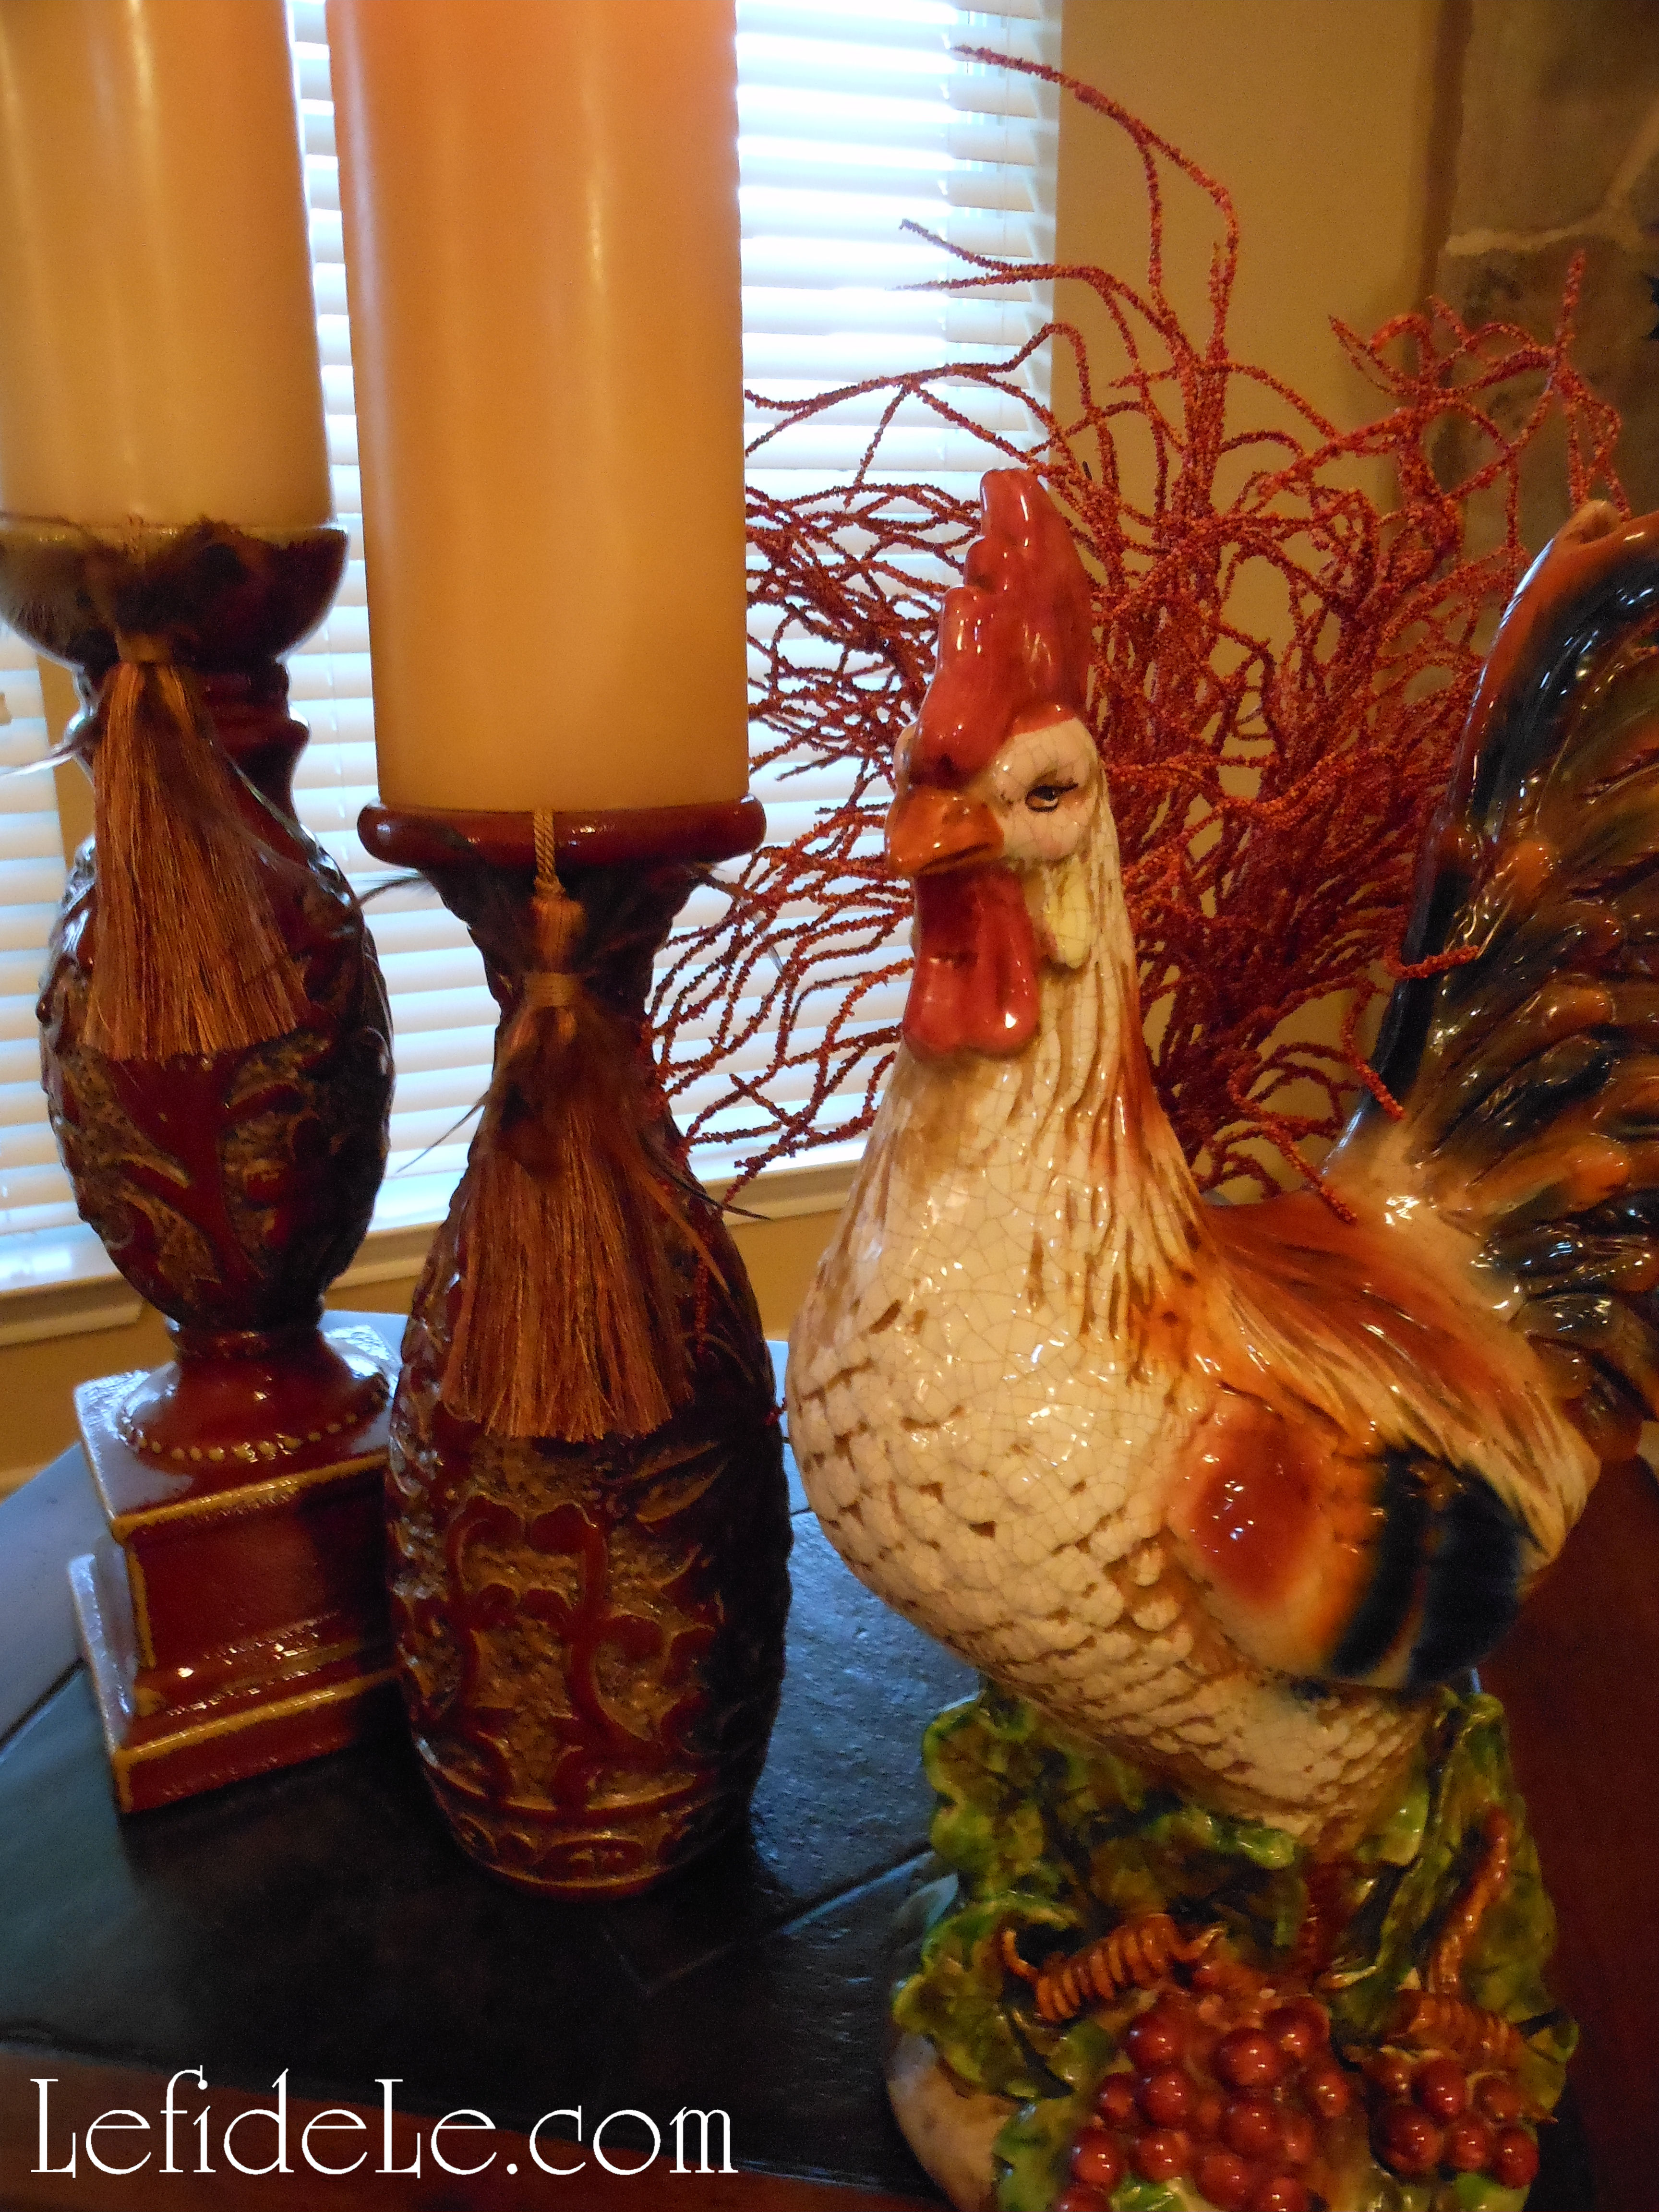 By the fireplace, I placed a rooster painting on an easel atop an old burgundy leather suitcase. Another served as a base for a spiral topiary. It was housed in an inexpensive and lightweight cranberry pot meant to simulate glazed pottery. In front of that, I positioned a small vintage brass rooster doorstop. I actually have many more roosters, but I was able to (somewhat) contain myself.
 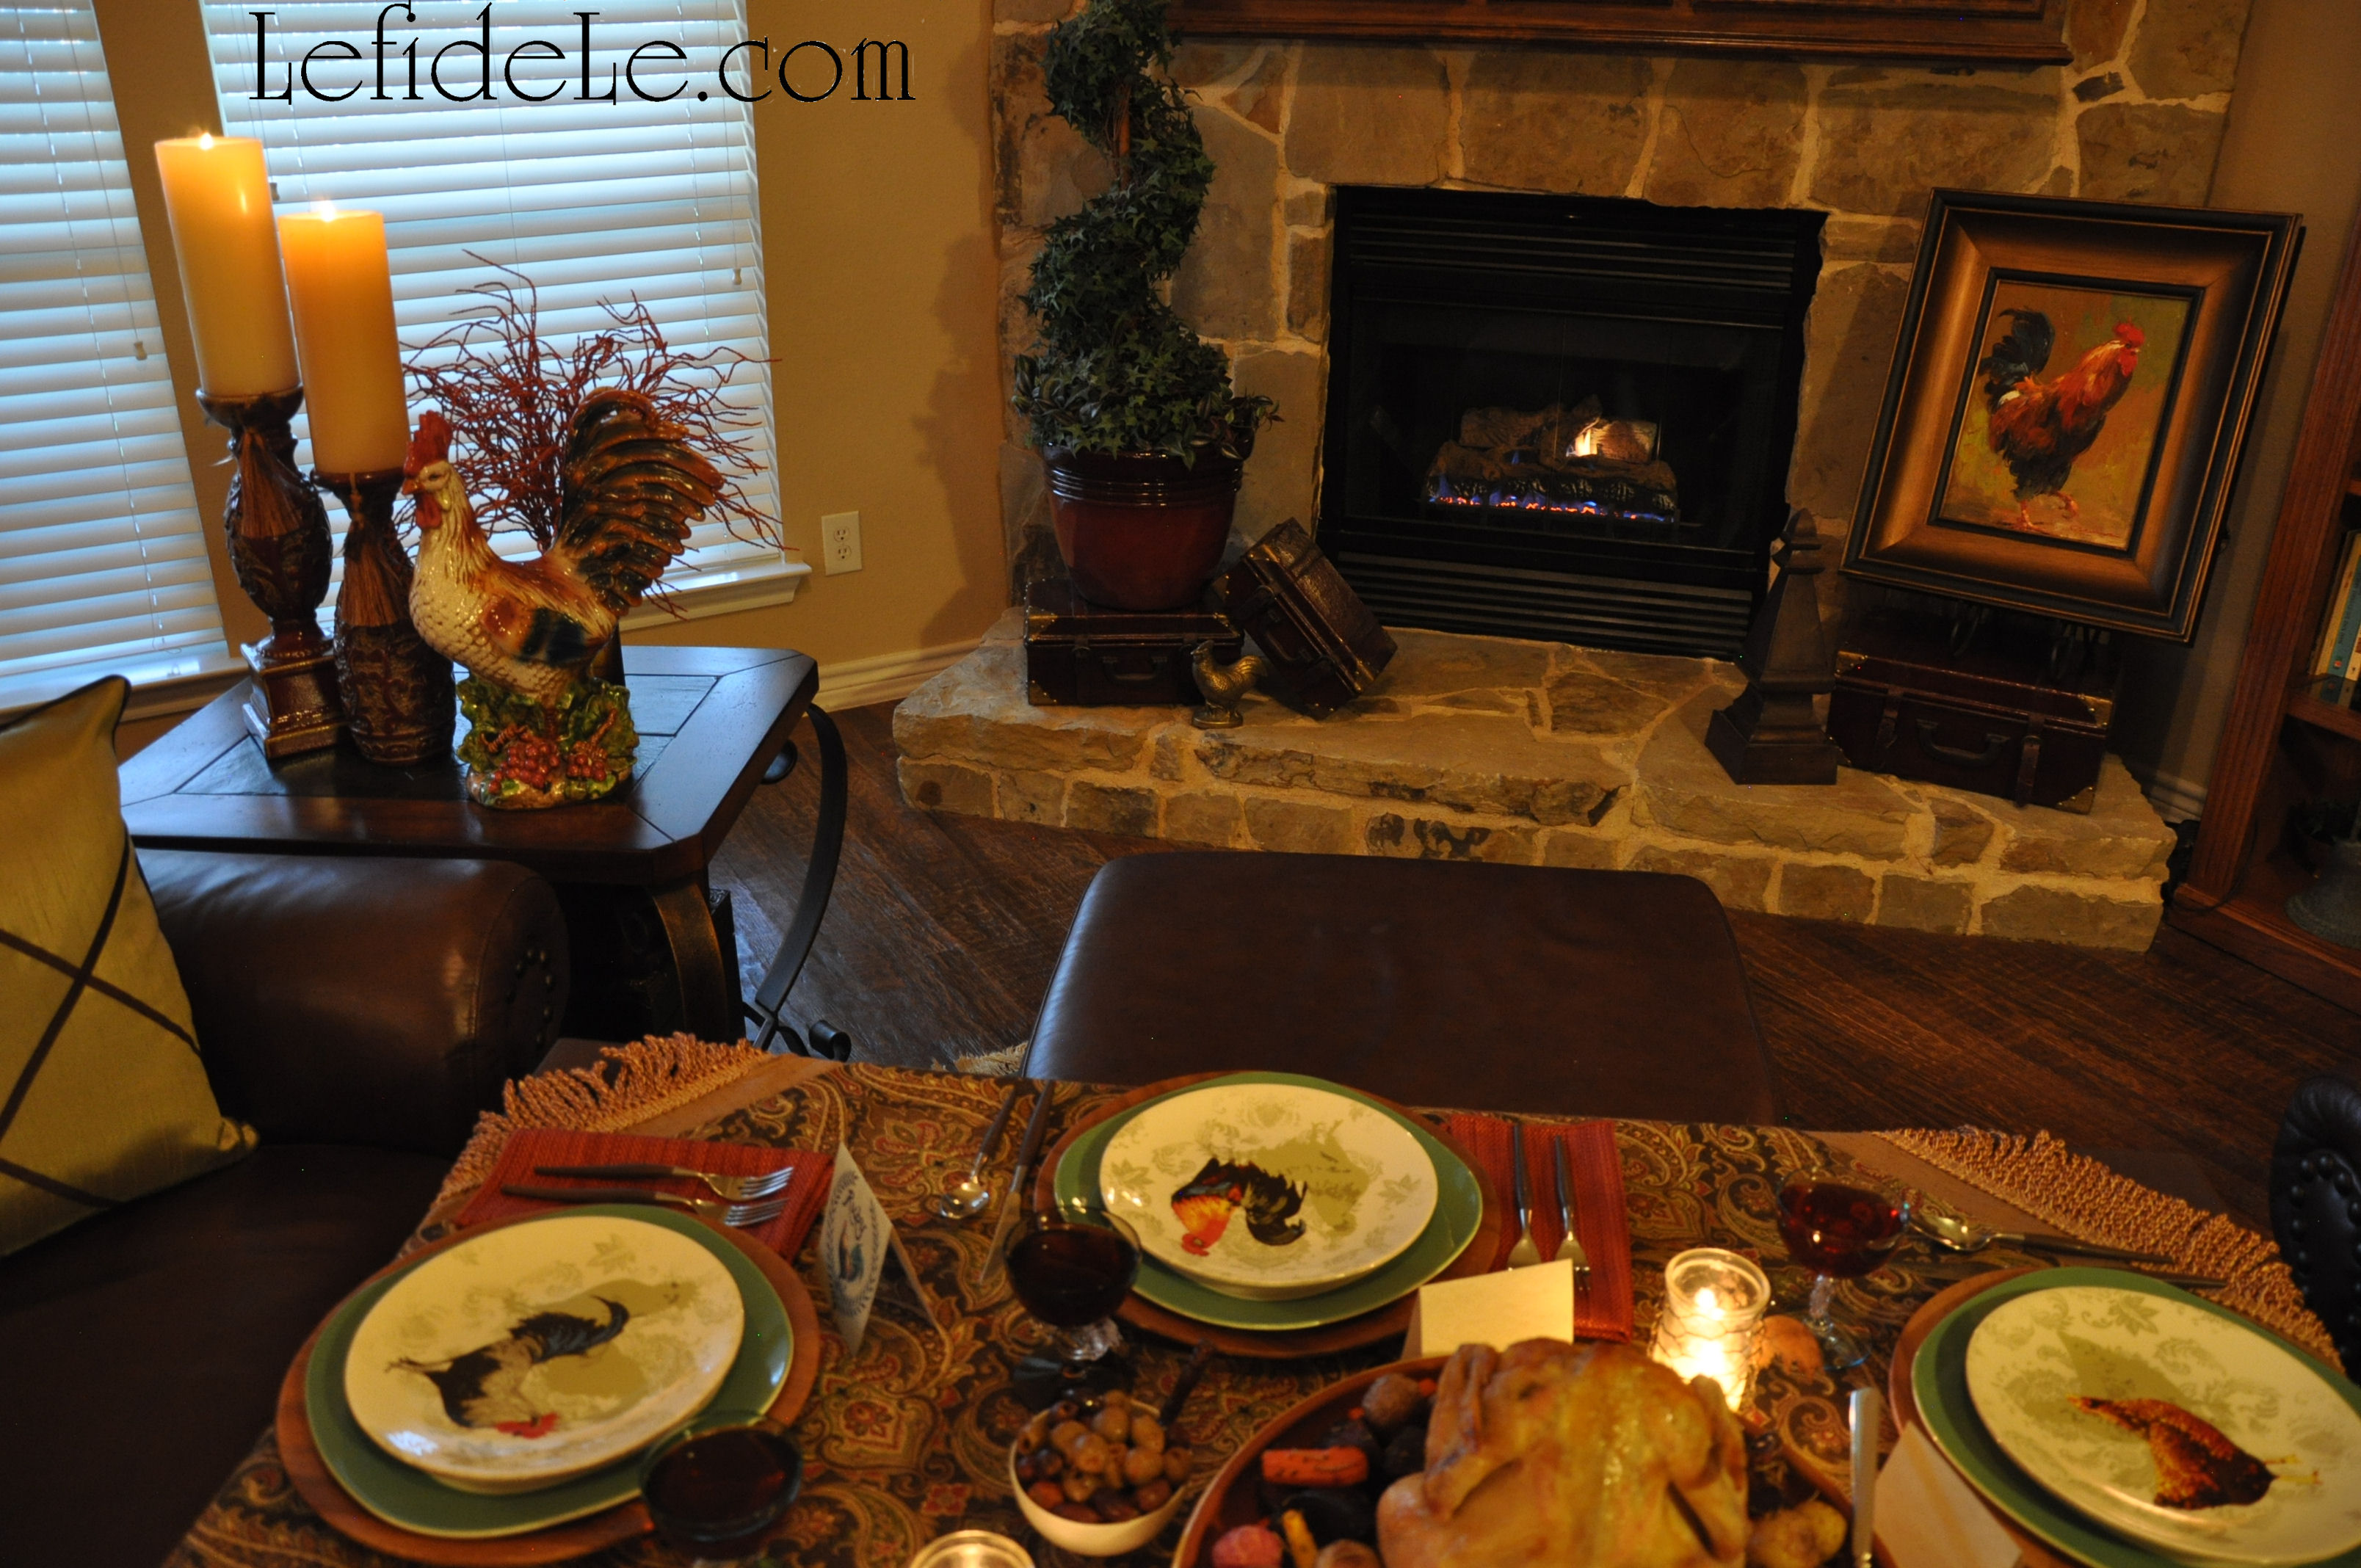 I gathered sage and chocolate colored throw pillows to coordinate with the linens and dishes. These softened the deep chocolate leather sofas. Switching out small elements of your décor for an evening is an easy way to experience a change of scenery without breaking the bank.
 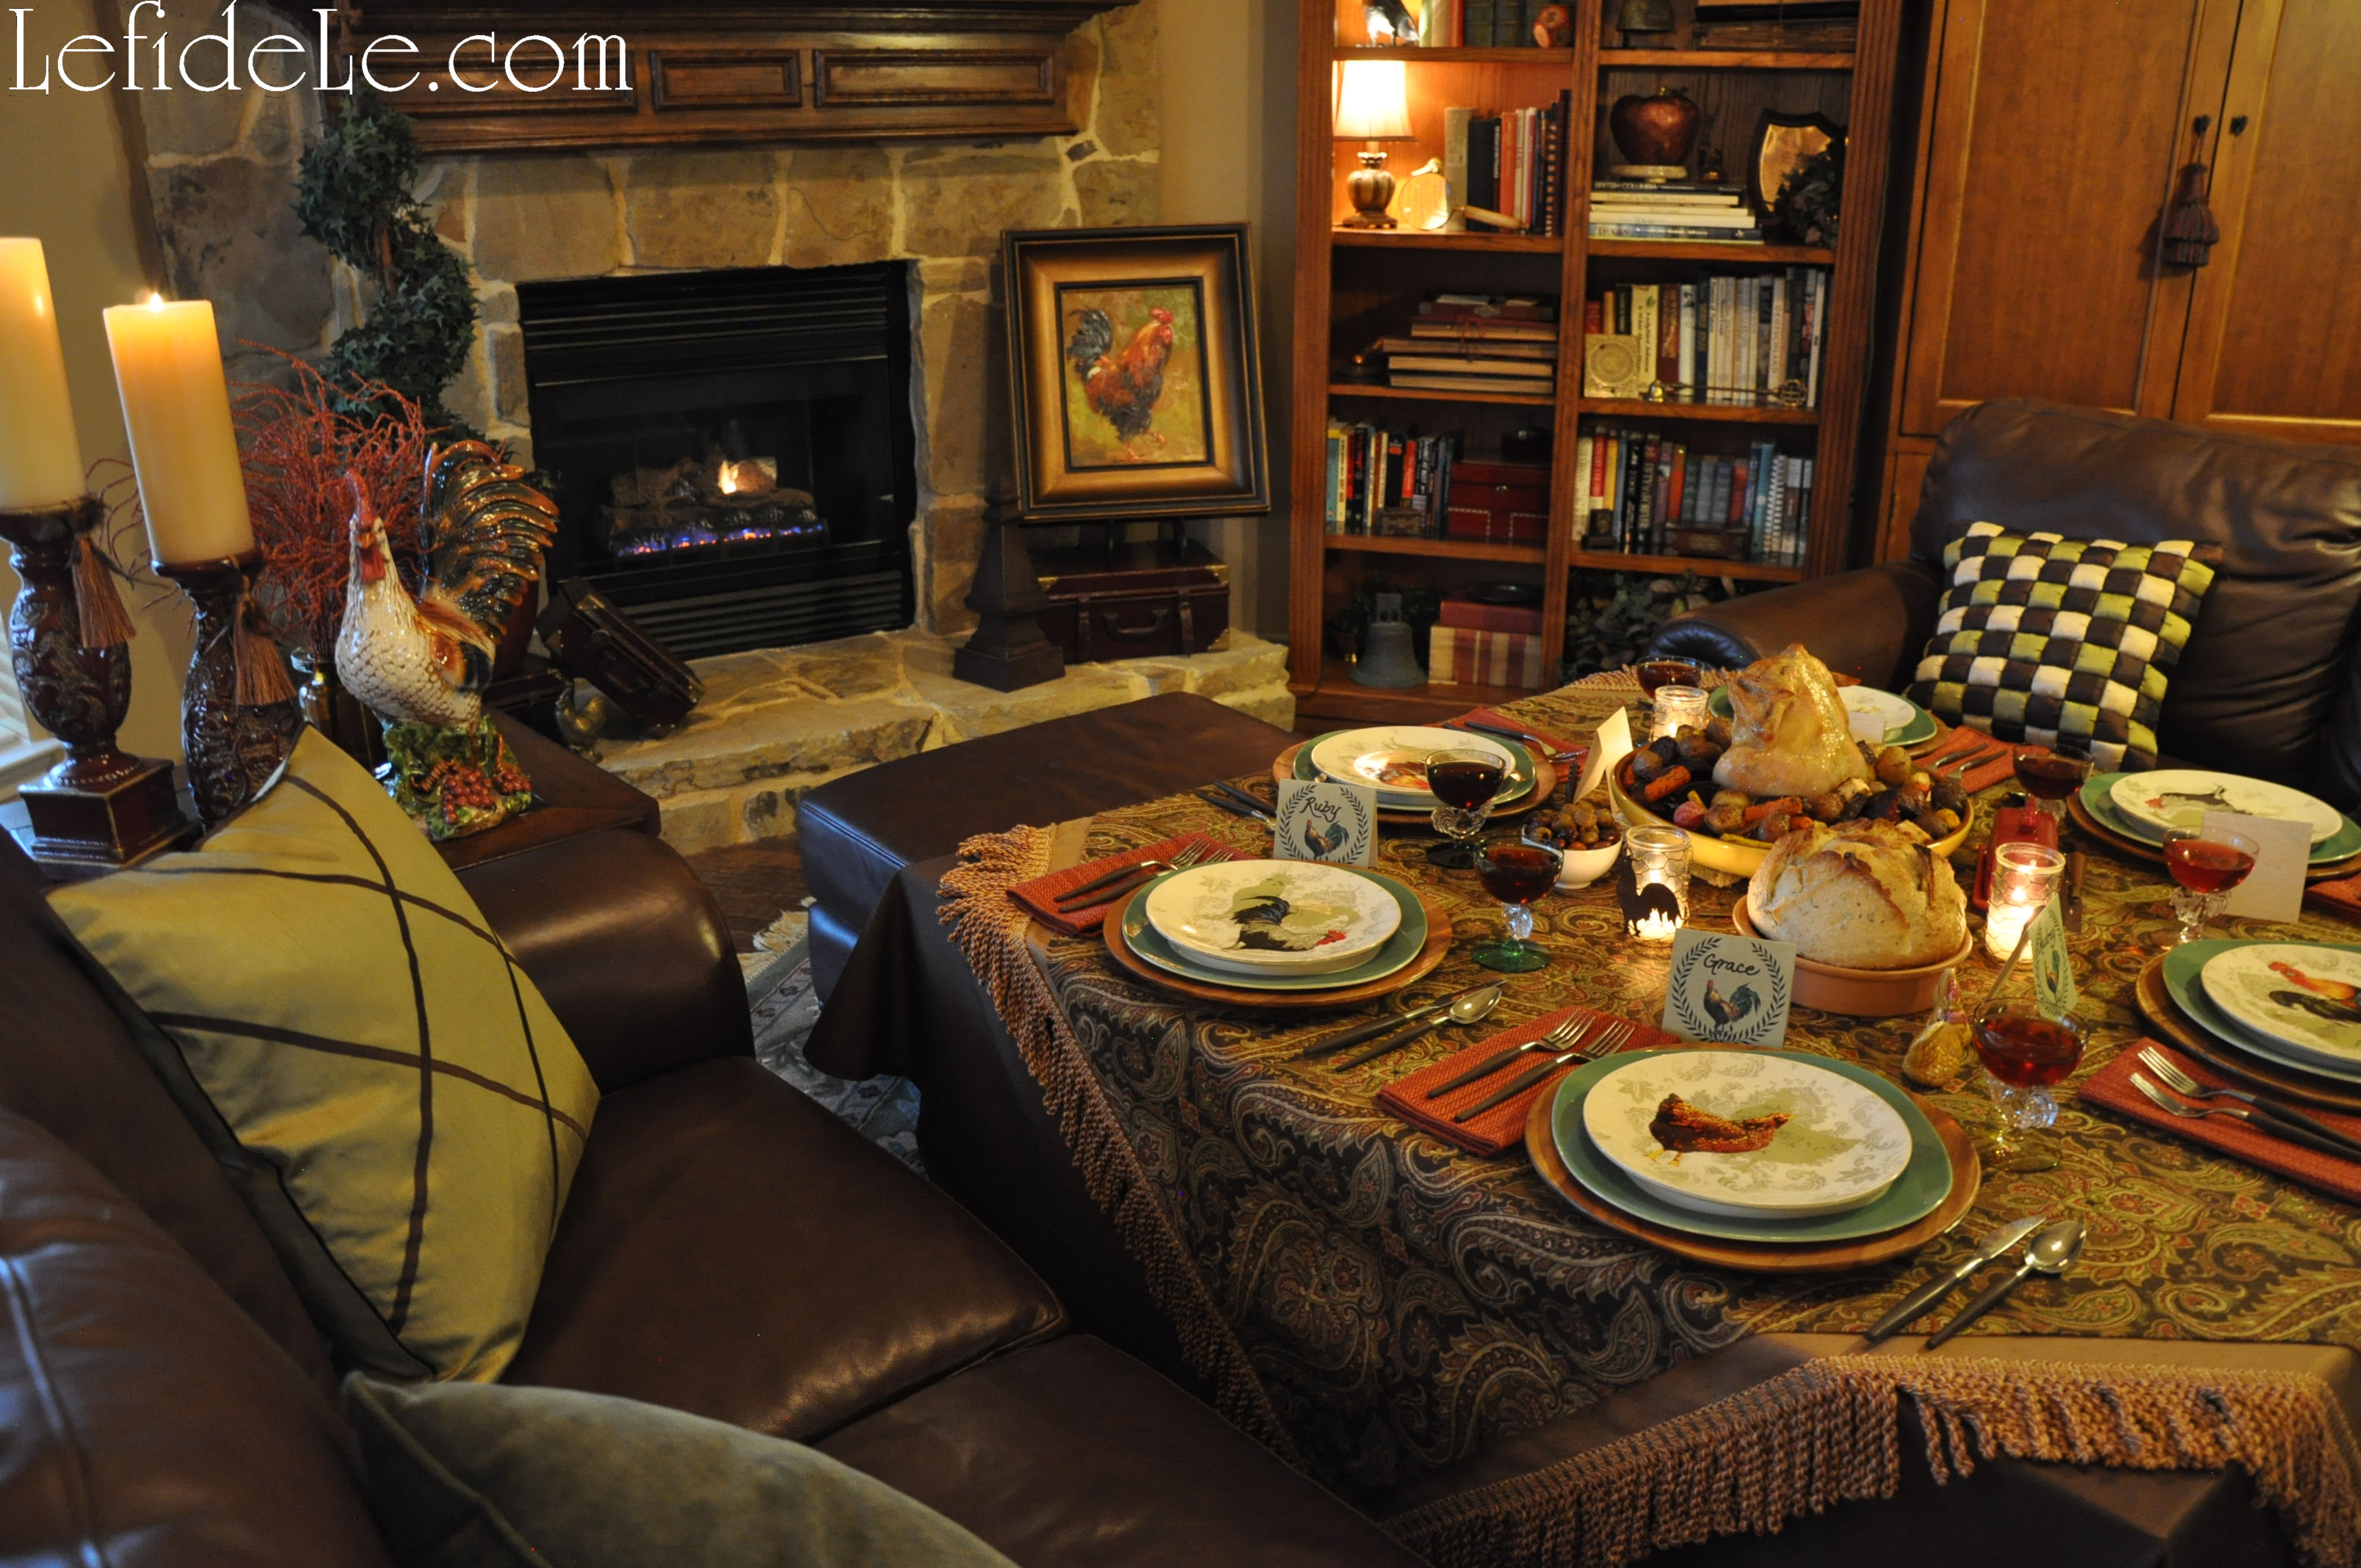 I set the table with wood-handled flatware and layers of dishware in various patterns. This included wooden plates as chargers, sage green bordered dinner plates, and a selection of chicken and rooster plates. Though completely untraditional, I figured these could be set to the side for bread later… they just looked too cute stacked this way! I actually found these little gems for $3 clearance at Dillards. Now they’re a part of my last minute rooster dinner party arsenal.
 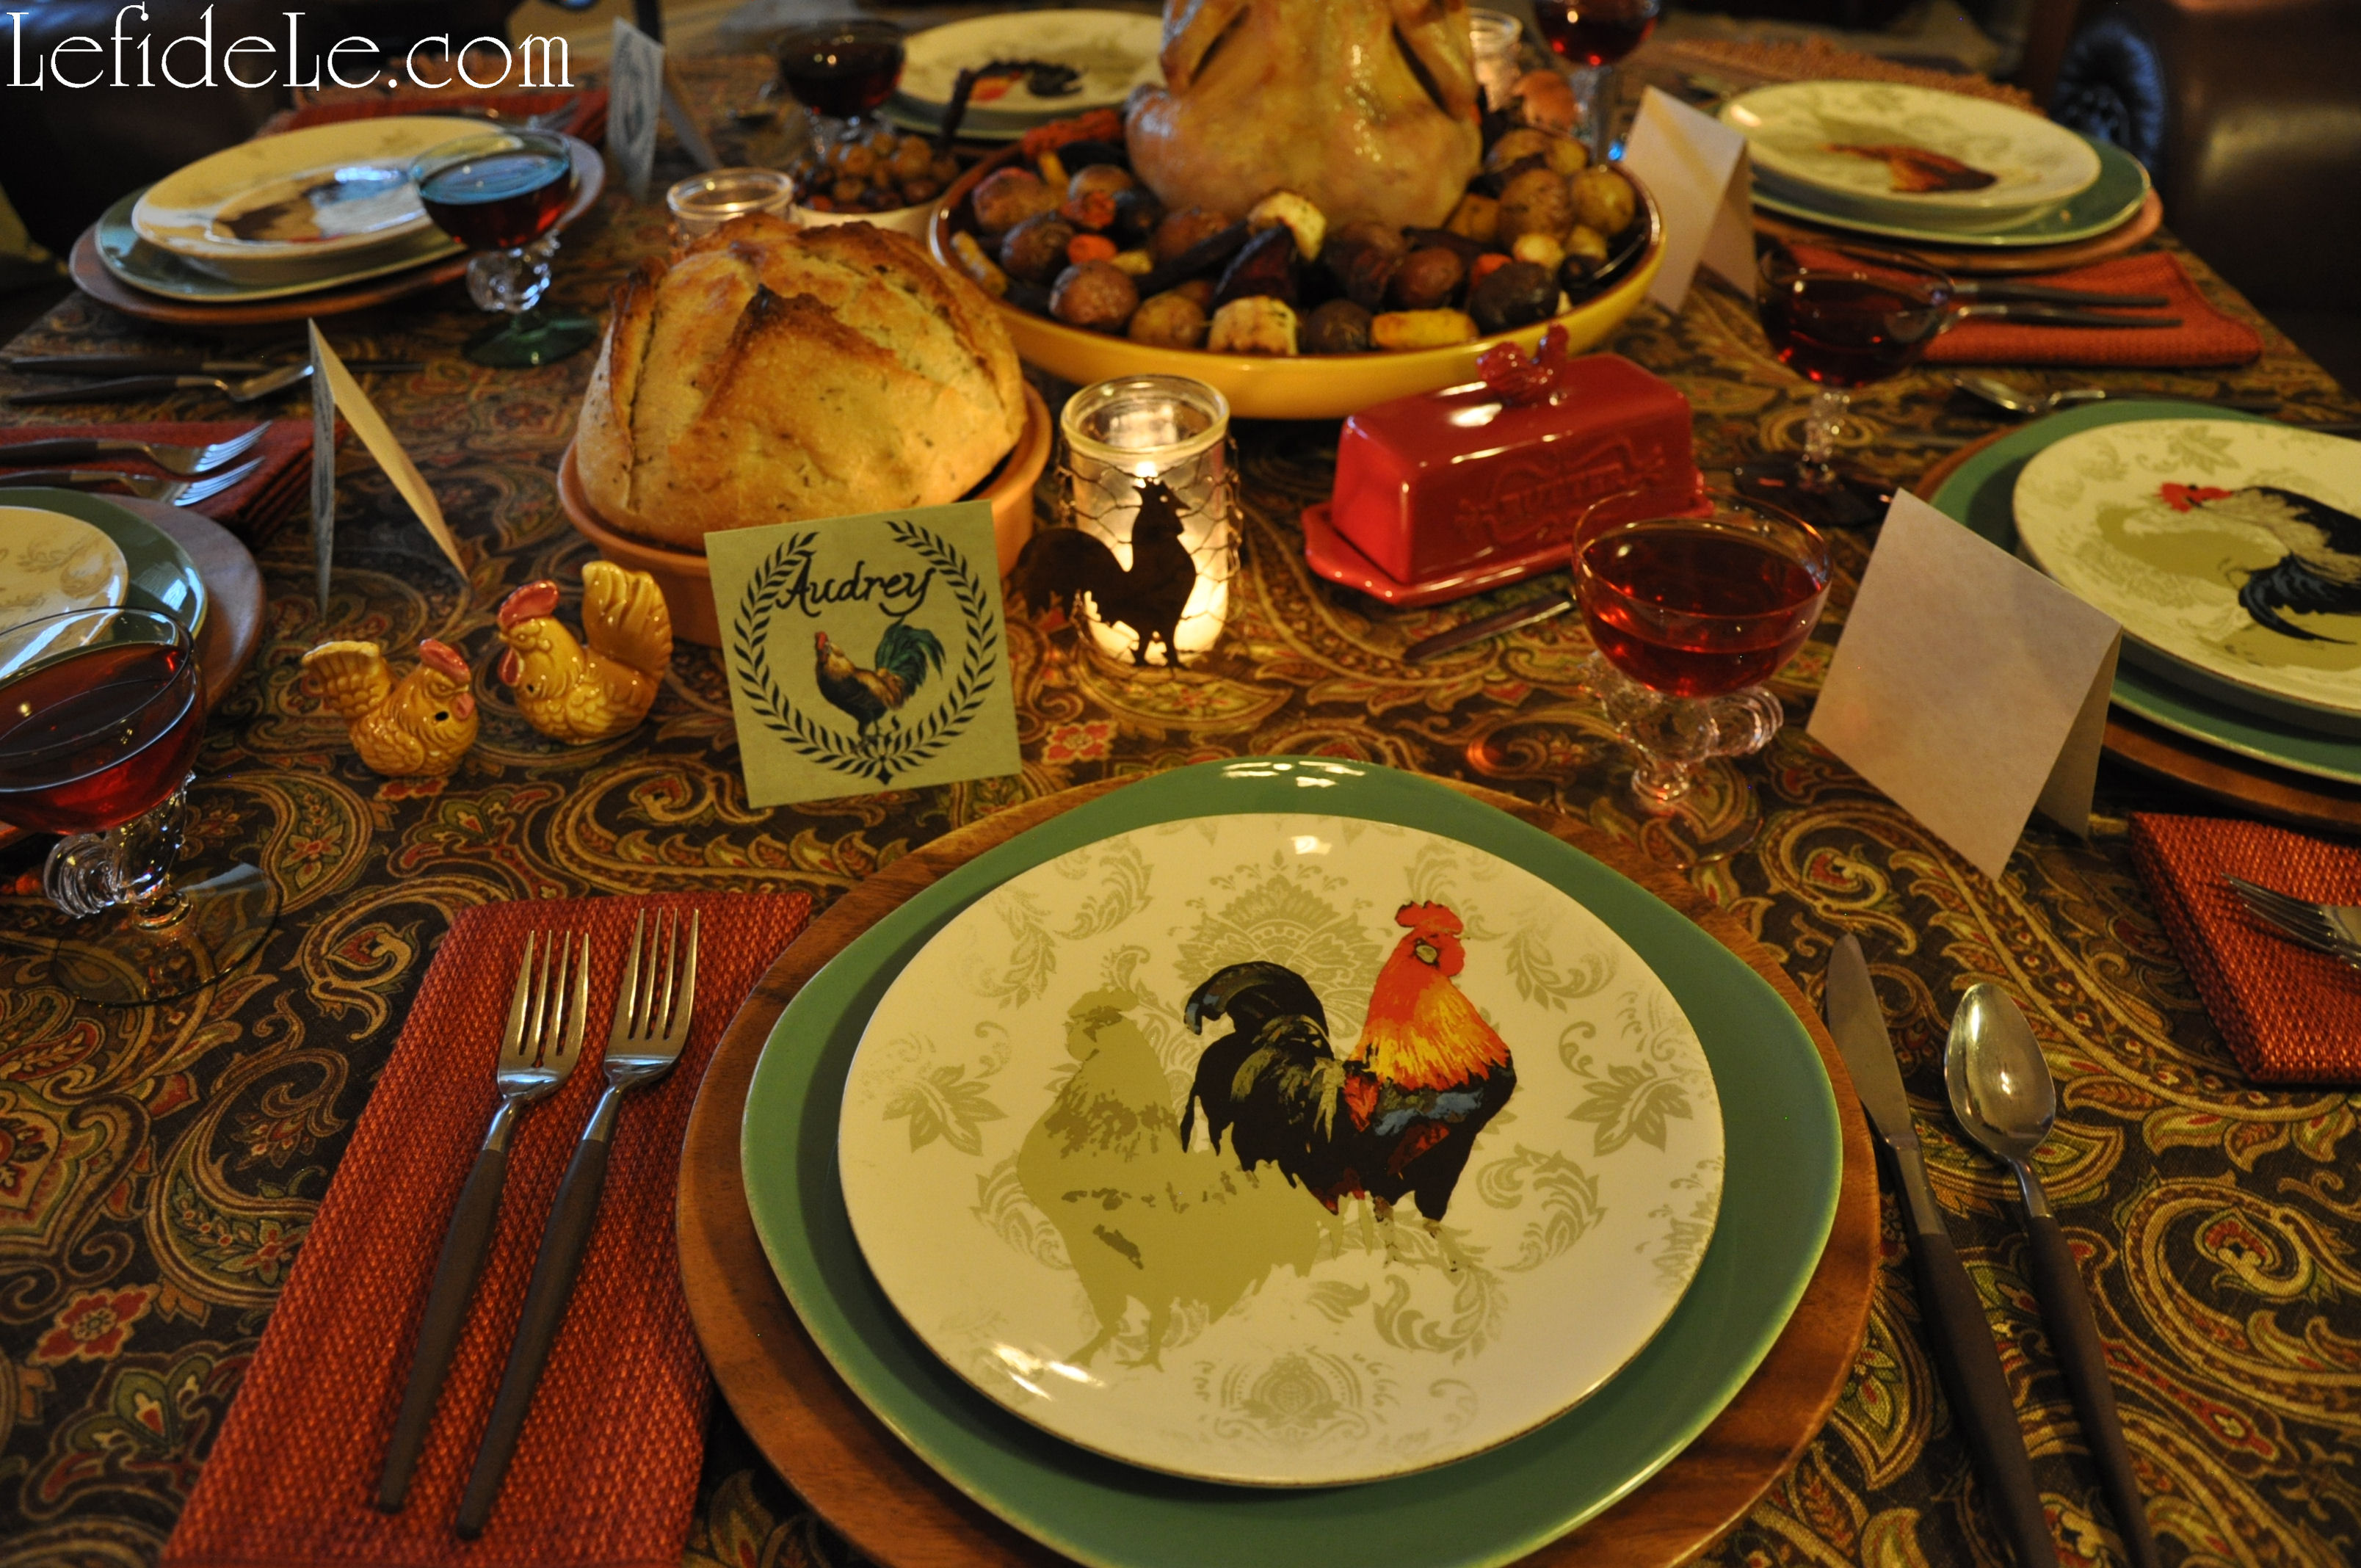 My other go-to elements are antique chicken salt and pepper shakers from my grandmother, and vintage multicolor rooster stemmed glassware from my mother.
 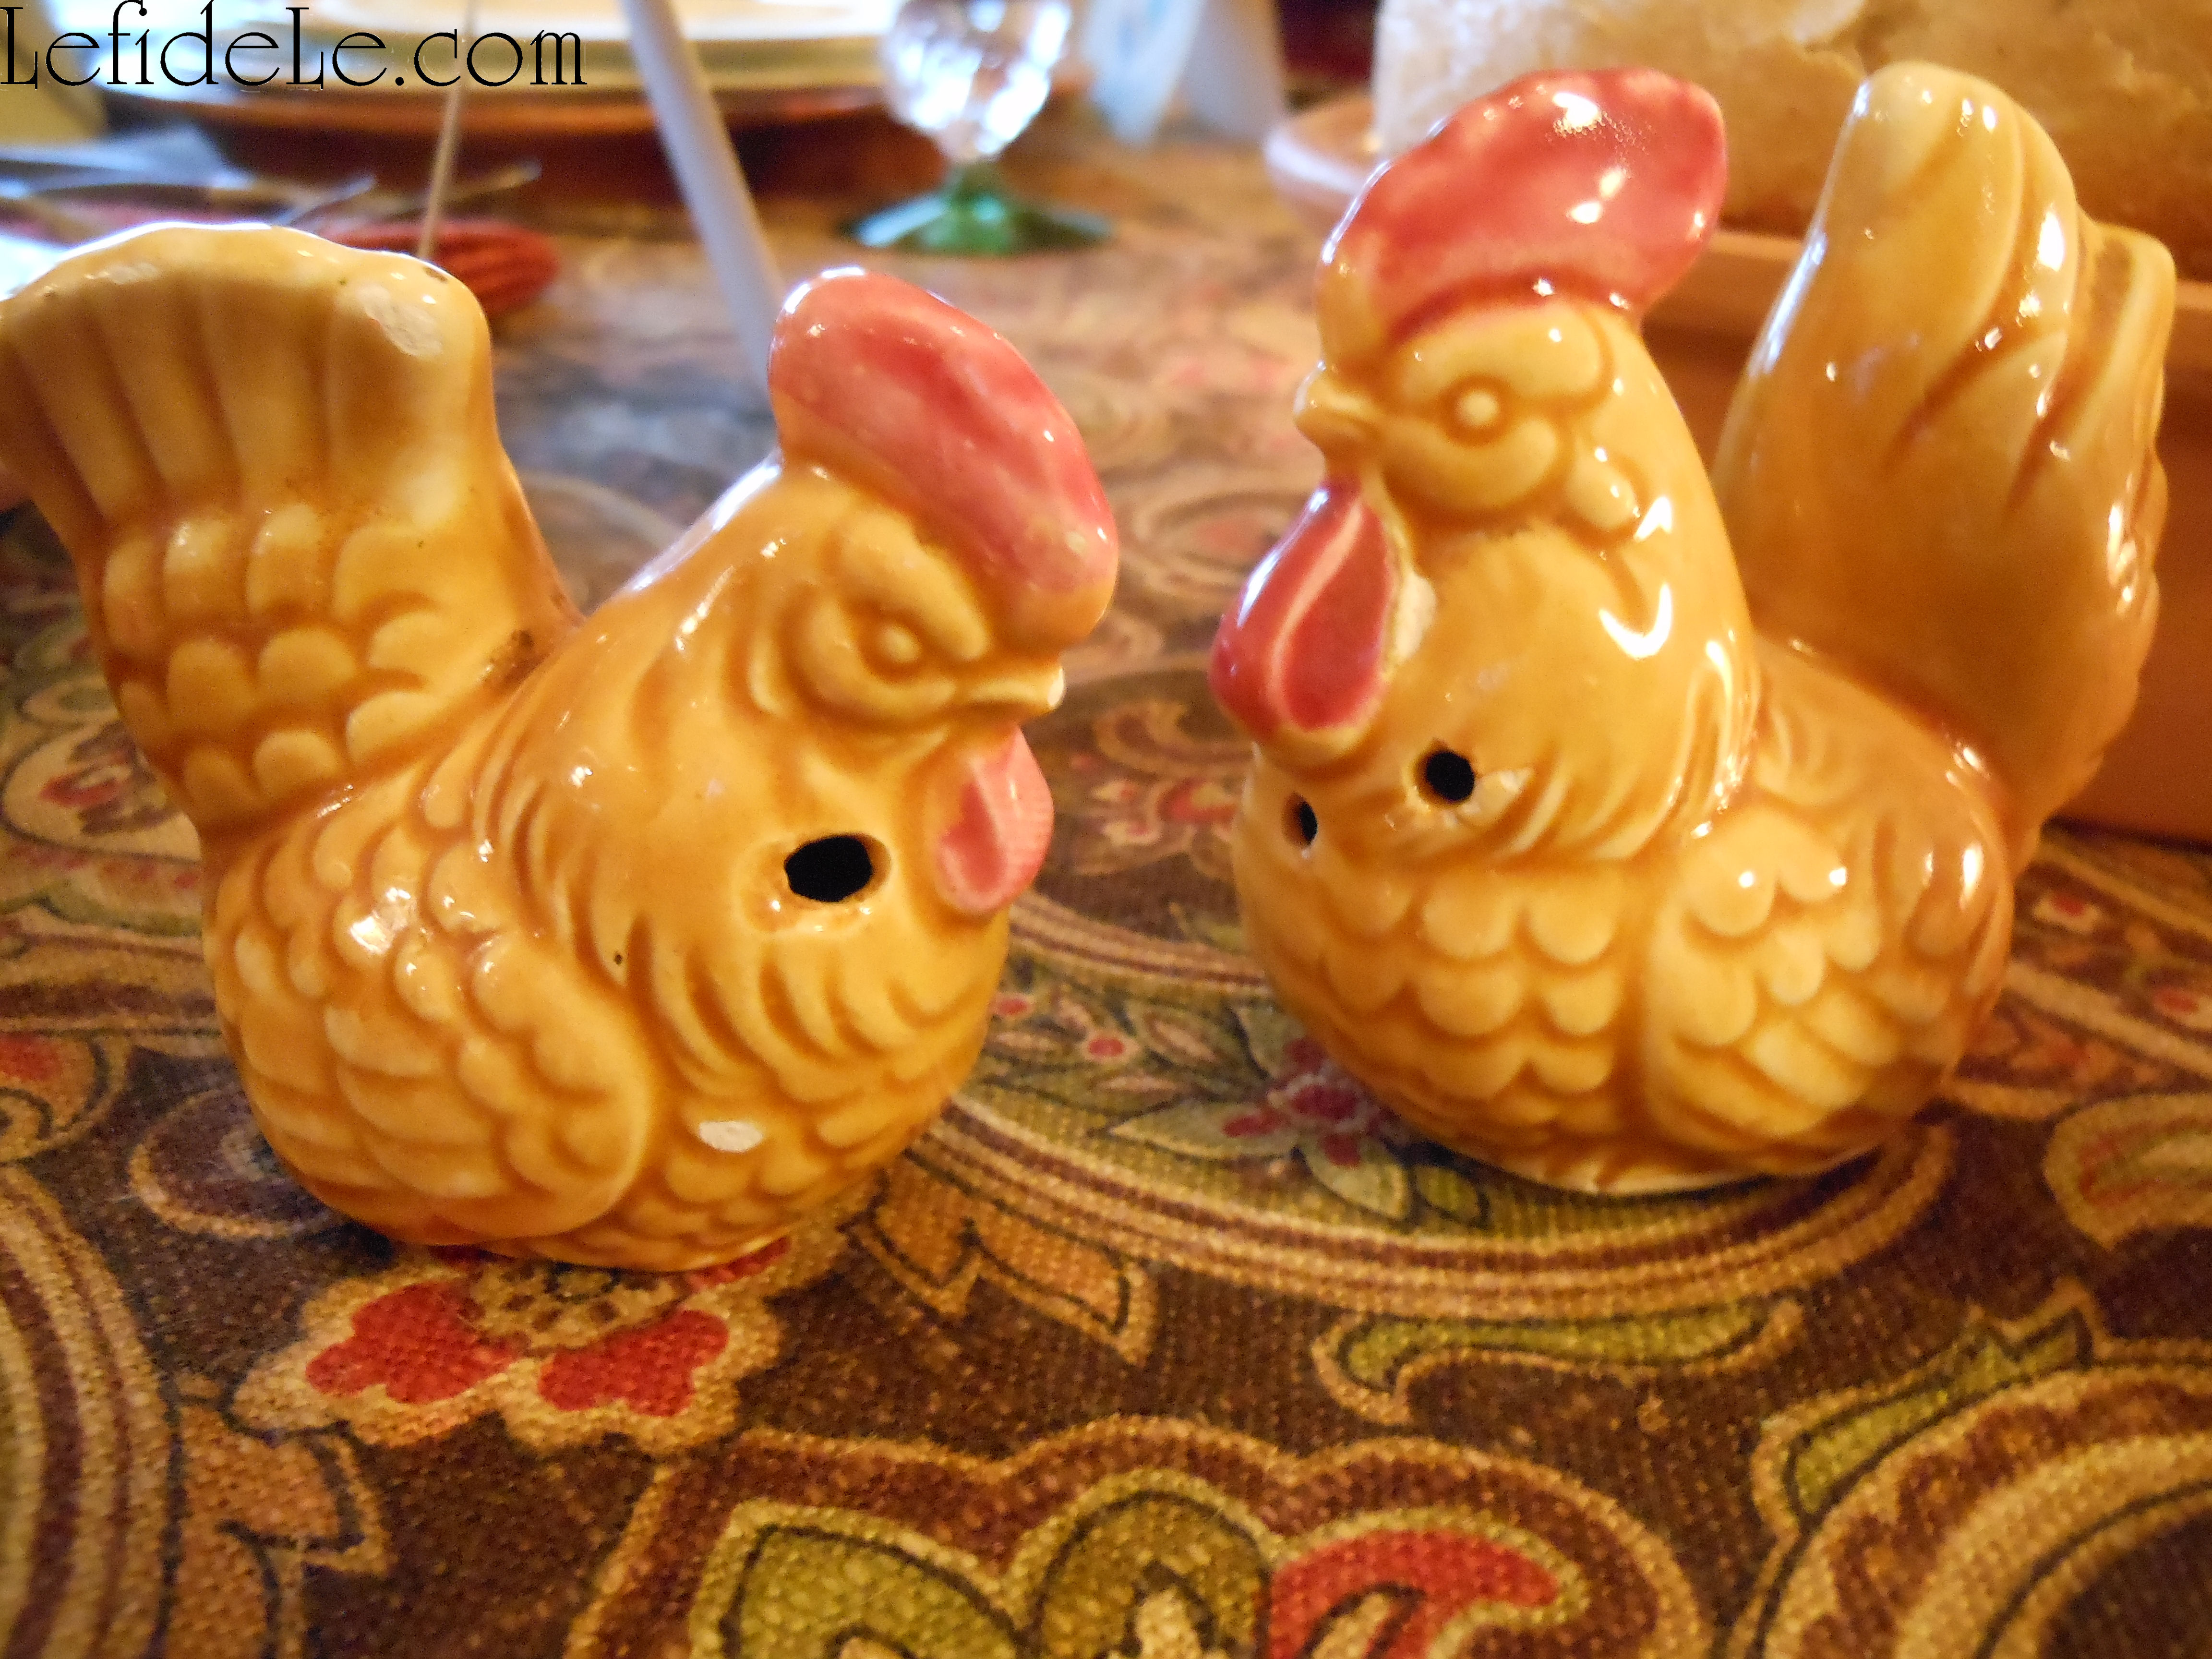 It’s really great to have coordinating pieces that can be thrown together without much forethought, while having the appearance of effort. In this way, a simple chicken dinner is elevated to a special evening. Make a point of collecting what you like, and pull it out for your get-togethers.
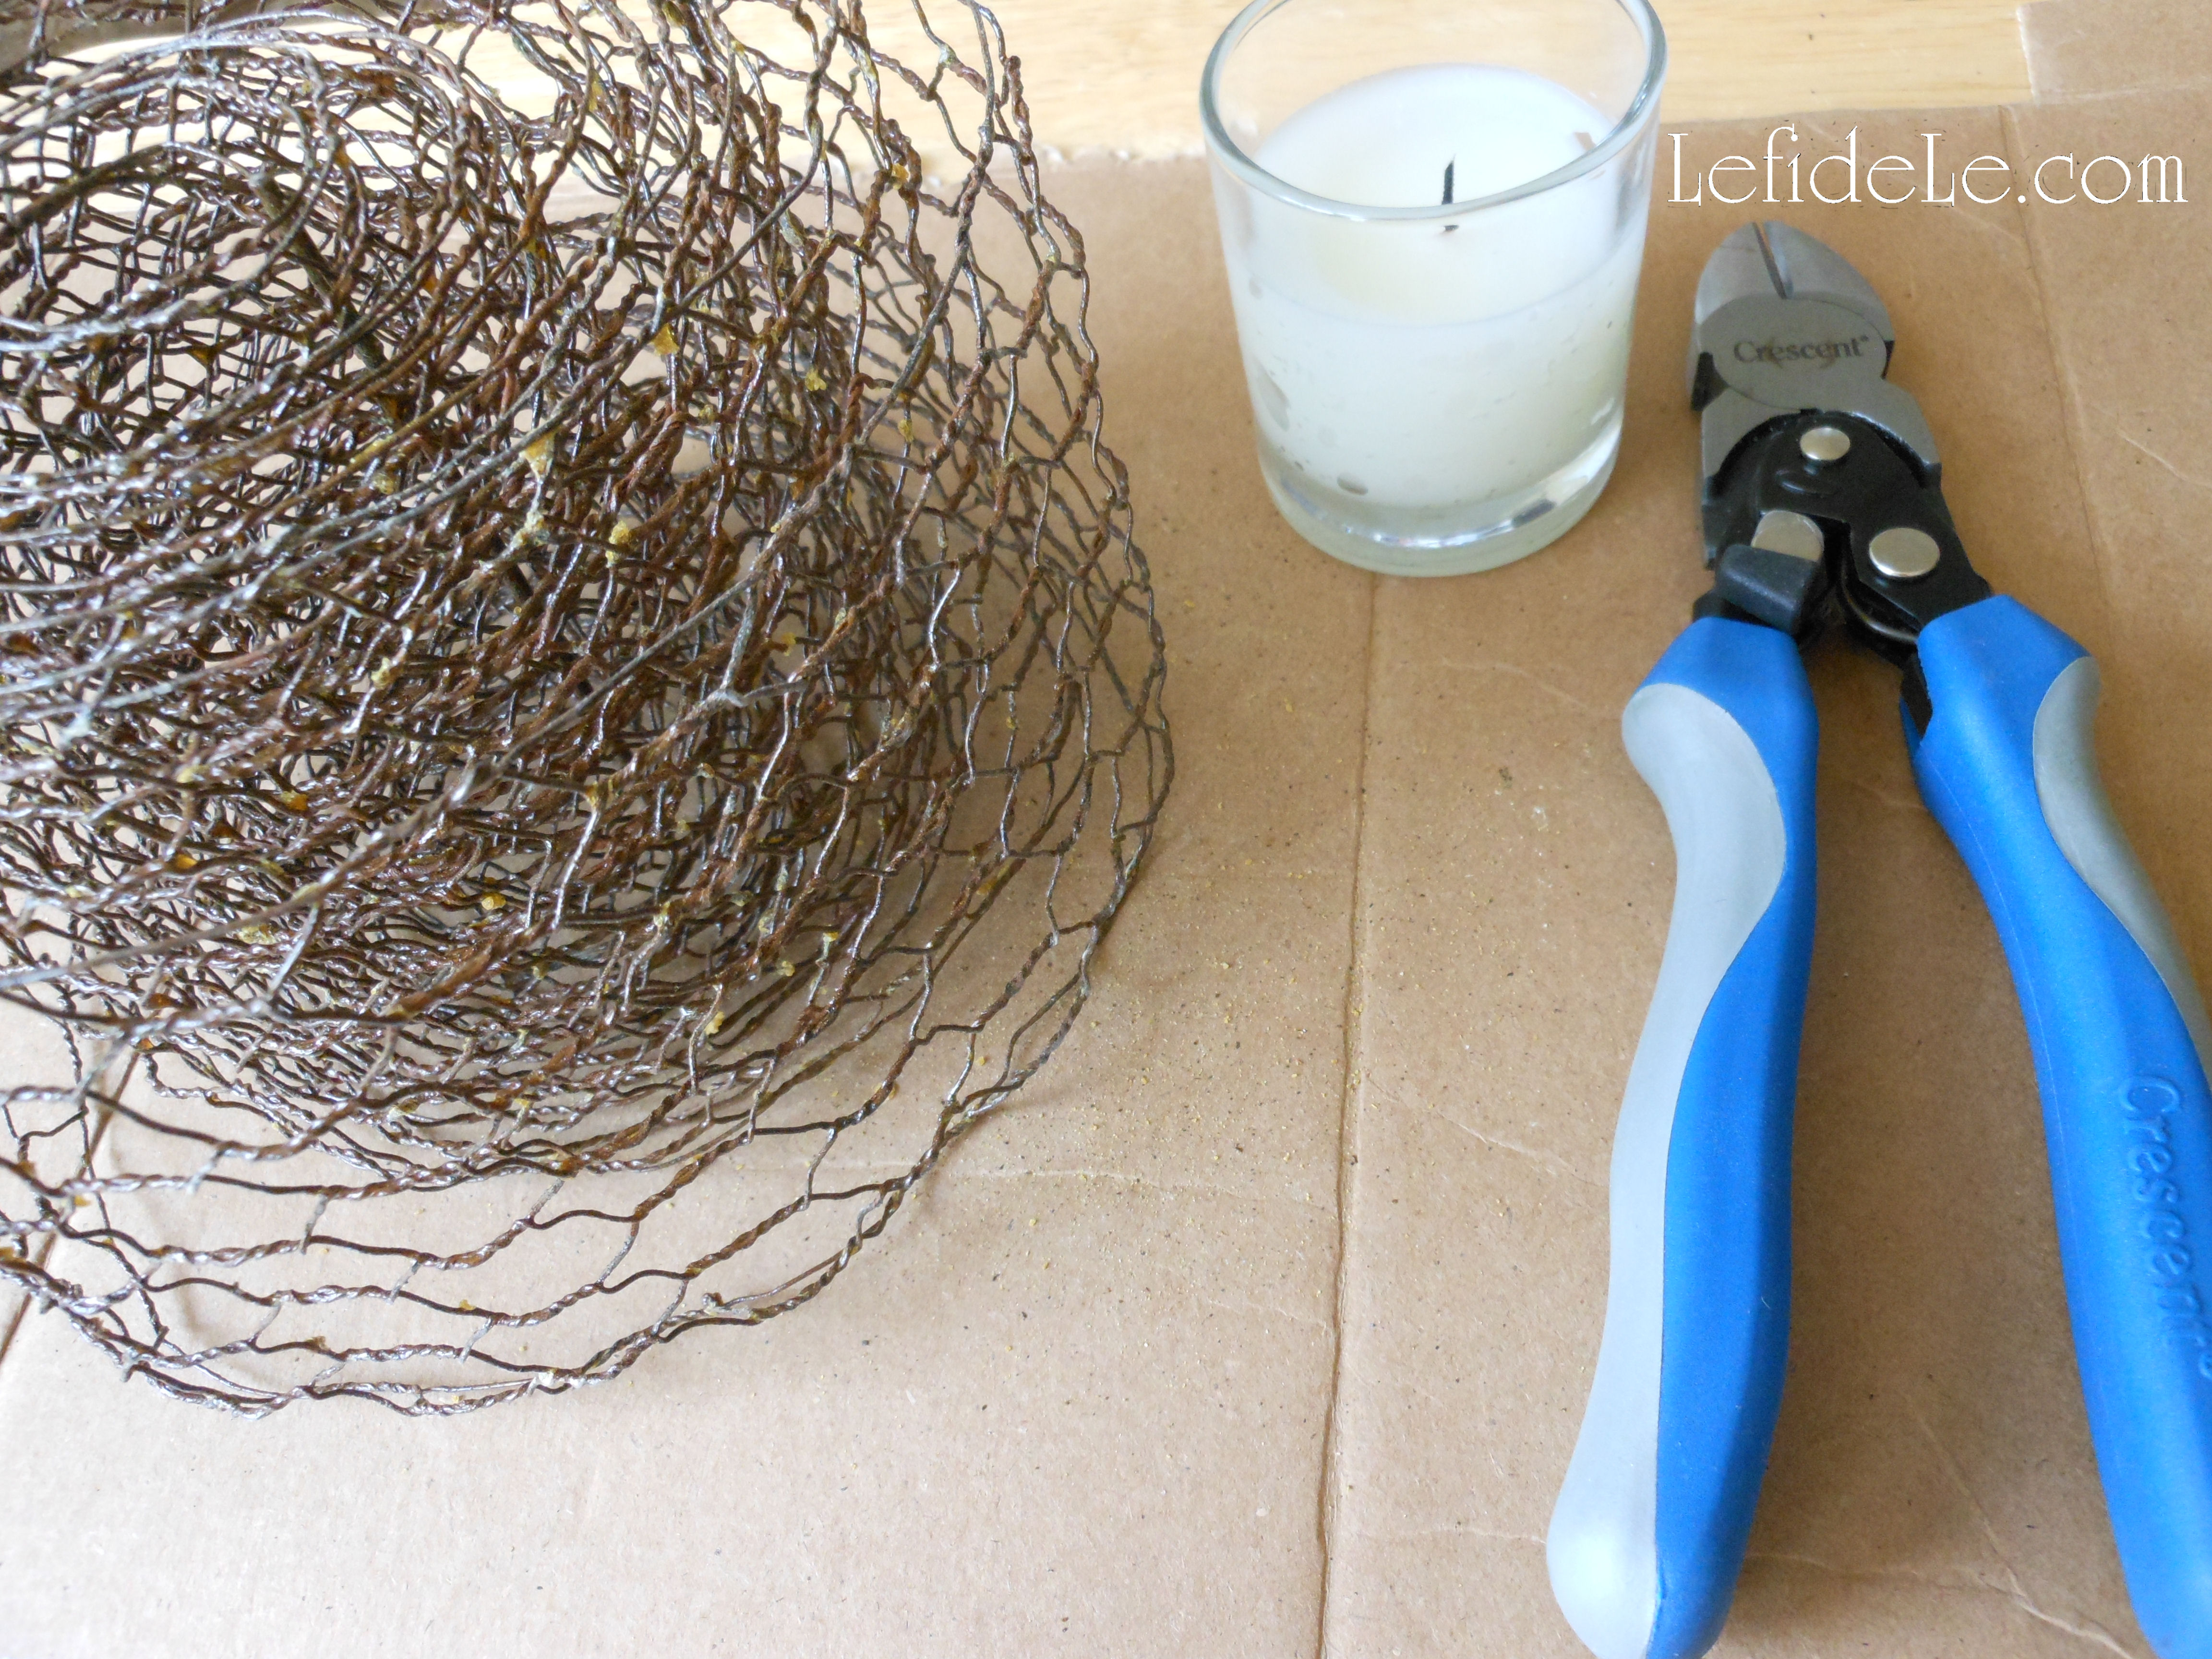
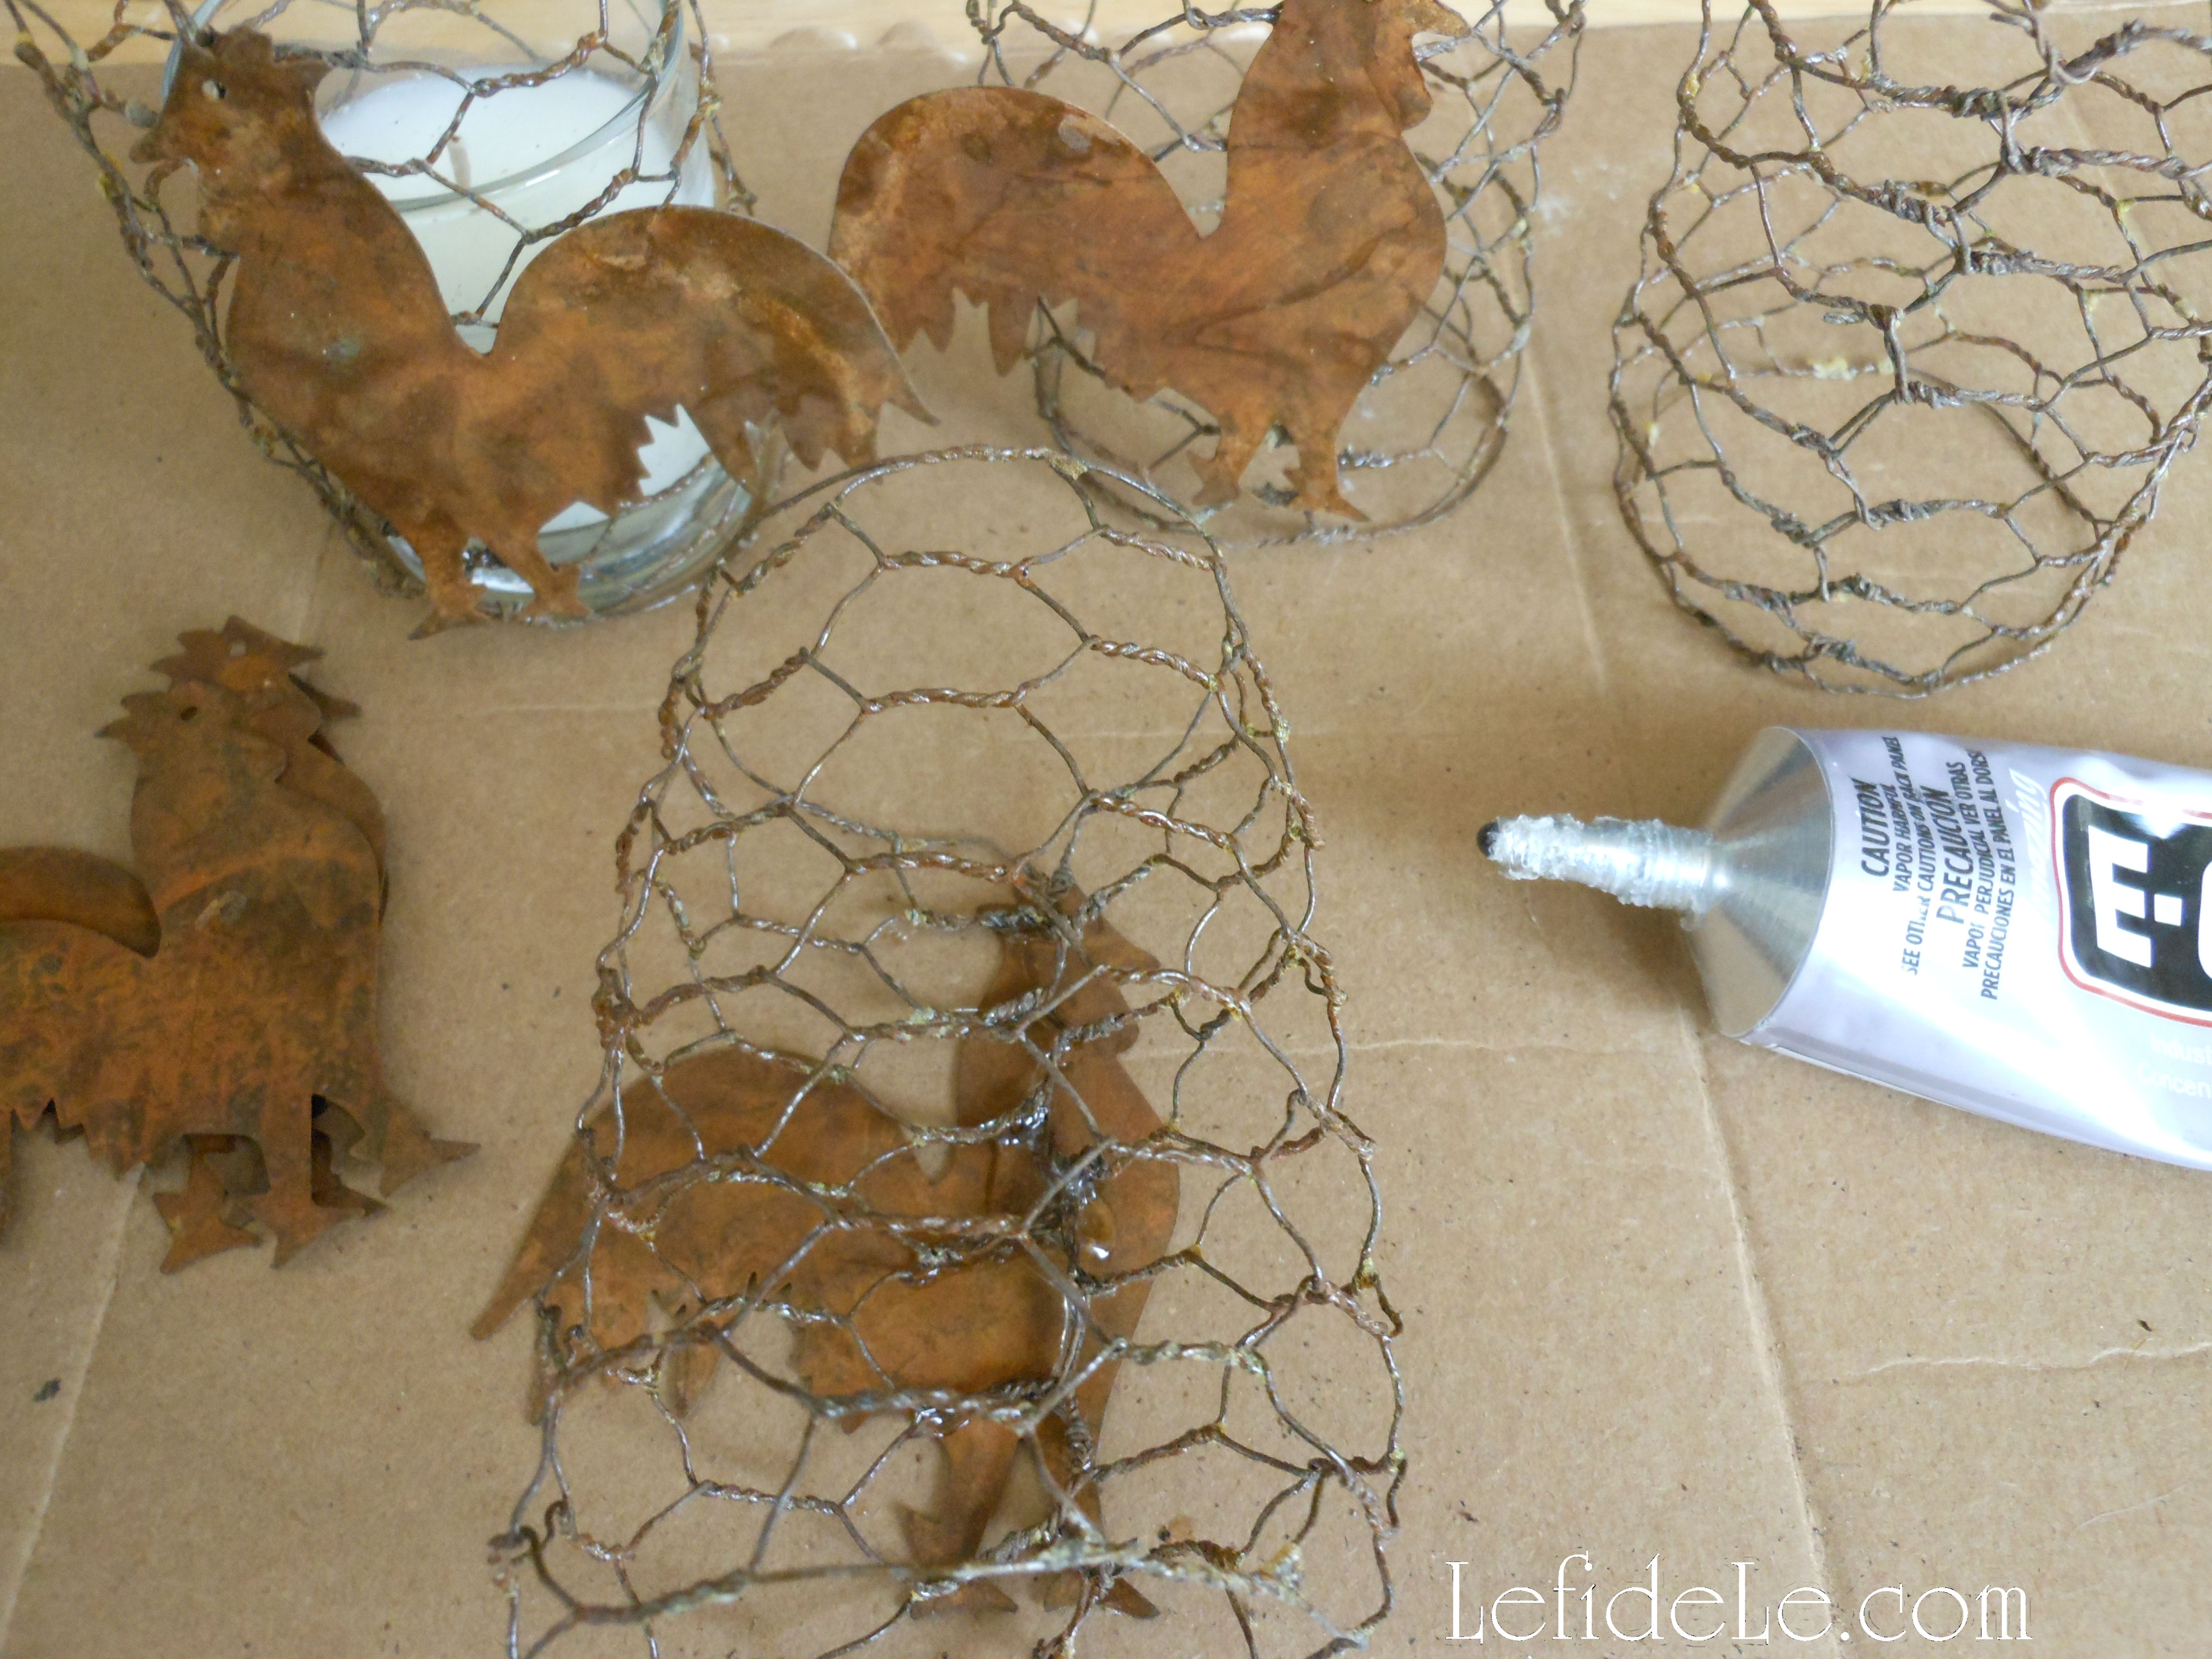
 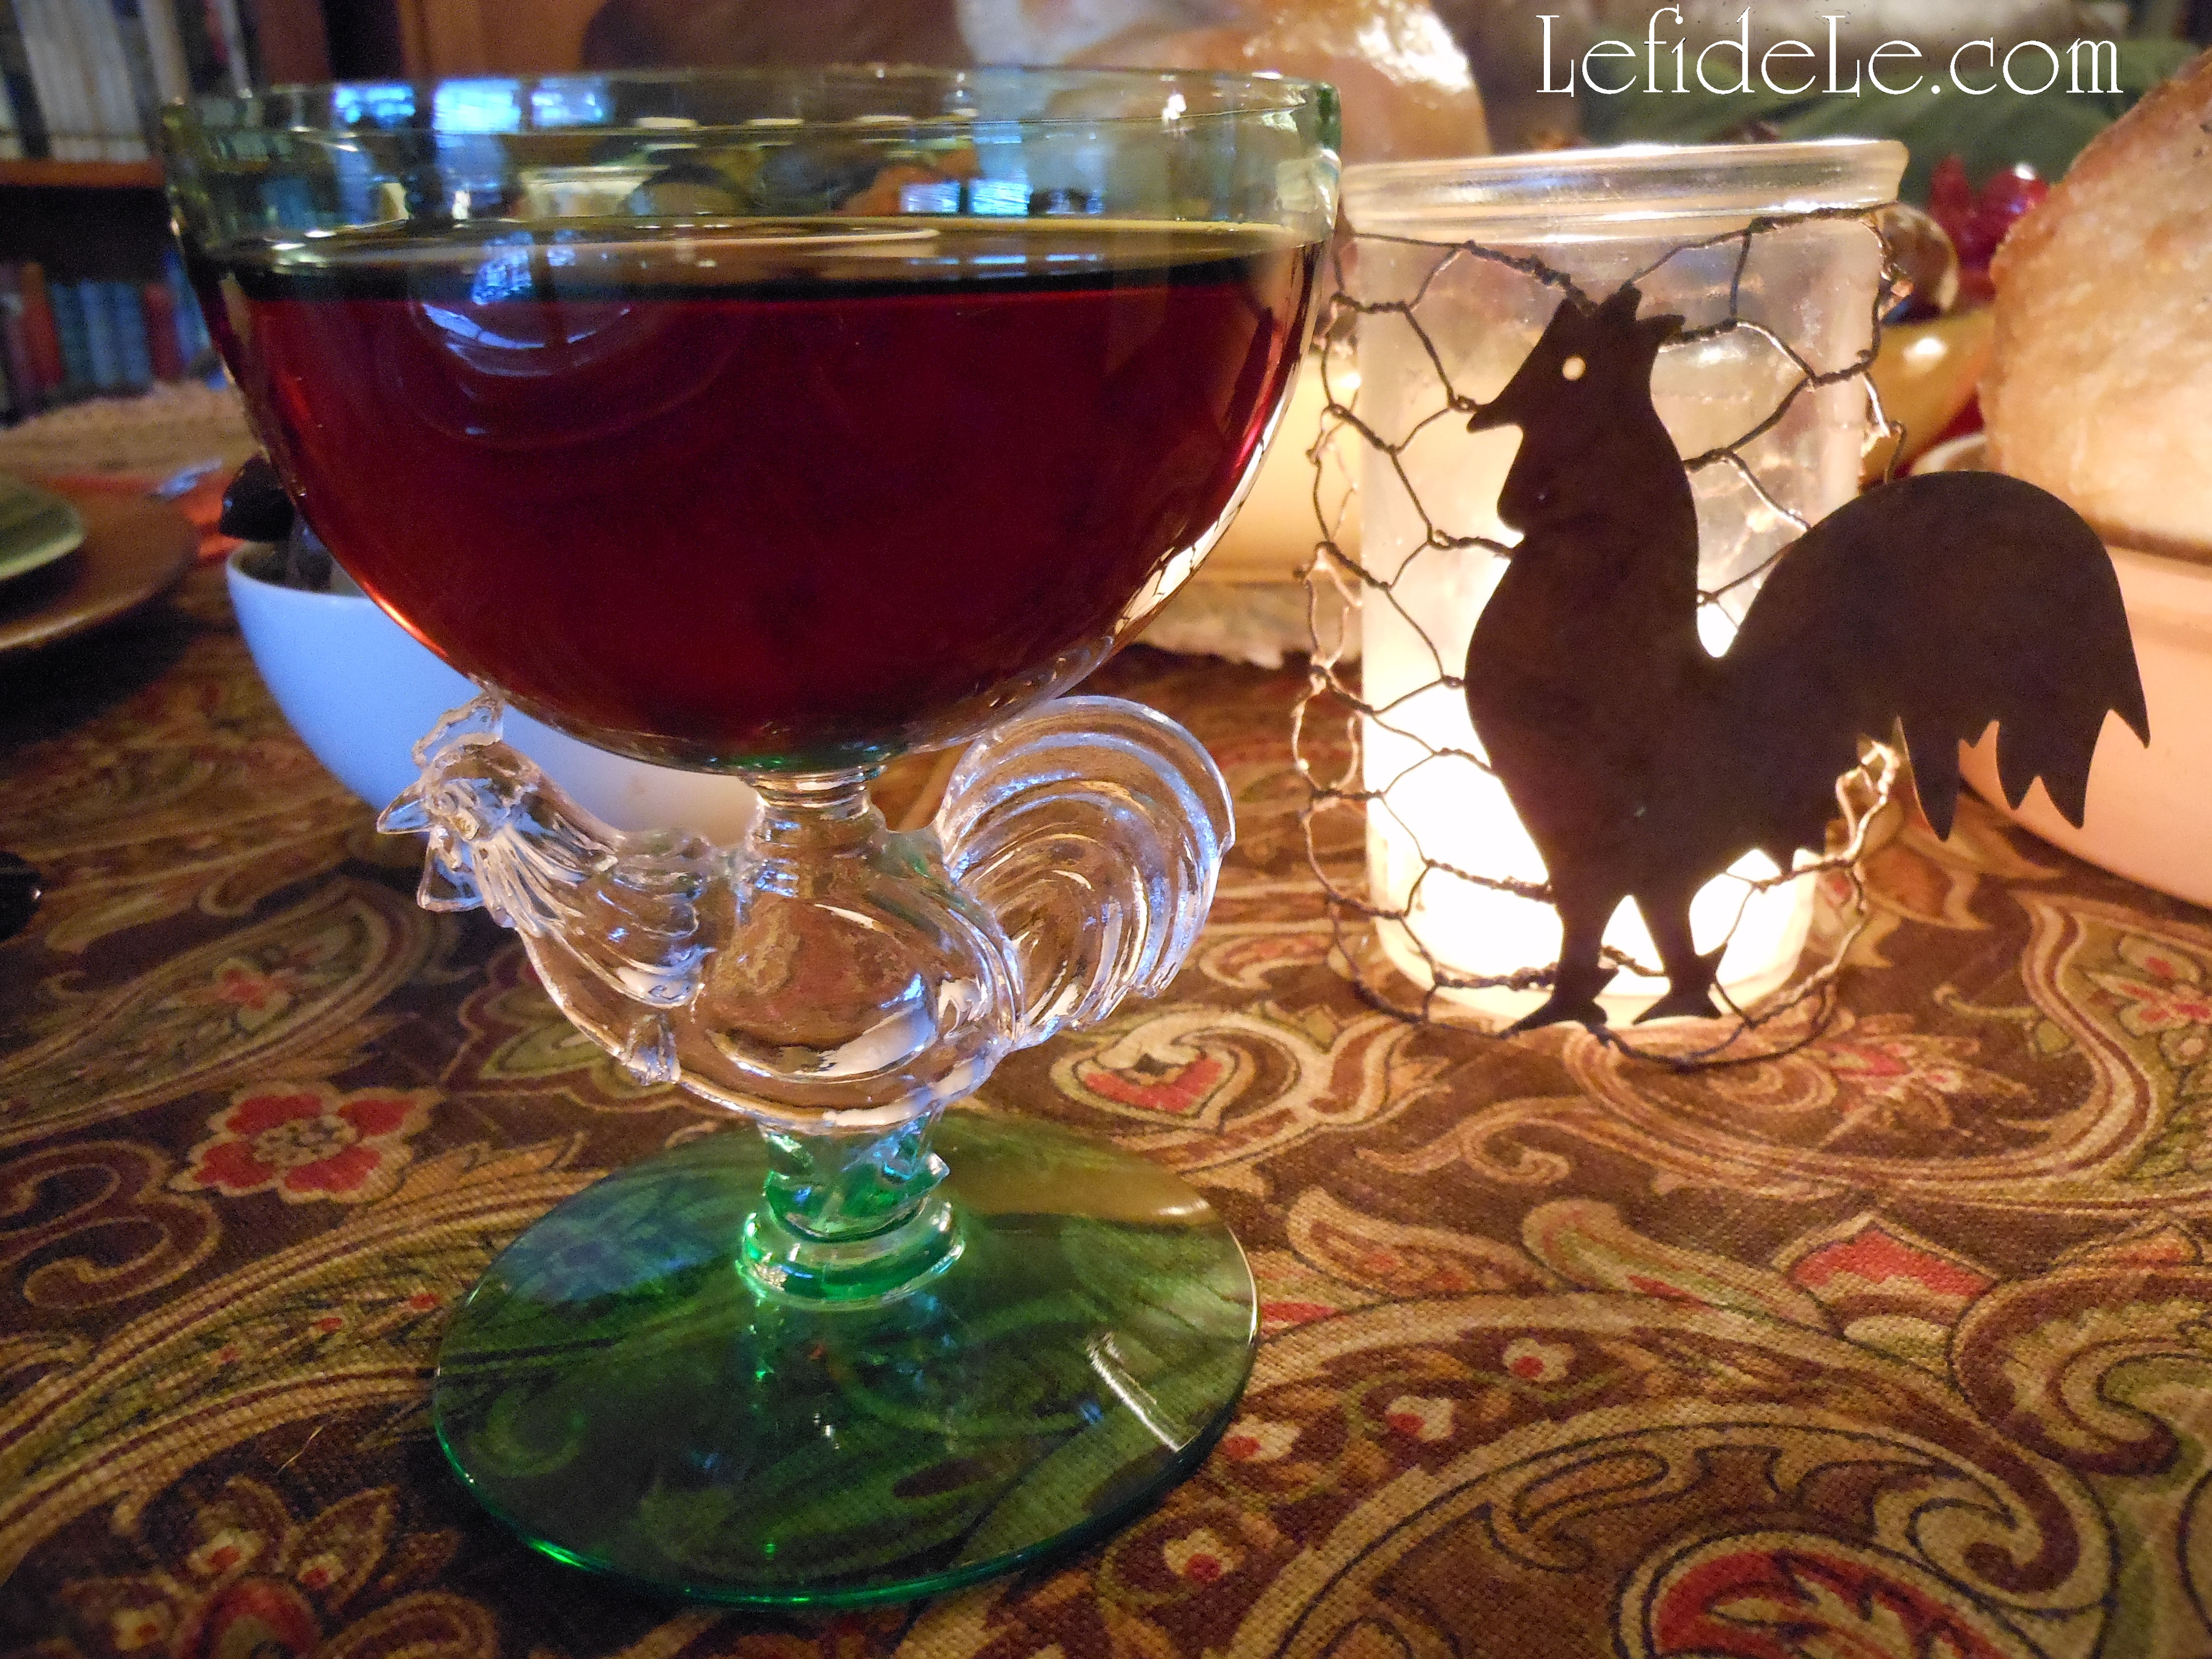 Another component which you can make for yourself is my DIY Rusted Rooster Chicken Wire Votive Holder Craft. Because they were so easy, I actually made many more than I used in the pictures. (These can be made with any shape you like, fall leaves for example.) They really added a beautiful glow to the table.
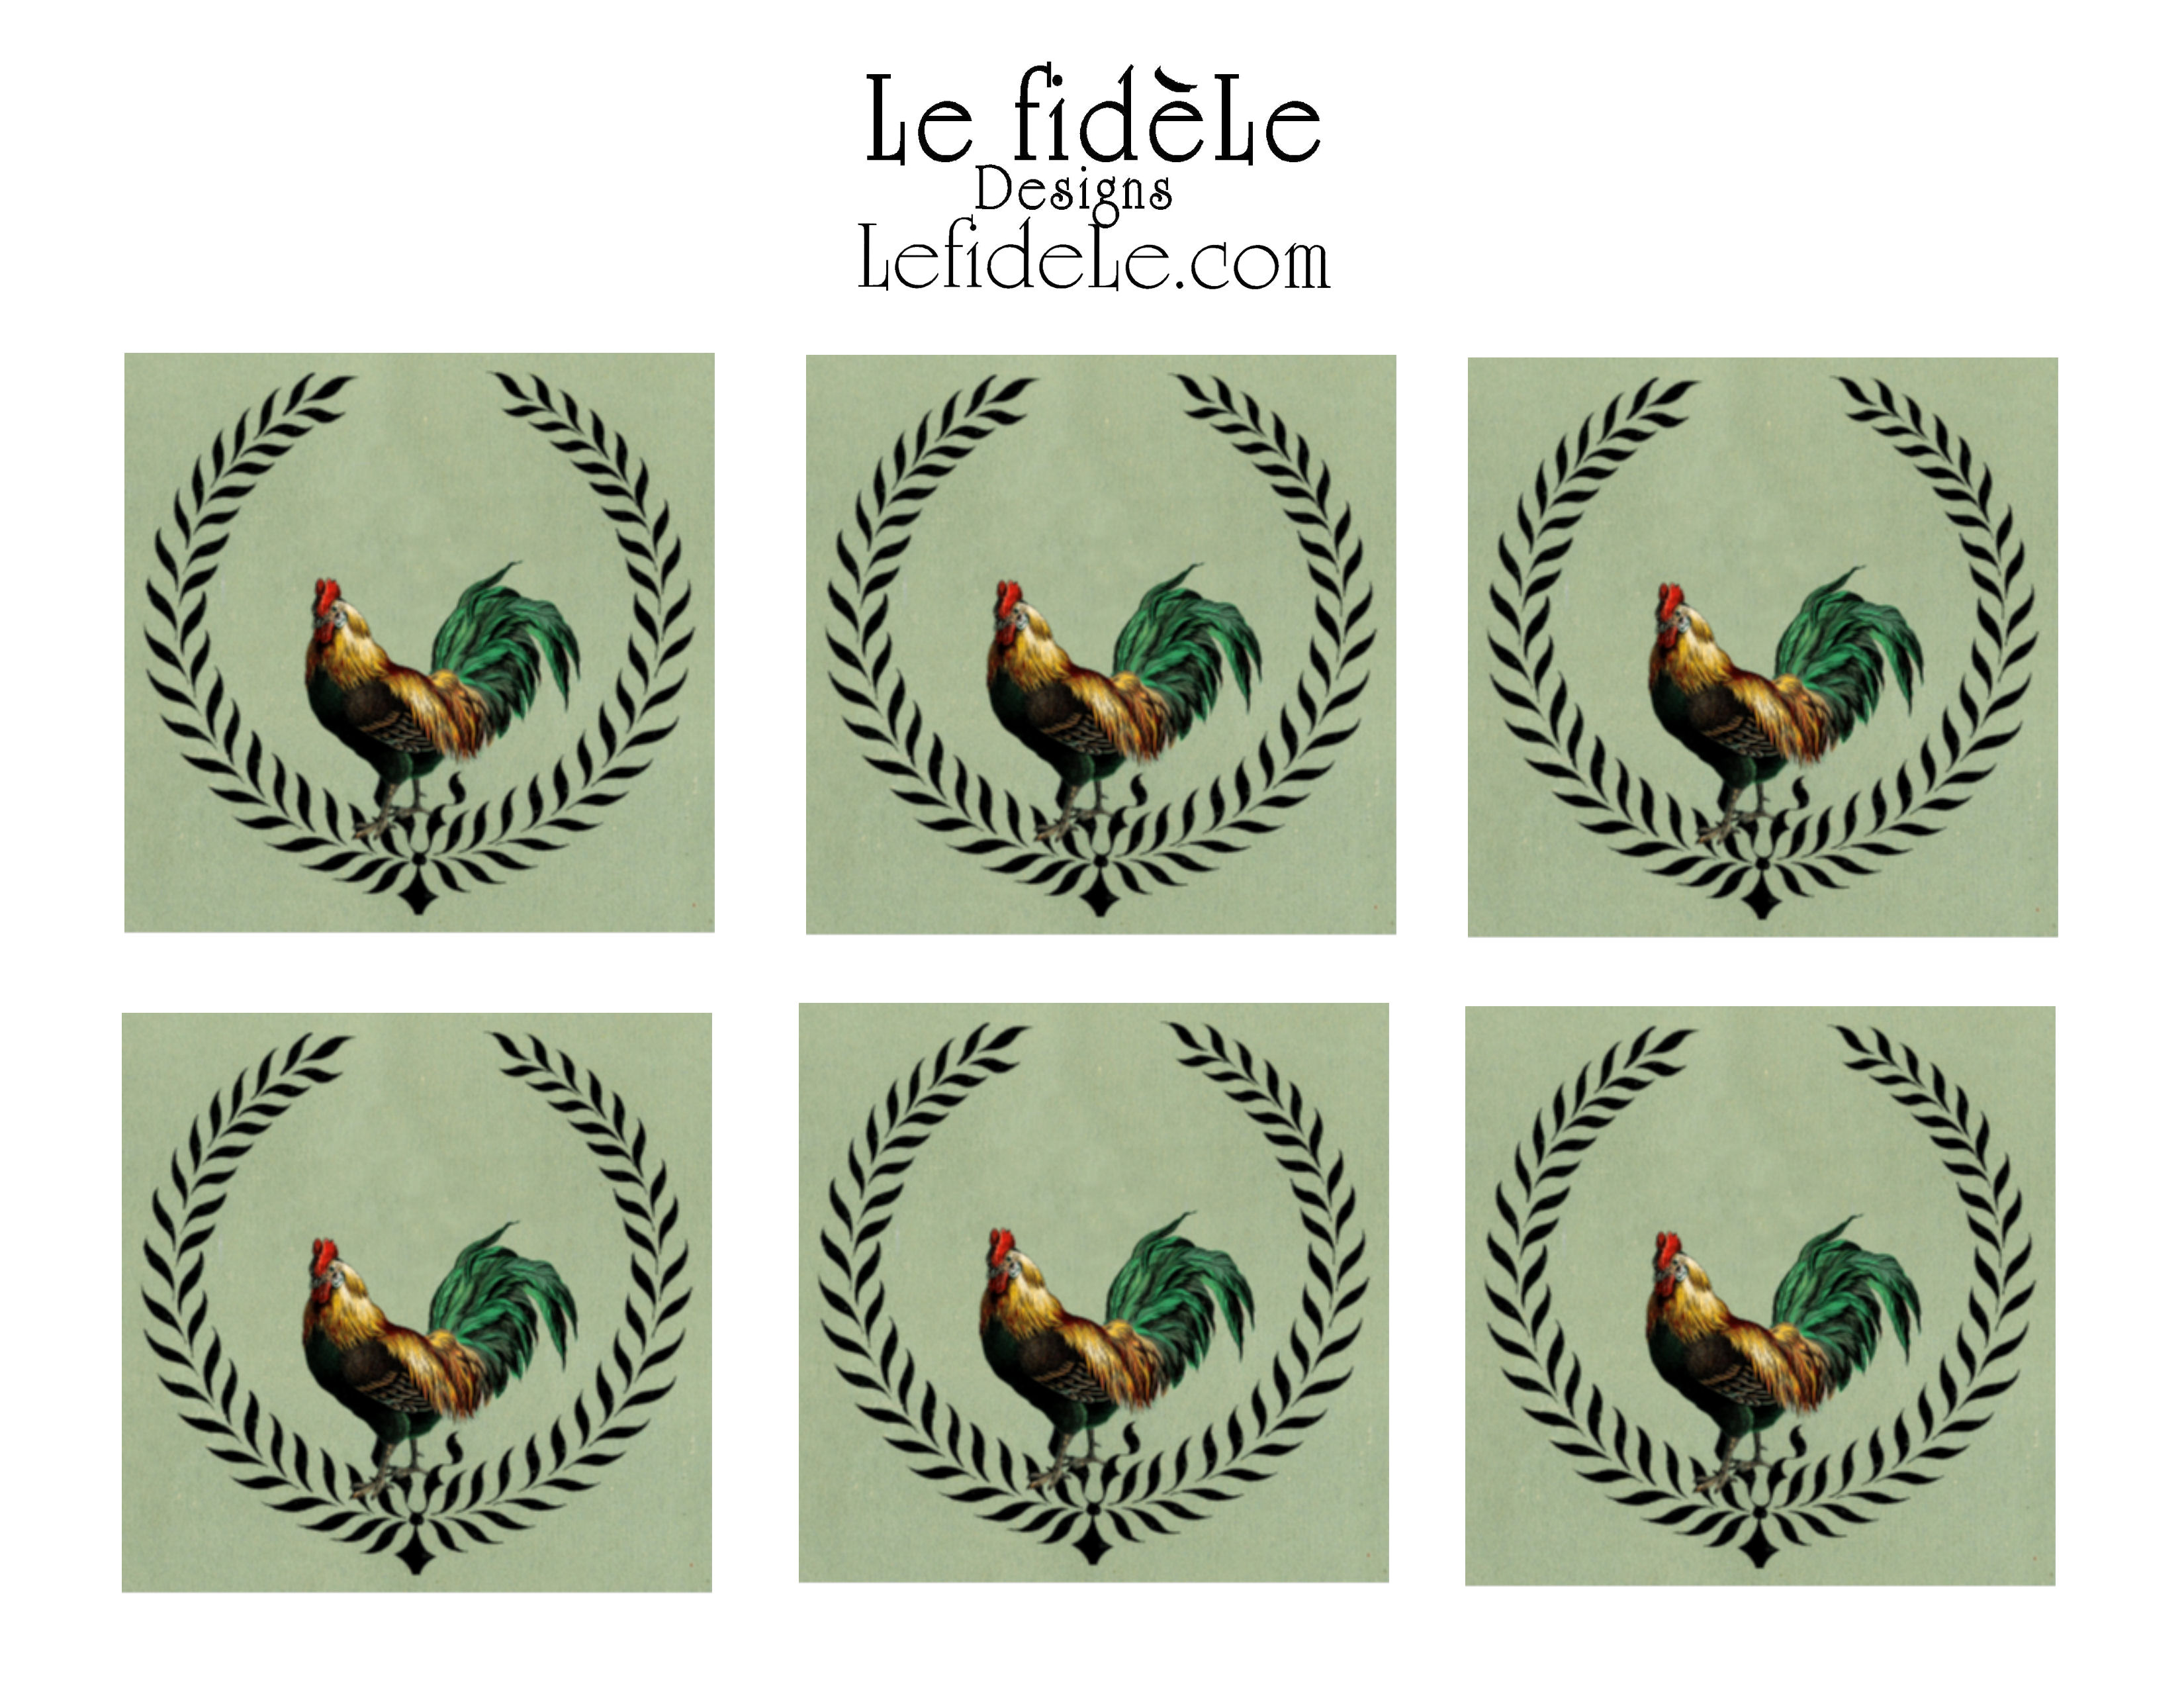
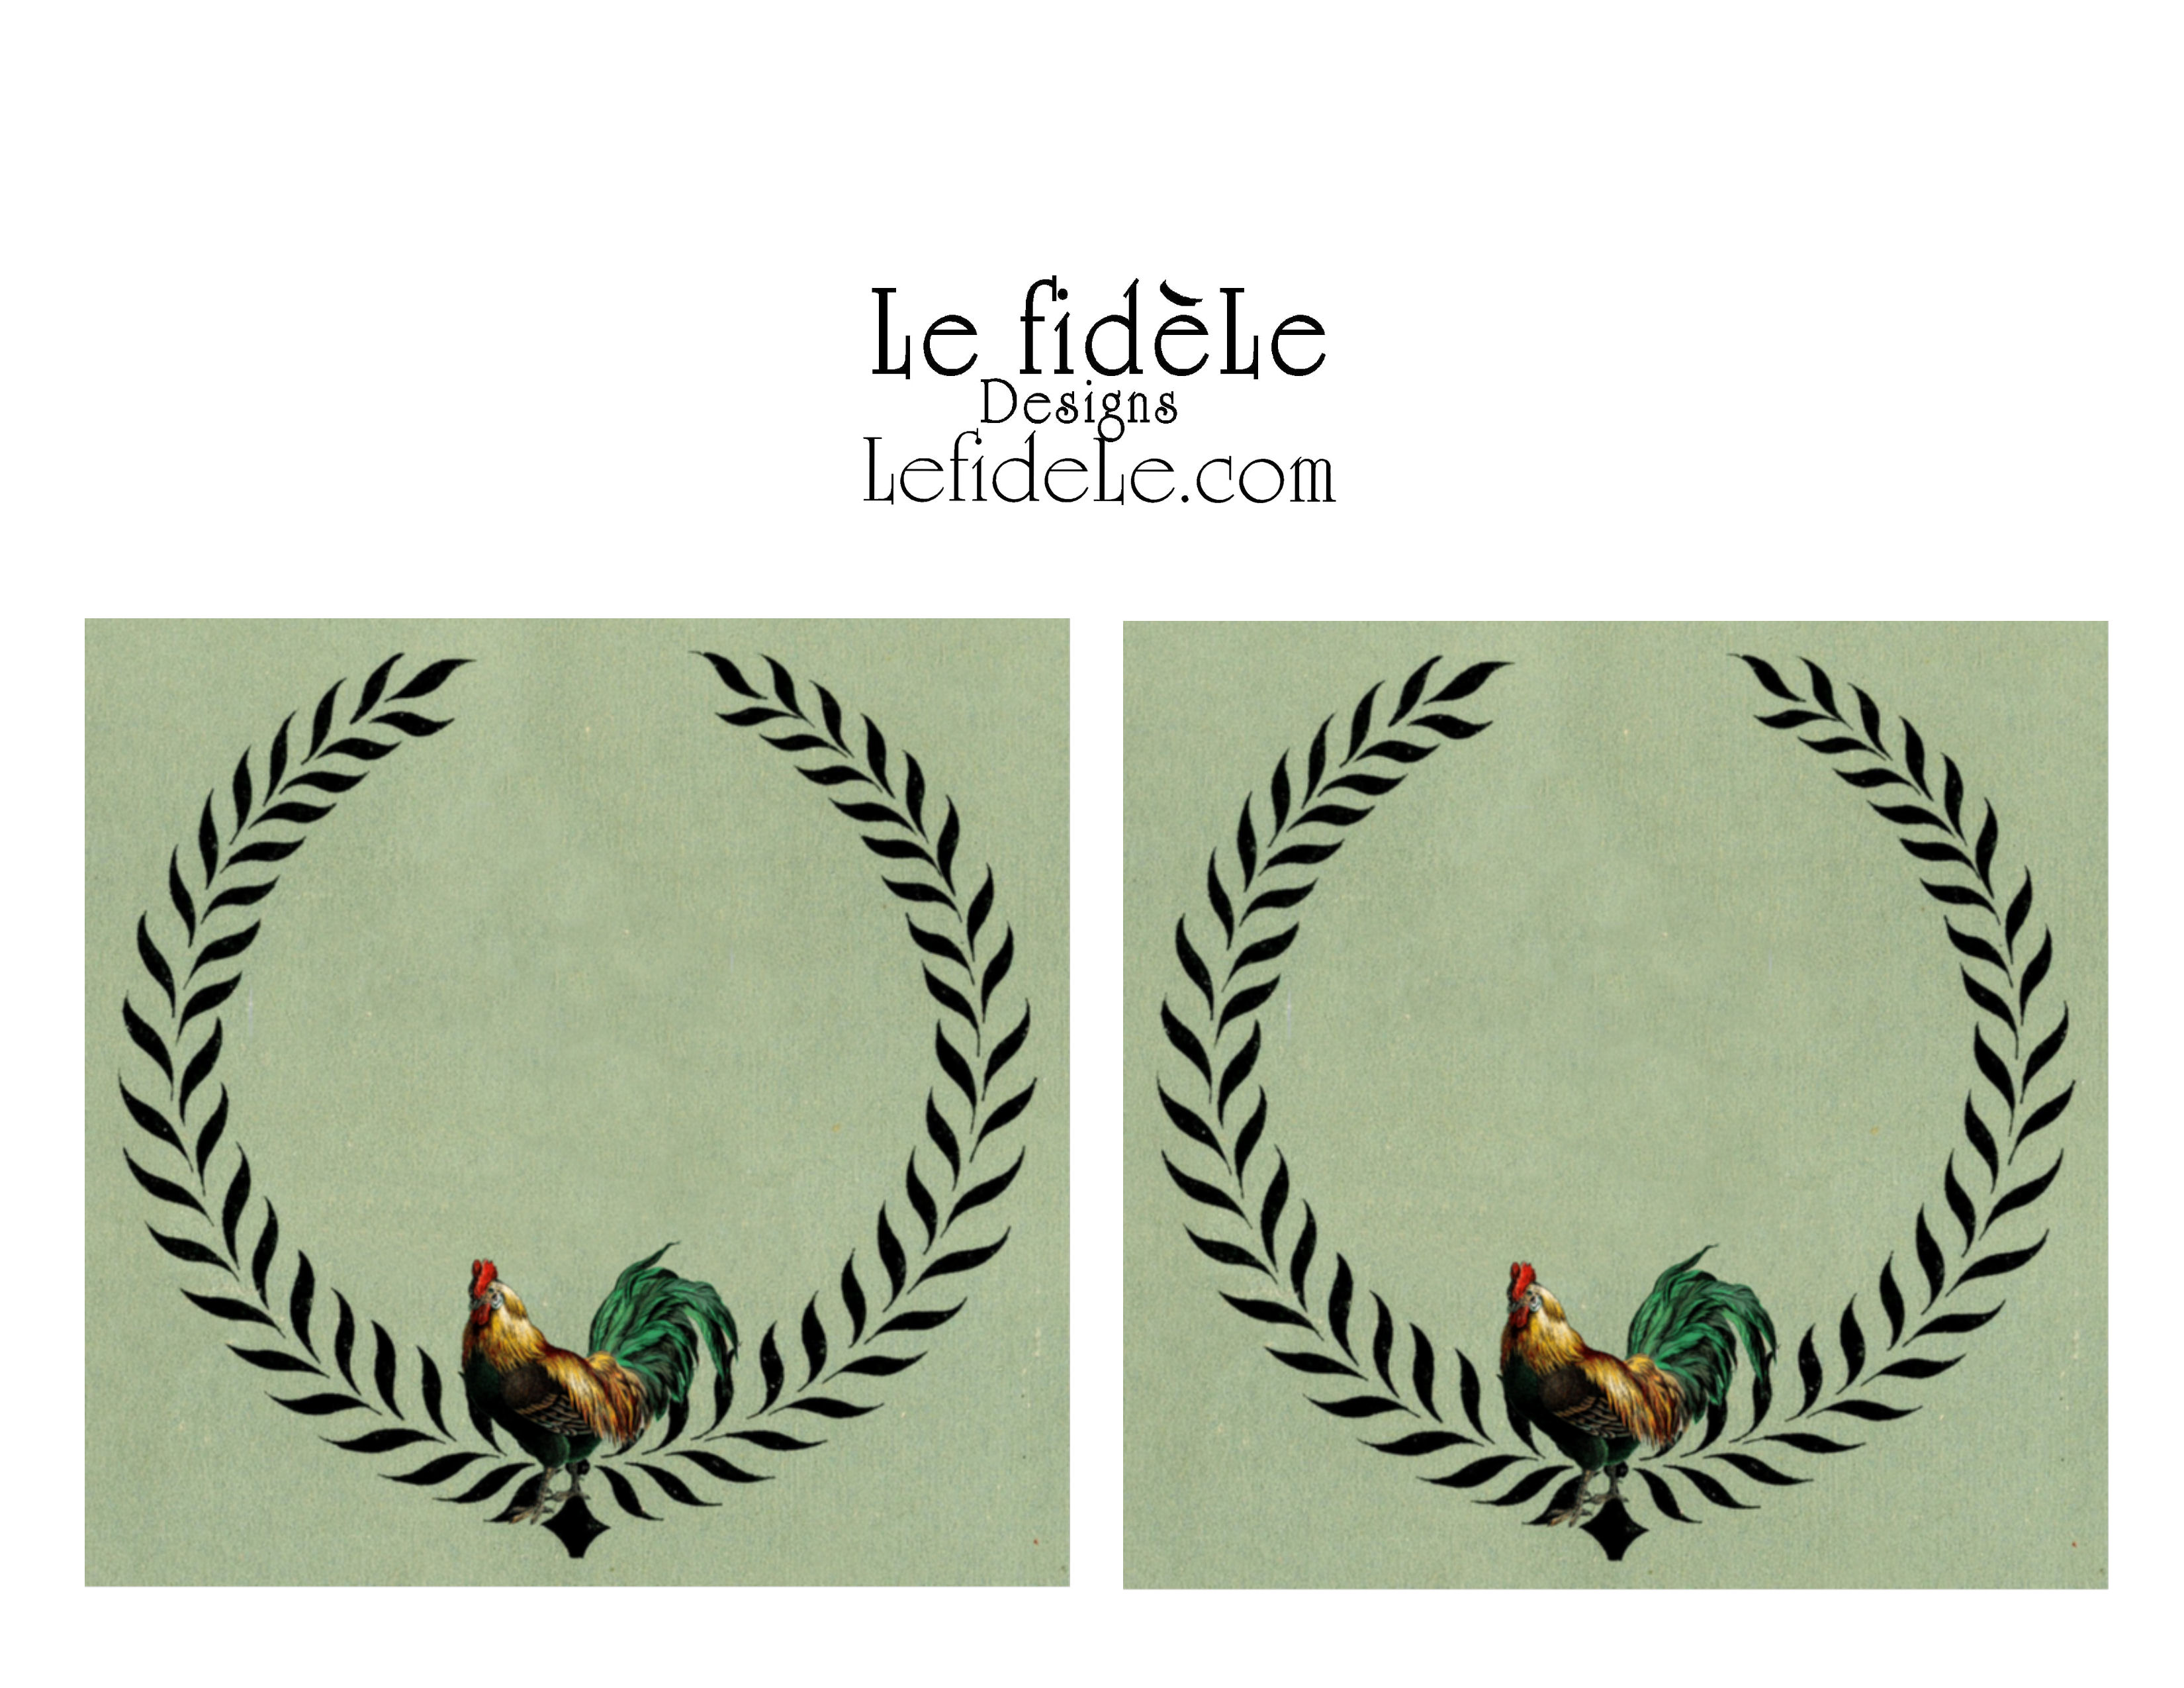
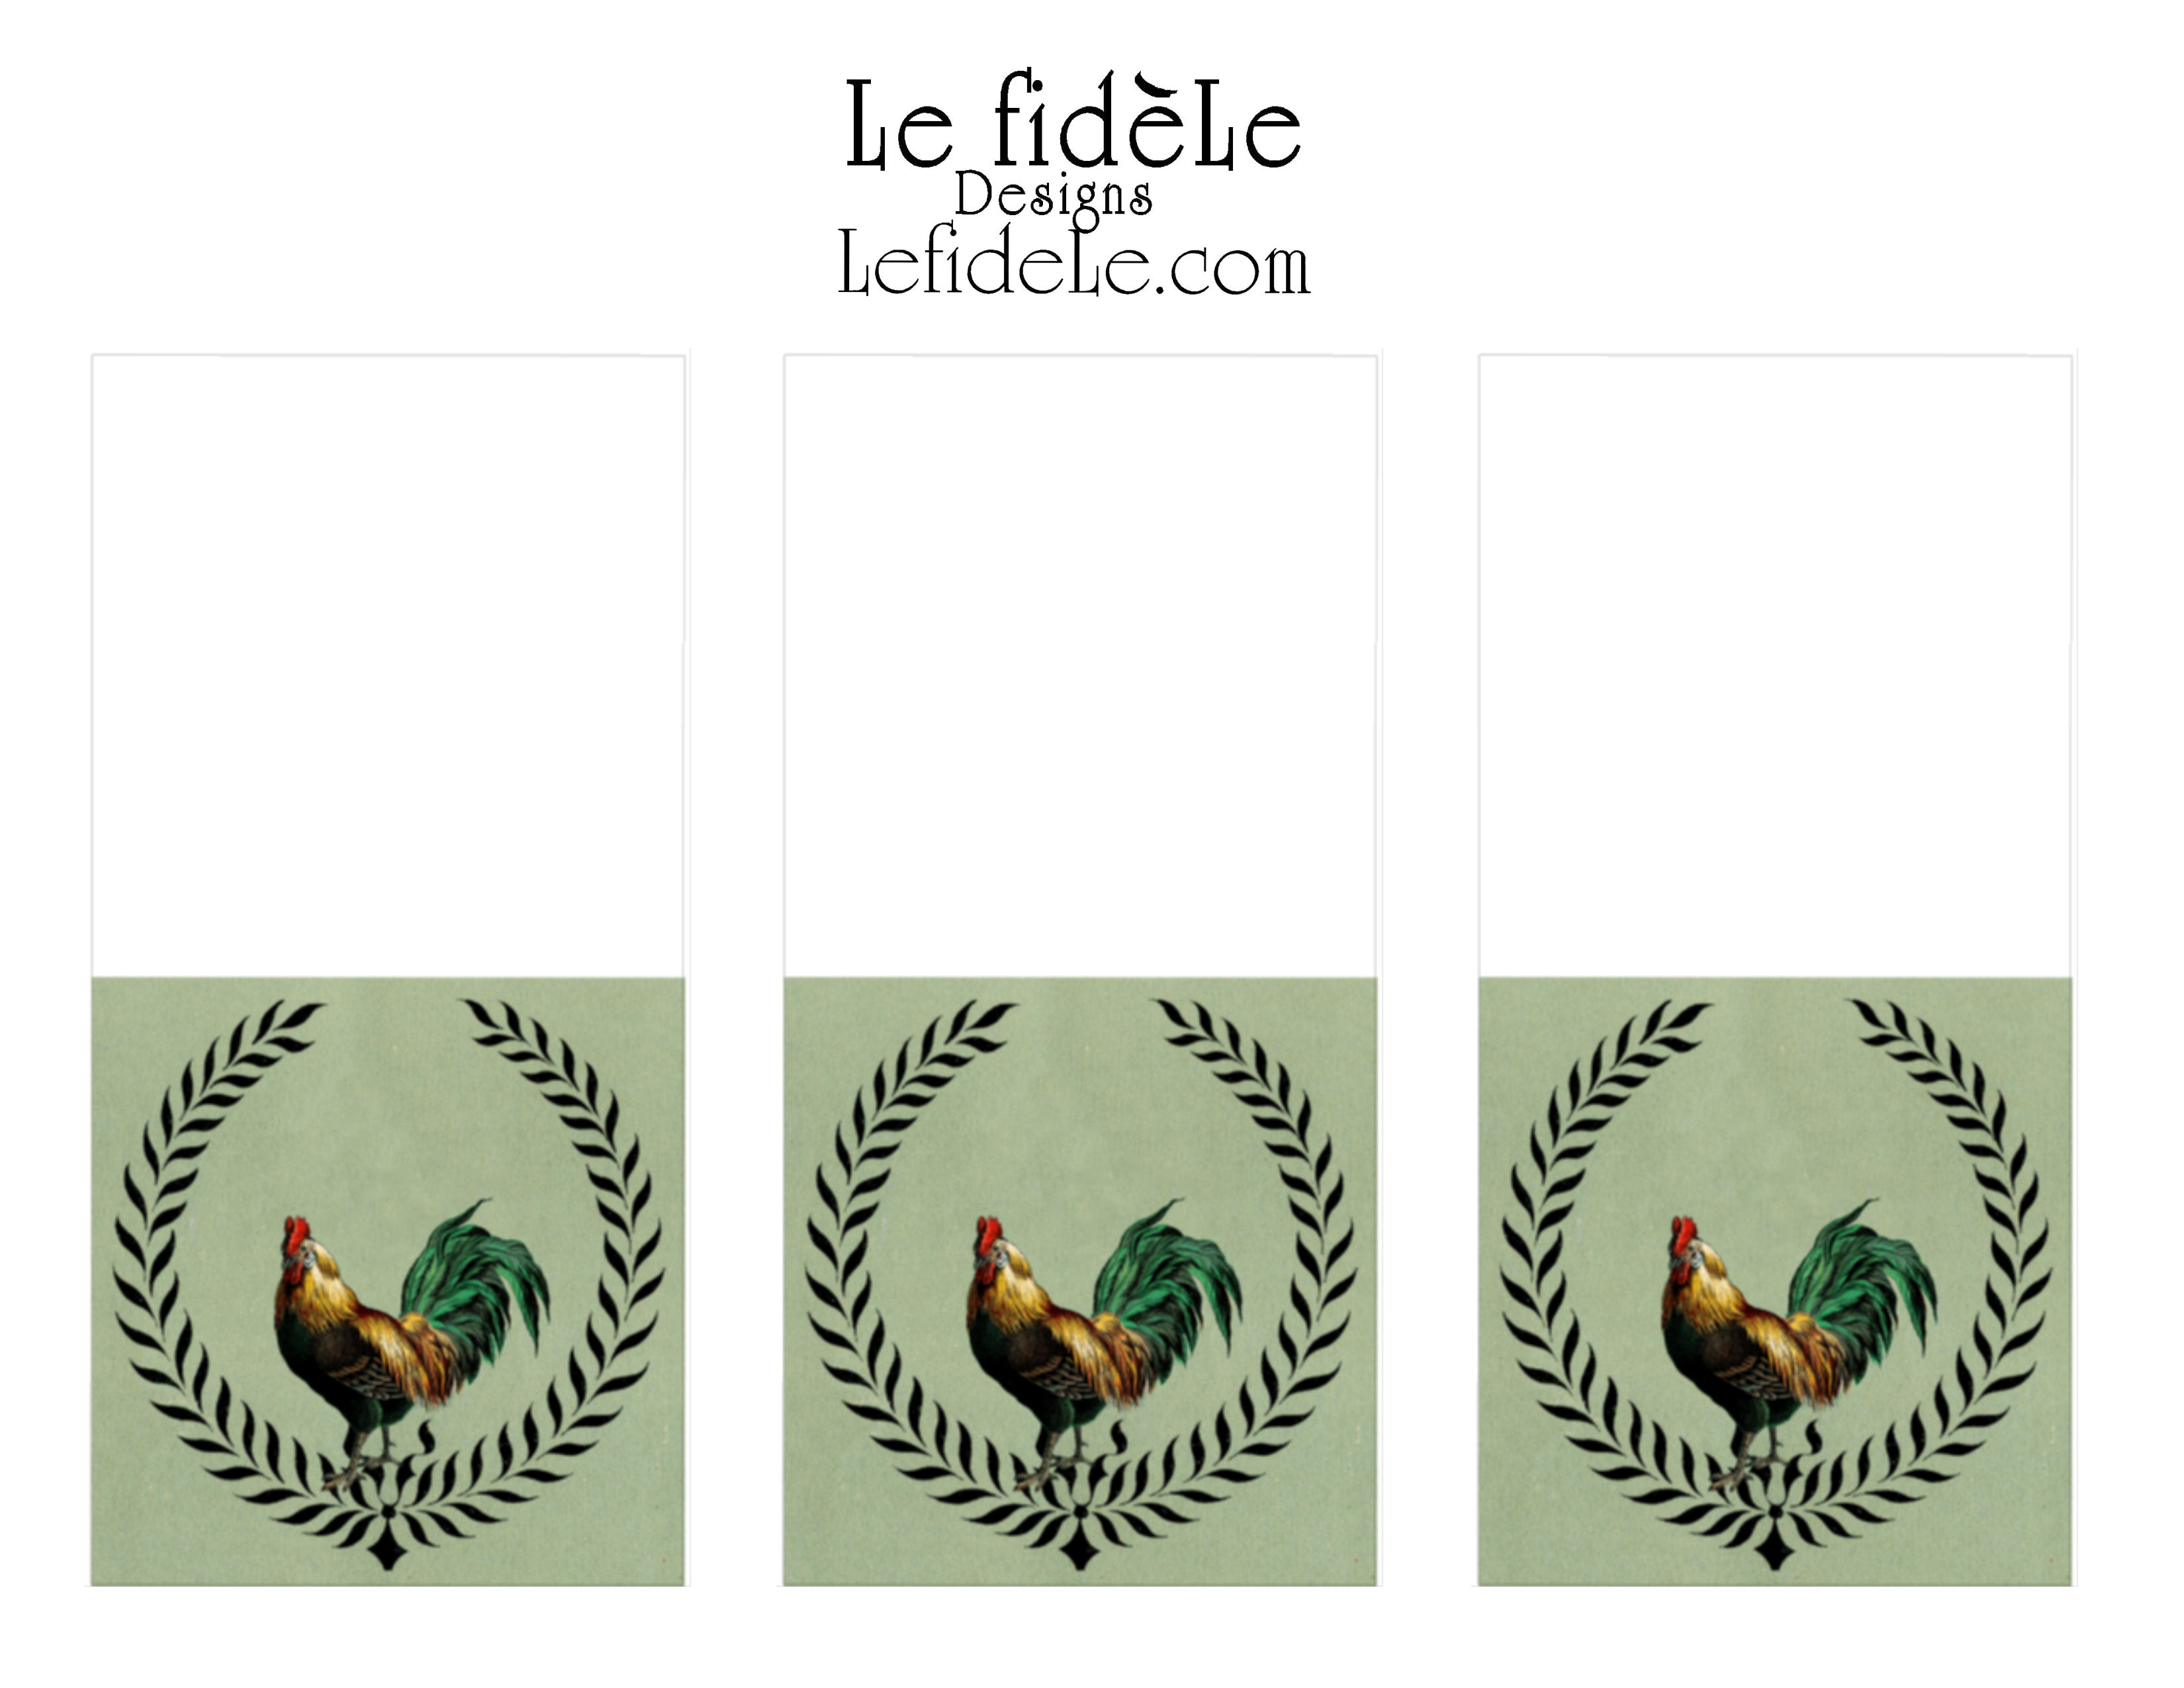
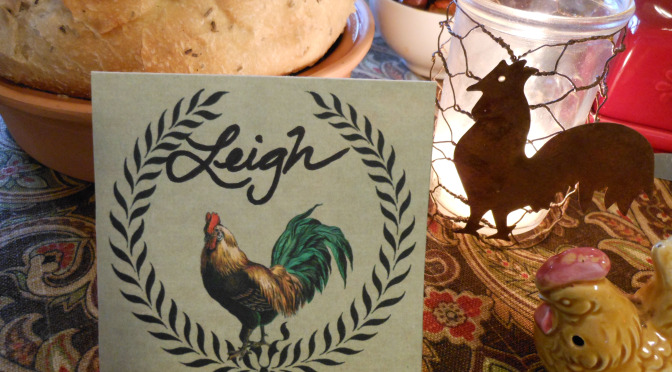
  I transformed, recolored, combined, and resized vintage images to make 3 free printables for invitations, labels, signs, menus, food tents, name place-cards, recipe cards, etc… (These are free for personal use only.)
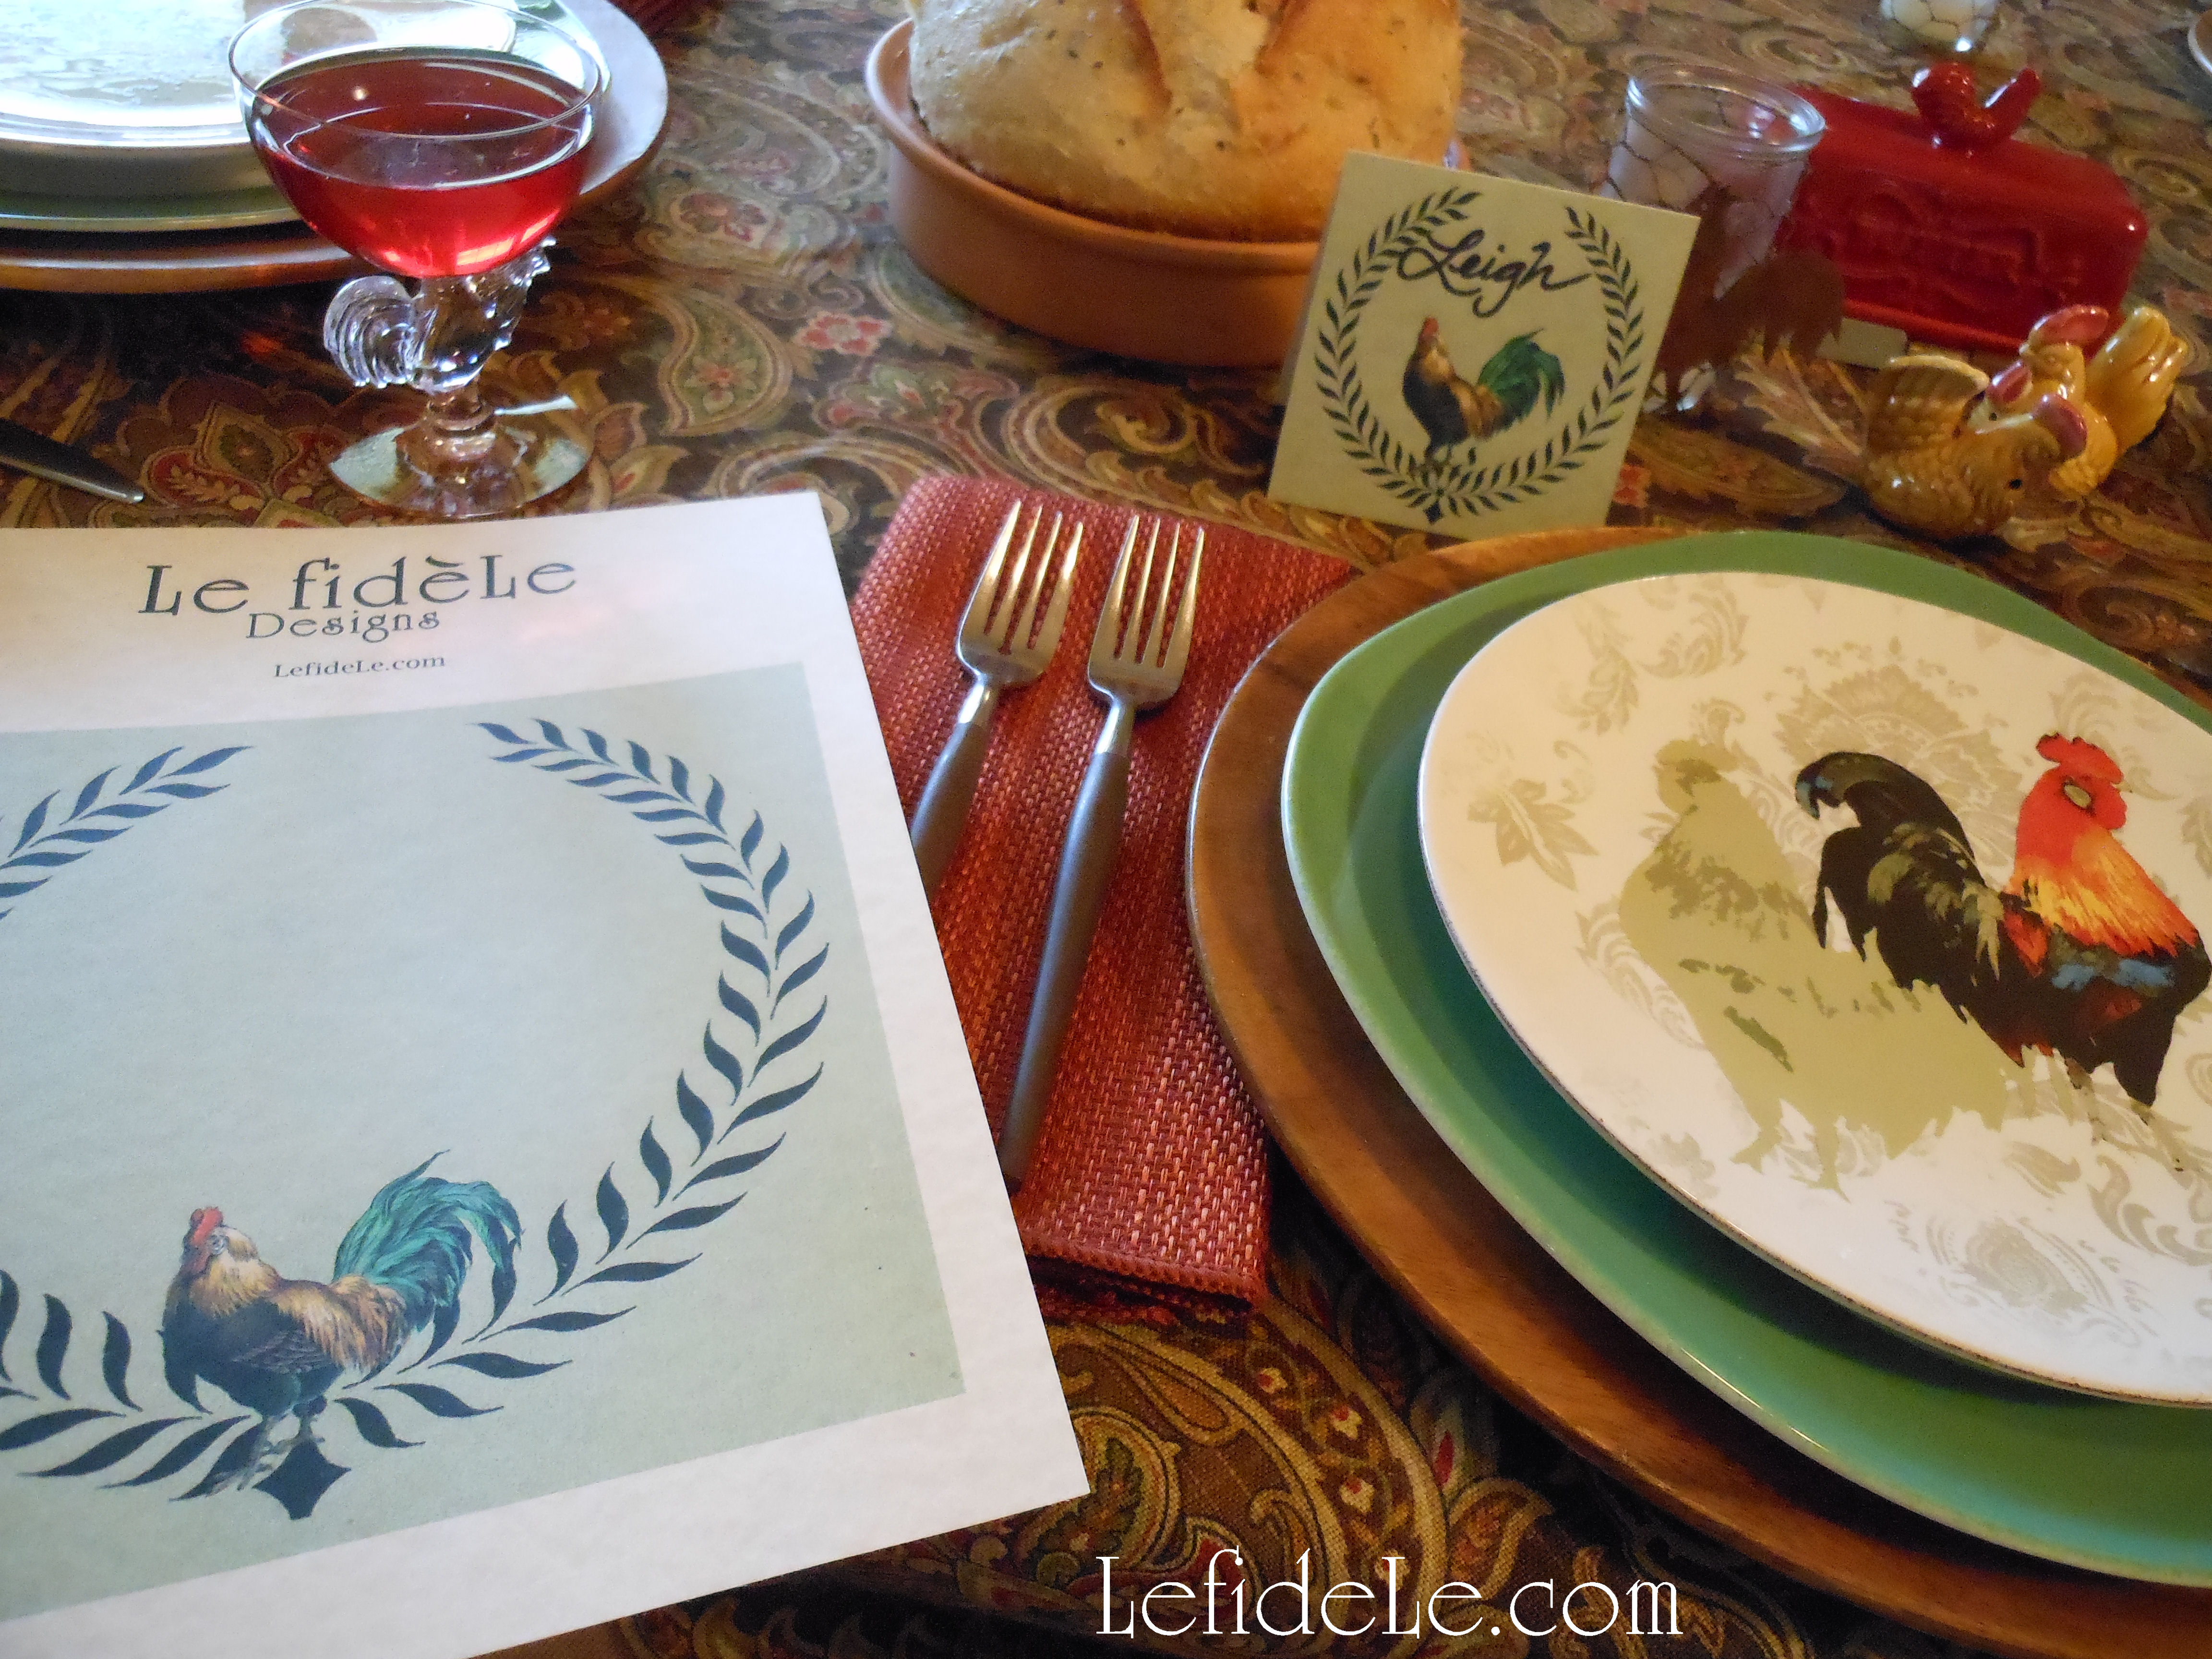 These are available at the end of the article (simply right click on each image, and print in color and on photo settings on cardstock). Then just cut out your place-cards as needed… or enlist a significant other or kiddo to do it while you prep for dinner!
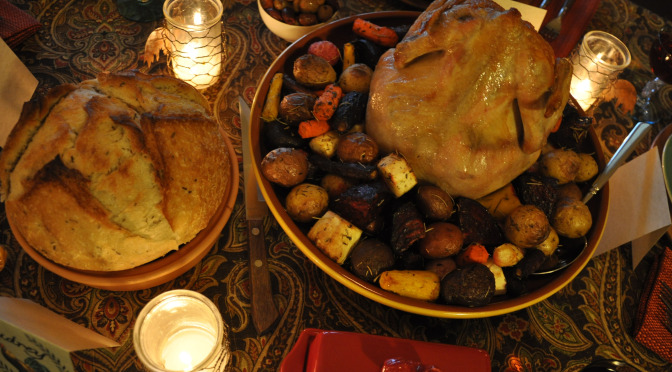
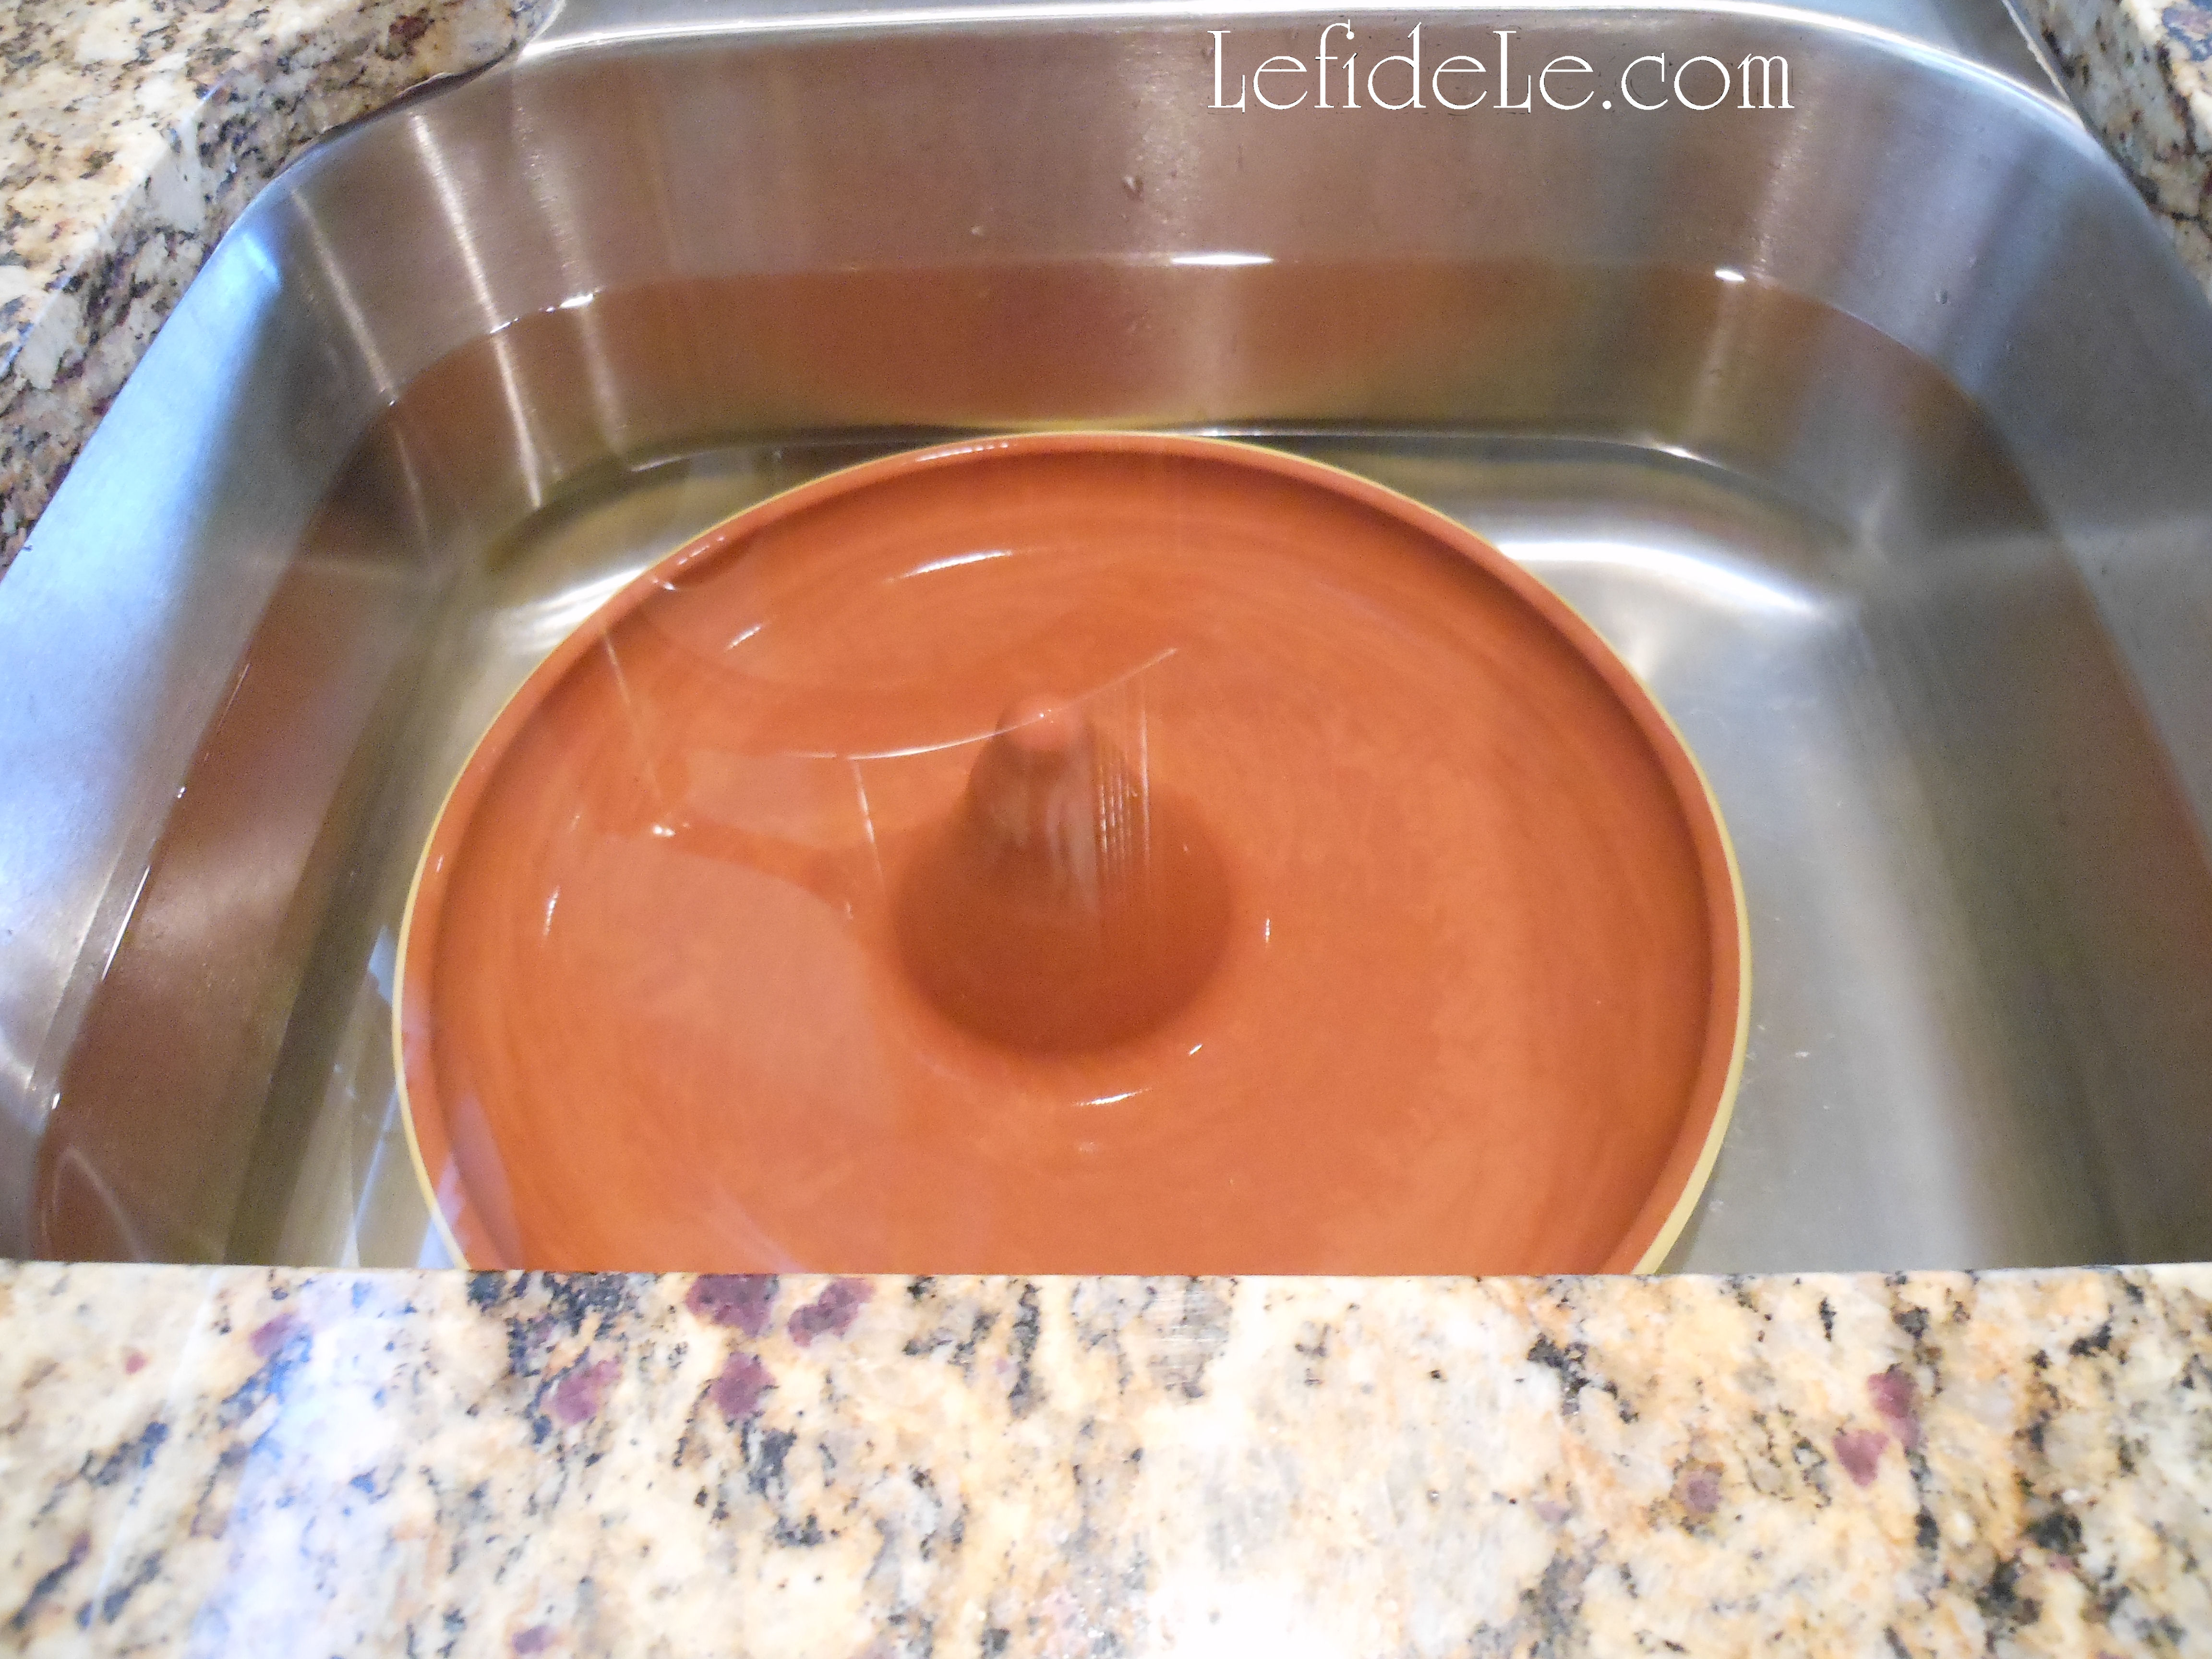
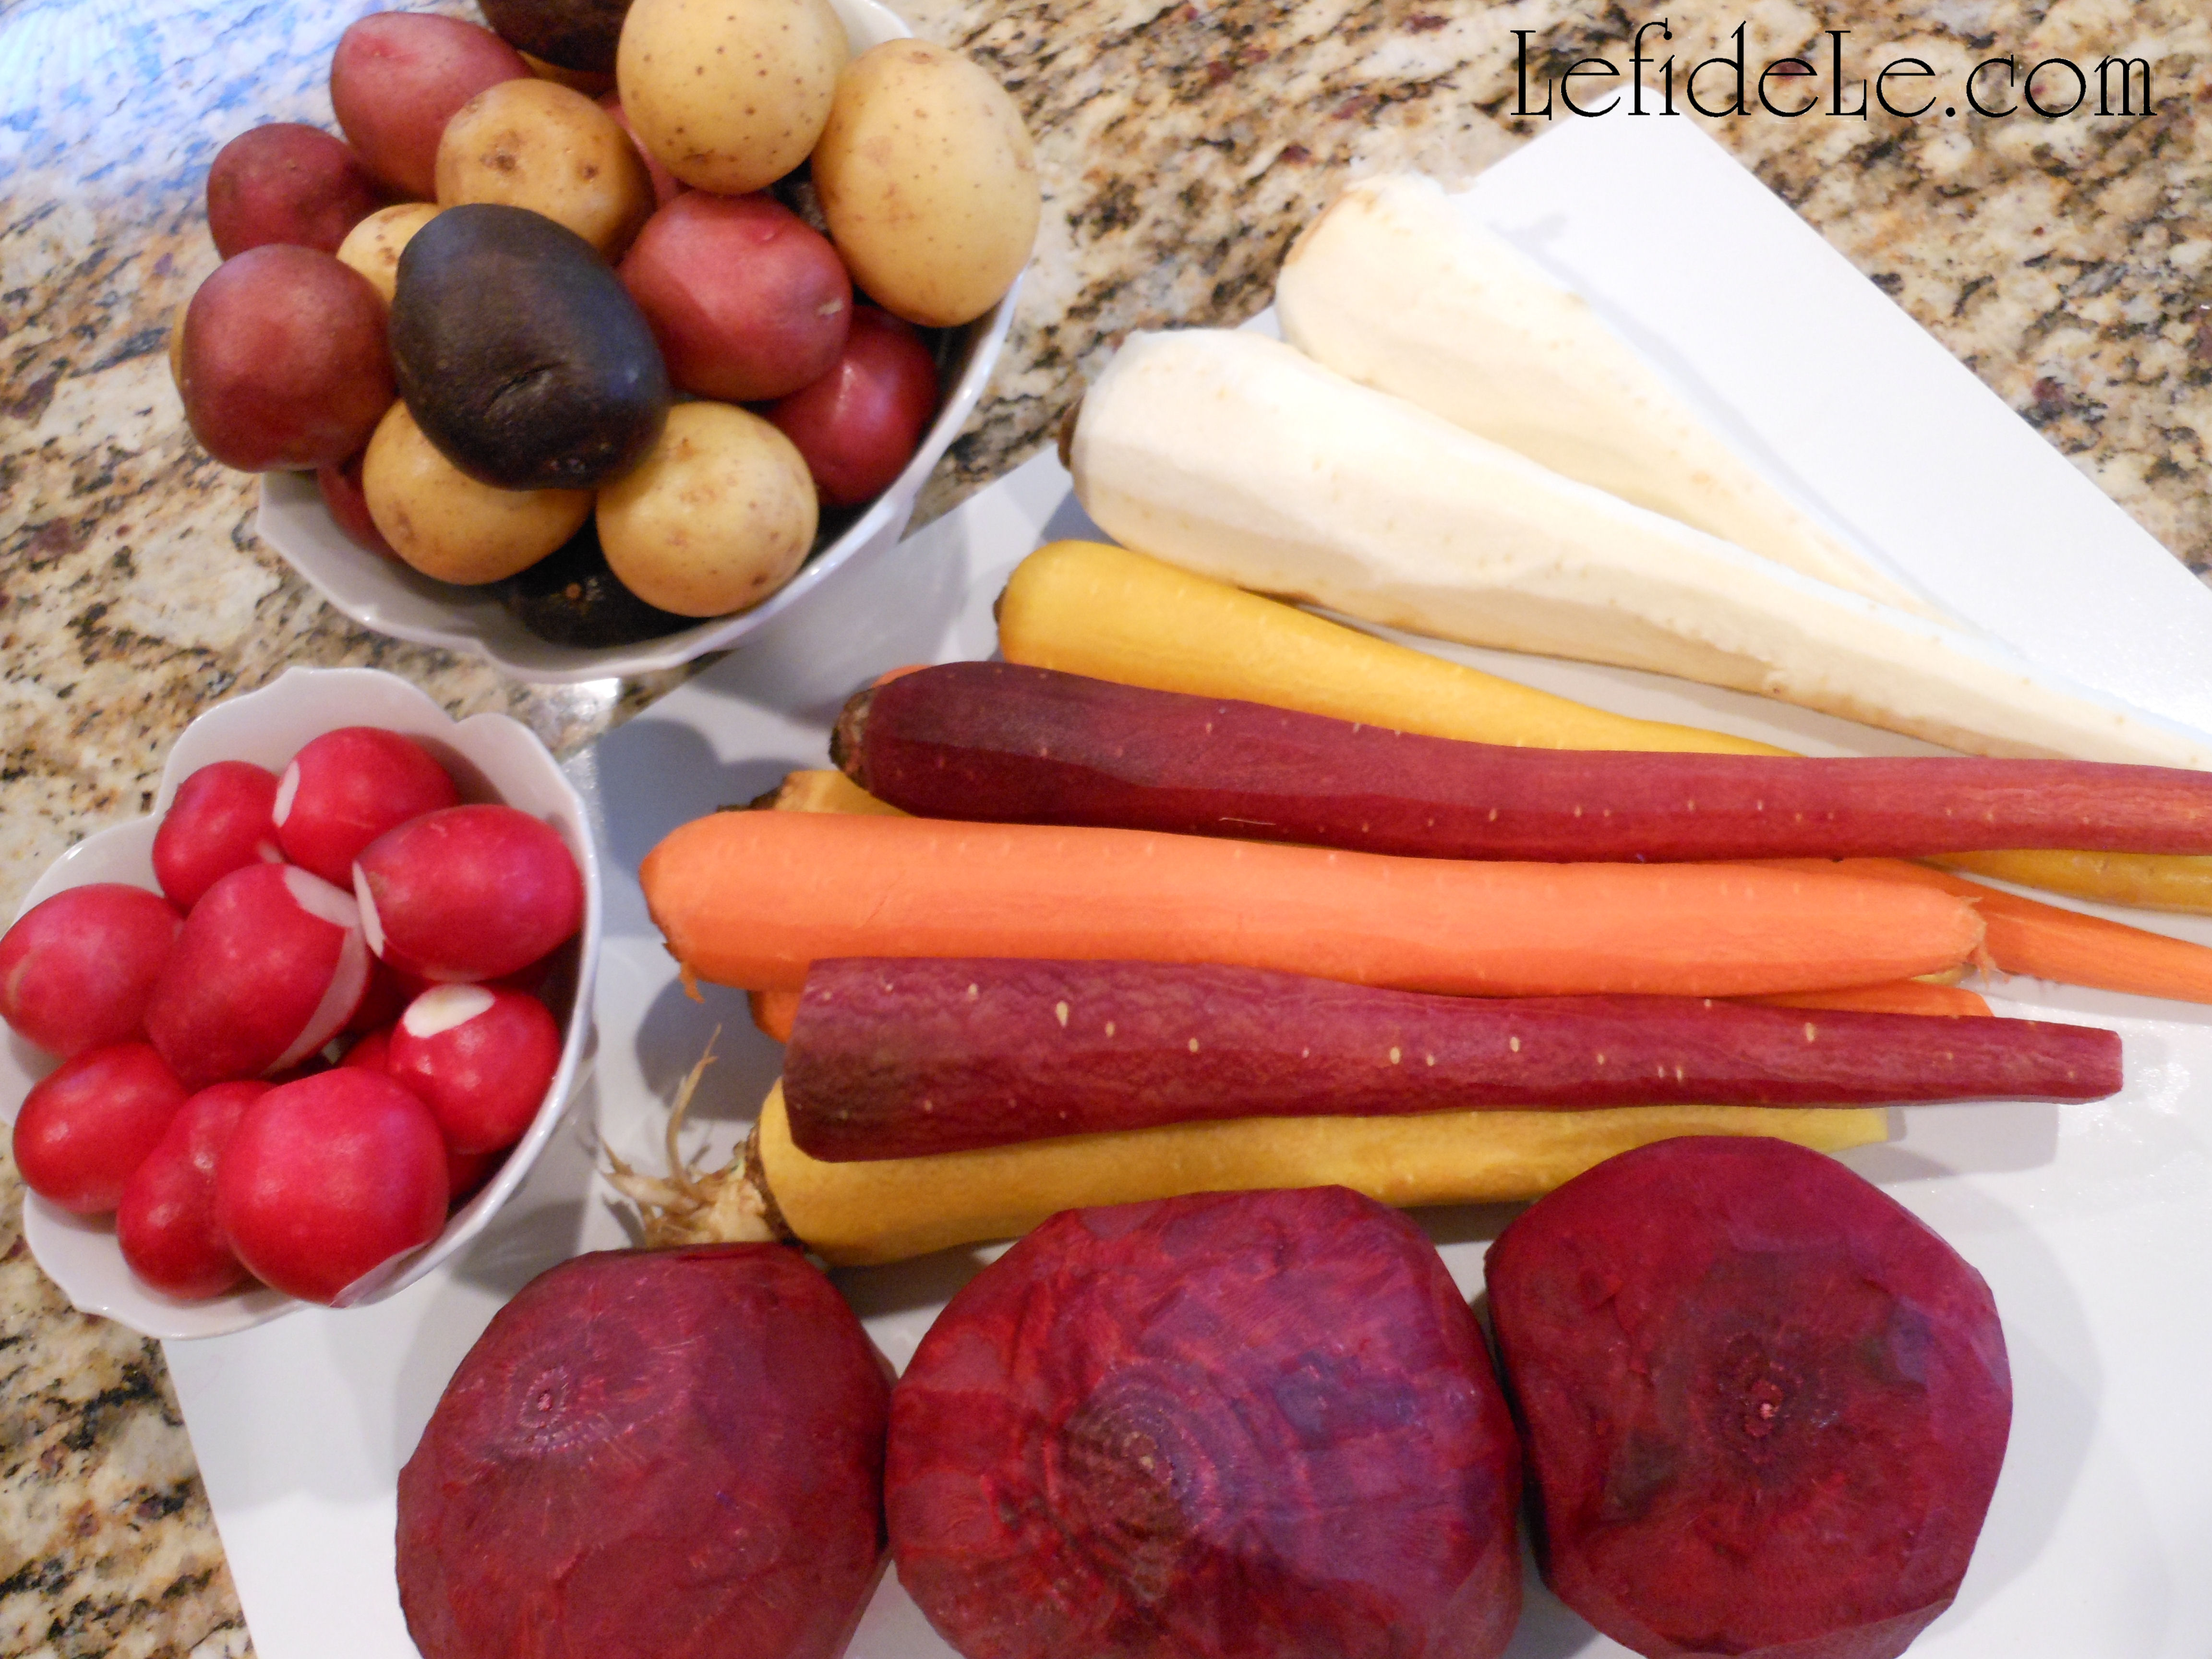
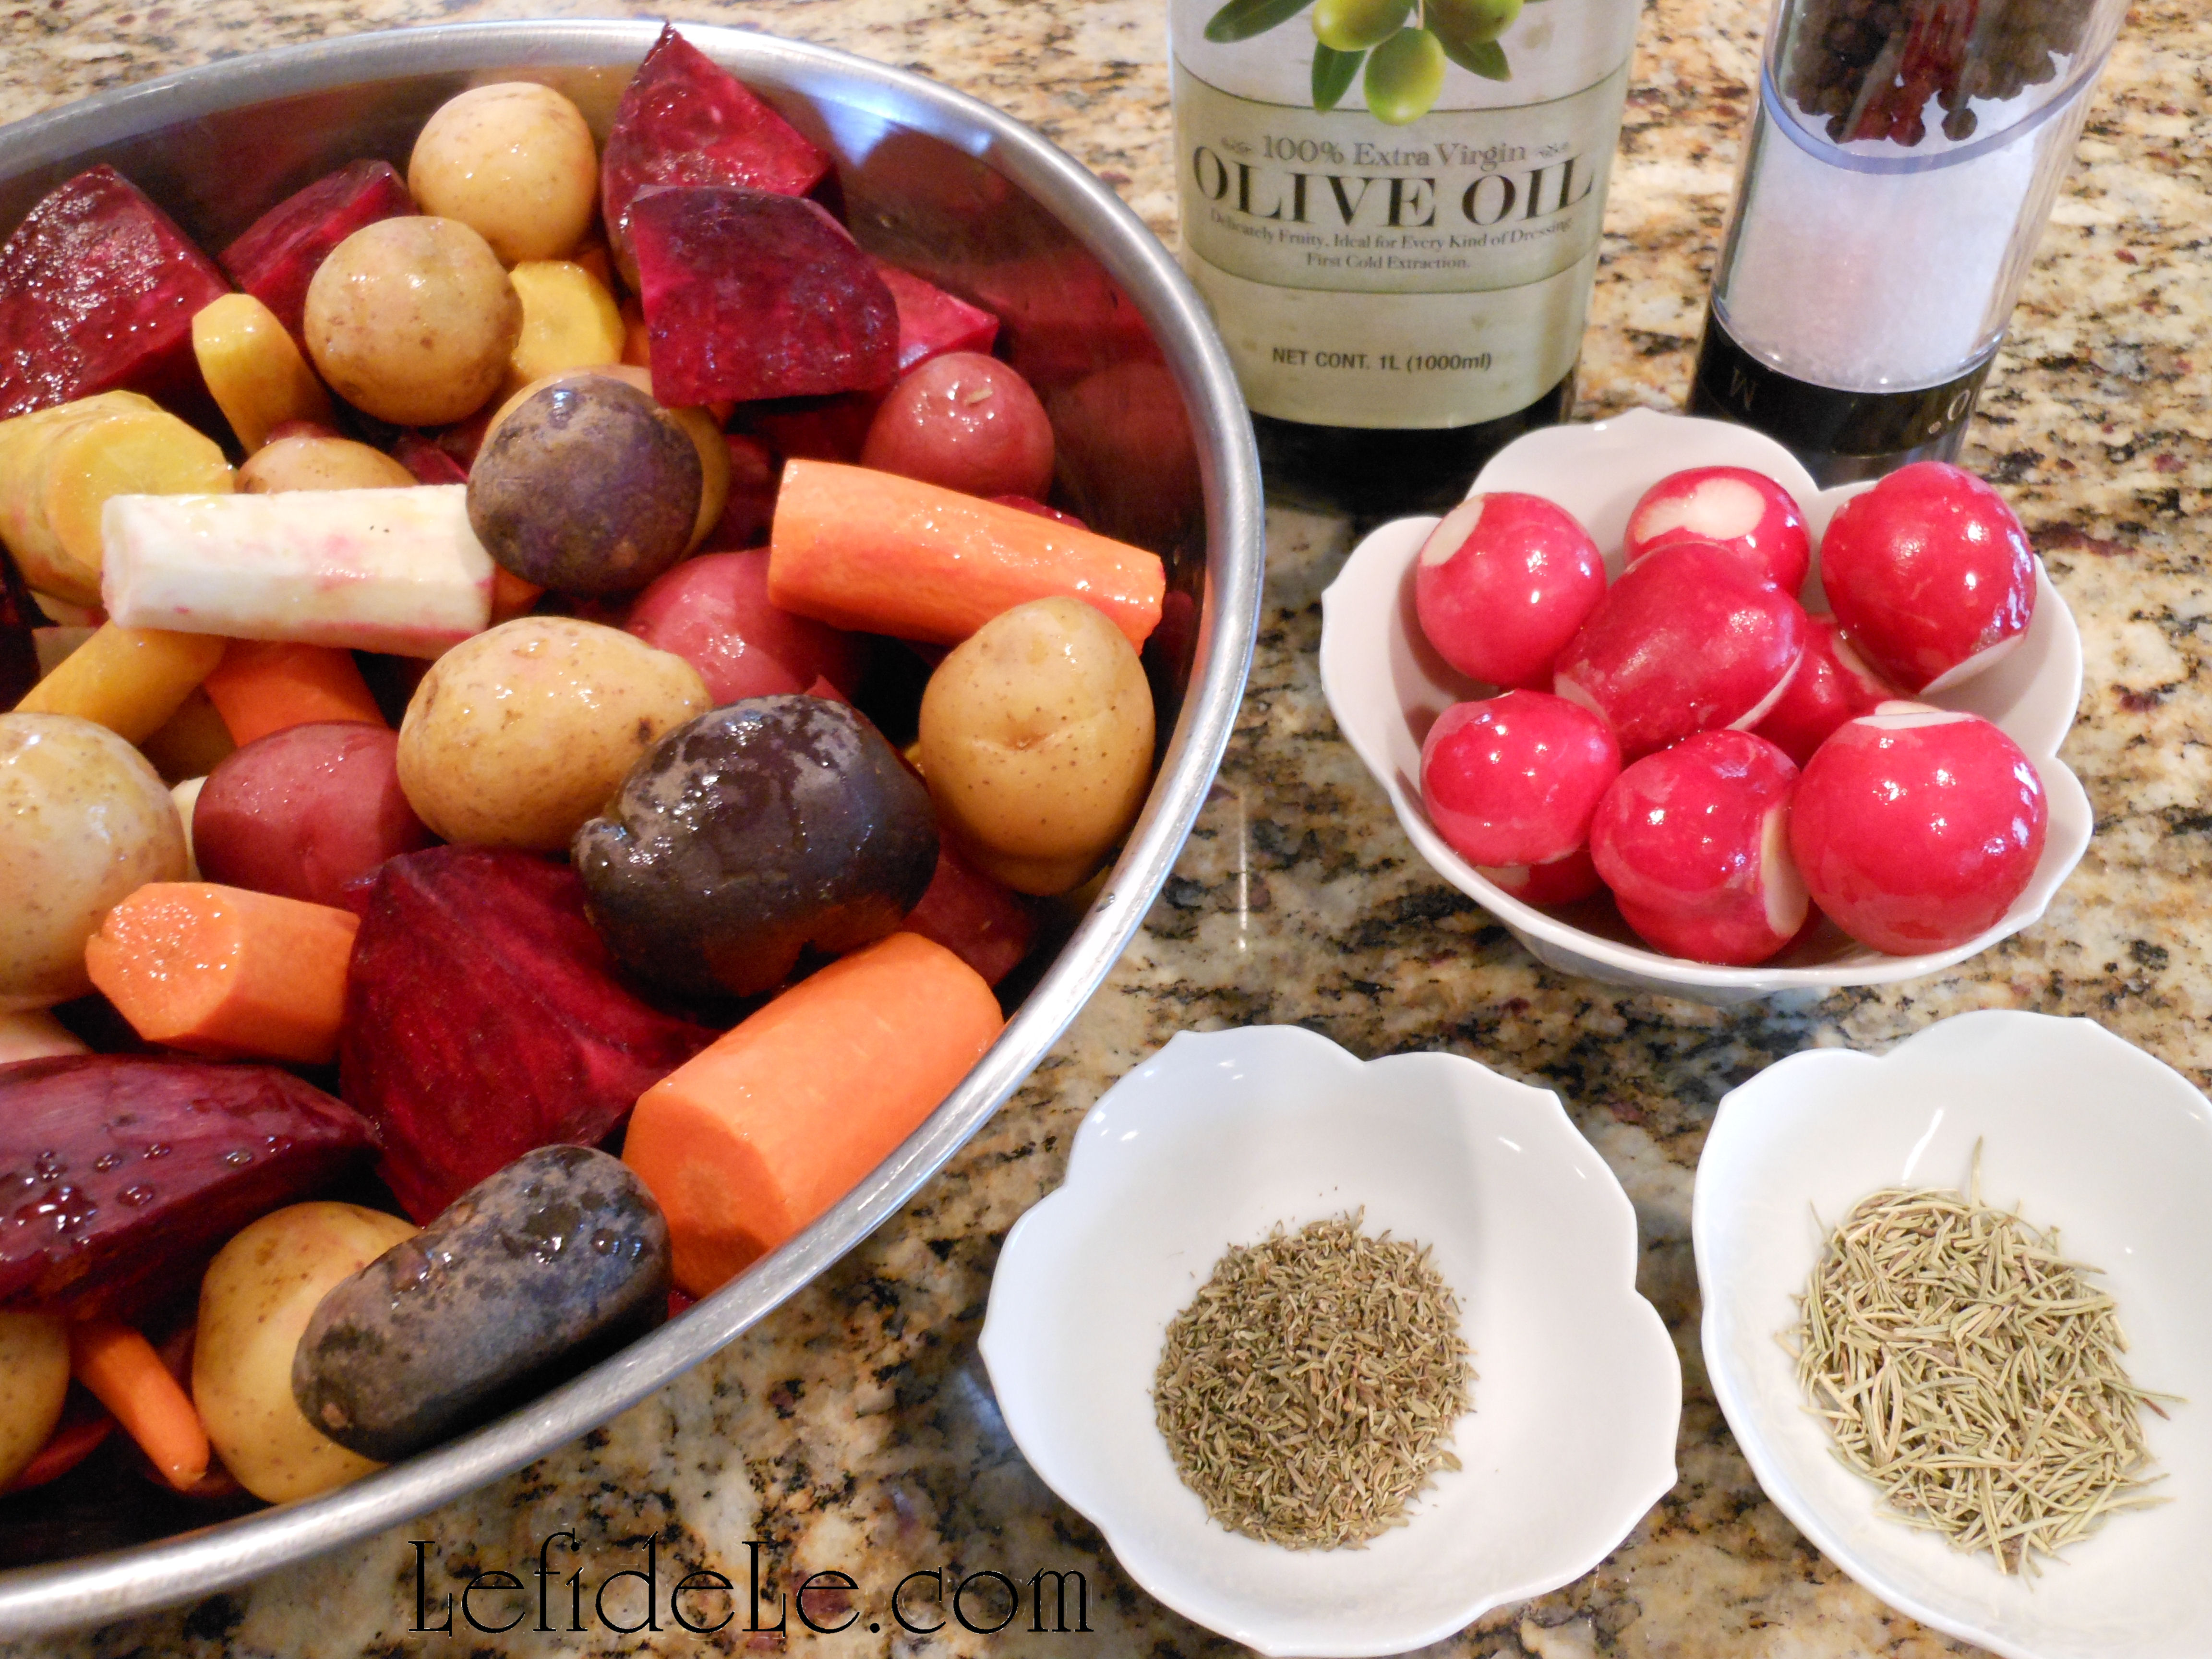
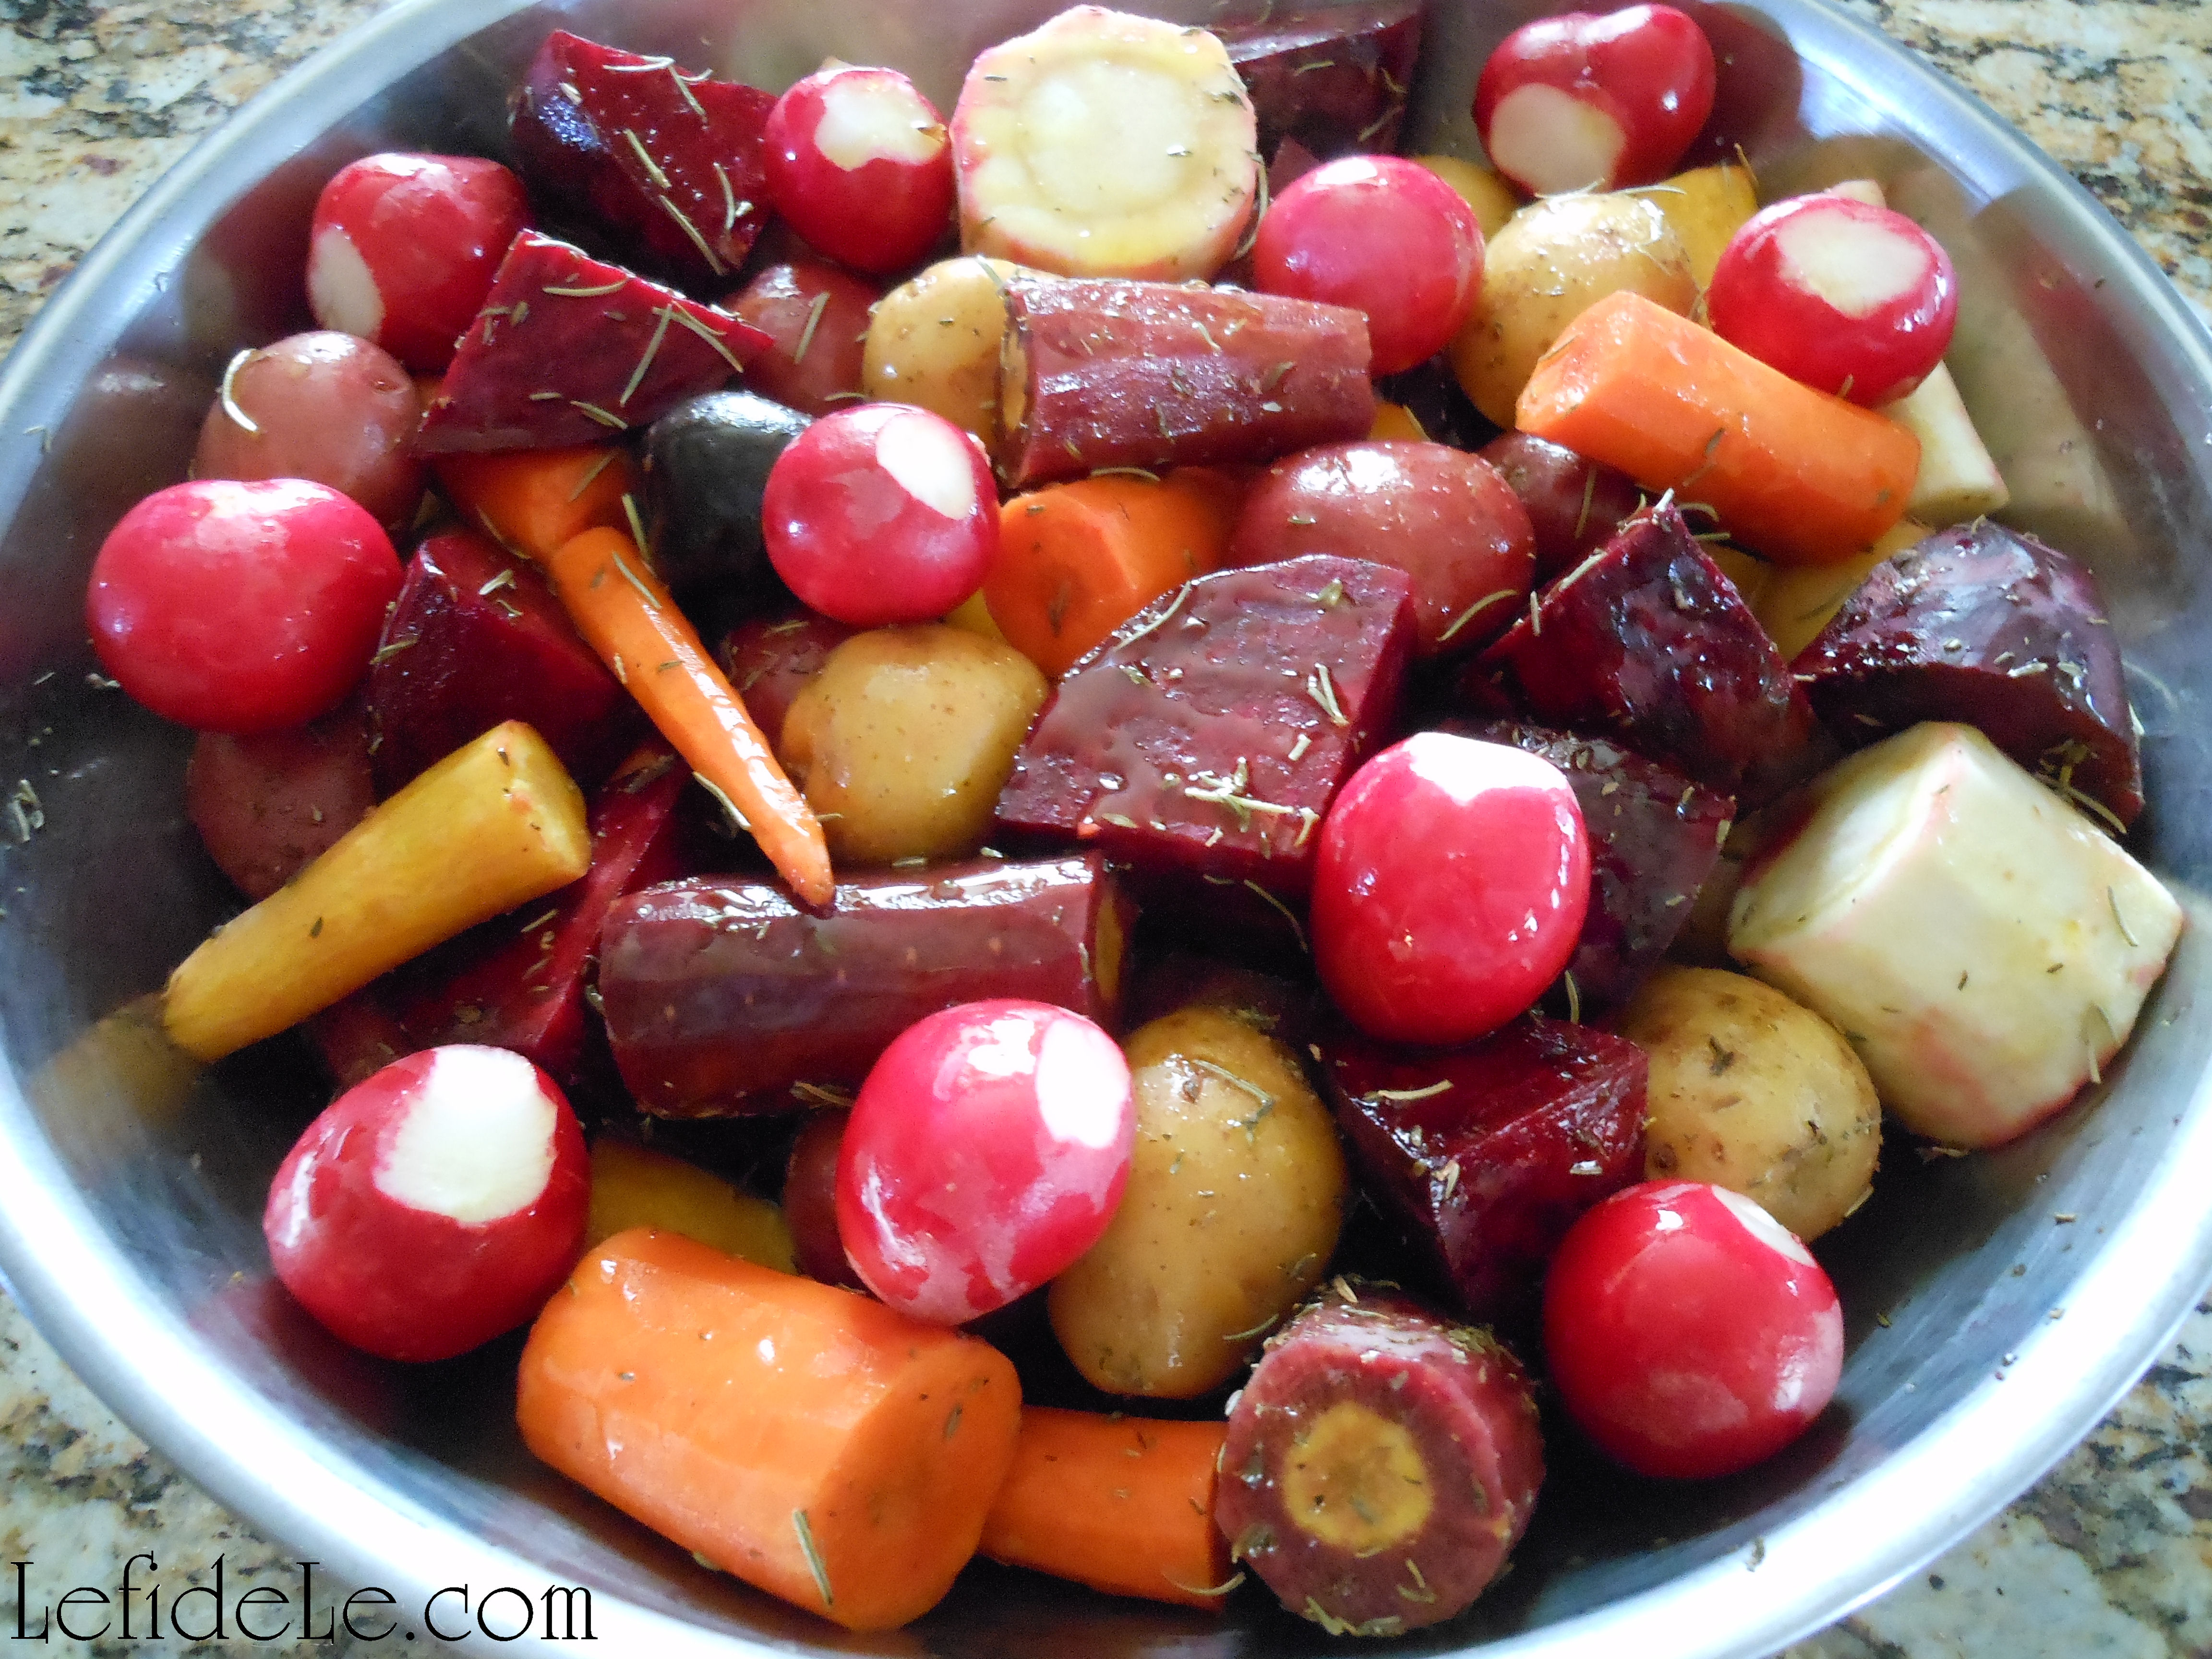
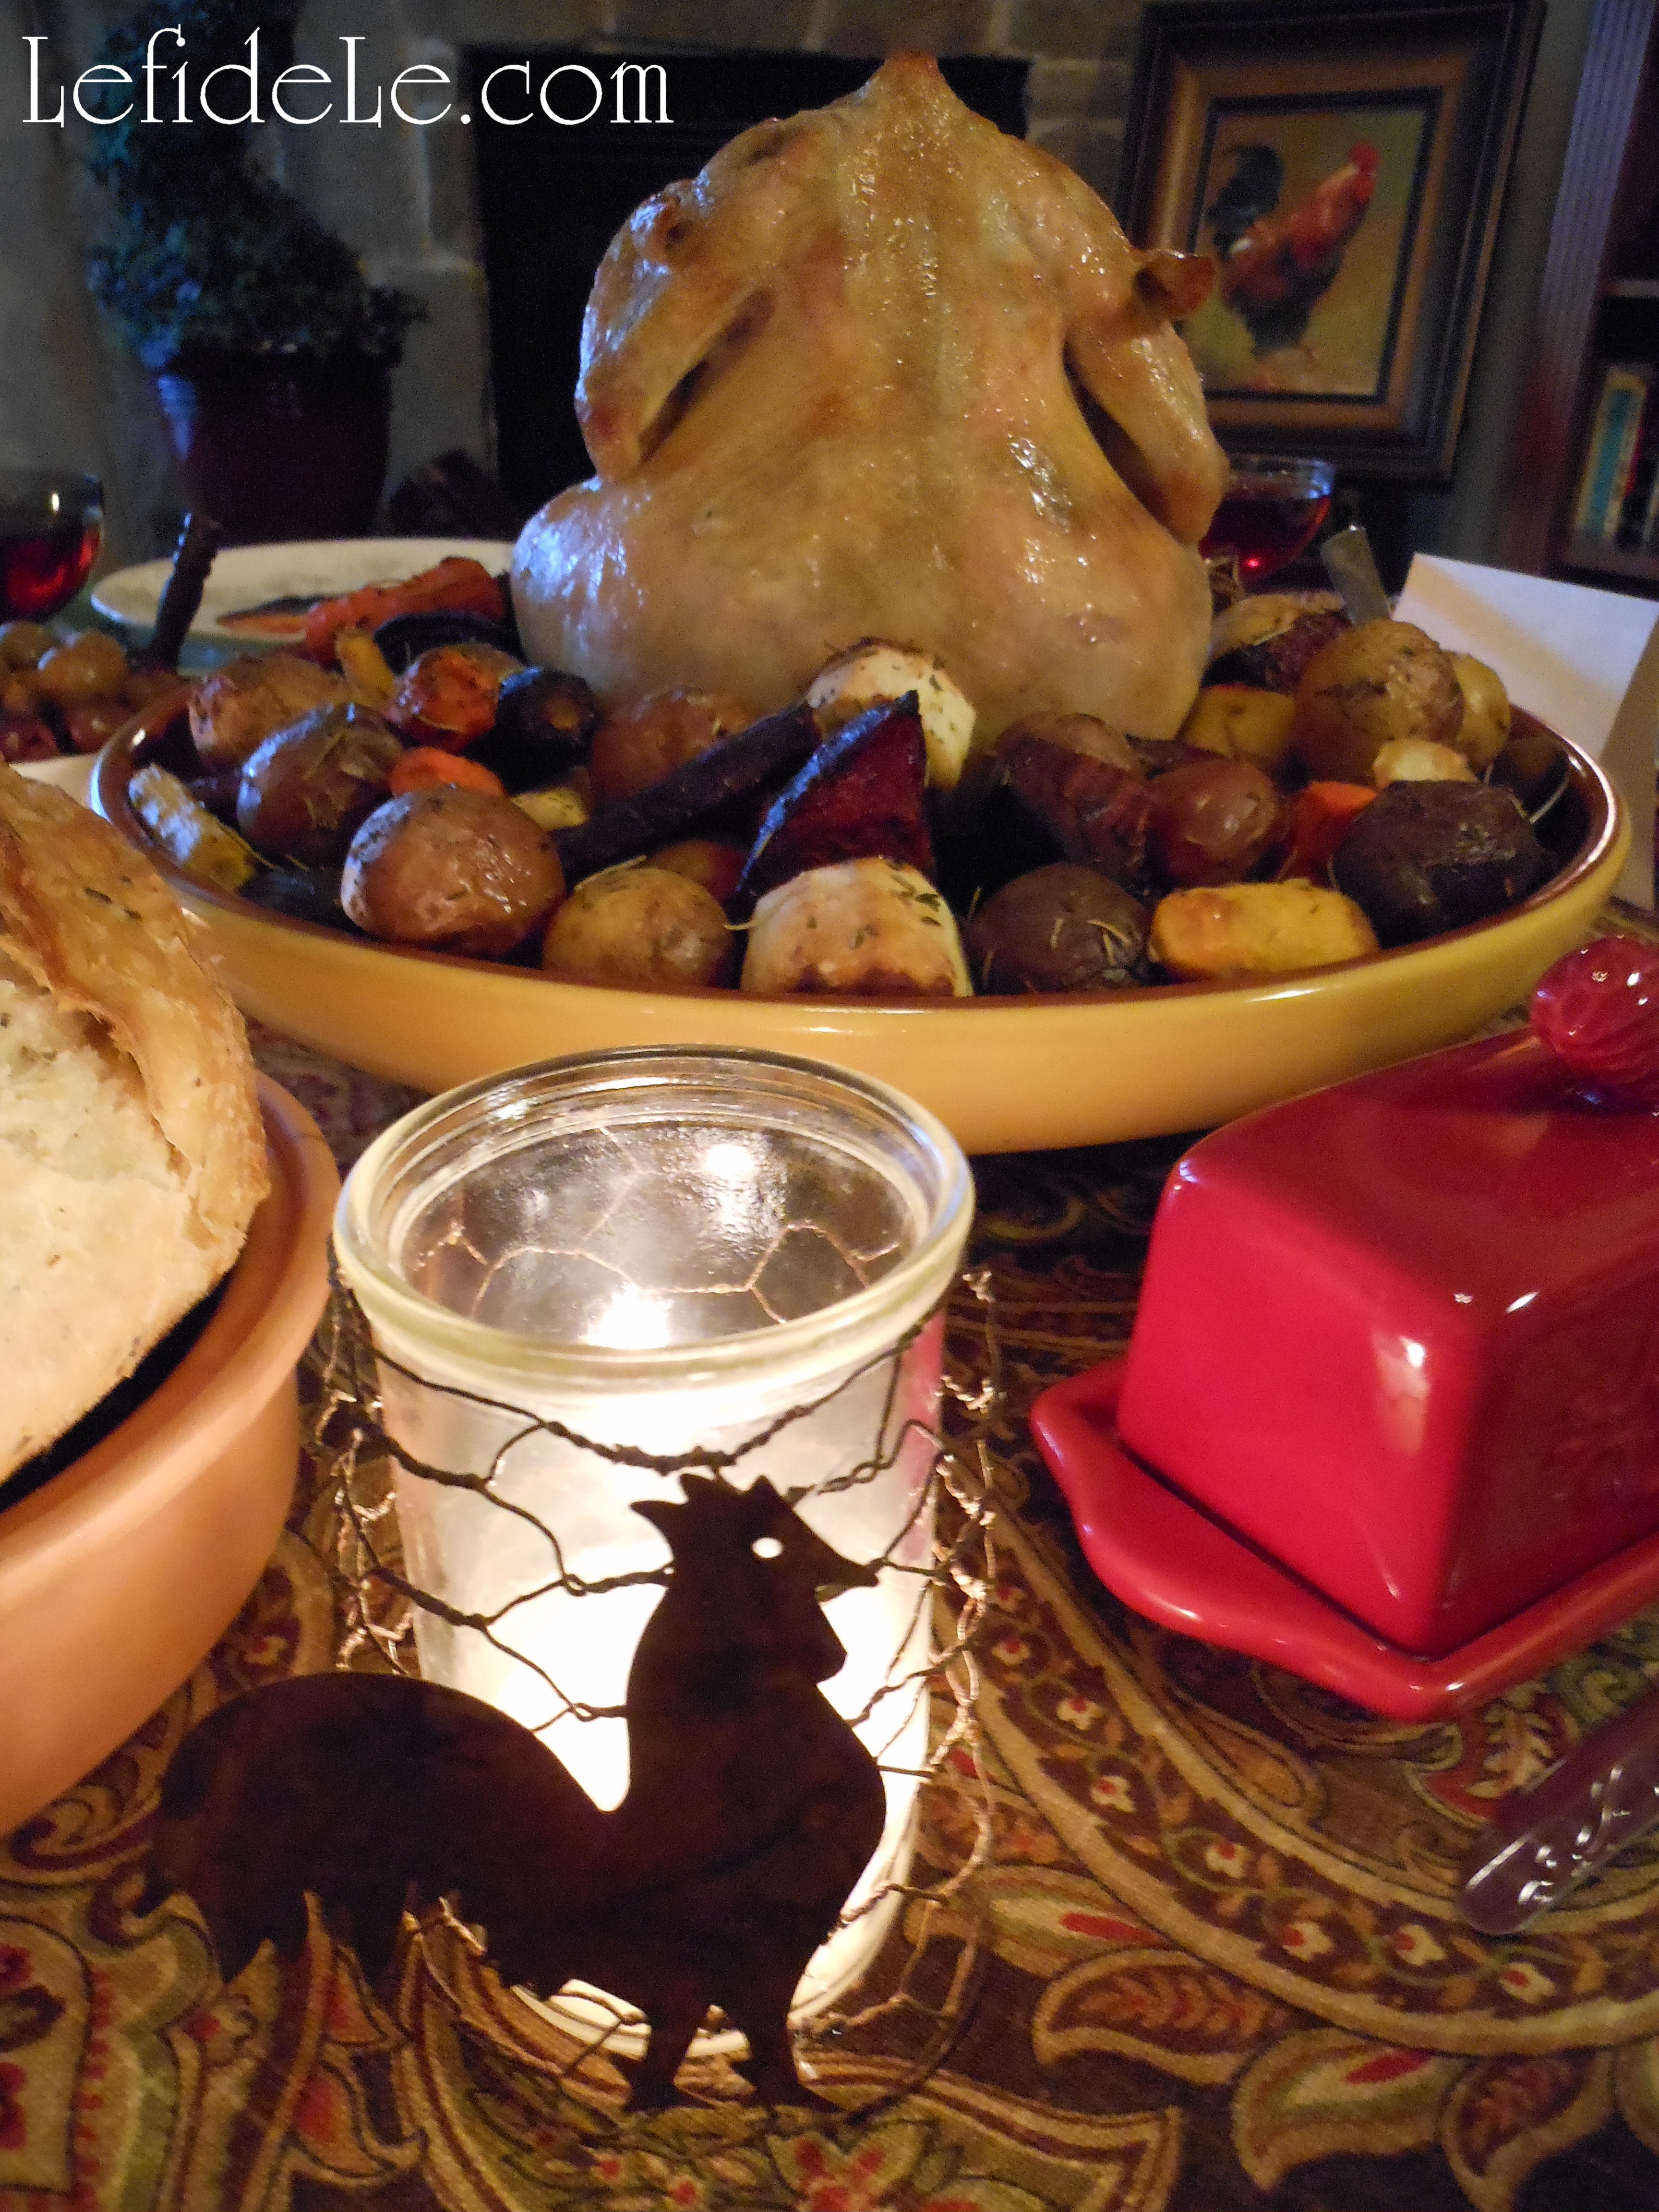
 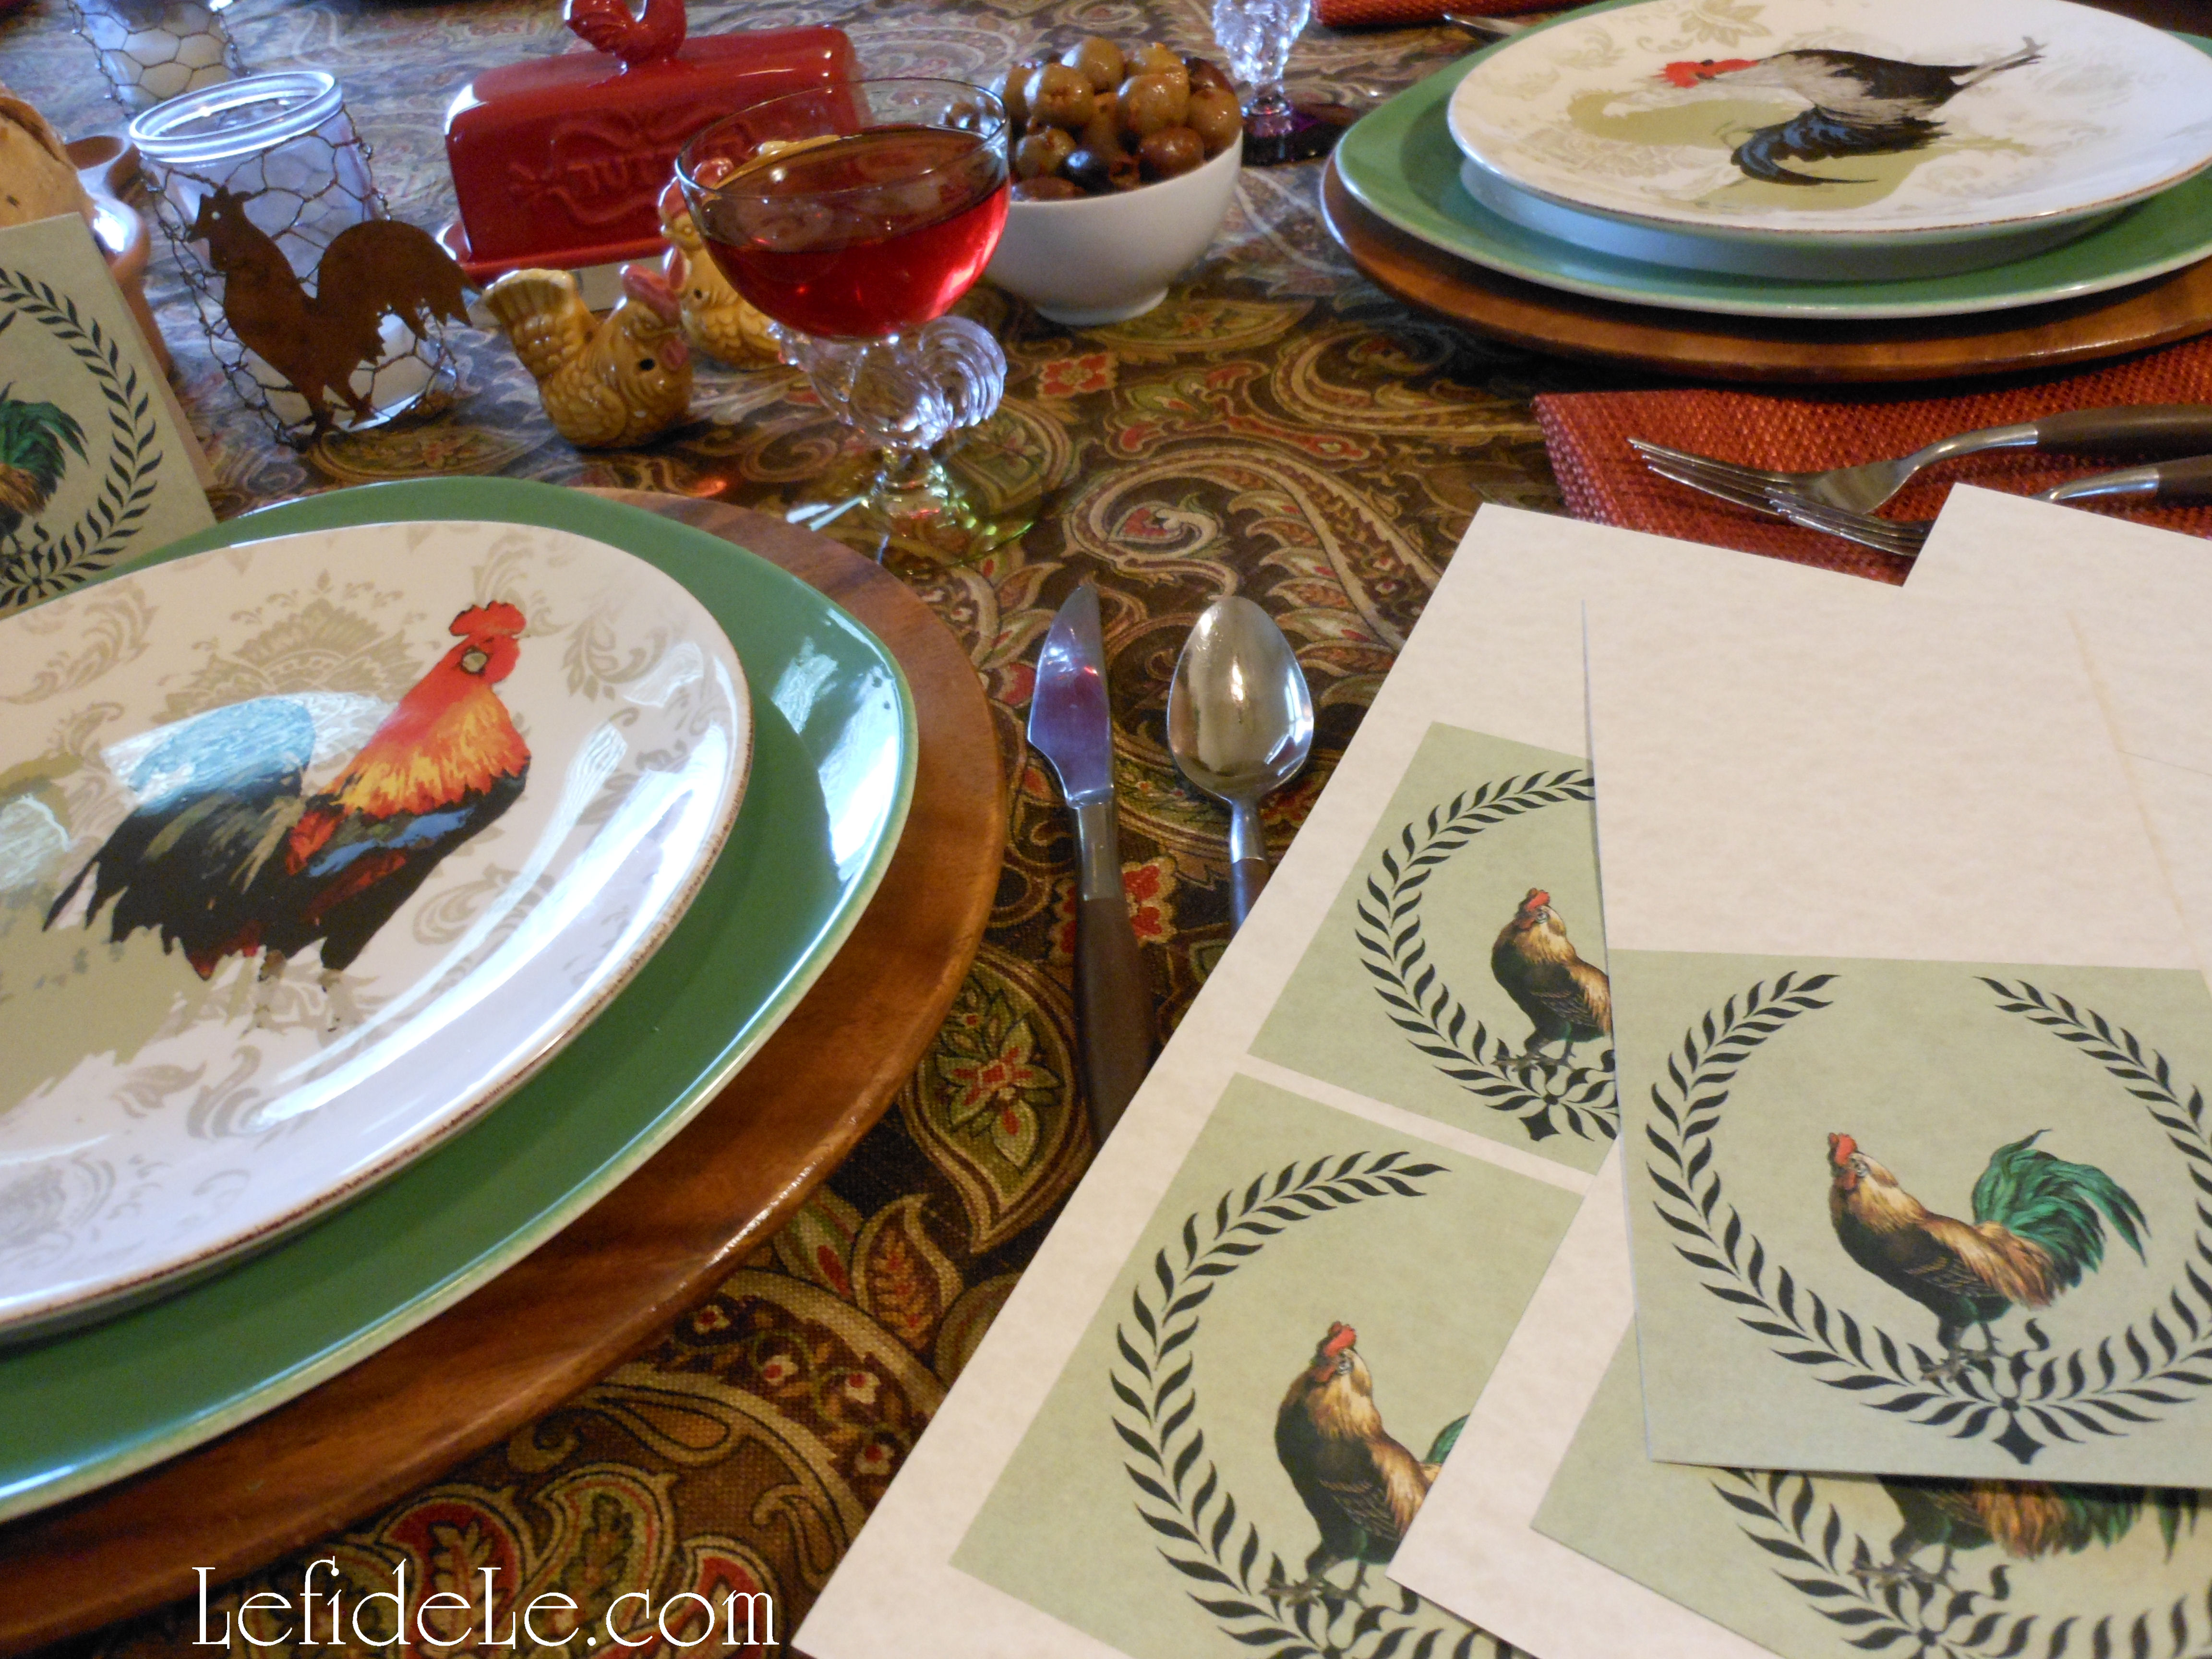 The last step was to add the food… artisanal rosemary bread in terra cotta to compliment the Cocorico, compound butter in a rooster dish, mixed olives seasoned in flavored oil and spices, and the off-center centerpiece of roasted chicken and multi-colored root vegetables of carrots, beets, parsnips, radishes, and fingerling potatoes.
 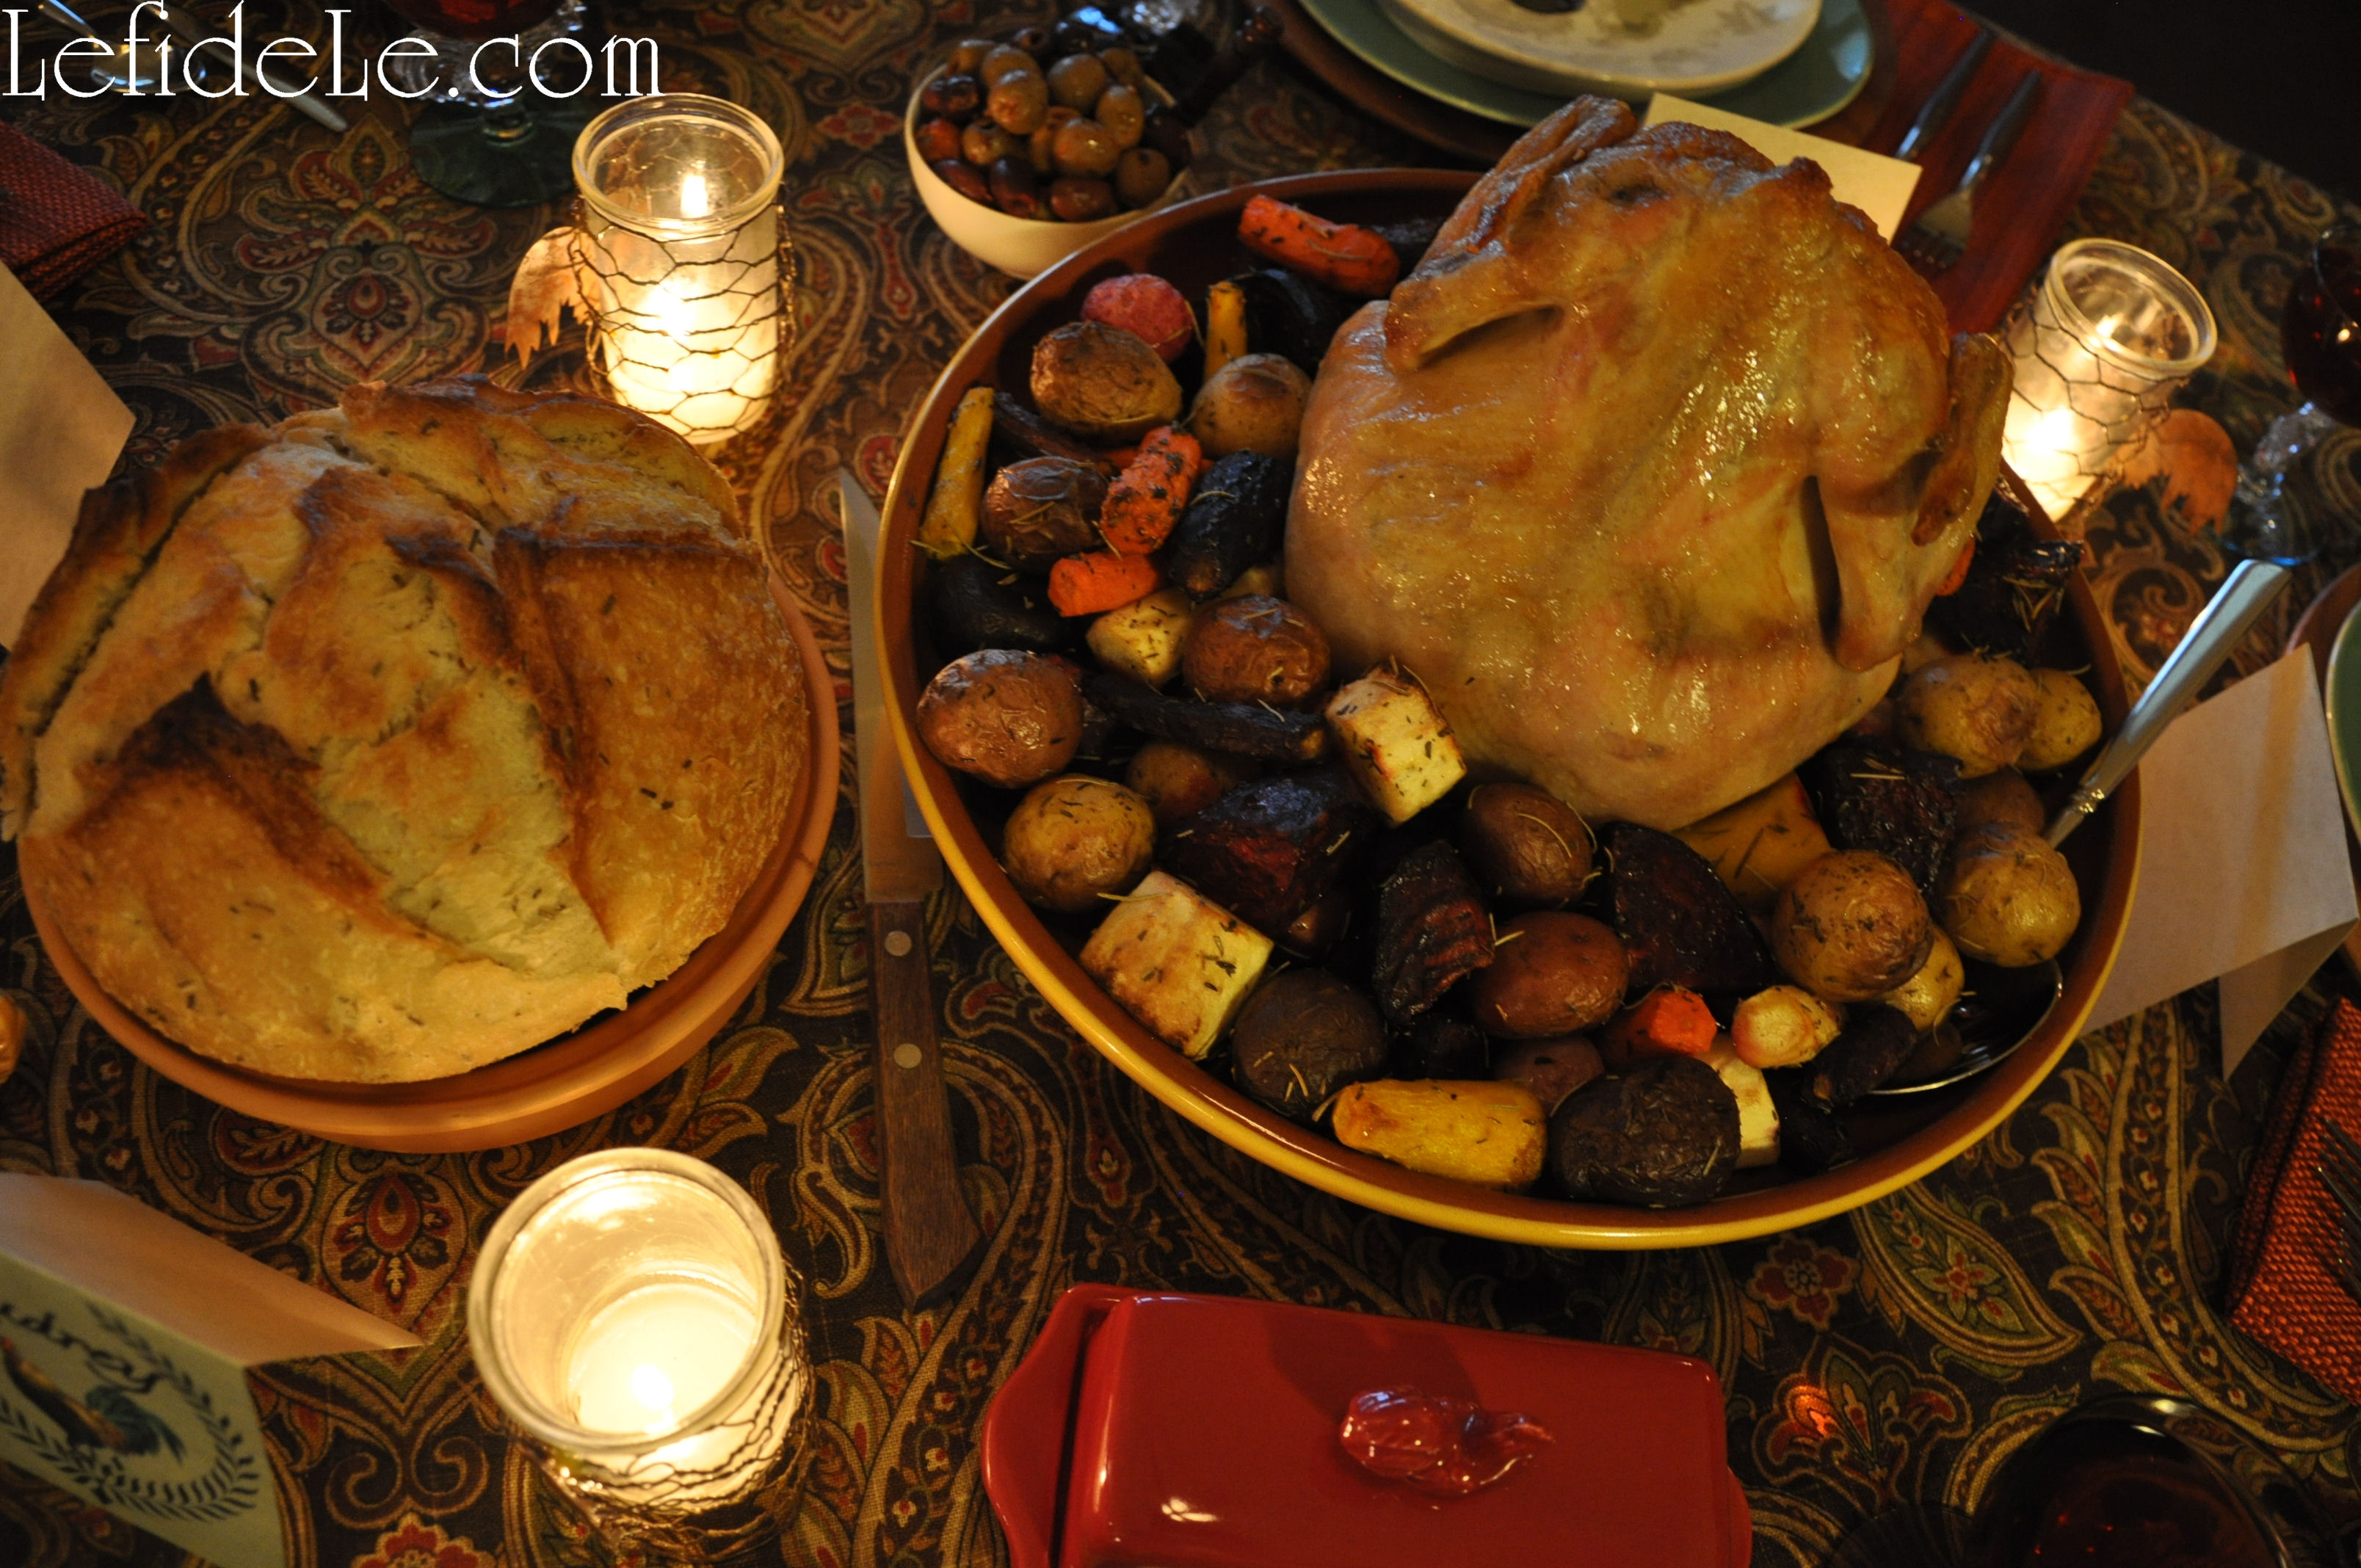 Cocorico roasters are perfect “one-pot” wonders that deliver beautifully from oven-to-table. Root veggies may be peeled and seasoned the day prior to an after-work gathering if need be. Simply pick up bread and dessert to accompany your meal. Or, try out my Easy No Cook Layered (N)ice-Cream Pie with Nut Crust (Vegan, Dairy-Free, Gluten-Free) which may also be made with traditional ice cream, and can be made and frozen well in advance.
  Happy Fall Y’all! (…I couldn’t resist.)
 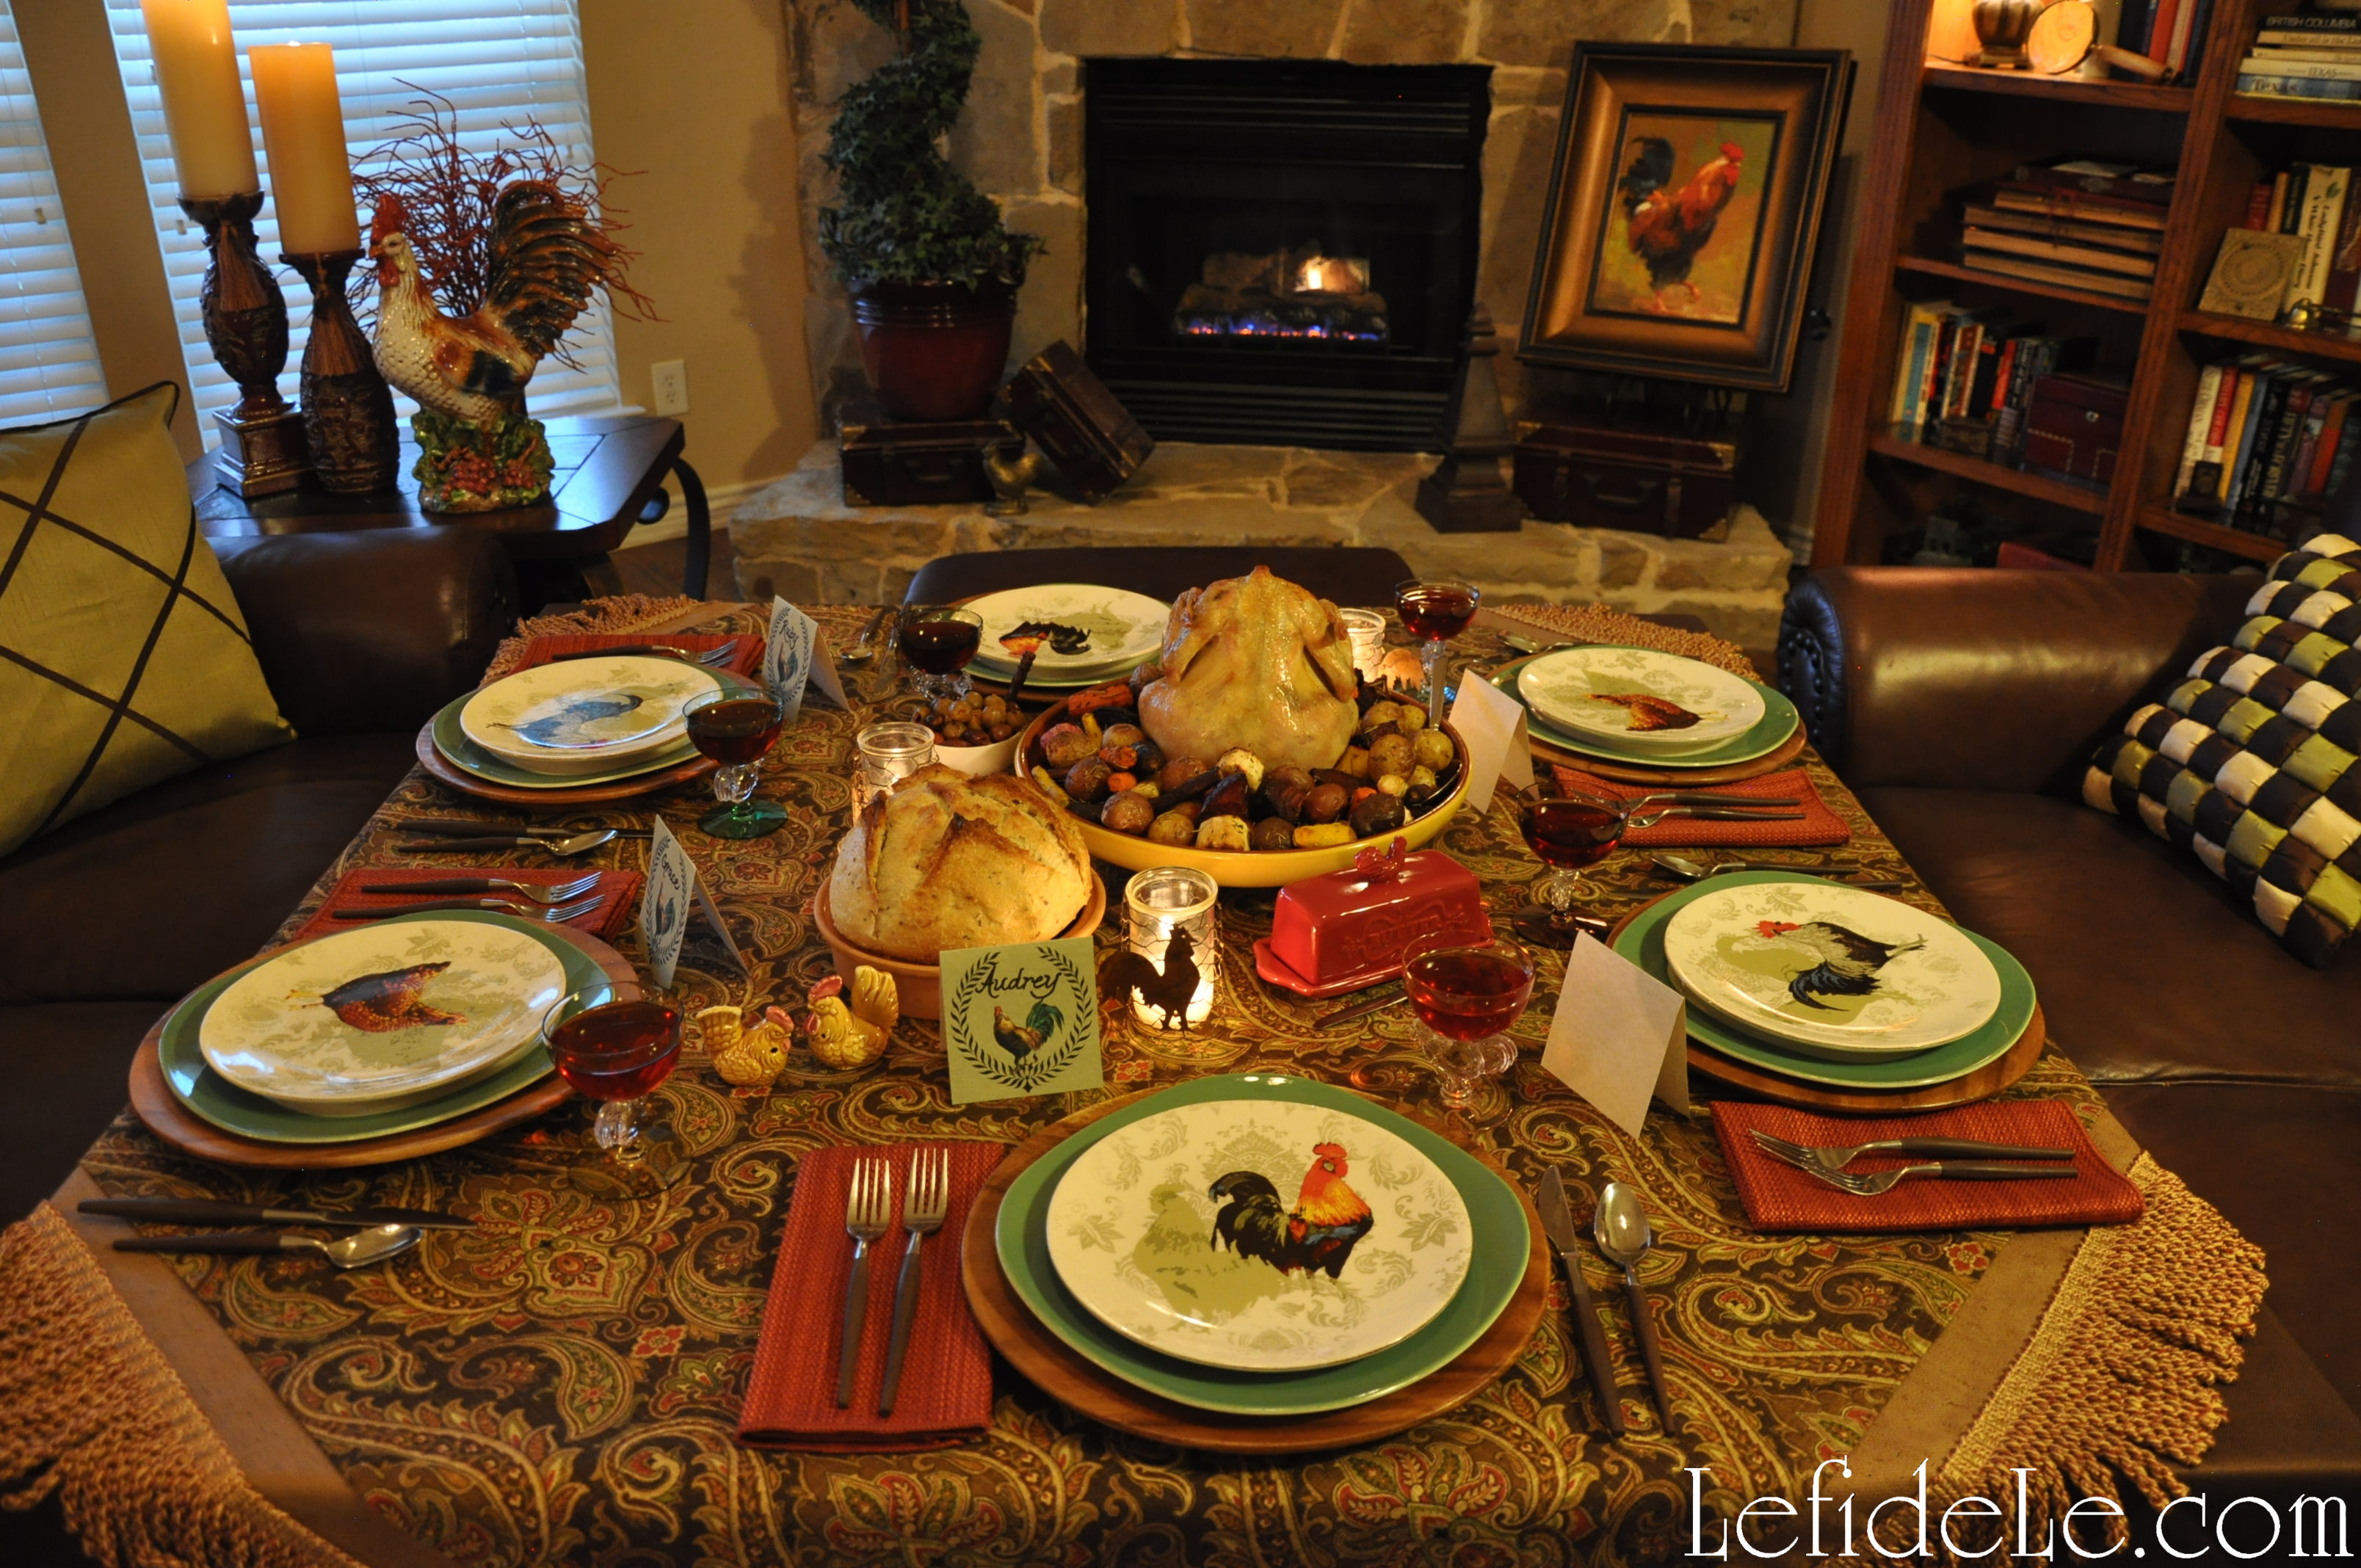 Faithfully Yours,
Leigh