Tag Archives: Instructions

Quick & Easy Overnight Pickled Cucumbers Recipe (for Chinese New Year or Anytime)

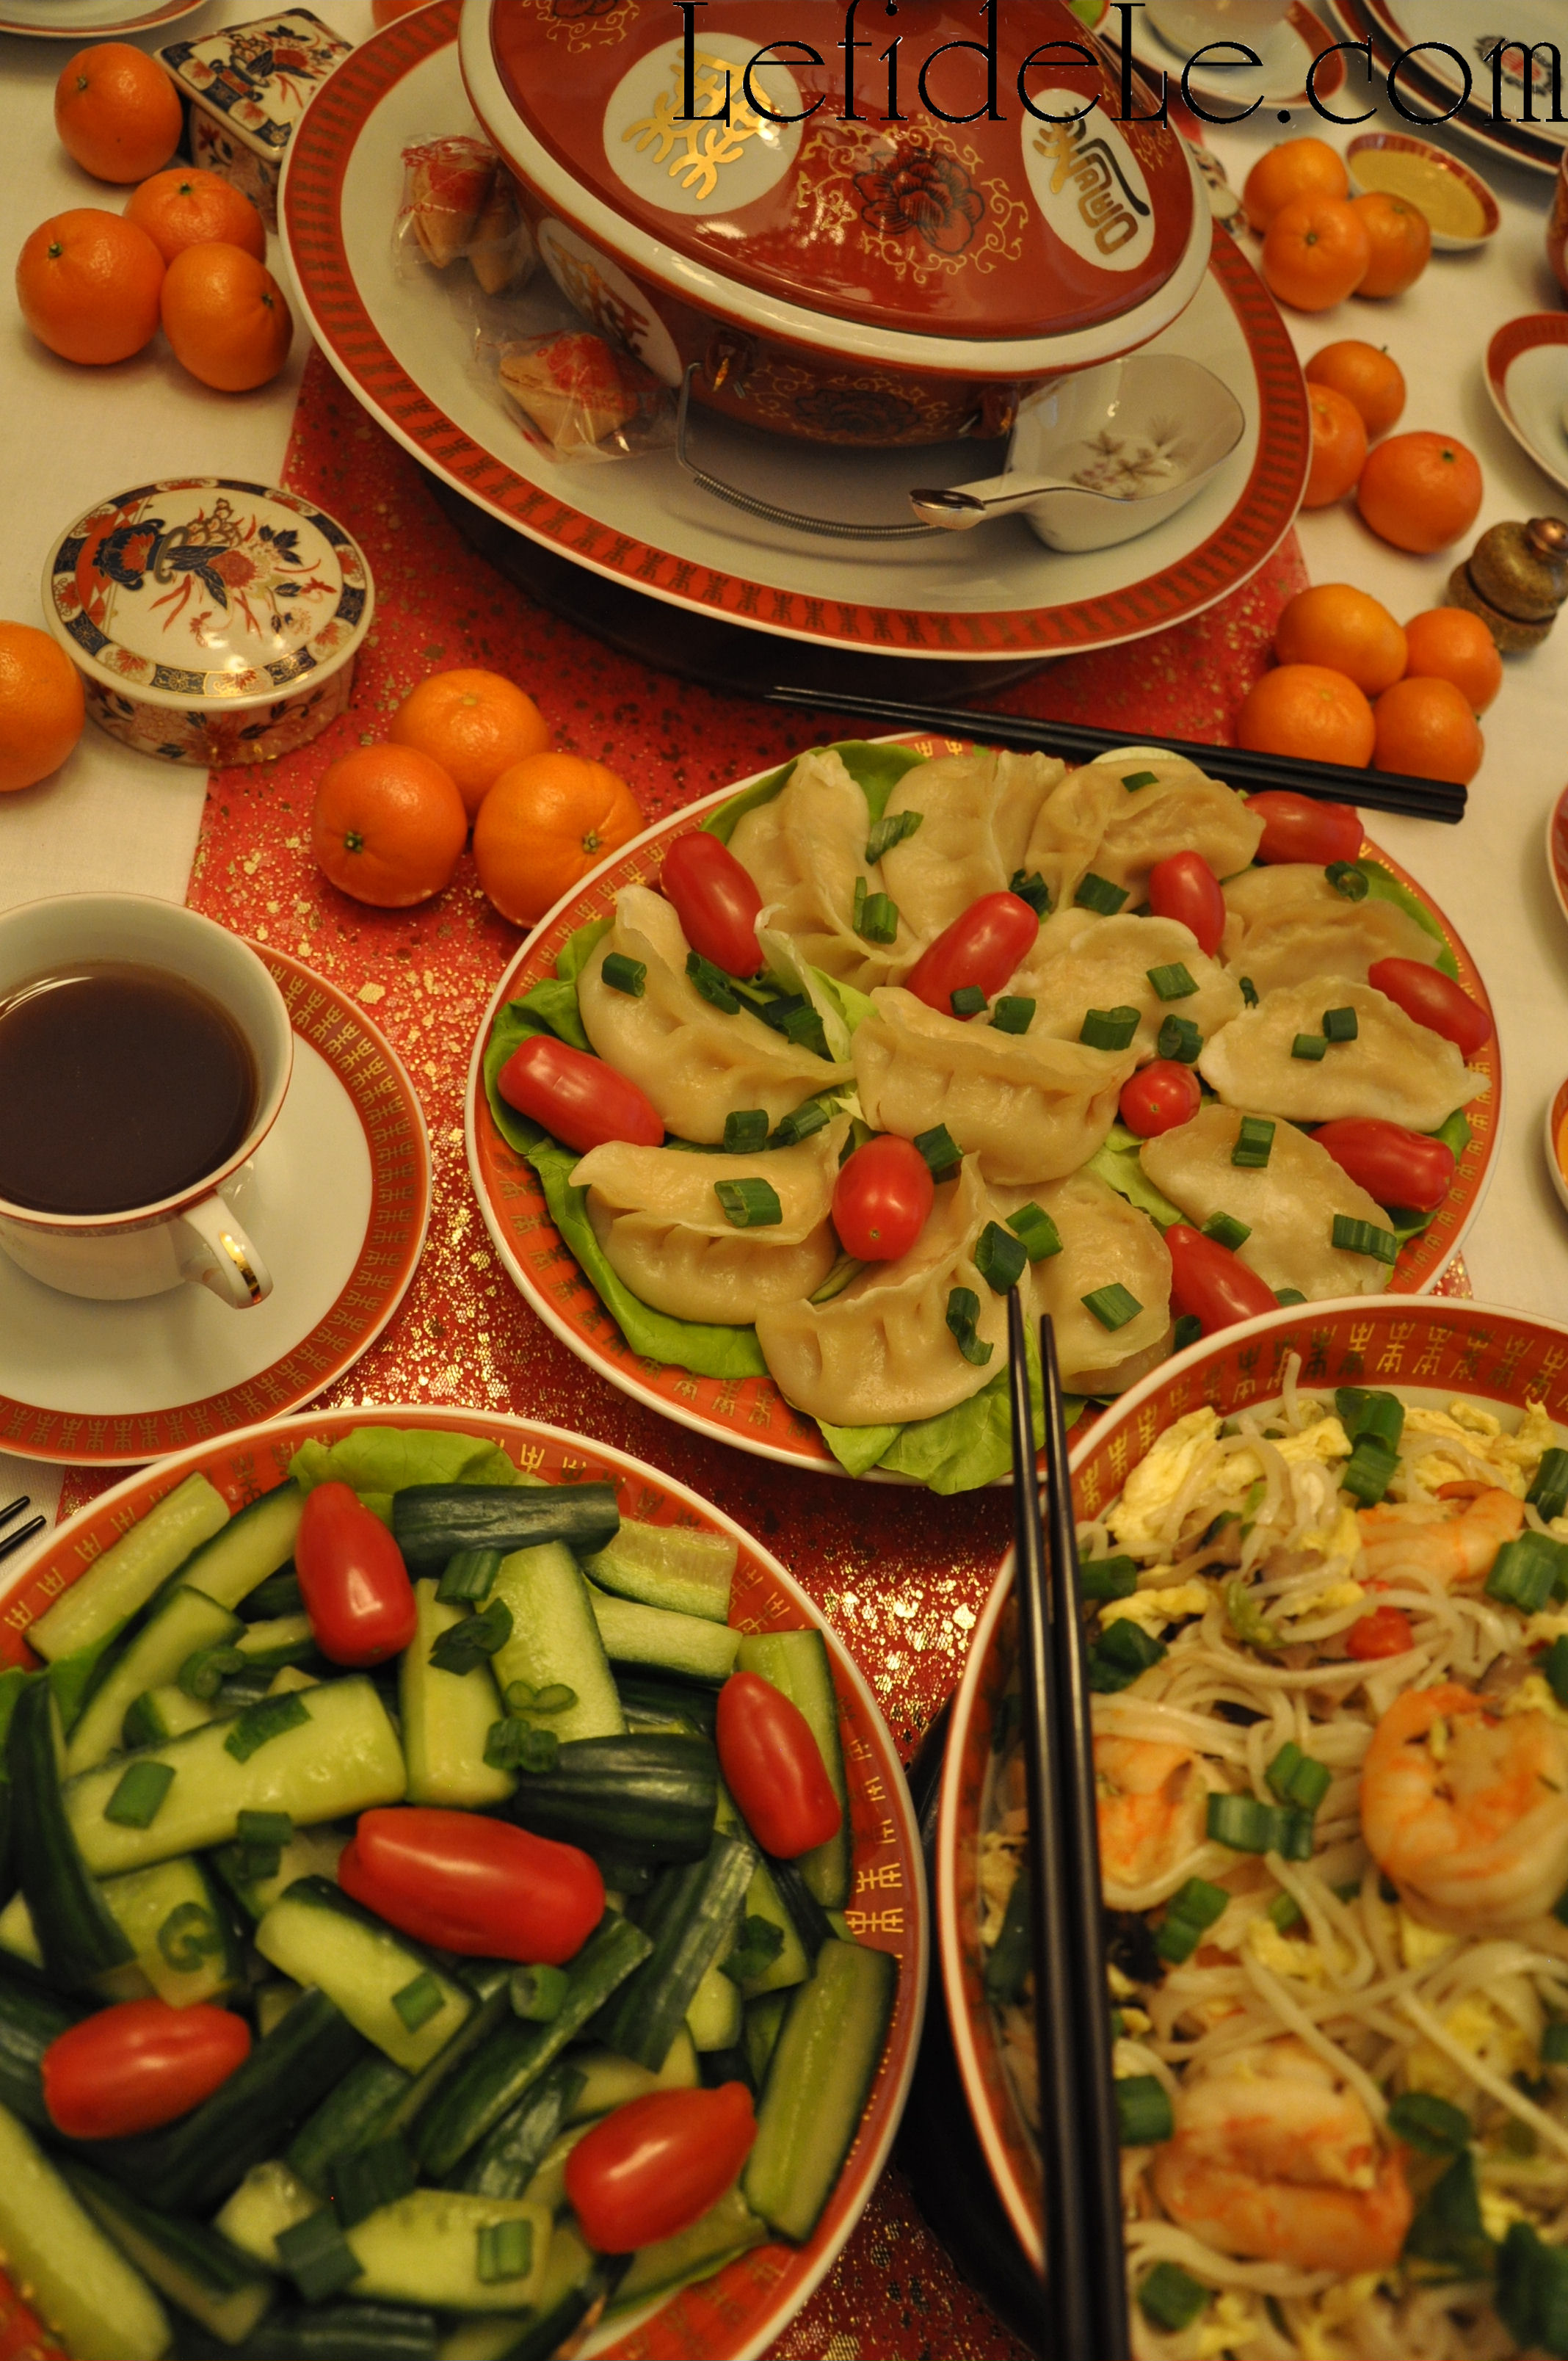
This quick and easy recipe was inspired by a Chinese Travel Website that described the traditional foods of various regions. I was delighted to see that pickled cucumbers were listed… because who in the world doesn’t love a good pickle? Quick pickling makes this a great side dish for any occasion because it can be prepped overnight, and everyone really needs a good last minute dish. Just change up the spices, acids, and sweetener to suit your taste or event theme. It’s perfect for a Chinese New Year Celebration because it’s a light and green food to add to all the traditionally starchy New Year’s foods like longevity noodles, moon cakes, spring rolls, and dumplings. What’s more is that you can control the amount of sodium and sugar you put into it… so that family member with high blood pressure can still enjoy a good pickle without cheating with the jarred stuff!

132Leigh


Ingredients:

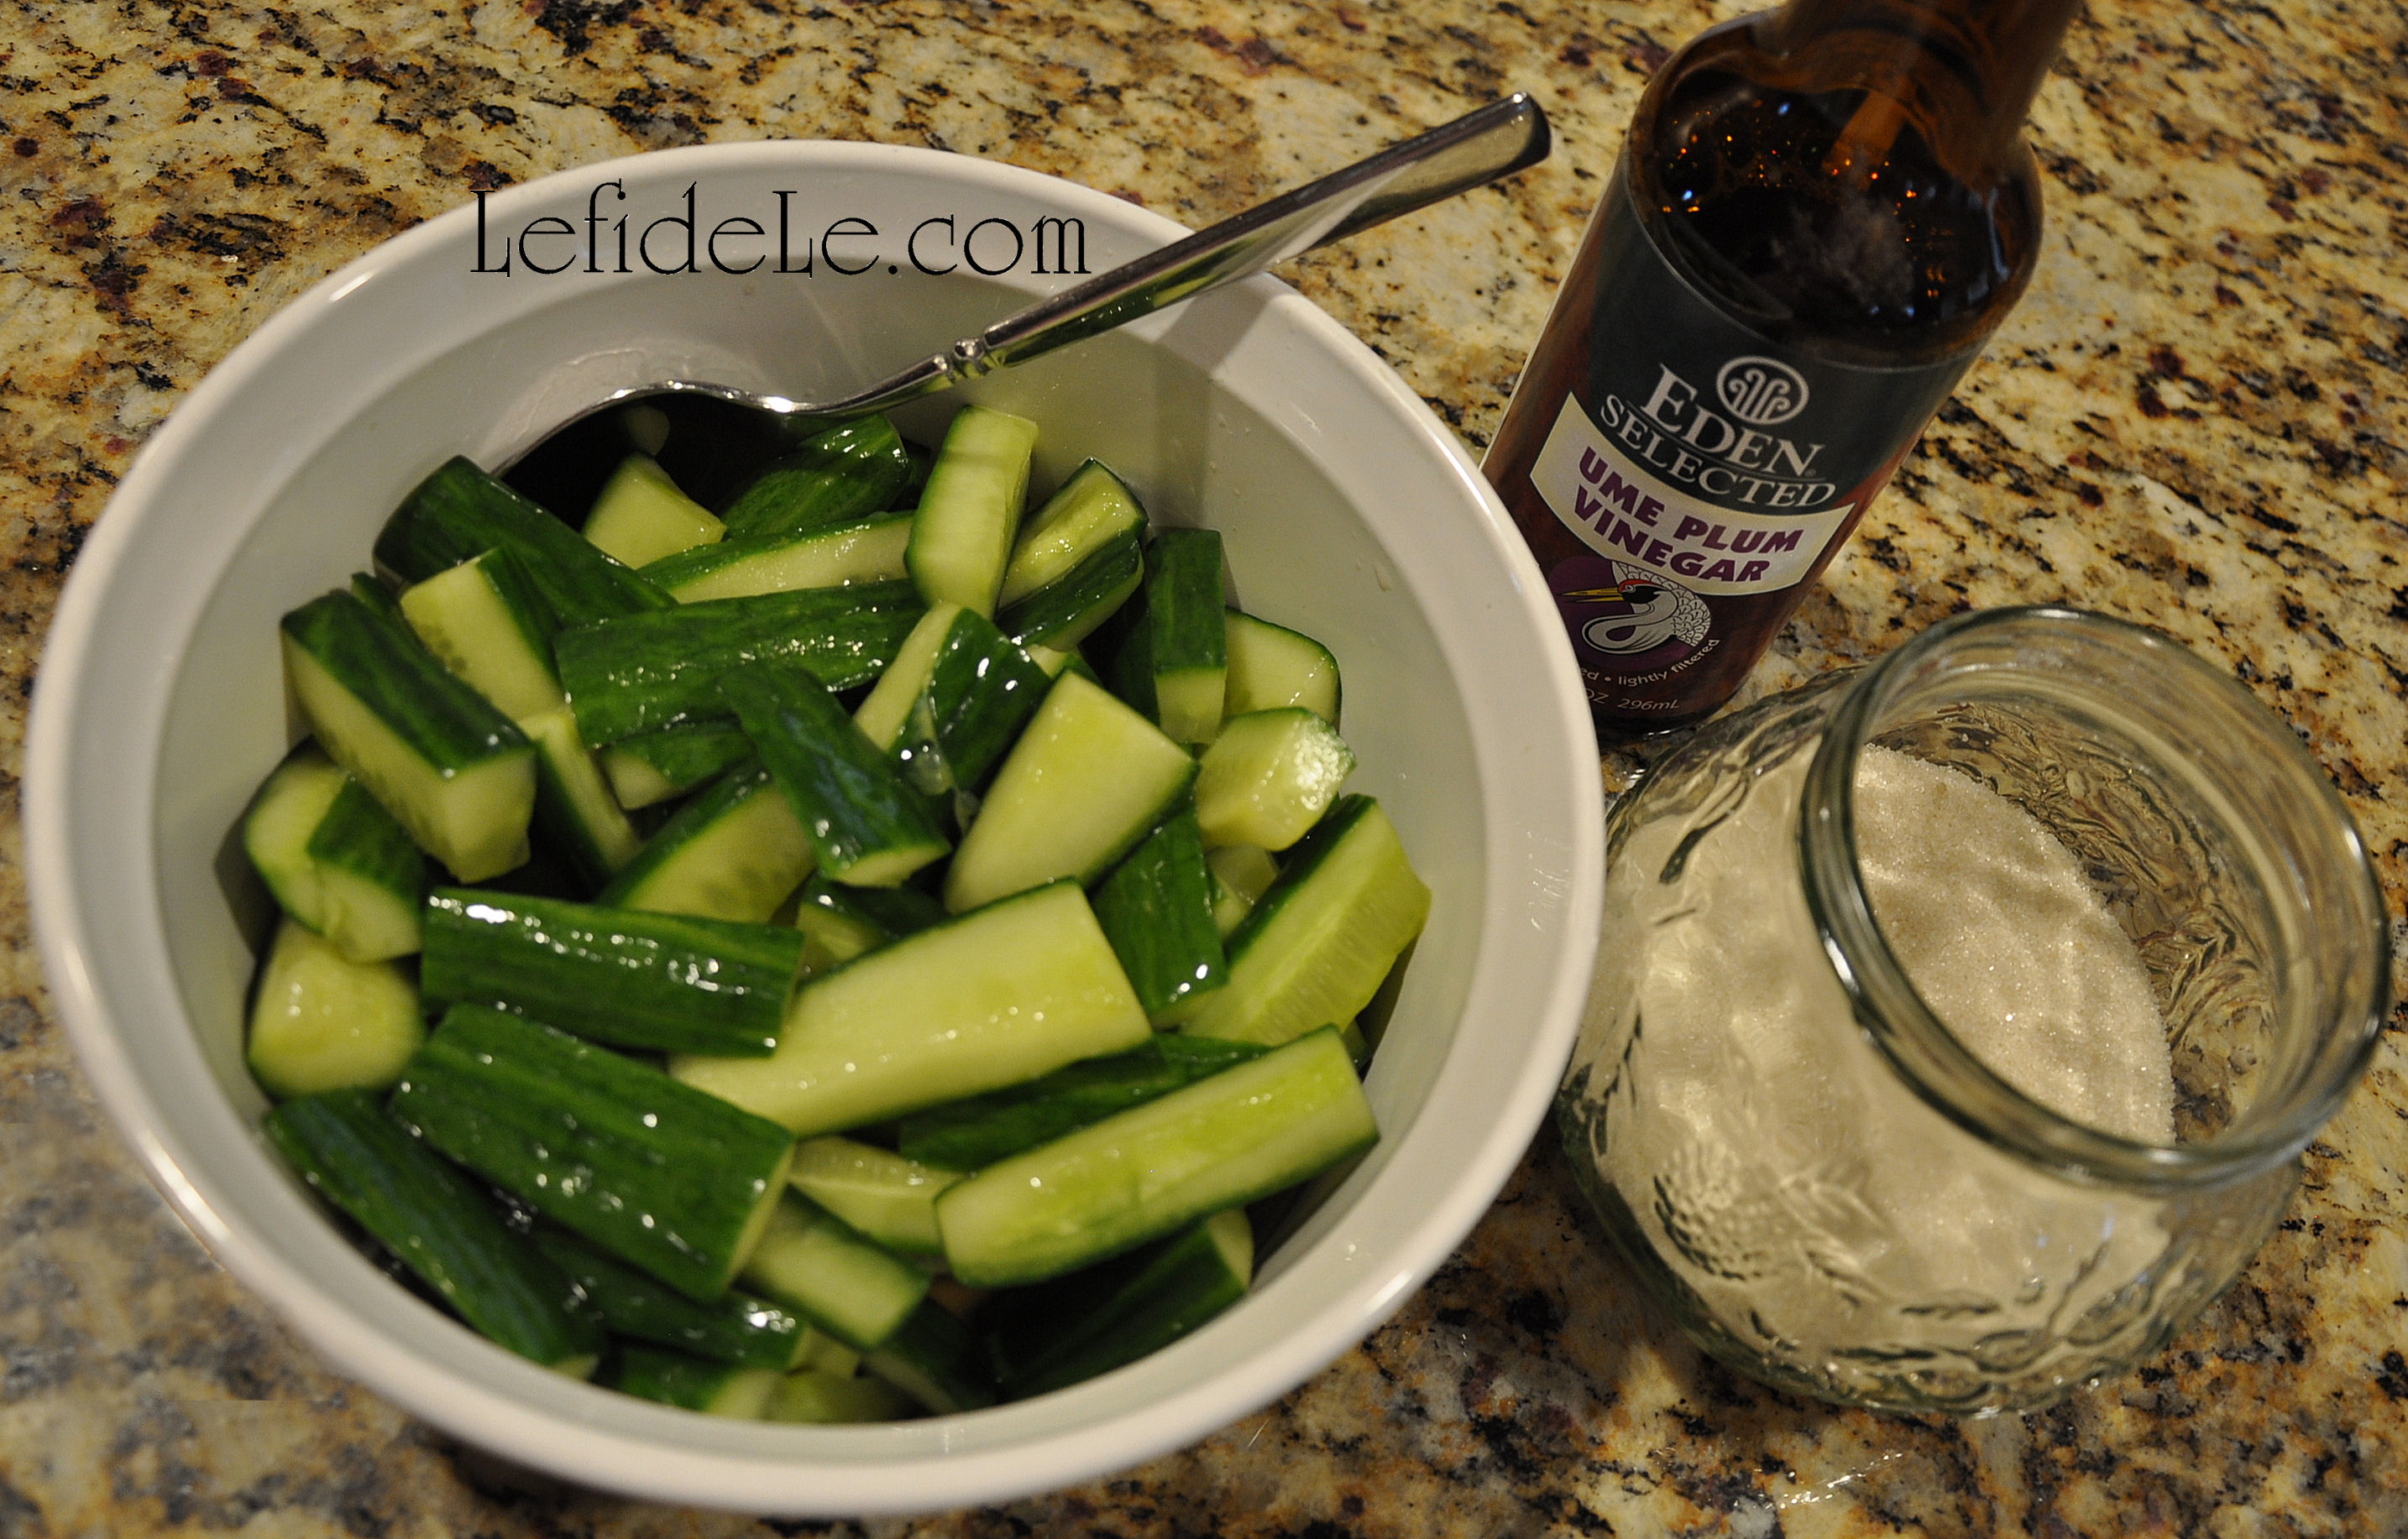
  • 2 cucumbers (I used the English hothouse variety because no peeling is needed.)
  • 1 tablespoon sea salt (Adjust the amount according to taste & dietary needs.)
  • 3 tablespoons Ume plum vinegar (Use any type of vinegar or lemon juice.)
  • 1 tablespoon turbinado sugar (Use any sweetener such as honey, agave, stevia, etc.)
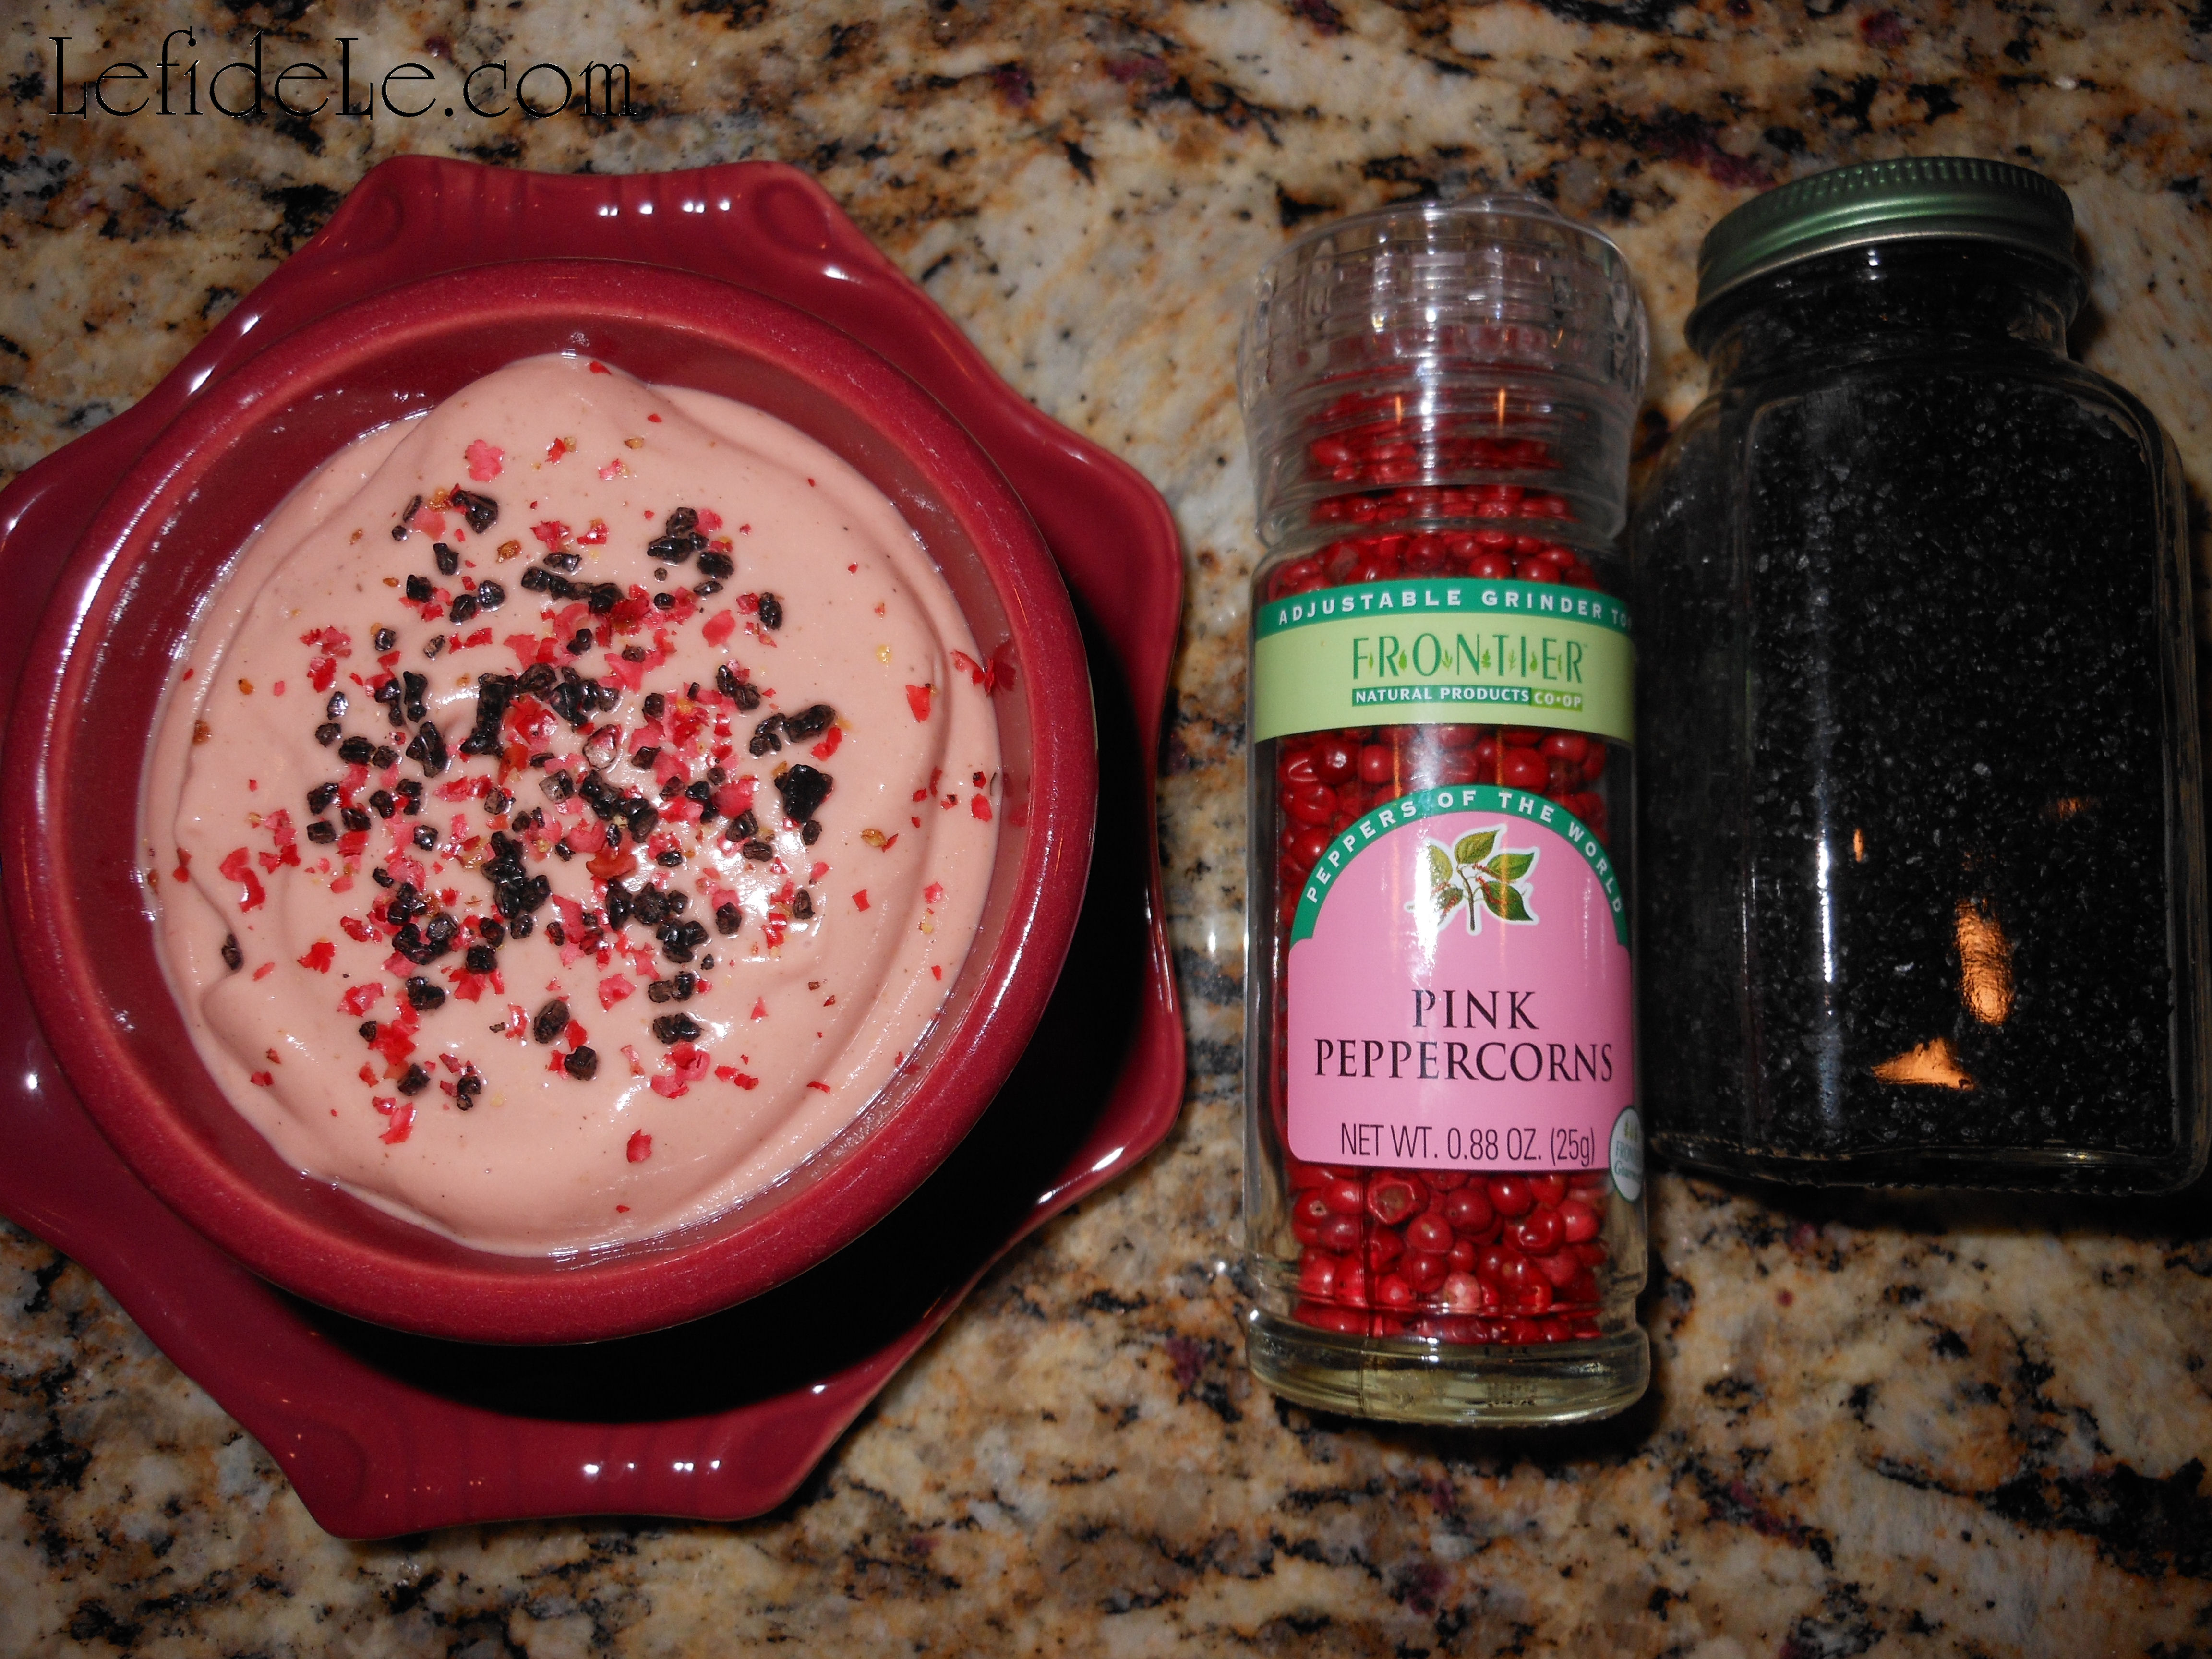
  • ~ 1 teaspoon each of various spices (Try ground peppercorns, coriander, marjoram, ginger, etc.)

Instructions:

101Leigh

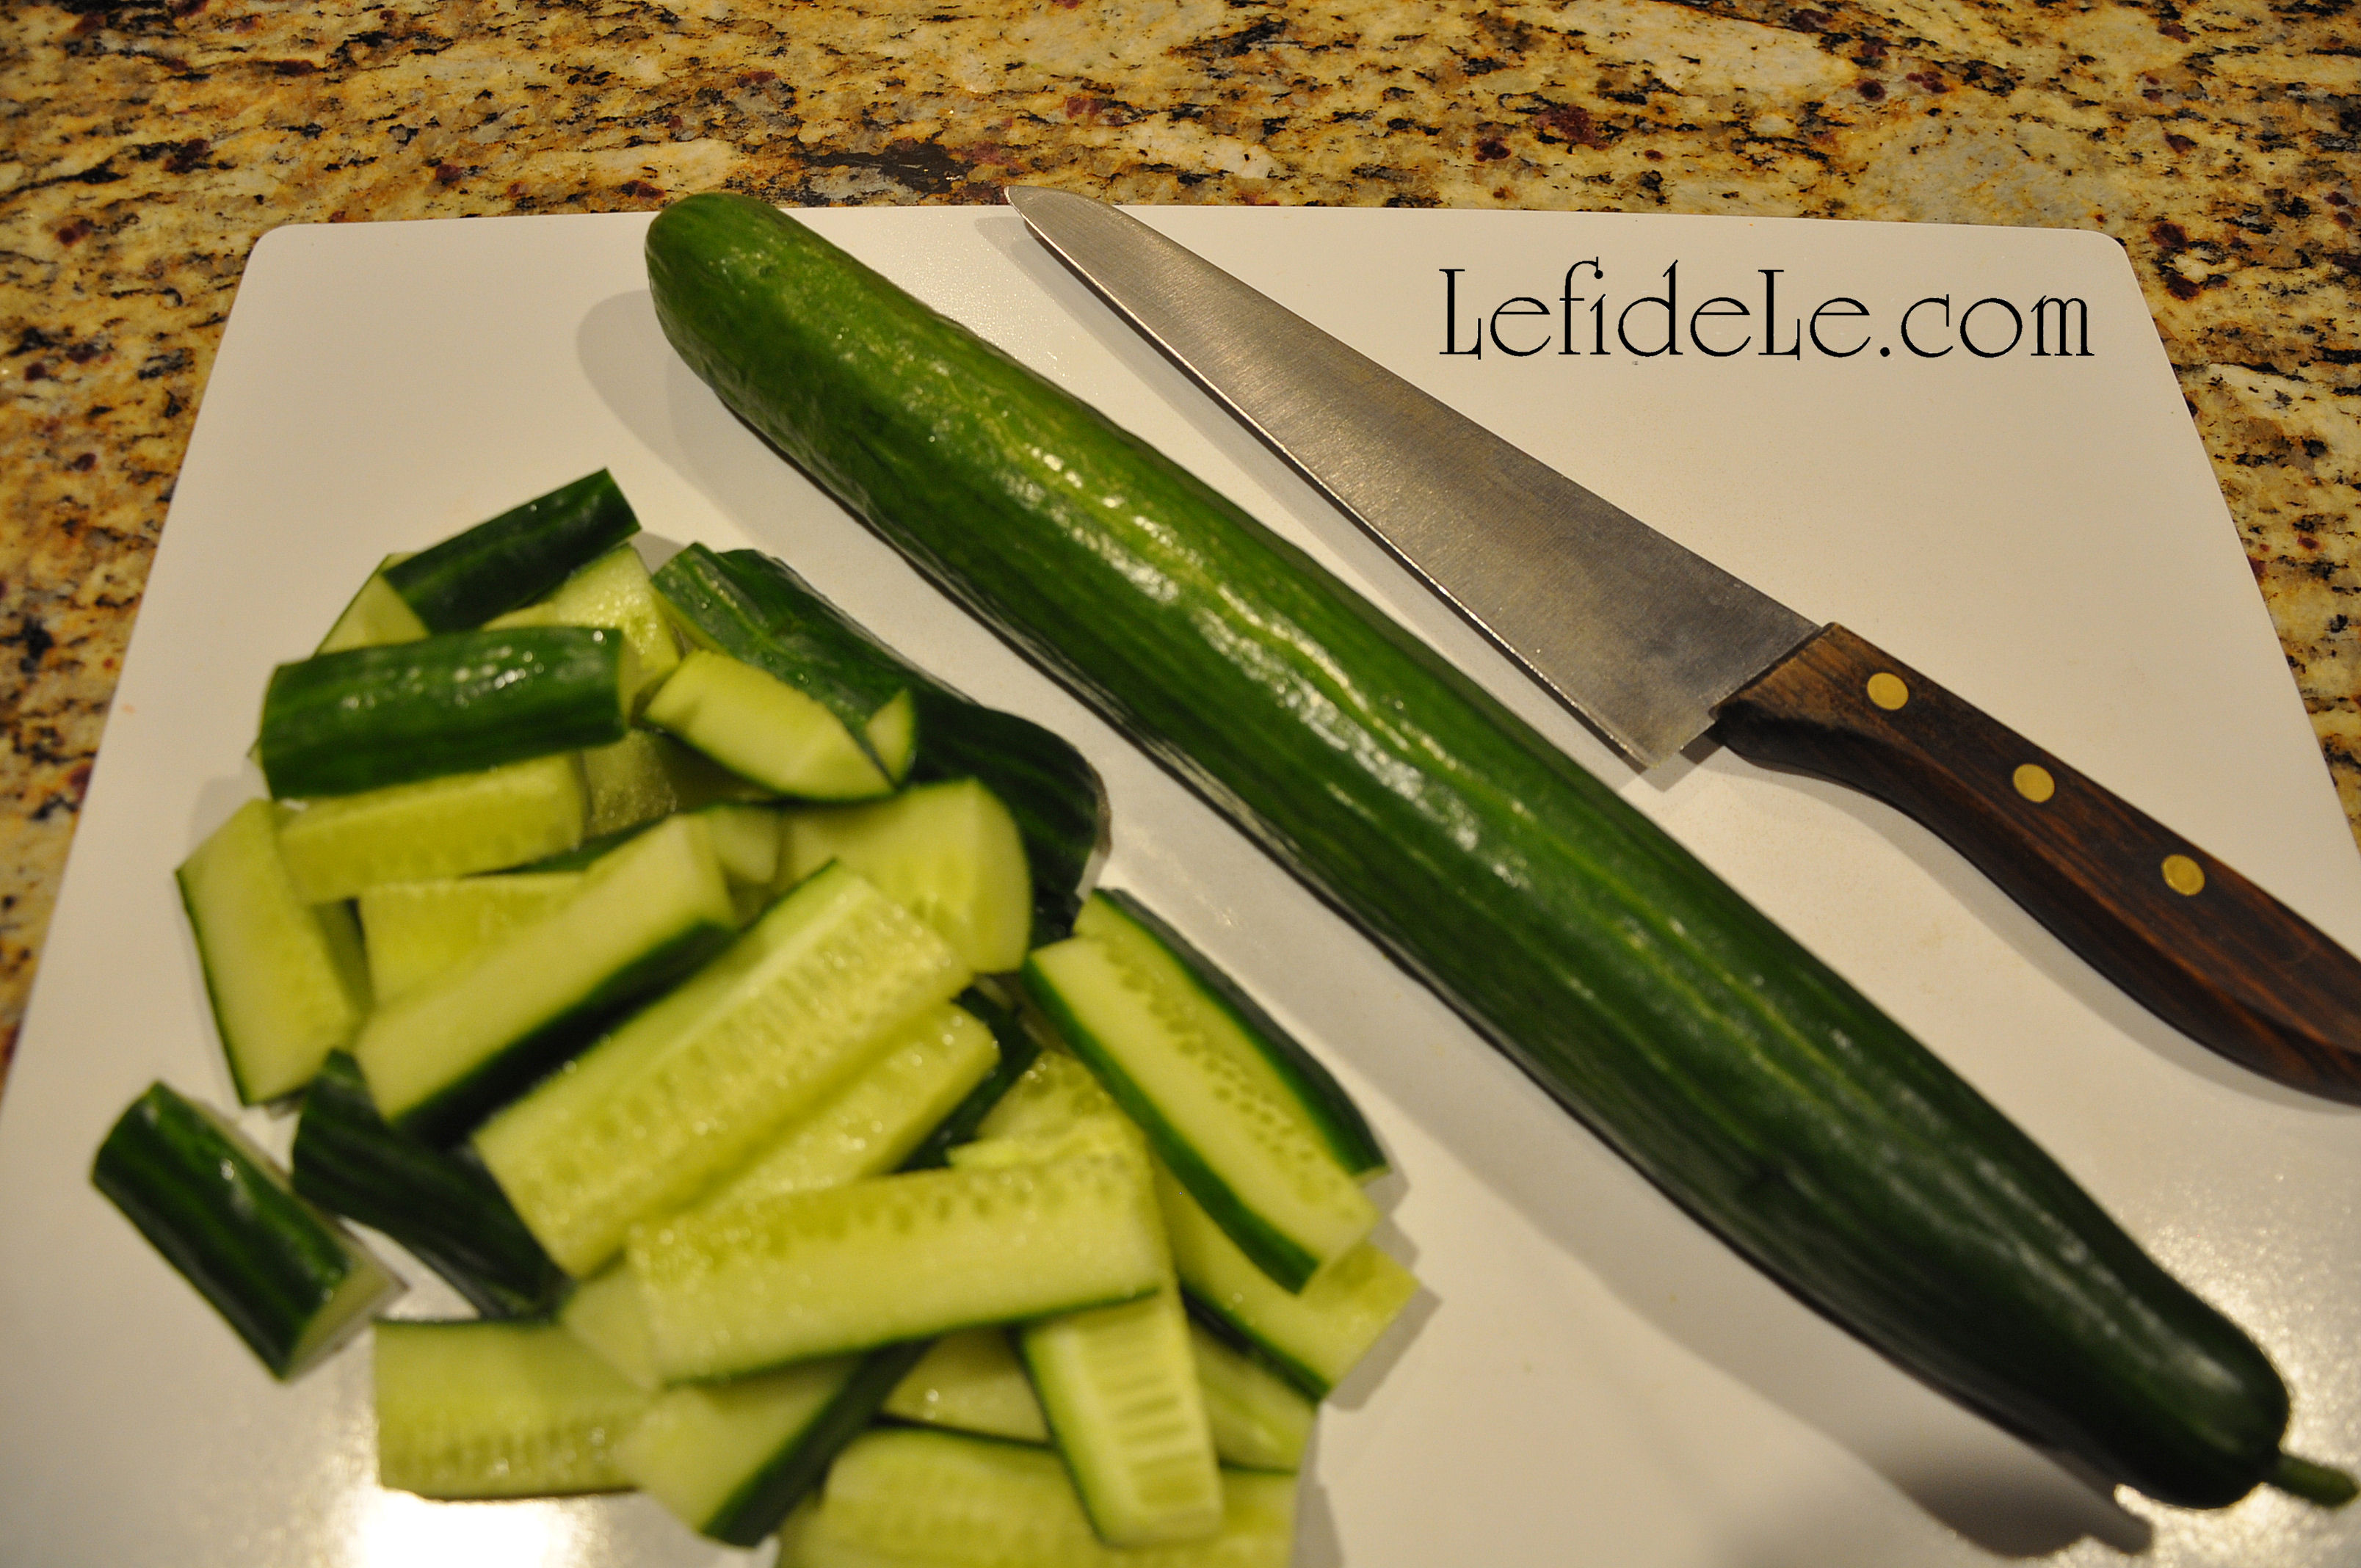
Wash your cucumbers well. There is no need to peel English Cucumbers, as pictured here, but the traditional waxed variety can have a bitter peel so it’s better to remove it. (The hothouse types are prettier with the 2 green tones, and we are making quick pickles… so the quicker the better, right?) A traditional looking dish has “cukes” that are split down the middle twice, so that you’re left with 4 long sections. Then cut these into approximately 2 inch chunks.

105Leigh

Salt the cucumber chunks, and stir them well. Refrigerate them covered overnight.

109Leigh

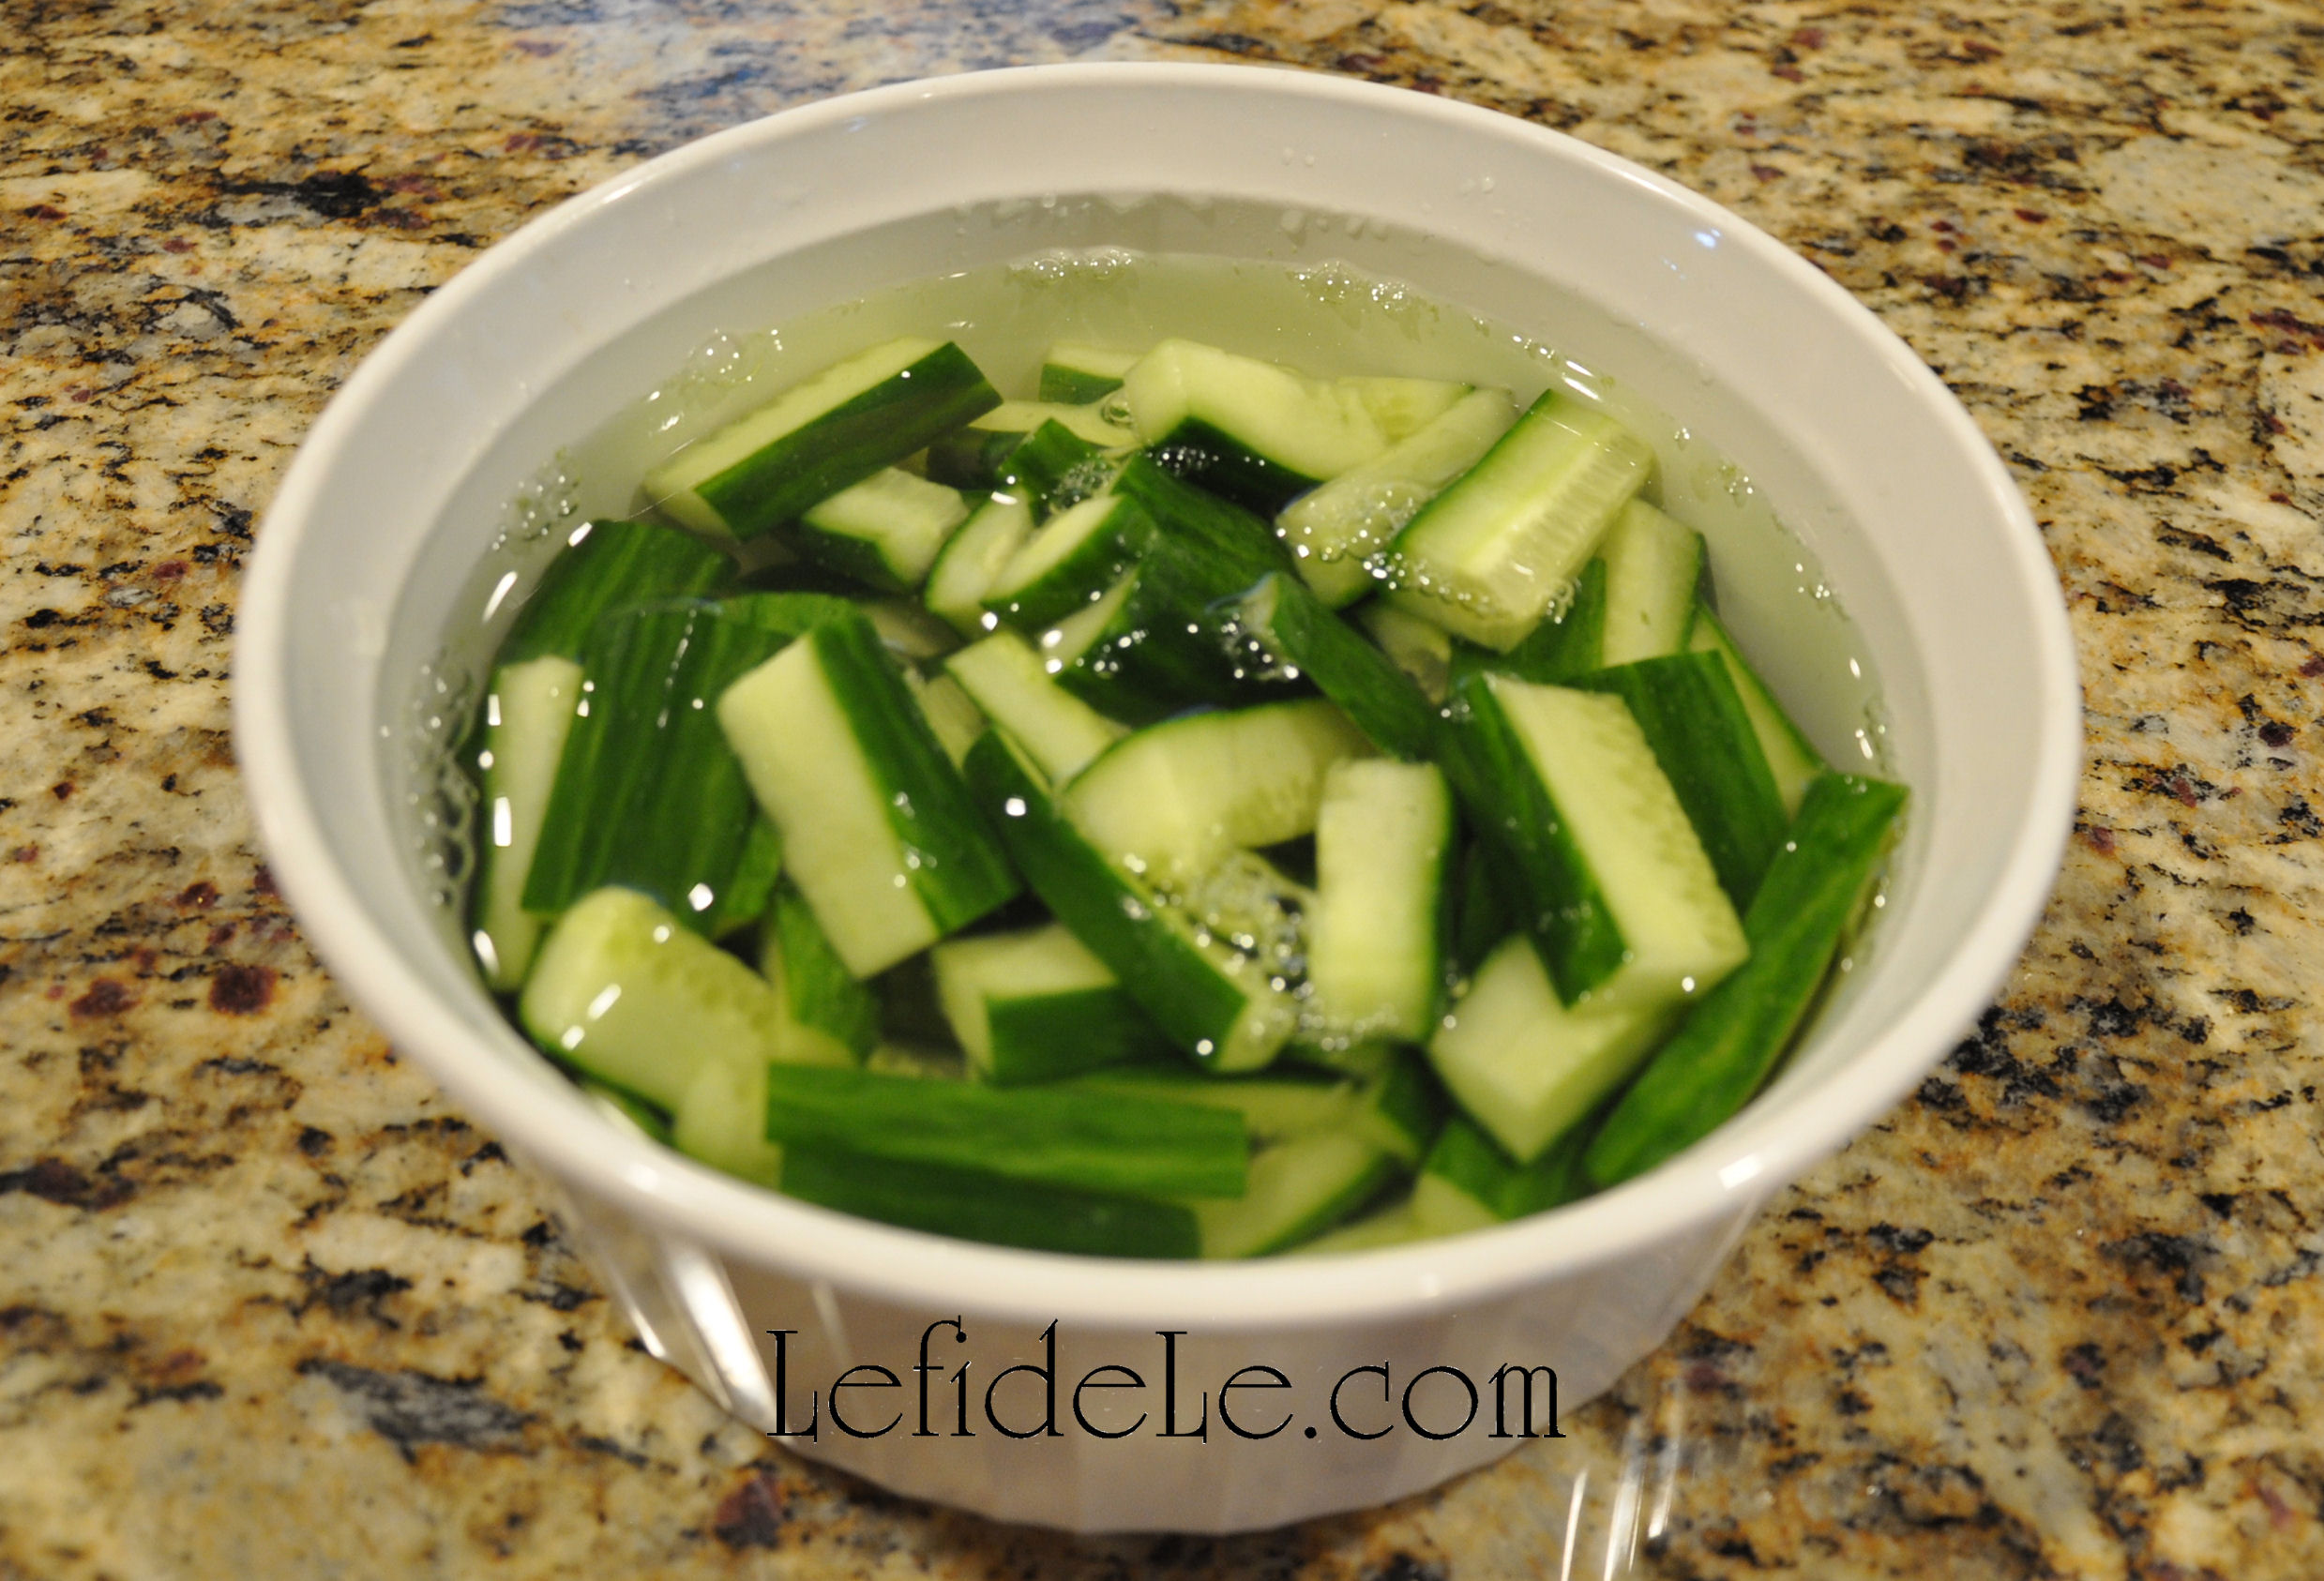
Rinse the cucumber chunks several times in water to remove excess sodium. (I just run water right into the casserole dish they’re already in, and place the top back on. I hold the top and bottom together, and turn them to the side letting the water drain out, leaving the washed cucumbers behind. Not having to wash a colander makes quick pickles even quicker!)

116Leigh

Add your acidic liquid such as lemon juice or vinegar. (I chose Ume plum vinegar because its flavor was a perfect complement for the other Chinese New Year dishes being served.) Also mix in your choice of spices. (After reading through about a dozen of my grandmother’s vintage Chinese cookbooks, I’ve come to the conclusion that there is no such thing as a traditional recipe. Everyone has their own spin, which means that you should feel free to make up your own concoction too!)

175Leigh

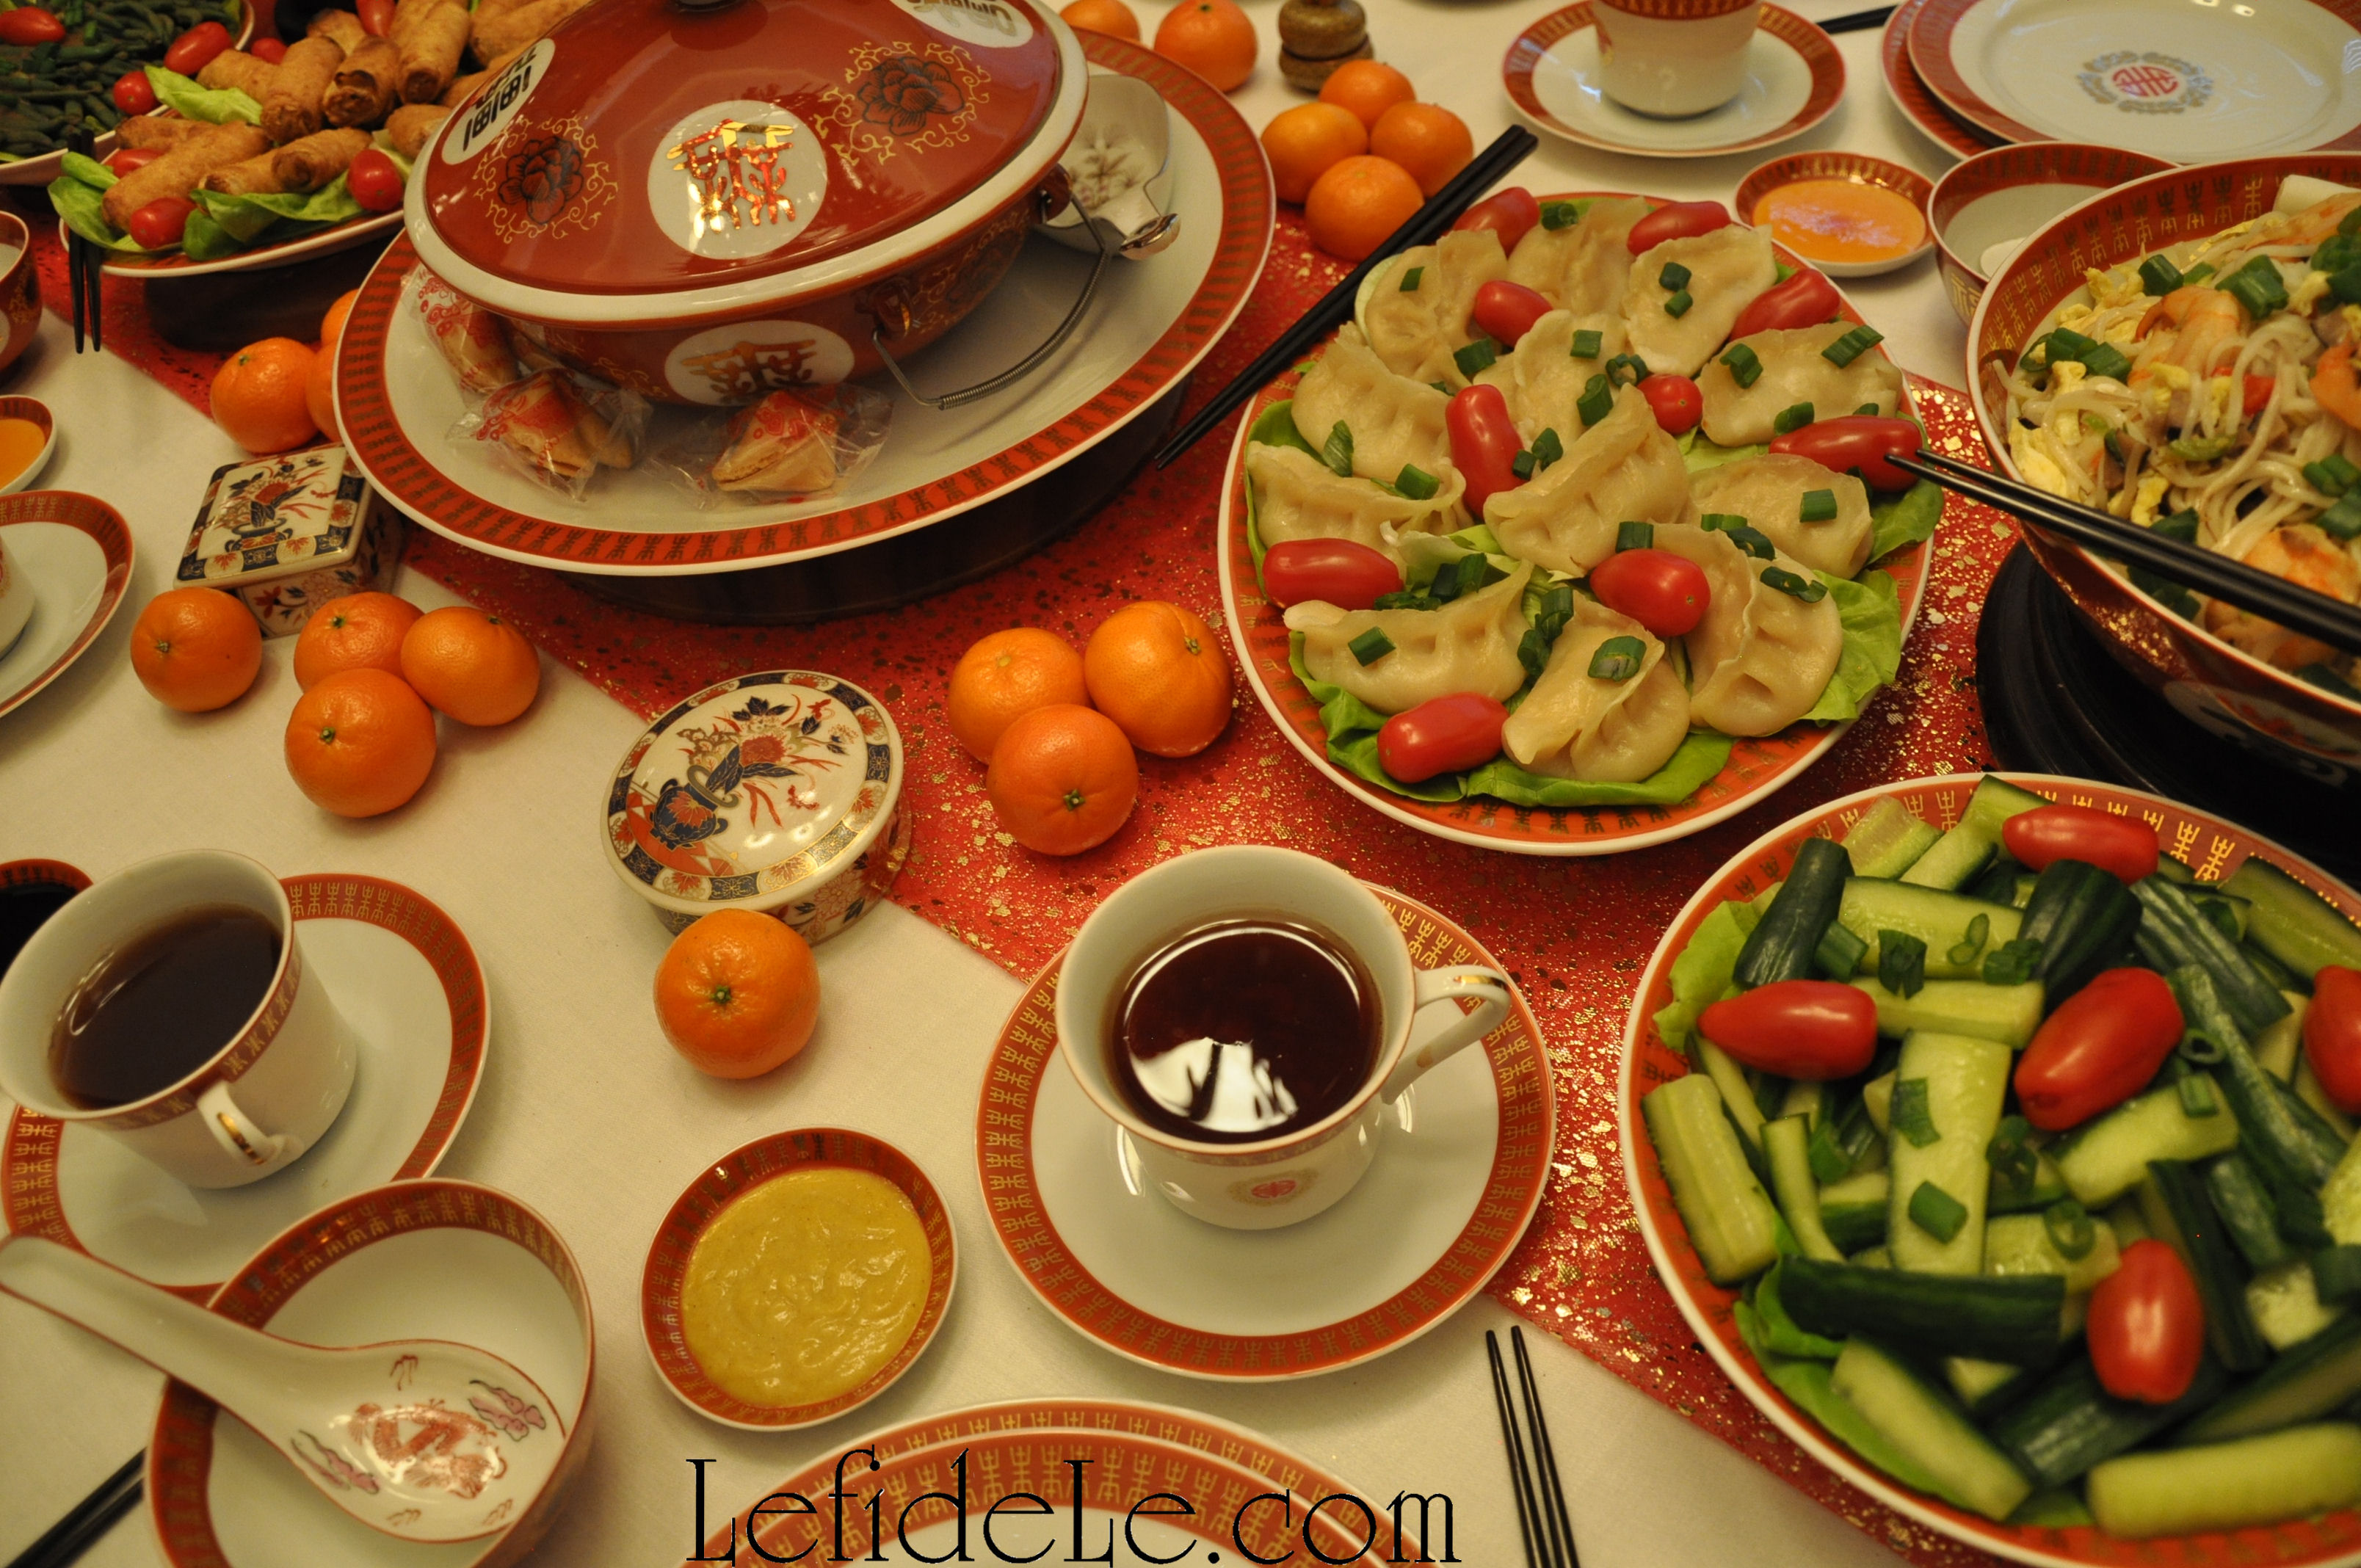
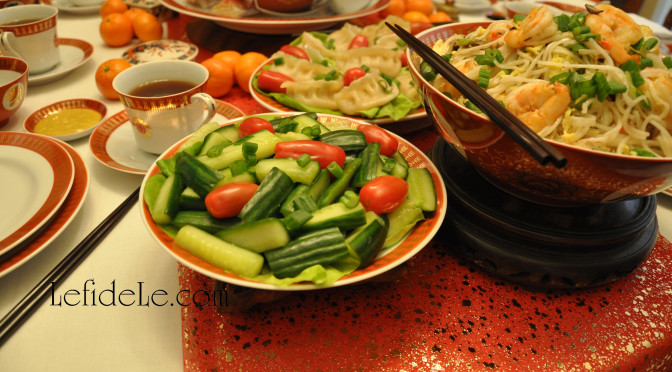
Mix your flavored cukes well, and refrigerate until it’s time to plate and garnish for serving. (The pickles pictured here are garnished with diced spring onions and whole roma tomatoes. Click here to see more of the Chinese New Year Party of the Sheep/Ram.)

161Leigh

I hereby confess that I don’t actually measure anything when preparing these little gems. I just go with my creative cooking instincts and prevailing mood to judge the flavor… which is exactly what is fun about this. They always seem to turn out just right. I do, of course, use less salt when making them for my grandmother, and less spice for my mother’s bland preferences. So, those pictured here were decidedly less flavorful than what I typically produce, yet they still tasted fantastic. The take home message is this, don’t be afraid to experiment with flavor. Have fun and enjoy not only the end result but the process as well!

Faithfully Yours,

Leigh

Mardi Gras Masquerade Themed “Fat Tuesday” Dinner Party Tablescape Décor Ideas

This Mardi Gras Masquerade themed tablescape for a “Fat Tuesday” dinner party was instigated by the desire to go all out like the big Krewe celebrations in Louisiana… but on a tiny budget! Not finding what I wanted in a suitable price range, I opted to remix what I already owned and make the rest. It turned out to be even more cost effective than if I had gone with paper and plastic… which was not only more elegant, but better for the environment too. Use some of these ideas as inspiration for your own festive fête, and read my other article… DIY Fast & Easy Mardi Gras Glittered Napkin Rings Craft Tutorial (+ Ribbon Votives, Centerpiece, Free Place-card & Invitation Printables)… for craft instruction and free printables.

096Leigh

I organized my theme according to the traditional Mardi Gras colors of gold, purple, and green (representing power, justice, and faith respectively). Then I pulled out everything I had in glittery versions of those colors. I used a leftover fabric remnant as a festive table topper, and layered that with gold placemats and my grandmother’s gold-rimmed china (also seen here in my Christmas / New Year’s Eve tablescapes).

104Leigh

Atop that, I placed vintage green plates that matched my grandmothers crystal stemware. If there was ever a time to pull out fabulous drinking vessels… it would be for Fat Tuesday!

070Leigh

Echoing my printable Mardi Gras masquerade place-cards (which may also be used as invitation cards, get my free printable here) were sequin fleur-de-lis masks which were positioned on each setting, for reveler donning should the desire arise. I found an inexpensive set of 12 of these at Oriental Trading Company online. (Find a free shipping coupon from them at the link in the sidebar.) I added the 6 extra masks to the centerpiece as ornaments.

018Leigh

I wrapped green metallic washi tape across the decorative elements in my flatware to jazz them up for the occasion. Washi wrapping is an easy way to embellish your everyday utensils for a special occasion, and it is so much cheaper than buying a new set. (You can see the same technique used on the flatware in my Herb Themed Luncheon by viewing the picture in the Upcoming Projects Gallery in the sidebar.)

019Leigh

I didn’t have any napkin rings that would tie into my theme besides the gold varieties I had recently used this winter, so I made my own in a matter of minutes from glitter ribbon and washi tape. This is so much easier than it sounds! (Find my crafting instructions here.)

024Leigh

Squares of shiny fabric, purchased with a 40% off coupon, were used for napkins. A fleur-de-lis shape was achieved by first folding the gold square in half and pulling it through the ring forming a loop. I then folded the purple square in half and formed two loops which I subsequently pulled through the ring over the gold. Lastly, the uneven bottom edges were tucked under.

073Leigh

I made the centerpiece with trim from my Glitter-ween Party Décor (see it here) and a few new sprigs wrapped around a metal tree base. (Incidentally, I had previously painted this gold from its earlier pewter and bronze incarnations. (See how to use paint to change the color of metal and to age a piece in my upcoming lion fu-dog décor for Chinese New Year.)

120Leigh

The base of the tree was swathed in the same purple fabric remnant from Glitter-ween’s spooky tree, and then draped with yards of Mardi Gras trim. (See how to hike up a chandelier to accommodate a tall centerpiece here.)

053Leigh

Though it’s hard to tell from the pictures, the tree centerpiece actually didn’t obstruct any person to person viewing. This is why I only draped the bottom with some Mardi Gras necklaces and wrapped the trunk with ribbon.

091Leigh

I hung embroidered Christmas crown ornaments, snapped up at 10 cent clearance, along with glittered musical instruments, green mirror balls, and a mask garland. (See more on the centerpiece here.) I try to plan all my holiday themes in advance of the after Christmas sales to snag a year’s worth of décor deals at 90% off. I keep my theme collections in labeled bins that I add to as I accumulate finds so that I’m ready to craft and decorate when each holiday arrives.

078Leigh

Surrounding the tree are 4 standing glittered metal masks that I scored at a post-holiday clearance sale for less than 2 dollars each… no kidding folks. I couldn’t have made them for less. To do as I did, scope out this year’s merchandise then pounce as soon as it gets marked down. The purple mercury glass crown votive holders were also found this way for less than a dollar for all 3. I wrapped the other gold votive holders with the same ribbon as the tree trunk to customize them for the holiday. (See how easy it is to do that here.)

131Leigh

The side table has another clearance mask sign hanging near it on the wall. I placed a variety of my other mercury glass candlestick holders with swirling gold tapers to further accent the tablescape. A theme appropriate pot was filled with faux doubloons to add a dash of New Orleans to Texas. (These will reappear as pot-of-gold coins on St. Patrick’s Day.) All of this was set upon an extra placemat.

125Leigh

So you see, it’s really not difficult or expensive to celebrate Krewe-style with your own crew… just don’t forget to serve up that king cake!

095Leigh

Laissez les bon temps roules!

Faithfully Yours,

Leigh

DIY Fast & Easy Mardi Gras Glittered Napkin Rings Craft Tutorial (+ Ribbon Votives, Centerpiece, Free Place-card & Invitation Printables)

012Leigh

Create your own elegant Mardi Gras themed glittered napkin rings for mere pennies with this fast and easy craft. The tutorial includes how to embellish votives to match your theme, free masquerade place-card and invitation printables, plus more details on the centerpiece from the Mardi Gras Masquerade Themed “Fat Tuesday” Dinner Party Tablescape Décor Ideas. These DIY projects are an easy and inexpensive way to bring the look of an authentic Krewe’s fête to your own crew!

304Leigh

The secret element to an inexpensive napkin ring form is the core of a wrapping paper roll. You can’t do better than free! Mark and cut sections that are smaller than the ribbon you choose to cover it with.

308Leigh

Then cut lengths of ribbon long enough to wrap around those cores.

309Leigh

Use hot glue to adhere a strip of ribbon around each core. Here I’ve chosen gold glitter ribbon to coordinate with my Mardi Gras theme. (You can see the same technique used on the rings in my Herb Themed Luncheon by viewing the picture in the Upcoming Projects Gallery in the sidebar.)

311Leigh

Next, I cut and attached layers of green and purple glitter washi tape in different widths atop the gold base. Layers of ribbon would have also worked well, but I already owned the perfect sized tape.

313Leigh

Read how to make your own fleur-de-lis shapes with napkins at the article on Mardi Gras Masquerade Themed “Fat Tuesday” Dinner Party Tablescape Décor Ideas.

024Leigh

I made all six napkin rings for way less than a dollar, in a matter of minutes, and they coordinated perfectly with my theme’s décor… Awesome!

299Leigh

Now for those ribbon votives… simply start with any type of votive holder or small jar. You can leave them plain or apply glitter paint to them. I went with gold glittered glass. Cut lengths of coordinating ribbon long enough to wrap around them and overlap. You can attach one end to the other with a dot of glue or double stick tape. Because my ribbon was wired, I merely twisted one side over the other like a twist-tie. (See more twisty ribbon action here on my DIY Rusted Rooster Chicken Wire Votive Holder Craft.)

303Leigh

In this way, I can unwrap the ribbons and reuse both them and the votives for a future holiday in a different way. I think they turned out great, and they literally took me minutes to complete… Yea!

392Leigh

Create a dramatic centerpiece without a lot of drama by merely starting with a basic tree form from another holiday. (For example, use a black one from Halloween or a white one from Easter.) I used a metal votive holding tree that I had previously painted gold from its earlier pewter and bronze incarnations. (See how to use paint to change the color of metal and to age a piece in my upcoming lion fu-dog décor for Chinese New Year.)

393Leigh

I wrapped it with trim from my Glitter-ween Party Décor (see it here) then added a few new sprigs.

235Leigh

I painted simple purple ball ornaments with a glitter mist (not the blast variety) to impart both gloss and glitter shine to the previously satin sheen.

236Leigh

I set these onto the rings that would normally hold the votive holders. (You’ll likely see these in a future article.)

053Leigh

I hung embroidered Christmas crown ornaments, snapped up at 10 cent clearance, along with glittered musical instruments, green mirror balls, and a mask garland. I even hung the same sequin fleur-de-lis masks used at each table setting as ornaments. I try to plan all my holiday themes I advance of the after Christmas sales to snag a year’s worth of décor deals at 90% off. I keep my theme collections in labeled bins that I add to as I accumulate finds so that I’m ready to craft and decorate when each holiday arrives.

091Leigh

Though it’s hard to tell from the pictures, the tree centerpiece actually didn’t obstruct any person to person viewing. This is why I only draped the bottom with some Mardi Gras necklaces and wrapped the trunk with the same ribbon I used on the votive holders.

120Leigh

The base of the tree was then swathed in the same purple fabric remnant from Glitter-ween’s spooky tree and draped with yards of Mardi Gras trim. (See how to hike up a chandelier to accommodate a tall centerpiece here.)

043Leigh

Surrounding that are 4 standing glittered metal masks that I scored at a post-holiday clearance sale for less than 2 dollars each… no kidding folks. I couldn’t have made them for less. To do as I did, scope out this year’s merchandise then pounce as soon as it gets marked down. The purple mercury glass crown votive holders were also found this way for less than a dollar for all 3… Score!

009Leigh

Last but definitely not least, are my free printable Mardi Gras masquerade place-cards which may also be used as invitation cards!

mardi-gras-placecards-leigh

Simple right click on this small picture and select print. Print these in best color photo on thick cardstock.

004Leigh

Then simply cut on the solid black lines to separate the images for invitations. For place-cards, use the pictures a guide for how to cut out the top and crown while still making a tent folding card that will stand upright.

039Leigh

Poke a point into the paper just above the crown with a pointy pen, or compass point, etc. Use that as a starting point for your scissors to cut a V shape above the picture. Then cut one side close to the top and crown next to the image. Don’t cut all the way to the ends. Stop where the curve meets the flat top. Those flat parts are what join the front and back together. Then fold it in half. Cut through both pieces around the image. Again, a picture speaks a thousand words… use it as a visual guide.

028Leigh

Simply write names on the bottom with a gold sharpie marker or paint pen… Voila!

104Leigh

See more of my Mardi Gras Masquerade Themed “Fat Tuesday” Dinner Party Tablescape Décor Ideas here for more holiday inspiration!

070Leigh

Let the good times roll!

Faithfully Yours,

Leigh

Origami Crane Paper Folding Instructions (for Get Well Wishes or Chinese New Year Party Décor)

The timeless art of origami paper folding is an easy and inexpensive way to decorate for a Chinese New Year Celebration. The project also provides a means for quality time in generational bonding. This tutorial for the historically traditional crane figure is an apropos symbol of hope for the coming year. The Japanese tradition of the Senbazuru folding of 1000 paper cranes is said to grant the maker a wish, such as healing for a loved one. (Why not fold and send one in lieu of a get well card?) The “Tsuru” (crane) is also said to denote happiness and luck, which is the same meaning of the “Fú” 福character of the Chinese New Year. My Take-Out Favor Box & Paper Lantern Craft Printable (Chinese New Year Party Décor) also utilizes the symbol which has graced the entrances of Chinese homes for many hundreds of New Year’s.

341Leigh

There are beautiful origami papers available, but it’s easy to make your own from any inexpensive paper. By cutting them yourself, you can make any sized piece you like… and if you’re a beginner, it’s much easier to fold a larger sheet. Here I’ve chosen gold metallic wrapping paper purchased at an after clearance sale years ago. I used a large T-square ruler to mark 6 x 6 inch sections, and then cut them out.

342Leigh

Begin by folding the paper in half diagonally then unfold it.

344Leigh

Repeat this on the other diagonal, thereby creating an X crease on the paper.

346Leigh

Next fold the paper in half, creating a rectangle, then unfold it.

348Leigh

Repeat this fold, of a half rectangle, to complete another X crease.

349Leigh

Now that you’ve made an asterisk * shape mark on the paper, turn a tip to point directly towards you. Take the remaining 3 tips, and pull them over the closest one. The 2 side points will meet in the middle, and the farthest tip will close over those.

353Leigh

Next take the 2 side points and fold them to meet in a line dissecting the middle of the piece, then unfold it.

355Leigh

Take the farthest point and pull it toward you to form a triangle, and then unfold it also.

357bLeigh

Pull the upper point away from you while pushing in the 2 side points so that they meet in the middle.

360Leigh

Push it all down to crease it flat.

362Leigh

Flip the piece over, and repeat the last step to form a diamond shape.

370Leigh

Once again, fold the 2 side points inward to meet in the center.

372Leigh

Flip it over, and repeat the last step to form a much pointier diamond.

374Leigh

There will be 2 pieces resembling legs that comprise the portion closest to you, take one and bend it up and out on a diagonal… as if it’s making a high kick. Do the same with the other leg then crease both well. Unfold them straight again.

376Leigh

The next step is the trickiest part, but it can be unfolded and retried until it works out. The legs need to be bent inward in what is called a “reverse fold”. The easiest way that I’ve found to do this is to use your thumbs to sort of pop in the center of the leg toward the center of the piece. The crease you made earlier will be the line it folds according to. Just study the picture and play with your piece until they look similar. Crease it flat once it’s in the correct position. Do this with both legs of the piece which will form the head and tail/feet of the crane.

378Leigh

Make the wings flap down by folding the farthest point of the upper flap towards you. Flip over and repeat for the other wing.

381Leigh

The last step is to form the bird’s head by performing a “reverse fold” downward on one of the former legs. Adjust it, if need be, by strengthening your creases and pushing up on the center portion until it sits upright on its own.

384Leigh

Now what to do with it… write a “Get Well Soon” or “Happy New Year” message on one of the wings and push the crane flat to enclose in an envelope, use a needle and thread to string and hang it, or just set it out on your table for an easy décor element.

031Leigh

May all your dearest wishes be granted this year!

Faithfully Yours,

Leigh

Chalkboard & Glitter Hearts Themed Valentine’s Day Party Buffet Décor Ideas (+ DIY & Printable Links)

Running with the idea that opposites attract, I decided to make a Valentine’s Day Party theme that incorporated both matte black chalkboard and glittery red hearts. The elements actually coordinated beautifully for a party theme that would suit a variety of age groups, or even just serve as a surprise for that special someone. The whole shebang was actually quite inexpensive to pull off, though happily I believe that doesn’t appear to be the case. You can either follow the links to make the fast and easy crafts yourself, or go shopping with the theme in mind.

229Leigh

After deciding on my theme, I actually found this adorable chalkboard Valentine fabric that also had glitter hearts. (You can find some for yourself at Hancock Fabrics or Fabric.com using coupons from the affiliate links in the sidebar.) I hung this up with clear thumbtacks.

204cLeigh

I then strung my glitter hearts Valentine’s banner atop of this. I also attached another doily banner to the credenza itself with tiny tack nails. (The printable and instructions for both banners may be found by clicking here.)

213Leigh

I love incorporating ornament filled trees into holidays besides Christmas. Valentine’s Day is especially easy to do this with because it falls so quickly after on the calendar so that one may really take advantage of all those deep after-Christmas clearance sales. Some of the baubles on this tree were marked 90% off which left the cost at mere cents. The topper is a glittered sprig of holiday pine.

205Leigh

Some of you may recognize the black wooden tree from the Halloween Party. It looks really different when trimmed according to another theme. The conversation heart ornaments were made from white foam shapes (whose craft tutorial may be found here).

215Leigh

On the opposite side of the buffet, I made an arrangement that can be disassembled one heart wand at a time, to be given away as favors to departing guests. This is especially sweet when given as scepters to little Valentines princess party goers. (See the tutorial at the link here.)

206Leigh

I set all of these into a vase shaped like a thread spool twinned with glittery red flat yarn. It symbolizes the ties the bind… and is filled with hearts. Glass marbles contain the arranged wands yet allow for easy removal. These are topped with another variety of glittery yarn to conceal the marbles.

214Leigh

Other décor elements are the chalkboard sign crafts set onto easels (find tutorial here) alongside a store-bought slate that I was gifted with early. (Thanks Mom!)

209Leigh

A variety of gift bags and boxes overflowing with candy were nestled into the ensemble. The heart bags and mail boxes were machine cut from construction paper.

238Leigh

I included both oversized gems and tiny crystal hearts to fill in the empty spaces. I borrowed a bouquet of crepe paper roses that I had actually made for my mother years ago, and set these into a marble filled vase. I wrapped it with some leftover rope trim that coordinated with the theme, and set it atop an upturned boxy metal vessel. It’s really easy to create lifts and levels when one starts to think out-of-the-box and repurpose items for that other than which they were intended for.

219Leigh

The treat tower is actually comprised of two metal trays that I found on after Christmas clearance years ago. I simply stacked these by using an empty drink mix container wrapped with glittery fabric.

17Leigh

It was surprisingly stable, but you can add further assurance by hot gluing these for a temporary bond. A stronger adhesive would make the bond permanent. I stocked the tower with icing laden cookies, cupcakes, and candy cocktails.

208Leigh

The other platter was another clearance gem from over a decade ago. It’s a lovely red metallic reverse painted glass. You can mimic this with a lovely red charger in either acrylic or glass. More of the same sweet treats topped the dish plus some delectable chocolate covered cherries set into their own treat cups. Try this with truffles or even upside down cake pops.

77Leigh

I made my own treat pops with Peeps red speckled white “love birds” with chocolate bases. To make your own, simply poke a pilot hole with a skewer or tooth pick then jab in a paper straw. I chose adorable heart covered ones, and then set these into gumball packed vintage crystal vessels. Any solid candy would serve as well.

250fLeigh

A non-alcoholic berry soda set into an ice bucket serves as equal-opportunity refreshment. The same red metallic plates that appear in the chalkboard sign crafts were placed front and center. Last but not least to complete the sweet buffet was the addition of candlelight. (Use LEDs if you fear sleeves catching fire or if you have young guests attending.) Red mercury glass votives were, you guessed it, purchased for mere cents post-Christmas. They really added to the ambiance of the whole setting.

202Leigh

♥ As you prepare for your own Valentine’s celebration… just remember to, “Keep calm & party on!”

Faithfully yours,

Leigh

Fast & Easy Glitter Heart Wand Centerpiece, Foam Ornaments, & Faux Chalkboard Valentine’s Day Décor Craft Tutorials (+ Printable)

205Leigh

This mélange of fast and easy crafts were made to decorate a Valentine’s Day Party, but you can adapt them for any purpose you like. The faux chalkboard craft is an inexpensive way to decorate for the holiday, but also makes a quick Valentine for a love one. The chalkboard idea can also be extended to other favors quite easily. The glitter heart wands effortlessly gather into a dramatic centerpiece, and can be taken home as favors by each Valentine princess at the party. (Make these with foam hearts or my free printable from the Valentine’s Day banner craft.) Also, make Valentine ornaments with the kiddos in your life using foam Conversation hearts in a matter of minutes.

61Leigh

Let’s begin with the simplest project first, making Valentine ornaments out of foam conversation hearts from the craft store. (I used the white ones only, so as to coordinate with my theme colors, and reserved the other pastels for the candy-land themed party which will appear in an upcoming article.)

81Leigh

You can either glue the hearts back to back, sandwiching twine or thin ribbon between them, or simply tape twine loops to the heart backs. The latter is the quickest way to make them, and the easiest for a little one to help with.

80Leigh

(See these similarly on the How to Make an Assemblage Sculpture (= 3D Collage) for Your Valentine (Art Instruction / Craft Tutorial).)

168Leigh

The next project is a faux chalkboard sign, that also makes an inexpensive Valentine, using the unexpected material of a paper party plate. The square metallic disposable plates are lovely yet extremely budget friendly. Why not pick some up for the party and reserve one or two to fill in as décor.

45Leigh

Merely use dots of glue to layer square doilies onto the plates. Simply trim down the doilies to fit the smaller plate sizes.

47Leigh

Then cut a square of matte black cardstock to size, and glue atop the doily.

50Leigh

Use a white paint marker to write whichever sentiment, poem, or quote you wish.

55Leigh

Use a hole-punch to add 2 openings with which to slip a strand of coordinating ribbon through. Simply tie the two ends in a bow, which also serves to further decorate the sign.

21Leigh

Similarly, cut squares of black cardstock to adorn gift bags and boxes, using the same white paint marker to write your sentiment in “chalk”.  If the writing doesn’t seem clear enough, simply go over the letters until they do. The uneven edges make them look even more like chalk, but won’t come off on your clothing while delivering them to your recipient.

208Leigh

Moreover, in this way you can ride the chalkboard trend without spending as much on readymade tags, stickers, or chalkboard paint. (The bags I made were machine cut from construction paper then adorned.)

215Leigh

The last project is a centerpiece of glittery hearts meant to be taken home as party favors at the end of an event. You can even print, cut, and glue these onto tiny wooden dowels using my free printable at the end of the article.

34Leigh

I sandwiched a thin dowel between 2 glittered foam hearts with the aid of hot glue. The thinnest dowels are really easy to just snap in half where you want to section them. Trim with a bow of glitzy ribbon if you like. I used readymade glittered bows from an after Christmas clearance sale.

10Leigh

The open hearts were made from inexpensive styrofoam and red glitter blast spray. For the largest ones, I simply jabbed in a cut section of wire hanger as a handle, but a thin dowel would be better if gifting them. I added glittery bows to some of these as well. All of them will sit securely arranged in a vase filled with marbles. This way they can be easily pulled out one by one at the end of the celebration as favors. I just pilled on an unraveled skein of glittery red yarn atop the marbles to hide them.

206Leigh

♥ Happy Sweetheart’s Day!

213Leigh

Faithfully yours,

Leigh

V-dayHearts-Leigh

P.S. Here is the Glitter-Doily Heart Printable. Simply right click on the image and select Print. Print them in the best color photo setting.

2 Fast & Easy Valentine’s Day Banner Décor Craft Tutorials (Doily & Glitter Hearts + Printable)

229Leigh

These Valentine’s Day banner crafts are so fast and easy that even the busiest mama can make them with her little ones. The glitter heart and doily printable only needs the addition of letters to spell out any message you wish. The second banner is comprised of layered doilies and extra valentines. Both are so inexpensive yet add a lot of heartfelt sentiment and party atmosphere. Plus, they’re lightweight enough to stick in a big envelope and send to a loved one whose away for the holiday. You can even use the printables as stand-alone Valentine Cards!

176Leigh

First let’s make the doily valentine banner. This is a great project to use up any leftover schoolroom Valentine cards from your kiddo’s class. You can even save the received ones to make banners for next year’s celebration.

175Leigh

One only needs to add some low-cost paper doilies in varying sizes. I used leftovers from last year along with some Holly-Hobby Valentine Cards from my childhood.

51Leigh

Merely use dots of glue to layer the doilies and Valentines. Then add a ribbon bow for dimension.

54Leigh

Tie circles of twine, yarn, or ribbon through the holes in the doilies and knot together. Hang it up and enjoy!

171Leigh

The glitter heart and doily banner is one that can be easily made by two different methods. You can print and cut out all the glitter doily hearts you need, using my printable at the end of the article. You can also use inexpensive glittered foam hearts from the craft store, and use hot glue to layer white doily hearts onto them.

26Leigh

Either way, the next step is add letters spelling out any sentiment you’d like. I cut out letters with a machine from black card stock to coordinate with my chalkboard theme. You can also use a stencil to trace and hand cut them, or buy them readymade at the craft store. (Michaels has them in every color and texture you can think of. Click on the affiliate link in the side bar to snatch the latest coupons.) I added a knot of ribbon to each dip in the heart to further tie in with my theme’s color palette. Feel free to add any other elements you’d like from paper roses to stickers. (You can even skip the letters and let a kiddo color in pictures to use the printables as Valentine Cards.)

38Leigh

Next add holes to both sides of each heart with a hole-punch. Then use ribbon or twine to string them together. Add a loop at each end to hang the banners by. Voila!

224Leigh

♥ Happy Heart’s Day!

Faithfully yours,

Leigh

V-dayHearts-Leigh

P.S. Here is the Glitter-Doily Heart Printable. Simply right click on the image and select Print. Print them in the best color photo setting.

How to Make an Assemblage Sculpture (= 3D Collage) for Your Valentine (Art Instruction / Craft Tutorial)

34Leigh

In honor of Valentine’s Day, I’ve made 2 assemblage sculptures (which are the 3-dimensional versions of collages), one honoring romantic spirits and the other creative kindred spirits. With photographic examples of the steps, along with some basic instruction, I’m sure you’ll be able to create your own. This project is the perfect Valentine gift because you can incorporate little bits of ephemera like ticket stubs and cards from your romance, or you can celebrate a creative spirit with little items that symbolize the recipient’s talents. It’s an inexpensive way to demonstrate affection in a memorable one-of-a-kind way… and they’re so much fun to make!

20Leigh

Let’s start with the basics… assemblage sculptures are really just 3D collages. Instead of merely cutting and gluing flat pieces of paper images to a larger sheet of paper, solid ephemera (like perfume bottles) are glued to a base (like a book box). As with any sculpture, they are viewed from 360ᵒ and so should be layered on all sides. In this way, they really are more challenging to make and more interesting to look at. Completed pieces are best viewed close up and in person like one would inspect the contents of a tiny dollhouse.

26Leigh

I’ve made two at the same time in order to demonstrate more fully just how to complete such a project. They have very different themes, but utilize the same color scheme and even some of the same items like crystal hearts. In one artwork these symbolize romantic affection while in the other representing the love of craft. Personally, I find that it’s best to begin by gathering all the important ephemera you’d like to use first.

1Leigh

Think of it like an exaggerated version of scrapbooking. Add things that depict cherished memories or even inside jokes. Another way to begin is make a list of things you want to portray, and then look for elements that would render those. And, let’s just say that you don’t have the right memento from that beach trip… well, just go buy a lovely shell and write a date on it in permanent marker. It really is that simple.

45Leigh

Observe the collected items to see which colors are repeated most. Allow this to dictate your color scheme. Any pieces that clash with that scheme can be altered to blend in seamlessly. Paint, stain, glitter, glue, ribbon, and tape can change a tchotchke to suit your palette. Here I’ve use a bingo marker to stain some pale wooden heart cutouts and potential base feet. (See more about the possibilities of bingo markers in my article: Fast & Easy DIY Hand-stamped Polka-dot Gift Wrap & Matching Gift Crafts.)

25-2Leigh

The next step is to go to your craft area, local craft store, or even online to search for coordinating bits of ribbon, washi tape, or even feathers to fill in the empty portions of your project. (A few of my affiliates offer great rotating discounts on art and craft supplies. Check them out in the sidebars and footer.) How much you use is a matter of personal artistic preference. I intentionally load some assemblages up to the hilt, while in others I designate empty voids as a design element in and of itself. (This is called “negative space” in “art-speak”.)

48Leigh

Choose an appropriate sized base object according to the size and amount of your collected ephemera, and by how you would like to display them. (Of course, I’ve also started with a really awesome base then collected items after. For a Valentine project though, the most important elements are the collected ones.) You can use a tiny chocolate box if you only have a few key items and are short on time. Or, you can use that chocolate box as a pedestal inside a bigger box (just remember to glue the little box together before adhering it to the base).

7Leigh

I used a vintage fabric covered book box for the “Sweet-Heart” assemblage. I love using old pieces off-book so to speak. I thought a drawer organizer box would be perfect for the “Creative-Heart” project. I just turned it on its side to make a kind of display case out of it. You can even use a plain paper-mache box, and decorate to suit your theme.

51Leigh

Lay out the items you’d like to use to see how it looks best arranged. Move things around until you find it visually appealing. Eventually it will just look right. You can lock this into your memory, or even take a photo to reference it while you glue things down. Use a permanent glue stick to adhere the paper pieces in layers to the base.

73Leigh

Here I’ve added washi, glitter, and foil tape to add visual interest to the plain centers of the “Creative-Heart” assemblage. Then I glued paper pieces to the backs like a papered wall.

39Leigh

Use a clear glue with more staying power for heftier pieces like glass bottles and metal pieces. (I placed some great glue varieties in the curated art supplies gallery box in the sidebar. Just click on them to read the specs.)

59-2Leigh

I glued small stained wooden shapes to the bases to serve as feet (those shown earlier). This is the most inexpensive way to both elevate and protect the artwork. You also use more ornate metal feet specifically made for assemblages or even small silicone stickers.

57Leigh

Rotate bases to glue all of the heavier objects onto that side, and then let them set to dry. Continue to rotate and glue various edges. Of course, try to position the bigger more important pieces before filling in with the tiny ones.

54Leigh

Think about adding meaningful words, phrases, questions, or quotes to impart further meaning to your elements. I added these using printed label tape, dymo tape, vinyl lettering, glittered chipboard letters, a Chinese character, and even fortune cookie papers. Apply these directly onto your pieces and to the base itself.

50Leigh

I also made ivory shapes using Plaid Mod Molds. (These have been added to the curated gallery too.) I love being able to quickly make whatever element I feel needs to be included. I included metal jewelry charms, painted paper clips, mini-CDs, Spanish bingo cards, old keys, rulers, scissors, paper rosettes, ornaments, cupcake picks, playing cards, spools, thimbles, magnets, paintbrushes, crystals, glass vials and jars, etc.

56Leigh

Here is a pair of giant winged earrings that I’ve modified for the project. I even cut out music notes from the shiny display card. You never really know where something’s come from in one of my pieces. I generally use a lot of vintage elements and scraps that I modify. I’m lucky enough to have a grandma that collected a lot of random stuff that I can now use, but you can find a lot of knickknacks both online and in antique shops. Let your creativity run wild and use anything that can be altered and glued down!

3Leigh

55Leigh

Just keep layering your pieces into the base like you would to complete a puzzle. It’s done when you think adding anything else will mess it up… the Goldilocks moment of when it’s just right. Of course, there will always be critics, but you didn’t make it for them. If your recipient appreciates the care that went into it, and if you enjoyed making it…. well, isn’t that just the point of making a homemade gift?

17Leigh

18Leigh

Have fun & tell stupid Cupid you’ve got it covered!

Faithfully Yours,

Leigh

27Leigh

37Leigh

“Heartbeats” (Heart Shaped Beet Root Chips / Croutons) & “Lettuce Turnip the Beet” (Pink Savory Herbed Avocado Yogurt Dip / Salad Dressing) Recipe (Healthy, Gluten-Free, Dairy-Free, Vegan) AKA- Undercover Valentine Veggies!

056Leigh

This is the perfect Valentine savory snack for the picky eater who turns away from anything green or labeled as a healthy vegetable. Who can turn down trying an adorable hot pink heart chip, even if it is an undercover veggie! The avocado’s green is also disguised as pink and creamy yumminess thanks to a couple of healthy secrets, and the seasoning can be adjusted to any taste. It’s also easy to spoon out a bit of the dip into another bowl then turn up the flavor in the first one (hence the “let us turn up the beat” veggie pun in the title). Enjoy them as a healthy chip and dip combo, or make smaller “heartbeats” to use as croutons in a salad flavored by the dip as creamy dressing!

66Leigh


Heartbeat Chip Ingredients:

  • 3 beet roots (or as many as you’d like to make)
  • olive oil (enough to drizzle, & try any oil you prefer)
  • salt & pepper to sprinkle atop (or garlic salt, lemon pepper, no-salt seasoning, cinnamon & sugar, etc.)

Lettuce Turnip the Beet Dip Ingredients:

  • 1 ripe avocado
  • 8 ounces unsweetened vegan coconut yogurt (or any unflavored yogurt, but note that “unsweetened” is less sweet than “plain”)
  • 1 ⅟₂ teaspoons lemon juice
  • 1 tablespoon beet juice (or pomegranate juice)
  • herbs & spices according to taste, on this particular day I chose…

♥ ⅟₂ teaspoon ground white pepper

♥ ⅓ ground ginger

♥ ⅓ teaspoon ground coriander

♥ ⅓ teaspoon ground thyme

♥ 1 teaspoon granulated garlic

♥ ⅓ teaspoon salt

♥ + lots of cracked red peppercorns & black carbon sea salt for fiery garnish

… but you might want to omit the ginger, coriander, & thyme for a more traditional taste experience J


“Heartbeats” Chip Instructions:

1Leigh

First wash the beets roots thoroughly, and cut off the plant tops.

8Leigh

Then remove the tough outer part with a veggie peeler.

12Leigh

The best way to prepare beet chips is to use a mandolin kitchen tool to cut really thin slices. I have a beautiful stainless steel one that can be cleaned in the dishwasher, but I wanted to make sure that you could make these at home using a knife, cutting board, and old fashioned elbow-grease! It does take a little longer, but as you can see they turned out beautifully. They also took longer to bake because the slices were thicker. If you’re trying it this way, try to cut them as thin and uniformly as possible. You can also try cutting them with a food processor.

14Leigh

Once you have those cut, you can use cookie cutters to press shapes into the slices. I wanted hearts for Valentine’s Day, but you can choose any shape that will fit. Tiny flowers would make delightful pink chips and look lovely atop a spring salad like healthy croutons!Take the leftover bits and dice them further to spike another meal with vitamins. You can bake these into croutons for soup or salad, or steam them with some olive oil and seasoning to add to a pilaf or veggie mix.

26Leigh

Toss your cut out shapes (or plain slices) with olive oil in a bowl. Then spread out your lovelies on a parchment lined cookie sheet. Bake these in a 375ᵒ oven, to preserve the vitamins in your veggies, for 45 minutes to an hour. If you’ve cut these thicker, by hand, add cooking time. Thinner mandolin cuts will of course finish faster. Either way, I would advise checking on them often (by turning on the oven light, not opening the door).

33Leigh

About halfway through the cooking time, when the top side looks fairly done like this picture, take out the tray and flip them over before returning it to continue baking. If utilizing a dehydrator, cook them at 145ᵒ for 45 minutes then reduce heat to 115ᵒ for 24 hours until crunchy.

36Leigh

They’re done when crispy but not brittle. Blot these with a paper towel and sprinkle with your preferred seasonings. I used the same ones (cracked red peppercorns in a mill and black carbon sea salt) that I garnished the dip with. These not only showed up beautifully on the chips but also gave them an amazing fiery zing. You can even make sweet chips by sprinkling with cinnamon and sugar like a pink veggie buñuelo!

056Leigh

Enjoy the heartbeat chips by themselves or prepare this Avocado yogurt dip while they’re baking…


“Lettuce Turnip the Beet” Dip Instructions:

23Leigh

Wash and cut open a lovely ripe avocado. They’re best when just slightly softened to the touch. The easiest way to get the seed out is to whack it with a knife, twist, and pull it out in one motion. Slice the flesh into tiny crosshatch squares right in the shell, and then squeeze it into the bowl. (I do this all the time when making my “minute guacamole”, because it can then be smashed with a spoon into the side of the bowl very easily and quickly.)

18Leigh

Add the lemon juice and plain yogurt into the bowl along with your favorite mix of spices… or try my crazy combination. I love to cook by adding different flavors until it just tastes right… just remember to use different spoons with each tasting. No double dipping people! J If making this into a salad dressing, just add more yogurt, lemon juice… or both.

25Leigh

I used an immersion blender to completely emulsify and thicken the dip, but any good blender should be fine. Of course the “smash-against-the-side-of-the-bowl-with-the-back-of-a-big-spoon” method also works… it just burns more calories.

31Leigh

Spoon into a pretty dish and refrigerate until ready to eat. Garnish with a contrasting seasoning like these (cracked red peppercorns in a mill and black carbon sea salt) that also serve to turn up the flavor.

64Leigh

I have to admit that I enjoyed this recipe so much that I would have eaten the whole thing by myself (guilt-free) had I been alone. Next time, I will be making so much more!

42bLeigh

Happy Heartbeating!

Faithfully Yours,

Leigh

P.S. What are your favorite seasonings to add to dips & dressings? Tell me how you like to “turn up the flavor” in the comments section, and I may use them in a future recipe!

Quick & Easy Chocolate Bark & Dipped Strawberries with Toppings Recipe for Your Valentine (Gluten-Free, Vegan)

161Leigh

If you’re looking to make some sweets for your sweetheart but haven’t got a lot a time to get organized for a complicated recipe, then these Valentine concoctions are a sure bet. The fool-proof process is so quick and easy, that it really needs no hard-fast formula in order to turn out so delicioso! I tend to make both of the confections at the same time because they use identical shelf-stable ingredients (save one), but make two very different desserts that coordinate beautifully.  (If trying this, simply make the strawberries first then make bark out of the leftover ingredients.) Best of all, these are simple enough to be prepared by little ones, and can be made gluten-free and allergy-friendly for everyone to enjoy!

151Leigh


Ingredients:

  • 1 bag of semi-sweet or dark chocolate chips- preferably gluten-free vegan (or candy coating chips in any color)
  • 1 basket of fresh strawberries to dip (or try dried pieces to place into bark)
  • any toppings you like (oven-toasted coconut, chopped pistachios or walnuts, sugar sprinkles, dried fruit, crushed peppermints, even a contrasting colored chocolate chip, etc…)

Instructions:

77Leigh

Fill a heat-proof vessel with the chocolate chips of your choice. (Candy coating turns out a bit smoother, but isn’t as healthy or allergy-friendly as gluten-free vegan chocolate morsels. It really is a matter of personal preference.)

78Leigh

Either stir the chips in a pot on the stove (as I did at this link for Quick & Easy Chocolate Coconut Fondue Recipe (Vegan, Gluten-Free, Dairy-Free) where I write more about the available forms of chocolate) or microwave the chips in a bowl in 30 second bursts, stirring in between each.

83Leigh

I used the stove for the fondue and the microwave for the bark… again it’s up to you and how much time you have.


For the Chocolate Bark:

152Leigh

When the chips are completely melted to a liquid state, pour onto an aluminum lined cookie sheet.

154Leigh

Sprinkle your choice of toppings onto the still warm chocolate.

155Leigh

Gently press the larger toppings like coconut into the chocolate with the back of your fingers. (Smaller bits like sprinkles don’t need any pressing.) Either allow this to harden on the counter or in the refrigerator.

157Leigh

This is the fun part… when it’s solid to the touch, take one end and break it by attempting to fold it in half.

161Leigh

Repeat this with all sections until you’re left with decent sized chunks of yumminess then plate it for company… after reserving a few bites for immediate consumption!


For the Chocolate-Dipped Strawberries:

108Leigh

Wash the strawberries well, then let them air dry on a paper towel, or pat them dry completely before dipping.

148Leigh

When the chips are melted thoroughly with no chucky bits left, merely hold your strawberries by the green tops and dip into the chocolate. After completely enrobing it, turn the wrist to let the last drip catch back onto the fruit.

114Leigh

Then spoon chopped toppings or sprinkles over the still warm chocolate. Gently press any large chunks into place, and then set it aside to dry and harden.

139Leigh

You can either place the completed strawberries onto aluminum foil and transfer them to a pretty plate later, or do as I’ve done and save a step by dishing them immediately to dry on the platter they will be served on. I always begin with the prettiest of the berries, and when I find that the platter is full… eat the rest!

151Leigh


🙂 Happy Chocolate err… Valentine’s Day!

Faithfully Yours,

Leigh

P.S. A personal note on washing strawberries to dispel any old-fashioned notions regarding such… I promise that cleansing them of dirt and germs will in no way injure the fruit. In fact, they look even lovelier when truly clean. Wiping them with a towel only serves to redistribute bacteria. (The same can be said of mushrooms, which are often grown in actual manure.) For those of you who are thinking, “Well of course I wash my produce”… I’ve actually had this disagreement with a chef from a very popular up-scale restaurant that only reuses a towel on strawberries and mushrooms. (I hear they don’t wash the salad greens either, and never the lemons before cutting them.) So please forgive me, but with the recent listeria outbreak on caramel apples, I felt compelled to write a little about this now. Here are a few links for anyone who doesn’t want to take my word for it:

http://www.foodsafety.gov/keep/types/fruits/tipsfreshprodsafety.html

http://www.fsis.usda.gov/wps/portal/fsis/topics/food-safety-education/get-answers/food-safety-fact-sheets/safe-food-handling/washing-food-does-it-promote-food-safety/washing-food

http://www.fsis.usda.gov/wps/portal/fsis/topics/food-safety-education/get-answers/food-safety-fact-sheets/safe-food-handling/washing-food-does-it-promote-food-safety/washing-food