Tag Archives: Do It Yourself

July 4th Altered Art Greeting Card as Mailable Mixed Media Independence Day Décor (DIY Collage Art Tutorial)

120Leigh

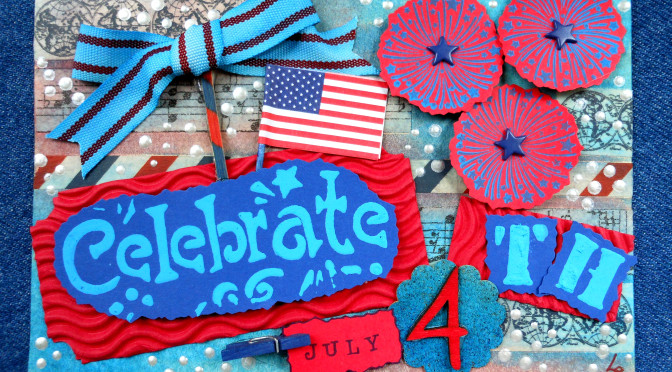
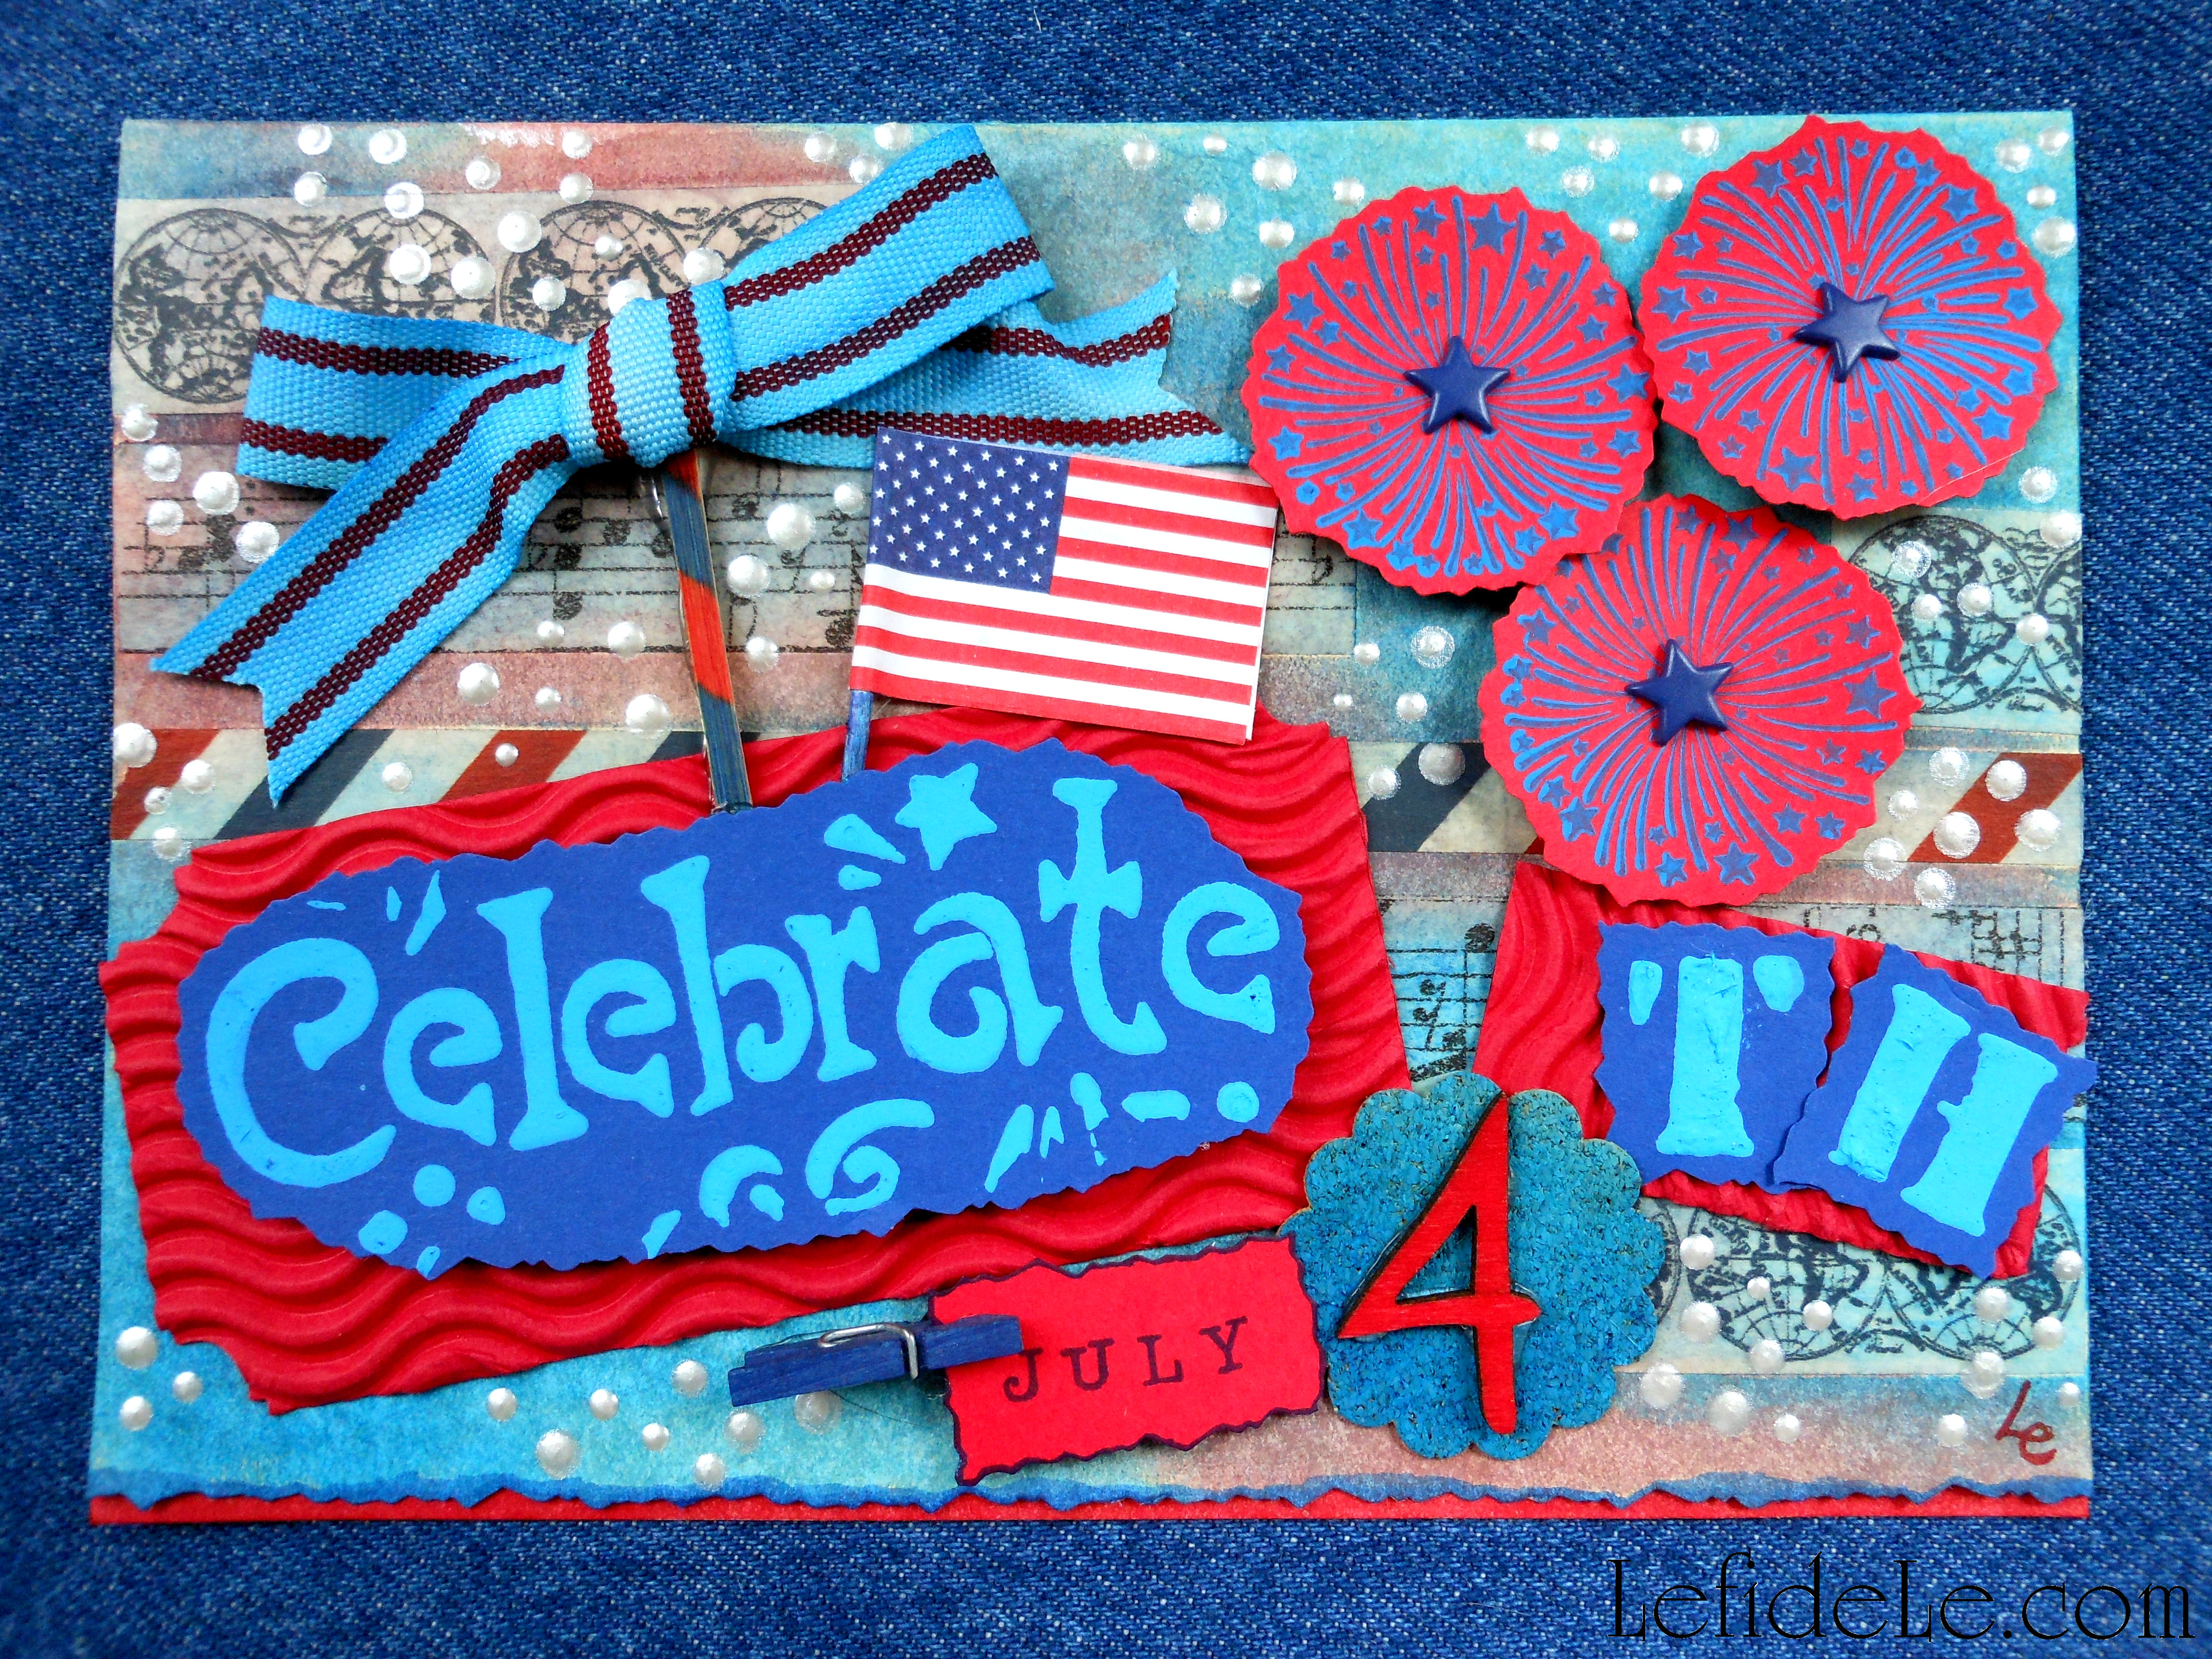
Herald in the fourth of July with an altered art greeting card that doubles as a mailable gift, as it may be framed by the recipient as mixed media décor commemorating Independence Day. It’s a delightful way to send a bit of revelry to a loved one who can’t attend the year’s celebration. This art project is perfect for gathering the whole family together for a fun “crafternoon”, because the Design Memory Craft mediums are non-toxic. They are also fully compatible with each other and a large variety of substrates. This product versatility makes it so easy to combine collage material into something impressive. So follow along as I create an art card ablaze with the spirit of the season, then use the ideas to make one infused with your own artistic essence… because a blast of creativity is the best way to start the holiday off with a bang!

058Leigh

Begin with a readymade greeting card base or make your own inexpensively from sturdy cardstock.

061Leigh

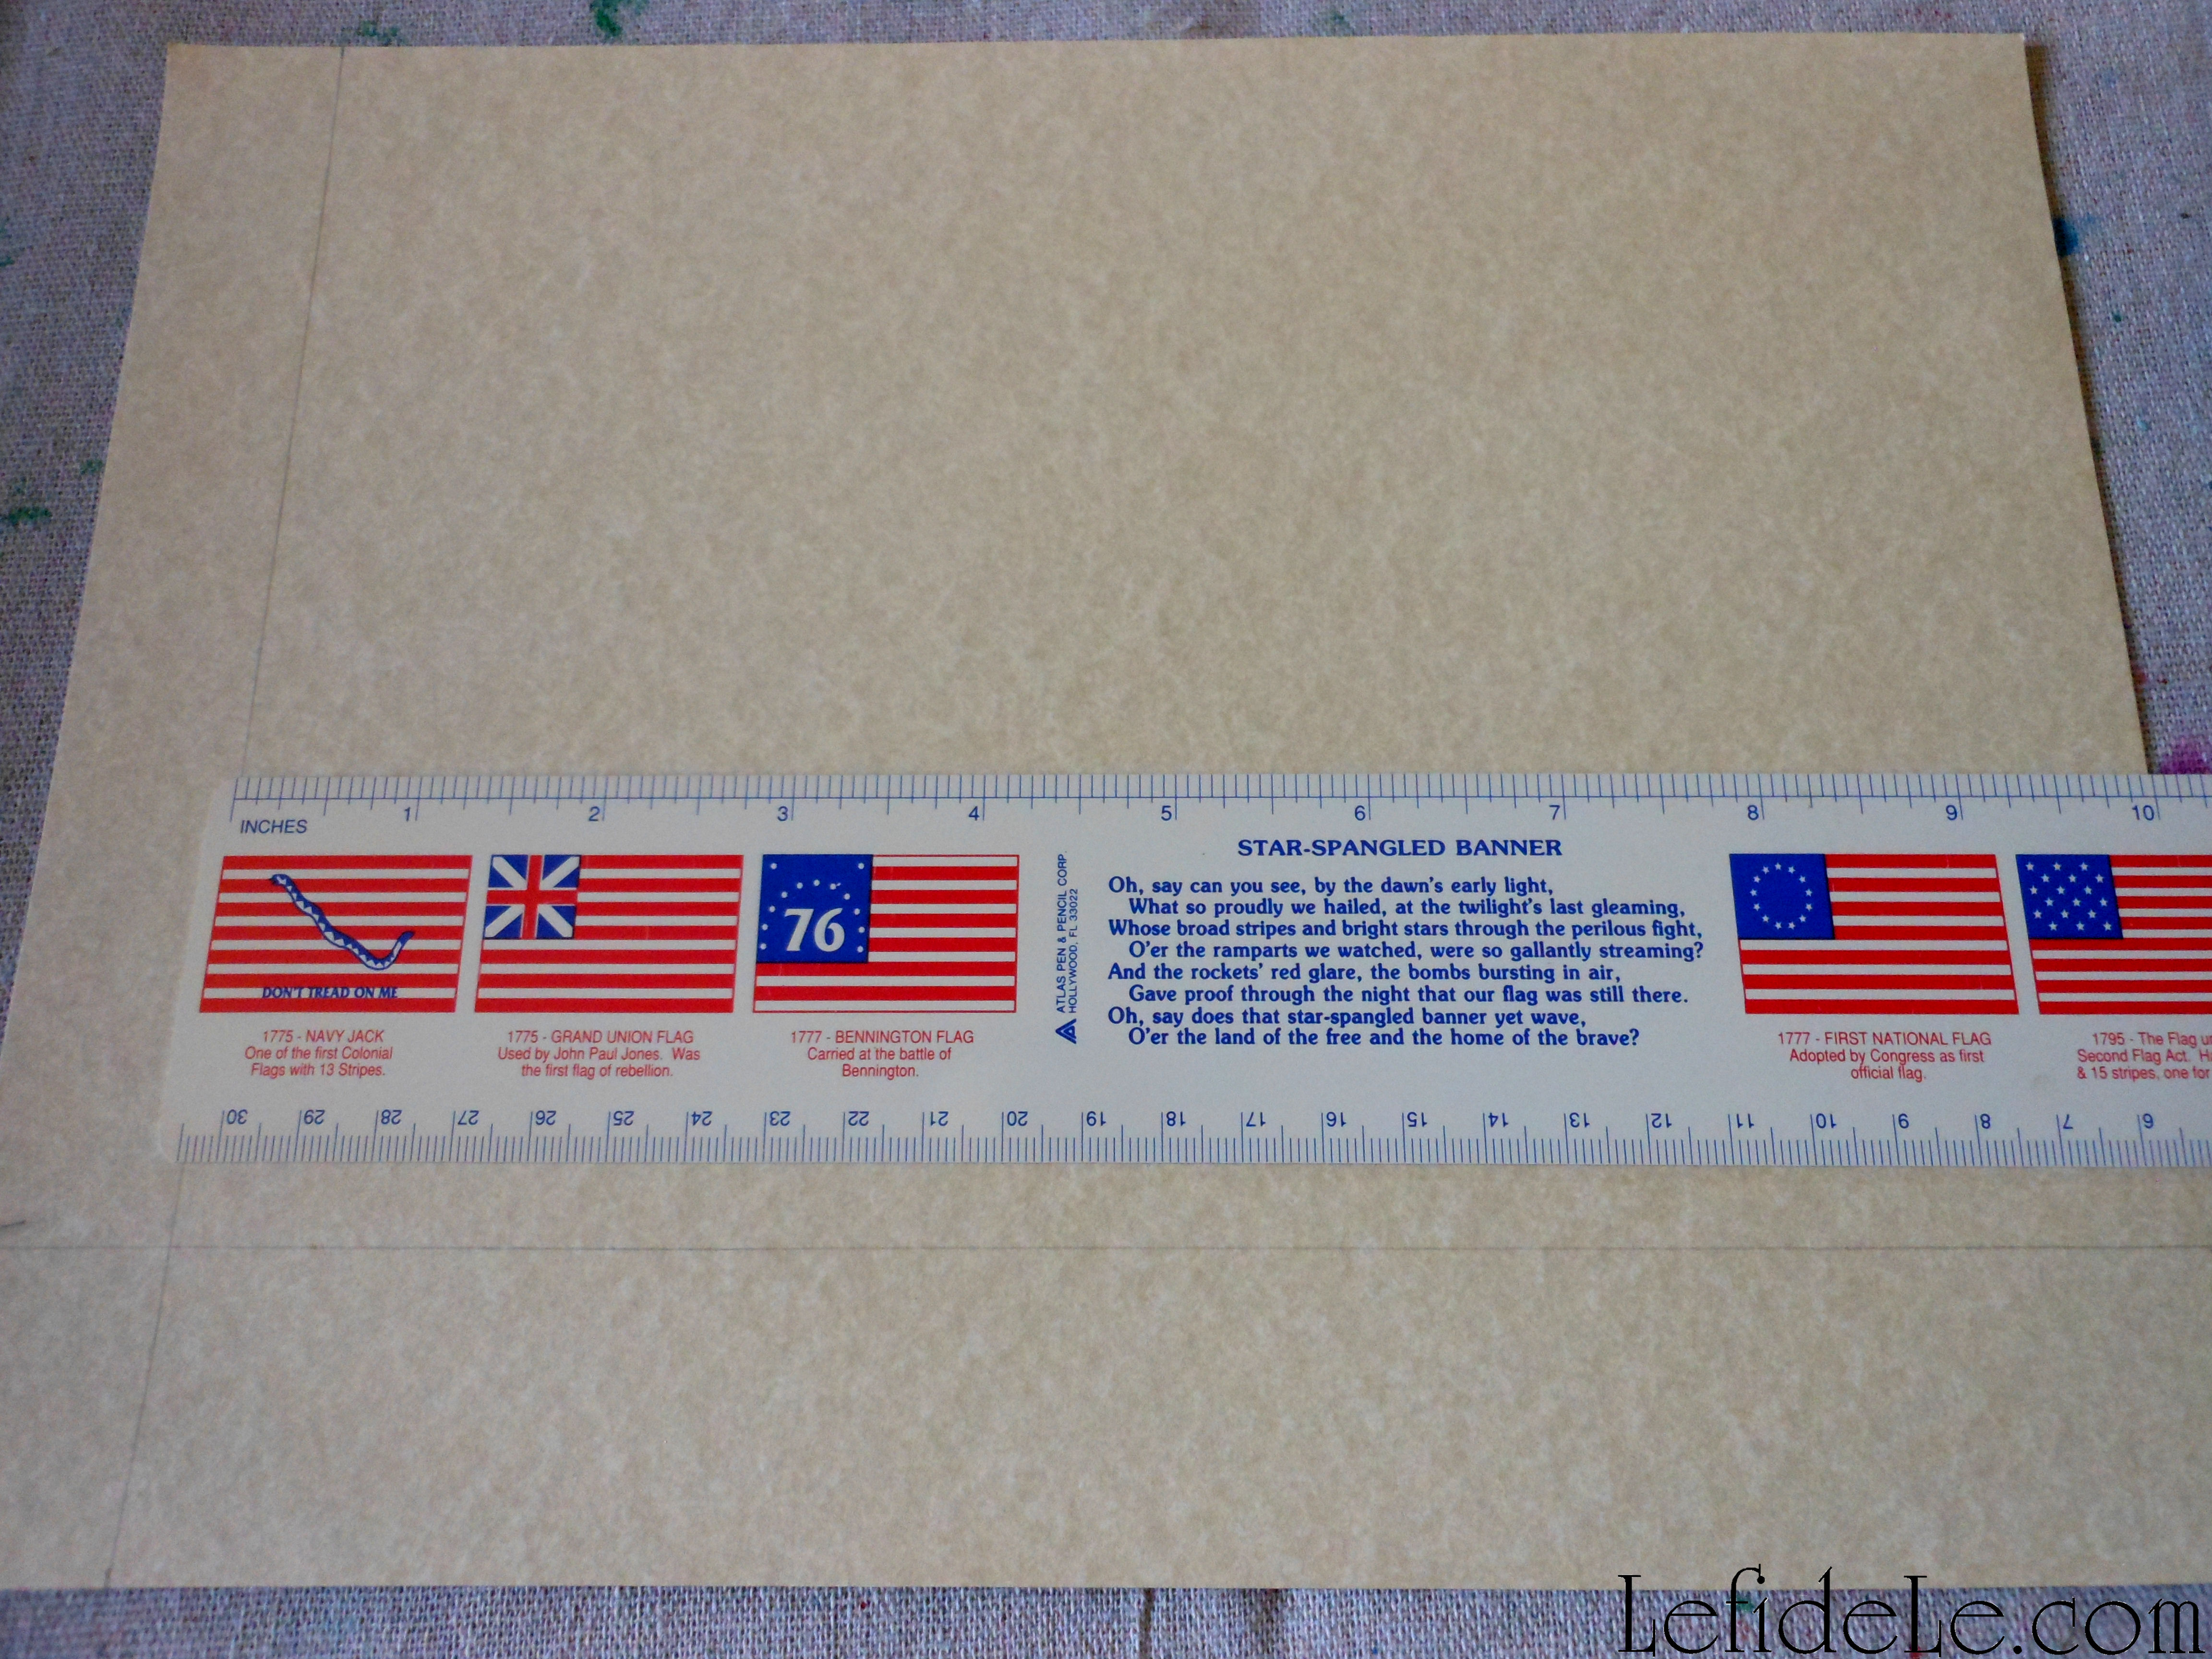
I cut a piece of parchment printed paper to a 7 x 10 inch size, so that it could be folded into a 5 x 7 card… perfect for framing.

63Leigh

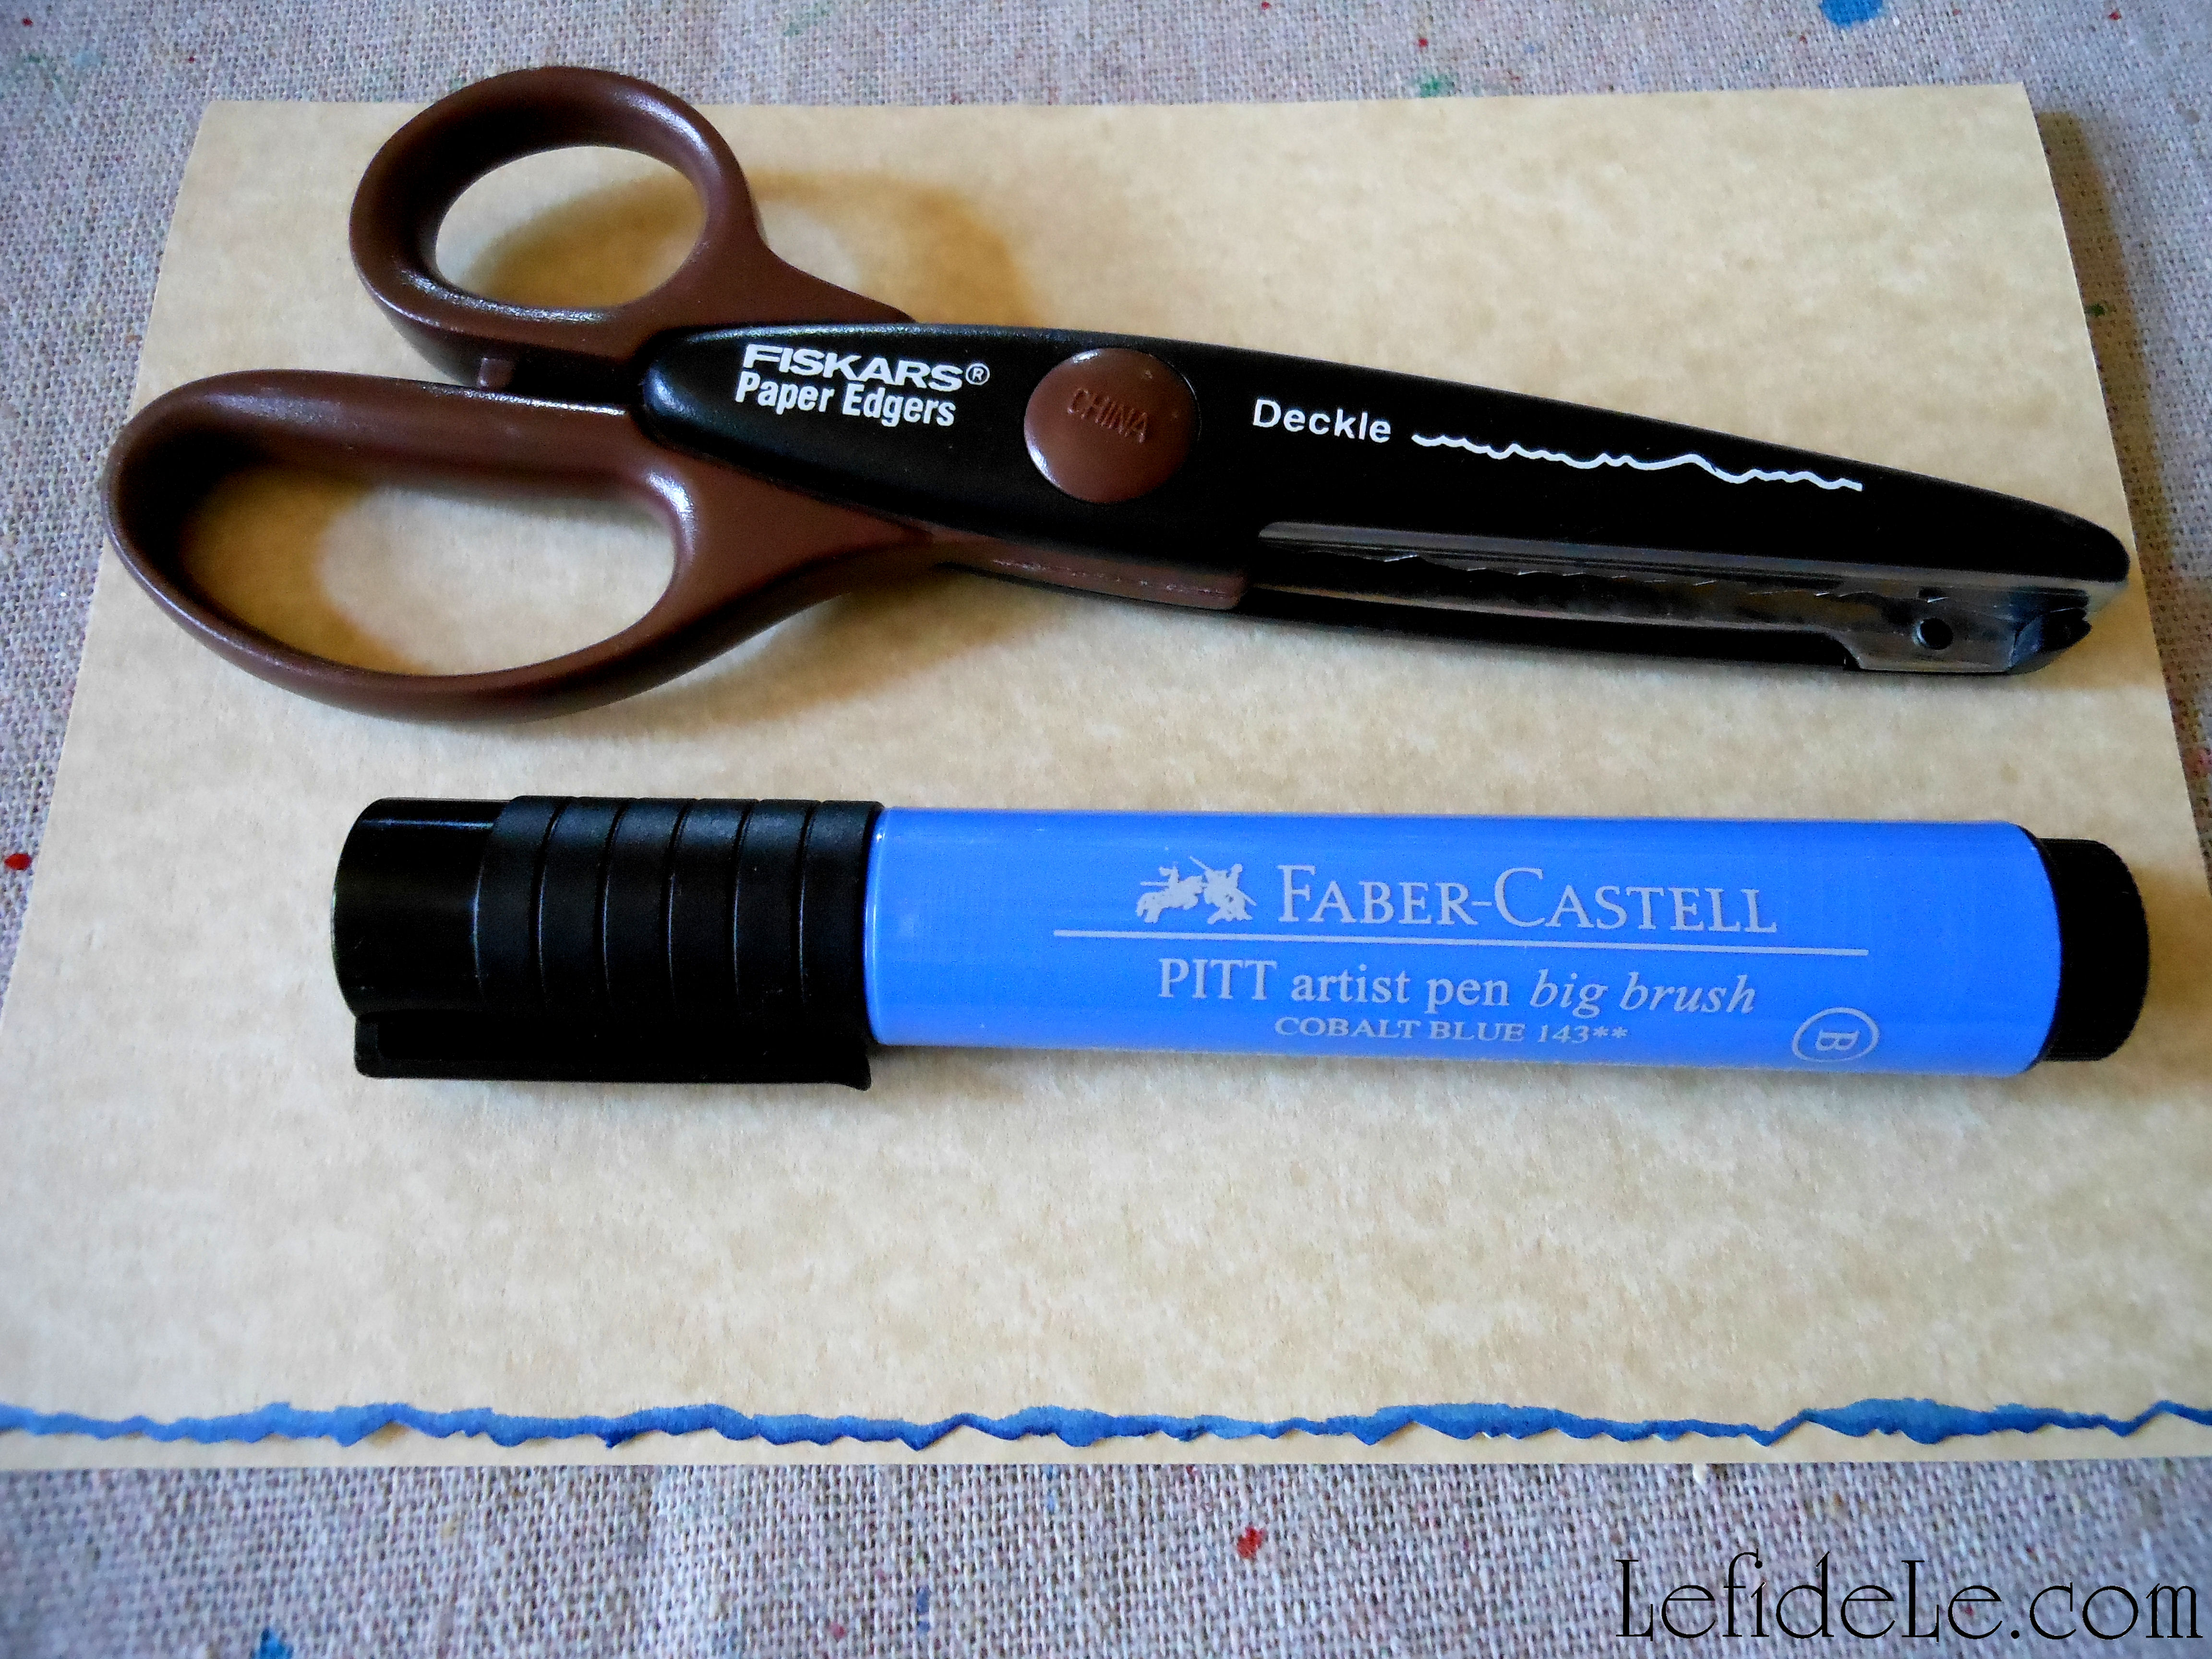
I used deckle edge cutting scissors to produce a torn looking finish on the card. (I later used the deckle scissors to cut around some of the stamped images too.) Pitt artist pen big brushes are perfect for highlighting such details. Just swipe the side of the brush along the edge to deposit the permanent ink in a rough fashion.

064Leigh

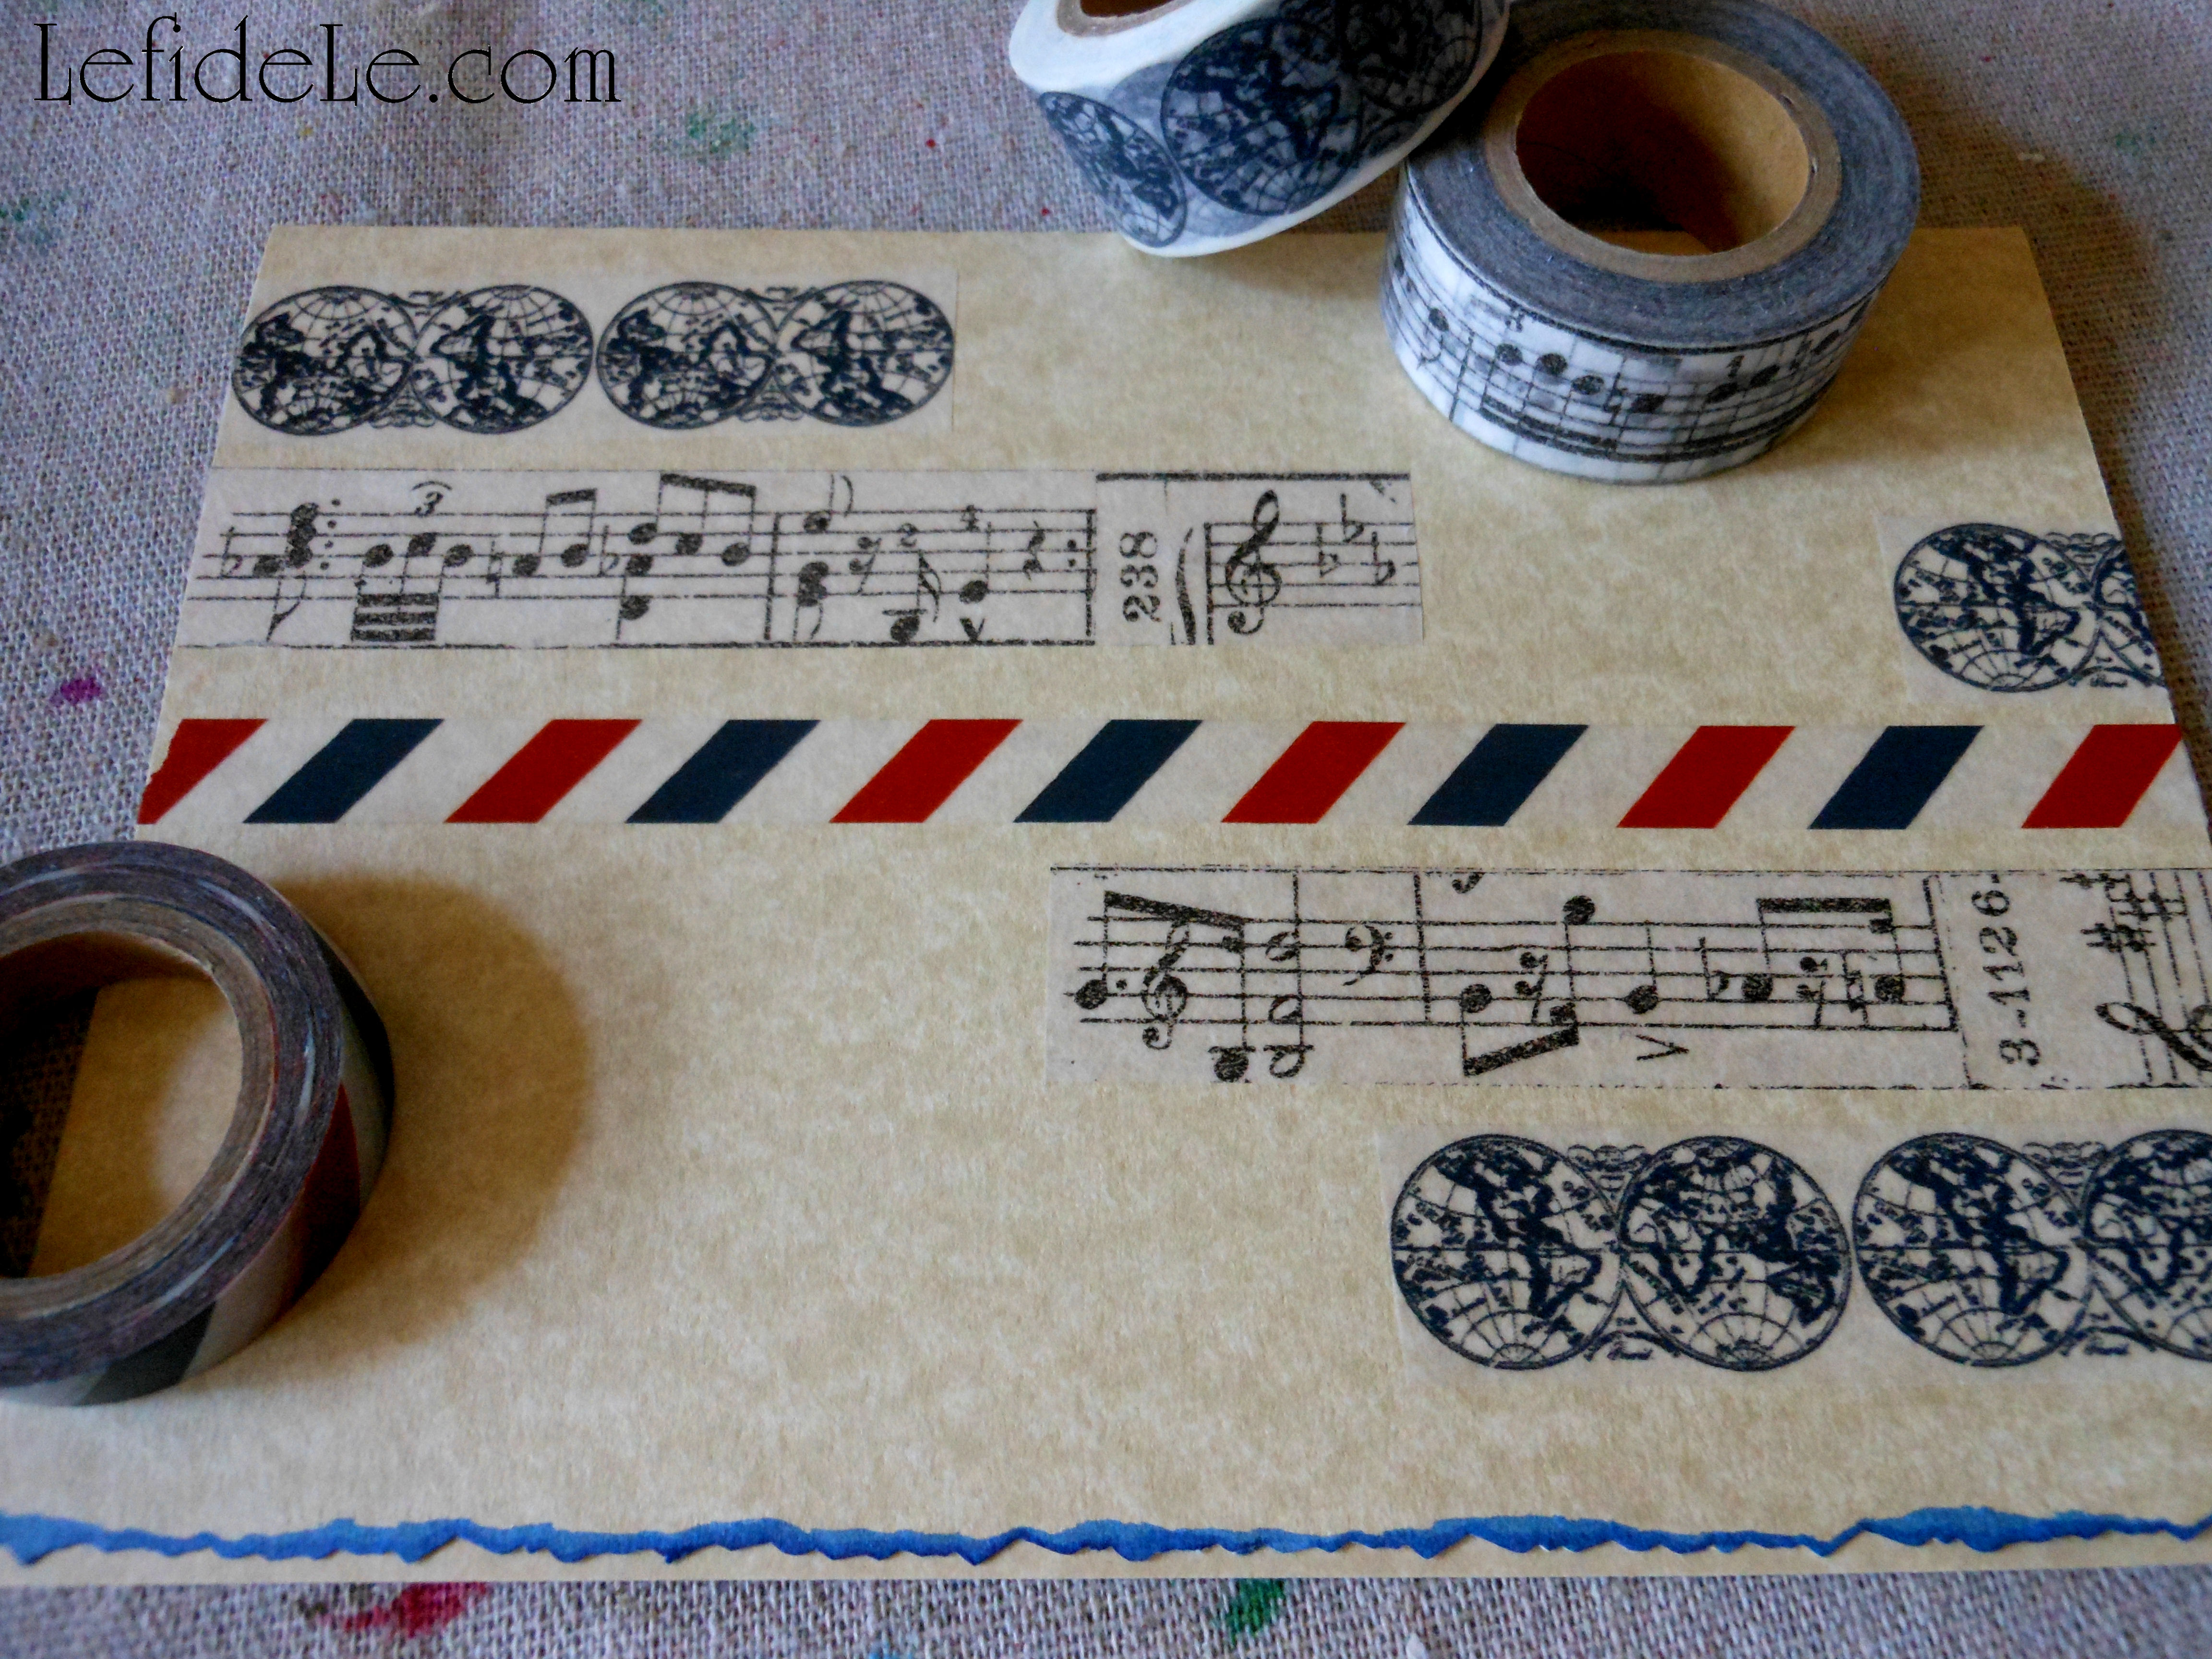
Paper washi tape is a quick way to imbed visual texture onto the base of a collage. Another way is apply printed pages with gel medium. (I’ll demonstrate this more fully in a future tutorial.)

068Leigh

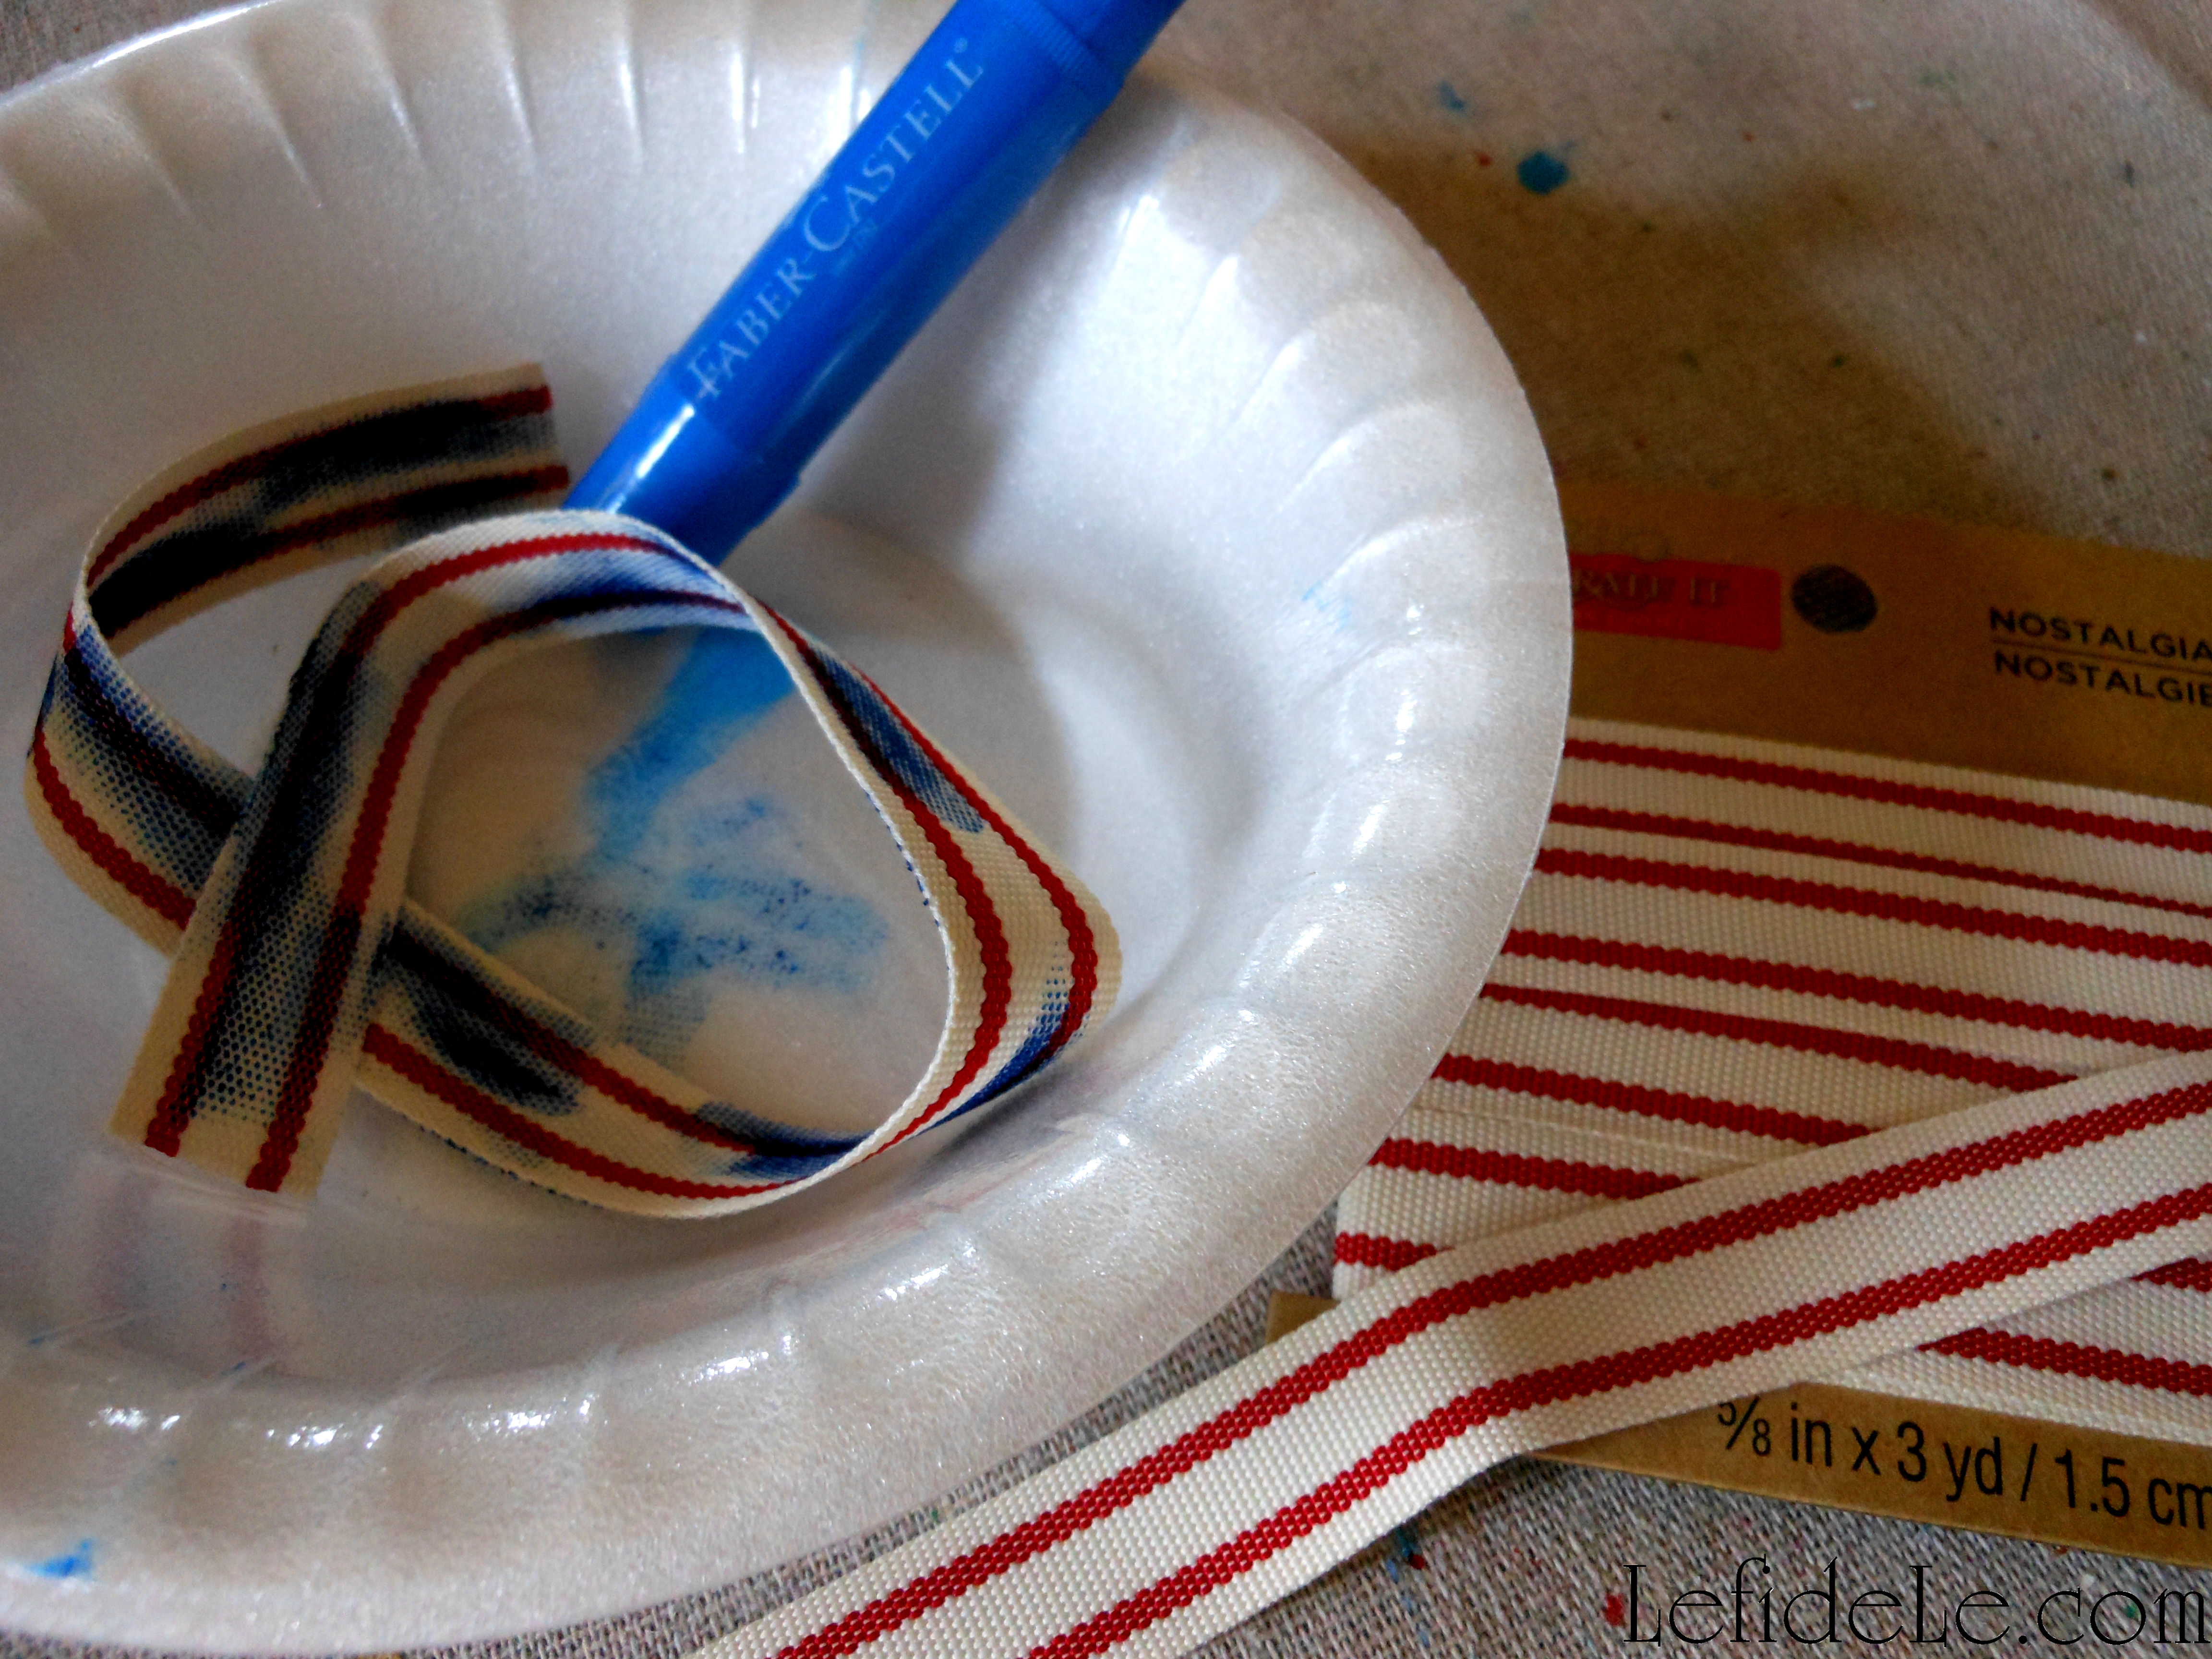
Design Memory Craft gelatos are multipurpose mediums that look like colored chap-sticks. They apply thickly, but can be thinned to watercolor consistency when mixed with water. (You can even turn them into a liquid spray paint to splatter your work with!) They can be used to dye a variety of materials as well. To dye canvas ribbon, I simply marked it haphazardly with a gelato on both sides. I then took water and rubbed it into the ribbon, like magic… it turned blue. It dried fairly quickly too!

070Leigh 
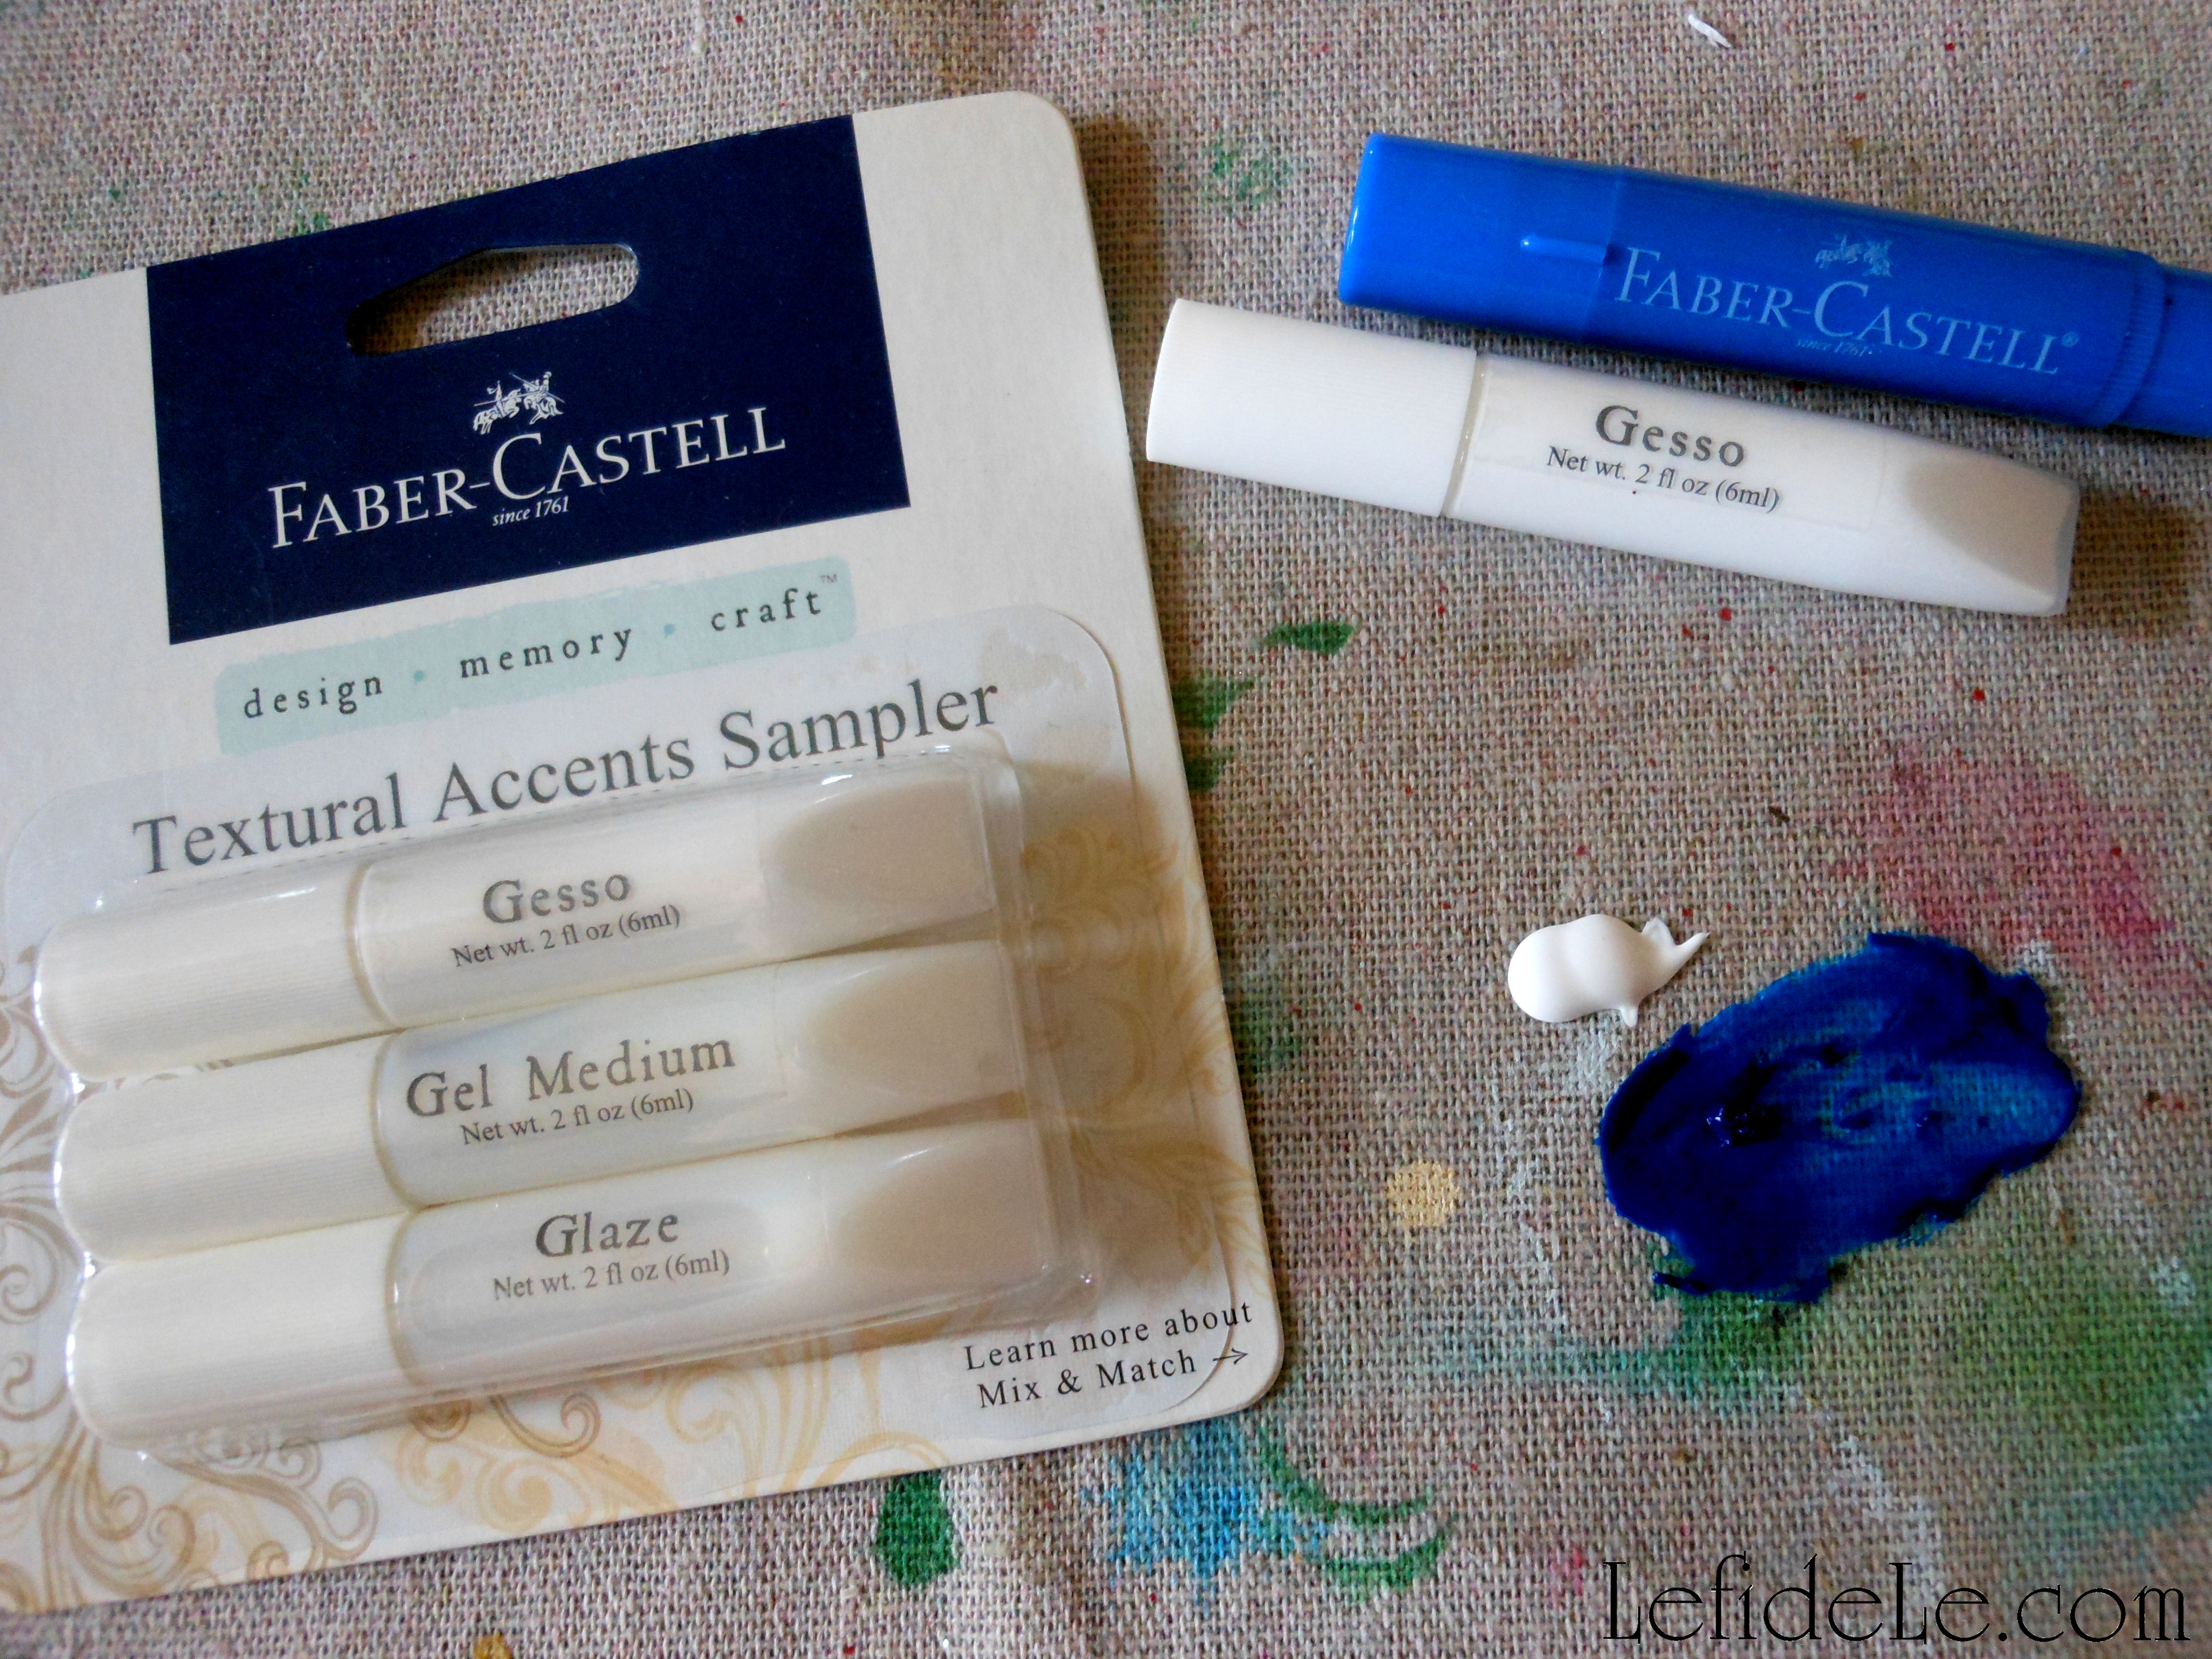
They can be mixed with other mediums also. You can see here what straight gelato and plain gesso looked like before mixing. (Warning: if you explore medium capability with a small sample pack like I did… you may get totally hooked too!)

074Leigh

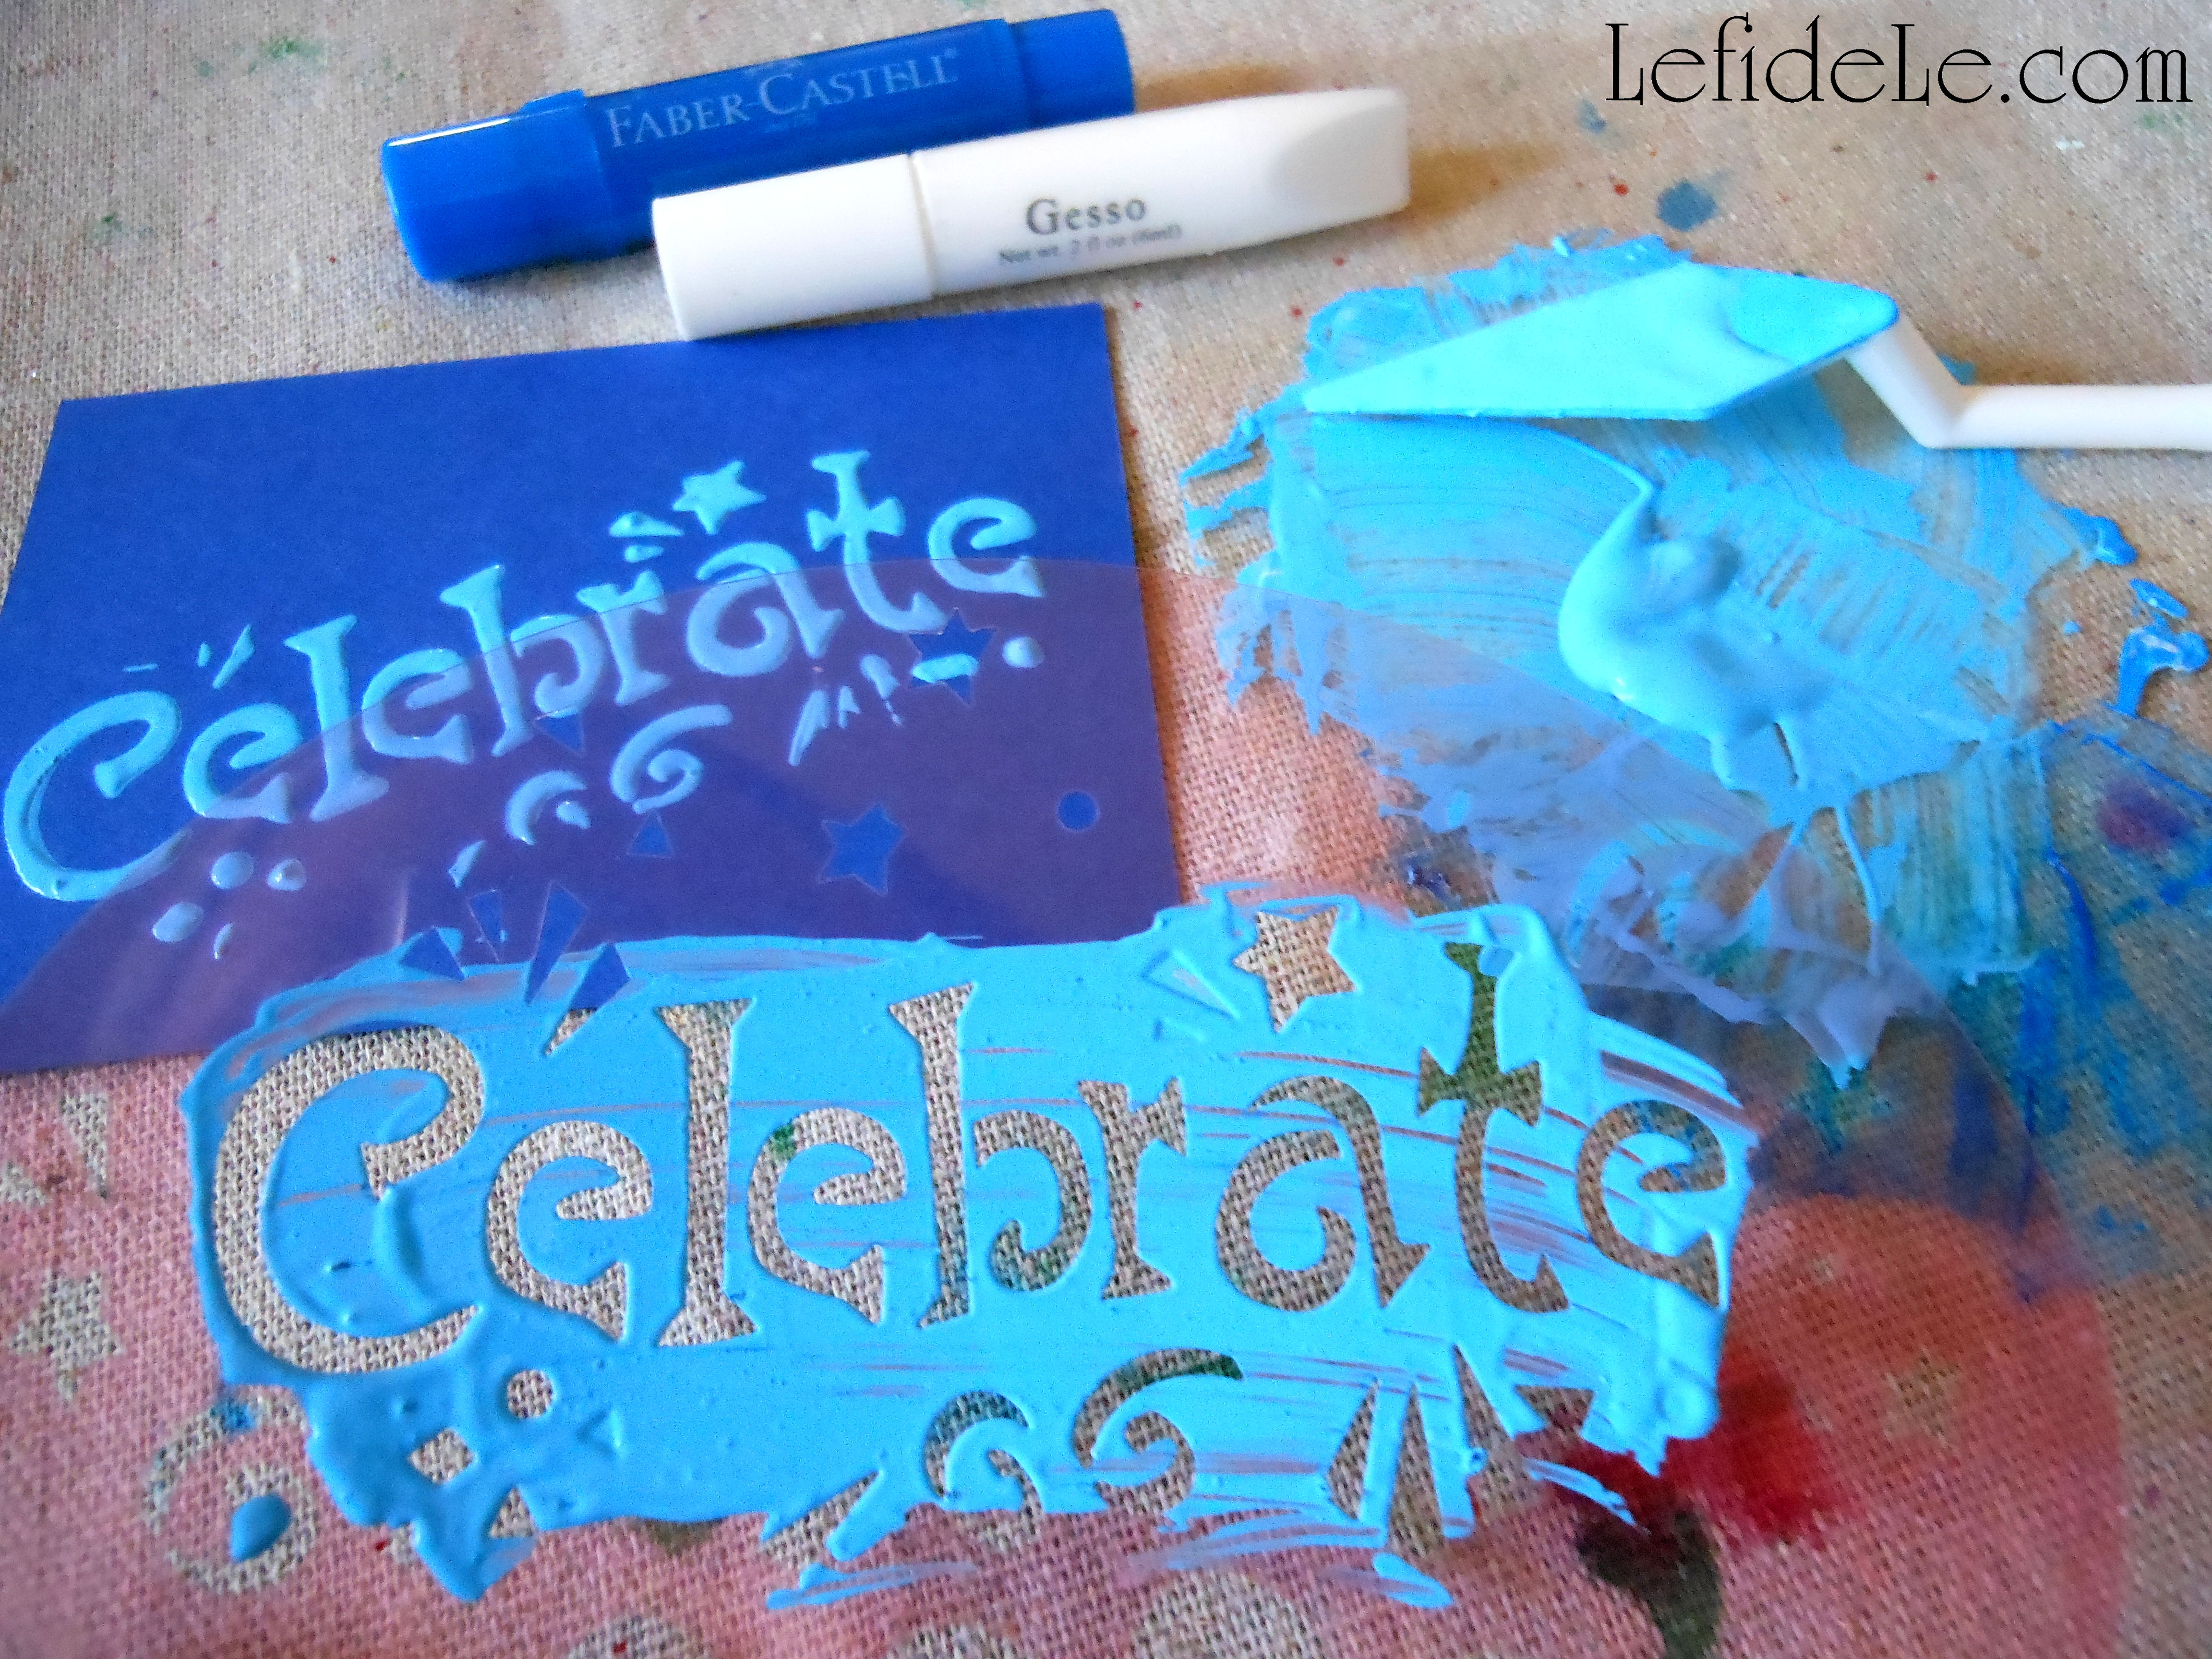
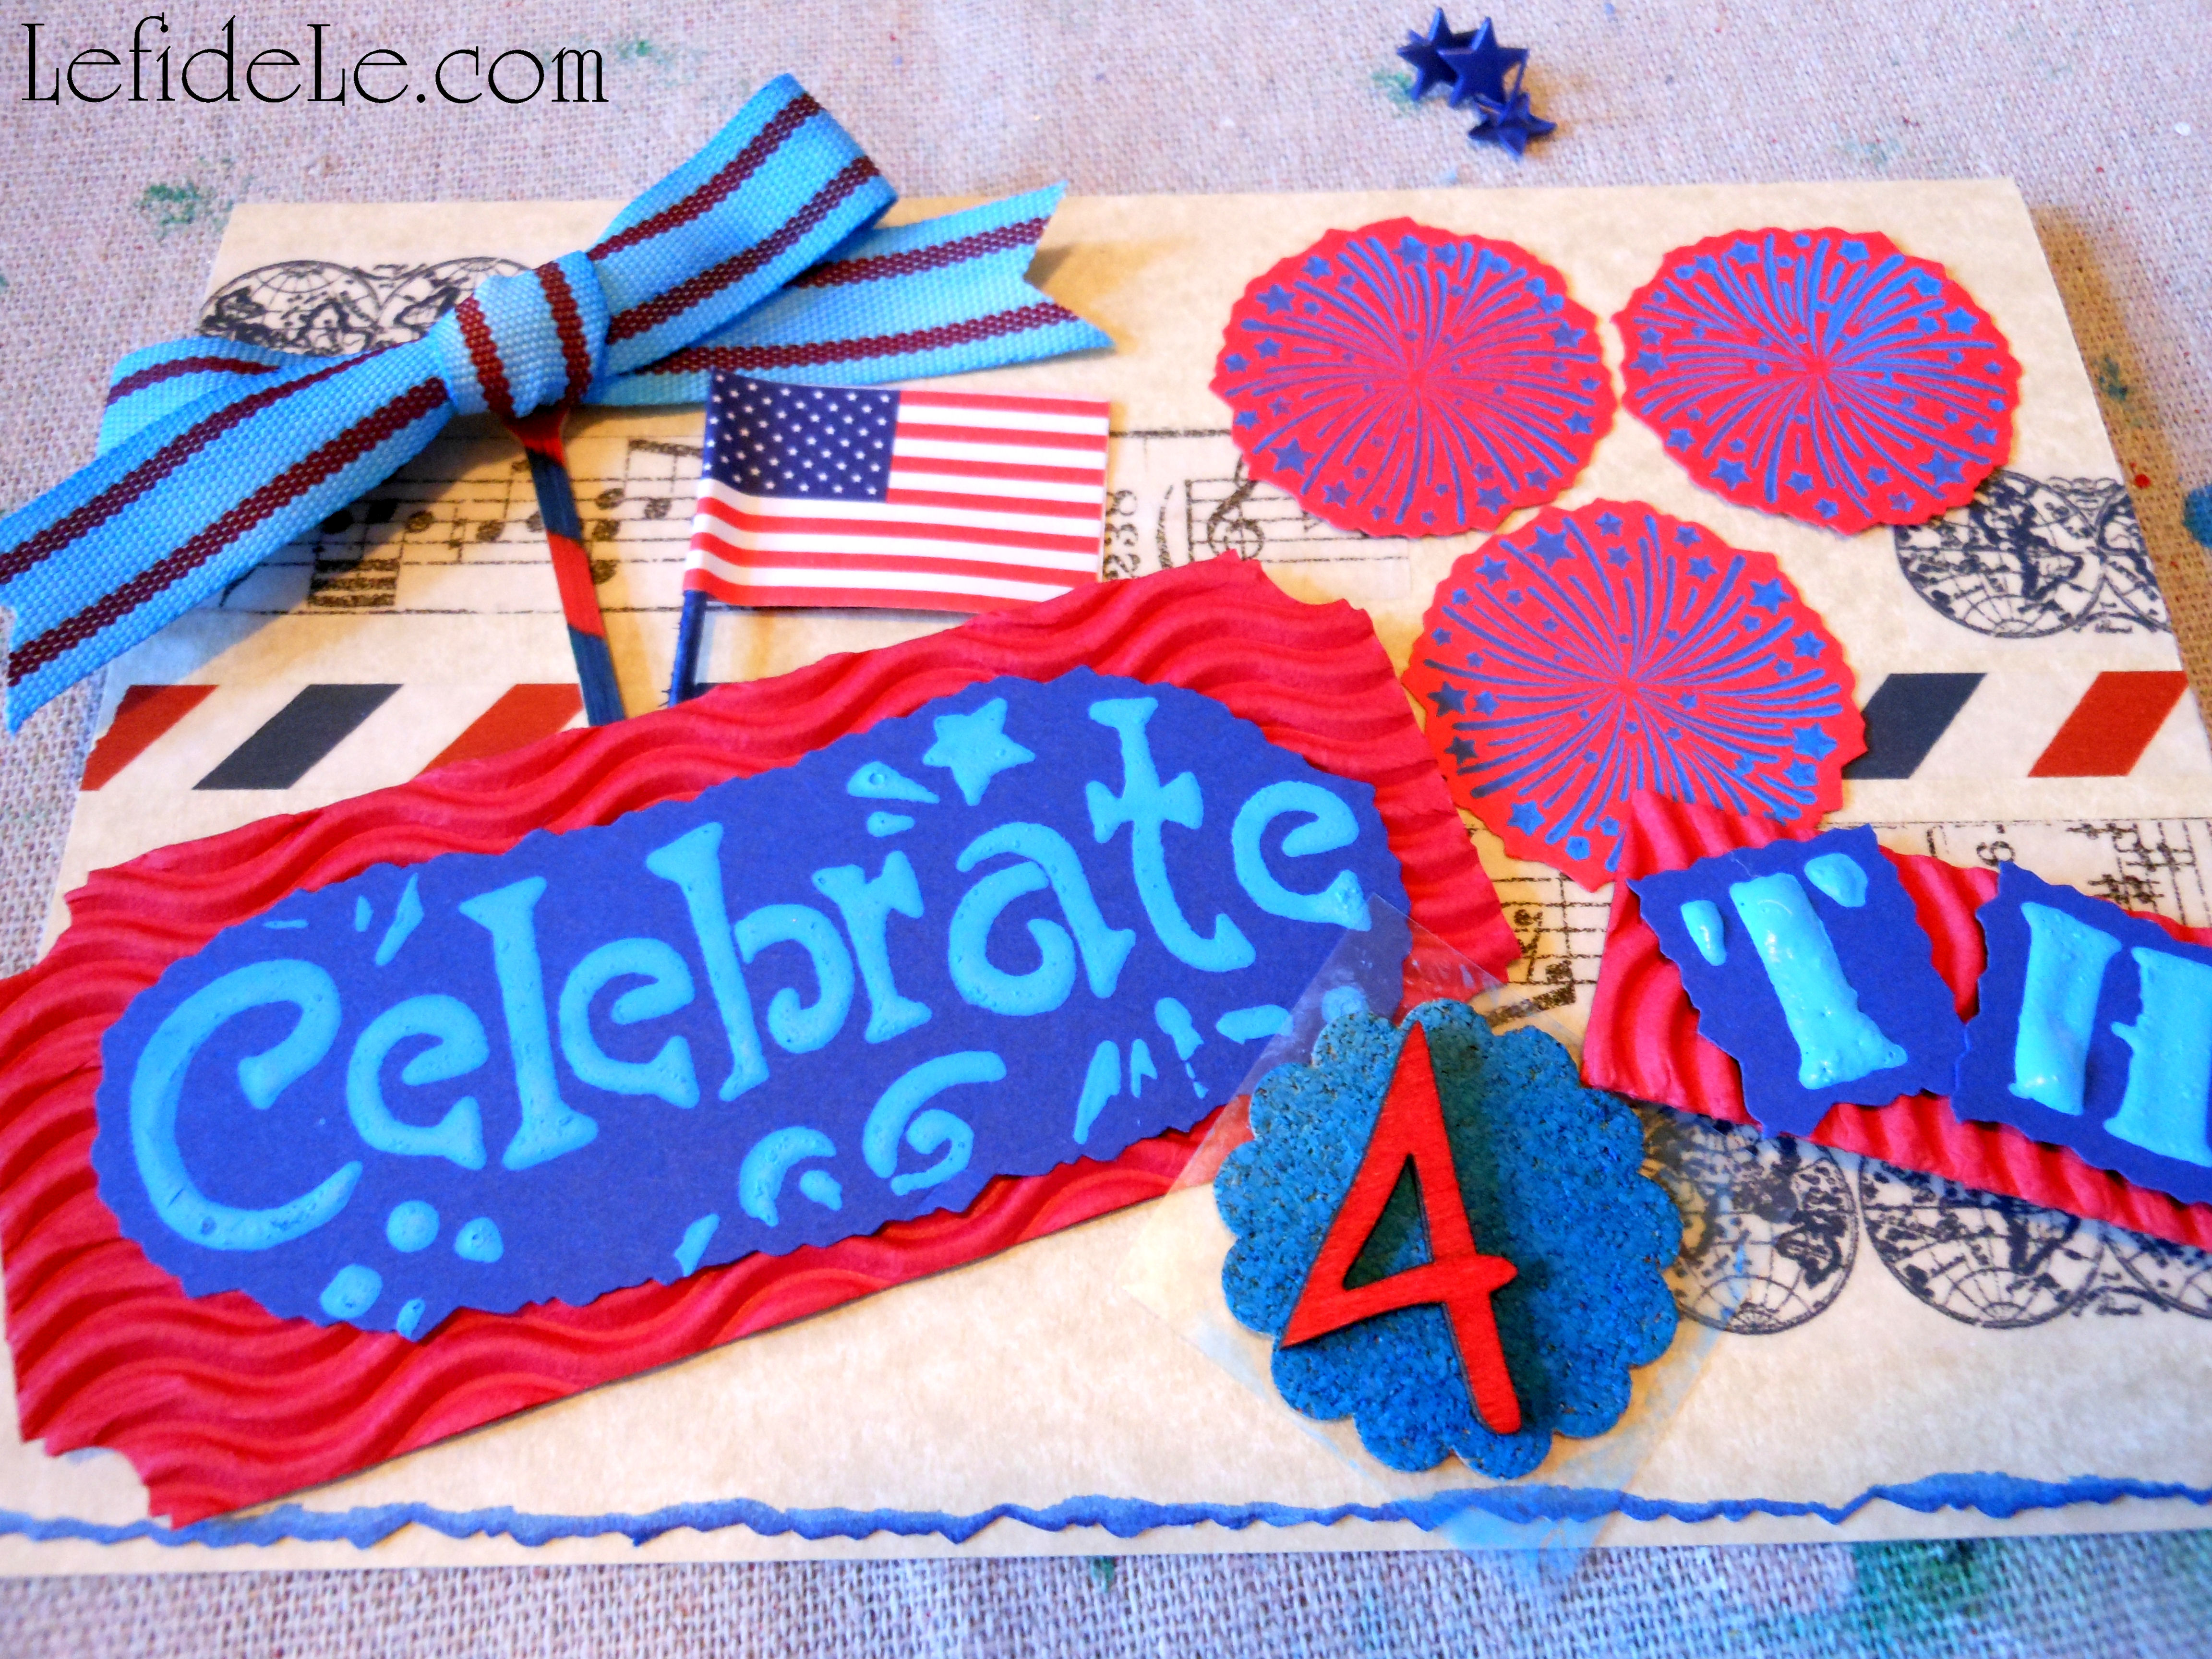
Here I used a palette knife to tint gesso with a cobalt blue gelato. White gesso opacified the color into more of a cornflower blue. A thick swipe of medium over a stencil will lay down a swath of shaped color onto your paper. (Stencil words like “celebrate” are great to have in a craft arsenal to use year round.)

076Leigh

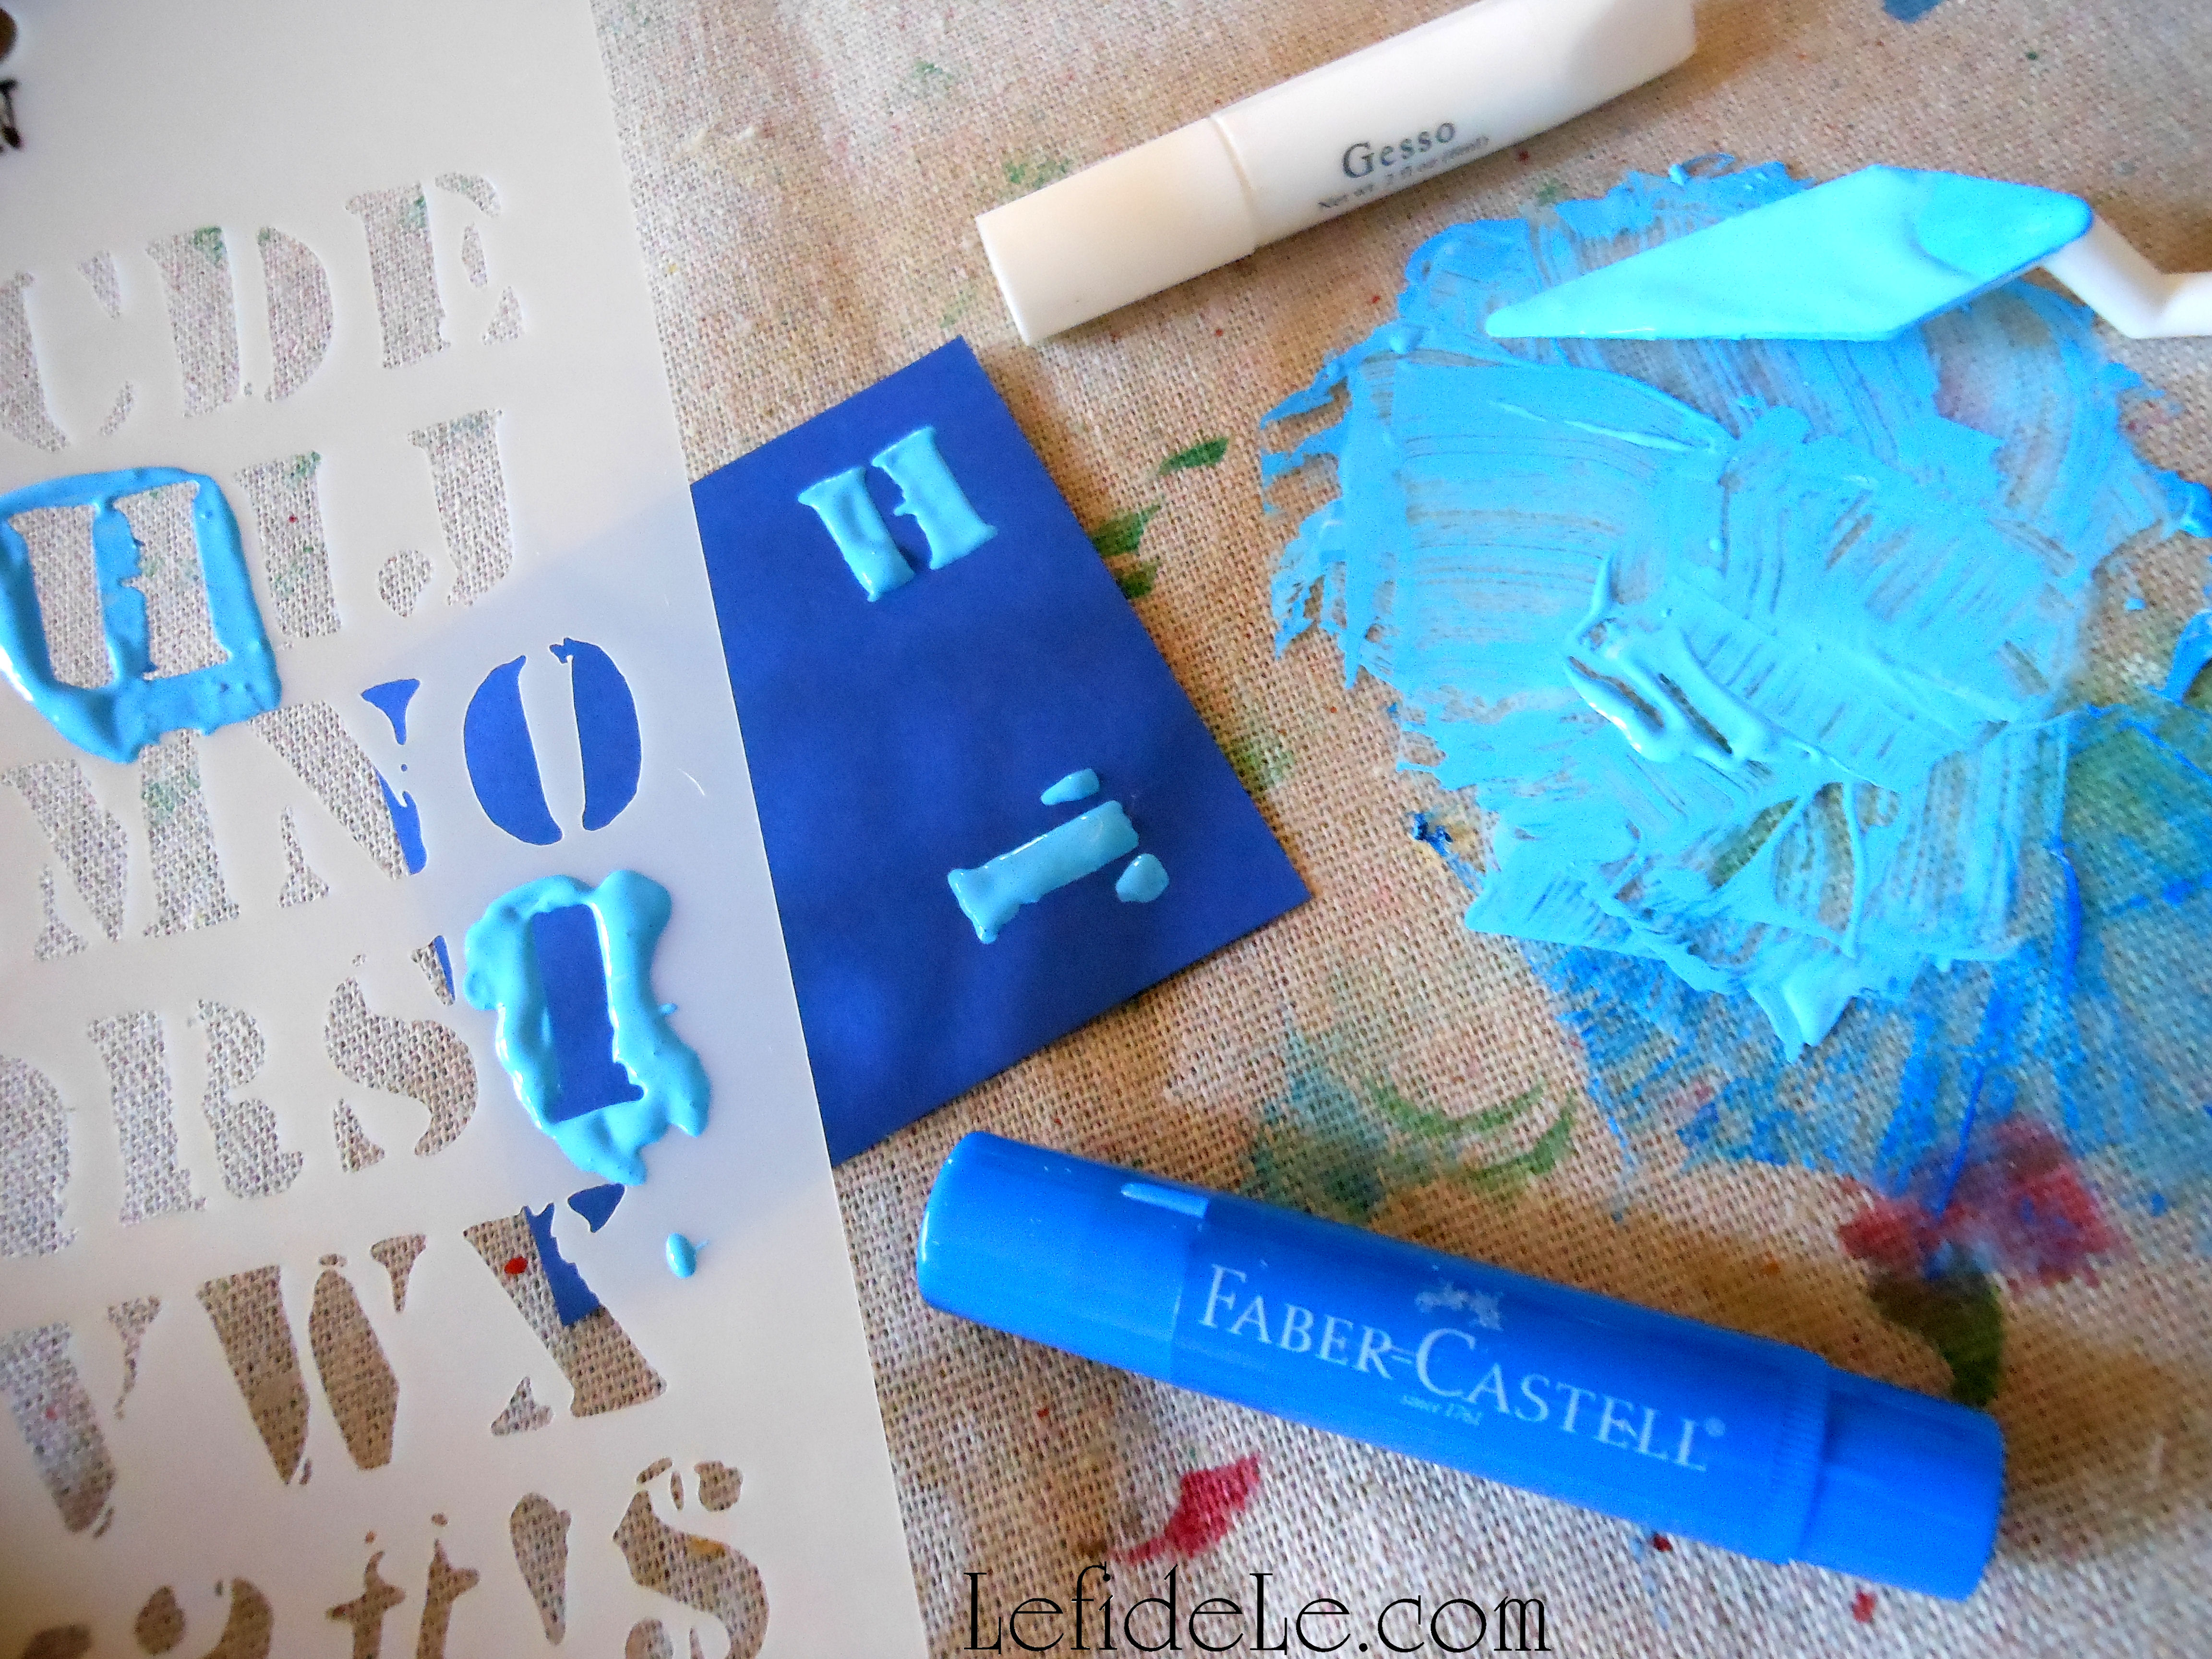
I used the same technique to form raised letters onto colored paper. (This is a great way to use up all those scraps of “craftermath” from previous projects!) The thicker the layer of gesso, the longer it will take to dry.

072Leigh

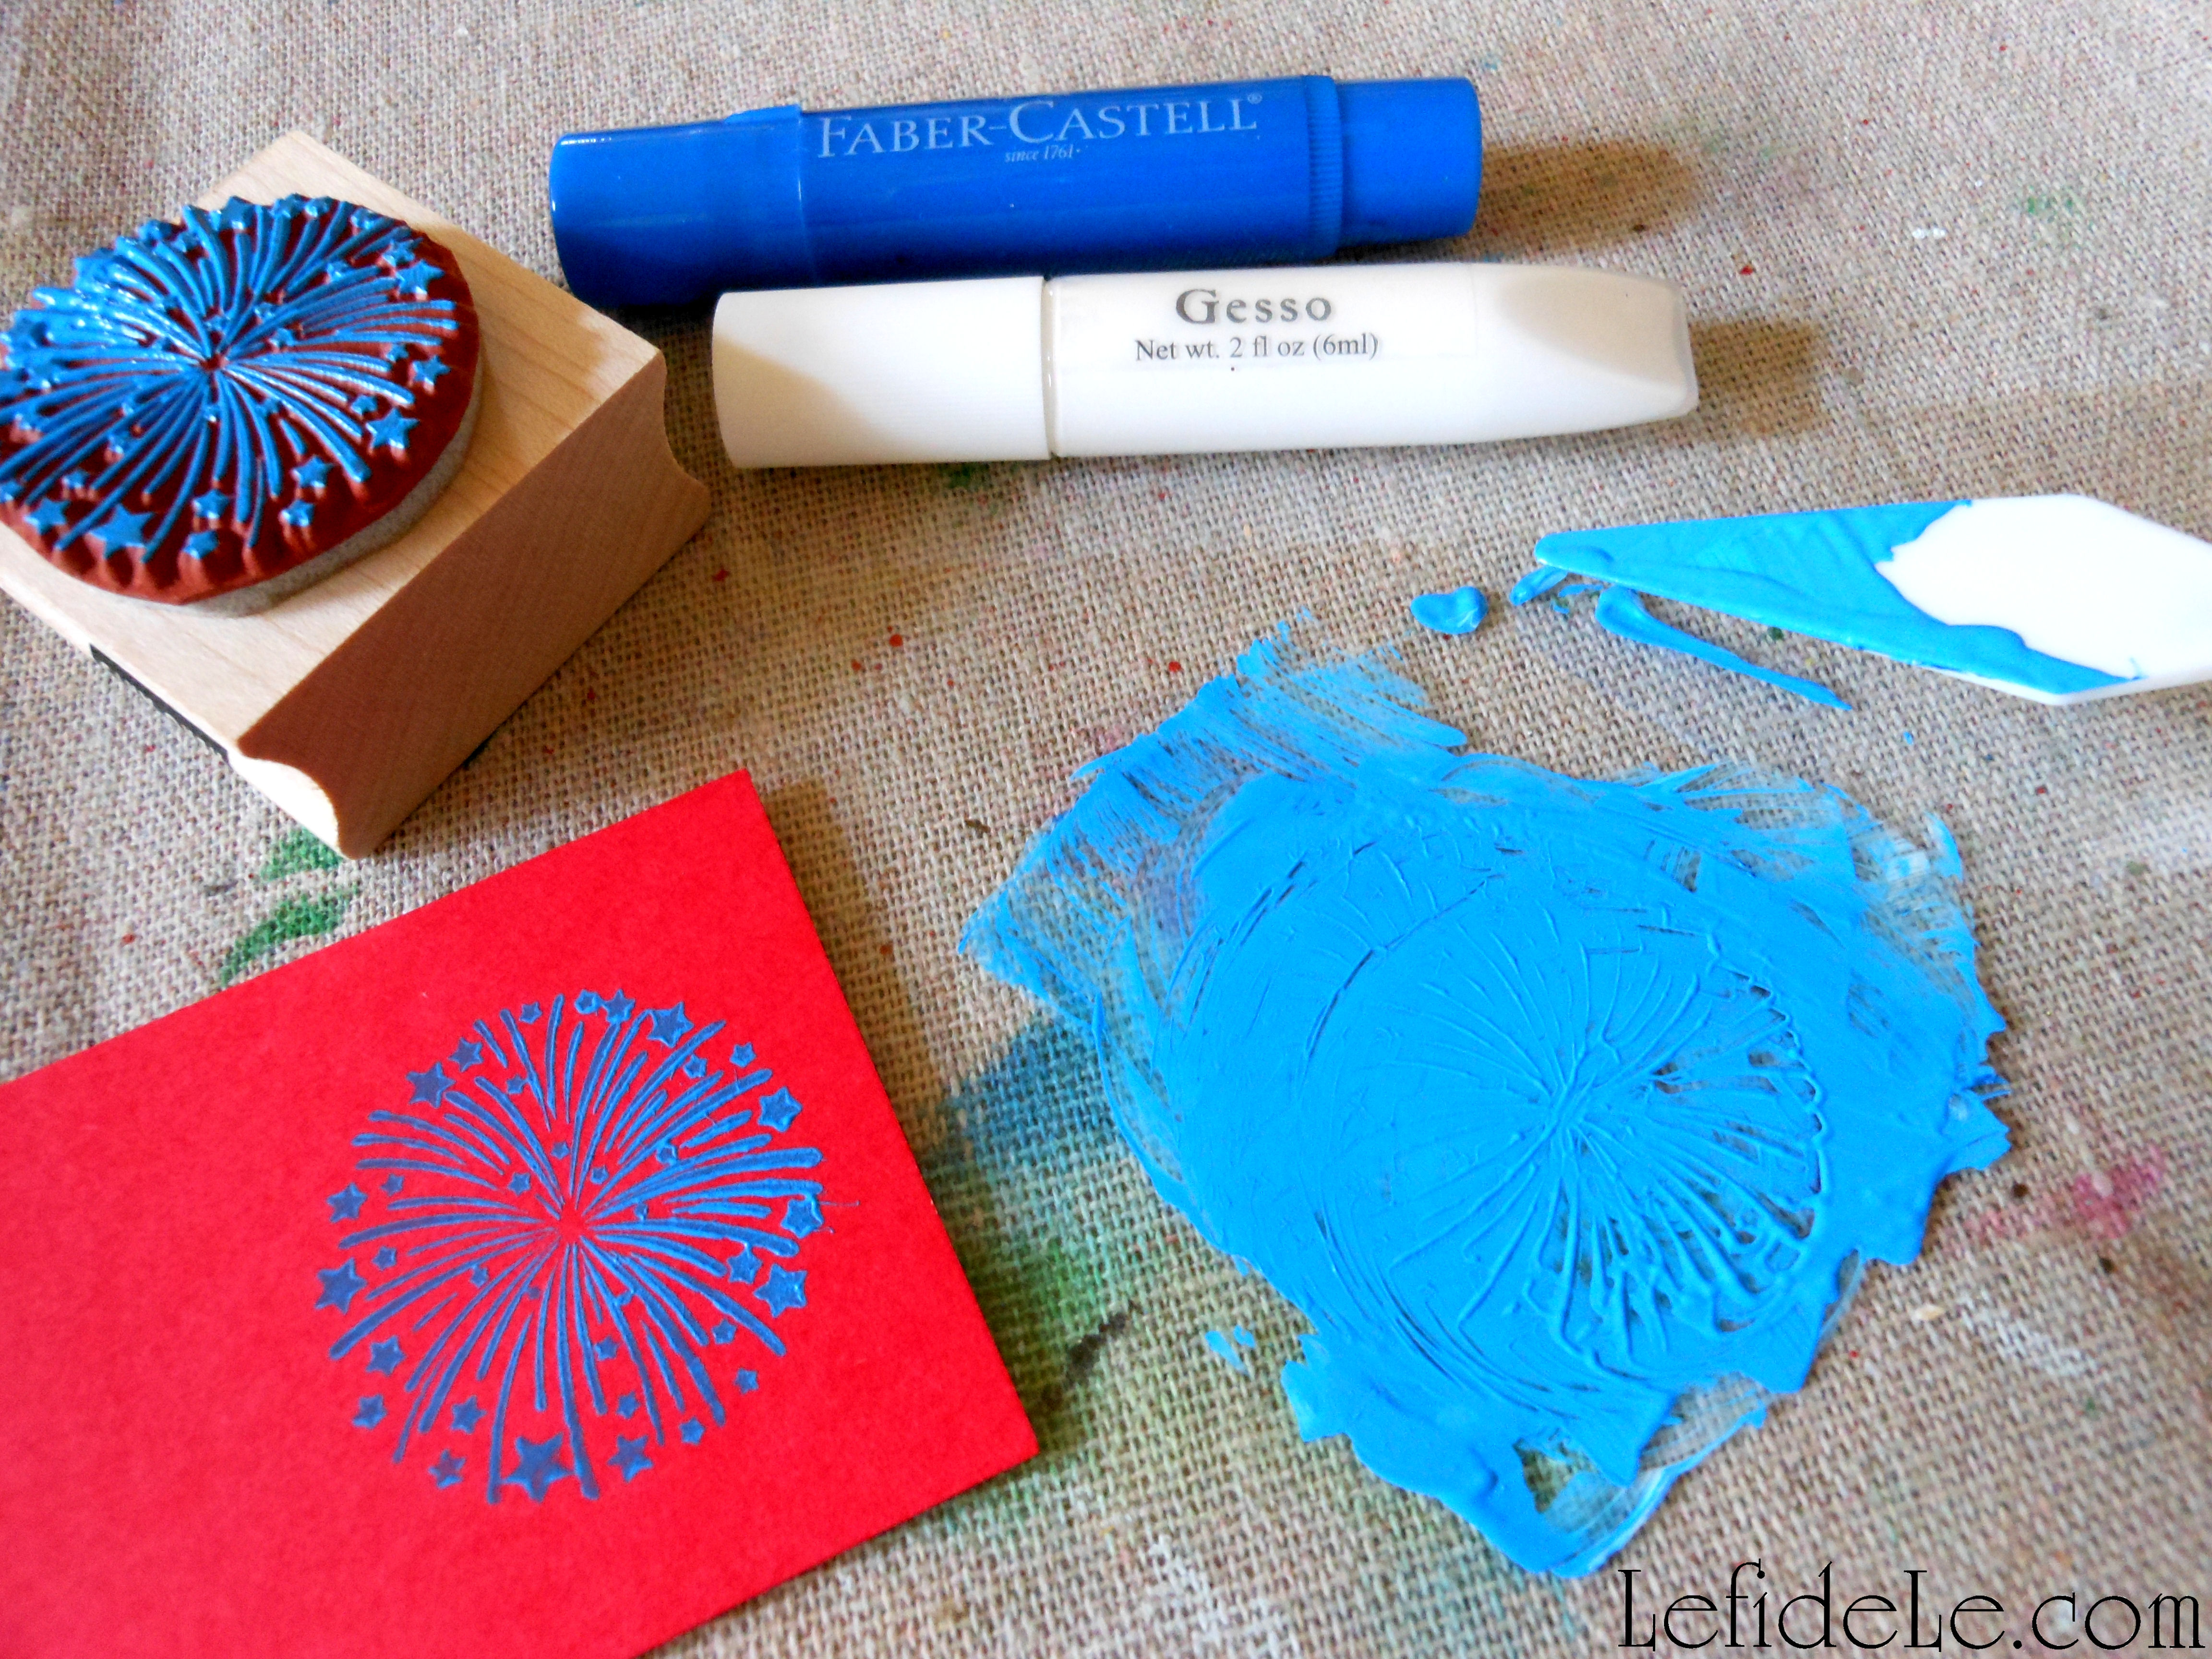
Use any leftover gelatoed-gesso as an opaque stamping ink. It’s great to use on colored papers that would just appear as plain black if using a stamp pad. (I really liked the blue on red for these fireworks.) Just remember to rinse off your stamp before the gesso dries.

079Leigh

You can dye just about anything with gelatos and pitt pens. The gelato dyed ribbon will appear lighter once it has dried. If you’d like to impart deeper color, just repeat with more gelato. The little scalloped round element is a cork sticker that I tinted with cobalt blue gelato. It’s easy to make an ombre effect by applying color to only one side then rubbing it across the piece. I used the pitt pens as a wood stain by simply coloring the laser-cut birch 4 and bamboo food pick. (This is the easiest and cleanest way I’ve found to tint wood without losing the grain pattern!)

083Leigh

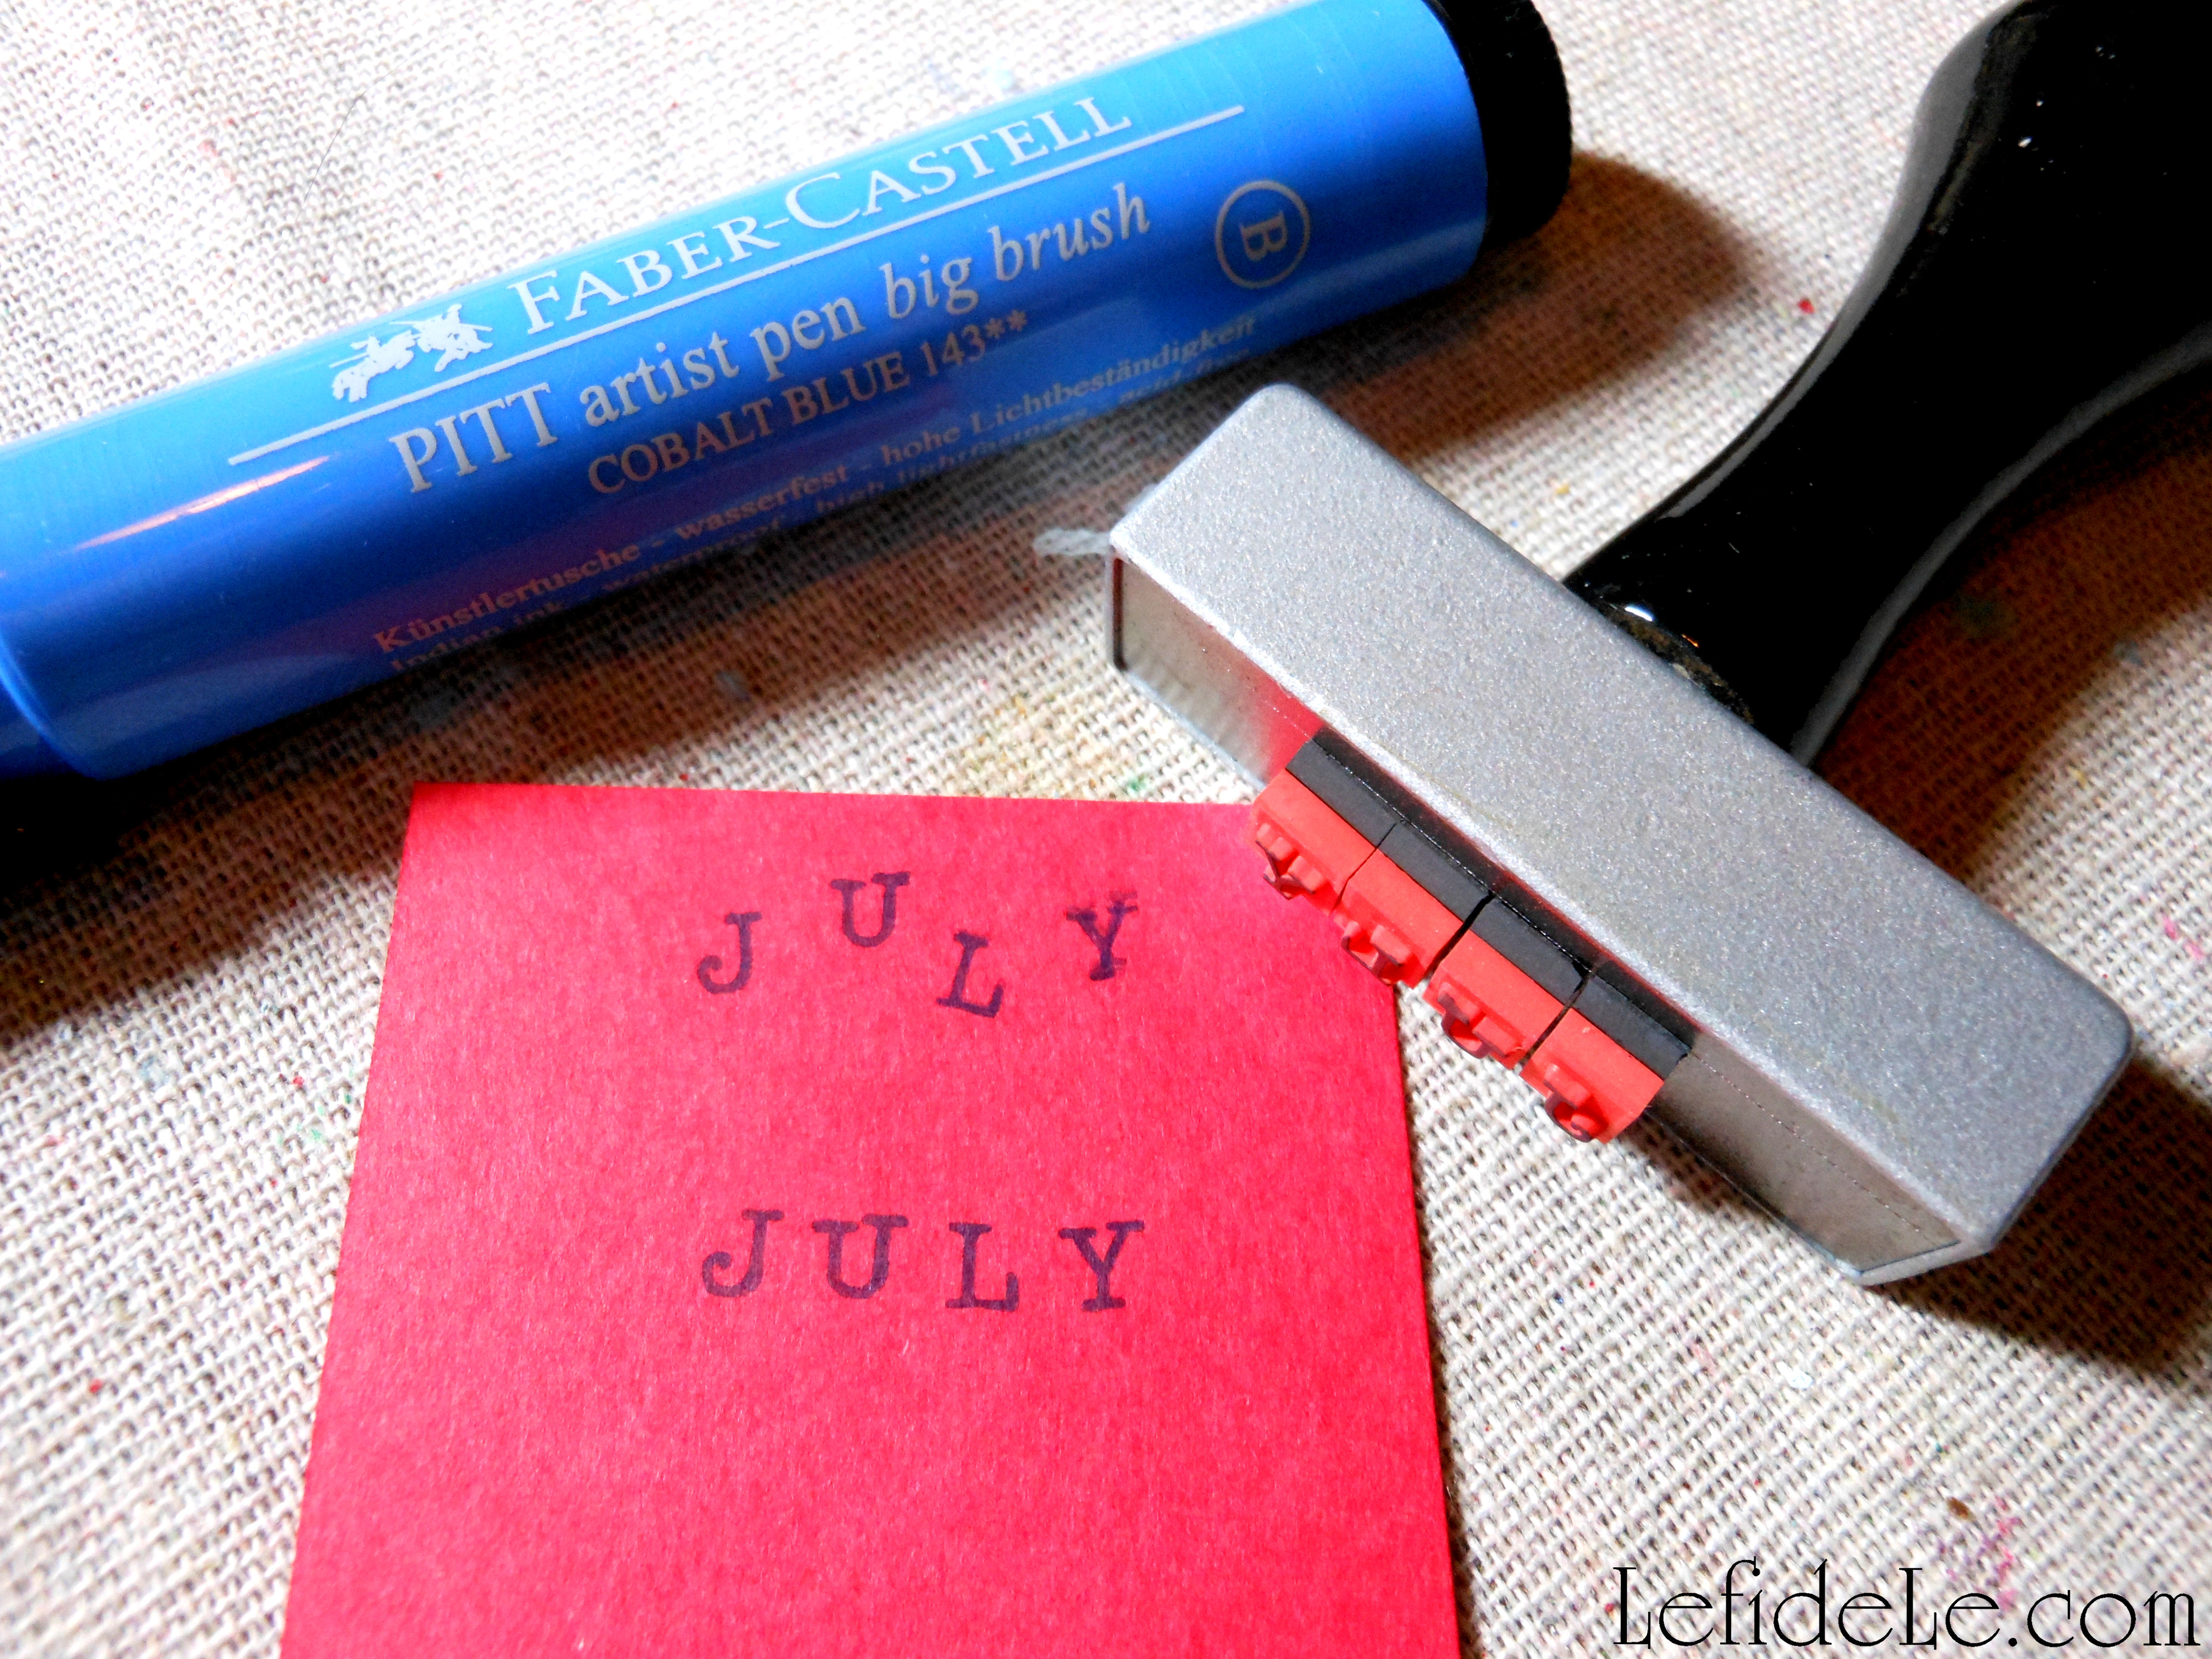
Pitt artist pen big brushes can also be used in place of stamp pads. (They’re especially great when you want to combine colors onto one stamp image!) I spelled out JULY, with a magnetic lettering stamp, as if it had been printed by an old-school typewriter.

087Leigh

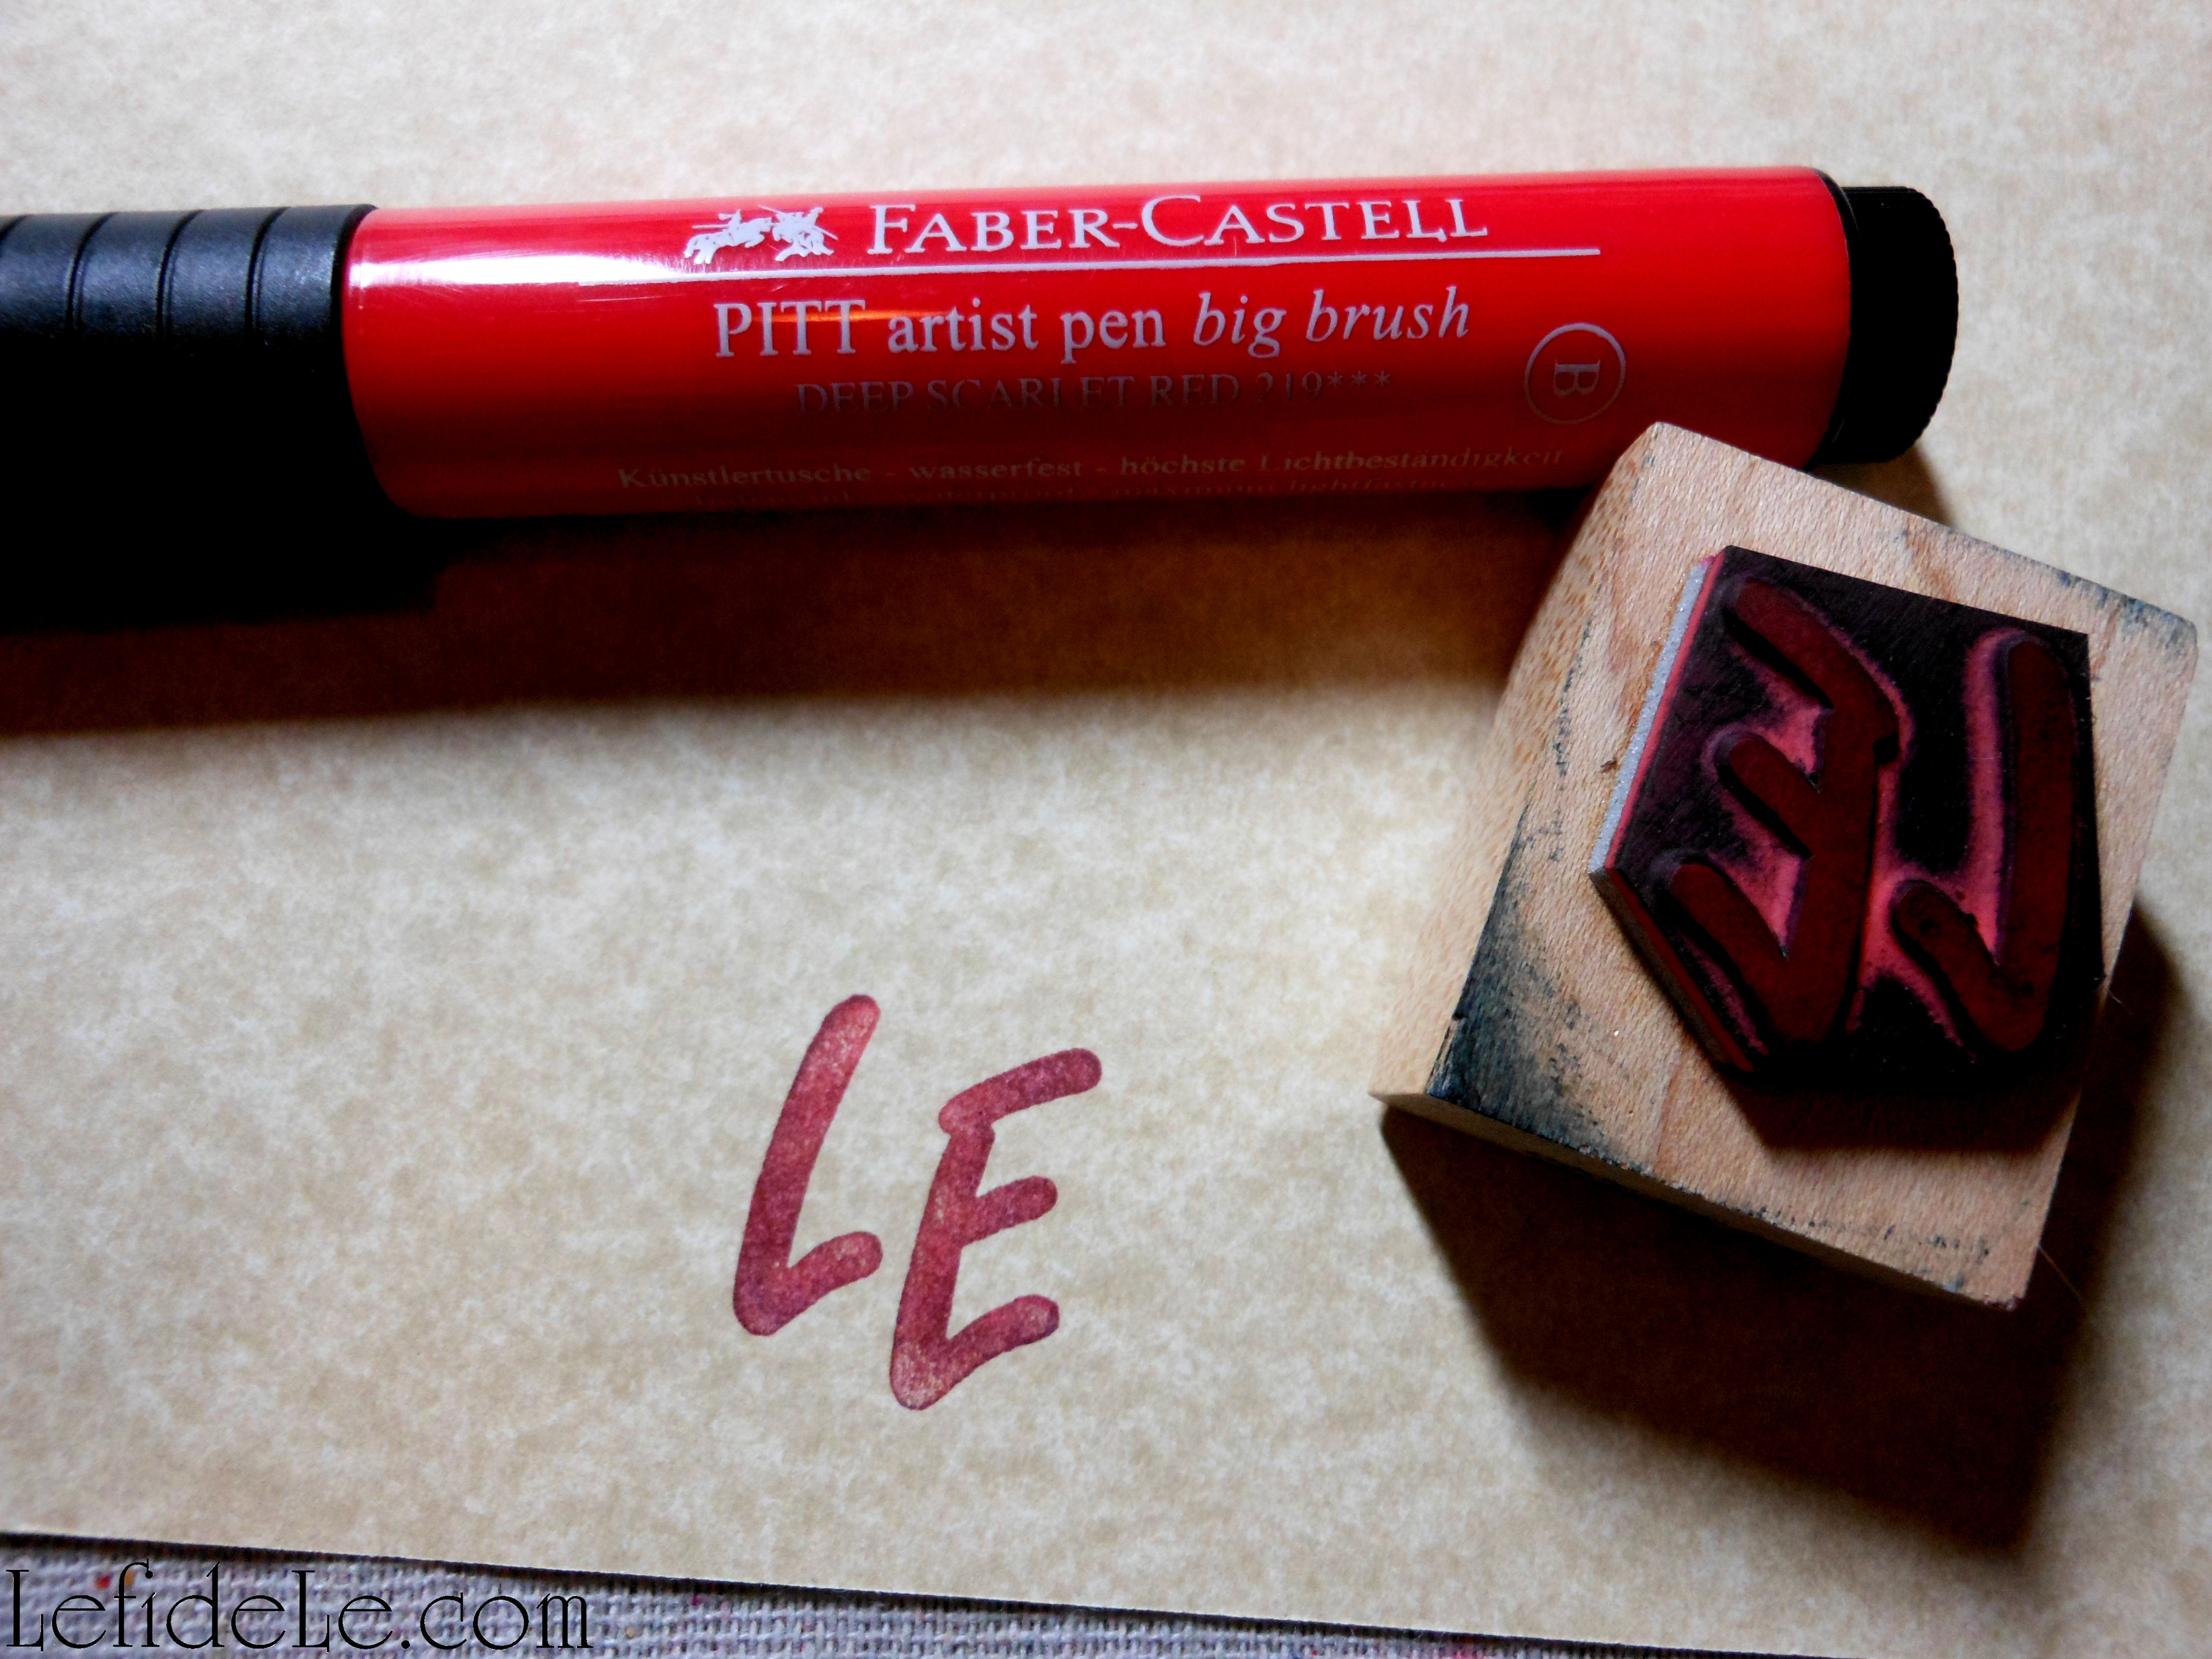
Don’t forget to add your seal of “makership” to the back of your creation! Leftover ink on my stamp blended with the deep scarlet red pitt pen ink to tint the edges a bit darker… which I completely adore.

81Leigh

Once most of your elements are constructed, you can place them on the card in order to edit… if need be. I used the rough-draft placement to decide where my background colors should go.

086Leigh

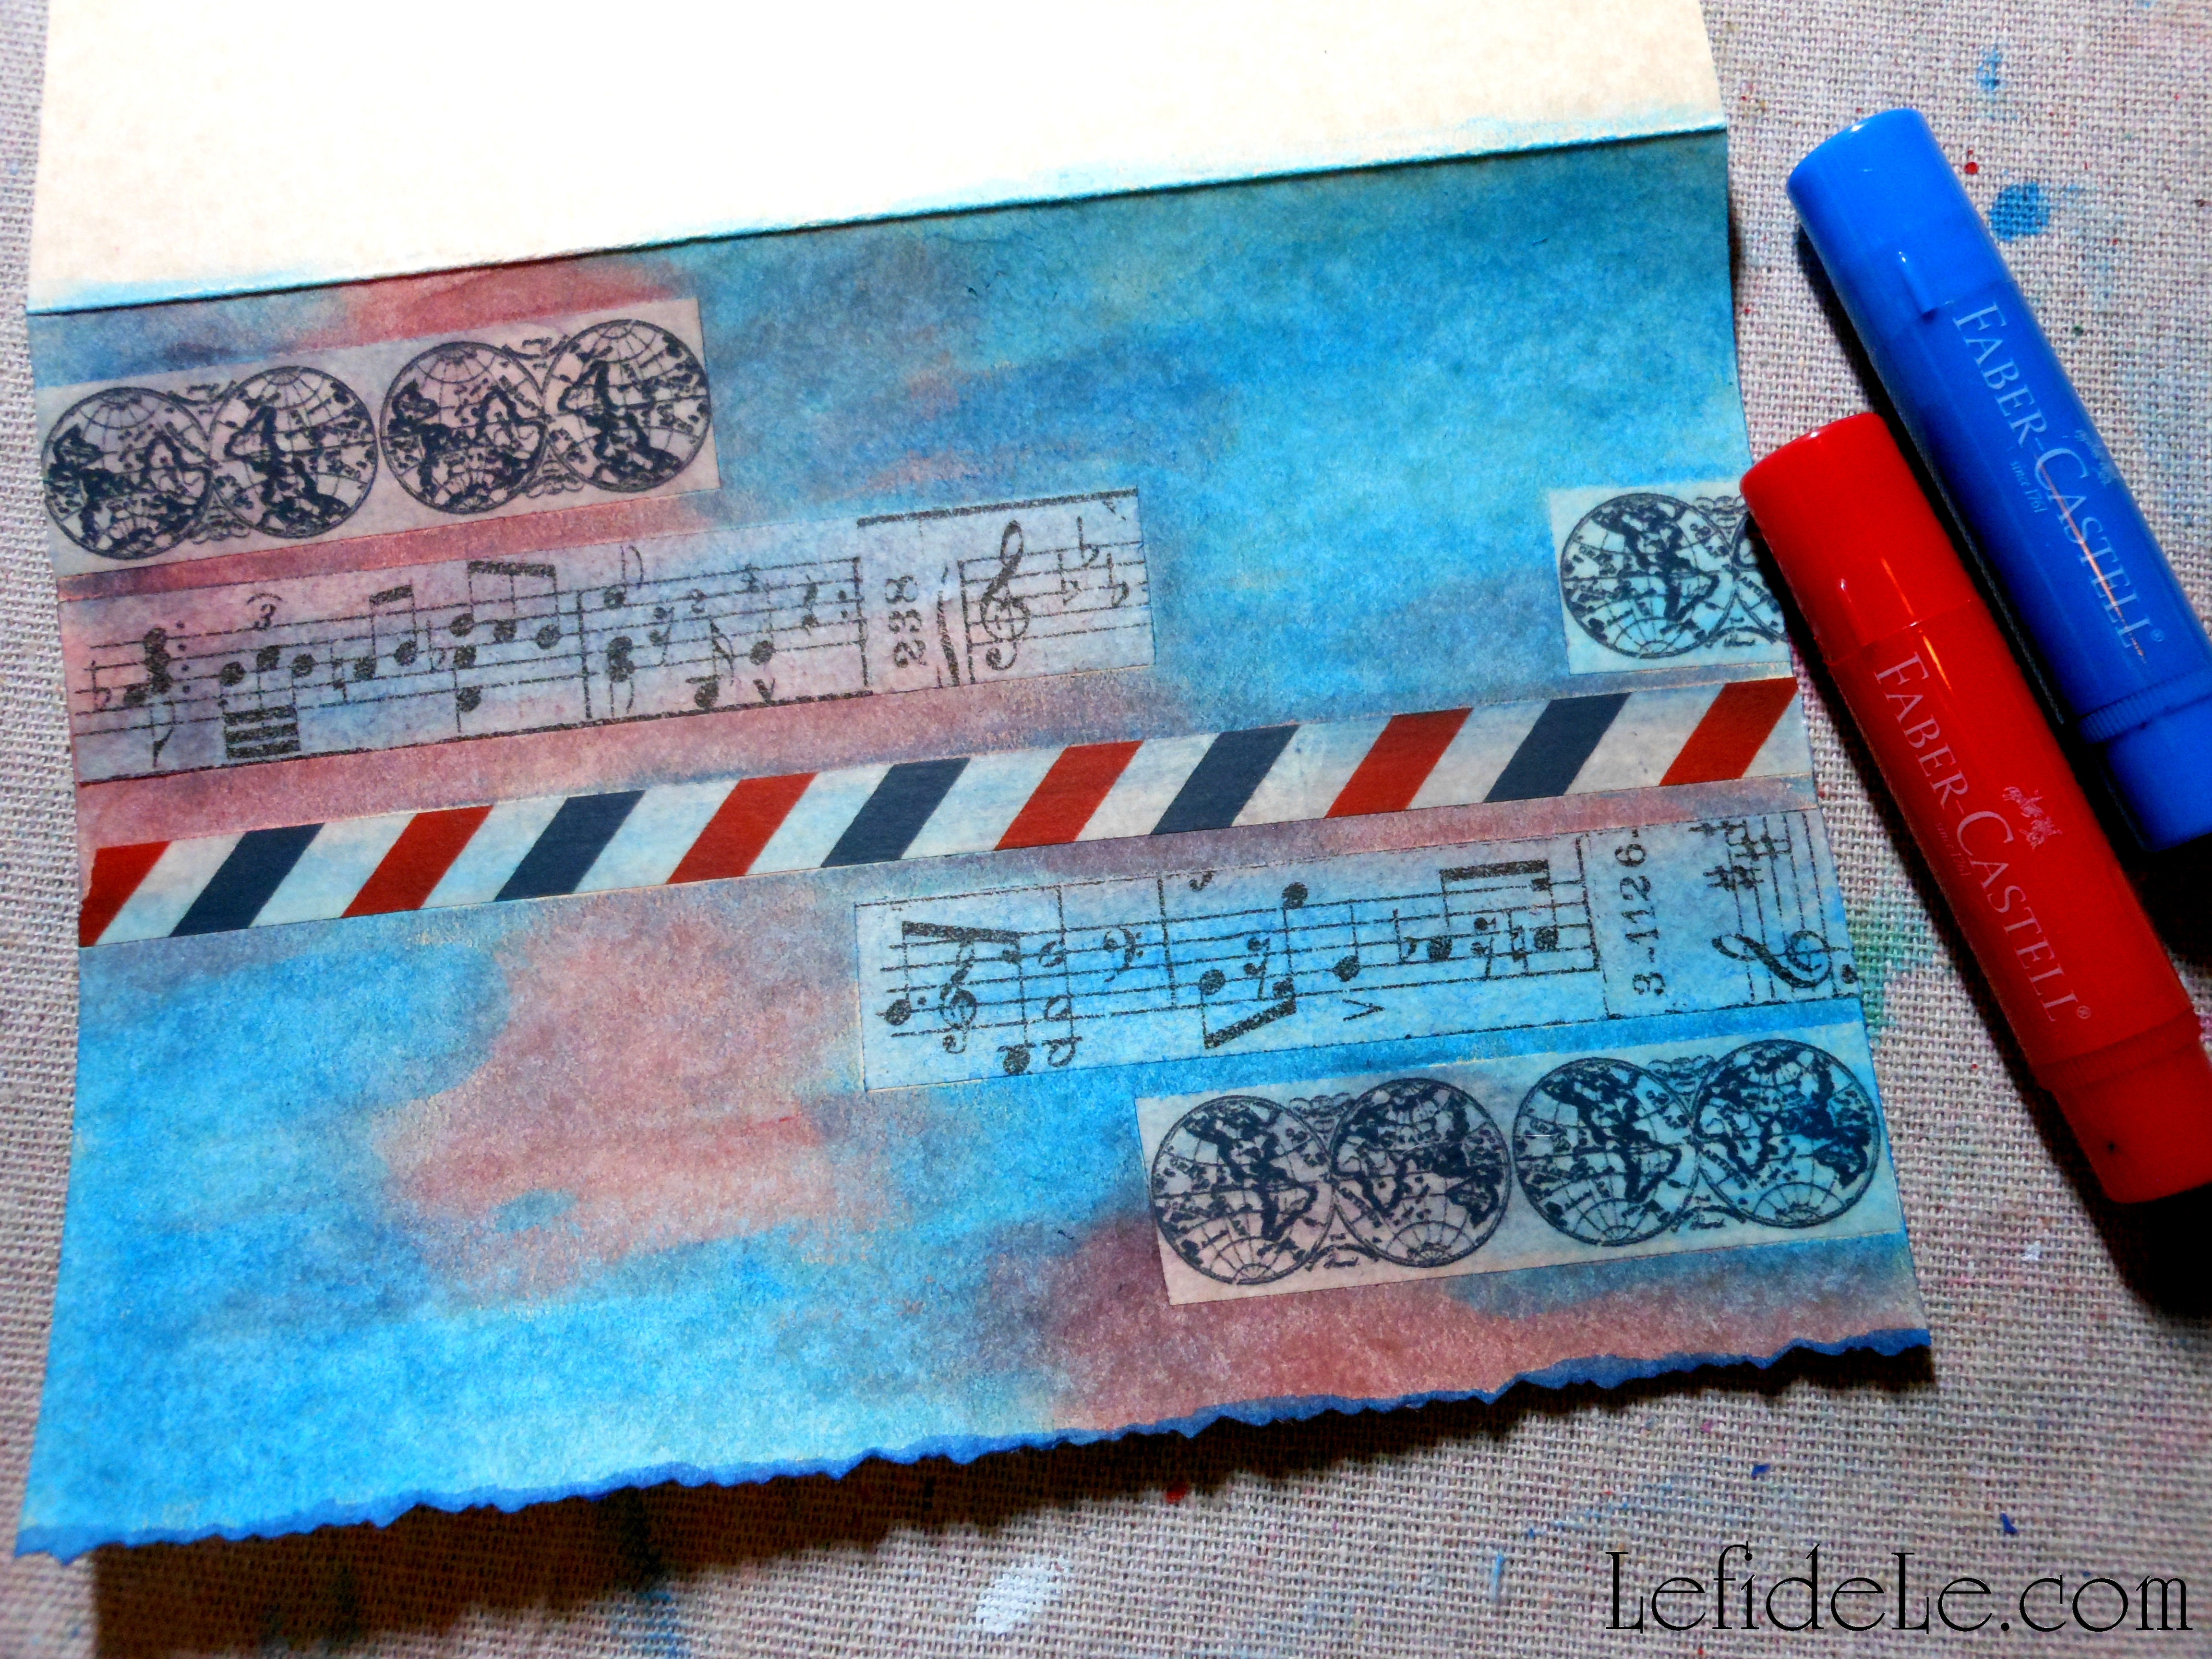
I used red and blue gelatos as finger-paint to tint the paper and washi tape background with. Use a wet finger or a water brush to grab pigment straight from a gelato, or dip a brush or finger into pre-mixed gelato and water. (My choice took me straight back to kindergarten!)

091Leigh

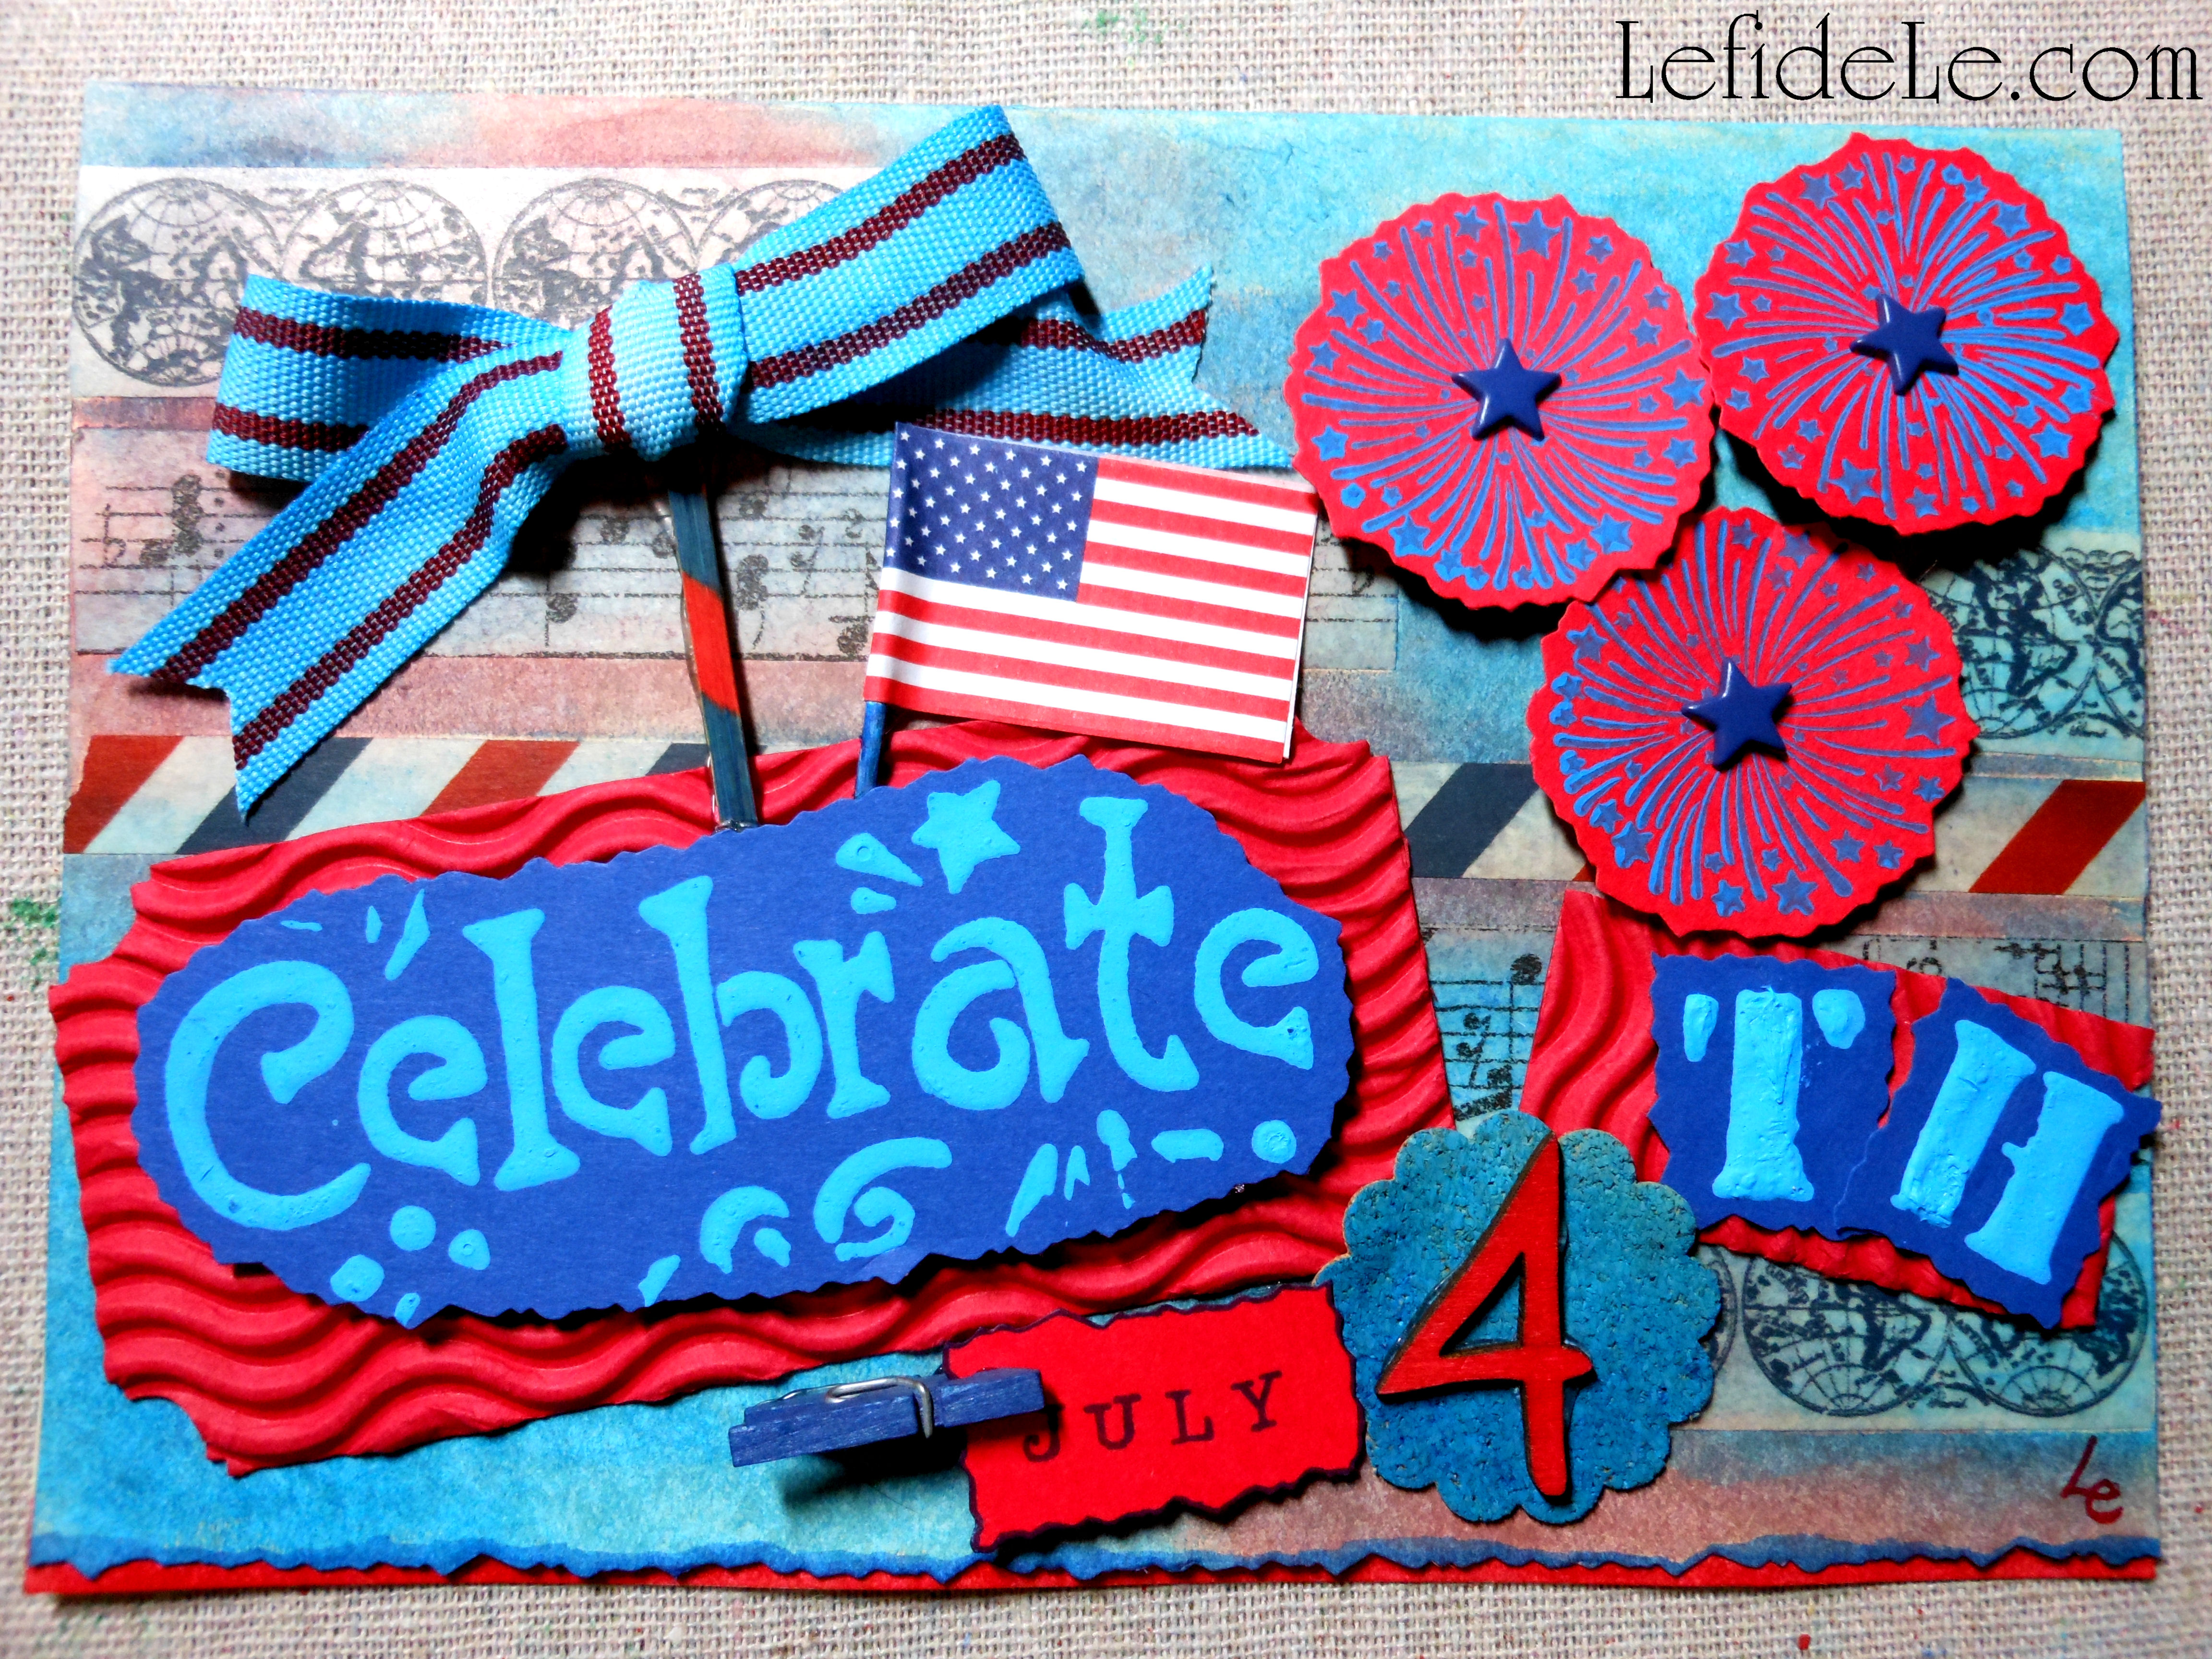
Next, I tied a bow with the ribbon (representing remembrance) and glued everything down. You can use any glue you like, or even the gel medium to glue down the papers with. (I chose hot glue because it works on all the elements I used… even the wooden ones.)

122Leigh

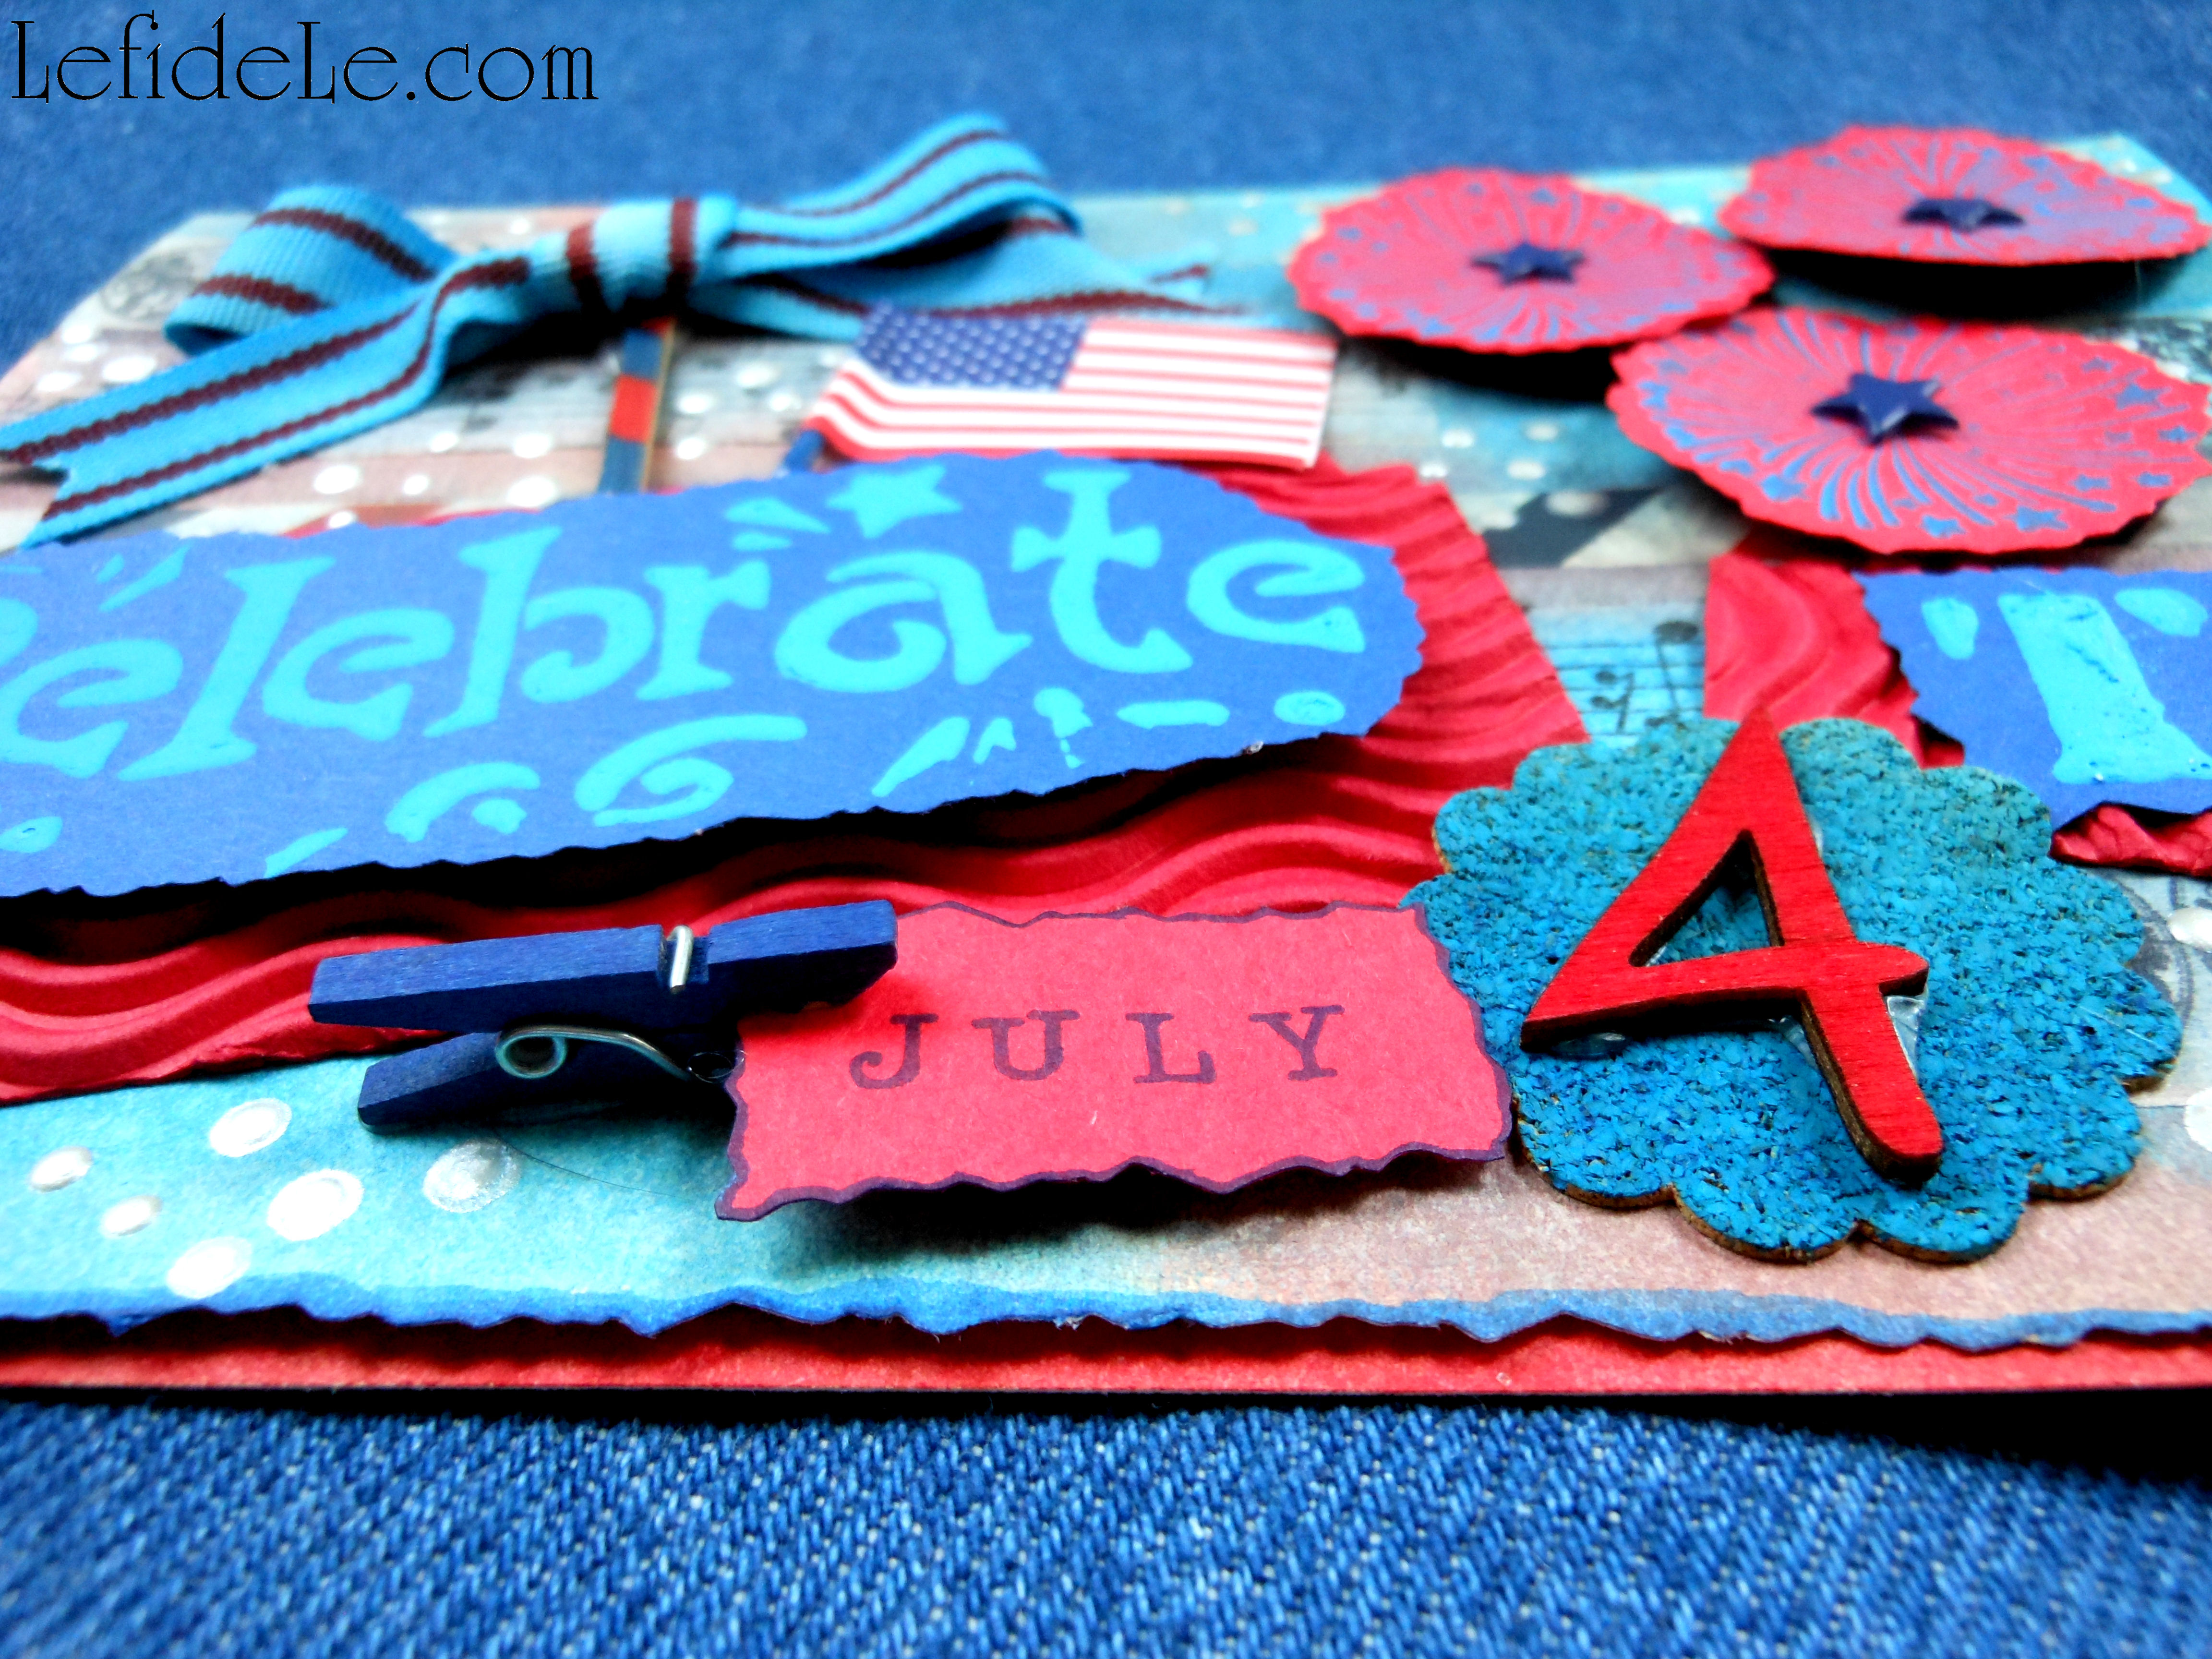
I layered red tinted cardboard under the stenciled papers, and elevated them with tiny foam stickers for dimension. The fireworks were attached with brads, but I added hot glue dots beneath them to make them pop right off the page. (Note that the star spangled banner is actually another repurposed food pick!)

093Leigh

For a finishing touch, I applied dots with opalescent texture gems gel liner (to symbolize stars in the night sky filled with the rocket’s red glare which we memorialize with fireworks).

120Leigh

It’s that subtle yet profound symbolic meaning that completes the piece’s transformation from craft into art which makes it worthy of being framed, not just as a holiday decoration, but as artwork. This Independence Day, I will be celebrating the liberty we are given to express ourselves in a country of freedom.

Faithfully Yours,

Leigh

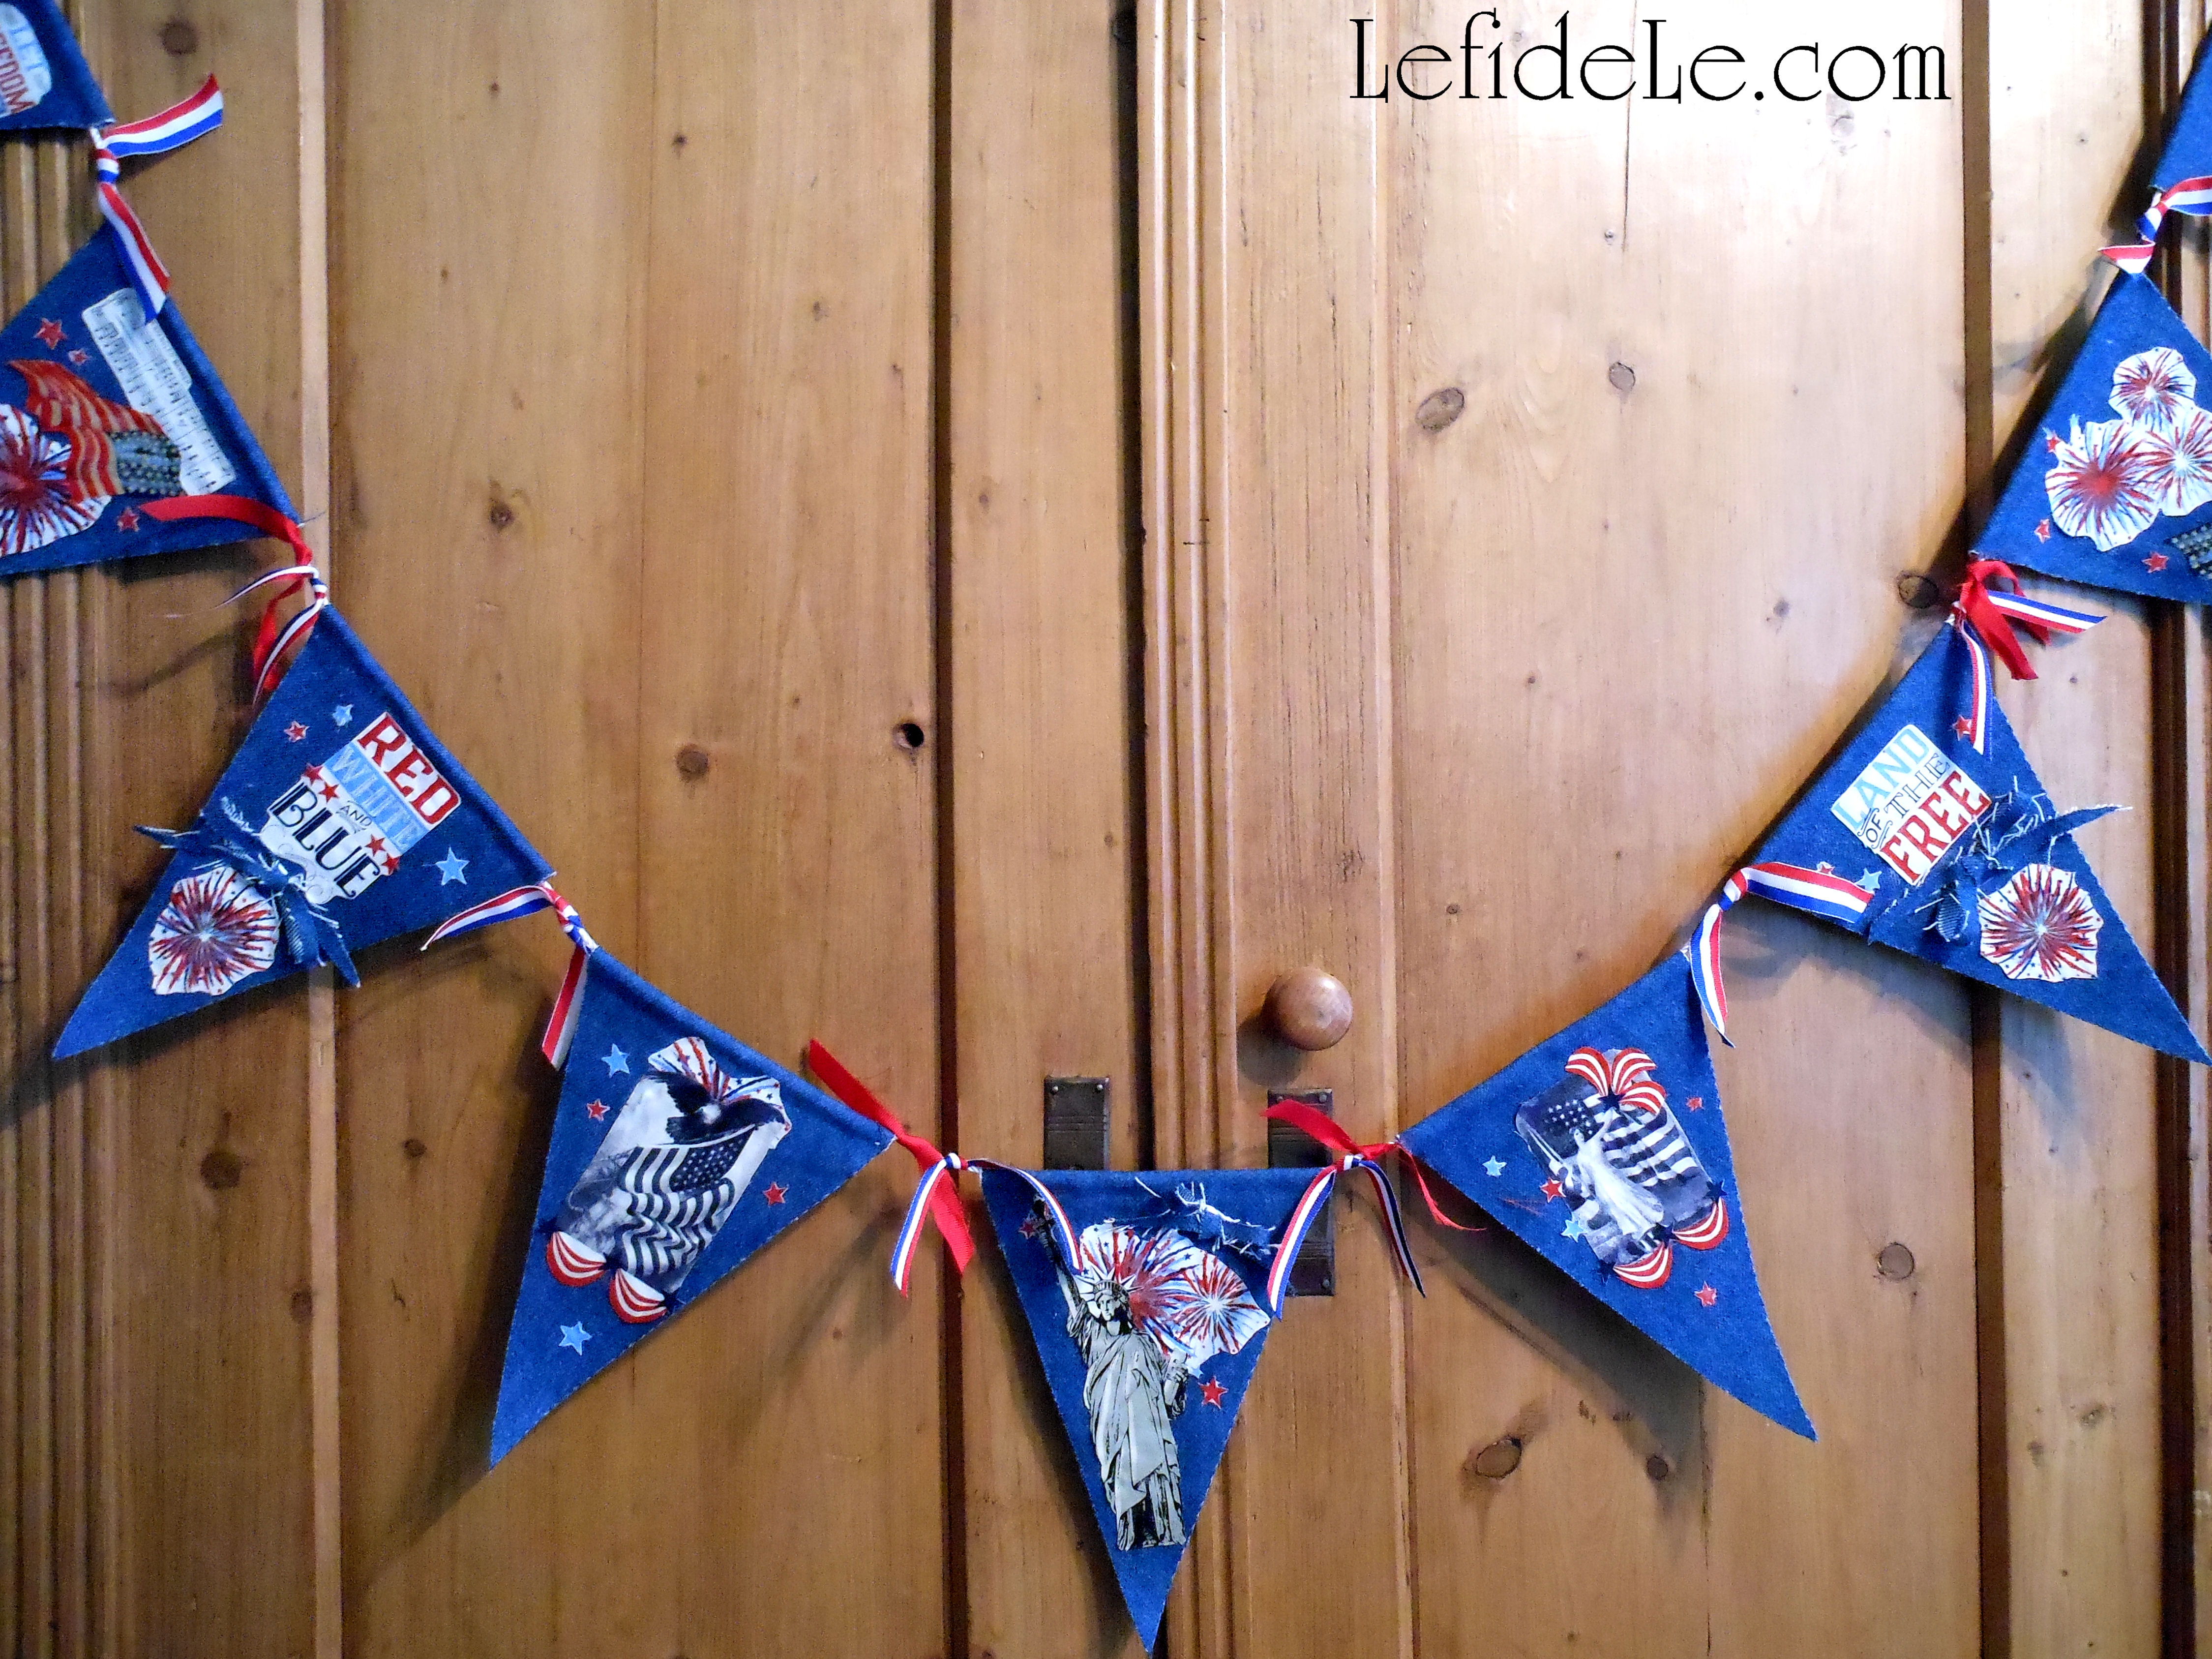
P.S. If you like making collages, be sure to check out my DIY July 4th Denim No-Sew Appliqué Collage Star-Spangled Banner Craft Tutorial for Independence Day. 

163Leigh

Quick & Easy Tapestry Napkin Rings, Upcycled Button Jewelry Box, & Keychain Gift Crafts Tutorial (for Mother’s Day Tea)

105Leigh

This tutorial will teach you how to quickly craft elegant tapestry and lacework napkin rings for your Spring Garden Mother’s Day Tea Party, then easily make cross keychain gifts and an upcycled jewelry box encrusted with vintage buttons. These are great last minute projects that are actually pretty inexpensive to produce, but would cost a pretty penny if purchased from a boutique. So craft along with me… the best is yet to be!

365Leigh

Let’s begin our crafternoon by making 6 napkin rings so that our tables may be set early.

380Leigh

Start with 3 feet of any variety of woven tapestry ribbon. (I always snatch these up when I find them on clearance, because they are just so versatile. I’ll show you more craft ideas to use it with in the future.) Also look for 6 feet of lovely lacework in a small width.

166Leigh

Cut all of your ribbon and lace into 6 inch lengths.

171Leigh

Glue the ends of the tapestry together overlapping them slightly. Use hot fabric glue or clamp a cold fabric glue to dry… or sew it if you’re so inclined.

177Leigh

Glue one length of lace to either side of the ring, layering it over the serged seam of the ribbon to conceal it.

111Leigh

Fill with any coordinating cloth napkin to suit your event’s color scheme.

083aLeigh

Next, let’s craft a cross keychain gift to extend our best wishes for a blessed life… or one with a heart full of loving-kindness.

080Leigh

Begin with any variety of coordinating beads of various shapes, a shape pendant, a key ring, thin fishing line, and a small split ring. (These can almost always be purchased on sale or clearance.)

082Leigh

Slide the small ring onto the key ring. (This will enable keys to be added to the ring later.)

083Leigh

Slip one end of the fishing line into all the beads first then through the pendant.

085Leigh

Now feed the line back up through those same beads.

087Leigh

Tie the two ends sticking up out of the beads onto the small ring with your choice of a double knot or surgeon’s knot. (Try triple looping the ends then triple looping them again in the opposite direction. Pull the ends really tight to bring it together. This is a great knot to keep keychains secure.)

090Leigh

Cut the dangling ends close but with a little bit sticking out of the knot to keep it from unraveling.

092Leigh

Package it with an apropos and sincere message.

94-2Leigh

Think about buying extra beads to make one for yourself as well!

371Leigh

Now I’ll tell you how I made an upcycled jewelry box, so that you can think about making your own quickly and easily. It would be lovely to enclose that keychain in it as a complete gift… because it’s bad luck to give away an empty jewelry box.

097Leigh

I actually began this upcycled project many years ago as a gift for my grandmother. I hot glued vintage mother of pearl, glass, and pearl buttons to a vintage powder puff box. I then used tacky glue to adhere white grosgrain ribbon to the sides and inside of the box. I added silicone feet to prevent table scuffing along with a button closure.

168Leigh

I never felt that it was quite good enough for my liking, so this year I decided to embellish it further with some ivory lace.

173Leigh

I simply hot glued dots onto the points of the lace then gently tapped them down onto the ribbon. I continued all around the box, and then cut and glued the end corner.

176Leigh

To finish it, I simply inverted another length of lace and glued it all the way around as well.

001Leigh

It looks so much more finished now, so I am happy to present the new and improved version back to my grandmother. To make your own, upcycle any old but pretty box or paint a new paper maché one. Cover it with vintage buttons or newly purchased ones. Glue on silicone or wooden feet. It’s an easy project that makes a beautiful gift.

128Leigh

Now you’re on your way to a fantastic Mother’s Day!

Faithfully Yours,

Leigh

P.S. Get free printable cards and invitations, plus see the napkin rings and box placed in the whole Tea here: Spring Garden Mother’s Day Tea Party Tablescape Décor Ideas (+ Free Printable Card & Invitation)

Leaping Bunny Topiary Spring Indoor Garden Party Décor Ideas for Easter or even Showers, Luncheons, & Brunches

256Leigh

Say goodbye to winter storms and hello to spring splendor with a vivacious indoor garden party resplendent with leaping bunny topiaries! Put away the pastels and embrace vibrant carrot oranges and greens echoing this time of growth. Add apropos messages spelled out in hedgerow letters declaring the true reason for the Easter season. Give lettuce-edged napkins the bunny ear treatment as a tongue-in-cheek homage to all those cherished family photos. Layer chevron patterning with textural fibers to modernize the fête’s décor, forming an ensemble proclaiming, “Hello Spring!”

252Leigh

Crisp orange and white chevron fabric awakens the senses, making it the perfect underpinning for this little soiree. (My mother actually made this tablecloth, which is amazing for someone who has repeatedly stated, “I don’t sew.”)

255Leigh

Layered on that are round raffia mats placed as chargers. Rustic sage green plates are topped with orange salad bowls filled with fresh garden salads of baby greens like kale, spinach, and chard, with orange heirloom cherry tomatoes, English cucumbers, fresh parsley, sprouted pumpkin seeds, and crunchy carrot croutons. (Find the easy recipe for it here.)

149Leigh

Daily flatware is used, with the exception of the knives which have been exchanged with lovely patterned versions. (Mixing patterns is not only okay, but fantastic!)

139Leigh

Orange burlap bunny ears napkin rings hold lettuce-edge napkins matching the sage plates. (Learn how to easily make your own rings here.)

220Leigh

Understated water glasses were chosen as the only simple elements on the tablescape. Carrot lollipops with jute bows sit in place of dessert spoons. (Find them on sale at affiliate Oriental Trading Company. The link in the side bar adds a coupon with free shipping to your cart automatically.)

158Leigh

Baby leaping bunny topiaries sprout from burlap covered carrot pots above each place setting. (Learn how to craft them easily here.) Tiny printable carrots act as place-cards for each invitee. (Snag my free printables here.)

287Leigh

Big bunny mama springs from the center of the table in declaration of a beautiful life.

257Leigh

Orange twine wrapped Easter eggs sit on the grass beneath her. Twine and crepe carrots suggest growth of one’s soul.

294Leigh

Faith stands as the center of the celebration both literally and figuratively. (The hedgerow letters are bandaged with burlap and jute symbolizing that one may be battered, but not broken when one has such faith.)

063Leigh

The side table holds another hedgerow spelling Believe. It sits with an additional egg enmeshed in a swirl of vibrant chevrons and burlap lilies.

198Leigh

A green trunk elevates another bunny constructed of grapevines holding both faux farm eggs and green bird eggs.

183Leigh

Above that a carrot wreath with my topiary printable hangs next to my banner. (Find the carrot wreath at affiliate Cost Plus World Market whose sale link is in the sidebar.)

209Leigh

The end of my printable bunny and carrot banner sits close to a burlap carrot sign extending an honest welcome to all enter. (Get my free printables here.)

253Leigh

Take an idea or two, or use all of my craft tutorials and free printables for your own indoor garden party that declares, “Hello Spring!”

Faithfully Yours,

Leigh

P.S. The Easter Bunny approves this message.

WildBackyardBunnyLeigh

(This is one of the wild backyard bunnies visiting my porch!)

Easy DIY Leaping Bunny Topiary Craft Tutorials with Free Banner, Wreath, Place-card, Invitation, & Thank You Note Printables (for Easter, Showers, Luncheons, & Brunches)

253Leigh

Make your own tabletop garden full of leaping bunnies for your next indoor garden party. DIY these easy projects 3-dimensionally or with my free printables… or mix and match the crafts as I’ve done here. Choose your own color and theme to embellish the bunnies with, or follow my lead and make burlap carrot pots to sprout your menagerie from. Better yet, keep the wraps, rosettes, and ribbons nonpermanent so the bunnies may be used again for another theme. Let these rascally rabbits transform your spring fling into a colossal cute –fest today!

256Leigh

I’ve seen faux foliage covered bunny and bird ornaments as well as topiary picks at several stores locally, and online the choices are endless. Using one of these ready-mades is the quickest way to craft a 3-dimensional creature topiary. (I’ll tell you how to make 2 other types later.)

020Leigh

Wrap small terra cotta pots with burlap fabric or ribbon, and cut after the overlap. Use dots of hot glue to adhere one side to the other. Avoid gluing the burlap to the pot if you’d like to reuse these with another theme, as I’ll be sure to do in the future. Trim the excess length off with scissors so that the pots sit flat on the table.

023Leigh

Add a length of ribbon around the top and tie it in a taut bow. This is not only decorative, but is a trick to keep the burlap securely in place without having to glue it permanently.

005Leigh

Fill each pot with a chunk cut to fit, from a large block of stryofoam. Wedge little chunks of stryofoam in between the large block and the wall of the pot until the large block has no wiggle room. This keeps your creation from drooping later.

006Leigh

Glue ground cover to the top of your moss. Do this by cutting the green edges to fit the pot, and gluing those edges to the rim. I used faux earth meant for a table runner, but I’ve seen similar stuff in the form of placemats as well. Other options are faux Easter grass, moss ribbon, Astroturf, green burlap, or grass printed scrapbook paper (for the printable topiary).

010(2)Leigh

Cut stems, sticks, or dowels to jab into your ornaments, and wrap them with brown floral tape. If your animals are already on sticks, simply cut them to size with good sheers.

013 (2)Leigh

It’s easier to embellish your bunnies before potting them. Double-wrapped a length of jute (or yarn, ribbon, twine) around each bunny neck and knot it loosely. Slip a burlap rosette under the jute so that it sits securely without glue.

014 (2)Leigh

Make a pilot hole into the center of the green stuff. Do this carefully with any sharp point from an awl to a screwdriver. (I used a scissor side… but I have a tendency toward crafting dangerously.) Lastly, jab the bunny stick into the pilot hole.

134Leigh

Continue crafting the rest of your rascally rabbits.

287Leigh

Another option is cover a carved styrofoam shape with moss, as I have done with the larger bunny centerpiece. I’m not going to cover that in detail here because it took a lot more time, energy, and patience. If you choose to go that route, you can either purchase a ready-made animal shape, or carve one from a block of stryofoam yourself. Foam cutting knives are available that will make the job slightly easier.

257Leigh

One way to add foliage is to cover your creation with moss ribbon as I have done. This is a kind of moss covered carpet tape. Cut it into pieces and round the edges, so that the animal shape may be completed in an unseen patchwork. Adhere the patches with hot glue, pressing firmly.

130Leigh

 Embellish it with a burlap ribbon collar and flower, and pot it in the same way as I showed you earlier. I wanted to reuse the bunny topiary again for future themes, so I did not glue the collar to the bunny. I simply glued the flower to one end of a length of ribbon, and then wrapped the ribbon around the neck. I began with the blank end and looped it underneath. The weight of the flower resting on top of the opposite ribbon end kept it firmly in place. It will look completely different with a another color of base wrap and type of collar embellishment.

183Leigh

The following are my leaping bunny printables (free for noncommercial use). Right click on the image you want to use, and select print. Choose color and photo settings for your printer, and print them on sturdy white cardstock.

BigBunnyTopiaryCraftLeighBunnyTopiaryCraftLeigh2BunnyTopiary5x7LeighCarrotsCraftLeigh


To make a paper topiary from my printables, begin by printing and cutting out the two opposite facing bunnies.

034Leigh

Glue them together, back to back with a stick or popsicle stick in between. Pot the stick, as shown previously, and embellish it further with paper rosettes and ribbons.

129Leigh

Cut out the carrots to use as place-cards that rest on your newly crafted topiaries. I printed mine, 2 sheets to a piece of cardstock, so that they would be smaller than the banner carrots.

158Leigh

Another option for folded place-cards, is to print out the 5×7 invitations / thank you cards and fold them in half. Embellish them with tiny bows or paper flowers, and write guests’ names on them.

198Leigh

Adding my leaping bunny topiary printable to the center of an existing wreath is an easy way to update a piece you already own and make it fit perfectly to your theme. (This carrot wreath came from Le fidèLe Design’s affiliate Cost Plus World Market. Find a link to them with up to date coupons in the side bar.)

032Leigh

Make a banner with the bunnies and carrots by simply arranging them in a pleasing manner and taping the backs to jute, ribbon, twine, or yarn. I chose to criss-cross the carrots between the bunnies.

209Leigh

A loop at each end makes it easy to hang with clear thumbtacks.

113Leigh

You can also attach the carrots to readymade treat bags like the orange chevron one here. It’s filled with sprouted pumpkin seeds as a part of a healthy and tasty lunch. (See more of this along with the recipe here.)

090Leigh

(Find the bunny ears napkin ring tutorial here.)

Faithfully Yours,

Leigh

P.S. The Easter Bunny approves this message.

WildBackyardBunnyLeigh

(This is one of the wild backyard bunnies visiting my porch!)

Fast & Easy DIY Burlap Ribbon Bunny Ears Napkin Rings Craft Tutorial (Perfect for Easter, Showers, Luncheons, & Brunches)

139Leigh

Why buy a set of bunny ears napkin rings when you can make your own for a fraction of the cost that suits your décor perfectly? This was the thought that sparked one of my cutest projects. 12 feet of 1 inch wide orange burlap ribbon was enough to make 6 rascally rabbit rings for my leaping bunny topiary theme, but many other ribbons would have worked just fine. Hot glue, scissors, and a ruler were the only tools needed to finish the napkin creatures in half an hour. What a perfect project for a spring “crafternoon”!

017 (2)Leigh

Each bunny will use about 2 feet of ribbon, so plan accordingly. Note that one inch wide ribbon is the perfect size for this project. Cut 2 lengths of 7 inch strips for each ring… or 12 strips for a half dozen rings.

019 (2)Leigh

Cut 2 lengths of 5 inch strips for each set of ears… or 12 strips for a half dozen rings.

020 (2)Leigh

Fold each 5 inch strip in half, and press a crease into the folded edge. Lay down a thin strip of hot glue along each vertical side edge, in order to glue the fold into place permanently. (Try using a cool temp hot glue gun to avoid burning your fingers with the hole-filled burlap.) Leave the bottom non-folded edges unglued, forming a tiny sack. At the top folded edge, take the right corner and fold it over toward the center. Then take the top left corner, and fold it over the right one. It will make the top of each ear. Glue the folds into place with a dot of glue, under the left corner and over the right.

023 (2)Leigh

With all your ears made, assembly line fashion, get started on attaching them to the rings. Take one of the 7 inch strips and fold it in half to locate its center. Cut centimeter length slits, about a centimeter away from that fold, perpendicular to the fold. (You just made two ear canals.) Fold the bottom open edge of an ear in half, and slip it into a slit opening. You should see about a half centimeter sticking out.

024 (2)Leigh

Glue the outside of this protruding portion to the 7 inch ring strip. It should fan outward. Repeat with the other ear, making sure they’re facing the same direction.

026Leigh

Take another 7 in strip of ribbon and glue it to the flat side of the bunny eared strip. The easiest way to begin is by gluing one end and tapping it into place. Continue on until the whole strip is joined. Make sure the ribbons are curved the same direction for a less troublesome experience.

037Leigh

Form the ring by gluing one end of the long strip to the other, by slightly overlapping the edges. (You just made a bunny face.)

170Leigh

Repeat this process until your rabbit warren is complete. (Know that they get easier after making the first one.)

149Leigh

I used sage green cloth napkins with a seam that is actually called a lettuce edge. These folded beautifully into a roll with a top that resembled a small head of lettuce.

252Leigh

These are perfect for an Easter party. (See more of the leaping bunny garden party here.)

090Leigh

They’re also great to pull out for a spring lunch. (Find the carrot croutons / “bacon” bits recipe here.)

166Leigh

I wanted orange bunnies to coordinate with my carrot décor, which no one even sells, so I made them with fall clearance ribbon… making the grand total for this project a whopping buck fifty!

220Leigh

The best part of all, was receiving the genuine compliment that they were so much cuter than the stores’ versions. I hope you think so too. (Get the topiary craft tutorial and printables here.)

073Leigh

Faithfully Yours,

Leigh

P.S. The Easter Bunny approves this message.

WildBackyardBunnyLeigh

(This is one of the wild backyard bunnies visiting my porch!)

Quick & Easy Candyland Confection Ideas: Pink Almond Milk Juice “Recipe”, Cotton Candy “Cream” Sodas, & Gingerbread Peep Pops

219Leigh

These Candyland party confections are so simple that I thought I’d just combine them into one article… if only to pass along a few easy ideas that can be prepped at the last minute. The versatile juice milk is a great way to colorize and disguise calcium while adding a flavorful kick, which is great for anyone with a picky eater. While sugary cotton candy isn’t known for its health benefits, it is a yummy once in while party-treat that looks adorable when served as ice cream sodas. And Peep pops are the fastest pop you can prop into a candy buffet! Just look for the sugar-free varieties if diabetic or avoiding corn syrup. They’re still just as yummy and cute!

341Leigh


Pink Almond Milk Juice Ingredients:

  • ½ gallon Silk almond milk (or any variety of milk like cashew, hemp, rice, oat, soy, or even cow’s)
  • 17 ounce bottle lingonberry juice concentrate (or any pink juice like pomegranate, black cherry, raspberry, cranberry, etc… or try blueberry, grape, or even orange for a liquid creamscicle!)
  • Optional: agave to taste… if needed to sweeten the more acidic juices, because it mixes well into cold liquids & is low glycemic

136Leigh135Leigh133Leigh127Leigh

Pink Almond Milk Juice Instructions:

Gather any variety of pink juices and your choice of milk to test which combination you like best in a small glass. I quickly realized that I preferred the lingonberry and pomegranate juices with the original 60 calorie per cup Silk almond milk. Though I typically love the black cherry concentrate, I did not care for it when combined with milk. I also didn’t care for the combo with the 30 calorie Silk, but it’s a fantastic option if you’re looking to cut the numbers. Use your own taste buds to discern your favorite, and let me know what you came up with!

137Leigh

Mix a crowd sized amount in a jug, and test the flavor before pouring into individual servings. The easiest one to one ratio was the Silk’s half gallon and Ikea’s 17 ounce lingonberry concentrate, but I realize this taste profile isn’t for everyone. The most liked version does seem to be the orange creamscicle.

179Leigh

For the Candyland theme, I served the juiced milk in these super cute jugs with washable reusable straws. Another adorable option would be to use trendy jars as drinking vessels. (Find some at Le fidèLe Design’s affiliate Ball Fresh Preserving Store at the link in the side bar.)


Cotton Candy “Cream” Sodas Ingredients:

  • 1 package of readymade cotton candy (with sugar & not corn syrup that color coordinates with your theme)
  • small vessels that resemble soda glasses or ice cream dishes
  • 1 package of theme coordinating paper straws (or thick half straws as pictured)

366Leigh

Cotton Candy “Cream” Sodas Instructions:

This is the cutest and easiest way to serve cotton candy to a crowd… which is the perfect last minute fill-in for a Candyland theme. Find the yummy stuff packaged anywhere from convenience stores to grocery marts. (You can even find some at Le fidèLe Design’s affiliate Cost Plus World Market at the link in the side bar, they even have solid colors like a green in watermelon flavor.)

159CottonCandySodasLeigh

Starting with clean and well dried hands, pinch sections of cotton candy large enough to fit into the base of each dish. Keep layering until you reach the top, and stick a straw (or one cut in half) into the side of it. Take a section of cotton candy and gently ball it into a rounded mound to set on top. Gently tap it into place. (Your hands will be coated in spun sugar… but I’m thinking that’s where the phrase “finger lickin’ good” came from!)

183Leigh

These are especially adorable when perched atop a treat tower, like this one I crafted for the Candyland theme.


Gingerbread Peep Pops Ingredients:

  • 1 package of gingerbread peeps (or any theme coordinating variety, note that the sugar-free varieties don’t have corn syrup)
  • 1 package of color coordinated paper straws

338Leigh

Gingerbread Peep Pops Instructions:

It literally takes 2 seconds to make a Peep Pop, so it’s a last minute treat that looks absolutely precious. You can find so many varieties of the darling confections just about anywhere (and online year round), so it’s easy to add them to any candy buffet.

77Leigh

Simply poke a hole in each peep base with a skewer or toothpick, and wiggle it side to side to widen that hole. Slowly push in a straw until it feels securely held, yet doesn’t disfigure the peep.

356Leigh

Prop it into a cake pop holder or vessel filled with non-sticky candy like gumballs or jellybeans.

209Leigh

See more Peep Pops in action from another themes by clicking the following link: Chalkboard & Glitter Hearts Themed Valentine’s Day Party Buffet Décor Ideas (+ DIY & Printable Links)

214Leigh

For a tasty yet healthy snack to add to your Candyland theme, try my Spicy Guacamole Shooters / Avocado Appetizers Recipe (Allergy-Friendly & Nightshade Free = No Red Pepper or Tomatoes).

Faithfully Yours,

Leigh

Free 23 E-Books & Labels on Arts, Crafts, Cooking, & Gardening from Craftsy!

The online learning site Craftsy has generously offered some super cute labels to download and print for free. Simply click on the image below for a link to the webpage posting them.  Also from Craftsy are 23 amazingly free e-books on a variety of arts, crafts, cooking, and gardening subjects! Just click on a picture to find the book it depicts. Then you can download it and keep it forever to reference whenever you want to.  Yea!! Note that Craftsy is a Le fidèLe Design’s affiliate, so I may be compensated if you decide to make a purchase after clicking on these links, but these e-books and labels really are free… and free is really great! This is why I took the time to pass them along to you. I do hope you enjoy them. I can’t wait to read them myself!

Faithfully Yours,

Leigh

St. Patrick’s Day Party Tablescape Décor Ideas (with Rainbows, Shamrocks, Money Tree, & Printable Card & Invite)

Discover what is really at the end of the rainbow with these St. Patrick’s Day party décor ideas. A centerpiece filled with pots of gold will prove that money does grow on shamrock laden trees! This colorful tablescape is quick and easy to achieve with inexpensive materials and my Quick & Easy Metal Napkin Rings Tutorial, Money Tree + Rainbow & Shamrock Crafts for St. Patrick’s Day Party Décor article to guide you, and use my free printable card to invite your friends to join you for a wee bit o’ whimsy this holiday.

048Leigh

This celebration, I really wanted to indulge in a pure state of whimsicality. I envisioned leprechauns dining in Seussville… and this vibrant tablescape is what resulted. This may of course be toned down for your own home, taking just an idea or two if you like… but as for me and mine, it’s whimsy all the way.

042Leigh

I began with a crisp green field of tablecloth topped with chargers of golden coins. This was layered with green plates and rainbow colored madras plaid napkins ringed in green glittered metal.

163Leigh

(See how to quickly make your own napkin rings easily here.)

038Leigh

Utensils were adorned with metallic green washi tape, just as I had previously done for Mardi Gras. (See more on this here.) Basket gilded glassware contributed to the theme as well. (See these in a Thanksgiving tablescape here.)

050Leigh

The table was strewn with green pom-poms plus mylar and glitter shamrocks as confetti. (The glitter varieties were actually individual stickers that can be used to adorn something later, because their backings remained intact.)

067Leigh

At the table’s center was a money tree with shamrock leaf ornaments, coin-studded branches, with gold and green lights.

073Leigh

Rainbow archways and pots of gold were held in its arms, and its trunk was festooned with more polychromatic splendor. (Find instructions for all of this year’s St. Pat’s crafts here.)

058Leigh

The base of the tree was encircled with a multi-hued feathered boa and apropos greeting. Around that were glowing votive holders and more pots of gold, some complete with their very own rainbows.

070Leigh

A chair for the guest of honor was draped with a rainbow sash, green sequin tiara, glitter shamrock wand, and metallic beads in various shade of green. This was a device with which to further invite whimsy, because who could maintain a serious façade when someone so adorned is seated across from you? For your celebration, this spot might be reserved for the smallest family member. I confess that I have a lot of fun dressing my grandmother in such crazy holiday attire for her parties at the senior center, and it garners her much attention.

075leigh

Glittered holiday signs strewn with rainbow streamers fill the window in the background. Believe it or not, I actually held myself back from adding many more rainbows… using the rest of my 81 foot roll of crepe paper would have mummified the window blocking out all sunlight!

StPatsDayCardsLeigh

My free 4 x 6 printable card may be sent as an invite when details like time and place are added to the inside, but it is also serves as a lovely remembrance for any one that’s cared for. The Irish blessing on the card reads, “For each petal on the shamrock. This brings a wish your way, Good health, good luck, and happiness, For today and every day.”

4x6StPatsCardLeigh

Simply right click on the small image, and select print. Then print it using the color and photo settings on cardstock. Here, I’ve printed them on both plain white stock and a parchment variety so that you may see how paper choice can alter the look of your card. You can also print it in black on green paper. (I’m offering it, along with my other printables free for your personal use. I just ask that my work not be used for commercial purposes.) You can even embellish it for a personal touch with glitter glue, stickers, ribbon, etc. The shamrock stickers I used on the card here are the same kind seen in the tablescape as confetti. A dab of quick dry tacky glue adhered a bow with the same ribbon used on the pots of gold.

074Leigh

I will leave you with this lovely St. Patrick’s Day toast, “May the sound of happy music, And the lilt of Irish laughter, fill your heart with gladness, that stays forever after.”

040Leigh

Faithfully Yours,

Leigh

Quick & Easy Metal Napkin Rings, Money Tree, + Rainbow & Shamrock Crafts for St. Patrick’s Day Party Décor

058Leigh

Celebrate St. Patrick’s Day with rainbow filled party décor. Make pots of gold for a centerpiece to prove that money does grow on shamrock laden trees! These colorful crafts are quick and easy to achieve with inexpensive materials like metal ribbon for napkin rings and crepe paper for rainbow arches and votive holders. Find my free printable card & invite at the article for St. Patrick’s Day Party Tablescape Décor Ideas, along with how to complete the rest of the celebration.

133Leigh

Top o’ this morning’s question is how to fill a party with rainbows without breaking the bank. The answer is with crepe paper streamers in a rainbow print… 2 dollars will purchase 81 feet of decorating power! The trick is to use it in the same way you would utilize ribbon.

140Leigh

It only took a few inches of crepe streamer to adorn each of the slim handles of glittered baskets, taking them from Christmas to St. Pat’s in a flash. They only needed a few dots of glue to adhere each underside edge to the other, and it only takes a tug to remove the paper and reuse the baskets for the next theme. “Gold” coins atop gold gift bag stuffing complete the pots at the ends of the rainbow.

146Leigh

Some of you may have seen my last Mardi Gras Party article where I wrapped gold glitter votive holders with an amazing tri-color tinsel ribbon. I used those very same glittered holders and wrapped them with crepe rainbows for St. Pat’s. A tiny piece of transparent tape makes them reusable for another celebration, because nothing is attached that will pull the glitter off. A final touch is to add a piece of shamrock confetti using tape that’s been doubled over.

155Leigh

I purchased the confetti at half-off for 50 cents, and had more than enough to spread around, so I decided to decorate little Halloween cauldrons as pots of gold. I took a hole-punch to the shamrocks, and then I attached them with strips of two-toned green Christmas clearance ribbon. All they needed to complete them was a bit of green gift bag stuffing and some more gold coins… yes, those are the same ones that functioned as doubloon décor at Mardi Gras.

142Leigh

Some of these little pots dotted the table, and some sat perched in the shamrock leaved money tree.

152Leigh

Also gracing the glowing tree were rainbow arches made with the same crepe paper used earlier. I just cut a corresponding length of floral wire and taped it to the center of the underside. This provided a posable structure with which to bend the rainbow to my decorating will… which happened to be filling in some empty space between the branches.

156Leigh

The tree is the same gilded metal one I used for Mardi Gras, but was filled this time with different branches, lights, and shamrock ornaments. I used holographic branches that were 34 cents each, from last year’s St. Pat’s clearance sale. I filled in with a mylar leaf studded vine that I cut into sections. I found it along with the gold and green lights after Christmas for 90% off.

116Leigh

The holographic shamrock ornaments were dollar bin finds, but the glittered wooden varieties were made from a party store sign for a few dollars.

151Leigh

All I needed to do was cut them apart and add ribbon loops as hangers. For a future holiday, I can add rainbows or coins for a completely new look.

154Leigh

This metal tree has been painted different colors and adorned with a complete range of décor to suit every holiday.

121Leigh

For this one, I just wrapped the trunk in more rainbows and laid a green feather boa at its base. This too was found post St. Pat’s for less than 2 dollars.

067Leigh

If you plan your theme a year ahead, it’s easy to gather all the material you need for the cost a burger out. Then you can spend your cash on quality ingredients for a fabulous dinner menu!

208Leigh

The last, and most fabulous, craft is how to make your own metal napkin rings. These aren’t just for St. Pat’s but will work beautifully for any occasion. This is because you can find its base of decorative metal ribbon in a wide variety of styles and colors. For this party, I wanted to use the green glittered variety to encircle my rainbow colored napkins. Because I found the material on clearance, I made all 6 of them for only 50 cents.

149Leigh

First I needed to cut 6 inch metal strips. If you have any trouble cutting though yours, just cut a line into the metal with clippers, and then bend each side of it back and forth until it breaks free. This is much easier on the wrists than brute force. Then bend each strip into as much of a rounded circle as you can get it, and overlap the 2 edges a wee bit. Then glue those edges with E6000 in a well ventilated space.

095Leigh

Just let them cure a couple of days before sliding your pretty little napkins through them!

163Leigh

May all your crafting days be filled with the luck of the Irish!

135Leigh

Faithfully Yours,

Leigh

Chinese New Year of the Sheep / Ram Party Décor Ideas (With Formal Table Setting & Kid’s Table)

063Leigh

Celebrating Chinese New Year is always fun as each year comes with a new built-in theme to accompany the vibrant traditional colors and motifs. In this way, it’s easy to build on the previous event by adding a few new décor elements each year. Use the elegant formal table setting or the fun and playful Kid’s Table… or a combination as ideas for your own celebration. Spend as much or as little as you like, making the evening a complete spectacle or a simple affair. It’s a wonderful opportunity to celebrate the beauty of another culture, and the Year of the Ram will only return in twelve years… and well, it’s a really good excuse for having a great time!

039Leigh

The kids table utilized printables and crafts from my recent articles (Origami Crane Paper Folding Instructions -for Get Well Wishes or Chinese New Year Décor) & (Take-Out Favor Box & Paper Lantern Craft Printable + Bamboo Lantern + Paint to Antique a Lion Fú-Dog -DIY Chinese New Year Party Décor Crafts). The projects are a quick and easy way to decorate while leaving your budget available for all the wonderful food.

066Leigh

Lanterns are a traditional element of the Chinese New Year because the last day of it is the start of the lantern festival. My printables are an easy way to employ that tradition in your own home. They only need printing, cutting, and gluing. The “Fú” 福 characters, decorating the boxes, have graced the entrances of Chinese homes for many hundreds of New Year’s. It is said to have originated, not just for its meaning of happiness and luck, but also because “upside down” and “to arrive” sound alike when spoken in Chinese, thus making an upside down Fú equate to “good luck arrives”. (For some, however, hanging the Fu upside down is bad luck, so I’ve decided to make the character right side up on my printable boxes!)

096Leigh

Use the printables as favor containers, table crayon corrals, or cut out the character to make an LED lantern or luminaria. I stacked some of them onto a vintage brass tea-light holder and stuck in paper dragon favor puppets to heighten the spectacle… with no expectation that the centerpiece would stay intact long! Using LED lights insures that no fire will catch the paper, even if knocked over… so they are super kid and pet safe. It’s also easy to use the cut-out character to embellish a bamboo lantern like those I’ve painted in the pictures. (See my tutorial for the instructions on how to complete your own.)

031Leigh

Origami cranes are a lovely way to bring the kiddos into the party planning while teaching a timeless art to another generation. The historically traditional crane figure is an apropos symbol of hope for the coming year. The Japanese tradition of the “Senbazuru” folding of 1000 paper cranes is said to grant the maker a wish, such as healing for a loved one. The “Tsuru” (crane) is also said to denote happiness and luck, which is the same meaning of the “Fú” 福 character. These can easily be made with anything from wrapping paper to typing paper (see my tutorial for instructions with a picture for each step).

032Leigh

The powerful guardian lion Fú-dog is a traditional Chinese figure of protection. The one seen here is male because he’s resting a paw on a ball that represents the earth. Usually they are presented in pairs, but I only had one in a bright lime green color. I took this statuette from modern lime lion to antique guardian in a few simple steps (detailed in my tutorial). You can do the same with any accessory that doesn’t quite match your décor. Also set on the side table was a small sheep figure as a traditional way to represent the year. The gilded platter (non-breakable) symbolized the land of the rising sun. A book with more dragon puppets (from Oriental Trading Company, see the side bar for discount links) extra coloring pages, and lucky candy completed the picture.

025Leigh

Decorating the background were a mix of traditionally made bamboo kites (red phoenix bird and orange karp / goldfish) and modern kites (tiger and panda). Extend the New Year’s celebration to the weekend by letting your decorations fly freely. Having something else to look forward to is a nice way to ease the post-party let down that kiddos sometimes feel. (All of these were found on clearance for a few dollars each at Cost Plus World Market.) Above them hung an inexpensive yet lovely Chinese banner (again from Oriental Trading Company) suspended on simple pushpins.

052Leigh

Decorative paper plates and napkins were set onto printed coloring pages depicting all of the animals in the Chinese zodiac. Red envelopes containing coin money in even numbers are a traditional gift for children. Colorful punch, lucky candy, paper cranes, crayons, and mandarin oranges completed the setting.

183Leigh

Orange fruit is another traditional element of the Chinese New Year, so I included them in both tablescapes. It’s an easy way to add color without the trouble or expense of a formal centerpiece. It allows the gorgeous food to remain the center of attention.

132Leigh

My Quick & Easy Overnight Pickled Cucumbers Recipe was another colorful element to complement the other traditional dishes. (I will be posting more Asian inspired recipes from time to time in the future.)

175Leigh

Next to it were longevity noodles which symbolize long life when uncut. The dish was topped with prawns because seafood is a Chinese New Year must have. (Just make sure no guest has a shellfish allergy.) A whole fish pointed in the direction of the guest of honor would have been more traditional, but I was out-voted on that menu choice.

161Leigh

Half-moon shaped steamed dumplings are another necessity for the year’s celebration. (The round shaped variety depicts a life that goes around in circles never completing any goals, so those are considered bad luck!) Check out my allergy-friendly recipe for steamed dumplings here.

211Leigh

Fried springs rolls are practically required New Year’s fare! Adjacent to those were long beans with a black bean sauce and a prawn vegetable dish served over rice.

162Leigh

Some of the dishes were set onto wooden stands to both protect the table and elevate the vessels to different heights.

179Leigh

Each platter should have its own set of chopsticks or spoon. Serving chopsticks are typically longer and more decorative than those one eats with, but I only had one set of that type.

200Leigh

A lovely soup tureen was set into another platter to catch spills. This also contained a serving spoon and a few fortune cookies… an American tradition only, but why not celebrate the blending of beautiful cultures. Scattered around the center were some vintage boxes containing lucky candy.

210Leigh

Many Chinese tables are fitted with “lazy susan” turntables at the center so that everyone can reach each dish. I have a couple of these, but opted for a different style of arrangement this year. Hanging in a circle from the chandelier, was another red banner like the one in the other room.

189Leigh

Down the center of table ran a length of metallic sprayed mesh fabric to coordinate with my grandmother’s china. She actually purchased the tableware when she lived in Taiwan for a time. A simple white tablecloth anchored it all. I was hesitant to use white, because it can be considered a funerary color (yikes), but it was the only thing I had that suited the china… which was incidentally made the year of a ruler’s death, thus the color of the teacups were made white instead of the normal red (according to my grandmother).

122Leigh

Tea is the drink of choice for such a celebration, and its cup is placed to the right just as in a Western table setting. The bowl for soup or rice goes to the left where a Western bread plate would sit. The flat bottomed spoon is set into that if there is no double rest for spoon and chopsticks. At the top and center is a small rimmed plate for dipping sauce. Usually only one variety is served universally, but I served 3 kinds from which guests could choose from.

221Leigh

Seated on the side table in the background were three of my grandmother’s dancing statues, an orchid, and one of my painted lanterns.

212Leigh

Above that were two of her woven hats that she requested I hang on the wall as décor. There really was something here for everyone.

180Leigh

In celebrating this Chinese New Year (slightly early so that I could post it for y’all), I tried to incorporate traditions and symbols while adding some playful American touches. In this way, I believe we can pay special recognition to the beauty of our blended cultures.

059Leigh

Faithfully Yours,

Leigh

P.S. If any of you live near Frisco, Texas… be sure to check out “Tasty Garden Chinese Restaurant” whose kind individuals would love to make your party preparations easier by adding a beautiful dish or two to complete the setting. Who says you have to make every recipe at the table? They’ve said they would be happy to work with individuals to avoid allergens… which is always appreciated! http://www.tastygardenonline.com/

121Leigh