Tag Archives: Tutorial

Chinese Steamed Dumplings Recipe (Allergy Friendly, Gluten-Free, & Soy-Free)

184Leigh

Steamed Dumplings are an absolute must serve “lucky” dish for the Chinese New Year, but unfortunately they were also a dish I must not have… and I know I wasn’t the only unlucky one. Different restaurants have varied recipes for them, but nearly all make them with allergens. So I decided to make my own recipe that played on the basics but omitted the soy sauce, pig lard, pork, shellfish, mushrooms, etc. Plus, by using my optional substitutions, just about everyone can enjoy these delightfully delicious dumplings!


Shell Ingredients: (note that ~ means approximately)

  • ~ 3½ cups sweet rice flour + a good bit more for rolling (a.k.a. glutinous rice flour… that is 100% gluten free!)
  • ~ ⅔ cup boiling water
  • ~ ⅓ cold water

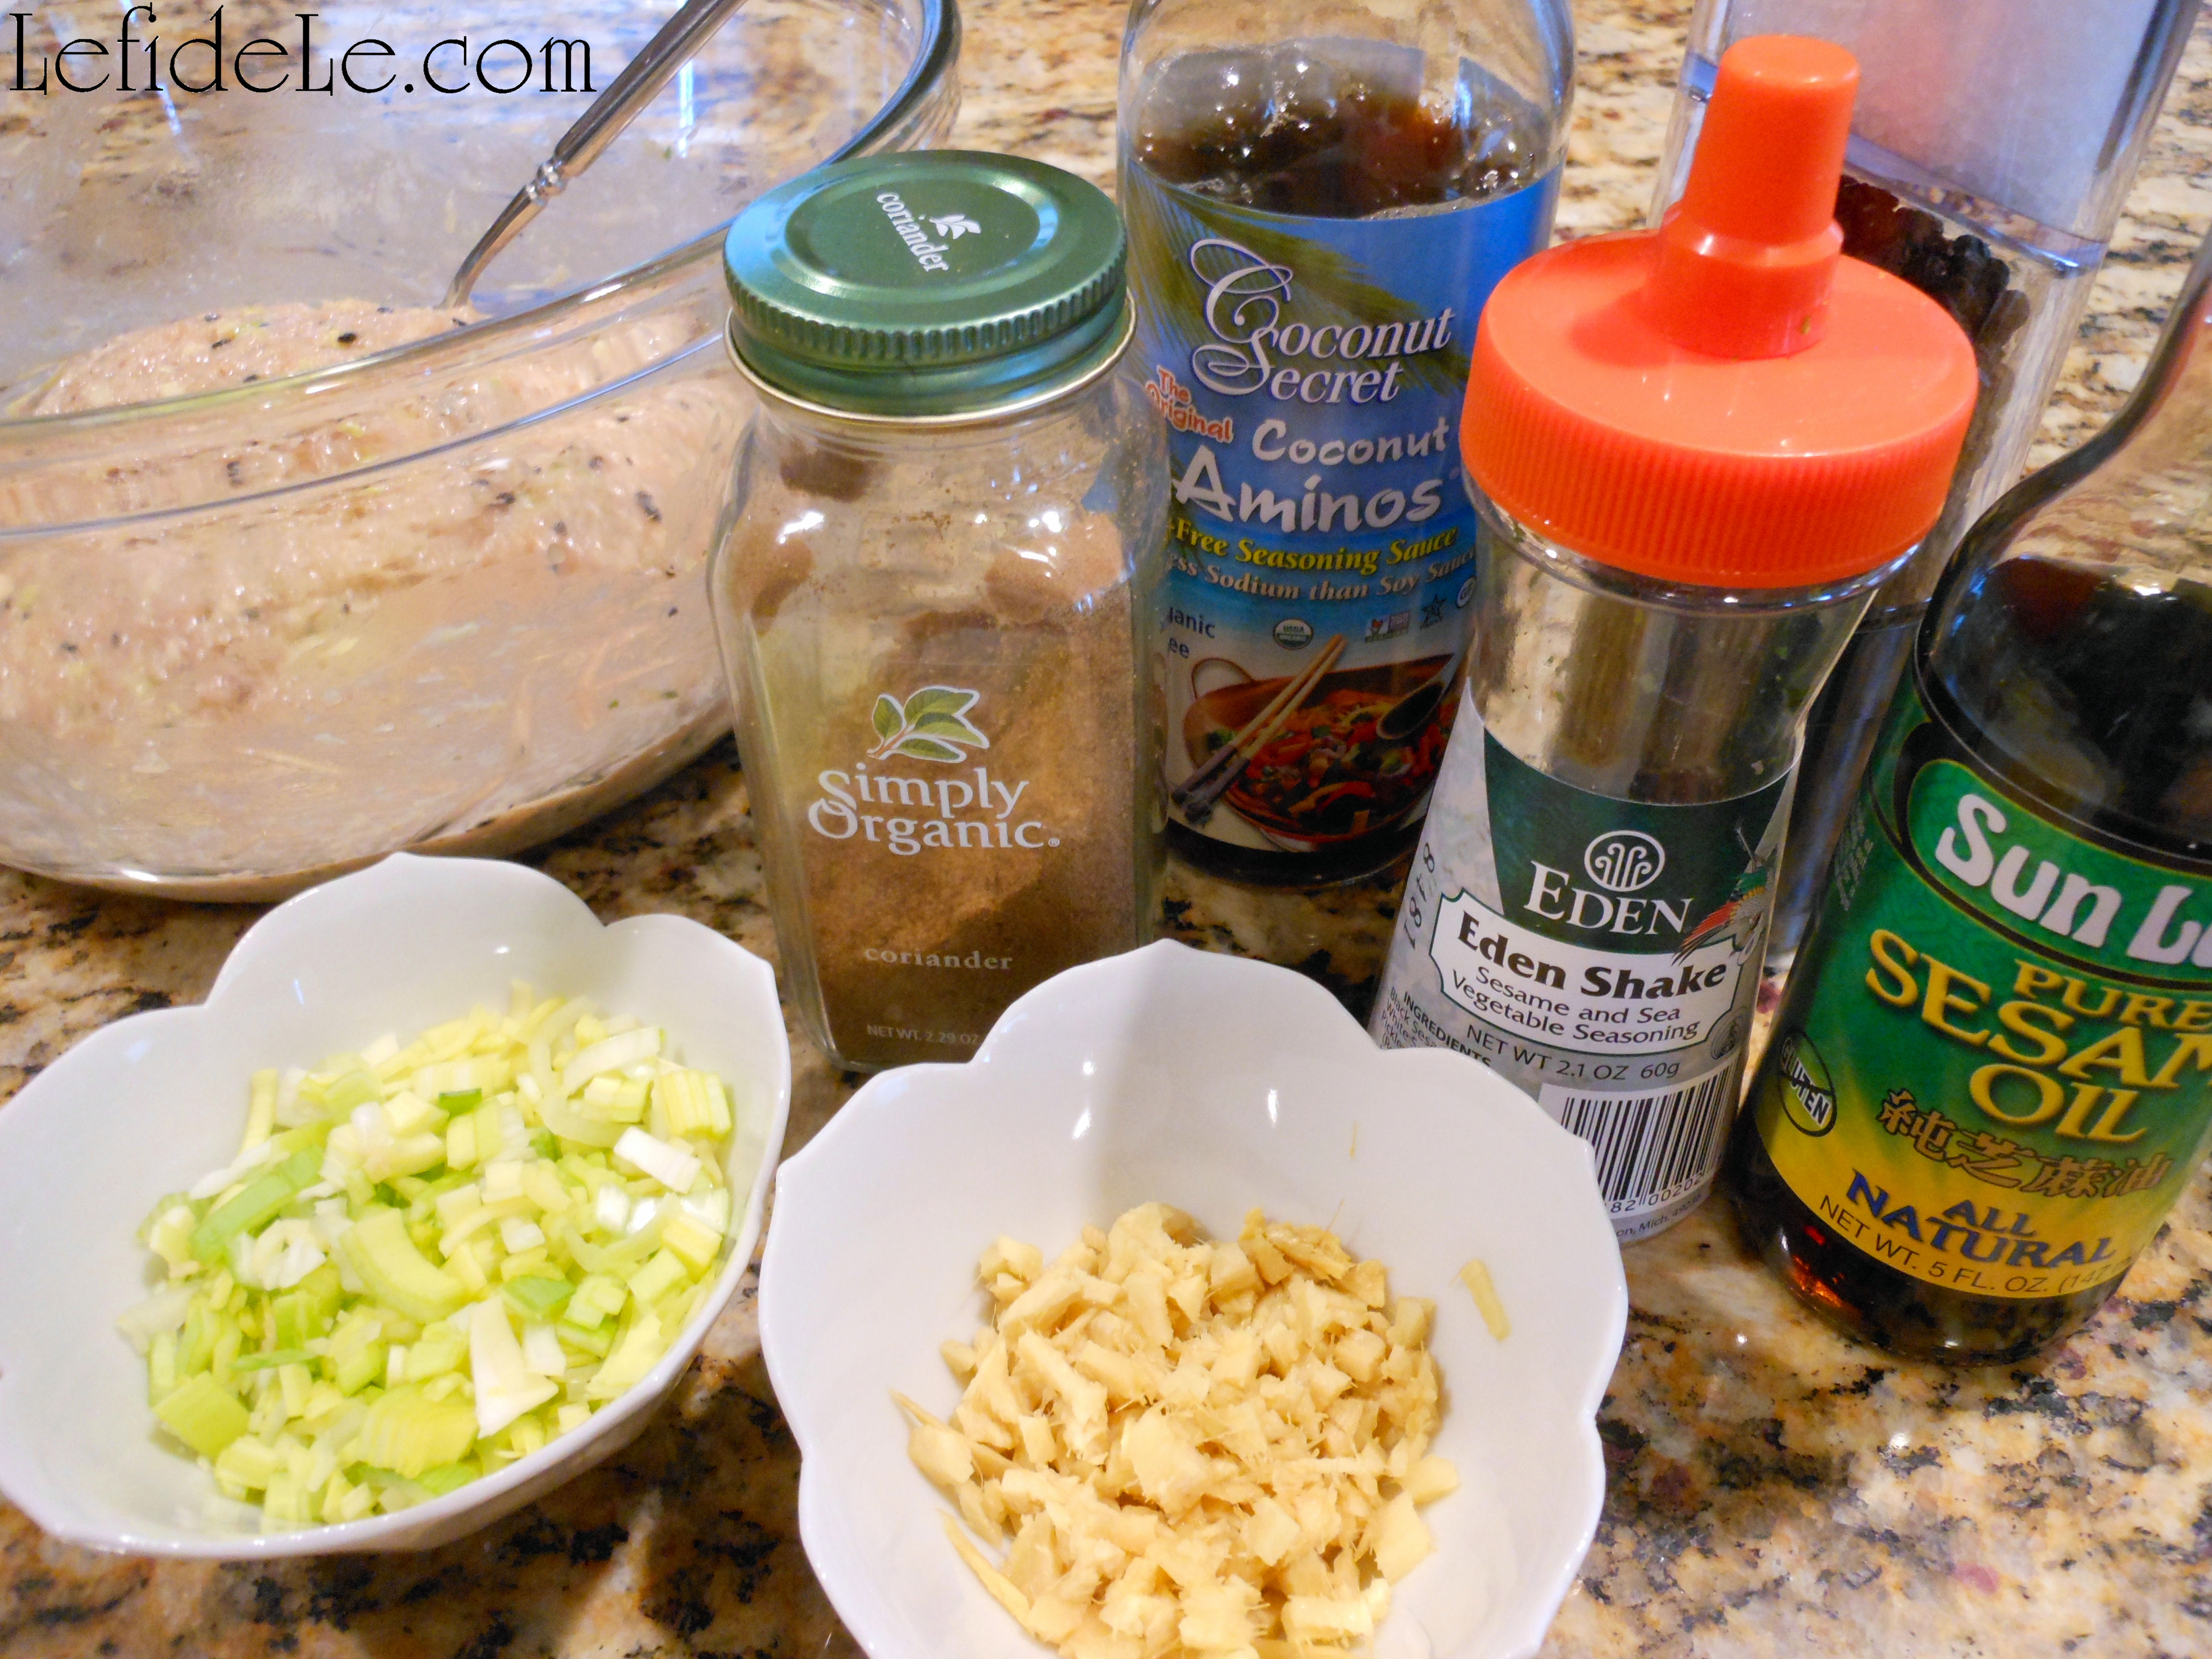
Filling Ingredients:

  • ~ ¾ pound ground chicken (or turkey… or minced water chestnuts/mushrooms/tofu for vegan)
  • 3 tablespoons sesame oil (or another flavored oil of your choice)
  • 2 tablespoons Coconut Aminos (a.k.a. soy sauce that is 100% soy free… or soyu if you like)
  • 2 teaspoons minced ginger root (or garlic)
  • ¼ cup minced leeks (or spring onions, bamboo shoots, shredded cabbage, etc.)

Filling Seasoning: (I used these, but add whatever you like adapting it to your tastes.)

  • 2 teaspoons sea salt
  • 1 teaspoon ground coriander (try adding 1 tsp. ground ginger if not using minced)
  • 3 teaspoons of Eden Shake + more for garnish (a.k.a. black & white sesame seeds plus pickled redshiso leaf… Anyone with sesame allergies can use hemp seeds which are the perfect high protein substitute.)

162Leigh

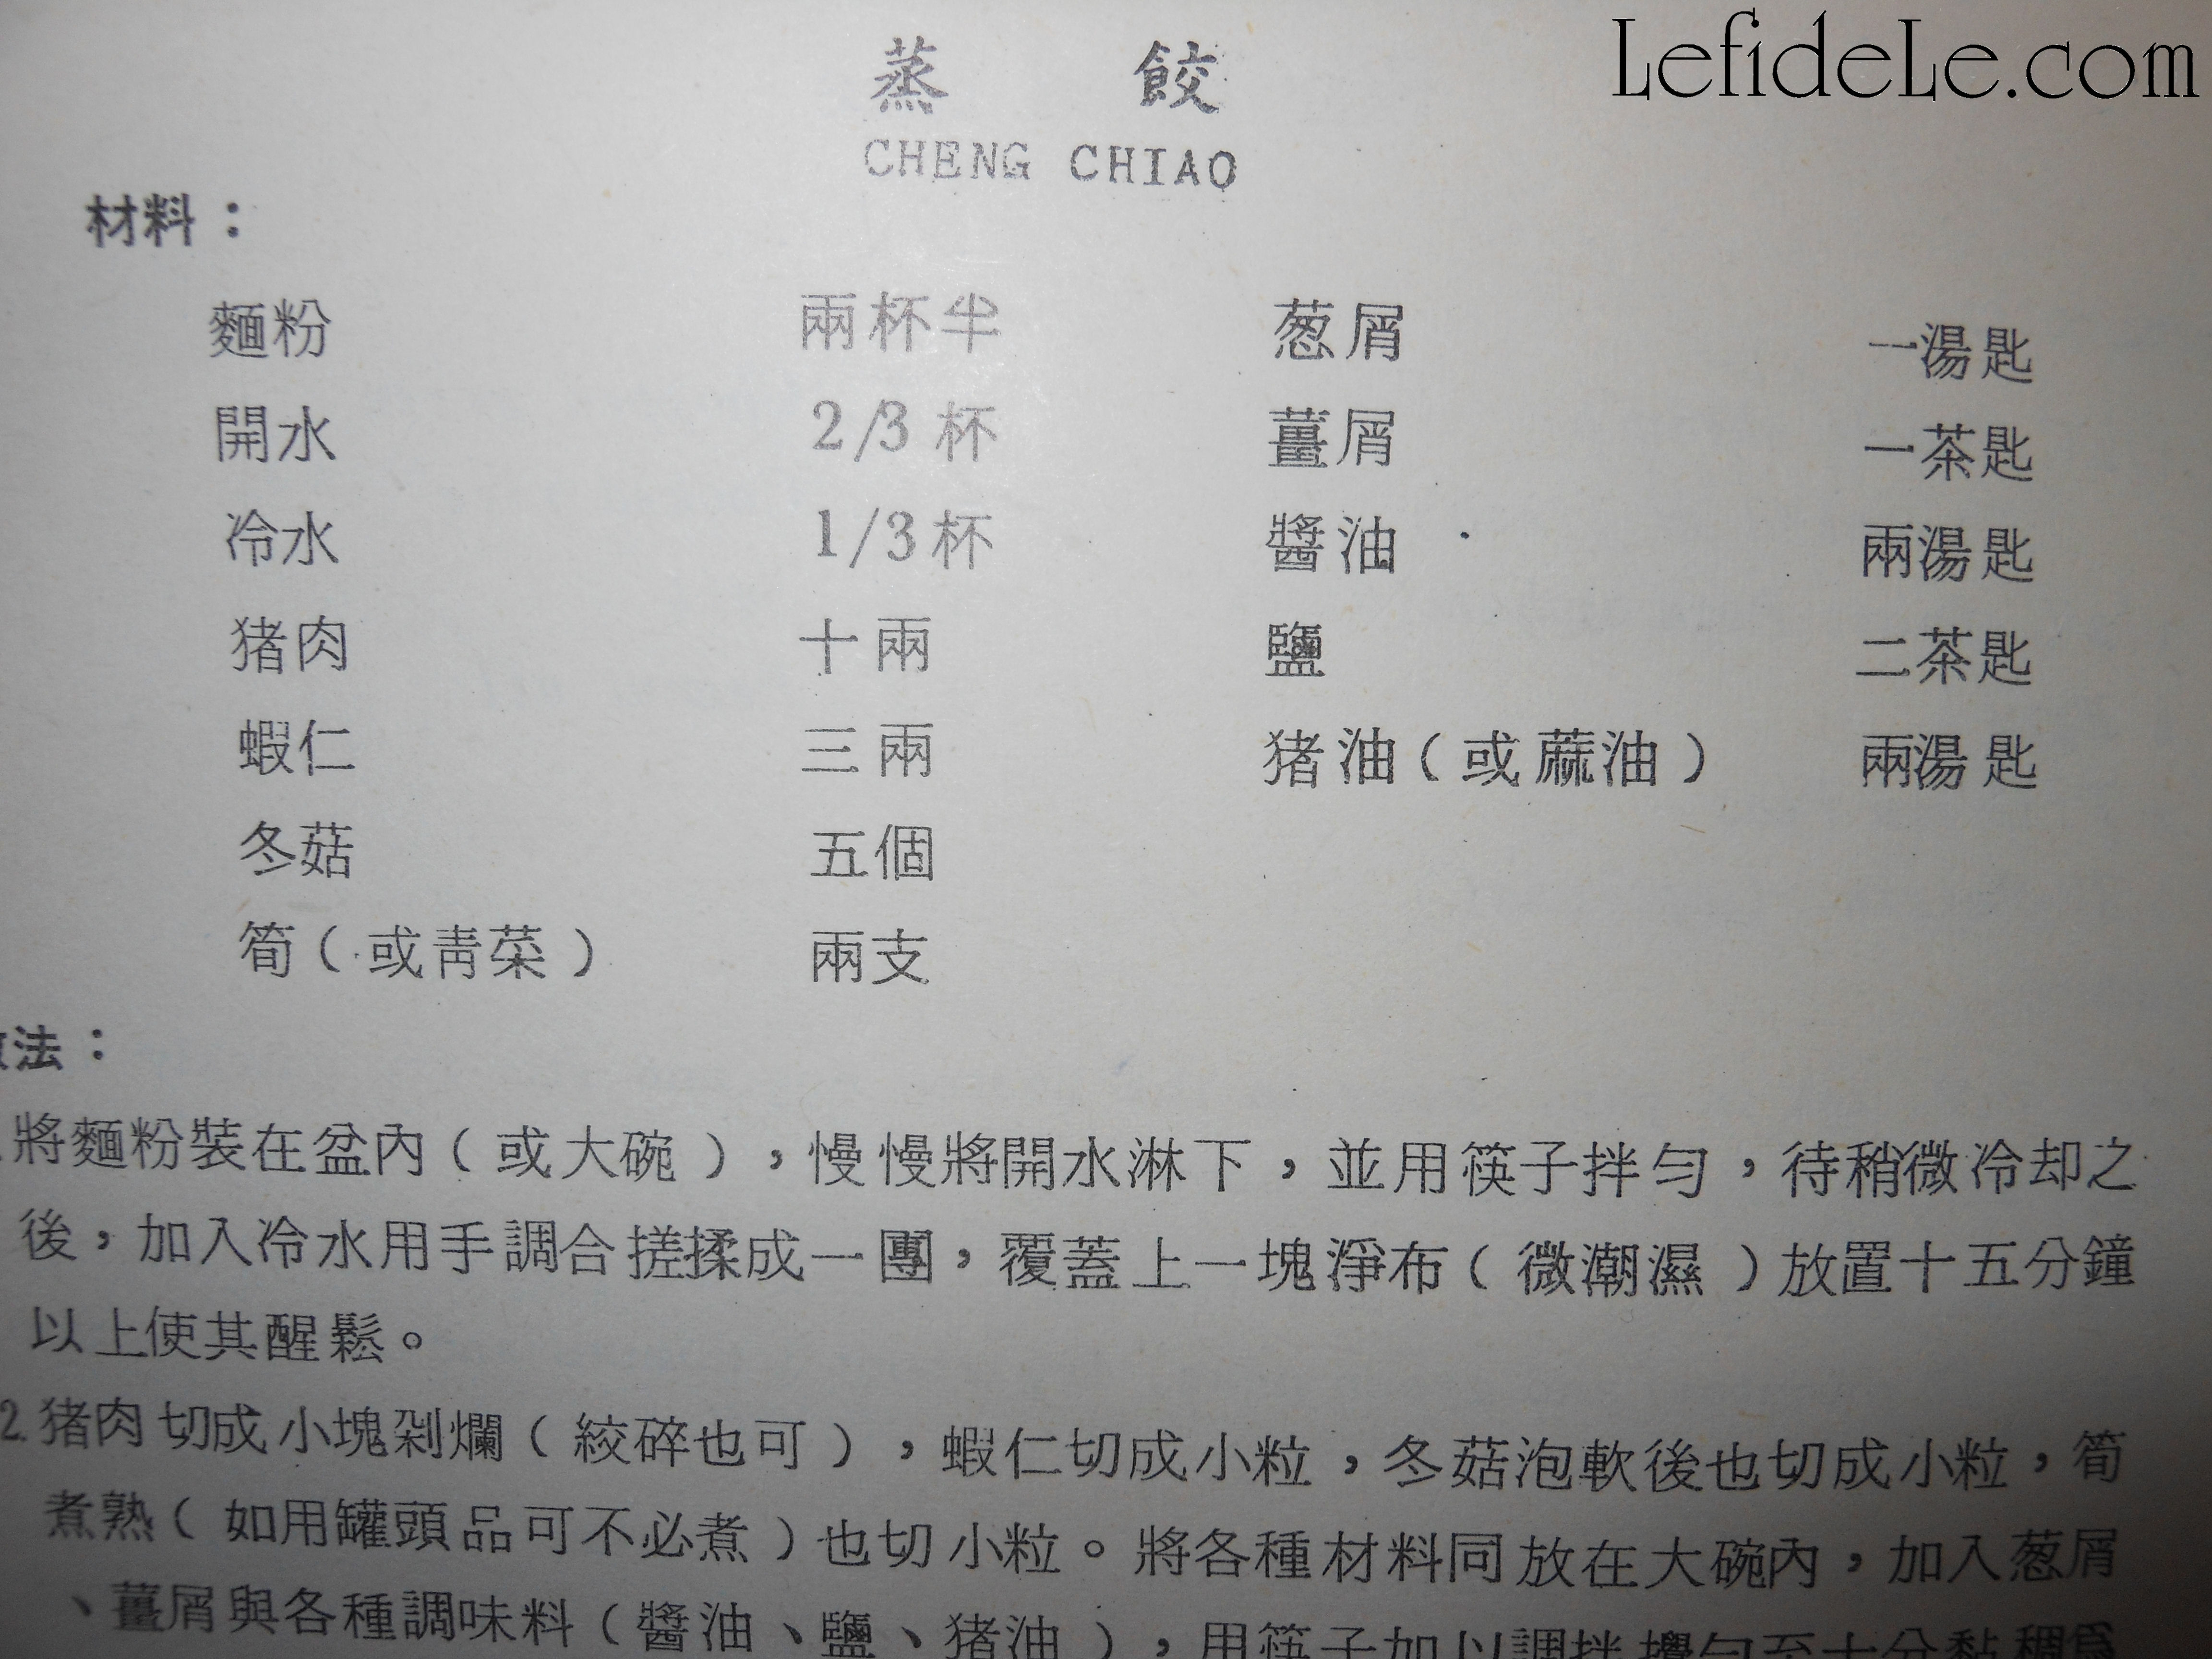
↑ This is a picture from my grandmother’s old recipe book that called for pig lard, soy, and the other things I spoke of earlier. I’m sure it was a tasty recipe, but I changed every ingredient but the rice flour… which I increased the portion of because the dough was too sticky to roll as it was. Note that even more flour than this will be needed as you roll.


Instructions:

168Leigh

First mince the ginger and leeks. Then mix all of the filling ingredients well.

172Leigh

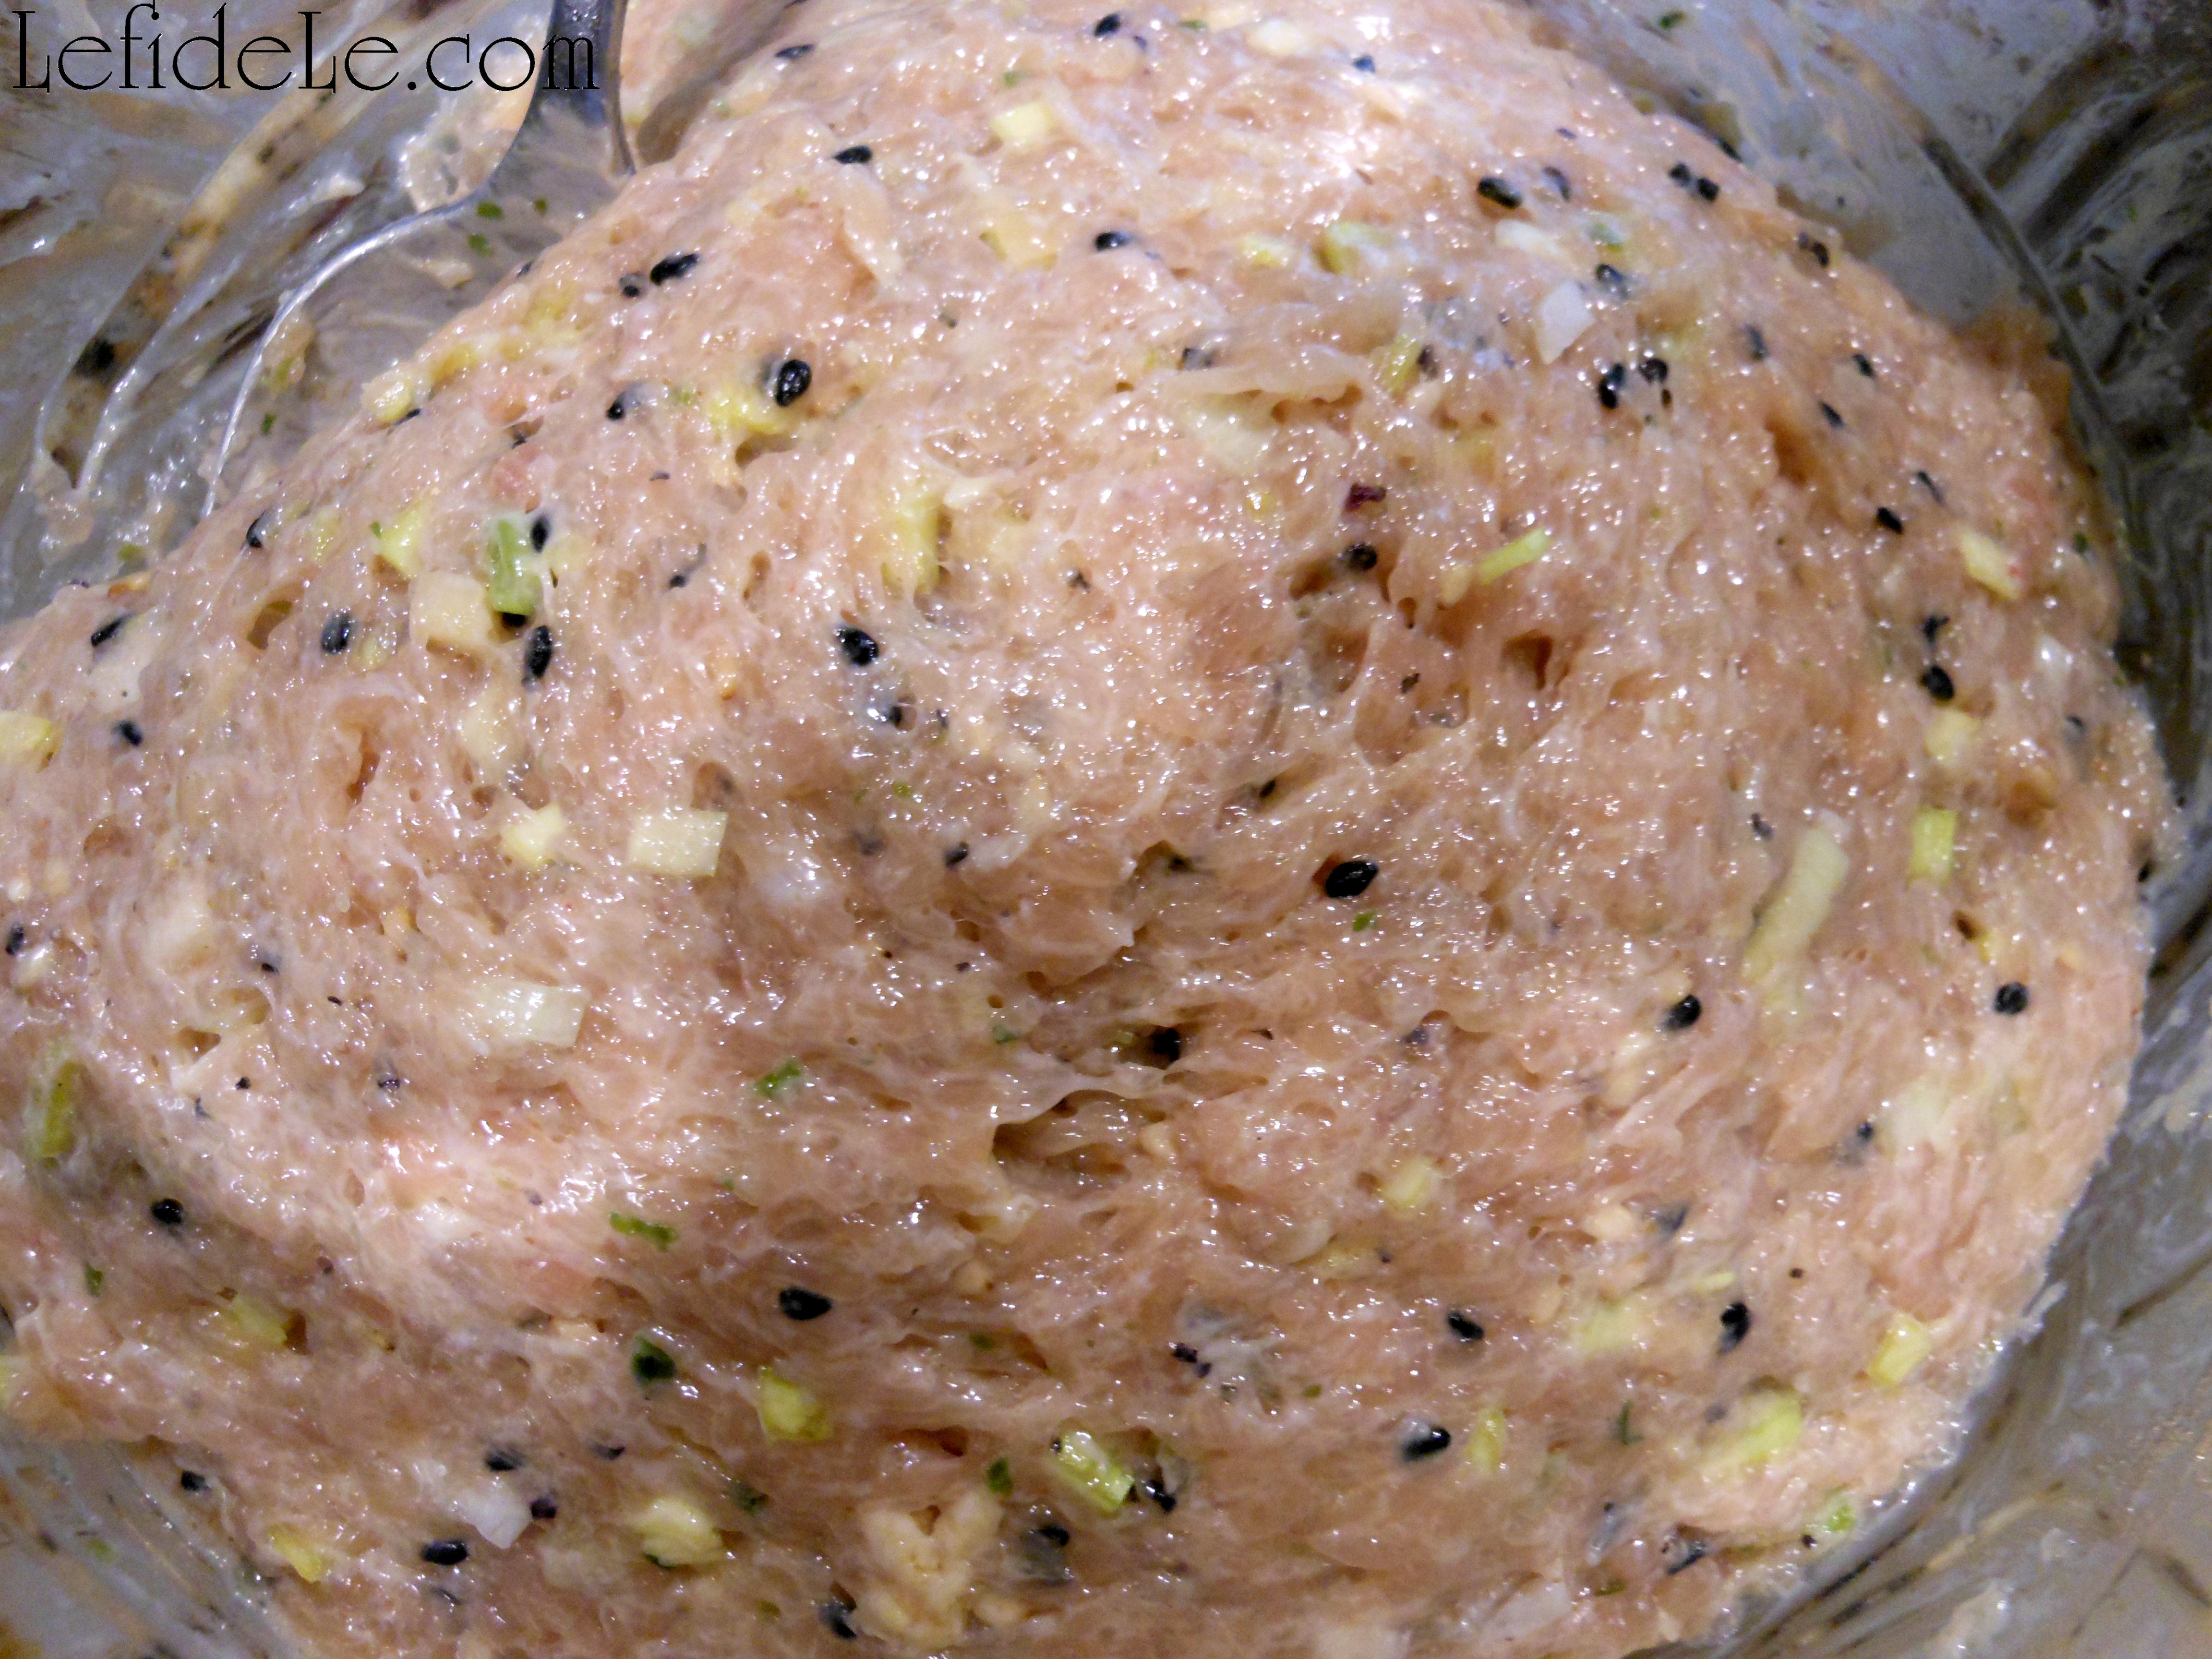
The ground meat will absorb all of the liquids, but you can tell when it is well mixed when the minced ingredients seem well dispersed. Let this marinate in the refrigerator until you’re ready to fill the dough.

174Leigh

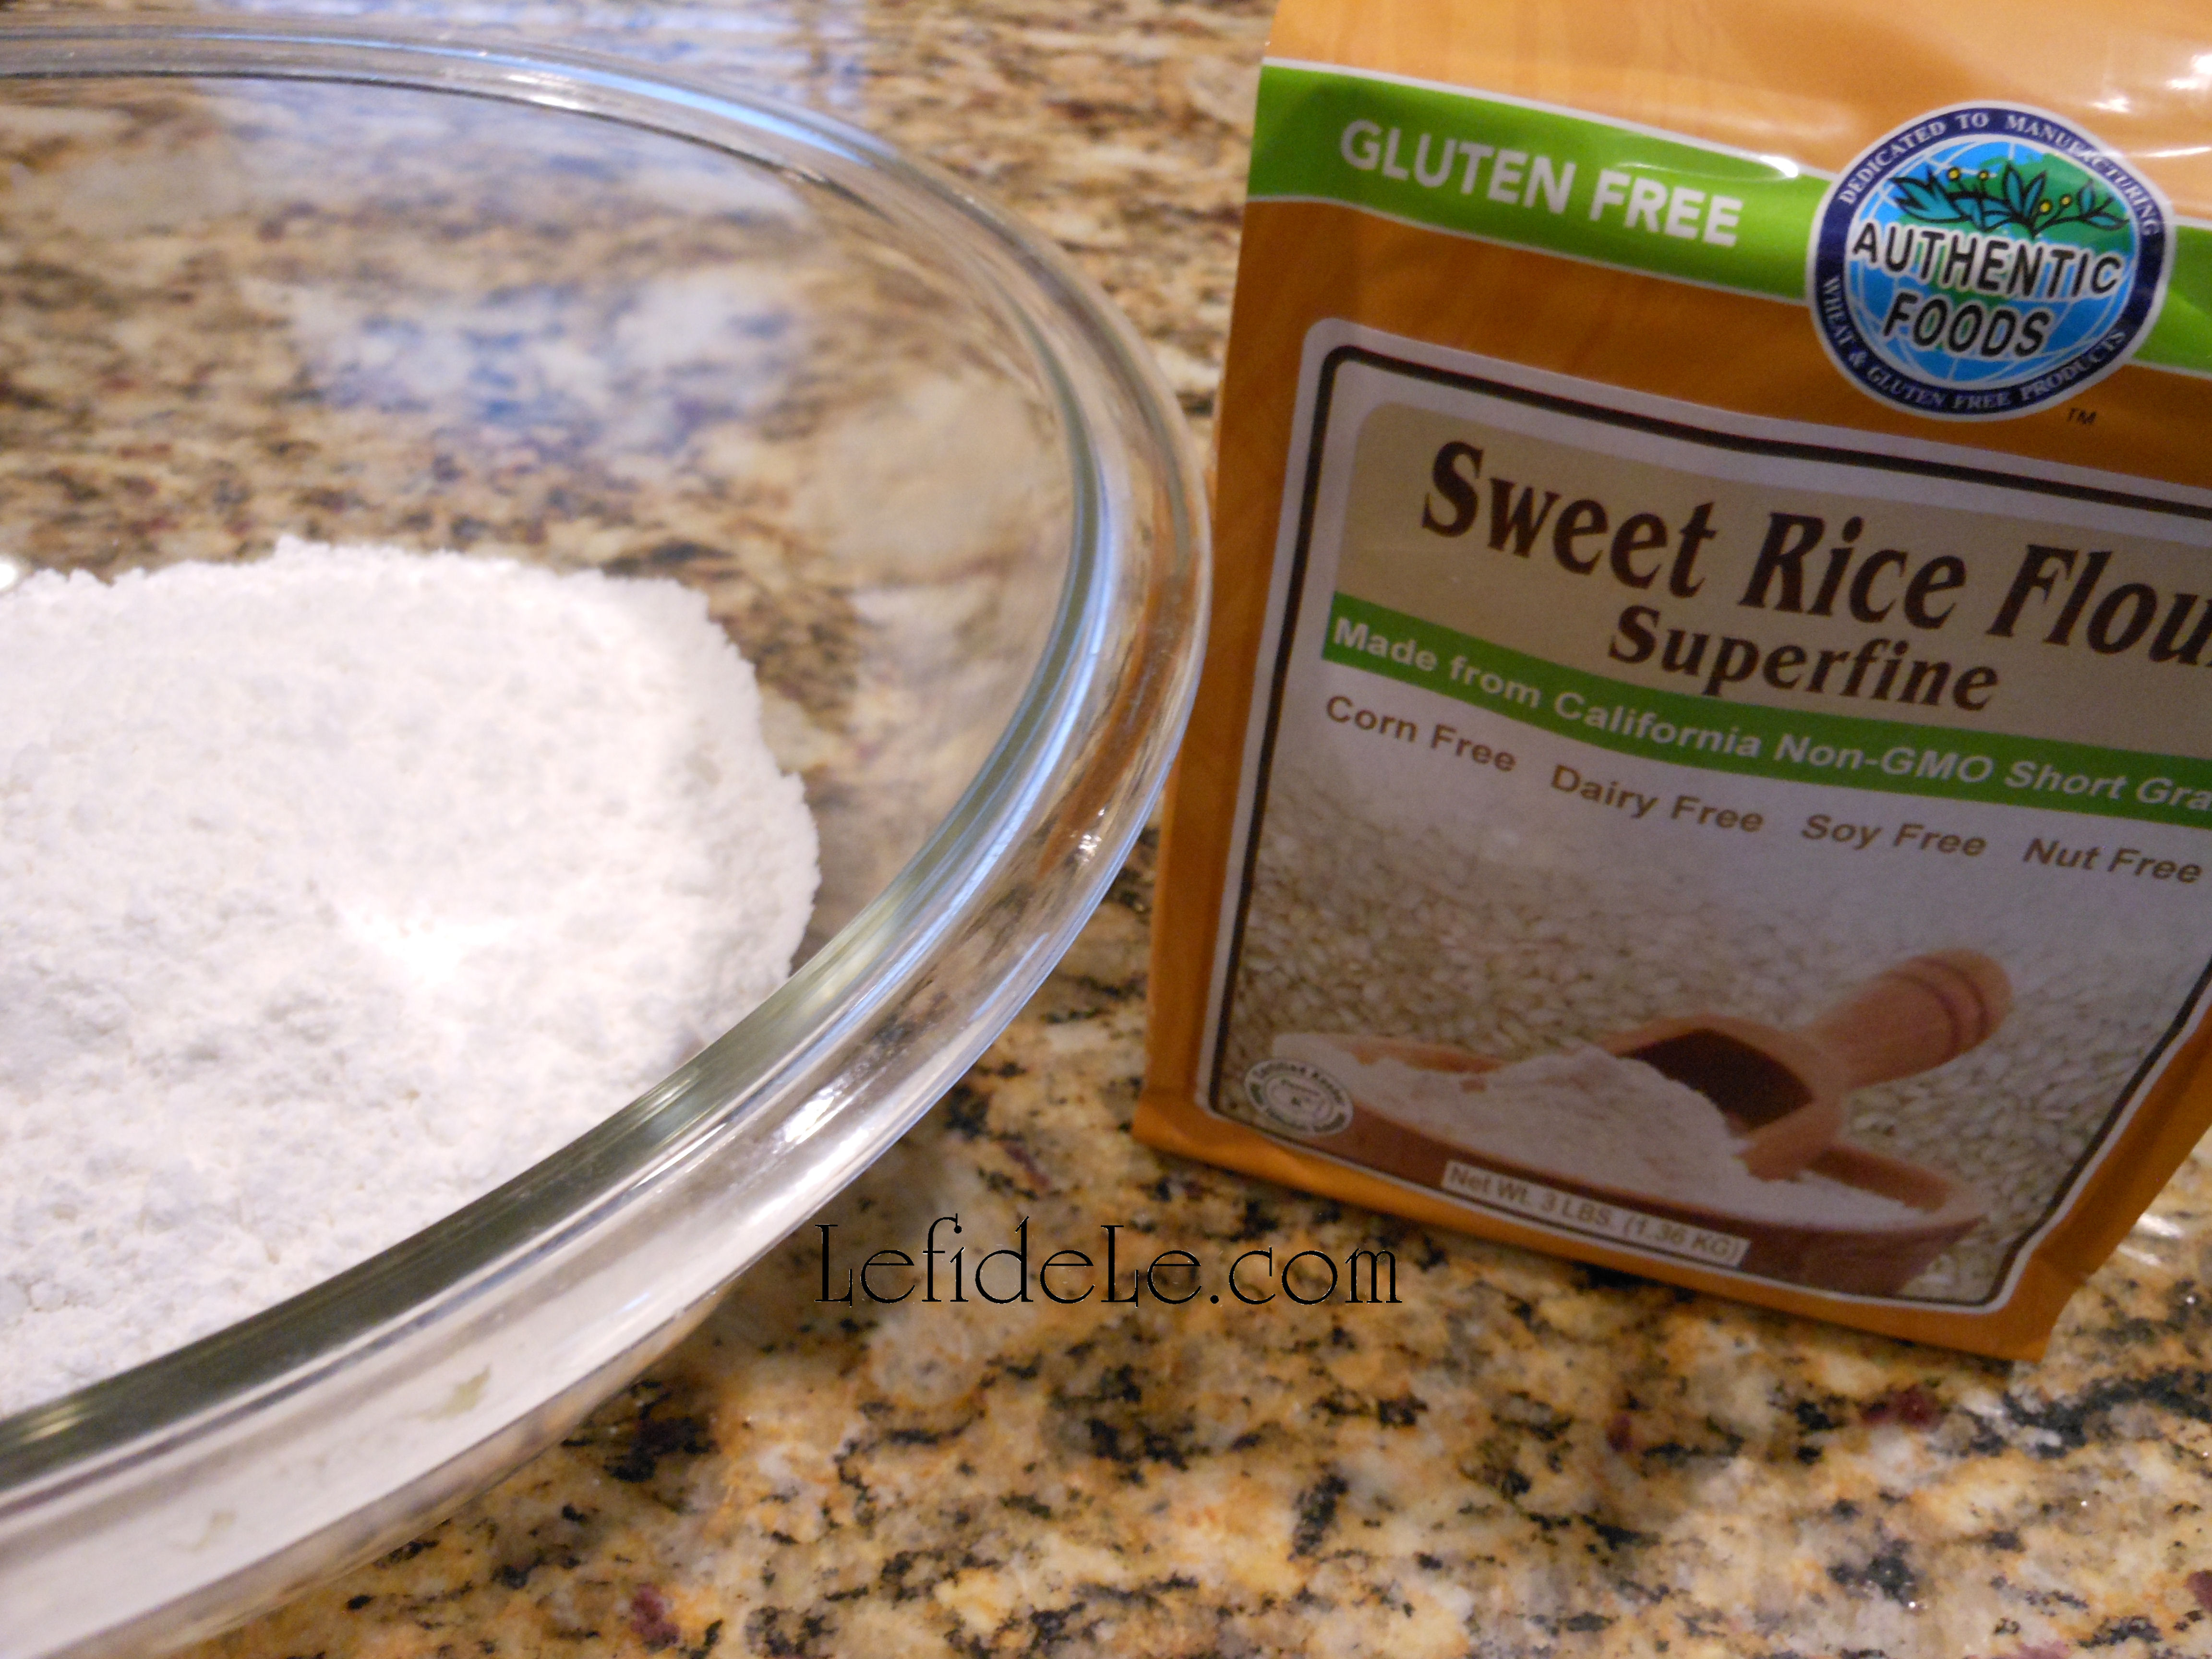
Place your measured rice flour into a larger mixing bowl.

177Leigh

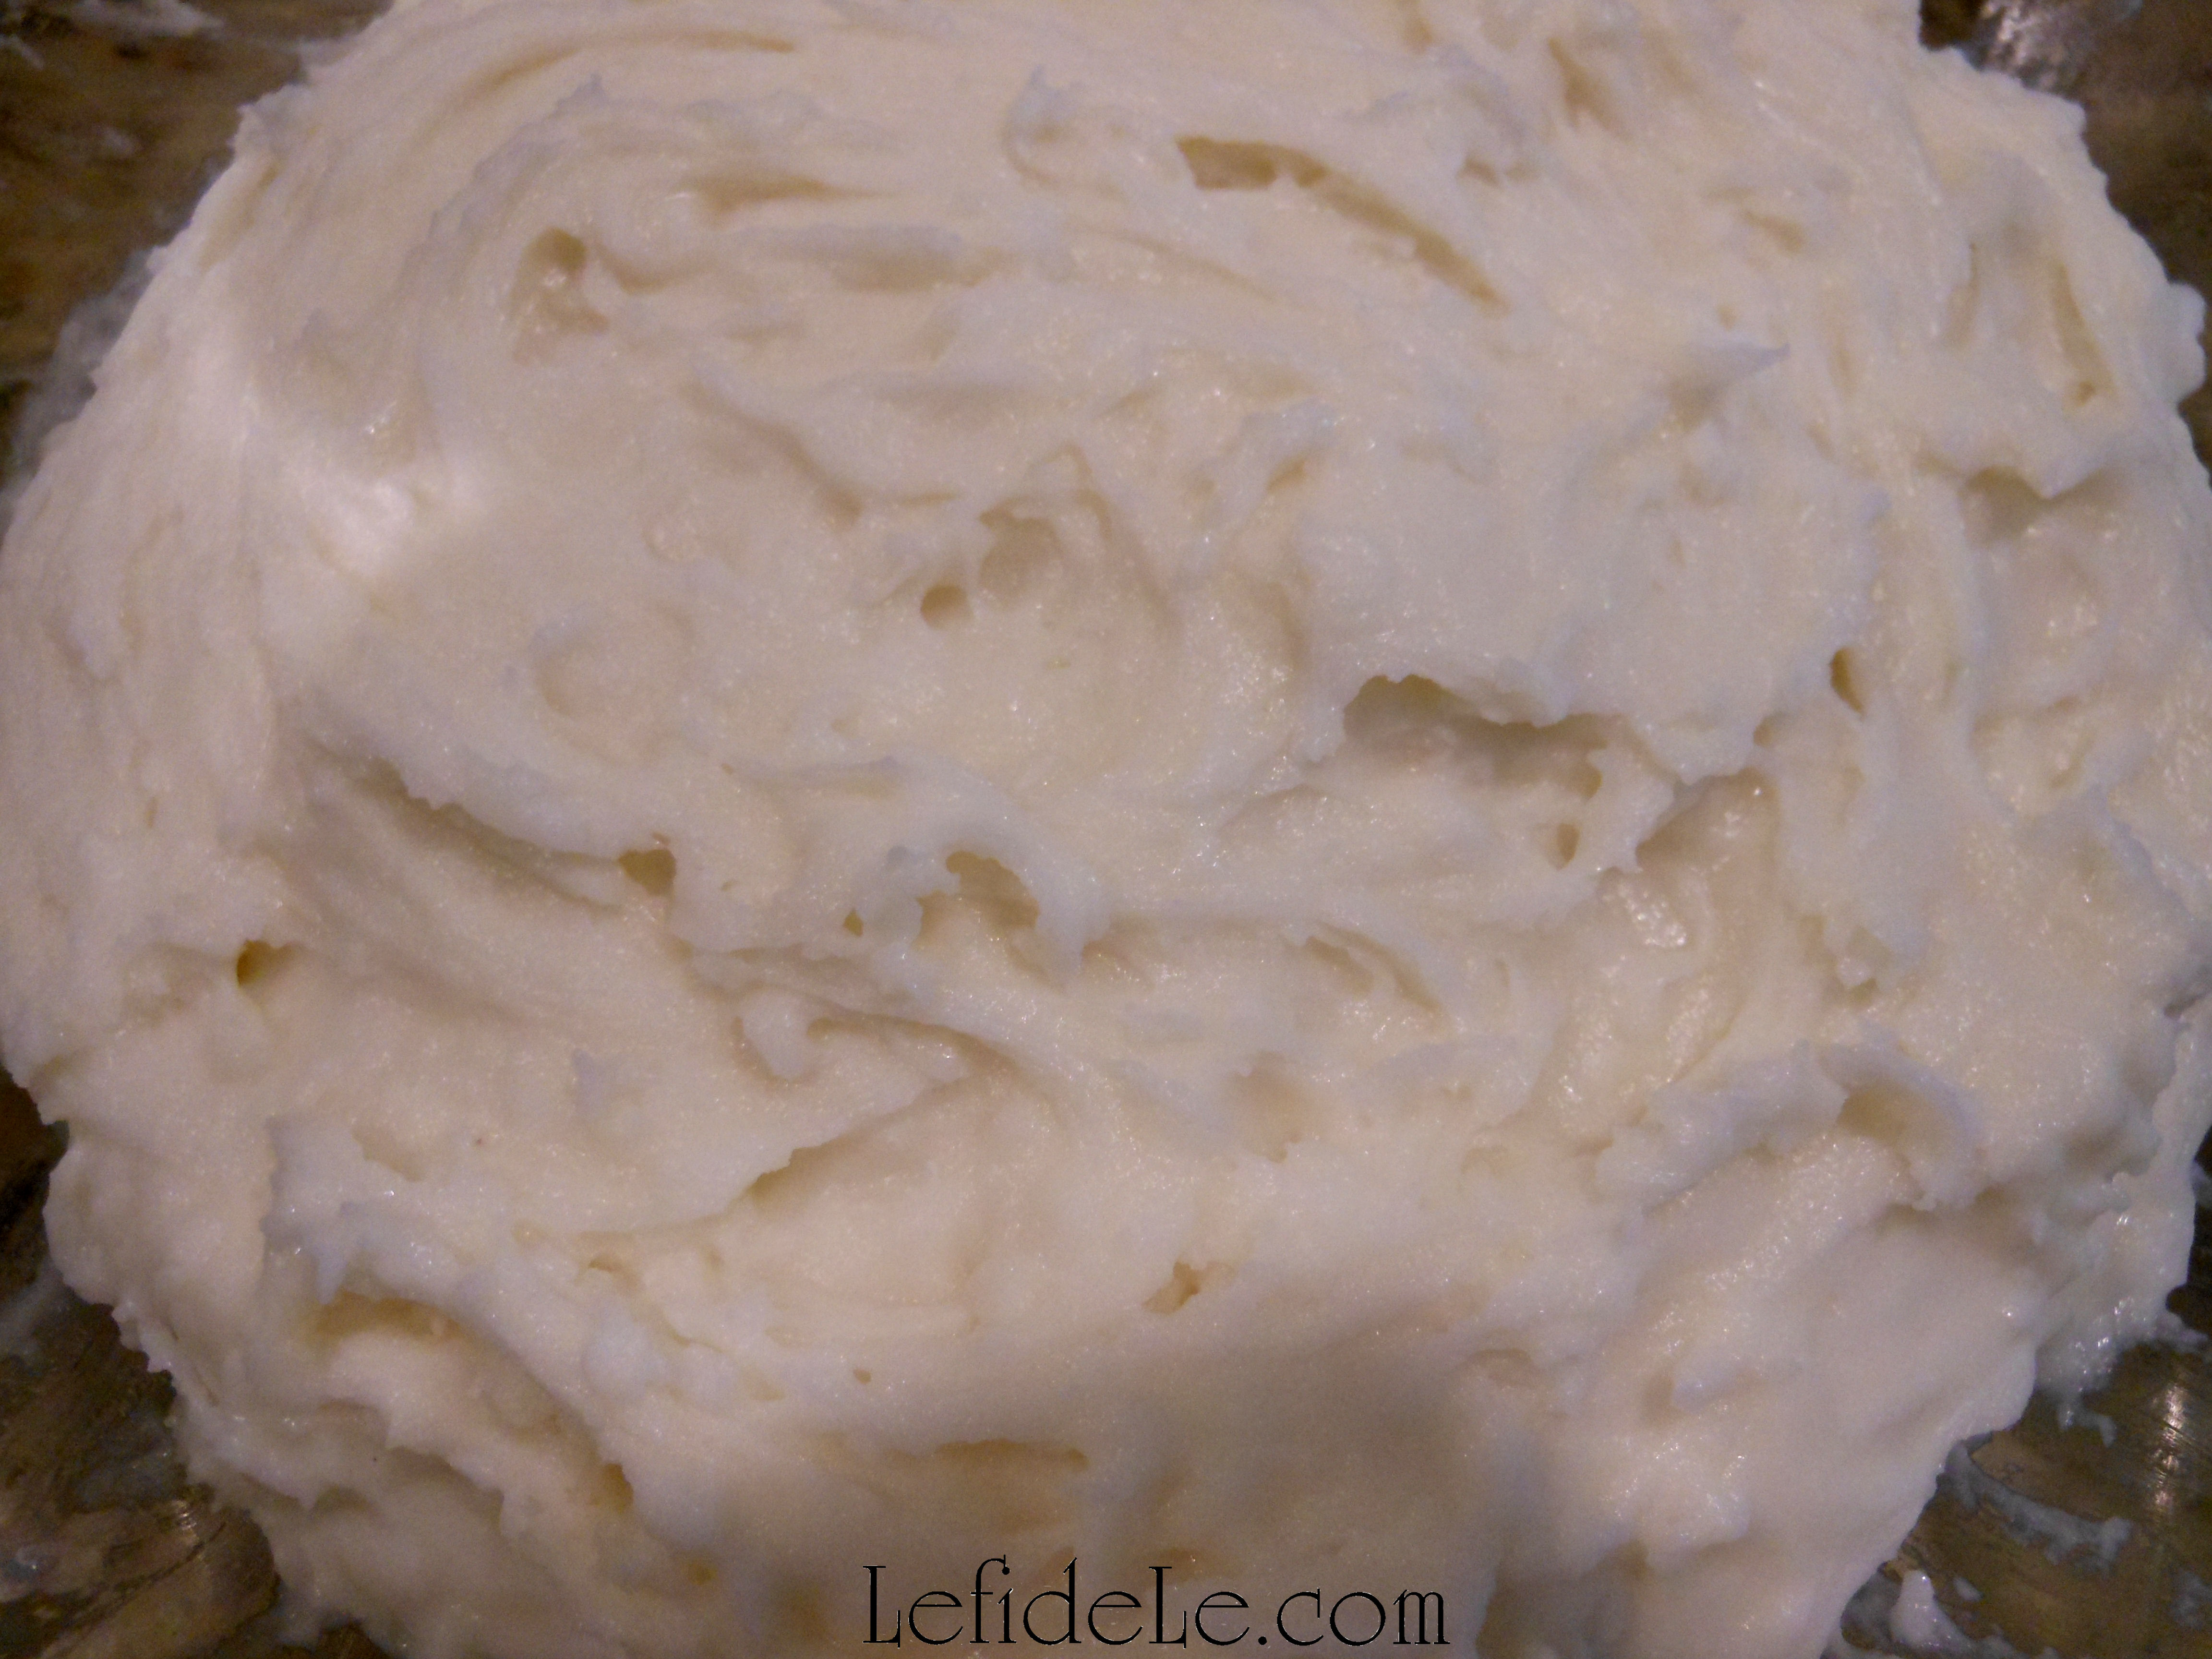
Boil about a cup of water then use just a ⅔ cup of it. This is the easiest way to ensure the right amount. Mix it into the flour well, making a gooey paste. Then add the other portion of water, and mix it well. Let this sit about 15 minutes while you get everything else ready for your dumpling preparation… rolling pin, pastry mat, steamer, dumpling mold if you have one, etc.

180Leigh

Mix the dough again by hand and see if it’s the right consistency for rolling. Note that it will be much stickier than any wheat based dough, but you should be able to dust your hands with sticky rice flour and roll little 1 inch balls of dough in your palms. Mix in more flour if you need to. Take each ball and smash it flat with a floured palm into a floured surface. You will be making little pancakes. Then roll them out with a floured rolling pin into about 3 inch diameter circles, like tiny tortillas. In fact, this is exactly how I would make wheat based tortillas growing up. Working gluten-free is admittedly a bit trickier though.

192Leigh

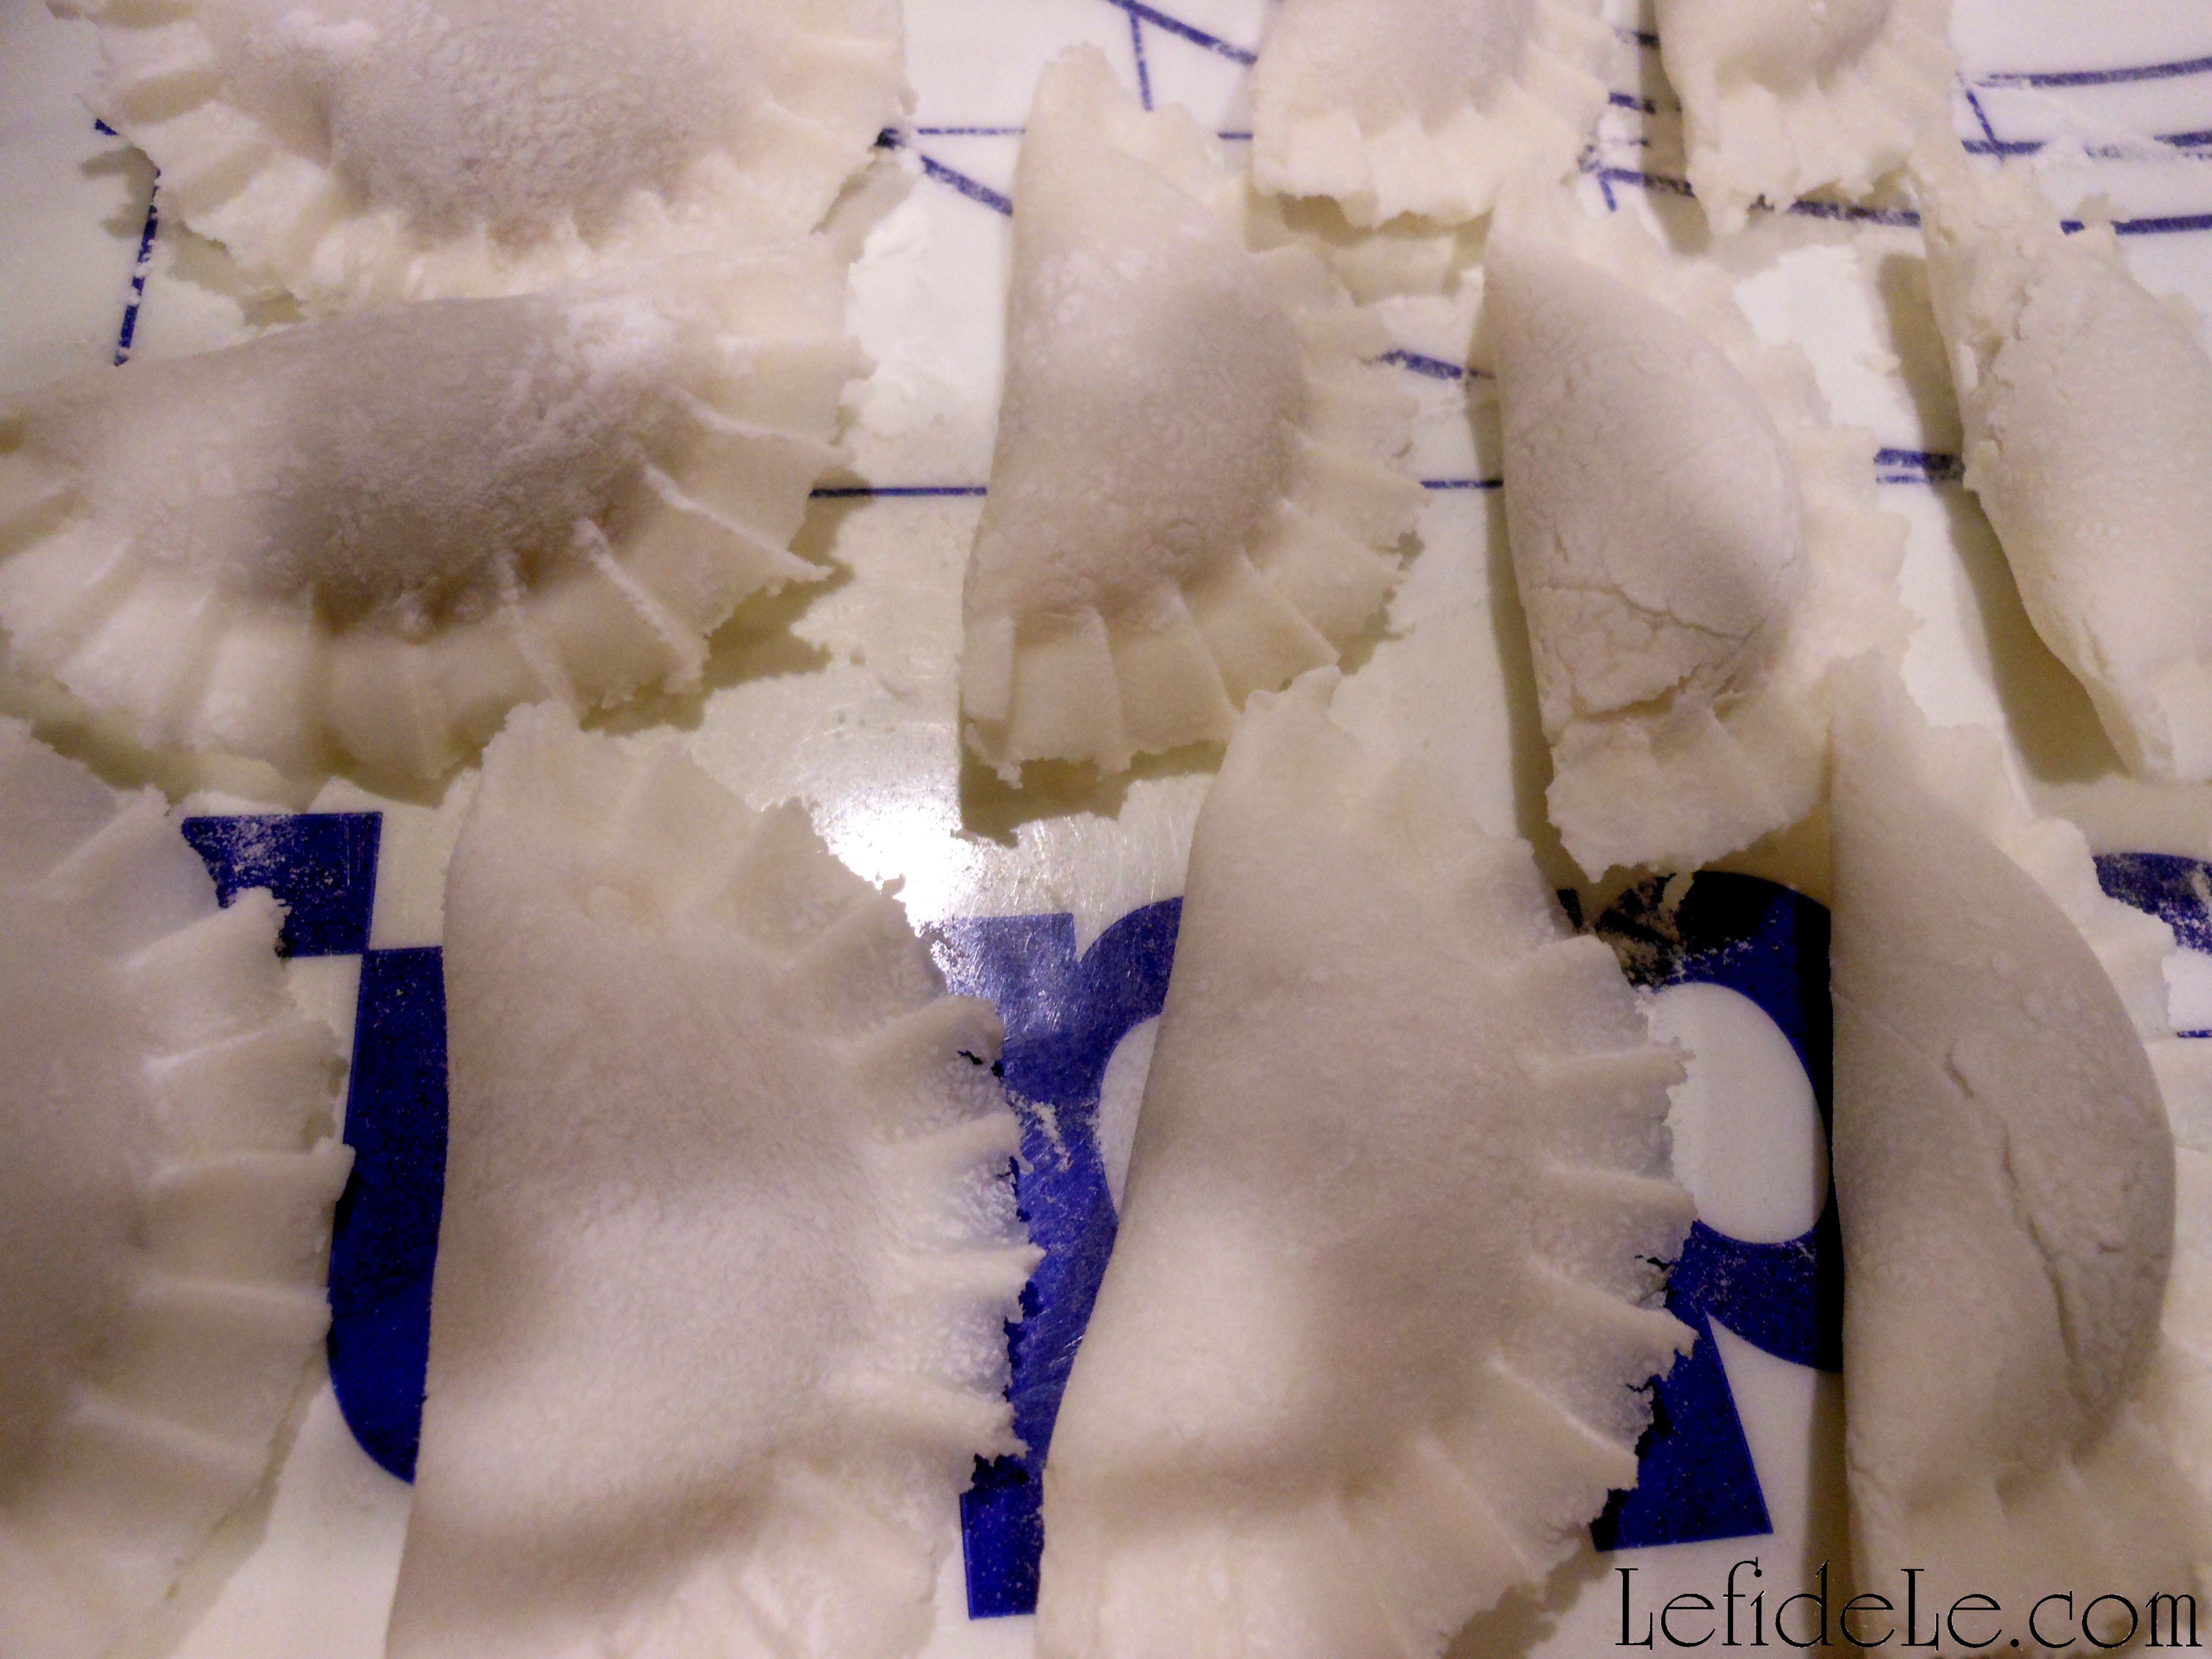
Use the smallest size dumpling mold, if you have one. Molds are a speedy way to make perfect portions, but don’t fret if you don’t own one. Either way, you just spoon about a teaspoons worth of filling into the center of the circle. Close the mold tightly and remove the excess dough… or close the circle by hand into a half moon shape over the filling, and pinch pleat the rounded edges together. You could even use a fork to press the edges like you would a pie crust.

184Leigh

Inexpensive bamboo steamers are widely available, but here I’ve used a stainless one that sets onto my wok base. I love this thing! I actually made enough dumplings to fill it twice with this recipe. If using metal, use cooking spray on the top portion that the dough will rest on. If using bamboo, the Chinese recipe advises lining the bottom with a cloth.

194Leigh

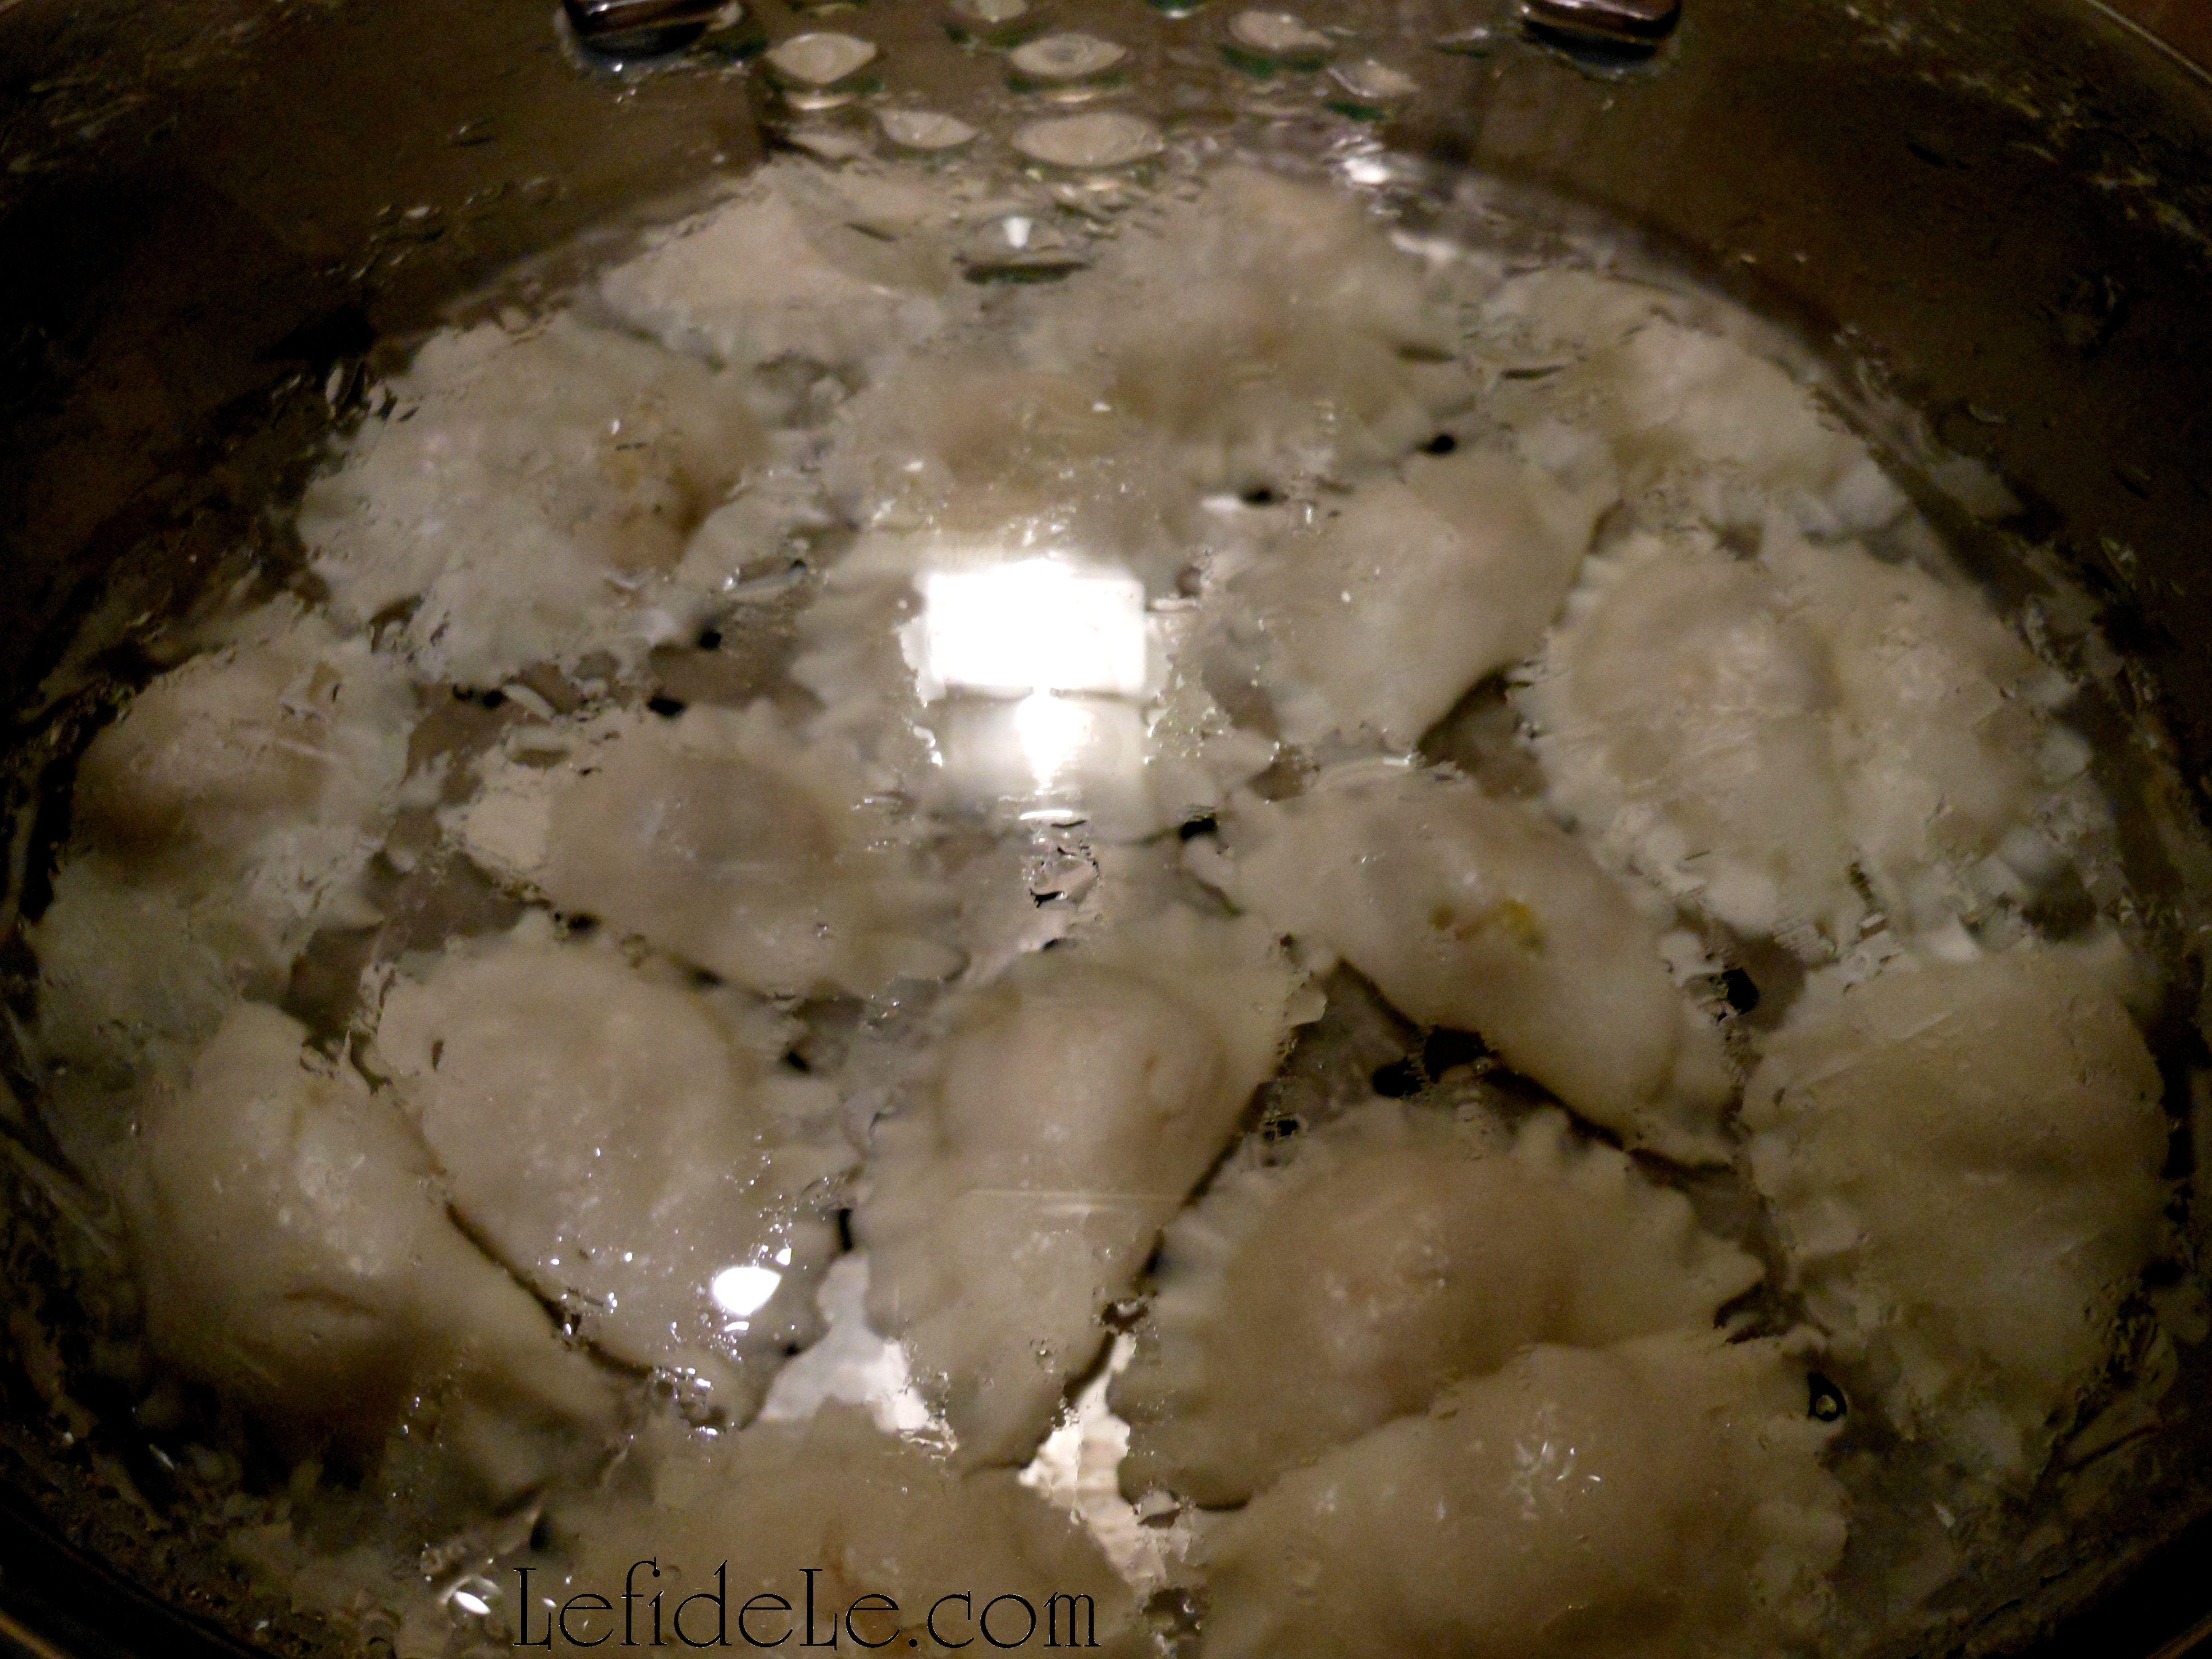
Place the dumpling portion over already boiling water set on high. The Chinese recipe advises 15 minutes steaming, but I intentionally overcooked mine because I left the chicken filling out a good while during rolling… and no one wants salmonella. I actually left the second group on almost 30 minutes and they were fine, so just use your judgment.

189Leigh

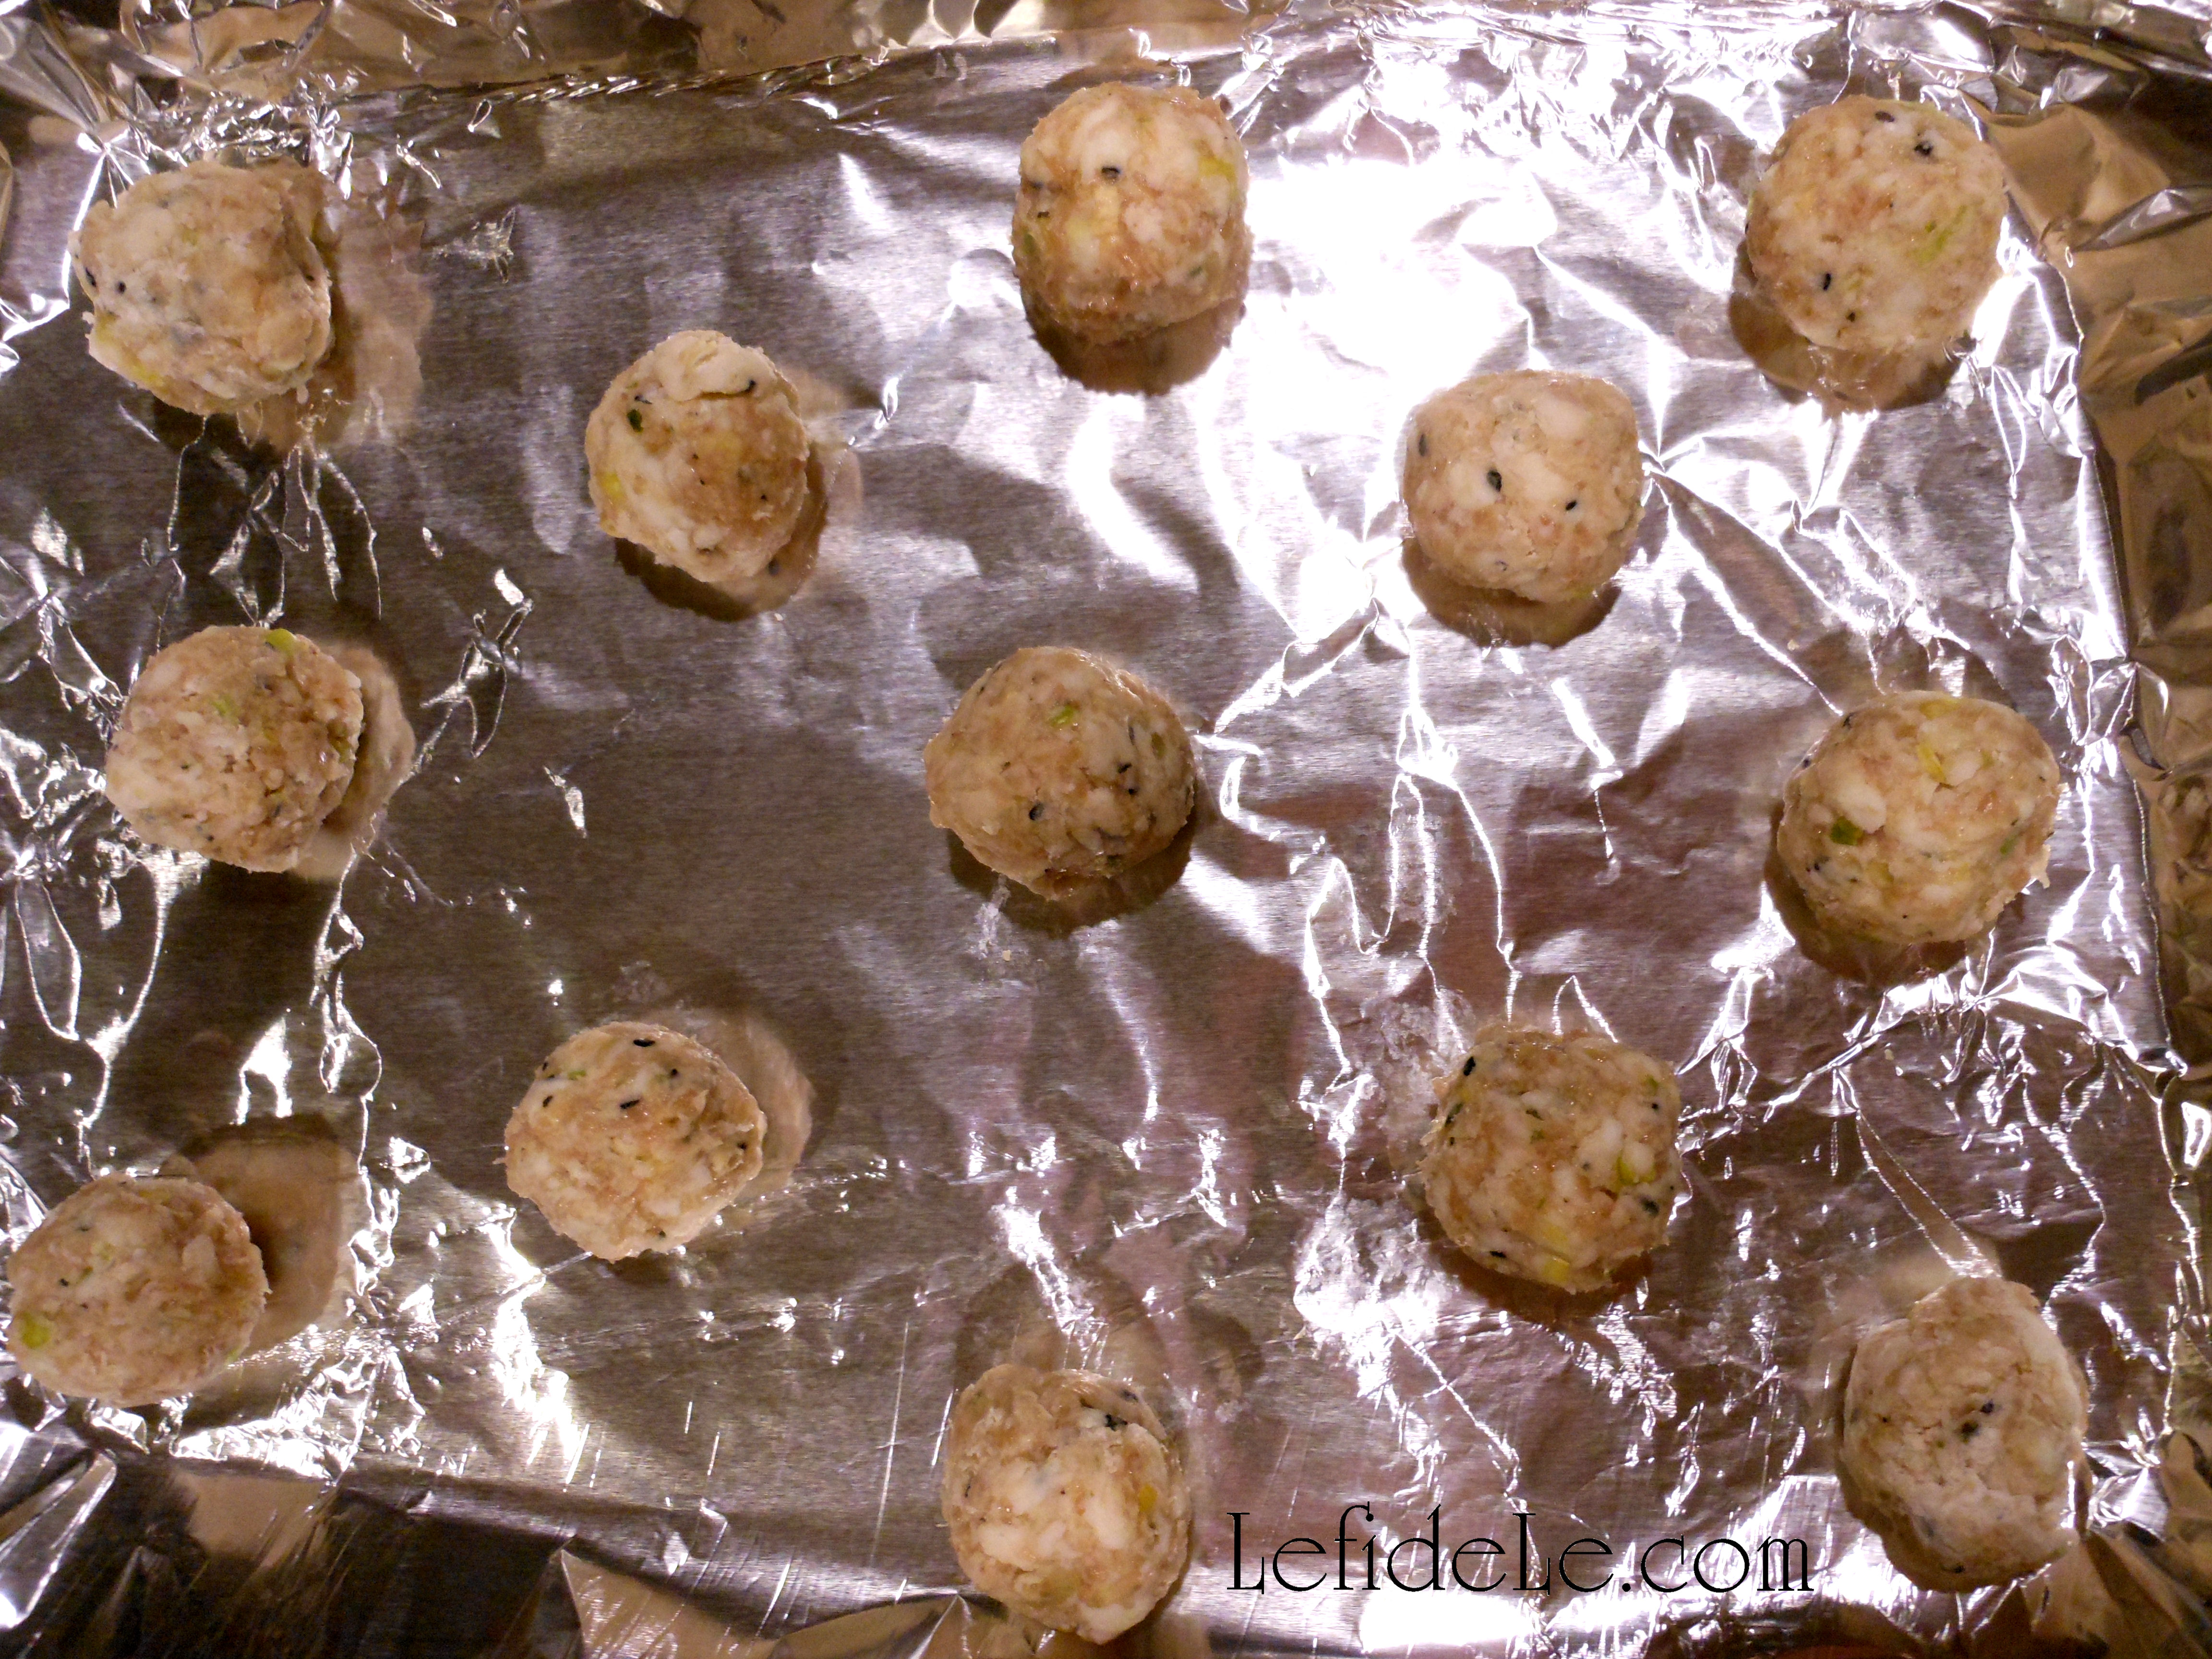
Any leftover dough and filling can be combined into meatballs (like these that are uncooked), and baked at 325° for about 30 minutes.

197Leigh

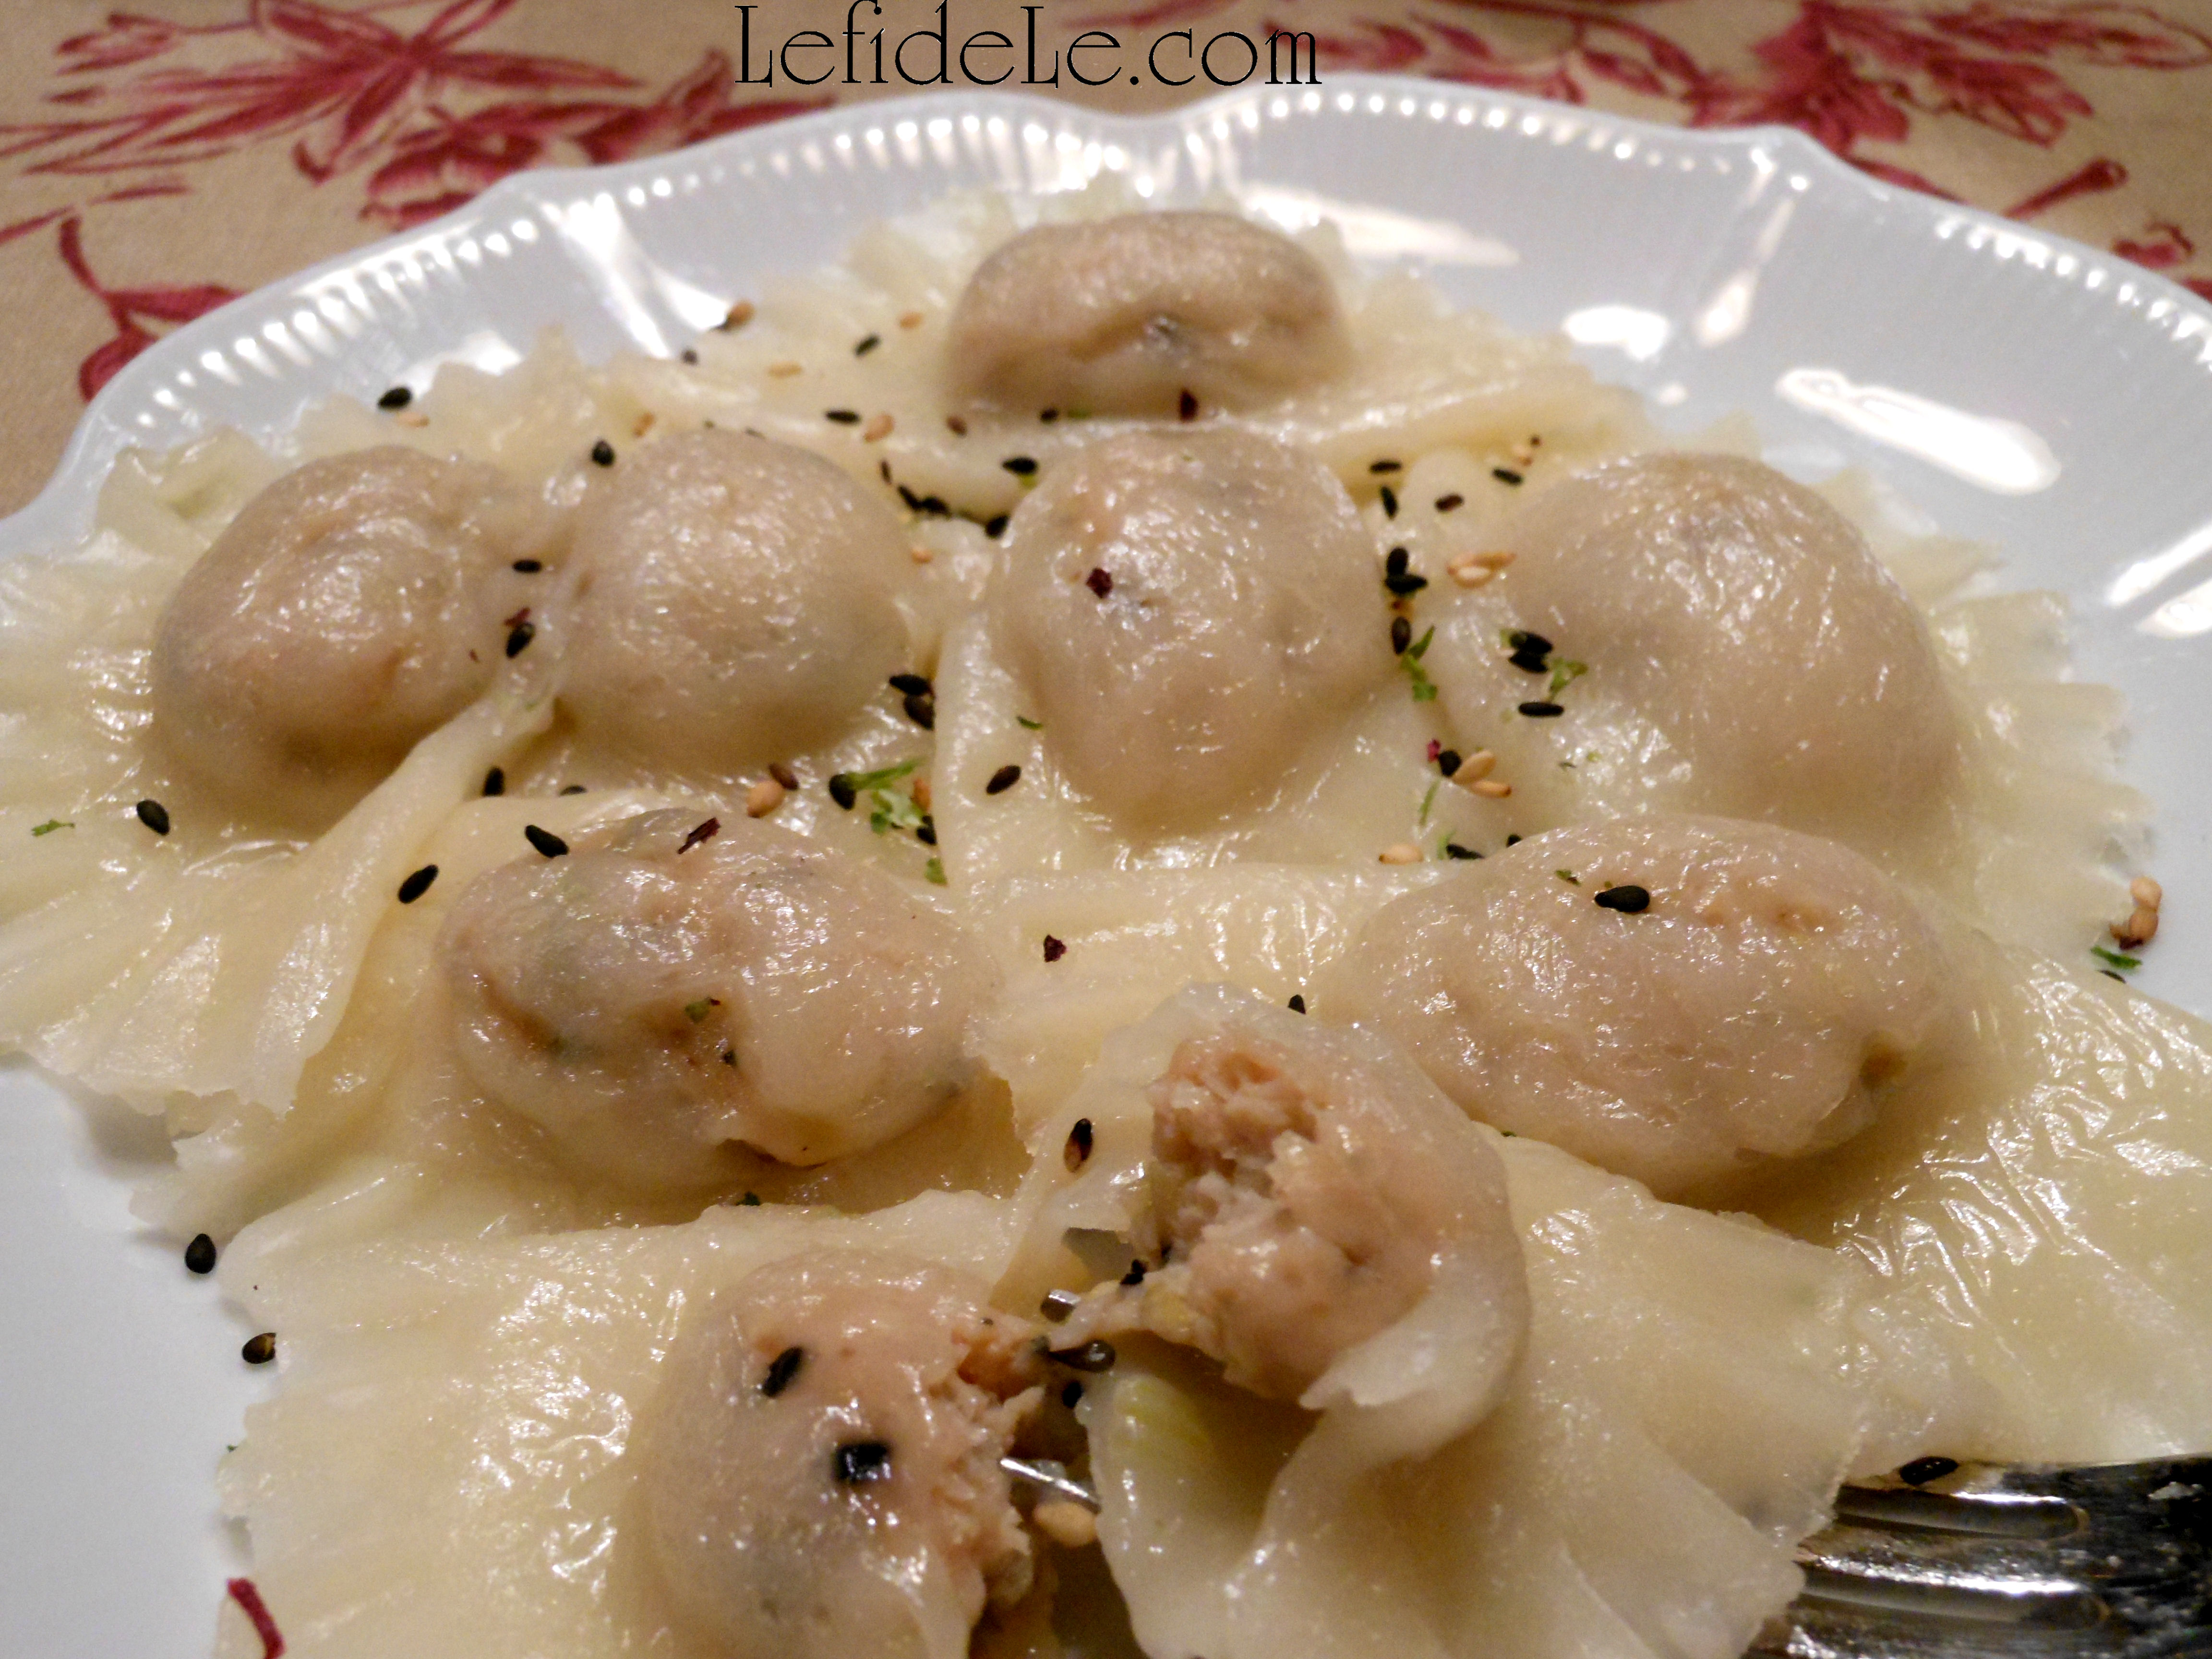
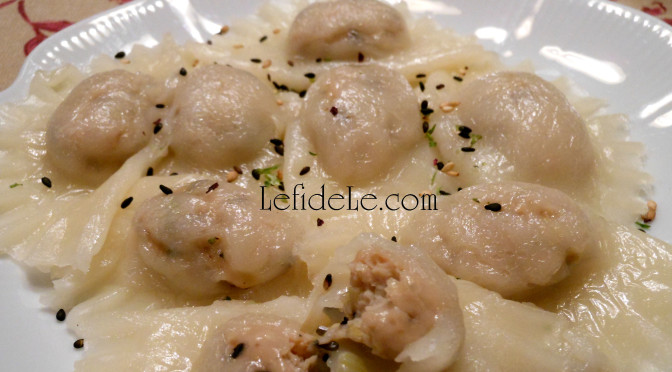
Use two forks to plate your dumplings, or just bring a bamboo steamer to the table. Next time, I think I’ll roll mine out thicker and use a bit less filling. They seemed to expand as they cooked. I garnished these with more Eden shake because I love the flavor, but you can serve them with any sauce.

201Leigh

Here are the leftovers reheated in the microwave with marinara to morph them into an Italian ravioli fusion! They were fantastic this way! I just garnished them with parsley. You can even try adding rice based parmesan if you avoid dairy.

132Leigh

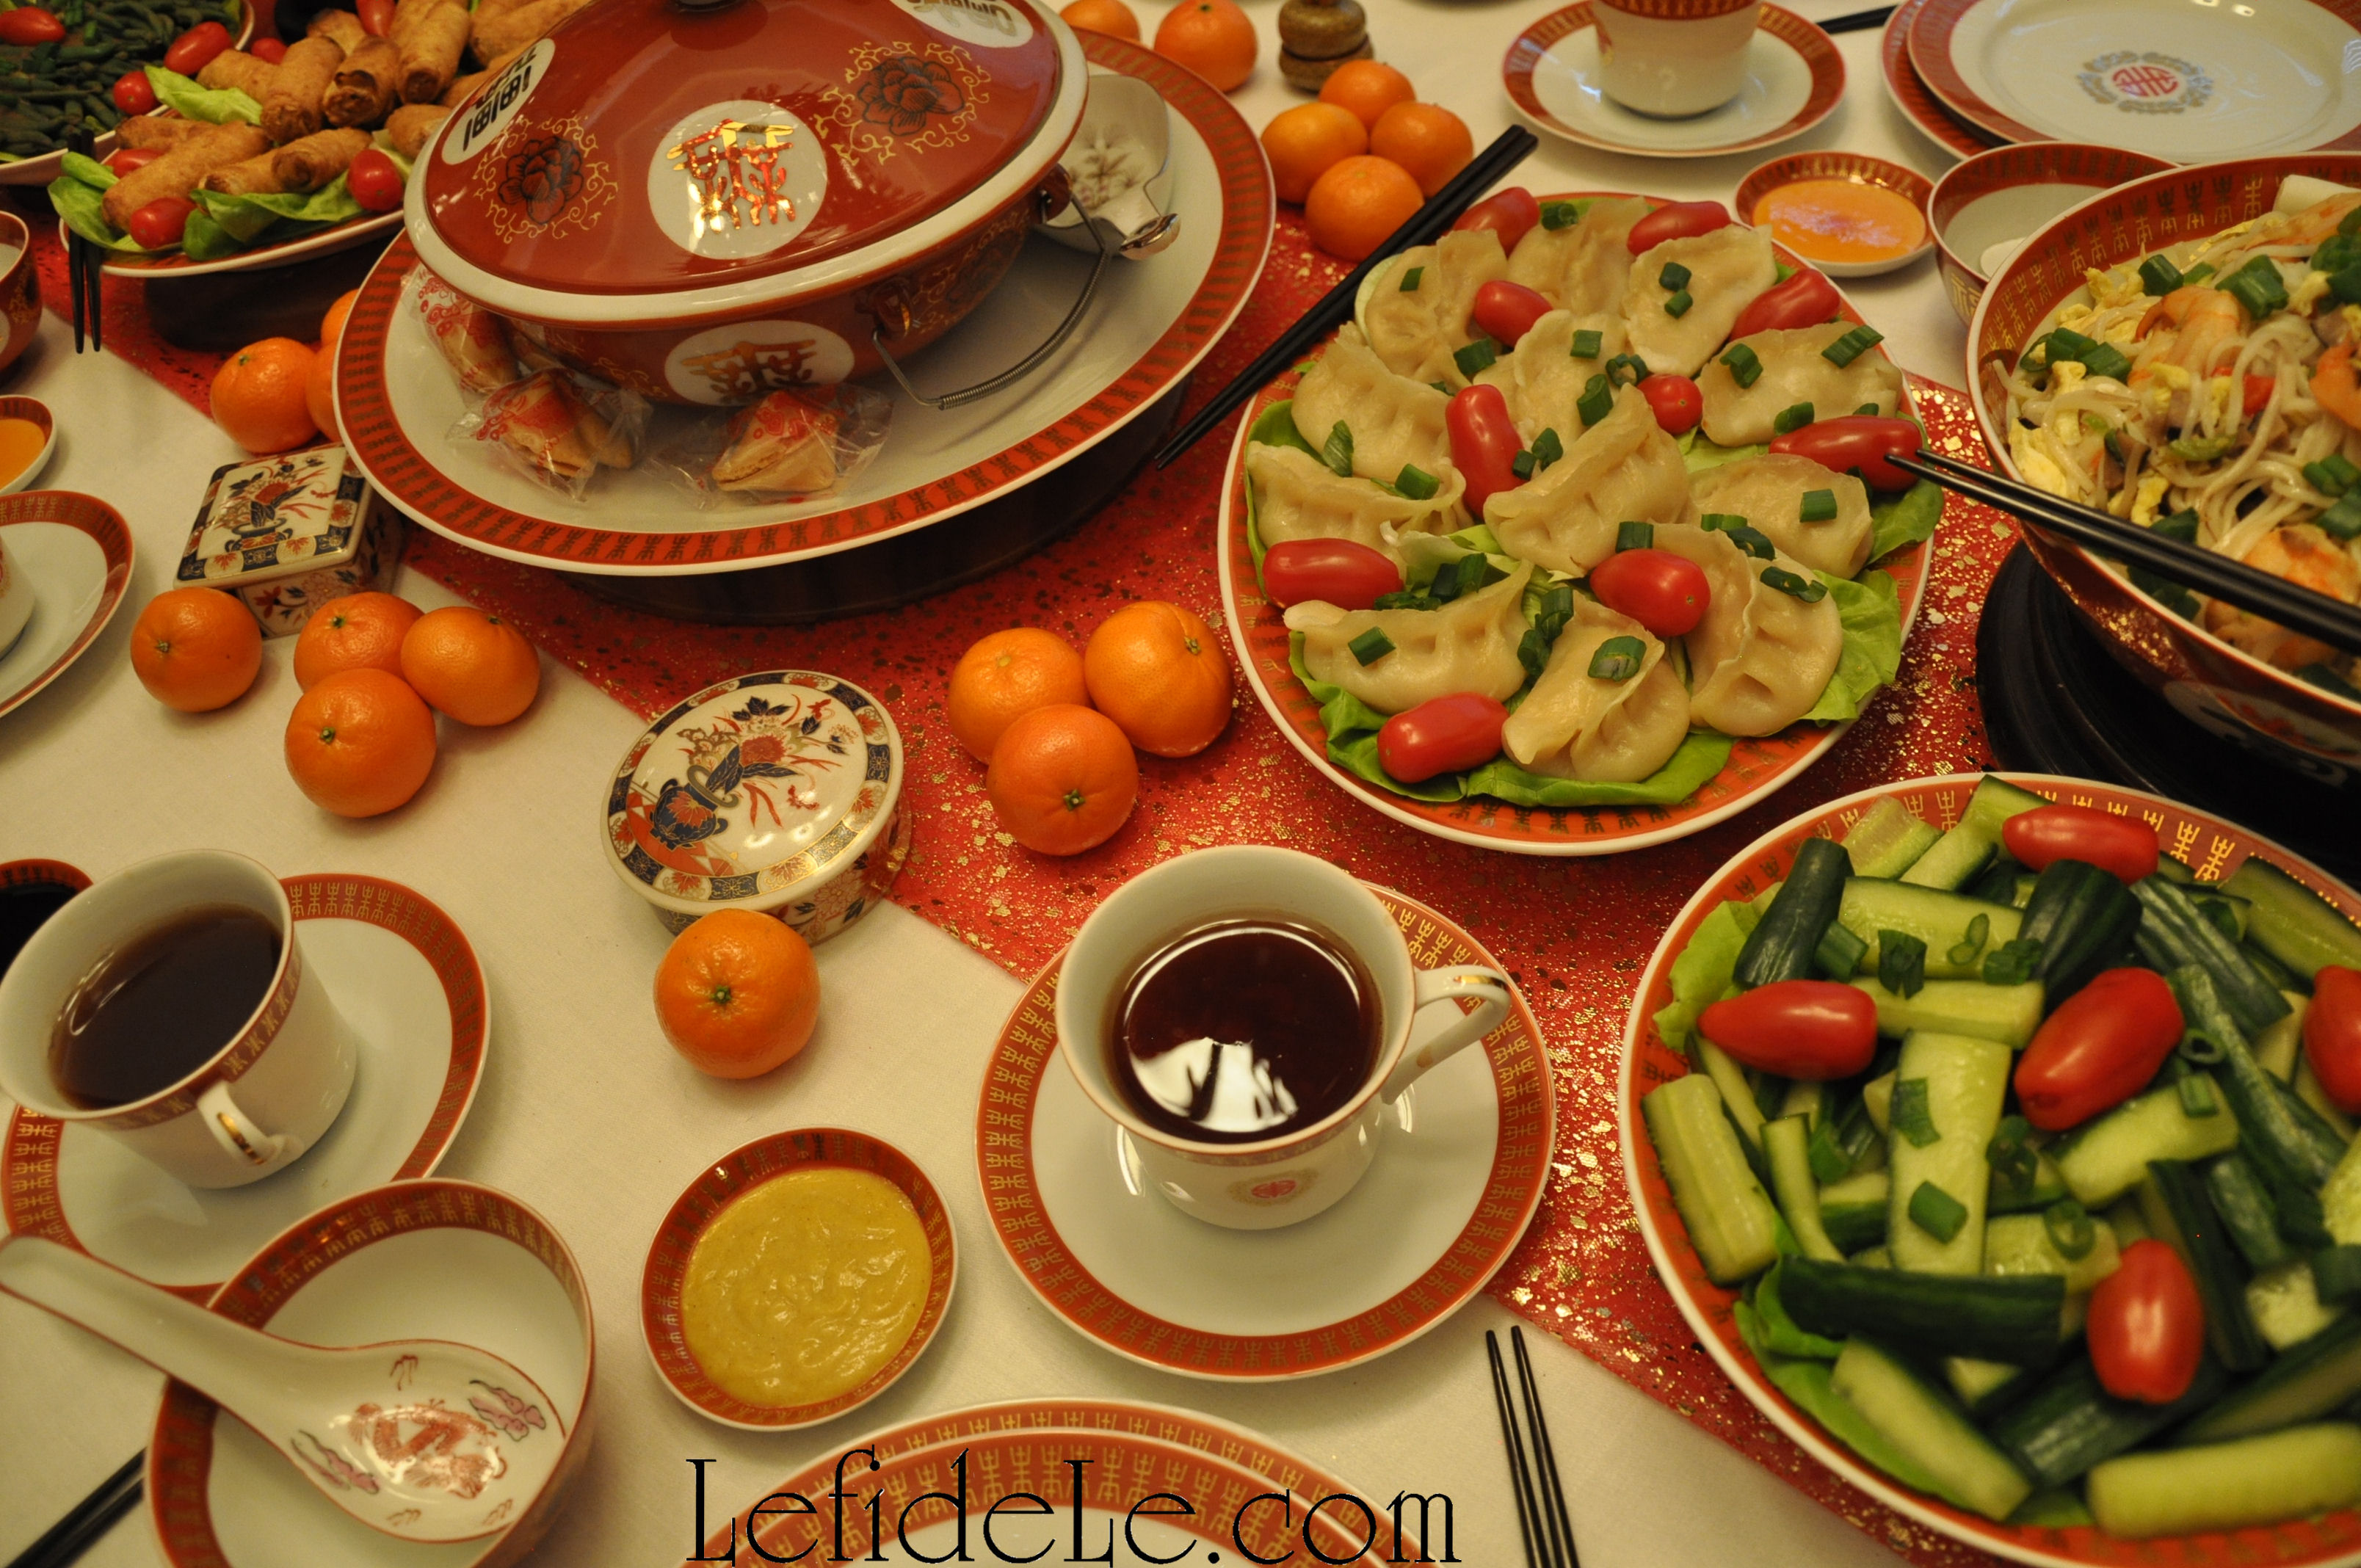
See more pictures of dumplings from my Chinese New Year of the Sheep / Ram Party here. Those I garnished with diced spring onion and small tomatoes and set over a bed of Bibb lettuce. The Quick Pickled Cucumber Recipe can be seen here.

175Leigh

Though more work than an everyday food, these little dumplings are worth the effort… especially when other family members help by making a chatty assembly line. It’s a great way to gather for a holiday!

Faithfully Yours,

Leigh

Take-Out Favor Box & Paper Lantern Craft Printable + Bamboo Lantern + Paint to Antique a Lion Fú-Dog (DIY Chinese New Year Party Décor Crafts)

059Leigh

The “Fú” 福 character has graced the entrances of Chinese homes for many hundreds of New Year’s. It is said to have originated not just for its meaning of happiness and luck, but also because “upside down” and “to arrive” sound alike when spoken in Chinese, thus making an upside down Fú equate to “good luck arrives”. (For some, however, hanging the Fu upside down is bad luck, so I’ve decided to make the character right side up on my printable boxes!) Use them as favor containers, table crayon corrals, or cut out the character to make an LED lantern or luminaria. Use the cut-out character to easily embellish a bamboo lantern. I’ll demonstrate this along with how to paint a modern lion Fú-dog statuette to make it look like an antique.

HappinessBox-Leigh

To make your own favor take out boxes or lanterns, simply right click on the small image and select print. Print them on a photo and color setting. One page makes one box, so just print as many copies as boxes you need.

267Leigh

Next you need to cut out the black boxes… this is a great time to enlist help from the family!

269Leigh

To make the paper lanterns, you will want to cut out the Chinese character before gluing the box together. Use an x-acto knife if you’re brave… I always seem to slice my thumb with these so I opt for rougher cuts using scissors. Simply poke a little hole with the pointy tip of a pen, compass point, or scissor tip then use it as a pilot hole to begin cutting each section of the character out. (If you’re short on time, just skip the cutting + vellum part and place an LED tea-light inside an open box. They still look adorable this way.)

268Leigh

The paper lanterns, with the cut out characters, glow when little squares of vegan vellum are glued to the underside/inside of the boxes. Use the photo to check how the “Fú” 福 character is supposed to look like from the outside, and place that outside edge down onto your working surface. Cut a piece of vegan vellum to fit the box’s side and cover the character completely. Use a permanent glue stick along the edges of the vellum and place it over the character face down. Press it down flat to adhere it fully.

272Leigh

To make both the favor boxes and the paper lanterns, glue the tabs to the sides with a permanent glue stick. Use the photos as visual reference for how to do this. Note that 2 sides will be wider than the others. These should be glued opposite to each other, so that a narrow side is in between each.

279Leigh

Glue all of the sides, and leave the top free to be filled with crayons, good luck candies, fortune cookies, LED tea-lights, or even small condiment bowls for sauces… just let your creativity run with these! Just try to let them dry well before loading them up with goodies. I let mine sit overnight, and they became super sturdy.

096Leigh

I stacked some of the paper lanterns onto a vintage brass tea-light holder and stuck in paper dragon favor puppets to heighten the spectacle… with no expectation that the centerpiece would stay intact long! Crayon filled favor boxes sat at the base of the structure to be used on Chinese New Year coloring pages. (See more from the Chinese New Year of the Sheep / Ram Party Décor Ideas (With Formal Table Setting & Kid’s Table.)

081Leigh

The top of the tower held an inexpensive bamboo lantern that I painted to coordinate with the theme’s colors.

246Leigh

Simple red acrylic craft paint covered the whole structure well.

250Leigh

Gold paint made the handle and base appear as a richer metallic surface.

253Leigh

I glued a cut out “Fú” 福 character to a strip of vegan vellum with a permanent glue stick. You may use the red symbol cut from the printable, or just use it as a template to draw by with black marker, or cut out a black character from cardstock.

254Leigh

This strip can then be set into any clear votive cup… lantern or not! It doesn’t even need to be glued or taped. The vellum just expands to fit the glass securely. Using LED lights insures that no fire will catch the paper, even if knocked over… so it’s super kid and pet safe.

258Leigh

The best part is that I retain the option of removing the vellum strip and repainting the lanterns for a new color scheme in the future. I just love redoing and reusing… it’s so much better than merely recycling!

221Leigh

I also set a lantern onto the side table of the formal tablescape. (The bamboo lanterns originally came from Cost Plus World Market for a few dollars on clearance. See the sidebar for coupons and free shipping links.)

229Leigh

The powerful guardian lion Fú-dog is a traditional Chinese figure of protection. The one seen here is male because he’s resting a paw on a ball that represents the earth. Usually they are presented in pairs, but I only had one in a bright lime green color. I simply had to antique it!

231Leigh

I began to turn the resin into metal by first using a gold Rub-n-Buff paint all over its surface. I gently wiped away the excess and let it set for a couple of days. Then I used a paper towel to rub/shine it up.

242Leigh

Next I coated that layer with the same red acrylic craft paint that I used on the lantern. I gently wiped off the excess, leaving an interesting pattern of color… green, gold, and red.

259Leigh

I let that dry overnight, then took some bronze glazing paint (called Elegant Finish by Deco Art) and coated the whole piece. I really gently dapped at the piece in spots to lightly remove some of the paint. For any of you who have ragged a wall, this is similar to that technique. I let that dry for another night.

284Leigh

The last layer is the one you actually have to pay attention to. It requires plain old black acrylic craft paint and a really messed up “scruffy brush”. Never throw away those brushes that your loved ones mess up, don’t wash well, and leave in a horrible condition… they are your new besties. They’re great if you barely dip them into paint, pounce off the excess onto a paper towel, then “stipple” paint onto your surface. This is a sort of haphazard pouncing of the brush perpendicularly to the piece. It’s the easiest way to paint an antique looking surface… and it’s actually a lot of fun.

290Leigh

I took this statuette from lime lion to antique guardian in a few simple steps. You can do the same with any accessory that doesn’t quite match your décor, or looks a bit cheaper than you’d like. This is especially great to do when you see a fantastic find on clearance that just has a ding or two… paint it up! You will have created your own one-of-a-kind upcycled beauty that will have people thinking it’s an antique.

032Leigh

Happy crafting in the New Year!

Faithfully Yours,

Leigh

DIY Fast & Easy Mardi Gras Glittered Napkin Rings Craft Tutorial (+ Ribbon Votives, Centerpiece, Free Place-card & Invitation Printables)

012Leigh

Create your own elegant Mardi Gras themed glittered napkin rings for mere pennies with this fast and easy craft. The tutorial includes how to embellish votives to match your theme, free masquerade place-card and invitation printables, plus more details on the centerpiece from the Mardi Gras Masquerade Themed “Fat Tuesday” Dinner Party Tablescape Décor Ideas. These DIY projects are an easy and inexpensive way to bring the look of an authentic Krewe’s fête to your own crew!

304Leigh

The secret element to an inexpensive napkin ring form is the core of a wrapping paper roll. You can’t do better than free! Mark and cut sections that are smaller than the ribbon you choose to cover it with.

308Leigh

Then cut lengths of ribbon long enough to wrap around those cores.

309Leigh

Use hot glue to adhere a strip of ribbon around each core. Here I’ve chosen gold glitter ribbon to coordinate with my Mardi Gras theme. (You can see the same technique used on the rings in my Herb Themed Luncheon by viewing the picture in the Upcoming Projects Gallery in the sidebar.)

311Leigh

Next, I cut and attached layers of green and purple glitter washi tape in different widths atop the gold base. Layers of ribbon would have also worked well, but I already owned the perfect sized tape.

313Leigh

Read how to make your own fleur-de-lis shapes with napkins at the article on Mardi Gras Masquerade Themed “Fat Tuesday” Dinner Party Tablescape Décor Ideas.

024Leigh

I made all six napkin rings for way less than a dollar, in a matter of minutes, and they coordinated perfectly with my theme’s décor… Awesome!

299Leigh

Now for those ribbon votives… simply start with any type of votive holder or small jar. You can leave them plain or apply glitter paint to them. I went with gold glittered glass. Cut lengths of coordinating ribbon long enough to wrap around them and overlap. You can attach one end to the other with a dot of glue or double stick tape. Because my ribbon was wired, I merely twisted one side over the other like a twist-tie. (See more twisty ribbon action here on my DIY Rusted Rooster Chicken Wire Votive Holder Craft.)

303Leigh

In this way, I can unwrap the ribbons and reuse both them and the votives for a future holiday in a different way. I think they turned out great, and they literally took me minutes to complete… Yea!

392Leigh

Create a dramatic centerpiece without a lot of drama by merely starting with a basic tree form from another holiday. (For example, use a black one from Halloween or a white one from Easter.) I used a metal votive holding tree that I had previously painted gold from its earlier pewter and bronze incarnations. (See how to use paint to change the color of metal and to age a piece in my upcoming lion fu-dog décor for Chinese New Year.)

393Leigh

I wrapped it with trim from my Glitter-ween Party Décor (see it here) then added a few new sprigs.

235Leigh

I painted simple purple ball ornaments with a glitter mist (not the blast variety) to impart both gloss and glitter shine to the previously satin sheen.

236Leigh

I set these onto the rings that would normally hold the votive holders. (You’ll likely see these in a future article.)

053Leigh

I hung embroidered Christmas crown ornaments, snapped up at 10 cent clearance, along with glittered musical instruments, green mirror balls, and a mask garland. I even hung the same sequin fleur-de-lis masks used at each table setting as ornaments. I try to plan all my holiday themes I advance of the after Christmas sales to snag a year’s worth of décor deals at 90% off. I keep my theme collections in labeled bins that I add to as I accumulate finds so that I’m ready to craft and decorate when each holiday arrives.

091Leigh

Though it’s hard to tell from the pictures, the tree centerpiece actually didn’t obstruct any person to person viewing. This is why I only draped the bottom with some Mardi Gras necklaces and wrapped the trunk with the same ribbon I used on the votive holders.

120Leigh

The base of the tree was then swathed in the same purple fabric remnant from Glitter-ween’s spooky tree and draped with yards of Mardi Gras trim. (See how to hike up a chandelier to accommodate a tall centerpiece here.)

043Leigh

Surrounding that are 4 standing glittered metal masks that I scored at a post-holiday clearance sale for less than 2 dollars each… no kidding folks. I couldn’t have made them for less. To do as I did, scope out this year’s merchandise then pounce as soon as it gets marked down. The purple mercury glass crown votive holders were also found this way for less than a dollar for all 3… Score!

009Leigh

Last but definitely not least, are my free printable Mardi Gras masquerade place-cards which may also be used as invitation cards!

mardi-gras-placecards-leigh

Simple right click on this small picture and select print. Print these in best color photo on thick cardstock.

004Leigh

Then simply cut on the solid black lines to separate the images for invitations. For place-cards, use the pictures a guide for how to cut out the top and crown while still making a tent folding card that will stand upright.

039Leigh

Poke a point into the paper just above the crown with a pointy pen, or compass point, etc. Use that as a starting point for your scissors to cut a V shape above the picture. Then cut one side close to the top and crown next to the image. Don’t cut all the way to the ends. Stop where the curve meets the flat top. Those flat parts are what join the front and back together. Then fold it in half. Cut through both pieces around the image. Again, a picture speaks a thousand words… use it as a visual guide.

028Leigh

Simply write names on the bottom with a gold sharpie marker or paint pen… Voila!

104Leigh

See more of my Mardi Gras Masquerade Themed “Fat Tuesday” Dinner Party Tablescape Décor Ideas here for more holiday inspiration!

070Leigh

Let the good times roll!

Faithfully Yours,

Leigh

Origami Crane Paper Folding Instructions (for Get Well Wishes or Chinese New Year Party Décor)

The timeless art of origami paper folding is an easy and inexpensive way to decorate for a Chinese New Year Celebration. The project also provides a means for quality time in generational bonding. This tutorial for the historically traditional crane figure is an apropos symbol of hope for the coming year. The Japanese tradition of the Senbazuru folding of 1000 paper cranes is said to grant the maker a wish, such as healing for a loved one. (Why not fold and send one in lieu of a get well card?) The “Tsuru” (crane) is also said to denote happiness and luck, which is the same meaning of the “Fú” 福character of the Chinese New Year. My Take-Out Favor Box & Paper Lantern Craft Printable (Chinese New Year Party Décor) also utilizes the symbol which has graced the entrances of Chinese homes for many hundreds of New Year’s.

341Leigh

There are beautiful origami papers available, but it’s easy to make your own from any inexpensive paper. By cutting them yourself, you can make any sized piece you like… and if you’re a beginner, it’s much easier to fold a larger sheet. Here I’ve chosen gold metallic wrapping paper purchased at an after clearance sale years ago. I used a large T-square ruler to mark 6 x 6 inch sections, and then cut them out.

342Leigh

Begin by folding the paper in half diagonally then unfold it.

344Leigh

Repeat this on the other diagonal, thereby creating an X crease on the paper.

346Leigh

Next fold the paper in half, creating a rectangle, then unfold it.

348Leigh

Repeat this fold, of a half rectangle, to complete another X crease.

349Leigh

Now that you’ve made an asterisk * shape mark on the paper, turn a tip to point directly towards you. Take the remaining 3 tips, and pull them over the closest one. The 2 side points will meet in the middle, and the farthest tip will close over those.

353Leigh

Next take the 2 side points and fold them to meet in a line dissecting the middle of the piece, then unfold it.

355Leigh

Take the farthest point and pull it toward you to form a triangle, and then unfold it also.

357bLeigh

Pull the upper point away from you while pushing in the 2 side points so that they meet in the middle.

360Leigh

Push it all down to crease it flat.

362Leigh

Flip the piece over, and repeat the last step to form a diamond shape.

370Leigh

Once again, fold the 2 side points inward to meet in the center.

372Leigh

Flip it over, and repeat the last step to form a much pointier diamond.

374Leigh

There will be 2 pieces resembling legs that comprise the portion closest to you, take one and bend it up and out on a diagonal… as if it’s making a high kick. Do the same with the other leg then crease both well. Unfold them straight again.

376Leigh

The next step is the trickiest part, but it can be unfolded and retried until it works out. The legs need to be bent inward in what is called a “reverse fold”. The easiest way that I’ve found to do this is to use your thumbs to sort of pop in the center of the leg toward the center of the piece. The crease you made earlier will be the line it folds according to. Just study the picture and play with your piece until they look similar. Crease it flat once it’s in the correct position. Do this with both legs of the piece which will form the head and tail/feet of the crane.

378Leigh

Make the wings flap down by folding the farthest point of the upper flap towards you. Flip over and repeat for the other wing.

381Leigh

The last step is to form the bird’s head by performing a “reverse fold” downward on one of the former legs. Adjust it, if need be, by strengthening your creases and pushing up on the center portion until it sits upright on its own.

384Leigh

Now what to do with it… write a “Get Well Soon” or “Happy New Year” message on one of the wings and push the crane flat to enclose in an envelope, use a needle and thread to string and hang it, or just set it out on your table for an easy décor element.

031Leigh

May all your dearest wishes be granted this year!

Faithfully Yours,

Leigh

Chalkboard & Glitter Hearts Themed Valentine’s Day Party Buffet Décor Ideas (+ DIY & Printable Links)

Running with the idea that opposites attract, I decided to make a Valentine’s Day Party theme that incorporated both matte black chalkboard and glittery red hearts. The elements actually coordinated beautifully for a party theme that would suit a variety of age groups, or even just serve as a surprise for that special someone. The whole shebang was actually quite inexpensive to pull off, though happily I believe that doesn’t appear to be the case. You can either follow the links to make the fast and easy crafts yourself, or go shopping with the theme in mind.

229Leigh

After deciding on my theme, I actually found this adorable chalkboard Valentine fabric that also had glitter hearts. (You can find some for yourself at Hancock Fabrics or Fabric.com using coupons from the affiliate links in the sidebar.) I hung this up with clear thumbtacks.

204cLeigh

I then strung my glitter hearts Valentine’s banner atop of this. I also attached another doily banner to the credenza itself with tiny tack nails. (The printable and instructions for both banners may be found by clicking here.)

213Leigh

I love incorporating ornament filled trees into holidays besides Christmas. Valentine’s Day is especially easy to do this with because it falls so quickly after on the calendar so that one may really take advantage of all those deep after-Christmas clearance sales. Some of the baubles on this tree were marked 90% off which left the cost at mere cents. The topper is a glittered sprig of holiday pine.

205Leigh

Some of you may recognize the black wooden tree from the Halloween Party. It looks really different when trimmed according to another theme. The conversation heart ornaments were made from white foam shapes (whose craft tutorial may be found here).

215Leigh

On the opposite side of the buffet, I made an arrangement that can be disassembled one heart wand at a time, to be given away as favors to departing guests. This is especially sweet when given as scepters to little Valentines princess party goers. (See the tutorial at the link here.)

206Leigh

I set all of these into a vase shaped like a thread spool twinned with glittery red flat yarn. It symbolizes the ties the bind… and is filled with hearts. Glass marbles contain the arranged wands yet allow for easy removal. These are topped with another variety of glittery yarn to conceal the marbles.

214Leigh

Other décor elements are the chalkboard sign crafts set onto easels (find tutorial here) alongside a store-bought slate that I was gifted with early. (Thanks Mom!)

209Leigh

A variety of gift bags and boxes overflowing with candy were nestled into the ensemble. The heart bags and mail boxes were machine cut from construction paper.

238Leigh

I included both oversized gems and tiny crystal hearts to fill in the empty spaces. I borrowed a bouquet of crepe paper roses that I had actually made for my mother years ago, and set these into a marble filled vase. I wrapped it with some leftover rope trim that coordinated with the theme, and set it atop an upturned boxy metal vessel. It’s really easy to create lifts and levels when one starts to think out-of-the-box and repurpose items for that other than which they were intended for.

219Leigh

The treat tower is actually comprised of two metal trays that I found on after Christmas clearance years ago. I simply stacked these by using an empty drink mix container wrapped with glittery fabric.

17Leigh

It was surprisingly stable, but you can add further assurance by hot gluing these for a temporary bond. A stronger adhesive would make the bond permanent. I stocked the tower with icing laden cookies, cupcakes, and candy cocktails.

208Leigh

The other platter was another clearance gem from over a decade ago. It’s a lovely red metallic reverse painted glass. You can mimic this with a lovely red charger in either acrylic or glass. More of the same sweet treats topped the dish plus some delectable chocolate covered cherries set into their own treat cups. Try this with truffles or even upside down cake pops.

77Leigh

I made my own treat pops with Peeps red speckled white “love birds” with chocolate bases. To make your own, simply poke a pilot hole with a skewer or tooth pick then jab in a paper straw. I chose adorable heart covered ones, and then set these into gumball packed vintage crystal vessels. Any solid candy would serve as well.

250fLeigh

A non-alcoholic berry soda set into an ice bucket serves as equal-opportunity refreshment. The same red metallic plates that appear in the chalkboard sign crafts were placed front and center. Last but not least to complete the sweet buffet was the addition of candlelight. (Use LEDs if you fear sleeves catching fire or if you have young guests attending.) Red mercury glass votives were, you guessed it, purchased for mere cents post-Christmas. They really added to the ambiance of the whole setting.

202Leigh

♥ As you prepare for your own Valentine’s celebration… just remember to, “Keep calm & party on!”

Faithfully yours,

Leigh

Fast & Easy Glitter Heart Wand Centerpiece, Foam Ornaments, & Faux Chalkboard Valentine’s Day Décor Craft Tutorials (+ Printable)

205Leigh

This mélange of fast and easy crafts were made to decorate a Valentine’s Day Party, but you can adapt them for any purpose you like. The faux chalkboard craft is an inexpensive way to decorate for the holiday, but also makes a quick Valentine for a love one. The chalkboard idea can also be extended to other favors quite easily. The glitter heart wands effortlessly gather into a dramatic centerpiece, and can be taken home as favors by each Valentine princess at the party. (Make these with foam hearts or my free printable from the Valentine’s Day banner craft.) Also, make Valentine ornaments with the kiddos in your life using foam Conversation hearts in a matter of minutes.

61Leigh

Let’s begin with the simplest project first, making Valentine ornaments out of foam conversation hearts from the craft store. (I used the white ones only, so as to coordinate with my theme colors, and reserved the other pastels for the candy-land themed party which will appear in an upcoming article.)

81Leigh

You can either glue the hearts back to back, sandwiching twine or thin ribbon between them, or simply tape twine loops to the heart backs. The latter is the quickest way to make them, and the easiest for a little one to help with.

80Leigh

(See these similarly on the How to Make an Assemblage Sculpture (= 3D Collage) for Your Valentine (Art Instruction / Craft Tutorial).)

168Leigh

The next project is a faux chalkboard sign, that also makes an inexpensive Valentine, using the unexpected material of a paper party plate. The square metallic disposable plates are lovely yet extremely budget friendly. Why not pick some up for the party and reserve one or two to fill in as décor.

45Leigh

Merely use dots of glue to layer square doilies onto the plates. Simply trim down the doilies to fit the smaller plate sizes.

47Leigh

Then cut a square of matte black cardstock to size, and glue atop the doily.

50Leigh

Use a white paint marker to write whichever sentiment, poem, or quote you wish.

55Leigh

Use a hole-punch to add 2 openings with which to slip a strand of coordinating ribbon through. Simply tie the two ends in a bow, which also serves to further decorate the sign.

21Leigh

Similarly, cut squares of black cardstock to adorn gift bags and boxes, using the same white paint marker to write your sentiment in “chalk”.  If the writing doesn’t seem clear enough, simply go over the letters until they do. The uneven edges make them look even more like chalk, but won’t come off on your clothing while delivering them to your recipient.

208Leigh

Moreover, in this way you can ride the chalkboard trend without spending as much on readymade tags, stickers, or chalkboard paint. (The bags I made were machine cut from construction paper then adorned.)

215Leigh

The last project is a centerpiece of glittery hearts meant to be taken home as party favors at the end of an event. You can even print, cut, and glue these onto tiny wooden dowels using my free printable at the end of the article.

34Leigh

I sandwiched a thin dowel between 2 glittered foam hearts with the aid of hot glue. The thinnest dowels are really easy to just snap in half where you want to section them. Trim with a bow of glitzy ribbon if you like. I used readymade glittered bows from an after Christmas clearance sale.

10Leigh

The open hearts were made from inexpensive styrofoam and red glitter blast spray. For the largest ones, I simply jabbed in a cut section of wire hanger as a handle, but a thin dowel would be better if gifting them. I added glittery bows to some of these as well. All of them will sit securely arranged in a vase filled with marbles. This way they can be easily pulled out one by one at the end of the celebration as favors. I just pilled on an unraveled skein of glittery red yarn atop the marbles to hide them.

206Leigh

♥ Happy Sweetheart’s Day!

213Leigh

Faithfully yours,

Leigh

V-dayHearts-Leigh

P.S. Here is the Glitter-Doily Heart Printable. Simply right click on the image and select Print. Print them in the best color photo setting.

2 Fast & Easy Valentine’s Day Banner Décor Craft Tutorials (Doily & Glitter Hearts + Printable)

229Leigh

These Valentine’s Day banner crafts are so fast and easy that even the busiest mama can make them with her little ones. The glitter heart and doily printable only needs the addition of letters to spell out any message you wish. The second banner is comprised of layered doilies and extra valentines. Both are so inexpensive yet add a lot of heartfelt sentiment and party atmosphere. Plus, they’re lightweight enough to stick in a big envelope and send to a loved one whose away for the holiday. You can even use the printables as stand-alone Valentine Cards!

176Leigh

First let’s make the doily valentine banner. This is a great project to use up any leftover schoolroom Valentine cards from your kiddo’s class. You can even save the received ones to make banners for next year’s celebration.

175Leigh

One only needs to add some low-cost paper doilies in varying sizes. I used leftovers from last year along with some Holly-Hobby Valentine Cards from my childhood.

51Leigh

Merely use dots of glue to layer the doilies and Valentines. Then add a ribbon bow for dimension.

54Leigh

Tie circles of twine, yarn, or ribbon through the holes in the doilies and knot together. Hang it up and enjoy!

171Leigh

The glitter heart and doily banner is one that can be easily made by two different methods. You can print and cut out all the glitter doily hearts you need, using my printable at the end of the article. You can also use inexpensive glittered foam hearts from the craft store, and use hot glue to layer white doily hearts onto them.

26Leigh

Either way, the next step is add letters spelling out any sentiment you’d like. I cut out letters with a machine from black card stock to coordinate with my chalkboard theme. You can also use a stencil to trace and hand cut them, or buy them readymade at the craft store. (Michaels has them in every color and texture you can think of. Click on the affiliate link in the side bar to snatch the latest coupons.) I added a knot of ribbon to each dip in the heart to further tie in with my theme’s color palette. Feel free to add any other elements you’d like from paper roses to stickers. (You can even skip the letters and let a kiddo color in pictures to use the printables as Valentine Cards.)

38Leigh

Next add holes to both sides of each heart with a hole-punch. Then use ribbon or twine to string them together. Add a loop at each end to hang the banners by. Voila!

224Leigh

♥ Happy Heart’s Day!

Faithfully yours,

Leigh

V-dayHearts-Leigh

P.S. Here is the Glitter-Doily Heart Printable. Simply right click on the image and select Print. Print them in the best color photo setting.

How to Make an Assemblage Sculpture (= 3D Collage) for Your Valentine (Art Instruction / Craft Tutorial)

34Leigh

In honor of Valentine’s Day, I’ve made 2 assemblage sculptures (which are the 3-dimensional versions of collages), one honoring romantic spirits and the other creative kindred spirits. With photographic examples of the steps, along with some basic instruction, I’m sure you’ll be able to create your own. This project is the perfect Valentine gift because you can incorporate little bits of ephemera like ticket stubs and cards from your romance, or you can celebrate a creative spirit with little items that symbolize the recipient’s talents. It’s an inexpensive way to demonstrate affection in a memorable one-of-a-kind way… and they’re so much fun to make!

20Leigh

Let’s start with the basics… assemblage sculptures are really just 3D collages. Instead of merely cutting and gluing flat pieces of paper images to a larger sheet of paper, solid ephemera (like perfume bottles) are glued to a base (like a book box). As with any sculpture, they are viewed from 360ᵒ and so should be layered on all sides. In this way, they really are more challenging to make and more interesting to look at. Completed pieces are best viewed close up and in person like one would inspect the contents of a tiny dollhouse.

26Leigh

I’ve made two at the same time in order to demonstrate more fully just how to complete such a project. They have very different themes, but utilize the same color scheme and even some of the same items like crystal hearts. In one artwork these symbolize romantic affection while in the other representing the love of craft. Personally, I find that it’s best to begin by gathering all the important ephemera you’d like to use first.

1Leigh

Think of it like an exaggerated version of scrapbooking. Add things that depict cherished memories or even inside jokes. Another way to begin is make a list of things you want to portray, and then look for elements that would render those. And, let’s just say that you don’t have the right memento from that beach trip… well, just go buy a lovely shell and write a date on it in permanent marker. It really is that simple.

45Leigh

Observe the collected items to see which colors are repeated most. Allow this to dictate your color scheme. Any pieces that clash with that scheme can be altered to blend in seamlessly. Paint, stain, glitter, glue, ribbon, and tape can change a tchotchke to suit your palette. Here I’ve use a bingo marker to stain some pale wooden heart cutouts and potential base feet. (See more about the possibilities of bingo markers in my article: Fast & Easy DIY Hand-stamped Polka-dot Gift Wrap & Matching Gift Crafts.)

25-2Leigh

The next step is to go to your craft area, local craft store, or even online to search for coordinating bits of ribbon, washi tape, or even feathers to fill in the empty portions of your project. (A few of my affiliates offer great rotating discounts on art and craft supplies. Check them out in the sidebars and footer.) How much you use is a matter of personal artistic preference. I intentionally load some assemblages up to the hilt, while in others I designate empty voids as a design element in and of itself. (This is called “negative space” in “art-speak”.)

48Leigh

Choose an appropriate sized base object according to the size and amount of your collected ephemera, and by how you would like to display them. (Of course, I’ve also started with a really awesome base then collected items after. For a Valentine project though, the most important elements are the collected ones.) You can use a tiny chocolate box if you only have a few key items and are short on time. Or, you can use that chocolate box as a pedestal inside a bigger box (just remember to glue the little box together before adhering it to the base).

7Leigh

I used a vintage fabric covered book box for the “Sweet-Heart” assemblage. I love using old pieces off-book so to speak. I thought a drawer organizer box would be perfect for the “Creative-Heart” project. I just turned it on its side to make a kind of display case out of it. You can even use a plain paper-mache box, and decorate to suit your theme.

51Leigh

Lay out the items you’d like to use to see how it looks best arranged. Move things around until you find it visually appealing. Eventually it will just look right. You can lock this into your memory, or even take a photo to reference it while you glue things down. Use a permanent glue stick to adhere the paper pieces in layers to the base.

73Leigh

Here I’ve added washi, glitter, and foil tape to add visual interest to the plain centers of the “Creative-Heart” assemblage. Then I glued paper pieces to the backs like a papered wall.

39Leigh

Use a clear glue with more staying power for heftier pieces like glass bottles and metal pieces. (I placed some great glue varieties in the curated art supplies gallery box in the sidebar. Just click on them to read the specs.)

59-2Leigh

I glued small stained wooden shapes to the bases to serve as feet (those shown earlier). This is the most inexpensive way to both elevate and protect the artwork. You also use more ornate metal feet specifically made for assemblages or even small silicone stickers.

57Leigh

Rotate bases to glue all of the heavier objects onto that side, and then let them set to dry. Continue to rotate and glue various edges. Of course, try to position the bigger more important pieces before filling in with the tiny ones.

54Leigh

Think about adding meaningful words, phrases, questions, or quotes to impart further meaning to your elements. I added these using printed label tape, dymo tape, vinyl lettering, glittered chipboard letters, a Chinese character, and even fortune cookie papers. Apply these directly onto your pieces and to the base itself.

50Leigh

I also made ivory shapes using Plaid Mod Molds. (These have been added to the curated gallery too.) I love being able to quickly make whatever element I feel needs to be included. I included metal jewelry charms, painted paper clips, mini-CDs, Spanish bingo cards, old keys, rulers, scissors, paper rosettes, ornaments, cupcake picks, playing cards, spools, thimbles, magnets, paintbrushes, crystals, glass vials and jars, etc.

56Leigh

Here is a pair of giant winged earrings that I’ve modified for the project. I even cut out music notes from the shiny display card. You never really know where something’s come from in one of my pieces. I generally use a lot of vintage elements and scraps that I modify. I’m lucky enough to have a grandma that collected a lot of random stuff that I can now use, but you can find a lot of knickknacks both online and in antique shops. Let your creativity run wild and use anything that can be altered and glued down!

3Leigh

55Leigh

Just keep layering your pieces into the base like you would to complete a puzzle. It’s done when you think adding anything else will mess it up… the Goldilocks moment of when it’s just right. Of course, there will always be critics, but you didn’t make it for them. If your recipient appreciates the care that went into it, and if you enjoyed making it…. well, isn’t that just the point of making a homemade gift?

17Leigh

18Leigh

Have fun & tell stupid Cupid you’ve got it covered!

Faithfully Yours,

Leigh

27Leigh

37Leigh

Making a Custom Book to Make the World a Better Place (One Fundraiser at a Time!)

Fundraise with Blurb custom books (This is a sponsored post from Le fidèLe Designs affiliate Blurb, helping to bring you free & fabulous content!) If you are involved with any type of organization – animal rescue, PTA, even little league, you’ll probably need to raise money for it at some point. Creating a Blurb custom book to sell (or give away to donors) is a simple yet effective way to fundraise.

Tips for charity book-making:

  1. If your subject is the tiniest bit photogenic (like animals, the environment, or kids), think about putting together a simple yet classic photo book to sell. It’s easier than it sounds! Just use one of these six professionally designed templates and you’ll get a stunning book… without having to hire a professional designer. There is always at least one creative-type in every group who’s ready for a worthwhile project!
  2. Think about your narrative—what’s the story you want to tell? Using a mixture of words and images will tell people exactly what you do, and why you do it. With an inspiring story, you’ll find people are so much more open to your message. (Check out this great online book-making tool to get started.)
  3. Another great fundraising idea is to create a cute little notebook or planner covered with your organization’s logo atop a heart-inspiring photo. It’s so handy that people will actually want to carry it around… and carry your message with them!

Here’s a How To for the Right-Brained Folks: Feel free to forward this post to the charity-driven creator in your group, and if you have any of your own tips or tricks on how to raise money for a good cause, I’d love to hear them!

Faithfully Yours

Leigh

P.S. You can also publish your own travel, poetry, art, photo, portfolio, children’s, wedding, baby, memory, planner, notebook, memoirs, or even cookbooks! (Click here for a video on how to make a photo book!)

Fast & Easy DIY Hand-stamped Polka-dot Gift Wrap & Matching Gift Crafts

With all of the miles of commercially produced wrapping paper that stores seem to stock at every corner… why make your own? Well, it can be made super-fast and super-easy without looking like it! With my simple repurposing trick, you can make handcrafted gift wrap inexpensively in a matter of minutes. It’s really easy to stamp any type of package, paper, tag, card or box… even one that gets addressed and sent in the mail! It looks even more adorable on matching notebooks, craft letters, or any other gift that would accept inking. With stamping, you can match the colors to your décor for a catalog worthy Christmas, and delight loved ones with one-of-a-kind gifts at the same time. And, I don’t know about you, but I really love it when someone has cared enough to make something just for me.

94Leigh

My simple trick to easy and fast polka-dot making (ahem, drumroll please)… bingo markers! The idea was sparked about 15 years ago when someone gave me a few of these because she thought I might want the ink in them. Let me tell you, I made so many spotted cards with them! Everyone was always surprised when I told them what I had used.

49-2Leigh

You can find them in so many colors. I’ve used pink, green, blue, red, and purple as examples here. They even come in shapes like shamrocks or hearts, but I’m sticking with polka-dots for now because they are just so classic and chic!

46Leigh

You can use any kind of paper for the gift wrap or bags. Glossy paper will leave more of a watercolor look, while matte paper will dry to a solid flat color. Both have their merits. Just know that glossy surfaces take much longer to dry. It’s great to buy neutral colored bags in white or kraft paper color, and then stamp them into personalized colors as needed.

44Leigh

You can match your décors theme, go with traditional colors, or even pick a different color combo for each family member. Pink is my grandmother’s favorite color, so that’s just what she gets!

102Leigh

Blue and pink polka-dots are perfect for gender-neutral baby showers.

28Leigh

The paper I’m showing here is the best I’ve found for wrapping. It’s thick enough to hide the contents well. It won’t tear like the commercial variety in transit or mailing. It dries quickly and evenly so you can make a ton of it and just roll it back up. The tag in the picture has dry ink on pink paper, and it’s sitting atop tan with freshly applied ink.

39Leigh

The roll is really inexpensive for quite a lot, so it fits everyone’s budget. It’s so versatile because you can do anything with it (spray paint it, paint a scene on it, write messages on it, have kiddos draw on it, make gift tags or cards out of it, etc…) What is this amazing product? (Another drumroll please)… rosin paper from a hardware store! It’s actually used in homes during construction. I learned about it from my interior designer mother of course. It’s available in pink, green, white and tan like kraft paper in rolls that will last for years. I even use this stuff for covering the backs of framed artwork. (I’ll do a DIY tutorial for this in the future. It’s really easy and will save you so much money.)

30Leigh34Leigh

I try to stamp one color in a grid-like pattern, and then follow up in between those with a contrasting color. I have to admit though… sometimes it’s fun to just get stamp-happy all over the place! Do expect this when kiddos are involved. It’s fun to see the creations they come up with.

105Leigh

When making hand-stamped giftwrap for my Etsy store, I make long sections for wrapping purchased goods, and also package making kits complete with tag and twine.

74Leigh

I make my individual sheets much larger (36 x 30 inches) than others typically offer (20 x 30 inches) so as to fit larger packages. Each kit will definitely cover several small boxes.

27Leigh

If you want to make individual wrapping paper sheets for yourself, just use a T-square ruler to measure and mark straight distances before cutting.

25Leigh

Another idea, how fun would it be to have a holiday stamping and wrapping craft party with the gal-pals!

24-2Leigh

Here are traditional red and green packages for Christmas with added ornament decorations. You can see for yourself the differences between glossy, matte, box, bag, and wrapping paper.

53Leigh

I also used a stamp on them that says, “handmade for you, because you’re worth it,” as it really exemplifies what I’m trying to do… show that I care!

24Leigh

This is an idea for a friend celebrating Hanukkah. I realized I had no appropriate bag decoration for it, so I took a couple of minutes to make one. To make your own, run the matching bingo marker over 6 popsicle sticks to stain them. After they’re dry, hot glue 3 into a triangle. Repeat this with the last three, then glue one triangle on top of the other. Tie on with coordinating twine, yarn, or ribbon.

71Leigh

This would be a great type of Christmas craft for the little ones making ornaments for the family. The bingo markers don’t make a big mess and the ink washes off of skin. Adding a year and a name in permanent marker would make it even more precious.

91Leigh

Here are some birthday gift packages with tiny frames as bag décor.

87Leigh

I went ahead and stamped them ahead of time because I already had everything out, and I’m planning an upcoming green and pink polka-dot theme birthday party. It fit just too perfectly!

78Leigh

Also, I’ve made some critter themed wrap in blue and green. It seems like there is always a little one being born or having a birthday, so I make a point of finding theme items throughout the year for gift baskets. I can always find cute things in ducks, frogs, and ladybugs.

81Leigh

Here are some attempts at making shapes with the bingo markers. I’m sure it probably would have been smarter to practice before doing this on the bag and boxes. Oh well, at least you can get the idea.

42Leigh

The Mickey / Minnie Mouse bag appears to have black ink on it because green ink appears black on the red paper. I also stamped polka dots onto a length of red paper ribbon to demonstrate the endless possibilities of decorating with ink. The green Hungry Caterpillar box just as easily could have featured a blue Alice in Wonderland Caterpillar.

62-2Leigh

The hearts on the box aren’t great because it isn’t easy to make a V-point with a round stamp. Although I did get better at it by the time I made the leaves for the flowers. Just use a Sharpie to draw in details like arrows or a wavy lined stem. The peppermint candies were made by a foam stamp inked with the bingo marker. I thought it might work, and was delighted to find that it did! I will soon be posting a Winter Candyland Party that this type of stamp is perfect for, but here it’s used for a “sweetheart” gift box.

68Leigh

It’s really great to just stamp the outside of gift boxes, and not worry about wrapping at all! Here I’ve use some Christmas yarn… purchased with a coupon so that it was a fraction of the price of baker’s twine. I have enough quantity to be generous with it without worrying about running out… and it’s just really cute.

59Leigh

The Rudolph decoration was manufactured, but it would be really easy to draw a silly character on poster board in Sharpie markers and glue on a red pom-pom nose. That could be a fun way to get the kids involved as well. Another festive idea is to stamp the outside of a mailing parcel then write the recipient’s address in black Sharpie.

15Leigh

Don’t forget to make tags for your “presies”. I just used several large punches to cut them out of the same paper.

21Leigh

I then stamped them in assembly line fashion… proof positive that quick can be cute!

19Leigh

I used the handmade stamp and candy stamp on some. The star tag was stamped with a foam star and acrylic craft paint. This way you can see the difference between how ink and paint look. Use a Sharpie marker to write messages on any of these as pens just don’t show up well.

40-2Leigh

As for the gifts themselves, why not make super-quick stocking stuffers with matching polka-dots?

51Leigh

I took boring kraft paper notebooks, and raised the cuteness factor exponentially with a little ink stamping and twine wrapping.

45-2Leigh

I also added some washi tape to one whose top was peeling slightly. I personalized that one with my name in Sharpie.

54Leigh

There is one thing which will save you some length on twine brands that have a tendency to unravel easily… tie two knots before cutting in between them. I found that the yarn that looks like twine actually unravels less.

26-2Leigh

Here is a collection of my various colors of notebooks that will be made available at Le fidèLe Designs Etsy store.

42-2Leigh

Another stamping idea that’s super-easy and fast is making message holiday décor. I bought the only “J” left in 3 stores, so JOY must be popular for the holidays. Really, any letters using different colors can be made year-round. A name would make a terrific personalized gift for a little one’s nursery.

110Leigh

I simply stamped haphazardly with the red and green, because it was more fun that way!

116Leigh

I went ahead and inked the back as well, for versatility. In this way I can set them anywhere, even freestanding in the bar area.

121Leigh

Lastly, I found some holiday charms and bells to tie on with Christmas yarn. It was easy and done in a few minutes.

36-2Leigh

The best part of all of these projects is that I found people really want to reuse some of the stamped wrap. (I even had one request that I not to write on the tag next time, so that she could send it forward… not the gift, just the bag and tag!) By hand-making your own wrapping, you are not only demonstrating that you really cared enough to go that extra mile, but it’s also beneficial to the environment when others want to continue passing it along. Reusing is even better than recycling! It’s yet another way to give when we are good stewards for His majestic creation.

28-2Leigh

Faithfully Yours,

Leigh