Tag Archives: Kid Friendly

Creamy Broccoli Salad Recipe with Vegan & Turkey Bacon Options (Gluten-Free, Egg-Free, Dairy-Free, Soy-Free, Nut-Free, Pepper-Free)

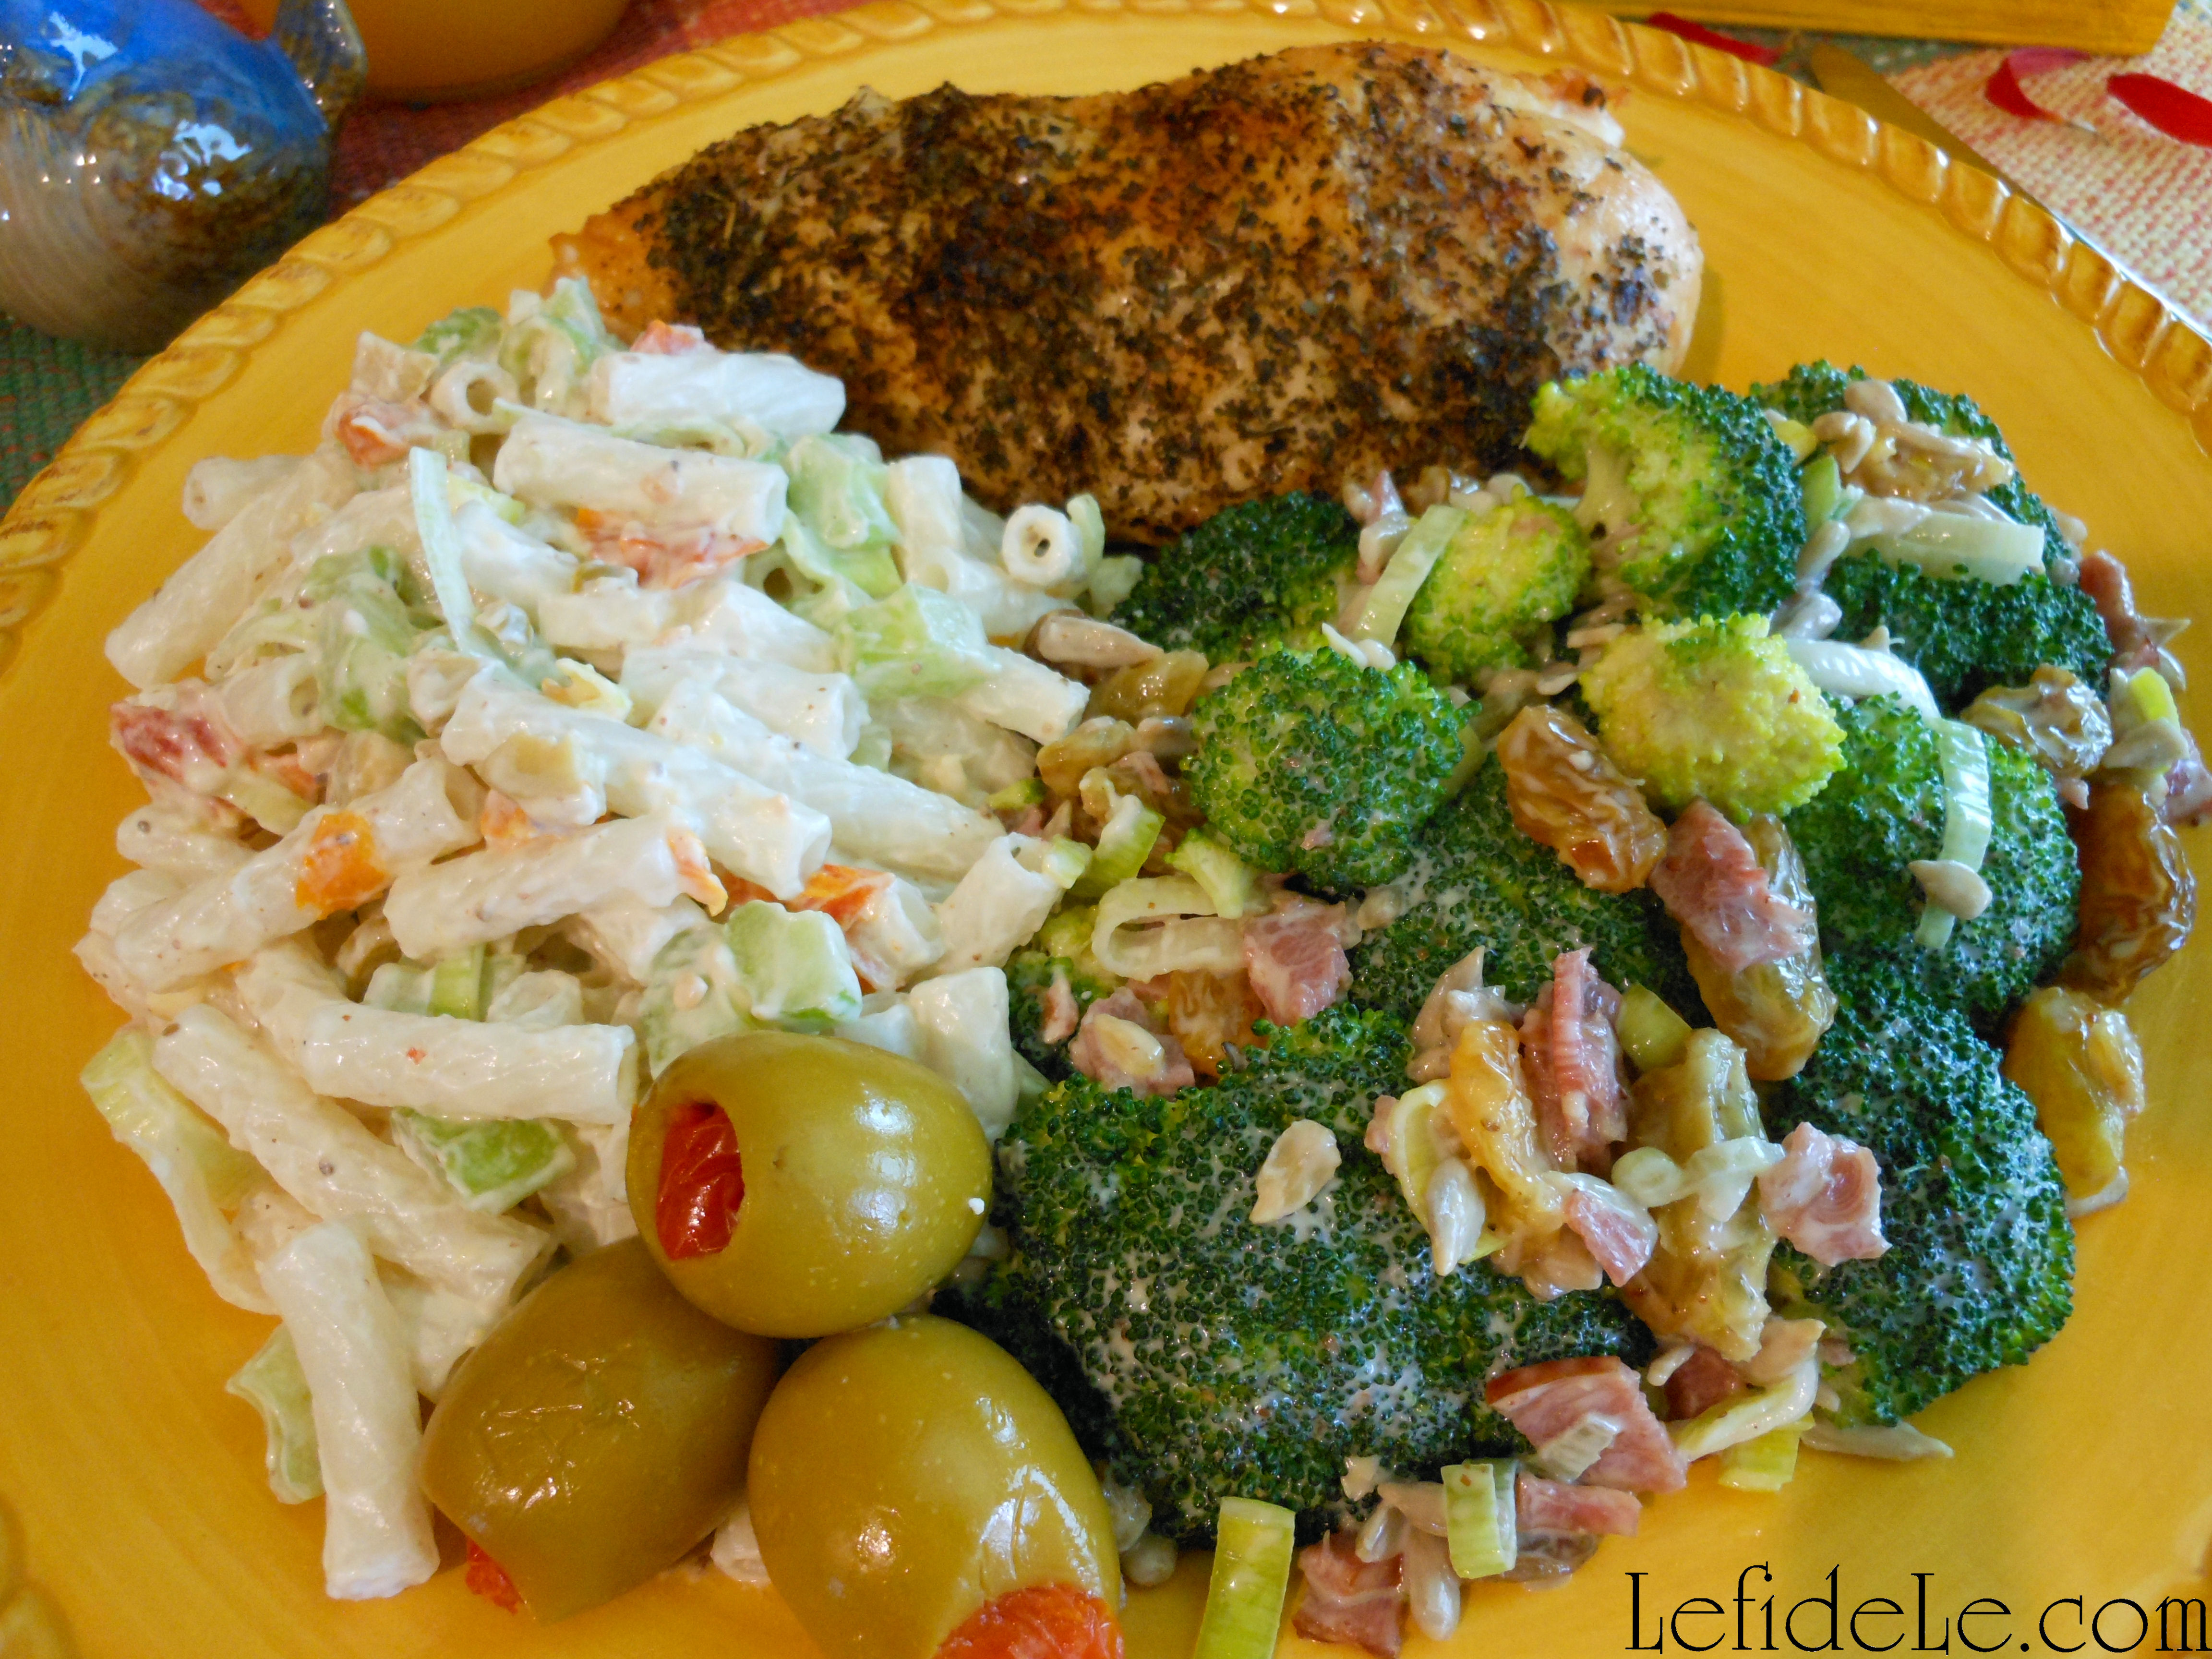
This allergy-friendly creamy broccoli salad recipe is so tasty that no one will be able to tell that it’s vegan, egg-free, dairy-free, soy-free, nut-free, pepper-free, and gluten-free. Make it vegan friendly or add turkey bacon to punch up the flavor, and you can even chop the broccoli smaller to disguise it from picky eaters. It’s the perfect make-ahead and take dish for everyone to enjoy at picnics or pot-lucks because it’s celiac and allergy-friendly, and has no egg or dairy to trigger food poisoning… because who would want to be responsible for that!


Ingredients:

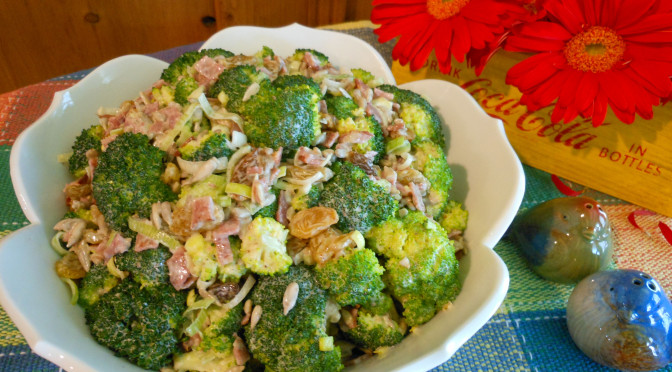
1½ pounds fresh broccoli tops (blanched for color & health)

1⅓ cup golden raisins (or purple raisins, or craisins)

1 cup diced leeks (or spring onions, shallots, red onion)

¾ cup sunflower seeds / kernels (raw or toasted)

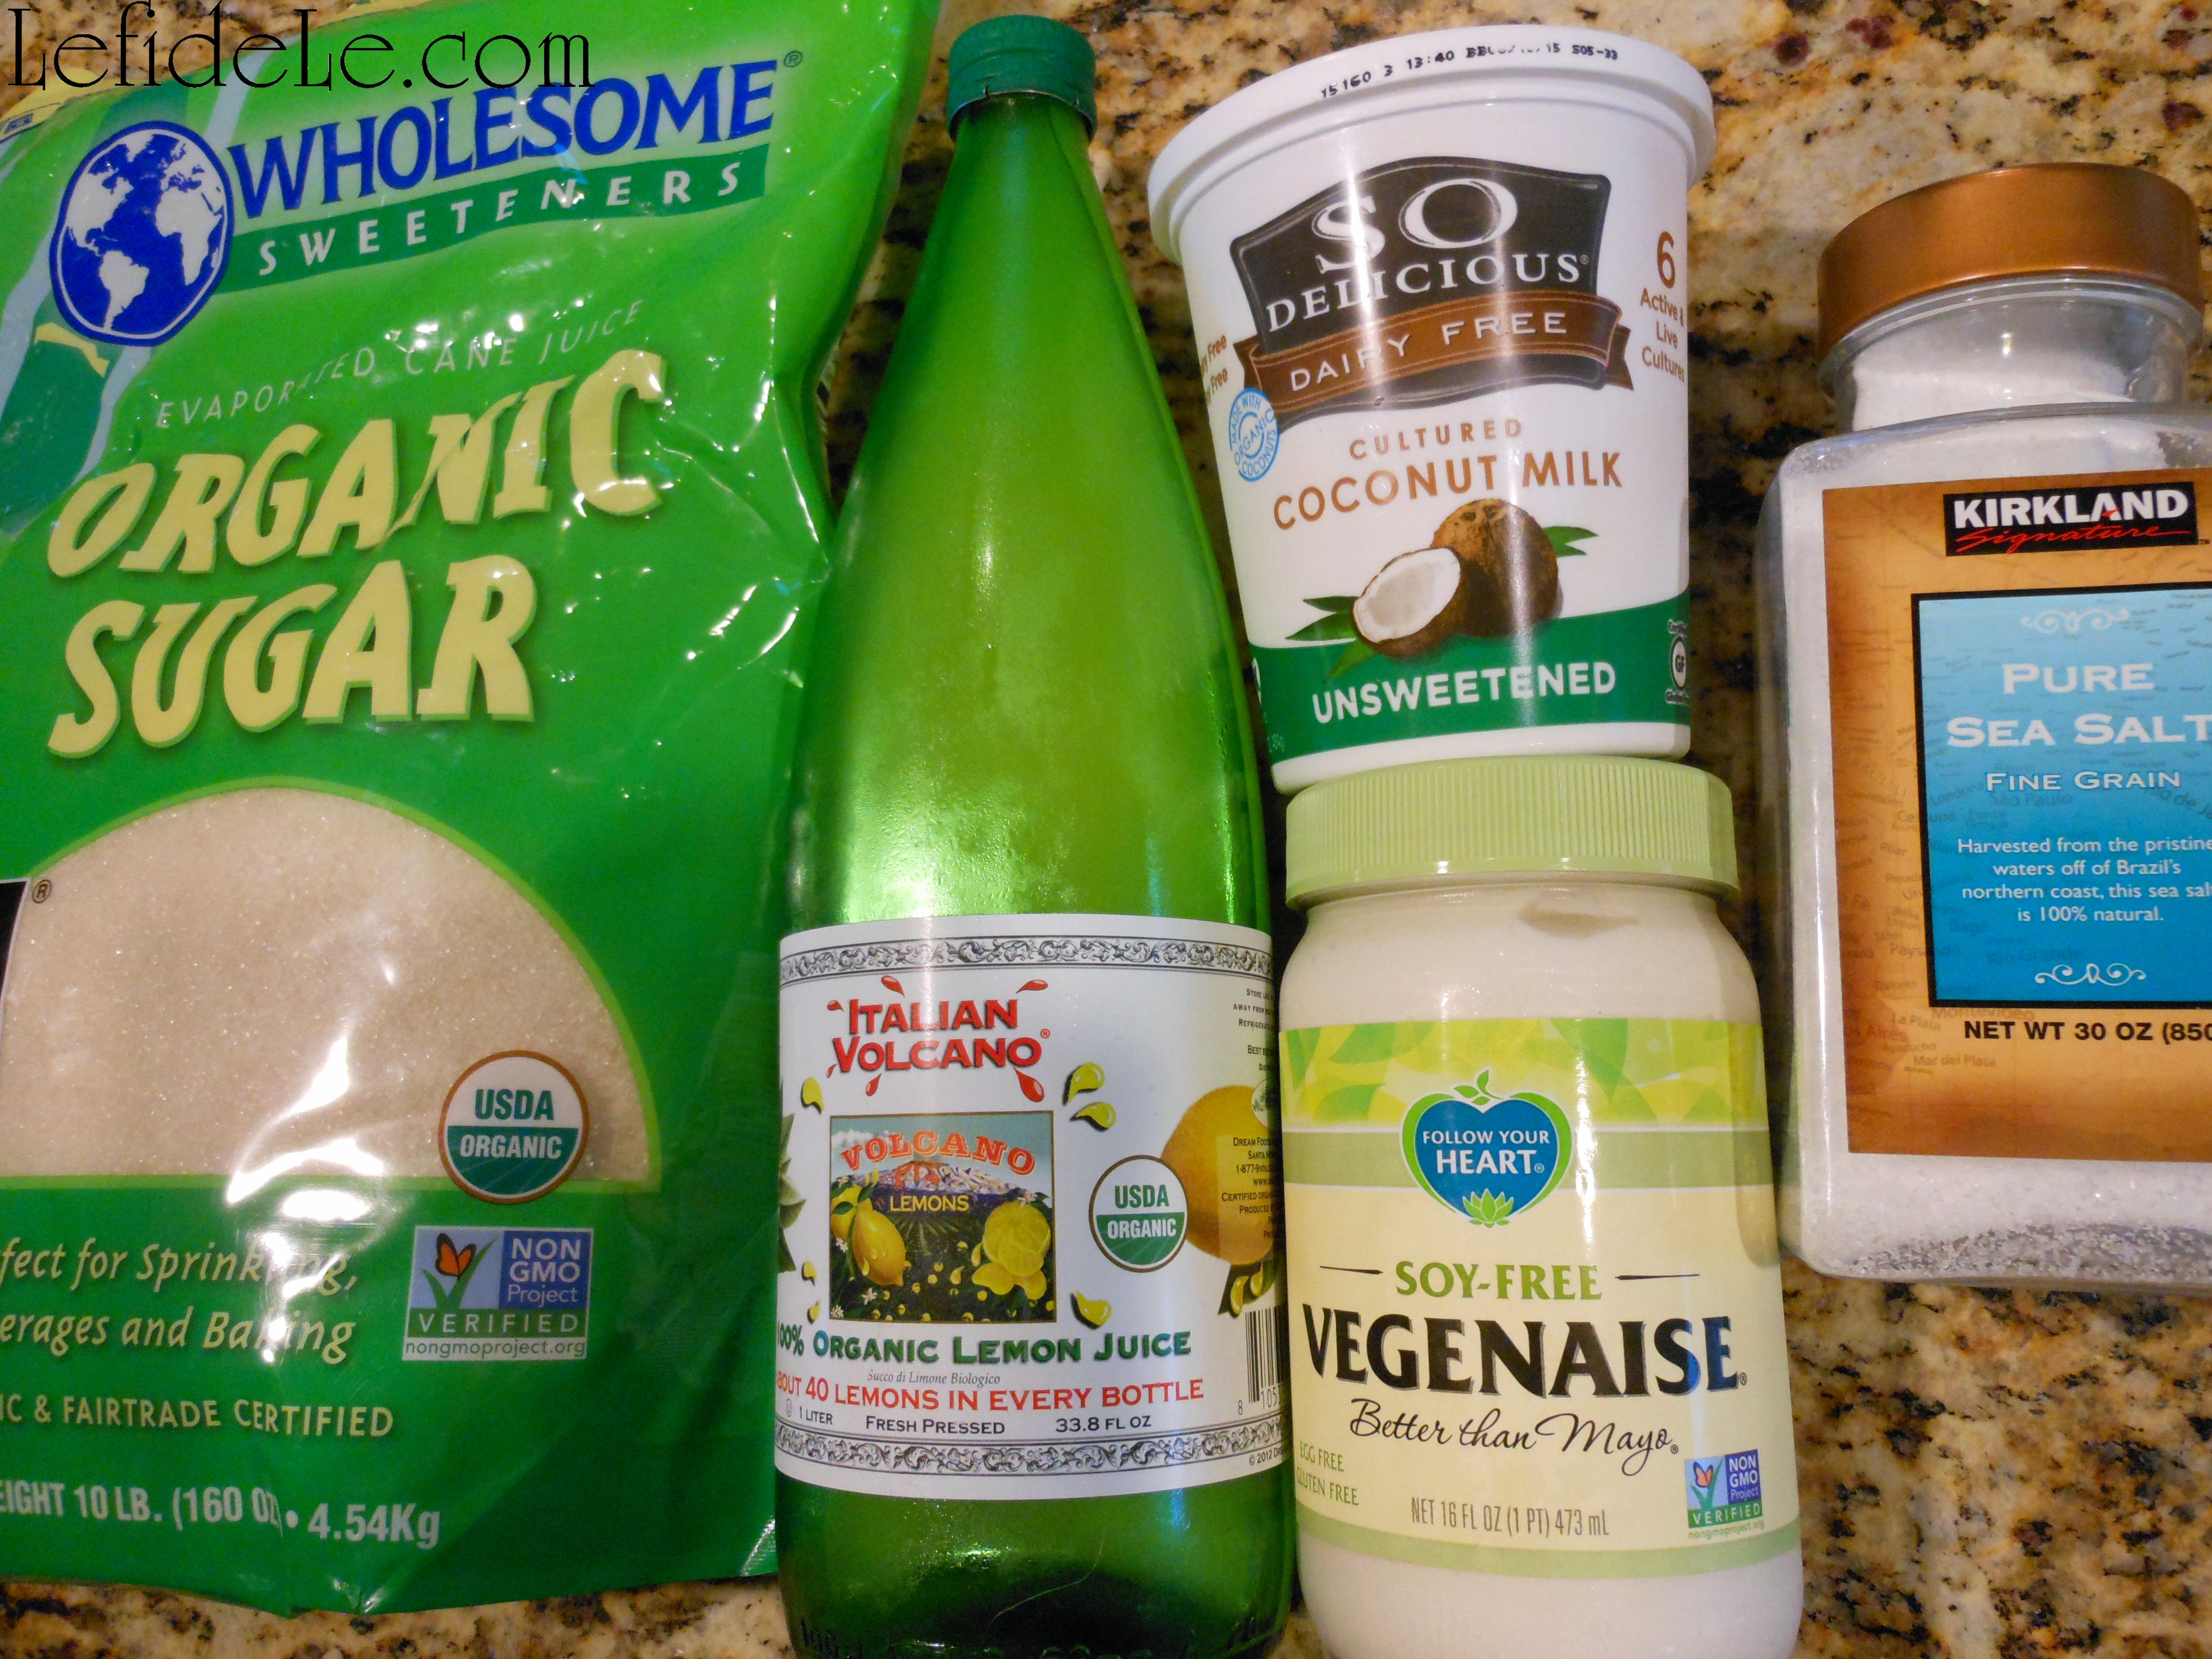
½ of my prepared Creamy Salad Dressing Recipe (For Green Salad, Broccoli Salad, Macaroni Salad) Gluten-Free, Vegan, Egg-Free, Dairy-Free, Soy-Free, Nut-Free, Pepper-Free (Click here to see it!)

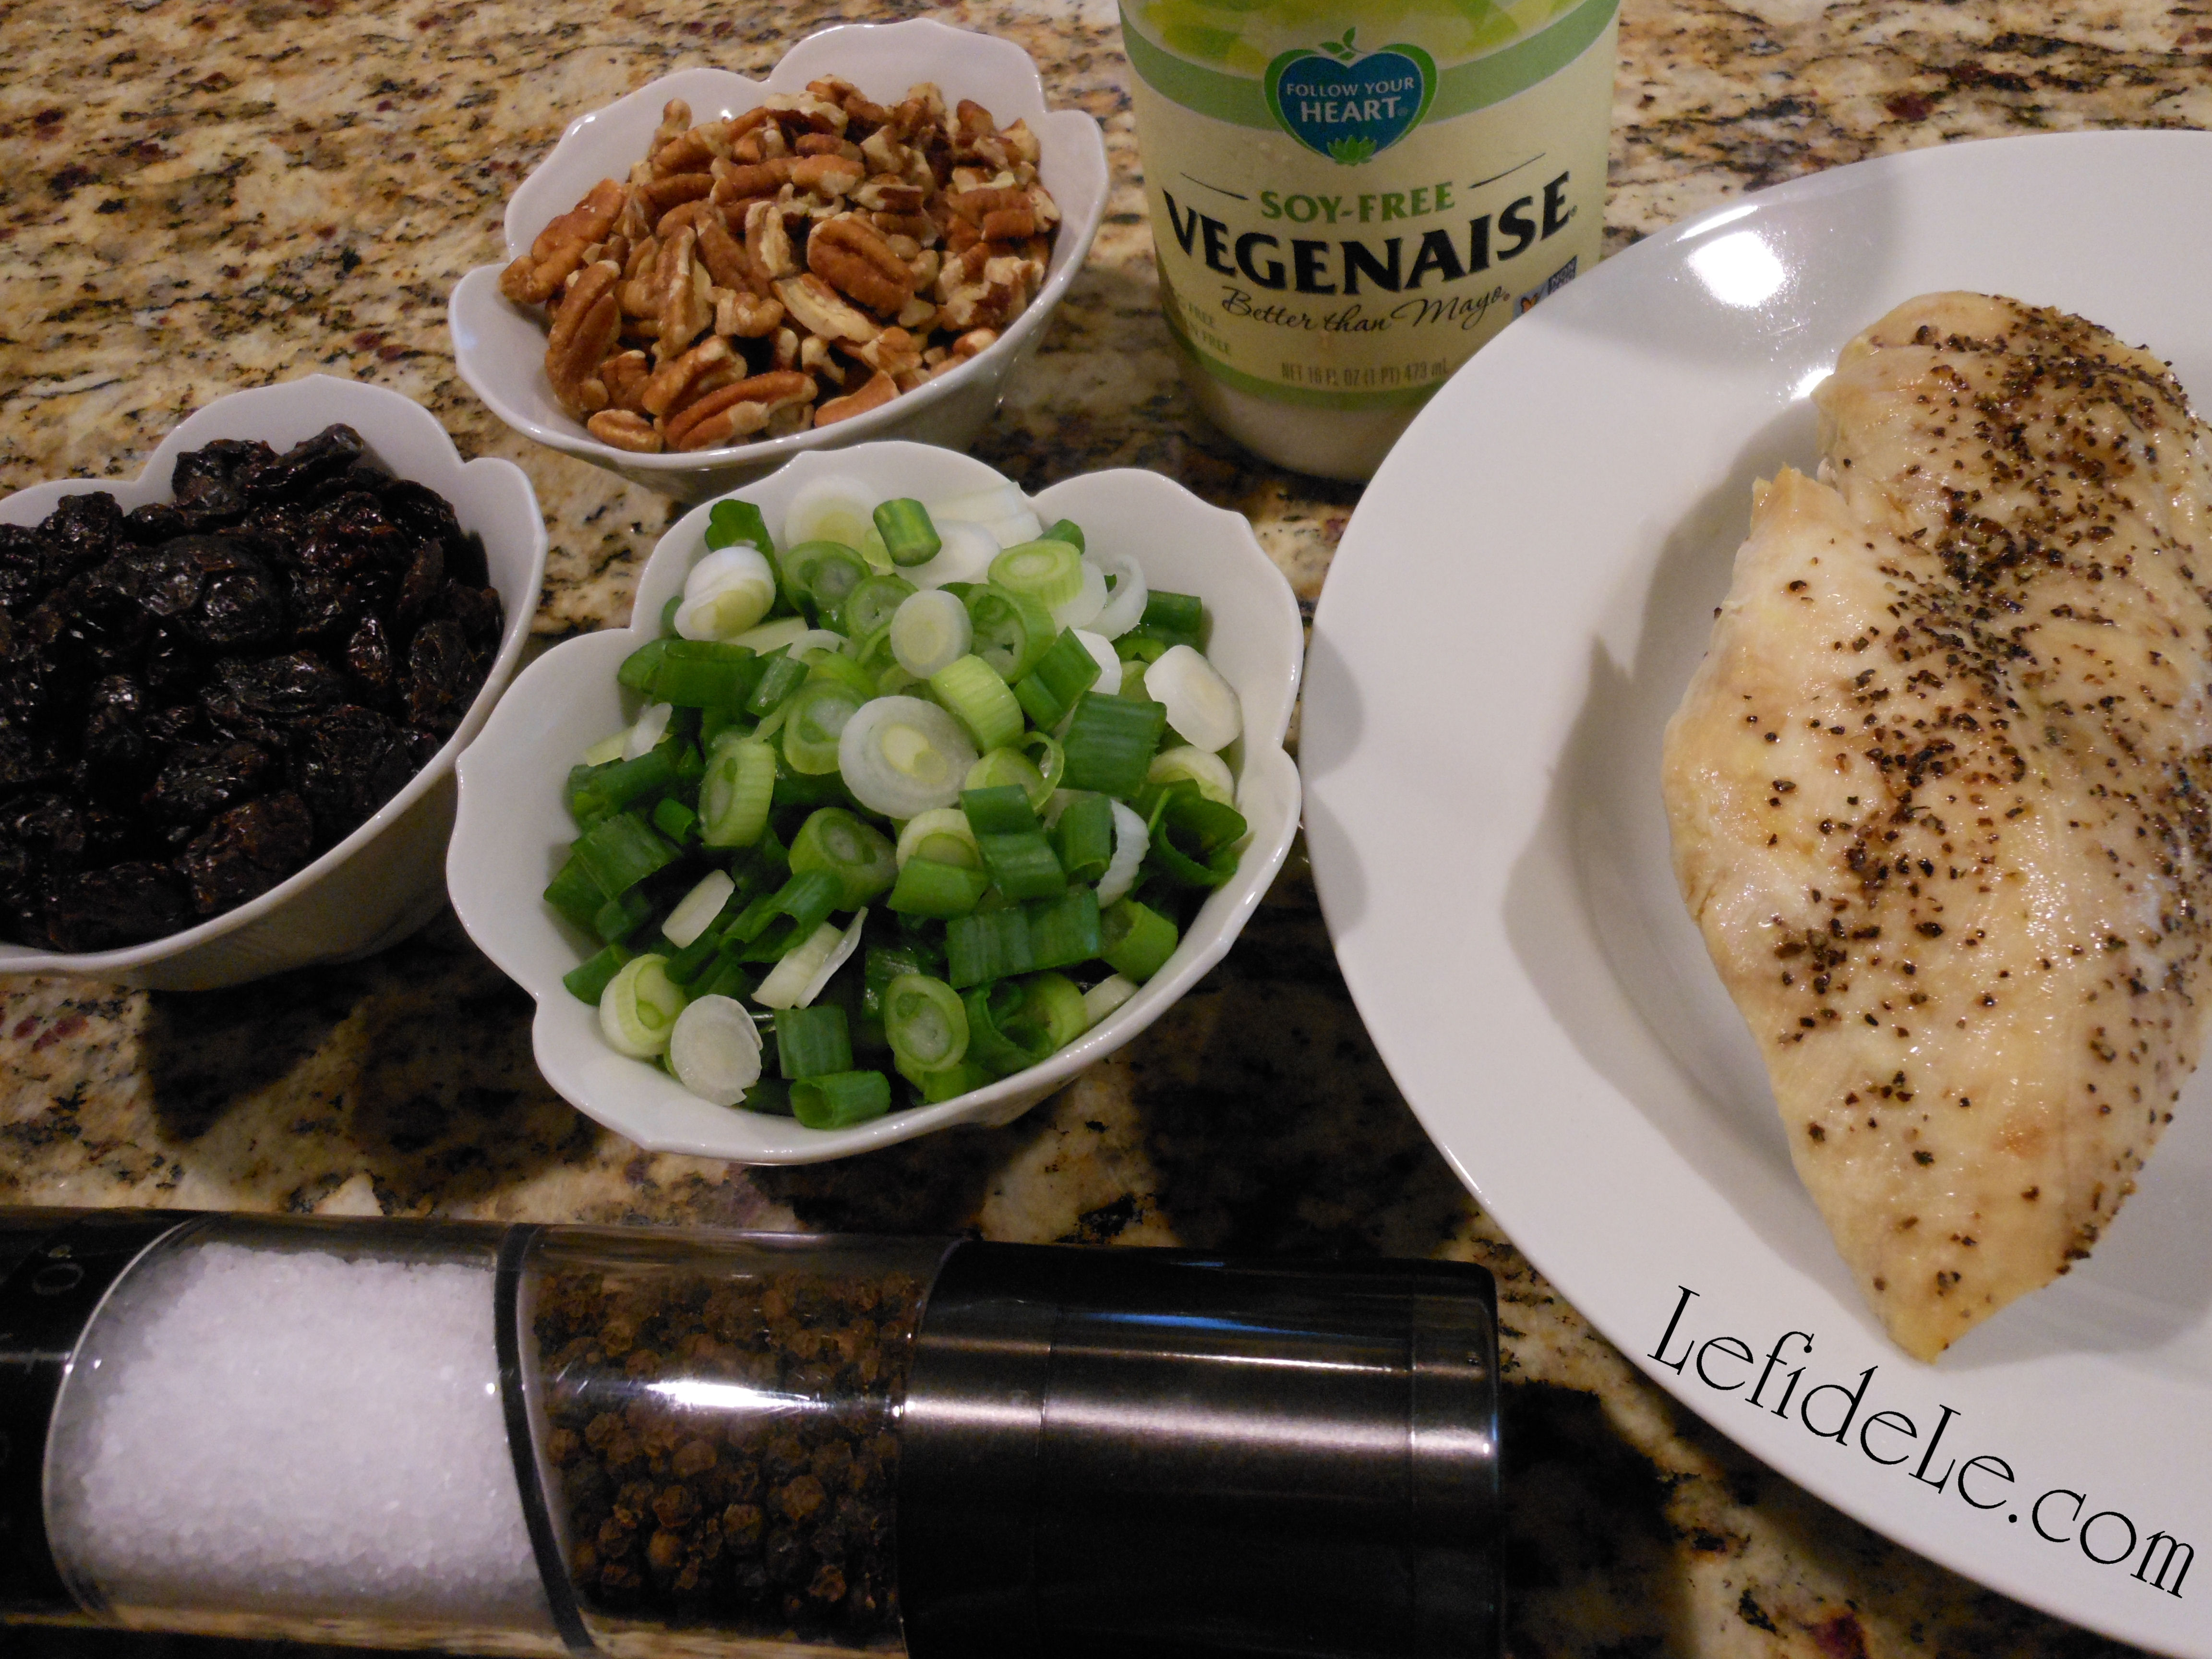
* Optional: ⅓ pound chopped turkey bacon (or vegan bacon, bacon bits, regular bacon)


Instructions:

039Leigh

Gather and wash your ingredients then dice the leeks. Blanch the broccoli tops in boiling water for a few seconds… or quickly microwave them, I won’t tell. Chop the broccoli into smaller pieces to get your picky eaters to devour their veggies… but you might just want to call it “creamy salad”! (Bagged broccoli tops are an easy shortcut. I used half of a 3 pound bag from Costco.)

054Leigh

If you’re using bacon… bake, grill, or pan fry it, and then chop it up. (It’s easy to split a recipe into two bowls… one for the vegans, and one for those who think no meal is complete without meat!)

008Leigh

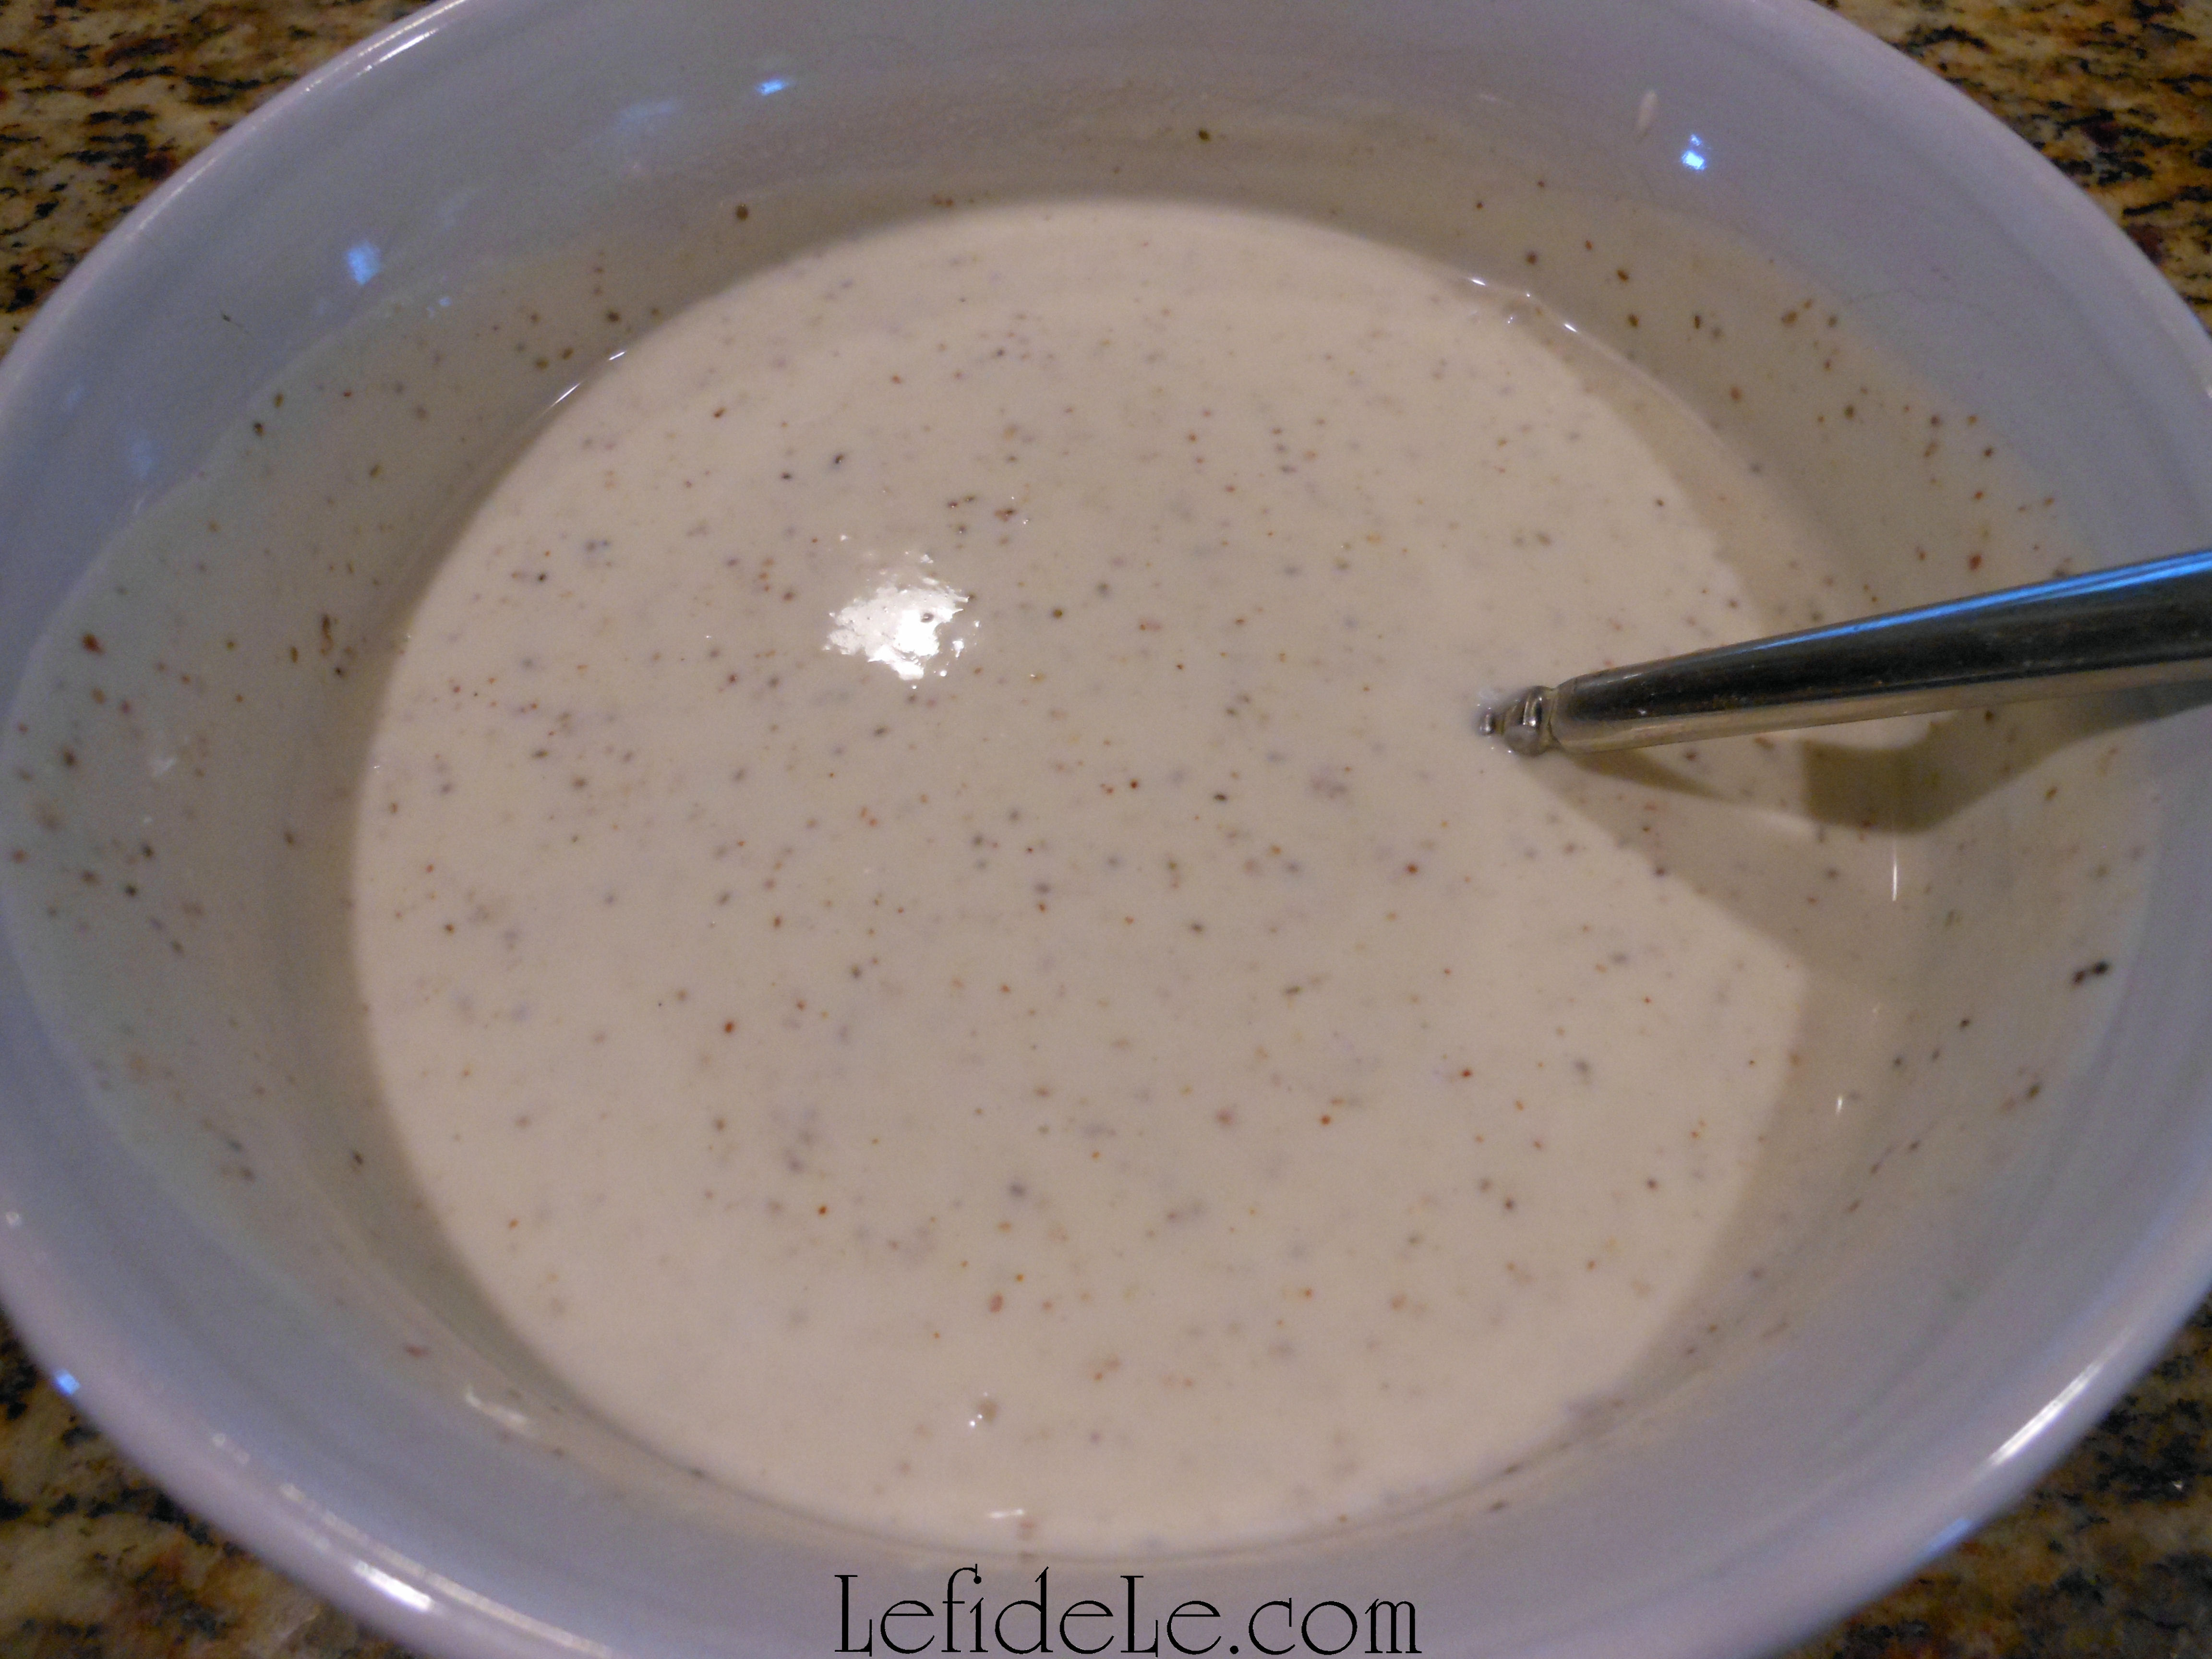
Prepare a ½ portion of my Creamy Salad Dressing Recipe (For Green Salad, Broccoli Salad, Macaroni Salad) for this broccoli salad. (For a larger crowd, use a whole recipe of dressing with a double recipe of the broccoli salad.)

065Leigh

Mix everything together, and refrigerate until ready to consume. (This is such a great make-ahead and take dish.)

043Leigh

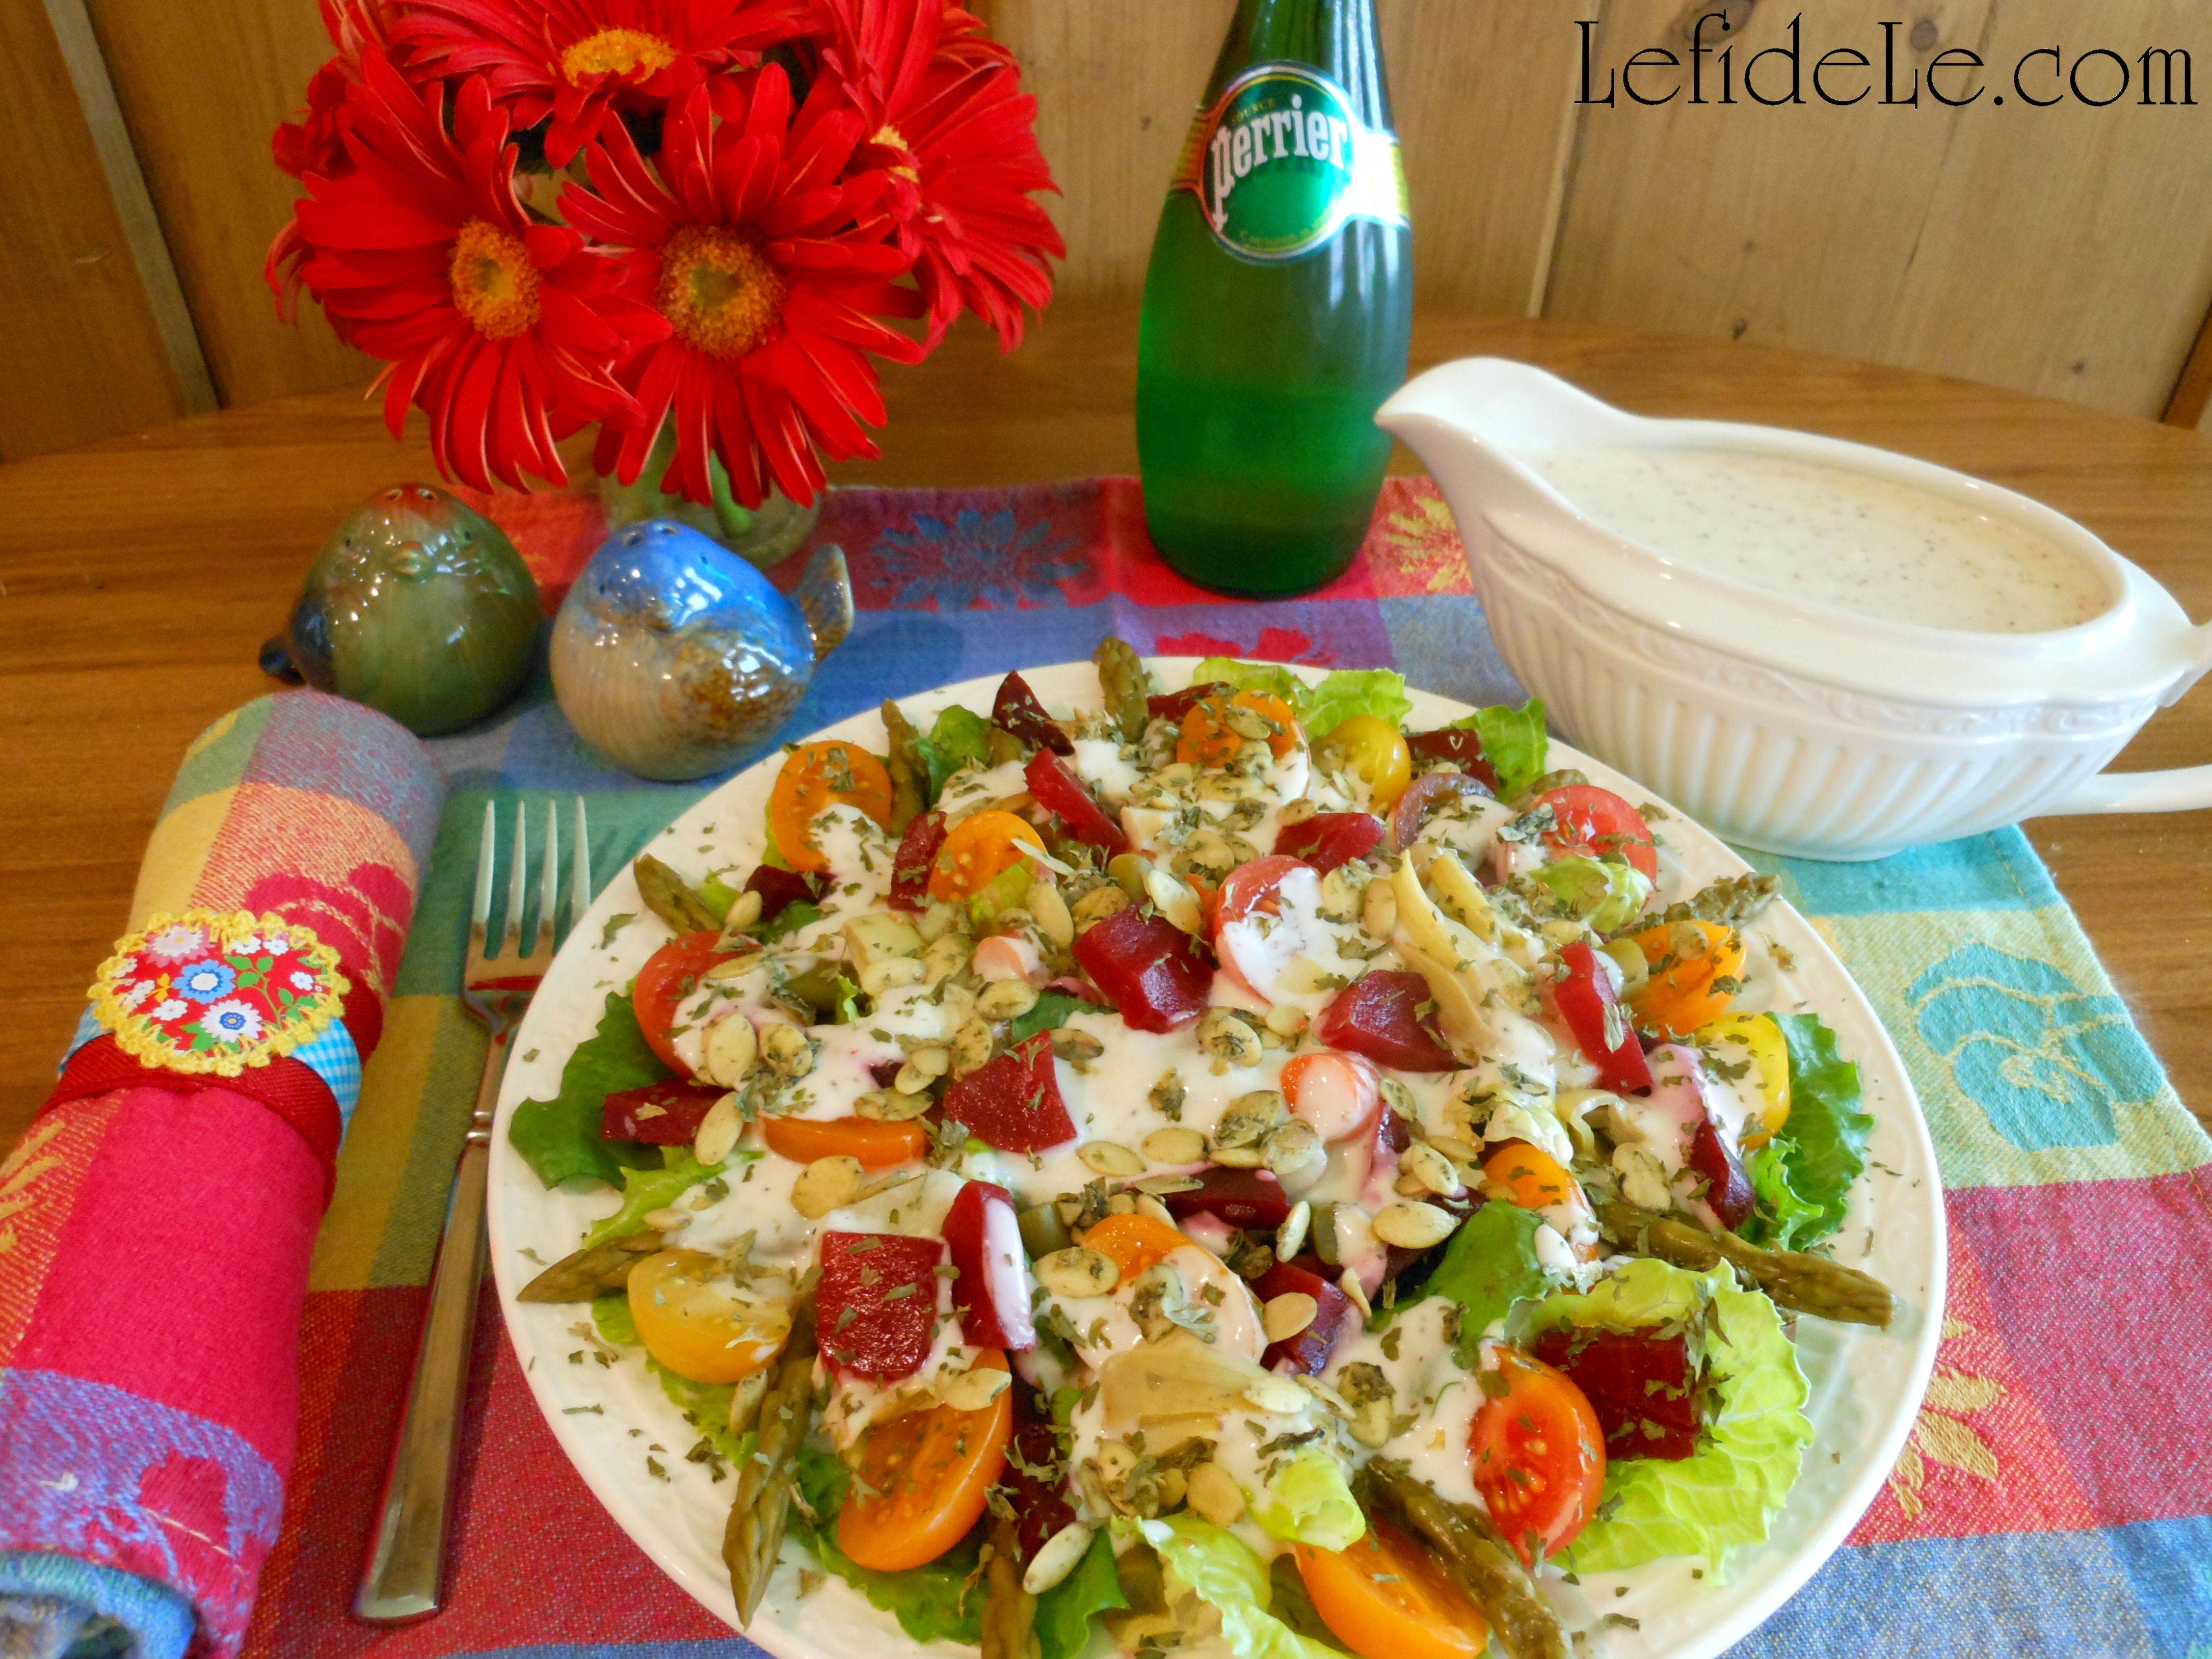
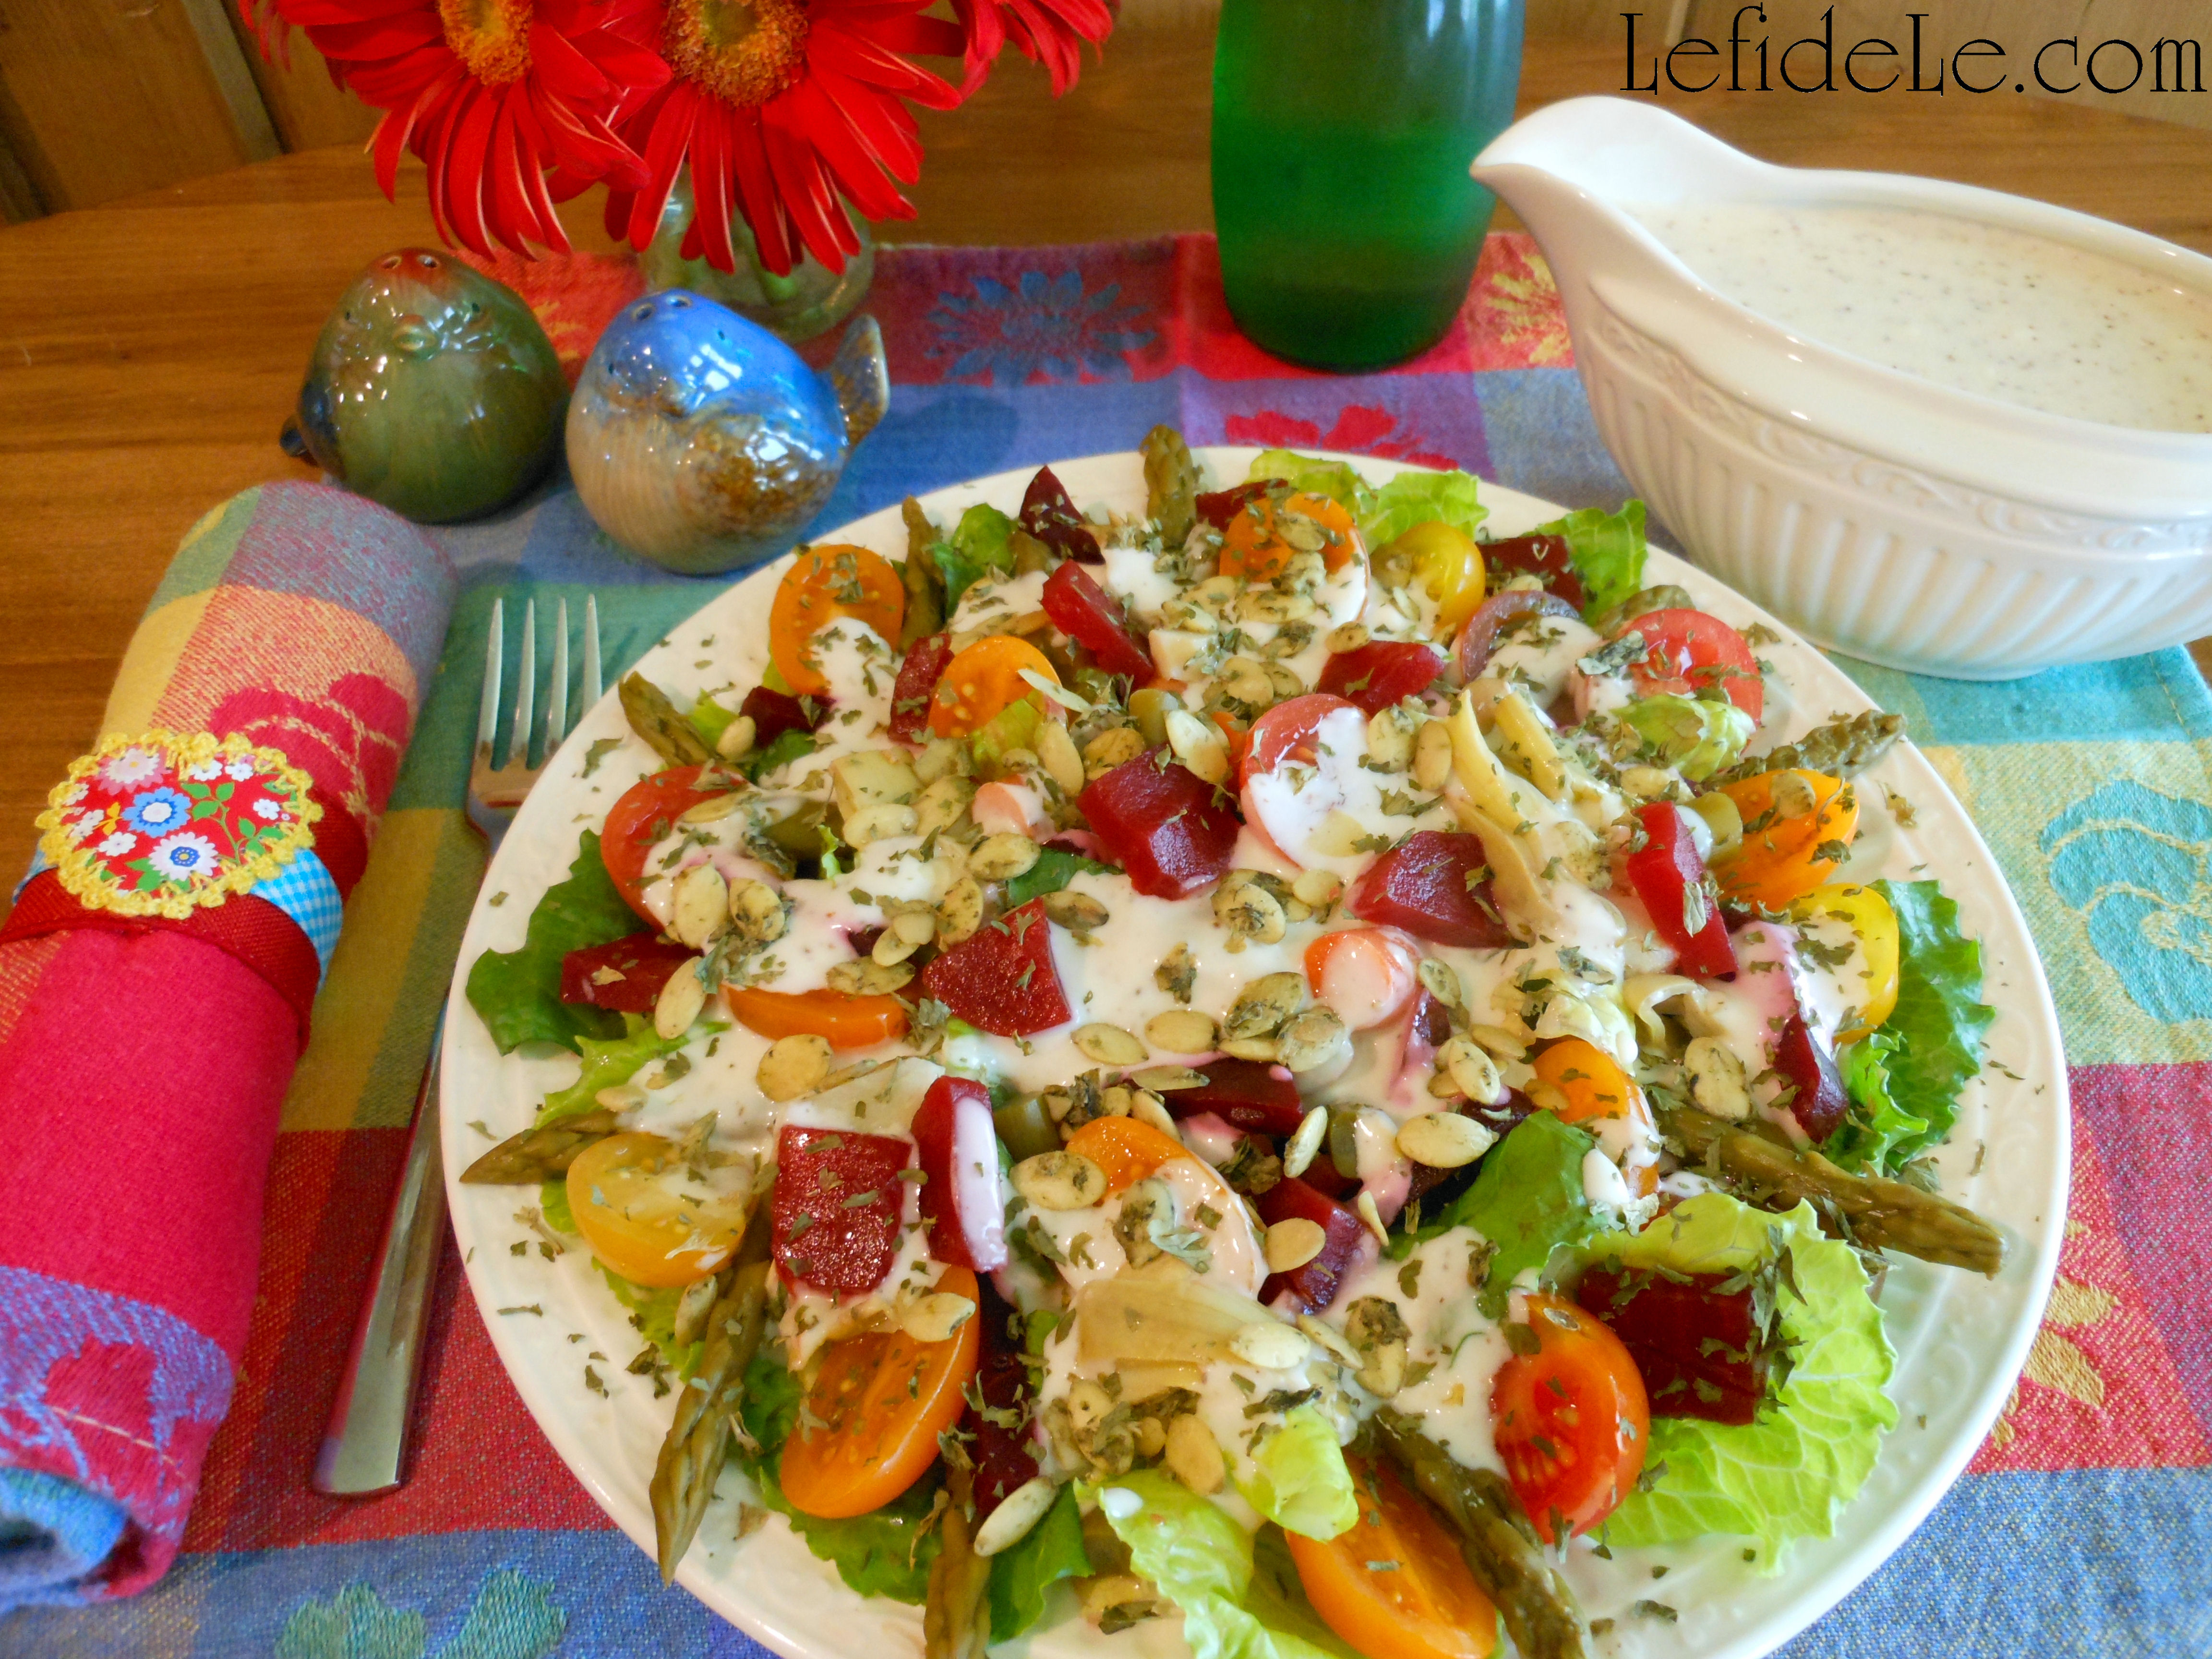
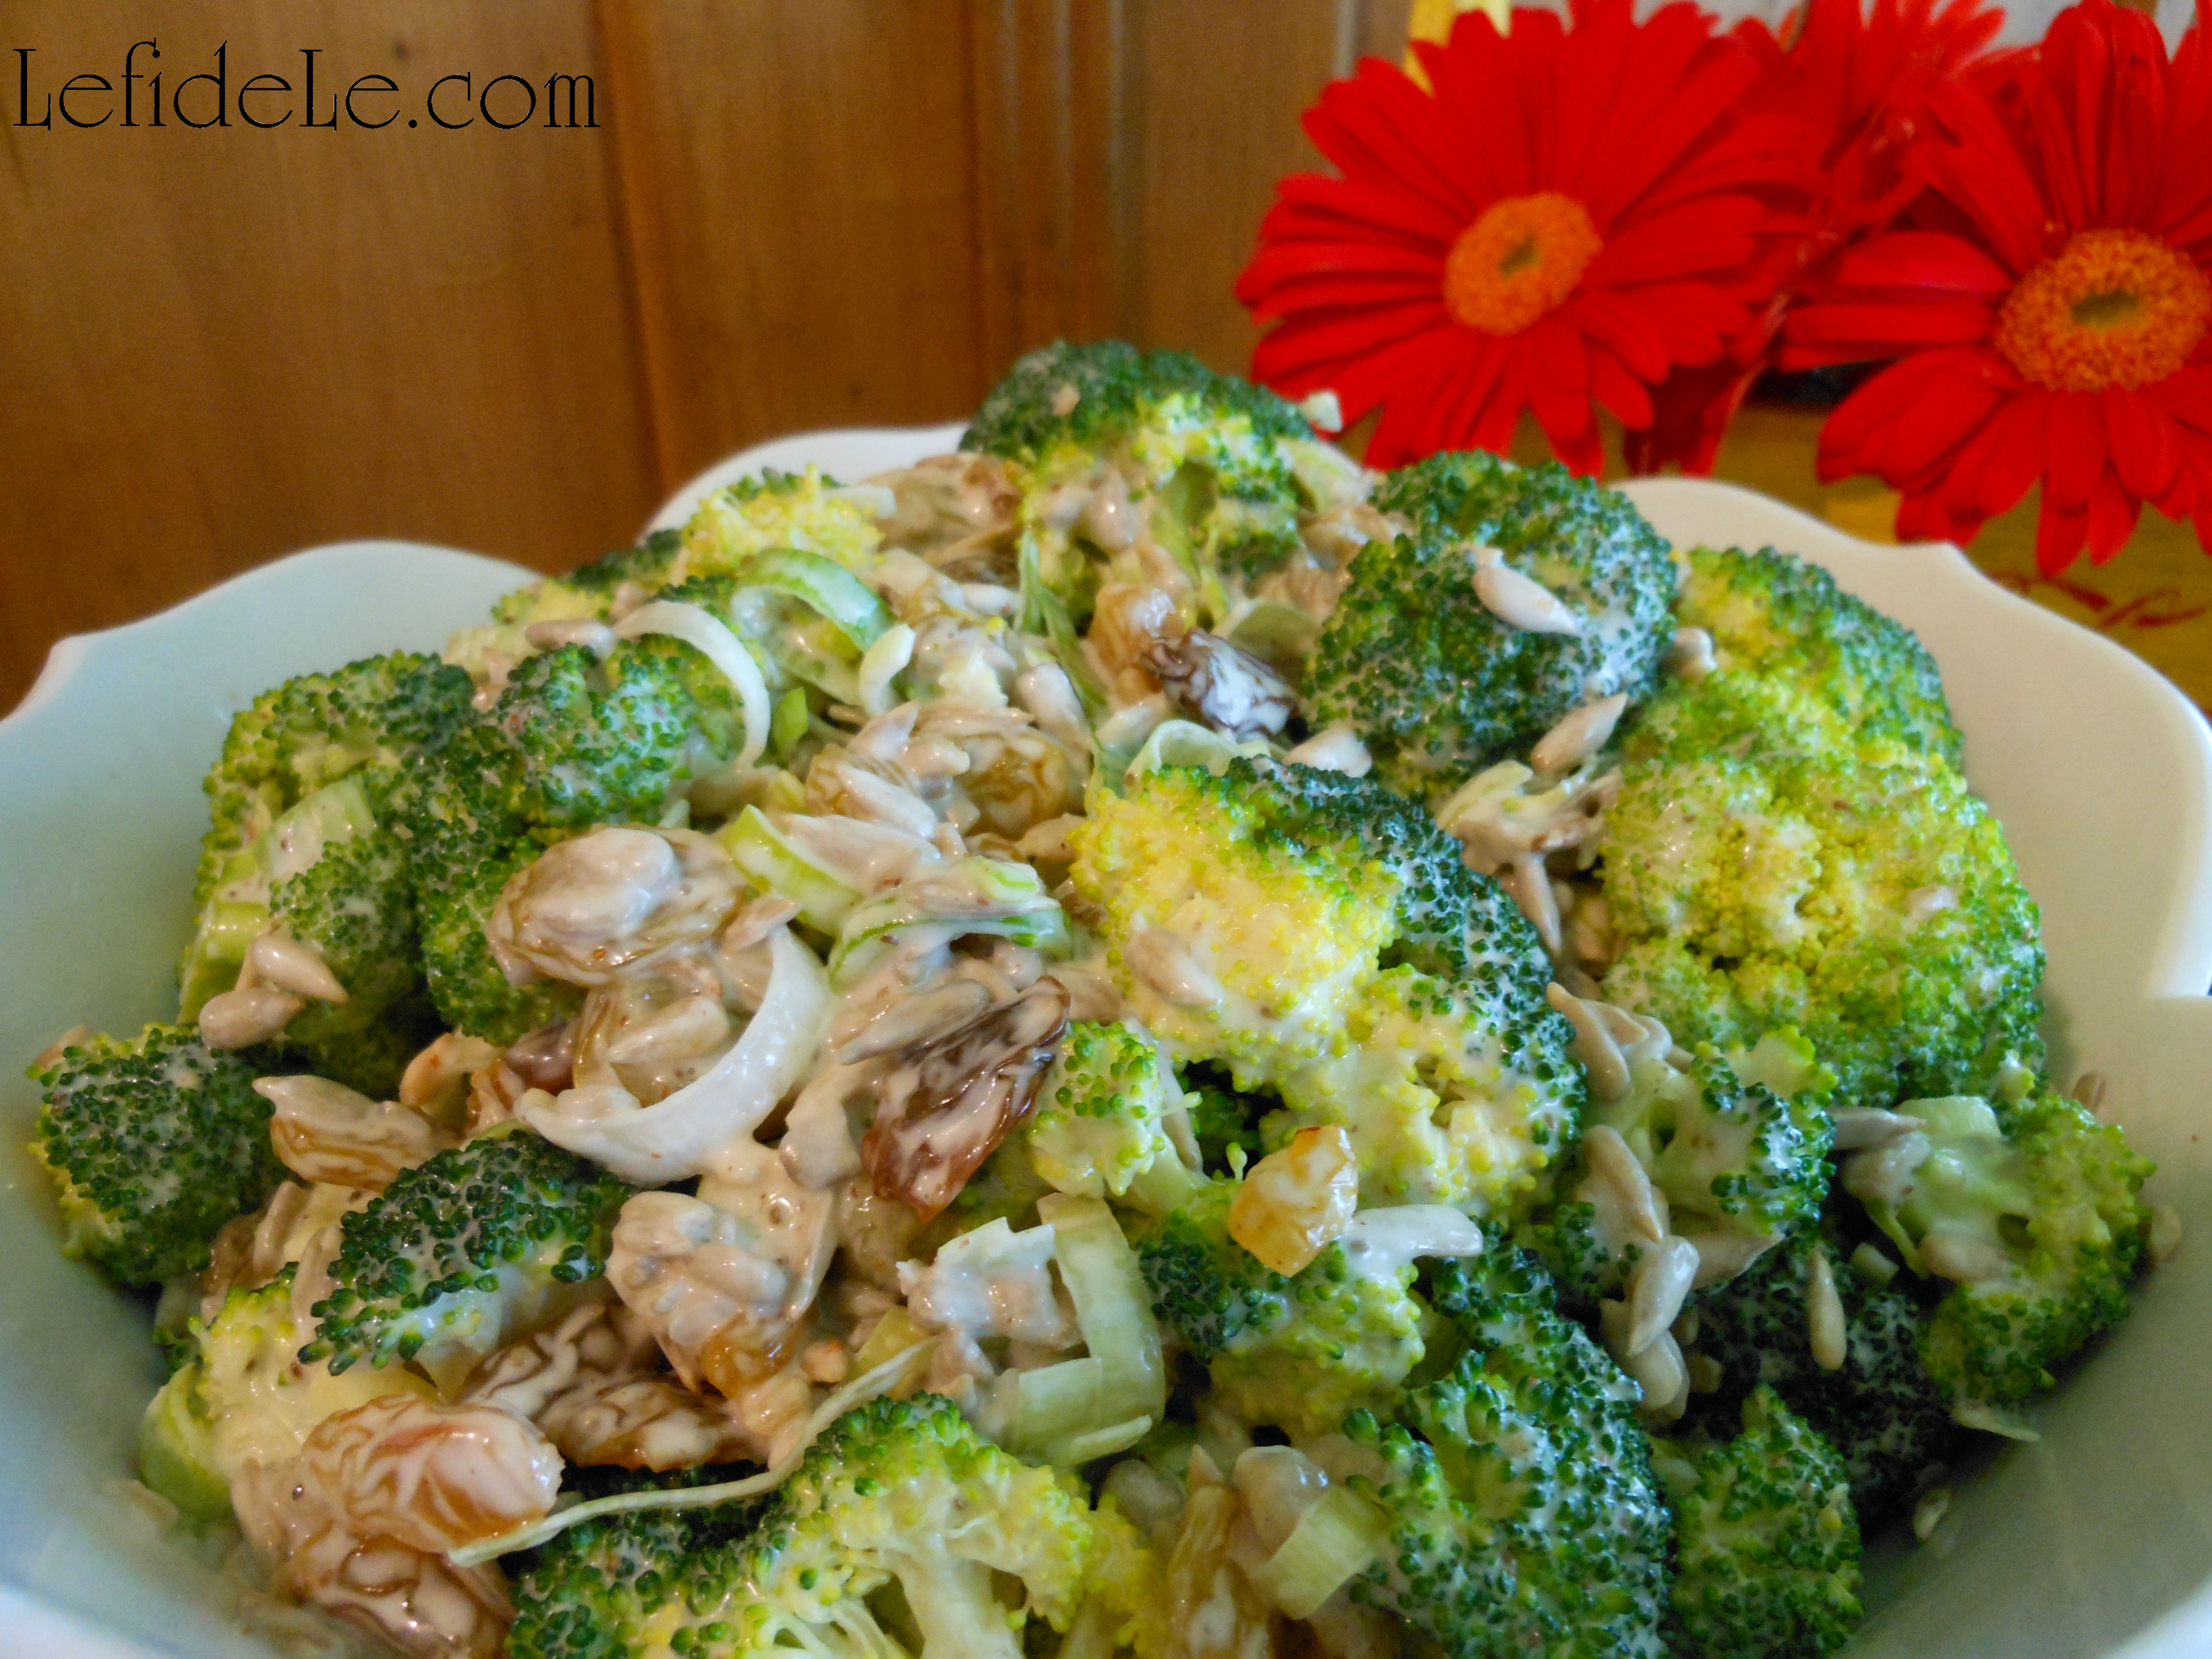
Here is the broccoli salad in its vegan form… no bacon!

070Leigh

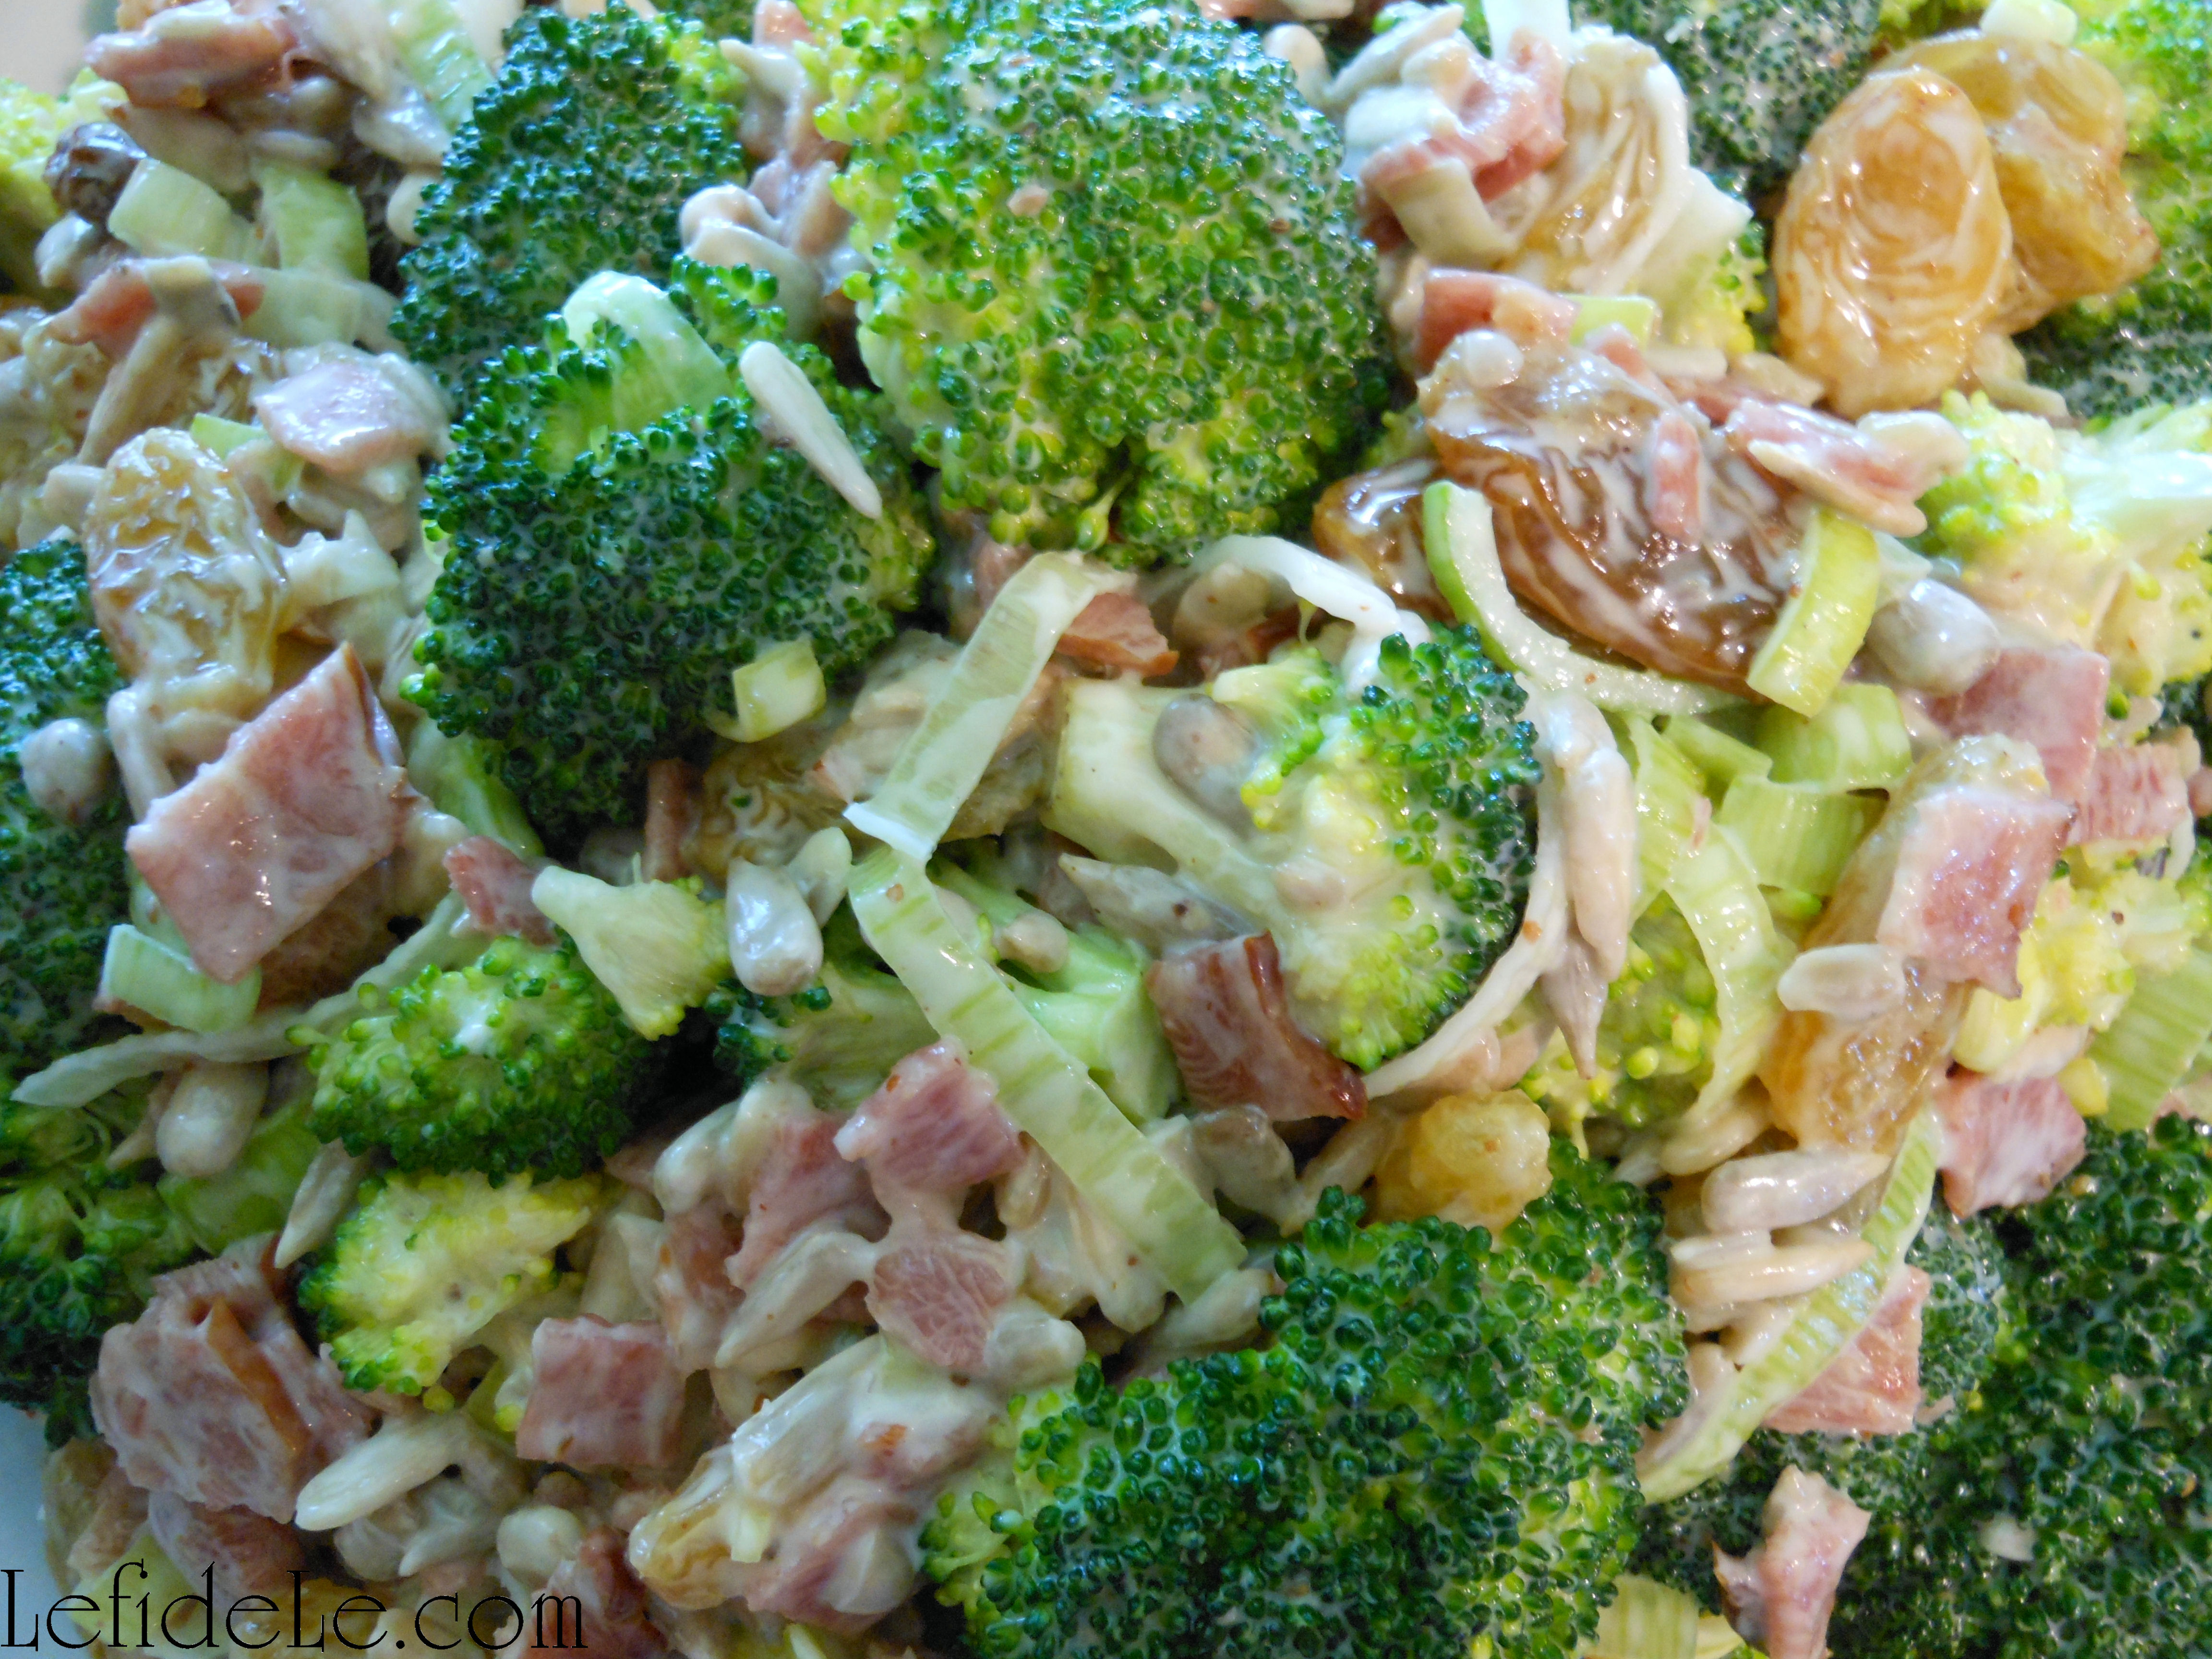
This is the omnivore’s broccoli salad… bacon, bacon, bacon, and more bacon!

088Leigh

Make both my macaroni and broccoli salads using just one recipe of my creamy dressing. Pair them with a baked chicken breast for a complete meal.

051Leigh

Make the broccoli and macaroni salads the day before a gathering for even greater flavor as the ingredients have had time to meld… and so you can indulge in more sleep the next morning.

045Leigh

Take any of my allergy-friendly salads to picnics and pot-lucks, and be assured that no one will go home sick by your hand. (Egg-based mayo + outdoors = food poisoning threat… so not fun for anyone.)

061Leigh

So just keep calm and picnic on!

Faithfully Yours,

Leigh

Creamy Salad Dressing Recipe (For Green Salad, Broccoli Salad, Macaroni Salad) Gluten-Free, Vegan, Egg-Free, Dairy-Free, Soy-Free, Nut-Free, Pepper-Free

088Leigh

This allergy-friendly creamy salad dressing recipe is so tasty that no one will be able to tell that it’s vegan, egg-free, dairy-free, soy-free, nut-free, pepper-free, and gluten-free. It’s the perfect touch for any combination of salad fixings, and a half-portion serves as the base for each of my broccoli salad and macaroni salad recipes. They are the perfect make-ahead and take dishes for everyone to enjoy at picnics or pot-lucks because they’re vegan, celiac and allergy-friendly, and have no egg or dairy to trigger food poisoning… because who would want to be responsible for that!


Ingredients:

1½ cups soy-free vegan mayonnaise (try the Follow Your Heart brand, or any mayo)

½ cup unsweetened vegan coconut yogurt (or any plain or unsweetened yogurt)

¼ cup lemon juice (or lime juice)

2 tablespoons Dijon mustard (or stoneground mustard)

2½ teaspoons granulated sugar (cane, coconut, white, etc…)

2½ teaspoons sea salt (adjust for taste & sodium needs)

1 teaspoon celery seed (a great salad staple for a spice cabinet)


Instructions:

004Leigh

Gather the ingredients, and feel free to make any substitutions you need to. (I used a healthier mayo and combined it with yogurt to add good probiotics. It also cut out some calories without cutting any flavor at all… trust me, my grandmother would definitely let me know if it had.)

008Leigh

Mix the measured ingredients well, and feel free to add some of your favorite herbs to complement the salad fixings you’re pairing them with.

041Leigh

I like using an elegant gravy boat to serve dressing on the side… it’s less likely to end up on your tablecloth!

020Leigh

This particular salad contains organic romaine lettuce, heirloom cherry tomatoes, prepared beets, artichoke hearts, sprouted pumpkin seeds, dried parsley… and of course my creamy salad dressing.

012Leigh

My Creamy Macaroni Salad Recipe (Gluten-Free, Vegan, Egg-Free, Dairy-Free, Soy-Free, Nut-Free, Pepper-Free) uses a half portion of my prepared creamy dressing.

065Leigh

Also using a half portion of this creamy dressing is my Creamy Broccoli Salad Recipe with Vegan & Turkey Bacon Options (Gluten-Free, Egg-Free, Dairy-Free, Soy-Free, Nut-Free, Pepper-Free). Chop the broccoli into smaller pieces to get your picky eaters to devour their veggies… but you might just want to call it “creamy salad”!

073Leigh

Make both my macaroni and broccoli salads using just one recipe of this creamy dressing. Pair them with a baked chicken breast for a complete meal.

088Leigh

Make the broccoli and macaroni salads the day before a gathering for even greater flavor as the ingredients have had time to meld… and so you can indulge in more sleep the next morning.

003Leigh

Take any of my allergy-friendly salads to picnics and pot-lucks, and be assured that no one will go home sick by your hand. (Egg-based mayo + outdoors = food poisoning threat… so not fun for anyone.)

013Leigh

Just keep calm and picnic on!

Faithfully Yours,

Leigh

DIY Picnic Heart Napkin Rings & Customizable Banner + Pinwheel Craft Tutorials (+ Free Printable Templates)

Craft your own colorful indoor picnic party quickly and inexpensively with scrapbooking paper, ribbon, and dimensional stickers! Use them to create your own customizable banner and pinwheels with my free printable templates, and then make DIY heart napkin rings to up the ante…. taking your picnic from average to outstanding!

091Leigh

My heart napkin rings utilize dollar bin dimensional chipboard stickers that were decoratively crocheted (which I actually purchase half-price at Le fidèLe Design’s affiliate Michaels). The scrapbooking section of your local craft store always has items such as these which are made with sturdy materials, whose pretty looks belie their price points.

213Leigh

Find coordinating colors of wire ribbon and bias tape to tie together the set of differing stickers. (It’s like using different photos with matching frames to give a cohesive look to a home gallery.)

215Leigh

Cut 6 inch lengths of both the ribbon and bias tape. (Bias fabric tape is a sewing product, but makes a beautiful trim for this project. You can also use a thin ribbon in its place.) Pull the sticky dots off of the sticker backs. (Place them on plastic packaging to reuse for dimensional card-making later.)

219Leigh

Glue the bias tape across the center of each wired ribbon strip, making sure the tape doesn’t have a flap open… if so, glue it down too. Next, glue one end to the other by laying down a thin line of glue onto one short-side edge, and then press the other end onto it. (Press it down hard… using silicone finger cots if utilizing hot glue. I’ve use hot glue, fabric hot glue, fabric glue, tacky glue, universal glue… and it all worked beautifully.)

077Leigh

Take advantage of the wired ribbon’s staying power to form perfectly round circles for your rolled fabric napkins to slide right into. (Wired ribbon is the perfect base as it has a clean finished edge without needing to fold and glue.)

228Leigh

I made a set of 8 different heart napkin rings to mix and match according to my tablescapes (and it only cost me a few dollars).

233Leigh

Here they are featured in my Colorful Indoor Picnic Party Tablescape Perfect for Rainy Days or Texas Temps, because in my world, a picnic is the perfect excuse for crafting! (Note the heart stickers were also placed on the drinking jars.)

274Leigh

Make your own banners quickly using my free printable template to cut perfectly precise pennants from any scrapbook paper matching your theme décor. Finish them of with chipboard stickers like those I used on my heart napkin rings.

BannerTriangleTemplatesLeigh

Print the template by first clicking on the picture above. Next right click on the image and select print. Choose a text or black and white setting to conserve ink. Cut out the two triangles.

001Leigh

Trace around the triangles with a pencil onto the back of the scrapbook paper. (Use them to conserve paper by flipping them until you maximize the number of triangles per sheet.) Now cut out these triangles. (Save the leftover bits for card-making later.)

003Leigh

Glue a smaller triangle to the center of a larger one of a contrasting color. (A permanent glue stick works beautifully with less mess.) Punch a hole next to each top point of a glued pennant.

006Leigh

Place a dimensional sticker onto the center of each pennant. (Try to use contrasting colors to make a more visually interesting combination.)

010Leigh

Use any variety of string, twine, yarn, or ribbon to run through the punched holes. Knot each end into a loop to hang them by. (To do this, form a loop then make a simple overhand knot.)

019Leigh

For additional flair, tie small lengths of thin ribbon in between each pennant. Hang it up for an extra dose of cheerful festiveness!

096Leigh

Next, let’s make matching pinwheels for décor or children’s play.

PinwheelTemplatesLeigh

Either fold over an edge of scrapbook paper to form a box that can be cut out, or… print a template to quickly churn out pinwheel bases. (The templates are great to enhance a young kiddo’s tracing skills.) Click on the picture above, then right click on the resulting image and select print. Choose text or black and white settings to conserve ink.

012Leigh

Cut out a single square from double-sided paper, or cut 2 squares of the same size for single-sided paper.

015Leigh

If using single-sided scrapbooking paper, glue them back to back with a permanent glue stick. Or, you can do as I’ve done here by cutting one piece, gluing it to the plain side of another, and then cutting around the box… which I think is easier.

016Leigh

Next use a ruler to draw a line with a pencil, from one corner across to the other. Cut along this line, but leave a half inch or so at the center making 4 flaps.

020Leigh

Take the right corner of each flap and glue it onto the center. Decide if you want them to be functional or just décor. For décor, use cardstock and hot glue the whole thing onto a paper straw then glue a paper flower onto the center… and call it a day. For functional pinwheels, use thinner paper and weaker glue. Push a tack into a thin wooden dowel cut about a foot long… not pushing it in all the way in order to leave some room for the paper wheel to turn on.

237Leigh

‘Cause nothing says happy picnic like a pinwheel!

Faithfully Yours,

Leigh

263Leigh

P.S. See all of these projects in action in my Colorful Indoor Picnic Party Tablescape Perfect for Rainy Days or Texas Temps!

Star-Spangled Independence Day Patriotic Party Décor Ideas (& All-American Burger Bar)

333Leigh

Every year on the fourth of July, families across the country gather in jubilant celebration of the birth of our proud democracy. We join together to commemorate our forefathers’ defiant stand to secure those inalienable rights we enjoy today, and to venerate that hard-won freedom. Take part in a tour of my star-spangled Independence Day event for décor ideas to plan your own patriotic party with!

358Leigh

History was heralded with a welcoming wreath spangled with bright steel stars and the broad stripes of old glory… denoting a gallantly streaming flag hailed through the perilous fight.

368Leigh

A table  in the aft zone was layered with patriotically printed fabric atop a white tablecloth… symbolizing the purchase of peace. The table’s façade was treated as a frontispiece with a star-spangled banner collage featuring iconic imagery in the appliqués cut from the same patriotic print fabric. (Find my no-sew craft tutorial on it here.)

362Leigh

The theatre’s horizon displayed a dazzling banner of classic Americana exclaiming, “God Bless America”. An explosion of color extended to thematic paper plates, blue cups, and flag printed napkins. A plain white vintage water pitcher was adorned with the sparkle of a steel star and flag ribbon.

014Leigh

Decorating rebellion manifested itself with a centerpiece, placed off-center, of beribboned candles atop vintage ceiling tile candlesticks… all to represent Lady Liberty’s torch. Hanging from them were steel stars and flag painted Christmas ball ornaments… representing bombs bursting in air and the flag that was still there. A galvanized pail held utensils set for dessert.

021Leigh

Revelers were offered the refreshment of blue patriot punch held in sustainable vessels festooned with stars and stripes. Further sustenance was provided with chips in a red painted basket (from the Beanitos brand made in the USA).

363Leigh

The memory of George Washington was honored with “truthful cherry patriotic pie” (of my own upcoming gluten-free vegan recipe) held high in esteem upon a metal pillar spelled with zinc USA letters. Sweet vegan tarts crowned with candy stars (from another American brand Hail Merry) topped a second pillar swathed in more stars.

333Leigh

The fore-field was set as an all American build a burger bar over the classic American staple of blue jean cloth set over a red tablecloth. Blasts of star spray shot out from beneath a centermost tray… connoting embattled fireworks.

373Leigh

Homemade burger buns (of my own upcoming gluten-free vegan recipe) were displayed in a pewter dish. Behind that sat a vintage tray offering hamburger accompaniments… like heirloom tomato slices, organic green onion, artisan leaf lettuce, and locally grown red onion slices.

375Leigh

An additional vintage pewter dish served onion loaded beef patties (another of my upcoming recipes). Slices of soy-free vegan cheese (from USA brand Follow Your Heart) were stamped with an American Flag seal of approval. Deep square vintage steel dishes presented pickled okra, onion, cornichons, gherkins, and sun-dried tomato stuffed green olives.

353Leigh

Galvanized metal buckets lined with flag napkins made admirable single-serving fry baskets bursting with seasoned steak fries (see my upcoming recipe). Old-school salt and pepper shakers got the patriotic washi treatment. More vintage dishes contained soy-free veganaise, paprika-free mustard, and corn-syrup-free ketchup… so that no allergy got served.

351Leigh

As the July 4th night sky blazes with the flash of celebratory fireworks, may we all seek to reflect upon the valorous sacrifices made for our collective liberty.

374Leigh

Faithfully Yours,

Leigh

P.S. Keep checking in on my Recipes Page for the latest postings on Gluten-Free & Egg-Free Pies, Fries, & Hamburger Buns! I’m launching a new on-going series of Burger Creations that is set to grow increasingly creative with time!

044Leigh

Be sure check out my article for a DIY July 4th Denim No-Sew Appliqué Collage Star-Spangled Banner Craft Tutorial for Independence Day here!

163Leigh

And this article for July 4th Altered Art Greeting Card as Mailable Mixed Media Independence Day Décor (DIY Collage Art Tutorial)here!

120Leigh

DIY July 4th Denim No-Sew Appliqué Collage Star-Spangled Banner Craft Tutorial for Independence Day

163Leigh

Inspired by our glorious national anthem, I set out to construct my own star-spangled banner (not old glory) to wave over a modern Independence Day celebration. Making a fabric appliqué collage banner is easier than it looks, and it’s easy on the budget because it only takes a little fabric, rope, ribbon, and hot fabric glue. That’s right, glue… no sewing skills are necessary! This makes it so quick to construct, that it can be made the day before a party. Even better, no one else will have anything like it, because it’s your own one-of-a-kind work of art!

125Leigh

Let’s begin with fabric selection as there are a number of ways to go about this… if you have a plethora of leftover fabric scraps, all the power to you, use them! For my banner base triangles, I used old denim. (This might be the perfect project to do something useful with that old pair of jeans that hasn’t fit in, well… awhile!) You can also purchase coordinates at the fabric shops and craft stores. (See my affiliate links in the side bars as they offer great discounts from time to time.) For my appliqués, I bought a patriotic print on sale (from Le fidèLe Designs affiliate Joann / Hancock Fabrics) that was just perfect for collaging. (See more denim and patriotic print fabric completing my Star-Spangled Independence Day Party Décor as table cloths here.)

127Leigh

Divide the end of your base fabric into 6 inch sections, and mark the underside of the fabric with a pen.

128Leigh

Next, mark 8 inches below the top line to form the length of your future triangles. (You can either cut this strip now or wait until all your marks have been made.)

133Leigh

Mark a dot on the 3 inch midpoint of each 6 inch top section. Use a ruler to mark the corresponding point directly below it, onto the 8 inch line (or cut). This will be your triangle’s point. Mark a line to connect this point to each corner of the 6 inch marks you made first. (You will be making triangles with each connection.)

132Leigh

Cut along each line to make your triangle bases. Another option is to make a tab at the top of each triangle in order to fold it over a thick piece of rope… otherwise just glue the triangle top to the rope. (I elected to make a tab for these. I’ll demonstrate the tab-less version in a future tutorial.)

140Leigh

Cut a tapered edge on any tab tops you make, so that it isn’t seen on the front after gluing.

136Leigh

Now cut out individual images from your printed fabric… just as you would in a paper collage or decoupage project. Use good fabric shears for a clean cut, or old scissors to make an intentionally rough edge… again, it’s your project, so it’s your choice. Also, think about cutting apart some of the larger images into smaller ones. (For example, cut apart the eagle from the flag in one image.)

138Leigh

Lay out your triangles to plan your design. Rearrange your cut images until you find it looks pleasing. (This is the part where banner craft becomes collage art.)

142Leigh

Adhere the appliqués to the triangle base with hot fabric glue. (Because I’ve already dealt with staunch naysayers concerning the ability of hot glue to work on fabric… there are varieties of hot glue made just for fabric, and it will say so on the label. Press the fabrics together immediately after applying the glue, using silicone hand protection of course. Once the glue has cooled completely, I defy anyone to pull the 2 materials apart!) There are also many varieties of cold fabric glue that just require more drying time. (This would be the safer option if constructing this with kiddos.)

145Leigh

Next glue each triangle flap over the rope you’ve chosen, leaving an inch or so between each. (For the tab-less version, just glue along the top of the triangle’s underside to attach it to the rope directly.) Don’t forget to tie a loop at each end for hanging.

148Leigh

Cut lengths of random yet coordinating ribbon to tie between each panel. Another option is to cut strips of fabric and tie those on. (You can see I’ve done this in the bows I glued to the panel fronts.) Now go hang it up and admire your handiwork! 🙂

162Leigh

“Oh, say, can you see, by the dawn’s early light,What so proudly we hail’d at the twilight’s last gleaming? Whose broad stripes and bright stars, thro’ the perilous fight, O’er the ramparts we watch’d, were so gallantly streaming? And the rockets’ red glare, the bombs bursting in air, Gave proof thro’ the night that our flag was still there. O say, does that star-spangled banner yet wave O’er the land of the free and the home of the brave?”

368Leigh

May you have an absolute blast crafting your own star-spangled banner this Independence Day!

Faithfully Yours,

Leigh

P.S. If you like collage, check out my July 4th Altered Art Greeting Card as Mailable Mixed Media Independence Day Décor (DIY Collage Art Tutorial).

120Leigh

July 4th Altered Art Greeting Card as Mailable Mixed Media Independence Day Décor (DIY Collage Art Tutorial)

120Leigh

Herald in the fourth of July with an altered art greeting card that doubles as a mailable gift, as it may be framed by the recipient as mixed media décor commemorating Independence Day. It’s a delightful way to send a bit of revelry to a loved one who can’t attend the year’s celebration. This art project is perfect for gathering the whole family together for a fun “crafternoon”, because the Design Memory Craft mediums are non-toxic. They are also fully compatible with each other and a large variety of substrates. This product versatility makes it so easy to combine collage material into something impressive. So follow along as I create an art card ablaze with the spirit of the season, then use the ideas to make one infused with your own artistic essence… because a blast of creativity is the best way to start the holiday off with a bang!

058Leigh

Begin with a readymade greeting card base or make your own inexpensively from sturdy cardstock.

061Leigh

I cut a piece of parchment printed paper to a 7 x 10 inch size, so that it could be folded into a 5 x 7 card… perfect for framing.

63Leigh

I used deckle edge cutting scissors to produce a torn looking finish on the card. (I later used the deckle scissors to cut around some of the stamped images too.) Pitt artist pen big brushes are perfect for highlighting such details. Just swipe the side of the brush along the edge to deposit the permanent ink in a rough fashion.

064Leigh

Paper washi tape is a quick way to imbed visual texture onto the base of a collage. Another way is apply printed pages with gel medium. (I’ll demonstrate this more fully in a future tutorial.)

068Leigh

Design Memory Craft gelatos are multipurpose mediums that look like colored chap-sticks. They apply thickly, but can be thinned to watercolor consistency when mixed with water. (You can even turn them into a liquid spray paint to splatter your work with!) They can be used to dye a variety of materials as well. To dye canvas ribbon, I simply marked it haphazardly with a gelato on both sides. I then took water and rubbed it into the ribbon, like magic… it turned blue. It dried fairly quickly too!

070Leigh They can be mixed with other mediums also. You can see here what straight gelato and plain gesso looked like before mixing. (Warning: if you explore medium capability with a small sample pack like I did… you may get totally hooked too!)

074Leigh

Here I used a palette knife to tint gesso with a cobalt blue gelato. White gesso opacified the color into more of a cornflower blue. A thick swipe of medium over a stencil will lay down a swath of shaped color onto your paper. (Stencil words like “celebrate” are great to have in a craft arsenal to use year round.)

076Leigh

I used the same technique to form raised letters onto colored paper. (This is a great way to use up all those scraps of “craftermath” from previous projects!) The thicker the layer of gesso, the longer it will take to dry.

072Leigh

Use any leftover gelatoed-gesso as an opaque stamping ink. It’s great to use on colored papers that would just appear as plain black if using a stamp pad. (I really liked the blue on red for these fireworks.) Just remember to rinse off your stamp before the gesso dries.

079Leigh

You can dye just about anything with gelatos and pitt pens. The gelato dyed ribbon will appear lighter once it has dried. If you’d like to impart deeper color, just repeat with more gelato. The little scalloped round element is a cork sticker that I tinted with cobalt blue gelato. It’s easy to make an ombre effect by applying color to only one side then rubbing it across the piece. I used the pitt pens as a wood stain by simply coloring the laser-cut birch 4 and bamboo food pick. (This is the easiest and cleanest way I’ve found to tint wood without losing the grain pattern!)

083Leigh

Pitt artist pen big brushes can also be used in place of stamp pads. (They’re especially great when you want to combine colors onto one stamp image!) I spelled out JULY, with a magnetic lettering stamp, as if it had been printed by an old-school typewriter.

087Leigh

Don’t forget to add your seal of “makership” to the back of your creation! Leftover ink on my stamp blended with the deep scarlet red pitt pen ink to tint the edges a bit darker… which I completely adore.

81Leigh

Once most of your elements are constructed, you can place them on the card in order to edit… if need be. I used the rough-draft placement to decide where my background colors should go.

086Leigh

I used red and blue gelatos as finger-paint to tint the paper and washi tape background with. Use a wet finger or a water brush to grab pigment straight from a gelato, or dip a brush or finger into pre-mixed gelato and water. (My choice took me straight back to kindergarten!)

091Leigh

Next, I tied a bow with the ribbon (representing remembrance) and glued everything down. You can use any glue you like, or even the gel medium to glue down the papers with. (I chose hot glue because it works on all the elements I used… even the wooden ones.)

122Leigh

I layered red tinted cardboard under the stenciled papers, and elevated them with tiny foam stickers for dimension. The fireworks were attached with brads, but I added hot glue dots beneath them to make them pop right off the page. (Note that the star spangled banner is actually another repurposed food pick!)

093Leigh

For a finishing touch, I applied dots with opalescent texture gems gel liner (to symbolize stars in the night sky filled with the rocket’s red glare which we memorialize with fireworks).

120Leigh

It’s that subtle yet profound symbolic meaning that completes the piece’s transformation from craft into art which makes it worthy of being framed, not just as a holiday decoration, but as artwork. This Independence Day, I will be celebrating the liberty we are given to express ourselves in a country of freedom.

Faithfully Yours,

Leigh

P.S. If you like making collages, be sure to check out my DIY July 4th Denim No-Sew Appliqué Collage Star-Spangled Banner Craft Tutorial for Independence Day. 

163Leigh

Lemon Glazed Pumpkin Pear Teacakes (Gluten-Free Vegan, Dairy-Free, Egg- Free) for Mother’s Day Tea

047Leigh

My dairy, egg, and gluten-free recipe for Lemon Glazed Pumpkin Pear Teacakes began as an experiment to concoct an original healthy and allergy-friendly cake. It can be fashioned into your choice of layered cake, cupcakes, and teacakes. The level of sweetness can be controlled by the amount of glaze you choose to top it with, and almost four cups of pumpkin and pear make this a yummy but guilt-free treat for all to enjoy. So for this Mother’s Day, let them eat teacakes!

032Leigh


Pumpkin Pear Cake Ingredients:

  • 4 cups gluten-free baking mix (brands vary greatly… I used Arrowhead Mills)
  • 2 egg replacers (3 teaspoons + 4 Tablespoons water = 2 eggs… or just use eggs)
  • 1 cup of canned pumpkin (or use homemade purée)
  • 2 ¾ cups pear puree (blended ripe pears, or other fruit purée)
  • ½ cup melted coconut oil (or butter)
  • 1½ cups sugar (or alternative granular sweetener)
  • 2 tablespoons lemon juice (or other citrus juice)
  • 2 teaspoons pure vanilla extract (not imitation)
  • 1 teaspoon salt
  • 2 teaspoons cinnamon
  • 1 teaspoon ginger
  • ½ teaspoon nutmeg
  • ½ teaspoon cloves
  • ½ teaspoon allspice

Lemon Glaze Icing Ingredients:

  • 4 tablespoons lemon juice (or any citrus juice)
  • 1 cup confectioner’s sugar (or use powdered)
  • optional: dust with more confectioner’s sugar (or use powdered)

Instructions:

002Leigh

Mix all the dry ingredients together.

007Leigh

Add in the wet ingredients to make a super sticky batter.

008Leigh

Spray a 2 tea cake pans, 1 muffin tin, or 2 cake rounds with coconut oil… or use a jarred stuff to grease them the old fashioned way. Do not dust with flour afterward.

011Leigh

Pack the dough into your pans. If you’re making muffins, shape rounded tops with the back of a spoon. If making cakes or tea cakes, smooth the mixture flat with a spoon. (This is a sticky dough that will retain more of its shape than the more fluid batters.)

025Leigh

021Leigh

Slide your filled pans into a non-preheated 350ᵒ oven. (This is because gluten-free vegan goods bake a bit differently than the wheat and egg types.) Bake according to your oven’s temperament, for about 40 minutes.

022Leigh

Let them cool off a little before popping them out.

030Leigh

To make the glaze while you’re waiting for them to cool completely, simply mix the ingredients well in a bowl.

031Leigh

Spoon the glaze onto cooled teacakes.

122Leigh

Confectioner’s sugar may also be dusted over the top if you like. (Confectioner’s is a dusting sugar without corn additives.) Top these teacakes with raspberries for a delightful sight.

051Leigh

They were a delicious allergy-free addition to my Spring Garden Mother’s Day Tea.

082Leigh

I hope they bring a smile to your face too!

Faithfully Yours,

Leigh

Cherry Pecan Chicken Salad (Soy-Free / Egg-Free with Stuffed Tomato & Gluten-Free Shaped Finger Sandwich Options) for Mother’s Day Tea

122Leigh

Skip the watercress and cucumber, and opt for heartier fare for your Mother’s Day Tea with this easy allergy-friendly recipe for Cherry Pecan Chicken Salad. Serve this delicious soy-free and egg-free delight with gluten-free bread or crackers for all your guests to enjoy worry-free. Or just make a nutritious lunch of adorably shaped finger sandwiches for the kiddos and a stuffed tomato for yourself. Either way, try some today!

011Leigh


Ingredients:

  • 1 oven baked chicken breast (see my recipe for this here… or use a can, leftovers, or even turkey)
  • ½ cup pecan pieces (or walnuts, almonds, etc.)
  • ½ cup diced green onion (or leeks, onion, etc.)
  • ½ cup dried cherries (or dried cranberries, raisins, etc.)
  • ¾ cup soy-free veganaise (or mayo, vegan unsweetened yogurt, etc… or mix these ½ and ½)
  • sea salt to taste (or salt free substitute)
  • ground peppercorns to taste
  • optional: heirloom tomato to stuff, gluten-free crackers to top, artisan lettuce to fill, gluten-free bread for tea sandwiches, etc.

Instructions:

002Leigh

Bake and cut a chicken breast into cubes. (See my roasted cocorico chicken with root veggies recipe here, and my chicken with sautéed mixed greens recipe here.) Wash and dice the green onion.

008Leigh

Measure and mix all of the ingredients. Add sea salt and pepper according to your taste and sodium requirements.

017Leigh

Here I cut the top off of a large red and purple heirloom variety tomato, and then scooped out some of the center. Then I spooned a good portion of chicken salad into it and garnished the top with ground red peppercorns and green onion.

025Leigh

The green and purple artisan lettuce it’s resting on, also makes a wonderful carb-free wrap for the chicken salad. Those are gluten-free vegan Mary’s Gone Crackers in the Super Seed variety… yum!

130Leigh

The chicken salad was the perfect filling for the gluten-free tea sandwiches I served at the Spring Garden Mother’s Day Tea.

082Leigh

To go beyond tea sandwich triangles, simply press a cookie cutter into the bread, and fill with chicken salad. (Tulip, daisy, and butterfly shapes were my choice for the tea, but you can see bunny bread here with my carrot crouton recipe.)

043Leigh

Thanks Mom, for all the chicken salad you’ve made me over the years!

Faithfully Yours,

Leigh

31SweetPotatoTortas-Leigh

P.S. If you’re looking for another easy version of this, try my turkey salad recipe here.

“Nacho Average Fiesta Dip” & Spicy Nachos Compuesto (Dairy, Corn, Red Pepper, & Gluten-Free) Easy Appetizer for Cinco de Mayo Fiesta

254Leigh

My “nacho average fiesta dip” is the main ingredient for my spicy nachos compuesto, and it proves that you don’t need to add red pepper to get a spicy kick out of Tex-Mex. And they make perfecto Cinco de Mayo appetizers because they’re not only quick and easy to make, but are also free of other allergens (like dairy, corn, and gluten) that are so typical of Mexican cuisine. So feel free to indulge without feeling indulgent… & ¡Fiesta forever!


“Nacho Average Fiesta Dip” Ingredients:

  • 7 ounces canned vegan refried black beans (the vegan varieties have no lard added… or try pintos, or make fresh)
  • 7 ounces canned fire roasted crushed tomatoes (or use freshly chopped and roasted)
  • 8 ounce package gourmet soy-free vegan cheddar shreds (this kind doesn’t have canola, soy, or milk casein protein… but use any variety of cheese you prefer)
  • 1 tablespoon lemon juice (or lime)
  • 1 teaspoon ground ginger
  • 1 teaspoon onion powder (or 1 tablespoon fresh)
  • 1 teaspoon garlic powder (or minced fresh)
  • 1 teaspoon ground peppercorns
  • 1 teaspoon sea salt (or salt substitute)
  • 2 teaspoons dried cilantro (or 1 tablespoon fresh)
  • chips, crackers, or veggies for dipping (try a corn & gluten-free alternative like bean and rice chips)

Spicy Nachos Compuesto Ingredients:

  • diced green onion
  • diced tomatoes
  • fresh cilantro
  • sliced black olives
  • shredded lettuce
  • chips (try corn-free bean and rice chips like these Beanitos)
  • prepared “Nacho Average Fiesta Dip”
  • optional: vegan yogurt or sour cream
  • optional: guacamole (try my spicy recipe that’s red pepper free here)

“Nacho Average Fiesta Dip” Instructions:

243Leigh

Gather all your ingredients and mix them together.

246Leigh

Heat the mixture until the cheese melts. (I used a microwave on 80% power stirring every 2 minutes, for a total of 8 minutes… but a saucepan on a stovetop works well too.)

250Leigh

Blend the hot mix until the cheese is indistinguishable from the beans and rice. (I, of course, used my handy-dandy immersion blender.)

256Leigh

Transfer to a serving dish and garnish with sliced olives, cilantro, and fresh ground peppercorns.248Leigh

Serve with freshly cut veggies, crackers, or your favorite chips. (I used beautifully dark “Beanitos” made in Austin because the bean and rice combo make a complete protein, at 4 grams per serving… plus they’re yummy.)

254Leigh


Spicy Nachos Compuesto Instructions:

274Leigh

Arrange an overlapping layer of chips onto a dish, and spoon hot “Nacho Average Fiesta Dip” over the top. Add the remaining ingredients in amounts that suit your taste-buds.

277Leigh

I had yogurt on hand and guacamole already made, but the nachos didn’t even need them. The Fiesta Dip had all the flavor I craved. Try tasting the chip-dip combo before loading yours up.

269Leigh

All of that salad-like part (lettuce, tomato, olives, green onion, and cilantro) that makes up the compuesto part of the nachos transforms this recipe from a snack into a meal… and therefore a guilt-free indulgence.

279fLeigh

¡Yo quiero spicy nachos!

Faithfully Yours,

Leigh

238Leigh

P.S. Try my Healthy Tex-Mex Cilantro Chicken Spinach Quesadilla Recipe (Dairy, Red Pepper, Corn, & Gluten-Free) Easy Appetizer for Cinco de Mayo Fiesta as well!

Healthy Tex-Mex Cilantro Chicken Spinach Quesadilla Recipe (Dairy, Red Pepper, Corn, & Gluten-Free) Easy Appetizer for Cinco de Mayo Fiesta

This cilantro chicken quesadilla is the latest in my healthy undercover veggie series because it gets spinach haters to eat like Pop-eye. And you don’t have to strong-hold the recipe to make it gluten-free and dairy-free… just switch out a few simple ingredients so that everyone may enjoy it. This makes it the perfecto appetizer for a fabuloso Cinco de Mayo Fiesta. It’s one of my favorite delicioso lunches because it’s so quick and easy to make. So let this recipe send you to Tex-Mex heaven too… guilt free!

232Leigh


Ingredients (for each quesadilla)

  • 2 brown rice tortillas (or any variety of wrap you like)
  • a few ounces gourmet vegan soy-free cheddar shreds (this kind doesn’t have canola, soy, or milk casein protein… but try any variety of cheese you like)
  • ½ sliced baked chicken breast (see my sautéed greens with chicken recipe for instructions, or use any ground meat)
  • 1 ounce thawed frozen spinach (or use less fresh spinach)
  • ⅛ of a diced onion (or use green onion, leeks, dried onion…)
  • a few sprigs of fresh cilantro (or dried, to sprinkle with the onion or top as garnish)
  • optional spices: sea salt, ground peppercorns, garlic powder (to sprinkle inside the quesadilla)
  • ½ diced tomato (or salsa to top the finished quesadilla with)
  • optional: vegan unsweetened yogurt or sour cream topping
  • optional: guacamole topping (try my spicy recipe that’s free of red pepper here)

Instructions:

195Leigh

First gather all the ingredients then wash and chop the veggies. (I’ve used frozen spinach here because it’s easy to keep on hand for impromptu meals, being frozen means it’s retained all of its nutrients, more quantity may be added than if using fresh, and it doesn’t need to be washed and dried before cooking. Microwave it if you like, but definitely chop it into smaller bits.)

198Leigh

Lightly spray a skillet with oil and place it over medium heat. (Here I’ve used a ceramic variety, but the non-stick types work well.) Line it with your first layer of tortilla, and then sprinkle half of the cheese evenly over it.

200Leigh

Layer the chopped spinach over the cheese. Then dust it with spices according to your preferences.

202Leigh

Scatter the diced onion across the spinach layer. Add cilantro if not using it as garnish… or do both!

203Leigh

Then distribute the chicken over the onion. (Think about cooking extra chicken to slice and freeze for easy last minute lunches like this one.)

205Leigh

Add the remainder of the cheese. (An even layer acts like a glue for the tortilla.)

208Leigh

Top with the last tortilla and press it down with a large spatula as it cooks through. (Using a cast iron press is another option.) When the quesadilla has heated thoroughly enough to stick together, flip it over quickly with a large spatula. This side won’t take as long to cook… it will be done when it has browned nicely.

240Leigh

Transfer the finished quesadilla to a cutting plate and slice into equal triangles like a pizza. Serve it in the round or stacked in a pretty arrangement like this.

232Leigh

Offer bowls of toppings like guacamole, yogurt, sour cream, salsa, diced tomatoes, and fresh cilantro… or add dollops and sprinkles to each slice.

238Leigh

I like to smother flavor toppings onto each triangle then grind fresh peppercorns over the top… and the cilantro is not only a pretty garnish but adds a distinct burst of flavor.

219fLeigh

Keep a bunch of these warm in a low temp oven to serve all at once for your Cinco de Mayo Fiesta… or just make them for yourself as mouthwatering meal that only seems indulgent!

Faithfully Yours,

Leigh

P.S. Holy guacamole! I’ve been seeing a new commercial that erringly pronounces the G in that green goodness over and over and over. If any of you out there are now wondering which way is right way to say it… think Fozzie Bear and begin the word with “wocca”. “Muchas gracias amigos!” on behalf of my Texan ears. 🙂

274Leigh

P.P.S. And if you crave more Tex-Mex… try my “Nacho Average Fiesta Dip” & Spicy Nachos Compuesto (Dairy, Corn, Red Pepper, & Gluten-Free) Easy Appetizer for Cinco de Mayo Fiesta.

254Leigh