Tag Archives: Holiday

Feather & Vegan Leather Napkin Ring Craft Tutorial + Easy DIY Centerpiece & Fall Place-card Holders for Oktoberfest

070Leigh
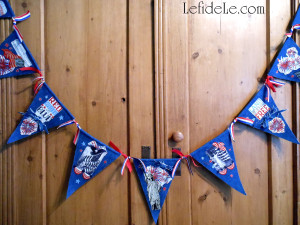
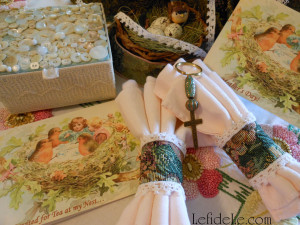
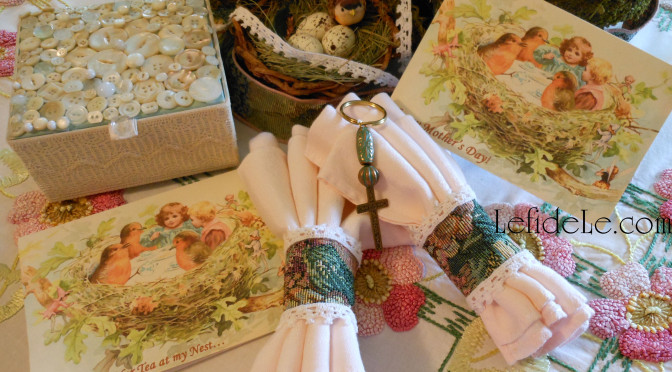
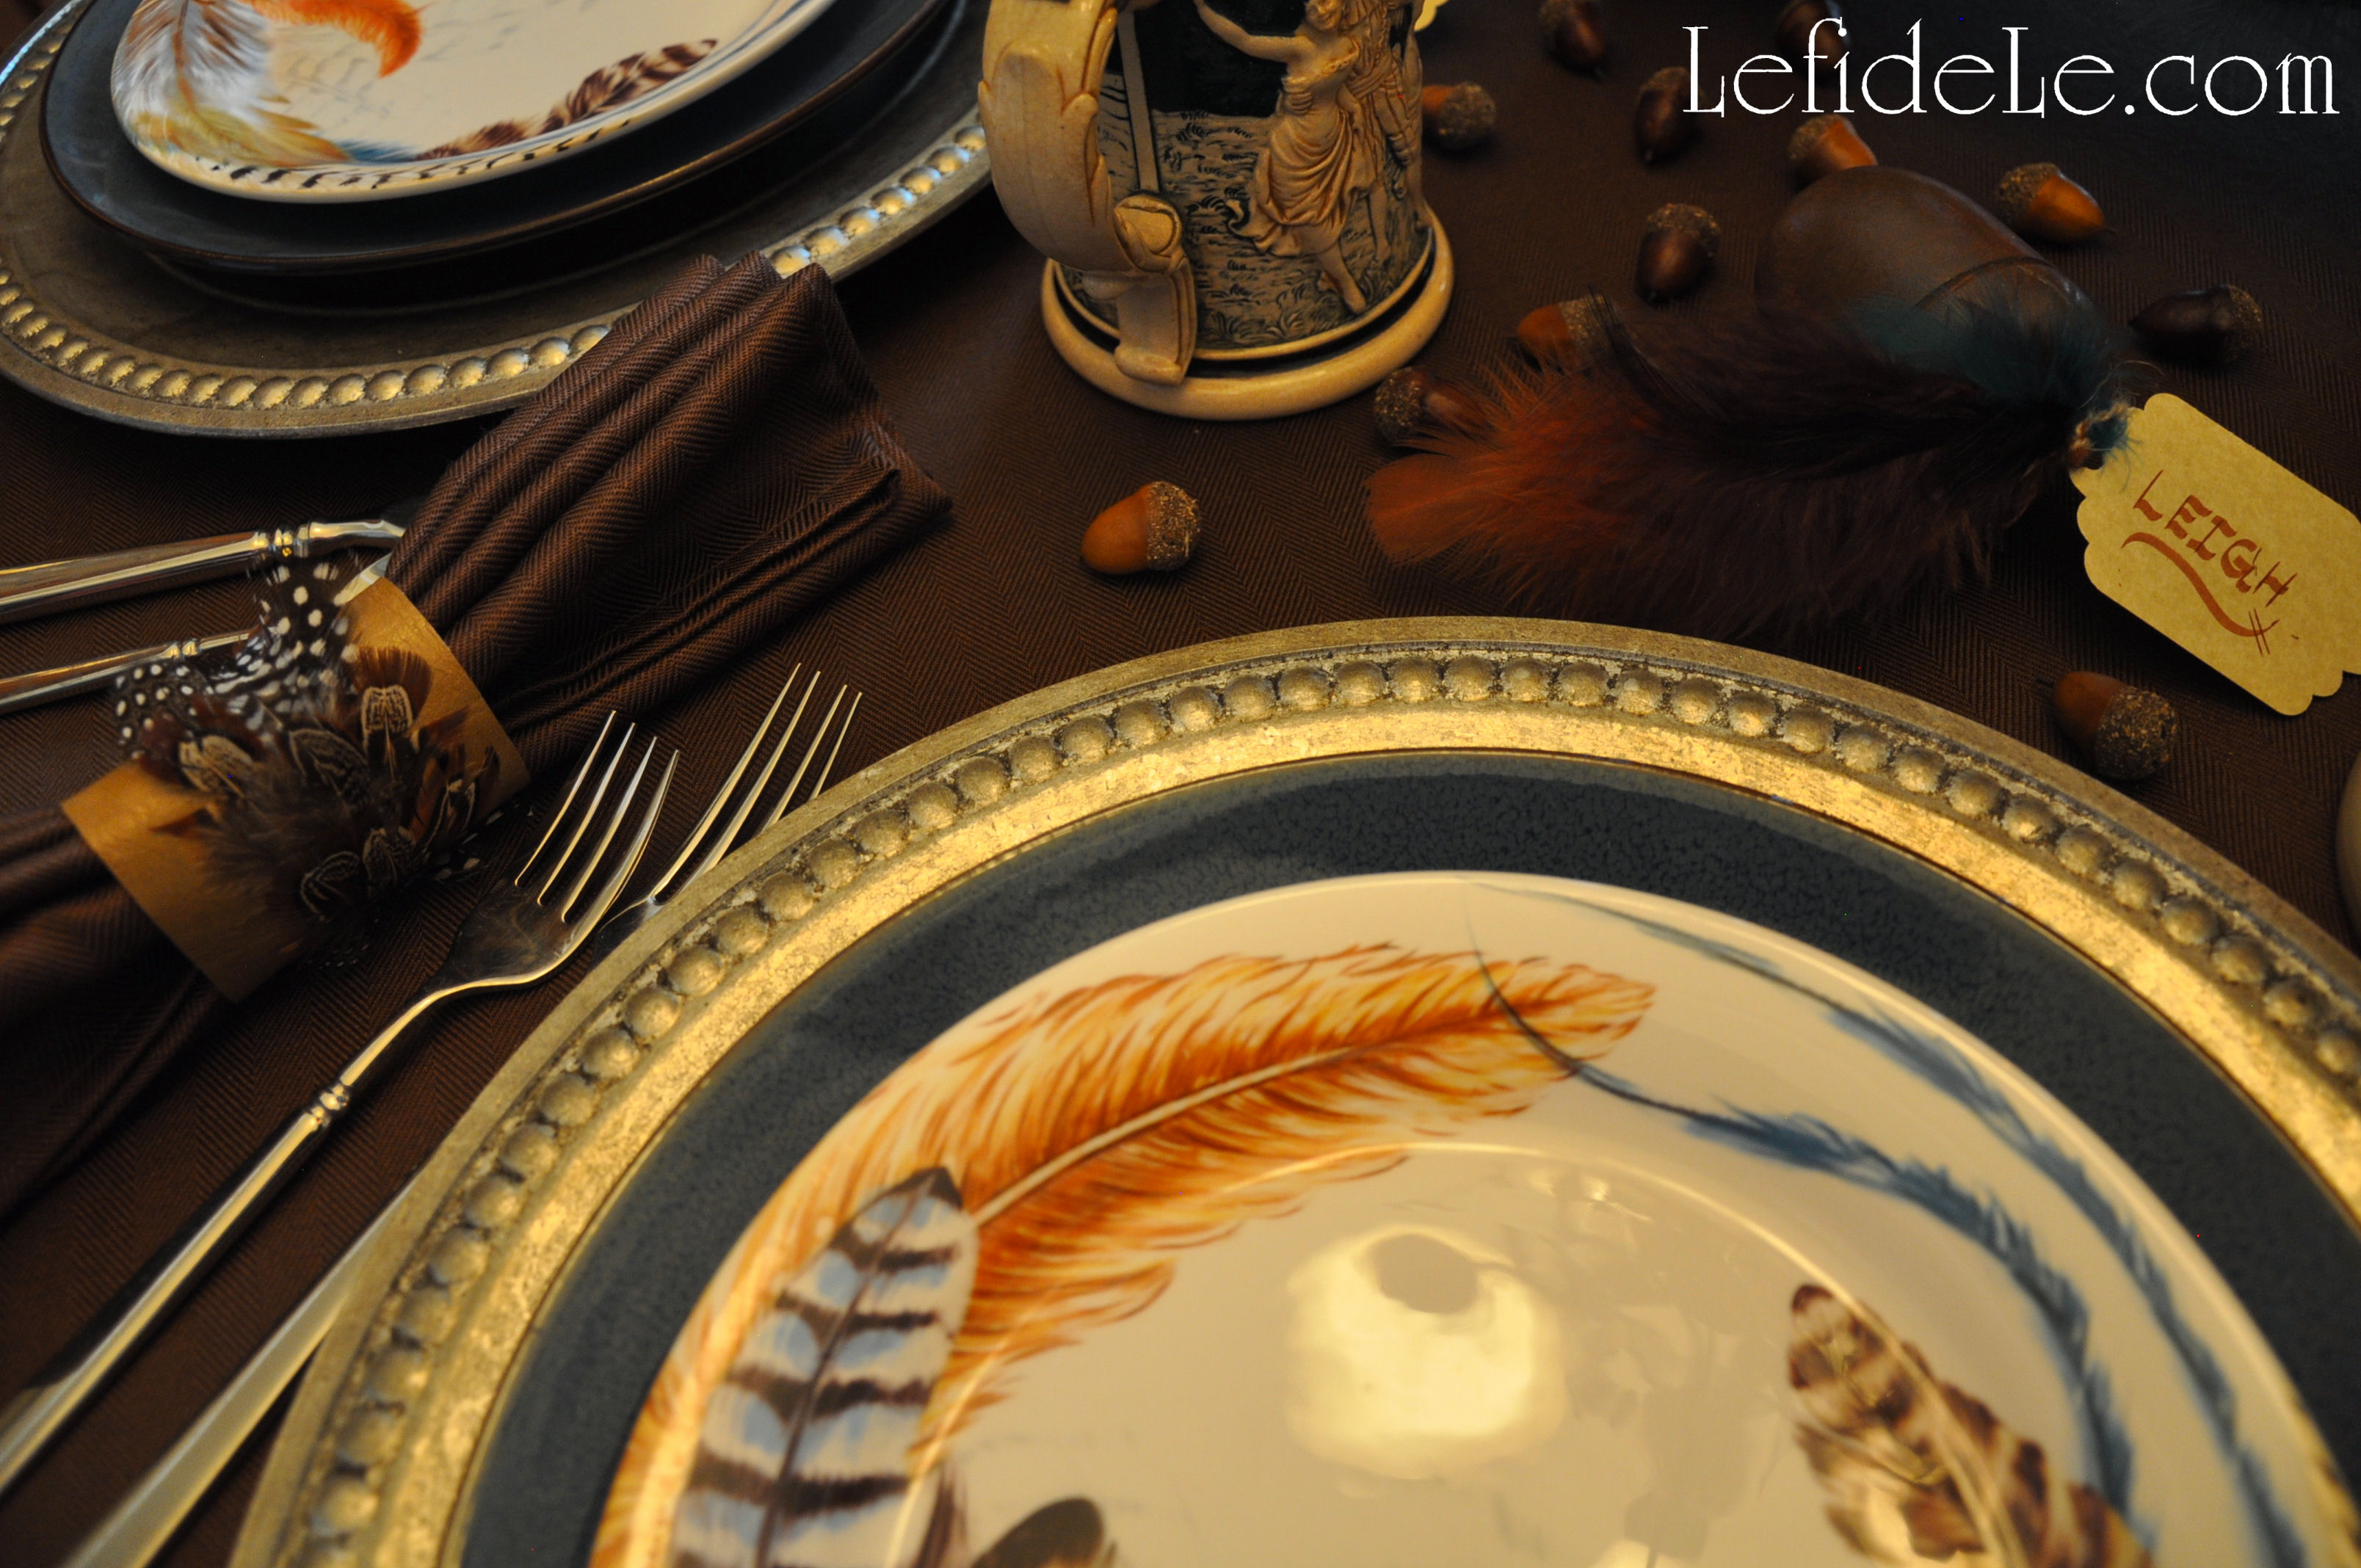
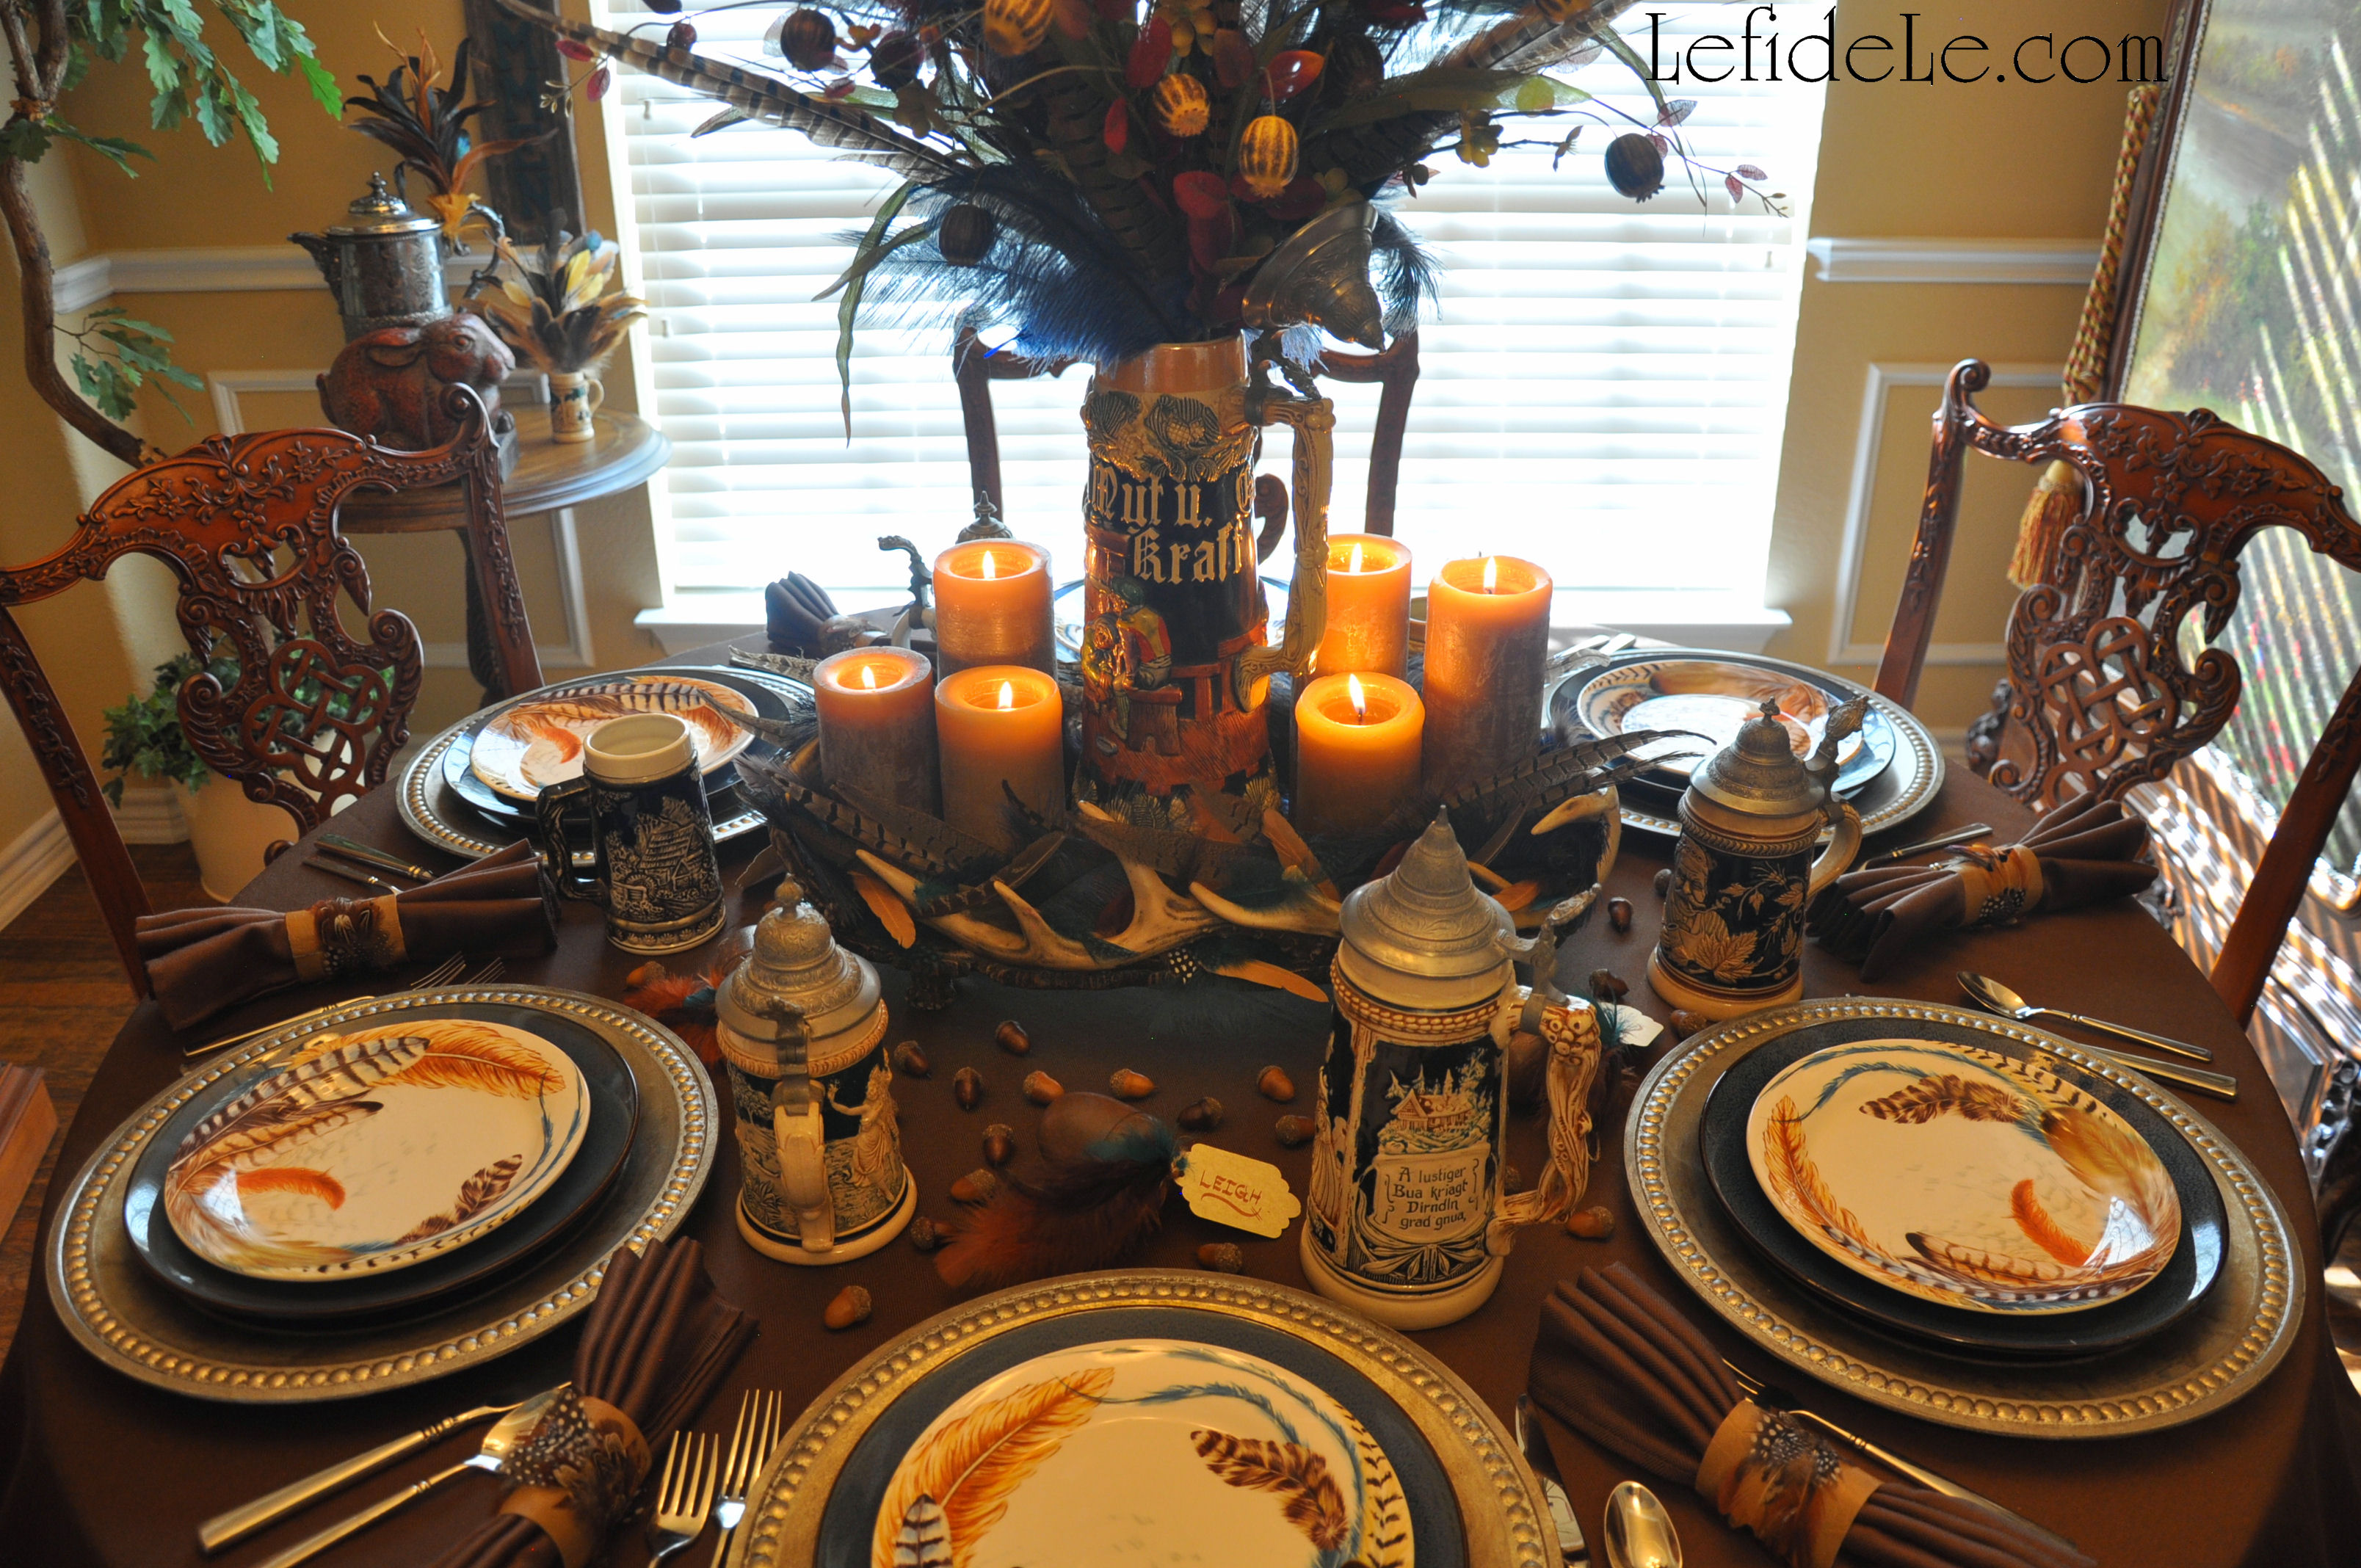
Making your own feather and vegan leather napkin rings is an inexpensive way to bring an element of elegance to any gathering, but especially an Oktoberfest celebration of German heritage. Use a stein as a vase for feathers and fall foliage along with feathered wooden acorns to transport your guests to a fanciful fairytale version of a Bavarian hunting lodge. Then reuse the rings and acorns with a different centerpiece for Thanksgiving!

001Leigh

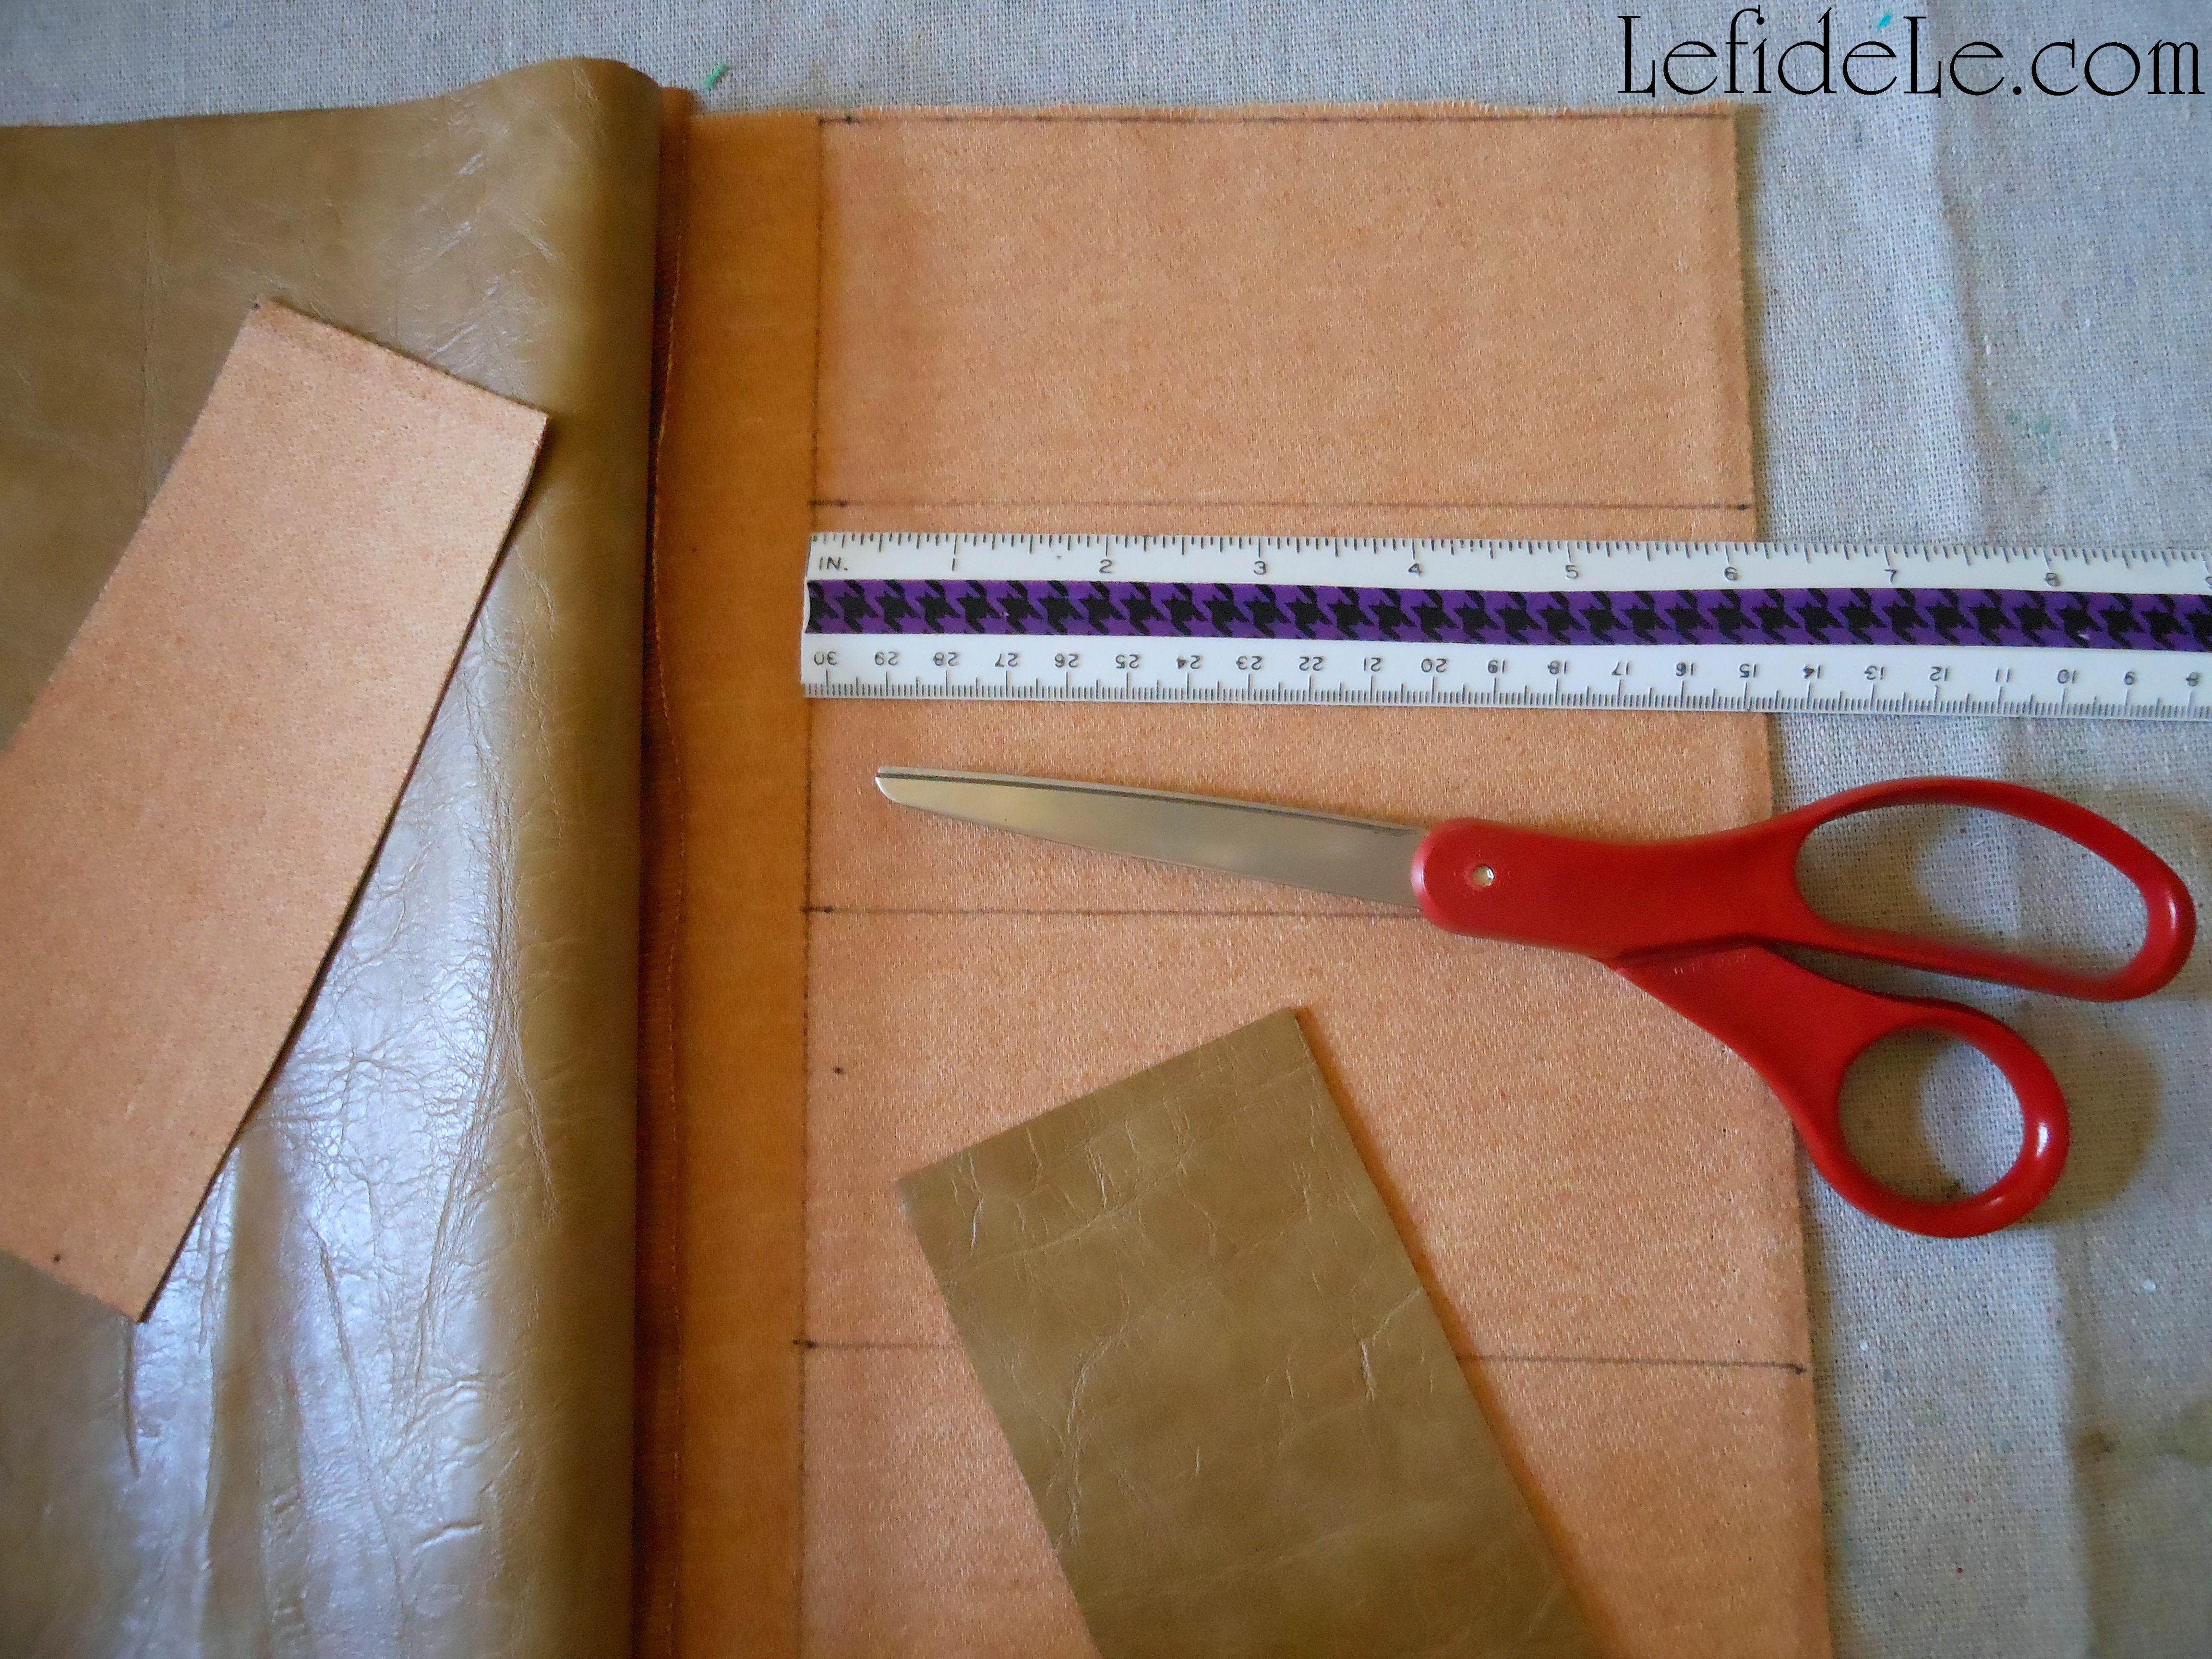
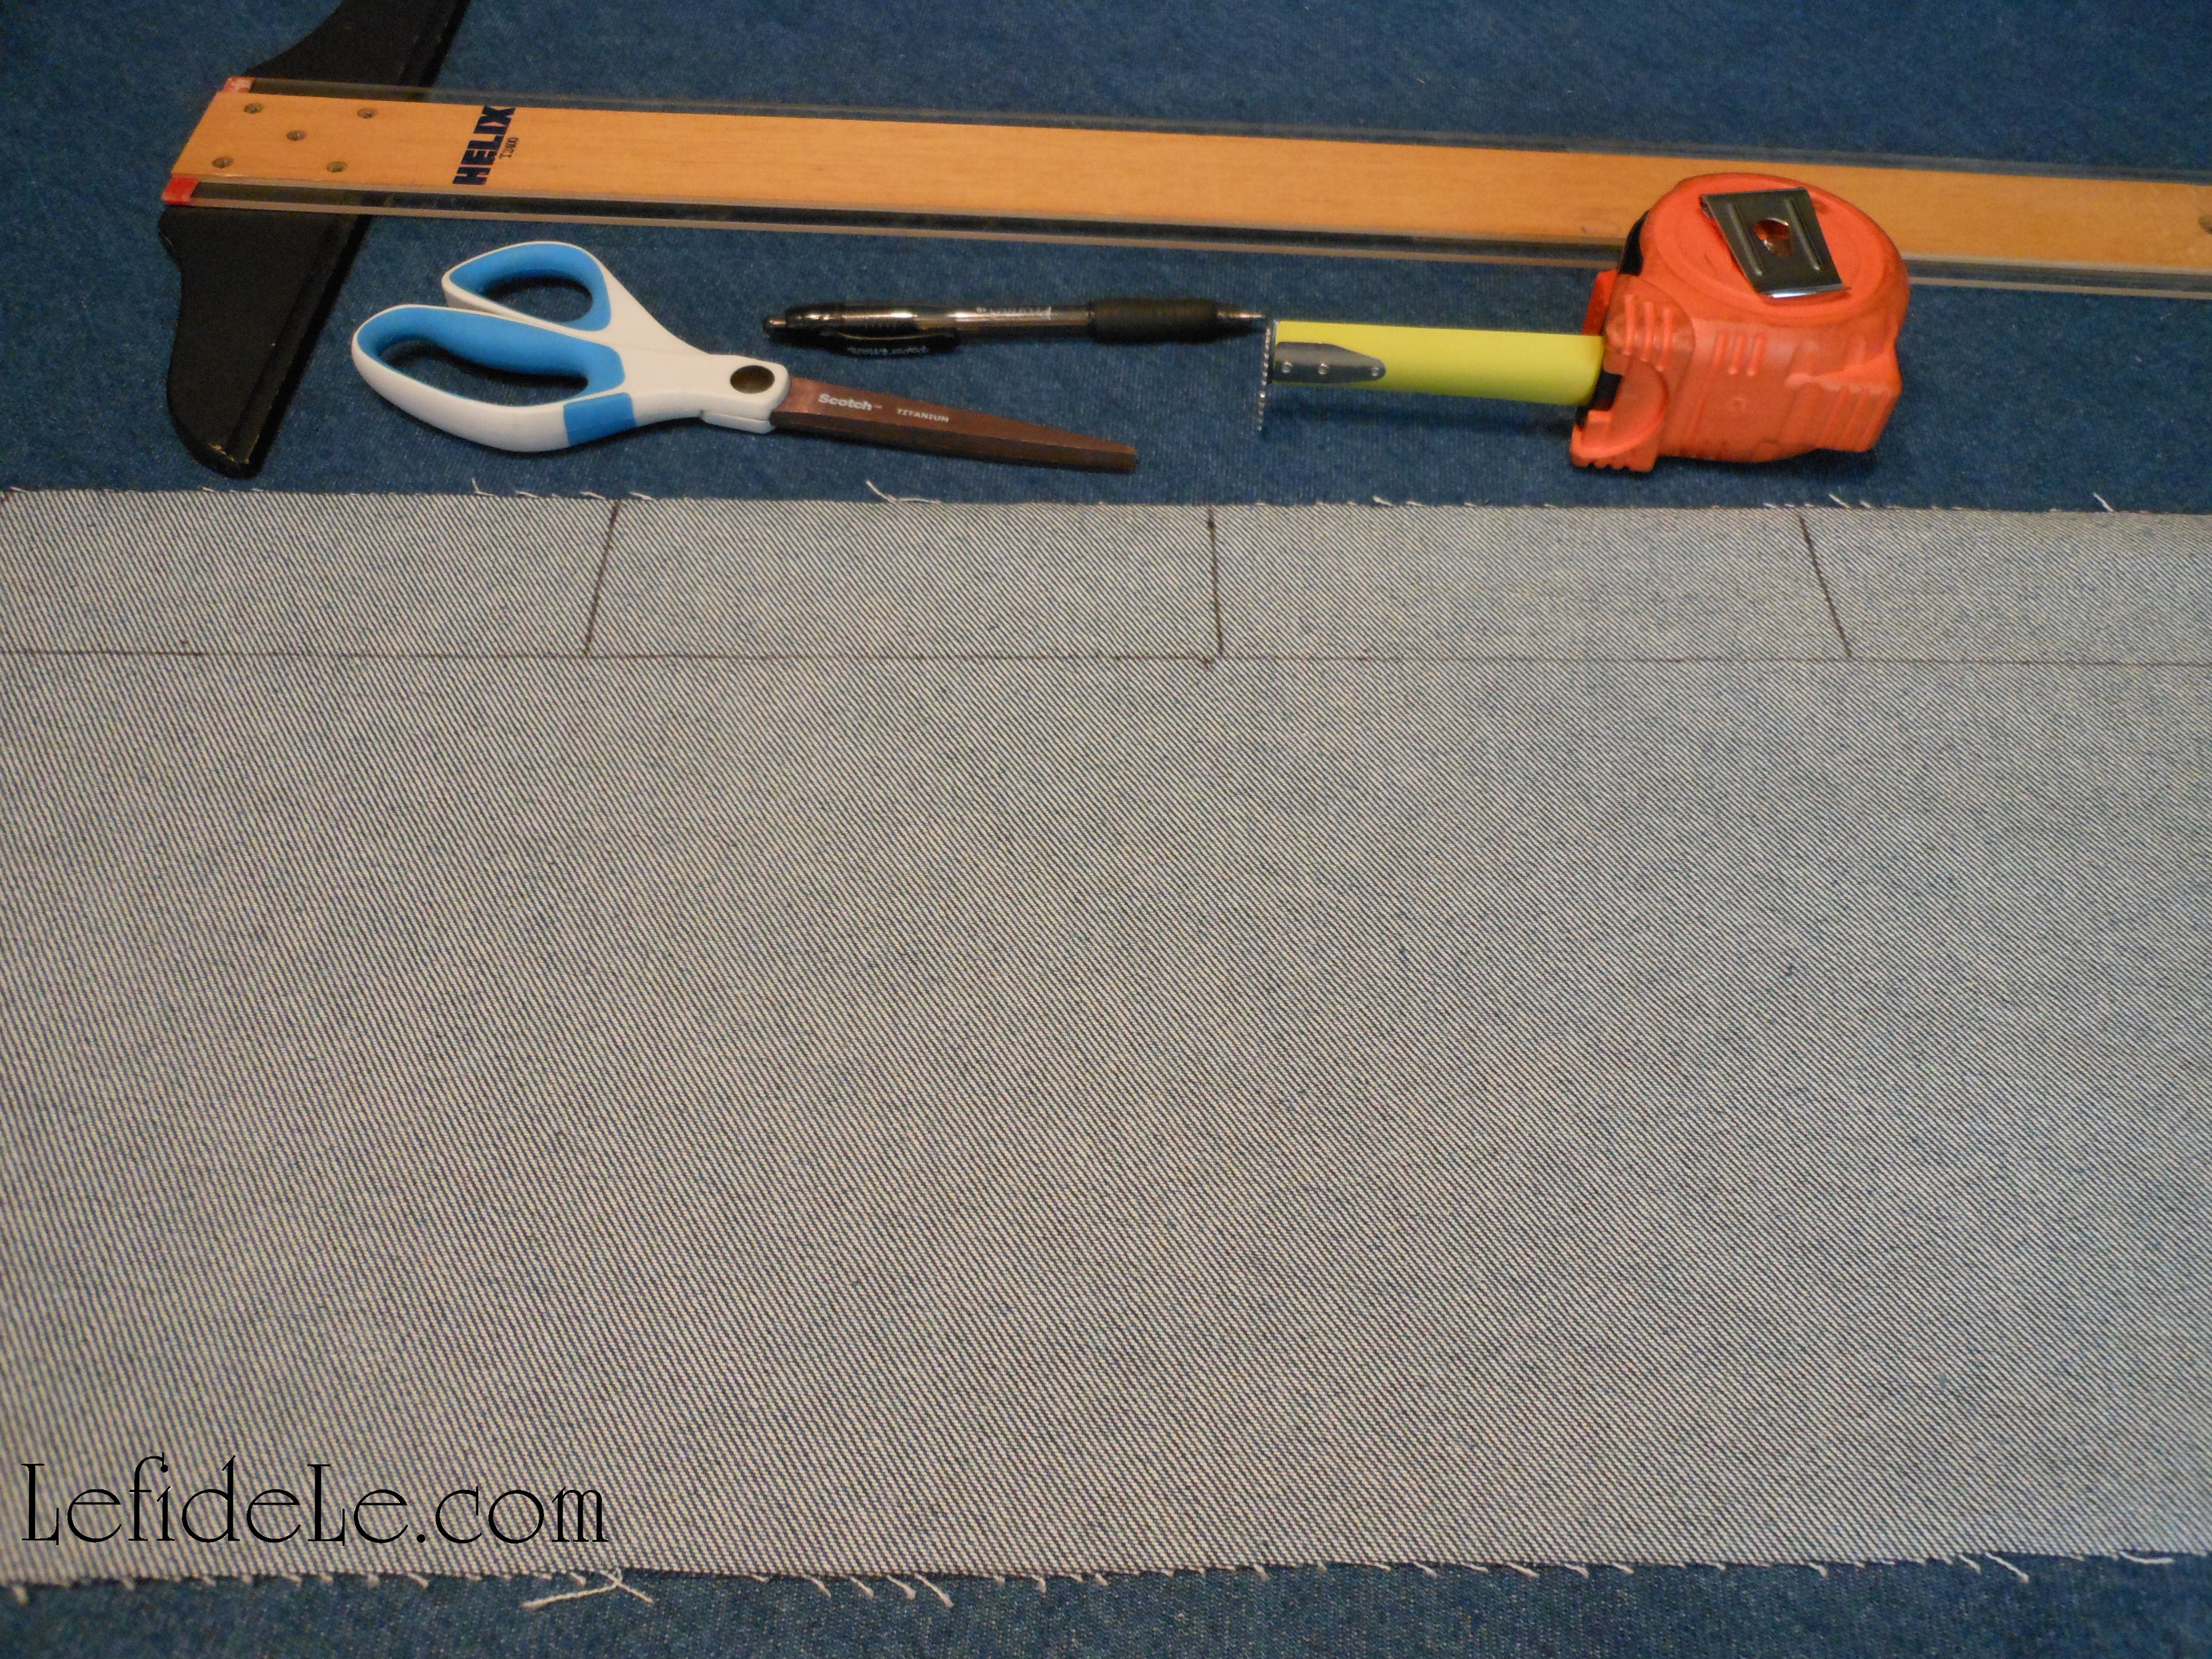
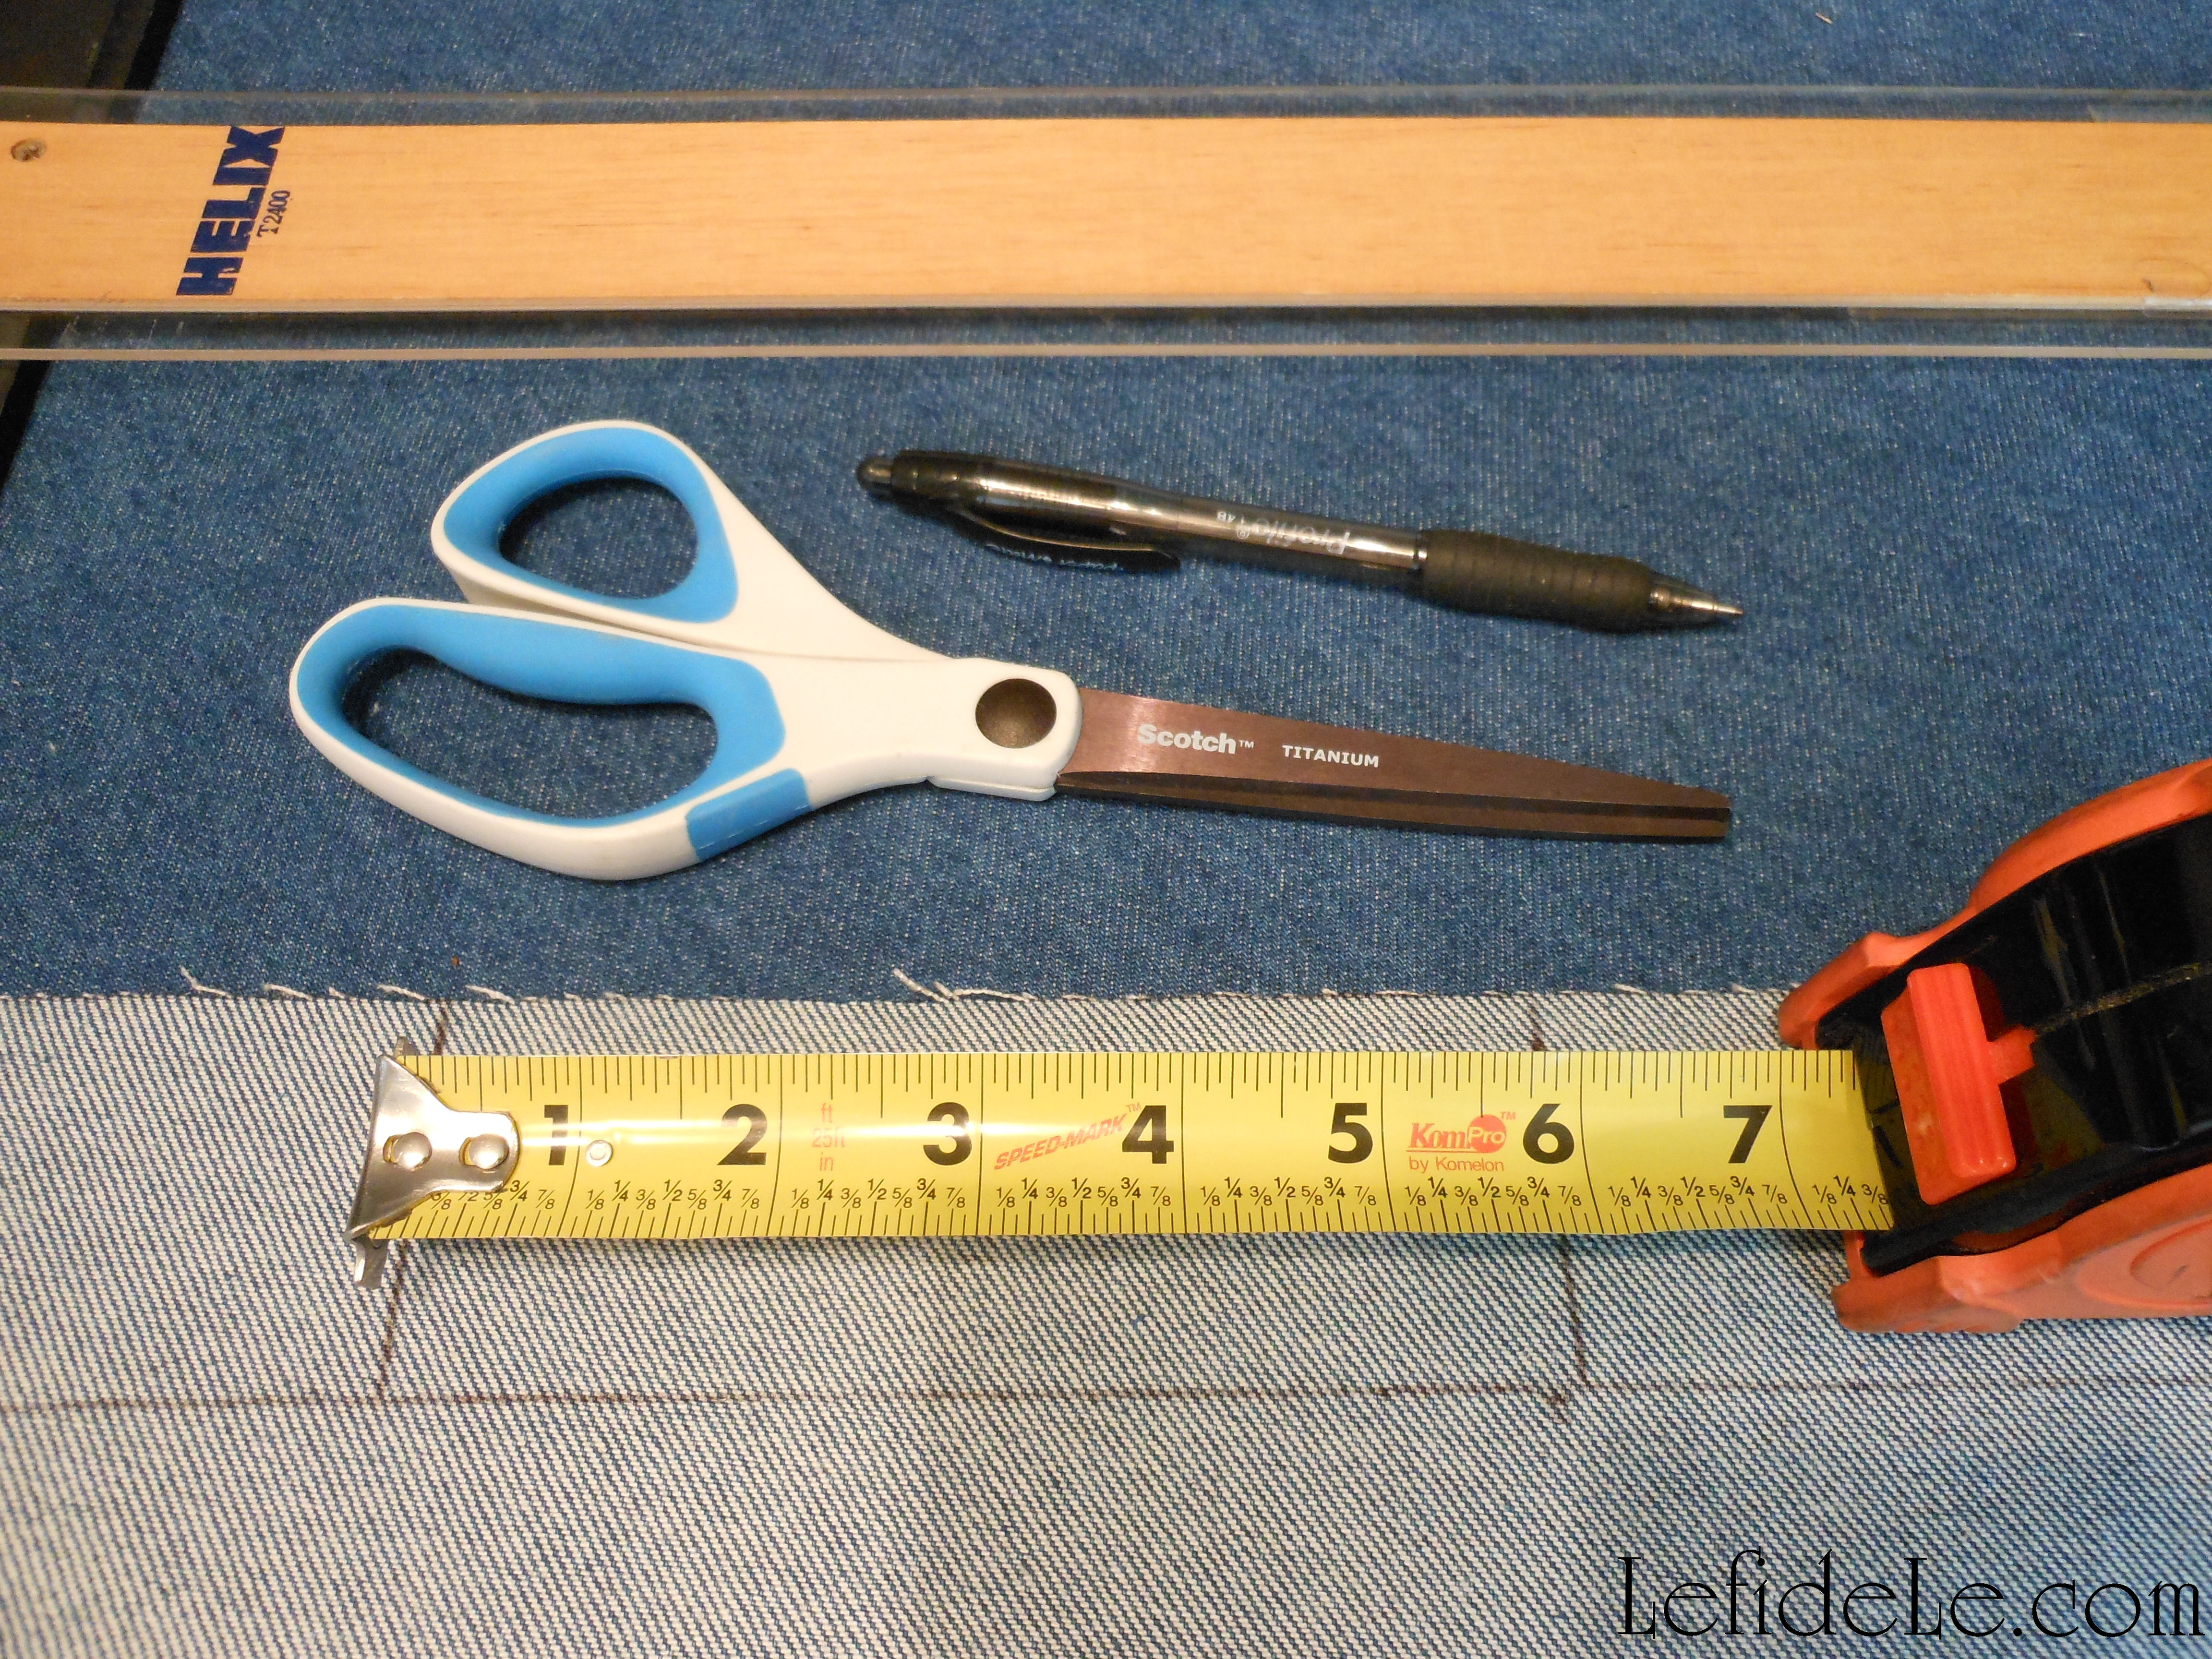
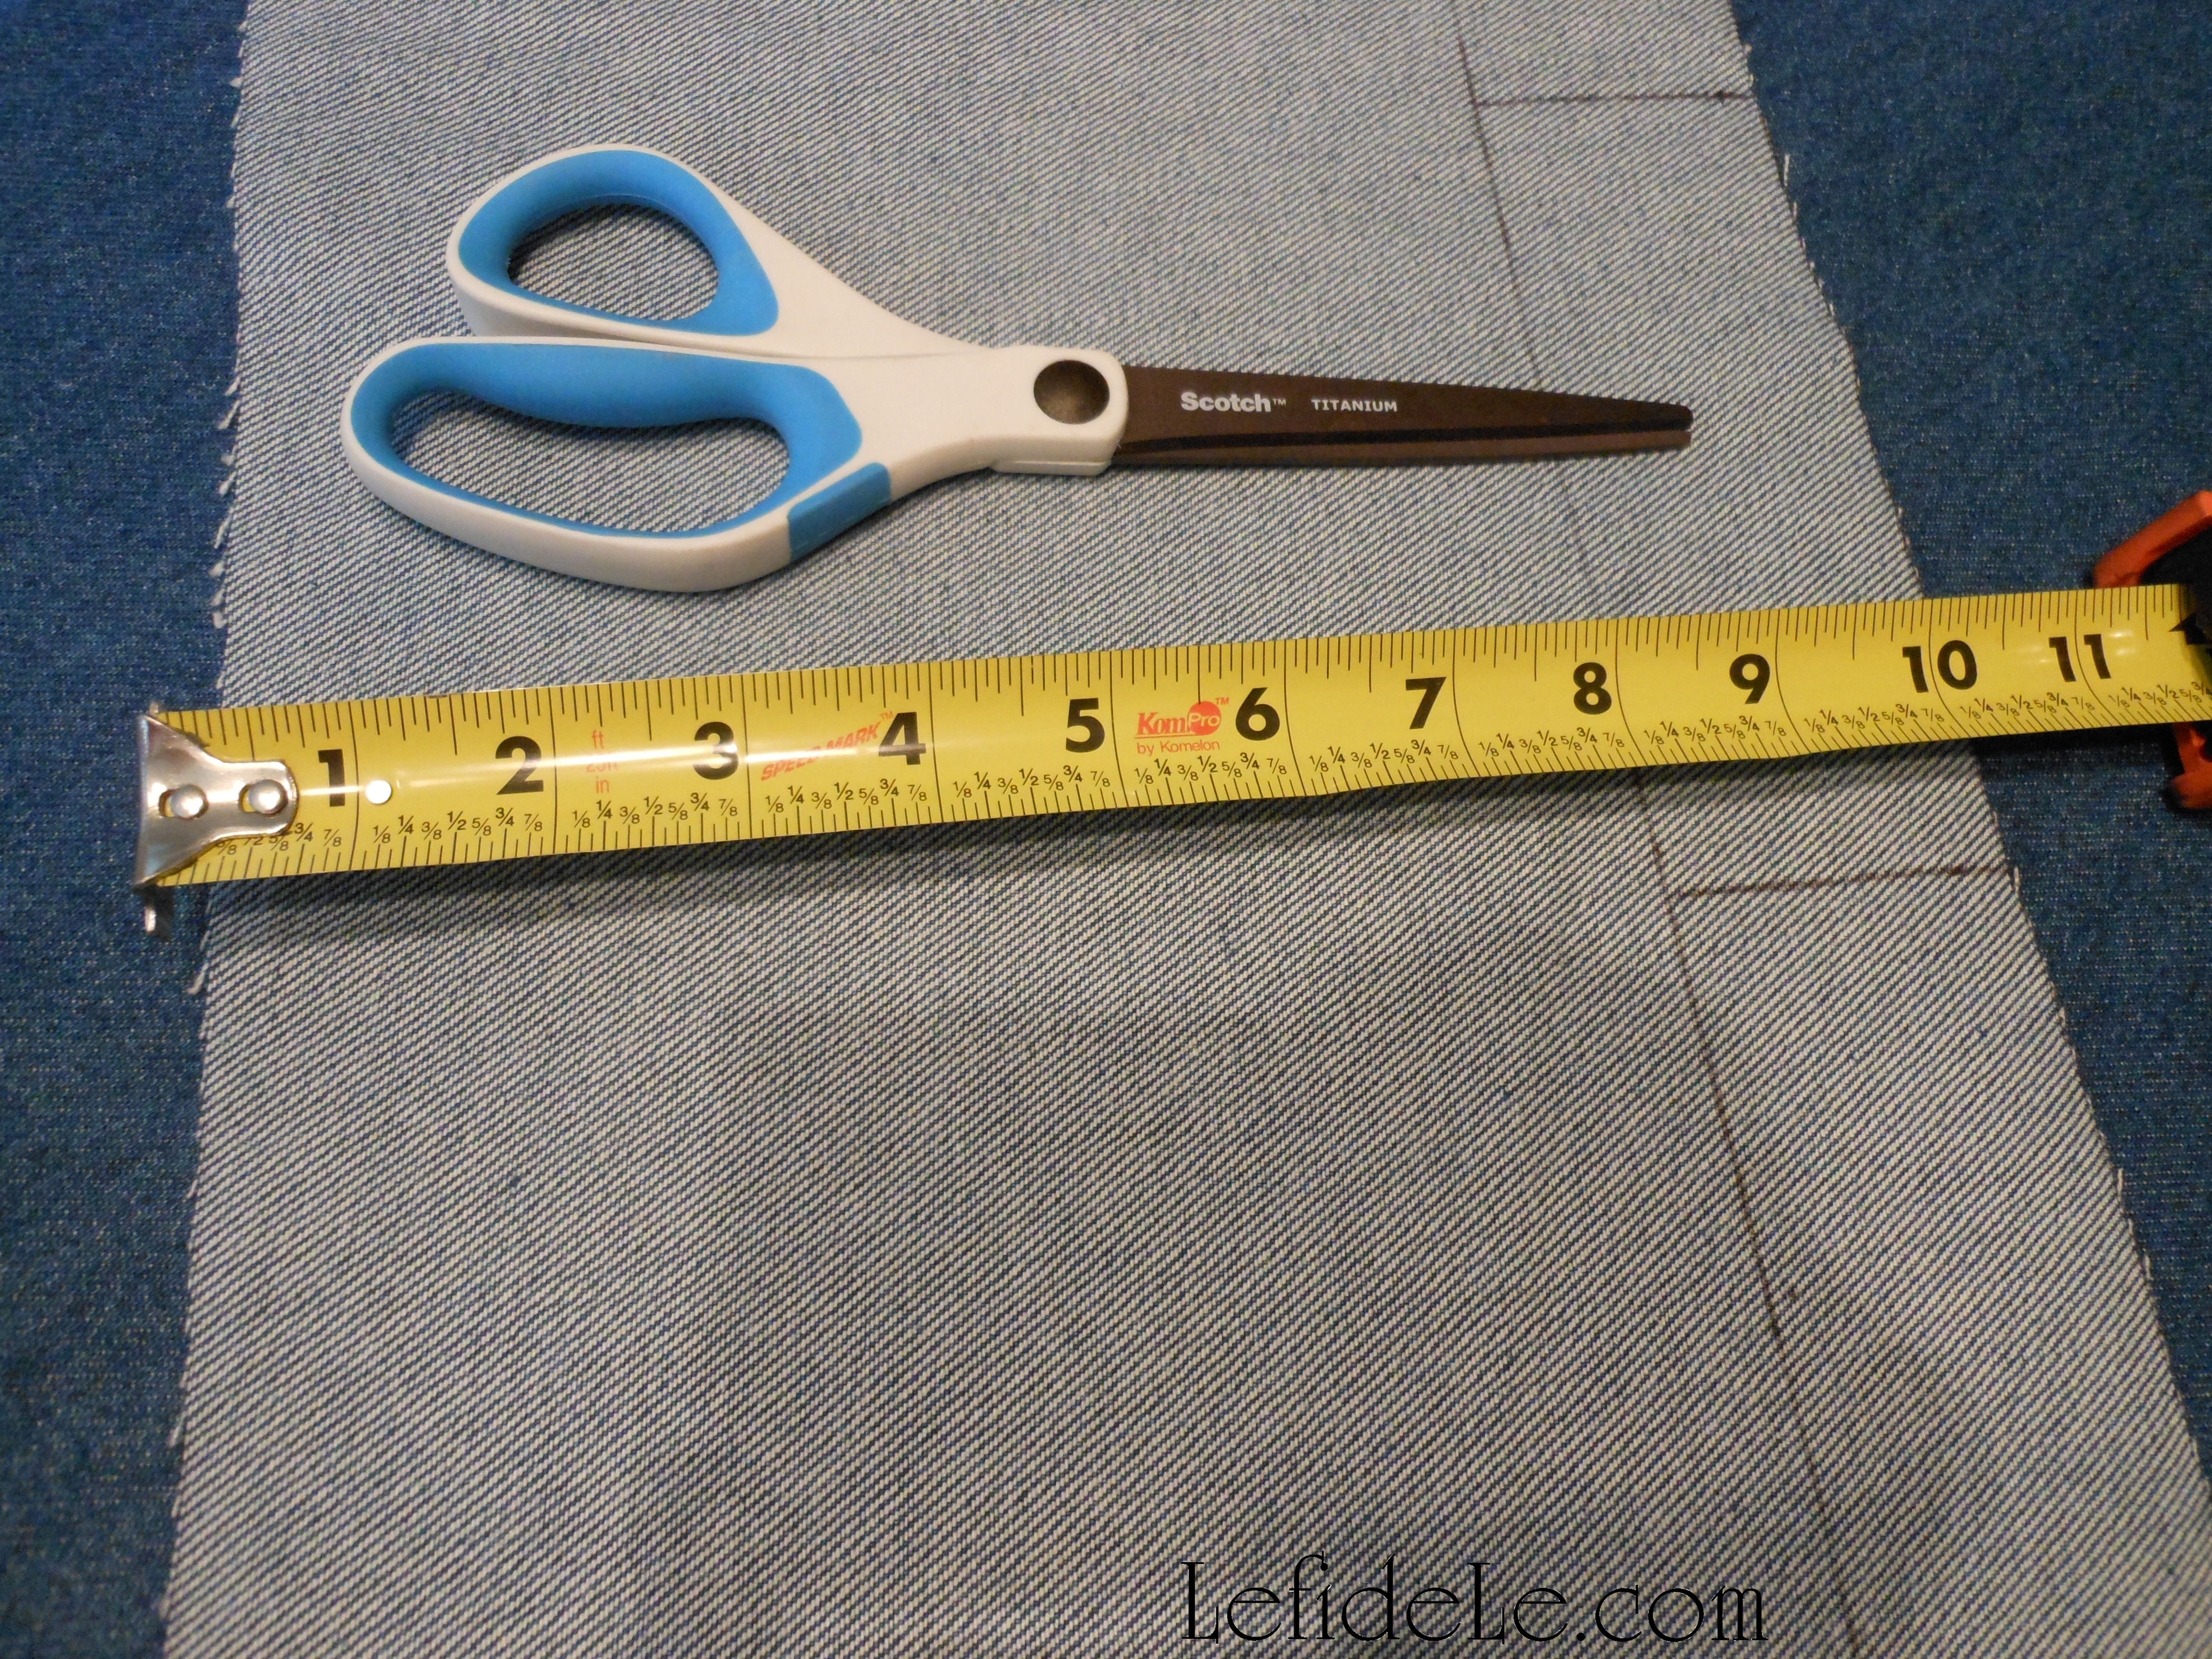
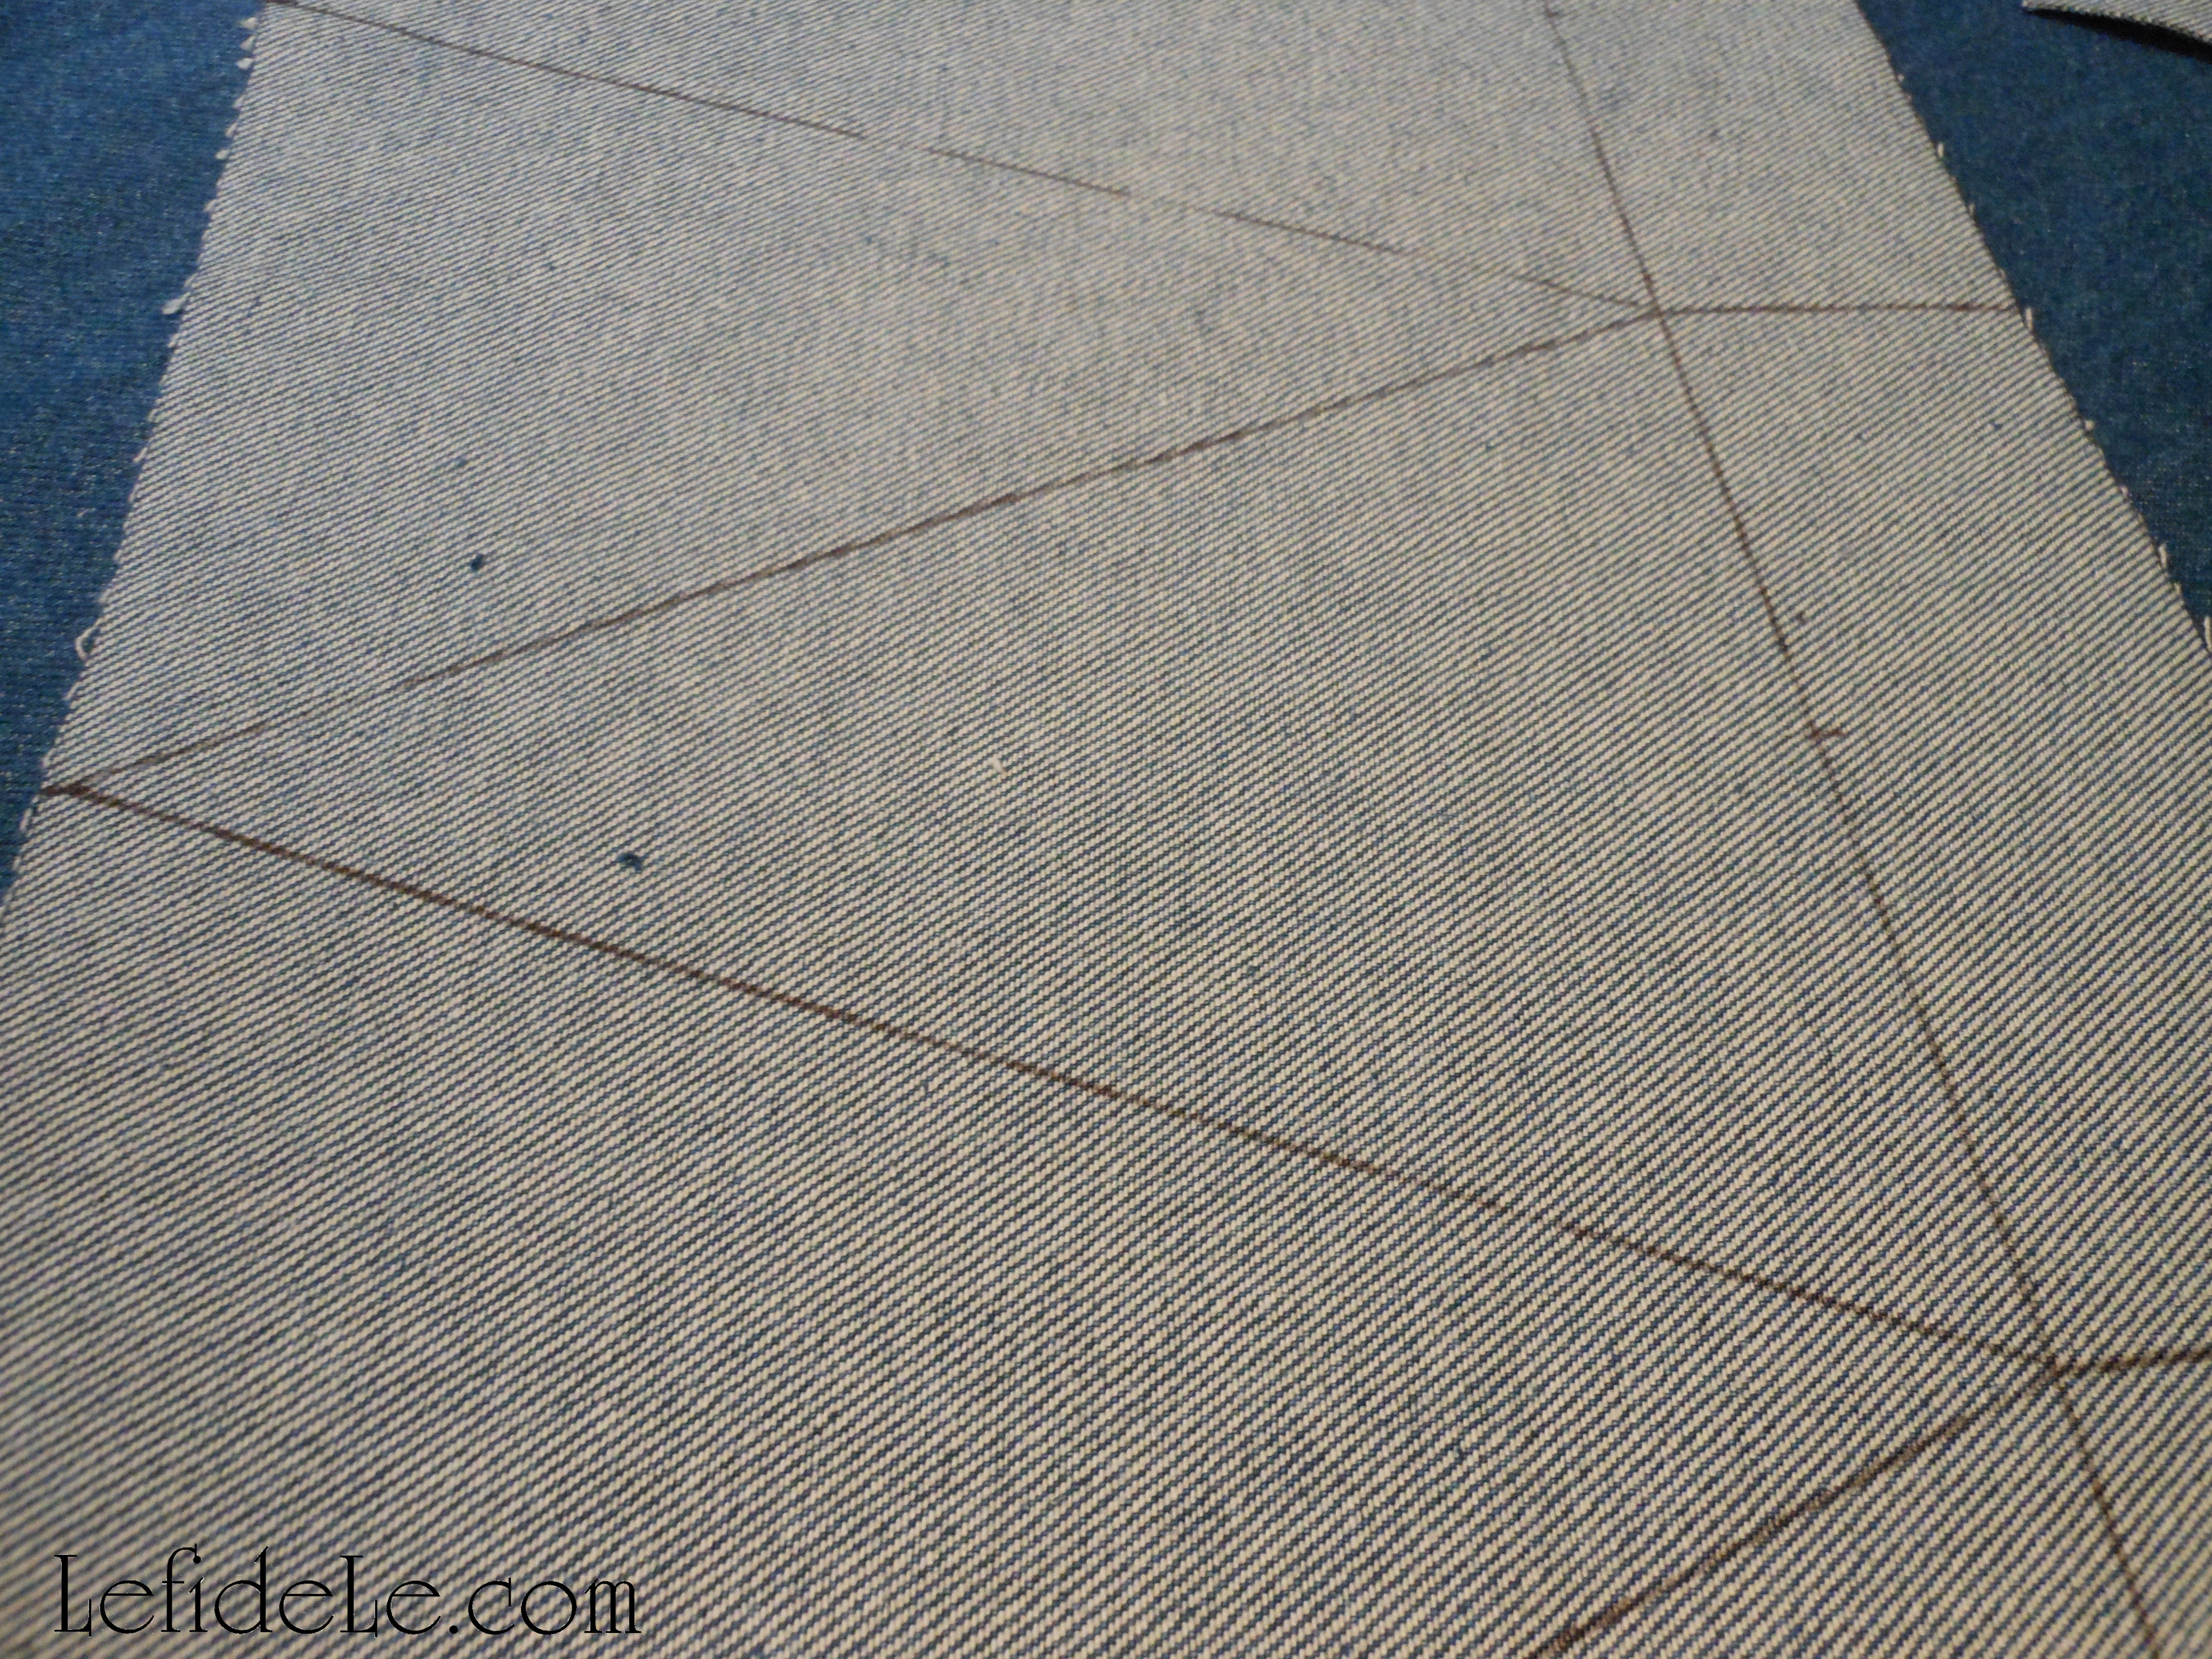
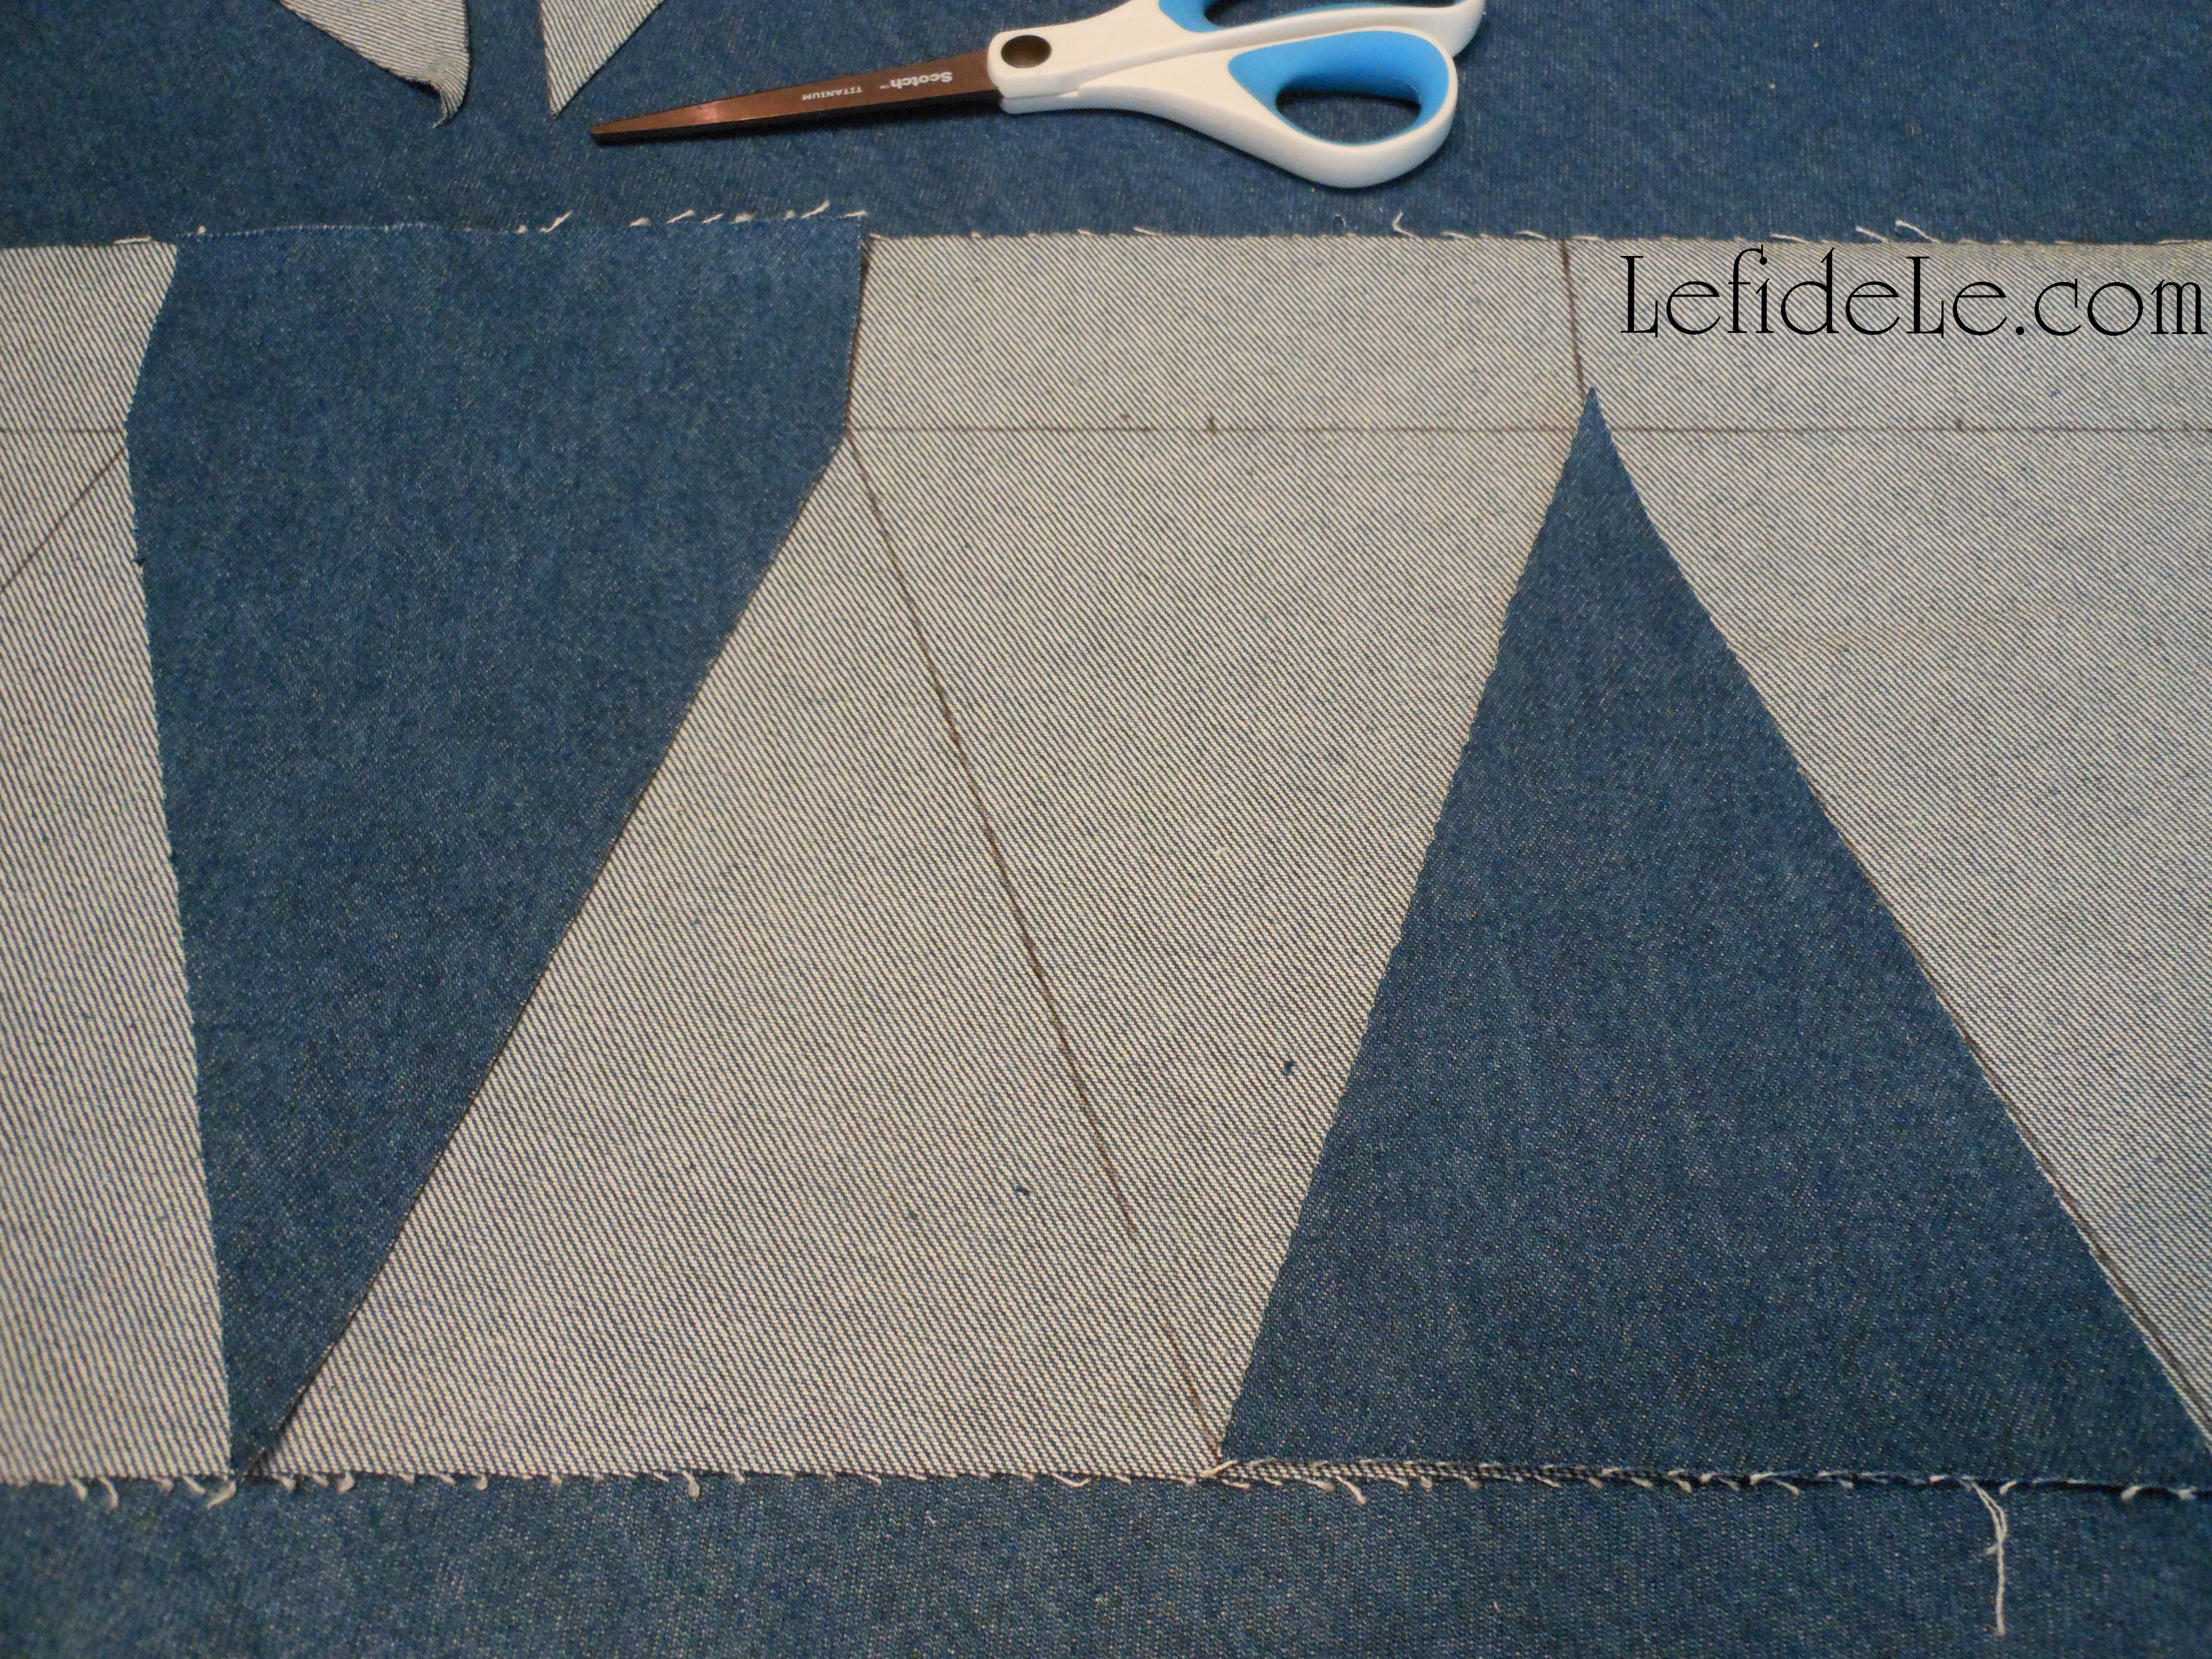
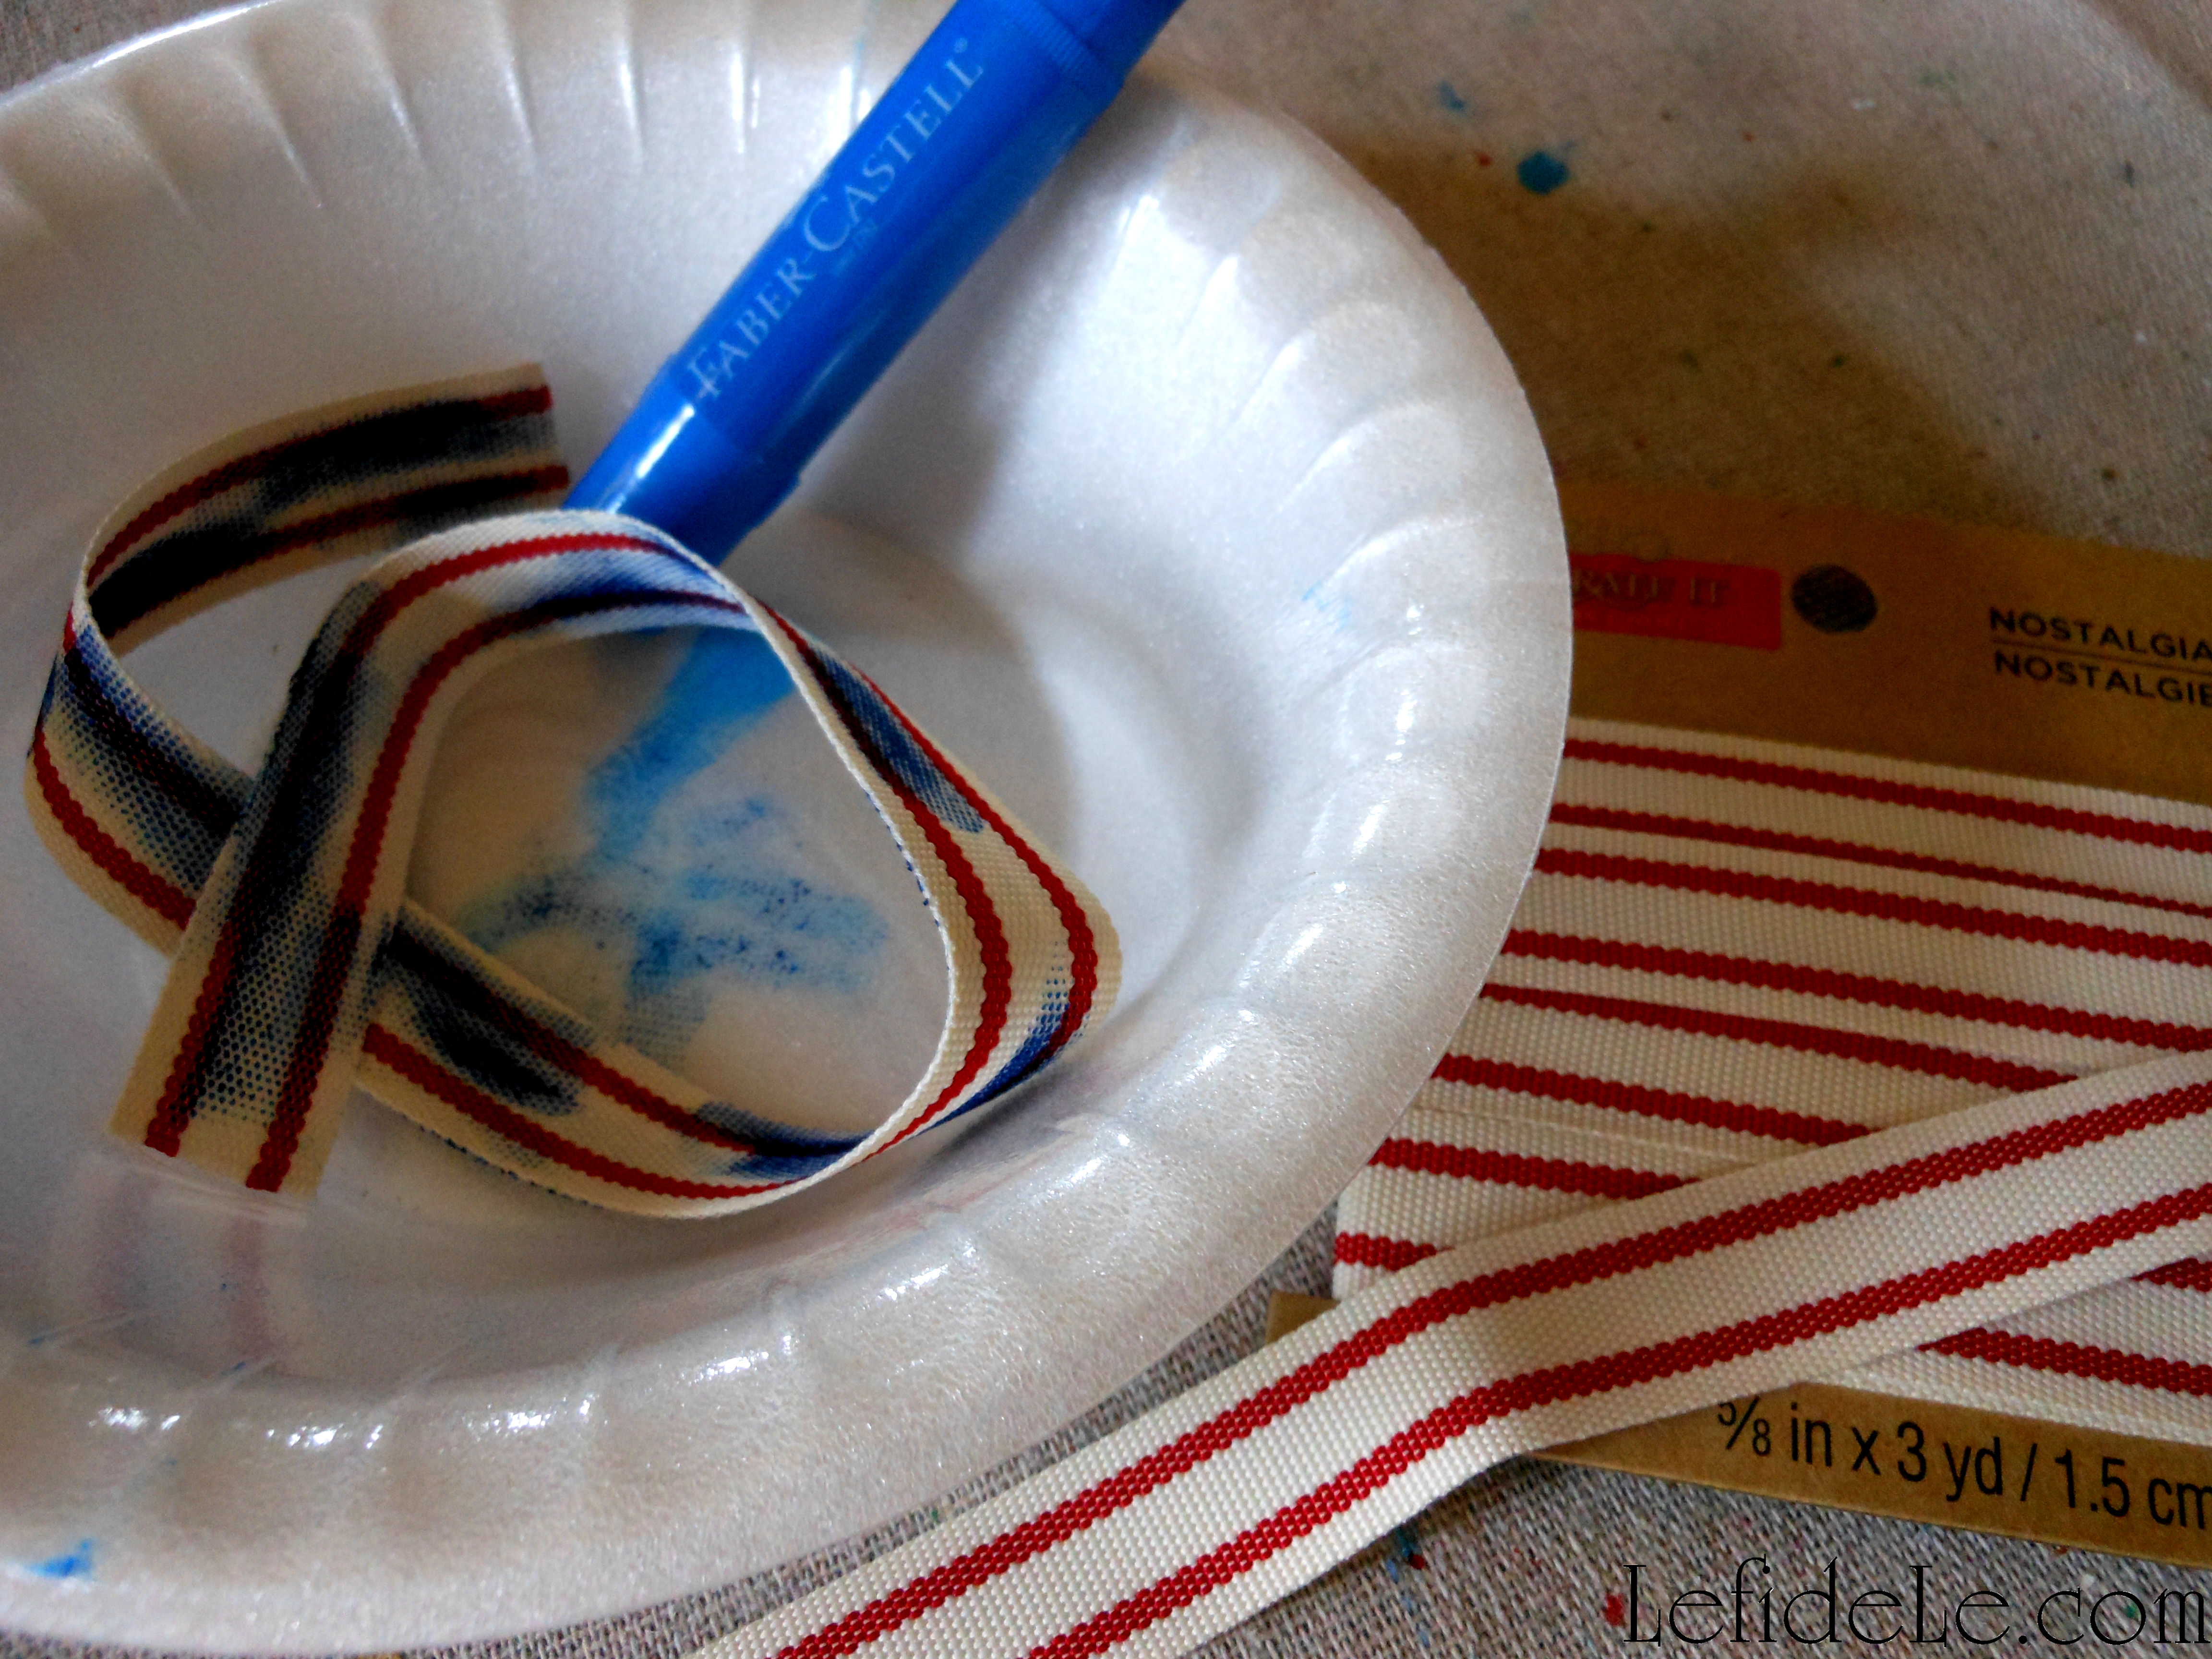
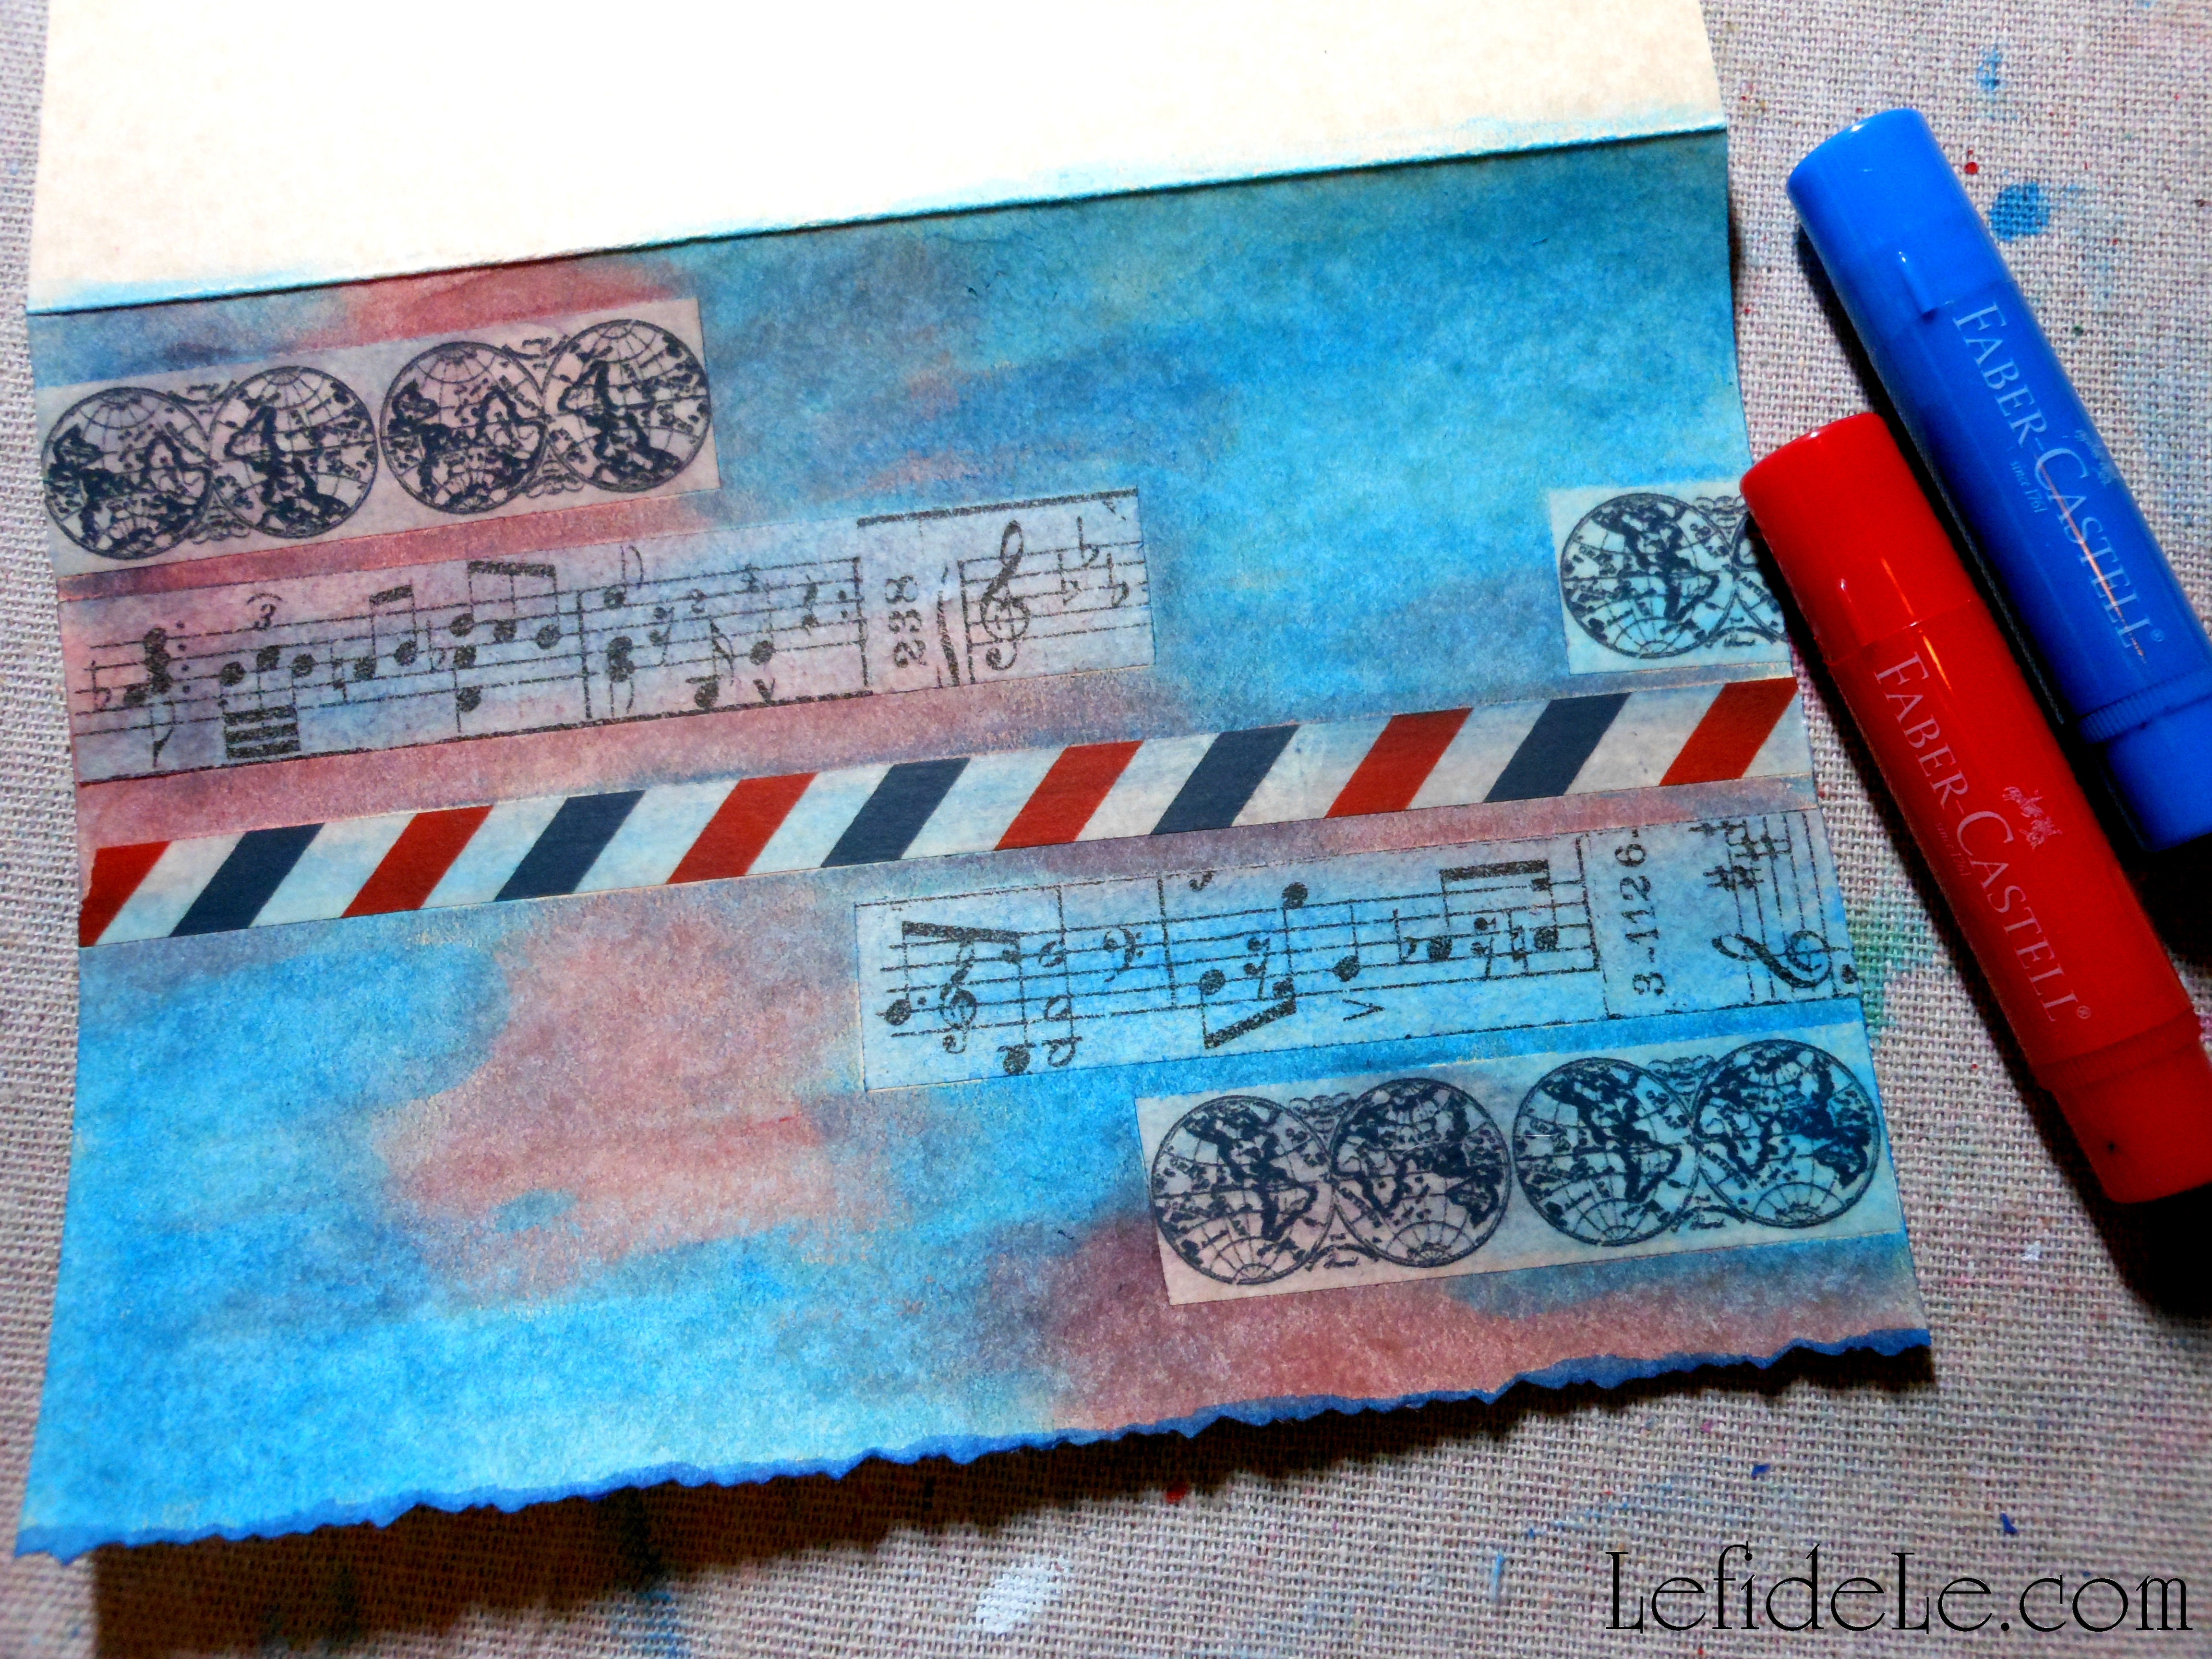
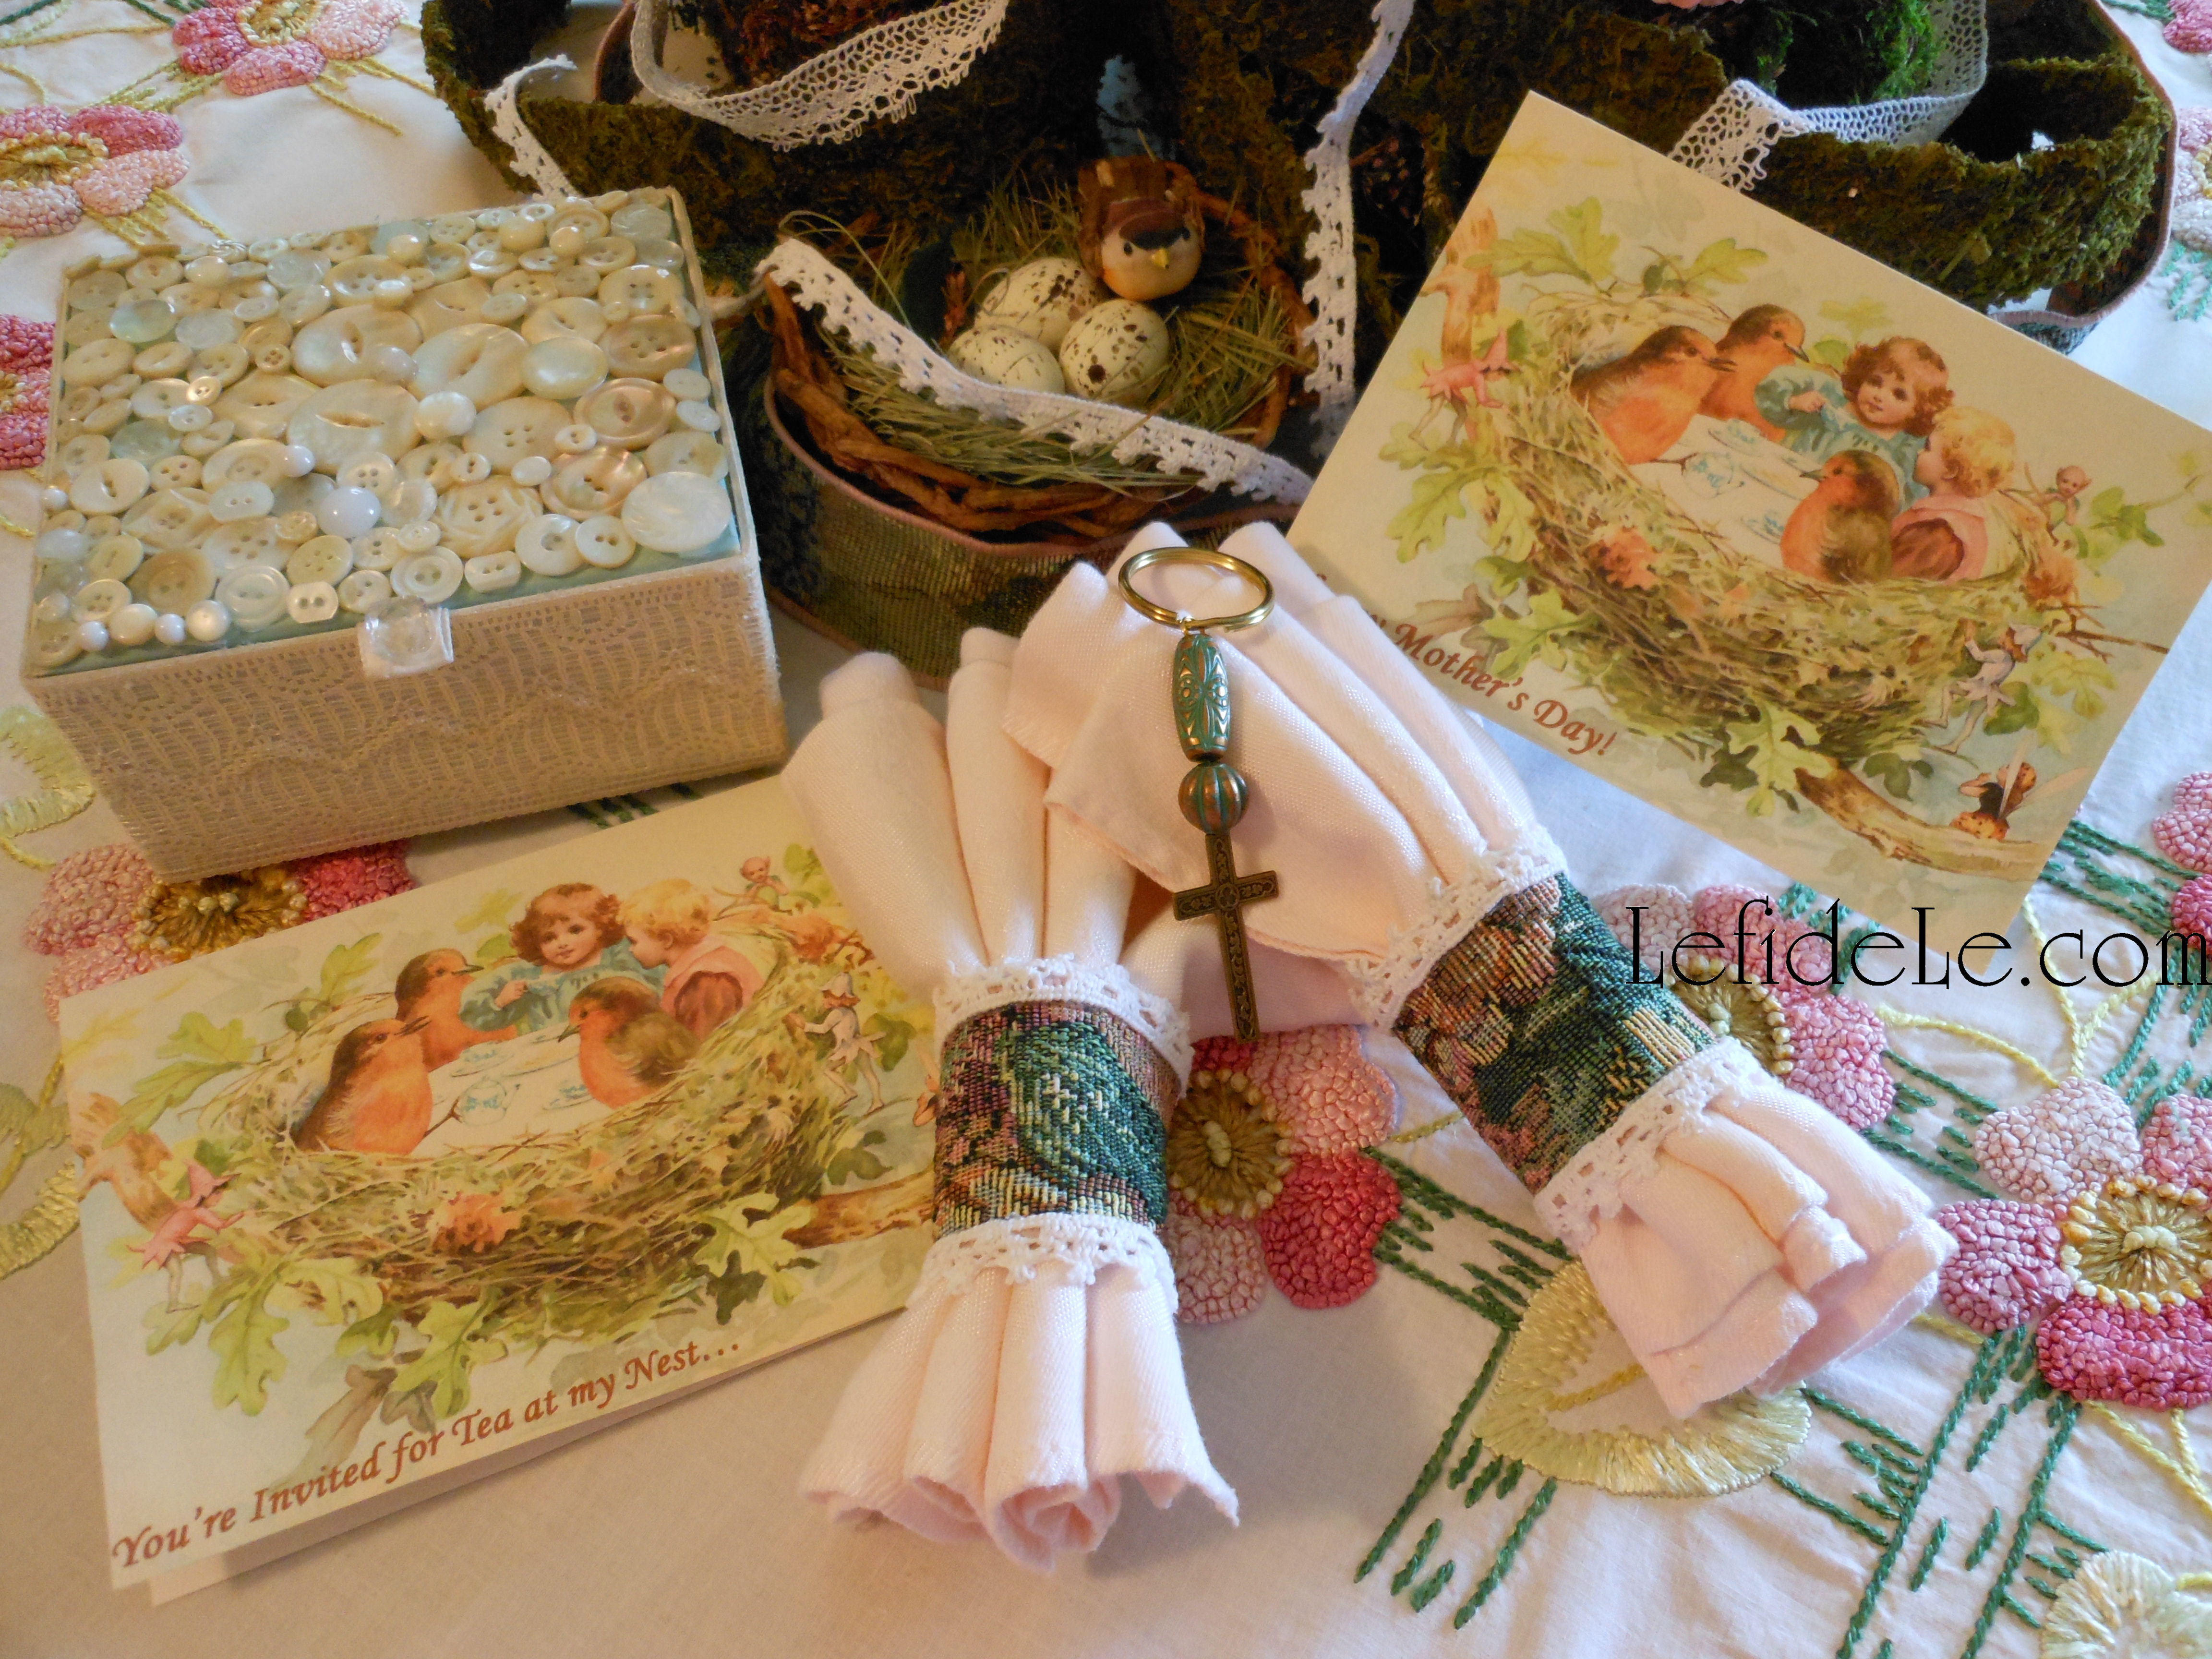
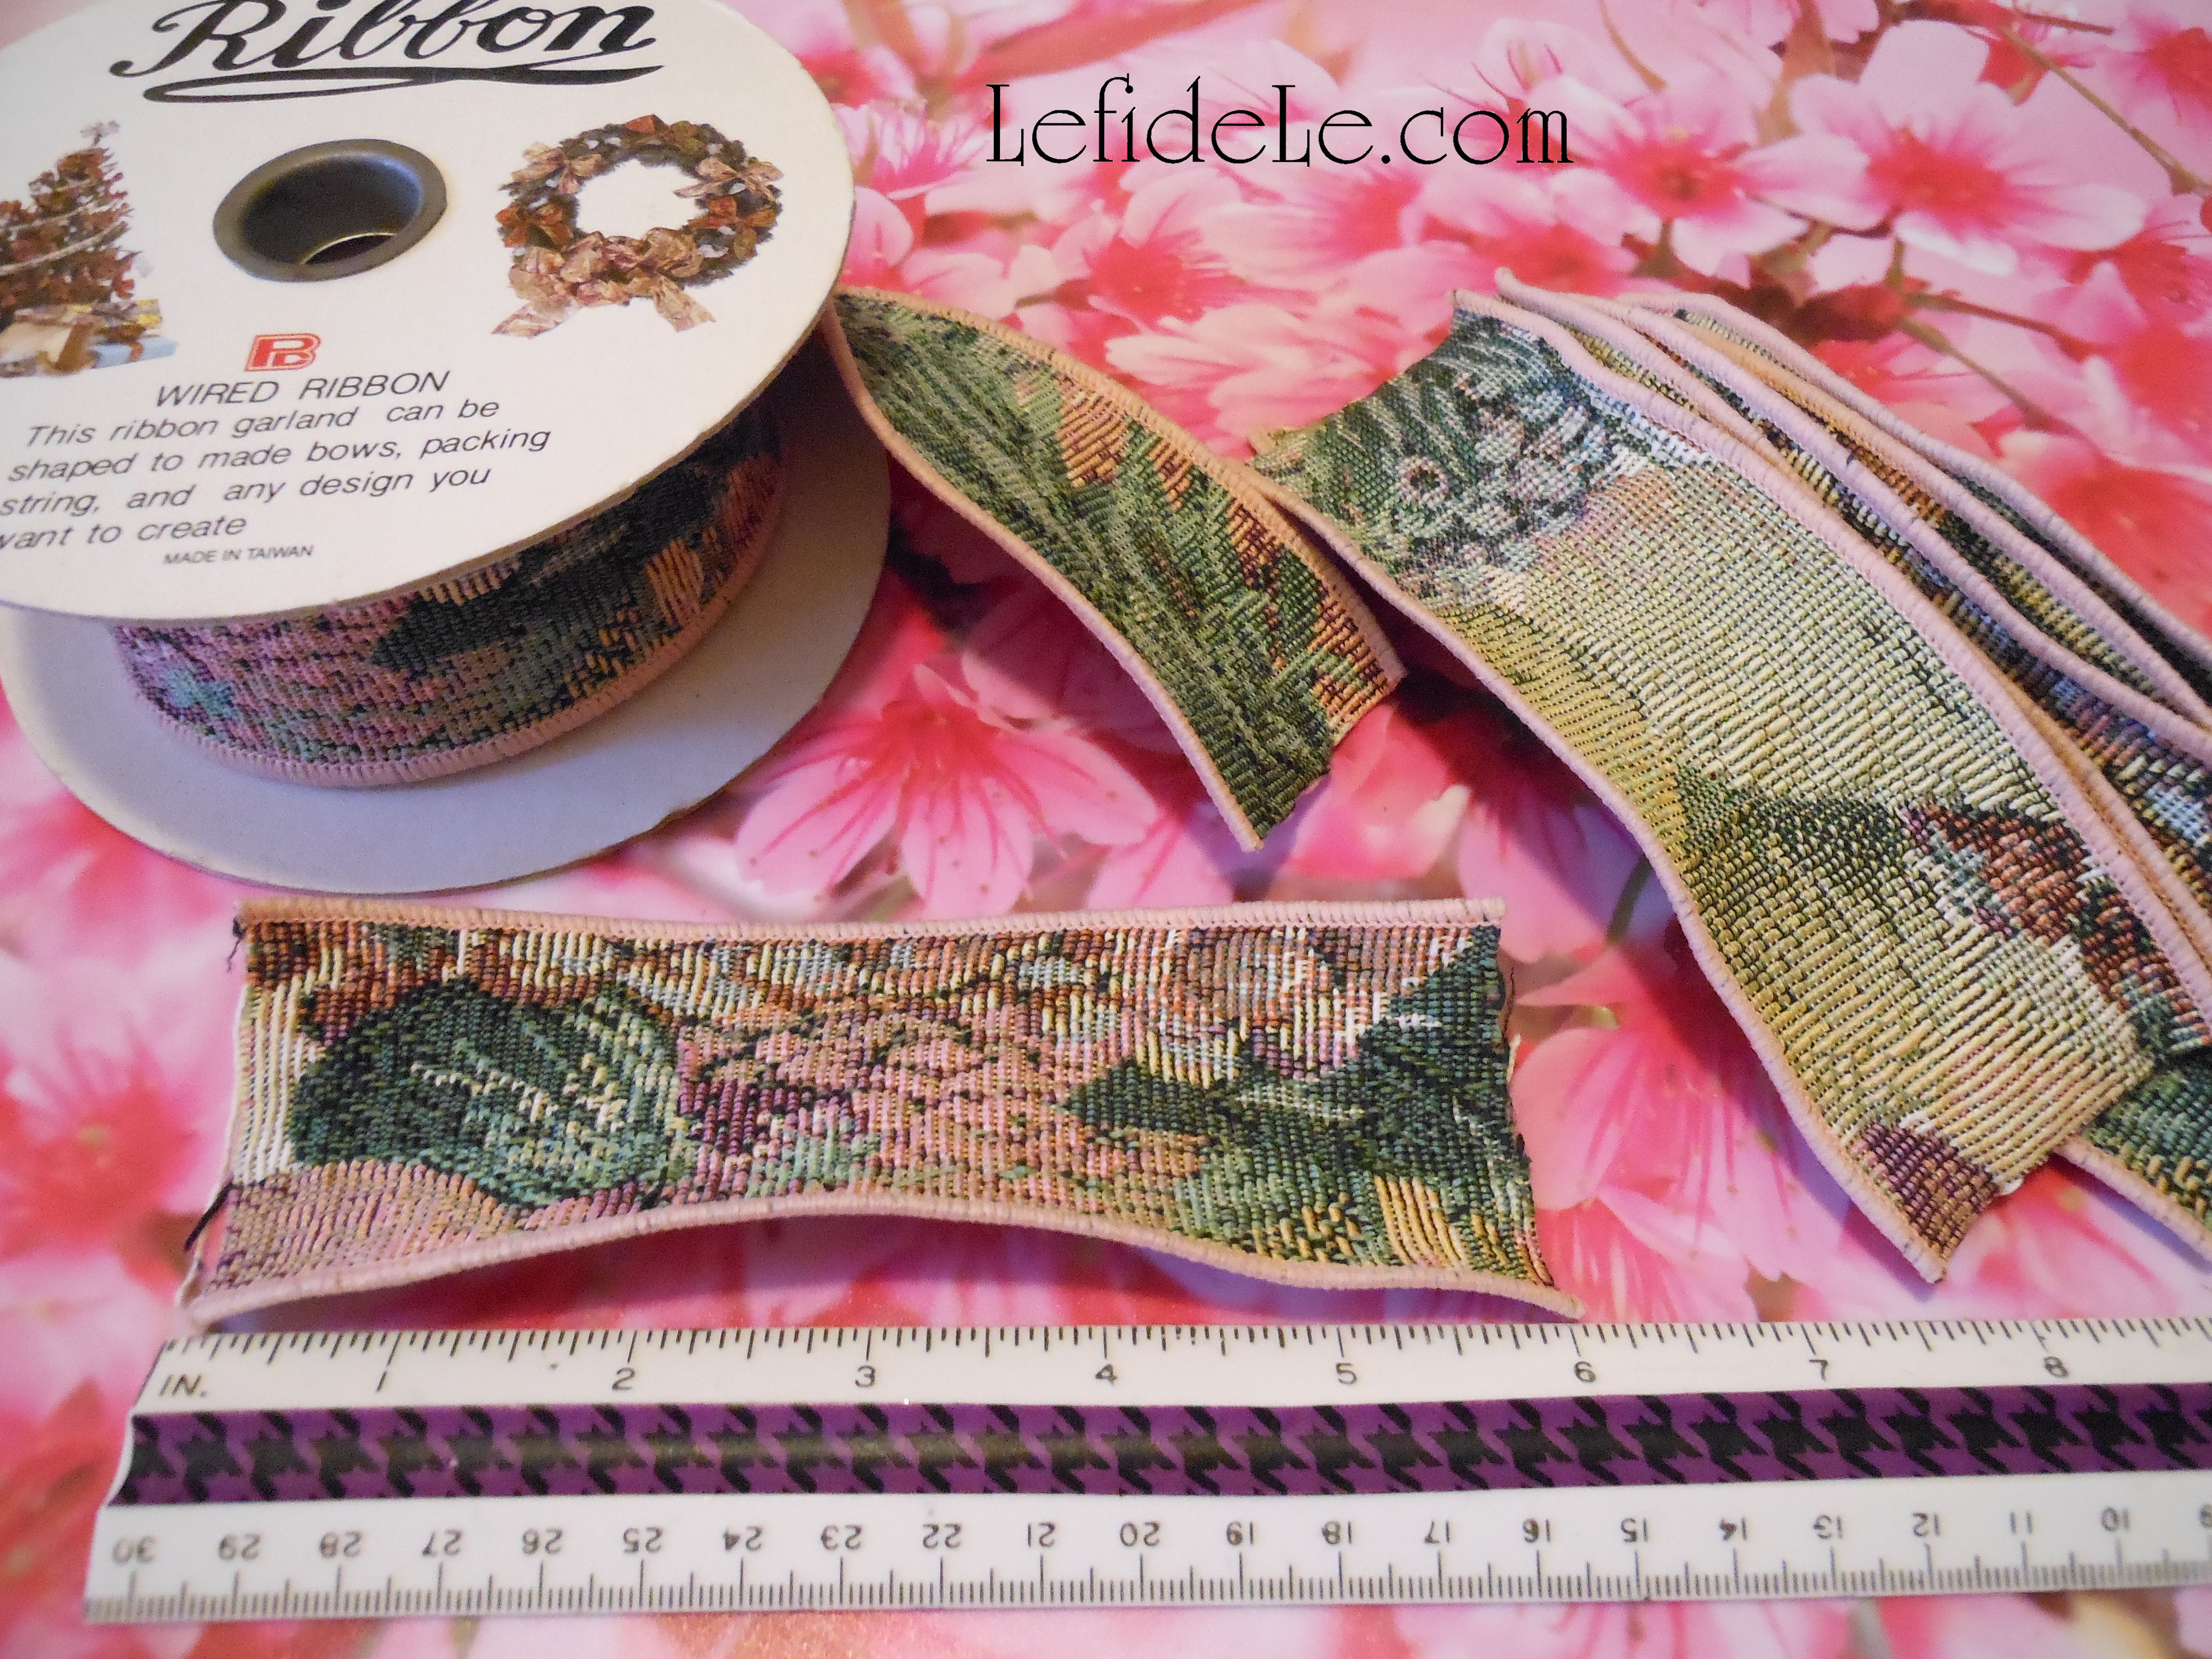
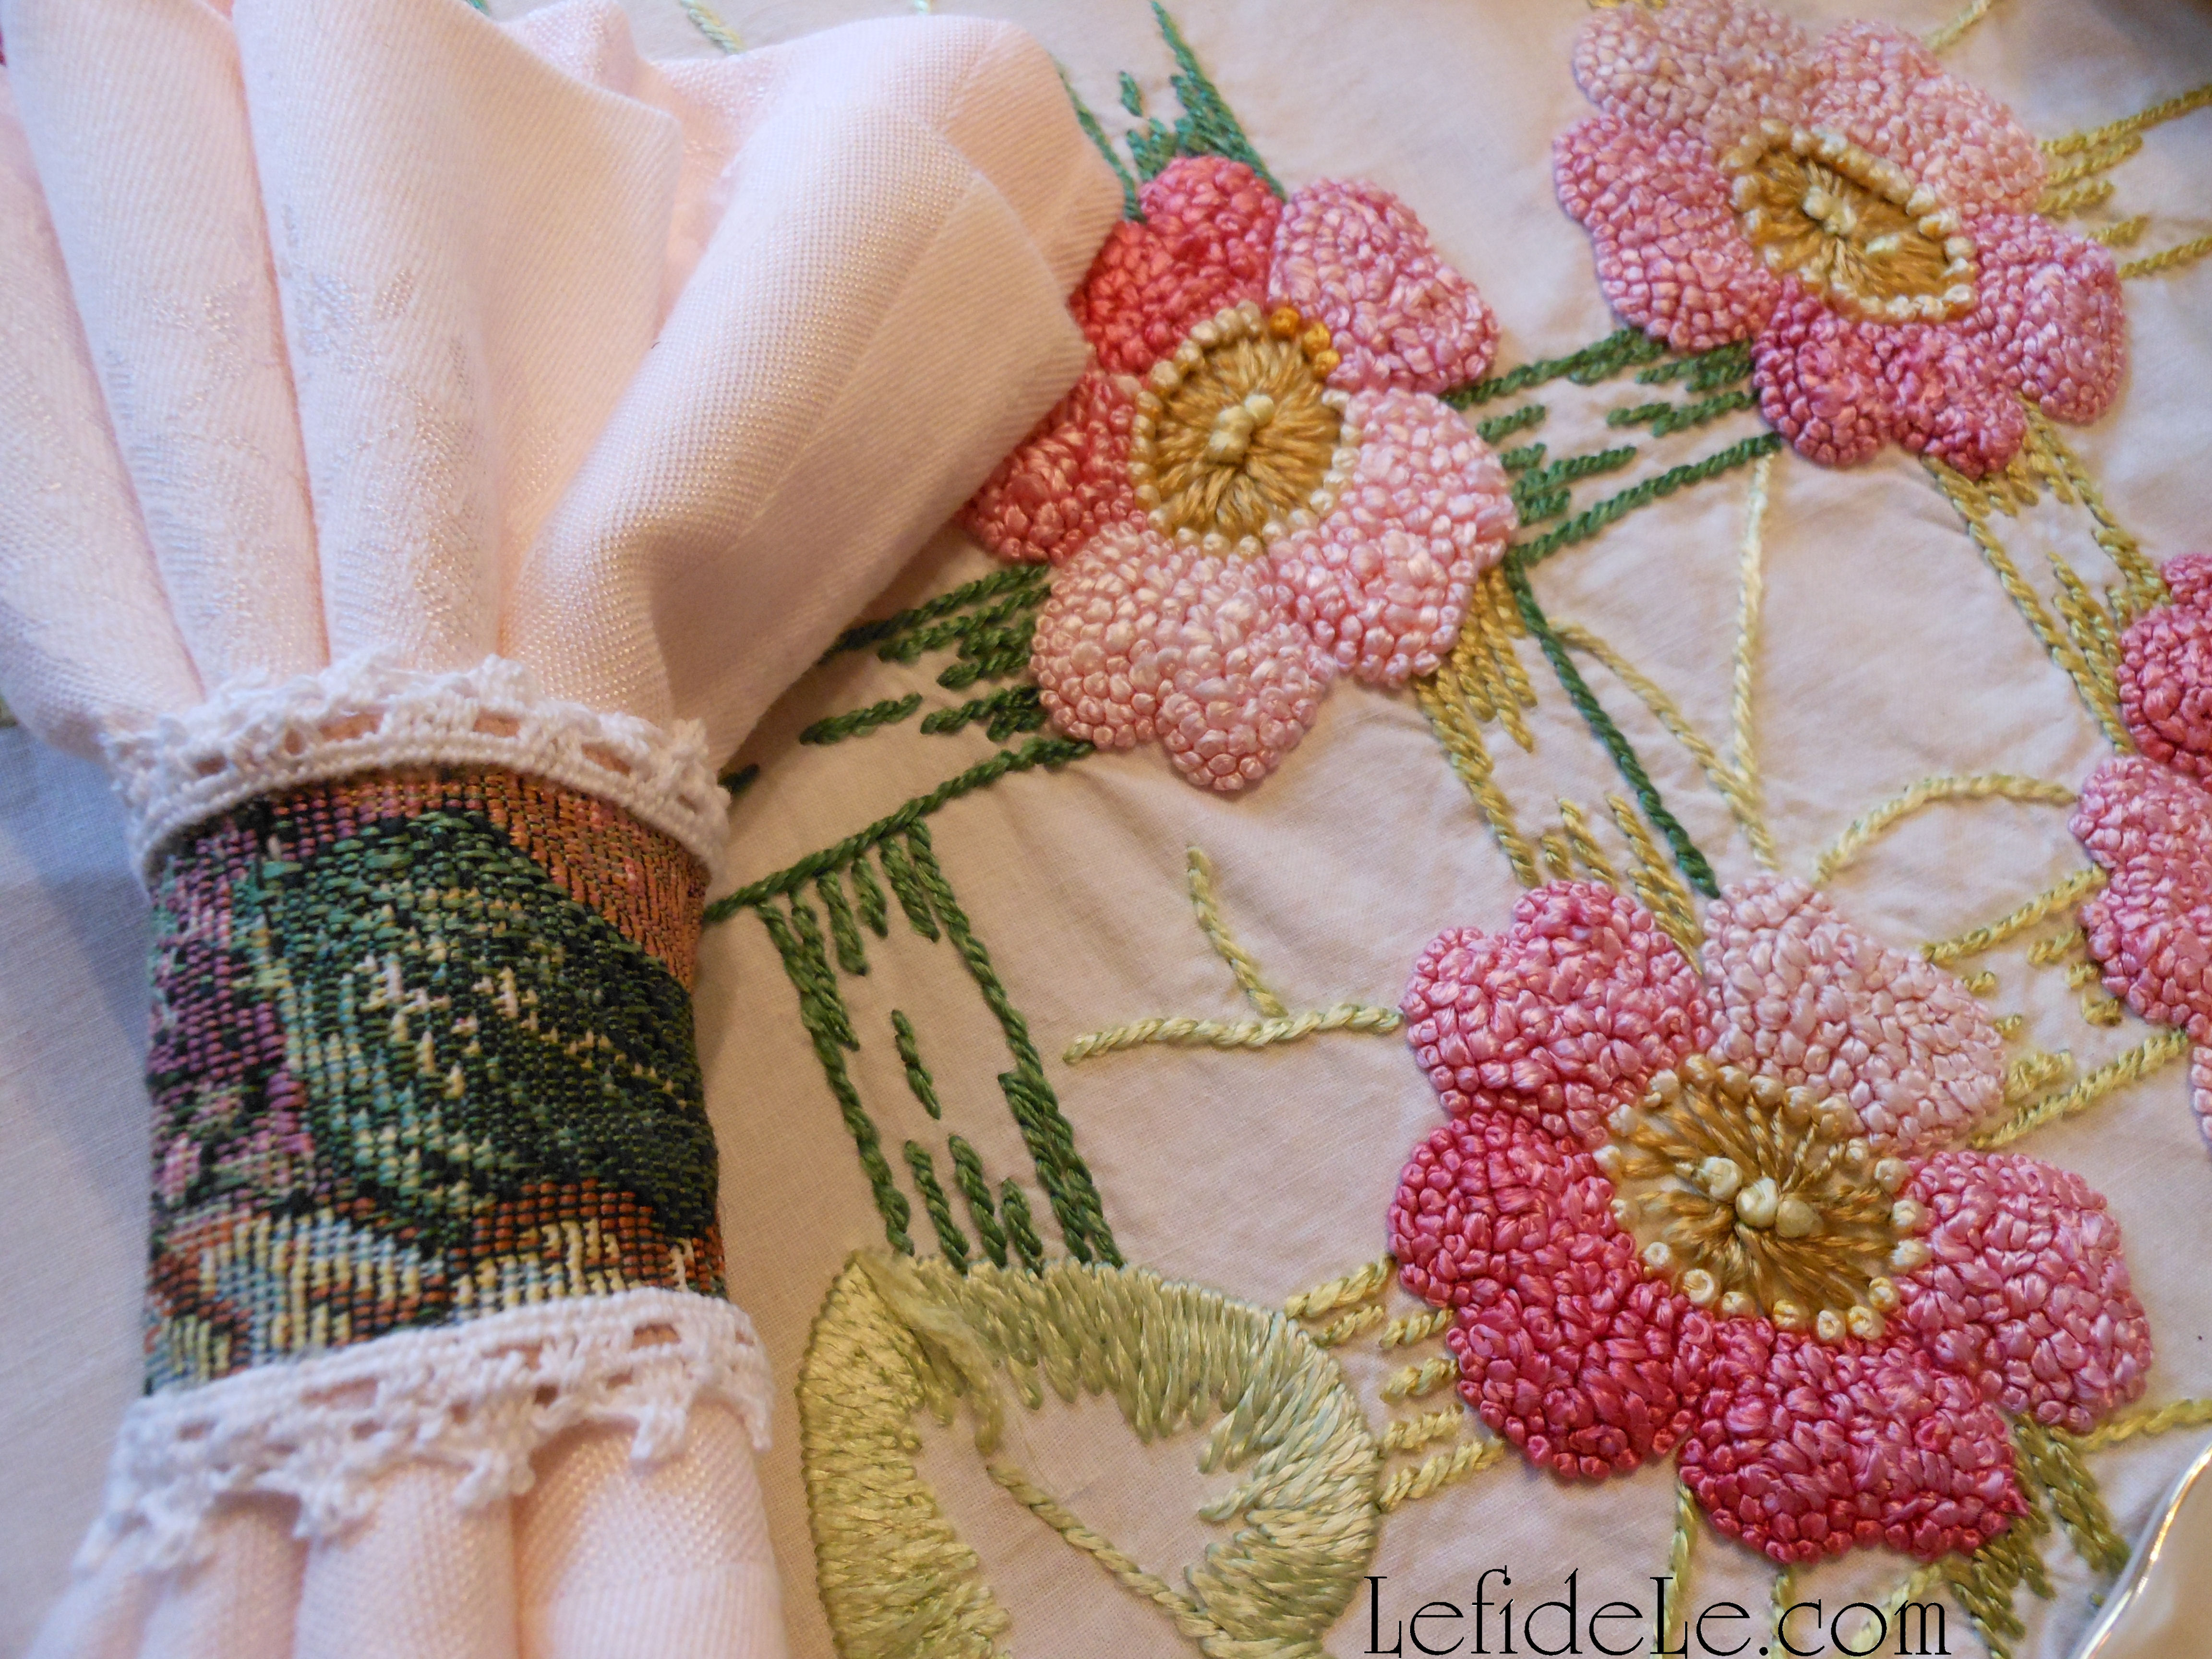
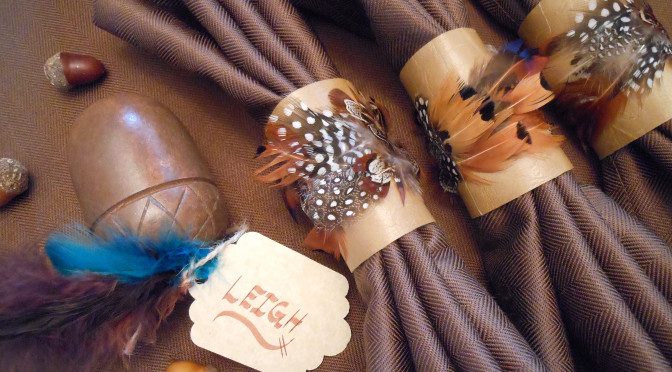
Start with finding a remnant of realistic appearing vegan leather and feather ribbon trim (these are available from Le fidèLe Design’s fabric affiliates whose links appear in the sidebar). Use a pen to mark the underside of the fabric into 6 inch long strips that are about 2¾ inches wide (vary according to the width of your feather ribbon). Cut them carefully to make a smooth self-sealing edge.

006Leigh

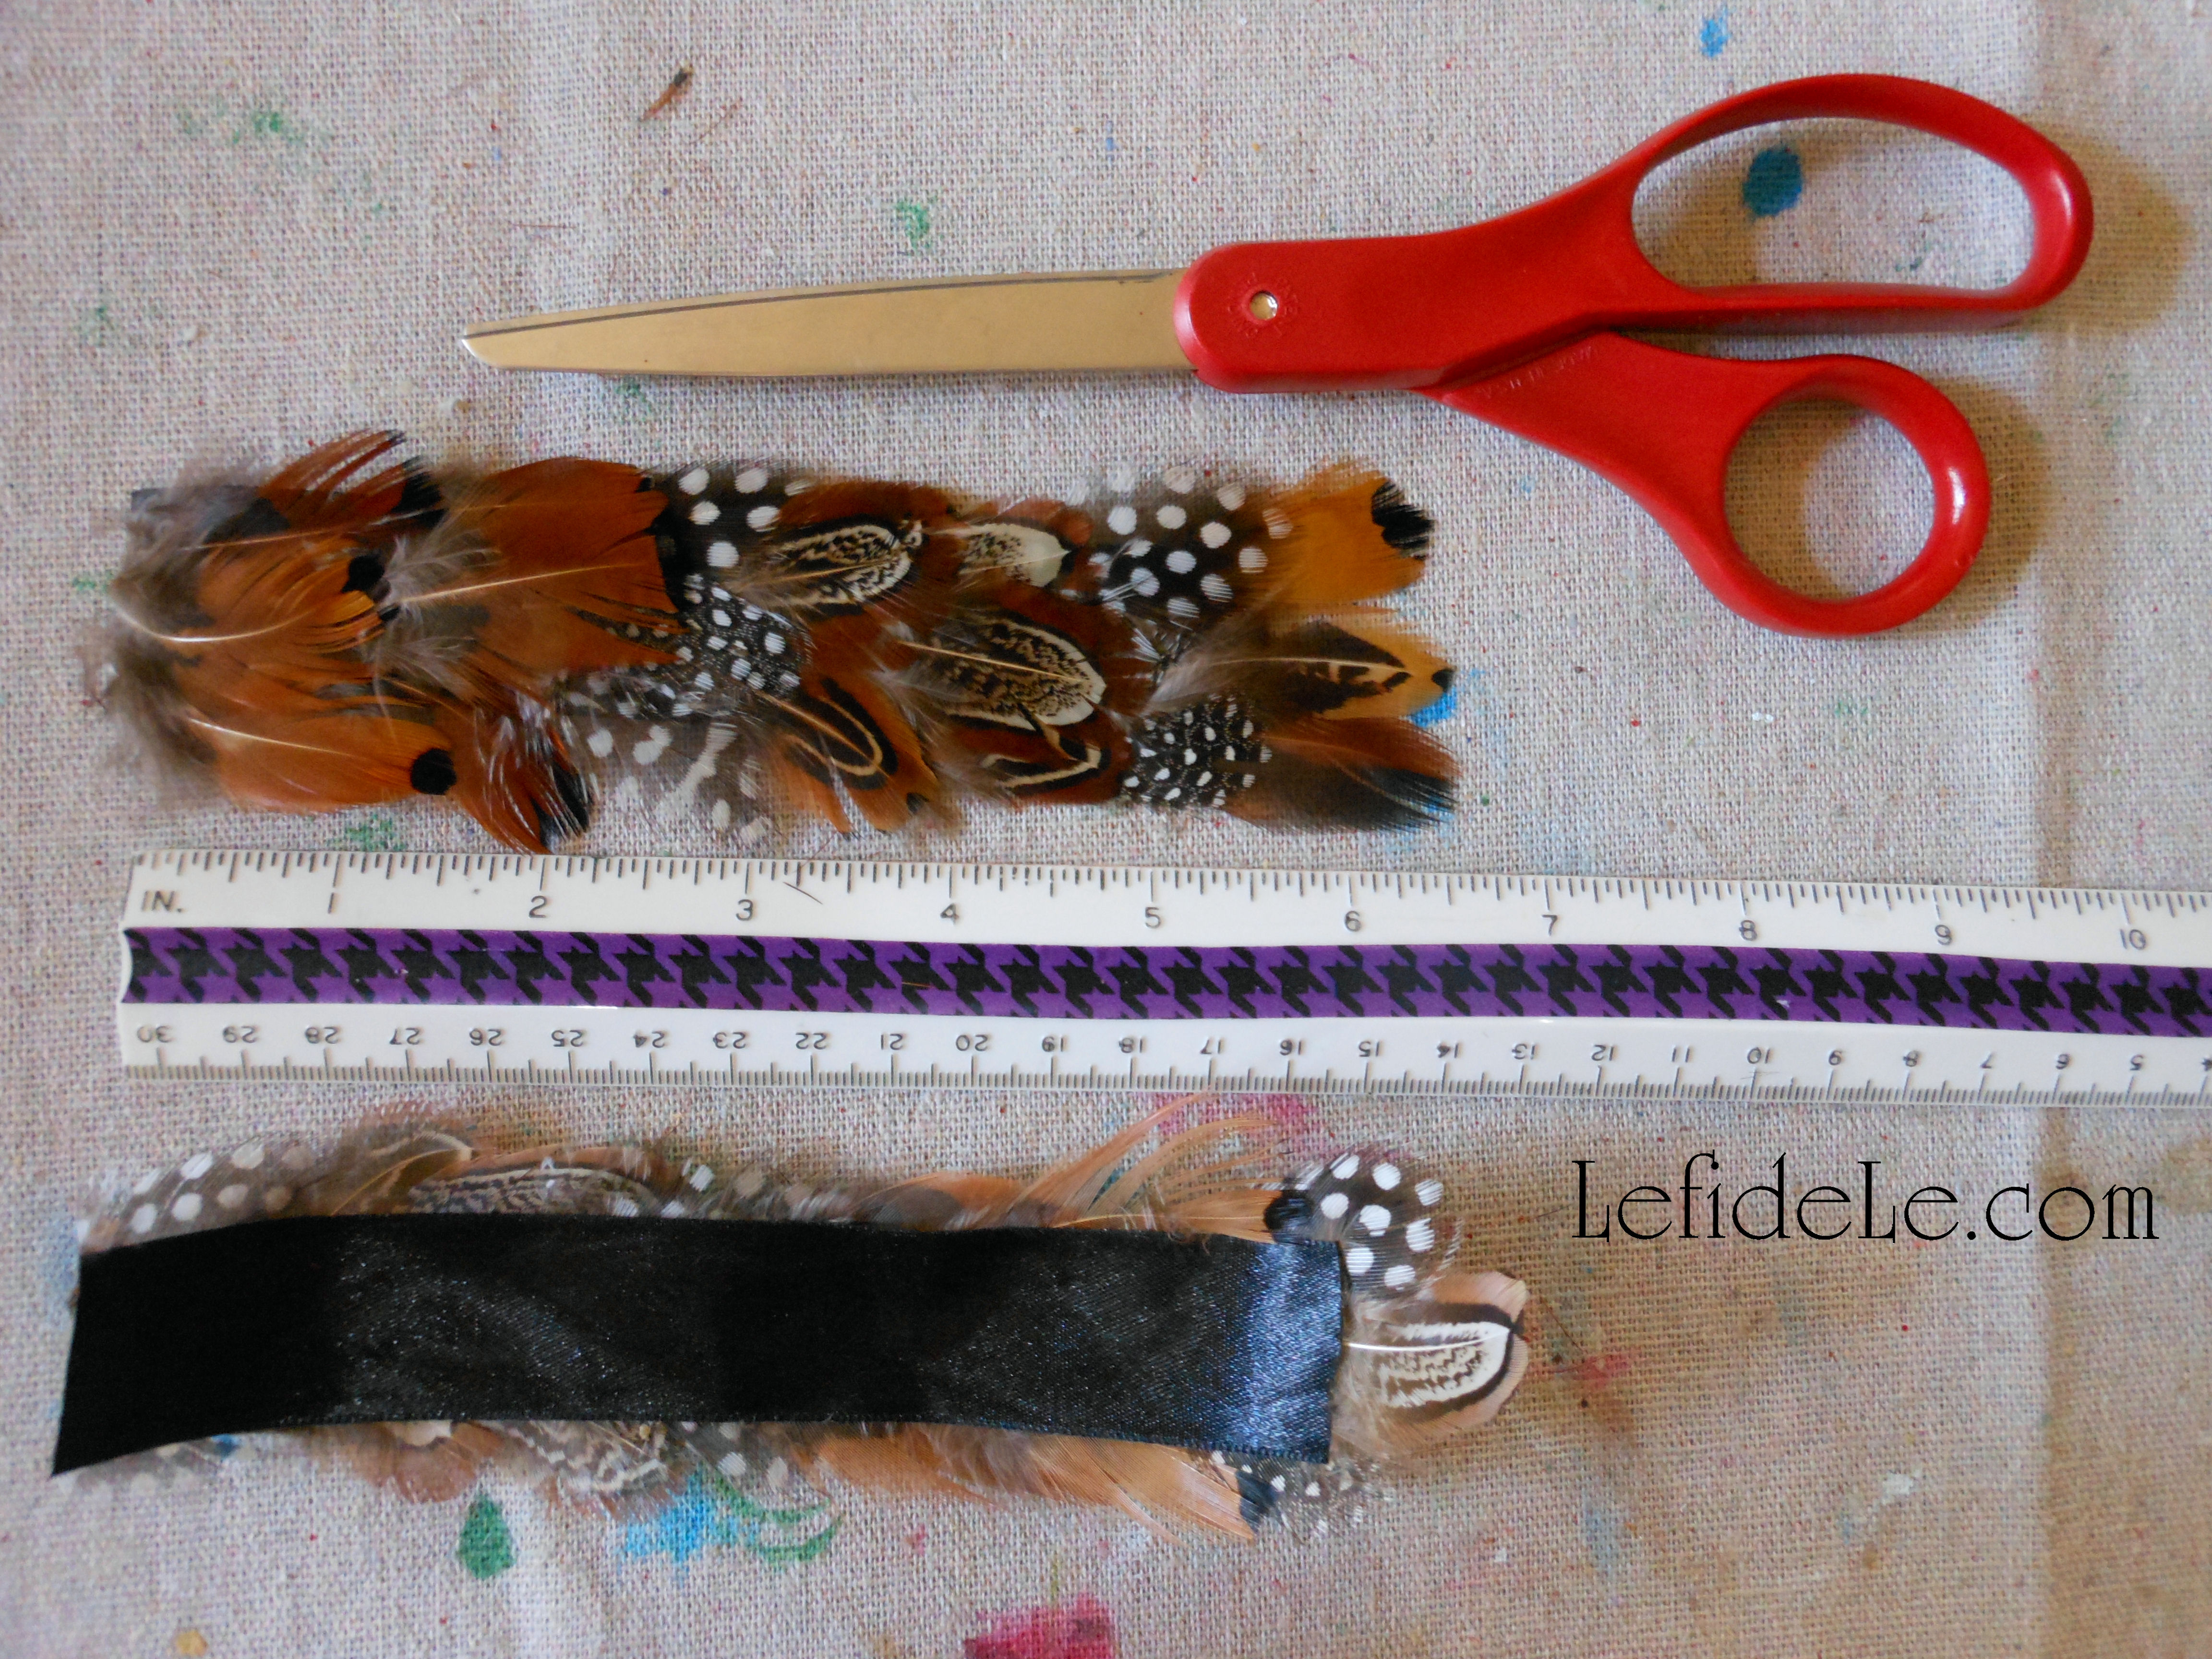
Cut the feather ribbon into 6 inch strips as well. (If you’re feeling super-crafty… you make this from scratch by gluing individual feathers onto a strip of ribbon, overlapping them as you go.)

007Leigh

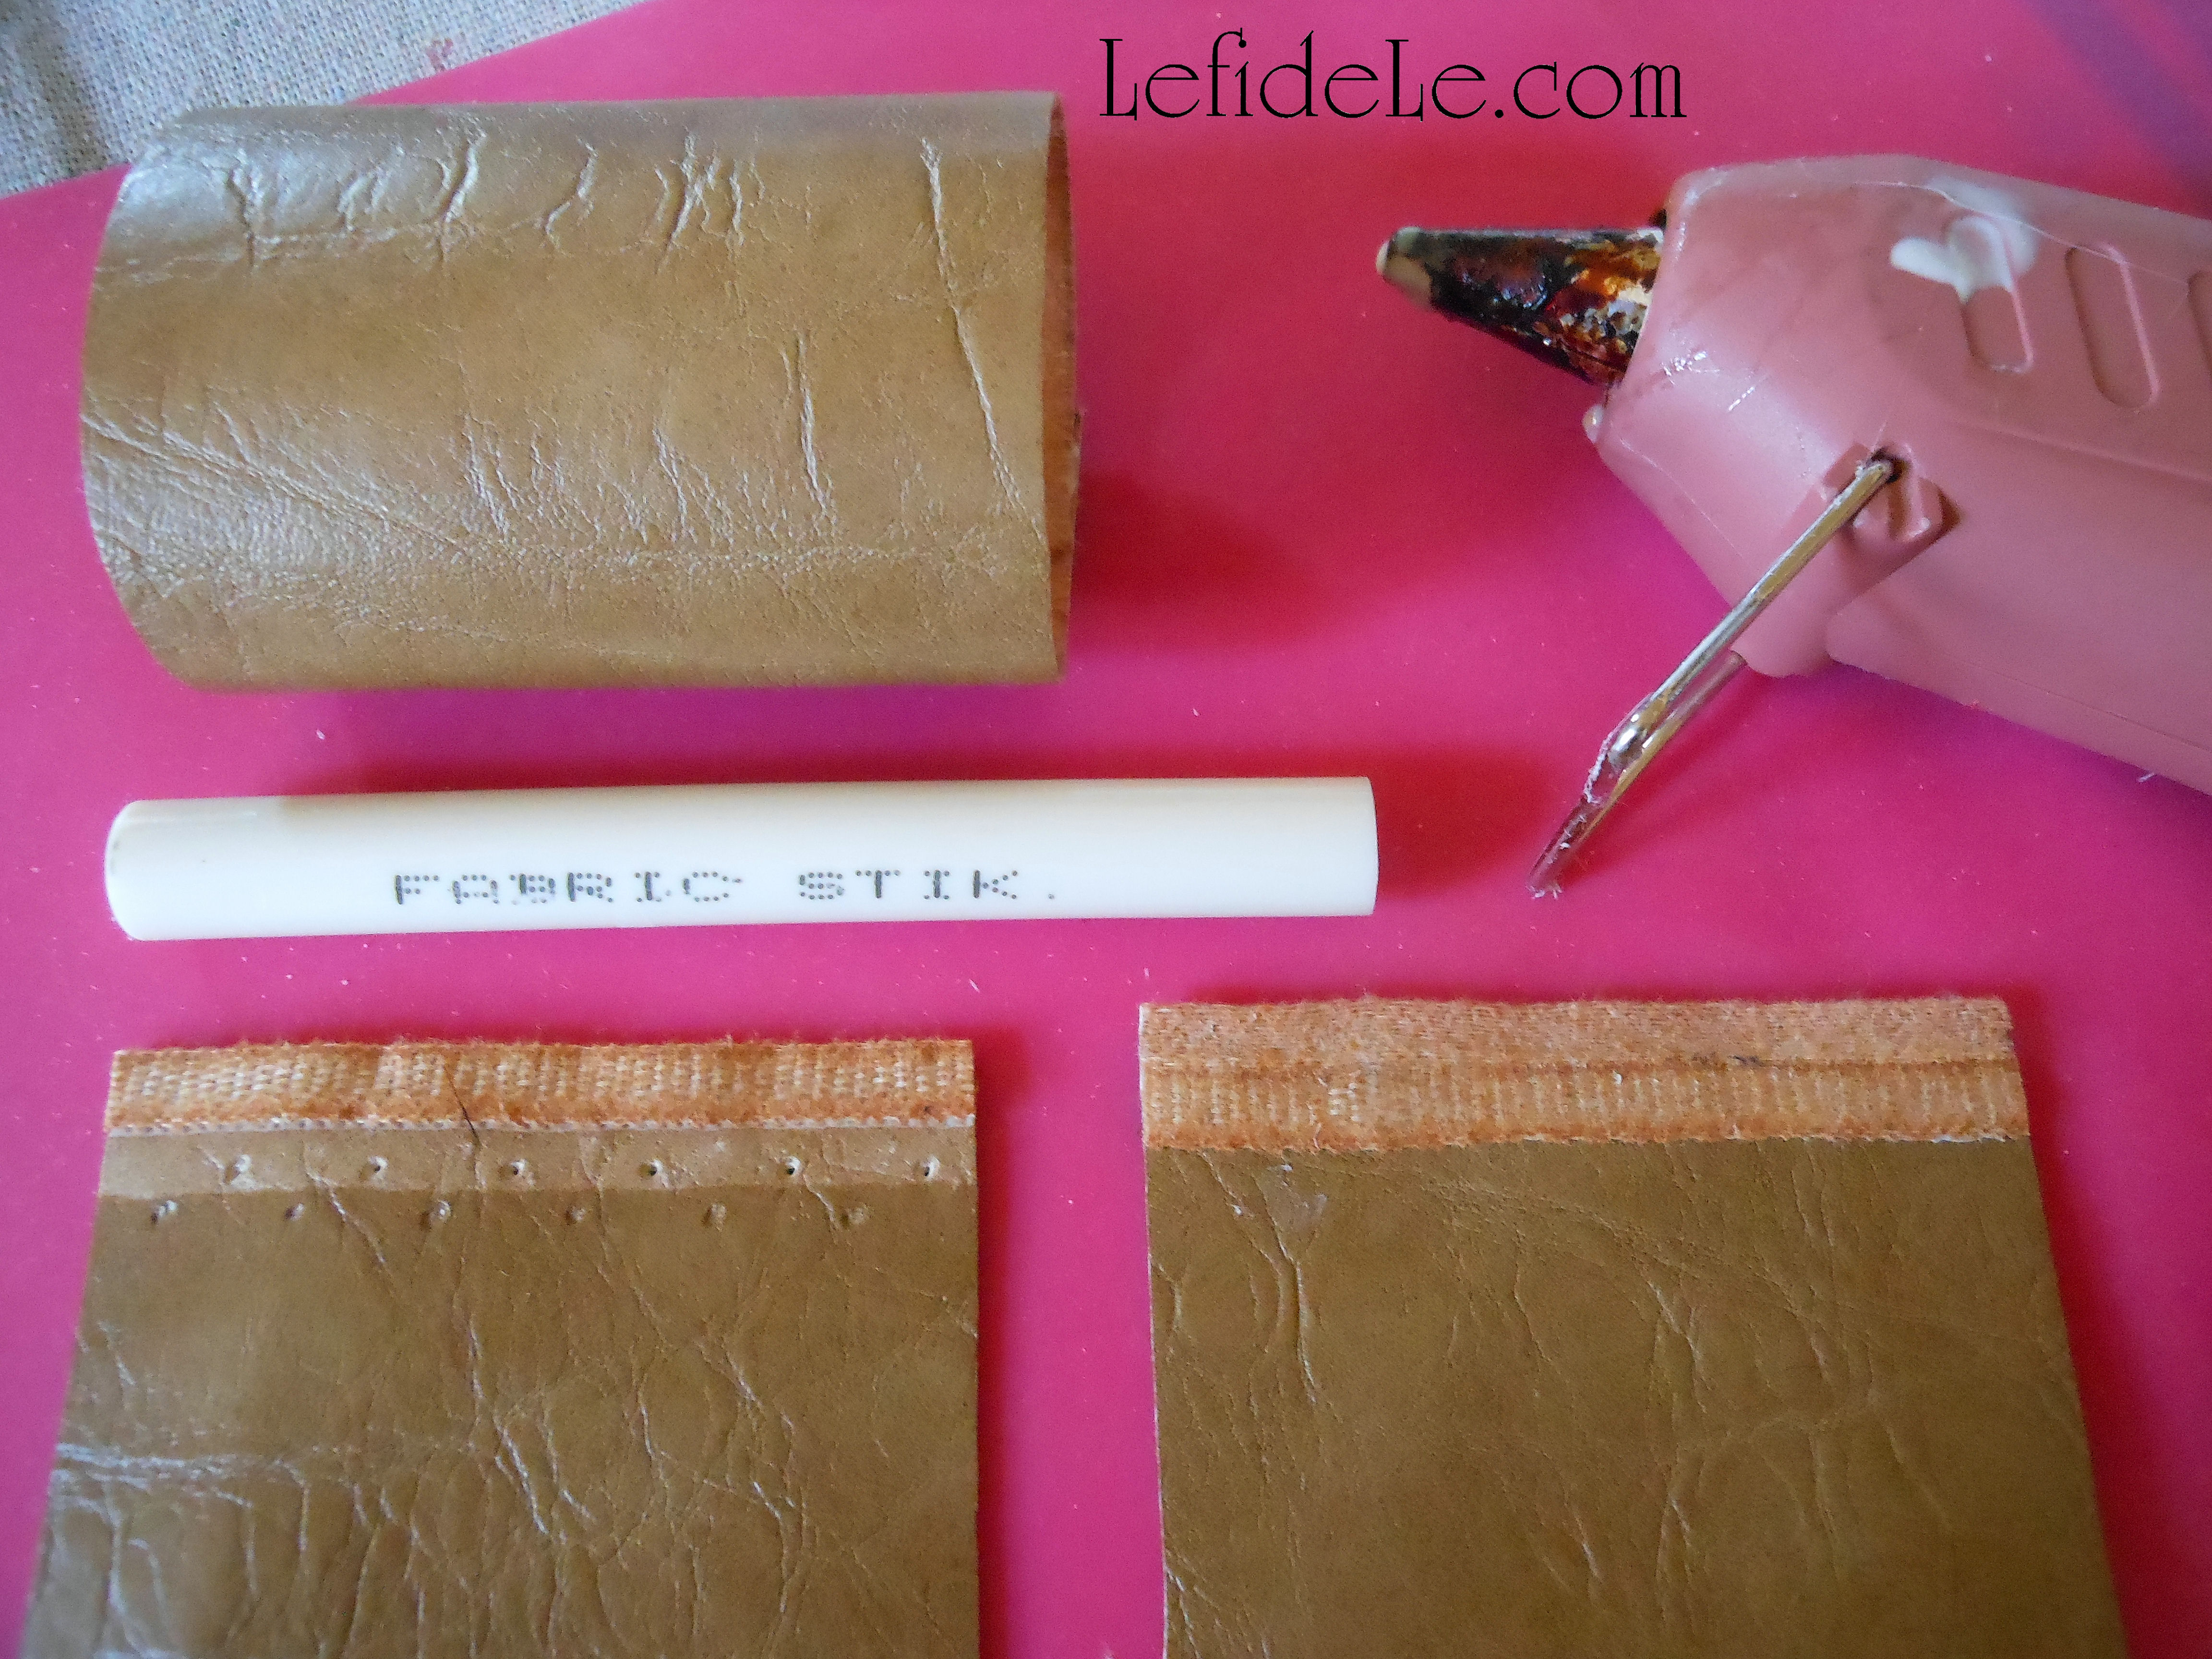
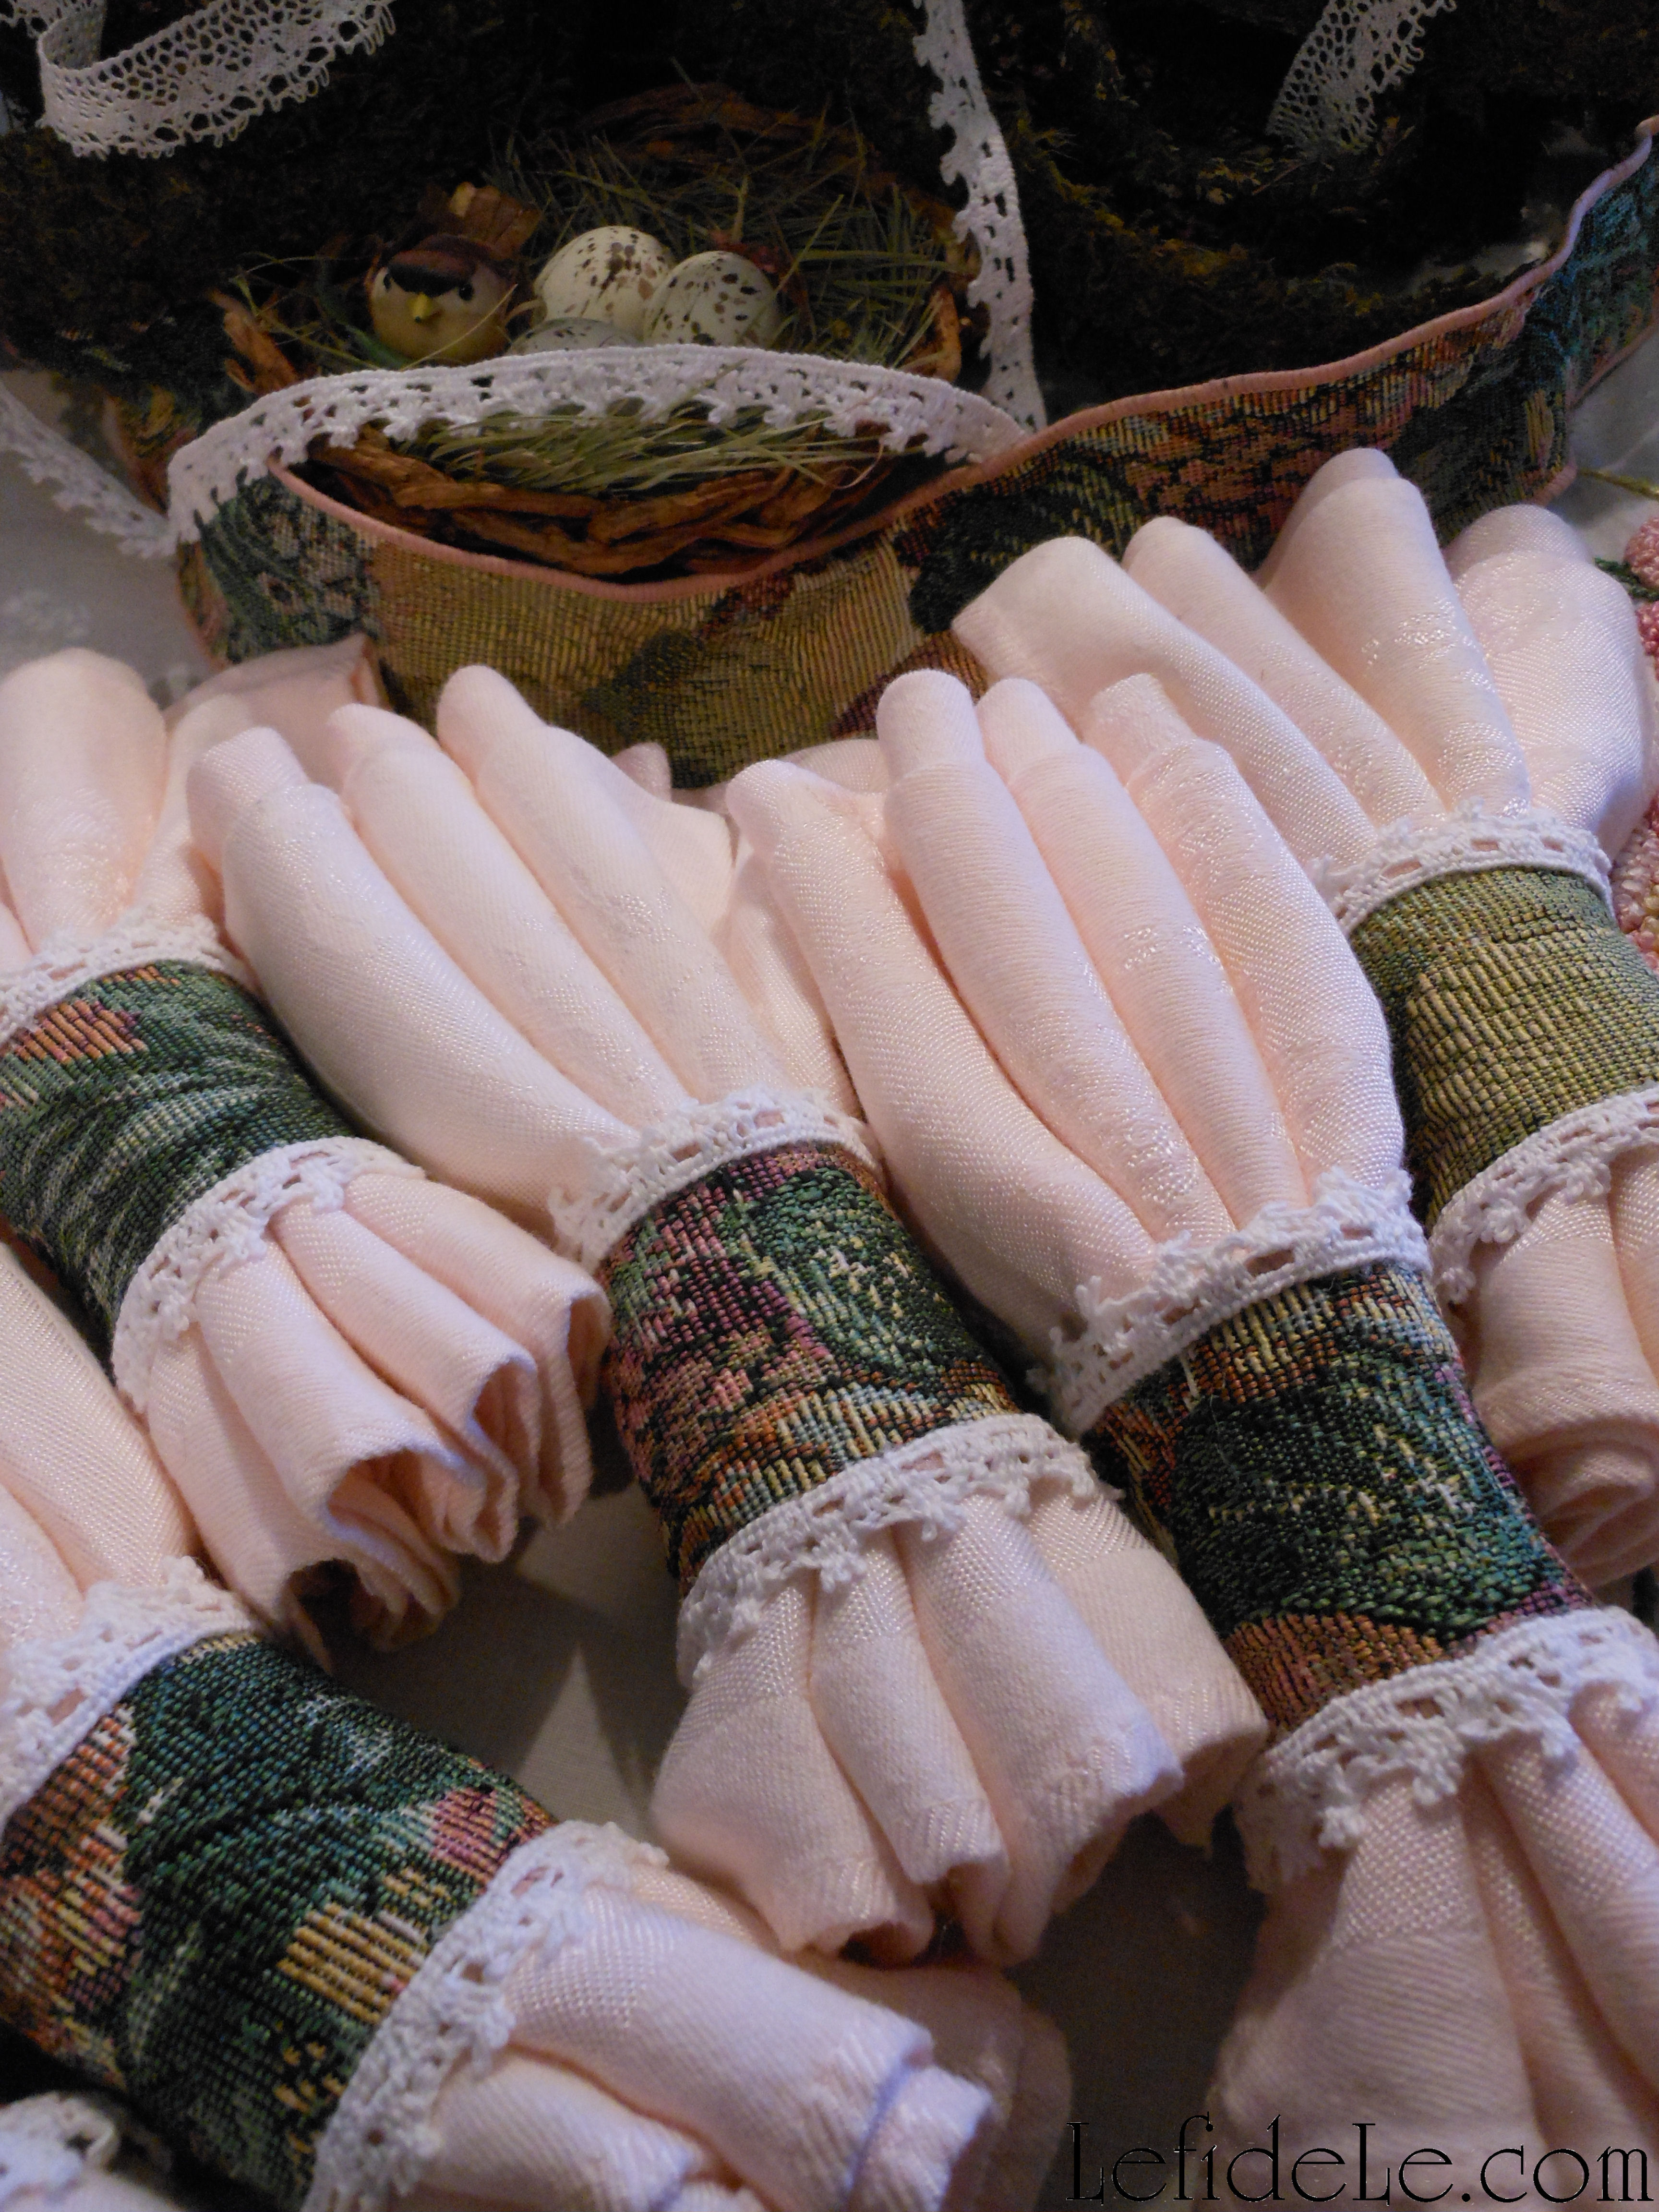
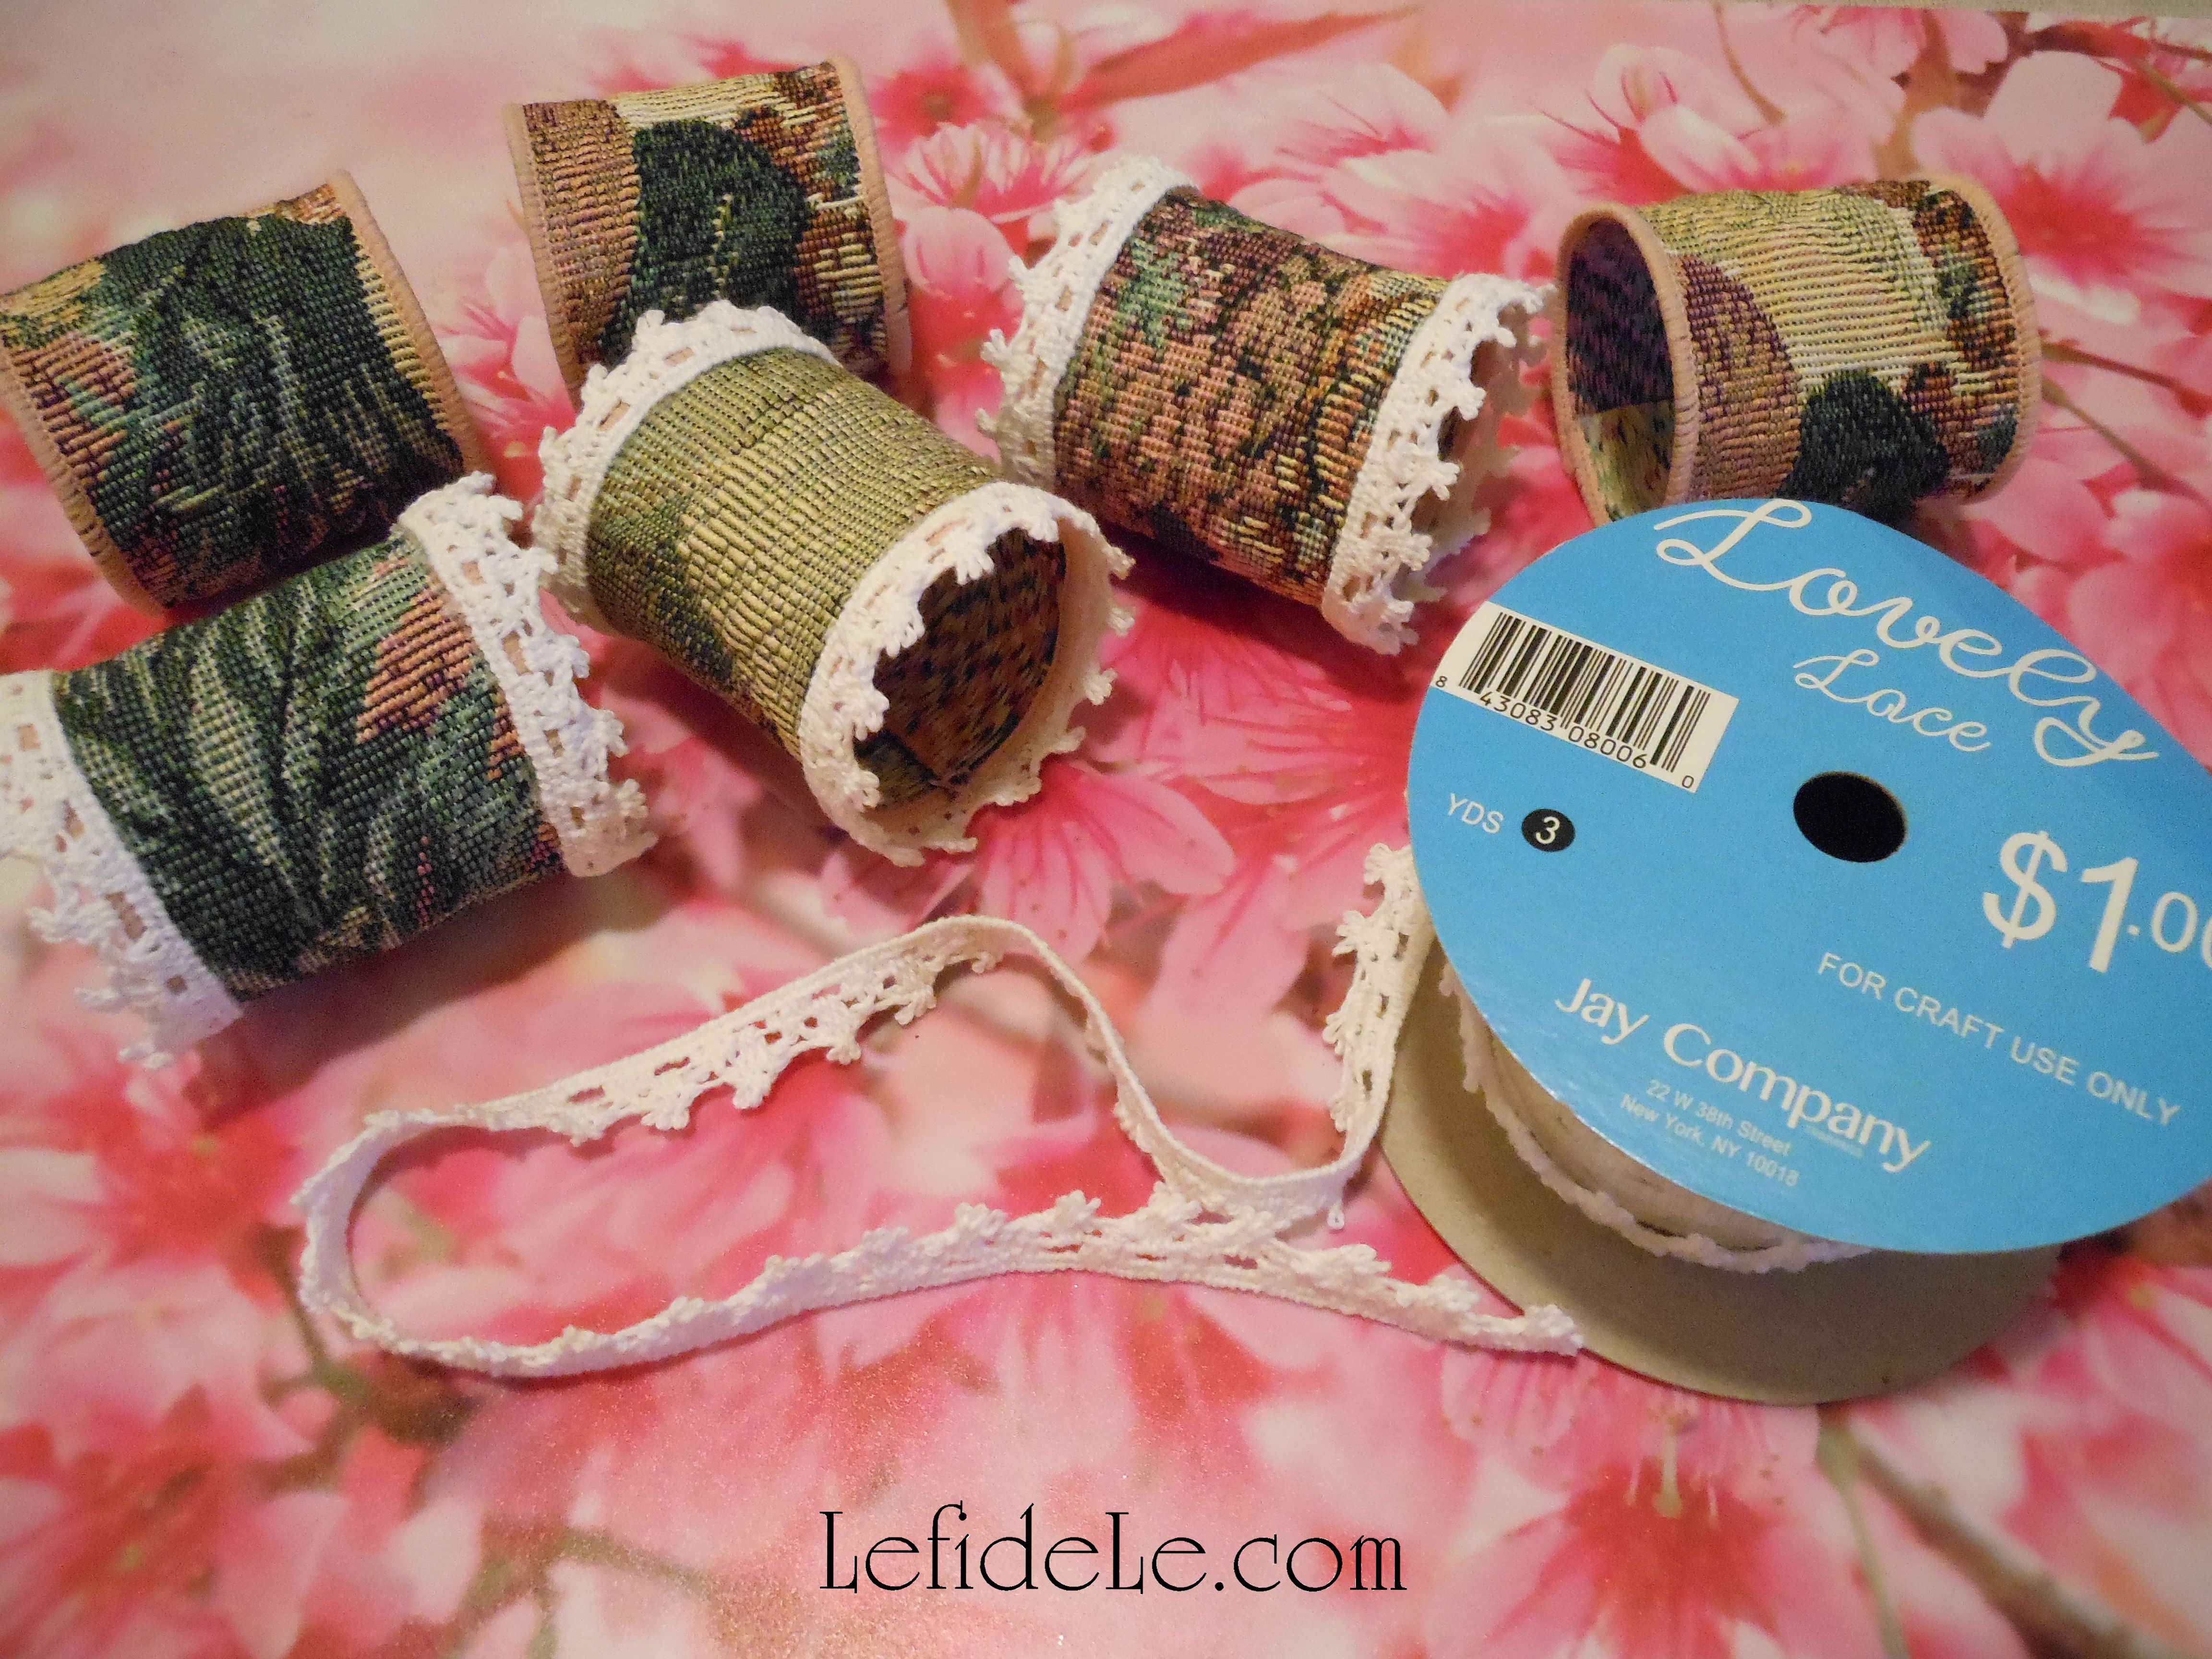
Use fabric hot glue to adhere one end of the vegan leather to the other end, forming a ring.

013Leigh

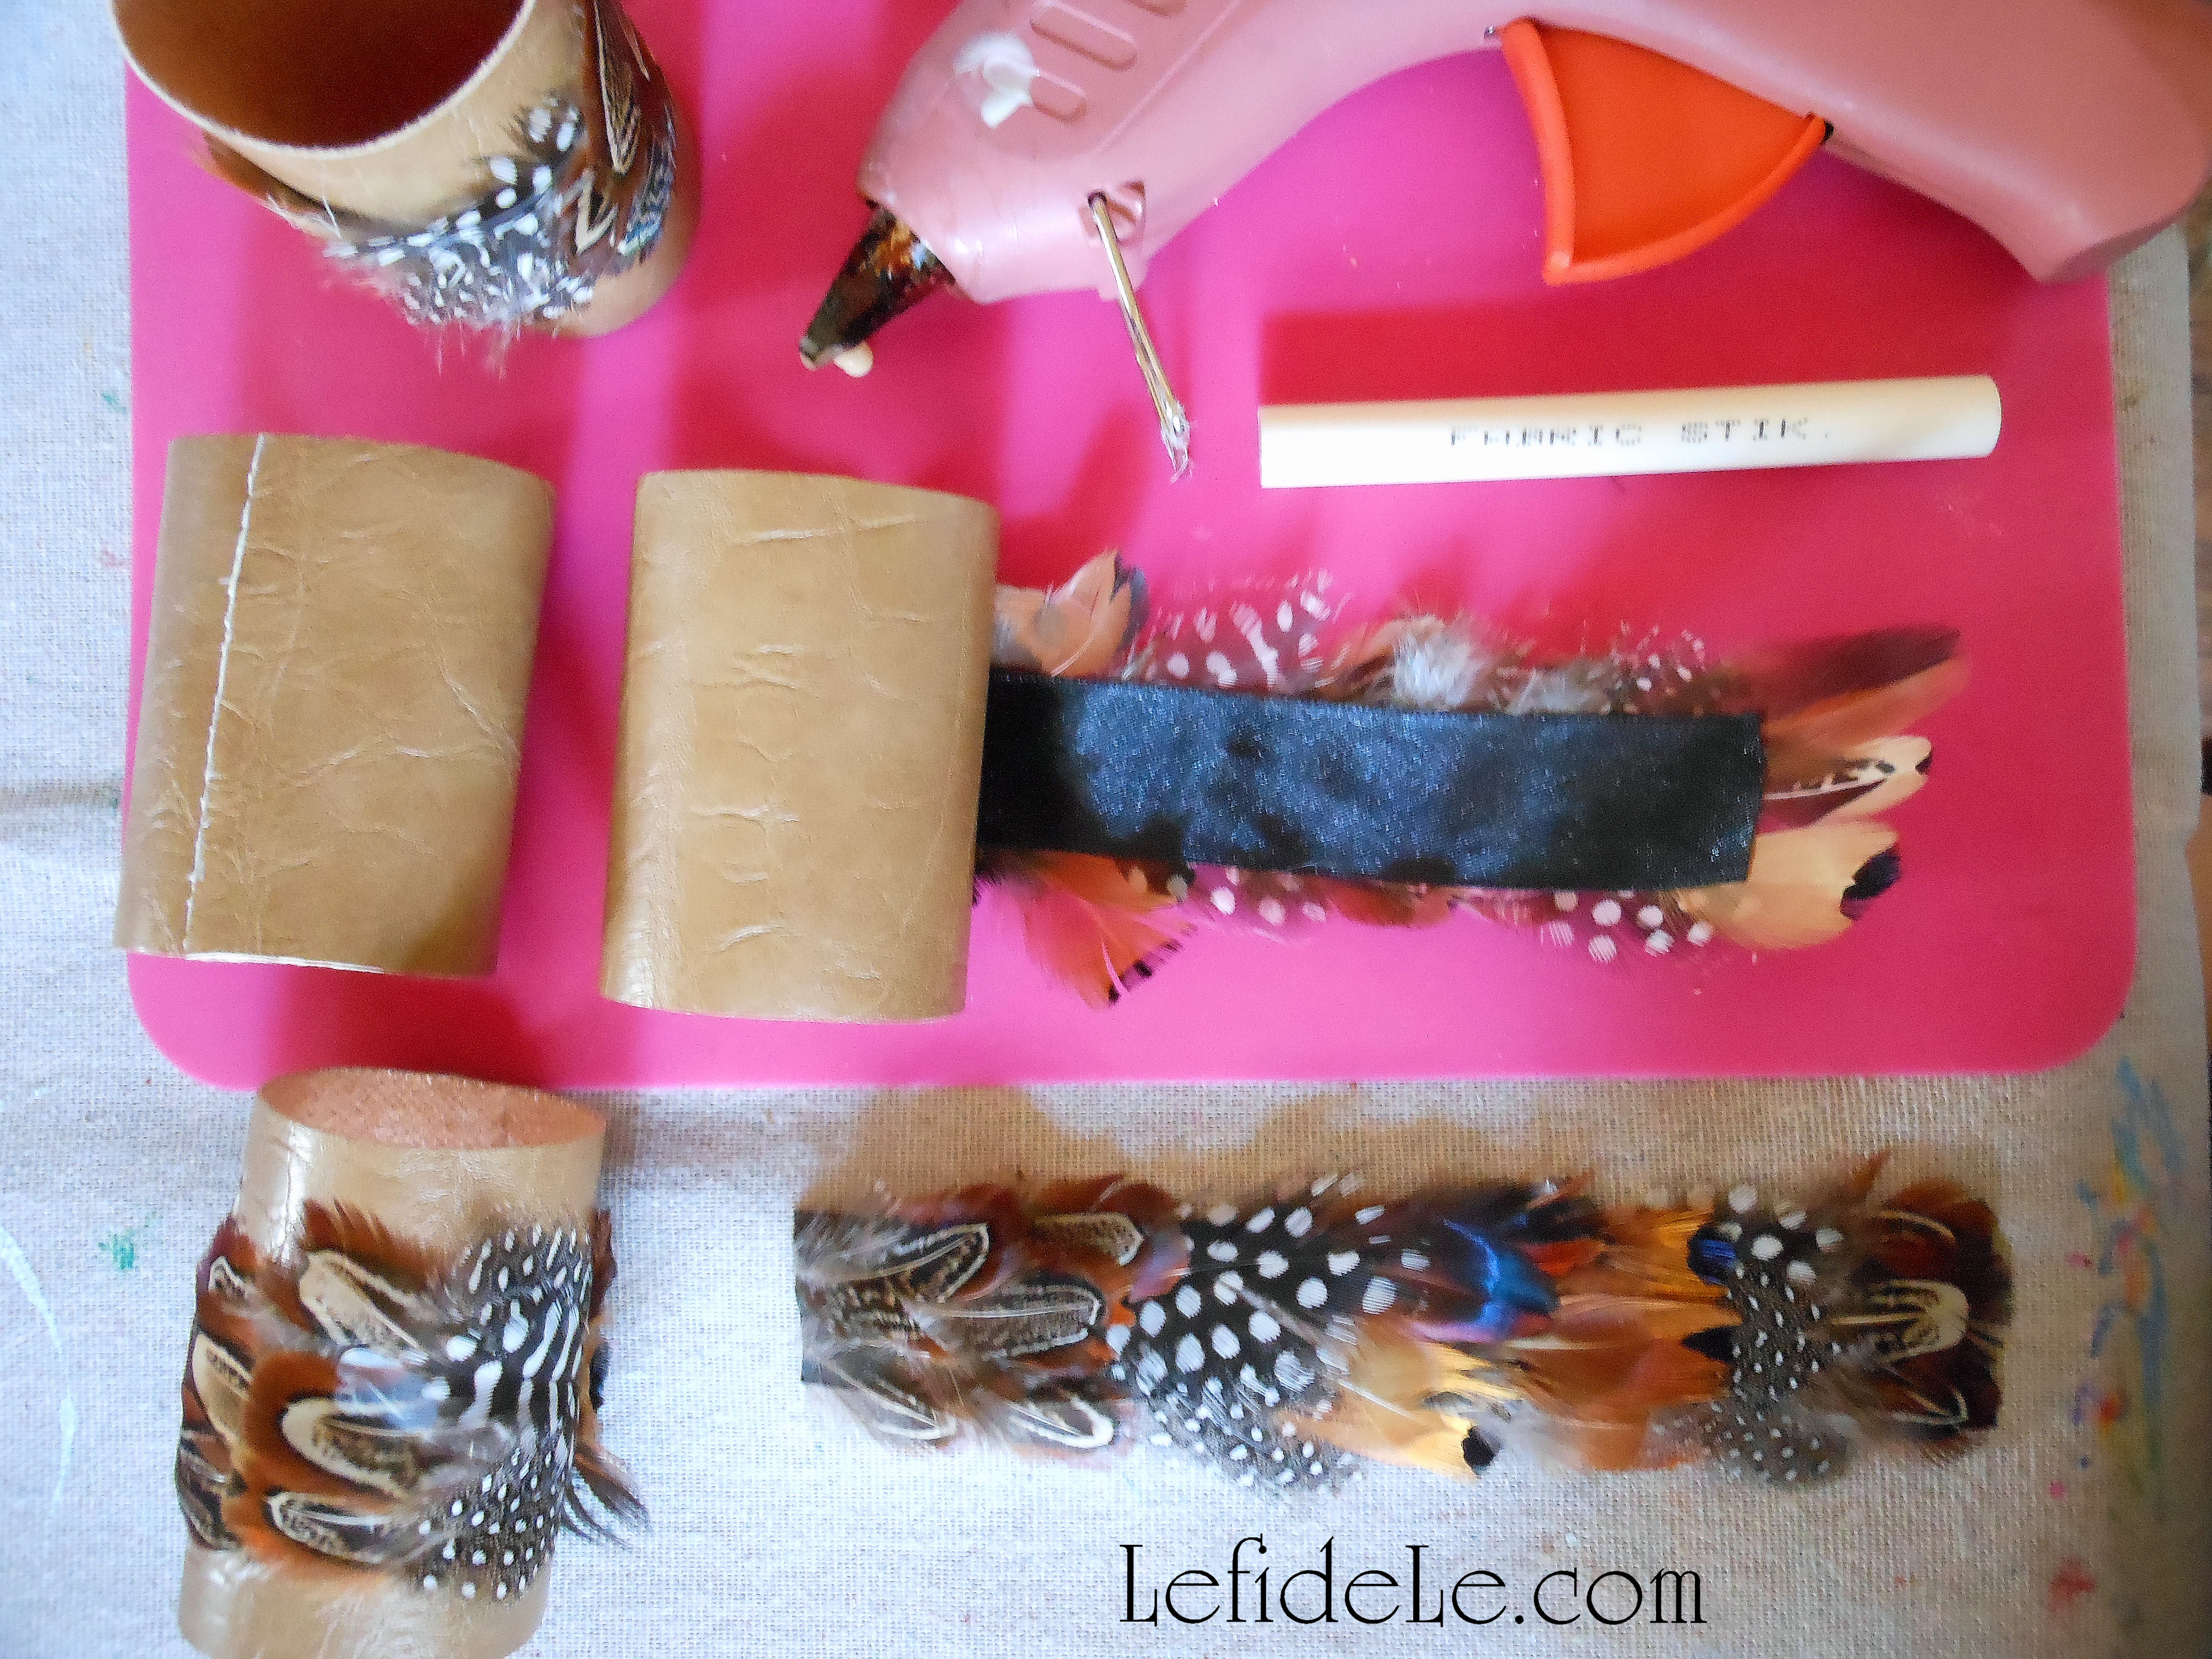
Lastly, glue a feather ribbon strip around the middle section of the ring you just made. (How easy was that?!)

034Leigh

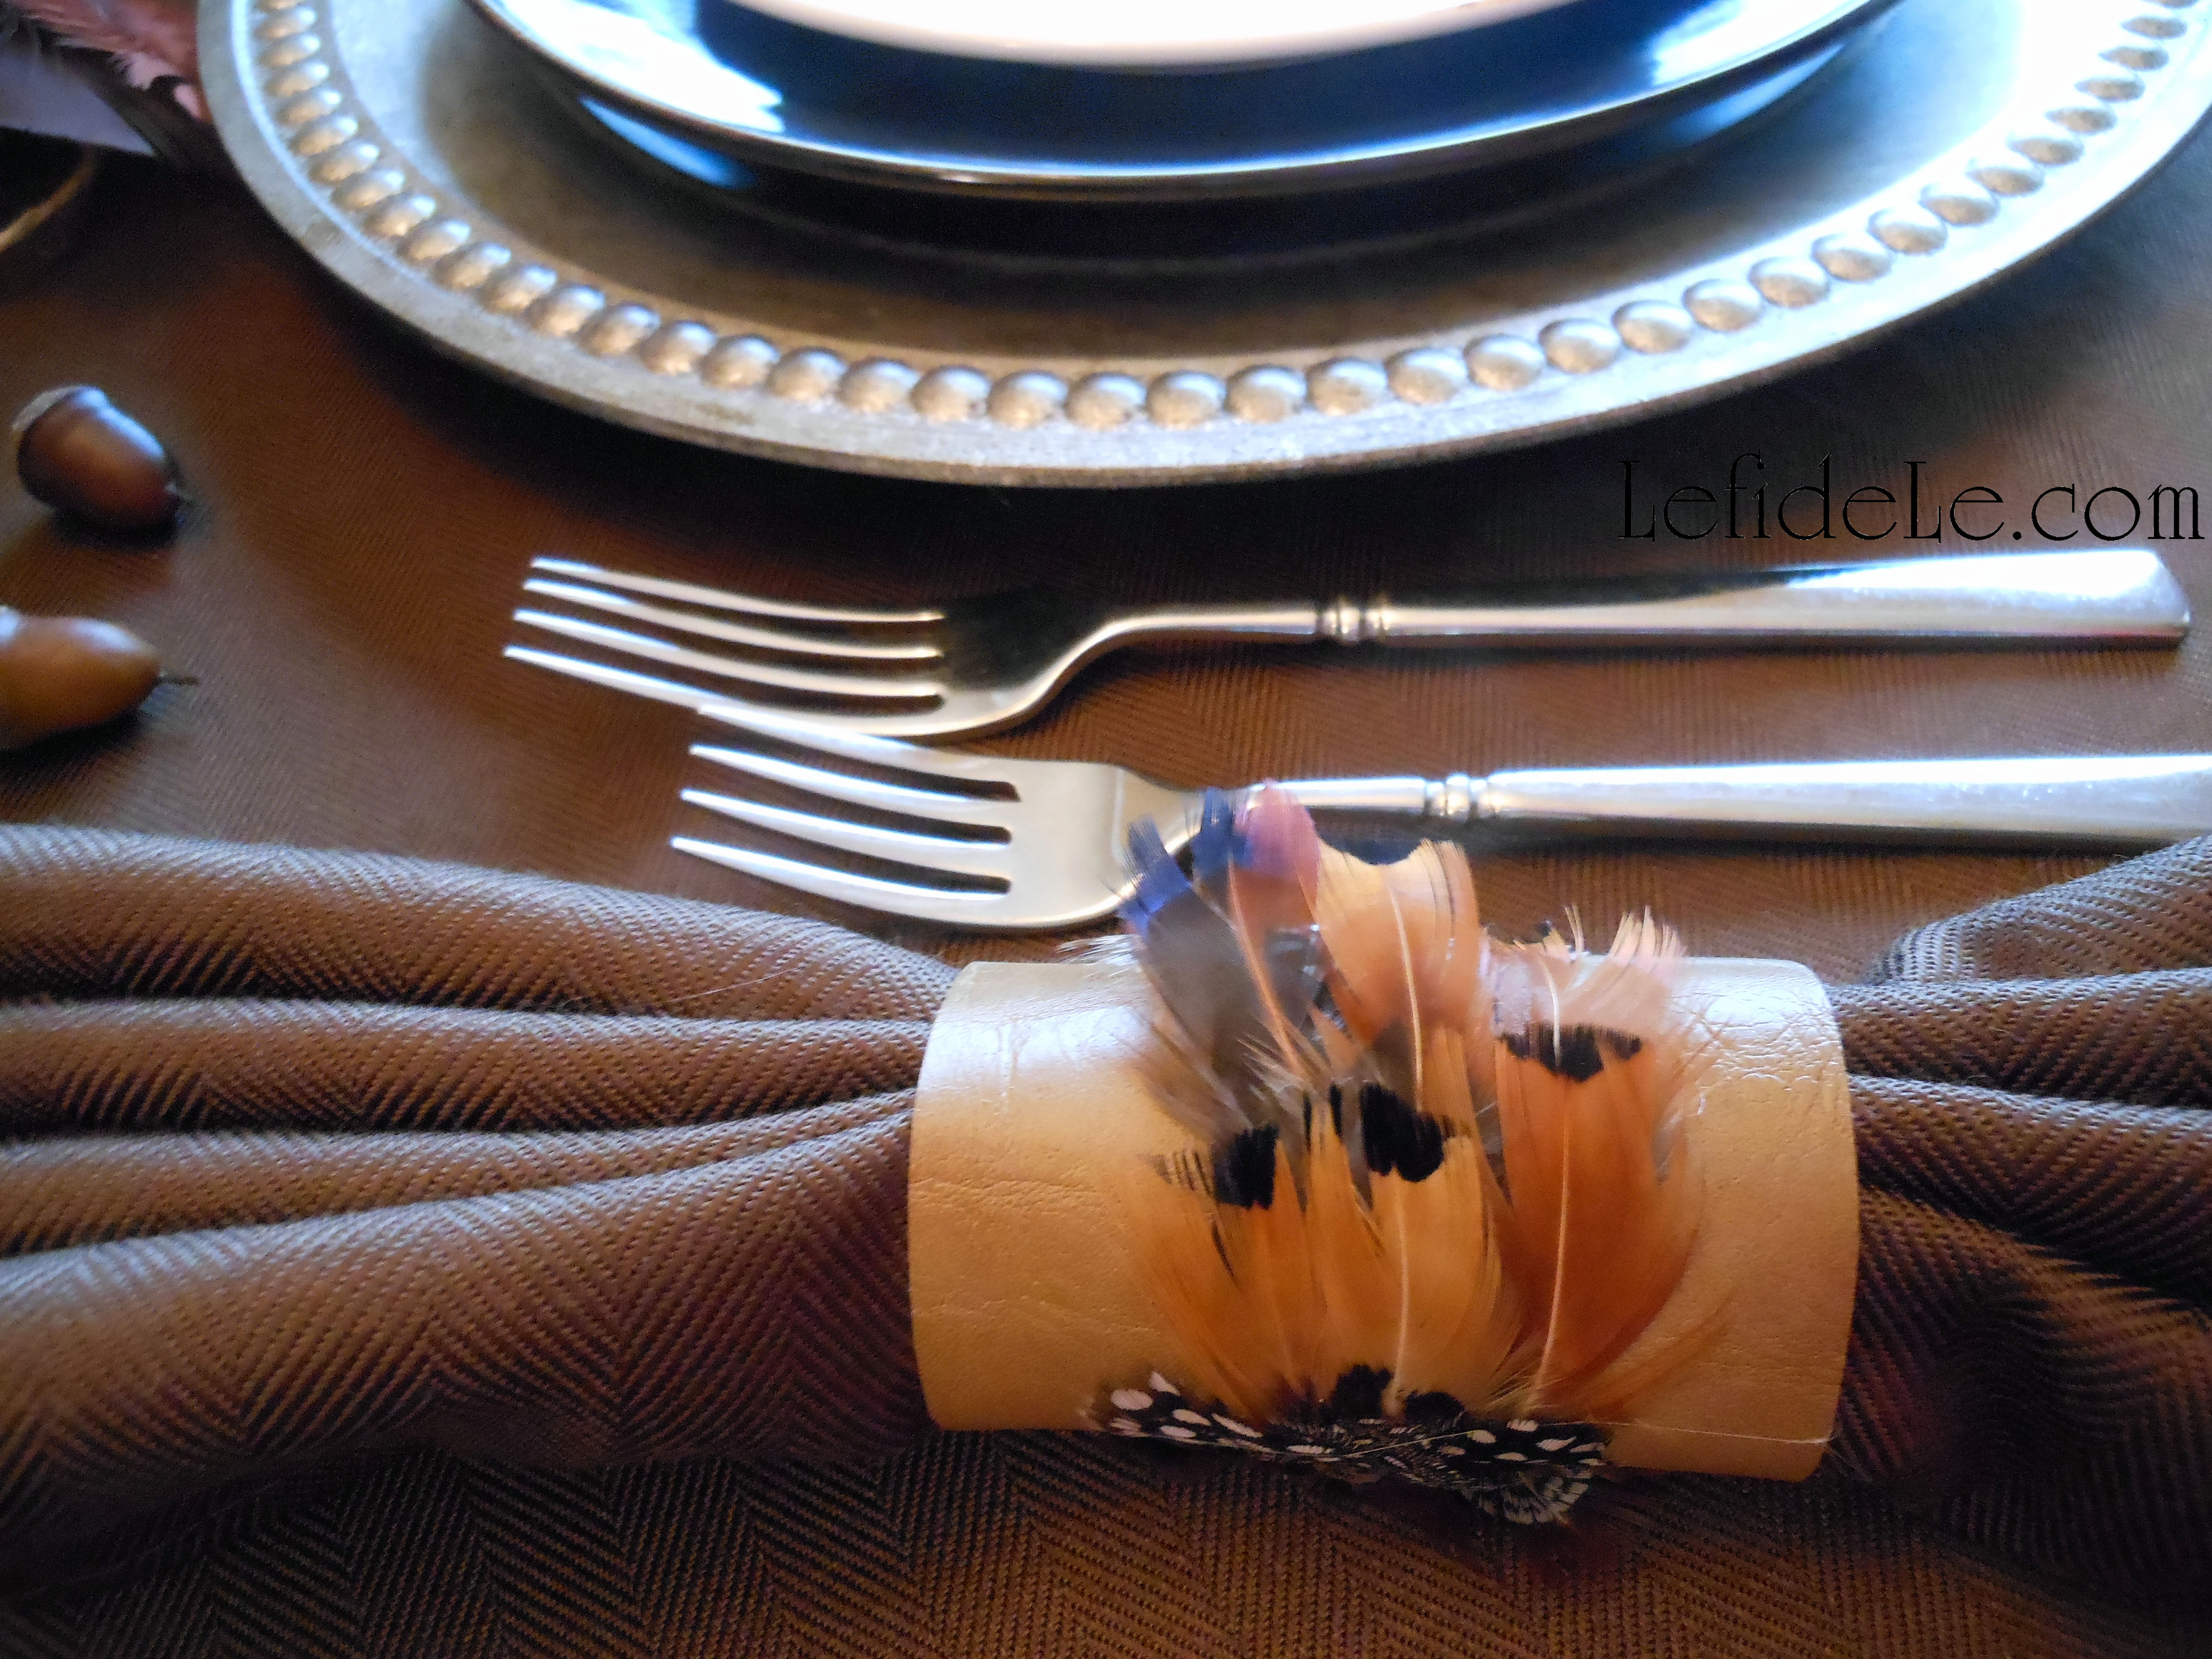
This would’ve cost so much more if purchased from a department store or boutique!

038Leigh

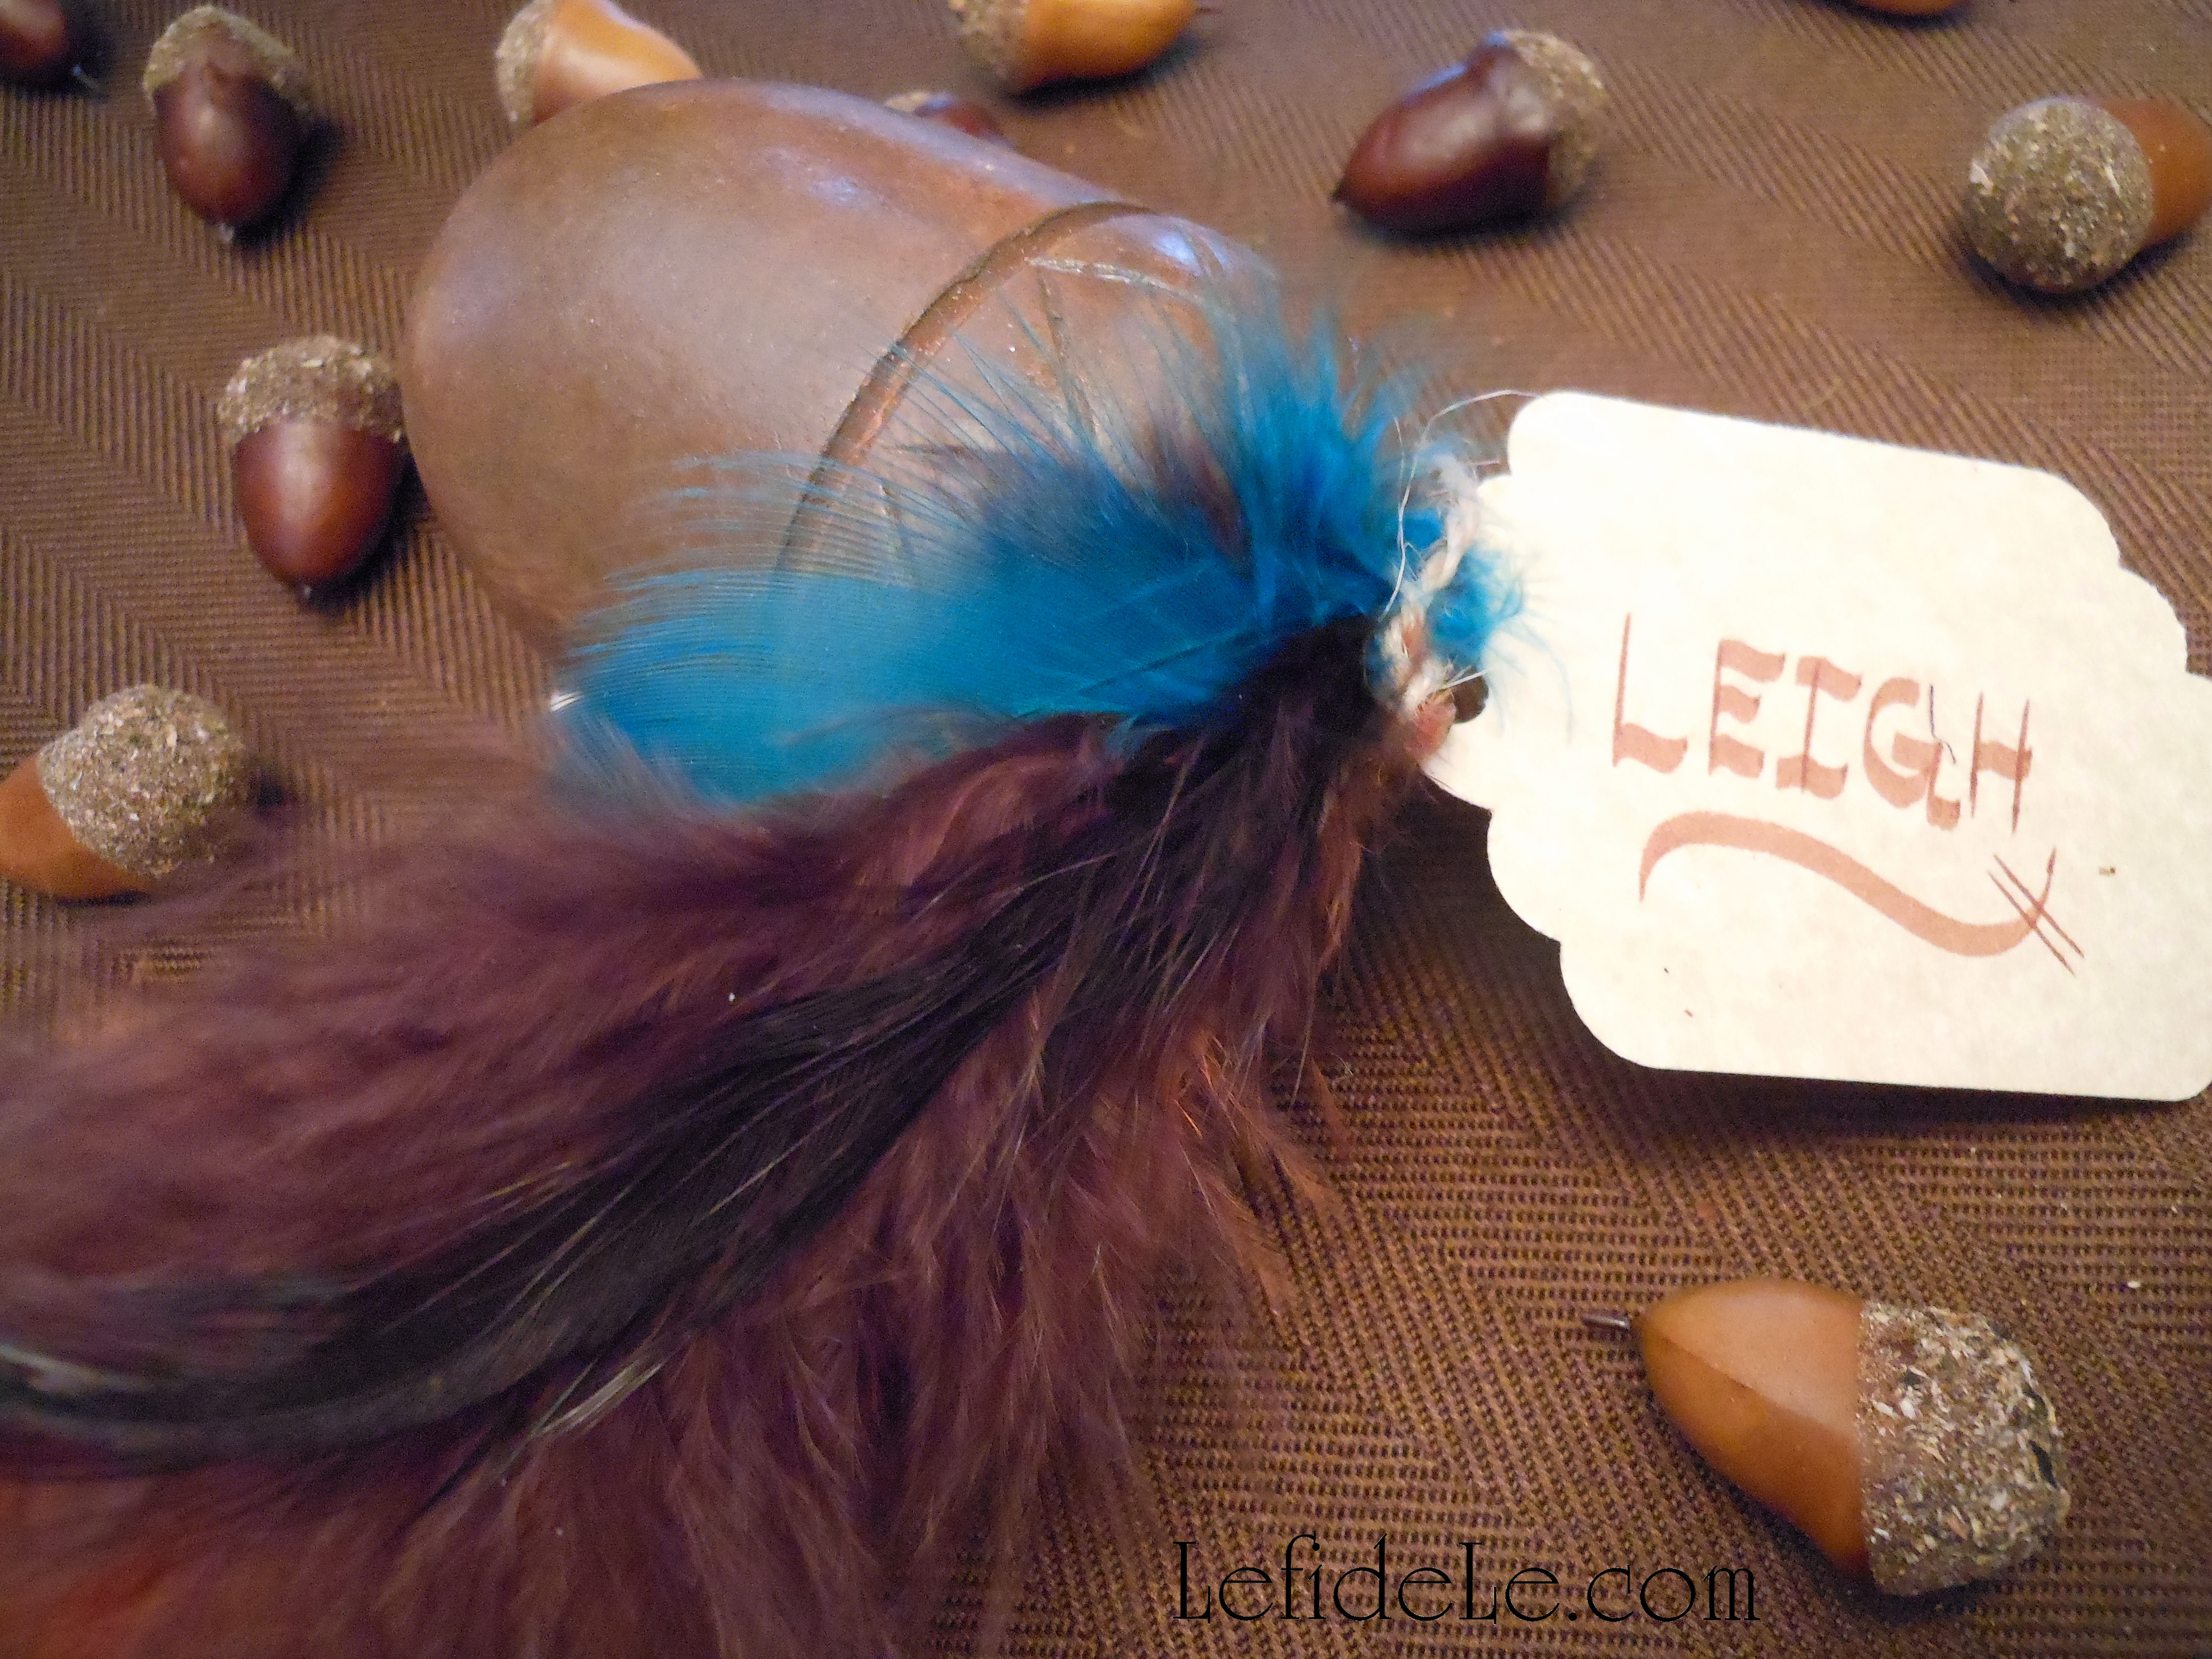
Next, make place-card holders using simple decorative acorns. (I found these carved wooden types in a 6 pack at 40% off this summer.) I’ve seen various types from burlap and fabric to glittered and beaded… just pick those which suit your linens and dishware best.

035Leigh

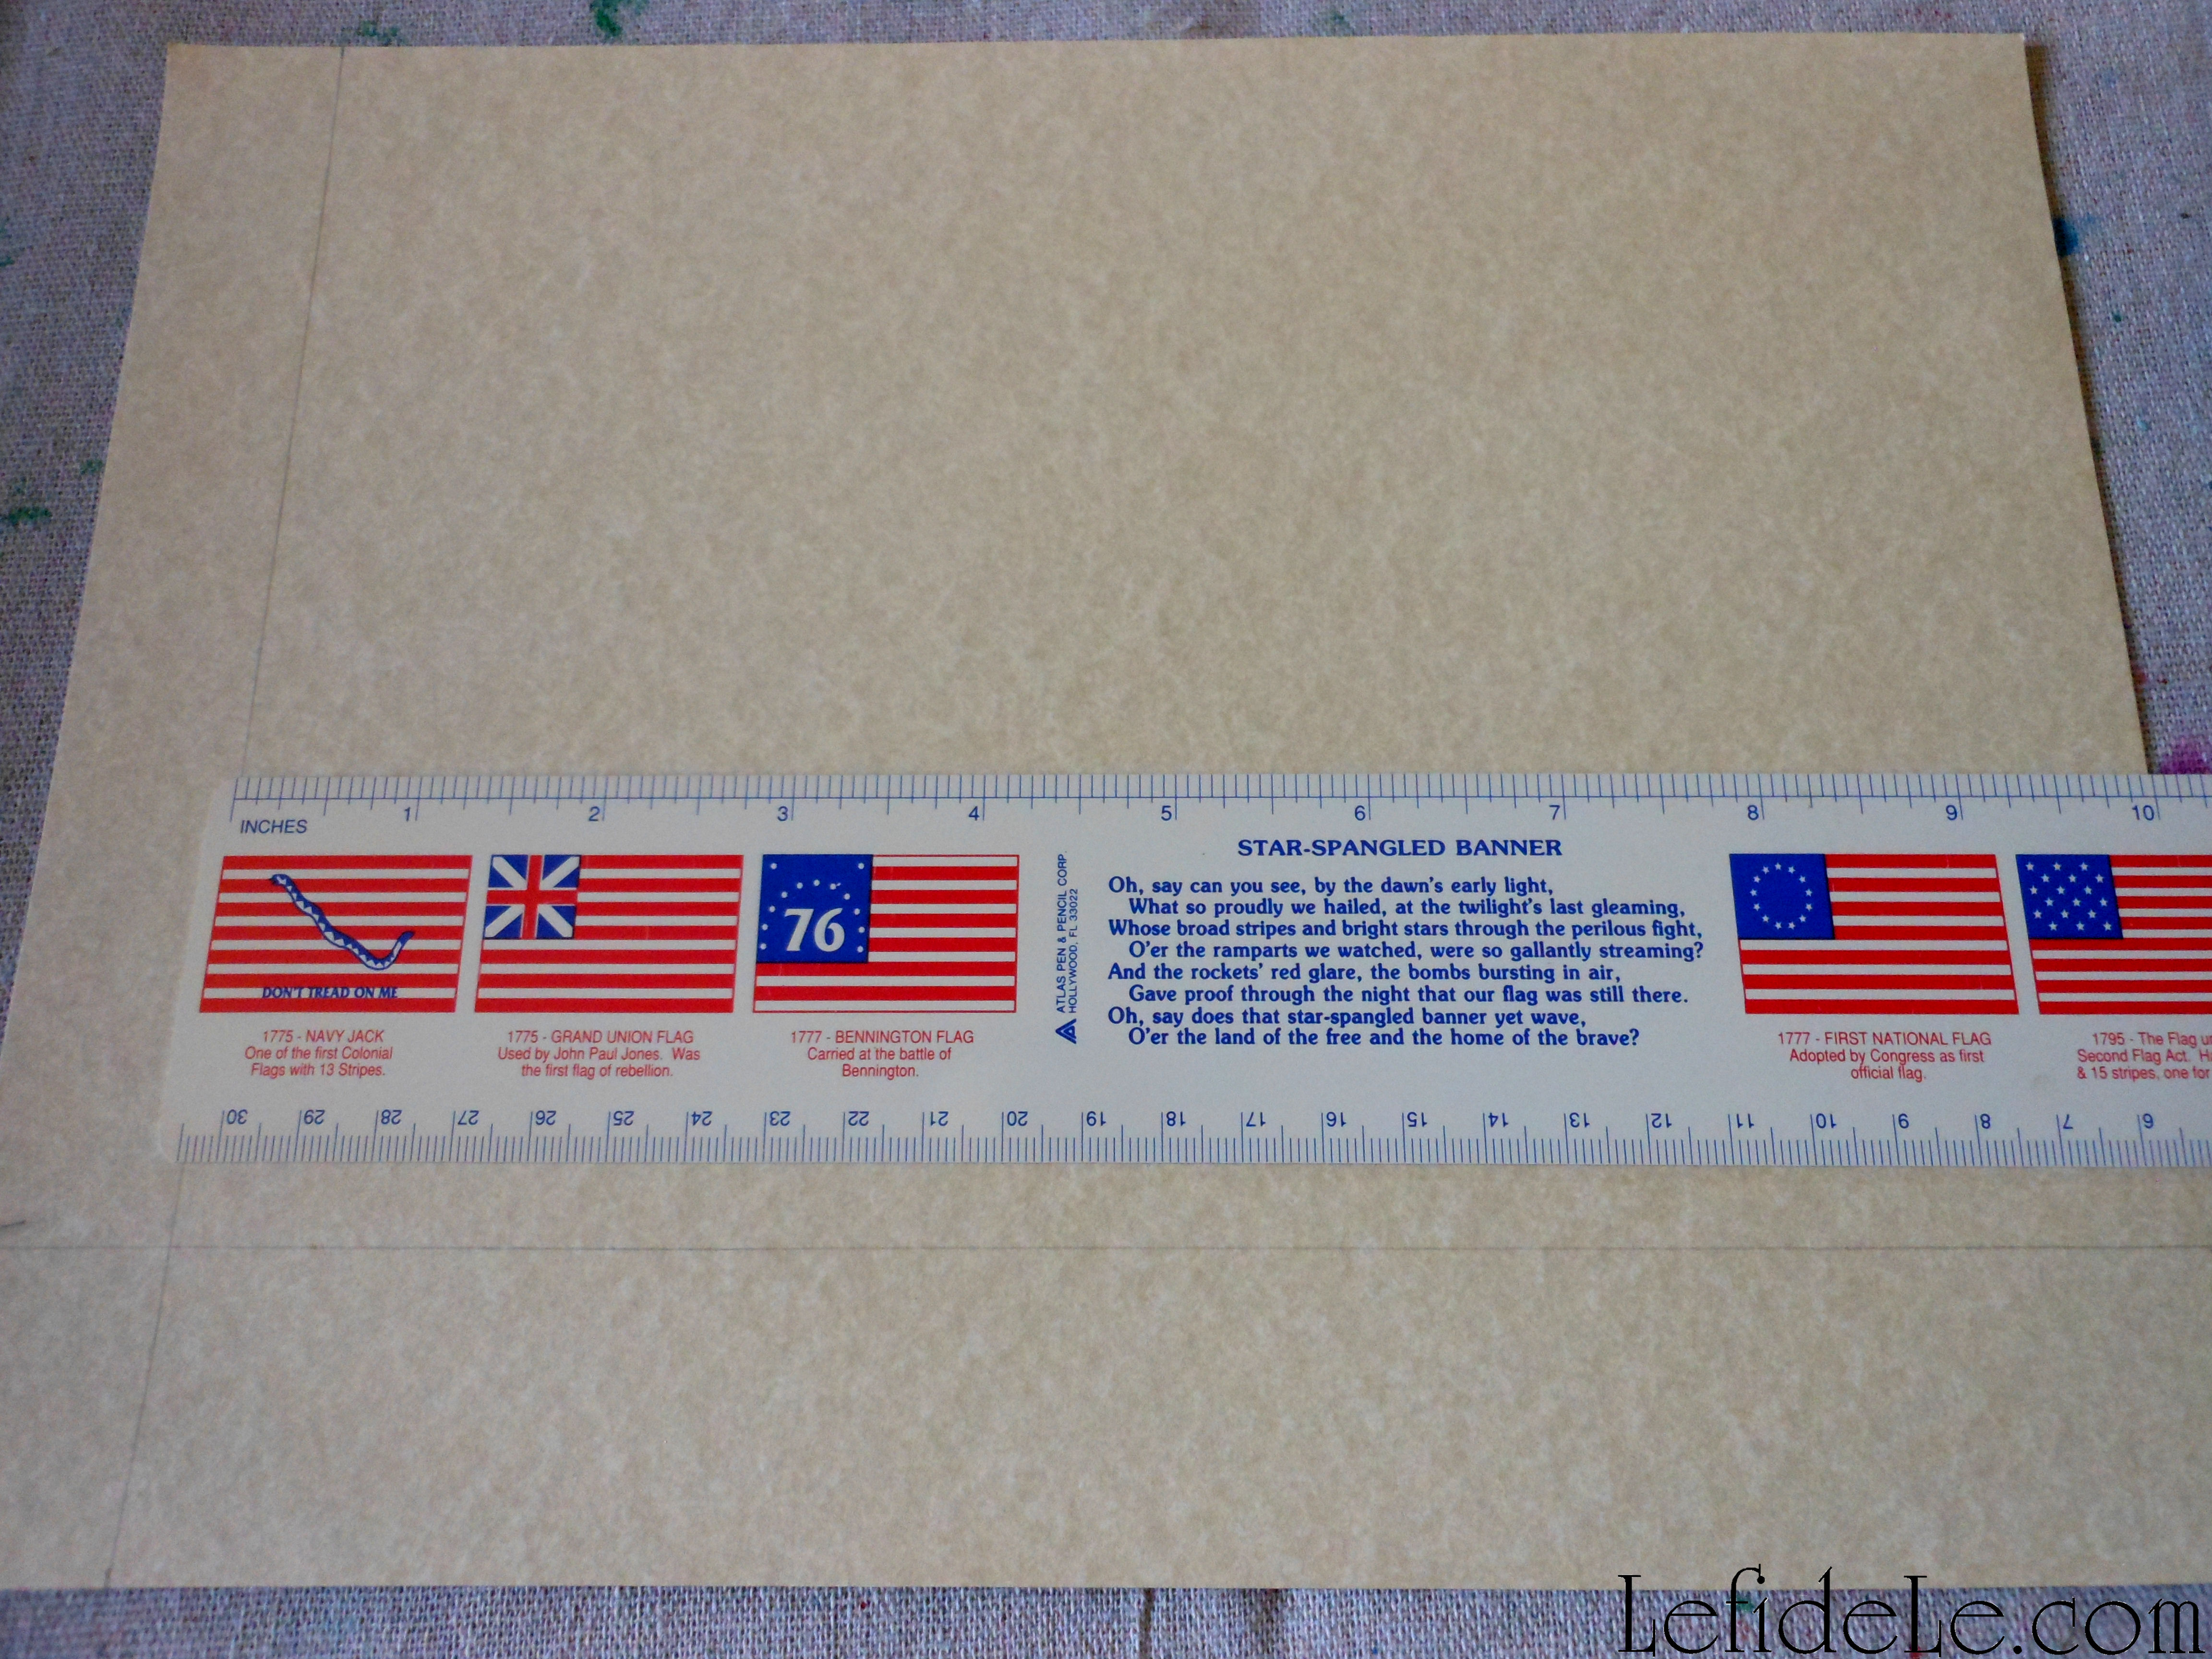
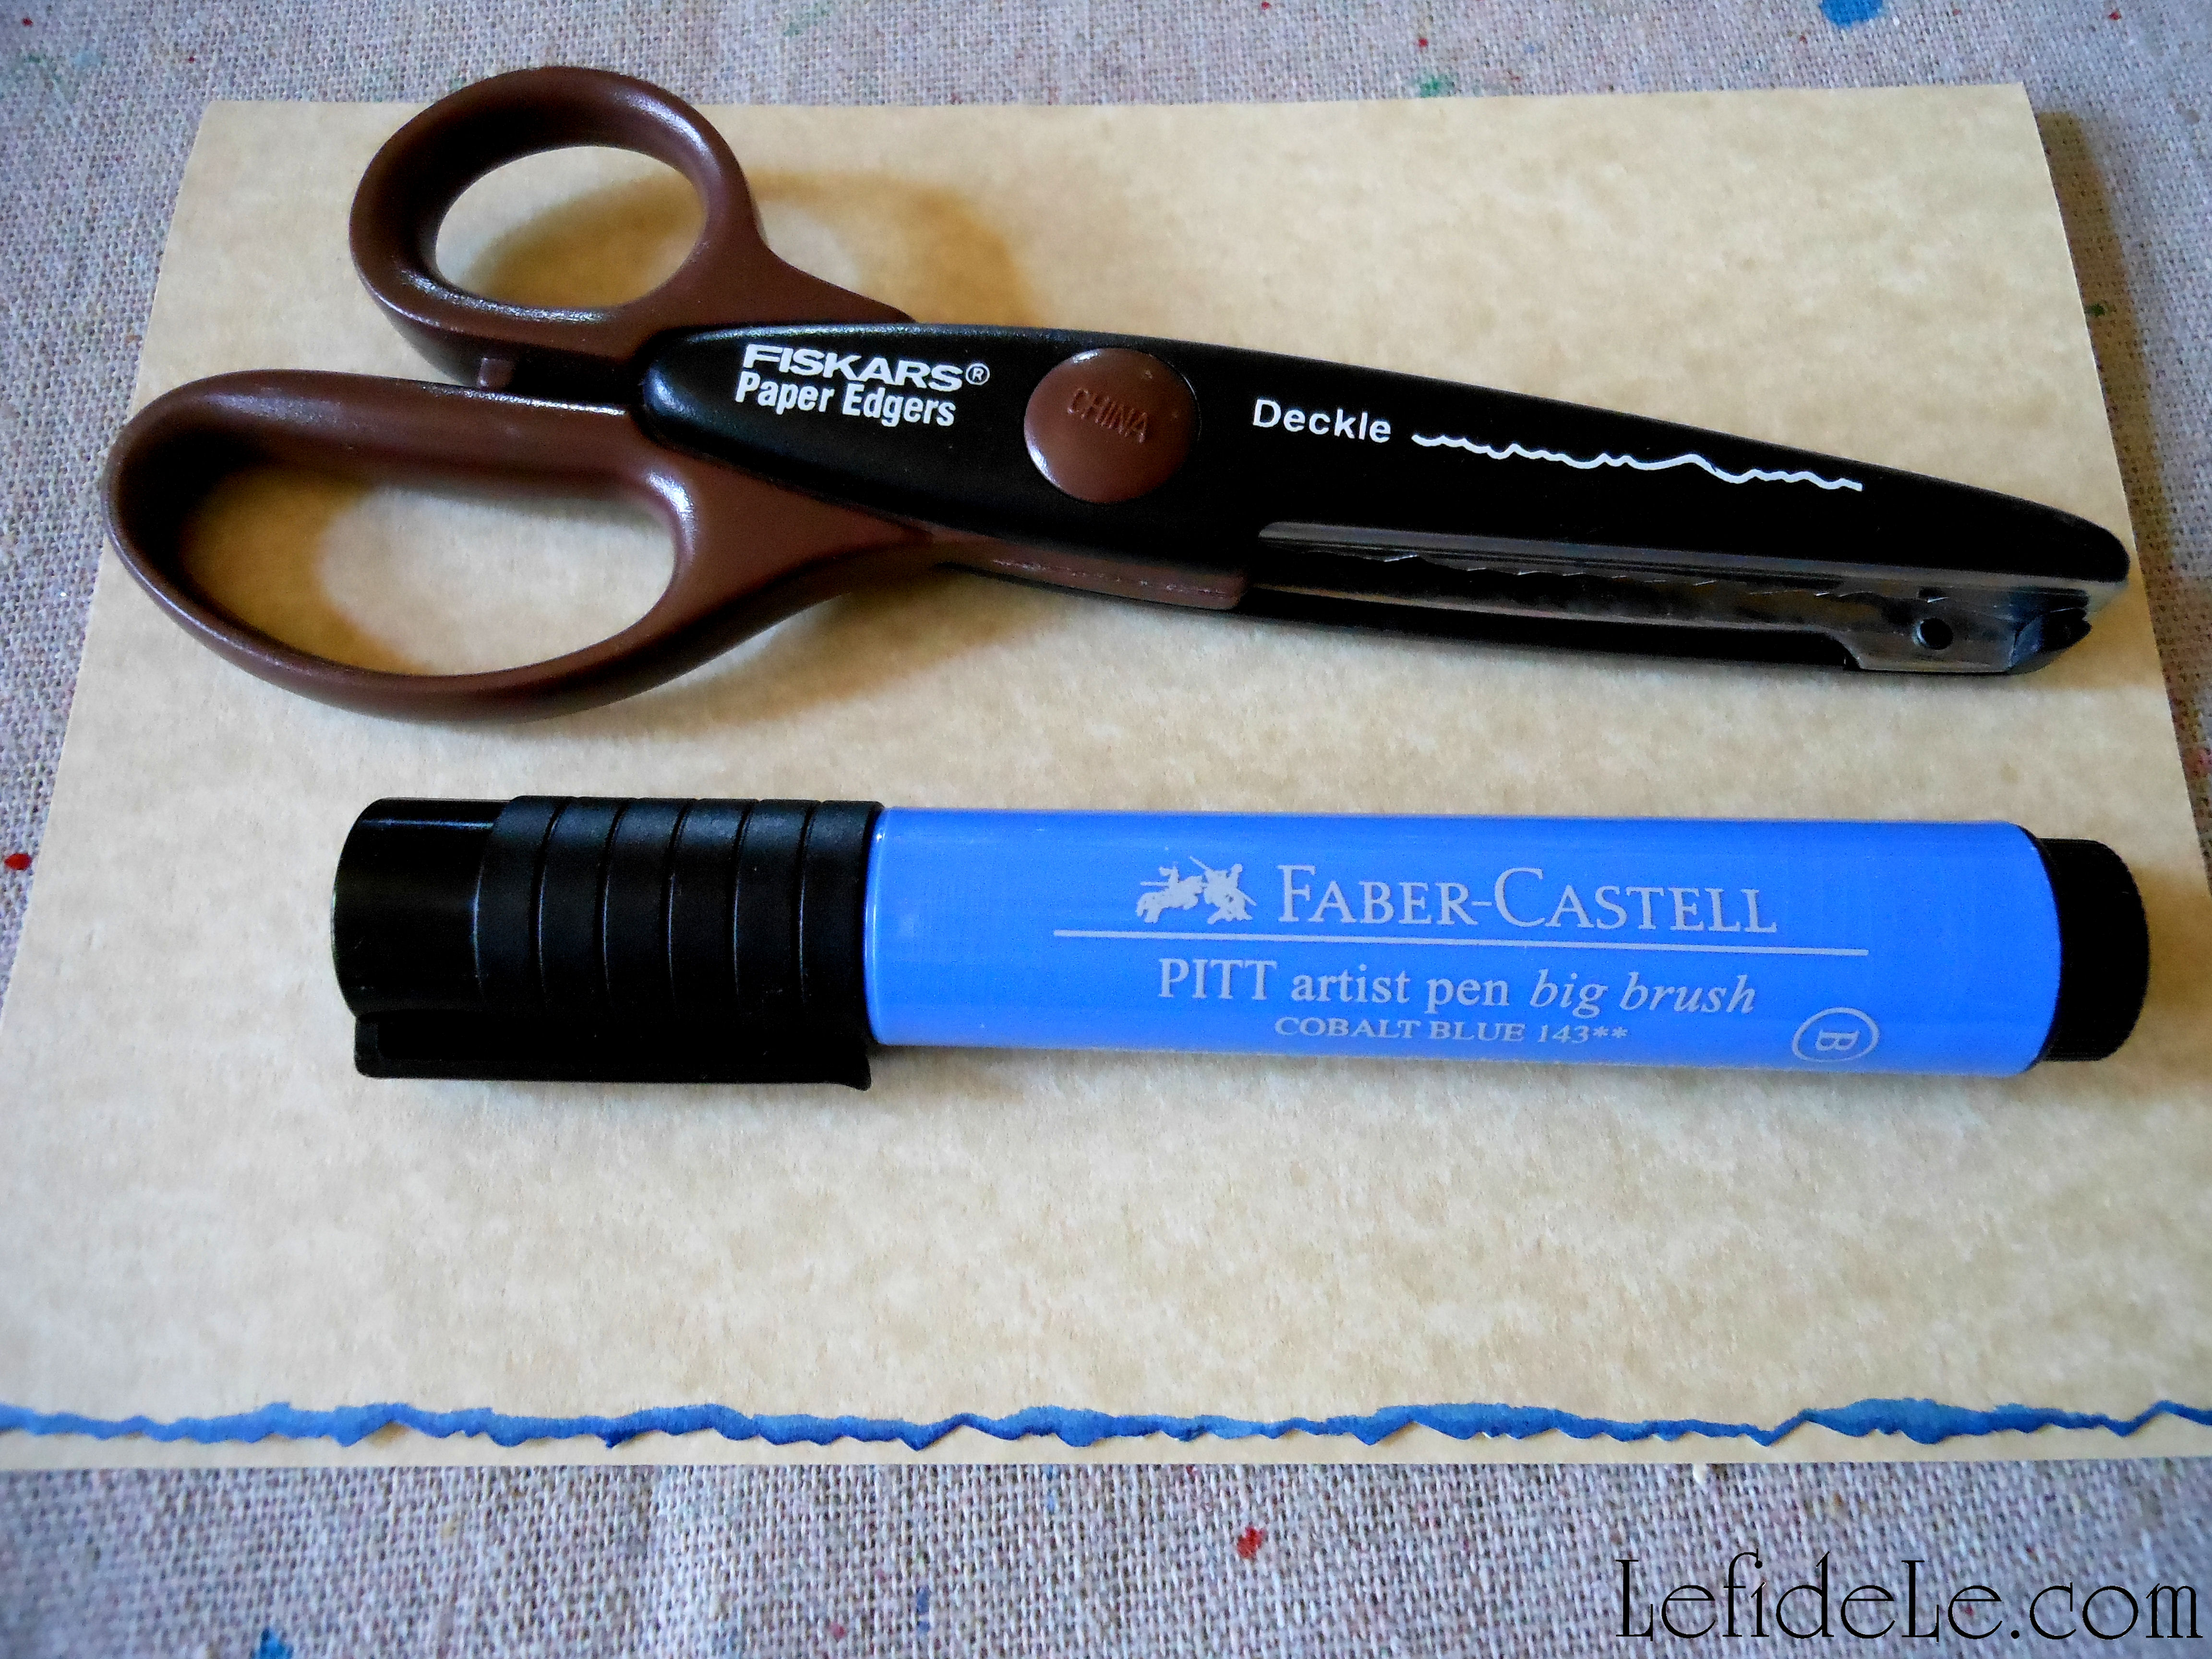
Use a punch cutter to make small gift tags from a parchment-like cardstock, and punch a hole in them (or just buy readymade tags). Use a brown calligraphy pen to scroll on the names of your guests.

039Leigh

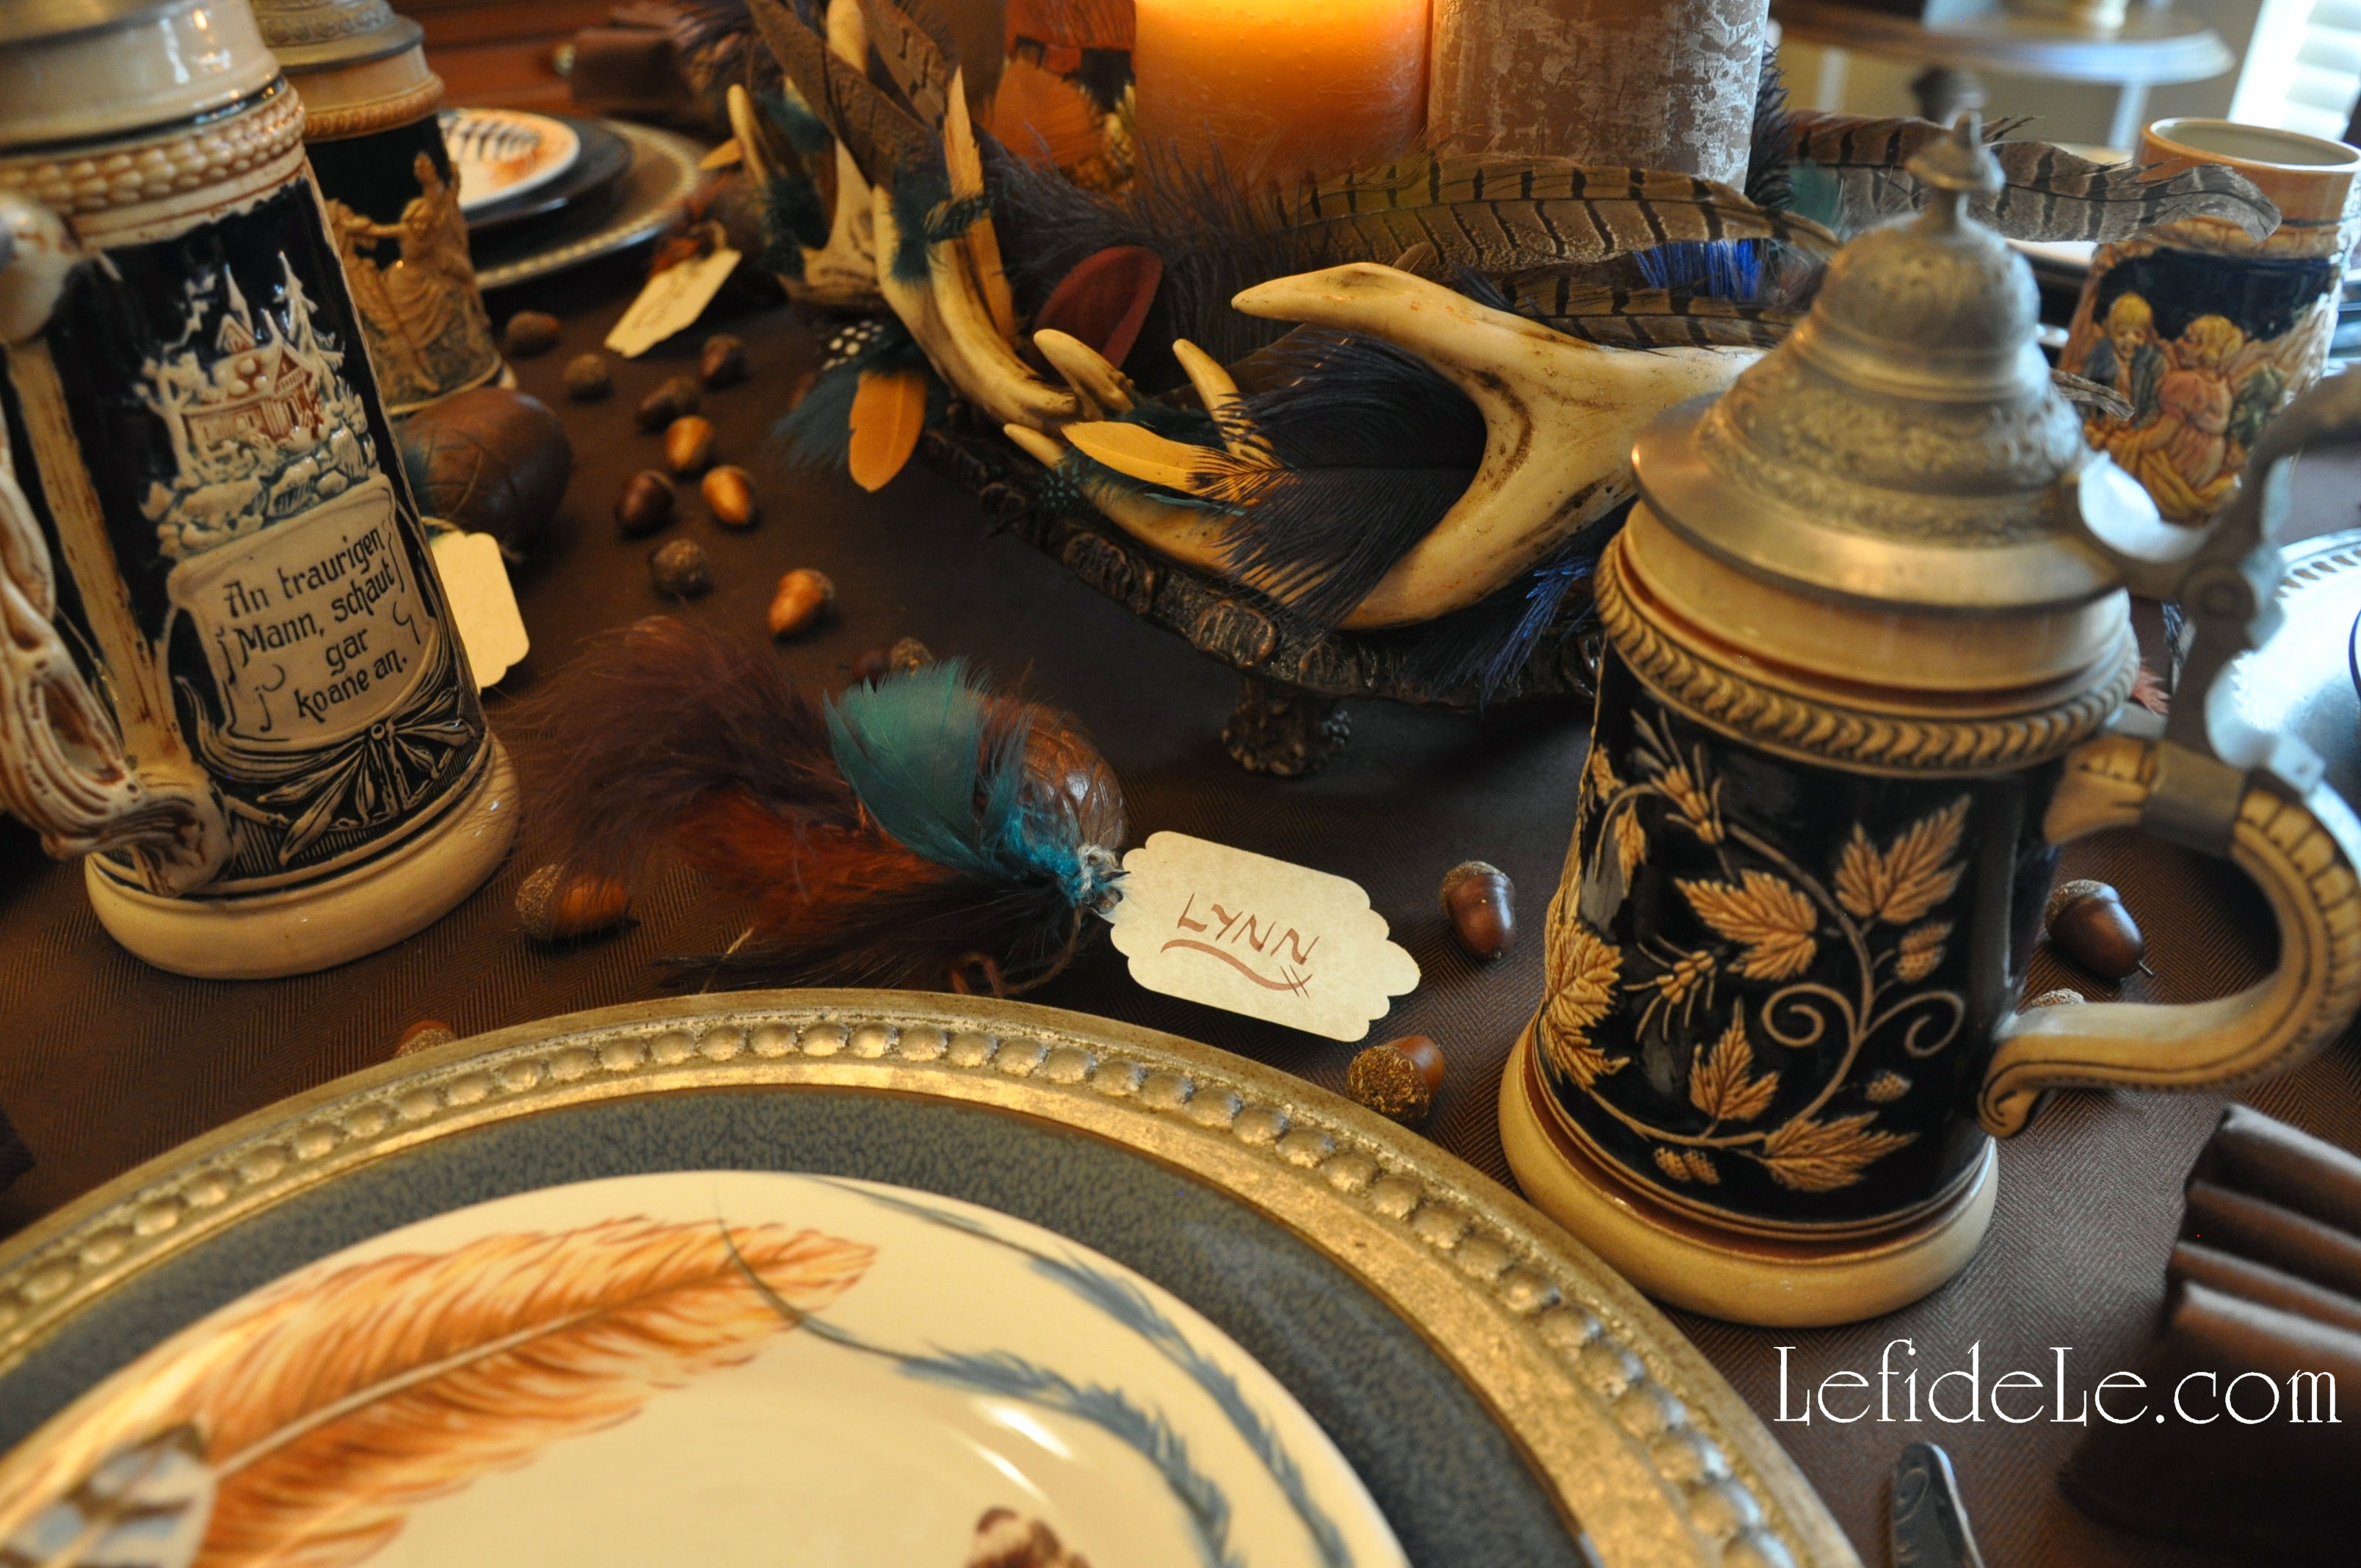
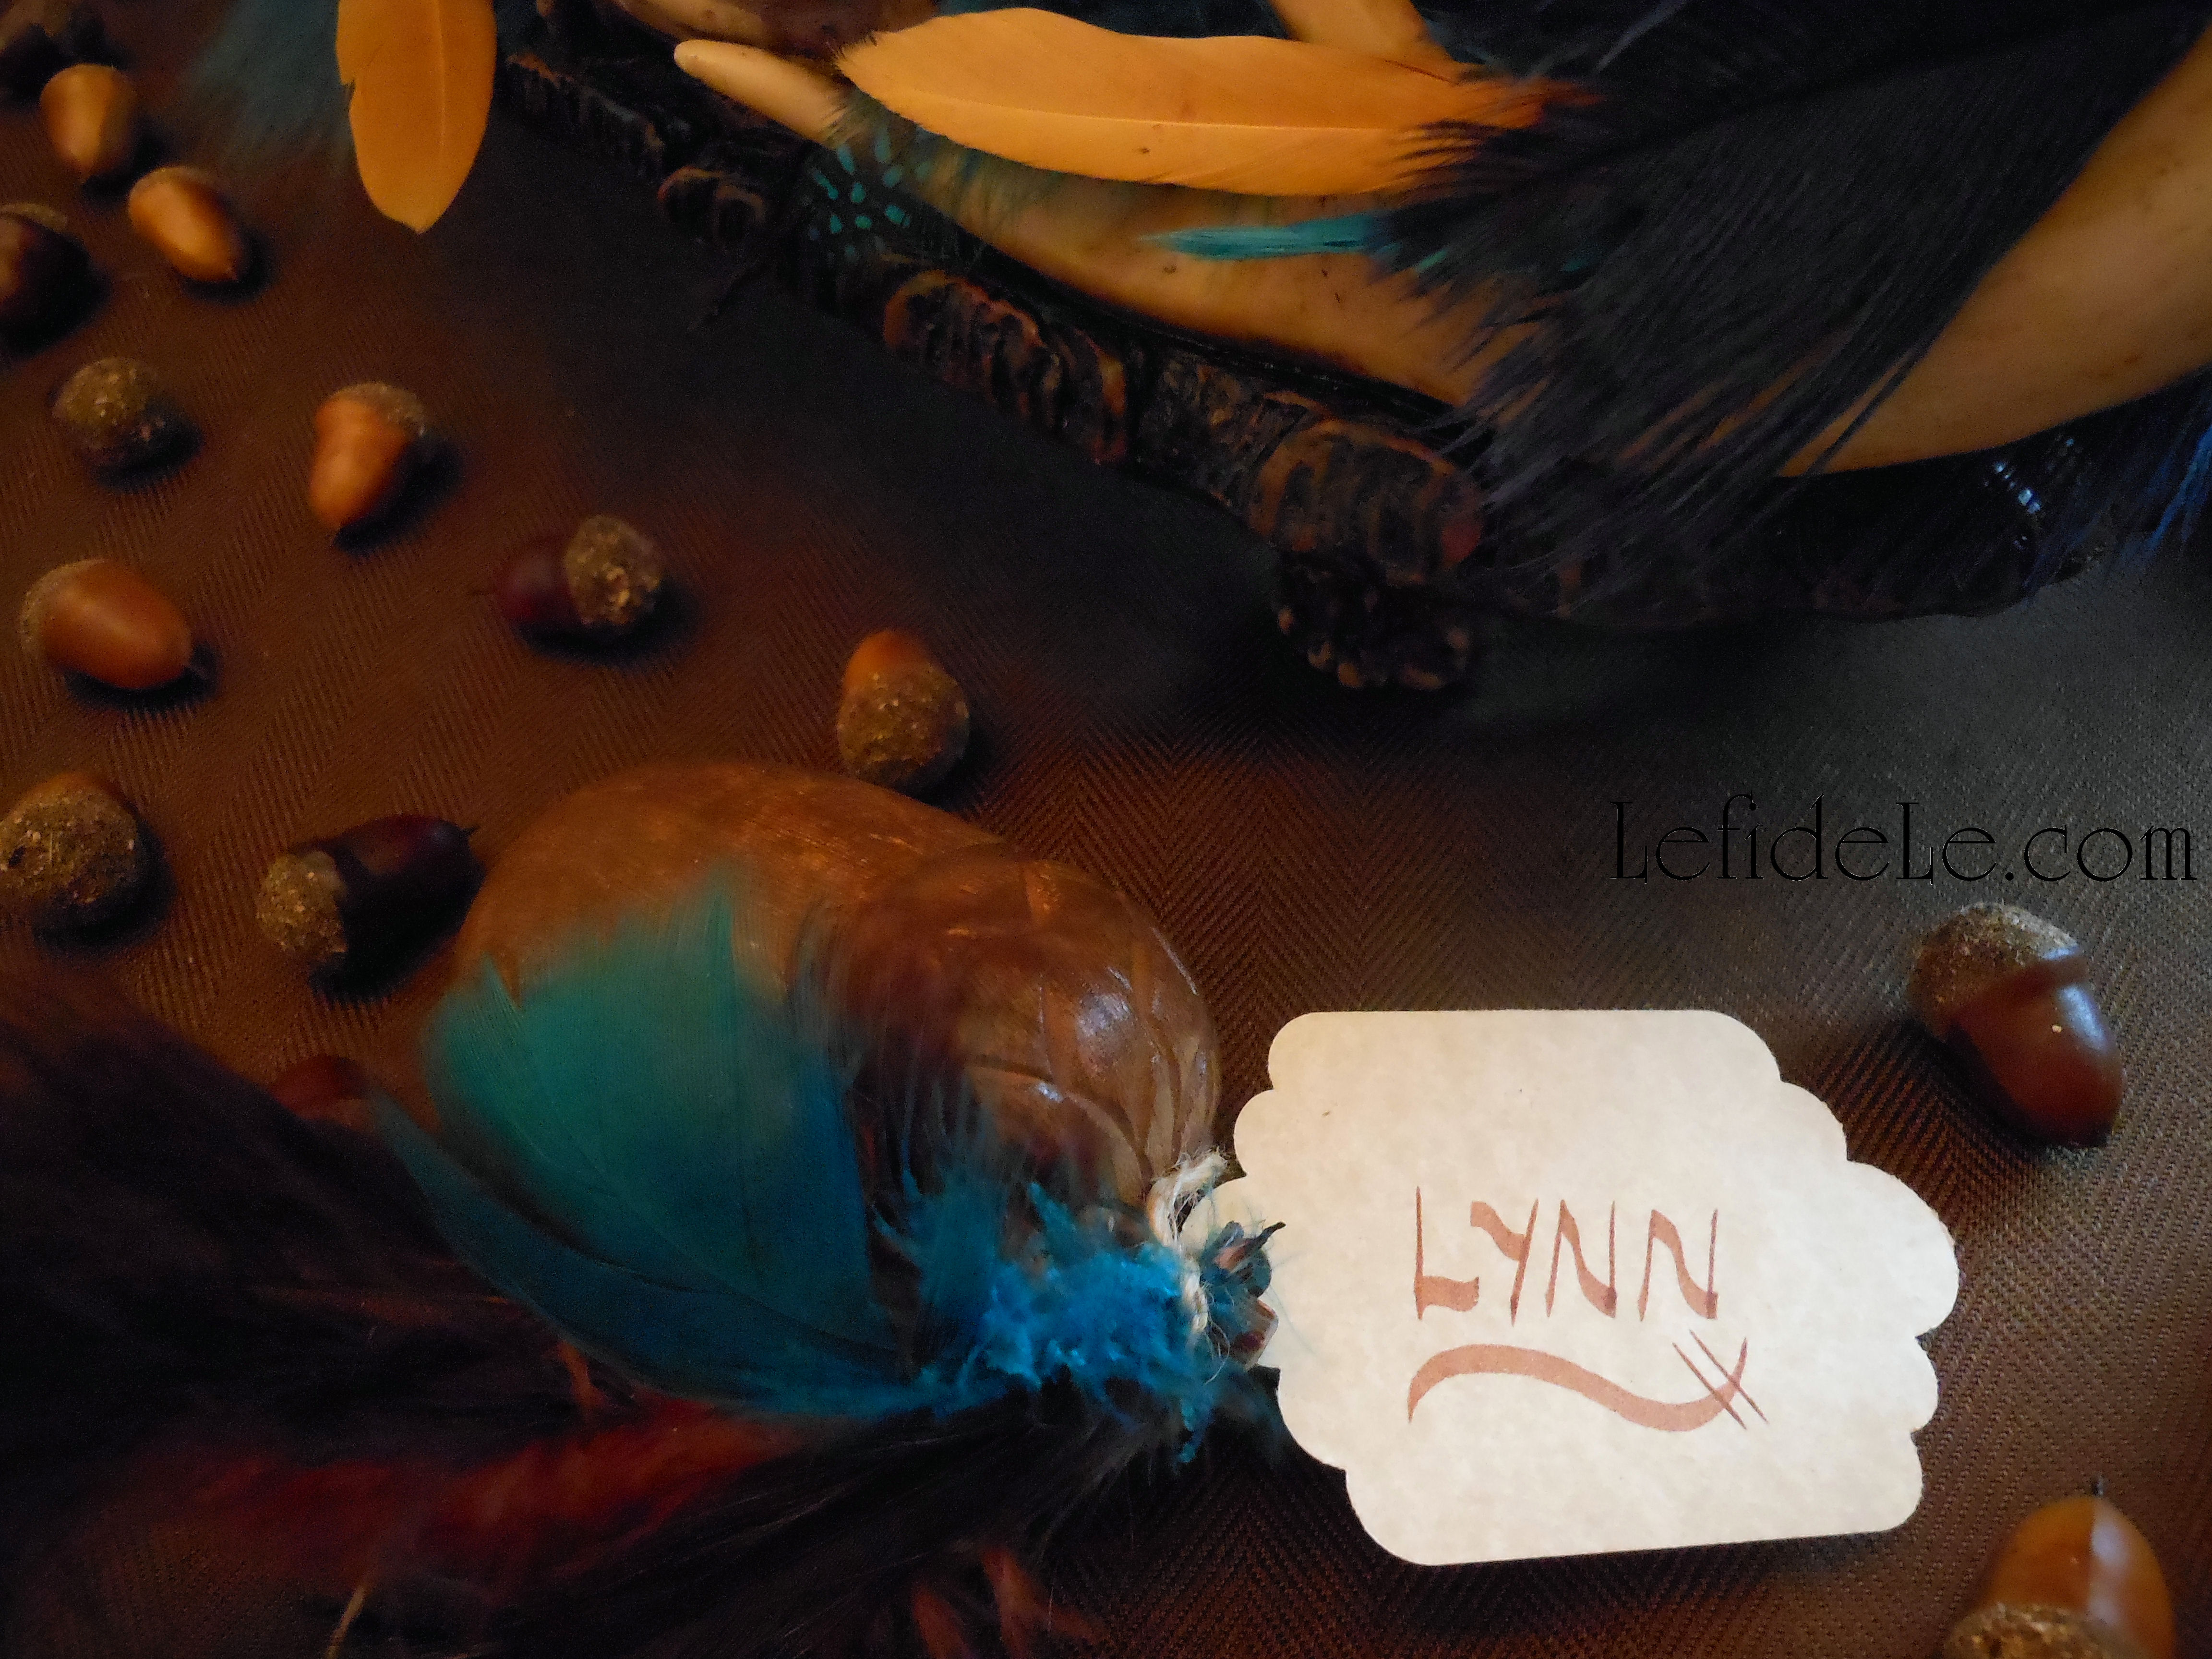
Use a few inches of jute cord (I get mine super-cheap at the hardware store) to tie the name tag and a small handful of feathers onto the stem of the acorn. (Think about adding brighter feathers to the typical fall colors… so that your ensemble doesn’t resemble mulch. I included some teal feathers to tie in with my other décor.)

002Leigh

Set them into place, and you’re done! The best part is that they can be reused with a different theme because the feather decoration and tag slip right off… however, feel free to glue them into place for a permanent set.

058Leigh

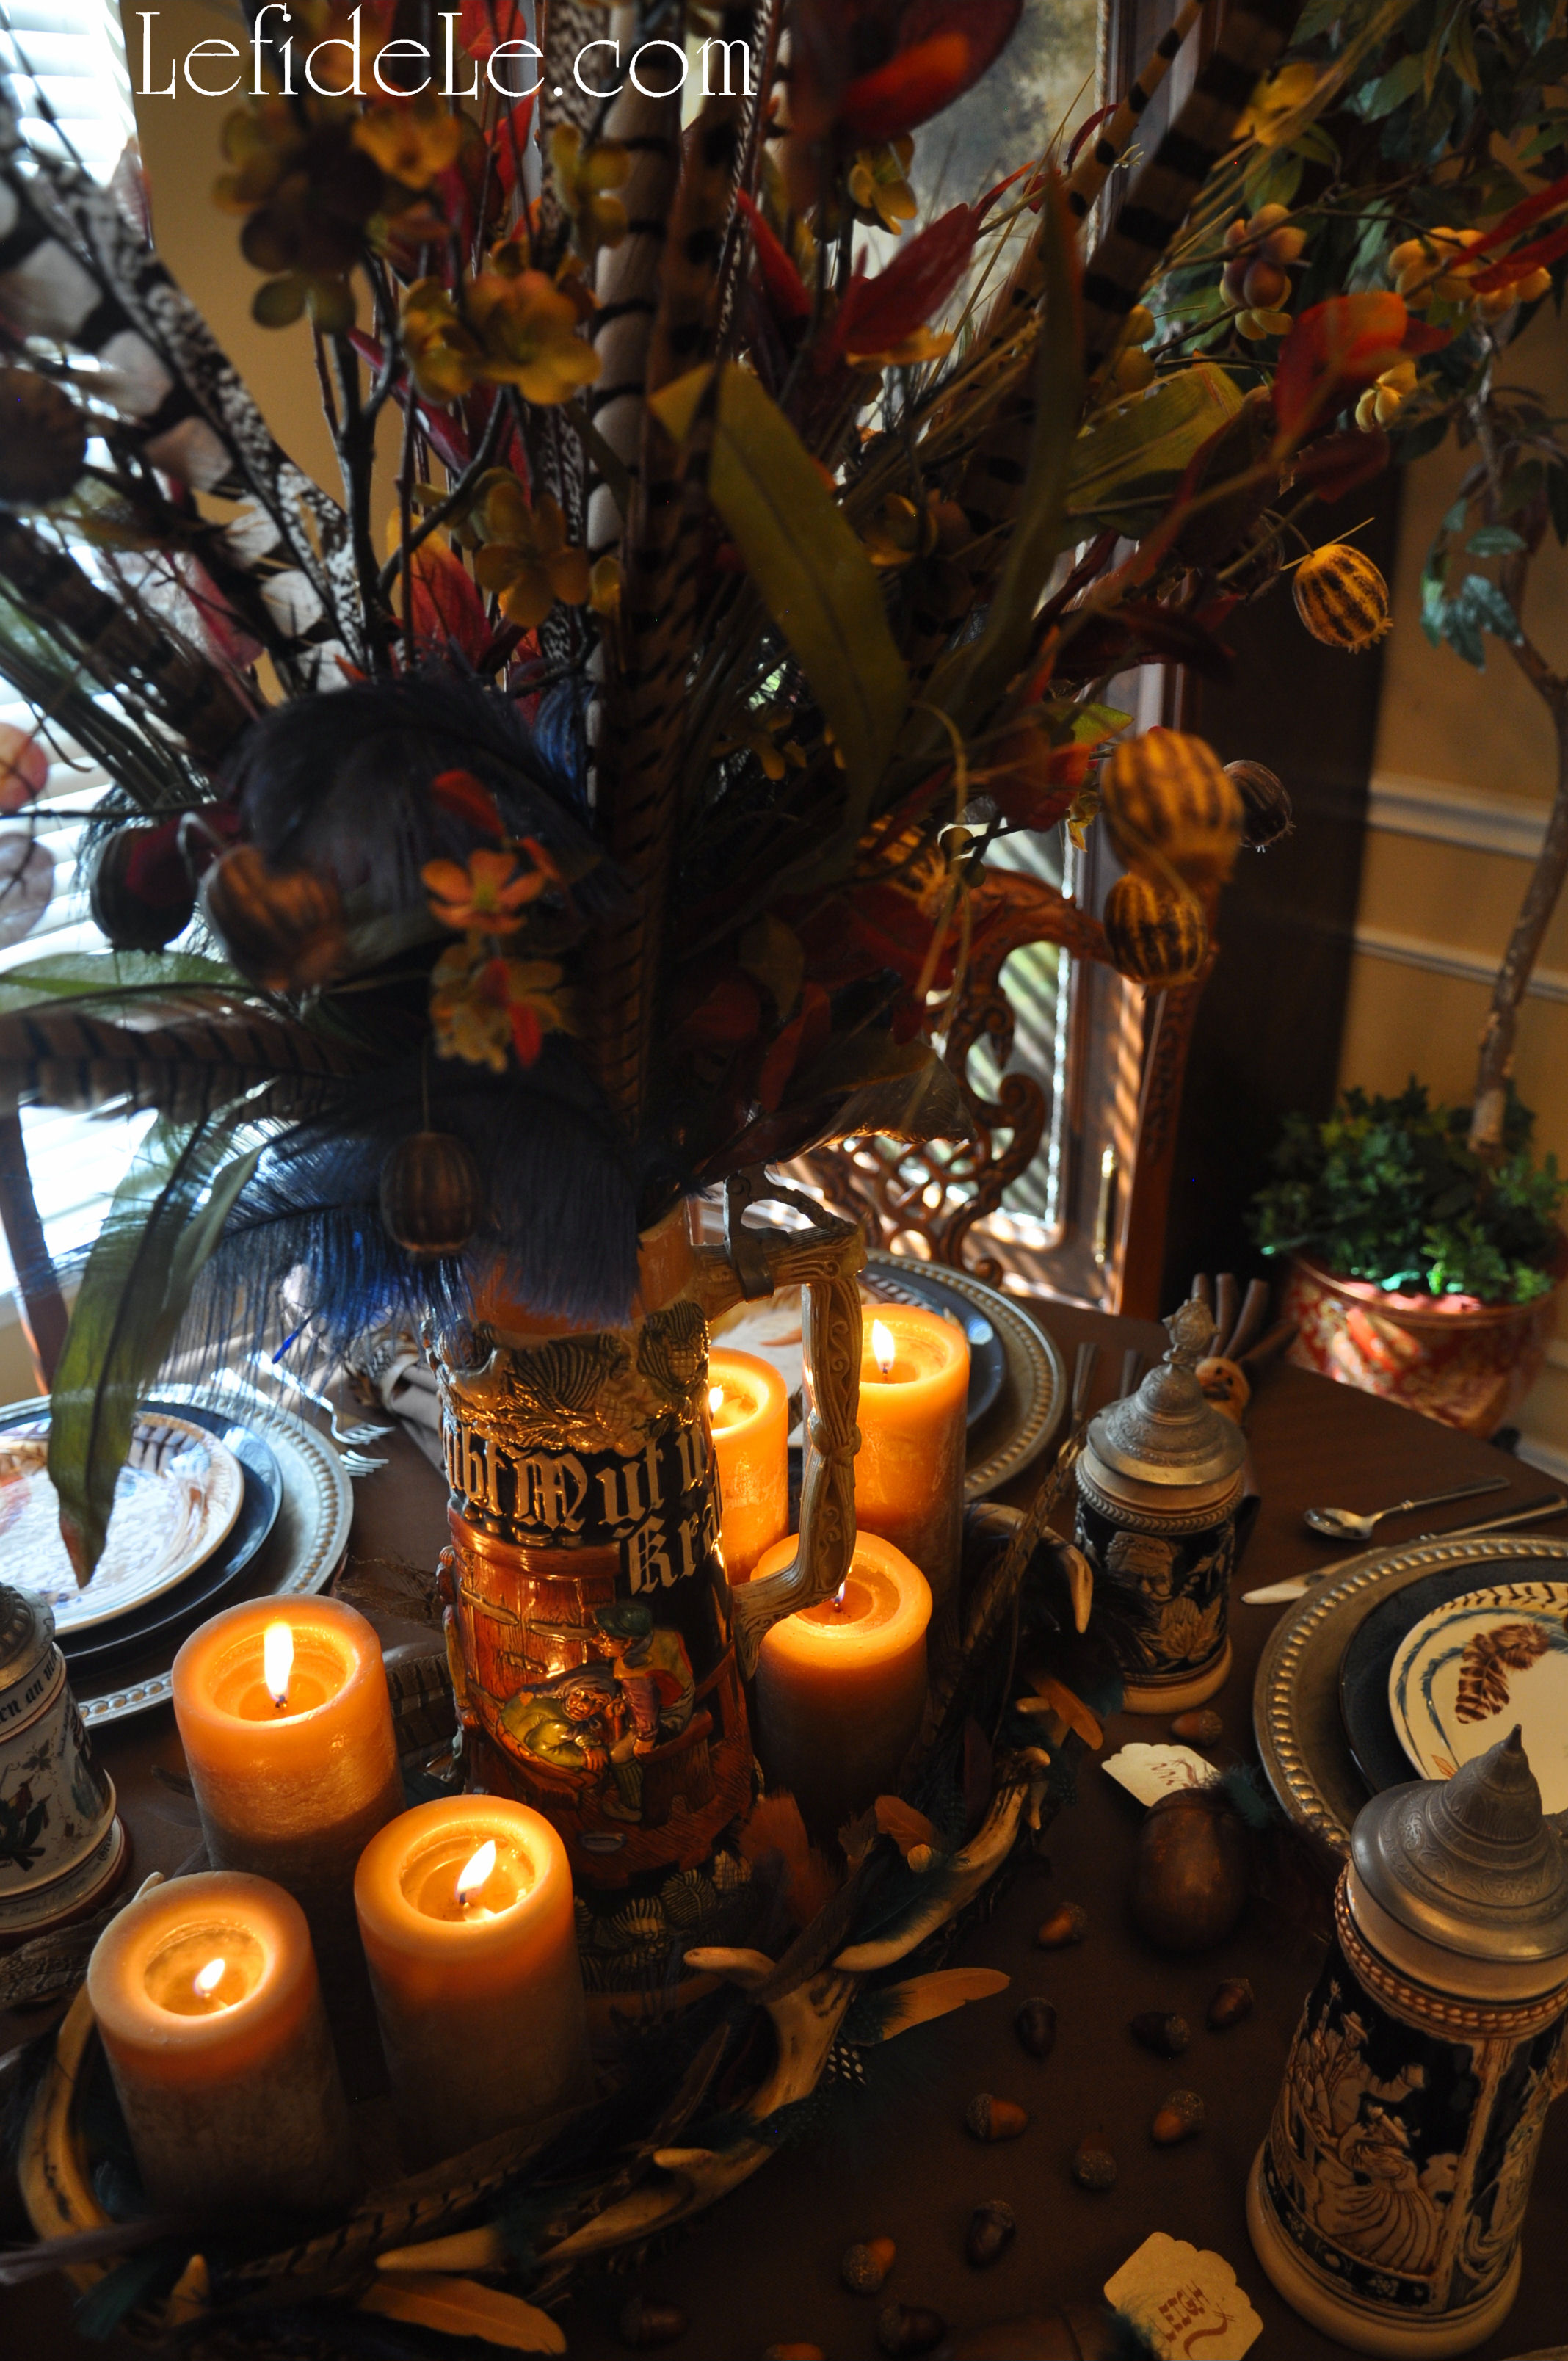
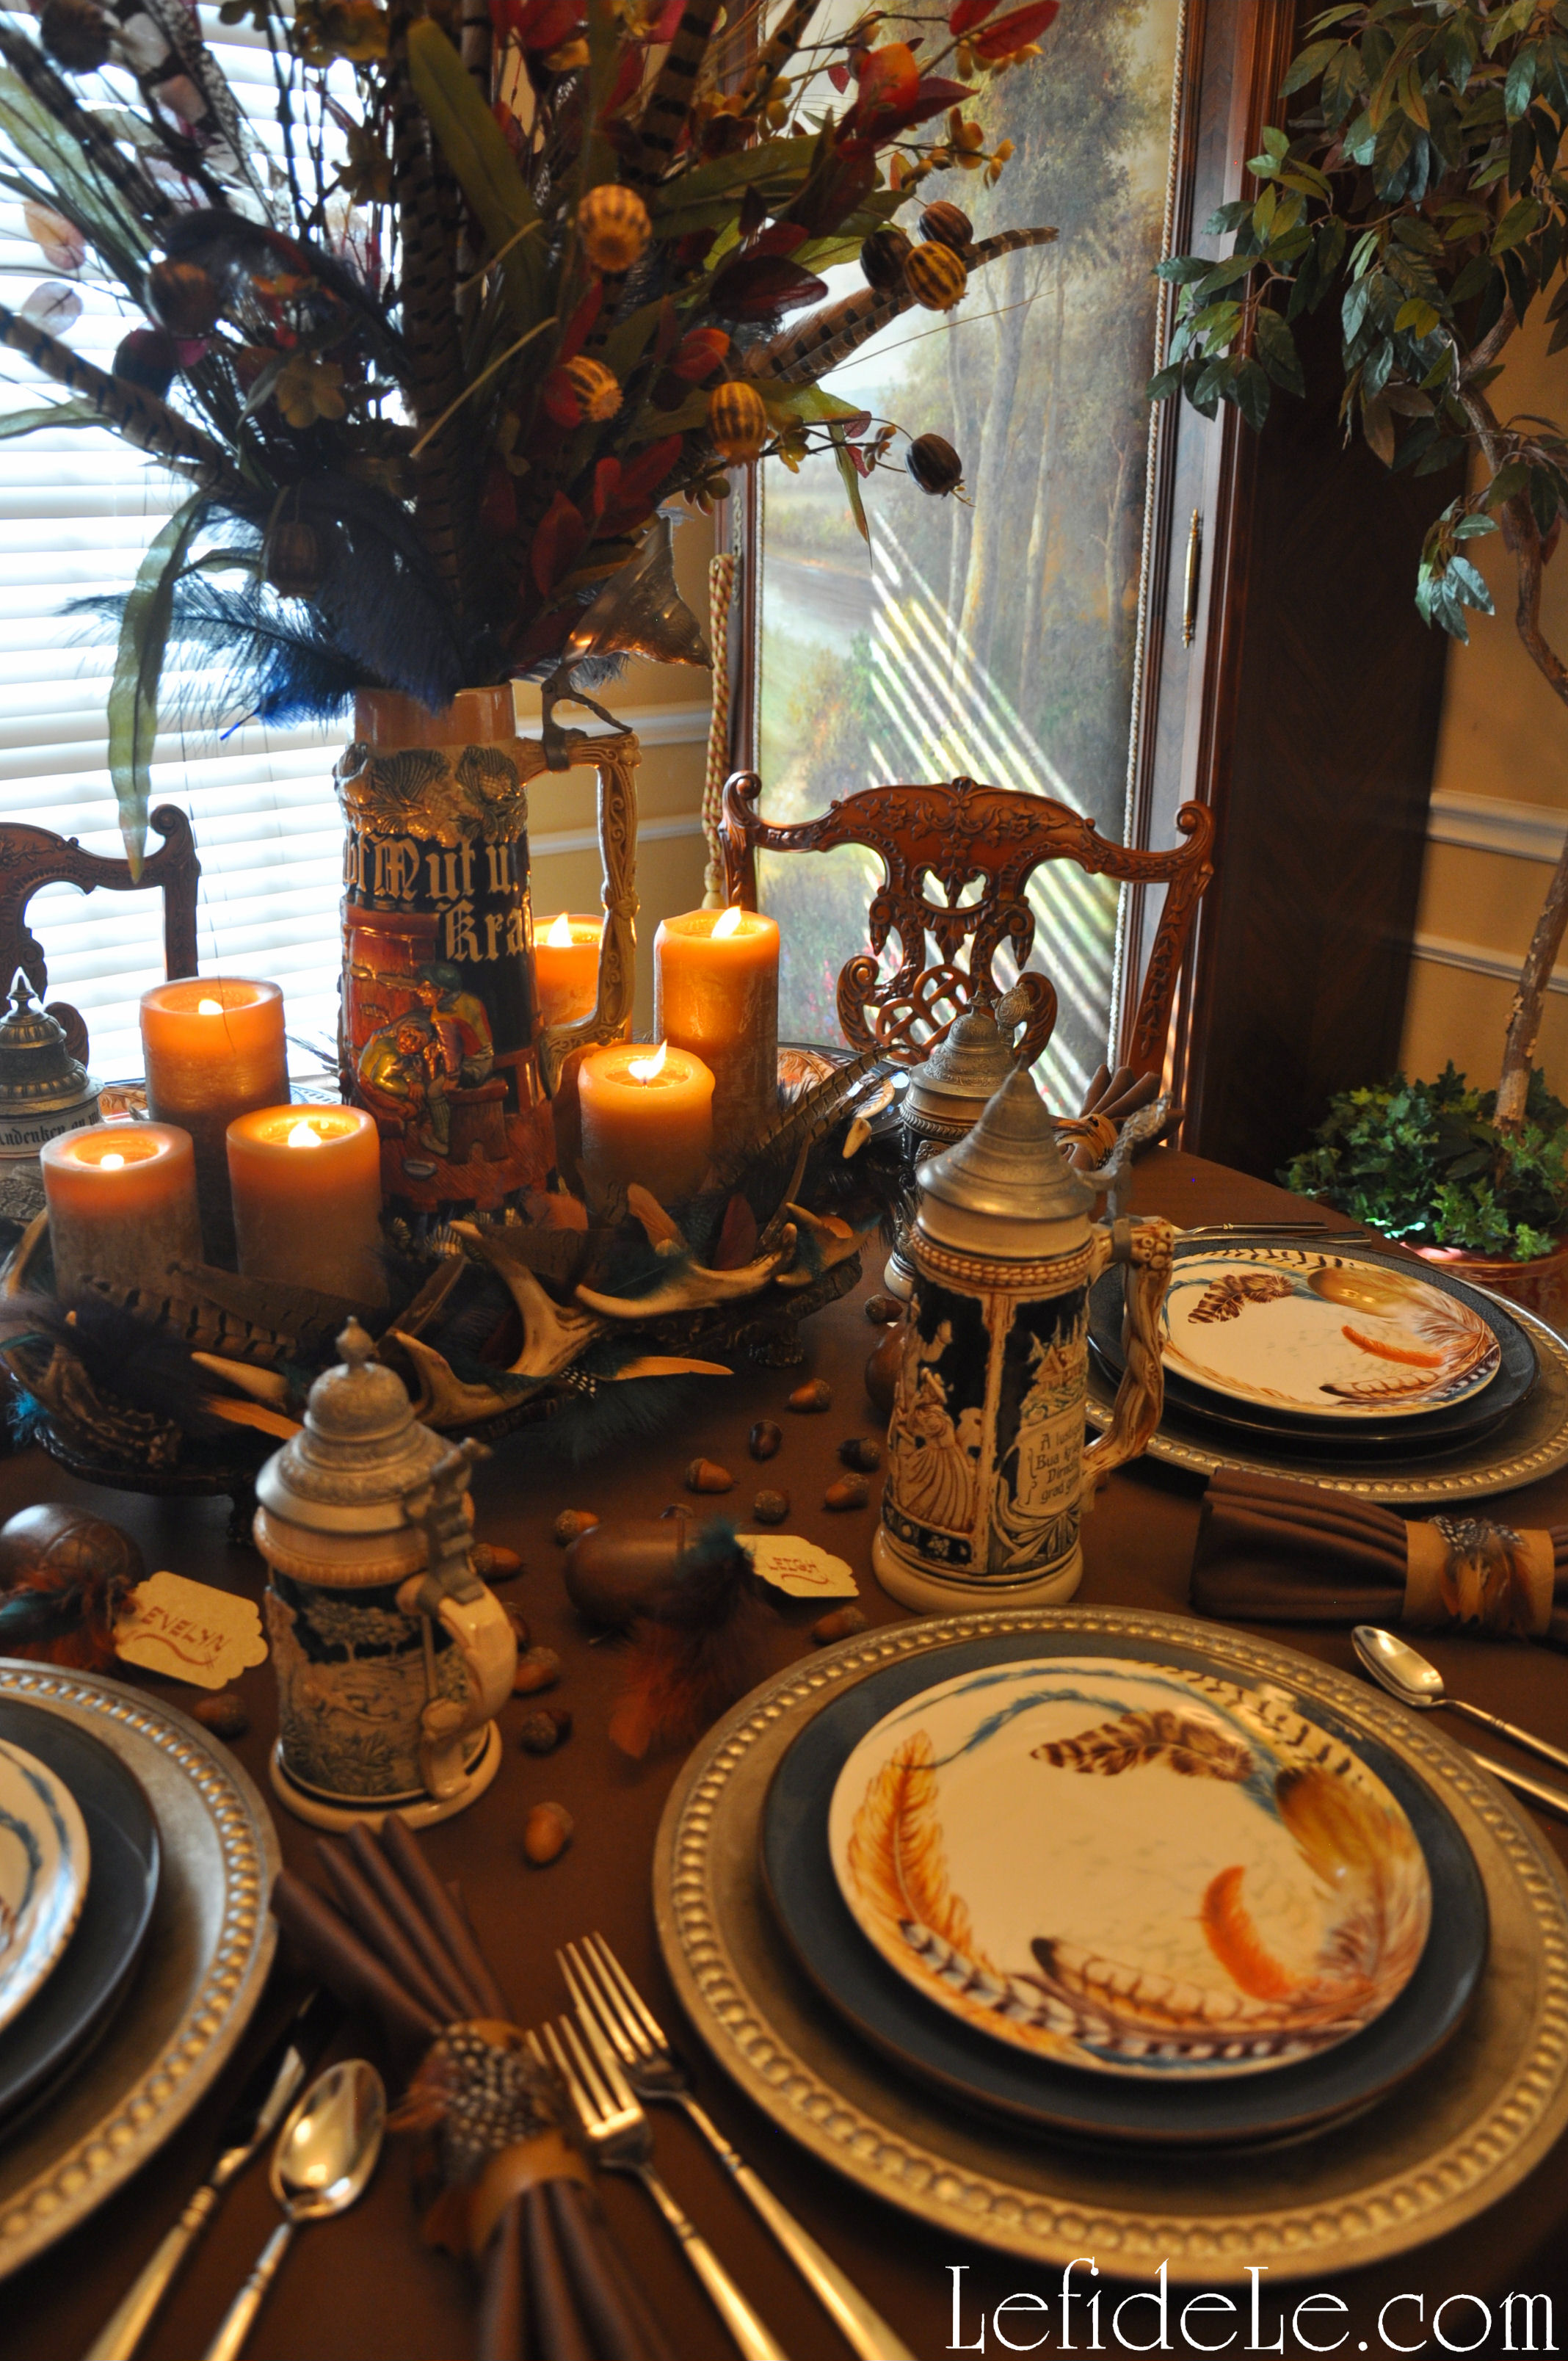
Make a centerpiece by simply using a steinkrug in place of a vase. (I used my grandfather’s, but a new one would look great too!) Fill it with a few boughs of natural or faux fall foliage and some gathered branches. Tuck in long feathers from the local craft store.

93Leigh

I set this onto a faux horned tray and placed shorter candles around it. (I got the tray 90% off because it had some broken tips which were easily camouflaged with paint.) Any decorative tray can visually contain the elements into a cohesive appearing centerpiece.

052Leigh

I then distributed feathers around the outer edge of the tray to coordinate with the others. (Look in the children’s craft section of your local craft store to find a larger quantity of bagged feathers much cheaper than those in other aisles.)

090Leigh

Time to go download some “oom-pah” music… so kidding! (Click here to see more Bavarian Oktoberfest Party Décor Ideas for a Fall Tablescape)

Faithfully Yours,

Leigh


Star-Spangled Independence Day Patriotic Party Décor Ideas (& All-American Burger Bar)

333Leigh

Every year on the fourth of July, families across the country gather in jubilant celebration of the birth of our proud democracy. We join together to commemorate our forefathers’ defiant stand to secure those inalienable rights we enjoy today, and to venerate that hard-won freedom. Take part in a tour of my star-spangled Independence Day event for décor ideas to plan your own patriotic party with!

358Leigh

History was heralded with a welcoming wreath spangled with bright steel stars and the broad stripes of old glory… denoting a gallantly streaming flag hailed through the perilous fight.

368Leigh

A table  in the aft zone was layered with patriotically printed fabric atop a white tablecloth… symbolizing the purchase of peace. The table’s façade was treated as a frontispiece with a star-spangled banner collage featuring iconic imagery in the appliqués cut from the same patriotic print fabric. (Find my no-sew craft tutorial on it here.)

362Leigh

The theatre’s horizon displayed a dazzling banner of classic Americana exclaiming, “God Bless America”. An explosion of color extended to thematic paper plates, blue cups, and flag printed napkins. A plain white vintage water pitcher was adorned with the sparkle of a steel star and flag ribbon.

014Leigh

Decorating rebellion manifested itself with a centerpiece, placed off-center, of beribboned candles atop vintage ceiling tile candlesticks… all to represent Lady Liberty’s torch. Hanging from them were steel stars and flag painted Christmas ball ornaments… representing bombs bursting in air and the flag that was still there. A galvanized pail held utensils set for dessert.

021Leigh

Revelers were offered the refreshment of blue patriot punch held in sustainable vessels festooned with stars and stripes. Further sustenance was provided with chips in a red painted basket (from the Beanitos brand made in the USA).

363Leigh

The memory of George Washington was honored with “truthful cherry patriotic pie” (of my own upcoming gluten-free vegan recipe) held high in esteem upon a metal pillar spelled with zinc USA letters. Sweet vegan tarts crowned with candy stars (from another American brand Hail Merry) topped a second pillar swathed in more stars.

333Leigh

The fore-field was set as an all American build a burger bar over the classic American staple of blue jean cloth set over a red tablecloth. Blasts of star spray shot out from beneath a centermost tray… connoting embattled fireworks.

373Leigh

Homemade burger buns (of my own upcoming gluten-free vegan recipe) were displayed in a pewter dish. Behind that sat a vintage tray offering hamburger accompaniments… like heirloom tomato slices, organic green onion, artisan leaf lettuce, and locally grown red onion slices.

375Leigh

An additional vintage pewter dish served onion loaded beef patties (another of my upcoming recipes). Slices of soy-free vegan cheese (from USA brand Follow Your Heart) were stamped with an American Flag seal of approval. Deep square vintage steel dishes presented pickled okra, onion, cornichons, gherkins, and sun-dried tomato stuffed green olives.

353Leigh

Galvanized metal buckets lined with flag napkins made admirable single-serving fry baskets bursting with seasoned steak fries (see my upcoming recipe). Old-school salt and pepper shakers got the patriotic washi treatment. More vintage dishes contained soy-free veganaise, paprika-free mustard, and corn-syrup-free ketchup… so that no allergy got served.

351Leigh

As the July 4th night sky blazes with the flash of celebratory fireworks, may we all seek to reflect upon the valorous sacrifices made for our collective liberty.

374Leigh

Faithfully Yours,

Leigh

P.S. Keep checking in on my Recipes Page for the latest postings on Gluten-Free & Egg-Free Pies, Fries, & Hamburger Buns! I’m launching a new on-going series of Burger Creations that is set to grow increasingly creative with time!

044Leigh

Be sure check out my article for a DIY July 4th Denim No-Sew Appliqué Collage Star-Spangled Banner Craft Tutorial for Independence Day here!

163Leigh

And this article for July 4th Altered Art Greeting Card as Mailable Mixed Media Independence Day Décor (DIY Collage Art Tutorial)here!

120Leigh

DIY July 4th Denim No-Sew Appliqué Collage Star-Spangled Banner Craft Tutorial for Independence Day

163Leigh

Inspired by our glorious national anthem, I set out to construct my own star-spangled banner (not old glory) to wave over a modern Independence Day celebration. Making a fabric appliqué collage banner is easier than it looks, and it’s easy on the budget because it only takes a little fabric, rope, ribbon, and hot fabric glue. That’s right, glue… no sewing skills are necessary! This makes it so quick to construct, that it can be made the day before a party. Even better, no one else will have anything like it, because it’s your own one-of-a-kind work of art!

125Leigh

Let’s begin with fabric selection as there are a number of ways to go about this… if you have a plethora of leftover fabric scraps, all the power to you, use them! For my banner base triangles, I used old denim. (This might be the perfect project to do something useful with that old pair of jeans that hasn’t fit in, well… awhile!) You can also purchase coordinates at the fabric shops and craft stores. (See my affiliate links in the side bars as they offer great discounts from time to time.) For my appliqués, I bought a patriotic print on sale (from Le fidèLe Designs affiliate Joann / Hancock Fabrics) that was just perfect for collaging. (See more denim and patriotic print fabric completing my Star-Spangled Independence Day Party Décor as table cloths here.)

127Leigh

Divide the end of your base fabric into 6 inch sections, and mark the underside of the fabric with a pen.

128Leigh

Next, mark 8 inches below the top line to form the length of your future triangles. (You can either cut this strip now or wait until all your marks have been made.)

133Leigh

Mark a dot on the 3 inch midpoint of each 6 inch top section. Use a ruler to mark the corresponding point directly below it, onto the 8 inch line (or cut). This will be your triangle’s point. Mark a line to connect this point to each corner of the 6 inch marks you made first. (You will be making triangles with each connection.)

132Leigh

Cut along each line to make your triangle bases. Another option is to make a tab at the top of each triangle in order to fold it over a thick piece of rope… otherwise just glue the triangle top to the rope. (I elected to make a tab for these. I’ll demonstrate the tab-less version in a future tutorial.)

140Leigh

Cut a tapered edge on any tab tops you make, so that it isn’t seen on the front after gluing.

136Leigh

Now cut out individual images from your printed fabric… just as you would in a paper collage or decoupage project. Use good fabric shears for a clean cut, or old scissors to make an intentionally rough edge… again, it’s your project, so it’s your choice. Also, think about cutting apart some of the larger images into smaller ones. (For example, cut apart the eagle from the flag in one image.)

138Leigh

Lay out your triangles to plan your design. Rearrange your cut images until you find it looks pleasing. (This is the part where banner craft becomes collage art.)

142Leigh

Adhere the appliqués to the triangle base with hot fabric glue. (Because I’ve already dealt with staunch naysayers concerning the ability of hot glue to work on fabric… there are varieties of hot glue made just for fabric, and it will say so on the label. Press the fabrics together immediately after applying the glue, using silicone hand protection of course. Once the glue has cooled completely, I defy anyone to pull the 2 materials apart!) There are also many varieties of cold fabric glue that just require more drying time. (This would be the safer option if constructing this with kiddos.)

145Leigh

Next glue each triangle flap over the rope you’ve chosen, leaving an inch or so between each. (For the tab-less version, just glue along the top of the triangle’s underside to attach it to the rope directly.) Don’t forget to tie a loop at each end for hanging.

148Leigh

Cut lengths of random yet coordinating ribbon to tie between each panel. Another option is to cut strips of fabric and tie those on. (You can see I’ve done this in the bows I glued to the panel fronts.) Now go hang it up and admire your handiwork! 🙂

162Leigh

“Oh, say, can you see, by the dawn’s early light,What so proudly we hail’d at the twilight’s last gleaming? Whose broad stripes and bright stars, thro’ the perilous fight, O’er the ramparts we watch’d, were so gallantly streaming? And the rockets’ red glare, the bombs bursting in air, Gave proof thro’ the night that our flag was still there. O say, does that star-spangled banner yet wave O’er the land of the free and the home of the brave?”

368Leigh

May you have an absolute blast crafting your own star-spangled banner this Independence Day!

Faithfully Yours,

Leigh

P.S. If you like collage, check out my July 4th Altered Art Greeting Card as Mailable Mixed Media Independence Day Décor (DIY Collage Art Tutorial).

120Leigh

July 4th Altered Art Greeting Card as Mailable Mixed Media Independence Day Décor (DIY Collage Art Tutorial)

120Leigh

Herald in the fourth of July with an altered art greeting card that doubles as a mailable gift, as it may be framed by the recipient as mixed media décor commemorating Independence Day. It’s a delightful way to send a bit of revelry to a loved one who can’t attend the year’s celebration. This art project is perfect for gathering the whole family together for a fun “crafternoon”, because the Design Memory Craft mediums are non-toxic. They are also fully compatible with each other and a large variety of substrates. This product versatility makes it so easy to combine collage material into something impressive. So follow along as I create an art card ablaze with the spirit of the season, then use the ideas to make one infused with your own artistic essence… because a blast of creativity is the best way to start the holiday off with a bang!

058Leigh

Begin with a readymade greeting card base or make your own inexpensively from sturdy cardstock.

061Leigh

I cut a piece of parchment printed paper to a 7 x 10 inch size, so that it could be folded into a 5 x 7 card… perfect for framing.

63Leigh

I used deckle edge cutting scissors to produce a torn looking finish on the card. (I later used the deckle scissors to cut around some of the stamped images too.) Pitt artist pen big brushes are perfect for highlighting such details. Just swipe the side of the brush along the edge to deposit the permanent ink in a rough fashion.

064Leigh

Paper washi tape is a quick way to imbed visual texture onto the base of a collage. Another way is apply printed pages with gel medium. (I’ll demonstrate this more fully in a future tutorial.)

068Leigh

Design Memory Craft gelatos are multipurpose mediums that look like colored chap-sticks. They apply thickly, but can be thinned to watercolor consistency when mixed with water. (You can even turn them into a liquid spray paint to splatter your work with!) They can be used to dye a variety of materials as well. To dye canvas ribbon, I simply marked it haphazardly with a gelato on both sides. I then took water and rubbed it into the ribbon, like magic… it turned blue. It dried fairly quickly too!

070Leigh They can be mixed with other mediums also. You can see here what straight gelato and plain gesso looked like before mixing. (Warning: if you explore medium capability with a small sample pack like I did… you may get totally hooked too!)

074Leigh

Here I used a palette knife to tint gesso with a cobalt blue gelato. White gesso opacified the color into more of a cornflower blue. A thick swipe of medium over a stencil will lay down a swath of shaped color onto your paper. (Stencil words like “celebrate” are great to have in a craft arsenal to use year round.)

076Leigh

I used the same technique to form raised letters onto colored paper. (This is a great way to use up all those scraps of “craftermath” from previous projects!) The thicker the layer of gesso, the longer it will take to dry.

072Leigh

Use any leftover gelatoed-gesso as an opaque stamping ink. It’s great to use on colored papers that would just appear as plain black if using a stamp pad. (I really liked the blue on red for these fireworks.) Just remember to rinse off your stamp before the gesso dries.

079Leigh

You can dye just about anything with gelatos and pitt pens. The gelato dyed ribbon will appear lighter once it has dried. If you’d like to impart deeper color, just repeat with more gelato. The little scalloped round element is a cork sticker that I tinted with cobalt blue gelato. It’s easy to make an ombre effect by applying color to only one side then rubbing it across the piece. I used the pitt pens as a wood stain by simply coloring the laser-cut birch 4 and bamboo food pick. (This is the easiest and cleanest way I’ve found to tint wood without losing the grain pattern!)

083Leigh

Pitt artist pen big brushes can also be used in place of stamp pads. (They’re especially great when you want to combine colors onto one stamp image!) I spelled out JULY, with a magnetic lettering stamp, as if it had been printed by an old-school typewriter.

087Leigh

Don’t forget to add your seal of “makership” to the back of your creation! Leftover ink on my stamp blended with the deep scarlet red pitt pen ink to tint the edges a bit darker… which I completely adore.

81Leigh

Once most of your elements are constructed, you can place them on the card in order to edit… if need be. I used the rough-draft placement to decide where my background colors should go.

086Leigh

I used red and blue gelatos as finger-paint to tint the paper and washi tape background with. Use a wet finger or a water brush to grab pigment straight from a gelato, or dip a brush or finger into pre-mixed gelato and water. (My choice took me straight back to kindergarten!)

091Leigh

Next, I tied a bow with the ribbon (representing remembrance) and glued everything down. You can use any glue you like, or even the gel medium to glue down the papers with. (I chose hot glue because it works on all the elements I used… even the wooden ones.)

122Leigh

I layered red tinted cardboard under the stenciled papers, and elevated them with tiny foam stickers for dimension. The fireworks were attached with brads, but I added hot glue dots beneath them to make them pop right off the page. (Note that the star spangled banner is actually another repurposed food pick!)

093Leigh

For a finishing touch, I applied dots with opalescent texture gems gel liner (to symbolize stars in the night sky filled with the rocket’s red glare which we memorialize with fireworks).

120Leigh

It’s that subtle yet profound symbolic meaning that completes the piece’s transformation from craft into art which makes it worthy of being framed, not just as a holiday decoration, but as artwork. This Independence Day, I will be celebrating the liberty we are given to express ourselves in a country of freedom.

Faithfully Yours,

Leigh

P.S. If you like making collages, be sure to check out my DIY July 4th Denim No-Sew Appliqué Collage Star-Spangled Banner Craft Tutorial for Independence Day. 

163Leigh

Lemon Glazed Pumpkin Pear Teacakes (Gluten-Free Vegan, Dairy-Free, Egg- Free) for Mother’s Day Tea

047Leigh

My dairy, egg, and gluten-free recipe for Lemon Glazed Pumpkin Pear Teacakes began as an experiment to concoct an original healthy and allergy-friendly cake. It can be fashioned into your choice of layered cake, cupcakes, and teacakes. The level of sweetness can be controlled by the amount of glaze you choose to top it with, and almost four cups of pumpkin and pear make this a yummy but guilt-free treat for all to enjoy. So for this Mother’s Day, let them eat teacakes!

032Leigh


Pumpkin Pear Cake Ingredients:

  • 4 cups gluten-free baking mix (brands vary greatly… I used Arrowhead Mills)
  • 2 egg replacers (3 teaspoons + 4 Tablespoons water = 2 eggs… or just use eggs)
  • 1 cup of canned pumpkin (or use homemade purée)
  • 2 ¾ cups pear puree (blended ripe pears, or other fruit purée)
  • ½ cup melted coconut oil (or butter)
  • 1½ cups sugar (or alternative granular sweetener)
  • 2 tablespoons lemon juice (or other citrus juice)
  • 2 teaspoons pure vanilla extract (not imitation)
  • 1 teaspoon salt
  • 2 teaspoons cinnamon
  • 1 teaspoon ginger
  • ½ teaspoon nutmeg
  • ½ teaspoon cloves
  • ½ teaspoon allspice

Lemon Glaze Icing Ingredients:

  • 4 tablespoons lemon juice (or any citrus juice)
  • 1 cup confectioner’s sugar (or use powdered)
  • optional: dust with more confectioner’s sugar (or use powdered)

Instructions:

002Leigh

Mix all the dry ingredients together.

007Leigh

Add in the wet ingredients to make a super sticky batter.

008Leigh

Spray a 2 tea cake pans, 1 muffin tin, or 2 cake rounds with coconut oil… or use a jarred stuff to grease them the old fashioned way. Do not dust with flour afterward.

011Leigh

Pack the dough into your pans. If you’re making muffins, shape rounded tops with the back of a spoon. If making cakes or tea cakes, smooth the mixture flat with a spoon. (This is a sticky dough that will retain more of its shape than the more fluid batters.)

025Leigh

021Leigh

Slide your filled pans into a non-preheated 350ᵒ oven. (This is because gluten-free vegan goods bake a bit differently than the wheat and egg types.) Bake according to your oven’s temperament, for about 40 minutes.

022Leigh

Let them cool off a little before popping them out.

030Leigh

To make the glaze while you’re waiting for them to cool completely, simply mix the ingredients well in a bowl.

031Leigh

Spoon the glaze onto cooled teacakes.

122Leigh

Confectioner’s sugar may also be dusted over the top if you like. (Confectioner’s is a dusting sugar without corn additives.) Top these teacakes with raspberries for a delightful sight.

051Leigh

They were a delicious allergy-free addition to my Spring Garden Mother’s Day Tea.

082Leigh

I hope they bring a smile to your face too!

Faithfully Yours,

Leigh

Easy to Mold Naturally Colored Pink Sugar Shapes Sweethearts Recipe = a Spoonful of Sugar for Your Mother’s Day Tea

136Leigh

Celebrate Mother’s Day the Mary Poppins way with a spoonful of sugar in your tea! This no-cook recipe for pink sweethearts utilizes natural beet juice instead of artificial food coloring, but you can substitute any color of juice you like. Plus, they’re really easy to make and mold into any shape you desire. They’re a “supercallifragilisticexpialidocious” alternative for decorating your baked goods as well, because they contain no corn syrup. It only takes a matter of minutes to mix and mold, then let them dry overnight. They are “practically perfect in every way”.

125Leigh


Ingredients:

  • 2 cups granulated sugar (I used evaporated cane juice)
  • 3 teaspoons water
  • 1 teaspoon bottled beet juice (or other juice… or gel food color + 1 teaspoon water)

+ flexible silicone molds in your choice of shape


Instructions:

019Leigh

Gather the ingredients, and measure them precisely.

020Leigh

Mix them together very well, until the pink color is evenly distributed.

028Leigh

Use spoons to dispense the sweet mixture into each well of the mold. Pack it down tightly, flattening the top with the back of a spoon.  (This recipe filled two of my heart molds.)

118Leigh

Let them sit out to dry overnight, and unmold them gently in the morning. Keep them stored in an airtight container until you’re ready to use them.

097Leigh

Here they are at the Spring Garden Mother’s Day Tea.

122Leigh

One must be allowed to indulge in girliness every once in a while.

121Leigh

These are so much cuter than plain little squares of white sugar.

125Leigh

So how about you… one lump, or two?

128Leigh

“In every job that must be done, there is an element of fun. You find the fun, and – snap – the job’s a game!” –Mary Poppins

Faithfully Yours,

Leigh

Cherry Pecan Chicken Salad (Soy-Free / Egg-Free with Stuffed Tomato & Gluten-Free Shaped Finger Sandwich Options) for Mother’s Day Tea

122Leigh

Skip the watercress and cucumber, and opt for heartier fare for your Mother’s Day Tea with this easy allergy-friendly recipe for Cherry Pecan Chicken Salad. Serve this delicious soy-free and egg-free delight with gluten-free bread or crackers for all your guests to enjoy worry-free. Or just make a nutritious lunch of adorably shaped finger sandwiches for the kiddos and a stuffed tomato for yourself. Either way, try some today!

011Leigh


Ingredients:

  • 1 oven baked chicken breast (see my recipe for this here… or use a can, leftovers, or even turkey)
  • ½ cup pecan pieces (or walnuts, almonds, etc.)
  • ½ cup diced green onion (or leeks, onion, etc.)
  • ½ cup dried cherries (or dried cranberries, raisins, etc.)
  • ¾ cup soy-free veganaise (or mayo, vegan unsweetened yogurt, etc… or mix these ½ and ½)
  • sea salt to taste (or salt free substitute)
  • ground peppercorns to taste
  • optional: heirloom tomato to stuff, gluten-free crackers to top, artisan lettuce to fill, gluten-free bread for tea sandwiches, etc.

Instructions:

002Leigh

Bake and cut a chicken breast into cubes. (See my roasted cocorico chicken with root veggies recipe here, and my chicken with sautéed mixed greens recipe here.) Wash and dice the green onion.

008Leigh

Measure and mix all of the ingredients. Add sea salt and pepper according to your taste and sodium requirements.

017Leigh

Here I cut the top off of a large red and purple heirloom variety tomato, and then scooped out some of the center. Then I spooned a good portion of chicken salad into it and garnished the top with ground red peppercorns and green onion.

025Leigh

The green and purple artisan lettuce it’s resting on, also makes a wonderful carb-free wrap for the chicken salad. Those are gluten-free vegan Mary’s Gone Crackers in the Super Seed variety… yum!

130Leigh

The chicken salad was the perfect filling for the gluten-free tea sandwiches I served at the Spring Garden Mother’s Day Tea.

082Leigh

To go beyond tea sandwich triangles, simply press a cookie cutter into the bread, and fill with chicken salad. (Tulip, daisy, and butterfly shapes were my choice for the tea, but you can see bunny bread here with my carrot crouton recipe.)

043Leigh

Thanks Mom, for all the chicken salad you’ve made me over the years!

Faithfully Yours,

Leigh

31SweetPotatoTortas-Leigh

P.S. If you’re looking for another easy version of this, try my turkey salad recipe here.

Spring Garden Mother’s Day Tea Party Tablescape Décor Ideas (+ Free Printable Card & Invitation)

002Leigh

You’re invited for tea at my nest where enchanting tablescape décor awaits, where butterflies will carry you to a flower filled spring garden complete with the melody of birdsong. Delight upon delectable teacakes, treats, tarts, and tea sandwiches while sipping mint scented tea sweetened with pink sugar sweethearts. Celebrate with handmade gift crafts conveying heartfelt sentiments along with free printable invitations and cards sending your warmest wishes for a beautiful Mother’s Day!

022Leigh

Harken your ears to the call of birds whistling a merry tune of invitation to the spring garden. Two nests double the blessings bestowed upon the day as finding even one is said to be the harbinger of prosperity.

036Leigh

Notice the greeting of butterflies rising from moss laden purses filled with the yellow roses of friendship and tulips representing strength and life itself.

035Leigh

Take a seat cushioned with pastel patchwork pillows provided for your comfort.

028Leigh

Touch the threaded texture of a tablecloth hand embroidered generations ago.

380Leigh

Release baby pink vintage napkins from their handcrafted tapestry and lacework rings.

125Leigh

Sip mint scented tea from delicate vintage china teacups ornamented with floral motif.

136Leigh

Sweeten your tea with pink sugar sweethearts delivering a spoonful of sugar in the perfect dose.

122LeighStir in flavor with silver tea spoons that have been lovingly held by previous generations.

082Leigh

Sup on tea sandwiches packed with cherry pecan chicken salad, whose butterfly and floral shapes echo the garden’s delights.

130Leigh

Try almond crusted chocolate tarts balanced with healthy red raspberry fruit.

128Leigh

Taste pumpkin pear teacakes dripping with lemon icing, dusted with confectioner’s sugar, and topped with more fruit.

029Leigh

Cleanse your palette with pink peppermint almonds held in small antique silver bowls.

105Leigh

Sink your teeth into juicy plump strawberries offered amid vintage salt and pepper shakers.

051Leigh

Replenish your china plate from a grapevine heart topped tower of treats wrapped in lengths of tapestry and lace.

064Leigh

Gaze upon sunlight reflected from gleaming antique silver service layered with vintage doilies atop layers of vintage lace and patterned cloth.

097Leigh

Feel the impressions of vintage buttons encrusting a jewelry box gift sheltered by a lofty spring floral arrangement.

004fLeigh

And at last, read the Mother’s Day card that will hold the memory of the cherished event for years to come.

Sincerely wishing you the happiest of Mother’s Days!

Faithfully Yours,

Leigh

6FreePrintCardLeigh

P.S. Right click on the small image below, and select print to make your own invitations (at the left) and cards (at the right) free (for personal use only). Print them on photo and color settings for the best results.

5x7NestTeaInviteLeigh5x7MothersNestCardLeigh

P.P.S. Click on the links below for teacake, chicken salad, and sweetheart recipes as well as crafting instructions for the jewelry box, keychain, and napkin rings.

001Leigh

Quick & Easy Tapestry Napkin Rings, Upcycled Button Jewelry Box, & Keychain Gift Crafts Tutorial (for Mother’s Day Tea)

118Leigh

Easy to Mold Naturally Colored Pink Sugar Shapes Sweethearts Recipe = a Spoonful of Sugar for Your Mother’s Day Tea

47cakelette-Leigh

Lemon Glazed Pumpkin Pear Teacakes (Gluten-Free Vegan, Dairy-Free, Egg- Free) for Mother’s Day Tea

017Leigh

Cherry Pecan Chicken Salad (Soy-Free / Egg-Free with Stuffed Tomato & Gluten-Free Shaped Finger Sandwich Options) for Mother’s Day Tea

Quick & Easy Tapestry Napkin Rings, Upcycled Button Jewelry Box, & Keychain Gift Crafts Tutorial (for Mother’s Day Tea)

105Leigh

This tutorial will teach you how to quickly craft elegant tapestry and lacework napkin rings for your Spring Garden Mother’s Day Tea Party, then easily make cross keychain gifts and an upcycled jewelry box encrusted with vintage buttons. These are great last minute projects that are actually pretty inexpensive to produce, but would cost a pretty penny if purchased from a boutique. So craft along with me… the best is yet to be!

365Leigh

Let’s begin our crafternoon by making 6 napkin rings so that our tables may be set early.

380Leigh

Start with 3 feet of any variety of woven tapestry ribbon. (I always snatch these up when I find them on clearance, because they are just so versatile. I’ll show you more craft ideas to use it with in the future.) Also look for 6 feet of lovely lacework in a small width.

166Leigh

Cut all of your ribbon and lace into 6 inch lengths.

171Leigh

Glue the ends of the tapestry together overlapping them slightly. Use hot fabric glue or clamp a cold fabric glue to dry… or sew it if you’re so inclined.

177Leigh

Glue one length of lace to either side of the ring, layering it over the serged seam of the ribbon to conceal it.

111Leigh

Fill with any coordinating cloth napkin to suit your event’s color scheme.

083aLeigh

Next, let’s craft a cross keychain gift to extend our best wishes for a blessed life… or one with a heart full of loving-kindness.

080Leigh

Begin with any variety of coordinating beads of various shapes, a shape pendant, a key ring, thin fishing line, and a small split ring. (These can almost always be purchased on sale or clearance.)

082Leigh

Slide the small ring onto the key ring. (This will enable keys to be added to the ring later.)

083Leigh

Slip one end of the fishing line into all the beads first then through the pendant.

085Leigh

Now feed the line back up through those same beads.

087Leigh

Tie the two ends sticking up out of the beads onto the small ring with your choice of a double knot or surgeon’s knot. (Try triple looping the ends then triple looping them again in the opposite direction. Pull the ends really tight to bring it together. This is a great knot to keep keychains secure.)

090Leigh

Cut the dangling ends close but with a little bit sticking out of the knot to keep it from unraveling.

092Leigh

Package it with an apropos and sincere message.

94-2Leigh

Think about buying extra beads to make one for yourself as well!

371Leigh

Now I’ll tell you how I made an upcycled jewelry box, so that you can think about making your own quickly and easily. It would be lovely to enclose that keychain in it as a complete gift… because it’s bad luck to give away an empty jewelry box.

097Leigh

I actually began this upcycled project many years ago as a gift for my grandmother. I hot glued vintage mother of pearl, glass, and pearl buttons to a vintage powder puff box. I then used tacky glue to adhere white grosgrain ribbon to the sides and inside of the box. I added silicone feet to prevent table scuffing along with a button closure.

168Leigh

I never felt that it was quite good enough for my liking, so this year I decided to embellish it further with some ivory lace.

173Leigh

I simply hot glued dots onto the points of the lace then gently tapped them down onto the ribbon. I continued all around the box, and then cut and glued the end corner.

176Leigh

To finish it, I simply inverted another length of lace and glued it all the way around as well.

001Leigh

It looks so much more finished now, so I am happy to present the new and improved version back to my grandmother. To make your own, upcycle any old but pretty box or paint a new paper maché one. Cover it with vintage buttons or newly purchased ones. Glue on silicone or wooden feet. It’s an easy project that makes a beautiful gift.

128Leigh

Now you’re on your way to a fantastic Mother’s Day!

Faithfully Yours,

Leigh

P.S. Get free printable cards and invitations, plus see the napkin rings and box placed in the whole Tea here: Spring Garden Mother’s Day Tea Party Tablescape Décor Ideas (+ Free Printable Card & Invitation)

“Nacho Average Fiesta Dip” & Spicy Nachos Compuesto (Dairy, Corn, Red Pepper, & Gluten-Free) Easy Appetizer for Cinco de Mayo Fiesta

254Leigh

My “nacho average fiesta dip” is the main ingredient for my spicy nachos compuesto, and it proves that you don’t need to add red pepper to get a spicy kick out of Tex-Mex. And they make perfecto Cinco de Mayo appetizers because they’re not only quick and easy to make, but are also free of other allergens (like dairy, corn, and gluten) that are so typical of Mexican cuisine. So feel free to indulge without feeling indulgent… & ¡Fiesta forever!


“Nacho Average Fiesta Dip” Ingredients:

  • 7 ounces canned vegan refried black beans (the vegan varieties have no lard added… or try pintos, or make fresh)
  • 7 ounces canned fire roasted crushed tomatoes (or use freshly chopped and roasted)
  • 8 ounce package gourmet soy-free vegan cheddar shreds (this kind doesn’t have canola, soy, or milk casein protein… but use any variety of cheese you prefer)
  • 1 tablespoon lemon juice (or lime)
  • 1 teaspoon ground ginger
  • 1 teaspoon onion powder (or 1 tablespoon fresh)
  • 1 teaspoon garlic powder (or minced fresh)
  • 1 teaspoon ground peppercorns
  • 1 teaspoon sea salt (or salt substitute)
  • 2 teaspoons dried cilantro (or 1 tablespoon fresh)
  • chips, crackers, or veggies for dipping (try a corn & gluten-free alternative like bean and rice chips)

Spicy Nachos Compuesto Ingredients:

  • diced green onion
  • diced tomatoes
  • fresh cilantro
  • sliced black olives
  • shredded lettuce
  • chips (try corn-free bean and rice chips like these Beanitos)
  • prepared “Nacho Average Fiesta Dip”
  • optional: vegan yogurt or sour cream
  • optional: guacamole (try my spicy recipe that’s red pepper free here)

“Nacho Average Fiesta Dip” Instructions:

243Leigh

Gather all your ingredients and mix them together.

246Leigh

Heat the mixture until the cheese melts. (I used a microwave on 80% power stirring every 2 minutes, for a total of 8 minutes… but a saucepan on a stovetop works well too.)

250Leigh

Blend the hot mix until the cheese is indistinguishable from the beans and rice. (I, of course, used my handy-dandy immersion blender.)

256Leigh

Transfer to a serving dish and garnish with sliced olives, cilantro, and fresh ground peppercorns.248Leigh

Serve with freshly cut veggies, crackers, or your favorite chips. (I used beautifully dark “Beanitos” made in Austin because the bean and rice combo make a complete protein, at 4 grams per serving… plus they’re yummy.)

254Leigh


Spicy Nachos Compuesto Instructions:

274Leigh

Arrange an overlapping layer of chips onto a dish, and spoon hot “Nacho Average Fiesta Dip” over the top. Add the remaining ingredients in amounts that suit your taste-buds.

277Leigh

I had yogurt on hand and guacamole already made, but the nachos didn’t even need them. The Fiesta Dip had all the flavor I craved. Try tasting the chip-dip combo before loading yours up.

269Leigh

All of that salad-like part (lettuce, tomato, olives, green onion, and cilantro) that makes up the compuesto part of the nachos transforms this recipe from a snack into a meal… and therefore a guilt-free indulgence.

279fLeigh

¡Yo quiero spicy nachos!

Faithfully Yours,

Leigh

238Leigh

P.S. Try my Healthy Tex-Mex Cilantro Chicken Spinach Quesadilla Recipe (Dairy, Red Pepper, Corn, & Gluten-Free) Easy Appetizer for Cinco de Mayo Fiesta as well!