Tag Archives: Holiday

Elegant Chinese New Year of the Monkey Dinner Party Décor Tablescape Ideas

22Leigh

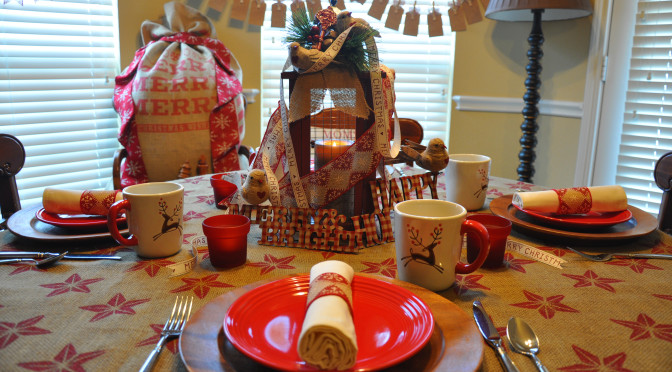
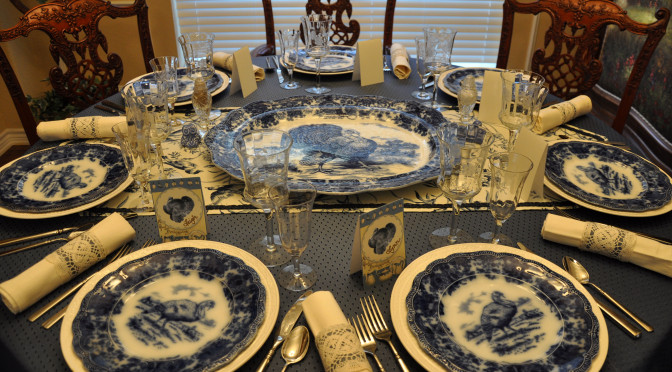
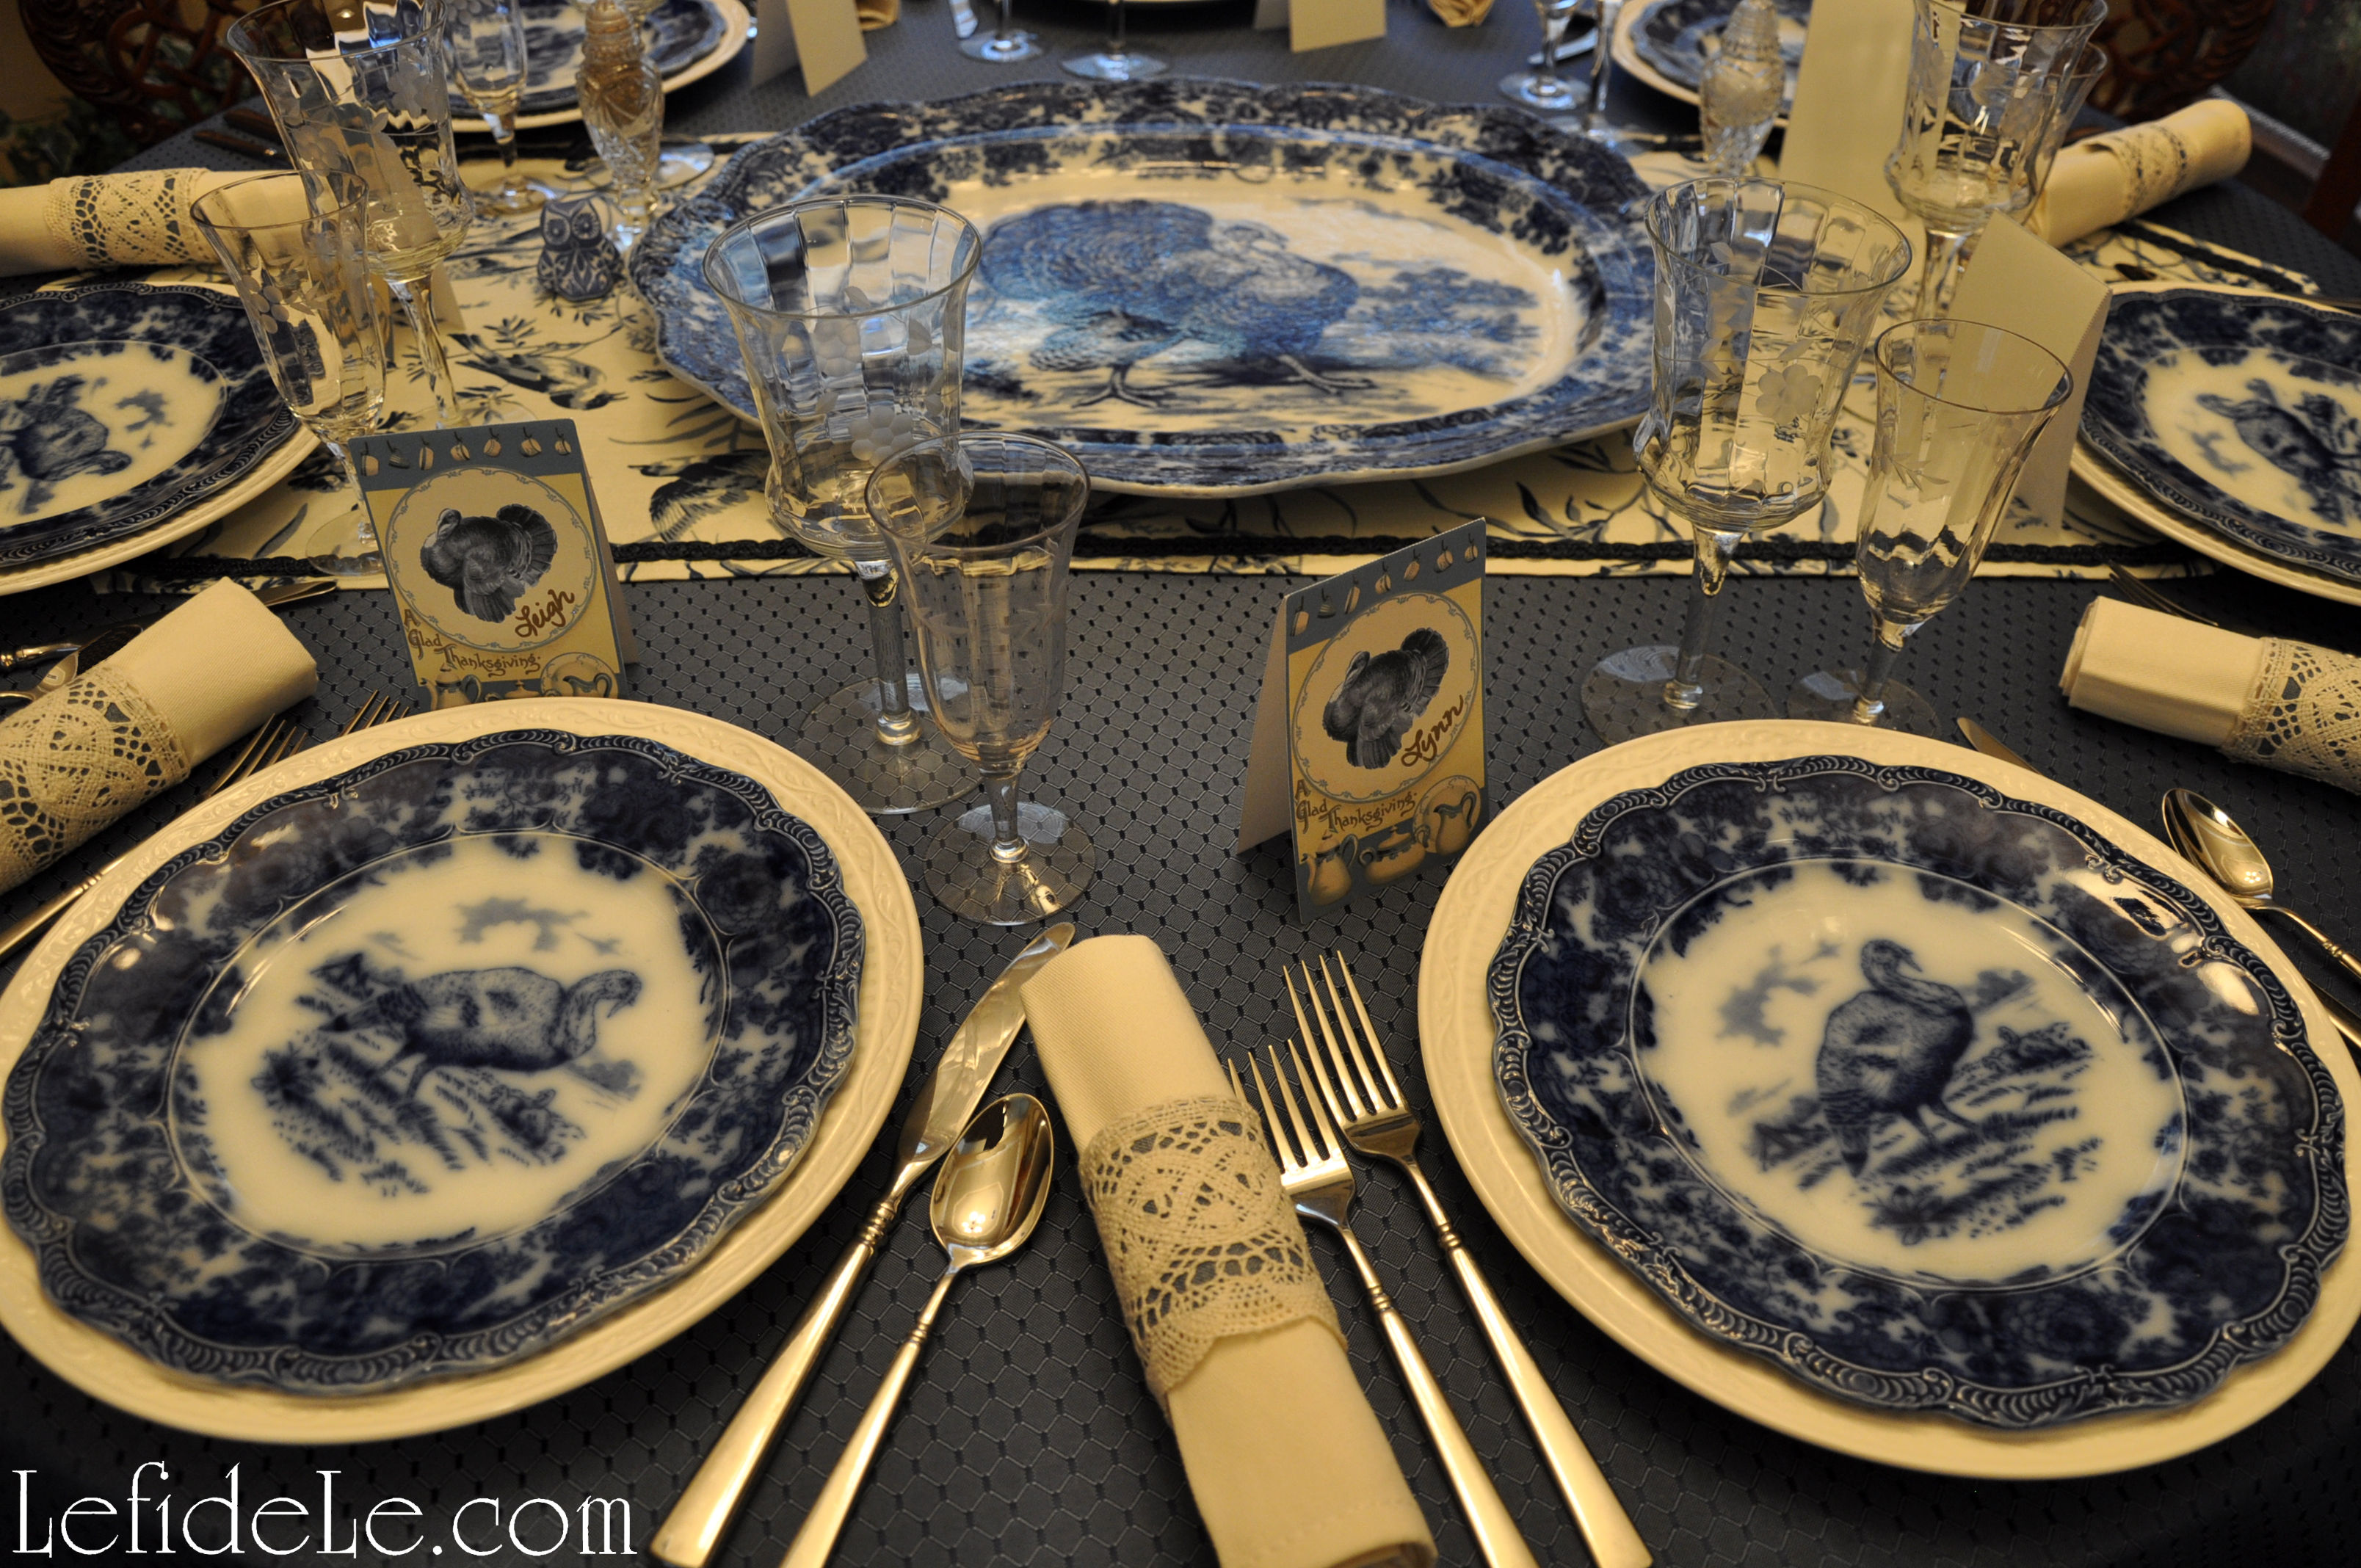
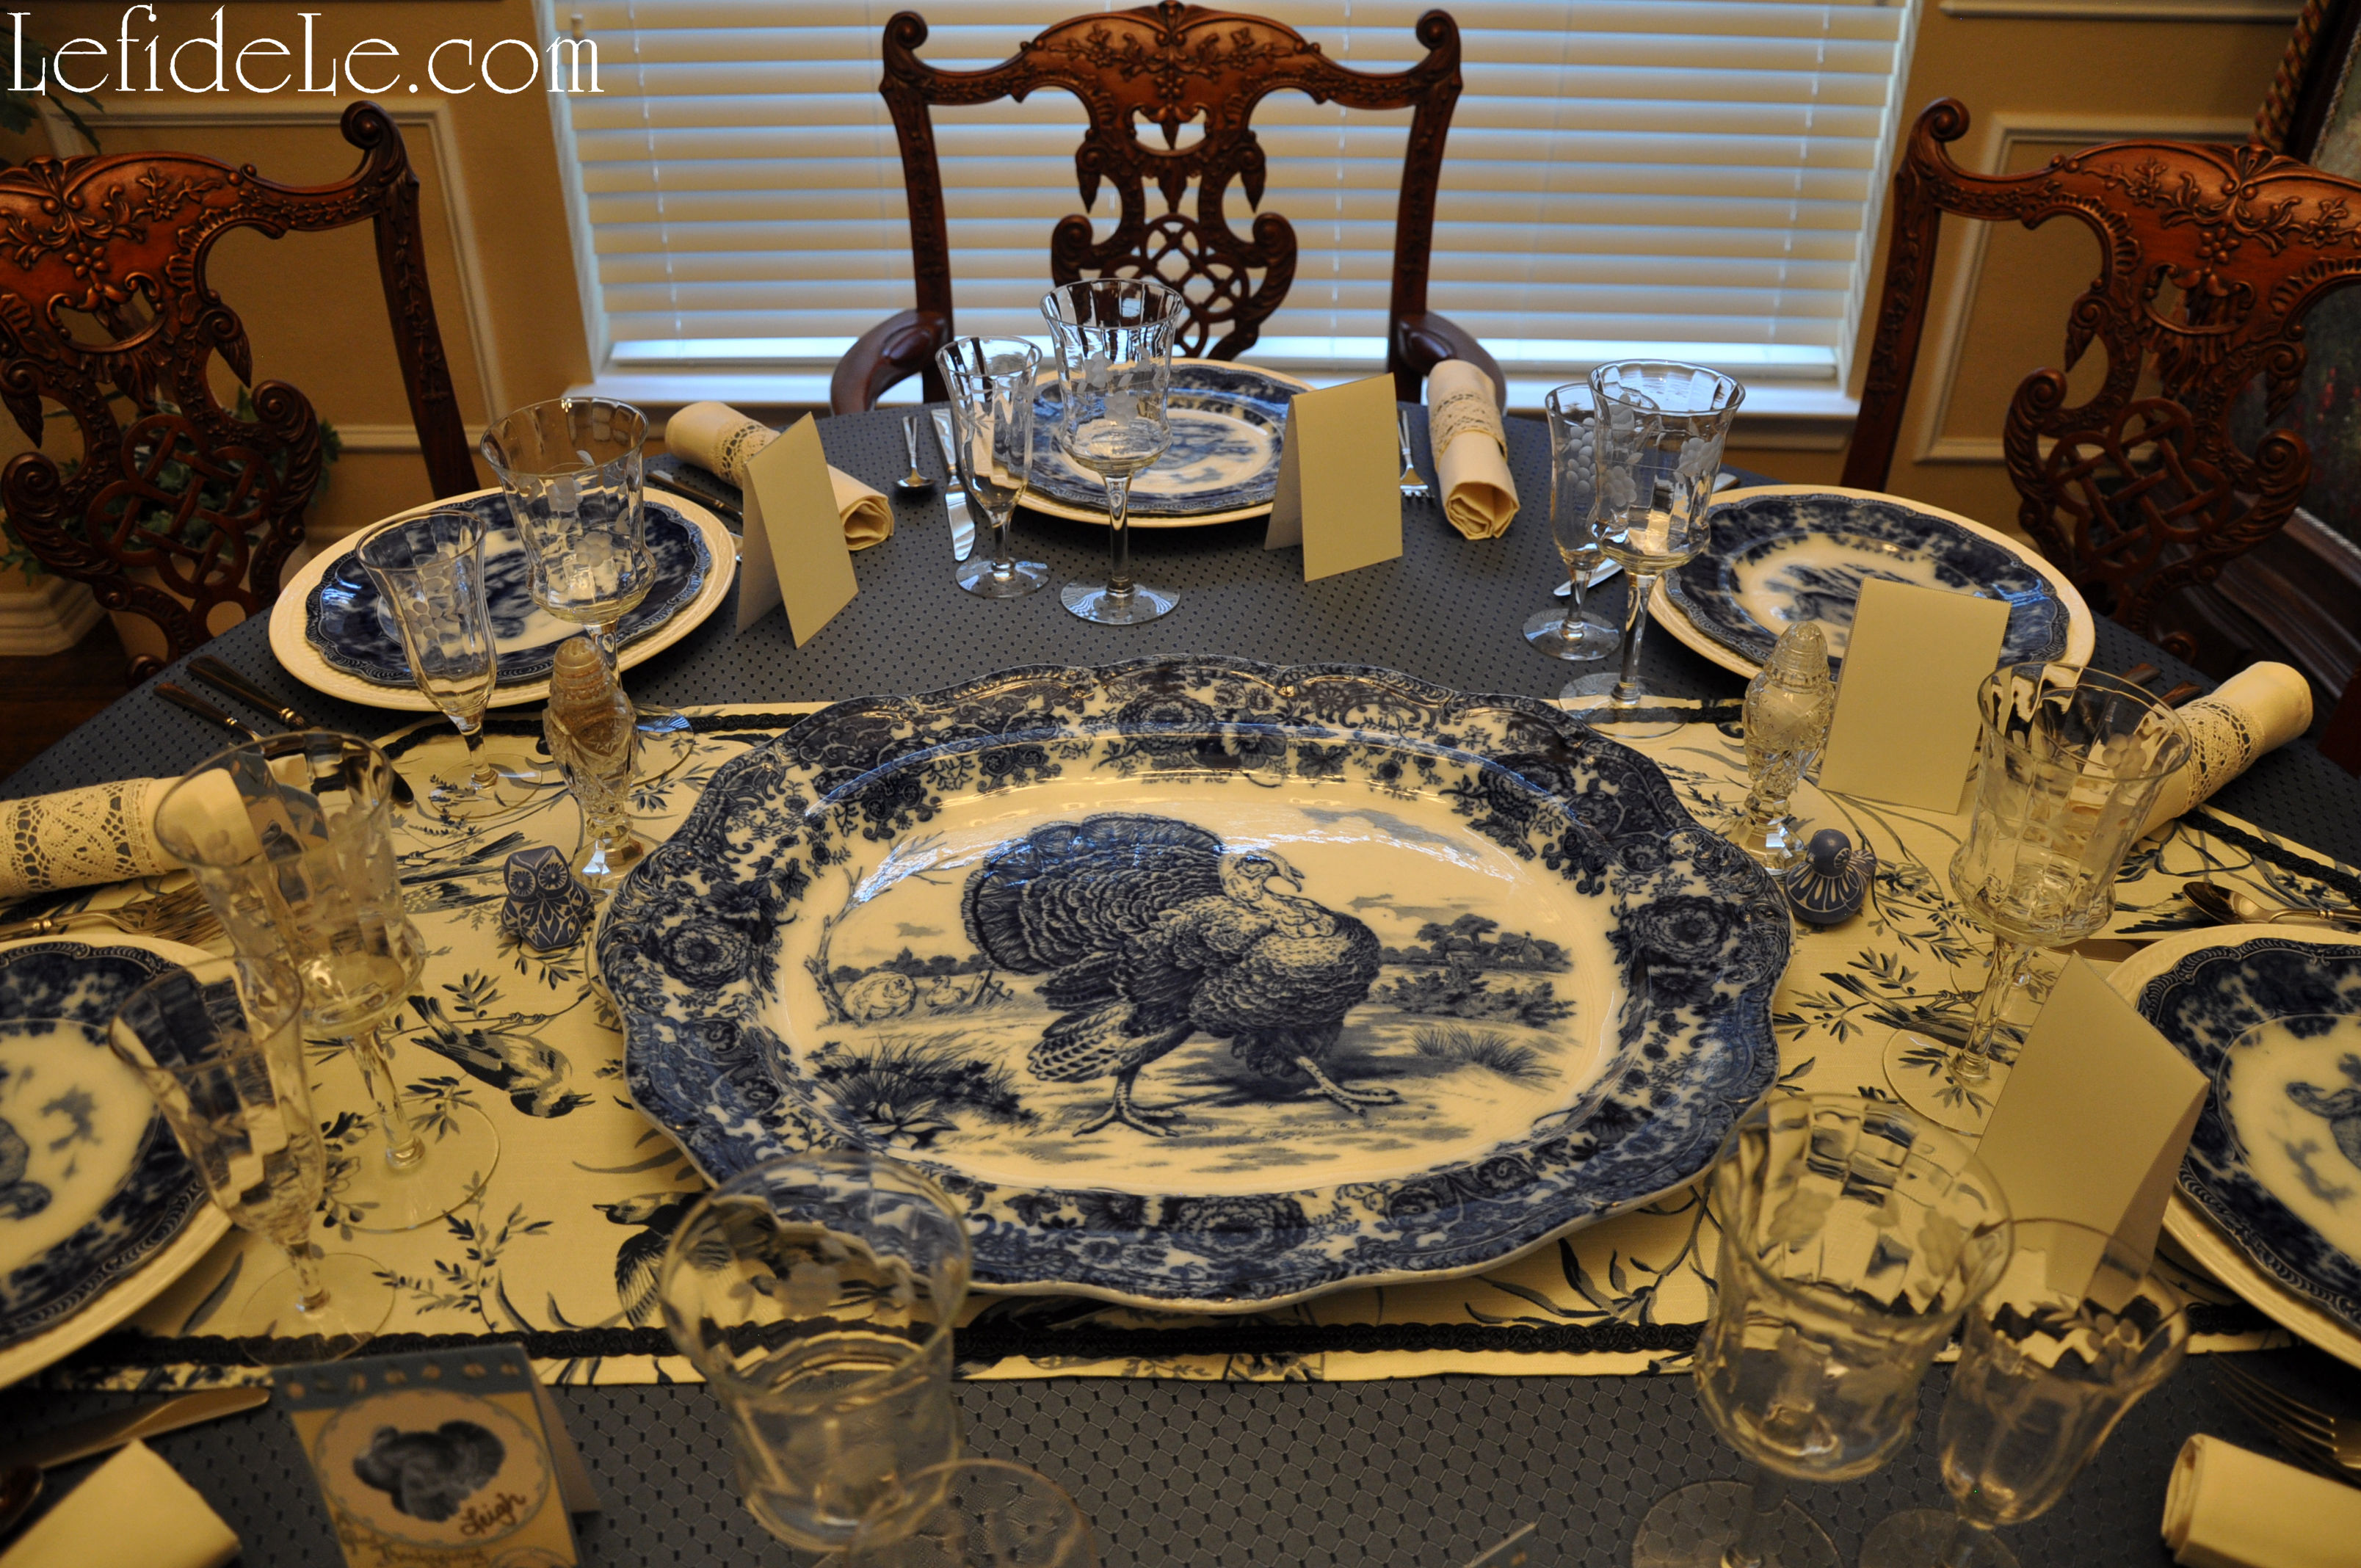
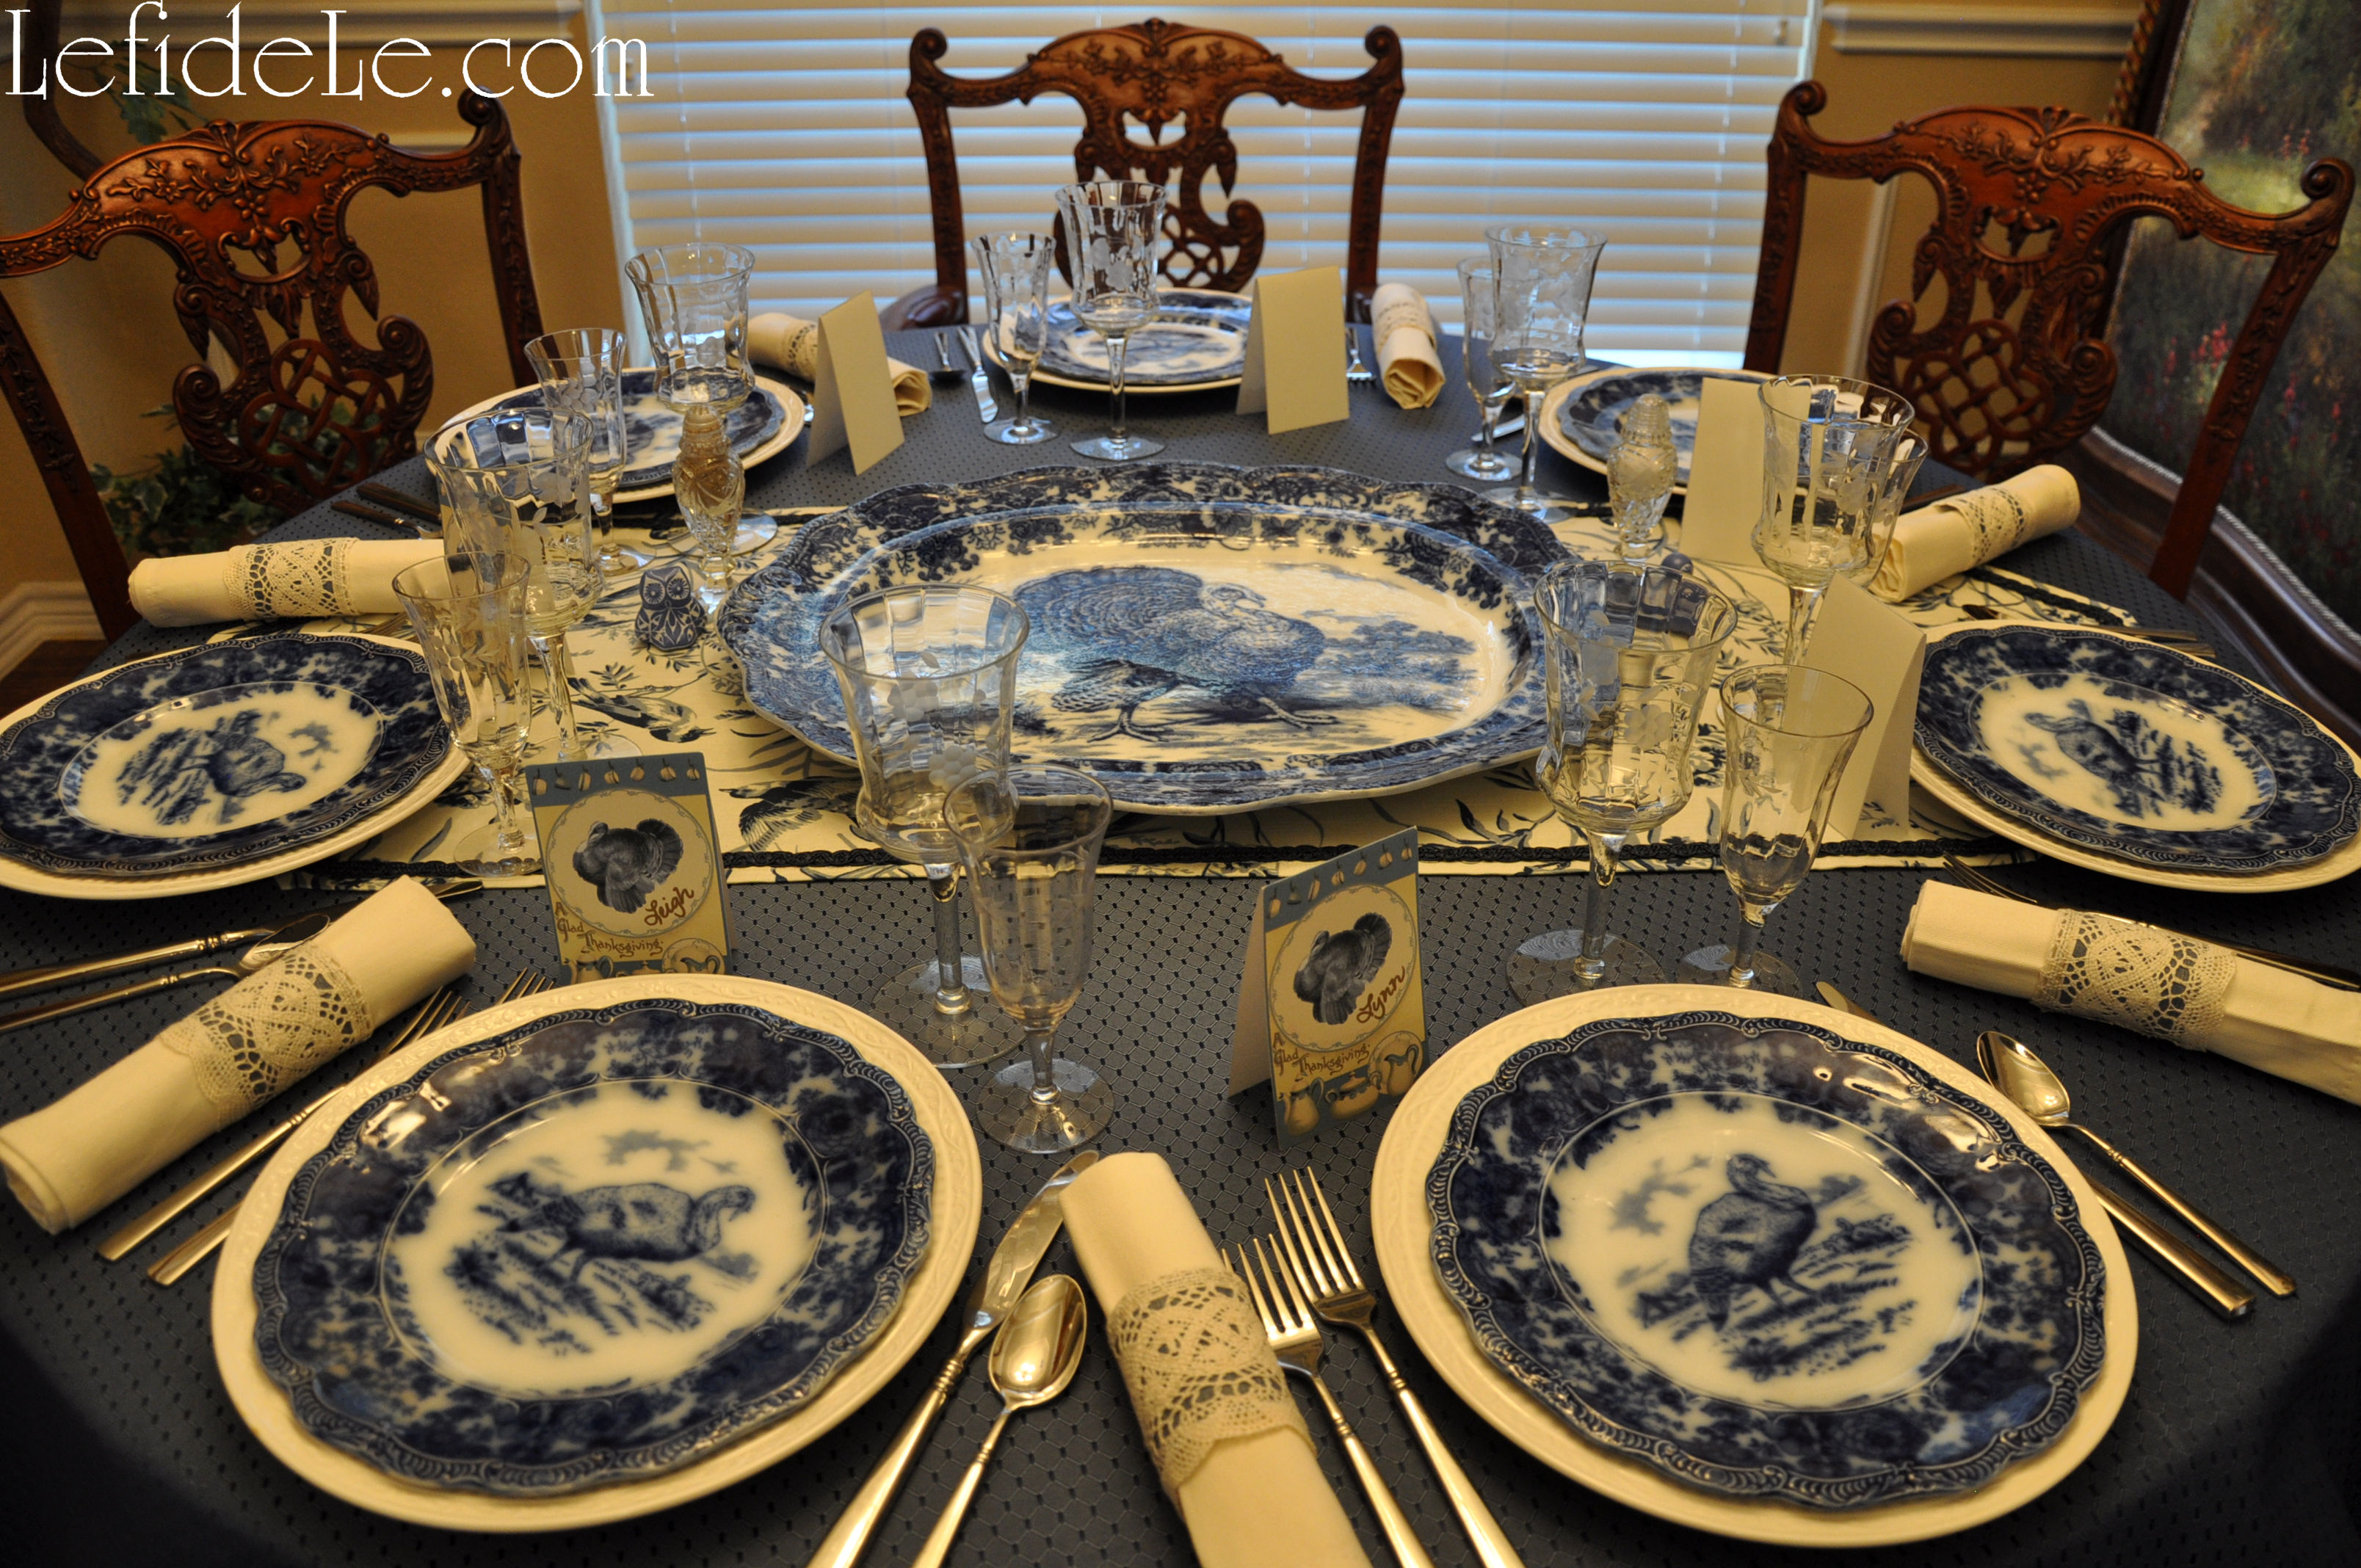
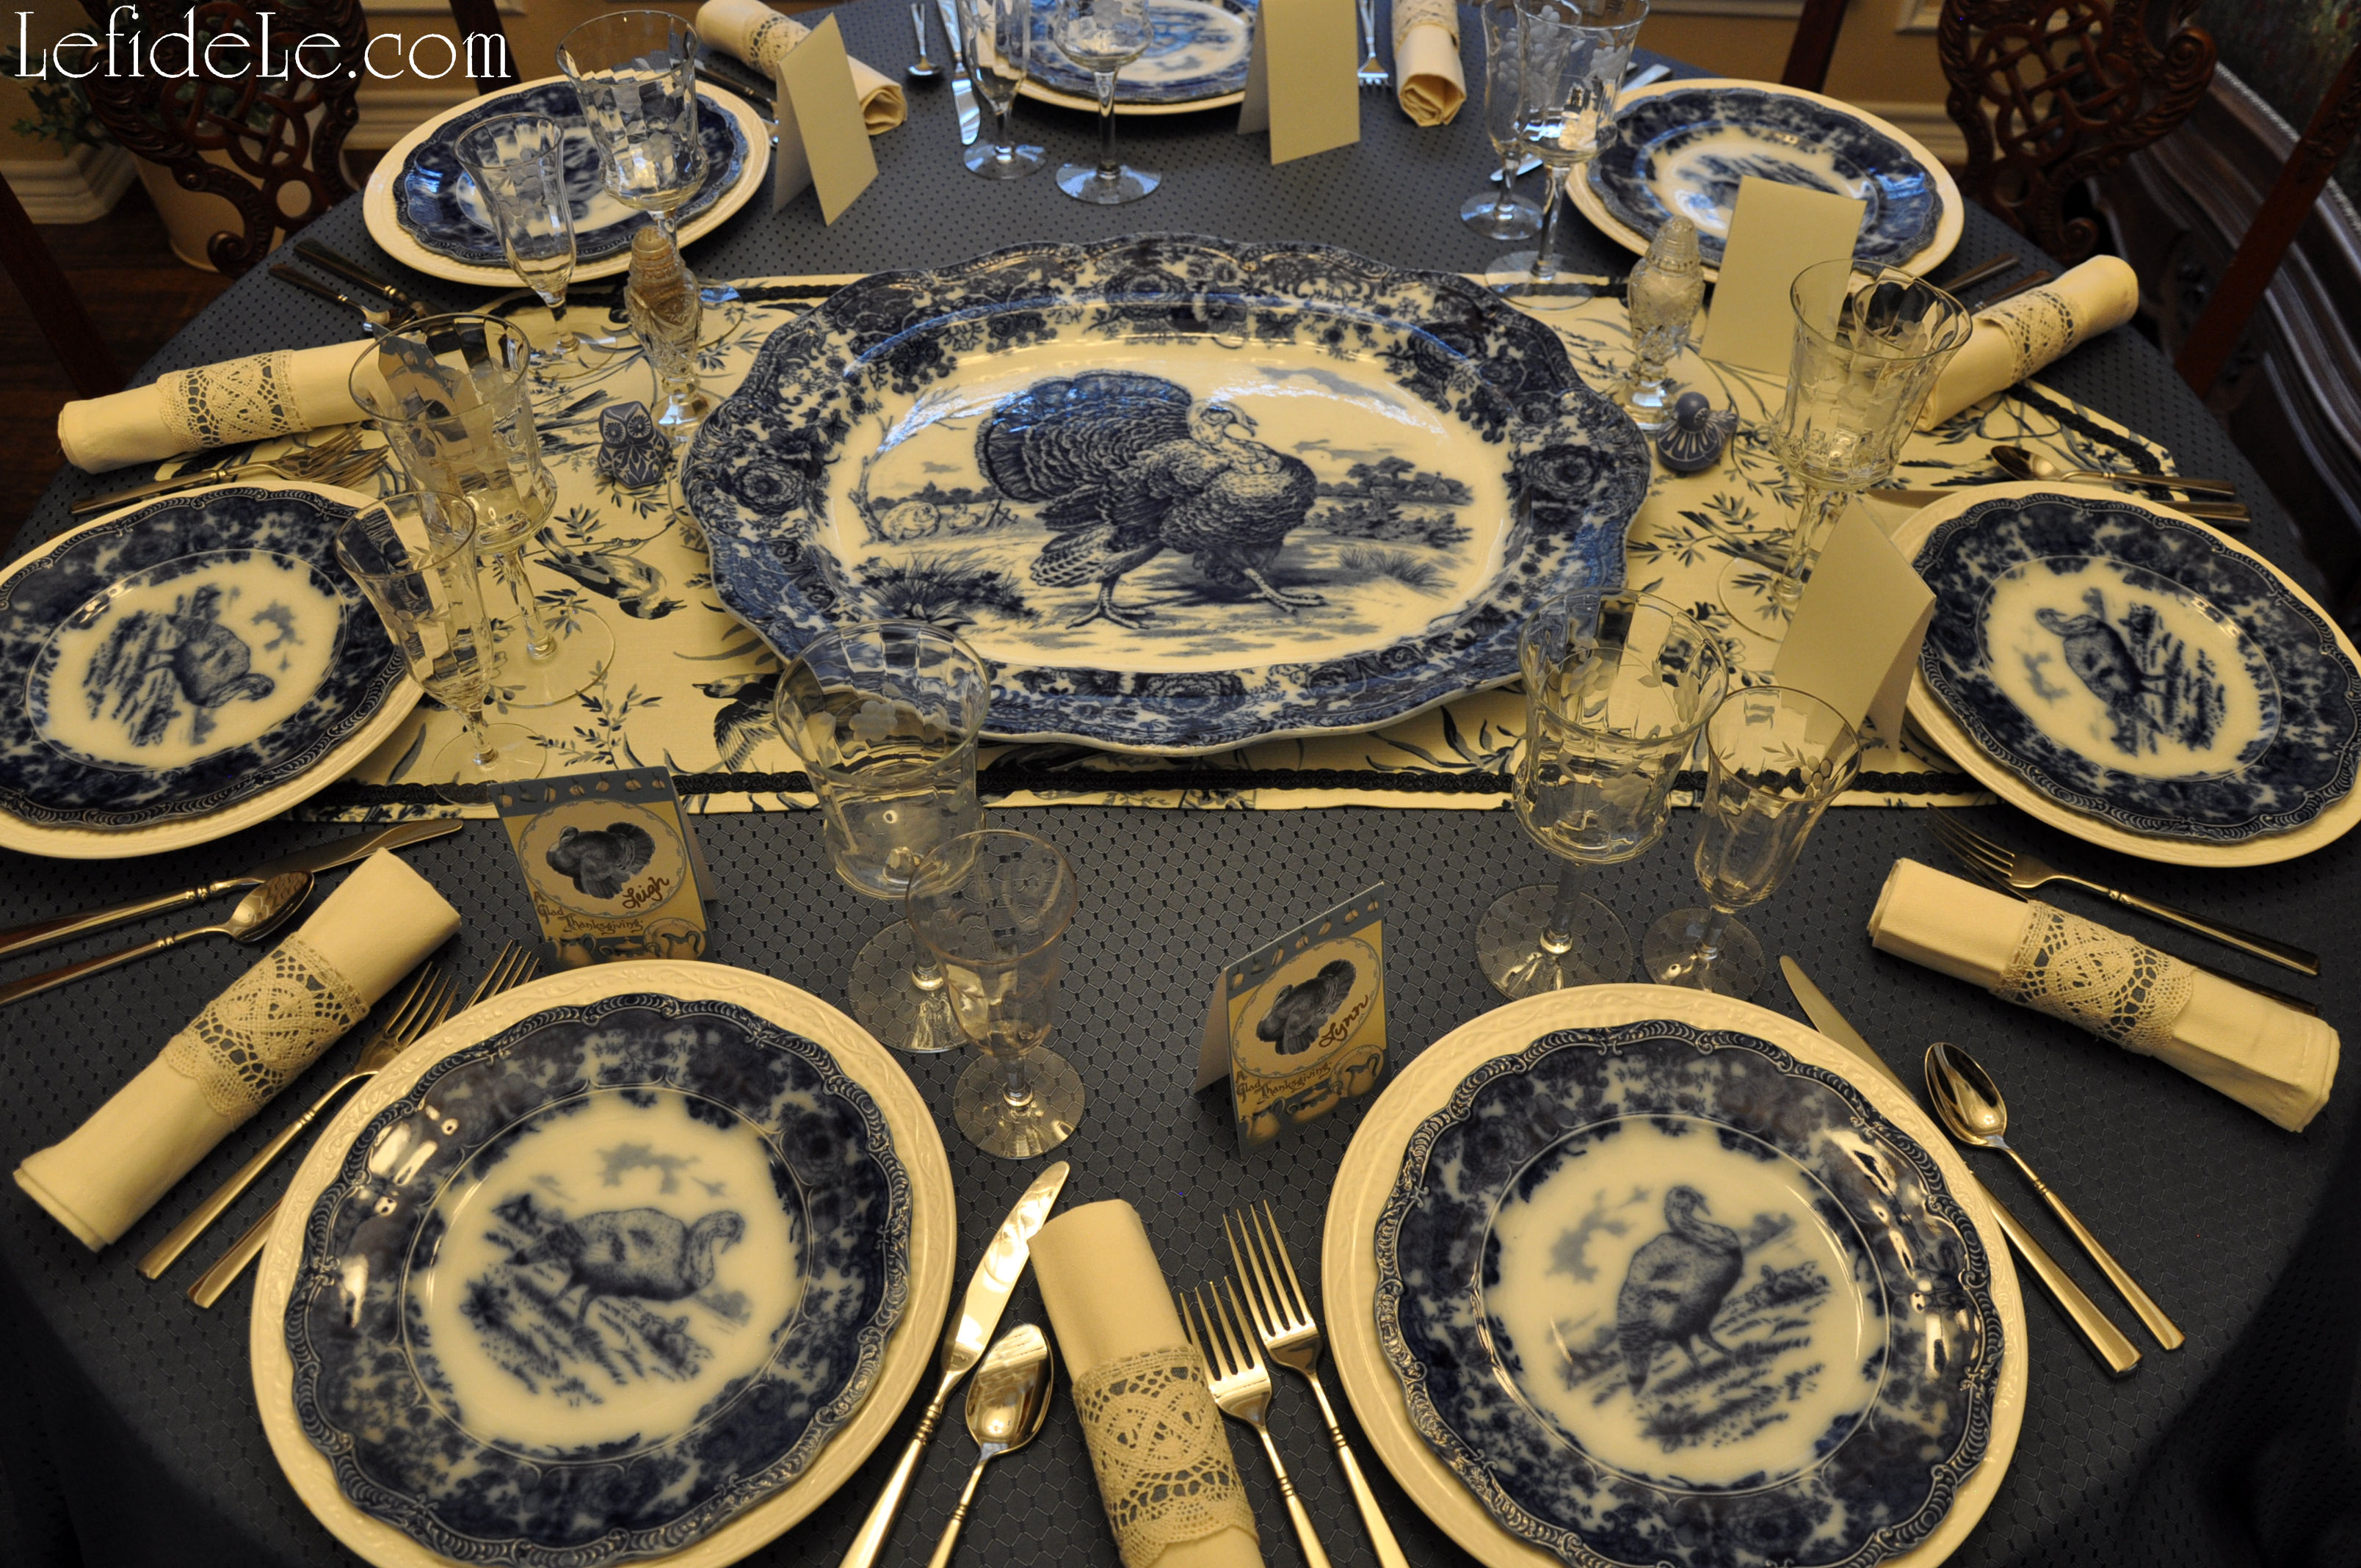
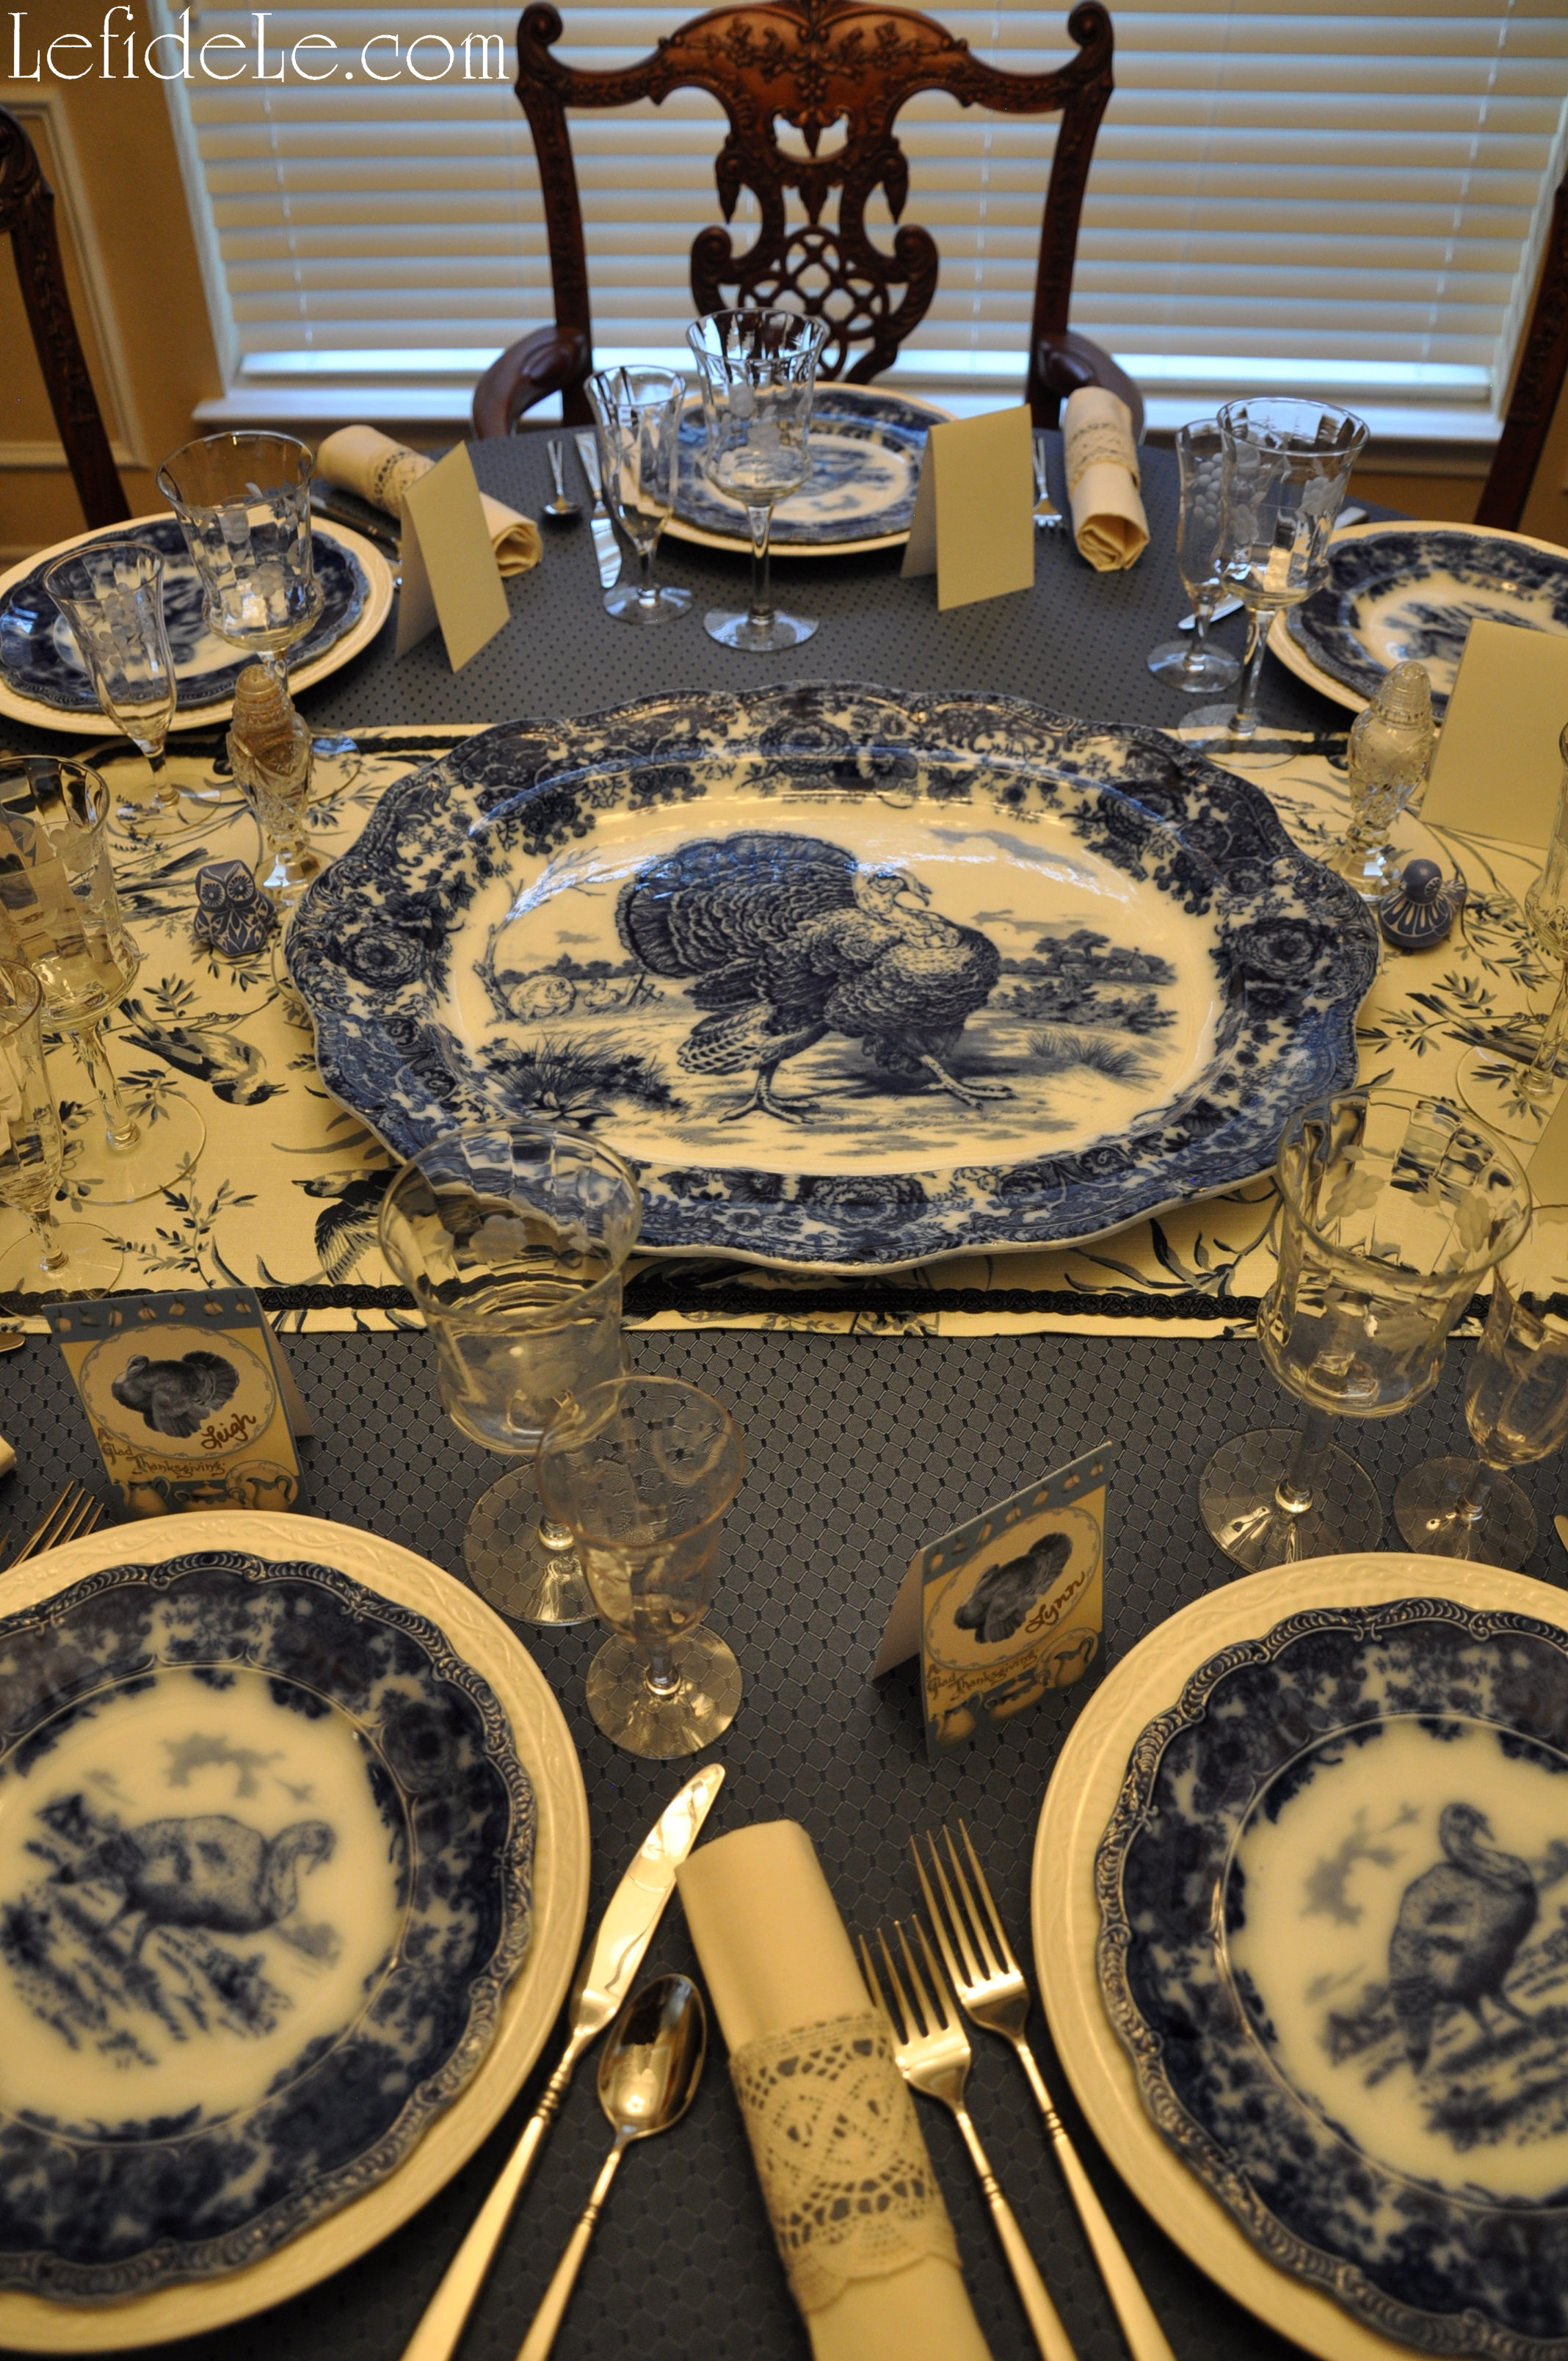
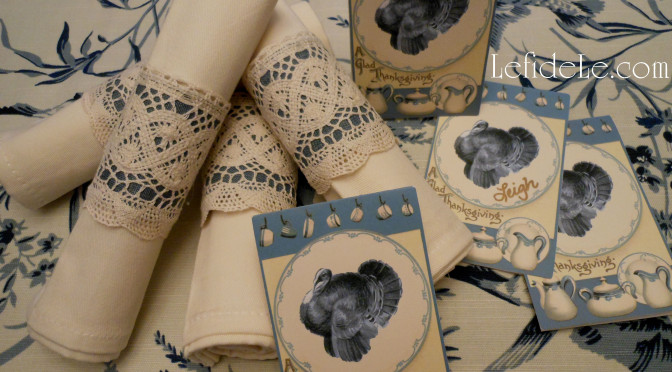
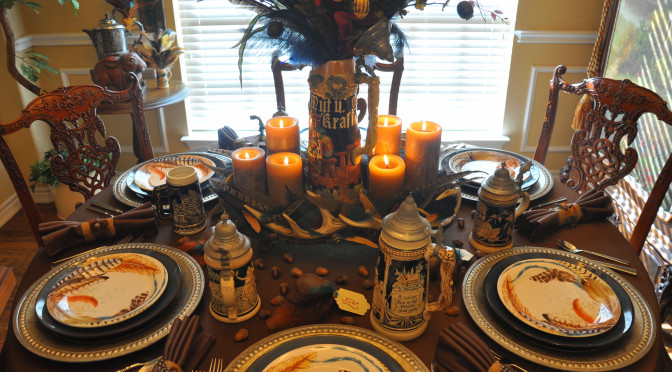
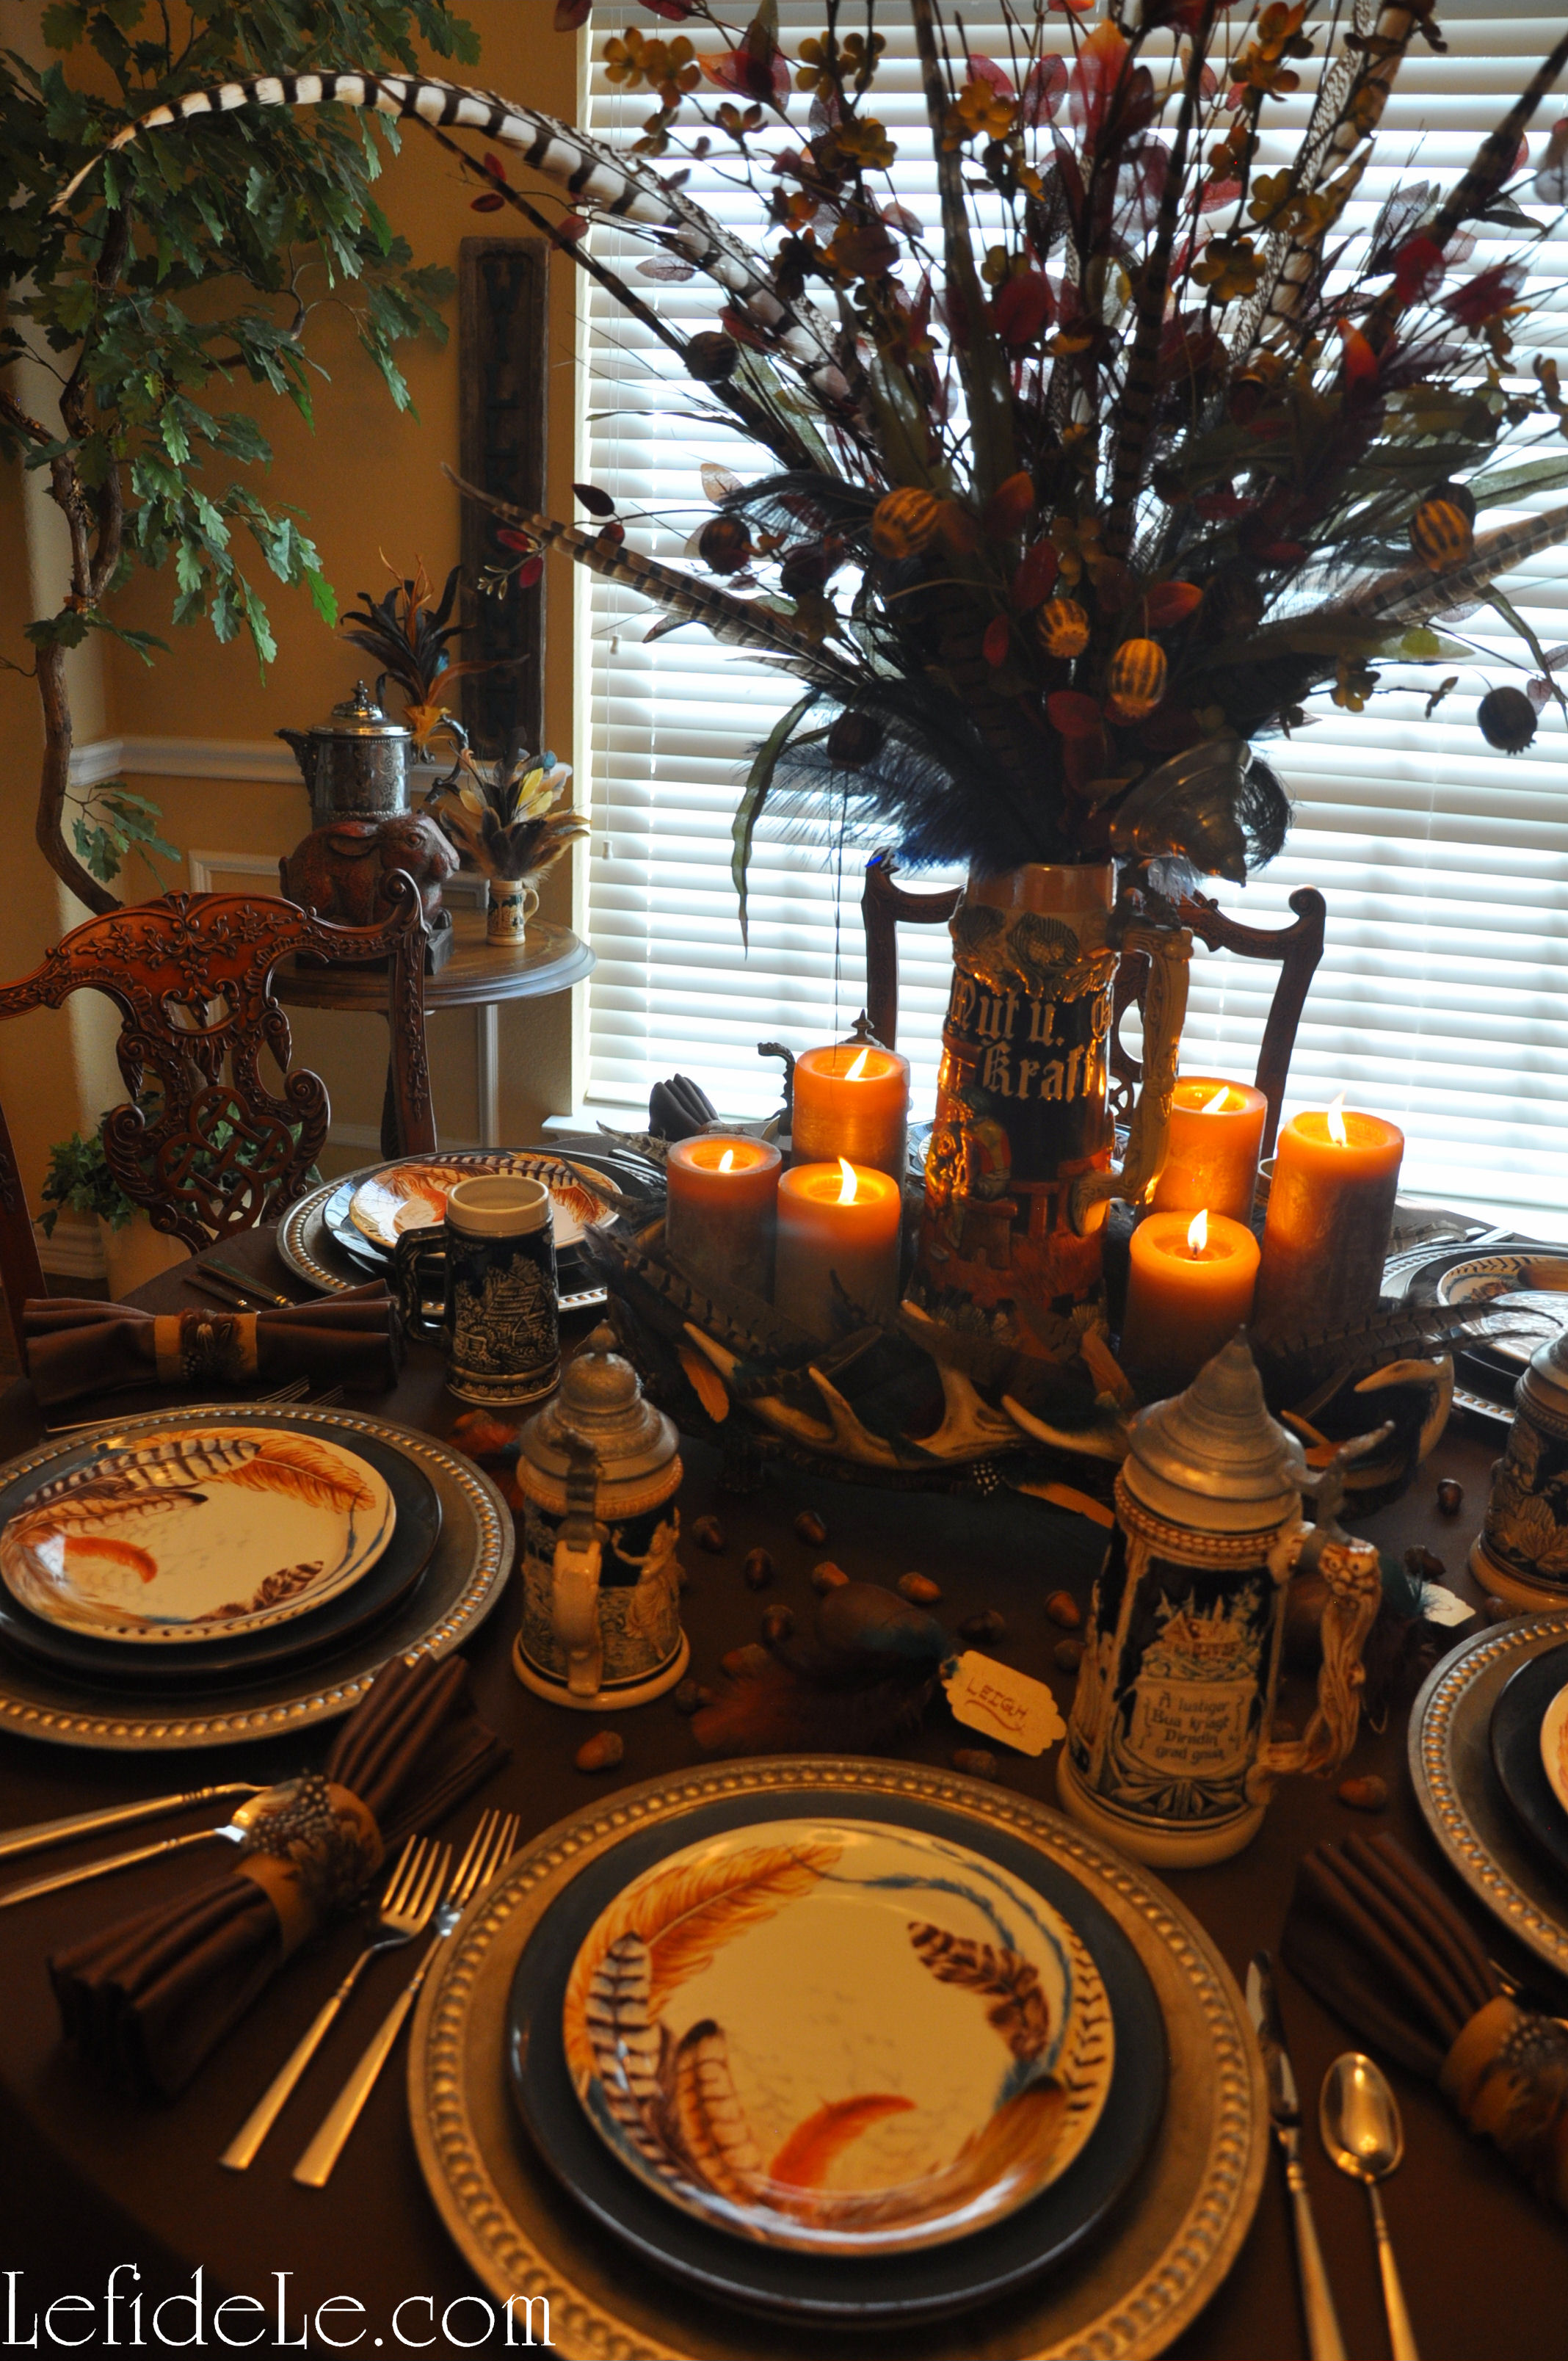
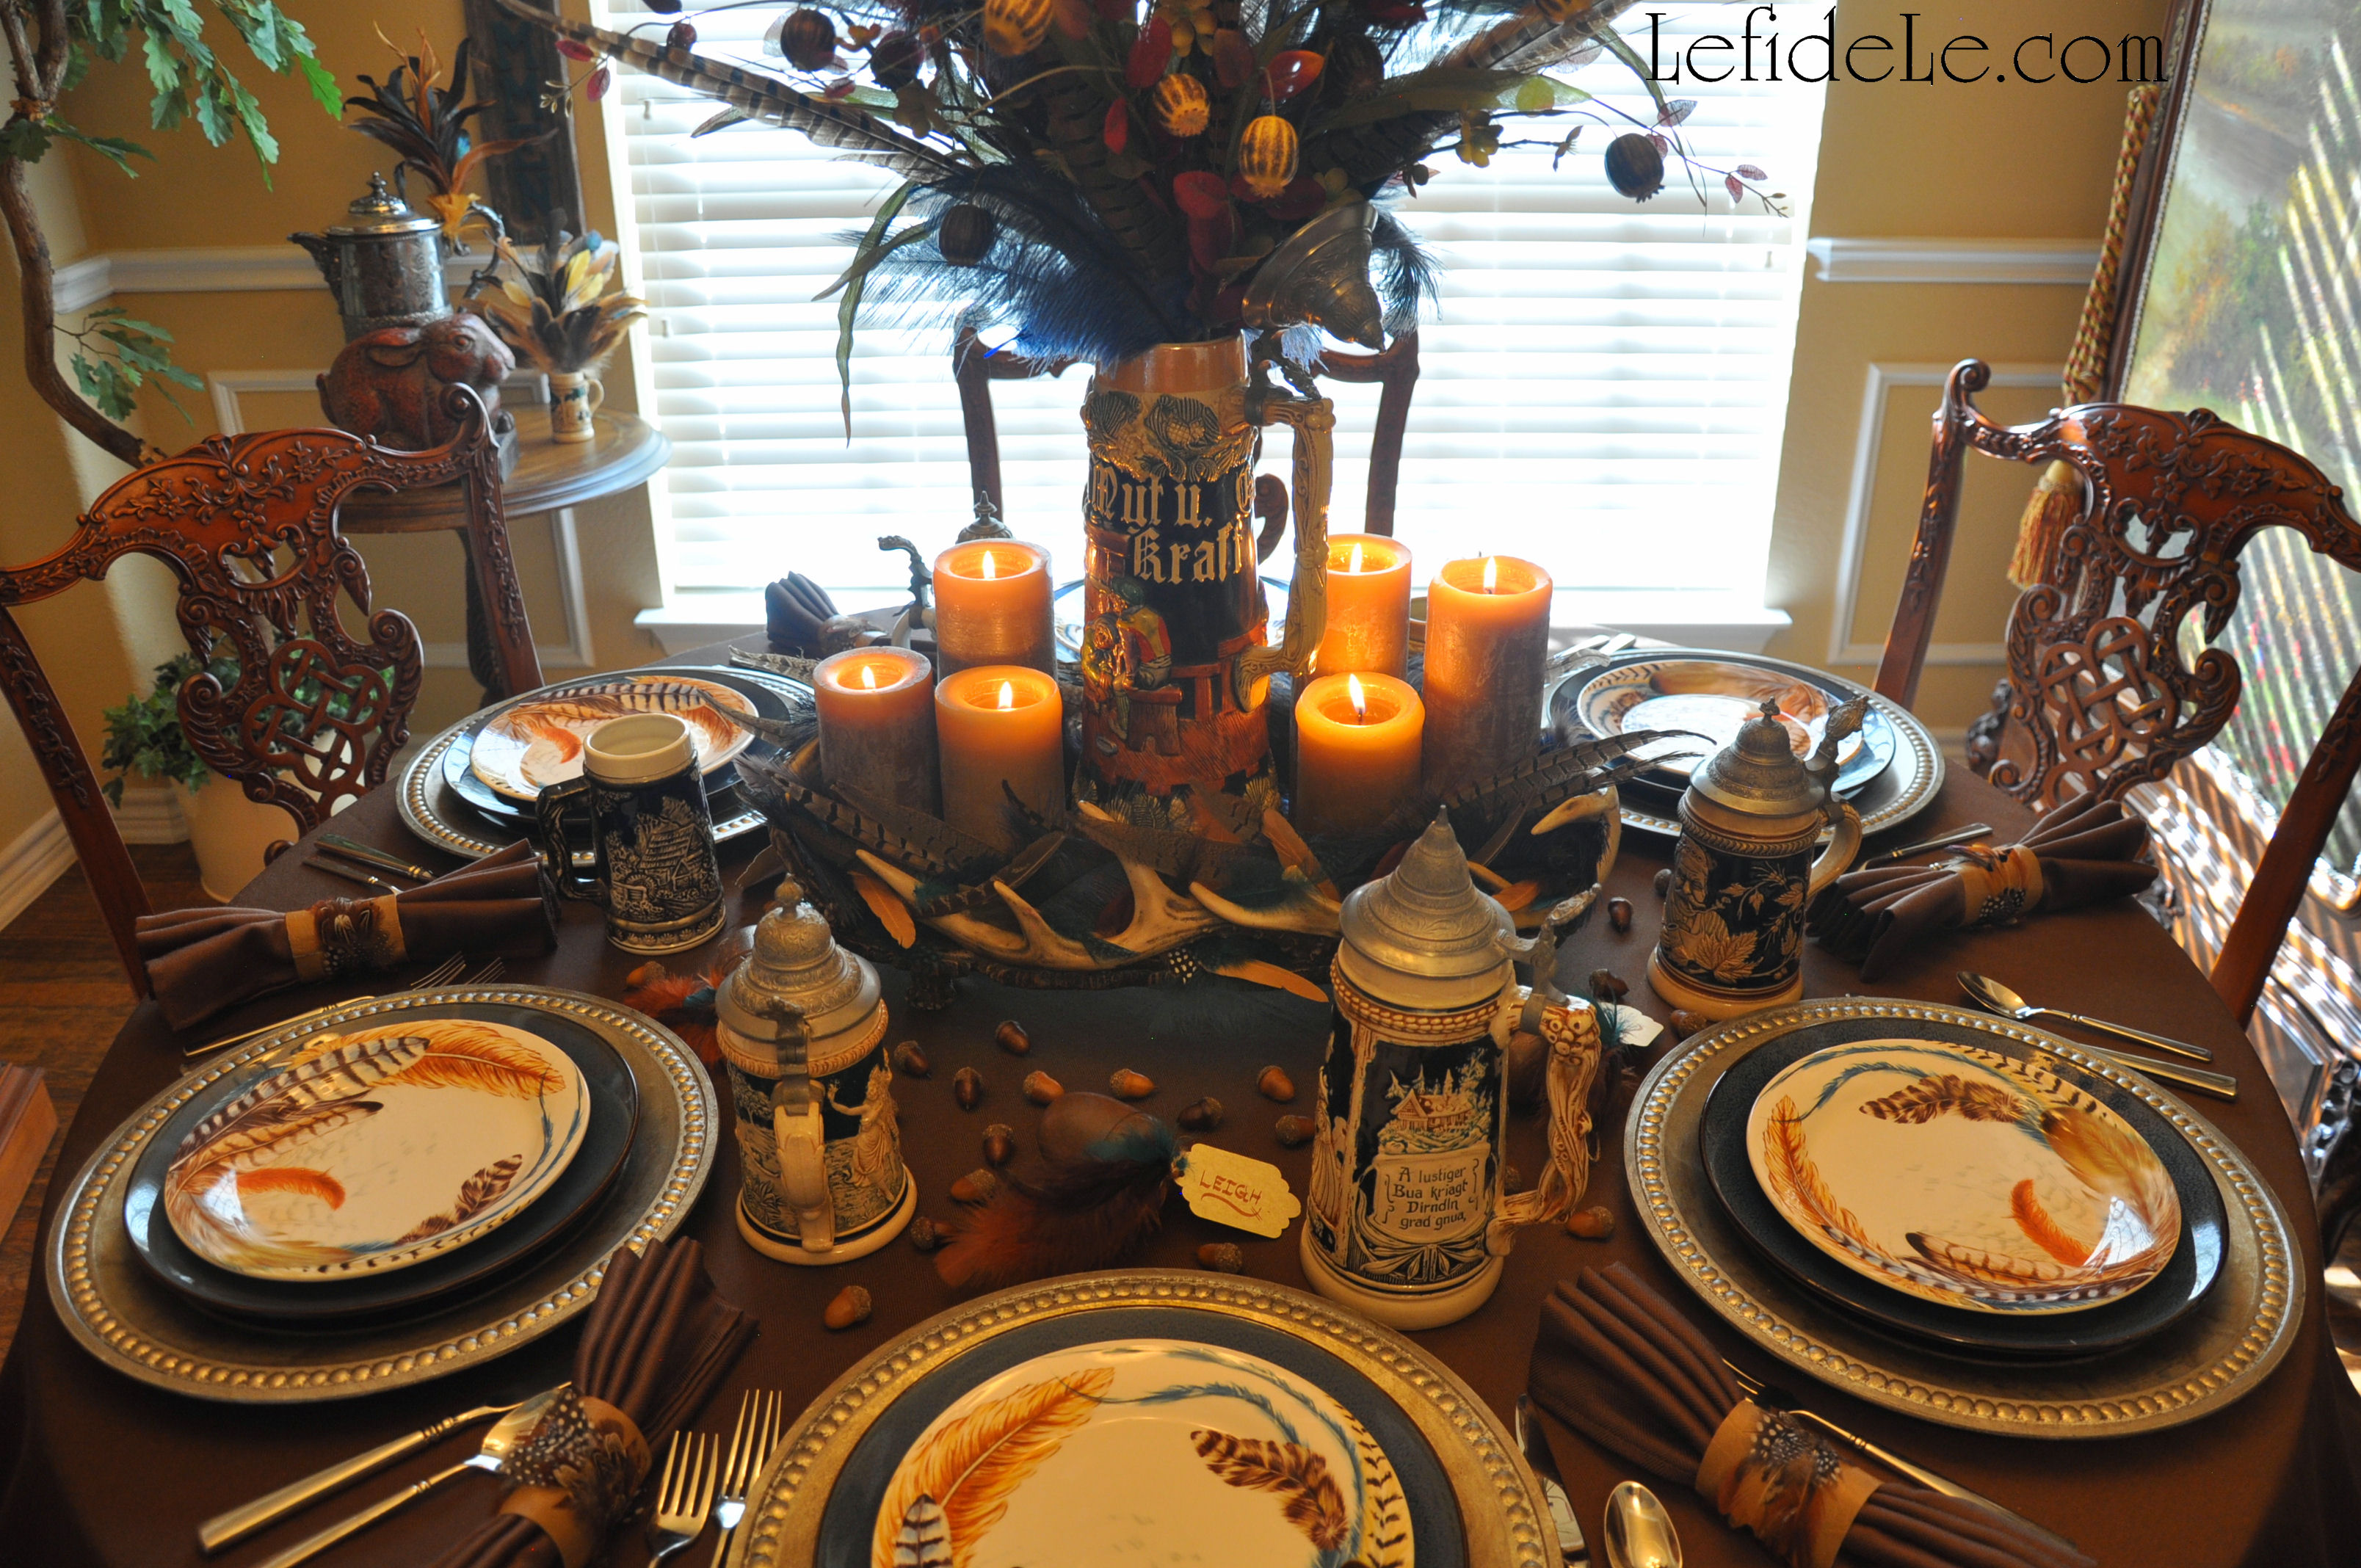
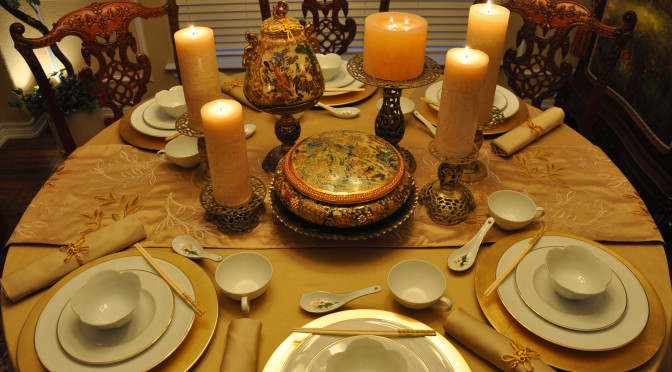
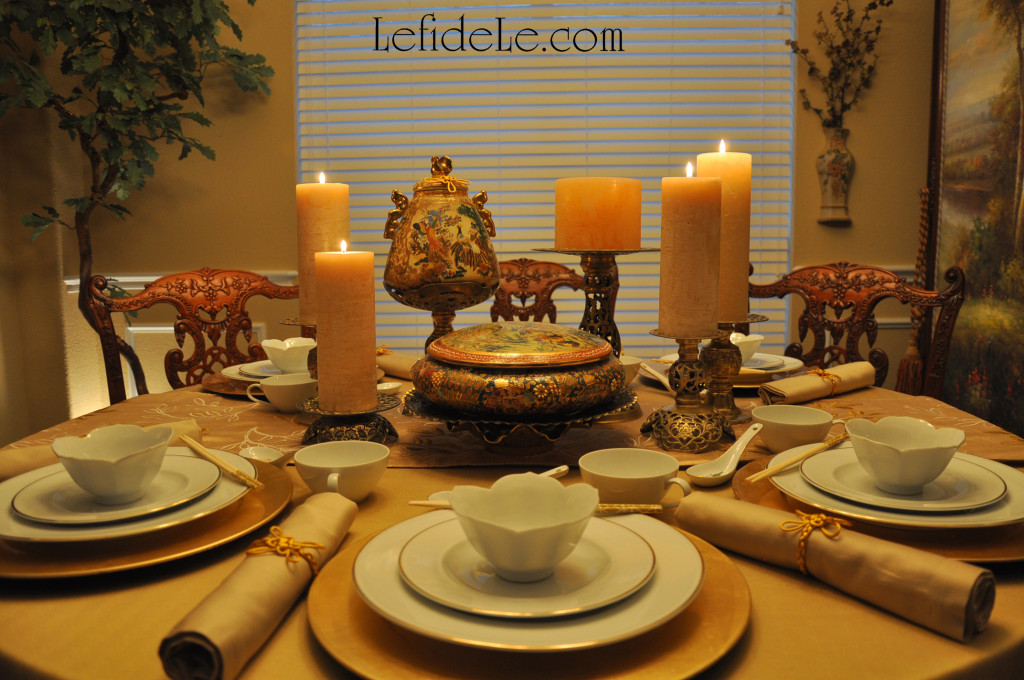
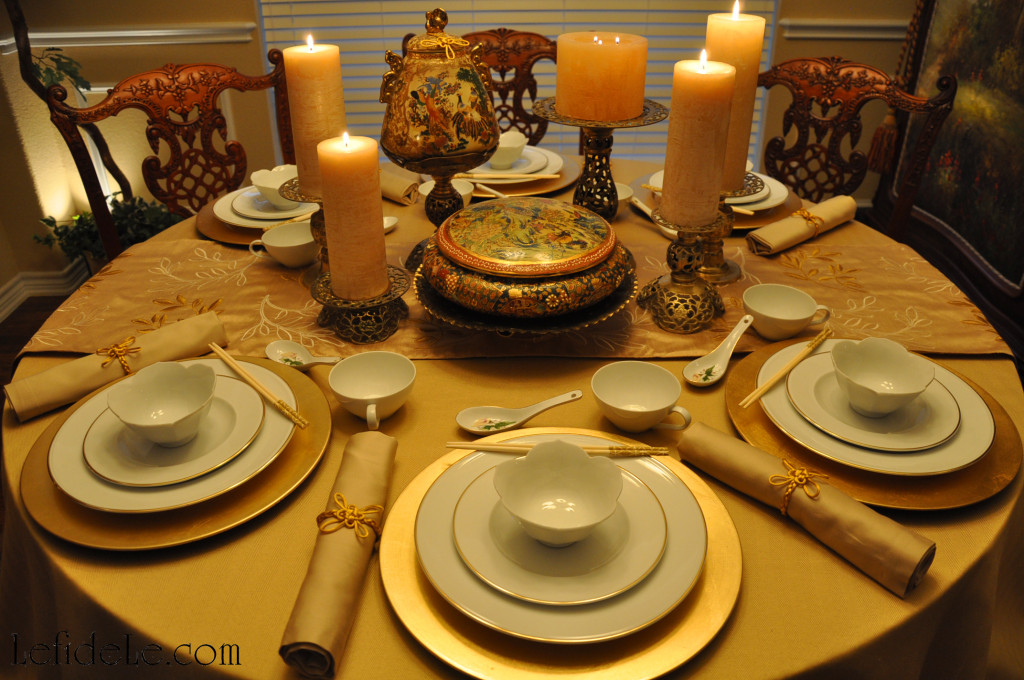
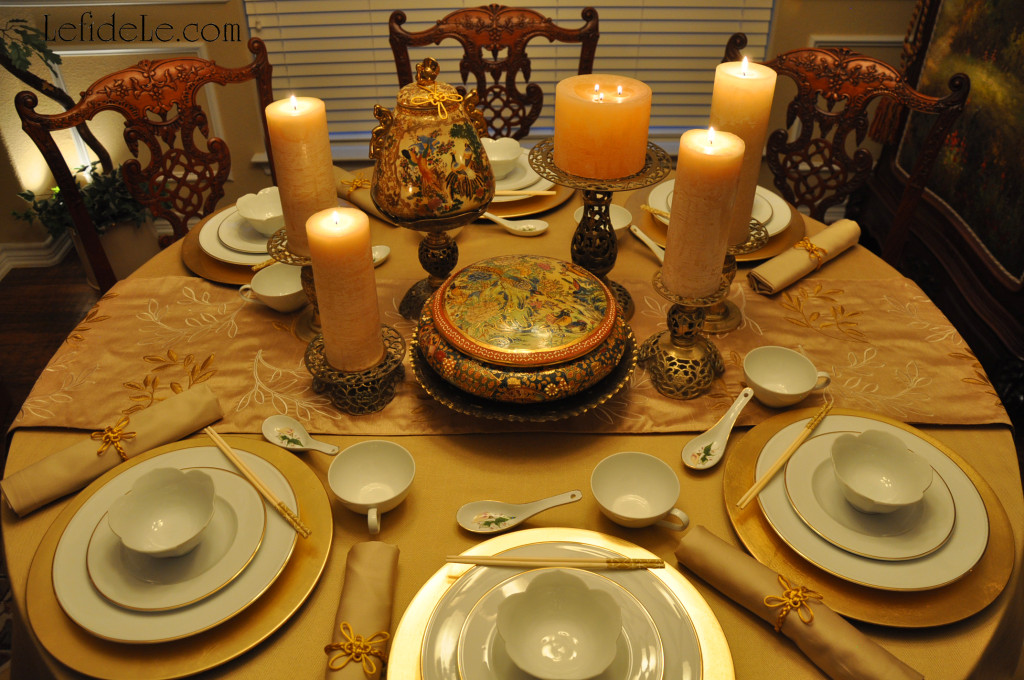
This Chinese New Year of the monkey dinner party contains many ideas for elegant tablescape décor with which to inspire your own celebration. As this is a time for provoking good fortune, customary New Year colors where replaced with those which are luckiest for the monkey sign. Favorable shades are white, gold, and blue while the traditional red is regarded as inauspicious. The typically shunned white funerary color is actually a propitious one for the primate, so it is utilized in the dishware. There are touches of blue in the ceramic vessels, and many shades of gold are included in the setting. Further yellow toned gold cording was selected for the napkin rings, as yellow is also regarded as a lucky royal color as it was once reserved only for use by the emperor. The handcrafted napkin rings were fashioned with traditional Chinese good luck knots, each with 8 petal-like loops. This is auspicious as the numbers 1, 7, and 8 are also providential for the monkey. There are 8 chairs in room, though some are off camera. 7 brass candle holders elevate candles with 7 lit wicks, and there are actually 7 good luck knots when the 6 rings are added to the one looped onto a ceramic lid. Of course, the table, table runner, tablecloth, and wall vase are each numbered as one. The Asian wall vase contains blossoming branches which are a prosperous theme repeated in the ceramics. Additionally, little lotus bowls bloom with blessings. Only chopsticks and ceramic spoons are included for dining, because knives unfortunately represent the cutting of relationship ties… and this is a holiday for flourishing connections in the burgeoning of a thriving new year! “Gung Hay Fat Choy, Gung Hay Fat Choy. Sing Happy New Year, Gung Hay Fat Choy.”

61Leigh

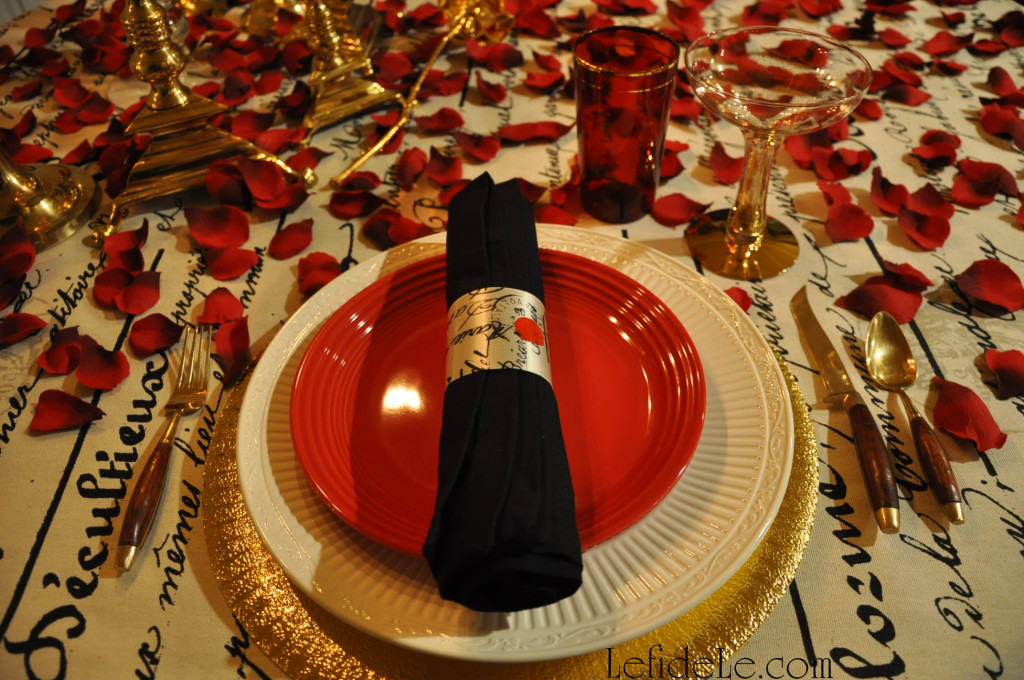
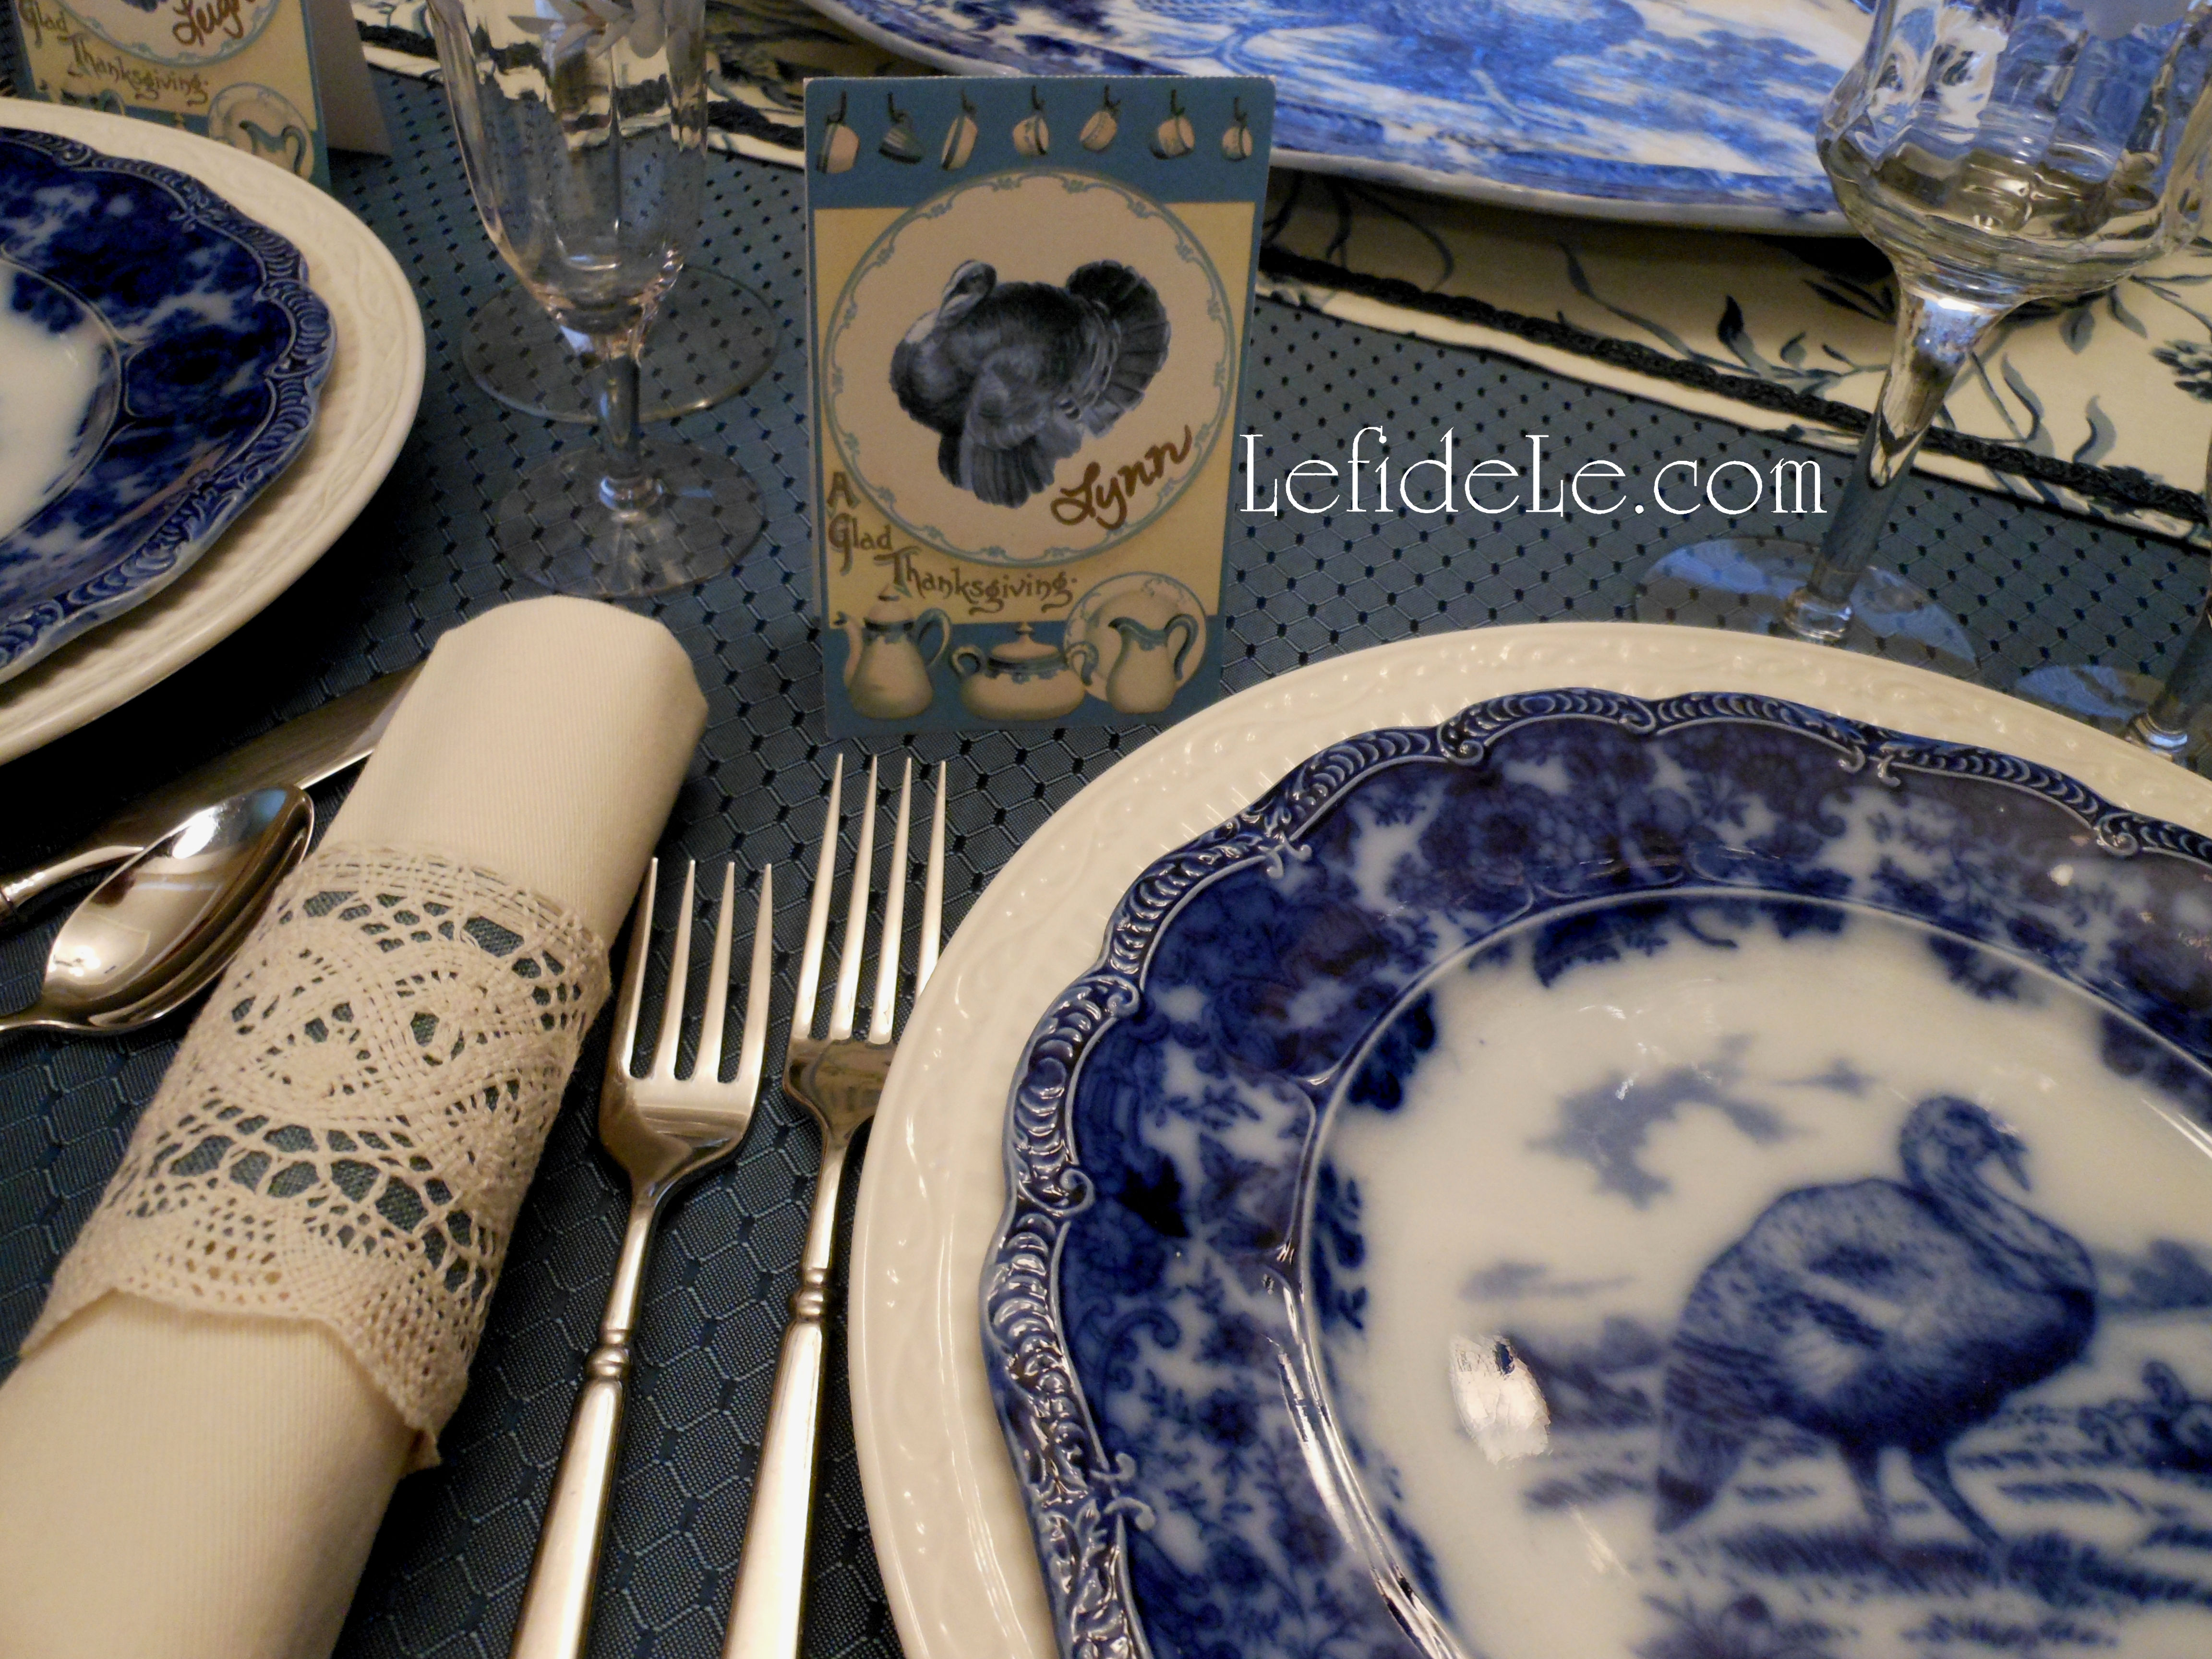
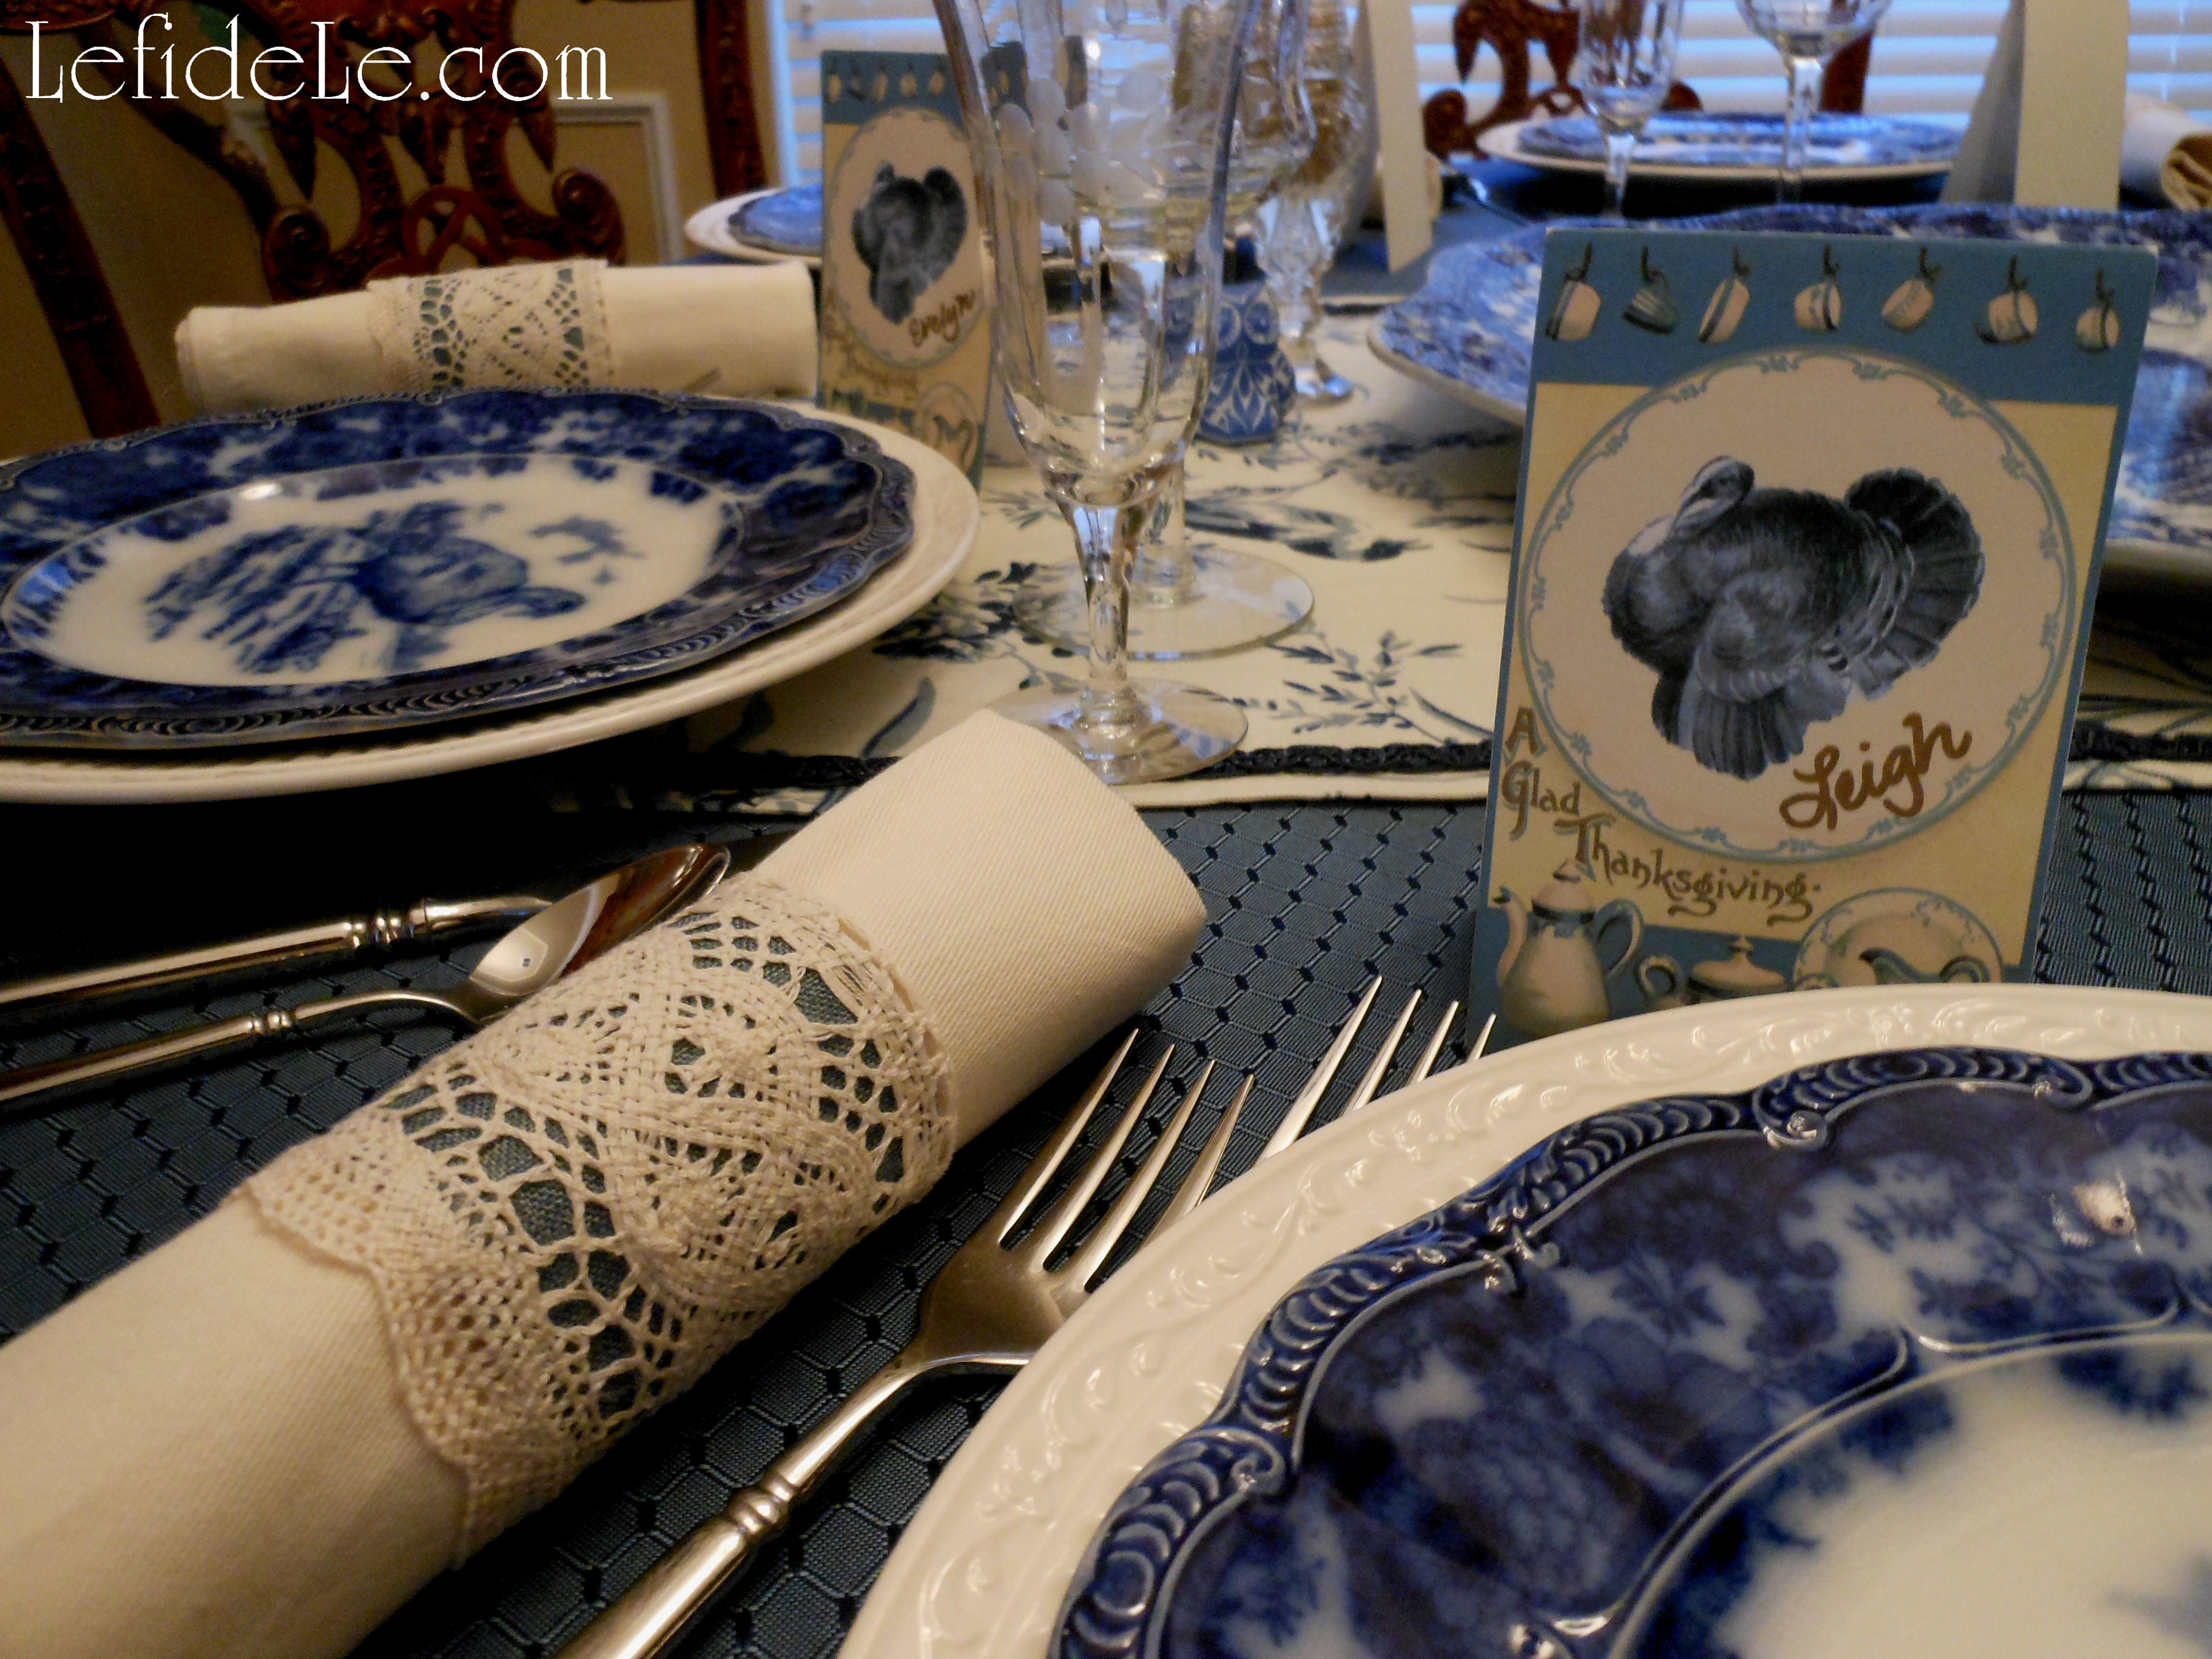
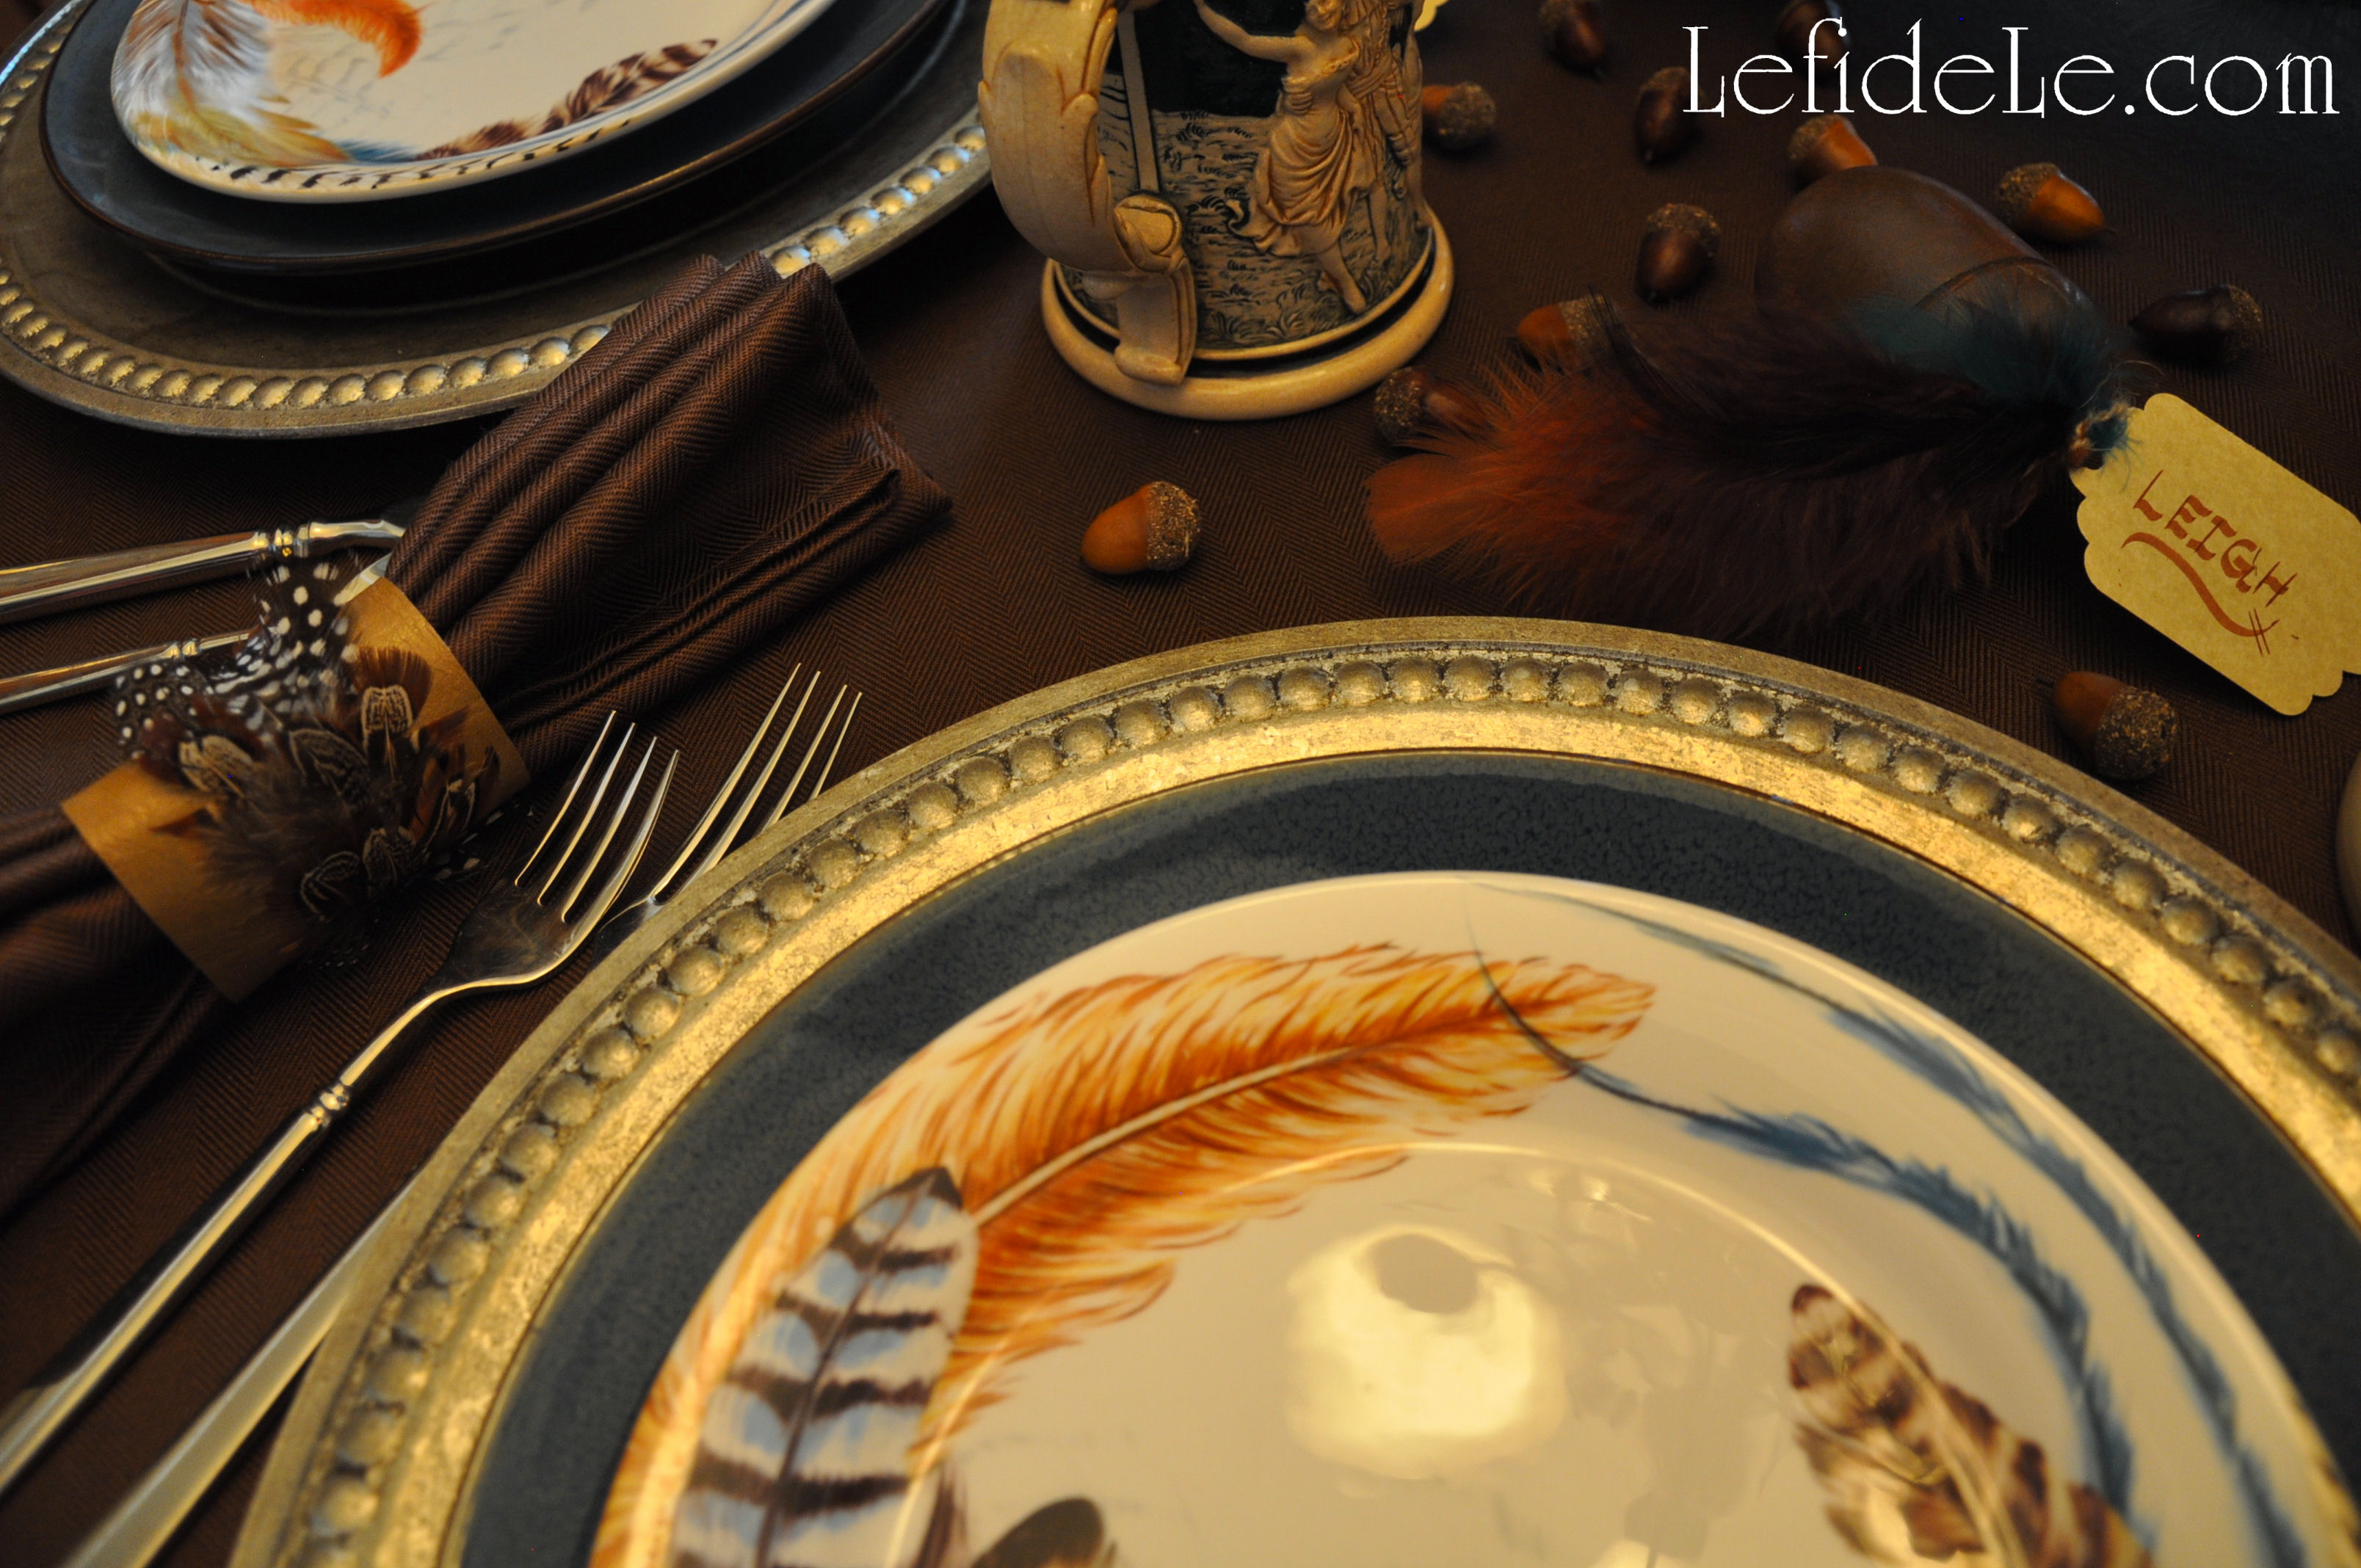
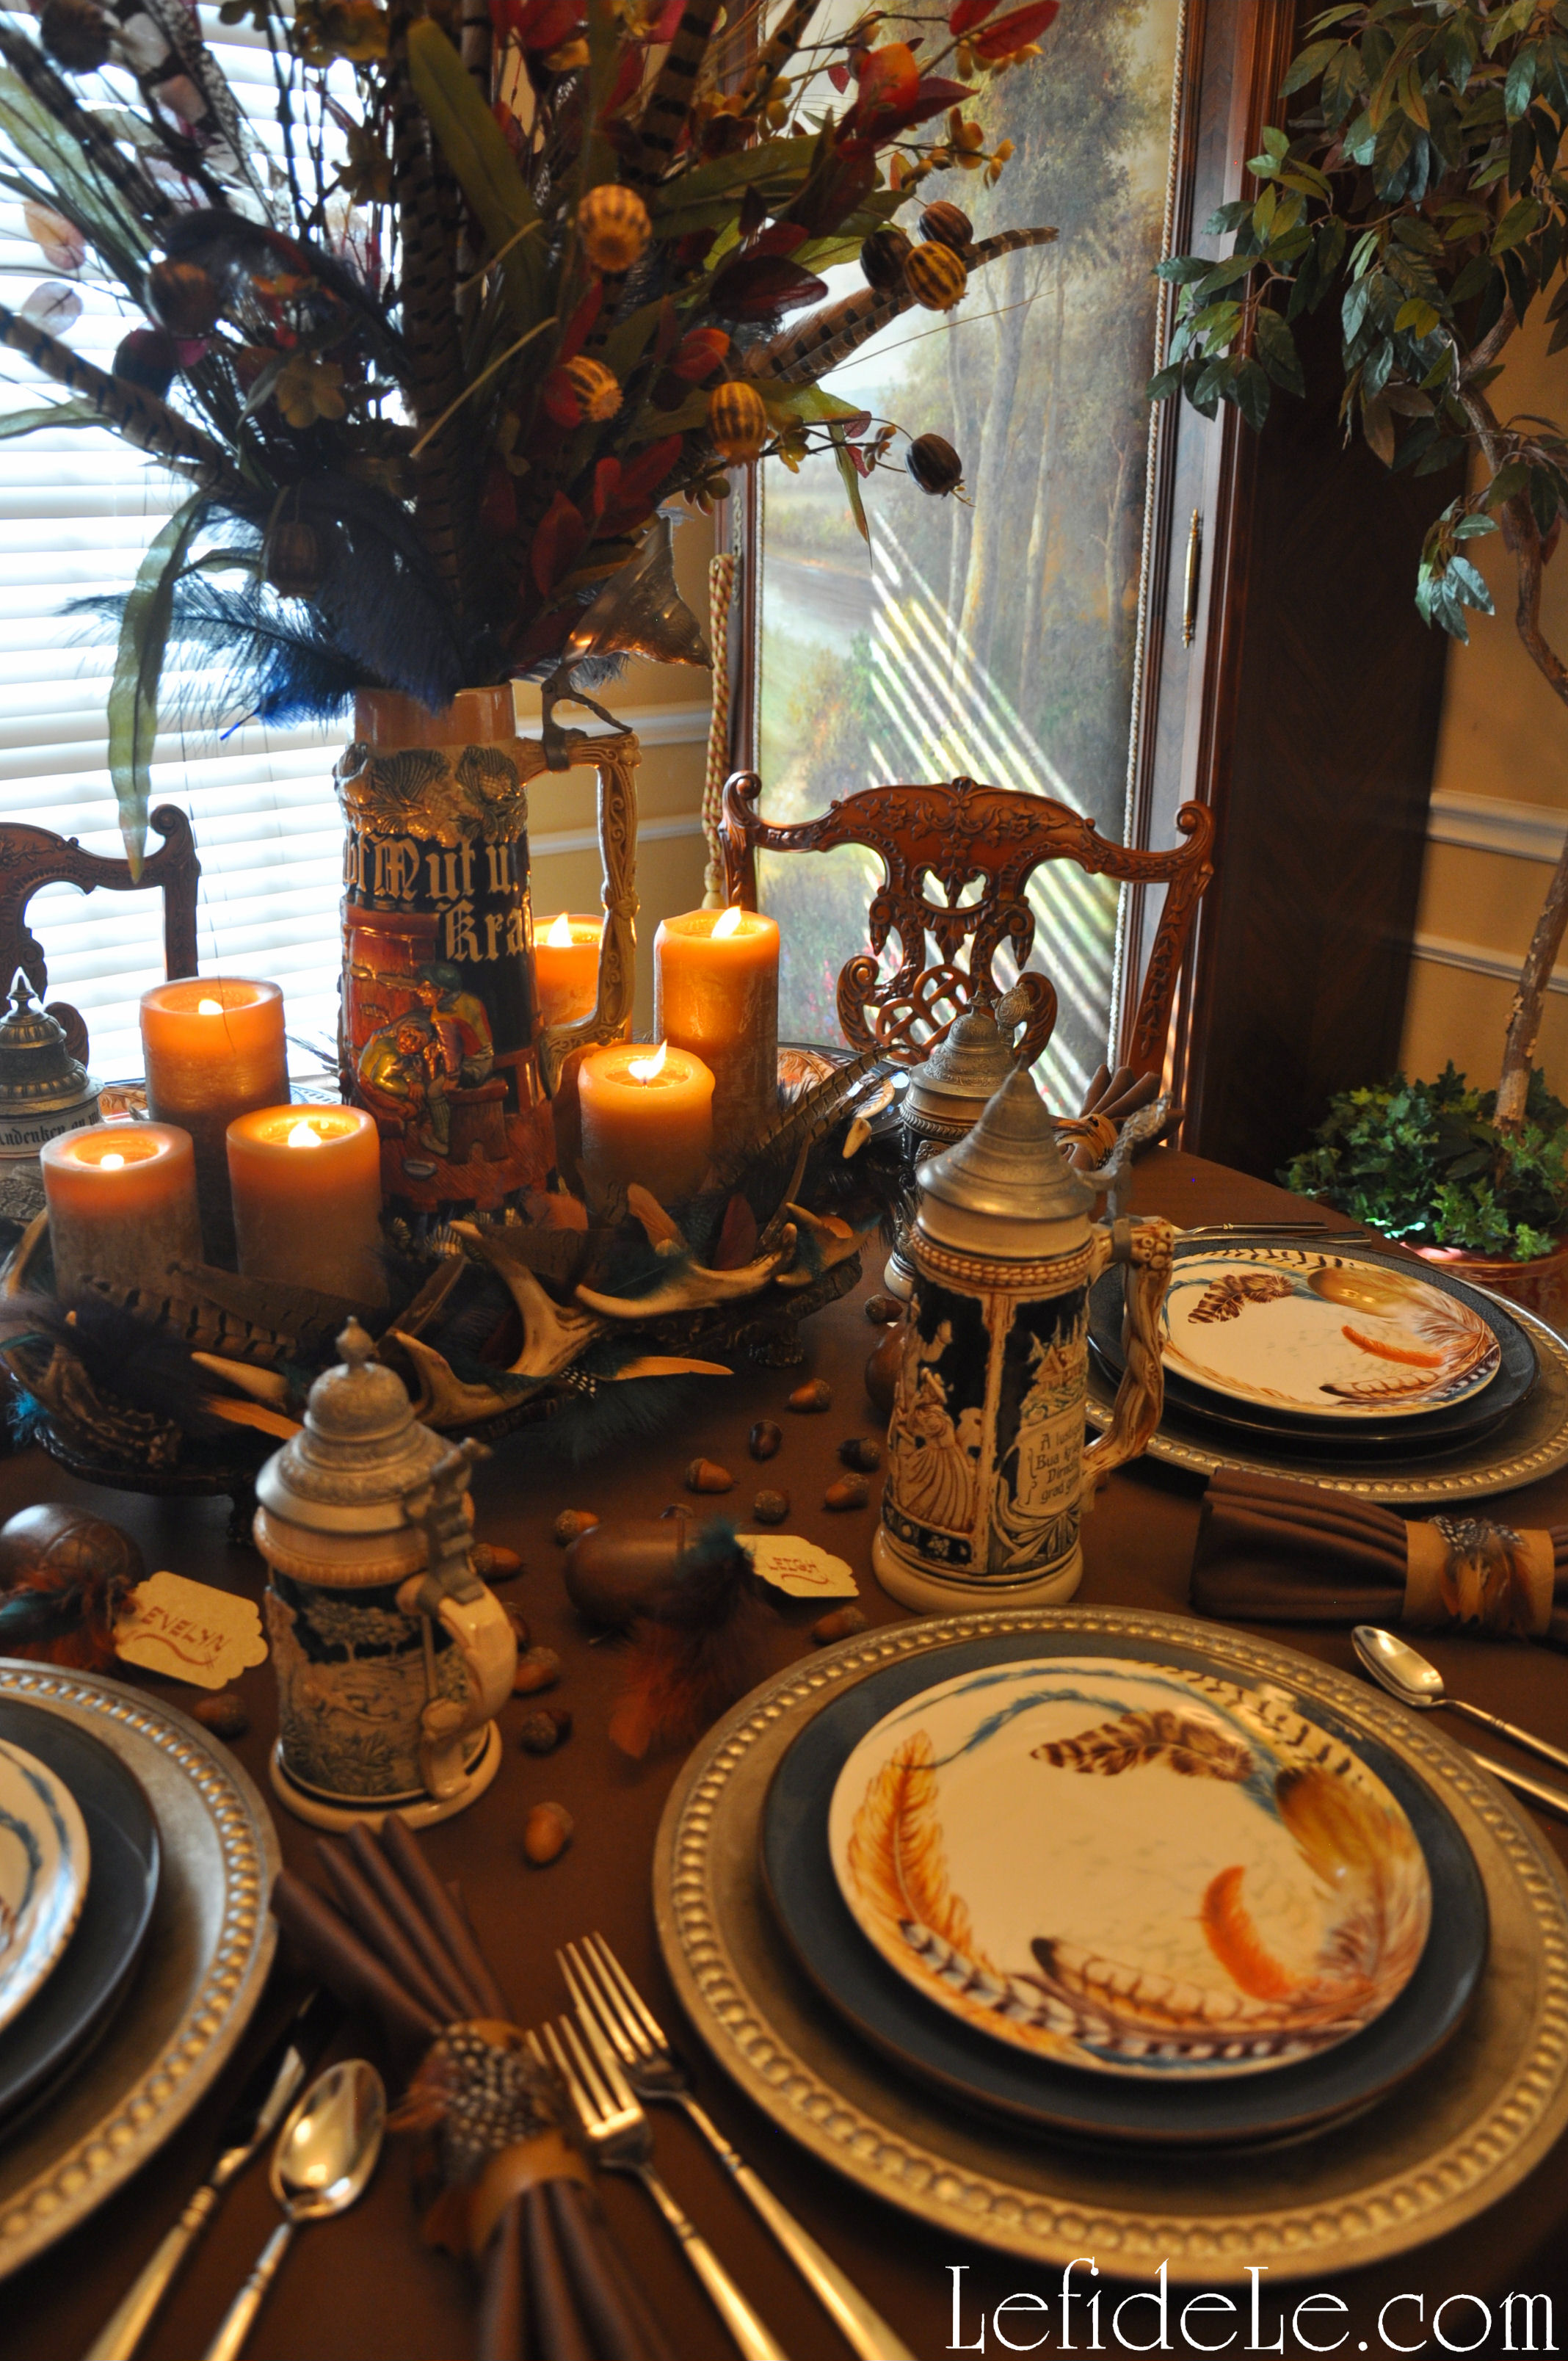
“The new moon tells us, exactly when to celebrate with family and friends.” Gold leaf chargers shine as the full moon beneath gold edged plates and propitious lotus blossom bowls. Delicate teacups accompany vintage ceramic spoons bordered also with gold. Bamboo chopsticks display adornment with patterned paper washi tape.

10Leigh

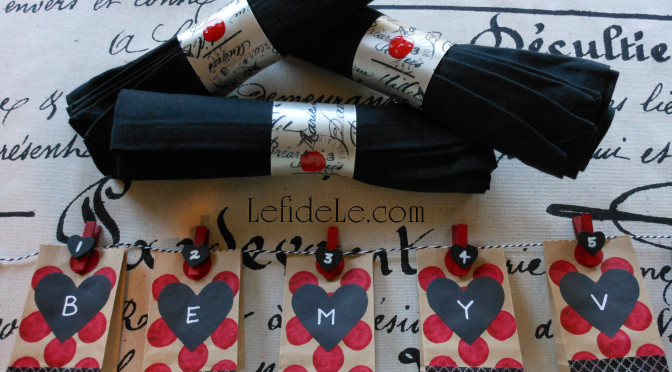
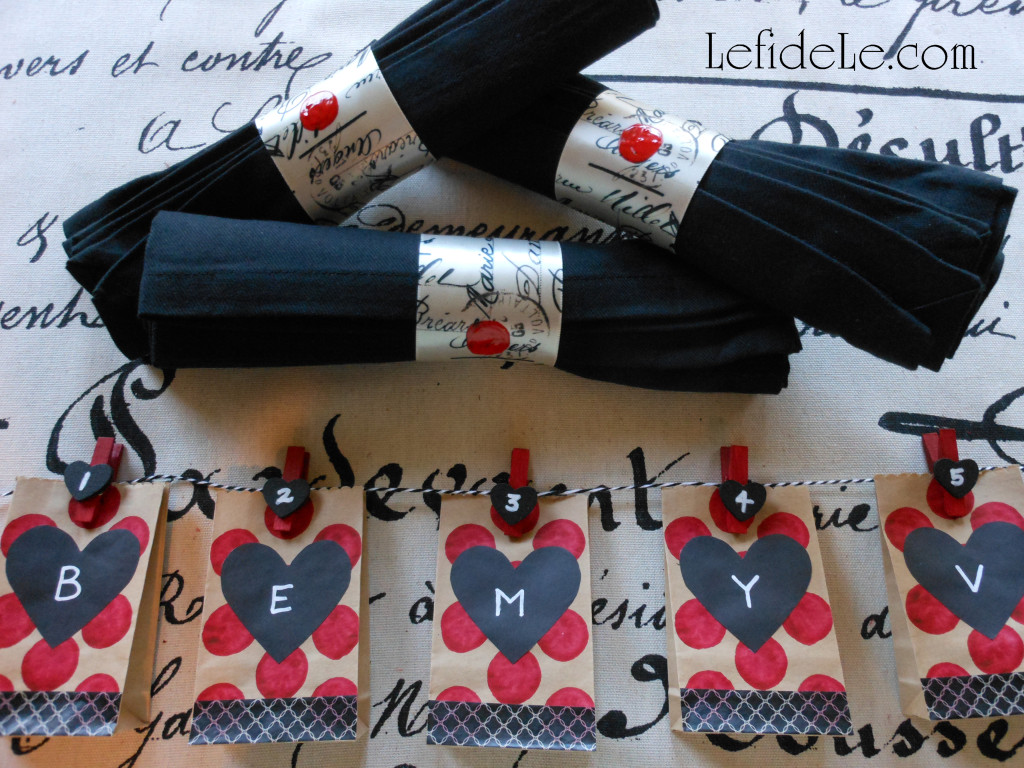
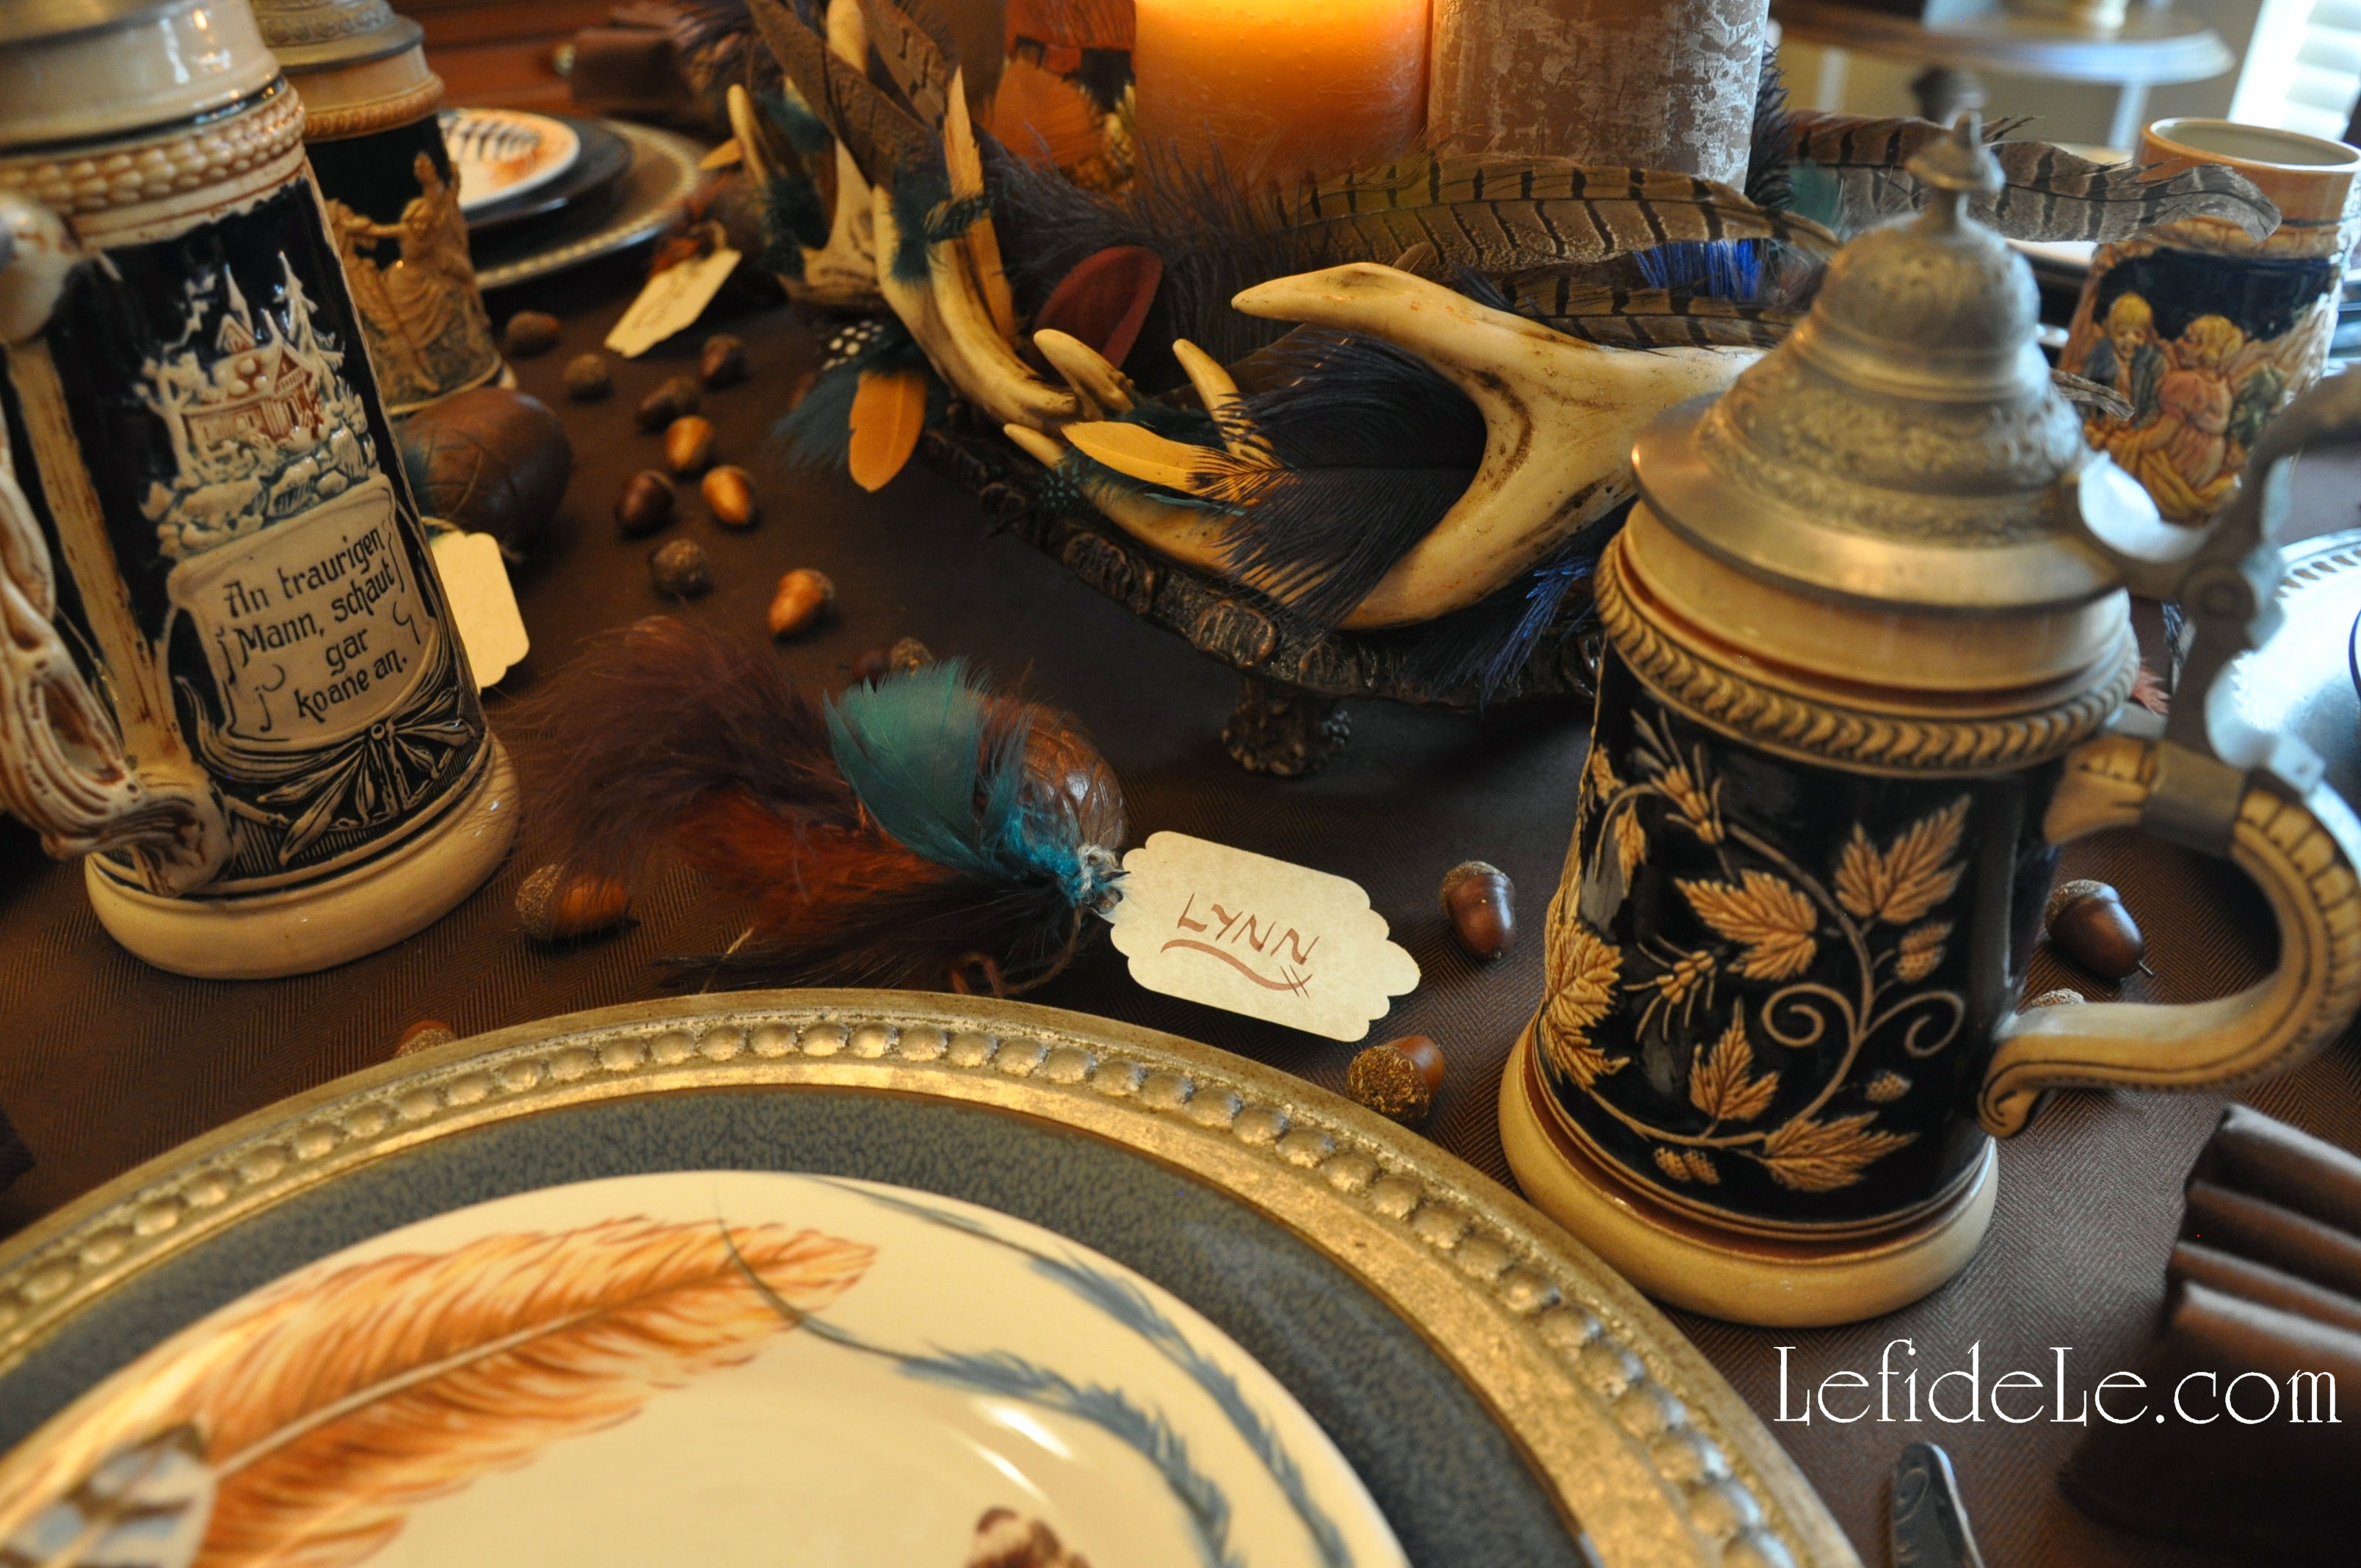
“Clean up the house and get out the broom. Sweep out the old year, bring in the new.” A pristine new tablecloth of muted gold matches cloth napkins encircled by plaited rings embellished with opportune good luck knots.

36Leigh

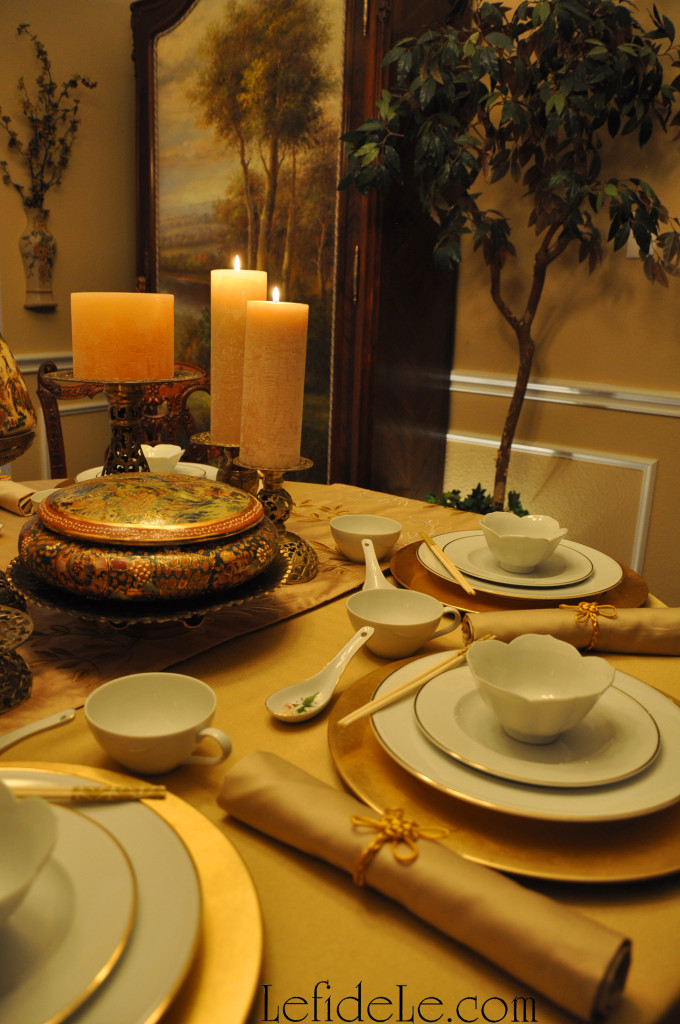
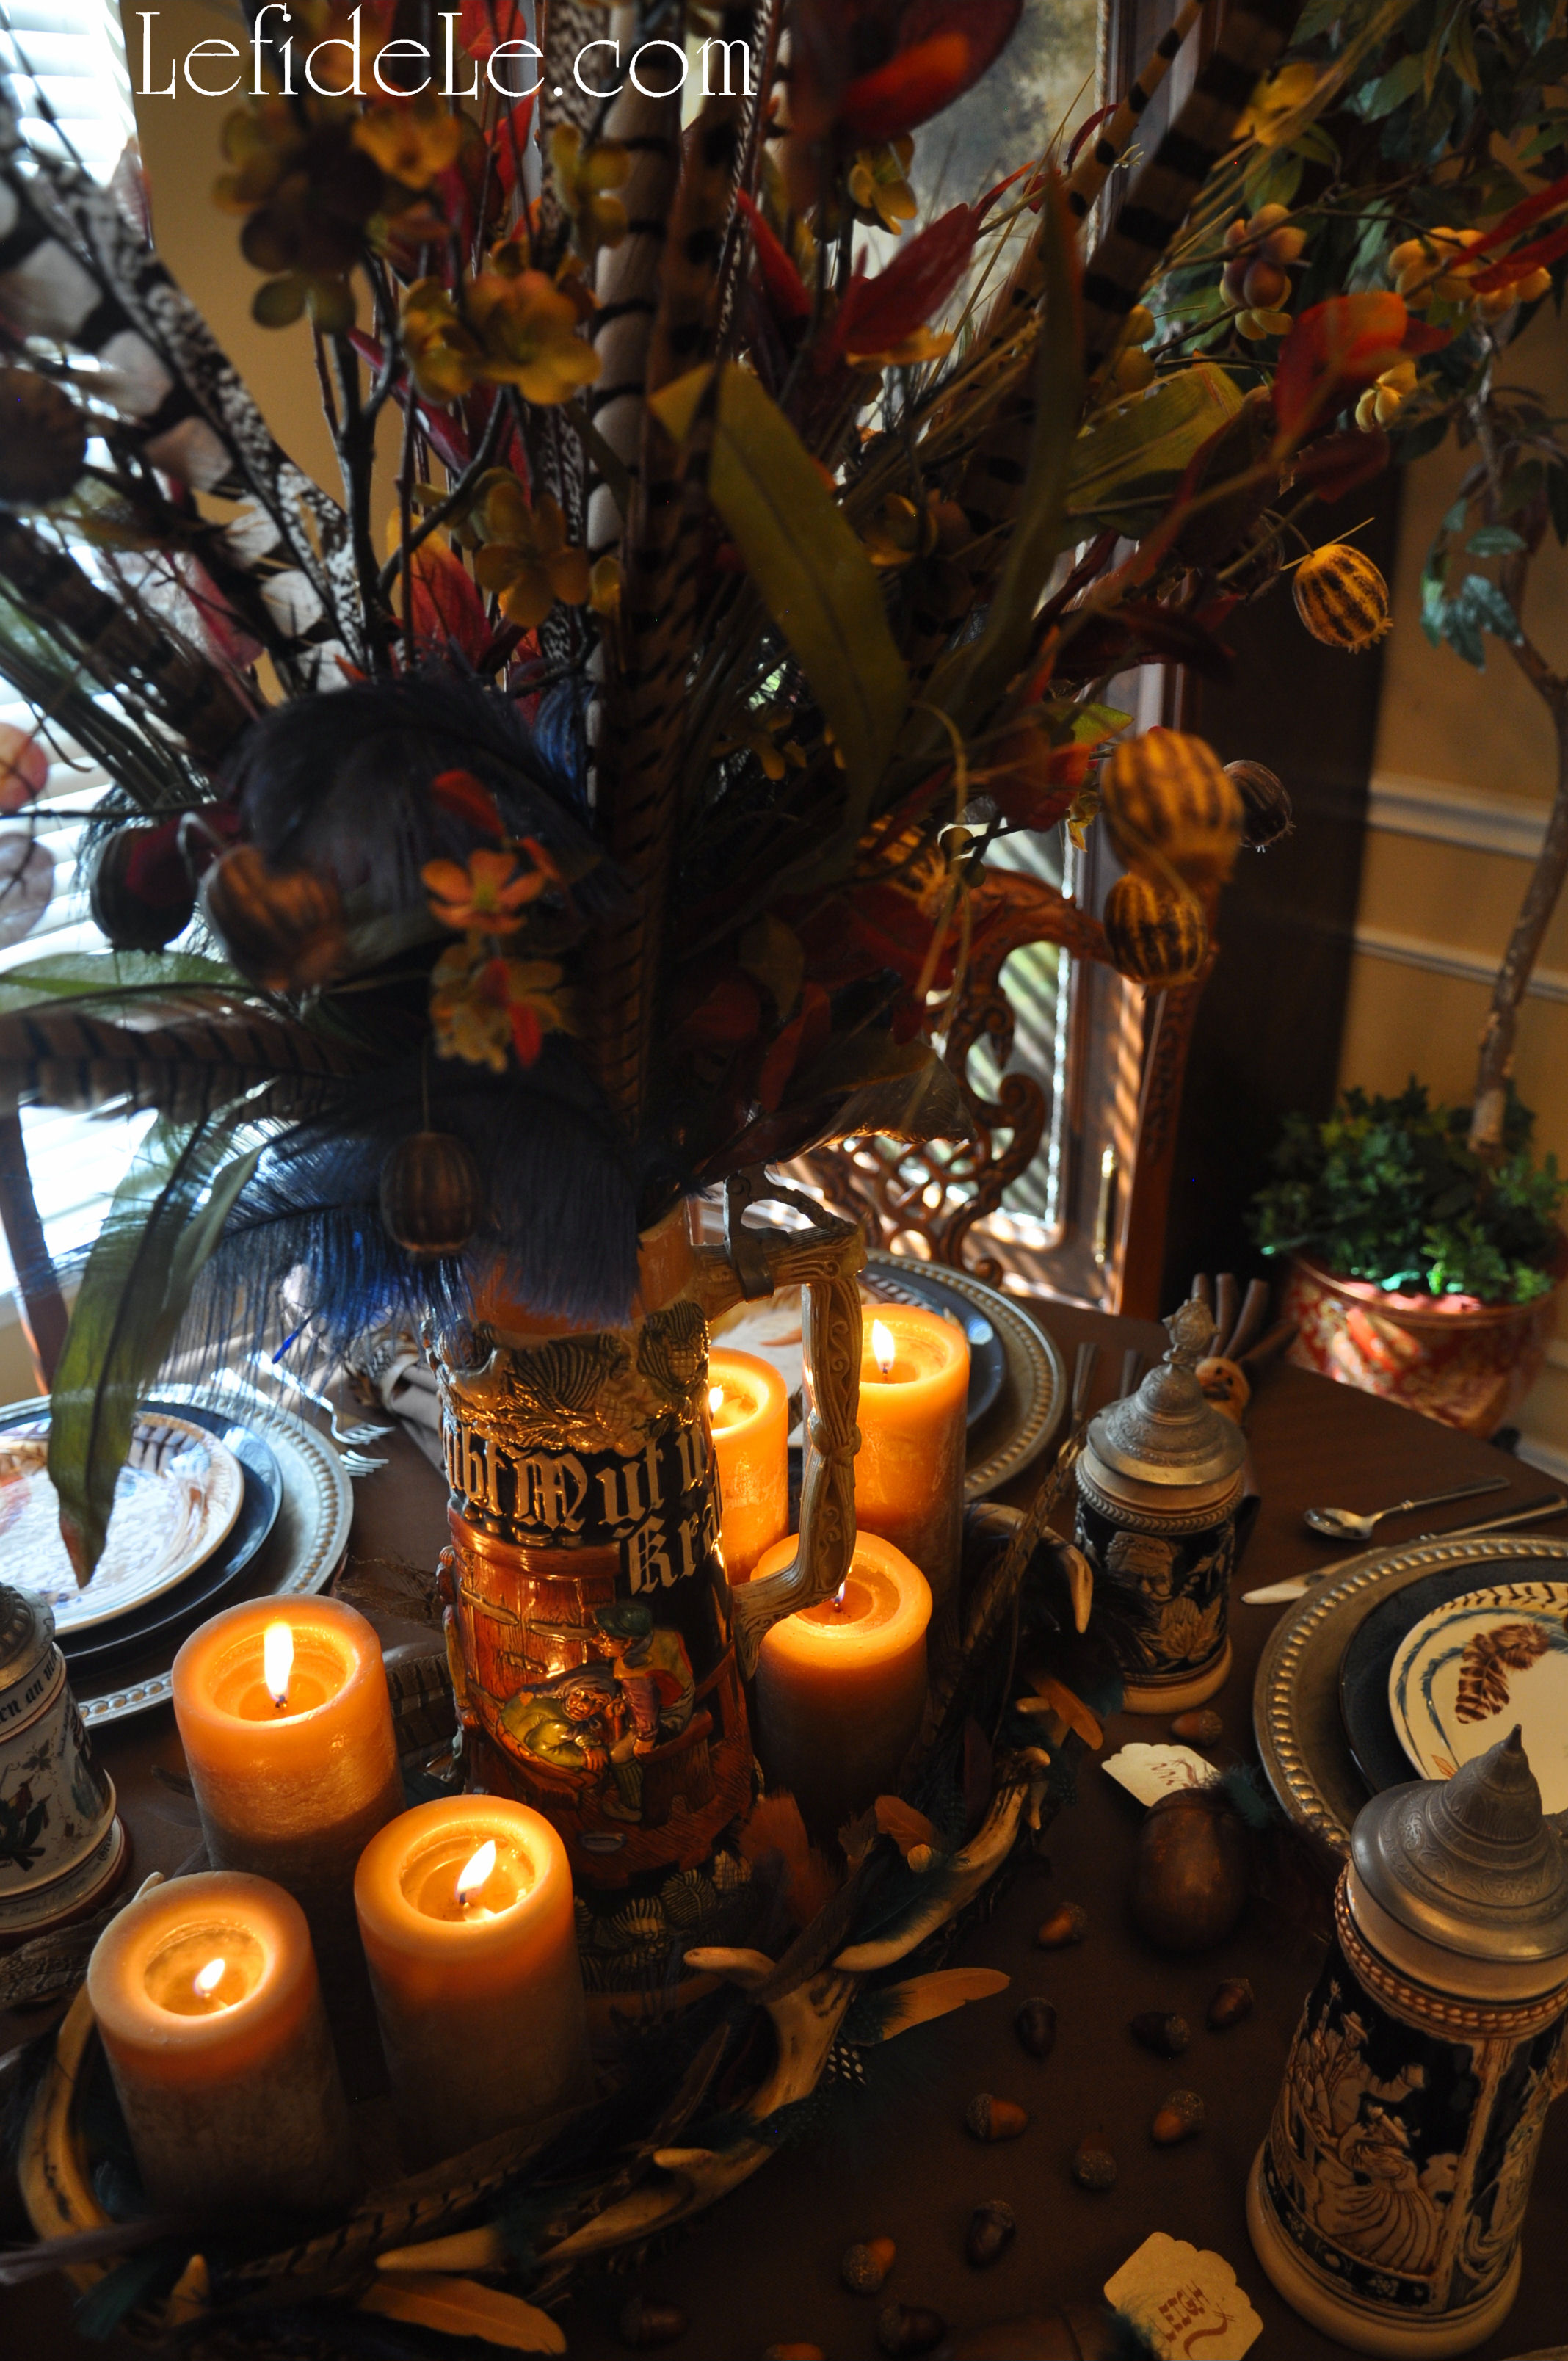
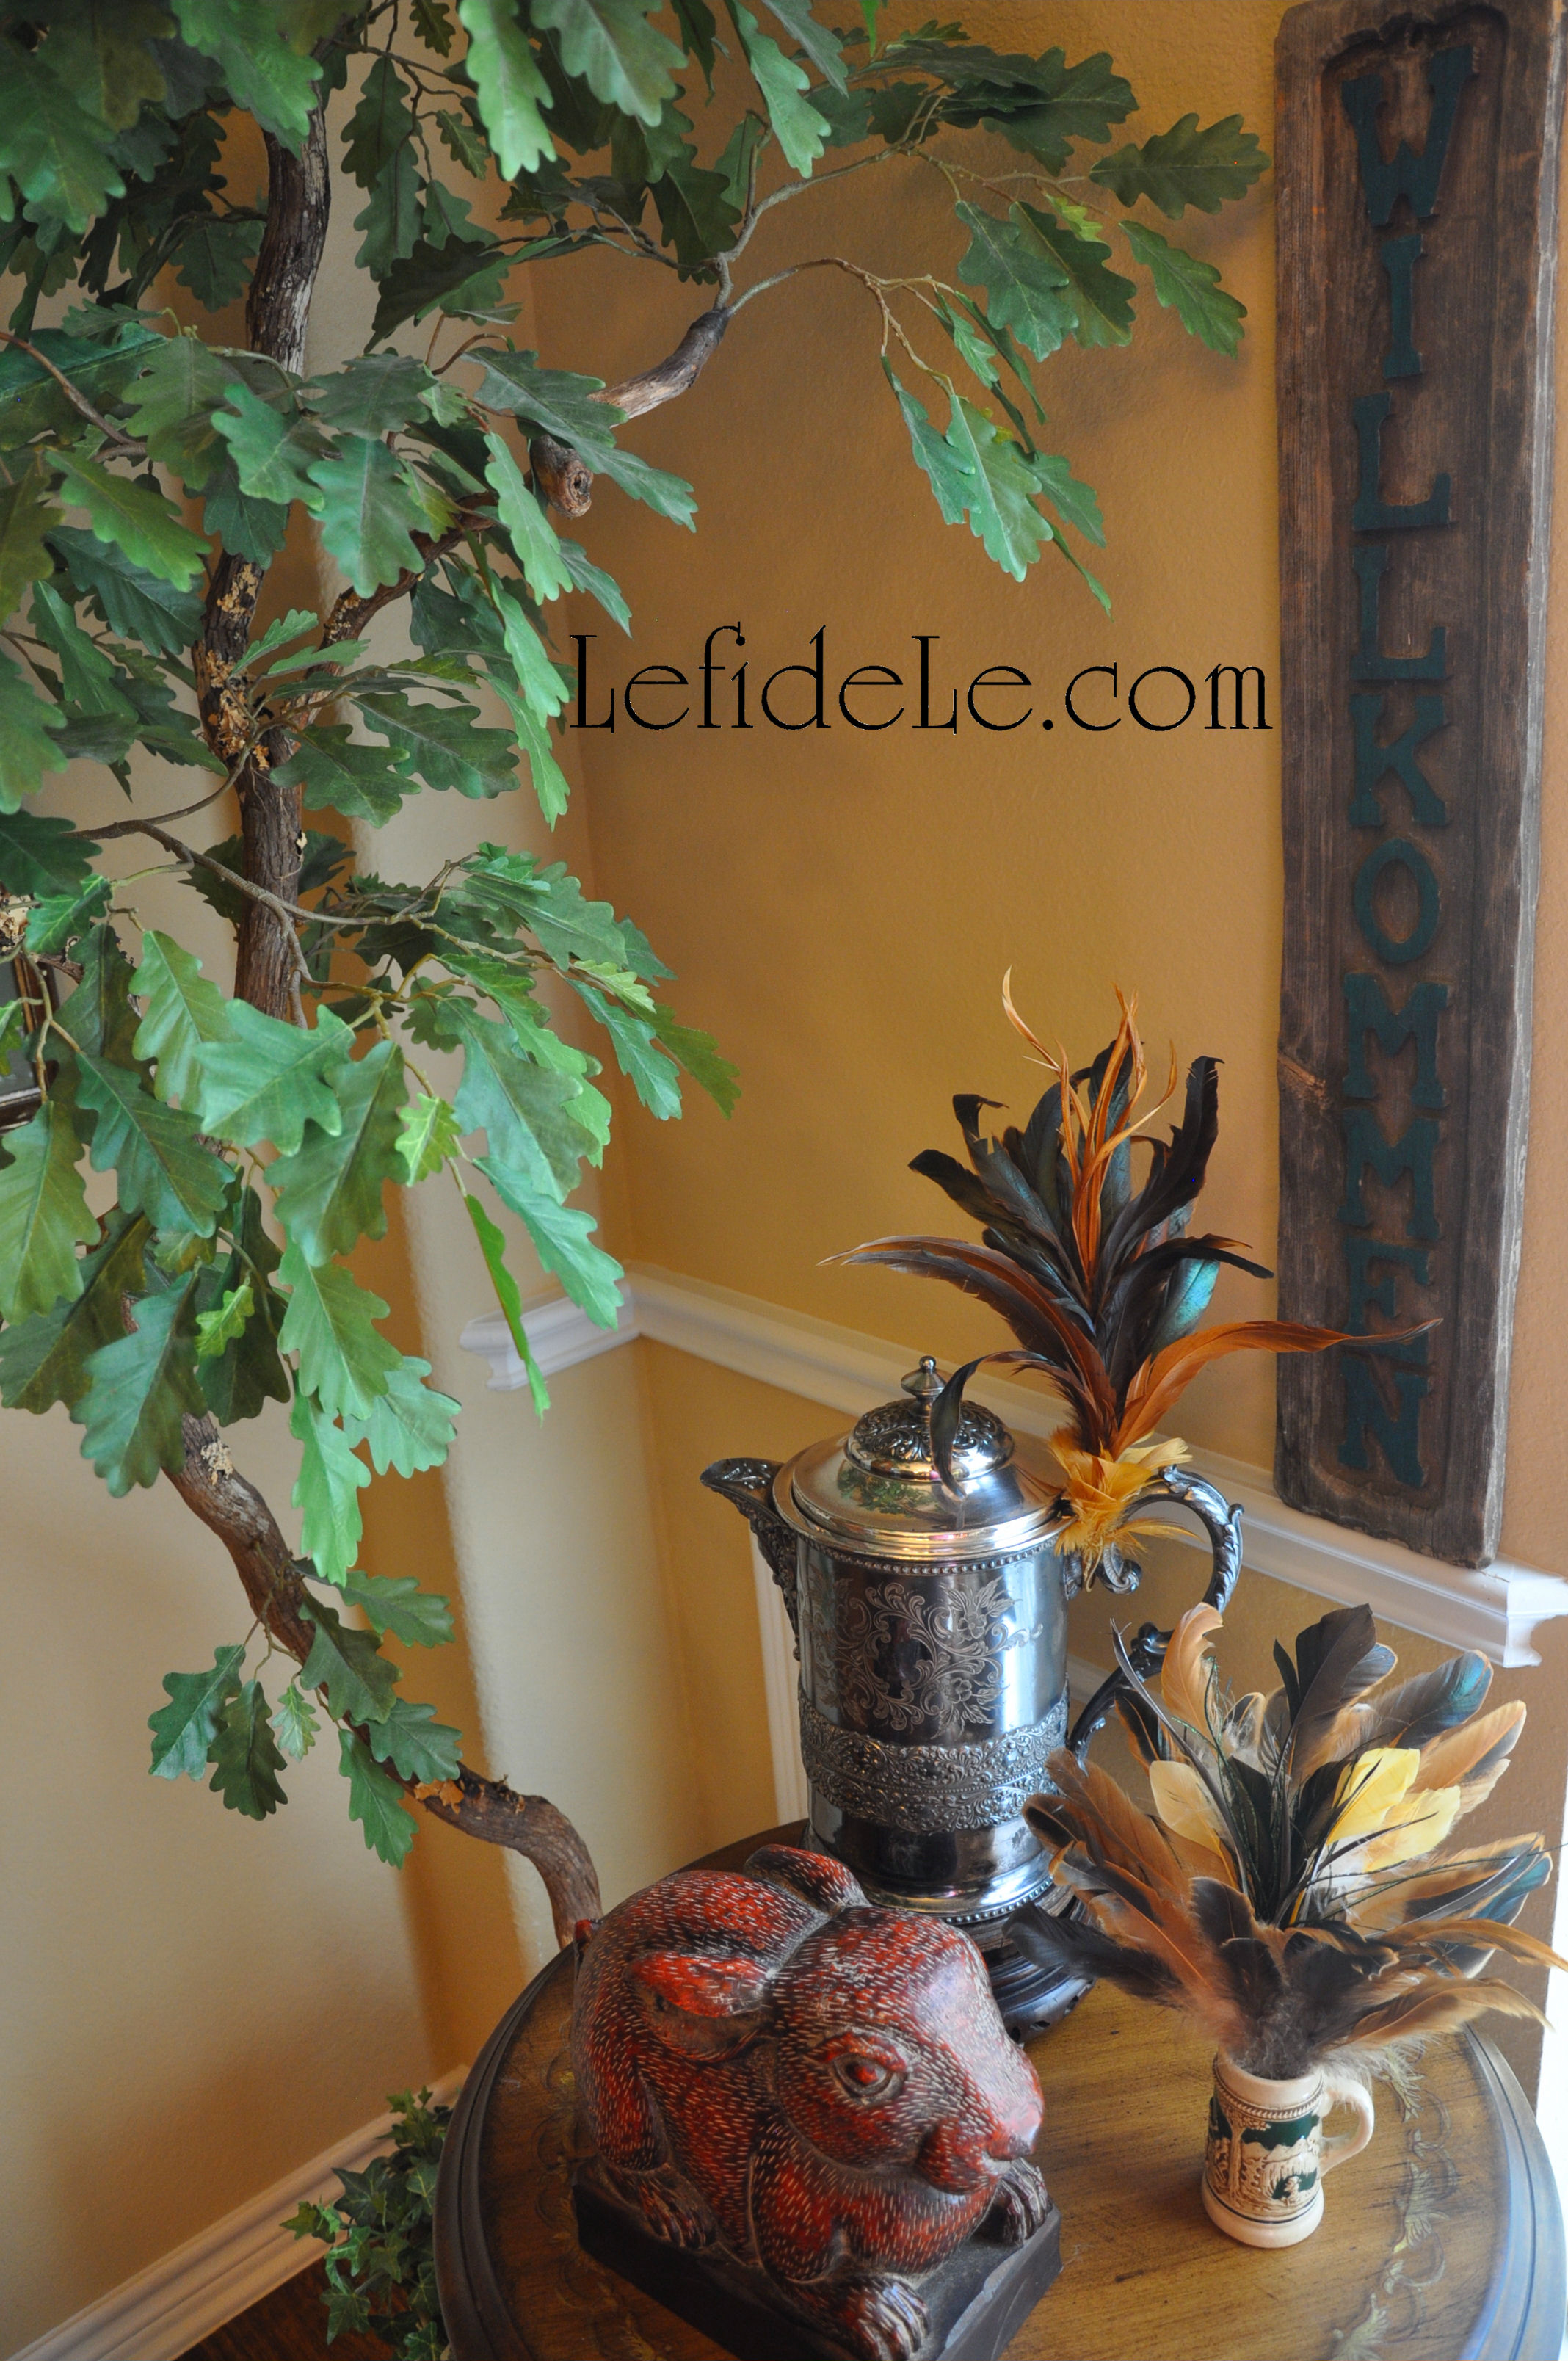
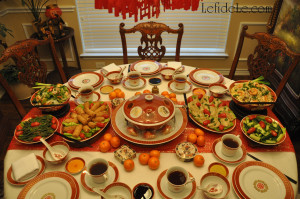
“Bring out the apples, the oranges too. Their colors bring us joy and good luck too.” Auspicious branches bloom from an Asian wall-mounted vase. Trees neighboring the tablescape are echoed by the table-runner embroidered with leaf filled branches.

55Leigh

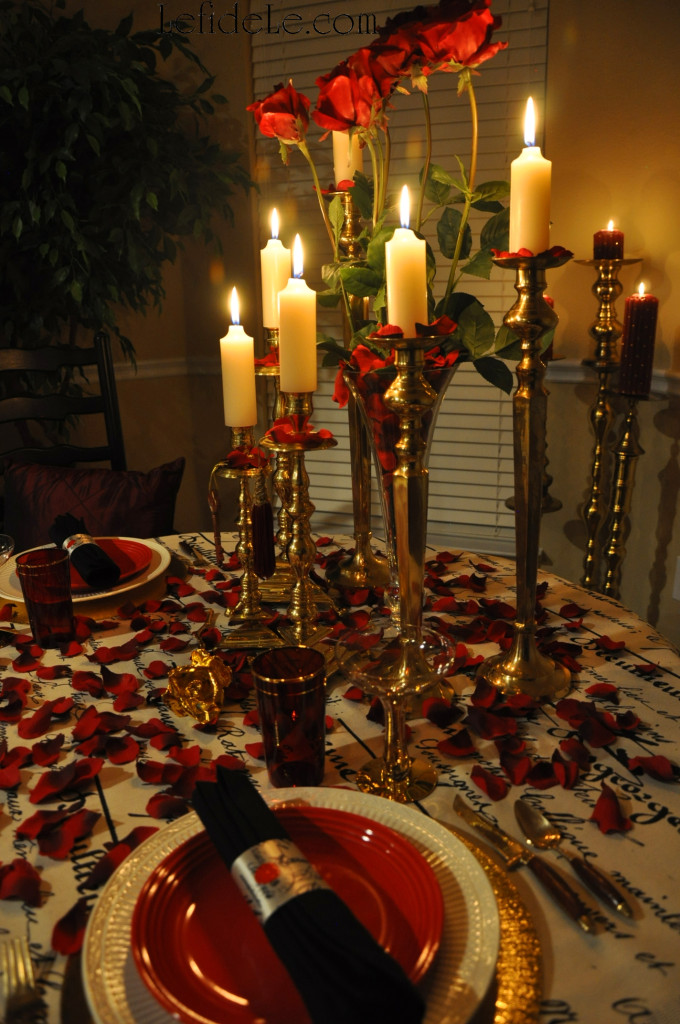
“The dragon dances, the lanterns light. The firecrackers light up the night.” Illuminating pillar candles stand eminently upon vintage scrolled brass candle holders embossed with tiny lotus blossoms. Traditionally made Chinese ceramic vessels lavishly depict scenes of lush bird filled paradises, which are decorated further by dimensional gold paint.

78Leigh

Gung Hay Fat Choy… Best wishes & congratulations! Have a prosperous and good year!

Faithfully Yours,

Leigh

P.S. The quoted Gung Hay Fat Choy children’s song lyrics are by Nancy Stewart.

f1721Leigh

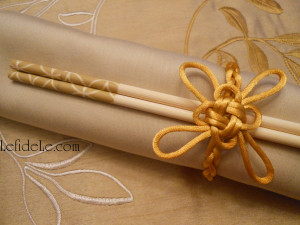
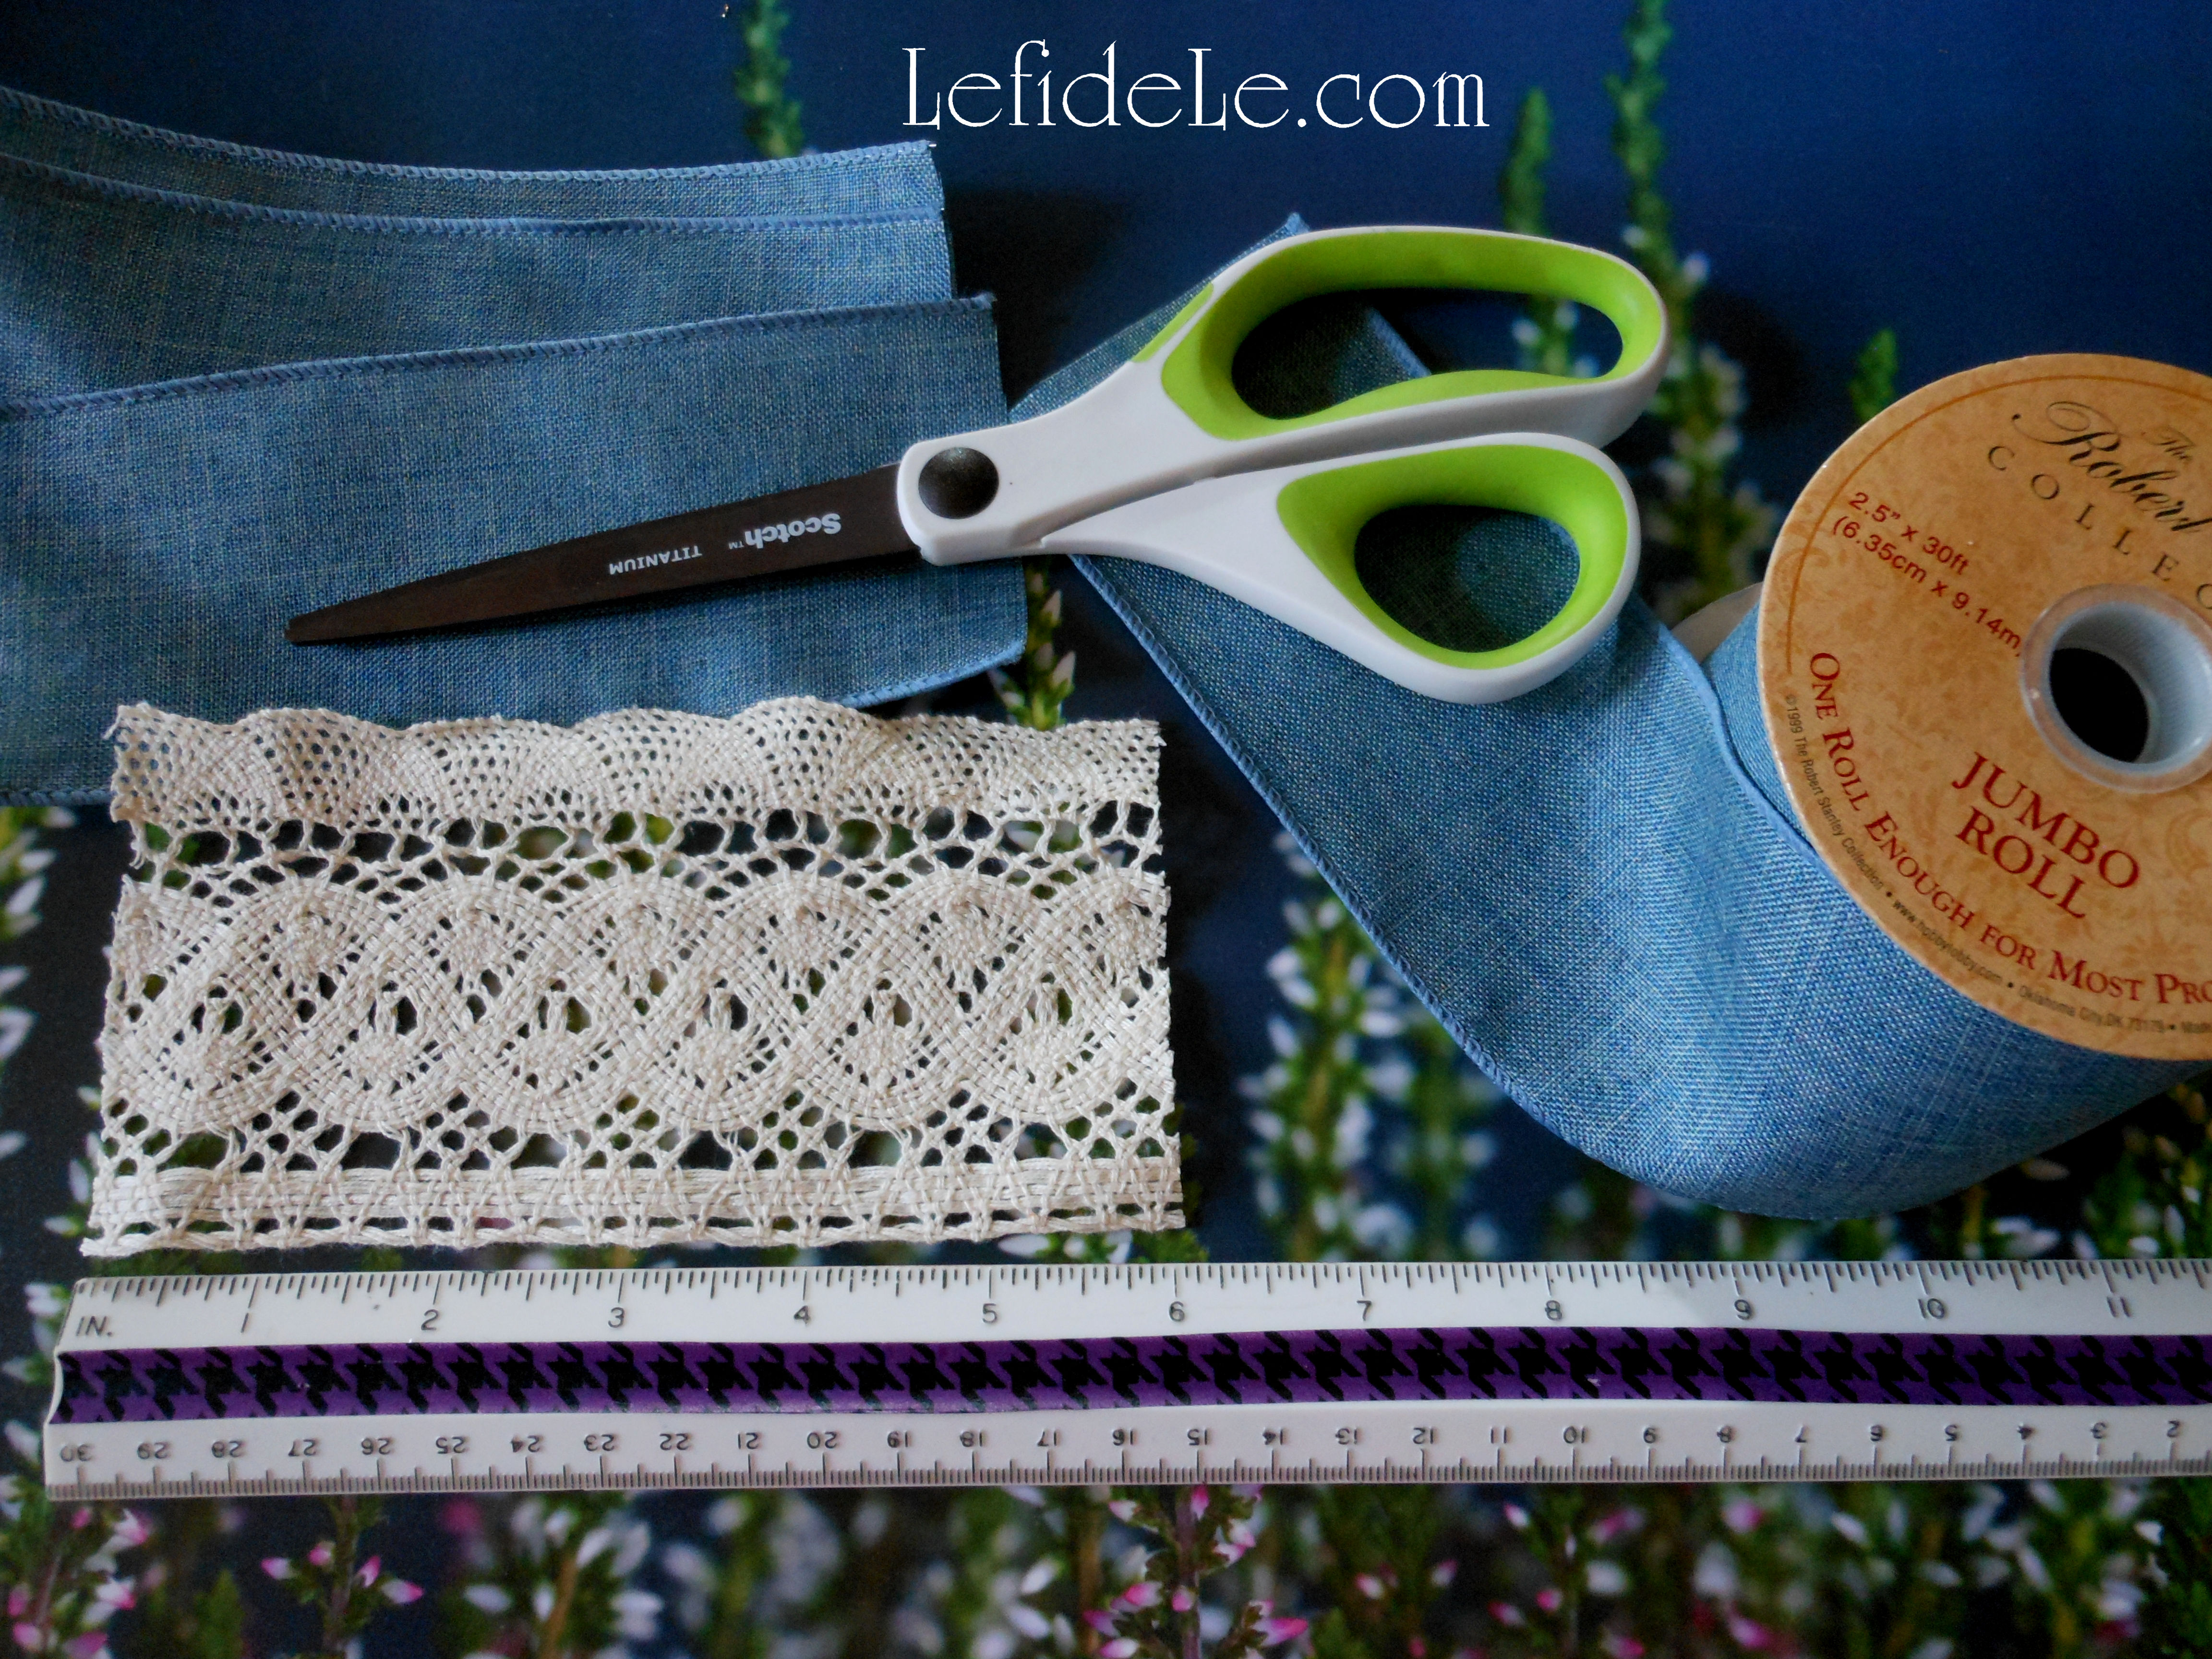
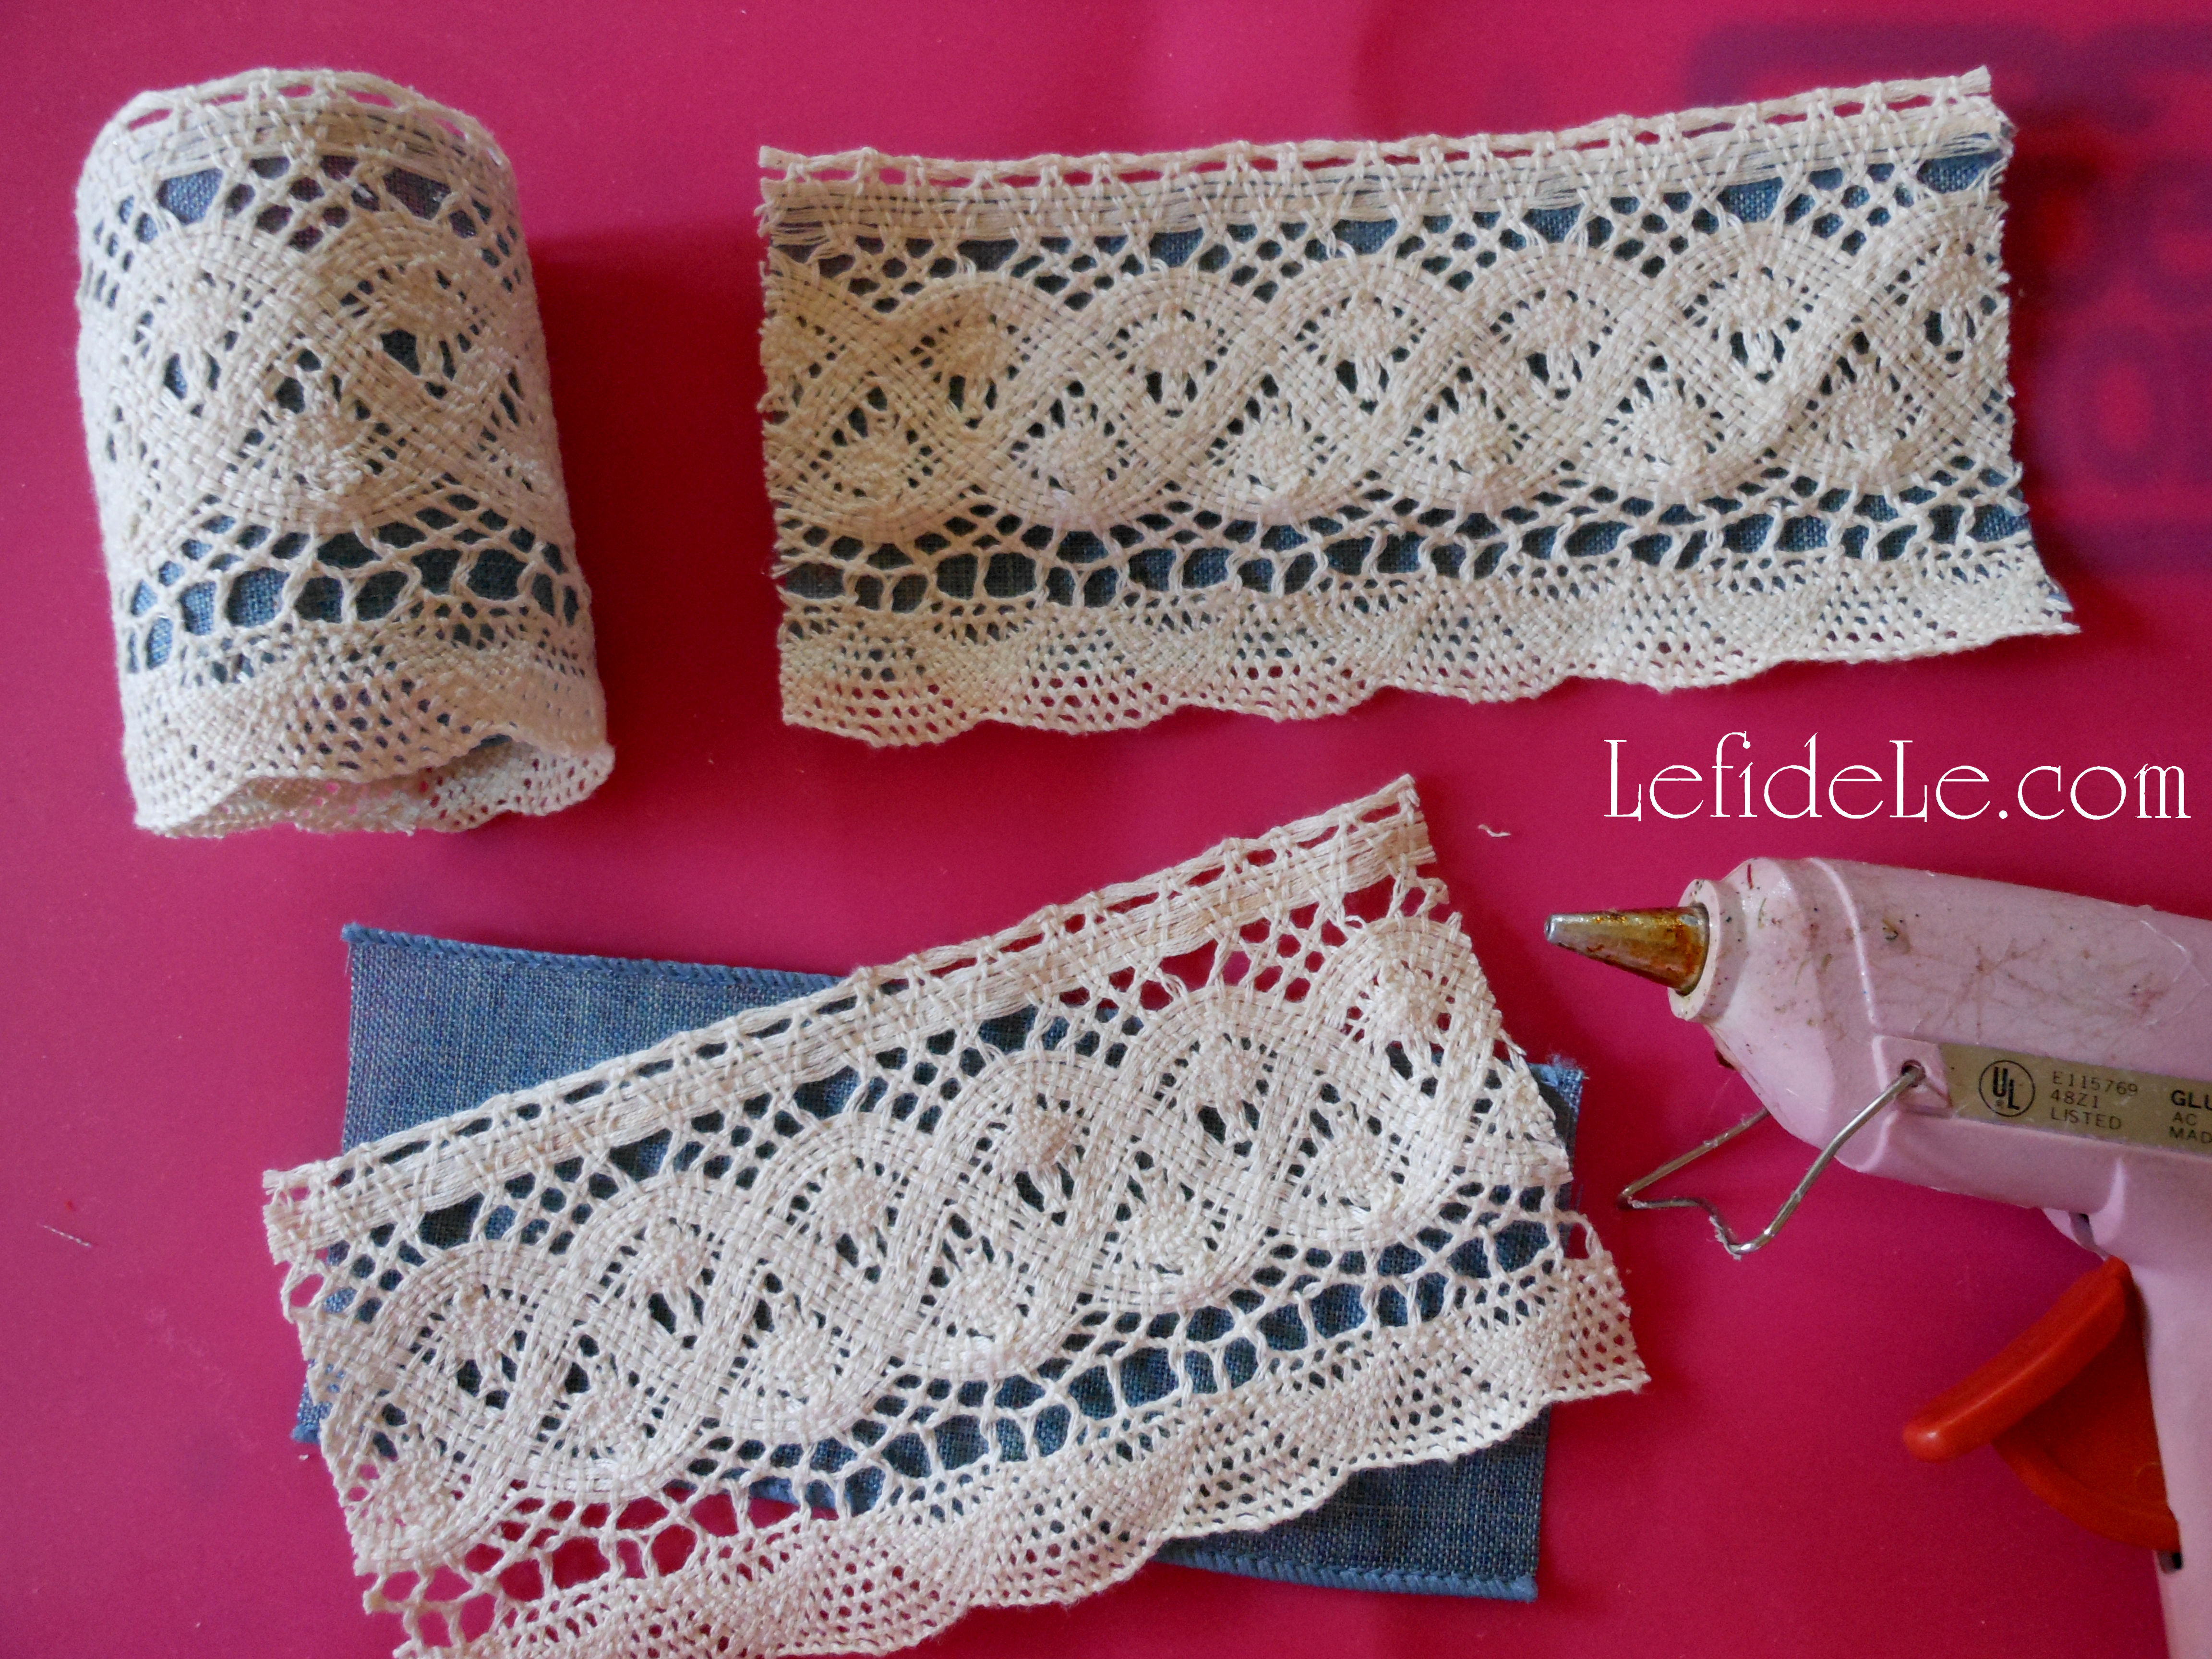
P.P.S. Learn how to make the traditional Chinese Good Luck knots seen here and how to turn them into napkin rings as well as decorating chopsticks with washi tape in my crafting article by clicking HERE!

183Leigh

P.P.P.S. Read more about traditional Chinese New Year celebrations in my article from last year by clicking HERE!

Love Letter Themed Tablescape (Perfect for Valentine’s Day, Romantic Date Night, or Anniversary Dinner)

This love letter themed tablescape make’s the perfect setting for Valentine’s Day, a romantic date night, or even an anniversary dinner. I find that in the modern era of effortless texting, emails, and social networking, that it can be a lovely quixotic gesture to turn back to the sentimentality of a handwritten letter on actual paper. Then to go further back to capture the romanticism of script, drafted with pen and ink well on paper that’s been sealed with wax… so that none other than the intended may lay eyes on the heartfelt content. Call me old fashioned if you will… I’ll just take it as a compliment.

101Leigh

“Shall I compare thee to a summer’s day? Thou art more lovely and more temperate:”

Verse spells its way across a love letter inspired cloth is laid upon a greater midnight black tablecloth.

112Leigh

“Rough winds do shake the darling buds of May, And summer’s lease hath all too short a date:”

Six ravishing red roses rise from a vase overflowing with soft petals. A boundless array of them blankets the table.

114Leigh

“Sometime too hot the eye of heaven shines, And often is his gold complexion dimmed;”

Luminous brass sextuplet candlesticks cast a romantic golden glow over the tablescape. Beneath them lies a once live rose plated in brilliant 14 karat gold. Gilded studs enhance burgundy pillar candles set upon stacked vintage candlesticks that playfully generate light and shadow in the background.

83Leigh

“And every fair from fair sometime declines, By chance, or nature’s changing course, untrimmed;”

Encircling tuxedo black napkins are love letter symbolizing napkin rings trimmed with faux wax seals. Golden utensils bearing wooden handles represent the pens of yesteryear. Waiting to be filled are vintage ruby glasses trimmed with rings of gold that are flanked by golden flecked midcentury champagne vessels.

75Leigh

“But thy eternal summer shall not fade, Nor lose possession of that fair thou ow’st, Nor shall death brag thou wand’rest in his shade,”

Beneath a resplendent tree sit black ladder-backed chairs cushioned with sumptuous garnet pillows.

67Leigh

“When in eternal lines to Time thou grow’st. So long as men can breathe, or eyes can see, So long lives this, and this gives life to thee.”

Italian countryside plates from Mikasa are topped by red dishes resembling wax seals. They obscure all but rings of gold from the gleaming mat chargers below them.

Faithfully Yours,

Leigh & William Shakespeare’s 18th Sonnet

P.S. Click here for my Easy DIY Valentine’s Day Countdown Calendar / Treat Bag Banner & Love Letter Napkin Rings Craft Tutorials.

Easy DIY Valentine’s Day Countdown Calendar / Treat Bag Banner & Love Letter Napkin Rings Craft Tutorials

1661Leigh

This easy DIY Valentine’s Day countdown calendar plus treat bag banner and love letter napkin rings craft tutorial comprises three of my favorite things to make… banners, napkin rings, and advent calendars. The latter project arose from the questions, “Why are countdown calendars typically made for Christmas advent and not for other holidays?” and, “Why not expand the celebration with 2 weeks of excitement leading up to Valentine’s Day?” This works well for either children or adults depending on what’s placed inside the bags. As for the love letter themed napkin rings, they perfectly fit a romantic Valentine’s theme… though this one is for adults only!

1638Leigh

Let’s begin with the napkin rings. You’ll need a roll of Offray Brand Ribbon in a script pattern. (I purchased this ½ price with a coupon from Joann Craft & Fabric Stores. There’s a link for them in the sidebar.)

1647Leigh

You can make 12 rings and still have enough left over for a gift package bow if you like. You’ll also need either hot glue or liquid fabric glue and fabric paint in red (because it works on so much more than just T-shirts).

1216Leigh

Measure and cut a 6 inch length of ribbon for each ring you wish to make (use sharp sewing scissors to prevent fraying ends). If using hot glue, bond the ends with one side overlapping the other and press them together tightly. For liquid fabric glue, use a plastic clothes pin as a clamp or secure with a straight pin… and allow them to dry completely.

1243Leigh

Next, make a faux sealing wax impression with the red paint. Either use the fabric paint tip to draw a circle and fill it in, or just squeeze some onto a plate and use a brush. Allow these to dry completely before handling. (Hot sauce bottles, glue bottles, and paint tubes placed inside the rings will prevent rolling and paint smears.)

83Leigh

These napkin rings were so quick and easy to craft, and they were a great little touch to add to the Love Letter Themed Tablescape (Perfect for Valentine’s Day, Romantic Date Night, or Anniversary Dinner).

1617Leigh

Now let’s make a Valentine’s Day countdown calendar and treat bag banner. (This is an easy enough project for the kiddos in your life to make too.) Begin by purchasing 14 mini clothespins complete with chalkboard hearts (these were 12 for $1 at the Target bargain bins). You can also buy the clothespins plainly and easily attach small flat wooden hearts with wood glue or hot glue… yes, hot glue does work on wood. Then all you need to do is paint the hearts with chalkboard paint. (All of the major craft stores carry the hearts. There are sidebar links for my favorite stores that carry coupon codes with them!)

1547Leigh

If you like, paint the remaining portion of the clothespins in your choice of red or pink… though the natural wood tone would look fine with the paper bags if you’re short on time. (I used dark scarlet multi-surface acrylic paint from DecoArt, because it matches my spice racks.) It’s easiest to clip them onto cardboard and just paint one side, leaving them to dry before flipping them over and completing the opposite side.

1552Leigh

You have the option of writing the 14 day numbered countdown with actual chalk (so that they may utilized in another capacity after the holiday) or with a permanent chalk marker that can’t be rubbed off.

1555Leigh

While those are drying, decorate your treat bags. (These plain little sacks were purchased cheaply for ½ off, but you can purchase printed ones if you’d like to speed up the process.) I used a red bingo marker to stamp dots in a polka dot pattern. (See more about this, along with other project ideas in my article on Fast & Easy DIY Hand-stamped Polka-dot Gift Wrap & Matching Gift Crafts.)Let these dry completely before the next step. (You also have the option of stamping a pattern onto the bags with ink or paint.)

1560Leigh

Next, cut out hearts from black chalkboard paper, or use a paper punch in any shape you like, or speedily use readymade chalkboard sticker labels.

heart template

Here is my handy little template to print free at home then cut out to trace around. It’s an easy way to make the same exact heart shape repeatedly. (Just right click the small image above and select print.)

1564Leigh


Adhere the paper hearts onto the bags with a permanent glue stick. Then run a strip of matching washi tape along the base for easily added flair.

1571Leigh

String the dry clothespins onto ribbon, string, jute, cording, twine, or yarn. (I used yarn that looks like twine because three times the amount can be purchased for ⅓of the price.) Once again, use either permanent white marker or actual chalk to write on each heart.

1623Leigh

I chose to write “Be my Valentine!” but “Valentines Day!” or “Happy Hearts Day” would also have fit on the 14 bags. You can also write the names of individual recipients like friends, classmates, or even alternate the names of family members.

1635Leigh

Fill the little bags with anything you like… you can make it as inexpensive or extravagant as you like.

1629Leigh

For kiddos: try candy, stickers, stamps, tiny toys, erasers, inexpensive jewelry… or silly printed jokes you won’t mind hearing over and over again. On the 14th day, think about directions leading to a larger gift like a stuffed animal.

1628Leigh

For adults: try printing faux fortunes, poems, romantic quotes, movie or event tickets, or even homemade coupons for “honey-do” chores or special treats. On the 14th day, think about directions leading to a larger gift like a dozen roses, box of chocolates… or something uber masculine like the latest power tool at home depot.

1661Leigh

This makes a super cute banner decoration as well, and it can be strung just about anywhere using either tape, 2 extra clothespins, or by tying knotted loops at each end of the string.

I ♥ Crafting… Don’t you?!

Faithfully Yours,

Leigh

Create a Homespun Holiday of Barn Red & Burlap with Christmas Tablescape & Mantle Décor Ideas

917Leigh

Why prepare for Christmas by waiting in long lines at overcrowded stores when you can create heartfelt moments with loved ones while crafting a homespun holiday that harkens back to simpler times. Deck the halls without breaking the bank using my easy craft tutorials for DIY décor that harmonizes perfectly with the season’s traditional crafts of gingerbread houses and strung cranberries or popcorn. Have friends over for a cookie decorating or gift wrapping party, and then move the décor over to the mantel in time for a cozy Christmas. In this way, we can all celebrate togetherness in the real spirit of the season!

943Leigh

“Deck the halls with boughs of holly“ and a one-of-a-kind burlap tablecloth painted with stamps and matching napkin rings which set a delightful tone for a homespun holiday gathering. (Learn how easy it is to make these here!)

928Leigh

“’Tis the season to be jolly” and nosh on gluten-free vegan gingerbread cake served upon red ceramic plates over wooden chargers accompanied by holiday reindeer mugs filled with steaming cups of hot chocolate and homemade marshmallows.

936Leigh

“Follow me in merry measure” to a table lit by barn red lantern bedecked with ribbons and merry-making birds. (See more about the birdies here!)

941Leigh

“While I tell of Yule-tide treasure” held in handcrafted advent calendars alongside festive banners and signs trimming the windows in the background. (Find out how to make these here!)

58Leigh

“See the blazing Yule before us” and the apropos message of J-O-Y spelling out the holiday sentiment. (Learn how easily these were made here!)

67Leigh

“Strike the harp and join the chorus” of pretty burlap birds perched perfectly upon tiny tin houses. (See this quick project here!)

918Leigh

“Sing we joyous, all together, heedless of the wind and weather.

Fa-La-La-La-La-La-La-La-La!”

Faithfully Yours,

Leigh

Easy DIY Burlap Ribbon Holiday Banner & Christmas Countdown Advent Calendar Craft Tutorials (+ Free Printable Heart Template)

75Leigh Why prepare for Christmas by waiting in long lines at overcrowded stores when you can create heartfelt moments with loved ones while crafting a homespun holiday that harkens back to simpler times. Deck the halls without breaking the bank with easy DIY advent calendars and holiday banners made from burlap, ribbon, jute or twine, and clothes pins. Nothing is more festive than a banner, and the countdown to Christmas is even more exiting when it’s accompanied with a daily treat. In this way, we can all celebrate togetherness in the real spirit of the season!

946Leigh

To make a simple yet adorable Christmas banner, use a wired ribbon (like patterned burlap) and a thinner flat woven ribbon. Cut the woven ribbon as long as you want your banner to be (like the length of your mantel).

624Leigh

To make the little flags, cut enough 4 inch lengths of the wired ribbon to fill the length of the banner. Next cut 1 inch V-notches out of one end of each (by folding in half lengthwise and making a straight cut at a diagonal angle).

628Leigh

Hot glue the straight sides of the cut flags to the center of the long woven strand (spacing them a little apart). Now add a line of glue to the top of the long ribbon and fold in half over the cut ribbons. (Press this down for better adherence.) Do this in sections of a few flags at a time (so the hot glue doesn’t have time to cool before pressing).

923Leigh

Try hanging it on a stairway or as a festive backdrop in your breakfast room. (I even have one hanging across my spice racks as I write this.)

84Leigh

To make an original yet inexpensive advent calendar use 25 clothespins, 25 tiny paper bags, jute or twine, and some leftover ribbon or burlap.

heart template

Print my heart stencil, and cut it out to use as an easy template to trace uniform shapes quickly. (Just right click on the image above, and select print.)

653Leigh

Trace the hearts (or make stars, trees, circles, etc.) onto the underside of your choice of ribbon, fabric, paper, or burlap. Cut 25 of the shapes out.

663Leigh

Then hot glue a shape to each clothespin. Next, you have the choice of gluing a ready-made number onto each heart, or simply adding a bow. (This is really cute when using them as a mantle-less stocking holder line. You can also add a strong magnet to the back, and stick it on the fridge.)

2Leigh

I chose to hot glue jute in the shape of numbers onto each heart. (It is easier than it looks, but it was a bit more time consuming.)

706Leigh

Be sure to knot small lengths of twine in between each clothespin at regular intervals (so that they don’t all end up in the center once they’re hung up).

58Leigh

A few ideas for daily treats are… gum or candy, jewelry or cufflinks, holiday fortunes without the cookies, gift cards from favorite stores, love notes or poetry, cash or coins, seasonal jokes, flash drives loaded with holiday movies or music, sewing goods like thimbles or embroidery floss, special recipes with a promise to make, barrettes or keyrings, homemade certificates for things like breakfast in bed or car-washing, lip gloss or chap-stick, scavenger hunt clues for large items, scrapbooking stickers or components, and tickets for movies, concerts, events, or travel. Or for the crafty person… try putting one piece of a crafting kit into each packet which can be completed when the holiday’s over. You can even assign odd and even days to different family members.

67Leigh

Why have one day of a filled stocking that competes with big presents, when you spread the joy of Christmas into 25 days of surprises!

Fa La La La La Lovin’ It!

Faithfully Yours,

Leigh

P.S. Check out my other coordinating homespun holiday craft tutorial HERE, and the full results all of the heartfelt crafting HERE!


Easy DIY Stamp Painted Tablecloth & Holiday Ribbon Napkin Rings + Burlap Birds Craft Tutorials

953Leigh

Why prepare for Christmas by waiting in long lines at overcrowded stores when you can create heartfelt moments with loved ones while crafting a homespun holiday that harkens back to simpler times. Deck the halls without breaking the bank with an easy DIY burlap tablecloth painted with stamps to coordinate with ribbon crafted napkin rings. Then add a personal touch to ready-made burlap and jute bird ornaments with just a little paint and sentiment. In this way, we can all celebrate togetherness in the real spirit of the season!

958Leigh

To make the tablecloth, fold the burlap fabric onto itself forming a triangle. Cut alongside the raw edge to remove the extra footage. Unfold it to reveal a perfect square without having measured a thing. The raw edges add to its rustic appeal… so nothing needs to be sewn either! (Note that burlap is available in varying widths which in turn will affect your length… so purchase the widest variety you can find.)

644Leigh

Spread the burlap over a cheap drop-cloth to protect your work surface from paint (because it will seep through). Add a holiday pattern to the cloth with a thick foam shape stamp. Dip it into cheap acrylic craft paint, and then stamp it onto a throw away piece to remove the excess paint before stamping your project.

943Leigh

I used a star shape for several reasons… I already owned the stamp, it symbolizes the star of wonder in the heavens, and the cloth can be used again on the fourth of July!

603Leigh

Make the matching napkin rings easily with wire edged burlap ribbon which is available in so many cute patterns. To do this, simply cut 6 inch lengths for each ring you’ll need.

615Leigh

Lay down a line of hot glue onto one end of a section of ribbon and fold it over to meet the other end. Press together firmly to ensure it forms a secure bond. One and done!

917Leigh

The rings coordinate perfectly with my advent calendar and banner crafts because they utilized the same roll of ribbon.

25Leigh

Saving the easiest for last… personalize any store bought ornament with a little paint for gifts or to make it match your décor perfectly.

635Leigh

For these bird picks (from the floral department of a local craft store) I simply painted the black beaks and added hearts with a bit of the leftover tablecloth paint.

31Leigh

These clip ornament birds were found at an overstock supply store locally. (Now painted, they look like lipstick laden lady birds wearing their hearts on their sleeves!)

975Leigh

I started the whole ornament personalization thing many years ago when my godmother (not a fairy) asked me to paint a pennant bearing penguin to change its school affiliation. It was a really easy way to customize a small gift to turn it into a keepsake. (If you’re not at ease with a brush and paint, try a paint pen!)

936Leigh

Fa La La La La Y’all!

Faithfully Yours,

Leigh

P.S. Check out my other coordinating homespun holiday craft tutorial HERE, and the full results all of the heartfelt crafting HERE!


A Thanksgiving for True Blue Loved Ones with “Turkey Day” Dinner Party Décor Ideas

Offer Thanksgiving for those loved ones who have remained true blue through the past year with a dinner party featuring a fresh blue color scheme, ubiquitous holiday turkeys, and modern china that complements family heirloom dishes and crystal. This is the perfect way to symbolically honor ancestral tradition while celebrating present day family as well… because family is made from so much more than DNA.

20151112_7Leigh

The beautiful 10 inch antique turkey plates are used as salad plates in this modern setting, though they functioned as dinner plates during the era in which they were made. They are placed upon ivory patterned dinner plates, by Mikasa Italian Countryside, which are technically vintage even though the pattern is modern as they remain open-stock.

20151112_34Leigh

The wild tom turkey patterned platter and dishes featuring scalloped edges, by Flow Blue by Ridgeways England, are family antiques made in the late 1800s. They were originally purchased by my Great-Great-Grandmother.

20151112_9Leigh

The delicate crystal stemware displays a subtle floral motif that echoes the bouquet border of the dishes. They were inherited from another line of the family.

20151112_30Leigh

Stretched across a blue patterned tablecloth is a joyfully patterned runner sporting bluebirds of happiness. This was kindly crafted by my mother who hand-stitched the navy trim border just for this occasion.

20151112_31Leigh

Guarding the antique crystal salt and pepper shakers, of yet another pattern, are a blue owl and blue bird handcrafted by an artisan in Chile.

20151112_16Leigh

My antique appearing napkin rings are actually modern crafts that were quick and easy to make. They coordinate well with my printed blue turkey dish place-cards hand-scrolled in gold with guest’s names. (Click here to see my article on the napkin ring tutorial and to get the free printable!)

“O Lord that lends me life, Lend me a heart replete with thankfulness.” — William Shakespeare

Faithfully Yours,

Leigh

P.S. If you have any trouble identifying your own pattern of crystal or china, there is a reputable company who will identify it by picture for free! Just upload images to http://patternid.replacements.com/ They are researching the stemware seen above for me. I’ll add a comment with the information when I find out!

P.P.S. Also, if any of you out there are interested in purchasing anything you see in my articles, from party supply sets to dishware, just send me a reasonable offer via the contact page!


Easy DIY Antique Looking Napkin Rings with Crochet Trim Craft Tutorial + Free Turkey & China Thanksgiving Printables (for Place-cards, Hostess Gift Tags, Thank You Notes, Doggie Bag Tags, Food Tent Cards, etc.)

Easily DIY your own antique looking napkin rings crafted with crochet trim to coordinate beautifully with any china pattern for your Thanksgiving. Then make place-cards using my free turkey and china printables that will double a doggie bag tags when the evening closes. Also, print some to use as food tents cards to identify pies or even as thank you notes or tags for hostess gifts.

20151019_602Leigh

To make each napkin ring, you will need to cut 6 inch sections of wide ribbon in a solid color that coordinates with your dishware or linens. (For a 6 place setting that equates to 36 inches, or 3 feet, which is the size of many standard ribbon rolls.) You will need to cut the same size lengths of crochet trim, which may be found in the sewing section of craft stores. (Ivory matches beautifully with most china patterns.)

20151019_622Leigh

Next, lay a line of hot glue (or liquid fabric glue) onto all edges of the base ribbon. Lay the crochet trim over it in a way that showcases the pretty edges. (If using liquid glue, let this dry completely before forming the ring.) Then just form a ring and connect the edges with a single line of glue on one side. (Clothes pins will need to be used as clamps when using liquid glue.)

DSCN0887Leigh

These really look like they could have been inherited, but took mere minutes to make.

DSCN0902Leigh

The napkin rings serve as a beautiful bridge coordinating my antique china with my modern linens, and they can do the same for you too!

20151019_80Leigh

My Thanksgiving printables (free for personal use only) feature vintage dishware and a wild tom turkey in a fresh hued theme that honors the true blue loved ones we’re thankful for this holiday. (See more of my true blue thanksgiving dinner party by clicking here!)

BlueThanksgivingLeigh

To make your own, right click on the image above and select print. Choose color and photo settings, and print them on sturdy cardstock paper. Cut along the image edges and dotted lines (or coax a relative into helping) then fold in half. Voila!

DSCN0897Leigh

Use these as place-cards during the meal (to strategically place guests for mealtime peace), and then attach them as labels for individual pie boxes or doggie bags (to ensure the holiday pounds are well distributed).

DSCN0905Leigh

These also make great hostess gift tags, thank you notes, or even food tent cards (to properly identify the mysterious pie everyone keeps asking about… in my family that would be Chess Pie).

Happy Turkey Day Y’all!

Faithfully Yours,

Leigh

Calaveras de Azucar (Sugar Skulls) Edible Folk Art & Egg-Free Vegan Candy Recipe for Dia de los Muertos (Day of the Dead) or Halloween

067Leigh

Calaveras de azucar (sugar skulls) are a folk art originating from southern Mexico for Dia de los Muertos (Day of the Dead). The sugar (azucar in Español) is said to balance the bitterness of death (muerte), and the small calaveras (skulls) are traditionally offered on All Saint’s Day (November 1) to beloved departed children (angelitos / inocentes) as one would leave flowers graveside. Because this recipe is an egg-free edible version that doesn’t use meringue powder or royal icing, it makes the perfect allergy-friendly, vegan, and low-calorie candy for a themed Halloween celebration!


Ingredients:

  • 2 cups granulated white sugar
  • 4 teaspoons water
  • Wilton ready-to-use icing multi-pack of 4 primary colors (not gel)
  • Wilton 3D skulls candy mold

Instructions:

022Leigh

Wash and dry the plastic mold. Measure a perfect cup of glistening white sugar (azucar in Español).

025Leigh

Use a small silicone spatula to mix 4 teaspoons of water (agua) into a bowl filled with the white sugar. (The key to sugar skull success is patient and thorough mixing to yield slightly damp sugar the consistency of sand.) Use the spatula to scoop globs of damp sugar into the mold, and also to pat it down compactly into each cavity. Smooth the top of each to flatten the sugar to sit evenly with the mold. (This helps later when combining the pieces to make 3D skull shapes.)

026Leigh

Place a cookie sheet on top of the mold. Flip them over while holding them together. The mold will now sit inverted on the cookie sheet. Carefully lift the plastic mold off to leave the sugar shapes on the sheet. (If some of them stick, gently flex two opposite corners of the mold in different directions. The remaining sugar shapes should pop out without breaking if you hover right over the sheet.) Make a second set of sugar shapes the same way. Let these dry at least 5 hours. (I left mine overnight, and decorated them the next day.) Another option is to bake these 5 to 10 minutes in a 200ᵒ oven. (Make sure to observe them closely in case your oven’s temperature is off.)

029Leigh

“Glue” a set of front and back skull (calavera) pieces together using Wilton ready to use icing. (This is an easy allergy-friendly egg-free alternative to a royal icing of meringue that hardens for the same traditional look, but note that they do contain corn. I found a 4 pack of primary colors in-store at Michaels that are the same size of a gel icing… but don’t use a gel because it doesn’t harden in the same way so that it may be handled when dry.) Press each shape together firmly and set aside.

031Leigh

You may leave these as Halloween skull candies or decorate them as a Mexican folk art. Add traditional decorative icing (glaseado) details like smile lines, hearts, flowers, swirls, dots, and marks that look like apostrophes. (The small icing tubes have a small tip built in that’s perfect adding small details to the skulls.) Let these sit overnight to harden thoroughly.

088Leigh

Wilton’s helpful hotline declared that the icing never really goes bad and may be used years later if capped tightly after use… good to know, but I doubt the small tubes will last long! Once dry, the sugar skulls (calaveras de azucar) may be handled without damaging them.

067Leigh

They may even be eaten as candy, which is wonderful considering most sugar skulls are inedible. (And so are the most popular recipes for them.) Since sugar is only 15 calories per teaspoon… I’m guessing that these are only about 35 calories each!

072Leigh

Set these sugar skulls out in a traditional Day of the Dead (Dia de los Muertos) offrenda, Halloween candy buffet, in the center of a October dinner table as edible decoration in lieu of after dinner mints!

8(3)Leigh

Be sure to check out my article on Dia de los Muertos (Day of the Dead) Themed Halloween Dinner Party Décor and the 2 on DIY sugar skull crafts… costume mask, banner, vase, napkin rings, and wine glass charms!

Ahora, comer con gusto!

Faithfully Yours,

Leigh

Bavarian Oktoberfest Party Décor Ideas for a Fall Tablescape

048Leigh

Willkommen to an Oktoberfest party where the tablescape décor will transport you to a fanciful Bavarian hunting lodge straight out of Grimm’s fairy tales. So don your dirndls or lederhosen, fill your bier steins, and raise prost to a chorus of “Ein Prosit” for a wunderbar family folk fest!

002Leigh

Dark brown tablecloths reminiscent of solid Alpine earth ground the tablescape. Nail-head trimmed pewter chargers topped with true blue dishes echo the pewter hinged lids and stoneware glazing of the steinkrugs. A feather motif dances around the edges of ivory salad plates.

93Leigh

Feathers encircle “leather” rings containing lederhosen protecting cloth. (Find the napkin ring craft tutorial here.)

039Leigh

Carved wooden acorns tied with feathers and nametags direct polka dancers to their seats. (Find the place-card craft tutorial here.)

070Leigh

Tiny acorns scatter across the table acting as yesteryear confetti.

058Leigh

An Alpine “horned” tray befits the base of a centerpiece glowing with candles, scattered feathers, and a large vintage steinkrug of gathered fall branches and long feathers. (Find the centerpiece tutorial here.)

052Leigh

Green foliaged trees and a one-of-a-kind European armoire, refit with a placid oil painting, set the background scenery.

019Leigh

A vintage wooden sign carved with a German message of welcome stands in greeting. A carven hare guards an antique pewter pitcher festooned with colorful plumes. A tiny bierkrug sits feather-filled alongside it.

090Leigh

A toast is proposed… may our hearts forever be filled with merriment just as the kartoffelpuffers, knackwurst, sauerkraut, and apfel sauce fill our bellies this very evening! Gemütlichkeit!

Faithfully Yours,

Leigh

122Leigh

P.S. Wondering how to prepare such a hearty meal for your own wunderbar gathering? Try my Gluten-Free & Egg-Free Potato Pancake (aka- Kartoffelpuffer, Latke, hash brown cups, etc.) Recipe with Baked & Fried Versions for Oktoberfest!