Tag Archives: fidèLe

Frozen Winter Wonderland Themed Christmas & New Year’s Eve Dinner Parties (+ Optional Crafts)

25FrozenChristmas-Leigh

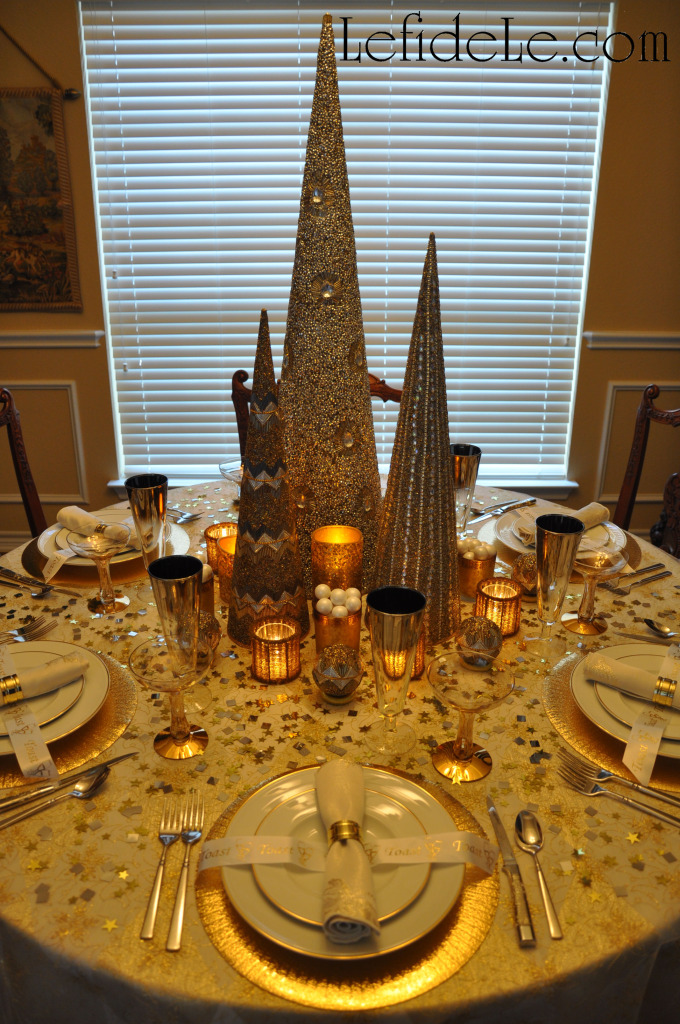
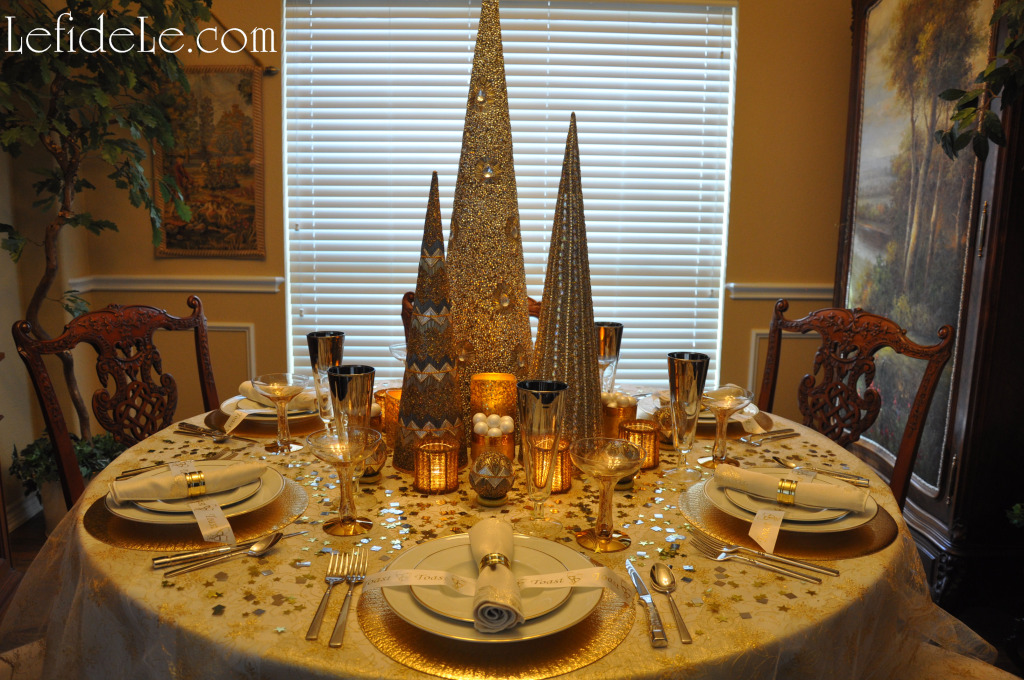
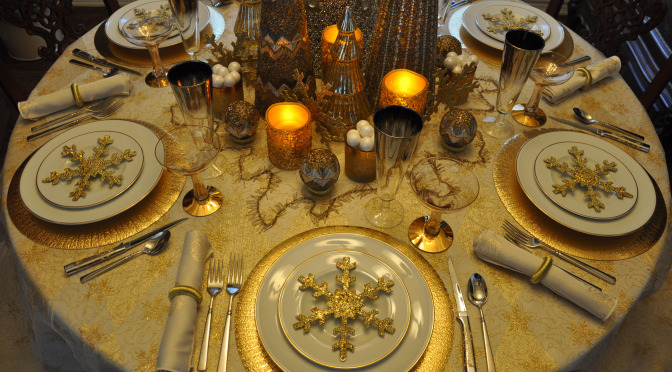
With New Year’s Eve trailing behind Christmas so closely, I wanted to create a dinner party theme that could easily be converted from one to the other without spending any more money or time. I’ve seen all of the decorative components in variation at stores ranging from high end home goods to budget craft supply. I’ll even describe how you can craft your own easily and inexpensively. I’ve chosen a winter wonderland theme as a visual narration of the “Frozen” movie that celebrates family and friendship. It makes an enchanting setting for the adults, and provides an extra dose of holiday magic for the kiddos with frozen-fever. And, hey, you can always pick up items on sale this year to use the theme for next year’s festivities!

63Leigh

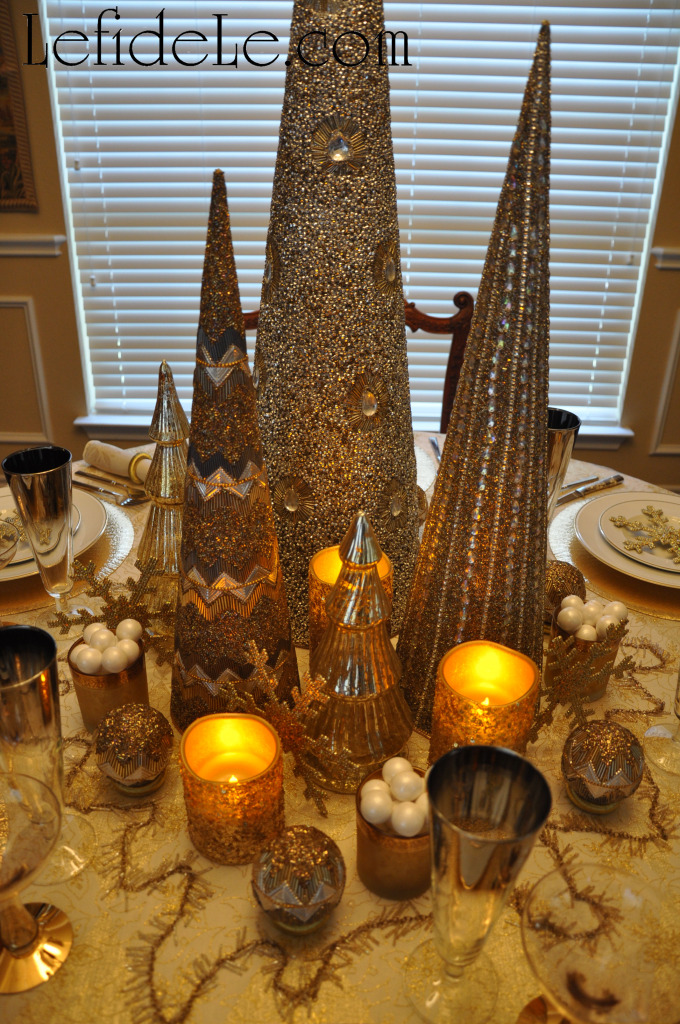
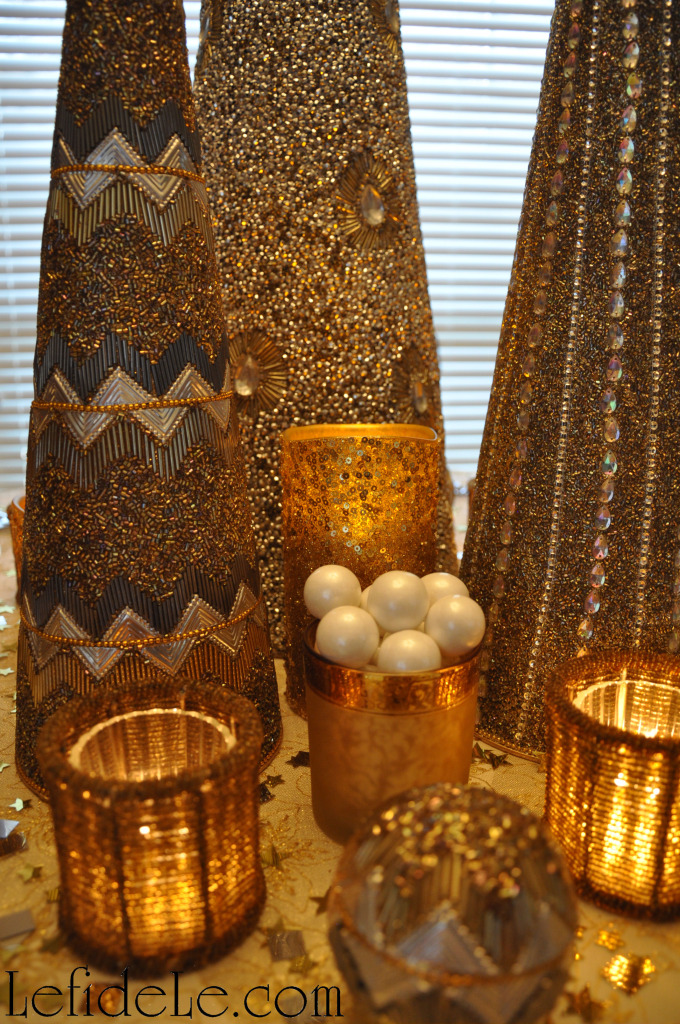
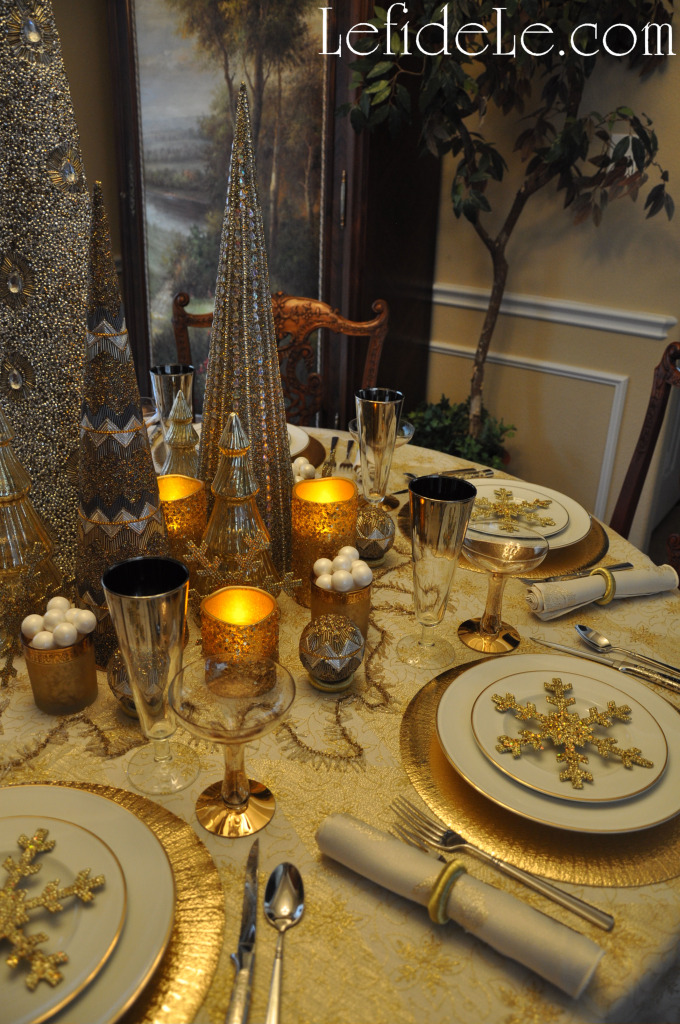
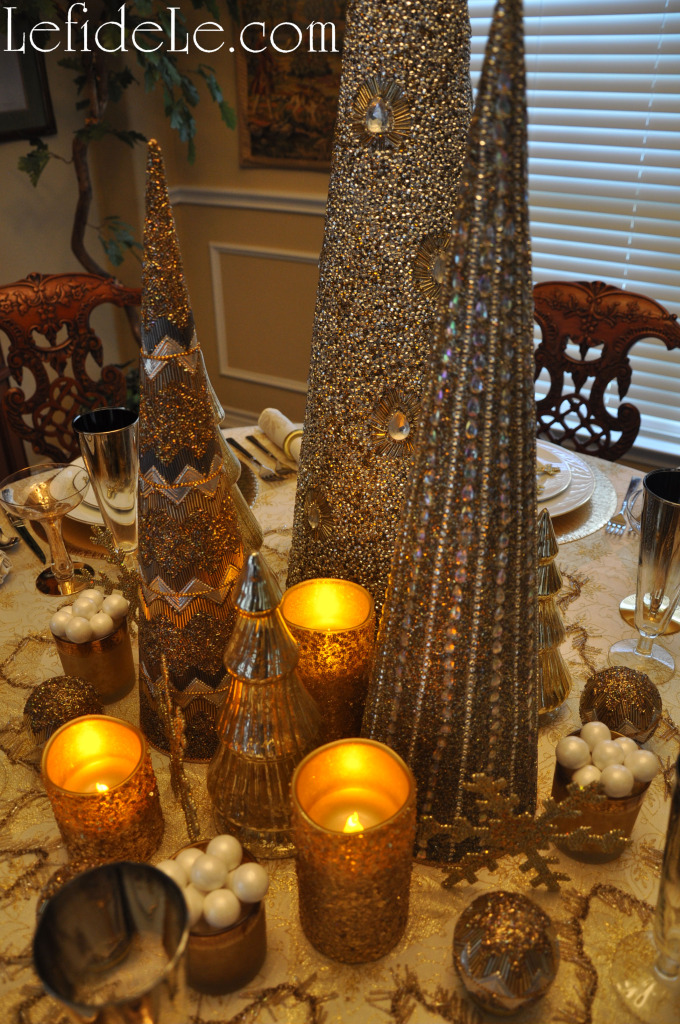
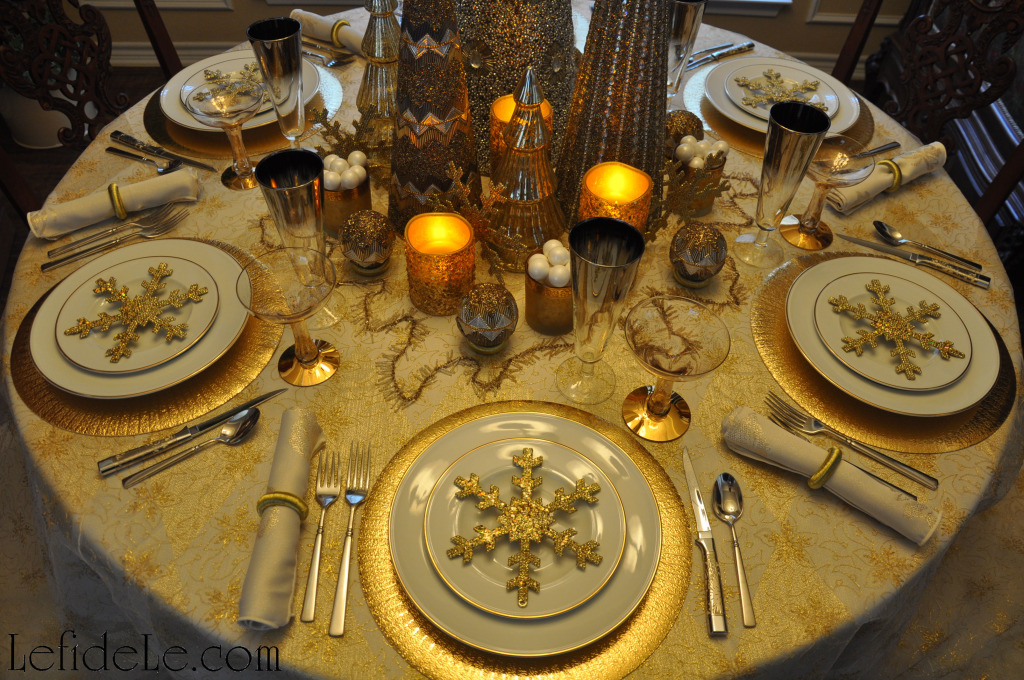
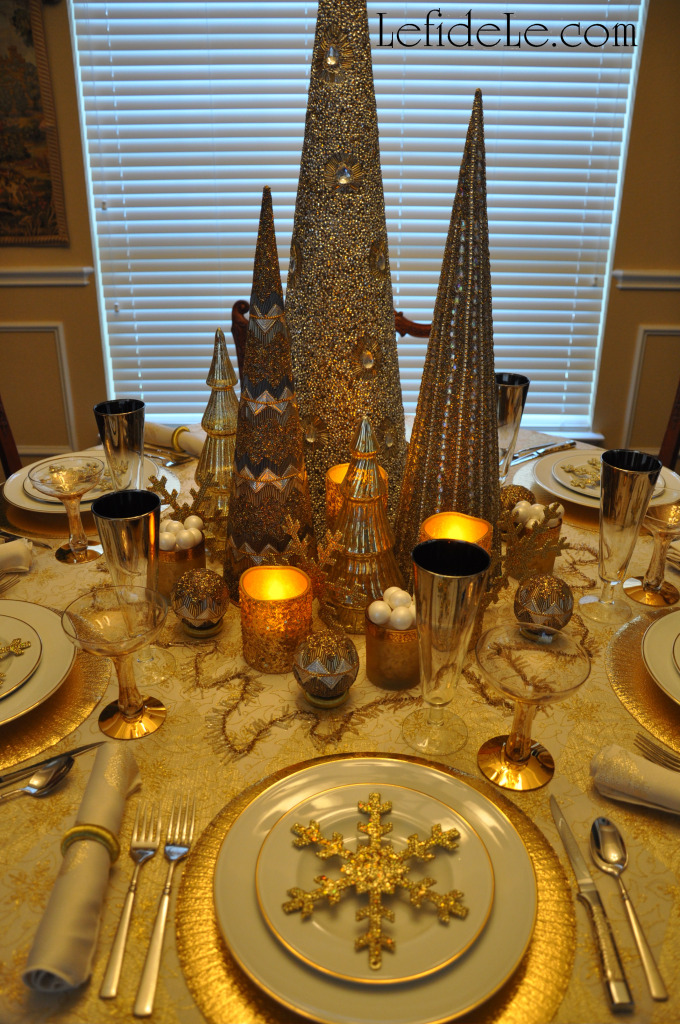
For each of the table-scapes, I set the base of the stage with a gold and ivory harlequin tablecloth found previously at an after Christmas sale. If you see something on your shopping trips that might work for next year’s theme… snap it up! This is how I manage to satisfy my high end taste while sticking to my tight budget. It’s really easy to fill in from there, just before the celebration. I did this with beautifully beaded cones in gold, silver, and pewter from Pier 1. (I have seen other versions of these at many of the stores I been to this year.)

26Leigh

If you’d like to make your own last minute, you have two easy options. One is to buy glitter wrapping paper and double-stick tape it into a cone shape. You can just cut different sizes of paper and wrap each into a tube shape, then tighten one end into a point and tape it down. This only takes a few minutes and is affordable for everyone. The best part is that the paper can be reused for gift wrap later! Another option is to spray inexpensive Styrofoam cones with Krylon Glitter Blast spray. (I really like this stuff. It comes in many colors and is so easy to turn out matching crafts out of very different materials. I’m planning on showing it in use for my next Valentine project.) If you’d really like to go all out with the “Frozen” movie theme, just set the table in aqua blues, silver and white. It would even make a fantastic birthday party for a fan of the film. I topped my harlequin tablecloth with an inherited vintage mesh cloth with golden embroidery. (This layered look is easy to emulate with all of the various sparkly mesh fabric available. I previously purchased some myself from Joann’s with a 40% off coupon.)

44Leigh

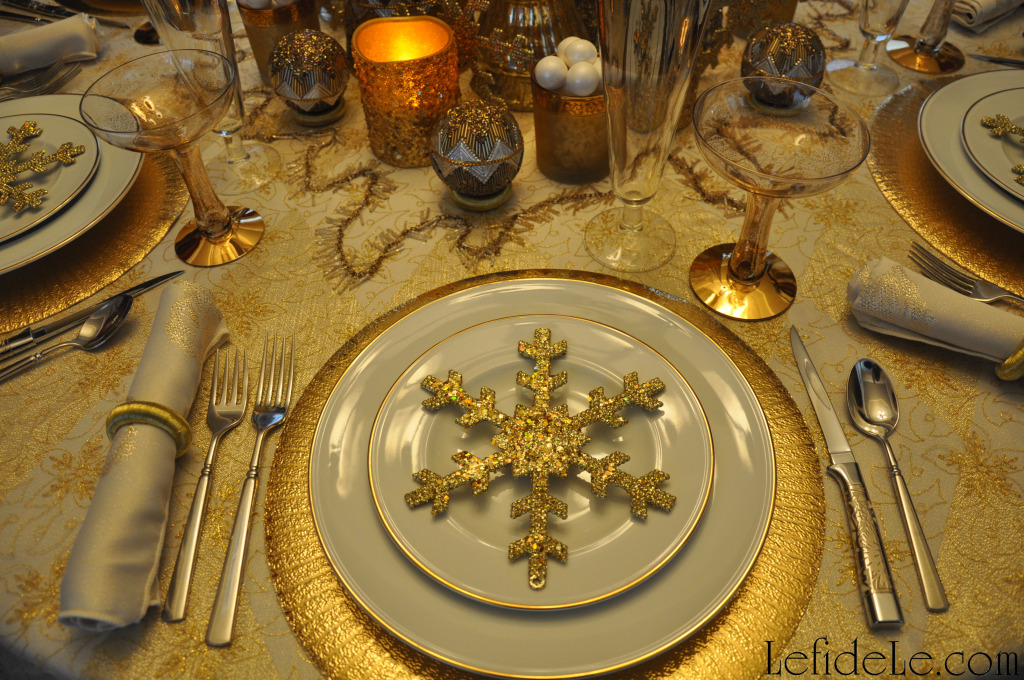
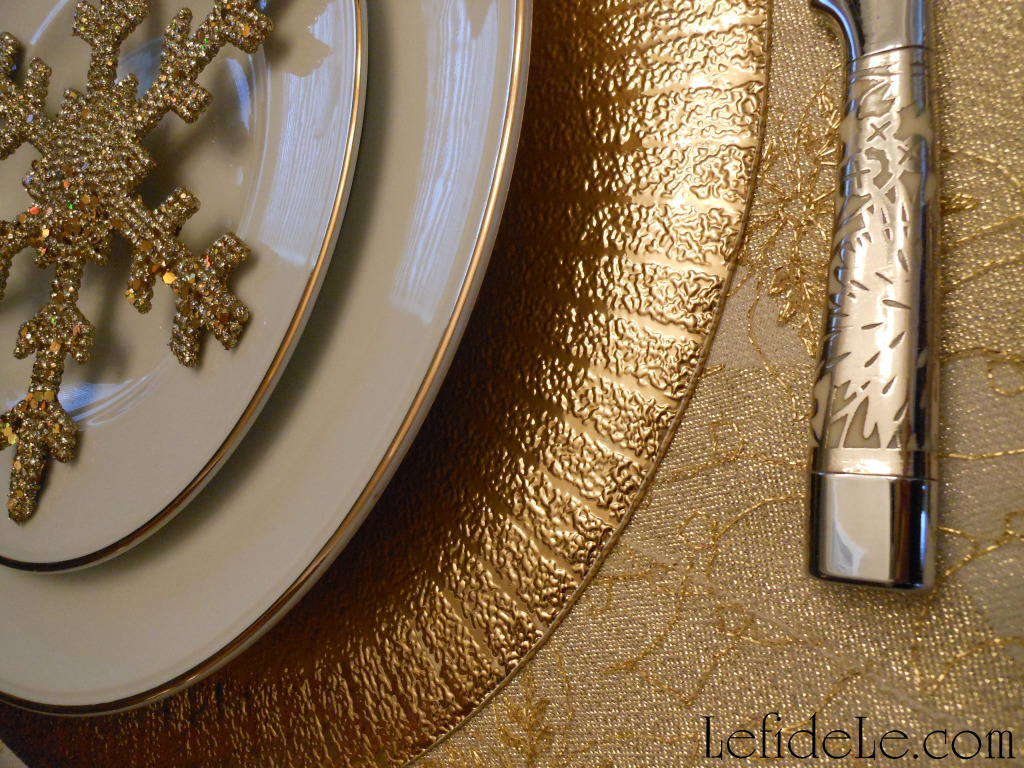
For each place setting, I used my grandmother’s ivory dishes with gold trim atop gilded round placemats that served as a form of plate chargers. I also made use of my daily Oneida silverware, but switched out the butter knife for vintage steak knives with ivory scrolled handles. I love mixing and matching seamlessly!

161Leigh

I already had two lovely sets of napkin rings that would work beautifully, so I decided to go with vintage brass ones for New Year’s, and those with golden threads for Christmas. I placed extras of these beneath beaded Christmas ball ornaments as tiny stands, with the metal eyelet hooks hidden inside the rings. (I’ve formerly employed this idea successfully with marble Easter eggs.)

75Leigh

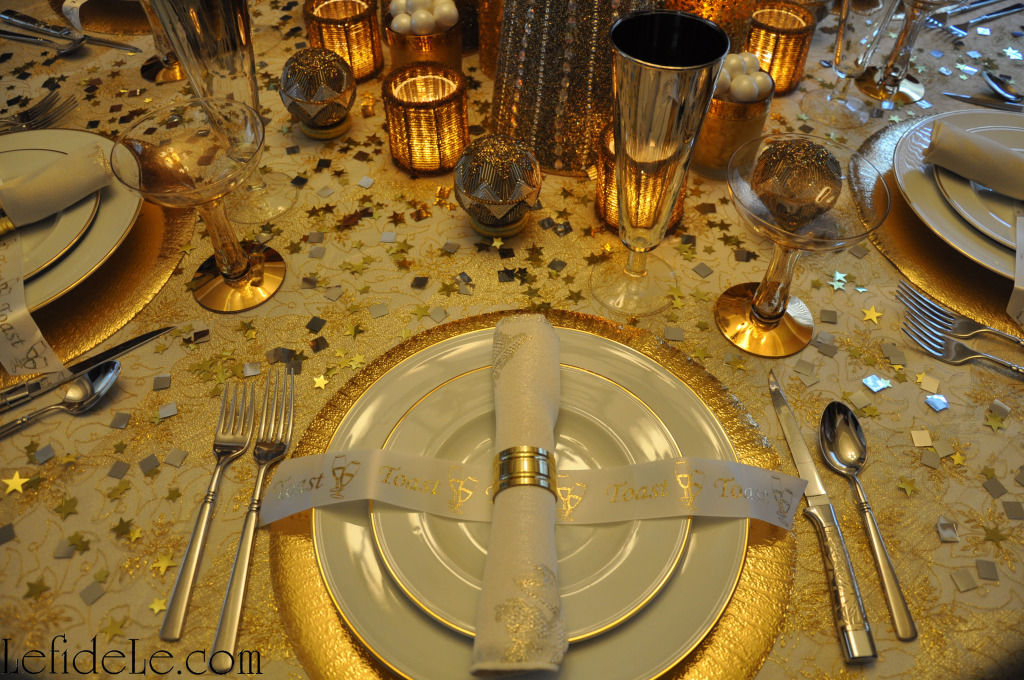
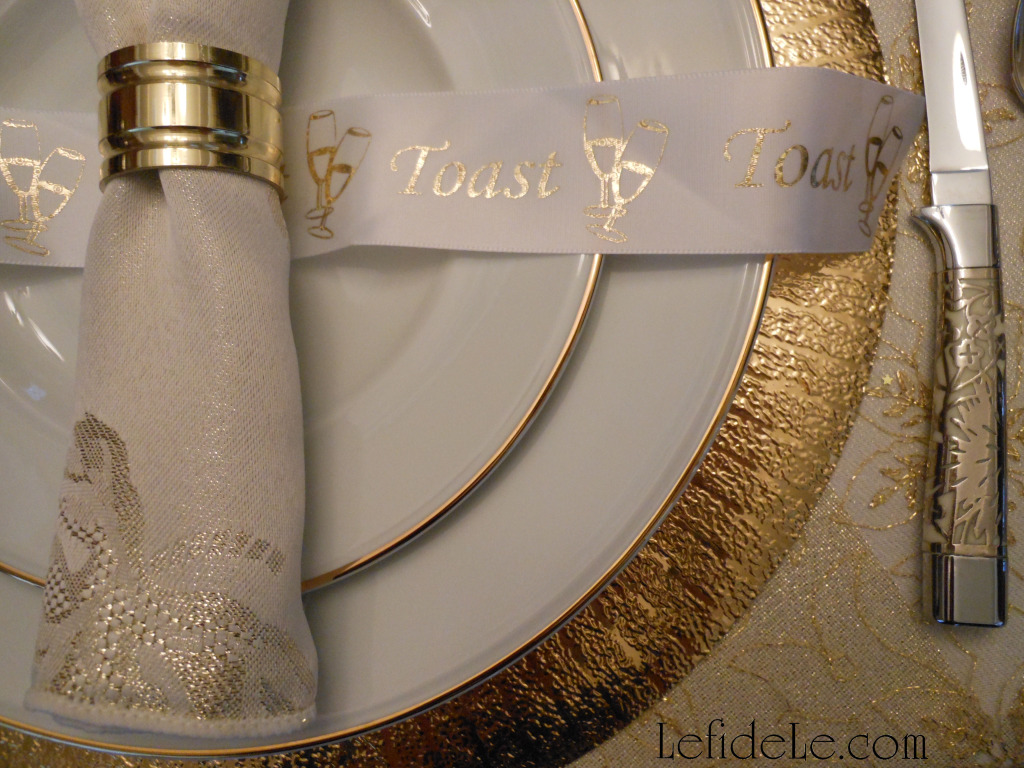
In the New Year’s setting, I placed ivory satin ribbon emblazoned with gold foiled champagne flutes and the exclamation “Toast”. (This ribbon from Joann’s would be equally lovely for a wedding as well.)

176Leigh

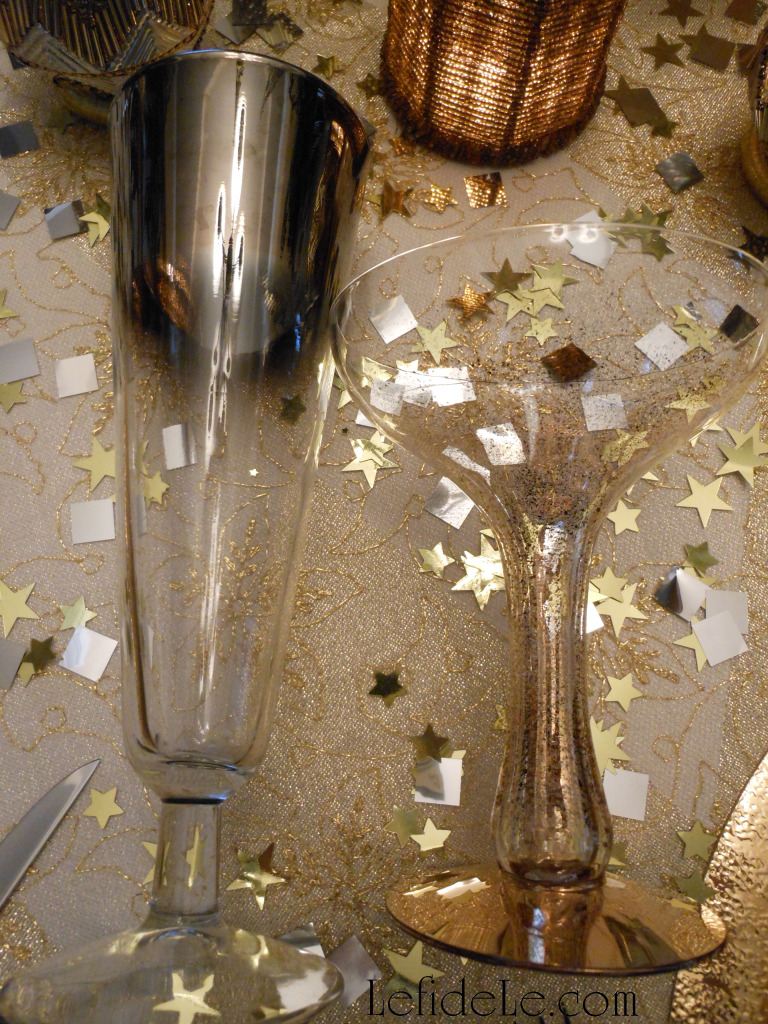
For Christmas, I topped the salad plates with large gold glitter snowflakes. I set more of these vertically throughout the centerpiece. (These can be found at numerous stores or may be homemade with chipboard or wooden snowflakes glittered with spray.) Lastly, I added inherited vintage glassware with pewter and golden touches. (Clear vessels would also be lovely in their place.)

195Leigh

Both table-scapes had golden scrolled embossed glass votive holders lined with plastic wrap to safely contain white “snowball” candies. Each of the centerpieces also had LED candles covered in gold sequins.

70Leigh

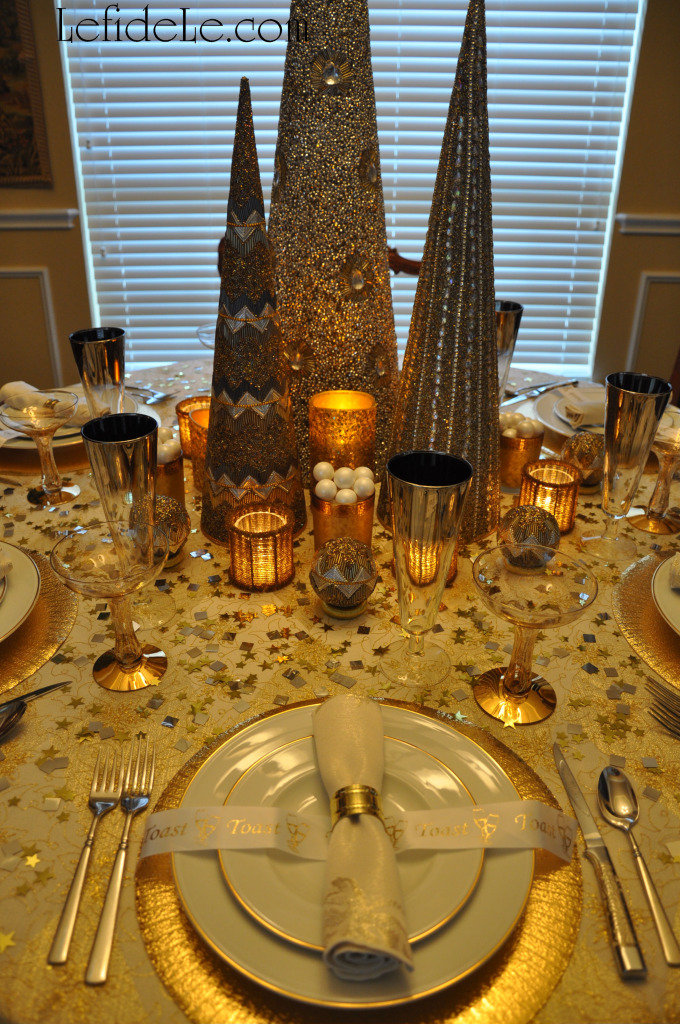
I added further glow to the New Year’s version with real votives in gold beaded holders. This table was finished off with large foil confetti of silver squares and gold stars. (Another easy addition would be to include metallic noise makers to ring in the New Year.)

84Leigh

For Christmas, pale gold glass trees were nestled between the cones. (I’ve seen different types of metallic glass trees at both department and craft stores.)

29Leigh

All of this was surrounded by a chain garland with opalescent bead “icicles”. (This can be made by anyone with jewelry skills using eye-pins, seed beads, and bulk chain. For everyone else, I’ll probably demonstrate this in the future!)

27Leigh

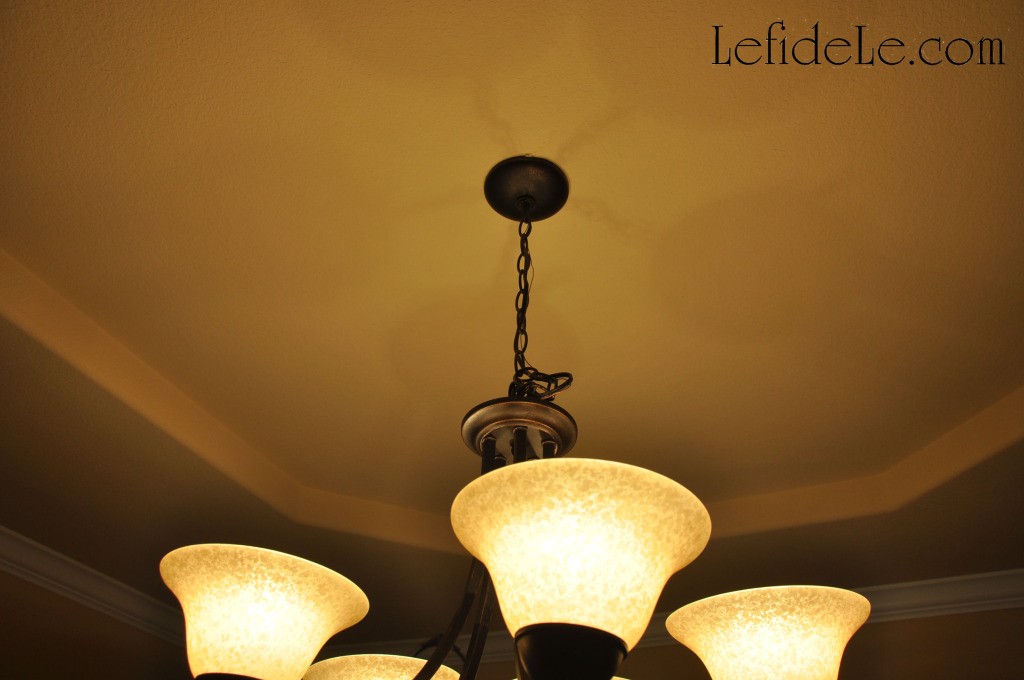
If your chandelier dips too low (as mine did) to accommodate the center cones, there is a simple solution. Use a small S-hook from a hardware store to hitch up a lower link to a higher one in the chain. Start by setting the S-hook on a link at the height you prefer, then lift the chandelier up, and lastly set a lower link onto the hook. (The photo really illustrates this better than I can describe.)

42Leigh

You might wait to try this until you have help to lift it while you relink it. The linking isn’t noticeable in person, and it really looks better to not have the chandelier visually conflict with the centerpiece.

91FrozenNewYear-Leigh

Whether or not you choose one or both of these table-scapes for your next fête, for this year or the next… the idea of making simple changes to perfect your party for its holiday is a notable one if simply for its low cost and ease of transition. Most importantly, it leaves more time for family and friends. Have a very Merry Christmas and a New Year filled with blessings!

33Leigh

Faithfully Yours,

Leigh

P.S. Be sure to check out my Fast & Easy DIY Hand-stamped Polka-dot Gift Wrap & Matching Gift Crafts!
Last Minute Cocorico Rooster Theme Dinner Party Décor Ideas (+ Free Printables)

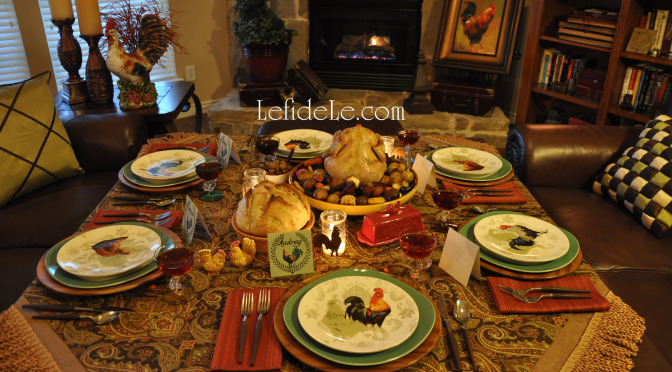
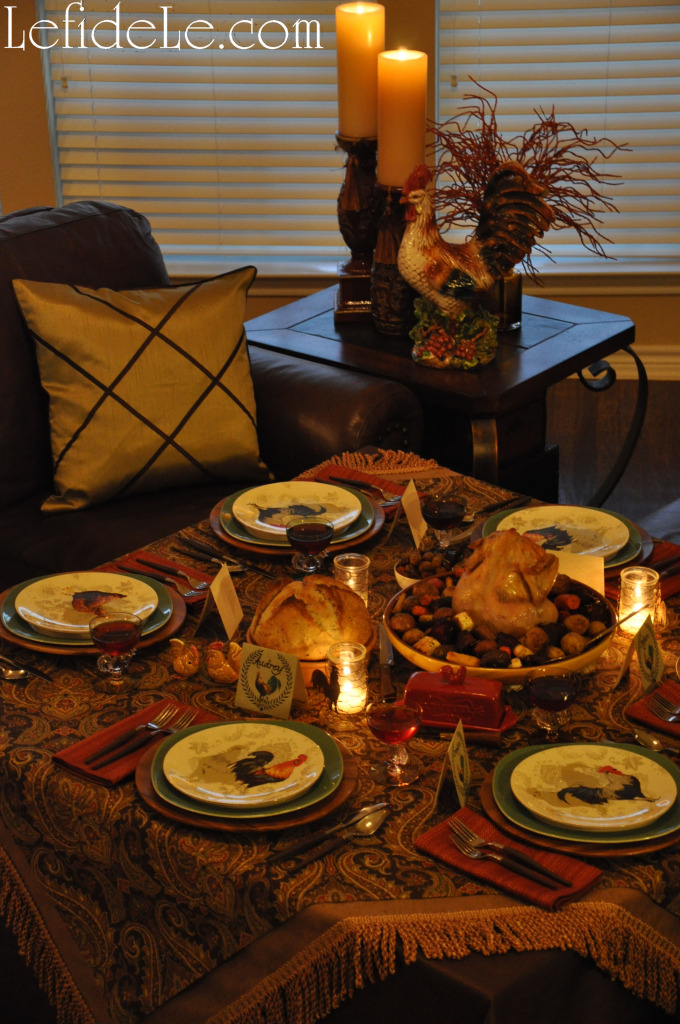
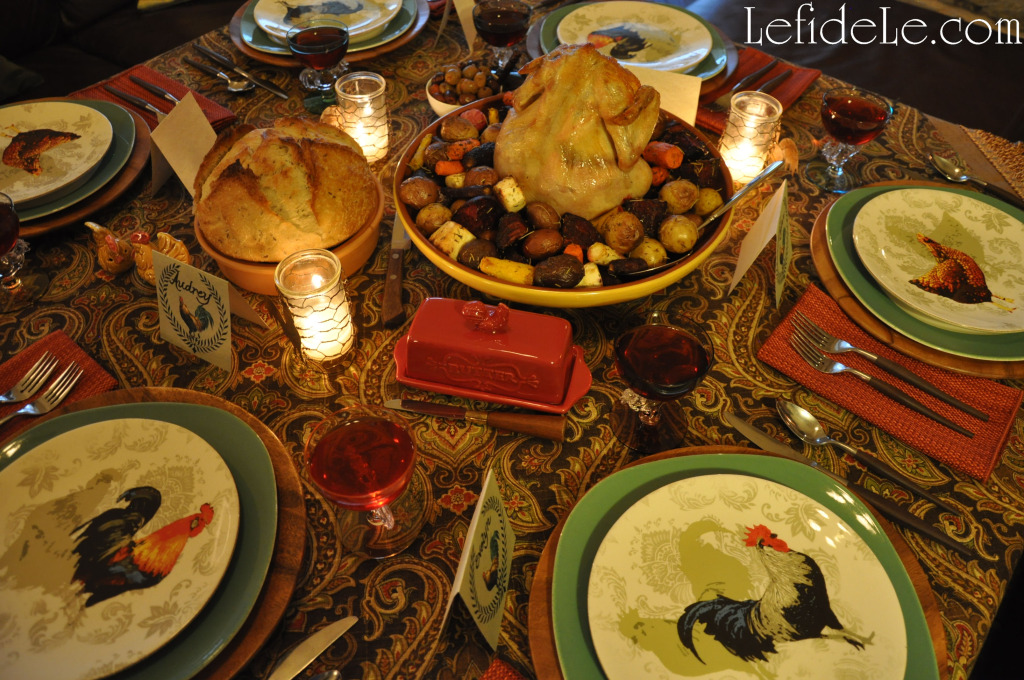
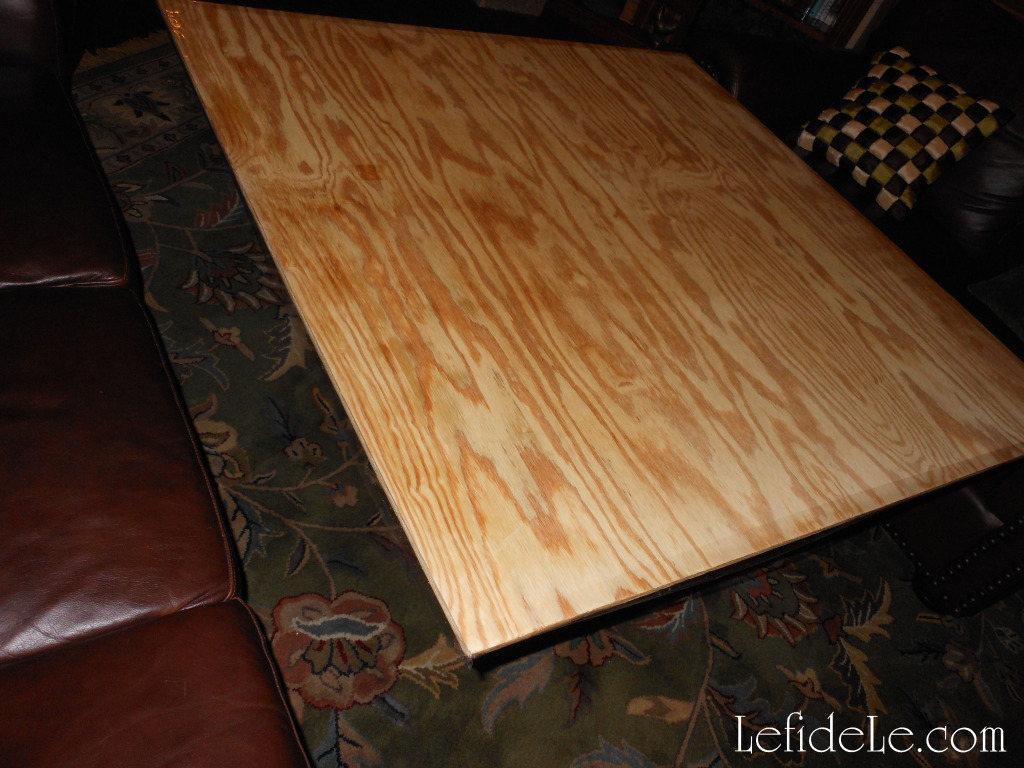
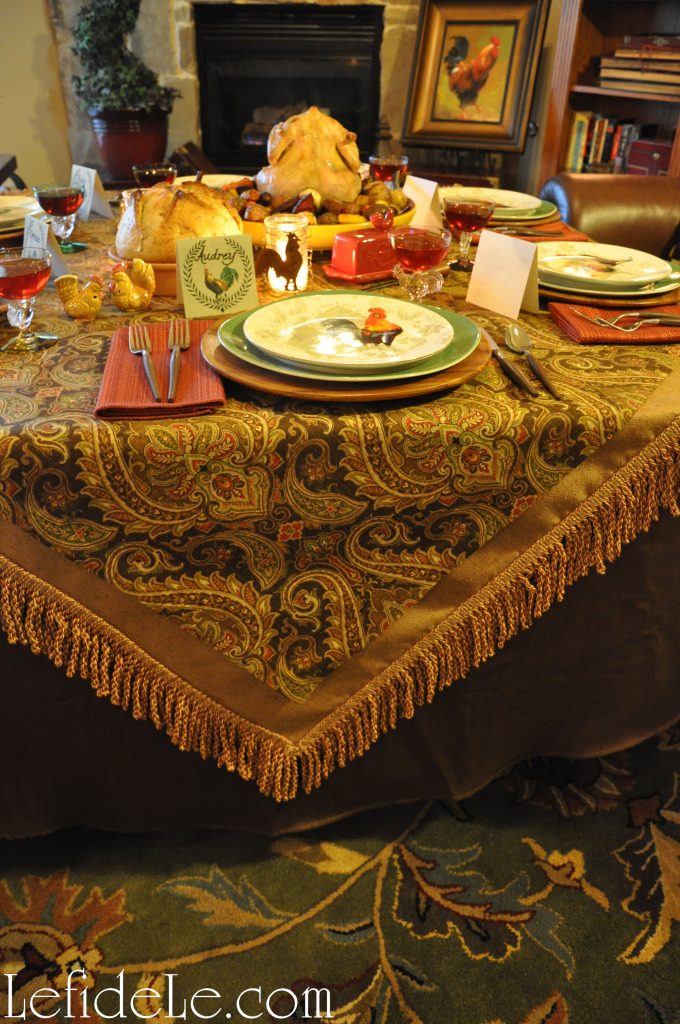
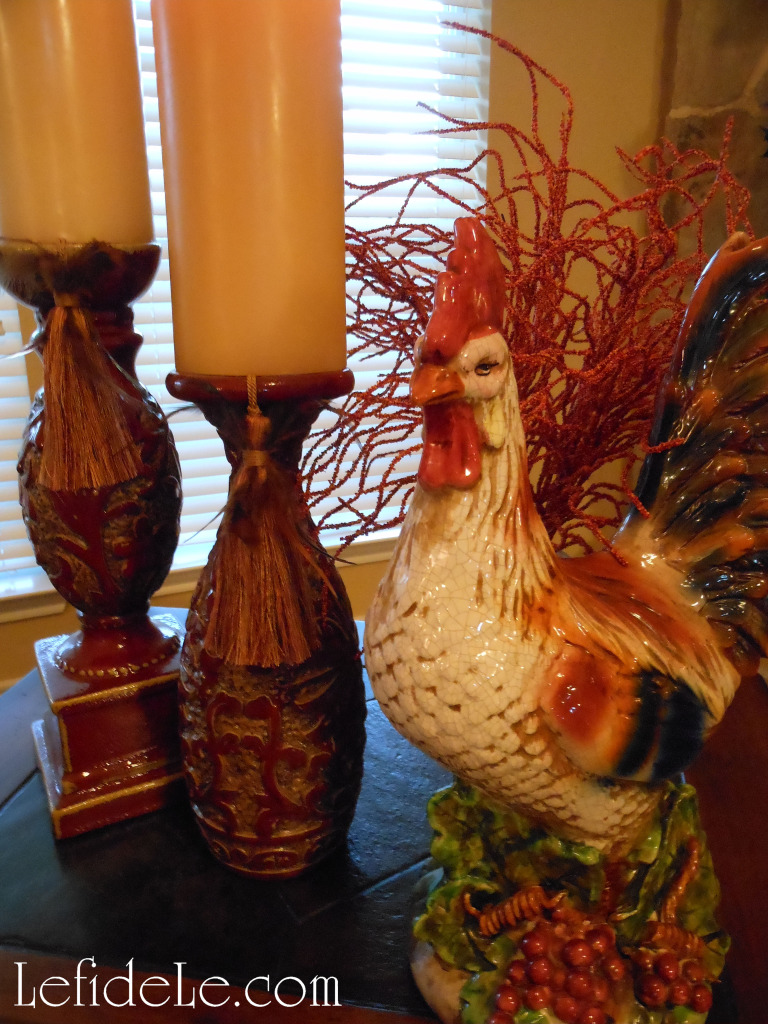
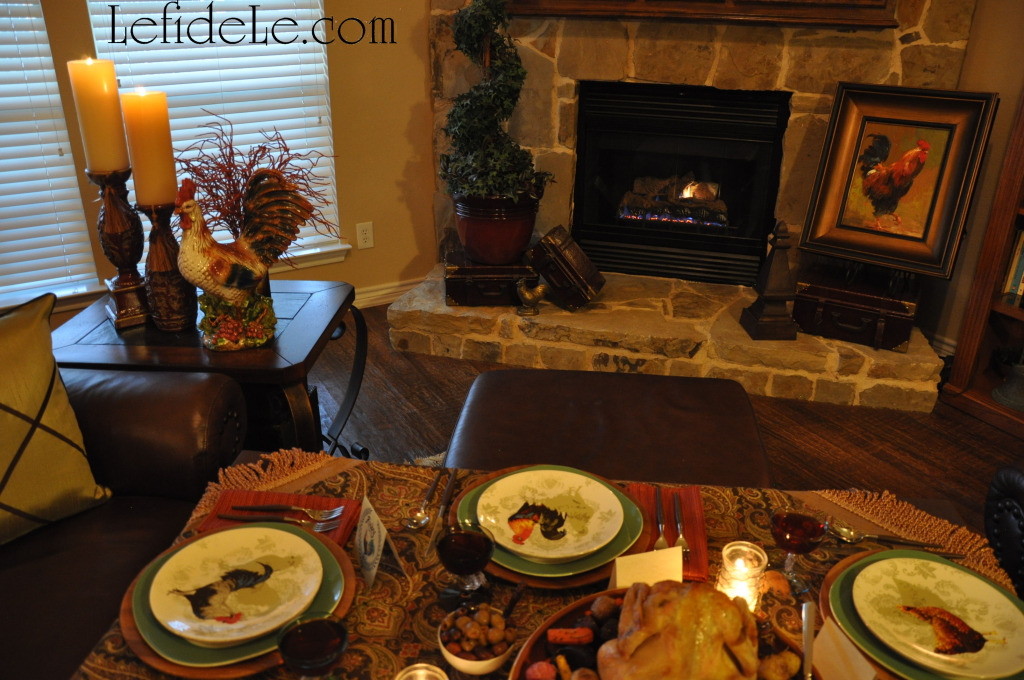
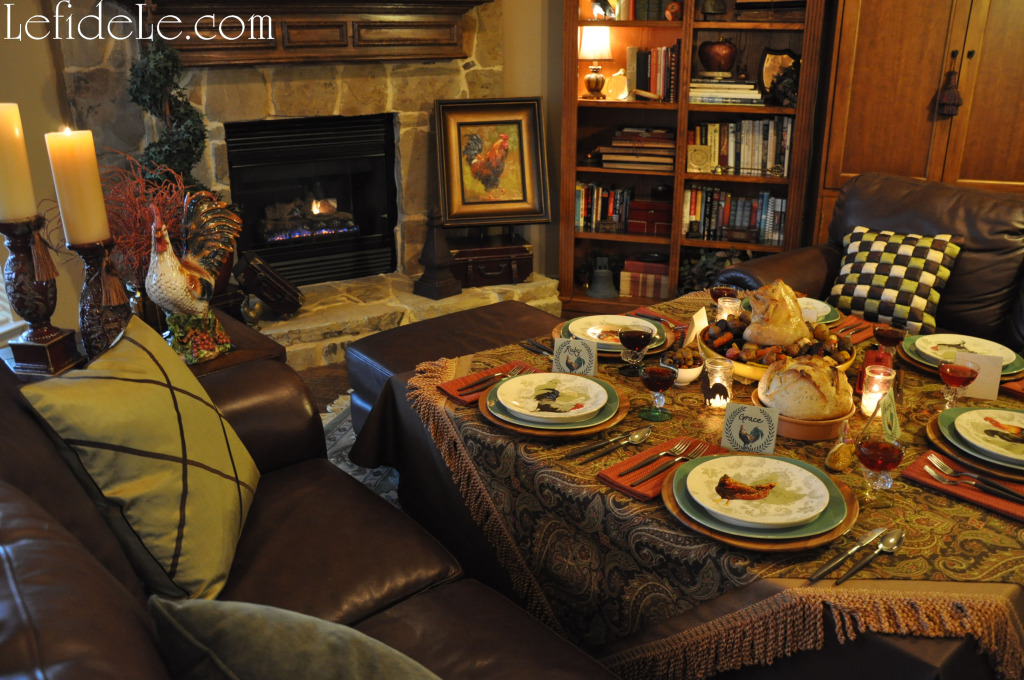
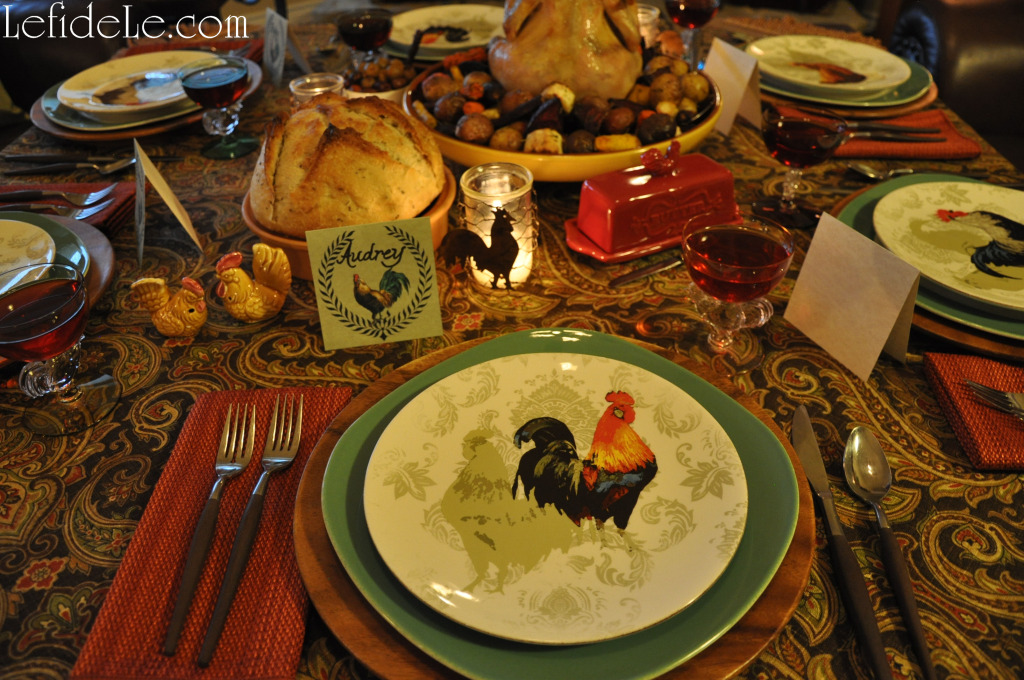
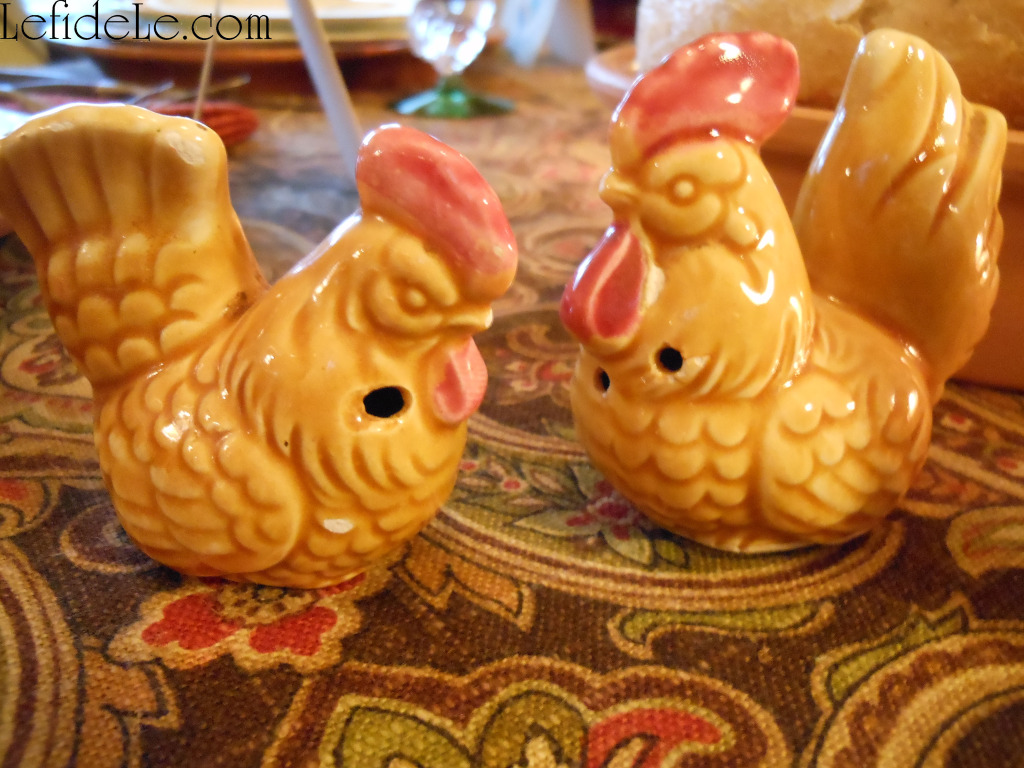
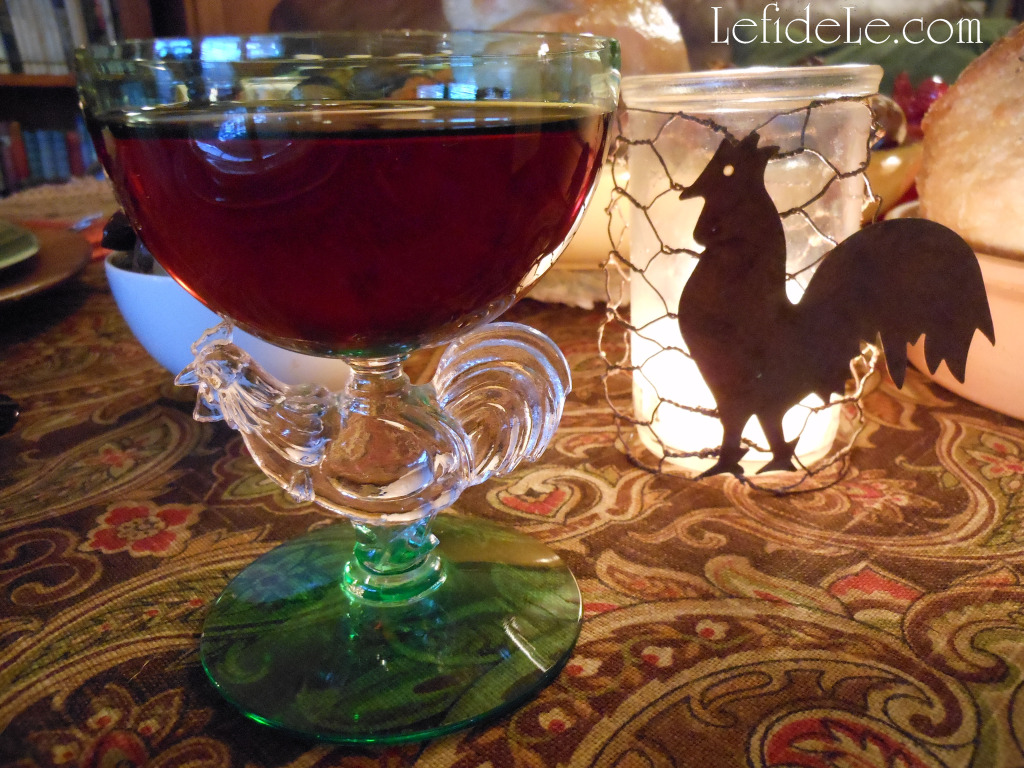
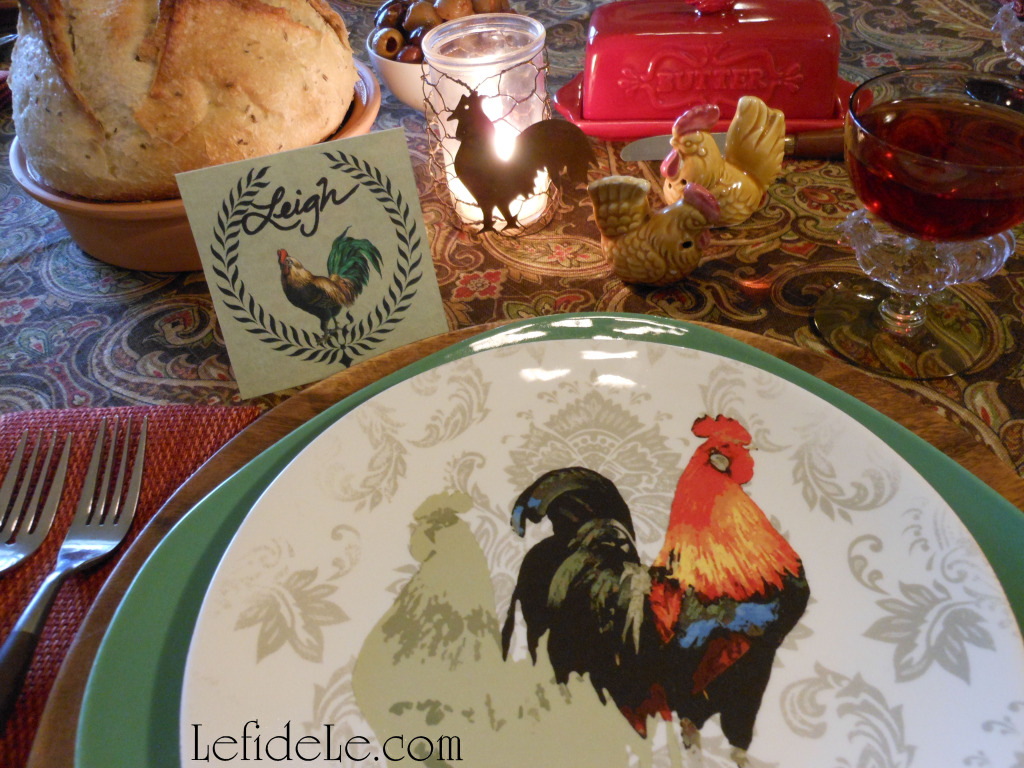
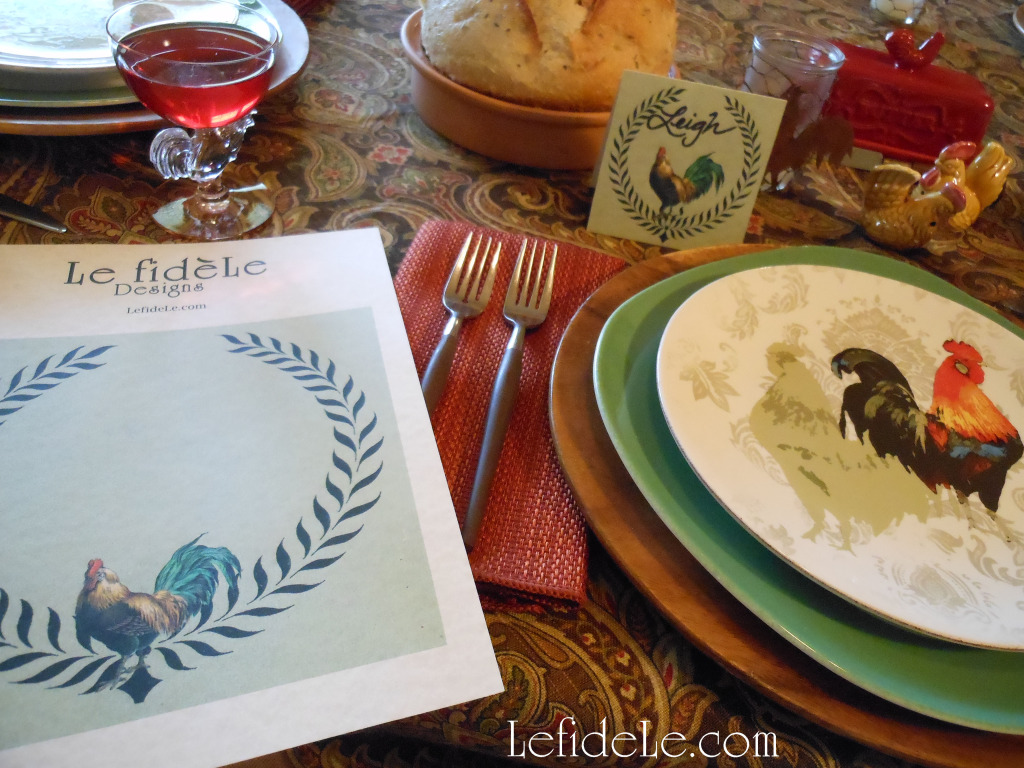
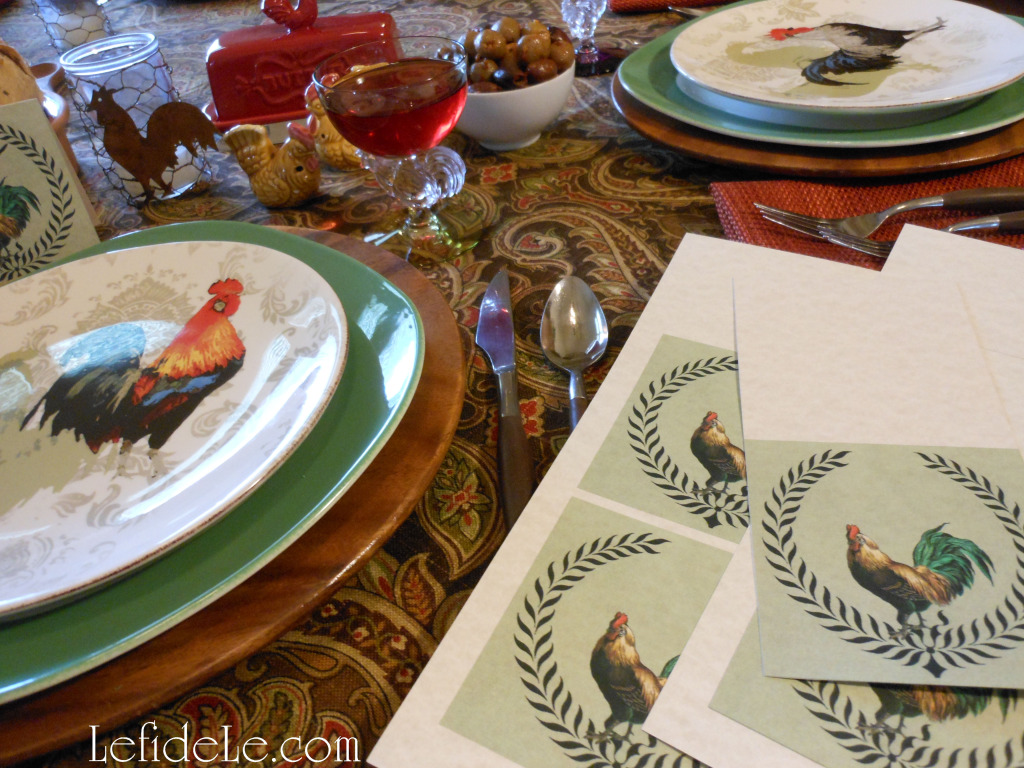
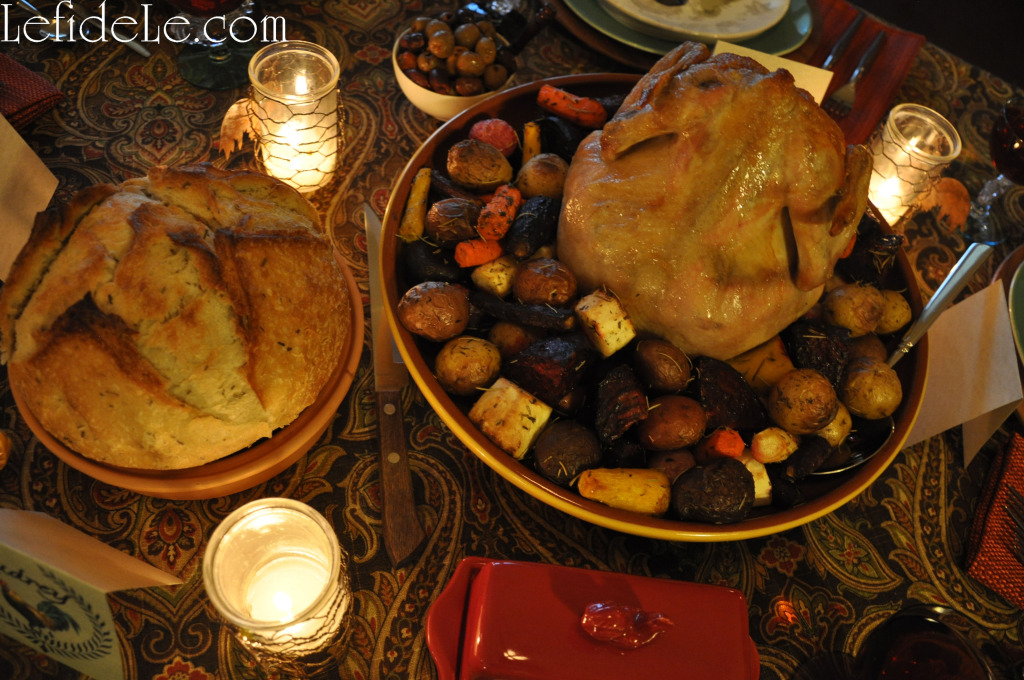
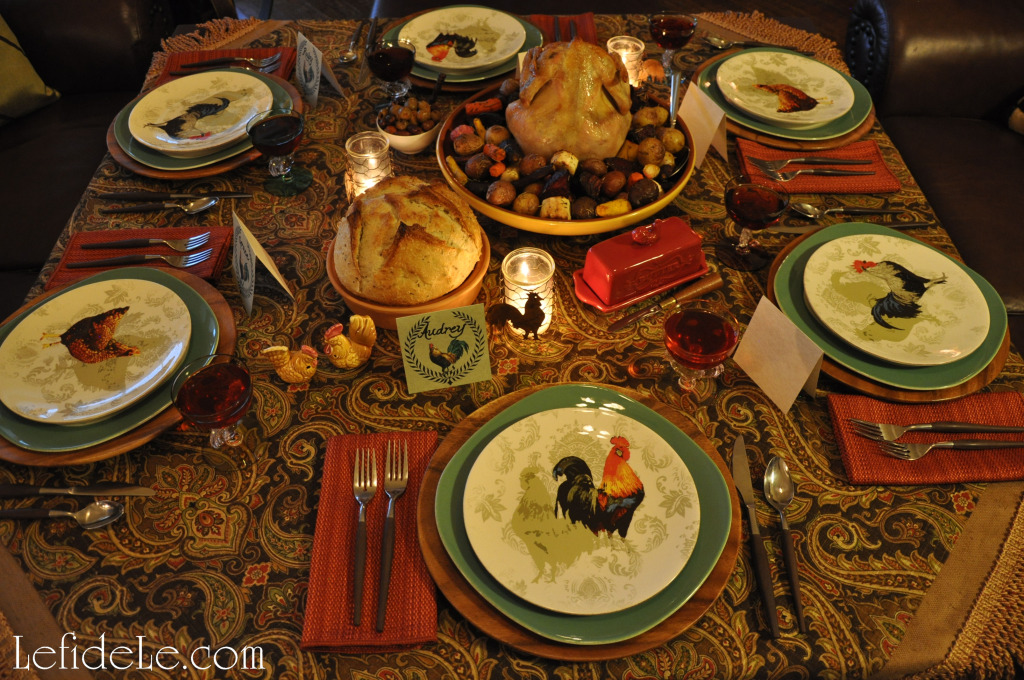
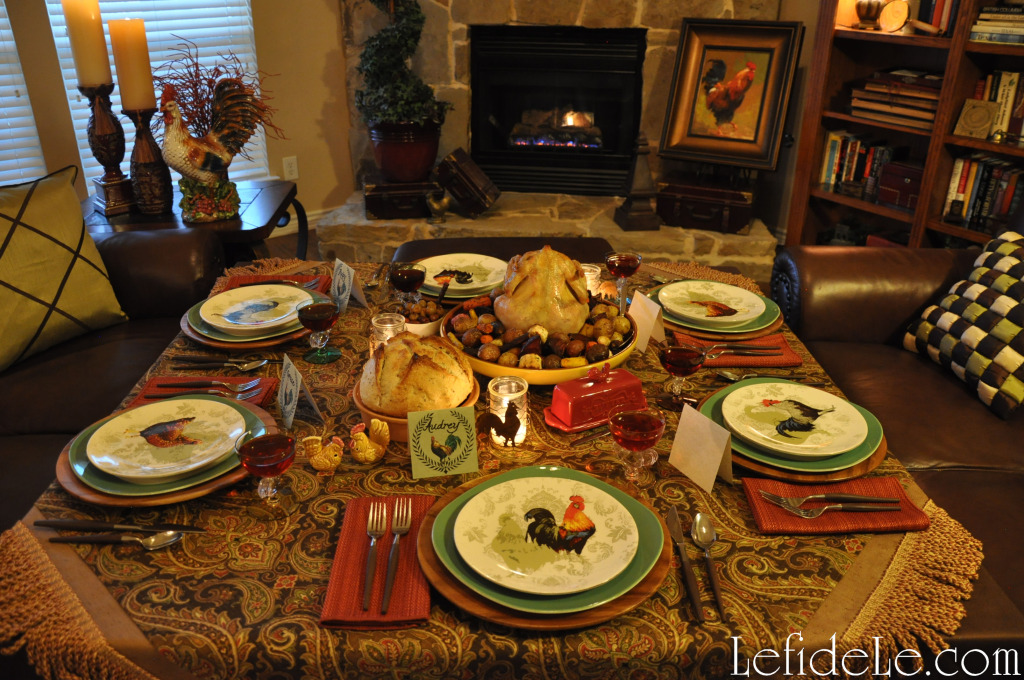
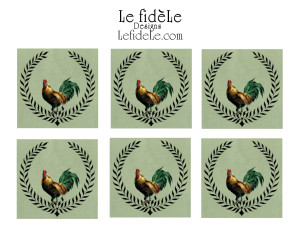
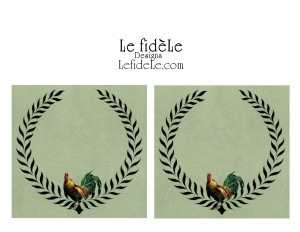
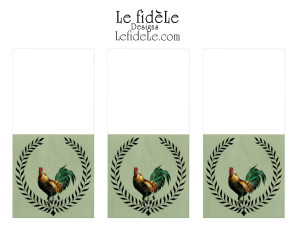
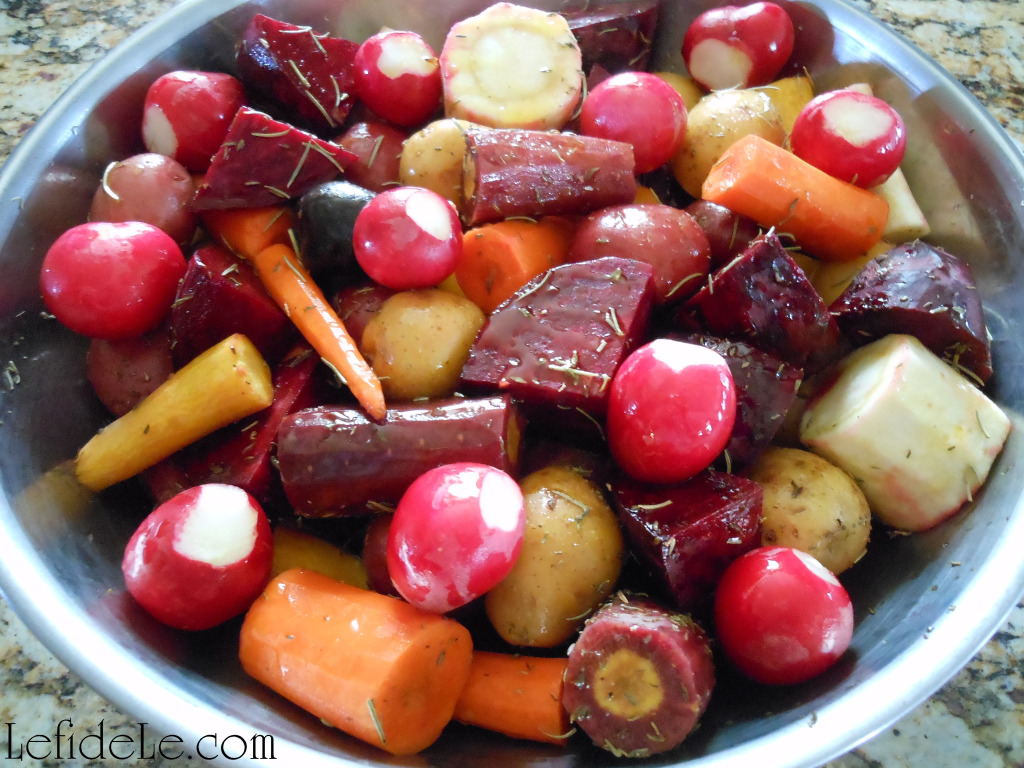
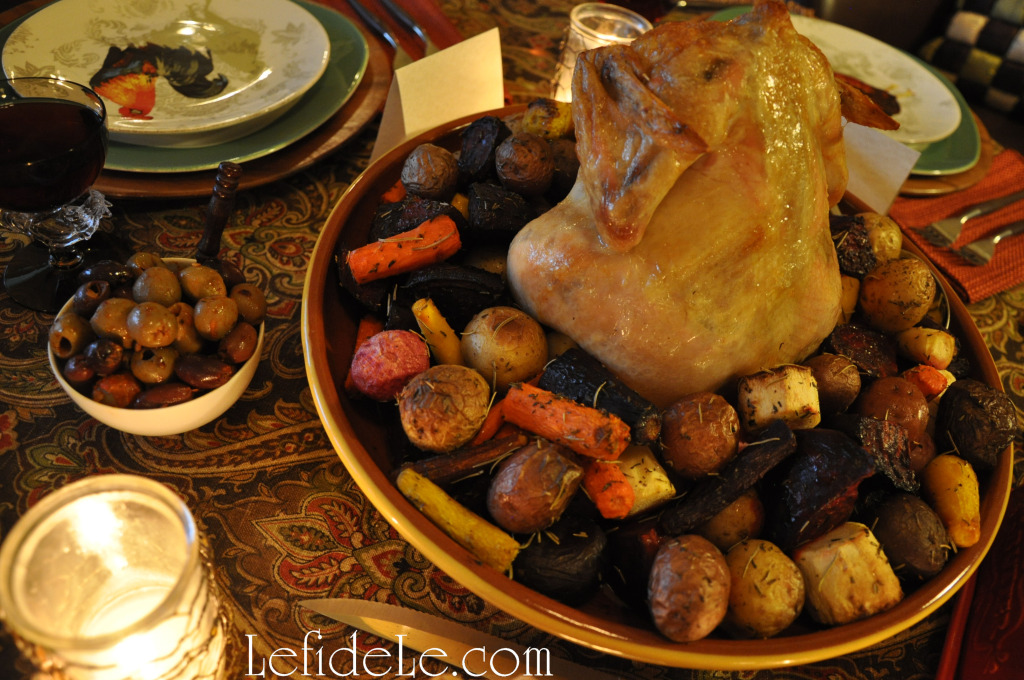
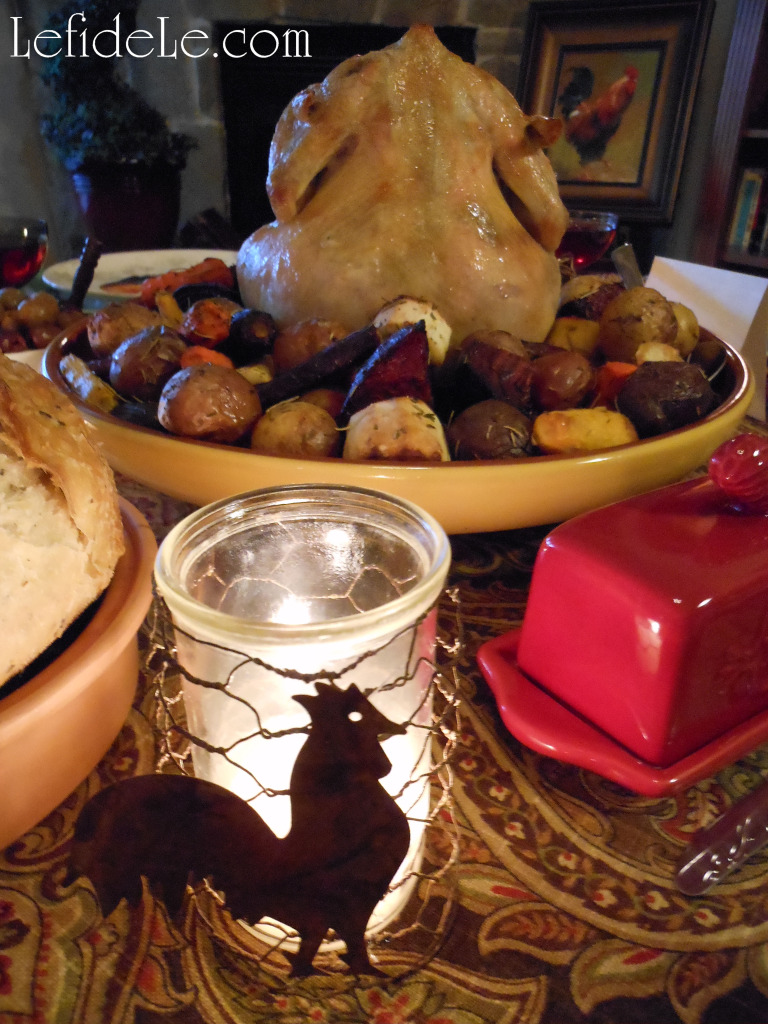
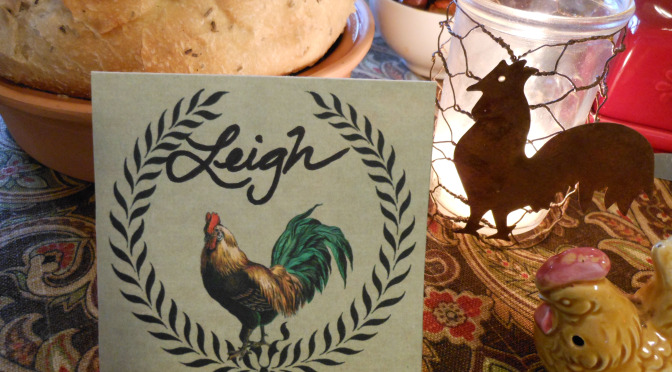
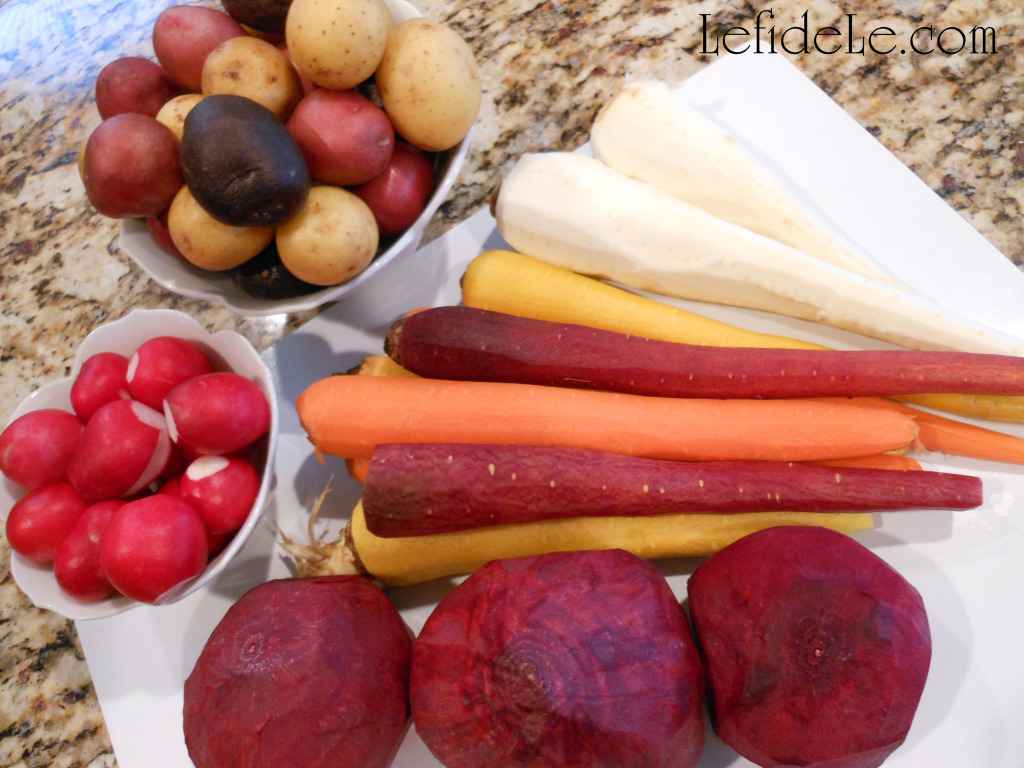
175Leigh With the winter season so turkey saturated for the holidays, I thought I’d utilize my overabundance of rooster décor and host a cozy dinner party by the fire. I used my Healthy “One-Pot” Cocorico Roasted Chicken (or Turkey) & Root Vegetables Recipe as a family-style centerpiece of food. And with my printable place-cards, it’s an easily emulated dinner party that offers a warm welcome for out-of-towners in for the holidays! 157Leigh I love the idea of taking dinner out of the dining room, especially in winter when there is a cozy fire available. So, my first task was to move the couches into a dining configuration. I have a large round antique coffee table that is mechanized to pop up to dining height. To accommodate more guests, I topped it with a $12 precut 4’ x 4’ plywood square from a chain hardware store. The edges of this were taped to avoid snagging the tablecloth. A card table is another easy option. 65Leigh Layering fabrics is a quick and easy way to add warmth to a gathering, so I draped layers of tablecloths over the square. The first layer was chocolate brown, then beige burlap with added trim, and a fall paisley print over the top. 106Leigh I exchanged the usual living room décor with various bits of rooster ephemera. I set a ceramic chicken on a side table next to cranberry colored candlesticks, and tucked feather tassels under the large candles. 49Leigh By the fireplace, I placed a rooster painting on an easel atop an old burgundy leather suitcase. Another served as a base for a spiral topiary. It was housed in an inexpensive and lightweight cranberry pot meant to simulate glazed pottery. In front of that, I positioned a small vintage brass rooster doorstop. I actually have many more roosters, but I was able to (somewhat) contain myself. 158Leigh I gathered sage and chocolate colored throw pillows to coordinate with the linens and dishes. These softened the deep chocolate leather sofas. Switching out small elements of your décor for an evening is an easy way to experience a change of scenery without breaking the bank. 143Leigh I set the table with wood-handled flatware and layers of dishware in various patterns. This included wooden plates as chargers, sage green bordered dinner plates, and a selection of chicken and rooster plates. Though completely untraditional, I figured these could be set to the side for bread later… they just looked too cute stacked this way! I actually found these little gems for $3 clearance at Dillards. Now they’re a part of my last minute rooster dinner party arsenal. 156Leigh My other go-to elements are antique chicken salt and pepper shakers from my grandmother, and vintage multicolor rooster stemmed glassware from my mother. 45Leigh It’s really great to have coordinating pieces that can be thrown together without much forethought, while having the appearance of effort. In this way, a simple chicken dinner is elevated to a special evening. Make a point of collecting what you like, and pull it out for your get-togethers. 44Leigh Another component which you can make for yourself is my DIY Rusted Rooster Chicken Wire Votive Holder Craft. Because they were so easy, I actually made many more than I used in the pictures. (These can be made with any shape you like, fall leaves for example.) They really added a beautiful glow to the table. 32Leigh I transformed, recolored, combined, and resized vintage images to make 3 free printables for invitations, labels, signs, menus, food tents, name place-cards, recipe cards, etc… (These are free for personal use only.)
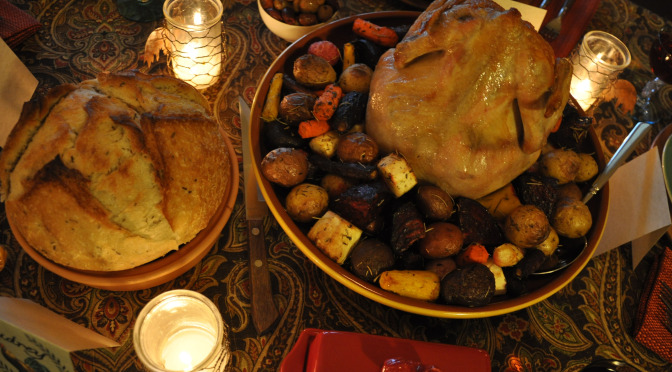
  24Leigh These are available at the end of the article (simply right click on each image, and print in color and on photo settings on cardstock). Then just cut out your place-cards as needed… or enlist a significant other or kiddo to do it while you prep for dinner! 25Leigh The last step was to add the food… artisanal rosemary bread in terra cotta to compliment the Cocorico, compound butter in a rooster dish, mixed olives seasoned in flavored oil and spices, and the off-center centerpiece of roasted chicken and multi-colored root vegetables of carrots, beets, parsnips, radishes, and fingerling potatoes. 125Leigh Cocorico roasters are perfect “one-pot” wonders that deliver beautifully from oven-to-table. Root veggies may be peeled and seasoned the day prior to an after-work gathering if need be. Simply pick up bread and dessert to accompany your meal. Or, try out my Easy No Cook Layered (N)ice-Cream Pie with Nut Crust (Vegan, Dairy-Free, Gluten-Free) which may also be made with traditional ice cream, and can be made and frozen well in advance. 160Leigh Happy Fall Y’all! (…I couldn’t resist.) 168Cocorico-Leigh Faithfully Yours,

Leigh

Cocorico3x3labels-flatcards

Cocorico5x5cards-labelsLeigh

CocoricoTent-PlacecardsLeigh

Healthy “One-Pot” Cocorico Roasted Chicken (or Turkey) & Root Vegetables Recipe

Making healthy roasted chicken and root vegetables is so easy with a Cocorico Roaster. I love to use mine as an easy “one-pot” wonder that presents beautifully from oven-to table. The night before a long day, I can peel the veggies and add herbs so it only needs to put it in the oven for a hardy home-cooked meal. Larger roasters will also accommodate a small turkey for the holidays.

125Leigh


Ingredients:
  • 1 roasting chicken (or turkey, in a size that will fit your Cocorico roaster)
  • 2 teaspoons thyme
  • 2 teaspoons rosemary
  • 1 fresh lemon
  • 1 teaspoon sea salt (or to taste)
  • Olive oil (enough to coat chicken & drizzle a little over veggies)

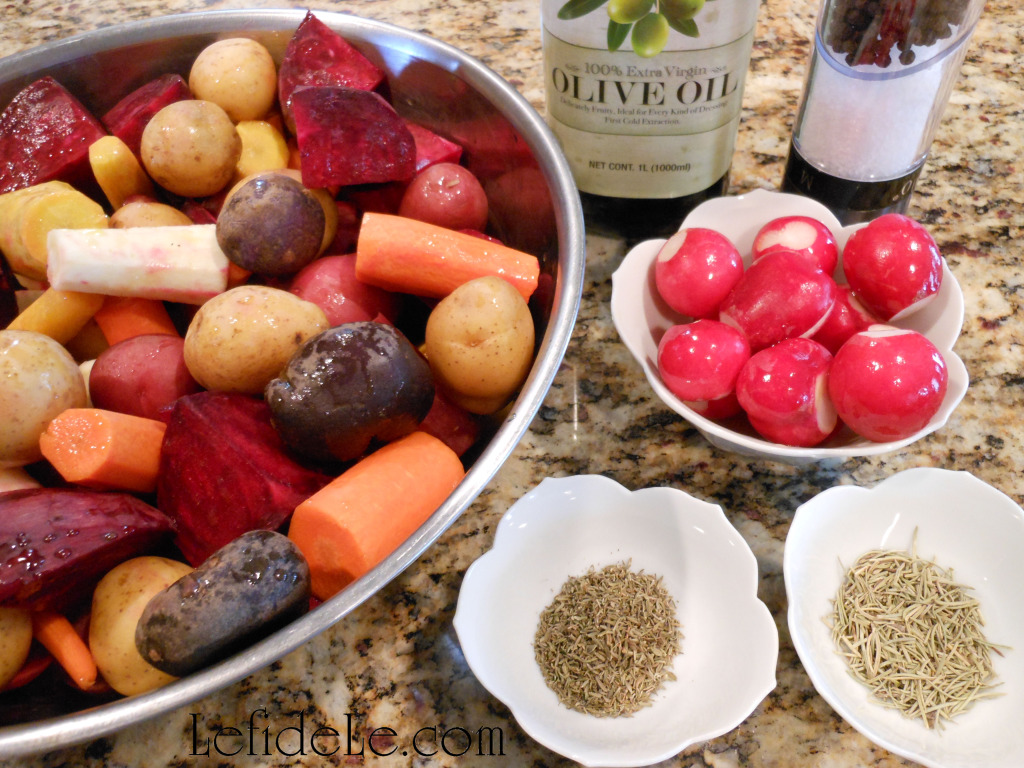
Multicolored root vegetables in season (enough to fill the cocorico base):

  • ~1 pound carrots
  • ~3 beets
  • ~2 parsnips
  • ~1 bunch radishes
  • ~1 or 2 pounds fingerling (or new) potatoes
  • (& turnips if you have better luck than I did finding good ones)

Instructions:

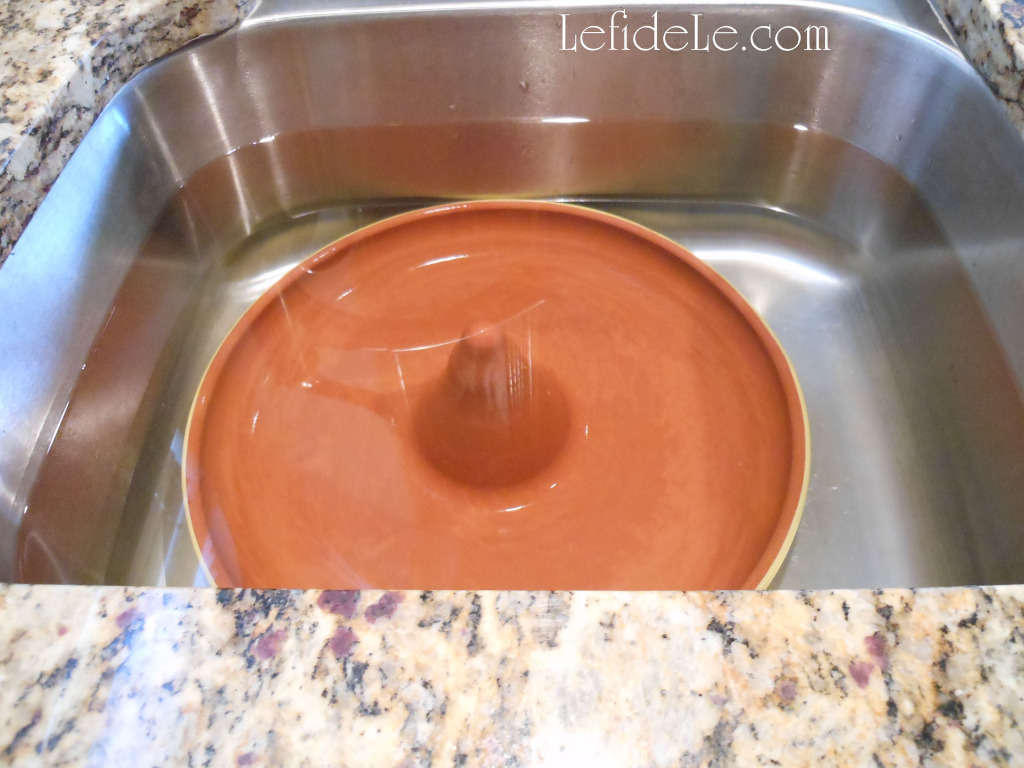
Cocorico roasters in glazed terra cotta are available locally and online. I ordered mine from Napa Style because it was the biggest I’ve seen, and also had a larger turkey cone that fit over the chicken cone. Soak the whole thing under water at least 30 minutes before cooking. This prevents any heat damage to the vessel. I saturate mine in a bleached clean sink.

2Leigh

Preheat your oven to 400ᵒ, while you soak the roaster and prep your veggies. There are a beautiful variety of purple, orange, red, and white root vegetables available. Peel and cut them into about 2 inch chunks to ensure even cooking. Some recipes will advise you boil potatoes ahead of roasting, but I’ve found that to be completely unnecessary if you buy small fingerlings. They roast just like baked fries. They’re prettier, easier, and quicker… so save the big ones for baked potatoes. Radishes may seem like an odd choice for roasting, but they completely change character after cooking. They mellow out, losing their sharpness and spicy heat. I really do prefer them this way.

4Leigh

Place these in a bowl with herbs and add just the smallest drizzle of olive oil. (The chicken juices will flow over the veggies while cooking thus providing more flavor.) Squeeze a little of your lemon over the veggies, and save the rest to place inside the chicken cavity before setting over the roasting cone. Add sea salt and toss to coat everything well. This may be done ahead of time, just cover the bowl and refrigerate it until needed.

13Leigh

Many recipes will also instruct you to wash chicken inside and out before cooking, but I read a study that found it only served to spread dangerous bacteria all over your kitchen. Thorough cooking will kill bacteria while rinsing will not. Drain the fluid and remove any extra gifts left in the cavity (neck, gizzard, giblets). Then set the chicken onto the soaked Cocorico. Other recipes will also say to do this with the legs up and trussed, but this is really subjective to the size of your roasting cone versus the size of your bird. I used a smaller chicken in the pictures, which would have been physically impossible to set upside down. It cooked beautifully and tasted great. Just place the chicken whichever way you can get it onto the cone. It’s really hard to mess up dinner with a Cocorico!

21Leigh

Roast in the oven at 400ᵒ for about 15 minutes, and then reduce it to 375ᵒ for an hour longer (for ~4 lb chicken). Because every oven heats differently, the safest way to cook is with a meat thermometer. Place it in the thickest part of the thigh, but not to the bone. www.foodsafety.gov says 165ᵒ is poultry’s magic number! I’ve also read to rotate the Cocorico every 15 minutes. Thinking of how heavy it was, how that would let heat escape, what else I could spend my time accomplishing, and burn potential… I decided to forgo that. Once again, the simplest way proved itself. The chickens turned out exactly the same.

127Leigh

Use a serving spoon to gently toss the roasted veggies, so that the juices are fully distributed. It’s easiest to serve the veggies first and then carve into the meat, using the newly empty well to hold the pieces. Or it can all be transferred to other serving dishes… but I prefer to avoid washing extra tableware, and the filled Cocorico looks so lovely. If trying this, be sure to use adequate hot pads beneath it.

35RoosterVotive-Leigh

In the past, I’ve saved time by omitting the oil and placing the roots directly into the Cocorico. When it finished cooking, I would sprinkle fresh herbs and orange juice over the top, stirring it right in the roaster. Whichever way you chose to prepare it, with whatever vegetables, with either chicken or turkey, and legs cooked up or down… Cocorico roasters make it all turn out so beautifully! (See this for yourself at the link: Last Minute Cocorico Rooster Theme Dinner Party Décor Ideas.) So think about getting one for yourself, and leave the “beer-can chicken” to the tailgaters! 🙂
157Leigh

Faithfully Yours,

Leigh

DIY Rusted Rooster Chicken Wire Votive Holder Craft

157Leigh

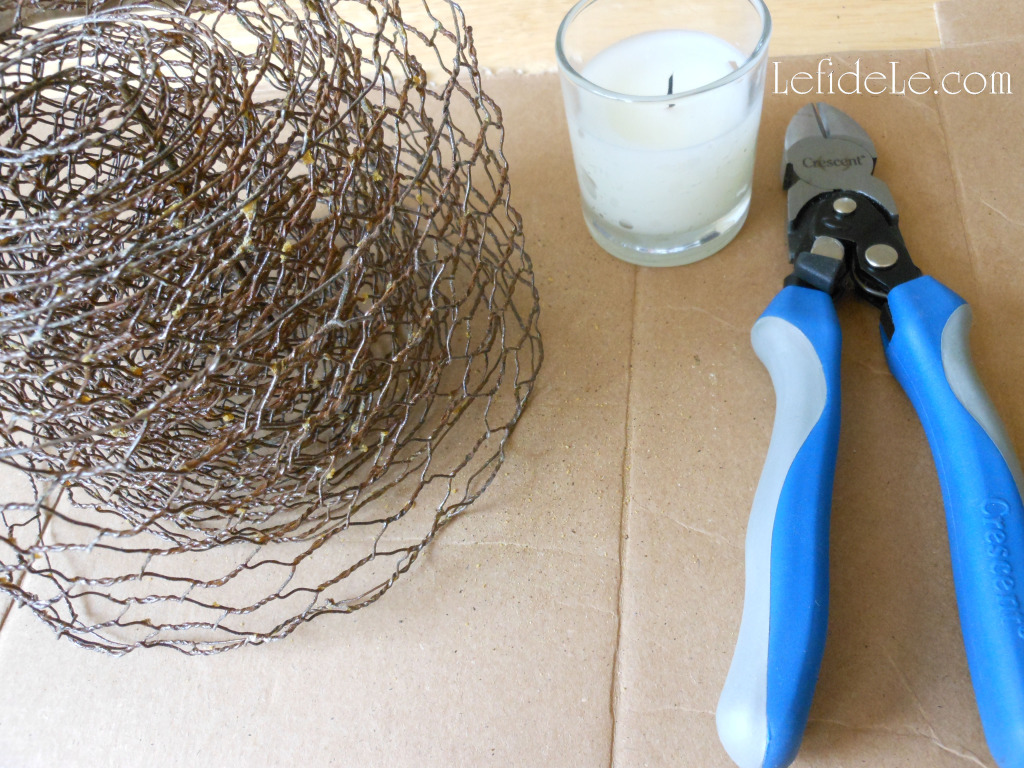
These votive holders were made to complement my Last Minute Cocorico Rooster Theme Dinner Party Décor Ideas, but you can easily craft them with plier/cutters and glue. The base is made of pre-rusted chicken wire “ribbon” (which may be substituted with chicken wire from the hardware store). Atop that are rusted rooster shapes (which are available online and at local craft stores… or made from scratch if you’re feeling super crafty). They can be lit by candle filled glass votives or LED tea-lights. It’s actually a very easy DIY project that just takes a little patience and elbow grease. Once made, they are lovely elements that can be pulled out anytime you need last minute dinner party décor to complement a simple chicken dinner.

44Leigh

Using a single roll of pre-rusted chicken wire “ribbon” saves time, because it already has 2 smoothed edges. If you can’t find this, regular chicken wire may be cut and bent over (toward the inside) at the top and base. Keep it naturally gray metallic or rust it with a liquid chemical solution. (There are several brands of liquid rust that may be found online or at a craft store.)

095Leigh

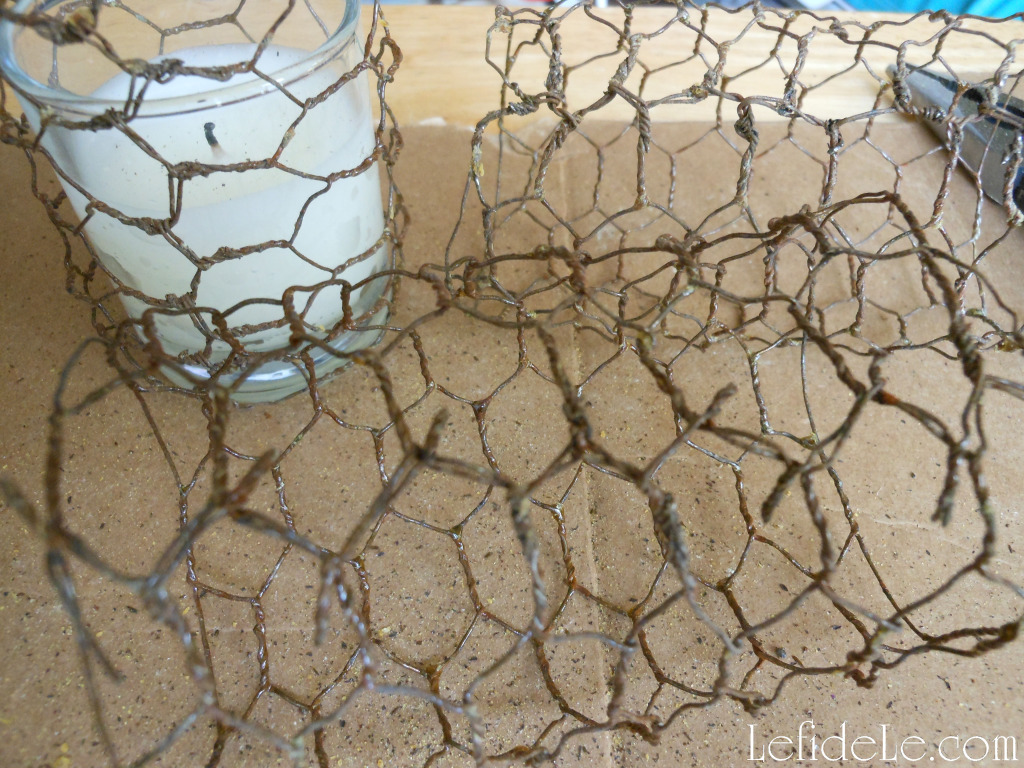
Use a glass votive as a measuring guide for wire length. Loosely wrap the chicken wire around the glass, overlapping it, and then cut the wires in a straight line. The extra length is needed for the tightening that occurs when joining the ends together later. This cut section may be used as a guide for cutting the rest. (The process would be the same for an LED tea-light candle.)

0100Leigh

The next step is to twist the ends together, just as you would begin tying a shoelace, with one end over the other. Begin at one corner and continue the rest of the way, closing the cylinder like a zipper. (This was the part that took patience, so I “multi-tasked” by watching a movie while I twisted.) Pinch these joined ends together with pliers to completely tighten them.

0104Leigh

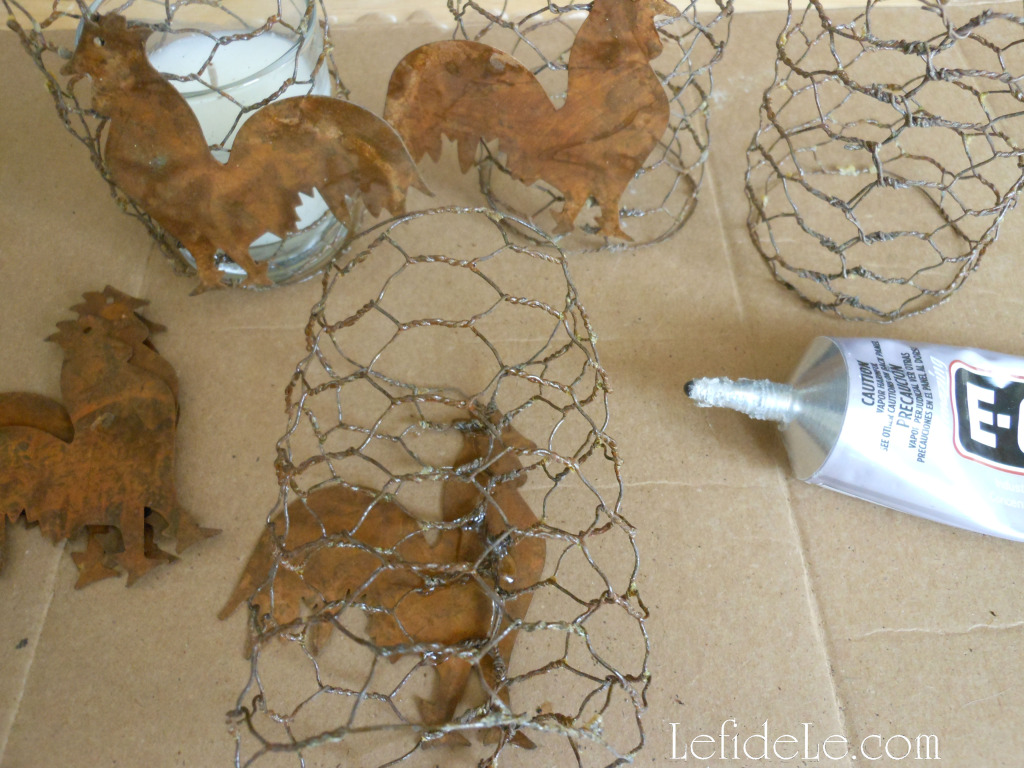
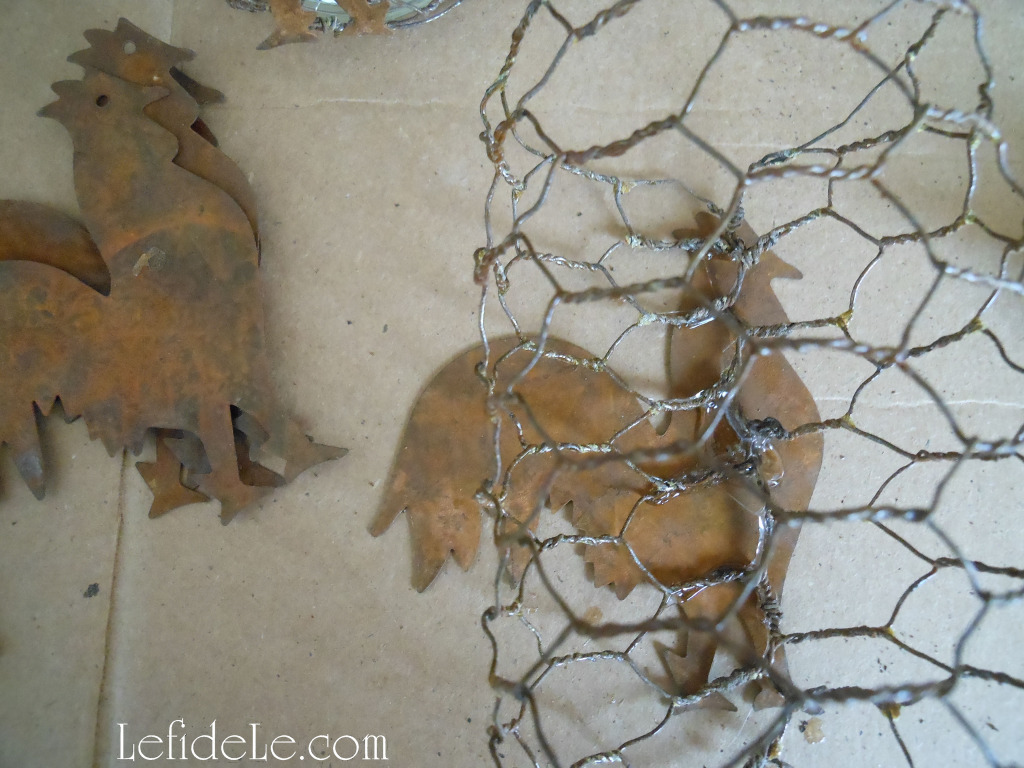
I found many dozens of reasonably priced pre-rusted shapes online. There is a shape to suit any theme. Also, feel free to cut your own out of thin metal. I’ve cut butterflies from various types of thin sheet metal and also up-cycled shapes from aluminum cans. These can be painted to mimic rust. In the future, I’ll show you how to make “metal” shapes from paper (these of course would need to be used with LEDs). If you need a rooster shape for a template, just cut it out of the free invitation PDF from my Cocorico dinner party.

0106Leigh Glue the joined section of a wire cylinder to the underside of your rooster. Let this sit face down overnight. I used E6000 glue, because I wanted to ensure that it stuck together despite the rust. This stuff has glued down everything I have ever tried it on, so it’s a go-to product where other glues have failed. It does have fumes though, so use it in a well-ventilated space.

35RoosterVotive-Leigh

Slide candles into your newly handcrafted wire cages, and set on your table. Then light to delight!
Faithfully yours,

Leigh

Easy No Cook Layered (N)ice-Cream Pie with Nut Crust Recipe (Vegan, Dairy-Free, Gluten-Free)

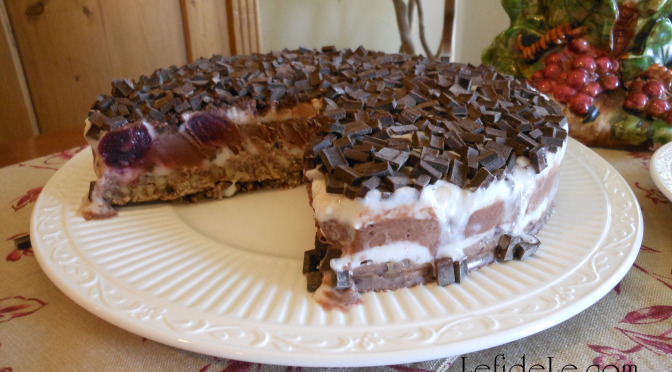
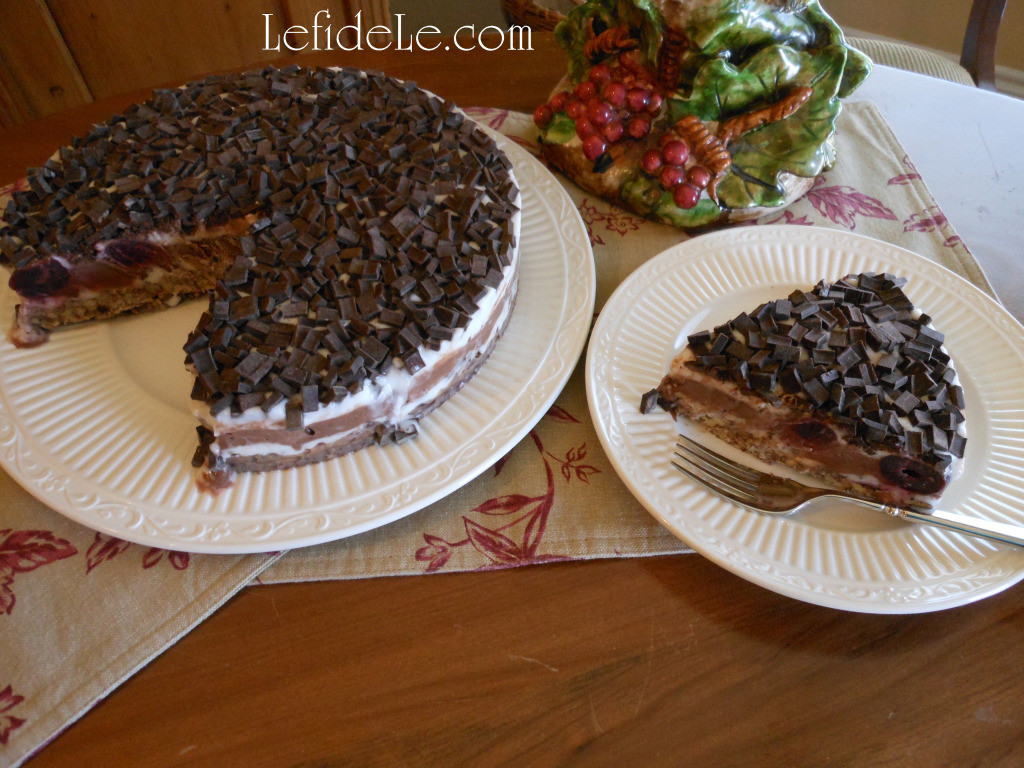
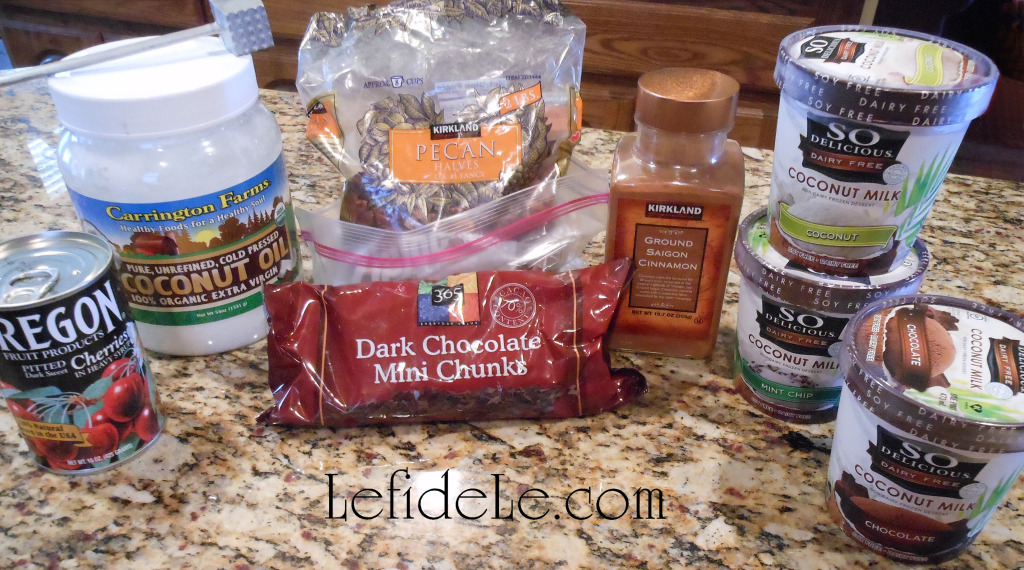
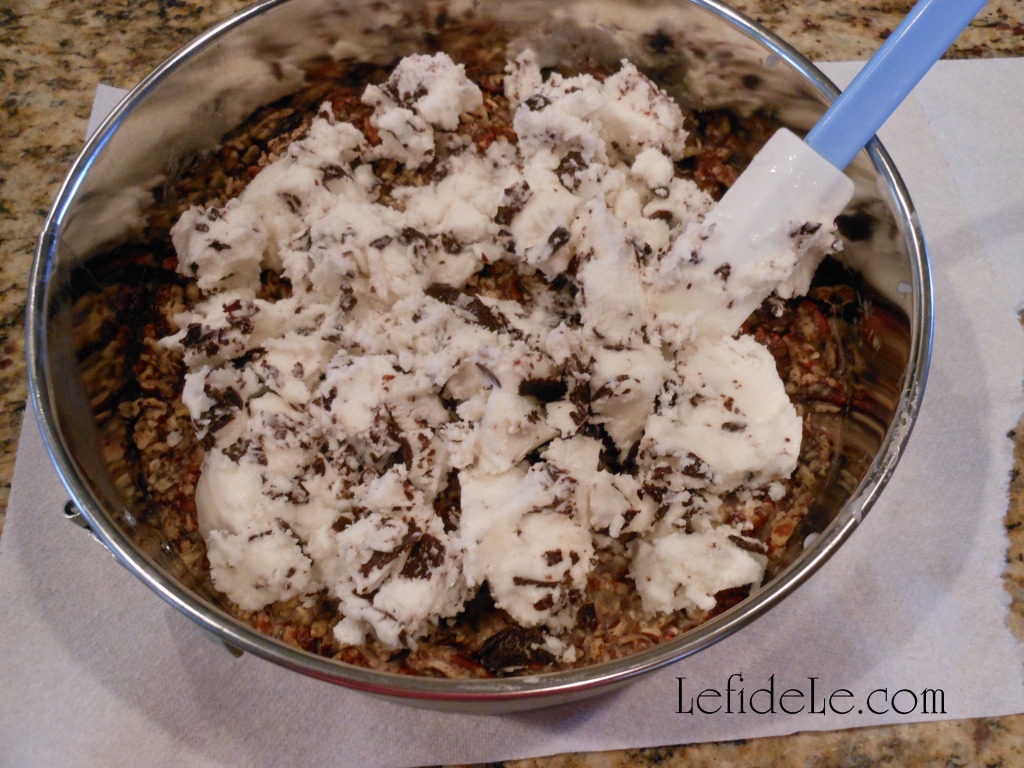
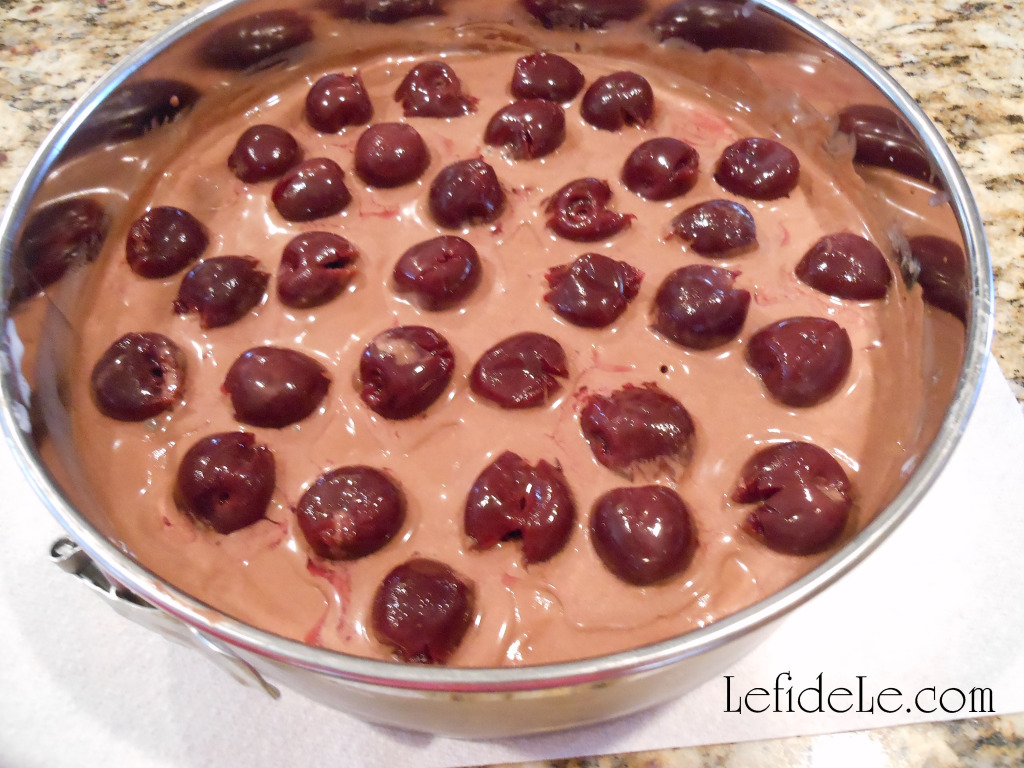
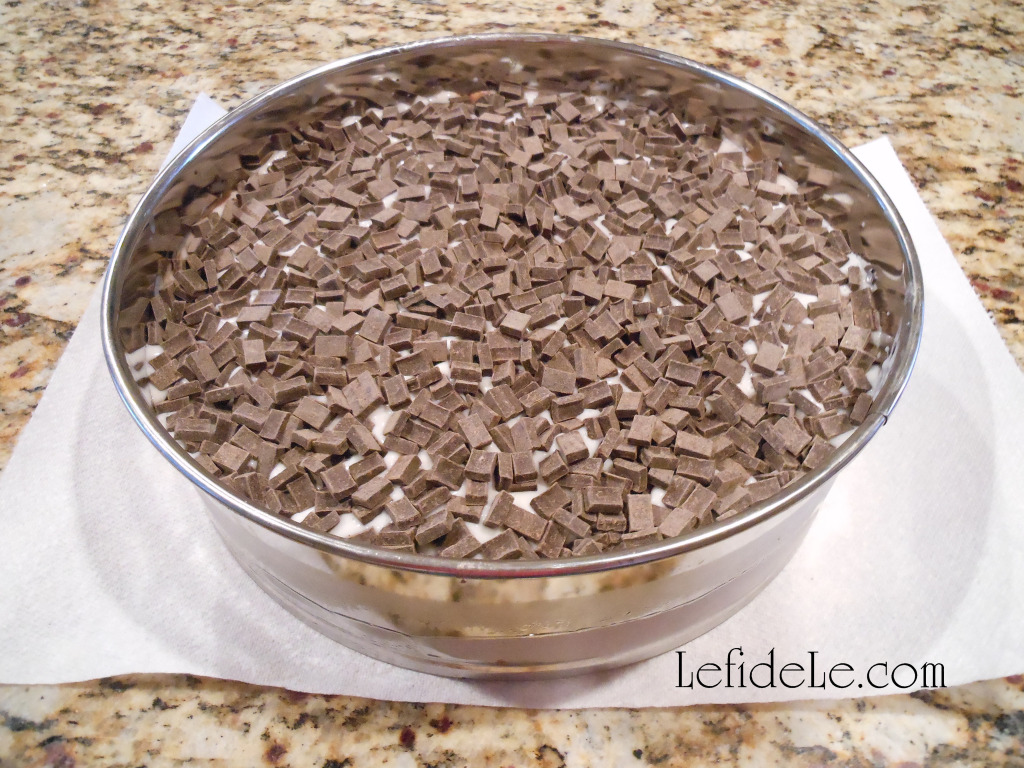
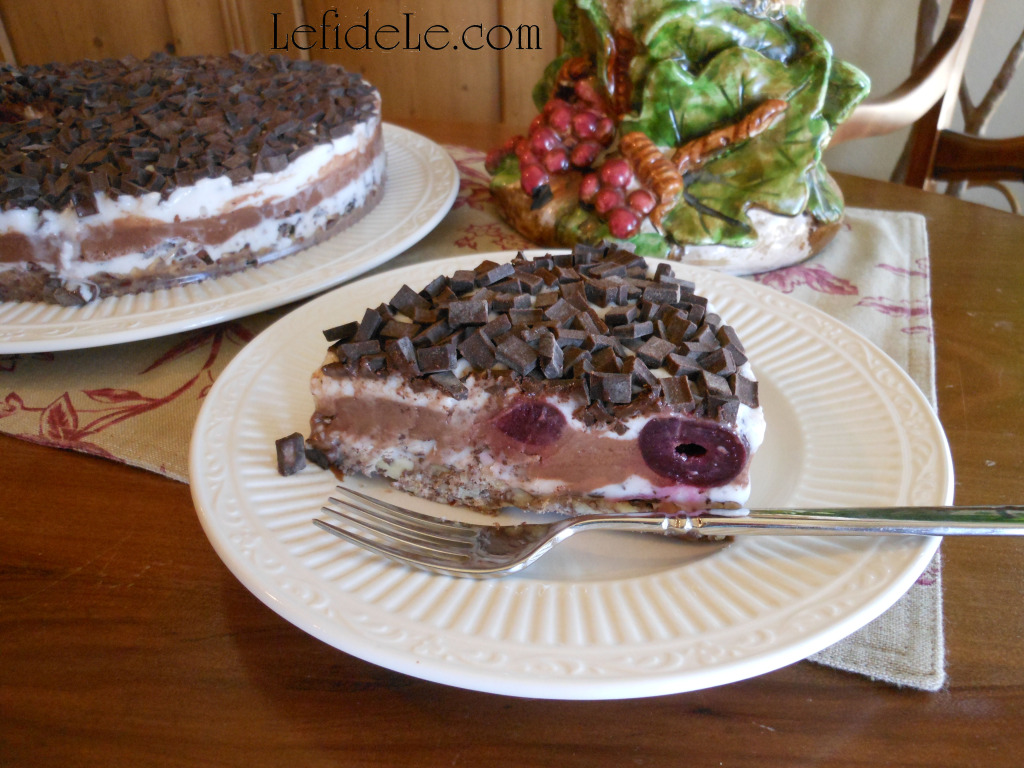
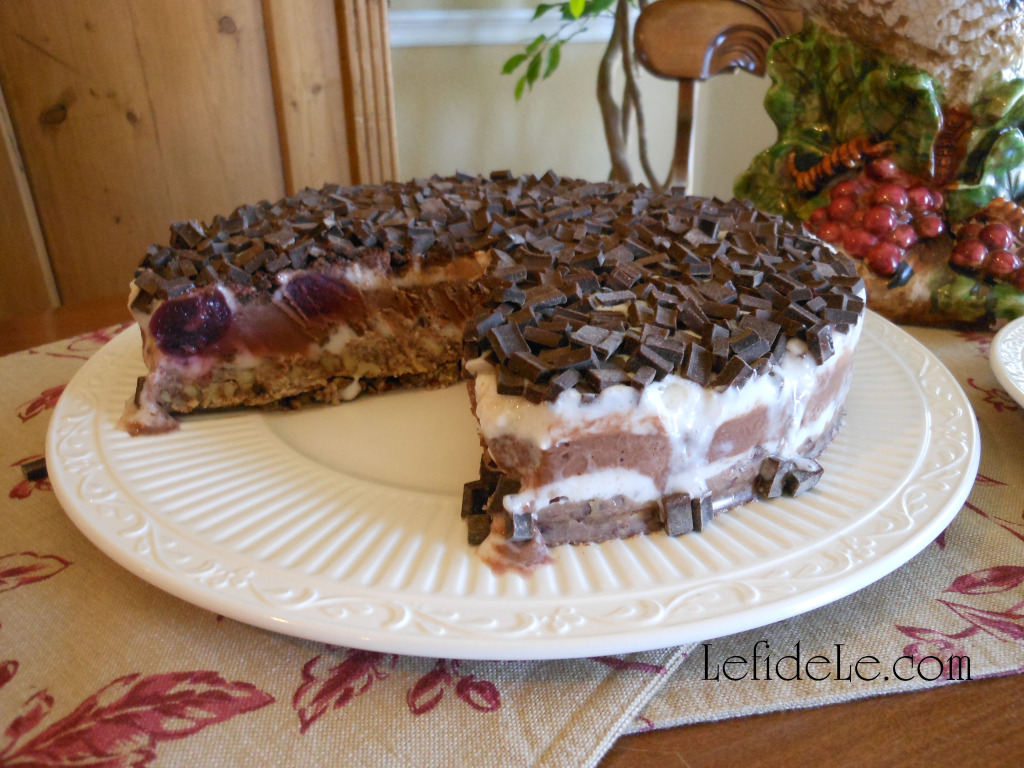
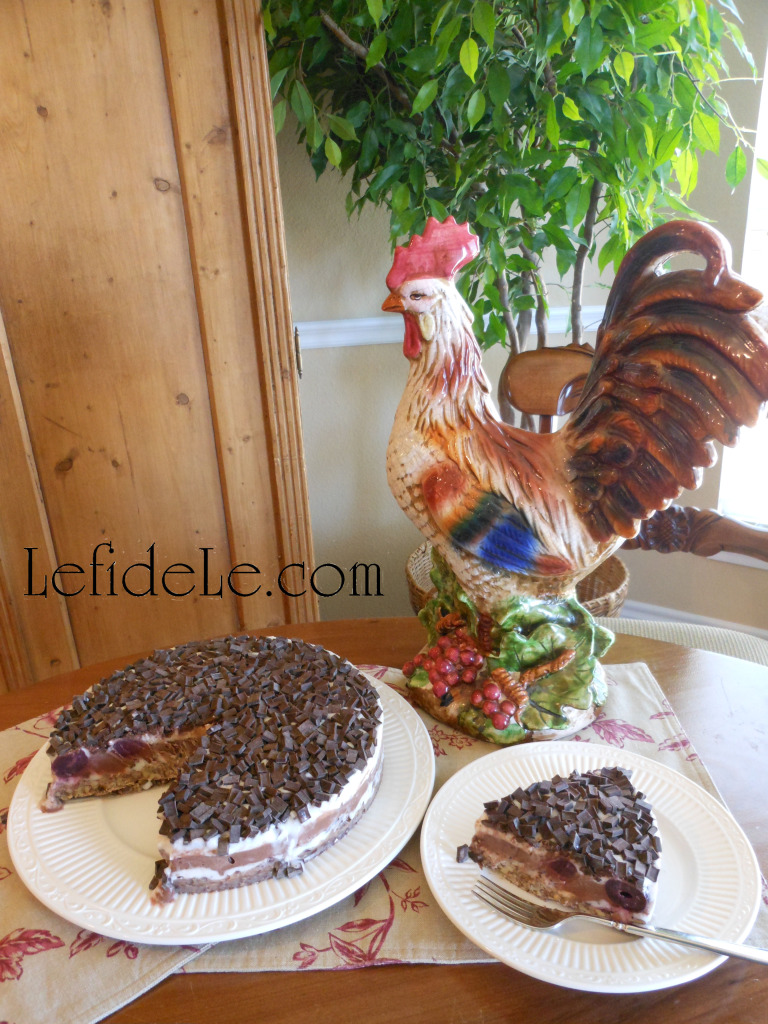
This super easy no cook recipe can be made well in advance of any gathering, or just made to enjoy a slice at a time straight from the freezer. It’s also a great alternative to the parade of traditional office birthday cakes. It has a gluten-free nut crust that may be enjoyed by almost everyone, which is also why it’s written with dairy-free ice cream. It can easily be made with traditional dairy… but in this way vegans, allergy sufferers, and the lactose intolerant may happily partake. For this occasion, I used pint sizes of coconut milk “ice-cream”. (A mint chocolate chip pint was used here for the bottom layer, chocolate for the middle layer with the cherries, and coconut for the top layer with the chocolate chunks.) It’s richer than the almond milk variety (which is also tasty), and it always surprises people when I tell them it’s dairy-free. Previously, I’ve even used a gallon sized regular Neapolitan ice-cream and just split up the colors for the layers. You can use whatever you have left in the freezer or even add more layers! Add multiple kinds of nuts, chips, or chunks… whatever is in your pantry. For this recipe, no rules are just right! 69Leigh


Ingredients:
  • 3 cups pecans (or pistachios, walnuts, macadamia nuts…)
  • 10 tablespoons extra-virgin coconut oil (or regular butter, dairy-free butter…)
  • 1 tablespoon turbinado sugar (or coconut sugar, brown sugar…)
  • 1 teaspoon cinnamon
  • 1 bag frozen sweet pitted cherries (or pitted fresh, 15 oz can in sugar syrup…)
  • 1 bag vegan dark chocolate mini-chunks (or dairy-free, traditional chocolate chips…)
  • 3 flavors/pints (here I used mint chocolate chip, chocolate, and coconut) dairy-free coconut milk “ice-cream” (or almond milk, soy milk, sugar-free, dairy milk ice cream…)

8Leigh


Instructions:

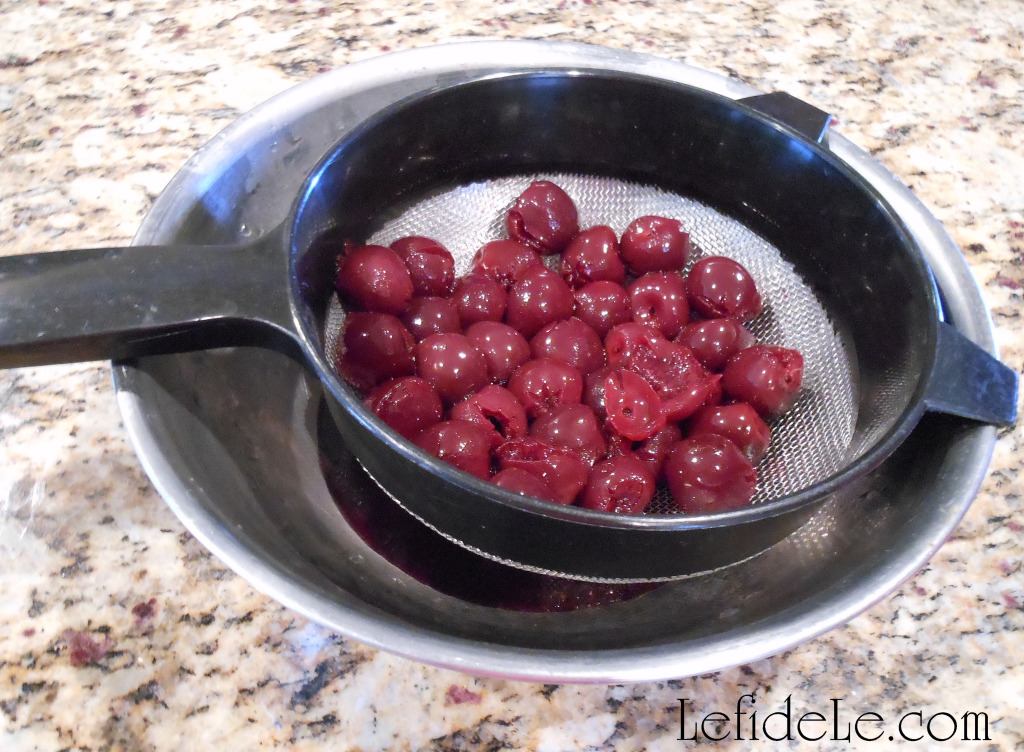
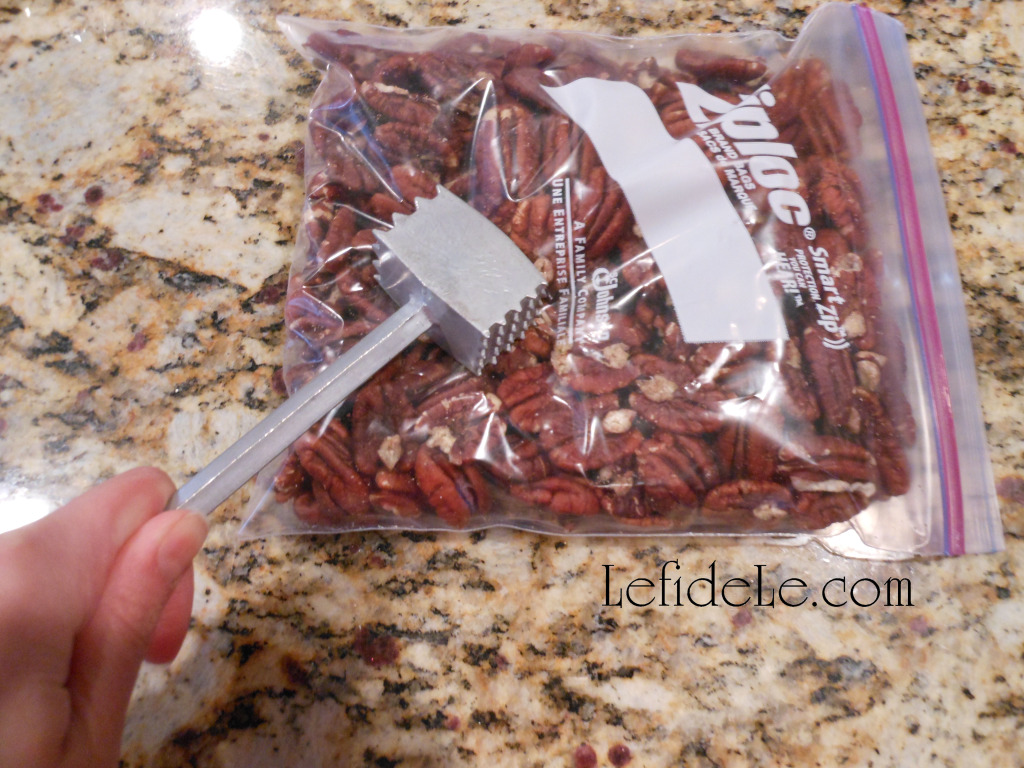
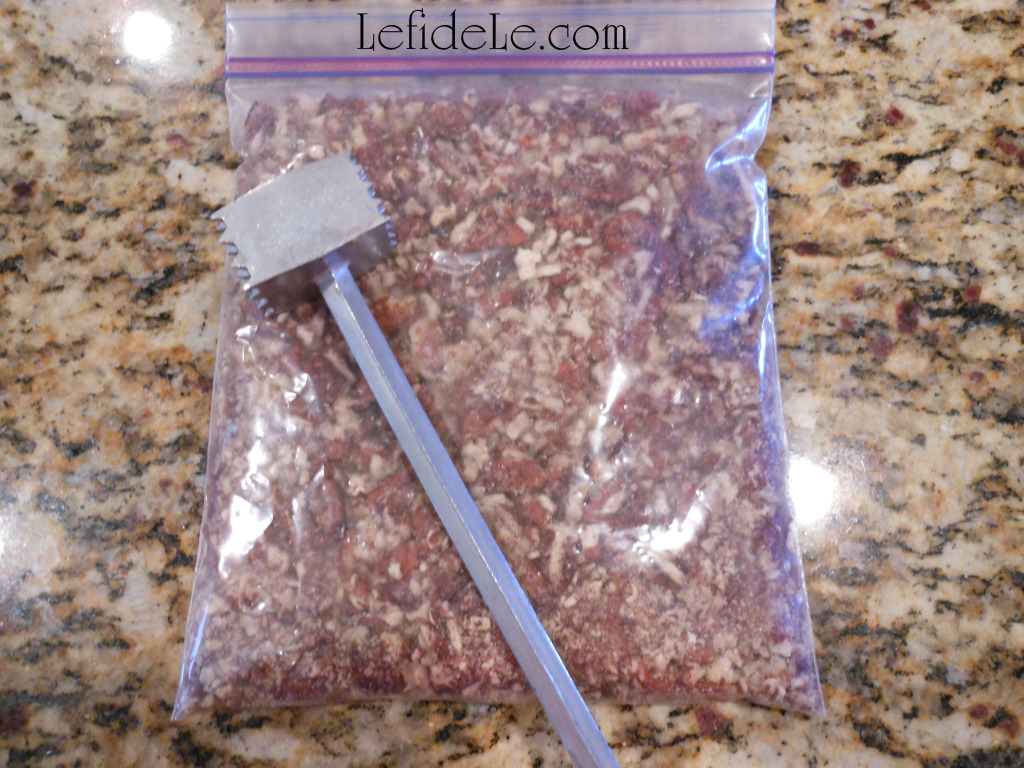
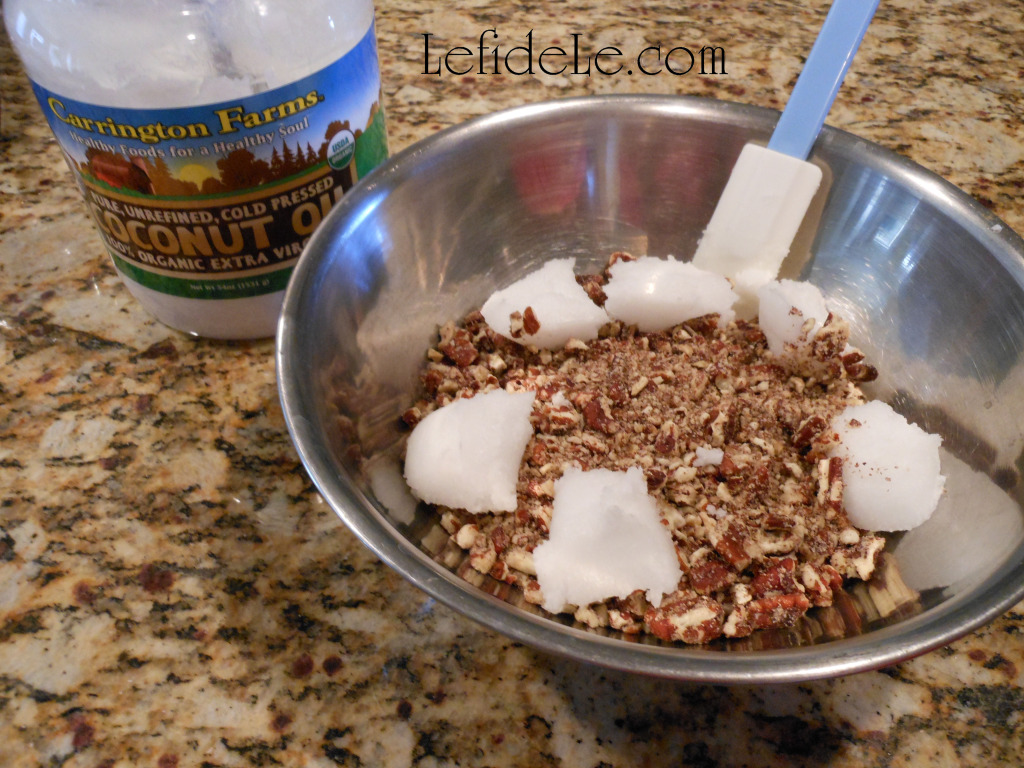
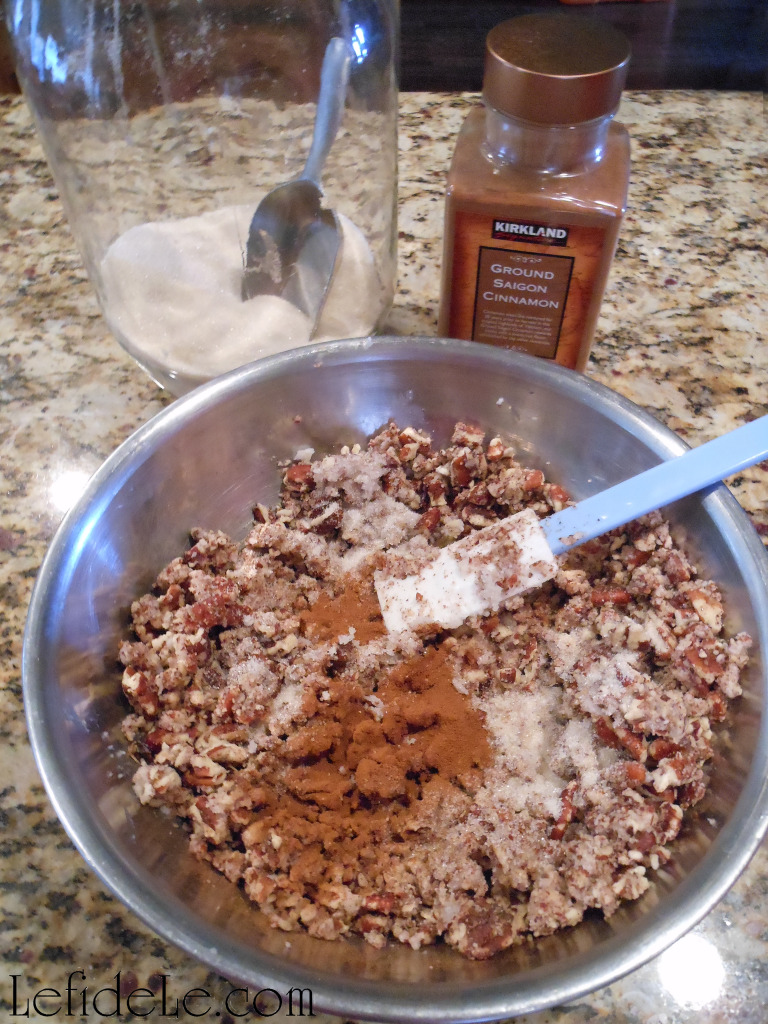
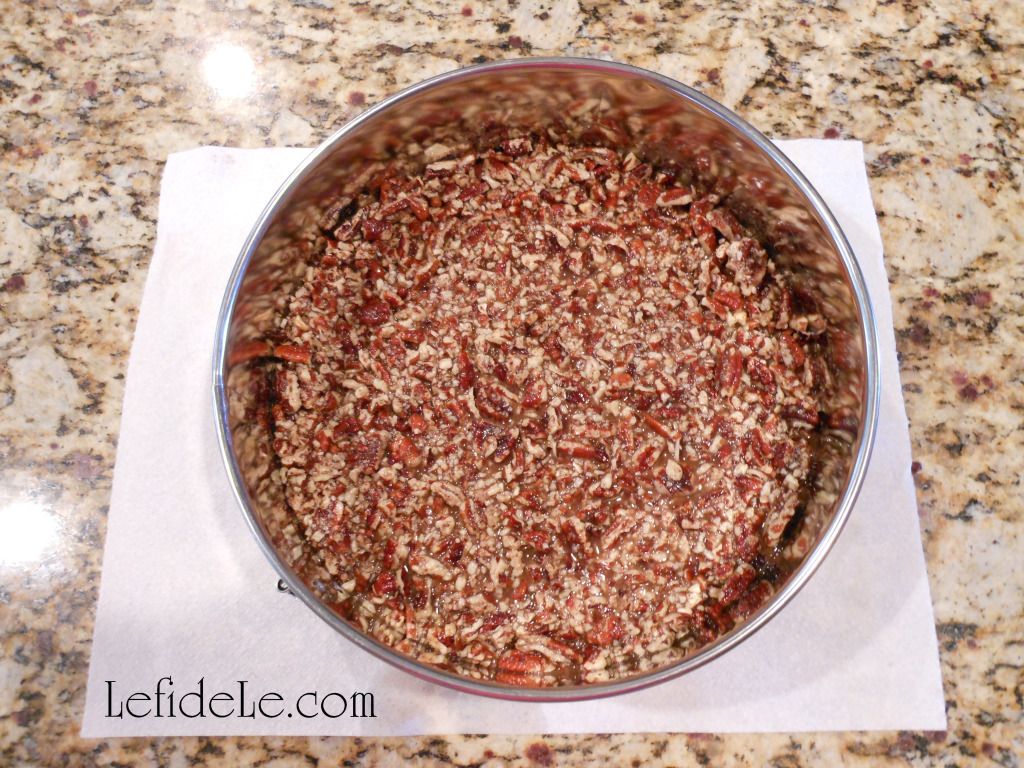
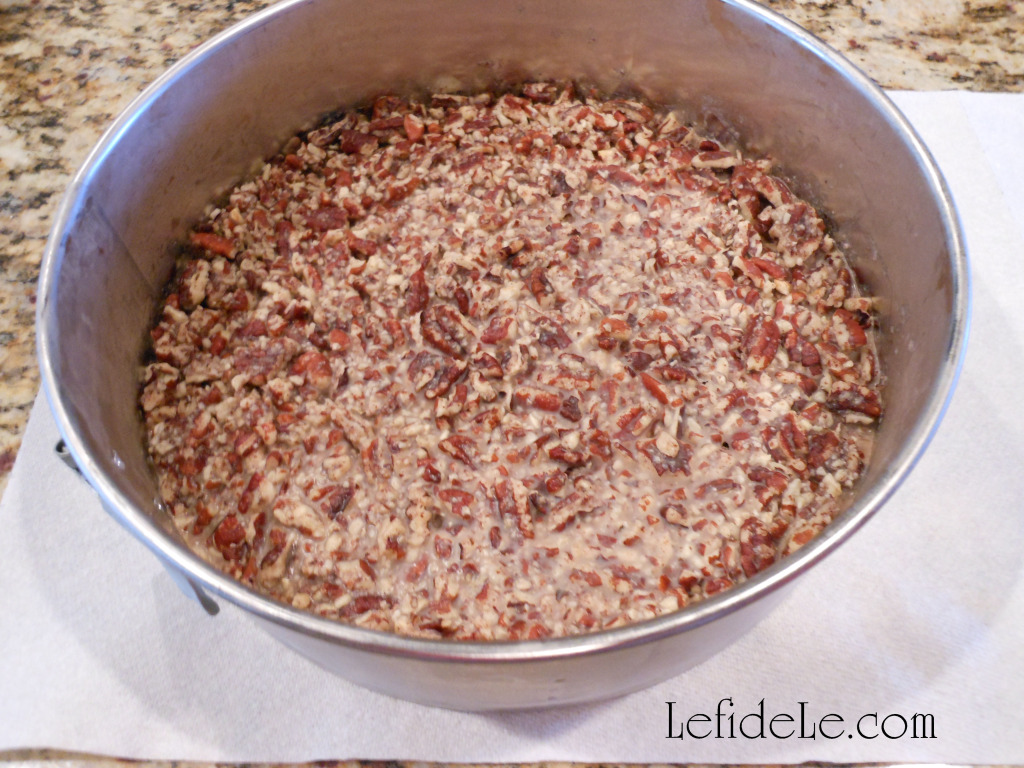
11Leigh Place the cherries in a strainer over a bowl, and set aside to drain. (The leftover cherry juice makes a great sweetener so you can add more greens to a smoothie!) 2Leigh Place the pecans in a quart size freezer bag (because it’s stronger than sandwich bags) and break them up using a kitchen-mallet/meat-tenderizer. It’s so much more fun than chopping! 3Leigh   Microwave the coconut oil in a glass bowl just until it softens. (Extra-virgin coconut oil is so good for the skin that it can even be found in the vitamin section of Whole Foods as a supplement.) 4Leigh Then add the crushed pecans, sugar, and cinnamon. 5Leigh Mix well, then pour/push into the bottom of a coconut oil “greased” springform pan. Smooth it out evenly with a spatula so that the entire bottom is covered. 7Leigh Place in freezer for at least 30 minutes, or until it feels frozen and solid. During this time, take out the mint chocolate chip to soften it. (Keep in mind that regular ice-cream melts quicker than vegan “ice-cream”, so if using the traditional stuff- take it out later!) 12Leigh When the nut crust is frozen and the quart has melted enough, smooth the “ice-cream” over the crust evenly with a spatula. Freeze the pan and take out the chocolate pint to melt. 013Leigh Spread the chocolate pint on when the previous layer has refrozen solid. Gently push the drained cherries into the “ice-cream” (= chocolate covered cherries). Freeze the pan again, and take out the coconut pint. 16Leigh When everything’s ready, spread on the last layer. Top this with the chocolate chunks & softly press them into the coconut “ice-cream”. 26Leigh Cover it and keep it frozen until it’s almost time for dessert. (Cutting through it is easier if you run the knife under hot water first.) 74Leigh It’s always great to have a stand-by gluten-free vegan desert recipe, so no one has to be left out of the fun. This easy one is a lot of fun to make with kiddos, as it has very little to measure and requires no knives until serving time. Any leftovers can be stored in the freezer and wrapped as individual slices for an occasional sweet-treat! Happy Un-birthday! 🙂 73Leigh Faithfully Yours,

Leigh 70NiceCreamPie-Leigh

Quick & Easy Informal Gathering Fondue Dessert Party Idea

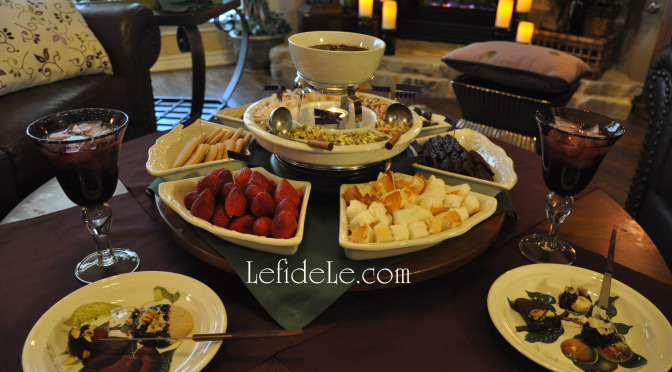
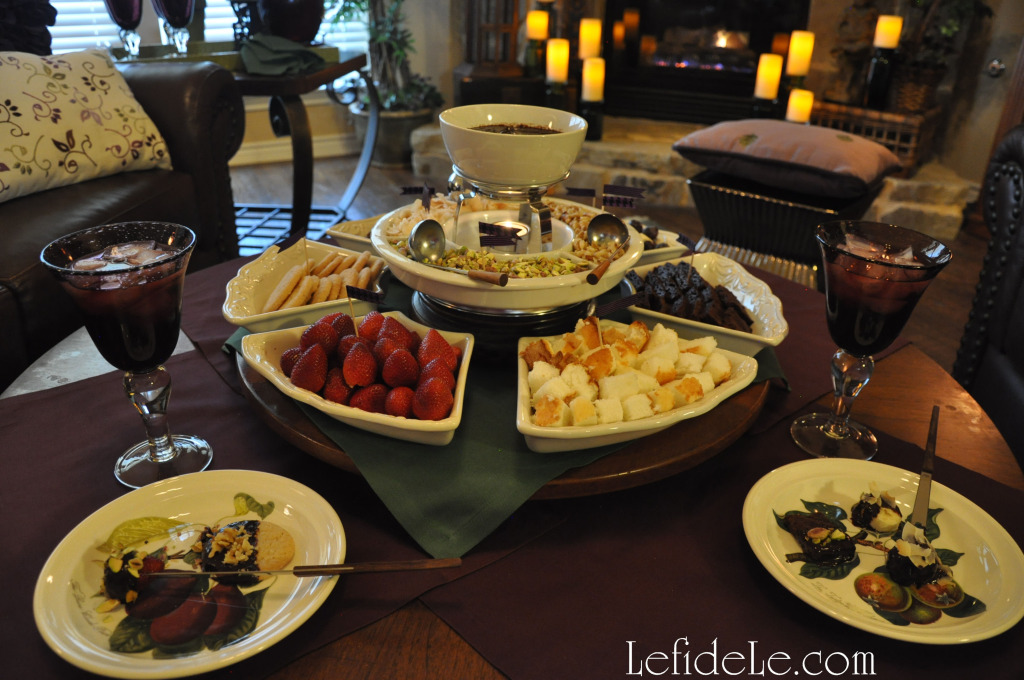
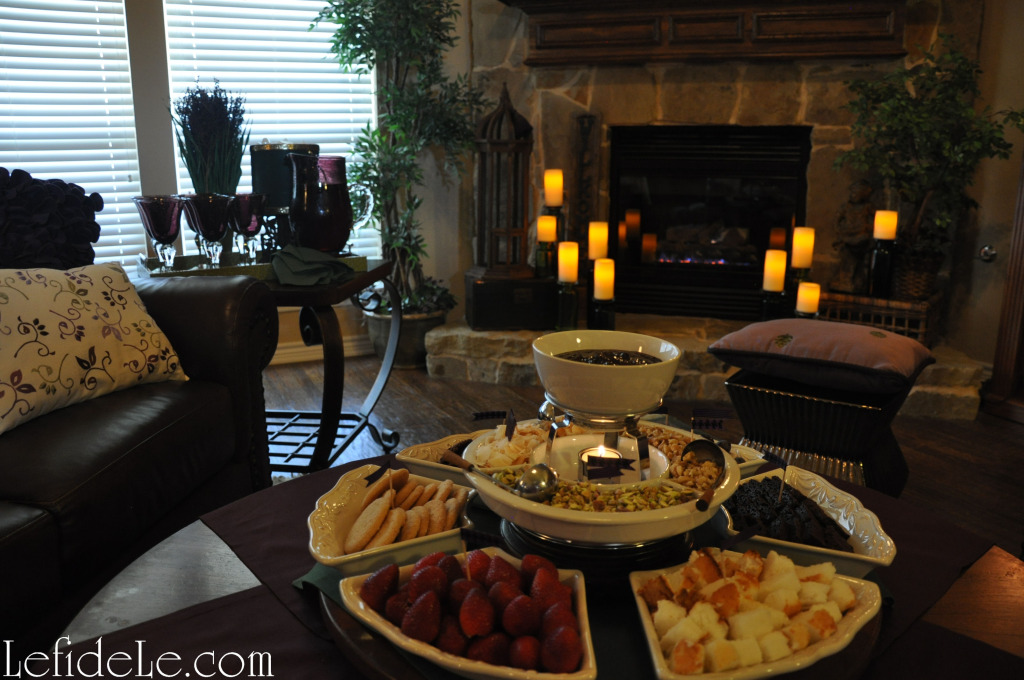
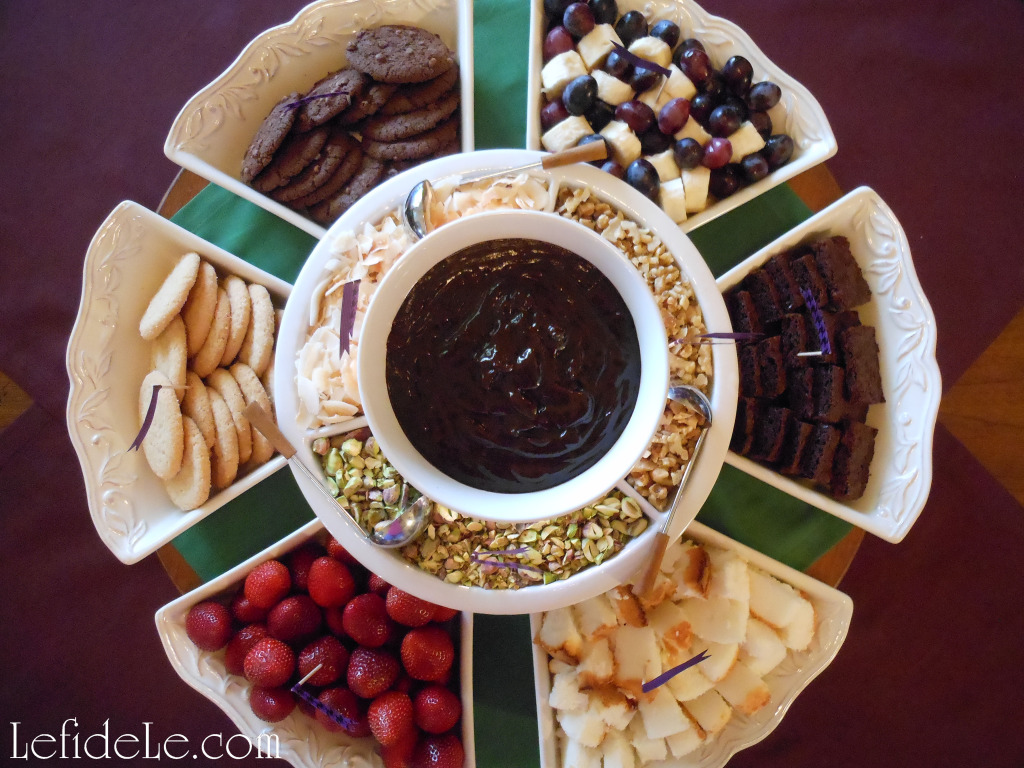
One may easily spend the fall and winter bouncing from one holiday into the next, and often those celebrations are hosted at someone else’s abode. Why not extend thanks by inviting those friends and family to a small gathering that doesn’t involve candy, pumpkins, or trees. This easy fondue theme can be quickly pulled together the evening before. See my accompanying Quick & Easy Chocolate Coconut Fondue Recipe here. It takes about 5 minutes to prepare just before everyone arrives. It is vegan, gluten-free, and dairy-free so no one has to be left out. (Just be sure to buy or prepare gluten and dairy-free items to dip also.) An informal dessert party can accommodate a larger number of people without adding more work, which is great not only during the busy holidays but at any time of year.

230Leigh

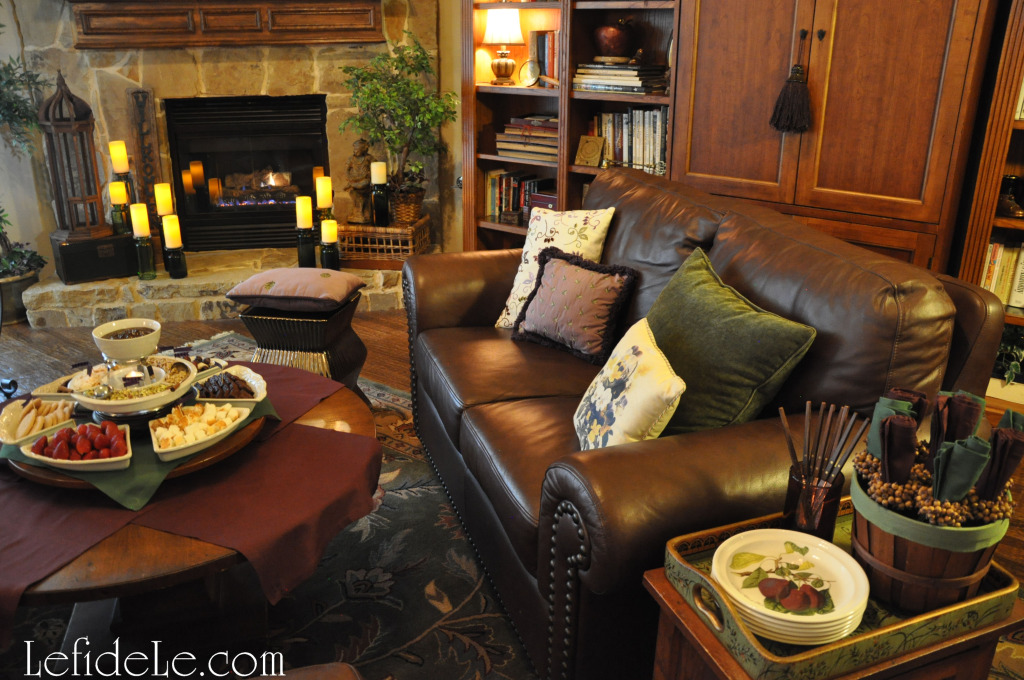
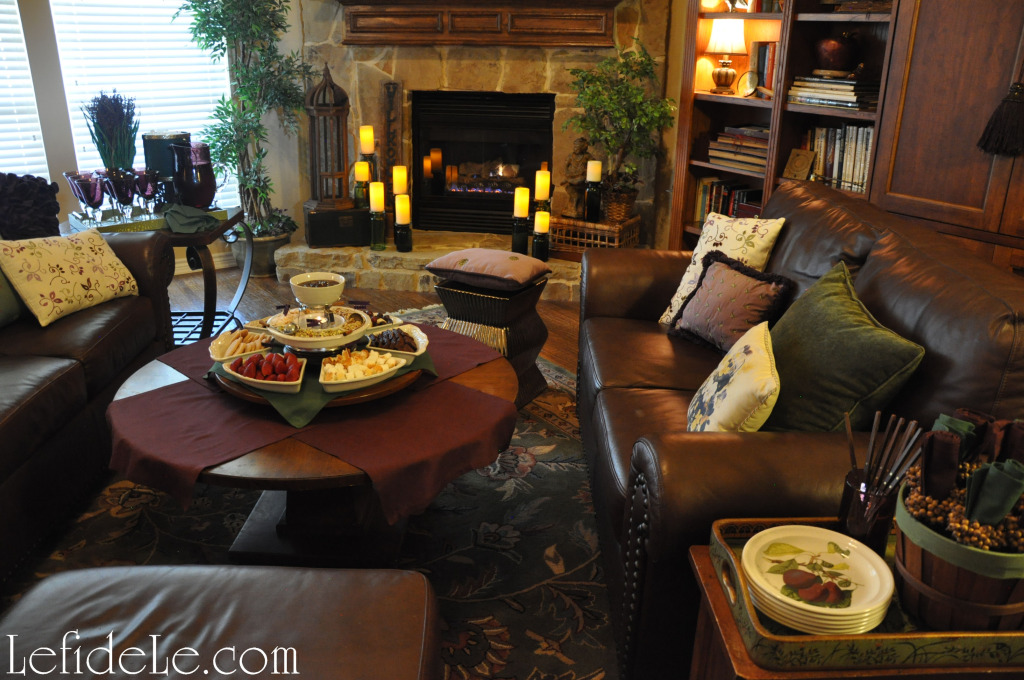
I chose the warm and inviting colors of purple and green in order to distance my theme from those traditionally used for the holidays. They were a lovely contrast to the ivory dishware and dark brown of the chocolate and leather. Color accents were seen in the throw pillows, trays, glassware, dishes, and even the foliage. It extended to the cloth napkins that were set on the coffee table and lazy-Susan. Adding the rotating tier not only eased food accessibility, but also created separation between the serving and eating areas which was visually more appealing.

200Leigh

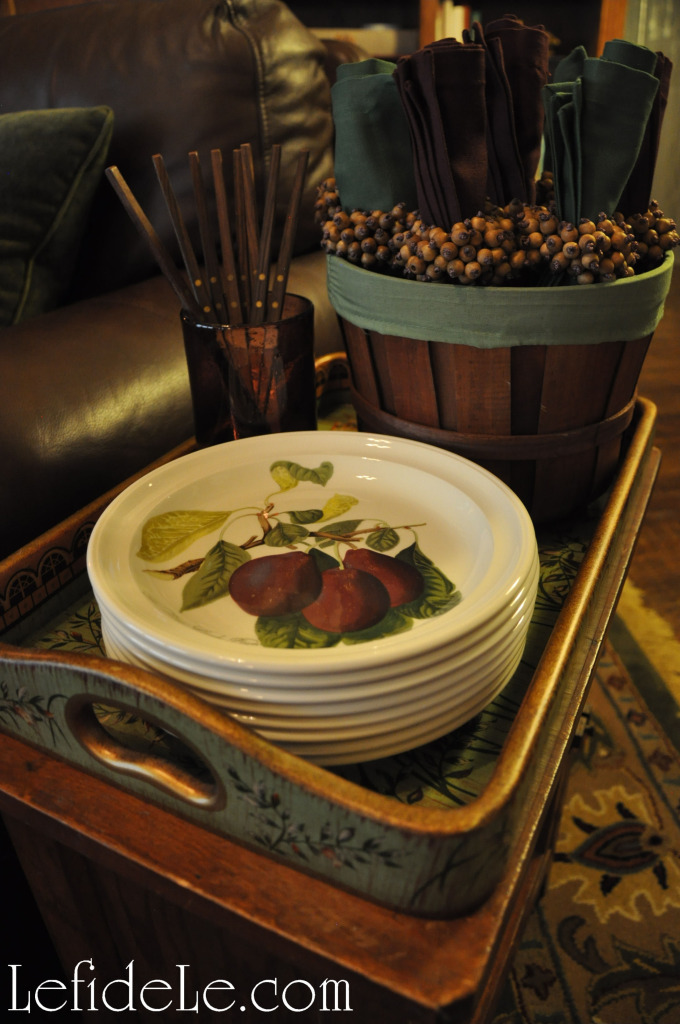
Seated on an end table was a painted tray that contained a basket of coordinating napkins in wood beaded rings, a glass holding fondue skewers, and Portmeirion Pomona plates.

251Leigh

I only used the plates with the pear and fig motif because they matched so perfectly, but even pretty paper plates would be fine for such an informal gathering.

208Leigh

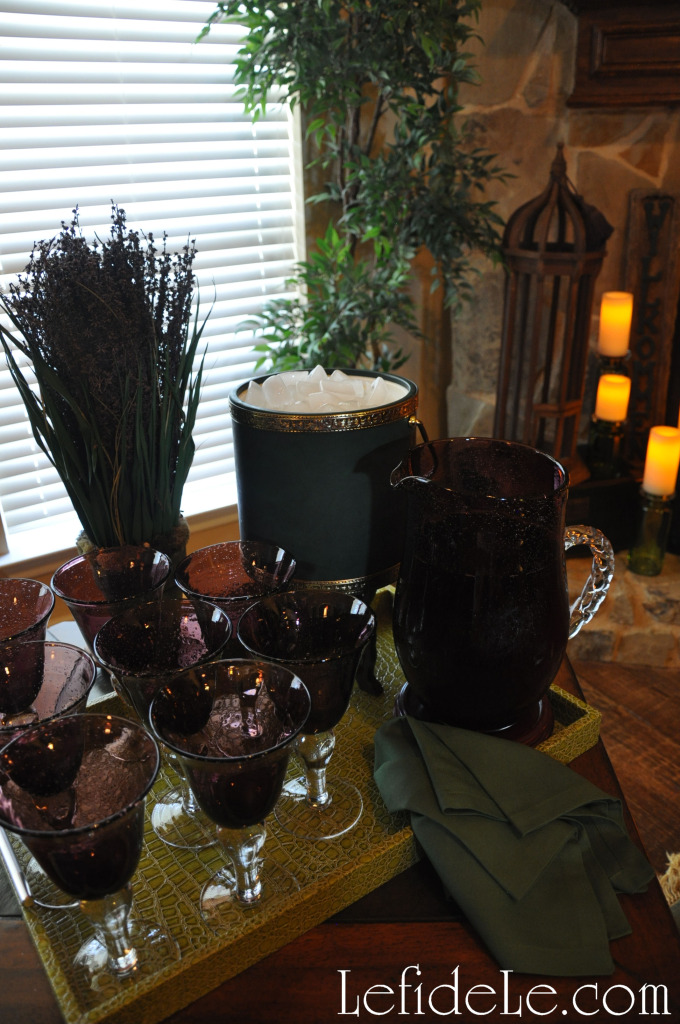
Another table held a larger tray with purple bubble glasses and a matching pitcher seated on a wooden riser. An ice bucket was placed on a taller stand behind that. A cloth napkin was draped to preemptively contain any spills. Preserved lavender sat in a painted pot to soften the visual edges.

231Fondue-Leigh

All of the furniture was rotated, for the evening, in order to accommodate an easy flow. An ottoman and a ceramic stool added seating to the arrangement, without blocking pathways. Pillows in coordinating colors were pulled from other rooms, to temper the masses of brown leather. For a smaller group, one could even pull furniture from the room, and just use stacked floor cushions around a coffee table.

192Leigh

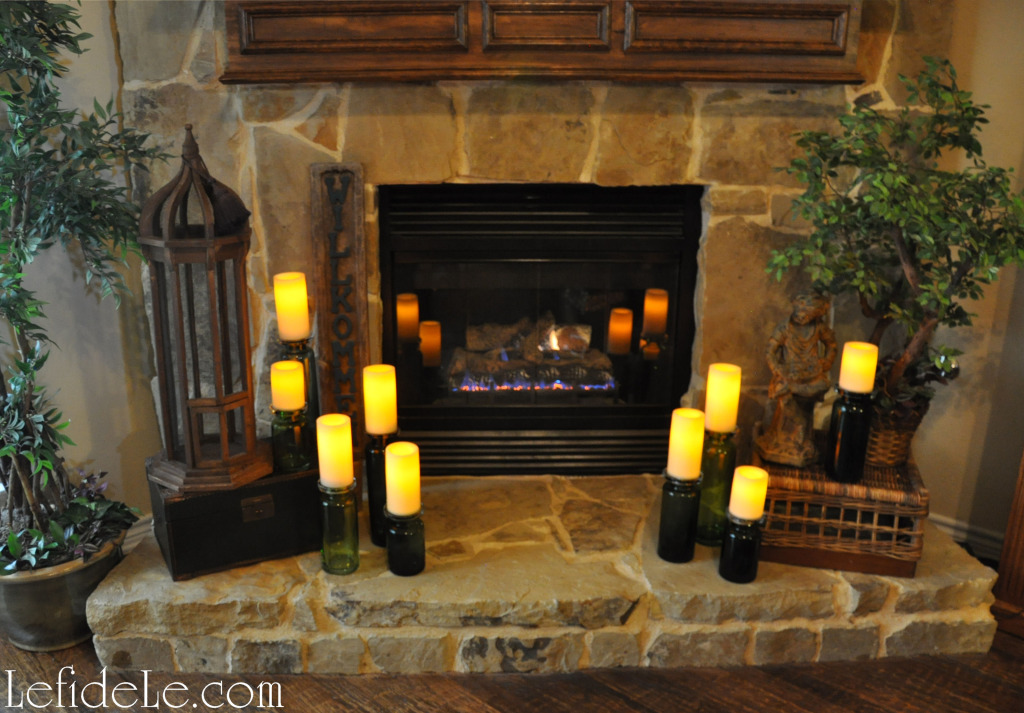
Even the rock fireplace was included as a focal point with the addition of candles on green glass. These were placed at varying levels by means of a trunk and upturned basket. Statuary, a birdcage, and small trees added height and interest. Why not switch accessories for a night?

205Leigh

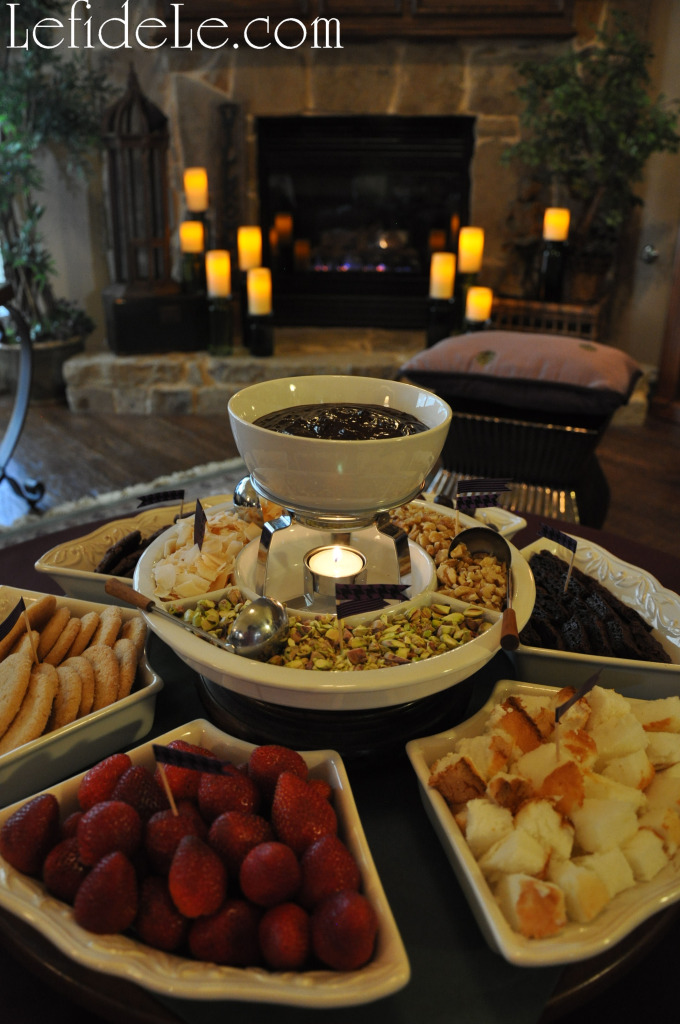
The serving pieces are actually comprised of two different sets of dishware. The center group is a small fondue set placed on a wooden stand for height. The ring of dishes surrounding that was actually meant to coordinate with a plain bowl for hors d’oeuvres, but worked beautifully to present a larger volume of food. Round bowls would also have been lovely surrounding the chocolate center.

204Leigh

Whether you choose to serve on paper plates or fine china, change up your décor or leave it all the same, bake your sweet treats or buy them at the store… your guests will be treated to a relaxing evening filled with delightful confections and camaraderie.

86Fondue-Leigh

Faithfully Yours,

Leigh

Fall Leaves & Pumpkins Themed Thanksgiving Tablescape Décor Ideas

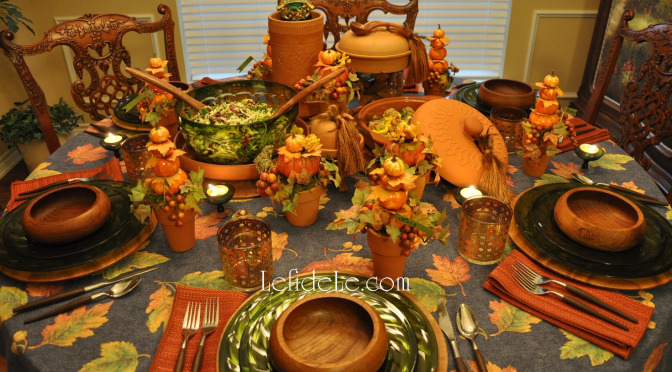
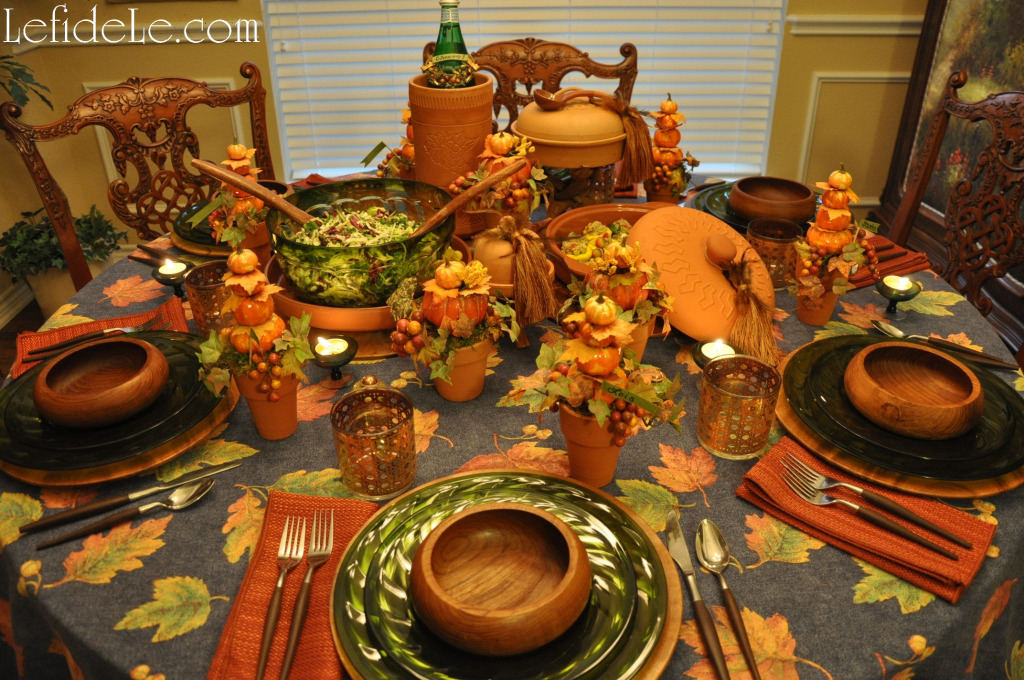
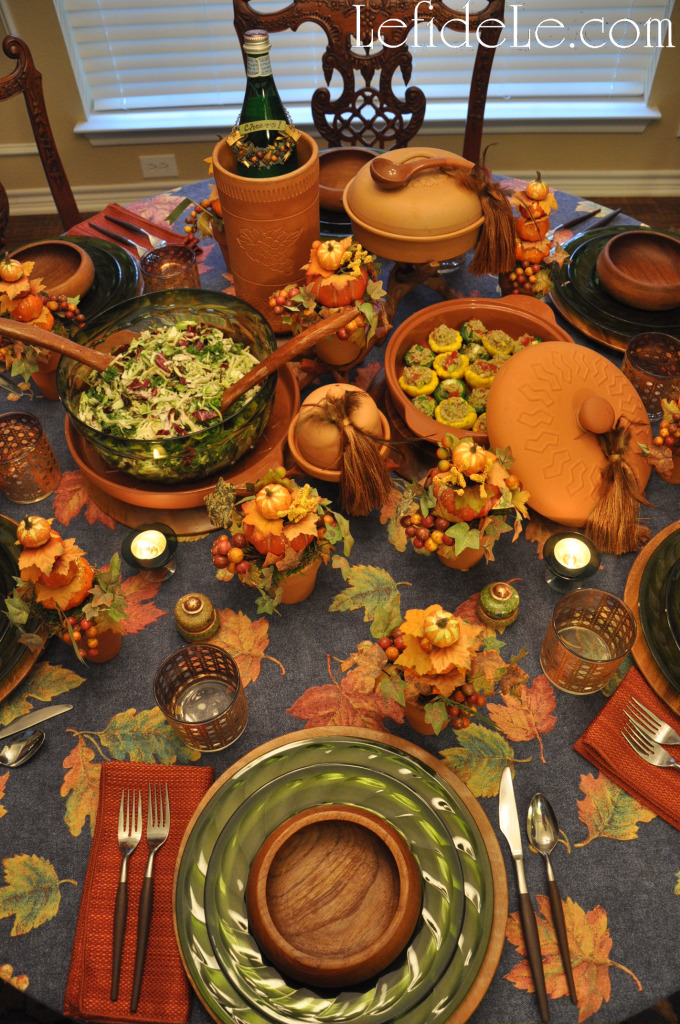
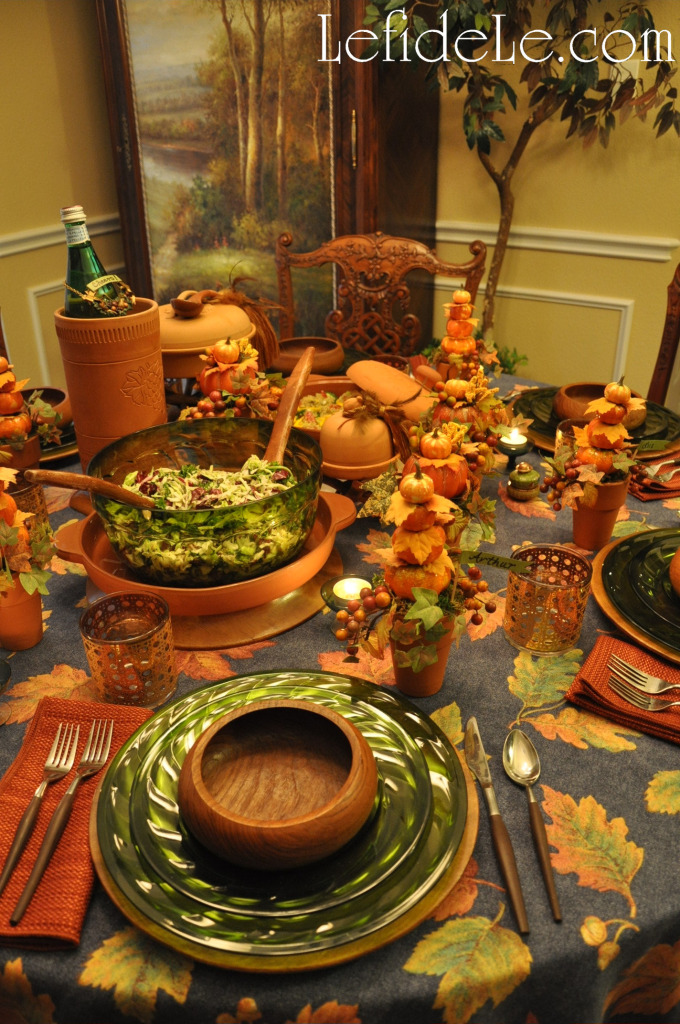
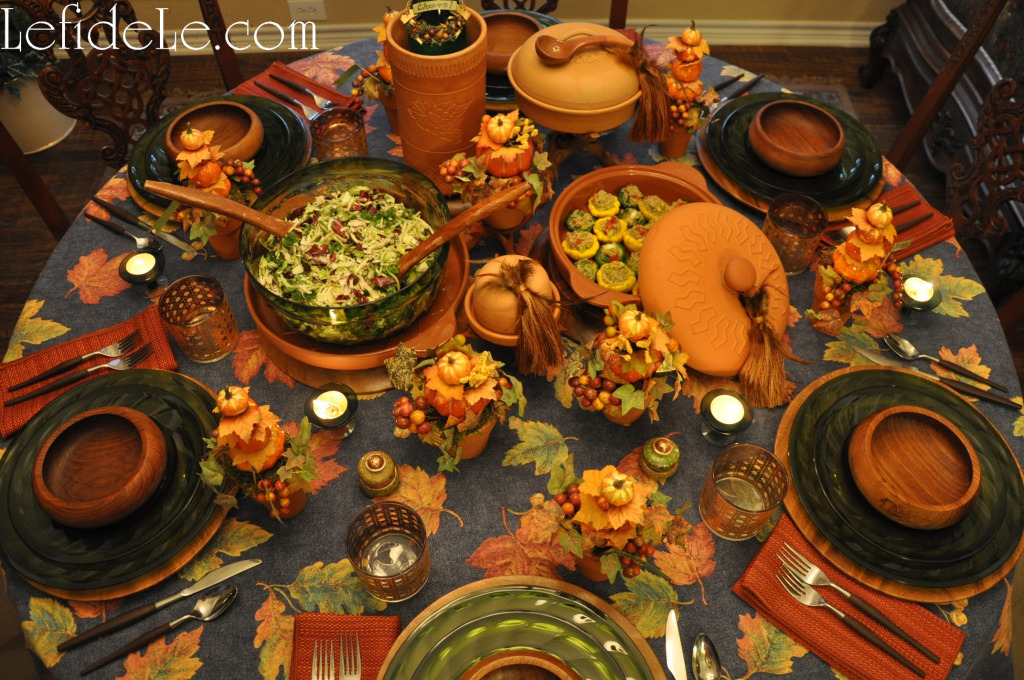
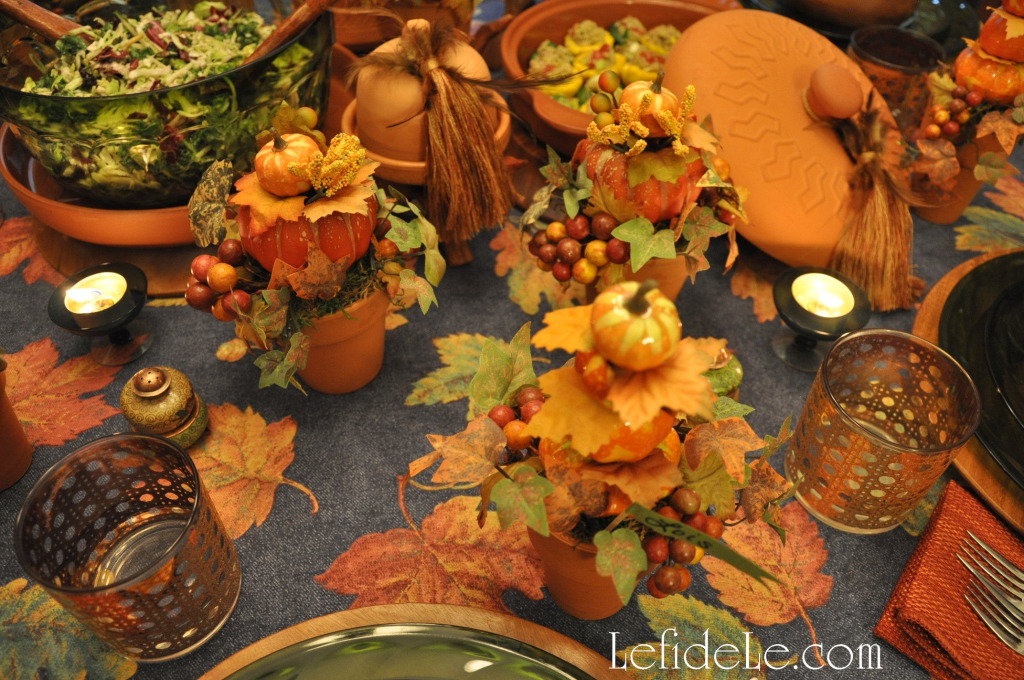
When I think of fall, images of brightly colored leaves and plump pumpkins immediately fill my mind’s eye. This was the initial inspiration behind this tablescape for Thanksgiving.

194fLeigh

I craved more color than is typically seen in fall décor, and so added a tablecloth with a denim background.

76Leigh

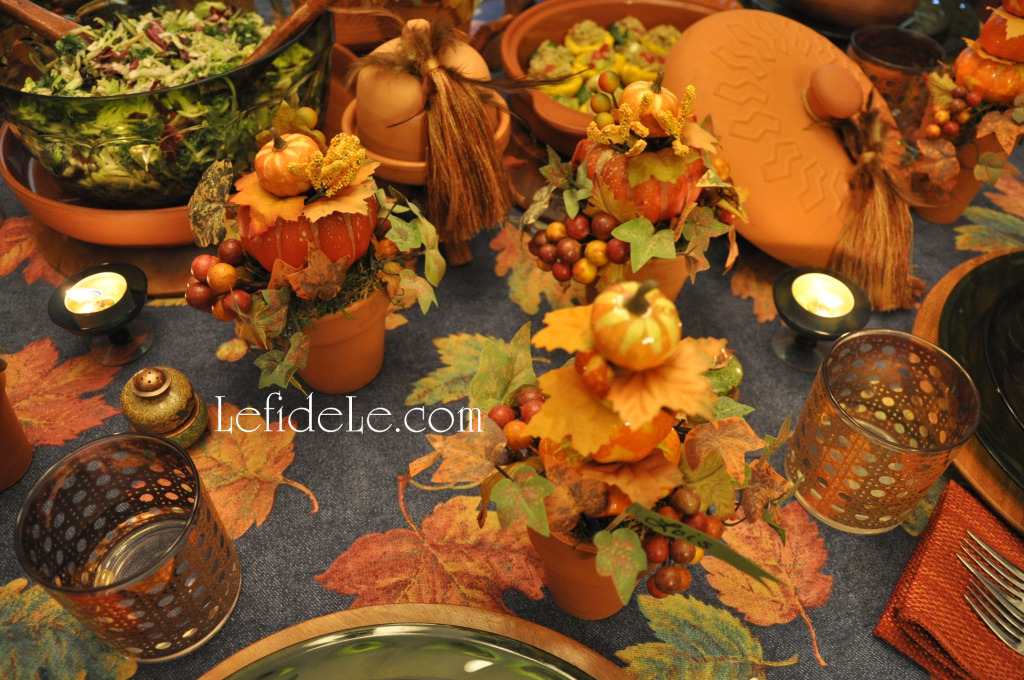
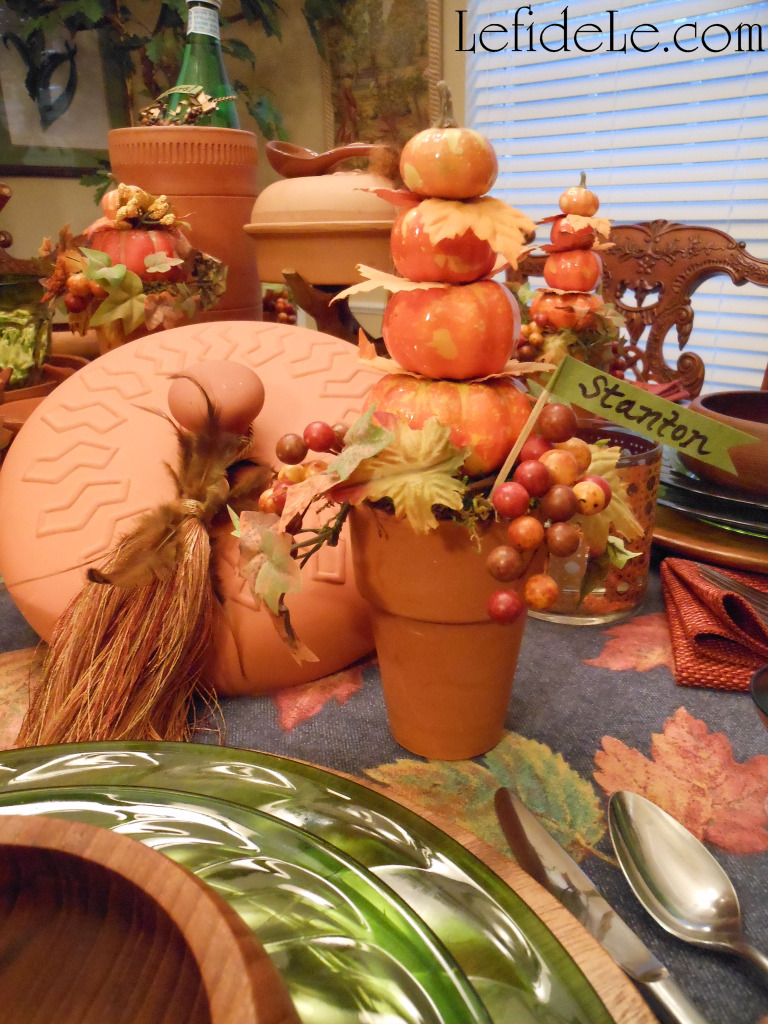
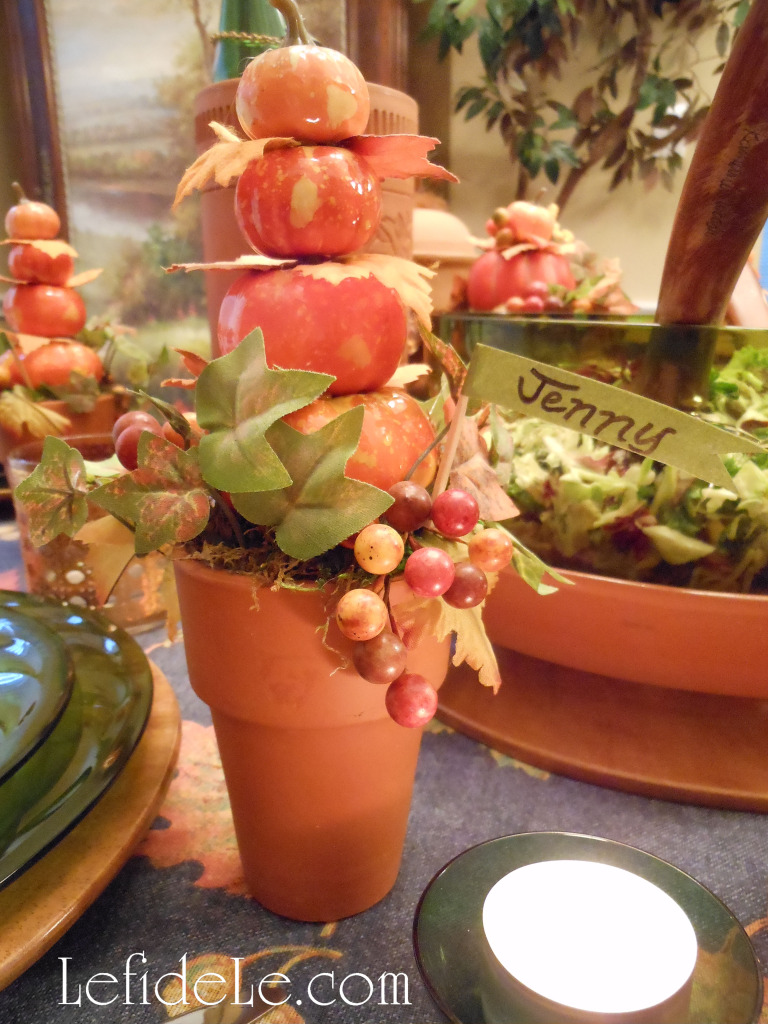
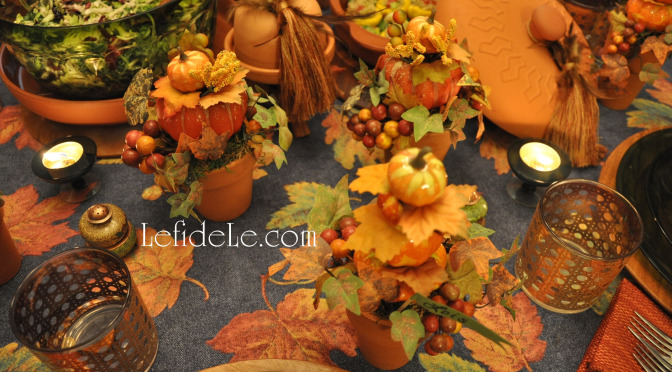
The blue color perfectly balanced the orange of my pumpkin topiary crafts that I made for place-card holders.

75PumpkinTopiaries-Leigh

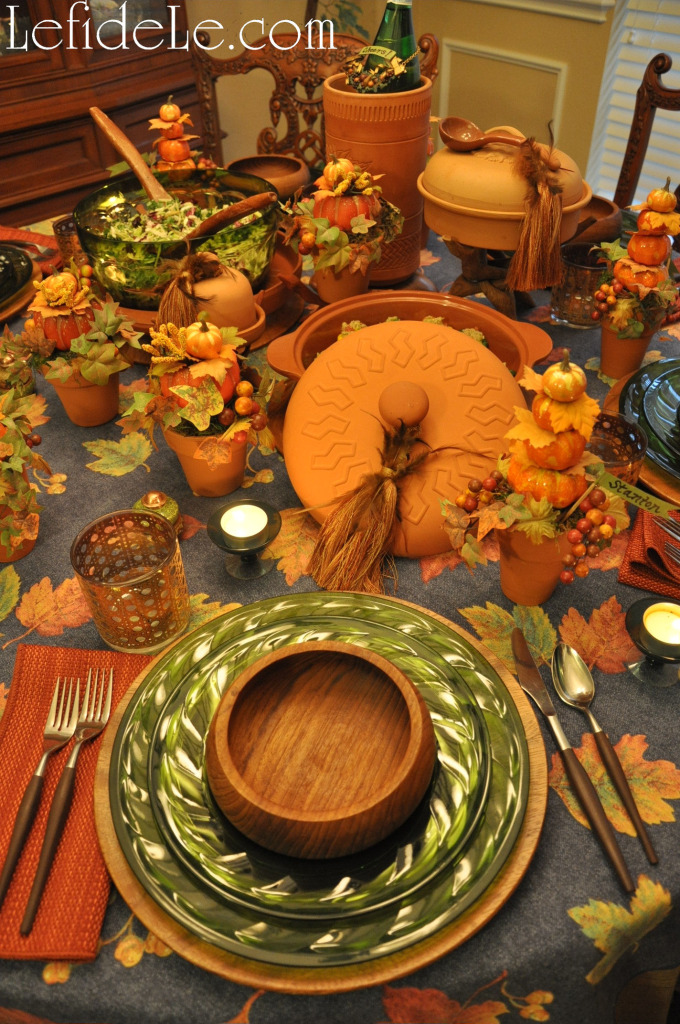
More color was added with green plates and green crystal votive holders.

148PumpkinTopiaries-Leigh

Deeply stained wooden bowls and chargers were utilized to reflect nature. Turning some upside down made stable pedestals for serving pieces.

141Leigh

I chose terra cotta to echo the pots of the topiaries and because the covered dishes would better retain the warmth of the meal. Little tassels tied to the handles softened the hard look of the pottery.

197Leigh

Wooden stands added interest and height to the tableware, thereby making the food the centerpiece. Bringing the floral out and the food in, contributed further to my untraditional Tablescape.

187Leigh

The silverware and golden basket weave glasses provided the finishing touches for the table, just as one would finish an outfit with jewelry.

143Leigh

After the salad course was served, the wooden pedestal hosted turkey slices that had been carved in the kitchen. This is a lovely alternative for round tables where the turkey would make up the entire centerpiece otherwise. This way, no one has to look at the carcass for the remainder of the meal, which is a blessing to any vegans who were invited.

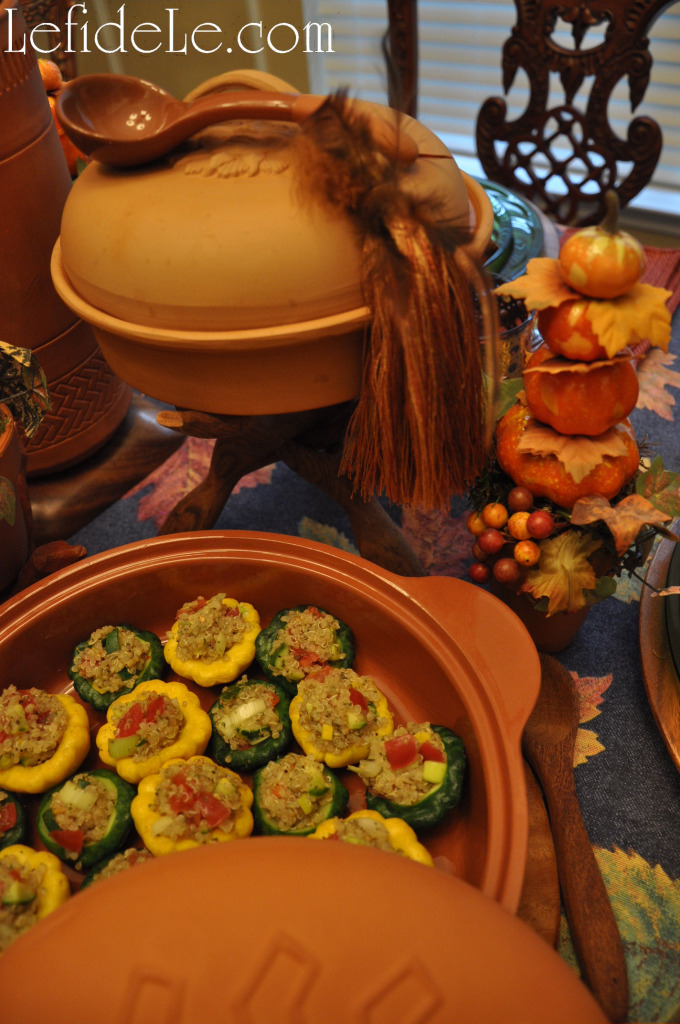
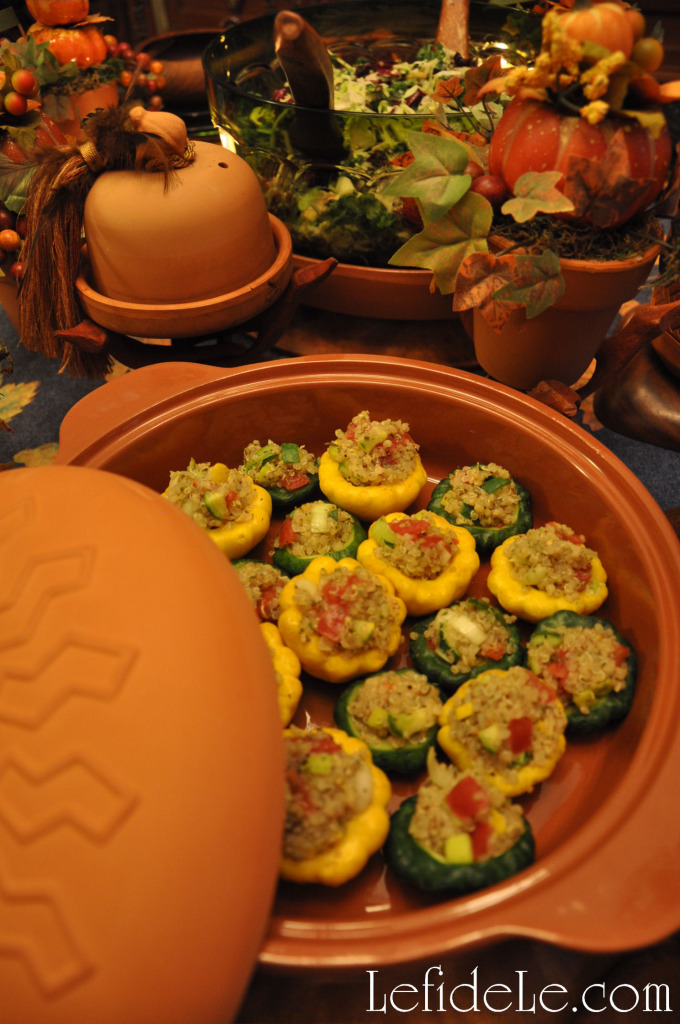
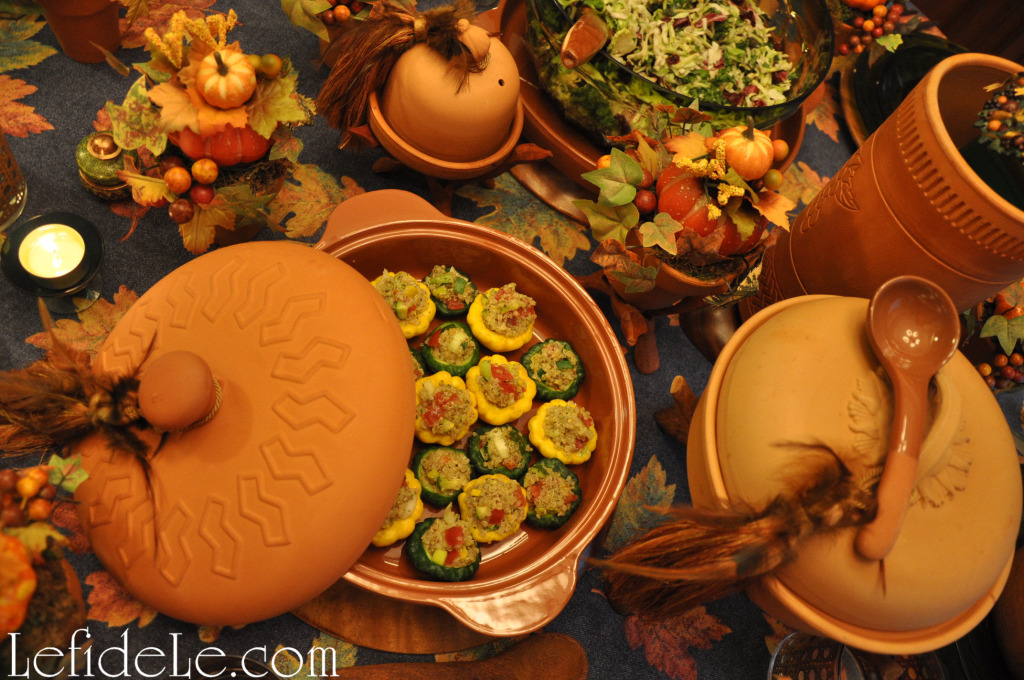
174QuinoaSquash-Leigh

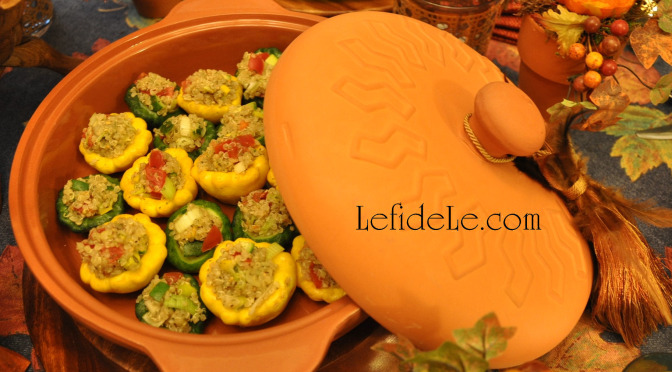
This is my healthy quinoa pilaf stuffed patty pan “mini” squash recipe which is Gluten-Free and Dairy-Free so that everyone may happily partake of the meal. Ground meat may also be added to make a complete meal.

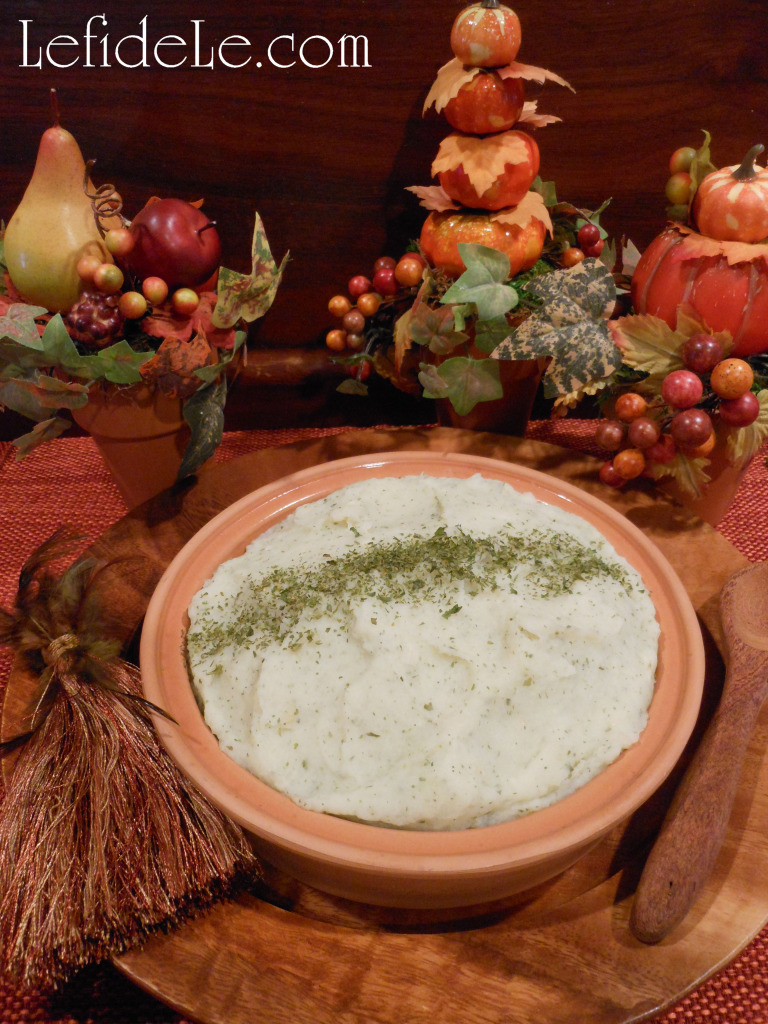
8CauliPotatoes-Leigh

This is my quick and easy heart-healthy “shortcut cauli-potatoes” recipe that is also Gluten-Free and Dairy-Free. It’s great year round because it’s so healthy and so fast to prepare.

160Leigh

Happy Thanksgiving!

Faithfully Yours,

Leigh

Fabulous Fall Leaf & Pumpkin Décor Crafts (Place-card Holders & Easy Remade Basket)

354PumpkinBasket-Leigh

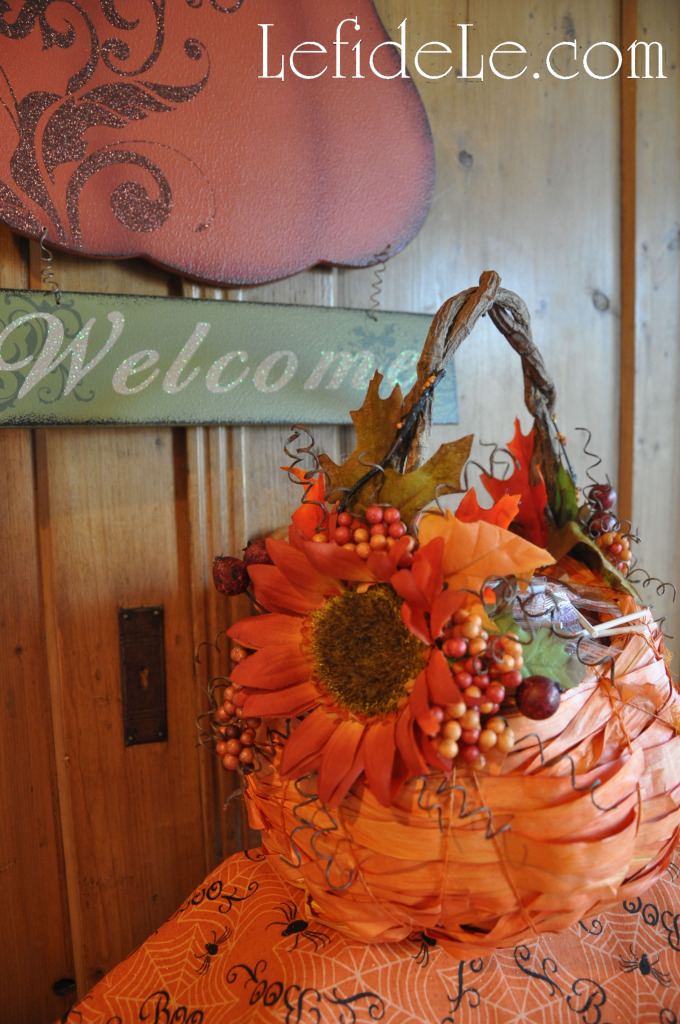
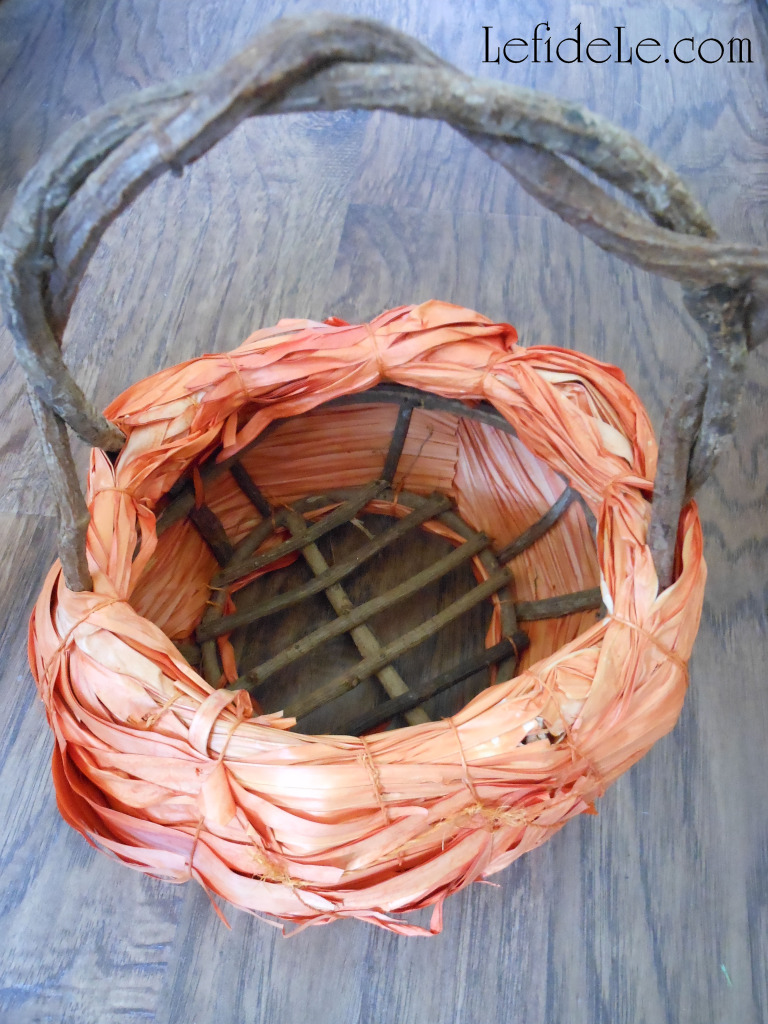
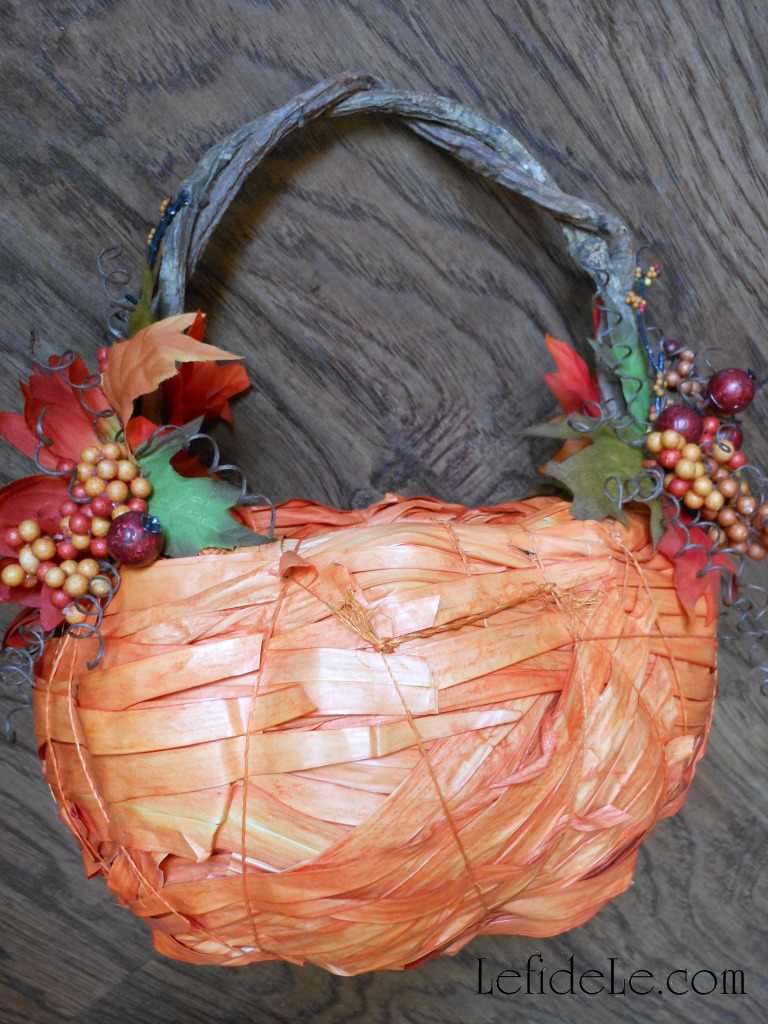
I’m combining what are essentially two projects, because they entail exactly the same easy process of hot gluing your way to a fabulous fall! With so many beautiful options in faux foliage available, you can keep your creations to display again. The pumpkin topiaries may be placed throughout your home or office as small floral elements, or used as place-card holders as I have for my Fall Leaves & Pumpkins Themed Thanksgiving Tablescape. And though I used a vintage pumpkin shaped basket, I’ve seen similar variations of it at several craft and party stores that are just begging for embellishment.

314Leigh

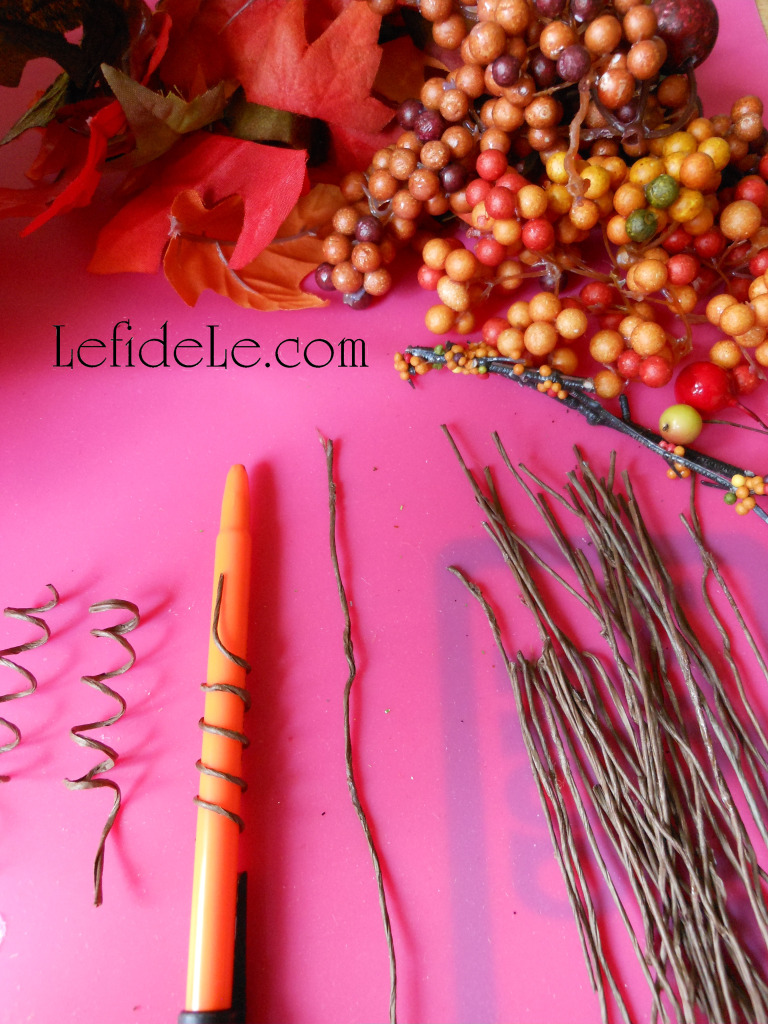
For those of you who are brand new to this kind of thing… always buy fall foliage on sale (and there is always a sale somewhere). There are a plethora of leaves, sunflowers, berries, twigs, and mini-pumpkins available in fall colors. Rip off (or cut) the pretty bits from the largest stem.

313Leigh

Make curlicue vines by first wrapping brown floral tape around wire (pulling as you go). Then take that and twirl it around a pen. Pull the pen out, and you’re ready to use your newly made vine.

316Leigh

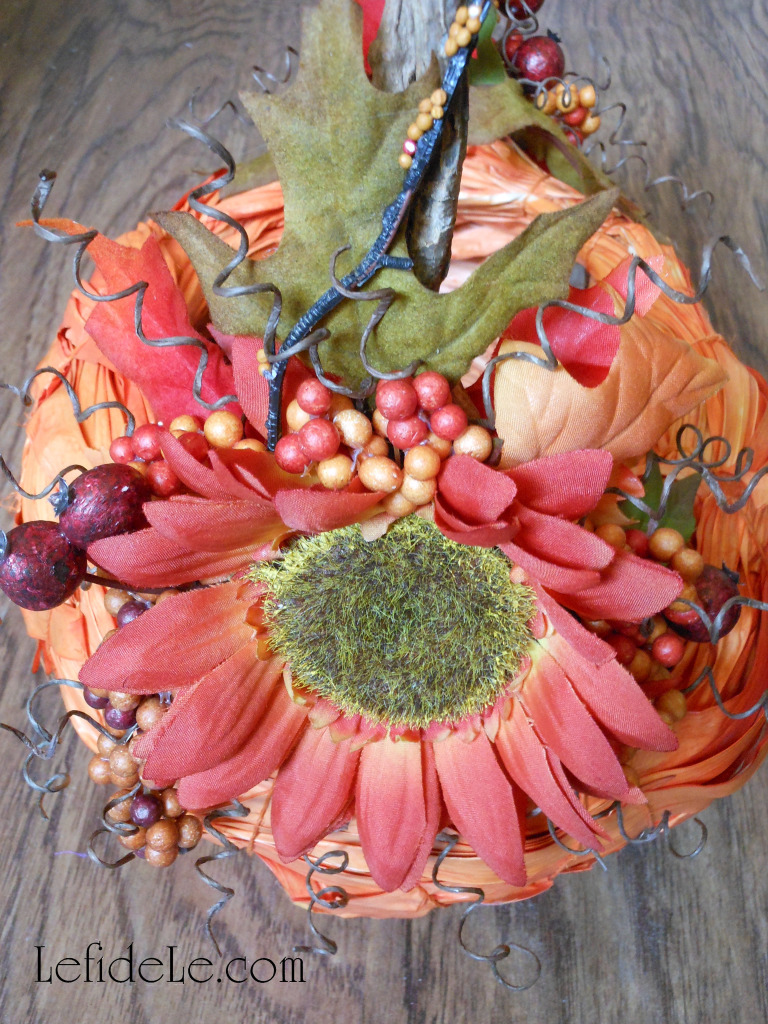
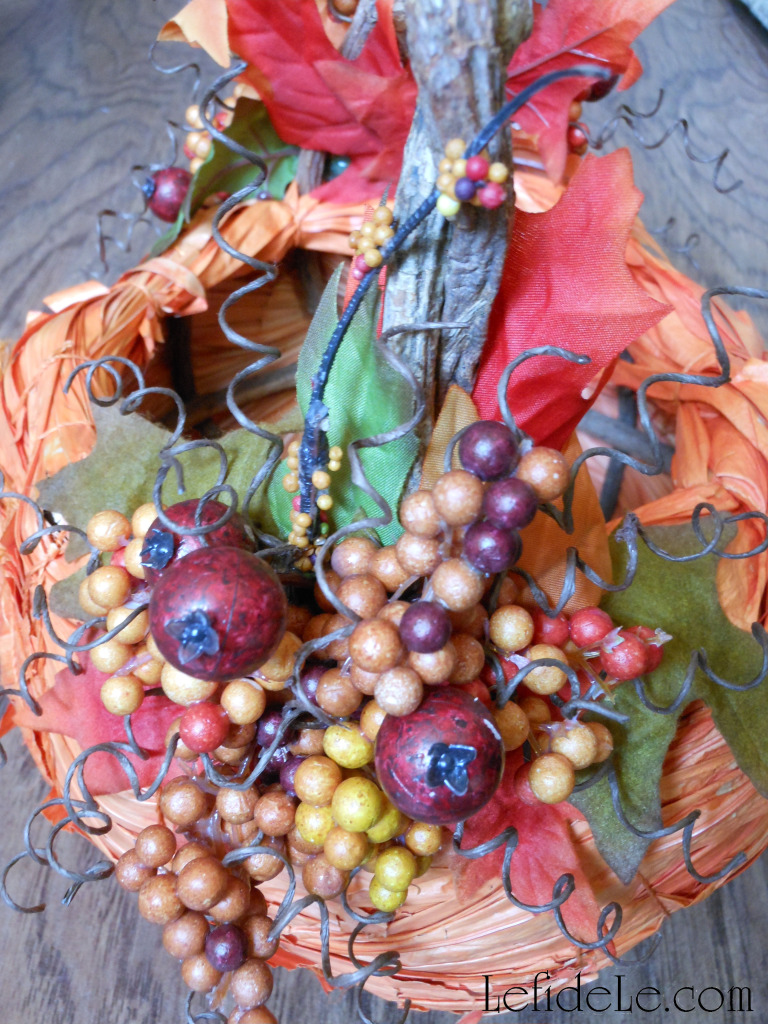
Now glue, glue, glue to your heart’s content. For the basket, start with leaves in order to form a base platform (at the junction between the handle and bowl of the basket). Then glue the larger elements on top of that blanket of leaves (without covering them completely).

317Leigh

Add smaller elements like berries, by dropping glue onto the stem ends, then tucking them in behind the biggest center element. Lastly, glue the vine ends (in the same way as the berries) and tuck those in wherever you see empty spaces.

320Leigh

It’s just that easy! You may now fill your creation with anything from candy to potpourri. To see it action, check out my “Glitter-Ween” Halloween Party Theme Decorating Ideas (With DIY Links).

194Leigh

As for the pumpkin topiaries… simply start with small terra cotta rose pots (because they are taller than regular pots). Fill these with floral styrofoam cut to size (not squishy “oasis” as that is made for wet arrangements). Next, hot glue a stack of tiny pumpkins (with a leaf in-between each) onto the top’s center. Cover the styrofoam with a layer of green moss. Then add a leaf or stem of berries here and there. Voila!

01Leigh

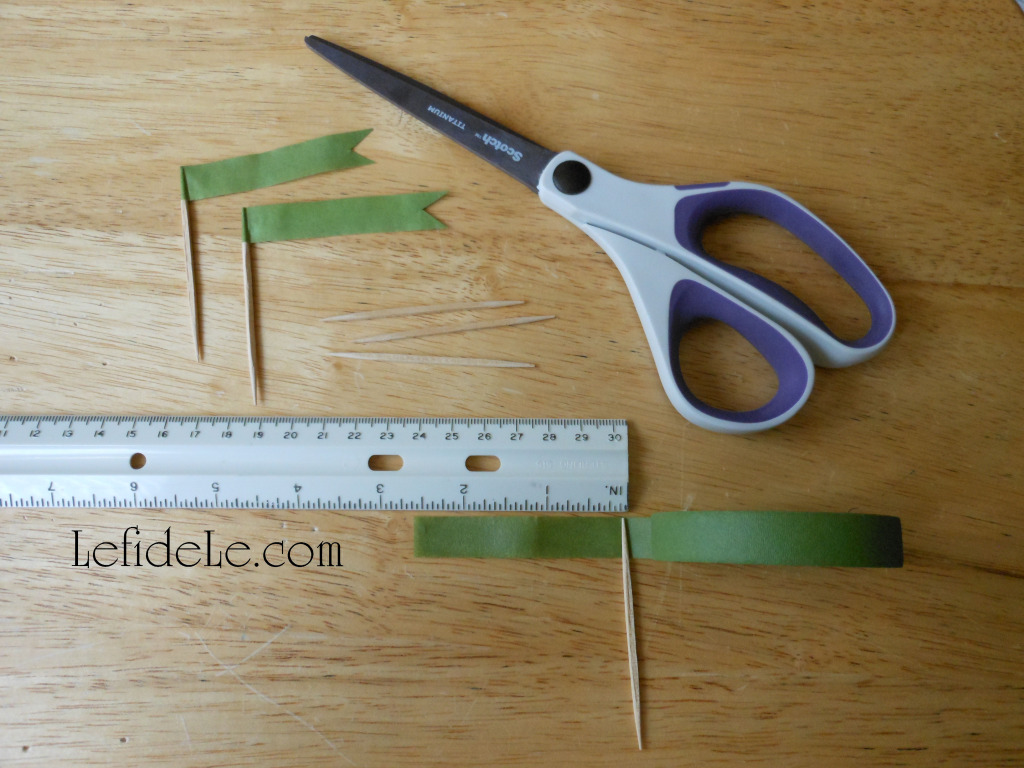
If you’d like to turn these into place-card holders… simply make flags out of toothpicks and washi tape, by using a ruler as a guide to cutting similar lengths.

75PumpkinTopiaries-Leigh

Or… you can use floral tape, like I did, so long as you stretch it as you smash it between your fingers. A permanent marker writes the name well. You can also do this for your décor, to add a message like, “Happy Fall Y’all!”

76Leigh

See more of these here: Fall Leaves & Pumpkins Themed Thanksgiving Tablescape Décor Ideas.

Faithfully Yours,

Leigh


Quinoa Pilaf Stuffed Patty Pan “Mini” Squash Recipe (Healthy, Gluten-Free & Dairy Free)

Growing up, I would eat any vegetable that my mother said was of the cute “baby” variety. Broccoli became baby trees, Brussel sprouts were baby cabbages, and patty pans renamed baby squashes. Now that I’m an adult, I make those adorable mini squashes into a healthy yet beautiful dish that’s actually really easy to make… it just looks like it took work. It will satisfy the vegans when made this way, as a side dish, but you can add ground meat to the pilaf to make it a complete meal. And as it’s a gluten-free and dairy-free recipe, everyone at the table can enjoy it. This makes it perfect for this time of year when folks gather to celebrate together in the spirit of Thanksgiving. See more of the Fall Leaves & Pumpkins Themed Thanksgiving Tablescape Décor Ideas here.

165Leigh


Ingredients:
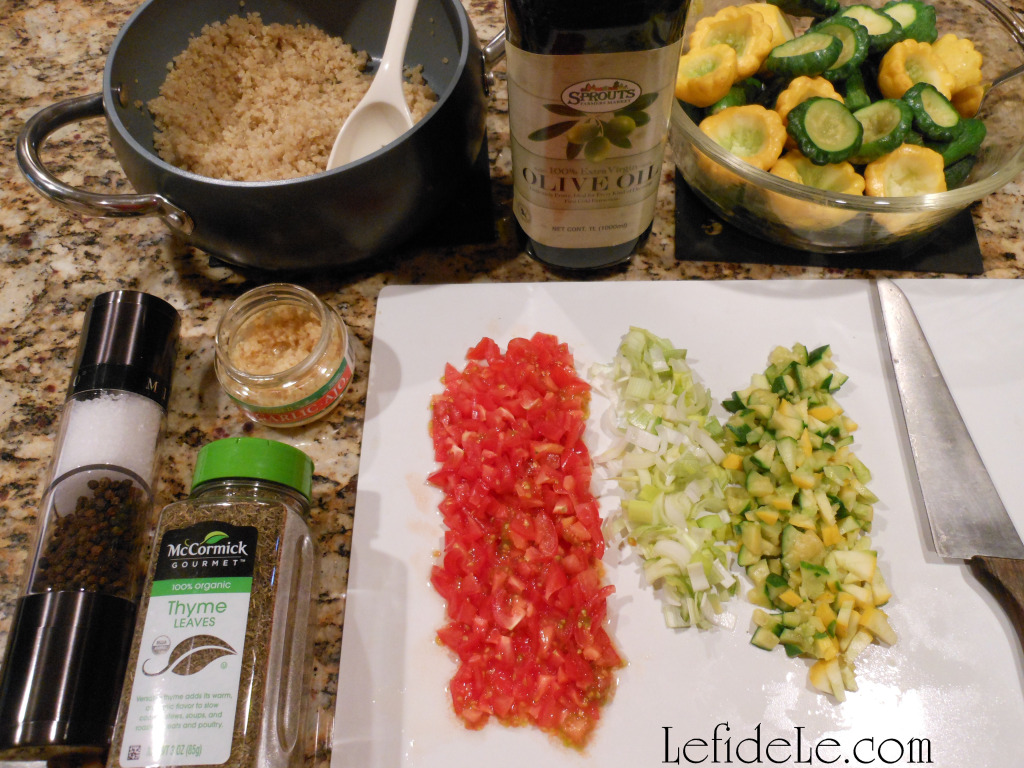
  • ½ cup cooked quinoa (or brown rice) with 1 cup water
  • I container of patty pan squash
  • ½ cup chopped leeks (or onion)
  • ½ cup diced tomatoes
  • ½ teaspoon minced garlic
  • 2 teaspoons olive oil
  • ½ teaspoon dried thyme
  • 1 teaspoon dried parsley
  • ¼ teaspoon salt (or to taste)
  • dash of ground peppercorns

Instructions:

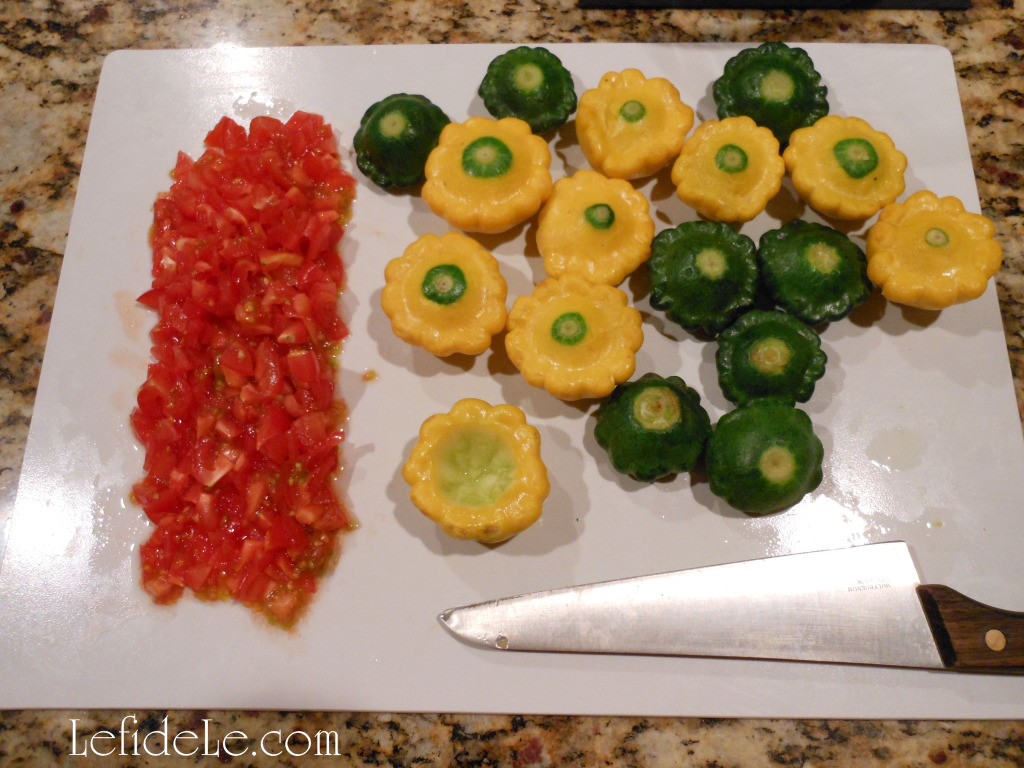
Cook the quinoa (or brown rice) according to package instructions. (If you’re just making this for yourself… it’s the perfect way to spruce up leftover grains.) Steam the squash about 4 or 5 minutes or until bright, soft, and tender. (Time will vary depending on method… electric steamer, in a steamer basket on the stove, microwave.)

47Leigh

Chop, mince, and measure while you’re steaming. Combine all of the ingredients in a bowl. When the patty pans are cool enough to touch, cut an inverted cone shaped depression into each squash (like you would cut the top out of a strawberry).

48Leigh

Set these into your serving dish. Dice the cut-out squash bits, and mix this into the rest of your ingredients. Spoon this quinoa pilaf into each squash and serve immediately. (If you need to prepare this ahead of time, the pilaf stuffed squash reheats beautifully.) Bon appétit!

174QuinoaSquash-Leigh

Another great recipe for Fall is my Quick & Easy “Shortcut” Cauliflower Mashed Potatoes Recipe (Heart-Healthy & Dairy-Free) 🙂

Faithfully Yours,

Leigh

Quick & Easy “Shortcut” Cauliflower Mashed Potatoes Recipe (Heart-Healthy & Dairy-Free)

Just about everyone likes mashed potatoes, but not everyone can enjoy eating them guilt-free. And who has time to gather and prepare all the ingredients then boil and mash the potatoes into smooth perfection? This super quick and easy recipe uses mostly shelf-stable pantry items, so it can be made last minute. It takes into account allergies and other health concerns by omitting all the saturated fats from dairy… which will satisfy the gluten-free vegans as well. Calories are also cut dramatically by adding cauliflower. This recipe for “Short-Cut Cauli-Potatoes” even fooled my Grandmother into eating her veggies. She’s enjoyed eating her way to losing about 70 pounds!


Ingredients:
  • 1 head cauliflower
  • 2 cups water
  • 1 tablespoon dehydrated chopped onion (= shortcut)
  • ¼ teaspoon garlic powder (= shortcut)
  • 1 tablespoon dried parsley (+ more for garnish = shortcut)
  • 1 teaspoon salt (adjust for taste or health needs)
  • 1 tablespoon extra-virgin olive oil (heart healthy)
  • 1 cup Potato Buds (secret ingredient shortcut = dehydrated potatoes in a box)

 Instructions:

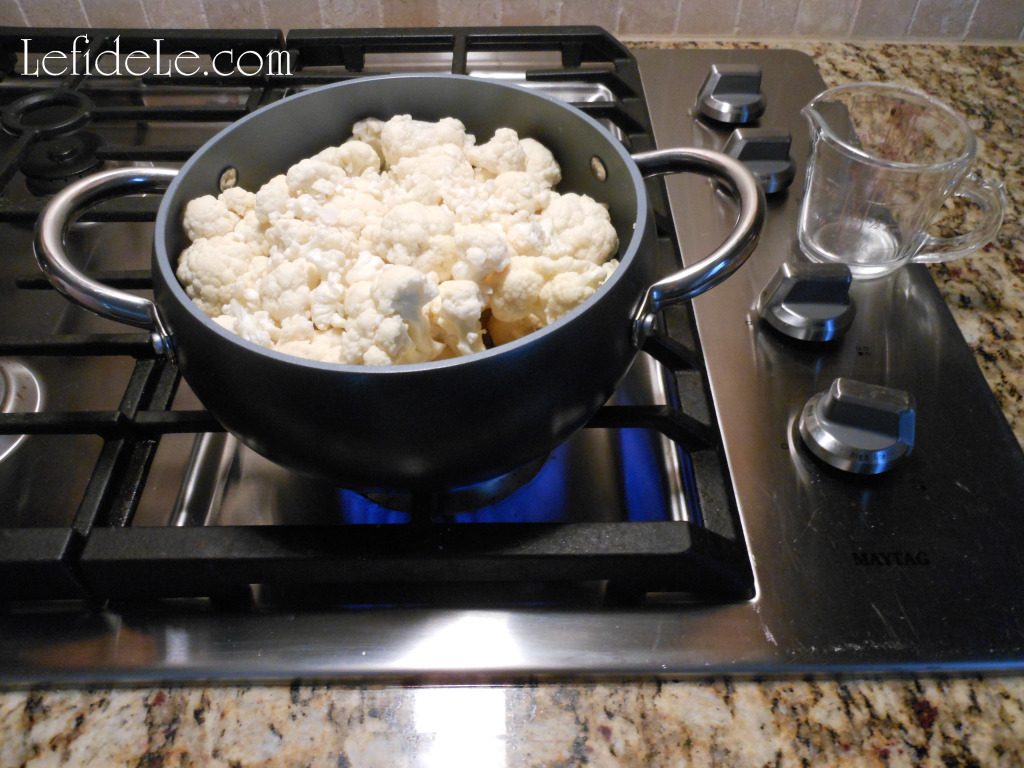
Separate the cauliflower head into small sections and wash well. Place in a pot with 2 cups of water. (This amount is important because we do not drain it, which also helps retain the vitamins.) Add the onion as well.

1Leigh

Place covered over medium heat for about 15 minutes (or until cauliflower is soft and tender).

3Leigh

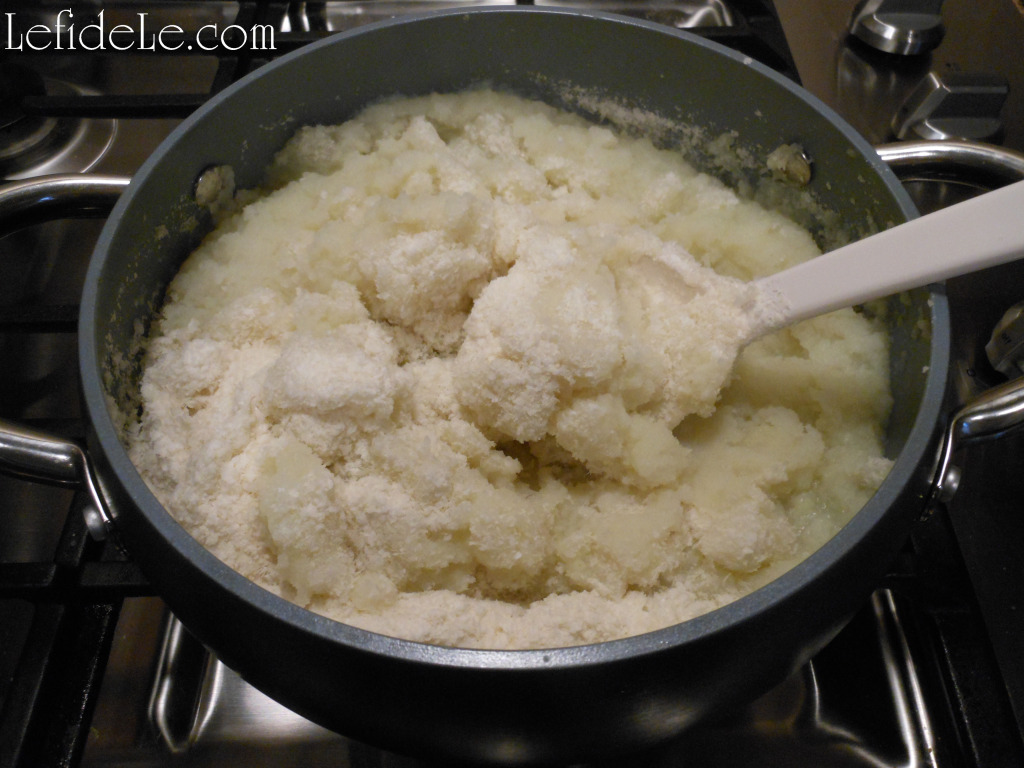
Use an immersion blender to “soupify” the veggies. Mix in the potato buds a little at a time, until thoroughly blended. Add the rest of your spices and olive oil.

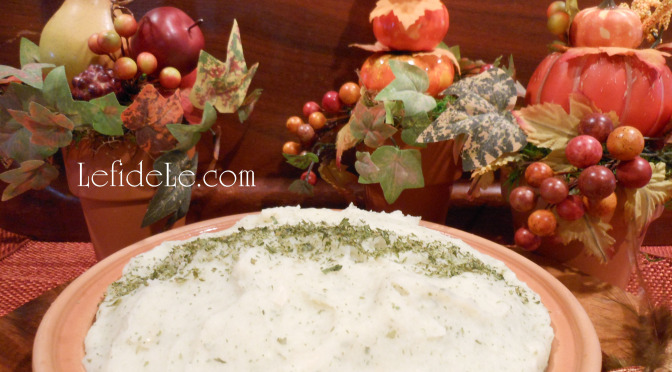
8CauliPotatoes-Leigh

Place in a pretty covered dish and garnish with more parsley. No one had ever guessed they’re made from dehydrated potatoes, but I guess my secret shortcut is out now! Just don’t tell Grandma 🙂 Bon appétit!

197Leigh

Pictured is another great recipe for Fall, my Quinoa Pilaf Stuffed Patty Pan “Mini” Squash Recipe (Healthy, Gluten-Free & Dairy Free) 🙂

And see more of my Fall Leaves & Pumpkins Themed Thanksgiving Tablescape Décor Ideas here.

Faithfully Yours,

Leigh