Tag Archives: Party

Mardi Gras Masquerade Themed “Fat Tuesday” Dinner Party Tablescape Décor Ideas

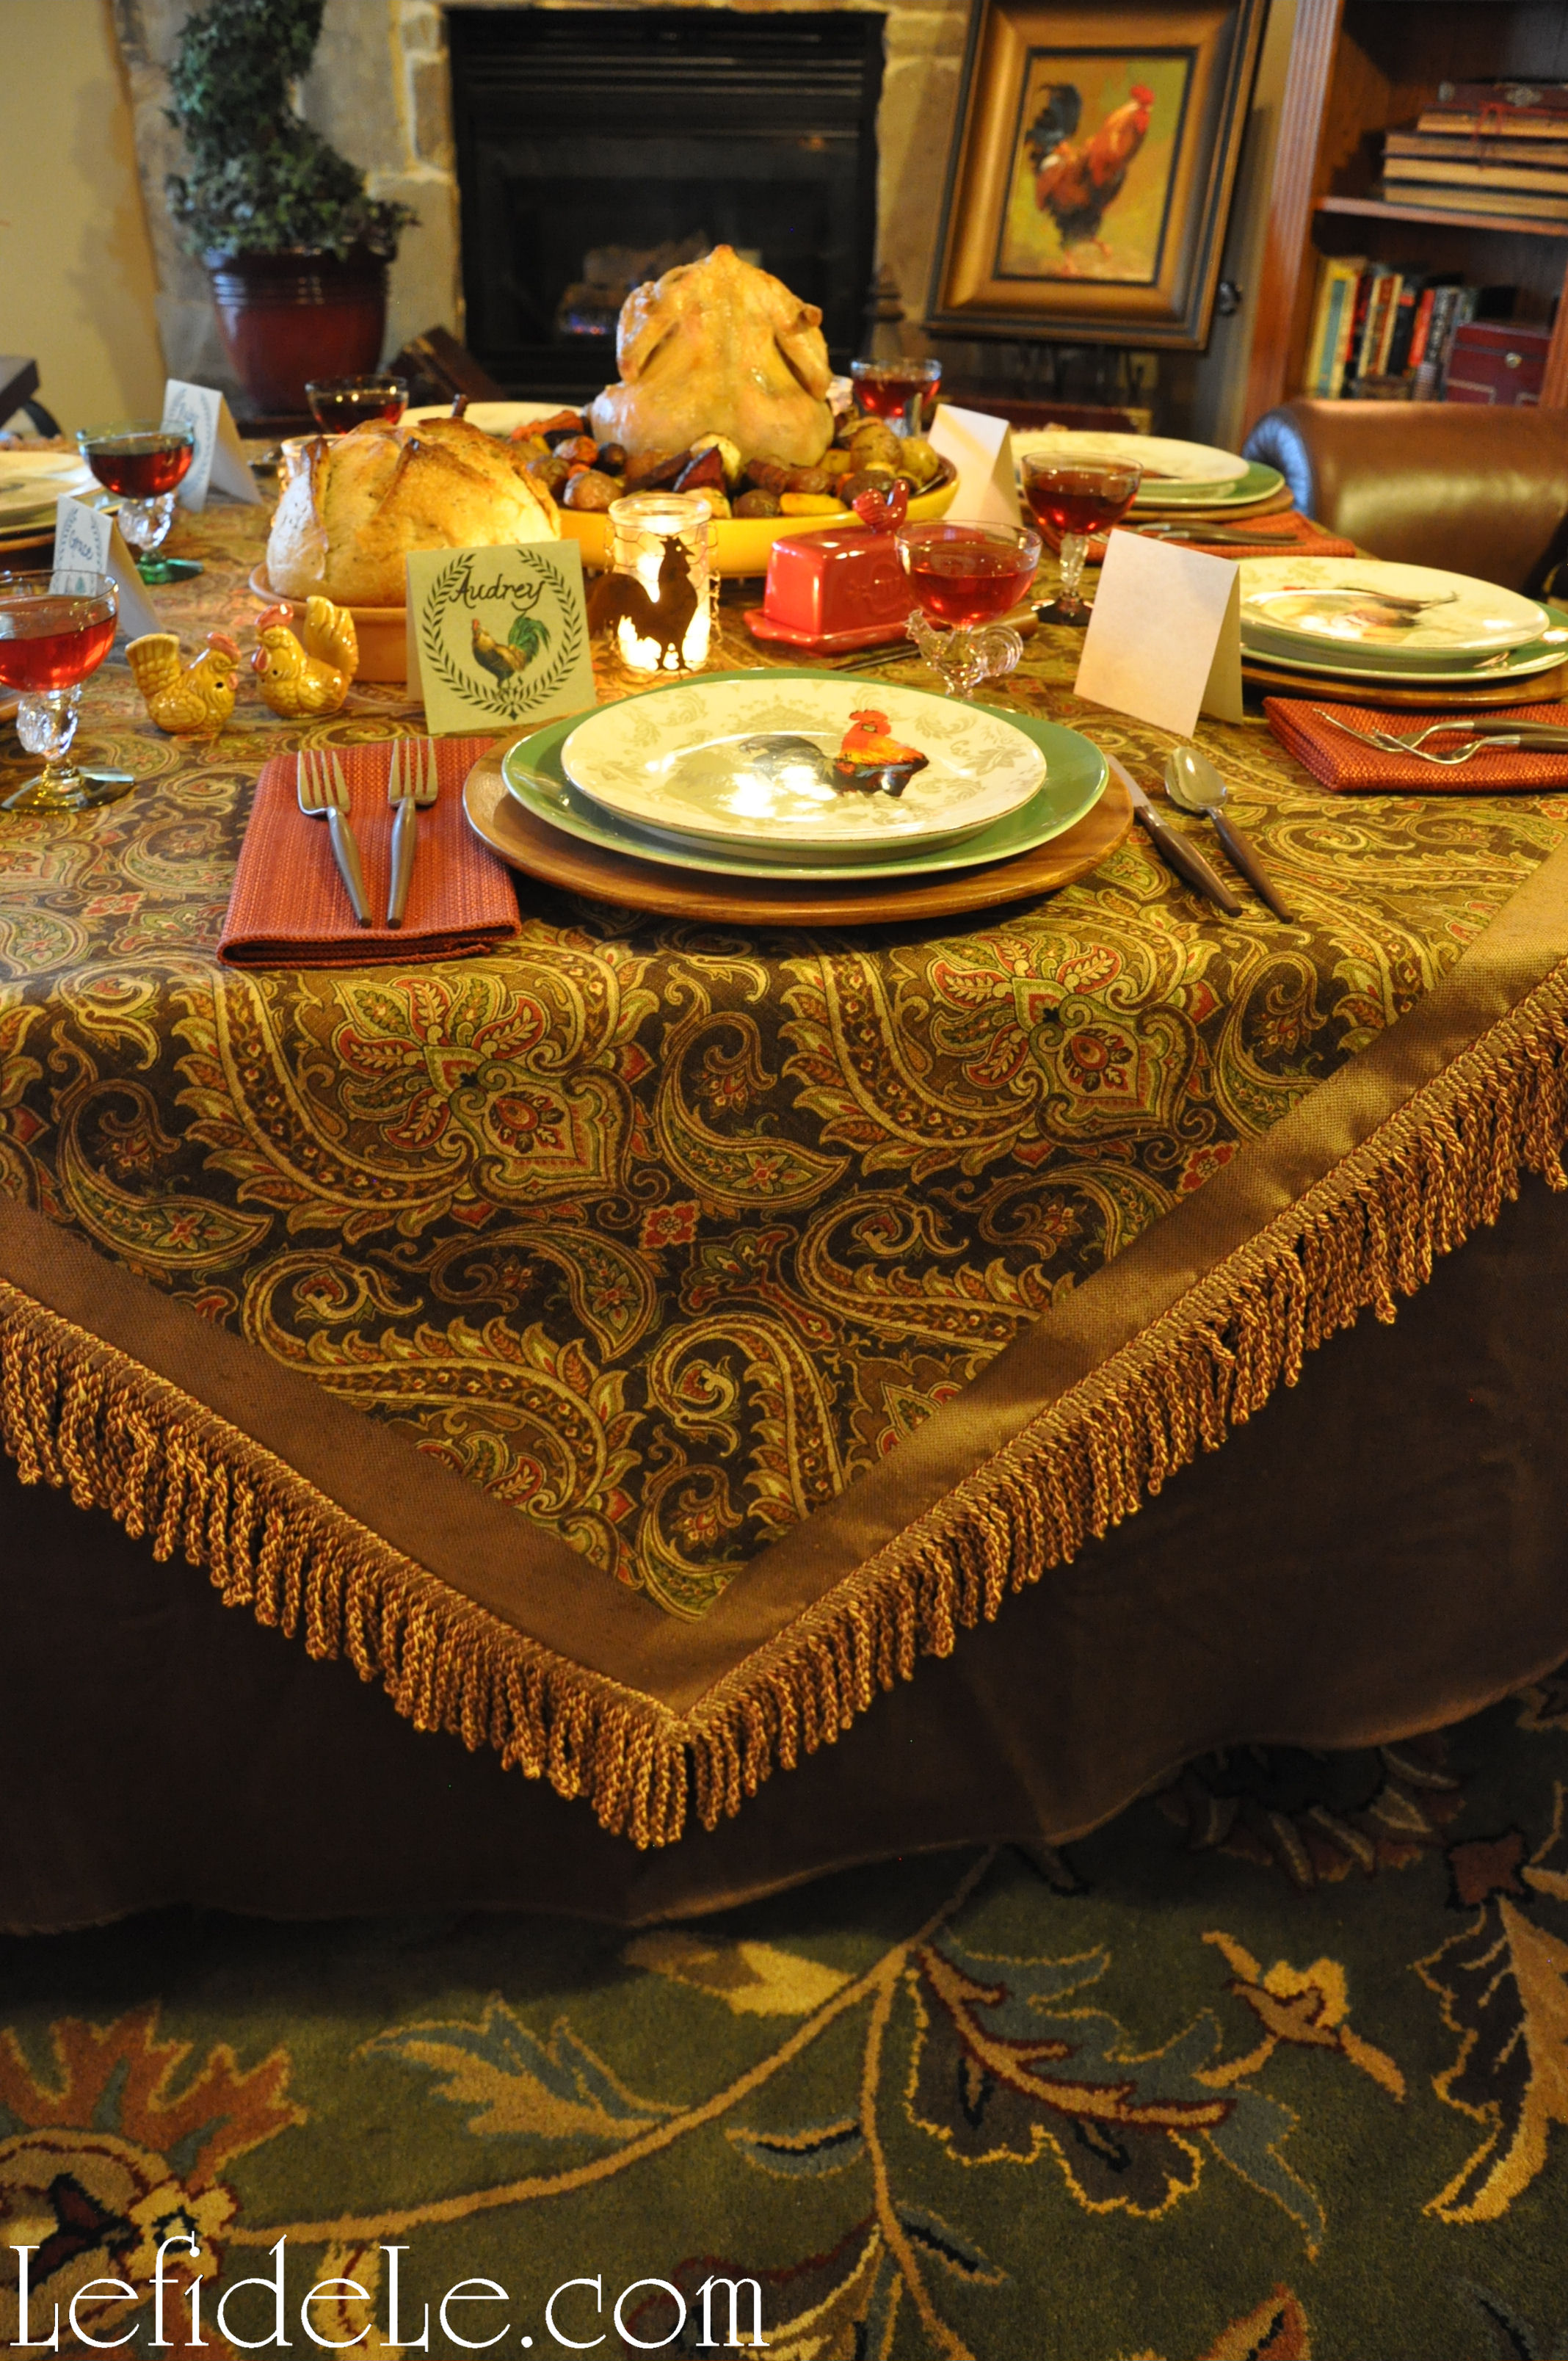
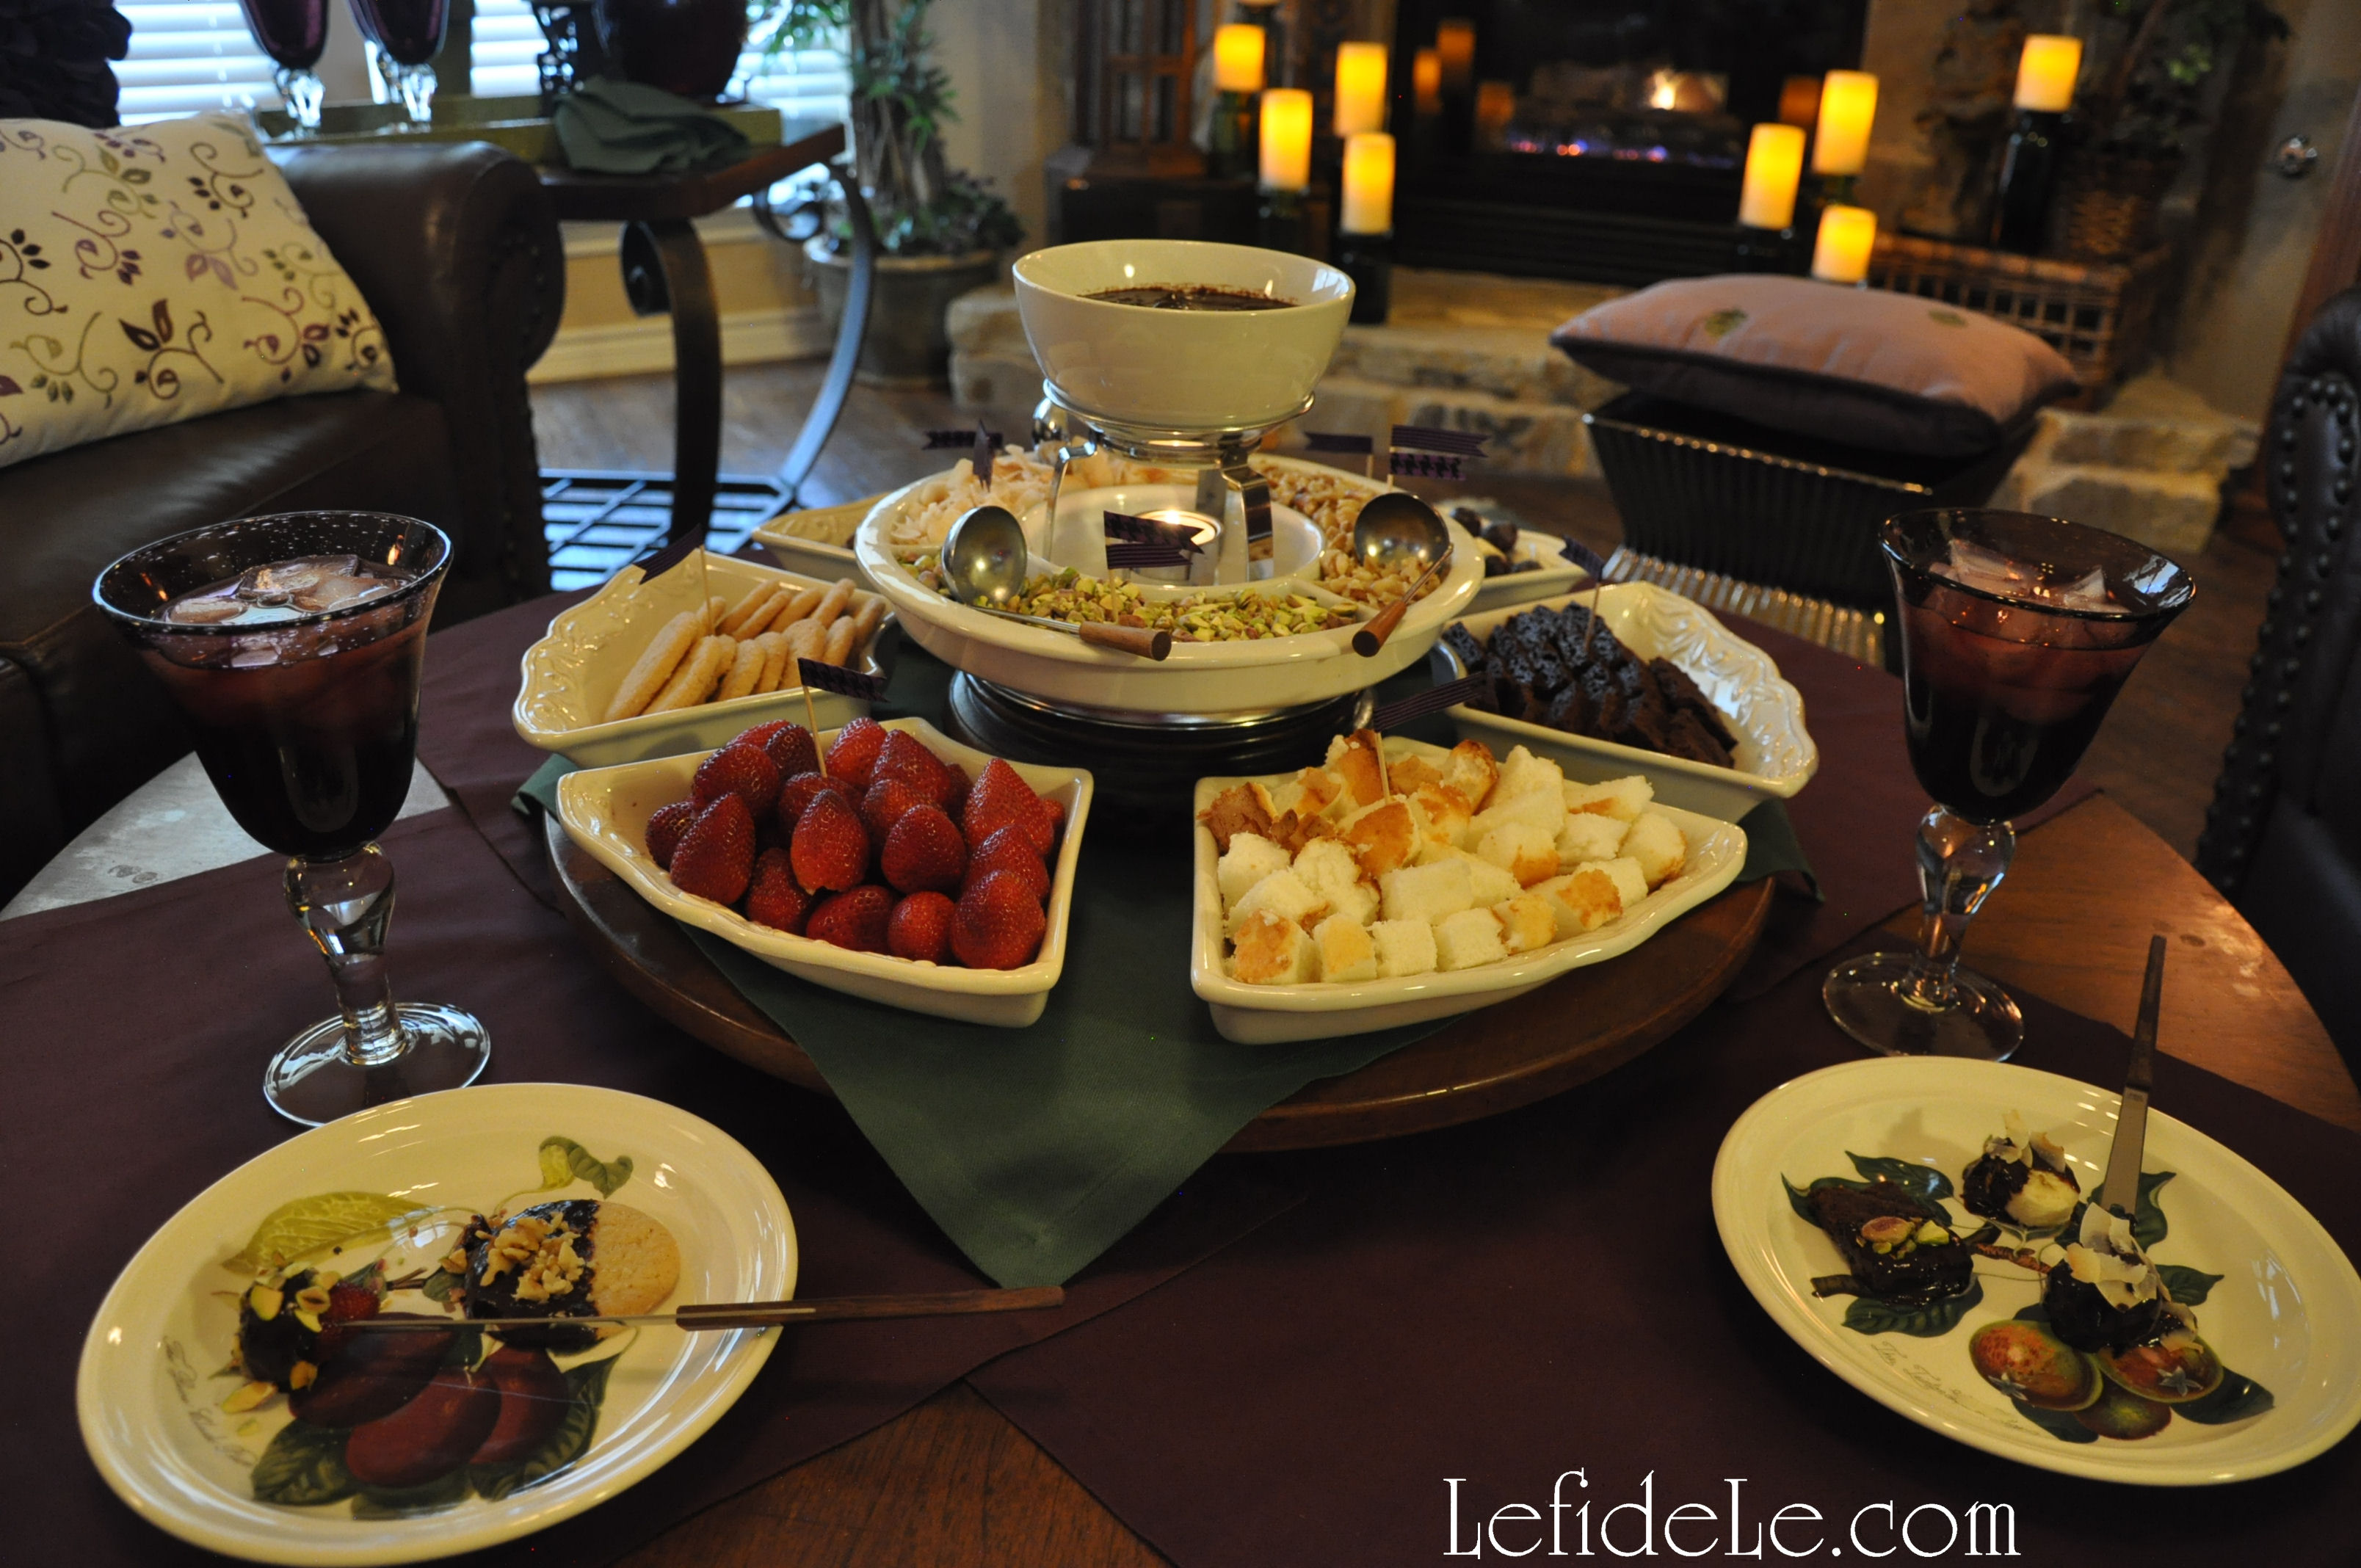
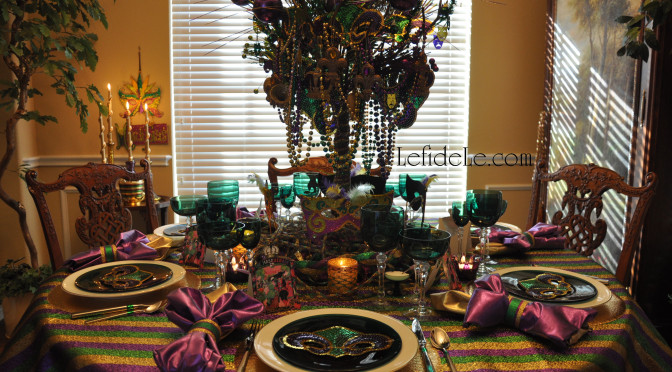
This Mardi Gras Masquerade themed tablescape for a “Fat Tuesday” dinner party was instigated by the desire to go all out like the big Krewe celebrations in Louisiana… but on a tiny budget! Not finding what I wanted in a suitable price range, I opted to remix what I already owned and make the rest. It turned out to be even more cost effective than if I had gone with paper and plastic… which was not only more elegant, but better for the environment too. Use some of these ideas as inspiration for your own festive fête, and read my other article… DIY Fast & Easy Mardi Gras Glittered Napkin Rings Craft Tutorial (+ Ribbon Votives, Centerpiece, Free Place-card & Invitation Printables)… for craft instruction and free printables.

096Leigh

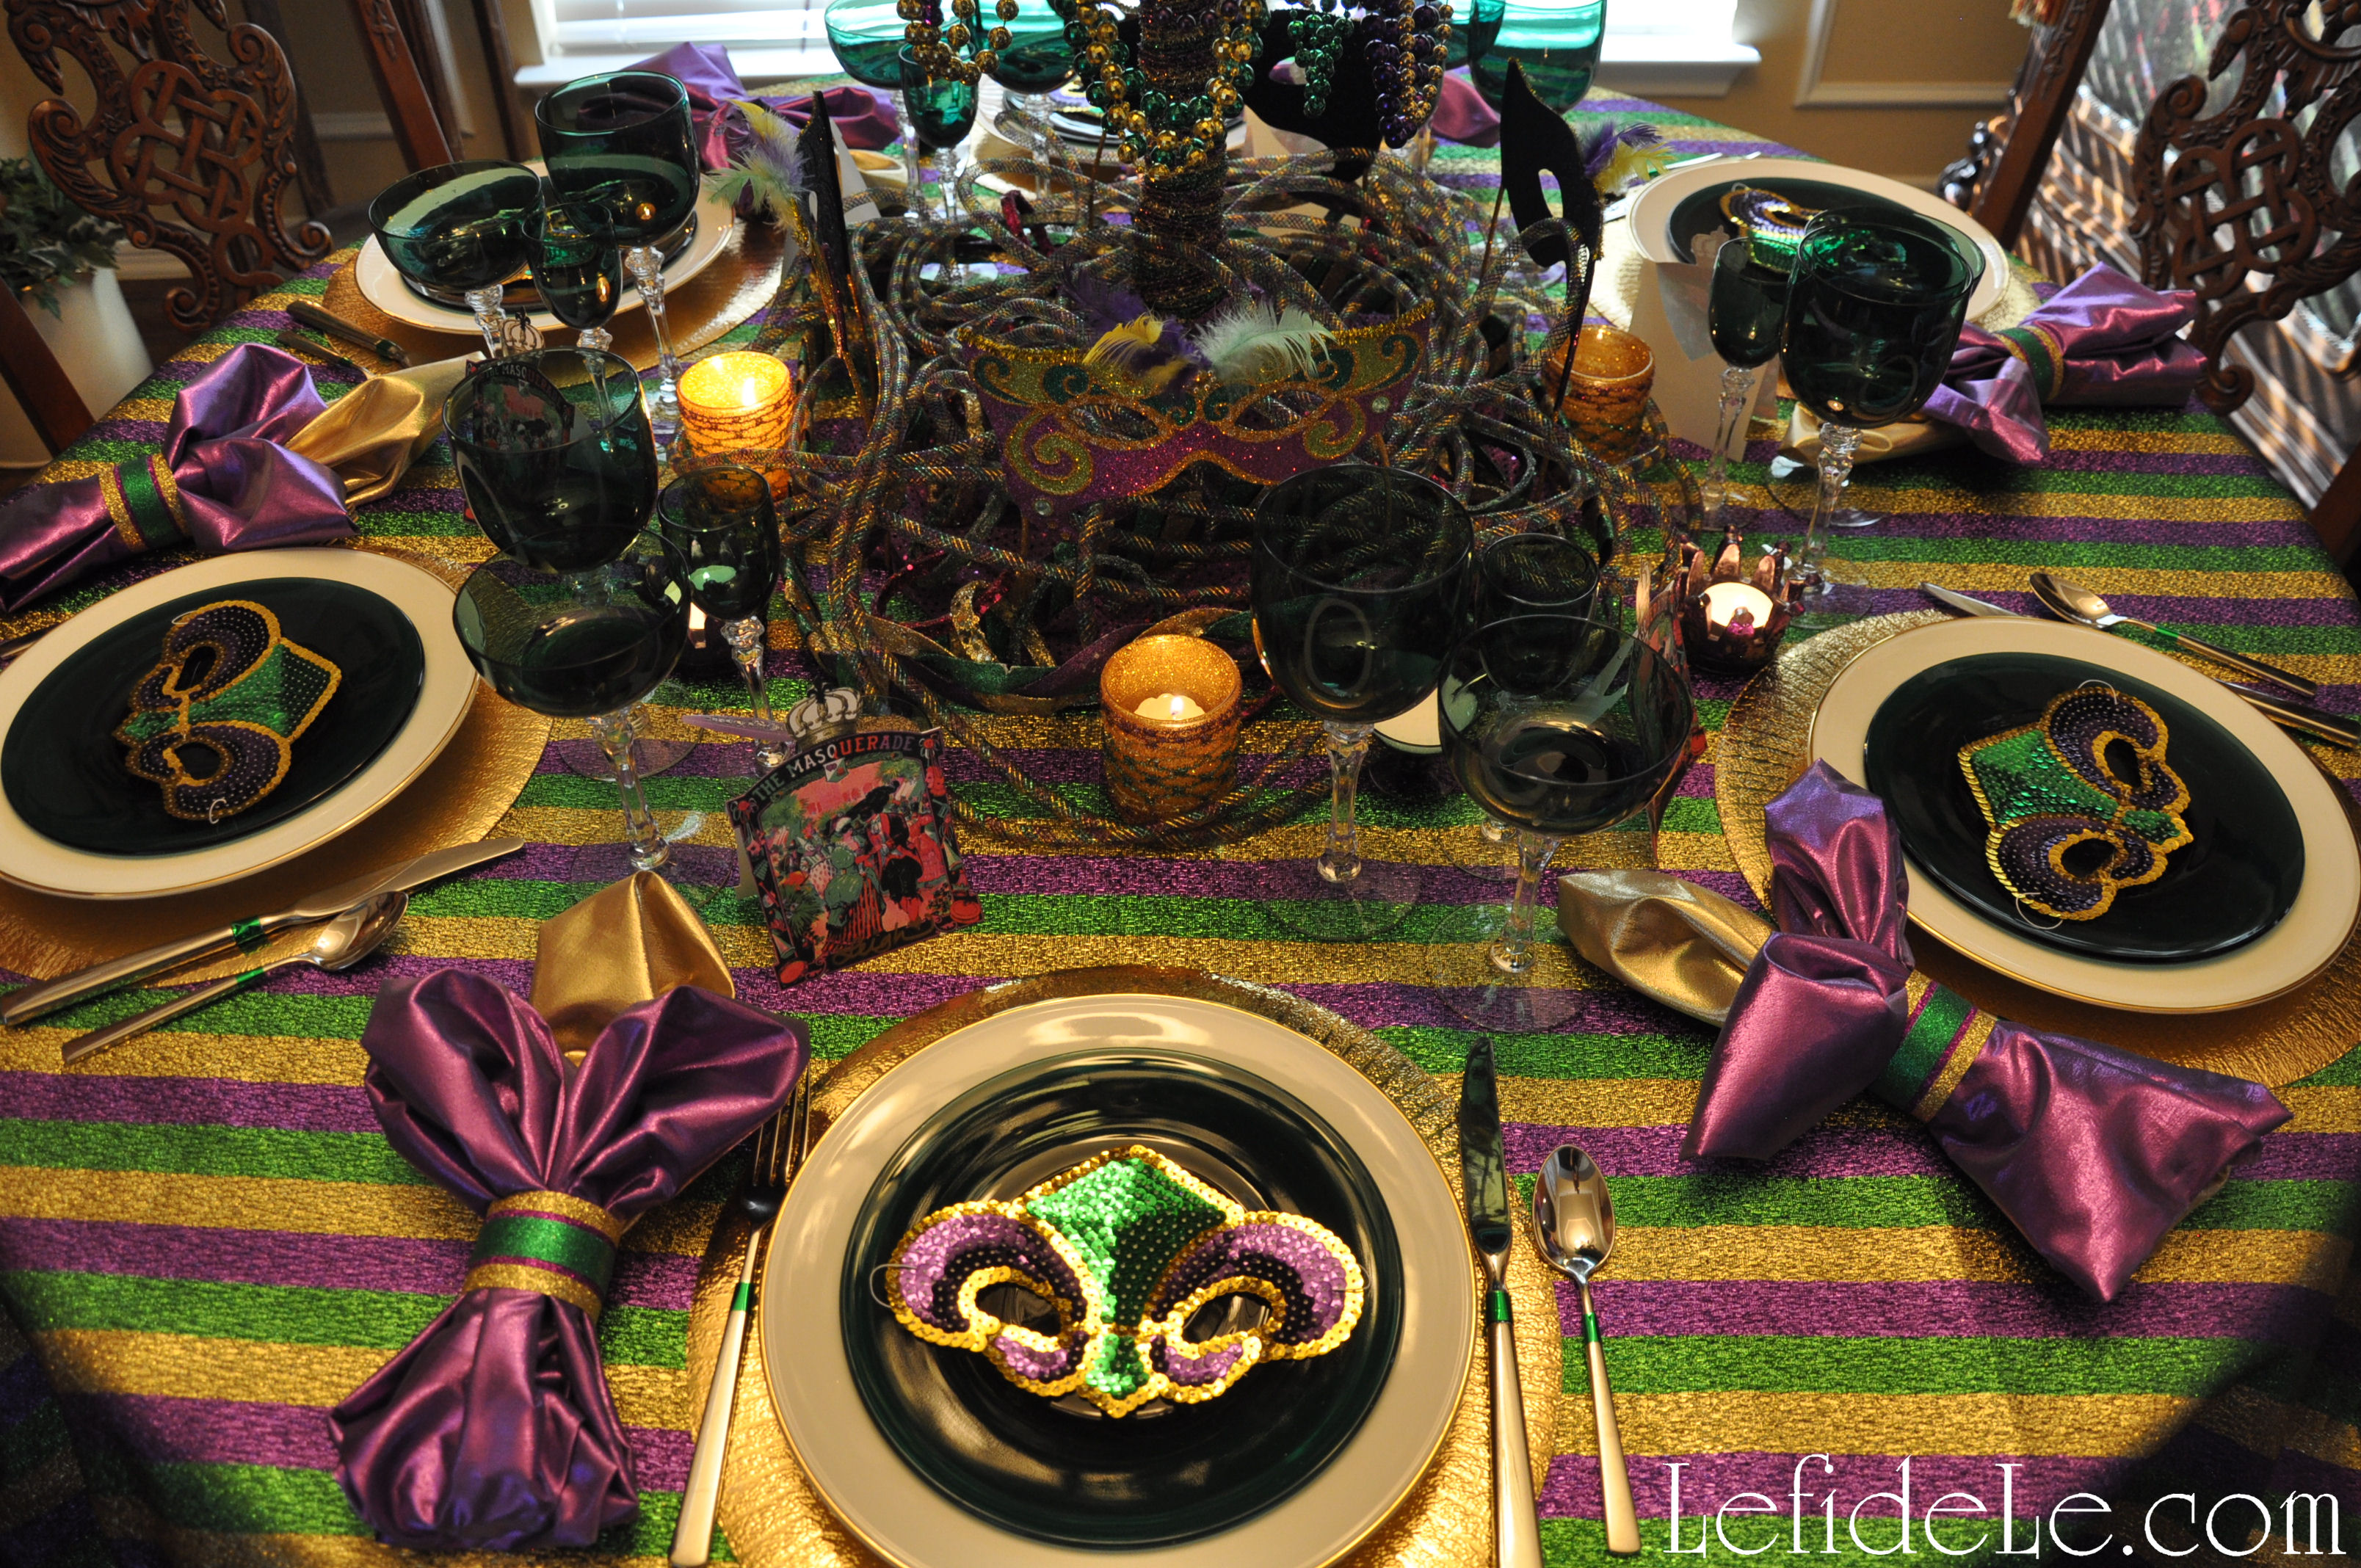
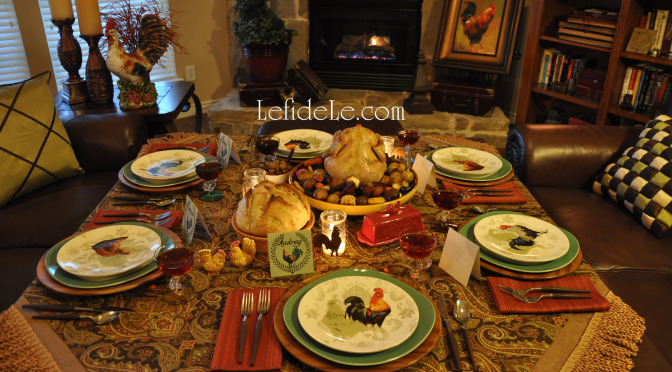
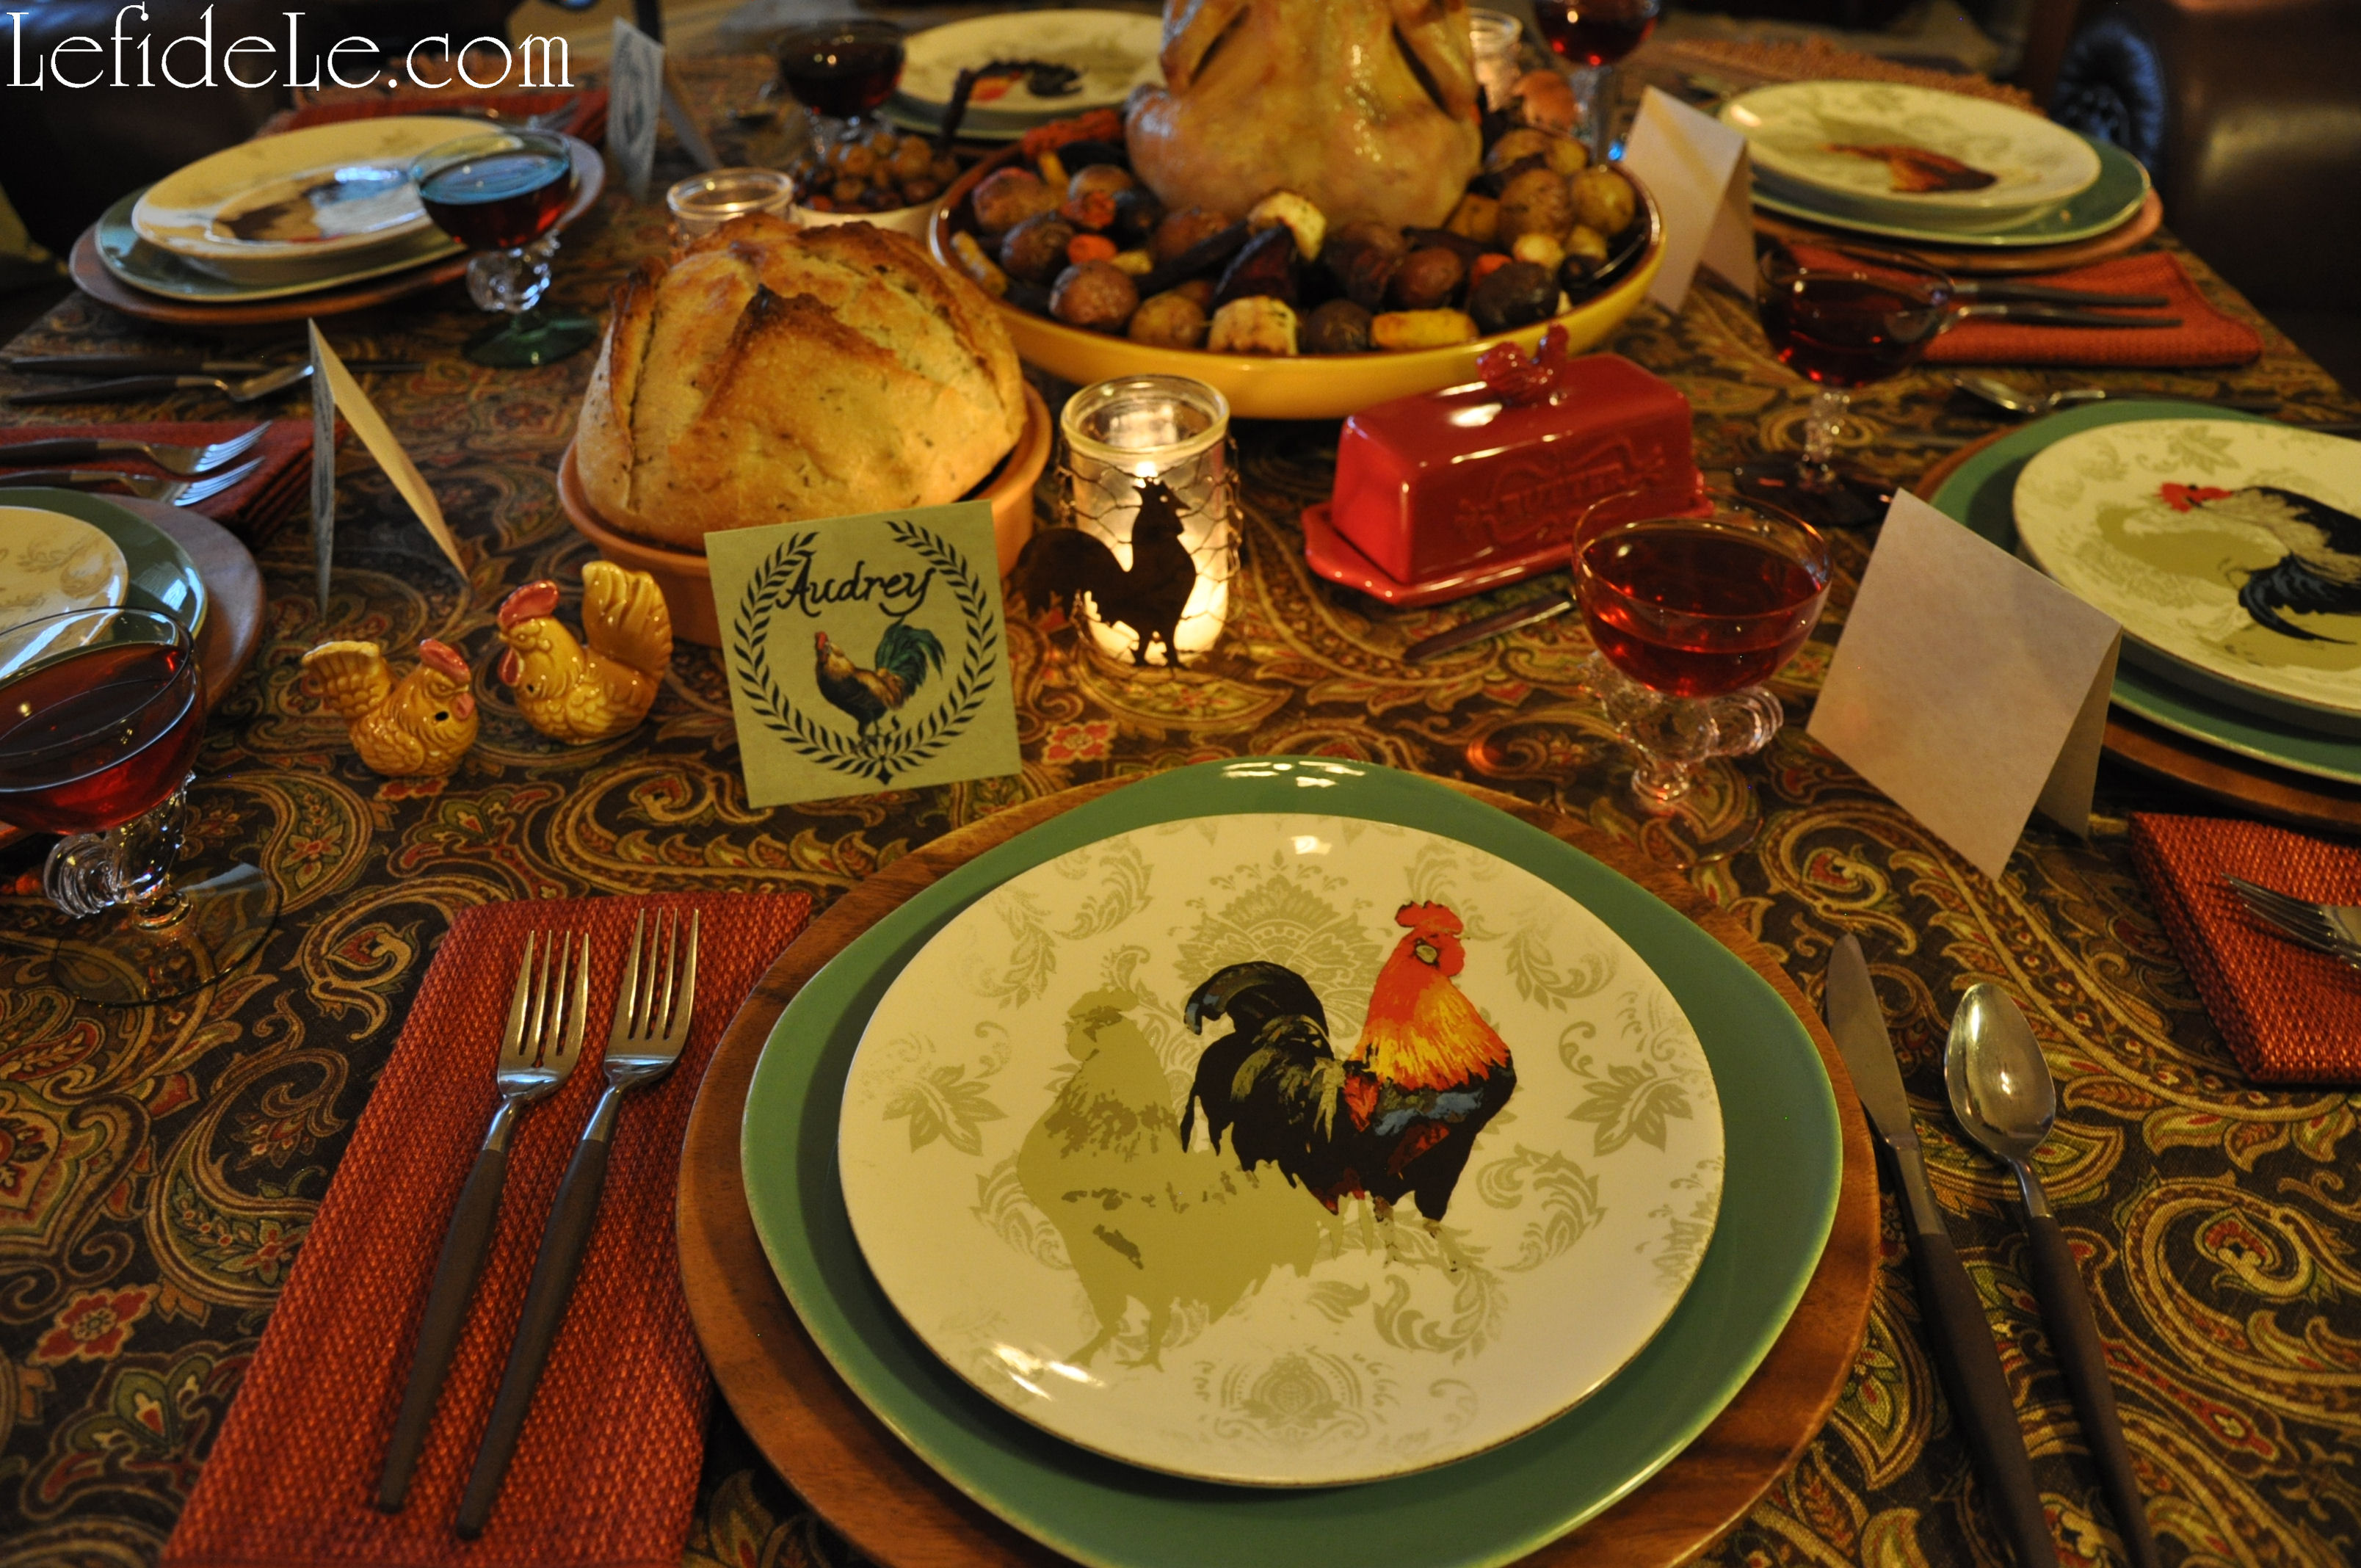
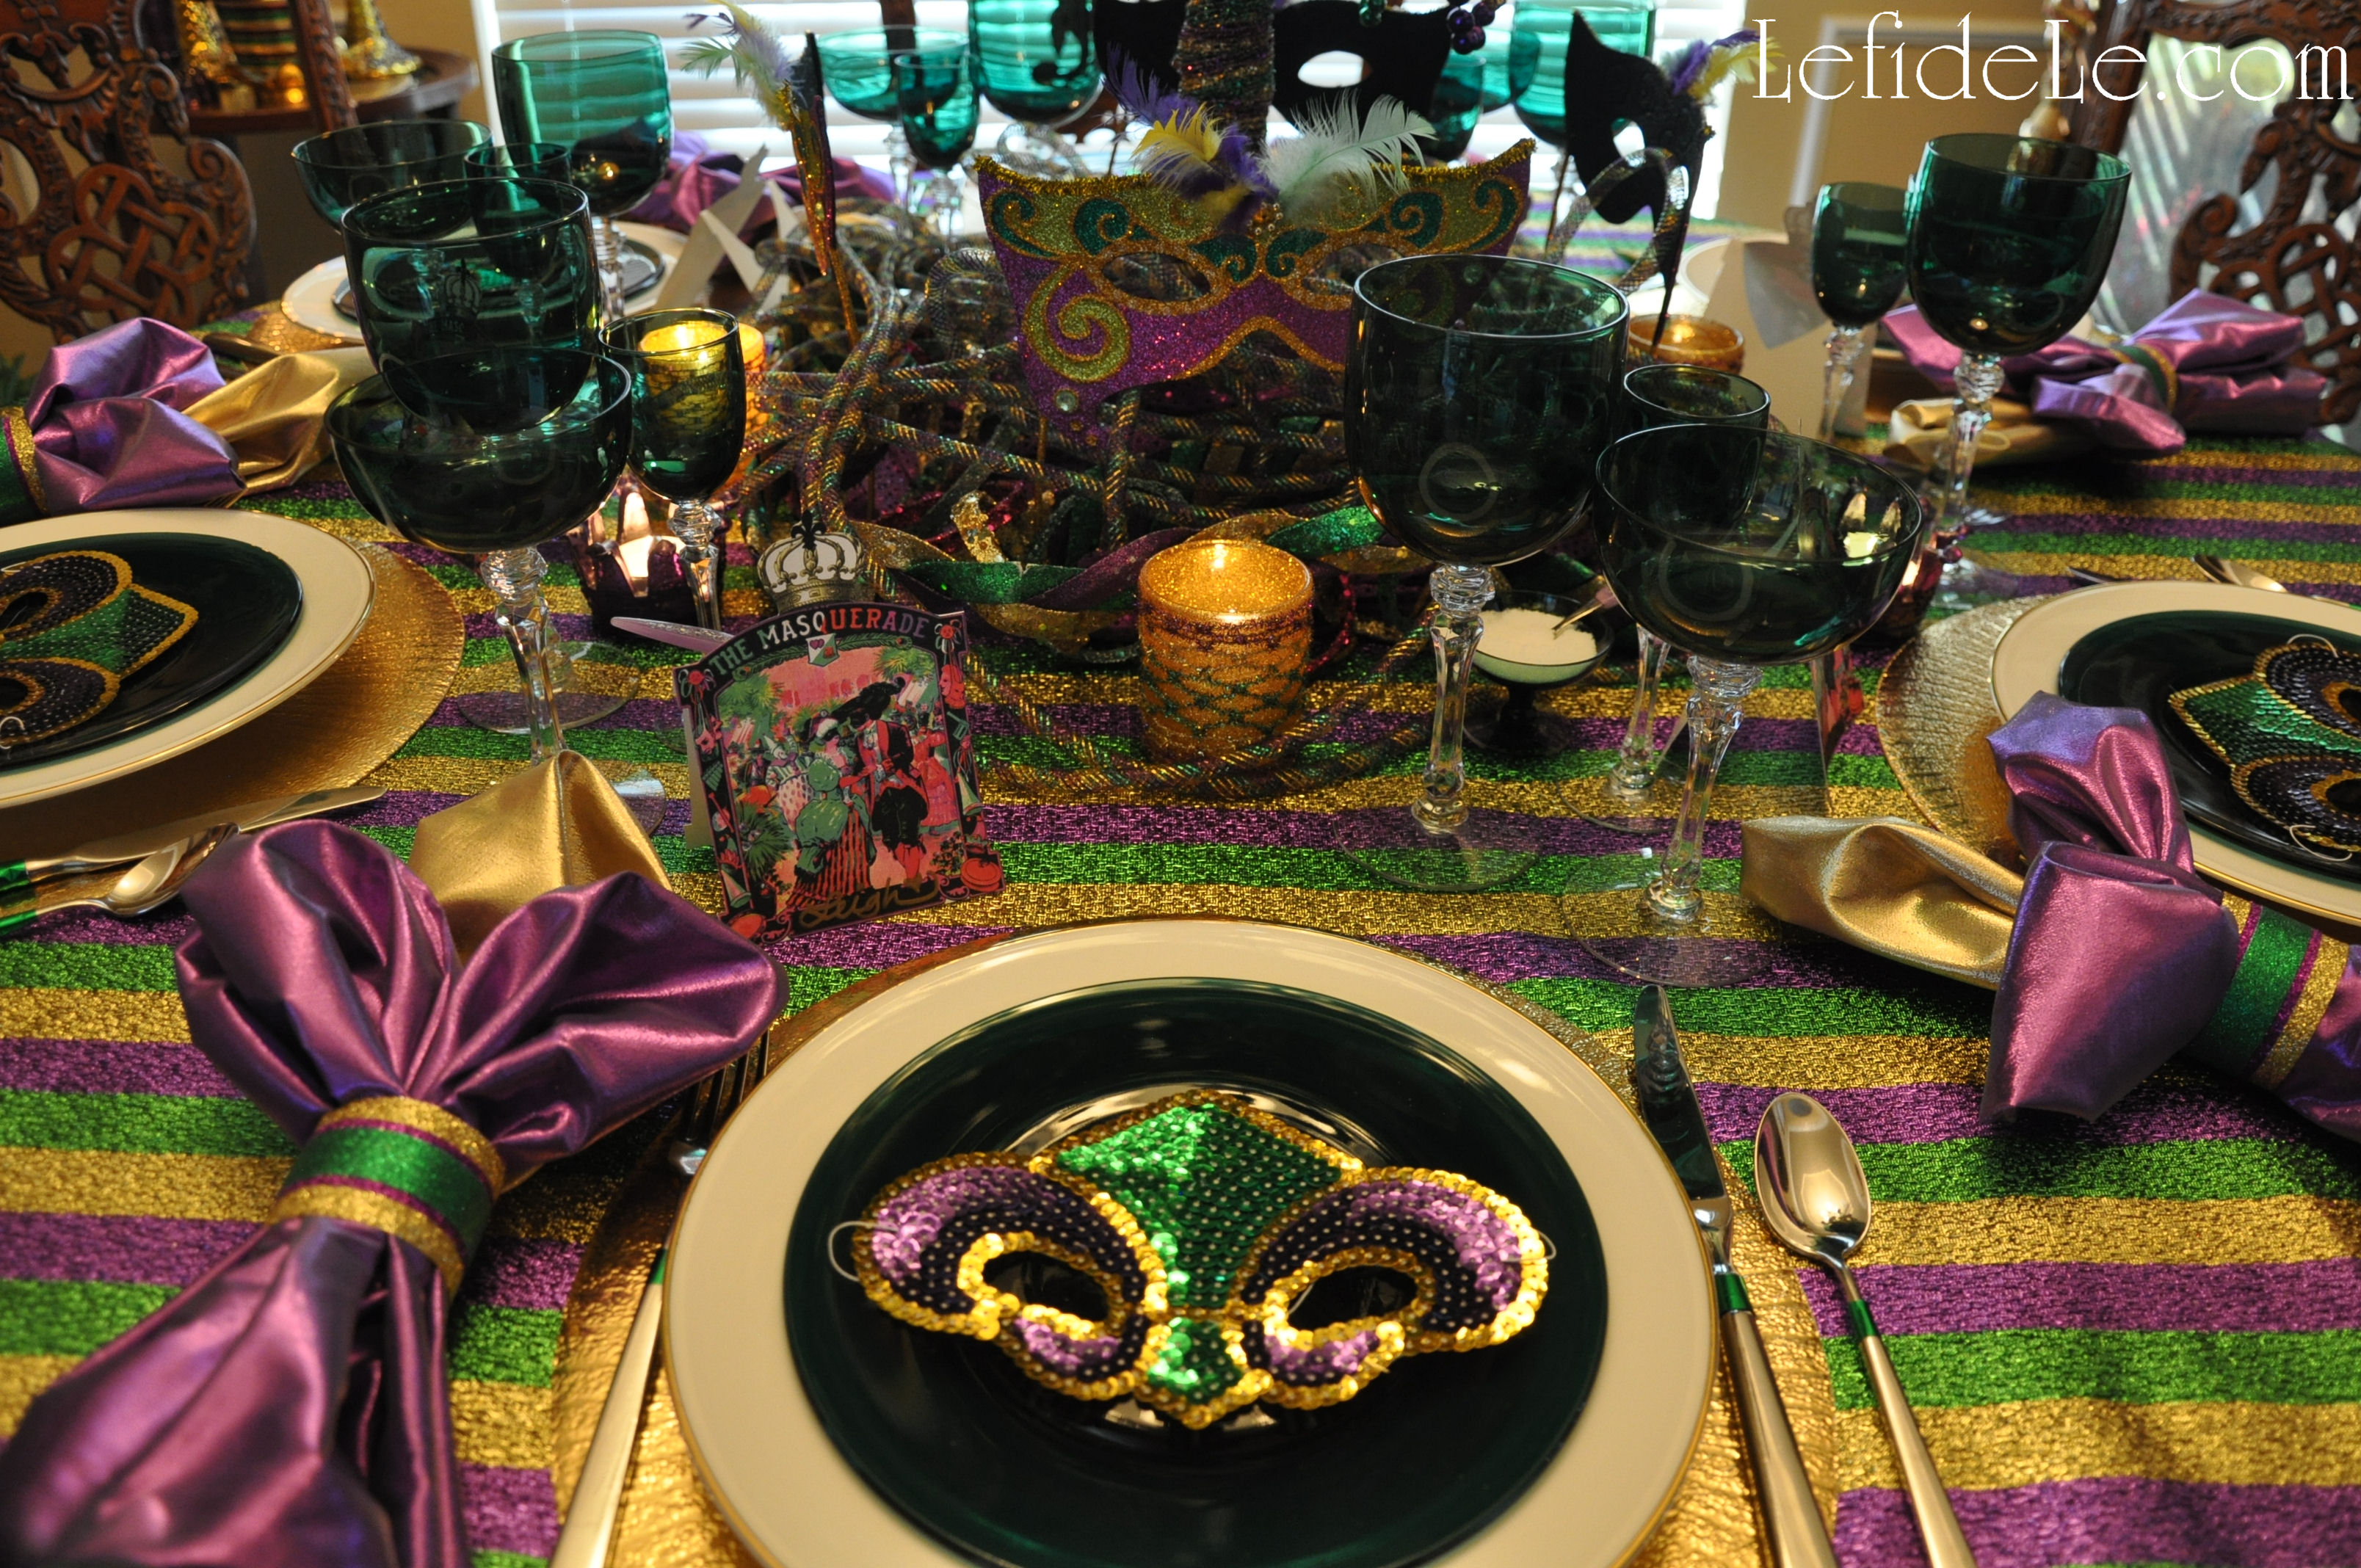
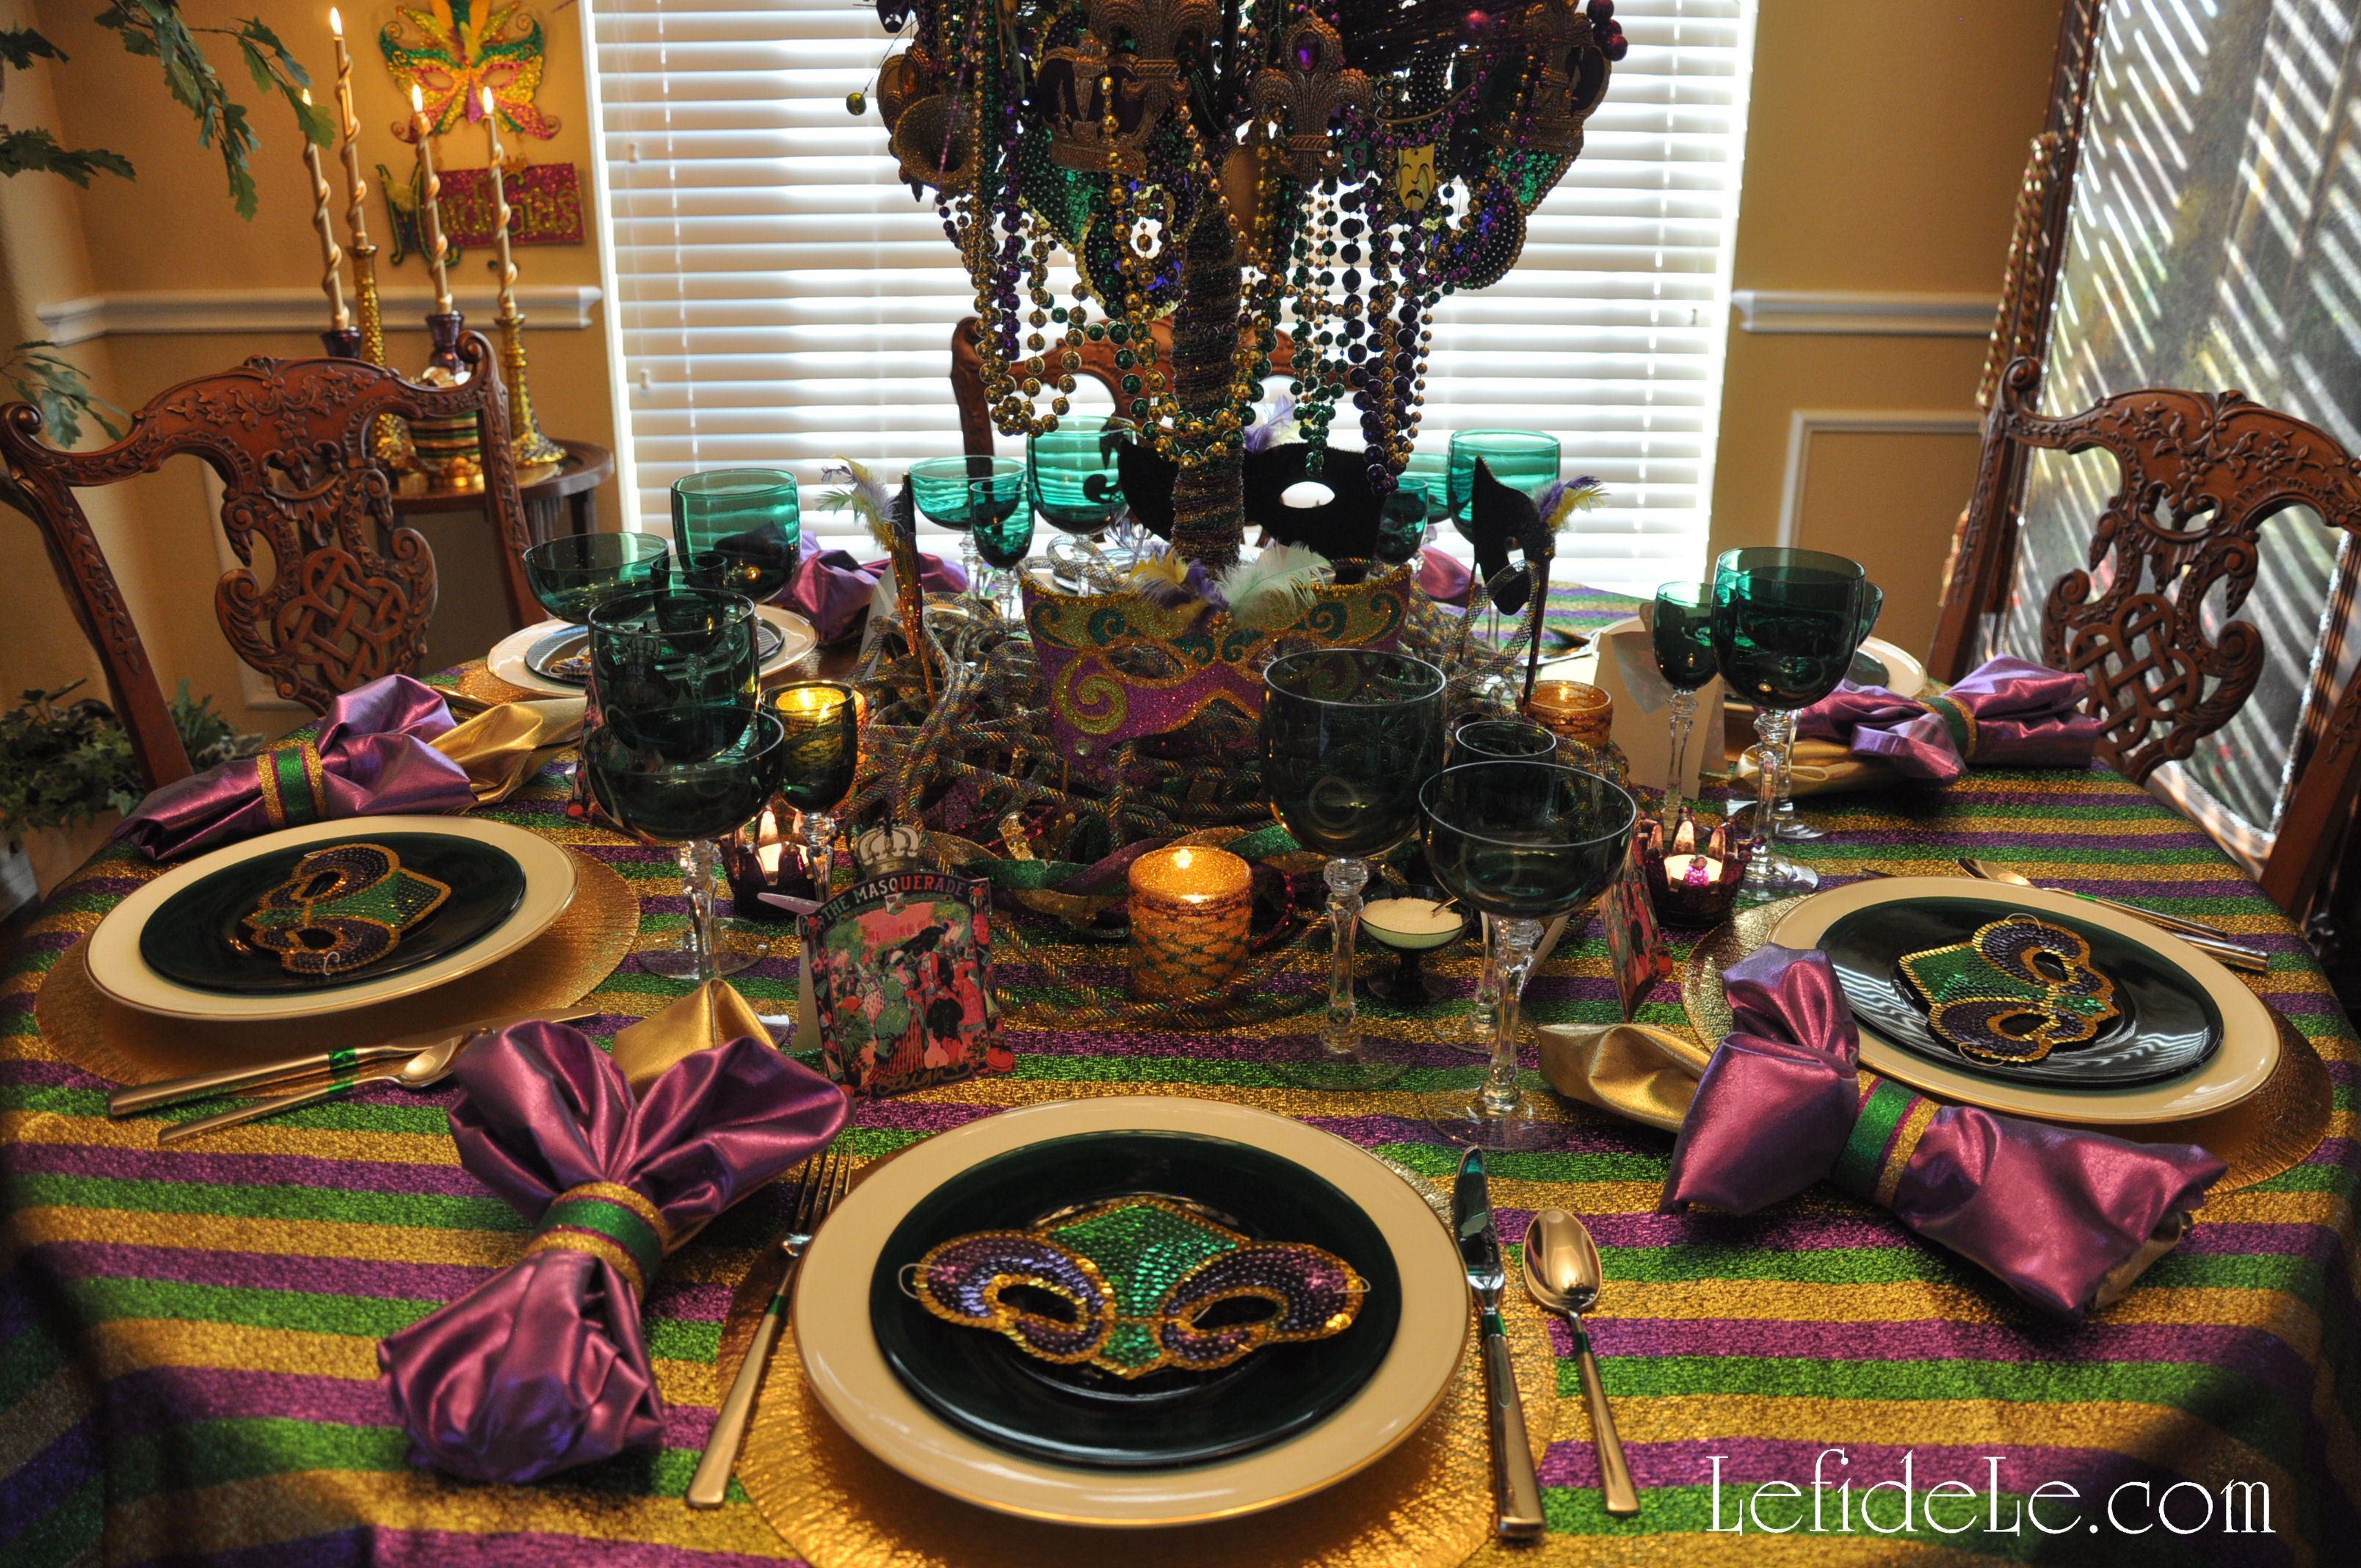
I organized my theme according to the traditional Mardi Gras colors of gold, purple, and green (representing power, justice, and faith respectively). Then I pulled out everything I had in glittery versions of those colors. I used a leftover fabric remnant as a festive table topper, and layered that with gold placemats and my grandmother’s gold-rimmed china (also seen here in my Christmas / New Year’s Eve tablescapes).

104Leigh

Atop that, I placed vintage green plates that matched my grandmothers crystal stemware. If there was ever a time to pull out fabulous drinking vessels… it would be for Fat Tuesday!

070Leigh

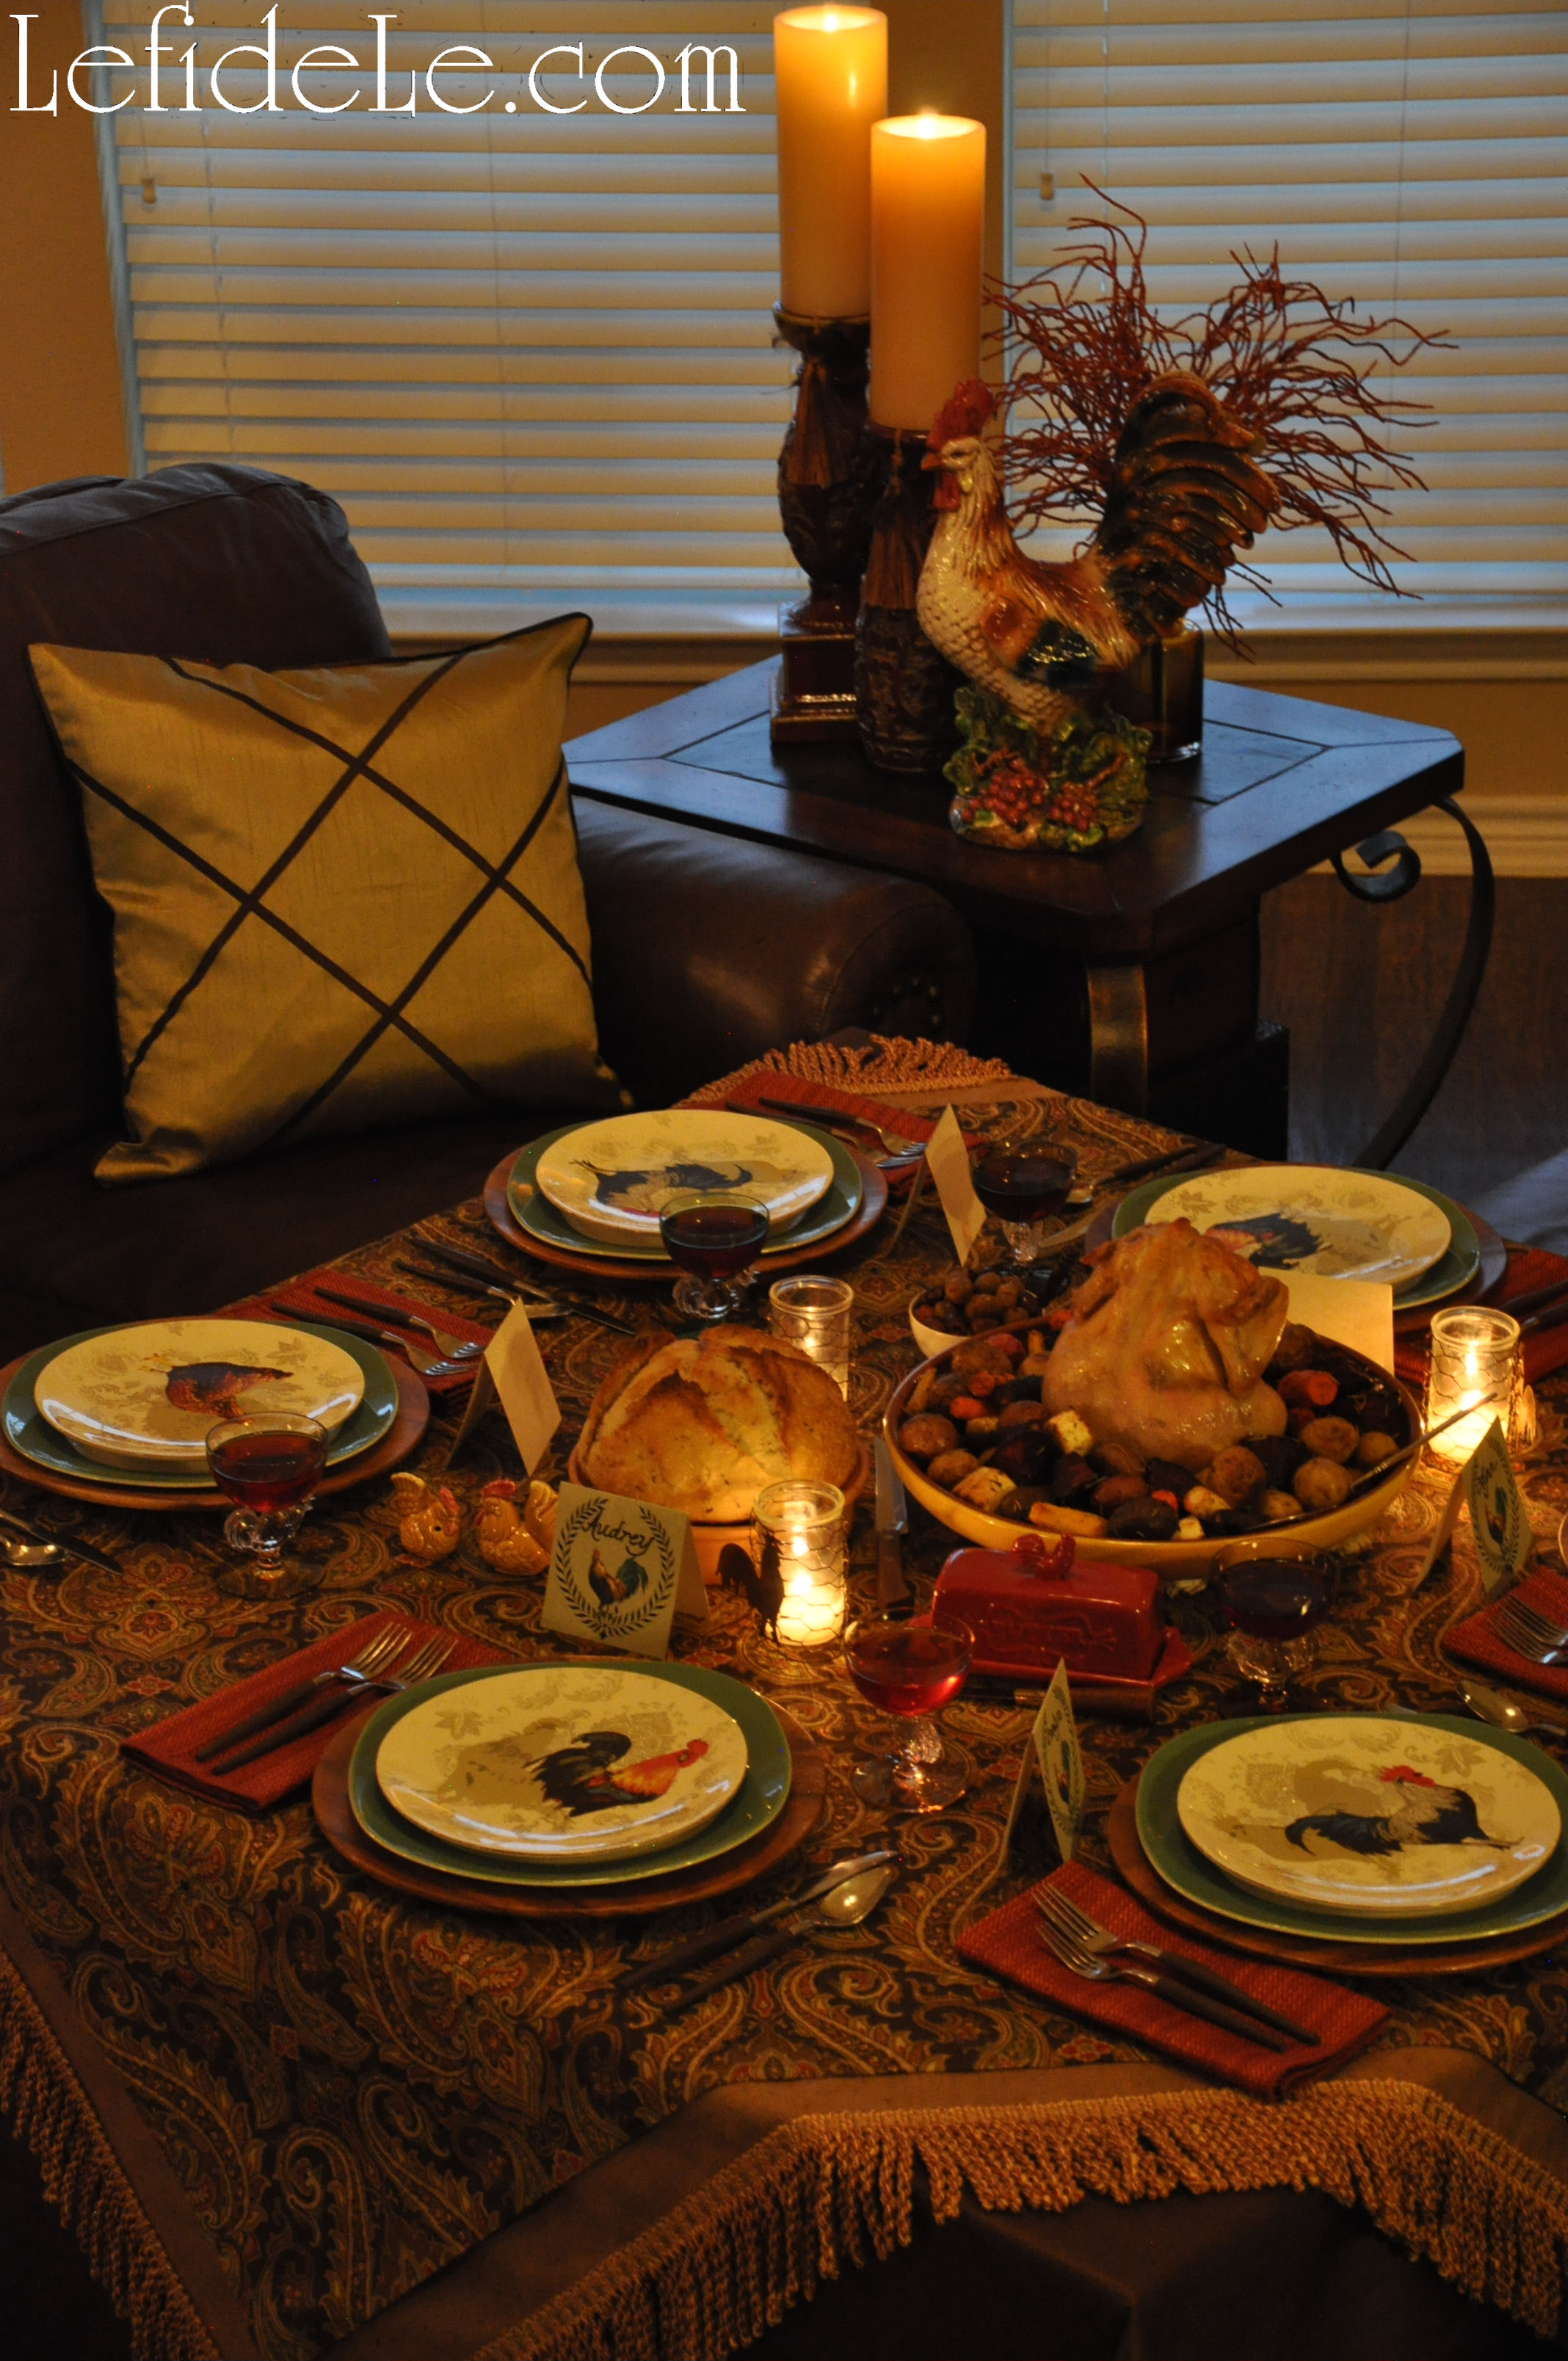
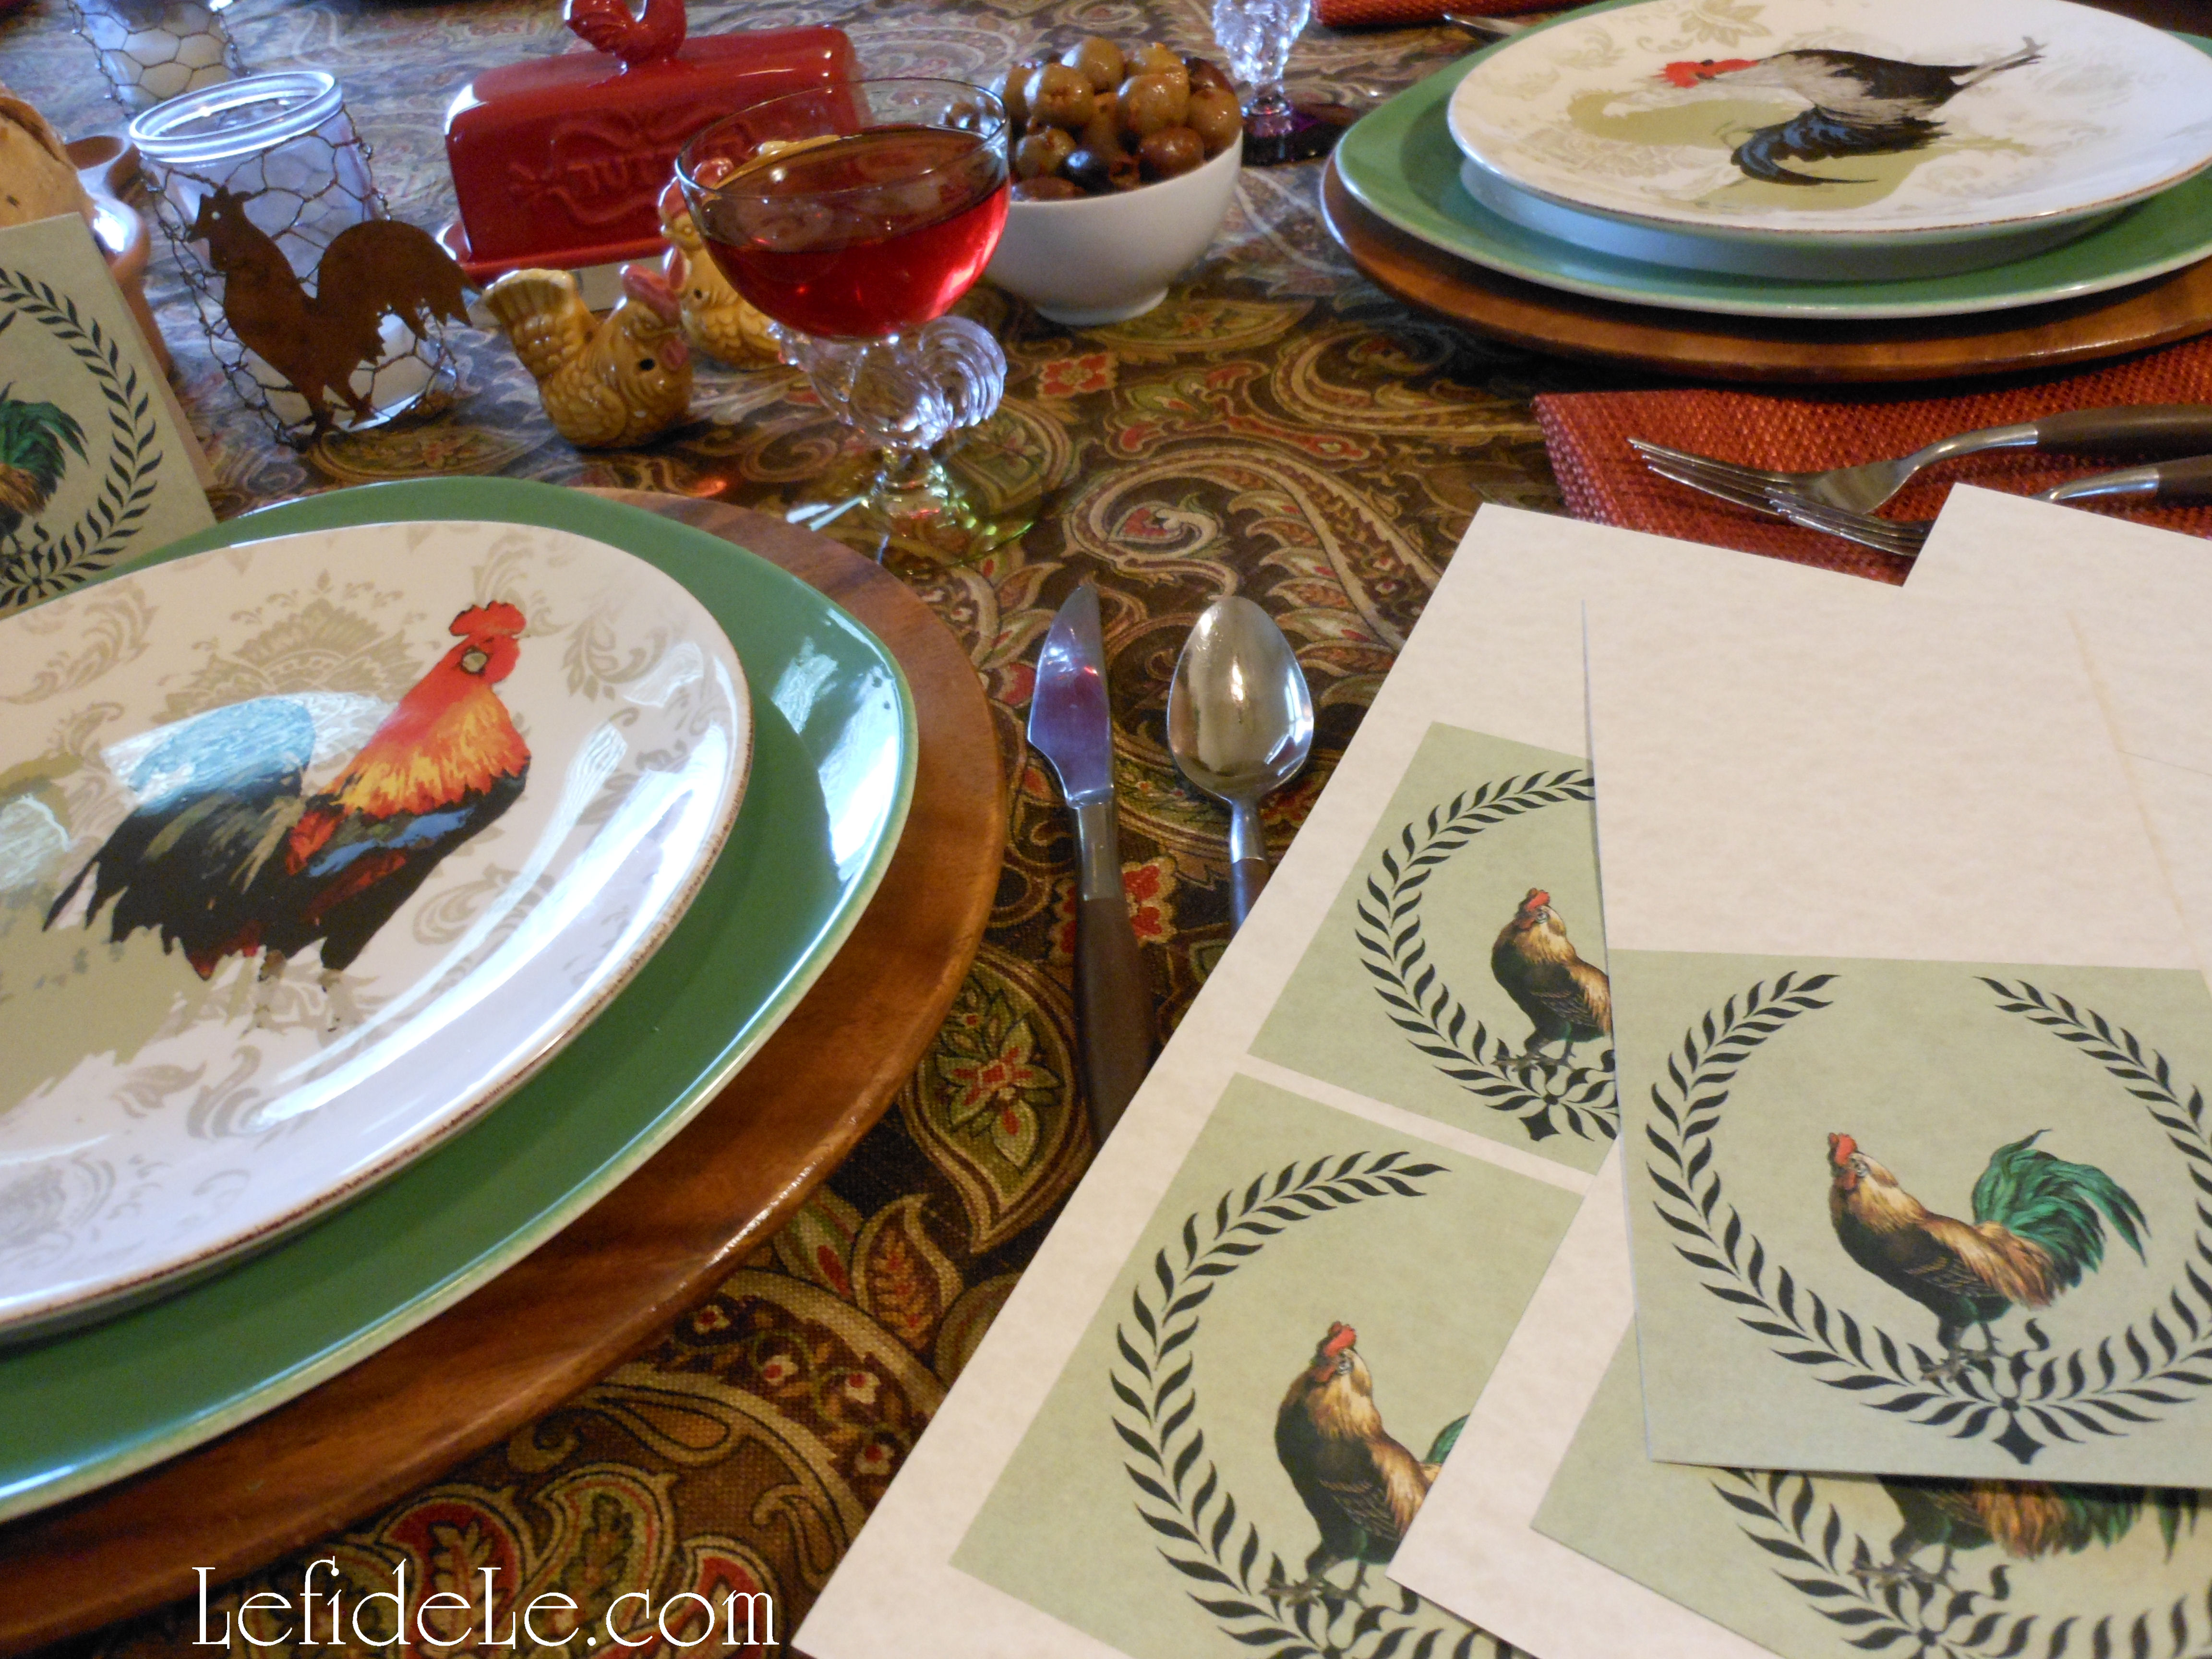
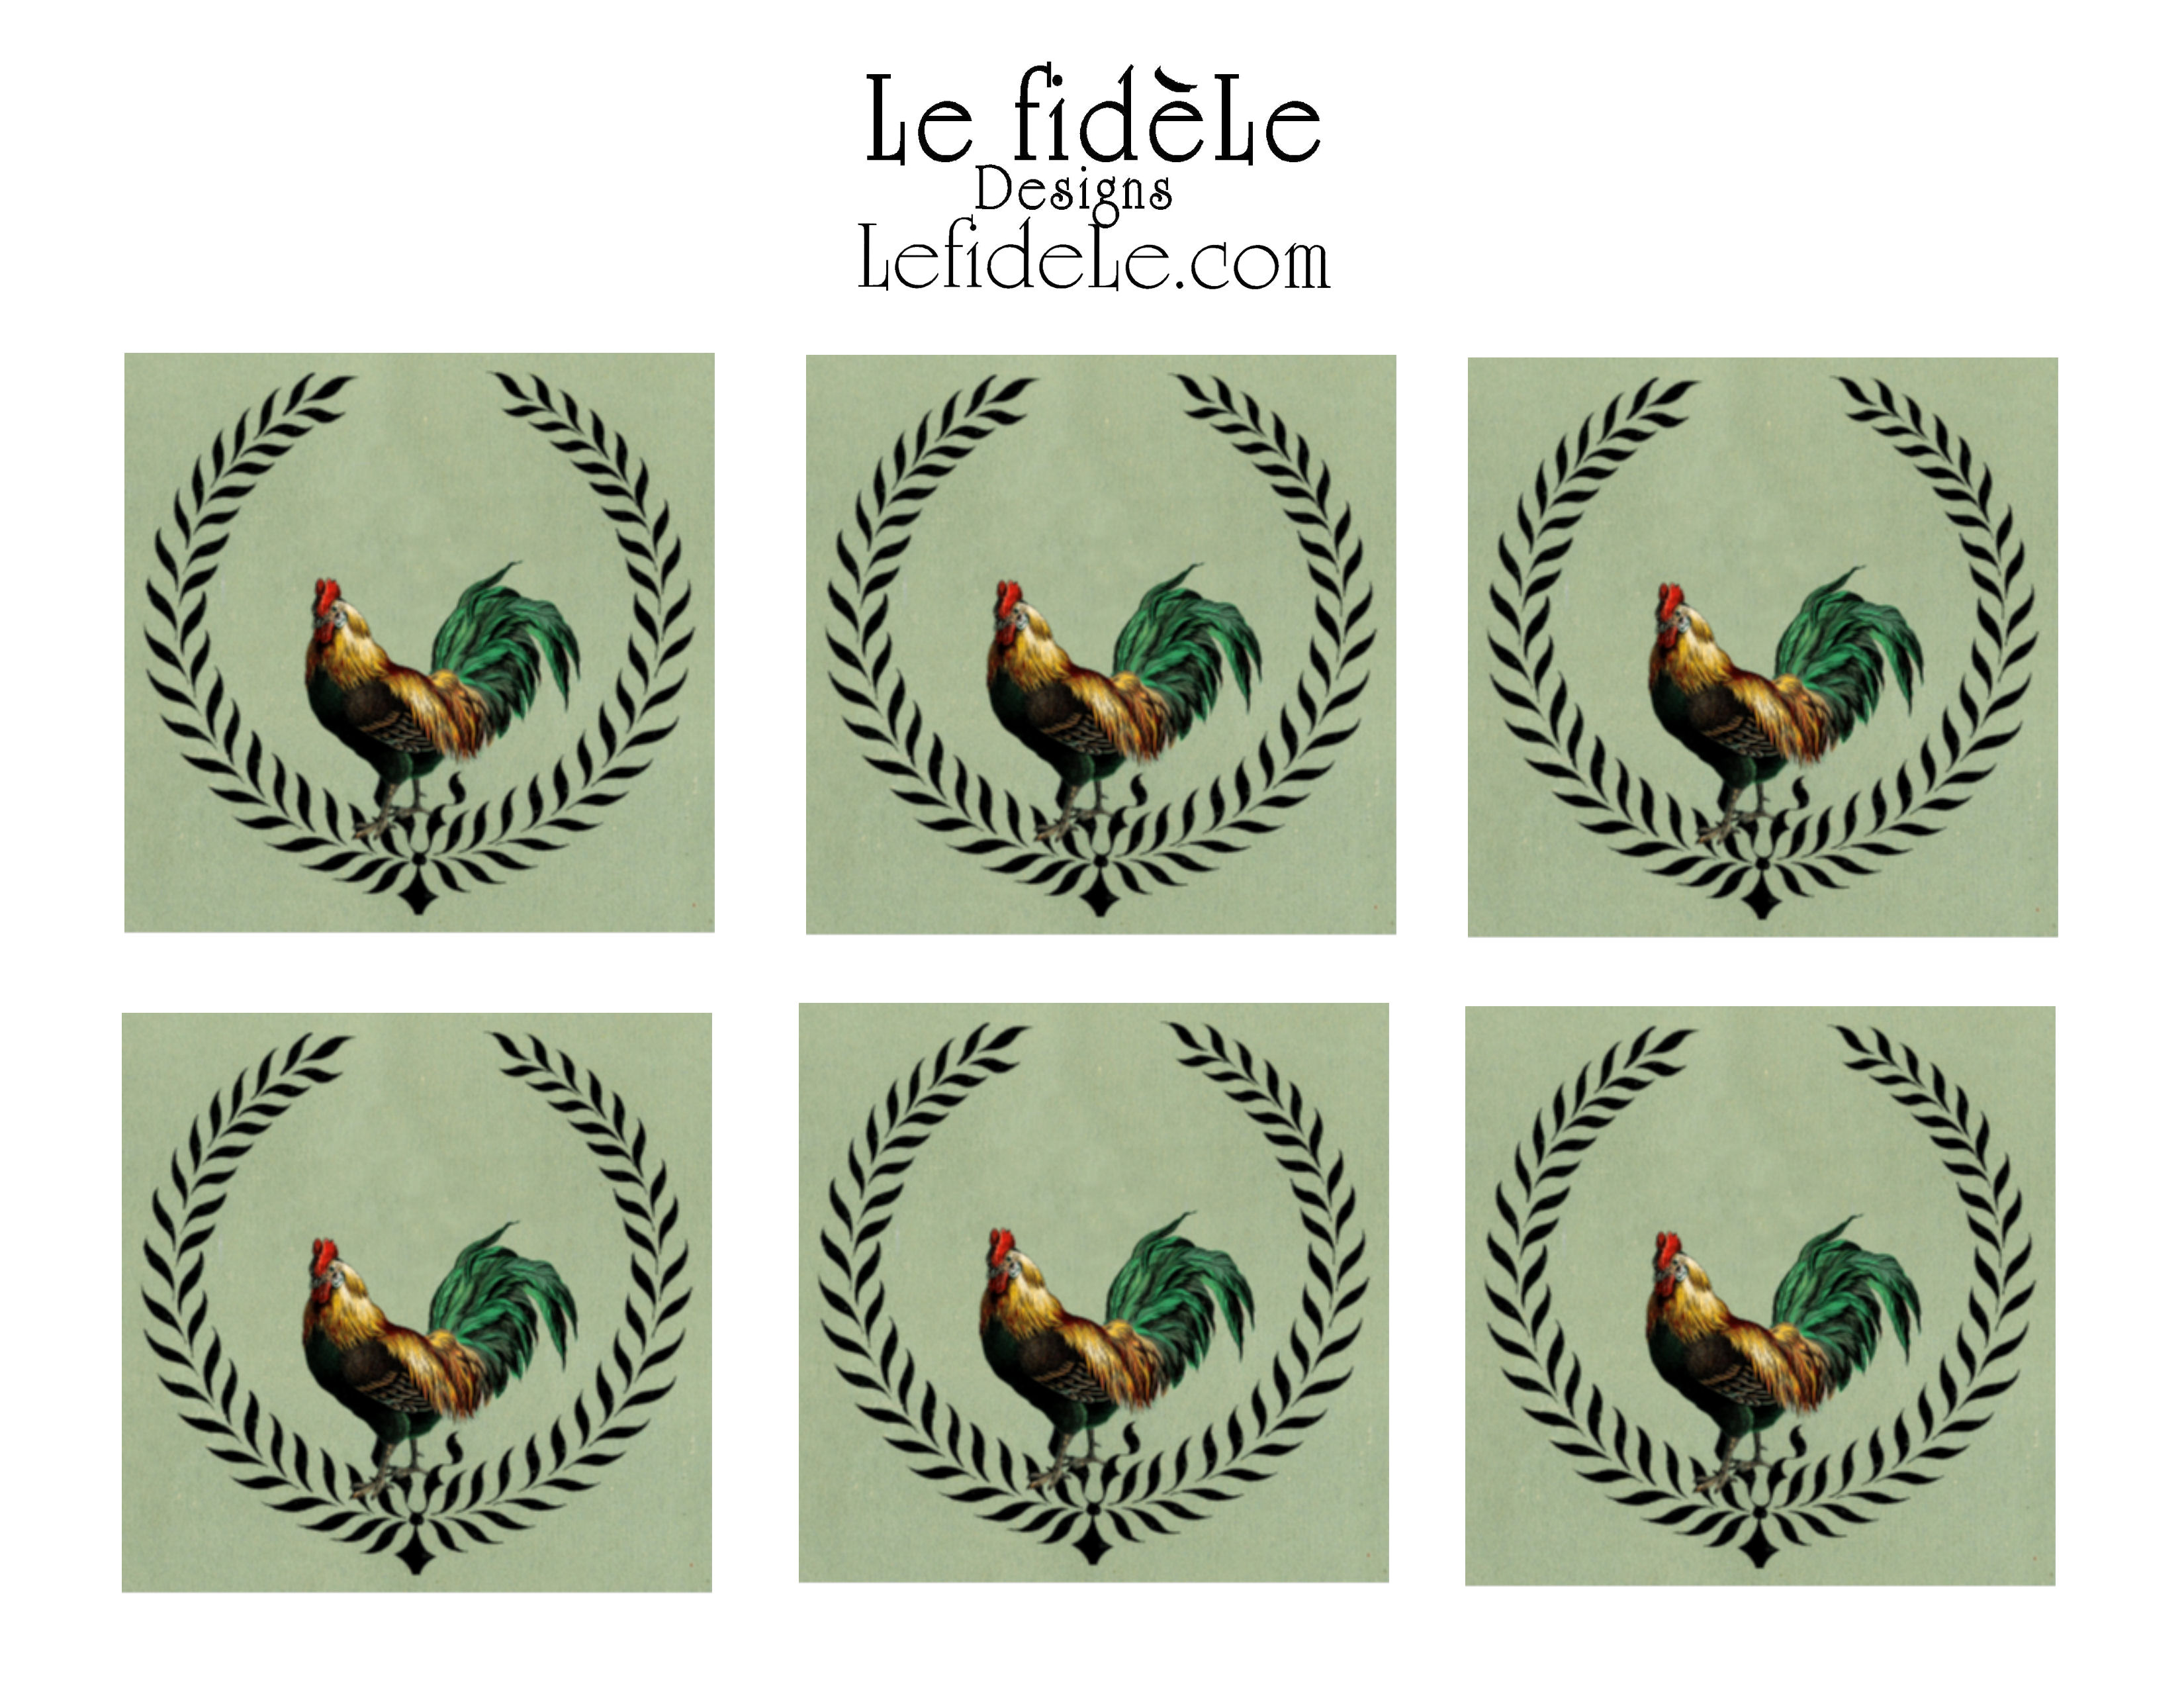
Echoing my printable Mardi Gras masquerade place-cards (which may also be used as invitation cards, get my free printable here) were sequin fleur-de-lis masks which were positioned on each setting, for reveler donning should the desire arise. I found an inexpensive set of 12 of these at Oriental Trading Company online. (Find a free shipping coupon from them at the link in the sidebar.) I added the 6 extra masks to the centerpiece as ornaments.

018Leigh

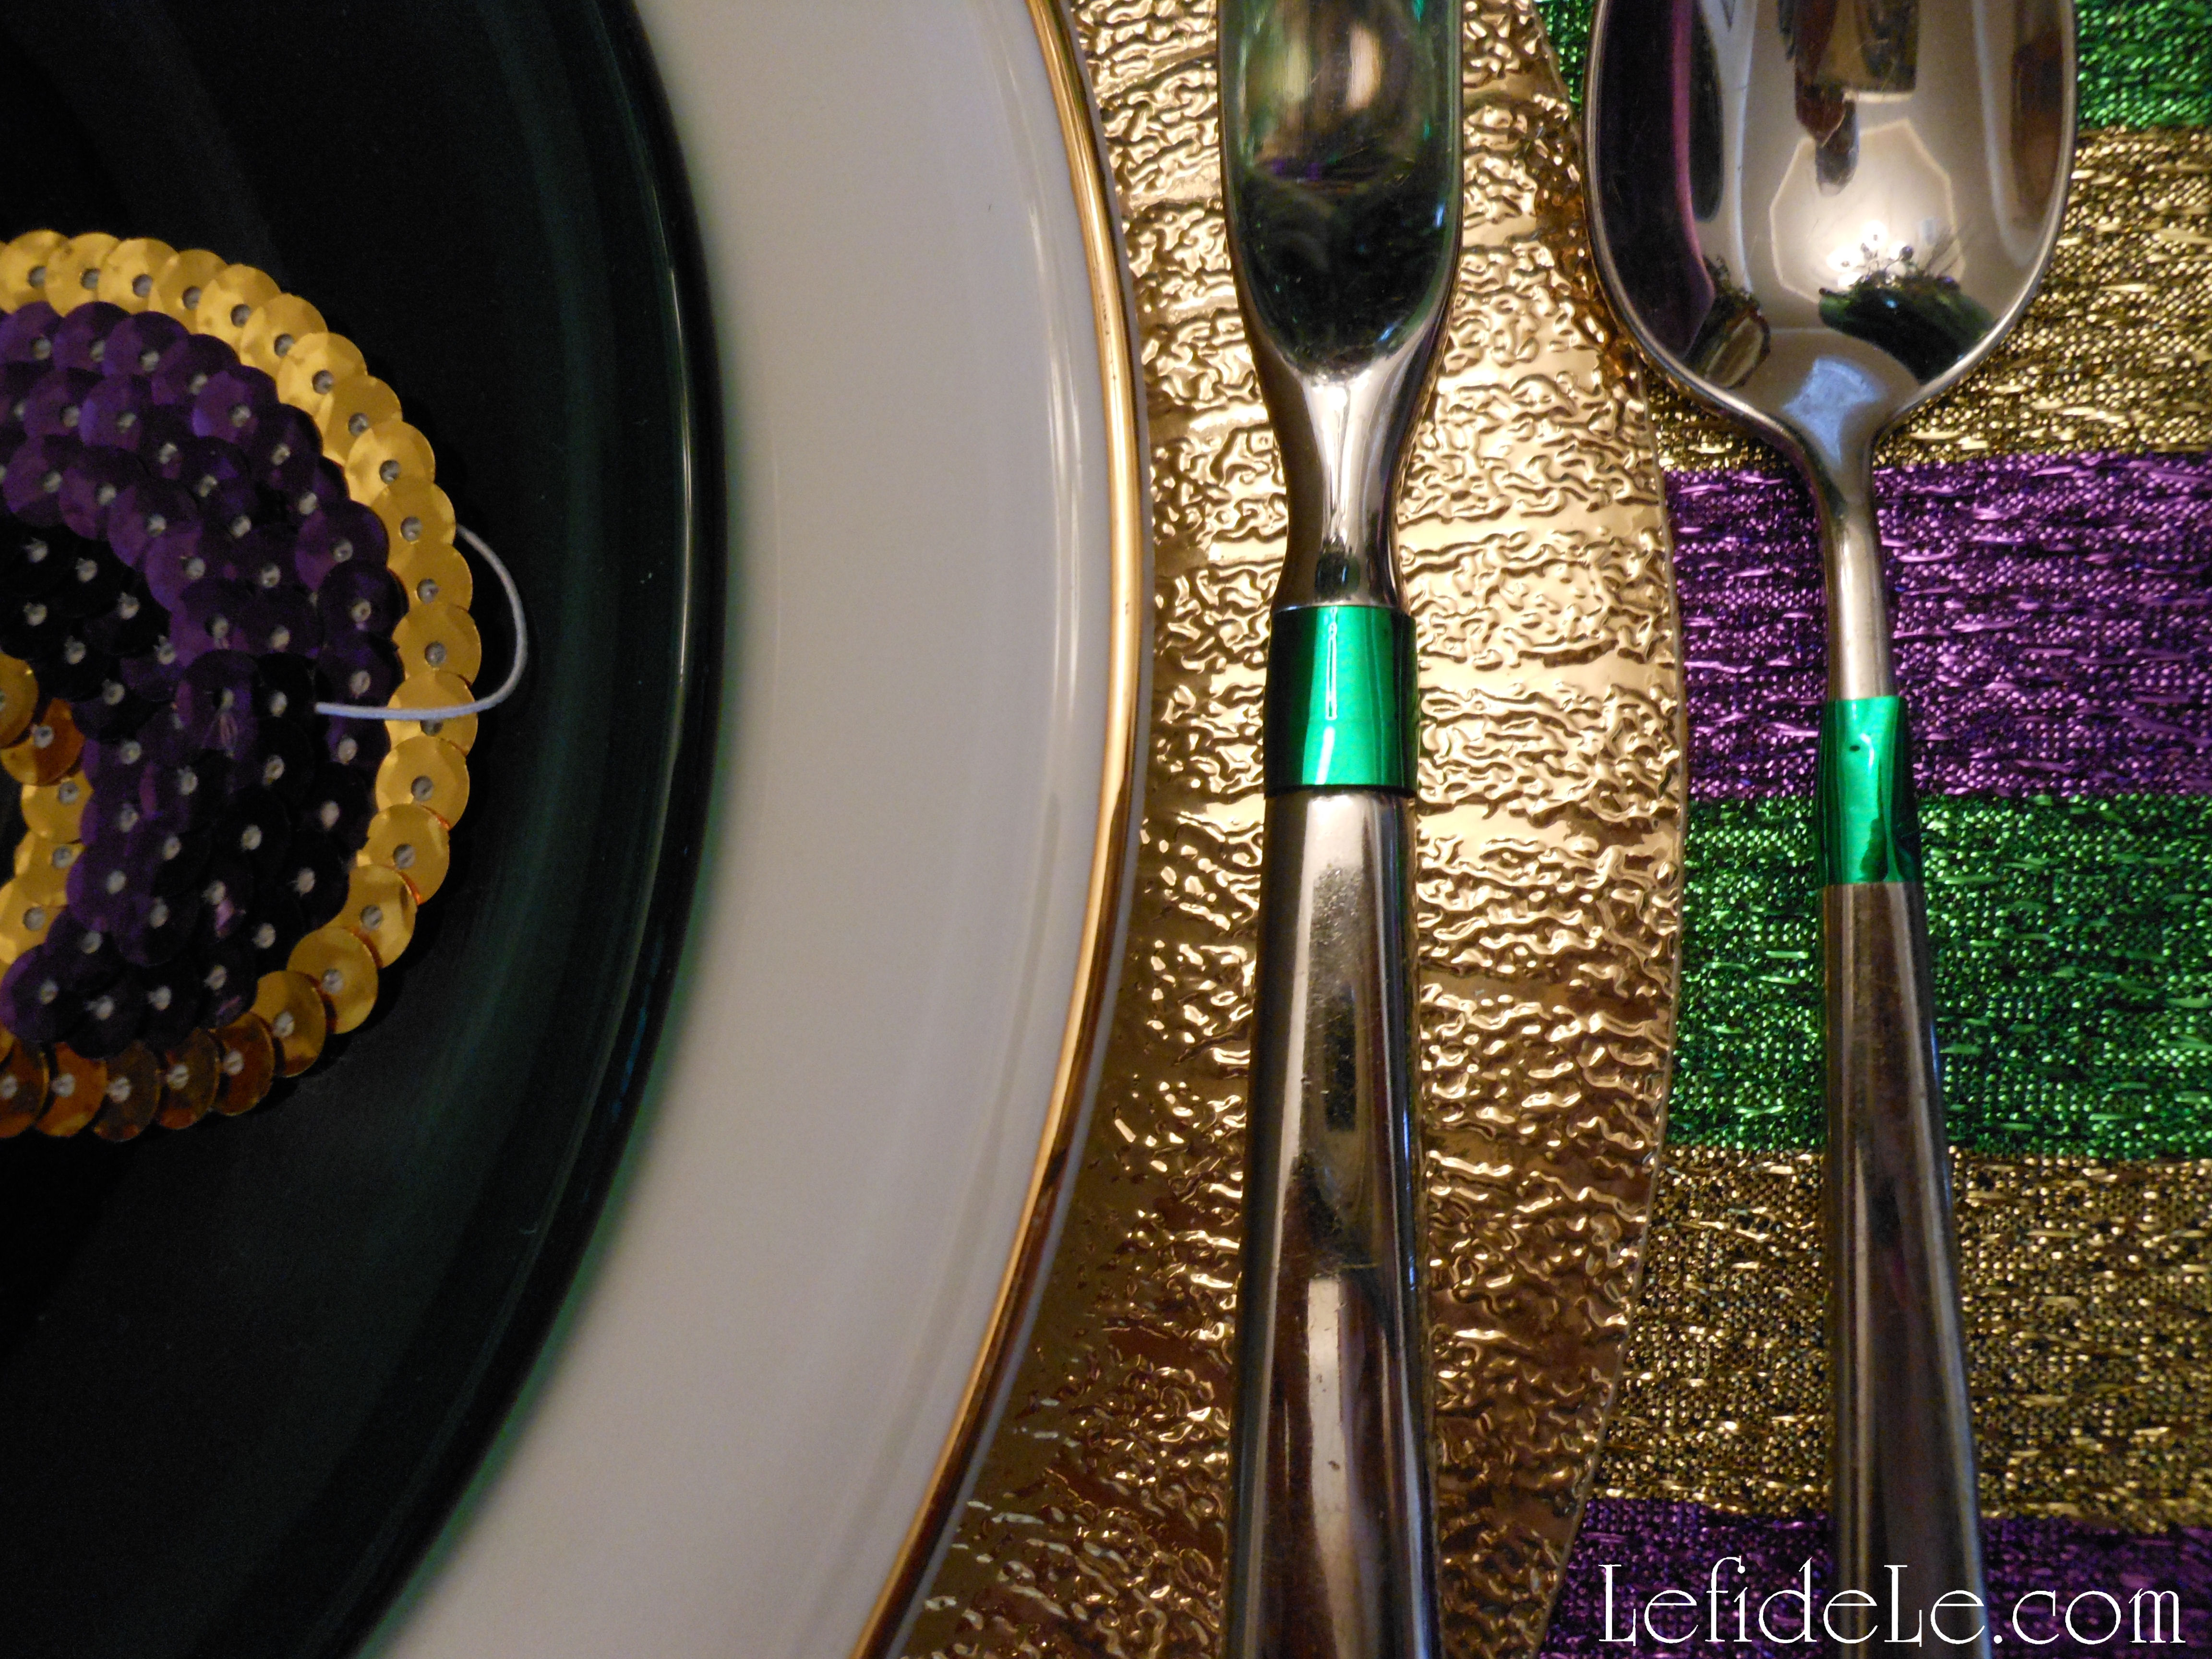
I wrapped green metallic washi tape across the decorative elements in my flatware to jazz them up for the occasion. Washi wrapping is an easy way to embellish your everyday utensils for a special occasion, and it is so much cheaper than buying a new set. (You can see the same technique used on the flatware in my Herb Themed Luncheon by viewing the picture in the Upcoming Projects Gallery in the sidebar.)

019Leigh

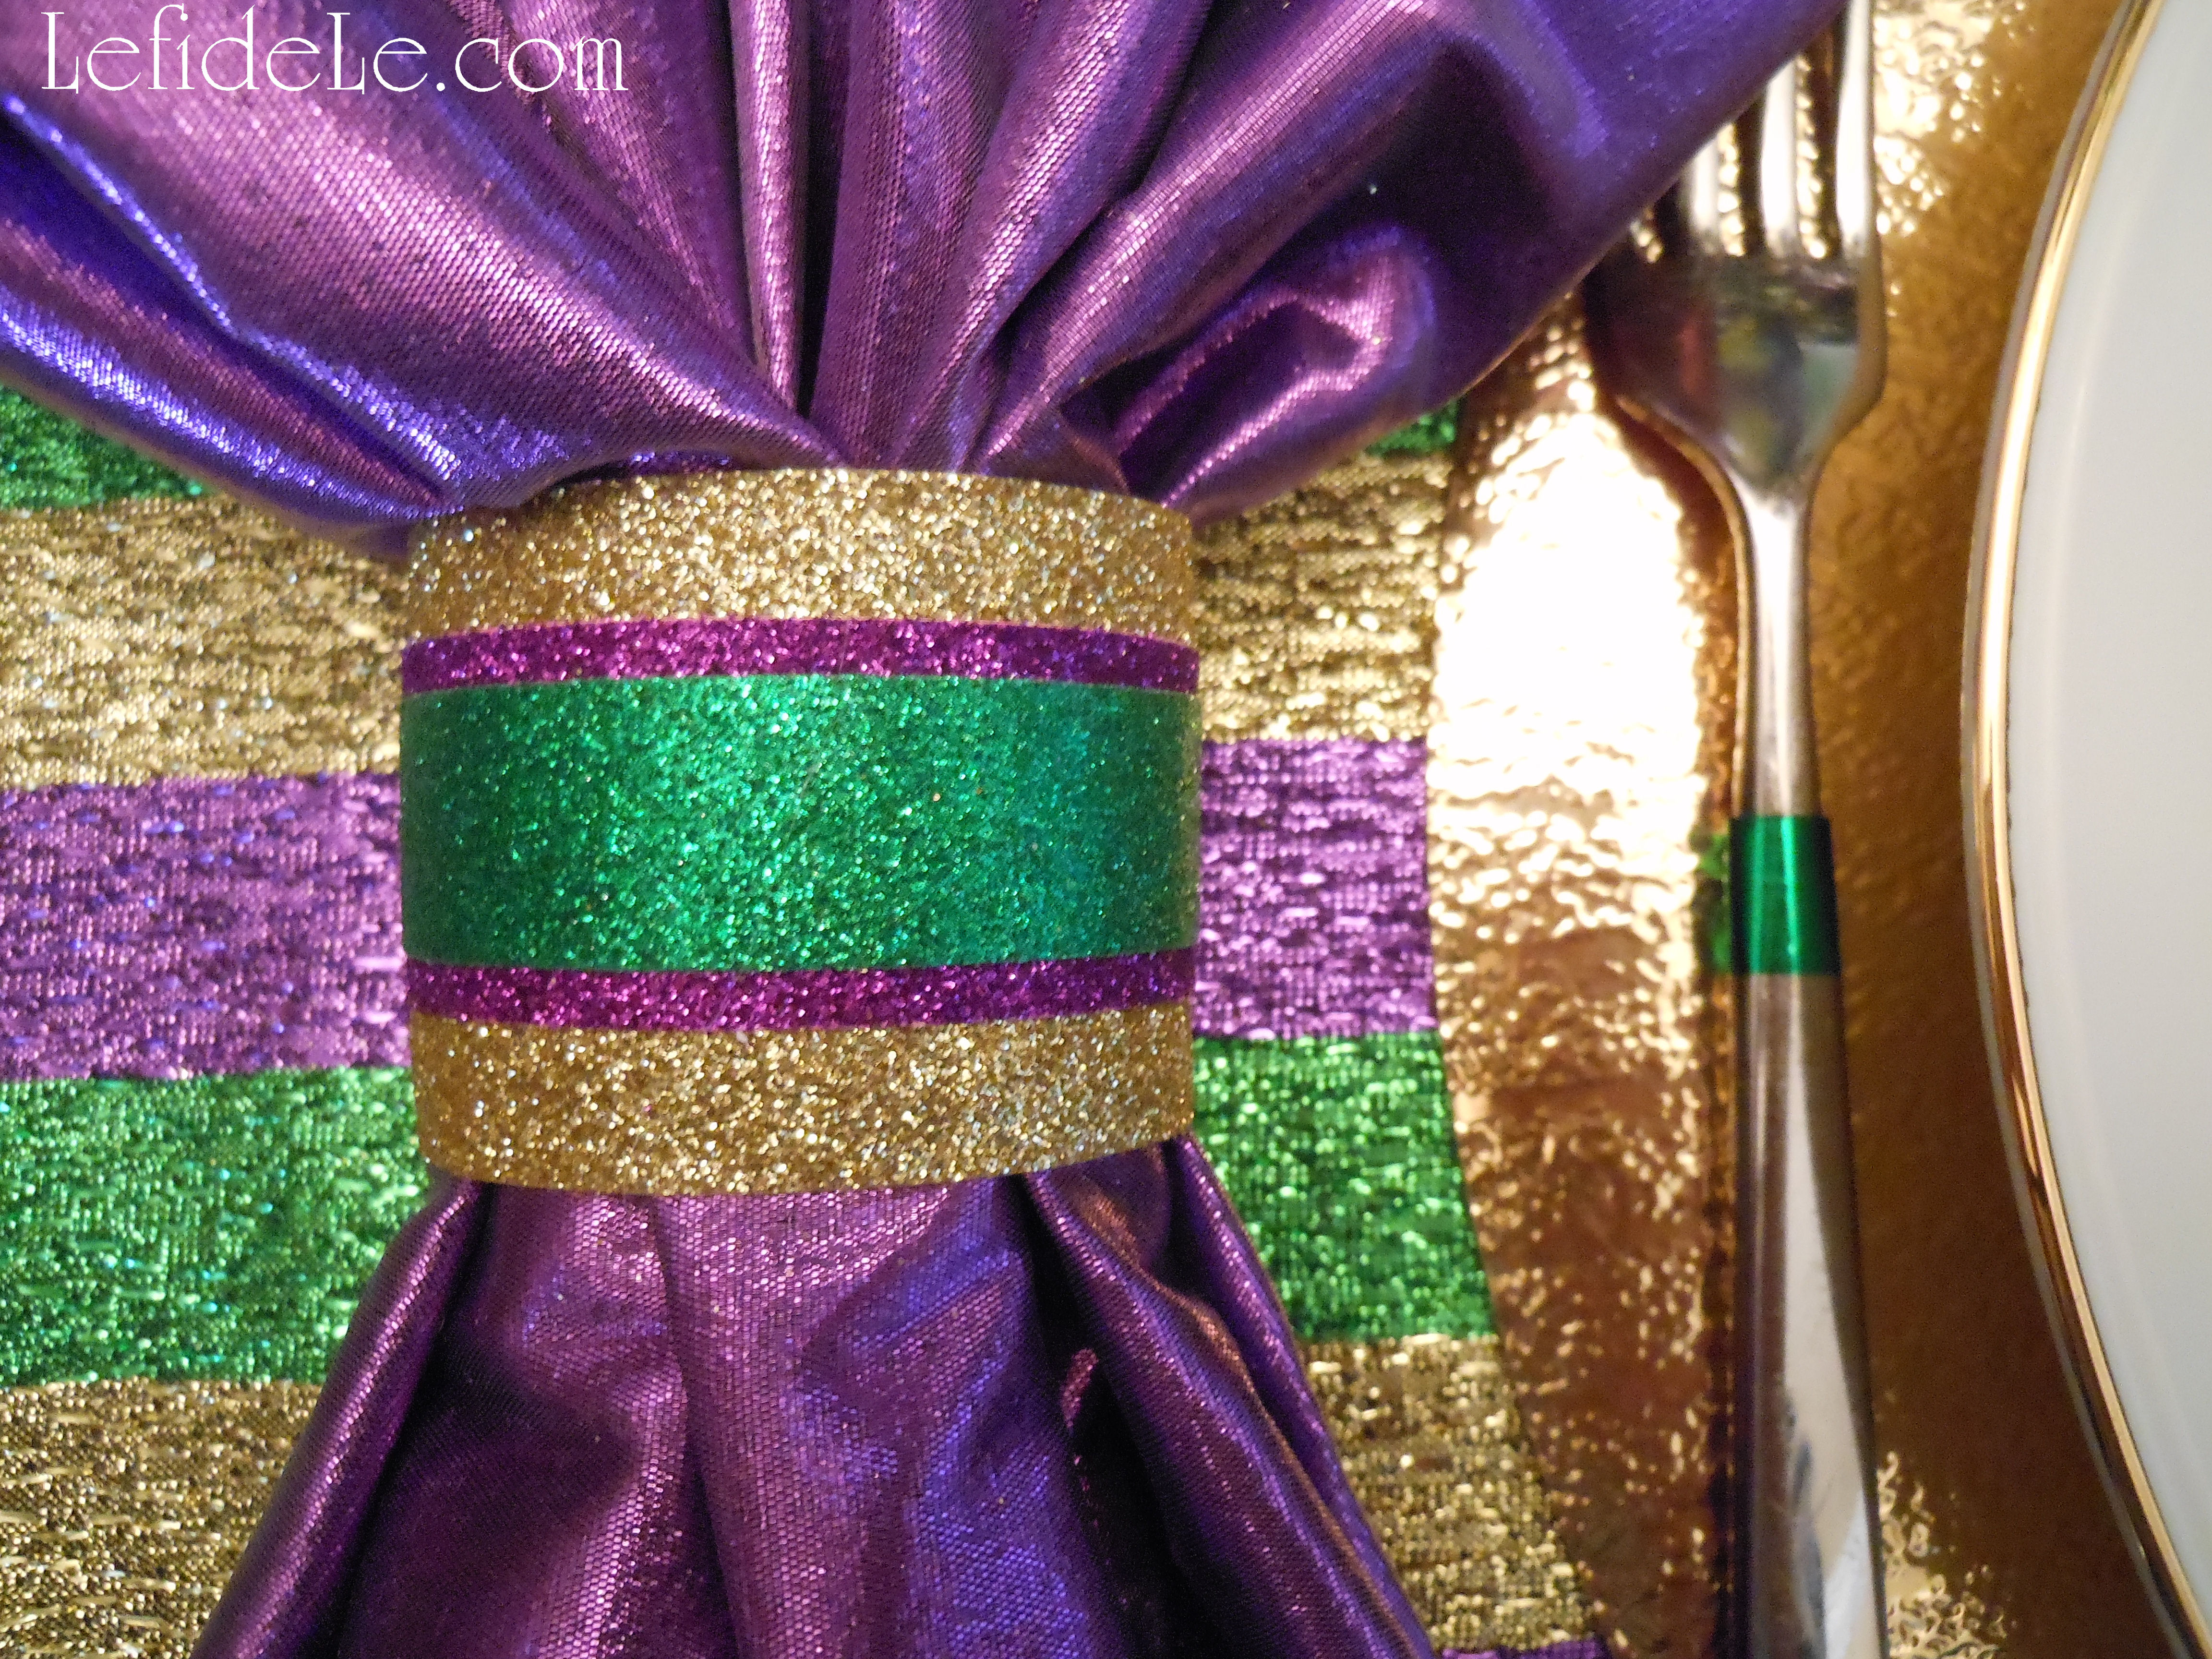
I didn’t have any napkin rings that would tie into my theme besides the gold varieties I had recently used this winter, so I made my own in a matter of minutes from glitter ribbon and washi tape. This is so much easier than it sounds! (Find my crafting instructions here.)

024Leigh

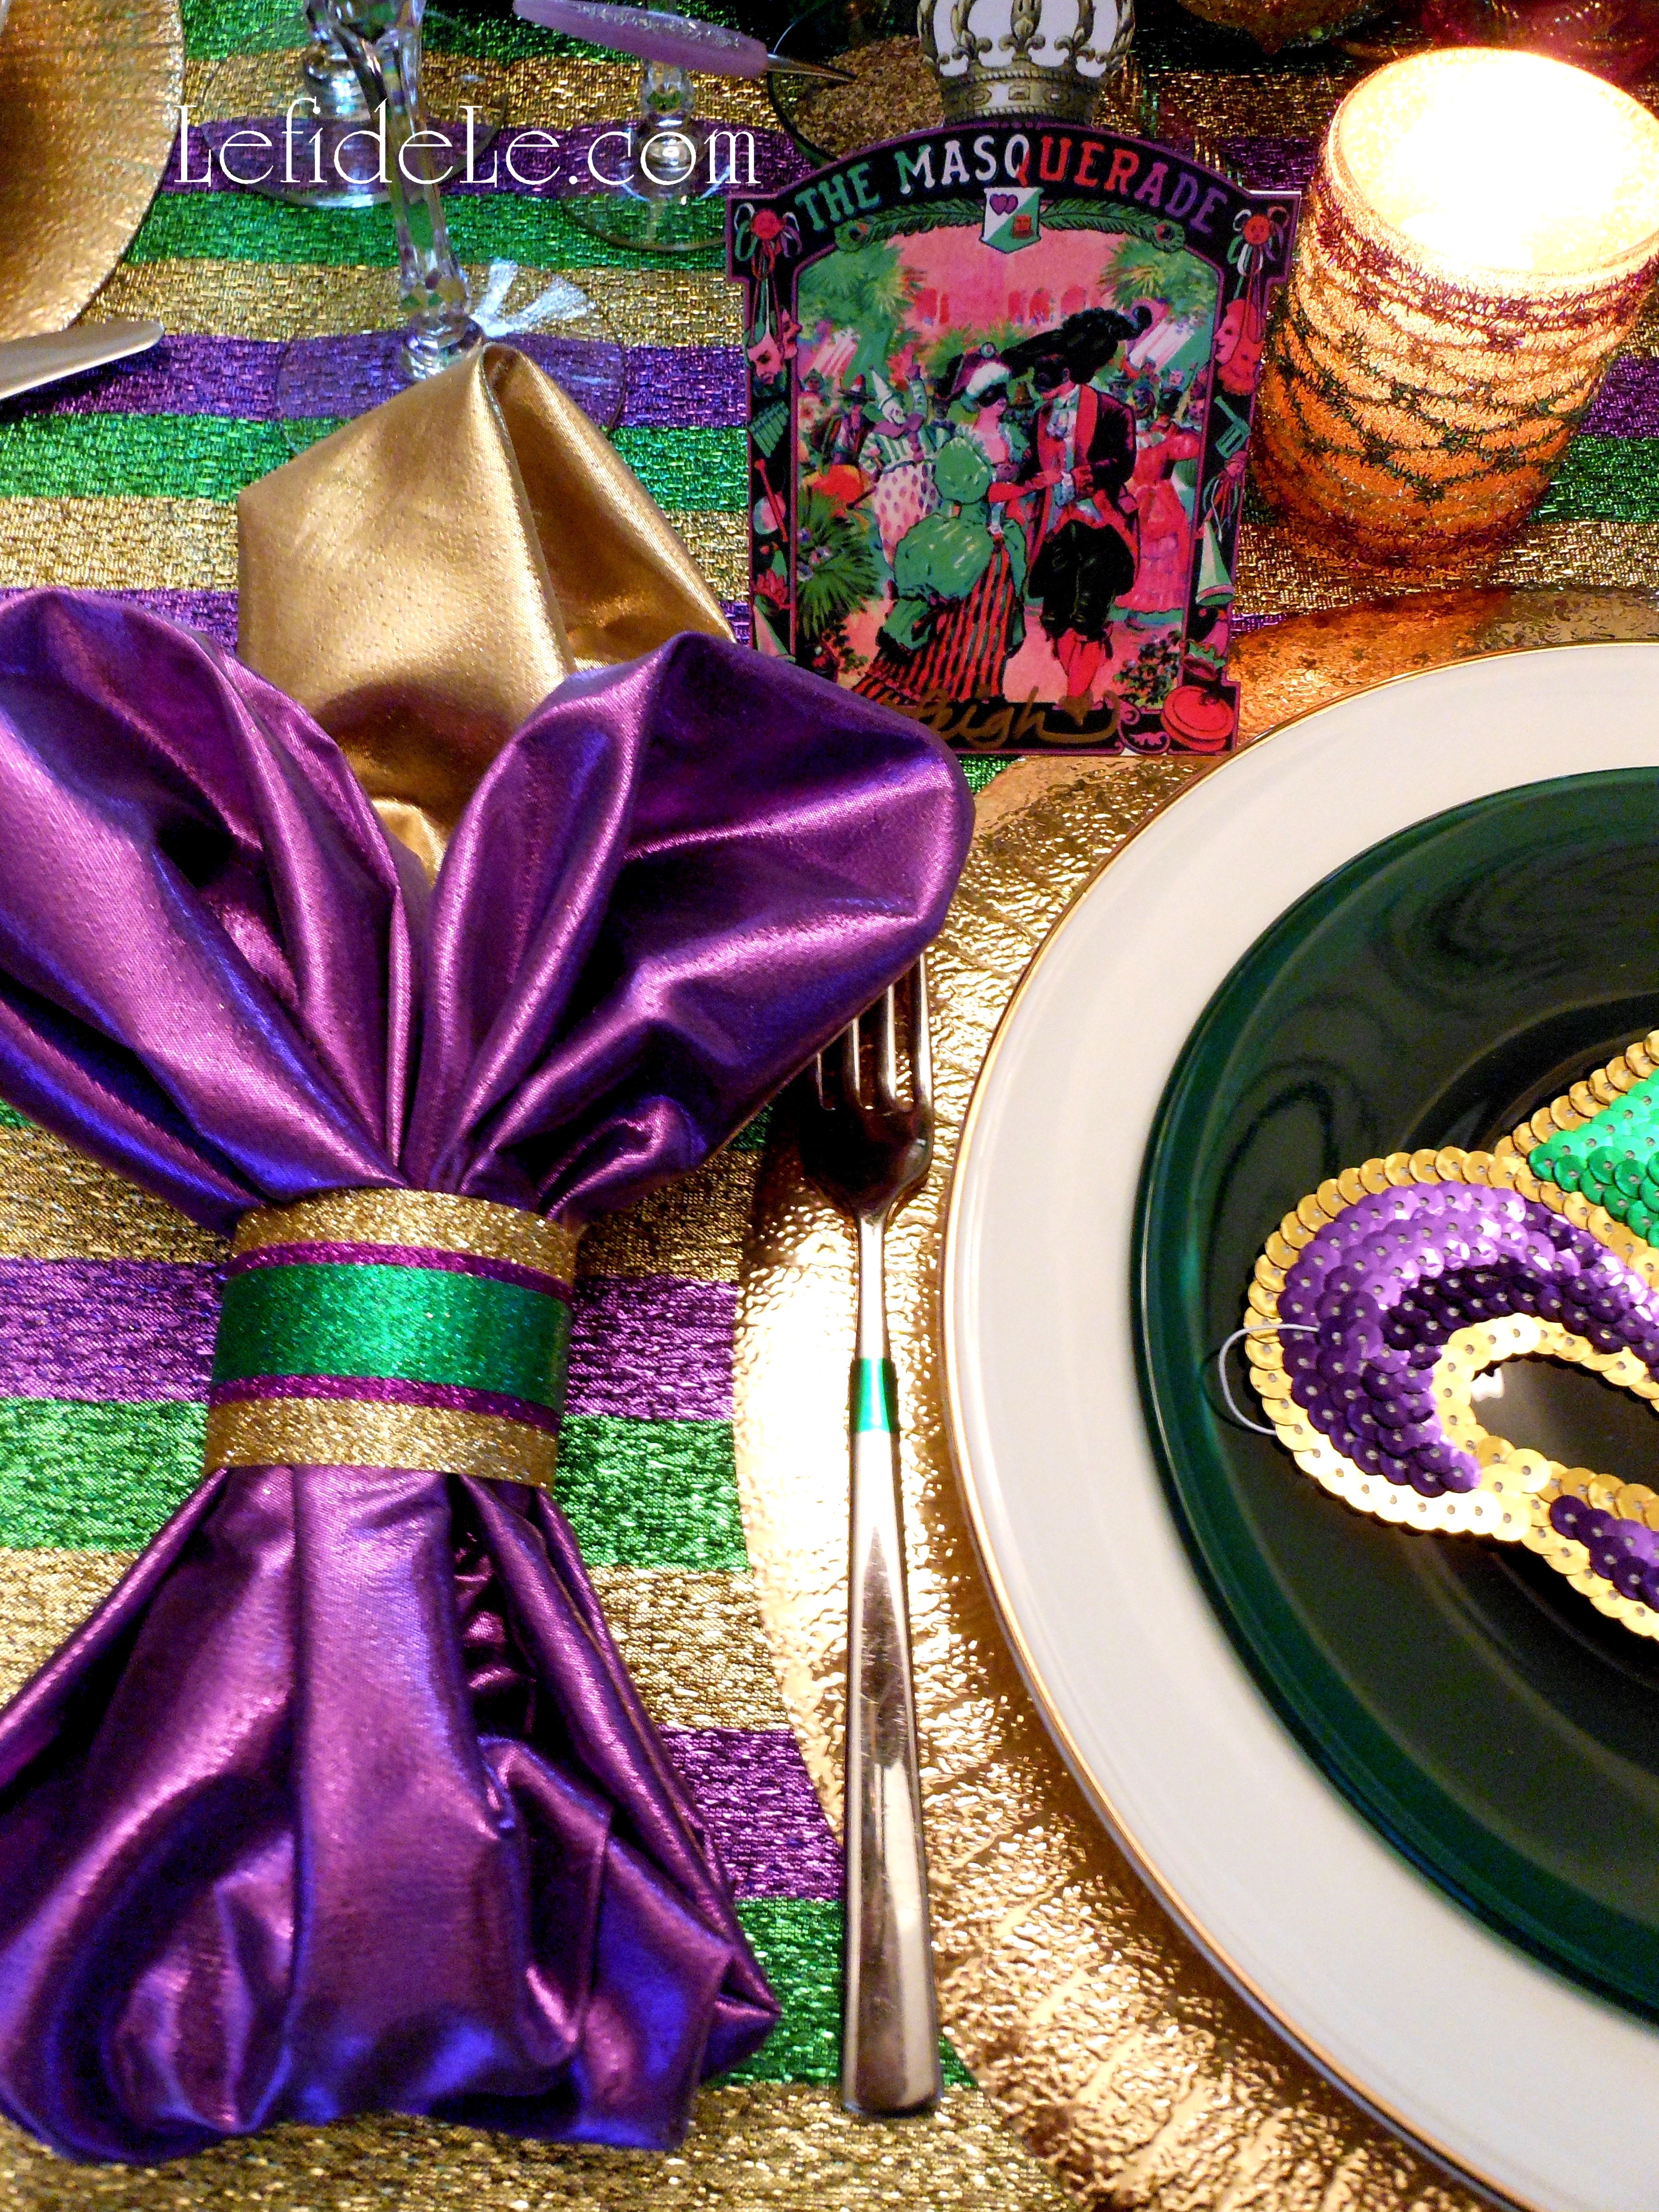
Squares of shiny fabric, purchased with a 40% off coupon, were used for napkins. A fleur-de-lis shape was achieved by first folding the gold square in half and pulling it through the ring forming a loop. I then folded the purple square in half and formed two loops which I subsequently pulled through the ring over the gold. Lastly, the uneven bottom edges were tucked under.

073Leigh

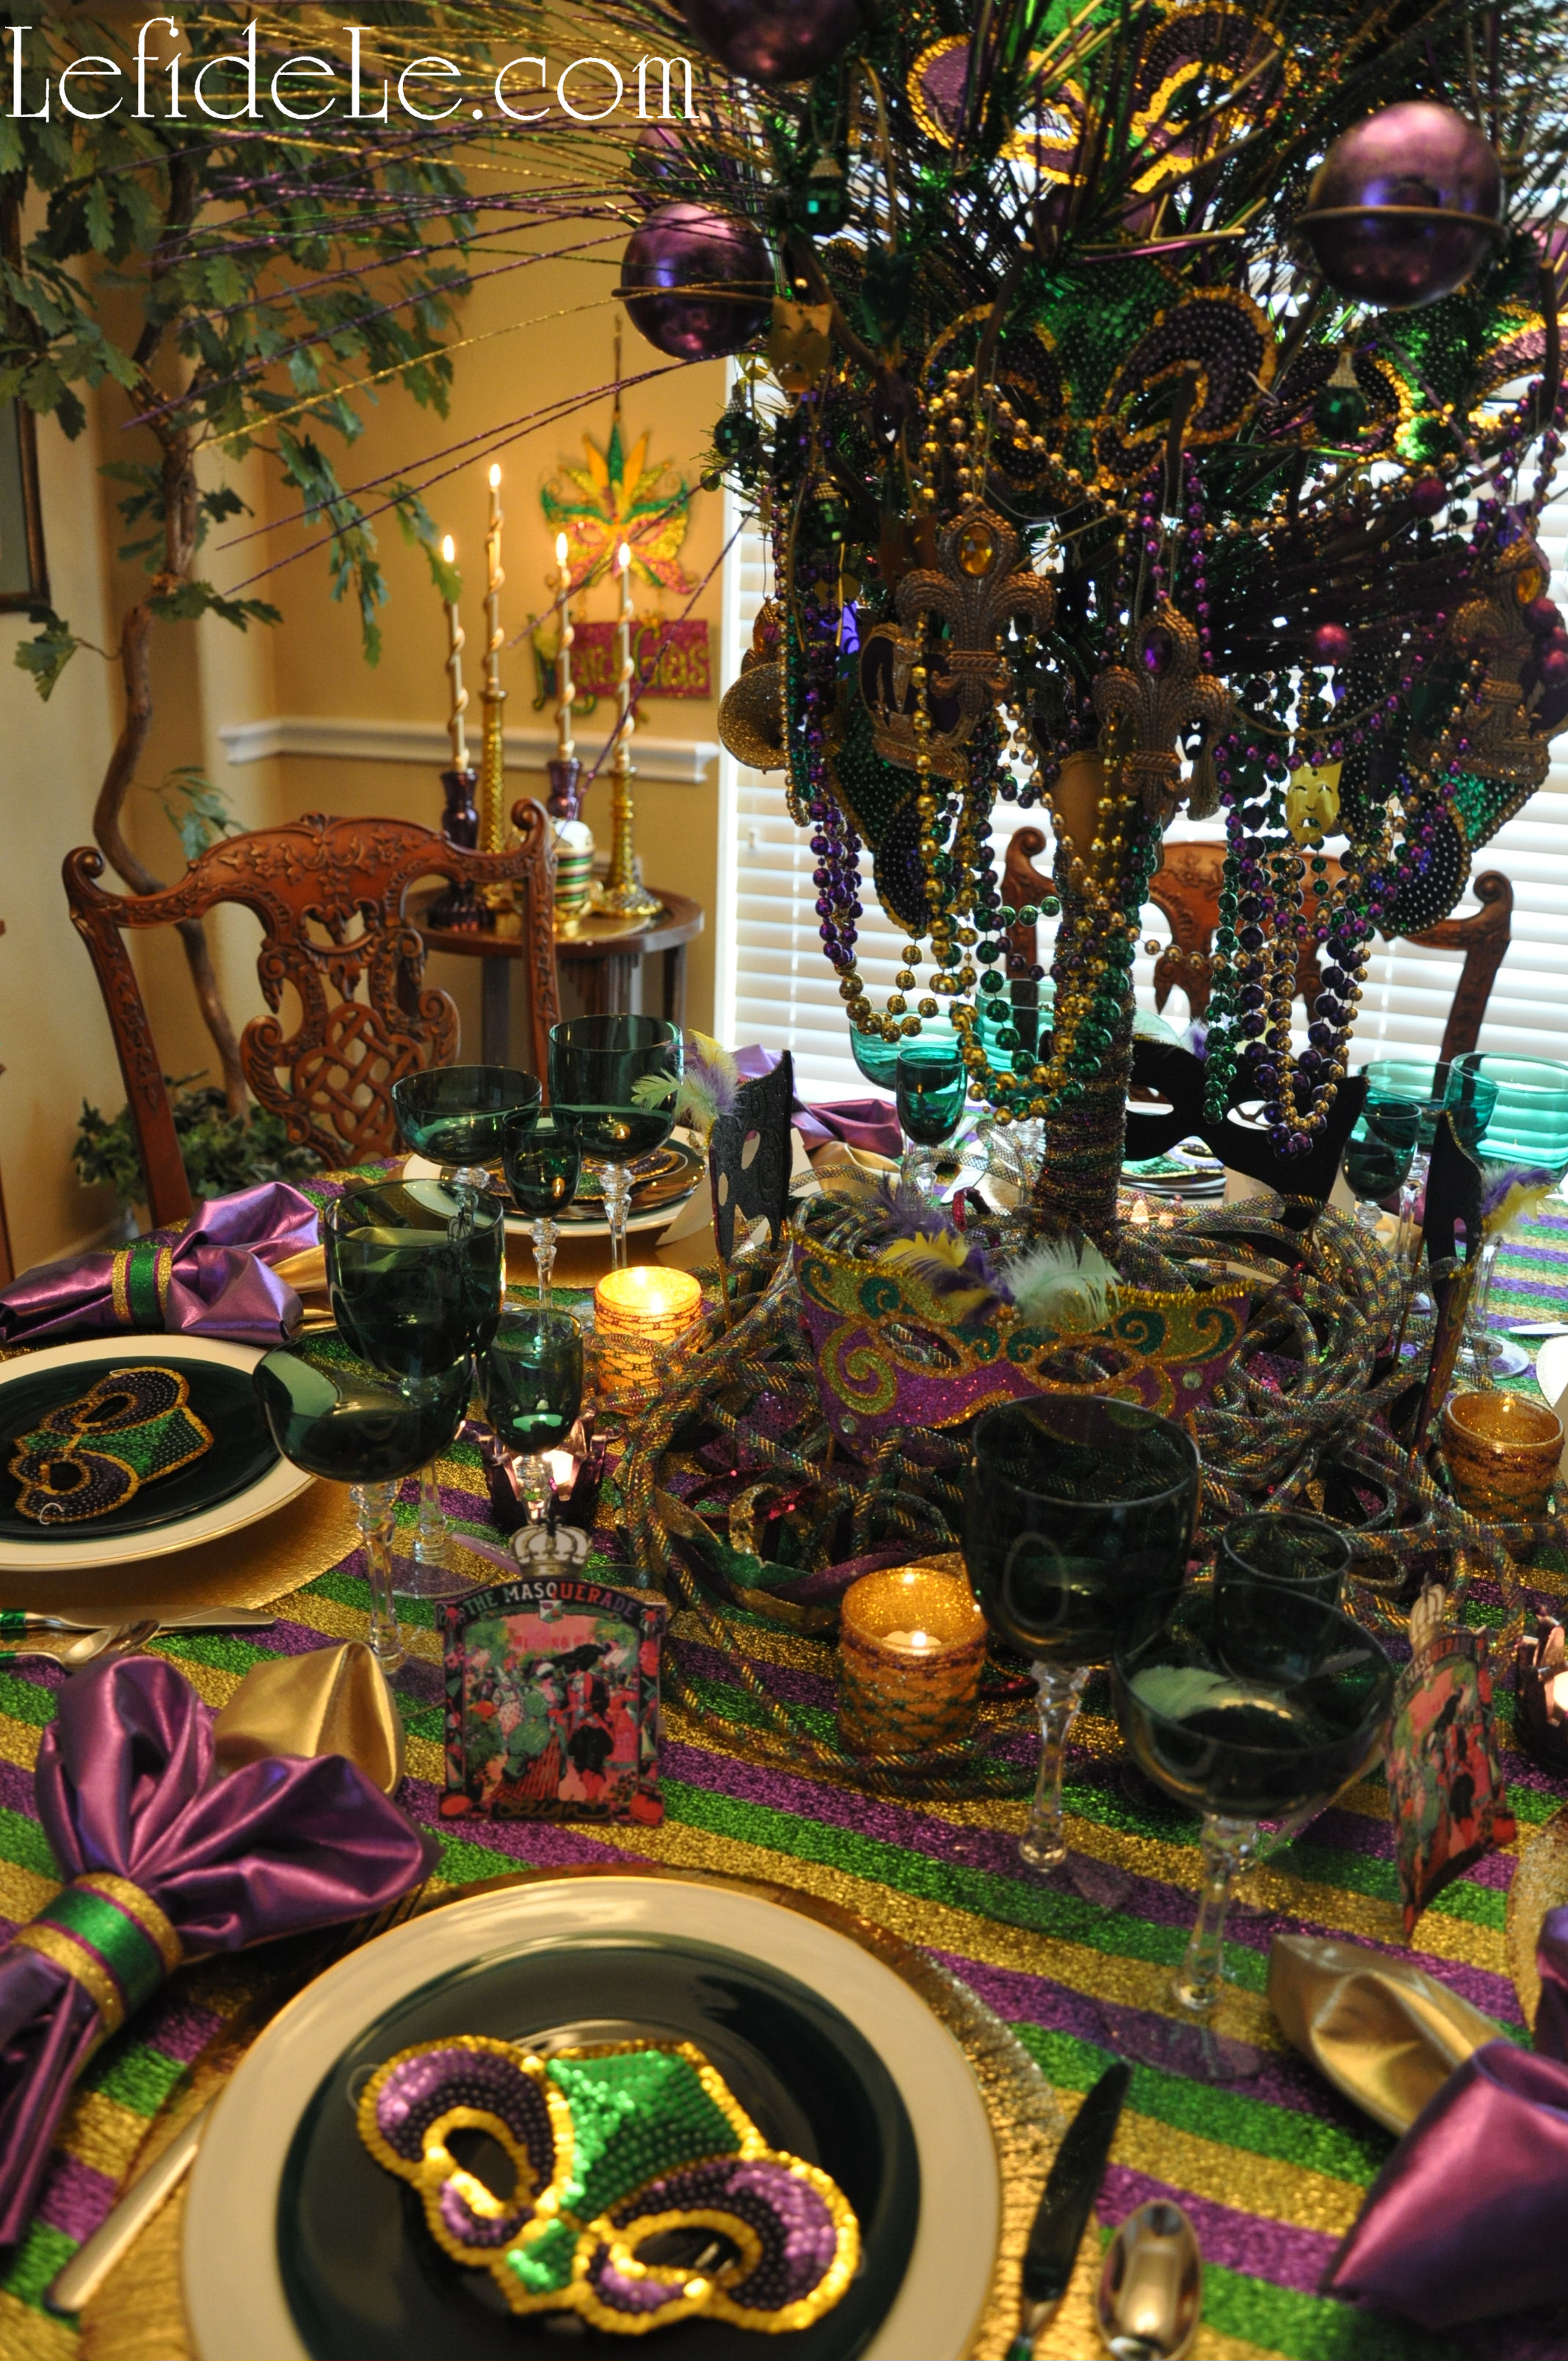
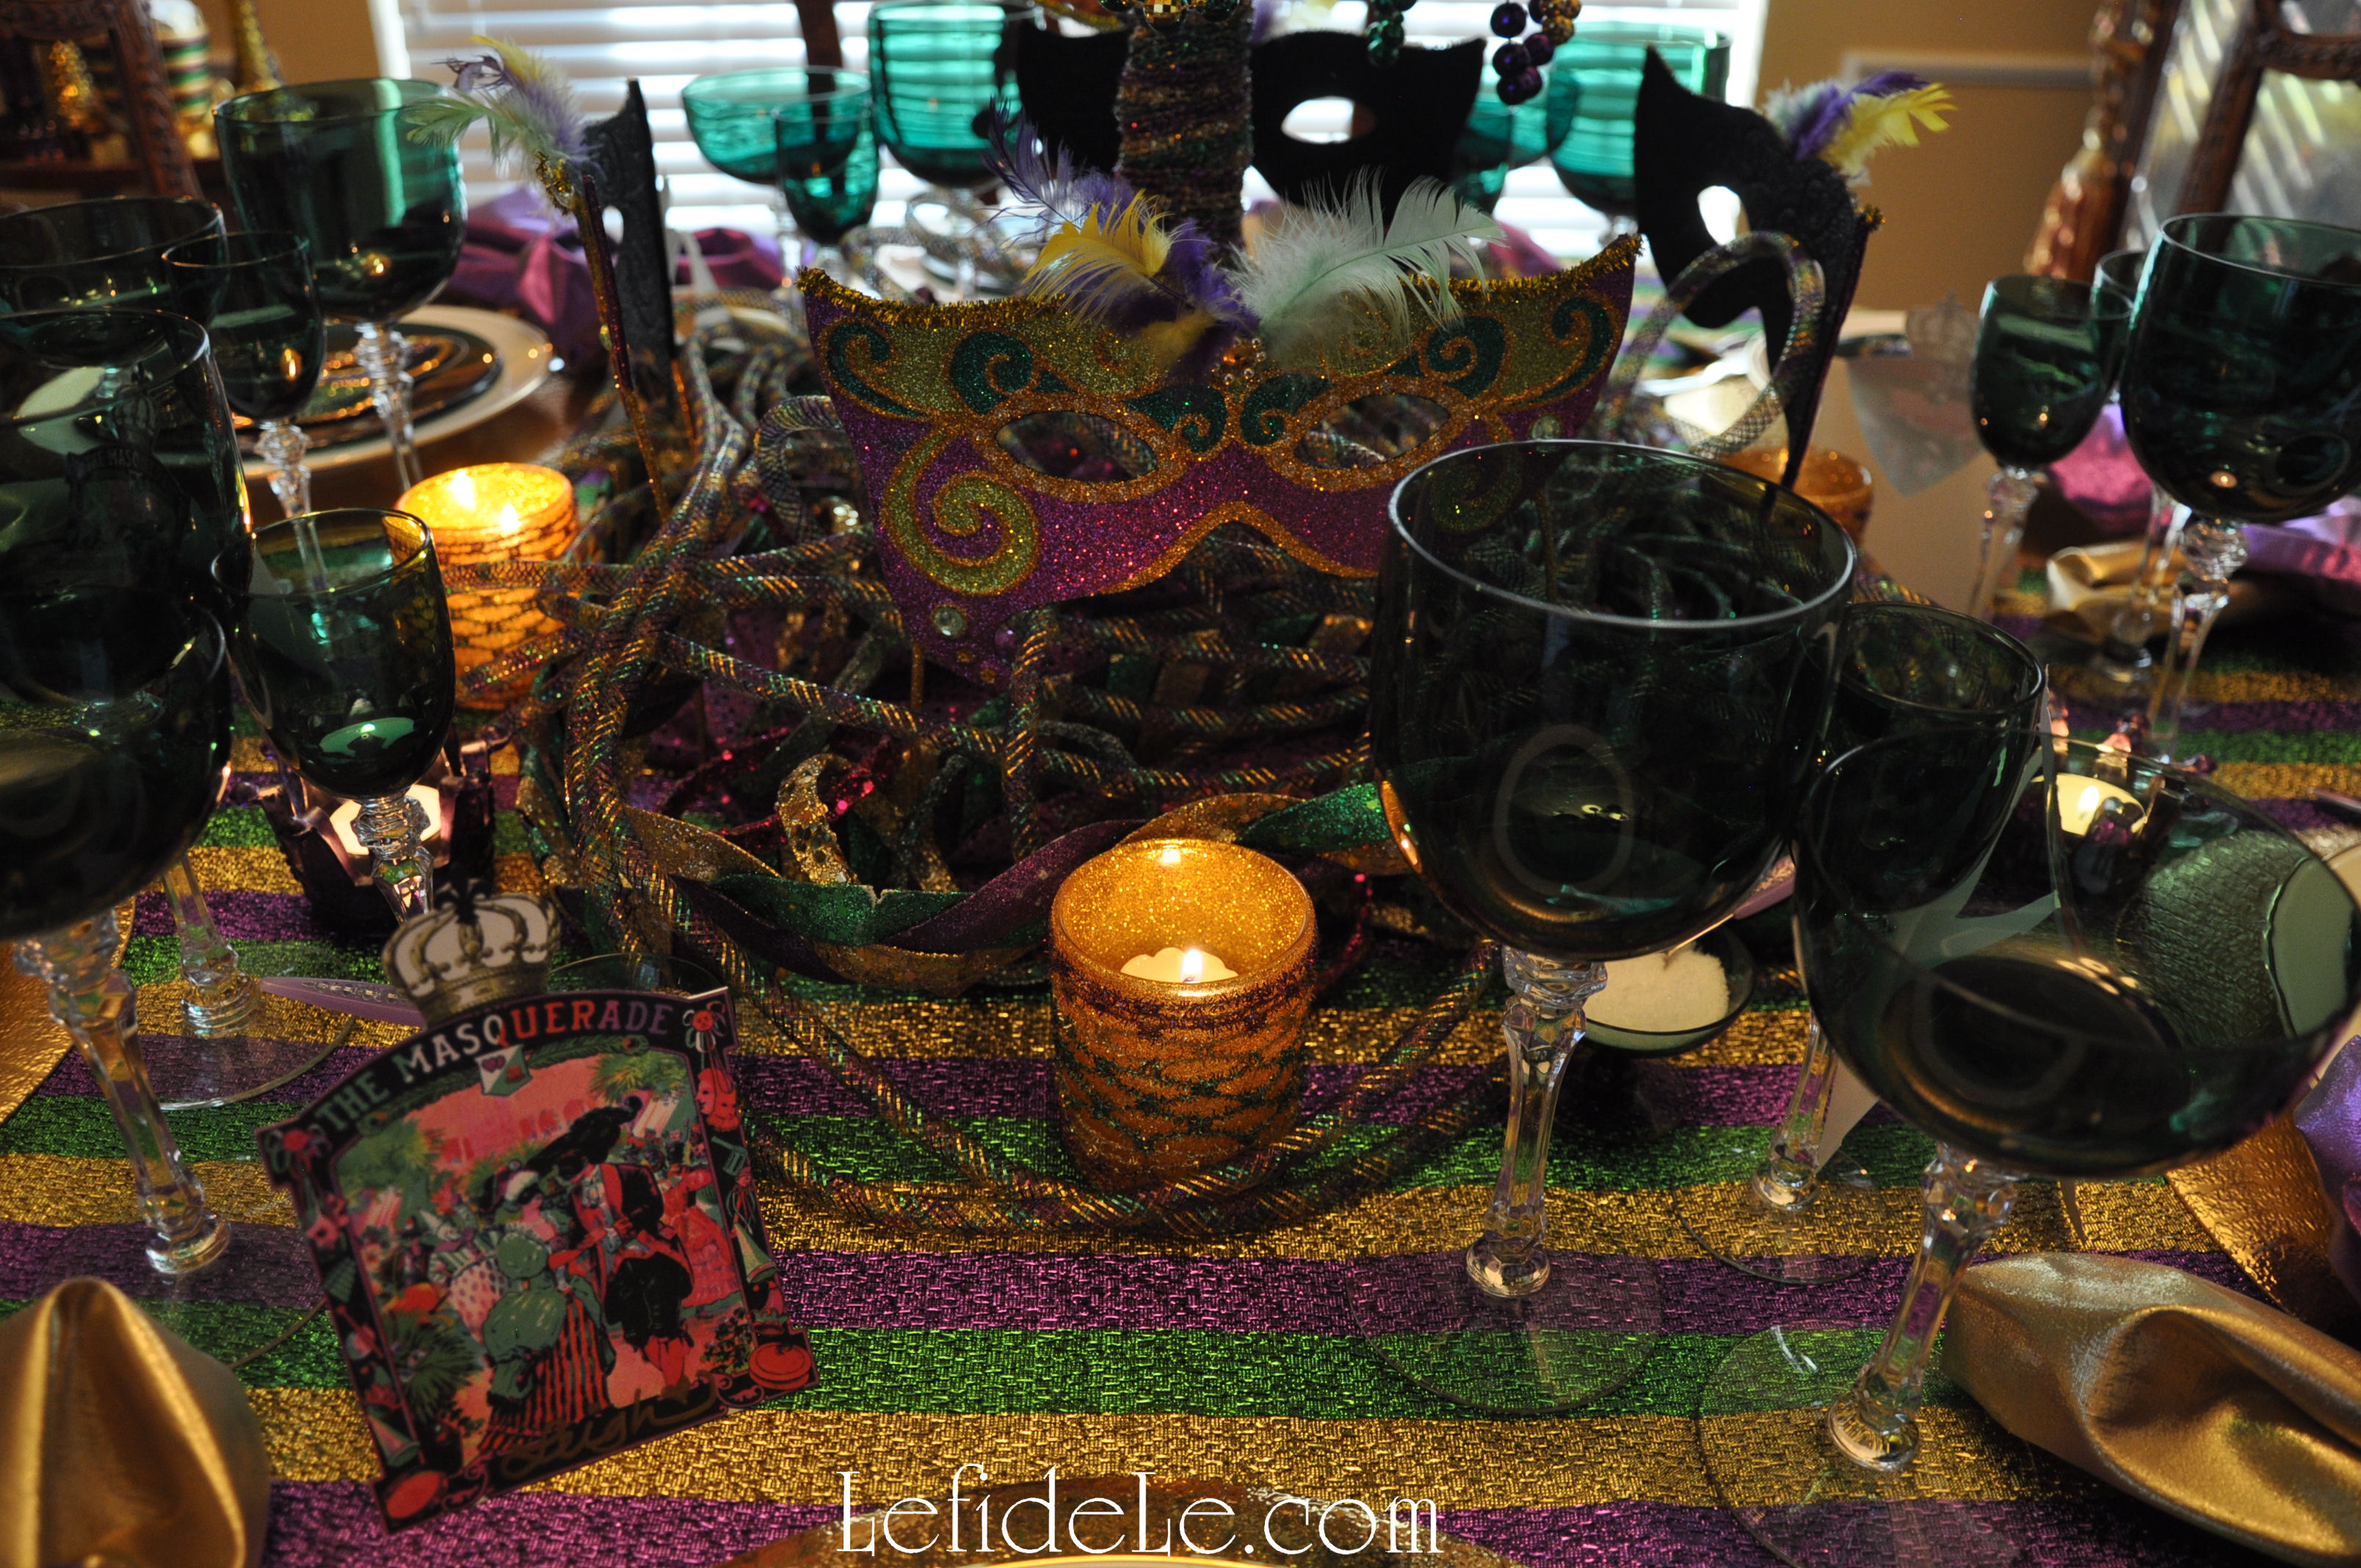
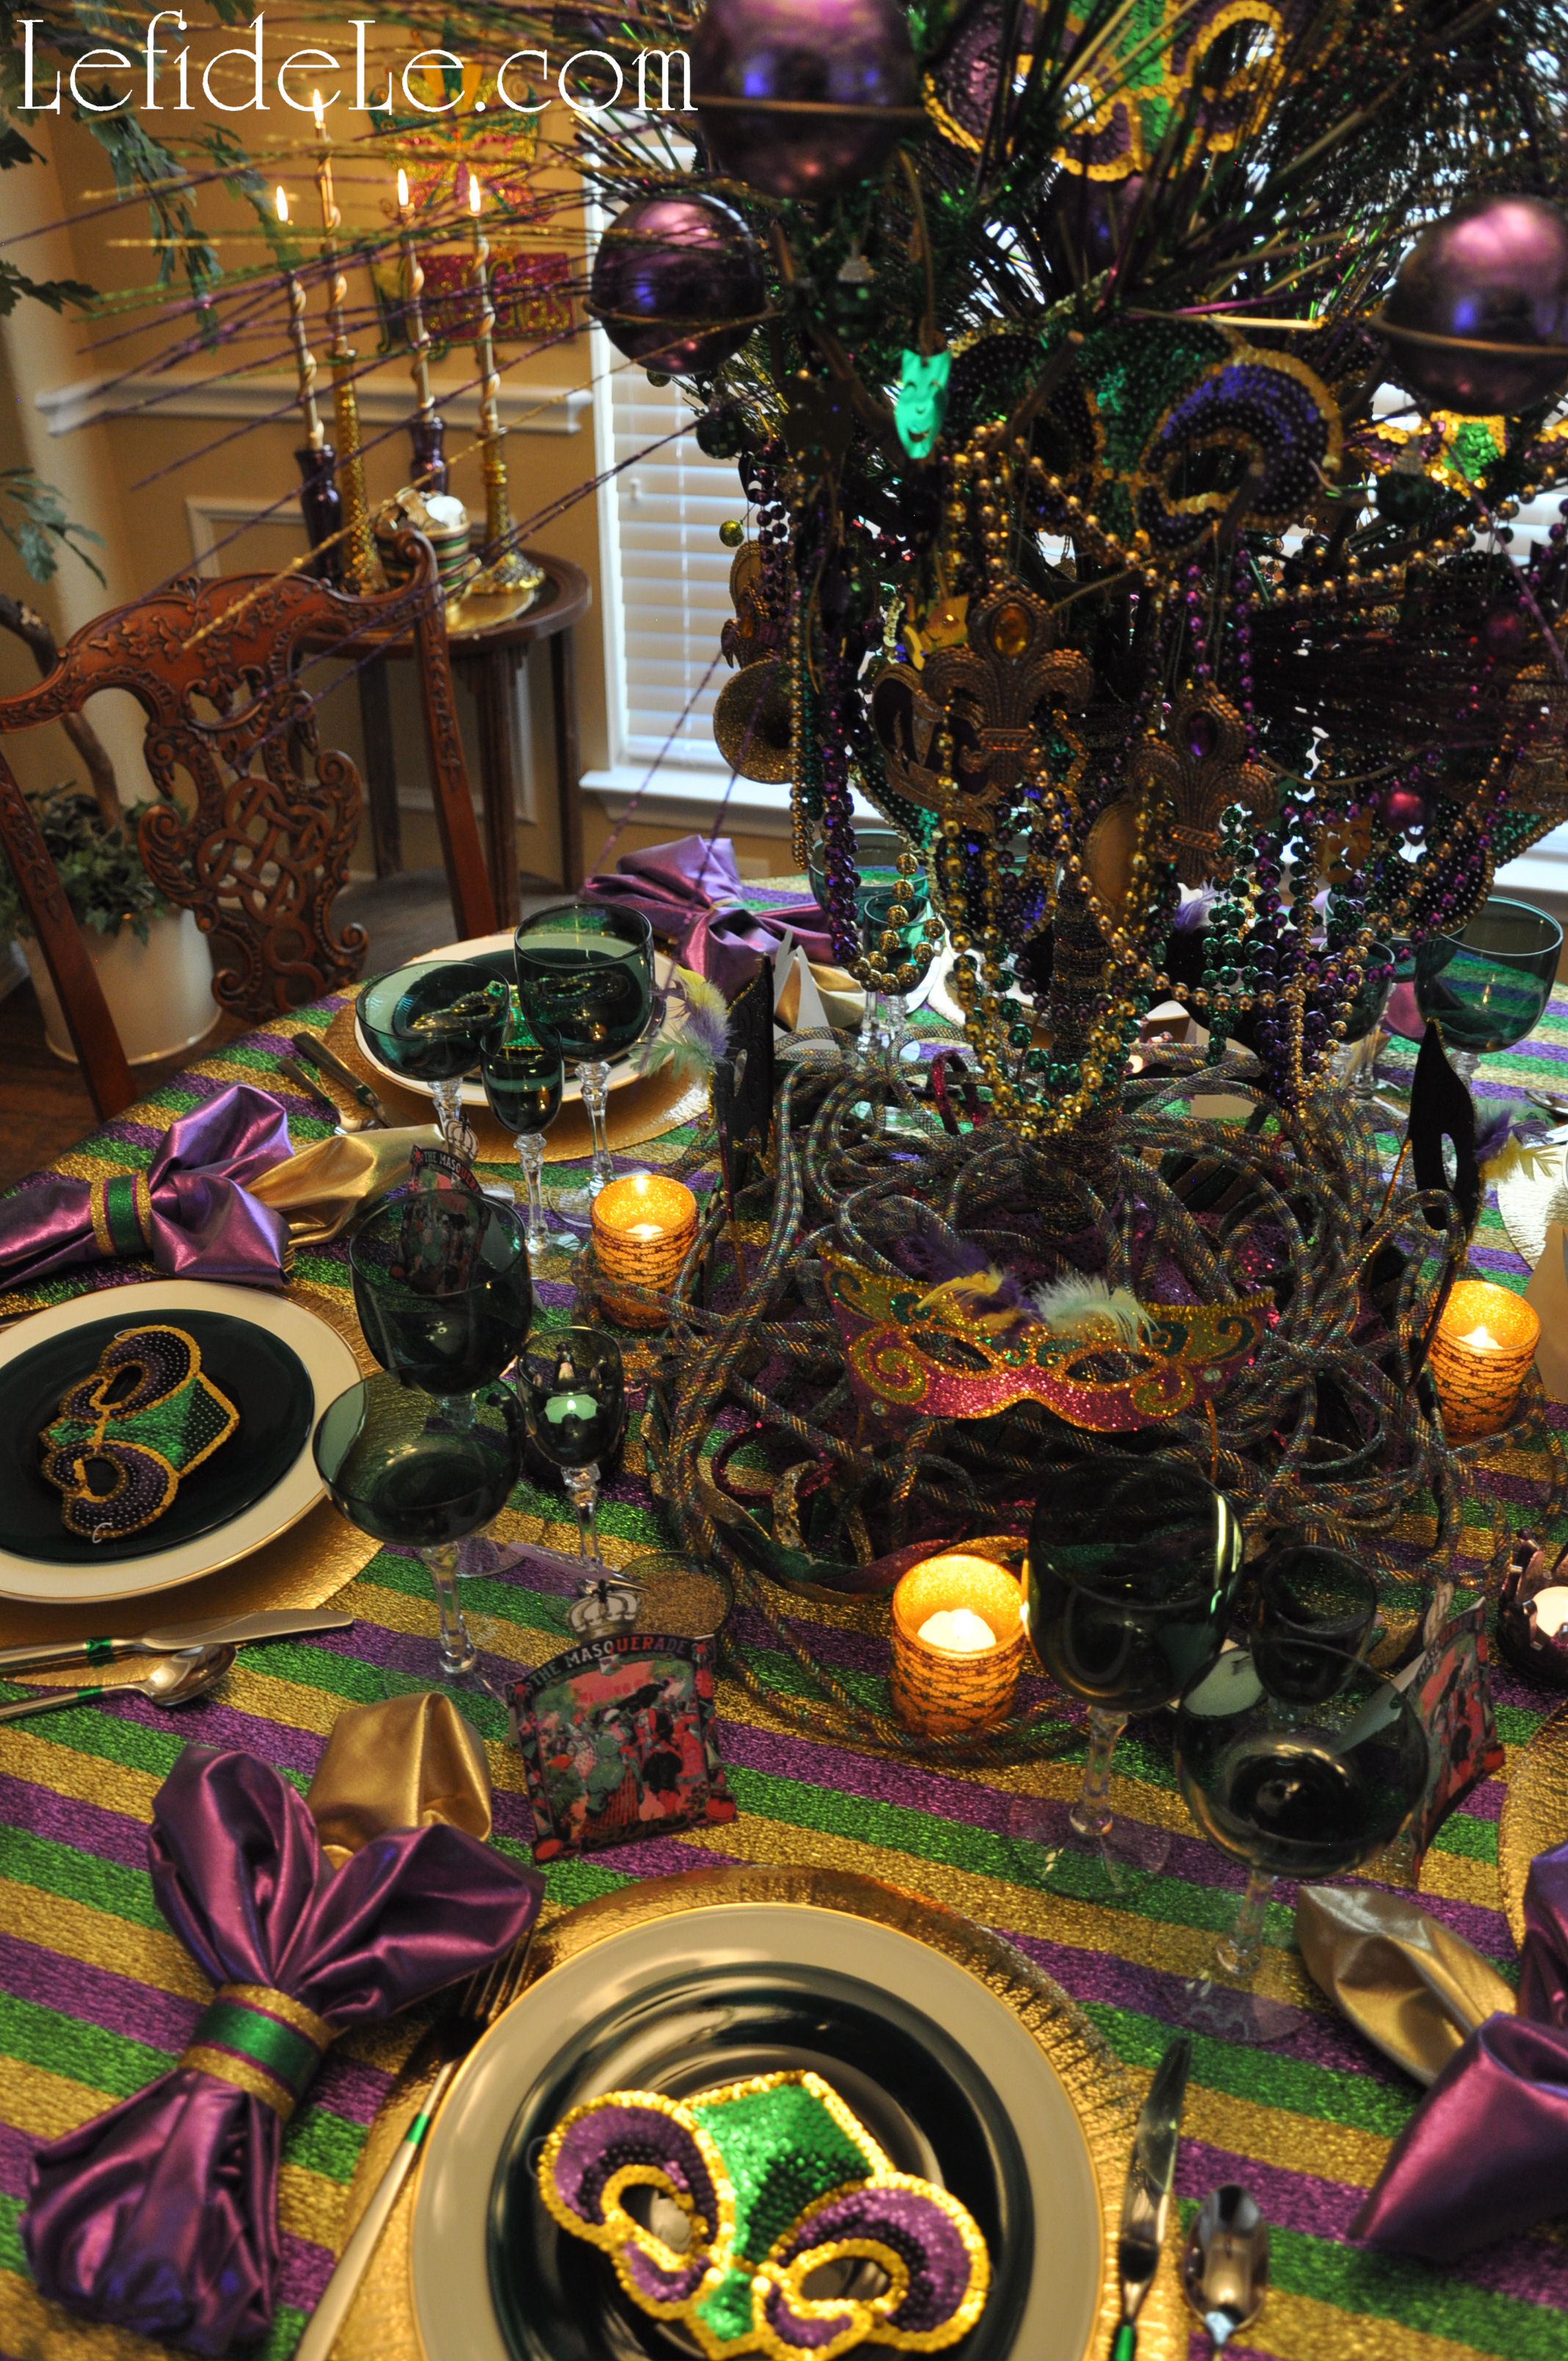
I made the centerpiece with trim from my Glitter-ween Party Décor (see it here) and a few new sprigs wrapped around a metal tree base. (Incidentally, I had previously painted this gold from its earlier pewter and bronze incarnations. (See how to use paint to change the color of metal and to age a piece in my upcoming lion fu-dog décor for Chinese New Year.)

120Leigh

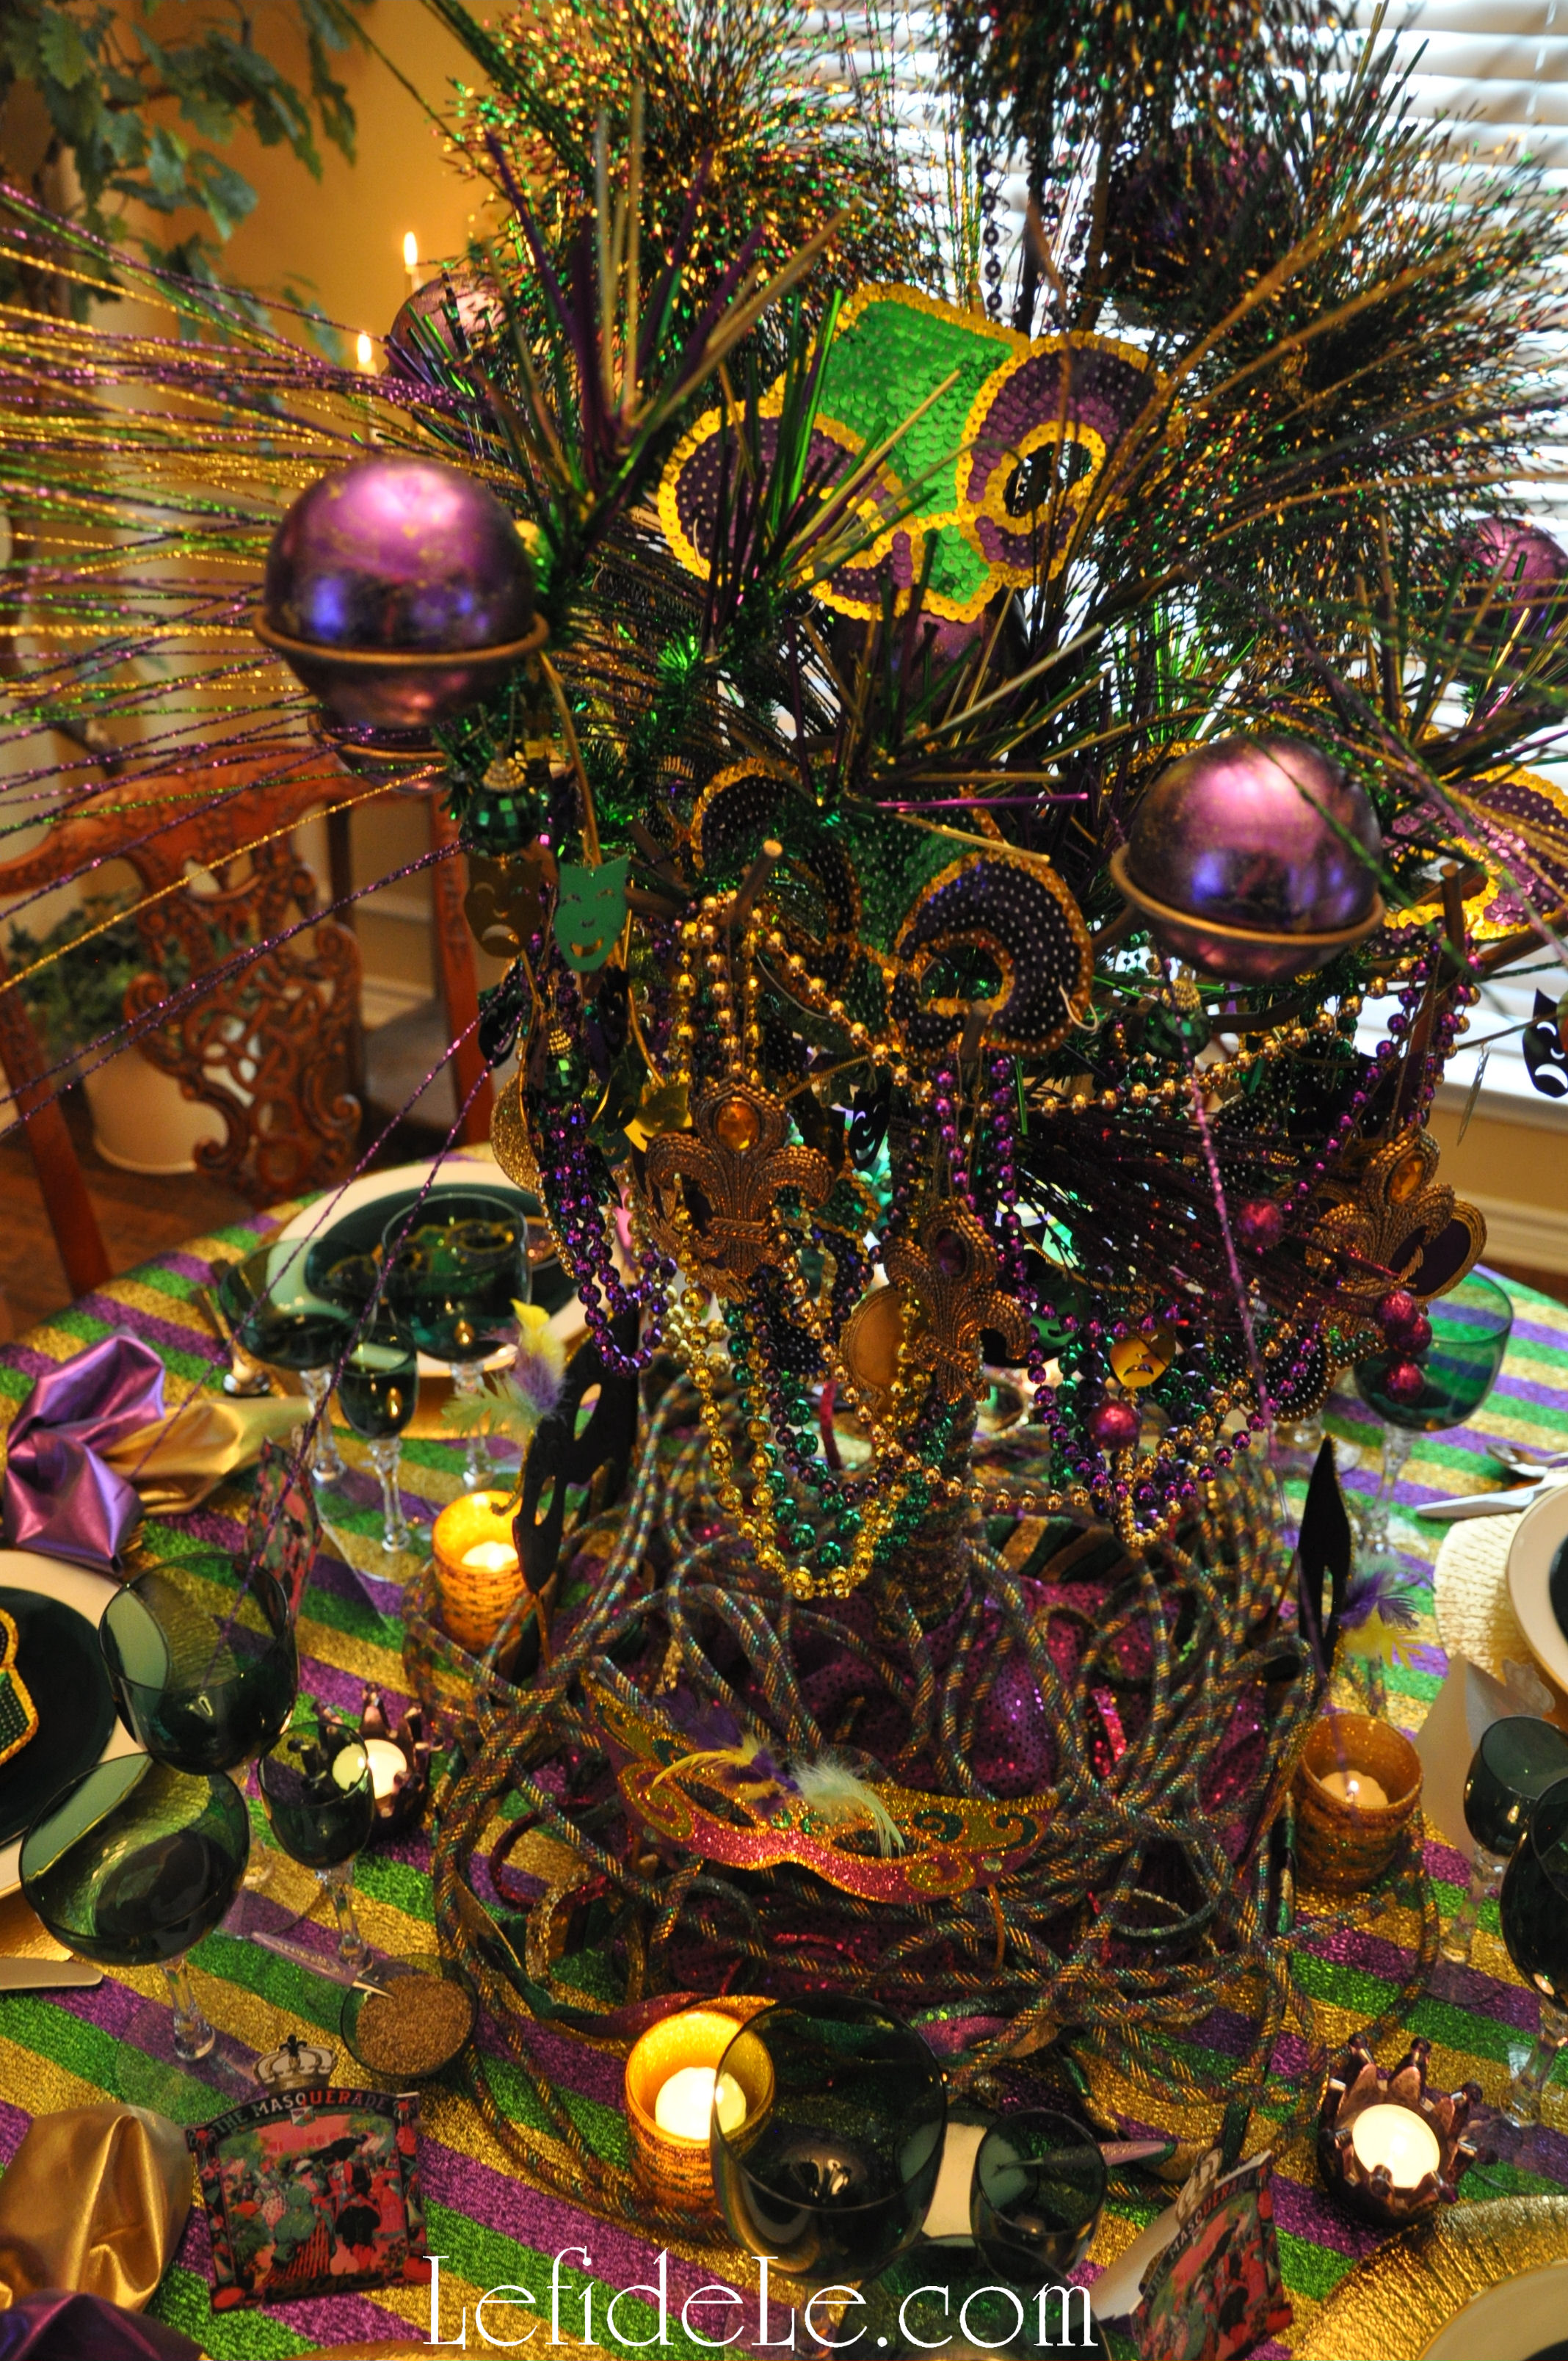
The base of the tree was swathed in the same purple fabric remnant from Glitter-ween’s spooky tree, and then draped with yards of Mardi Gras trim. (See how to hike up a chandelier to accommodate a tall centerpiece here.)

053Leigh

Though it’s hard to tell from the pictures, the tree centerpiece actually didn’t obstruct any person to person viewing. This is why I only draped the bottom with some Mardi Gras necklaces and wrapped the trunk with ribbon.

091Leigh

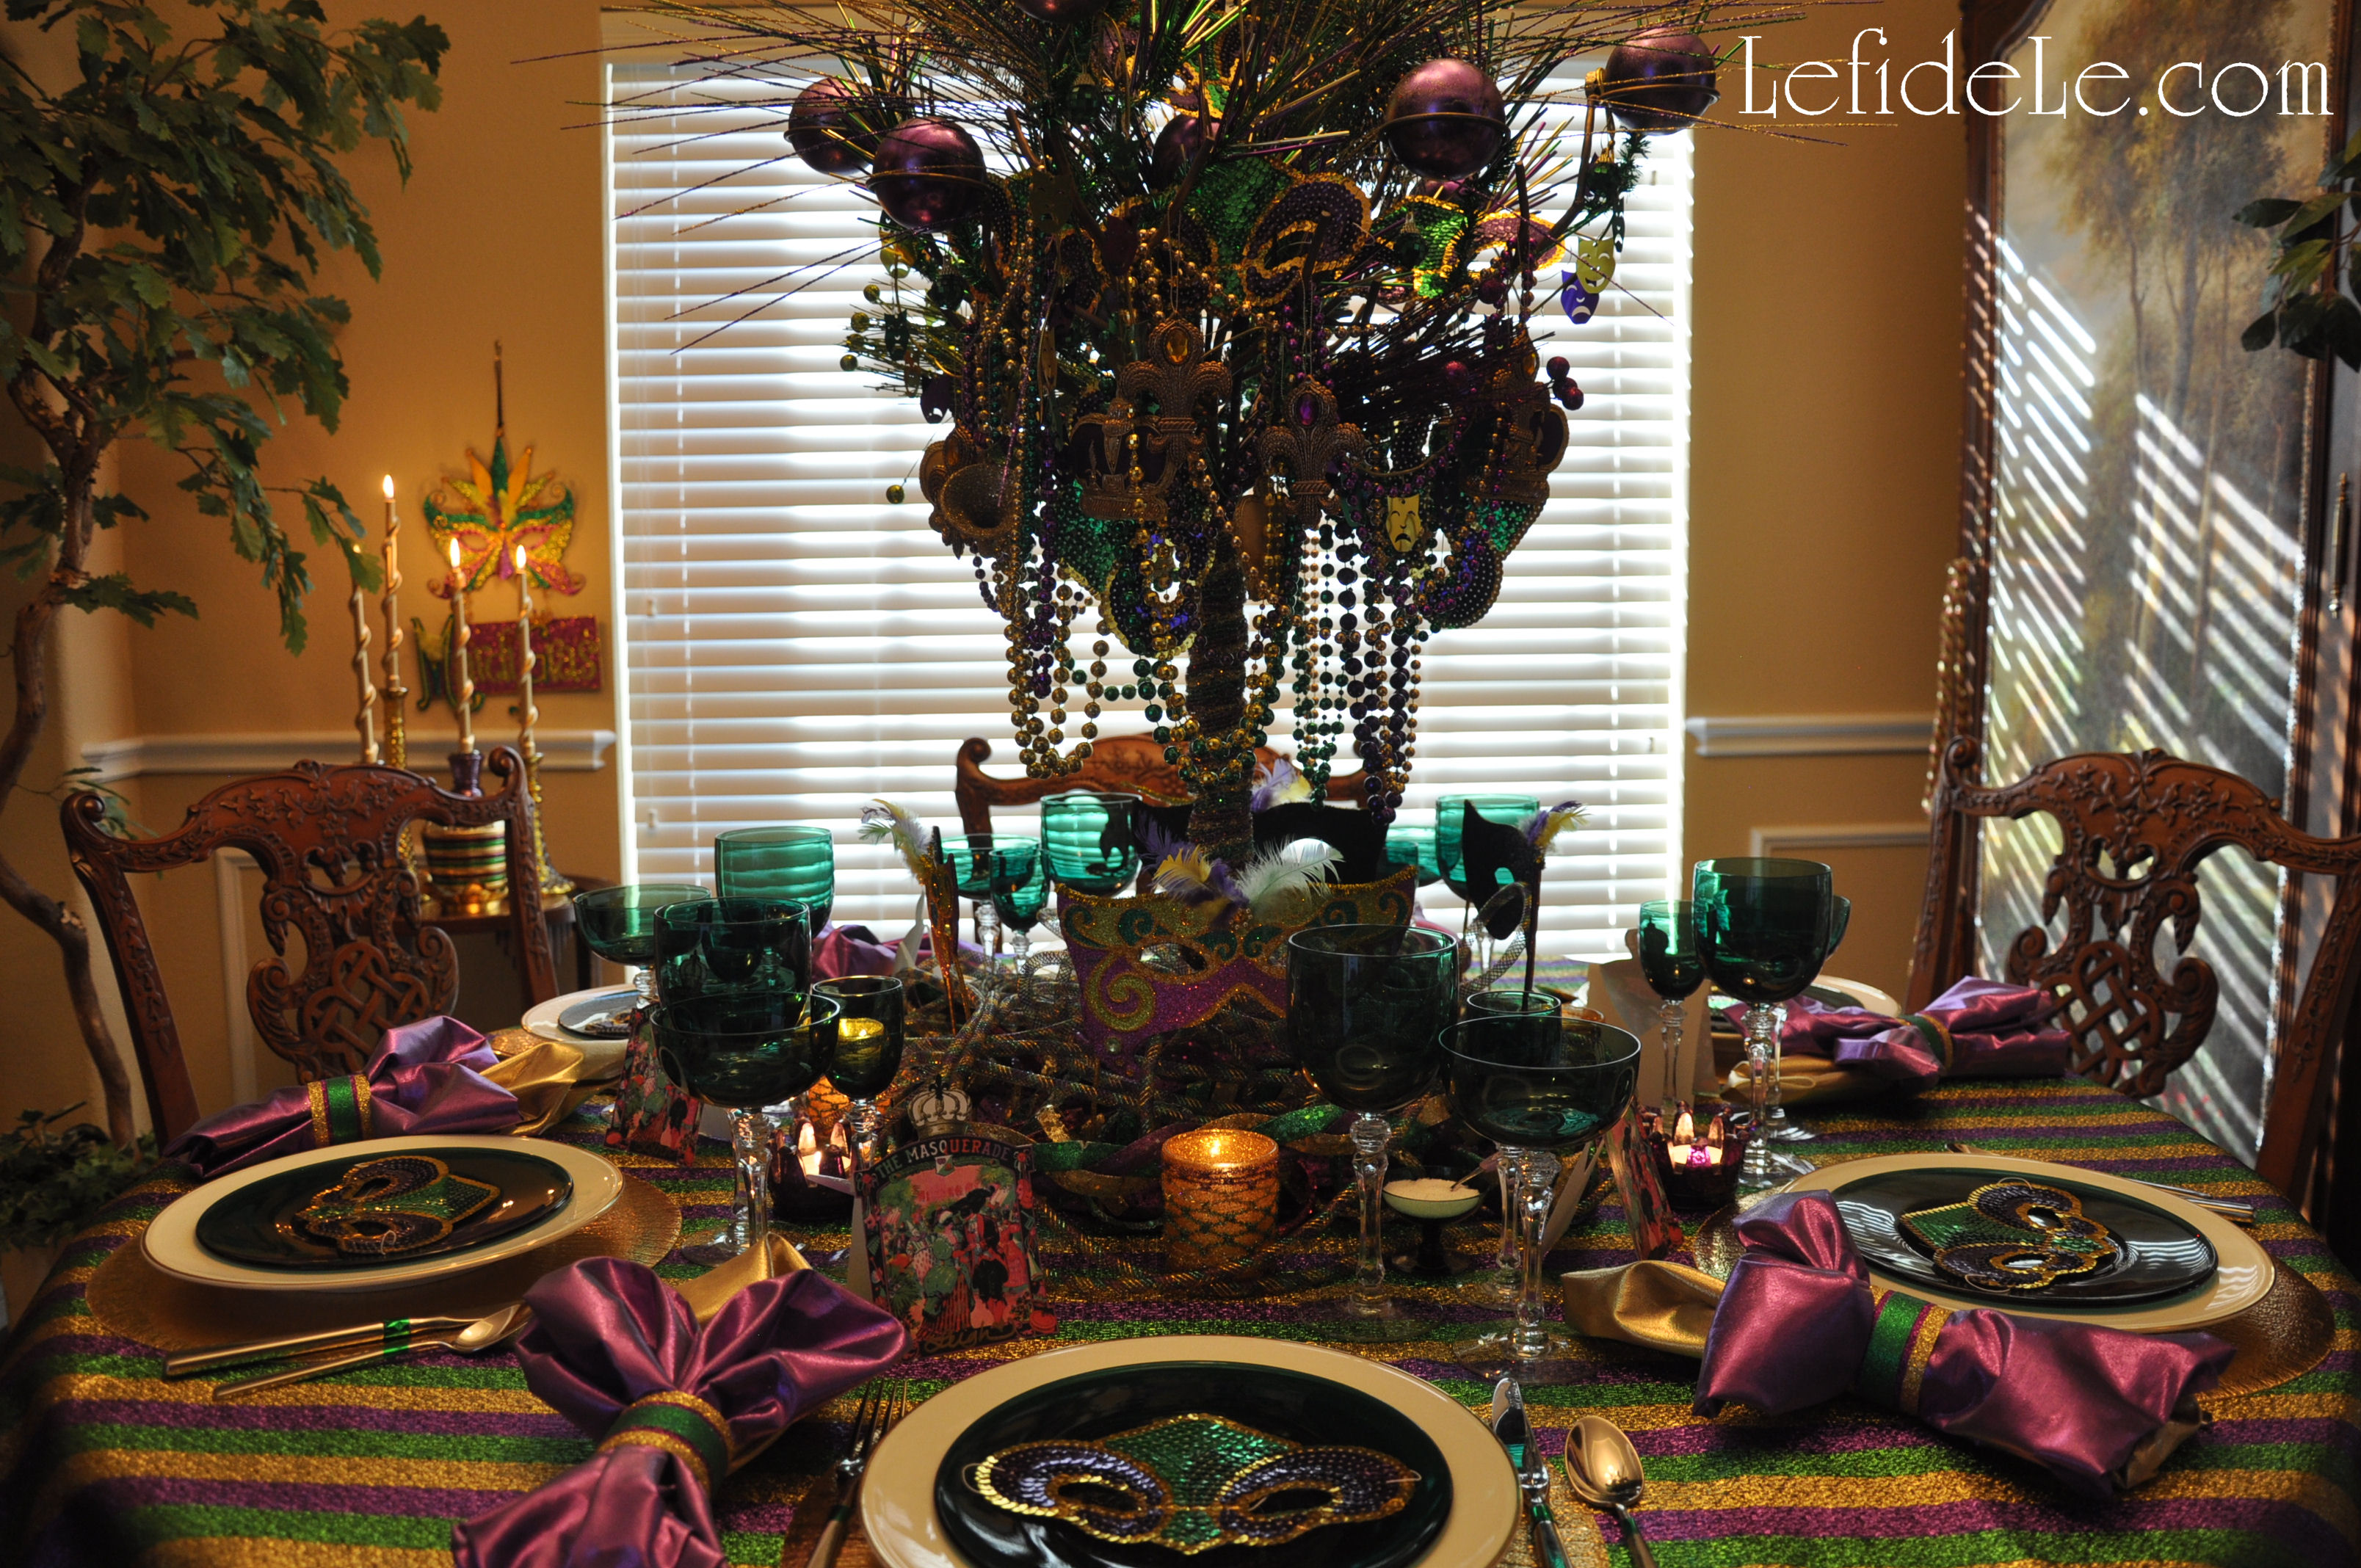
I hung embroidered Christmas crown ornaments, snapped up at 10 cent clearance, along with glittered musical instruments, green mirror balls, and a mask garland. (See more on the centerpiece here.) I try to plan all my holiday themes in advance of the after Christmas sales to snag a year’s worth of décor deals at 90% off. I keep my theme collections in labeled bins that I add to as I accumulate finds so that I’m ready to craft and decorate when each holiday arrives.

078Leigh

Surrounding the tree are 4 standing glittered metal masks that I scored at a post-holiday clearance sale for less than 2 dollars each… no kidding folks. I couldn’t have made them for less. To do as I did, scope out this year’s merchandise then pounce as soon as it gets marked down. The purple mercury glass crown votive holders were also found this way for less than a dollar for all 3. I wrapped the other gold votive holders with the same ribbon as the tree trunk to customize them for the holiday. (See how easy it is to do that here.)

131Leigh

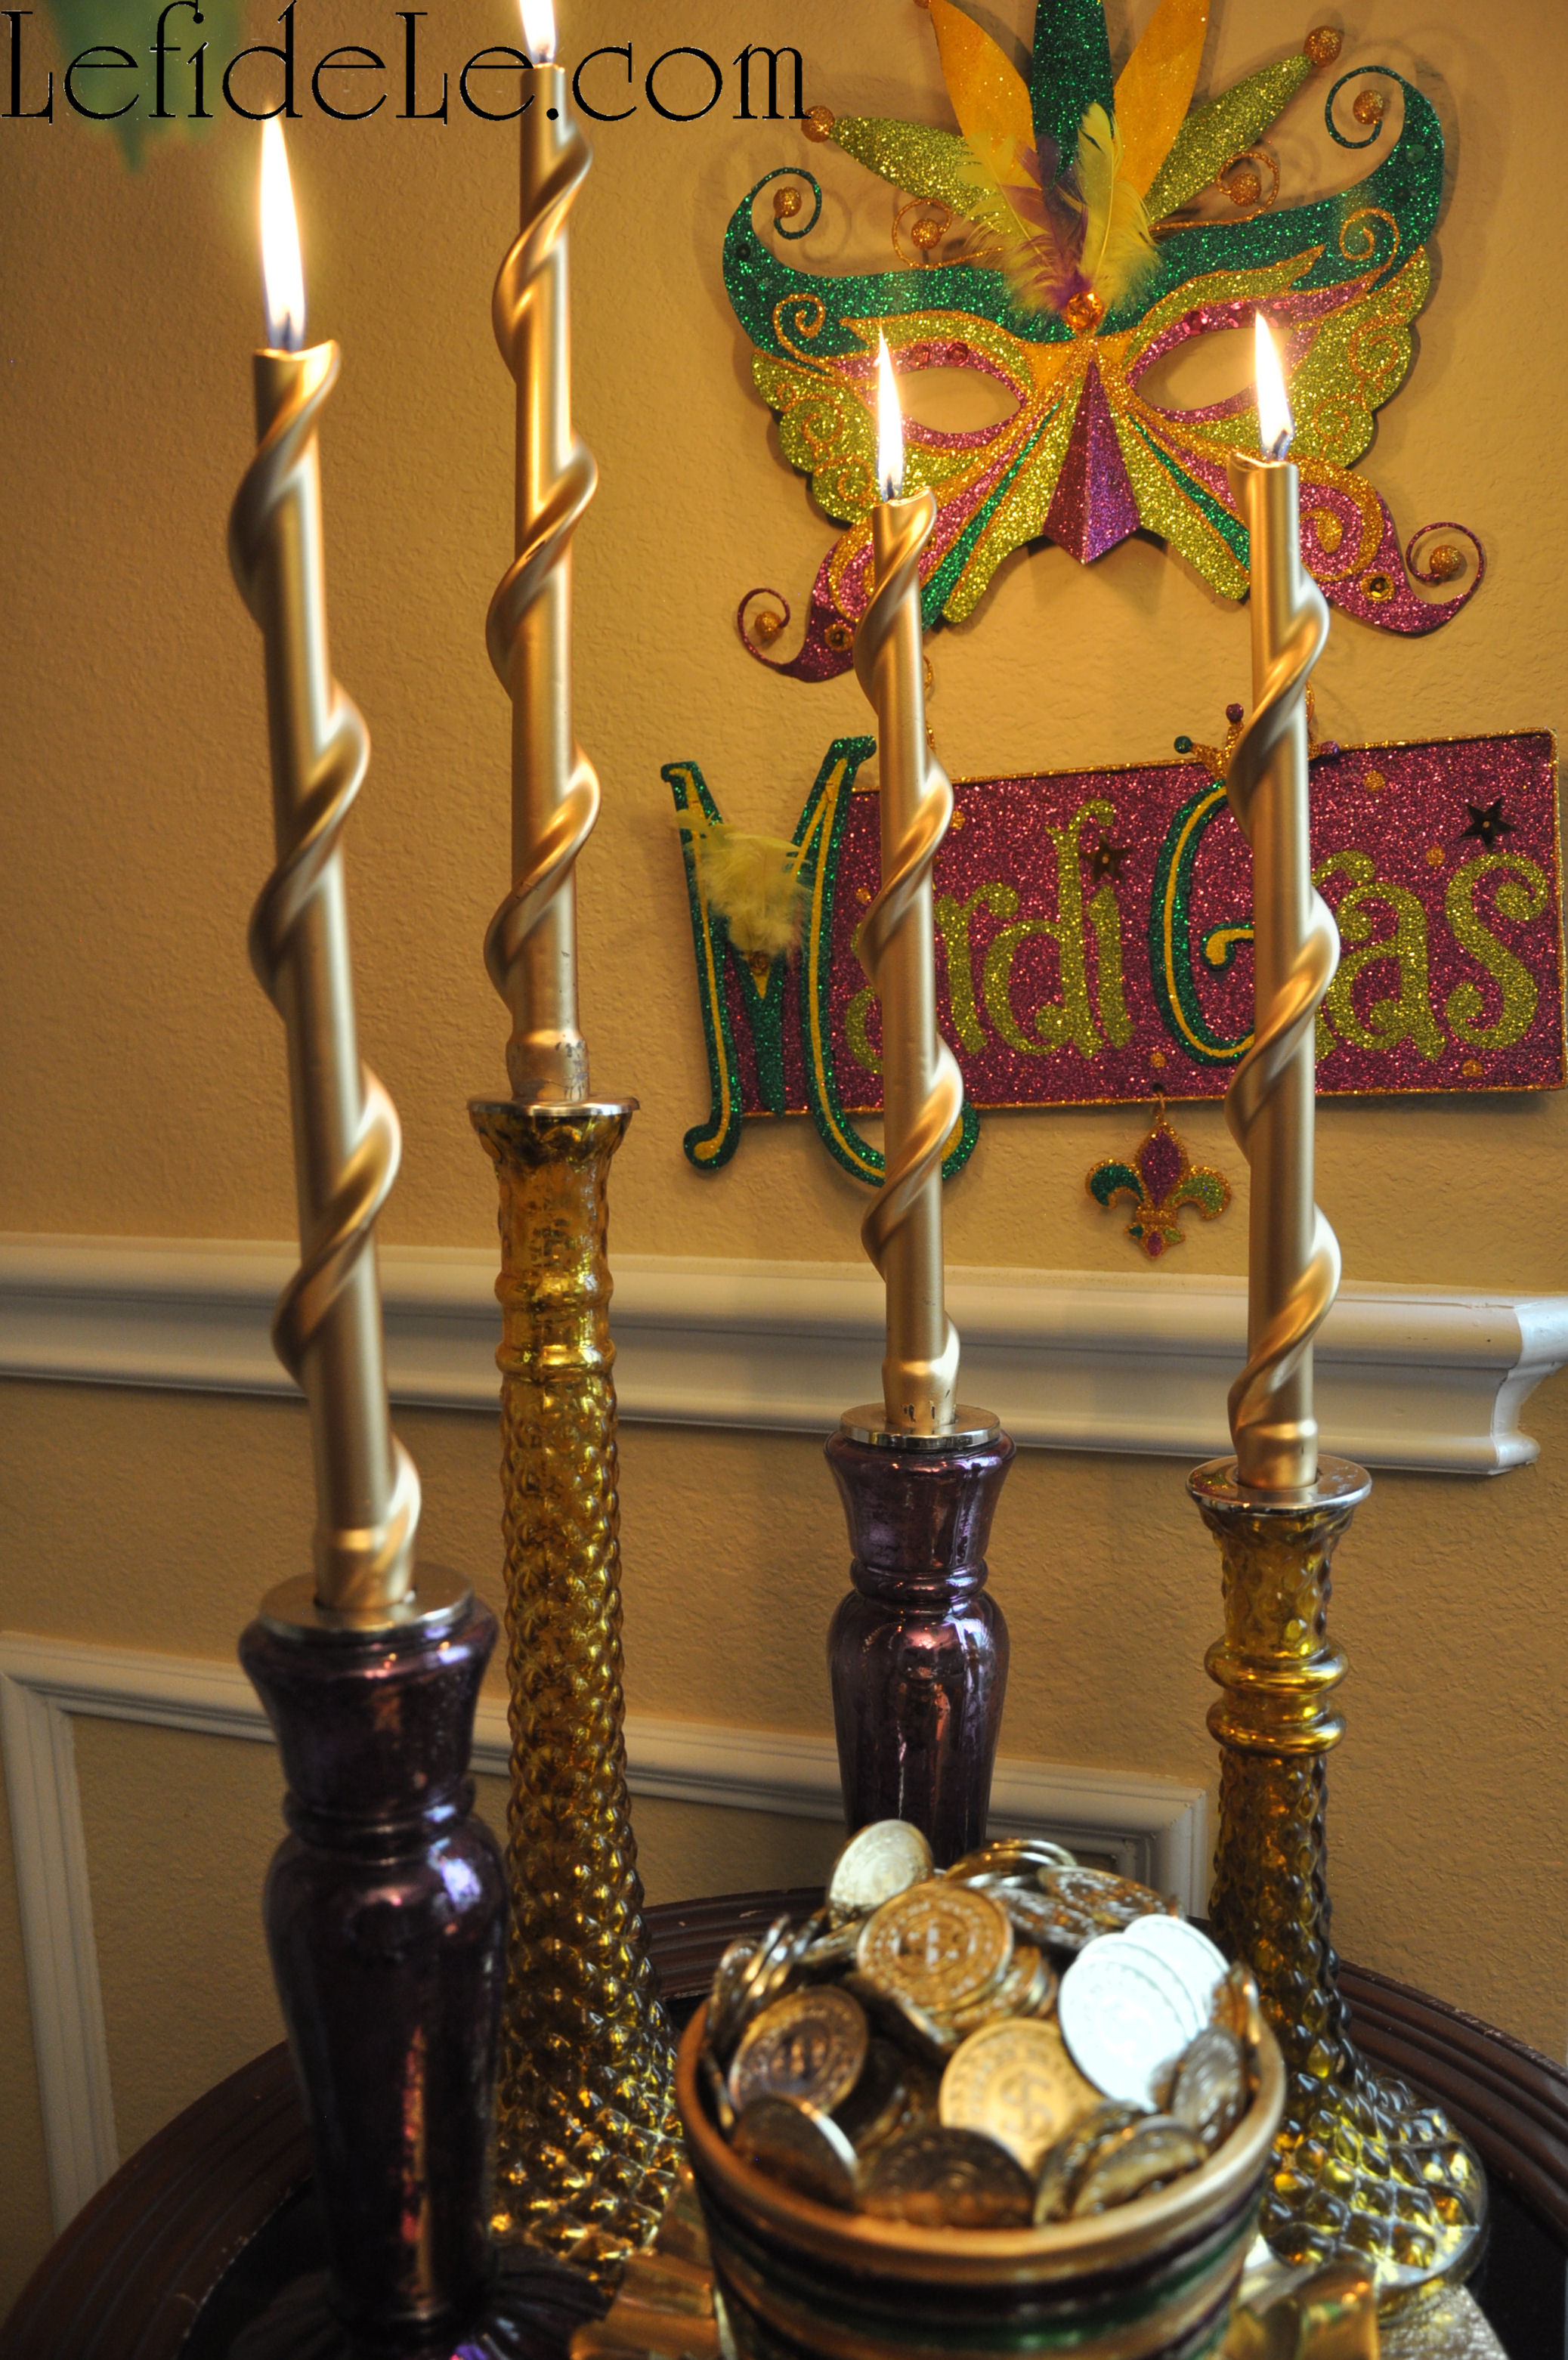
The side table has another clearance mask sign hanging near it on the wall. I placed a variety of my other mercury glass candlestick holders with swirling gold tapers to further accent the tablescape. A theme appropriate pot was filled with faux doubloons to add a dash of New Orleans to Texas. (These will reappear as pot-of-gold coins on St. Patrick’s Day.) All of this was set upon an extra placemat.

125Leigh

So you see, it’s really not difficult or expensive to celebrate Krewe-style with your own crew… just don’t forget to serve up that king cake!

095Leigh

Laissez les bon temps roules!

Faithfully Yours,

Leigh

Chalkboard & Glitter Hearts Themed Valentine’s Day Party Buffet Décor Ideas (+ DIY & Printable Links)

Running with the idea that opposites attract, I decided to make a Valentine’s Day Party theme that incorporated both matte black chalkboard and glittery red hearts. The elements actually coordinated beautifully for a party theme that would suit a variety of age groups, or even just serve as a surprise for that special someone. The whole shebang was actually quite inexpensive to pull off, though happily I believe that doesn’t appear to be the case. You can either follow the links to make the fast and easy crafts yourself, or go shopping with the theme in mind.

229Leigh

After deciding on my theme, I actually found this adorable chalkboard Valentine fabric that also had glitter hearts. (You can find some for yourself at Hancock Fabrics or Fabric.com using coupons from the affiliate links in the sidebar.) I hung this up with clear thumbtacks.

204cLeigh

I then strung my glitter hearts Valentine’s banner atop of this. I also attached another doily banner to the credenza itself with tiny tack nails. (The printable and instructions for both banners may be found by clicking here.)

213Leigh

I love incorporating ornament filled trees into holidays besides Christmas. Valentine’s Day is especially easy to do this with because it falls so quickly after on the calendar so that one may really take advantage of all those deep after-Christmas clearance sales. Some of the baubles on this tree were marked 90% off which left the cost at mere cents. The topper is a glittered sprig of holiday pine.

205Leigh

Some of you may recognize the black wooden tree from the Halloween Party. It looks really different when trimmed according to another theme. The conversation heart ornaments were made from white foam shapes (whose craft tutorial may be found here).

215Leigh

On the opposite side of the buffet, I made an arrangement that can be disassembled one heart wand at a time, to be given away as favors to departing guests. This is especially sweet when given as scepters to little Valentines princess party goers. (See the tutorial at the link here.)

206Leigh

I set all of these into a vase shaped like a thread spool twinned with glittery red flat yarn. It symbolizes the ties the bind… and is filled with hearts. Glass marbles contain the arranged wands yet allow for easy removal. These are topped with another variety of glittery yarn to conceal the marbles.

214Leigh

Other décor elements are the chalkboard sign crafts set onto easels (find tutorial here) alongside a store-bought slate that I was gifted with early. (Thanks Mom!)

209Leigh

A variety of gift bags and boxes overflowing with candy were nestled into the ensemble. The heart bags and mail boxes were machine cut from construction paper.

238Leigh

I included both oversized gems and tiny crystal hearts to fill in the empty spaces. I borrowed a bouquet of crepe paper roses that I had actually made for my mother years ago, and set these into a marble filled vase. I wrapped it with some leftover rope trim that coordinated with the theme, and set it atop an upturned boxy metal vessel. It’s really easy to create lifts and levels when one starts to think out-of-the-box and repurpose items for that other than which they were intended for.

219Leigh

The treat tower is actually comprised of two metal trays that I found on after Christmas clearance years ago. I simply stacked these by using an empty drink mix container wrapped with glittery fabric.

17Leigh

It was surprisingly stable, but you can add further assurance by hot gluing these for a temporary bond. A stronger adhesive would make the bond permanent. I stocked the tower with icing laden cookies, cupcakes, and candy cocktails.

208Leigh

The other platter was another clearance gem from over a decade ago. It’s a lovely red metallic reverse painted glass. You can mimic this with a lovely red charger in either acrylic or glass. More of the same sweet treats topped the dish plus some delectable chocolate covered cherries set into their own treat cups. Try this with truffles or even upside down cake pops.

77Leigh

I made my own treat pops with Peeps red speckled white “love birds” with chocolate bases. To make your own, simply poke a pilot hole with a skewer or tooth pick then jab in a paper straw. I chose adorable heart covered ones, and then set these into gumball packed vintage crystal vessels. Any solid candy would serve as well.

250fLeigh

A non-alcoholic berry soda set into an ice bucket serves as equal-opportunity refreshment. The same red metallic plates that appear in the chalkboard sign crafts were placed front and center. Last but not least to complete the sweet buffet was the addition of candlelight. (Use LEDs if you fear sleeves catching fire or if you have young guests attending.) Red mercury glass votives were, you guessed it, purchased for mere cents post-Christmas. They really added to the ambiance of the whole setting.

202Leigh

♥ As you prepare for your own Valentine’s celebration… just remember to, “Keep calm & party on!”

Faithfully yours,

Leigh

Fast & Easy Glitter Heart Wand Centerpiece, Foam Ornaments, & Faux Chalkboard Valentine’s Day Décor Craft Tutorials (+ Printable)

205Leigh

This mélange of fast and easy crafts were made to decorate a Valentine’s Day Party, but you can adapt them for any purpose you like. The faux chalkboard craft is an inexpensive way to decorate for the holiday, but also makes a quick Valentine for a love one. The chalkboard idea can also be extended to other favors quite easily. The glitter heart wands effortlessly gather into a dramatic centerpiece, and can be taken home as favors by each Valentine princess at the party. (Make these with foam hearts or my free printable from the Valentine’s Day banner craft.) Also, make Valentine ornaments with the kiddos in your life using foam Conversation hearts in a matter of minutes.

61Leigh

Let’s begin with the simplest project first, making Valentine ornaments out of foam conversation hearts from the craft store. (I used the white ones only, so as to coordinate with my theme colors, and reserved the other pastels for the candy-land themed party which will appear in an upcoming article.)

81Leigh

You can either glue the hearts back to back, sandwiching twine or thin ribbon between them, or simply tape twine loops to the heart backs. The latter is the quickest way to make them, and the easiest for a little one to help with.

80Leigh

(See these similarly on the How to Make an Assemblage Sculpture (= 3D Collage) for Your Valentine (Art Instruction / Craft Tutorial).)

168Leigh

The next project is a faux chalkboard sign, that also makes an inexpensive Valentine, using the unexpected material of a paper party plate. The square metallic disposable plates are lovely yet extremely budget friendly. Why not pick some up for the party and reserve one or two to fill in as décor.

45Leigh

Merely use dots of glue to layer square doilies onto the plates. Simply trim down the doilies to fit the smaller plate sizes.

47Leigh

Then cut a square of matte black cardstock to size, and glue atop the doily.

50Leigh

Use a white paint marker to write whichever sentiment, poem, or quote you wish.

55Leigh

Use a hole-punch to add 2 openings with which to slip a strand of coordinating ribbon through. Simply tie the two ends in a bow, which also serves to further decorate the sign.

21Leigh

Similarly, cut squares of black cardstock to adorn gift bags and boxes, using the same white paint marker to write your sentiment in “chalk”.  If the writing doesn’t seem clear enough, simply go over the letters until they do. The uneven edges make them look even more like chalk, but won’t come off on your clothing while delivering them to your recipient.

208Leigh

Moreover, in this way you can ride the chalkboard trend without spending as much on readymade tags, stickers, or chalkboard paint. (The bags I made were machine cut from construction paper then adorned.)

215Leigh

The last project is a centerpiece of glittery hearts meant to be taken home as party favors at the end of an event. You can even print, cut, and glue these onto tiny wooden dowels using my free printable at the end of the article.

34Leigh

I sandwiched a thin dowel between 2 glittered foam hearts with the aid of hot glue. The thinnest dowels are really easy to just snap in half where you want to section them. Trim with a bow of glitzy ribbon if you like. I used readymade glittered bows from an after Christmas clearance sale.

10Leigh

The open hearts were made from inexpensive styrofoam and red glitter blast spray. For the largest ones, I simply jabbed in a cut section of wire hanger as a handle, but a thin dowel would be better if gifting them. I added glittery bows to some of these as well. All of them will sit securely arranged in a vase filled with marbles. This way they can be easily pulled out one by one at the end of the celebration as favors. I just pilled on an unraveled skein of glittery red yarn atop the marbles to hide them.

206Leigh

♥ Happy Sweetheart’s Day!

213Leigh

Faithfully yours,

Leigh

V-dayHearts-Leigh

P.S. Here is the Glitter-Doily Heart Printable. Simply right click on the image and select Print. Print them in the best color photo setting.

2 Fast & Easy Valentine’s Day Banner Décor Craft Tutorials (Doily & Glitter Hearts + Printable)

229Leigh

These Valentine’s Day banner crafts are so fast and easy that even the busiest mama can make them with her little ones. The glitter heart and doily printable only needs the addition of letters to spell out any message you wish. The second banner is comprised of layered doilies and extra valentines. Both are so inexpensive yet add a lot of heartfelt sentiment and party atmosphere. Plus, they’re lightweight enough to stick in a big envelope and send to a loved one whose away for the holiday. You can even use the printables as stand-alone Valentine Cards!

176Leigh

First let’s make the doily valentine banner. This is a great project to use up any leftover schoolroom Valentine cards from your kiddo’s class. You can even save the received ones to make banners for next year’s celebration.

175Leigh

One only needs to add some low-cost paper doilies in varying sizes. I used leftovers from last year along with some Holly-Hobby Valentine Cards from my childhood.

51Leigh

Merely use dots of glue to layer the doilies and Valentines. Then add a ribbon bow for dimension.

54Leigh

Tie circles of twine, yarn, or ribbon through the holes in the doilies and knot together. Hang it up and enjoy!

171Leigh

The glitter heart and doily banner is one that can be easily made by two different methods. You can print and cut out all the glitter doily hearts you need, using my printable at the end of the article. You can also use inexpensive glittered foam hearts from the craft store, and use hot glue to layer white doily hearts onto them.

26Leigh

Either way, the next step is add letters spelling out any sentiment you’d like. I cut out letters with a machine from black card stock to coordinate with my chalkboard theme. You can also use a stencil to trace and hand cut them, or buy them readymade at the craft store. (Michaels has them in every color and texture you can think of. Click on the affiliate link in the side bar to snatch the latest coupons.) I added a knot of ribbon to each dip in the heart to further tie in with my theme’s color palette. Feel free to add any other elements you’d like from paper roses to stickers. (You can even skip the letters and let a kiddo color in pictures to use the printables as Valentine Cards.)

38Leigh

Next add holes to both sides of each heart with a hole-punch. Then use ribbon or twine to string them together. Add a loop at each end to hang the banners by. Voila!

224Leigh

♥ Happy Heart’s Day!

Faithfully yours,

Leigh

V-dayHearts-Leigh

P.S. Here is the Glitter-Doily Heart Printable. Simply right click on the image and select Print. Print them in the best color photo setting.

Last Minute Cocorico Rooster Theme Dinner Party Décor Ideas (+ Free Printables)

175Leigh With the winter season so turkey saturated for the holidays, I thought I’d utilize my overabundance of rooster décor and host a cozy dinner party by the fire. I used my Healthy “One-Pot” Cocorico Roasted Chicken (or Turkey) & Root Vegetables Recipe as a family-style centerpiece of food. And with my printable place-cards, it’s an easily emulated dinner party that offers a warm welcome for out-of-towners in for the holidays! 157Leigh I love the idea of taking dinner out of the dining room, especially in winter when there is a cozy fire available. So, my first task was to move the couches into a dining configuration. I have a large round antique coffee table that is mechanized to pop up to dining height. To accommodate more guests, I topped it with a $12 precut 4’ x 4’ plywood square from a chain hardware store. The edges of this were taped to avoid snagging the tablecloth. A card table is another easy option. 65Leigh Layering fabrics is a quick and easy way to add warmth to a gathering, so I draped layers of tablecloths over the square. The first layer was chocolate brown, then beige burlap with added trim, and a fall paisley print over the top. 106Leigh I exchanged the usual living room décor with various bits of rooster ephemera. I set a ceramic chicken on a side table next to cranberry colored candlesticks, and tucked feather tassels under the large candles. 49Leigh By the fireplace, I placed a rooster painting on an easel atop an old burgundy leather suitcase. Another served as a base for a spiral topiary. It was housed in an inexpensive and lightweight cranberry pot meant to simulate glazed pottery. In front of that, I positioned a small vintage brass rooster doorstop. I actually have many more roosters, but I was able to (somewhat) contain myself. 158Leigh I gathered sage and chocolate colored throw pillows to coordinate with the linens and dishes. These softened the deep chocolate leather sofas. Switching out small elements of your décor for an evening is an easy way to experience a change of scenery without breaking the bank. 143Leigh I set the table with wood-handled flatware and layers of dishware in various patterns. This included wooden plates as chargers, sage green bordered dinner plates, and a selection of chicken and rooster plates. Though completely untraditional, I figured these could be set to the side for bread later… they just looked too cute stacked this way! I actually found these little gems for $3 clearance at Dillards. Now they’re a part of my last minute rooster dinner party arsenal. 156Leigh My other go-to elements are antique chicken salt and pepper shakers from my grandmother, and vintage multicolor rooster stemmed glassware from my mother. 45Leigh It’s really great to have coordinating pieces that can be thrown together without much forethought, while having the appearance of effort. In this way, a simple chicken dinner is elevated to a special evening. Make a point of collecting what you like, and pull it out for your get-togethers. 44Leigh Another component which you can make for yourself is my DIY Rusted Rooster Chicken Wire Votive Holder Craft. Because they were so easy, I actually made many more than I used in the pictures. (These can be made with any shape you like, fall leaves for example.) They really added a beautiful glow to the table. 32Leigh I transformed, recolored, combined, and resized vintage images to make 3 free printables for invitations, labels, signs, menus, food tents, name place-cards, recipe cards, etc… (These are free for personal use only.)

  24Leigh These are available at the end of the article (simply right click on each image, and print in color and on photo settings on cardstock). Then just cut out your place-cards as needed… or enlist a significant other or kiddo to do it while you prep for dinner! 25Leigh The last step was to add the food… artisanal rosemary bread in terra cotta to compliment the Cocorico, compound butter in a rooster dish, mixed olives seasoned in flavored oil and spices, and the off-center centerpiece of roasted chicken and multi-colored root vegetables of carrots, beets, parsnips, radishes, and fingerling potatoes. 125Leigh Cocorico roasters are perfect “one-pot” wonders that deliver beautifully from oven-to-table. Root veggies may be peeled and seasoned the day prior to an after-work gathering if need be. Simply pick up bread and dessert to accompany your meal. Or, try out my Easy No Cook Layered (N)ice-Cream Pie with Nut Crust (Vegan, Dairy-Free, Gluten-Free) which may also be made with traditional ice cream, and can be made and frozen well in advance. 160Leigh Happy Fall Y’all! (…I couldn’t resist.) 168Cocorico-Leigh Faithfully Yours,

Leigh

Cocorico3x3labels-flatcards

Cocorico5x5cards-labelsLeigh

CocoricoTent-PlacecardsLeigh

Quick & Easy Informal Gathering Fondue Dessert Party Idea

One may easily spend the fall and winter bouncing from one holiday into the next, and often those celebrations are hosted at someone else’s abode. Why not extend thanks by inviting those friends and family to a small gathering that doesn’t involve candy, pumpkins, or trees. This easy fondue theme can be quickly pulled together the evening before. See my accompanying Quick & Easy Chocolate Coconut Fondue Recipe here. It takes about 5 minutes to prepare just before everyone arrives. It is vegan, gluten-free, and dairy-free so no one has to be left out. (Just be sure to buy or prepare gluten and dairy-free items to dip also.) An informal dessert party can accommodate a larger number of people without adding more work, which is great not only during the busy holidays but at any time of year.

230Leigh

I chose the warm and inviting colors of purple and green in order to distance my theme from those traditionally used for the holidays. They were a lovely contrast to the ivory dishware and dark brown of the chocolate and leather. Color accents were seen in the throw pillows, trays, glassware, dishes, and even the foliage. It extended to the cloth napkins that were set on the coffee table and lazy-Susan. Adding the rotating tier not only eased food accessibility, but also created separation between the serving and eating areas which was visually more appealing.

200Leigh

Seated on an end table was a painted tray that contained a basket of coordinating napkins in wood beaded rings, a glass holding fondue skewers, and Portmeirion Pomona plates.

251Leigh

I only used the plates with the pear and fig motif because they matched so perfectly, but even pretty paper plates would be fine for such an informal gathering.

208Leigh

Another table held a larger tray with purple bubble glasses and a matching pitcher seated on a wooden riser. An ice bucket was placed on a taller stand behind that. A cloth napkin was draped to preemptively contain any spills. Preserved lavender sat in a painted pot to soften the visual edges.

231Fondue-Leigh

All of the furniture was rotated, for the evening, in order to accommodate an easy flow. An ottoman and a ceramic stool added seating to the arrangement, without blocking pathways. Pillows in coordinating colors were pulled from other rooms, to temper the masses of brown leather. For a smaller group, one could even pull furniture from the room, and just use stacked floor cushions around a coffee table.

192Leigh

Even the rock fireplace was included as a focal point with the addition of candles on green glass. These were placed at varying levels by means of a trunk and upturned basket. Statuary, a birdcage, and small trees added height and interest. Why not switch accessories for a night?

205Leigh

The serving pieces are actually comprised of two different sets of dishware. The center group is a small fondue set placed on a wooden stand for height. The ring of dishes surrounding that was actually meant to coordinate with a plain bowl for hors d’oeuvres, but worked beautifully to present a larger volume of food. Round bowls would also have been lovely surrounding the chocolate center.

204Leigh

Whether you choose to serve on paper plates or fine china, change up your décor or leave it all the same, bake your sweet treats or buy them at the store… your guests will be treated to a relaxing evening filled with delightful confections and camaraderie.

86Fondue-Leigh

Faithfully Yours,

Leigh

Fall Leaves & Pumpkins Themed Thanksgiving Tablescape Décor Ideas

When I think of fall, images of brightly colored leaves and plump pumpkins immediately fill my mind’s eye. This was the initial inspiration behind this tablescape for Thanksgiving.

194fLeigh

I craved more color than is typically seen in fall décor, and so added a tablecloth with a denim background.

76Leigh

The blue color perfectly balanced the orange of my pumpkin topiary crafts that I made for place-card holders.

75PumpkinTopiaries-Leigh

More color was added with green plates and green crystal votive holders.

148PumpkinTopiaries-Leigh

Deeply stained wooden bowls and chargers were utilized to reflect nature. Turning some upside down made stable pedestals for serving pieces.

141Leigh

I chose terra cotta to echo the pots of the topiaries and because the covered dishes would better retain the warmth of the meal. Little tassels tied to the handles softened the hard look of the pottery.

197Leigh

Wooden stands added interest and height to the tableware, thereby making the food the centerpiece. Bringing the floral out and the food in, contributed further to my untraditional Tablescape.

187Leigh

The silverware and golden basket weave glasses provided the finishing touches for the table, just as one would finish an outfit with jewelry.

143Leigh

After the salad course was served, the wooden pedestal hosted turkey slices that had been carved in the kitchen. This is a lovely alternative for round tables where the turkey would make up the entire centerpiece otherwise. This way, no one has to look at the carcass for the remainder of the meal, which is a blessing to any vegans who were invited.

174QuinoaSquash-Leigh

This is my healthy quinoa pilaf stuffed patty pan “mini” squash recipe which is Gluten-Free and Dairy-Free so that everyone may happily partake of the meal. Ground meat may also be added to make a complete meal.

8CauliPotatoes-Leigh

This is my quick and easy heart-healthy “shortcut cauli-potatoes” recipe that is also Gluten-Free and Dairy-Free. It’s great year round because it’s so healthy and so fast to prepare.

160Leigh

Happy Thanksgiving!

Faithfully Yours,

Leigh

Fabulous Fall Leaf & Pumpkin Décor Crafts (Place-card Holders & Easy Remade Basket)

354PumpkinBasket-Leigh

I’m combining what are essentially two projects, because they entail exactly the same easy process of hot gluing your way to a fabulous fall! With so many beautiful options in faux foliage available, you can keep your creations to display again. The pumpkin topiaries may be placed throughout your home or office as small floral elements, or used as place-card holders as I have for my Fall Leaves & Pumpkins Themed Thanksgiving Tablescape. And though I used a vintage pumpkin shaped basket, I’ve seen similar variations of it at several craft and party stores that are just begging for embellishment.

314Leigh

For those of you who are brand new to this kind of thing… always buy fall foliage on sale (and there is always a sale somewhere). There are a plethora of leaves, sunflowers, berries, twigs, and mini-pumpkins available in fall colors. Rip off (or cut) the pretty bits from the largest stem.

313Leigh

Make curlicue vines by first wrapping brown floral tape around wire (pulling as you go). Then take that and twirl it around a pen. Pull the pen out, and you’re ready to use your newly made vine.

316Leigh

Now glue, glue, glue to your heart’s content. For the basket, start with leaves in order to form a base platform (at the junction between the handle and bowl of the basket). Then glue the larger elements on top of that blanket of leaves (without covering them completely).

317Leigh

Add smaller elements like berries, by dropping glue onto the stem ends, then tucking them in behind the biggest center element. Lastly, glue the vine ends (in the same way as the berries) and tuck those in wherever you see empty spaces.

320Leigh

It’s just that easy! You may now fill your creation with anything from candy to potpourri. To see it action, check out my “Glitter-Ween” Halloween Party Theme Decorating Ideas (With DIY Links).

194Leigh

As for the pumpkin topiaries… simply start with small terra cotta rose pots (because they are taller than regular pots). Fill these with floral styrofoam cut to size (not squishy “oasis” as that is made for wet arrangements). Next, hot glue a stack of tiny pumpkins (with a leaf in-between each) onto the top’s center. Cover the styrofoam with a layer of green moss. Then add a leaf or stem of berries here and there. Voila!

01Leigh

If you’d like to turn these into place-card holders… simply make flags out of toothpicks and washi tape, by using a ruler as a guide to cutting similar lengths.

75PumpkinTopiaries-Leigh

Or… you can use floral tape, like I did, so long as you stretch it as you smash it between your fingers. A permanent marker writes the name well. You can also do this for your décor, to add a message like, “Happy Fall Y’all!”

76Leigh

See more of these here: Fall Leaves & Pumpkins Themed Thanksgiving Tablescape Décor Ideas.

Faithfully Yours,

Leigh


“Glitter-Ween” Halloween Party Theme Decorating Ideas (With DIY Links)

This year’s Halloween party theme was “Glitter-Ween”! This gave me a plausible excuse to paint, spray, or glue… orange, purple, green, and black glitter to my heart’s content… at least until February that is. Here are some decorating ideas from my glitter-splosion event!

192cLeigh

The black painted console was the perfect stage for the “candy-bar” buffet. One small glittered bell wreath kept it from appearing too top heavy. An orange spider-web runner lined and protected the painted top.

202cGlitterween-Leigh

My glitter garland remade craft filled in the background of the smorgasbord. Candlesticks held glittered pumpkins at visible heights behind witch-cats who guarded the sweets.

110Leigh

Theme colored candy filled bowls were accented with pumpkins, ghosts, and bats from my foam puppet / food pick craft. LED candles eerily lit the scene safely, where no normal candle would have dared been set.

108Leigh

Spiders climbed the treat tower hung with their “spider-web” doilies.

32Leigh

Monochromatic jelly bean cups sat next to a variety of cupcakes on various lifts and levels.

157Leigh

Glittered brooms camouflaged another treat tower’s sides while a shimmering welcome beckoned at the top.

253Leigh

In the breakfast room, a wooden tree painted black, was trimmed with my garlands craft and my ornaments from scraps craft. The tree skirt of shimmering purple fabric was repurposed from Mardi-Gras. The tablecloth had hand-sewn bead and fringe trimming.

231Leigh

The centerpiece tree was flanked with hand-painted papier-mâché witch hats, and the felt ones featured favors from my foam shapes craft.

223Glitterween-Leigh

The chandelier was trimmed with ribbon and my friendly bats craft, and then draped with my pumpkin tassels craft.

288-Leigh

Another pumpkin tassel dangled from lamp. The pictured pumpkin basket will be featured in an article very soon.

260Leigh

Glittered pumpkins sat snugly in a ficus tree, next to a window hung with glittered “BOO” signs.

349Leigh

Another window framed my suspended “BOO” wreath craft that featured some of the same glittered shapes as the garland in the living room. (It was merely outlined in the photos due to conditional backlighting which is why this picture is here.)

263Leigh

A side table held a glitter pick arrangement and pumpkin lamp that’s been glowing since my childhood. Fabric witch feet were tucked into a vintage basket held with treats. My foam shape sign craft hung in the background.

209Leigh

Another surface in the room featured more of the friendly witch menagerie guarding one of my mixed media paintings. Changing up your artwork seasonally is a great way to feature your whimsical creations.

42Leigh

The ceramic pumpkin was made before I was born. It’s easy to add personal touches with mementos by nestling them into your themed décor.

105HalloweenStairs-Leigh

Even the staircase was decorated with foot wide green mesh ribbon, more glittered garlands, glowing luminarias, flying bats, and crawling spiders.

137cLeigh


Have a Safe and Happy “Glitter-Ween”!

Faithfully Yours,

Leigh


DIY Easy Last Minute Halloween Ornament Décor Remade From Scraps Craft

Is your spooky Halloween tree décor looking a tad too bare, and your budget’s already blown on candy and costumes? Then do what I did and use ribbon scraps, felt stickers, plastic rings, $1 felt garland, cupcake picks, and felt from a card found around the house to craft cute ornaments! So easy that it can be done last minute, and it makes an interesting artistic scavenger hunt for the kiddos… “Find as many things as you can, in 10 minutes, to turn into ornaments.”

109Leigh

Take a dollar bin felt garland, and cut the ribbon joining the shapes into sections. Tie a knot to form a hanging loop. You can stop there, or add bows made from glittery ribbon (also from the dollar bin) or from leftover pieces from your other crafts. Cut the ring part off the plastic spiders (that outnumber those treat bags).

0112Leigh

Hot glue those elements, at various angles, onto your new one-of-a-kind ornaments.

0117Leigh

Remove felt decorations (in this case a house shape) from cards. Cut the spikes off of leftover plastic cupcake picks. Pull the sticks out of floral arrangement decorations (the pumpkin people in the picture). Cut lengths of ribbon or tinsel twine to serve as hanging loops. These don’t stick into tiny fingers like hooks would, and they pack better too!

206Leigh

Hot glue the ends of the ribbons to the back of the shapes to make loops. Glue any decorations to the front sides. Then take fabric or ribbon (or in this case the thick orange paper that came with a floral arrangement) and glue the ornaments onto it. (The stickers will obviously just stick to it.)This makes for a prettier back that hides the hanging loop ends.

207Leigh

Hang your newly crafted ornaments as proof positive that cute doesn’t have to mean expensive or time intensive!

75Leigh

Happy Halloween!

Faithfully Yours,

Leigh