Tag Archives: Halloween

Celebrate Halloween with Colorful Day of the Dead (Dia de los Muertos) Party Décor Inspired by Traditional Ofrenda Symbolism (+ DIY Craft Tutorials & Candy Recipe)

65leigh

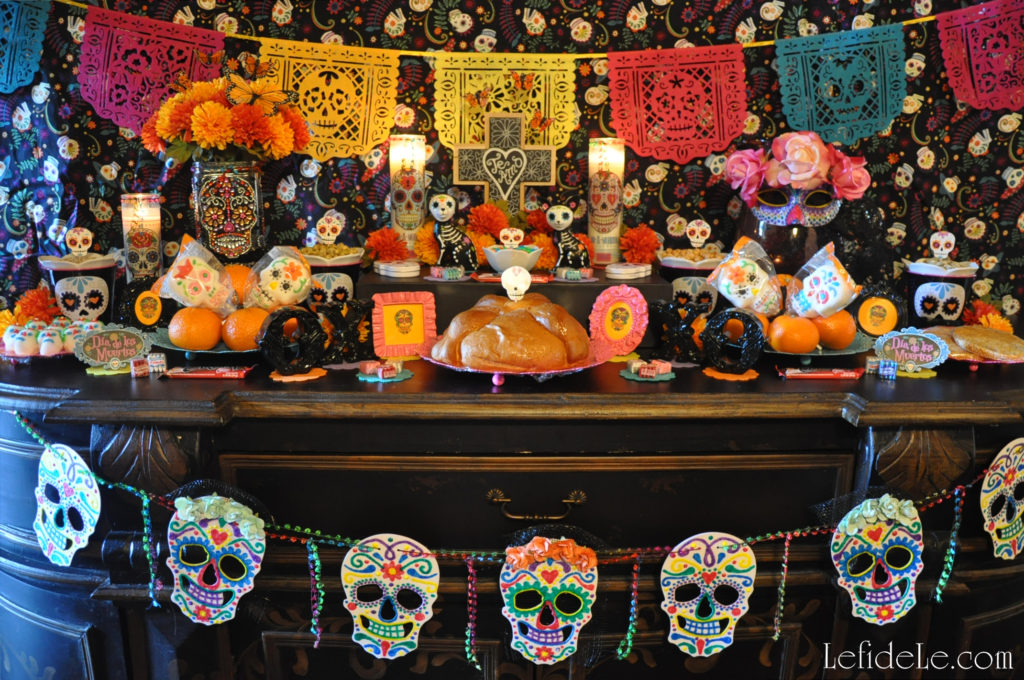
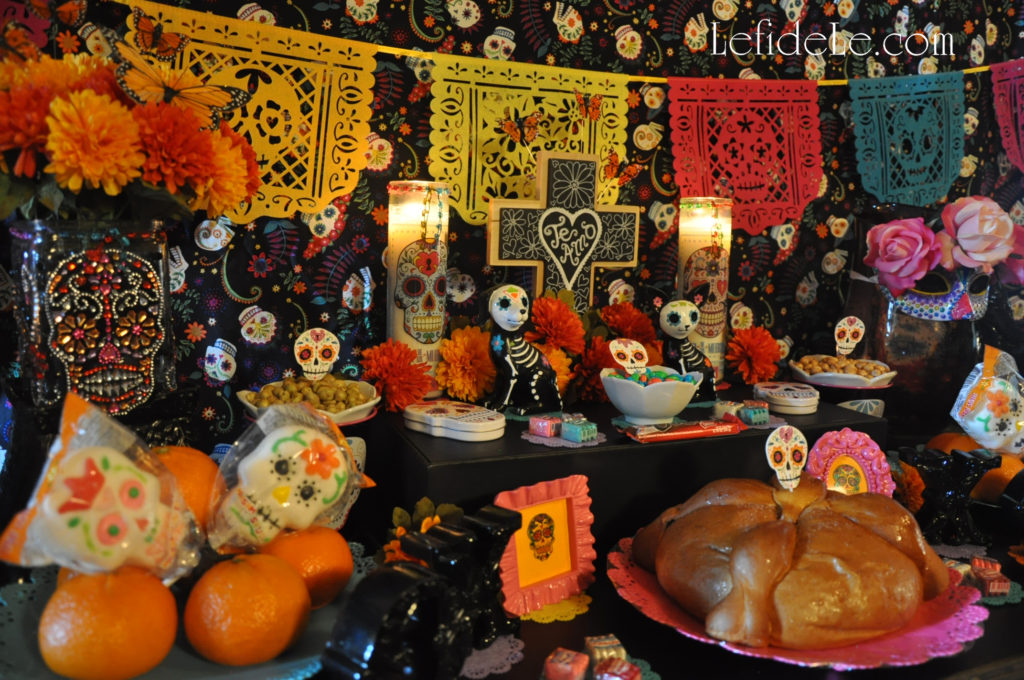
Celebrate Halloween with colorful Dia de los Muertos (Day of the Dead) party décor inspired by traditional ofrenda symbolism. It is an edifying means of incorporating both traditions into an event that seeks to cultivate an atmosphere of cultural understanding. By recognizing the universal conditions of love, life, and death through festivity, we can be united as one people comprised of a beautiful mosaic of ethnic tradition. In this way, revelry becomes a means of dispelling the negative cultural bias that plagues the nation, so that we may move forward together in celebration.
133leigh

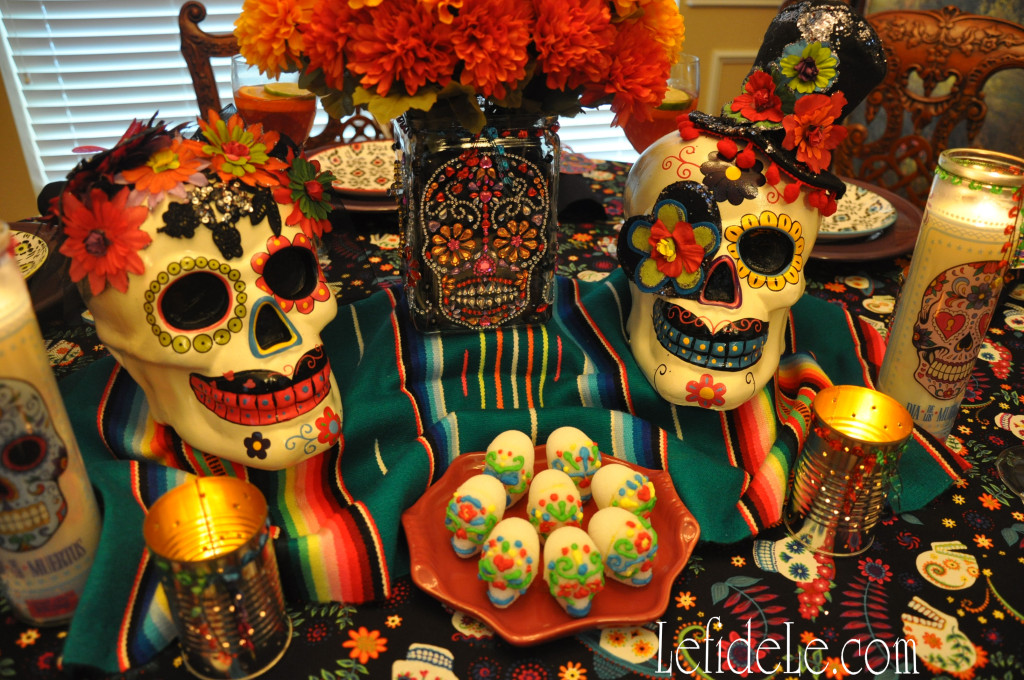
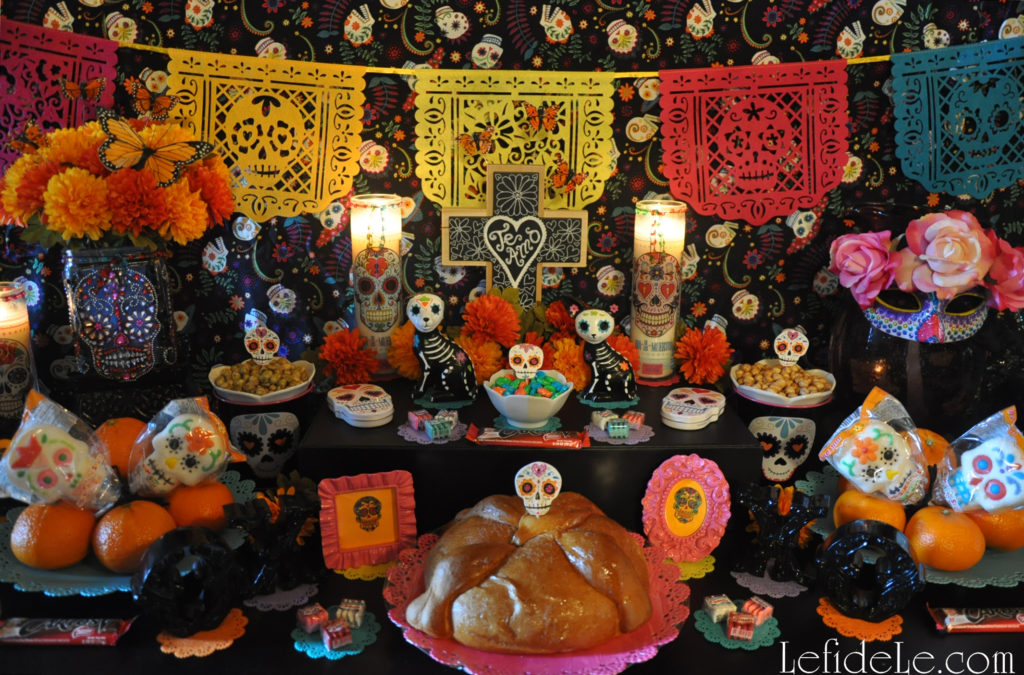
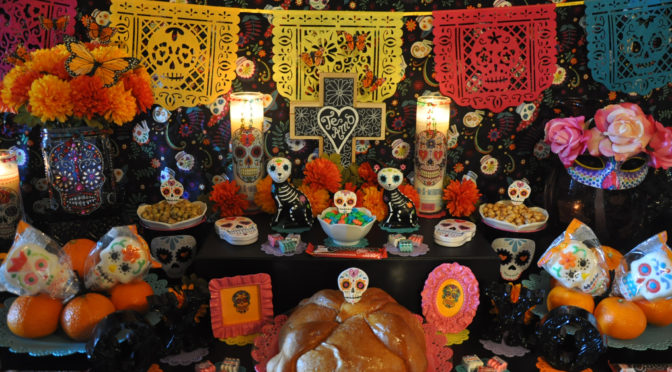
Dia de los Muertos (Day of the Dead) coincides with All Saints Day and All Souls Day in both tradition and calendar. In this regard, a traditional ofrenda (offering) has a higher central tier honoring a deceased loved one. Taking the place of a photograph is another traditional element, that of a religious symbol. It takes the form of a chalkboard cross that has been inscribed with flowers and the Spanish words, “Te Amo” (“I love You”). A vase upcycled with crystal appliques holds a floral offering in keeping with gravesite ritual. See how easy this is to make in my tutorial here: DIY Calaveras de Azucar (Sugar Skulls) Napkin Rings, Wine Glass Charms, & Vase Craft Tutorial for Dia de los Muertos (Day of the Dead) Themed Halloween Dinner Party Décor.
104leigh

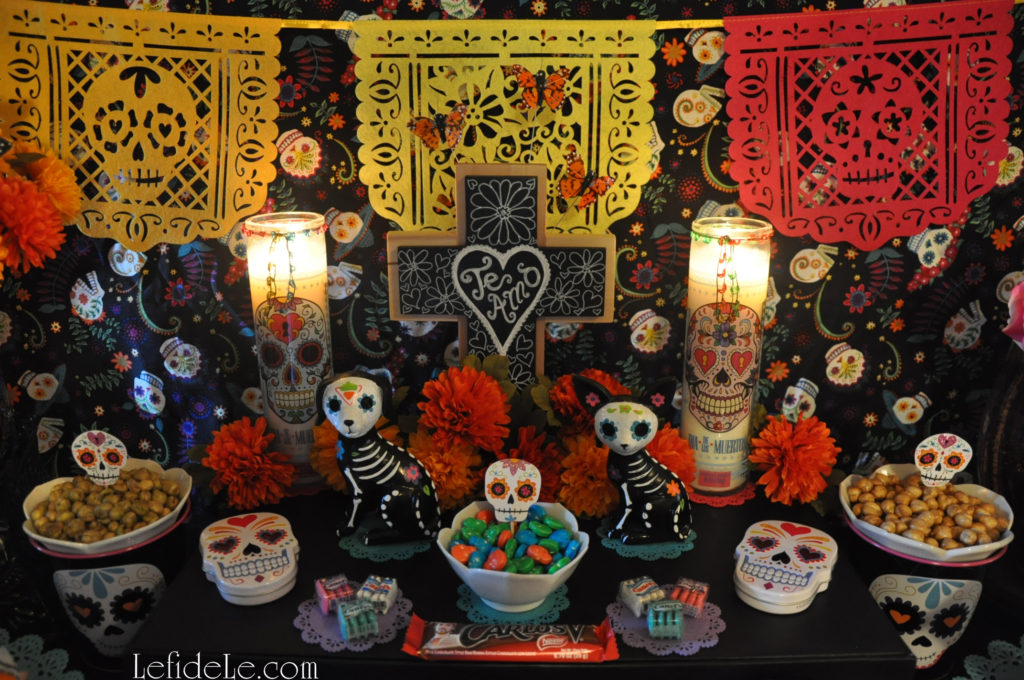
Lit candles are said to illuminate the path for the visiting spirits of loved ones. Representing fire, these may be in the form of Catholic religious candles depicting santos (saints), luminarias (lanterns) made of pierced paper bags or cans, or plain wax candles. Perritos (little dog figurines) are presented in symbolic gesture regarding the idea that dogs guided ancestral spirits to the afterlife. (Because surely “all dogs go to Heaven”!) Mariposas monarcha (monarch butterflies), that migrate to Mexico through Texas in the fall, represent visiting ancestors. Wild yellow and orange Mexican marigolds (cempasúchil) are known as the flor de muerto (flower of the dead). They may be linked into garlands, shaped into crosses, or placed decoratively. A fun way to incorporate these elements is make your own luminarias and flowers. The traditional crafts are easy to make using my tutorial here: Easy DIY Upcycled Can Tea-light Luminarias (+ Free Printable Template) & Tissue Paper Flowers Crafts (for Cinco de Mayo Fiesta Décor). Another essential item is a papel picado (cut paper) banner which signifies the fragility of life.
109leigh

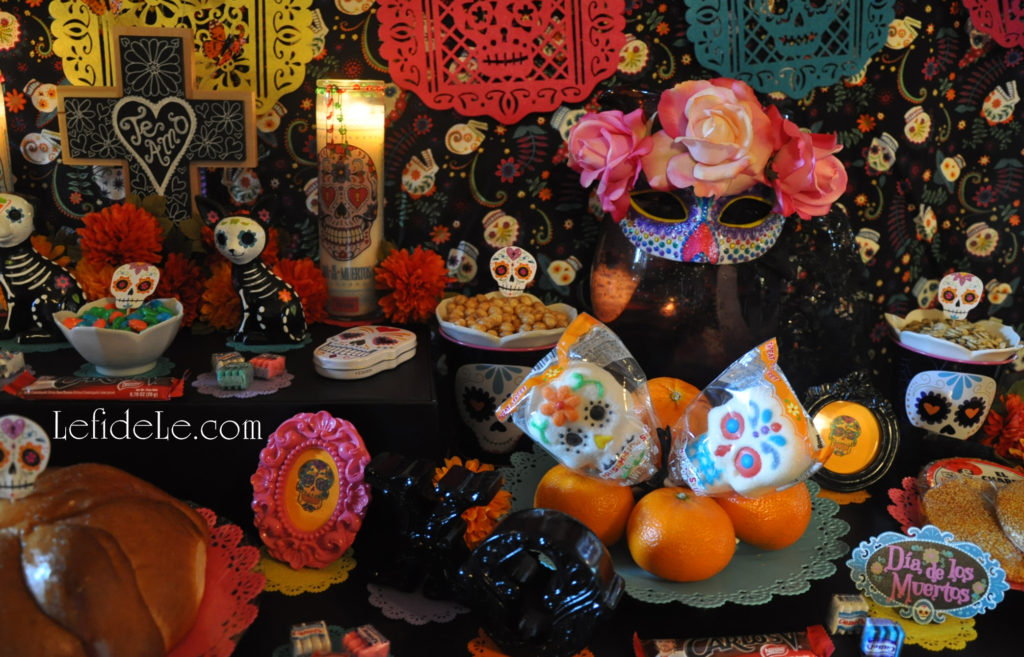
Representing water is a Mexican bubble glass pitcher bearing a traditional mask of la calavera catrina (iconic image of a wealthy 1800’s era Euro-Mexican lady). When worn as a parade mask, half of the face is covered with a skull representation symbolizing life as inextricably linked with death. Make your own with the help of my tutorial here: DIY La Calavera Catrina Costume Mask & Calaveras de Azucar (Sugar Skulls) Banner for a Dia de los Muertos (Day of the Dead) Themed Halloween. Other decorative elements are multi-colored doilies beneath figures of X’s & O’s(kisses & hugs), and little signs naming the holiday. Small sugar skull tins replace toys, and framed sugar skull images replace ancestors’ photos in this lighthearted nod to tradition.
79leigh

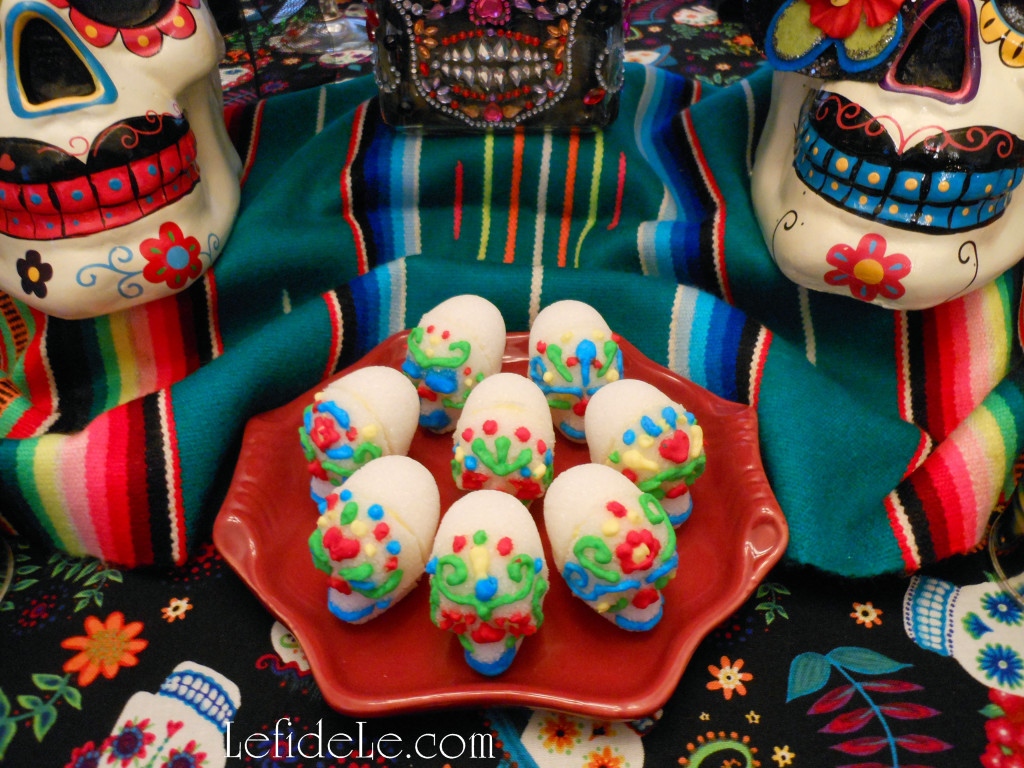
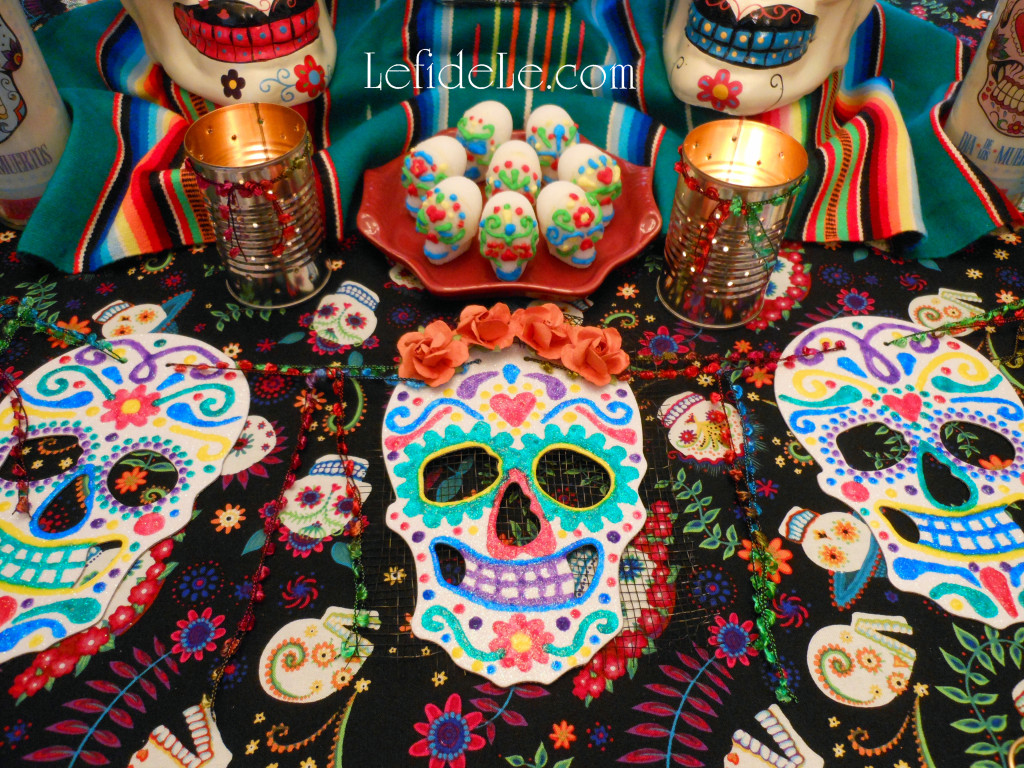
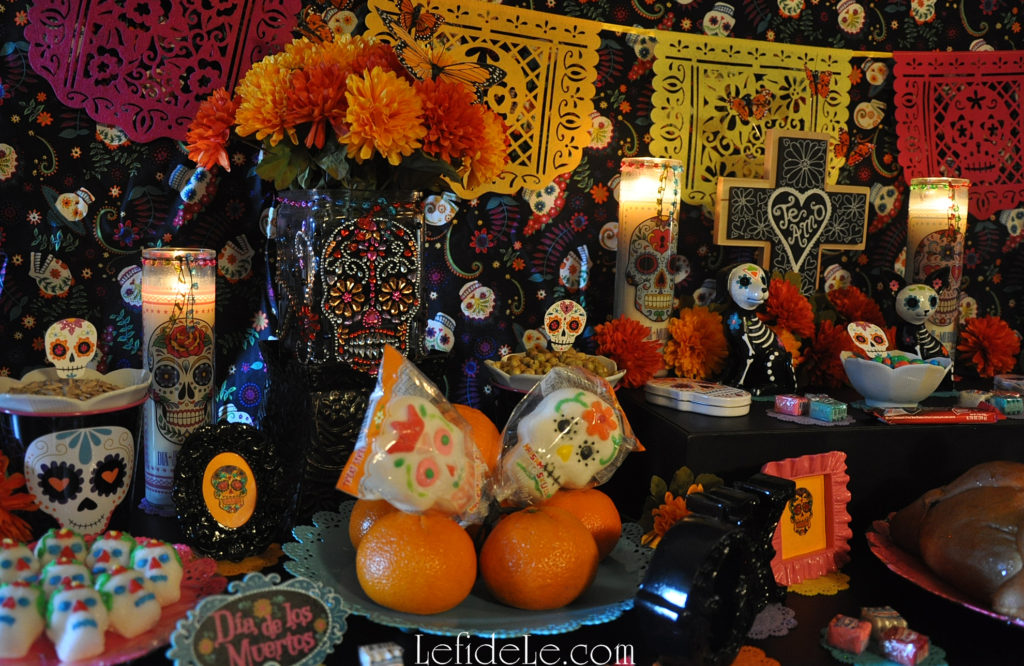
Calaveritas de azucar (little sugar skulls) are necessary offerings as its sweetness (representing life) is said to balance the bitterness of muerte (death). Easily make these with my recipe here: Calaveras de Azucar (Sugar Skulls) Edible Folk Art & Egg-Free Vegan Candy Recipe for Dia de los Muertos (Day of the Dead) or Halloween. Seeds (with an obvious connection to life) originally decorated skulls in place of sugar. They are still offered as a traditional component, with food representing the element earth. Here they are contained in floral dishes nested into decorative tin pails. Sprouted pepitas or semillas de Calabaza (pumpkin seeds), pipas (sunflower seeds), and fried green peas as well as roasted chick peas (garbanzo beans) are adorned here with glittered skull cupcake picks. A trio of palanqueta de ajonjoli disks (sesame seed candy) are another sweet form of seed offering. (Nut brittle is a form of this kind of candy.) Sugared marshmallow pops are propped into stacks of customary naranjas (oranges). (The pops were purchased at Fiesta Mart, but they may also be found at Le fidèLe affiliates Michaels & World Market whose coupon links are in the left side bar or below on a smart phone.) Pan de muerto (bread of the dead) sits front and center of the ofrenda as it denotes human life in its round skull-like form with an X of raised dough like cross-bones. It is a pan dulce (sweet bread) flavored with anise and orange peel. Candies, Mexican chocolate, and chicle (chewing gum) are also customary offerings.
93leigh

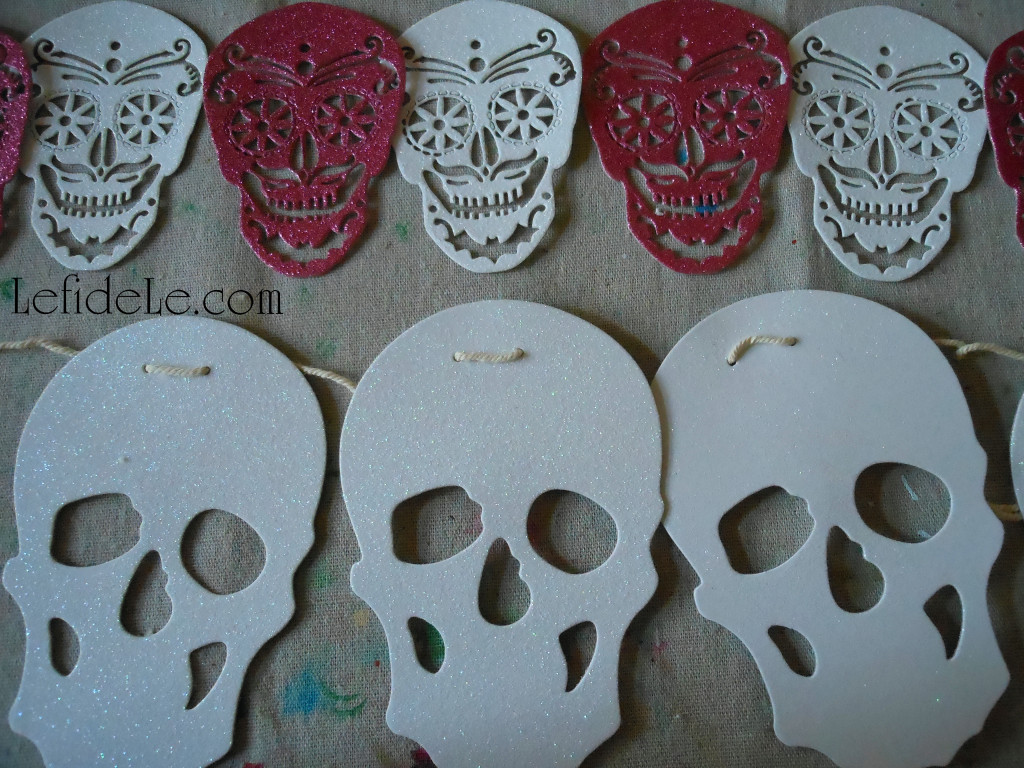
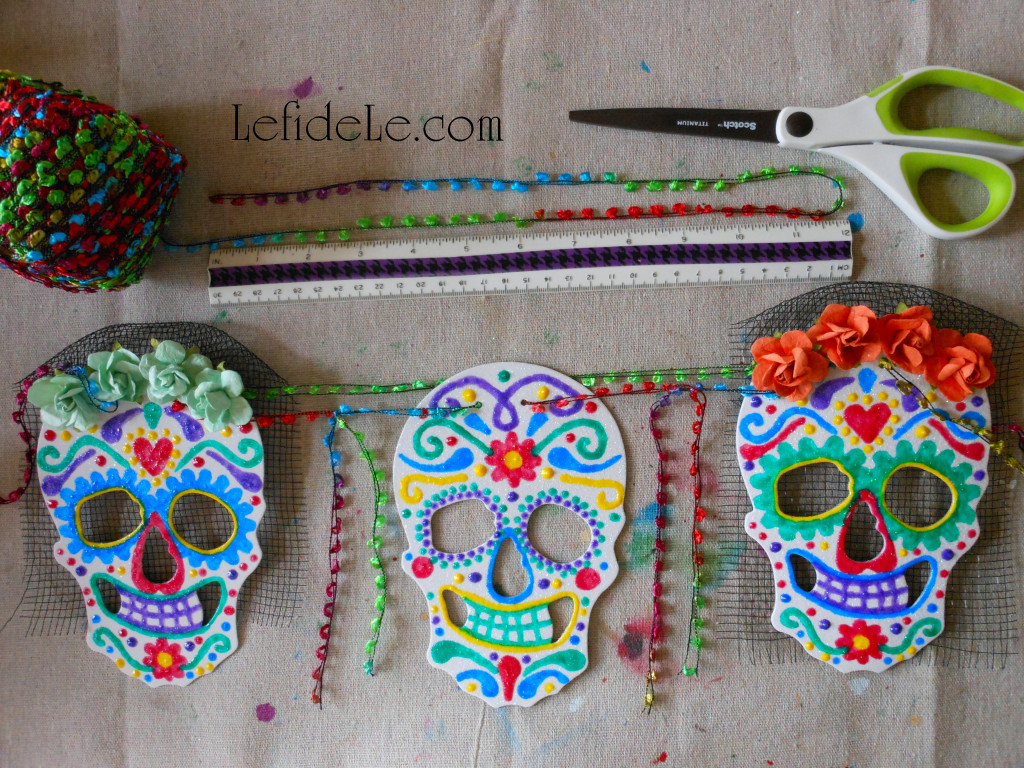
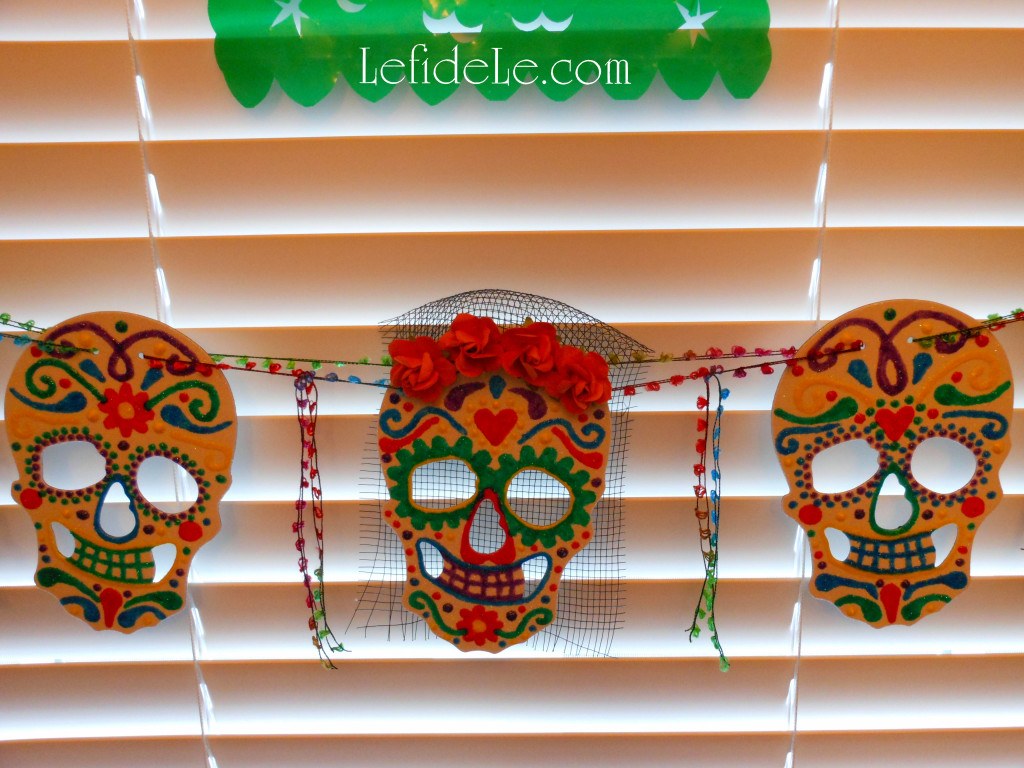
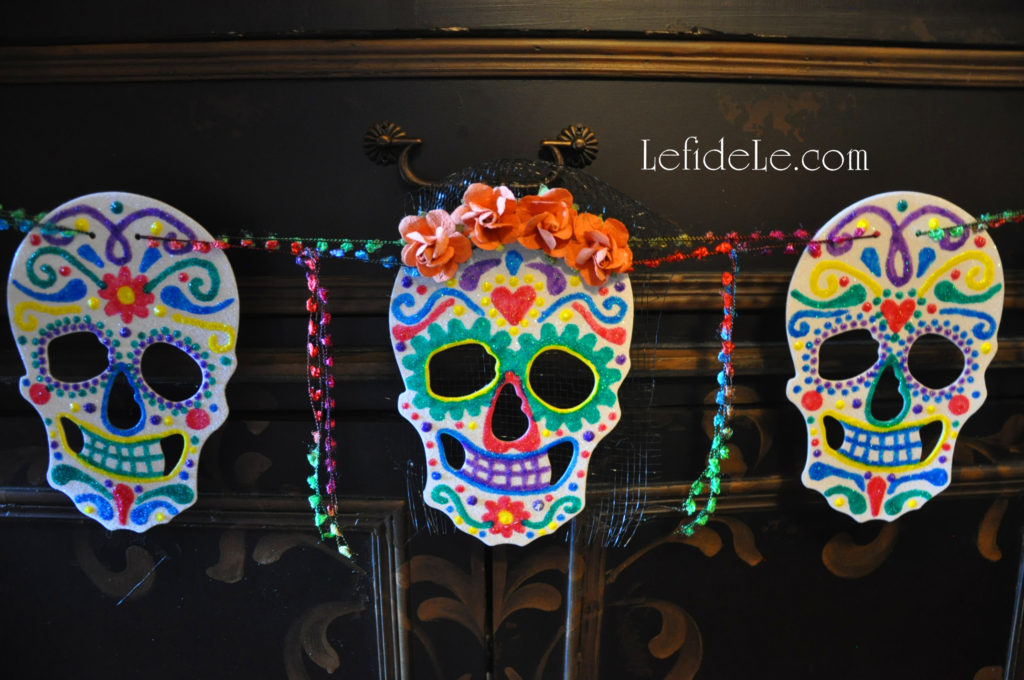
White glittered skull shapes may be decorated and strung as another craft honoring the holiday. Read how to make the banner here: DIY La Calavera Catrina Costume Mask & Calaveras de Azucar (Sugar Skulls) Banner for a Dia de los Muertos (Day of the Dead) Themed Halloween.
602leigh

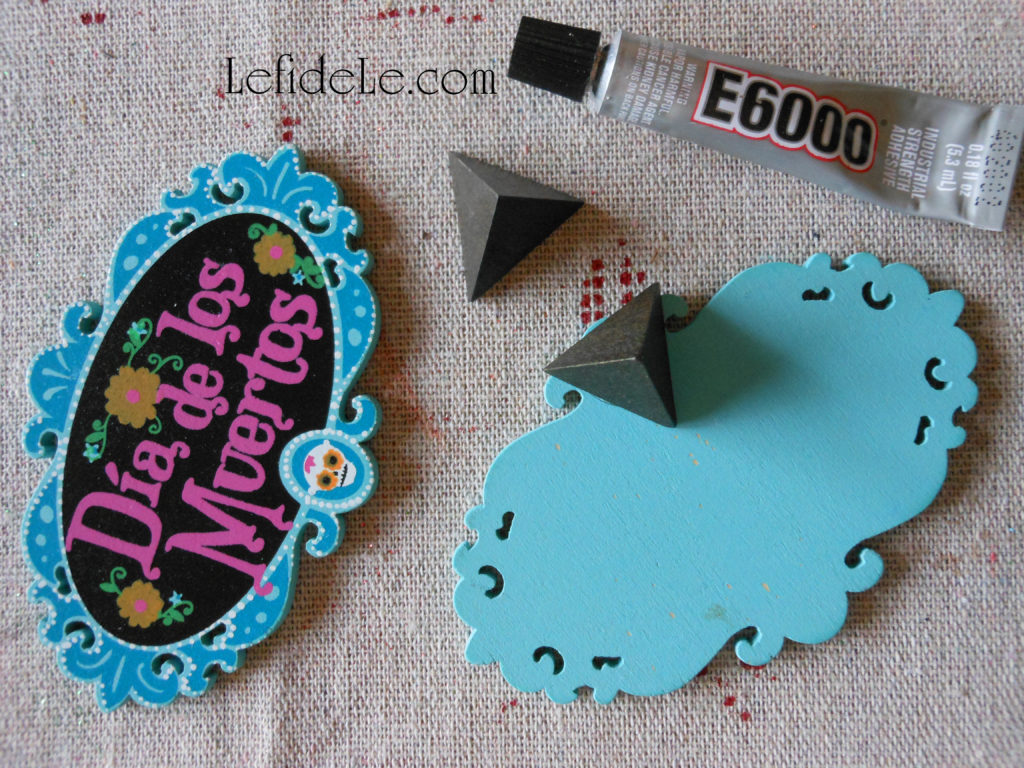
Make your own stand-up signs with dollar wooden shapes from the craft store. These prepainted shapes came from Le fidèLe Design’s affiliate Michaels (see the coupon link in the left side bar or scroll down on a smart phone), but any blank shape may be decorated easily with paint pens. Simply glue a wooden bead or shape (like these pyramids) to the base of the back.
492leigh

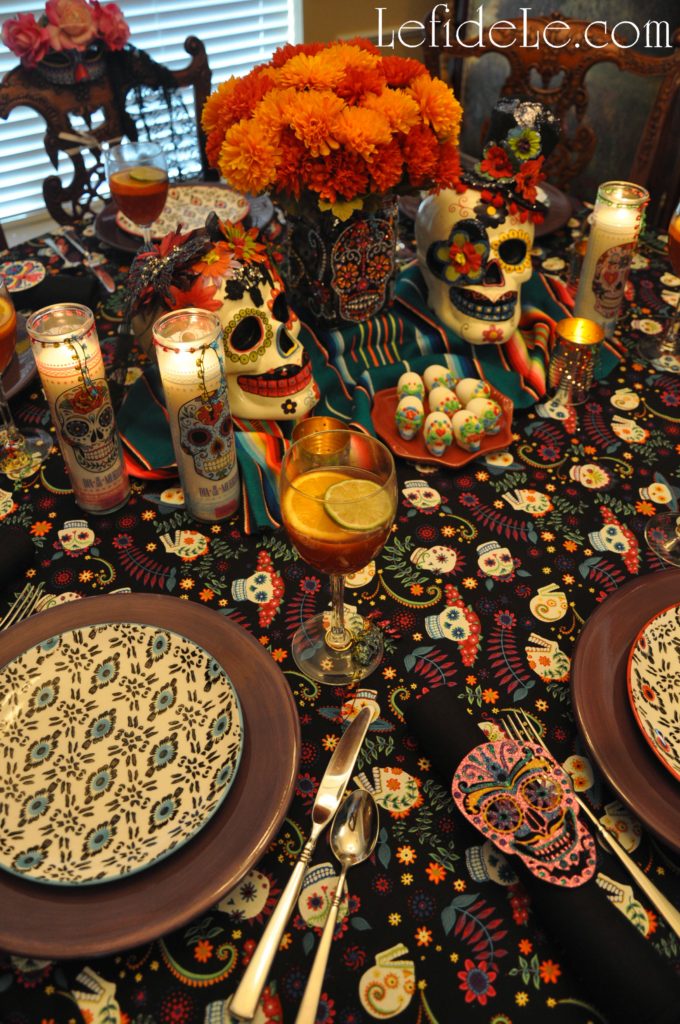
The background fabric for the ofrenda was once used as a tablecloth for a dinner party. (It can be purchased at Le fidèLe affiliate Joann whose coupon link is in the left sidebar, or below on a smart phone.) See it in this capacity in my previously posted article using this theme for a grown-up Halloween tablescape here: Dia de los Muertos (Day of the Dead) Themed Halloween Dinner Party Décor + DIY Décor & Recipe Links. Learn how to make your own wine glass charms and napkin rings for the dinner party here: DIY Calaveras de Azucar (Sugar Skulls) Napkin Rings, Wine Glass Charms, & Vase Craft Tutorial for Dia de los Muertos (Day of the Dead) Themed Halloween Dinner Party Décor.
76leigh

Feliz Dia de los Muertos!

Faithfully Yours,

Leigh
Calaveras de Azucar (Sugar Skulls) Edible Folk Art & Egg-Free Vegan Candy Recipe for Dia de los Muertos (Day of the Dead) or Halloween

067Leigh

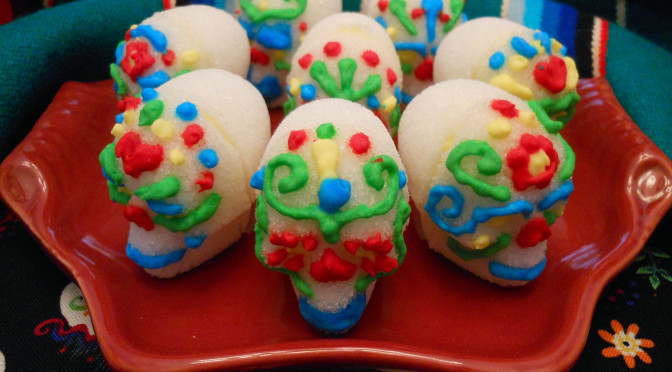
Calaveras de azucar (sugar skulls) are a folk art originating from southern Mexico for Dia de los Muertos (Day of the Dead). The sugar (azucar in Español) is said to balance the bitterness of death (muerte), and the small calaveras (skulls) are traditionally offered on All Saint’s Day (November 1) to beloved departed children (angelitos / inocentes) as one would leave flowers graveside. Because this recipe is an egg-free edible version that doesn’t use meringue powder or royal icing, it makes the perfect allergy-friendly, vegan, and low-calorie candy for a themed Halloween celebration!


Ingredients:

  • 2 cups granulated white sugar
  • 4 teaspoons water
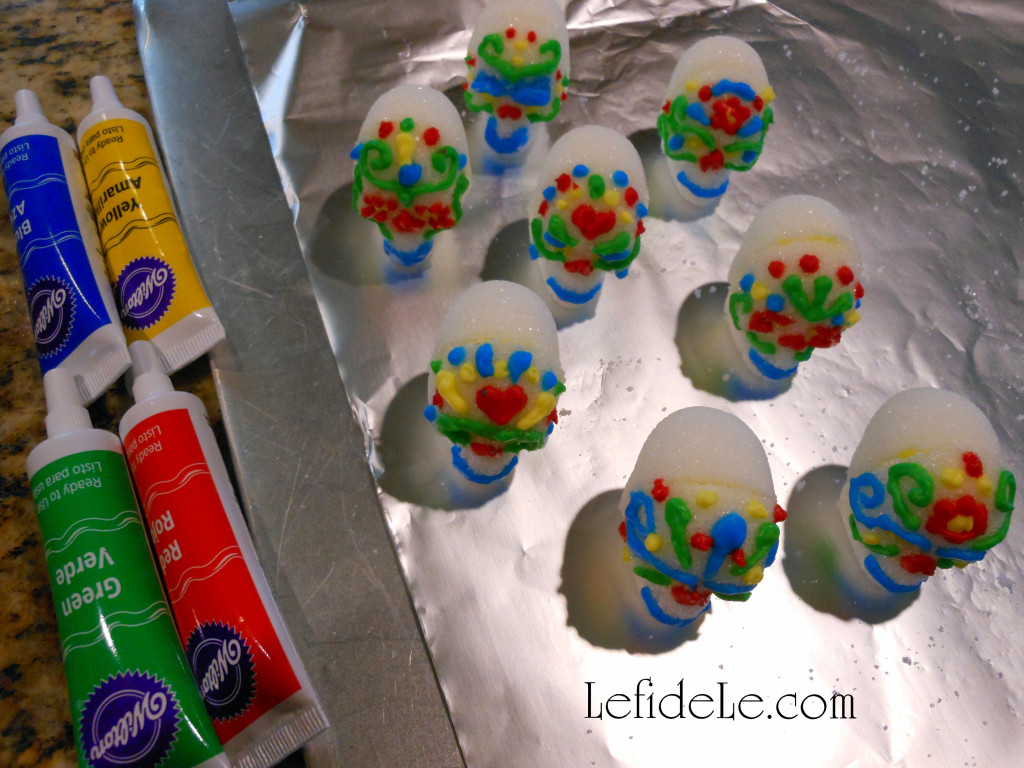
  • Wilton ready-to-use icing multi-pack of 4 primary colors (not gel)
  • Wilton 3D skulls candy mold

Instructions:

022Leigh

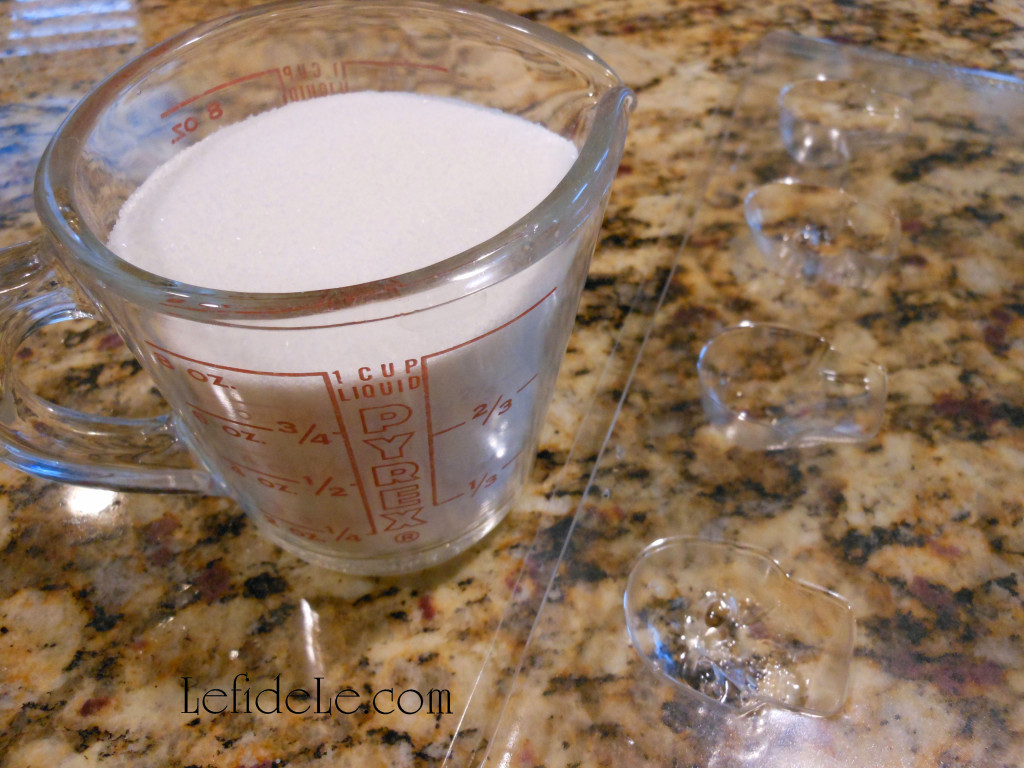
Wash and dry the plastic mold. Measure a perfect cup of glistening white sugar (azucar in Español).

025Leigh

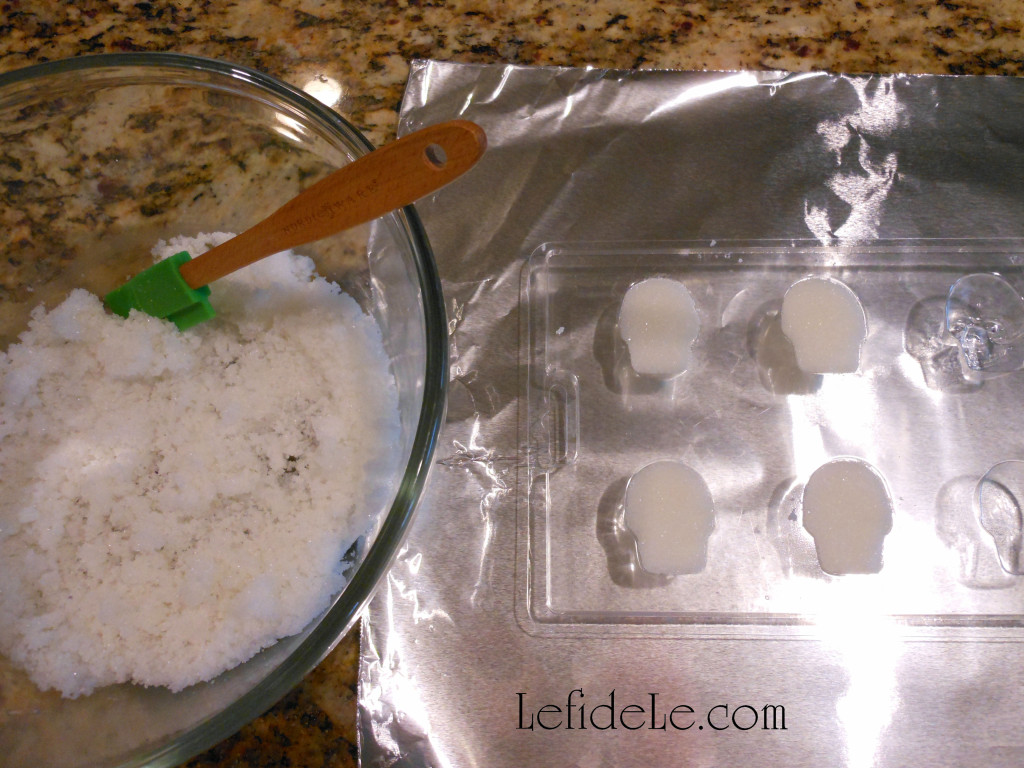
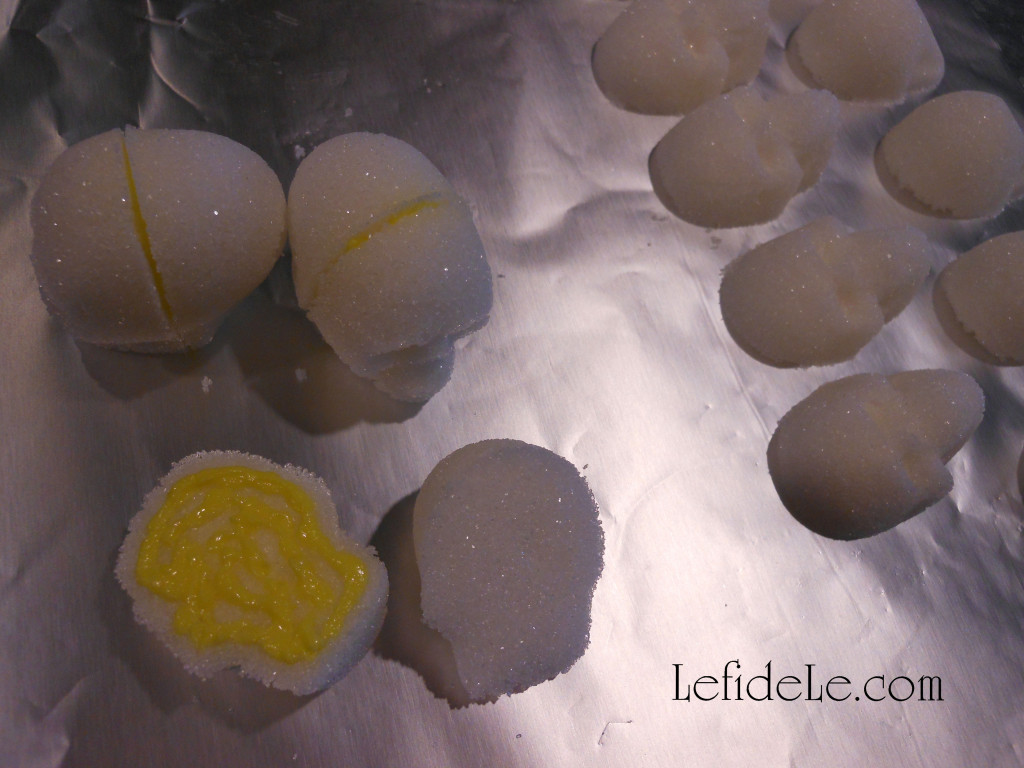
Use a small silicone spatula to mix 4 teaspoons of water (agua) into a bowl filled with the white sugar. (The key to sugar skull success is patient and thorough mixing to yield slightly damp sugar the consistency of sand.) Use the spatula to scoop globs of damp sugar into the mold, and also to pat it down compactly into each cavity. Smooth the top of each to flatten the sugar to sit evenly with the mold. (This helps later when combining the pieces to make 3D skull shapes.)

026Leigh

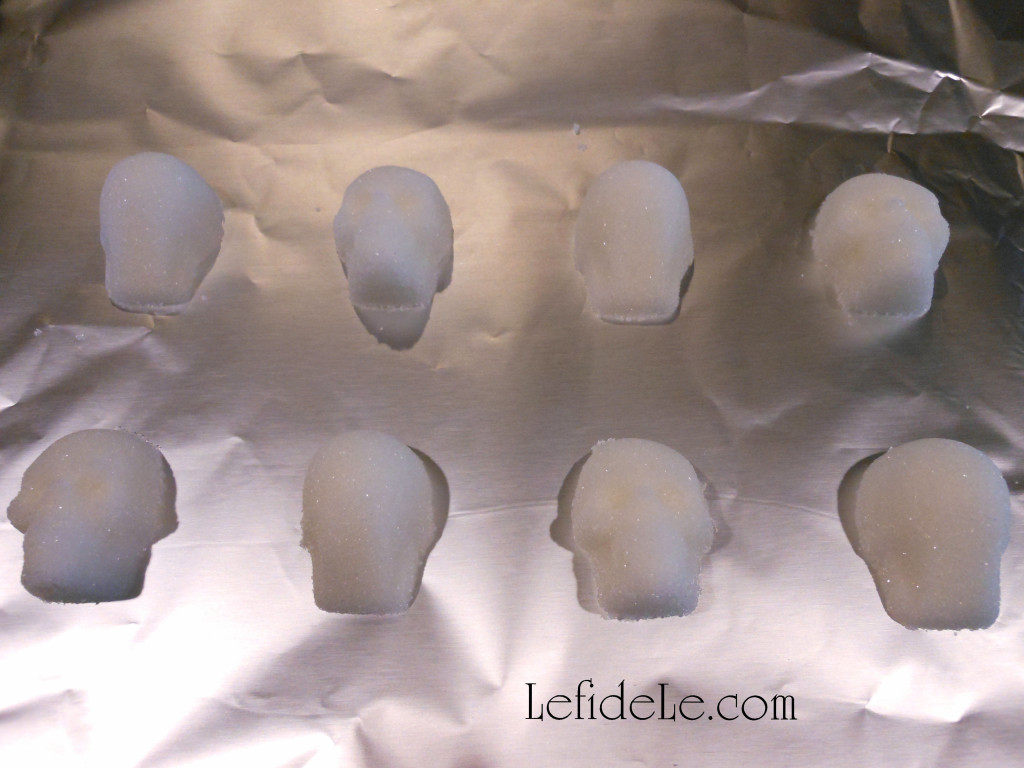
Place a cookie sheet on top of the mold. Flip them over while holding them together. The mold will now sit inverted on the cookie sheet. Carefully lift the plastic mold off to leave the sugar shapes on the sheet. (If some of them stick, gently flex two opposite corners of the mold in different directions. The remaining sugar shapes should pop out without breaking if you hover right over the sheet.) Make a second set of sugar shapes the same way. Let these dry at least 5 hours. (I left mine overnight, and decorated them the next day.) Another option is to bake these 5 to 10 minutes in a 200ᵒ oven. (Make sure to observe them closely in case your oven’s temperature is off.)

029Leigh

“Glue” a set of front and back skull (calavera) pieces together using Wilton ready to use icing. (This is an easy allergy-friendly egg-free alternative to a royal icing of meringue that hardens for the same traditional look, but note that they do contain corn. I found a 4 pack of primary colors in-store at Michaels that are the same size of a gel icing… but don’t use a gel because it doesn’t harden in the same way so that it may be handled when dry.) Press each shape together firmly and set aside.

031Leigh

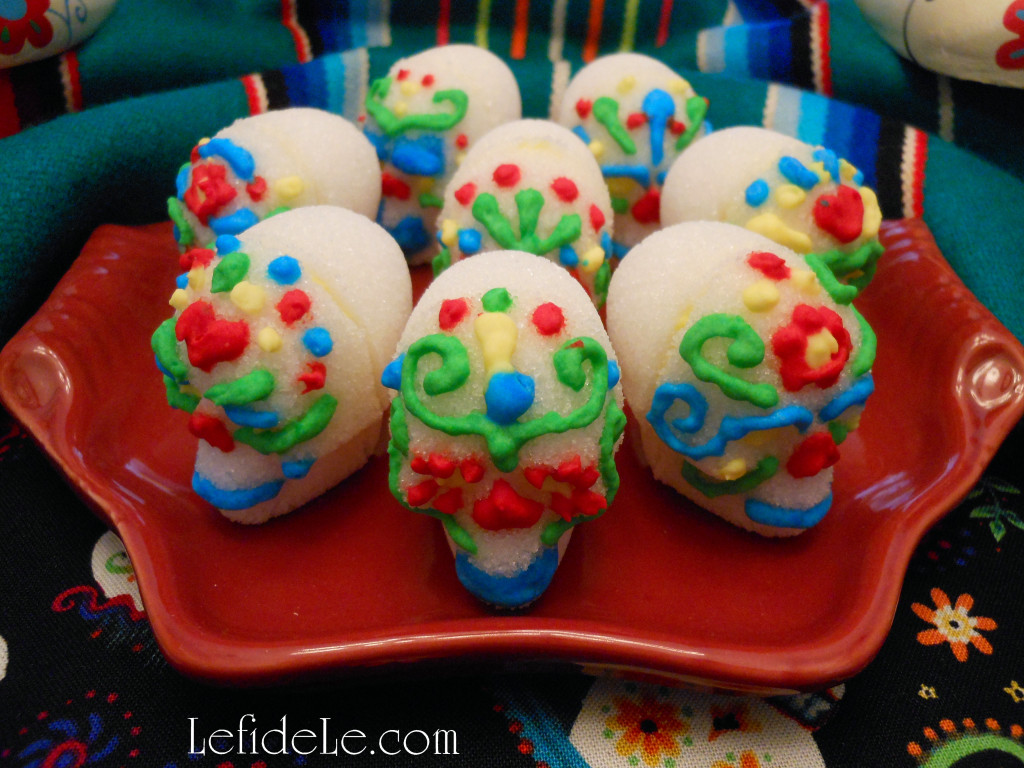
You may leave these as Halloween skull candies or decorate them as a Mexican folk art. Add traditional decorative icing (glaseado) details like smile lines, hearts, flowers, swirls, dots, and marks that look like apostrophes. (The small icing tubes have a small tip built in that’s perfect adding small details to the skulls.) Let these sit overnight to harden thoroughly.

088Leigh

Wilton’s helpful hotline declared that the icing never really goes bad and may be used years later if capped tightly after use… good to know, but I doubt the small tubes will last long! Once dry, the sugar skulls (calaveras de azucar) may be handled without damaging them.

067Leigh

They may even be eaten as candy, which is wonderful considering most sugar skulls are inedible. (And so are the most popular recipes for them.) Since sugar is only 15 calories per teaspoon… I’m guessing that these are only about 35 calories each!

072Leigh

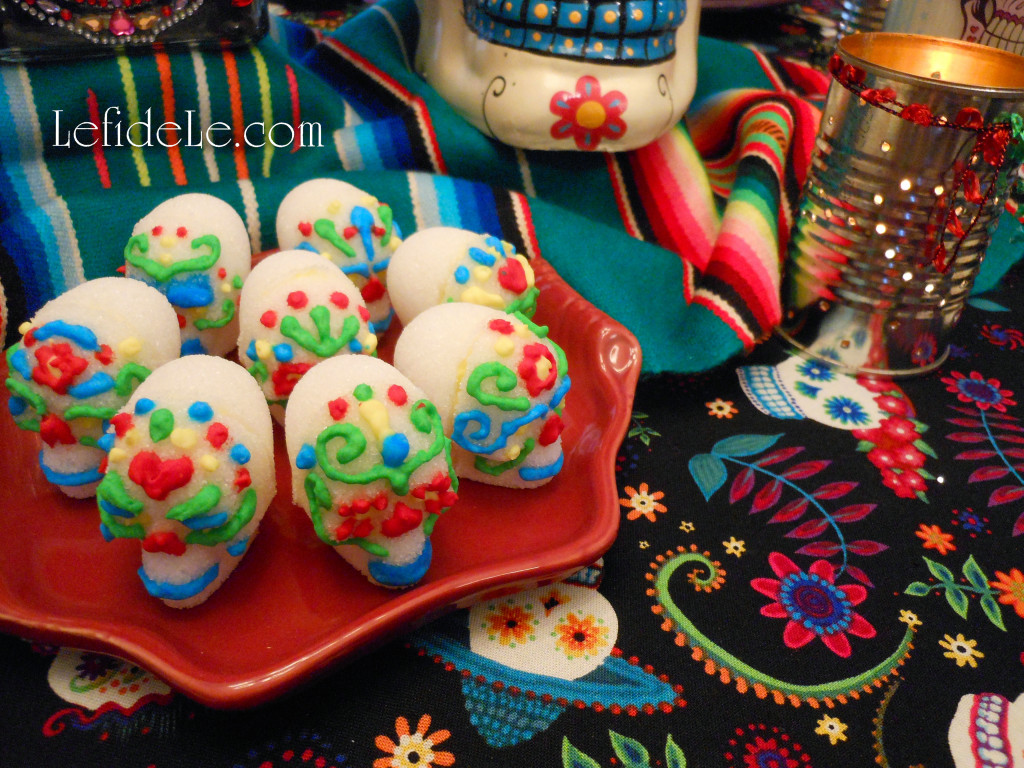
Set these sugar skulls out in a traditional Day of the Dead (Dia de los Muertos) offrenda, Halloween candy buffet, in the center of a October dinner table as edible decoration in lieu of after dinner mints!

8(3)Leigh

Be sure to check out my article on Dia de los Muertos (Day of the Dead) Themed Halloween Dinner Party Décor and the 2 on DIY sugar skull crafts… costume mask, banner, vase, napkin rings, and wine glass charms!

Ahora, comer con gusto!

Faithfully Yours,

Leigh

Dia de los Muertos (Day of the Dead) Themed Halloween Dinner Party Décor + DIY Décor & Recipe Links

75(2)Leigh

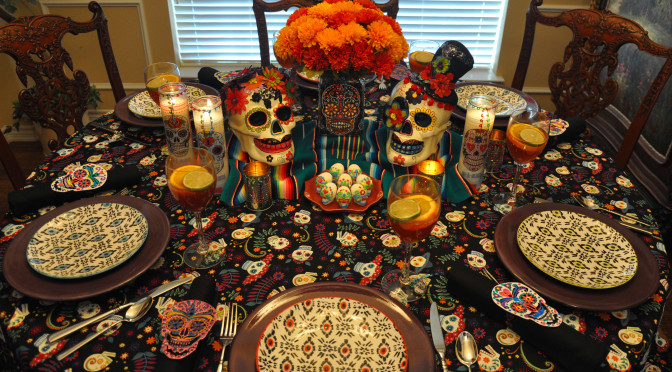
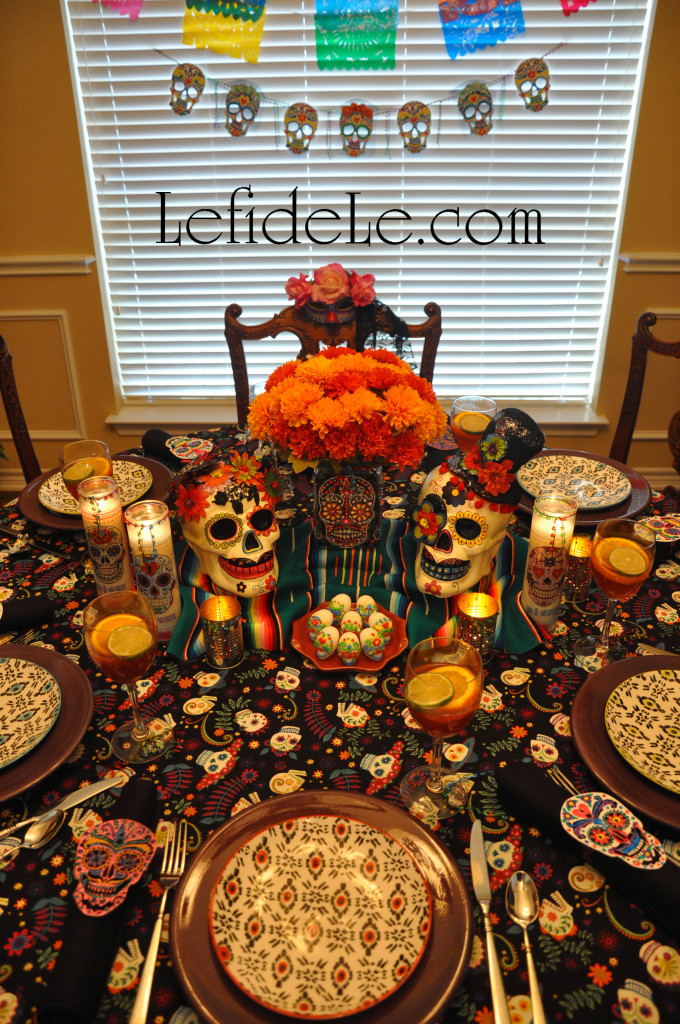
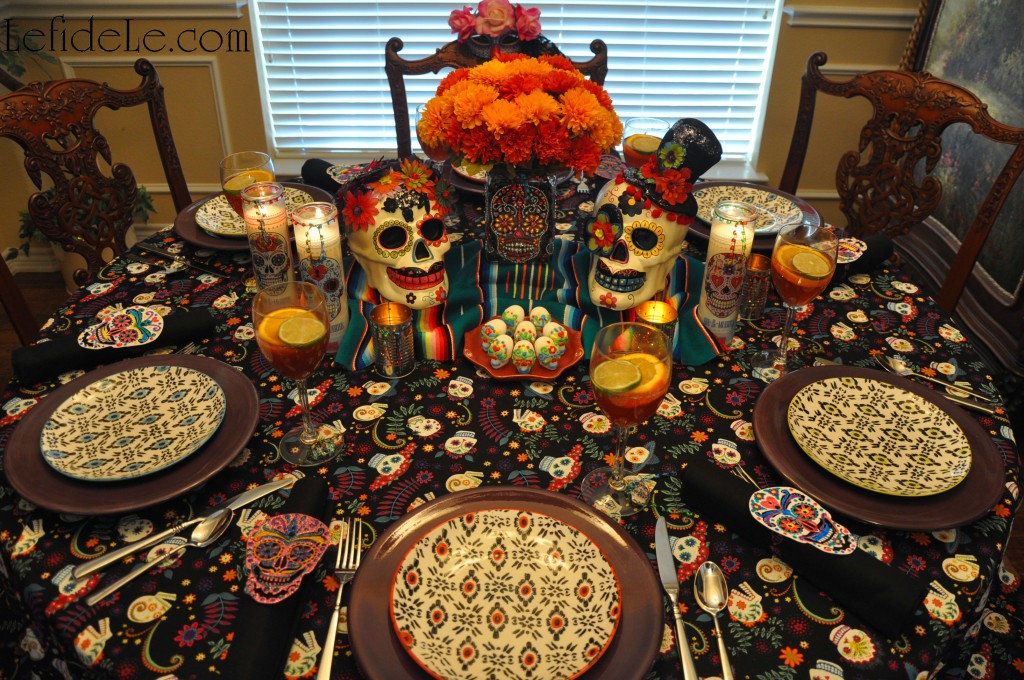
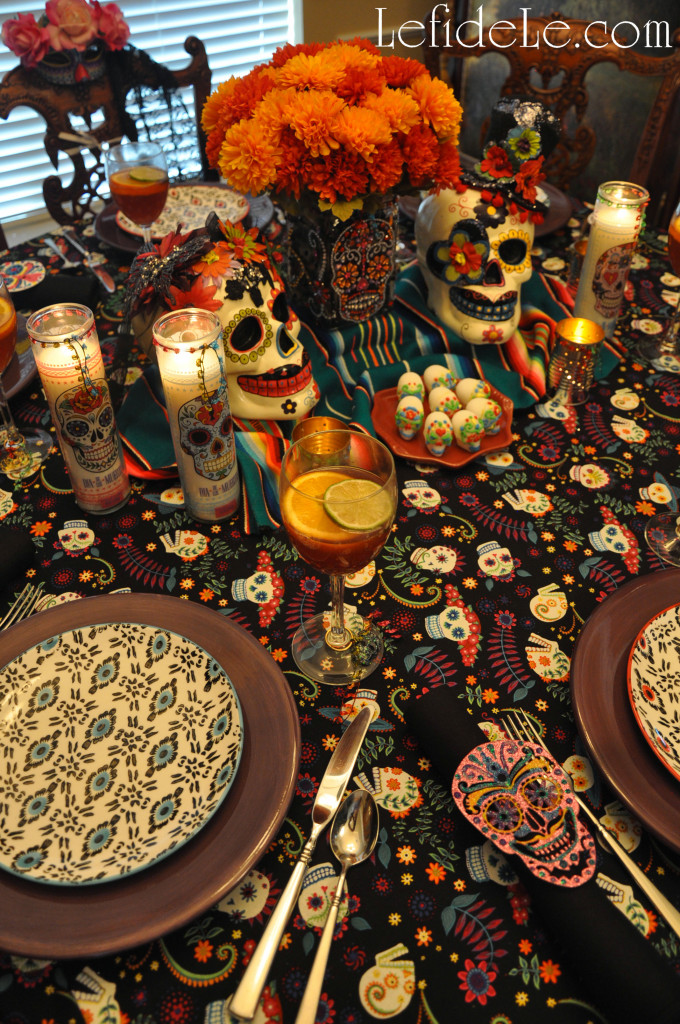
Celebrate Halloween with a Dia de los Muertos (Day of the Dead) themed dinner party filled with decorative sugar skulls (calaveras de azucar in Español) that embrace the lighthearted American holiday while still honoring Mexican traditions. Sugar (azucar) is said to balance the bitterness of death (muerte), and calaveras are traditionally offered on All Saint’s Day (November 1) to departed loved ones as one would leave flowers graveside. As Halloween serves to poke fun at all things scary, Dia de los Muertos is intended as a way to accept death as inevitable… and also to honor dearly departed loved ones. Representational calacas (colloquial term for skeletons) symbolize the idea of life being inextricably linked with death, and have migrated north from Mexico into American Halloween celebrations as themed décor. By using one celebration as a theme for the other, the two concepts combine to poke a little fun at death as not being so scary!

27(2)Leigh

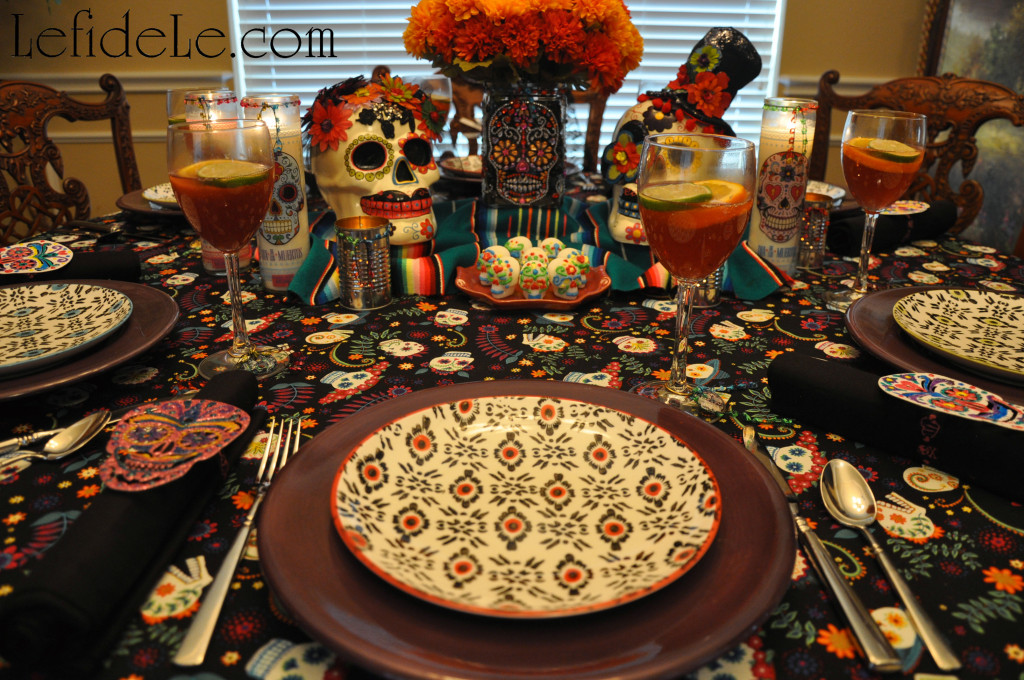
The vivacious tablecloth was made from fabric printed with customary Dia de los Muertos imagery in vibrant illustrations over a black background. (Purchase the cloth, glass candles, & large decorative skulls from Le fidèLe Designs affiliate Joann Fabric & Crafts whose clickable ad appears in the sidebar.)

20(2)Leigh

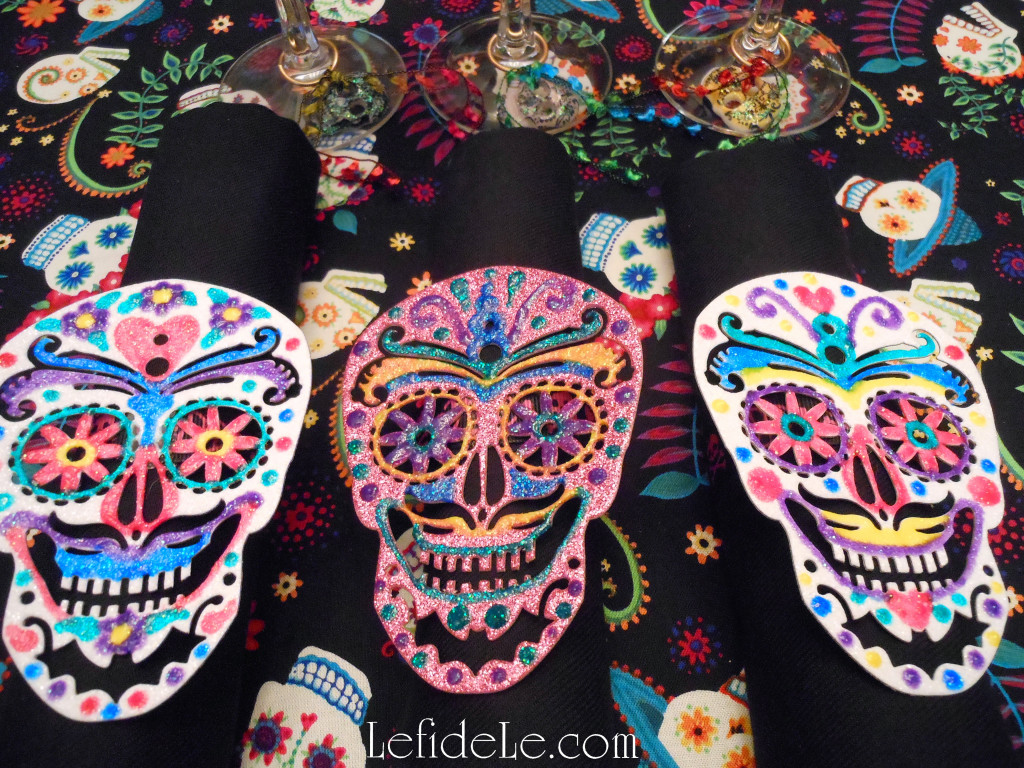
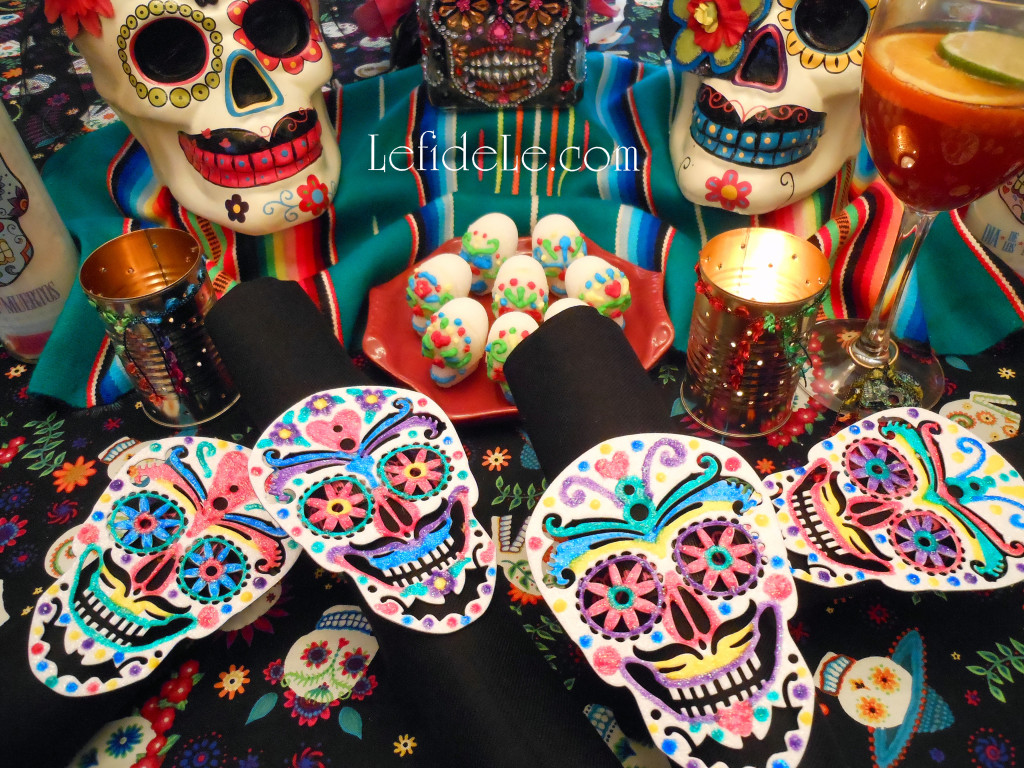
Exotically painted salad plates sit atop solid purple dishes to evoking the brightly embroidered dresses of Mexico. (Purchase the salad plates from Le fidèLe Designs affiliate Cost Plus World Market whose clickable ad appears in the sidebar.) Lustrously glittered napkin rings of sugar skulls hold death black napkins in their icy grip. (Learn how to craft the napkin rings here: DIY Calaveras de Azucar (Sugar Skulls) Napkin Rings, Wine Glass Charms, & Vase Craft Tutorial.)

9(2)Leigh

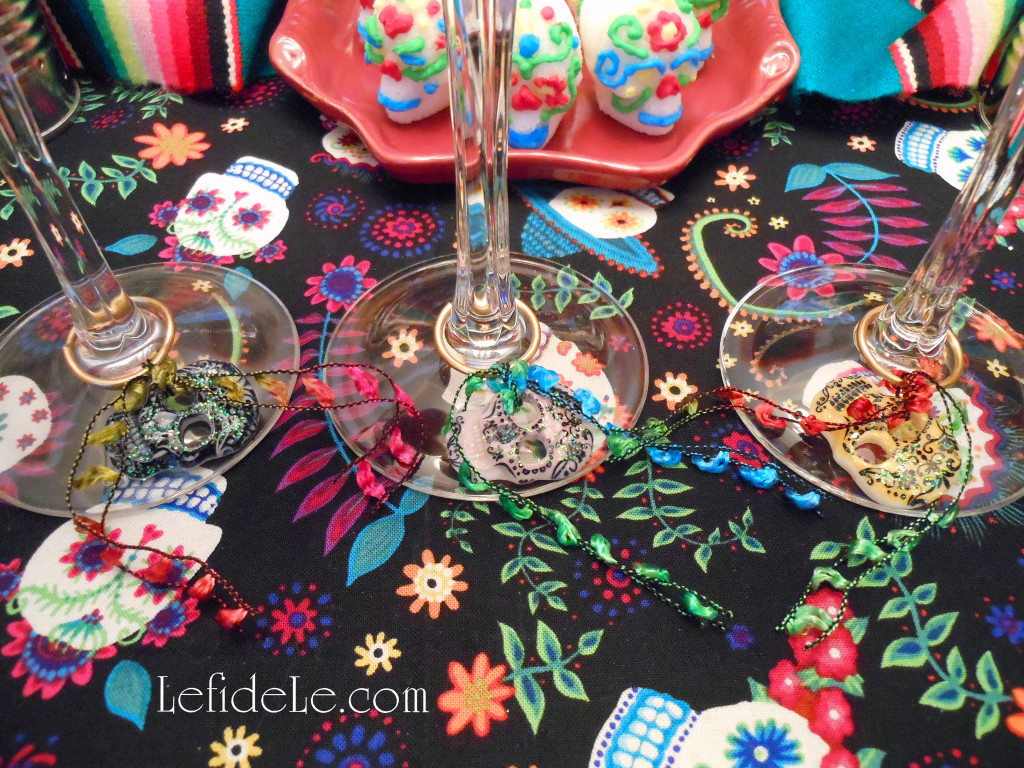
Crafted sugar skull wine glass charms embellish virgin sangria (fruity wine beverage known by the Spanish name for blood) filled vessels. (Learn how to easily make the charms here: DIY Calaveras de Azucar (Sugar Skulls) Napkin Rings, Wine Glass Charms, & Vase Craft Tutorial.)

49(2)Leigh

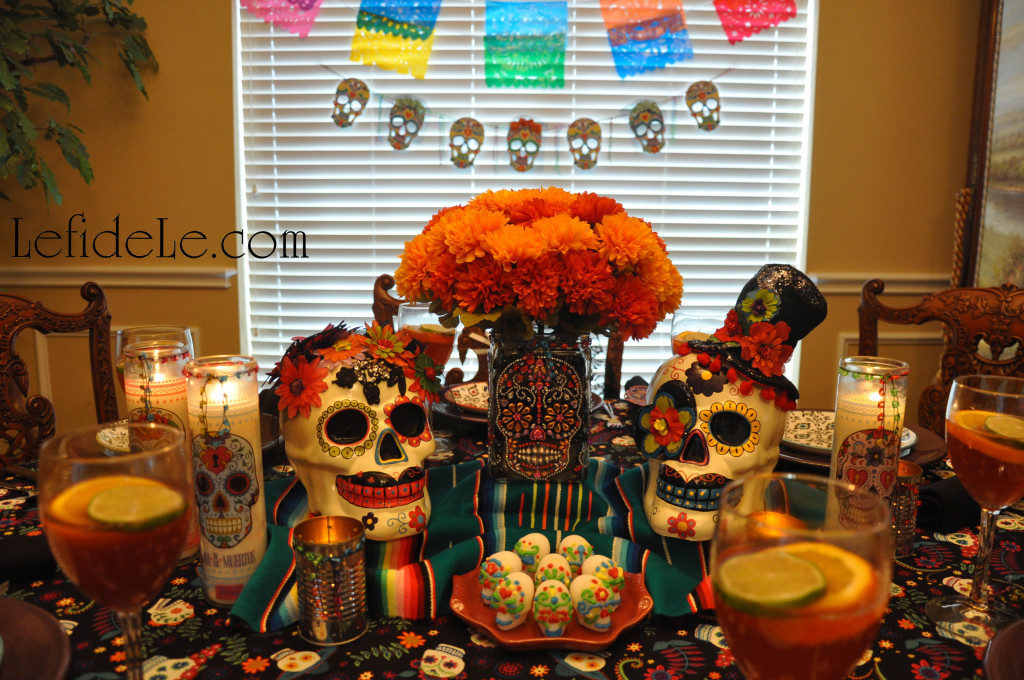
The tablescape is illuminated with Catholic religious candles (as a nod to All Saint’s Day) not decorated with santos (saints) but with Dia de los Muertos imagery. Small homemade luminarias (lanterns) filled with tea-light candles are tied with the same multi-colored yarn of the banners, charms, and vase. (Learn how to inexpensively make these here: Easy DIY Upcycled Can Tea-light Luminarias + Free Printable Template & Tissue Paper Flowers Crafts.)

36(2)Leigh

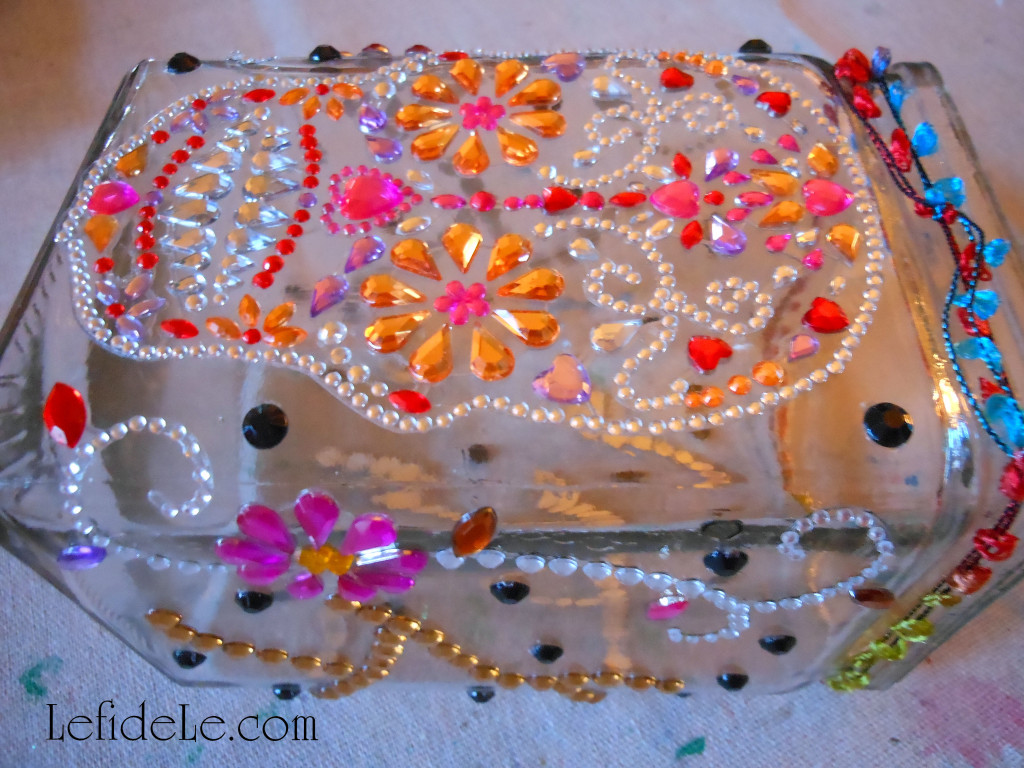
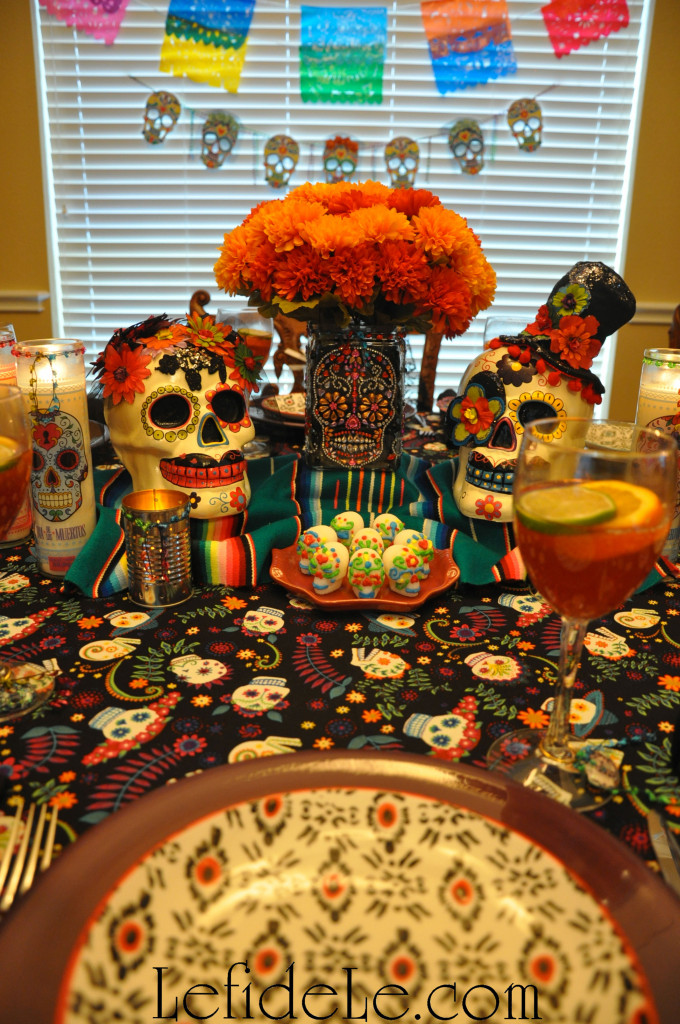
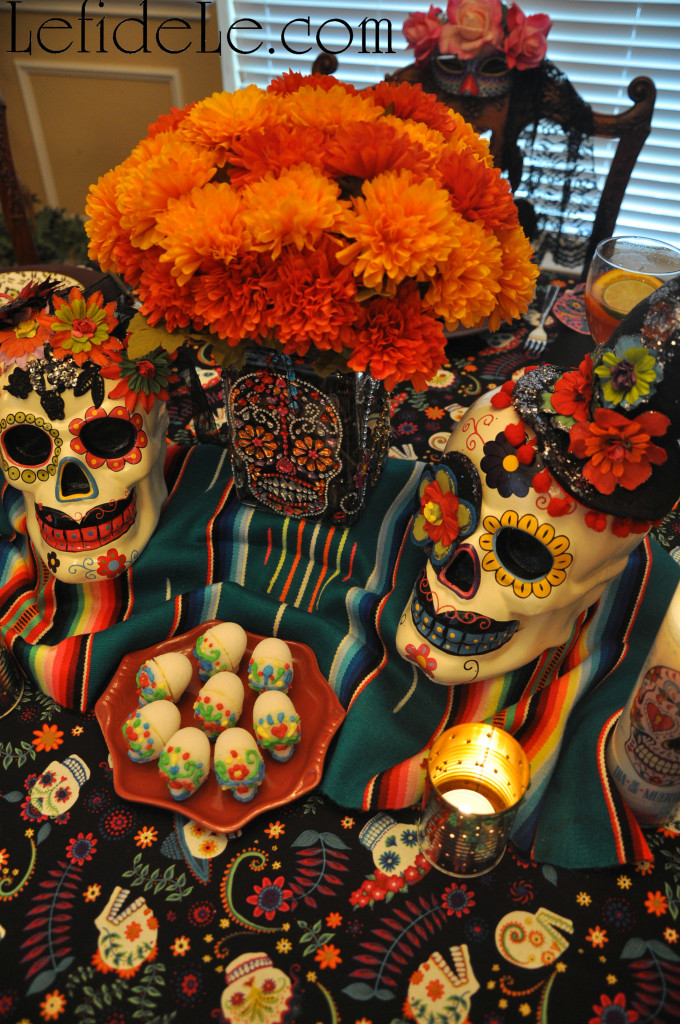
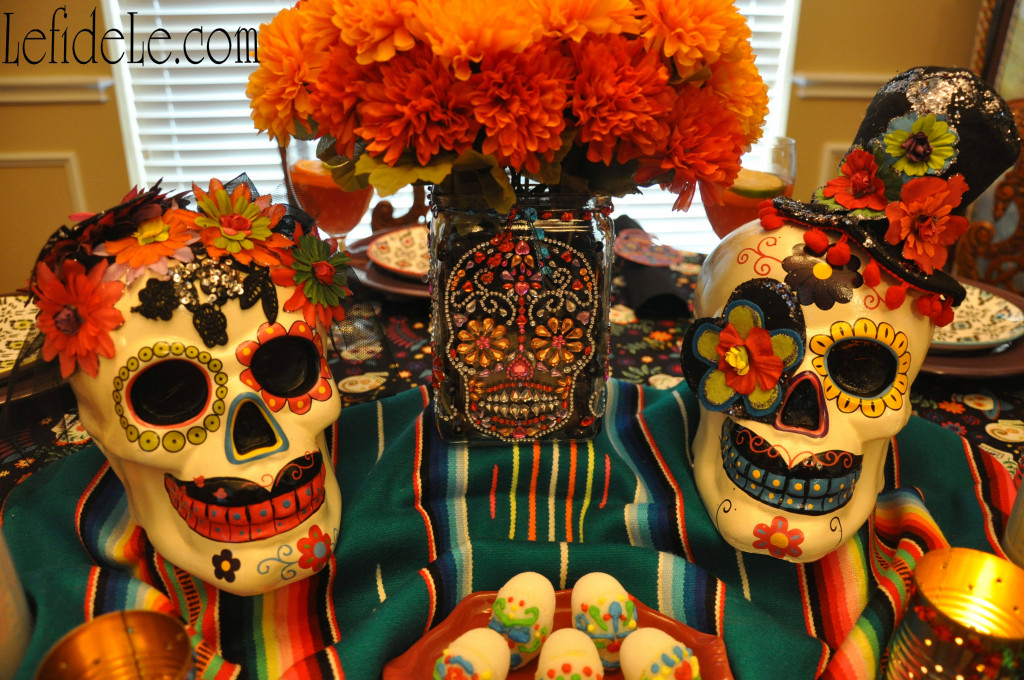
A clear square vase, decorated with crystals depicting Day of the Dead imagery, is filled with black glass marbles holding a tightly packed arrangement of cempasuchil (wild marigolds) which are typically left for the departed as ofrendas (offerings at altars or graves). (Learn how to quickly make the vase here: DIY Calaveras de Azucar (Sugar Skulls) Napkin Rings, Wine Glass Charms, & Vase Craft Tutorial.)

8(3)Leigh

Small edible sugar skulls serve as both customary folk art décor and sweet after dinner treat. (Get the easy recipe here: Calaveras de Azucar (Sugar Skulls) Edible Folk Art & Egg-Free Candy Recipe.)

67(2)Leigh

A polychromatic Mexican serape (wool shawl) covers lifts which elevate central elements of the centerpiece unseen. Ornamental calavera (skull) novios (brides and grooms) ceremoniously occupy the centerpiece. (Calacas, skeletons, dressed in wedding attire are a common theme describing the circle of life.)

43(2)Leigh

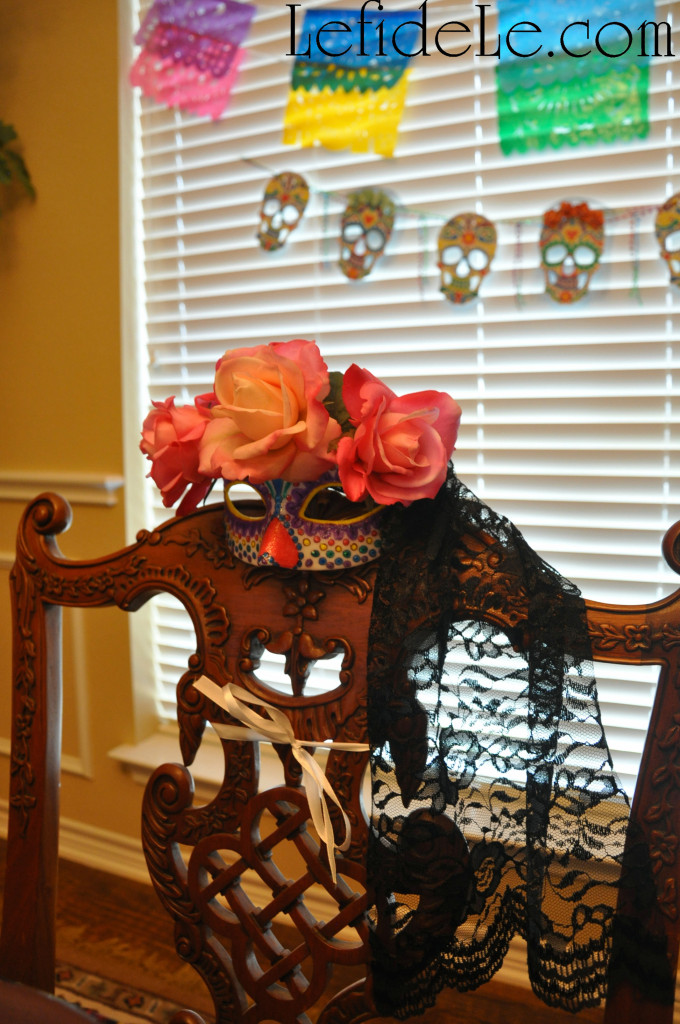
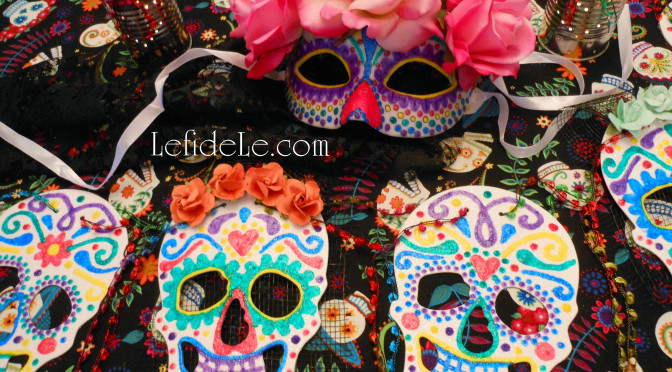
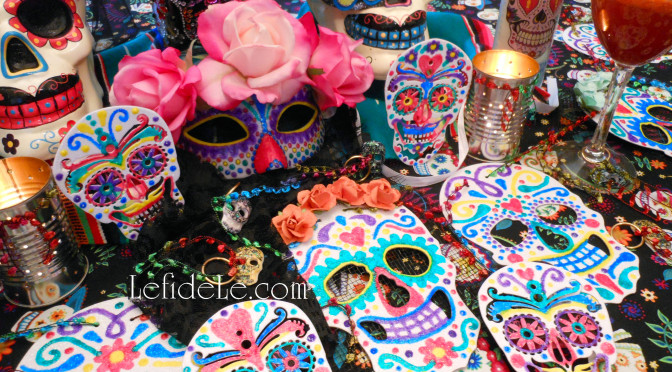
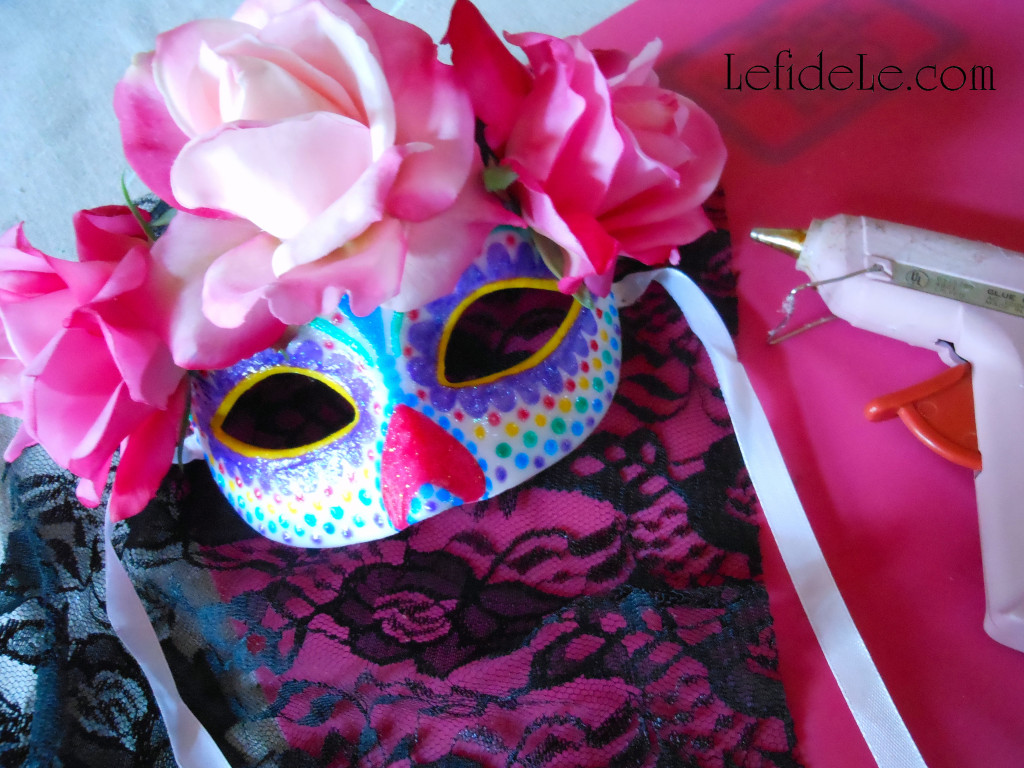
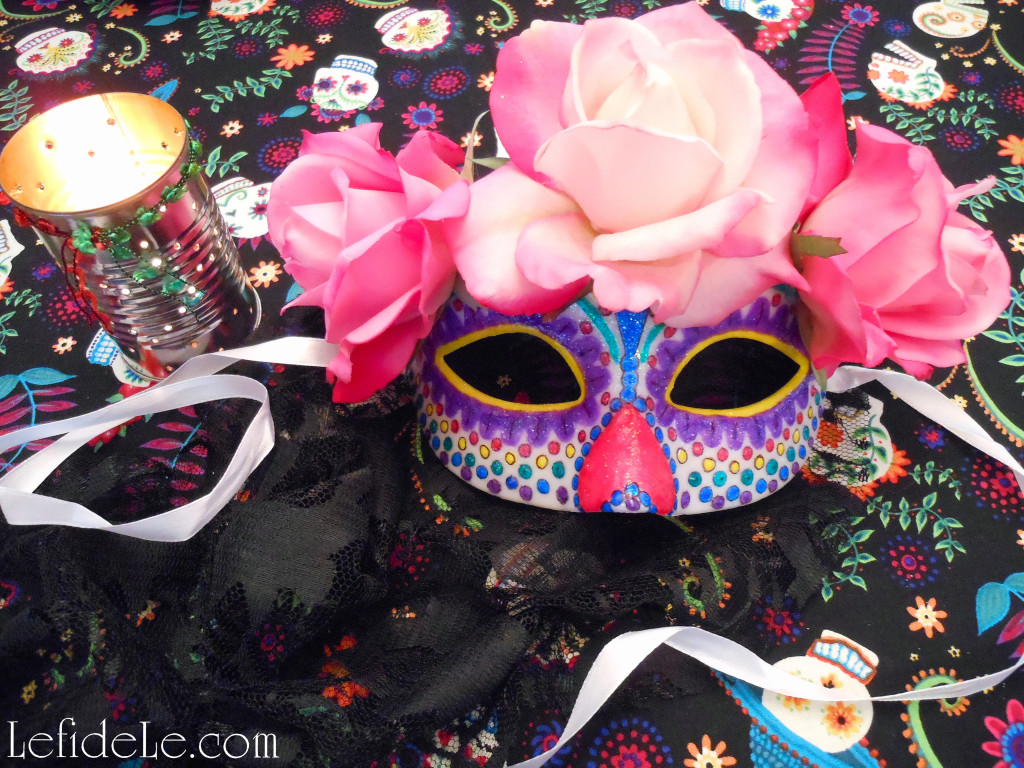
Awaiting a guest of honor, is a handcrafted Mexican parade mask portraying la calavera catrina (which is an iconic image of a wealthy Euro-Mexican lady from the 1800’s). When worn, ½ of the face is covered with a skull representation it symbolizes the idea of life being inextricably linked with death. Banners of traditional papel picado (pierced paper) and painted sugar skulls of novios adorn the background of the festive tablescape. (Learn how to easily craft the mask and banner here: DIY La Calavera Catrina Costume Mask & Calaveras de Azucar (Sugar Skulls) Banner for a Dia de los Muertos (Day of the Dead) Themed Halloween.)

54(2)Leigh

Feliz Dia de los Muertos!

Faithfully Yours,

Leigh
DIY La Calavera Catrina Costume Mask & Calaveras de Azucar (Sugar Skulls) Banner for a Dia de los Muertos (Day of the Dead) Themed Halloween

090Leigh

This tutorial will help you to inexpensively craft your own one-of-a-kind la calavera catrina costume mask in the Dia de los Muertos (Day of the Dead) style, and then easily DIY a Calaveras de Azucar (Sugar Skulls) banner to decorate your Halloween party. Sugar (azucar in Español) is said to balance the bitterness of death (muerte), and calaveras (skulls) are traditionally offered on All Saint’s Day (November 1) to departed loved ones as one would leave flowers graveside. These calacas (colloquial term for skeletons) have migrated north from Mexico into American Halloween celebrations as themed décor. In this same way, traditional parade skull masks have become party costumes. As Halloween serves to poke fun at all things scary, Dia de los Muertos is intended as a way to accept death as inevitable… and also to honor dearly departed loved ones. The Mexican ½ face parade masks symbolize this idea of life being inextricably linked with death. So when you don this half skull mask for Halloween, be sure to make up the lower half of your face as a beautiful representation of life… and poke a little fun at death as not being so scary!

1(2)Leigh

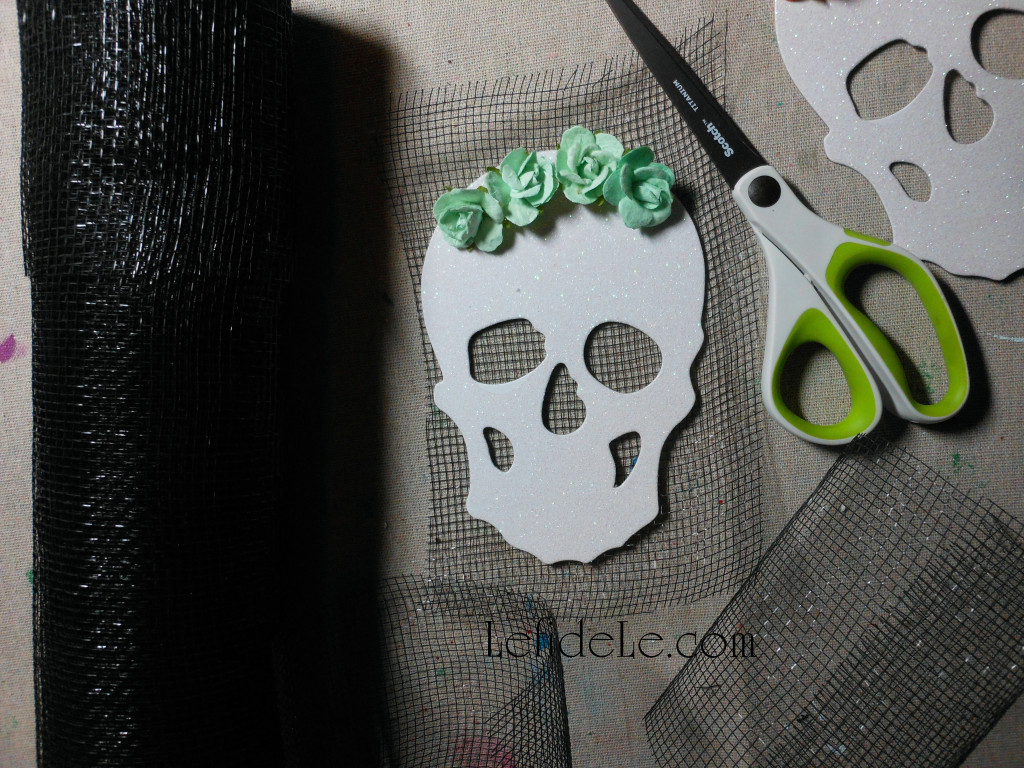
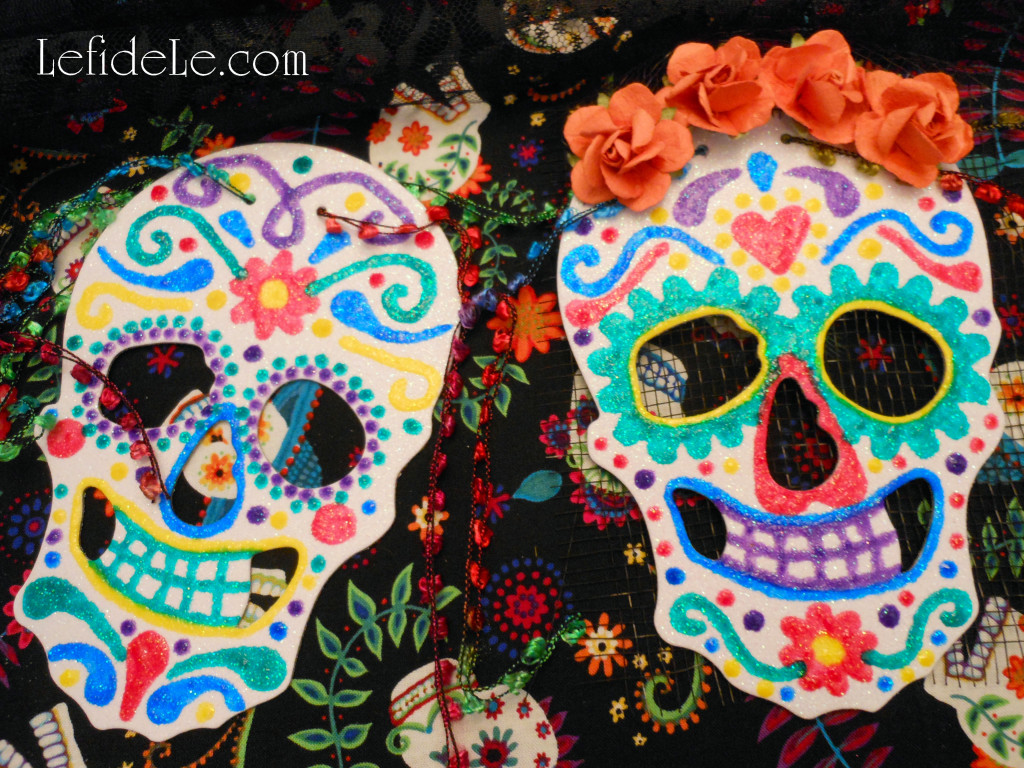
To craft the calaveras de azucar (sugar skulls) banner, begin with either a package of glittered skulls or cut your own shapes from glittered paper. Another option is upgrade a readymade skull banner. (All of these items are available at Le fidèLe Designs craft supply affiliates Michaels and/or Joann whose clickable ads may be found in the sidebar.)

6(2)Leigh

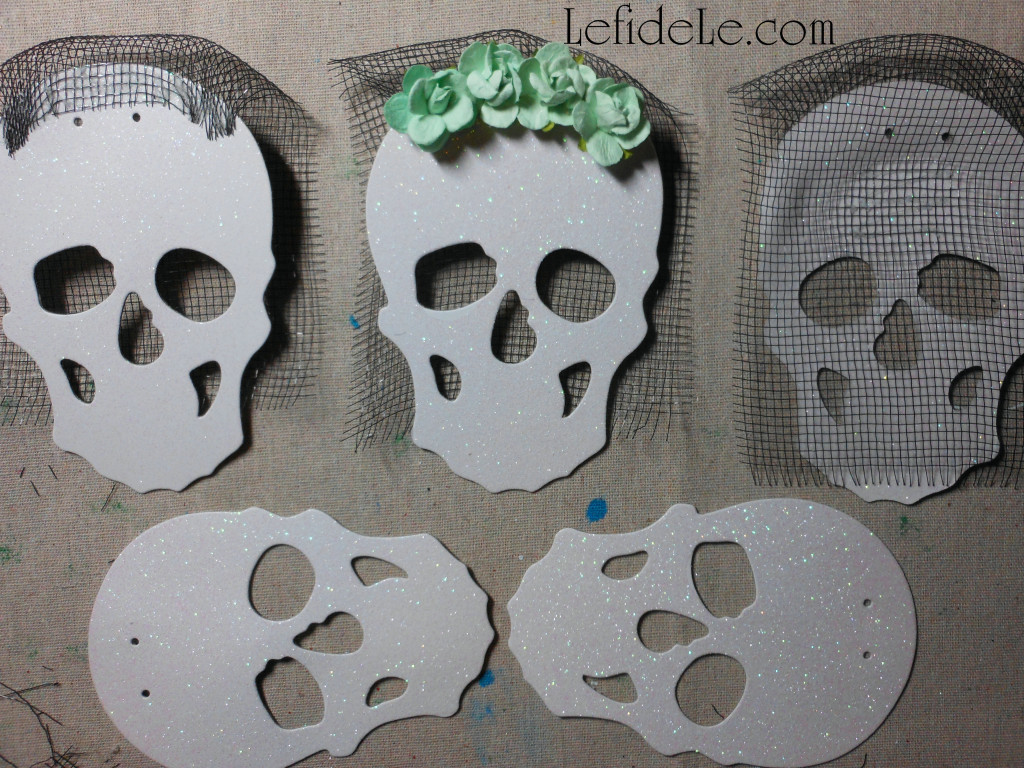
Attack black floral mesh squares to half of the skulls. Glue one end to the top of the front and the rest to the underside so that it looks like a lacy veil.

001Leigh

Next, glue paper rosettes to cover the front edge of the veils.

006Leigh

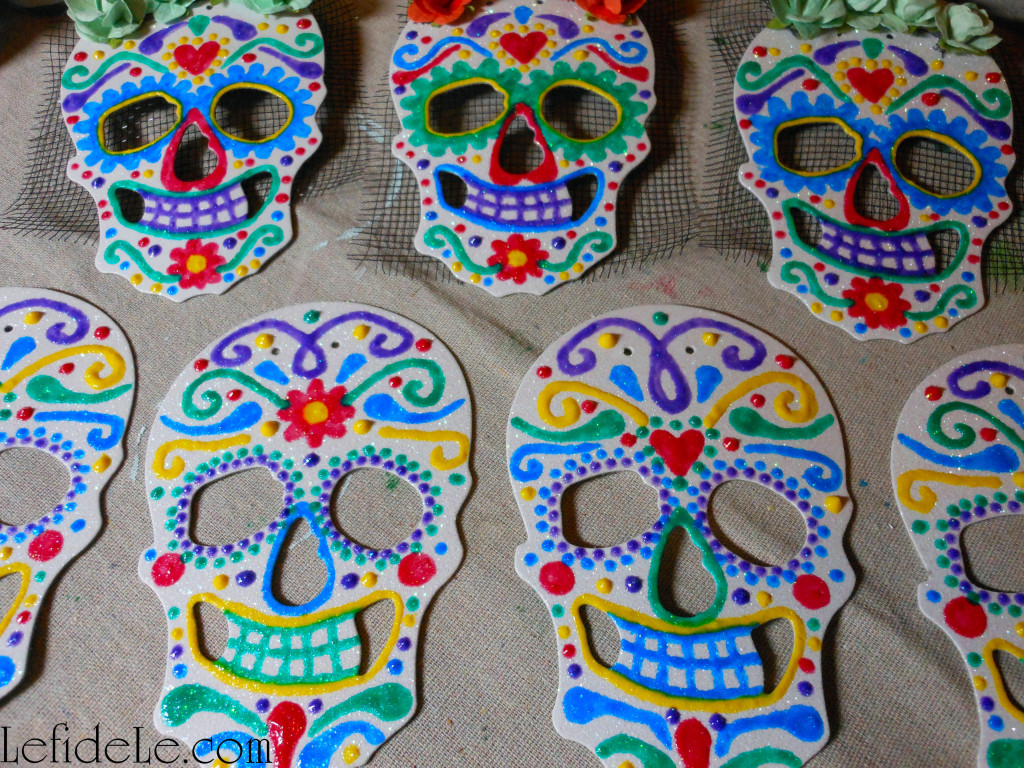
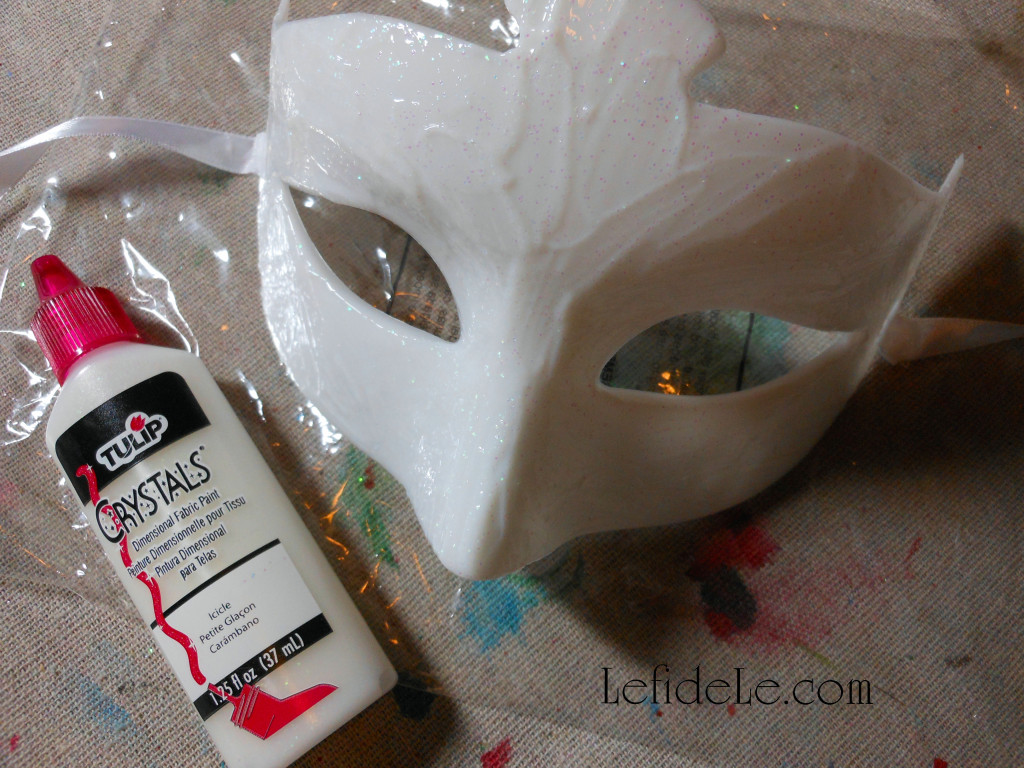
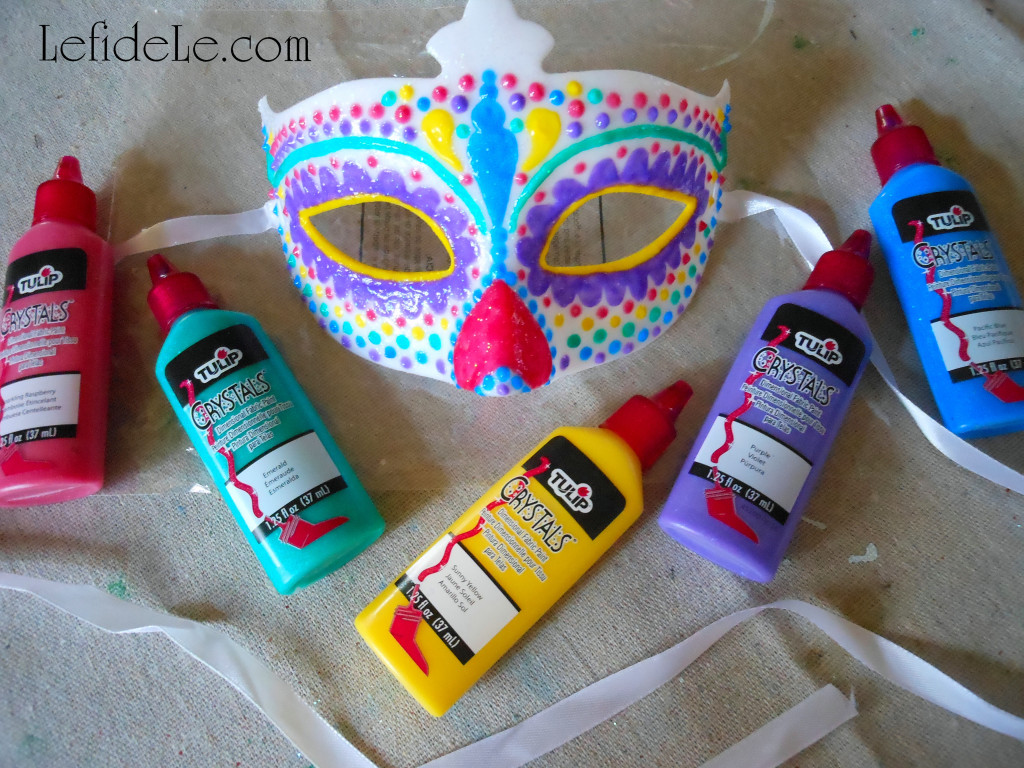
To decorate these with the traditional sugar skull designs of flowers, hearts, swirls, and apostrophe type marks, I utilized Tulip brand Crystals (= glittery like sugar) T-shirt paint. It works really well on many materials besides cotton. The small tips allow the paint to come out just like icing does on real sugar skulls. If you prefer the control of a paintbrush, just squeeze some out onto a paper plate to use as a palette. Let these dry overnight to cure.

015Leigh

Next cut lengths of colorful yarn or ribbon to string the banner on. If your skulls don’t have the right holes to string them through, just use a hole punch… or even poke some with an ice pick!

082Leigh

Hang them in the background of a themed party or over a candy buffet.

004Leigh

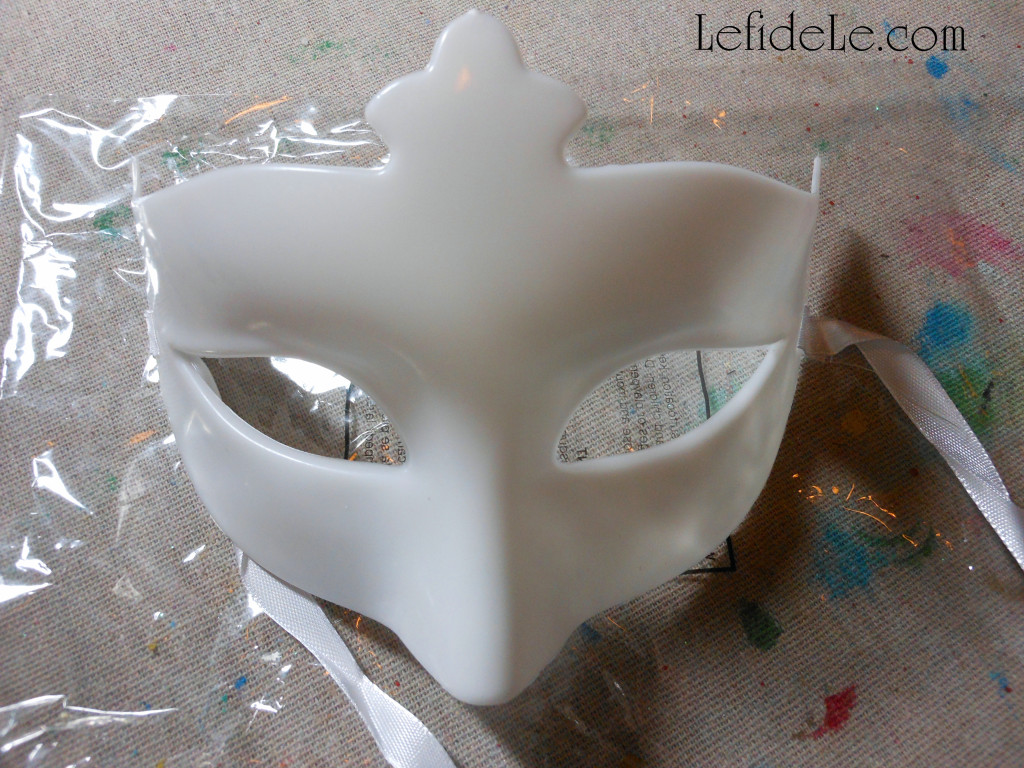
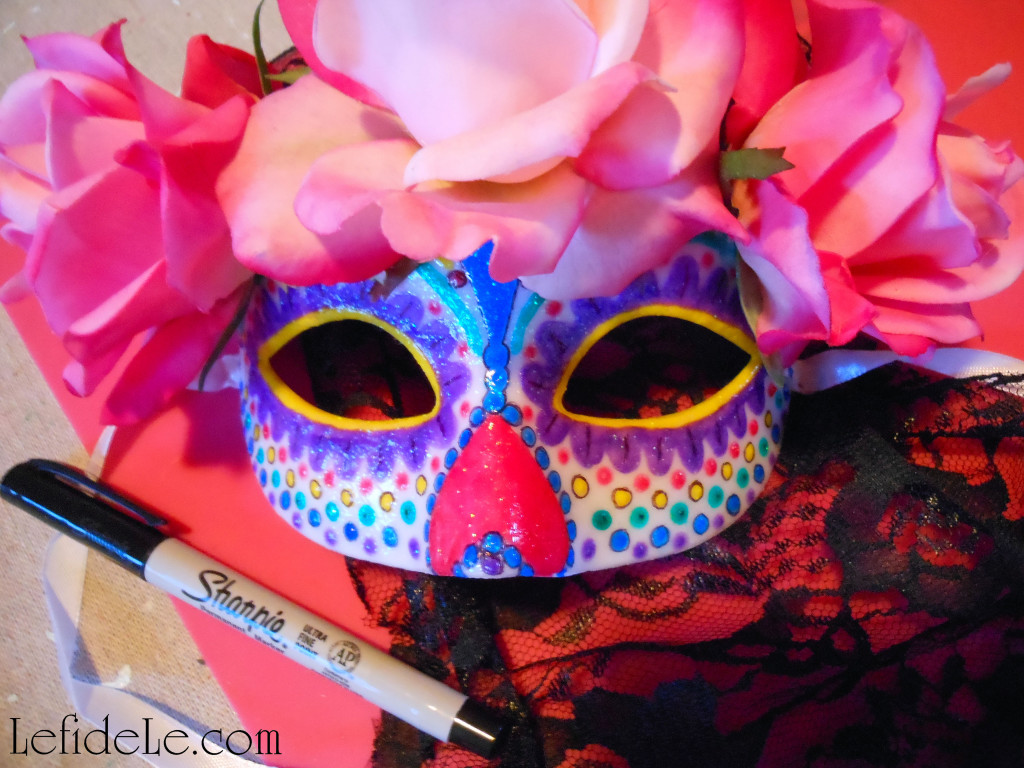
To make your own catrina mask, purchase a plain plastic one to embellish. (This Mardi Gras type can be found at Michaels for about $2, and Joann has some as well.)

011Leigh

Use the same T-shirt paint leftover from the sugar skull banner to cover the mask with. (I just used my finger to smear it around.) Let this layer dry well.

016Leigh

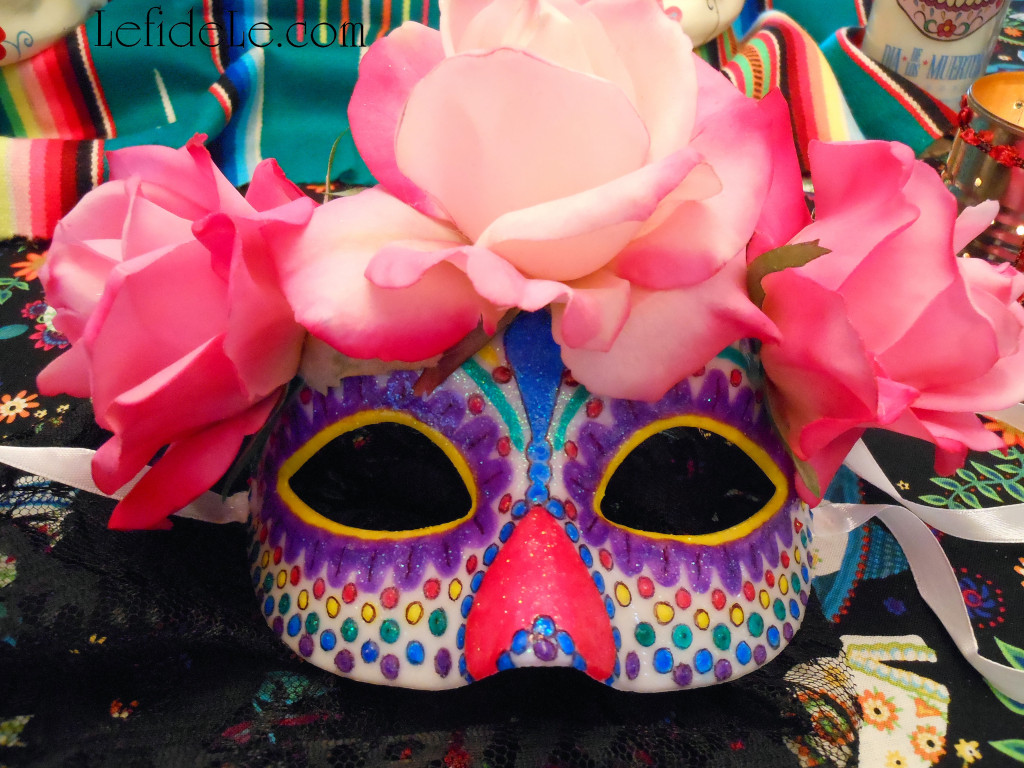
Begin using other colors to add designs to the mask. Dots are the easiest to make with these paints, but make an upside down heart for a nose decoration. (I made a girlier version than can be typically found at the Halloween stores by using softer colors than red and black and by making the eye sockets flowers instead of black rings.) Let this layer dry well too.

037Leigh

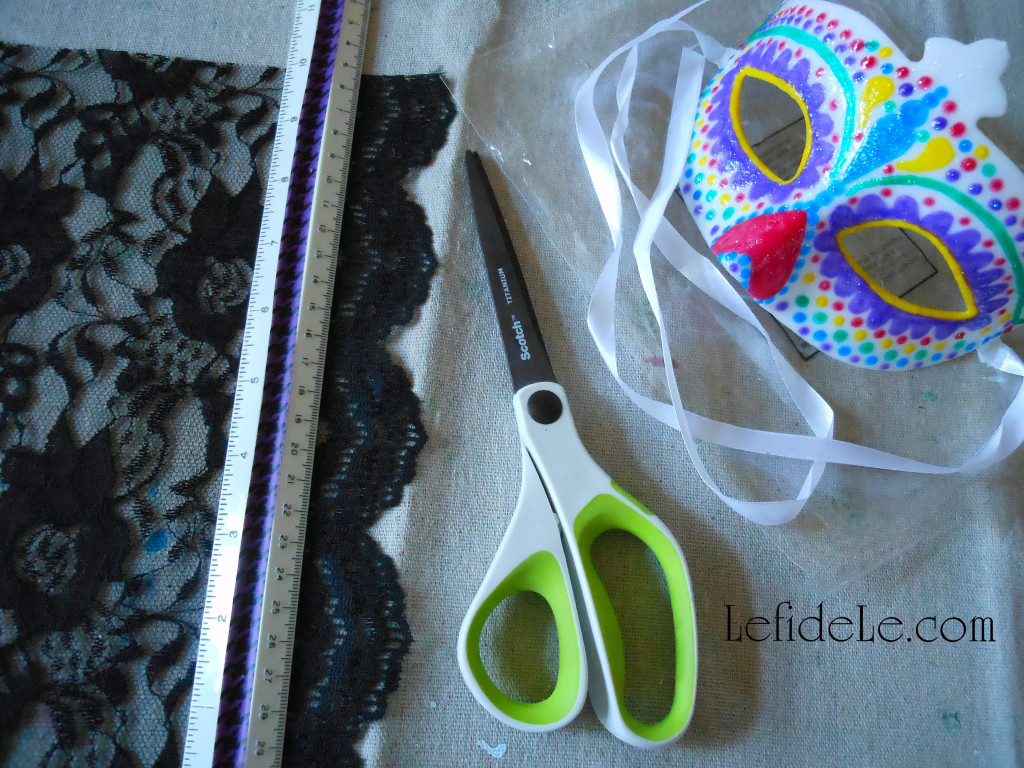
Cut a length of lace at about 10 inches across and at a length that will cover most of the hair of the recipient.

039Leigh

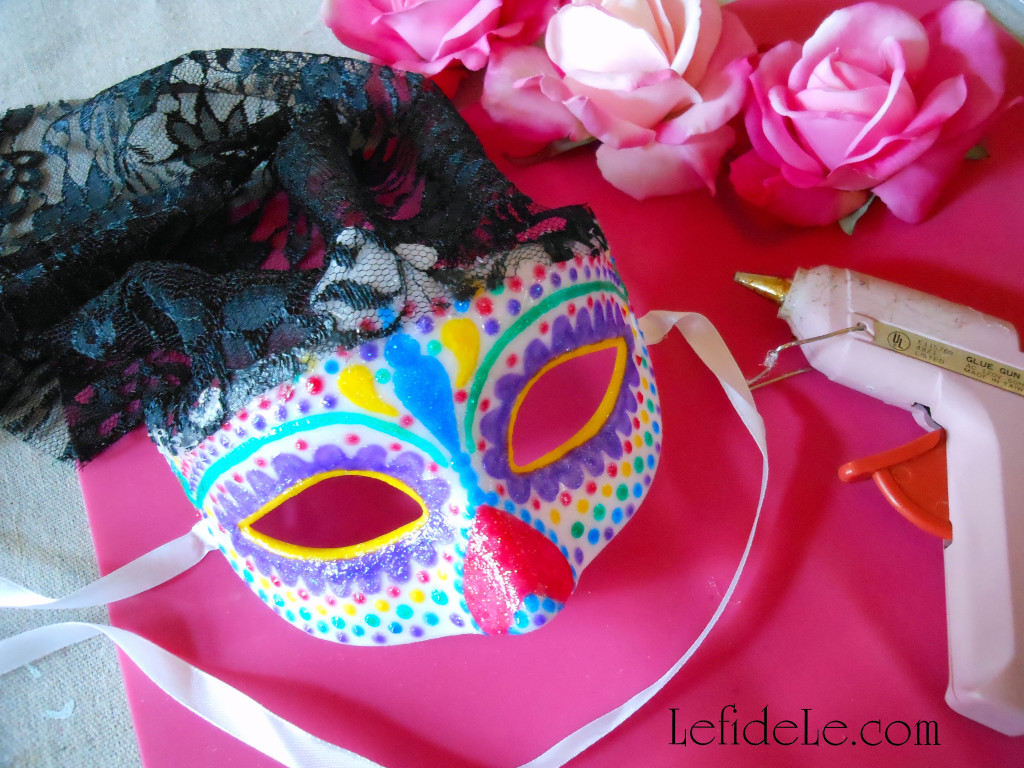
Glue the 10 inch edge to the top of the mask, pressing the fabric into the glue. Make small gathers to take up the width. This veil will expand over the head to better cover the hair.

042Leigh

Now pull off faux rose heads from their stems. Glue these on top of the lace, and hold them down until they don’t feel like they will slip off.

44Leigh

Further definition may be added to the edges of the paint lines with a fine tip sharpie permanent marker. (I think a little black helps to tie in the veil’s color.)

103Leigh

Try wearing this with a traditionally embroidered Mexican dress and a black lace shawl.

113Leigh

It may also be used as décor for a themed Halloween celebration.

107Leigh

Viva la celebration!

Faithfully Yours,

Leigh
DIY Calaveras de Azucar (Sugar Skulls) Napkin Rings, Wine Glass Charms, & Vase Craft Tutorial for Dia de los Muertos (Day of the Dead) Themed Halloween Dinner Party Décor

079Leigh

This tutorial will help you to inexpensively craft your own jeweled vase in the Dia de los Muertos (Day of the Dead) style to fill with traditional wild marigolds (cempasuchil), and then easily DIY calaveras de azucar (sugar skulls) napkin rings and wine glass charms to decorate your Halloween dinner party table with. Sugar (azucar in Español) is said to balance the bitterness of death (muerte), and calaveras (skulls) are traditionally offered on All Saint’s Day (November 1) to departed loved ones as one would leave flowers graveside. As Halloween serves to poke fun at all things scary, Dia de los Muertos is intended as a way to accept death as inevitable… and also to honor dearly departed loved ones. Representational calacas (colloquial term for skeletons) symbolize the idea of life being inextricably linked with death, and have migrated north from Mexico into American Halloween celebrations as themed décor. By using one celebration as a theme for the other, the two concepts combine to poke a little fun at death as not being so scary!

1(2)Leigh

To craft the calaveras de azucar (sugar skulls) napkin rings, begin with either a package of glittered skulls or cut your own shapes from glittered paper. Another option is upgrade a readymade skull banner. (All of these items are available at Le fidèLe Designs craft supply affiliates Michaels and/or Joann whose clickable ads may be found in the sidebar.)

4(2)Leigh

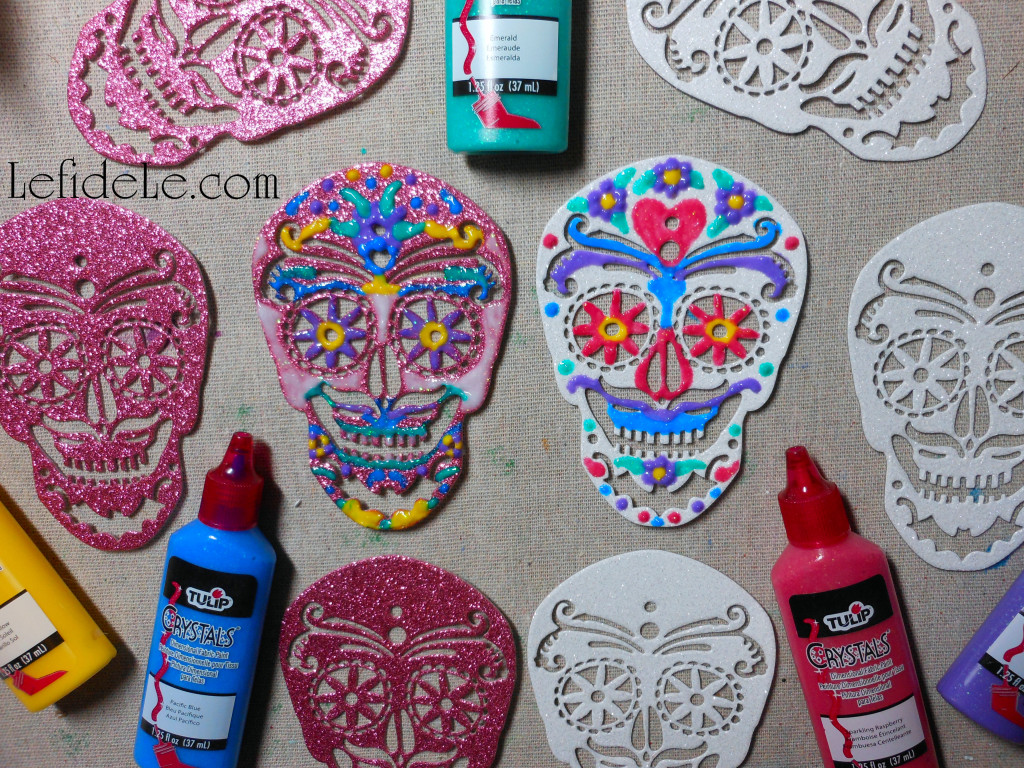
To decorate these with the traditional sugar skull designs of flowers, hearts, swirls, and apostrophe type marks, I utilized Tulip brand Crystals (= glittery like sugar) T-shirt paint. It works really well on many materials besides cotton. The small tips allow the paint to come out just like icing does on real sugar skulls. If you prefer the control of a paintbrush, just squeeze some out onto a paper plate to use as a palette. Let these dry overnight to cure, and ensure that no unwanted marks are impressed into the paint.

034Leigh

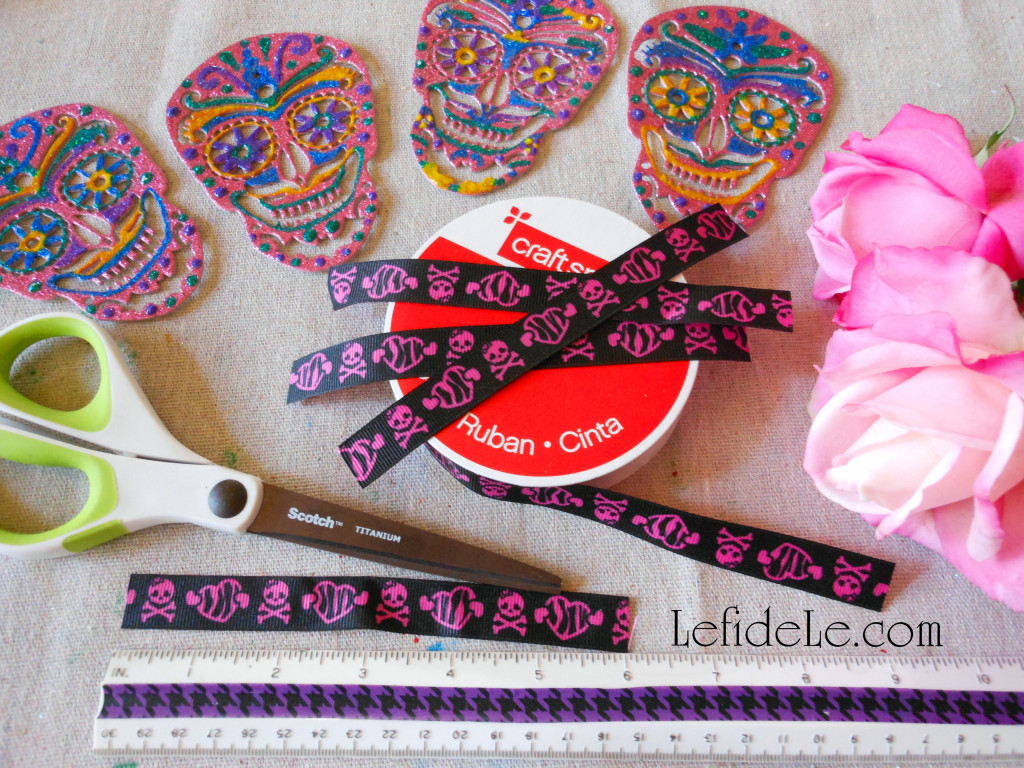
Cut 6 inch lengths of grosgrain ribbon to serve as the ring. (I found this skull printed roll on clearance, and didn’t find out until much later that it’s a “Monster High” motif. Oh well, it worked!)

036Leigh

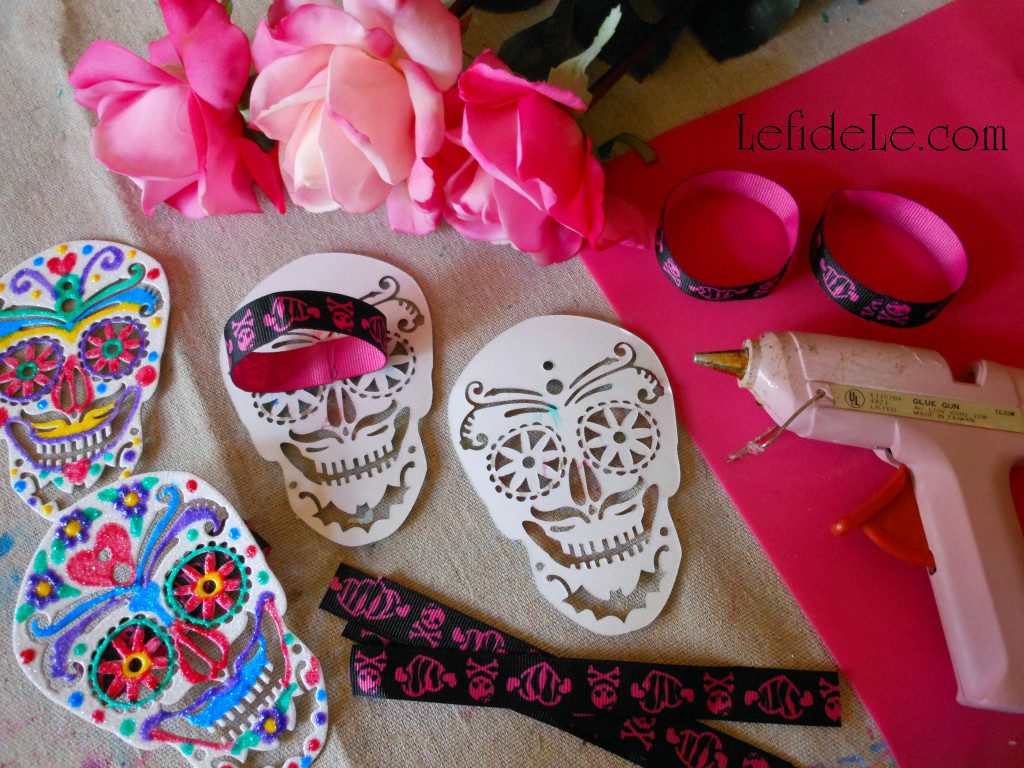
Hot glue each end of a ribbon length onto the center underside of a skull.

085Leigh

Ring a ding ding, look who made a napkin ring!

003Leigh

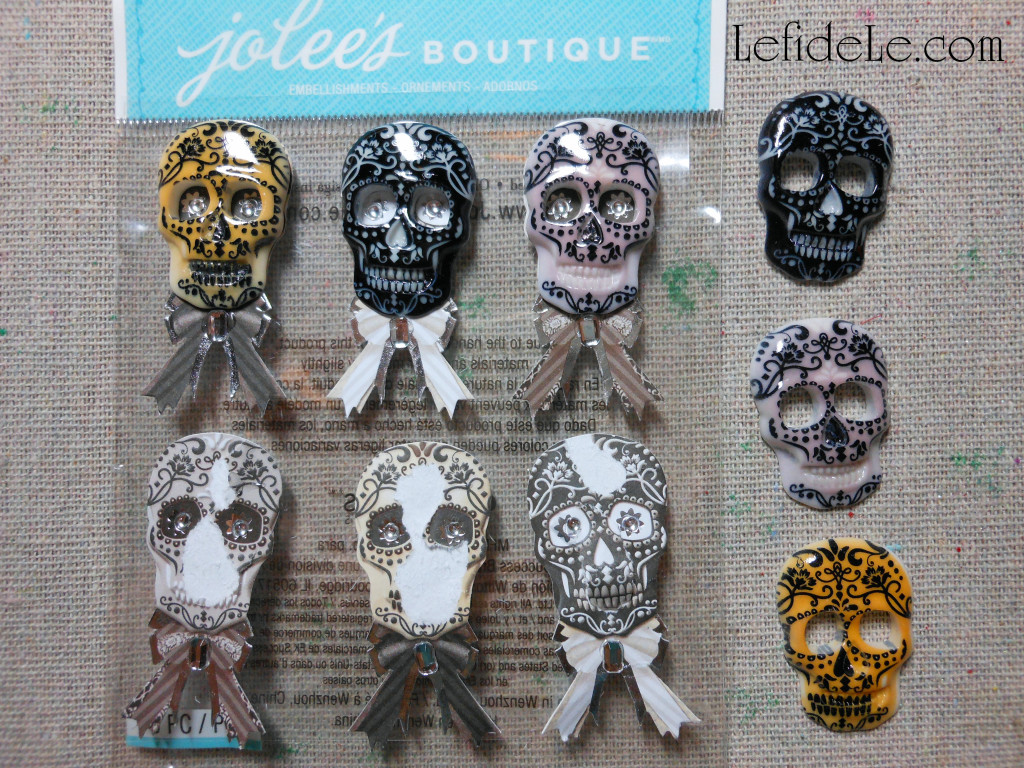
To create wine glass charms, begin with Jolee’s Boutique dimensional scrapbooking stickers. Pull the plastic fronts away from the flat backings.

009Leigh

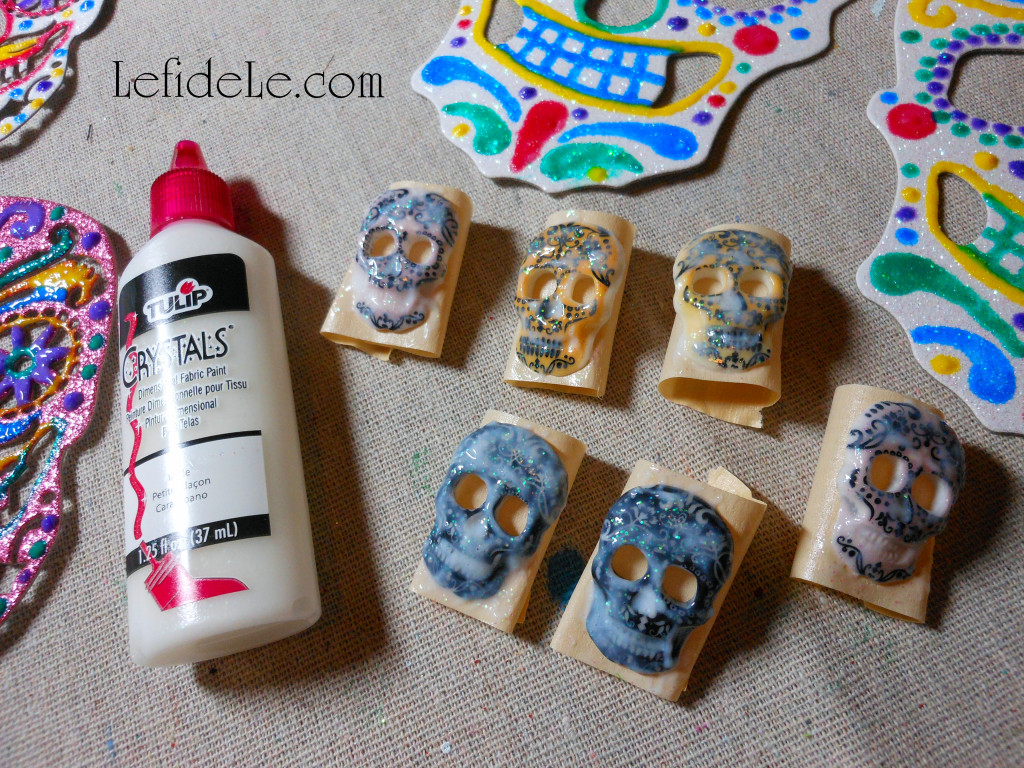
Use the same T-shirt paint in white to add a layer of sugary glitter to them. These will dry clear. (To make this easier, I made a finger loop of masking tape to hold them while I dotted on the paint, and then just slipped them off onto the table to dry overnight.)

013Leigh

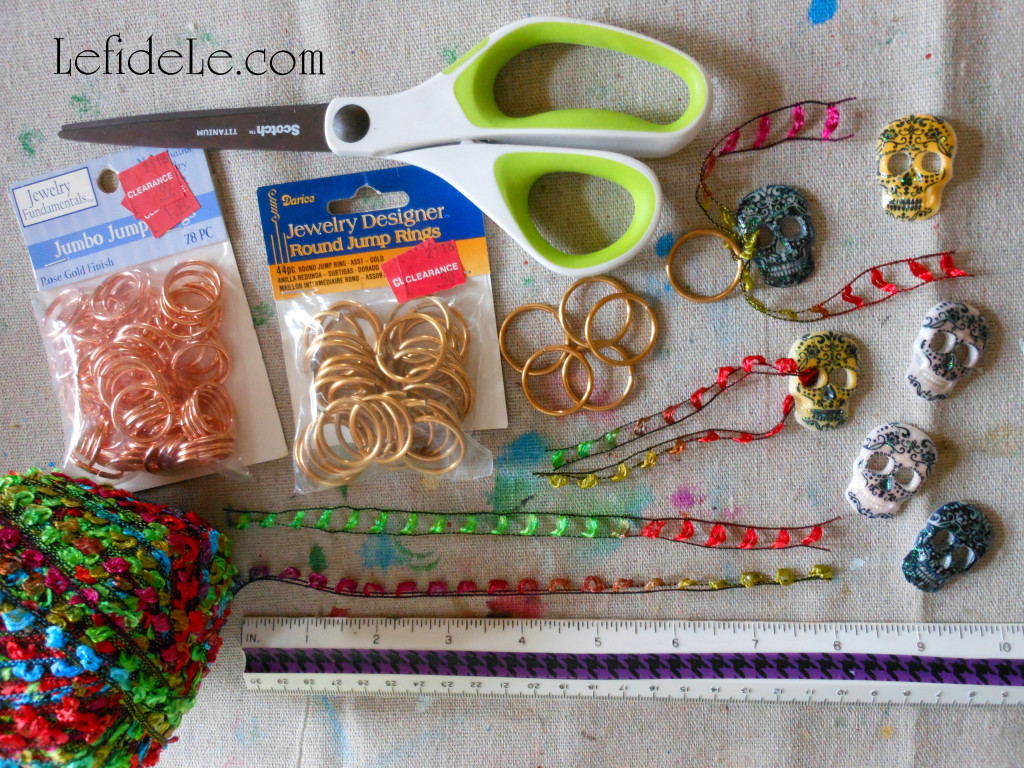
Tie these onto jumbo jump rings with a strand of colorful yarn or ribbon. (I used the same yarn on all my Dia de los Muertos crafts for continuity.)

078Leigh

Since the skulls come in colored sets of 2, why not color-code the drinks by kissing couples!?

018Leigh

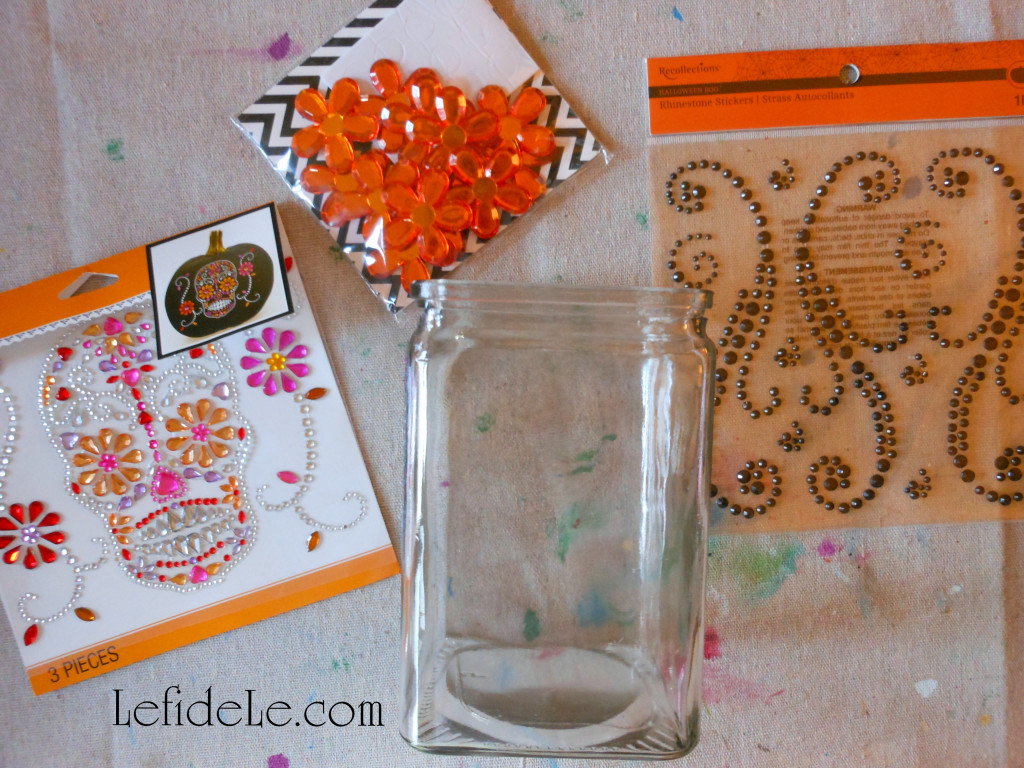
Quickly create a calavera vase by upcycling an old vase with crystal stickers or by gluing crystals on. You can use a complete picture, lay on crystals individually, or both. (If you need to use a pattern, just tape a coloring page to the inside of the vase and adhere crystals to the outside of it over the lines.)

020Leigh

Tie on a length of ribbon to coordinate with the other crafts, and fill the vase with black marbles.

67(2)Leigh

Fill it with traditional wild marigolds to use as a centerpiece surrounded by more calaveras.

Happy Day of the Dead!

Faithfully Yours,

Leigh
“Glitter-Ween” Halloween Party Theme Decorating Ideas (With DIY Links)

This year’s Halloween party theme was “Glitter-Ween”! This gave me a plausible excuse to paint, spray, or glue… orange, purple, green, and black glitter to my heart’s content… at least until February that is. Here are some decorating ideas from my glitter-splosion event!

192cLeigh

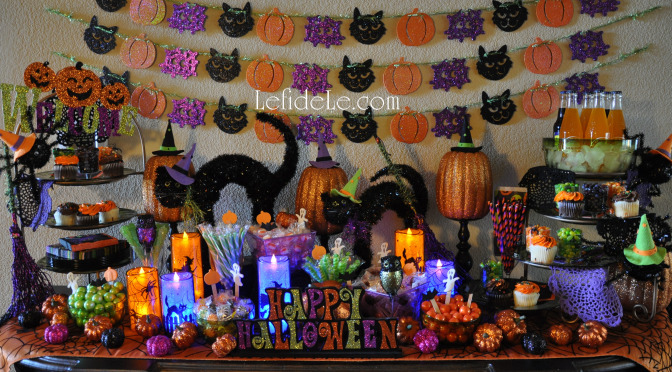
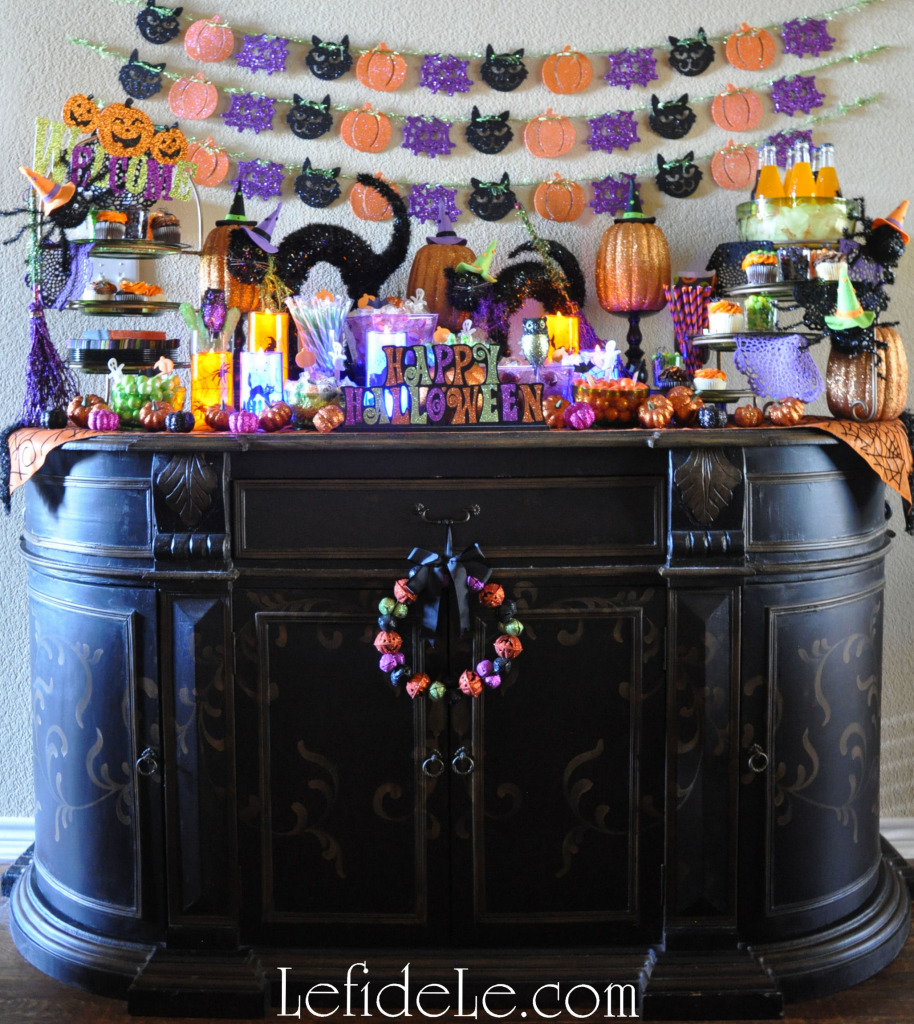
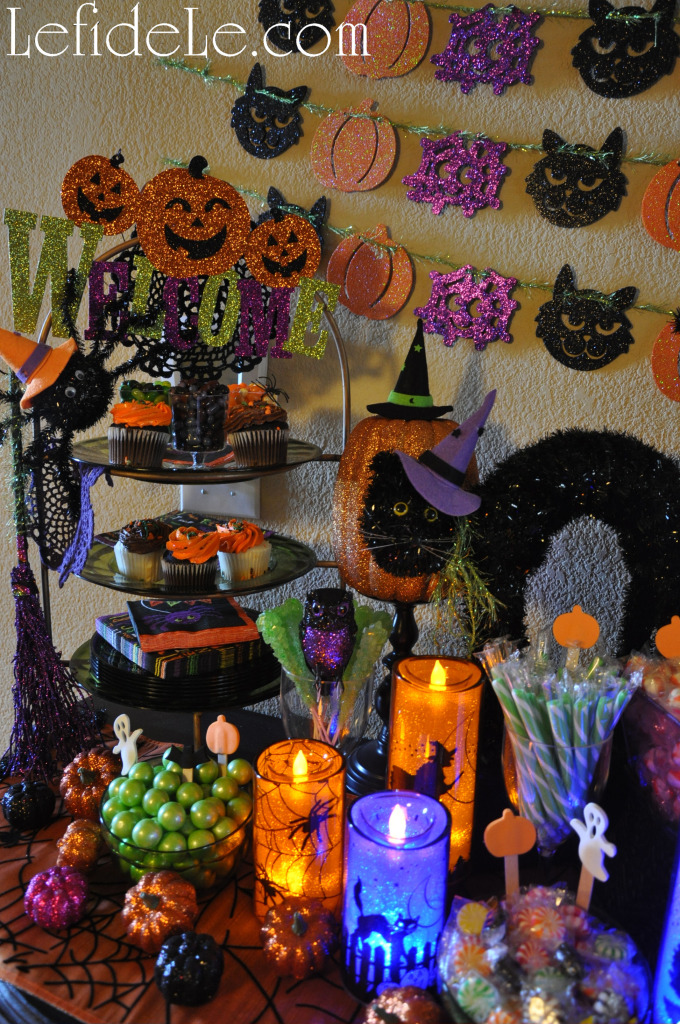
The black painted console was the perfect stage for the “candy-bar” buffet. One small glittered bell wreath kept it from appearing too top heavy. An orange spider-web runner lined and protected the painted top.

202cGlitterween-Leigh

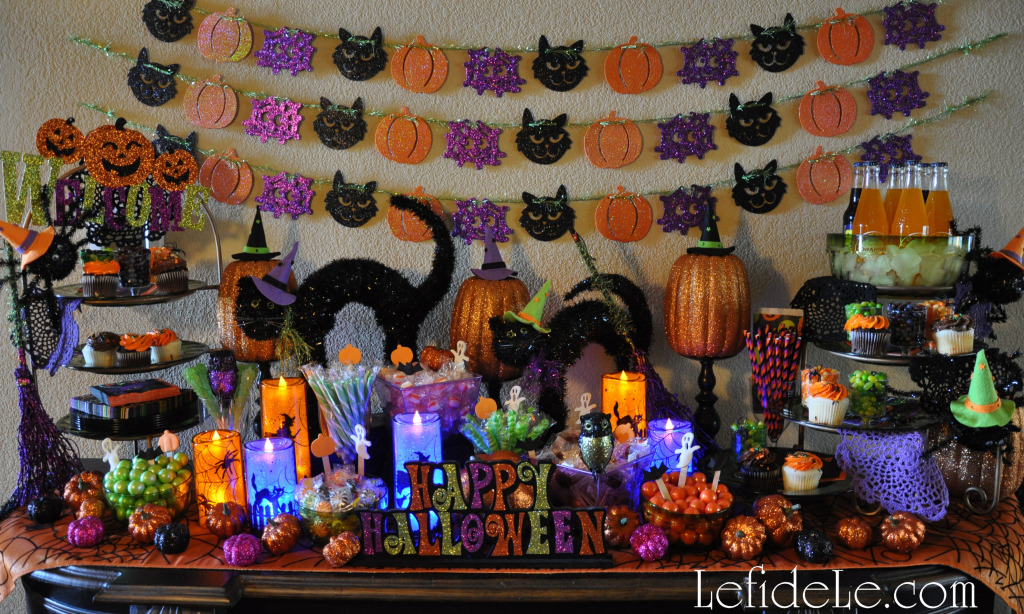
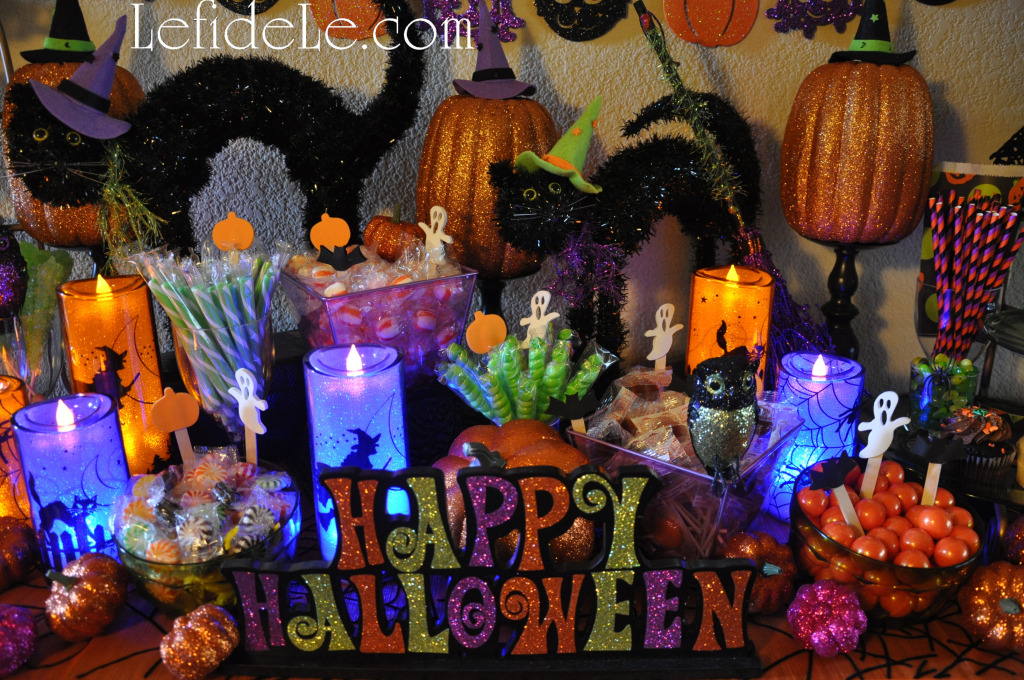
My glitter garland remade craft filled in the background of the smorgasbord. Candlesticks held glittered pumpkins at visible heights behind witch-cats who guarded the sweets.

110Leigh

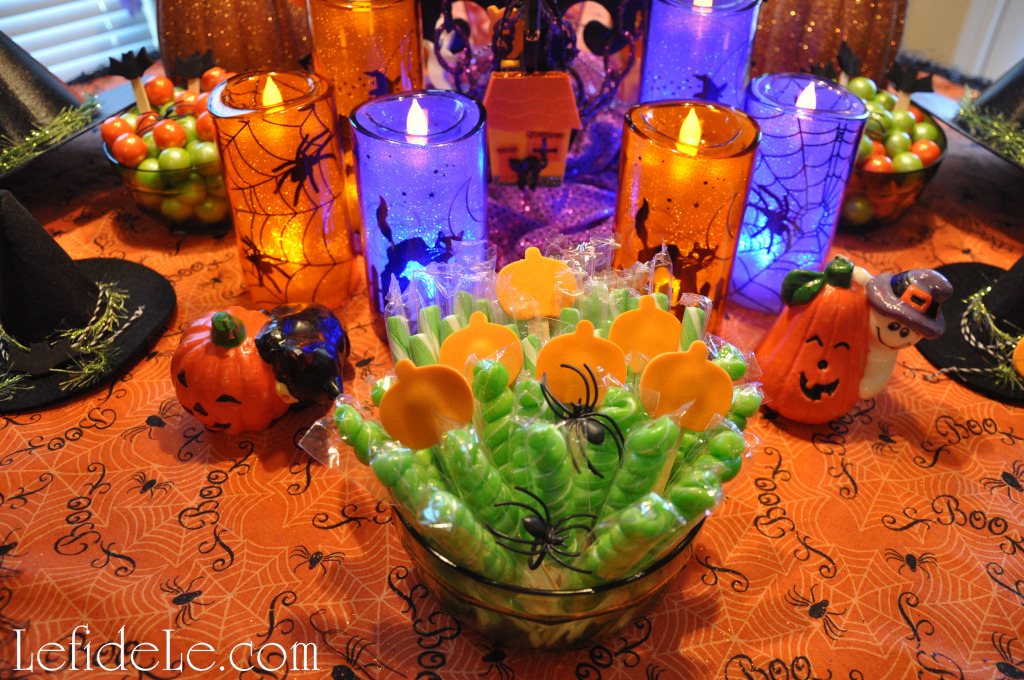
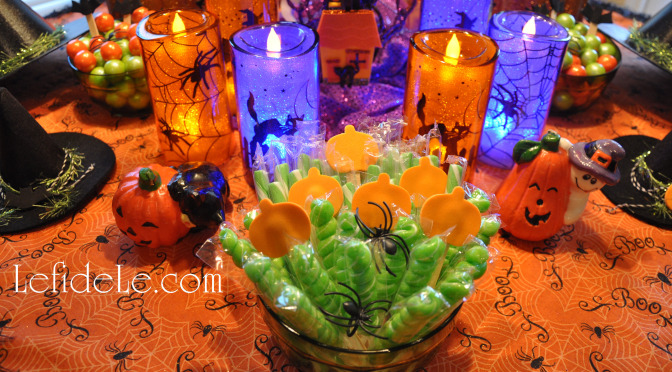
Theme colored candy filled bowls were accented with pumpkins, ghosts, and bats from my foam puppet / food pick craft. LED candles eerily lit the scene safely, where no normal candle would have dared been set.

108Leigh

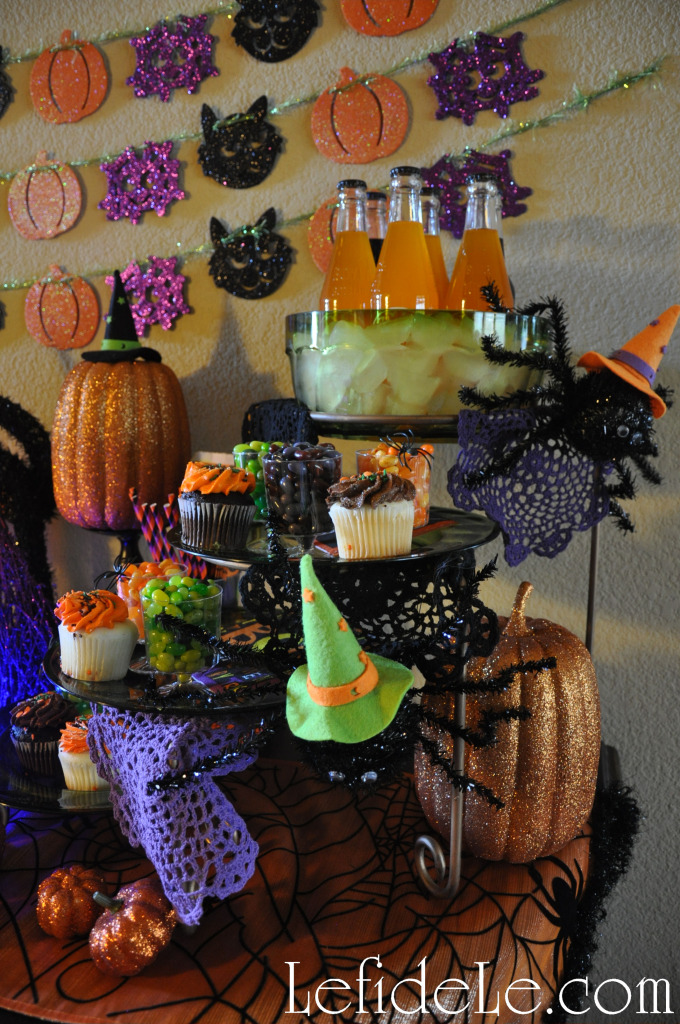
Spiders climbed the treat tower hung with their “spider-web” doilies.

32Leigh

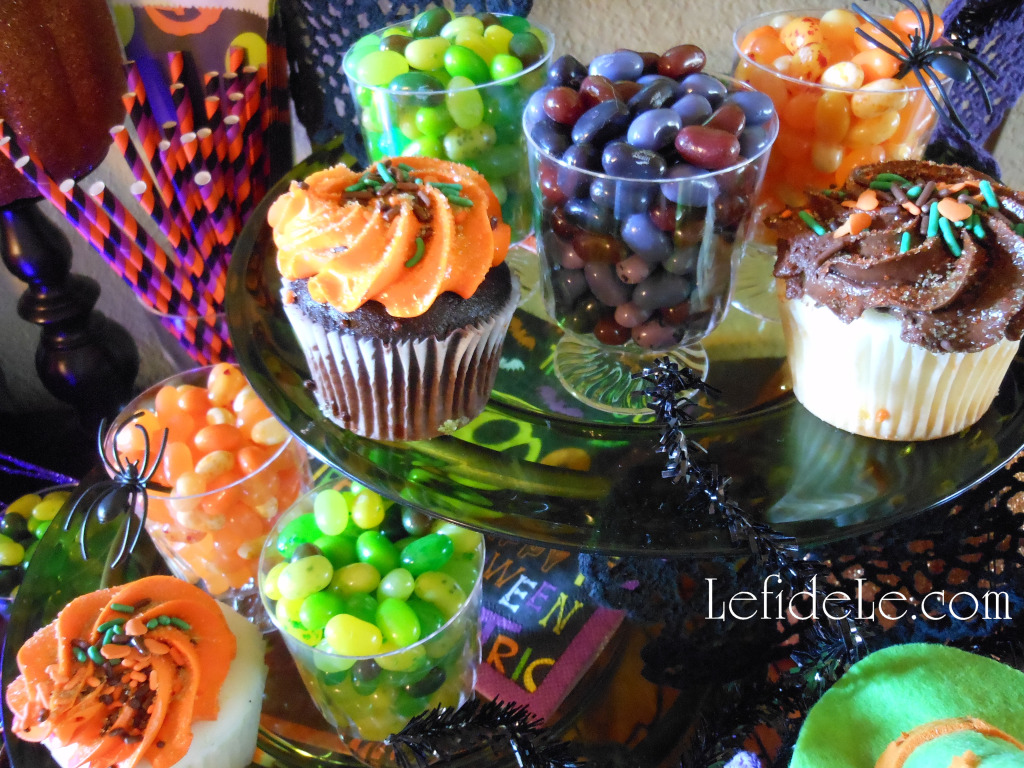
Monochromatic jelly bean cups sat next to a variety of cupcakes on various lifts and levels.

157Leigh

Glittered brooms camouflaged another treat tower’s sides while a shimmering welcome beckoned at the top.

253Leigh

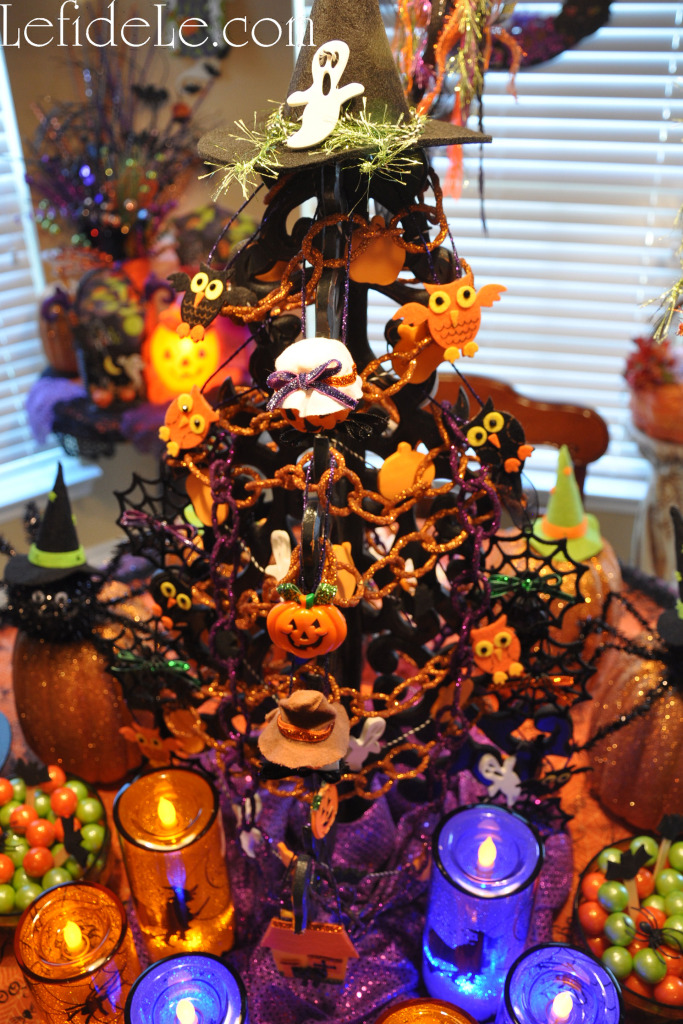
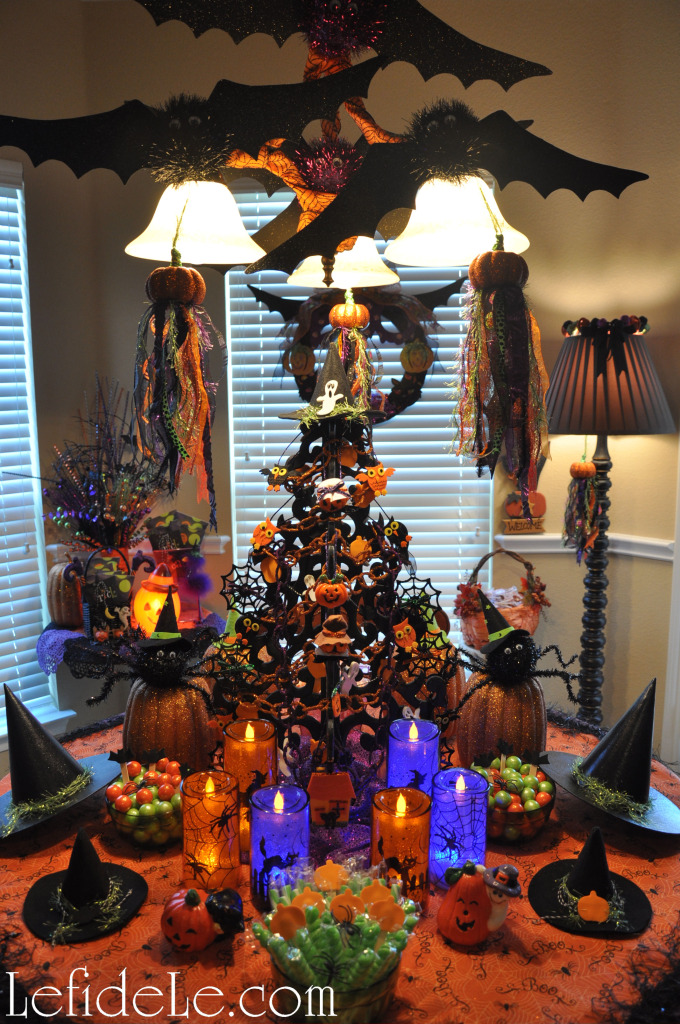
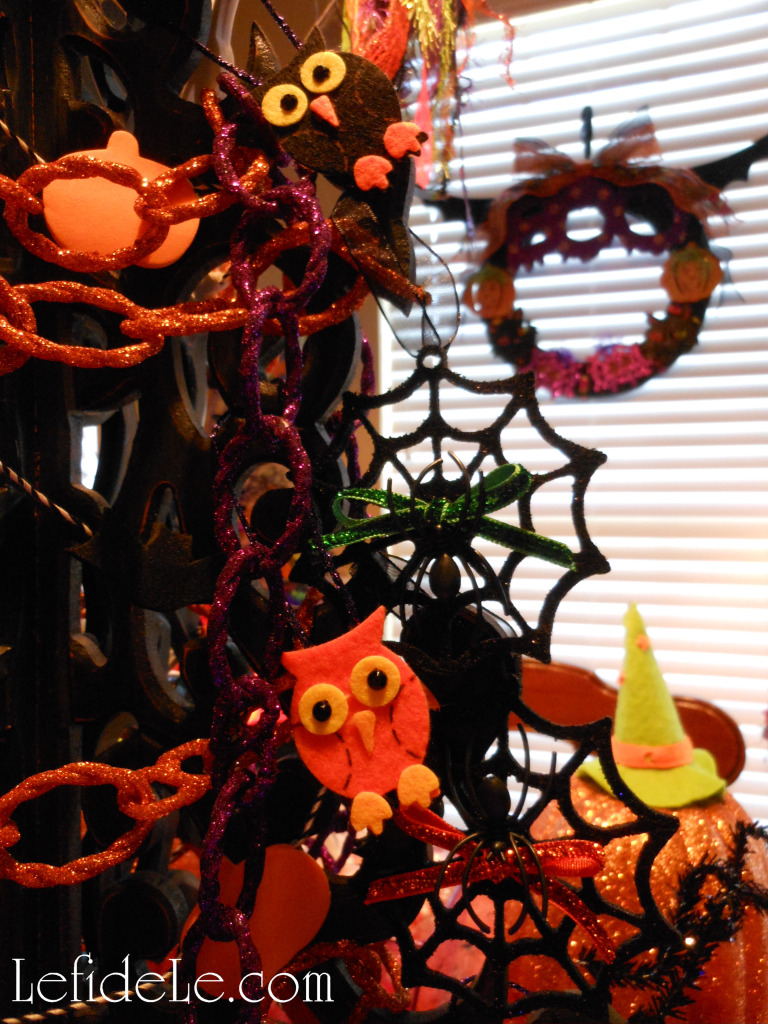
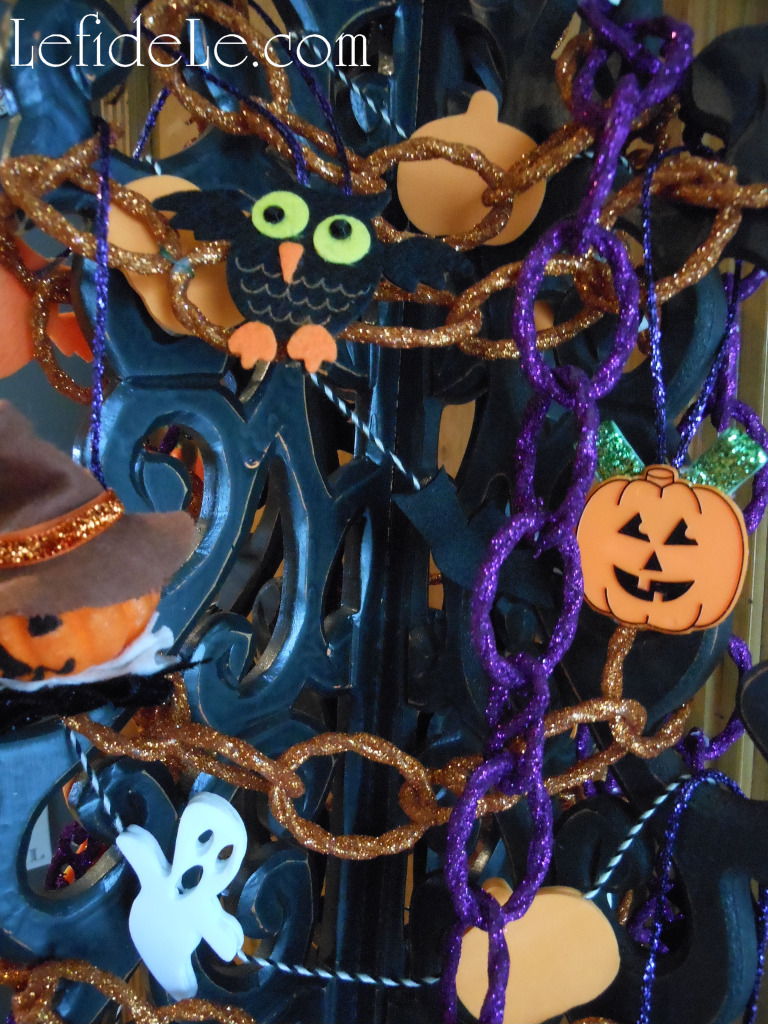
In the breakfast room, a wooden tree painted black, was trimmed with my garlands craft and my ornaments from scraps craft. The tree skirt of shimmering purple fabric was repurposed from Mardi-Gras. The tablecloth had hand-sewn bead and fringe trimming.

231Leigh

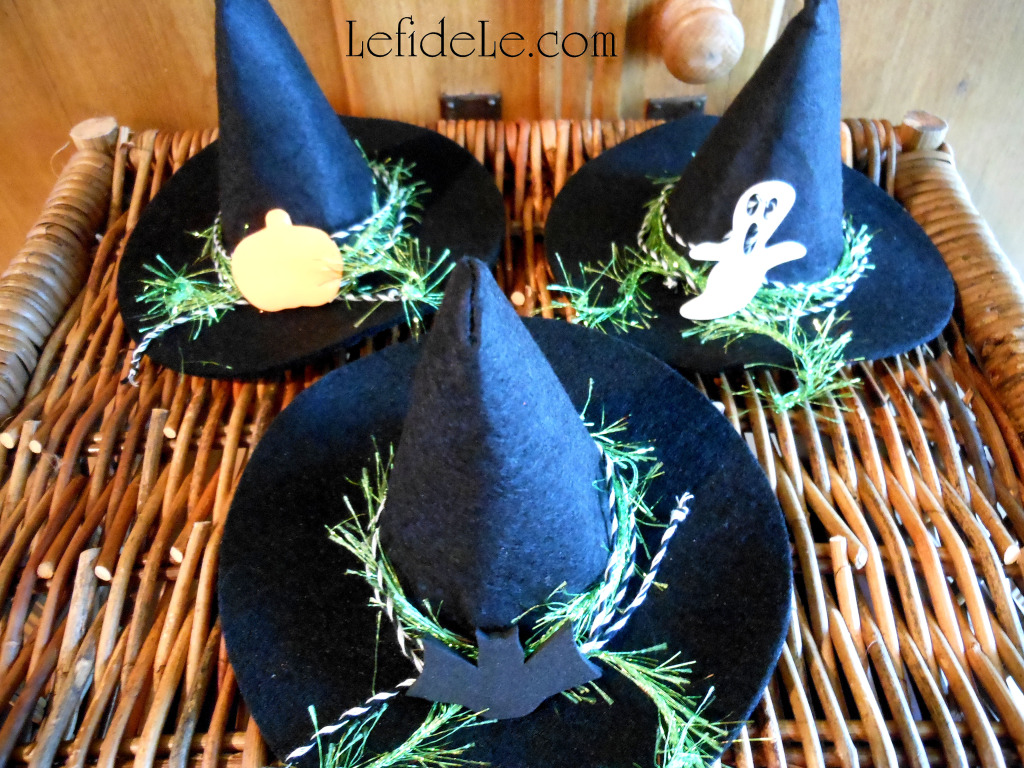
The centerpiece tree was flanked with hand-painted papier-mâché witch hats, and the felt ones featured favors from my foam shapes craft.

223Glitterween-Leigh

The chandelier was trimmed with ribbon and my friendly bats craft, and then draped with my pumpkin tassels craft.

288-Leigh

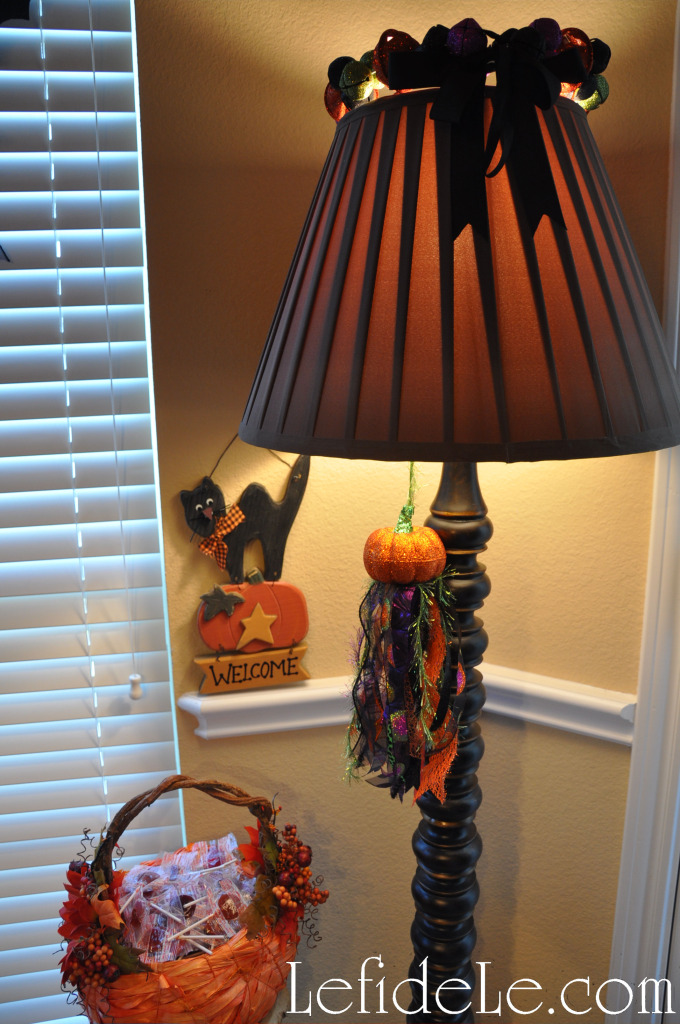
Another pumpkin tassel dangled from lamp. The pictured pumpkin basket will be featured in an article very soon.

260Leigh

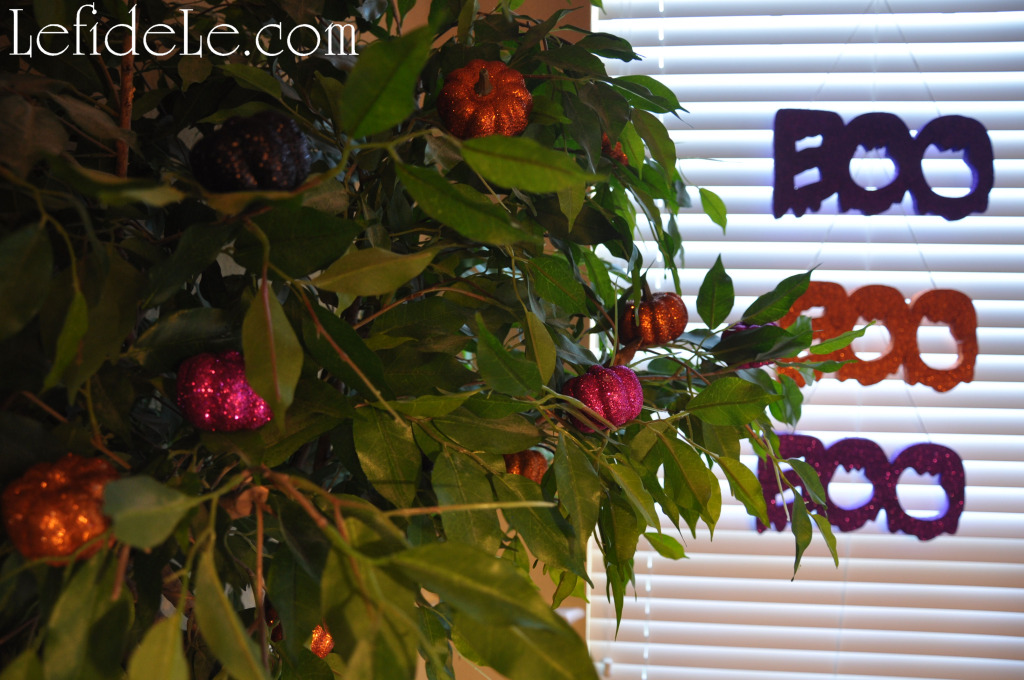
Glittered pumpkins sat snugly in a ficus tree, next to a window hung with glittered “BOO” signs.

349Leigh

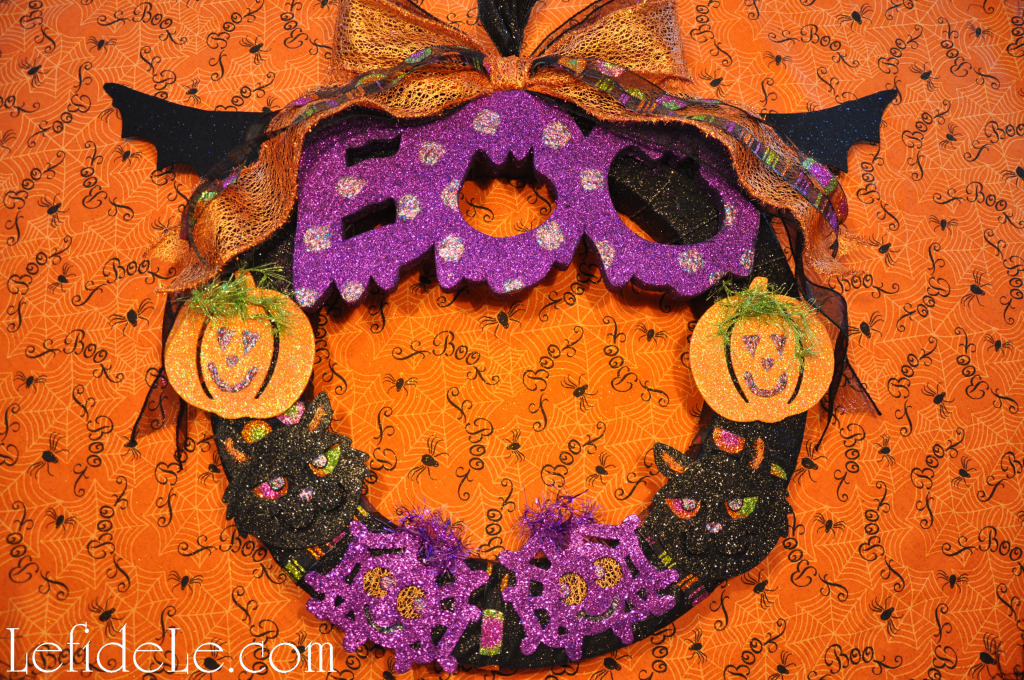
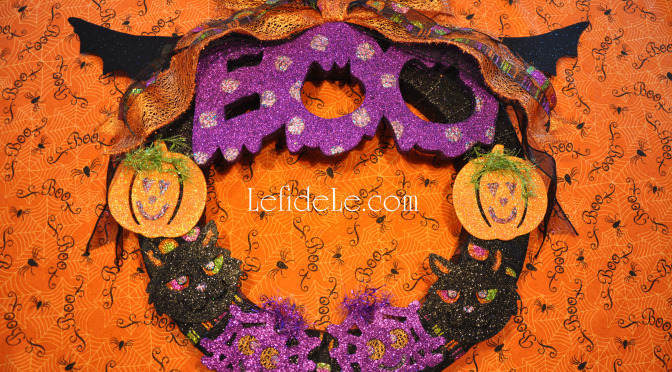
Another window framed my suspended “BOO” wreath craft that featured some of the same glittered shapes as the garland in the living room. (It was merely outlined in the photos due to conditional backlighting which is why this picture is here.)

263Leigh

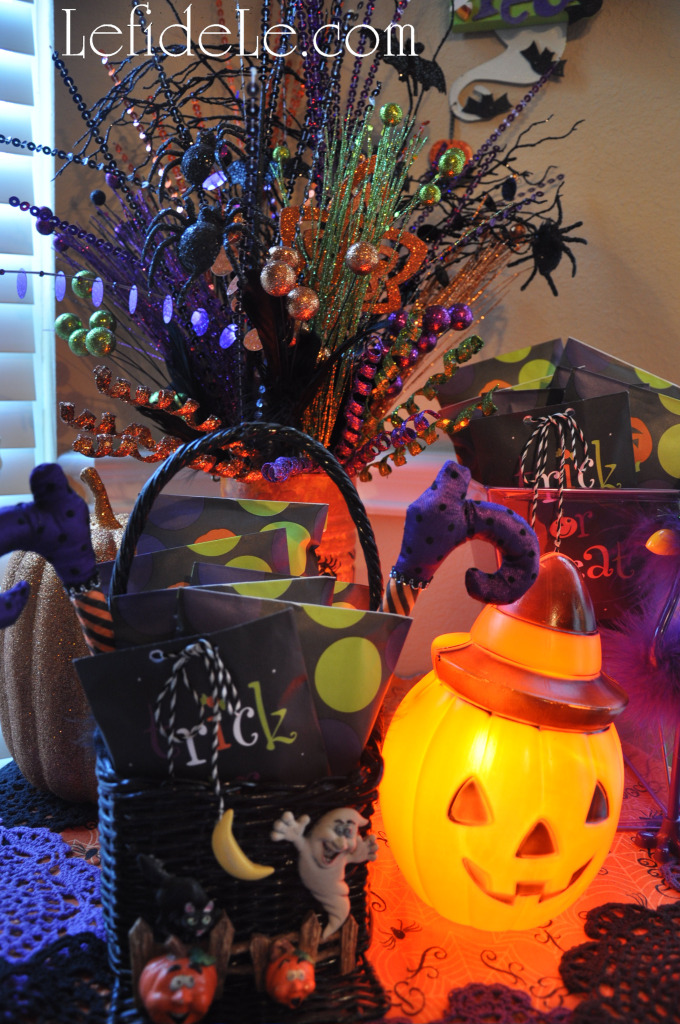
A side table held a glitter pick arrangement and pumpkin lamp that’s been glowing since my childhood. Fabric witch feet were tucked into a vintage basket held with treats. My foam shape sign craft hung in the background.

209Leigh

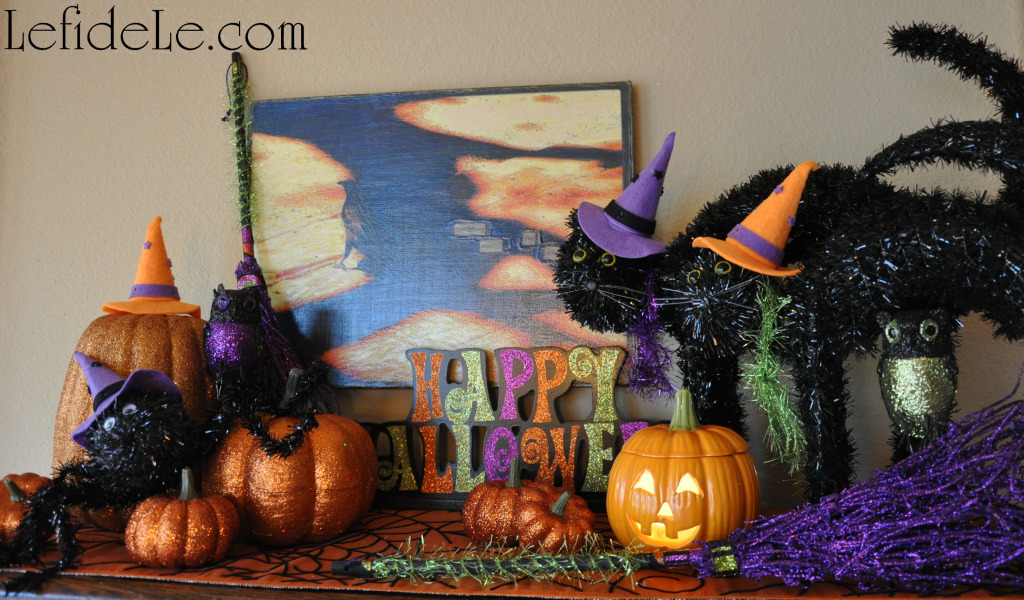
Another surface in the room featured more of the friendly witch menagerie guarding one of my mixed media paintings. Changing up your artwork seasonally is a great way to feature your whimsical creations.

42Leigh

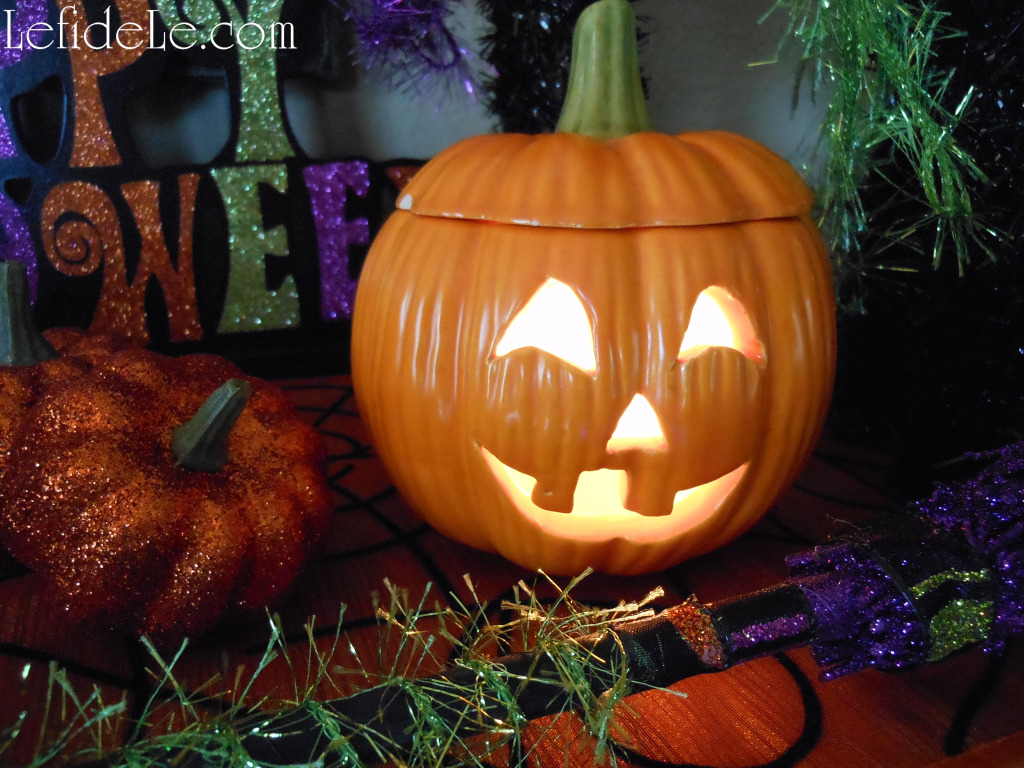
The ceramic pumpkin was made before I was born. It’s easy to add personal touches with mementos by nestling them into your themed décor.

105HalloweenStairs-Leigh

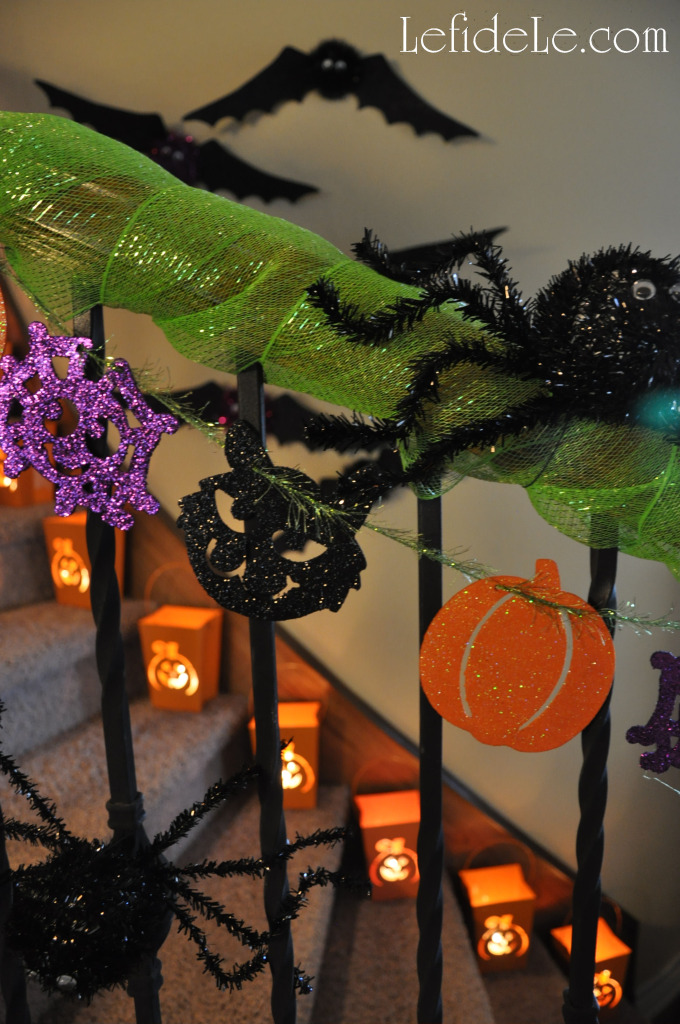
Even the staircase was decorated with foot wide green mesh ribbon, more glittered garlands, glowing luminarias, flying bats, and crawling spiders.

137cLeigh


Have a Safe and Happy “Glitter-Ween”!

Faithfully Yours,

Leigh
 

DIY Easy Last Minute Halloween Ornament Décor Remade From Scraps Craft

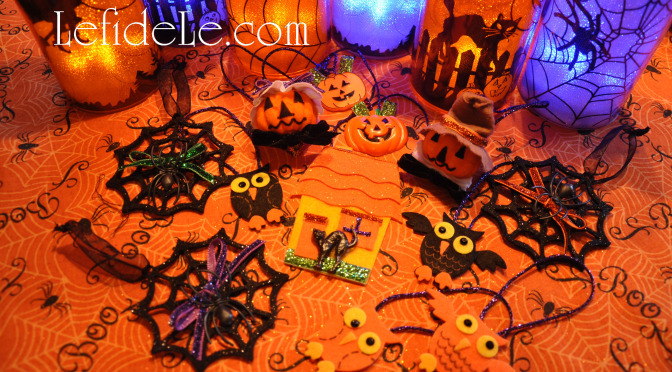
Is your spooky Halloween tree décor looking a tad too bare, and your budget’s already blown on candy and costumes? Then do what I did and use ribbon scraps, felt stickers, plastic rings, $1 felt garland, cupcake picks, and felt from a card found around the house to craft cute ornaments! So easy that it can be done last minute, and it makes an interesting artistic scavenger hunt for the kiddos… “Find as many things as you can, in 10 minutes, to turn into ornaments.”

109Leigh

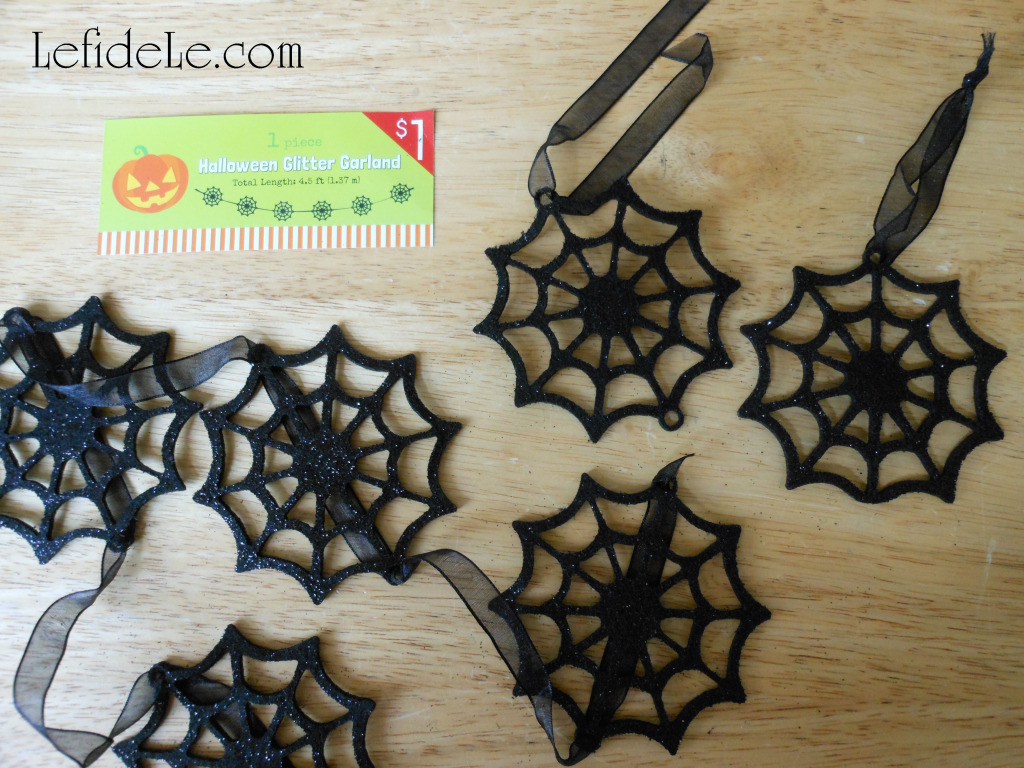
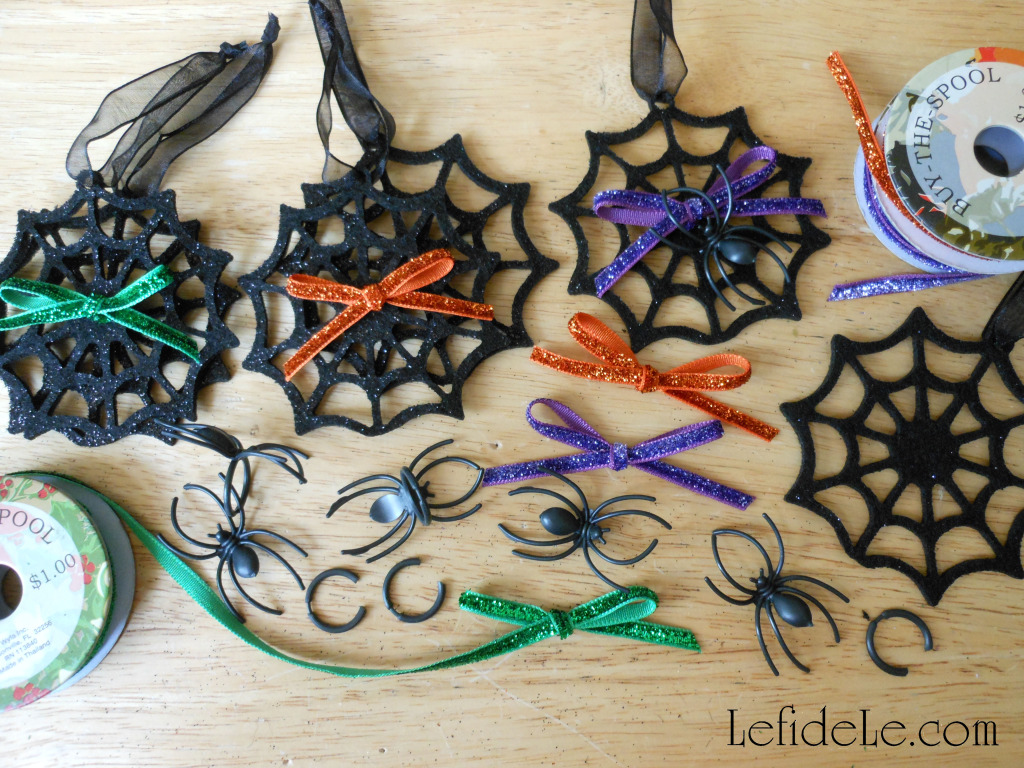
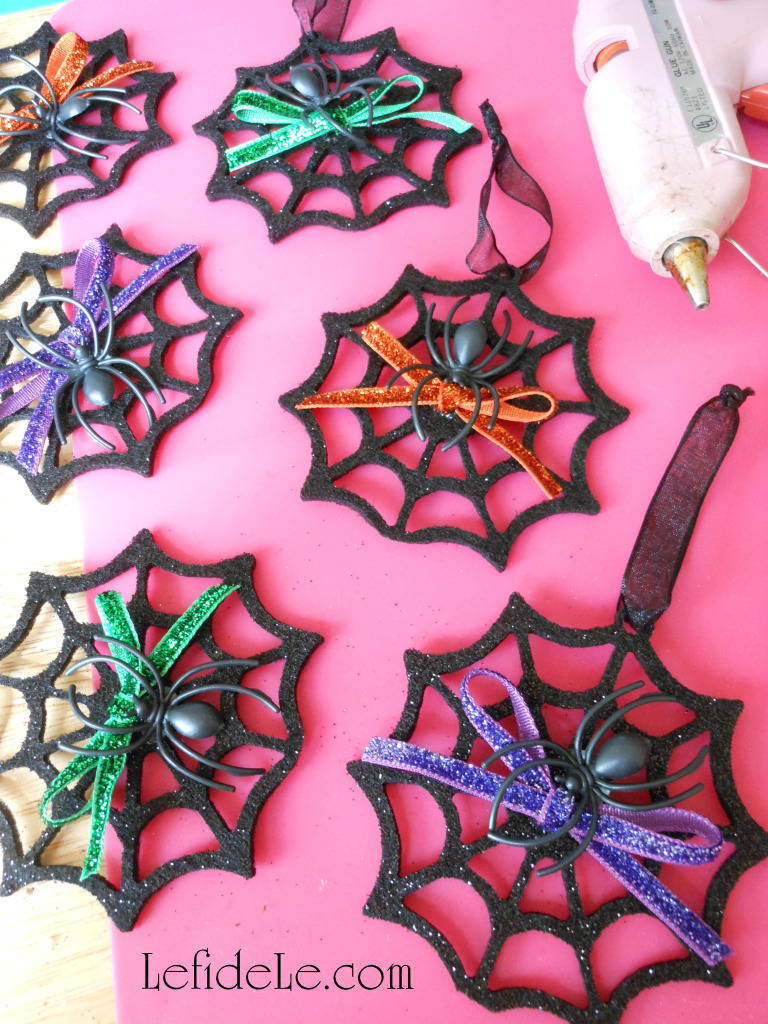
Take a dollar bin felt garland, and cut the ribbon joining the shapes into sections. Tie a knot to form a hanging loop. You can stop there, or add bows made from glittery ribbon (also from the dollar bin) or from leftover pieces from your other crafts. Cut the ring part off the plastic spiders (that outnumber those treat bags).

0112Leigh

Hot glue those elements, at various angles, onto your new one-of-a-kind ornaments.

0117Leigh

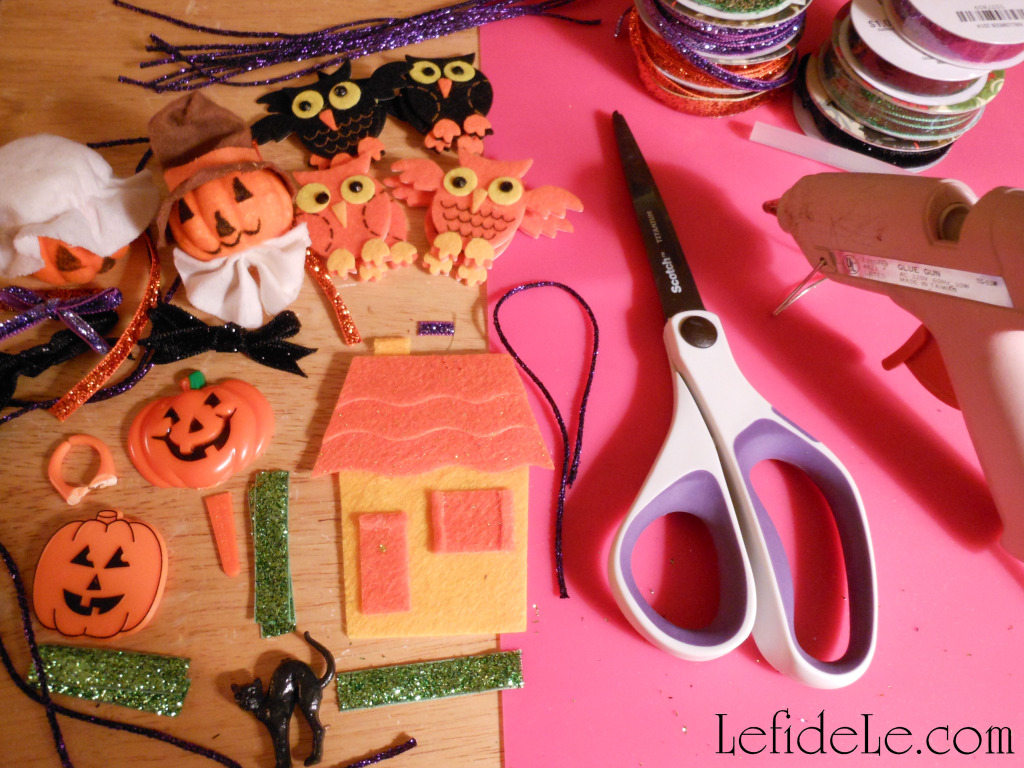
Remove felt decorations (in this case a house shape) from cards. Cut the spikes off of leftover plastic cupcake picks. Pull the sticks out of floral arrangement decorations (the pumpkin people in the picture). Cut lengths of ribbon or tinsel twine to serve as hanging loops. These don’t stick into tiny fingers like hooks would, and they pack better too!

206Leigh

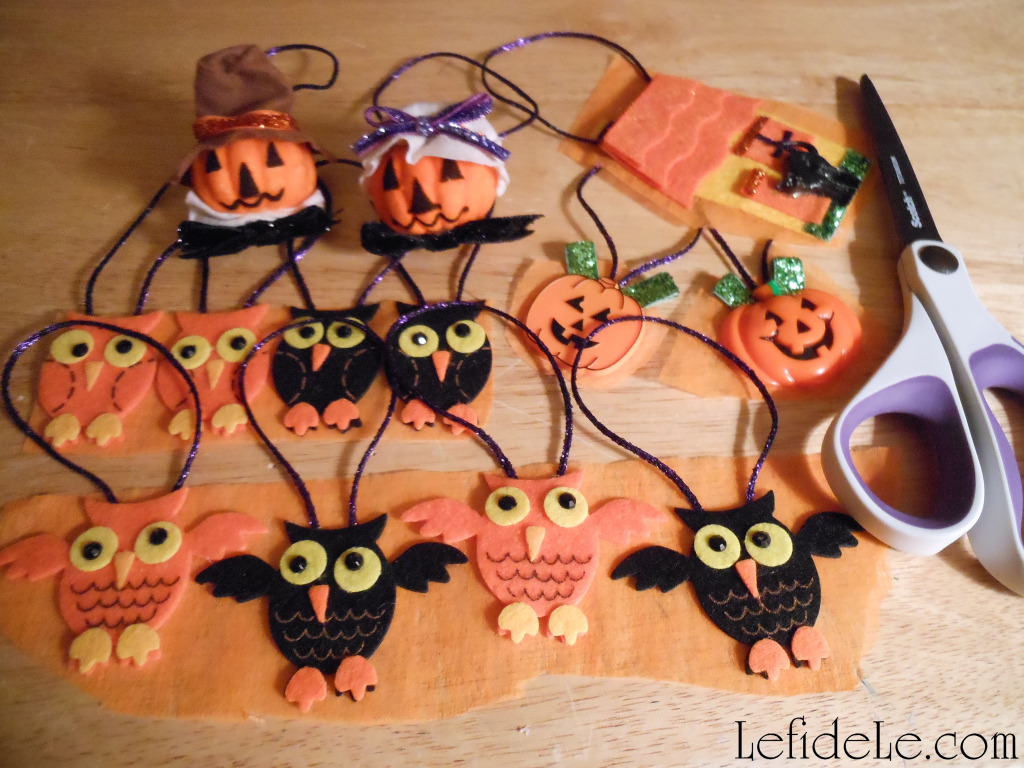
Hot glue the ends of the ribbons to the back of the shapes to make loops. Glue any decorations to the front sides. Then take fabric or ribbon (or in this case the thick orange paper that came with a floral arrangement) and glue the ornaments onto it. (The stickers will obviously just stick to it.)This makes for a prettier back that hides the hanging loop ends.

207Leigh

Hang your newly crafted ornaments as proof positive that cute doesn’t have to mean expensive or time intensive!

75Leigh

Happy Halloween!

Faithfully Yours,

Leigh
DIY Easy Last Minute Halloween Décor Kid Friendly Foam Shape Crafts

This project began with the question, “What on earth do I do with that sack of foam shapes that didn’t get used up in that last project?” My answer was to make holiday signs, spooky garlands, not-so-scary ornaments, favor necklaces, and puppet favor / food picks! So without further ado, here are some quick and easy kid friendly craft ideas that are great for last minute fill-ins for your décor this Halloween.

112Leigh

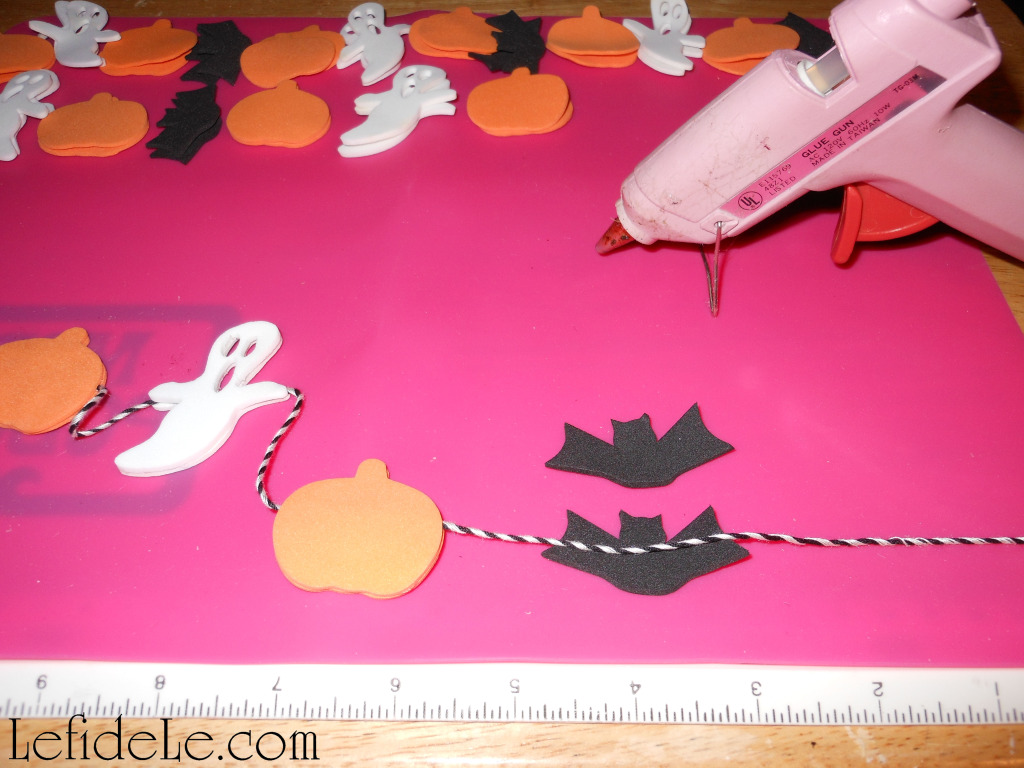
Glue colored twine in between two foam shapes to make any length garland you chose. Adults can use hot glue and a ruler as a distance guide. Kiddos can use foam glue and make it as crazy as they like!

297Leigh

Drape it along a spooky Halloween tree, or loop the ends and hang them on the wall with tacks.

291Leigh

Using the same technique, make favor necklaces for the little ones. Wrap them around mini felt witch hats for party hat dress up that doubles as décor. A barrette turns them into a grown-up witchy fascinator.

113Leigh

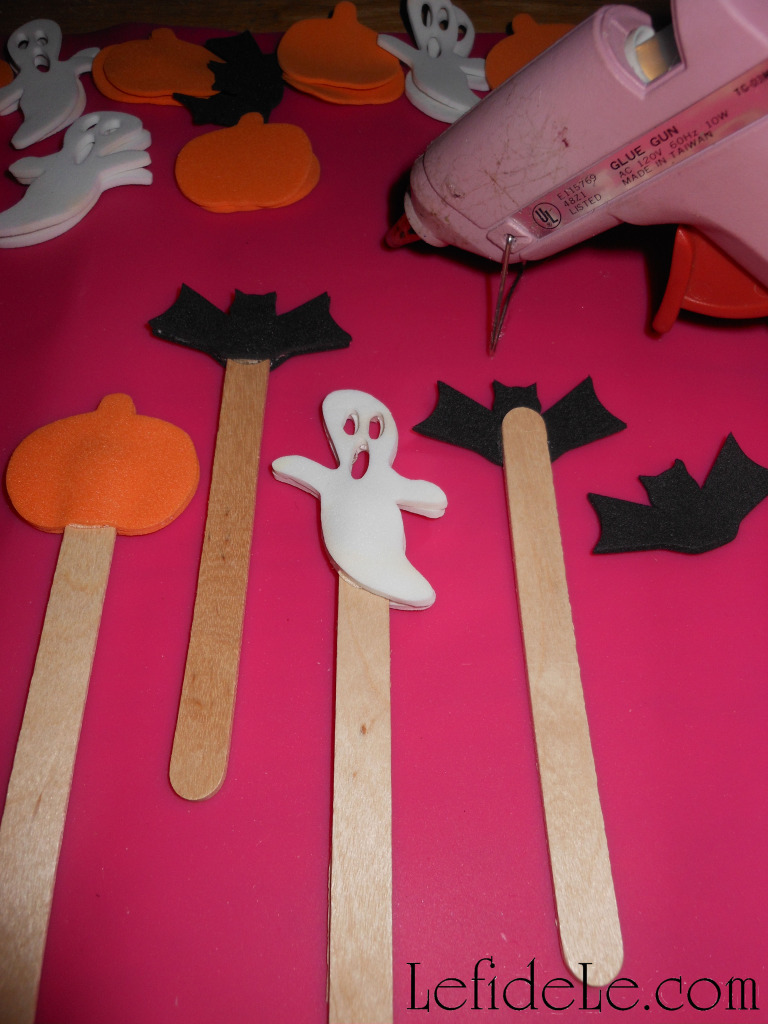
Glue the shapes back to back with a new popsicle sticks in-between.

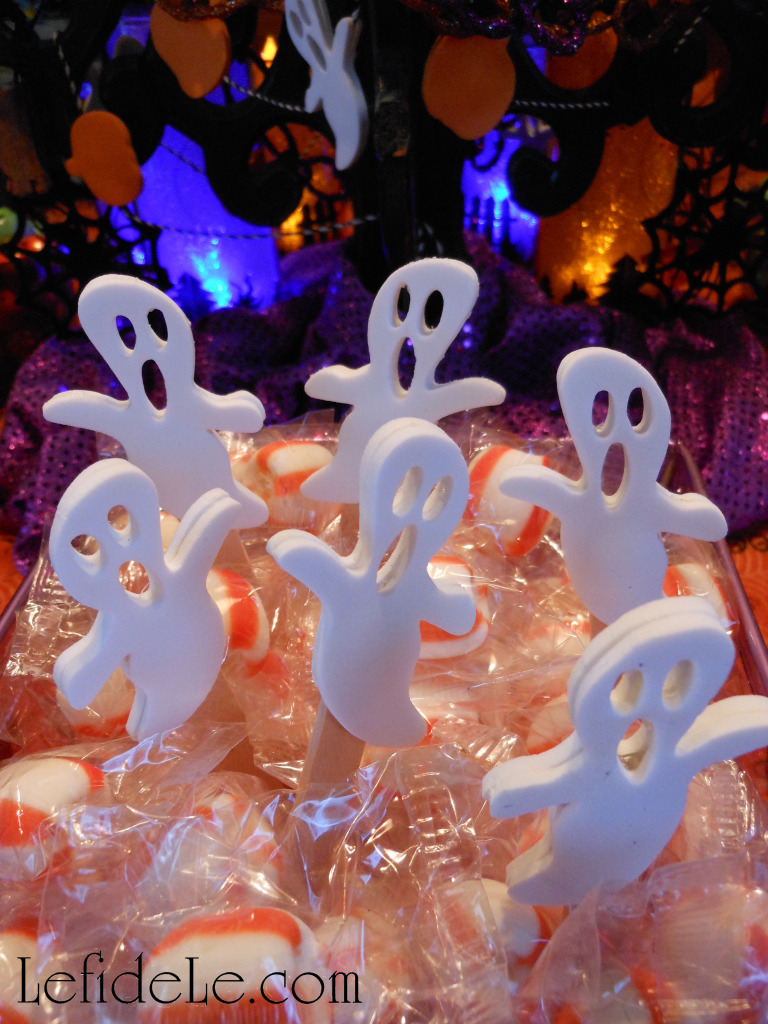
79Leigh

Stick those little puppet favors into candy stashes for an extra dose of Halloween fun.

327Leigh

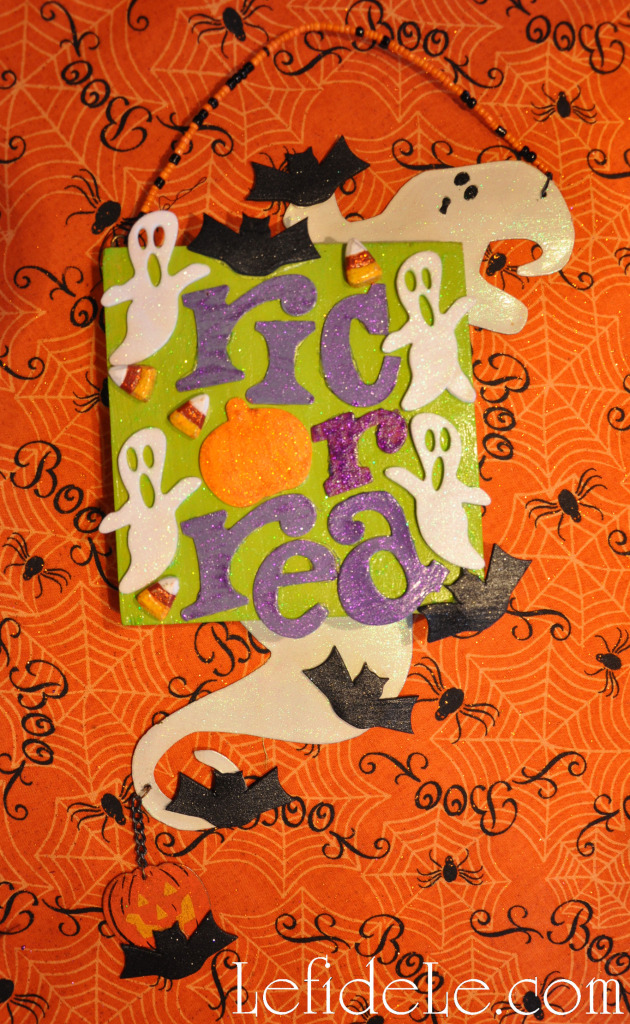
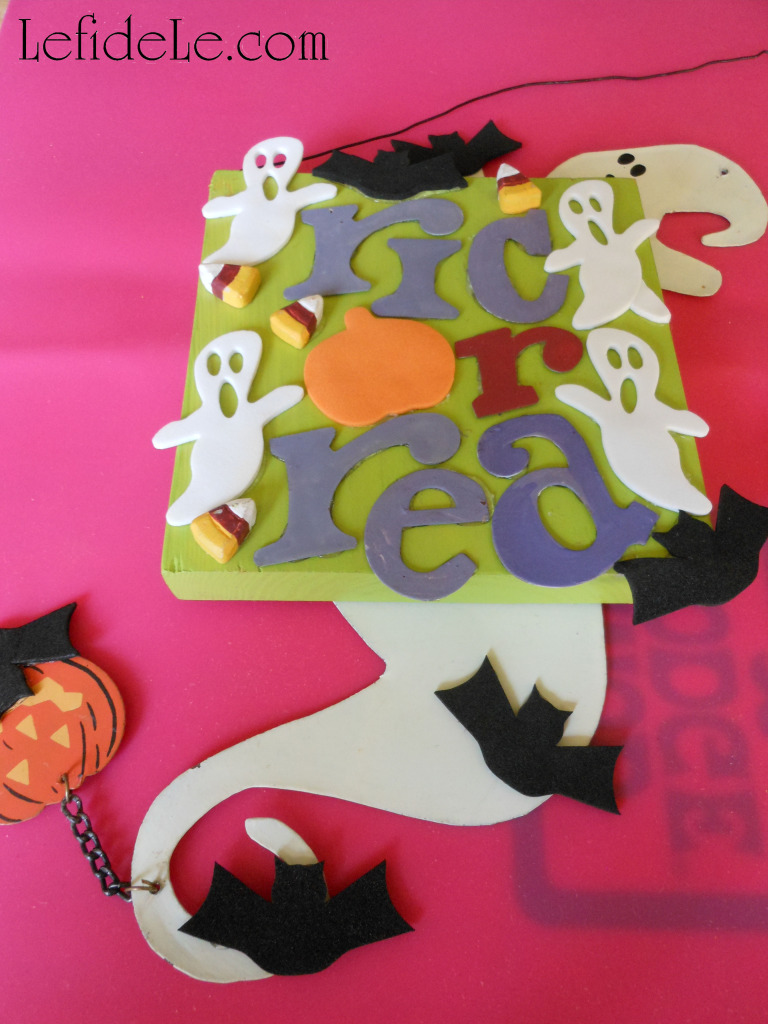
Some shapes can double as letters for a thrifty but cute holiday sign.

115Leigh

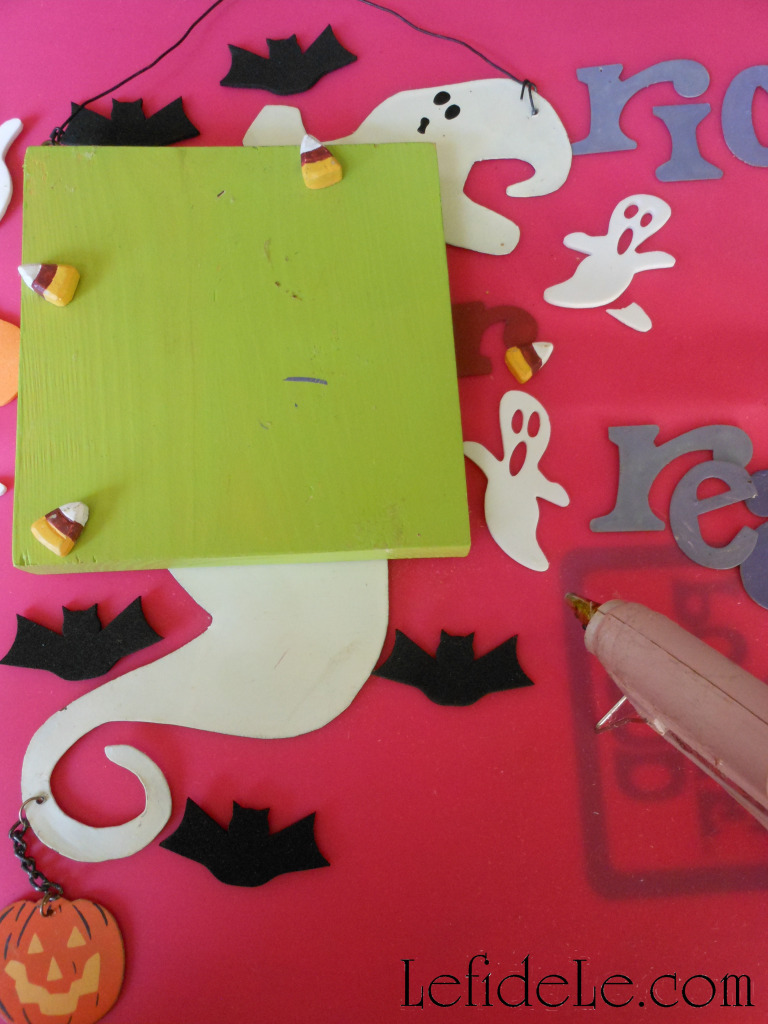
A block of wood or small canvas backed with a ghost cut-out, may be topped with eyehooks for a wire handle.

117Leigh

Glue on small letters plus pumpkins for O’s, armed ghosts for T’s and K’s (when an arm is cut and added as the kick in the K). Bats can just swarm the whole project!

118Leigh

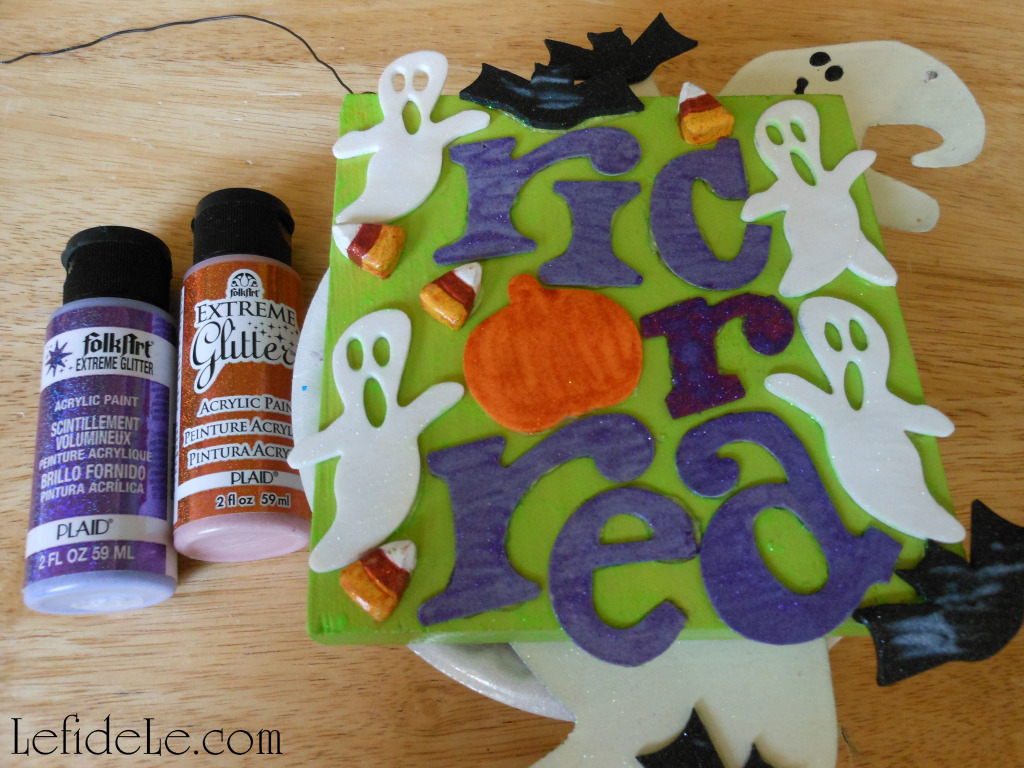
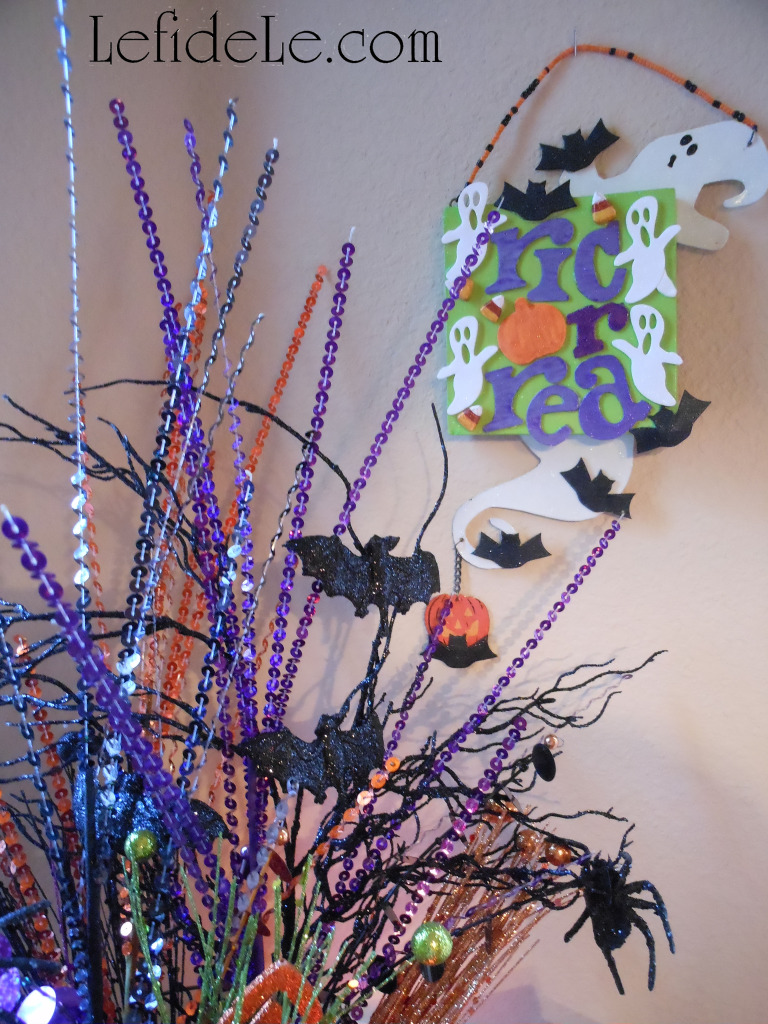
A coat of glitter paint (or glue) unifies the whole project, making the foam indistinguishable from other materials. The whole thing can actually dry on the wall (so long as wee fingers are out of reach).

121Leigh

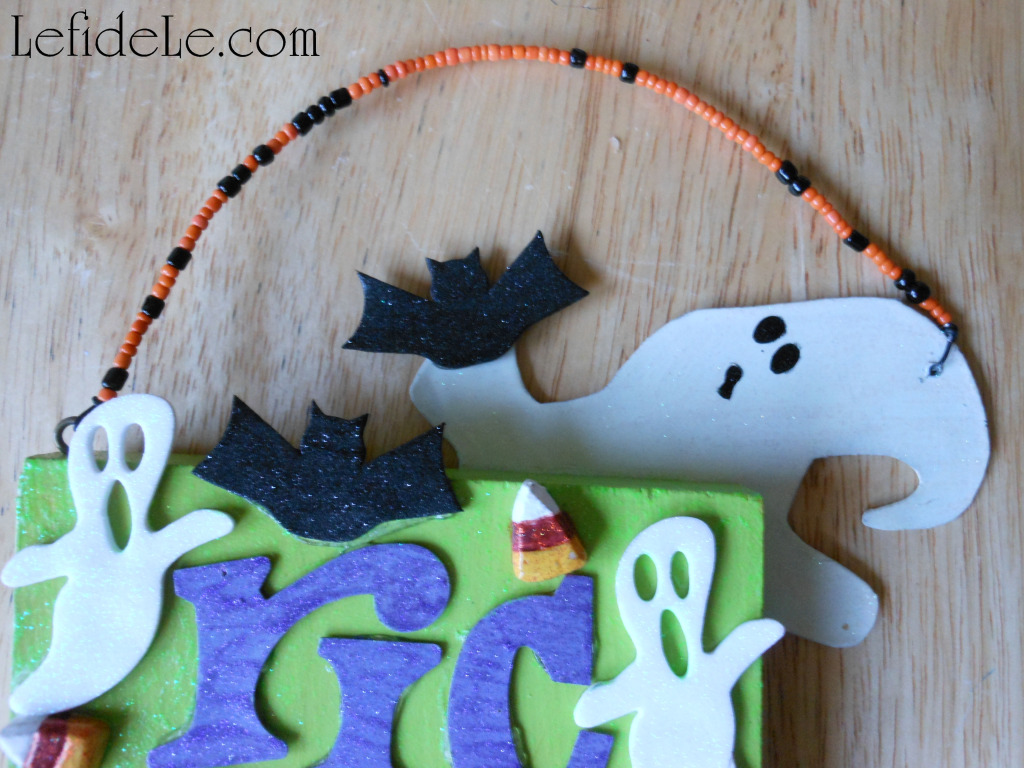
Thread an intentionally random mix of seed beads to a thick wire handle, and twist securely into a hole or eyehook.

56Leigh

Voila, super-cute… super-cheap… super-fun!

253Leigh

Happy Halloween!

Faithfully yours,

Leigh


DIY Glitter “BOO” Wreath Halloween Decoration Craft

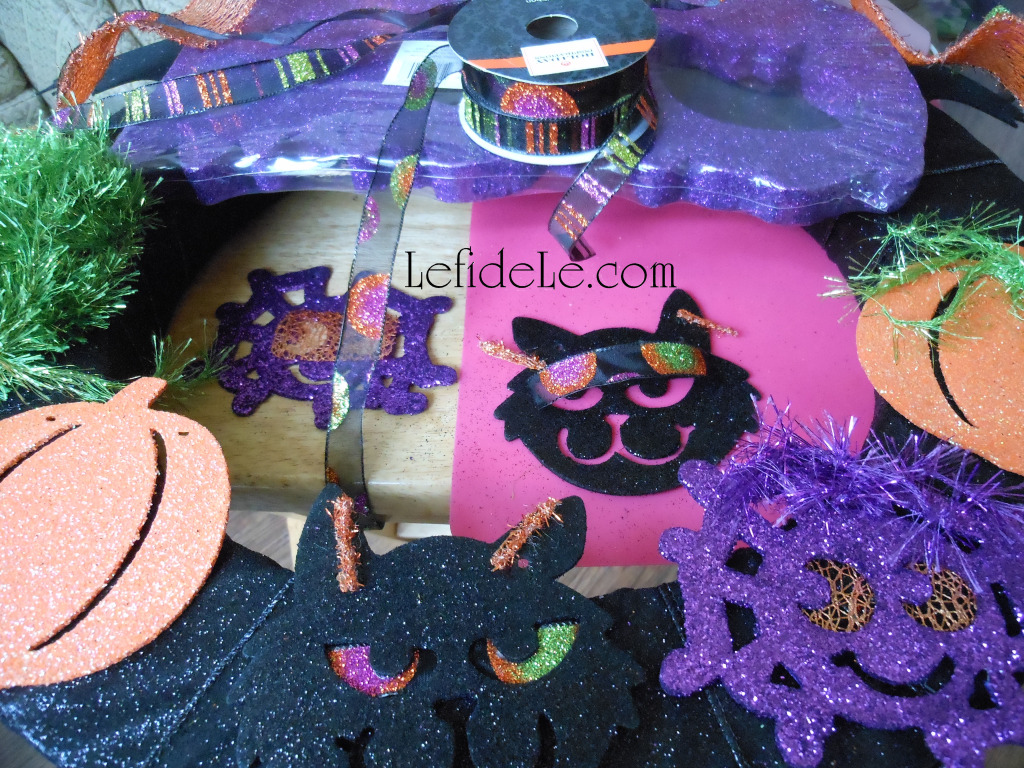
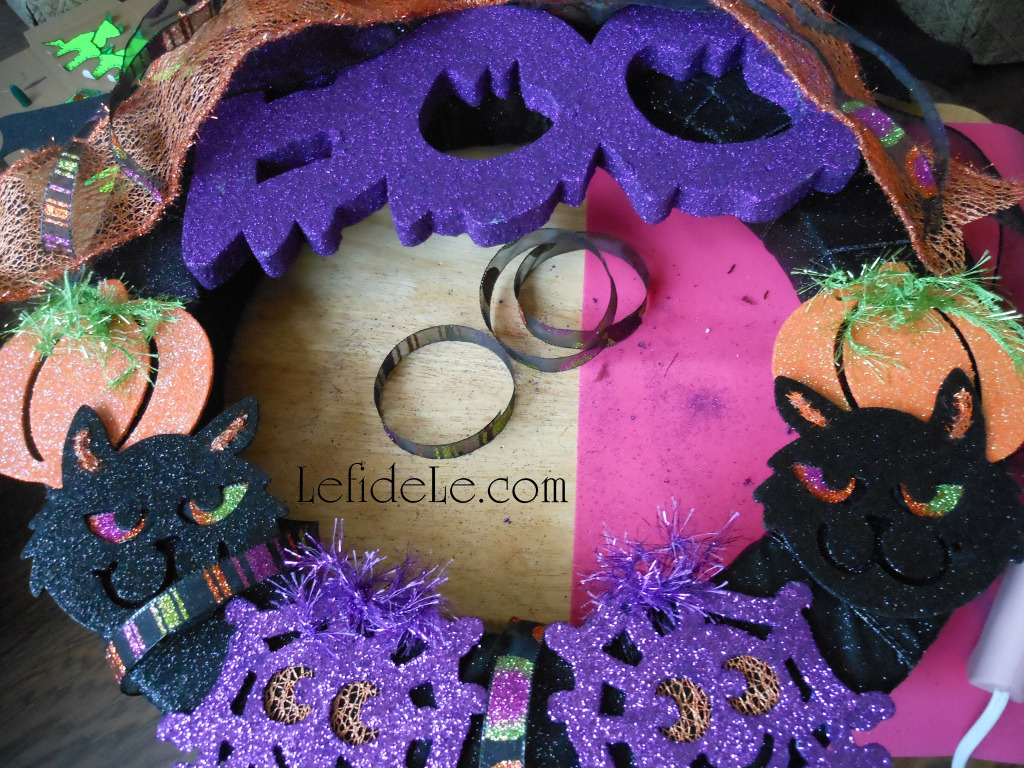
This year’s glitter explosion of kid-friendly Halloween party decorations needed an accompanying wreath, because every holiday deserves its own wreath… right?! I chose to make this one out of the same materials I had already been using. It contains a “BOO” sign, which you’ll see more of in my “Glitter-ween” Party article appearing soon. (You can find this type of thing at most craft stores.) I also used a pair of felt bat wings that were cut using my template from a previous craft, and some of the glitter shapes I set aside from my garland remade craft. (You can use any glitter shape made out of foam or wood.) Lastly, I used some of the same Halloween ribbon I had decorating various other elements in my home. This is why you should always buy extra rolls of matching ribbon. You never know when the crafting-bug will strike!

119Leigh

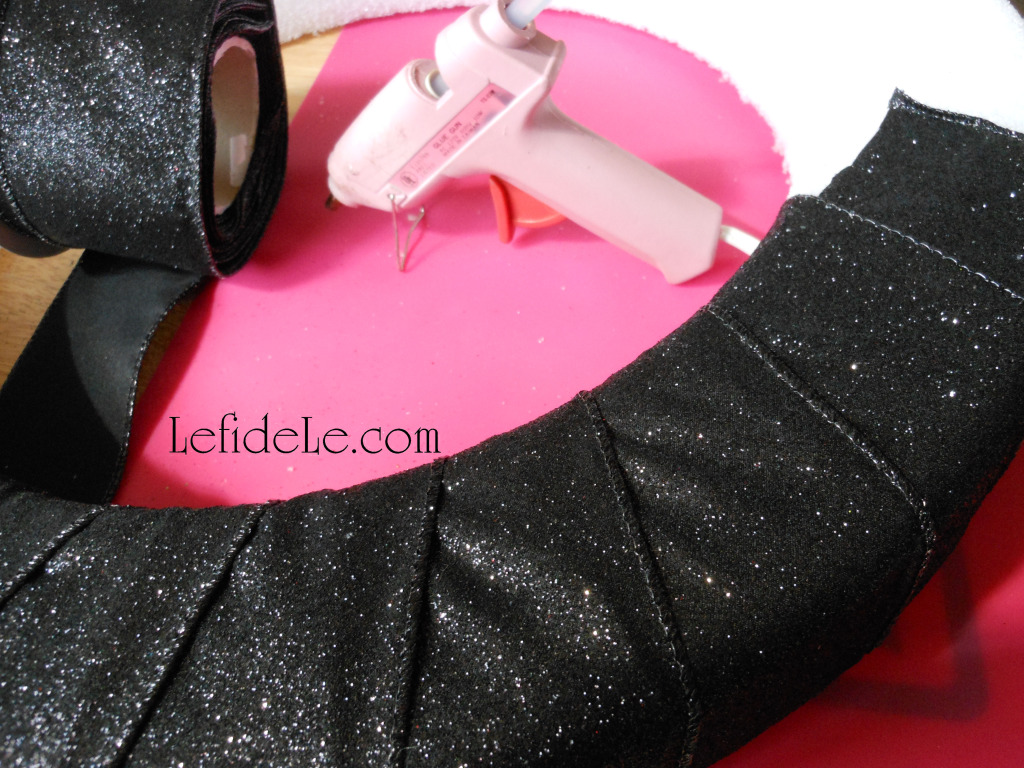
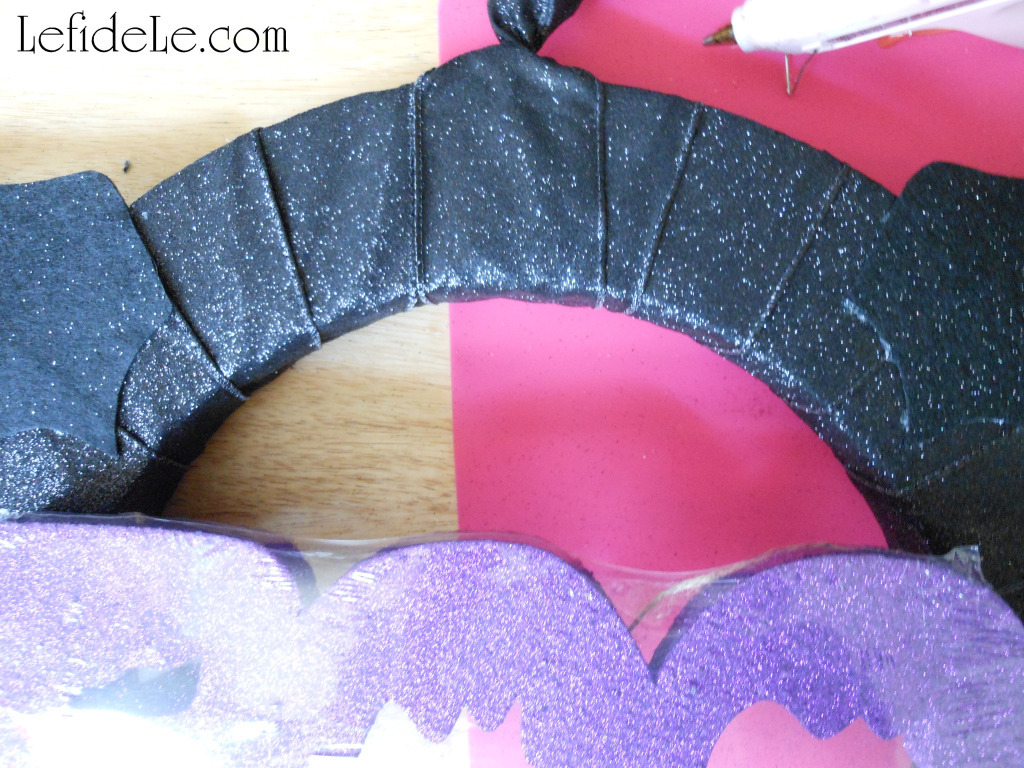
The best way to make a ribbon wreath is to use a hay or Styrofoam wreath form as a base. Just start by gluing the ribbon end at a 45 angle to the base. Then just pull tautly as you wrap the ribbon at the same angle around the form. I hot glue dots to the underside as I go, but that’s just because I’m a stickler for solid construction. It’s really not necessary until you reach the end of the underside. Then all you need to do is cut the ribbon and fold it over, for a clean finish, then glue it down. Though there’s no need to fold it over if you’re including a ribbon hanger.

0120Leigh

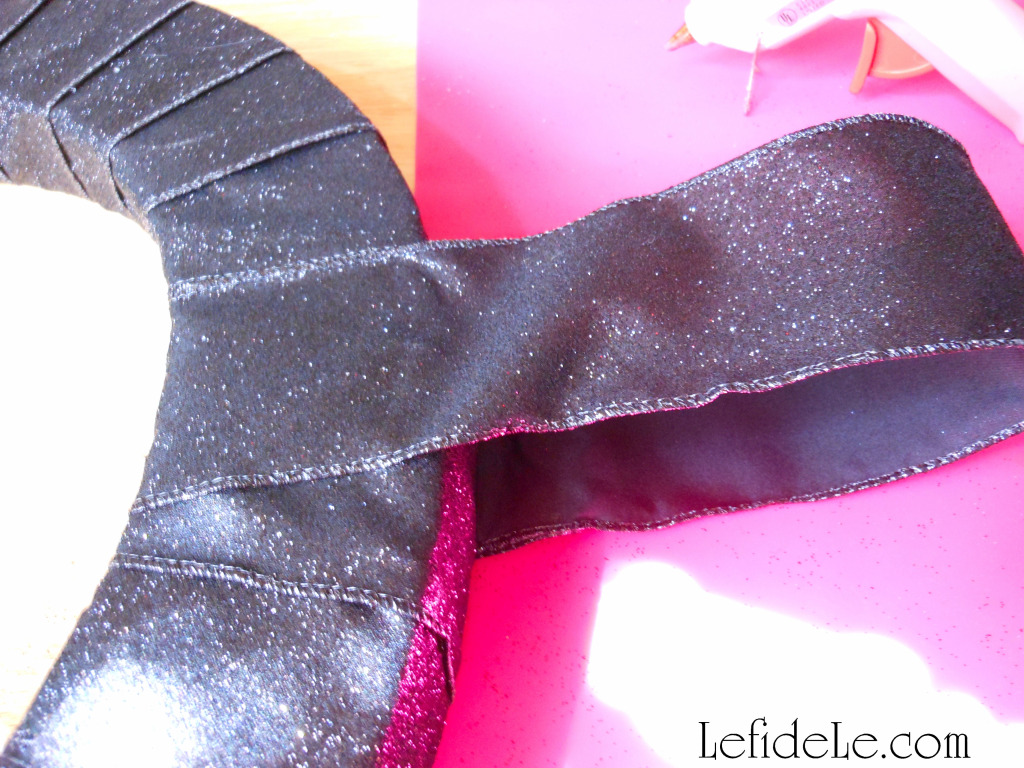
To add a convenient built in hanger, simply cut a length of ribbon in relation to the size of your wreath. (Use the photo as a visual guide.) Glue it well to the underside, forming a loop.

0121Leigh

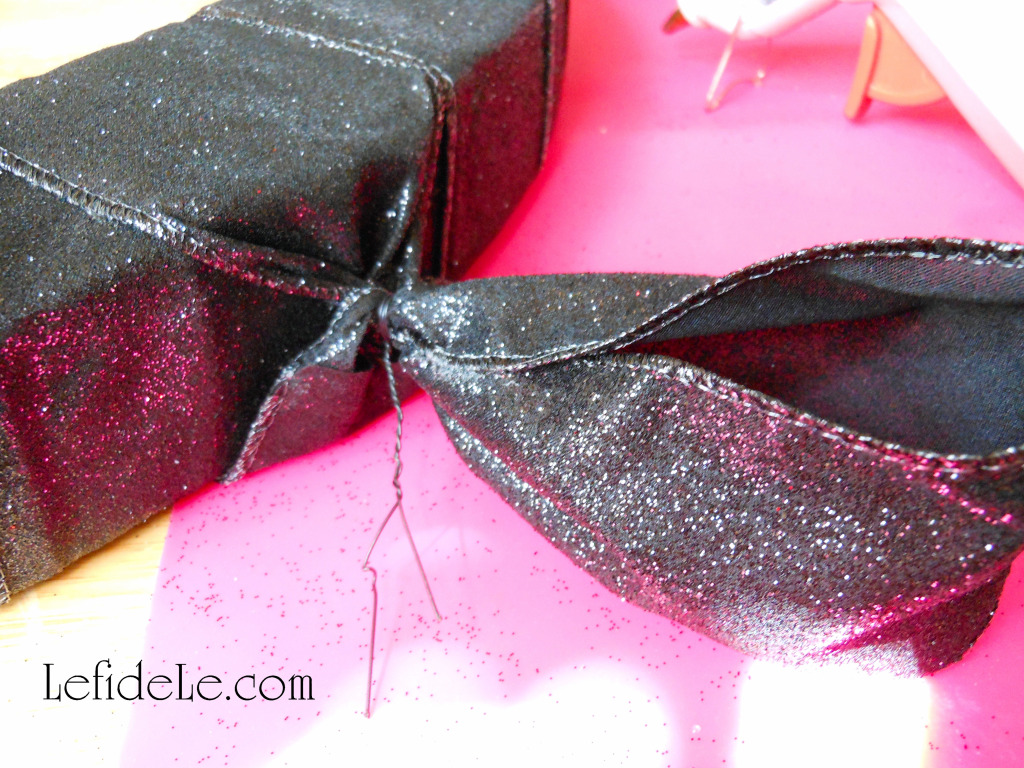
Cut a piece of floral wire, and then twist the loose section of ribbon. Give it a couple of turns, and tie it off with the wire (like you would a twist tie on a bag of chips). Don’t worry about how it looks as this will be covered by a bow later.

123Leigh

Now use my template to cut out bat wings from stiff felt or craft foam. Place your “BOO” sign (or individual letters) next to the top area… so it’s easier to judge where to place those wings. Once you’ve found your placement, glue them down.

124Leigh

Arrange your shapes in the way you like best, because enjoying your own creation is the most important part. Since the shape openings didn’t show up well on the black glittery ribbon, I made some “eyes” from brighter pieces. I merely glued the lengths onto the underside of the shapes.

127Leigh

To add more visual interest, glue more loops of bright ribbons around the base in between the shapes. Now make a bow and layer it with several types and colors of ribbon. You can either make it by tying several ribbons together at once, or by gluing additional ribbons to a bow. Glue all of that visual smorgasbord to the base then top it off with the “BOO” sign.

0130Leigh

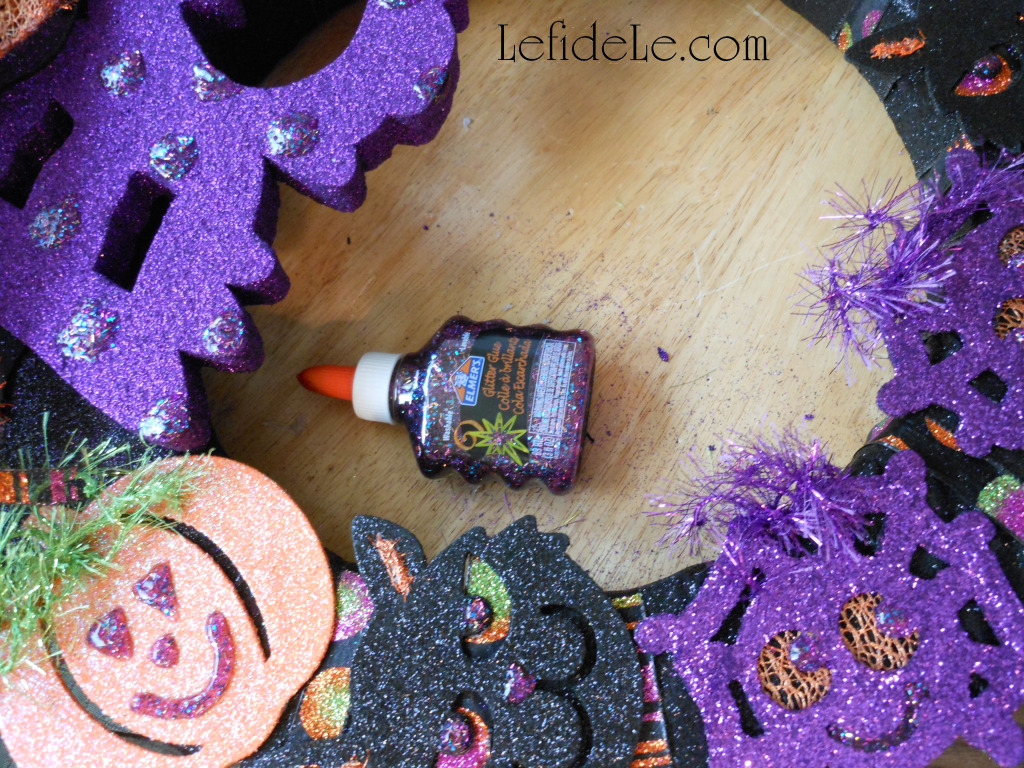
If you like, use coordinating glitter glue to add faces or fill in shape openings, but wait a day to hang it up. I added extra glitter dots to cover the sparse areas of the “BOO”.

349Leigh

The last step is to hang it up and enjoy your handiwork! Have a Happy Halloween!

Faithfully Yours,

Leigh


Superfast Glitter Halloween Shapes Garland Remade Craft

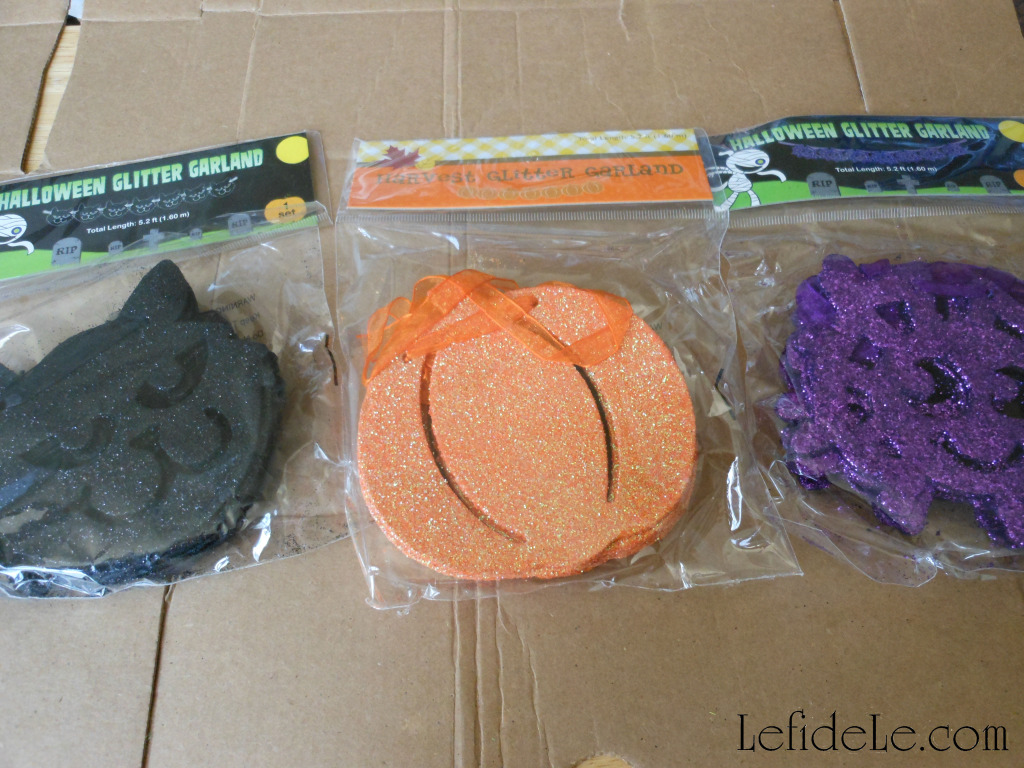
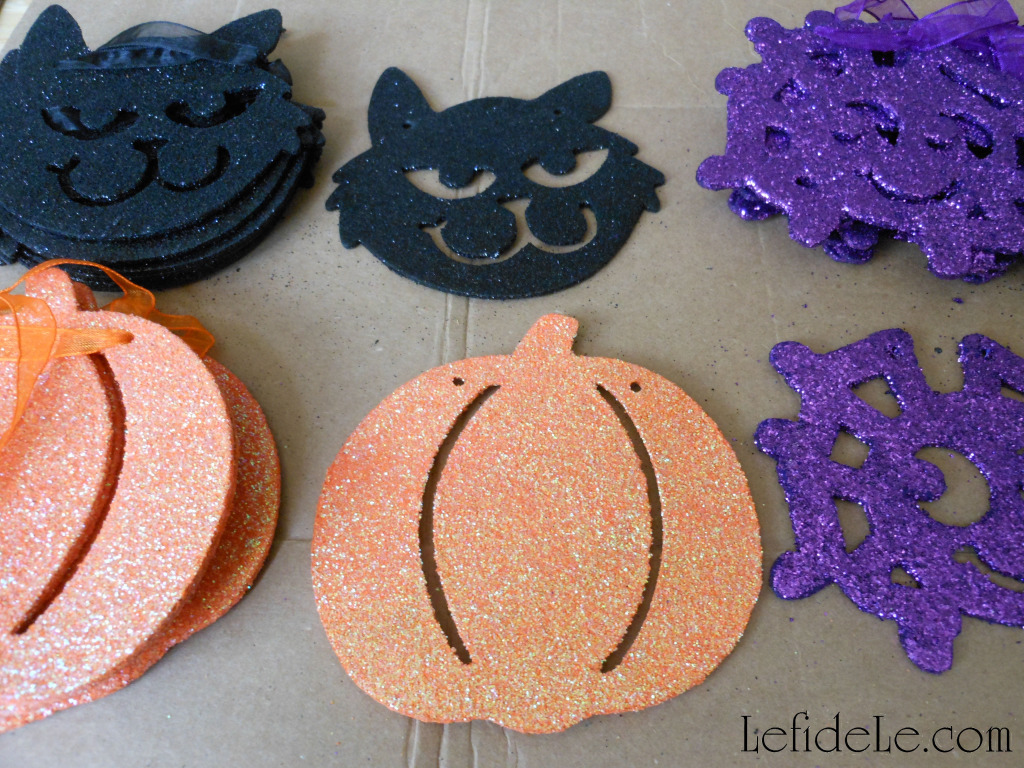
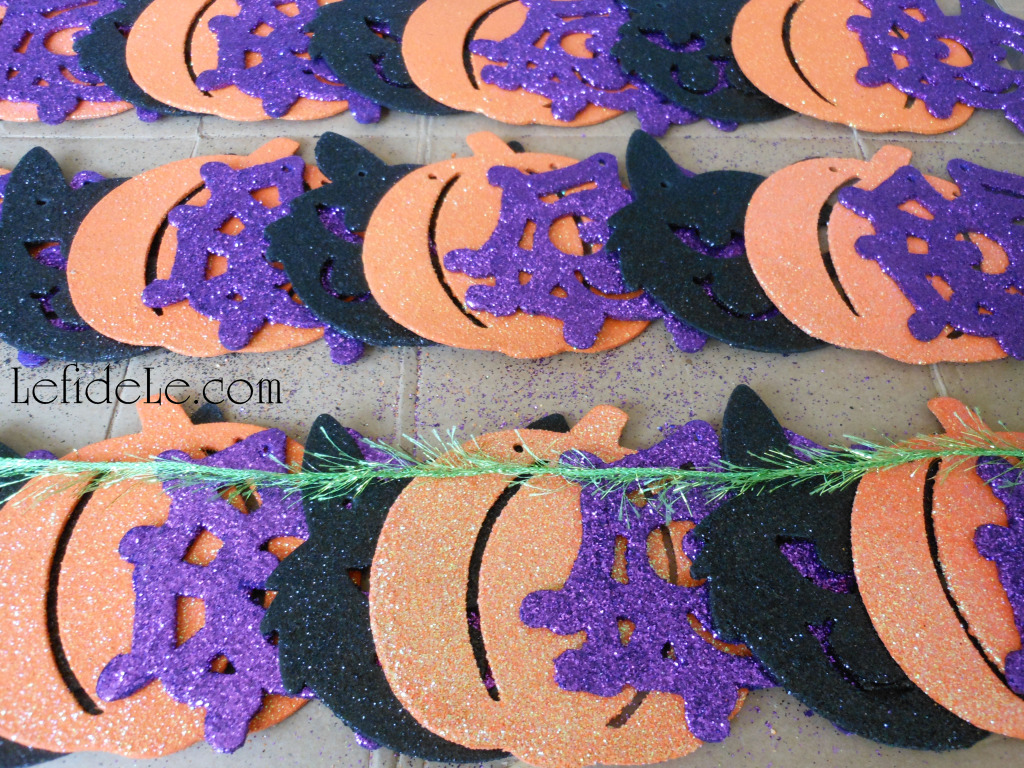
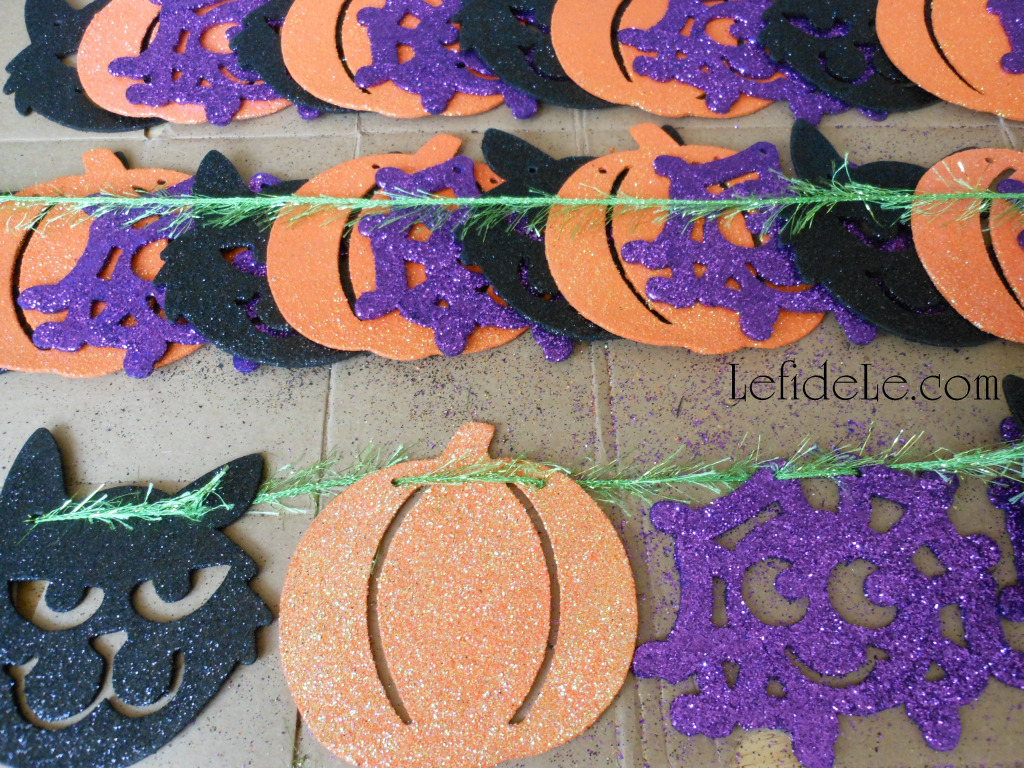
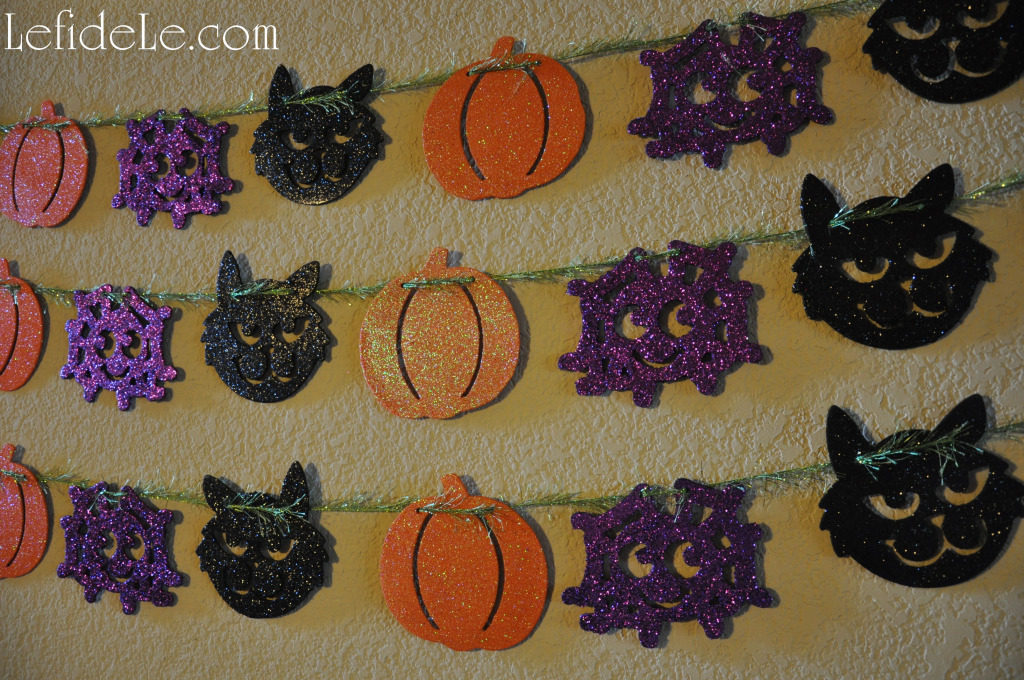
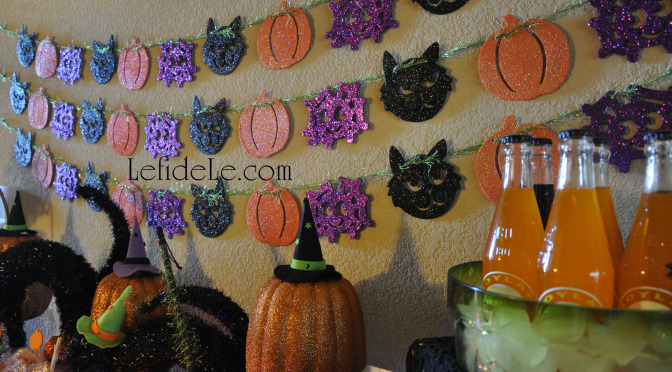
This superfast Halloween project is so easy that I more than hesitated to call it a craft. It’s more like a… remake something bland into something beautiful endeavor. Hence the name “remade craft”. I had three inexpensive pre-manufactured garlands that had cute shapes, but were boring in that they just contained one image and color per strand of generic ribbon. I just had to mix them up. I’m writing this as encouragement to look for the creative possibilities in everyday materials… but if you like the look of the completed piece, why not buy some glittered shapes and string them in the same way that I restrung these glittered wooden ones.

337Leigh
I always see glittered foam shapes like these in the craft stores, but if you’re feeling really crafty you can buy precut wooden shapes and glitter paint them yourself.

339Leigh
Remove all traces of cheap and twisted dull generic ribbon. Find some pretty sparkly yarn in a contrasting color that coordinates with your party color scheme.

340Leigh
Arrange the shapes in a pleasing order, and string them along. (But set aside some shapes to use on a Halloween wreath, article will follow.)

341Leigh
That’s just so much better.
343Leigh
I draped them along the staircase railing, using green floral wire to tie them on. See the Easy DIY Kid Friendly Bat Halloween Décor Craft from an earlier article.

105HalloweenStairs-Leigh
I think they made a terrific backdrop for my “Glitter-Ween” Party!

202cGlitterween-Leigh
Faithfully Yours,

Leigh