Tag Archives: Free

Candyland Themed Party Décor Ideas (for Baby Showers, Children’s Birthdays, or Christmas Decorating)

409Leigh

This Candyland theme was inspired by Mary, a dear lady who passed on long ago, but left her inimitable words of wisdom with me, “life is uncertain, eat dessert first,”…and she always did! So it is with her spirit of joie de vivre, that I unbound that creative kid within me that clamored for a sensory sugar high. To release your inner child, follow my 3 part DIY party decorating series (with easy project tutorials and free printables) as it’s a sure path to crafting your way to classic Candyland cuteness! Using some or all of the décor ideas (befitting kid’s birthdays, baby showers, and Christmas parties), you’ll be sure to delight the inner-child in your guests as well! While you’re at it, use my allergy friendly recipes and serving suggestions to fill your candy buffet quickly and easily. For now, let us escape to Candyland…

338Leigh

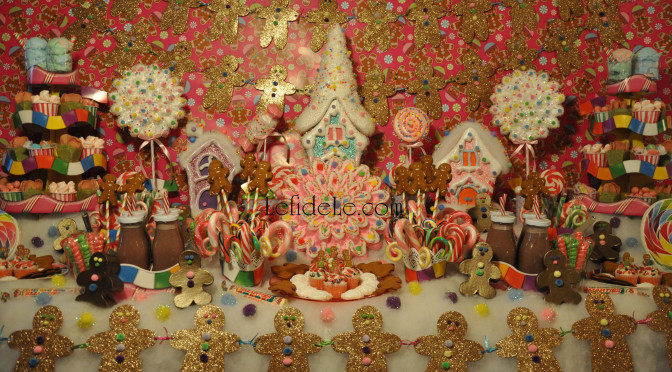
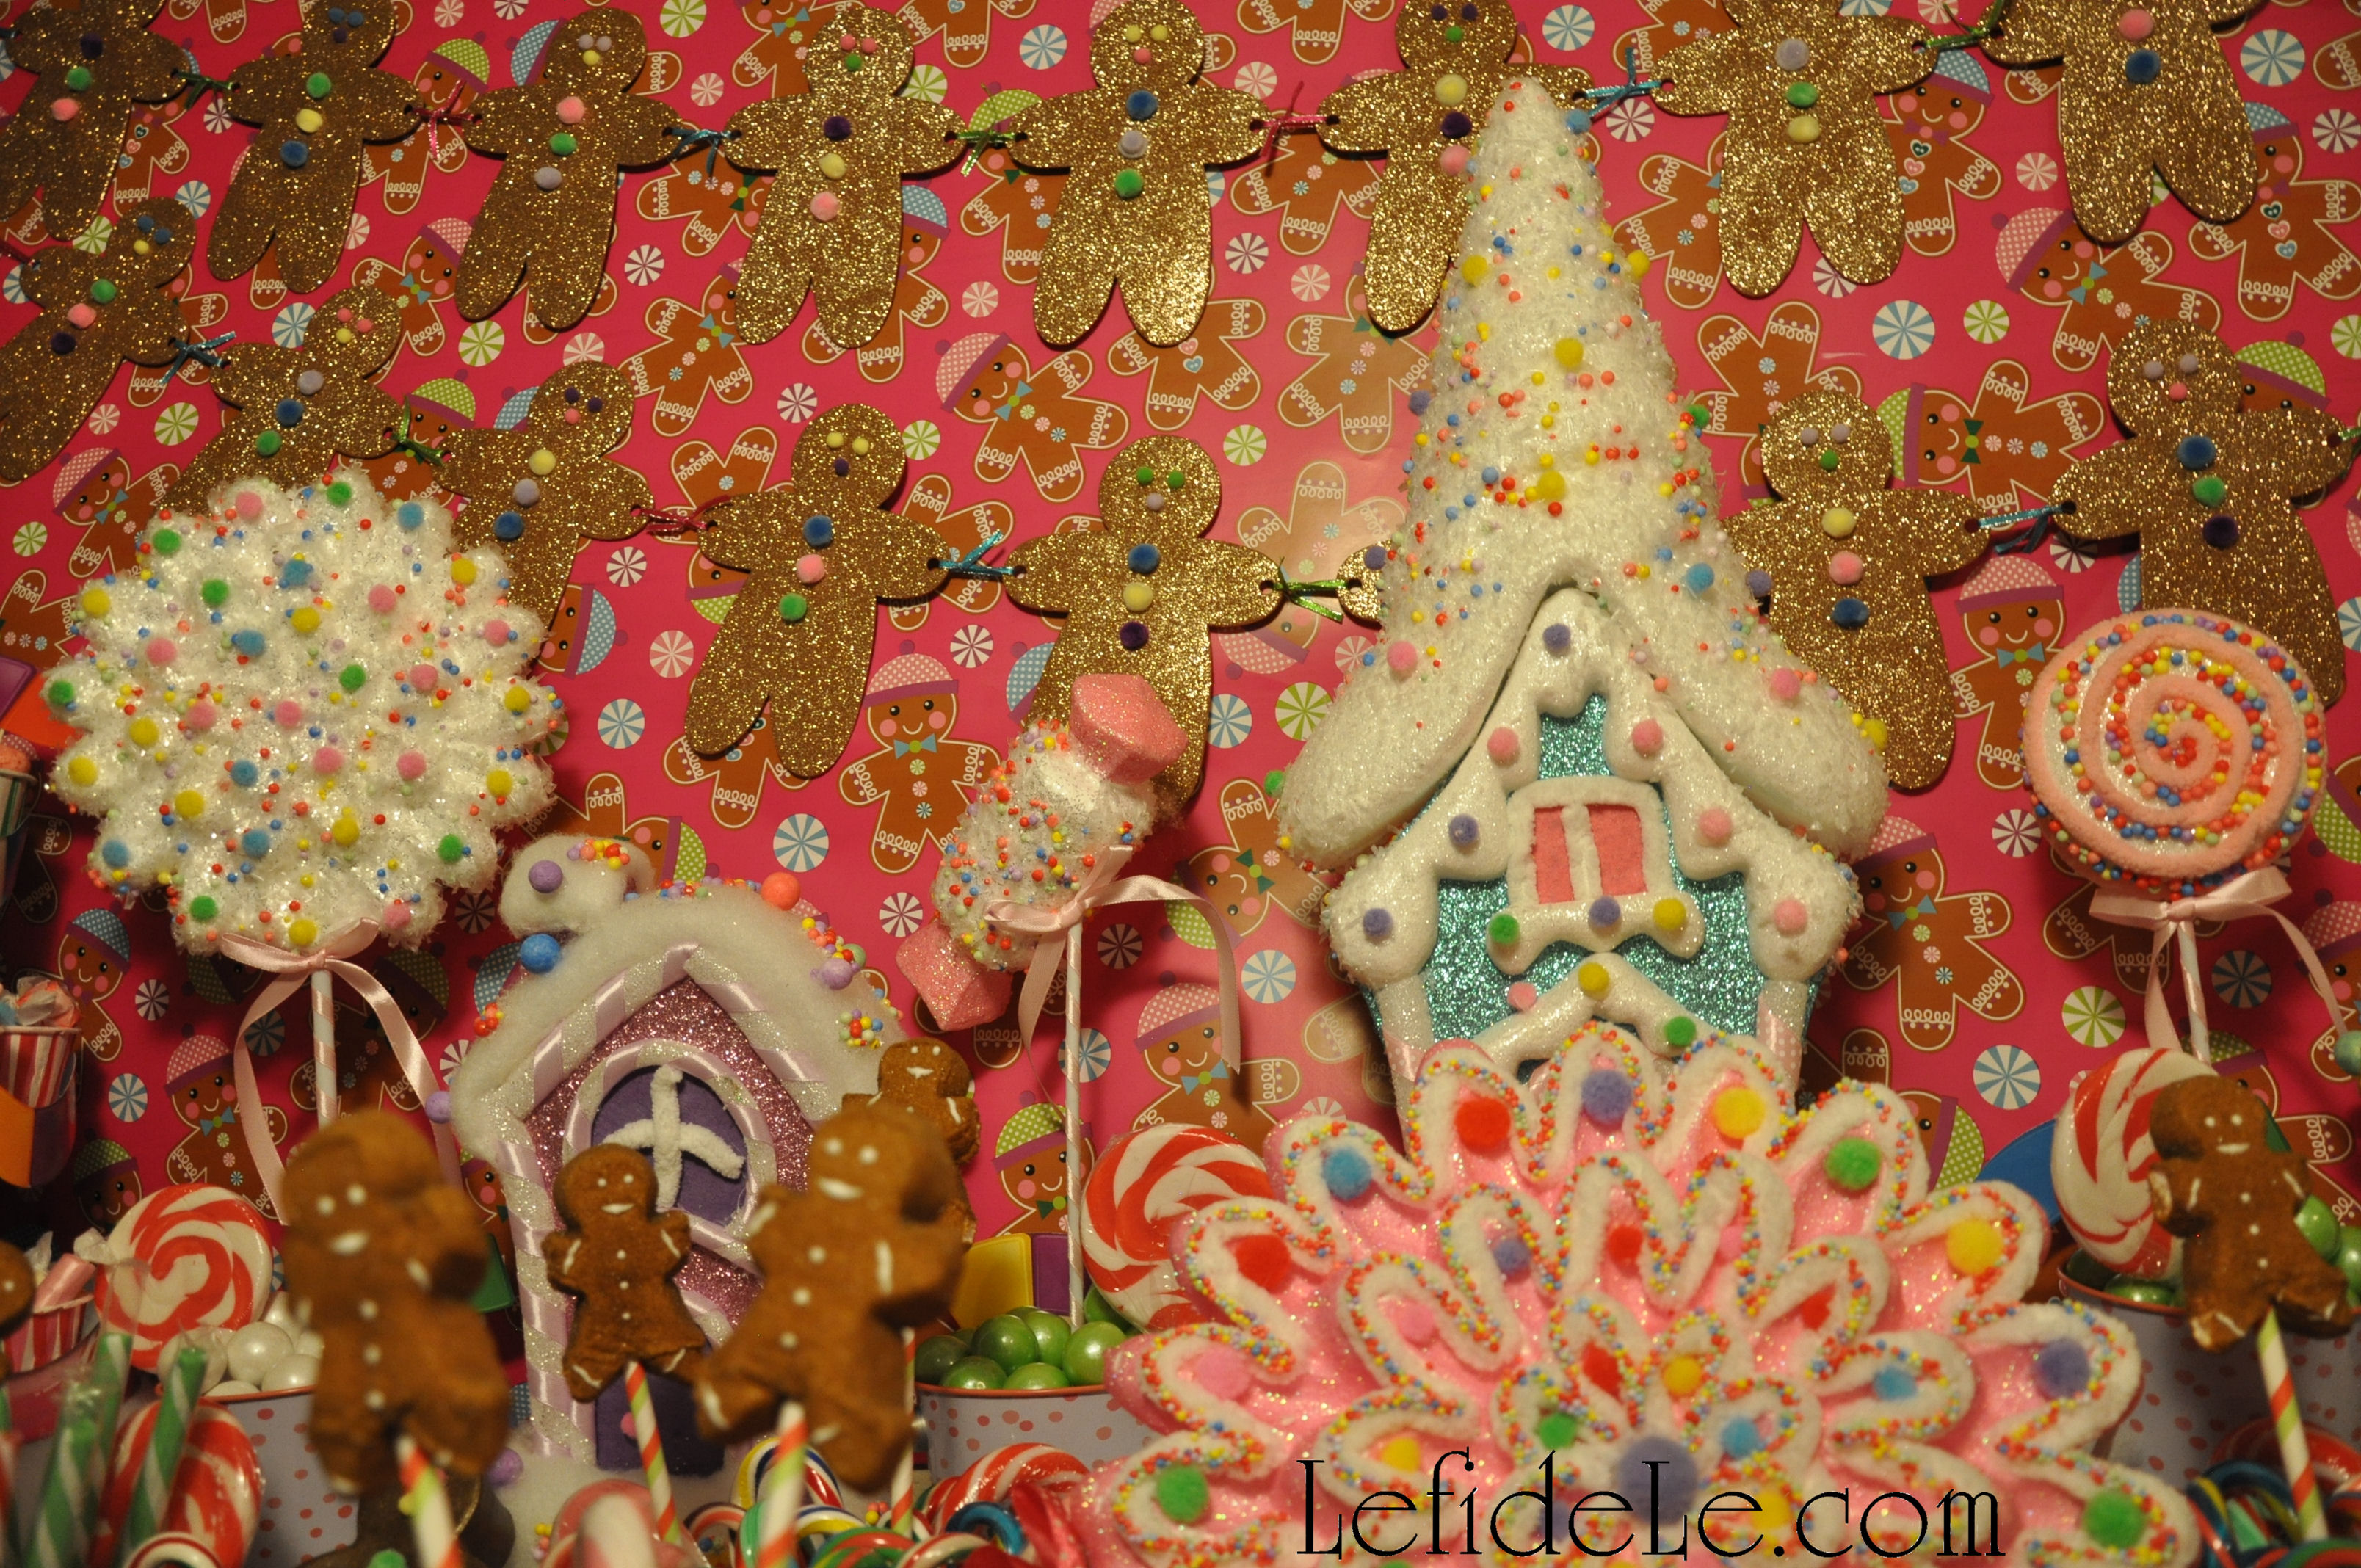
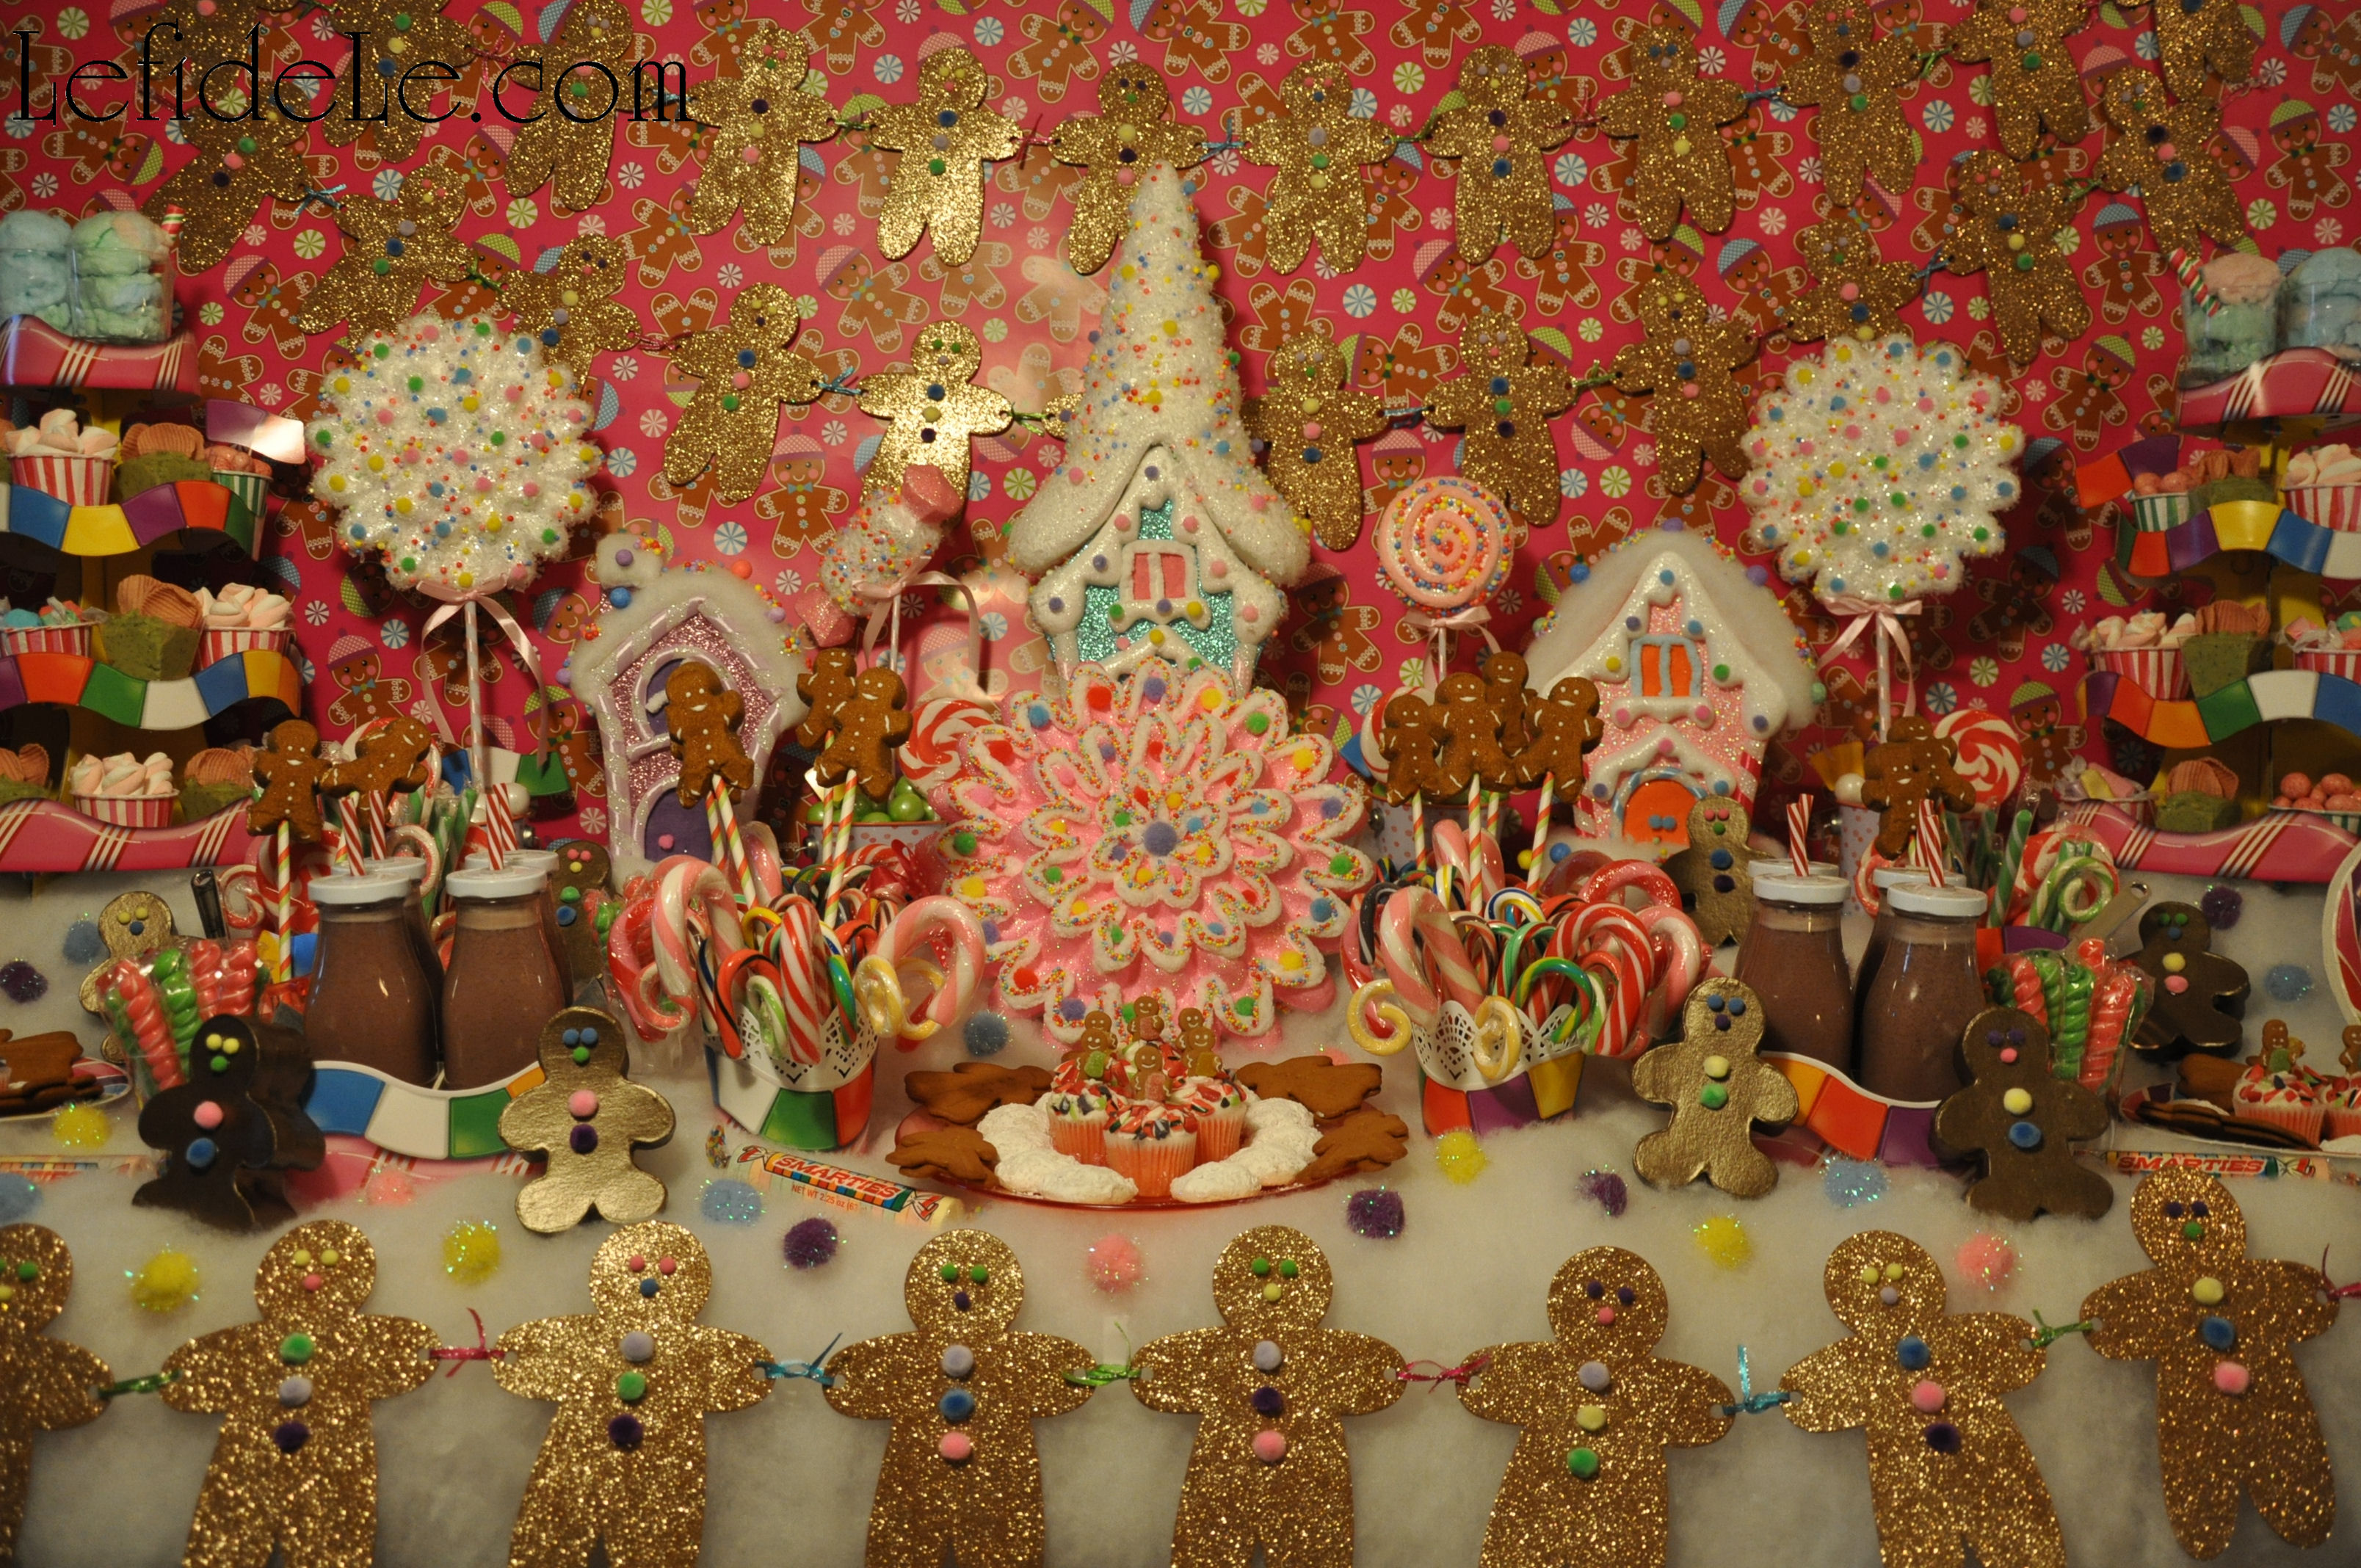
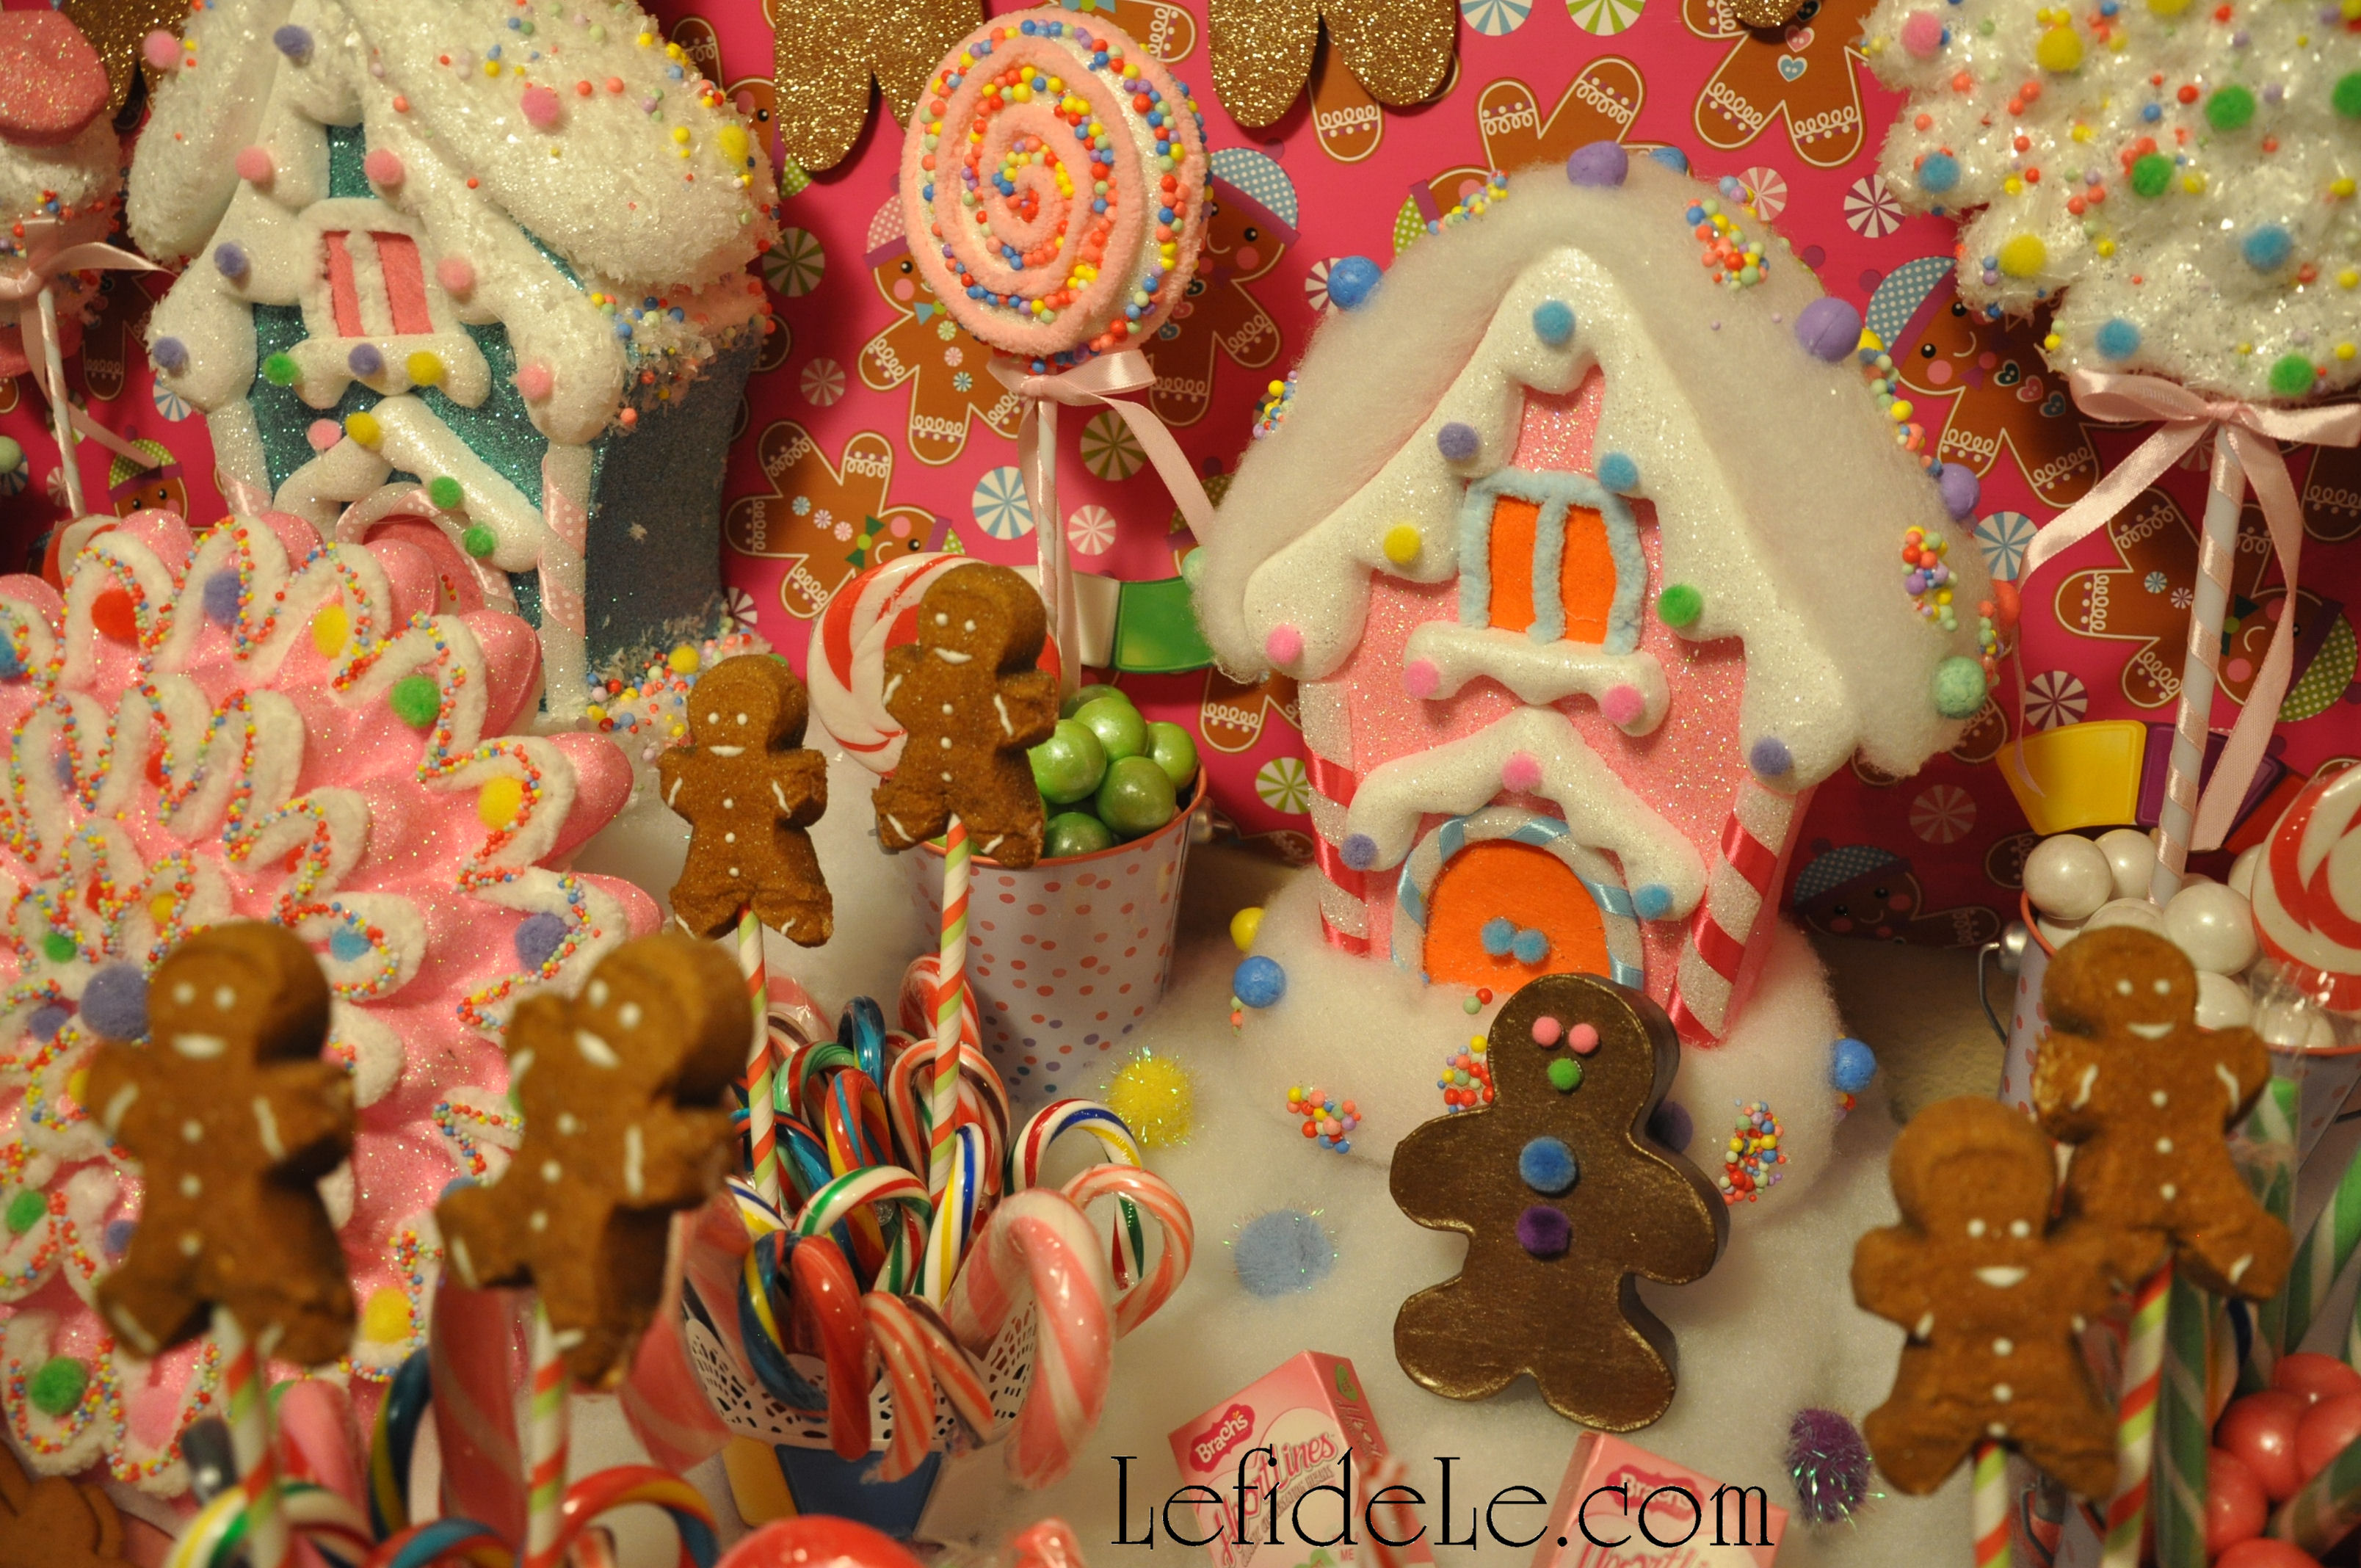
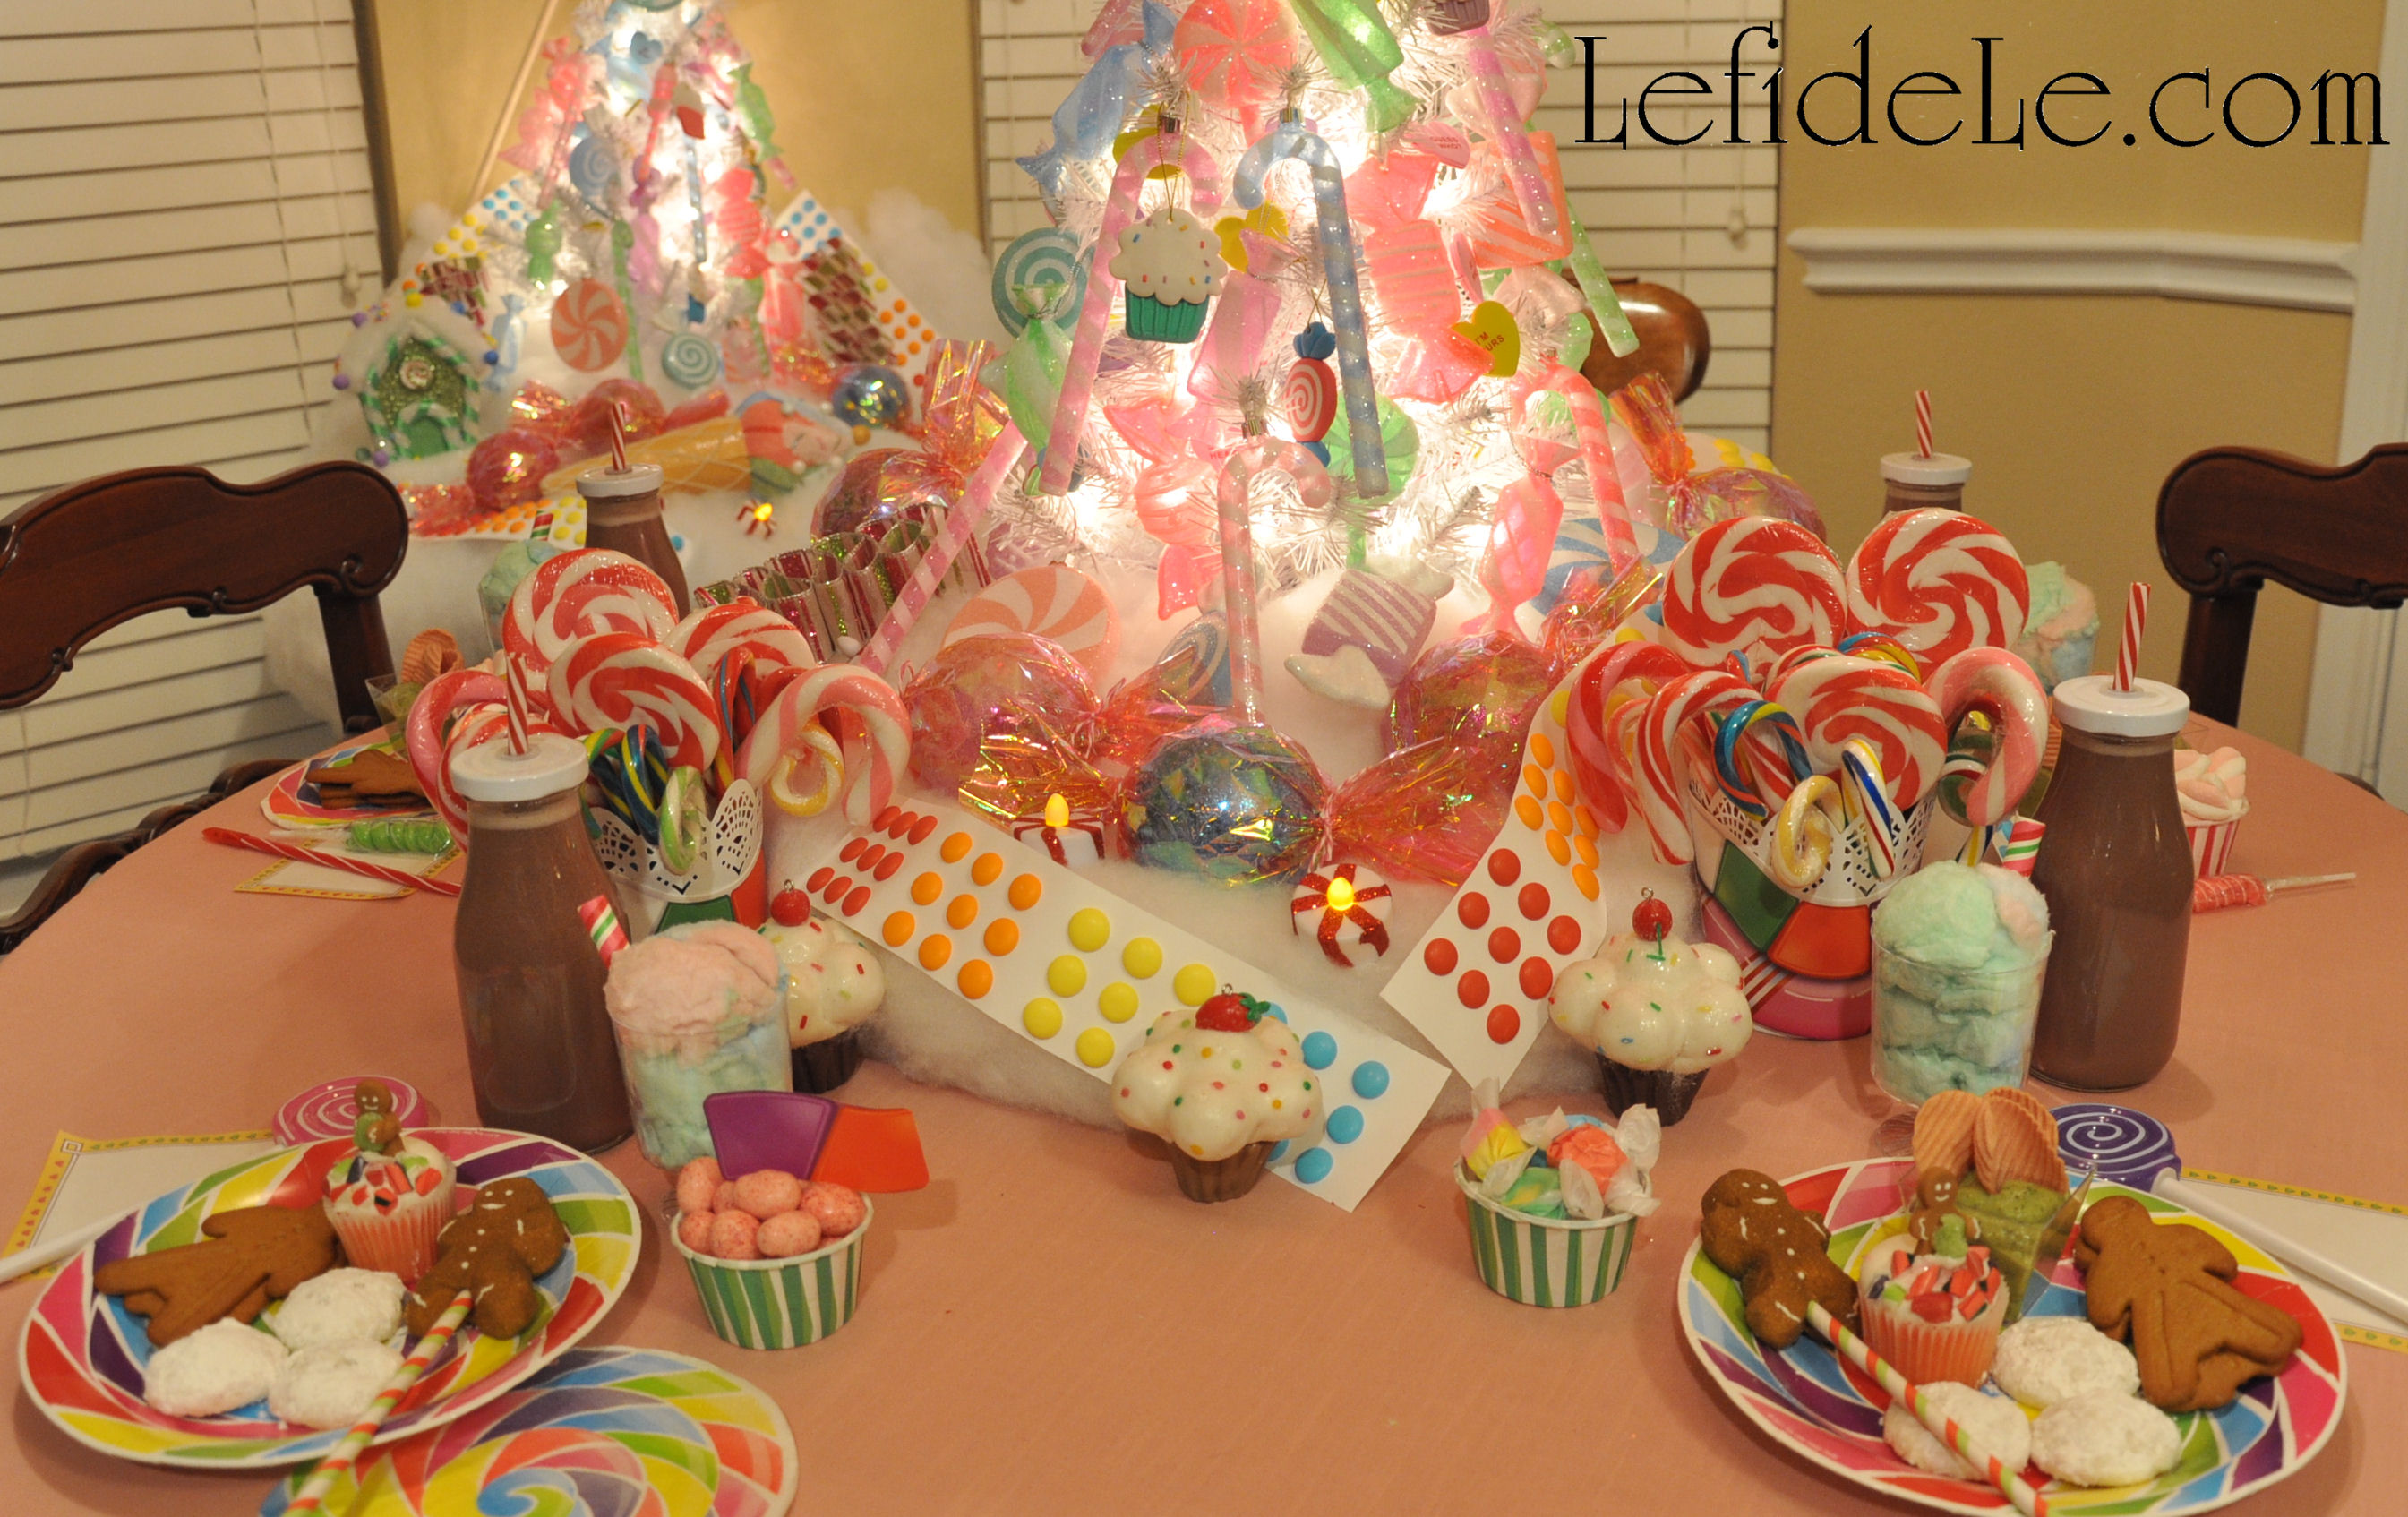
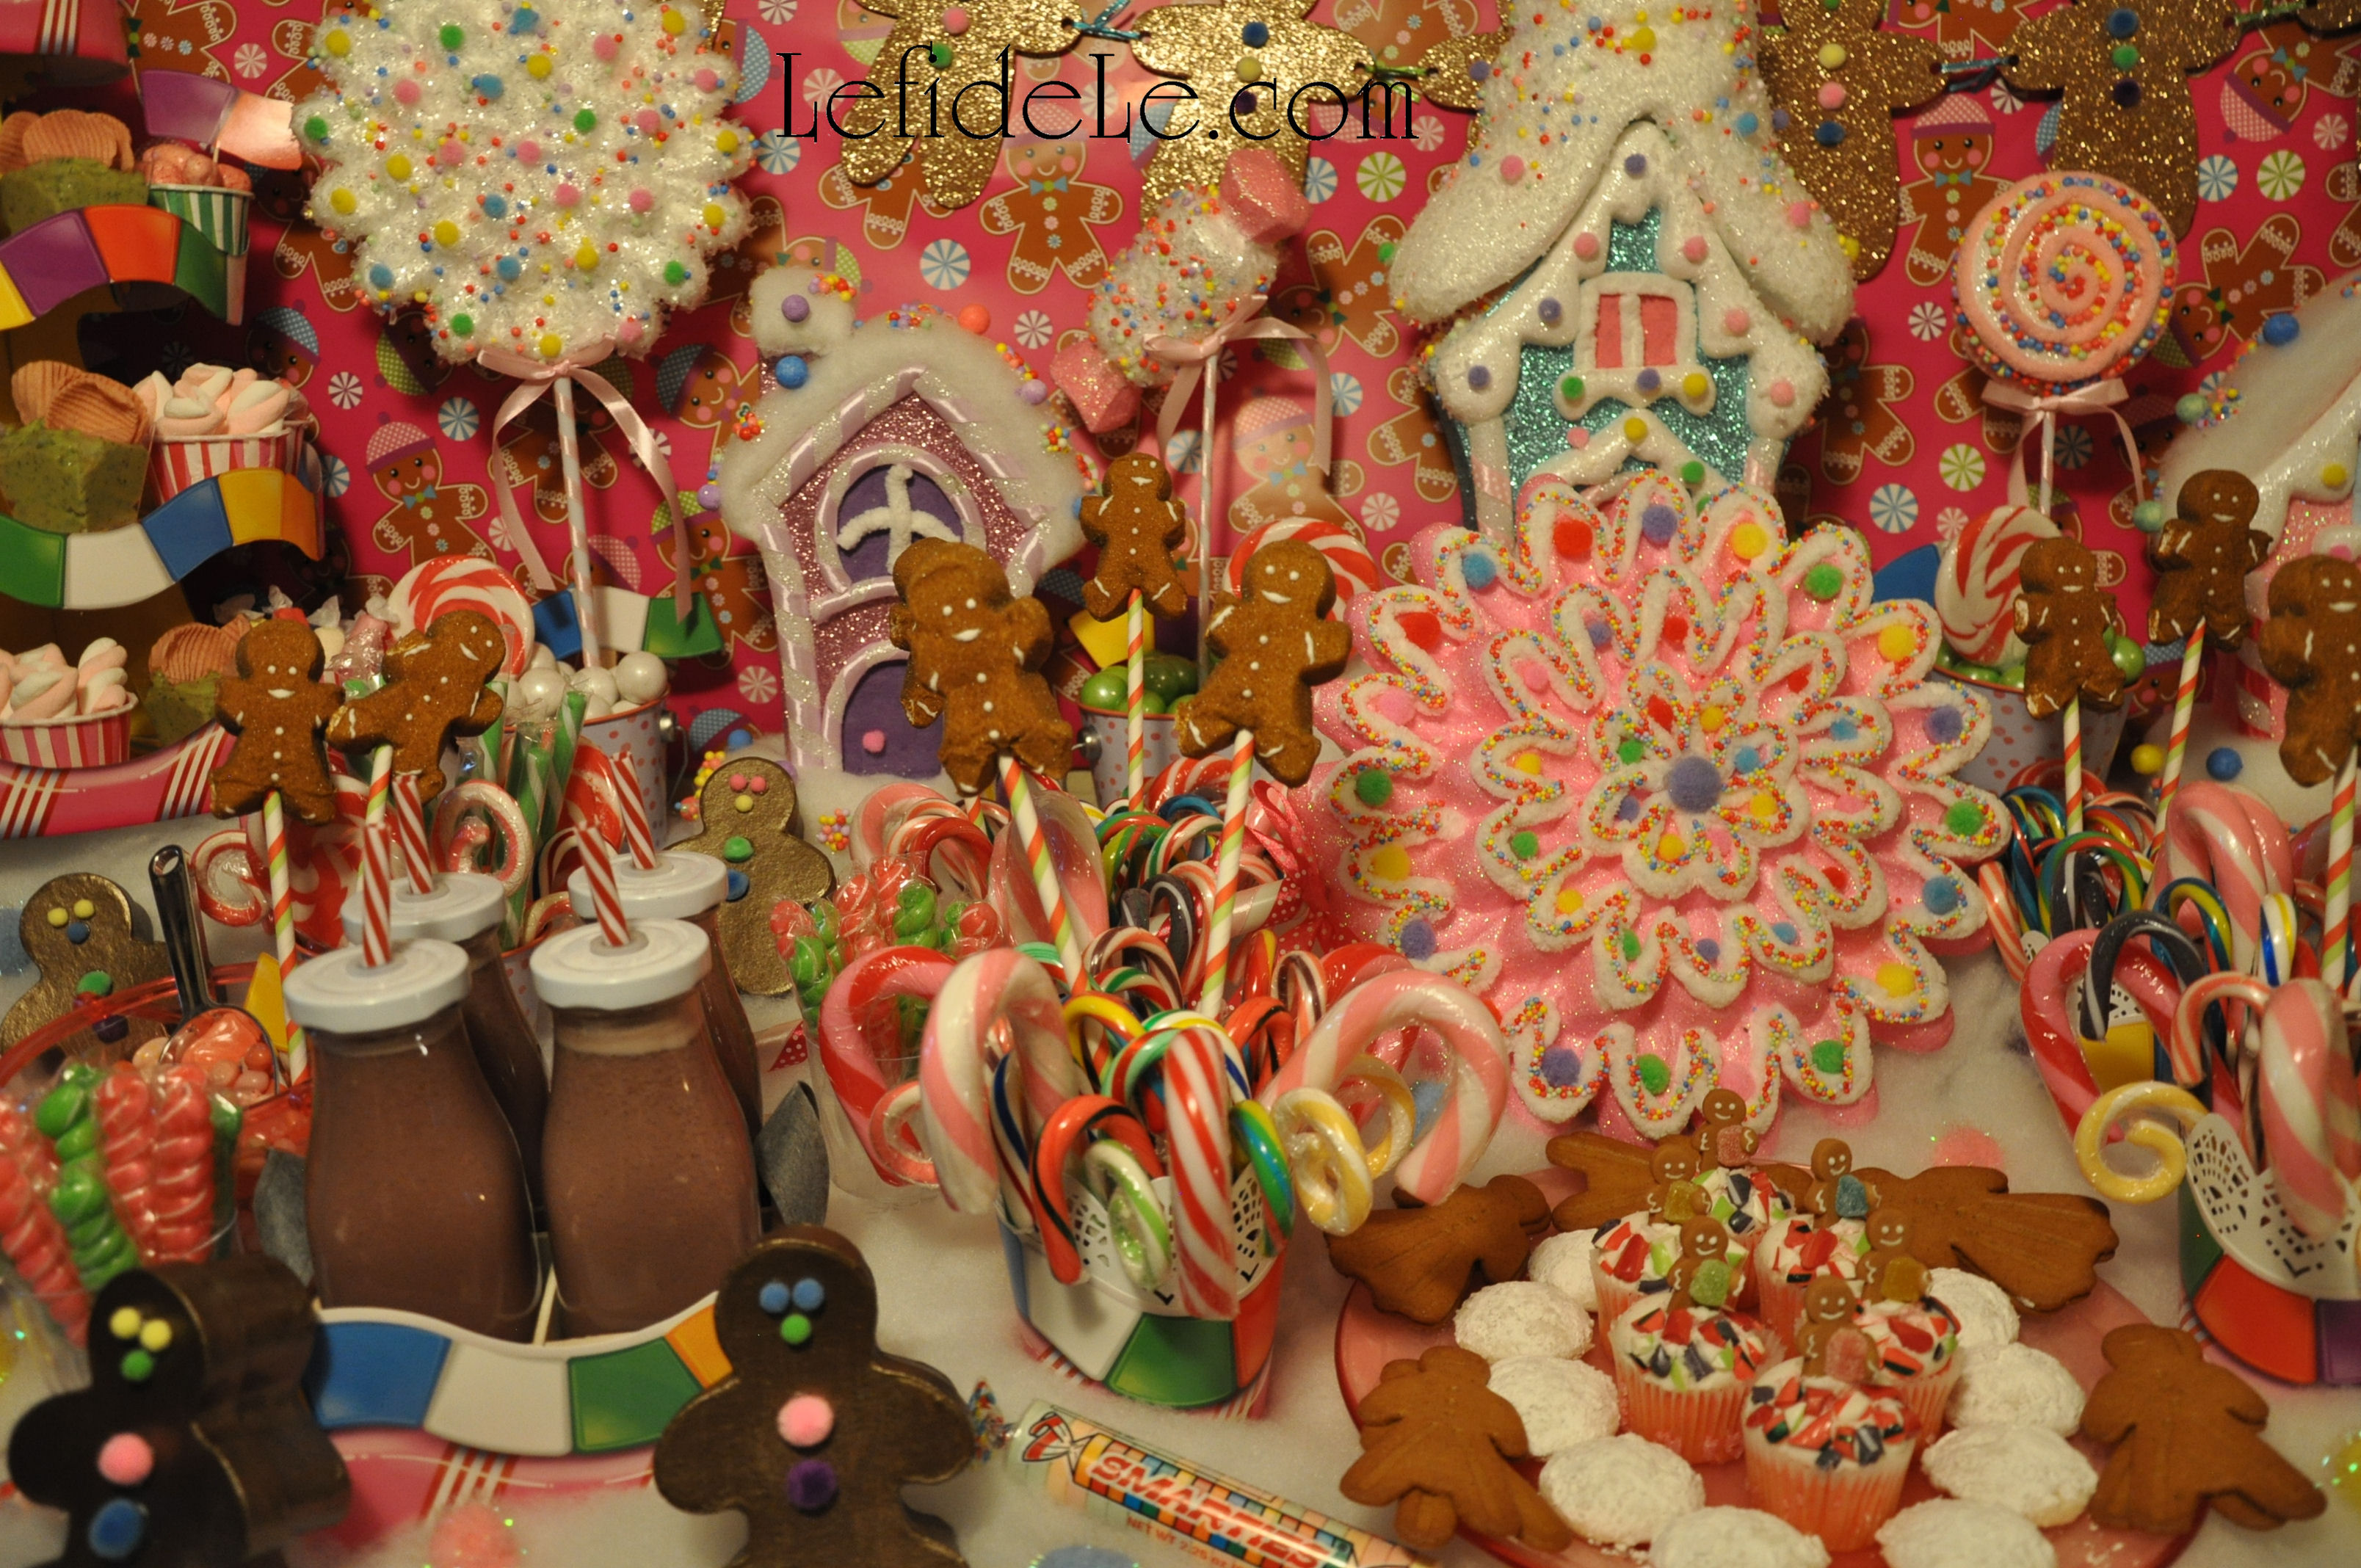
A Candyland village of (glittered) gingerbread houses sits nestled atop an icing laden hillside (of buffalo snow batting) dotted with (pom-pom) sprinkles.

308Leigh

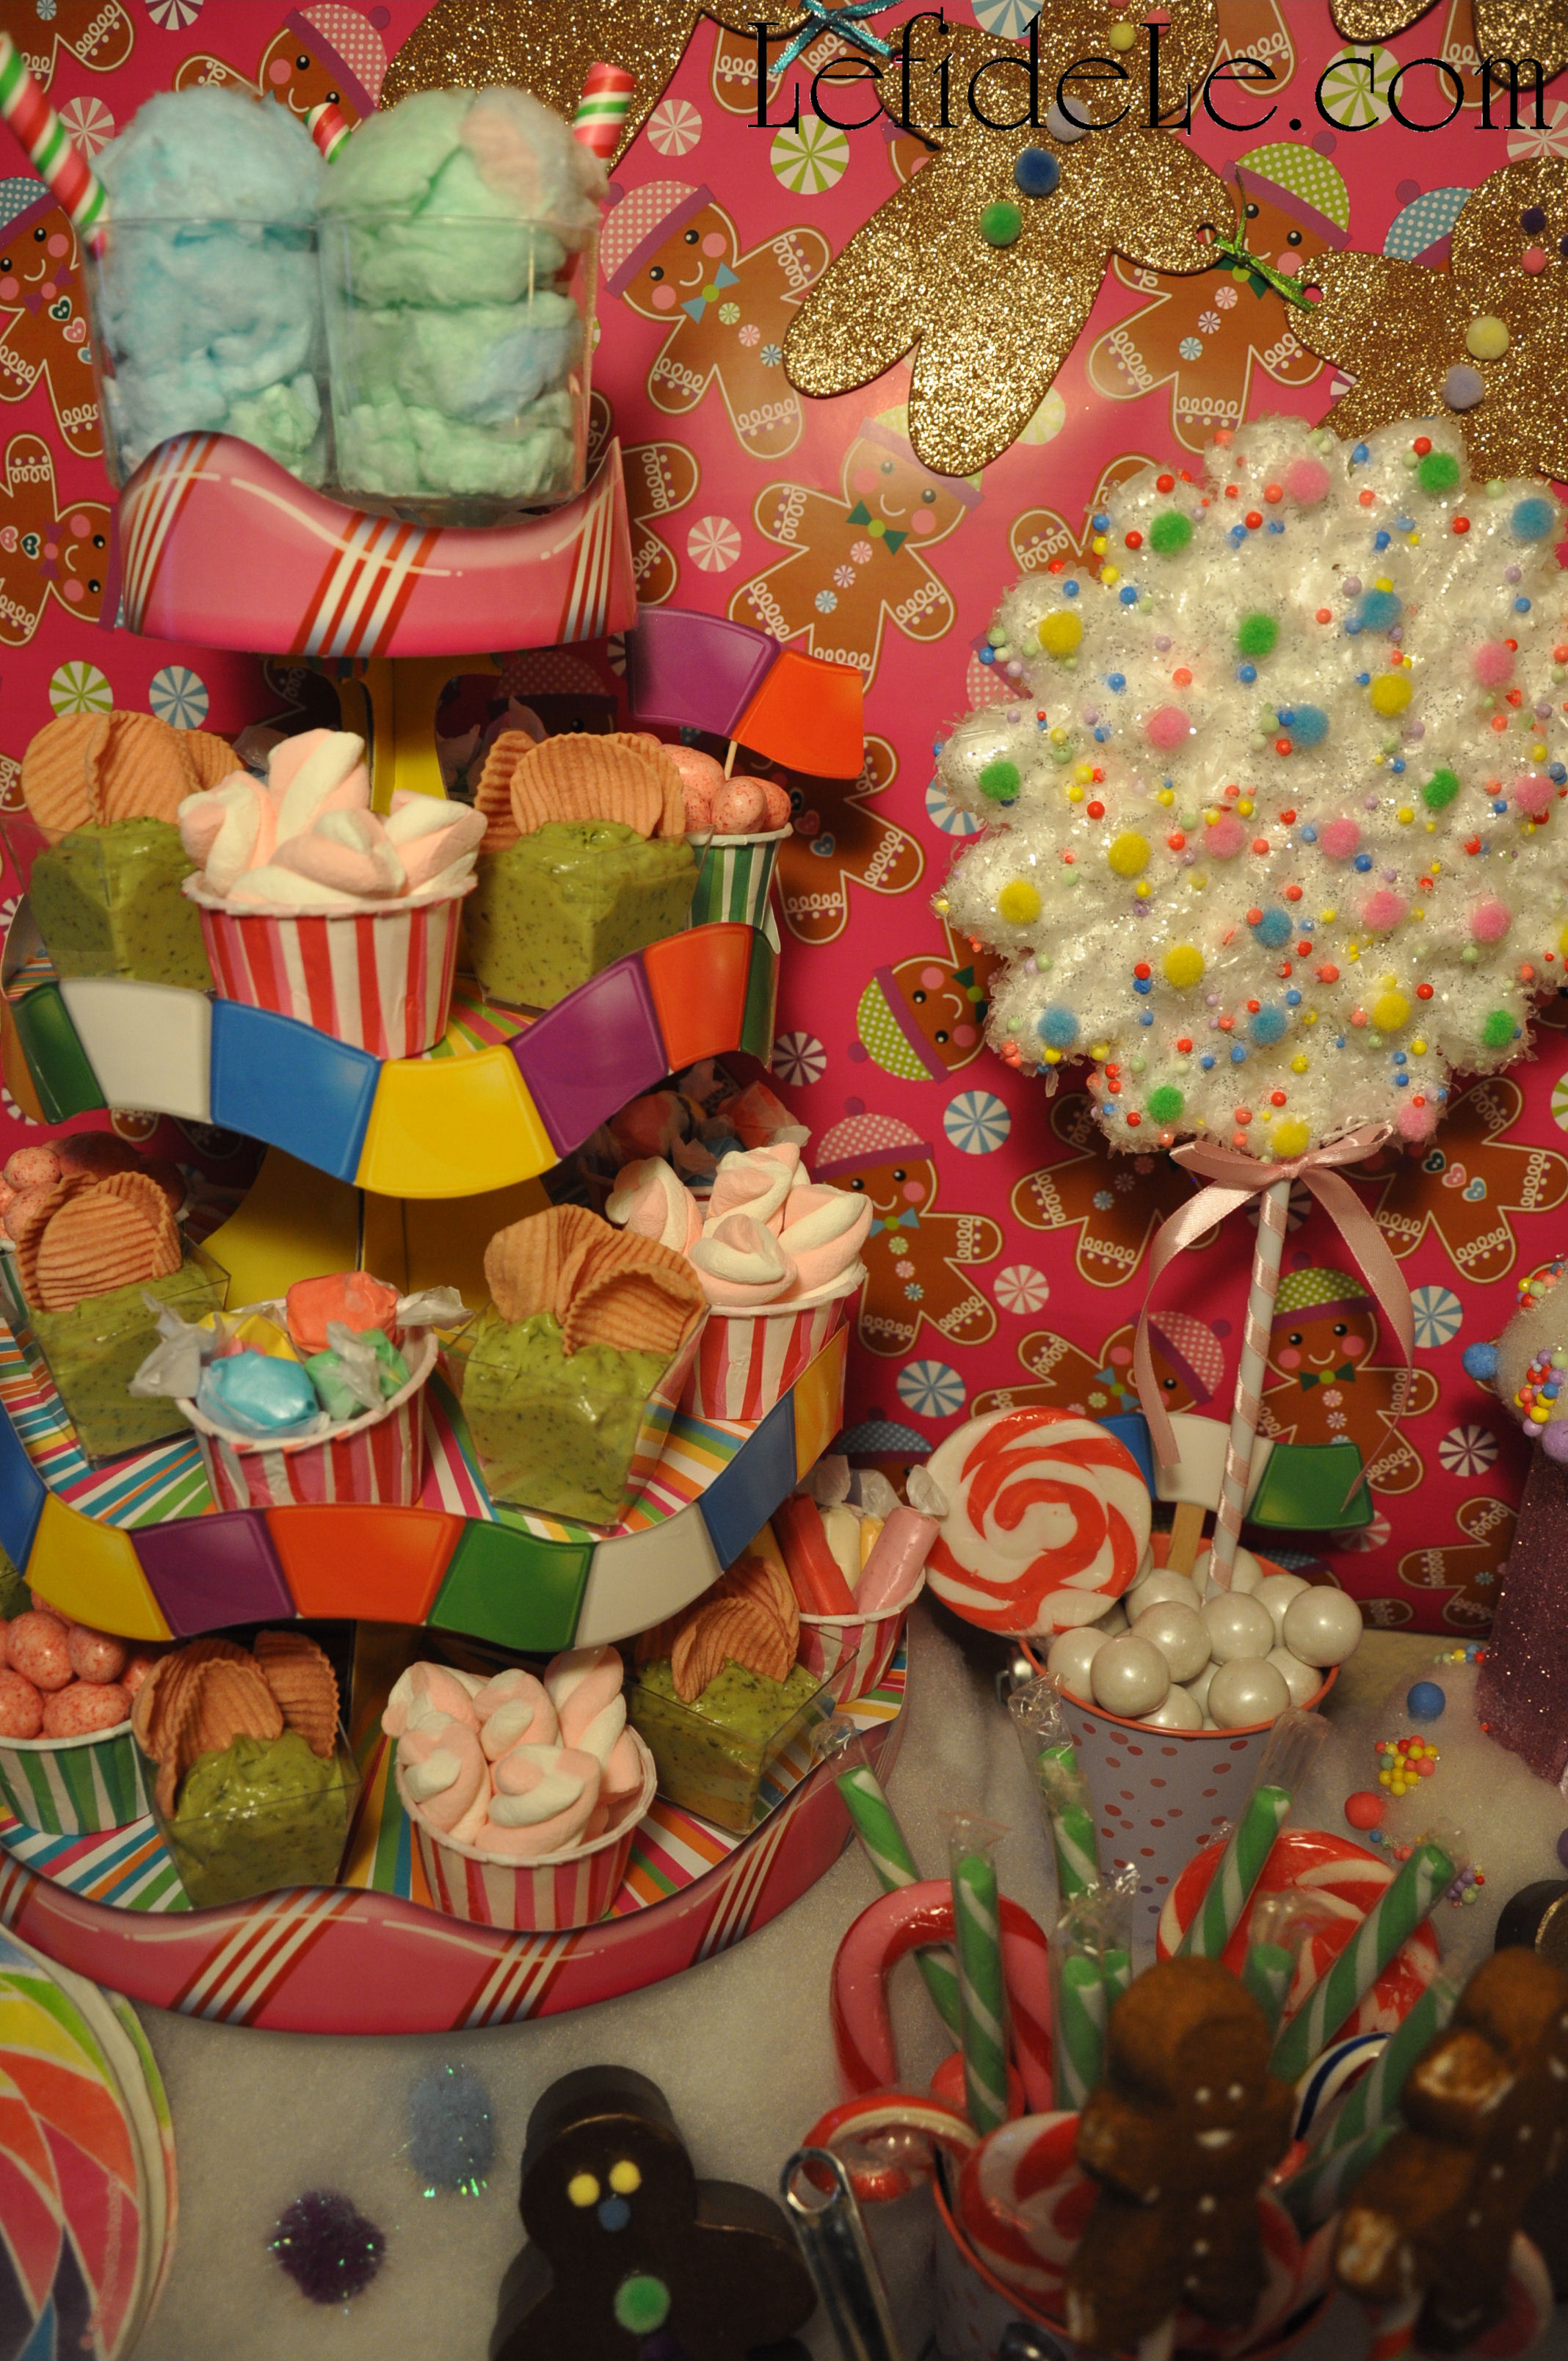
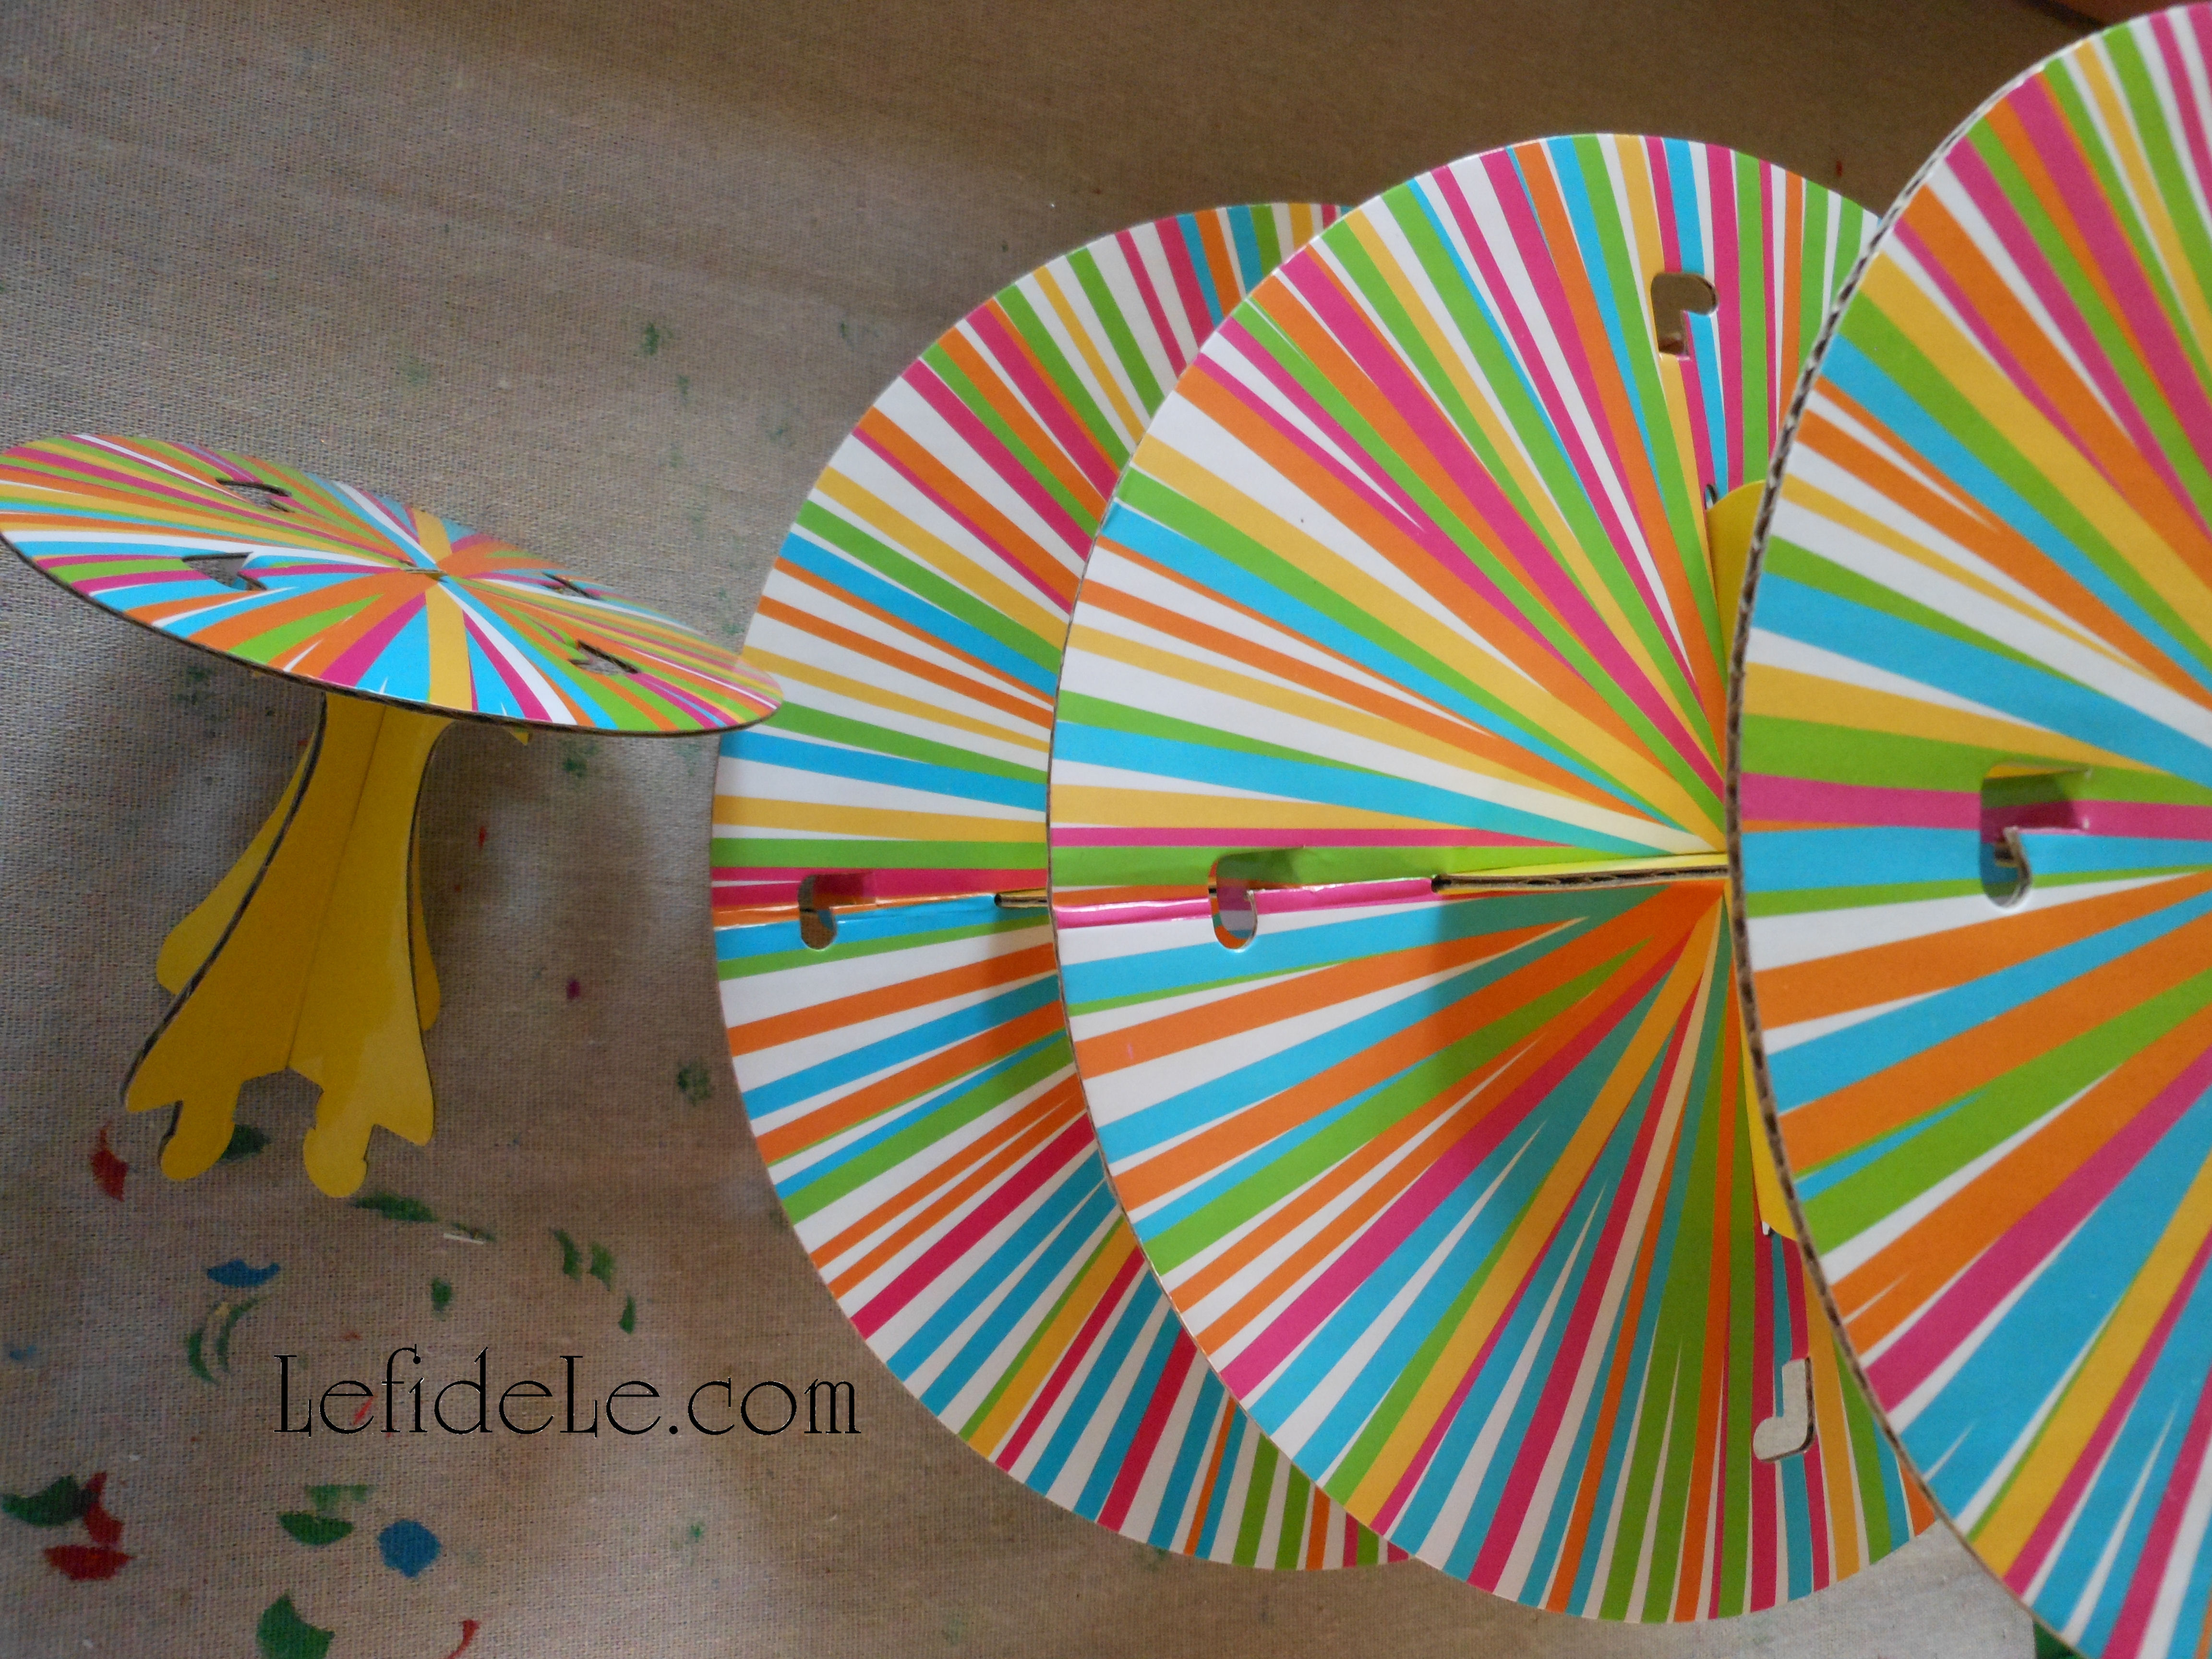
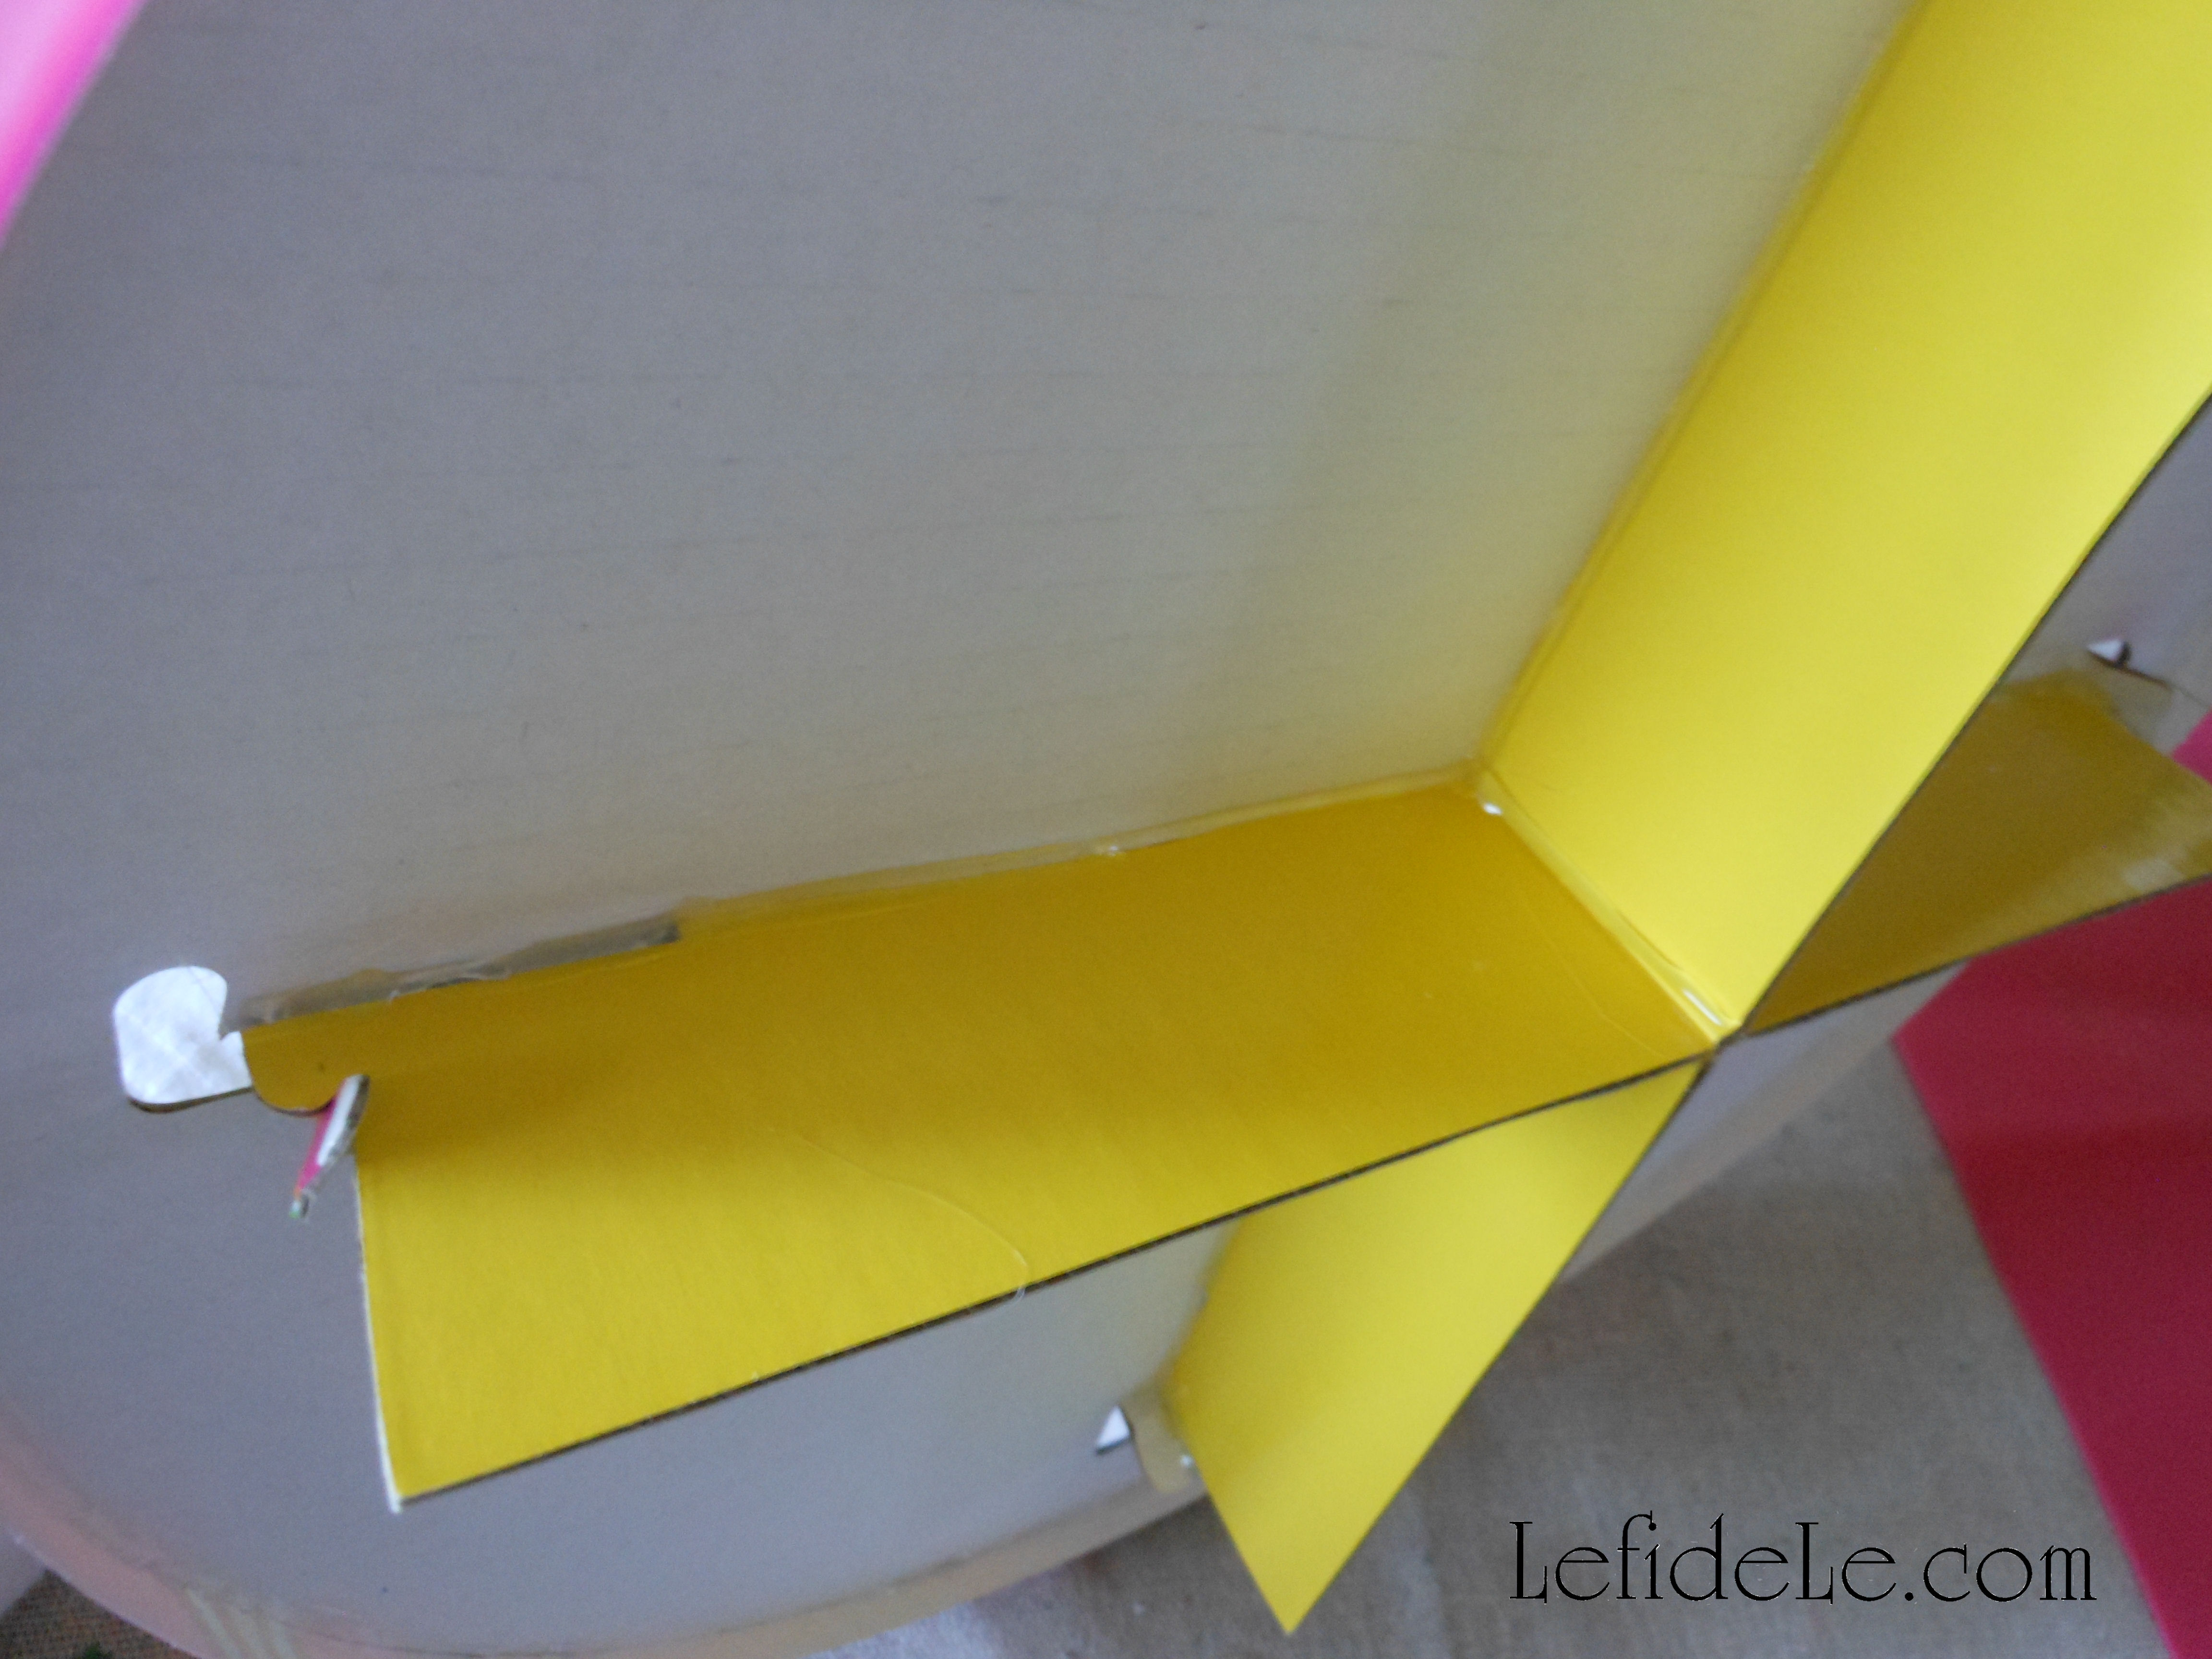
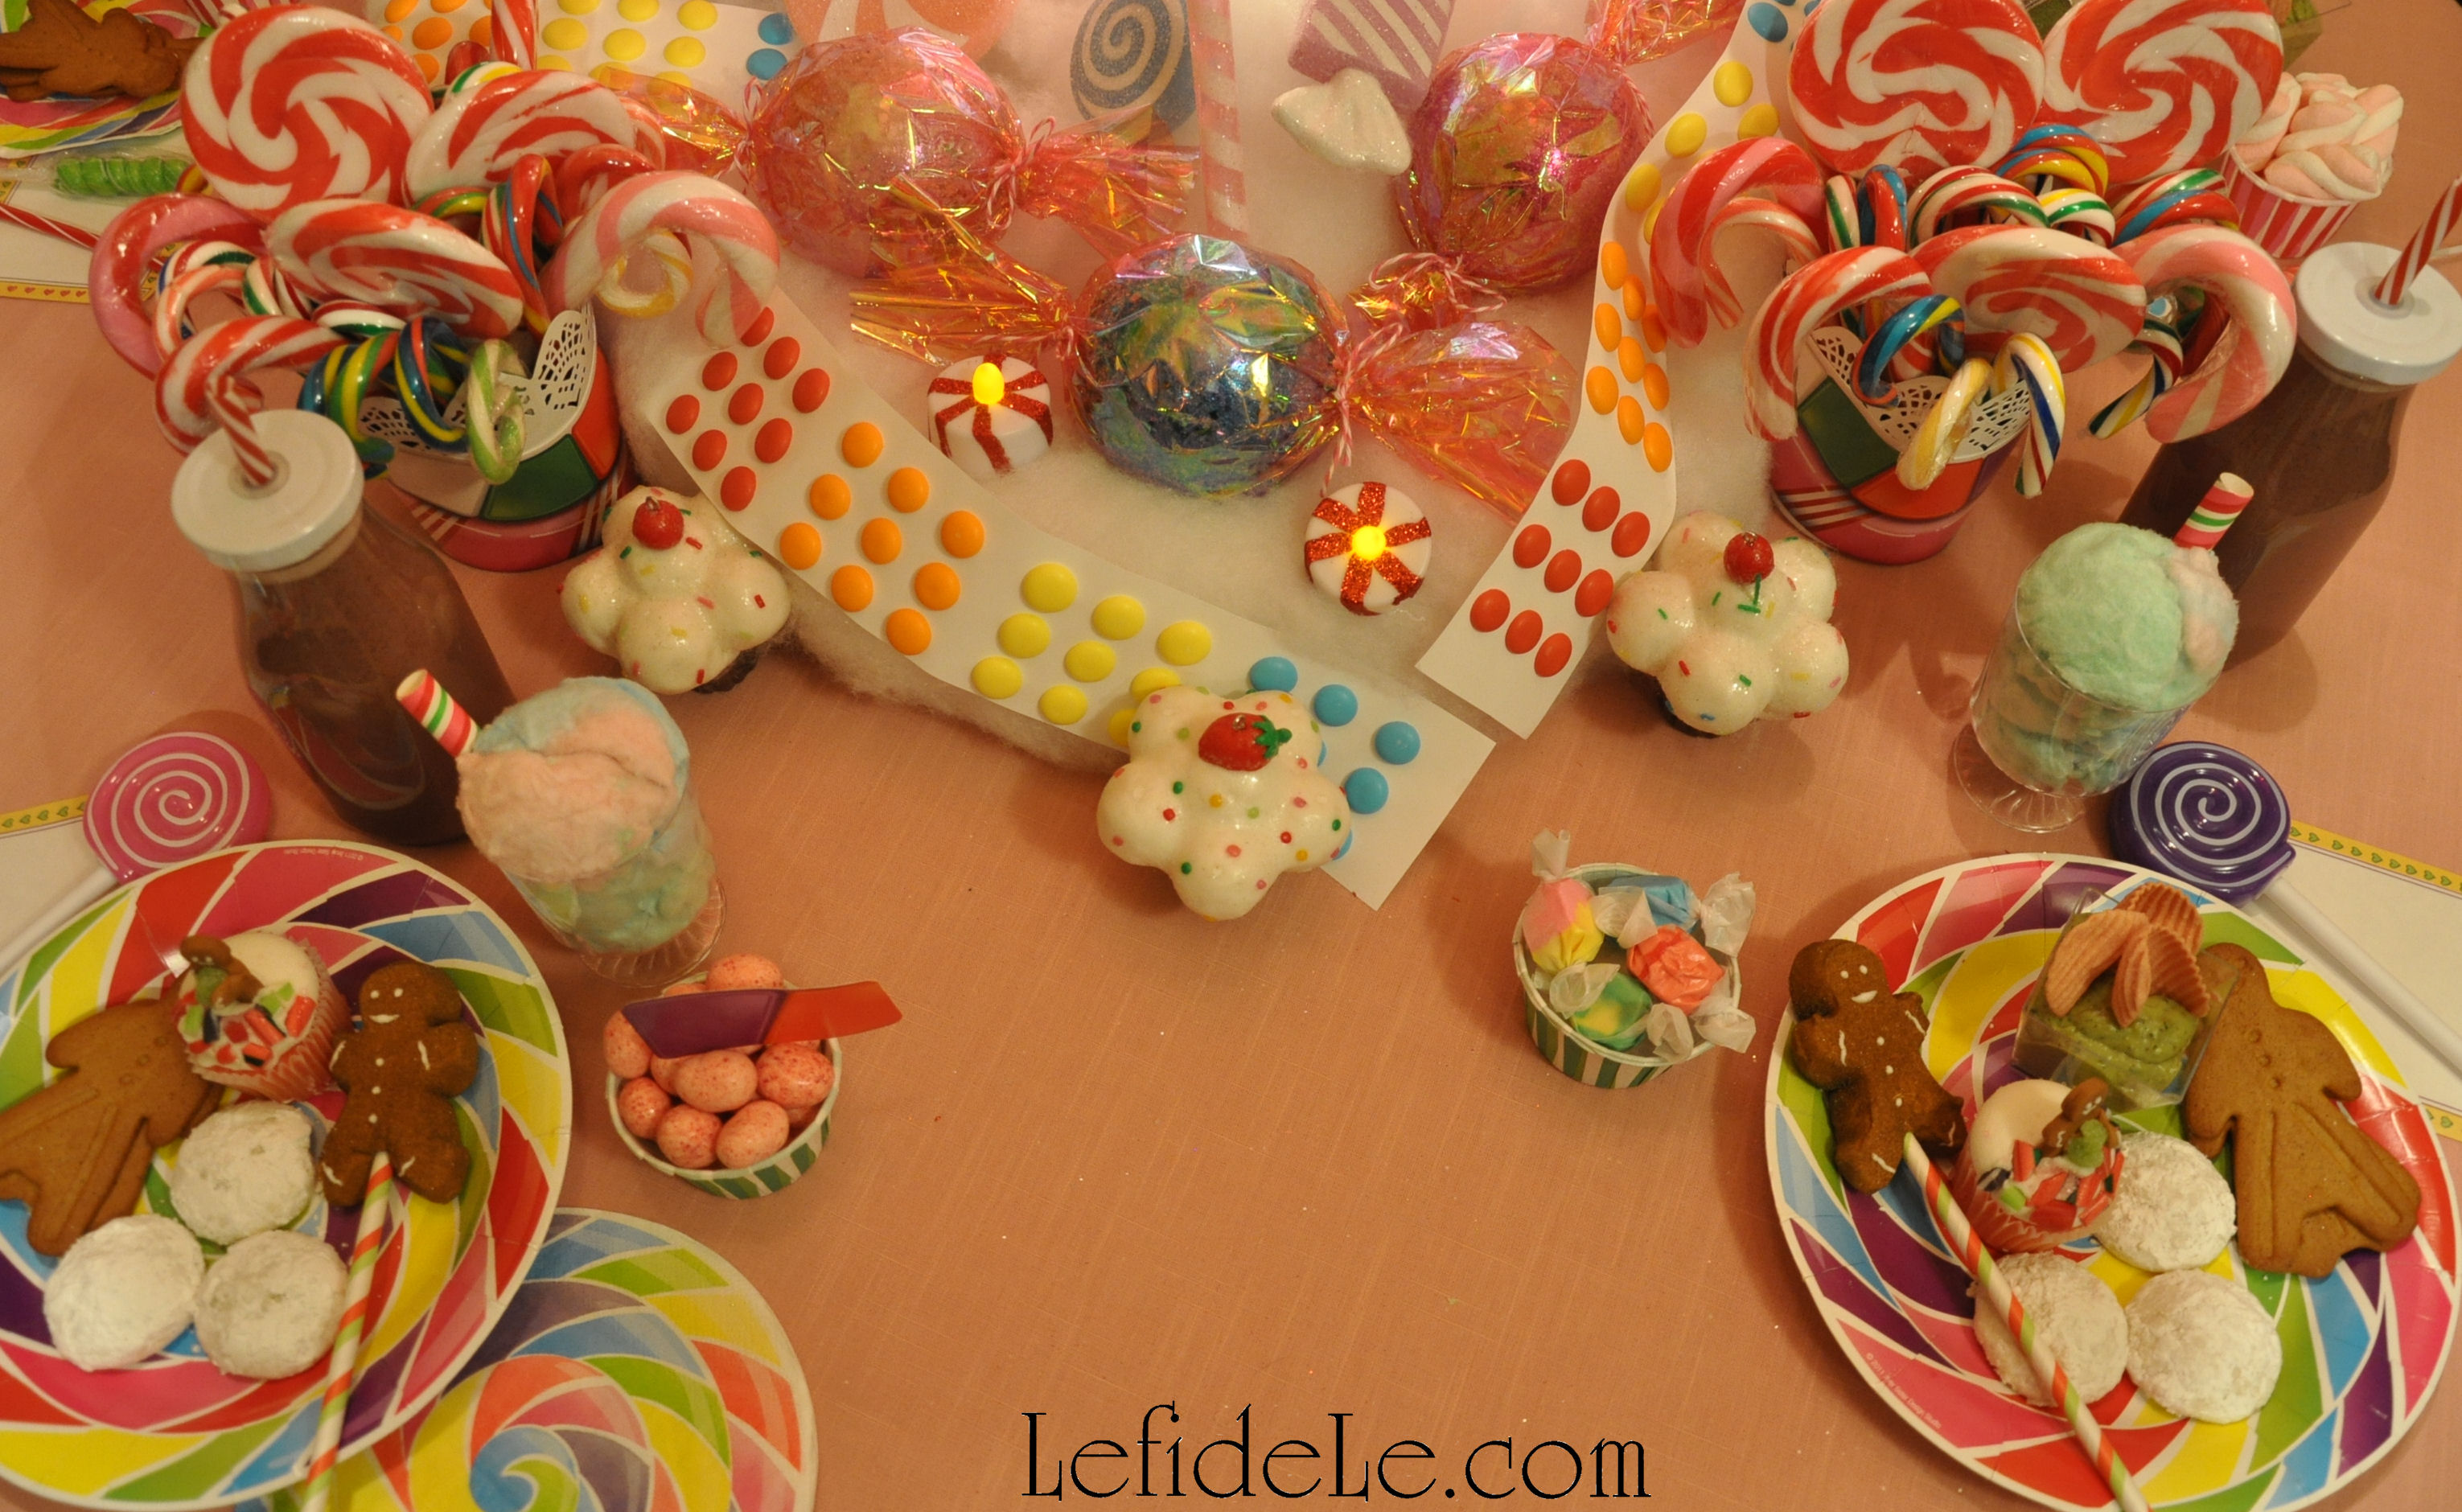
(Faux) lollipop trees spring forth from gumball forest floors (in speckled metal pails) and (real) candy-cane thickets abound.

302Leigh

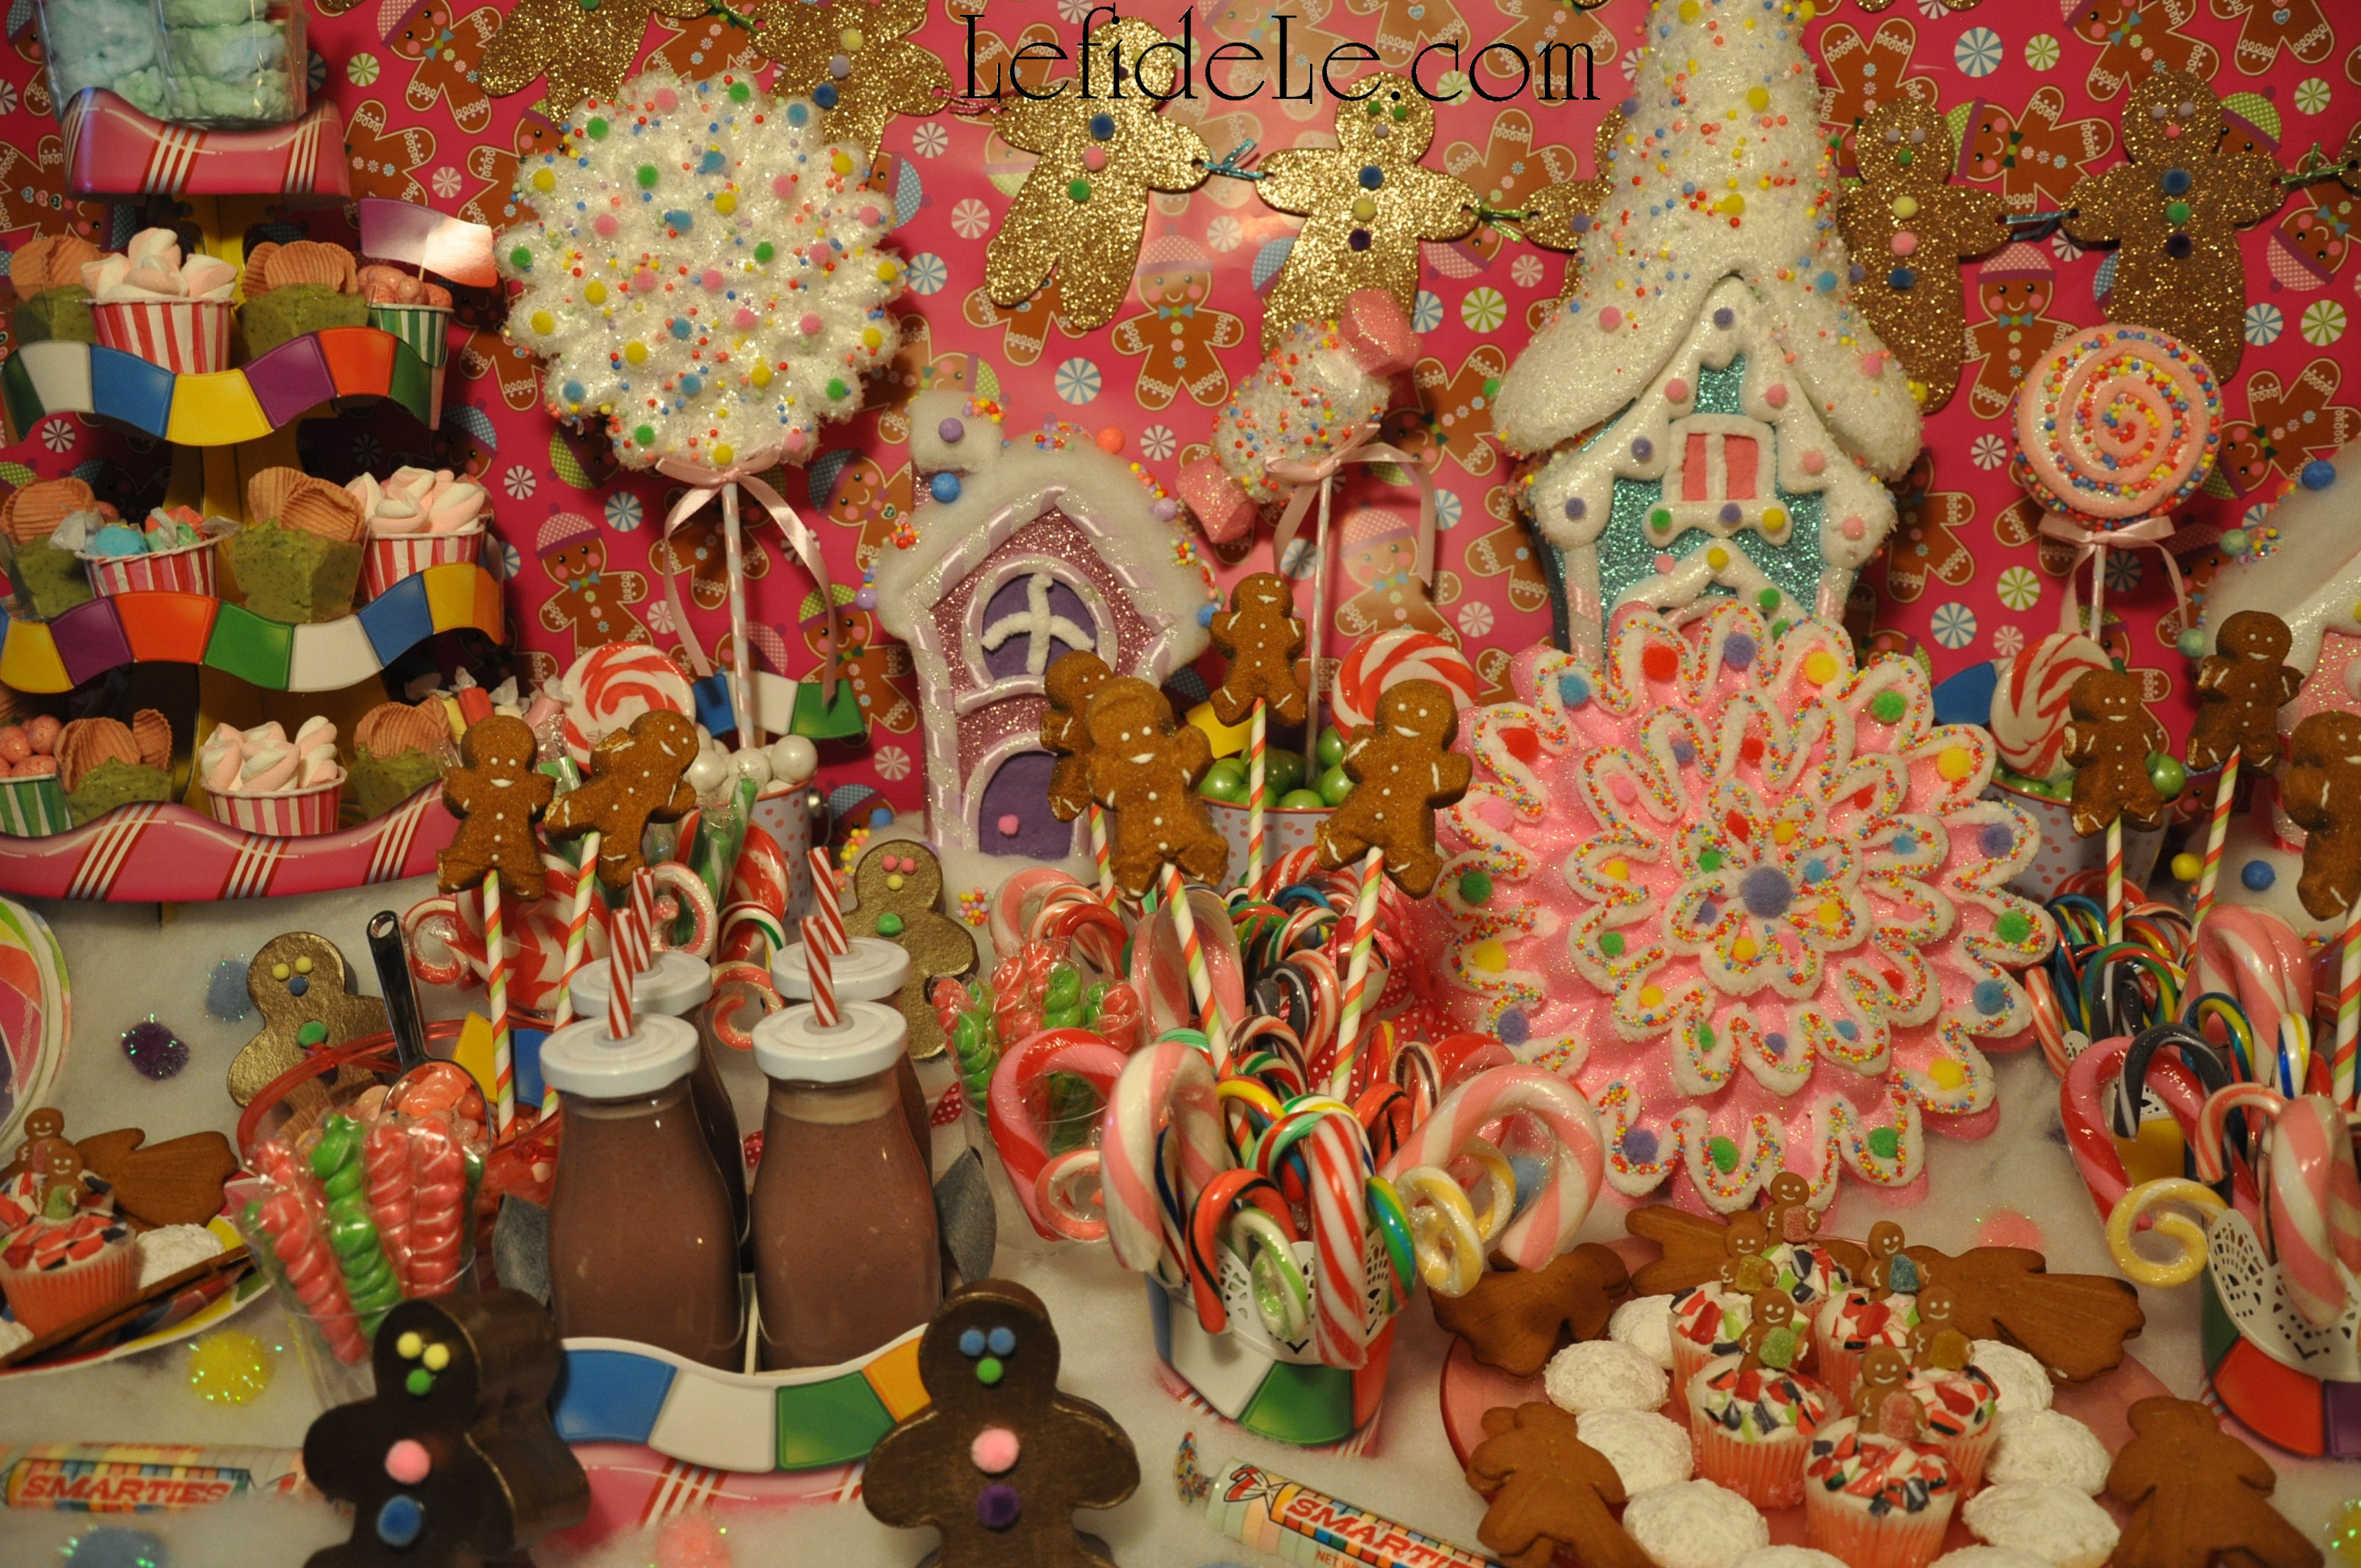
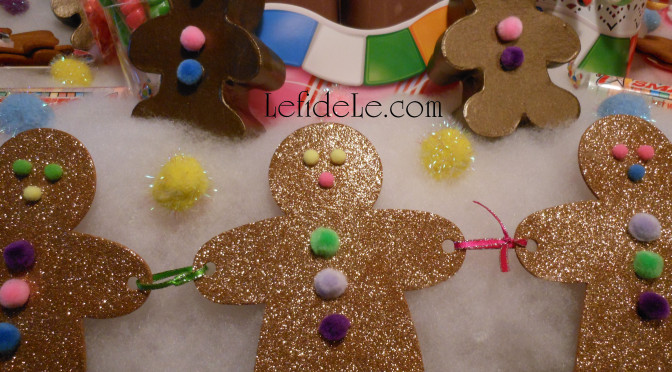
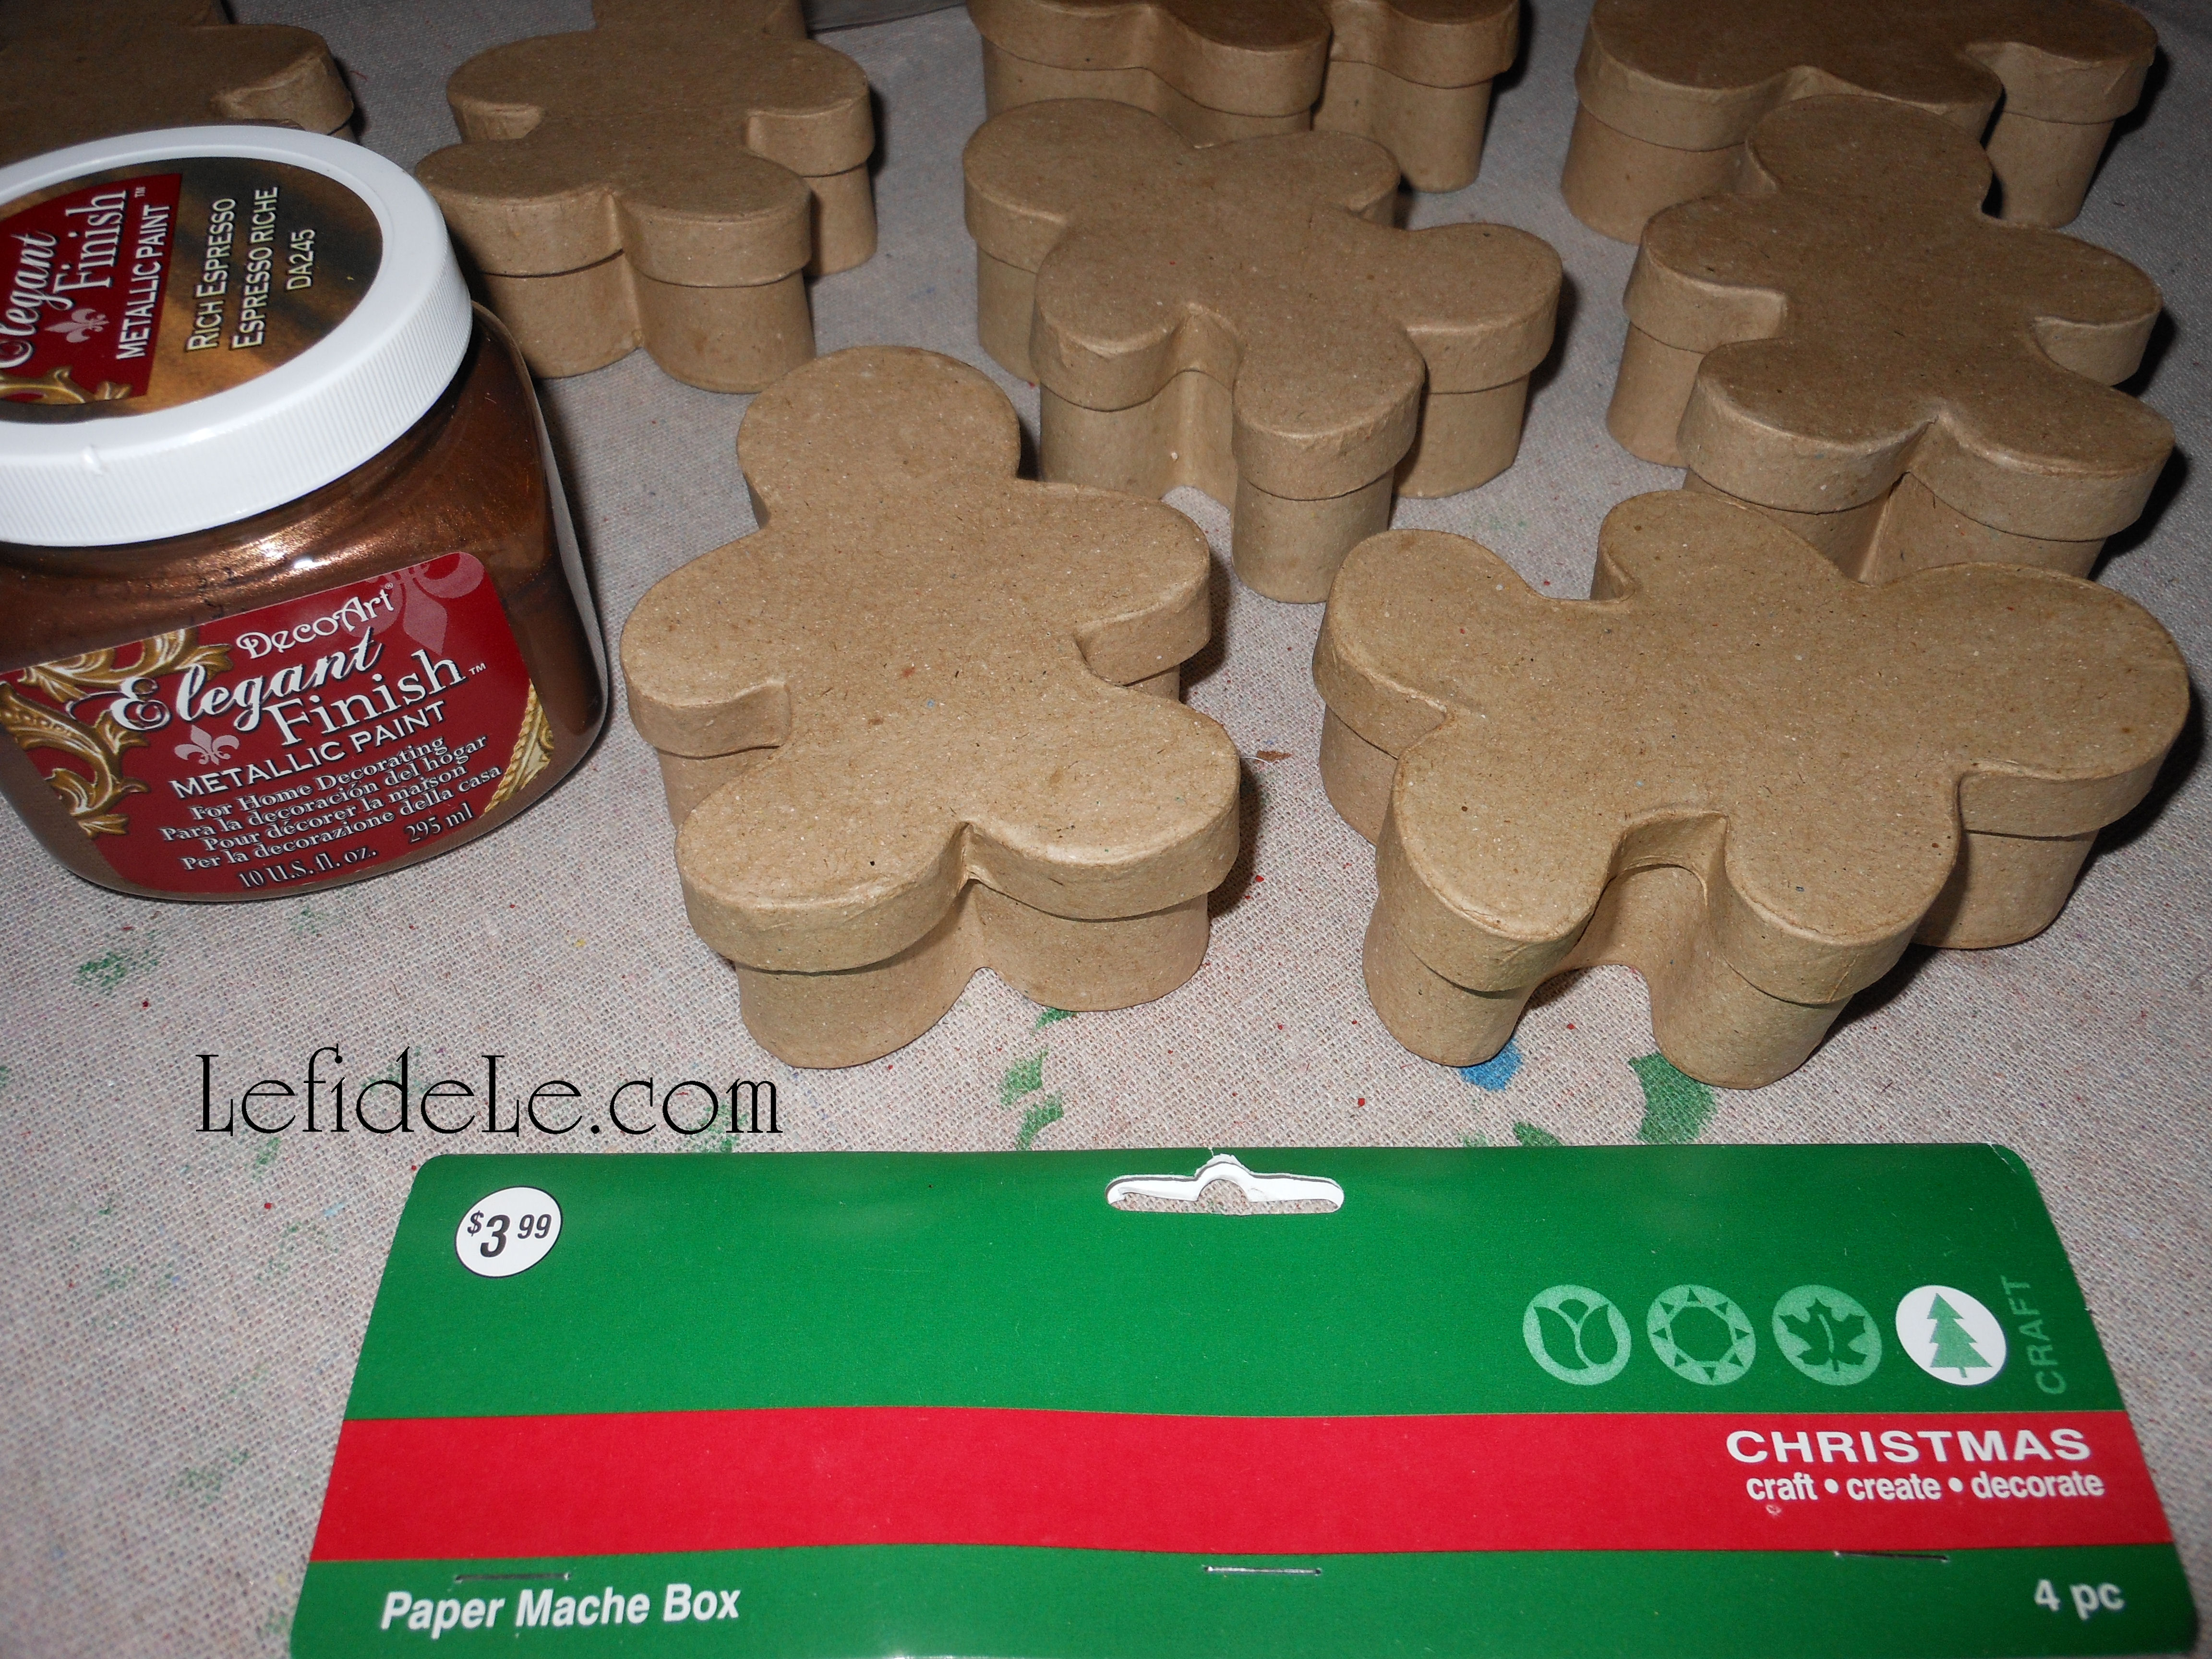
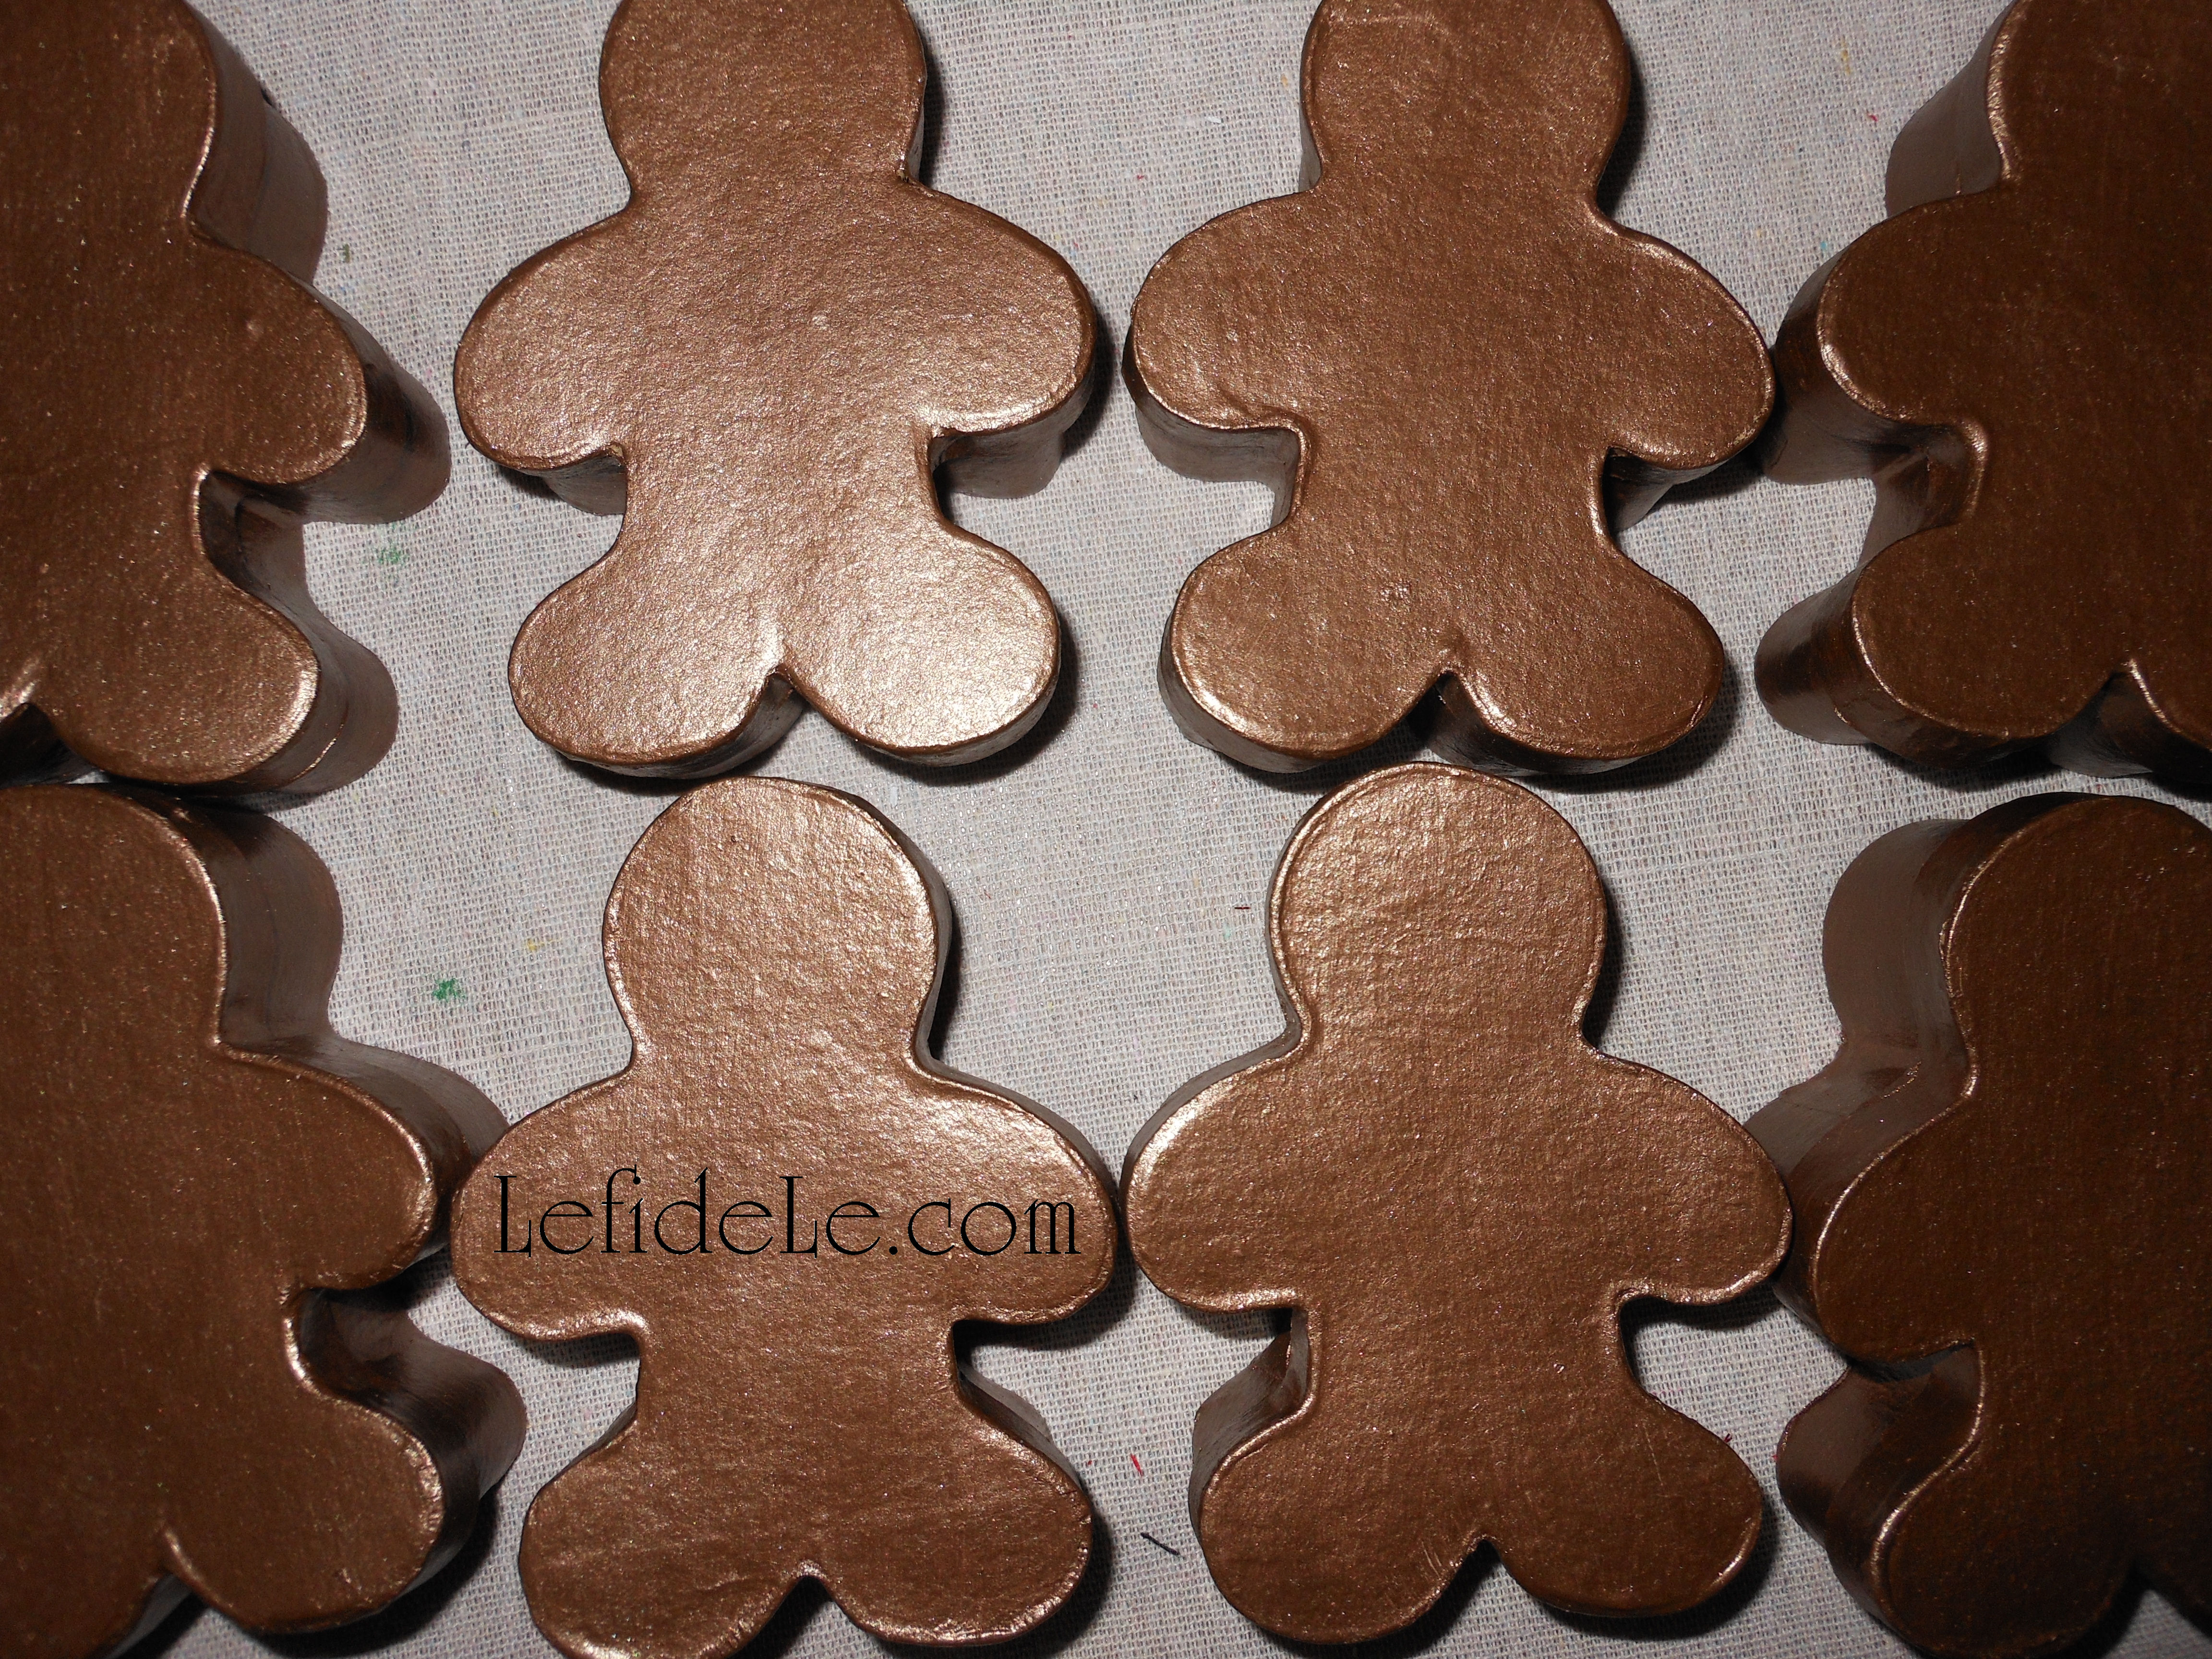
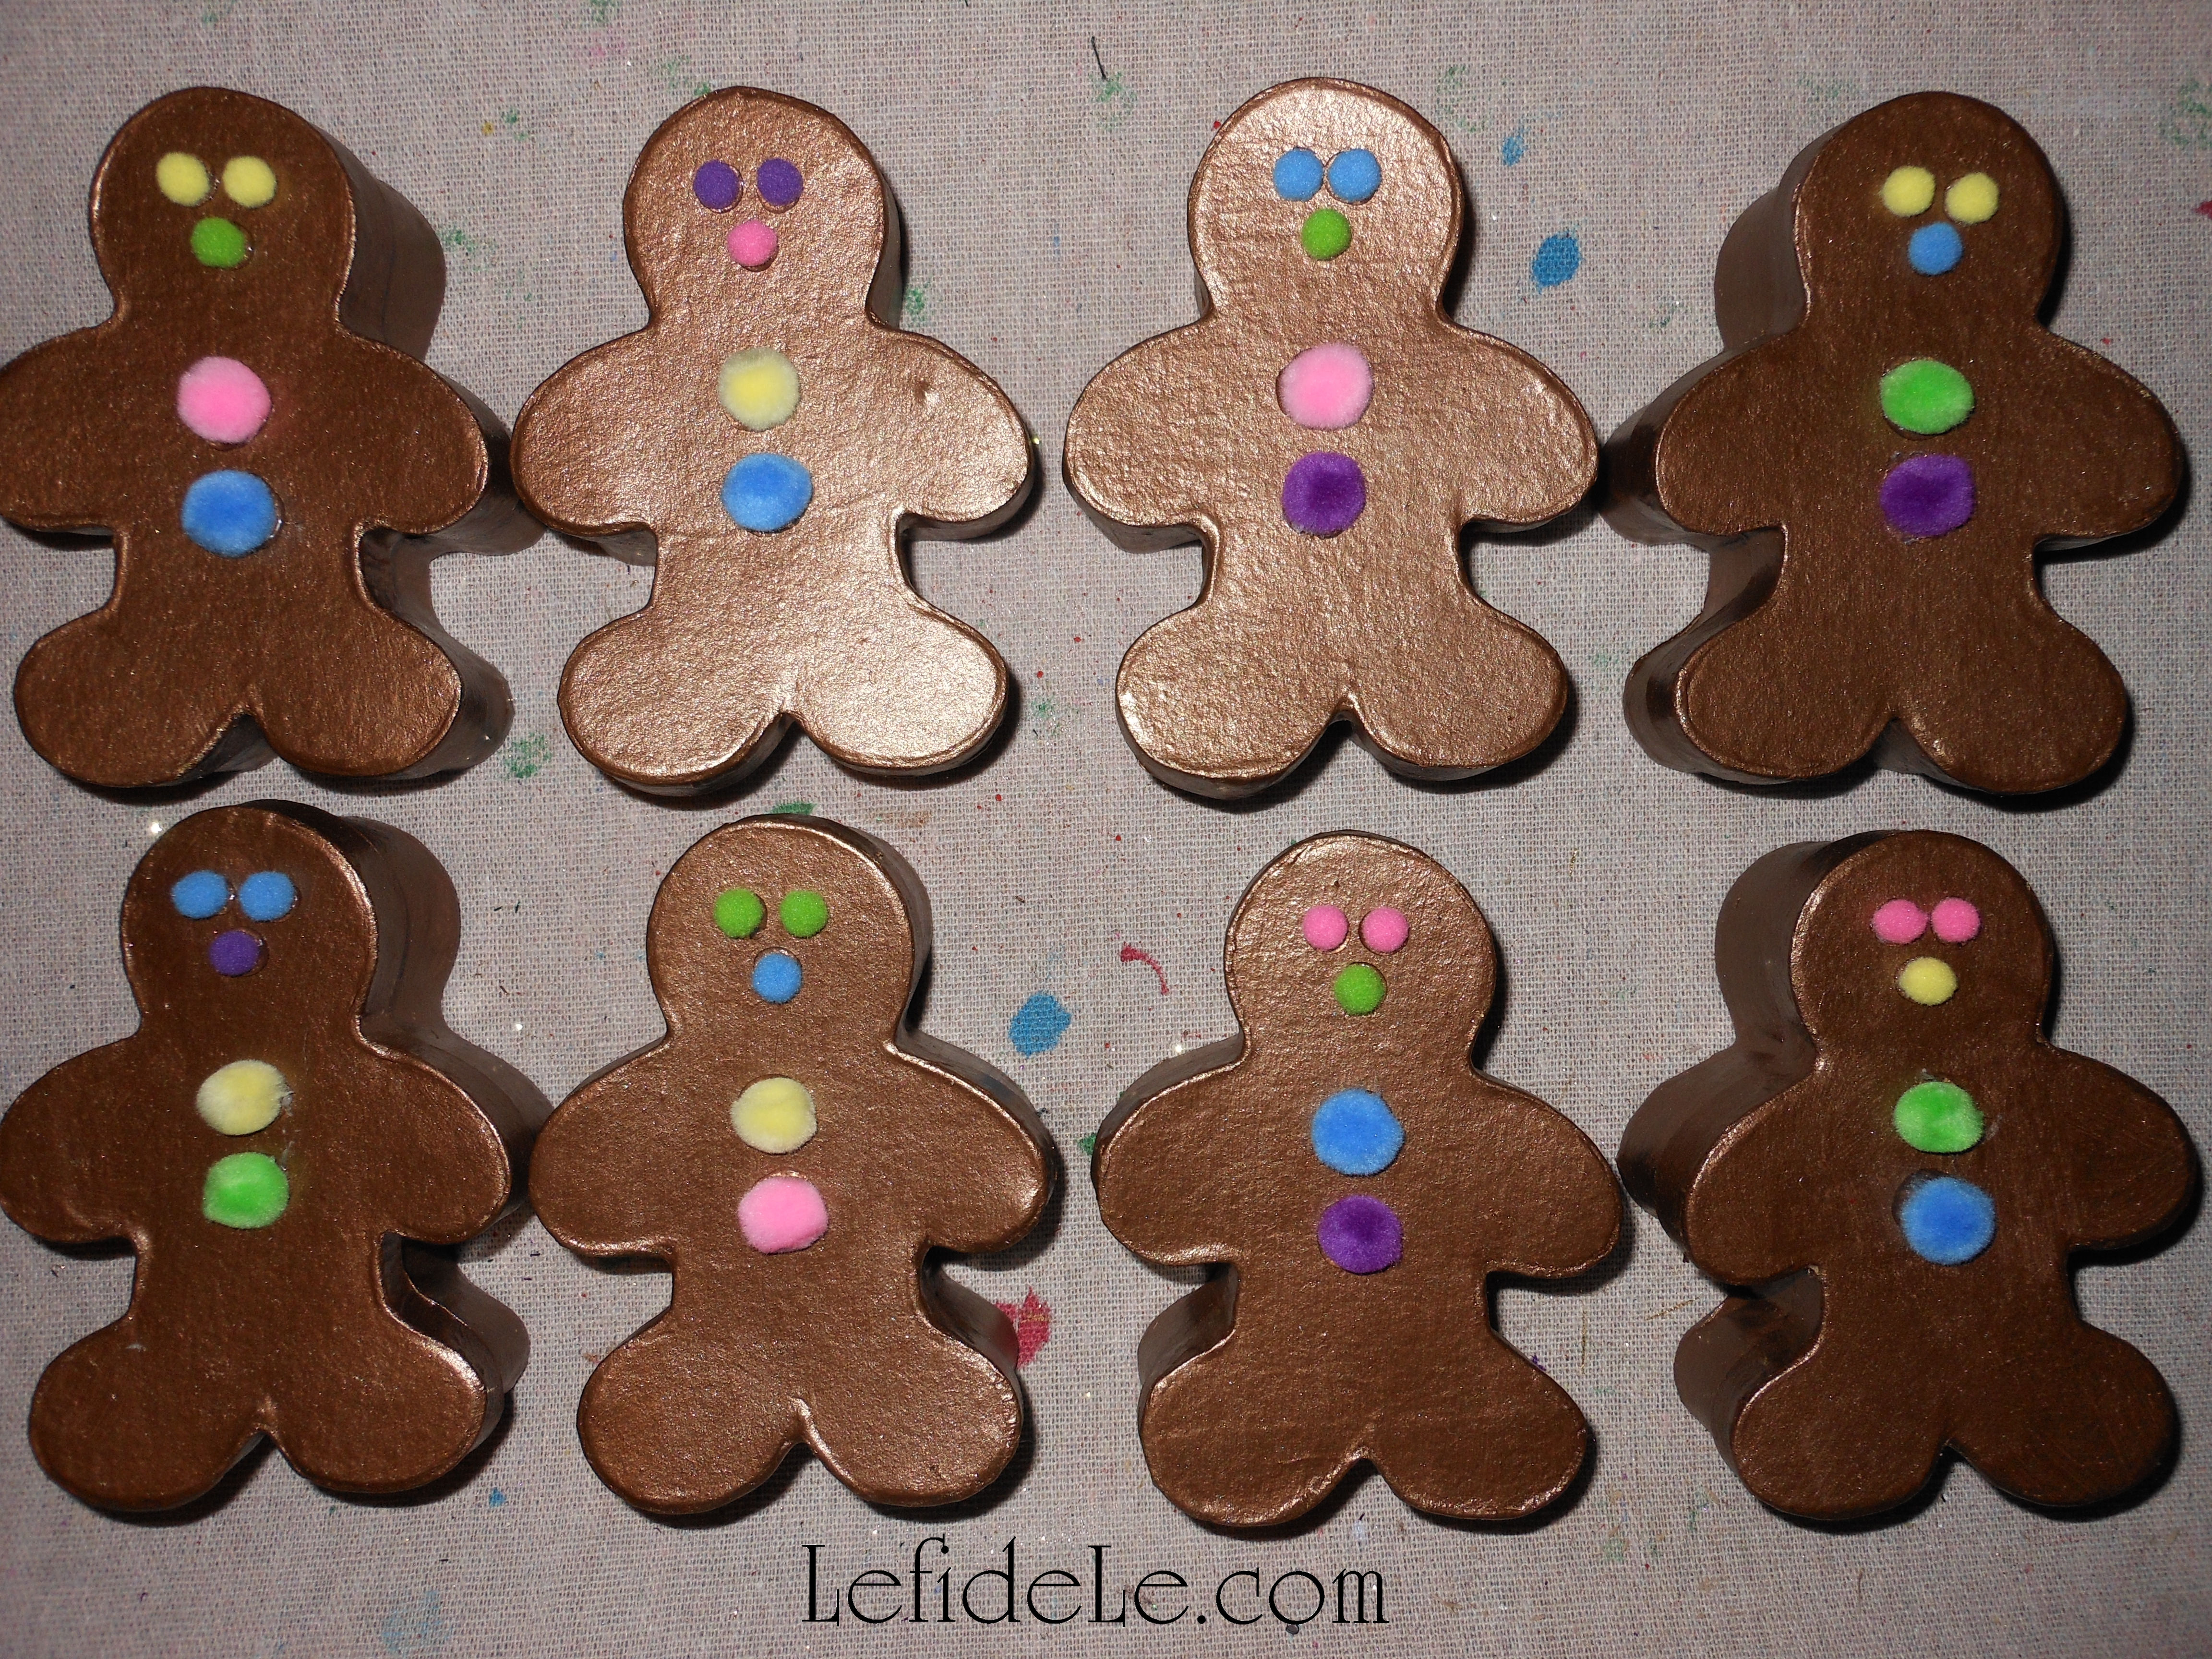
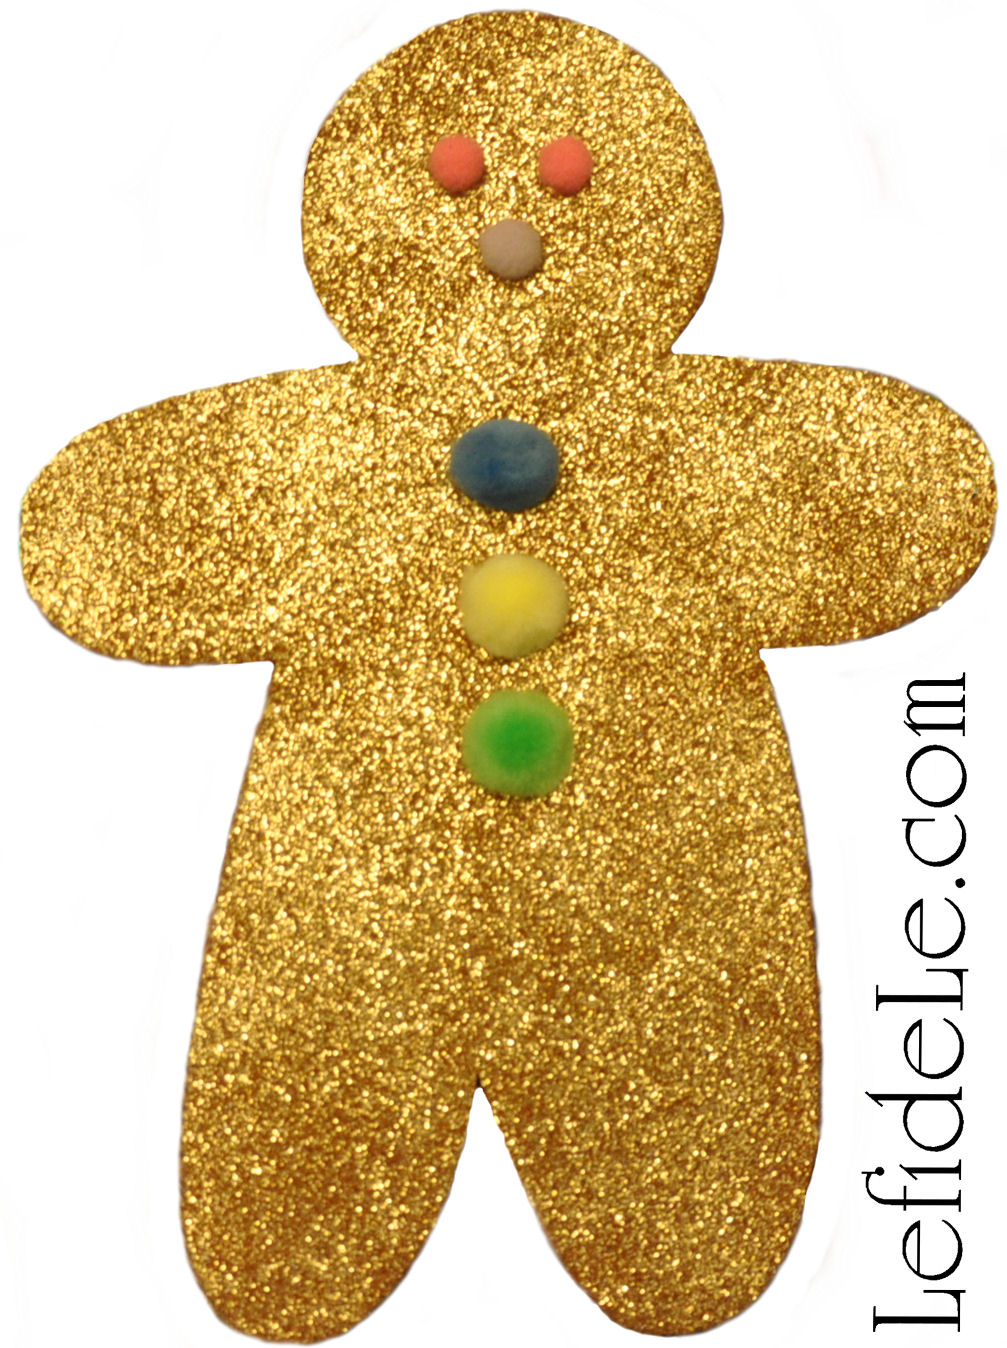
Gingerbread people (treat boxes) populate the village, travelling amongst the wellsprings of jellybean pools (in pink plastic pails).

321fLeigh

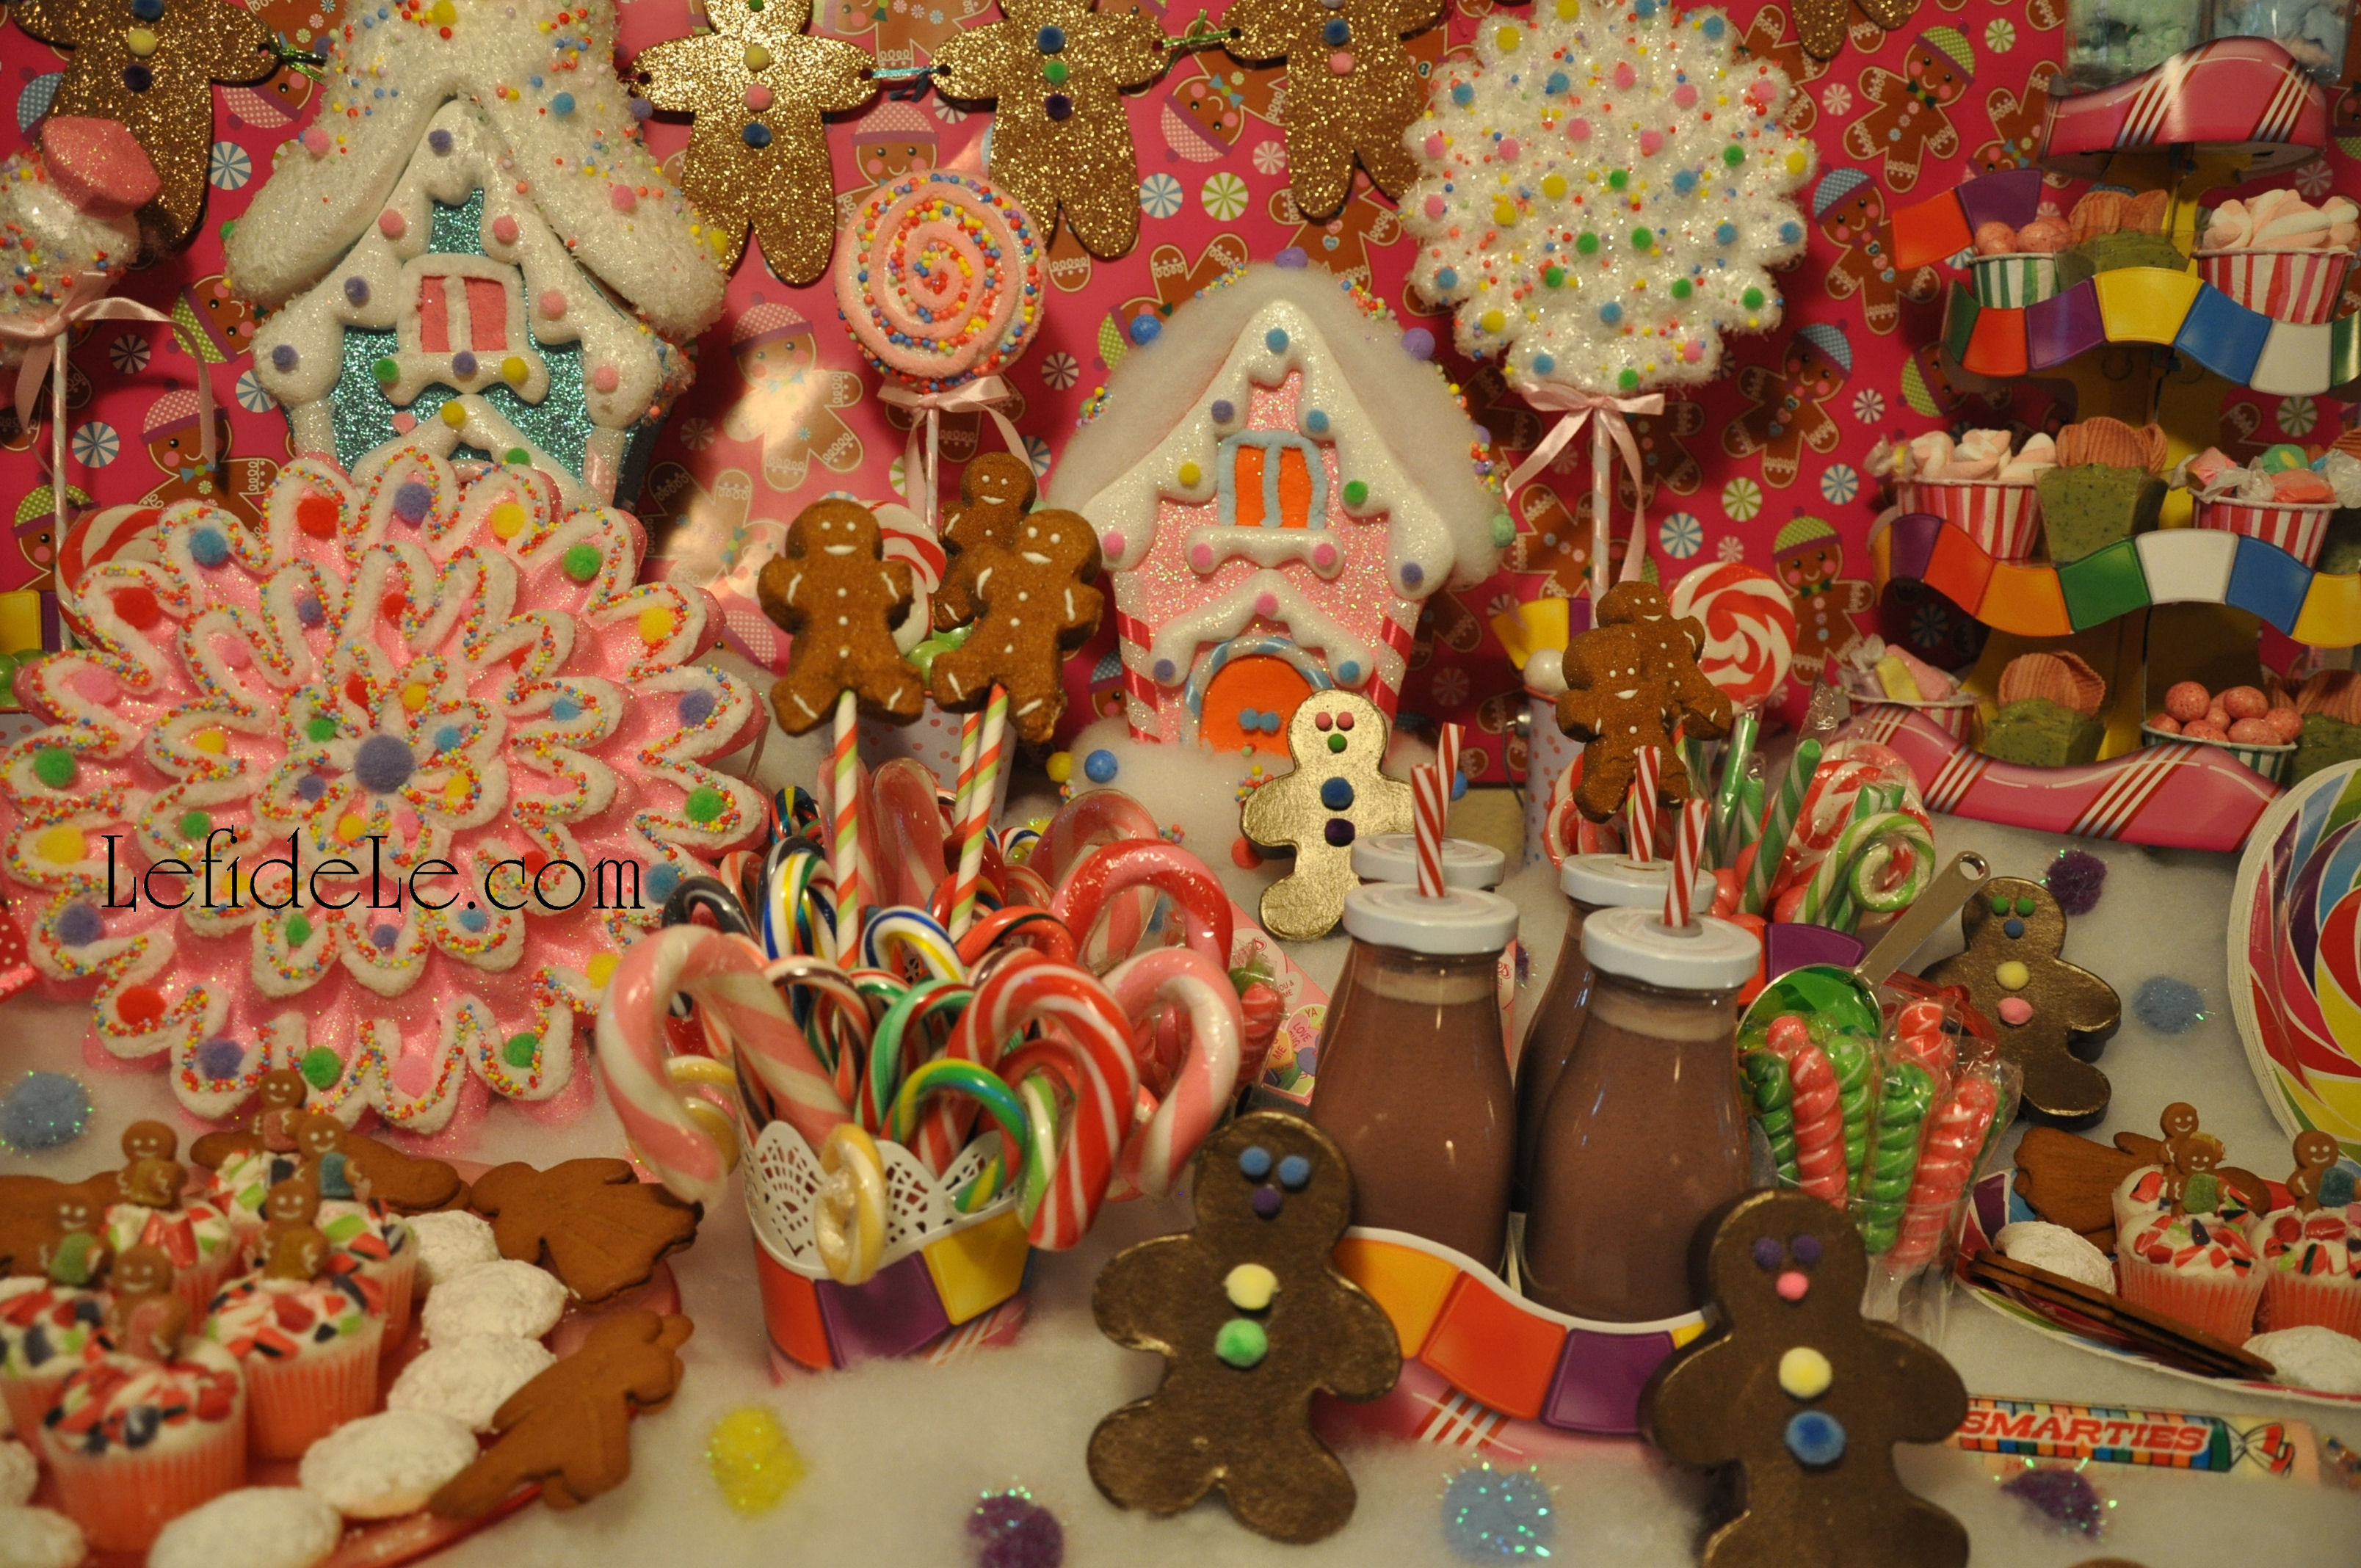
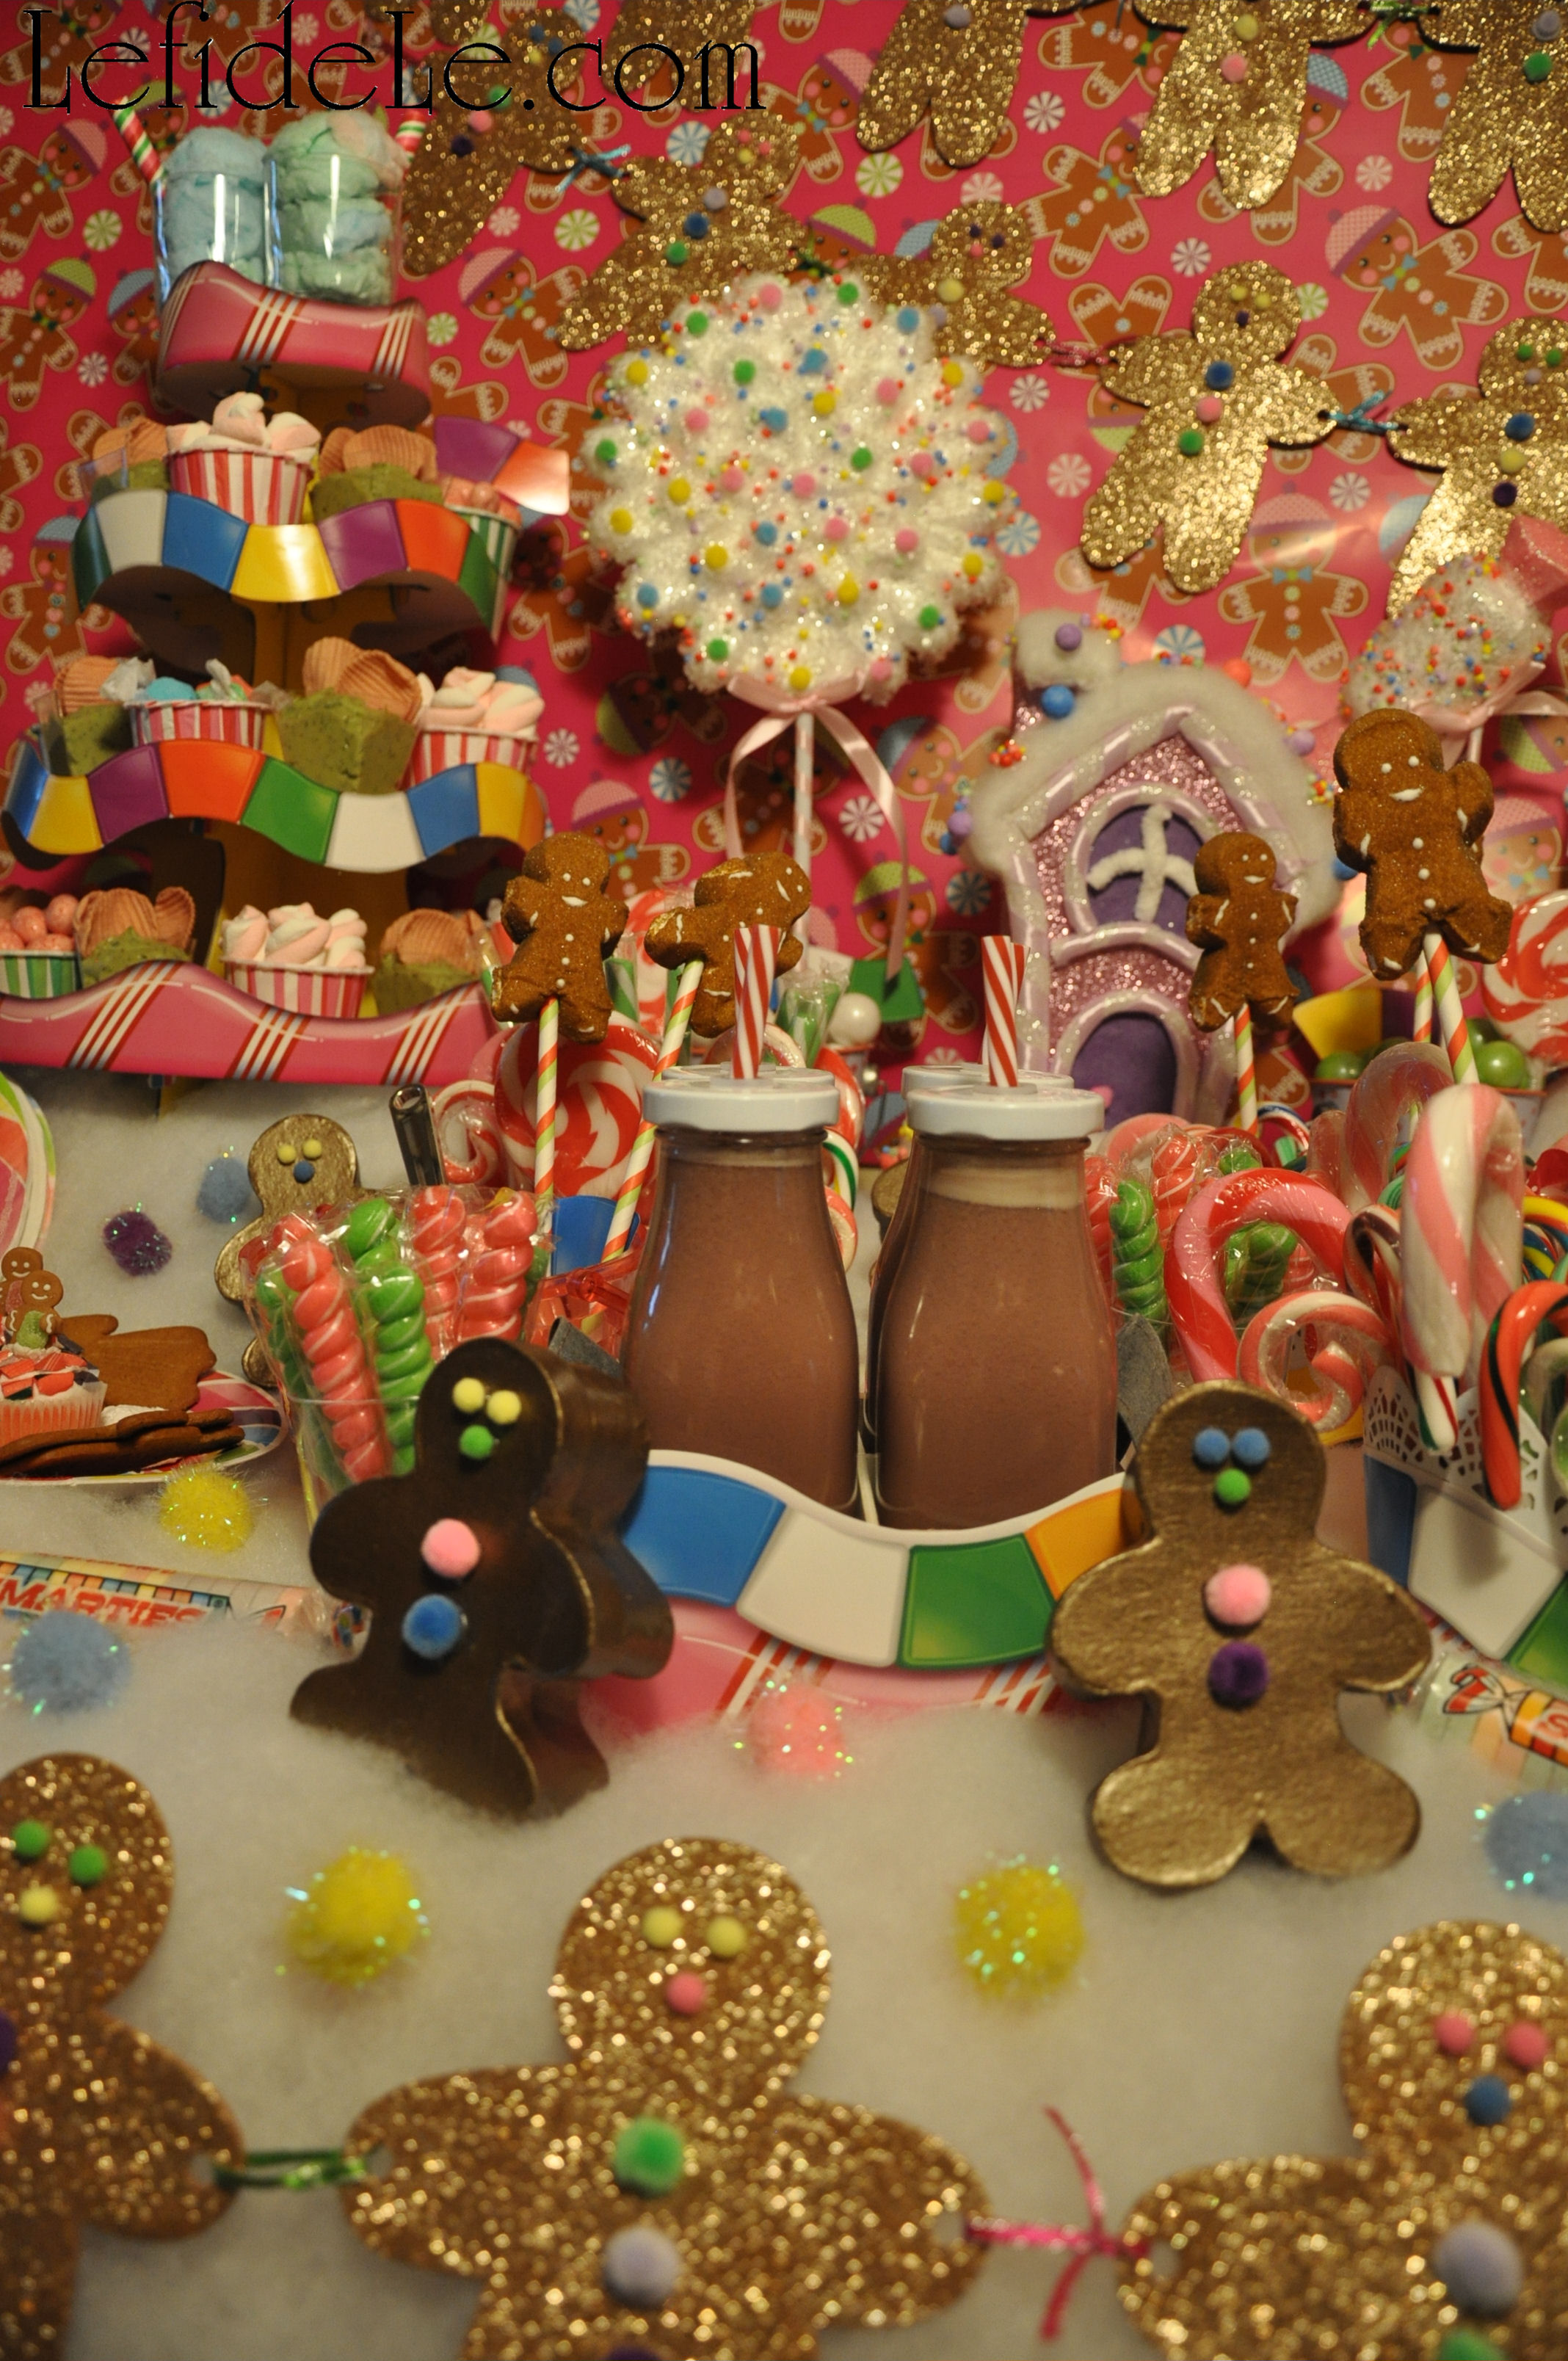
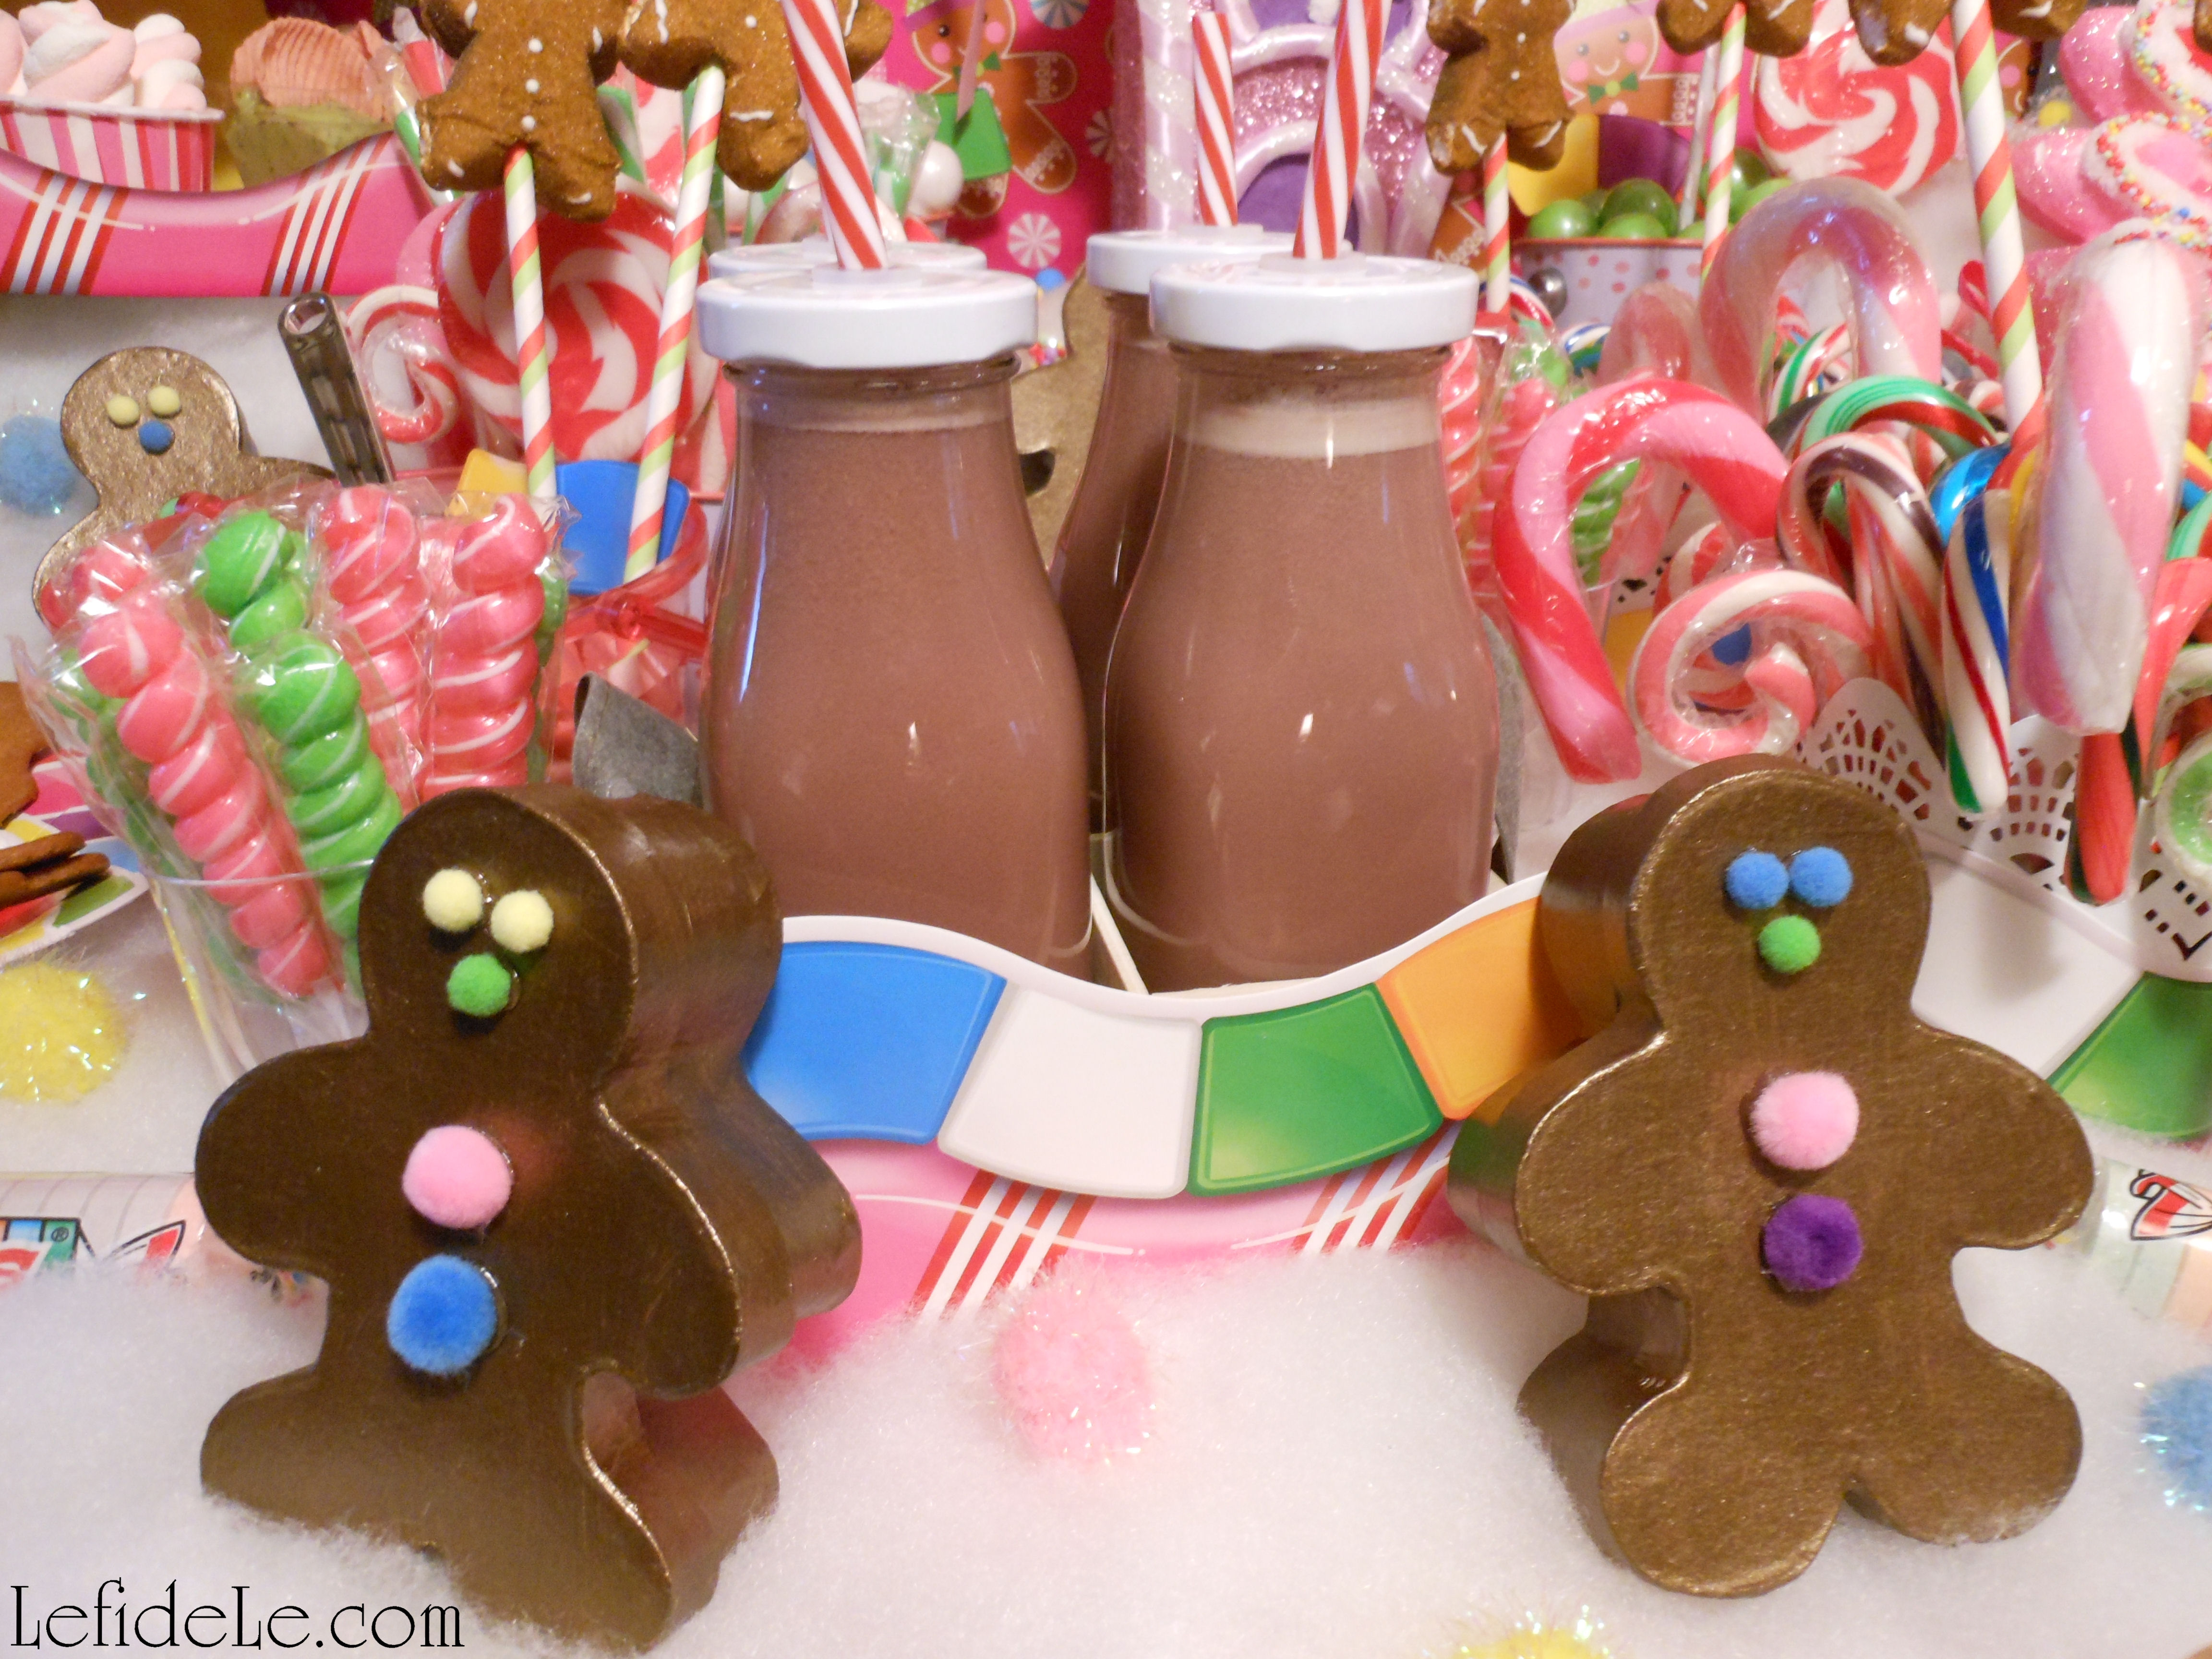
A few “gingies” guard a fenced supply of the village’s juice-milk stores.

361Leigh

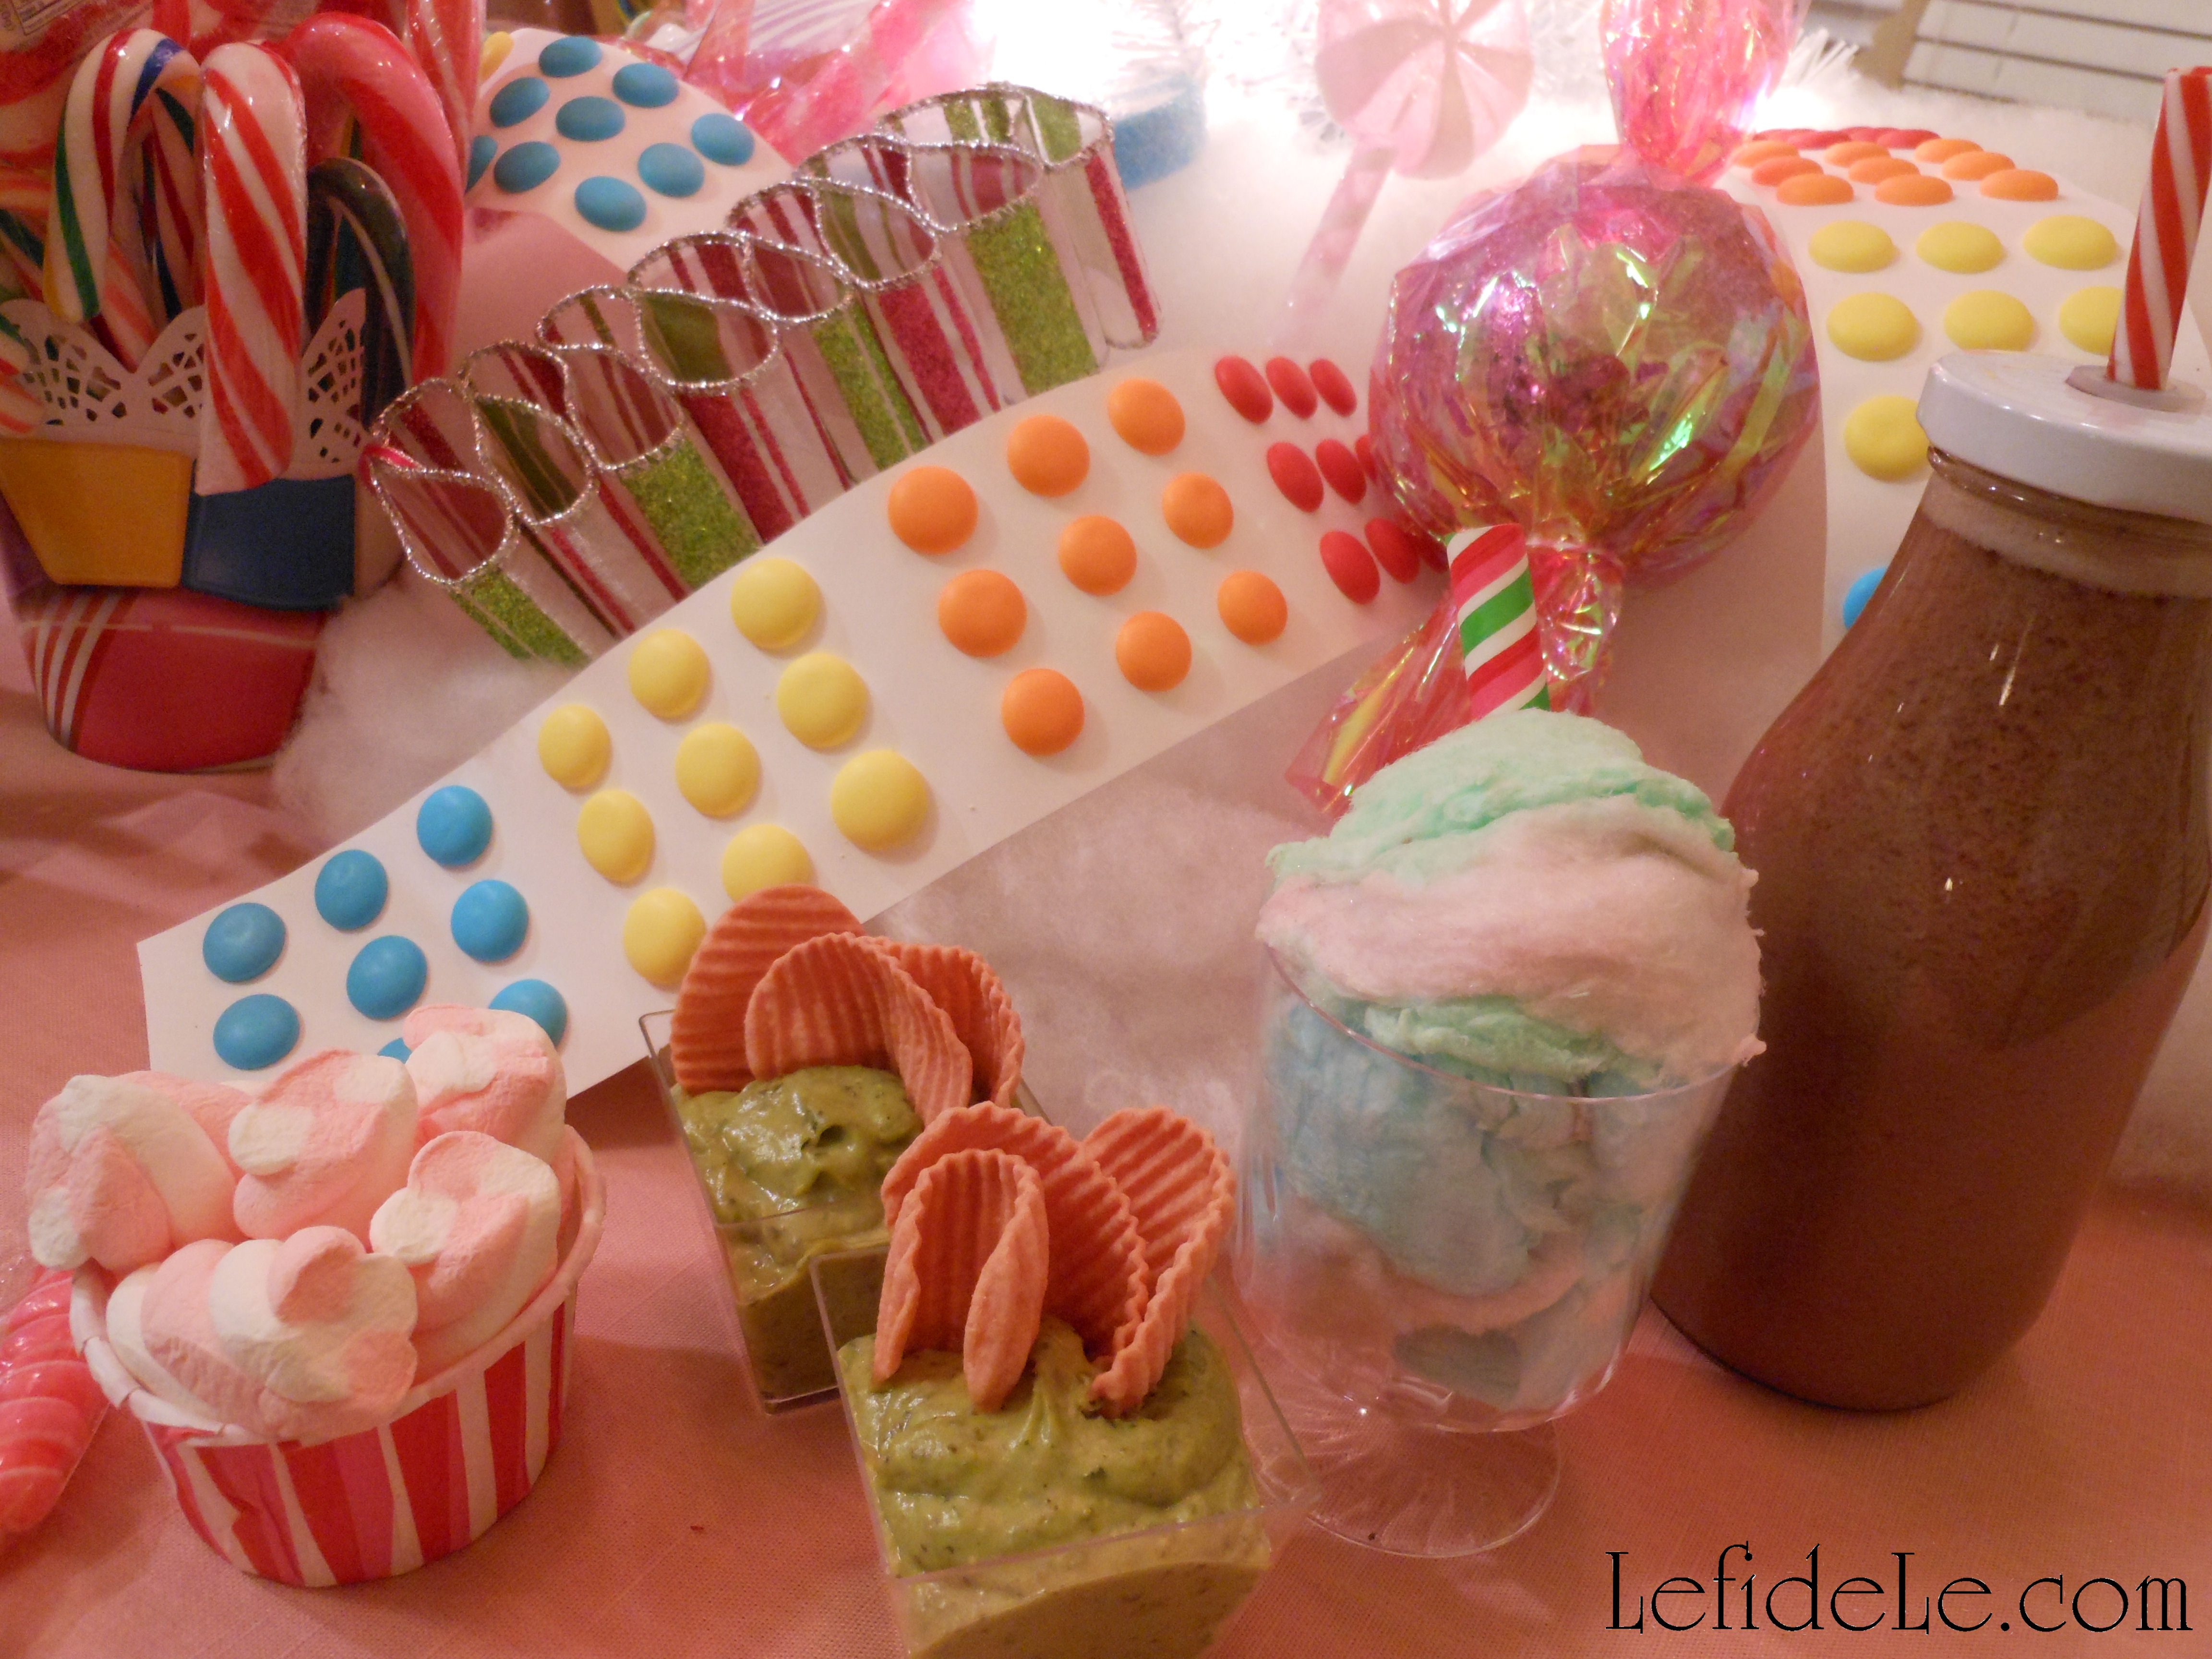
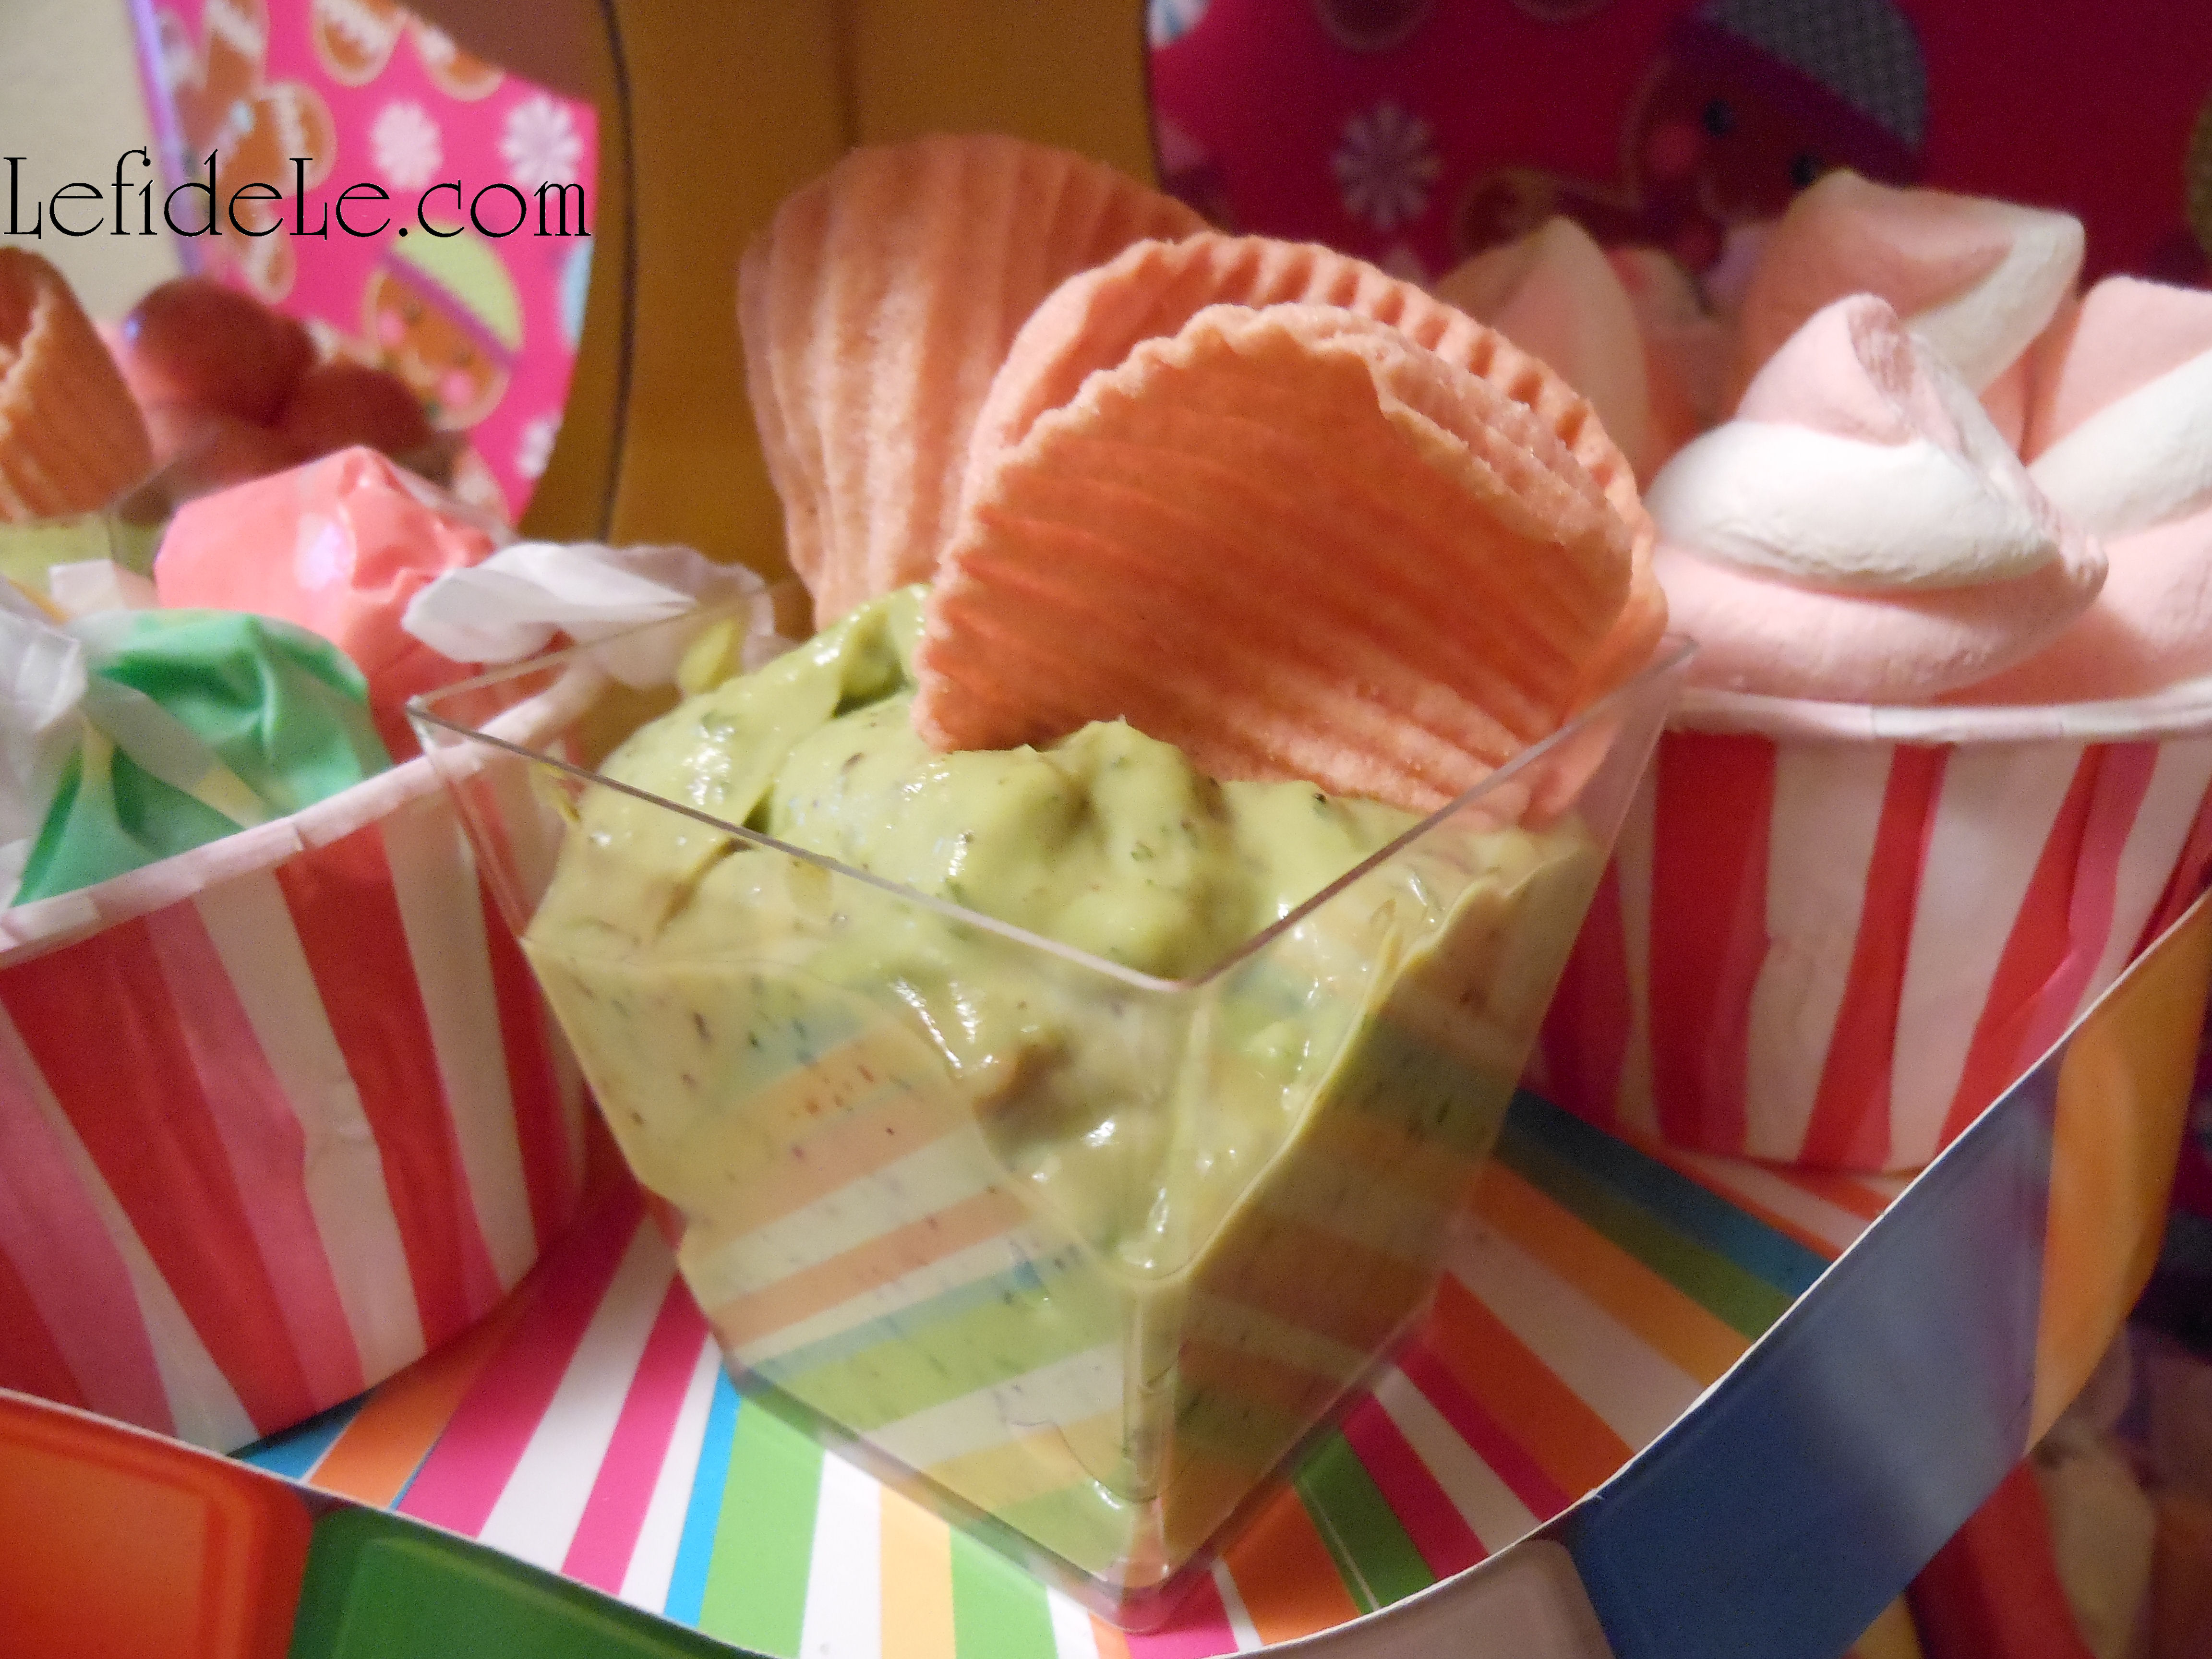
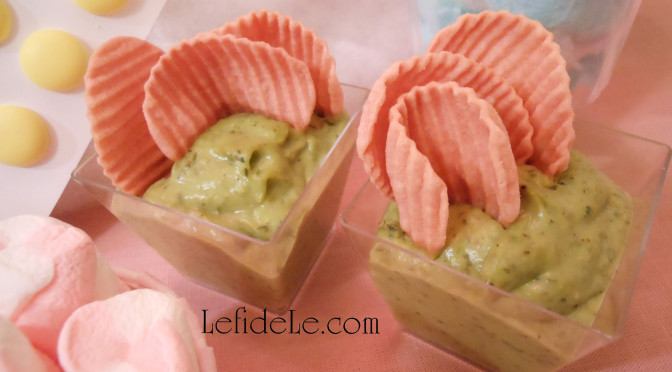
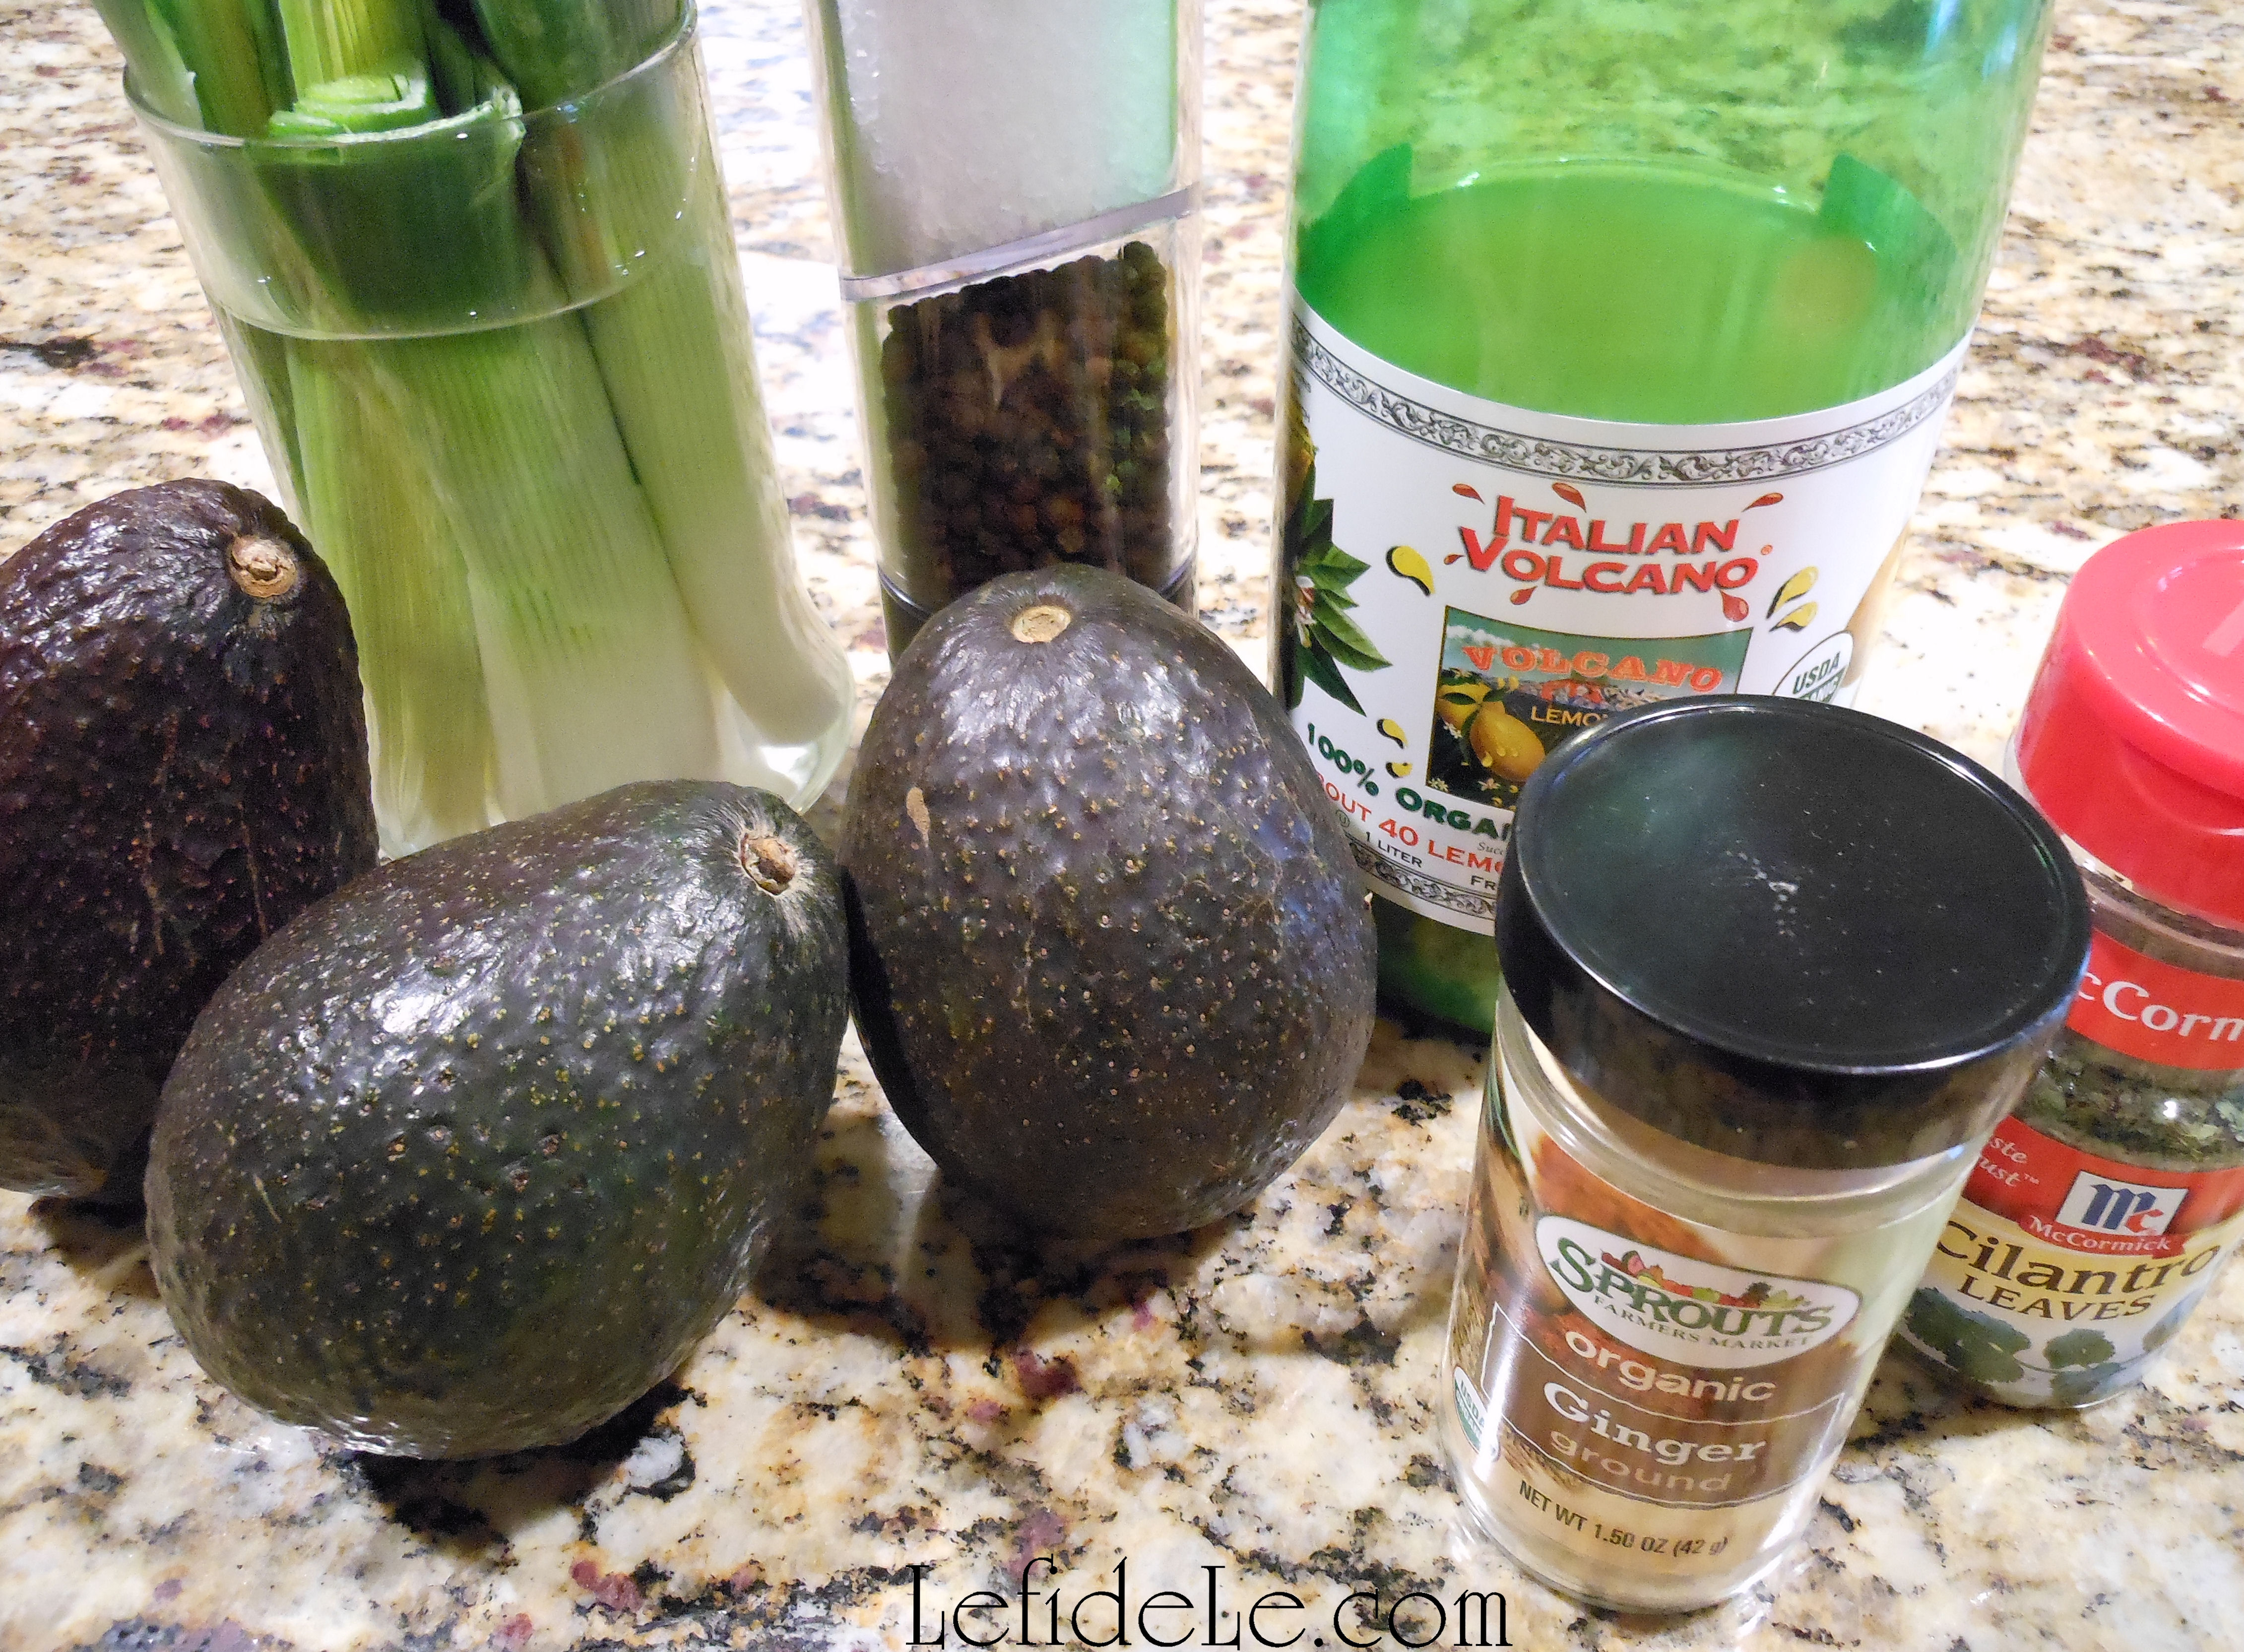
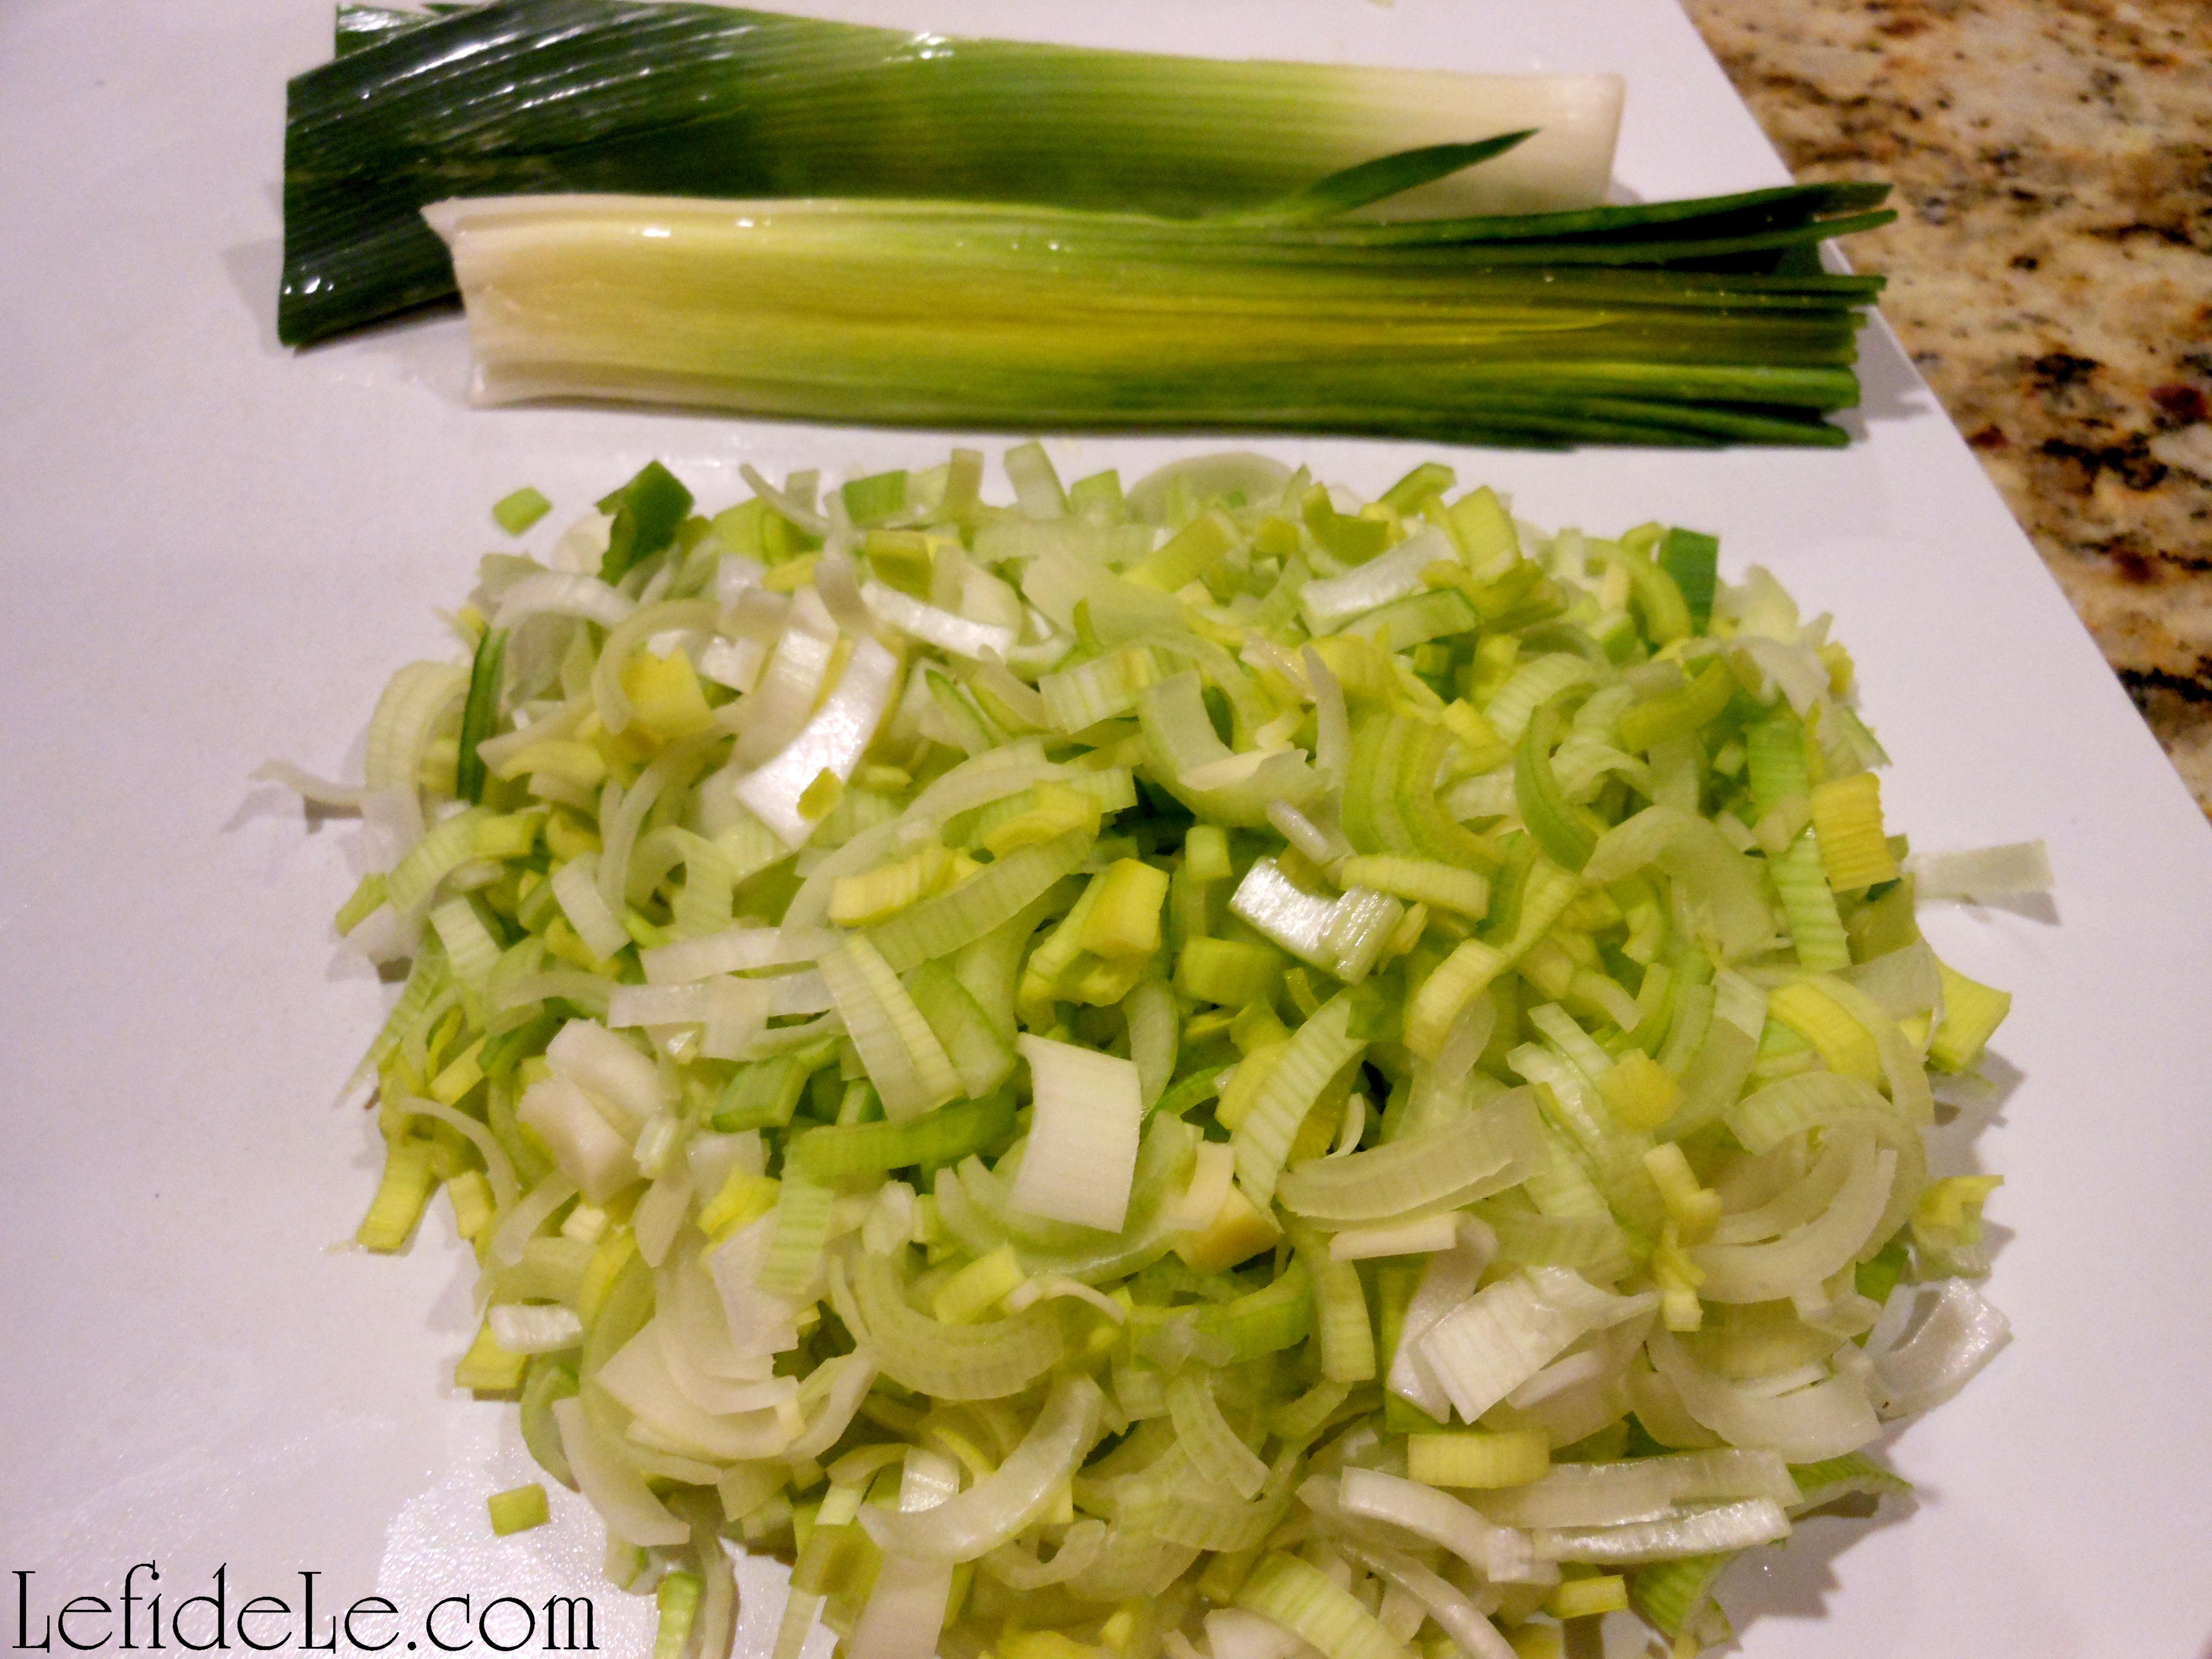
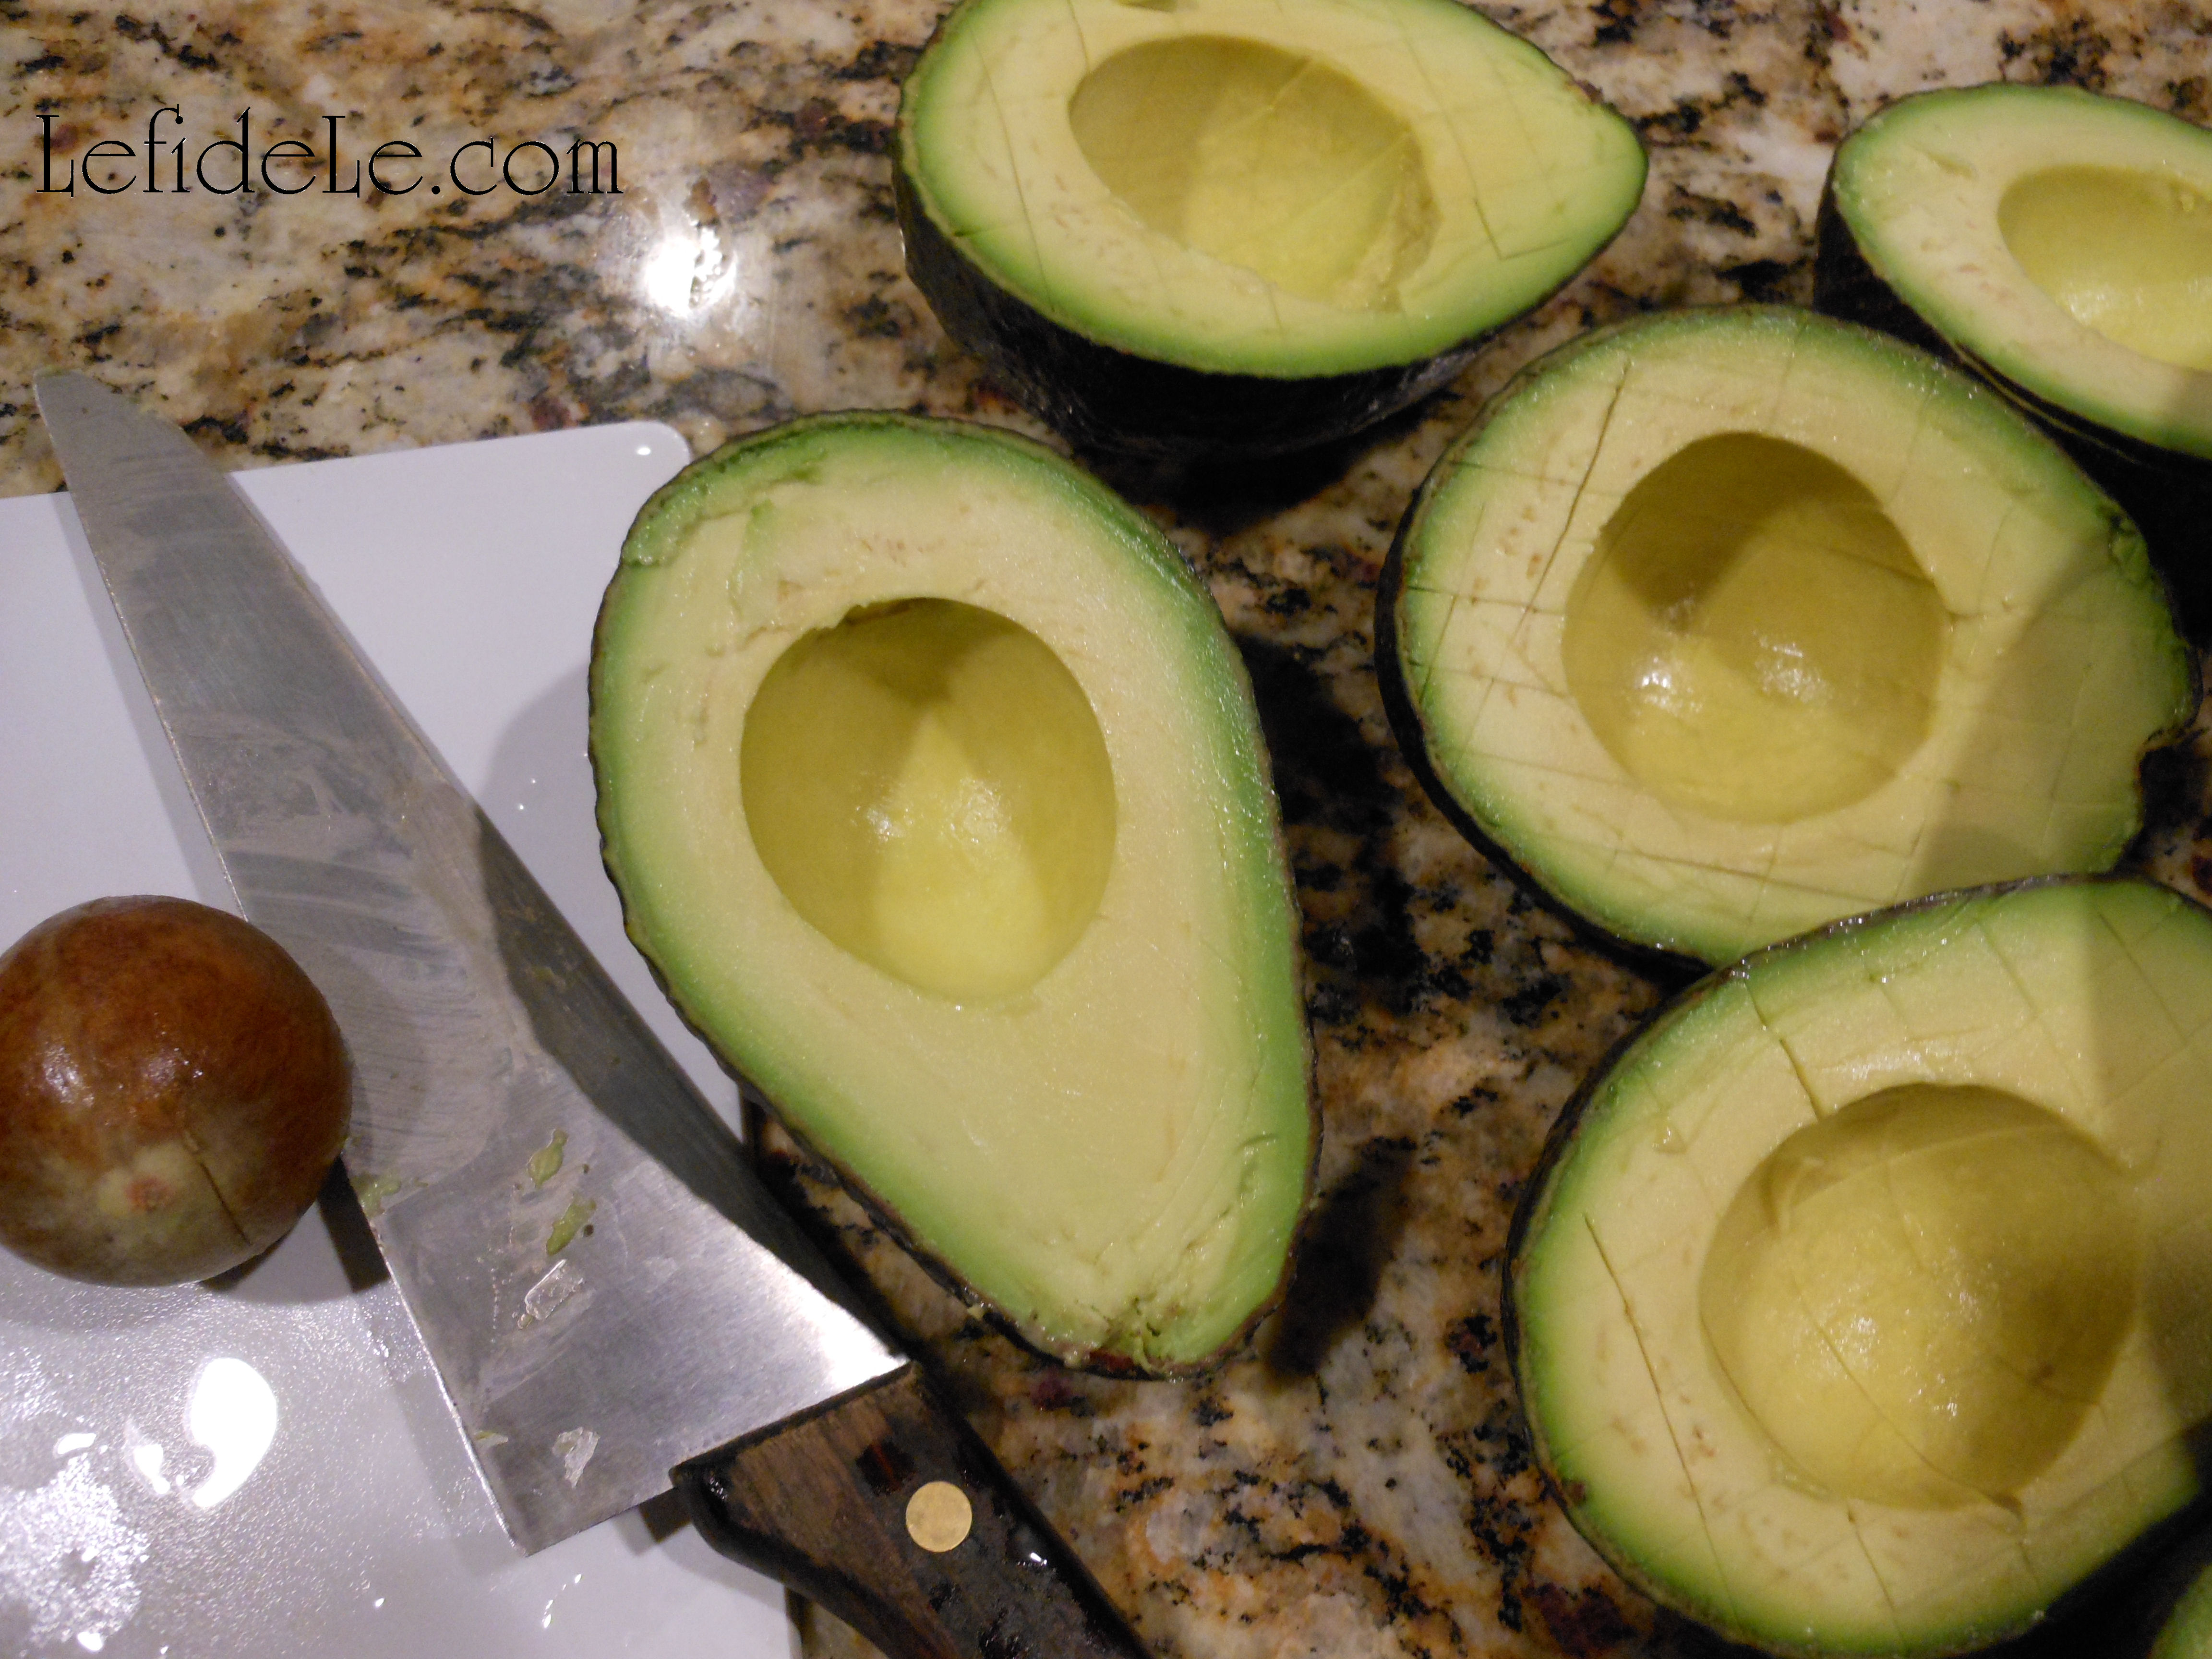
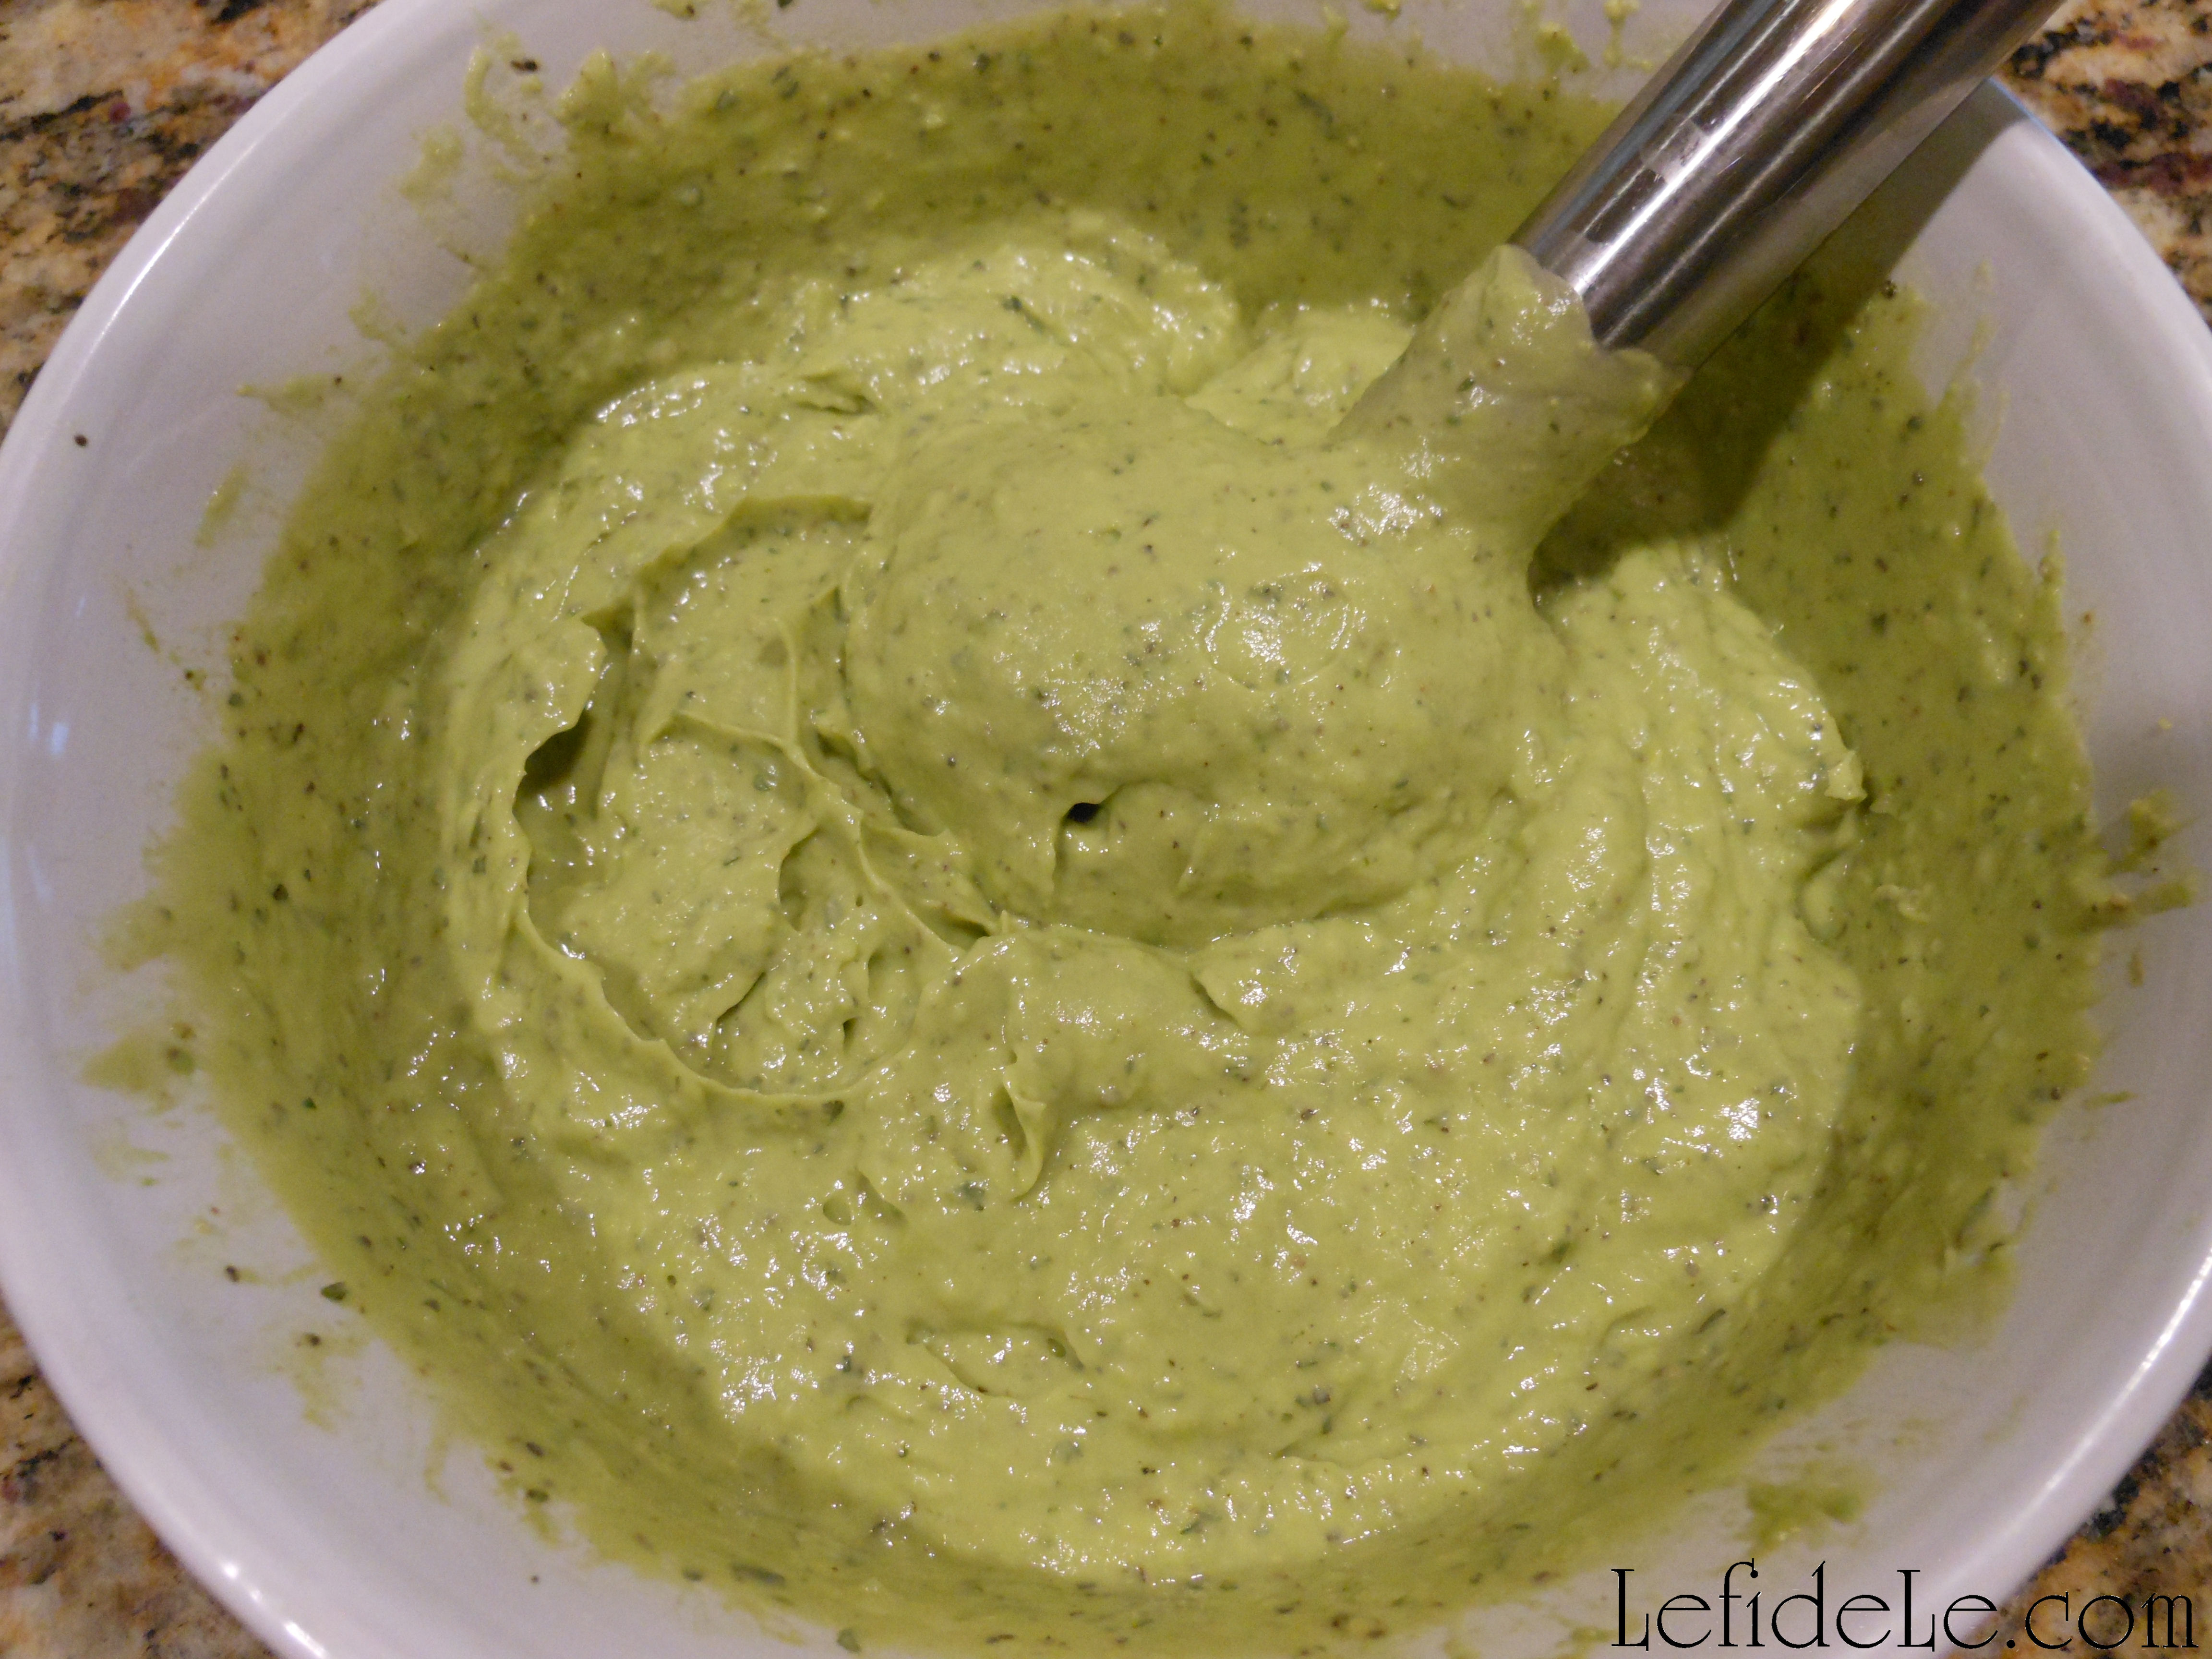
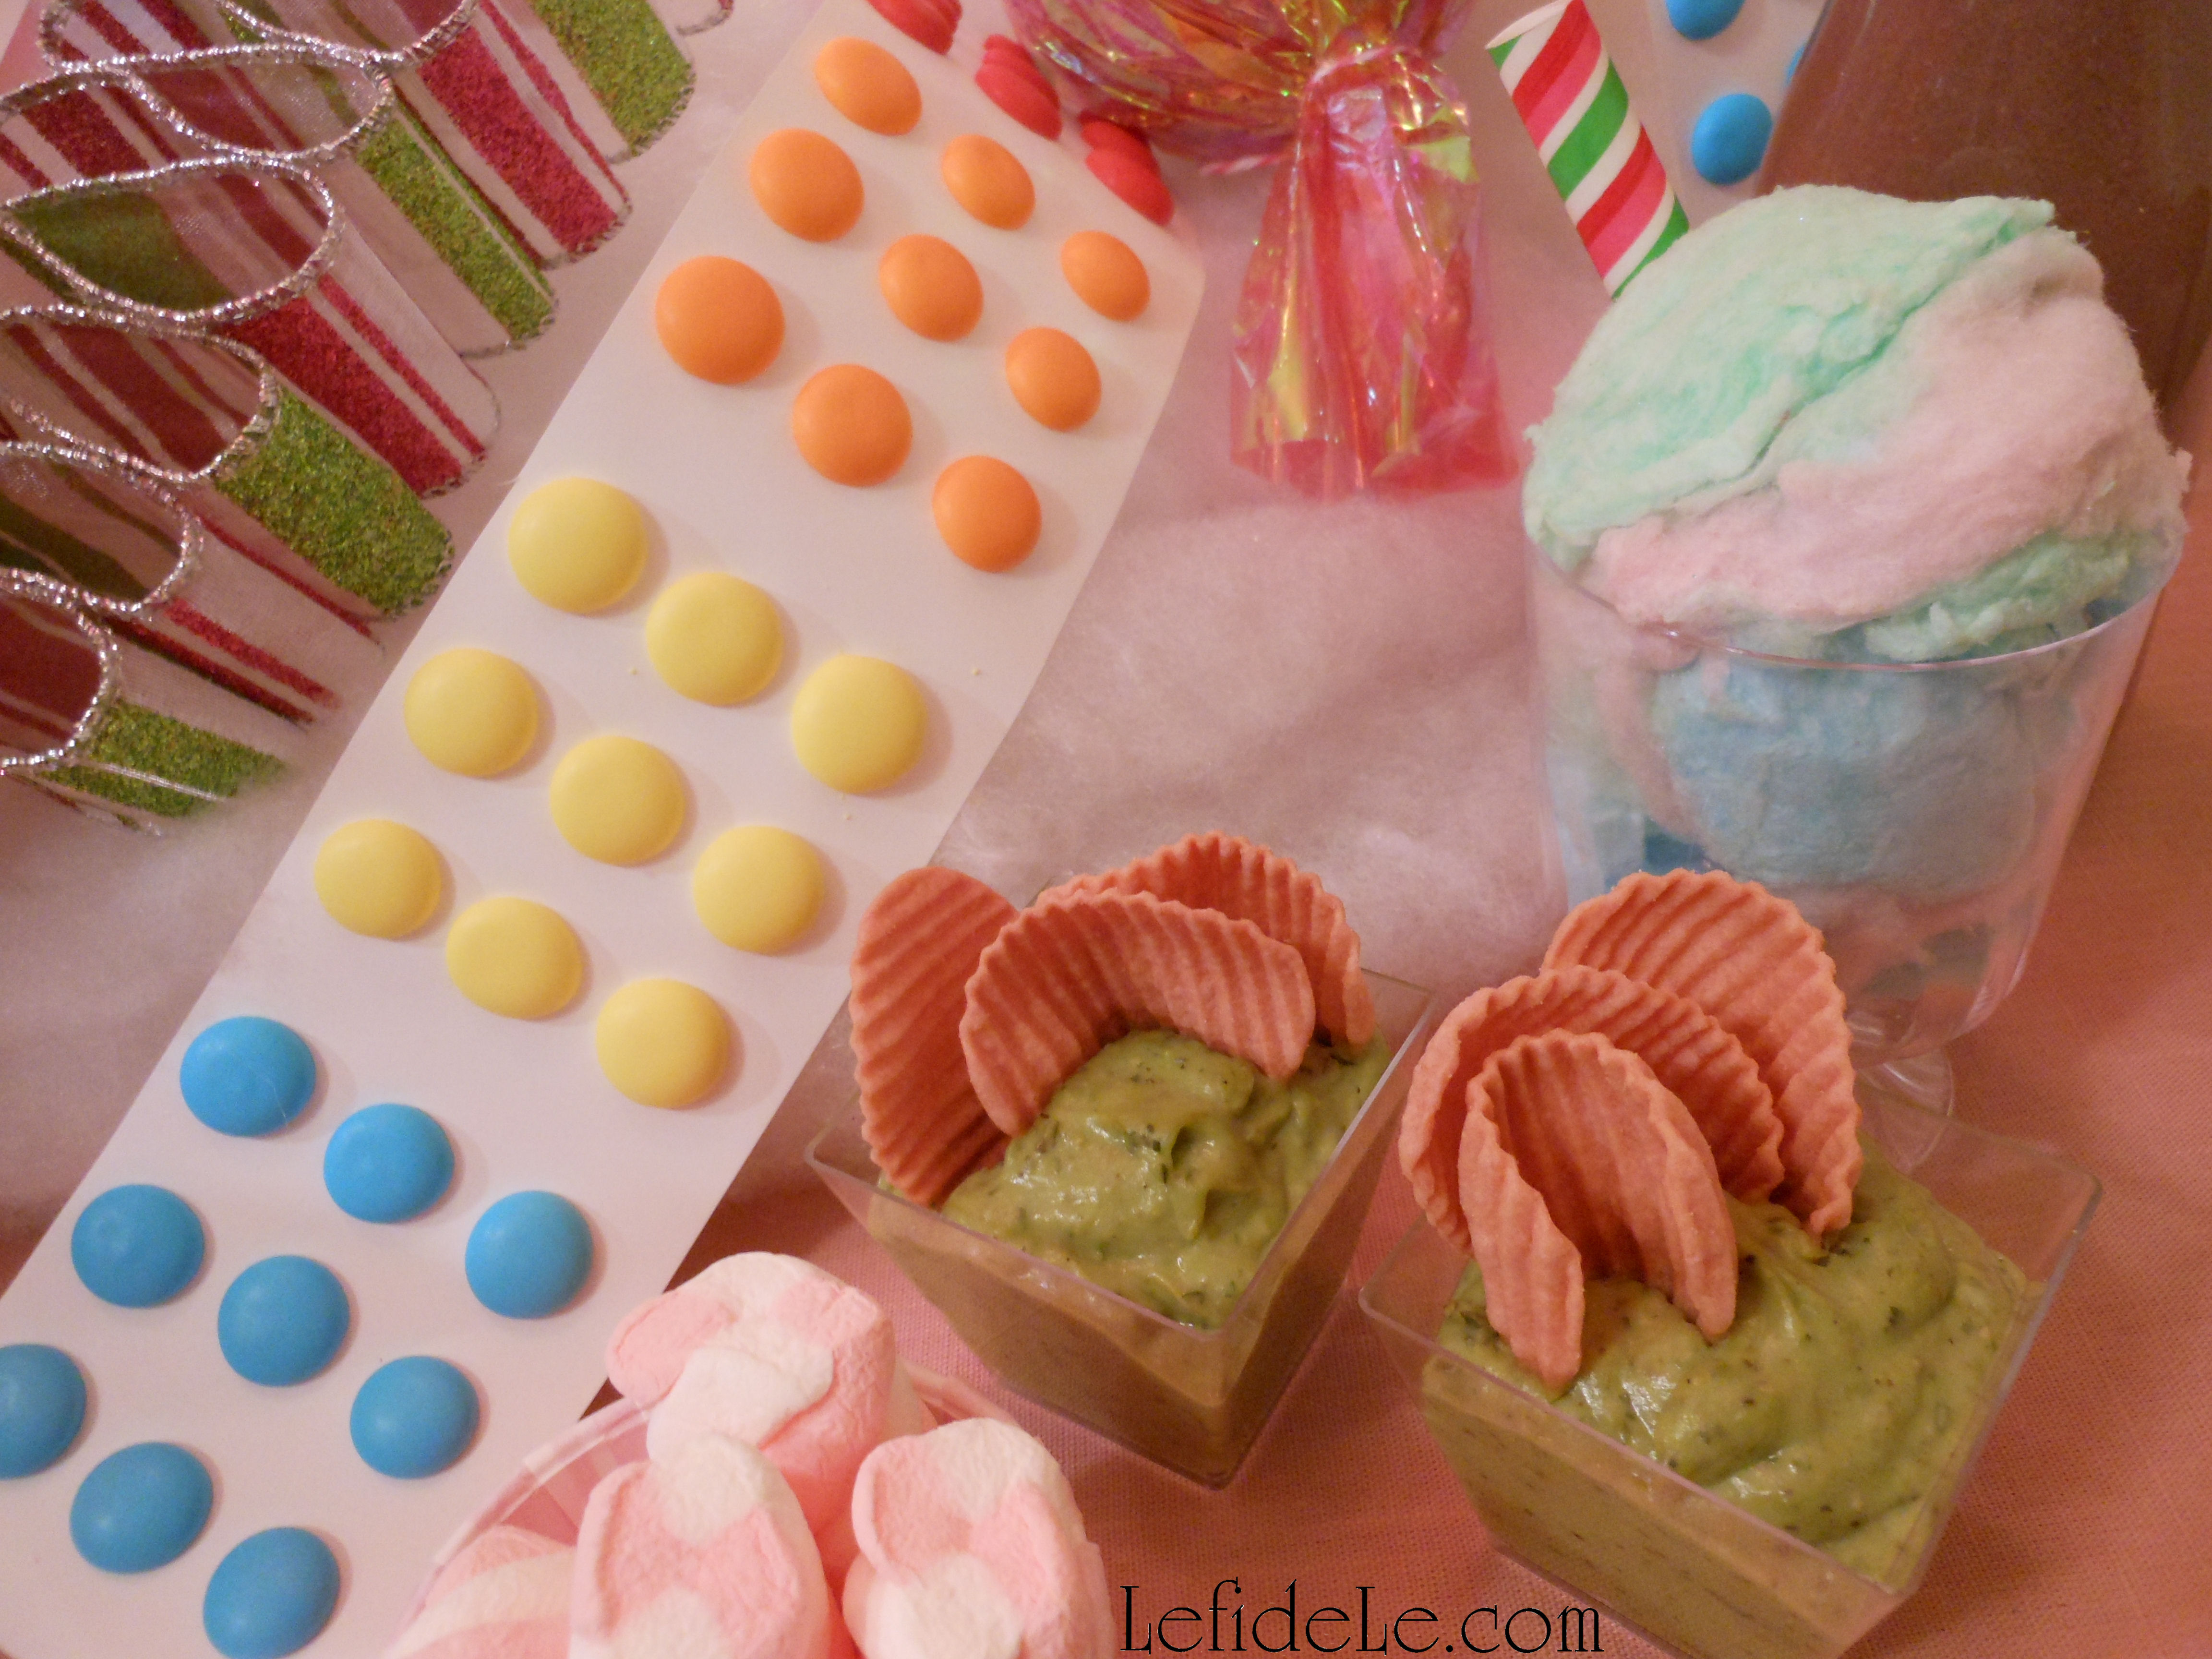
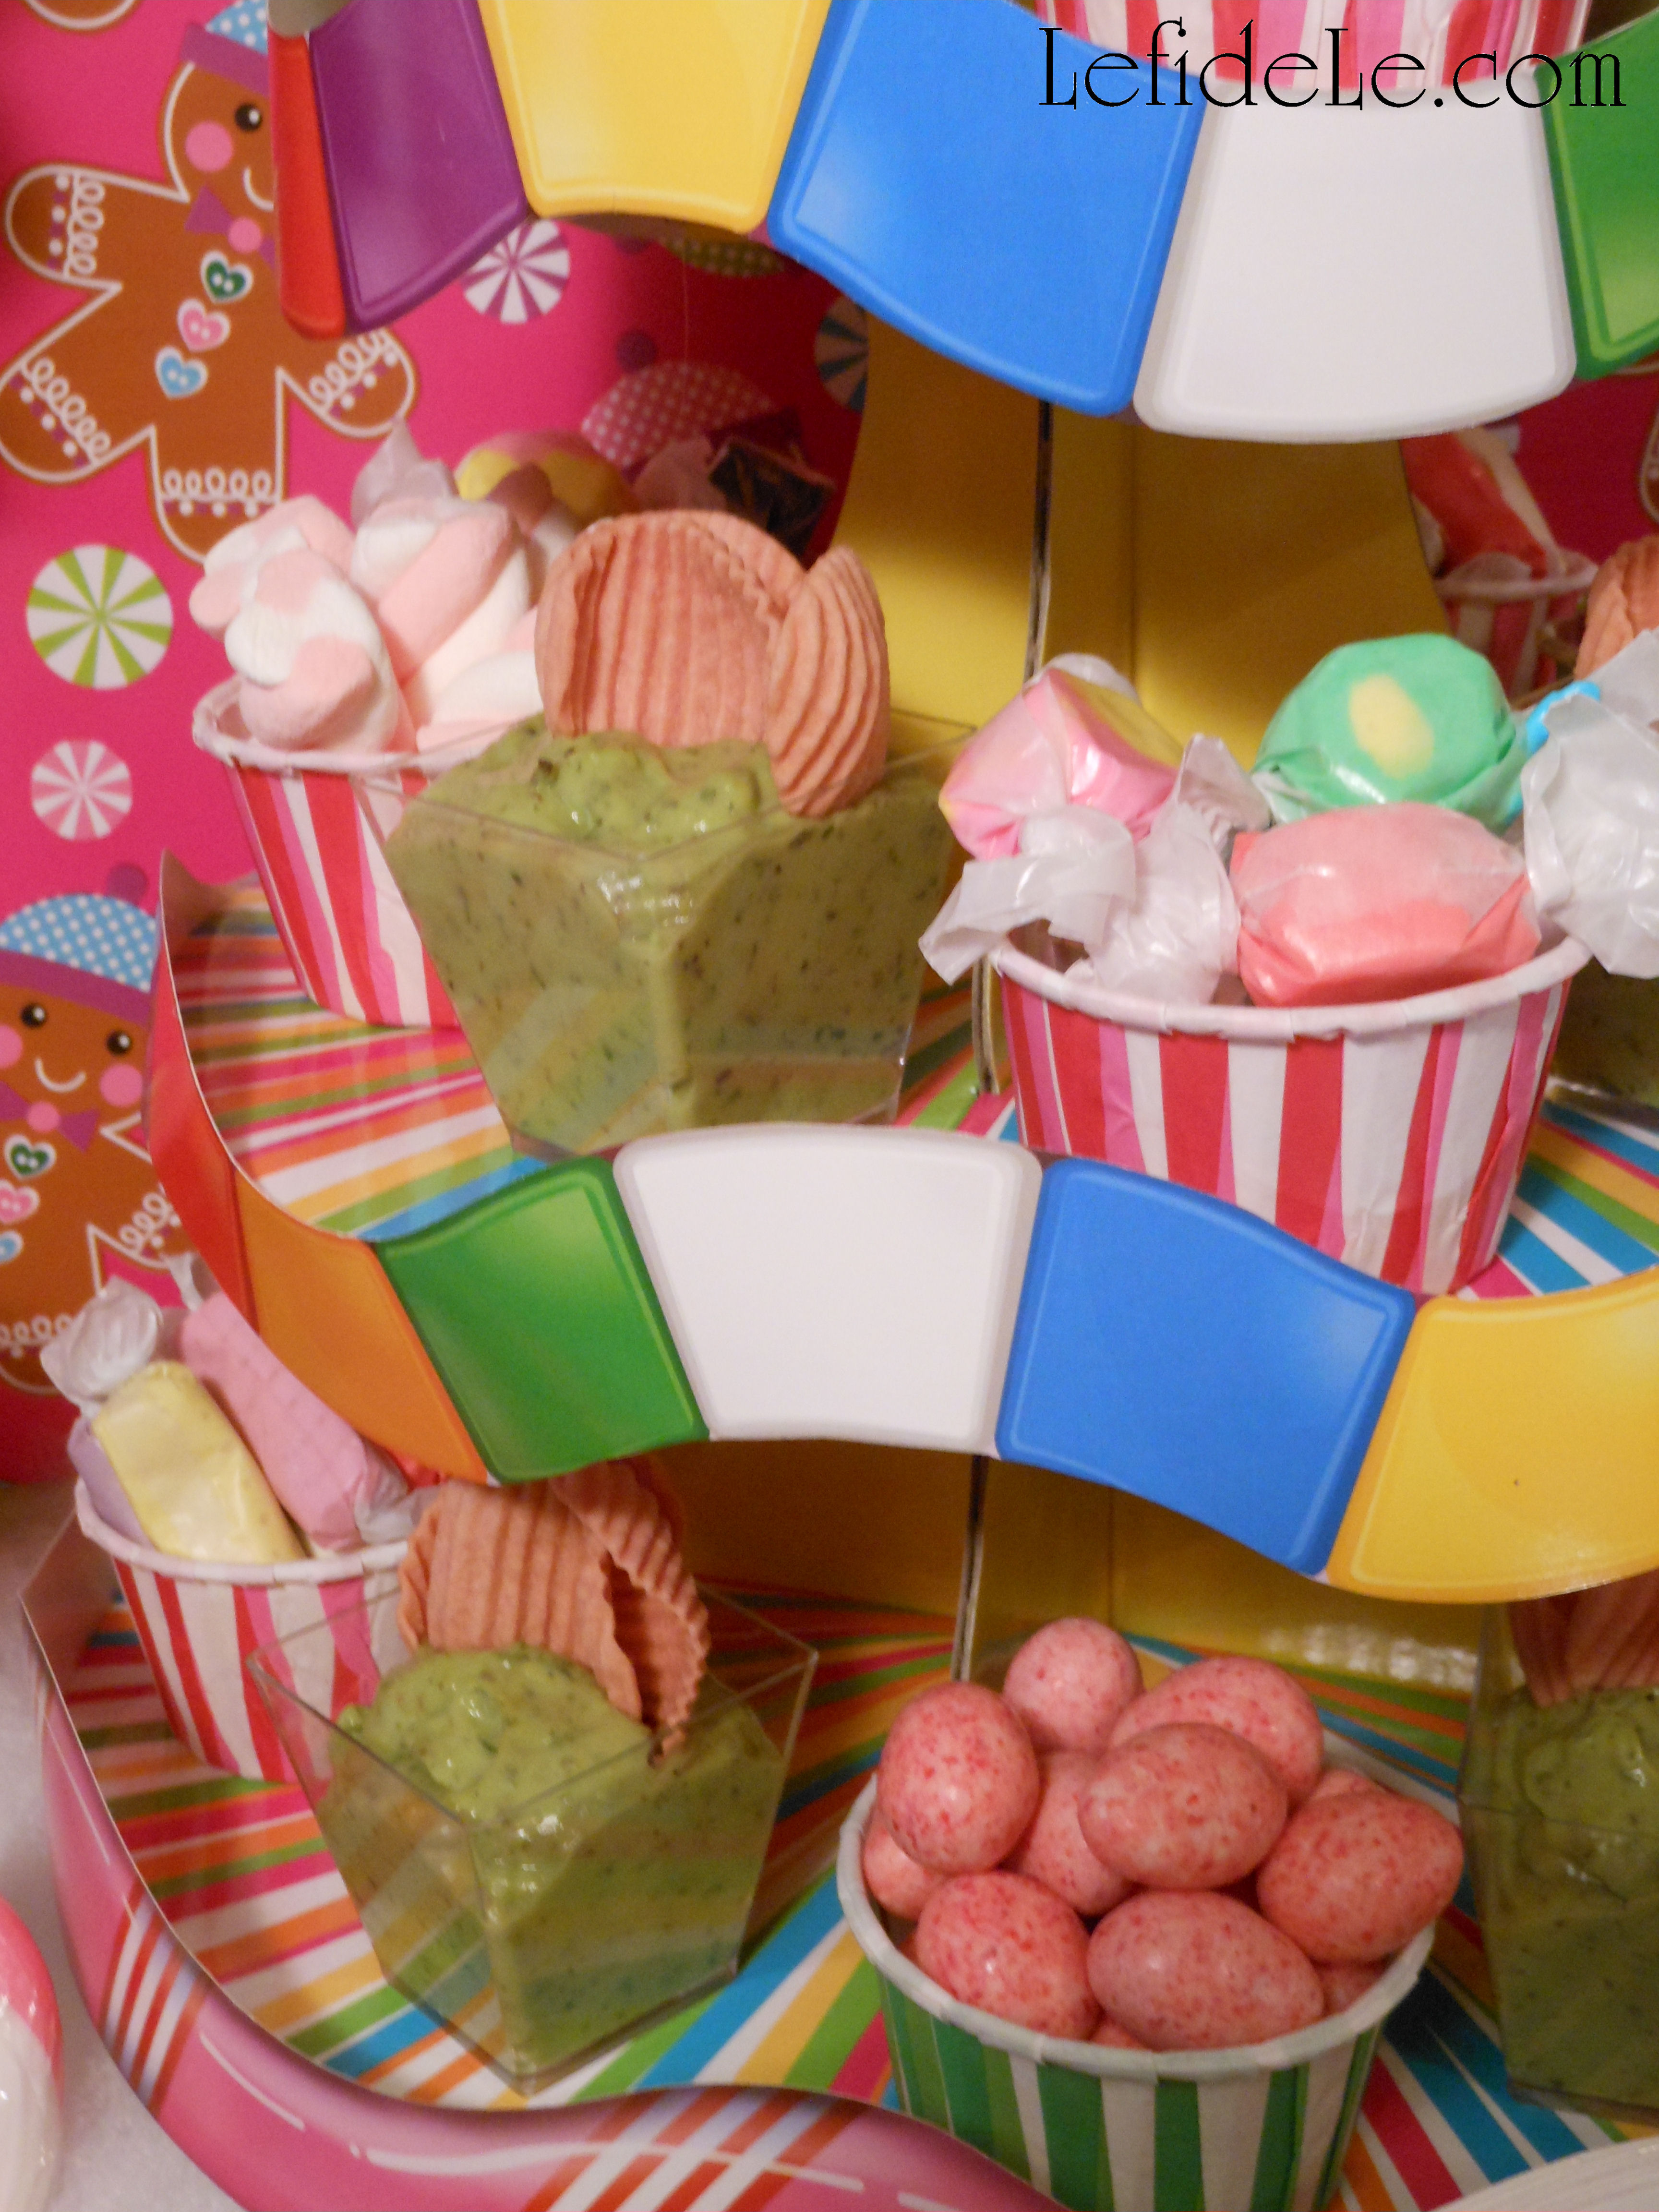
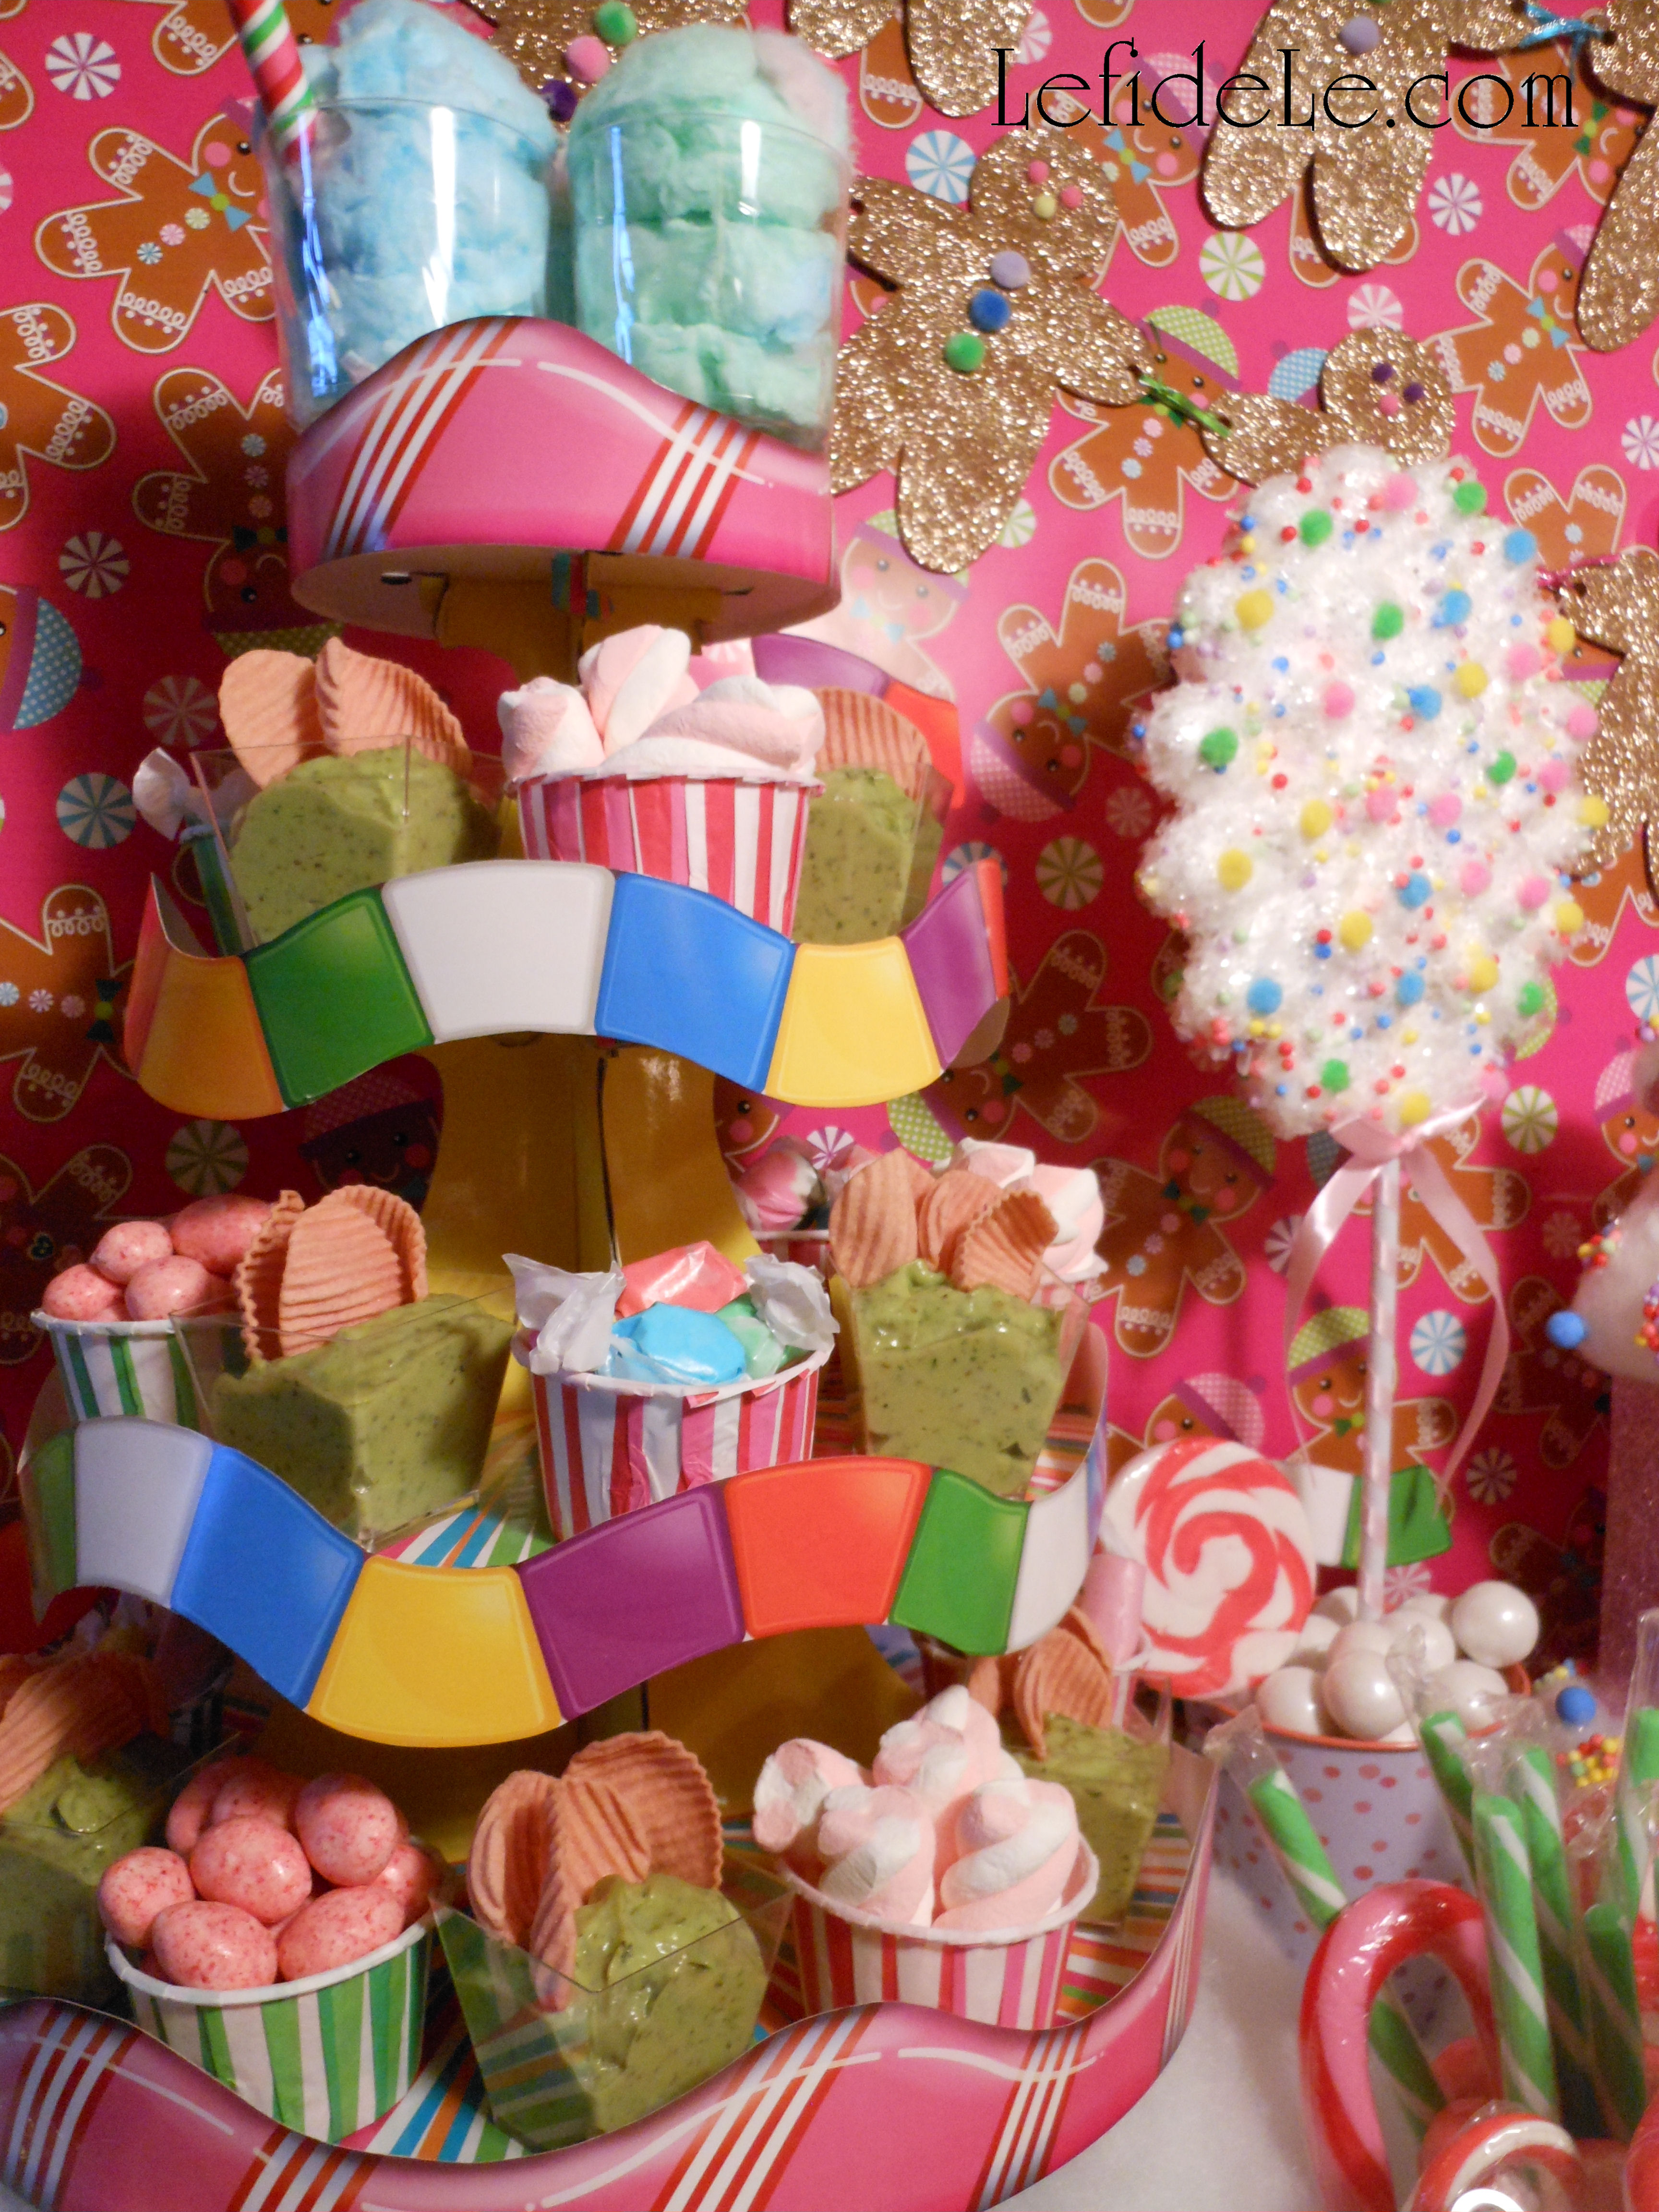
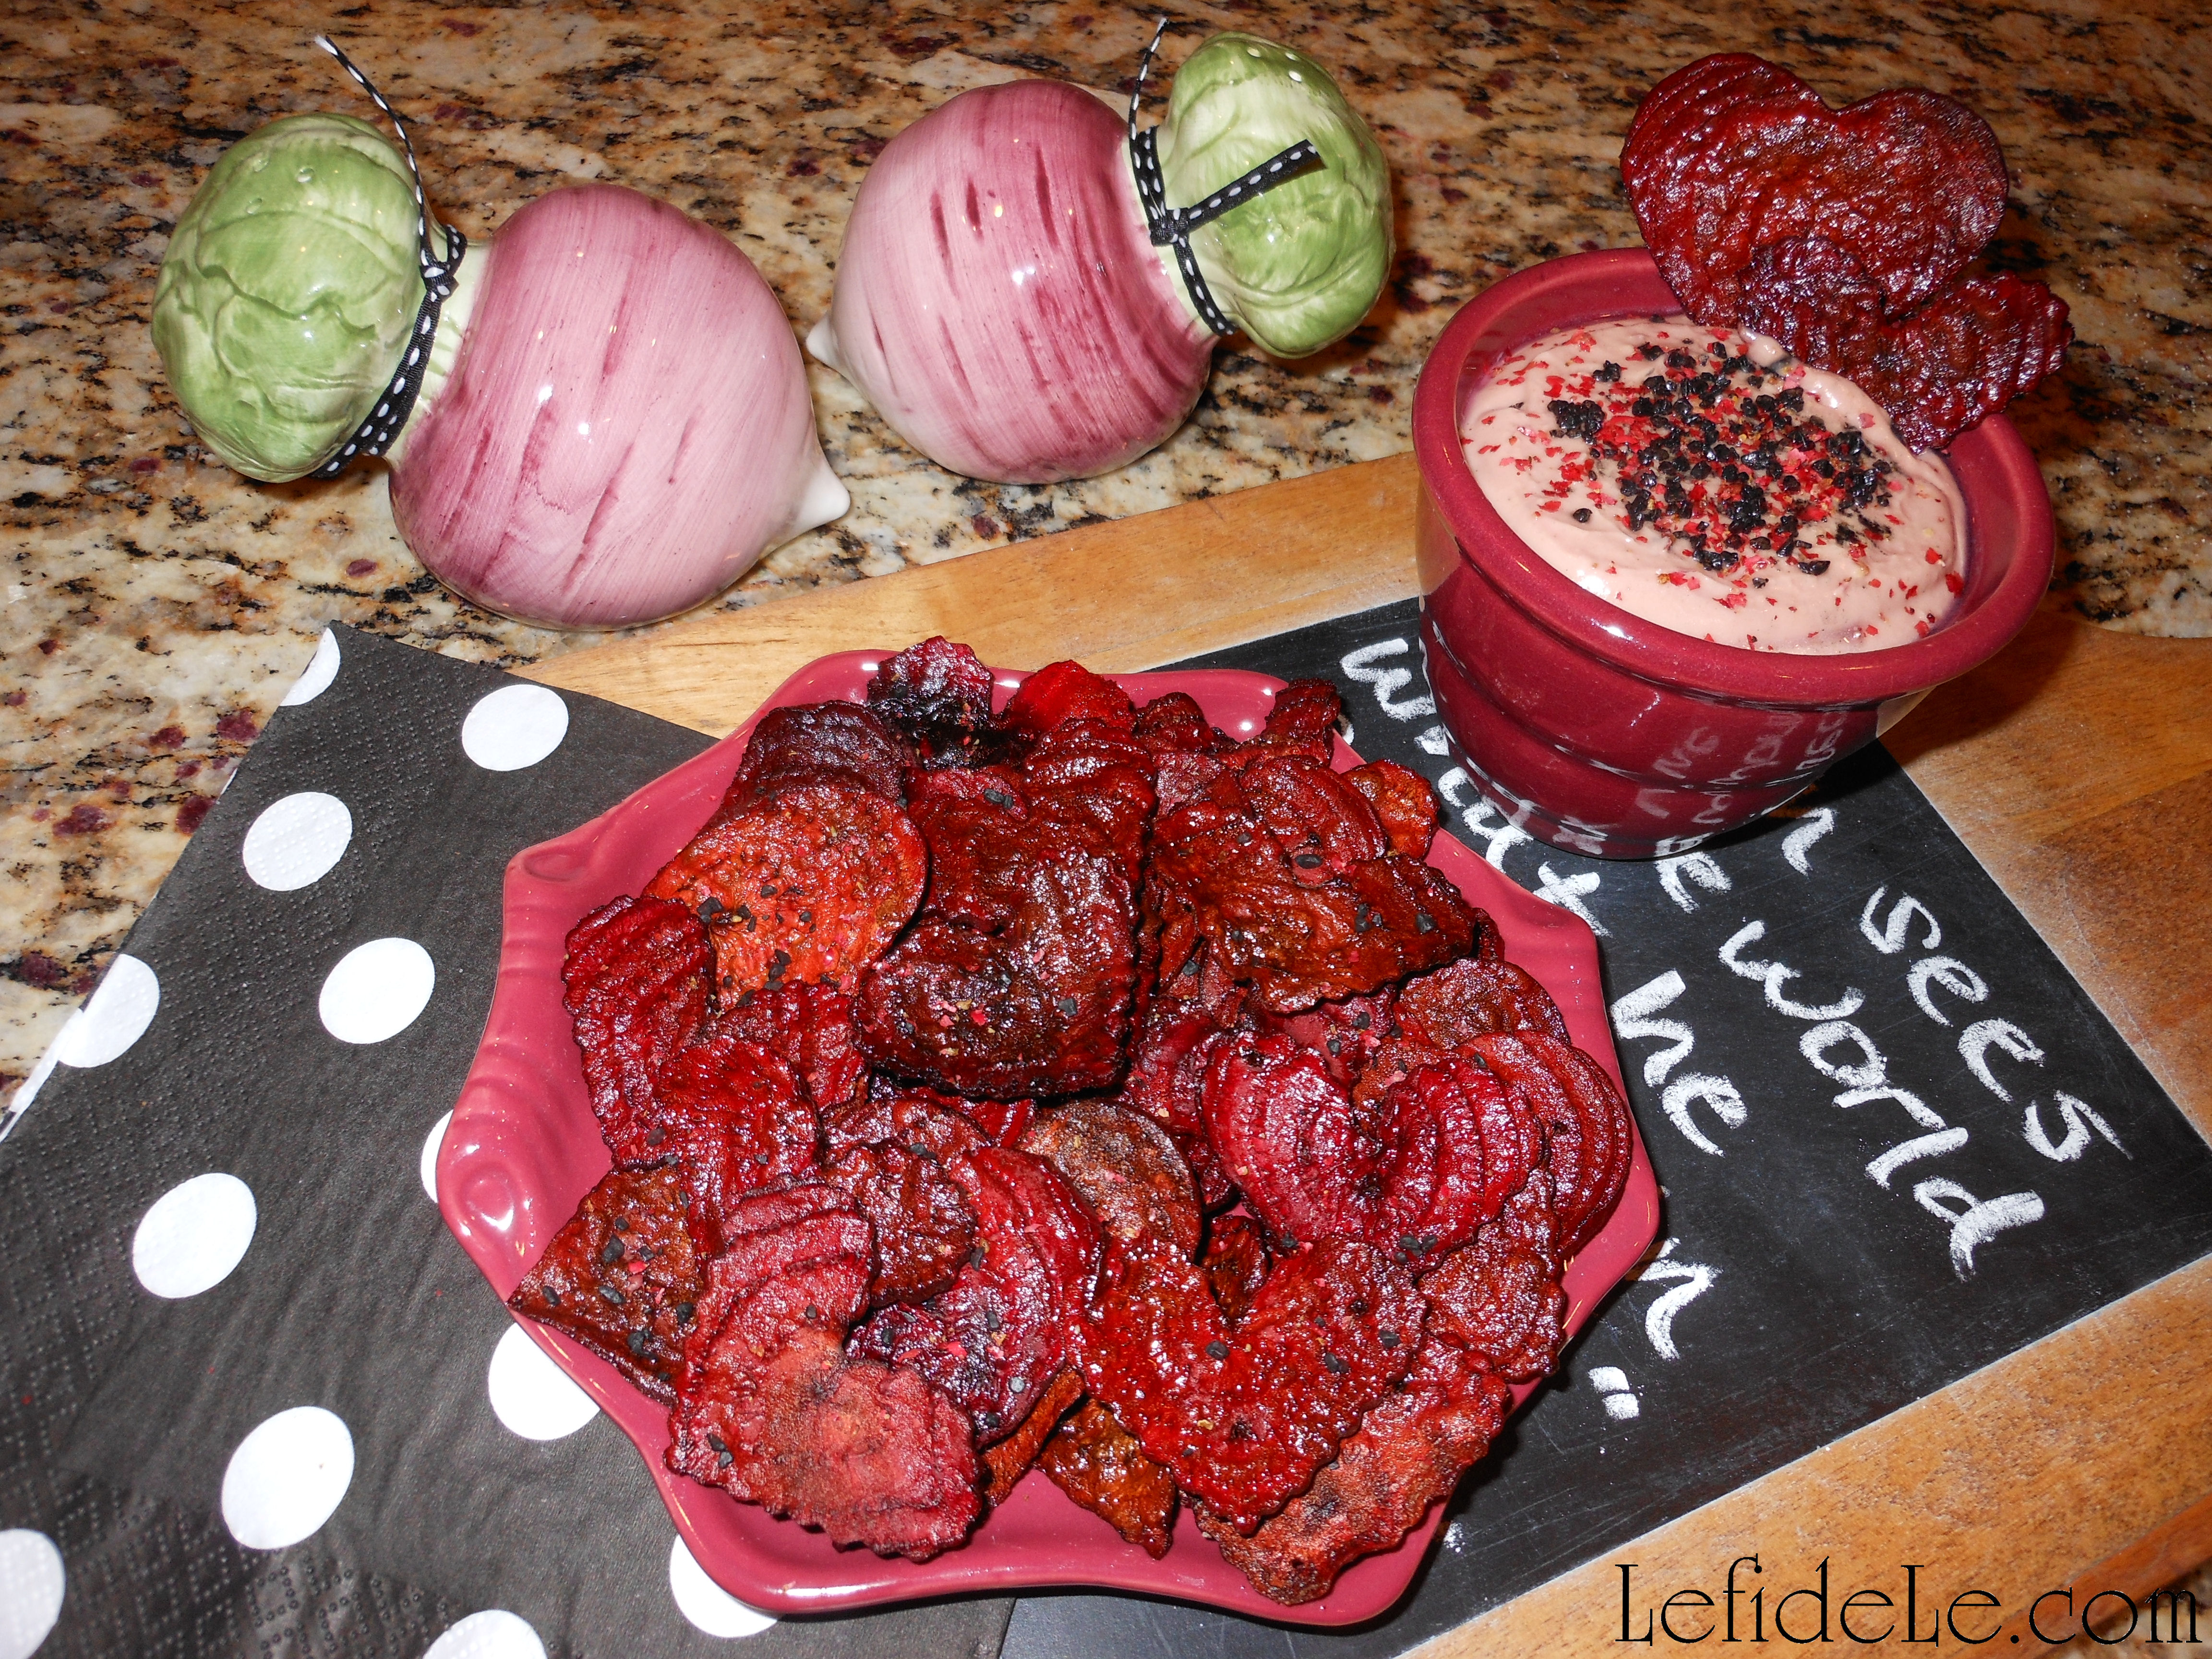
Gingerbread (banner) clouds float high amid skyscraping treat towers holding abundant soirees offering peppermint candied almonds, twisty marshmallows, pastel taffy, and (healthy) spicy guacamole shooters with pink pomegranate potato chips.

317 (2)Leigh

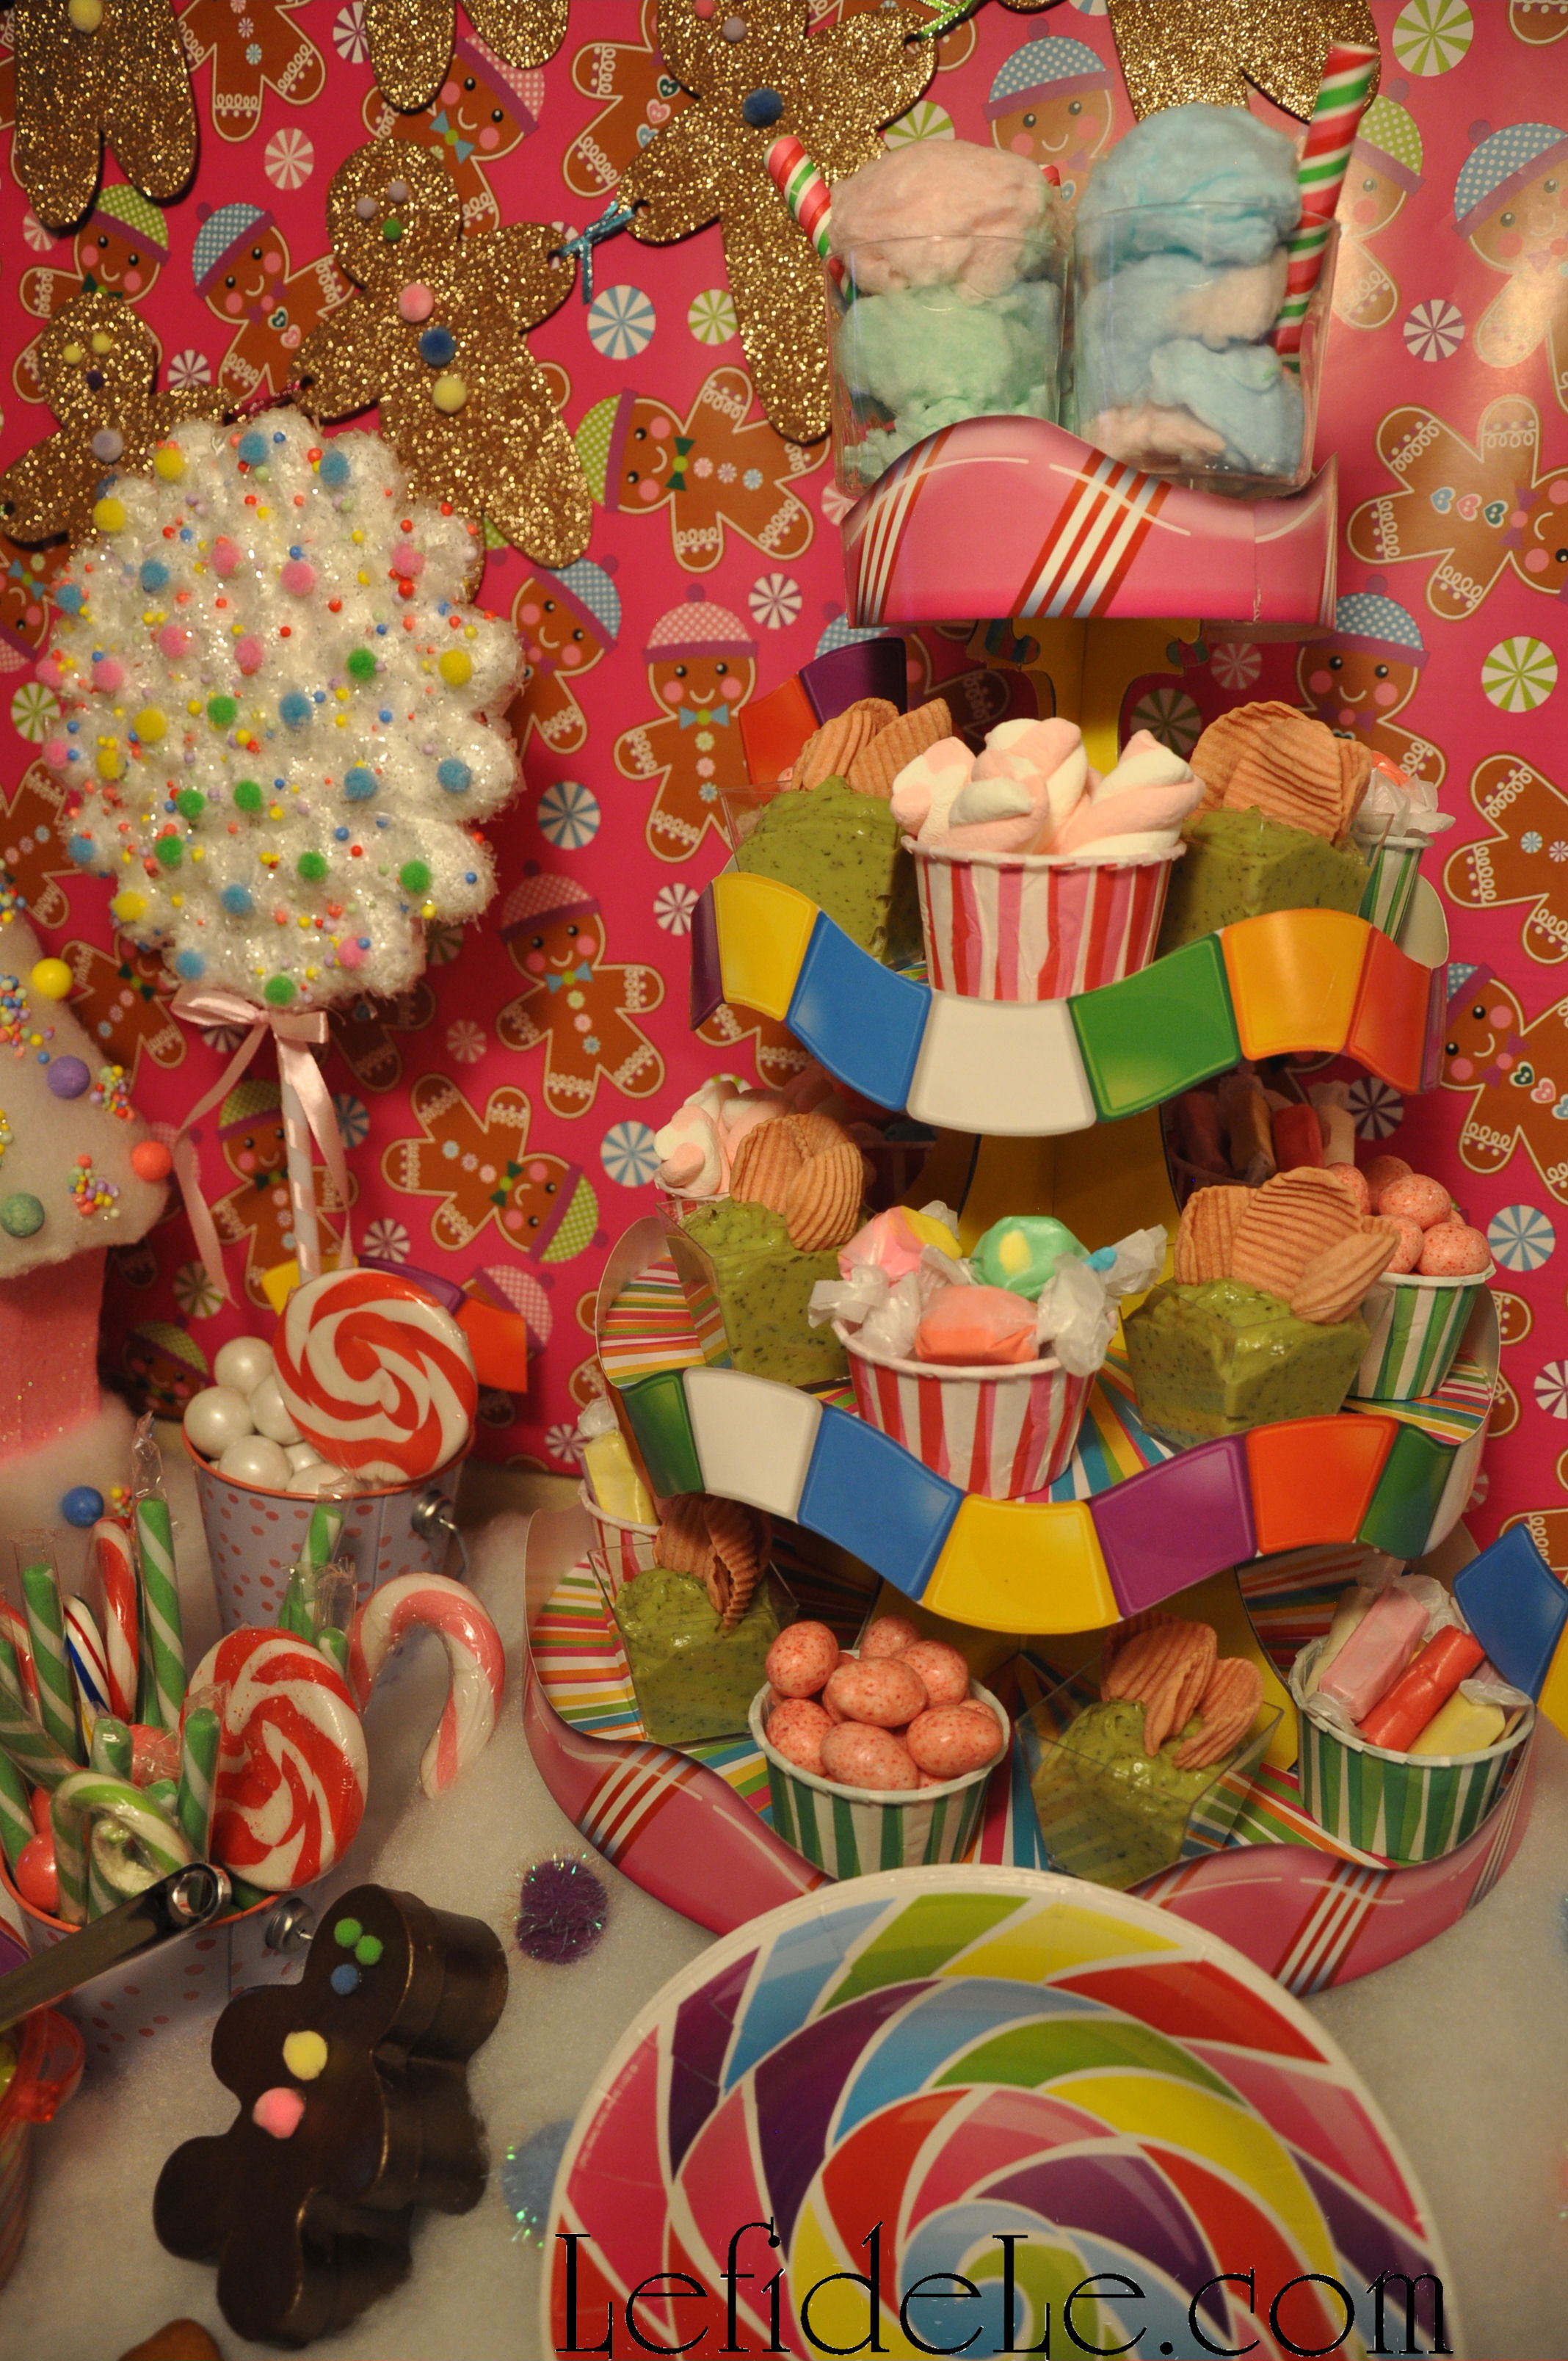
The towers’ penthouse floors encircle trios of cotton candy “cream” sodas with peppermint striped straws.

295Leigh

Round rainbow swirled plates and napkins stand by to serve Candyland visitors.

318 (2)Leigh

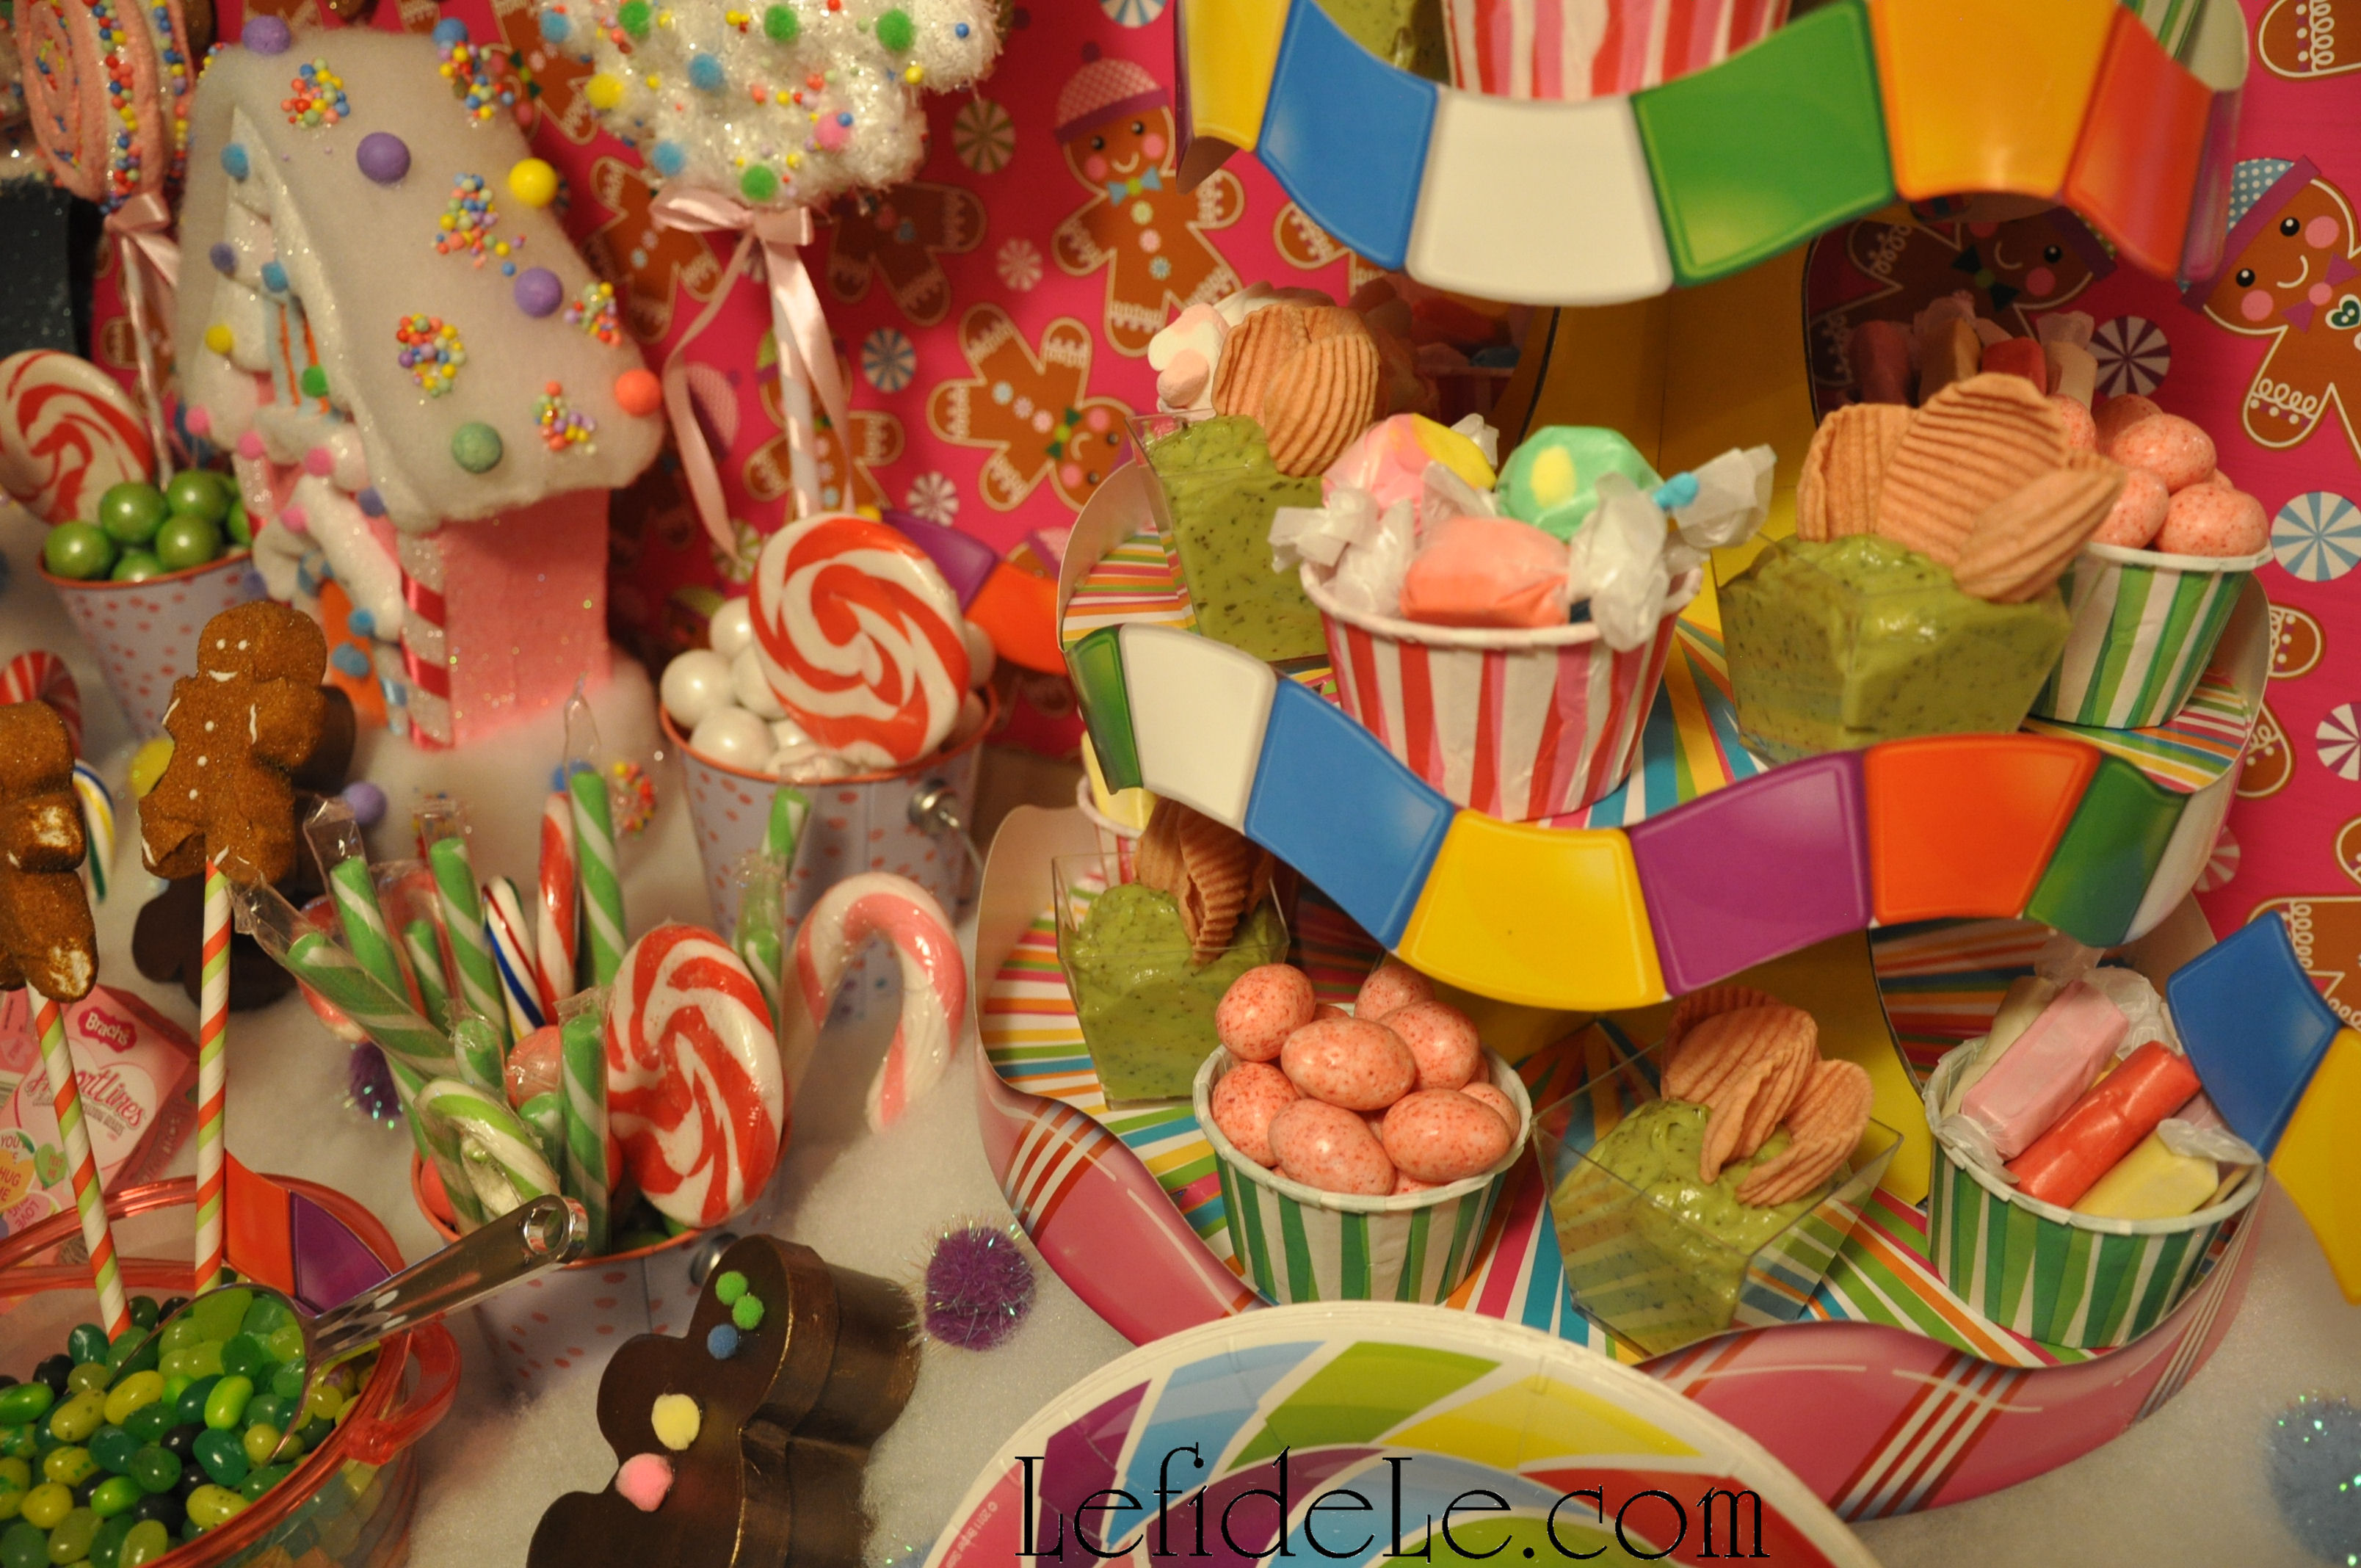
Boxed and wrapped candies sit ready for shipment to their final destinations.

356Leigh

Gingerbread peep billboards pop up to signal the way to gastronomical paradise.

351Leigh

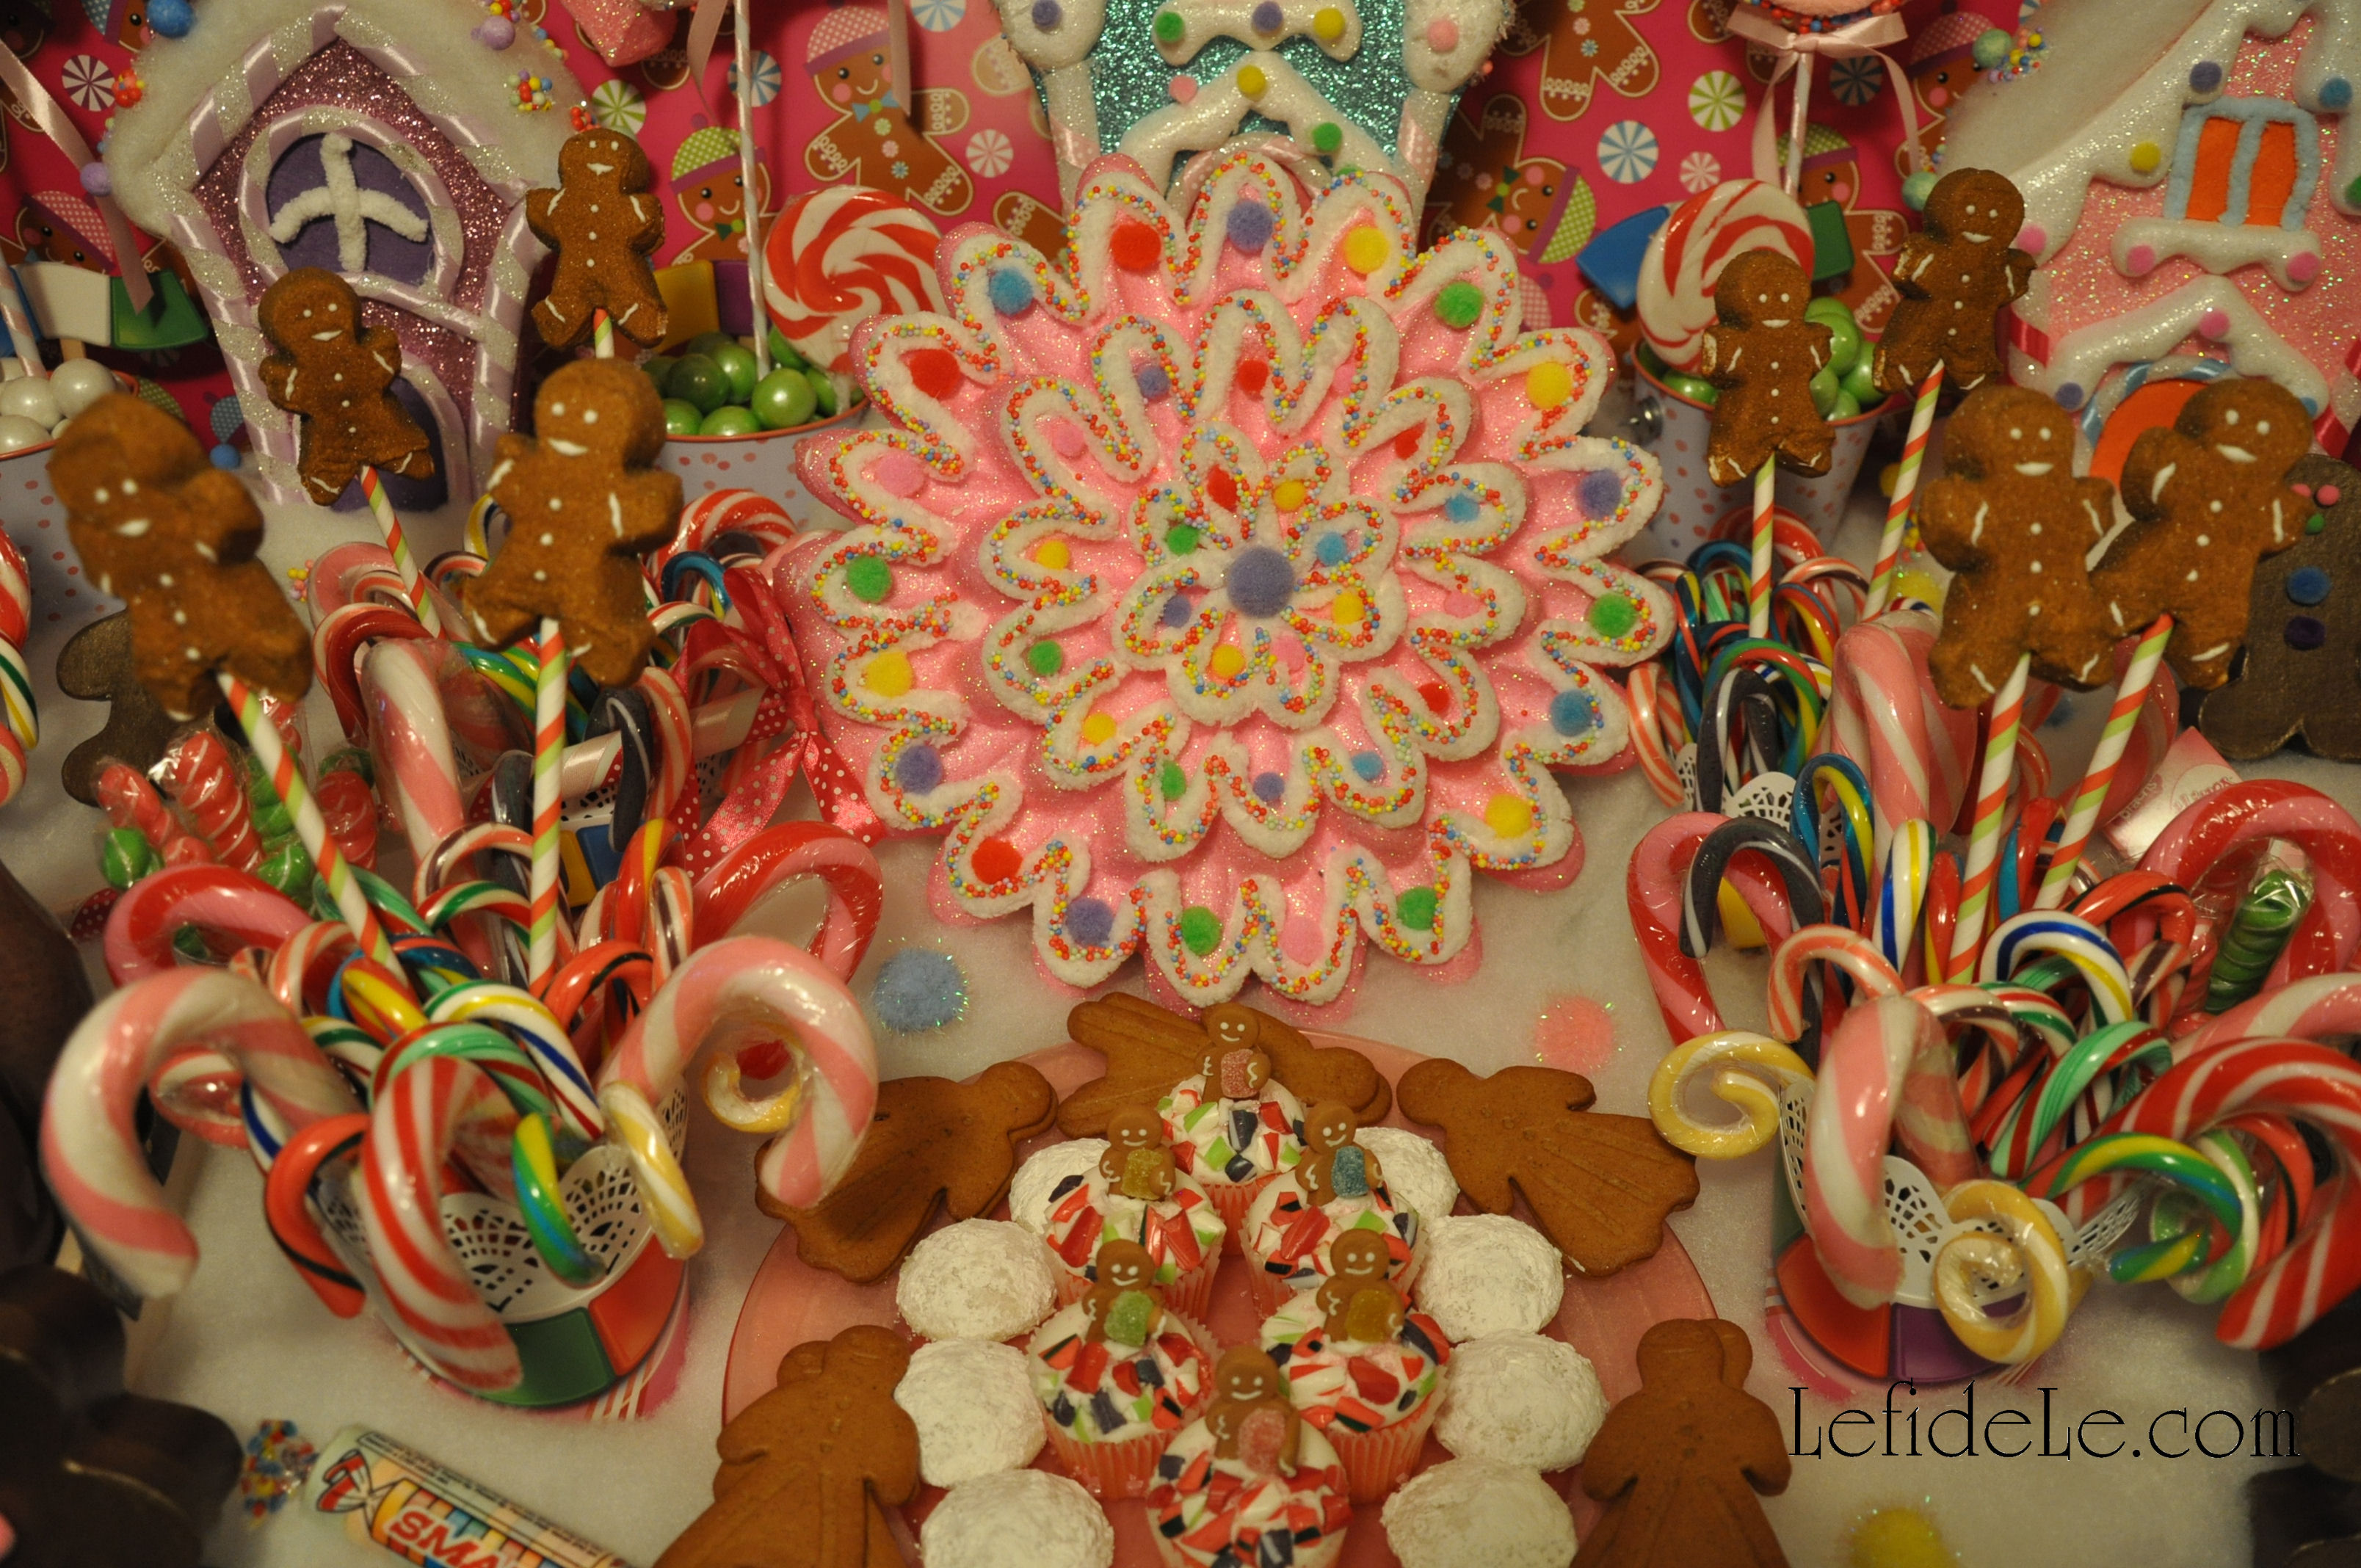
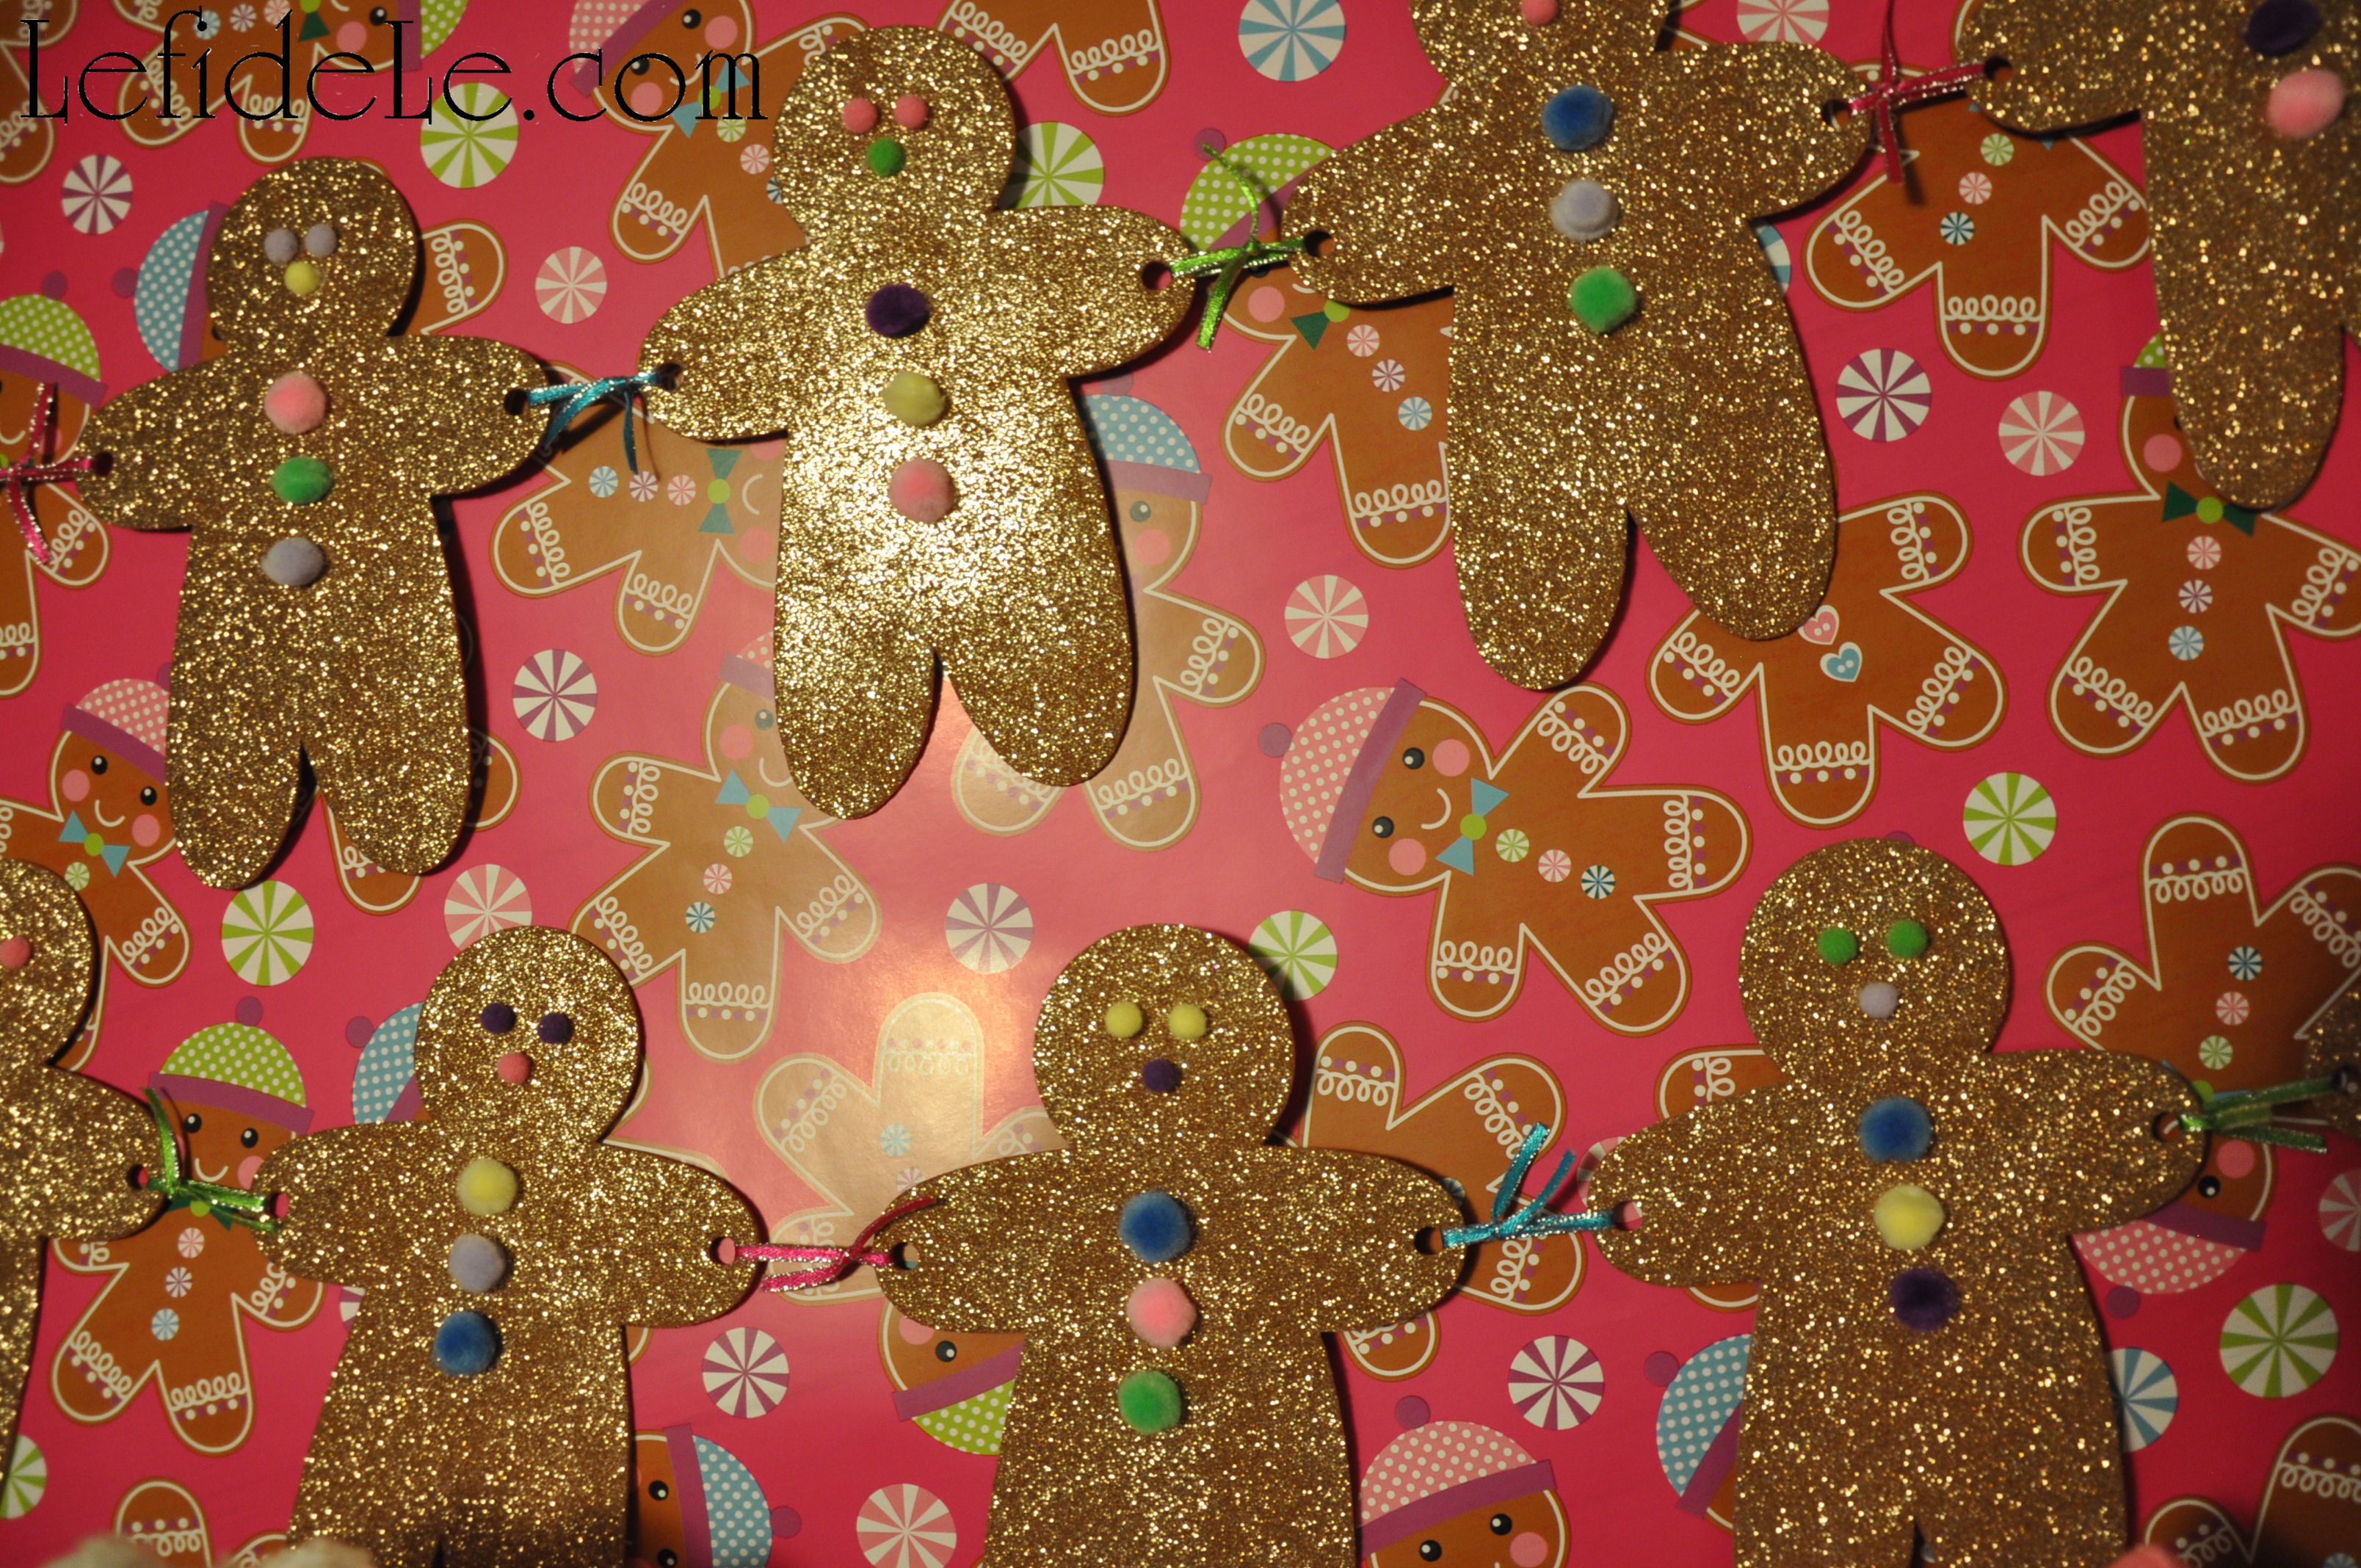
Gingerbread (cookie) ladies and gentlemen hold snowball (cookie) fights in the village round, whist the tiniest of “gingie” tots toddle home with gumball treats over candy-cane cobblestones lain over pink velvet (cupcake) roads.

341Leigh

A low gingerbread fog sinks below the sugary iced hills perched above a pink (cloth) cliffside.

381Leigh

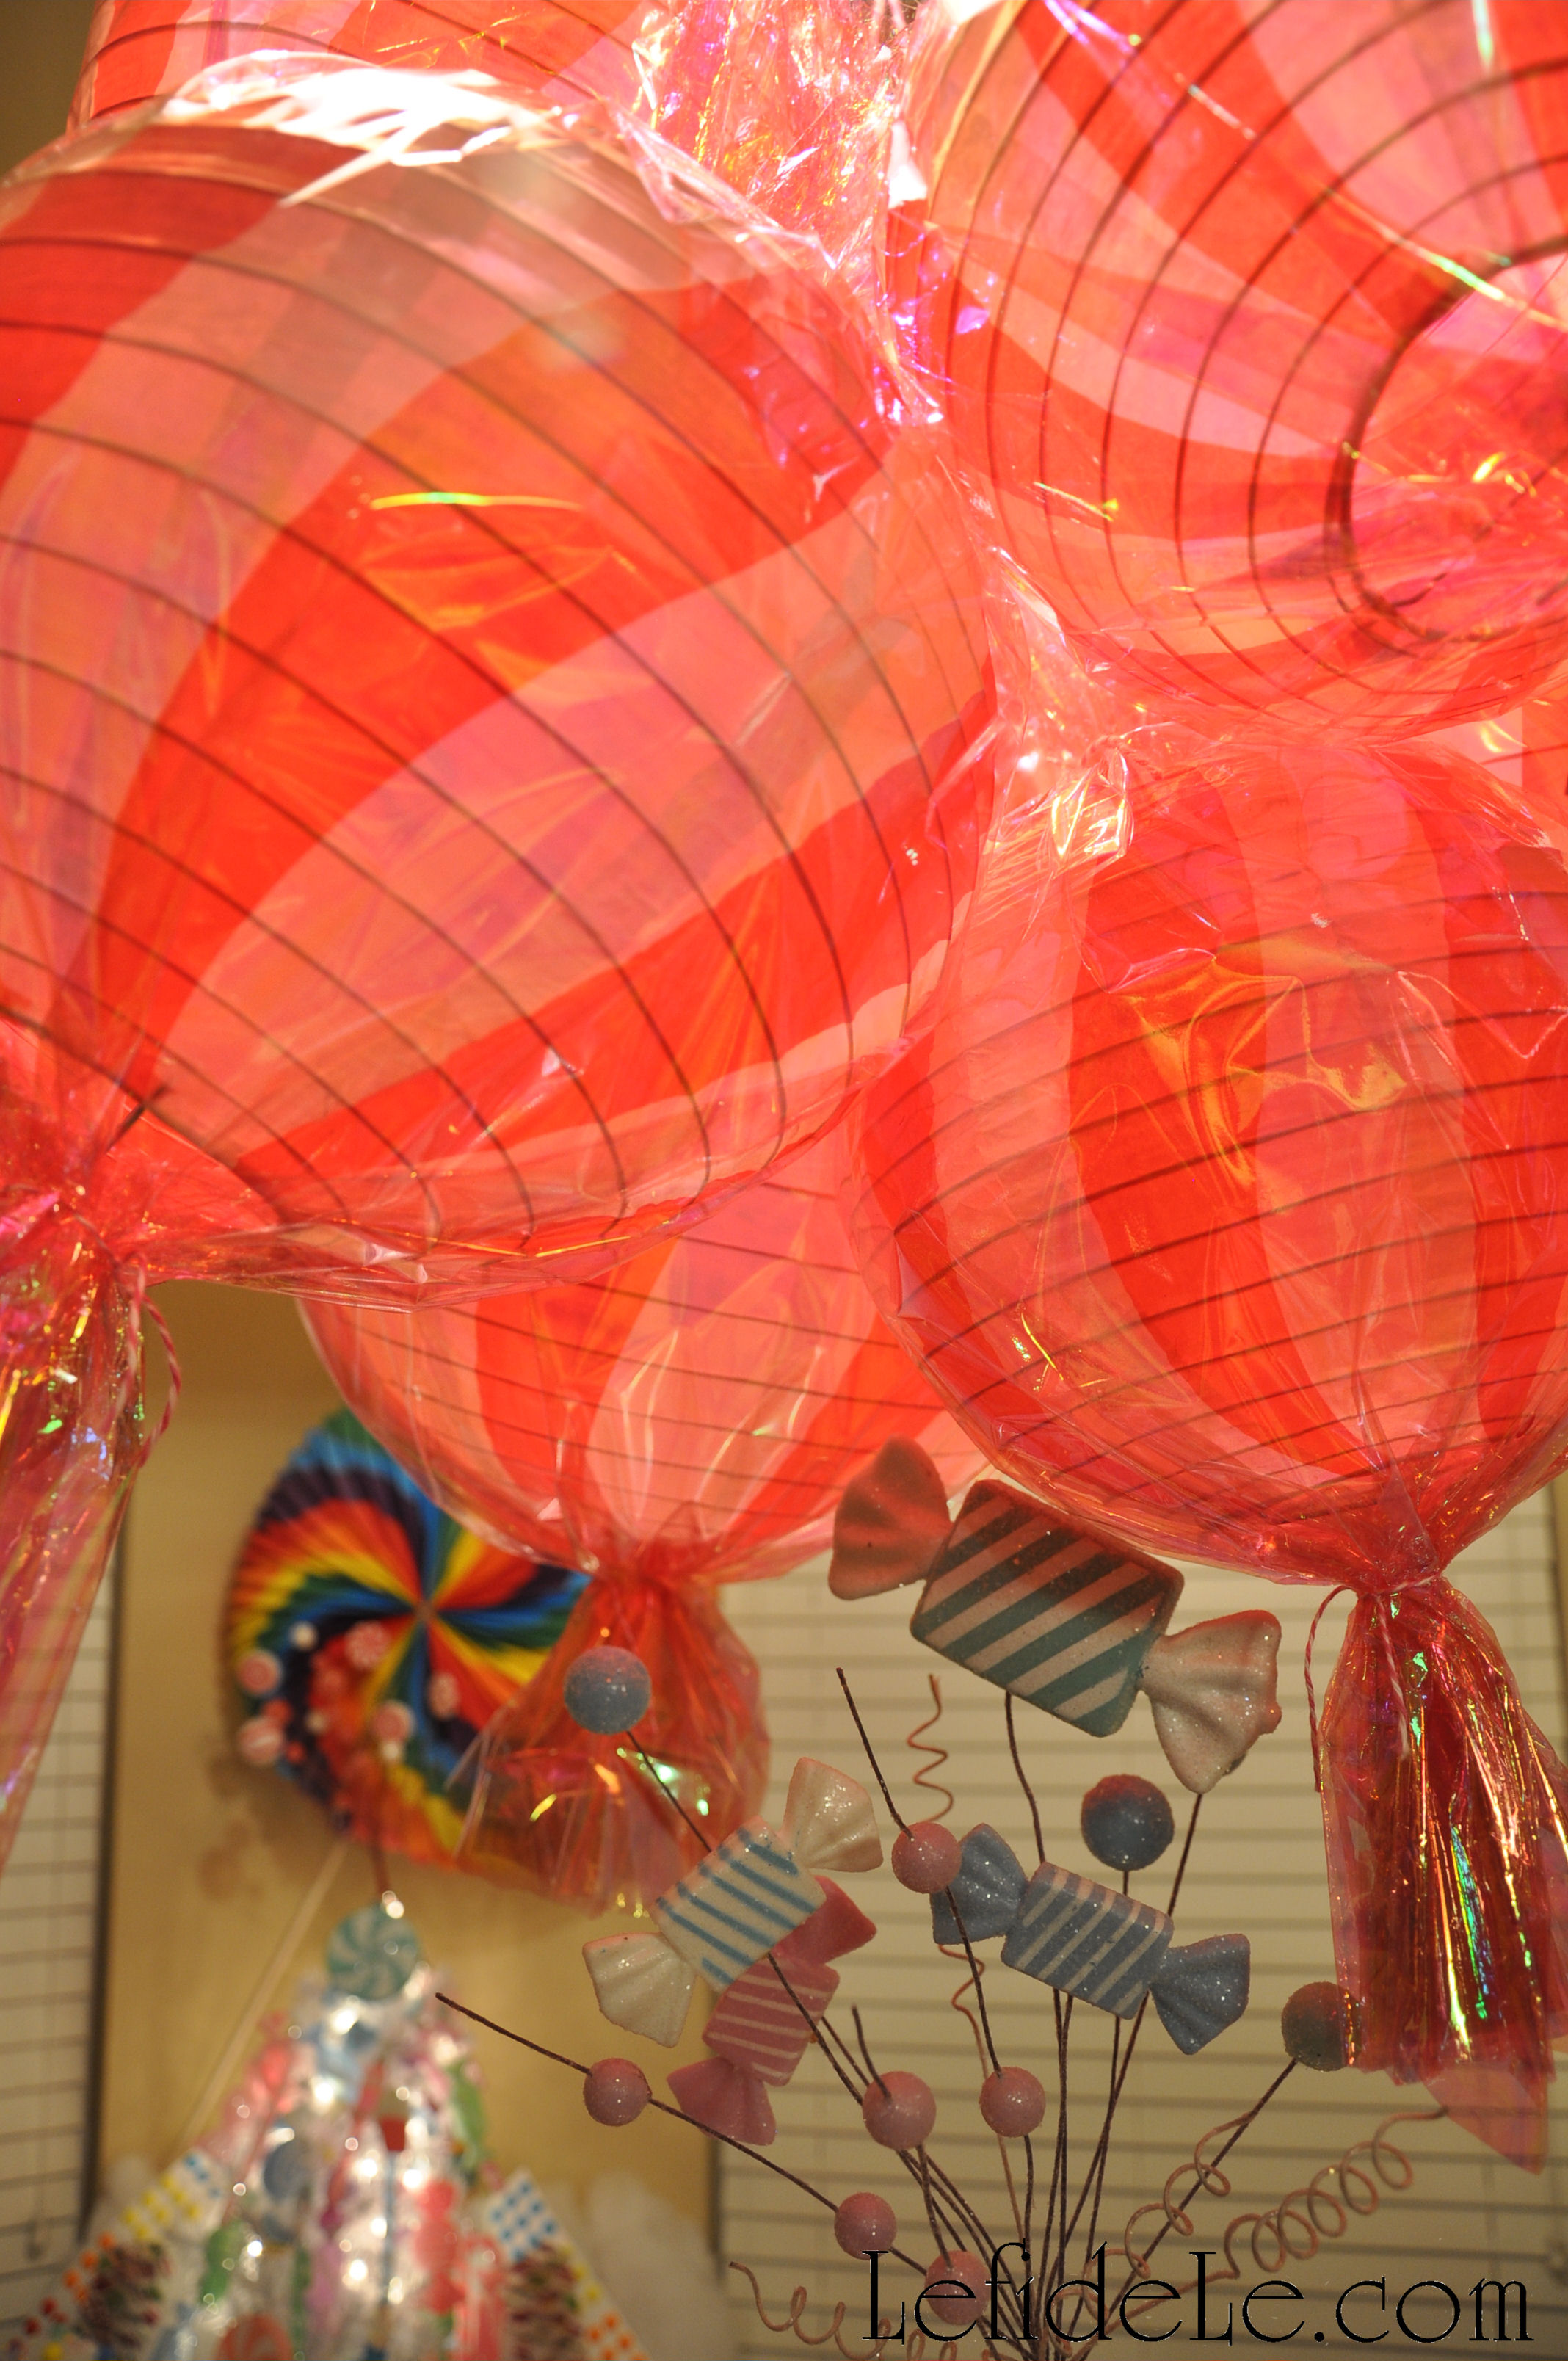
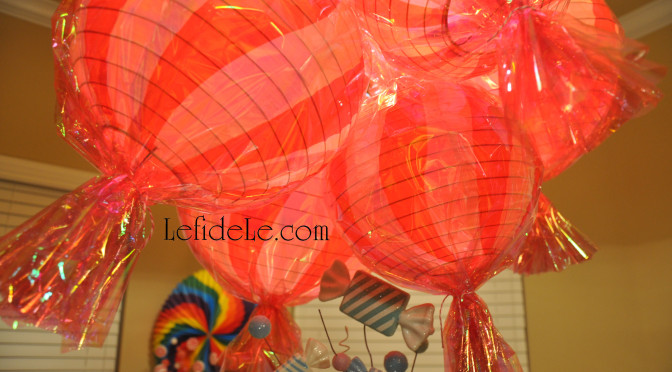
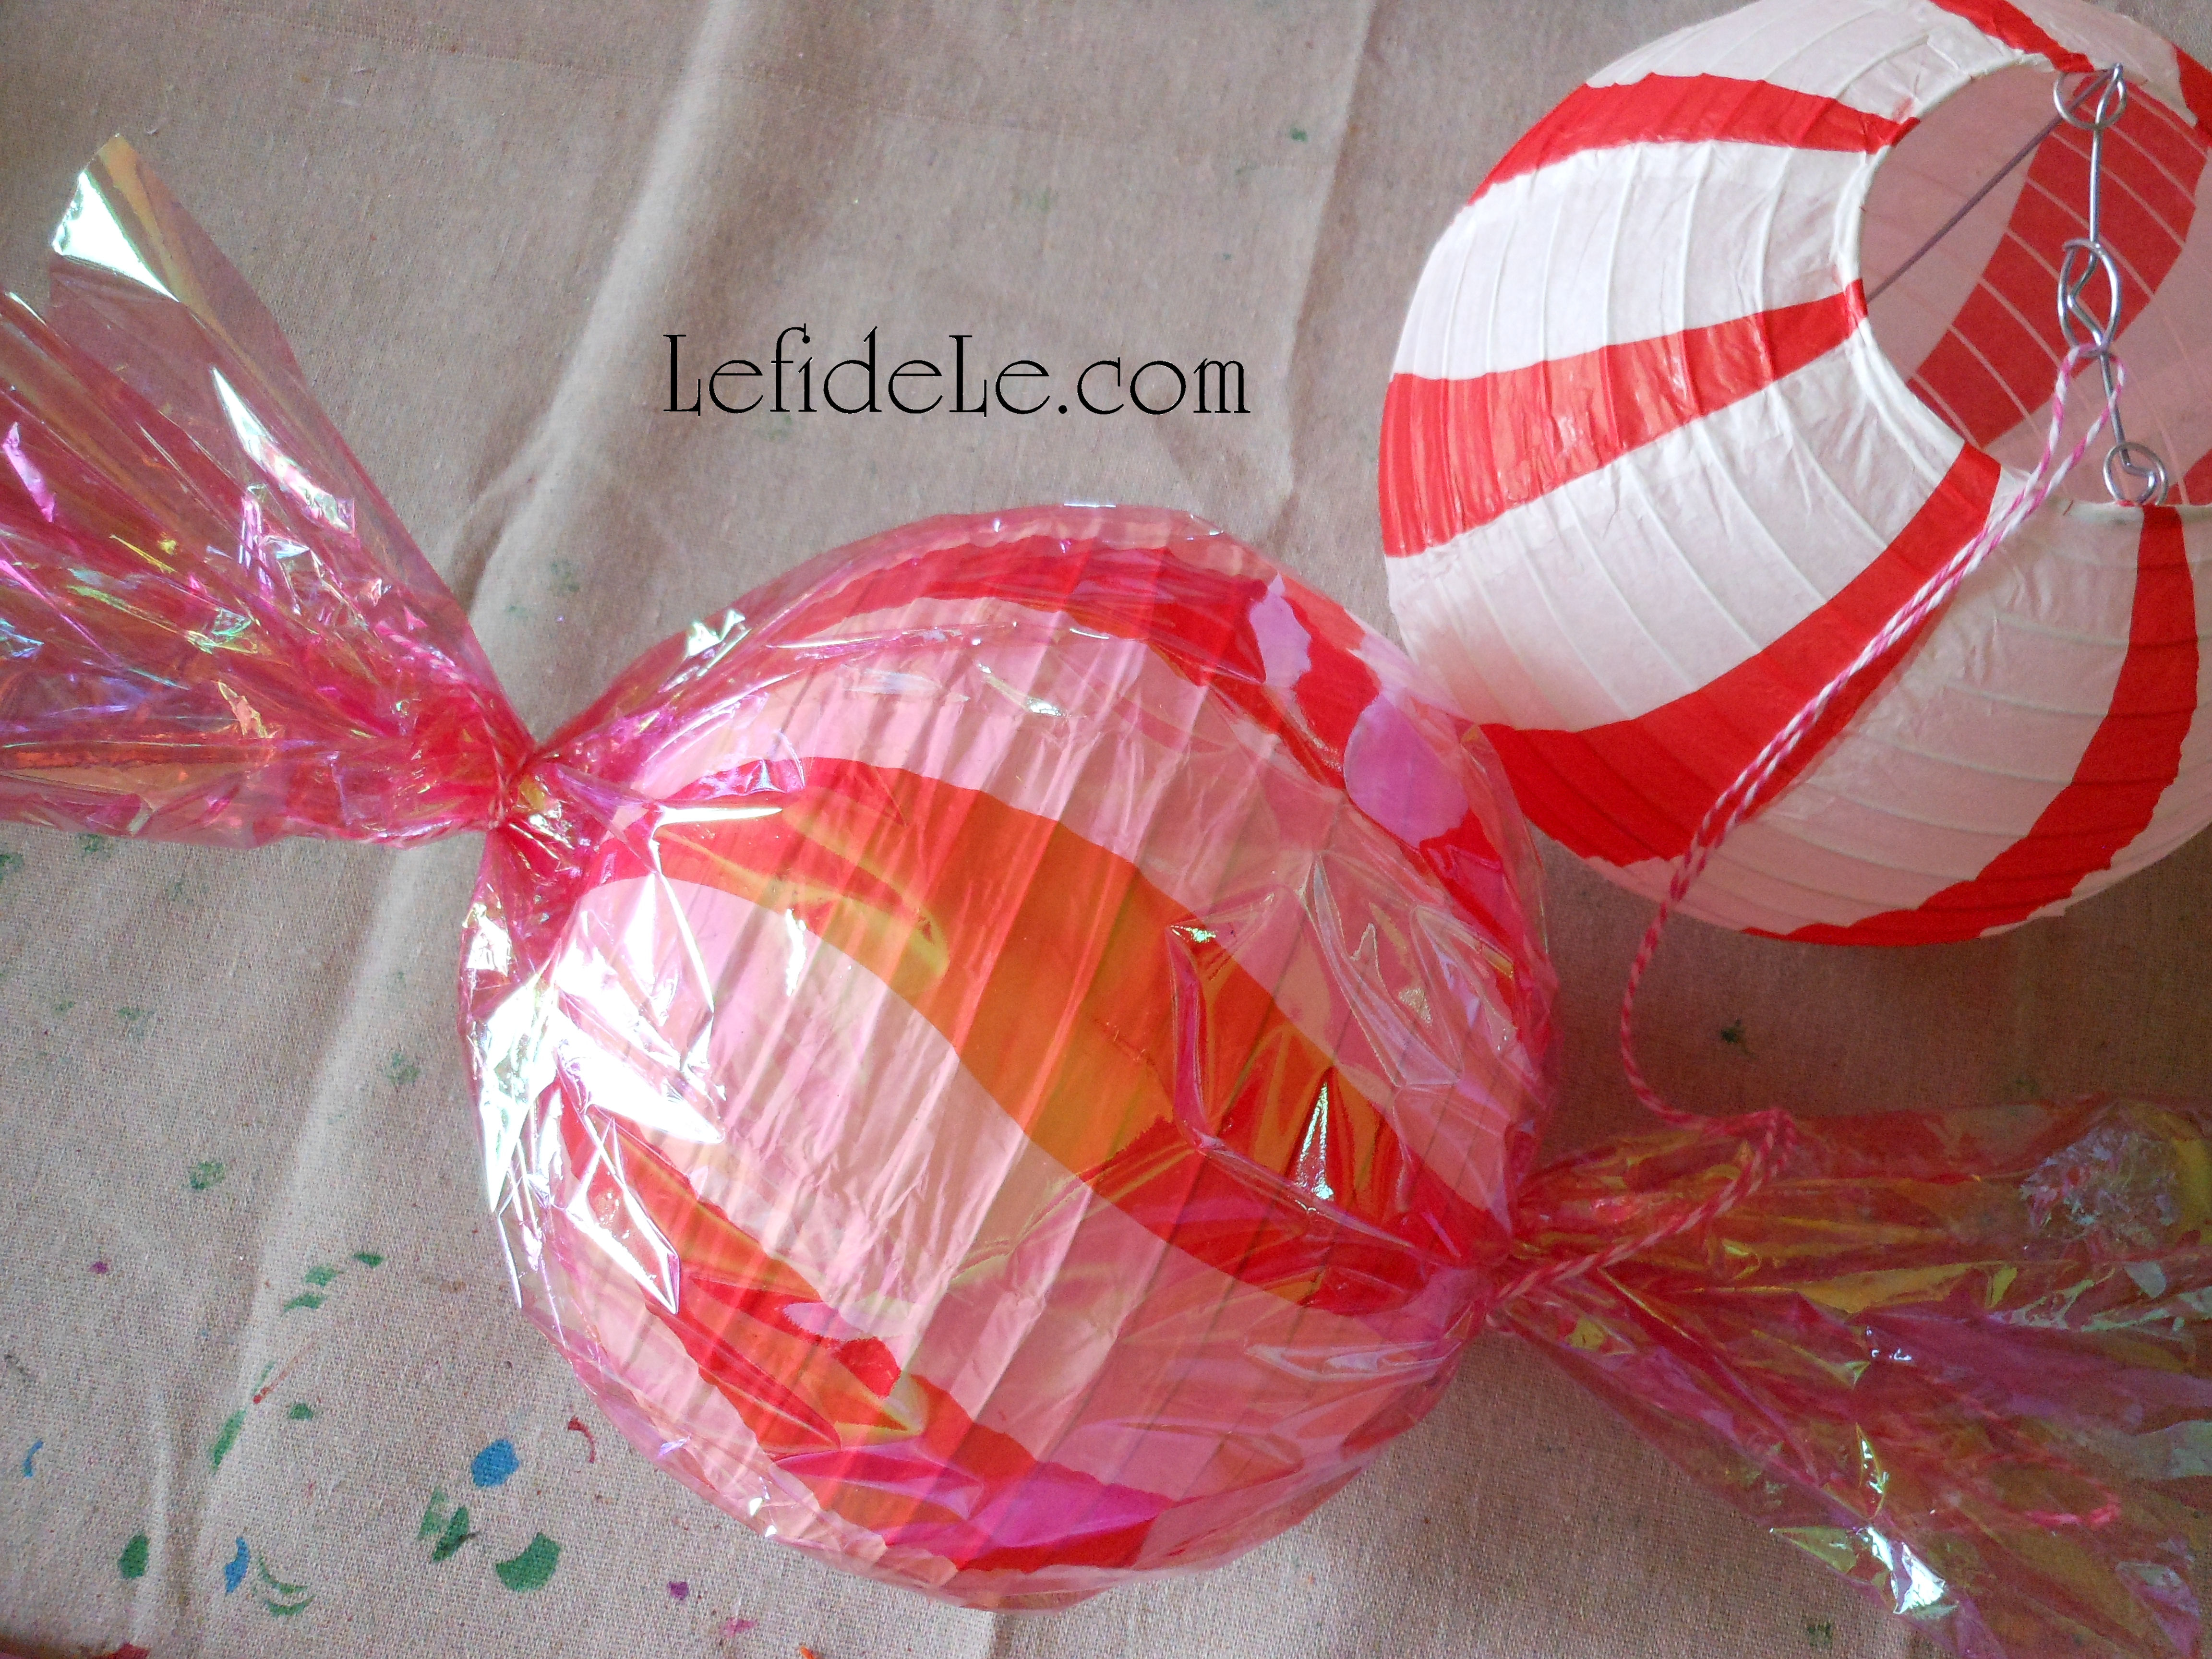
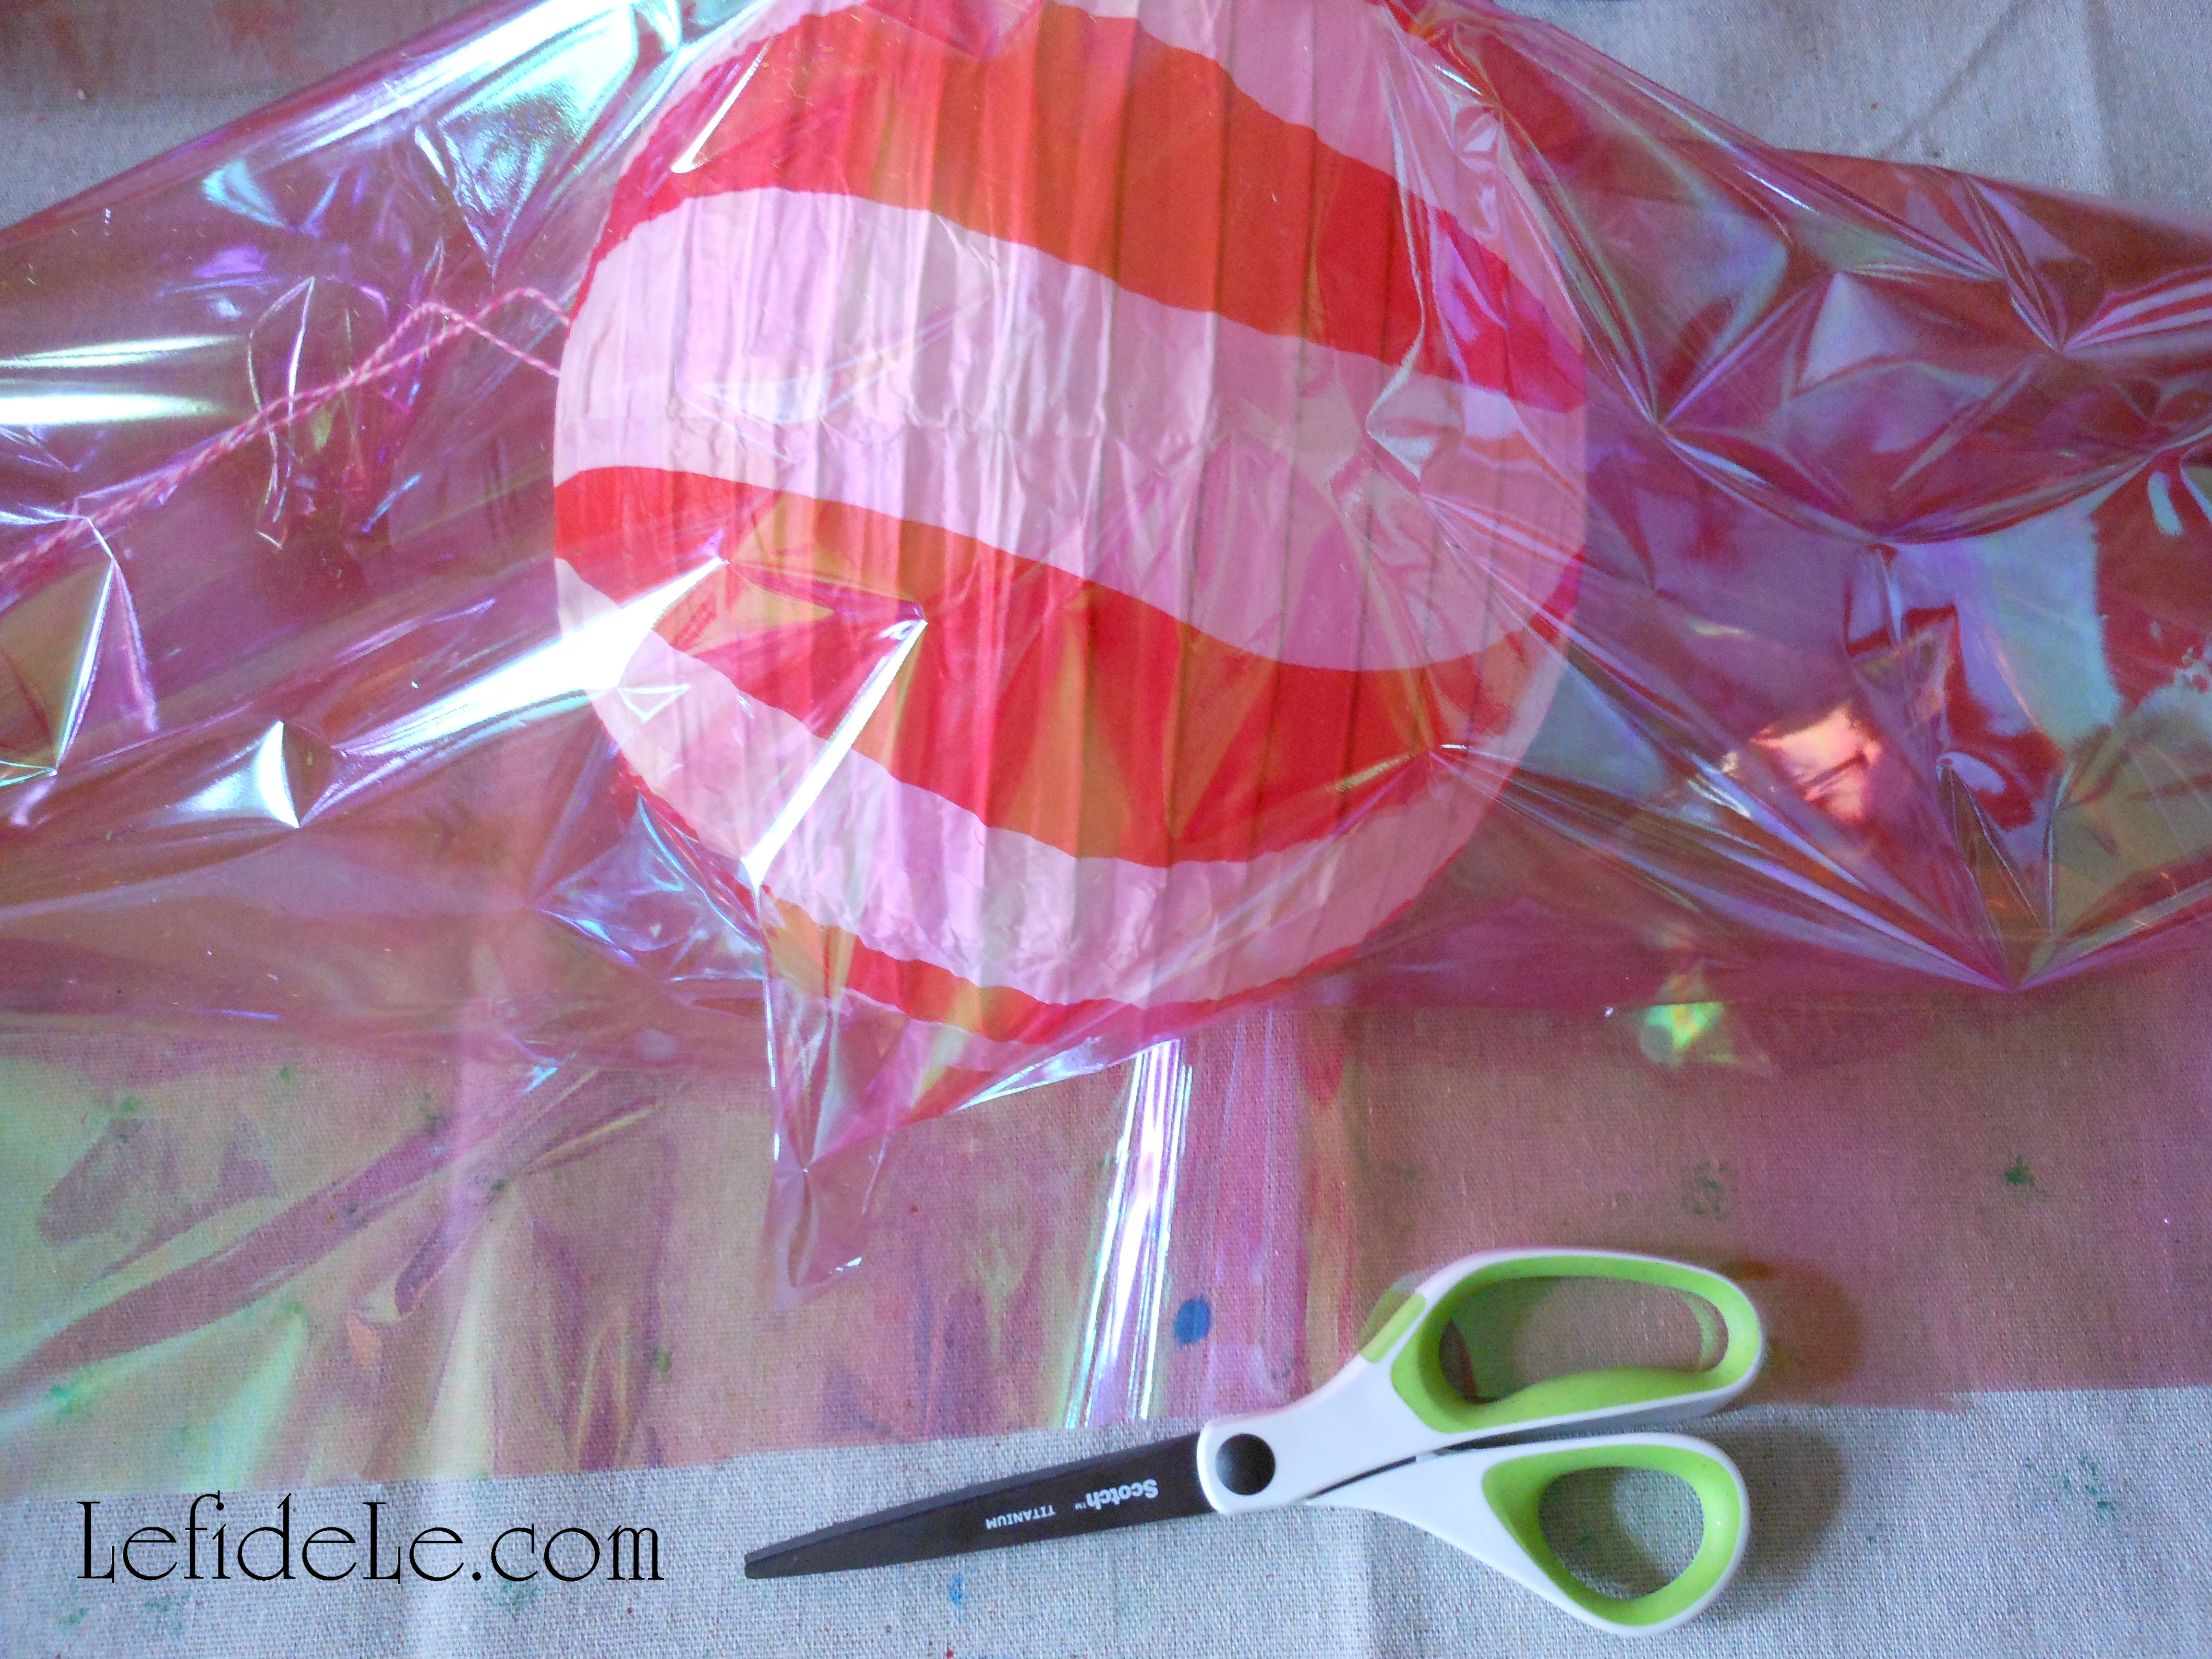
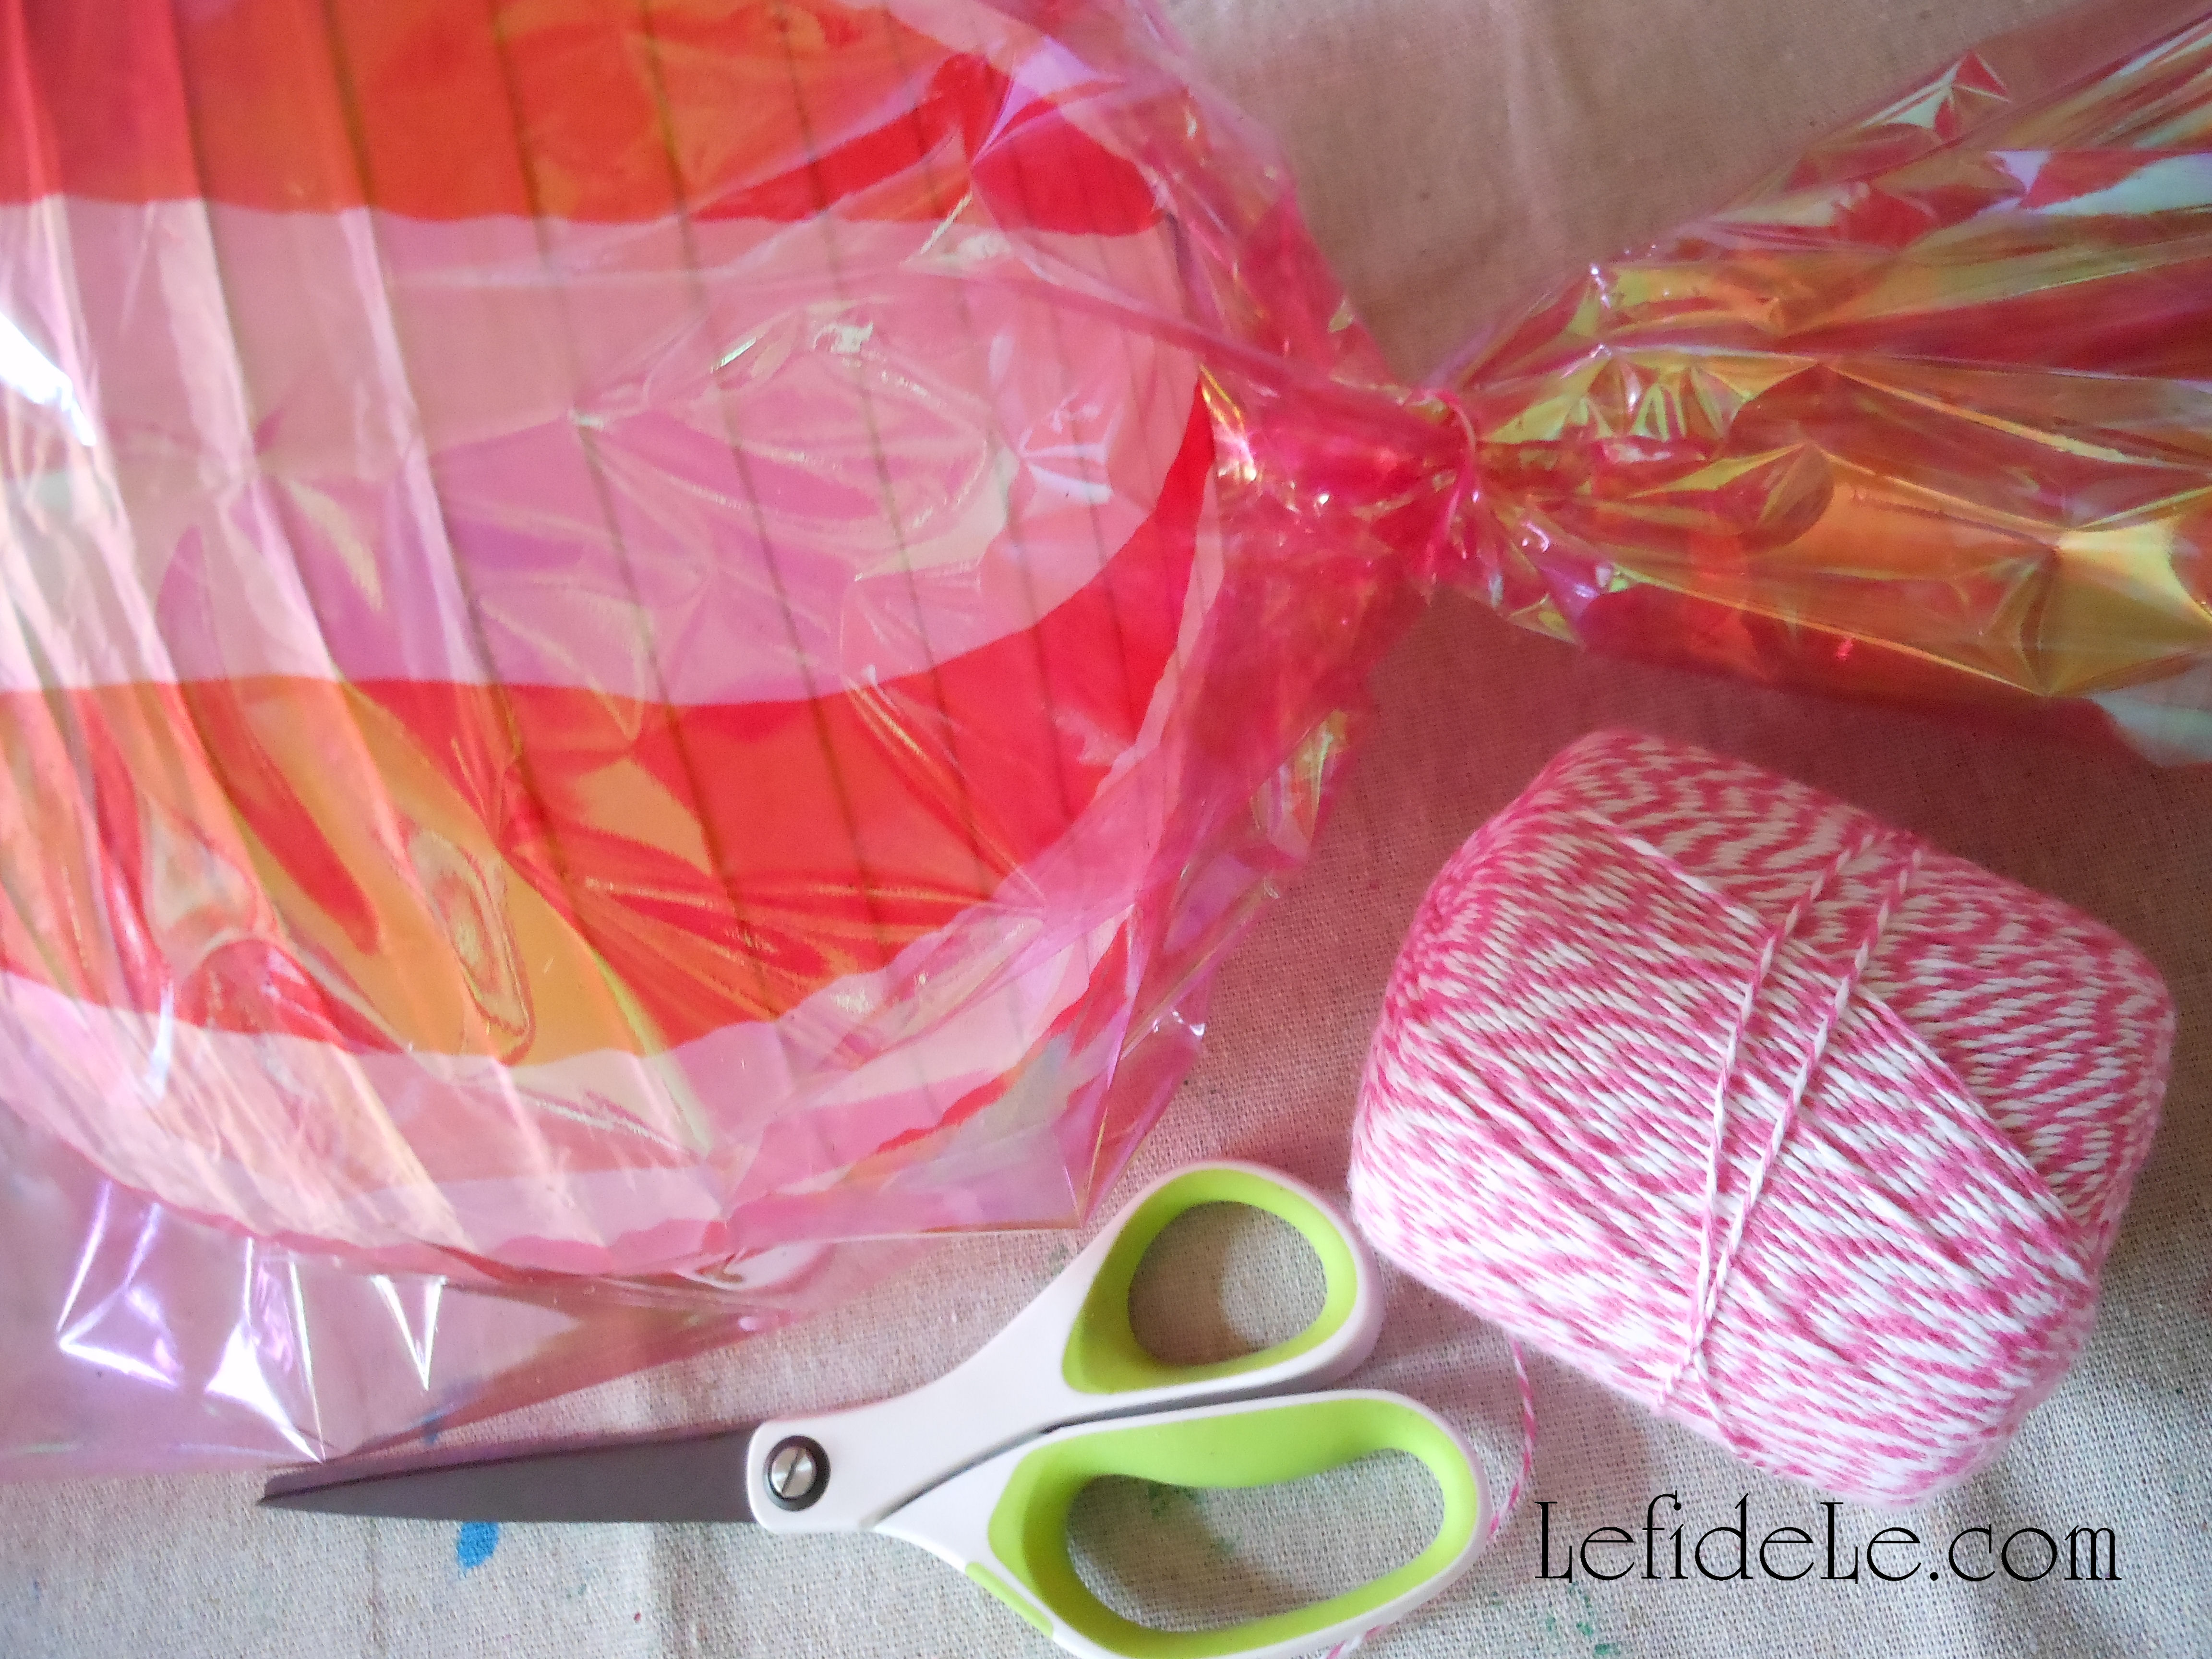
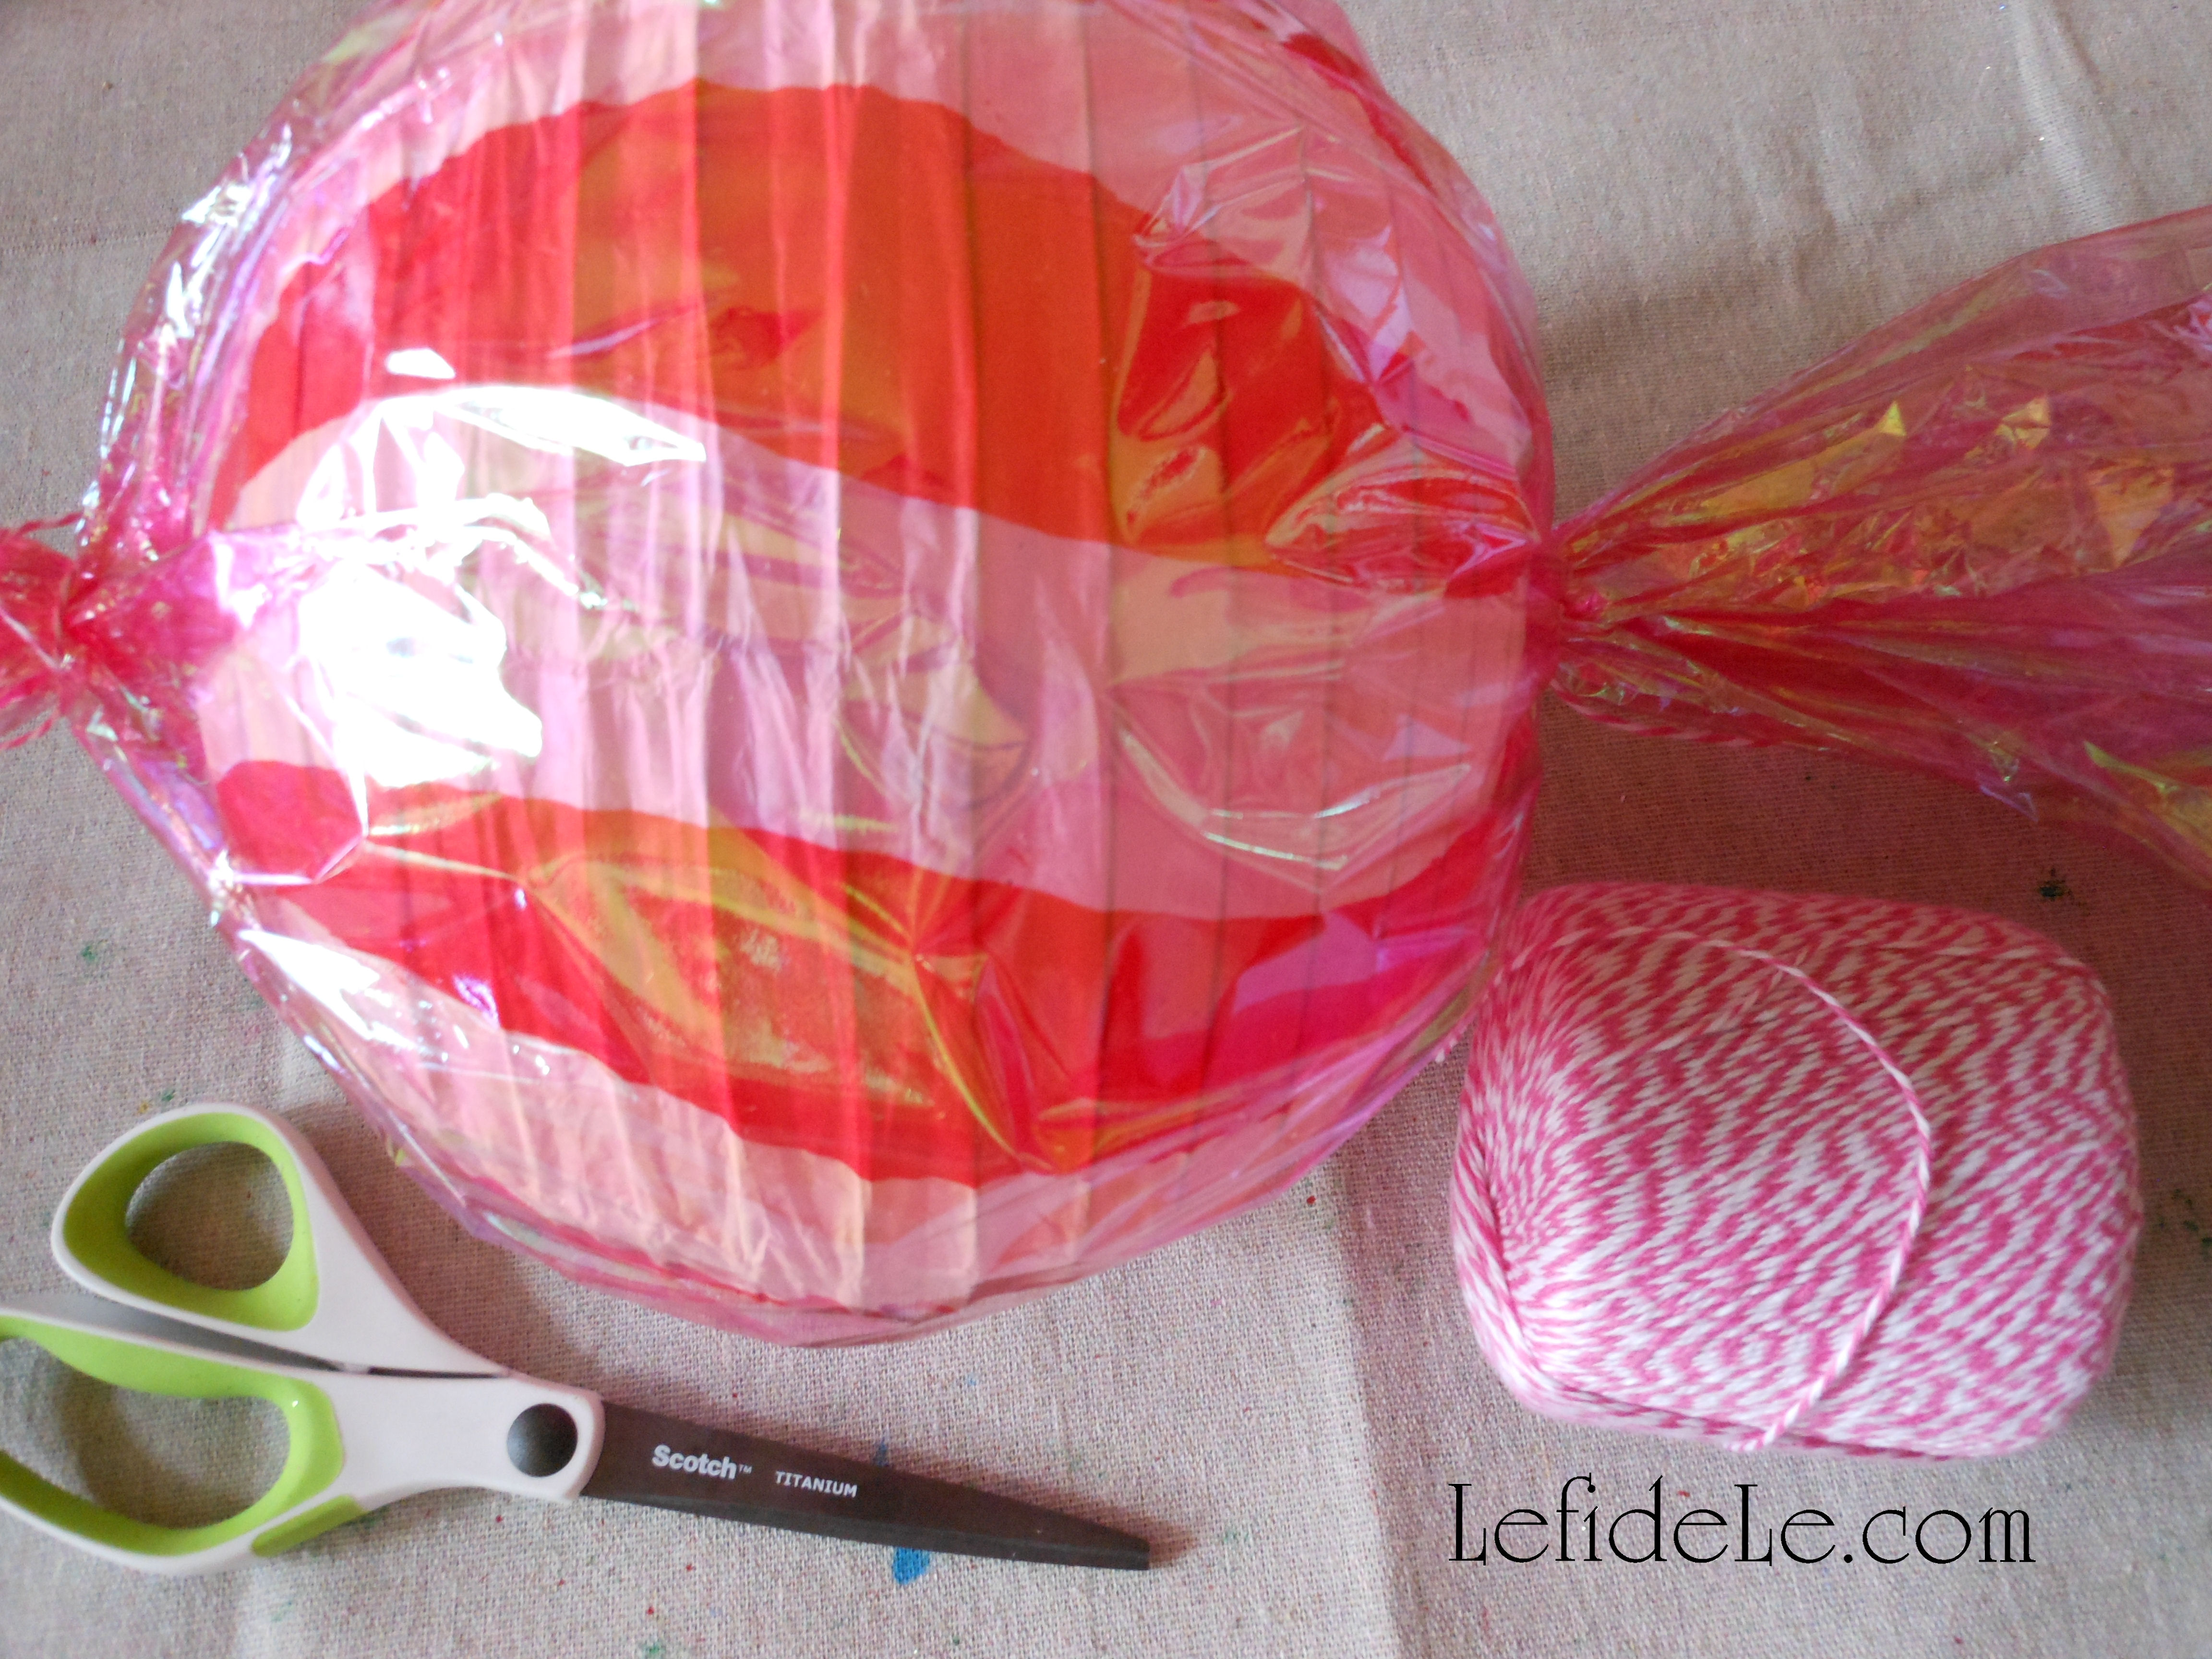
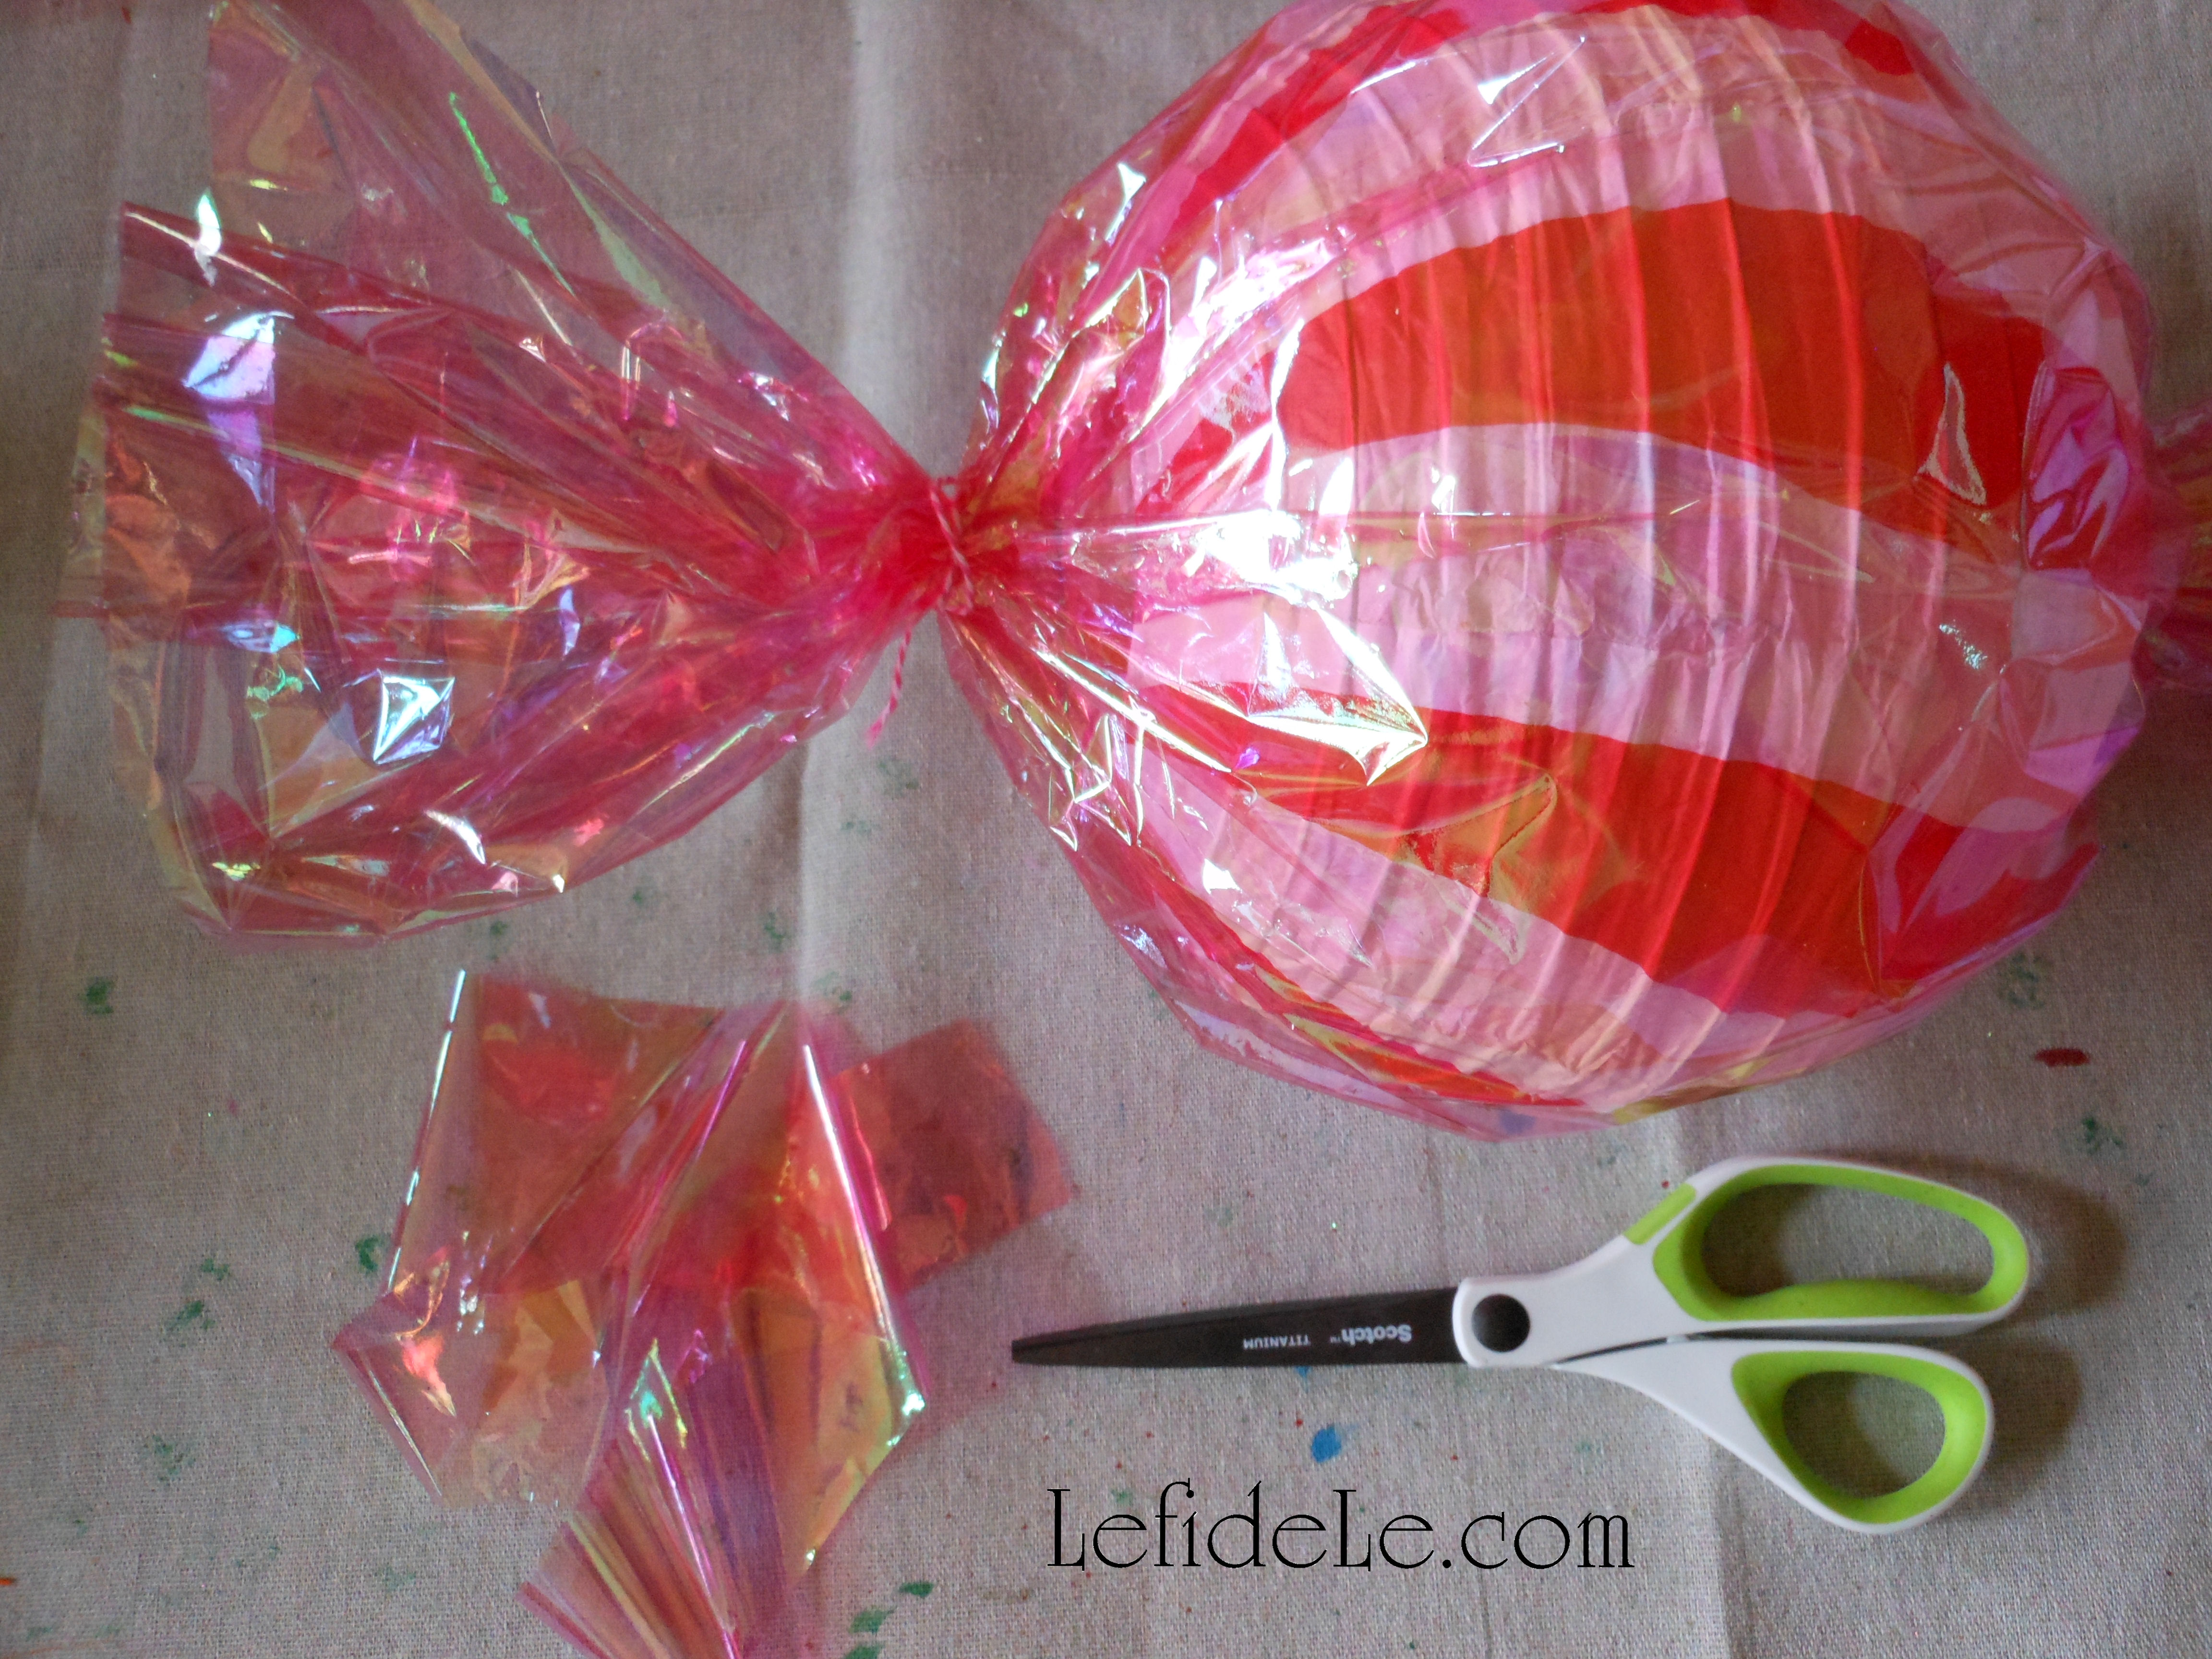
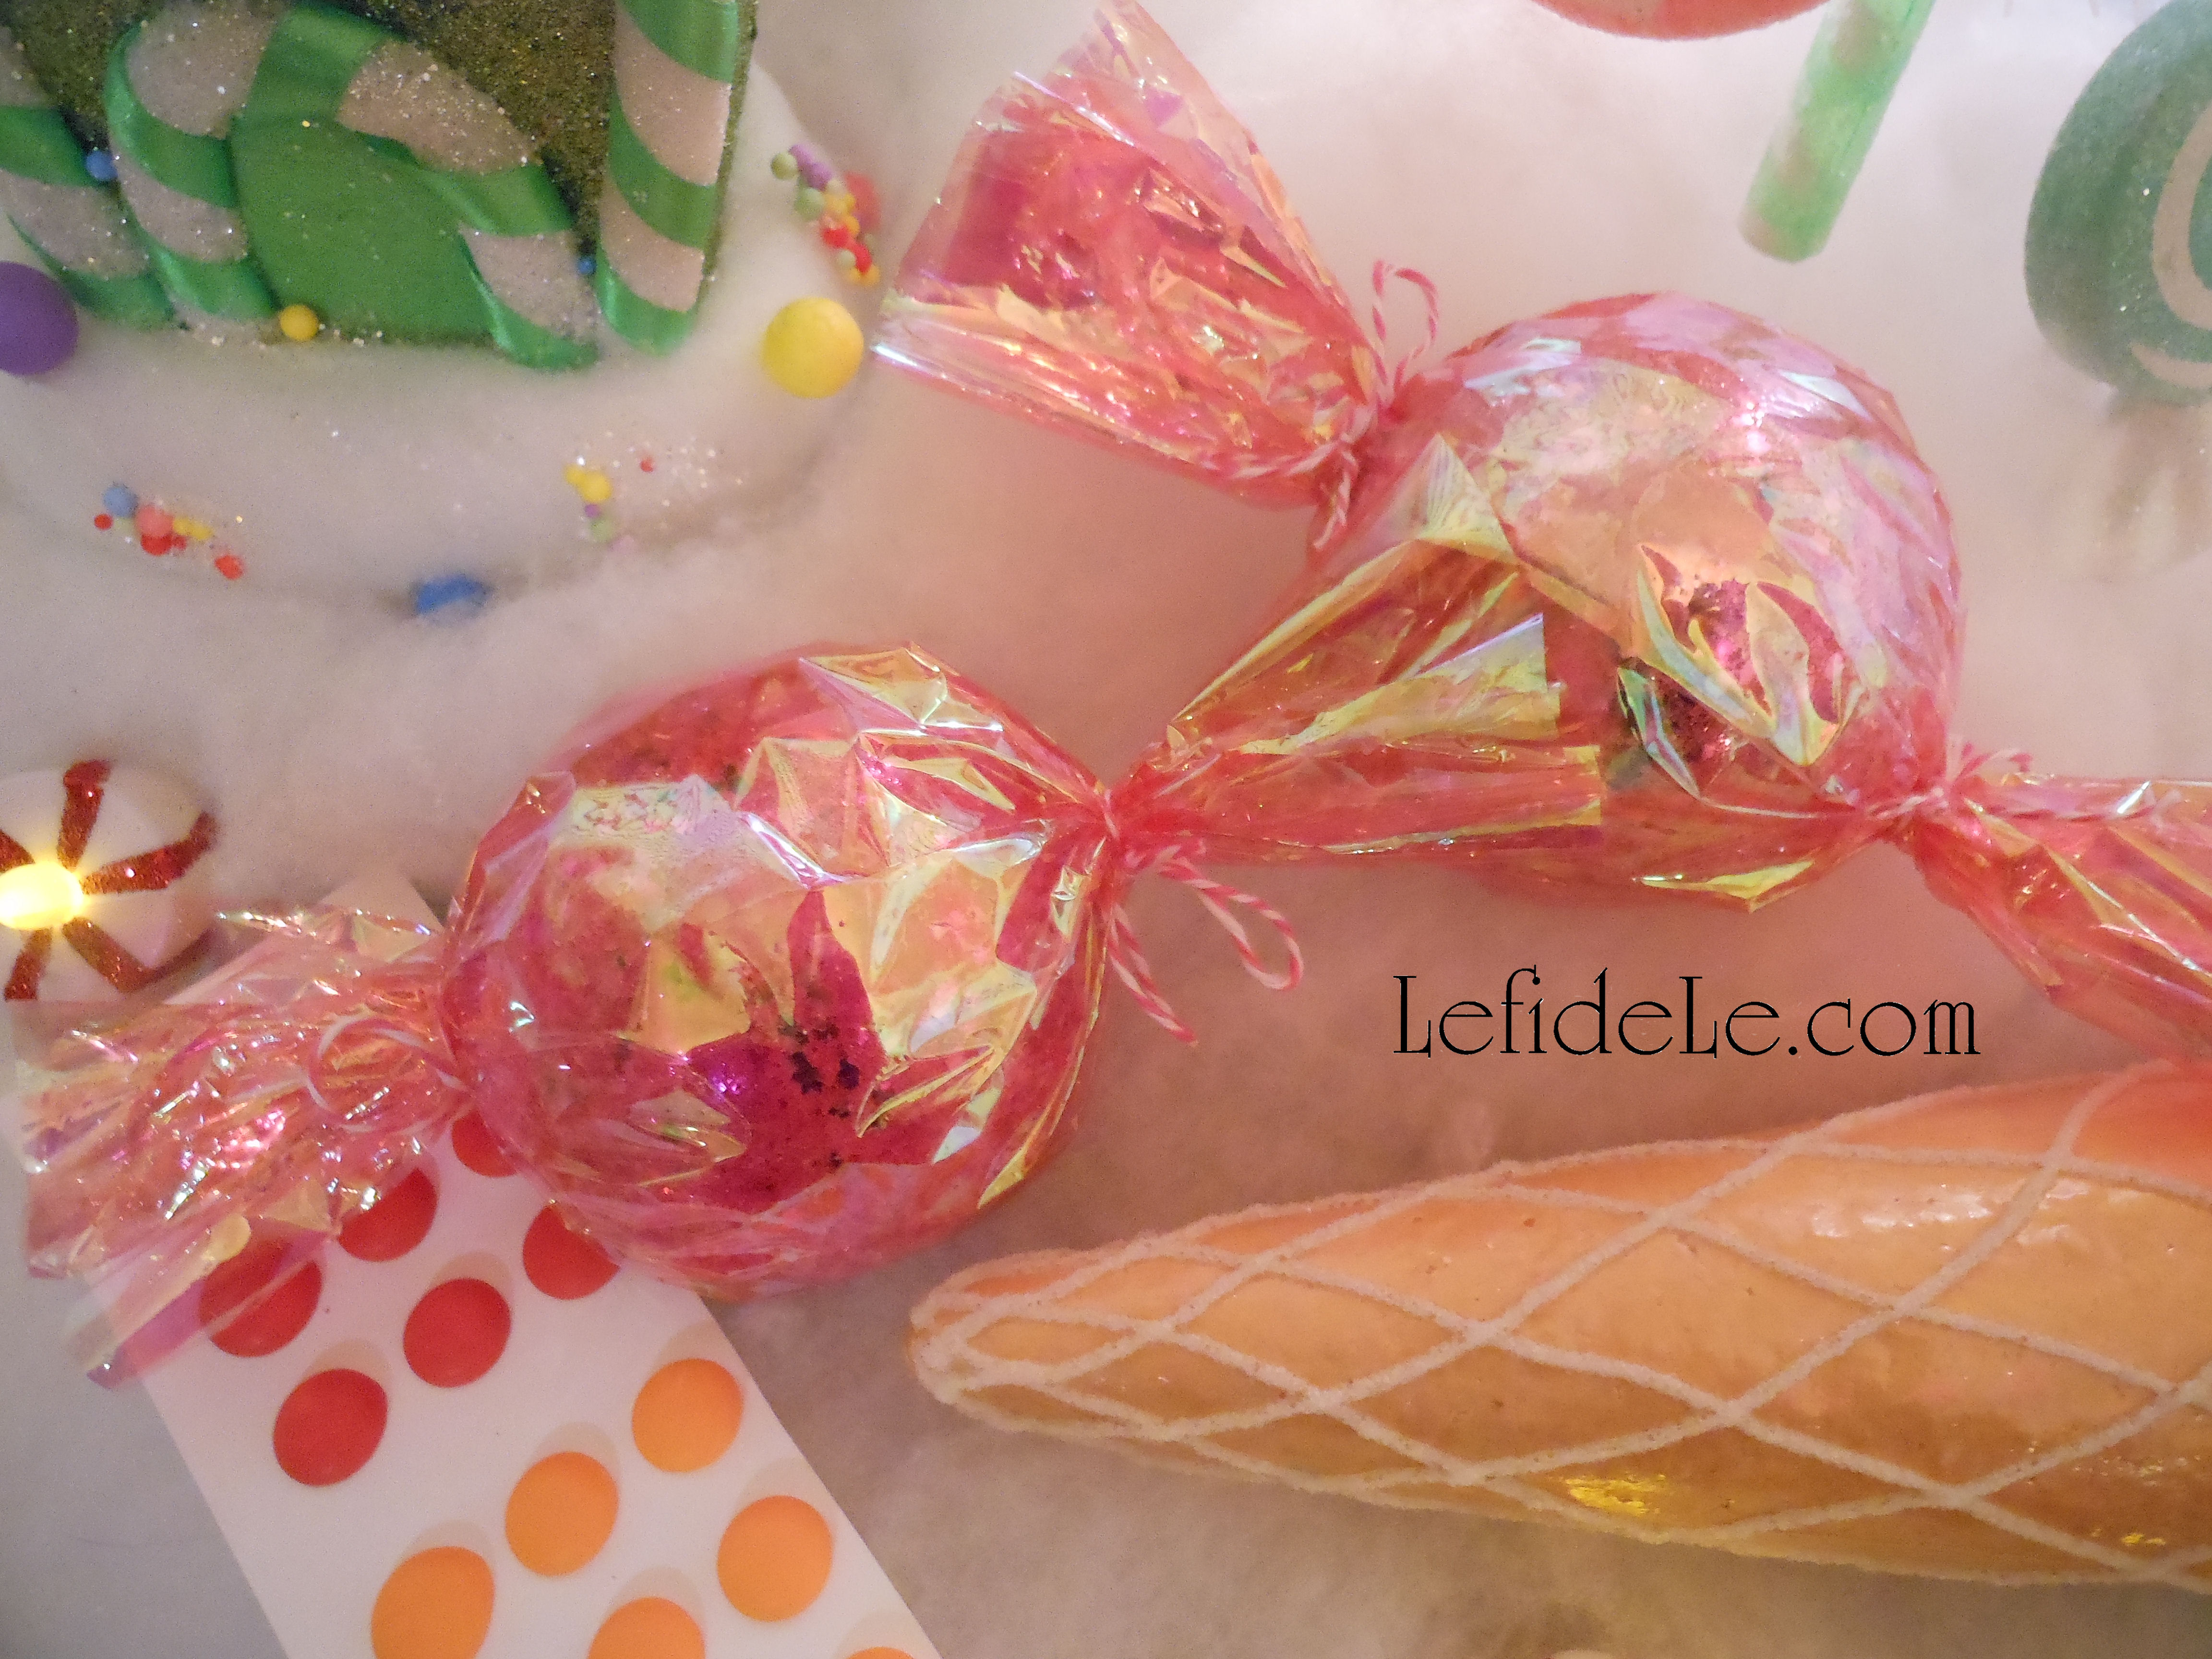
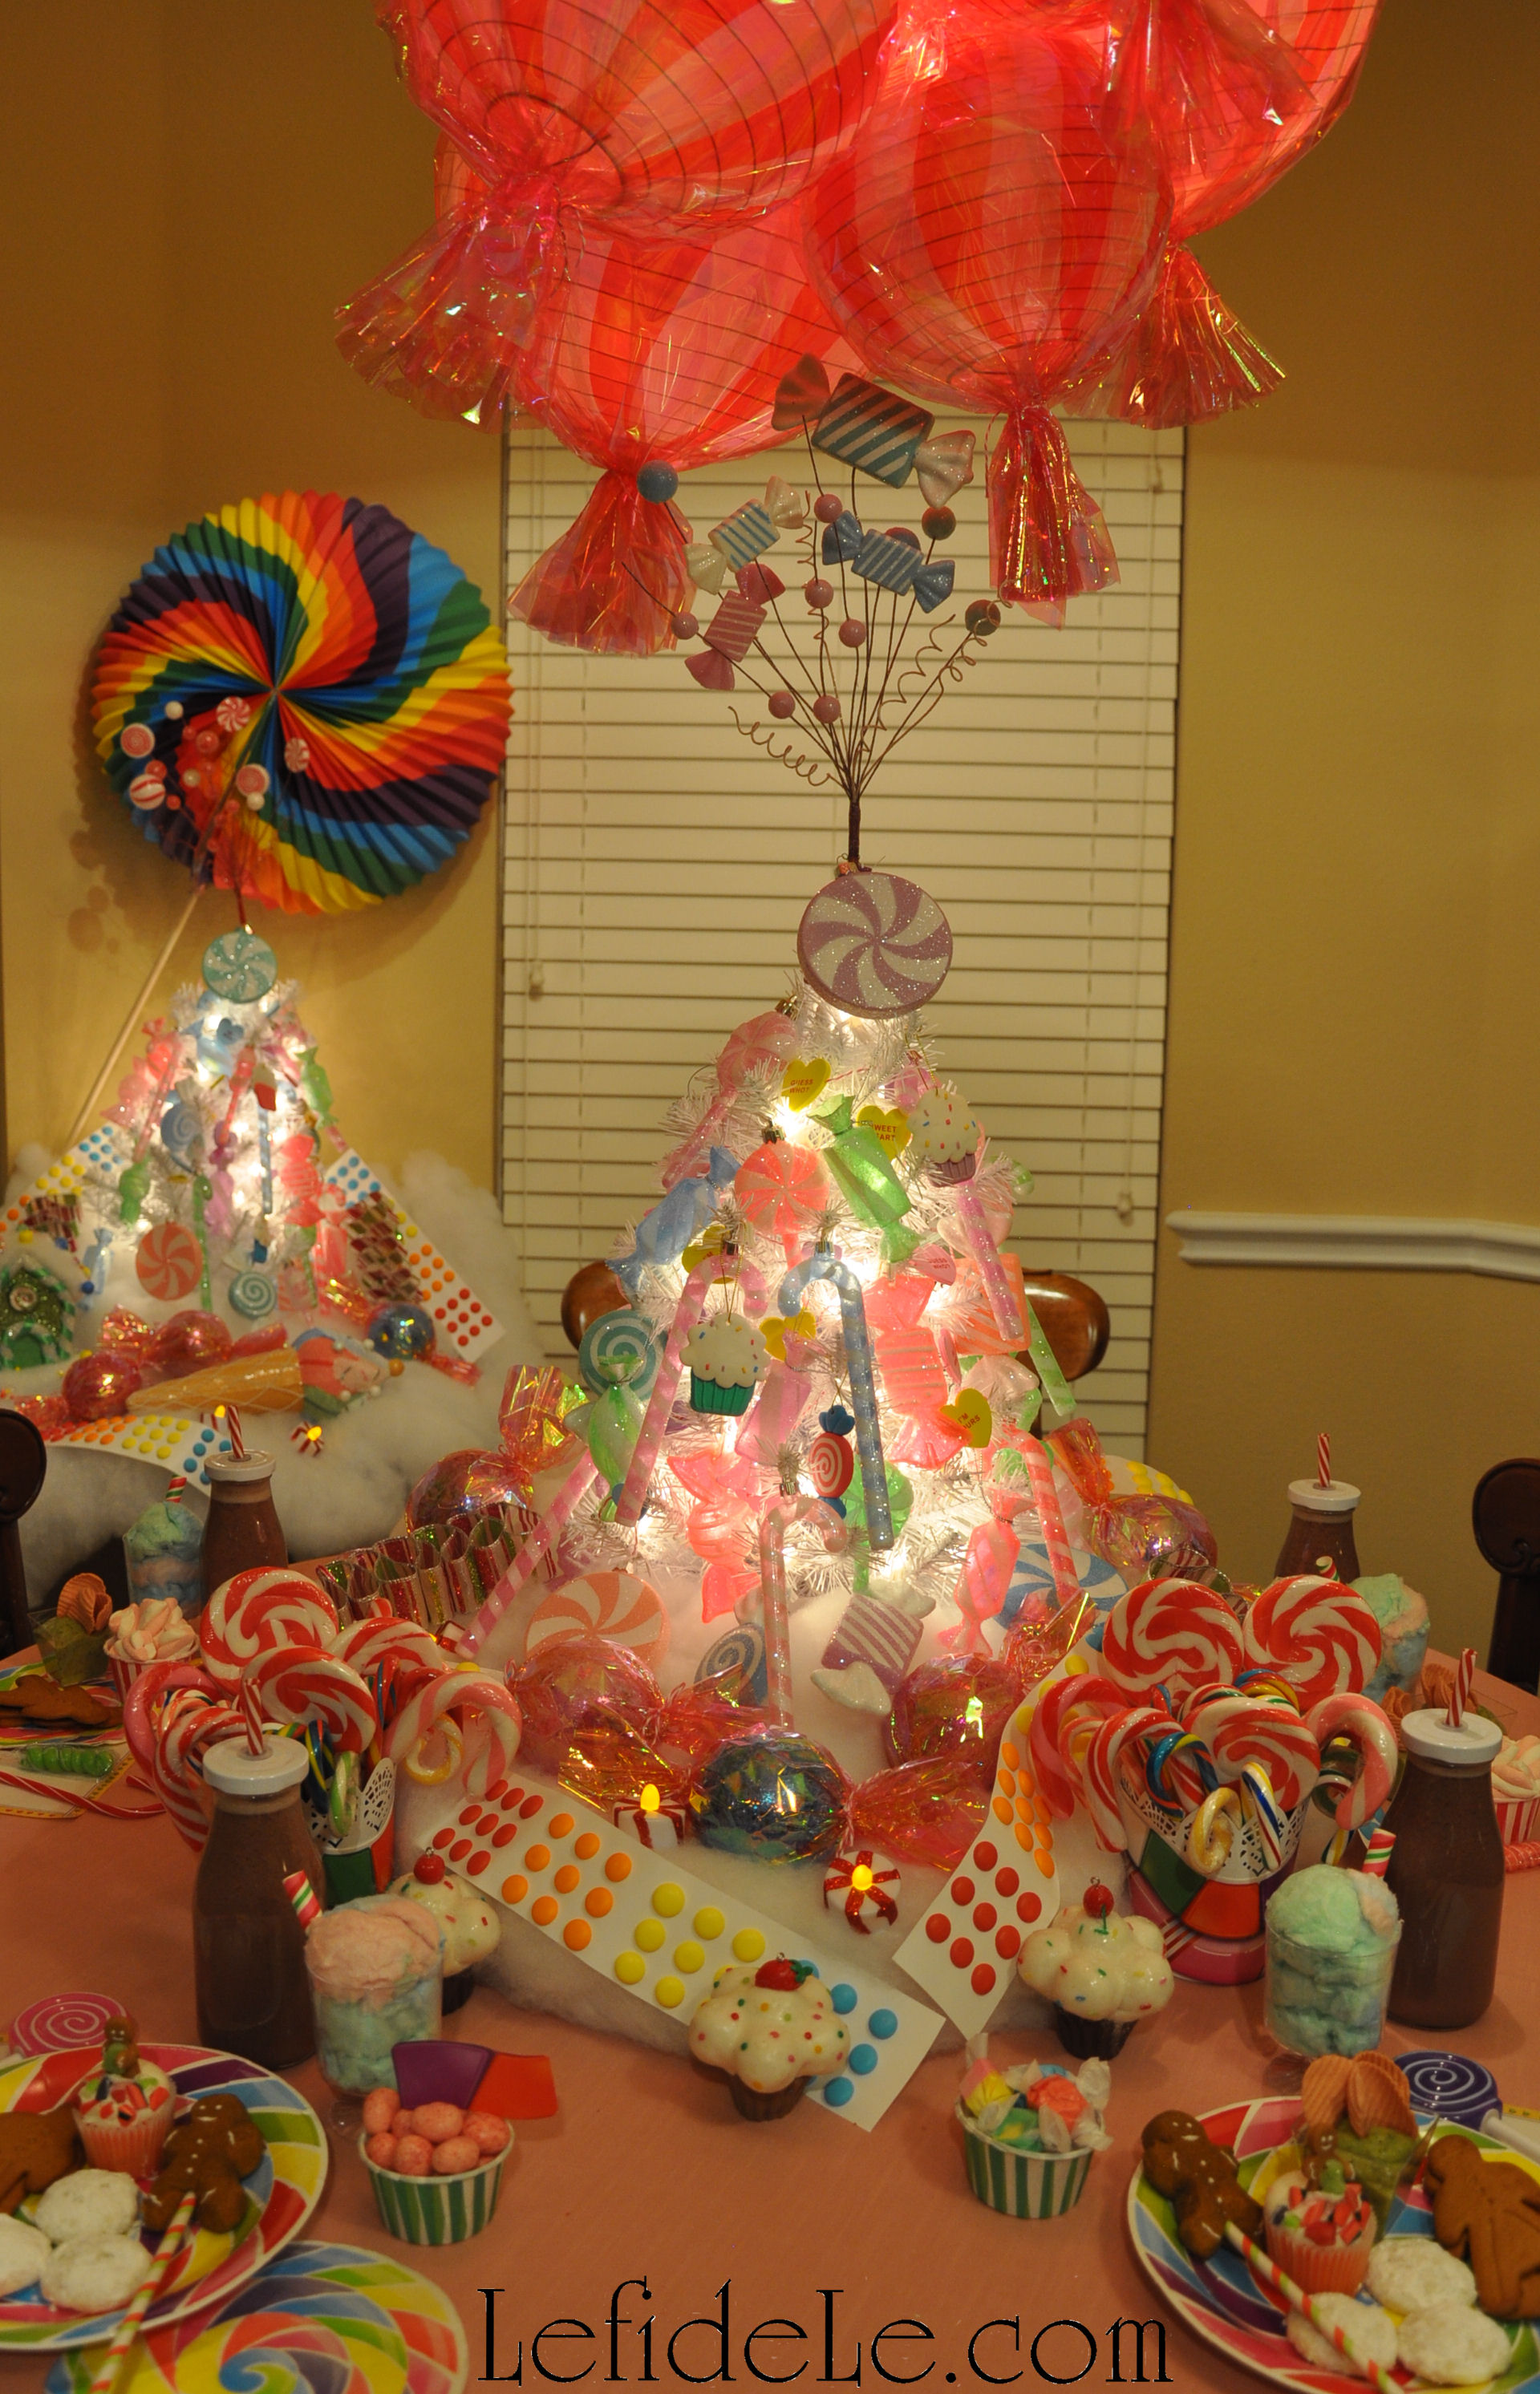
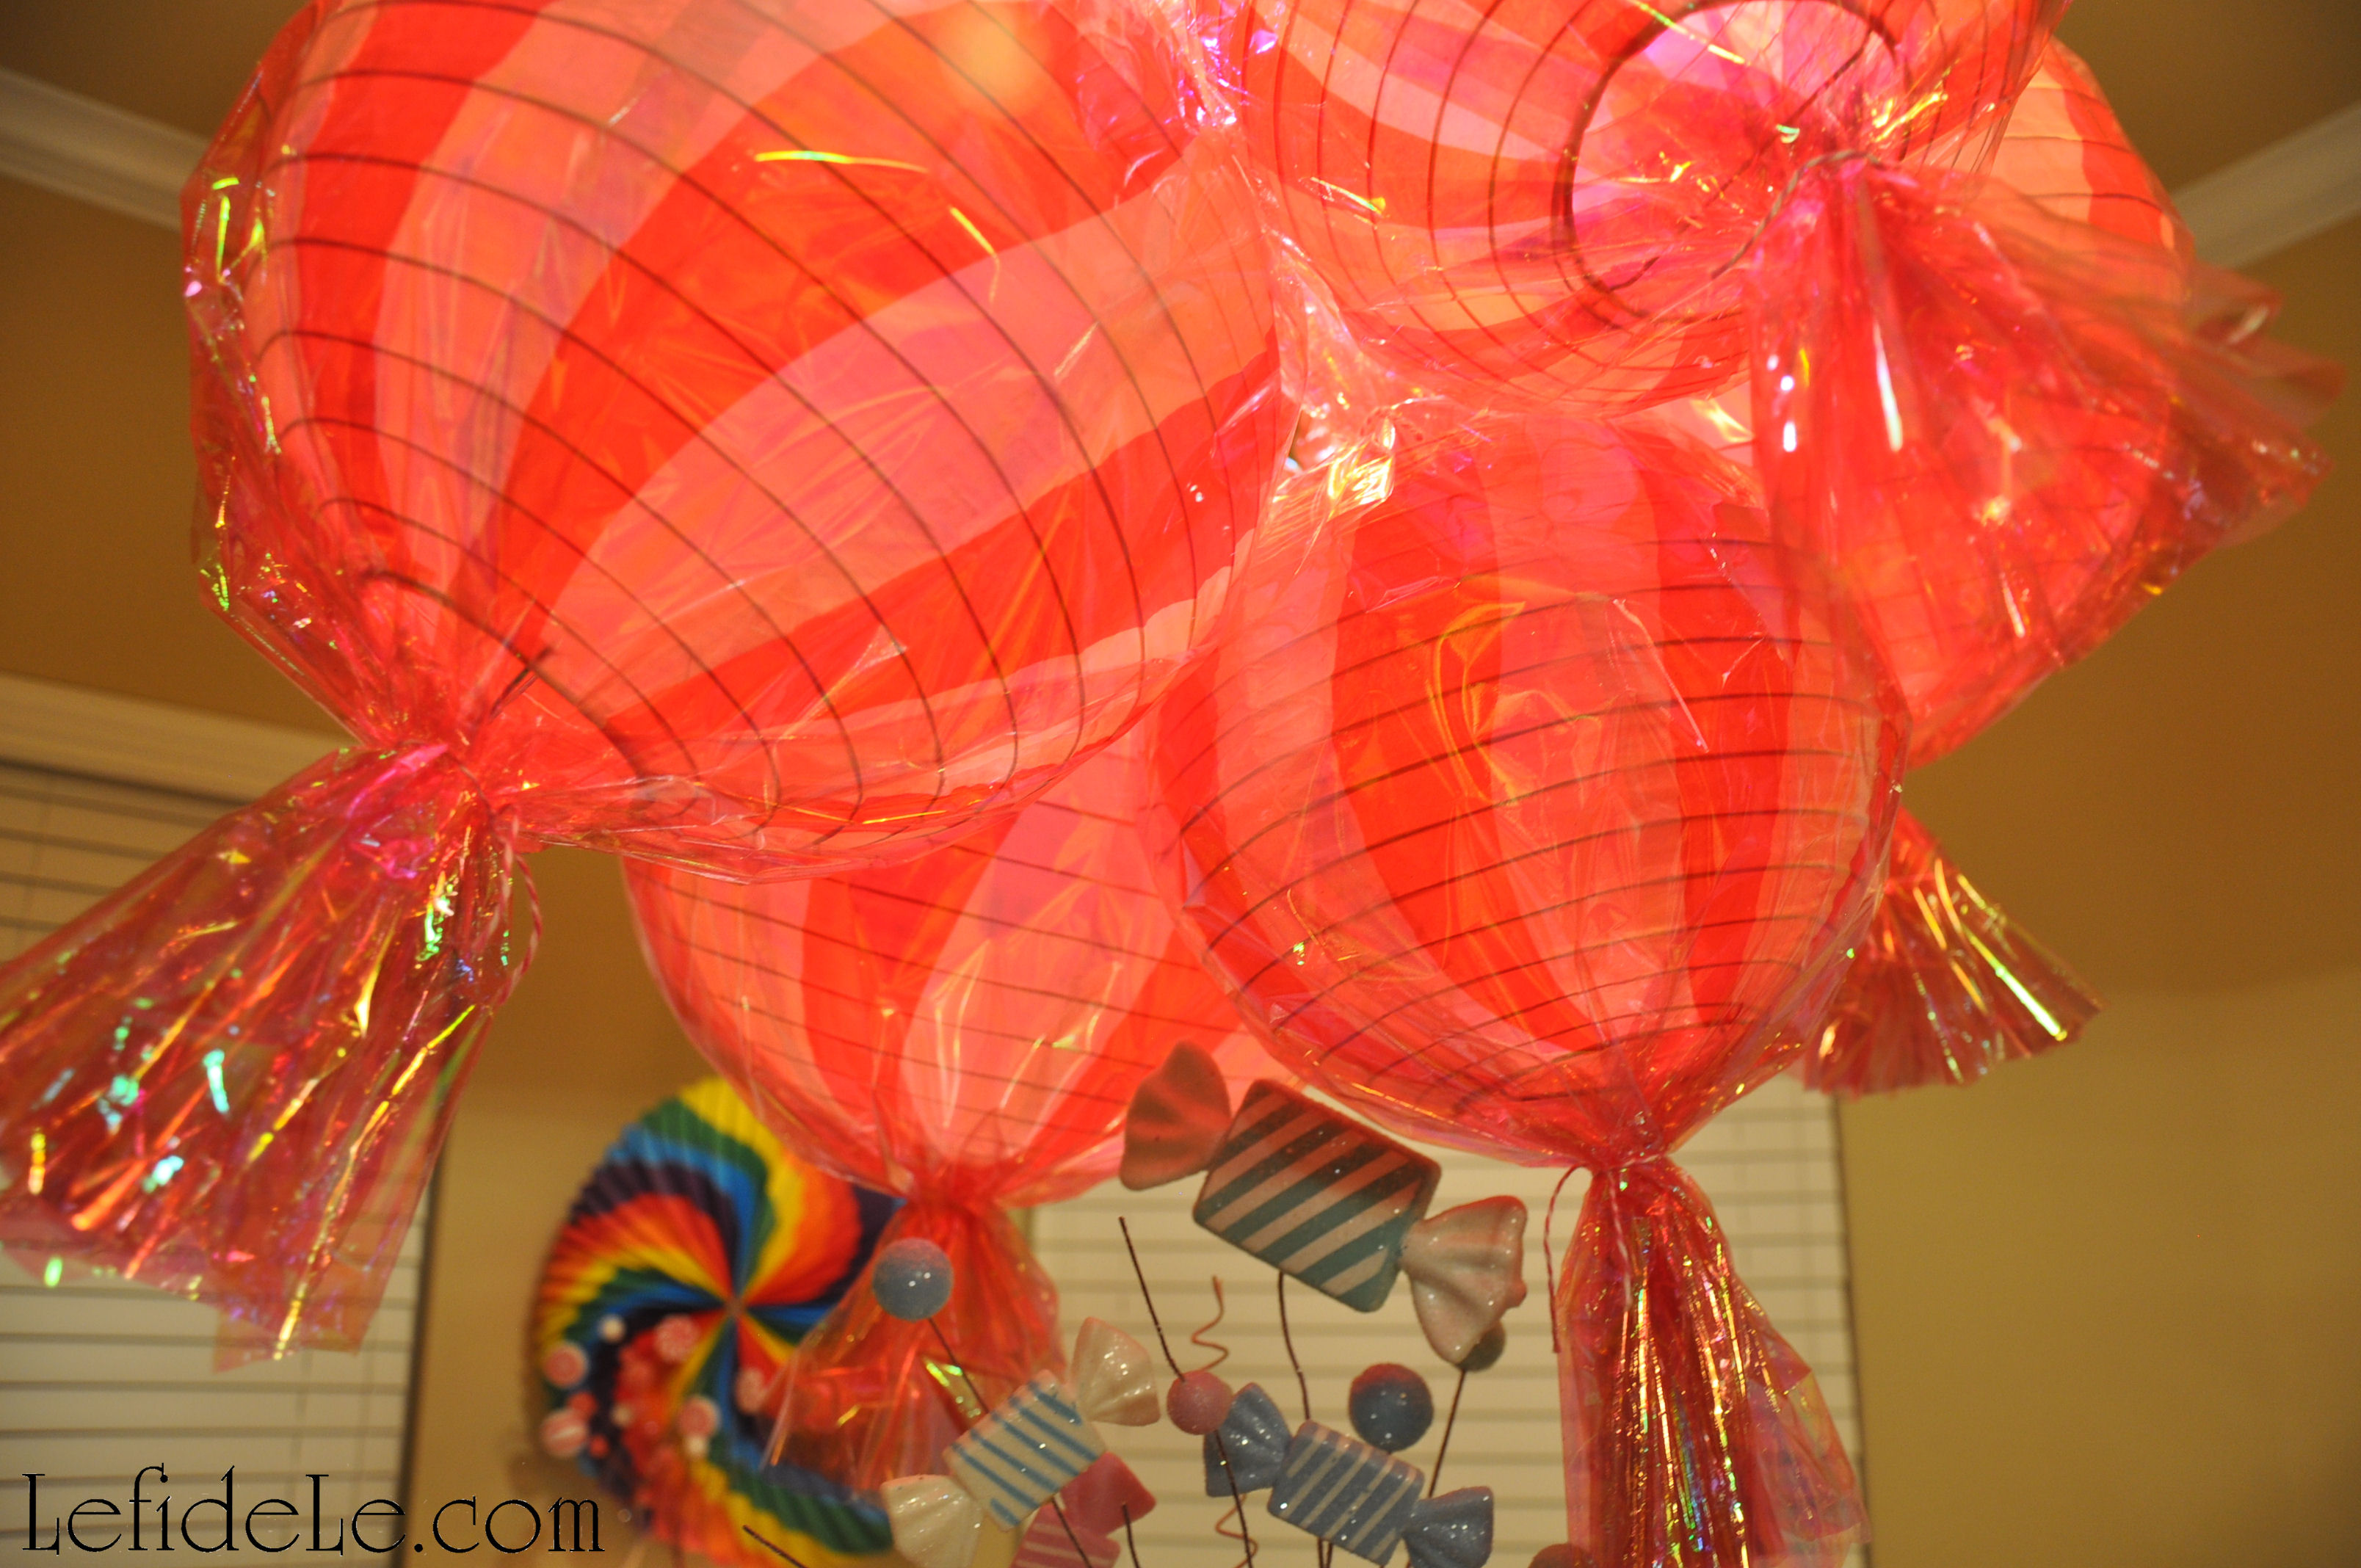
Around the bend, pink hard candy (lanterns) shine high above big rock candy mountains.

366Leigh

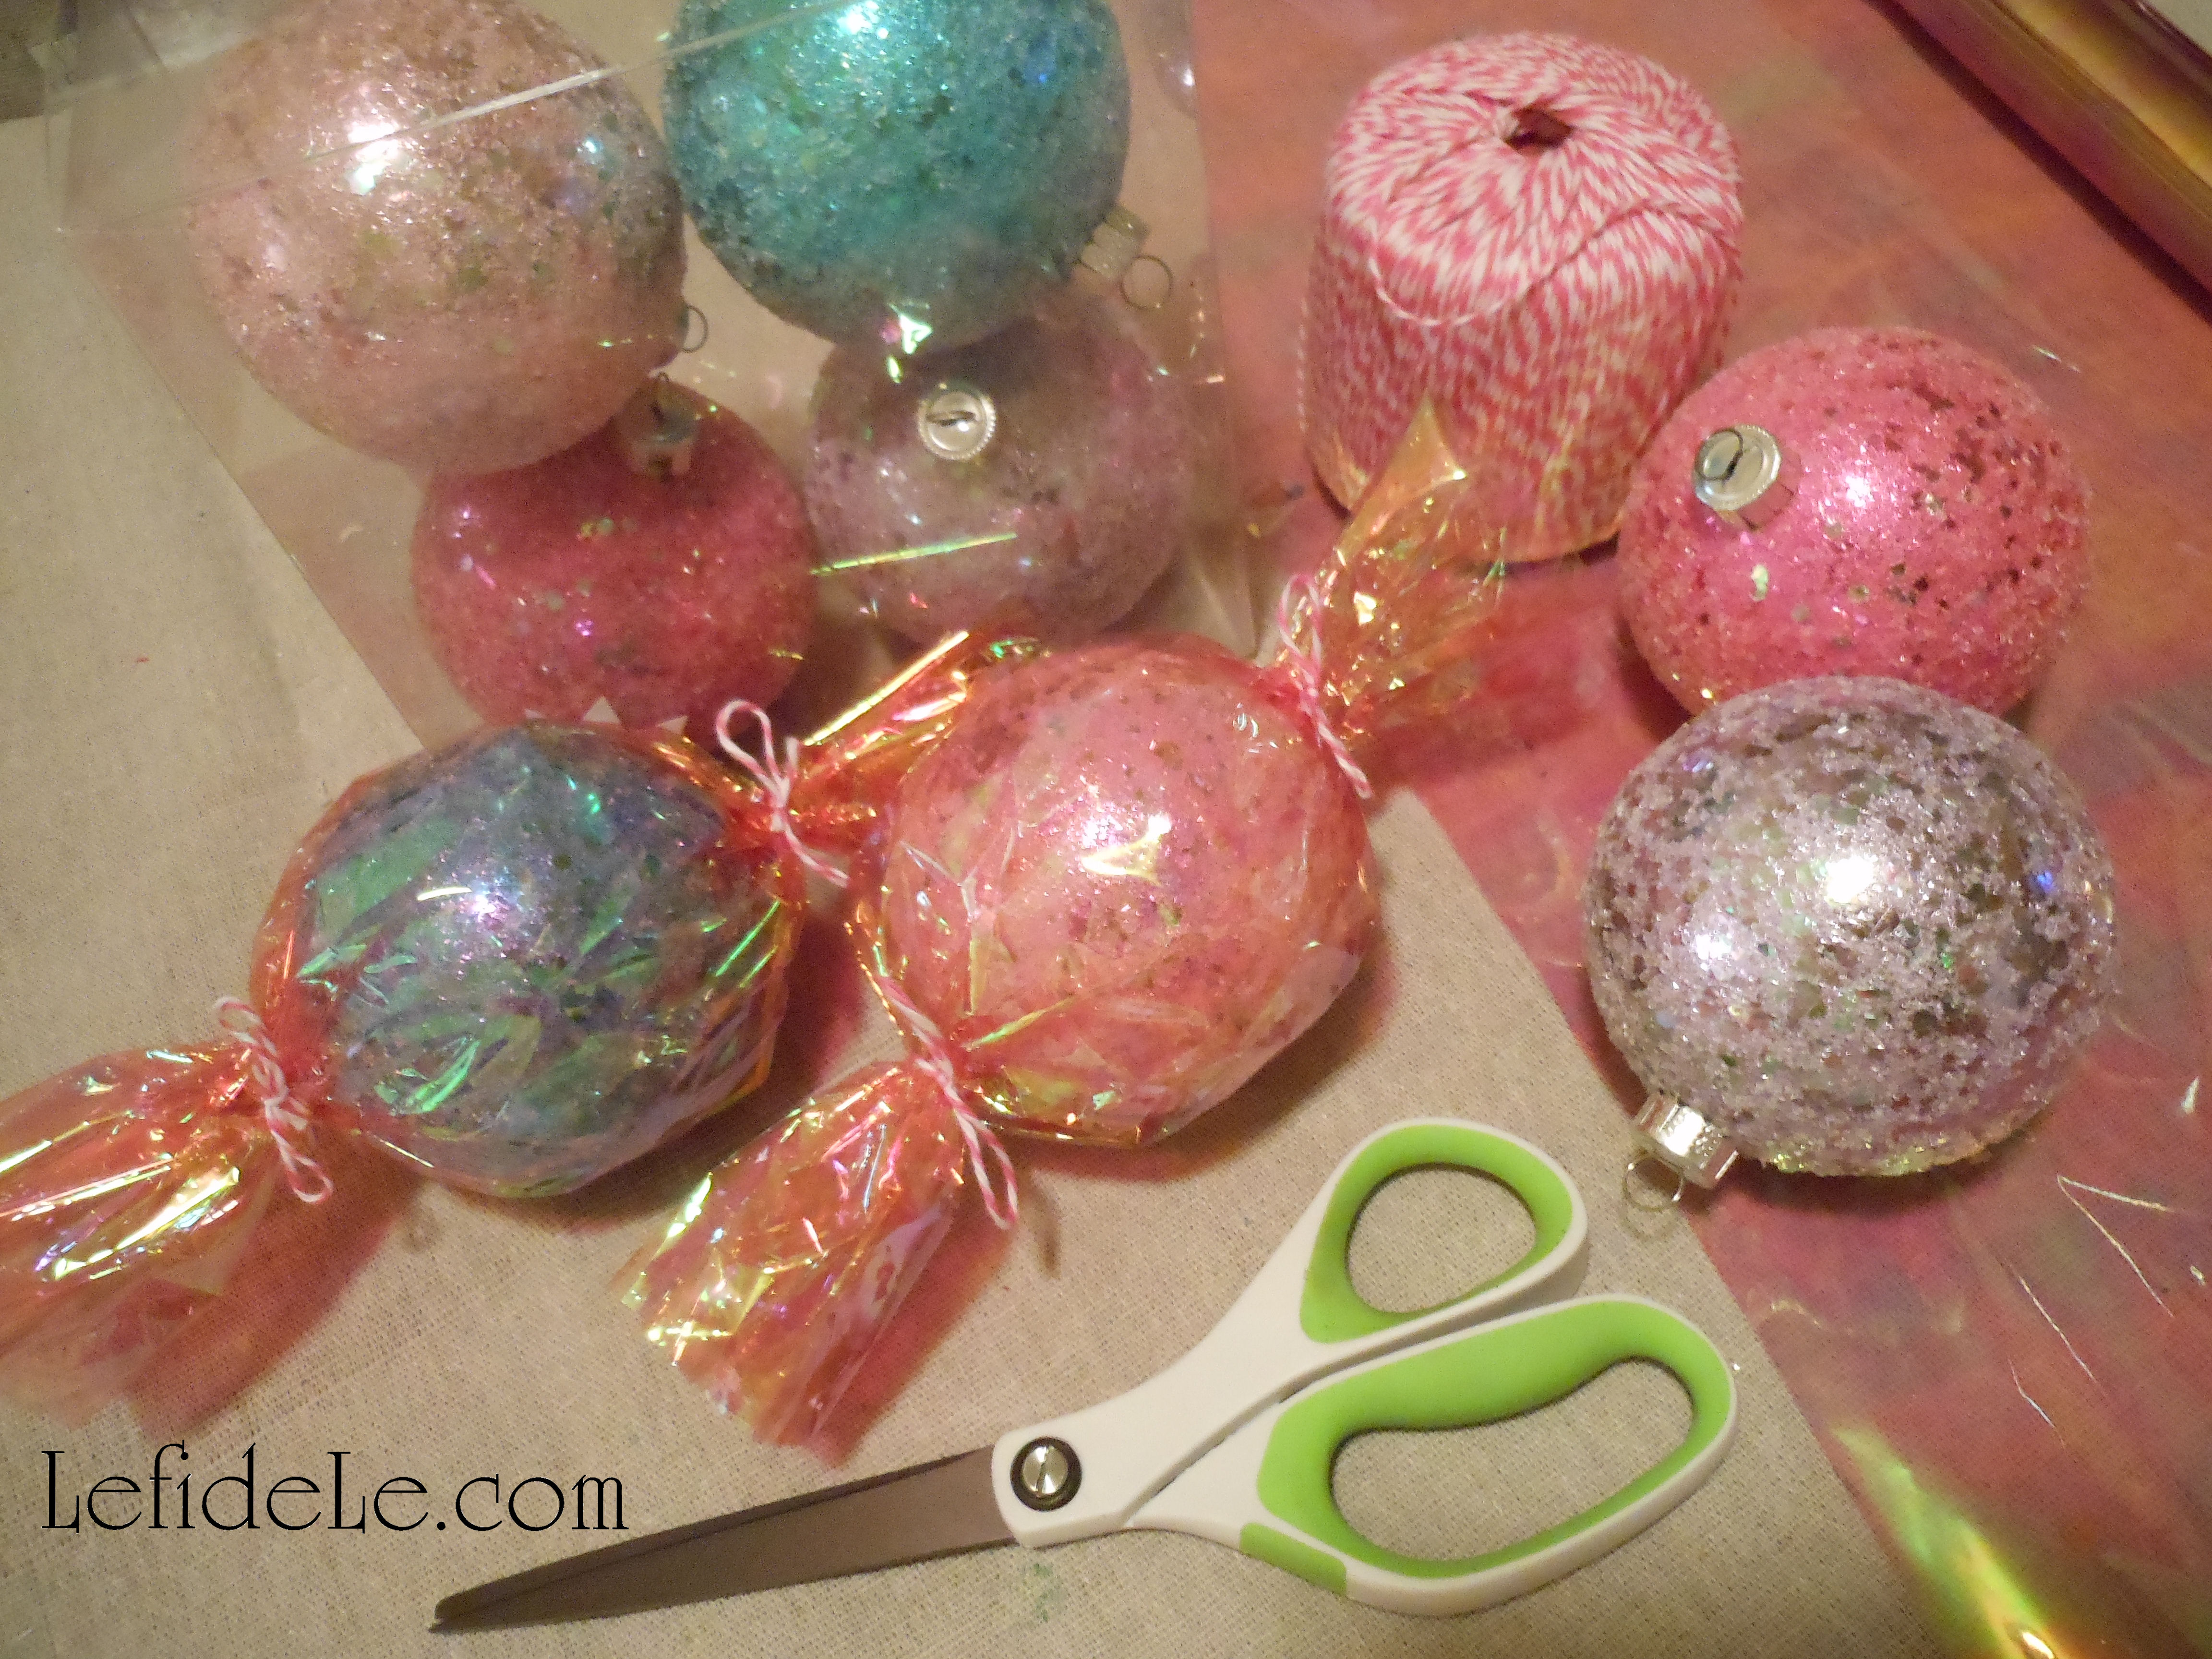
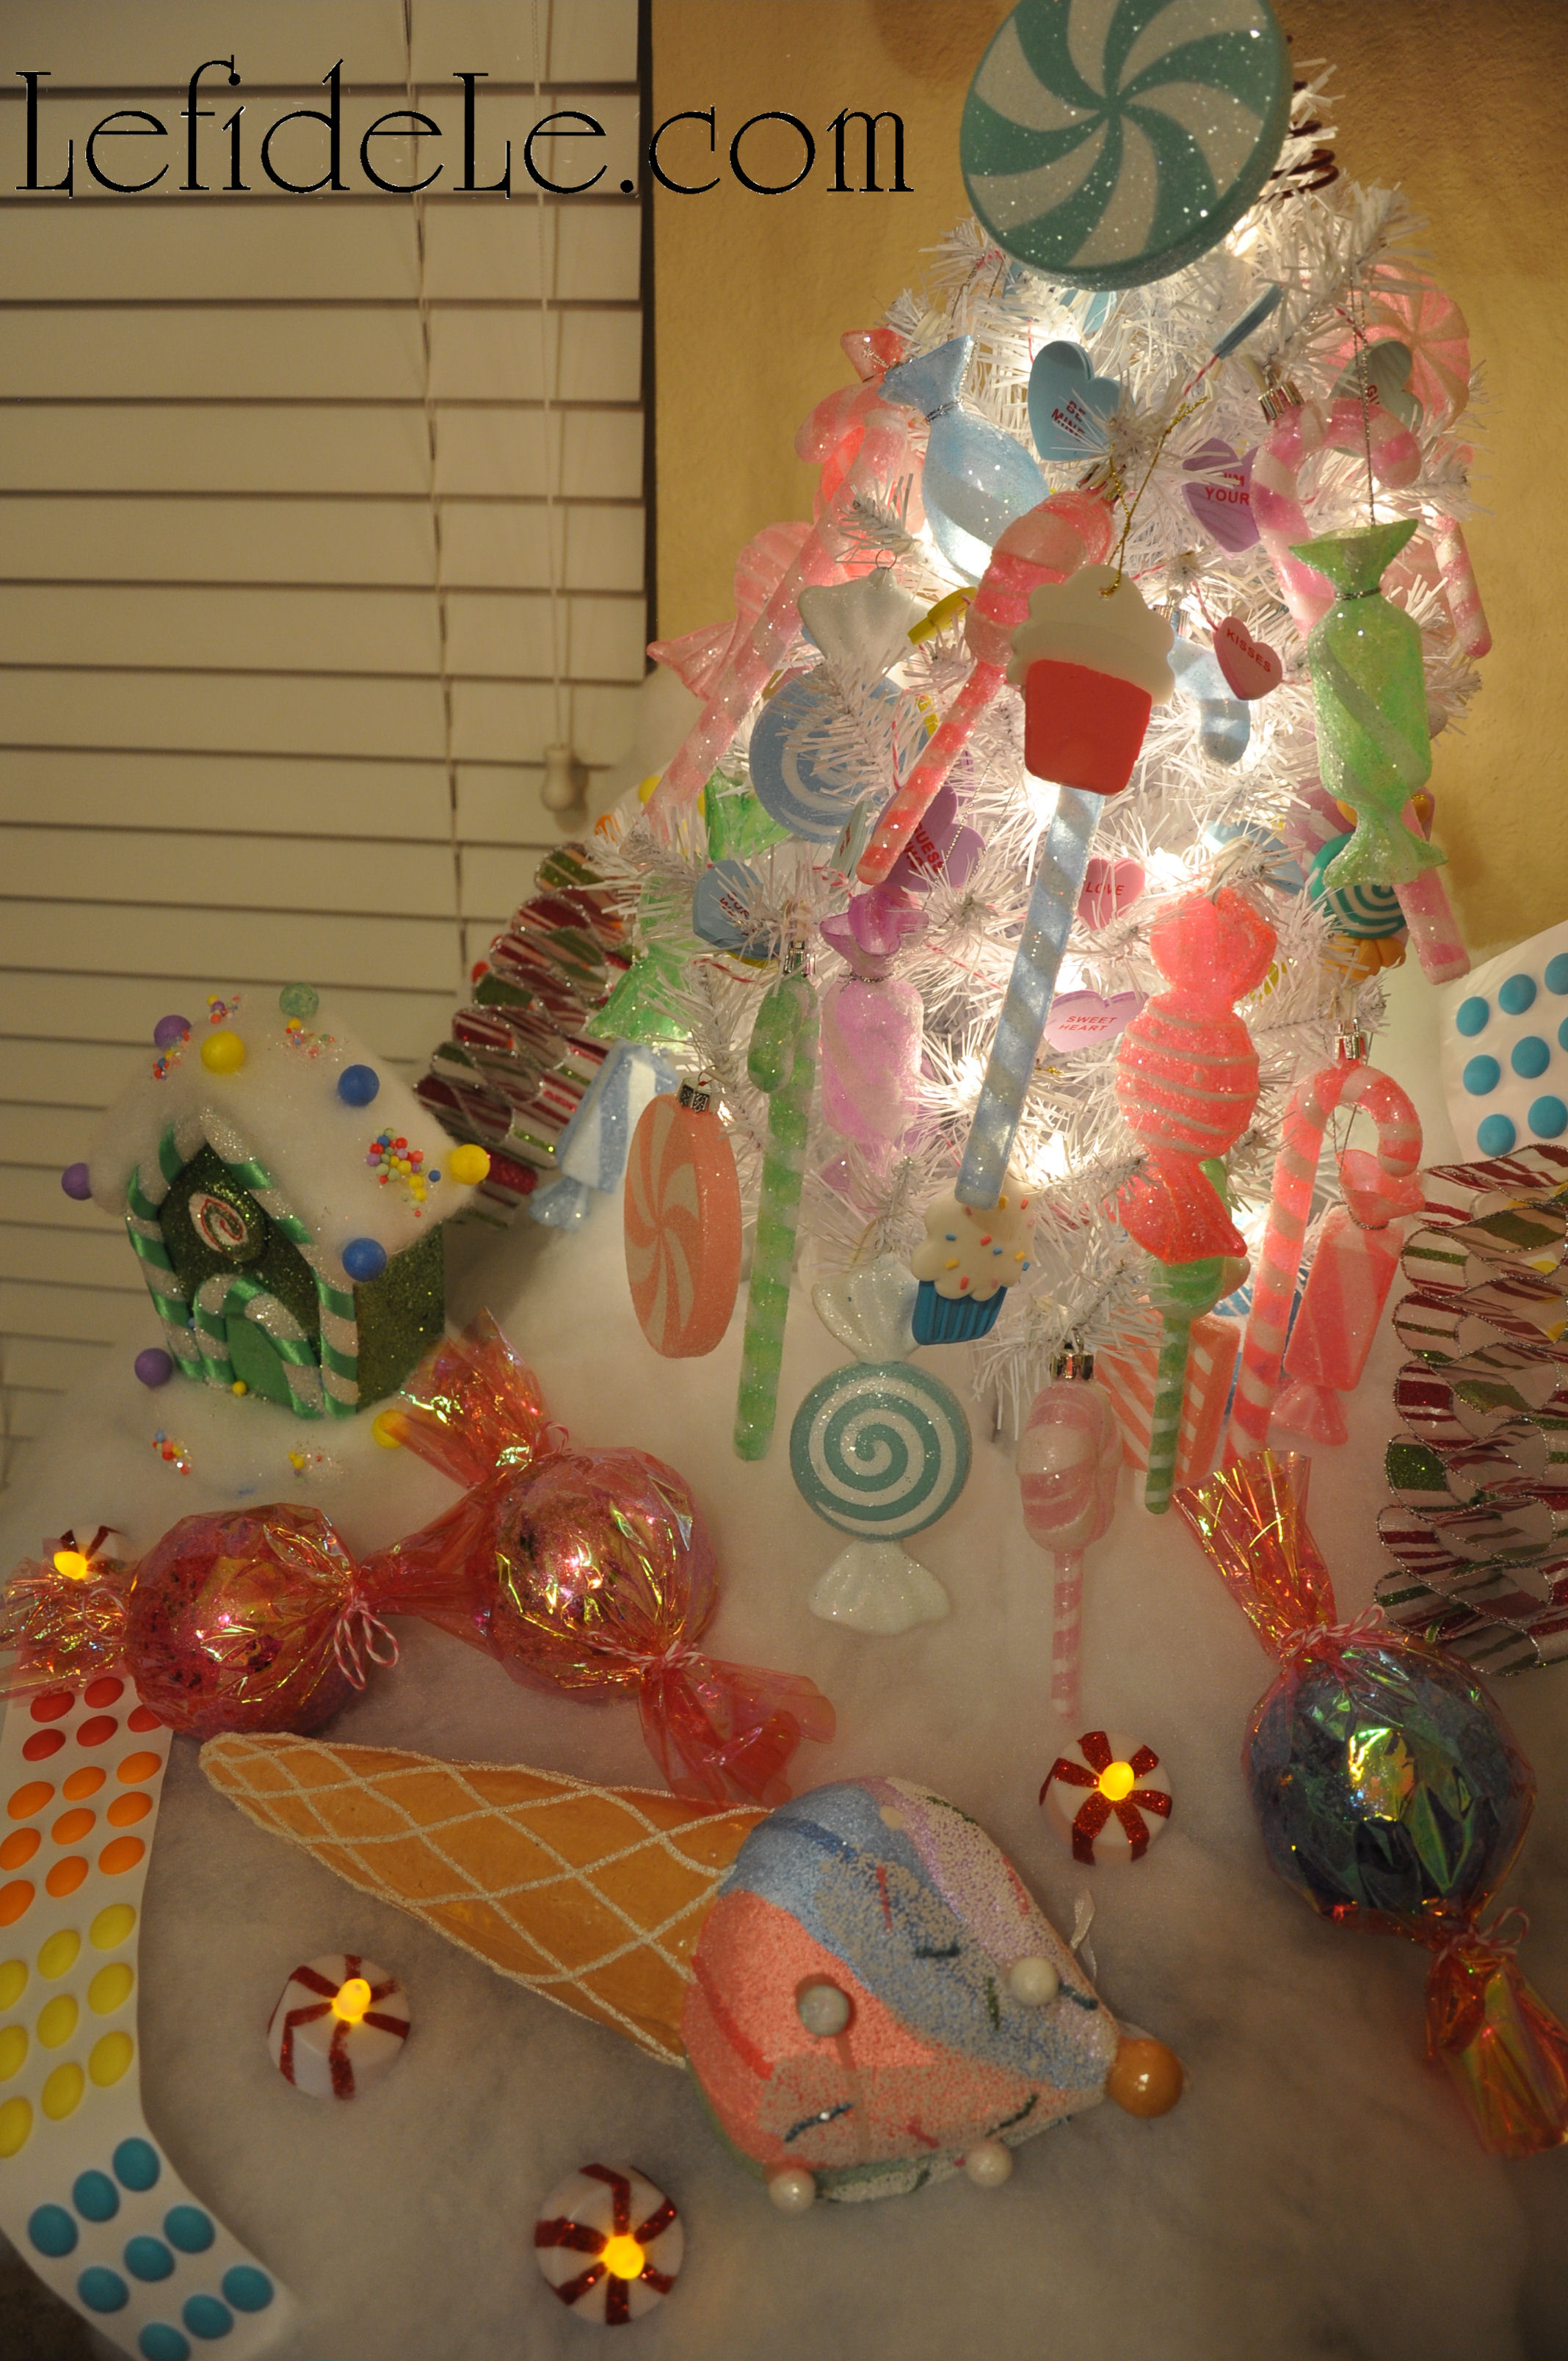
Glowing with hard candy (ornaments), they burst forth with pyroclastic explosions of candy treats spilling over pillowy white icing.

393Leigh

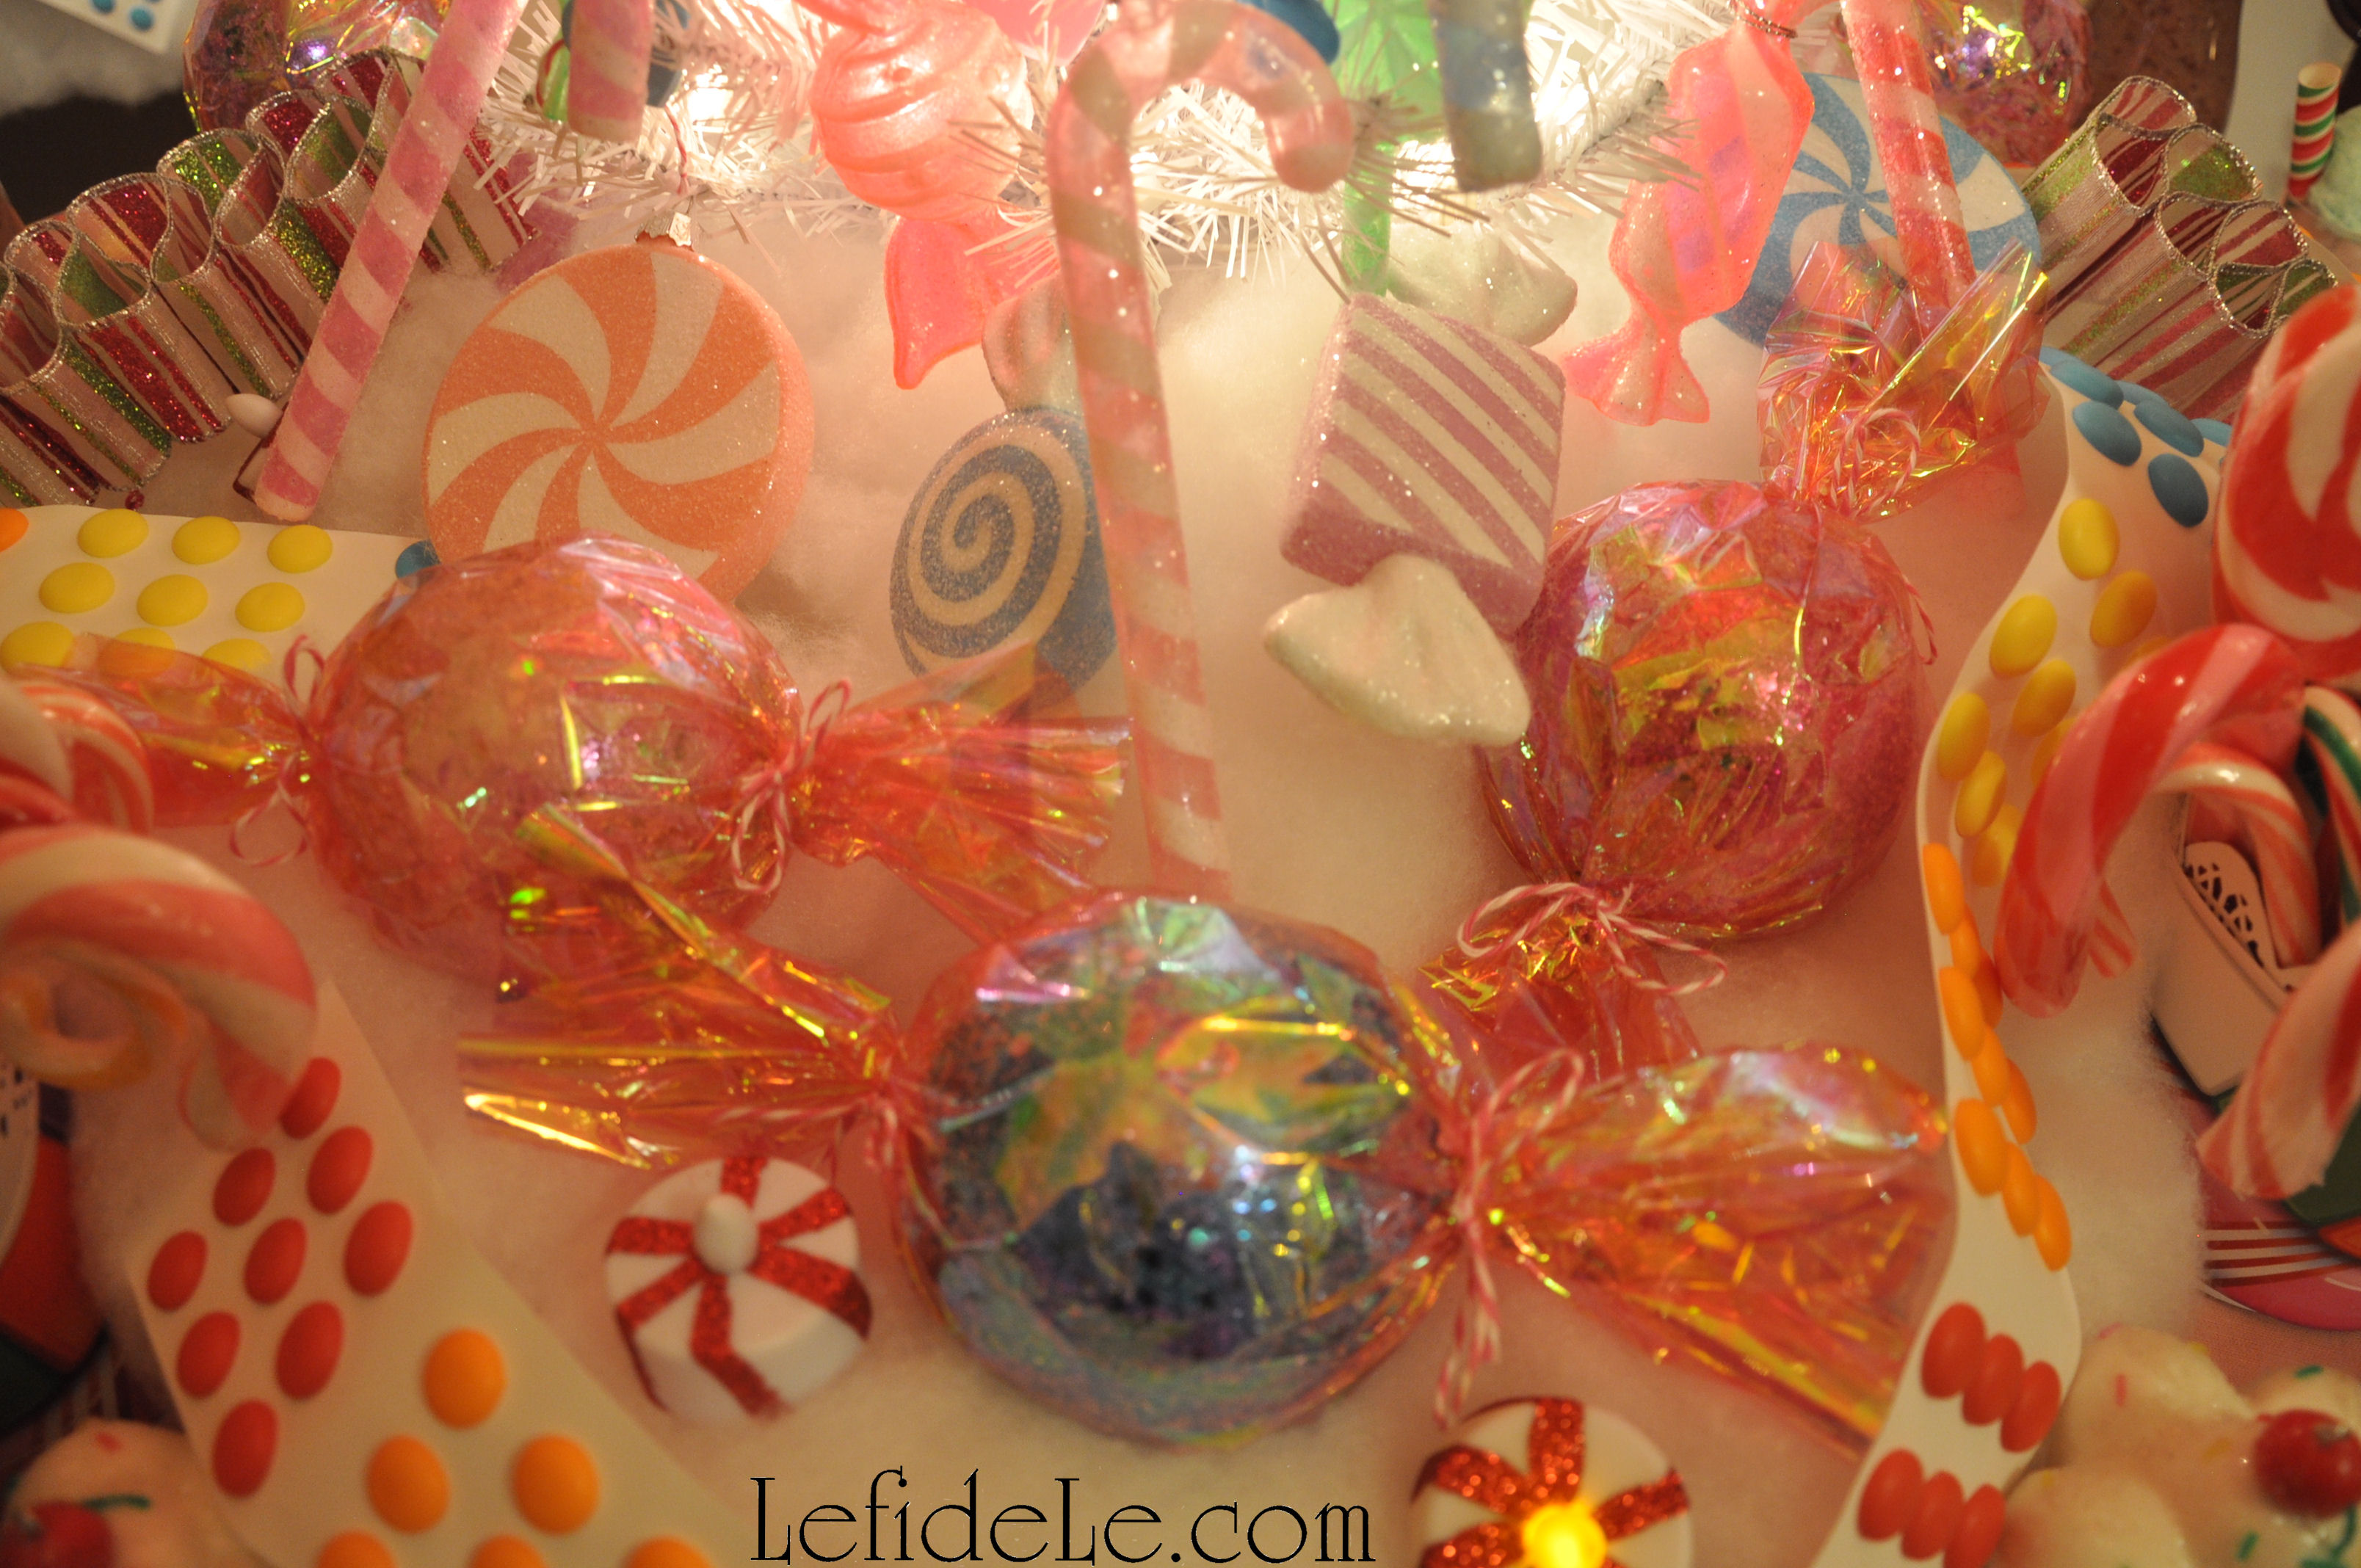
Hard candy (ornament) boulders tumble amid (faux) ribbon candy bushes and flowing streams of (real mega) candy buttons.

395 (2)Leigh

(LED) peppermint light posts illuminate the scene.

370Leigh(Real) candy-cane thickets and (faux) cupcake bushes dot the camping site where gingerbread residents roast marshmallows in the midst of the pink (tablecloth) countryside.

386Leigh

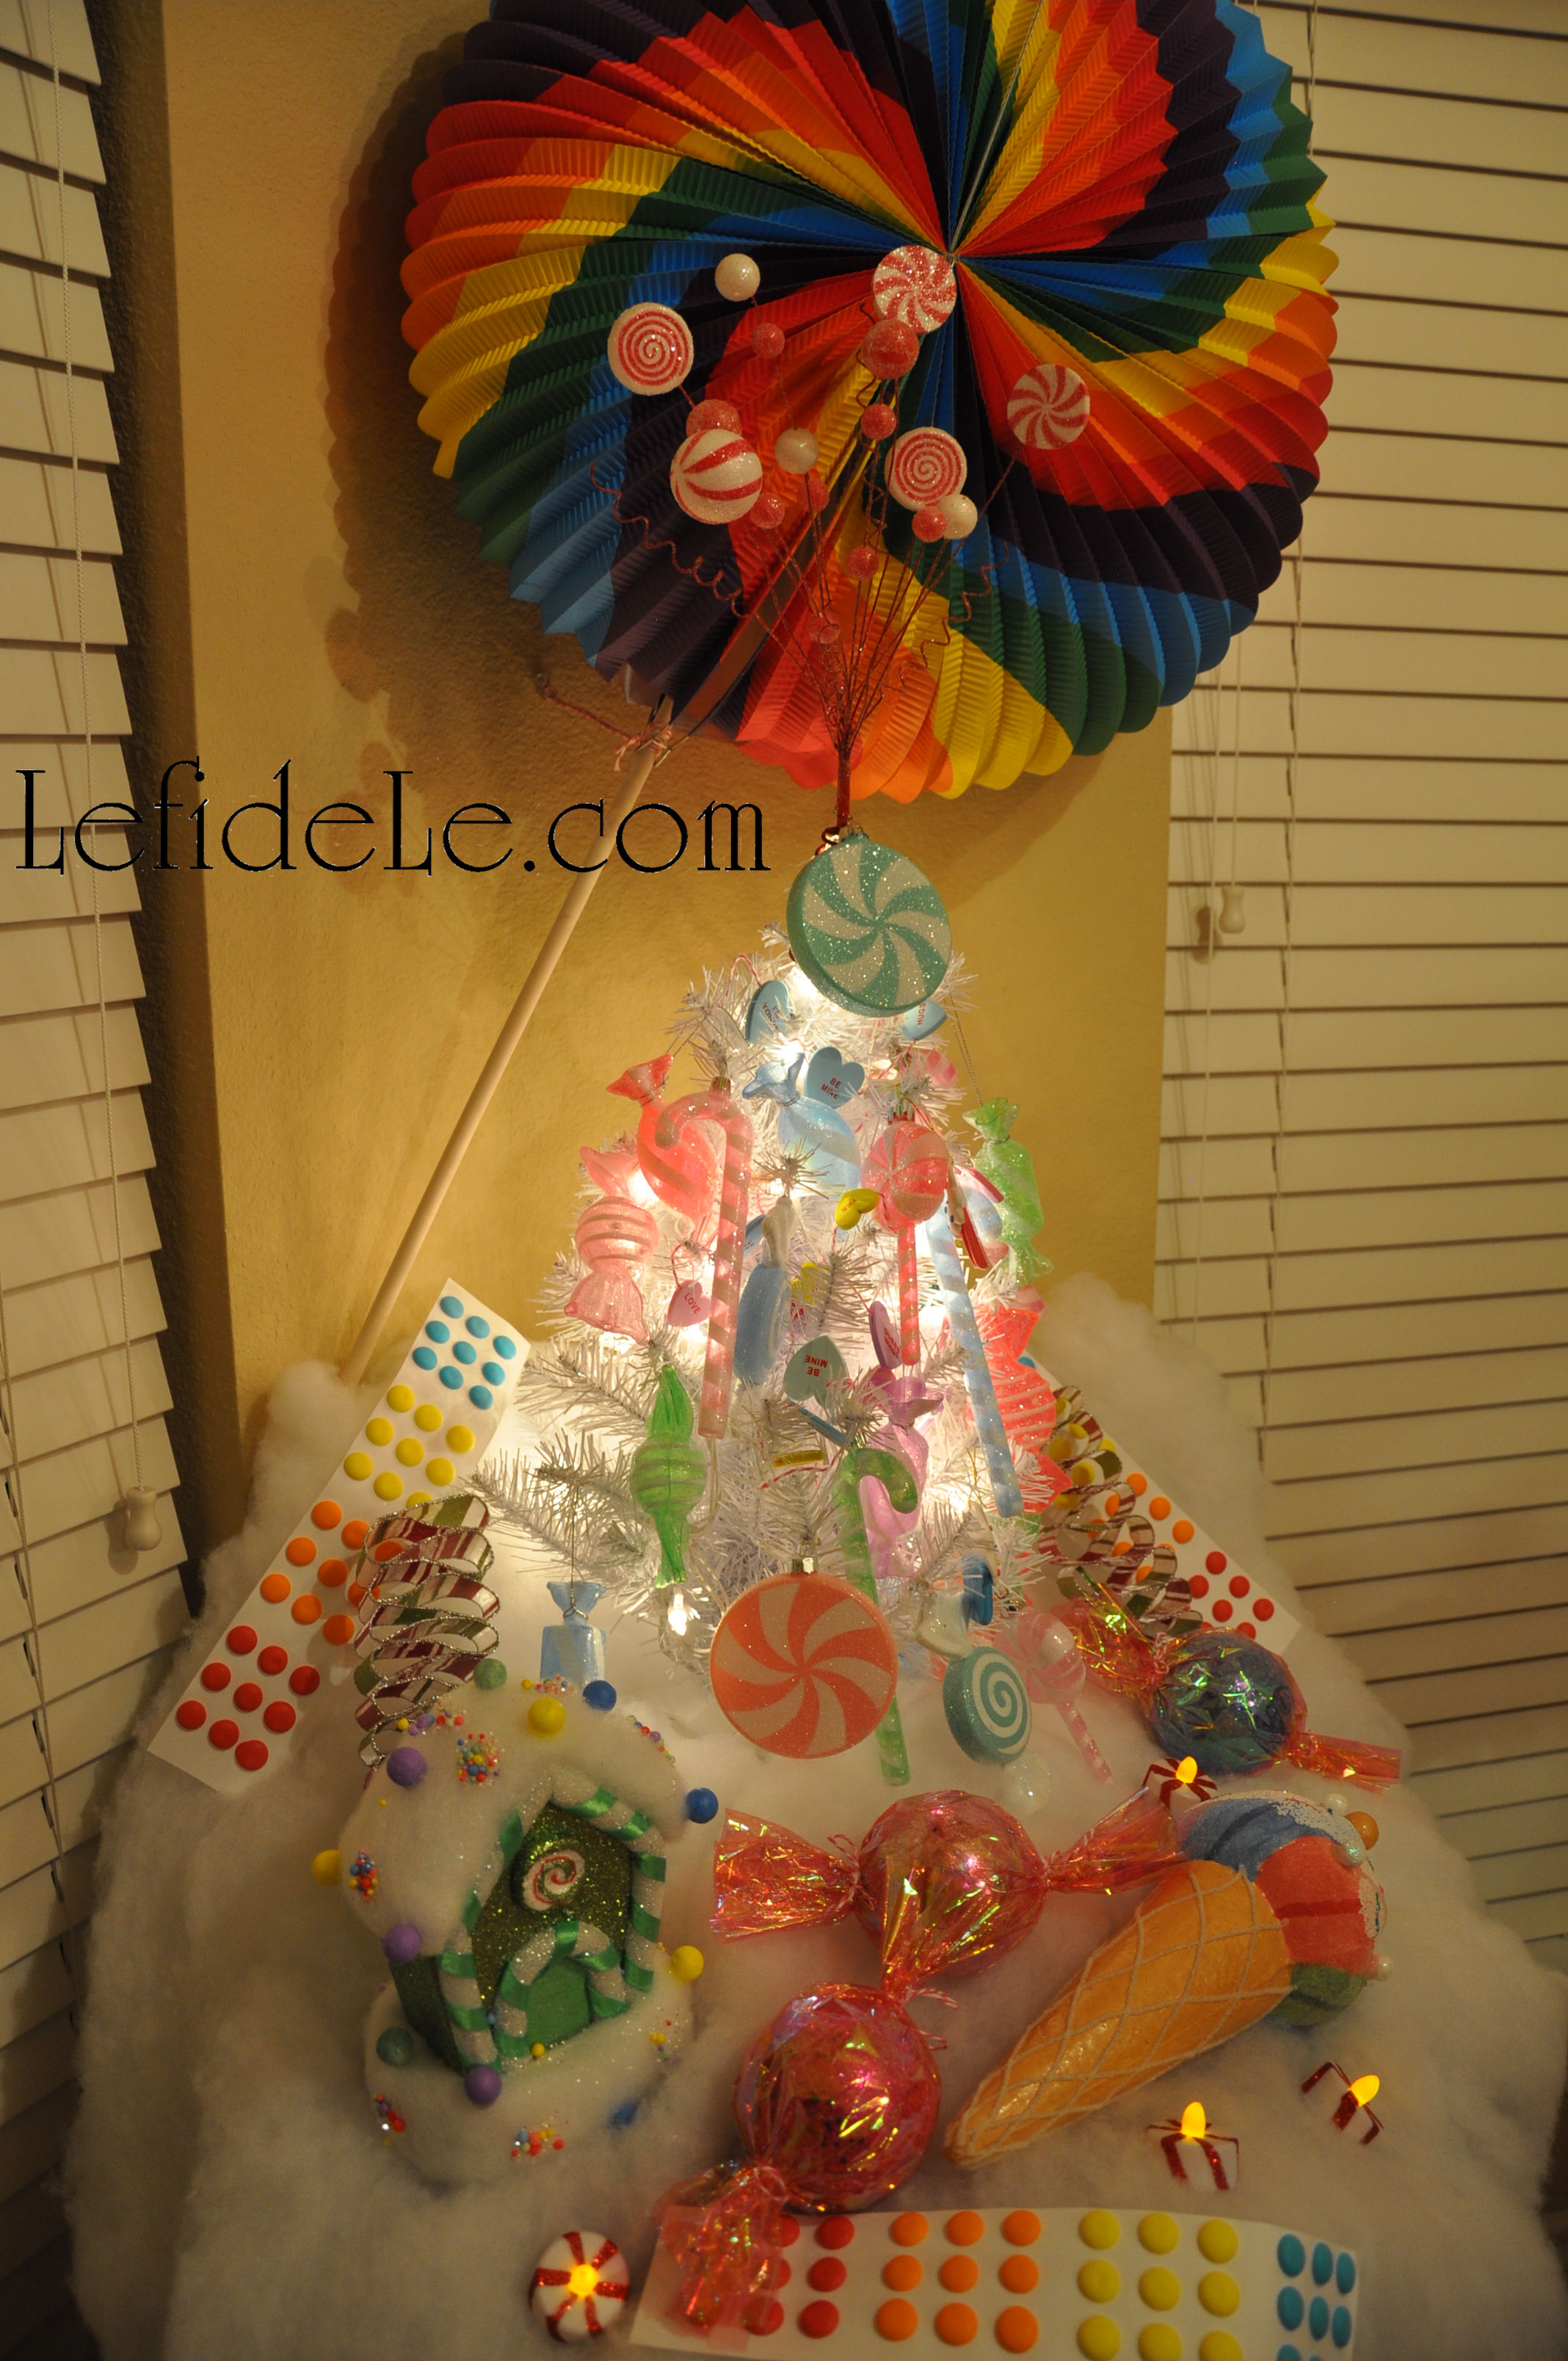
A rainbow lollipop (lantern) arcs above the distant rock candy mountain (tree).

388Leigh

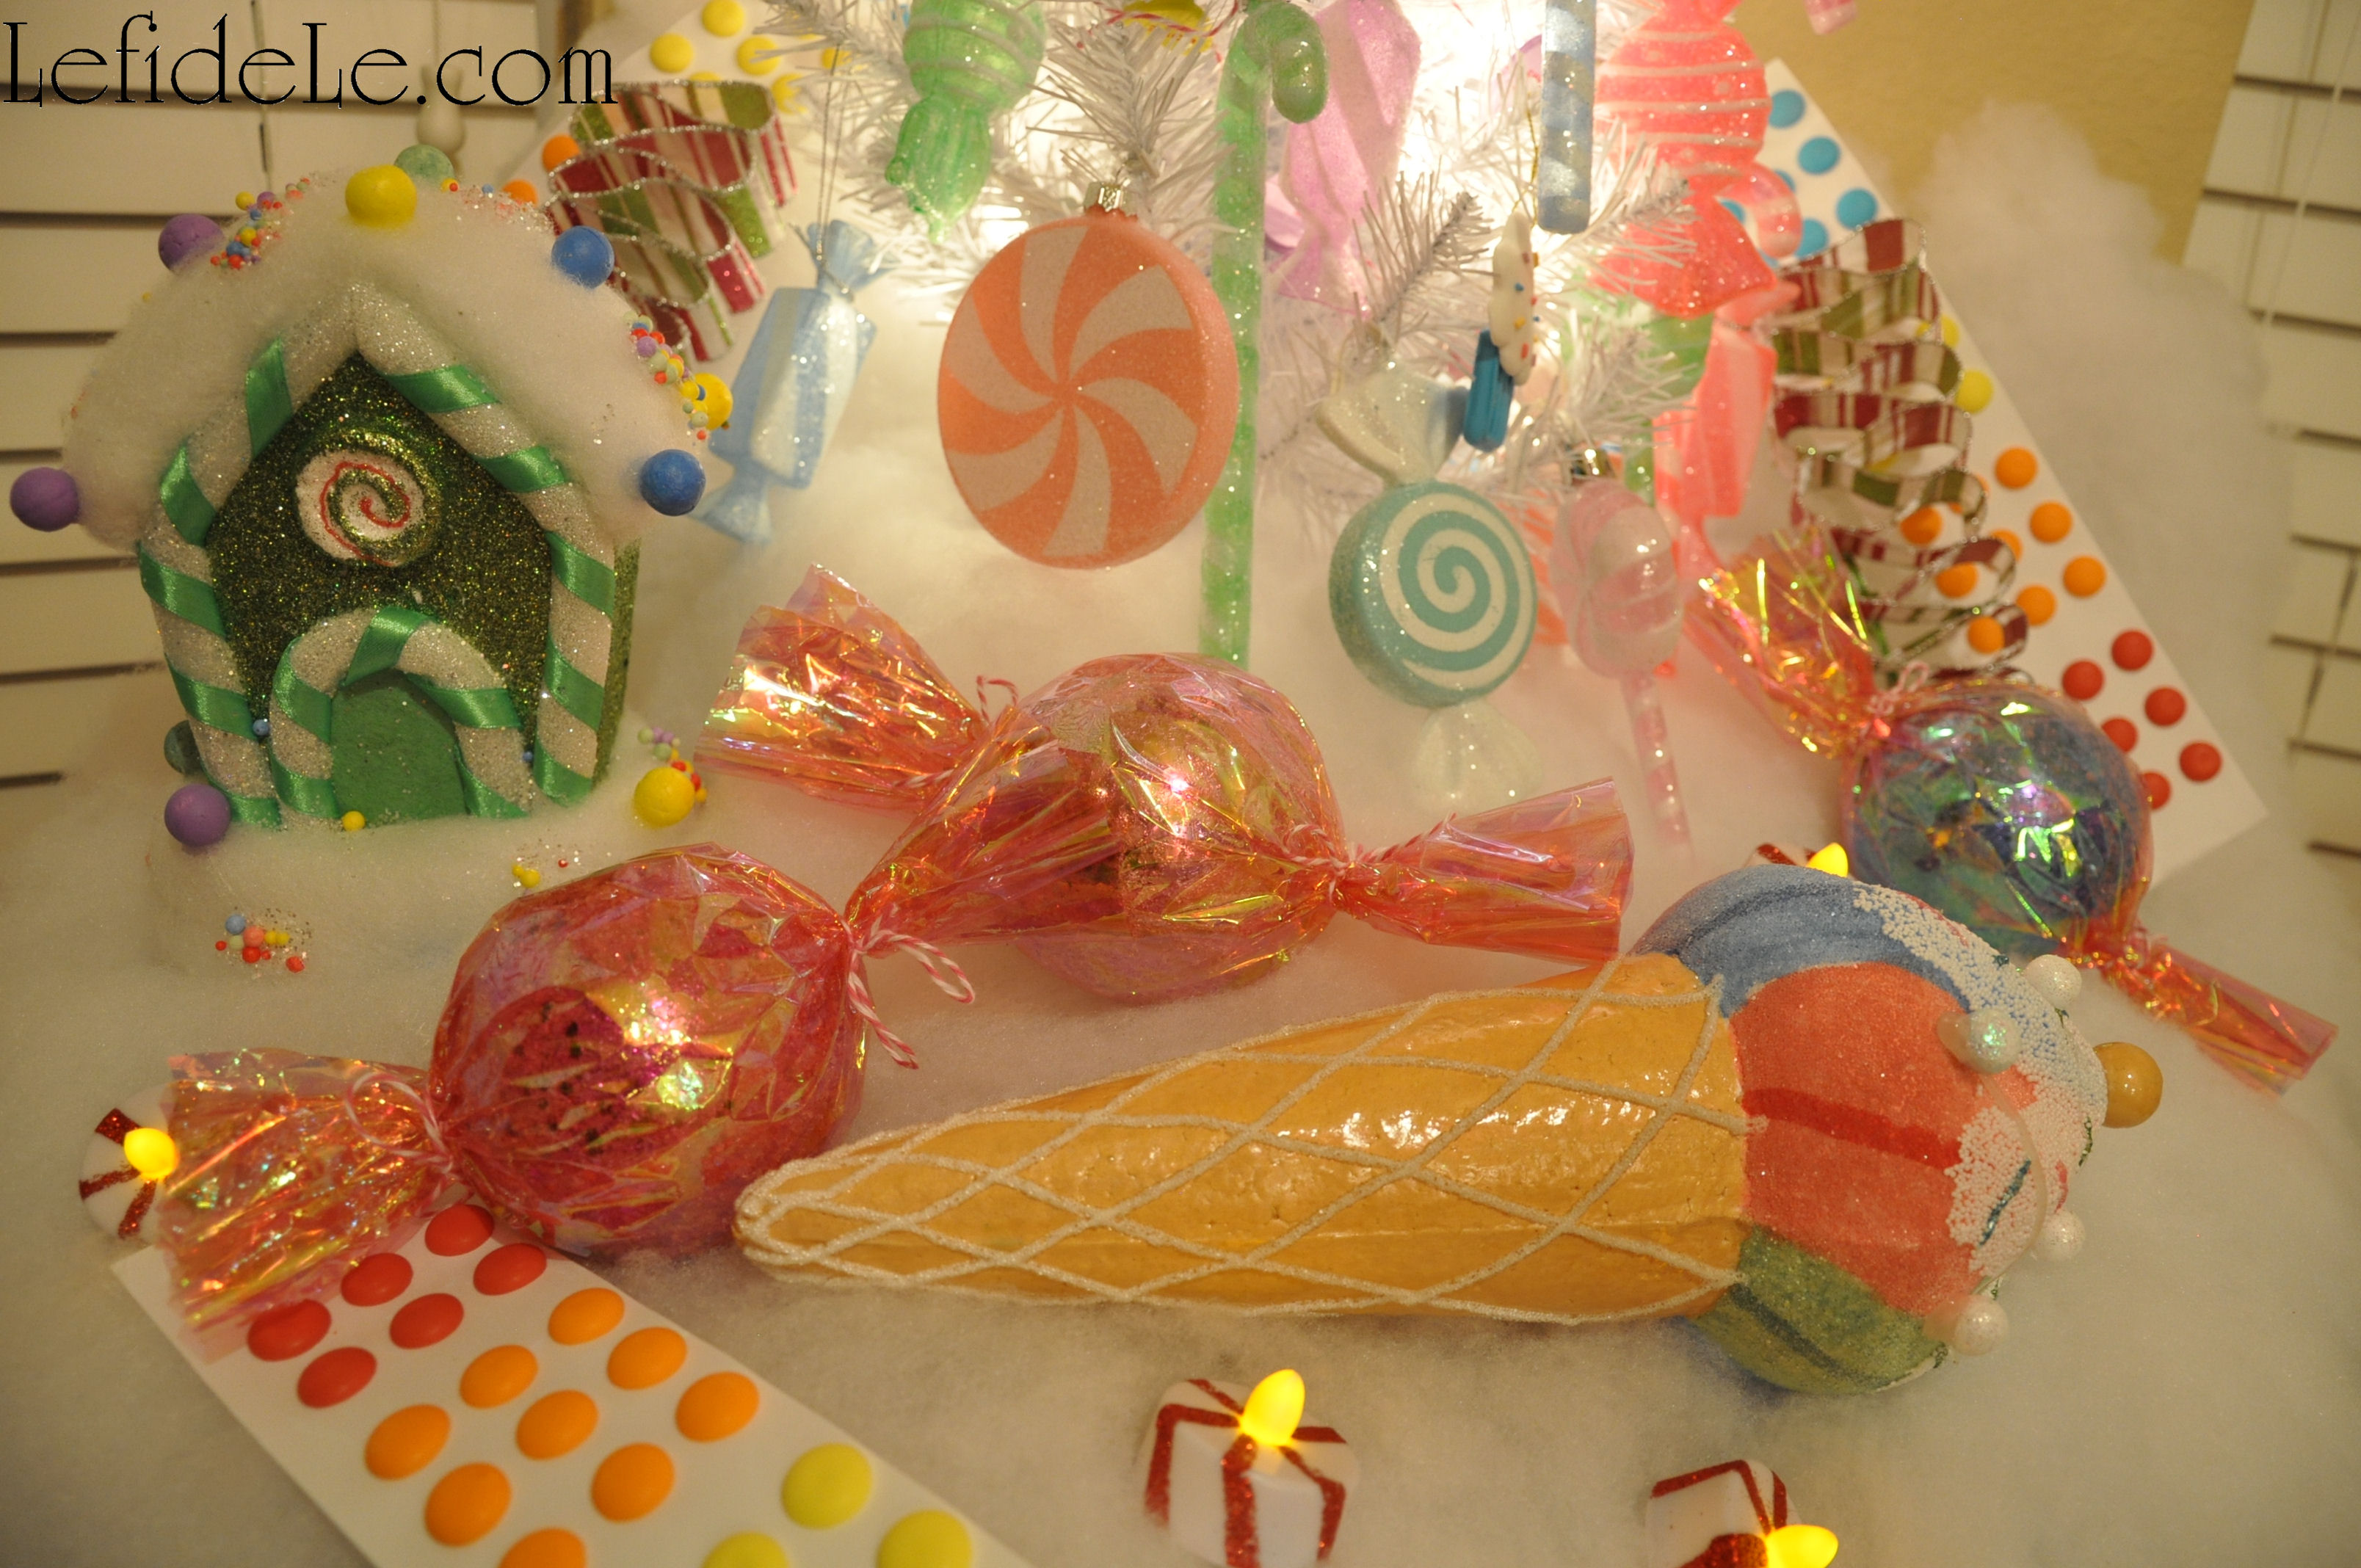
A lone home defiantly stands amidst the candy (ornament) strewn mountainside adjacent to a fallen (faux) ice cream cone log.

384Leigh

Waterfall (faux mega) candy buttons stream down the embankments whose vistas shout, “Welcome to Candyland!”

333Leigh

Wishing you a sweet life of seized moments in eating desserts first!

Faithfully Yours,

Leigh

P.S. Learn how easy it is to construct your very own Candyland village in these 5 articles:

182Leigh

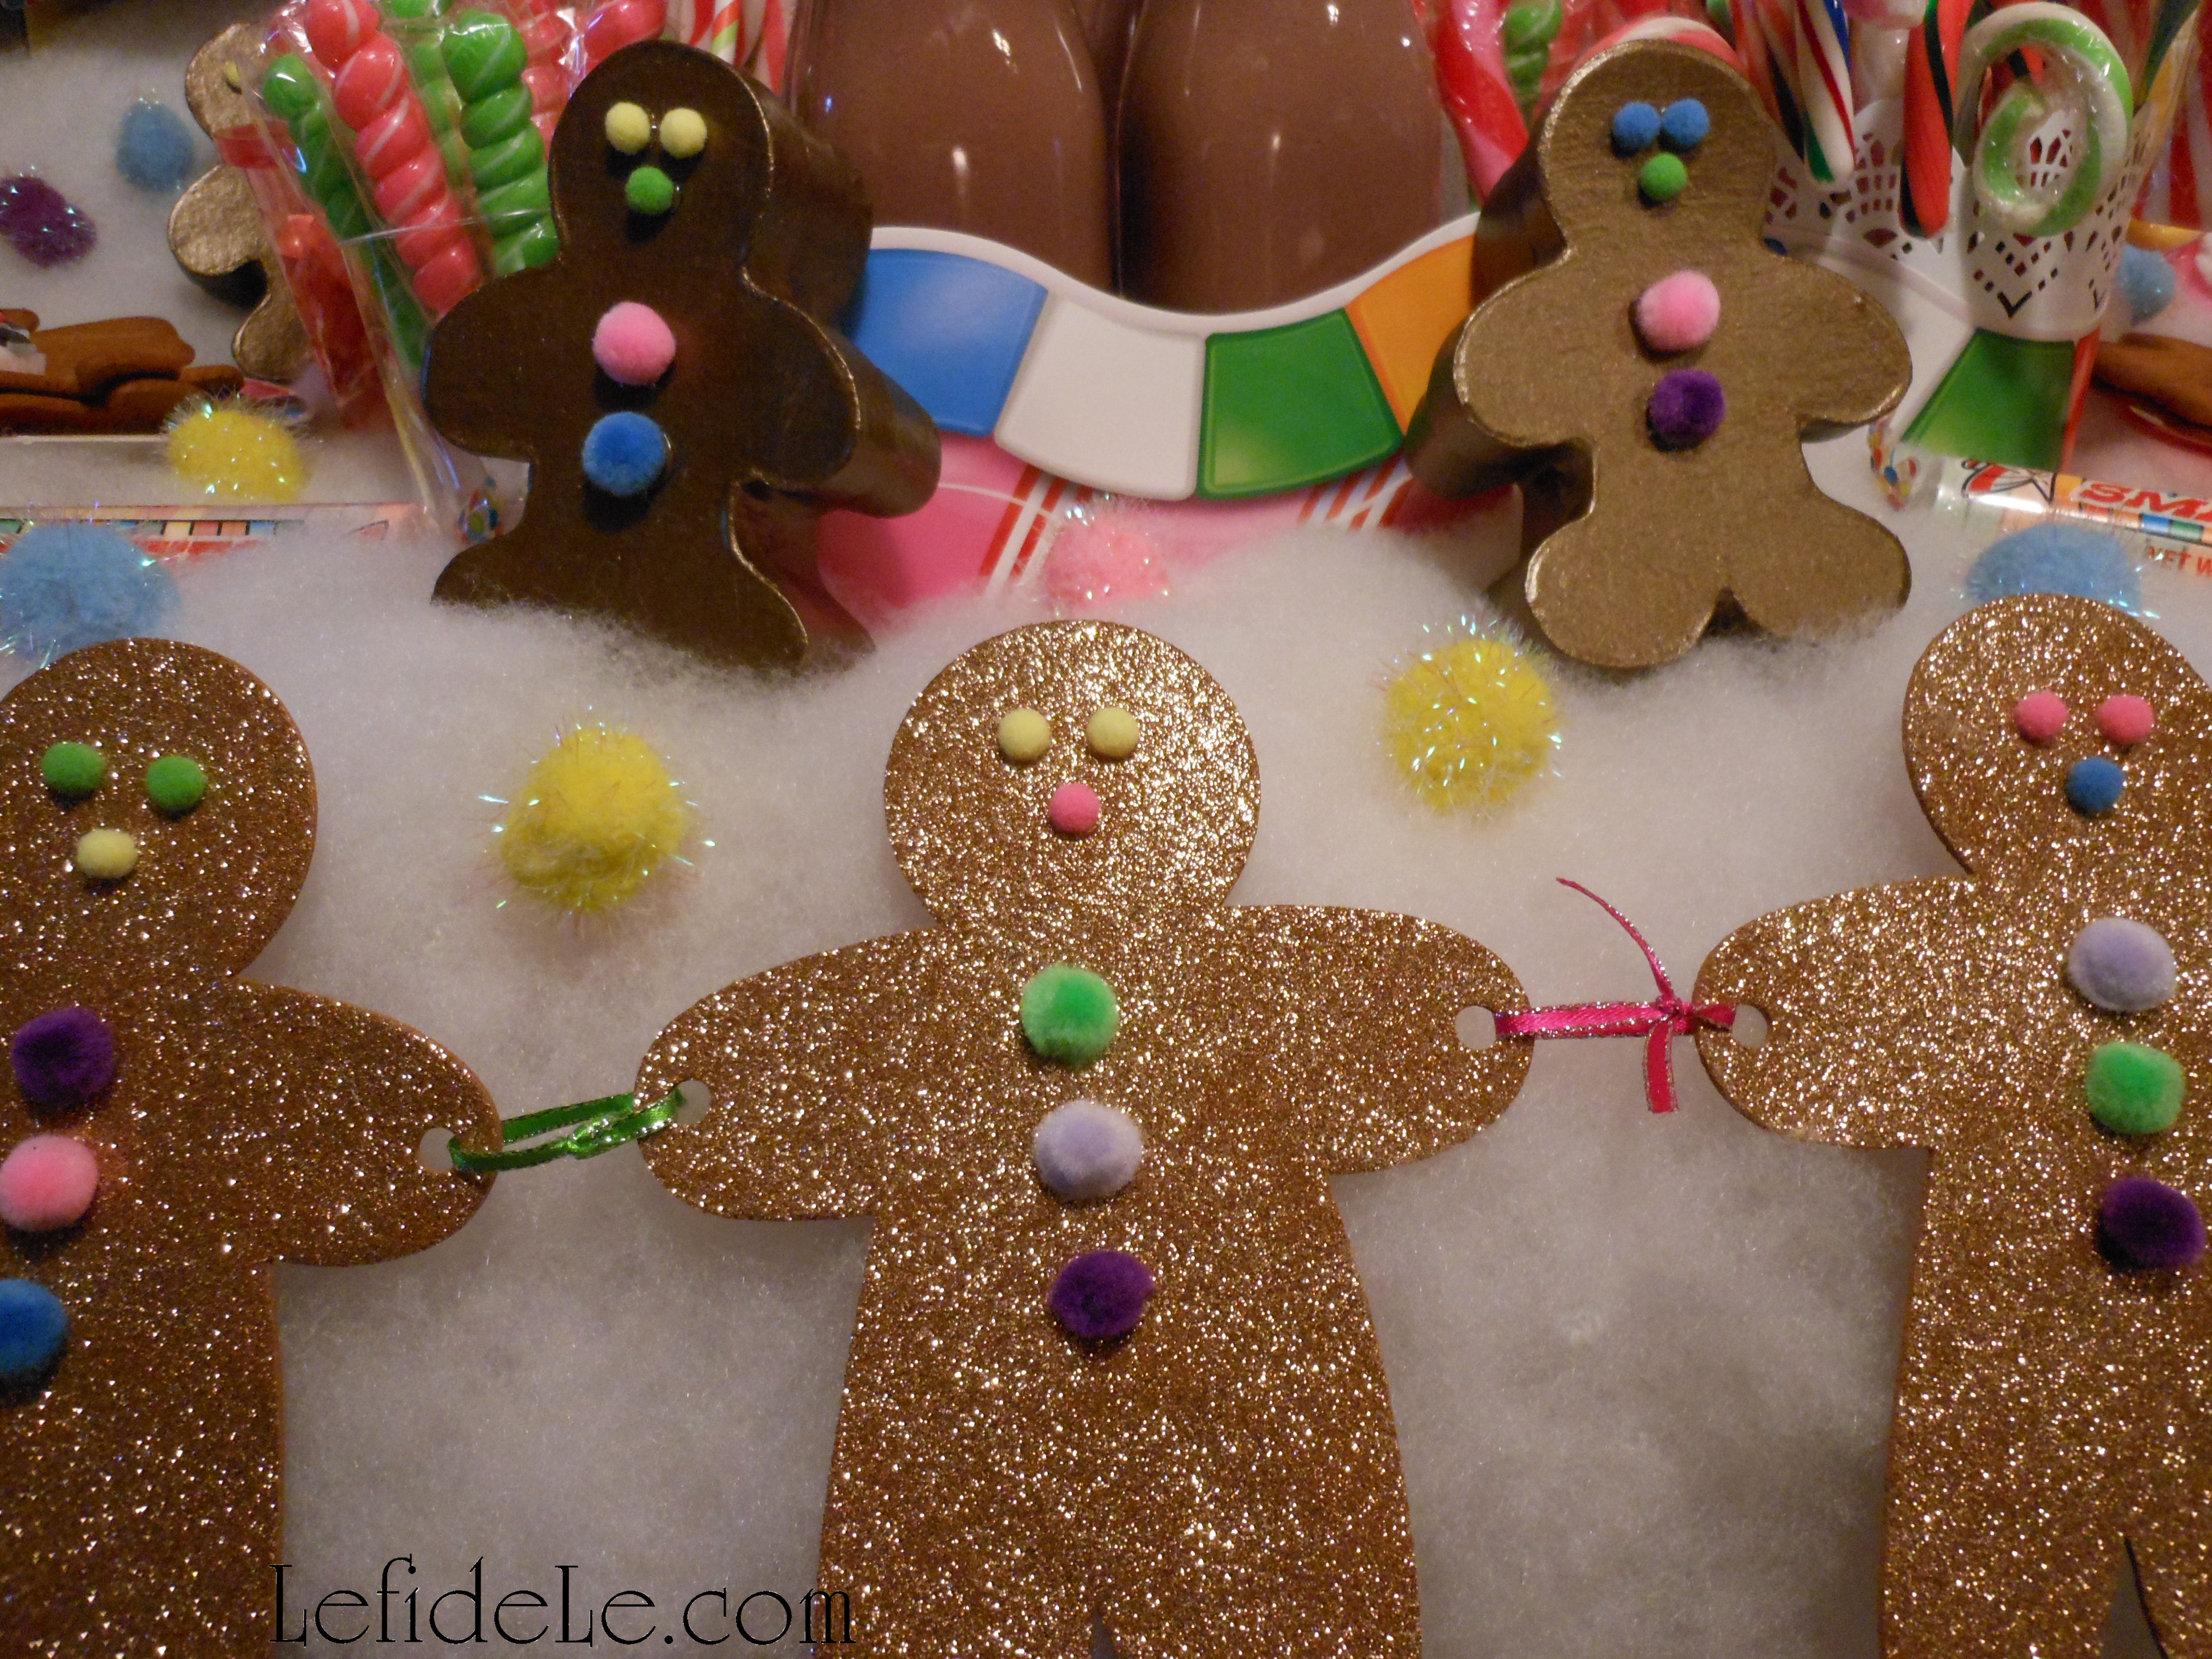
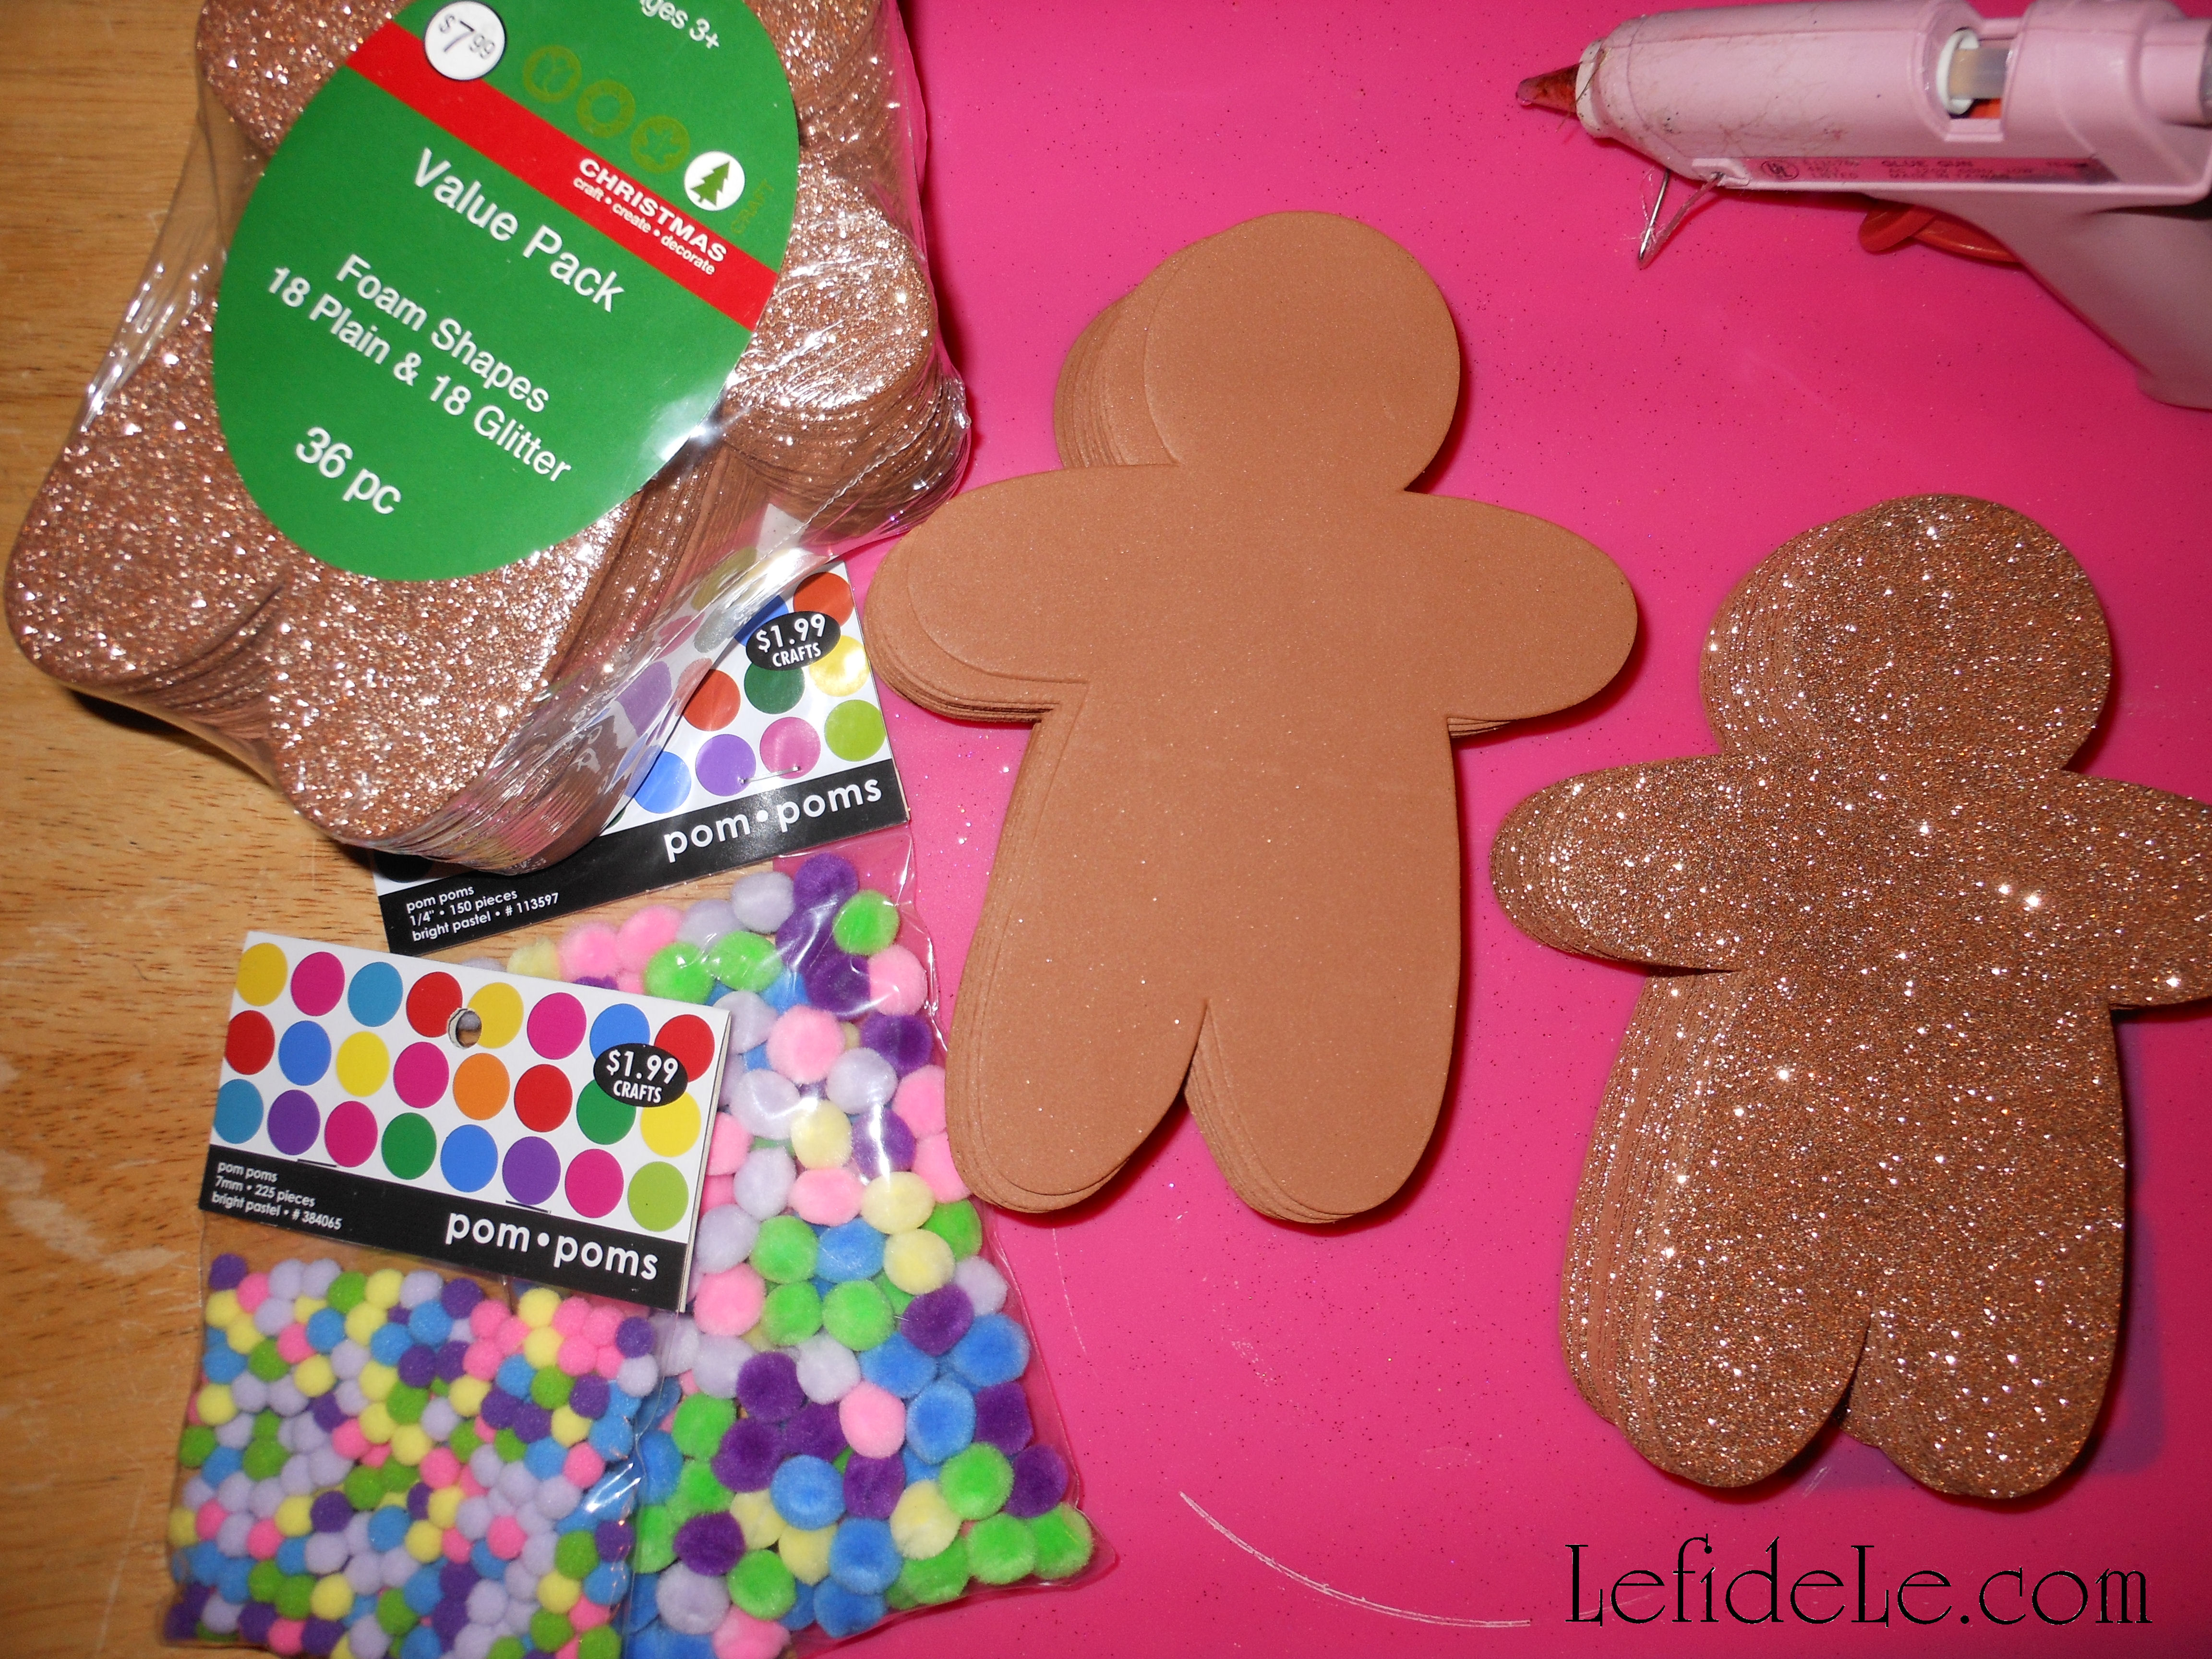
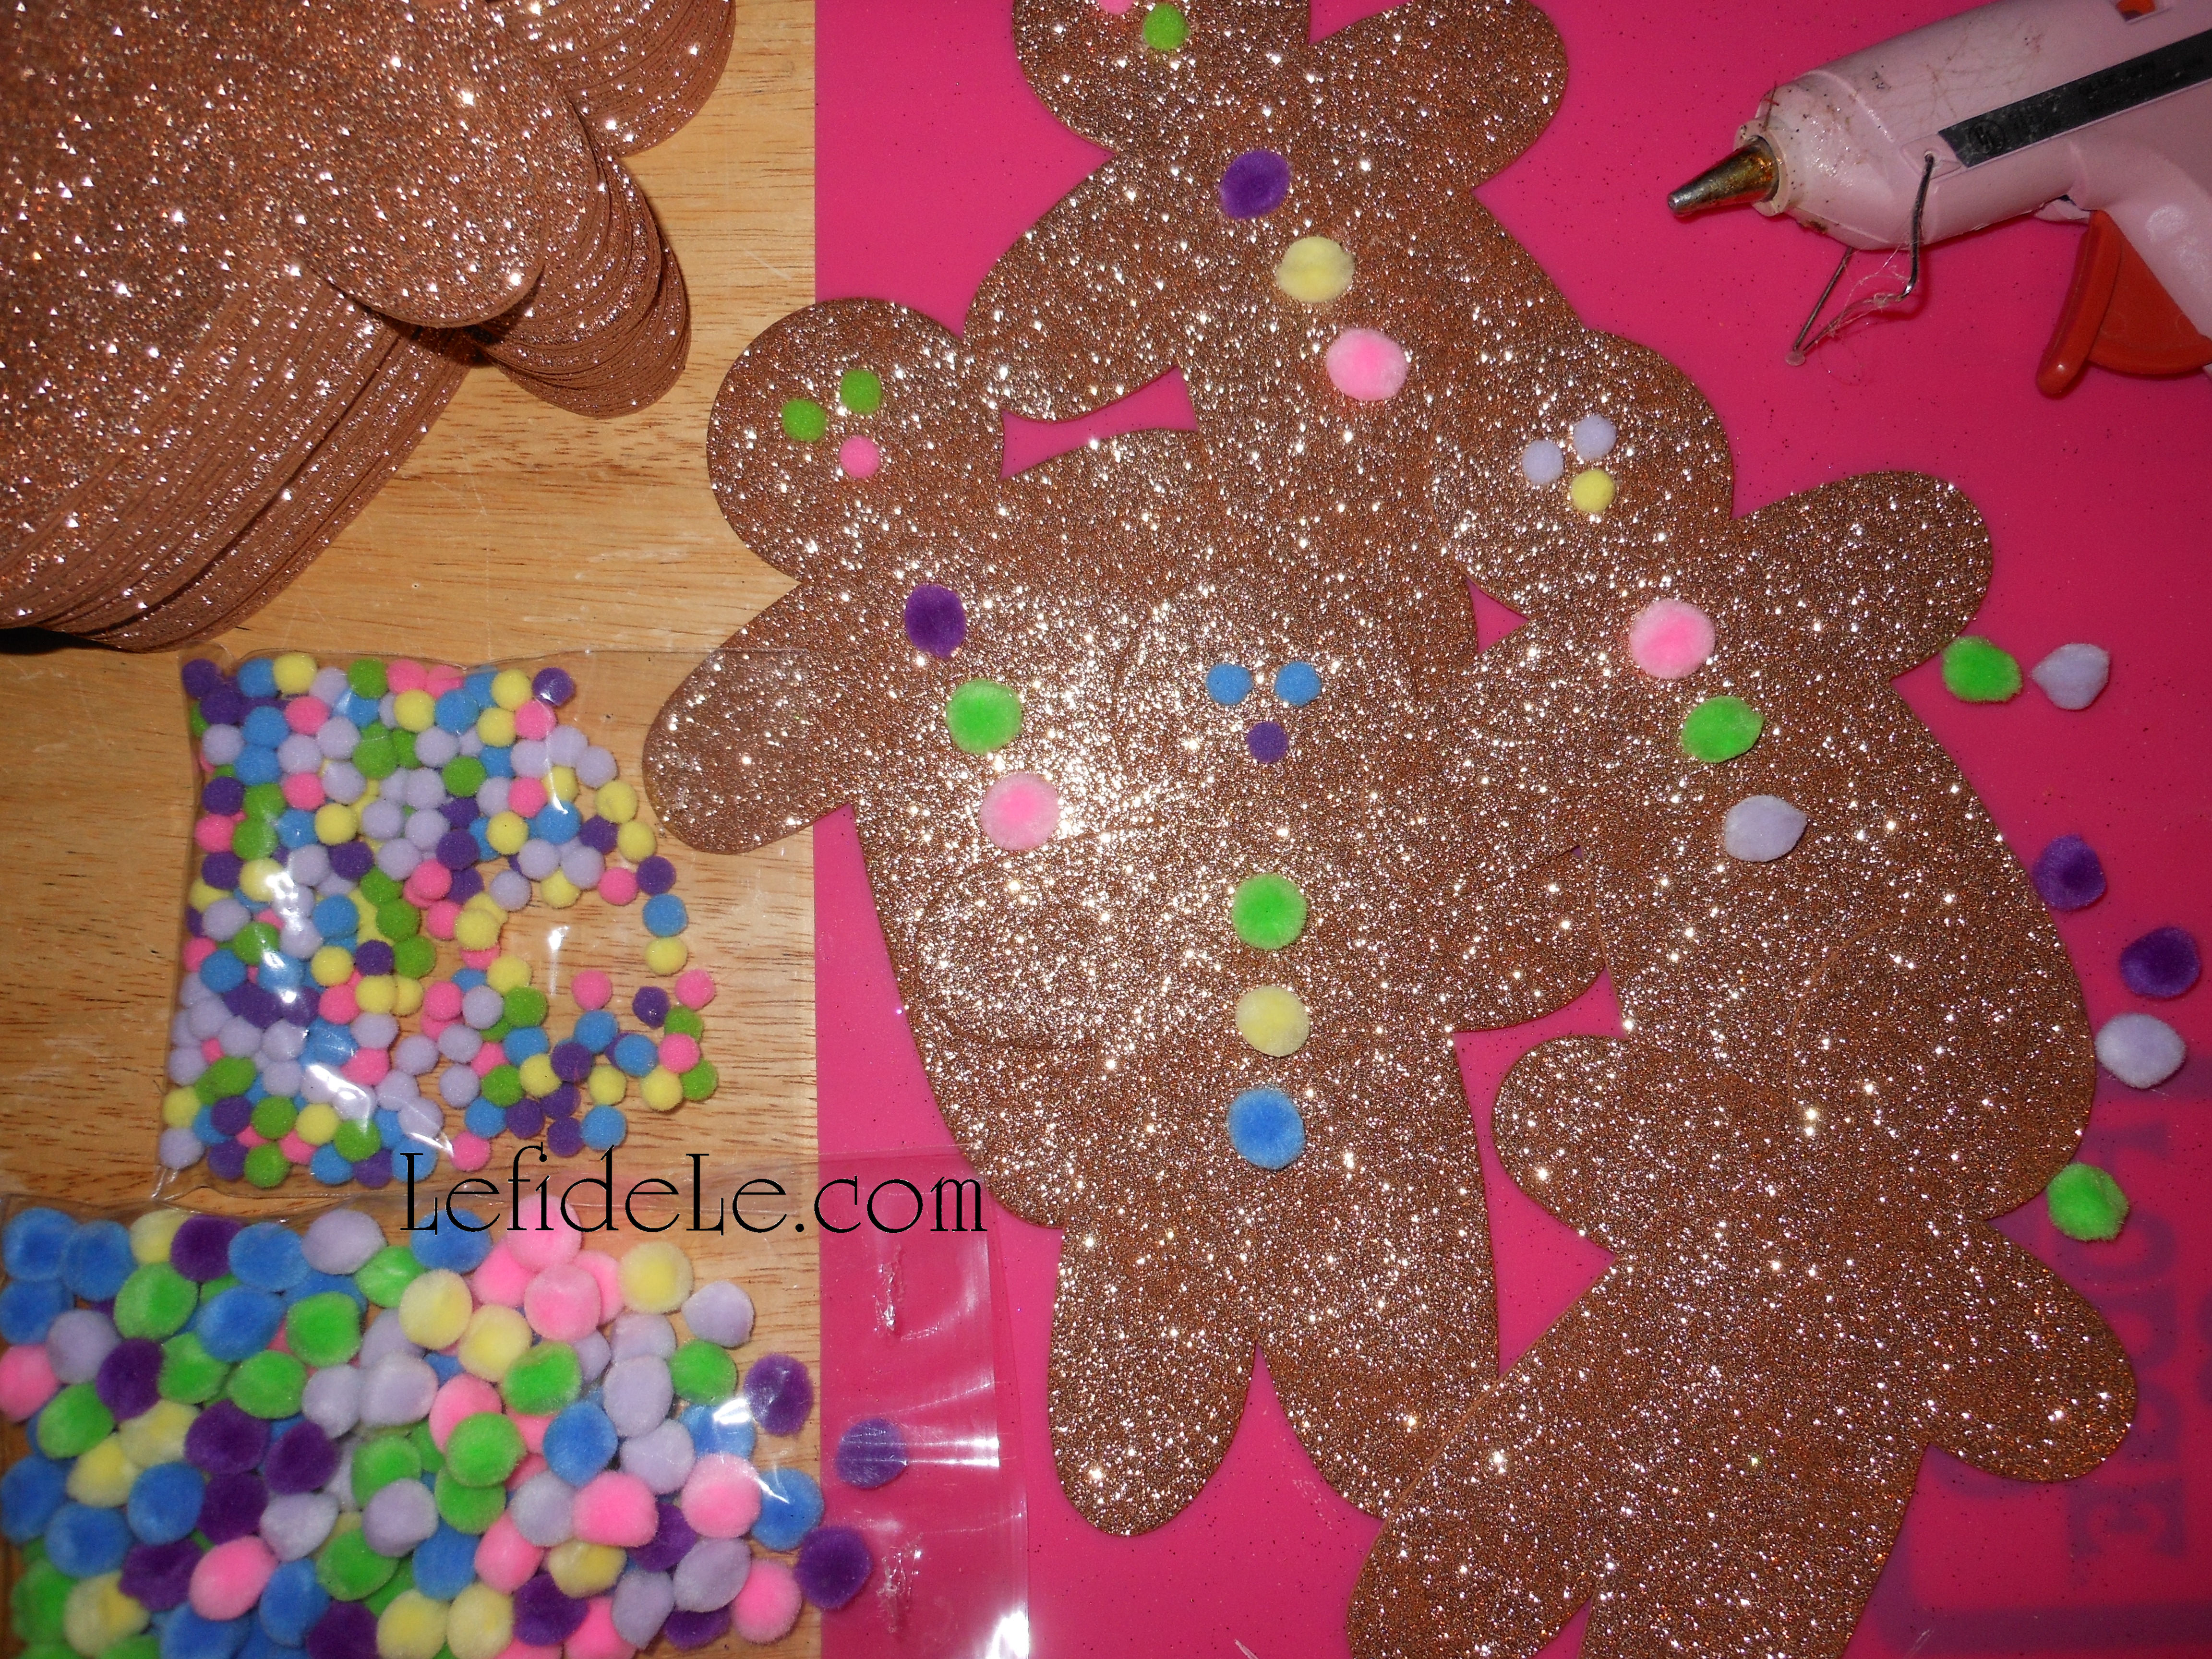
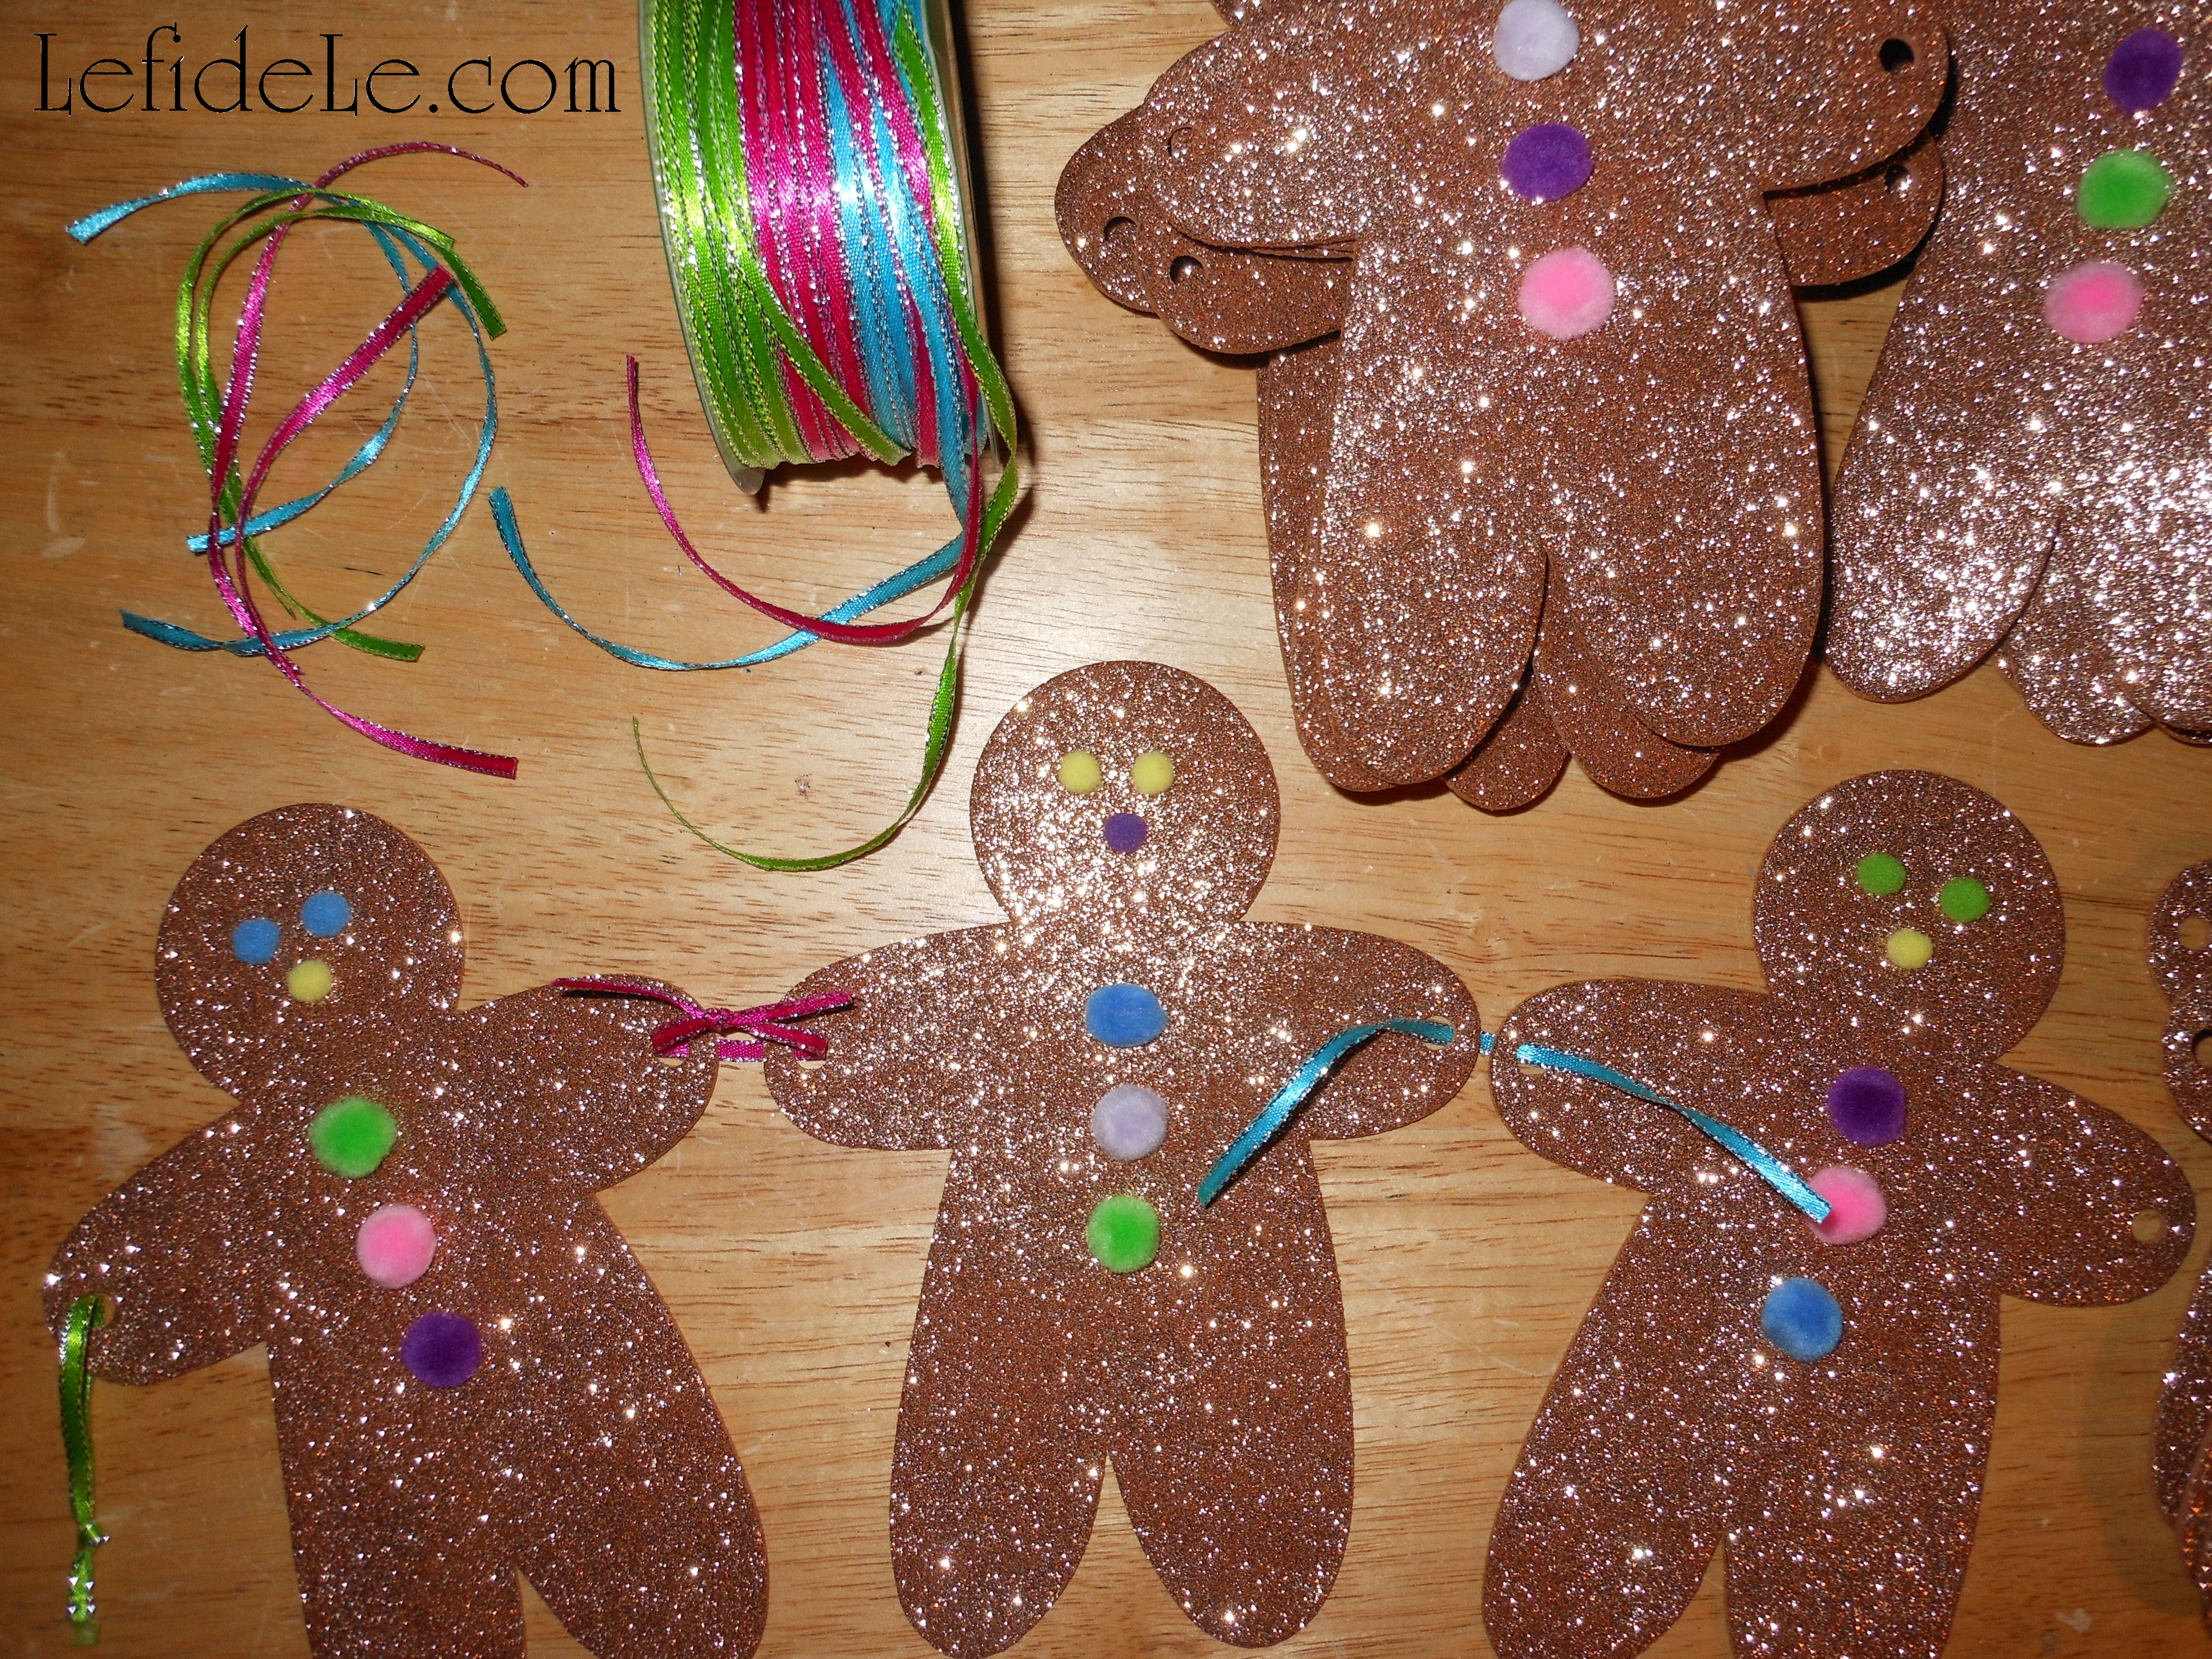
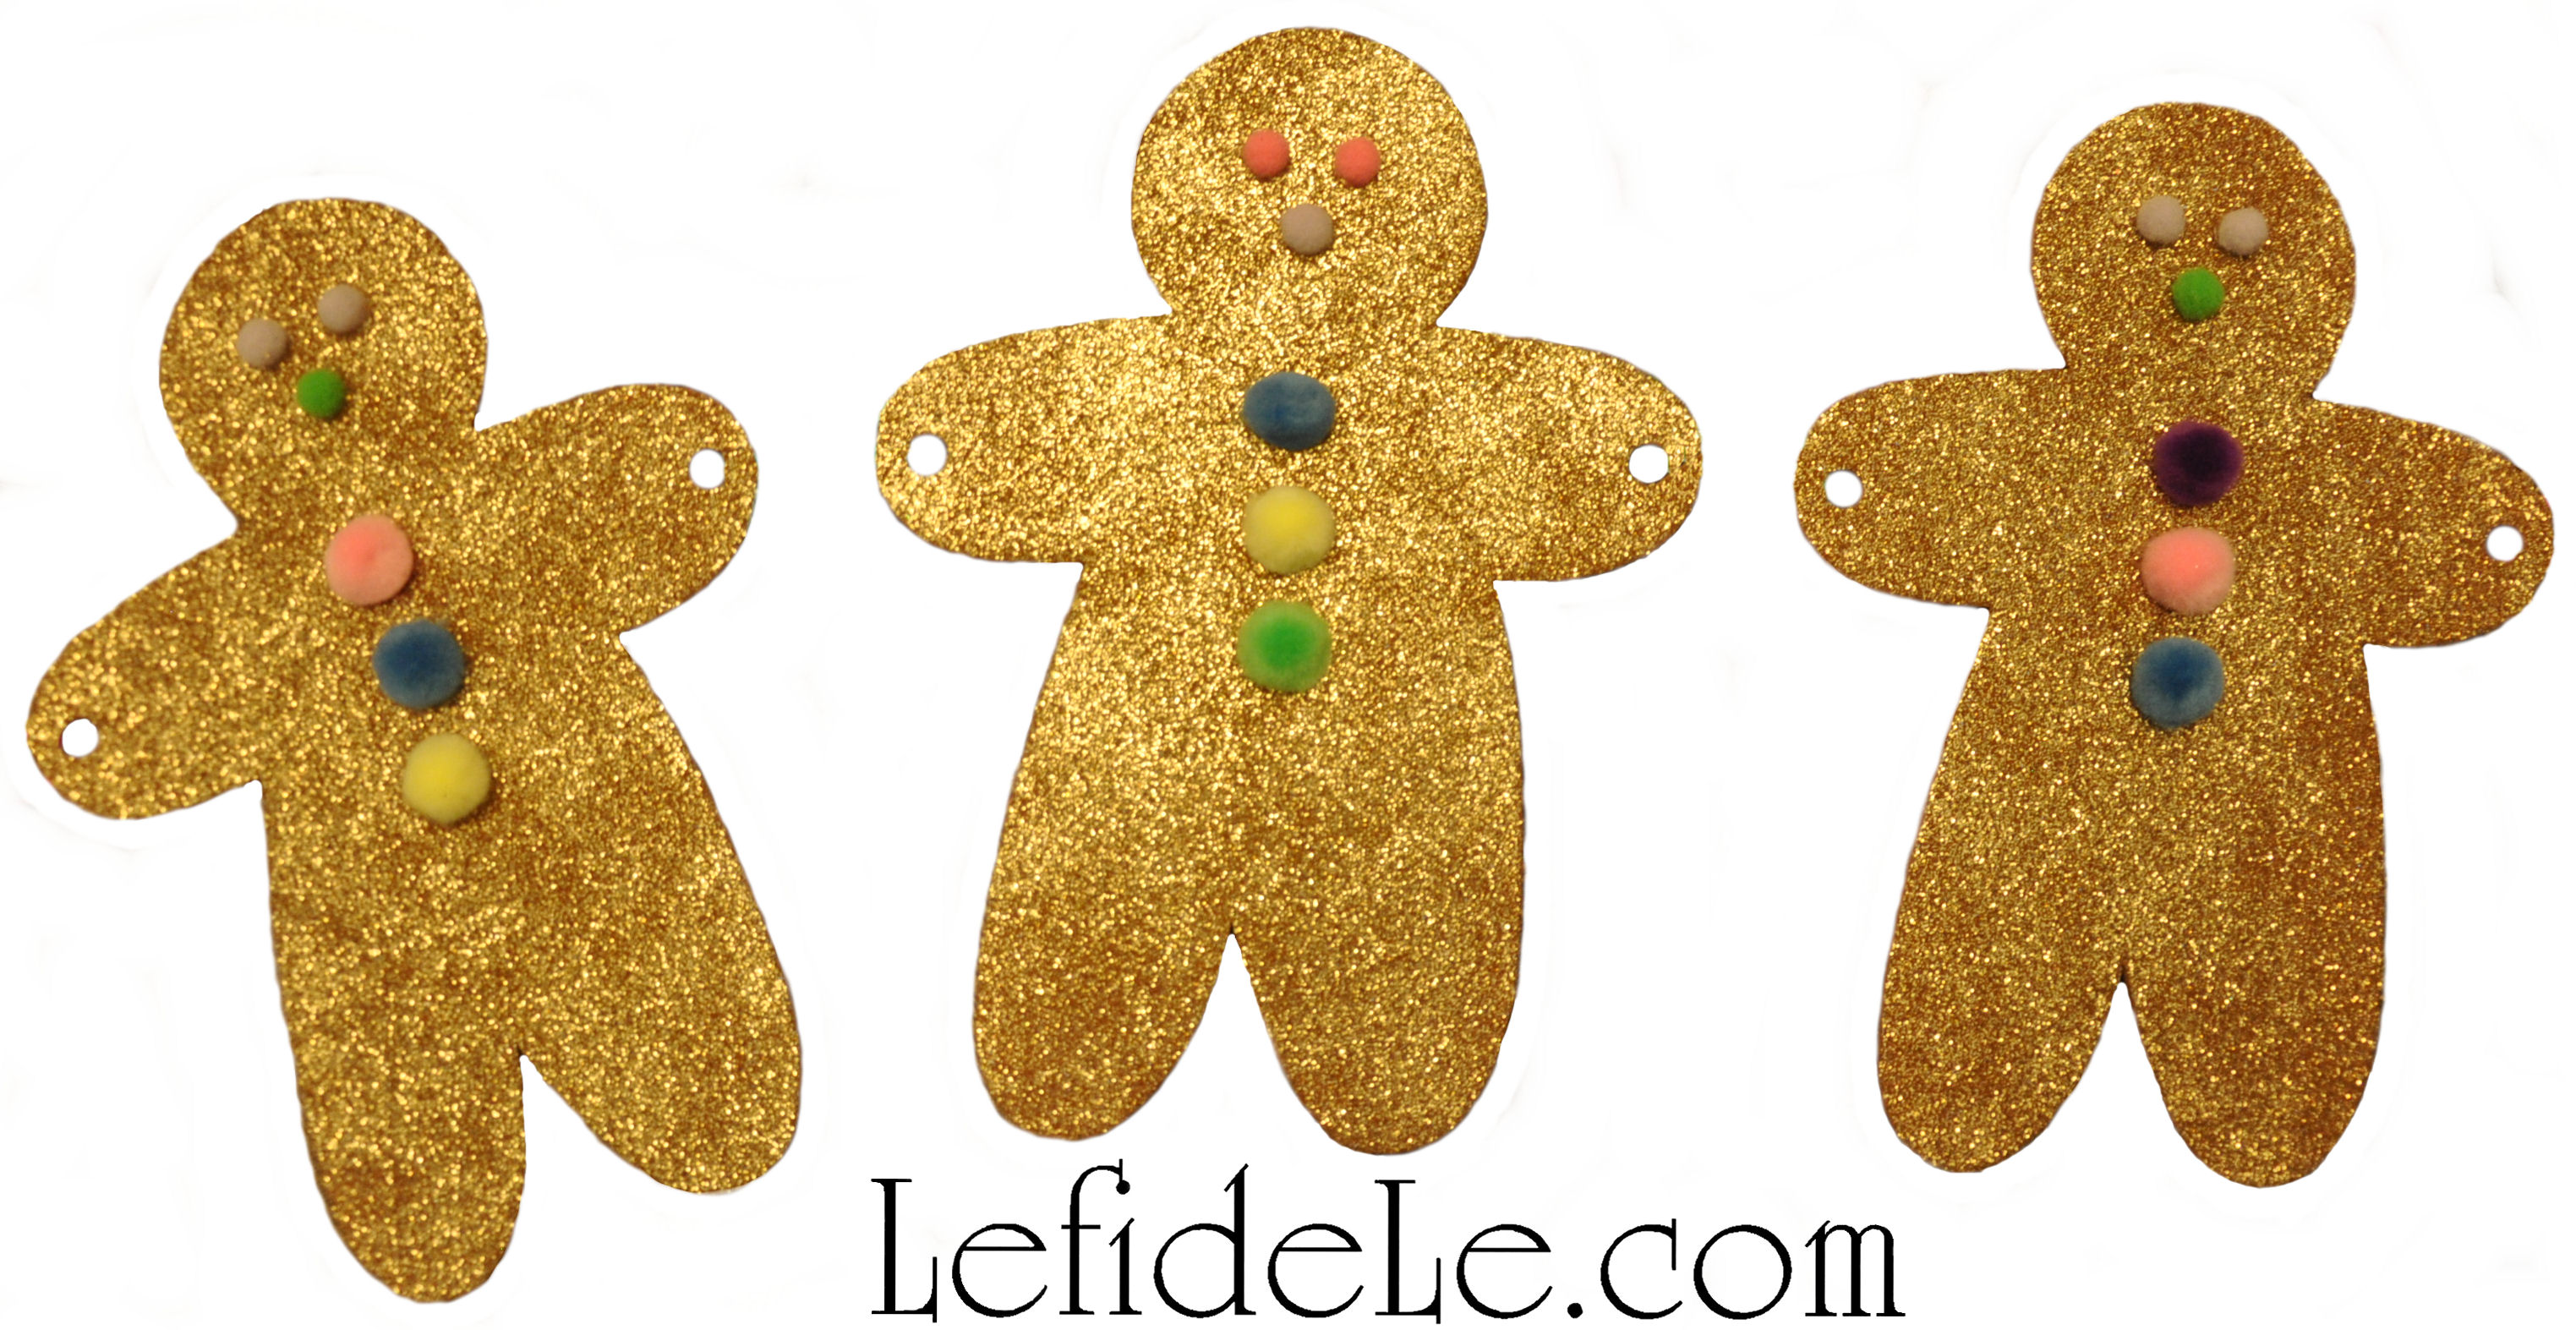
DIY Candyland Party Themed Craft Tutorial: Gingerbread People Banner, Treat Gifts Boxes, & Printable

380Leigh

DIY Candyland Party Themed Craft Tutorial: Hard Candy Lanterns, Candy Ornaments, & Conversation Heart Garland

179Leigh

DIY Candyland Party Themed Craft Tutorial: Game Board Treat Tower & Easy Buffet Display

231Leigh

Quick & Easy Candyland Confection Ideas: Pink Almond Milk Juice “Recipe”, Cotton Candy “Cream” Sodas, & Gingerbread Peep Pops

170Leigh

Spicy Guacamole Shooters / Avocado Appetizers Recipe (Allergy-Friendly & Nightshade Free = No Red Pepper or Tomatoes)

DIY Candyland Party Themed Craft Tutorial: Game Board Treat Tower & Easy Buffet Display

308Leigh

Craft your way to classic Candyland cuteness befitting birthdays, baby showers, and Christmas décor.  This tutorial for a game board treat tower and easy buffet display are part three of a DIY party decorating series with easy projects and free printables. Using some or all of the ideas, you’ll be sure to delight the inner-child in all of your guests. Sweet!

179Leigh

These simple crafts all utilize the same teacher’s bulletin board banner strips in a licensed Candyland board-game pattern. I made two towers, wrapped six pots, covered two milk corrals and a bunch of food picks… and I still have many strips left over! All of this is from one package of super-cute and inexpensive banners that could not fit my theme more perfectly.

7(2)Leigh

To cover food crates, all you need to do is measure the front width and cut a length off. Double a piece of tape onto itself to hold the cardstock in place during the party. Remove it to reuse later for another craft. One idea is to let the kiddos make thank you cards out of it.

6(2)Leigh

Wrap a length of the banner to coordinate a plain metal bucket to your theme. Simply cut and tape the ends together.

351Leigh

These can be used to hold candy and prop up Gingerbread Peep Pops (see the Candyland Confections article here).

120Leigh

Make food picks by simply cutting the leftover banner end bits into colored squares.

122Leigh

Tape toothpicks or popsicle sticks behind them. These can also be used for place-cards if you like.

109Leigh

My treat towers begin with ordinary cupcake stands that are transformed into darling 3-D gaming creations.

069Leigh

To make your own, first find a commercially packaged stand in a matching color palette.

394Leigh

Cut the teacher’s border into two sections (so that they’re small enough to allow food to be placed once it’s completed).

117Leigh

I just followed the natural curve of the game path pattern.

072Leigh

Put the stand together as per the package instructions.

105Leigh

Hot glue the underside if you really want it to be super-sturdy.

095Leigh

Hot glue a strip to the outside rim of each level. Cut off the excess length.

099Leigh

If your ends don’t match up perfectly, just trim off the top edge to make them appear seamlessly adjoined.

101Leigh

These are what the towering creations look like when laden with sweet treats galore! (See my allergy-friendly Spicy Guacamole Shooters Recipe here.)

317 (2)Leigh

Check out the rest of my Candyland craft series: Gingerbread People Banner, Treat Gift Boxes, & Printables and Hard Candy Lanterns, Candy Ornaments, & Conversation Heart Garland as well as the final party post on Candyland Themed Party Décor Ideas.

302Leigh

Faithfully Yours,

Leigh

DIY Candyland Party Themed Craft Tutorial: Hard Candy Lanterns, Candy Ornaments, & Conversation Heart Garlands

409Leigh

Craft your way to classic Candyland cuteness befitting birthdays, baby showers, and Christmas décor.  This tutorial for hard candy lanterns, candy ornaments, and conversation heart garlands are part two of a DIY party decorating series with easy projects and free printables. Using some or all of the ideas, you’ll be sure to delight the inner-child in all of your guests. Sweet!

049Leigh

Old-school paper lanterns may easily evolve into supersized hard candy confections with a few simple steps. Begin with any variety of sizes and colors (but choose lighter versions if you wish to light them). You can even find some in a candy swirl pattern like these red and white striped kinds in graduated sizes… or just start with white and add your own stripes. Craft paint is quicker, but marker works as well. Tie a loop of twine, ribbon, or fishing line to the top of each lantern to hang them by later.

039Leigh

Use a theme coordinating color of gift basket cellophane to wrap around each lantern. Be sure the ends overlap before cutting. I used opalescent pink so that the red stripes would show through as hot pink. This way I can reuse the lanterns later with a clear wrap as peppermint candies or without wrapping as striped beach balls in summer.

042Leigh

Tie a length of twine or ribbon to gather the cellophane at the lantern’s base. I actually used a pink and white yarn that mimics baker’s twine but is less expensive.

043Leigh

Pull the hanging cord straight out from the top of the lantern, and gather the cellophane around it. Pull the wrap taut around the sphere (like you would make a ponytail). Tie another bow around this end to secure it. (Note that you can now throw in some lit LED tea-light candles before closing it, but read on to find an easier way to light them.)

045Leigh

Cut off the excess cellophane from the “candy” ends so that it appears to be the right proportion.

381Leigh

You can set these on a table, integrate them into a display, or hang a grouping of various sizes to make a hanging centerpiece. I opted to hike up the chain of my chandelier with an S-hook to shorten it. (See a picture of how to do this here: Frozen Winter Wonderland Themed Christmas & New Year’s Eve Dinner Parties.) Then I attached the twine loops with a couple inches of wire to the chandelier at different levels. I turned the light on, and was immediately awash in a pink candy glow as the light filtered through the lanterns and cellophane. A plug-in up-light aimed squared at the lanterns will also cause them to glow in any location of your choosing. It’s much easier to do this rather than wait to light, close, and then hang your lanterns at the last minute. Of course, another option would be to purchase a light kit for each lantern then plug all those cords in… but who needs more trouble and expense?

232fLeigh

The exact same method was employed to craft the hard candy ornaments using, well… ball ornaments.

062Leigh

The only difference was that I didn’t tie on twine hangers, because I elected to use them for table display instead. They would have been lovely hanging though. I can always add twine to string them on a tree or centerpiece later, because I intentionally left the round hanging eye stick out of the gathered wrap. It’s visually concealed by the cellophane.

384Leigh

I made “big rock candy mountains” out of lit white Christmas trees that appeared to glow from within. I then placed the “candy”ornaments on and around them.

393Leigh

Ribbon candy ornaments are another simple décor craft that can utilize bits of leftover ribbon or even old package wrapping for an eclectic mix. I used a portion of a giant roll from Costco that is actually reserved for another project. Real ribbon candy doesn’t have glitter and has stripes facing the other way, but I thought they were adorable anyway.

124Leigh

To make these, just hot glue a line onto the ribbon’s end, and tap it down to form a loop.

130Leigh

Keep repeating this action, forming more and more loops, until you reach a size that seems proportionate to a candy dimension.

126Leigh

Cut off the end, and glue it down to form the last loop.

137Leigh

Next, add a hanger if you’d like to. I used the same thin ribbon as the banner in part one of the Candyland craft series. Make a loop through one loop end of the “candy” and tie a knot. (This seems to be a much safer option, than metal hooks, around small children and pets.)

388Leigh

Hang these from Christmas trees, add them to a candy lantern display, or set them around a centerpiece like my “big rock candy mountains”. The “icing” bases in the picture were comprised of blankets of buffalo snow batting.

057fLeigh

The last craft for the tree is a conversation heart garland that would serve equally as well as a banner for a Valentine’s celebration.

054Leigh

It’s so simple and inexpensive because it utilizes foam craft hearts and yarn (or thin ribbon, or baker’s twine if you like).

064Leigh

Begin by simply setting out your hearts according to color, so that you can string them in a pleasing order.

067Leigh

Use a ruler (or just “eyeball” it) in order to hot glue them back to back spaced 3 inches apart, sandwiching the yarn in-between.

386Leigh

Cut the yarn after the last “foamie”, and knot the ends to prevent fraying. (Click here to see the same method used on my kid-friendly “Glitter-ween” garland.)

395 (2)Leigh

Check out the rest of my Candyland craft series: Gingerbread People Banner, Treat Gift Boxes, & Printables and Game Board Treat Tower & Easy Buffet Display as well as the final party post on Candyland Themed Party Décor Ideas.

Faithfully Yours,

Leigh

DIY Candyland Party Themed Craft Tutorial: Gingerbread People Banner, Treat Gift Boxes, & Printables

295Leigh

Craft your way to classic Candyland cuteness befitting birthdays, baby showers, and Christmas décor.  This tutorial for gingerbread people banners and treat gift boxes are part one of a DIY party decorating series with easy projects and free printables. Using some or all of the ideas, you’ll be sure to delight the inner-child in all of your guests. Sweet!

179Leigh

Every Candyland village needs to be populated with gingerbread people, and it can be accomplished by more than just the menu. Gift your guests with take-home treat boxes that also serve to decorate your buffet.

260Leigh

Begin with readymade gingerbread people shaped paper maché boxes. These are widely available in stores beginning in the fall, and may be purchased online the remainder of the year. (Find discounts for online craft merchants in the side bar from Le fidèLe Design’s affiliates.) I found mine on sale at half off, making them 50 cents each. Use an acrylic paint color in a shimmery brown so that a top coat is unnecessary. (I used DecoArt’s elegant finish espresso metallic paint, because I already owned it, and it coordinated with my banner.)

277Leigh

Separate the tops from the bases, and paint the little guys. I set them rim side down onto a plastic bag, so that I could just peel them off when they dried. (On other surfaces, the paint sometimes acts as glue.)

318Leigh

Allow them to dry overnight, then use hot glue to adhere tiny pom-poms. They make the cutest dimensional eyes, nose, and buttons! I chose colors that would coordinate with my other décor elements, and tried to intentionally randomize the combinations on each “gingie”.

356Leigh

Fill your goodie boxes with candy, tiny toys, or even candy flavored lip gloss and intersperse them in your treat town.182Leigh

Another idea is to fill them with numbered papers that correspond to larger gifts or game elements.

353Leigh

Make a banner of gingerbread people adjoined in jubilant Candyland solidarity, using one of the two following methods.

2Leigh

Foam gingerbread people shapes may be located at just about every craft store in the fall and winter, and may be purchased online the rest of the year. You can choose from many sizes in matte and glitter. I wanted to use the glitter guys to match my houses.

3Leigh

Glue on tiny pom-poms that coordinate with your décor. Use hot glue in the same eyes, nose, and button pattern with which you made the treat boxes.

6Leigh

Punch a hole in each hand of the “gingies” in order to string it into a banner.

9Leigh

Make a loop of thin ribbon through holes in two “gingies”, and tie a knot to connect them. I alternated between three different colors from the same spool of clearance ribbon.

193LeighWM


The second method is to right click on my printable image above (free for noncommercial use), and select print. Then print them in color and photo settings on sturdy cardstock (so that they don’t curl when strung). Cut them out, and punch holes into the white circles in the arms. Choose to leave them as is, or add more glitter to the images. Then tie on ribbons to join them (as in the previous method). You can also glue pom-poms over the images in the prints to add dimension to your project.

193singleWMLeigh


Use the gingerbread person image without white holes for other décor or signage. Simply adjust your printing sizes to make smaller “gingies”. Do this by printing at a smaller percentage (i.e. at 50%) or by printing them as photos (i.e. wallet size). Or… you can get Kinko’s to do it for you! These little guys also make cute kid’s craft puppets when taped to a popsicle stick, so you can utilize them as a party activity for the little ones.

361Leigh

Check out the rest of my Candyland craft series: Hard Candy Lanterns, Candy Ornaments, & Conversation Heart Garlands and Game Board Treat Tower & Easy Buffet Display as well as the final party post on Candyland Themed Party Décor Ideas.

341Leigh

Faithfully Yours,

Leigh

Spicy Guacamole Shooters / Avocado Appetizers Recipe (Allergy-Friendly & Nightshade Free = No Red Pepper or Tomatoes)

318 (2)Leigh

This allergy-friendly guacamole recipe has no nightshades like red pepper or tomatoes, but it still has a spicy kick which makes is the perfect party appetizer that everyone can enjoy. It contains my secret Tex-Mex trick for adding creaminess, which also serves to keep the avocado from browning during the festivities. Serve it rustically in chunky form or blend it into creamy perfection. I can be served with any variety of veggies, chips, or even as a sauce for a meal. Think beyond taco pairings, and embrace it as dressing for your veggies. The heart-healthy avocados make this a guilt-free food, even though it tastes like a special treat, so enjoy!

170Leigh


Ingredients:

  • 3 large avocados (add more if using small ones)
  • 3 tablespoons lemon juice (or lime juice)
  • 2 heaping tablespoons unsweetened coconut yogurt (or use plain yogurt, or mayonnaise, or veganaise)
  • 1 diced leek (or use onion or spring onions)
  • 2 teaspoons dried cilantro (add more if using fresh)
  • 1 teaspoon ground ginger
  • 2 teaspoons ground black peppercorns
  • 1½ teaspoons sea salt (or no salt seasoning)
  • Dipping Foods: veggies for crudité or chips (pictured are pomegranate potato chips)

Instructions:

144Leigh

First, gather all your ingredients. Using bottled citrus juice is perfectly acceptable, just make sure that it is pure juice and not the fake variety… or else your guacamole will brown. I’ve used Haas avocados for this recipe. Ensure that they’re ripe by gently squeezing the outside. If they give in a bit, then they’re ready to eat. If not, then store them on the counter until they are.

078Leigh

Wash the outside of the leeks, cut off the excess green tops, and then slice them in half. Wash the insides of the two halves, and then dice them. (I really like the flavor leeks add to the mixture, and they won’t make you cry!)

148Leigh

Mix all of the herbs into the lemon juice to allow them time to soften while preparing the avocados. Adding yogurt or mayo is the secret Tex-Mex trick to making smooth and creamy guacamole. Both this and the lemon juice will keep the guacamole a lovely shade of green during your party.

145Leigh

Wash the outsides of the avocados before cutting into them to avoid transferring bacteria. Whack the avocado seed with a knife, then twist it a half turn to remove it. Slice a grid pattern into the green flesh. Use a spoon to scoop out it out, or just squeeze the rind to squish it into the bowl.

150Leigh

Mash and mix everything together. I use the back of a serving spoon to smash the avocado against the side of the bowl. You can serve it in a bowl rustically like this…

154Leigh

…or you can use a blender to smooth the guacamole into a perfect concoction. (Find a powerful one at Le fidèLe Design’s affiliate Blendtec at the link in the side bar.) Made in this way, there are no chunks of leeks or clumps of herbs, but all of the flavors are equally distributed. (I grew up making traditional guacamole with a molcajete, but I used an immersion blender here… which I admit is much faster and easier.)

157Leigh

Spoon the spicy guac into shot glasses or individual serving cups.

196Leigh

Add any variety of veggies or chips, from matchstick cut carrots (for Easter) to Fritos (for Cinco de Mayo).

214Leigh

On this day, I used pink pomegranate potato chips from Simply 7 to coordinate with my Candyland party theme. They are so yummy by themselves, but are really amazing when combined with the spiciness of the guacamole.

188Leigh

The little avocado shooters fit perfectly into the treat towers I crafted to match my theme. (I’ll be posting the tutorial on this very soon.)

183Leigh

You can also serve my Heartbeats Veggie Chips made from beet root with the guacamole, or try the Lettuce Turnip the Beet Dip I made to accompany it. It is a pink savory herbed avocado dip that I made for Valentine’s.

42bLeigh

Faithfully Yours,

Leigh


Free 23 E-Books & Labels on Arts, Crafts, Cooking, & Gardening from Craftsy!

The online learning site Craftsy has generously offered some super cute labels to download and print for free. Simply click on the image below for a link to the webpage posting them.  Also from Craftsy are 23 amazingly free e-books on a variety of arts, crafts, cooking, and gardening subjects! Just click on a picture to find the book it depicts. Then you can download it and keep it forever to reference whenever you want to.  Yea!! Note that Craftsy is a Le fidèLe Design’s affiliate, so I may be compensated if you decide to make a purchase after clicking on these links, but these e-books and labels really are free… and free is really great! This is why I took the time to pass them along to you. I do hope you enjoy them. I can’t wait to read them myself!

Faithfully Yours,

Leigh

St. Patrick’s Day Party Tablescape Décor Ideas (with Rainbows, Shamrocks, Money Tree, & Printable Card & Invite)

Discover what is really at the end of the rainbow with these St. Patrick’s Day party décor ideas. A centerpiece filled with pots of gold will prove that money does grow on shamrock laden trees! This colorful tablescape is quick and easy to achieve with inexpensive materials and my Quick & Easy Metal Napkin Rings Tutorial, Money Tree + Rainbow & Shamrock Crafts for St. Patrick’s Day Party Décor article to guide you, and use my free printable card to invite your friends to join you for a wee bit o’ whimsy this holiday.

048Leigh

This celebration, I really wanted to indulge in a pure state of whimsicality. I envisioned leprechauns dining in Seussville… and this vibrant tablescape is what resulted. This may of course be toned down for your own home, taking just an idea or two if you like… but as for me and mine, it’s whimsy all the way.

042Leigh

I began with a crisp green field of tablecloth topped with chargers of golden coins. This was layered with green plates and rainbow colored madras plaid napkins ringed in green glittered metal.

163Leigh

(See how to quickly make your own napkin rings easily here.)

038Leigh

Utensils were adorned with metallic green washi tape, just as I had previously done for Mardi Gras. (See more on this here.) Basket gilded glassware contributed to the theme as well. (See these in a Thanksgiving tablescape here.)

050Leigh

The table was strewn with green pom-poms plus mylar and glitter shamrocks as confetti. (The glitter varieties were actually individual stickers that can be used to adorn something later, because their backings remained intact.)

067Leigh

At the table’s center was a money tree with shamrock leaf ornaments, coin-studded branches, with gold and green lights.

073Leigh

Rainbow archways and pots of gold were held in its arms, and its trunk was festooned with more polychromatic splendor. (Find instructions for all of this year’s St. Pat’s crafts here.)

058Leigh

The base of the tree was encircled with a multi-hued feathered boa and apropos greeting. Around that were glowing votive holders and more pots of gold, some complete with their very own rainbows.

070Leigh

A chair for the guest of honor was draped with a rainbow sash, green sequin tiara, glitter shamrock wand, and metallic beads in various shade of green. This was a device with which to further invite whimsy, because who could maintain a serious façade when someone so adorned is seated across from you? For your celebration, this spot might be reserved for the smallest family member. I confess that I have a lot of fun dressing my grandmother in such crazy holiday attire for her parties at the senior center, and it garners her much attention.

075leigh

Glittered holiday signs strewn with rainbow streamers fill the window in the background. Believe it or not, I actually held myself back from adding many more rainbows… using the rest of my 81 foot roll of crepe paper would have mummified the window blocking out all sunlight!

StPatsDayCardsLeigh

My free 4 x 6 printable card may be sent as an invite when details like time and place are added to the inside, but it is also serves as a lovely remembrance for any one that’s cared for. The Irish blessing on the card reads, “For each petal on the shamrock. This brings a wish your way, Good health, good luck, and happiness, For today and every day.”

4x6StPatsCardLeigh

Simply right click on the small image, and select print. Then print it using the color and photo settings on cardstock. Here, I’ve printed them on both plain white stock and a parchment variety so that you may see how paper choice can alter the look of your card. You can also print it in black on green paper. (I’m offering it, along with my other printables free for your personal use. I just ask that my work not be used for commercial purposes.) You can even embellish it for a personal touch with glitter glue, stickers, ribbon, etc. The shamrock stickers I used on the card here are the same kind seen in the tablescape as confetti. A dab of quick dry tacky glue adhered a bow with the same ribbon used on the pots of gold.

074Leigh

I will leave you with this lovely St. Patrick’s Day toast, “May the sound of happy music, And the lilt of Irish laughter, fill your heart with gladness, that stays forever after.”

040Leigh

Faithfully Yours,

Leigh

Mardi Gras Masquerade Themed “Fat Tuesday” Dinner Party Tablescape Décor Ideas

This Mardi Gras Masquerade themed tablescape for a “Fat Tuesday” dinner party was instigated by the desire to go all out like the big Krewe celebrations in Louisiana… but on a tiny budget! Not finding what I wanted in a suitable price range, I opted to remix what I already owned and make the rest. It turned out to be even more cost effective than if I had gone with paper and plastic… which was not only more elegant, but better for the environment too. Use some of these ideas as inspiration for your own festive fête, and read my other article… DIY Fast & Easy Mardi Gras Glittered Napkin Rings Craft Tutorial (+ Ribbon Votives, Centerpiece, Free Place-card & Invitation Printables)… for craft instruction and free printables.

096Leigh

I organized my theme according to the traditional Mardi Gras colors of gold, purple, and green (representing power, justice, and faith respectively). Then I pulled out everything I had in glittery versions of those colors. I used a leftover fabric remnant as a festive table topper, and layered that with gold placemats and my grandmother’s gold-rimmed china (also seen here in my Christmas / New Year’s Eve tablescapes).

104Leigh

Atop that, I placed vintage green plates that matched my grandmothers crystal stemware. If there was ever a time to pull out fabulous drinking vessels… it would be for Fat Tuesday!

070Leigh

Echoing my printable Mardi Gras masquerade place-cards (which may also be used as invitation cards, get my free printable here) were sequin fleur-de-lis masks which were positioned on each setting, for reveler donning should the desire arise. I found an inexpensive set of 12 of these at Oriental Trading Company online. (Find a free shipping coupon from them at the link in the sidebar.) I added the 6 extra masks to the centerpiece as ornaments.

018Leigh

I wrapped green metallic washi tape across the decorative elements in my flatware to jazz them up for the occasion. Washi wrapping is an easy way to embellish your everyday utensils for a special occasion, and it is so much cheaper than buying a new set. (You can see the same technique used on the flatware in my Herb Themed Luncheon by viewing the picture in the Upcoming Projects Gallery in the sidebar.)

019Leigh

I didn’t have any napkin rings that would tie into my theme besides the gold varieties I had recently used this winter, so I made my own in a matter of minutes from glitter ribbon and washi tape. This is so much easier than it sounds! (Find my crafting instructions here.)

024Leigh

Squares of shiny fabric, purchased with a 40% off coupon, were used for napkins. A fleur-de-lis shape was achieved by first folding the gold square in half and pulling it through the ring forming a loop. I then folded the purple square in half and formed two loops which I subsequently pulled through the ring over the gold. Lastly, the uneven bottom edges were tucked under.

073Leigh

I made the centerpiece with trim from my Glitter-ween Party Décor (see it here) and a few new sprigs wrapped around a metal tree base. (Incidentally, I had previously painted this gold from its earlier pewter and bronze incarnations. (See how to use paint to change the color of metal and to age a piece in my upcoming lion fu-dog décor for Chinese New Year.)

120Leigh

The base of the tree was swathed in the same purple fabric remnant from Glitter-ween’s spooky tree, and then draped with yards of Mardi Gras trim. (See how to hike up a chandelier to accommodate a tall centerpiece here.)

053Leigh

Though it’s hard to tell from the pictures, the tree centerpiece actually didn’t obstruct any person to person viewing. This is why I only draped the bottom with some Mardi Gras necklaces and wrapped the trunk with ribbon.

091Leigh

I hung embroidered Christmas crown ornaments, snapped up at 10 cent clearance, along with glittered musical instruments, green mirror balls, and a mask garland. (See more on the centerpiece here.) I try to plan all my holiday themes in advance of the after Christmas sales to snag a year’s worth of décor deals at 90% off. I keep my theme collections in labeled bins that I add to as I accumulate finds so that I’m ready to craft and decorate when each holiday arrives.

078Leigh

Surrounding the tree are 4 standing glittered metal masks that I scored at a post-holiday clearance sale for less than 2 dollars each… no kidding folks. I couldn’t have made them for less. To do as I did, scope out this year’s merchandise then pounce as soon as it gets marked down. The purple mercury glass crown votive holders were also found this way for less than a dollar for all 3. I wrapped the other gold votive holders with the same ribbon as the tree trunk to customize them for the holiday. (See how easy it is to do that here.)

131Leigh

The side table has another clearance mask sign hanging near it on the wall. I placed a variety of my other mercury glass candlestick holders with swirling gold tapers to further accent the tablescape. A theme appropriate pot was filled with faux doubloons to add a dash of New Orleans to Texas. (These will reappear as pot-of-gold coins on St. Patrick’s Day.) All of this was set upon an extra placemat.

125Leigh

So you see, it’s really not difficult or expensive to celebrate Krewe-style with your own crew… just don’t forget to serve up that king cake!

095Leigh

Laissez les bon temps roules!

Faithfully Yours,

Leigh

DIY Fast & Easy Mardi Gras Glittered Napkin Rings Craft Tutorial (+ Ribbon Votives, Centerpiece, Free Place-card & Invitation Printables)

012Leigh

Create your own elegant Mardi Gras themed glittered napkin rings for mere pennies with this fast and easy craft. The tutorial includes how to embellish votives to match your theme, free masquerade place-card and invitation printables, plus more details on the centerpiece from the Mardi Gras Masquerade Themed “Fat Tuesday” Dinner Party Tablescape Décor Ideas. These DIY projects are an easy and inexpensive way to bring the look of an authentic Krewe’s fête to your own crew!

304Leigh

The secret element to an inexpensive napkin ring form is the core of a wrapping paper roll. You can’t do better than free! Mark and cut sections that are smaller than the ribbon you choose to cover it with.

308Leigh

Then cut lengths of ribbon long enough to wrap around those cores.

309Leigh

Use hot glue to adhere a strip of ribbon around each core. Here I’ve chosen gold glitter ribbon to coordinate with my Mardi Gras theme. (You can see the same technique used on the rings in my Herb Themed Luncheon by viewing the picture in the Upcoming Projects Gallery in the sidebar.)

311Leigh

Next, I cut and attached layers of green and purple glitter washi tape in different widths atop the gold base. Layers of ribbon would have also worked well, but I already owned the perfect sized tape.

313Leigh

Read how to make your own fleur-de-lis shapes with napkins at the article on Mardi Gras Masquerade Themed “Fat Tuesday” Dinner Party Tablescape Décor Ideas.

024Leigh

I made all six napkin rings for way less than a dollar, in a matter of minutes, and they coordinated perfectly with my theme’s décor… Awesome!

299Leigh

Now for those ribbon votives… simply start with any type of votive holder or small jar. You can leave them plain or apply glitter paint to them. I went with gold glittered glass. Cut lengths of coordinating ribbon long enough to wrap around them and overlap. You can attach one end to the other with a dot of glue or double stick tape. Because my ribbon was wired, I merely twisted one side over the other like a twist-tie. (See more twisty ribbon action here on my DIY Rusted Rooster Chicken Wire Votive Holder Craft.)

303Leigh

In this way, I can unwrap the ribbons and reuse both them and the votives for a future holiday in a different way. I think they turned out great, and they literally took me minutes to complete… Yea!

392Leigh

Create a dramatic centerpiece without a lot of drama by merely starting with a basic tree form from another holiday. (For example, use a black one from Halloween or a white one from Easter.) I used a metal votive holding tree that I had previously painted gold from its earlier pewter and bronze incarnations. (See how to use paint to change the color of metal and to age a piece in my upcoming lion fu-dog décor for Chinese New Year.)

393Leigh

I wrapped it with trim from my Glitter-ween Party Décor (see it here) then added a few new sprigs.

235Leigh

I painted simple purple ball ornaments with a glitter mist (not the blast variety) to impart both gloss and glitter shine to the previously satin sheen.

236Leigh

I set these onto the rings that would normally hold the votive holders. (You’ll likely see these in a future article.)

053Leigh

I hung embroidered Christmas crown ornaments, snapped up at 10 cent clearance, along with glittered musical instruments, green mirror balls, and a mask garland. I even hung the same sequin fleur-de-lis masks used at each table setting as ornaments. I try to plan all my holiday themes I advance of the after Christmas sales to snag a year’s worth of décor deals at 90% off. I keep my theme collections in labeled bins that I add to as I accumulate finds so that I’m ready to craft and decorate when each holiday arrives.

091Leigh

Though it’s hard to tell from the pictures, the tree centerpiece actually didn’t obstruct any person to person viewing. This is why I only draped the bottom with some Mardi Gras necklaces and wrapped the trunk with the same ribbon I used on the votive holders.

120Leigh

The base of the tree was then swathed in the same purple fabric remnant from Glitter-ween’s spooky tree and draped with yards of Mardi Gras trim. (See how to hike up a chandelier to accommodate a tall centerpiece here.)

043Leigh

Surrounding that are 4 standing glittered metal masks that I scored at a post-holiday clearance sale for less than 2 dollars each… no kidding folks. I couldn’t have made them for less. To do as I did, scope out this year’s merchandise then pounce as soon as it gets marked down. The purple mercury glass crown votive holders were also found this way for less than a dollar for all 3… Score!

009Leigh

Last but definitely not least, are my free printable Mardi Gras masquerade place-cards which may also be used as invitation cards!

mardi-gras-placecards-leigh

Simple right click on this small picture and select print. Print these in best color photo on thick cardstock.

004Leigh

Then simply cut on the solid black lines to separate the images for invitations. For place-cards, use the pictures a guide for how to cut out the top and crown while still making a tent folding card that will stand upright.

039Leigh

Poke a point into the paper just above the crown with a pointy pen, or compass point, etc. Use that as a starting point for your scissors to cut a V shape above the picture. Then cut one side close to the top and crown next to the image. Don’t cut all the way to the ends. Stop where the curve meets the flat top. Those flat parts are what join the front and back together. Then fold it in half. Cut through both pieces around the image. Again, a picture speaks a thousand words… use it as a visual guide.

028Leigh

Simply write names on the bottom with a gold sharpie marker or paint pen… Voila!

104Leigh

See more of my Mardi Gras Masquerade Themed “Fat Tuesday” Dinner Party Tablescape Décor Ideas here for more holiday inspiration!

070Leigh

Let the good times roll!

Faithfully Yours,

Leigh

2 Fast & Easy Valentine’s Day Banner Décor Craft Tutorials (Doily & Glitter Hearts + Printable)

229Leigh

These Valentine’s Day banner crafts are so fast and easy that even the busiest mama can make them with her little ones. The glitter heart and doily printable only needs the addition of letters to spell out any message you wish. The second banner is comprised of layered doilies and extra valentines. Both are so inexpensive yet add a lot of heartfelt sentiment and party atmosphere. Plus, they’re lightweight enough to stick in a big envelope and send to a loved one whose away for the holiday. You can even use the printables as stand-alone Valentine Cards!

176Leigh

First let’s make the doily valentine banner. This is a great project to use up any leftover schoolroom Valentine cards from your kiddo’s class. You can even save the received ones to make banners for next year’s celebration.

175Leigh

One only needs to add some low-cost paper doilies in varying sizes. I used leftovers from last year along with some Holly-Hobby Valentine Cards from my childhood.

51Leigh

Merely use dots of glue to layer the doilies and Valentines. Then add a ribbon bow for dimension.

54Leigh

Tie circles of twine, yarn, or ribbon through the holes in the doilies and knot together. Hang it up and enjoy!

171Leigh

The glitter heart and doily banner is one that can be easily made by two different methods. You can print and cut out all the glitter doily hearts you need, using my printable at the end of the article. You can also use inexpensive glittered foam hearts from the craft store, and use hot glue to layer white doily hearts onto them.

26Leigh

Either way, the next step is add letters spelling out any sentiment you’d like. I cut out letters with a machine from black card stock to coordinate with my chalkboard theme. You can also use a stencil to trace and hand cut them, or buy them readymade at the craft store. (Michaels has them in every color and texture you can think of. Click on the affiliate link in the side bar to snatch the latest coupons.) I added a knot of ribbon to each dip in the heart to further tie in with my theme’s color palette. Feel free to add any other elements you’d like from paper roses to stickers. (You can even skip the letters and let a kiddo color in pictures to use the printables as Valentine Cards.)

38Leigh

Next add holes to both sides of each heart with a hole-punch. Then use ribbon or twine to string them together. Add a loop at each end to hang the banners by. Voila!

224Leigh

♥ Happy Heart’s Day!

Faithfully yours,

Leigh

V-dayHearts-Leigh

P.S. Here is the Glitter-Doily Heart Printable. Simply right click on the image and select Print. Print them in the best color photo setting.