Tag Archives: Dinner

Mardi Gras Masquerade Themed “Fat Tuesday” Dinner Party Tablescape Décor Ideas

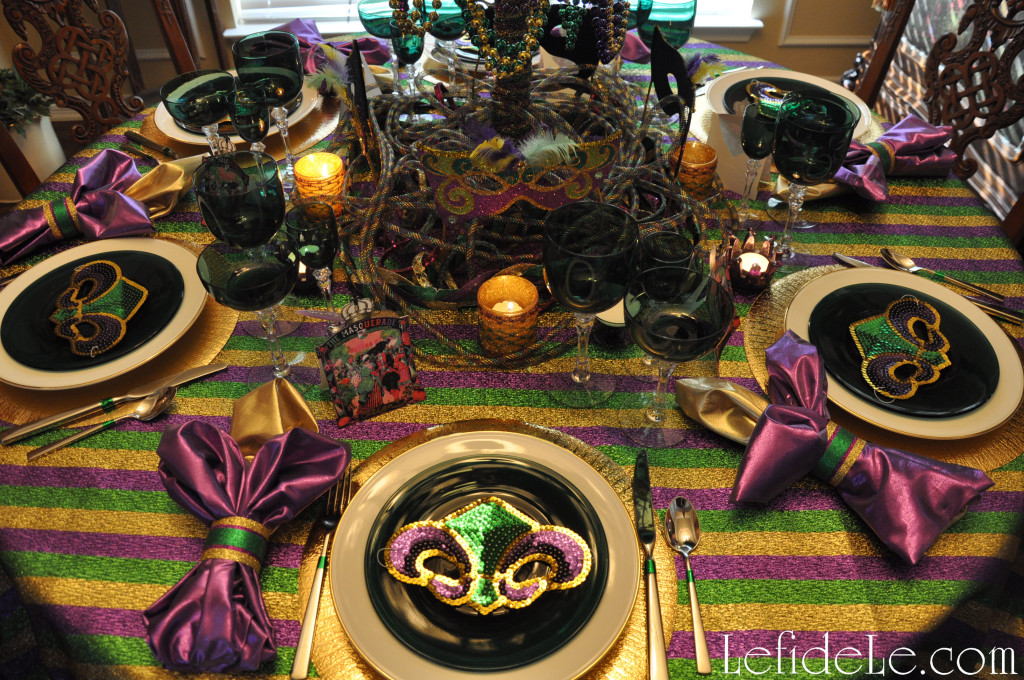
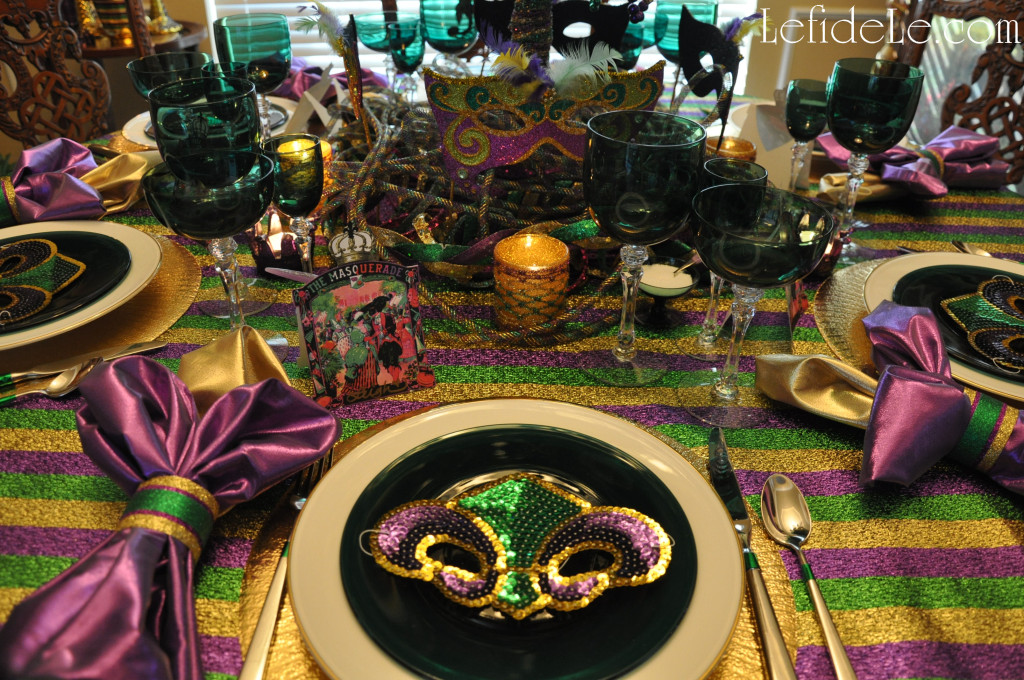
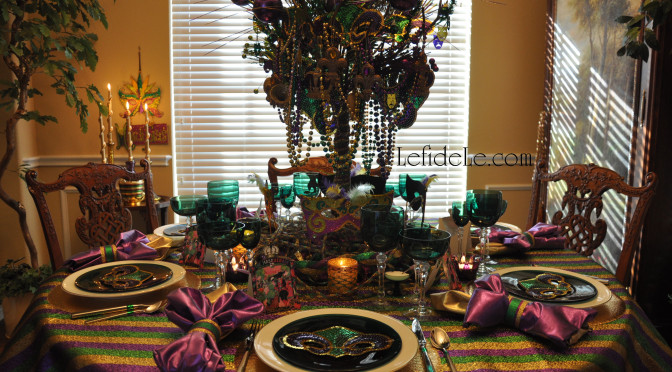
This Mardi Gras Masquerade themed tablescape for a “Fat Tuesday” dinner party was instigated by the desire to go all out like the big Krewe celebrations in Louisiana… but on a tiny budget! Not finding what I wanted in a suitable price range, I opted to remix what I already owned and make the rest. It turned out to be even more cost effective than if I had gone with paper and plastic… which was not only more elegant, but better for the environment too. Use some of these ideas as inspiration for your own festive fête, and read my other article… DIY Fast & Easy Mardi Gras Glittered Napkin Rings Craft Tutorial (+ Ribbon Votives, Centerpiece, Free Place-card & Invitation Printables)… for craft instruction and free printables.

096Leigh

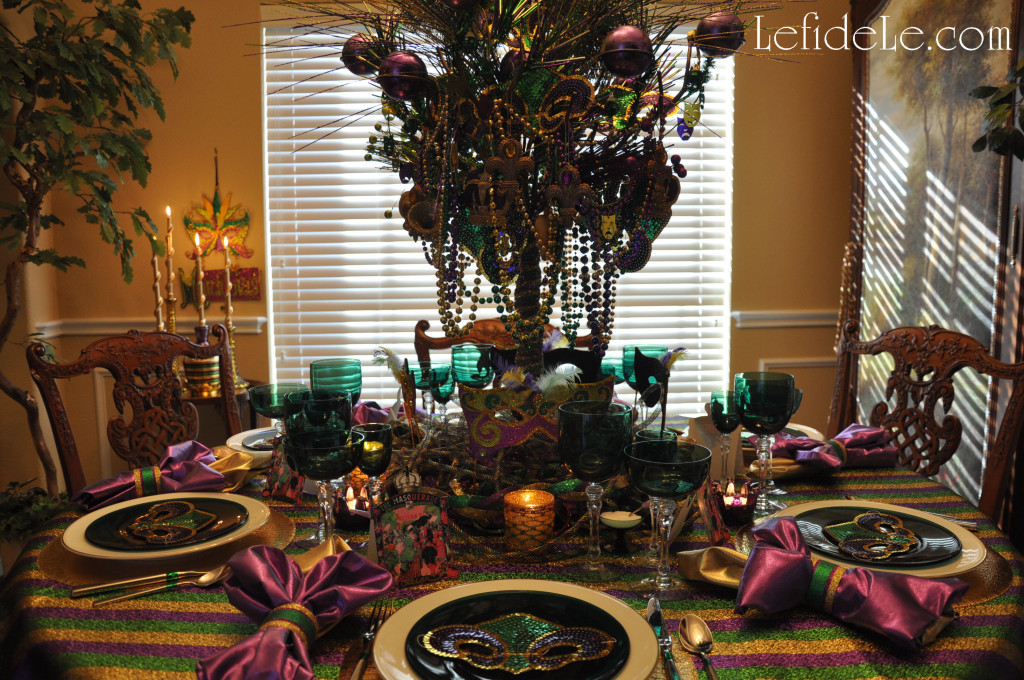
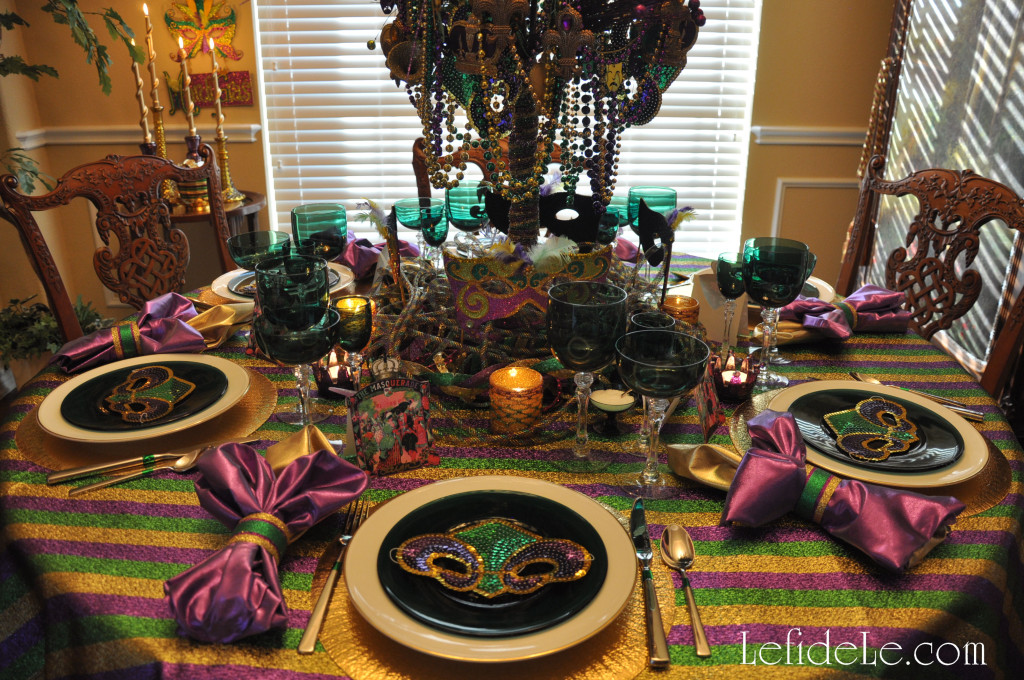
I organized my theme according to the traditional Mardi Gras colors of gold, purple, and green (representing power, justice, and faith respectively). Then I pulled out everything I had in glittery versions of those colors. I used a leftover fabric remnant as a festive table topper, and layered that with gold placemats and my grandmother’s gold-rimmed china (also seen here in my Christmas / New Year’s Eve tablescapes).

104Leigh

Atop that, I placed vintage green plates that matched my grandmothers crystal stemware. If there was ever a time to pull out fabulous drinking vessels… it would be for Fat Tuesday!

070Leigh

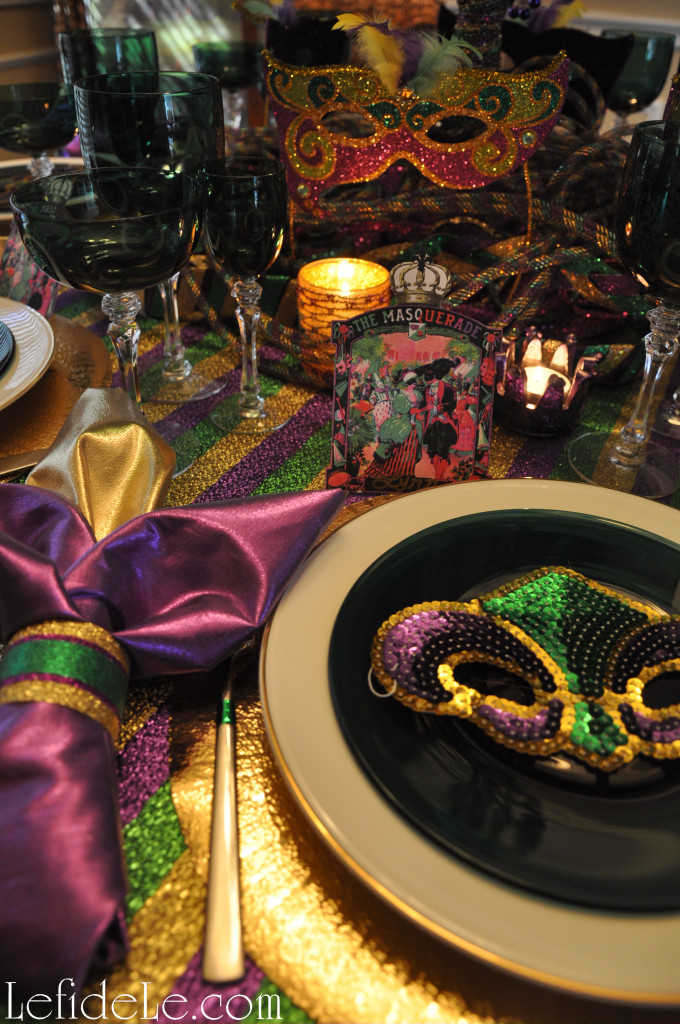
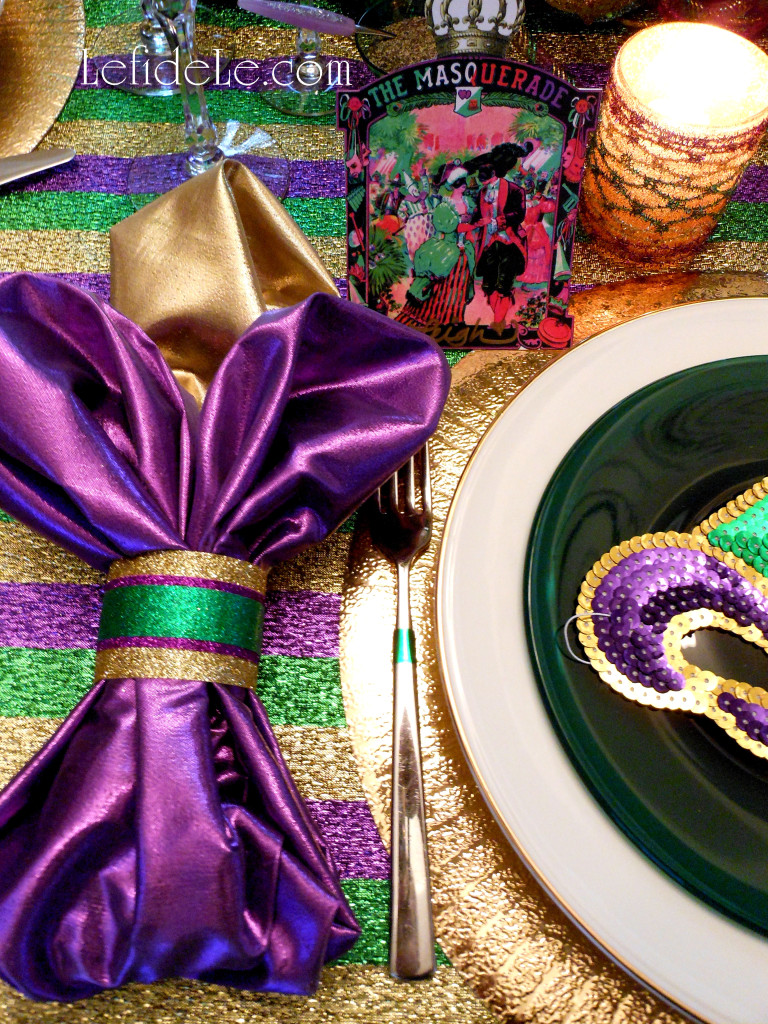
Echoing my printable Mardi Gras masquerade place-cards (which may also be used as invitation cards, get my free printable here) were sequin fleur-de-lis masks which were positioned on each setting, for reveler donning should the desire arise. I found an inexpensive set of 12 of these at Oriental Trading Company online. (Find a free shipping coupon from them at the link in the sidebar.) I added the 6 extra masks to the centerpiece as ornaments.

018Leigh

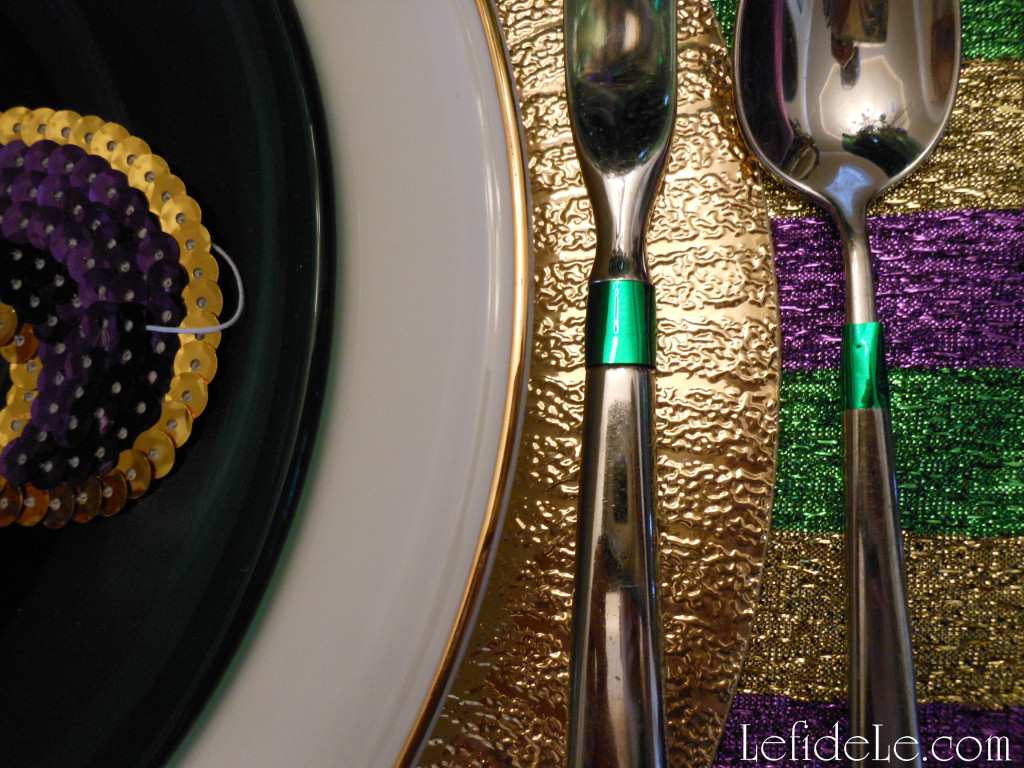
I wrapped green metallic washi tape across the decorative elements in my flatware to jazz them up for the occasion. Washi wrapping is an easy way to embellish your everyday utensils for a special occasion, and it is so much cheaper than buying a new set. (You can see the same technique used on the flatware in my Herb Themed Luncheon by viewing the picture in the Upcoming Projects Gallery in the sidebar.)

019Leigh

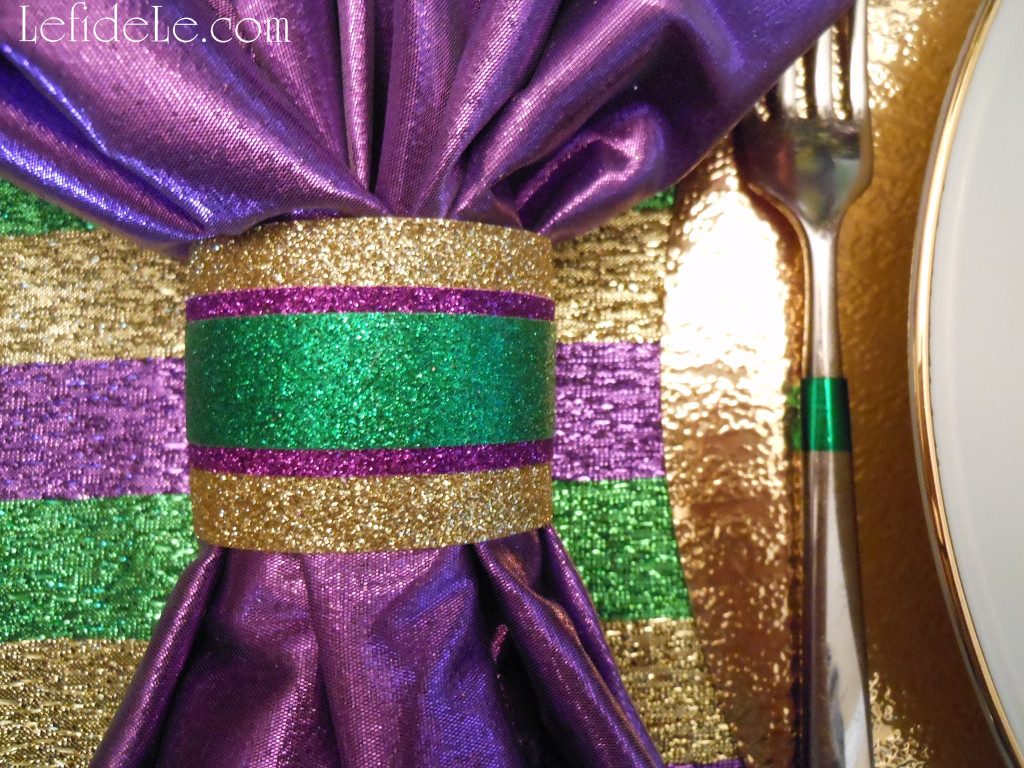
I didn’t have any napkin rings that would tie into my theme besides the gold varieties I had recently used this winter, so I made my own in a matter of minutes from glitter ribbon and washi tape. This is so much easier than it sounds! (Find my crafting instructions here.)

024Leigh

Squares of shiny fabric, purchased with a 40% off coupon, were used for napkins. A fleur-de-lis shape was achieved by first folding the gold square in half and pulling it through the ring forming a loop. I then folded the purple square in half and formed two loops which I subsequently pulled through the ring over the gold. Lastly, the uneven bottom edges were tucked under.

073Leigh

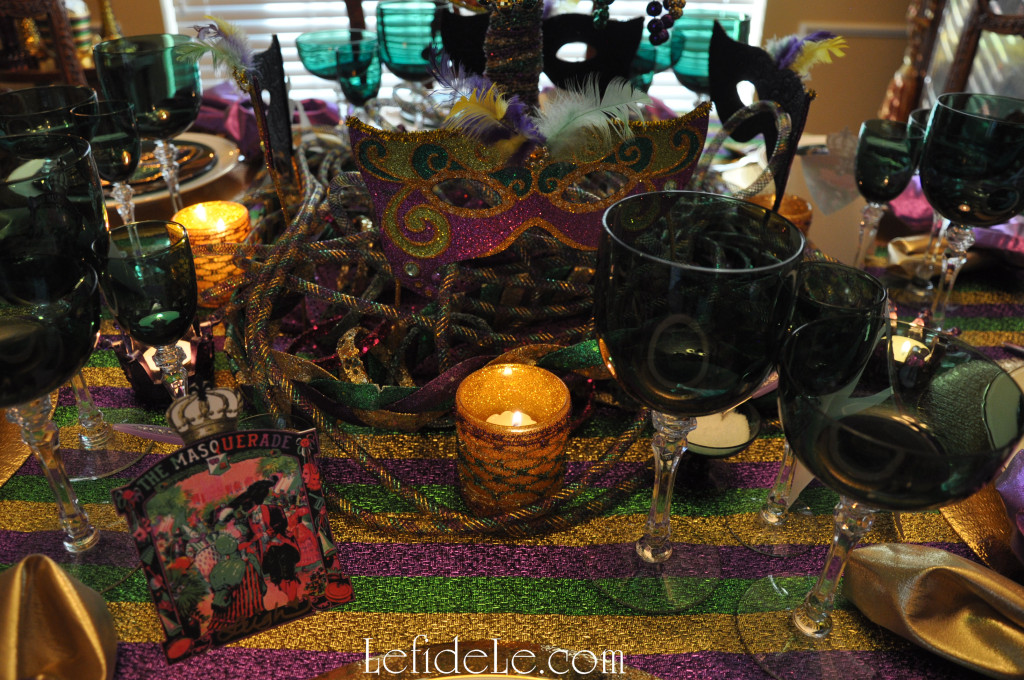
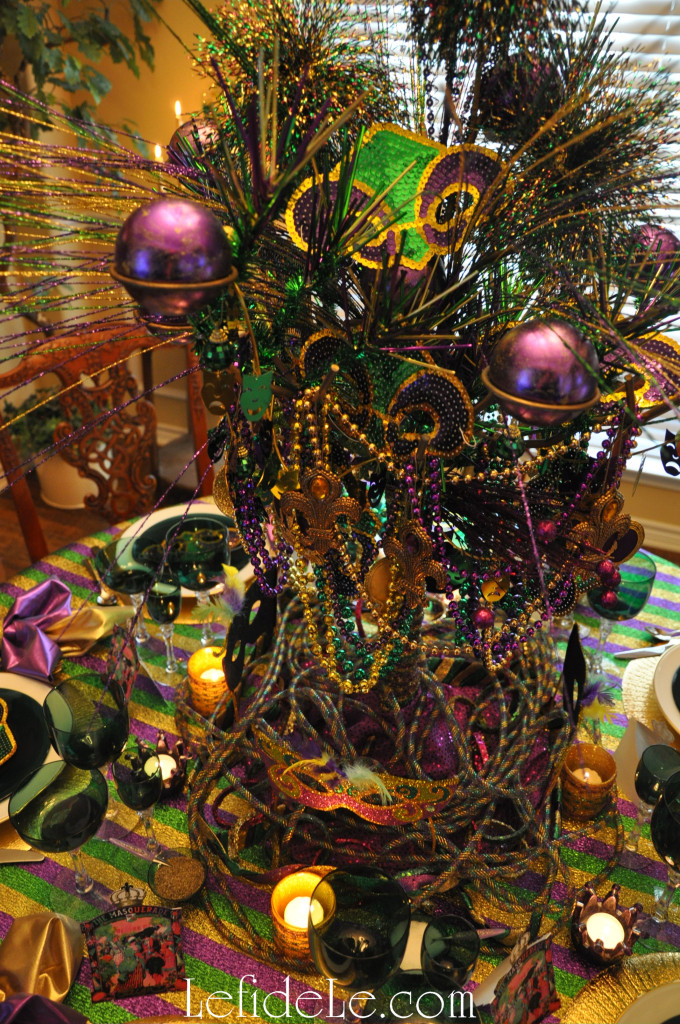
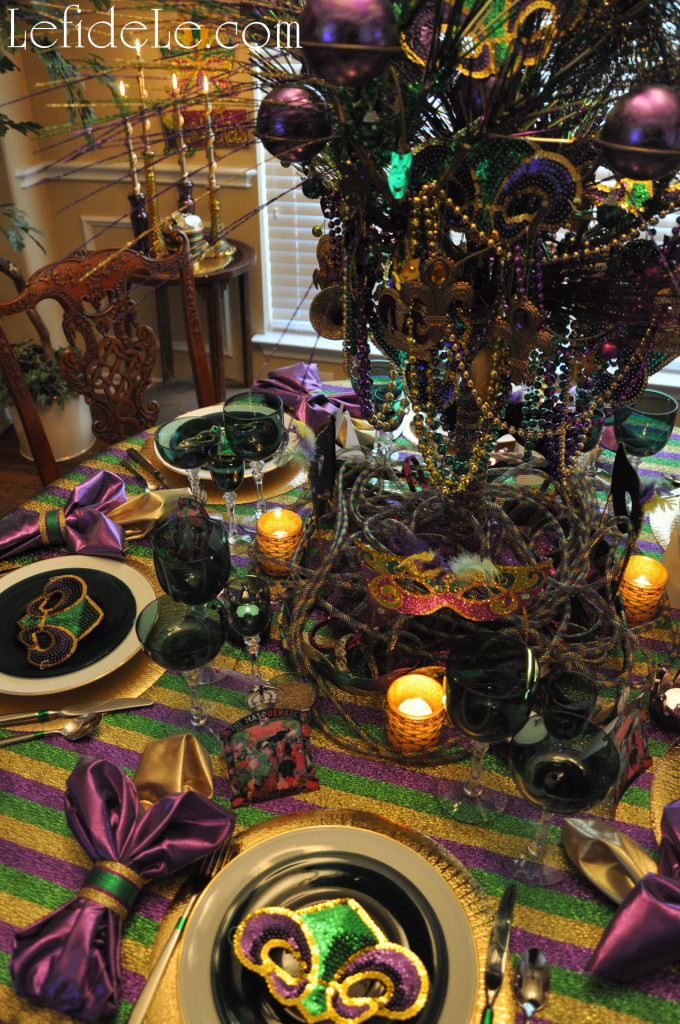
I made the centerpiece with trim from my Glitter-ween Party Décor (see it here) and a few new sprigs wrapped around a metal tree base. (Incidentally, I had previously painted this gold from its earlier pewter and bronze incarnations. (See how to use paint to change the color of metal and to age a piece in my upcoming lion fu-dog décor for Chinese New Year.)

120Leigh

The base of the tree was swathed in the same purple fabric remnant from Glitter-ween’s spooky tree, and then draped with yards of Mardi Gras trim. (See how to hike up a chandelier to accommodate a tall centerpiece here.)

053Leigh

Though it’s hard to tell from the pictures, the tree centerpiece actually didn’t obstruct any person to person viewing. This is why I only draped the bottom with some Mardi Gras necklaces and wrapped the trunk with ribbon.

091Leigh

I hung embroidered Christmas crown ornaments, snapped up at 10 cent clearance, along with glittered musical instruments, green mirror balls, and a mask garland. (See more on the centerpiece here.) I try to plan all my holiday themes in advance of the after Christmas sales to snag a year’s worth of décor deals at 90% off. I keep my theme collections in labeled bins that I add to as I accumulate finds so that I’m ready to craft and decorate when each holiday arrives.

078Leigh

Surrounding the tree are 4 standing glittered metal masks that I scored at a post-holiday clearance sale for less than 2 dollars each… no kidding folks. I couldn’t have made them for less. To do as I did, scope out this year’s merchandise then pounce as soon as it gets marked down. The purple mercury glass crown votive holders were also found this way for less than a dollar for all 3. I wrapped the other gold votive holders with the same ribbon as the tree trunk to customize them for the holiday. (See how easy it is to do that here.)

131Leigh

The side table has another clearance mask sign hanging near it on the wall. I placed a variety of my other mercury glass candlestick holders with swirling gold tapers to further accent the tablescape. A theme appropriate pot was filled with faux doubloons to add a dash of New Orleans to Texas. (These will reappear as pot-of-gold coins on St. Patrick’s Day.) All of this was set upon an extra placemat.

125Leigh

So you see, it’s really not difficult or expensive to celebrate Krewe-style with your own crew… just don’t forget to serve up that king cake!

095Leigh

Laissez les bon temps roules!

Faithfully Yours,

Leigh
Super Bowl of Chili (Recipe with Three Options: Beef, Turkey, or Veggie)

The following recipes have been recommended from Le fidèLe Designs affiliate Abe’s Market who has sponsored this article. I thought I’d pass them onto to y’all because I don’t invent recipes that include chili powder, corn, or soy… but I think there are many of you out there who would enjoy these anyway. (If you have allergies, you can try adding more beans to replace the tofu in the vegan chili, omit the corn in the turkey chili, and replace the chili powder with other spices of your choosing.)

Faithfully yours,

Leigh


Nobody wants to be stuck in the kitchen during the Big Game. Make the following recipes ahead and keep them warm until kickoff. The use of an all-natural slow cooker sauce made entirely of vegetables and seasonings speeds up prep time considerably. Using lean ground beef, turkey or all vegetables ensures a low-fat delicious meal!


(Click the link here to take an extra 25% Off Jesben Slow Cooker Sauces from Le fidèLe Designs affiliate Abe’s Market with Code: SNOWDAY until 2/1!)


Super Bowl of Chili – 3 Ways: Beef, Turkey, or Veggie:

Abe's Market Chili


SLOW COOKER SUPER BOWL OF BEEF CHILI
Ingredients:
1-2 lbs lean (90%) ground beef
1 jar (24 oz) Jesben® Italian Tomato, Peppers & Herbs Slow Cooker Sauce
1 can (approx. 15 oz) red kidney beans (rinsed and drained)
1 can (approx. 15 oz) pinto beans (rinsed and drained)
3 T chili powder
1 T ground cumin

Instructions:
Place meat in slow cooker.
Add beans.
Sprinkle spices over beef and beans.
Pour entire jar of Jesben® Italian Tomato, Peppers & Herbs Slow Cooker Sauce on top of meat, beans and spices. Cover and cook on low for 8-10 hours or high for 4-5 hours or until meat is fully cooked.
With large spoon thoroughly stir cooked chili, breaking up ground beef into chunks and then into smaller pieces with back of spoon.
Serve in bowls and enjoy!
Makes 8-10 servings


SLOW COOKER TURKEY CHILI
Ingredients:
1-2 lbs ground turkey
1 jar (24 oz) Jesben® Italian Tomato, Peppers & Herbs Slow Cooker Sauce
1 can (approx. 15 oz) black beans (rinsed and drained)
1 can (approx. 15 oz) yellow corn kernels (rinsed and drained)
3 T chili powder
1 T ground cumin

Instructions:
Place turkey in slow cooker.
Add beans.
Sprinkle spices over turkey and beans.
Pour entire jar of Jesben® Italian Tomato, Peppers & Herbs Slow Cooker Sauce on top of turkey, beans and spices. Cover and cook on low for 8-10 hours or high for 4-5 hours or until meat is fully cooked.
With large spoon thoroughly stir cooked chili, breaking up ground turkey into chunks, and then into smaller pieces with back of spoon.
Serve in bowls and enjoy!
Makes 8-10 servings


SLOW COOKER VEGETARIAN CHILI
Ingredients:
1 lb chopped portobello mushrooms
1 lb diced extra firm tofu
1 jar (24 oz) Jesben® Italian Tomato, Peppers & Herbs Slow Cooker Sauce
1 can (approx. 15 oz) cannellini beans (rinsed and drained)
1 can (approx. 15 oz) dark red kidney beans (rinsed and drained)
3 T chili powder
1 T ground cumin

Instructions:
Place mushrooms and tofu in slow cooker.
Add beans.
Sprinkle spices over veggies and beans.
Pour entire jar of Jesben® Italian Tomato, Peppers & Herbs Slow Cooker Sauce on top of vegetables, beans and spices. Cover and cook on low for 6-8 hours or high for 3-4 hours.
Stir thoroughly and keep warm in slow cooker until ready to eat.
Serve in bowls and enjoy!
Makes 8-10 servings

Note: If you prefer less heat, chili powder can be reduced in any of these recipes by 1 tablespoon. On the other hand, if you like your chili hot, add a dash of hot sauce or cayenne pepper to taste. Also, feel free to get creative with your ingredients!


Last Minute Cocorico Rooster Theme Dinner Party Décor Ideas (+ Free Printables)

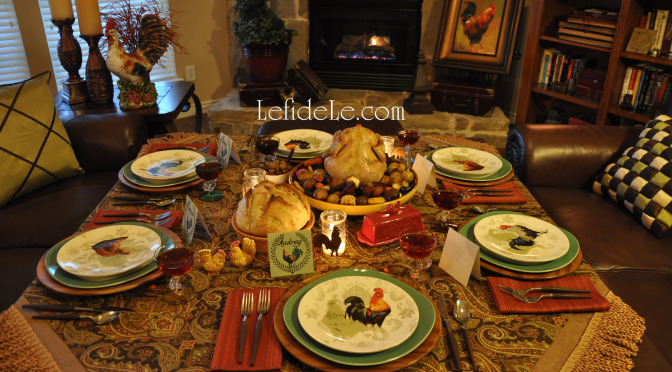
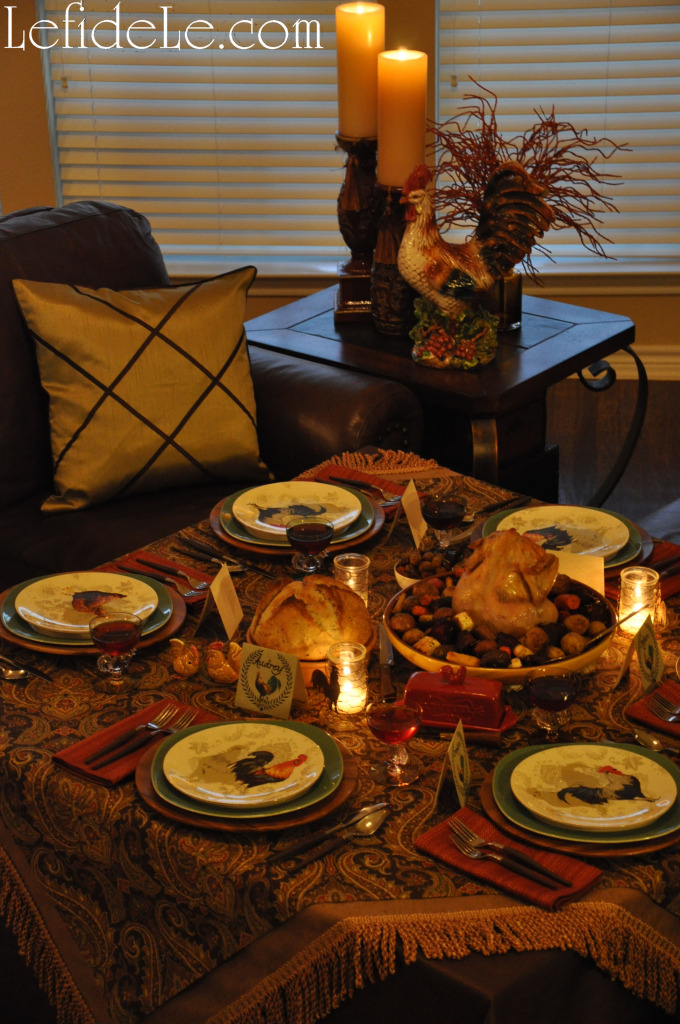
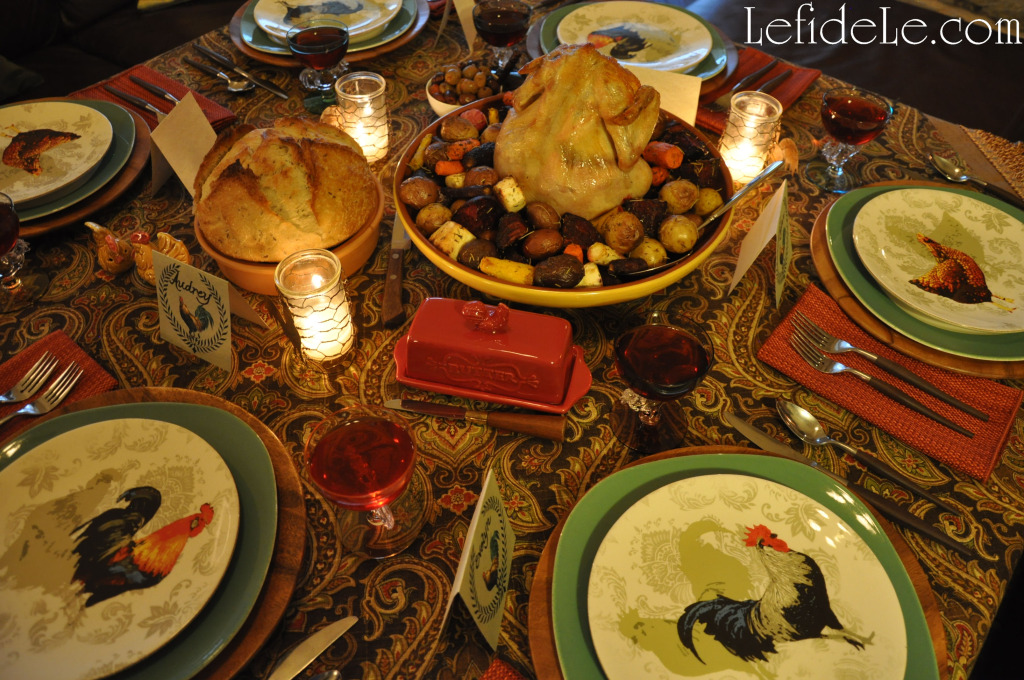
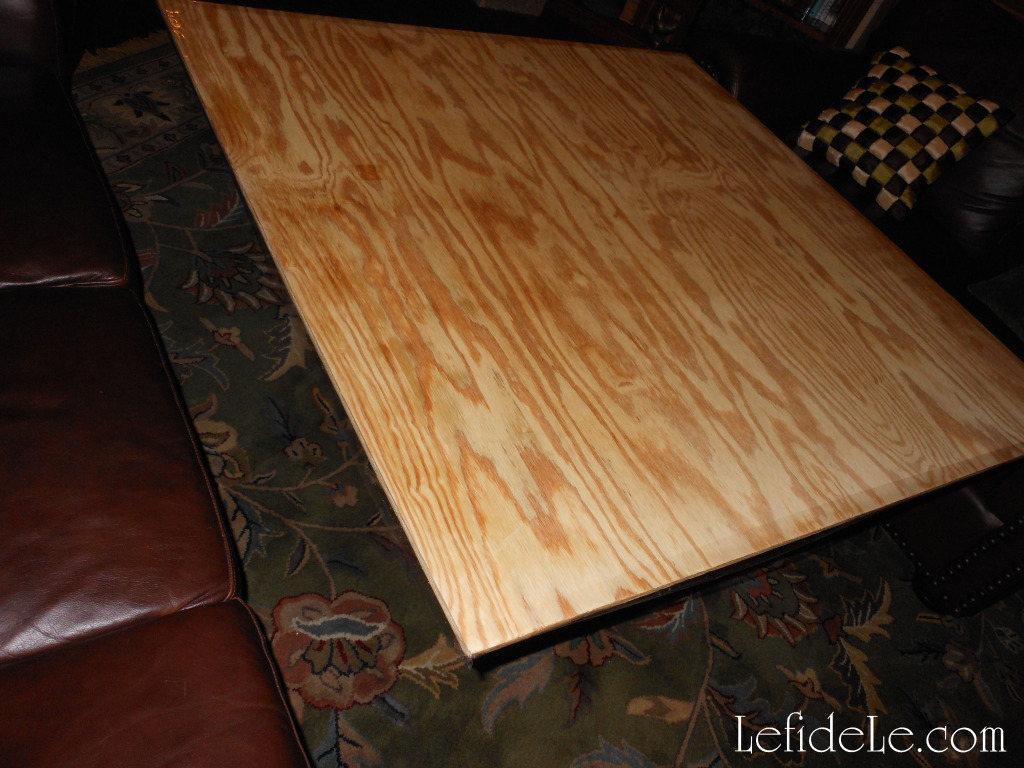
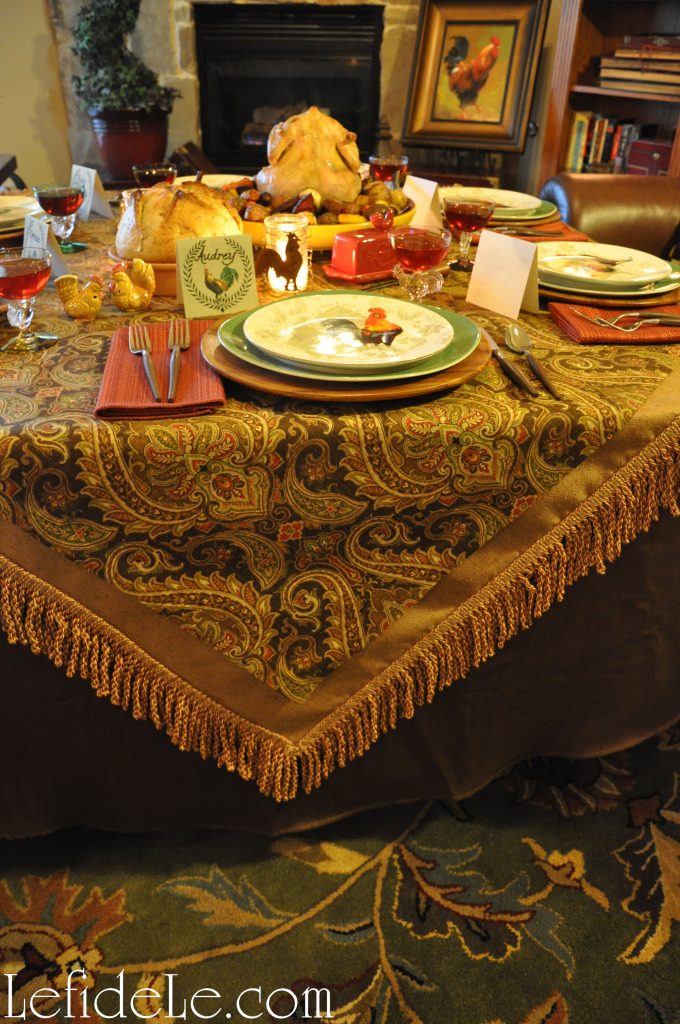
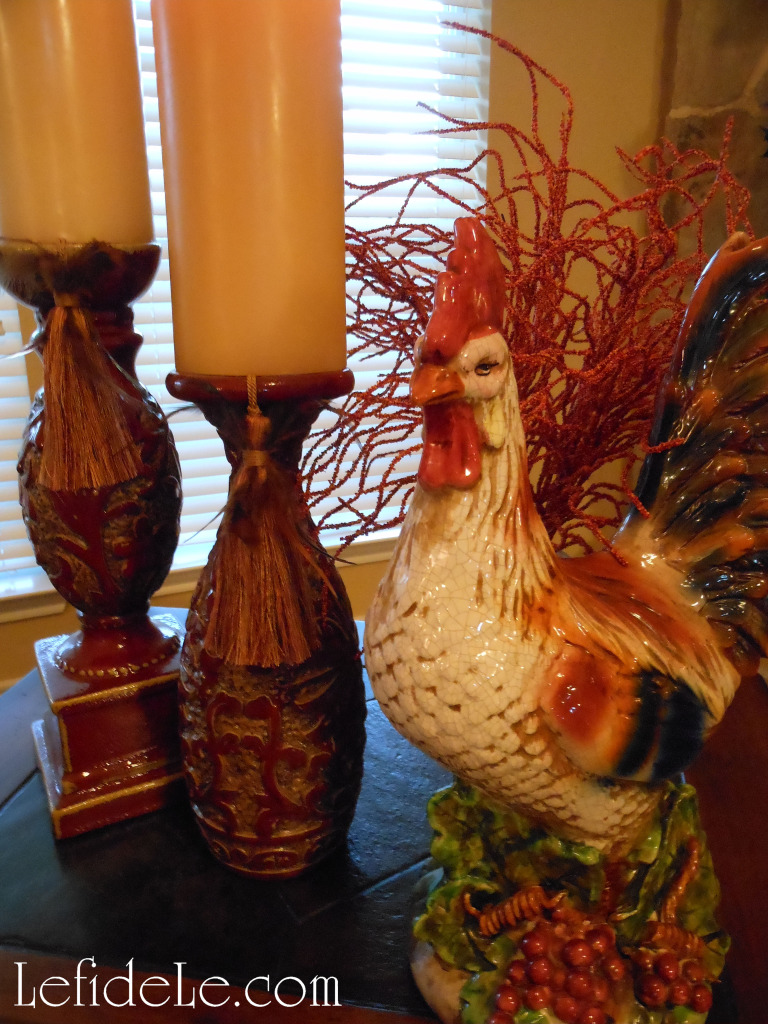
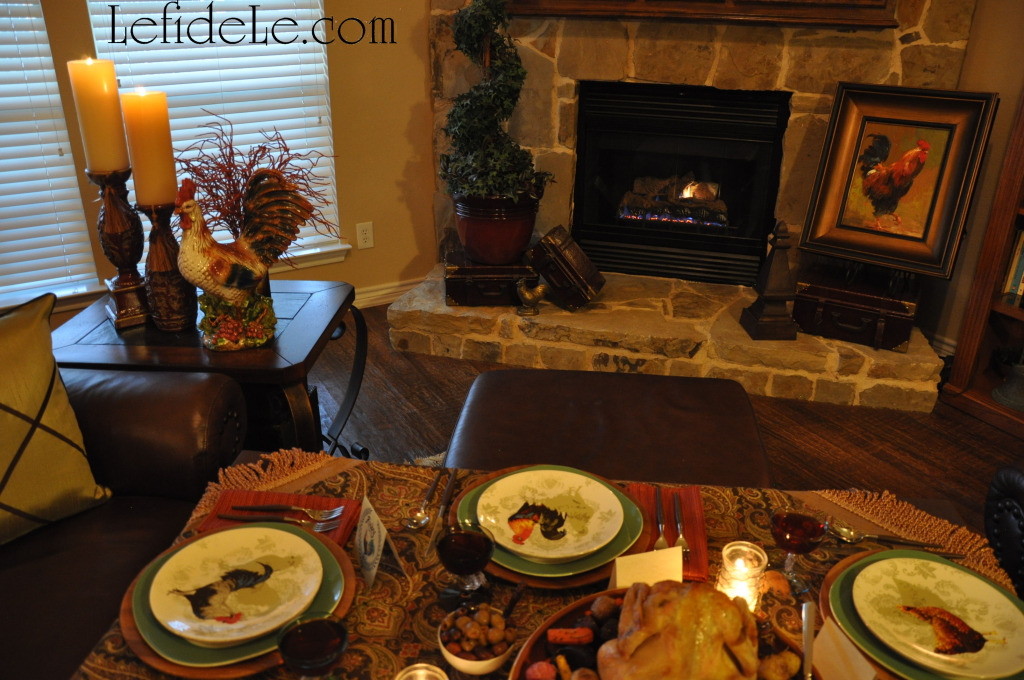
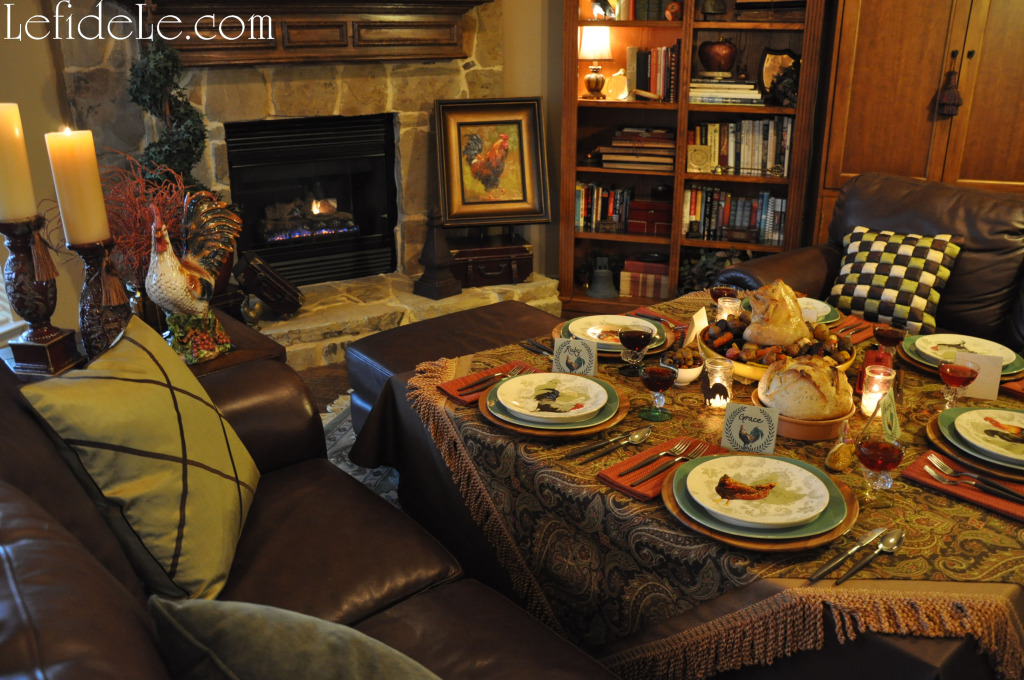
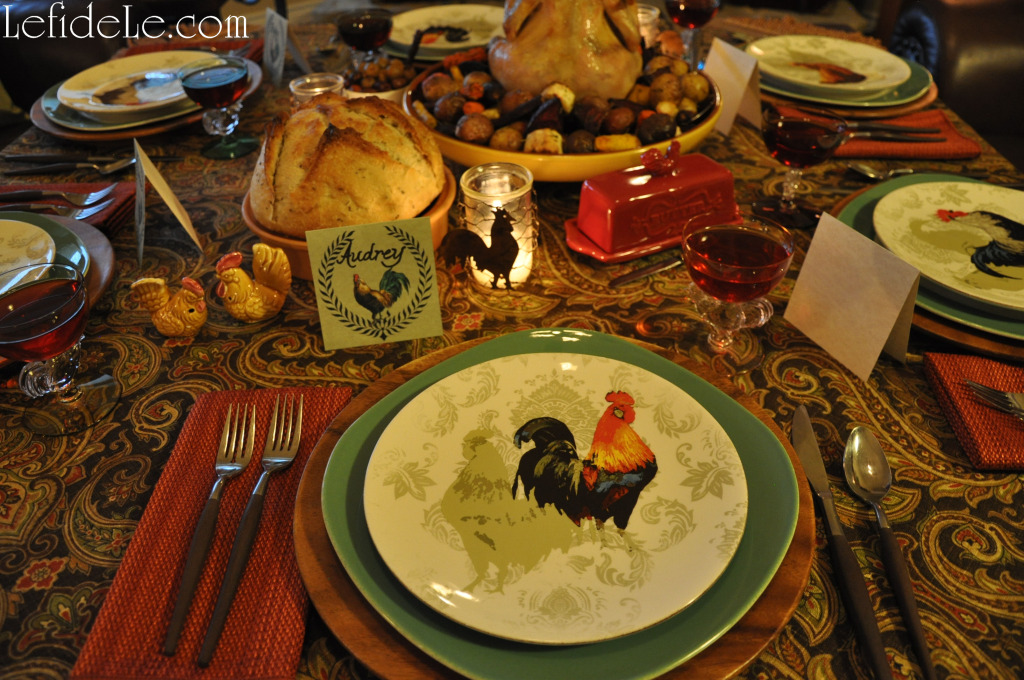
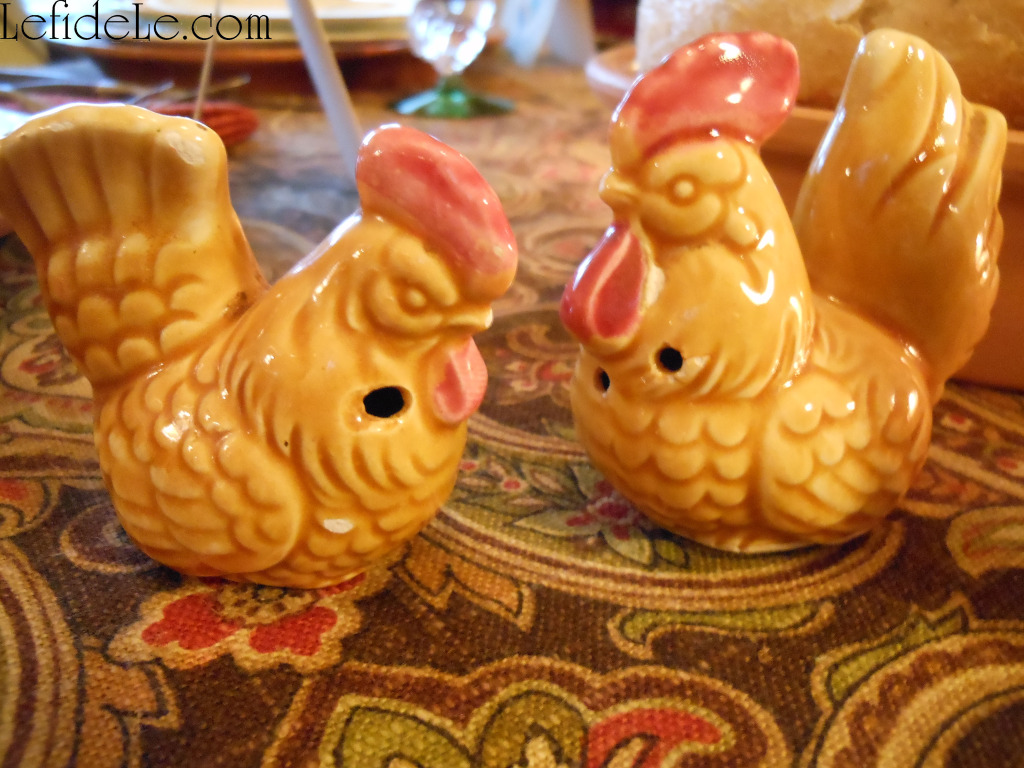
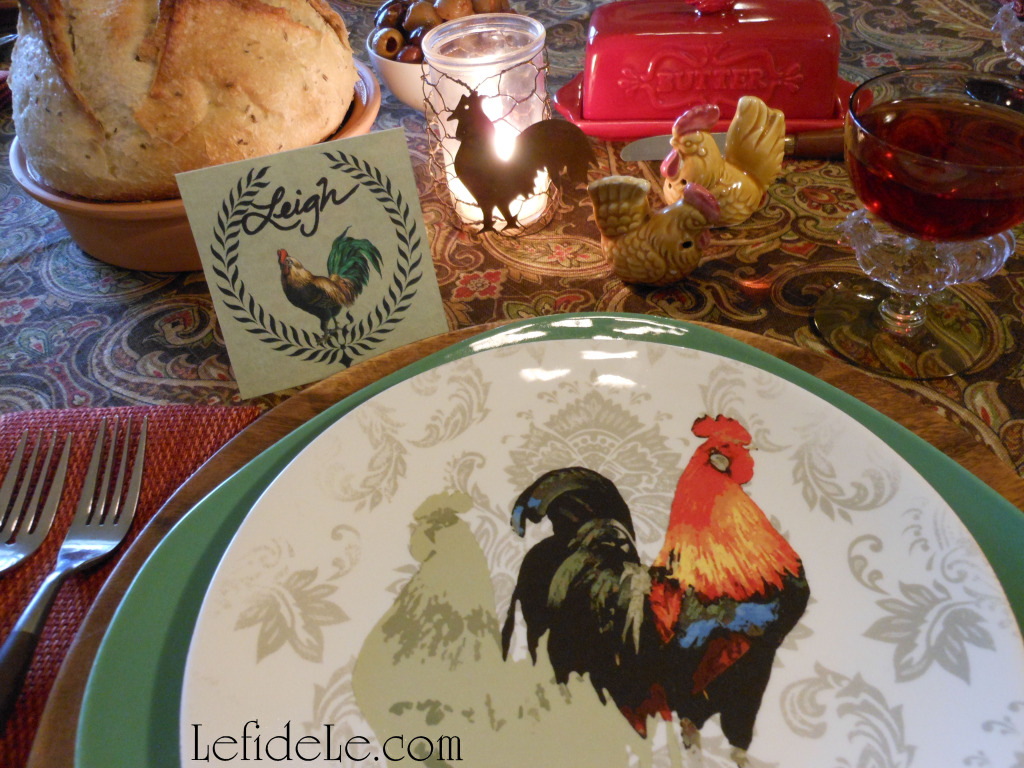
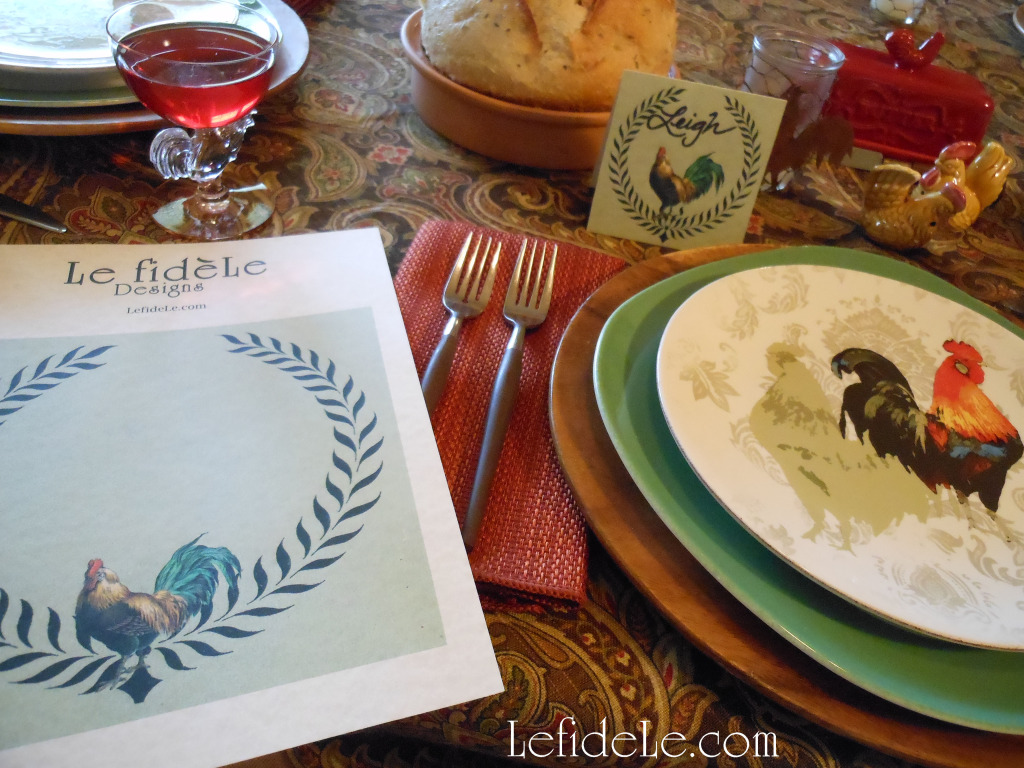
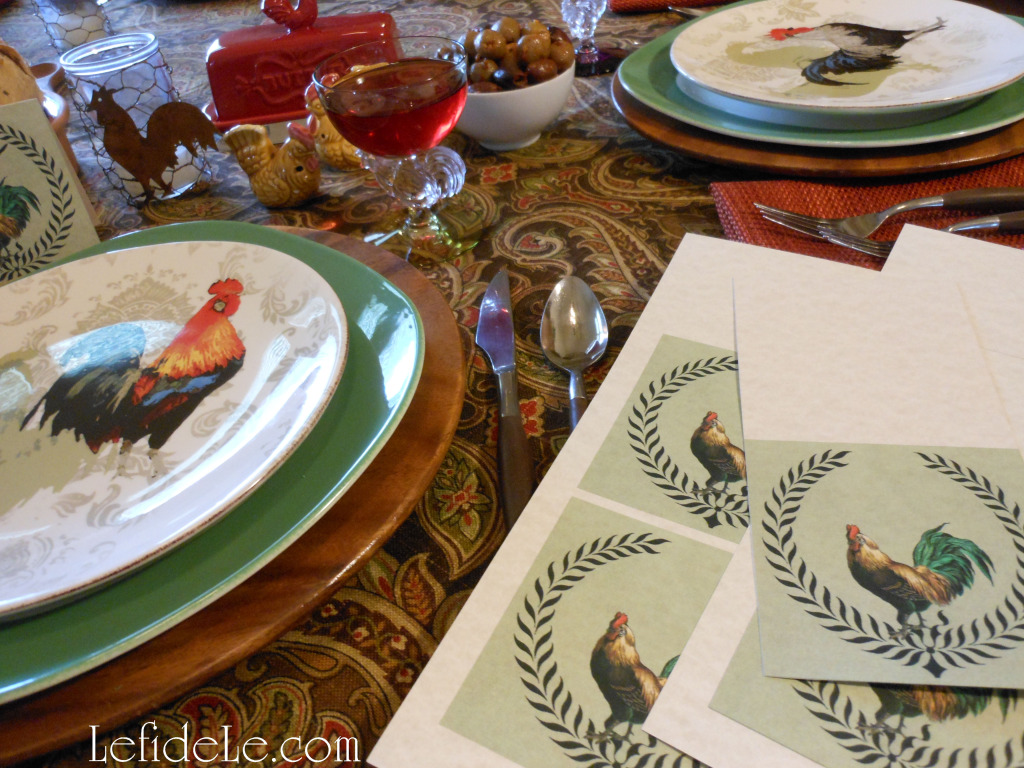
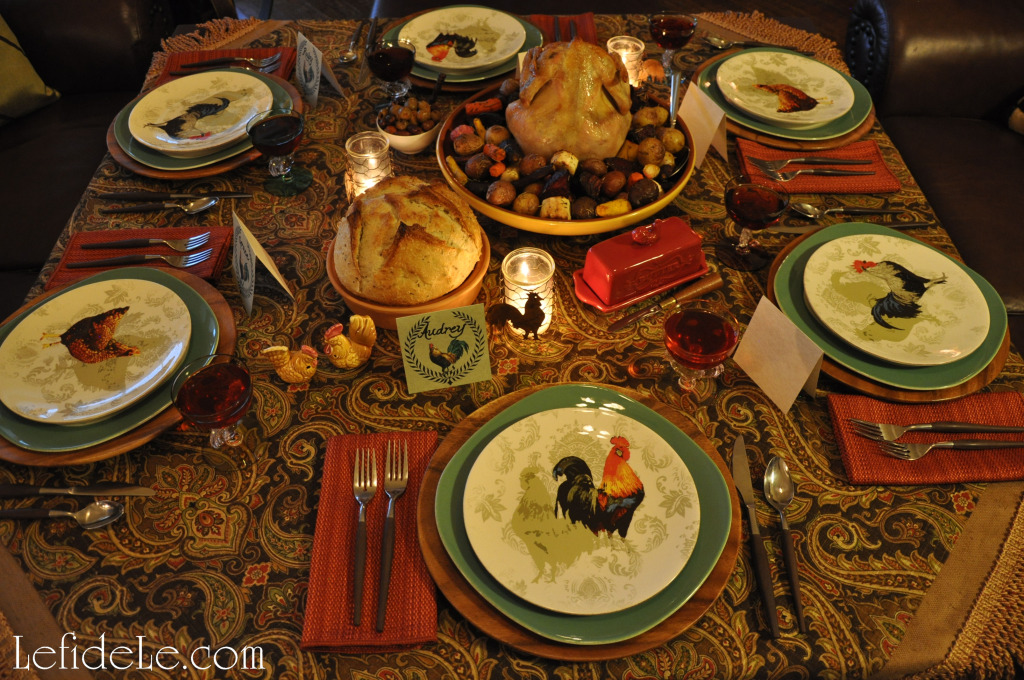
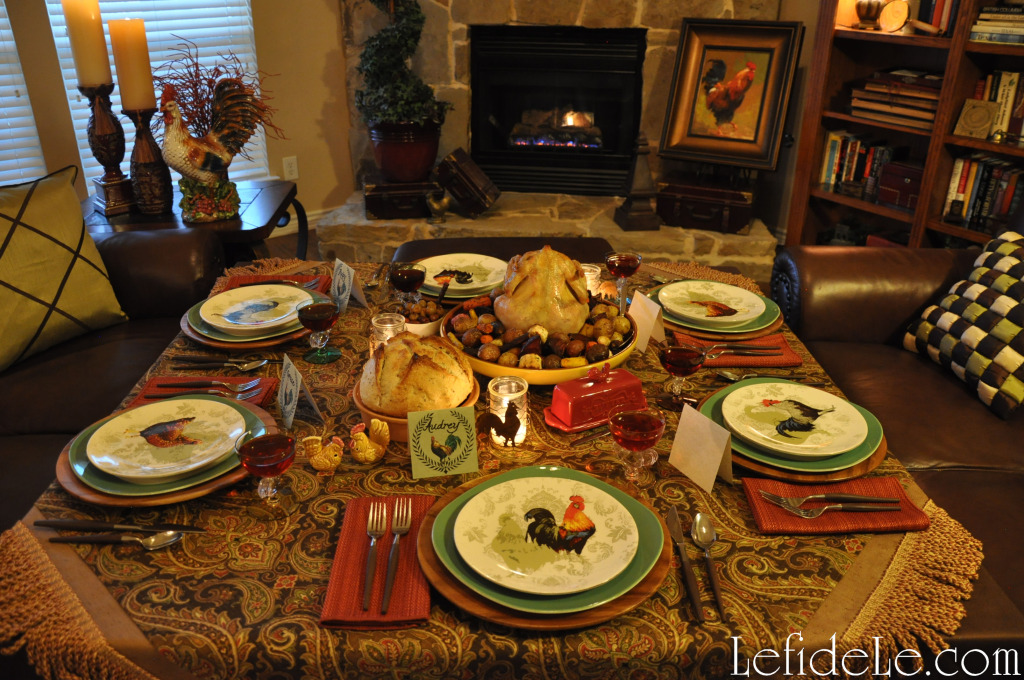
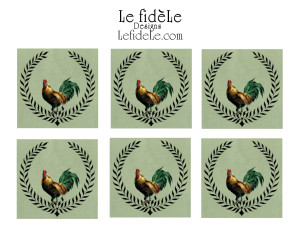
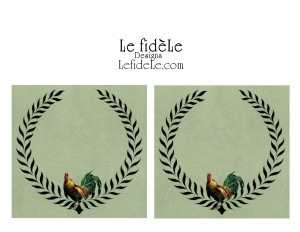
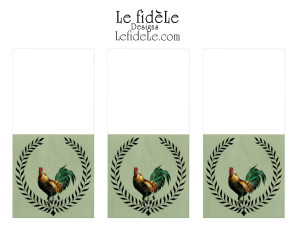
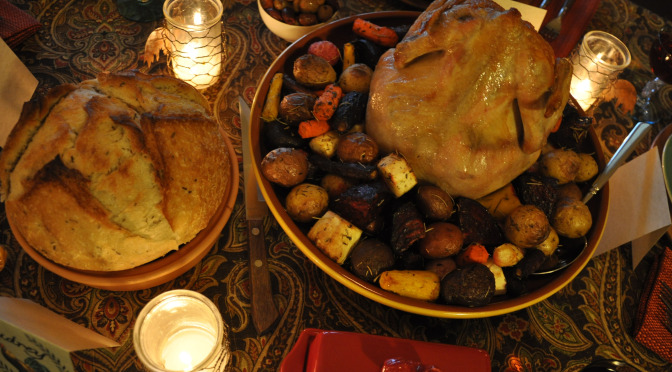
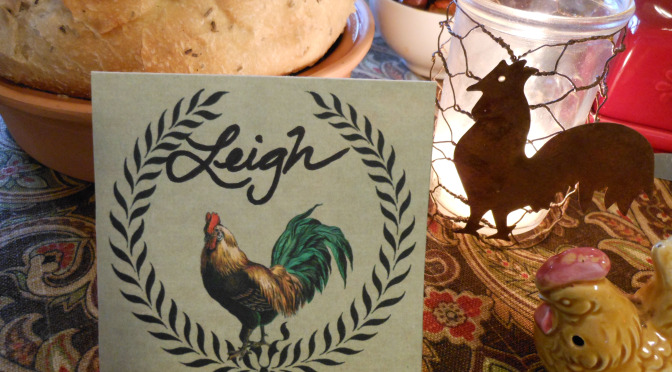
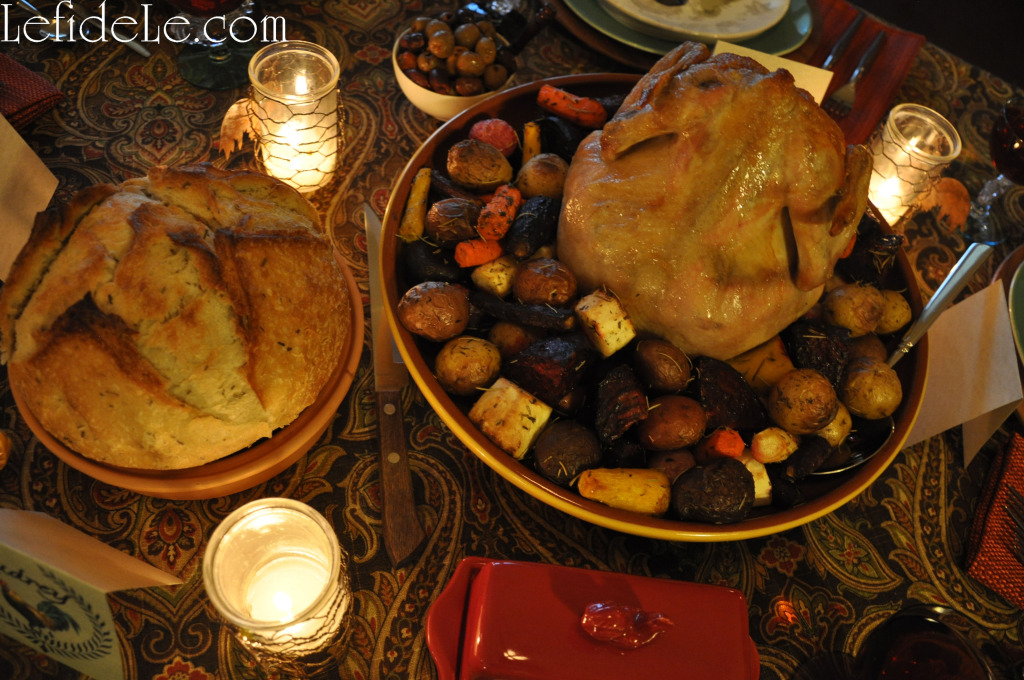
175Leigh With the winter season so turkey saturated for the holidays, I thought I’d utilize my overabundance of rooster décor and host a cozy dinner party by the fire. I used my Healthy “One-Pot” Cocorico Roasted Chicken (or Turkey) & Root Vegetables Recipe as a family-style centerpiece of food. And with my printable place-cards, it’s an easily emulated dinner party that offers a warm welcome for out-of-towners in for the holidays! 157Leigh I love the idea of taking dinner out of the dining room, especially in winter when there is a cozy fire available. So, my first task was to move the couches into a dining configuration. I have a large round antique coffee table that is mechanized to pop up to dining height. To accommodate more guests, I topped it with a $12 precut 4’ x 4’ plywood square from a chain hardware store. The edges of this were taped to avoid snagging the tablecloth. A card table is another easy option. 65Leigh Layering fabrics is a quick and easy way to add warmth to a gathering, so I draped layers of tablecloths over the square. The first layer was chocolate brown, then beige burlap with added trim, and a fall paisley print over the top. 106Leigh I exchanged the usual living room décor with various bits of rooster ephemera. I set a ceramic chicken on a side table next to cranberry colored candlesticks, and tucked feather tassels under the large candles. 49Leigh By the fireplace, I placed a rooster painting on an easel atop an old burgundy leather suitcase. Another served as a base for a spiral topiary. It was housed in an inexpensive and lightweight cranberry pot meant to simulate glazed pottery. In front of that, I positioned a small vintage brass rooster doorstop. I actually have many more roosters, but I was able to (somewhat) contain myself. 158Leigh I gathered sage and chocolate colored throw pillows to coordinate with the linens and dishes. These softened the deep chocolate leather sofas. Switching out small elements of your décor for an evening is an easy way to experience a change of scenery without breaking the bank. 143Leigh I set the table with wood-handled flatware and layers of dishware in various patterns. This included wooden plates as chargers, sage green bordered dinner plates, and a selection of chicken and rooster plates. Though completely untraditional, I figured these could be set to the side for bread later… they just looked too cute stacked this way! I actually found these little gems for $3 clearance at Dillards. Now they’re a part of my last minute rooster dinner party arsenal. 156Leigh My other go-to elements are antique chicken salt and pepper shakers from my grandmother, and vintage multicolor rooster stemmed glassware from my mother. 45Leigh It’s really great to have coordinating pieces that can be thrown together without much forethought, while having the appearance of effort. In this way, a simple chicken dinner is elevated to a special evening. Make a point of collecting what you like, and pull it out for your get-togethers. 44Leigh Another component which you can make for yourself is my DIY Rusted Rooster Chicken Wire Votive Holder Craft. Because they were so easy, I actually made many more than I used in the pictures. (These can be made with any shape you like, fall leaves for example.) They really added a beautiful glow to the table. 32Leigh I transformed, recolored, combined, and resized vintage images to make 3 free printables for invitations, labels, signs, menus, food tents, name place-cards, recipe cards, etc… (These are free for personal use only.)

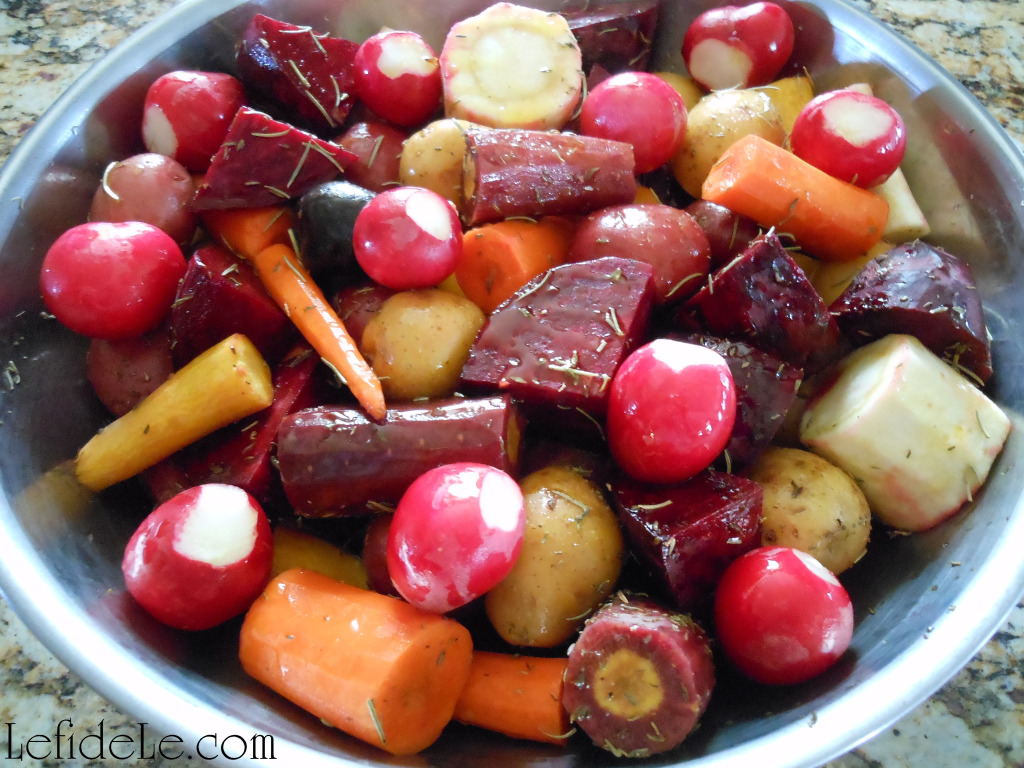
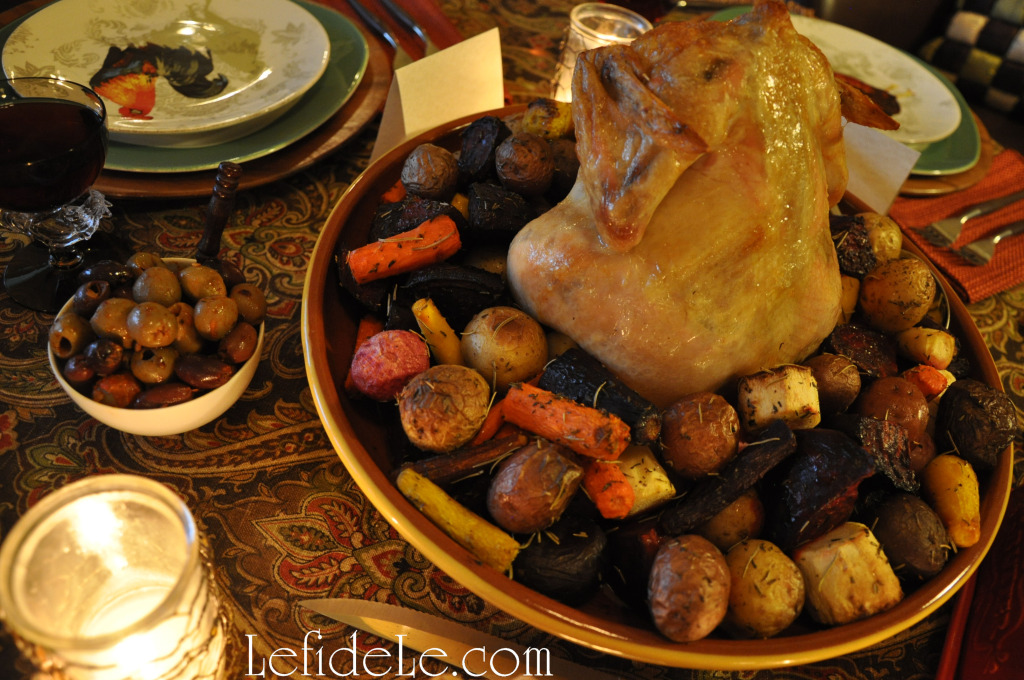
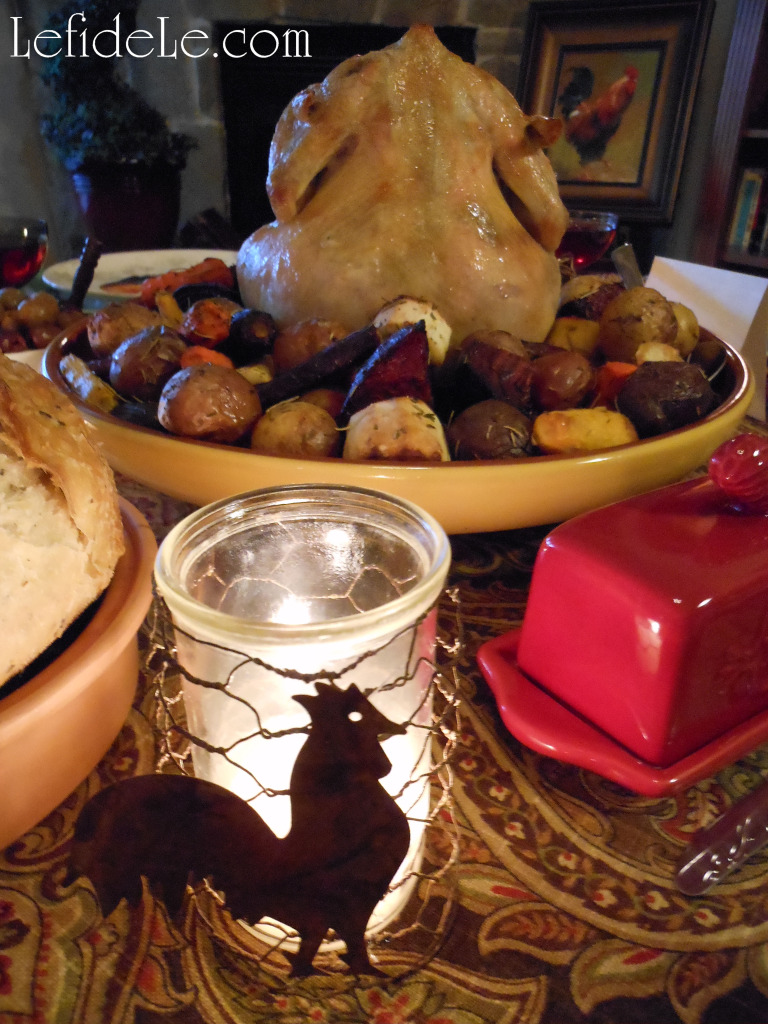
  24Leigh These are available at the end of the article (simply right click on each image, and print in color and on photo settings on cardstock). Then just cut out your place-cards as needed… or enlist a significant other or kiddo to do it while you prep for dinner! 25Leigh The last step was to add the food… artisanal rosemary bread in terra cotta to compliment the Cocorico, compound butter in a rooster dish, mixed olives seasoned in flavored oil and spices, and the off-center centerpiece of roasted chicken and multi-colored root vegetables of carrots, beets, parsnips, radishes, and fingerling potatoes. 125Leigh Cocorico roasters are perfect “one-pot” wonders that deliver beautifully from oven-to-table. Root veggies may be peeled and seasoned the day prior to an after-work gathering if need be. Simply pick up bread and dessert to accompany your meal. Or, try out my Easy No Cook Layered (N)ice-Cream Pie with Nut Crust (Vegan, Dairy-Free, Gluten-Free) which may also be made with traditional ice cream, and can be made and frozen well in advance. 160Leigh Happy Fall Y’all! (…I couldn’t resist.) 168Cocorico-Leigh Faithfully Yours,

Leigh

Cocorico3x3labels-flatcards

Cocorico5x5cards-labelsLeigh

CocoricoTent-PlacecardsLeigh

Healthy “One-Pot” Cocorico Roasted Chicken (or Turkey) & Root Vegetables Recipe

Making healthy roasted chicken and root vegetables is so easy with a Cocorico Roaster. I love to use mine as an easy “one-pot” wonder that presents beautifully from oven-to table. The night before a long day, I can peel the veggies and add herbs so it only needs to put it in the oven for a hardy home-cooked meal. Larger roasters will also accommodate a small turkey for the holidays.

125Leigh


Ingredients:
  • 1 roasting chicken (or turkey, in a size that will fit your Cocorico roaster)
  • 2 teaspoons thyme
  • 2 teaspoons rosemary
  • 1 fresh lemon
  • 1 teaspoon sea salt (or to taste)
  • Olive oil (enough to coat chicken & drizzle a little over veggies)

Multicolored root vegetables in season (enough to fill the cocorico base):

  • ~1 pound carrots
  • ~3 beets
  • ~2 parsnips
  • ~1 bunch radishes
  • ~1 or 2 pounds fingerling (or new) potatoes
  • (& turnips if you have better luck than I did finding good ones)

Instructions:

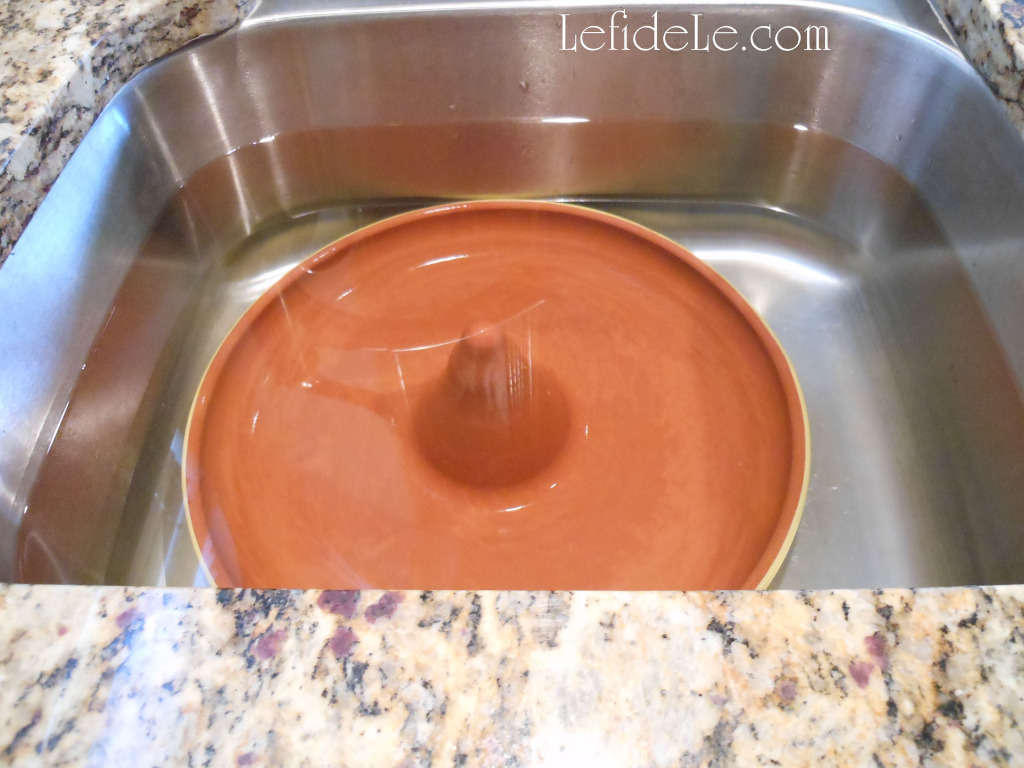
Cocorico roasters in glazed terra cotta are available locally and online. I ordered mine from Napa Style because it was the biggest I’ve seen, and also had a larger turkey cone that fit over the chicken cone. Soak the whole thing under water at least 30 minutes before cooking. This prevents any heat damage to the vessel. I saturate mine in a bleached clean sink.

2Leigh

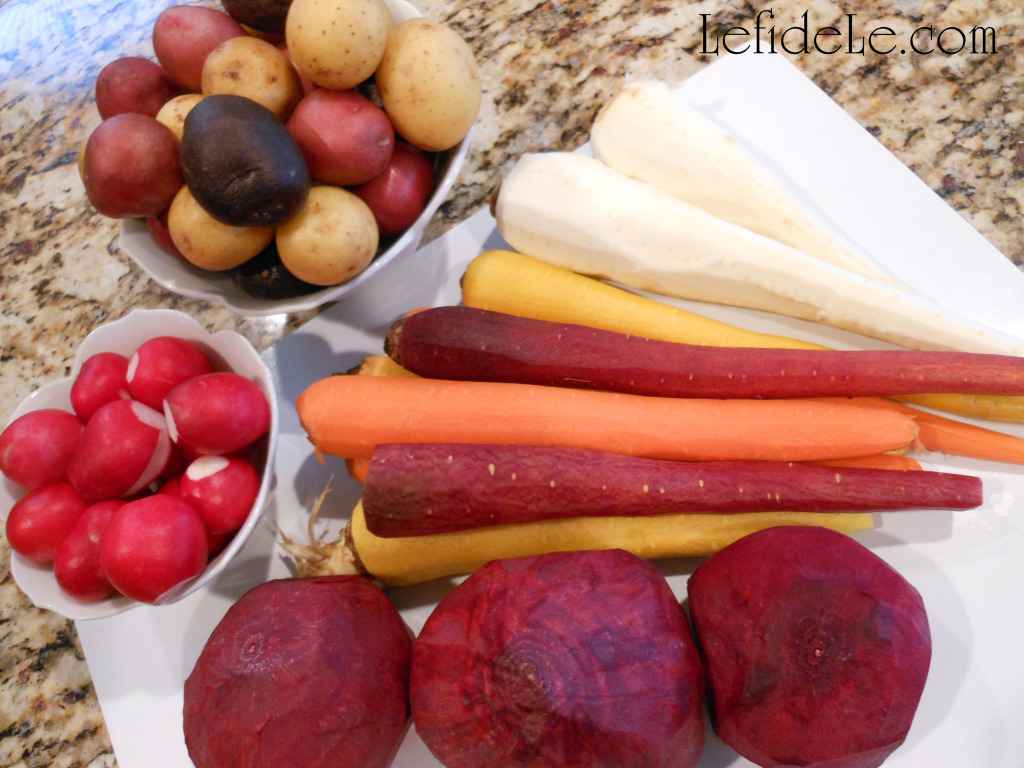
Preheat your oven to 400ᵒ, while you soak the roaster and prep your veggies. There are a beautiful variety of purple, orange, red, and white root vegetables available. Peel and cut them into about 2 inch chunks to ensure even cooking. Some recipes will advise you boil potatoes ahead of roasting, but I’ve found that to be completely unnecessary if you buy small fingerlings. They roast just like baked fries. They’re prettier, easier, and quicker… so save the big ones for baked potatoes. Radishes may seem like an odd choice for roasting, but they completely change character after cooking. They mellow out, losing their sharpness and spicy heat. I really do prefer them this way.

4Leigh

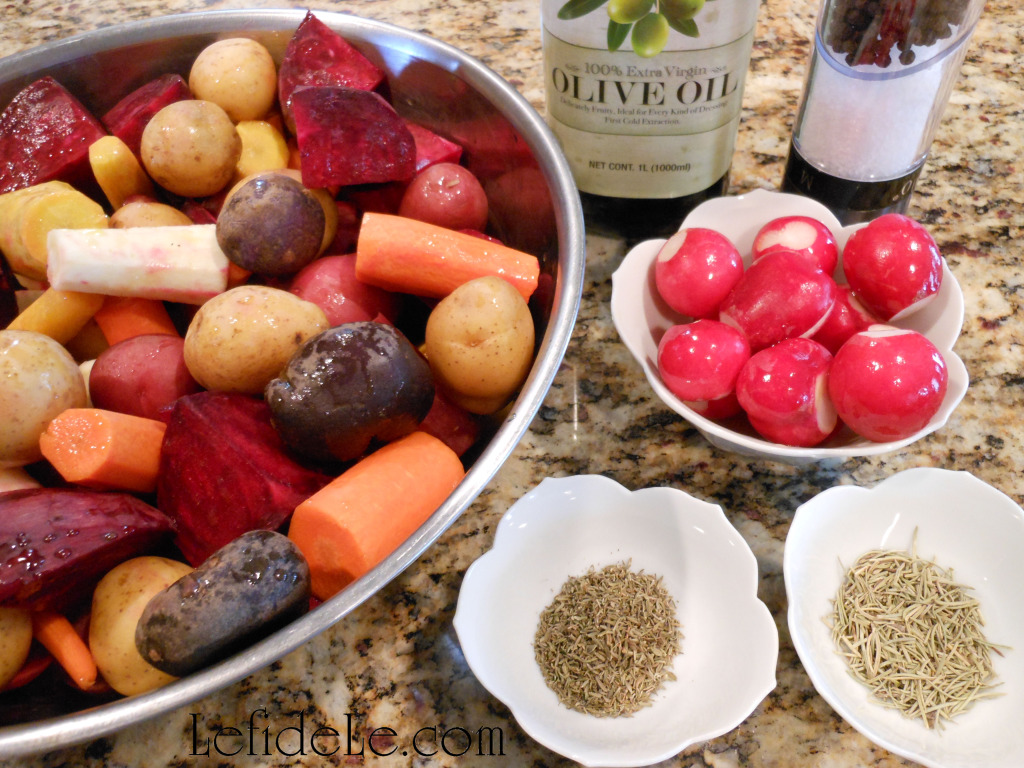
Place these in a bowl with herbs and add just the smallest drizzle of olive oil. (The chicken juices will flow over the veggies while cooking thus providing more flavor.) Squeeze a little of your lemon over the veggies, and save the rest to place inside the chicken cavity before setting over the roasting cone. Add sea salt and toss to coat everything well. This may be done ahead of time, just cover the bowl and refrigerate it until needed.

13Leigh

Many recipes will also instruct you to wash chicken inside and out before cooking, but I read a study that found it only served to spread dangerous bacteria all over your kitchen. Thorough cooking will kill bacteria while rinsing will not. Drain the fluid and remove any extra gifts left in the cavity (neck, gizzard, giblets). Then set the chicken onto the soaked Cocorico. Other recipes will also say to do this with the legs up and trussed, but this is really subjective to the size of your roasting cone versus the size of your bird. I used a smaller chicken in the pictures, which would have been physically impossible to set upside down. It cooked beautifully and tasted great. Just place the chicken whichever way you can get it onto the cone. It’s really hard to mess up dinner with a Cocorico!

21Leigh

Roast in the oven at 400ᵒ for about 15 minutes, and then reduce it to 375ᵒ for an hour longer (for ~4 lb chicken). Because every oven heats differently, the safest way to cook is with a meat thermometer. Place it in the thickest part of the thigh, but not to the bone. www.foodsafety.gov says 165ᵒ is poultry’s magic number! I’ve also read to rotate the Cocorico every 15 minutes. Thinking of how heavy it was, how that would let heat escape, what else I could spend my time accomplishing, and burn potential… I decided to forgo that. Once again, the simplest way proved itself. The chickens turned out exactly the same.

127Leigh

Use a serving spoon to gently toss the roasted veggies, so that the juices are fully distributed. It’s easiest to serve the veggies first and then carve into the meat, using the newly empty well to hold the pieces. Or it can all be transferred to other serving dishes… but I prefer to avoid washing extra tableware, and the filled Cocorico looks so lovely. If trying this, be sure to use adequate hot pads beneath it.

35RoosterVotive-Leigh

In the past, I’ve saved time by omitting the oil and placing the roots directly into the Cocorico. When it finished cooking, I would sprinkle fresh herbs and orange juice over the top, stirring it right in the roaster. Whichever way you chose to prepare it, with whatever vegetables, with either chicken or turkey, and legs cooked up or down… Cocorico roasters make it all turn out so beautifully! (See this for yourself at the link: Last Minute Cocorico Rooster Theme Dinner Party Décor Ideas.) So think about getting one for yourself, and leave the “beer-can chicken” to the tailgaters! 🙂

157Leigh

Faithfully Yours,

Leigh

DIY Rusted Rooster Chicken Wire Votive Holder Craft

157Leigh

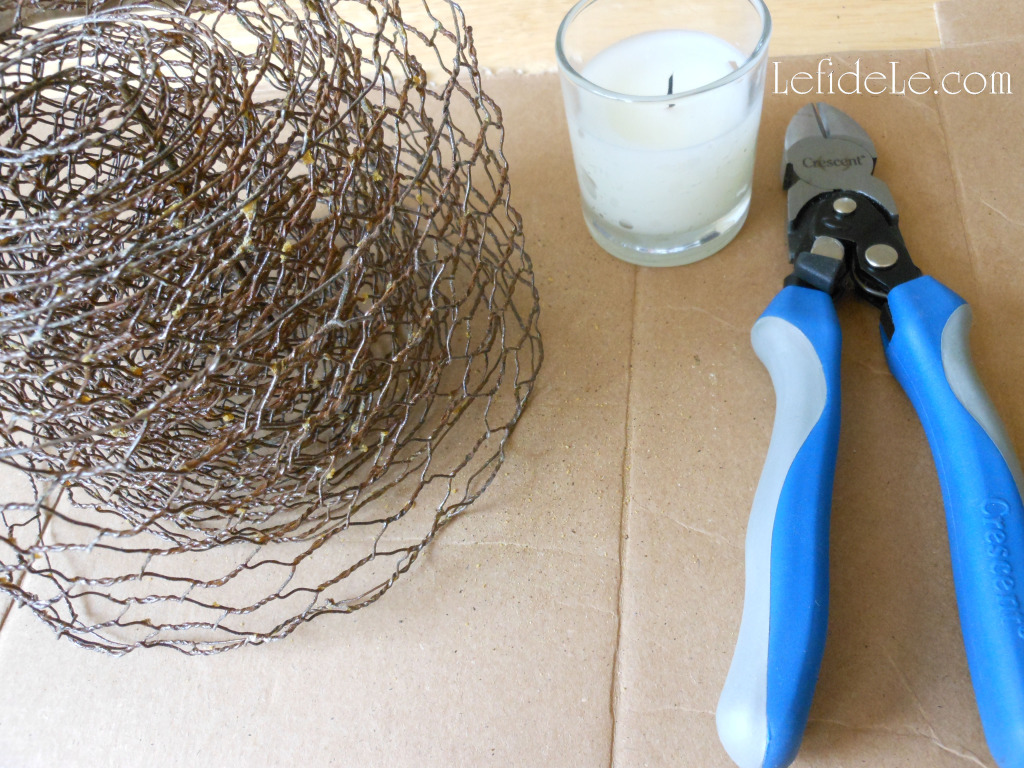
These votive holders were made to complement my Last Minute Cocorico Rooster Theme Dinner Party Décor Ideas, but you can easily craft them with plier/cutters and glue. The base is made of pre-rusted chicken wire “ribbon” (which may be substituted with chicken wire from the hardware store). Atop that are rusted rooster shapes (which are available online and at local craft stores… or made from scratch if you’re feeling super crafty). They can be lit by candle filled glass votives or LED tea-lights. It’s actually a very easy DIY project that just takes a little patience and elbow grease. Once made, they are lovely elements that can be pulled out anytime you need last minute dinner party décor to complement a simple chicken dinner.

44Leigh

Using a single roll of pre-rusted chicken wire “ribbon” saves time, because it already has 2 smoothed edges. If you can’t find this, regular chicken wire may be cut and bent over (toward the inside) at the top and base. Keep it naturally gray metallic or rust it with a liquid chemical solution. (There are several brands of liquid rust that may be found online or at a craft store.)

095Leigh

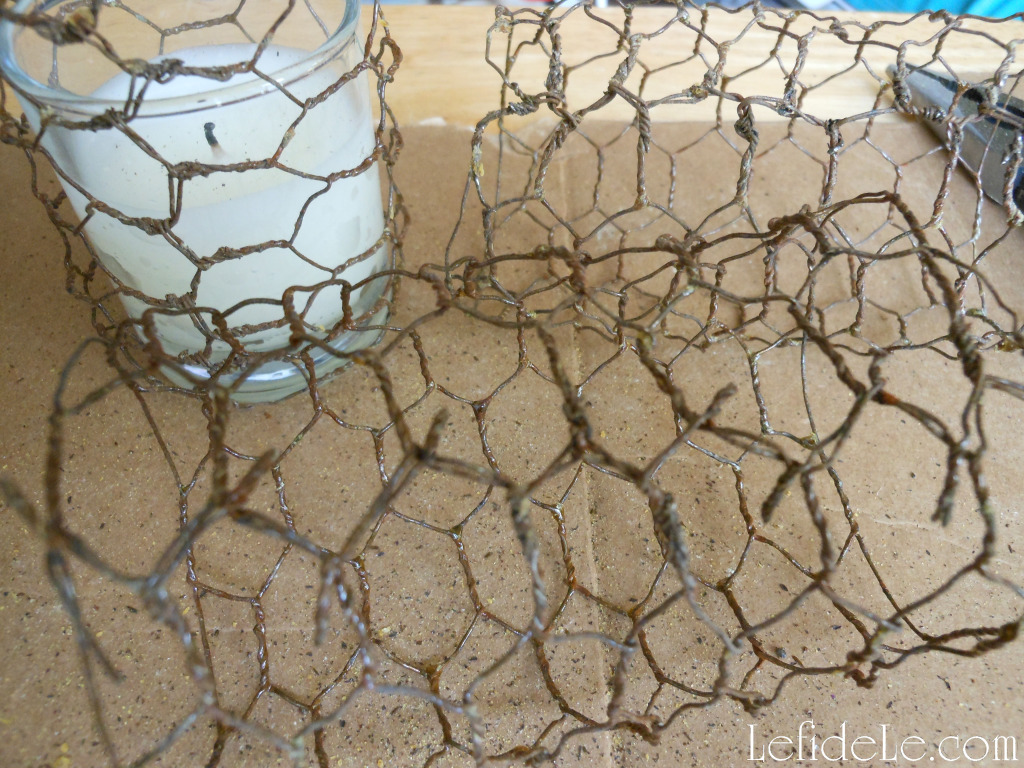
Use a glass votive as a measuring guide for wire length. Loosely wrap the chicken wire around the glass, overlapping it, and then cut the wires in a straight line. The extra length is needed for the tightening that occurs when joining the ends together later. This cut section may be used as a guide for cutting the rest. (The process would be the same for an LED tea-light candle.)

0100Leigh

The next step is to twist the ends together, just as you would begin tying a shoelace, with one end over the other. Begin at one corner and continue the rest of the way, closing the cylinder like a zipper. (This was the part that took patience, so I “multi-tasked” by watching a movie while I twisted.) Pinch these joined ends together with pliers to completely tighten them.

0104Leigh

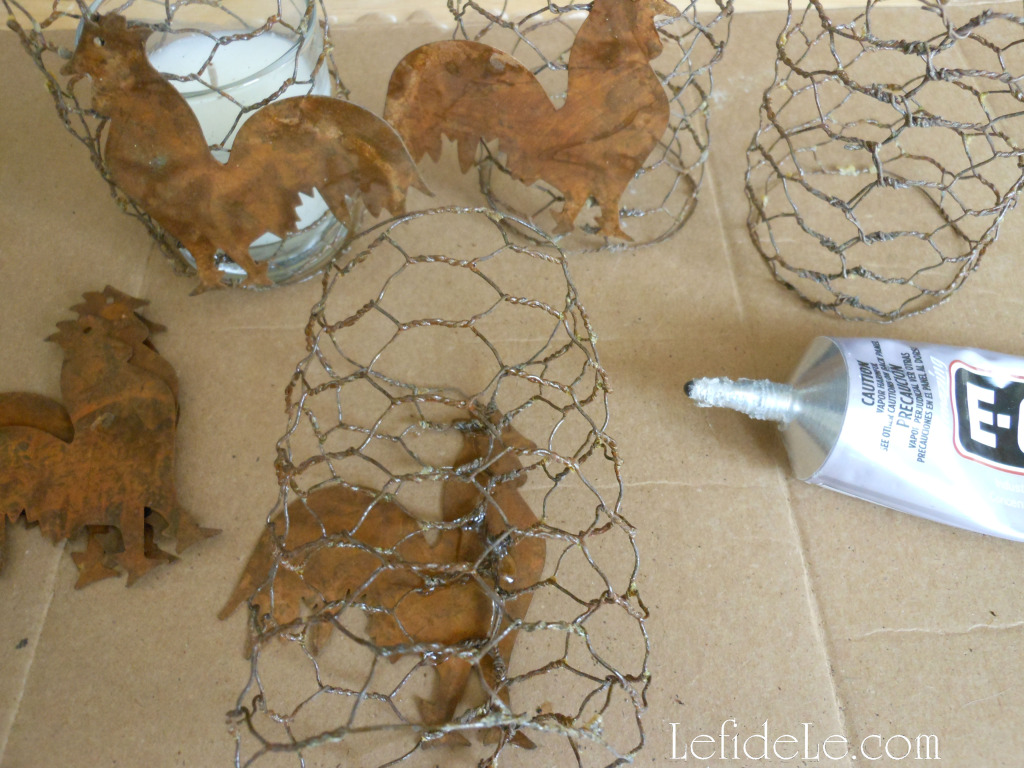
I found many dozens of reasonably priced pre-rusted shapes online. There is a shape to suit any theme. Also, feel free to cut your own out of thin metal. I’ve cut butterflies from various types of thin sheet metal and also up-cycled shapes from aluminum cans. These can be painted to mimic rust. In the future, I’ll show you how to make “metal” shapes from paper (these of course would need to be used with LEDs). If you need a rooster shape for a template, just cut it out of the free invitation PDF from my Cocorico dinner party.

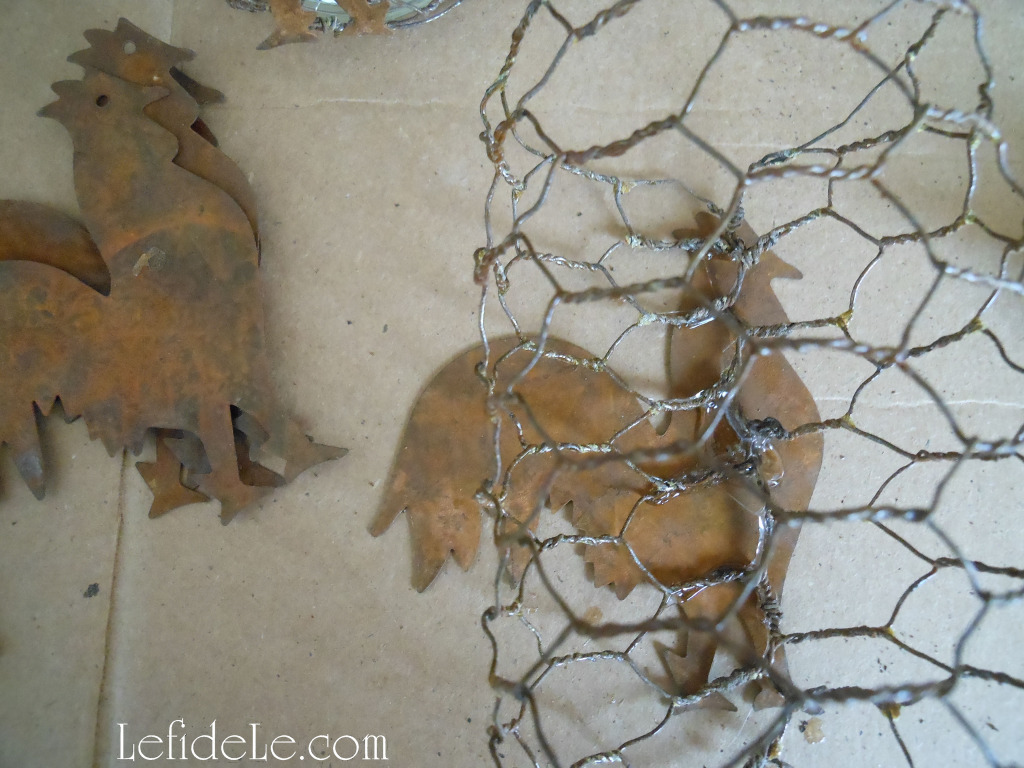
0106Leigh Glue the joined section of a wire cylinder to the underside of your rooster. Let this sit face down overnight. I used E6000 glue, because I wanted to ensure that it stuck together despite the rust. This stuff has glued down everything I have ever tried it on, so it’s a go-to product where other glues have failed. It does have fumes though, so use it in a well-ventilated space.

35RoosterVotive-Leigh

Slide candles into your newly handcrafted wire cages, and set on your table. Then light to delight!

Faithfully yours,

Leigh

Fall Leaves & Pumpkins Themed Thanksgiving Tablescape Décor Ideas

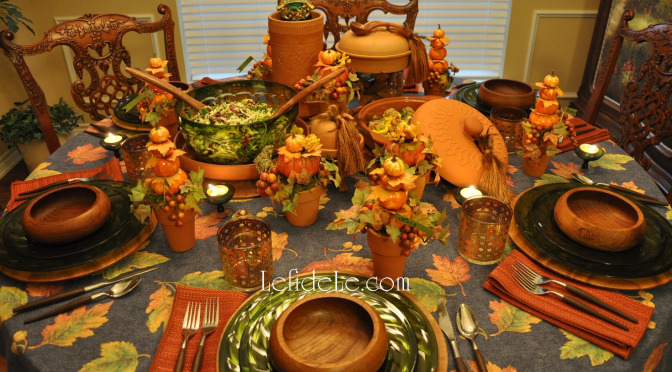
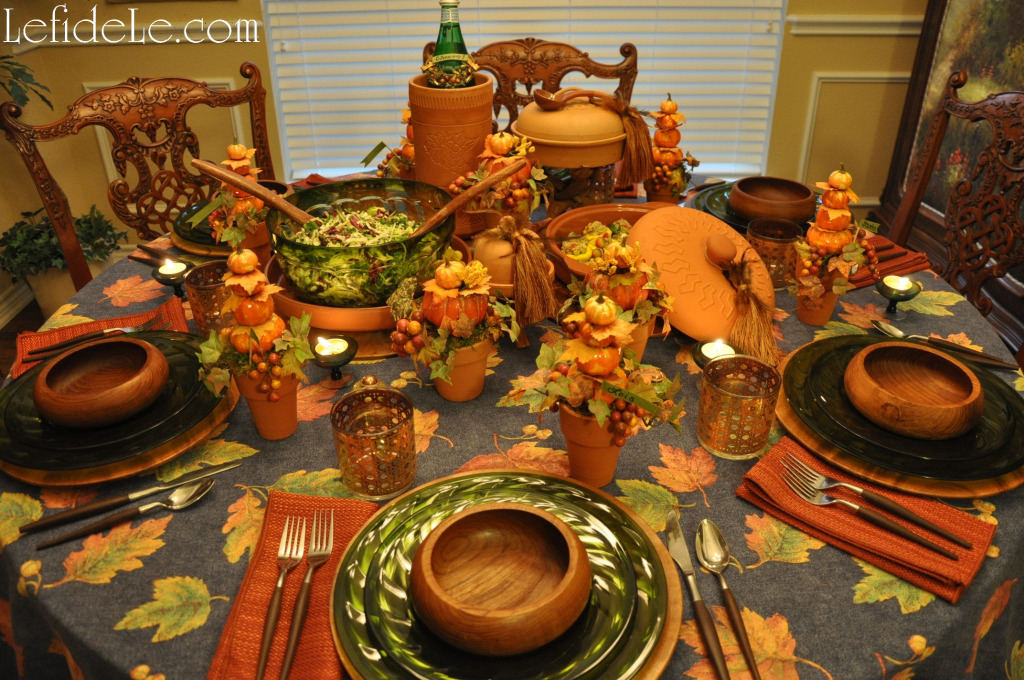
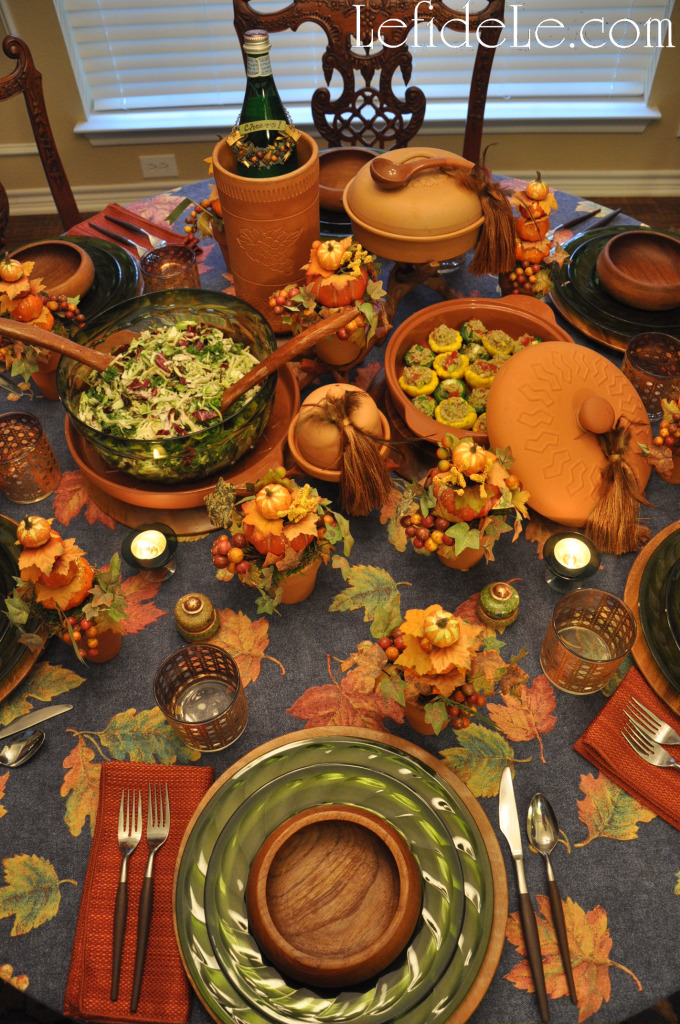
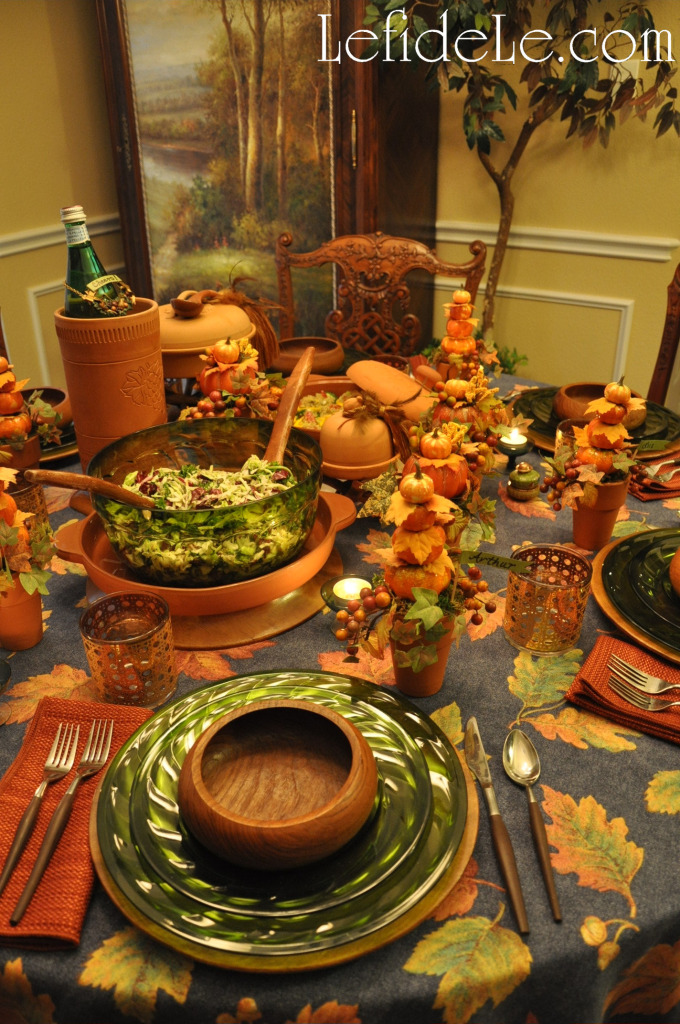
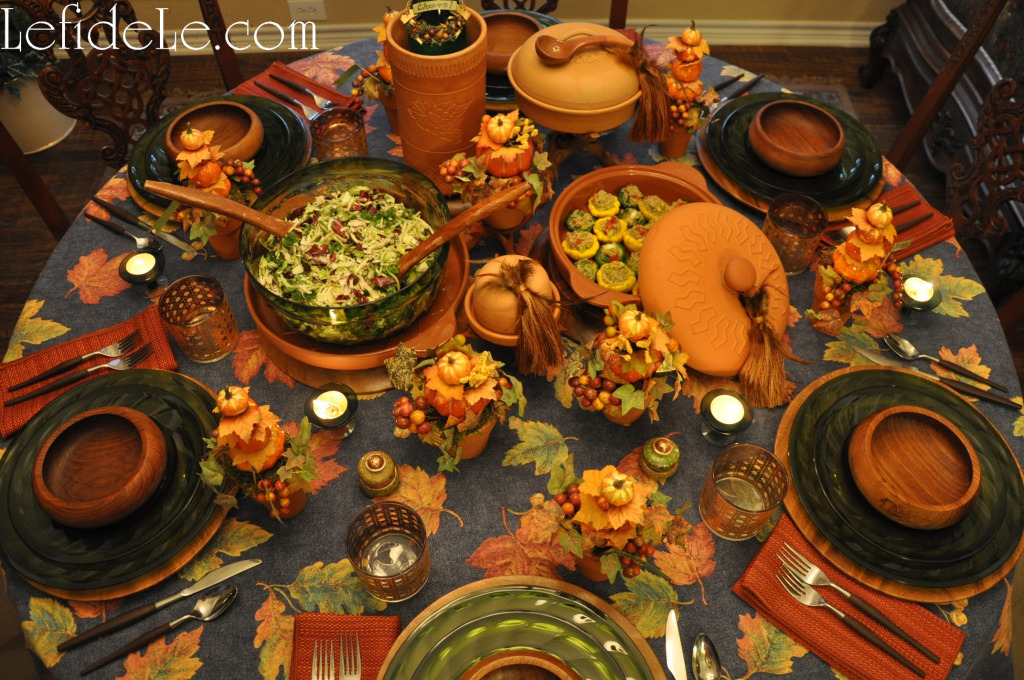
When I think of fall, images of brightly colored leaves and plump pumpkins immediately fill my mind’s eye. This was the initial inspiration behind this tablescape for Thanksgiving.

194fLeigh

I craved more color than is typically seen in fall décor, and so added a tablecloth with a denim background.

76Leigh

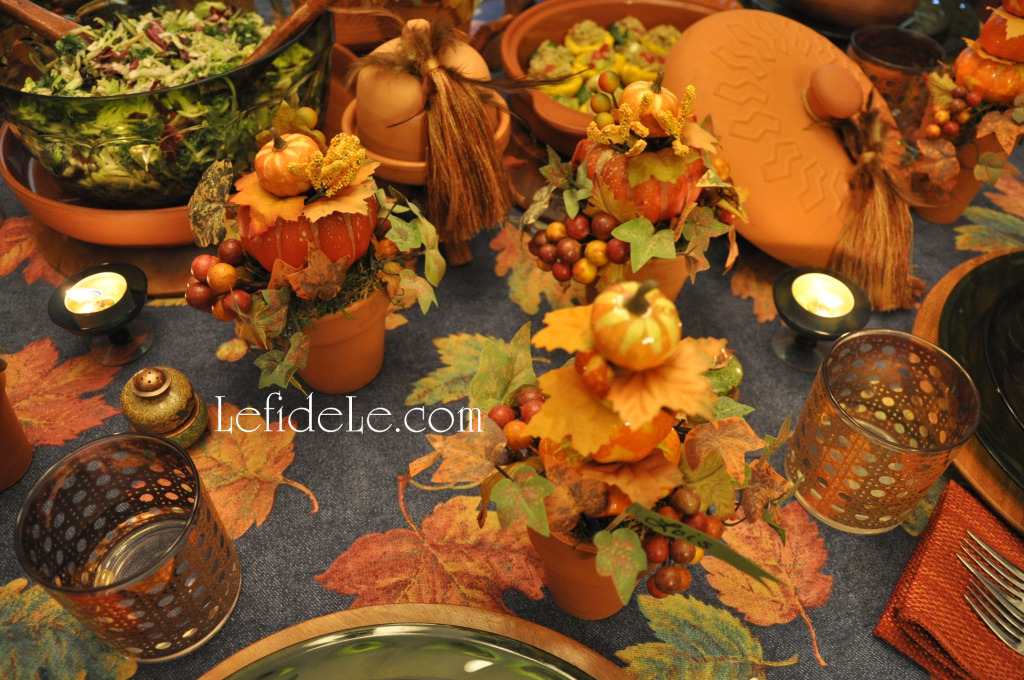
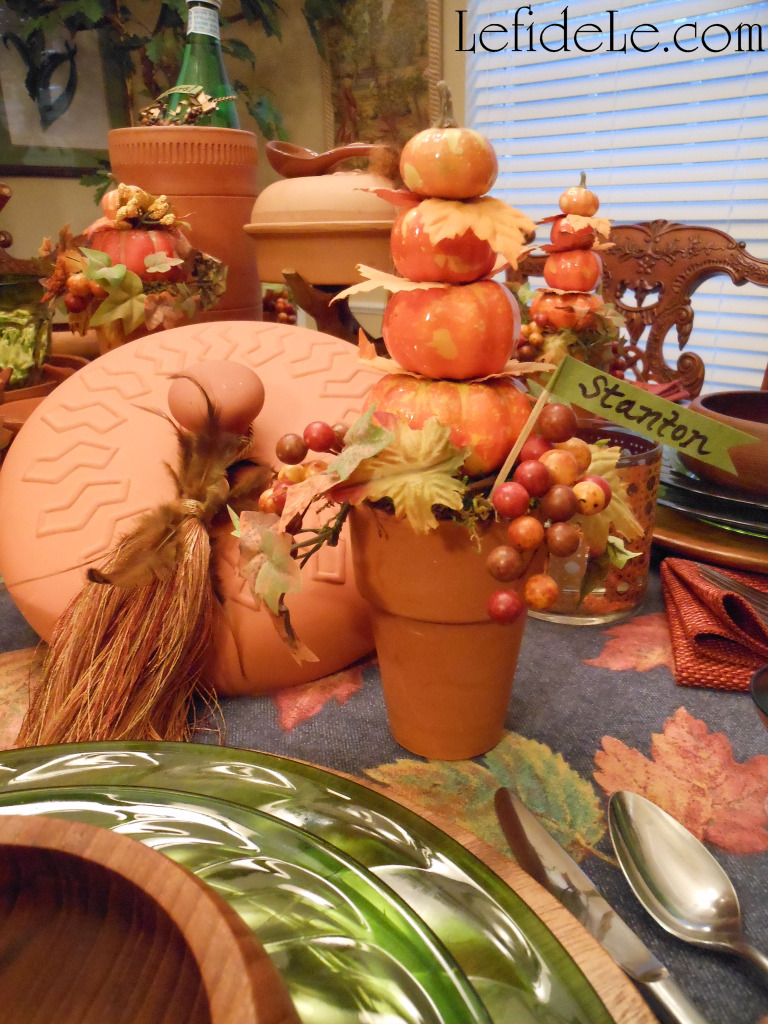
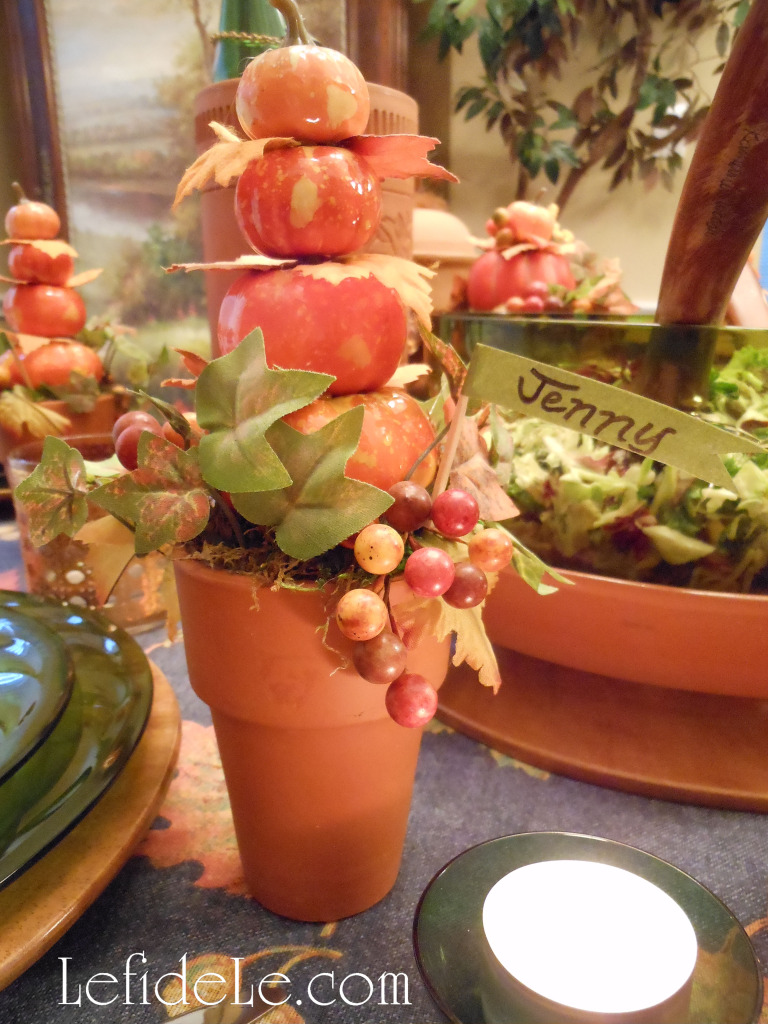
The blue color perfectly balanced the orange of my pumpkin topiary crafts that I made for place-card holders.

75PumpkinTopiaries-Leigh

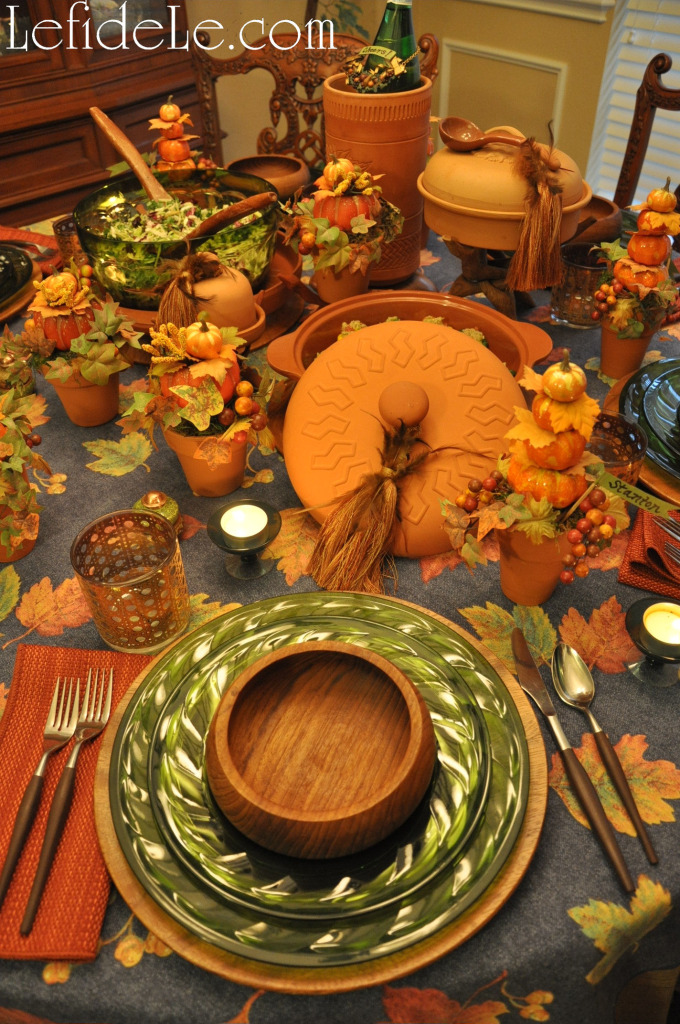
More color was added with green plates and green crystal votive holders.

148PumpkinTopiaries-Leigh

Deeply stained wooden bowls and chargers were utilized to reflect nature. Turning some upside down made stable pedestals for serving pieces.

141Leigh

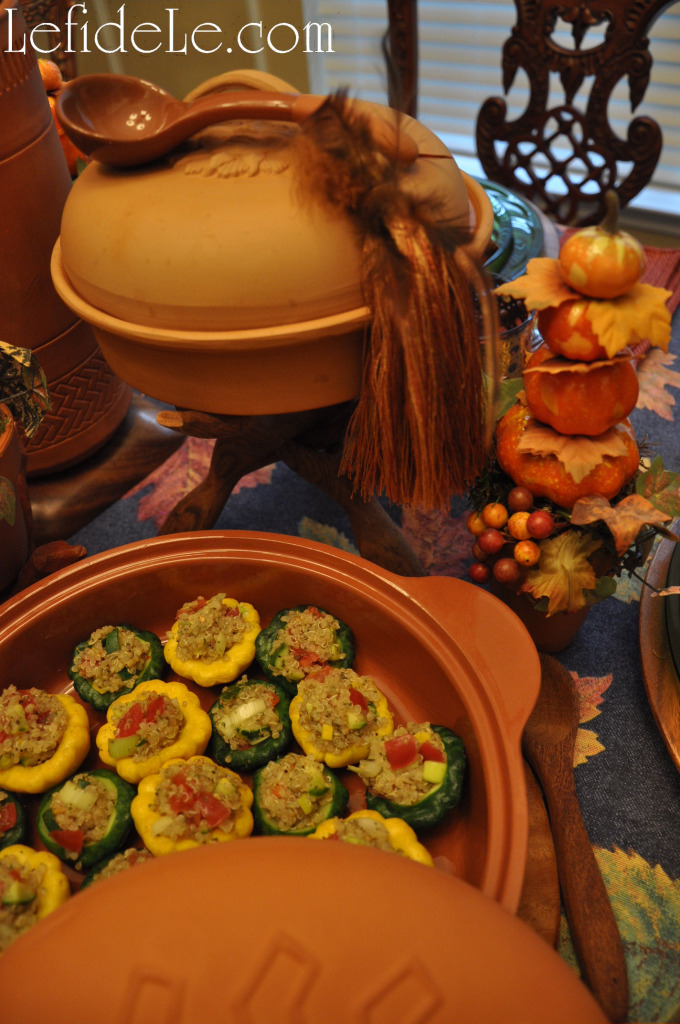
I chose terra cotta to echo the pots of the topiaries and because the covered dishes would better retain the warmth of the meal. Little tassels tied to the handles softened the hard look of the pottery.

197Leigh

Wooden stands added interest and height to the tableware, thereby making the food the centerpiece. Bringing the floral out and the food in, contributed further to my untraditional Tablescape.

187Leigh

The silverware and golden basket weave glasses provided the finishing touches for the table, just as one would finish an outfit with jewelry.

143Leigh

After the salad course was served, the wooden pedestal hosted turkey slices that had been carved in the kitchen. This is a lovely alternative for round tables where the turkey would make up the entire centerpiece otherwise. This way, no one has to look at the carcass for the remainder of the meal, which is a blessing to any vegans who were invited.

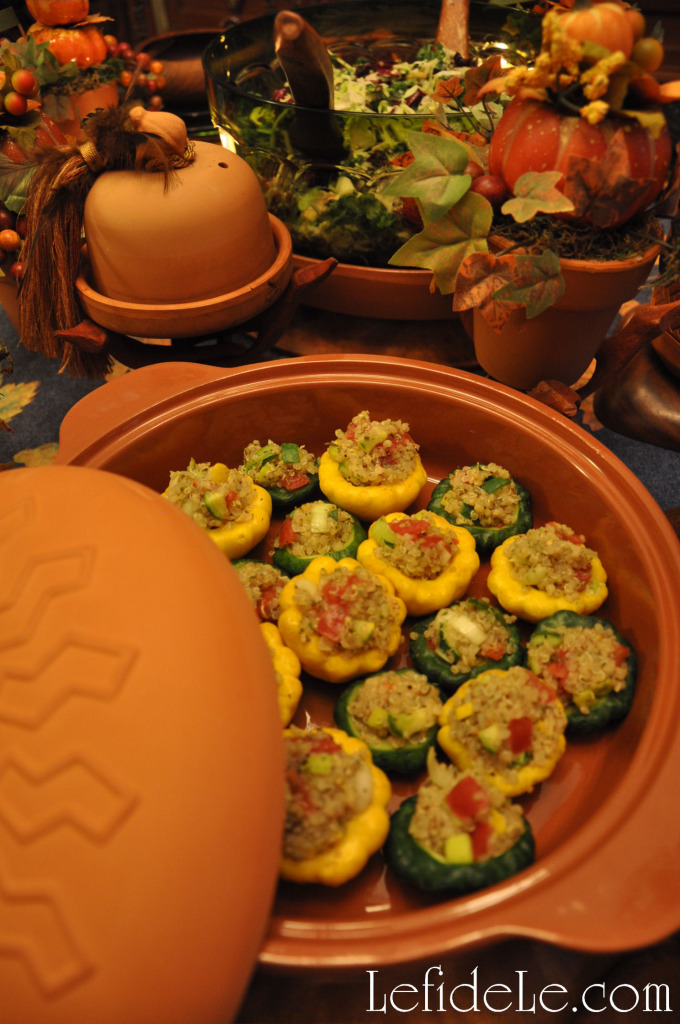
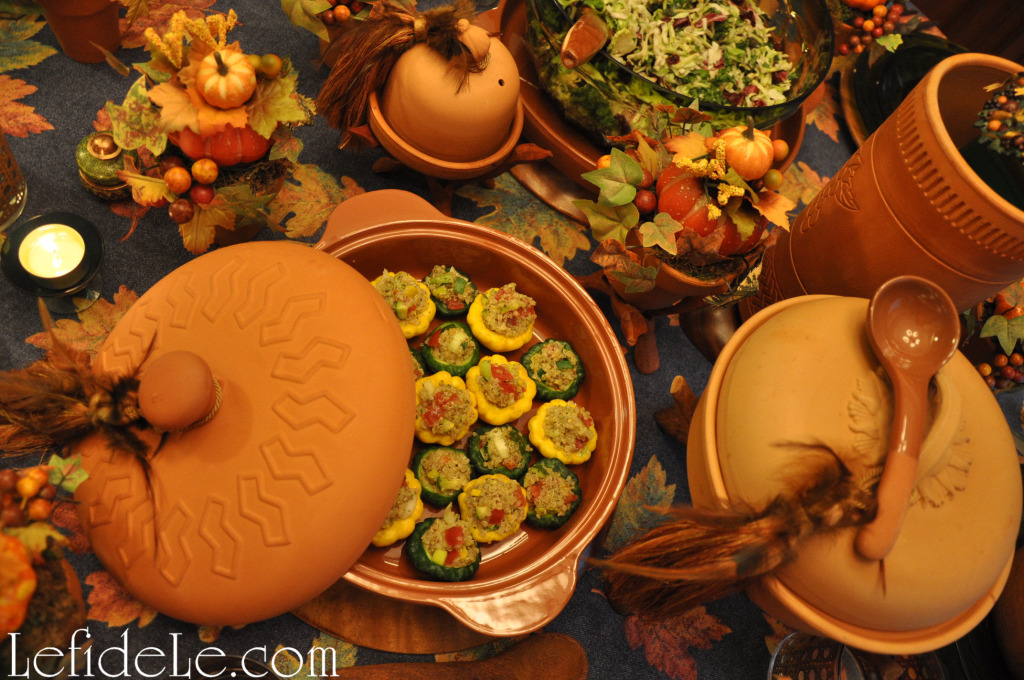
174QuinoaSquash-Leigh

This is my healthy quinoa pilaf stuffed patty pan “mini” squash recipe which is Gluten-Free and Dairy-Free so that everyone may happily partake of the meal. Ground meat may also be added to make a complete meal.

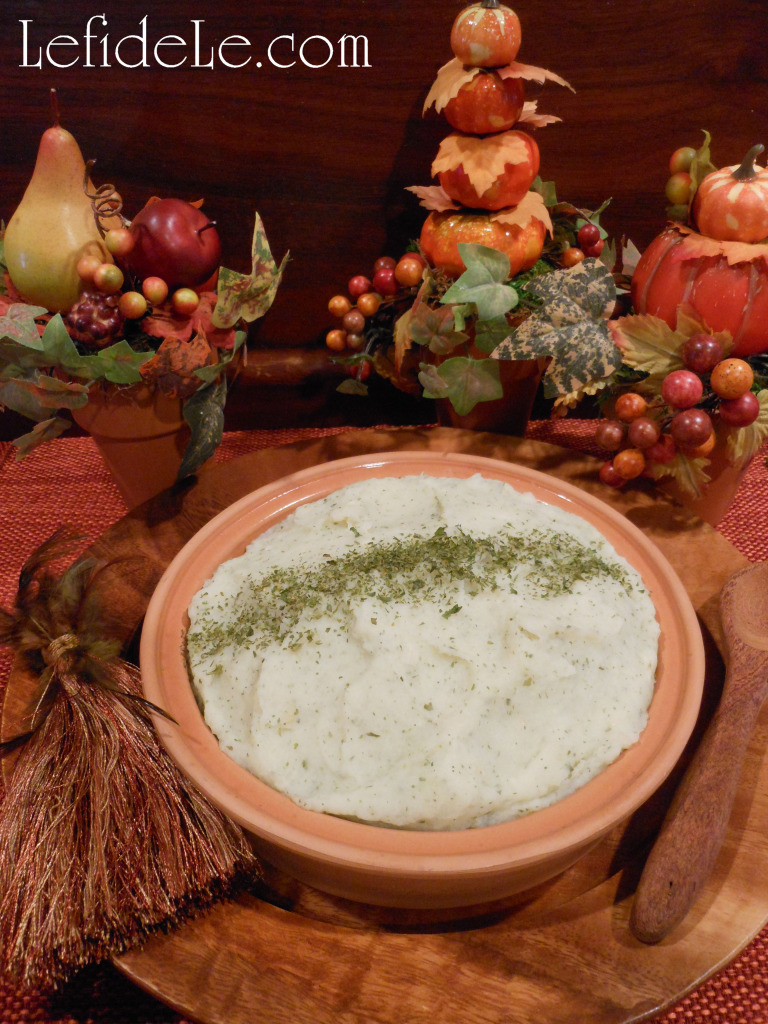
8CauliPotatoes-Leigh

This is my quick and easy heart-healthy “shortcut cauli-potatoes” recipe that is also Gluten-Free and Dairy-Free. It’s great year round because it’s so healthy and so fast to prepare.

160Leigh

Happy Thanksgiving!

Faithfully Yours,

Leigh
Quinoa Pilaf Stuffed Patty Pan “Mini” Squash Recipe (Healthy, Gluten-Free & Dairy Free)

Growing up, I would eat any vegetable that my mother said was of the cute “baby” variety. Broccoli became baby trees, Brussel sprouts were baby cabbages, and patty pans renamed baby squashes. Now that I’m an adult, I make those adorable mini squashes into a healthy yet beautiful dish that’s actually really easy to make… it just looks like it took work. It will satisfy the vegans when made this way, as a side dish, but you can add ground meat to the pilaf to make it a complete meal. And as it’s a gluten-free and dairy-free recipe, everyone at the table can enjoy it. This makes it perfect for this time of year when folks gather to celebrate together in the spirit of Thanksgiving. See more of the Fall Leaves & Pumpkins Themed Thanksgiving Tablescape Décor Ideas here.

165Leigh


Ingredients:
  • ½ cup cooked quinoa (or brown rice) with 1 cup water
  • I container of patty pan squash
  • ½ cup chopped leeks (or onion)
  • ½ cup diced tomatoes
  • ½ teaspoon minced garlic
  • 2 teaspoons olive oil
  • ½ teaspoon dried thyme
  • 1 teaspoon dried parsley
  • ¼ teaspoon salt (or to taste)
  • dash of ground peppercorns

Instructions:

Cook the quinoa (or brown rice) according to package instructions. (If you’re just making this for yourself… it’s the perfect way to spruce up leftover grains.) Steam the squash about 4 or 5 minutes or until bright, soft, and tender. (Time will vary depending on method… electric steamer, in a steamer basket on the stove, microwave.)

47Leigh

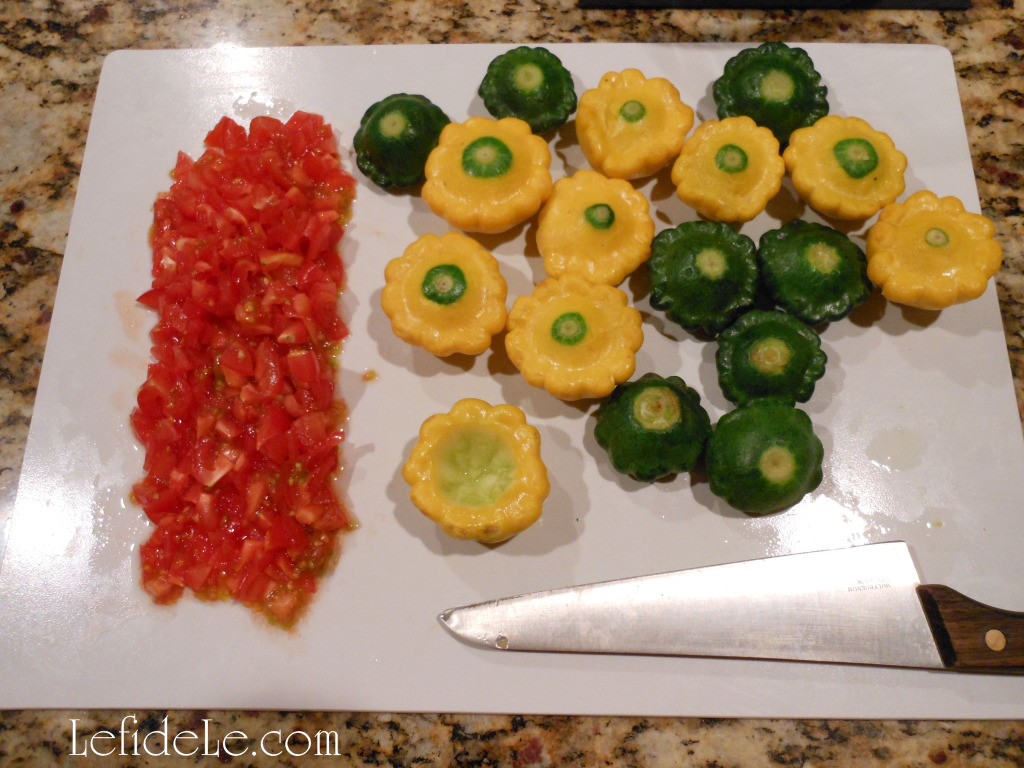
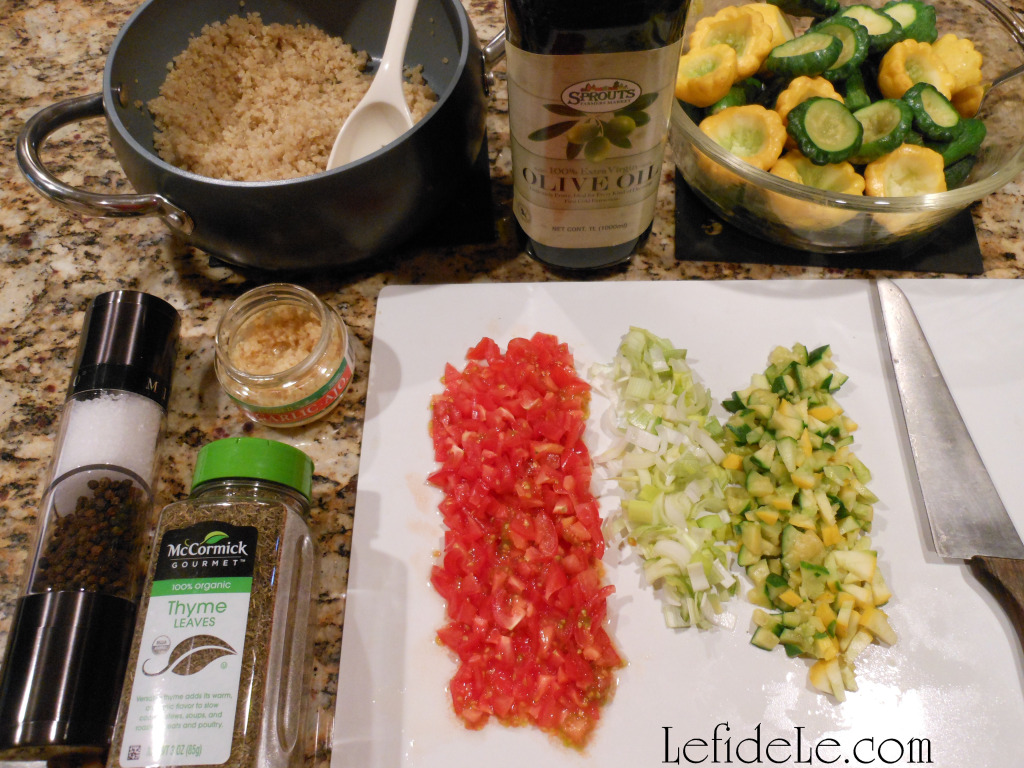
Chop, mince, and measure while you’re steaming. Combine all of the ingredients in a bowl. When the patty pans are cool enough to touch, cut an inverted cone shaped depression into each squash (like you would cut the top out of a strawberry).

48Leigh

Set these into your serving dish. Dice the cut-out squash bits, and mix this into the rest of your ingredients. Spoon this quinoa pilaf into each squash and serve immediately. (If you need to prepare this ahead of time, the pilaf stuffed squash reheats beautifully.) Bon appétit!

174QuinoaSquash-Leigh

Another great recipe for Fall is my Quick & Easy “Shortcut” Cauliflower Mashed Potatoes Recipe (Heart-Healthy & Dairy-Free) 🙂

Faithfully Yours,

Leigh

Savory Sweet Potato Tortas Recipe (Gluten-Free, Egg-Free, Dairy-Free)

Allergy Friendly: Dairy-Free, Egg-Free, Gluten-Free

Makes About: 8 (4 inch) Tortas

 This simple gluten-free recipe is vitamin packed and quick to prepare. These incredibly versatile savory sweet potato tortas may be topped with anything your palette desires, as the sweet potato taste doesn’t overpower. Eat them as a satisfying lunch, with a salad for dinner, or as sweet hotcakes for breakfast. It makes an efficient brunch menu as everything may be prepared and served at once. You can also make tiny tortas as appetizers.

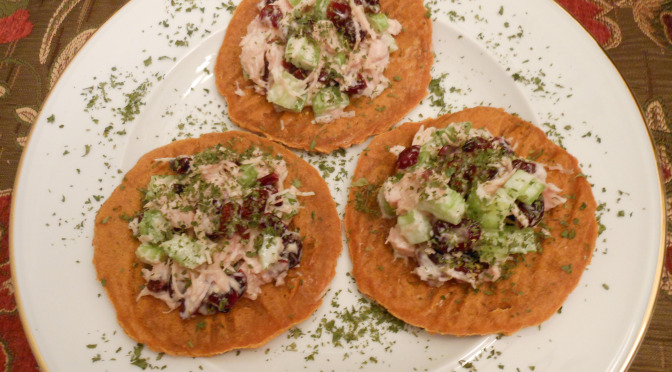
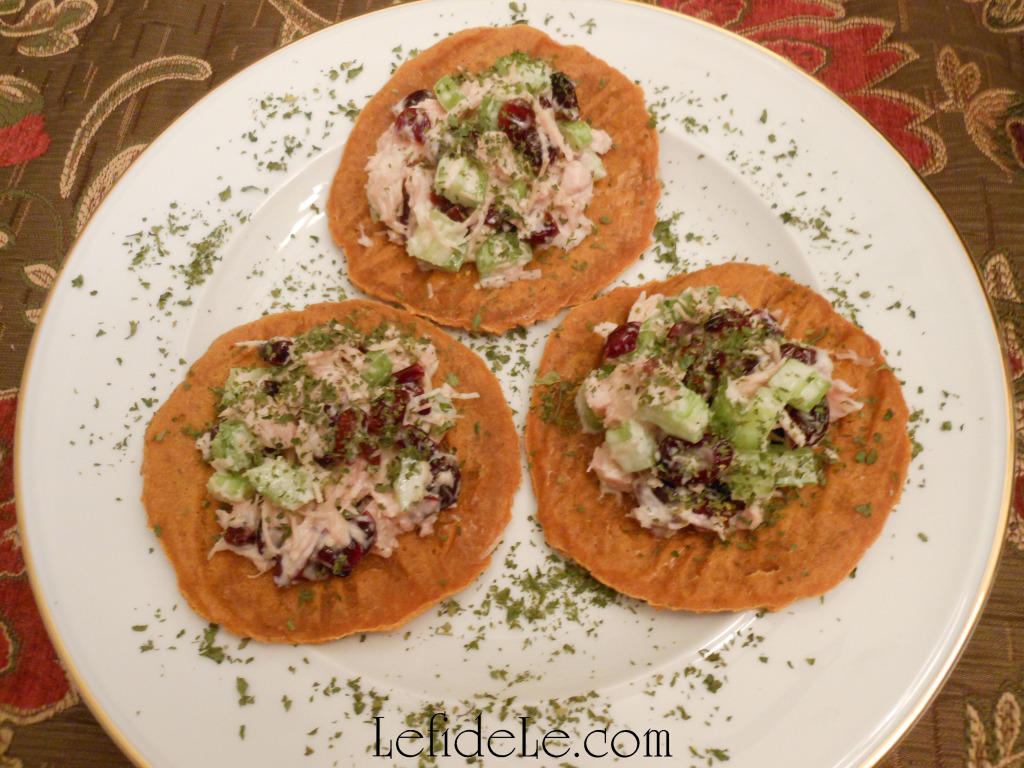
The completed tortas are pictured with my Dairy-Free Egg-free Turkey Salad, but you can also turn them into Sweet Potato Hotcakes by omitting the salt and adding 1 tablespoon of sugar. Serve them hot and drizzled with maple syrup and topped with toasted pecans or walnuts.

Faithfully Yours,
Leigh


Ingredients

  • 15 oz can organic unsweetened sweet potato purée (or purée 2 cups of sweet potato)
  • 1 cup gluten-free multi-purpose flour (for non-gluten-free use 1 cup AP wheat flour)
  • 1 teaspoon salt

Instructions

Preheat oven to 375ᵒ F. Trim parchment to line 2 cookie sheets with. Gather the ingredients.

20Tortas-Leigh

Mix sweet potato purée with flour and salt until smooth.

21Tortas-Leigh

The mixture will thicken and lighten in color. It should stick to the spatula.

22Tortas-Leigh

Spoon the dough into similar sized dollops onto parchment. Evenly smooth each into about a 4 inch circle with a silicone spatula (as if icing a cake). Don’t worry about making them look perfectly round… the artisanal look is in!

23Tortas-Leigh

Bake approximately 20 minutes, depending on your oven’s temperament!

24Tortas-Leigh

Using parchment paper keeps the underside of the tortas from browning or sticking too much. It also speeds up the cleaning afterward, which is especially great when you have guests.

28Tortas-Leigh

The completed tortas are pictured with my Dairy-Free Egg-free Turkey Salad.

31SweetPotatoTortas-Leigh

Bon appétit!

29Tortas-Leigh

Nutrition: Since I concocted this recipe myself, I have no idea how many calories it has. Does that mean it doesn’t have any!?! Well, at least I know it’s super healthy and vitamin packed! 🙂

Turkey Salad Recipe (Dairy-Free, Egg-free) Sweet Potato Tortas Topping

Allergy Friendly: Dairy-Free, Egg-Free, Gluten-Free

Makes Enough For: 8 torta toppings


Enjoy this simple and healthy turkey salad recipe alone or as a savory topping for my Sweet Potato Tortas (Gluten-Free, Dairy-Free, Egg-Free).

Faithfully Yours,

Leigh


Ingredients

  • 1 1/2 cups chopped white turkey (or a 12.5 oz. can)
  • 1 cup sweetened dried cranberries
  • 1 cup chopped celery
  • 1 cup chopped walnut
  • 2/3 cup vegan plain yogurt (or veganaise, mayo, Greek yogurt, etc…)
  • 1 diced leek (or 1 tablespoon dehydrated chopped onion, etc…)
  • salt to taste
  • parsley garnish (I always have the dried version on hand for this.)

Instructions

Mix all of the ingredients, and salt according to taste. It can be prepared the night before and refrigerated. Spoon the mixture onto the centers of my sweet potato tortas recipe, when completed. Garnish with parsley. Bon appétit!

29Tortas-Leigh
Nutrition: Since I concocted this recipe myself, I have no idea how many calories it has. Does that mean it doesn’t have any!?! Well, at least I know it’s super healthy and vitamin packed! 🙂