Tag Archives: Decorate

Traditional Chinese Good Luck Knot Craft Tutorial with DIY Plaited Napkin Rings & Washi Tape Decorated Chopsticks for Chinese New Year

1735Leigh

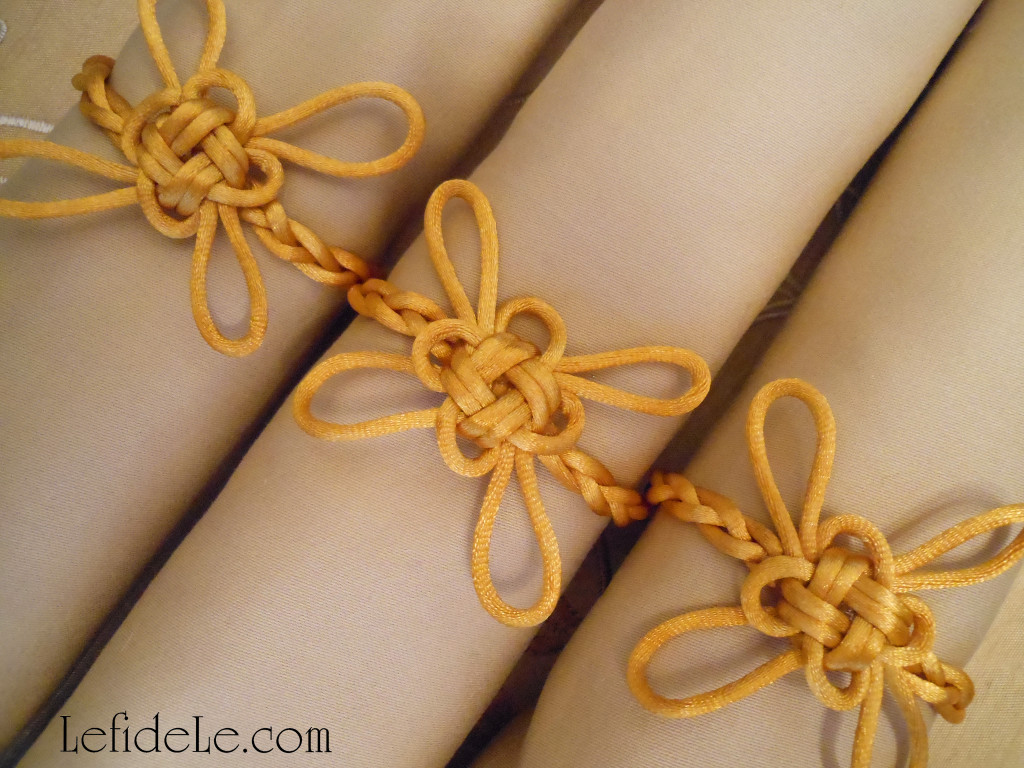
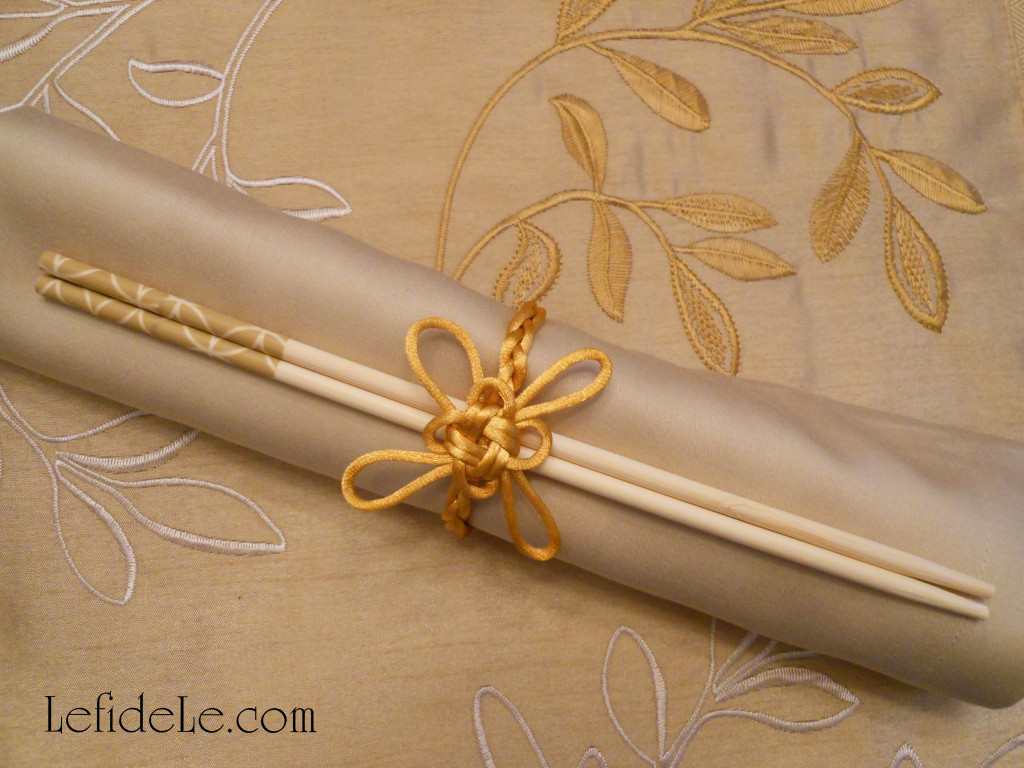
This craft tutorial for traditional Chinese good luck knots makes the perfect adornment for DIY plaited napkin rings which set an elegant tone for Chinese New Year along with quick washi tape decorated chopsticks. The knot demonstrated here is known by various names among diverse Asian cultures… Good Luck, Auspicious, Chrysanthemum, and One Mind. As a traditional Chinese folk art, decorative knots have been made in the same manner for well over a thousand years, though they originated in prehistoric times. These creations have been used to decorate homes, jewelry, clothing, and have functioned as stand-alone gifts as good luck charms. Knot, 中国结 or Jie in Chinese, translates as vigor, harmony, and unification. Therefore, they have been regarded as a token of blessing when gifted for friendship or love and for special occasions like weddings. This sentiment has led to many being passed down through the generations. As the Chinese New Year is a time for provoking good fortune, and yellow is regarded as a lucky royal color as it was once reserved only for use by the emperor, a yellow gold cording was chosen for the napkin rings so that guests will dine as royalty in the burgeoning of a prosperous year.
1508Leigh

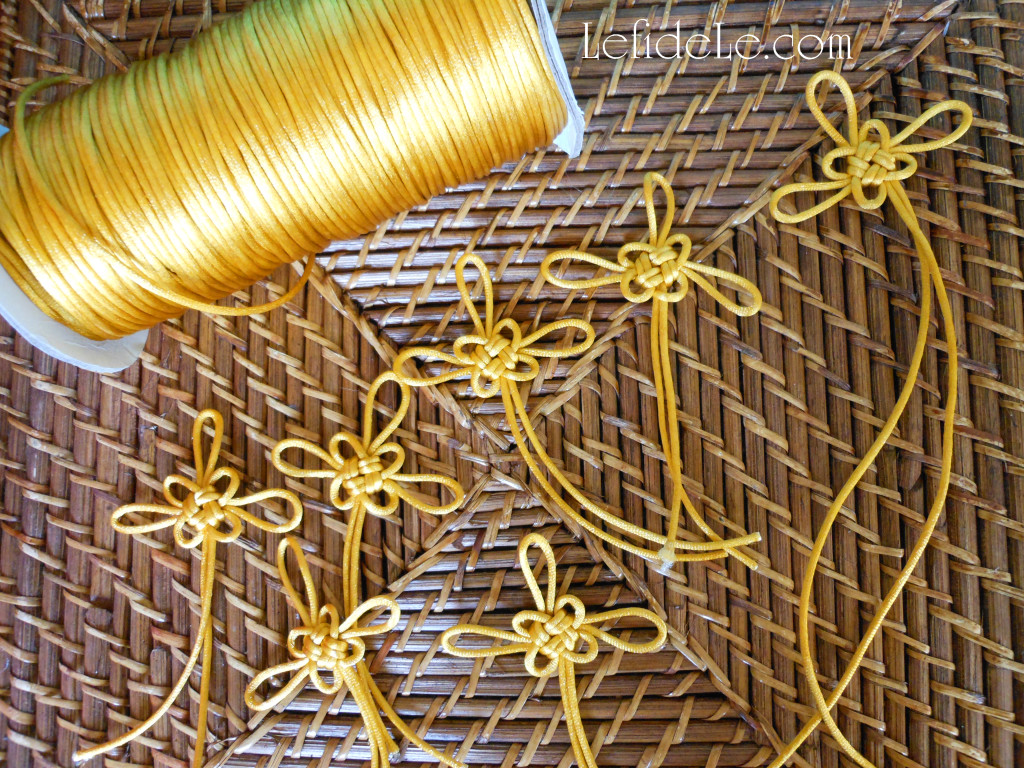
Begin by purchasing enough cord in silk or satin (in a “rattail” width) to complete the project. You’ll need 21 inches for each plaited ring (126” for 6) and 26 inches for each good luck knot (156” for 6)… totaling 47 inches for each ring with knot (almost 4 feet) or 182” for 6 (23½ feet). (I got mine inexpensively in bulk size from Fire Mountain Gems, whose sale link is in the sidebar, which is a great source for all types of cording in varying quantities.)
1748Leigh

I’m demonstrating the good luck knot here by pinning the cords to a cork plant saucer, because it makes clear photography of the process easier. You may find it easier to make a symmetric knot this way, but it can be easily made without pinning anything down. Don’t get discouraged if your first knot looks askew, just untangle the cord and try again. It will get easier with each knot you make. Practice does indeed make perfect!
1576Leigh

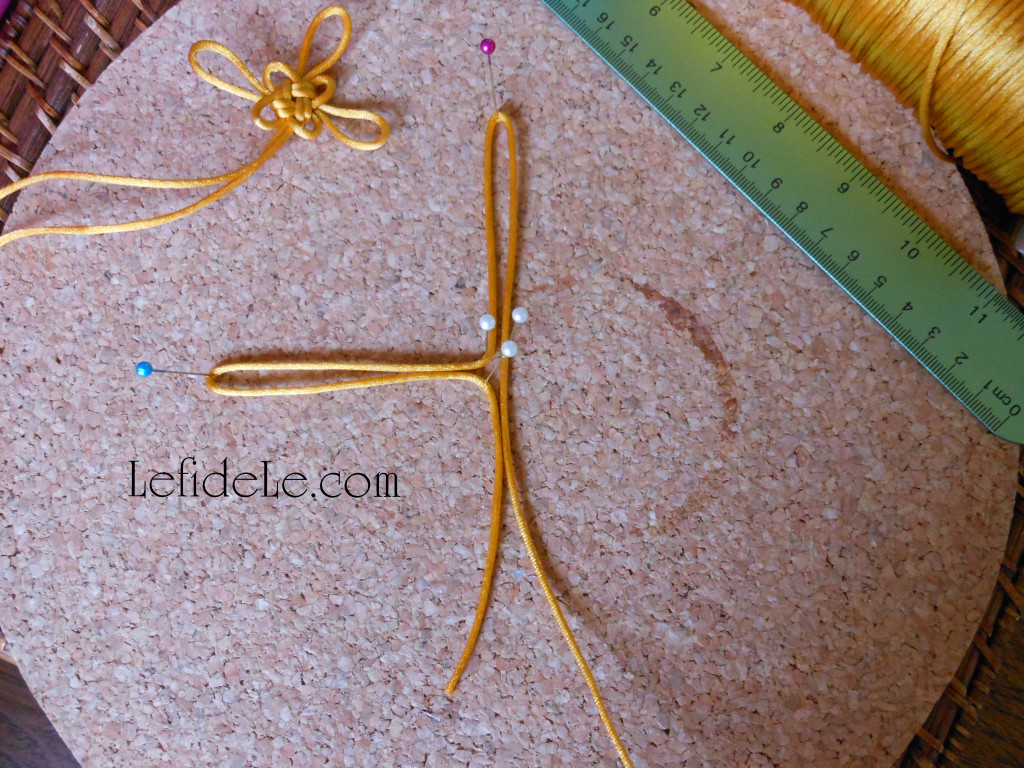
Start by cutting a 26 inch length of cord with sharp scissors to prevent fraying. Fold this in half to find the center point, which becomes the middle of the top loop (pinned in purple). Fold the left strand to find its center which becomes the middle of the left loop (blue pin). Repeat this on the right strand (red pin in the next picture). Note that I’ve pinned the very center in neutral white to keep the central points flat. The cording should resemble a cross at this point.
1579Leigh

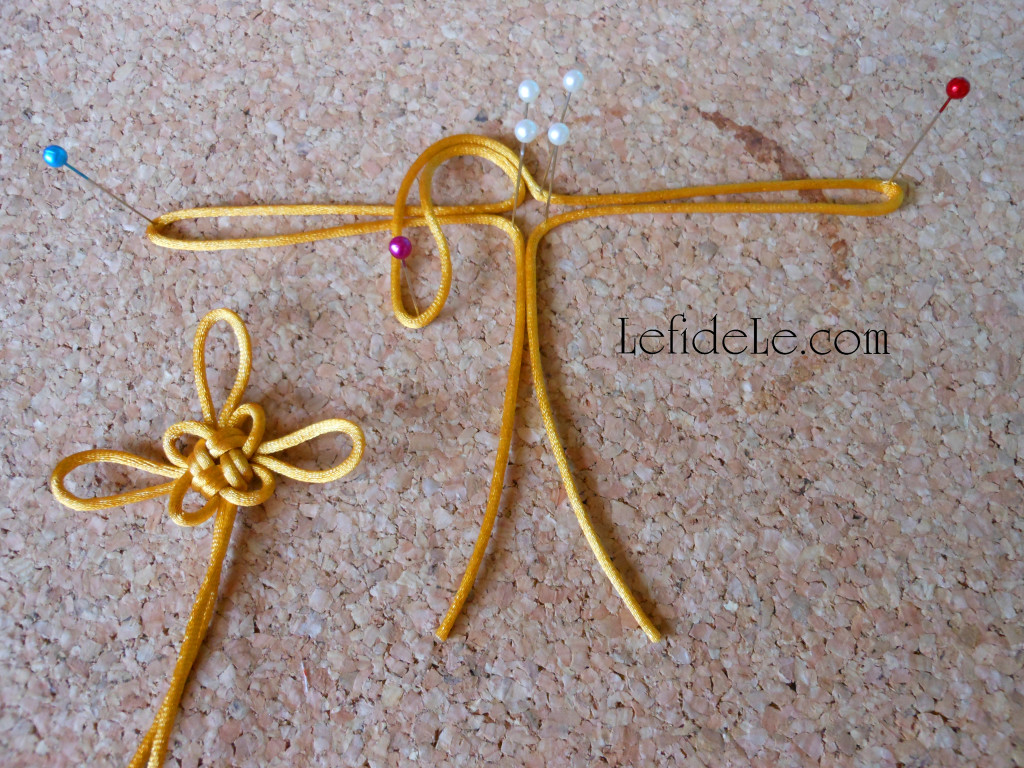
Next, fold the top (purple pin) loop over the left side (blue pin). It should now appear as a person with bowed head and outstretched arms.
1580Leigh

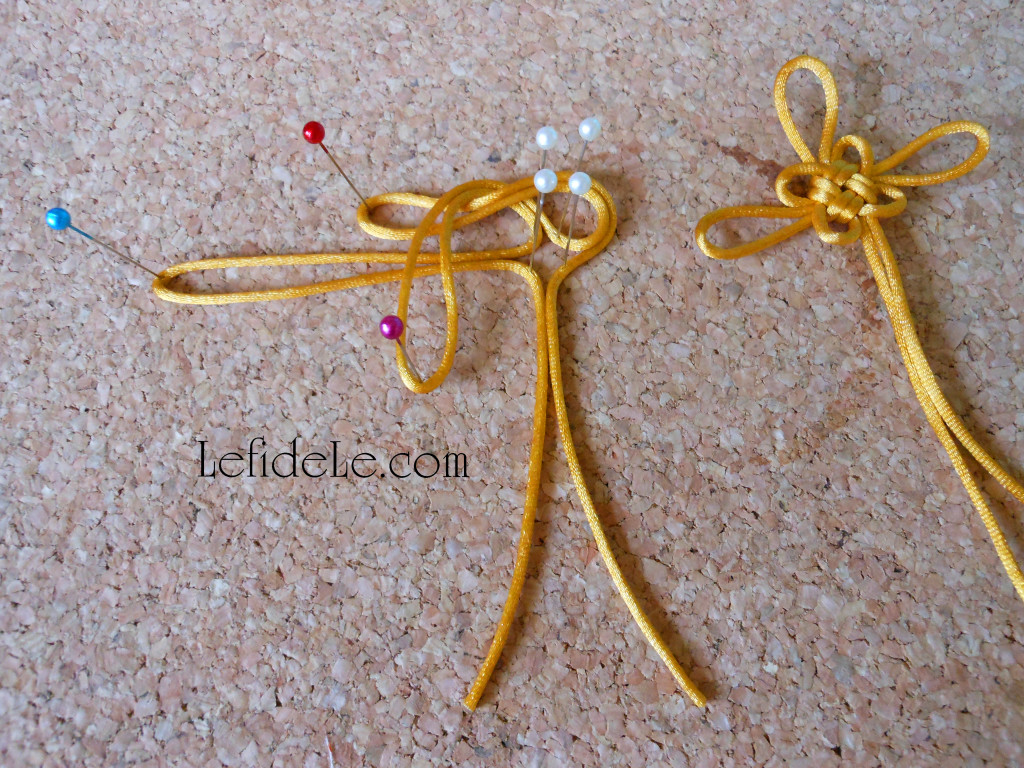
Then, take the right loop (red pin) and slip it under the top fold-over (purple pin). It should now give the impression of a windswept girl with arms down at sides.
1585Leigh

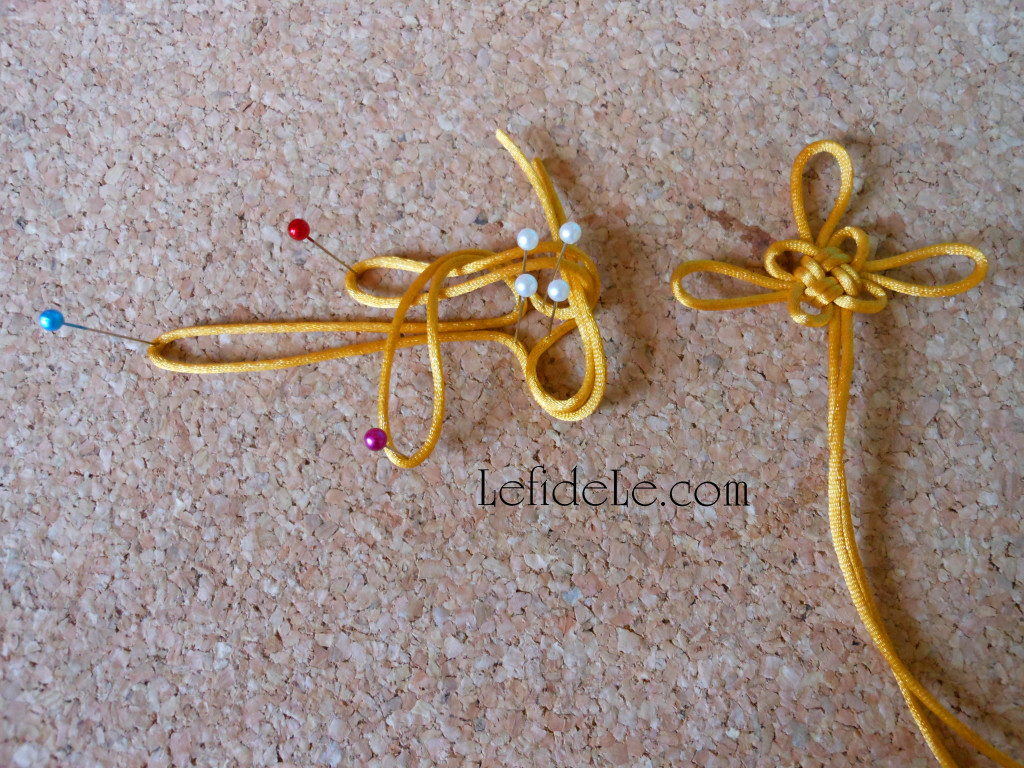
Now take the bottom two straight strands (no pin yet) and slip them under the fold-over above it (red pin). It should look a bit like a yoga contortion at this point.
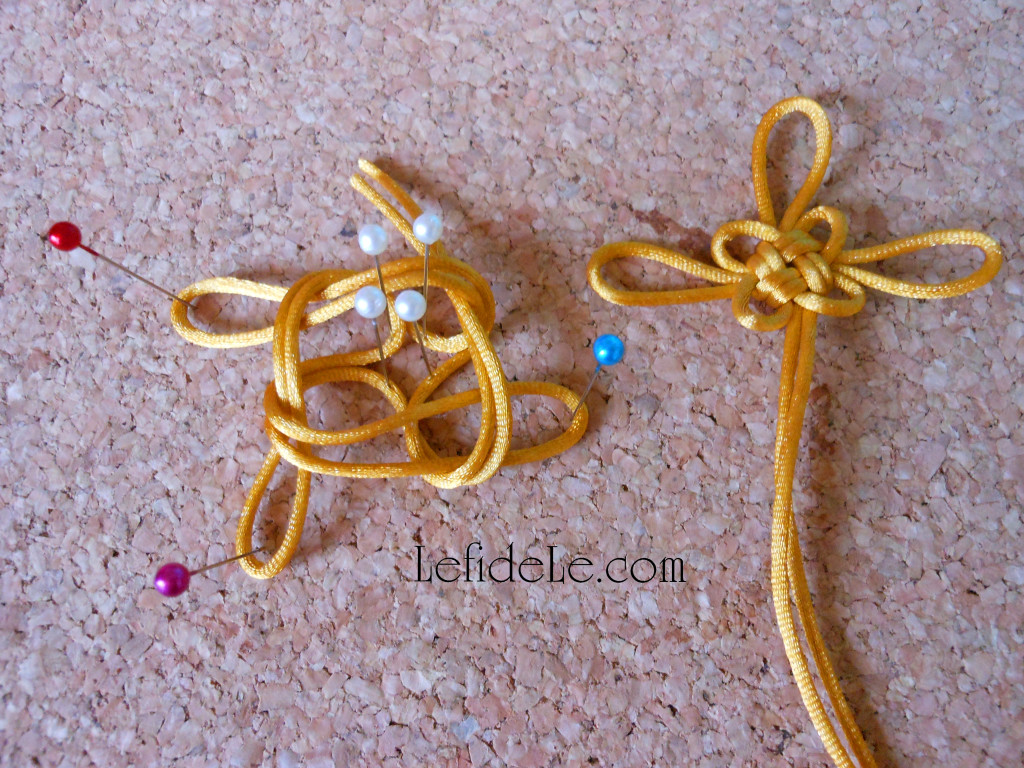
1588Leigh

Next, fold the left loop (blue pin) over what was once the top loop (purple pin), and then slip it under what was previously the bottom strands (no pin yet). It should now bring to mind a game of twister.
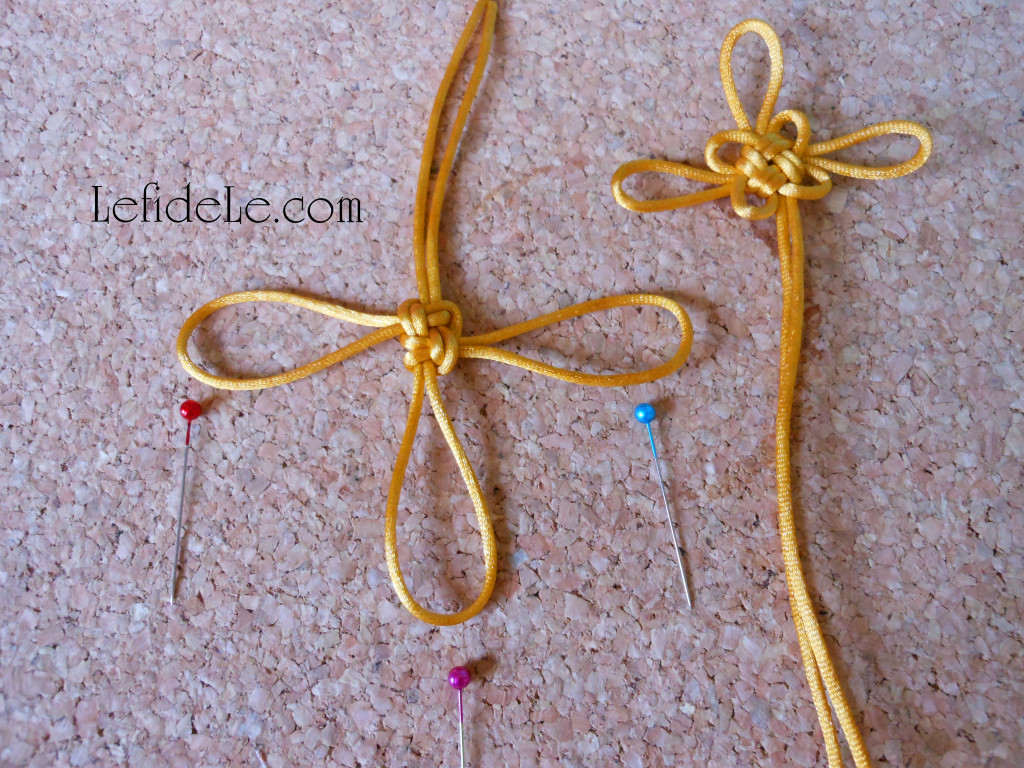
1589Leigh

Pull all of the outside loop ends outwardly, a little at a time, until the center is taut. It should look like an upside down cross.
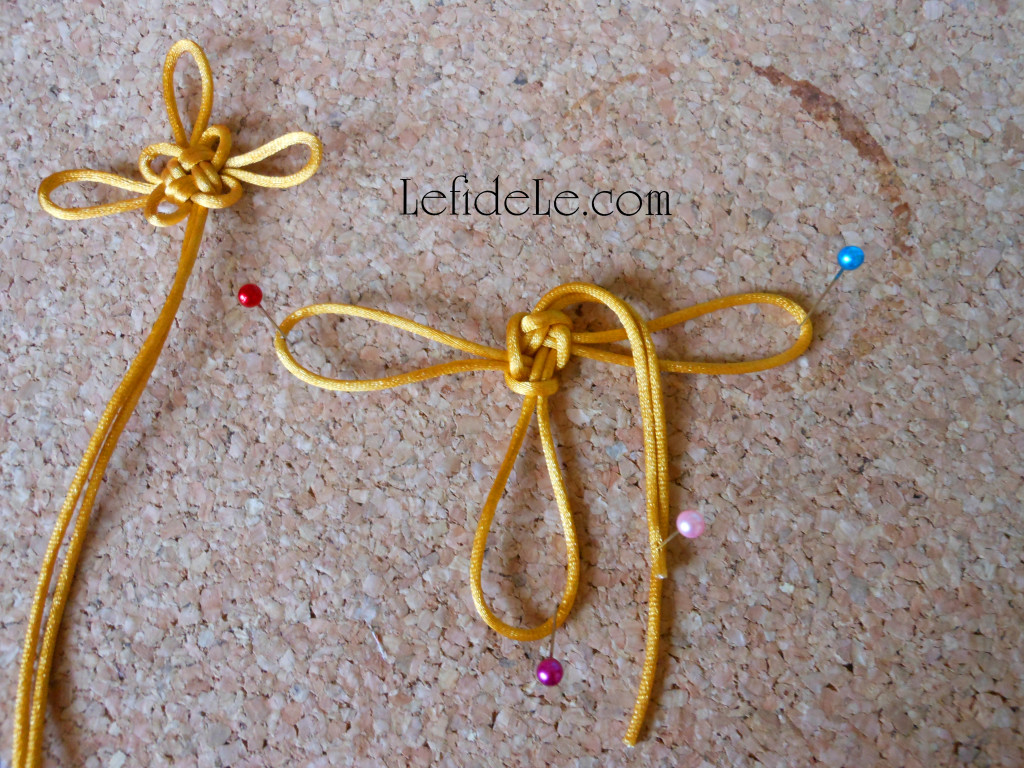
1594Leigh

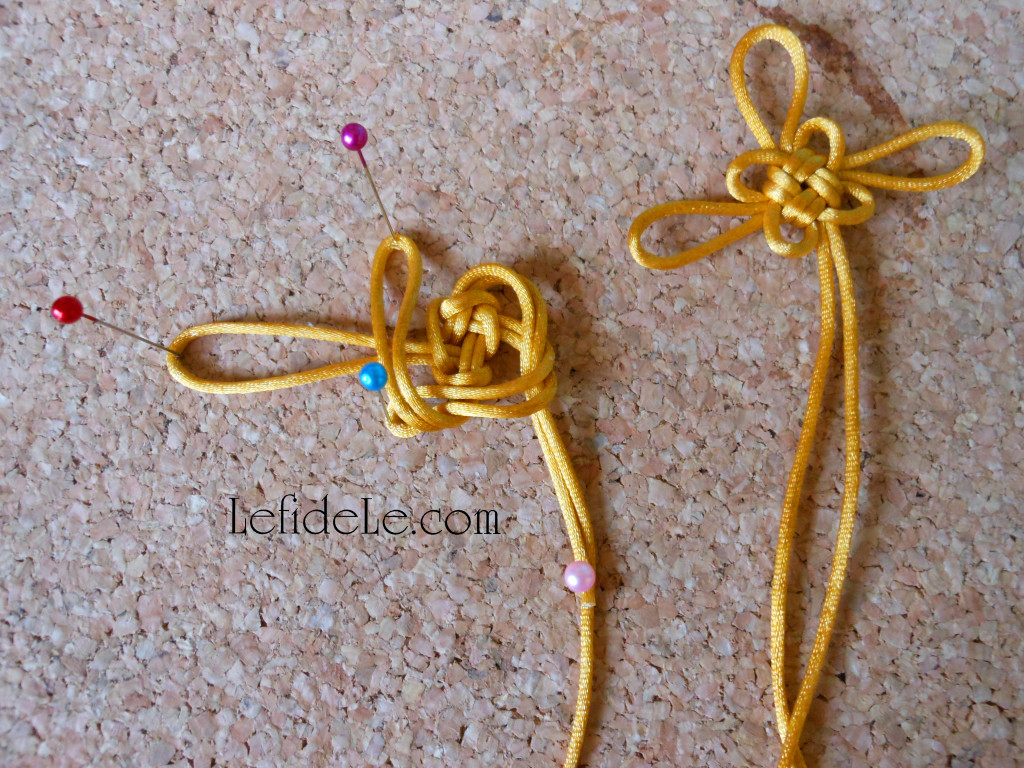
Repeat the previous fold-overs going clockwise. Fold the top loose strands (now a pink pin) over the right loop (blue pin). It should give the idea of a girl with really long hair.
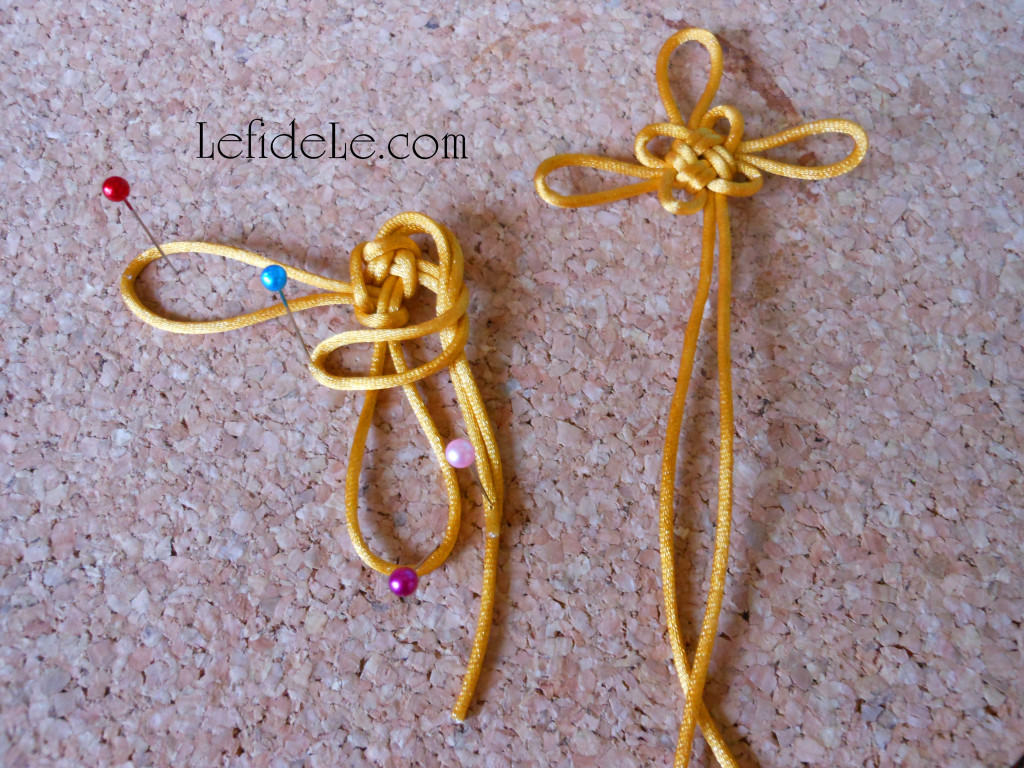
1598Leigh

Next, fold the right loop (blue pin) over the loose strands (pink pin). It should bring to mind a girl with really long hair, bowing with one arm outstretched and one crossing the abdomen.
1600Leigh

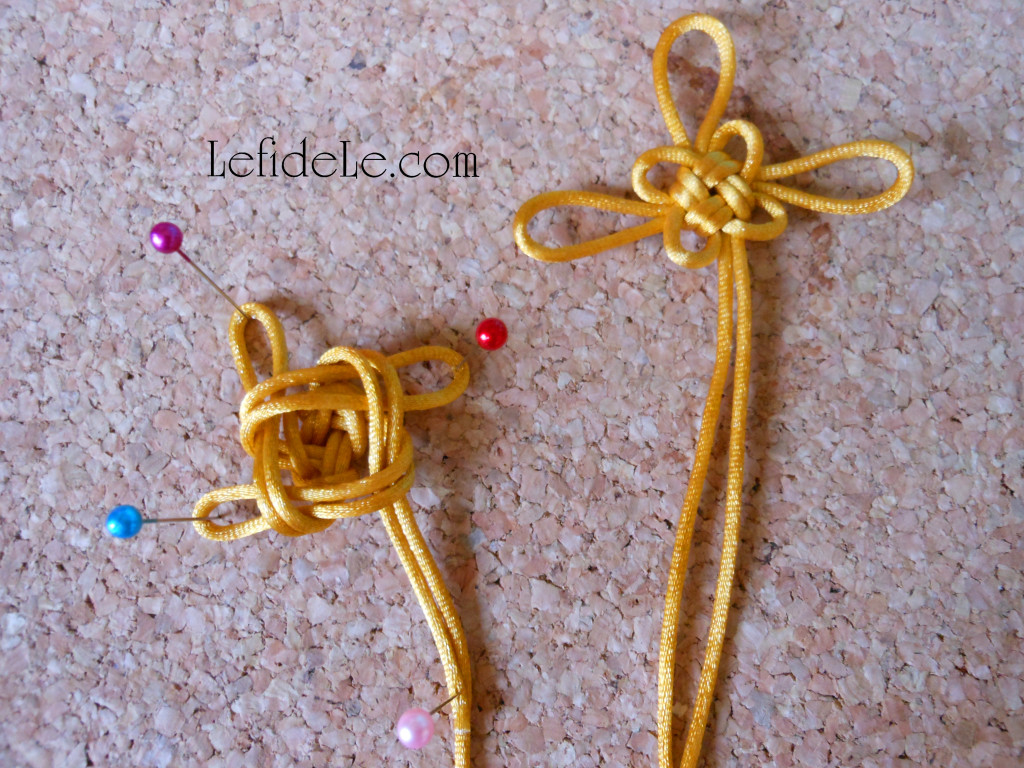
Now fold the bottom loop (purple pin) over the left loop (red pin). It should appear similar to a squashed bug.
1607Leigh

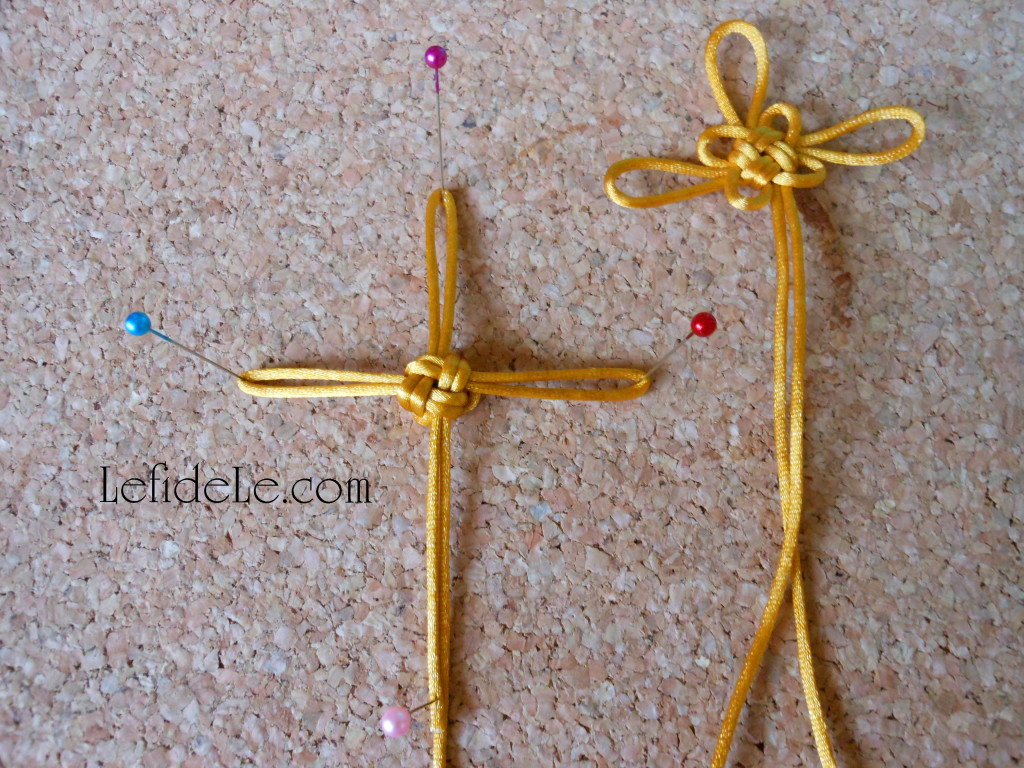
Take the left loop and fold it over what was once the bottom loop (now the top, purple pin) and slip under what was once the top strands (now the bottom, pink pin).It should bear a resemblance to an unfortunate wad of hair matted in bubble gum.
1610Leigh

Pull the ends straight out from the center. It should form another upright cross.
1611Leigh

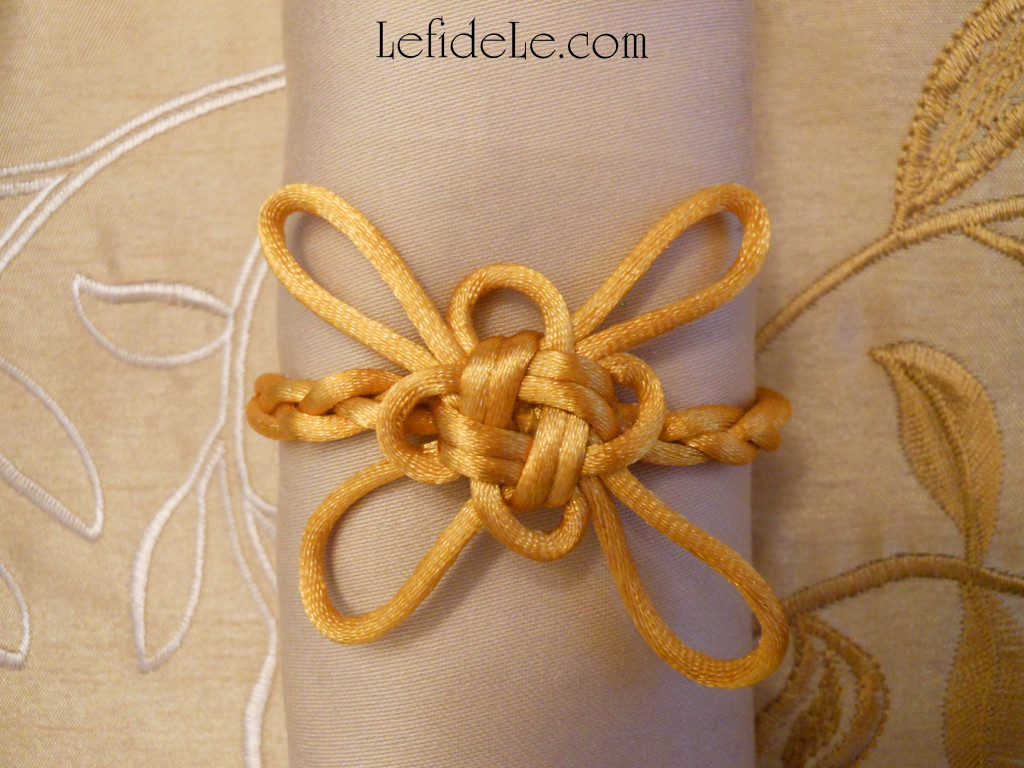
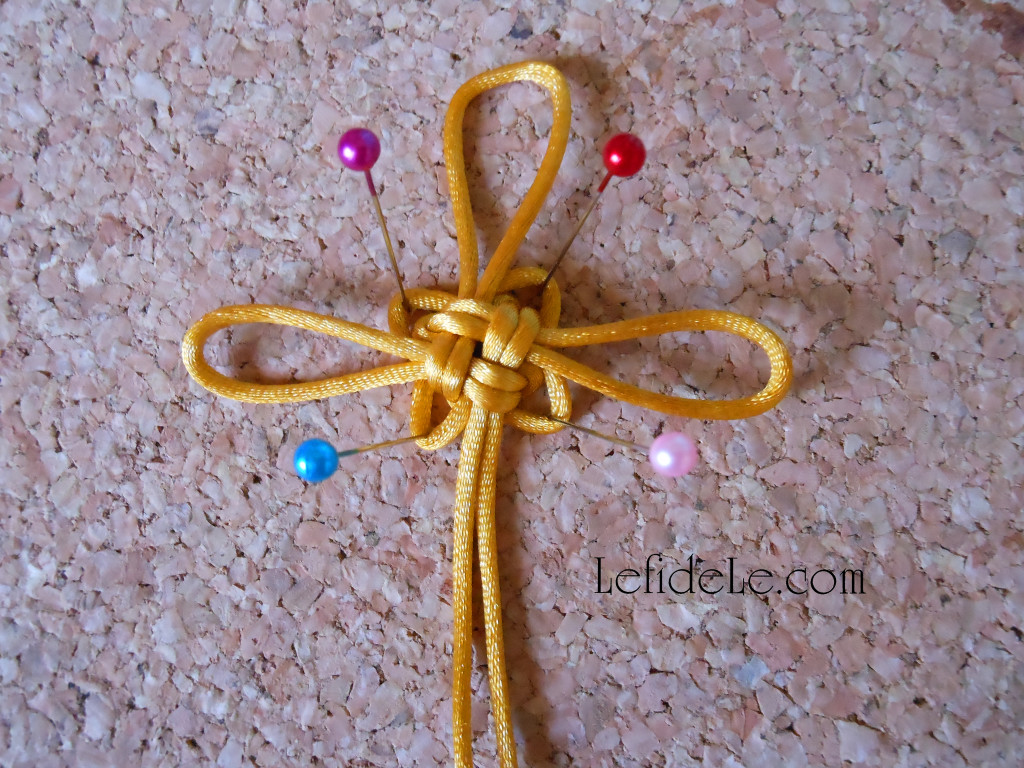
Lastly for the knot, pull the smallest loops outwardly until it forms petal-like structures of equal size. It should now seem more like a Celtic cross. (If it doesn’t look right to you, just pull the whole thing apart and try again. No harm done!)
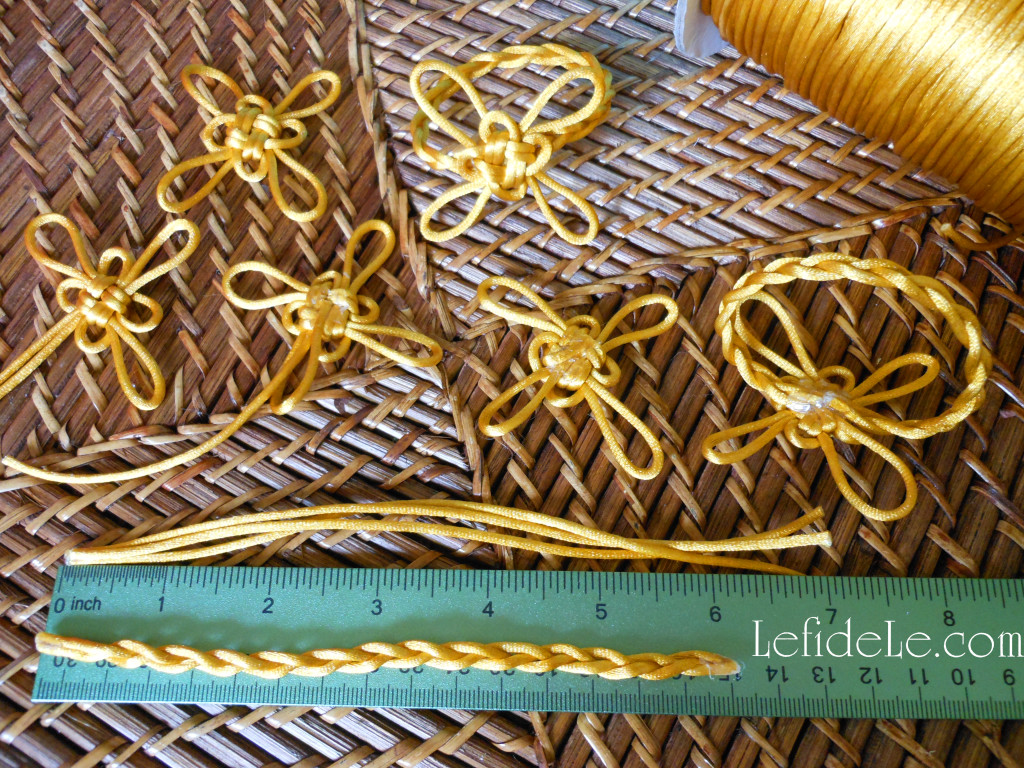
1518Leigh

For the plaited napkin rings, cut 3 pieces of cord (7 inches long) for each ring. Hot glue one end of each piece together like a tripod.
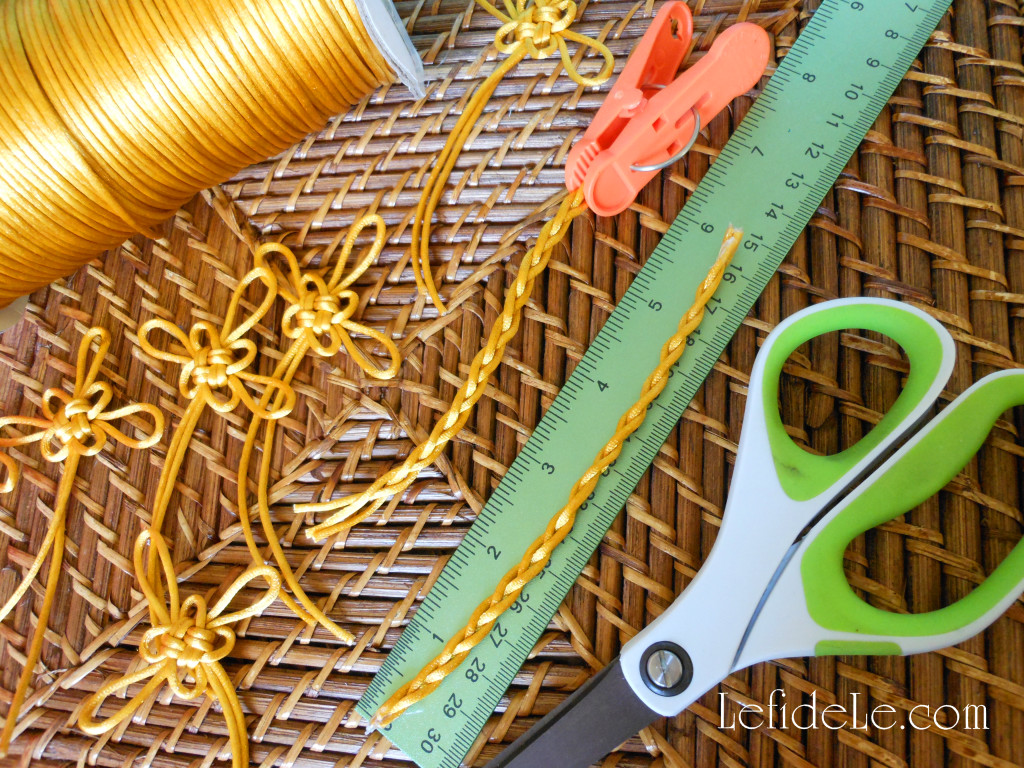
1517Leigh

Clip the glued end onto something sturdy for easier braiding (like a small pail full of pens). Make a classic 3 part braid, and then glue the ends together forming a strand. (A classic 3 part braid is like a simple hair braid… made by folding the left strand over the center, then the right strand over the new center, then the new left strand over the new center, then the new right strand over the new center… over and over again until you get to the end.)
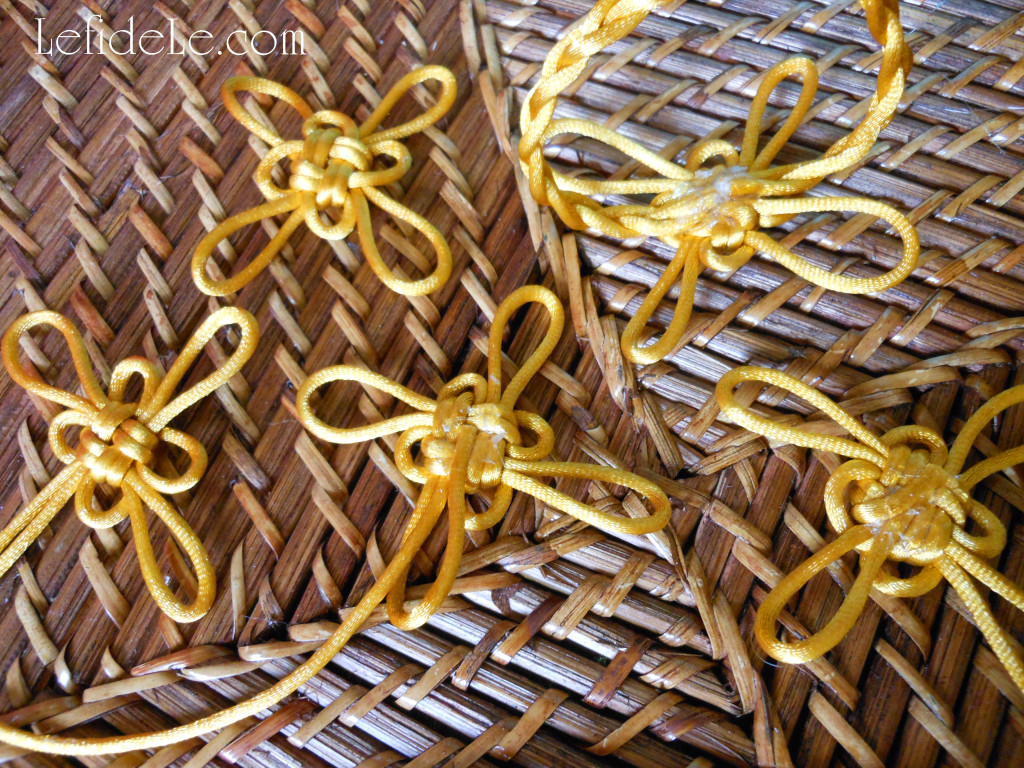
1521Leigh

For these napkin rings, the knots will need 4 equal loops. To easily do this, just fold one loose strand over to the underside center until it forms the right size. Cut it to the center of the knots back, and then glue it down. Next, take the last loose strand and fold it over tightly against the knot without any gaps. Also cut this strand at the center-point and glue it down. Now take a braided strand and glue each end to this same gluey underside of the knot (without overlapping the ends).
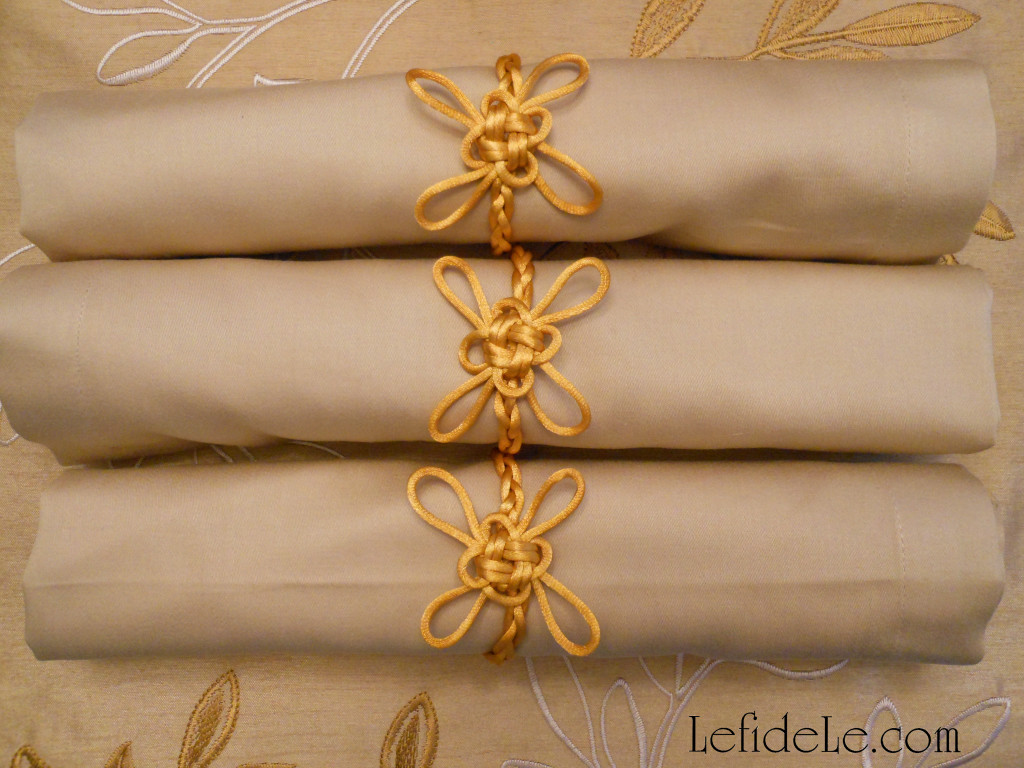
1724Leigh

Finally, flip it over and look at your amazing creation!
1701Leigh

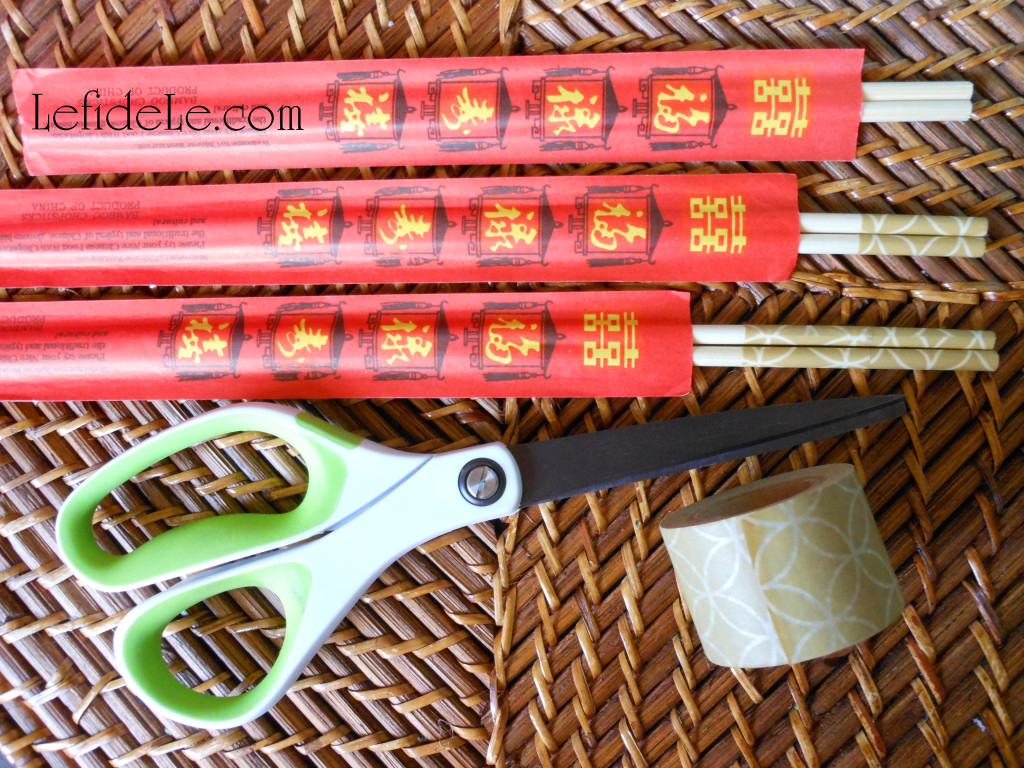
I saved the easiest project for last. Any inexpensive chopsticks can be made beautiful in a just few seconds with the addition of washi tape. You can even take some extra chopsticks home for free along with your takeout. (These came from the grocery store sushi counter.) They are disposable like plastic utensils, but are so much more environmentally friendly.
1563Leigh

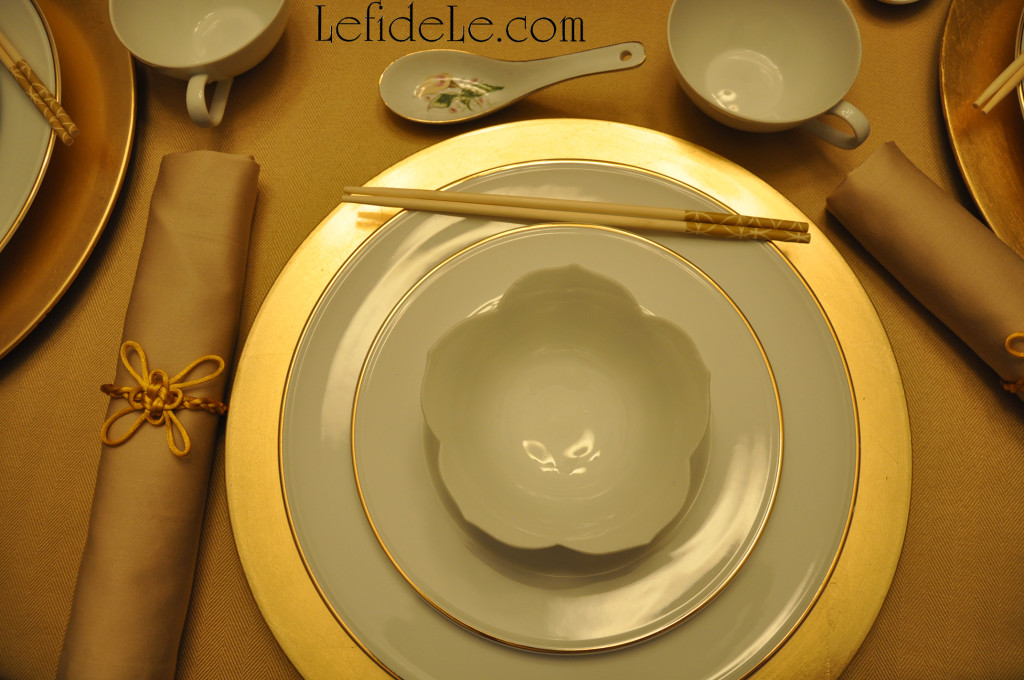
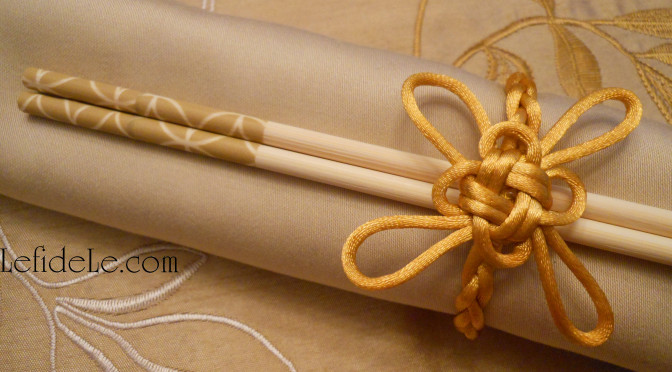
Simply adhere the top corner of a piece of the paper tape to the top of the stick. Wrap it around until it overlaps, and then cut it. Press it down hard to make sure it doesn’t unwrap at the dinner table. Use as many layers of it in as many styles as you like. (I used thick neutral tape twice over which matched my table runner.)
61Leigh

See more of these projects in action in my Elegant Chinese New Year of the Monkey Dinner Party Tablescape Décor Ideas Article.

Kung Xee Fa Chai… Congratulations & may you be prosperous!

Faithfully Yours,

Leigh
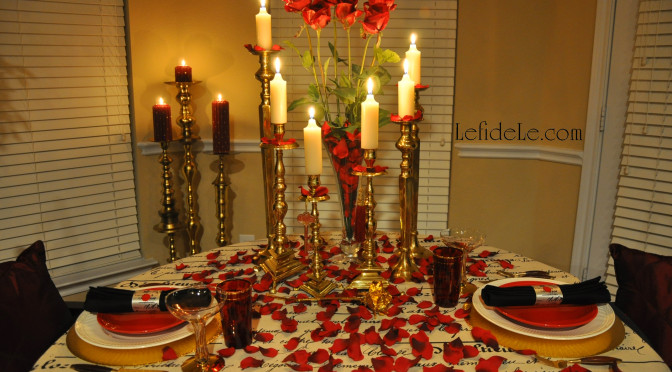
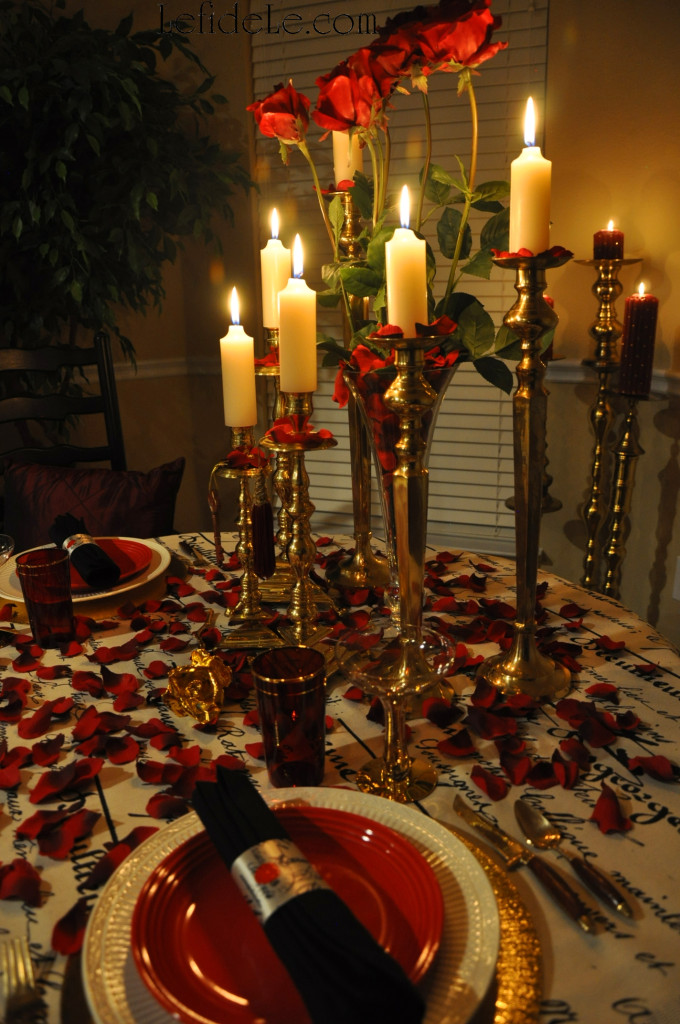
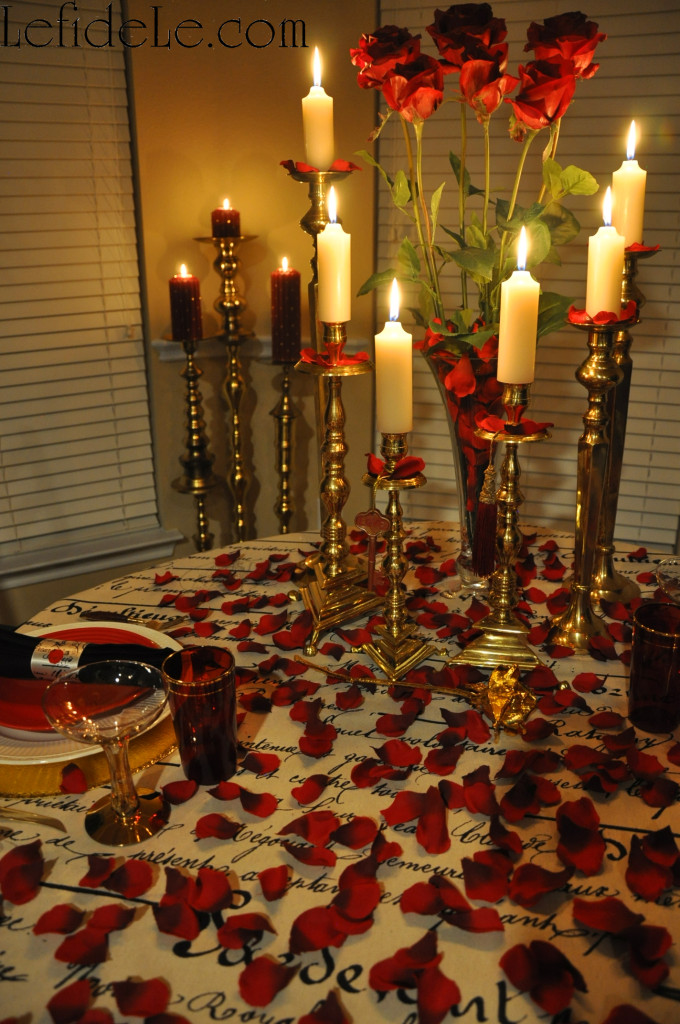
Love Letter Themed Tablescape (Perfect for Valentine’s Day, Romantic Date Night, or Anniversary Dinner)

This love letter themed tablescape make’s the perfect setting for Valentine’s Day, a romantic date night, or even an anniversary dinner. I find that in the modern era of effortless texting, emails, and social networking, that it can be a lovely quixotic gesture to turn back to the sentimentality of a handwritten letter on actual paper. Then to go further back to capture the romanticism of script, drafted with pen and ink well on paper that’s been sealed with wax… so that none other than the intended may lay eyes on the heartfelt content. Call me old fashioned if you will… I’ll just take it as a compliment.

101Leigh

“Shall I compare thee to a summer’s day? Thou art more lovely and more temperate:”

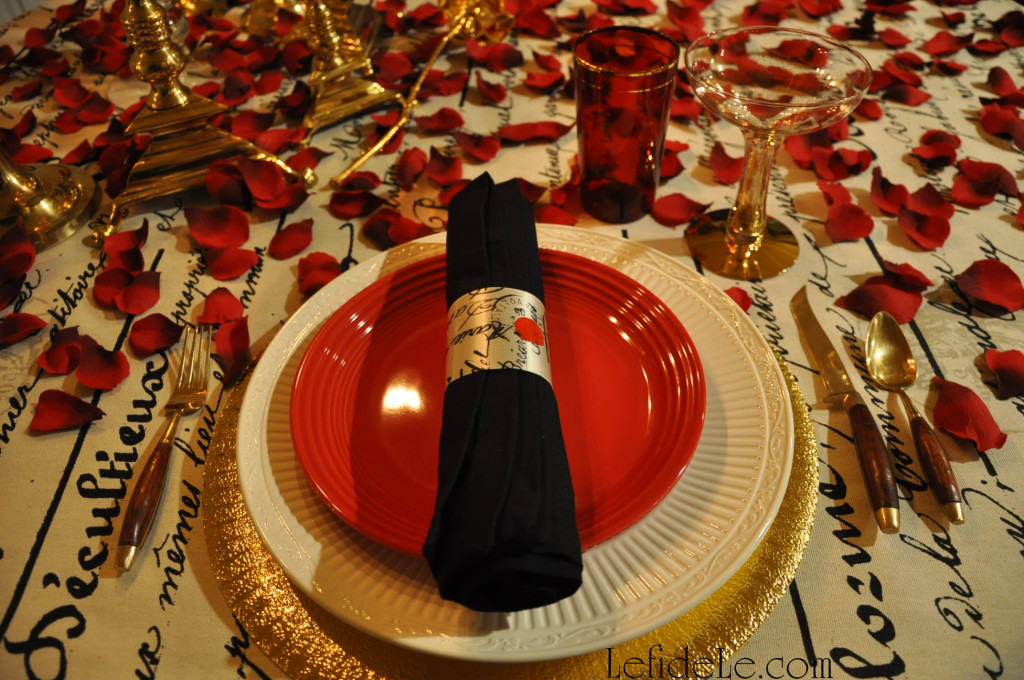
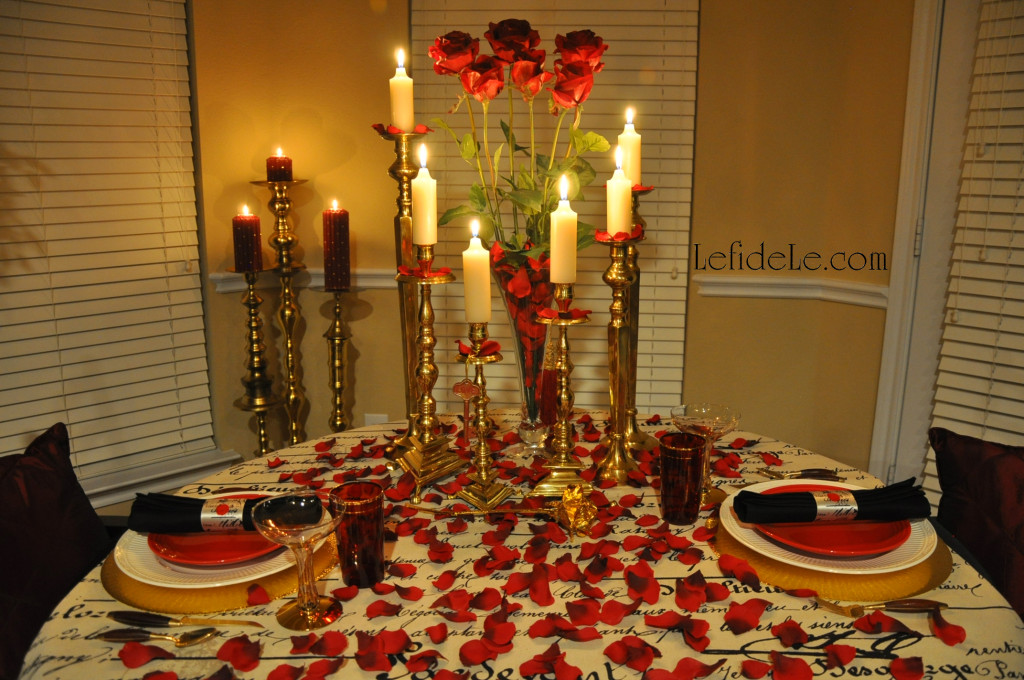
Verse spells its way across a love letter inspired cloth is laid upon a greater midnight black tablecloth.

112Leigh

“Rough winds do shake the darling buds of May, And summer’s lease hath all too short a date:”

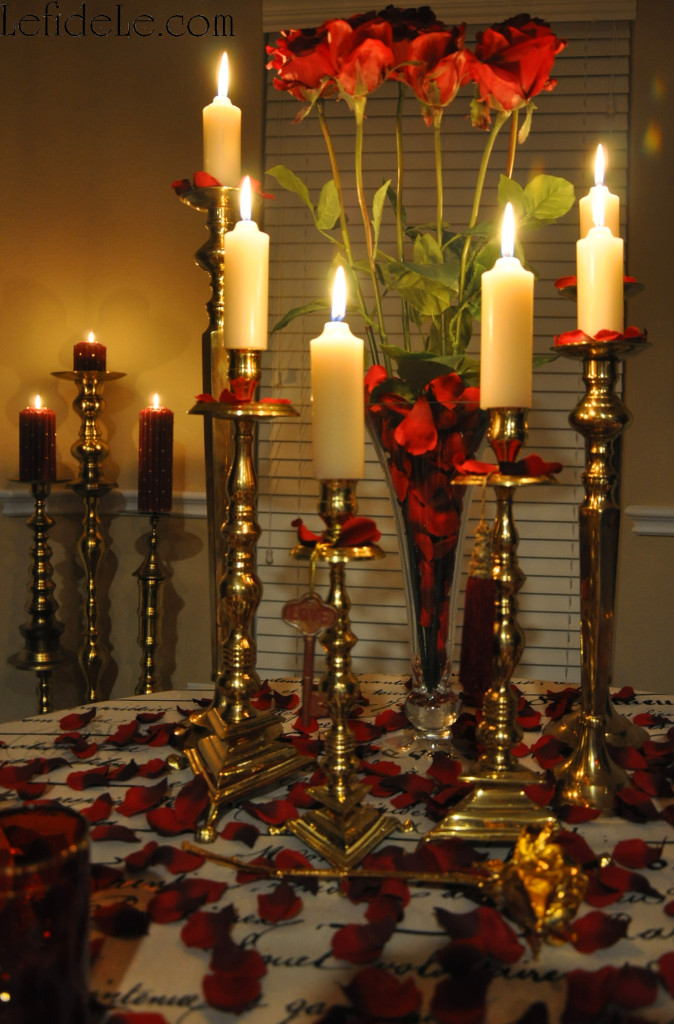
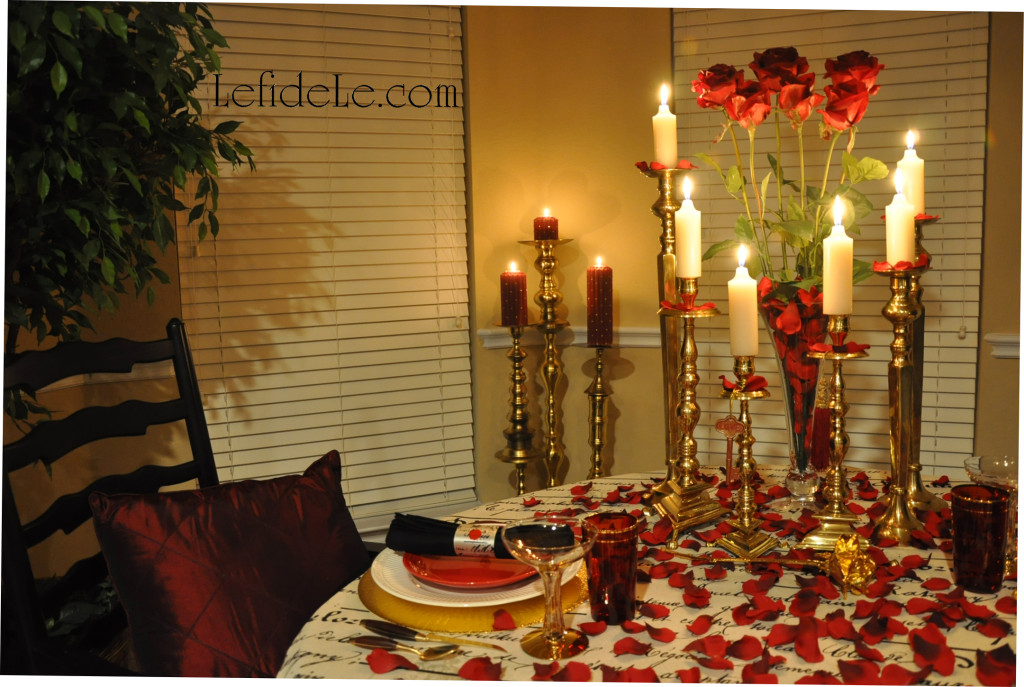
Six ravishing red roses rise from a vase overflowing with soft petals. A boundless array of them blankets the table.

114Leigh

“Sometime too hot the eye of heaven shines, And often is his gold complexion dimmed;”

Luminous brass sextuplet candlesticks cast a romantic golden glow over the tablescape. Beneath them lies a once live rose plated in brilliant 14 karat gold. Gilded studs enhance burgundy pillar candles set upon stacked vintage candlesticks that playfully generate light and shadow in the background.

83Leigh

“And every fair from fair sometime declines, By chance, or nature’s changing course, untrimmed;”

Encircling tuxedo black napkins are love letter symbolizing napkin rings trimmed with faux wax seals. Golden utensils bearing wooden handles represent the pens of yesteryear. Waiting to be filled are vintage ruby glasses trimmed with rings of gold that are flanked by golden flecked midcentury champagne vessels.

75Leigh

“But thy eternal summer shall not fade, Nor lose possession of that fair thou ow’st, Nor shall death brag thou wand’rest in his shade,”

Beneath a resplendent tree sit black ladder-backed chairs cushioned with sumptuous garnet pillows.

67Leigh

“When in eternal lines to Time thou grow’st. So long as men can breathe, or eyes can see, So long lives this, and this gives life to thee.”

Italian countryside plates from Mikasa are topped by red dishes resembling wax seals. They obscure all but rings of gold from the gleaming mat chargers below them.

Faithfully Yours,

Leigh & William Shakespeare’s 18th Sonnet

P.S. Click here for my Easy DIY Valentine’s Day Countdown Calendar / Treat Bag Banner & Love Letter Napkin Rings Craft Tutorials.

Easy DIY Valentine’s Day Countdown Calendar / Treat Bag Banner & Love Letter Napkin Rings Craft Tutorials

1661Leigh

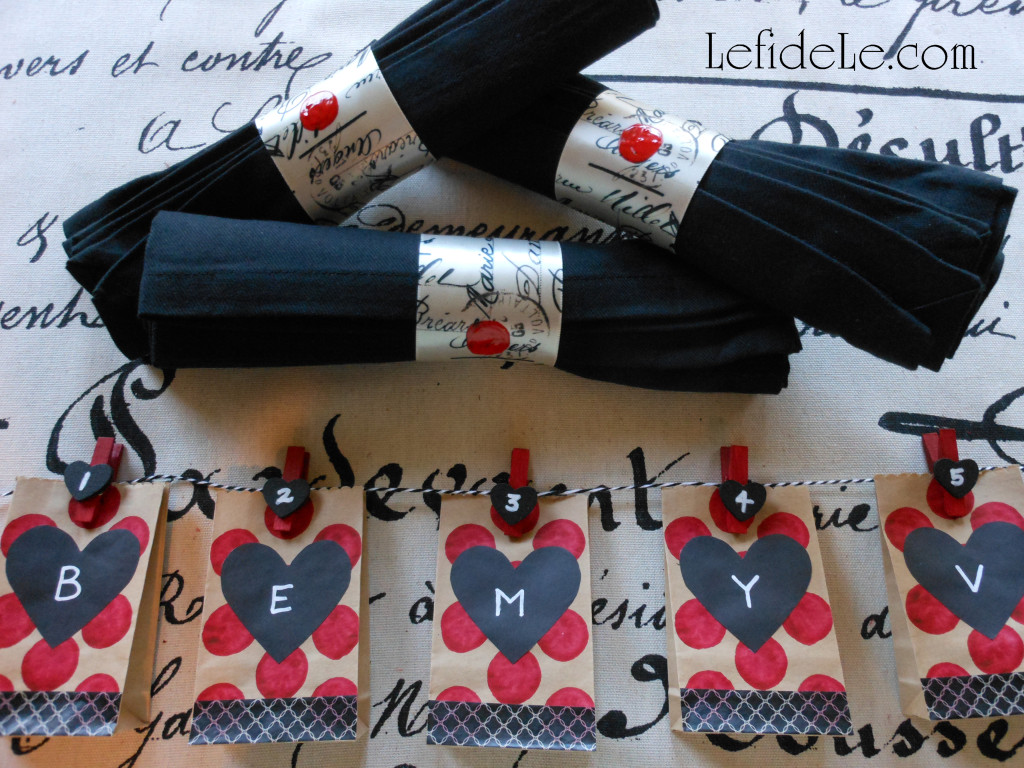
This easy DIY Valentine’s Day countdown calendar plus treat bag banner and love letter napkin rings craft tutorial comprises three of my favorite things to make… banners, napkin rings, and advent calendars. The latter project arose from the questions, “Why are countdown calendars typically made for Christmas advent and not for other holidays?” and, “Why not expand the celebration with 2 weeks of excitement leading up to Valentine’s Day?” This works well for either children or adults depending on what’s placed inside the bags. As for the love letter themed napkin rings, they perfectly fit a romantic Valentine’s theme… though this one is for adults only!

1638Leigh

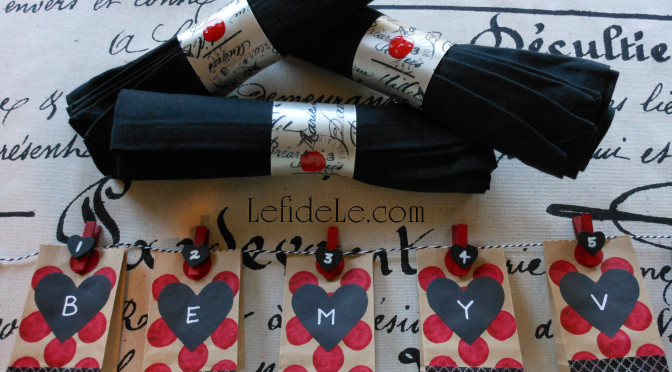
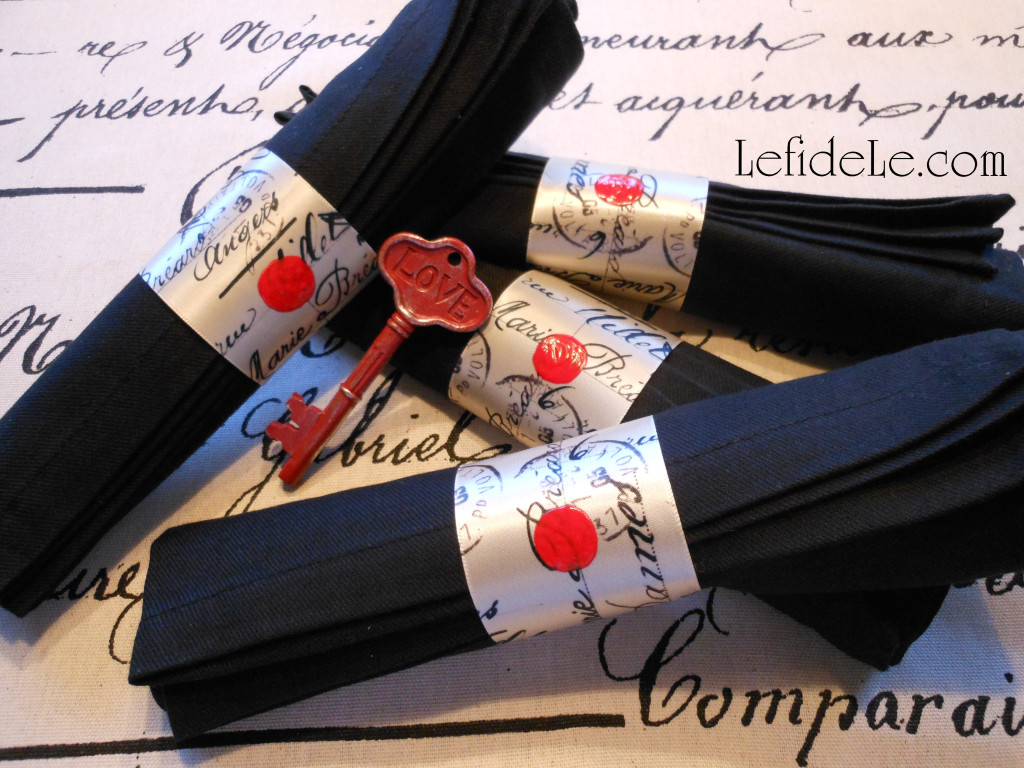
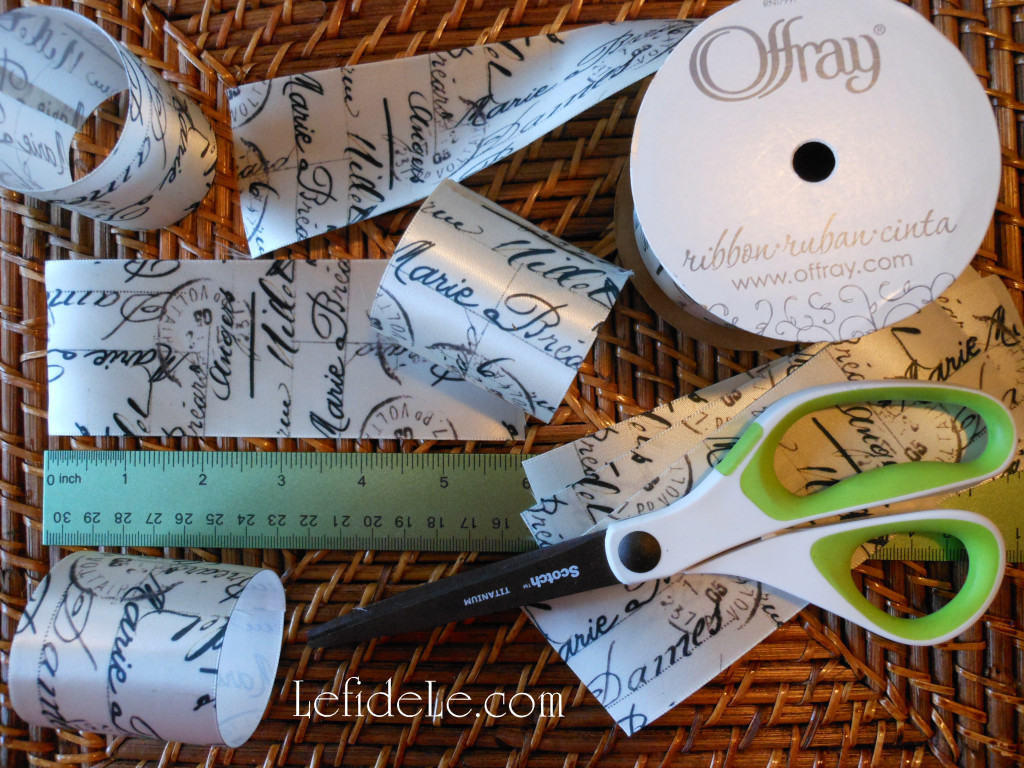
Let’s begin with the napkin rings. You’ll need a roll of Offray Brand Ribbon in a script pattern. (I purchased this ½ price with a coupon from Joann Craft & Fabric Stores. There’s a link for them in the sidebar.)

1647Leigh

You can make 12 rings and still have enough left over for a gift package bow if you like. You’ll also need either hot glue or liquid fabric glue and fabric paint in red (because it works on so much more than just T-shirts).

1216Leigh

Measure and cut a 6 inch length of ribbon for each ring you wish to make (use sharp sewing scissors to prevent fraying ends). If using hot glue, bond the ends with one side overlapping the other and press them together tightly. For liquid fabric glue, use a plastic clothes pin as a clamp or secure with a straight pin… and allow them to dry completely.

1243Leigh

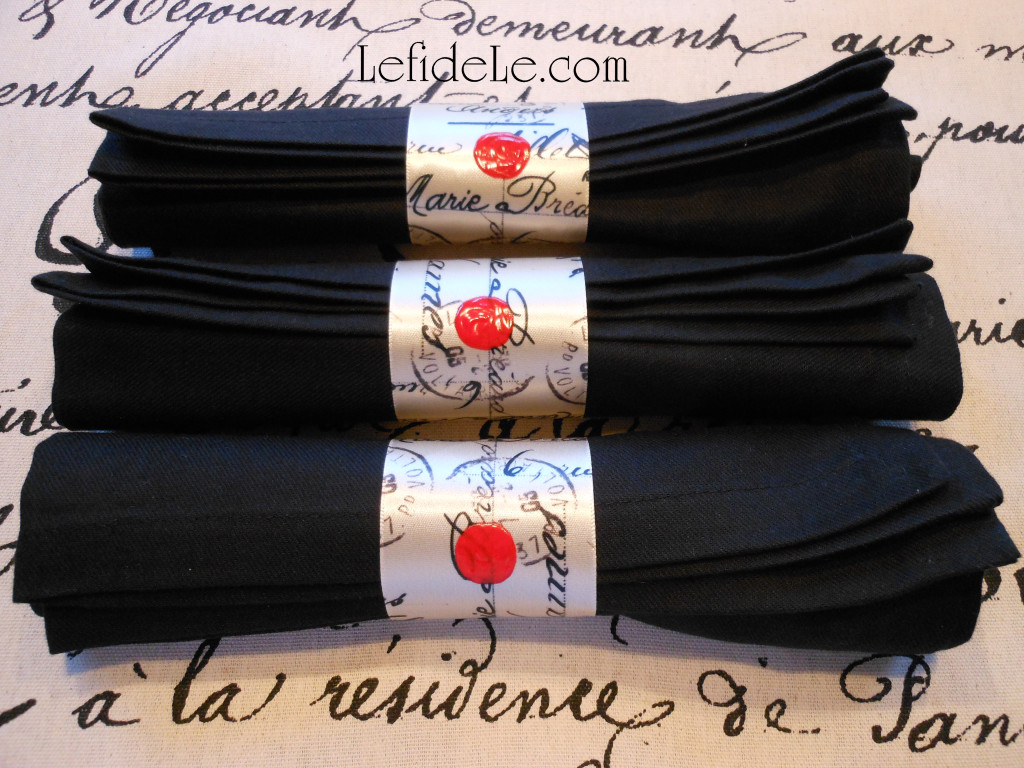
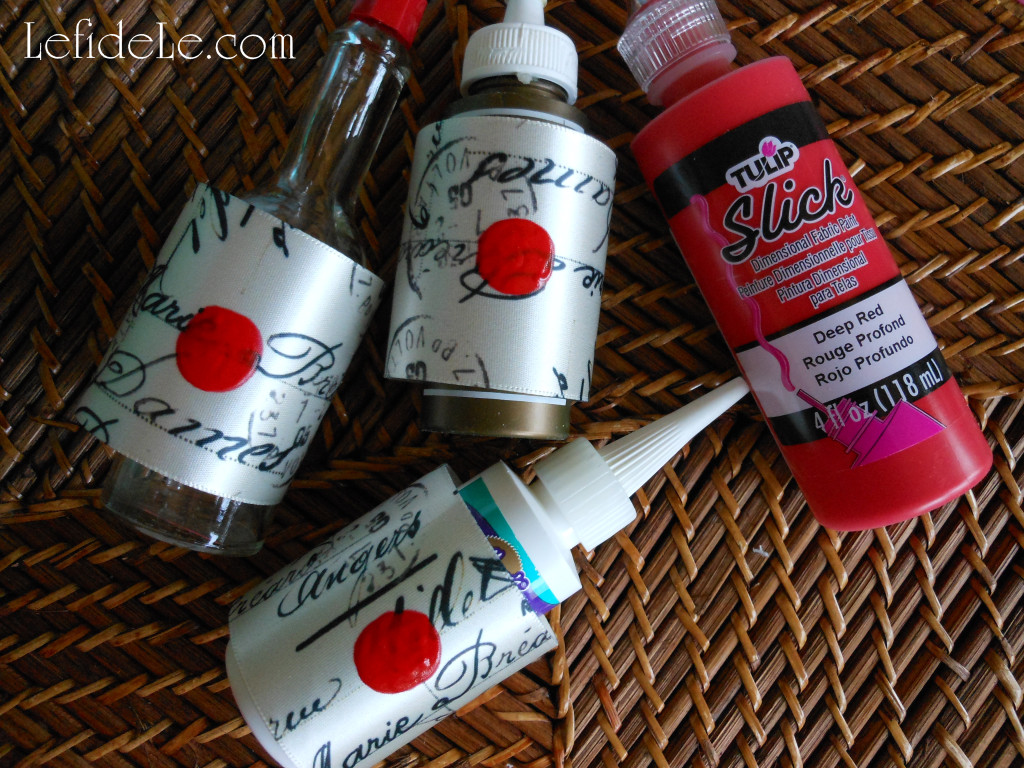
Next, make a faux sealing wax impression with the red paint. Either use the fabric paint tip to draw a circle and fill it in, or just squeeze some onto a plate and use a brush. Allow these to dry completely before handling. (Hot sauce bottles, glue bottles, and paint tubes placed inside the rings will prevent rolling and paint smears.)

83Leigh

These napkin rings were so quick and easy to craft, and they were a great little touch to add to the Love Letter Themed Tablescape (Perfect for Valentine’s Day, Romantic Date Night, or Anniversary Dinner).

1617Leigh

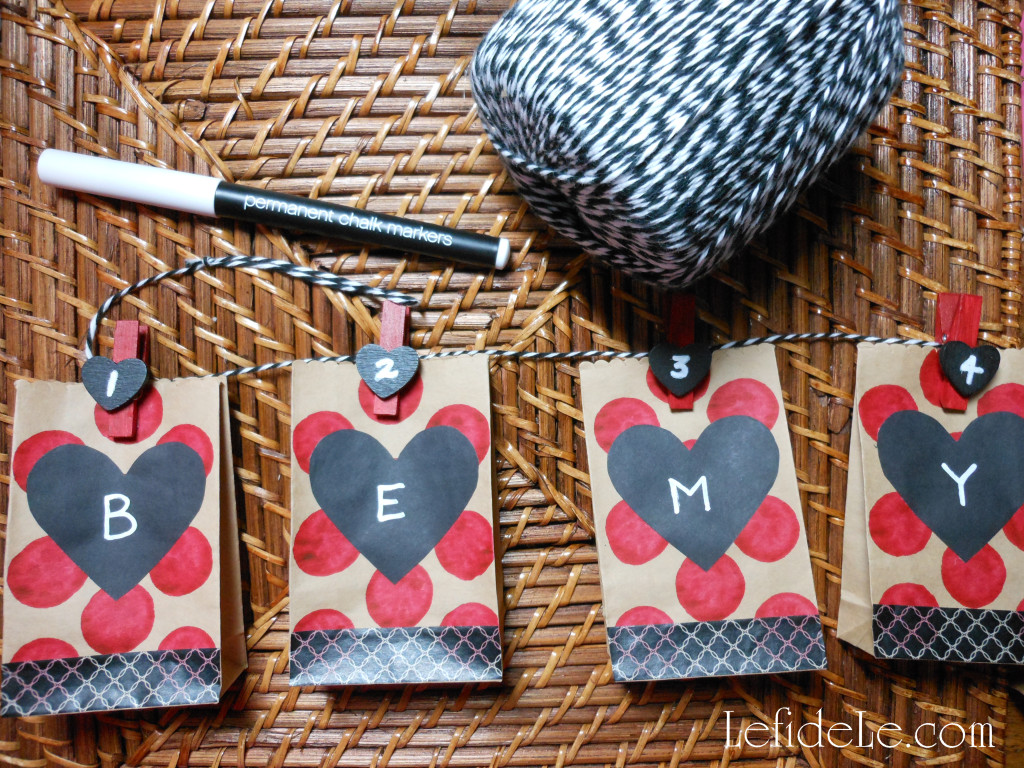
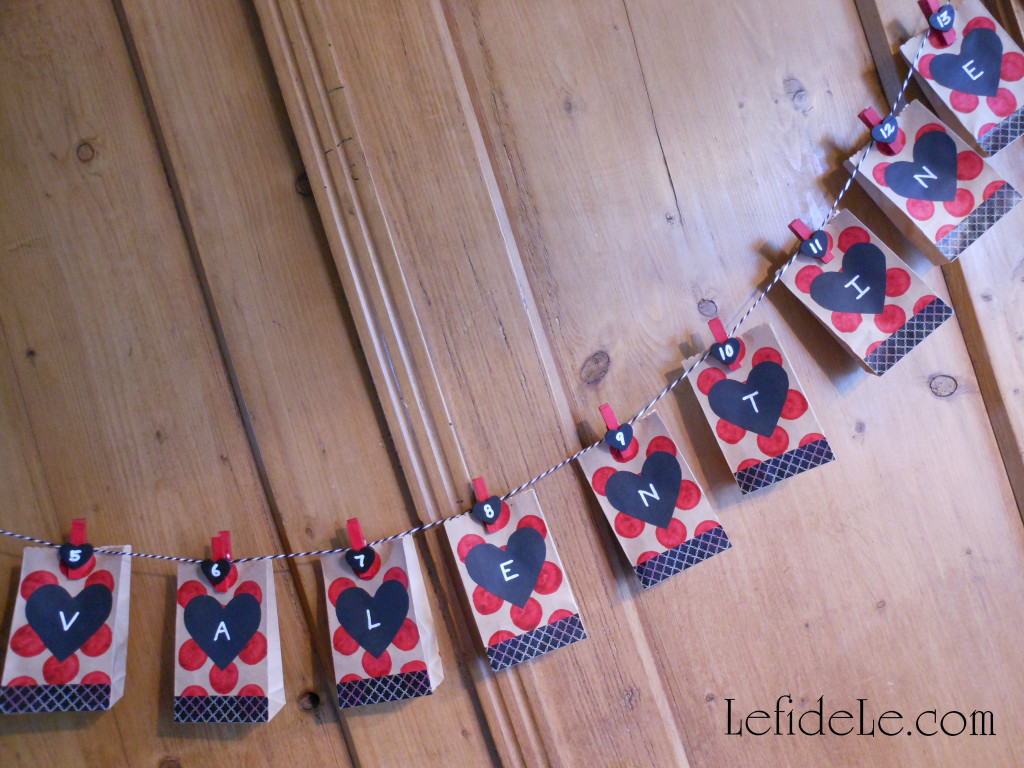
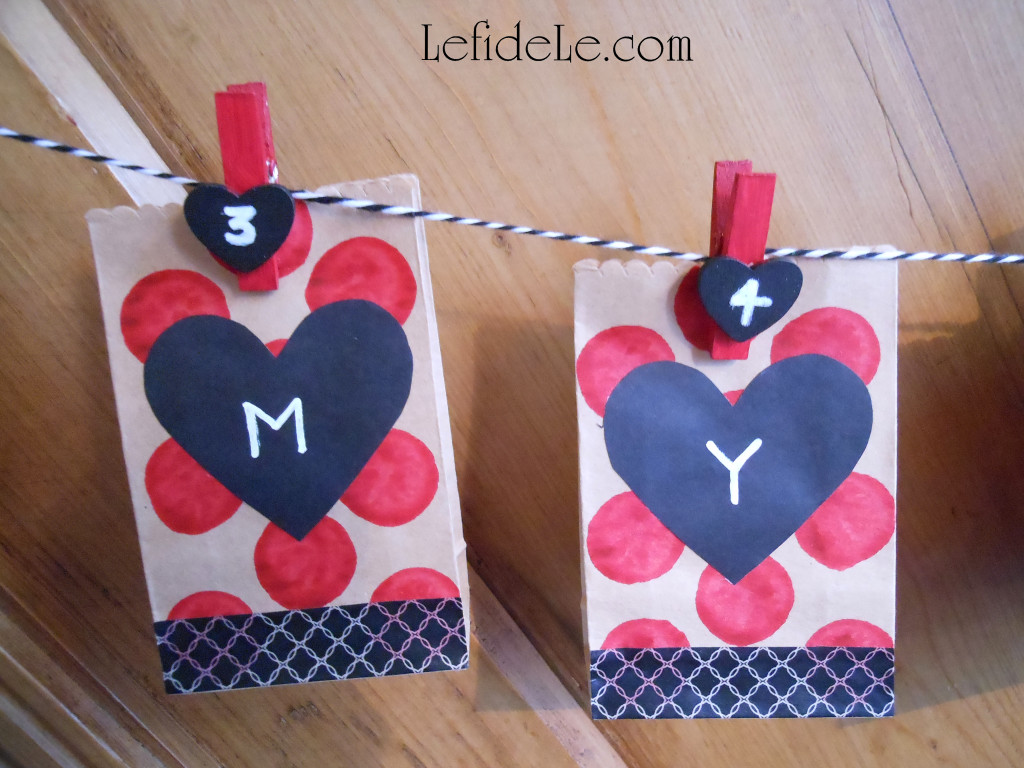
Now let’s make a Valentine’s Day countdown calendar and treat bag banner. (This is an easy enough project for the kiddos in your life to make too.) Begin by purchasing 14 mini clothespins complete with chalkboard hearts (these were 12 for $1 at the Target bargain bins). You can also buy the clothespins plainly and easily attach small flat wooden hearts with wood glue or hot glue… yes, hot glue does work on wood. Then all you need to do is paint the hearts with chalkboard paint. (All of the major craft stores carry the hearts. There are sidebar links for my favorite stores that carry coupon codes with them!)

1547Leigh

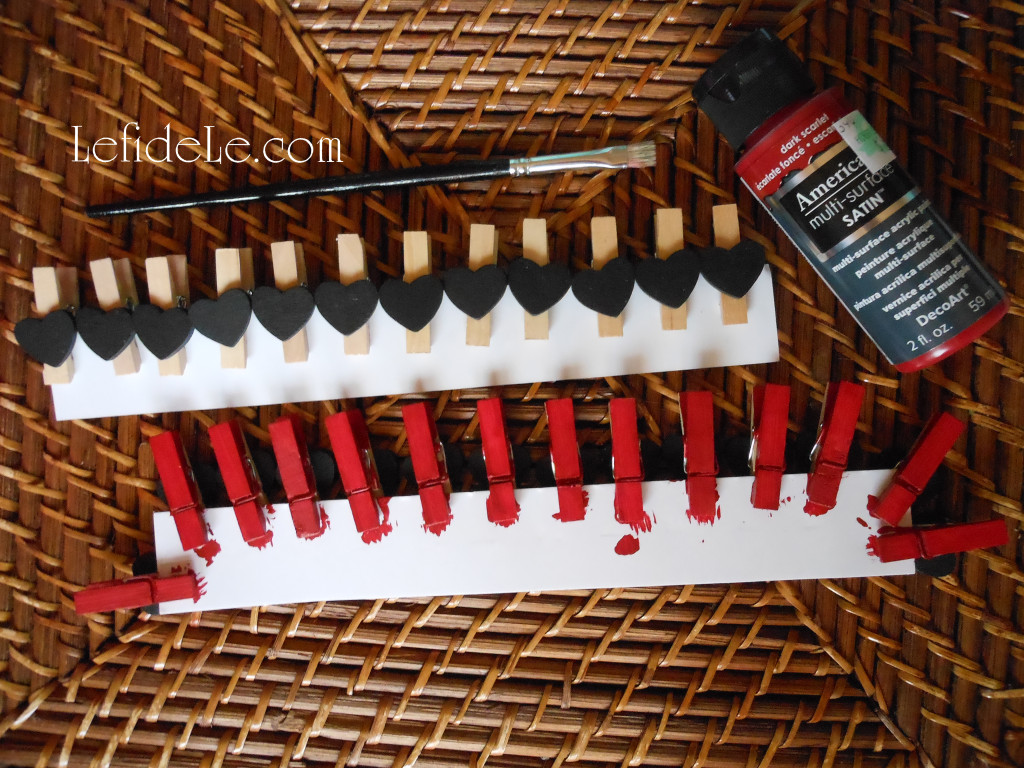
If you like, paint the remaining portion of the clothespins in your choice of red or pink… though the natural wood tone would look fine with the paper bags if you’re short on time. (I used dark scarlet multi-surface acrylic paint from DecoArt, because it matches my spice racks.) It’s easiest to clip them onto cardboard and just paint one side, leaving them to dry before flipping them over and completing the opposite side.

1552Leigh

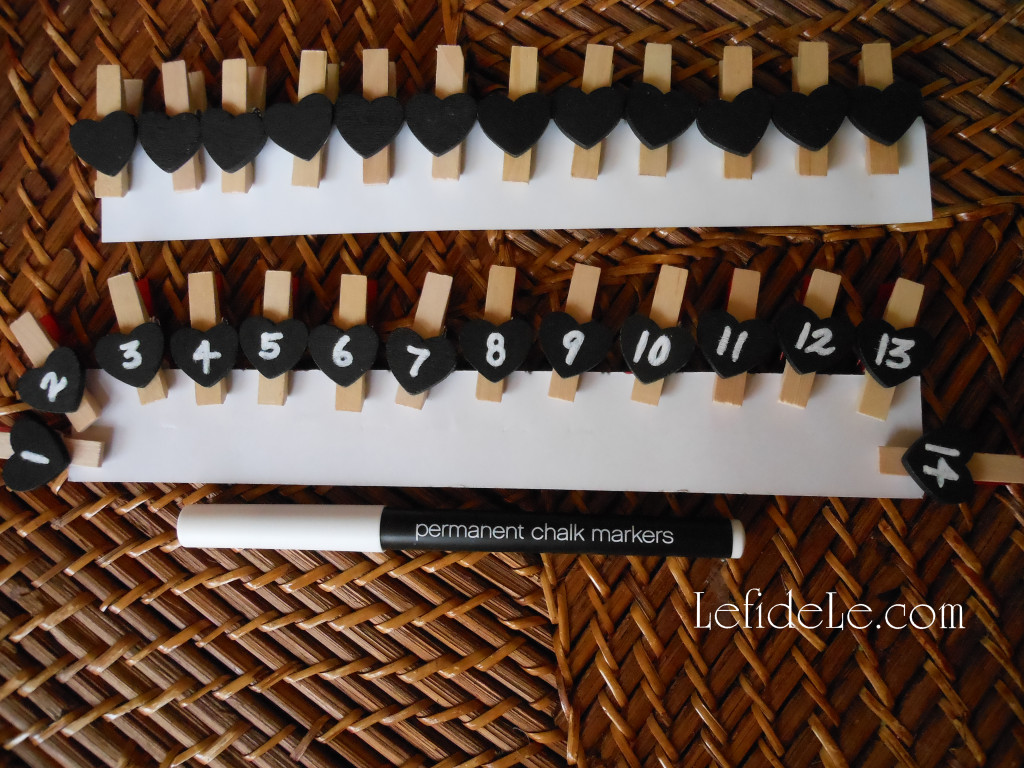
You have the option of writing the 14 day numbered countdown with actual chalk (so that they may utilized in another capacity after the holiday) or with a permanent chalk marker that can’t be rubbed off.

1555Leigh

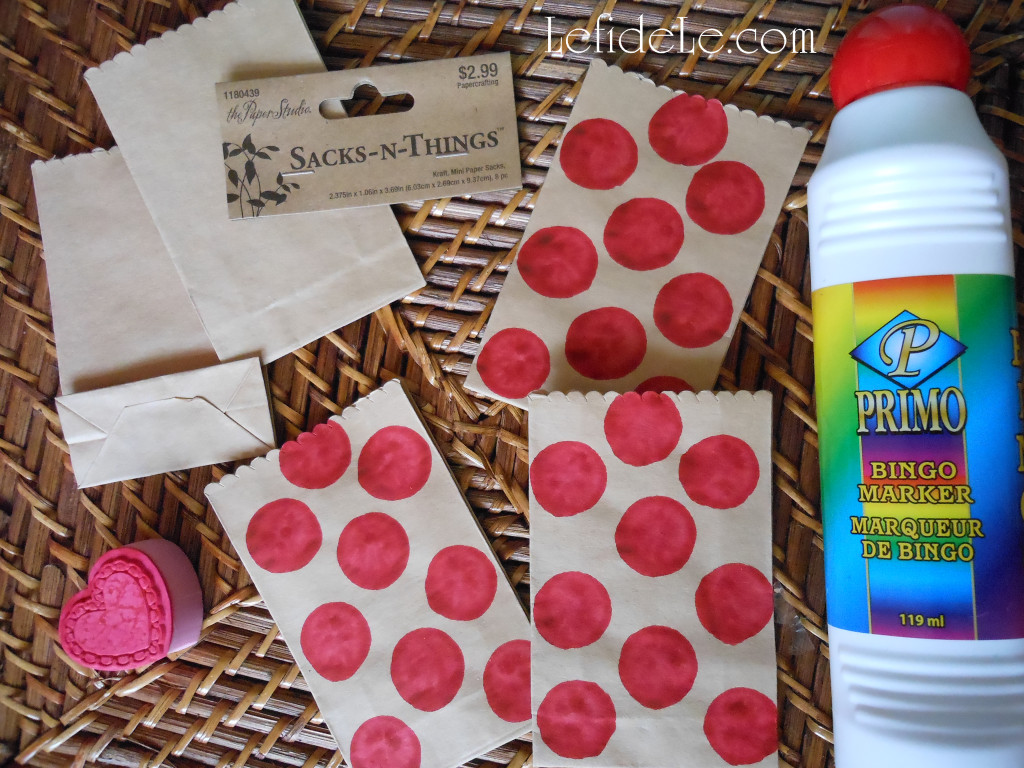
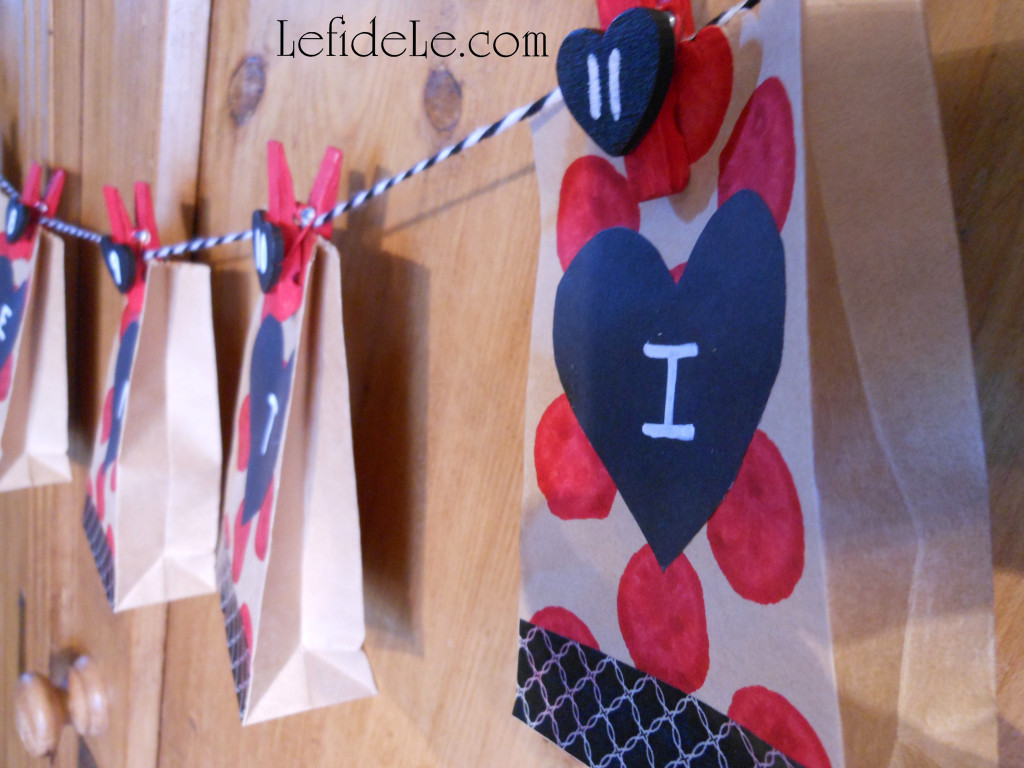
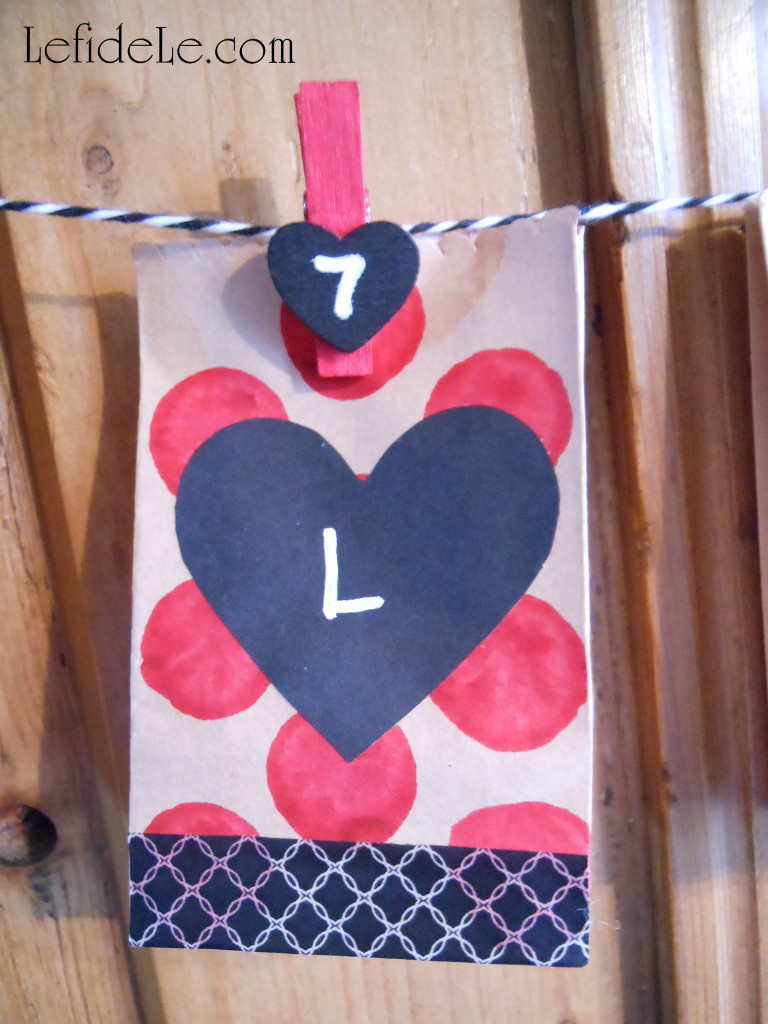
While those are drying, decorate your treat bags. (These plain little sacks were purchased cheaply for ½ off, but you can purchase printed ones if you’d like to speed up the process.) I used a red bingo marker to stamp dots in a polka dot pattern. (See more about this, along with other project ideas in my article on Fast & Easy DIY Hand-stamped Polka-dot Gift Wrap & Matching Gift Crafts.)Let these dry completely before the next step. (You also have the option of stamping a pattern onto the bags with ink or paint.)

1560Leigh

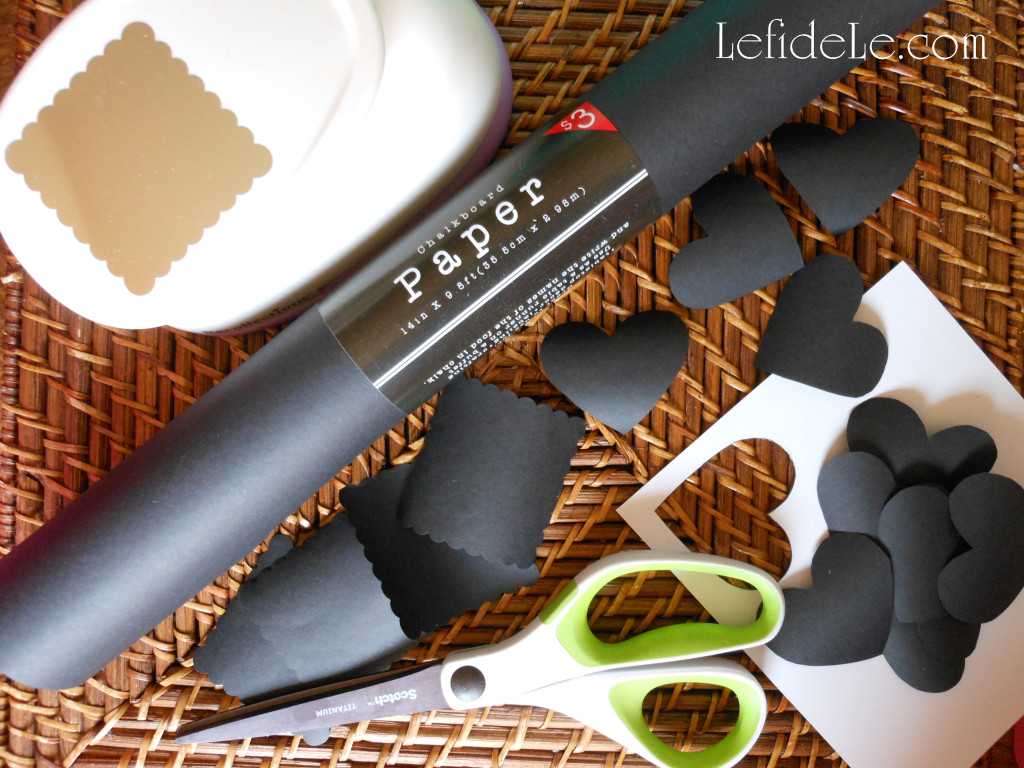
Next, cut out hearts from black chalkboard paper, or use a paper punch in any shape you like, or speedily use readymade chalkboard sticker labels.

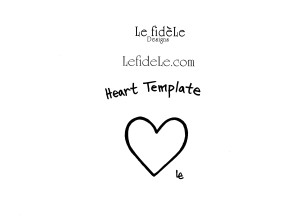
heart template

Here is my handy little template to print free at home then cut out to trace around. It’s an easy way to make the same exact heart shape repeatedly. (Just right click the small image above and select print.)

1564Leigh


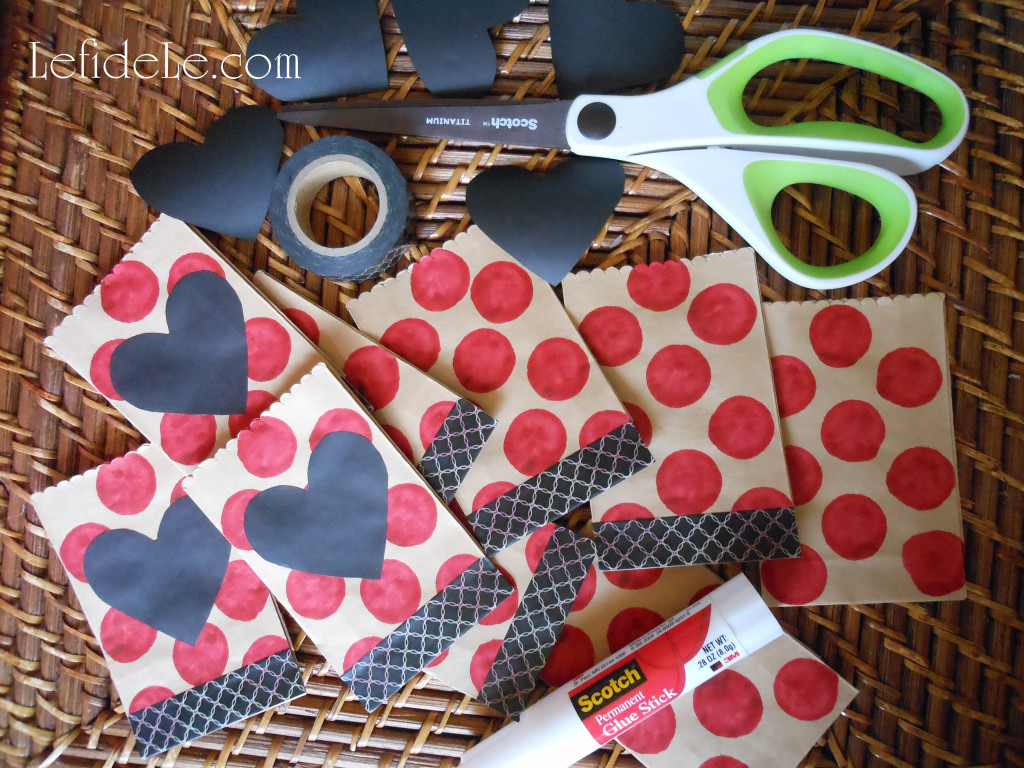
Adhere the paper hearts onto the bags with a permanent glue stick. Then run a strip of matching washi tape along the base for easily added flair.

1571Leigh

String the dry clothespins onto ribbon, string, jute, cording, twine, or yarn. (I used yarn that looks like twine because three times the amount can be purchased for ⅓of the price.) Once again, use either permanent white marker or actual chalk to write on each heart.

1623Leigh

I chose to write “Be my Valentine!” but “Valentines Day!” or “Happy Hearts Day” would also have fit on the 14 bags. You can also write the names of individual recipients like friends, classmates, or even alternate the names of family members.

1635Leigh

Fill the little bags with anything you like… you can make it as inexpensive or extravagant as you like.

1629Leigh

For kiddos: try candy, stickers, stamps, tiny toys, erasers, inexpensive jewelry… or silly printed jokes you won’t mind hearing over and over again. On the 14th day, think about directions leading to a larger gift like a stuffed animal.

1628Leigh

For adults: try printing faux fortunes, poems, romantic quotes, movie or event tickets, or even homemade coupons for “honey-do” chores or special treats. On the 14th day, think about directions leading to a larger gift like a dozen roses, box of chocolates… or something uber masculine like the latest power tool at home depot.

1661Leigh

This makes a super cute banner decoration as well, and it can be strung just about anywhere using either tape, 2 extra clothespins, or by tying knotted loops at each end of the string.

I ♥ Crafting… Don’t you?!

Faithfully Yours,

Leigh

A Thanksgiving for True Blue Loved Ones with “Turkey Day” Dinner Party Décor Ideas

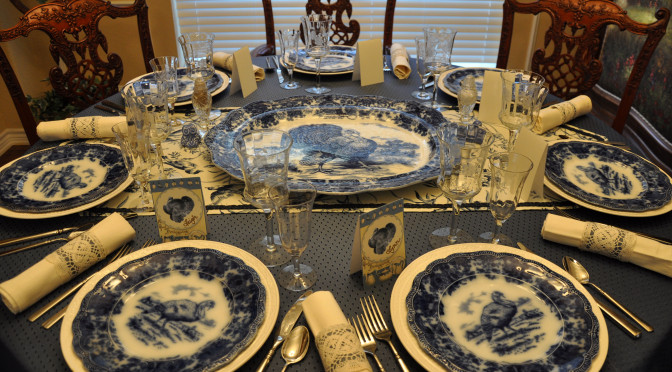
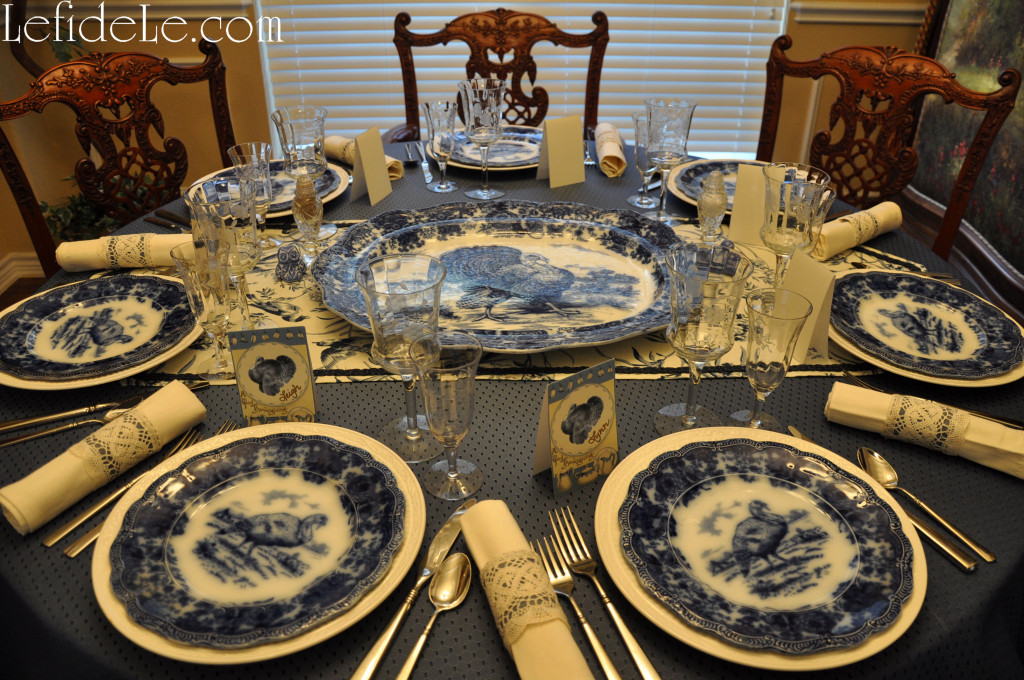
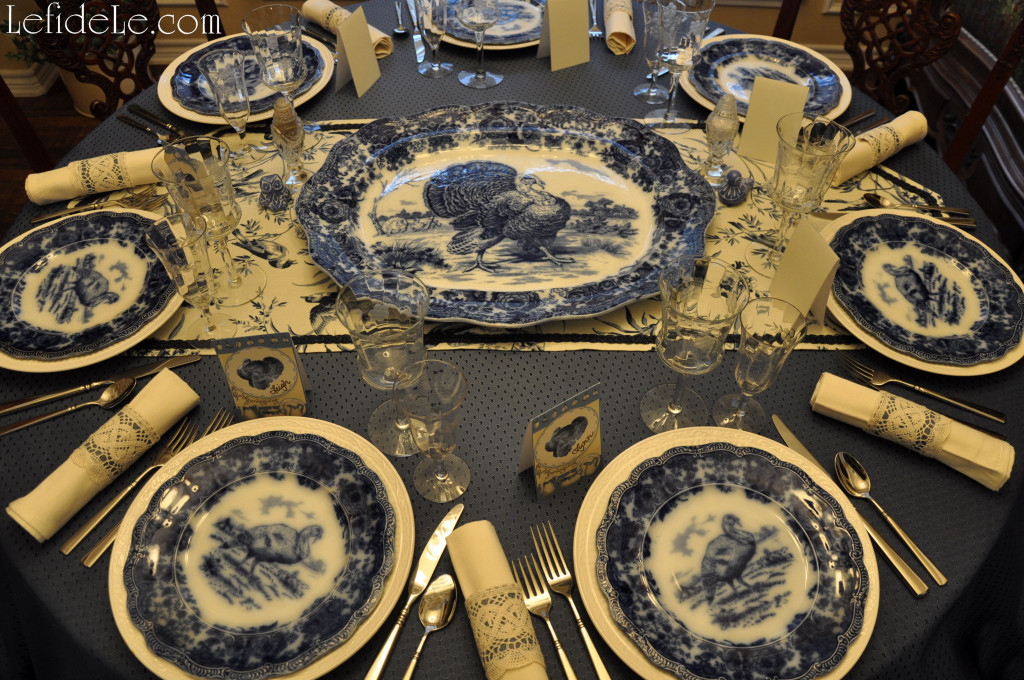
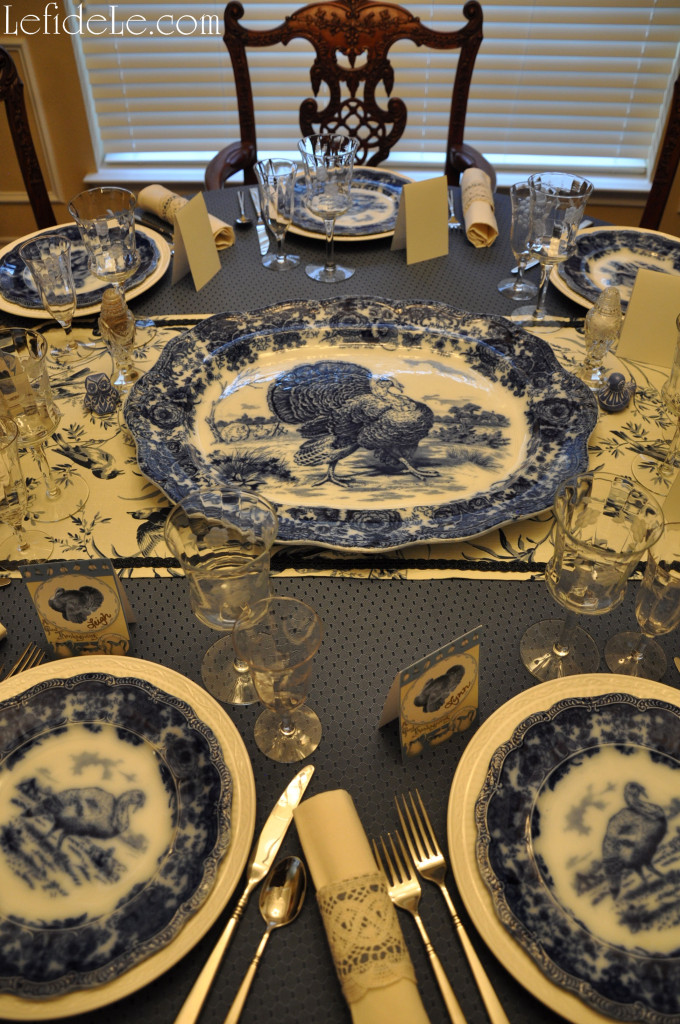
Offer Thanksgiving for those loved ones who have remained true blue through the past year with a dinner party featuring a fresh blue color scheme, ubiquitous holiday turkeys, and modern china that complements family heirloom dishes and crystal. This is the perfect way to symbolically honor ancestral tradition while celebrating present day family as well… because family is made from so much more than DNA.

20151112_7Leigh

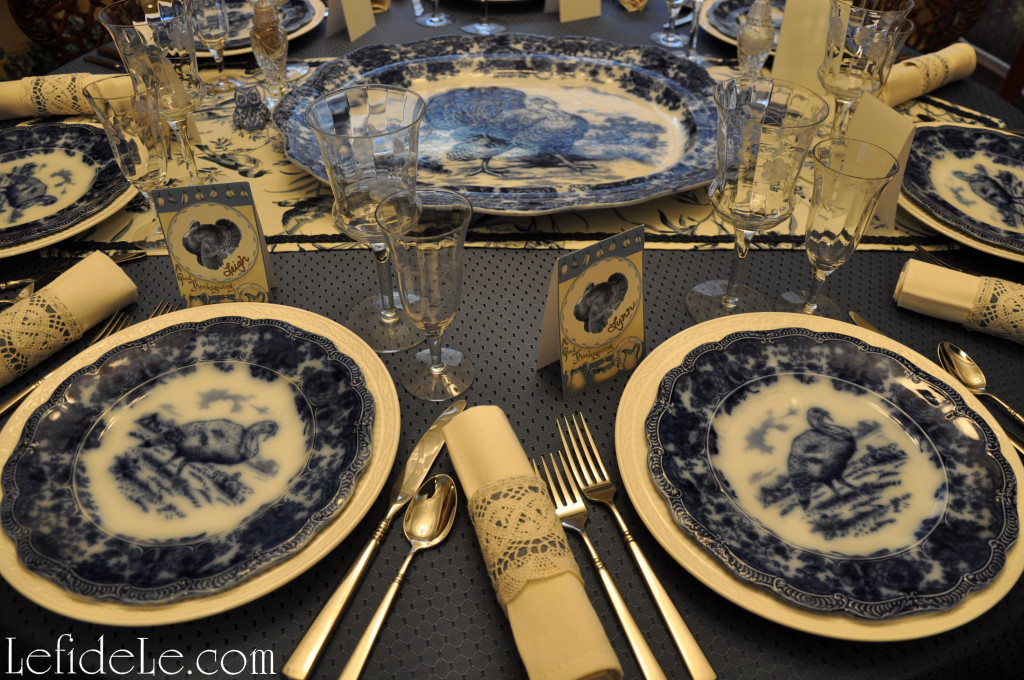
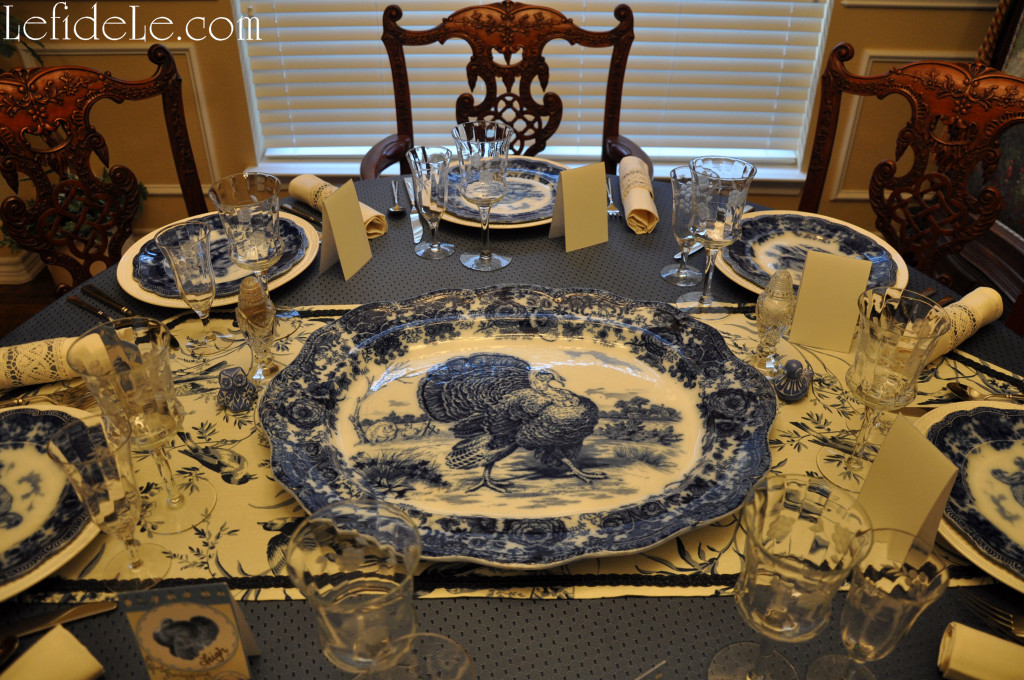
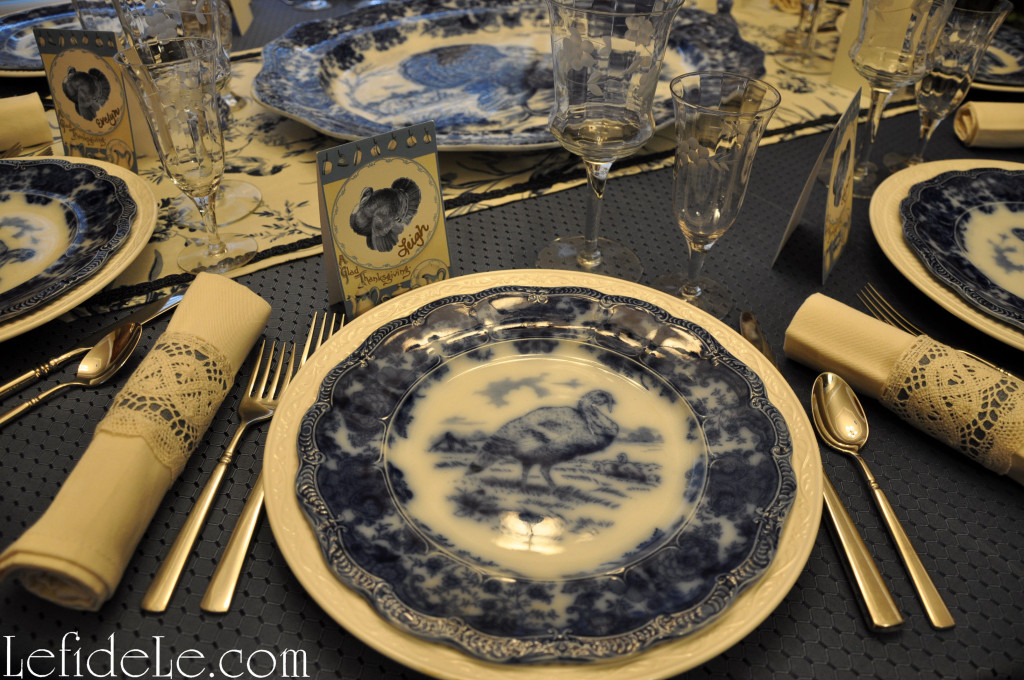
The beautiful 10 inch antique turkey plates are used as salad plates in this modern setting, though they functioned as dinner plates during the era in which they were made. They are placed upon ivory patterned dinner plates, by Mikasa Italian Countryside, which are technically vintage even though the pattern is modern as they remain open-stock.

20151112_34Leigh

The wild tom turkey patterned platter and dishes featuring scalloped edges, by Flow Blue by Ridgeways England, are family antiques made in the late 1800s. They were originally purchased by my Great-Great-Grandmother.

20151112_9Leigh

The delicate crystal stemware displays a subtle floral motif that echoes the bouquet border of the dishes. They were inherited from another line of the family.

20151112_30Leigh

Stretched across a blue patterned tablecloth is a joyfully patterned runner sporting bluebirds of happiness. This was kindly crafted by my mother who hand-stitched the navy trim border just for this occasion.

20151112_31Leigh

Guarding the antique crystal salt and pepper shakers, of yet another pattern, are a blue owl and blue bird handcrafted by an artisan in Chile.

20151112_16Leigh

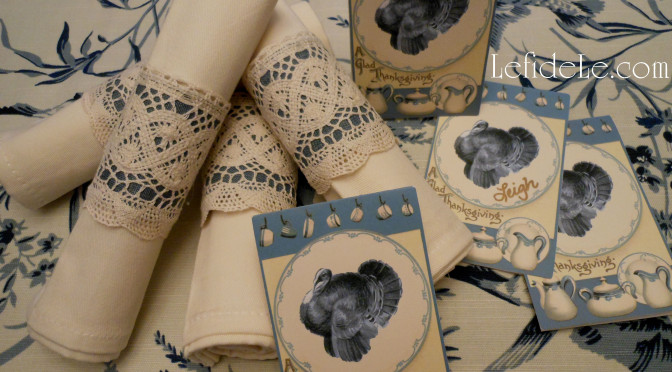
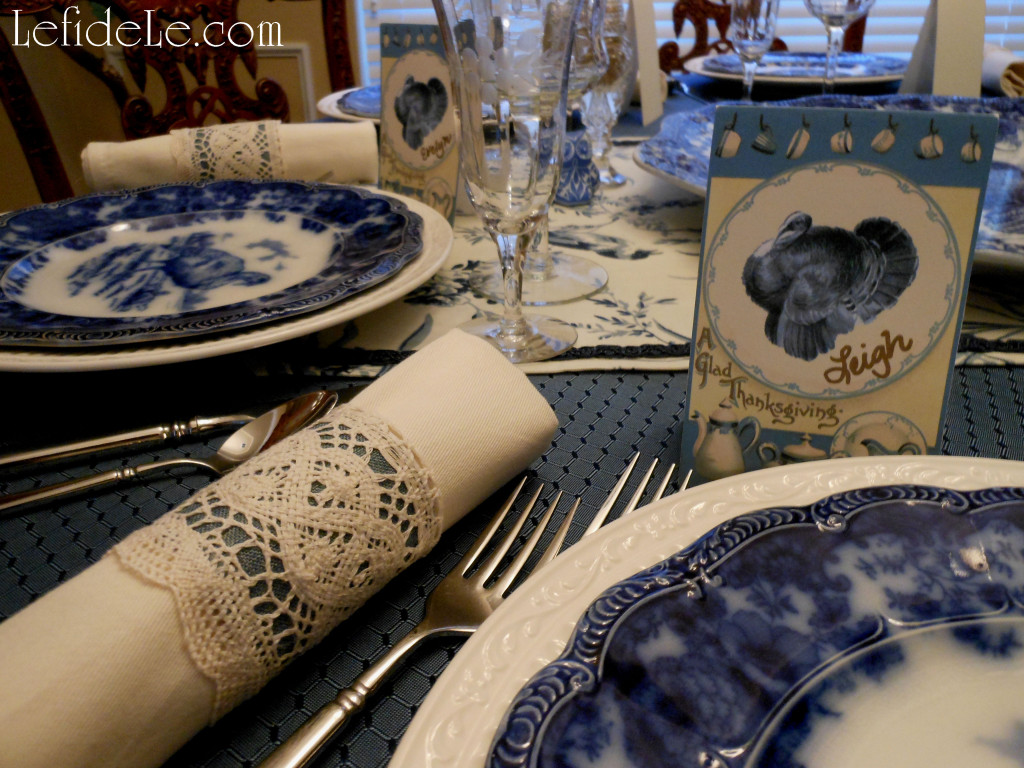
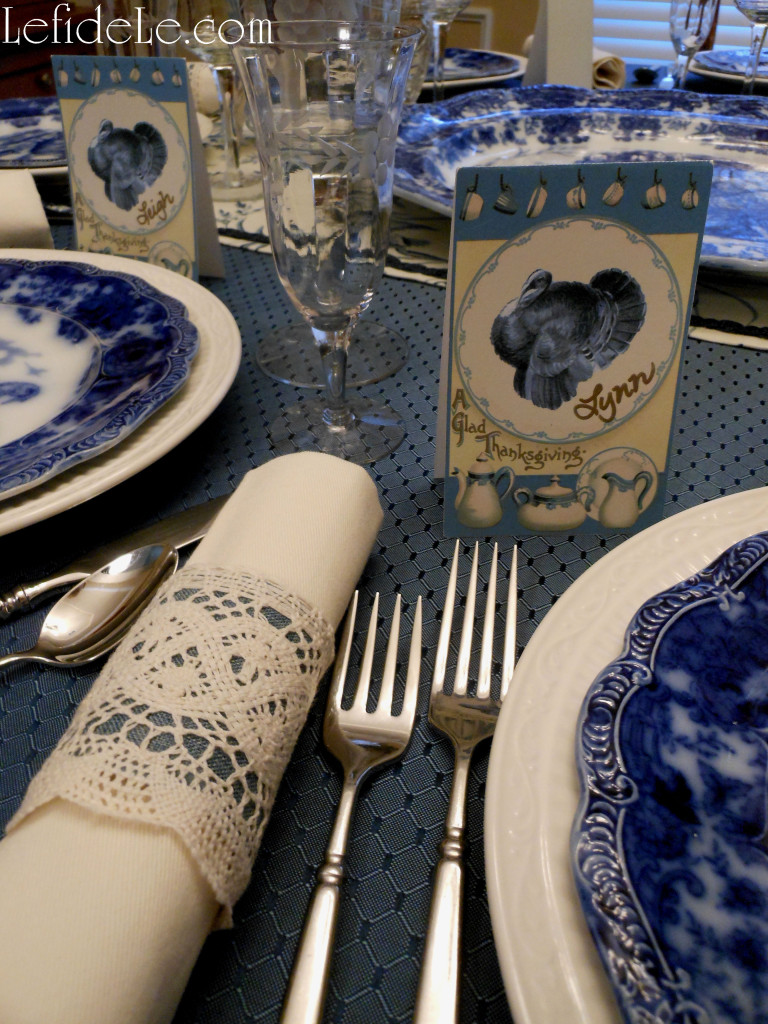
My antique appearing napkin rings are actually modern crafts that were quick and easy to make. They coordinate well with my printed blue turkey dish place-cards hand-scrolled in gold with guest’s names. (Click here to see my article on the napkin ring tutorial and to get the free printable!)

“O Lord that lends me life, Lend me a heart replete with thankfulness.” — William Shakespeare

Faithfully Yours,

Leigh

P.S. If you have any trouble identifying your own pattern of crystal or china, there is a reputable company who will identify it by picture for free! Just upload images to http://patternid.replacements.com/ They are researching the stemware seen above for me. I’ll add a comment with the information when I find out!

P.P.S. Also, if any of you out there are interested in purchasing anything you see in my articles, from party supply sets to dishware, just send me a reasonable offer via the contact page!


Easy DIY Antique Looking Napkin Rings with Crochet Trim Craft Tutorial + Free Turkey & China Thanksgiving Printables (for Place-cards, Hostess Gift Tags, Thank You Notes, Doggie Bag Tags, Food Tent Cards, etc.)

Easily DIY your own antique looking napkin rings crafted with crochet trim to coordinate beautifully with any china pattern for your Thanksgiving. Then make place-cards using my free turkey and china printables that will double a doggie bag tags when the evening closes. Also, print some to use as food tents cards to identify pies or even as thank you notes or tags for hostess gifts.

20151019_602Leigh

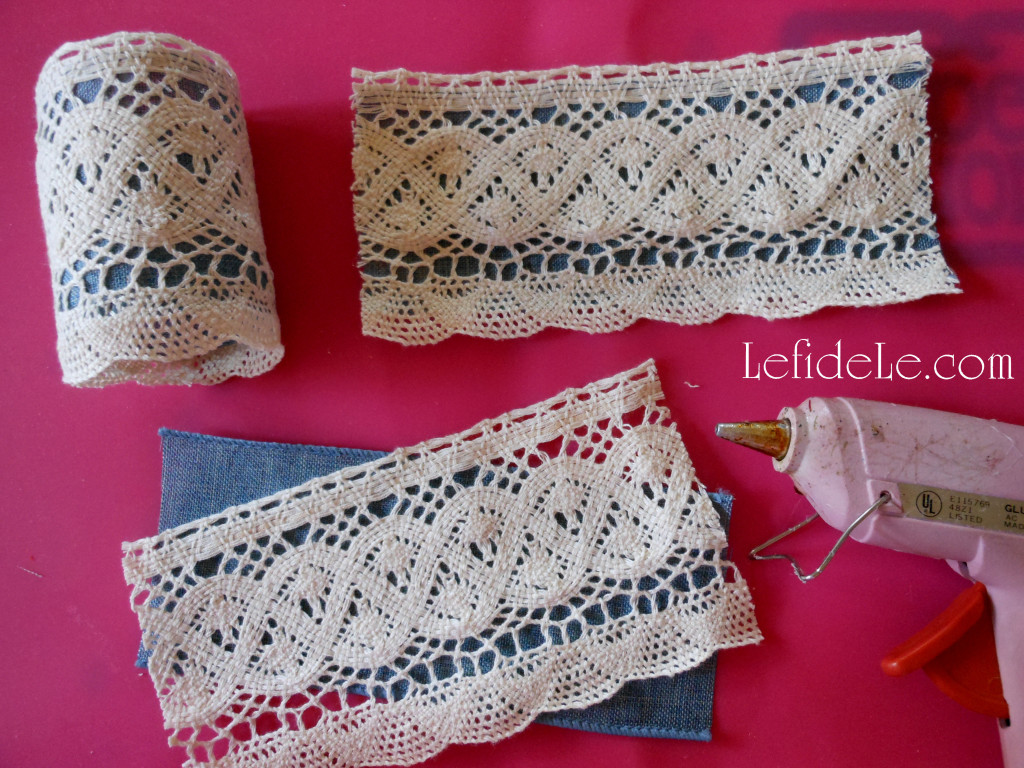
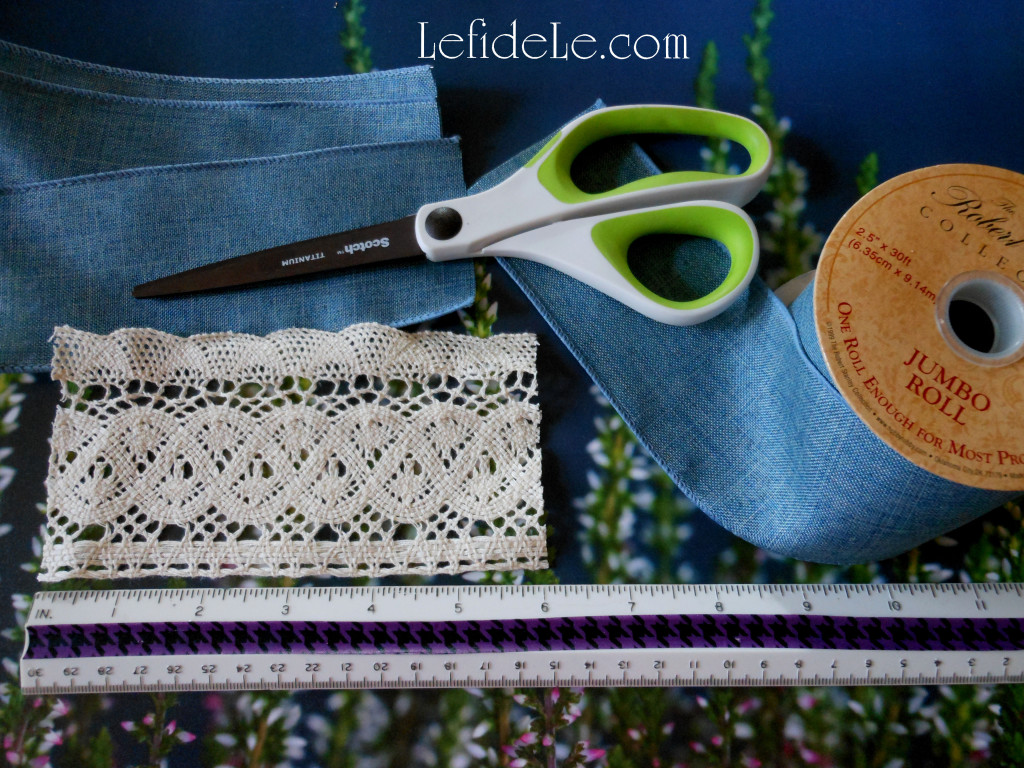
To make each napkin ring, you will need to cut 6 inch sections of wide ribbon in a solid color that coordinates with your dishware or linens. (For a 6 place setting that equates to 36 inches, or 3 feet, which is the size of many standard ribbon rolls.) You will need to cut the same size lengths of crochet trim, which may be found in the sewing section of craft stores. (Ivory matches beautifully with most china patterns.)

20151019_622Leigh

Next, lay a line of hot glue (or liquid fabric glue) onto all edges of the base ribbon. Lay the crochet trim over it in a way that showcases the pretty edges. (If using liquid glue, let this dry completely before forming the ring.) Then just form a ring and connect the edges with a single line of glue on one side. (Clothes pins will need to be used as clamps when using liquid glue.)

DSCN0887Leigh

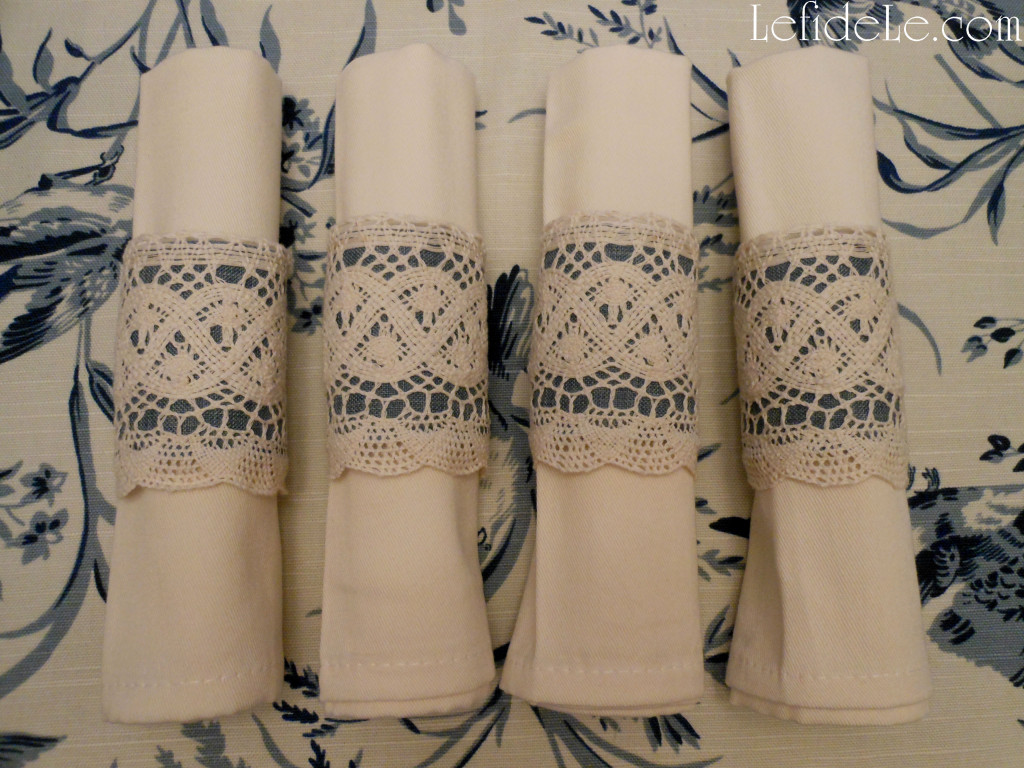
These really look like they could have been inherited, but took mere minutes to make.

DSCN0902Leigh

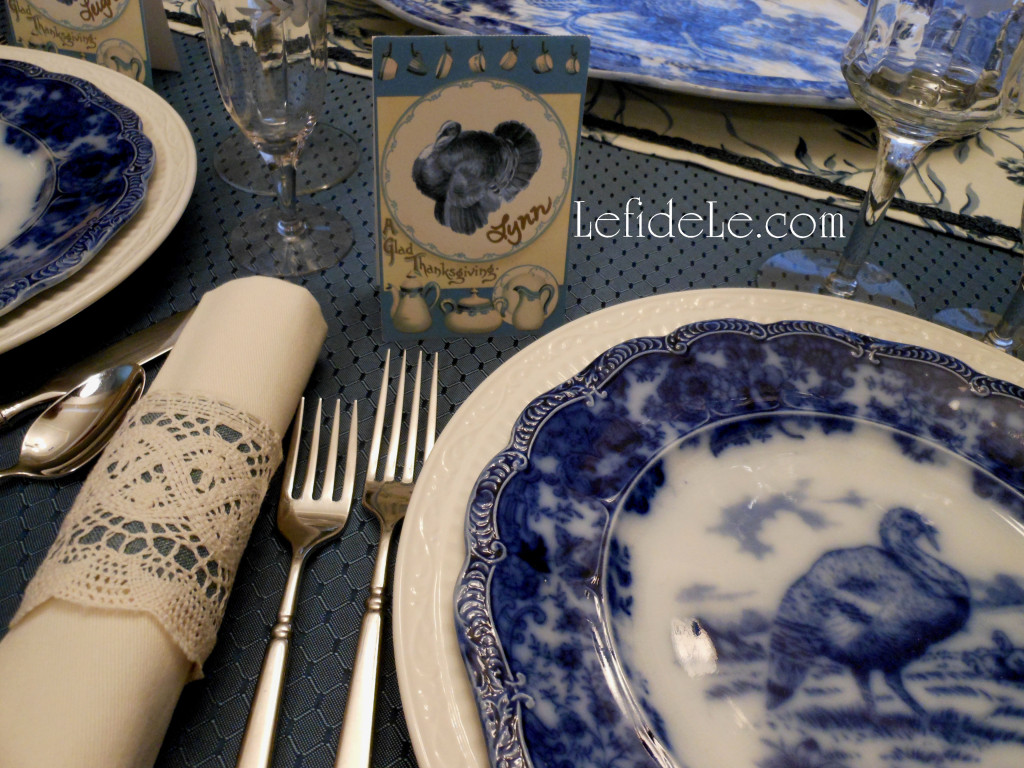
The napkin rings serve as a beautiful bridge coordinating my antique china with my modern linens, and they can do the same for you too!

20151019_80Leigh

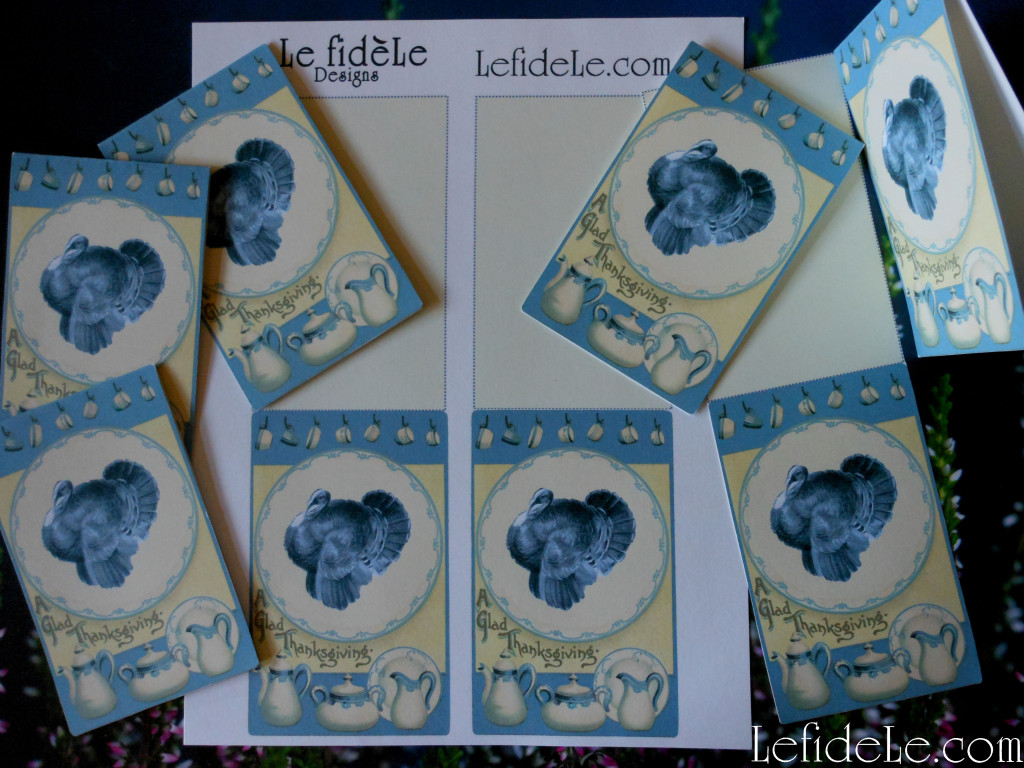
My Thanksgiving printables (free for personal use only) feature vintage dishware and a wild tom turkey in a fresh hued theme that honors the true blue loved ones we’re thankful for this holiday. (See more of my true blue thanksgiving dinner party by clicking here!)

BlueThanksgivingLeigh

To make your own, right click on the image above and select print. Choose color and photo settings, and print them on sturdy cardstock paper. Cut along the image edges and dotted lines (or coax a relative into helping) then fold in half. Voila!

DSCN0897Leigh

Use these as place-cards during the meal (to strategically place guests for mealtime peace), and then attach them as labels for individual pie boxes or doggie bags (to ensure the holiday pounds are well distributed).

DSCN0905Leigh

These also make great hostess gift tags, thank you notes, or even food tent cards (to properly identify the mysterious pie everyone keeps asking about… in my family that would be Chess Pie).

Happy Turkey Day Y’all!

Faithfully Yours,

Leigh

Calaveras de Azucar (Sugar Skulls) Edible Folk Art & Egg-Free Vegan Candy Recipe for Dia de los Muertos (Day of the Dead) or Halloween

067Leigh

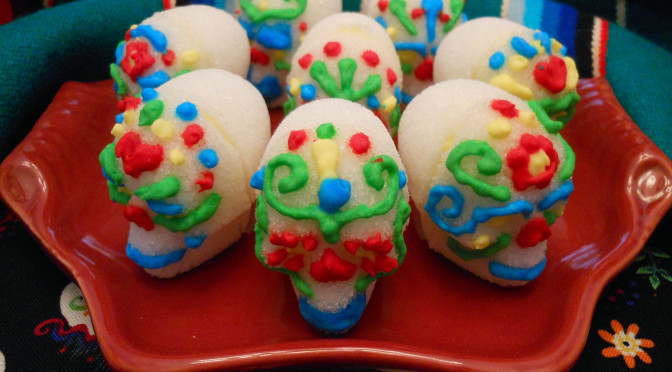
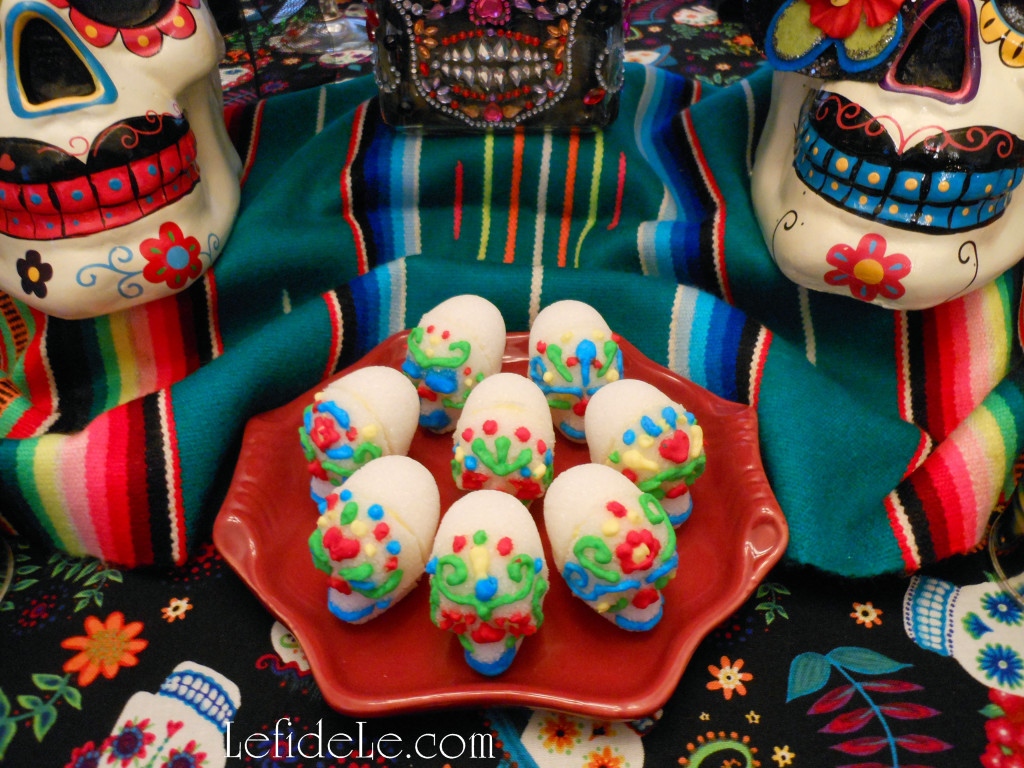
Calaveras de azucar (sugar skulls) are a folk art originating from southern Mexico for Dia de los Muertos (Day of the Dead). The sugar (azucar in Español) is said to balance the bitterness of death (muerte), and the small calaveras (skulls) are traditionally offered on All Saint’s Day (November 1) to beloved departed children (angelitos / inocentes) as one would leave flowers graveside. Because this recipe is an egg-free edible version that doesn’t use meringue powder or royal icing, it makes the perfect allergy-friendly, vegan, and low-calorie candy for a themed Halloween celebration!


Ingredients:

  • 2 cups granulated white sugar
  • 4 teaspoons water
  • Wilton ready-to-use icing multi-pack of 4 primary colors (not gel)
  • Wilton 3D skulls candy mold

Instructions:

022Leigh

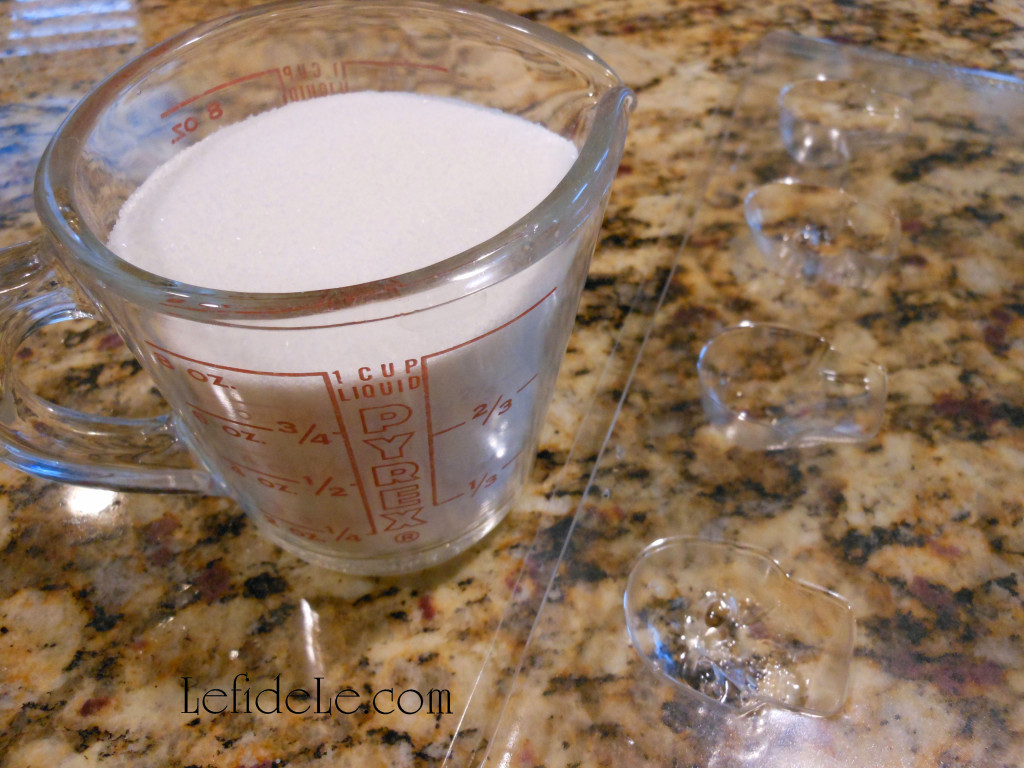
Wash and dry the plastic mold. Measure a perfect cup of glistening white sugar (azucar in Español).

025Leigh

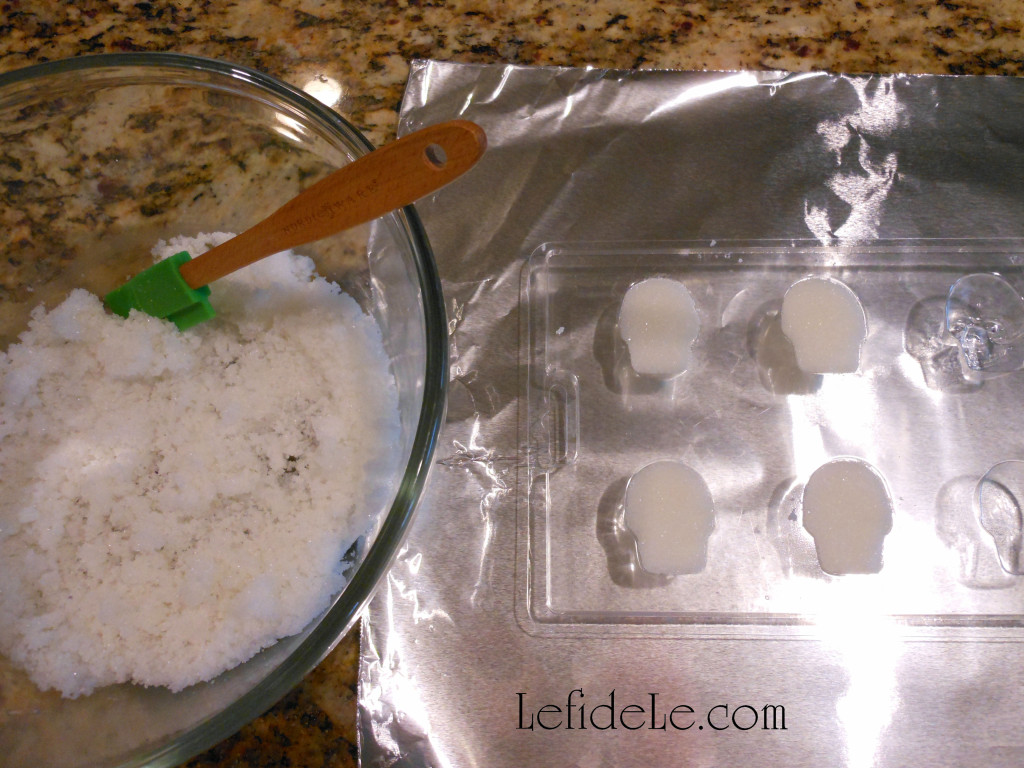
Use a small silicone spatula to mix 4 teaspoons of water (agua) into a bowl filled with the white sugar. (The key to sugar skull success is patient and thorough mixing to yield slightly damp sugar the consistency of sand.) Use the spatula to scoop globs of damp sugar into the mold, and also to pat it down compactly into each cavity. Smooth the top of each to flatten the sugar to sit evenly with the mold. (This helps later when combining the pieces to make 3D skull shapes.)

026Leigh

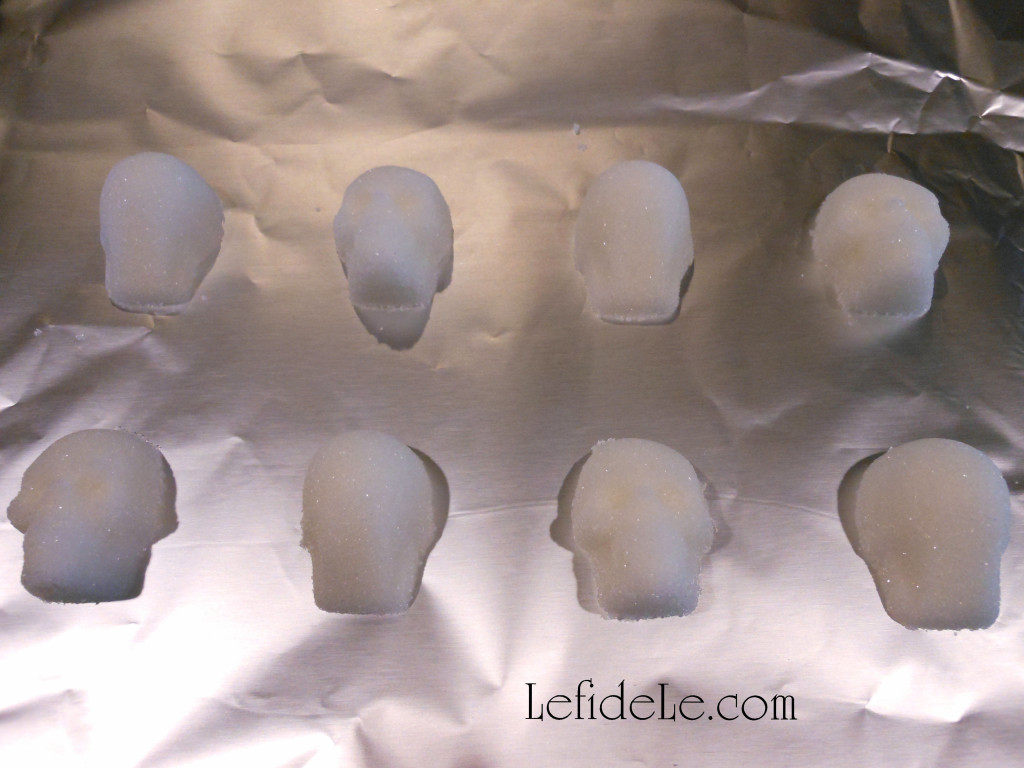
Place a cookie sheet on top of the mold. Flip them over while holding them together. The mold will now sit inverted on the cookie sheet. Carefully lift the plastic mold off to leave the sugar shapes on the sheet. (If some of them stick, gently flex two opposite corners of the mold in different directions. The remaining sugar shapes should pop out without breaking if you hover right over the sheet.) Make a second set of sugar shapes the same way. Let these dry at least 5 hours. (I left mine overnight, and decorated them the next day.) Another option is to bake these 5 to 10 minutes in a 200ᵒ oven. (Make sure to observe them closely in case your oven’s temperature is off.)

029Leigh

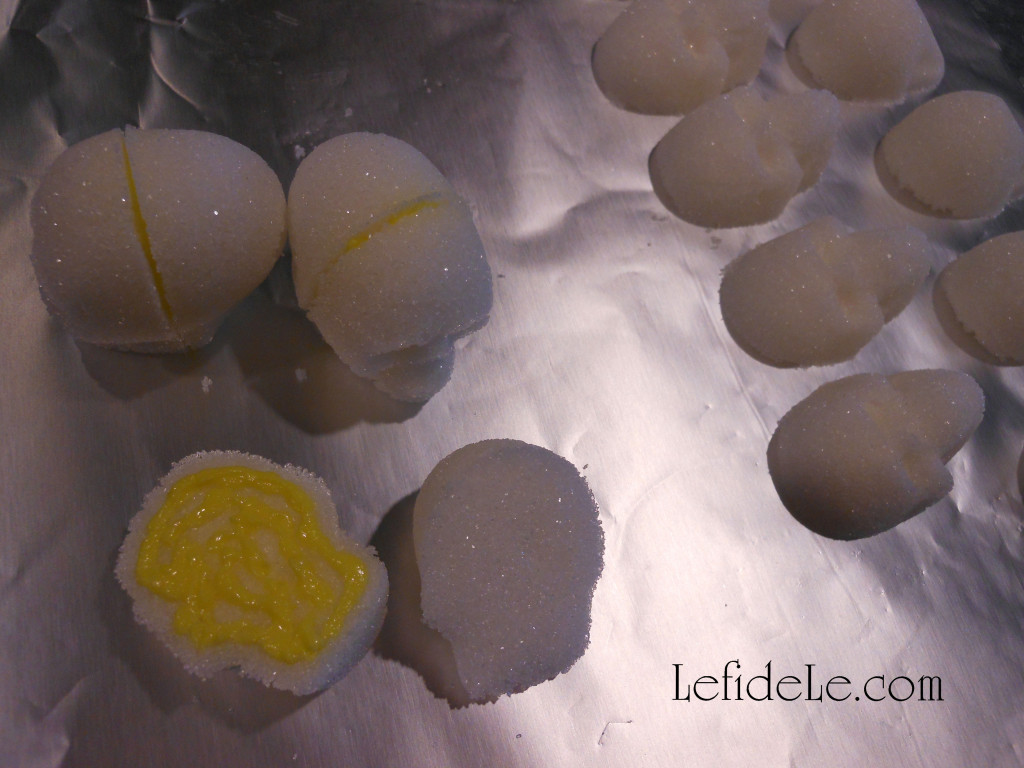
“Glue” a set of front and back skull (calavera) pieces together using Wilton ready to use icing. (This is an easy allergy-friendly egg-free alternative to a royal icing of meringue that hardens for the same traditional look, but note that they do contain corn. I found a 4 pack of primary colors in-store at Michaels that are the same size of a gel icing… but don’t use a gel because it doesn’t harden in the same way so that it may be handled when dry.) Press each shape together firmly and set aside.

031Leigh

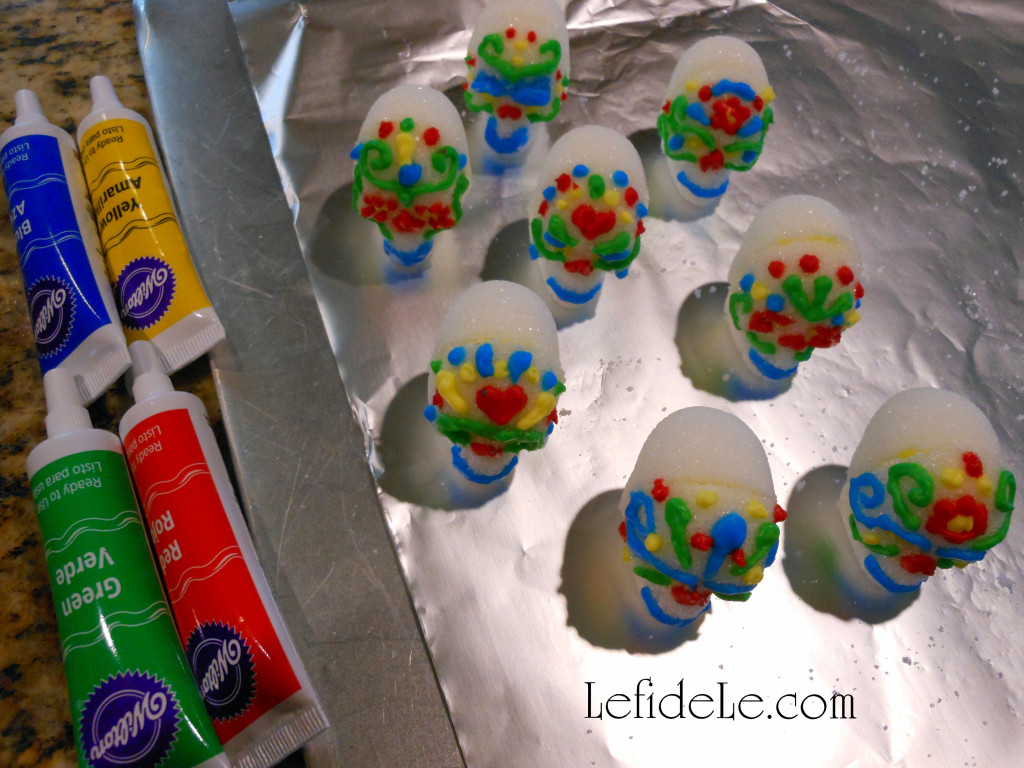
You may leave these as Halloween skull candies or decorate them as a Mexican folk art. Add traditional decorative icing (glaseado) details like smile lines, hearts, flowers, swirls, dots, and marks that look like apostrophes. (The small icing tubes have a small tip built in that’s perfect adding small details to the skulls.) Let these sit overnight to harden thoroughly.

088Leigh

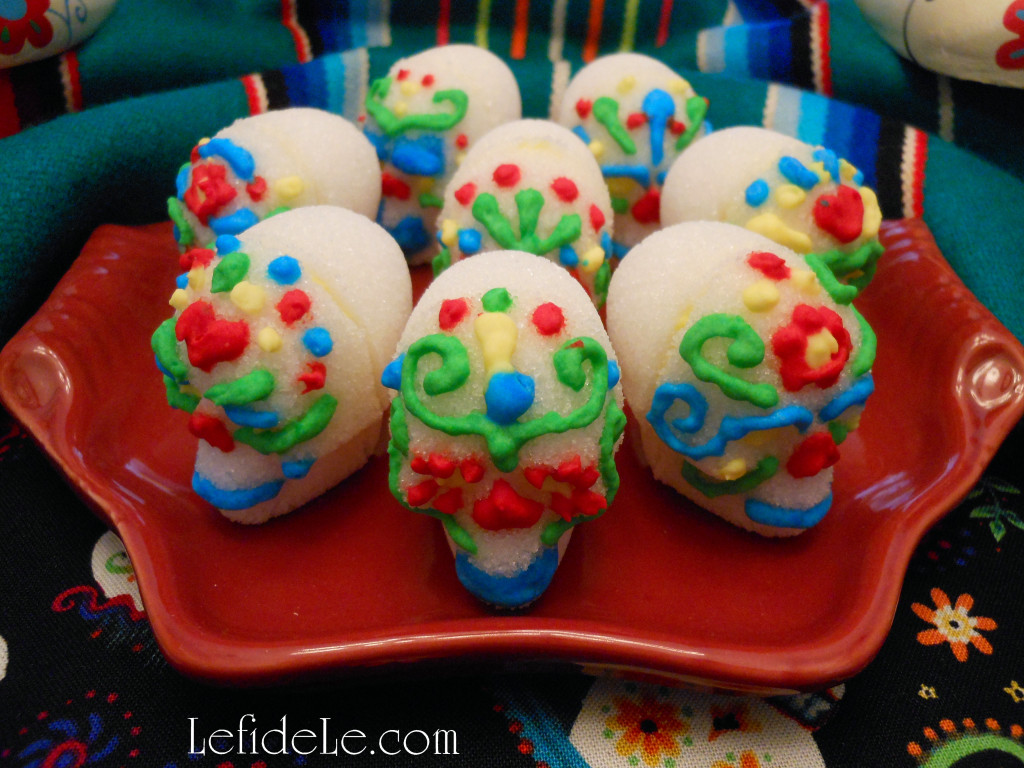
Wilton’s helpful hotline declared that the icing never really goes bad and may be used years later if capped tightly after use… good to know, but I doubt the small tubes will last long! Once dry, the sugar skulls (calaveras de azucar) may be handled without damaging them.

067Leigh

They may even be eaten as candy, which is wonderful considering most sugar skulls are inedible. (And so are the most popular recipes for them.) Since sugar is only 15 calories per teaspoon… I’m guessing that these are only about 35 calories each!

072Leigh

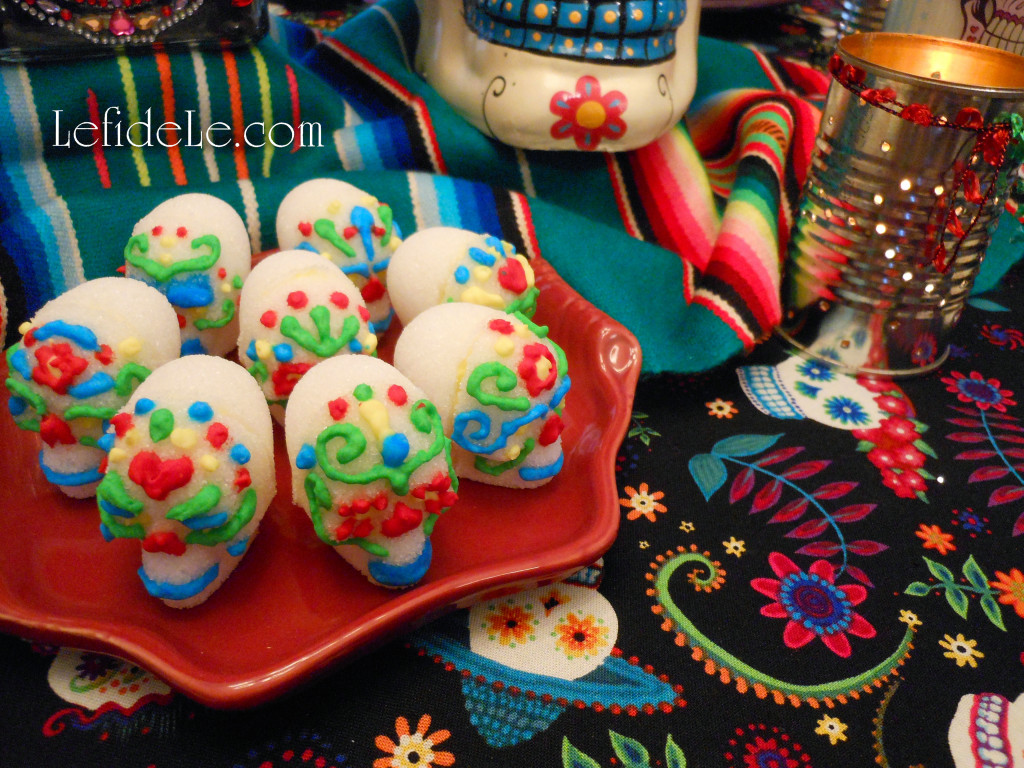
Set these sugar skulls out in a traditional Day of the Dead (Dia de los Muertos) offrenda, Halloween candy buffet, in the center of a October dinner table as edible decoration in lieu of after dinner mints!

8(3)Leigh

Be sure to check out my article on Dia de los Muertos (Day of the Dead) Themed Halloween Dinner Party Décor and the 2 on DIY sugar skull crafts… costume mask, banner, vase, napkin rings, and wine glass charms!

Ahora, comer con gusto!

Faithfully Yours,

Leigh

Dia de los Muertos (Day of the Dead) Themed Halloween Dinner Party Décor + DIY Décor & Recipe Links

75(2)Leigh

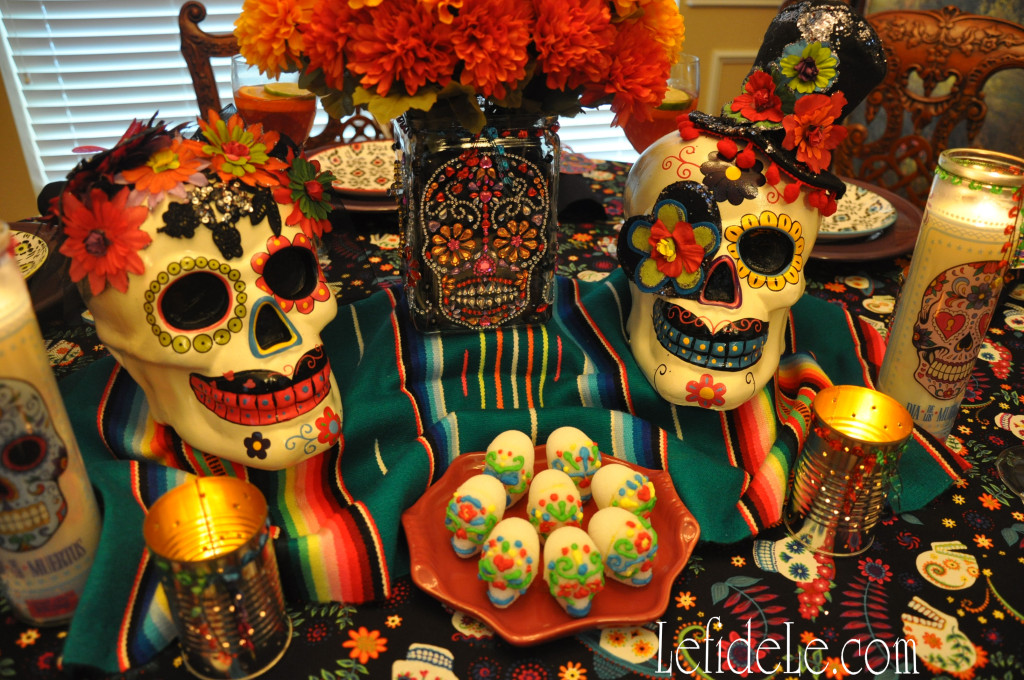
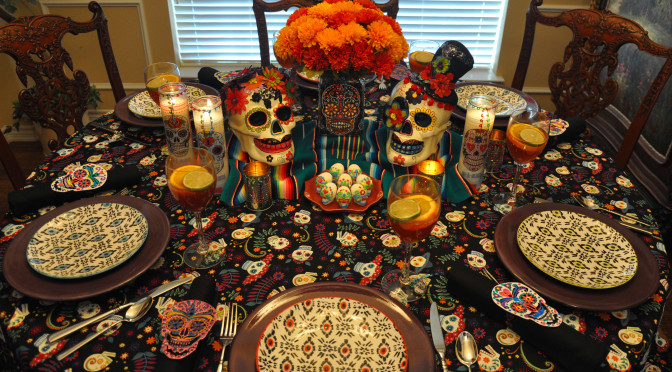
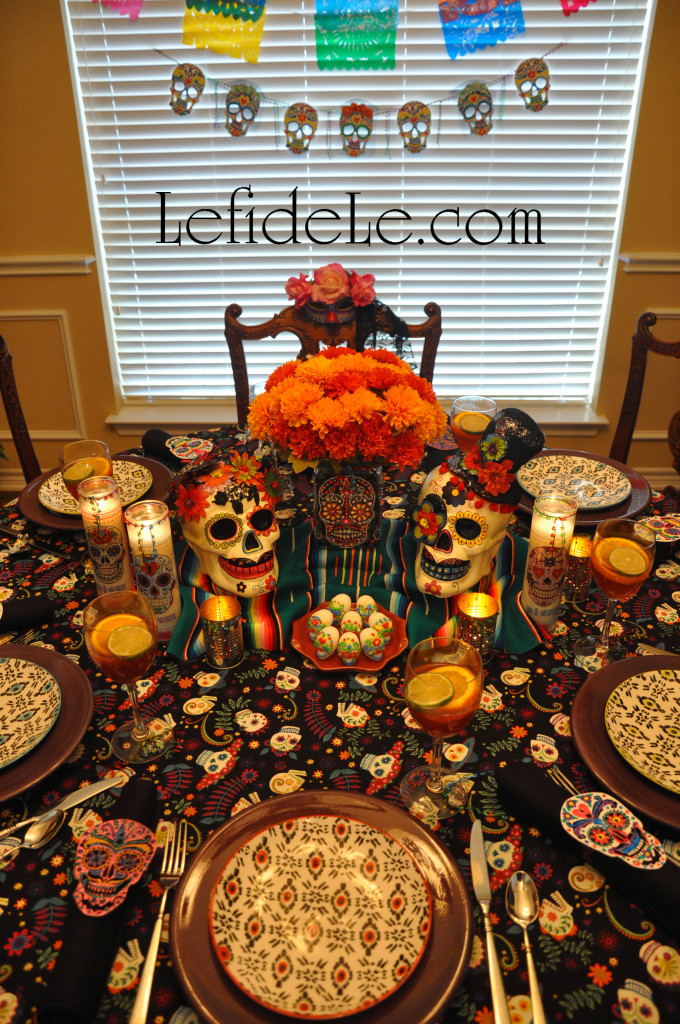
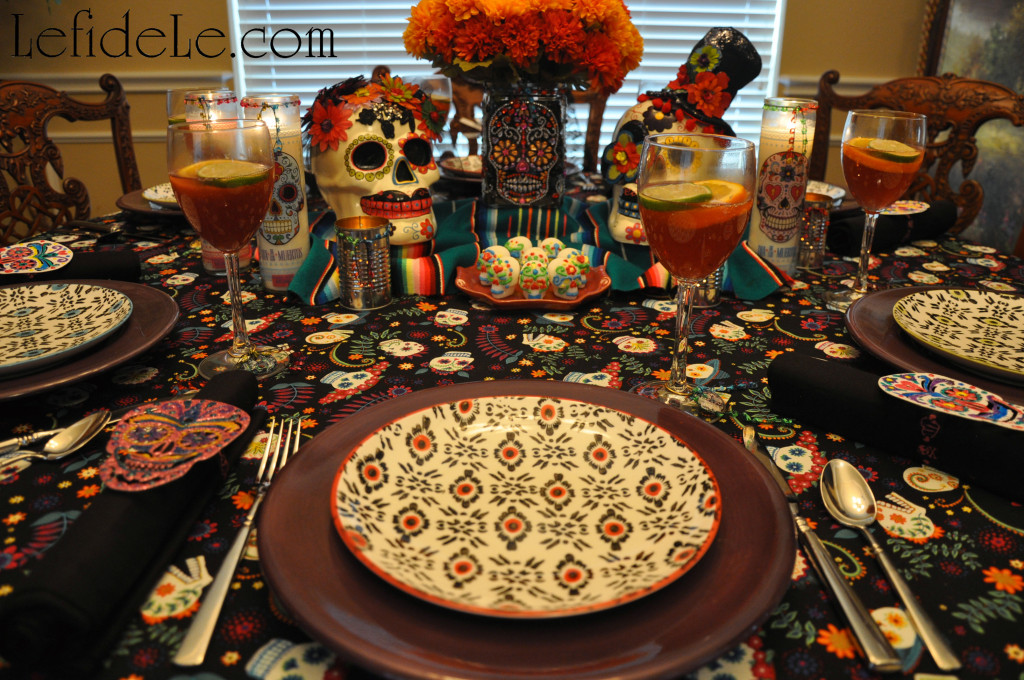
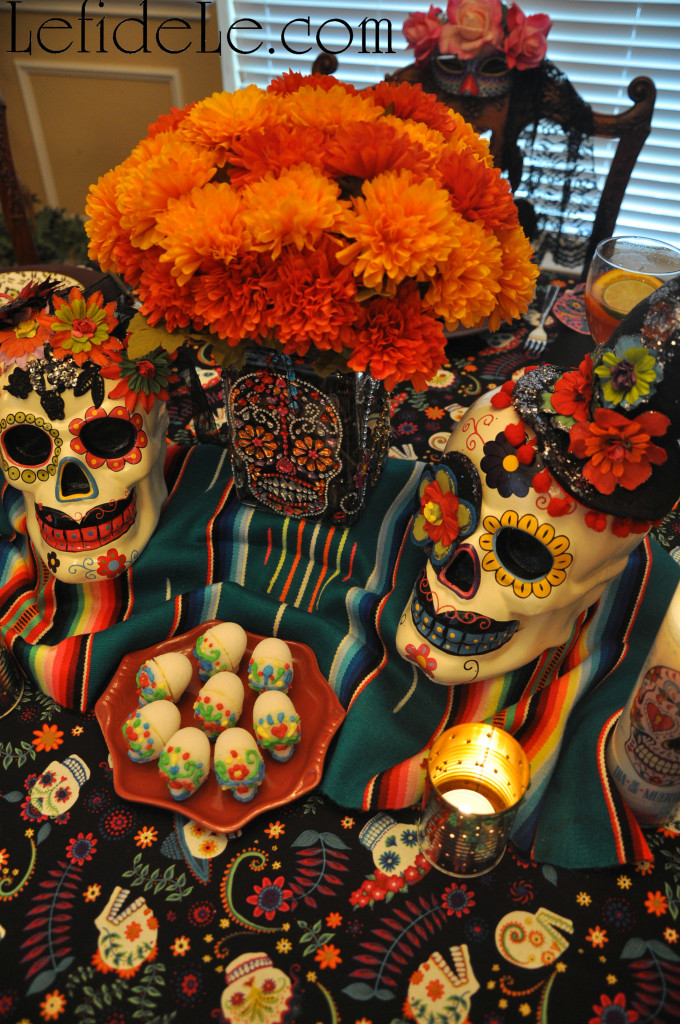
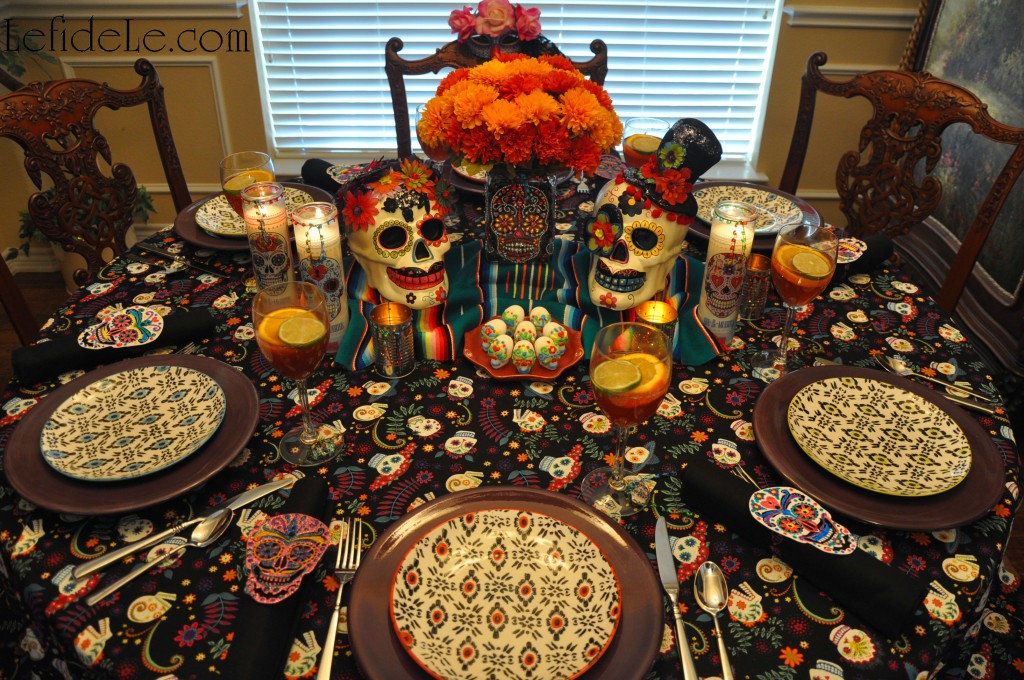
Celebrate Halloween with a Dia de los Muertos (Day of the Dead) themed dinner party filled with decorative sugar skulls (calaveras de azucar in Español) that embrace the lighthearted American holiday while still honoring Mexican traditions. Sugar (azucar) is said to balance the bitterness of death (muerte), and calaveras are traditionally offered on All Saint’s Day (November 1) to departed loved ones as one would leave flowers graveside. As Halloween serves to poke fun at all things scary, Dia de los Muertos is intended as a way to accept death as inevitable… and also to honor dearly departed loved ones. Representational calacas (colloquial term for skeletons) symbolize the idea of life being inextricably linked with death, and have migrated north from Mexico into American Halloween celebrations as themed décor. By using one celebration as a theme for the other, the two concepts combine to poke a little fun at death as not being so scary!

27(2)Leigh

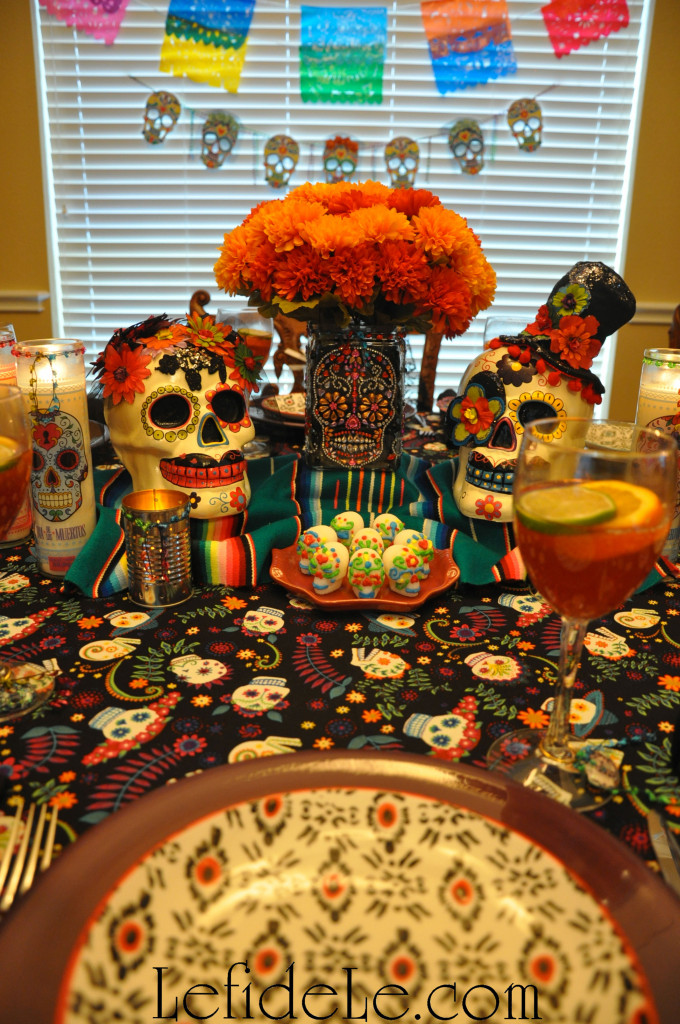
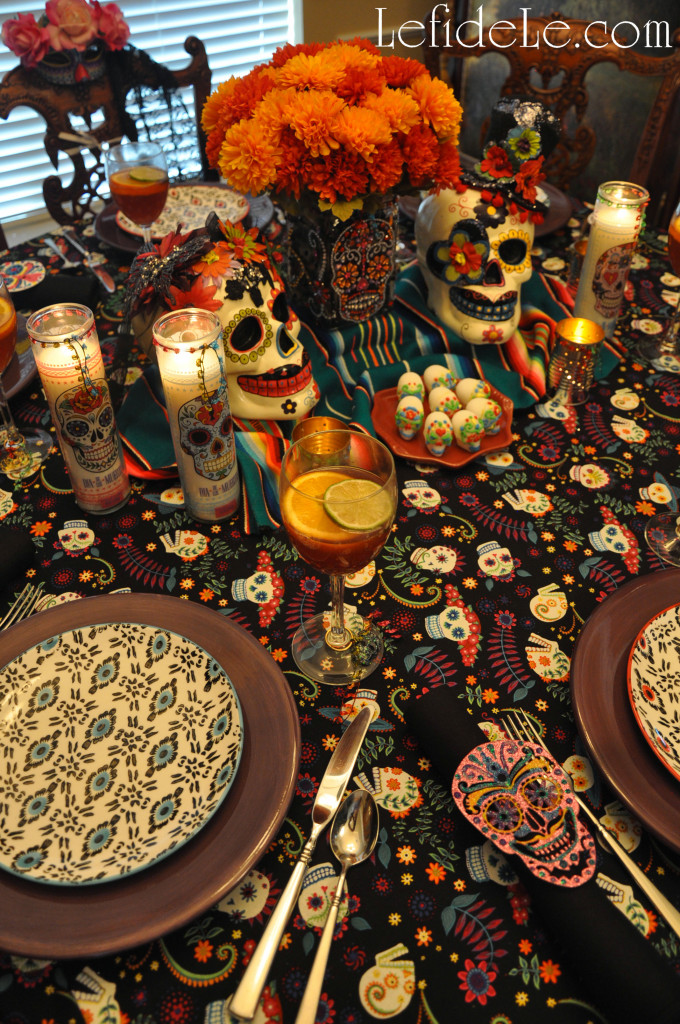
The vivacious tablecloth was made from fabric printed with customary Dia de los Muertos imagery in vibrant illustrations over a black background. (Purchase the cloth, glass candles, & large decorative skulls from Le fidèLe Designs affiliate Joann Fabric & Crafts whose clickable ad appears in the sidebar.)

20(2)Leigh

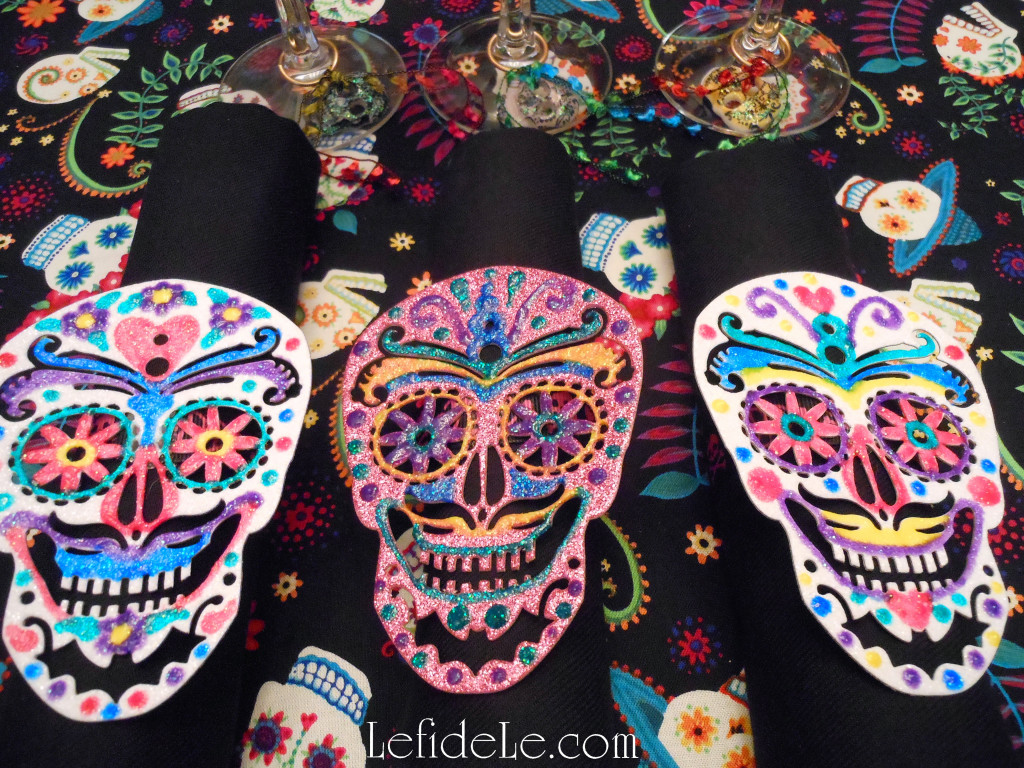
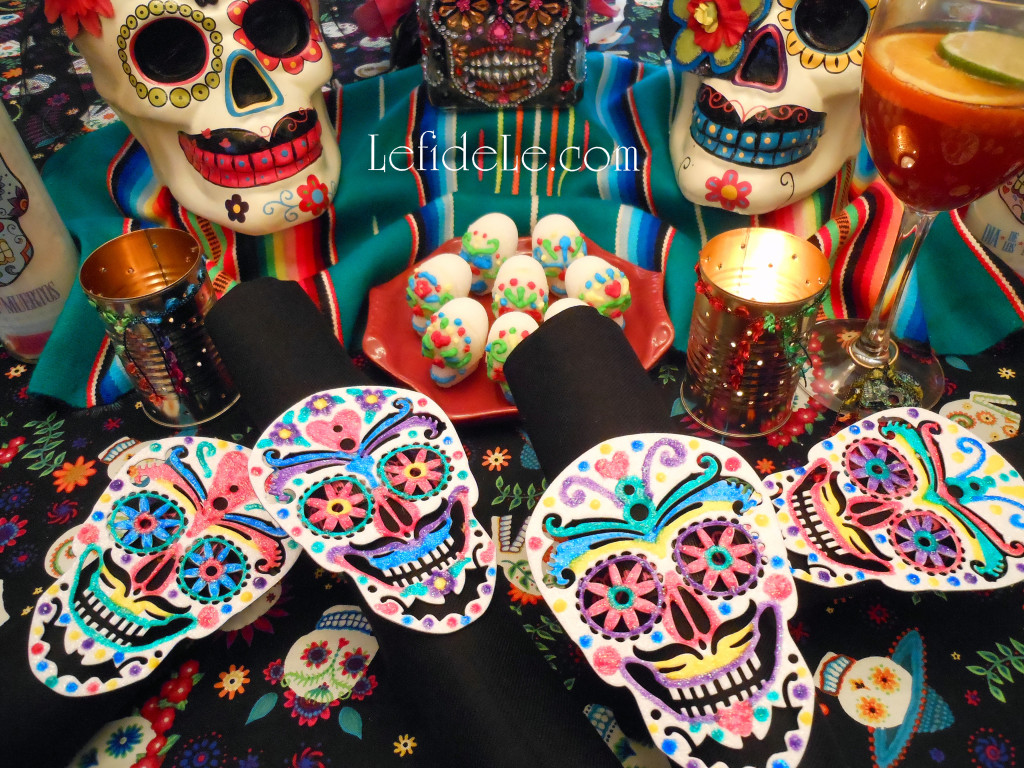
Exotically painted salad plates sit atop solid purple dishes to evoking the brightly embroidered dresses of Mexico. (Purchase the salad plates from Le fidèLe Designs affiliate Cost Plus World Market whose clickable ad appears in the sidebar.) Lustrously glittered napkin rings of sugar skulls hold death black napkins in their icy grip. (Learn how to craft the napkin rings here: DIY Calaveras de Azucar (Sugar Skulls) Napkin Rings, Wine Glass Charms, & Vase Craft Tutorial.)

9(2)Leigh

Crafted sugar skull wine glass charms embellish virgin sangria (fruity wine beverage known by the Spanish name for blood) filled vessels. (Learn how to easily make the charms here: DIY Calaveras de Azucar (Sugar Skulls) Napkin Rings, Wine Glass Charms, & Vase Craft Tutorial.)

49(2)Leigh

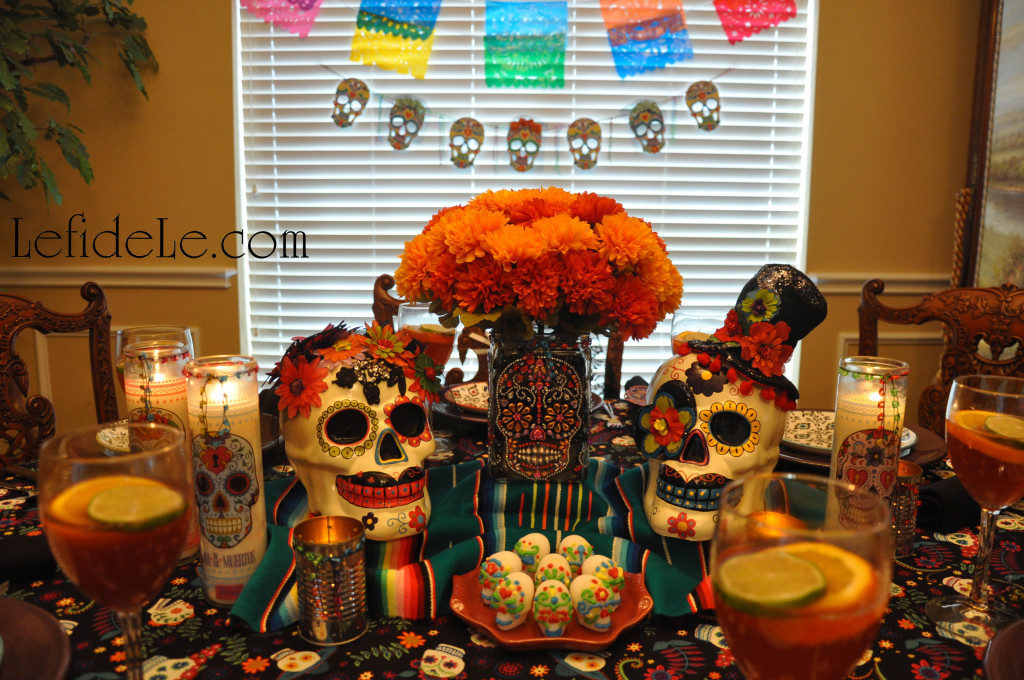
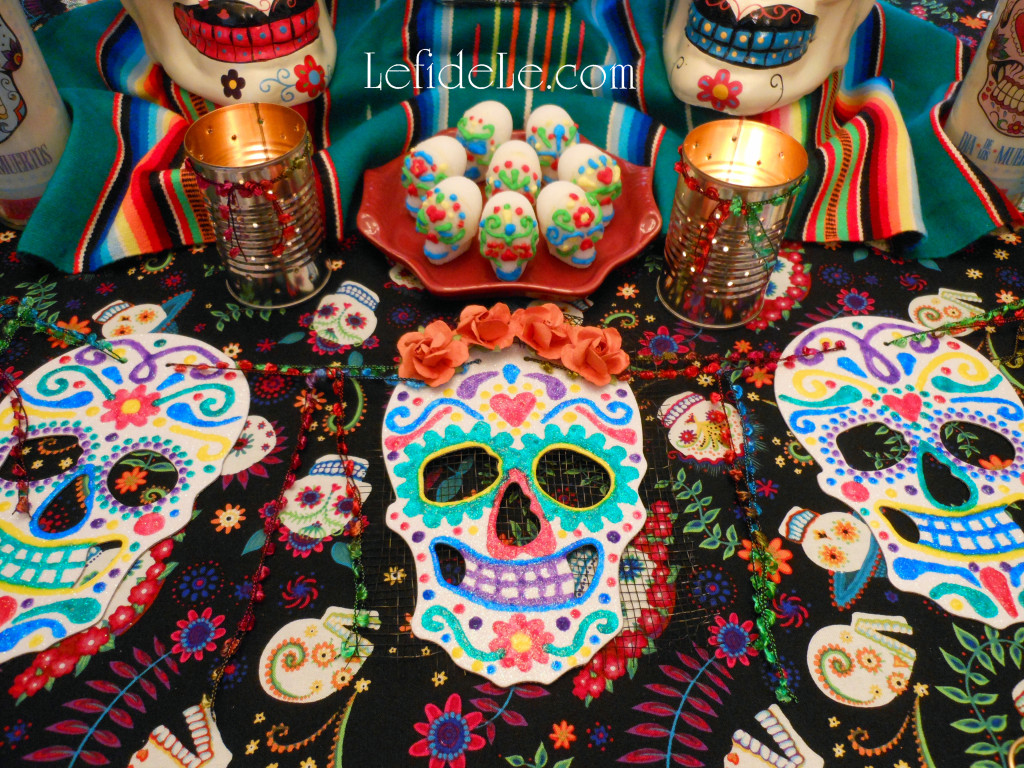
The tablescape is illuminated with Catholic religious candles (as a nod to All Saint’s Day) not decorated with santos (saints) but with Dia de los Muertos imagery. Small homemade luminarias (lanterns) filled with tea-light candles are tied with the same multi-colored yarn of the banners, charms, and vase. (Learn how to inexpensively make these here: Easy DIY Upcycled Can Tea-light Luminarias + Free Printable Template & Tissue Paper Flowers Crafts.)

36(2)Leigh

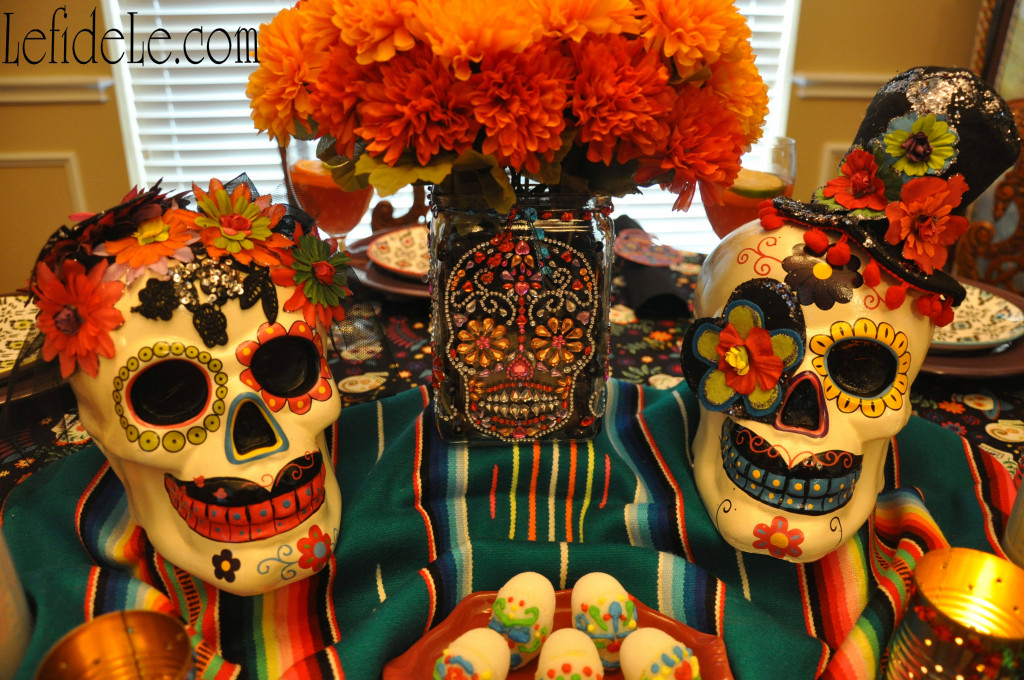
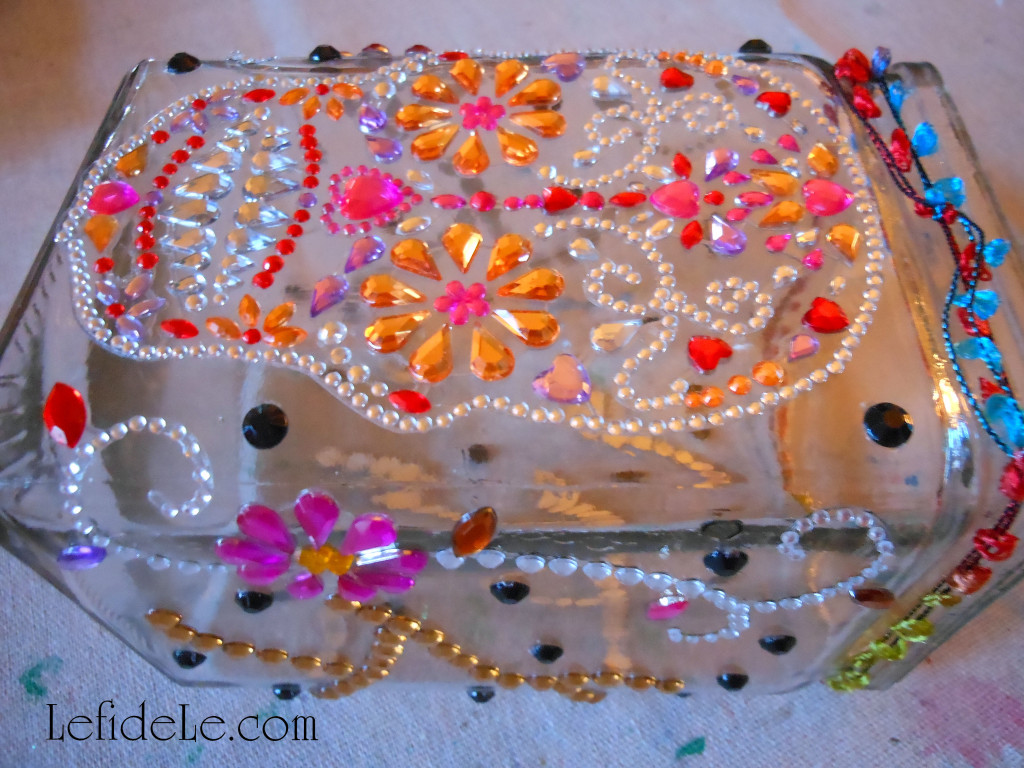
A clear square vase, decorated with crystals depicting Day of the Dead imagery, is filled with black glass marbles holding a tightly packed arrangement of cempasuchil (wild marigolds) which are typically left for the departed as ofrendas (offerings at altars or graves). (Learn how to quickly make the vase here: DIY Calaveras de Azucar (Sugar Skulls) Napkin Rings, Wine Glass Charms, & Vase Craft Tutorial.)

8(3)Leigh

Small edible sugar skulls serve as both customary folk art décor and sweet after dinner treat. (Get the easy recipe here: Calaveras de Azucar (Sugar Skulls) Edible Folk Art & Egg-Free Candy Recipe.)

67(2)Leigh

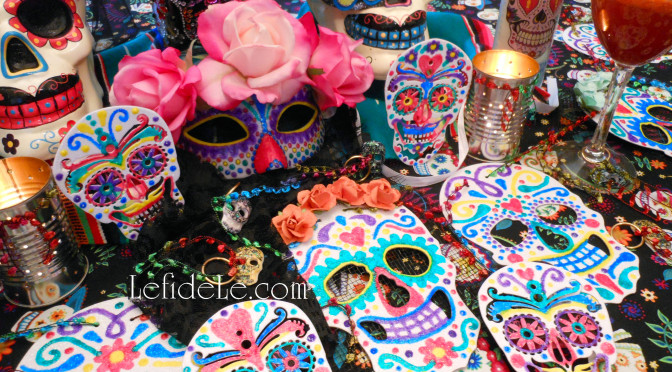
A polychromatic Mexican serape (wool shawl) covers lifts which elevate central elements of the centerpiece unseen. Ornamental calavera (skull) novios (brides and grooms) ceremoniously occupy the centerpiece. (Calacas, skeletons, dressed in wedding attire are a common theme describing the circle of life.)

43(2)Leigh

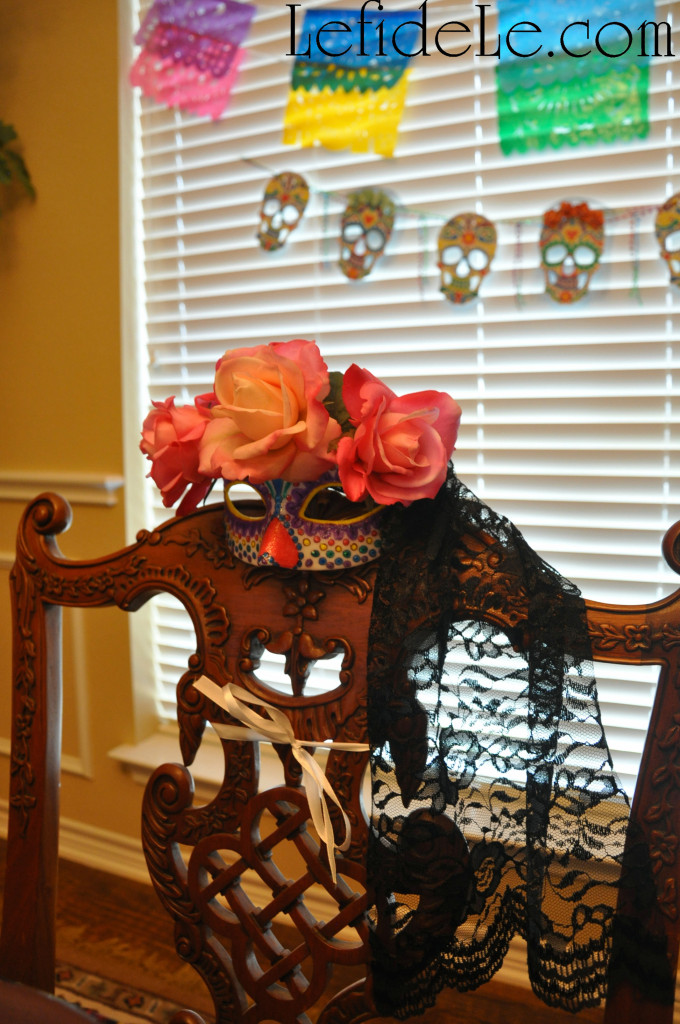
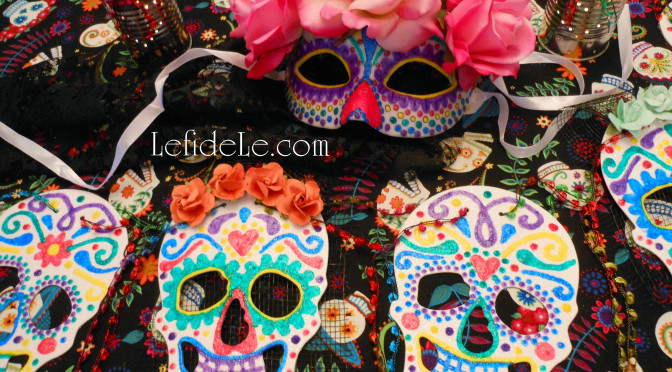
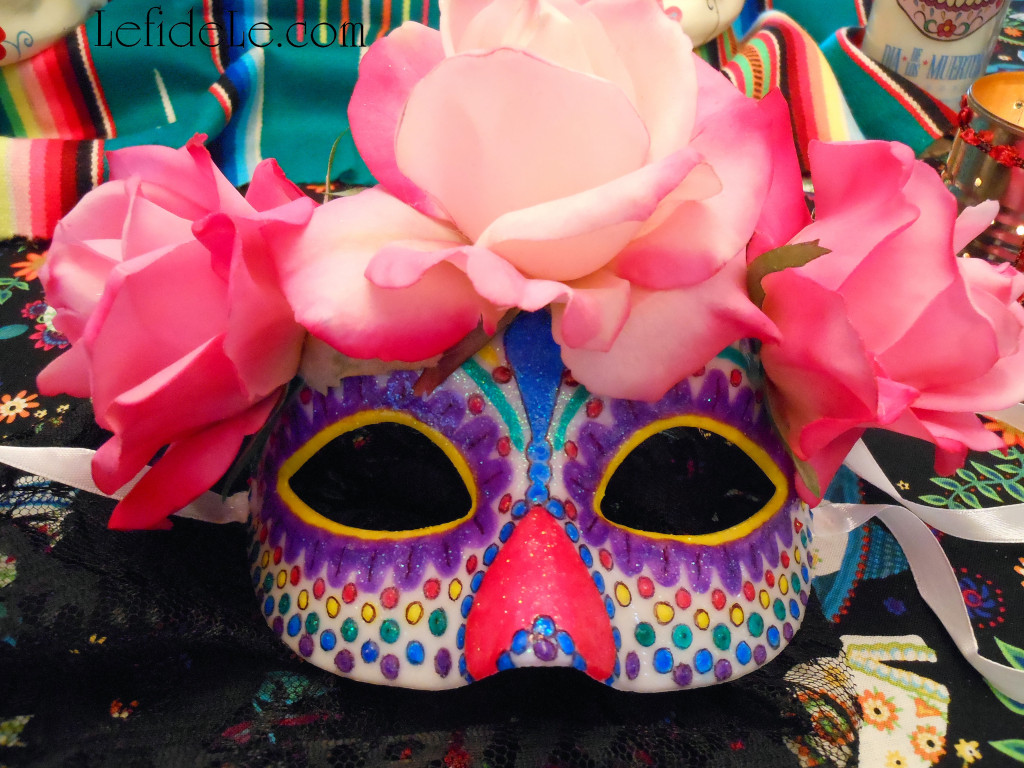
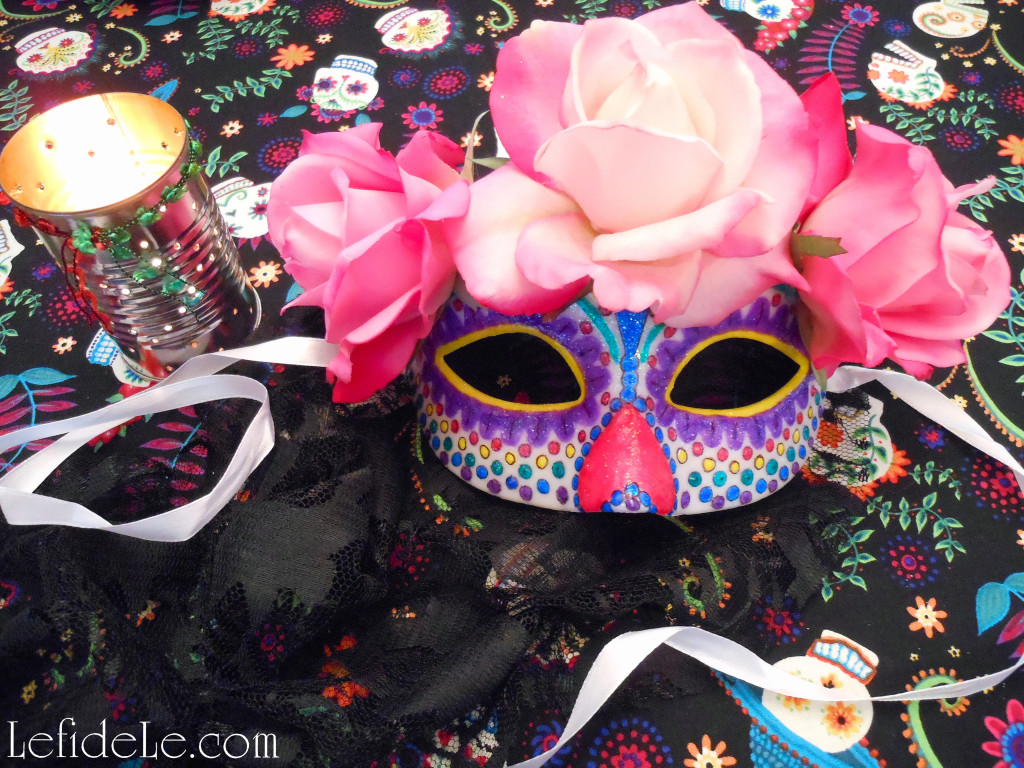
Awaiting a guest of honor, is a handcrafted Mexican parade mask portraying la calavera catrina (which is an iconic image of a wealthy Euro-Mexican lady from the 1800’s). When worn, ½ of the face is covered with a skull representation it symbolizes the idea of life being inextricably linked with death. Banners of traditional papel picado (pierced paper) and painted sugar skulls of novios adorn the background of the festive tablescape. (Learn how to easily craft the mask and banner here: DIY La Calavera Catrina Costume Mask & Calaveras de Azucar (Sugar Skulls) Banner for a Dia de los Muertos (Day of the Dead) Themed Halloween.)

54(2)Leigh

Feliz Dia de los Muertos!

Faithfully Yours,

Leigh
DIY La Calavera Catrina Costume Mask & Calaveras de Azucar (Sugar Skulls) Banner for a Dia de los Muertos (Day of the Dead) Themed Halloween

090Leigh

This tutorial will help you to inexpensively craft your own one-of-a-kind la calavera catrina costume mask in the Dia de los Muertos (Day of the Dead) style, and then easily DIY a Calaveras de Azucar (Sugar Skulls) banner to decorate your Halloween party. Sugar (azucar in Español) is said to balance the bitterness of death (muerte), and calaveras (skulls) are traditionally offered on All Saint’s Day (November 1) to departed loved ones as one would leave flowers graveside. These calacas (colloquial term for skeletons) have migrated north from Mexico into American Halloween celebrations as themed décor. In this same way, traditional parade skull masks have become party costumes. As Halloween serves to poke fun at all things scary, Dia de los Muertos is intended as a way to accept death as inevitable… and also to honor dearly departed loved ones. The Mexican ½ face parade masks symbolize this idea of life being inextricably linked with death. So when you don this half skull mask for Halloween, be sure to make up the lower half of your face as a beautiful representation of life… and poke a little fun at death as not being so scary!

1(2)Leigh

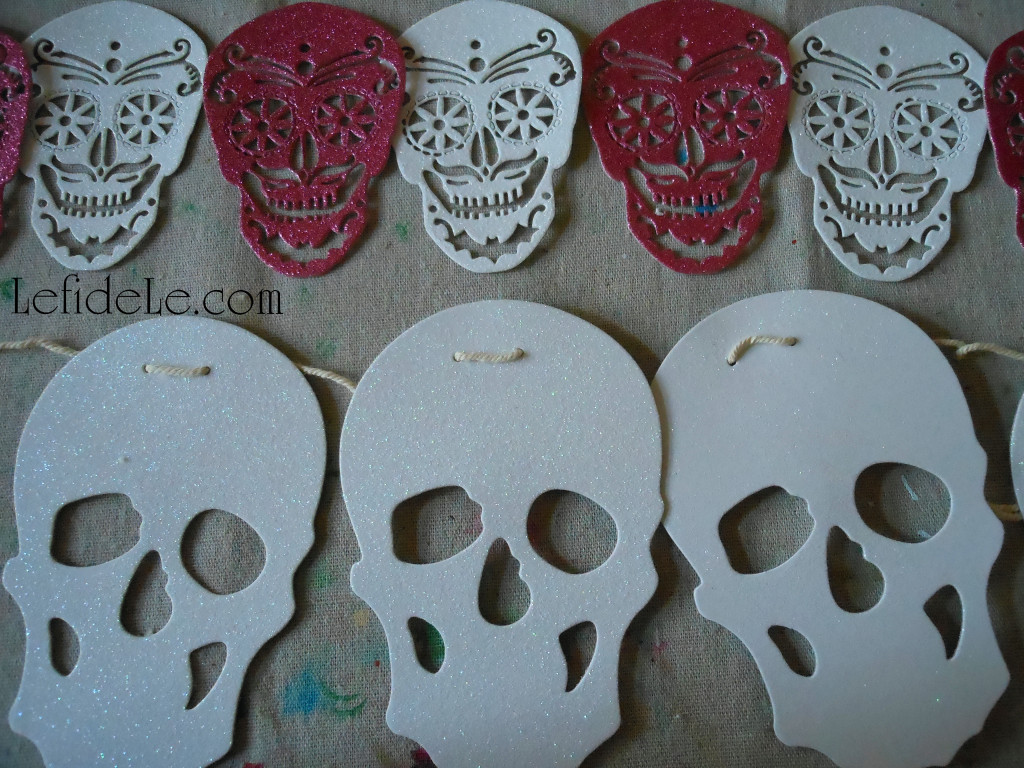
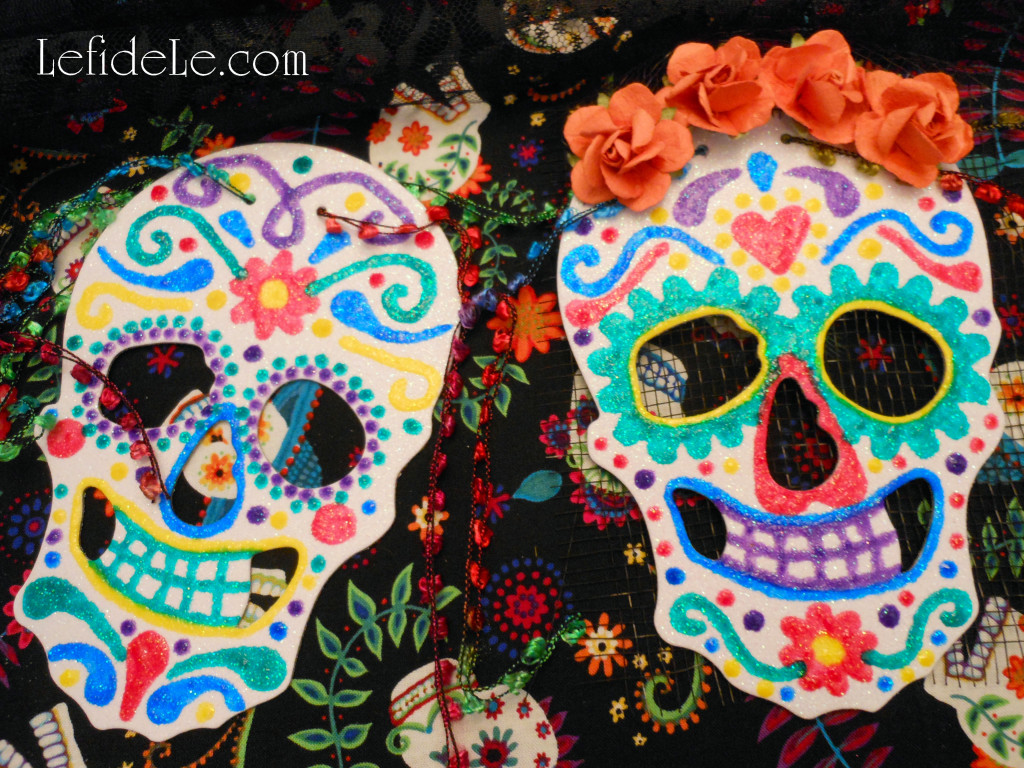
To craft the calaveras de azucar (sugar skulls) banner, begin with either a package of glittered skulls or cut your own shapes from glittered paper. Another option is upgrade a readymade skull banner. (All of these items are available at Le fidèLe Designs craft supply affiliates Michaels and/or Joann whose clickable ads may be found in the sidebar.)

6(2)Leigh

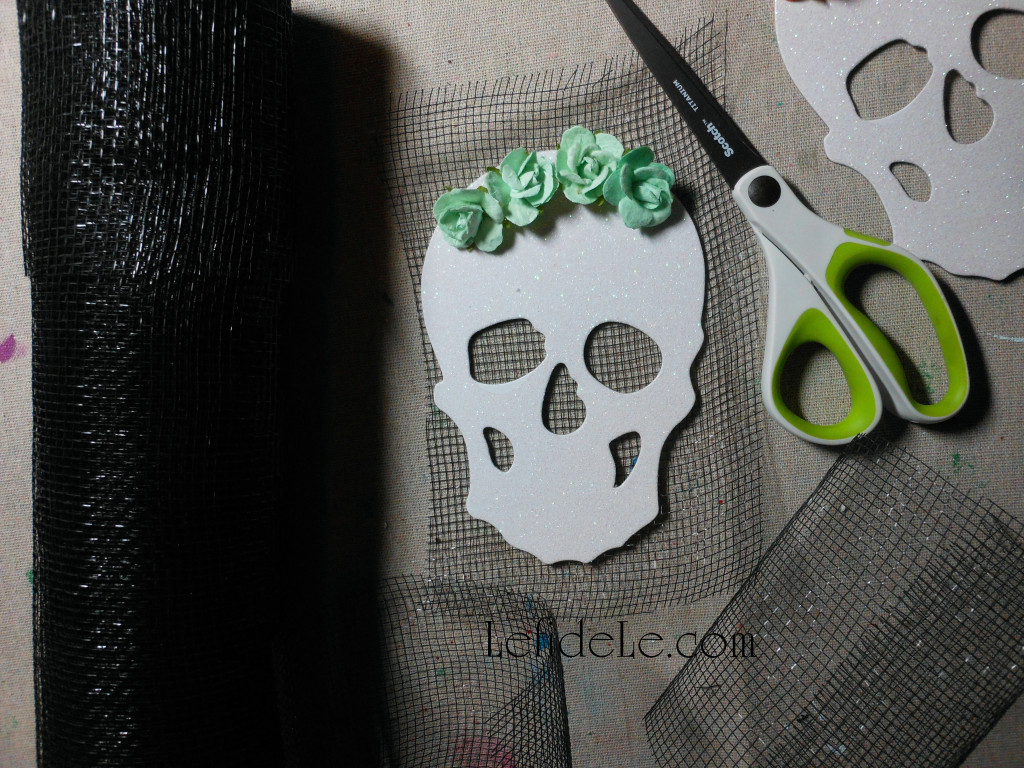
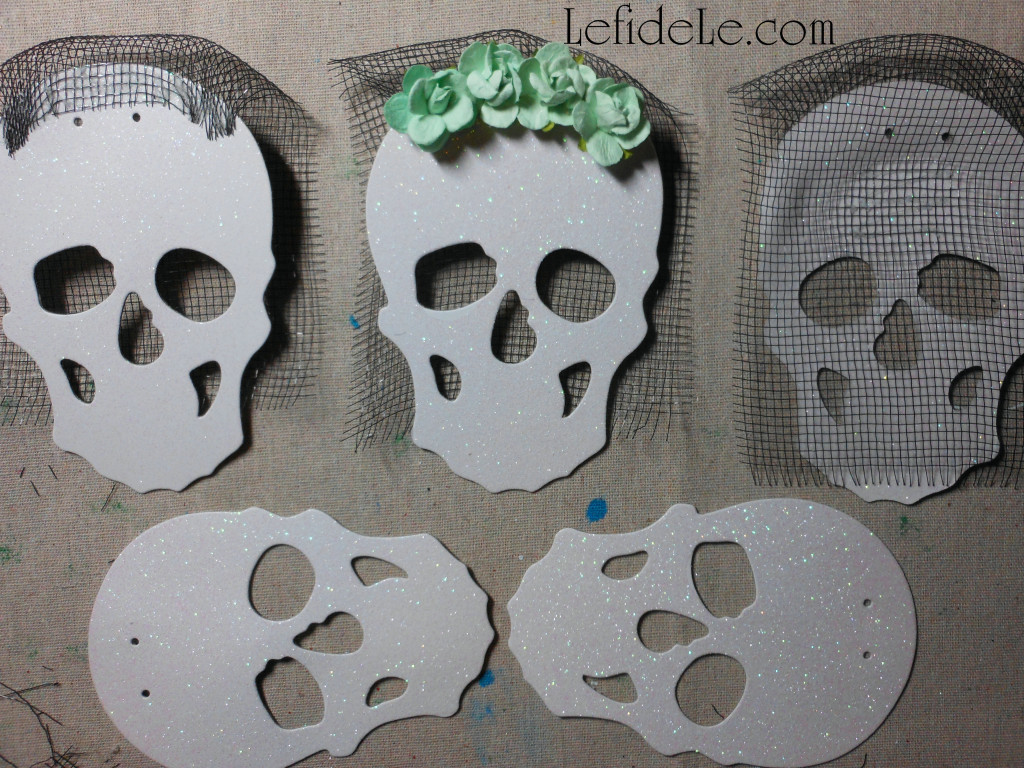
Attack black floral mesh squares to half of the skulls. Glue one end to the top of the front and the rest to the underside so that it looks like a lacy veil.

001Leigh

Next, glue paper rosettes to cover the front edge of the veils.

006Leigh

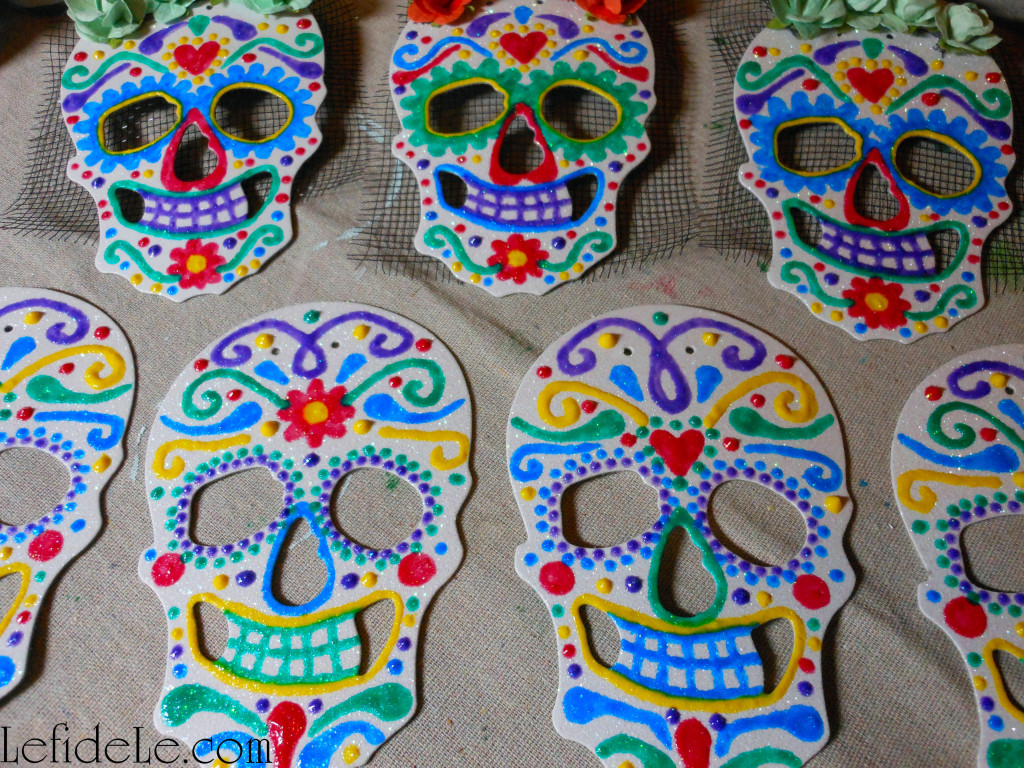
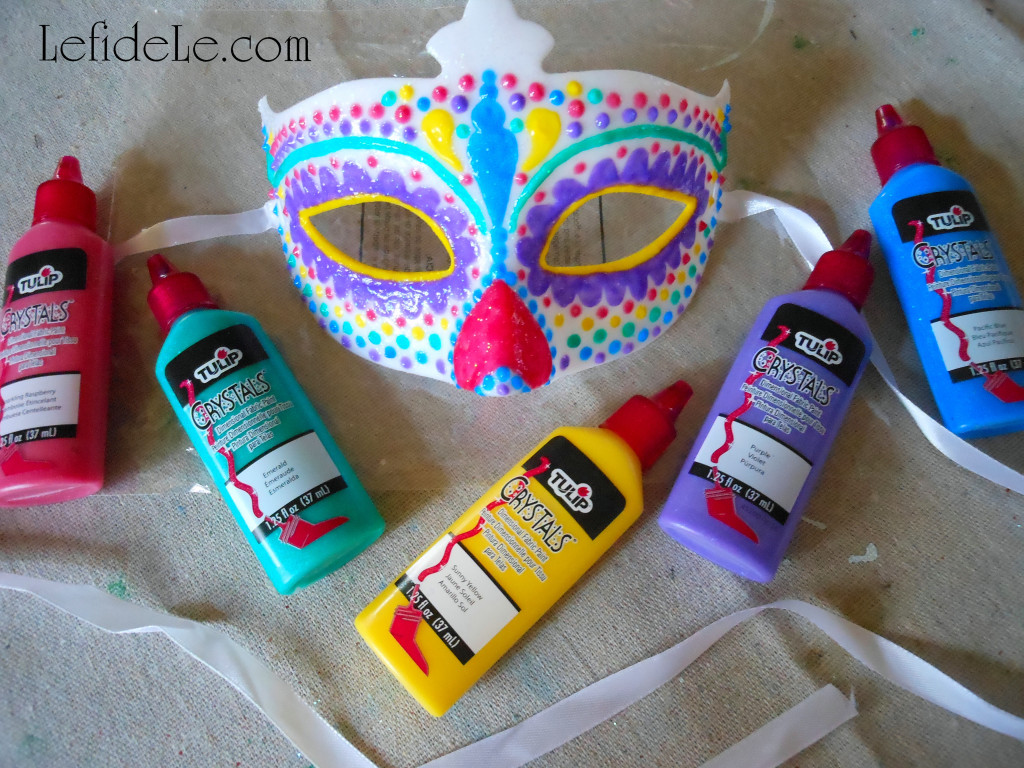
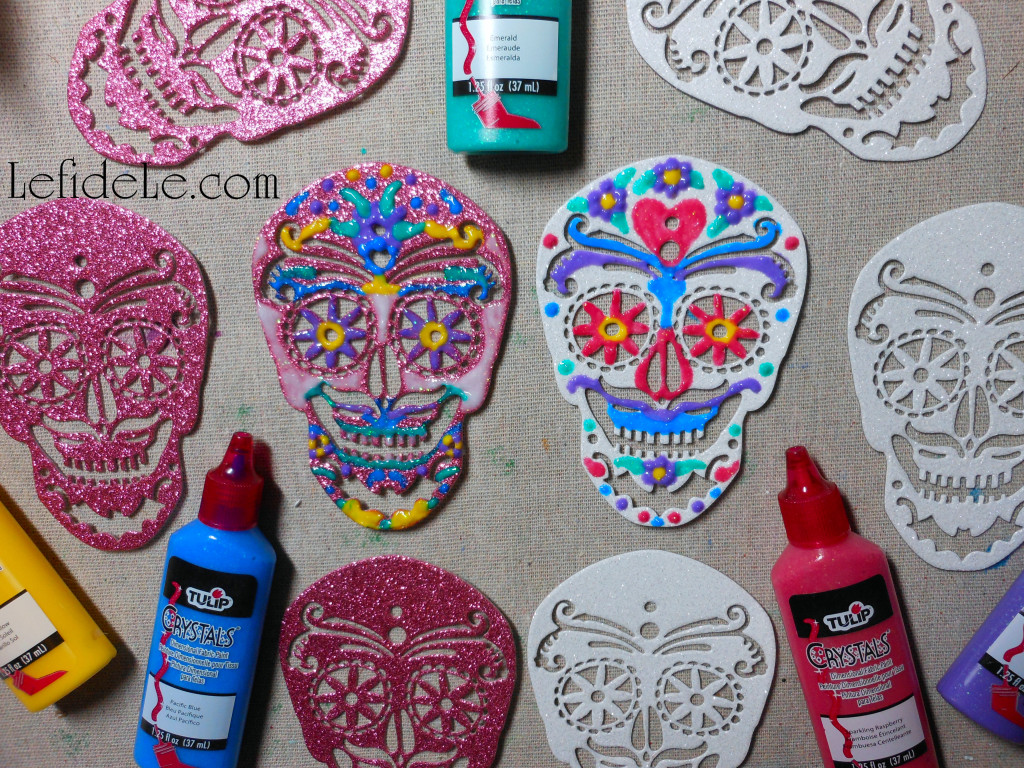
To decorate these with the traditional sugar skull designs of flowers, hearts, swirls, and apostrophe type marks, I utilized Tulip brand Crystals (= glittery like sugar) T-shirt paint. It works really well on many materials besides cotton. The small tips allow the paint to come out just like icing does on real sugar skulls. If you prefer the control of a paintbrush, just squeeze some out onto a paper plate to use as a palette. Let these dry overnight to cure.

015Leigh

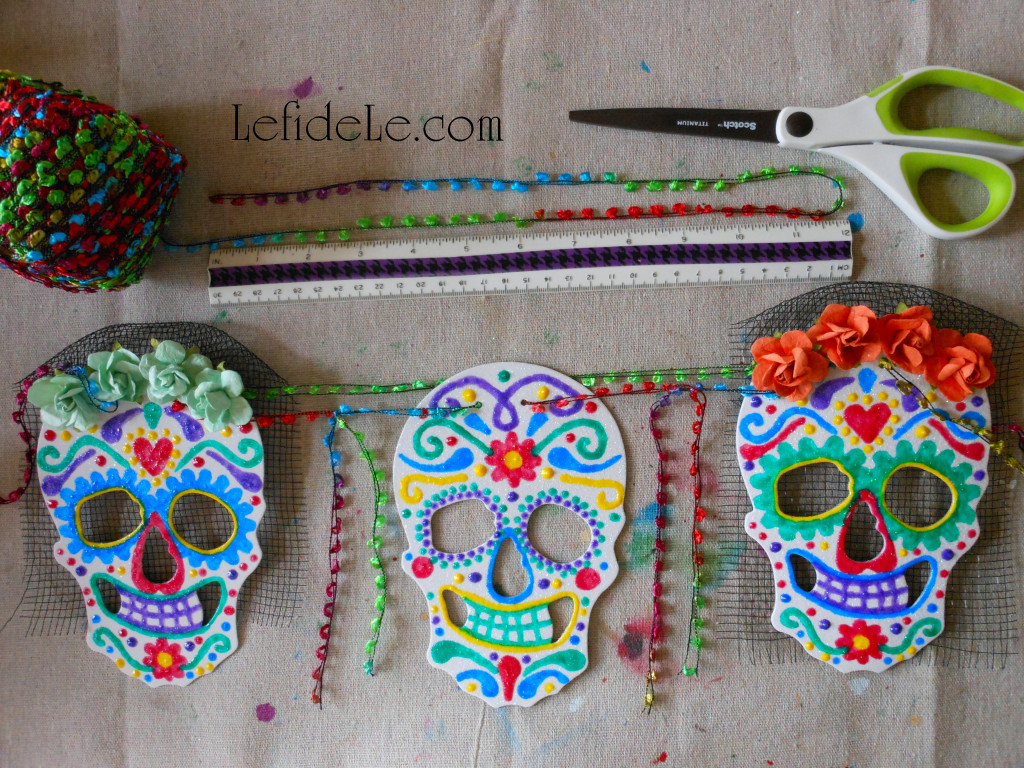
Next cut lengths of colorful yarn or ribbon to string the banner on. If your skulls don’t have the right holes to string them through, just use a hole punch… or even poke some with an ice pick!

082Leigh

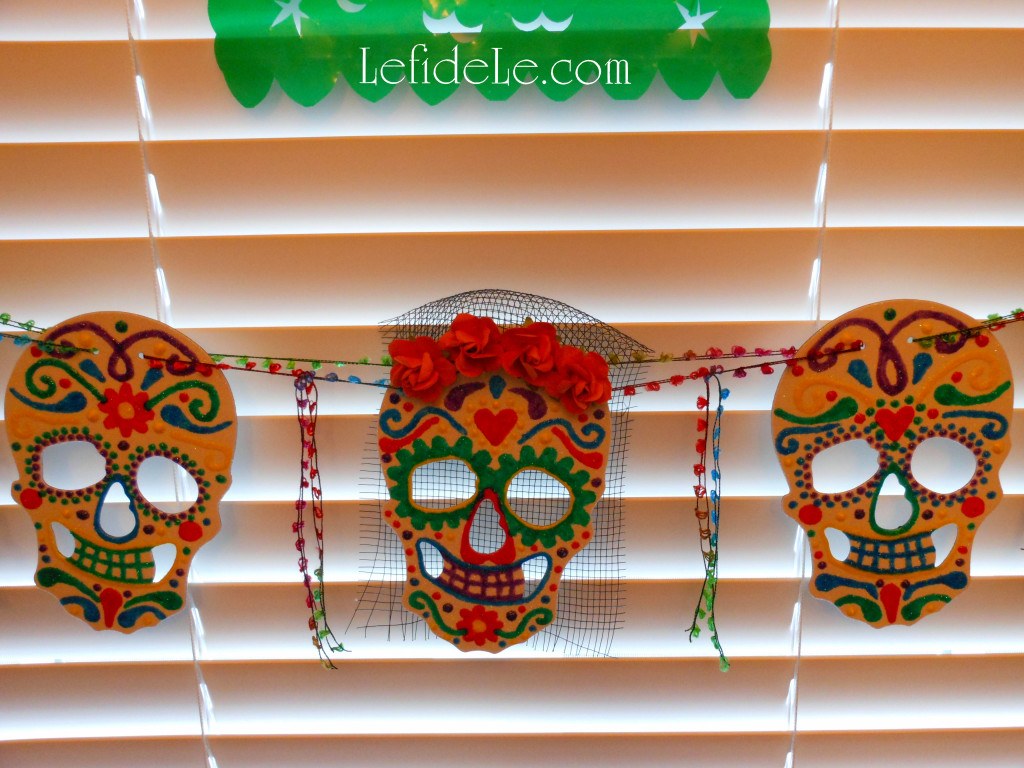
Hang them in the background of a themed party or over a candy buffet.

004Leigh

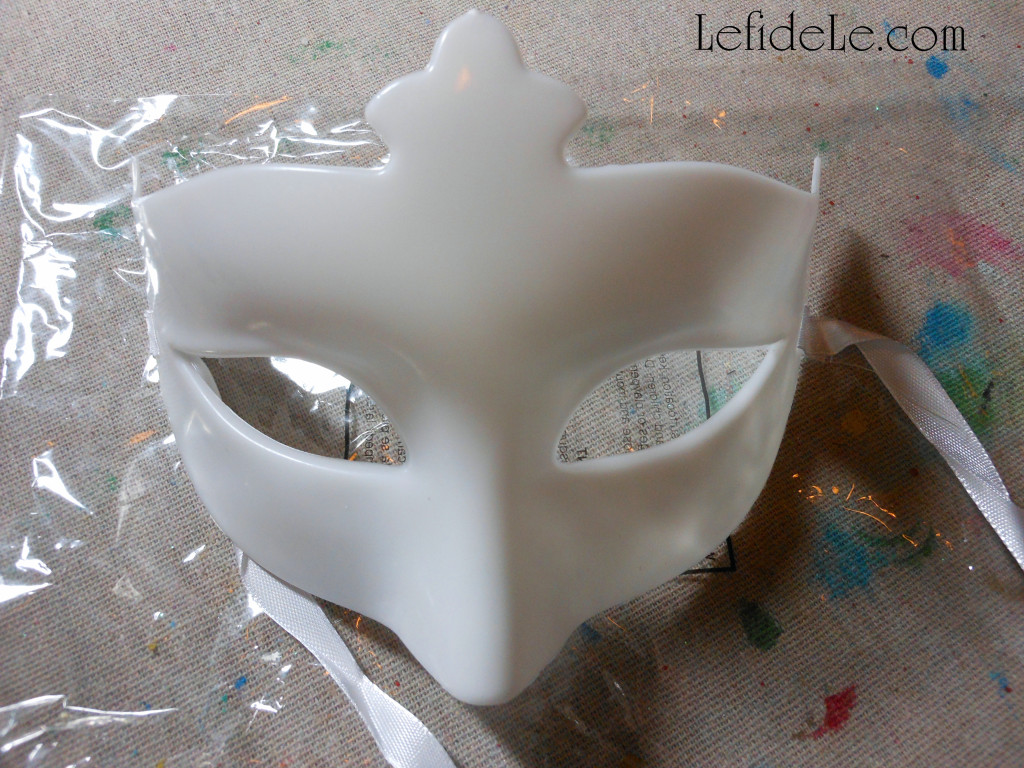
To make your own catrina mask, purchase a plain plastic one to embellish. (This Mardi Gras type can be found at Michaels for about $2, and Joann has some as well.)

011Leigh

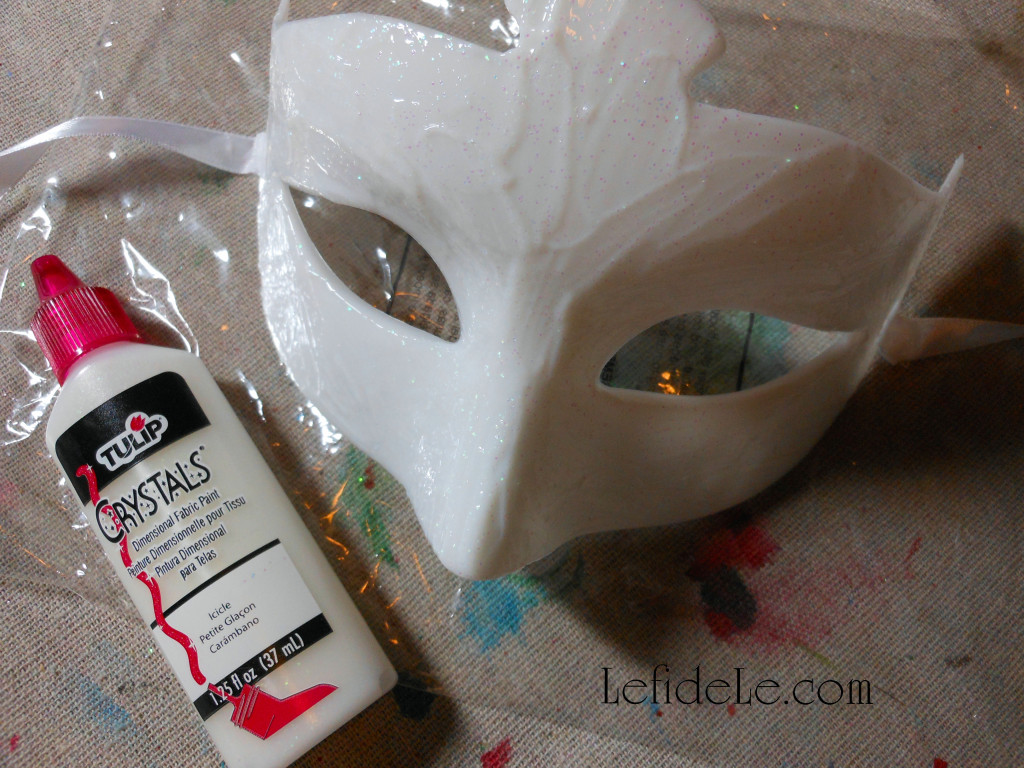
Use the same T-shirt paint leftover from the sugar skull banner to cover the mask with. (I just used my finger to smear it around.) Let this layer dry well.

016Leigh

Begin using other colors to add designs to the mask. Dots are the easiest to make with these paints, but make an upside down heart for a nose decoration. (I made a girlier version than can be typically found at the Halloween stores by using softer colors than red and black and by making the eye sockets flowers instead of black rings.) Let this layer dry well too.

037Leigh

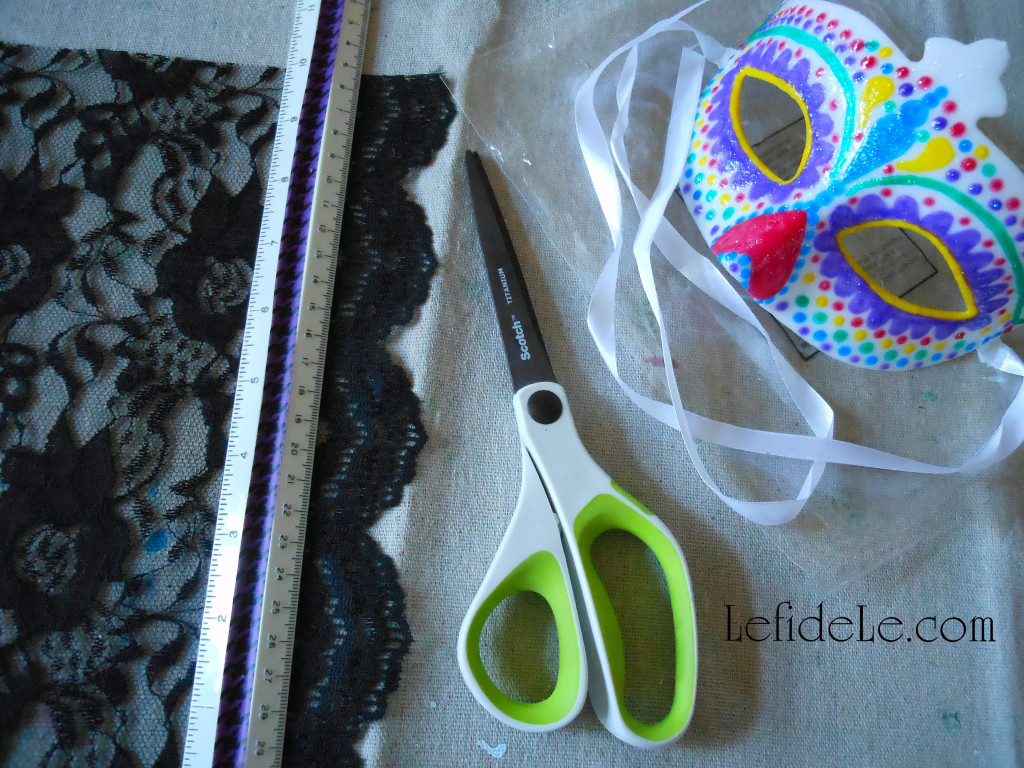
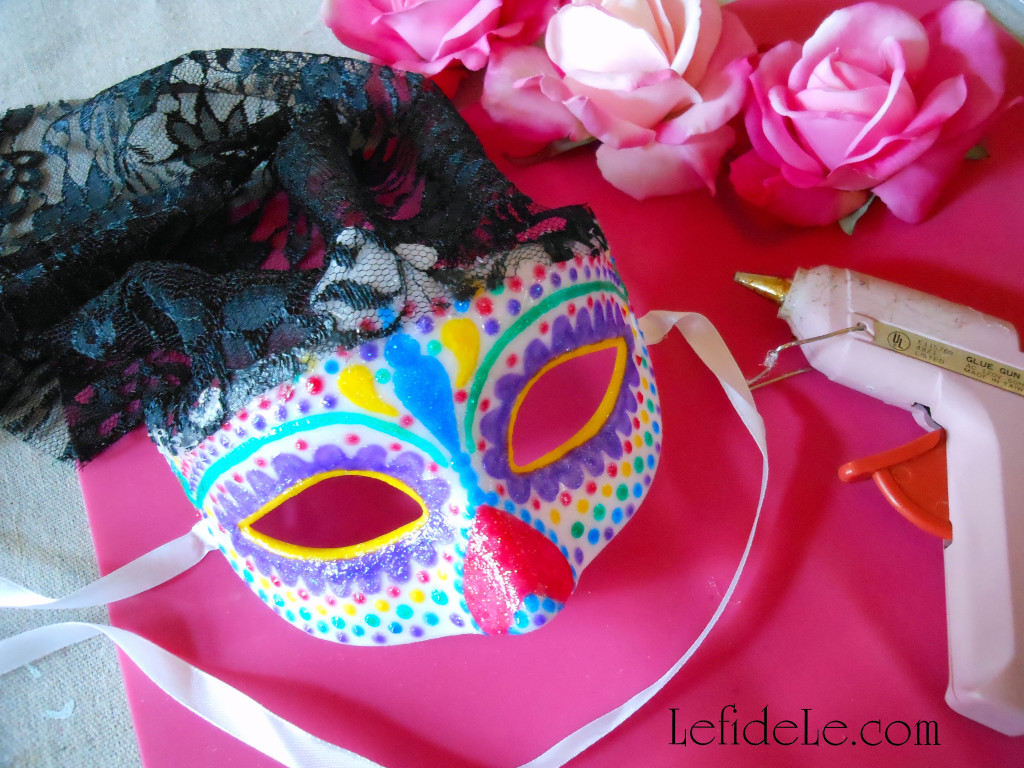
Cut a length of lace at about 10 inches across and at a length that will cover most of the hair of the recipient.

039Leigh

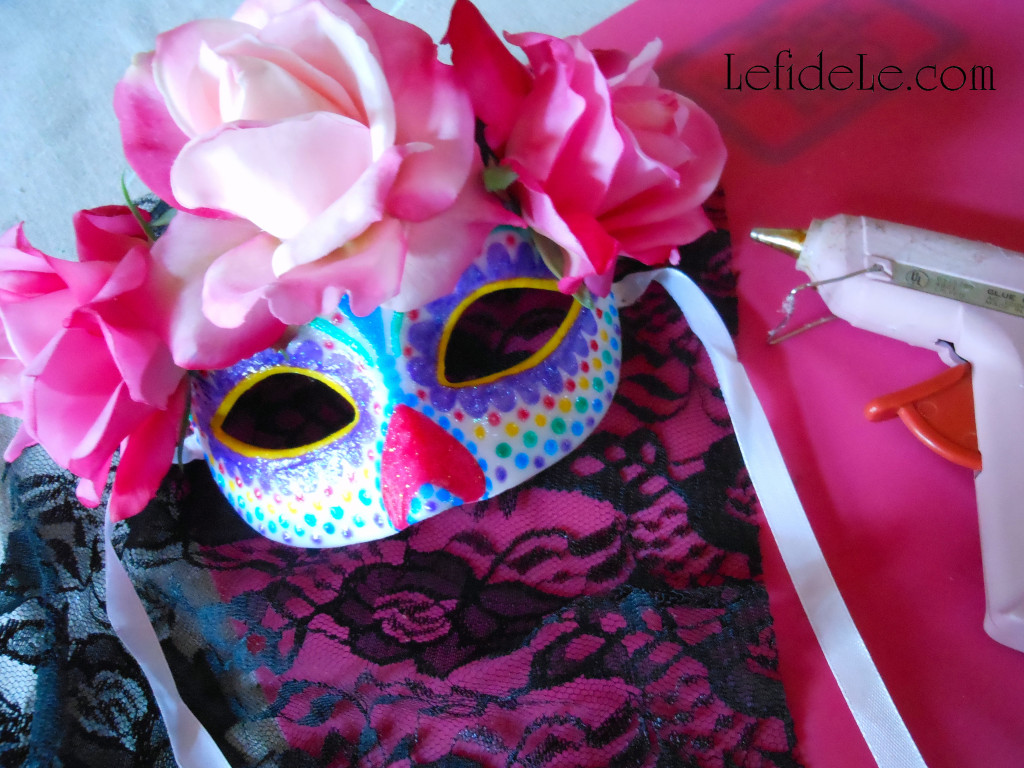
Glue the 10 inch edge to the top of the mask, pressing the fabric into the glue. Make small gathers to take up the width. This veil will expand over the head to better cover the hair.

042Leigh

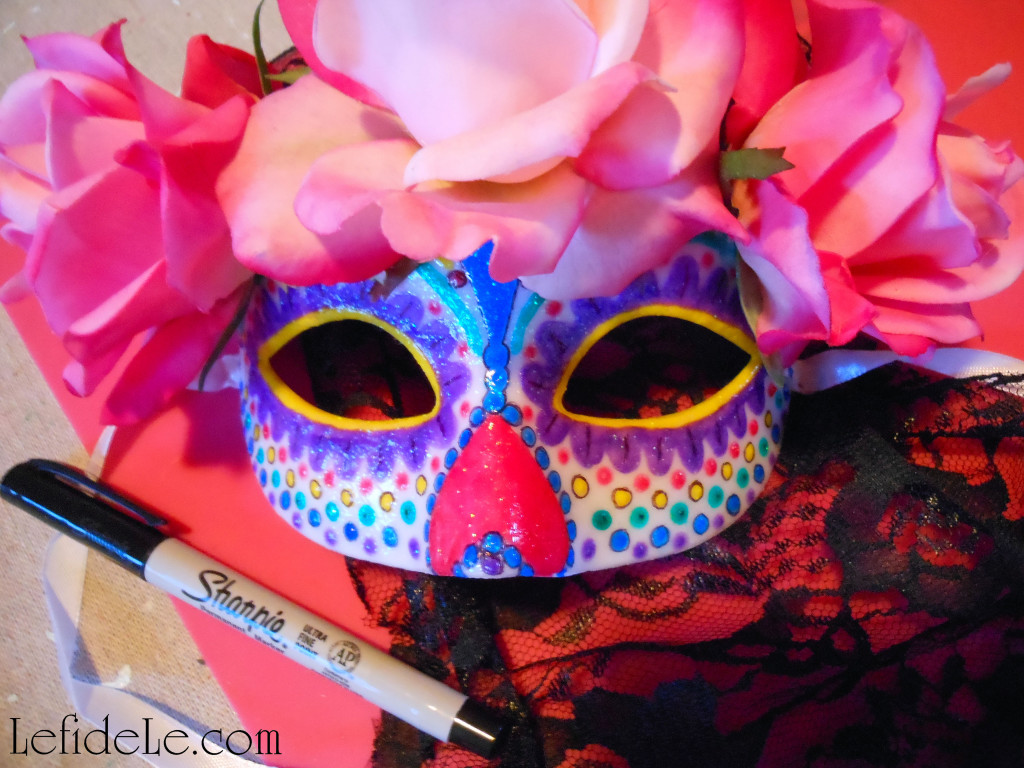
Now pull off faux rose heads from their stems. Glue these on top of the lace, and hold them down until they don’t feel like they will slip off.

44Leigh

Further definition may be added to the edges of the paint lines with a fine tip sharpie permanent marker. (I think a little black helps to tie in the veil’s color.)

103Leigh

Try wearing this with a traditionally embroidered Mexican dress and a black lace shawl.

113Leigh

It may also be used as décor for a themed Halloween celebration.

107Leigh

Viva la celebration!

Faithfully Yours,

Leigh

DIY Calaveras de Azucar (Sugar Skulls) Napkin Rings, Wine Glass Charms, & Vase Craft Tutorial for Dia de los Muertos (Day of the Dead) Themed Halloween Dinner Party Décor

079Leigh

This tutorial will help you to inexpensively craft your own jeweled vase in the Dia de los Muertos (Day of the Dead) style to fill with traditional wild marigolds (cempasuchil), and then easily DIY calaveras de azucar (sugar skulls) napkin rings and wine glass charms to decorate your Halloween dinner party table with. Sugar (azucar in Español) is said to balance the bitterness of death (muerte), and calaveras (skulls) are traditionally offered on All Saint’s Day (November 1) to departed loved ones as one would leave flowers graveside. As Halloween serves to poke fun at all things scary, Dia de los Muertos is intended as a way to accept death as inevitable… and also to honor dearly departed loved ones. Representational calacas (colloquial term for skeletons) symbolize the idea of life being inextricably linked with death, and have migrated north from Mexico into American Halloween celebrations as themed décor. By using one celebration as a theme for the other, the two concepts combine to poke a little fun at death as not being so scary!

1(2)Leigh

To craft the calaveras de azucar (sugar skulls) napkin rings, begin with either a package of glittered skulls or cut your own shapes from glittered paper. Another option is upgrade a readymade skull banner. (All of these items are available at Le fidèLe Designs craft supply affiliates Michaels and/or Joann whose clickable ads may be found in the sidebar.)

4(2)Leigh

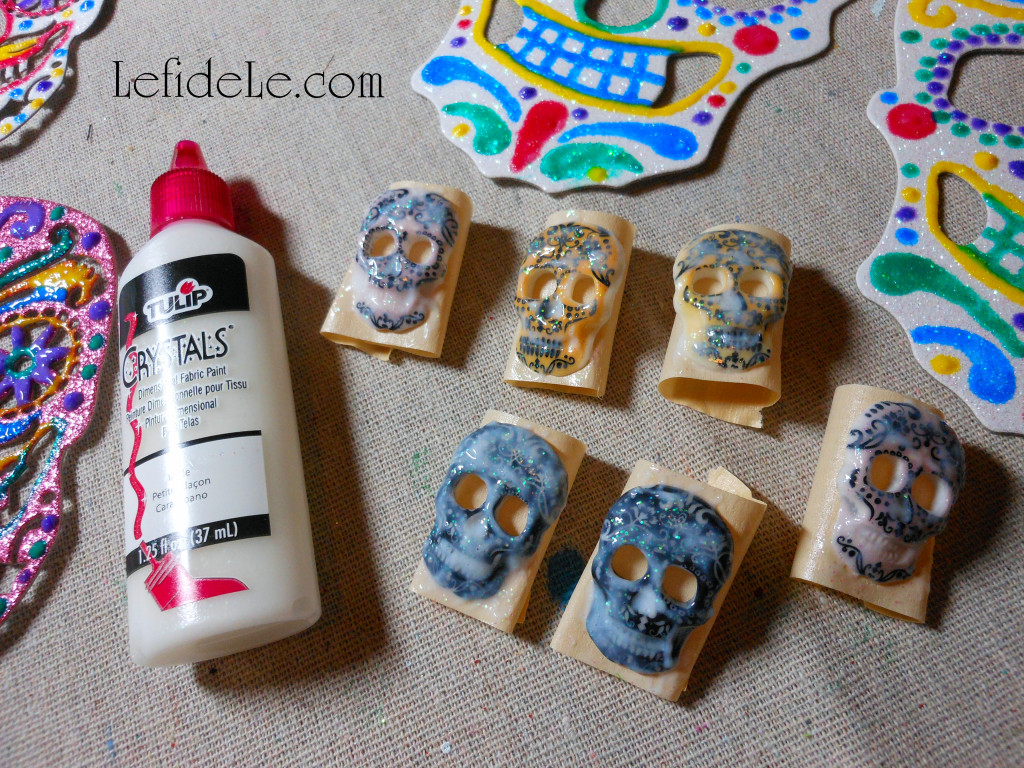
To decorate these with the traditional sugar skull designs of flowers, hearts, swirls, and apostrophe type marks, I utilized Tulip brand Crystals (= glittery like sugar) T-shirt paint. It works really well on many materials besides cotton. The small tips allow the paint to come out just like icing does on real sugar skulls. If you prefer the control of a paintbrush, just squeeze some out onto a paper plate to use as a palette. Let these dry overnight to cure, and ensure that no unwanted marks are impressed into the paint.

034Leigh

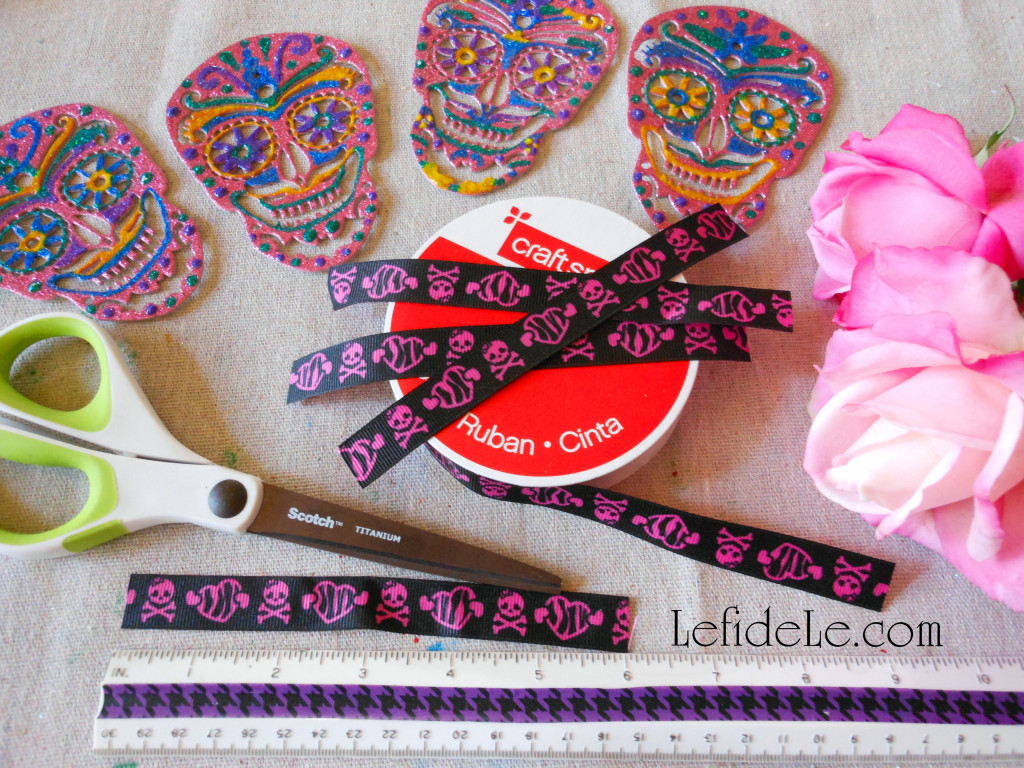
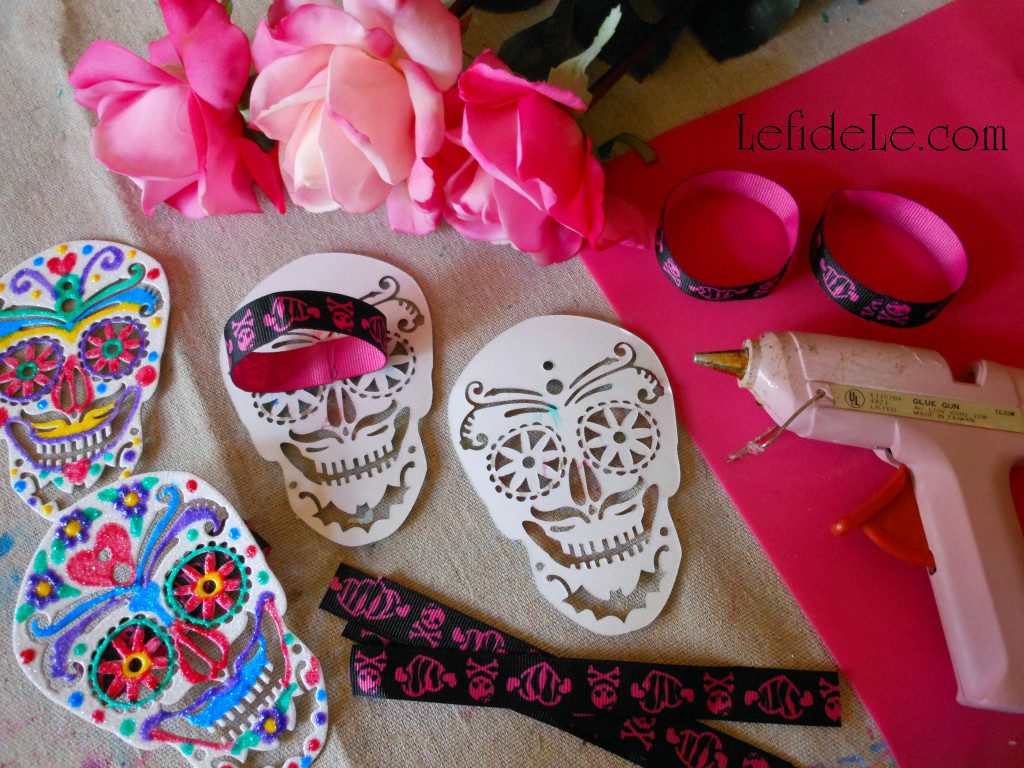
Cut 6 inch lengths of grosgrain ribbon to serve as the ring. (I found this skull printed roll on clearance, and didn’t find out until much later that it’s a “Monster High” motif. Oh well, it worked!)

036Leigh

Hot glue each end of a ribbon length onto the center underside of a skull.

085Leigh

Ring a ding ding, look who made a napkin ring!

003Leigh

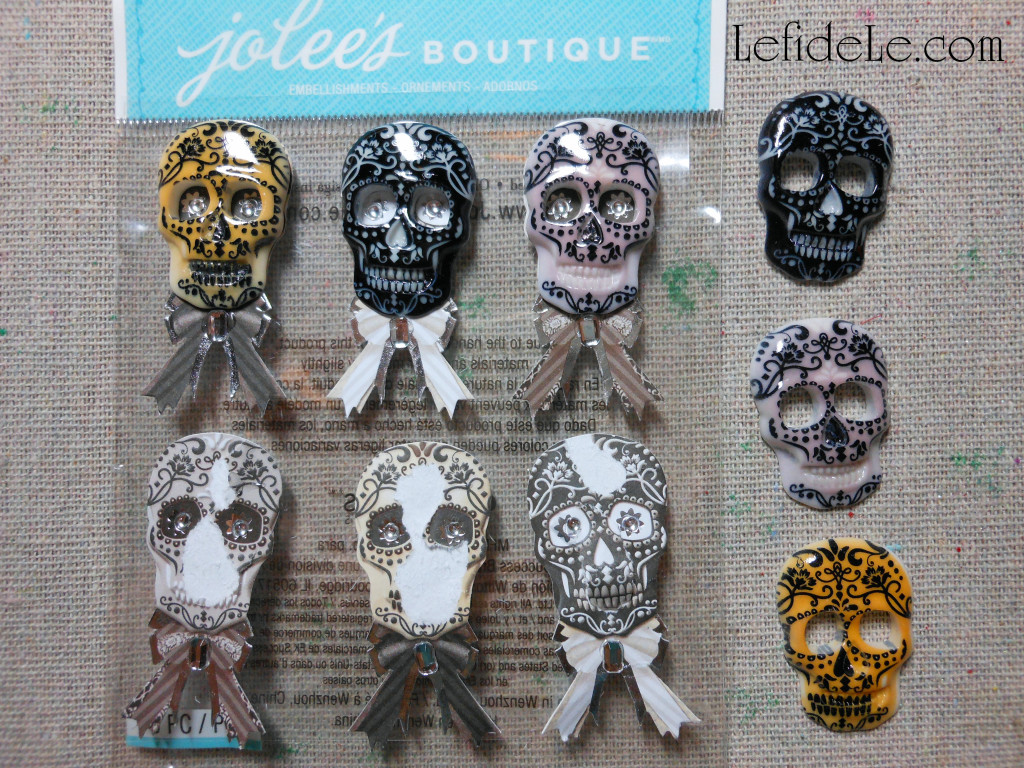
To create wine glass charms, begin with Jolee’s Boutique dimensional scrapbooking stickers. Pull the plastic fronts away from the flat backings.

009Leigh

Use the same T-shirt paint in white to add a layer of sugary glitter to them. These will dry clear. (To make this easier, I made a finger loop of masking tape to hold them while I dotted on the paint, and then just slipped them off onto the table to dry overnight.)

013Leigh

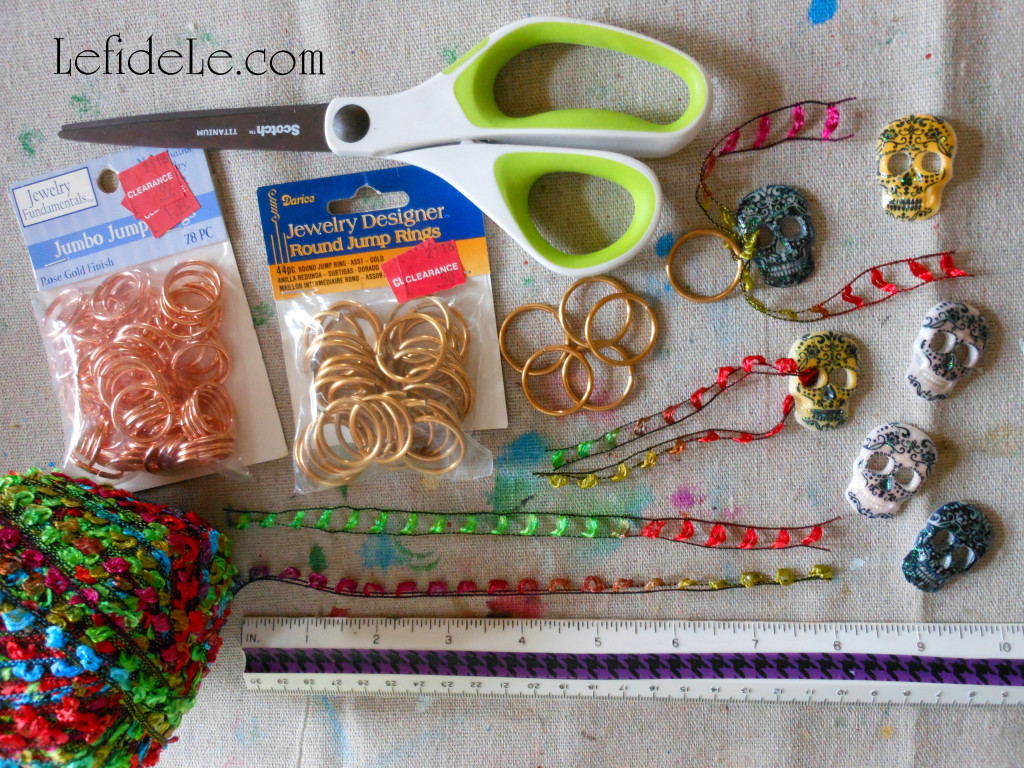
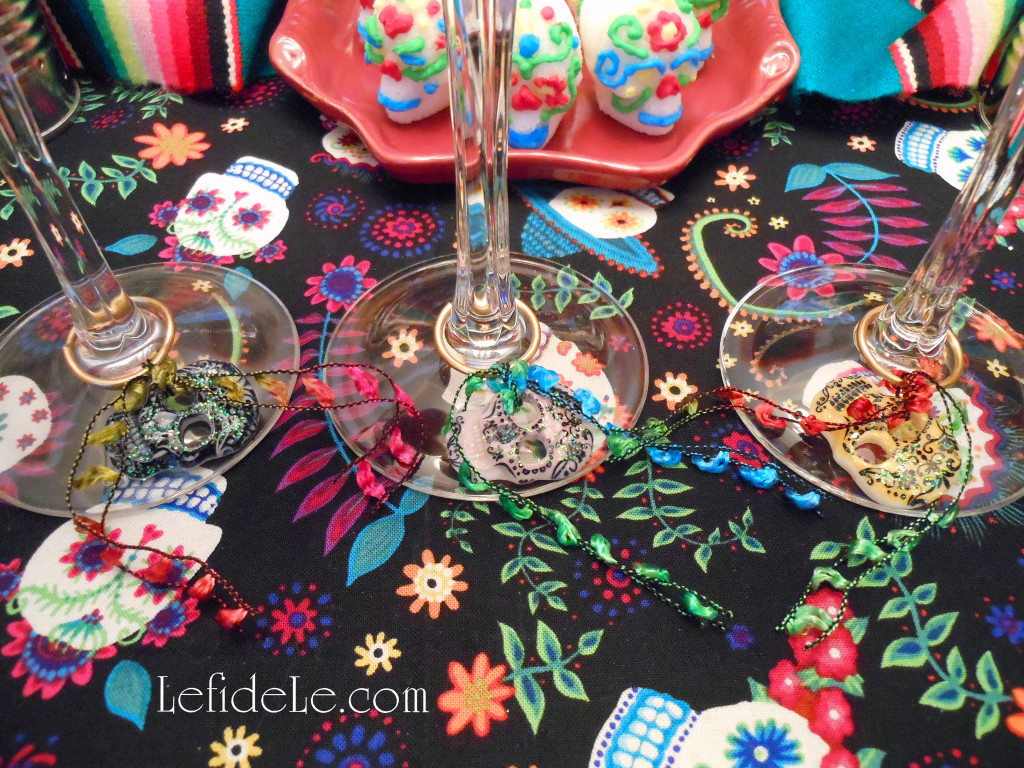
Tie these onto jumbo jump rings with a strand of colorful yarn or ribbon. (I used the same yarn on all my Dia de los Muertos crafts for continuity.)

078Leigh

Since the skulls come in colored sets of 2, why not color-code the drinks by kissing couples!?

018Leigh

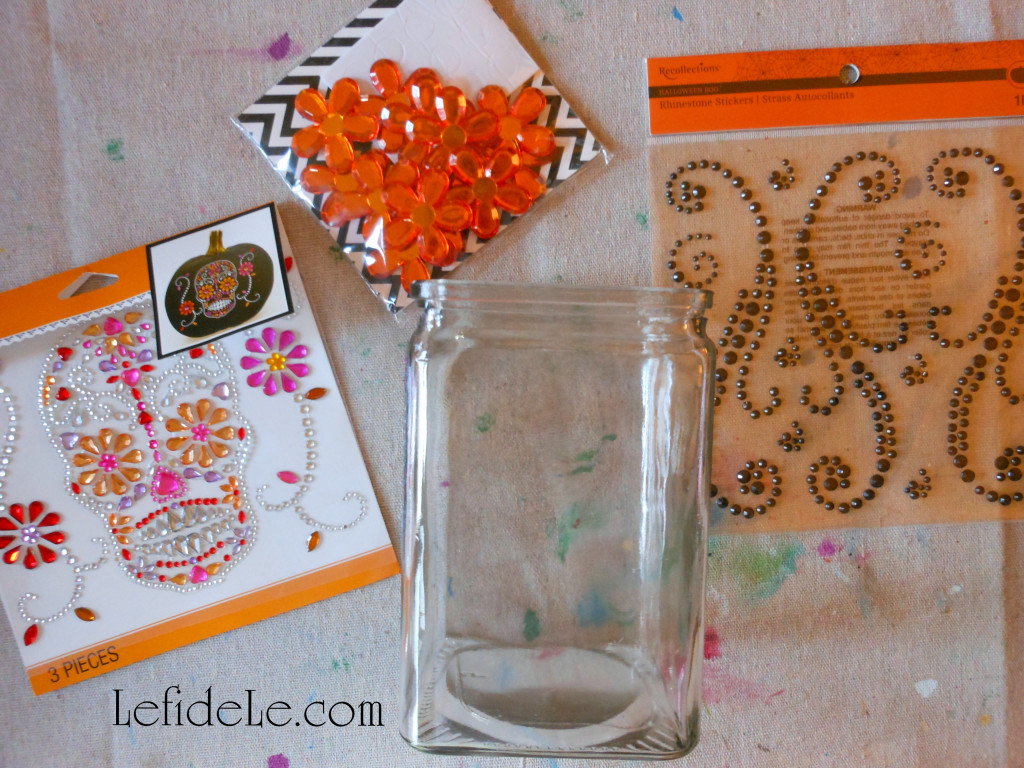
Quickly create a calavera vase by upcycling an old vase with crystal stickers or by gluing crystals on. You can use a complete picture, lay on crystals individually, or both. (If you need to use a pattern, just tape a coloring page to the inside of the vase and adhere crystals to the outside of it over the lines.)

020Leigh

Tie on a length of ribbon to coordinate with the other crafts, and fill the vase with black marbles.

67(2)Leigh

Fill it with traditional wild marigolds to use as a centerpiece surrounded by more calaveras.

Happy Day of the Dead!

Faithfully Yours,

Leigh
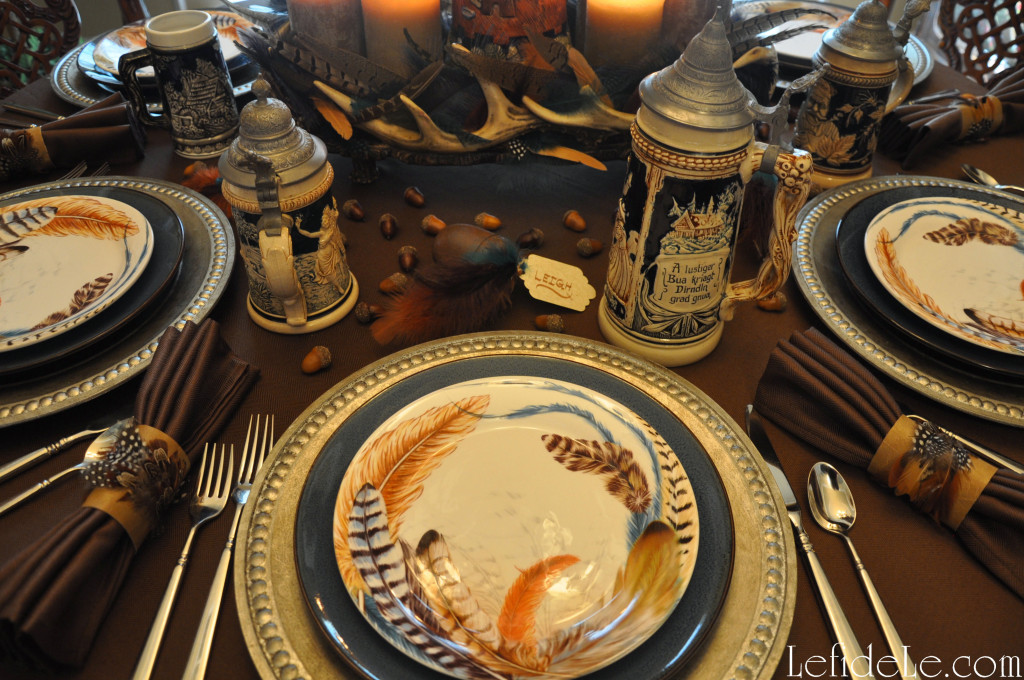
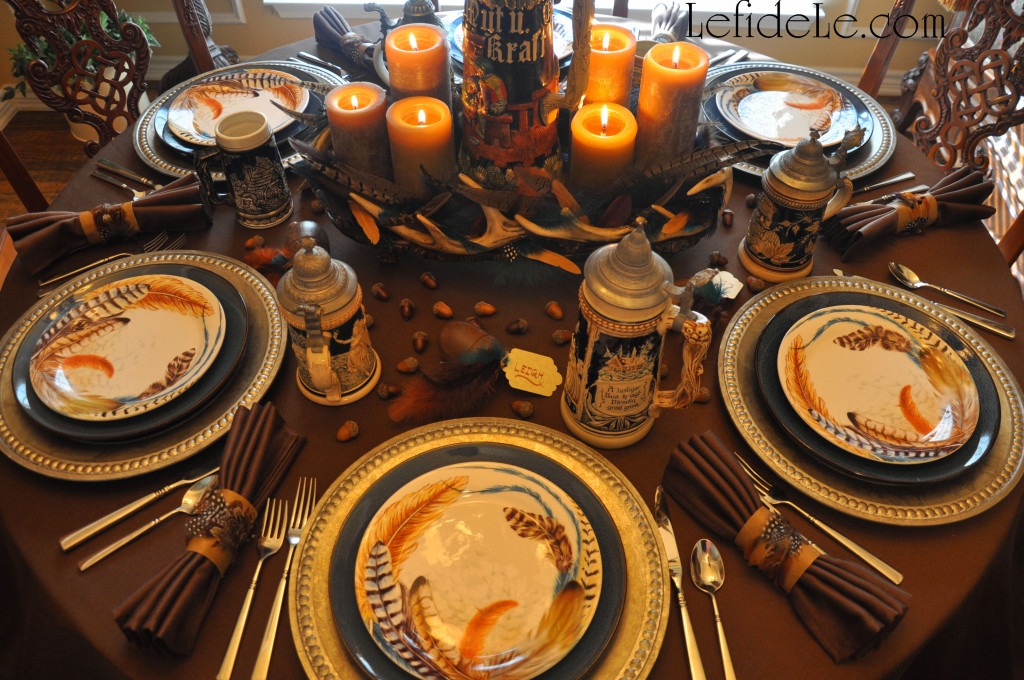
Bavarian Oktoberfest Party Décor Ideas for a Fall Tablescape

048Leigh

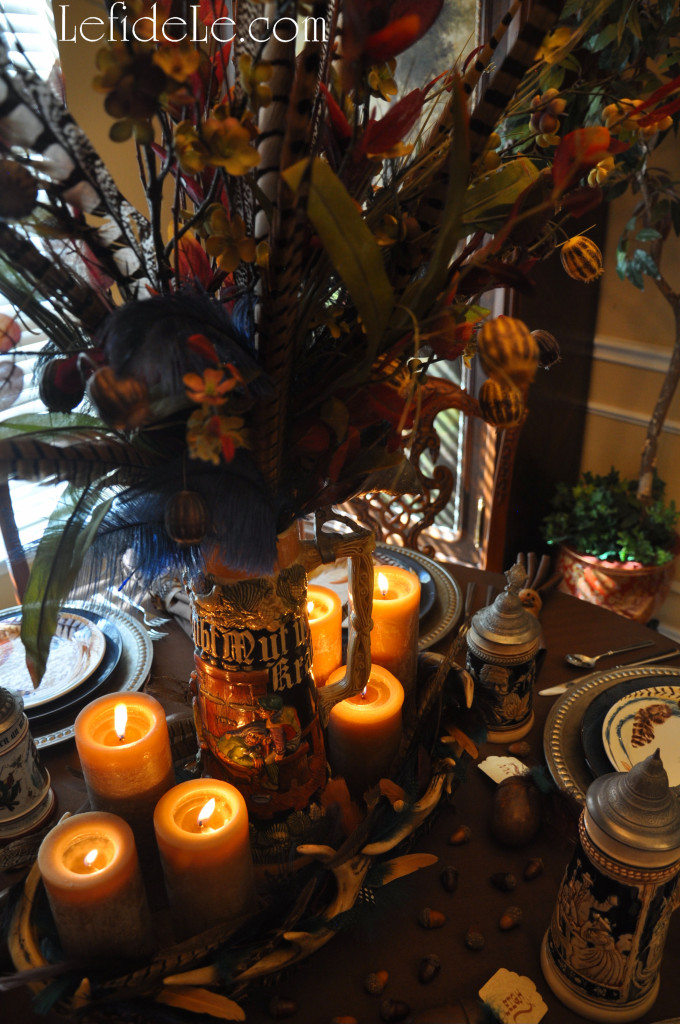
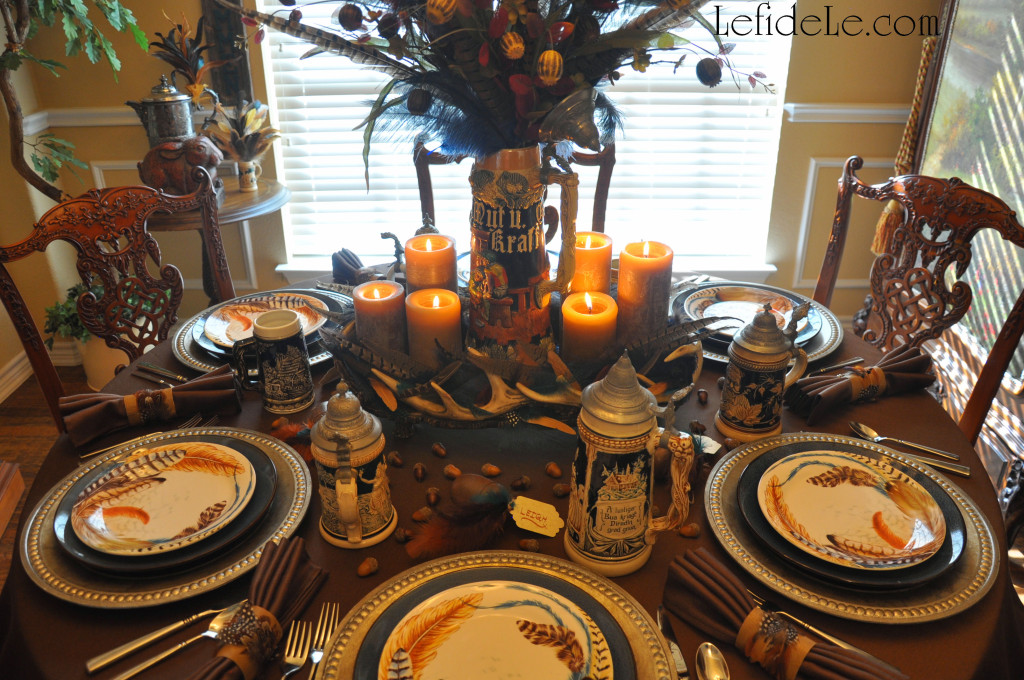
Willkommen to an Oktoberfest party where the tablescape décor will transport you to a fanciful Bavarian hunting lodge straight out of Grimm’s fairy tales. So don your dirndls or lederhosen, fill your bier steins, and raise prost to a chorus of “Ein Prosit” for a wunderbar family folk fest!

002Leigh

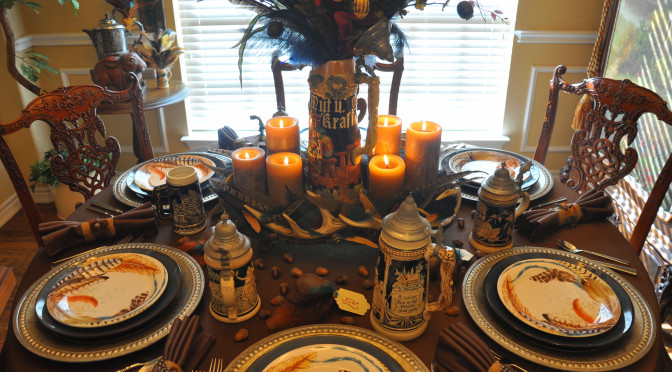
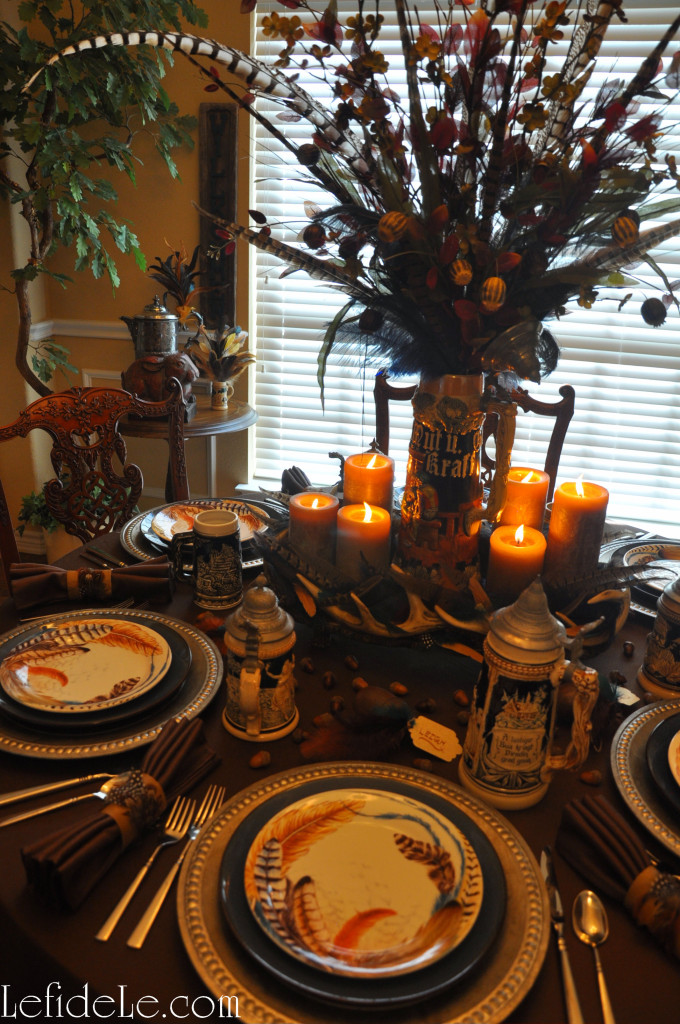
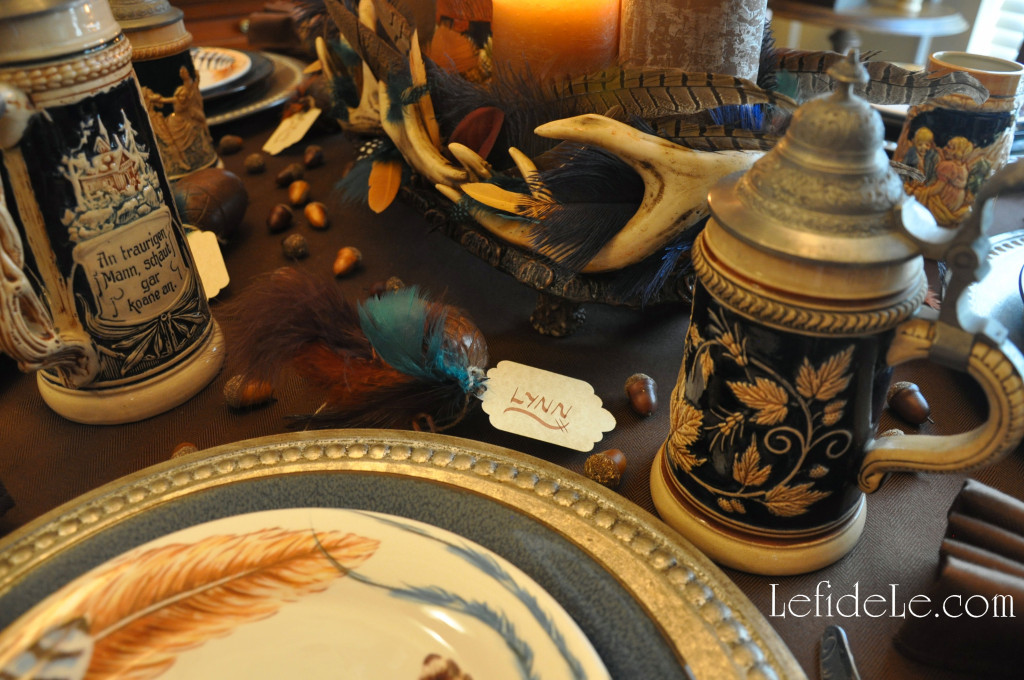
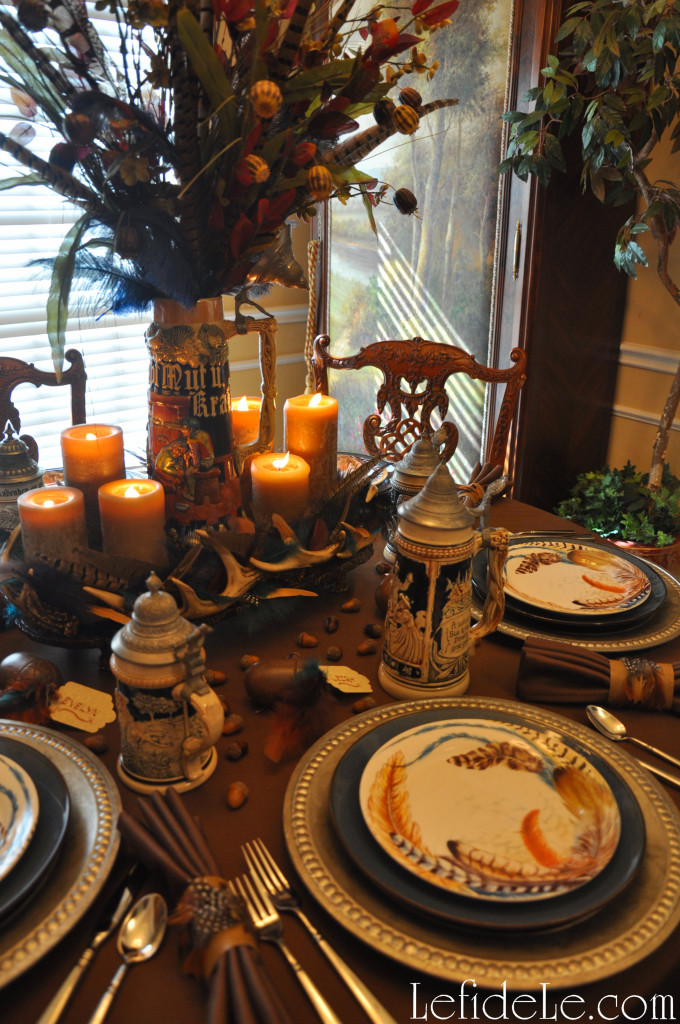
Dark brown tablecloths reminiscent of solid Alpine earth ground the tablescape. Nail-head trimmed pewter chargers topped with true blue dishes echo the pewter hinged lids and stoneware glazing of the steinkrugs. A feather motif dances around the edges of ivory salad plates.

93Leigh

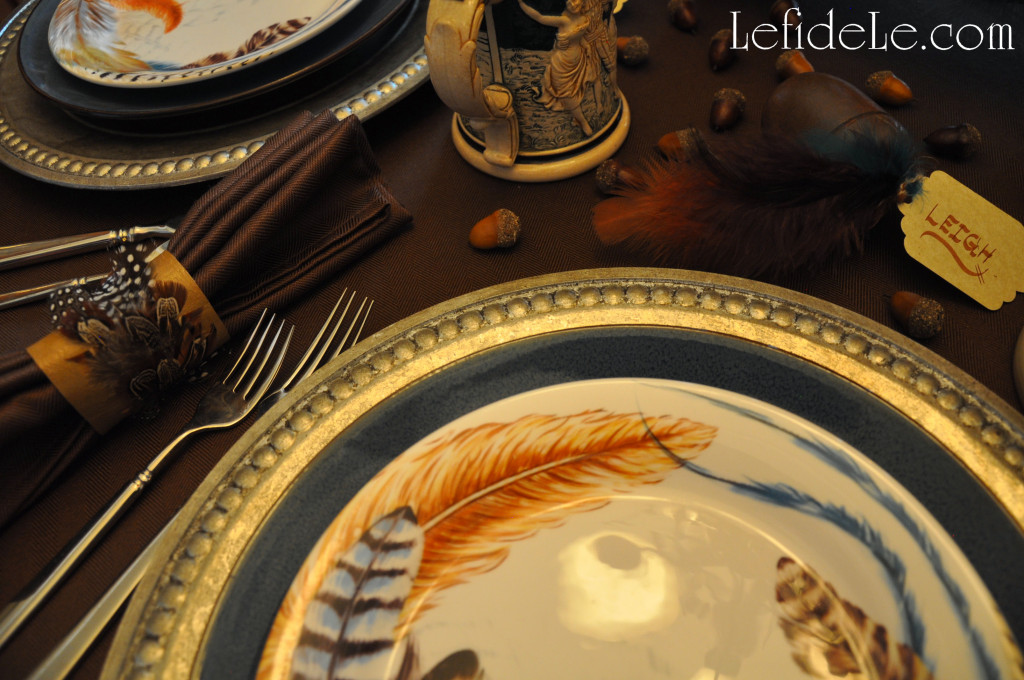
Feathers encircle “leather” rings containing lederhosen protecting cloth. (Find the napkin ring craft tutorial here.)

039Leigh

Carved wooden acorns tied with feathers and nametags direct polka dancers to their seats. (Find the place-card craft tutorial here.)

070Leigh

Tiny acorns scatter across the table acting as yesteryear confetti.

058Leigh

An Alpine “horned” tray befits the base of a centerpiece glowing with candles, scattered feathers, and a large vintage steinkrug of gathered fall branches and long feathers. (Find the centerpiece tutorial here.)

052Leigh

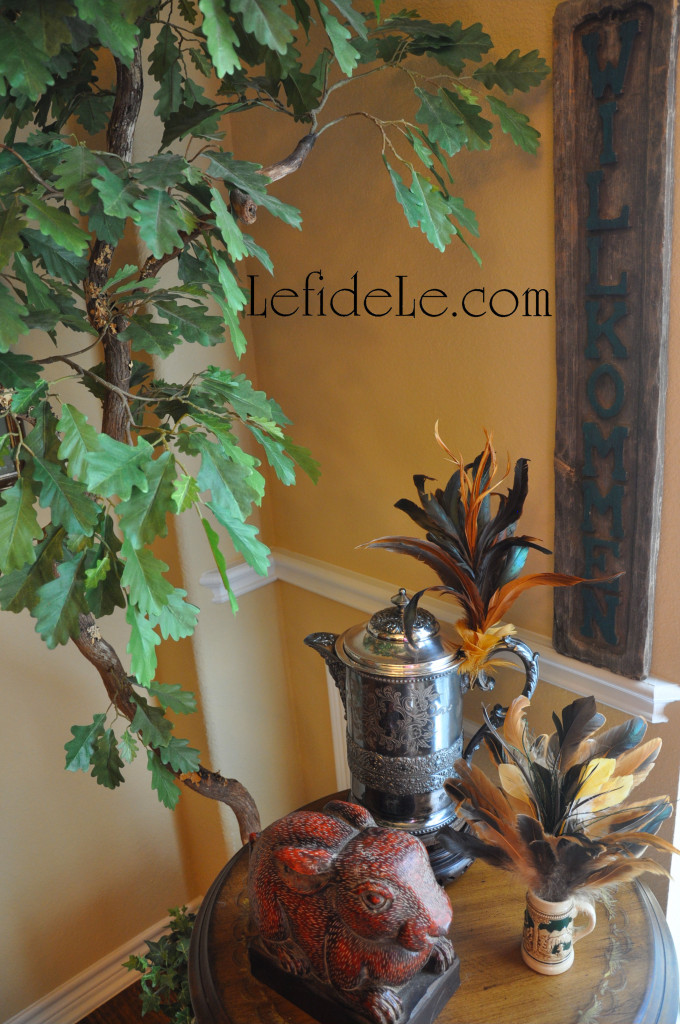
Green foliaged trees and a one-of-a-kind European armoire, refit with a placid oil painting, set the background scenery.

019Leigh

A vintage wooden sign carved with a German message of welcome stands in greeting. A carven hare guards an antique pewter pitcher festooned with colorful plumes. A tiny bierkrug sits feather-filled alongside it.

090Leigh

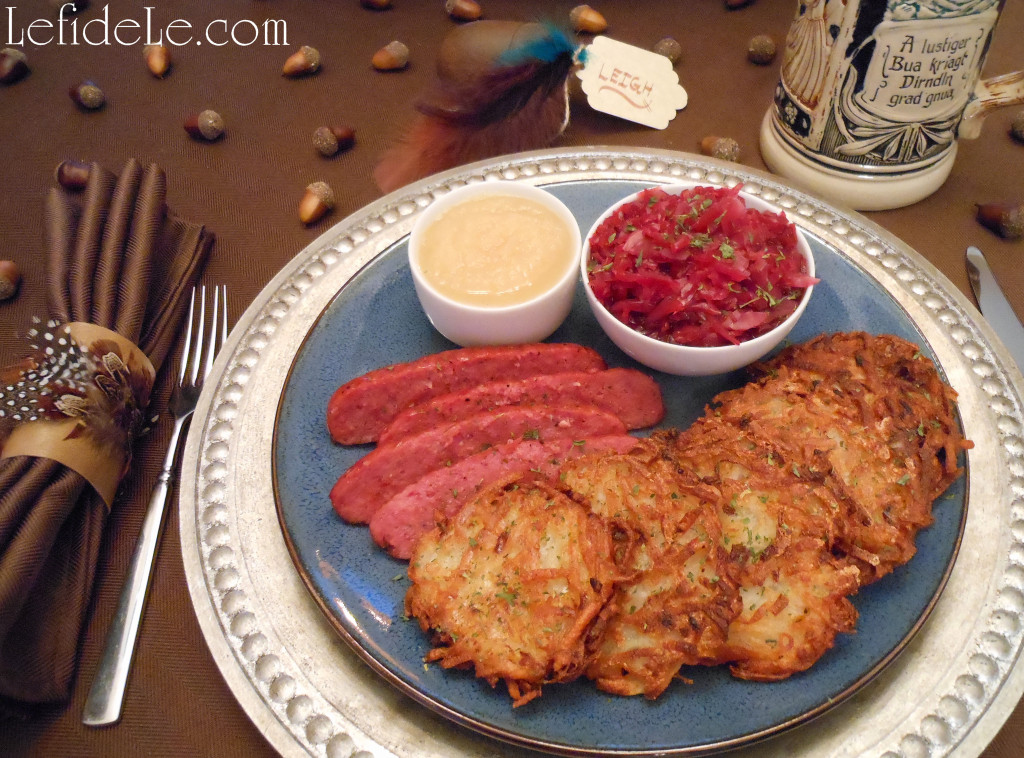
A toast is proposed… may our hearts forever be filled with merriment just as the kartoffelpuffers, knackwurst, sauerkraut, and apfel sauce fill our bellies this very evening! Gemütlichkeit!

Faithfully Yours,

Leigh
122Leigh
P.S. Wondering how to prepare such a hearty meal for your own wunderbar gathering? Try my Gluten-Free & Egg-Free Potato Pancake (aka- Kartoffelpuffer, Latke, hash brown cups, etc.) Recipe with Baked & Fried Versions for Oktoberfest!