Tag Archives: Creativity

How to Make an Assemblage Sculpture (= 3D Collage) for Your Valentine (Art Instruction / Craft Tutorial)

34Leigh

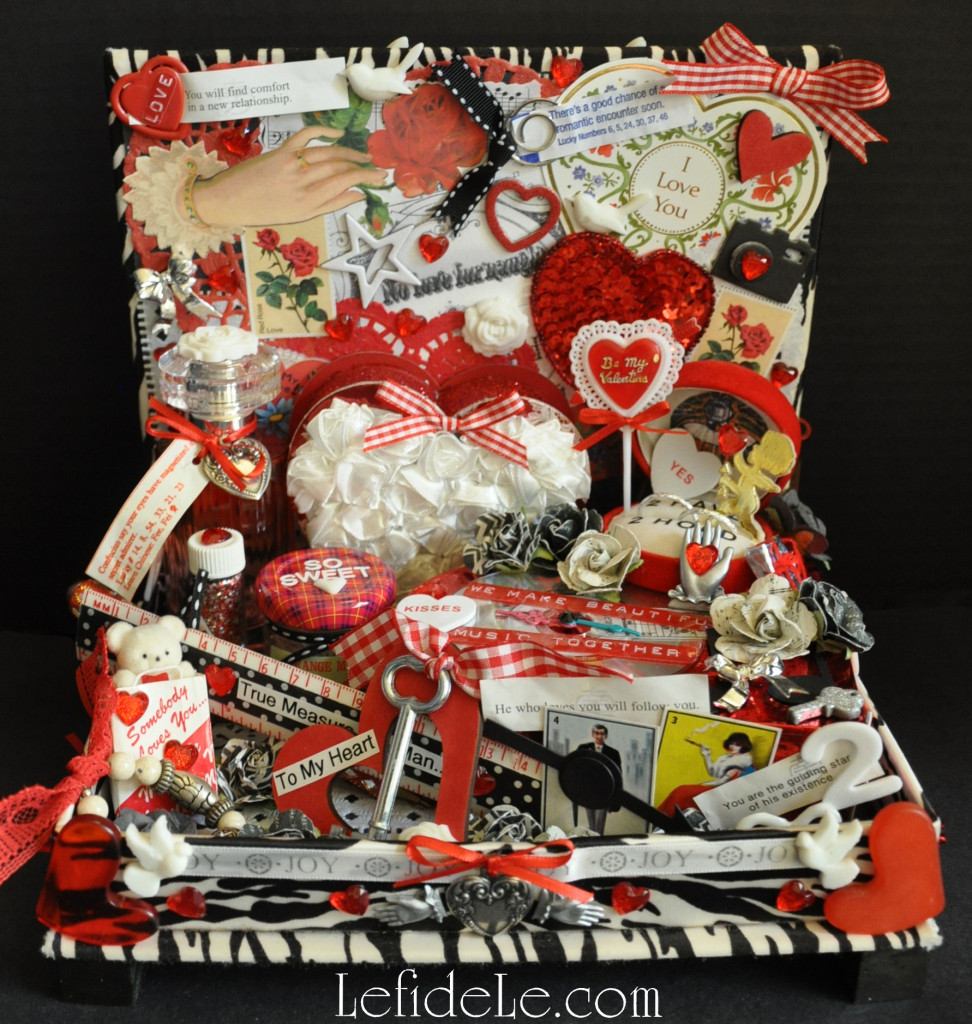
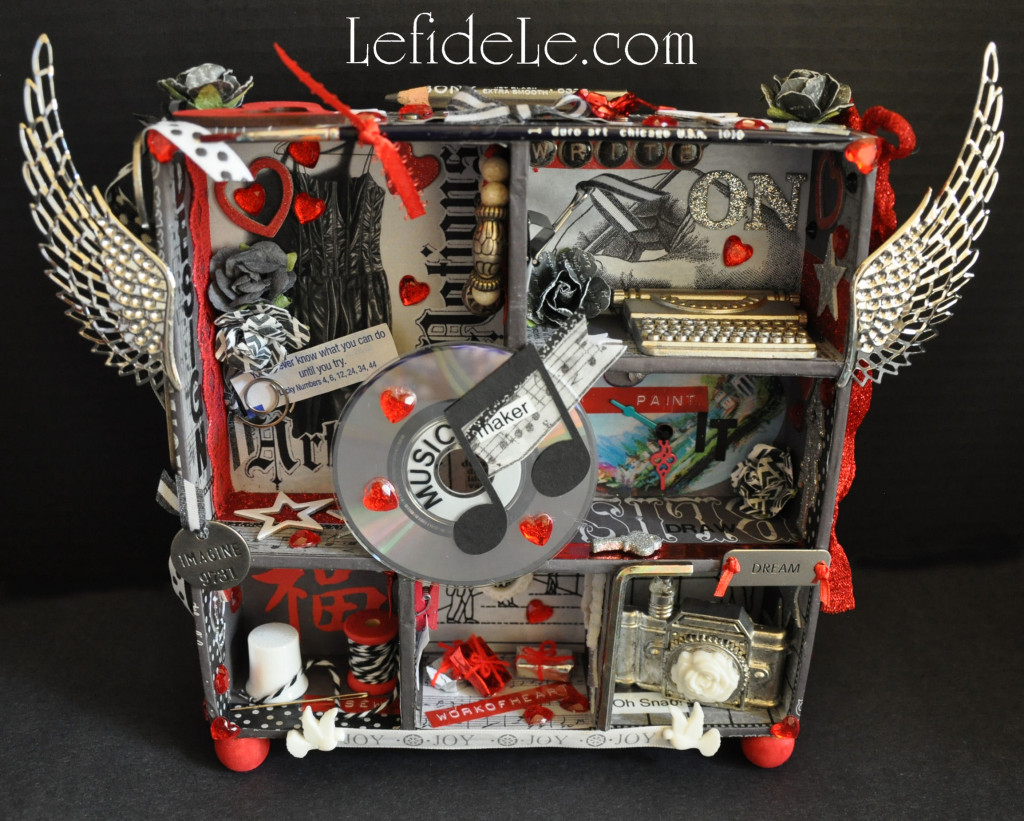
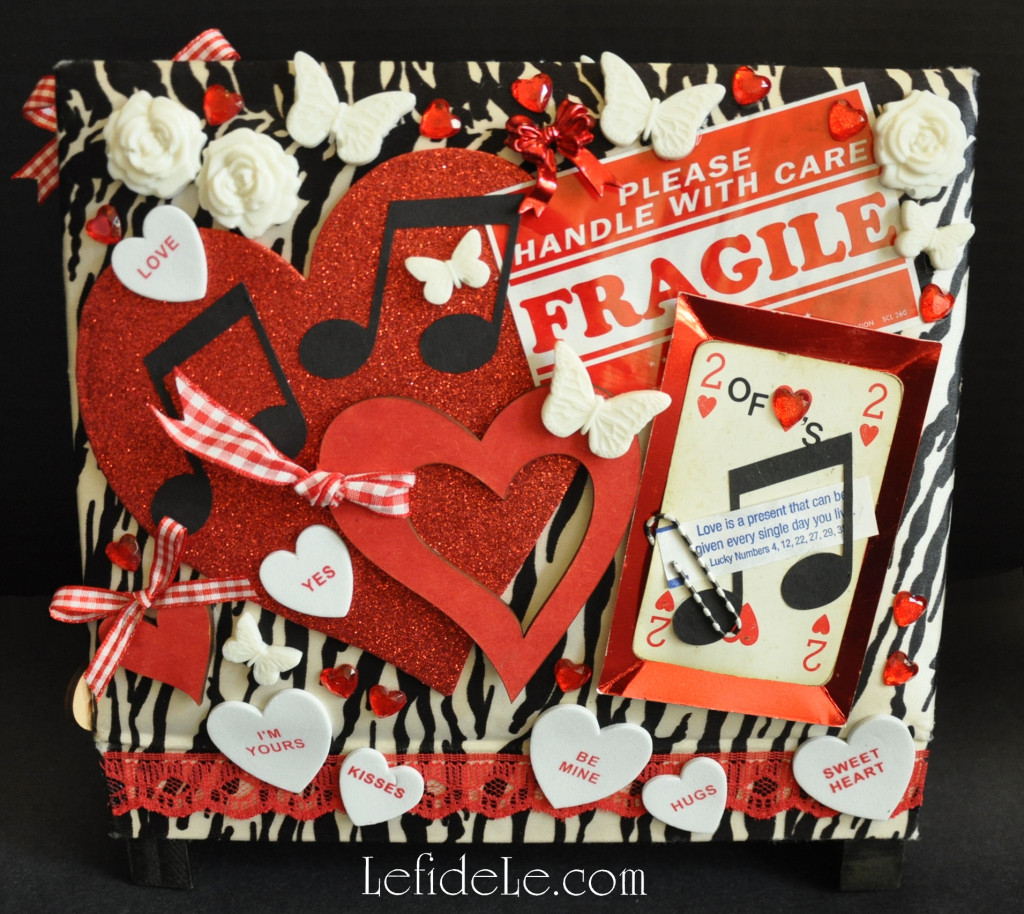
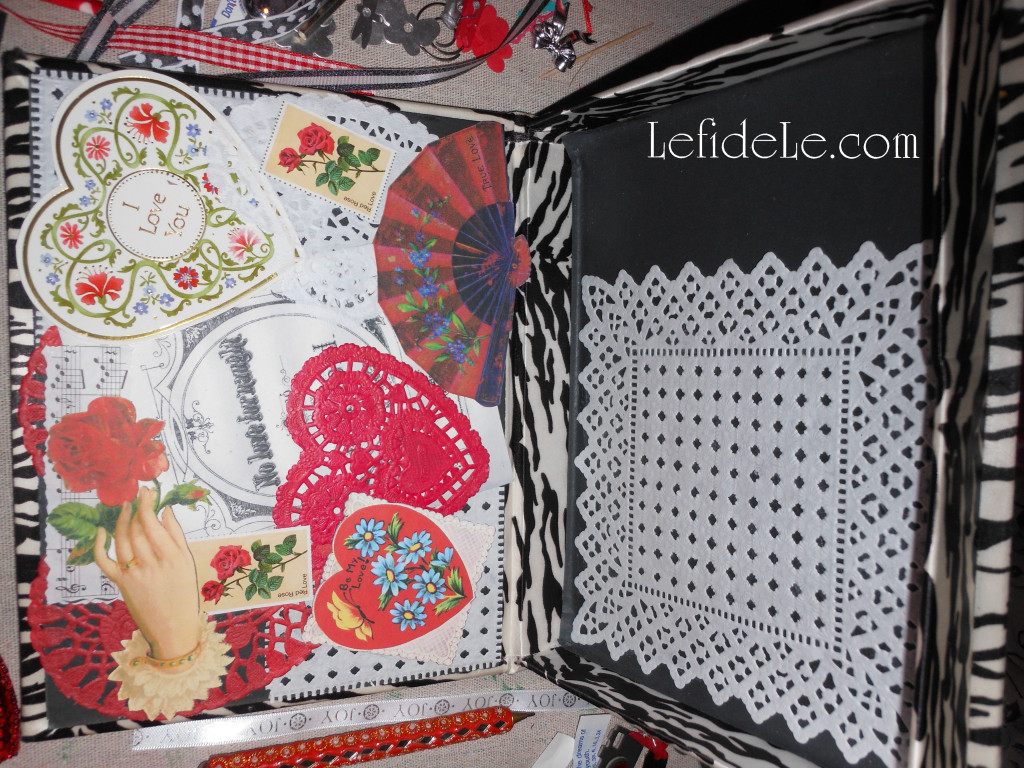
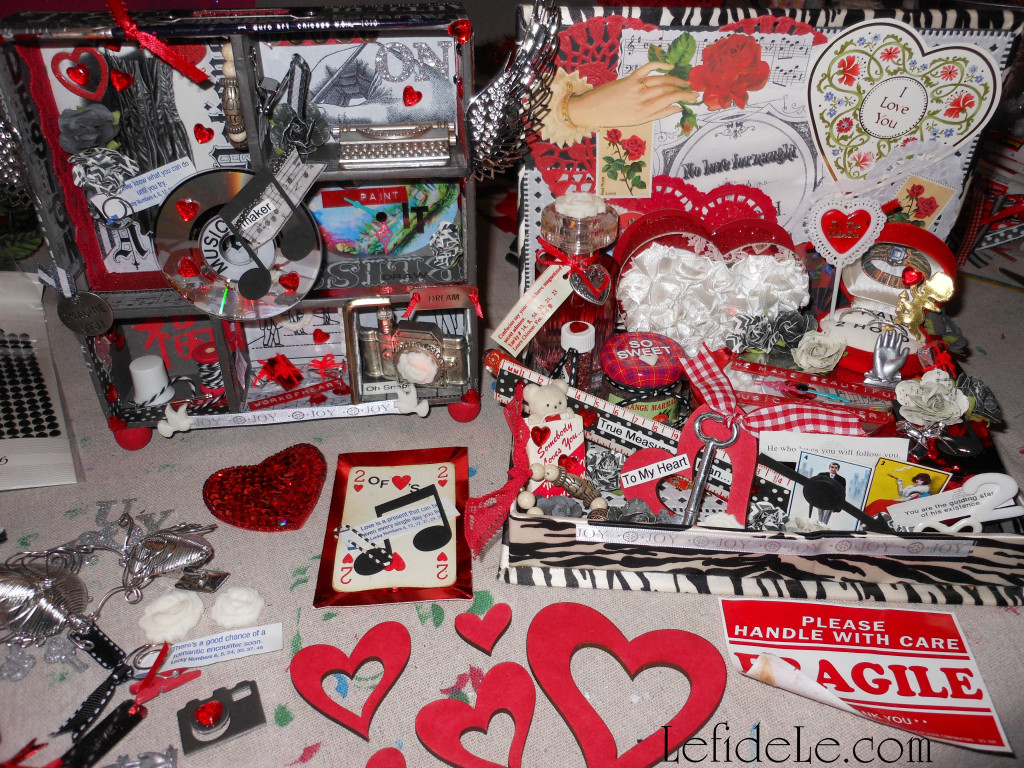
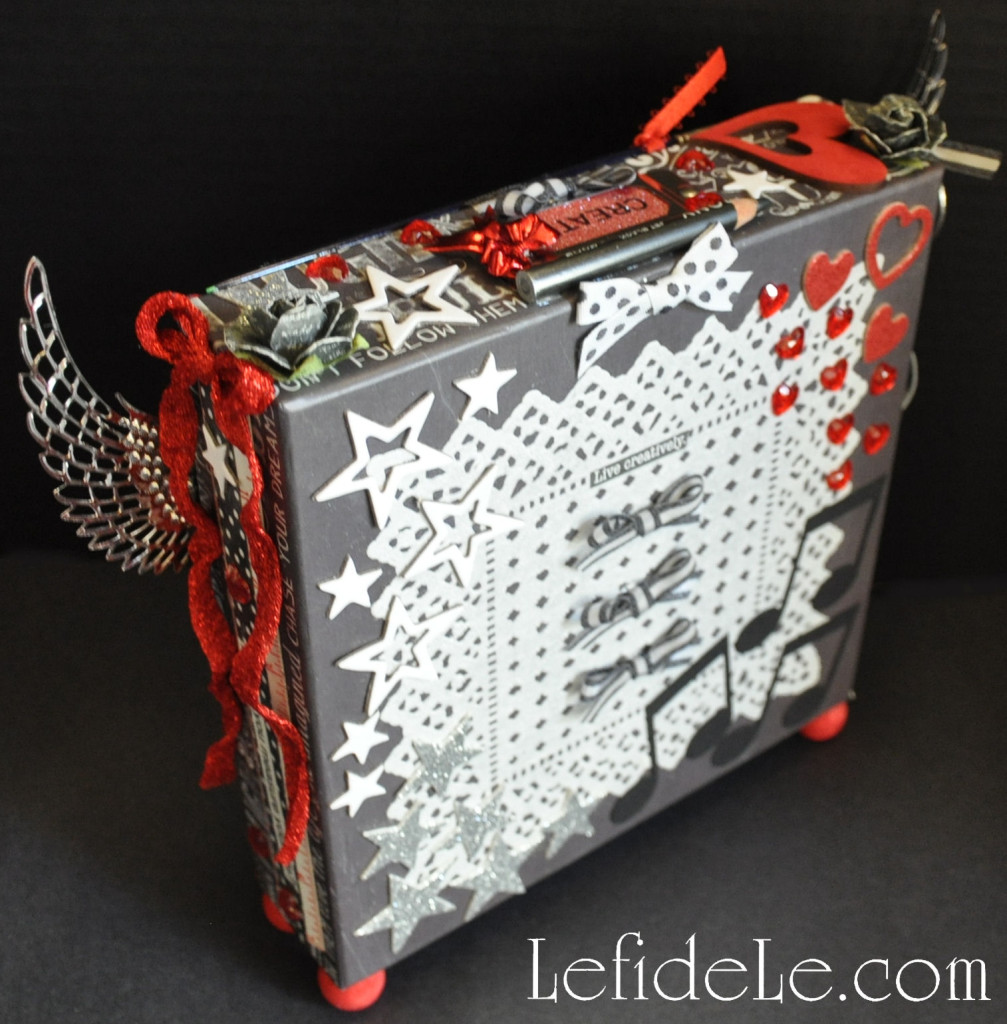
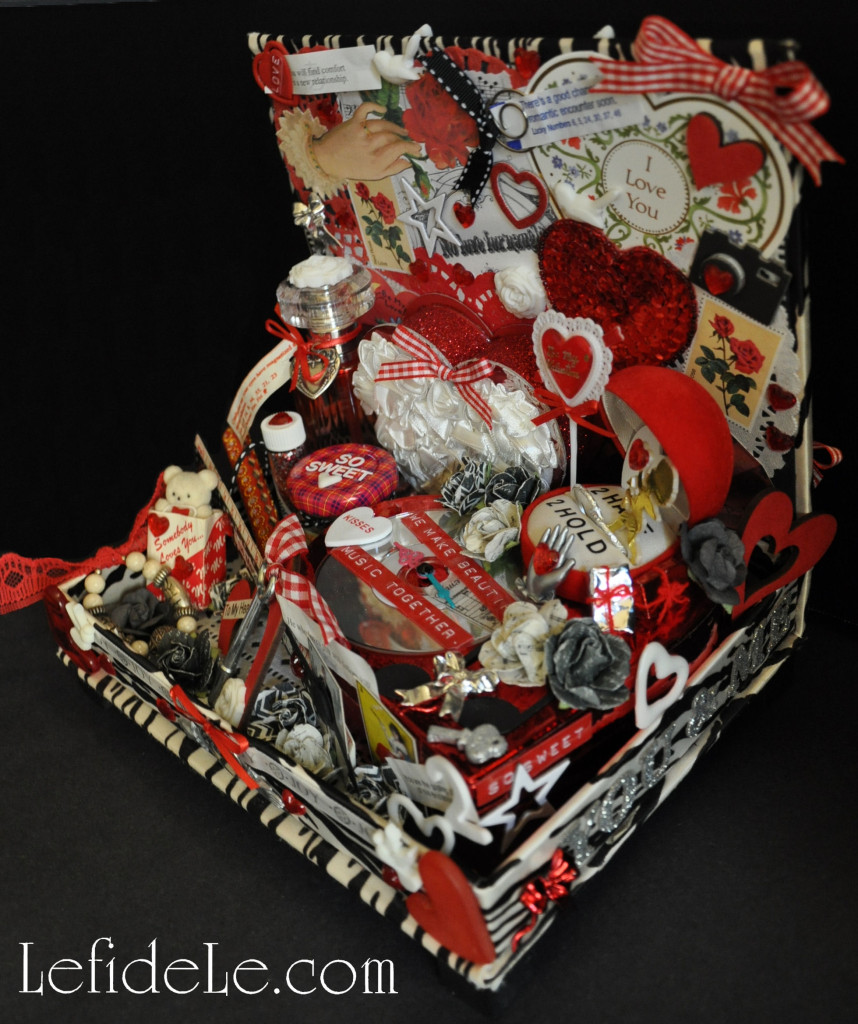
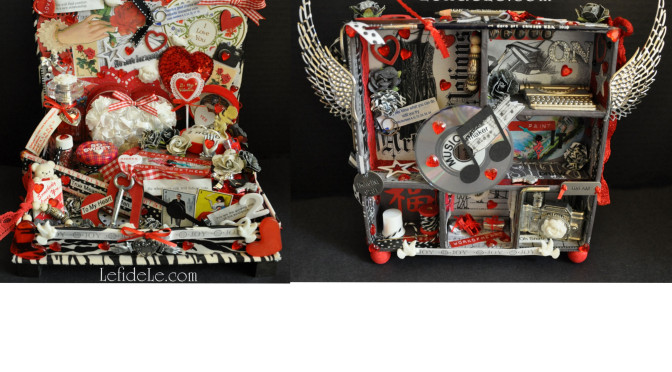
In honor of Valentine’s Day, I’ve made 2 assemblage sculptures (which are the 3-dimensional versions of collages), one honoring romantic spirits and the other creative kindred spirits. With photographic examples of the steps, along with some basic instruction, I’m sure you’ll be able to create your own. This project is the perfect Valentine gift because you can incorporate little bits of ephemera like ticket stubs and cards from your romance, or you can celebrate a creative spirit with little items that symbolize the recipient’s talents. It’s an inexpensive way to demonstrate affection in a memorable one-of-a-kind way… and they’re so much fun to make!

20Leigh

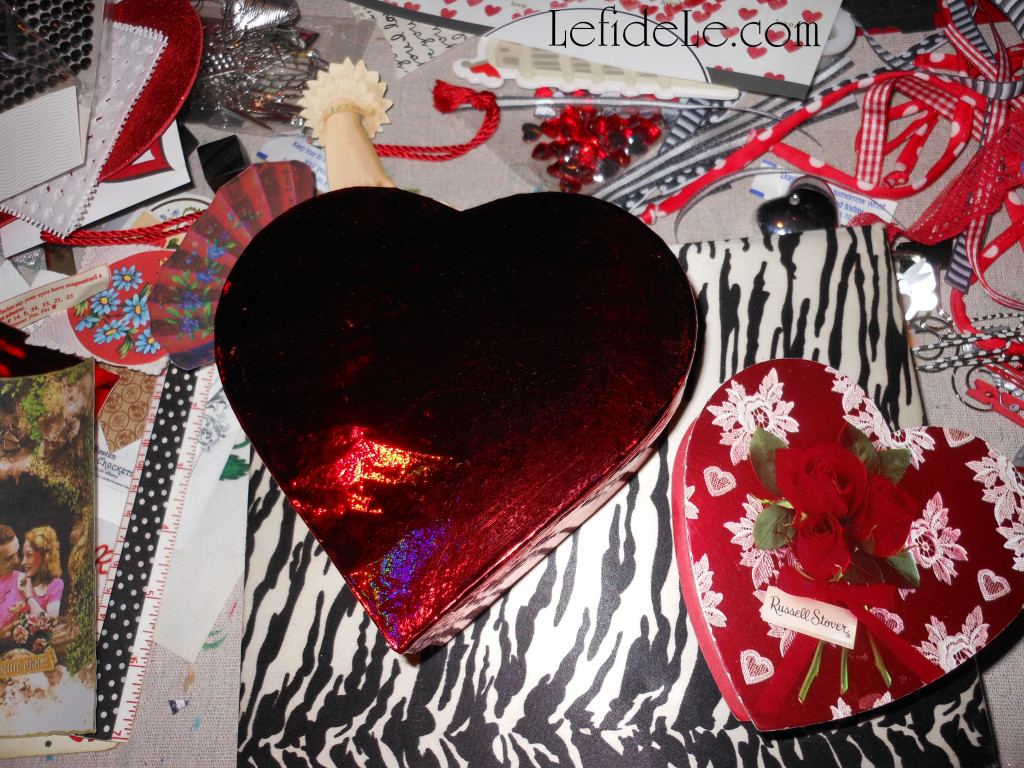
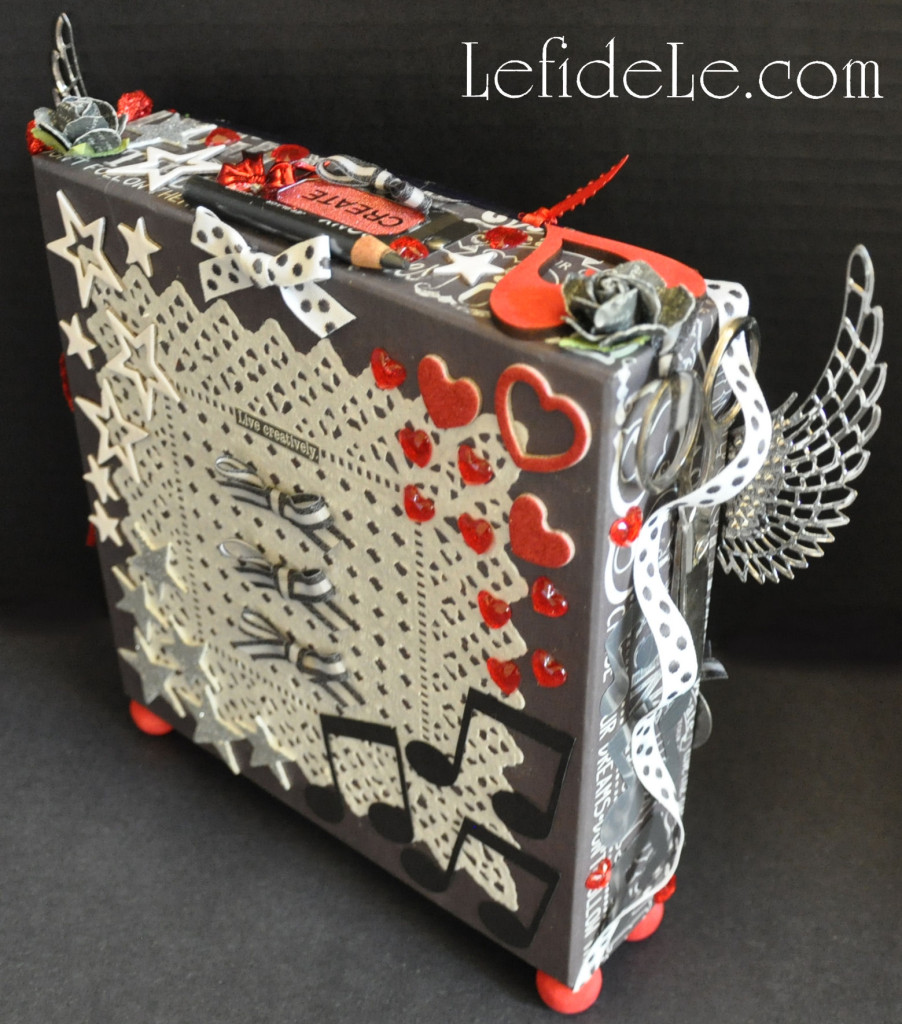
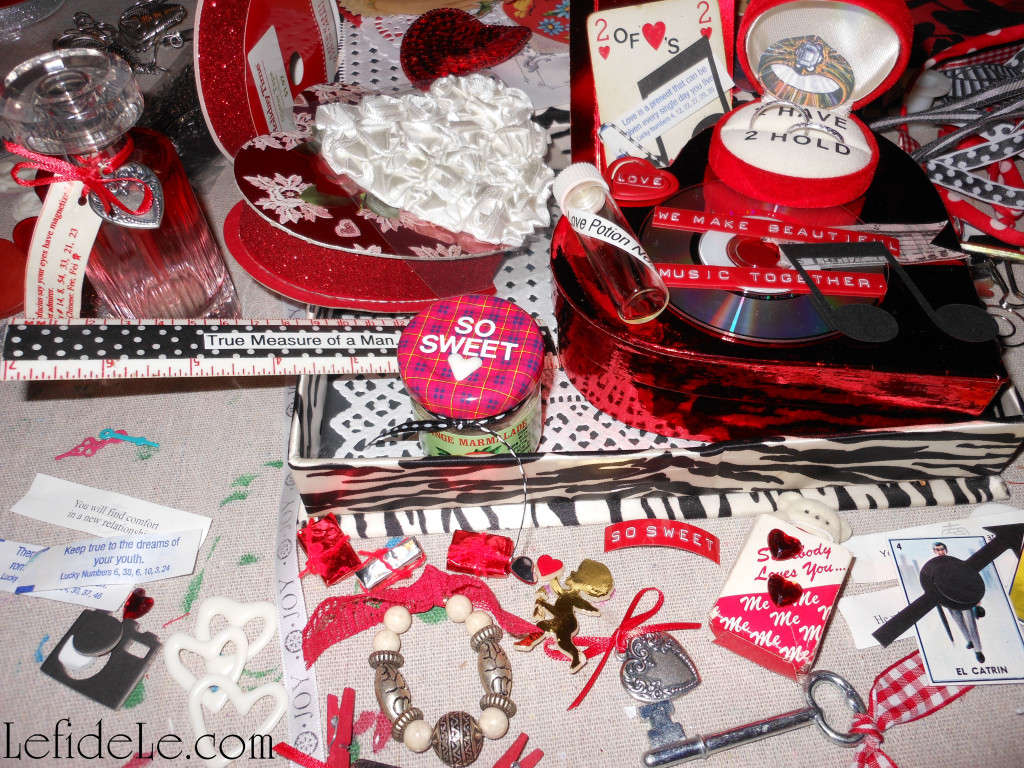
Let’s start with the basics… assemblage sculptures are really just 3D collages. Instead of merely cutting and gluing flat pieces of paper images to a larger sheet of paper, solid ephemera (like perfume bottles) are glued to a base (like a book box). As with any sculpture, they are viewed from 360ᵒ and so should be layered on all sides. In this way, they really are more challenging to make and more interesting to look at. Completed pieces are best viewed close up and in person like one would inspect the contents of a tiny dollhouse.

26Leigh

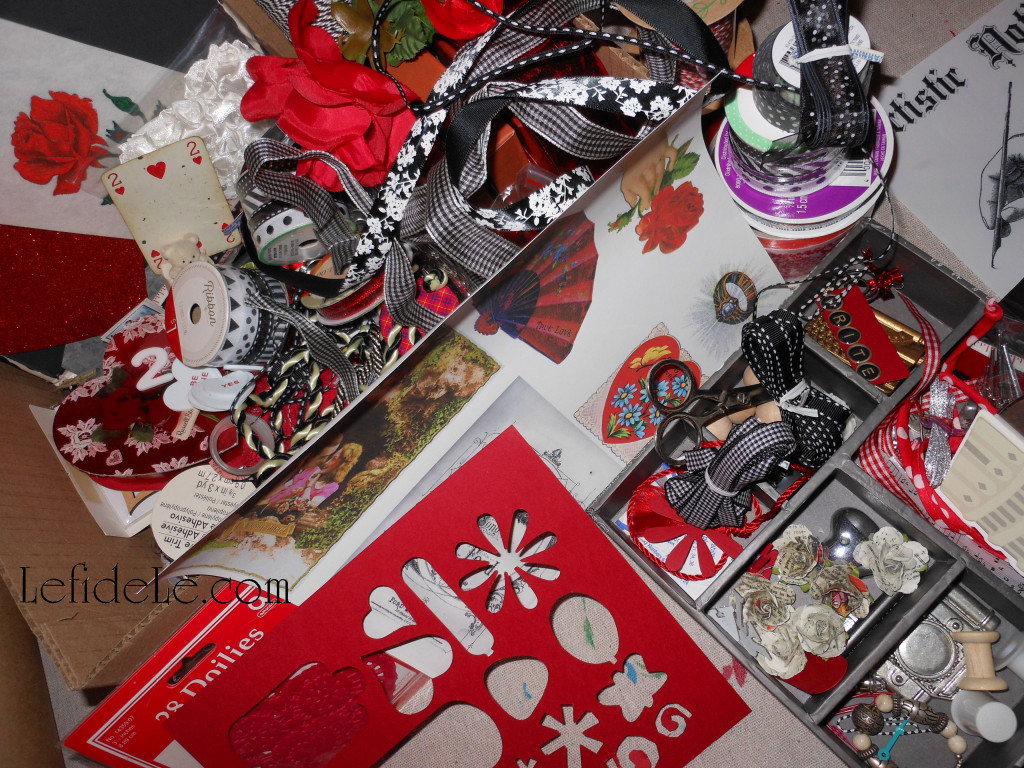
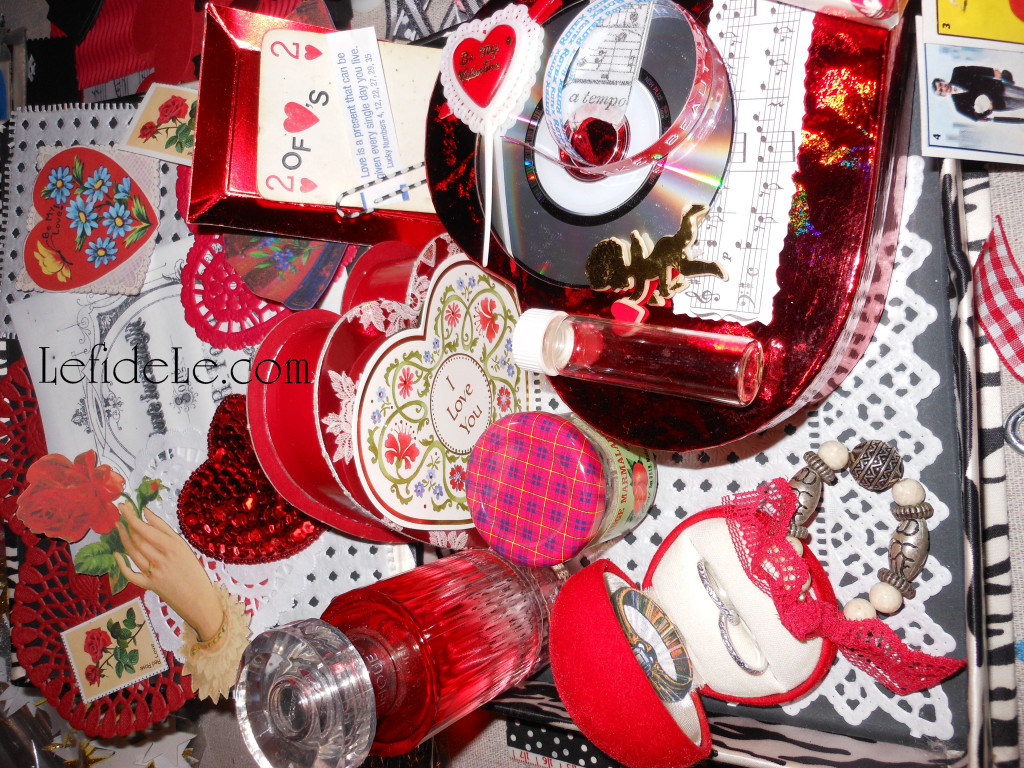
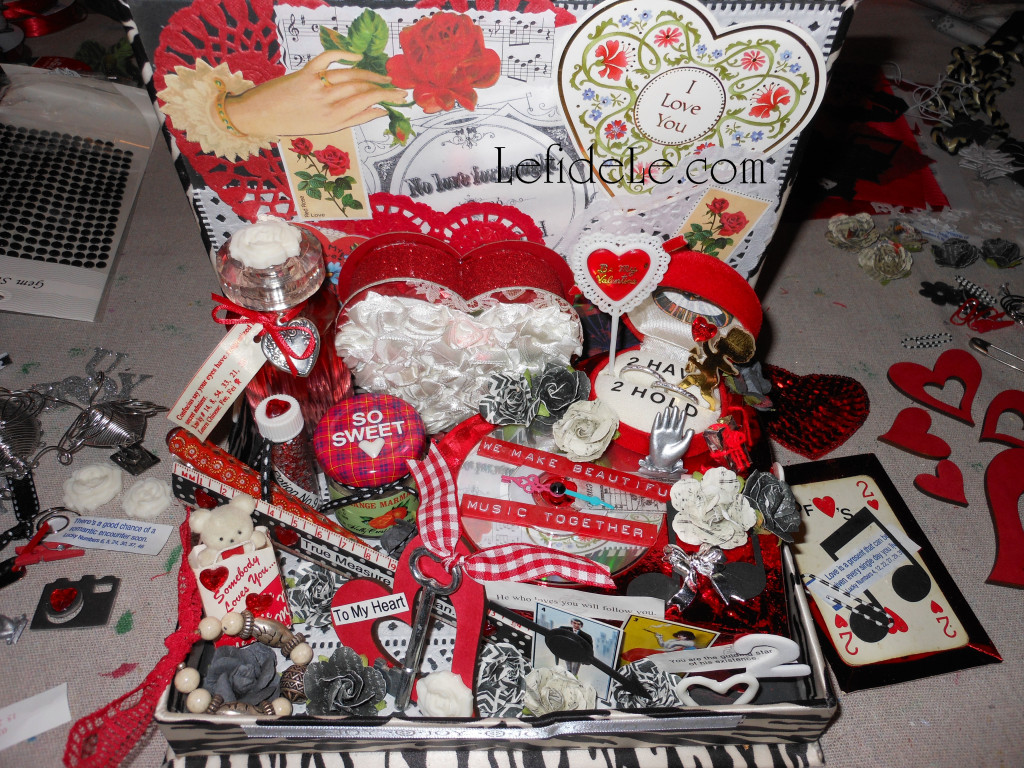
I’ve made two at the same time in order to demonstrate more fully just how to complete such a project. They have very different themes, but utilize the same color scheme and even some of the same items like crystal hearts. In one artwork these symbolize romantic affection while in the other representing the love of craft. Personally, I find that it’s best to begin by gathering all the important ephemera you’d like to use first.

1Leigh

Think of it like an exaggerated version of scrapbooking. Add things that depict cherished memories or even inside jokes. Another way to begin is make a list of things you want to portray, and then look for elements that would render those. And, let’s just say that you don’t have the right memento from that beach trip… well, just go buy a lovely shell and write a date on it in permanent marker. It really is that simple.

45Leigh

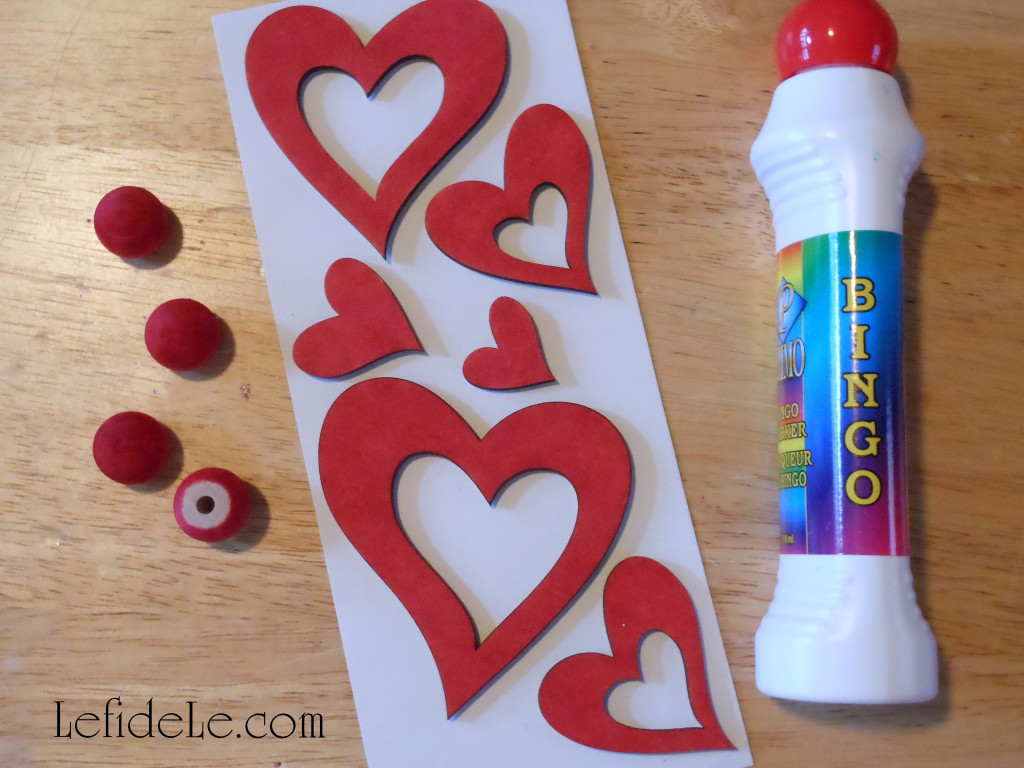
Observe the collected items to see which colors are repeated most. Allow this to dictate your color scheme. Any pieces that clash with that scheme can be altered to blend in seamlessly. Paint, stain, glitter, glue, ribbon, and tape can change a tchotchke to suit your palette. Here I’ve use a bingo marker to stain some pale wooden heart cutouts and potential base feet. (See more about the possibilities of bingo markers in my article: Fast & Easy DIY Hand-stamped Polka-dot Gift Wrap & Matching Gift Crafts.)

25-2Leigh

The next step is to go to your craft area, local craft store, or even online to search for coordinating bits of ribbon, washi tape, or even feathers to fill in the empty portions of your project. (A few of my affiliates offer great rotating discounts on art and craft supplies. Check them out in the sidebars and footer.) How much you use is a matter of personal artistic preference. I intentionally load some assemblages up to the hilt, while in others I designate empty voids as a design element in and of itself. (This is called “negative space” in “art-speak”.)

48Leigh

Choose an appropriate sized base object according to the size and amount of your collected ephemera, and by how you would like to display them. (Of course, I’ve also started with a really awesome base then collected items after. For a Valentine project though, the most important elements are the collected ones.) You can use a tiny chocolate box if you only have a few key items and are short on time. Or, you can use that chocolate box as a pedestal inside a bigger box (just remember to glue the little box together before adhering it to the base).

7Leigh

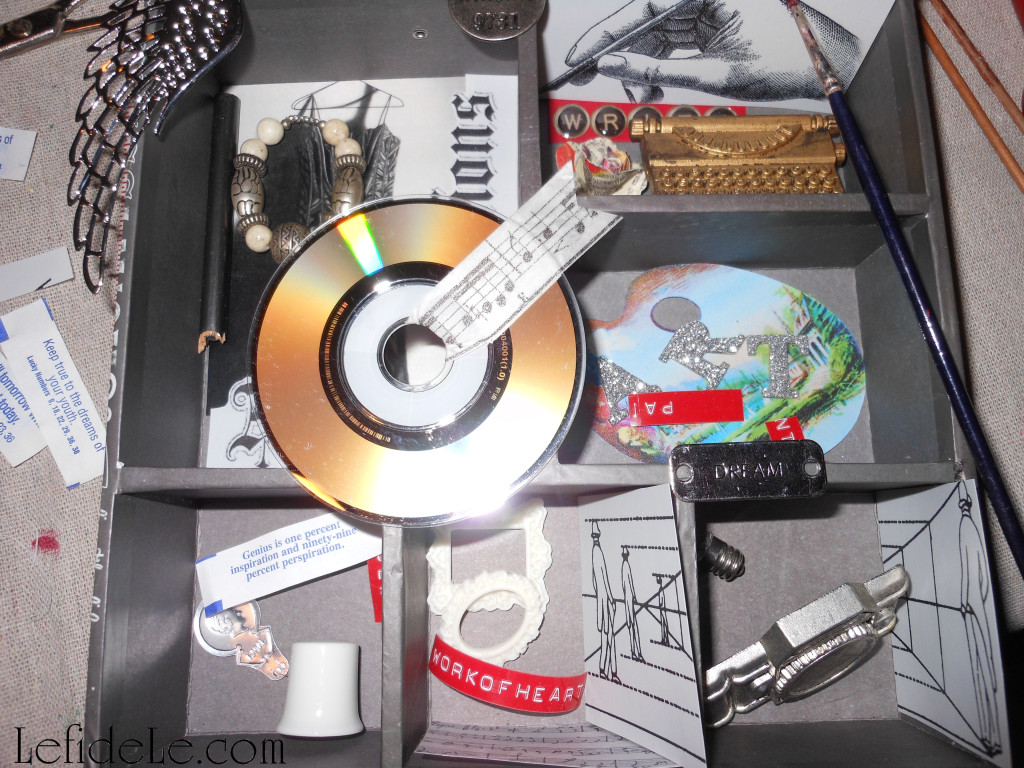
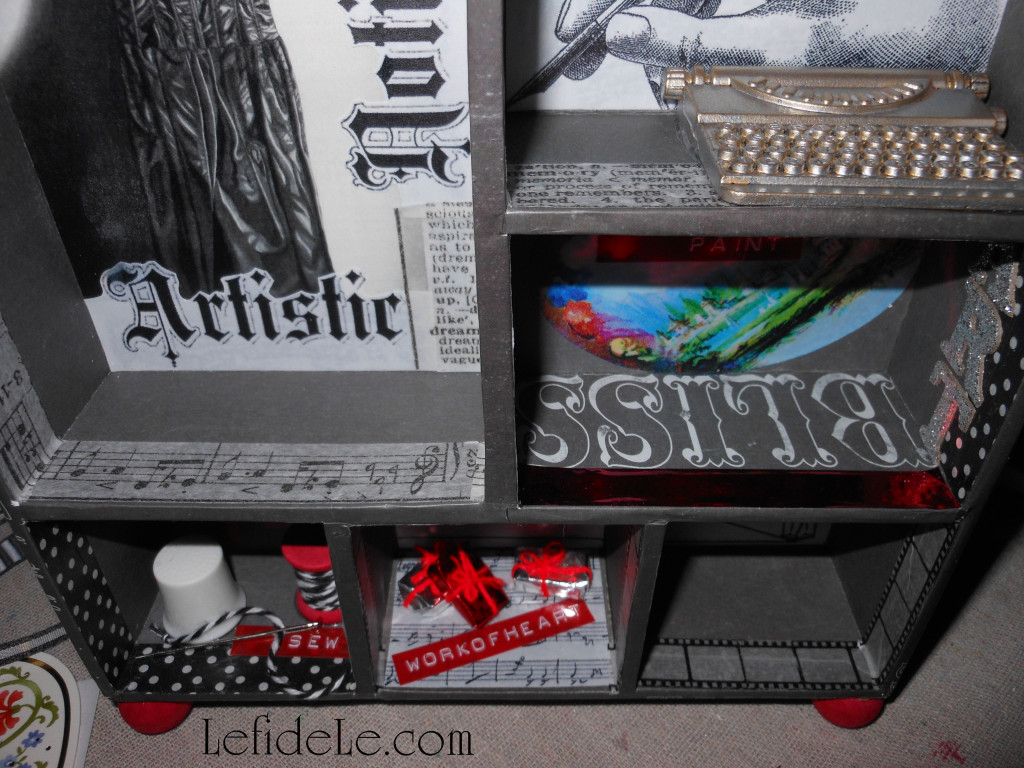
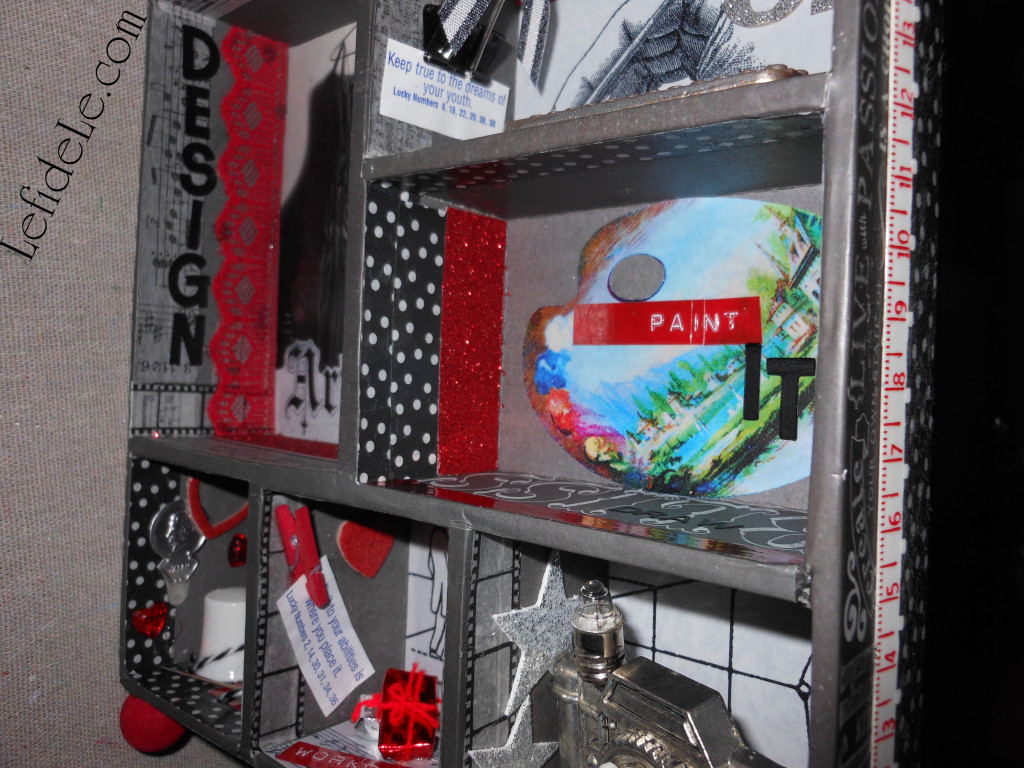
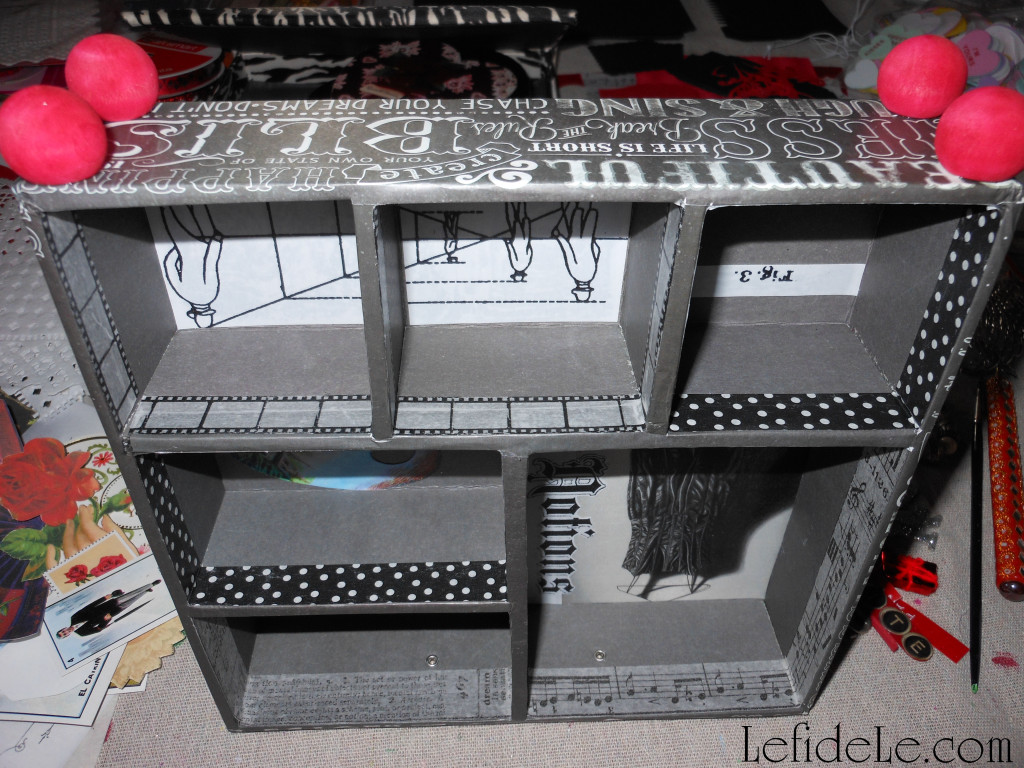
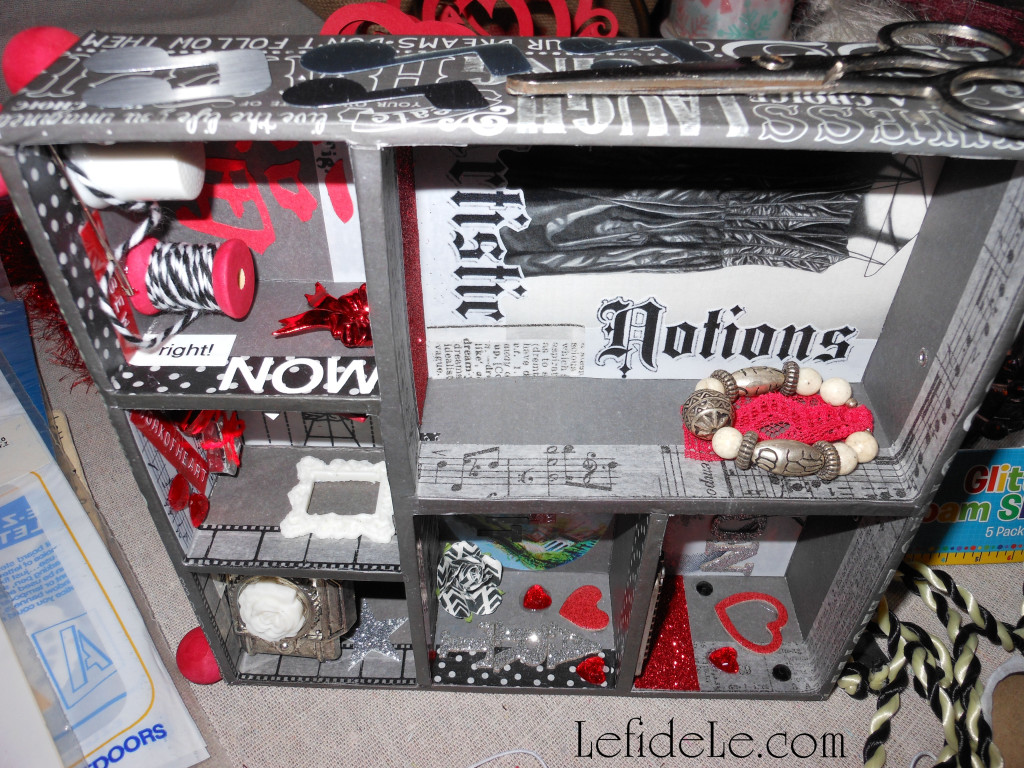
I used a vintage fabric covered book box for the “Sweet-Heart” assemblage. I love using old pieces off-book so to speak. I thought a drawer organizer box would be perfect for the “Creative-Heart” project. I just turned it on its side to make a kind of display case out of it. You can even use a plain paper-mache box, and decorate to suit your theme.

51Leigh

Lay out the items you’d like to use to see how it looks best arranged. Move things around until you find it visually appealing. Eventually it will just look right. You can lock this into your memory, or even take a photo to reference it while you glue things down. Use a permanent glue stick to adhere the paper pieces in layers to the base.

73Leigh

Here I’ve added washi, glitter, and foil tape to add visual interest to the plain centers of the “Creative-Heart” assemblage. Then I glued paper pieces to the backs like a papered wall.

39Leigh

Use a clear glue with more staying power for heftier pieces like glass bottles and metal pieces. (I placed some great glue varieties in the curated art supplies gallery box in the sidebar. Just click on them to read the specs.)

59-2Leigh

I glued small stained wooden shapes to the bases to serve as feet (those shown earlier). This is the most inexpensive way to both elevate and protect the artwork. You also use more ornate metal feet specifically made for assemblages or even small silicone stickers.

57Leigh

Rotate bases to glue all of the heavier objects onto that side, and then let them set to dry. Continue to rotate and glue various edges. Of course, try to position the bigger more important pieces before filling in with the tiny ones.

54Leigh

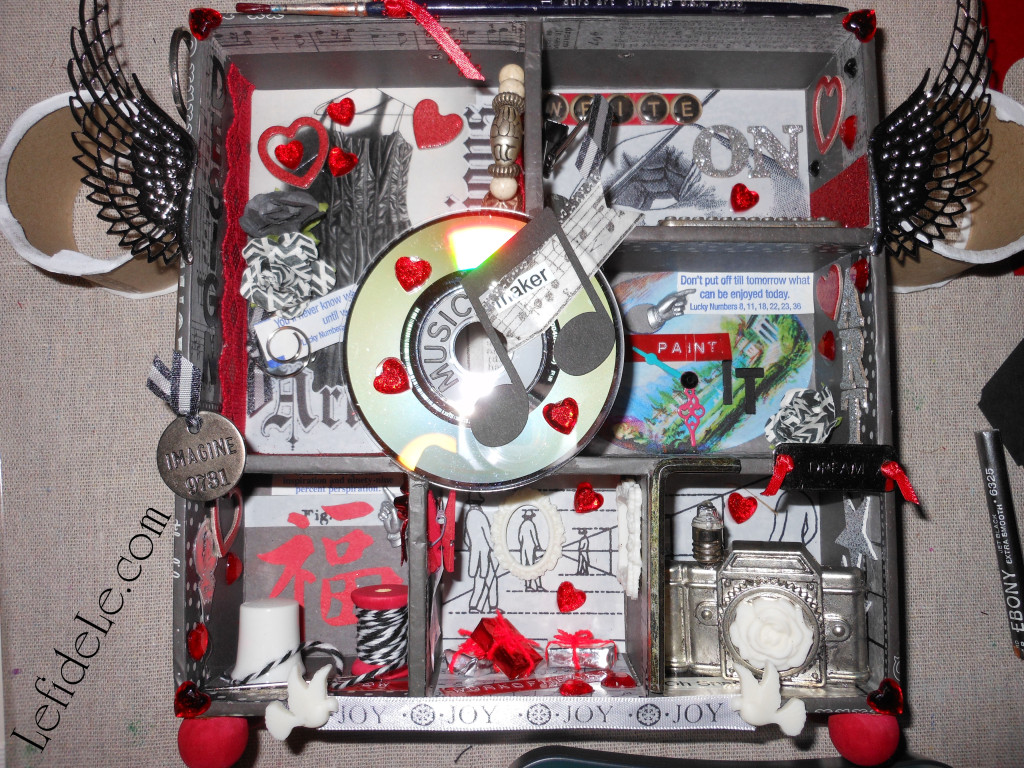
Think about adding meaningful words, phrases, questions, or quotes to impart further meaning to your elements. I added these using printed label tape, dymo tape, vinyl lettering, glittered chipboard letters, a Chinese character, and even fortune cookie papers. Apply these directly onto your pieces and to the base itself.

50Leigh

I also made ivory shapes using Plaid Mod Molds. (These have been added to the curated gallery too.) I love being able to quickly make whatever element I feel needs to be included. I included metal jewelry charms, painted paper clips, mini-CDs, Spanish bingo cards, old keys, rulers, scissors, paper rosettes, ornaments, cupcake picks, playing cards, spools, thimbles, magnets, paintbrushes, crystals, glass vials and jars, etc.

56Leigh

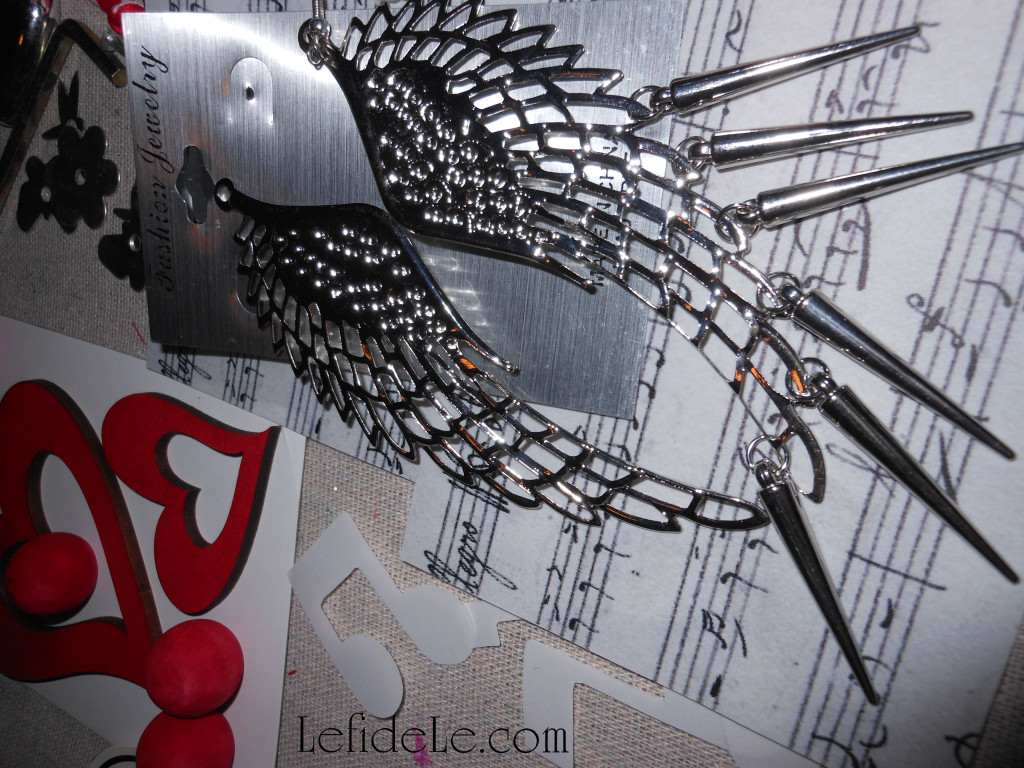
Here is a pair of giant winged earrings that I’ve modified for the project. I even cut out music notes from the shiny display card. You never really know where something’s come from in one of my pieces. I generally use a lot of vintage elements and scraps that I modify. I’m lucky enough to have a grandma that collected a lot of random stuff that I can now use, but you can find a lot of knickknacks both online and in antique shops. Let your creativity run wild and use anything that can be altered and glued down!

3Leigh

55Leigh

Just keep layering your pieces into the base like you would to complete a puzzle. It’s done when you think adding anything else will mess it up… the Goldilocks moment of when it’s just right. Of course, there will always be critics, but you didn’t make it for them. If your recipient appreciates the care that went into it, and if you enjoyed making it…. well, isn’t that just the point of making a homemade gift?

17Leigh

18Leigh

Have fun & tell stupid Cupid you’ve got it covered!

Faithfully Yours,

Leigh
27Leigh

37Leigh

Making a Custom Book to Make the World a Better Place (One Fundraiser at a Time!)

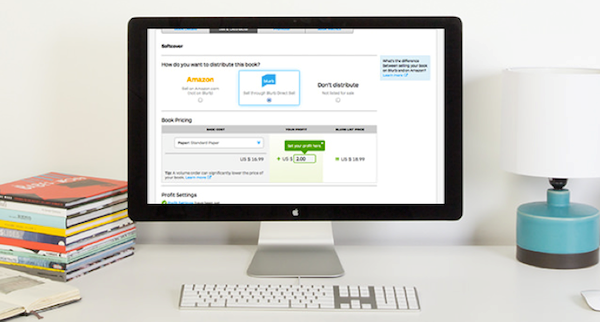
Fundraise with Blurb custom books (This is a sponsored post from Le fidèLe Designs affiliate Blurb, helping to bring you free & fabulous content!) If you are involved with any type of organization – animal rescue, PTA, even little league, you’ll probably need to raise money for it at some point. Creating a Blurb custom book to sell (or give away to donors) is a simple yet effective way to fundraise.

Tips for charity book-making:

  1. If your subject is the tiniest bit photogenic (like animals, the environment, or kids), think about putting together a simple yet classic photo book to sell. It’s easier than it sounds! Just use one of these six professionally designed templates and you’ll get a stunning book… without having to hire a professional designer. There is always at least one creative-type in every group who’s ready for a worthwhile project!
  2. Think about your narrative—what’s the story you want to tell? Using a mixture of words and images will tell people exactly what you do, and why you do it. With an inspiring story, you’ll find people are so much more open to your message. (Check out this great online book-making tool to get started.)
  3. Another great fundraising idea is to create a cute little notebook or planner covered with your organization’s logo atop a heart-inspiring photo. It’s so handy that people will actually want to carry it around… and carry your message with them!

Here’s a How To for the Right-Brained Folks: Feel free to forward this post to the charity-driven creator in your group, and if you have any of your own tips or tricks on how to raise money for a good cause, I’d love to hear them!

Faithfully Yours

Leigh

P.S. You can also publish your own travel, poetry, art, photo, portfolio, children’s, wedding, baby, memory, planner, notebook, memoirs, or even cookbooks! (Click here for a video on how to make a photo book!)

Fast & Easy DIY Hand-stamped Polka-dot Gift Wrap & Matching Gift Crafts

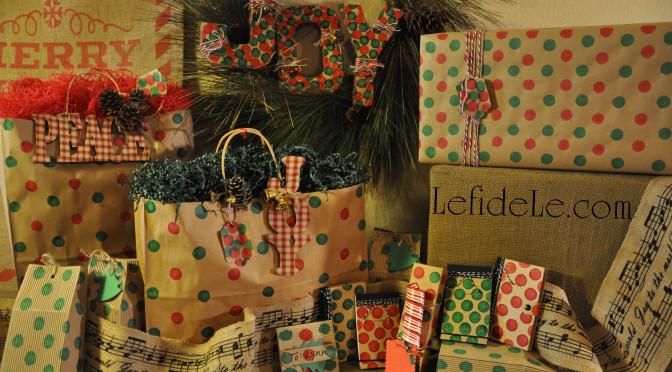
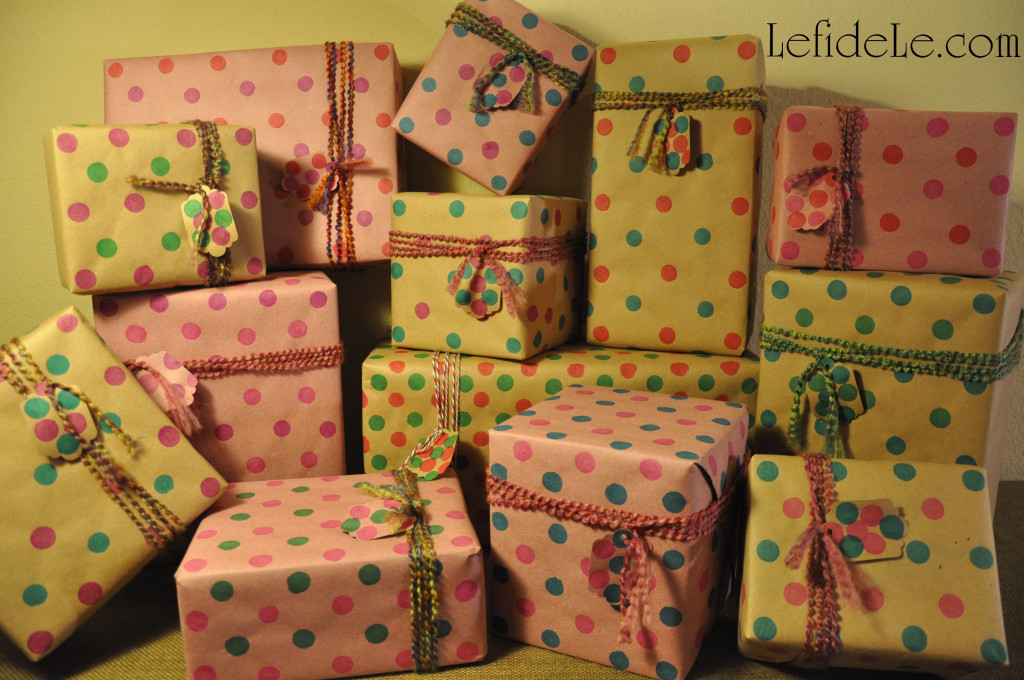
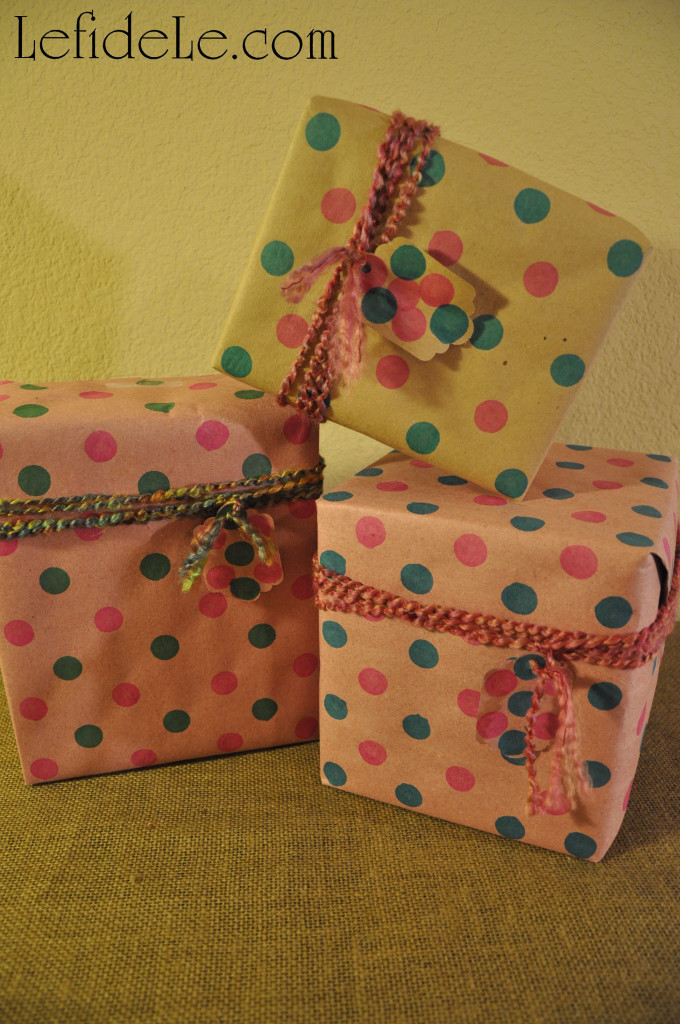
With all of the miles of commercially produced wrapping paper that stores seem to stock at every corner… why make your own? Well, it can be made super-fast and super-easy without looking like it! With my simple repurposing trick, you can make handcrafted gift wrap inexpensively in a matter of minutes. It’s really easy to stamp any type of package, paper, tag, card or box… even one that gets addressed and sent in the mail! It looks even more adorable on matching notebooks, craft letters, or any other gift that would accept inking. With stamping, you can match the colors to your décor for a catalog worthy Christmas, and delight loved ones with one-of-a-kind gifts at the same time. And, I don’t know about you, but I really love it when someone has cared enough to make something just for me.

94Leigh

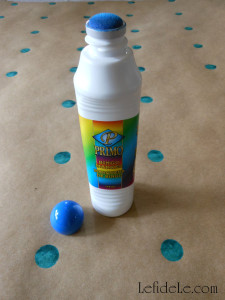
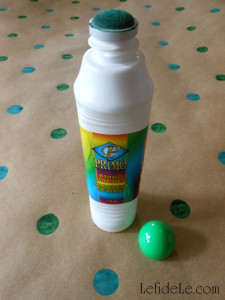
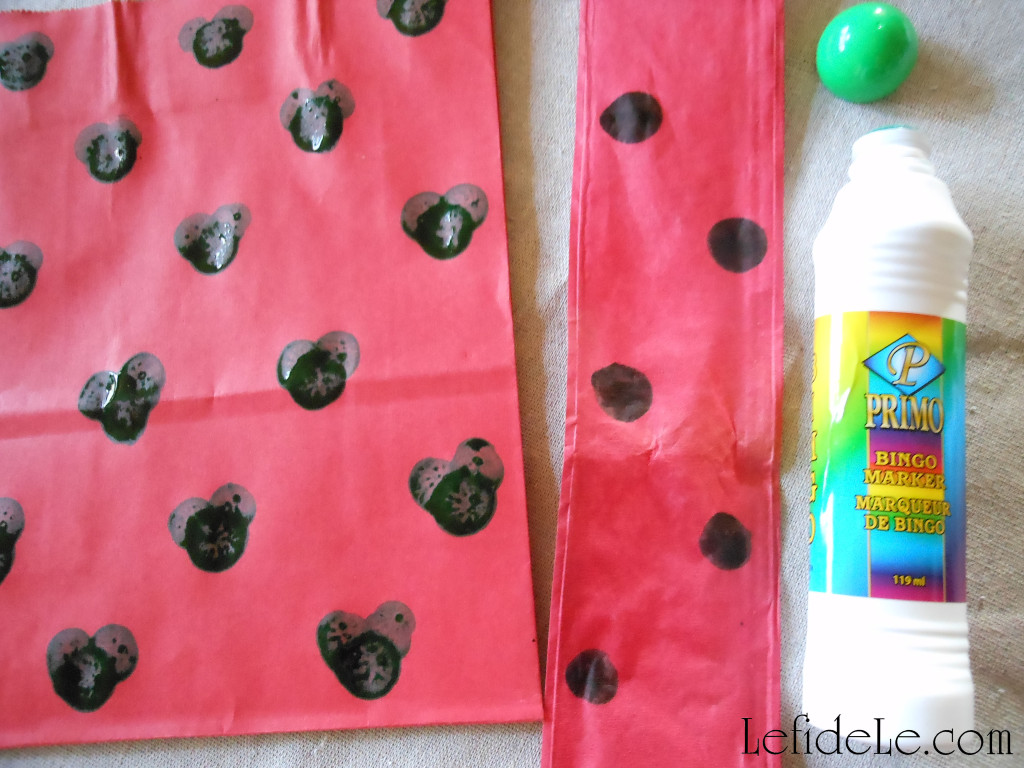
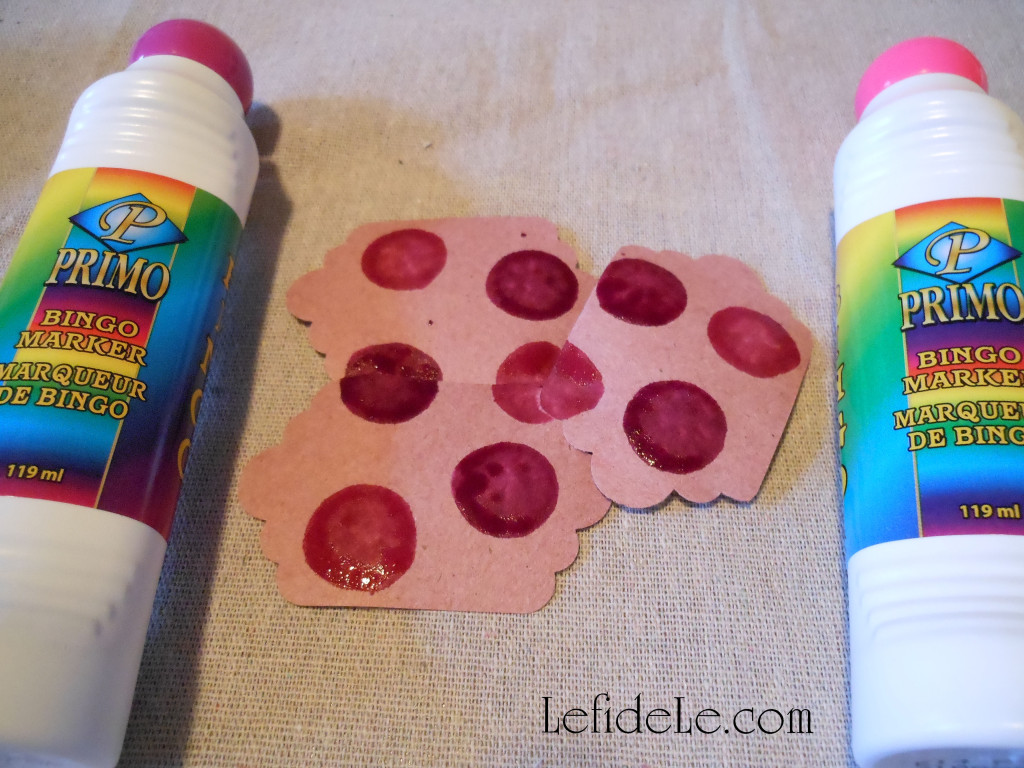
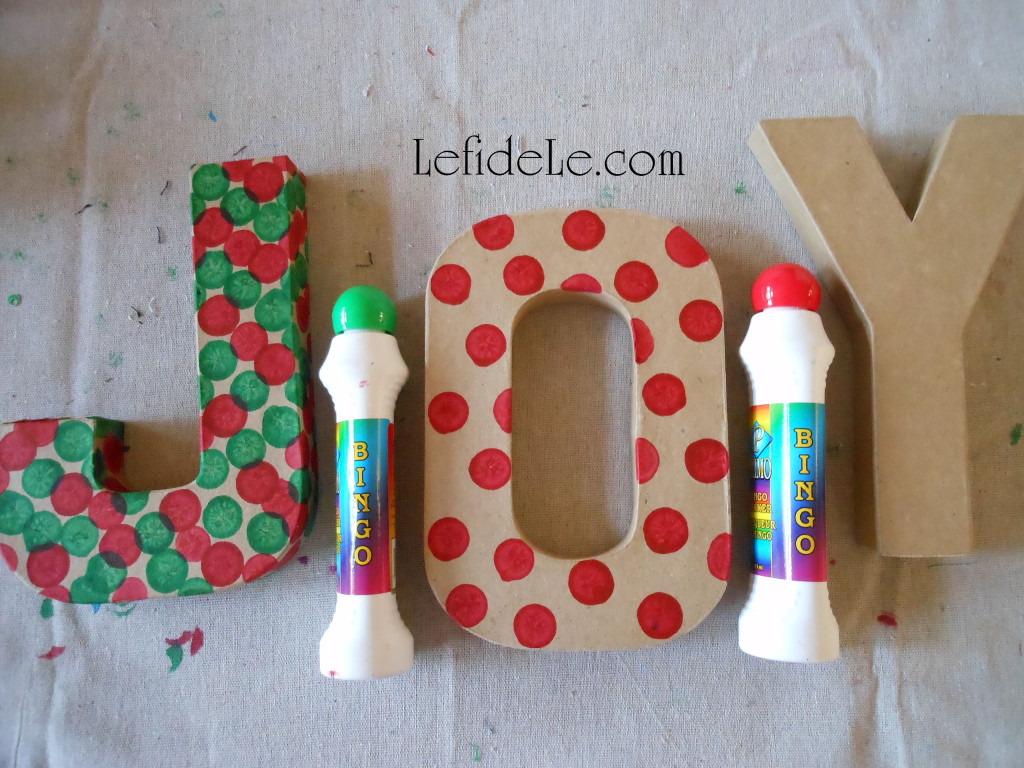
My simple trick to easy and fast polka-dot making (ahem, drumroll please)… bingo markers! The idea was sparked about 15 years ago when someone gave me a few of these because she thought I might want the ink in them. Let me tell you, I made so many spotted cards with them! Everyone was always surprised when I told them what I had used.

49-2Leigh

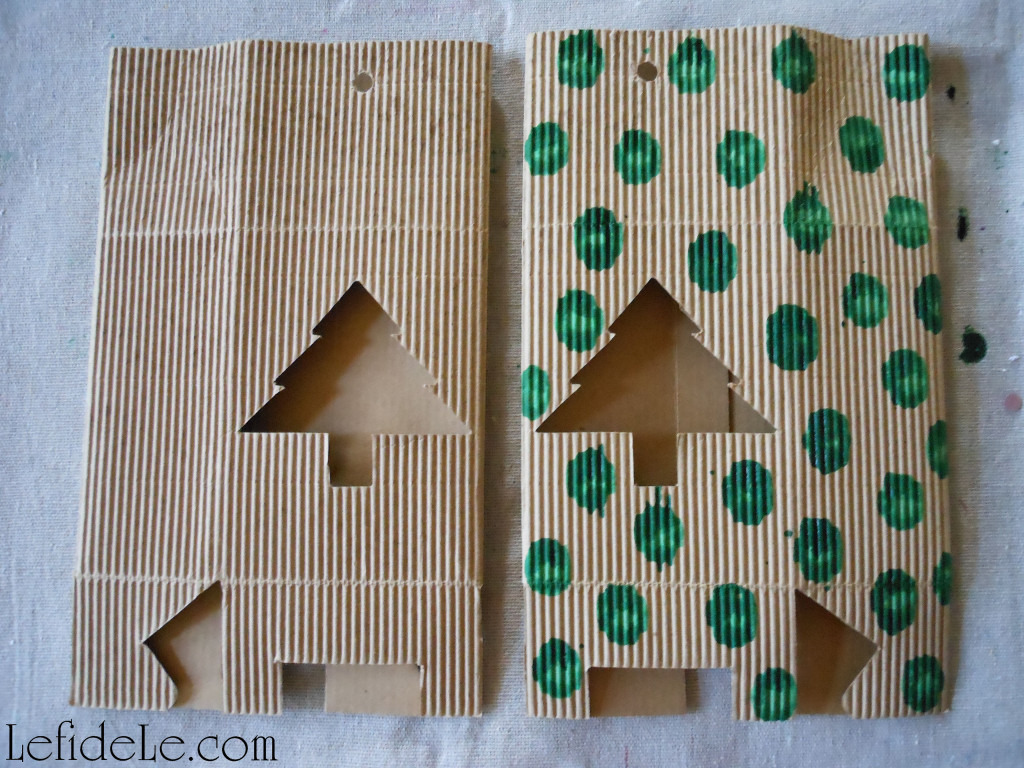
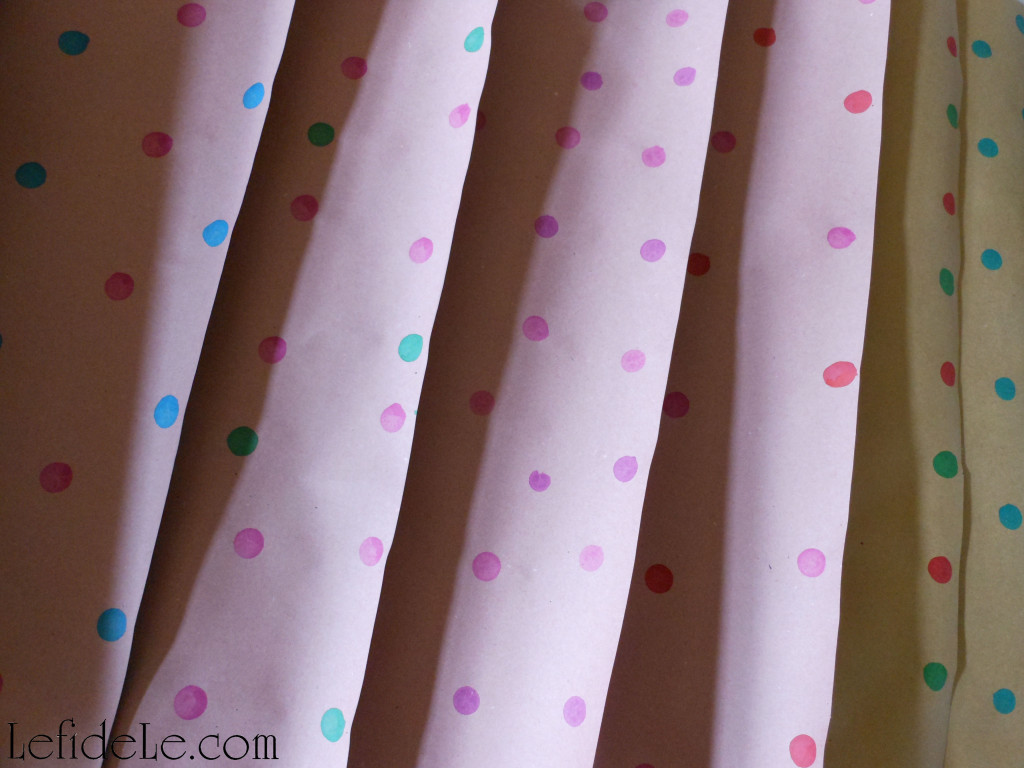
You can find them in so many colors. I’ve used pink, green, blue, red, and purple as examples here. They even come in shapes like shamrocks or hearts, but I’m sticking with polka-dots for now because they are just so classic and chic!

46Leigh

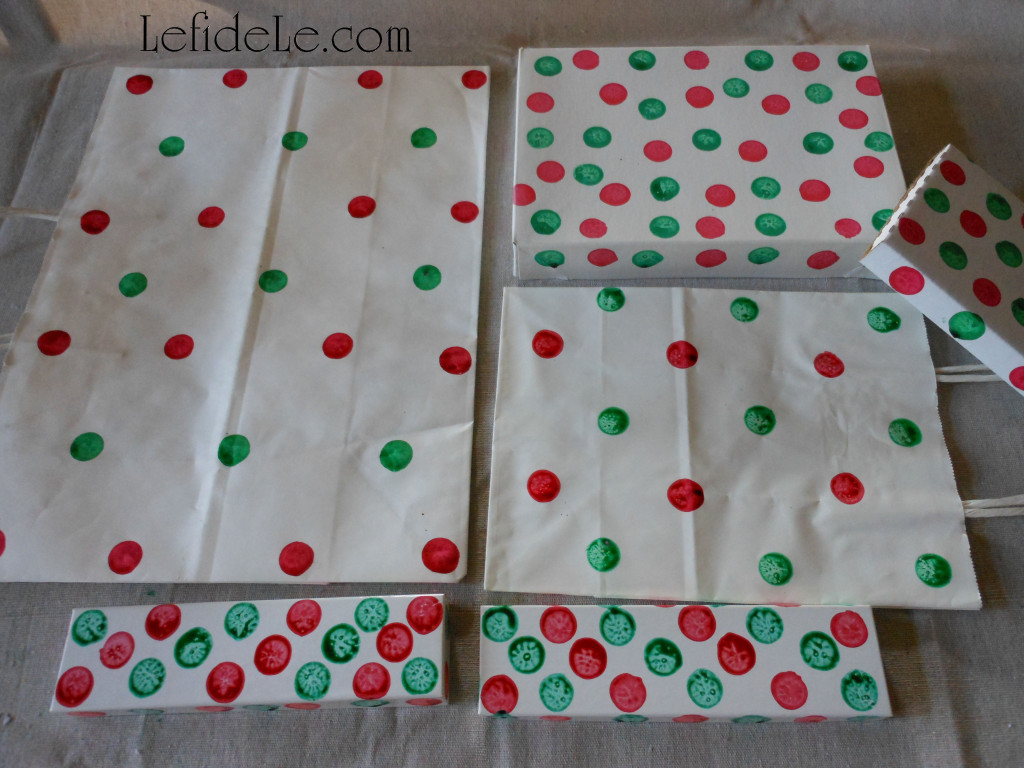
You can use any kind of paper for the gift wrap or bags. Glossy paper will leave more of a watercolor look, while matte paper will dry to a solid flat color. Both have their merits. Just know that glossy surfaces take much longer to dry. It’s great to buy neutral colored bags in white or kraft paper color, and then stamp them into personalized colors as needed.

44Leigh

You can match your décors theme, go with traditional colors, or even pick a different color combo for each family member. Pink is my grandmother’s favorite color, so that’s just what she gets!

102Leigh

Blue and pink polka-dots are perfect for gender-neutral baby showers.

28Leigh

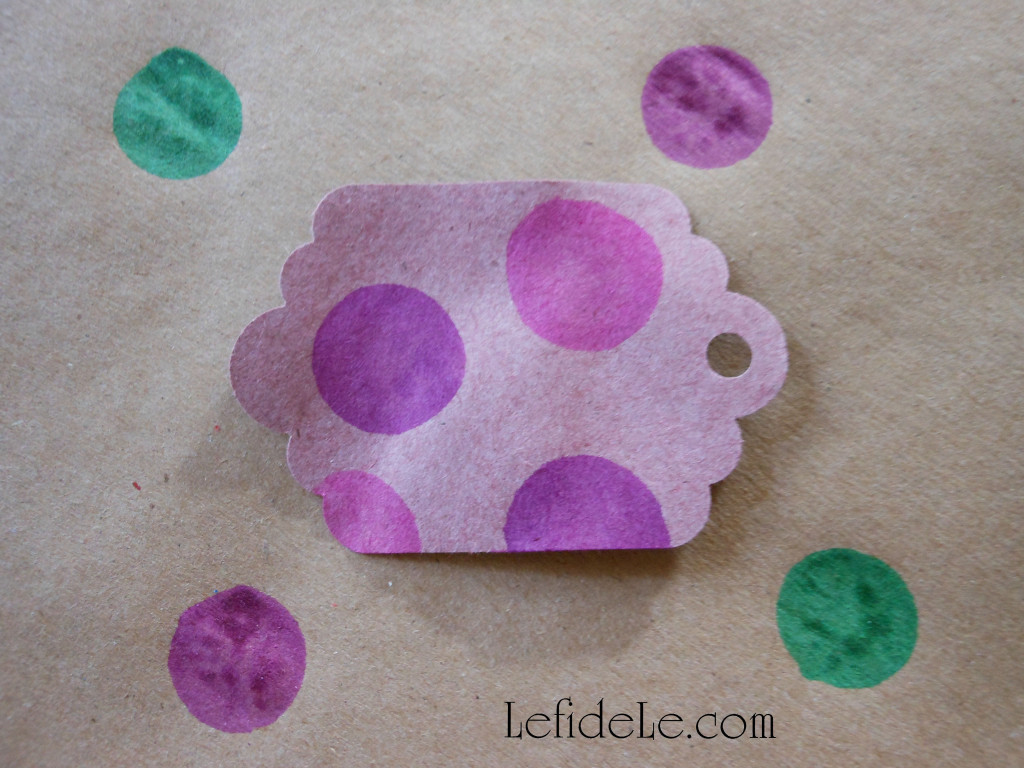
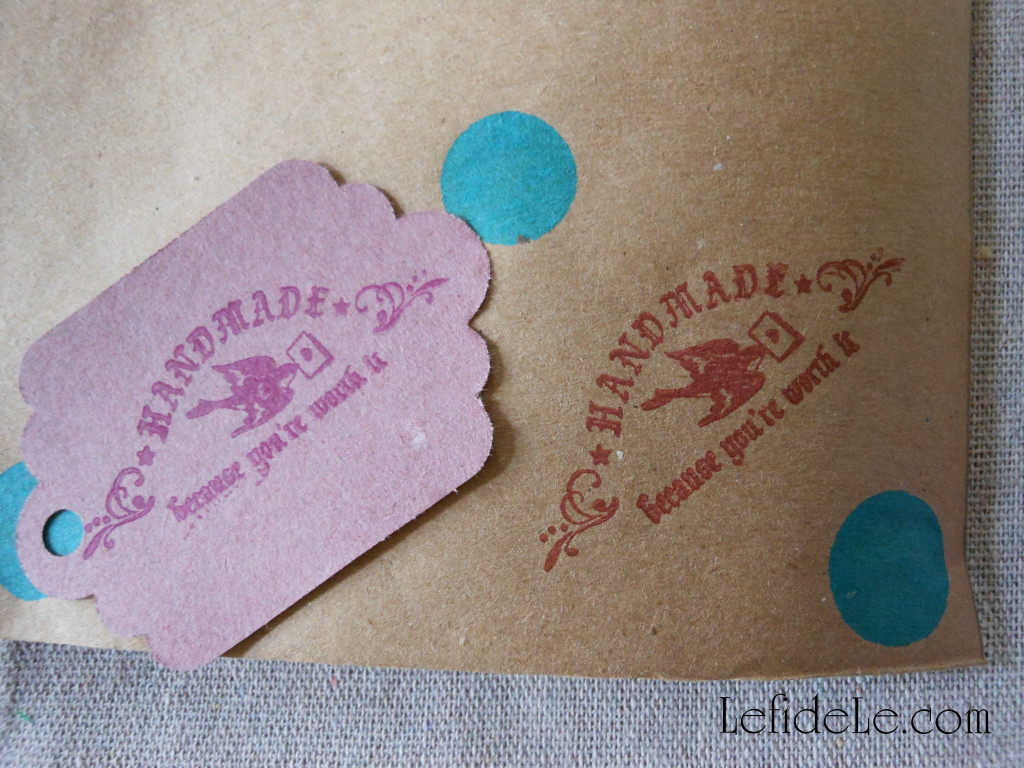
The paper I’m showing here is the best I’ve found for wrapping. It’s thick enough to hide the contents well. It won’t tear like the commercial variety in transit or mailing. It dries quickly and evenly so you can make a ton of it and just roll it back up. The tag in the picture has dry ink on pink paper, and it’s sitting atop tan with freshly applied ink.

39Leigh

The roll is really inexpensive for quite a lot, so it fits everyone’s budget. It’s so versatile because you can do anything with it (spray paint it, paint a scene on it, write messages on it, have kiddos draw on it, make gift tags or cards out of it, etc…) What is this amazing product? (Another drumroll please)… rosin paper from a hardware store! It’s actually used in homes during construction. I learned about it from my interior designer mother of course. It’s available in pink, green, white and tan like kraft paper in rolls that will last for years. I even use this stuff for covering the backs of framed artwork. (I’ll do a DIY tutorial for this in the future. It’s really easy and will save you so much money.)

30Leigh34Leigh

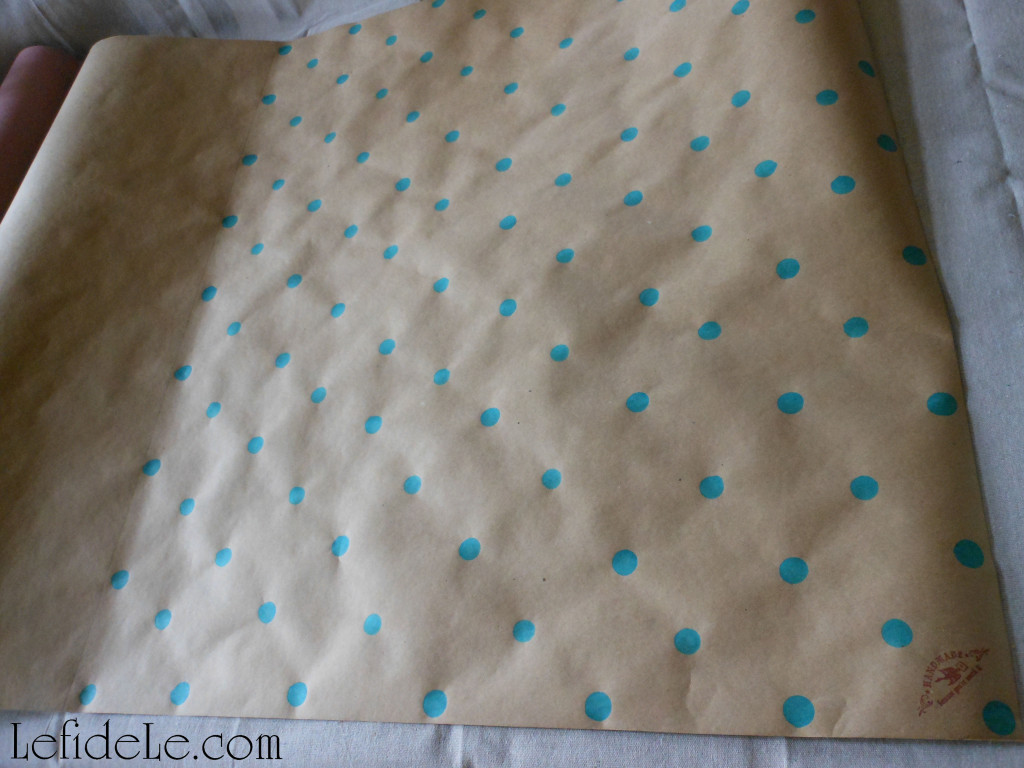
I try to stamp one color in a grid-like pattern, and then follow up in between those with a contrasting color. I have to admit though… sometimes it’s fun to just get stamp-happy all over the place! Do expect this when kiddos are involved. It’s fun to see the creations they come up with.

105Leigh

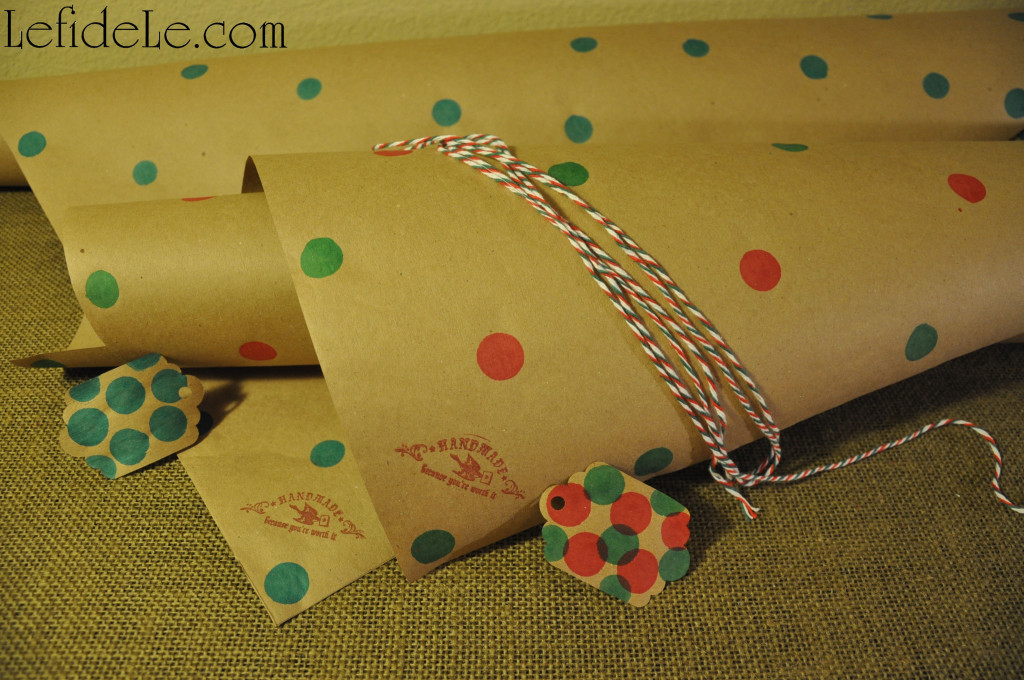
When making hand-stamped giftwrap for my Etsy store, I make long sections for wrapping purchased goods, and also package making kits complete with tag and twine.

74Leigh

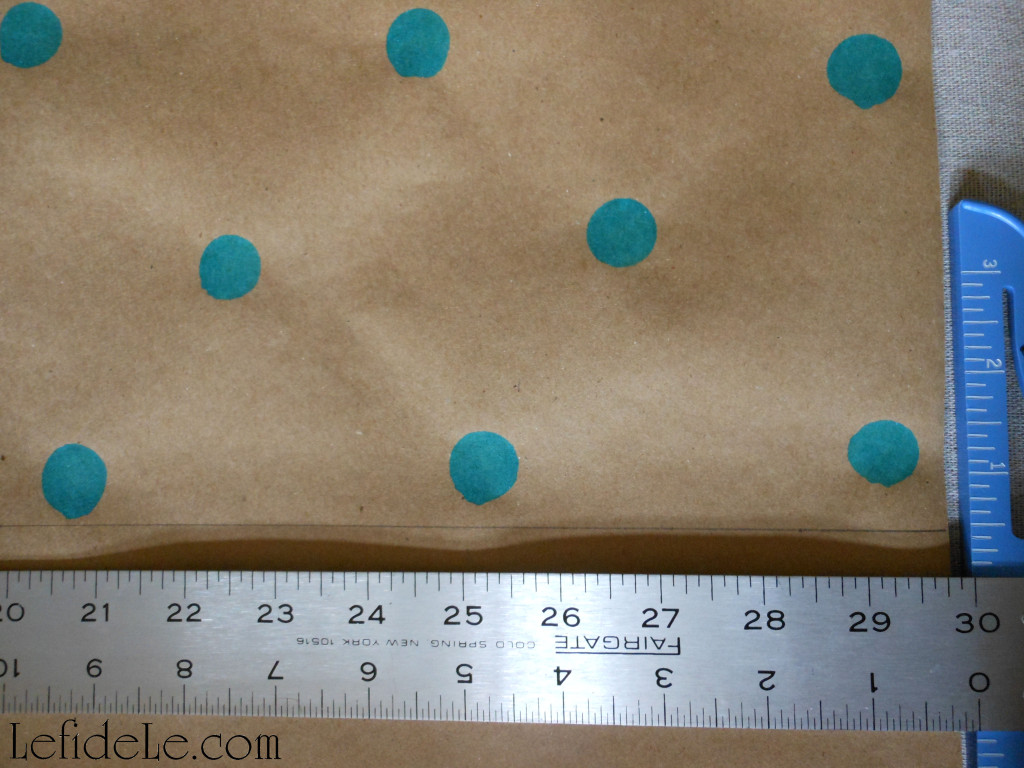
I make my individual sheets much larger (36 x 30 inches) than others typically offer (20 x 30 inches) so as to fit larger packages. Each kit will definitely cover several small boxes.

27Leigh

If you want to make individual wrapping paper sheets for yourself, just use a T-square ruler to measure and mark straight distances before cutting.

25Leigh

Another idea, how fun would it be to have a holiday stamping and wrapping craft party with the gal-pals!

24-2Leigh

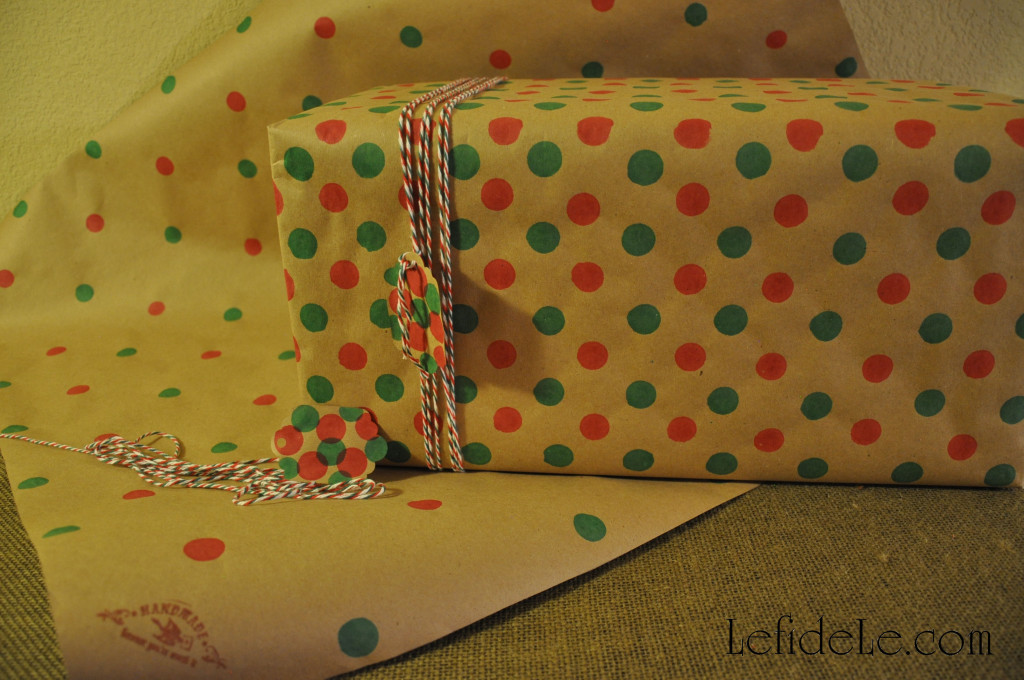
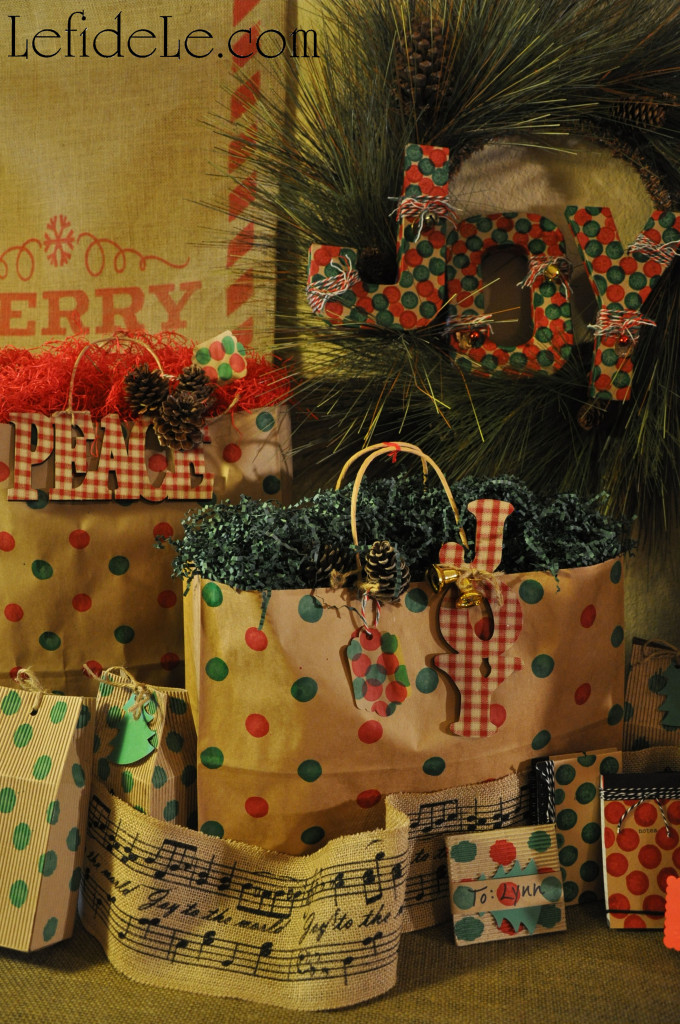
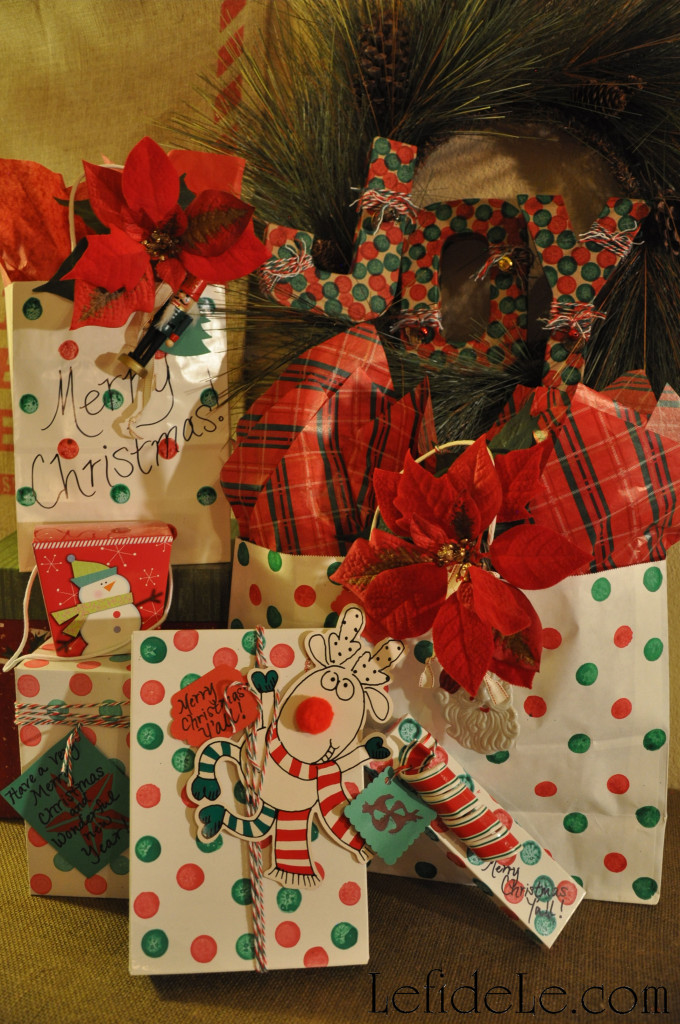
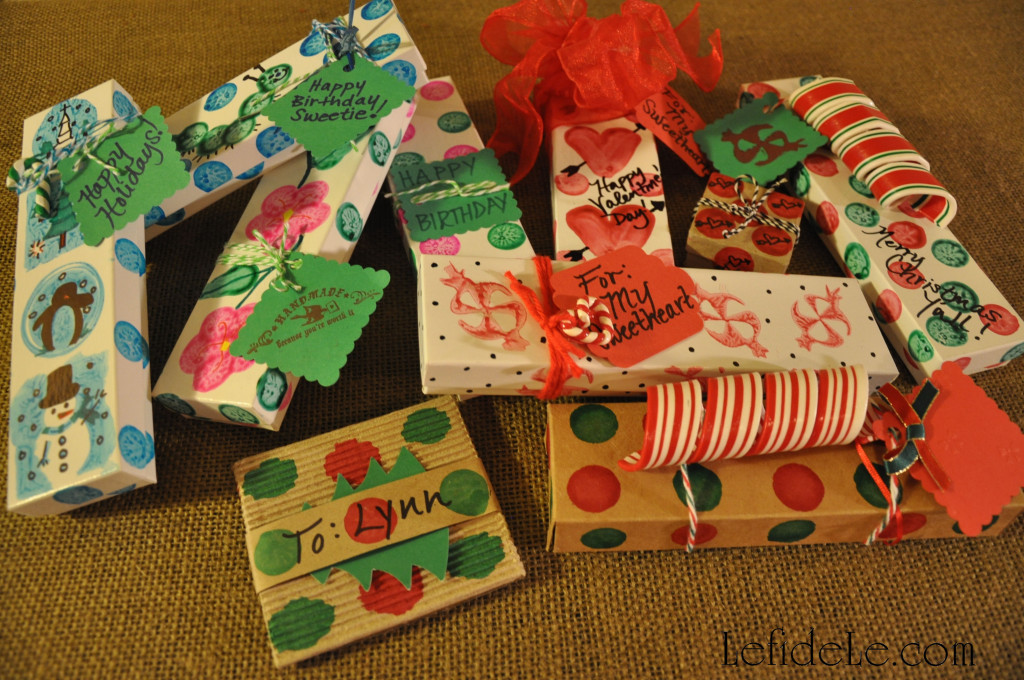
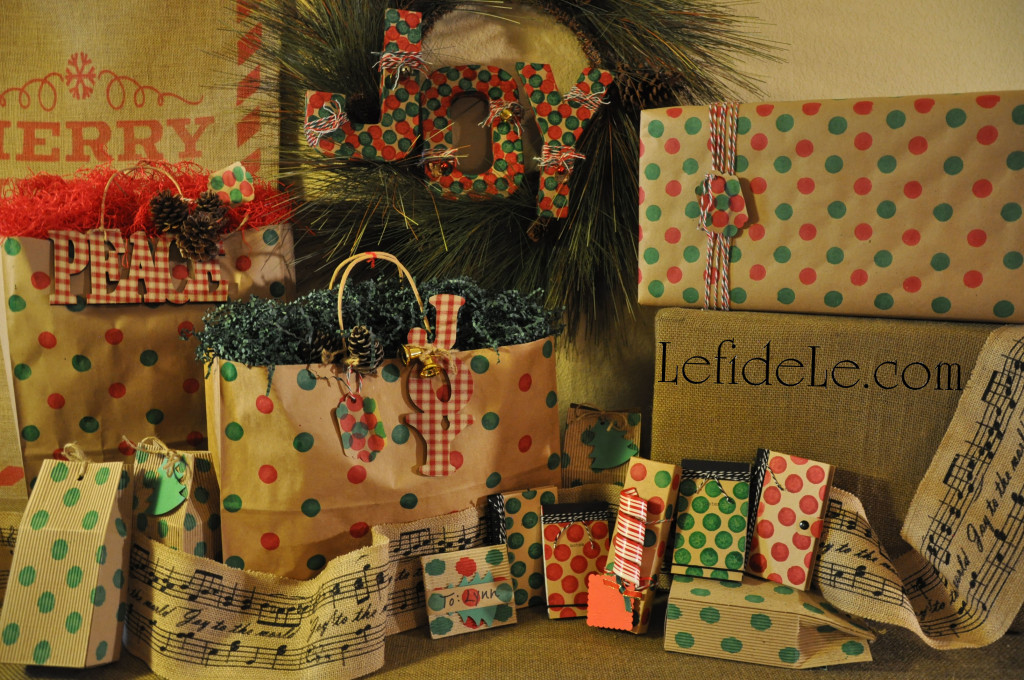
Here are traditional red and green packages for Christmas with added ornament decorations. You can see for yourself the differences between glossy, matte, box, bag, and wrapping paper.

53Leigh

I also used a stamp on them that says, “handmade for you, because you’re worth it,” as it really exemplifies what I’m trying to do… show that I care!

24Leigh

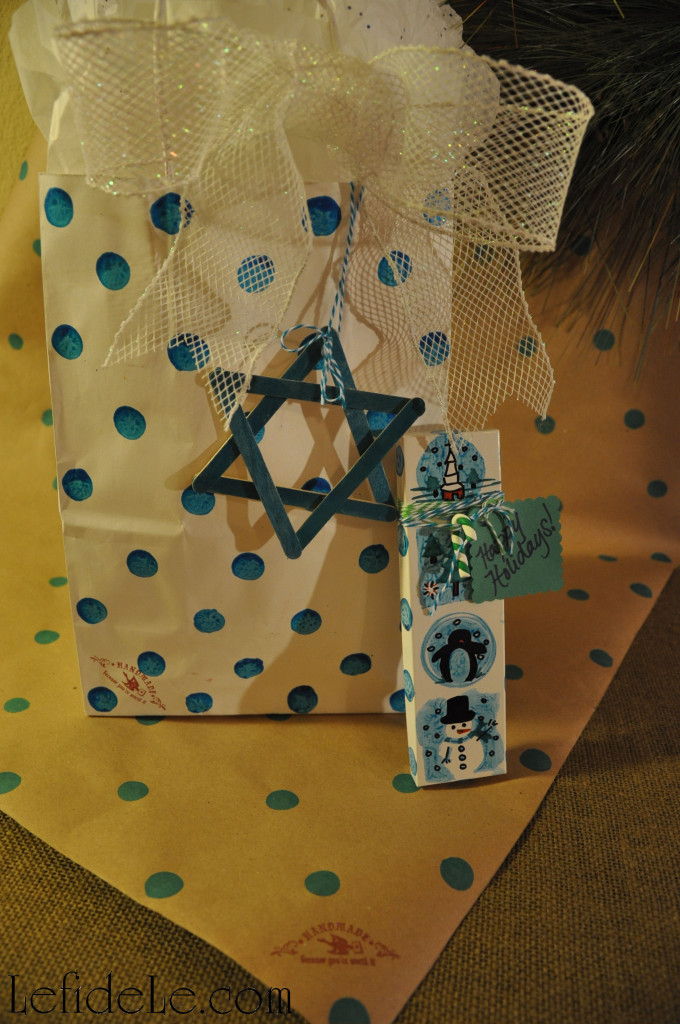
This is an idea for a friend celebrating Hanukkah. I realized I had no appropriate bag decoration for it, so I took a couple of minutes to make one. To make your own, run the matching bingo marker over 6 popsicle sticks to stain them. After they’re dry, hot glue 3 into a triangle. Repeat this with the last three, then glue one triangle on top of the other. Tie on with coordinating twine, yarn, or ribbon.

71Leigh

This would be a great type of Christmas craft for the little ones making ornaments for the family. The bingo markers don’t make a big mess and the ink washes off of skin. Adding a year and a name in permanent marker would make it even more precious.

91Leigh

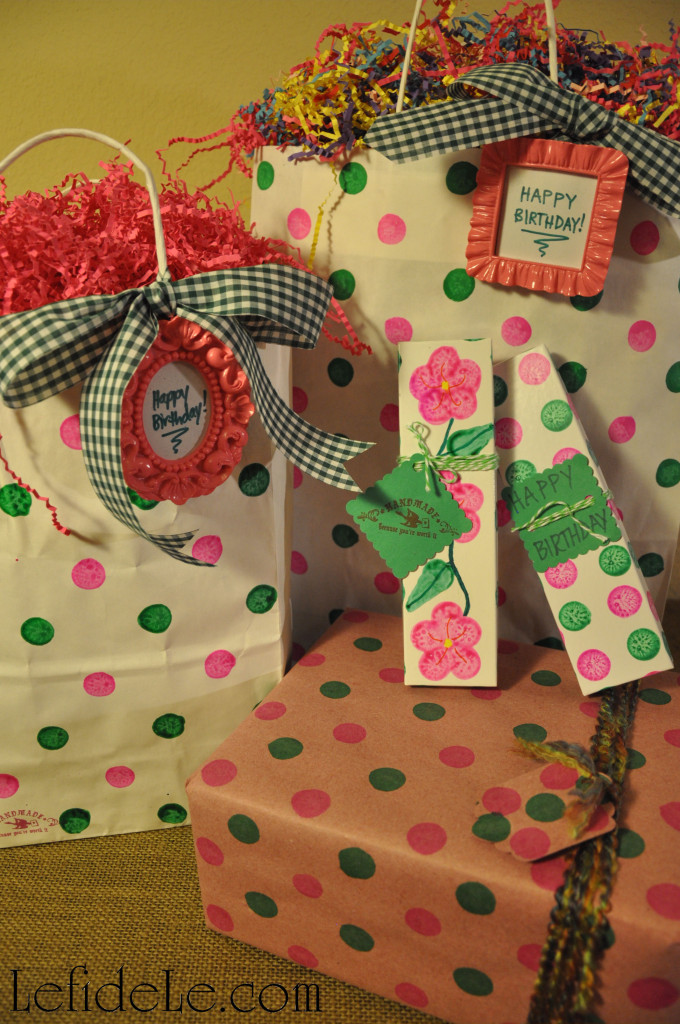
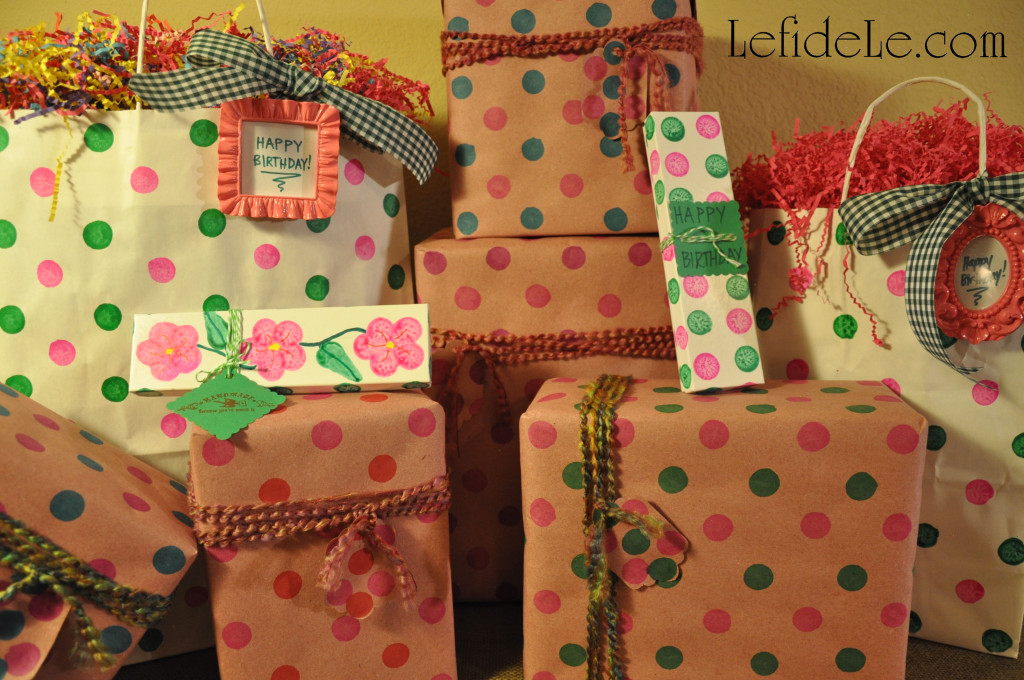
Here are some birthday gift packages with tiny frames as bag décor.

87Leigh

I went ahead and stamped them ahead of time because I already had everything out, and I’m planning an upcoming green and pink polka-dot theme birthday party. It fit just too perfectly!

78Leigh

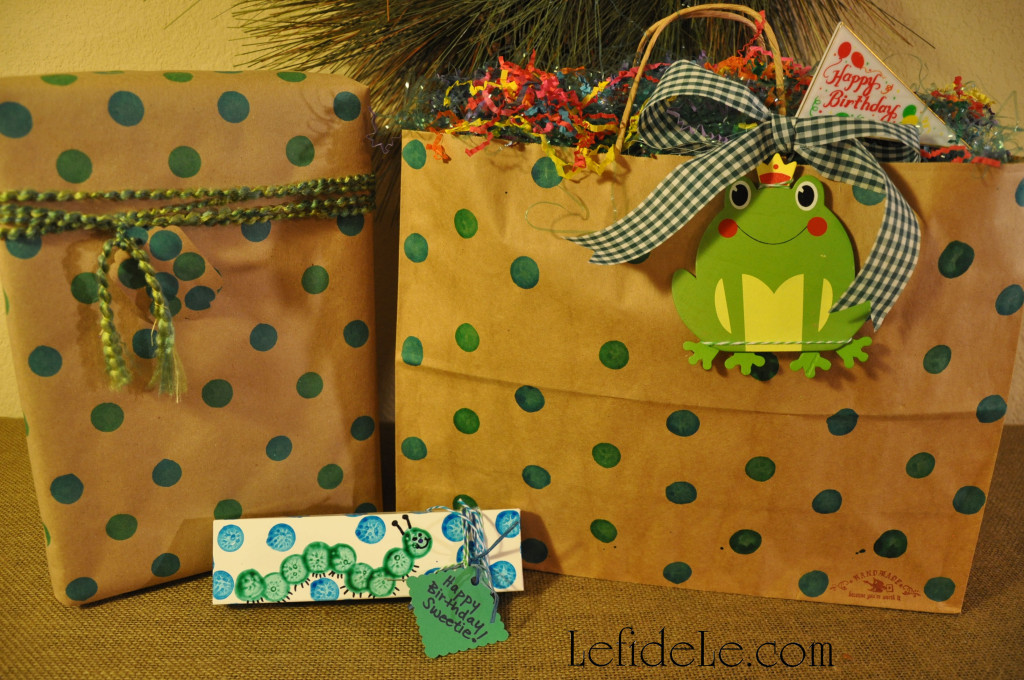
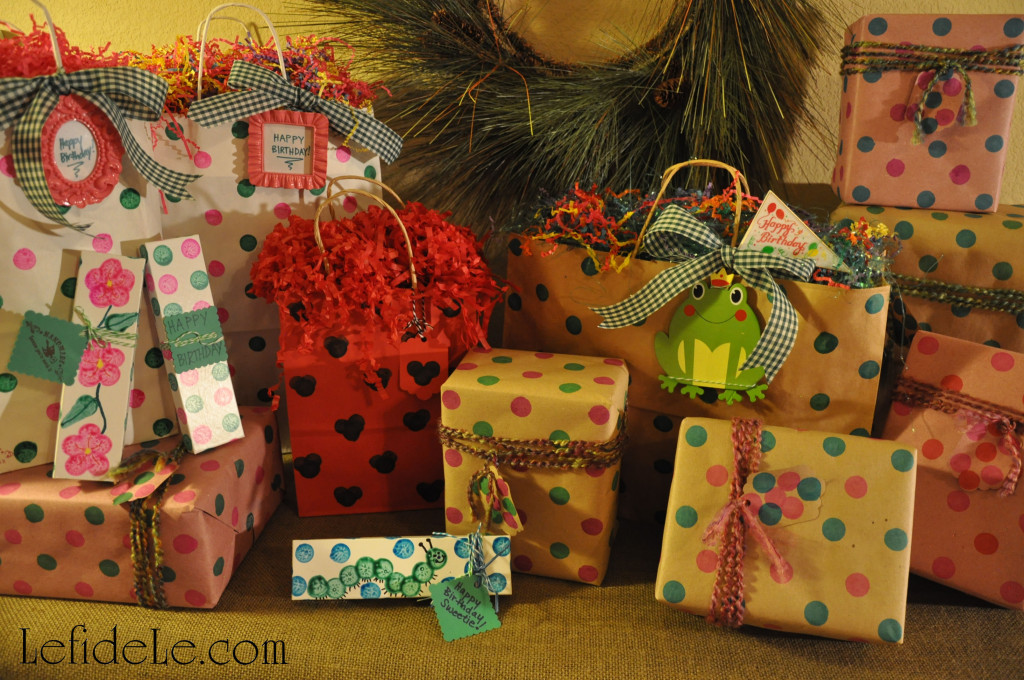
Also, I’ve made some critter themed wrap in blue and green. It seems like there is always a little one being born or having a birthday, so I make a point of finding theme items throughout the year for gift baskets. I can always find cute things in ducks, frogs, and ladybugs.

81Leigh

Here are some attempts at making shapes with the bingo markers. I’m sure it probably would have been smarter to practice before doing this on the bag and boxes. Oh well, at least you can get the idea.

42Leigh

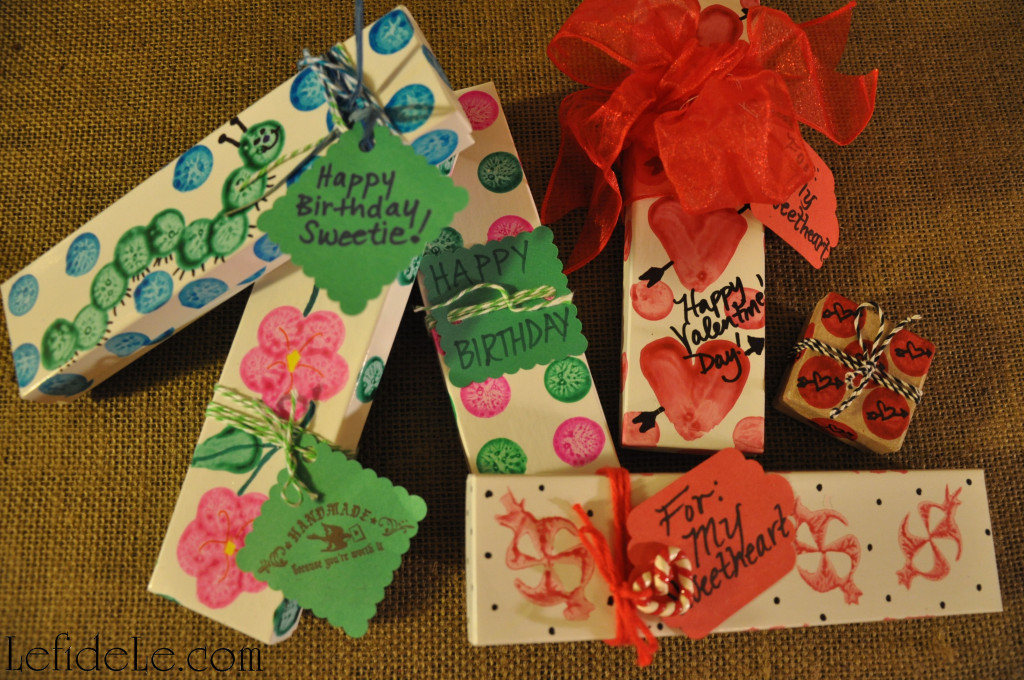
The Mickey / Minnie Mouse bag appears to have black ink on it because green ink appears black on the red paper. I also stamped polka dots onto a length of red paper ribbon to demonstrate the endless possibilities of decorating with ink. The green Hungry Caterpillar box just as easily could have featured a blue Alice in Wonderland Caterpillar.

62-2Leigh

The hearts on the box aren’t great because it isn’t easy to make a V-point with a round stamp. Although I did get better at it by the time I made the leaves for the flowers. Just use a Sharpie to draw in details like arrows or a wavy lined stem. The peppermint candies were made by a foam stamp inked with the bingo marker. I thought it might work, and was delighted to find that it did! I will soon be posting a Winter Candyland Party that this type of stamp is perfect for, but here it’s used for a “sweetheart” gift box.

68Leigh

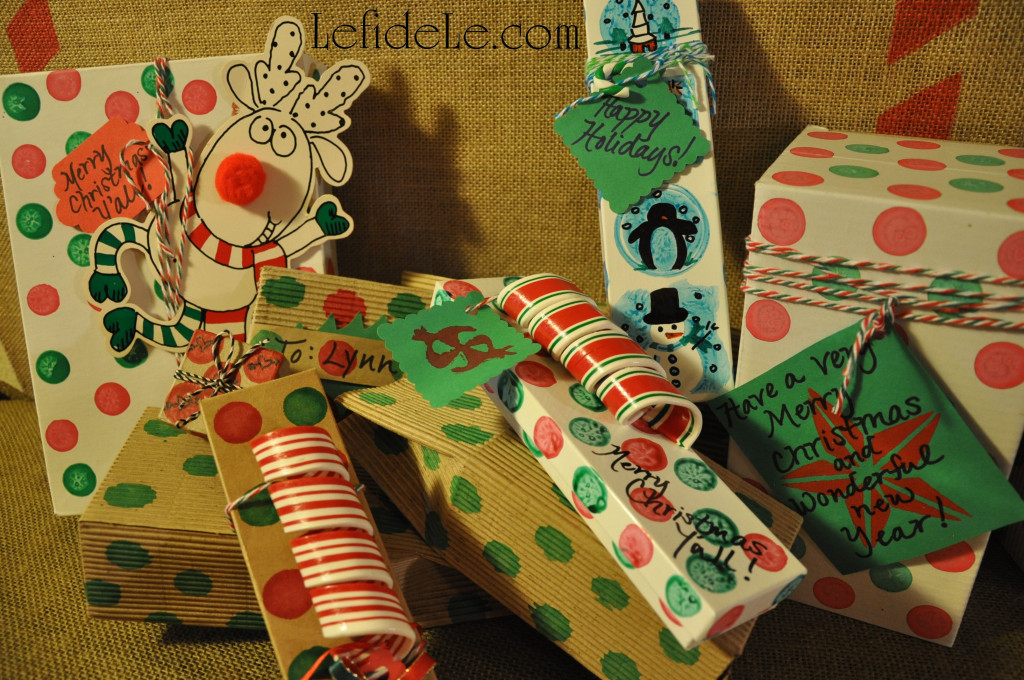
It’s really great to just stamp the outside of gift boxes, and not worry about wrapping at all! Here I’ve use some Christmas yarn… purchased with a coupon so that it was a fraction of the price of baker’s twine. I have enough quantity to be generous with it without worrying about running out… and it’s just really cute.

59Leigh

The Rudolph decoration was manufactured, but it would be really easy to draw a silly character on poster board in Sharpie markers and glue on a red pom-pom nose. That could be a fun way to get the kids involved as well. Another festive idea is to stamp the outside of a mailing parcel then write the recipient’s address in black Sharpie.

15Leigh

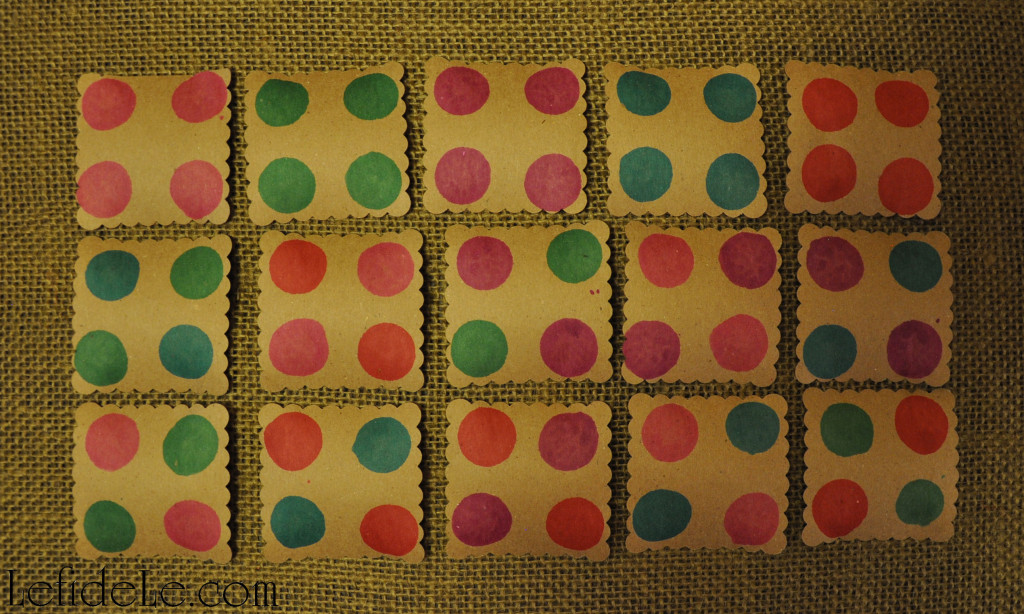
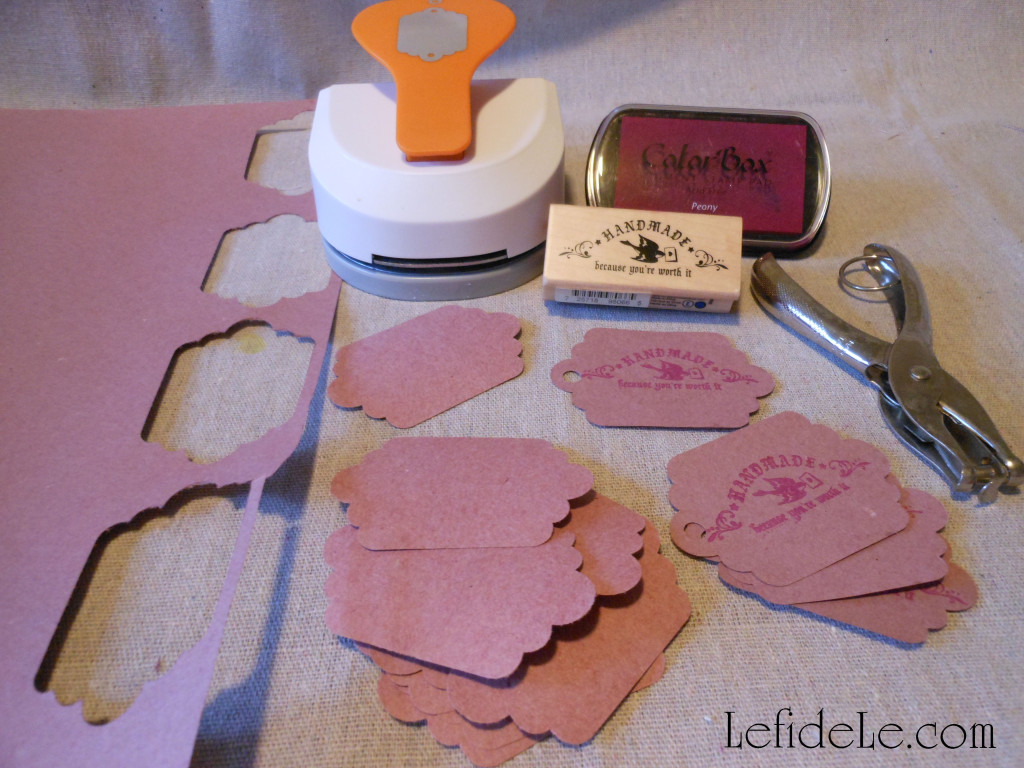
Don’t forget to make tags for your “presies”. I just used several large punches to cut them out of the same paper.

21Leigh

I then stamped them in assembly line fashion… proof positive that quick can be cute!

19Leigh

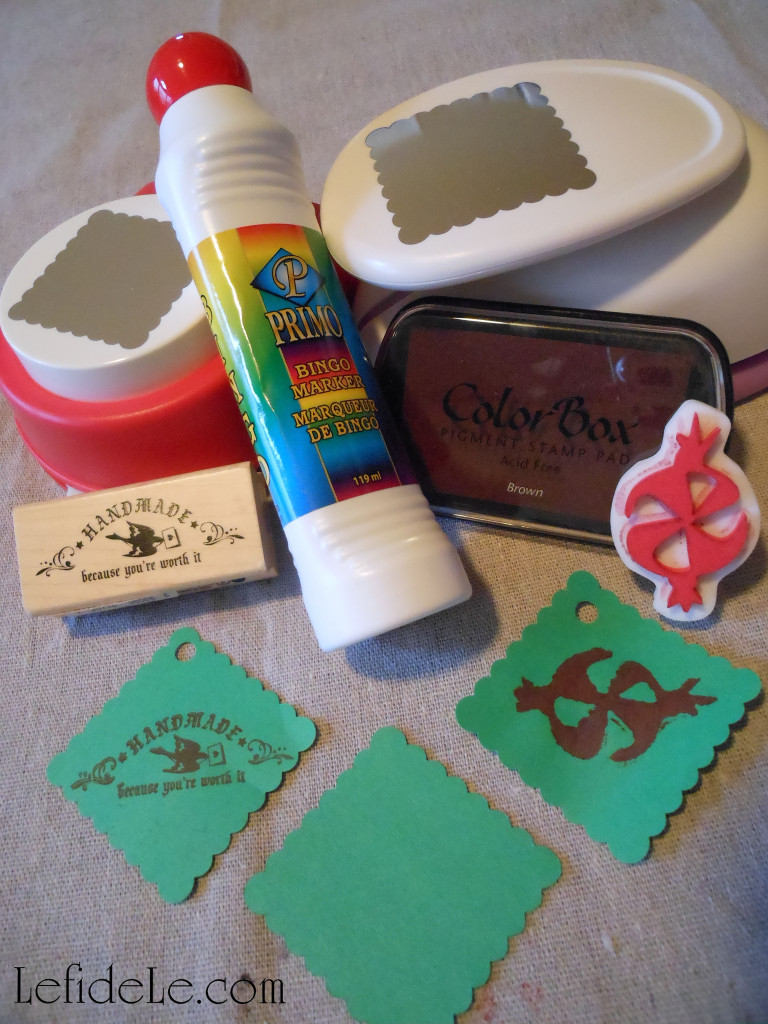
I used the handmade stamp and candy stamp on some. The star tag was stamped with a foam star and acrylic craft paint. This way you can see the difference between how ink and paint look. Use a Sharpie marker to write messages on any of these as pens just don’t show up well.

40-2Leigh

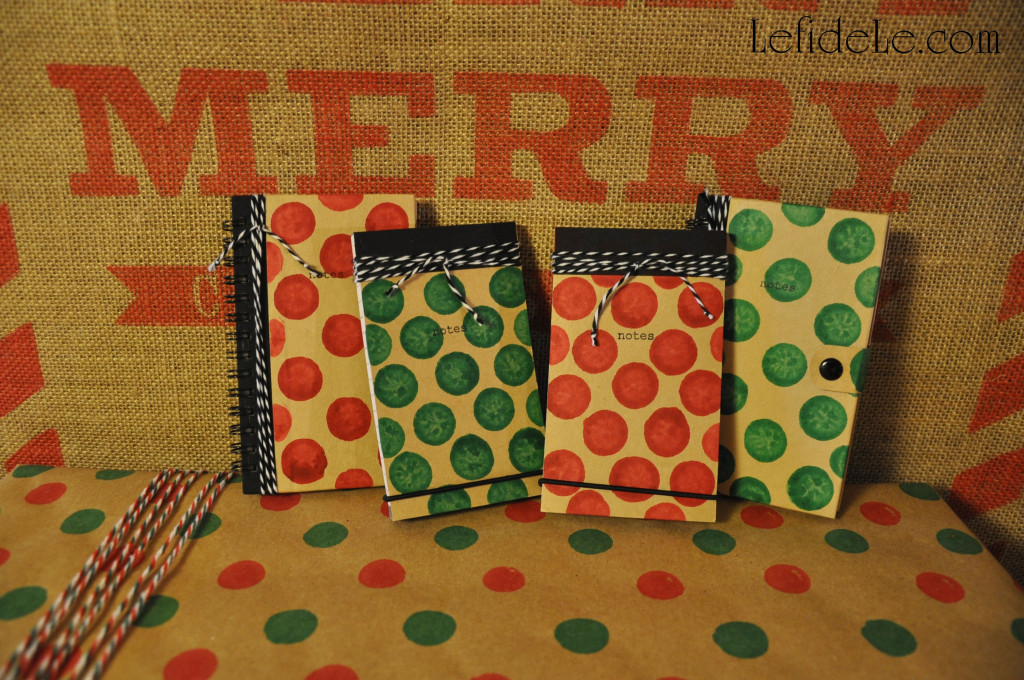
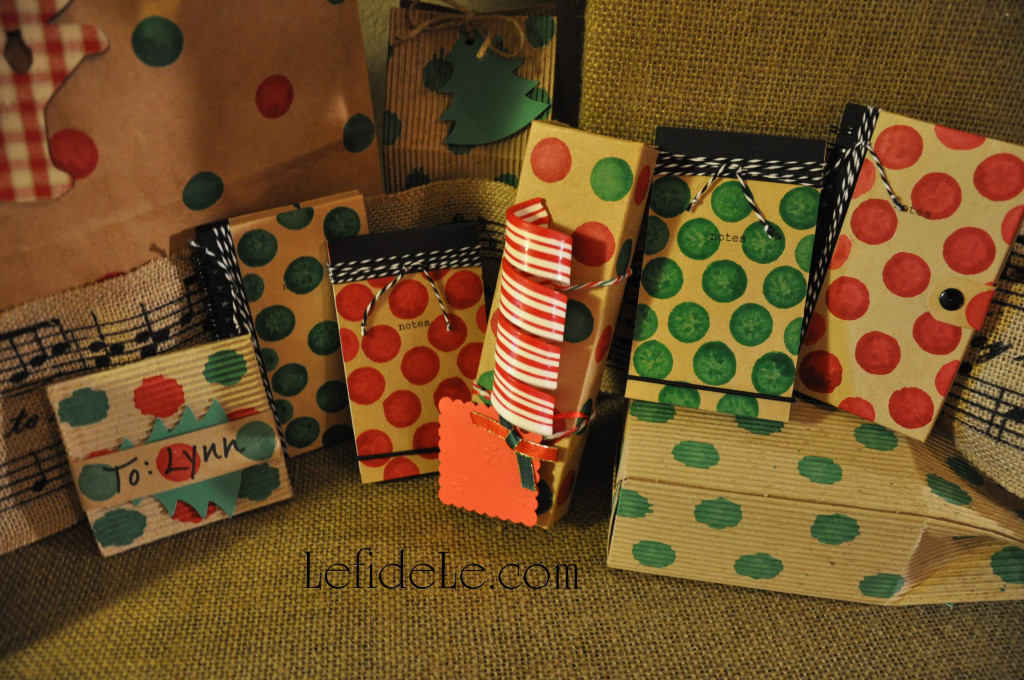
As for the gifts themselves, why not make super-quick stocking stuffers with matching polka-dots?

51Leigh

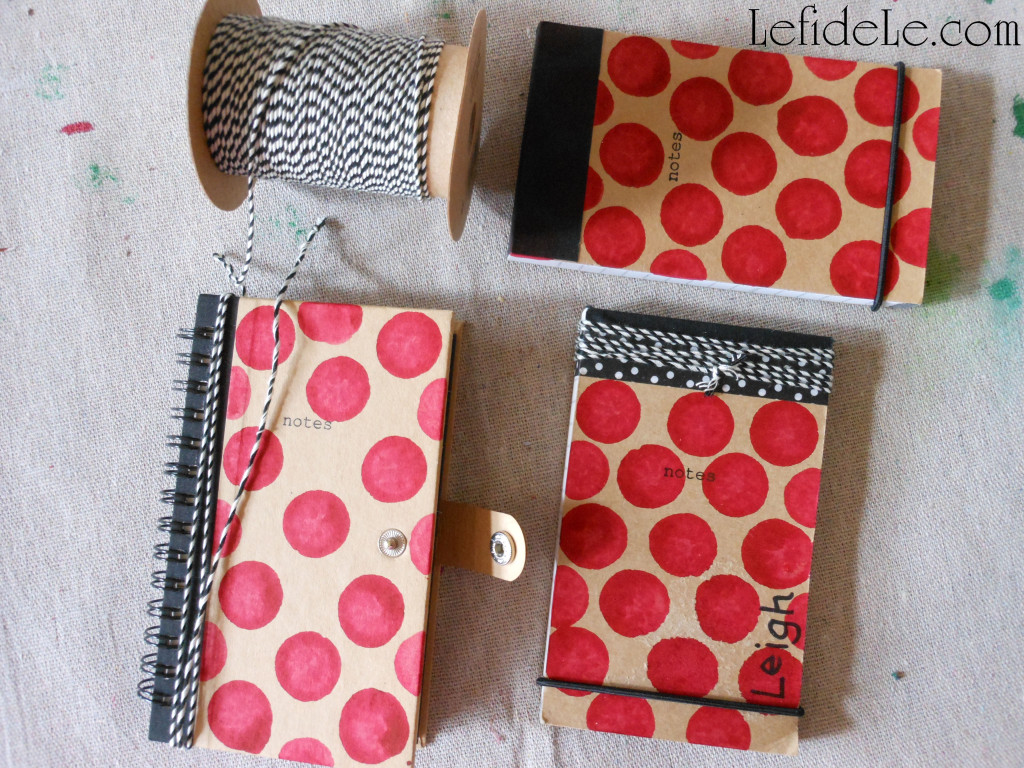
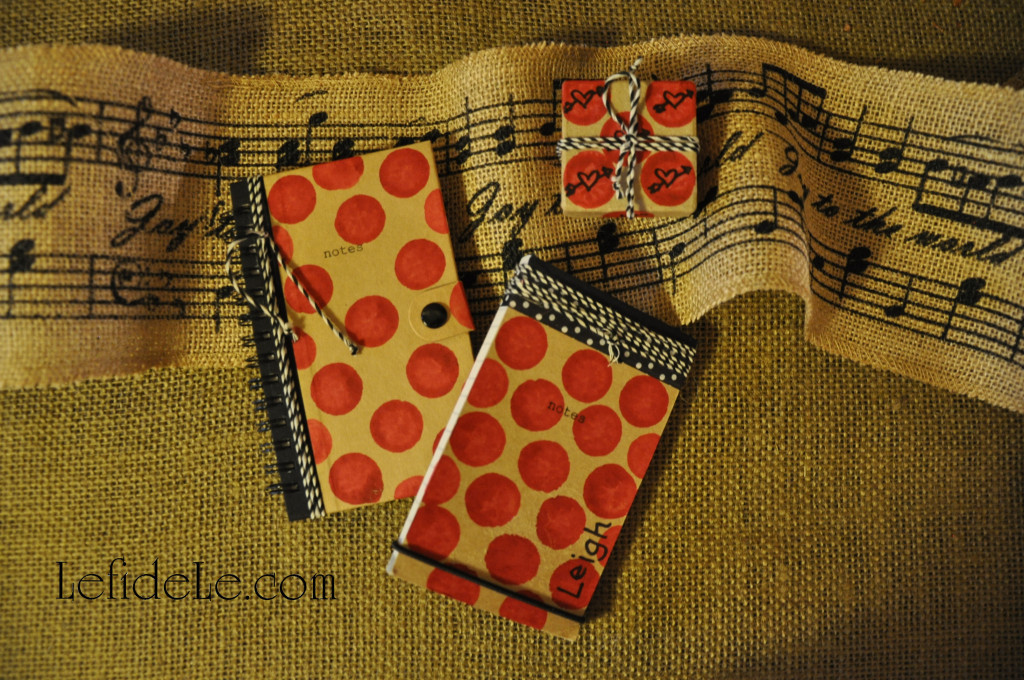
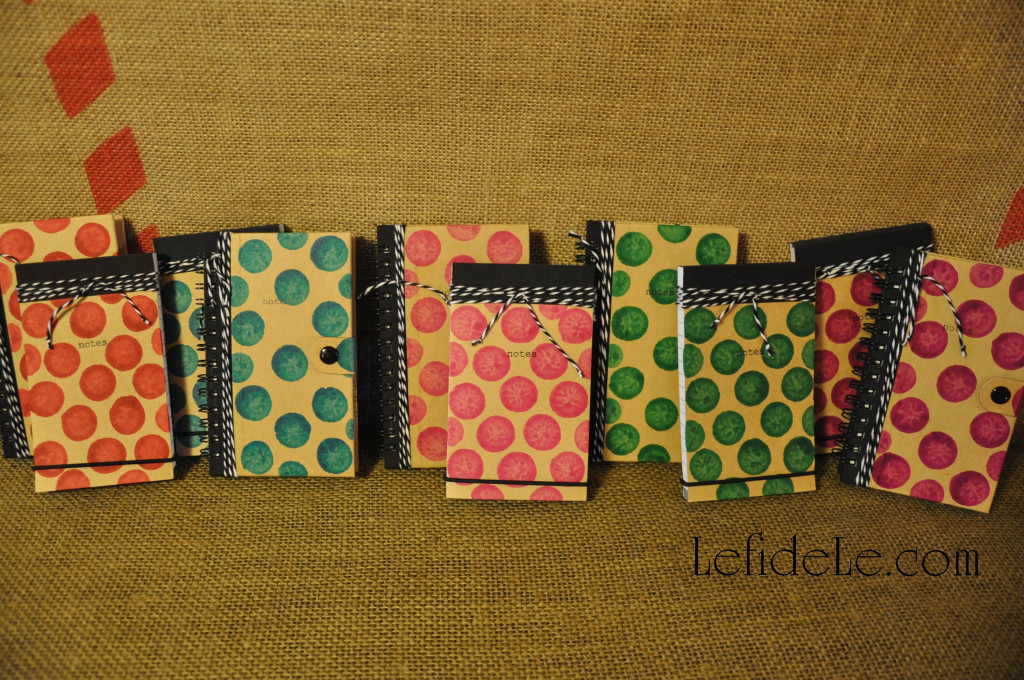
I took boring kraft paper notebooks, and raised the cuteness factor exponentially with a little ink stamping and twine wrapping.

45-2Leigh

I also added some washi tape to one whose top was peeling slightly. I personalized that one with my name in Sharpie.

54Leigh

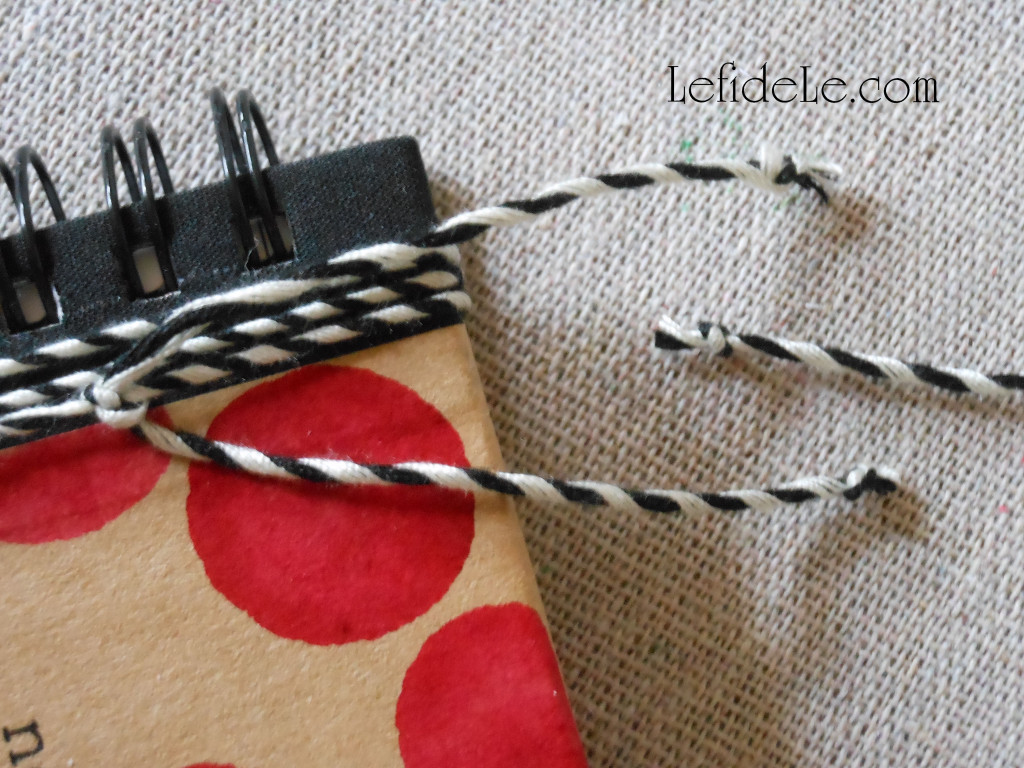
There is one thing which will save you some length on twine brands that have a tendency to unravel easily… tie two knots before cutting in between them. I found that the yarn that looks like twine actually unravels less.

26-2Leigh

Here is a collection of my various colors of notebooks that will be made available at Le fidèLe Designs Etsy store.

42-2Leigh

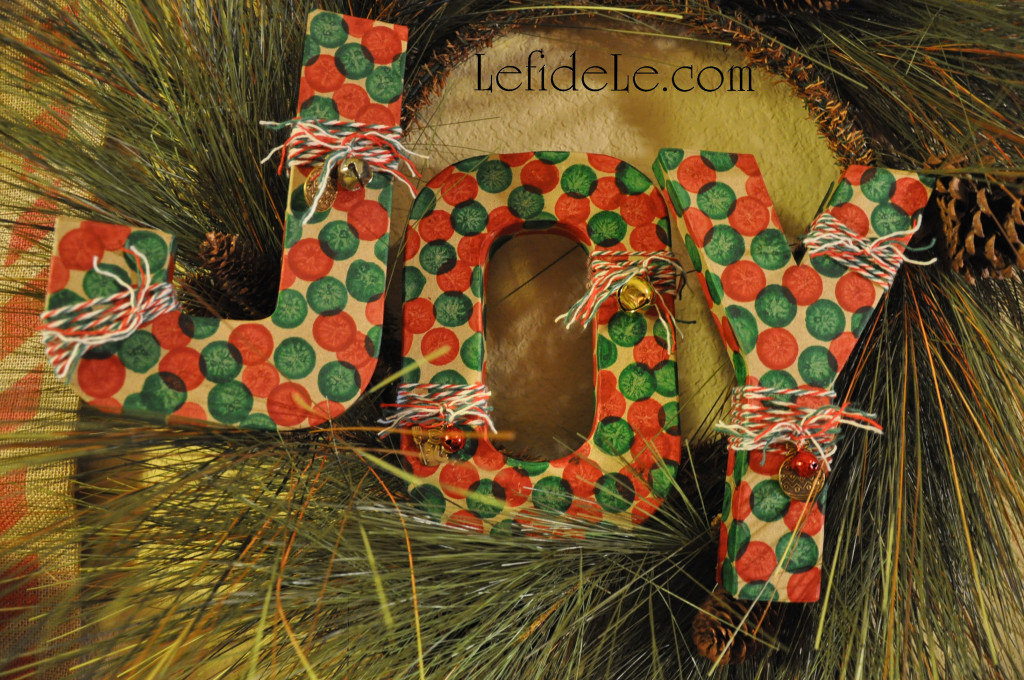
Another stamping idea that’s super-easy and fast is making message holiday décor. I bought the only “J” left in 3 stores, so JOY must be popular for the holidays. Really, any letters using different colors can be made year-round. A name would make a terrific personalized gift for a little one’s nursery.

110Leigh

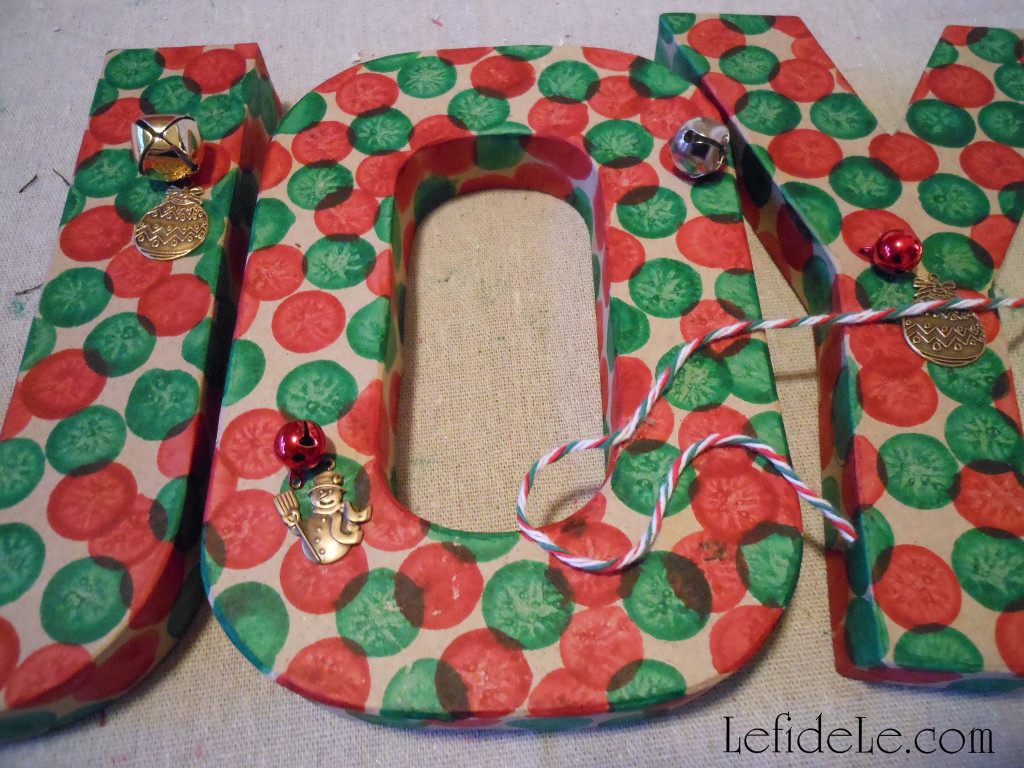
I simply stamped haphazardly with the red and green, because it was more fun that way!

116Leigh

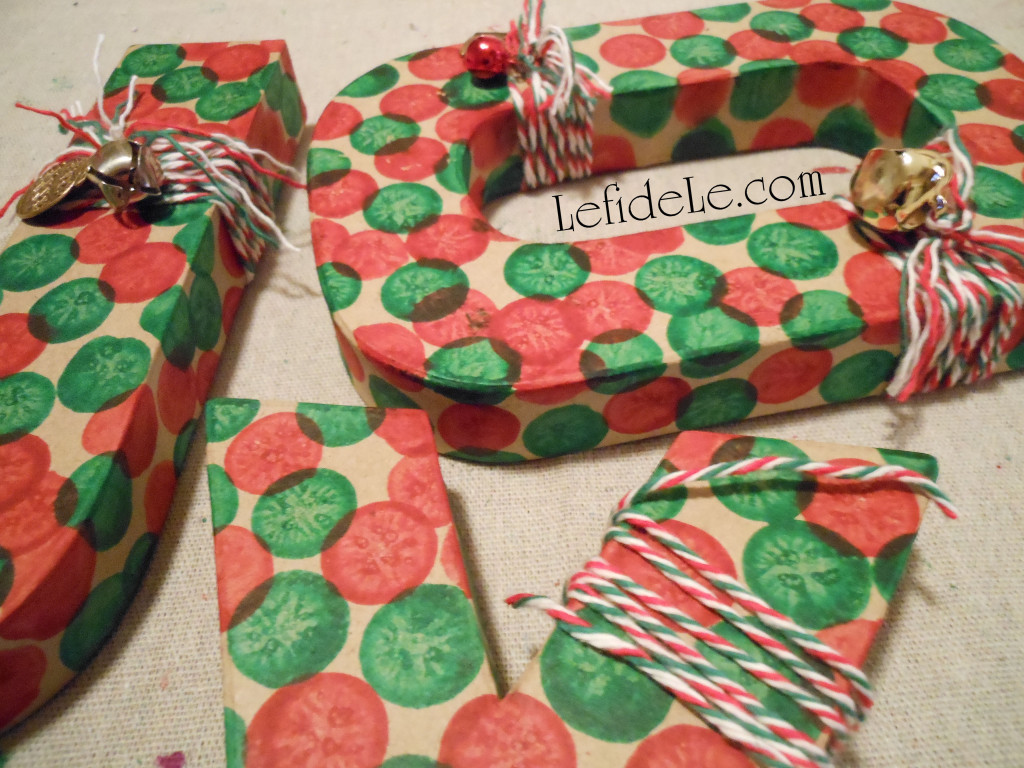
I went ahead and inked the back as well, for versatility. In this way I can set them anywhere, even freestanding in the bar area.

121Leigh

Lastly, I found some holiday charms and bells to tie on with Christmas yarn. It was easy and done in a few minutes.

36-2Leigh

The best part of all of these projects is that I found people really want to reuse some of the stamped wrap. (I even had one request that I not to write on the tag next time, so that she could send it forward… not the gift, just the bag and tag!) By hand-making your own wrapping, you are not only demonstrating that you really cared enough to go that extra mile, but it’s also beneficial to the environment when others want to continue passing it along. Reusing is even better than recycling! It’s yet another way to give when we are good stewards for His majestic creation.

28-2Leigh

Faithfully Yours,

Leigh

Frozen Winter Wonderland Themed Christmas & New Year’s Eve Dinner Parties (+ Optional Crafts)

25FrozenChristmas-Leigh

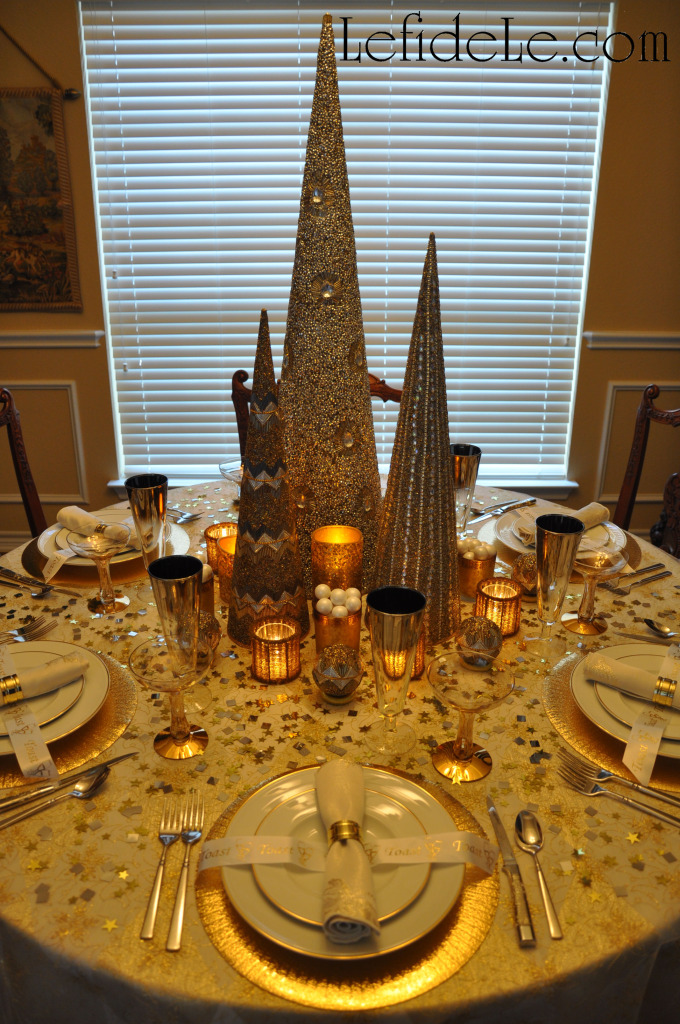
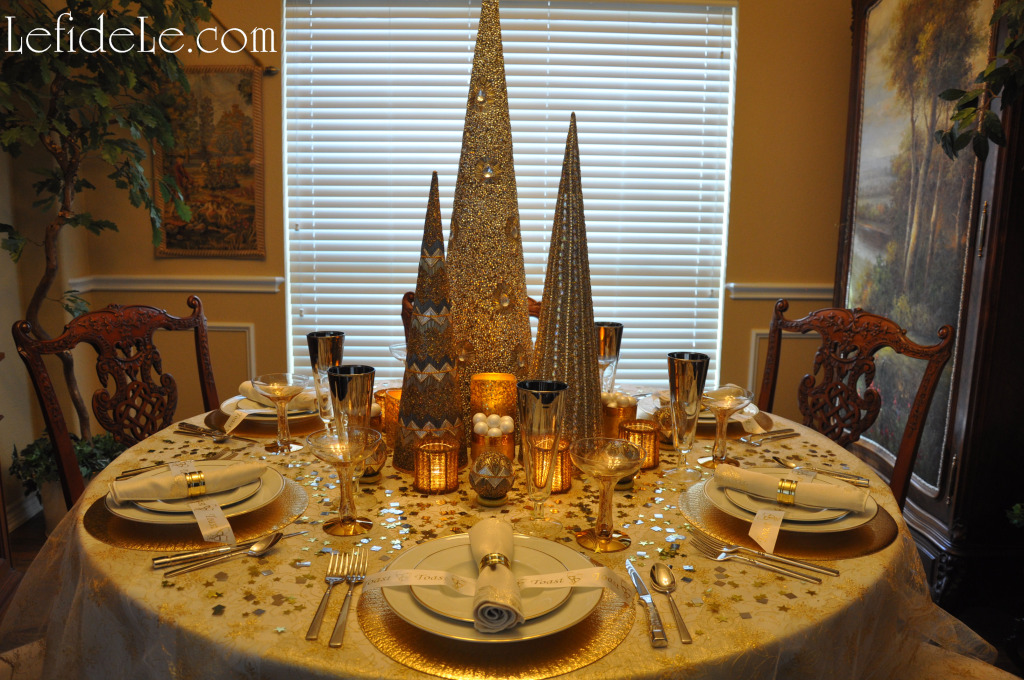
With New Year’s Eve trailing behind Christmas so closely, I wanted to create a dinner party theme that could easily be converted from one to the other without spending any more money or time. I’ve seen all of the decorative components in variation at stores ranging from high end home goods to budget craft supply. I’ll even describe how you can craft your own easily and inexpensively. I’ve chosen a winter wonderland theme as a visual narration of the “Frozen” movie that celebrates family and friendship. It makes an enchanting setting for the adults, and provides an extra dose of holiday magic for the kiddos with frozen-fever. And, hey, you can always pick up items on sale this year to use the theme for next year’s festivities!

63Leigh

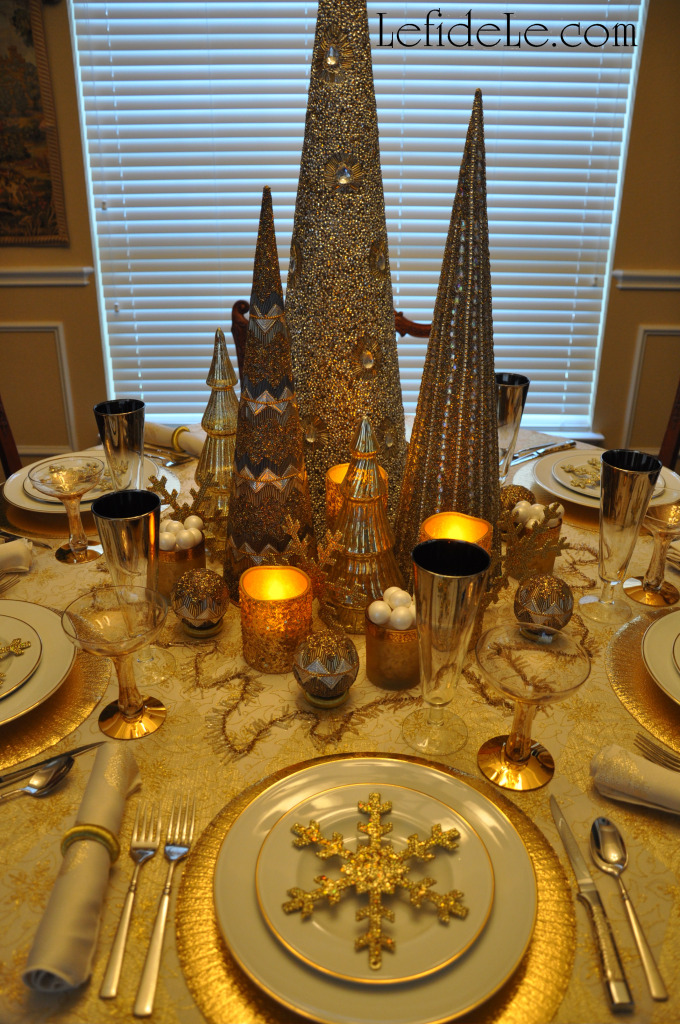
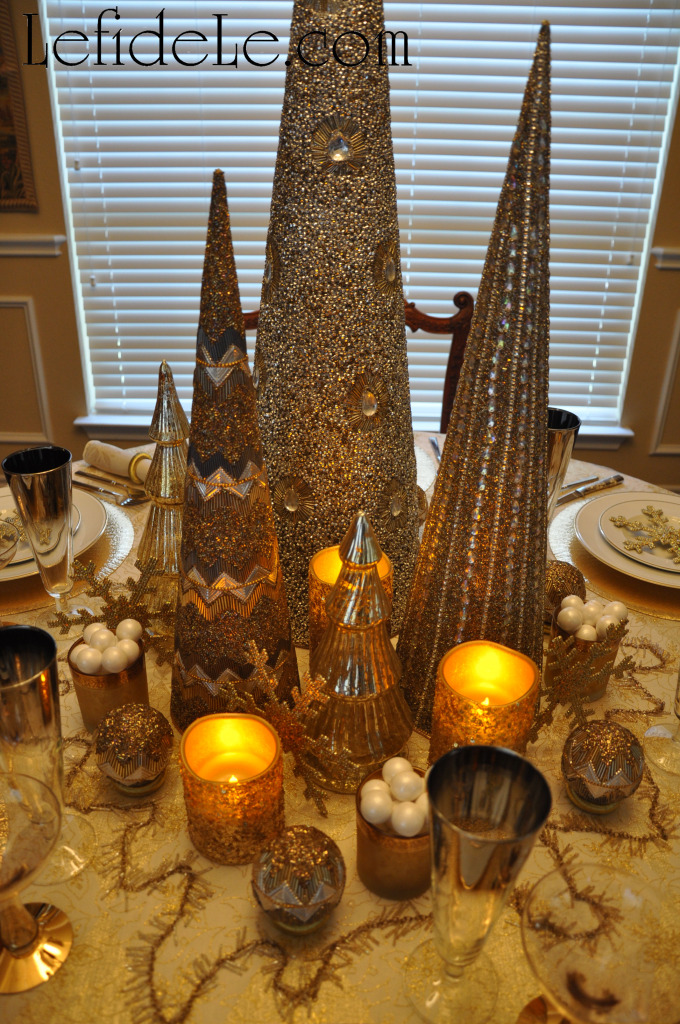
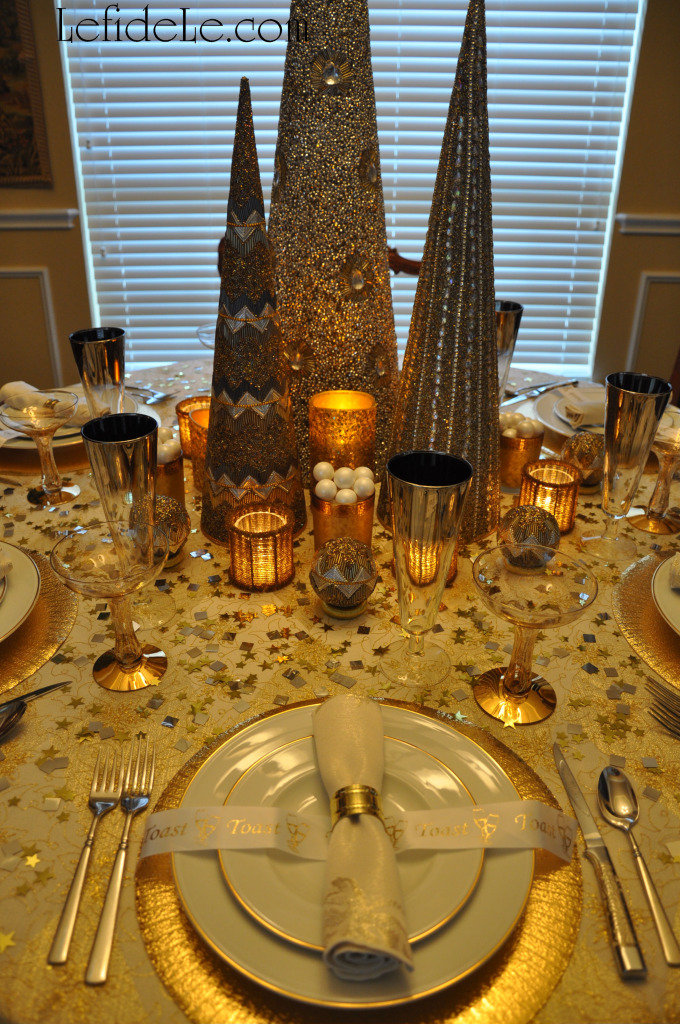
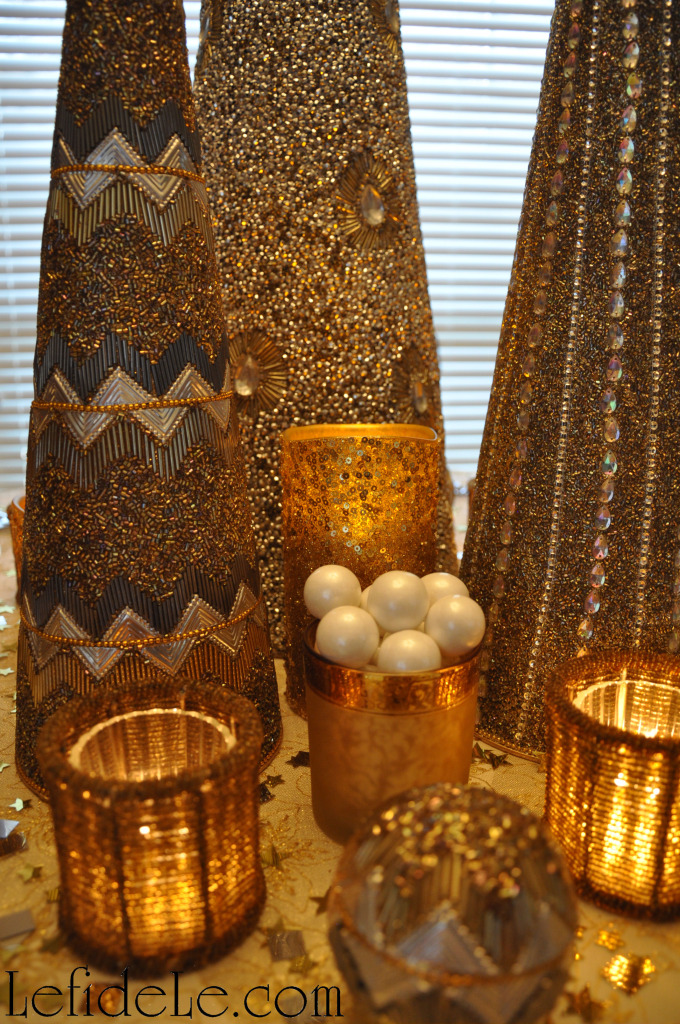
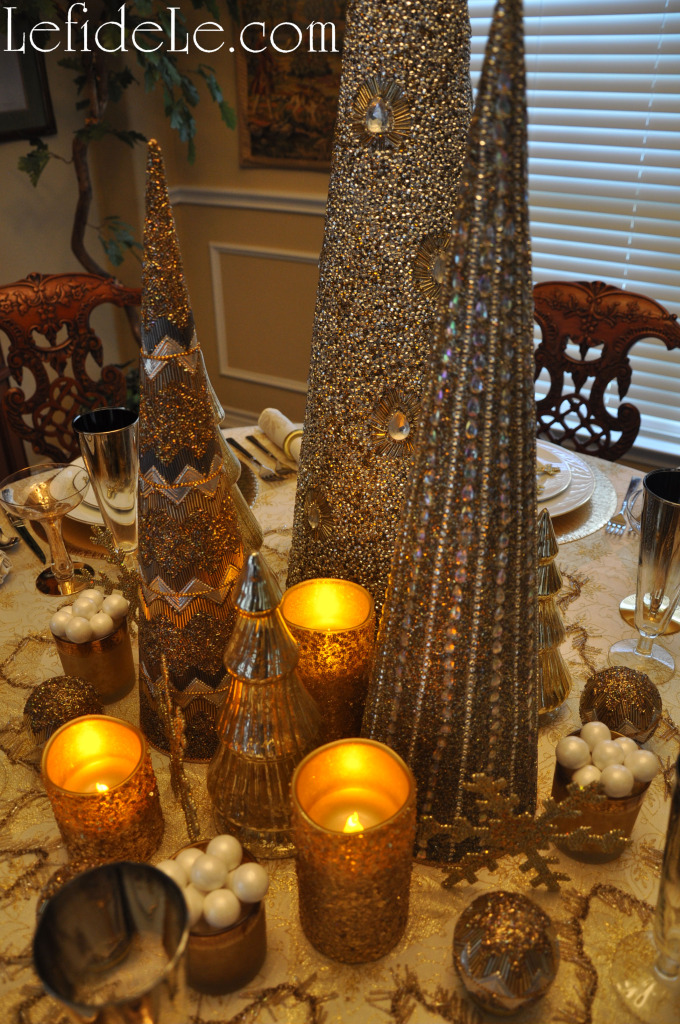
For each of the table-scapes, I set the base of the stage with a gold and ivory harlequin tablecloth found previously at an after Christmas sale. If you see something on your shopping trips that might work for next year’s theme… snap it up! This is how I manage to satisfy my high end taste while sticking to my tight budget. It’s really easy to fill in from there, just before the celebration. I did this with beautifully beaded cones in gold, silver, and pewter from Pier 1. (I have seen other versions of these at many of the stores I been to this year.)

26Leigh

If you’d like to make your own last minute, you have two easy options. One is to buy glitter wrapping paper and double-stick tape it into a cone shape. You can just cut different sizes of paper and wrap each into a tube shape, then tighten one end into a point and tape it down. This only takes a few minutes and is affordable for everyone. The best part is that the paper can be reused for gift wrap later! Another option is to spray inexpensive Styrofoam cones with Krylon Glitter Blast spray. (I really like this stuff. It comes in many colors and is so easy to turn out matching crafts out of very different materials. I’m planning on showing it in use for my next Valentine project.) If you’d really like to go all out with the “Frozen” movie theme, just set the table in aqua blues, silver and white. It would even make a fantastic birthday party for a fan of the film. I topped my harlequin tablecloth with an inherited vintage mesh cloth with golden embroidery. (This layered look is easy to emulate with all of the various sparkly mesh fabric available. I previously purchased some myself from Joann’s with a 40% off coupon.)

44Leigh

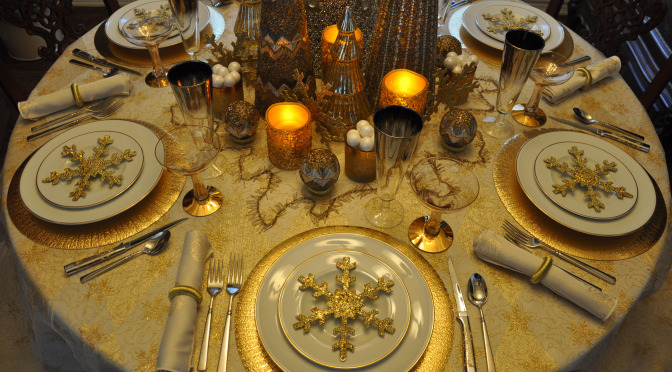
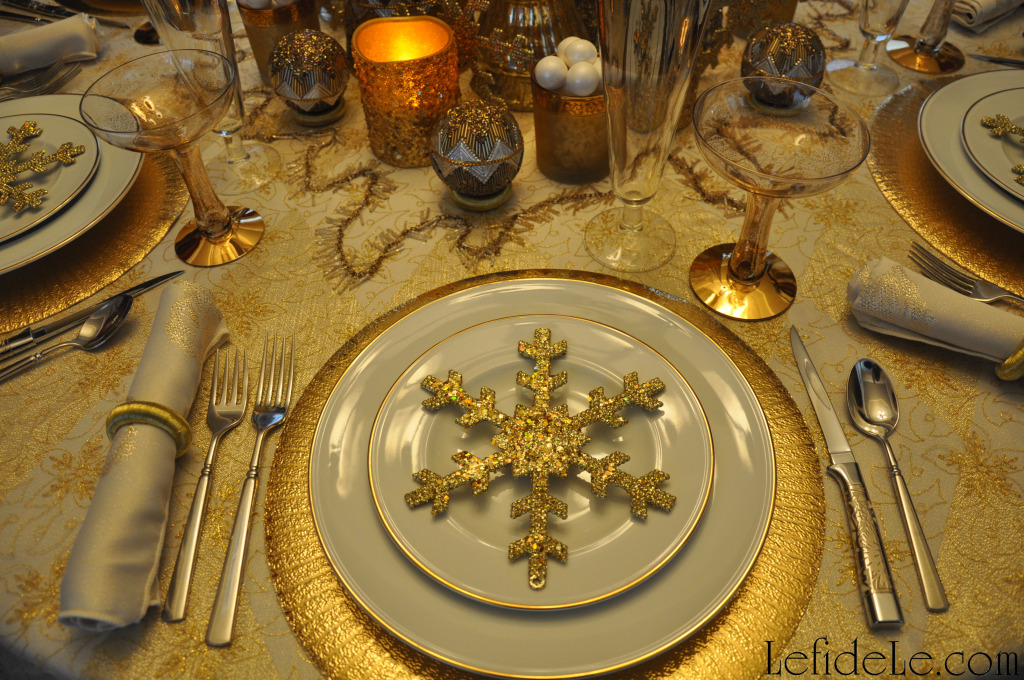
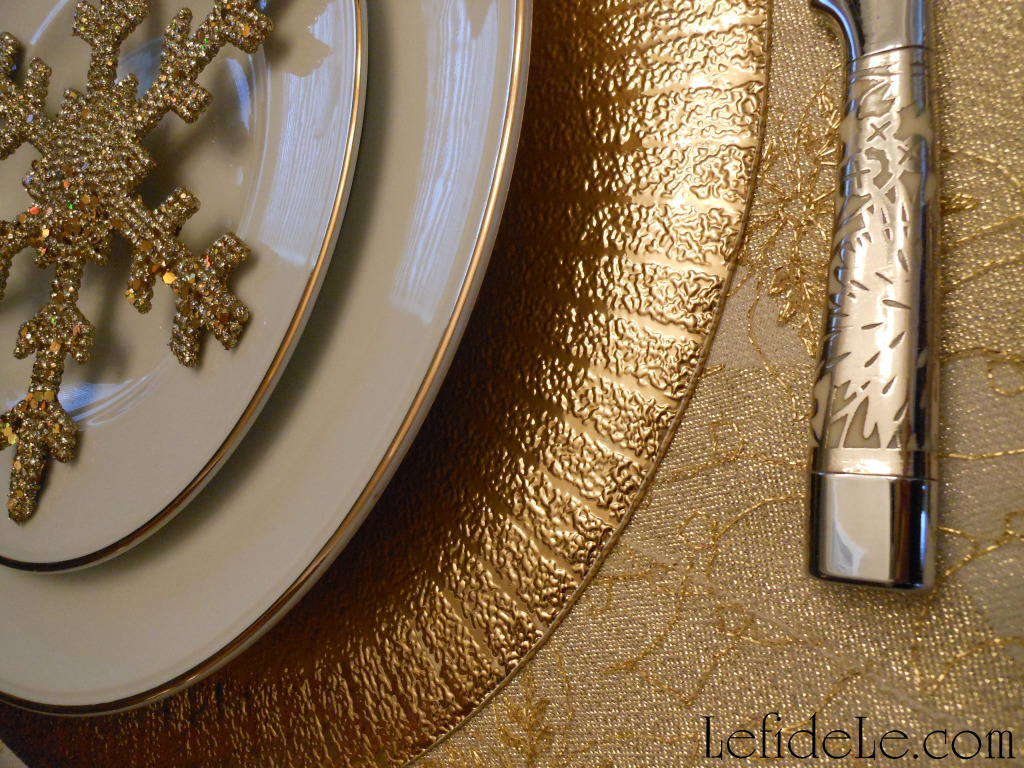
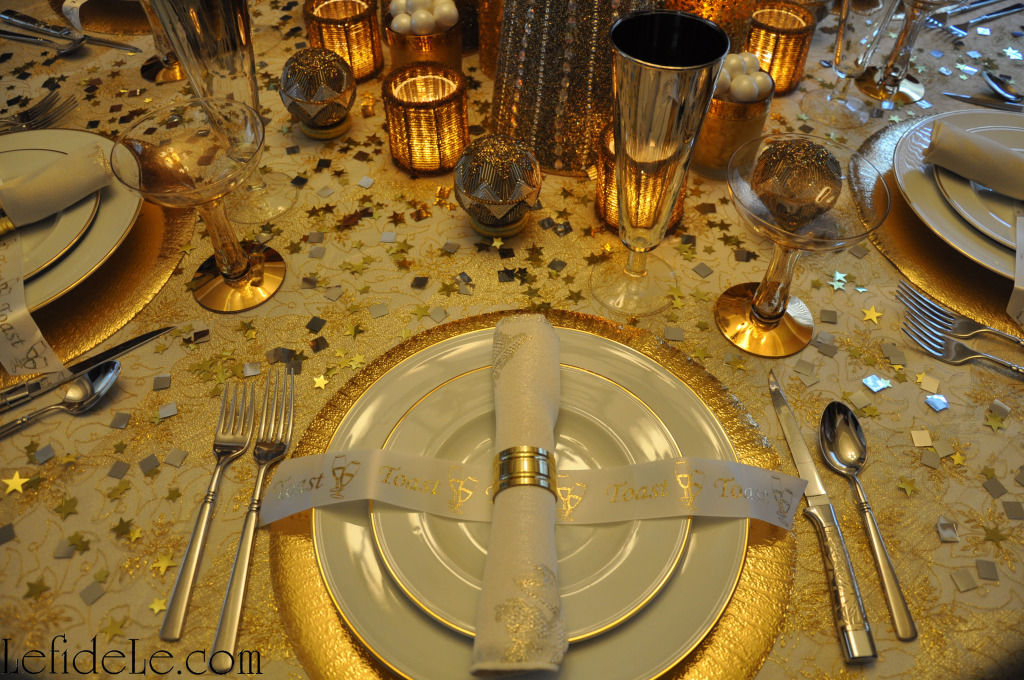
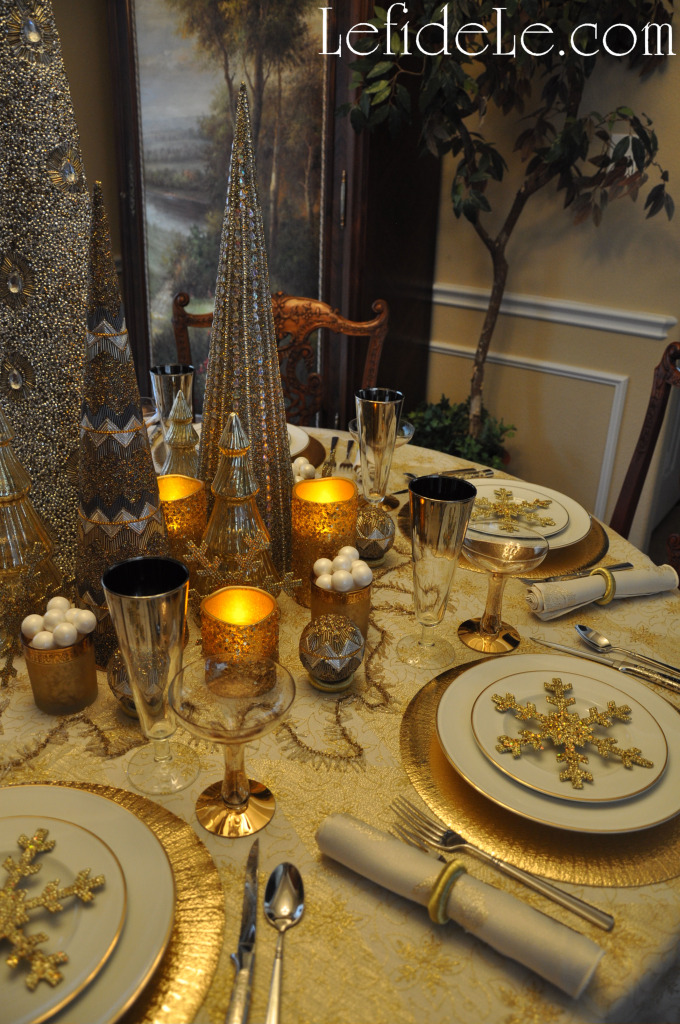
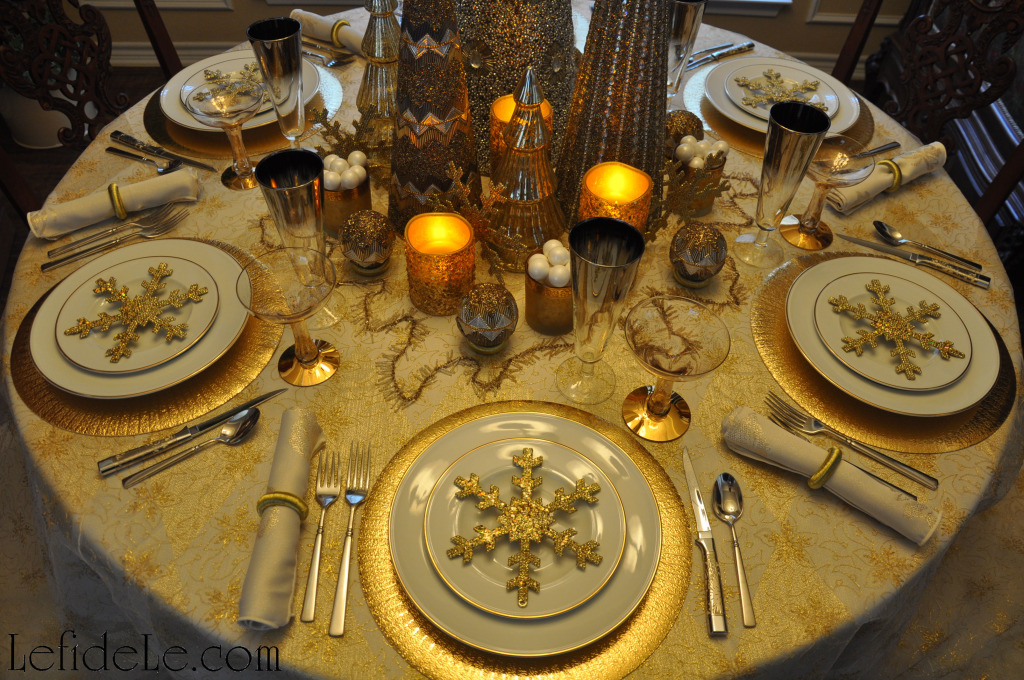
For each place setting, I used my grandmother’s ivory dishes with gold trim atop gilded round placemats that served as a form of plate chargers. I also made use of my daily Oneida silverware, but switched out the butter knife for vintage steak knives with ivory scrolled handles. I love mixing and matching seamlessly!

161Leigh

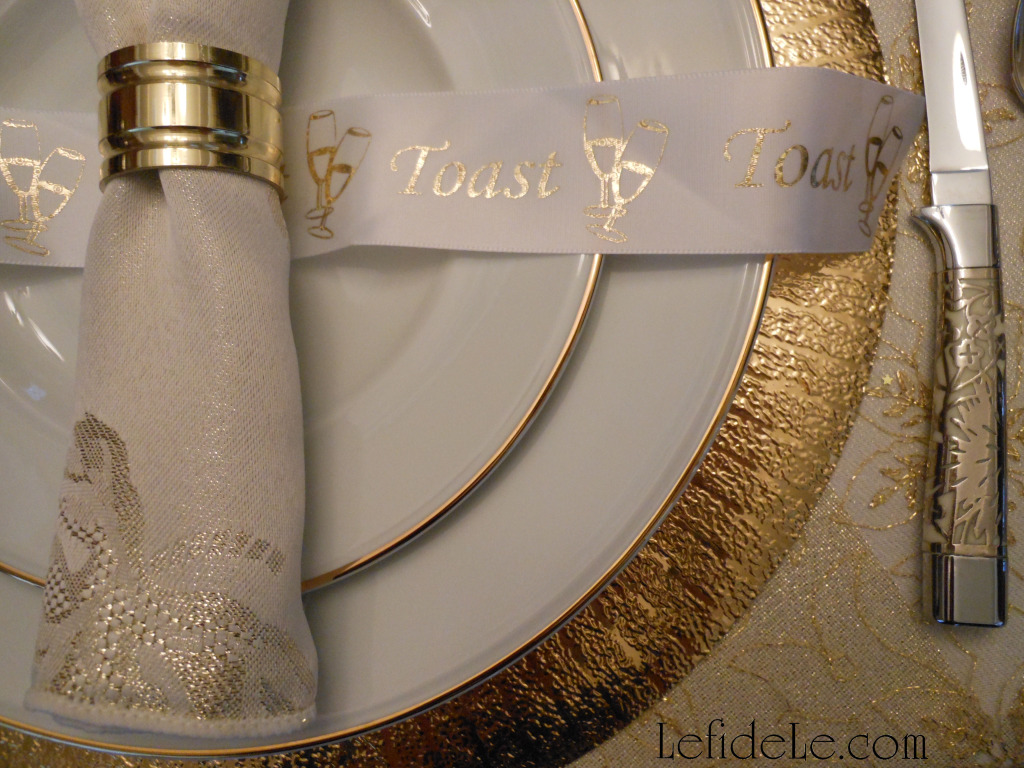
I already had two lovely sets of napkin rings that would work beautifully, so I decided to go with vintage brass ones for New Year’s, and those with golden threads for Christmas. I placed extras of these beneath beaded Christmas ball ornaments as tiny stands, with the metal eyelet hooks hidden inside the rings. (I’ve formerly employed this idea successfully with marble Easter eggs.)

75Leigh

In the New Year’s setting, I placed ivory satin ribbon emblazoned with gold foiled champagne flutes and the exclamation “Toast”. (This ribbon from Joann’s would be equally lovely for a wedding as well.)

176Leigh

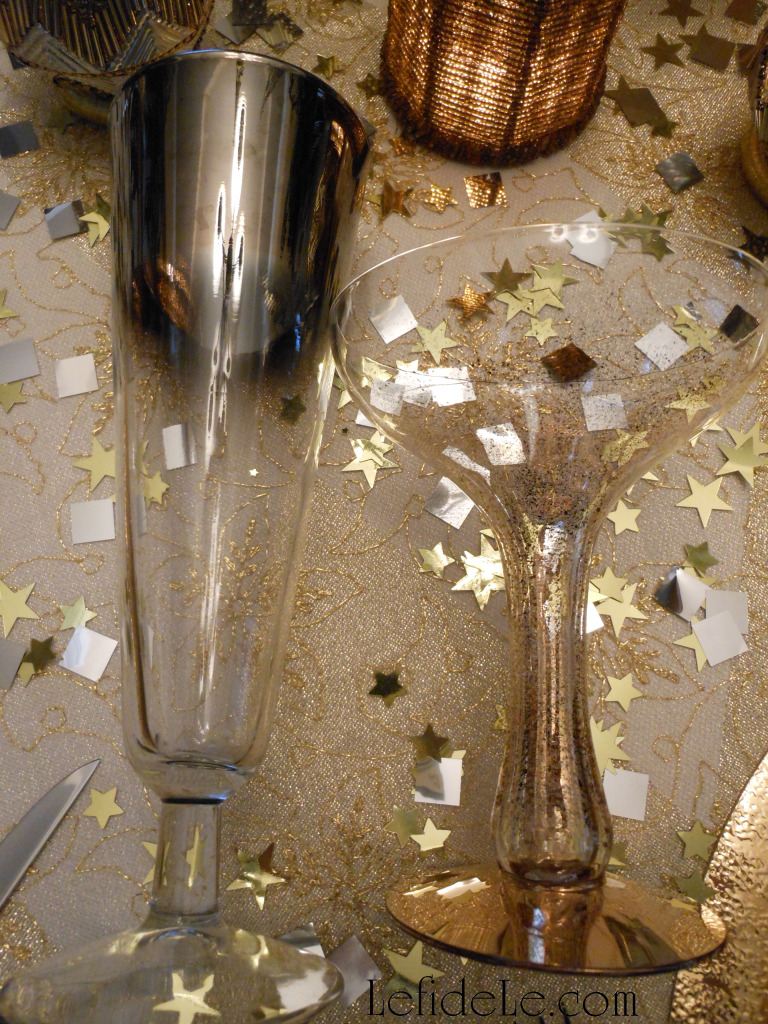
For Christmas, I topped the salad plates with large gold glitter snowflakes. I set more of these vertically throughout the centerpiece. (These can be found at numerous stores or may be homemade with chipboard or wooden snowflakes glittered with spray.) Lastly, I added inherited vintage glassware with pewter and golden touches. (Clear vessels would also be lovely in their place.)

195Leigh

Both table-scapes had golden scrolled embossed glass votive holders lined with plastic wrap to safely contain white “snowball” candies. Each of the centerpieces also had LED candles covered in gold sequins.

70Leigh

I added further glow to the New Year’s version with real votives in gold beaded holders. This table was finished off with large foil confetti of silver squares and gold stars. (Another easy addition would be to include metallic noise makers to ring in the New Year.)

84Leigh

For Christmas, pale gold glass trees were nestled between the cones. (I’ve seen different types of metallic glass trees at both department and craft stores.)

29Leigh

All of this was surrounded by a chain garland with opalescent bead “icicles”. (This can be made by anyone with jewelry skills using eye-pins, seed beads, and bulk chain. For everyone else, I’ll probably demonstrate this in the future!)

27Leigh

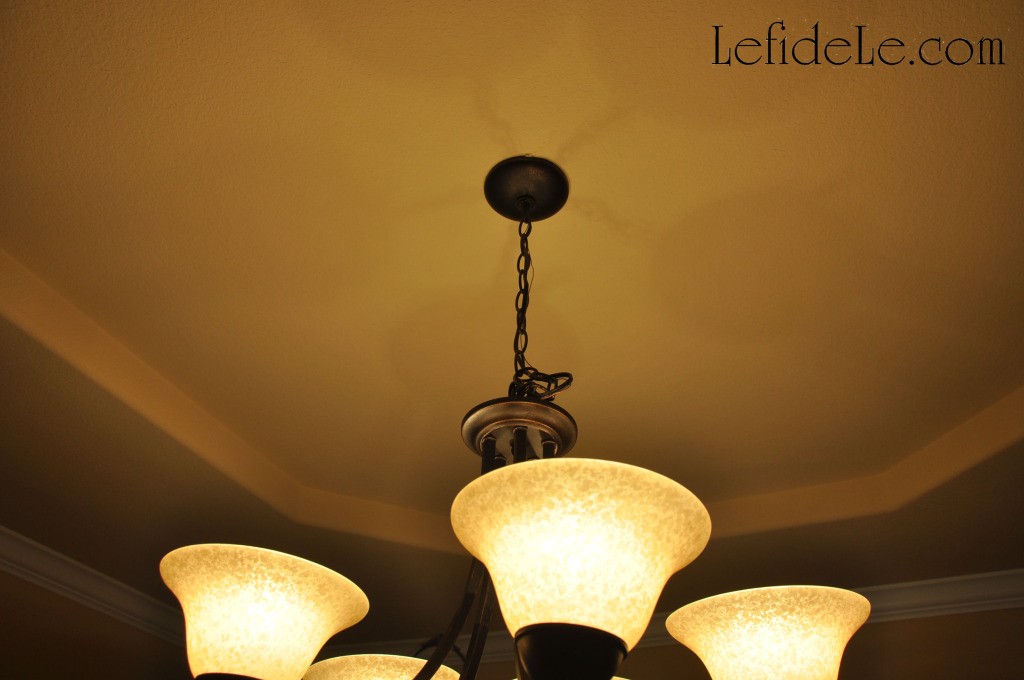
If your chandelier dips too low (as mine did) to accommodate the center cones, there is a simple solution. Use a small S-hook from a hardware store to hitch up a lower link to a higher one in the chain. Start by setting the S-hook on a link at the height you prefer, then lift the chandelier up, and lastly set a lower link onto the hook. (The photo really illustrates this better than I can describe.)

42Leigh

You might wait to try this until you have help to lift it while you relink it. The linking isn’t noticeable in person, and it really looks better to not have the chandelier visually conflict with the centerpiece.

91FrozenNewYear-Leigh

Whether or not you choose one or both of these table-scapes for your next fête, for this year or the next… the idea of making simple changes to perfect your party for its holiday is a notable one if simply for its low cost and ease of transition. Most importantly, it leaves more time for family and friends. Have a very Merry Christmas and a New Year filled with blessings!

33Leigh

Faithfully Yours,

Leigh

P.S. Be sure to check out my Fast & Easy DIY Hand-stamped Polka-dot Gift Wrap & Matching Gift Crafts!

Fall Leaves & Pumpkins Themed Thanksgiving Tablescape Décor Ideas

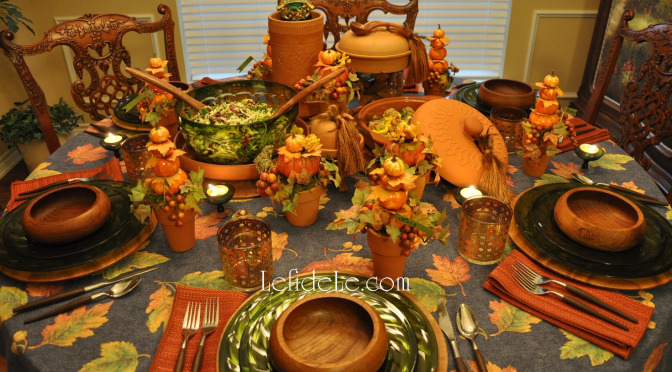
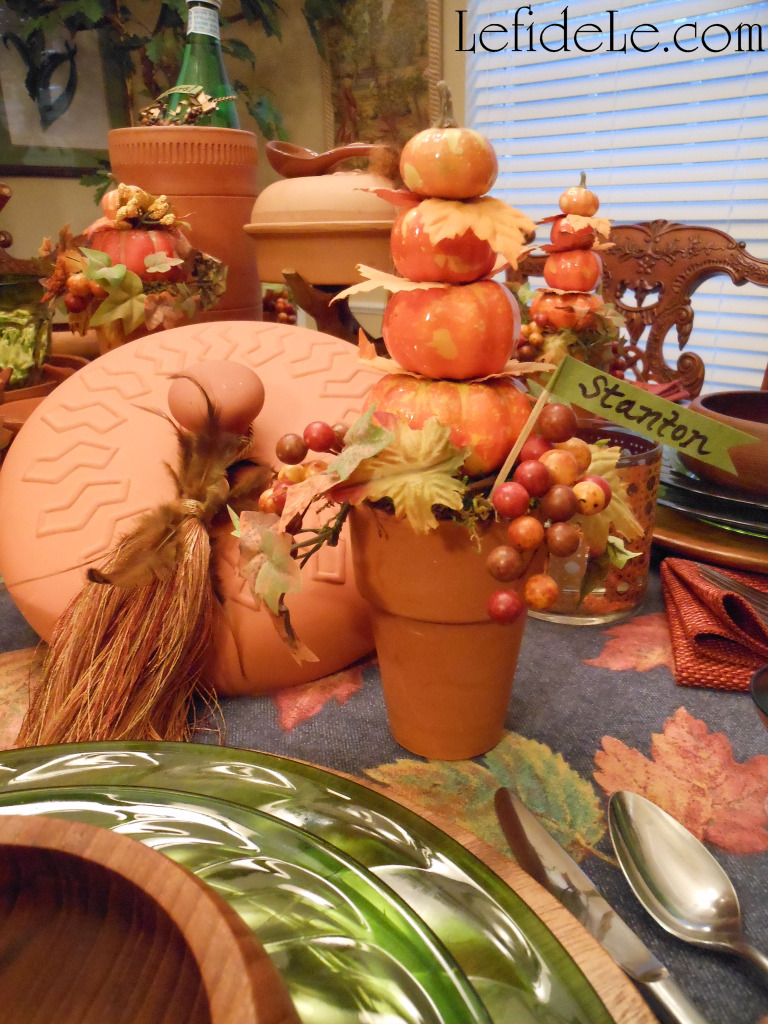
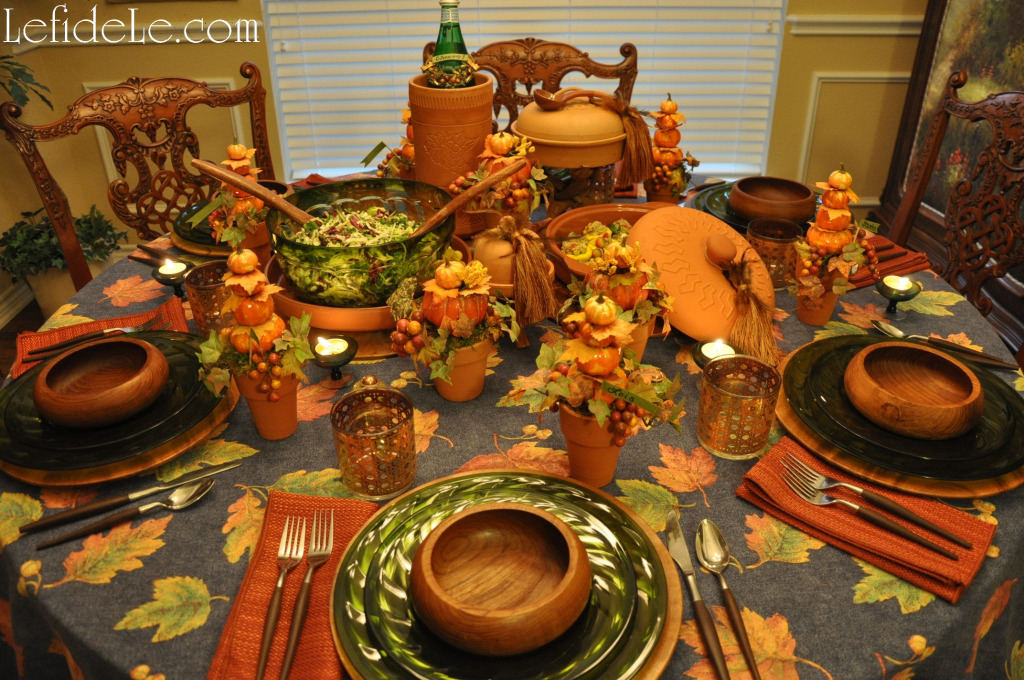
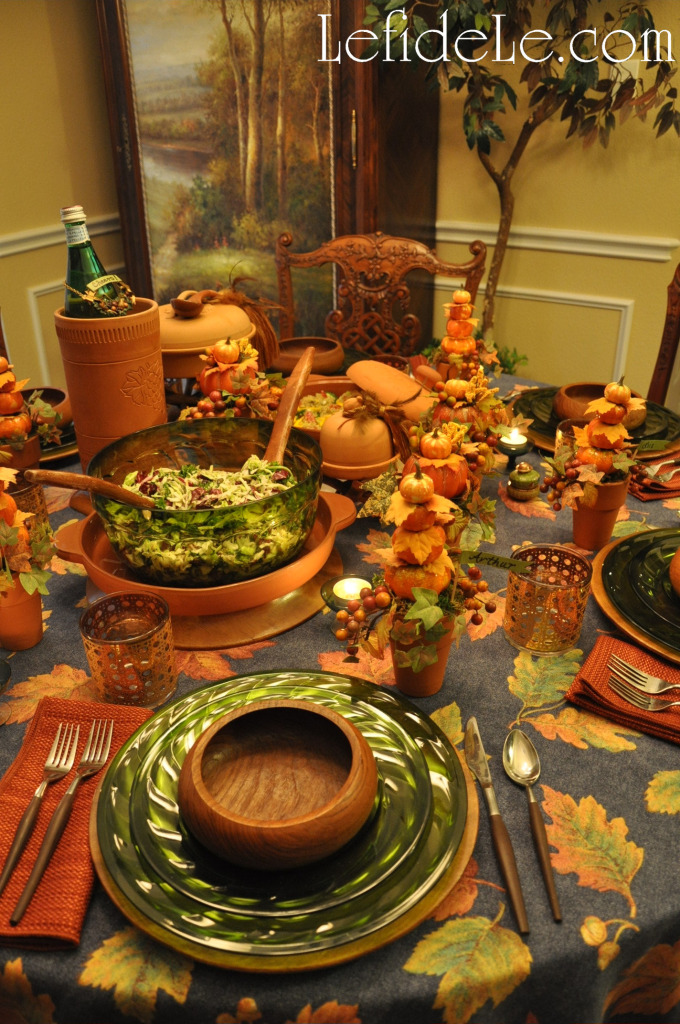
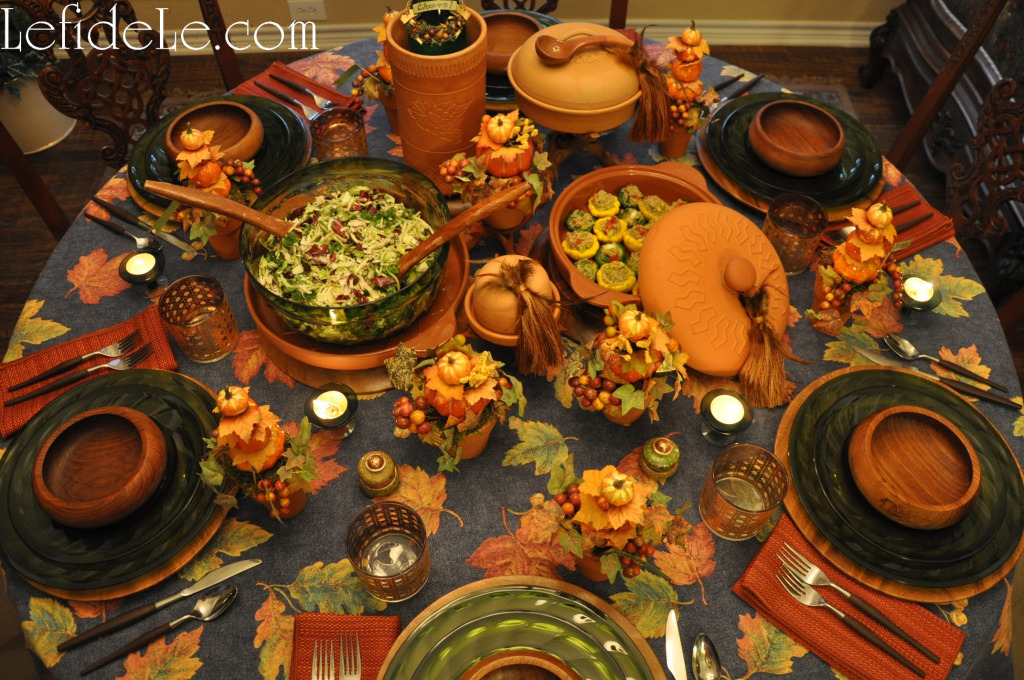
When I think of fall, images of brightly colored leaves and plump pumpkins immediately fill my mind’s eye. This was the initial inspiration behind this tablescape for Thanksgiving.

194fLeigh

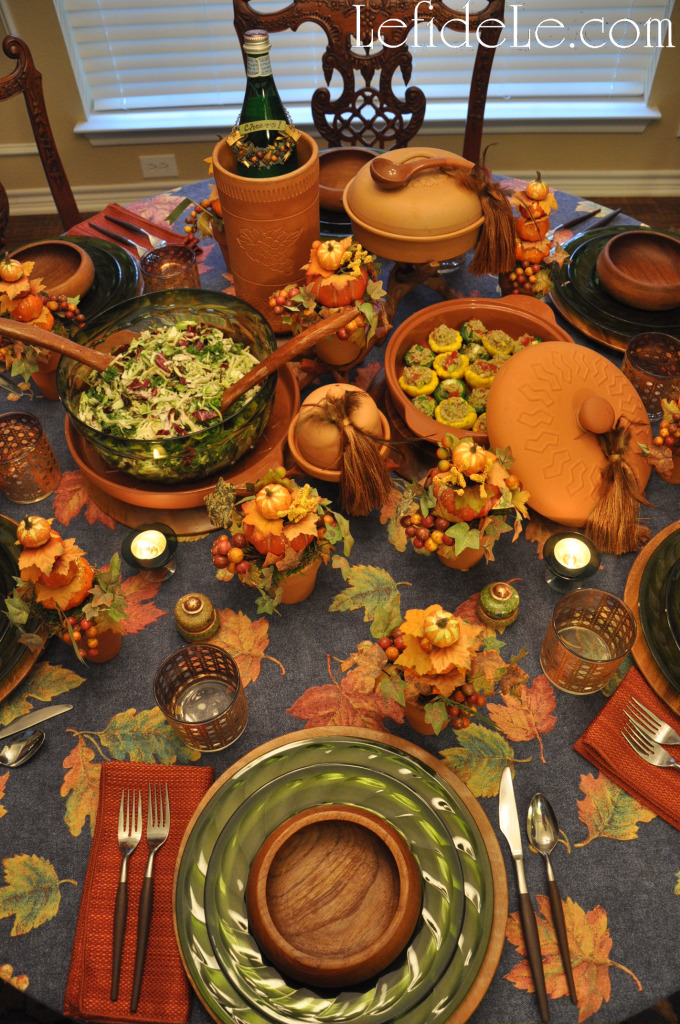
I craved more color than is typically seen in fall décor, and so added a tablecloth with a denim background.

76Leigh

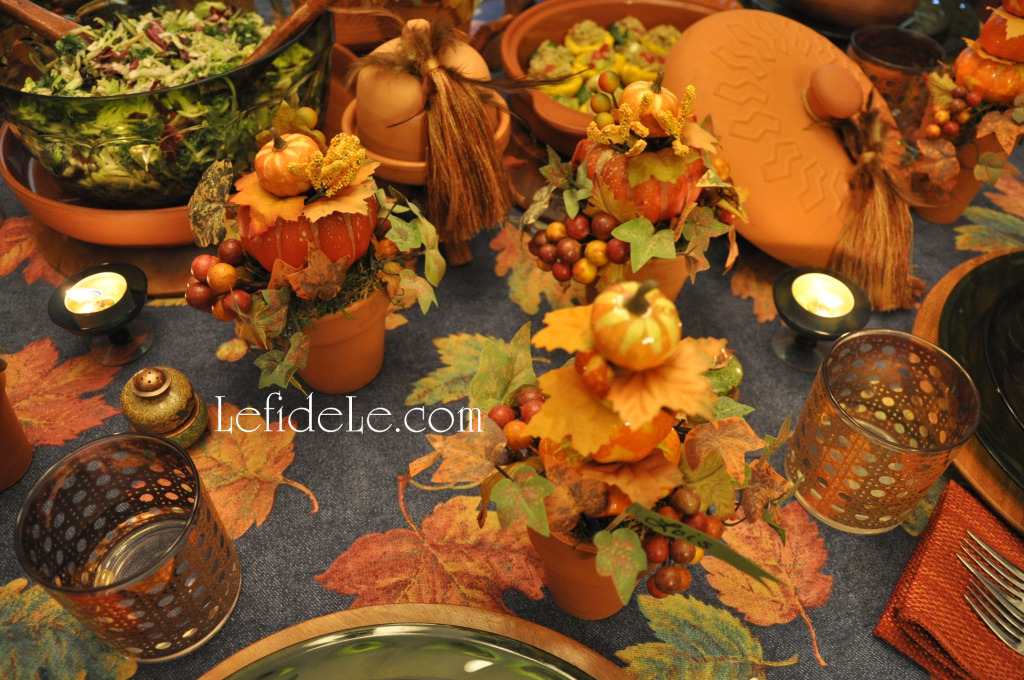
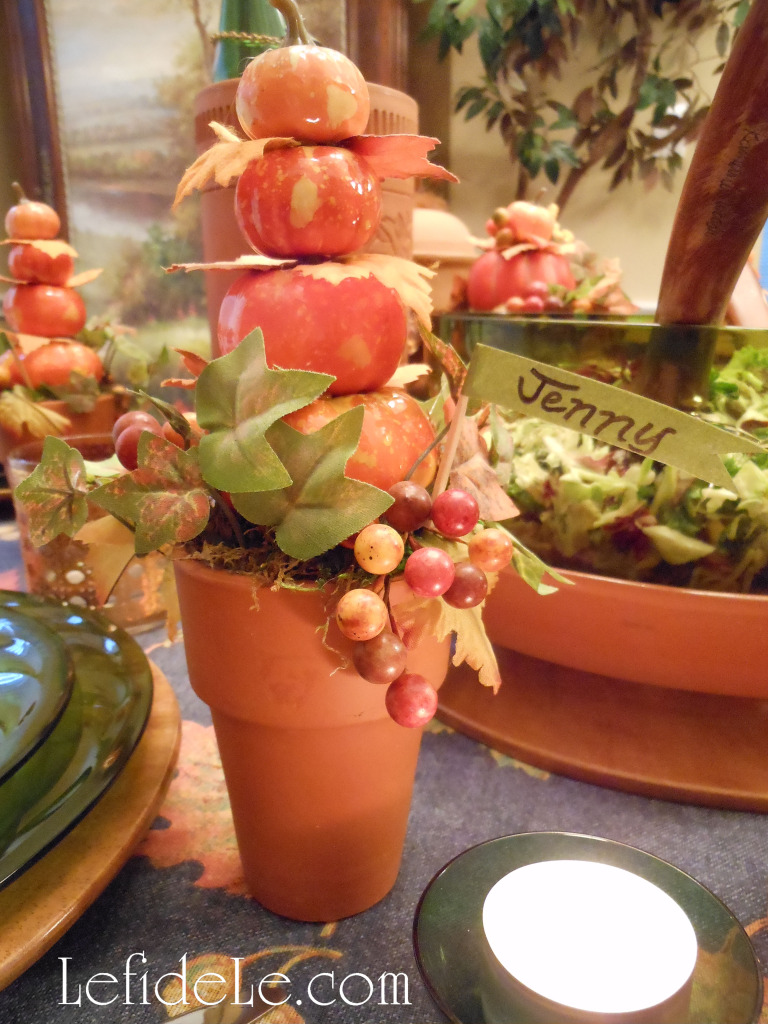
The blue color perfectly balanced the orange of my pumpkin topiary crafts that I made for place-card holders.

75PumpkinTopiaries-Leigh

More color was added with green plates and green crystal votive holders.

148PumpkinTopiaries-Leigh

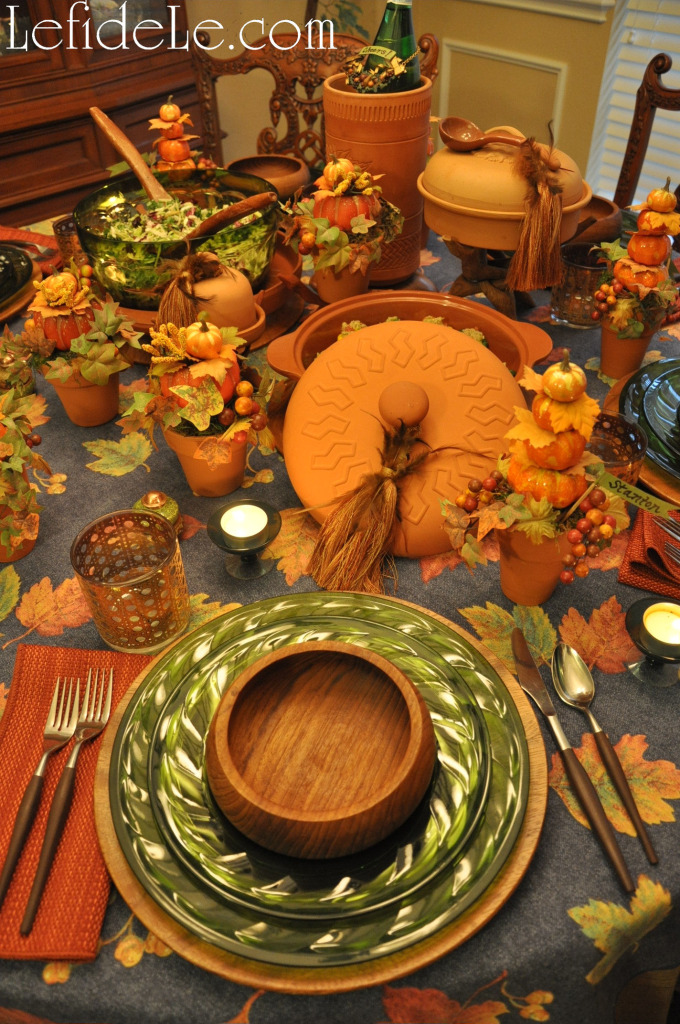
Deeply stained wooden bowls and chargers were utilized to reflect nature. Turning some upside down made stable pedestals for serving pieces.

141Leigh

I chose terra cotta to echo the pots of the topiaries and because the covered dishes would better retain the warmth of the meal. Little tassels tied to the handles softened the hard look of the pottery.

197Leigh

Wooden stands added interest and height to the tableware, thereby making the food the centerpiece. Bringing the floral out and the food in, contributed further to my untraditional Tablescape.

187Leigh

The silverware and golden basket weave glasses provided the finishing touches for the table, just as one would finish an outfit with jewelry.

143Leigh

After the salad course was served, the wooden pedestal hosted turkey slices that had been carved in the kitchen. This is a lovely alternative for round tables where the turkey would make up the entire centerpiece otherwise. This way, no one has to look at the carcass for the remainder of the meal, which is a blessing to any vegans who were invited.

174QuinoaSquash-Leigh

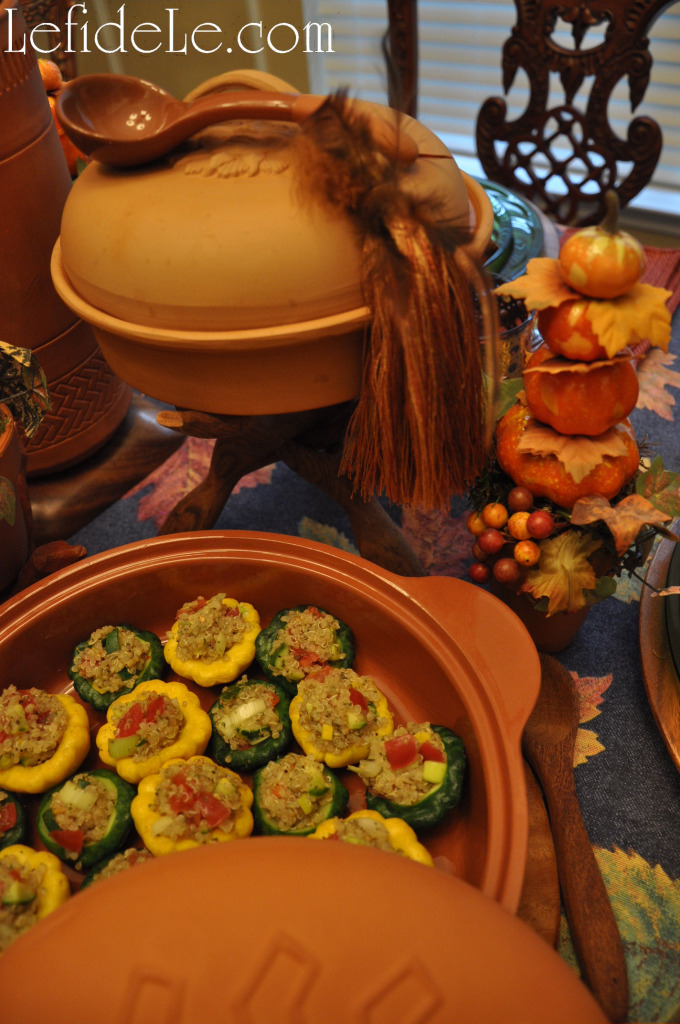
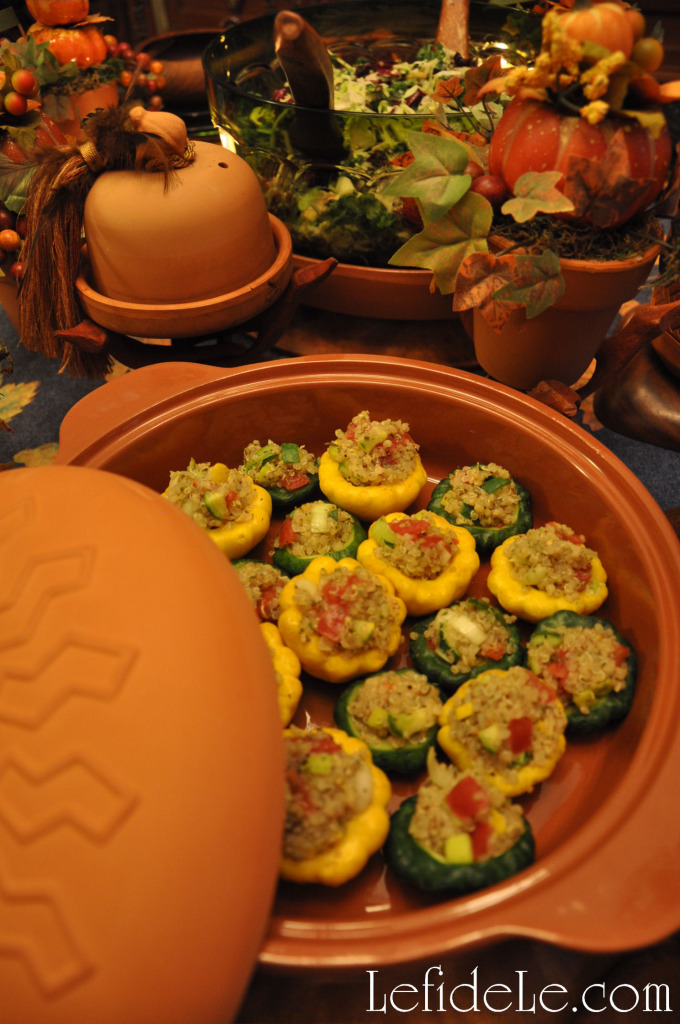
This is my healthy quinoa pilaf stuffed patty pan “mini” squash recipe which is Gluten-Free and Dairy-Free so that everyone may happily partake of the meal. Ground meat may also be added to make a complete meal.

8CauliPotatoes-Leigh

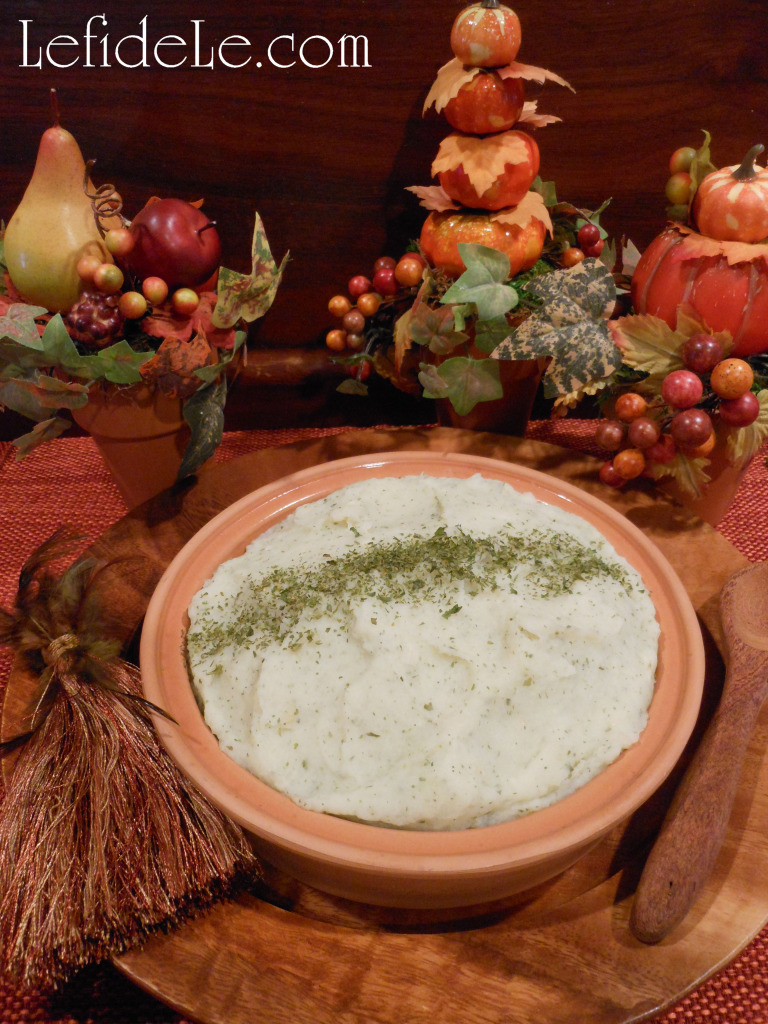
This is my quick and easy heart-healthy “shortcut cauli-potatoes” recipe that is also Gluten-Free and Dairy-Free. It’s great year round because it’s so healthy and so fast to prepare.

160Leigh

Happy Thanksgiving!

Faithfully Yours,

Leigh
DIY Glitter Pumpkin Tassels for Halloween Decorating


339-Leigh

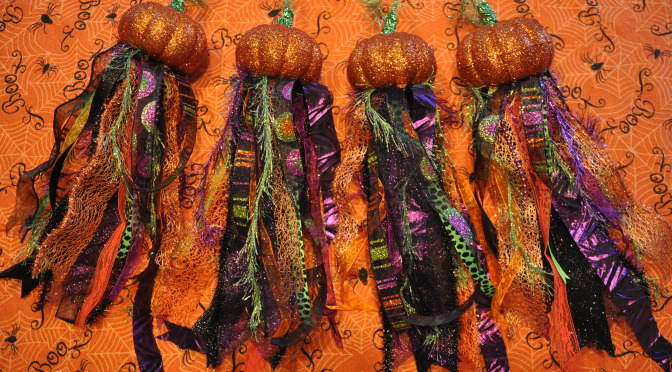
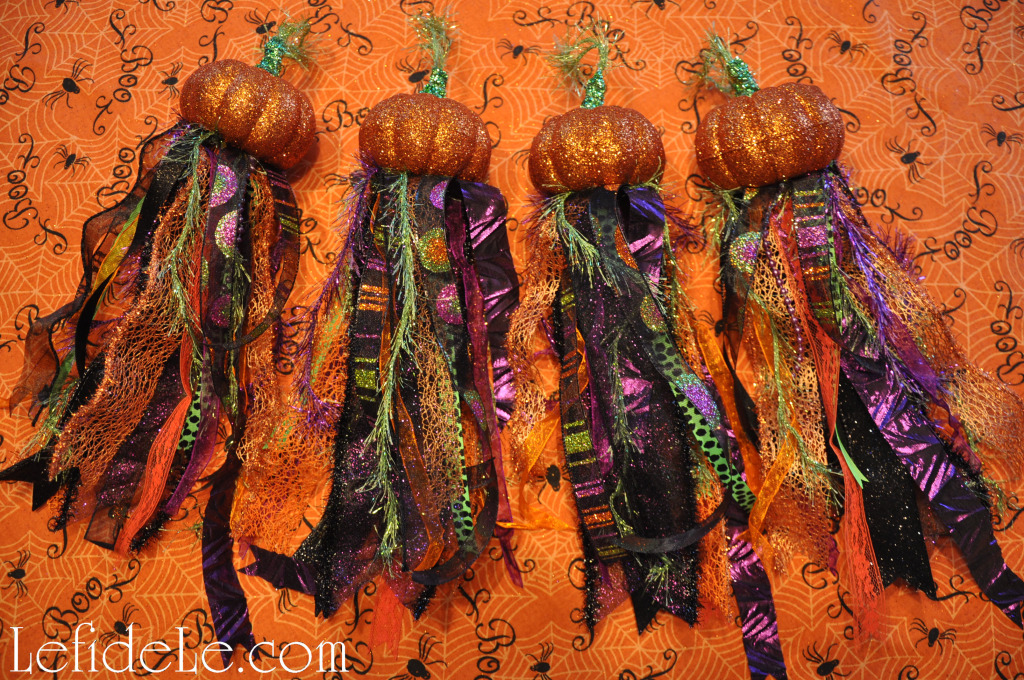
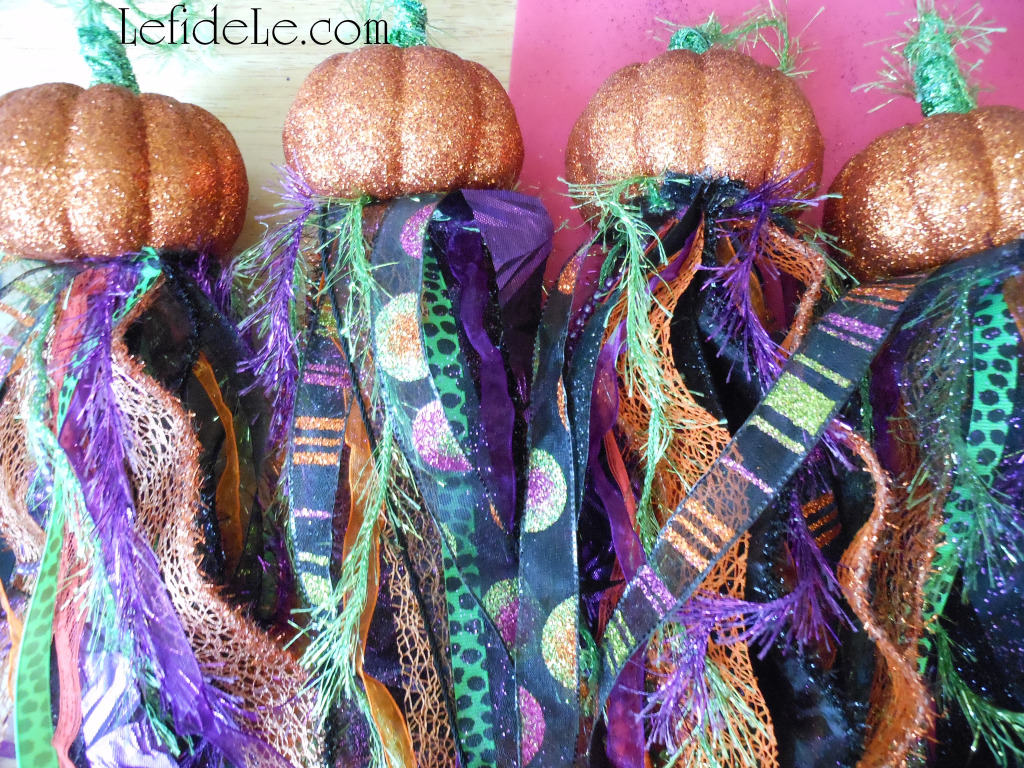
This DIY Halloween project makes perfect use of all those leftover ribbon scraps that are just too pretty to throw away, but are too short to do much else with. There are many kinds of tiny pumpkins available at craft stores, and they don’t have to be glittered like these. I love to mix various textures and finishes of materials because it produces more visually compelling creations.

133-Leigh

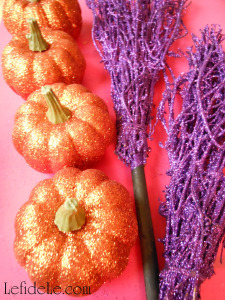
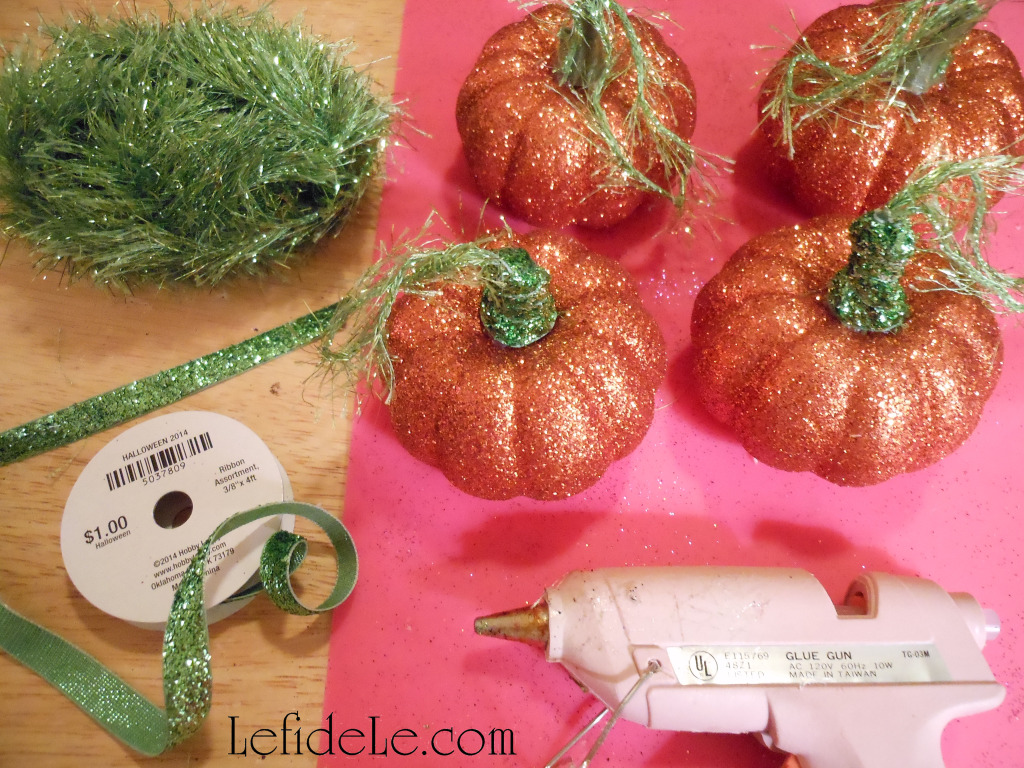
I used some of the scatter pumpkins that were decorating my living room console. I really don’t know what sparked the idea, but I just had to turn some of them into tassels. The conundrum was how to accomplish this, but as one of my studio art professors said, “Art is about problem solving.” My answer came in the form of a hot glue gun.

152-Leigh


I first glued the ends of a few inches of shimmering green yarn onto the plastic stem of the pumpkins, in order to form a hanging loop. Then I glued matching flat ribbon, as I coiled it around the stem, until it was covered completely. Clearance and dollar bin ribbon are great for projects like this, when you need just a few lengths to complete the job.

160-Leigh

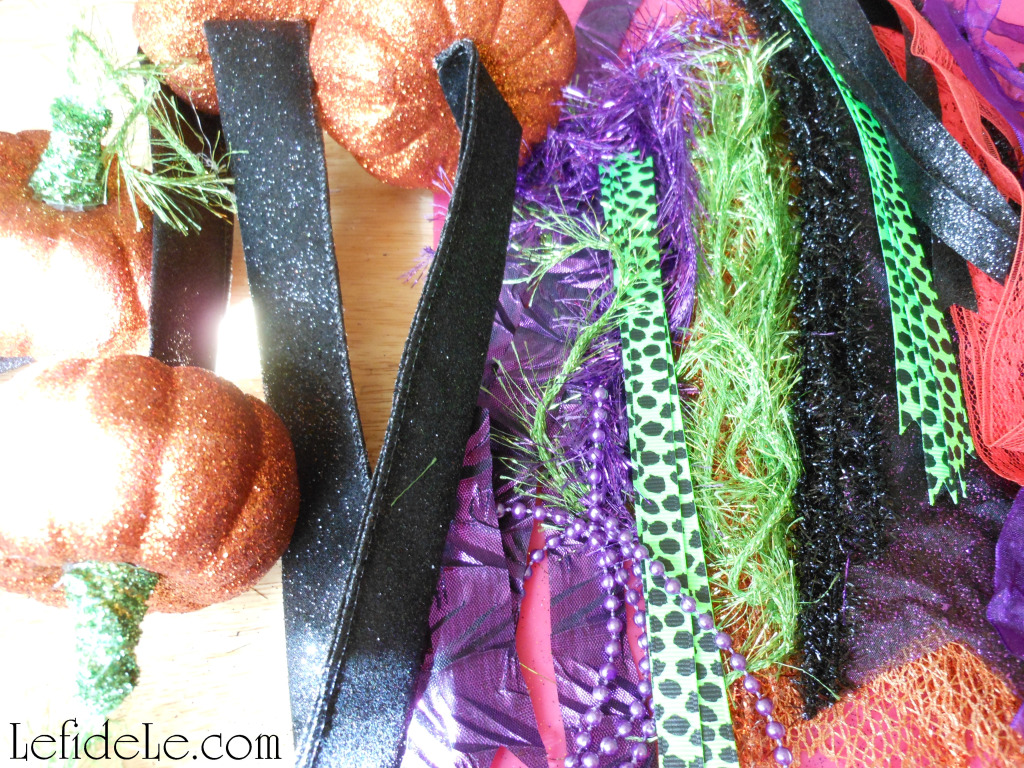
I gathered up all my coordinating ribbon scraps, and then cut additional lengths off new rolls that I had set aside for this year’s “Glitter-ween” Party theme. In that way, the finished product would harmonize with the other crafts I had already completed. I cut the wired ribbon into longer lengths to purposely be able to bend it into waves later. That would add dimension and separation by introducing “negative space” into the piece. Sometimes the empty places are as important to the composition as the materials themselves are. The wider ribbons, I either cut in half or folded in half and glued together. Cutting the gluing ends flat and the trailing ends pointed, into a V or W depending on the width, adds a touch of polish.

164-Leigh

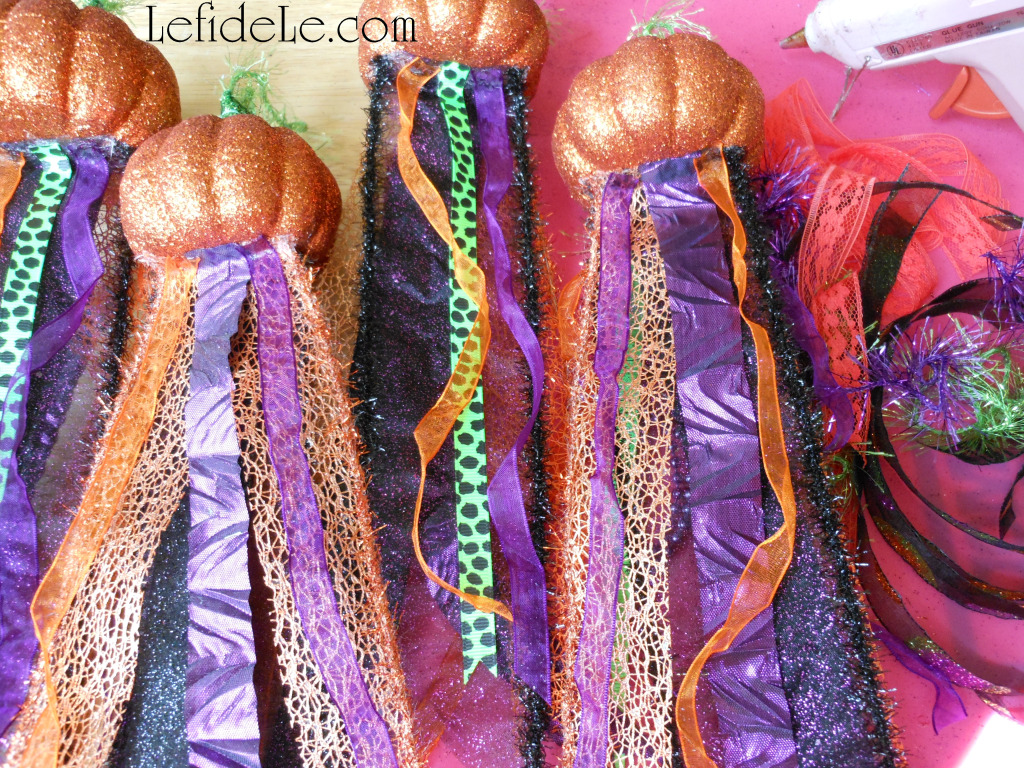
I began gluing bent tips of the darkest and thickest ribbons to the center of the pumpkin bases. From there I just kept turning and gluing until I got to the thin ribbons and yarns. Those I added to the outside areas where it seemed like some color was needed to fill to the space.

165-Leigh

This is where to just keep adding intuitively until it looks finished. I always say that I work on a project until I’m afraid that I’ll mess it up if I add any more. Then and only then, is it finished. If you feel like something’s missing, take a break and come back to it later with a fresh perspective. If you still feel that it’s just not quite right, ask a creative friend for their opinion. Sometimes a conversation about a design is enough to generate even more of your own ideas.

278-Leigh

Laying out all the pumpkins helps to see if any errant lengths need to be trimmed down. Then it’s time decorate with them.

288-Leigh

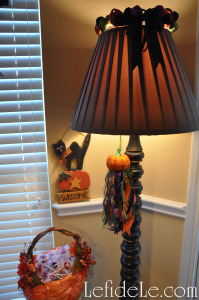
They look fanciful hanging from lamp switches where light can reflect on them. That’s a glittered bell wreath perched atop the lampshade.

319-Leigh

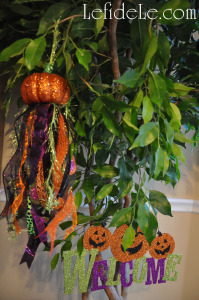
They make great ornaments for indoor trees. Adding a Happy Halloween sign helped too.

239-Leigh

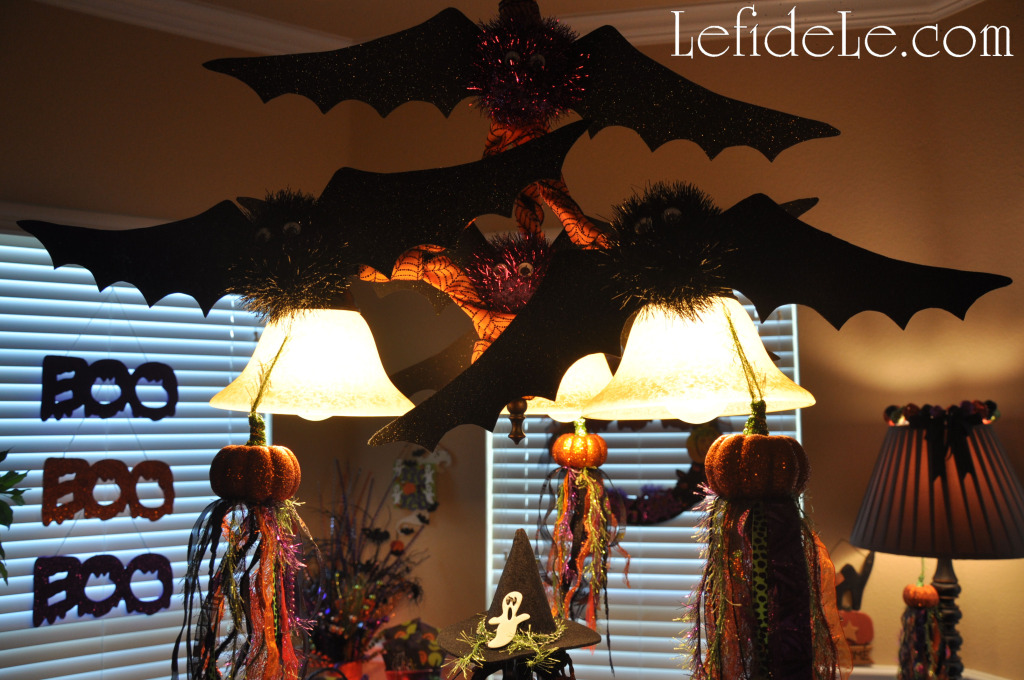
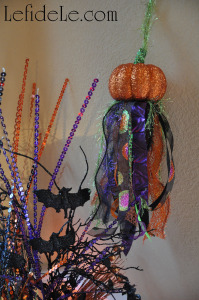
They connect the space between table and chandelier when suspended from the lights. The bats are an easy craft that will come with a PDF template in a future posting.

312-Leigh

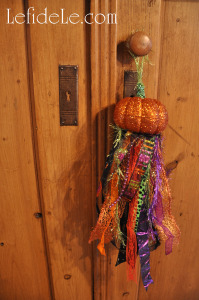
If the loops are made large enough, they’ll hang on any doorknob, even an armoire.

323-Leigh

They can even hang from a tack nail on the wall where a bit of empty space needs decorative filling.

339-Leigh

Best of all, they’re one-of-a-kind handmade in the USA creations that not everyone on the block has seen in a store’s ad, and I had fun making them. Here’s hoping you do too!

Faithfully Yours,

Leigh
Origins of Le fidèLe Designs

iconlogo

For those of you who don’t speak français, “Le fidèle” means “the faithful”. It’s pronounced Luh-Fee-Dell. I had originally chosen the name as a reflection of my intrinsic beliefs…

FAITHFUL to God who graces me with the purest form of love
FAITHFUL to the family who with dedication stand by me always
FAITHFUL to the friends who remain near in more than just fair weather
FAITHFUL to leading an authentic life of integrity
FAITHFUL to establishing ripples directed toward benevolence
FAITHFUL to utilizing and sharing the creative gifts with which I have been blessed

After countless requests for creative guidance and instruction, I have decided to heed the advice of sharing my projects with more than just those around me. I ask for your support as I explore this new medium of expression. I also invite you to make requests and share your suggestions (in the comments section following each post), so that I may improve as we move forward together in the spirit of embracing that creativity which I believe resides within us all.

Faithfully Yours,
Leigh
What you can expect from Le fidèLe Designs

iconlogo

Fine Art Instruction

I am an artist who encourages others to explore their creative potential by fearlessly trying new mediums and techniques. I believe that art can act as a balm for the soul when one’s innermost feelings are allowed to flow into artistic expression.

Craft Tutorials

As a lifelong craft enthusiast, I love the challenge of up-cycling and creating something beautiful out of otherwise unremarkable scraps. Not only is it mentally stimulating, but also salves my environmental conscience by participating in “good stewardship”.

Parties & Tablescapes

As so much of life is often experienced in accelerated motion, it becomes a real joy to slow down and cherish those special occasions and life changing events that bring us together. Putting forth time and energy into beautifying a venue serves to enrich the celebration by making the day even more precious in one’s memory.
Recipes

I know firsthand how food allergies can negatively impact one’s social experiences, and how even well-meaning hosts can have difficulty navigating safe recipes so that their guests may partake of least one dish. So it is with the spirit of inclusion that I will be posting recipes to help eliminate these problems. All of my healthy yet tasty recipes will always be free of gluten, dairy, eggs, soy, peanuts, corn, canola, mushrooms, and peppers in the nightshade family. I will also be offering ingredient substitutions and helpful tips. Bon appétit!

Faithfully Yours,
Leigh