Tag Archives: Allergy Friendly

Irish Colcannon / Herbed Kale Mashed Potatoes St. Patrick’s Day Recipe (Allergy-Friendly, Gluten-Free, Dairy-Free, Vegan)

202Leigh

Most traditional preparations and modern recipes for Irish Colcannon call for ingredients like cream and butter. Tasty as they may be, these ingredients aren’t as healthy as their dairy-free counterparts. Making them vegan also ensures that every St. Patrick’s Day guest may be served without worry. I’ve also switched out cabbage for the superfood kale, and added some amazing herbs. This healthy recipe transformation allows it to be enjoyed as an everyday food, while still tasting like a comfort food. So use it to feed your holiday guests, or just divide the recipe to indulge in it yourself!


Ingredients:

  • 5 pound bag Yukon Gold Potatoes (these have a natural buttery flavor, but use what you like)
  • 1 cup unsweetened almond milk (or any other variety of milk)
  • ½ cup extra virgin olive oil (you can reduce the amount, or try another healthy flavorful oil)
  • 1 big bunch of kale chopped (use any variety, just remove the core stems)
  • 1⅓ cup diced leeks (or onions, scallions, green onions…)
  • ⅔ cup minced fresh parsley (I used curly but flat leaf is great too, cut back if using dried)
  • ½ cup diced fresh chives (= ⅔ ounce organic package, or ¼ cup dried)
  • 1 teaspoon ground black peppercorns
  • 2 teaspoons sea salt (you can always use less, or try a no salt seasoning)
  • Optional: turkey bacon pieces to mix in and gluten-free breadcrumbs to top it with… Yummy!

Instructions:

063Leigh

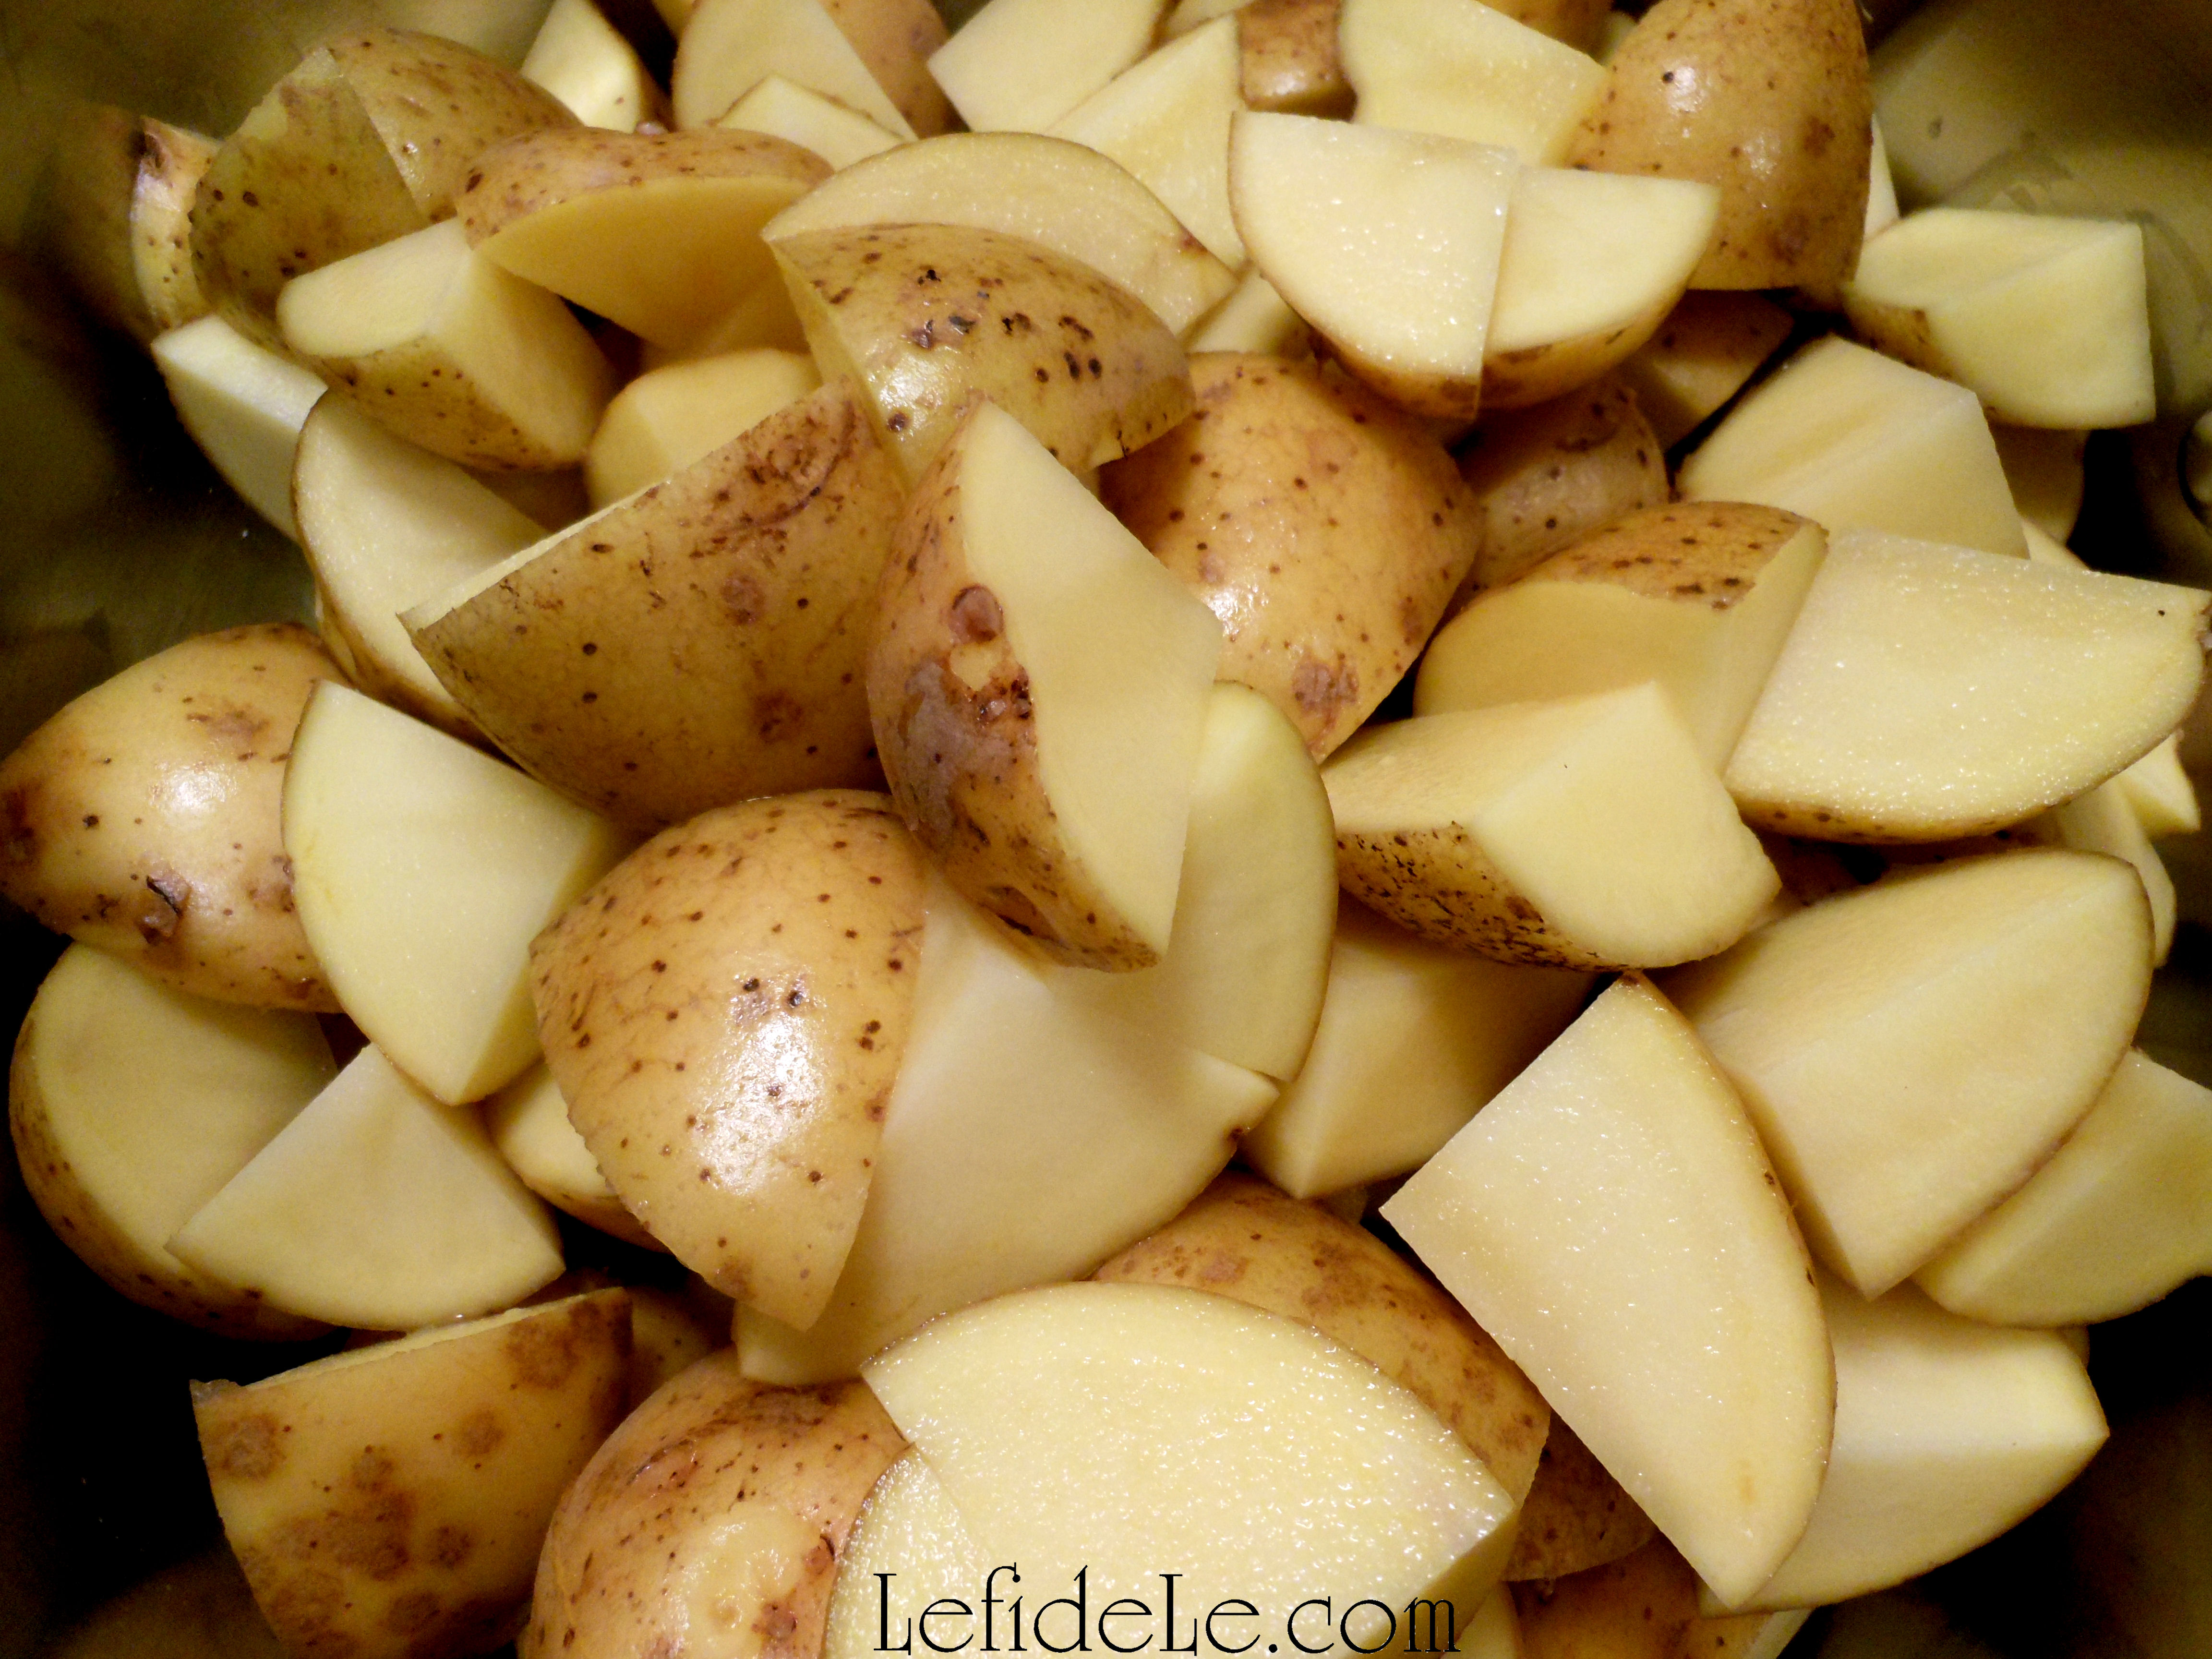
Wash and scrub the potatoes with a brush, and then cut them into quadrants for faster cooking. (I intentionally don’t peel mine because the skins contain most of the vitamins and fiber… plus they add a lovely rustic texture!) Bring them to a boil in salted water over high heat, and then reduce to a simmer.

080Leigh

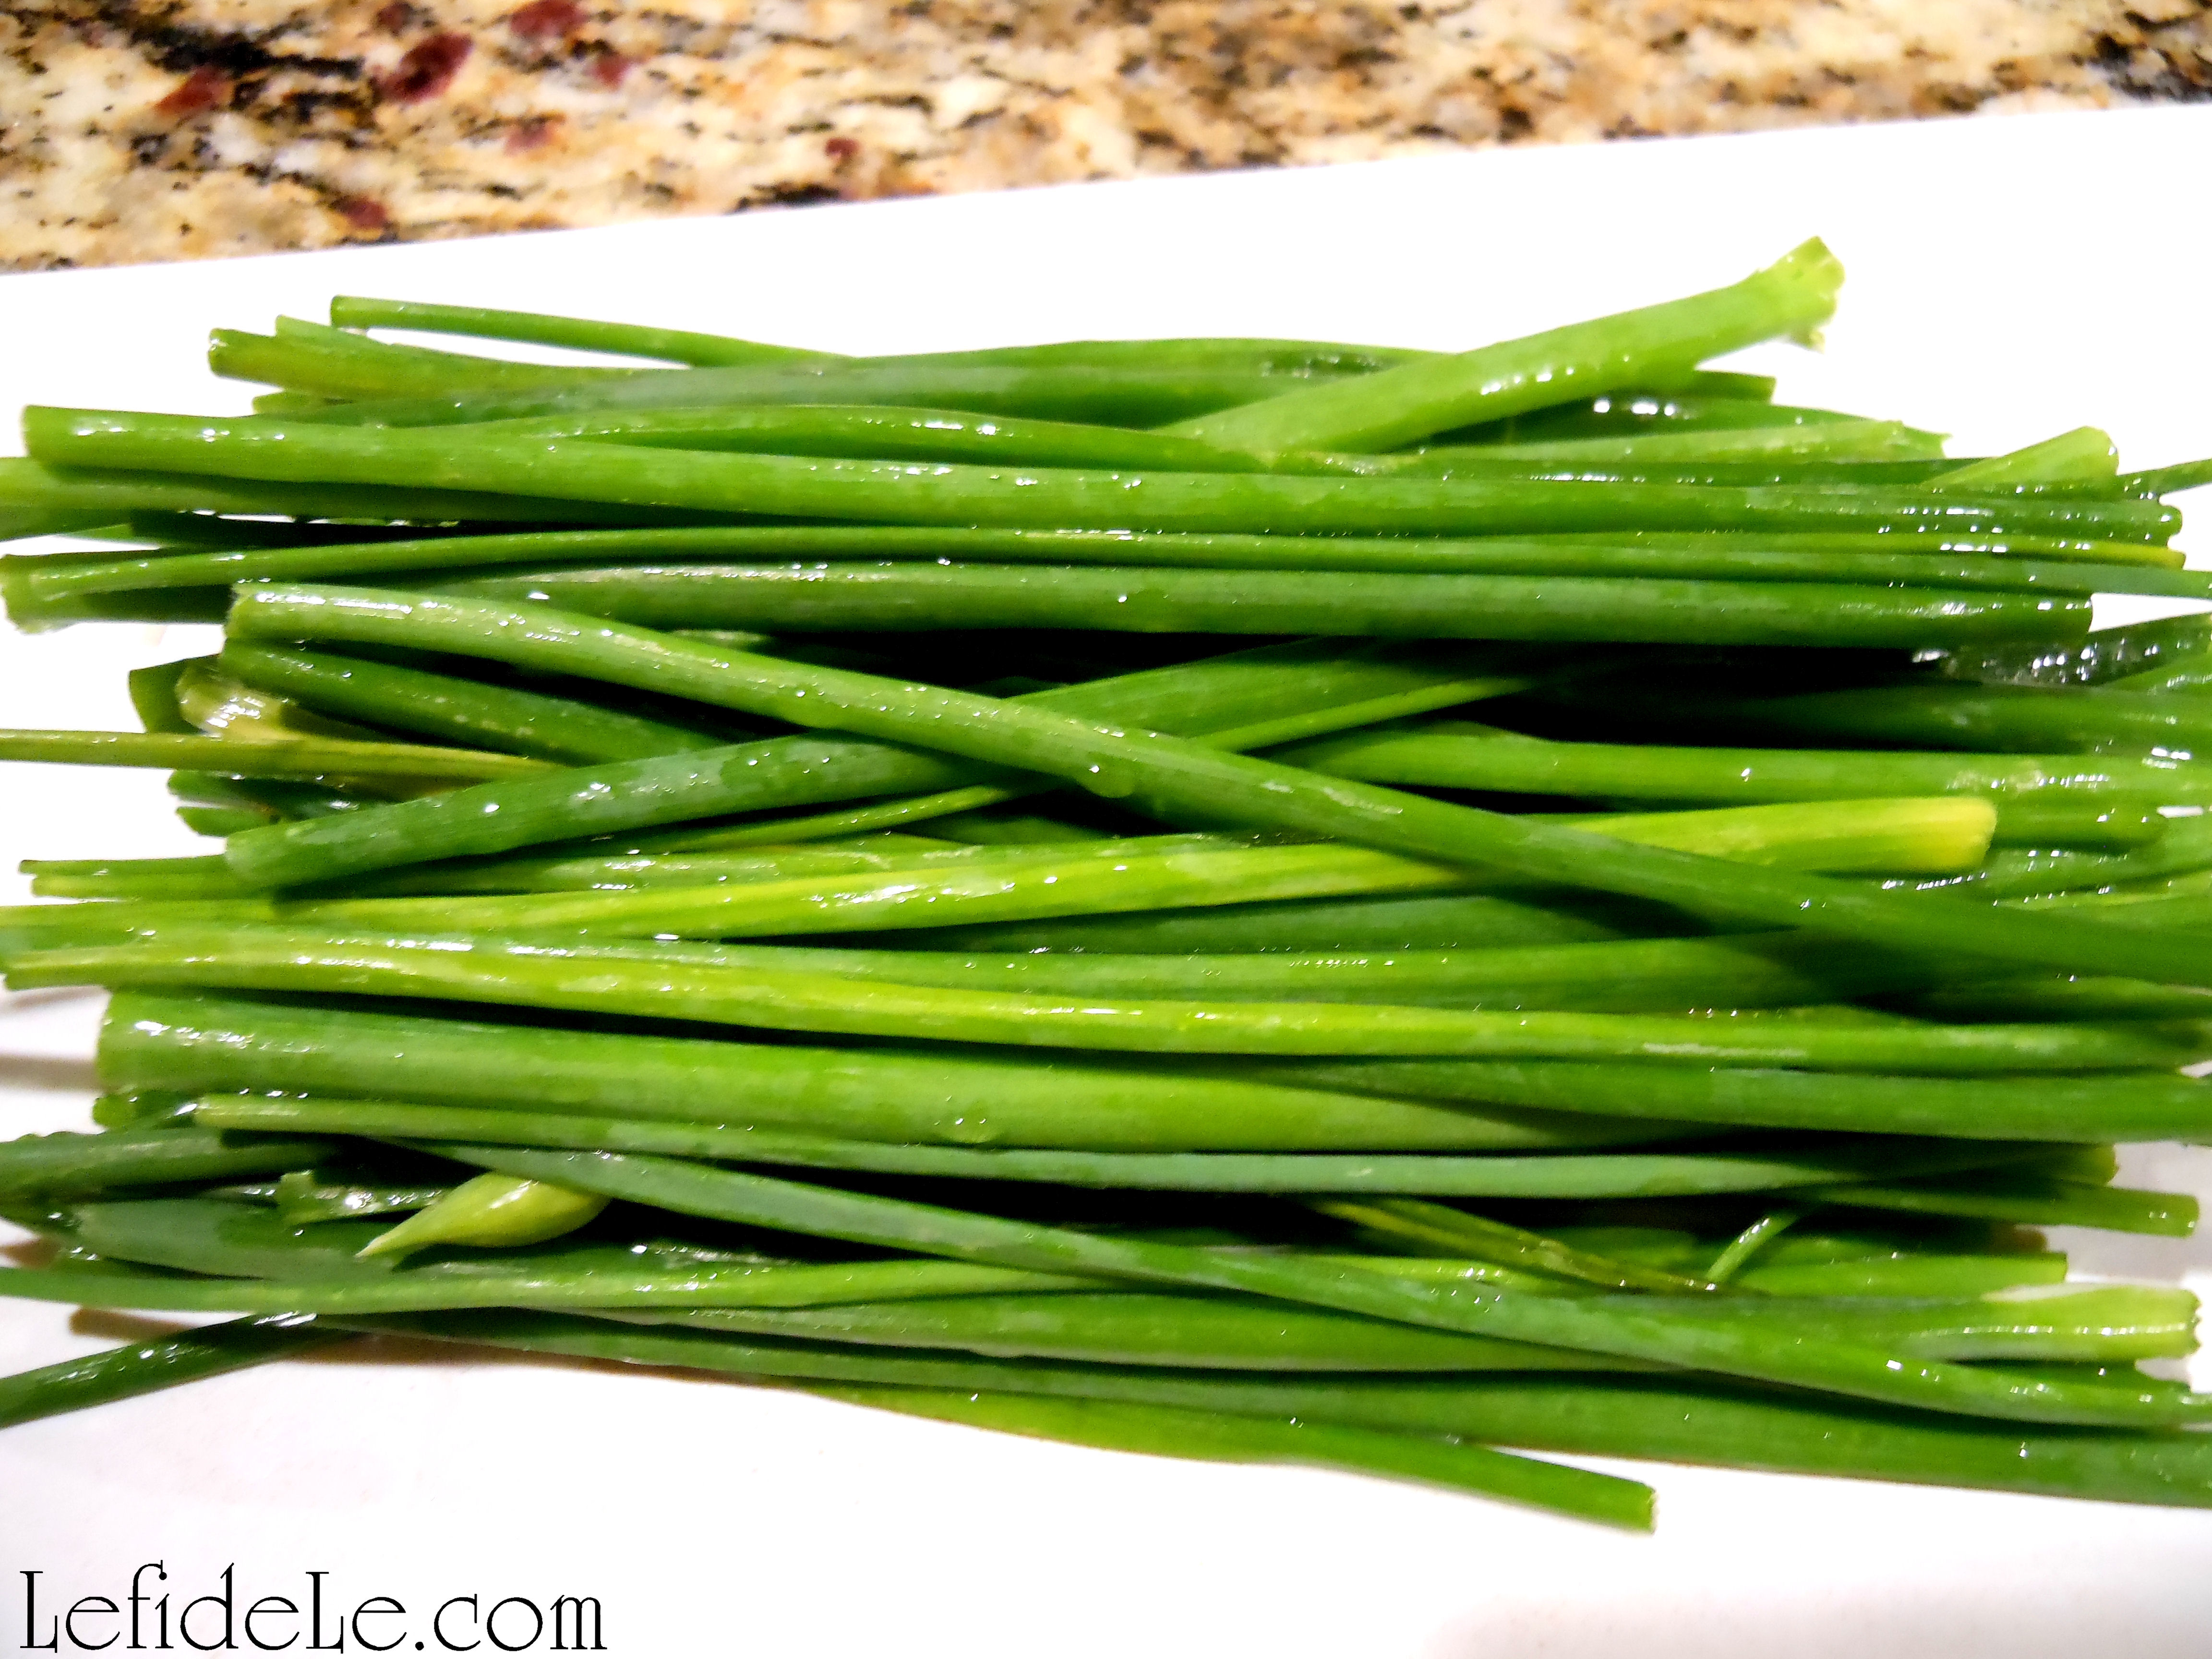
While the potatoes are cooking… wash the kale, chives, parsley, and leeks.

078Leigh

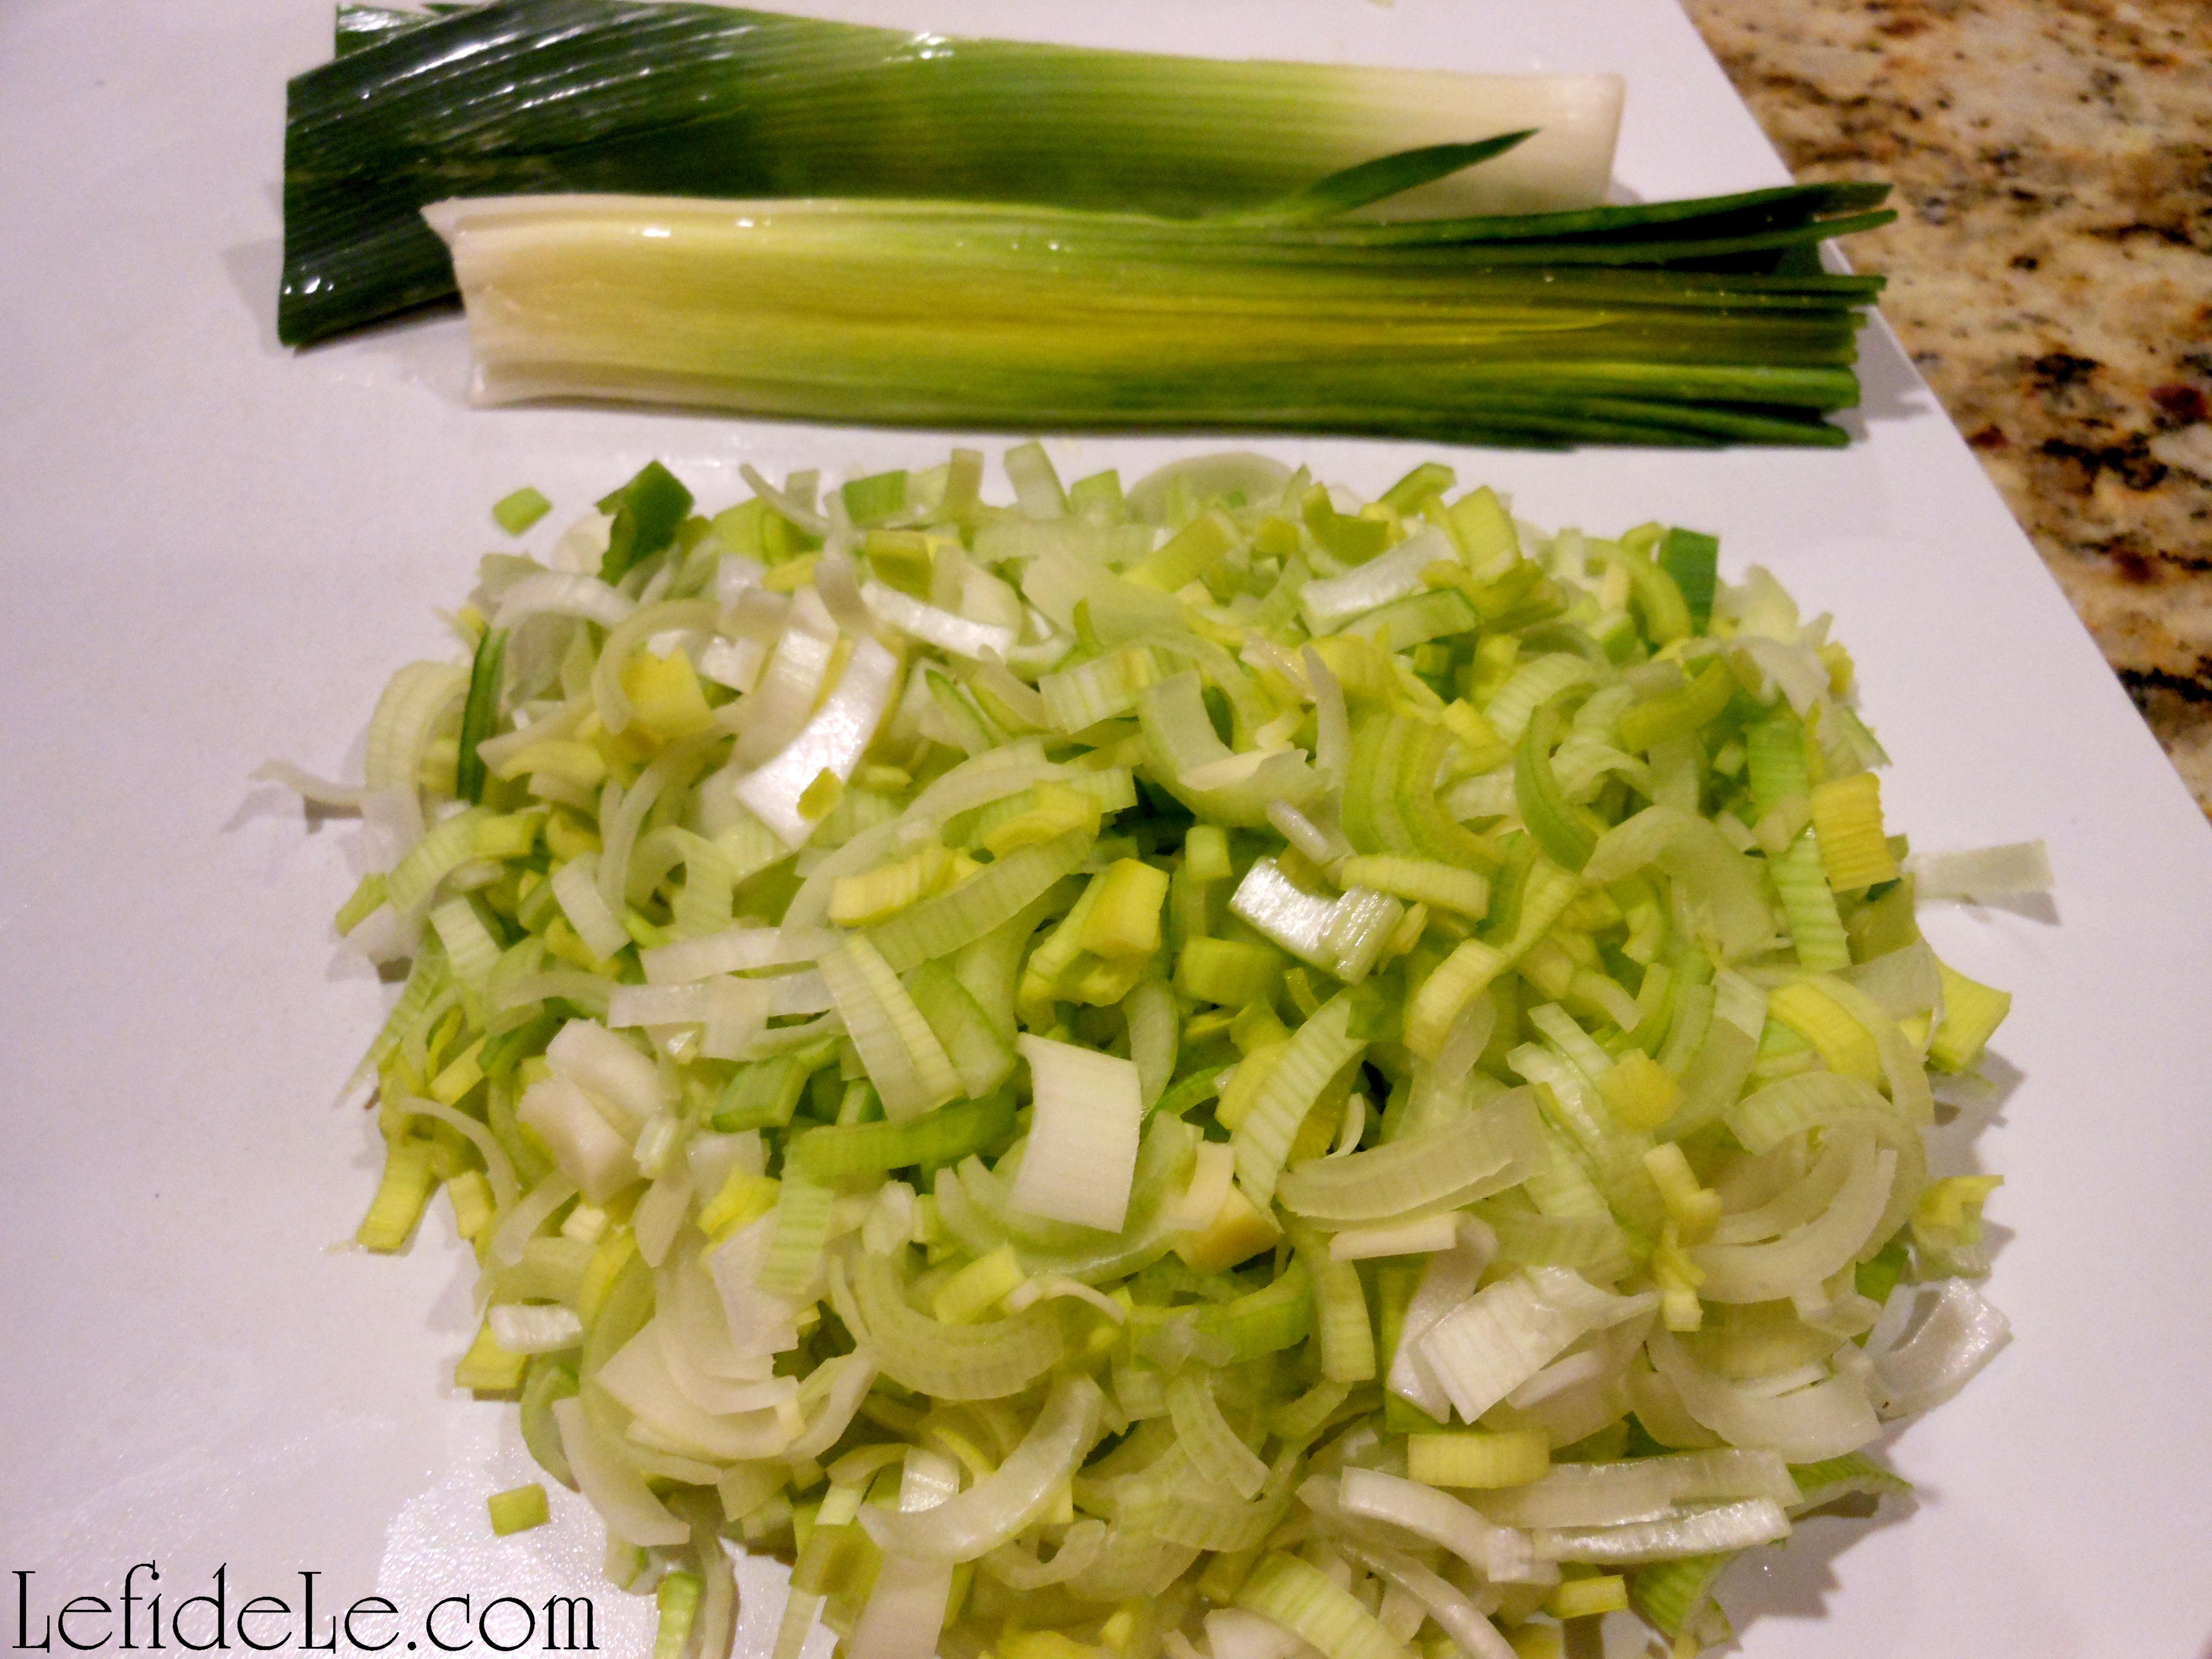
Leeks tend to get dirt stuck inside them, so it’s best to wash the outside first then cut them in half before washing the insides.

084Leigh

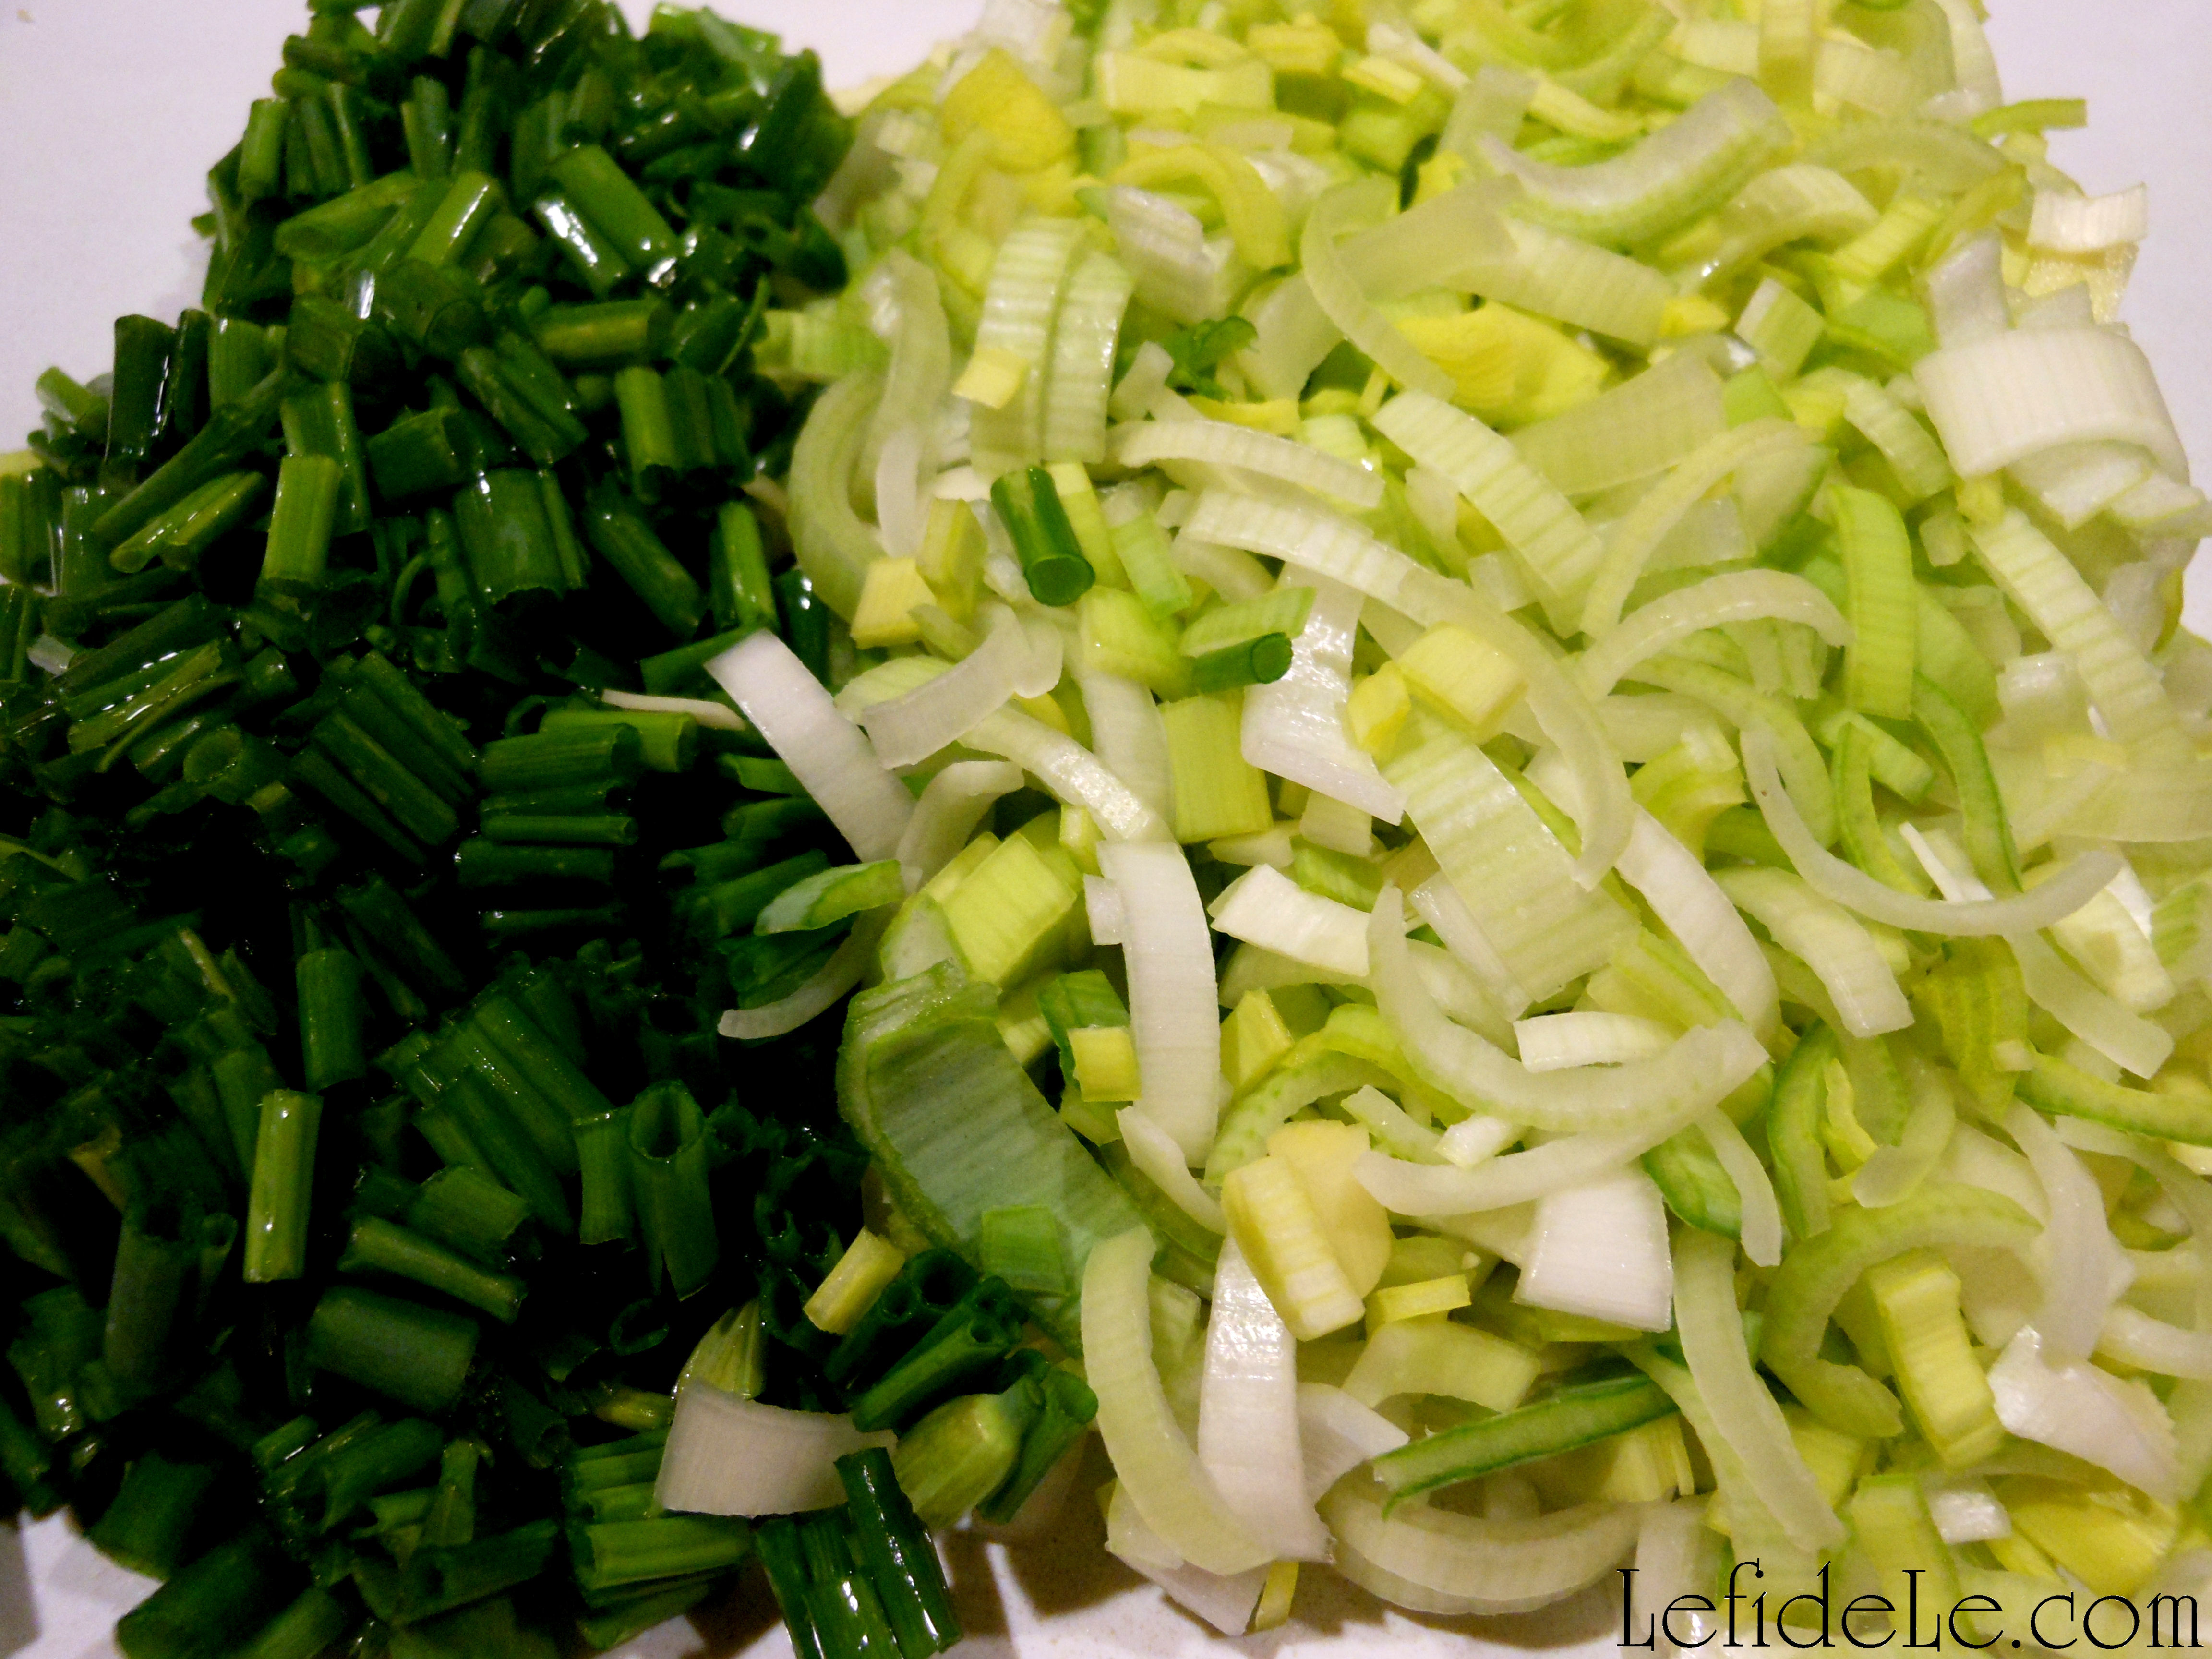
Dice those leeks and chives. (I love that leeks won’t make you cry like onions!)

087Leigh

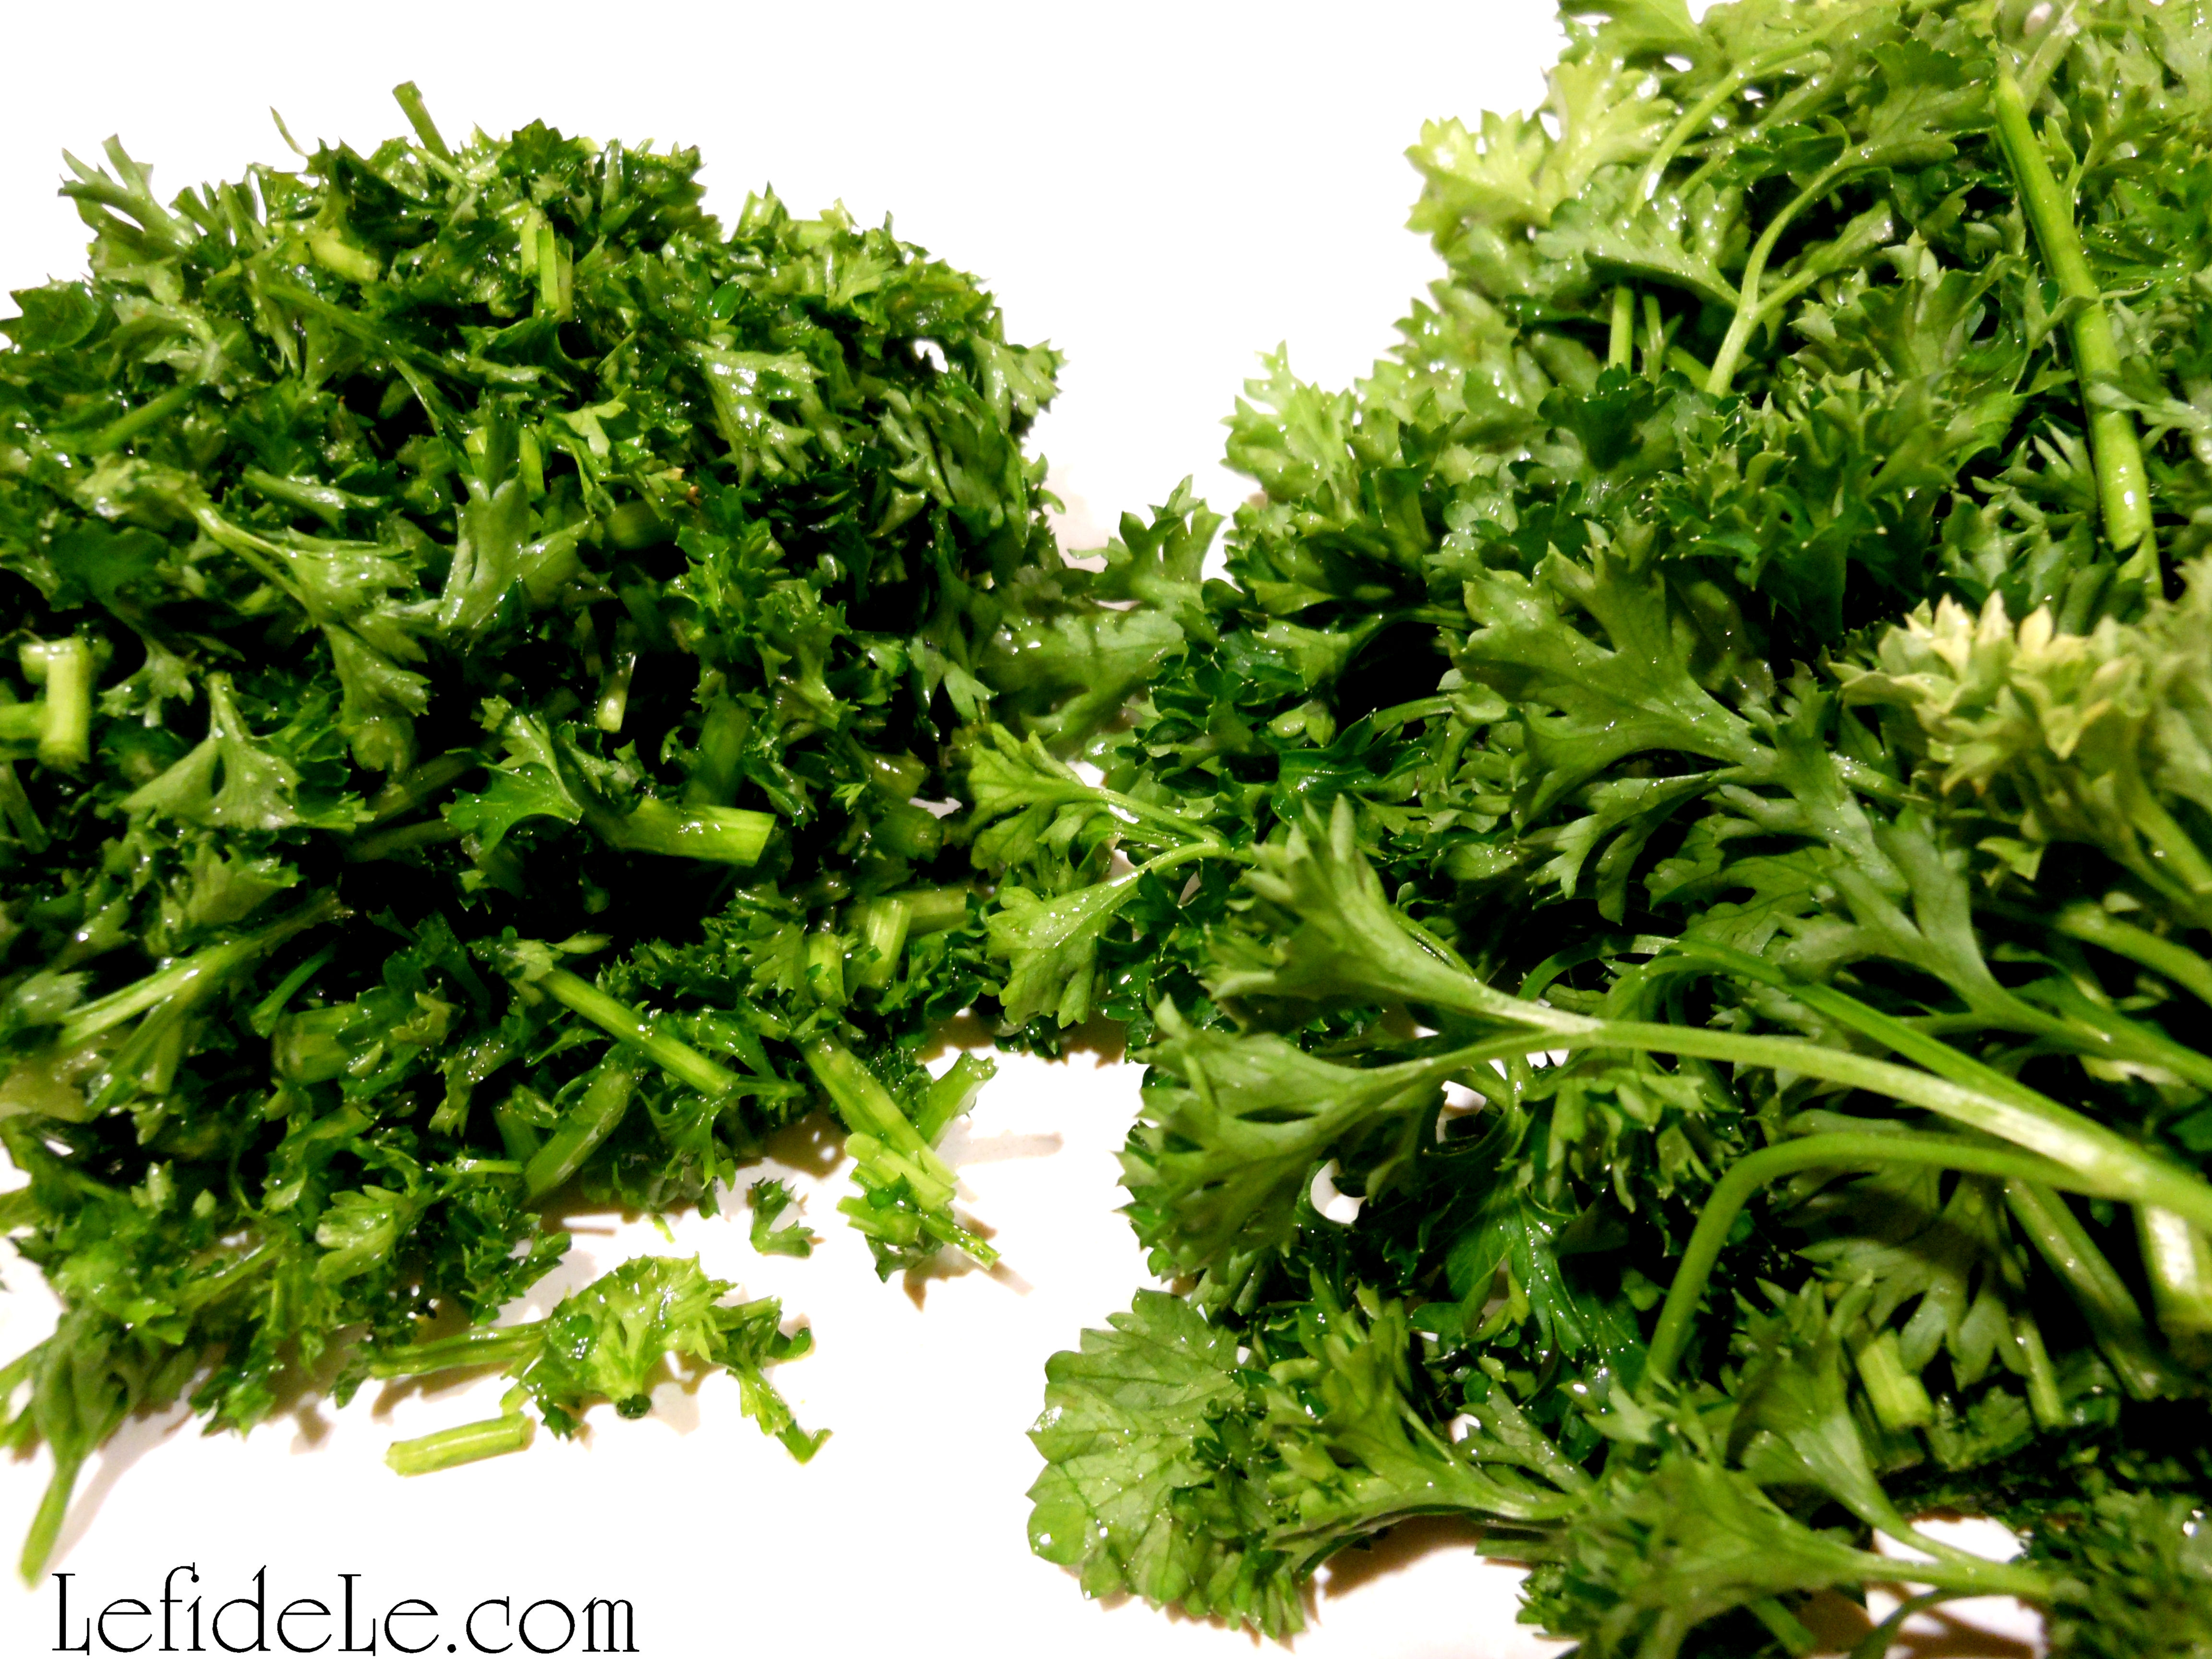
Mince the parsley. (The right side is the before, and the left is the after.)

093Leigh

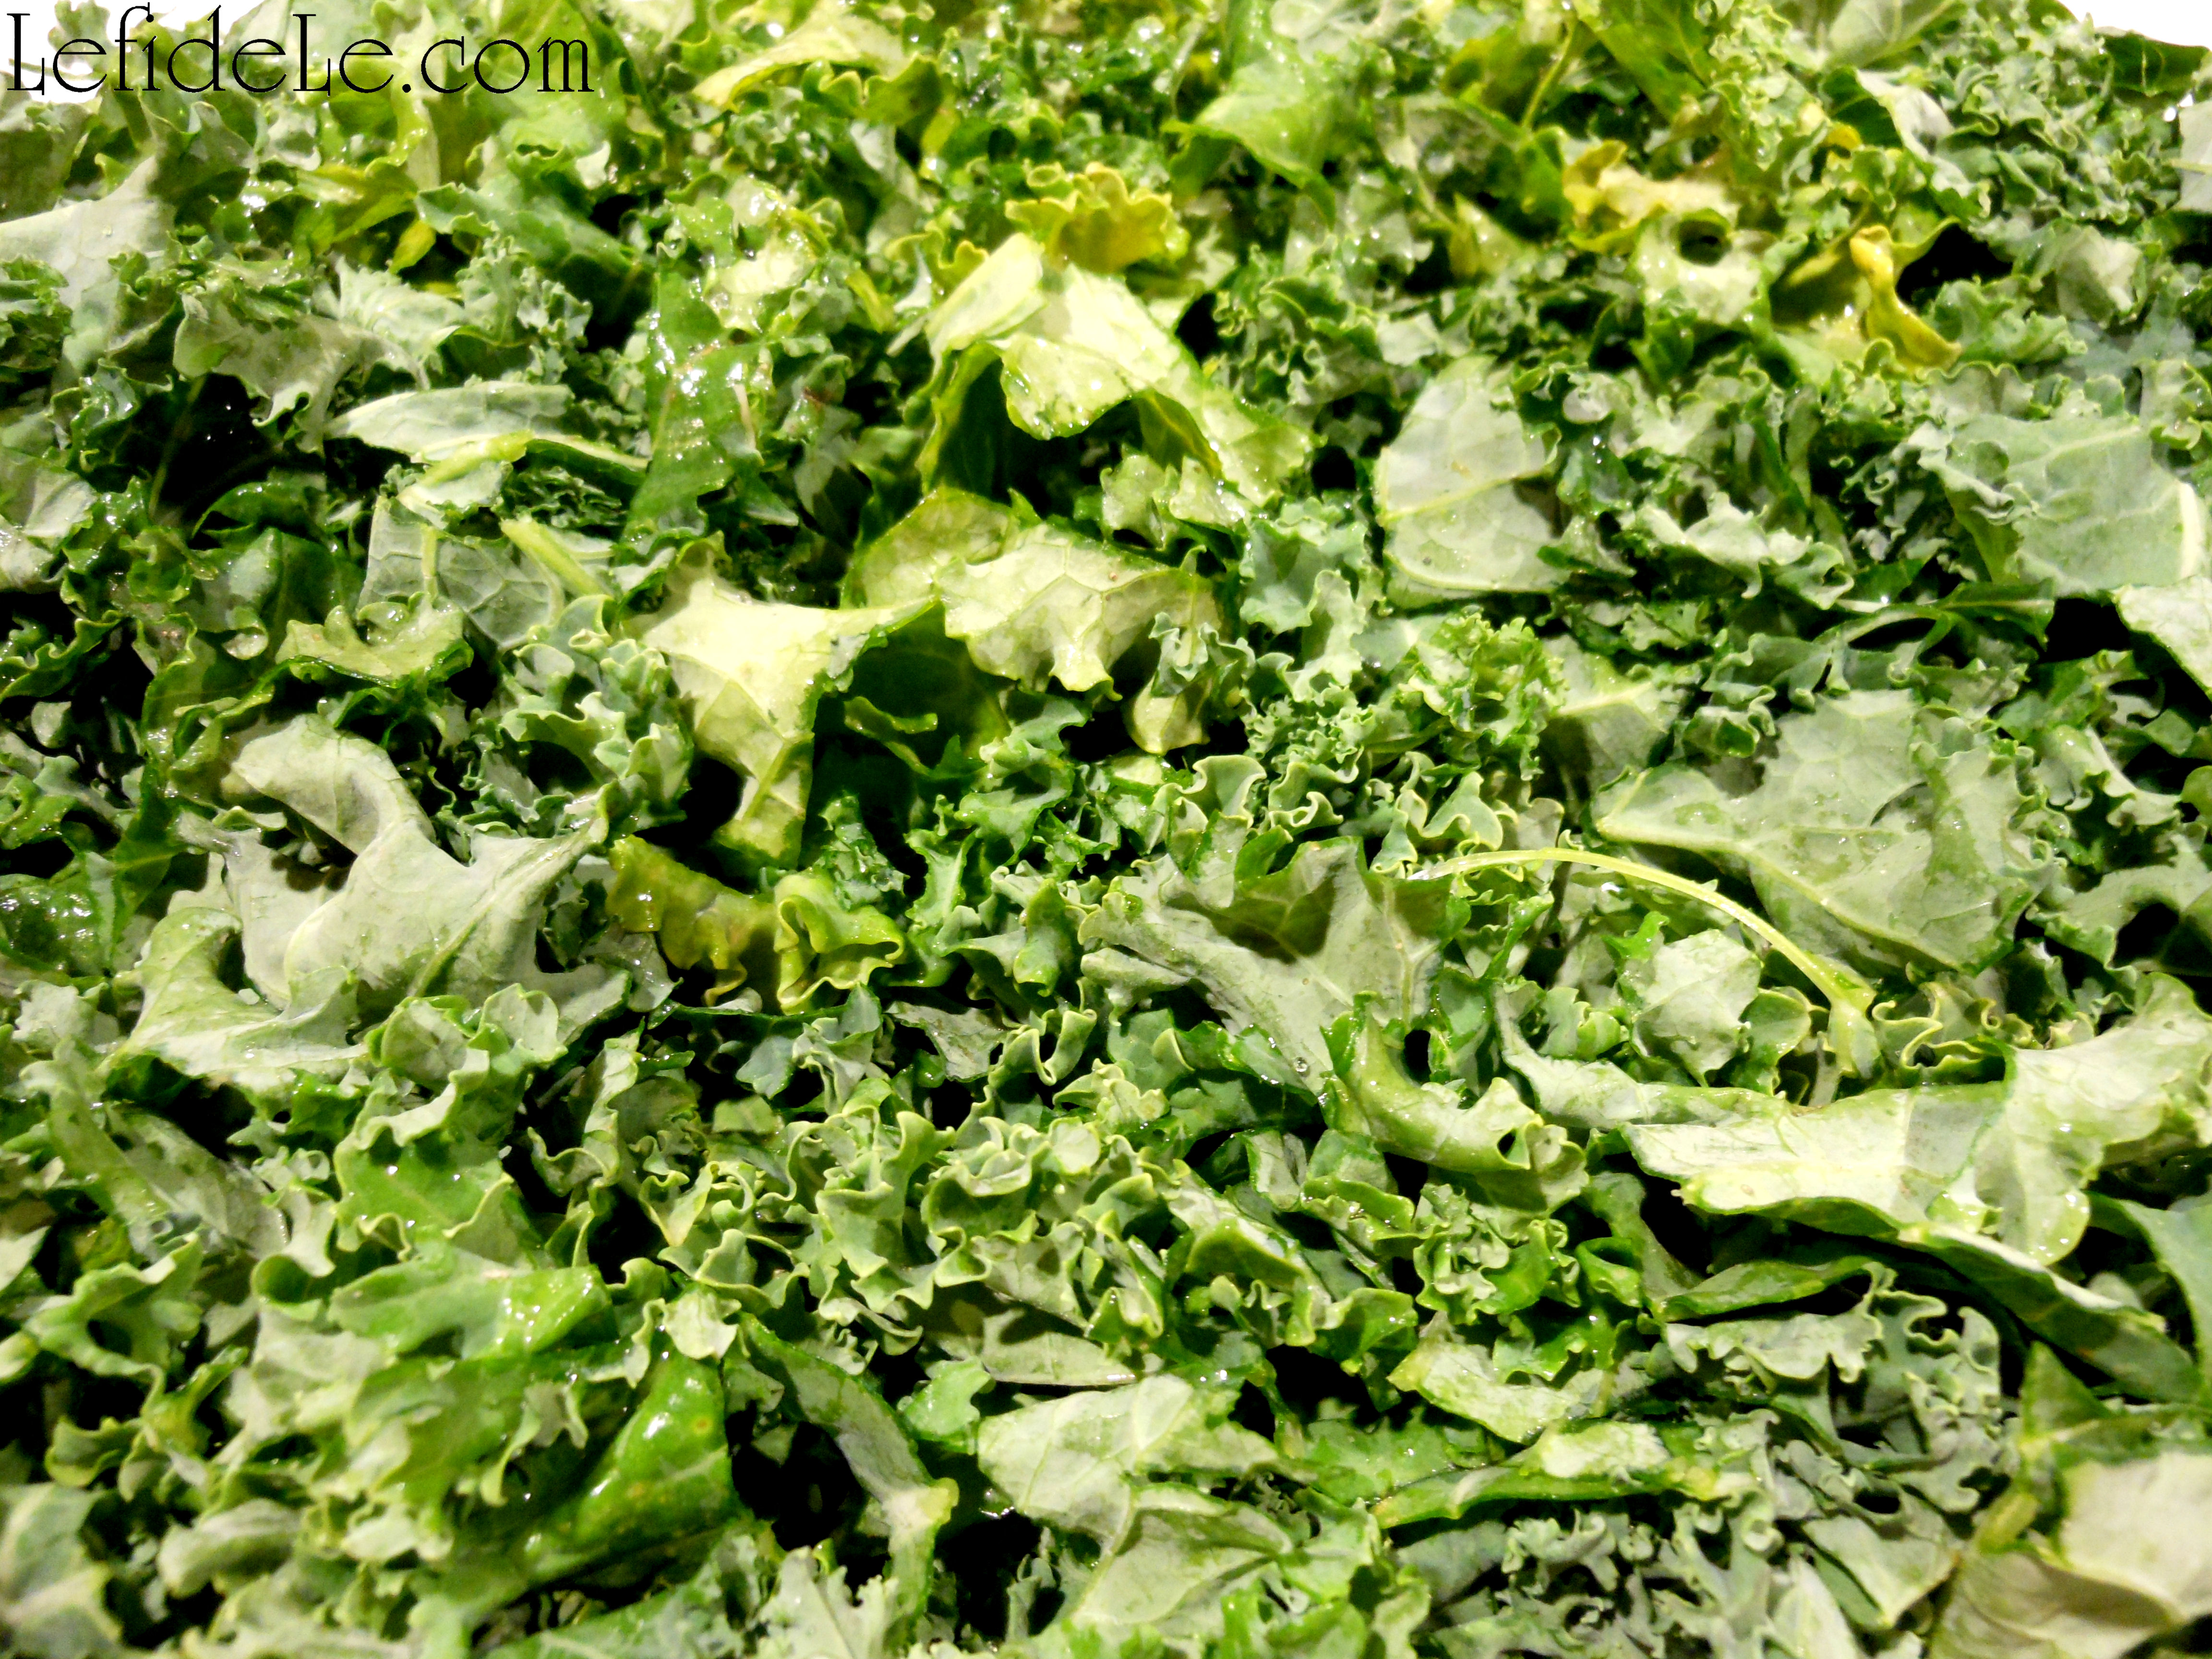
Trim off the hard core stems of the kale and chop up the leaves.

092Leigh

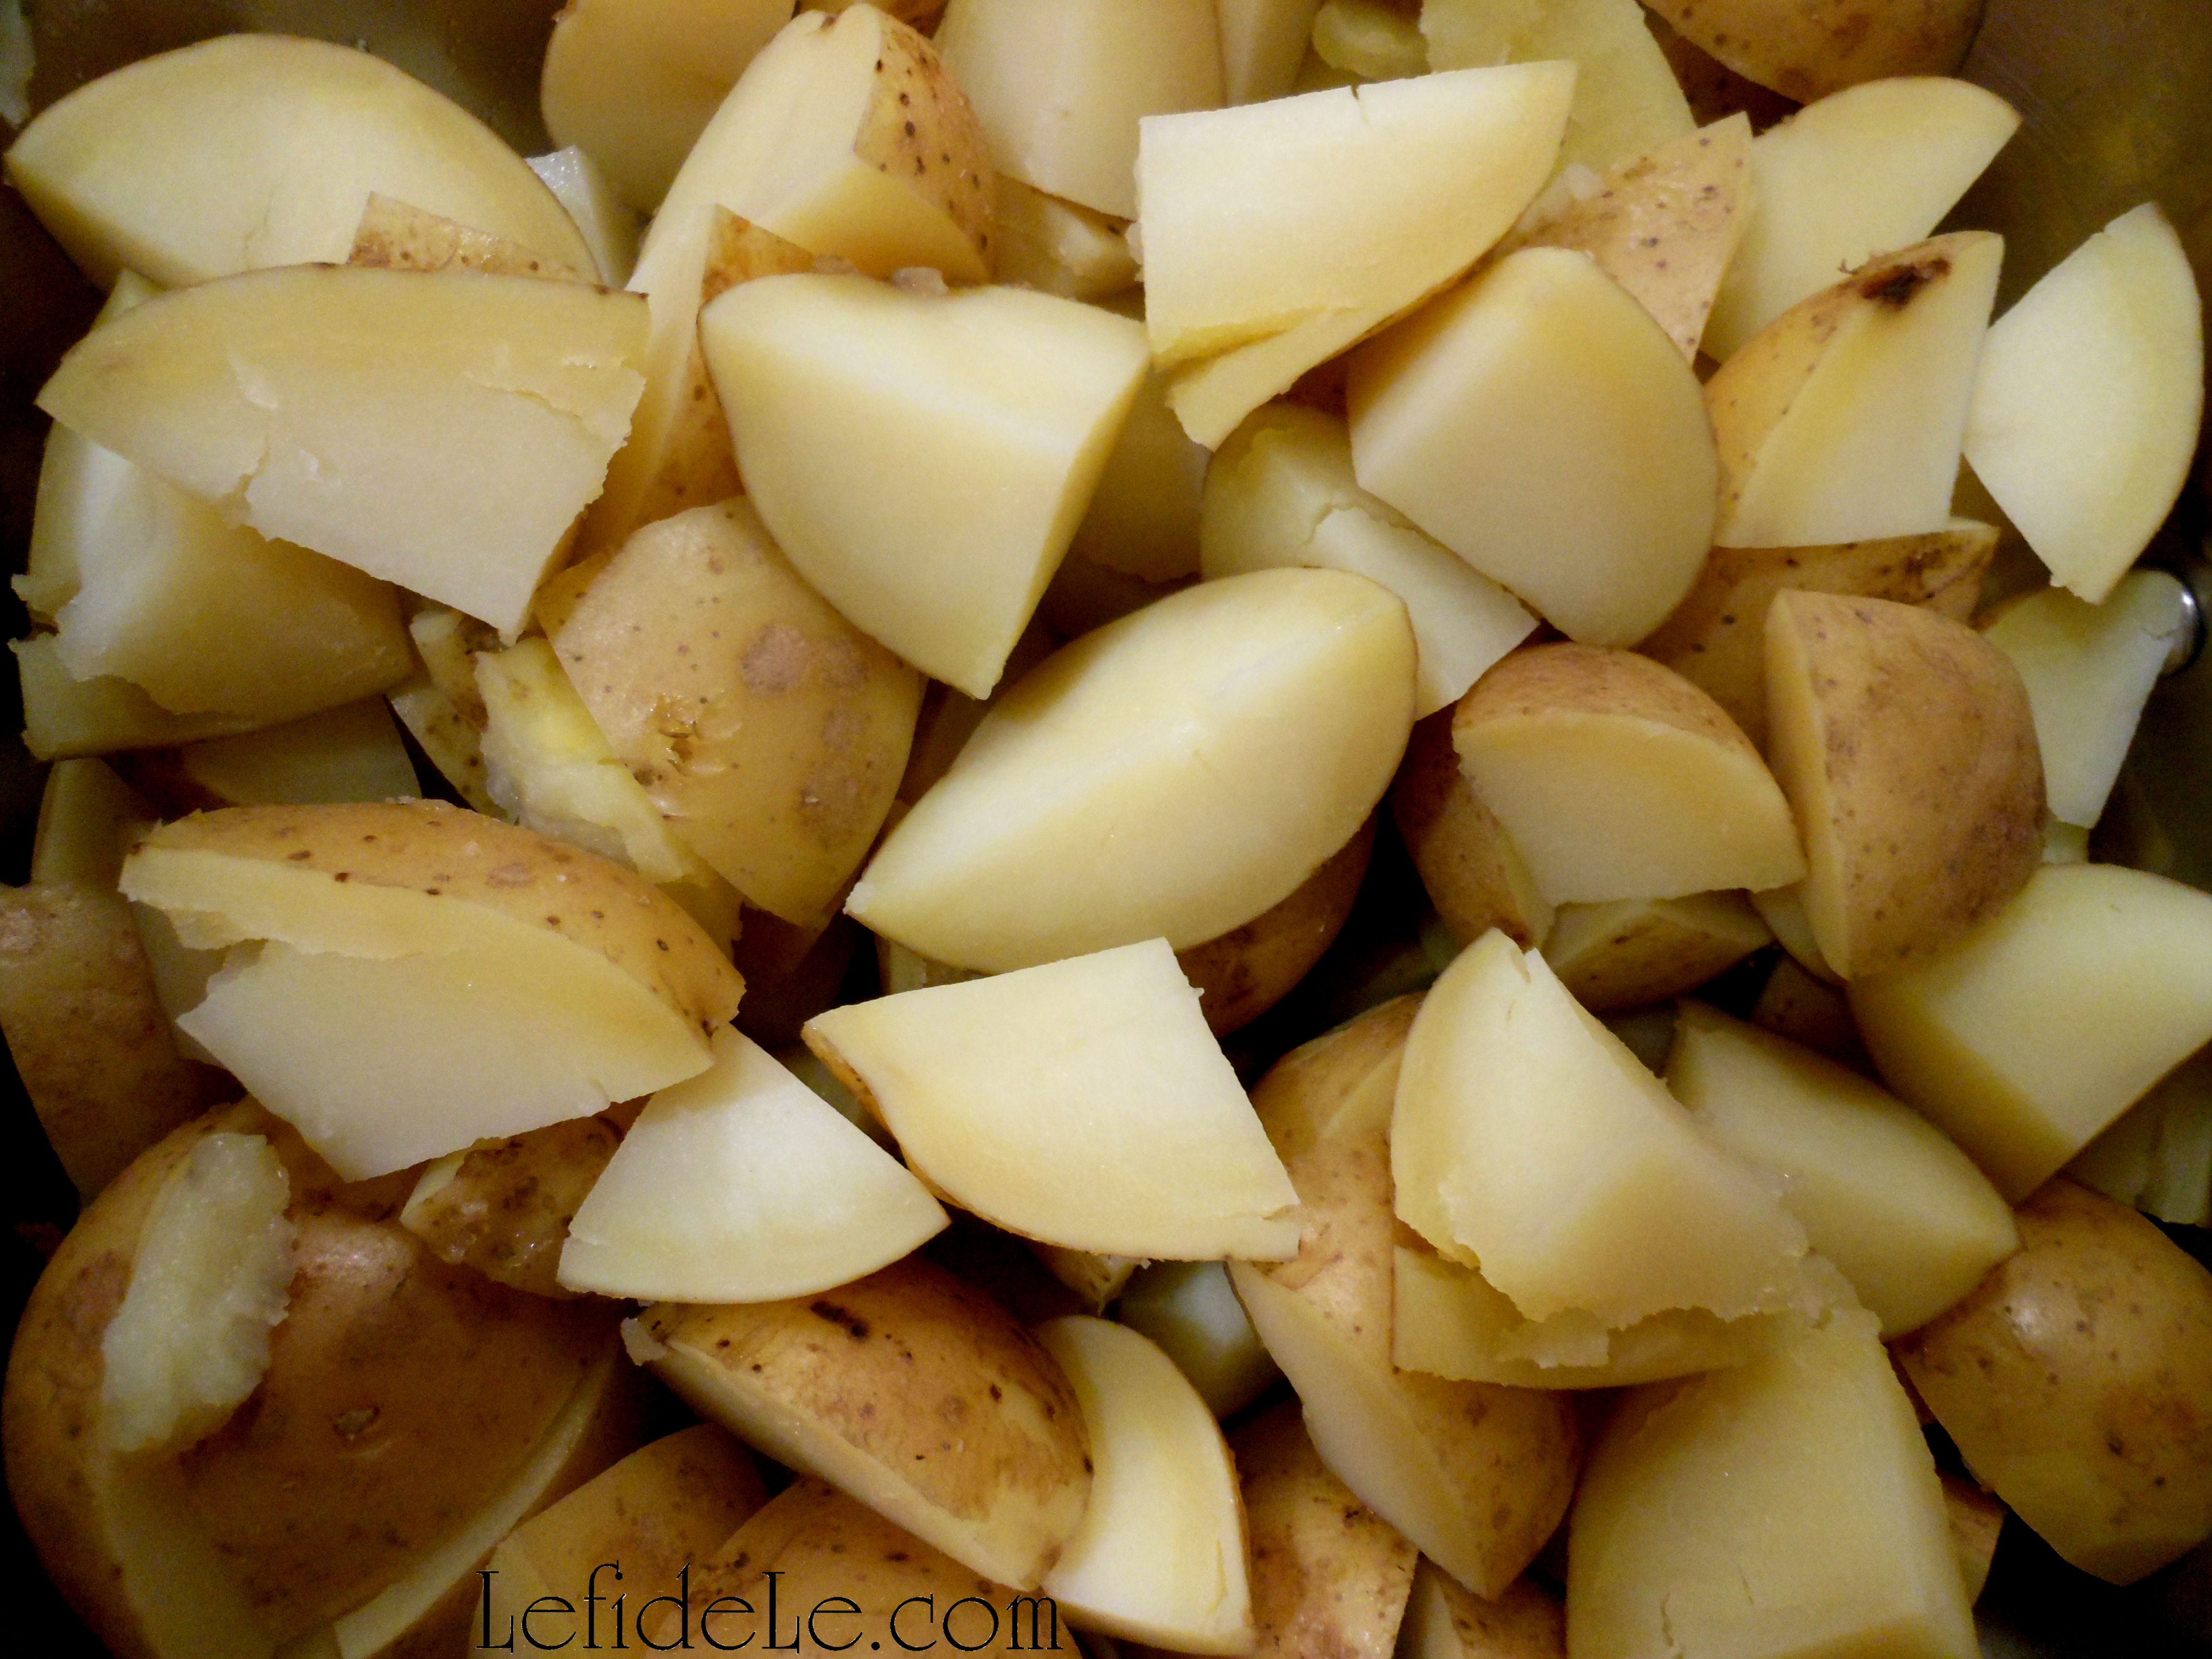
When the potatoes are tender enough to pierce with a fork, drain the cooking water out. (Check out my quick and easy recipe for cauli-potatoes here.)

098Leigh

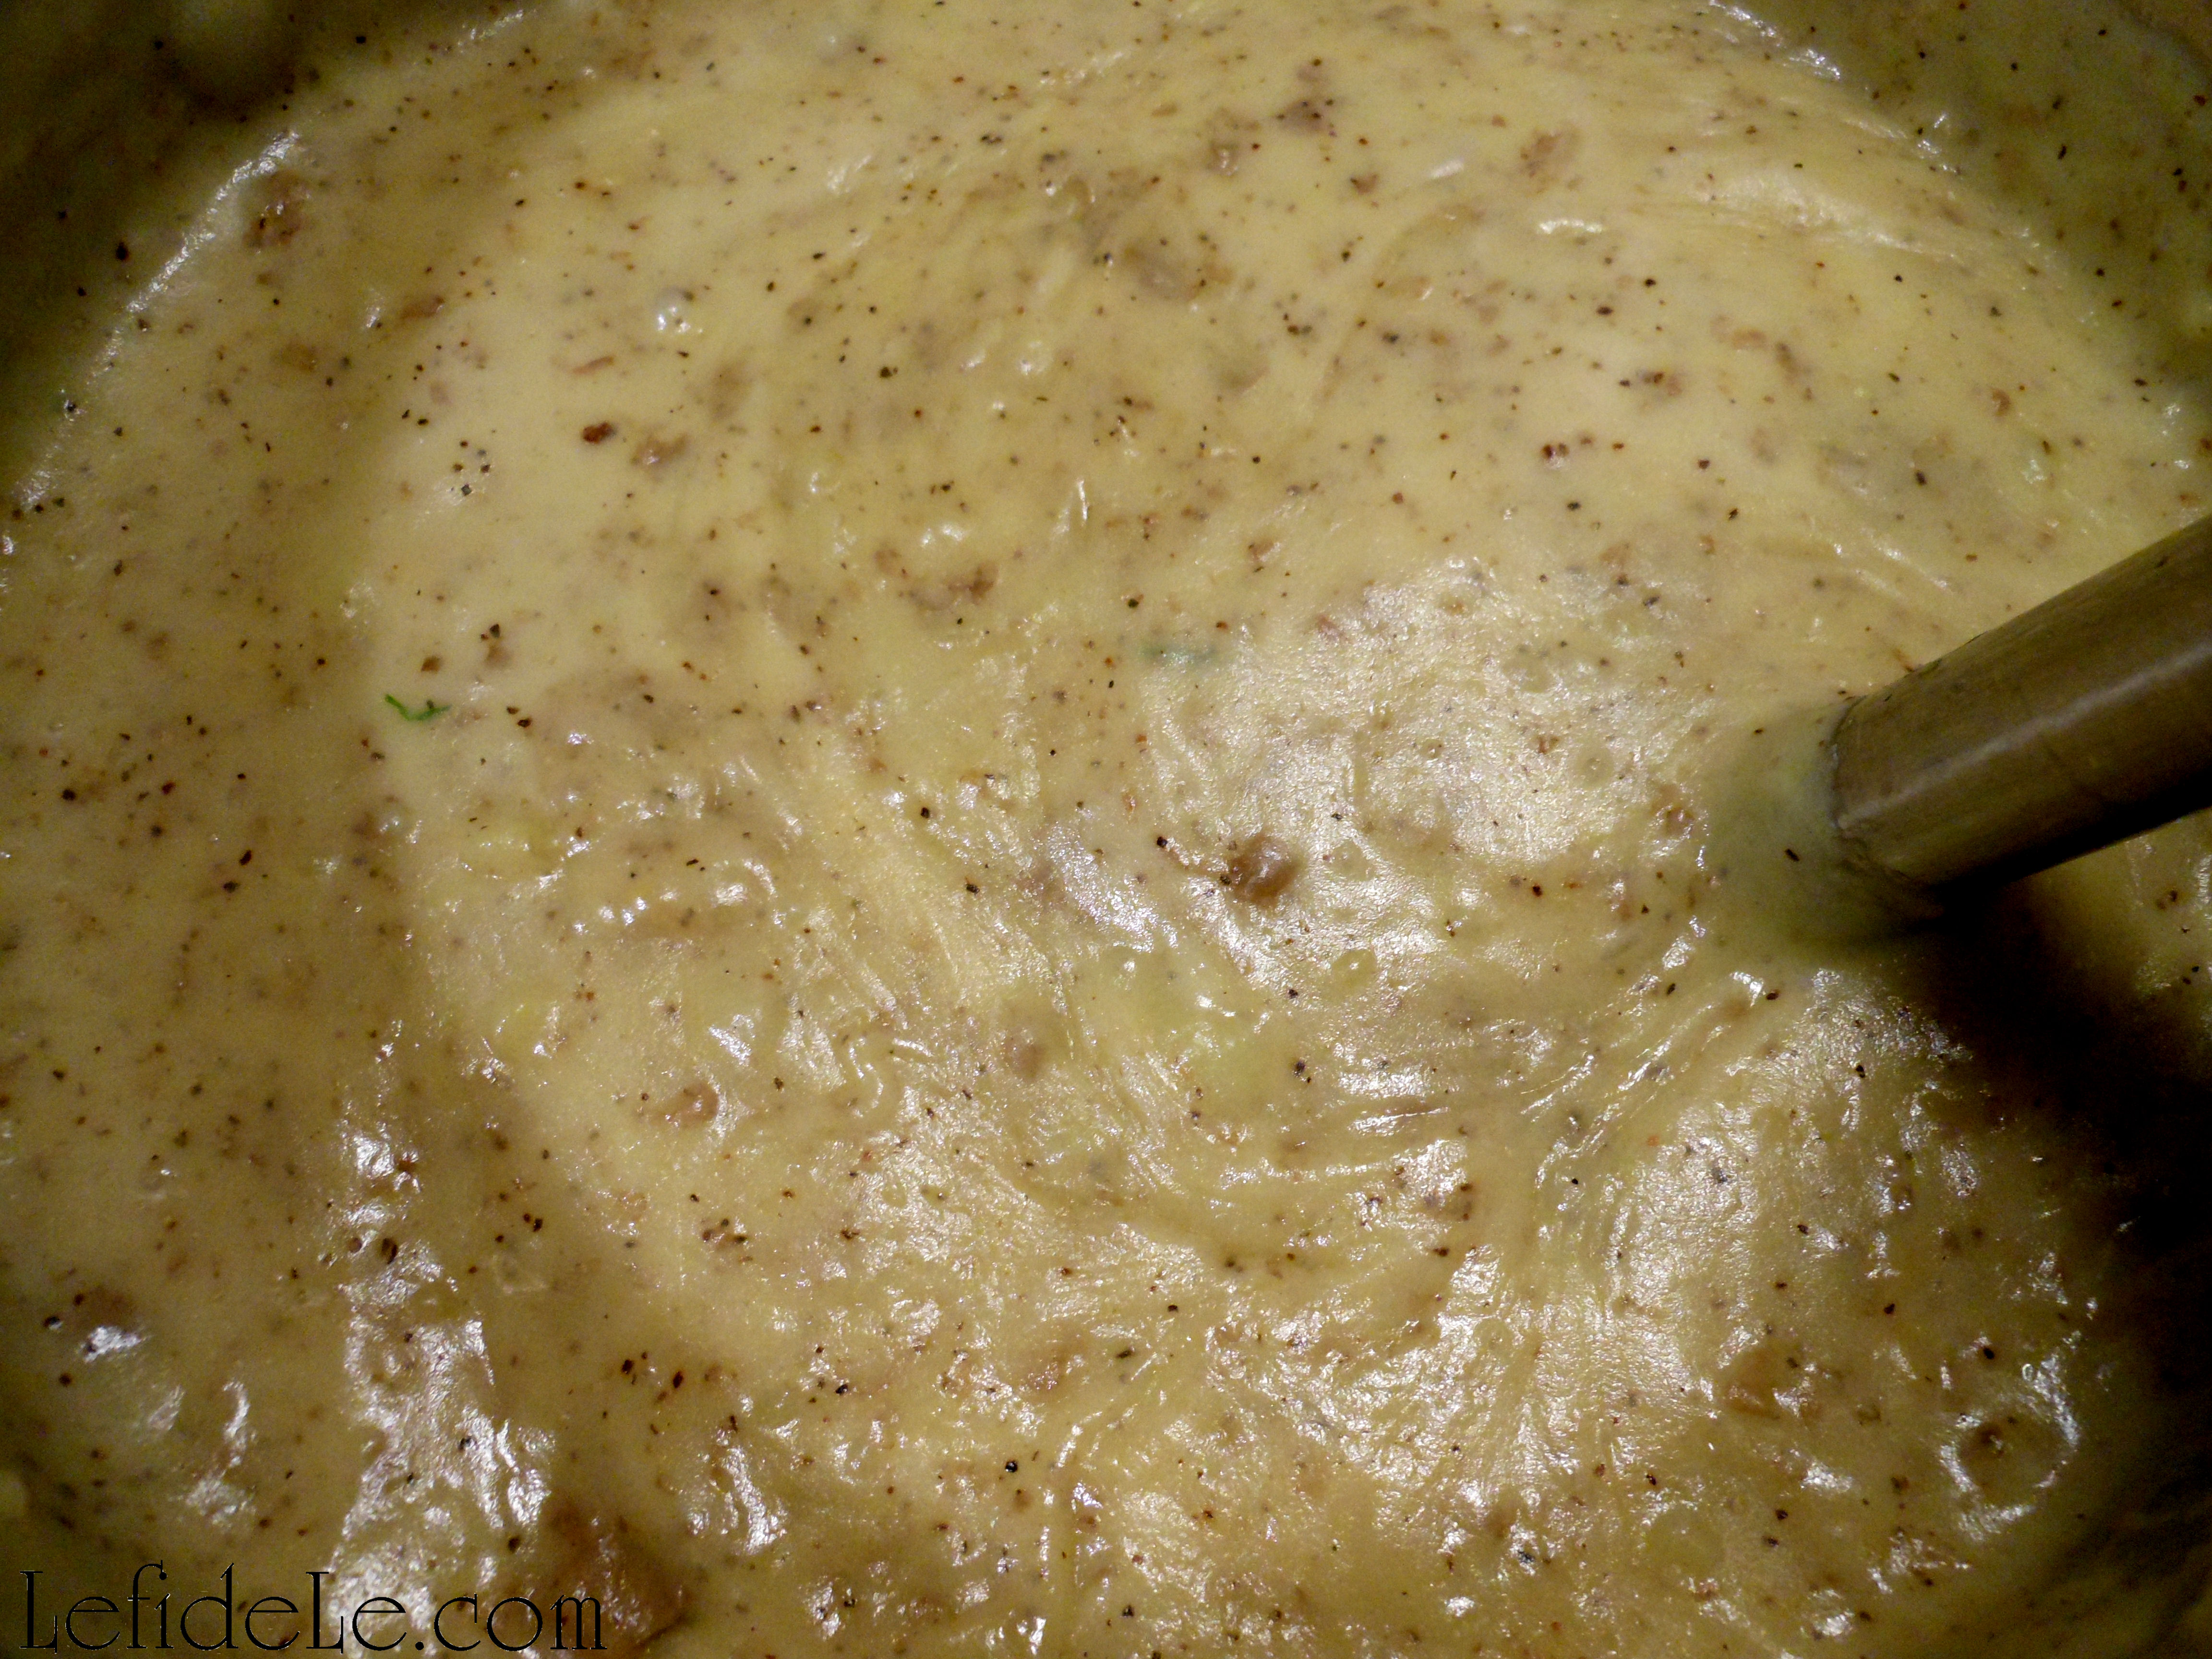
Mash them in the same cooking vessel with a masher, use a potato ricer, or do what I did and use an immersion blender. (Yes, I use that baby on everything!) Keeping the vessel heated, stir in the almond milk, olive oil, salt and pepper.

099Leigh

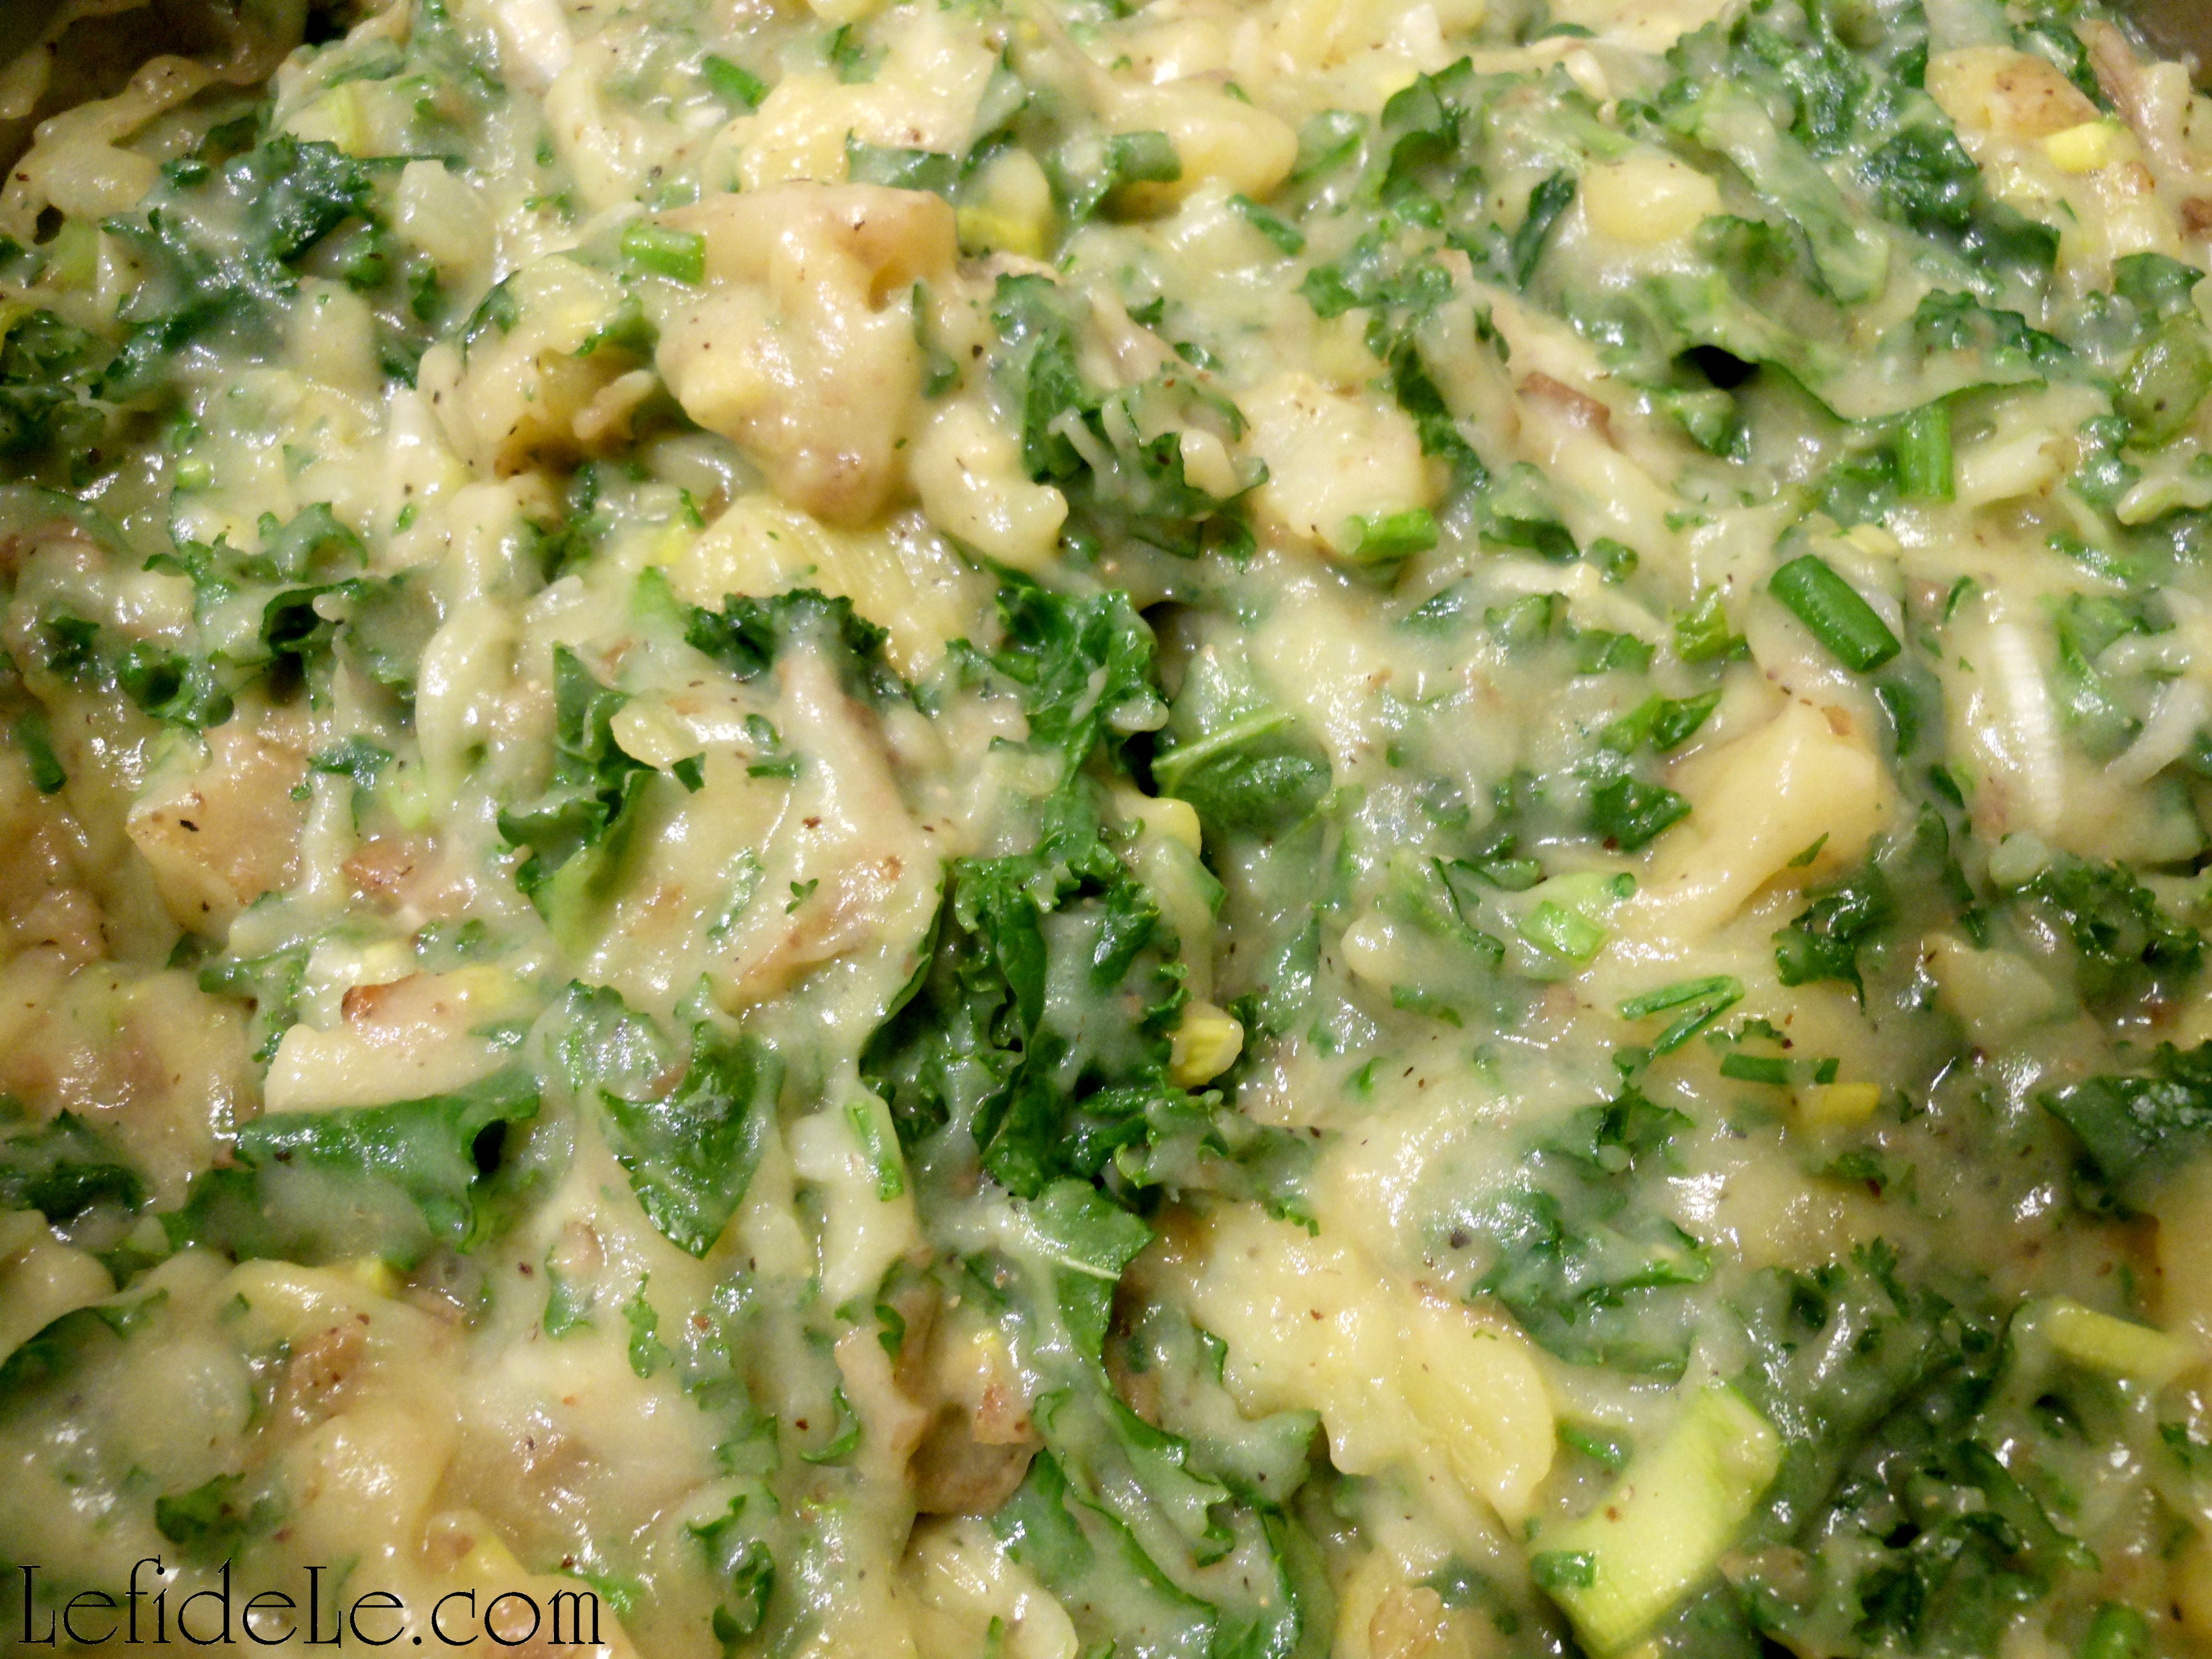
Mix in the veggies and herbs then heat them through. These can all be safely eaten raw, so the amount of time you cook them is a matter of taste. (I prefer to just wilt mine a good bit to preserve the vitamins and texture.)

111Leigh

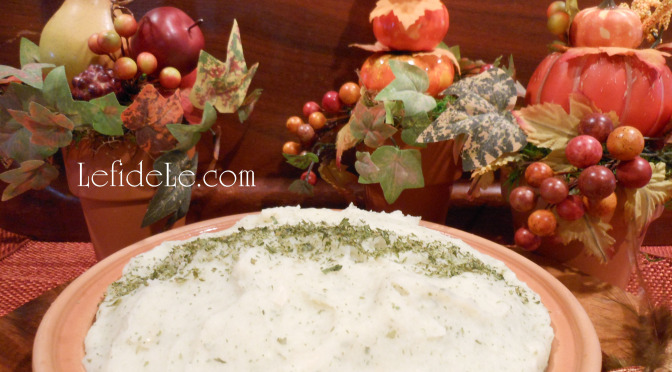
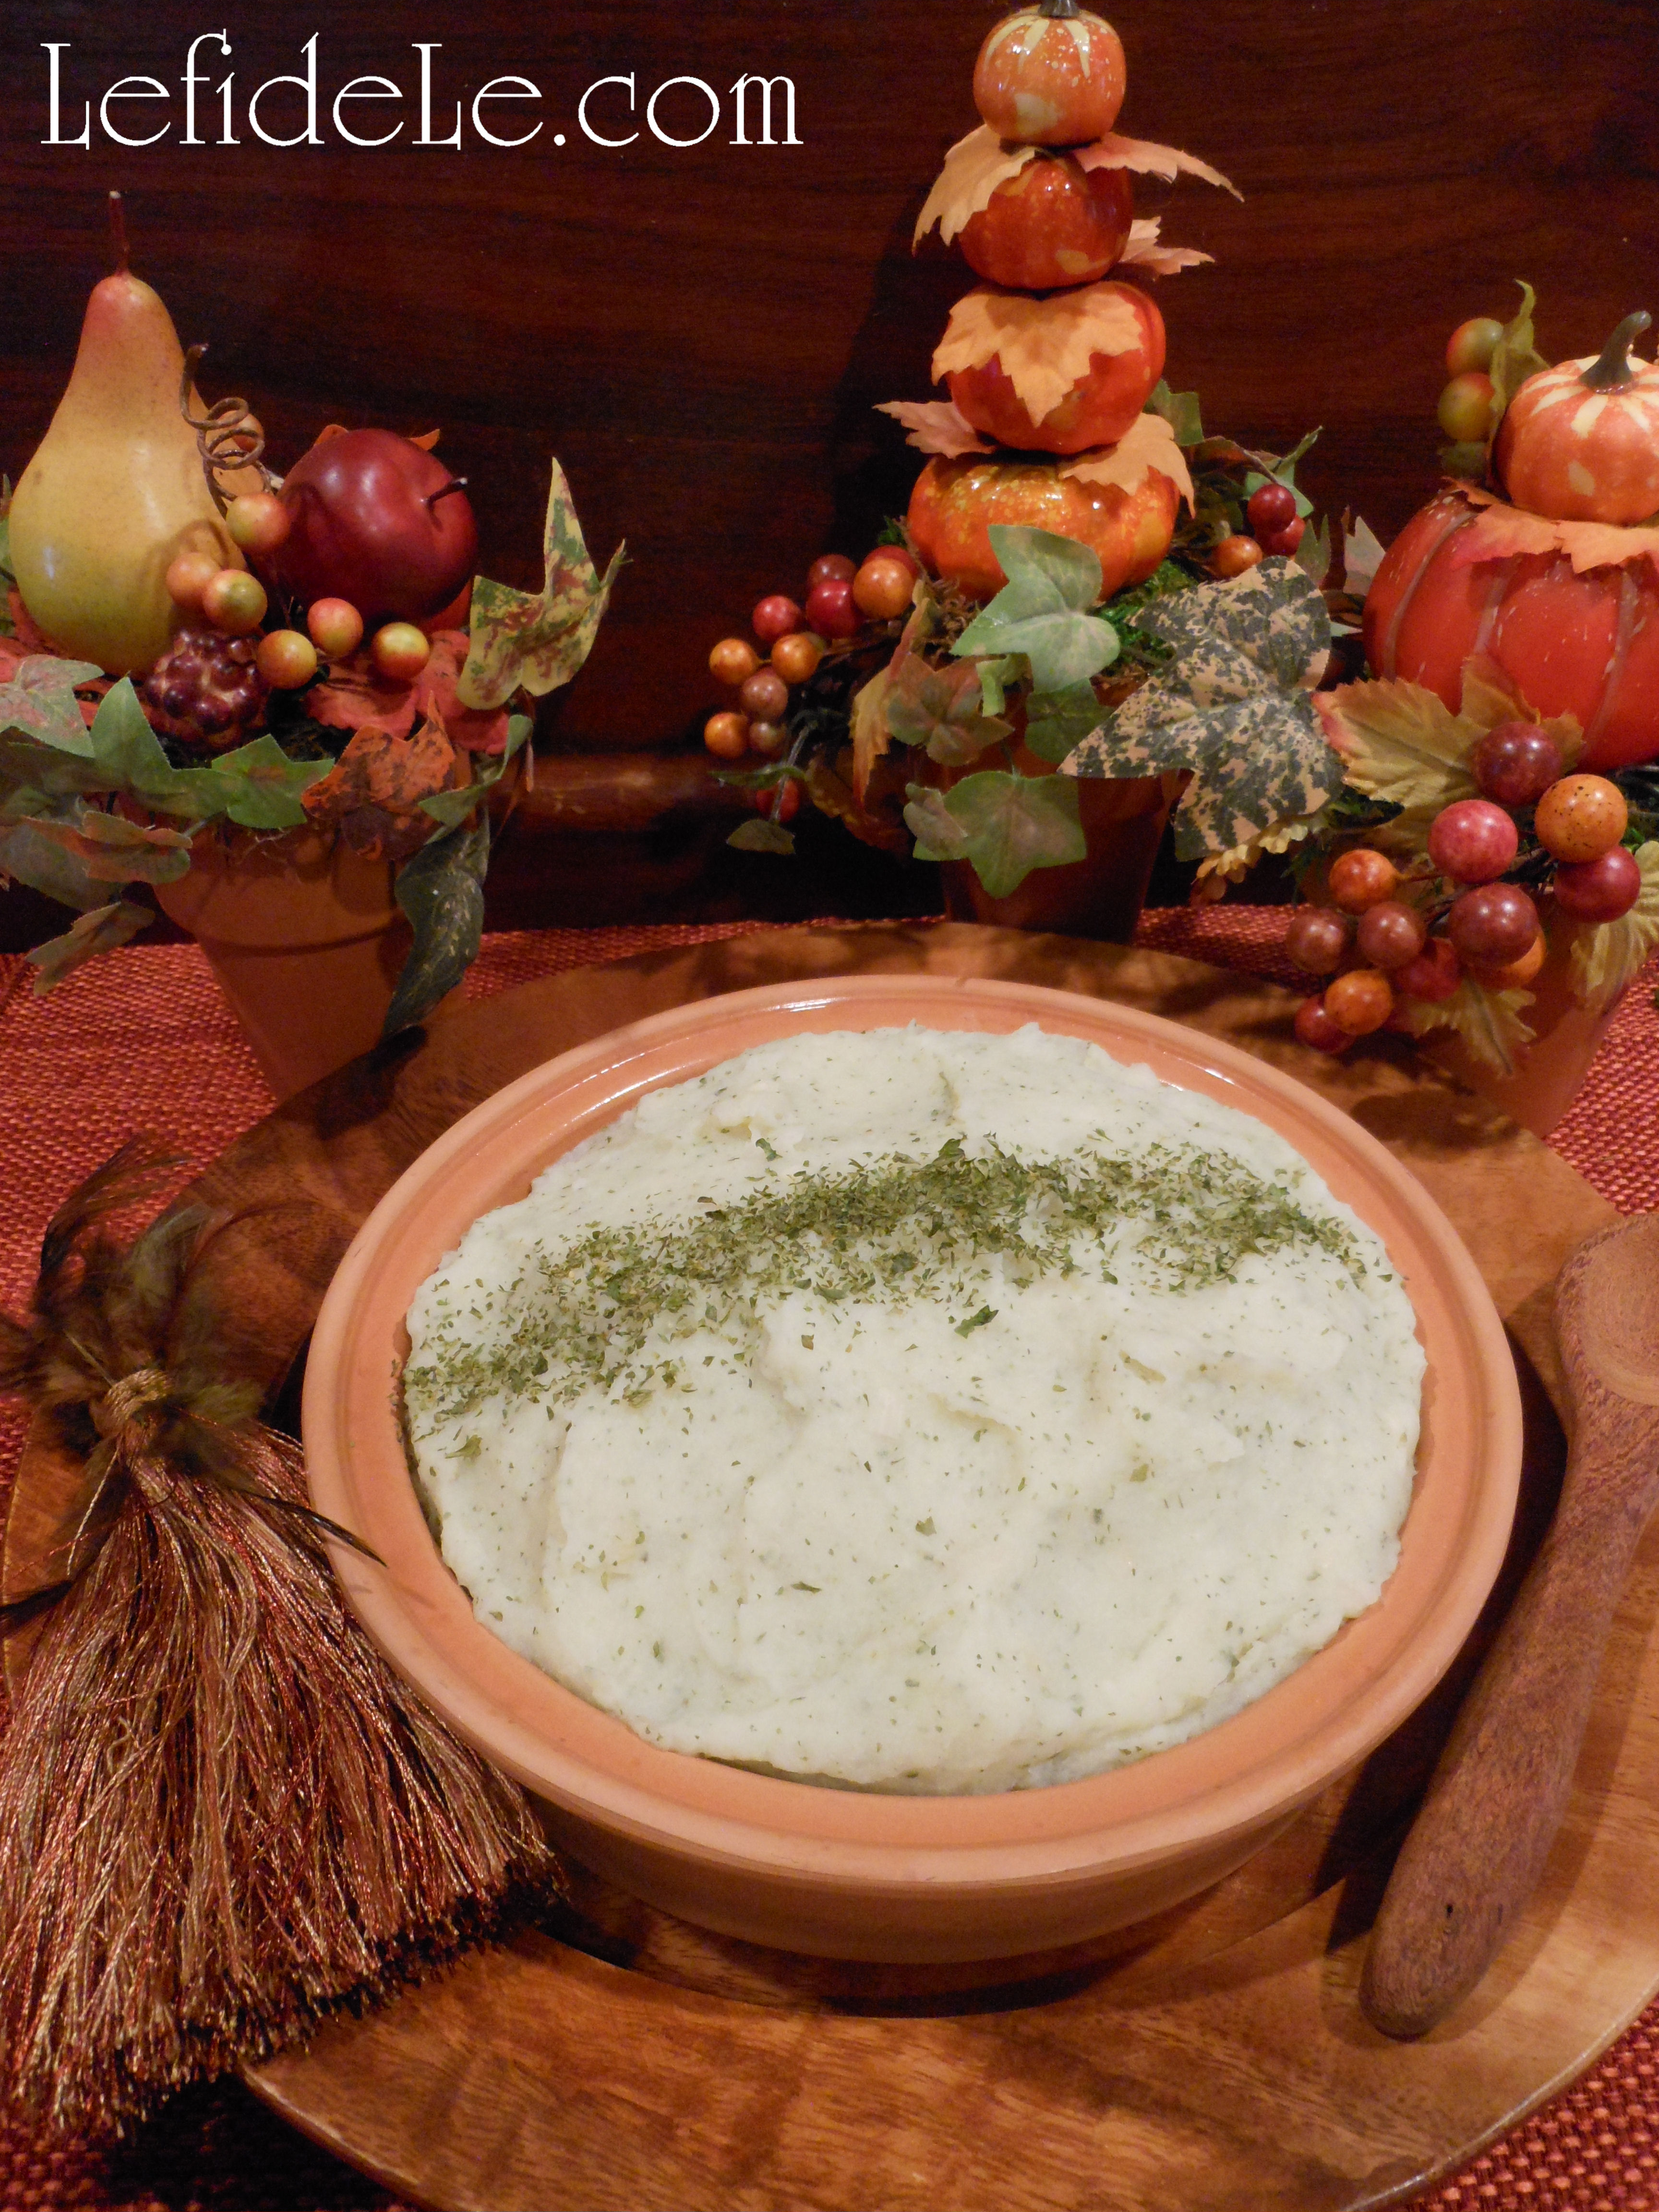
You can plate these directly from the stove…

202Leigh

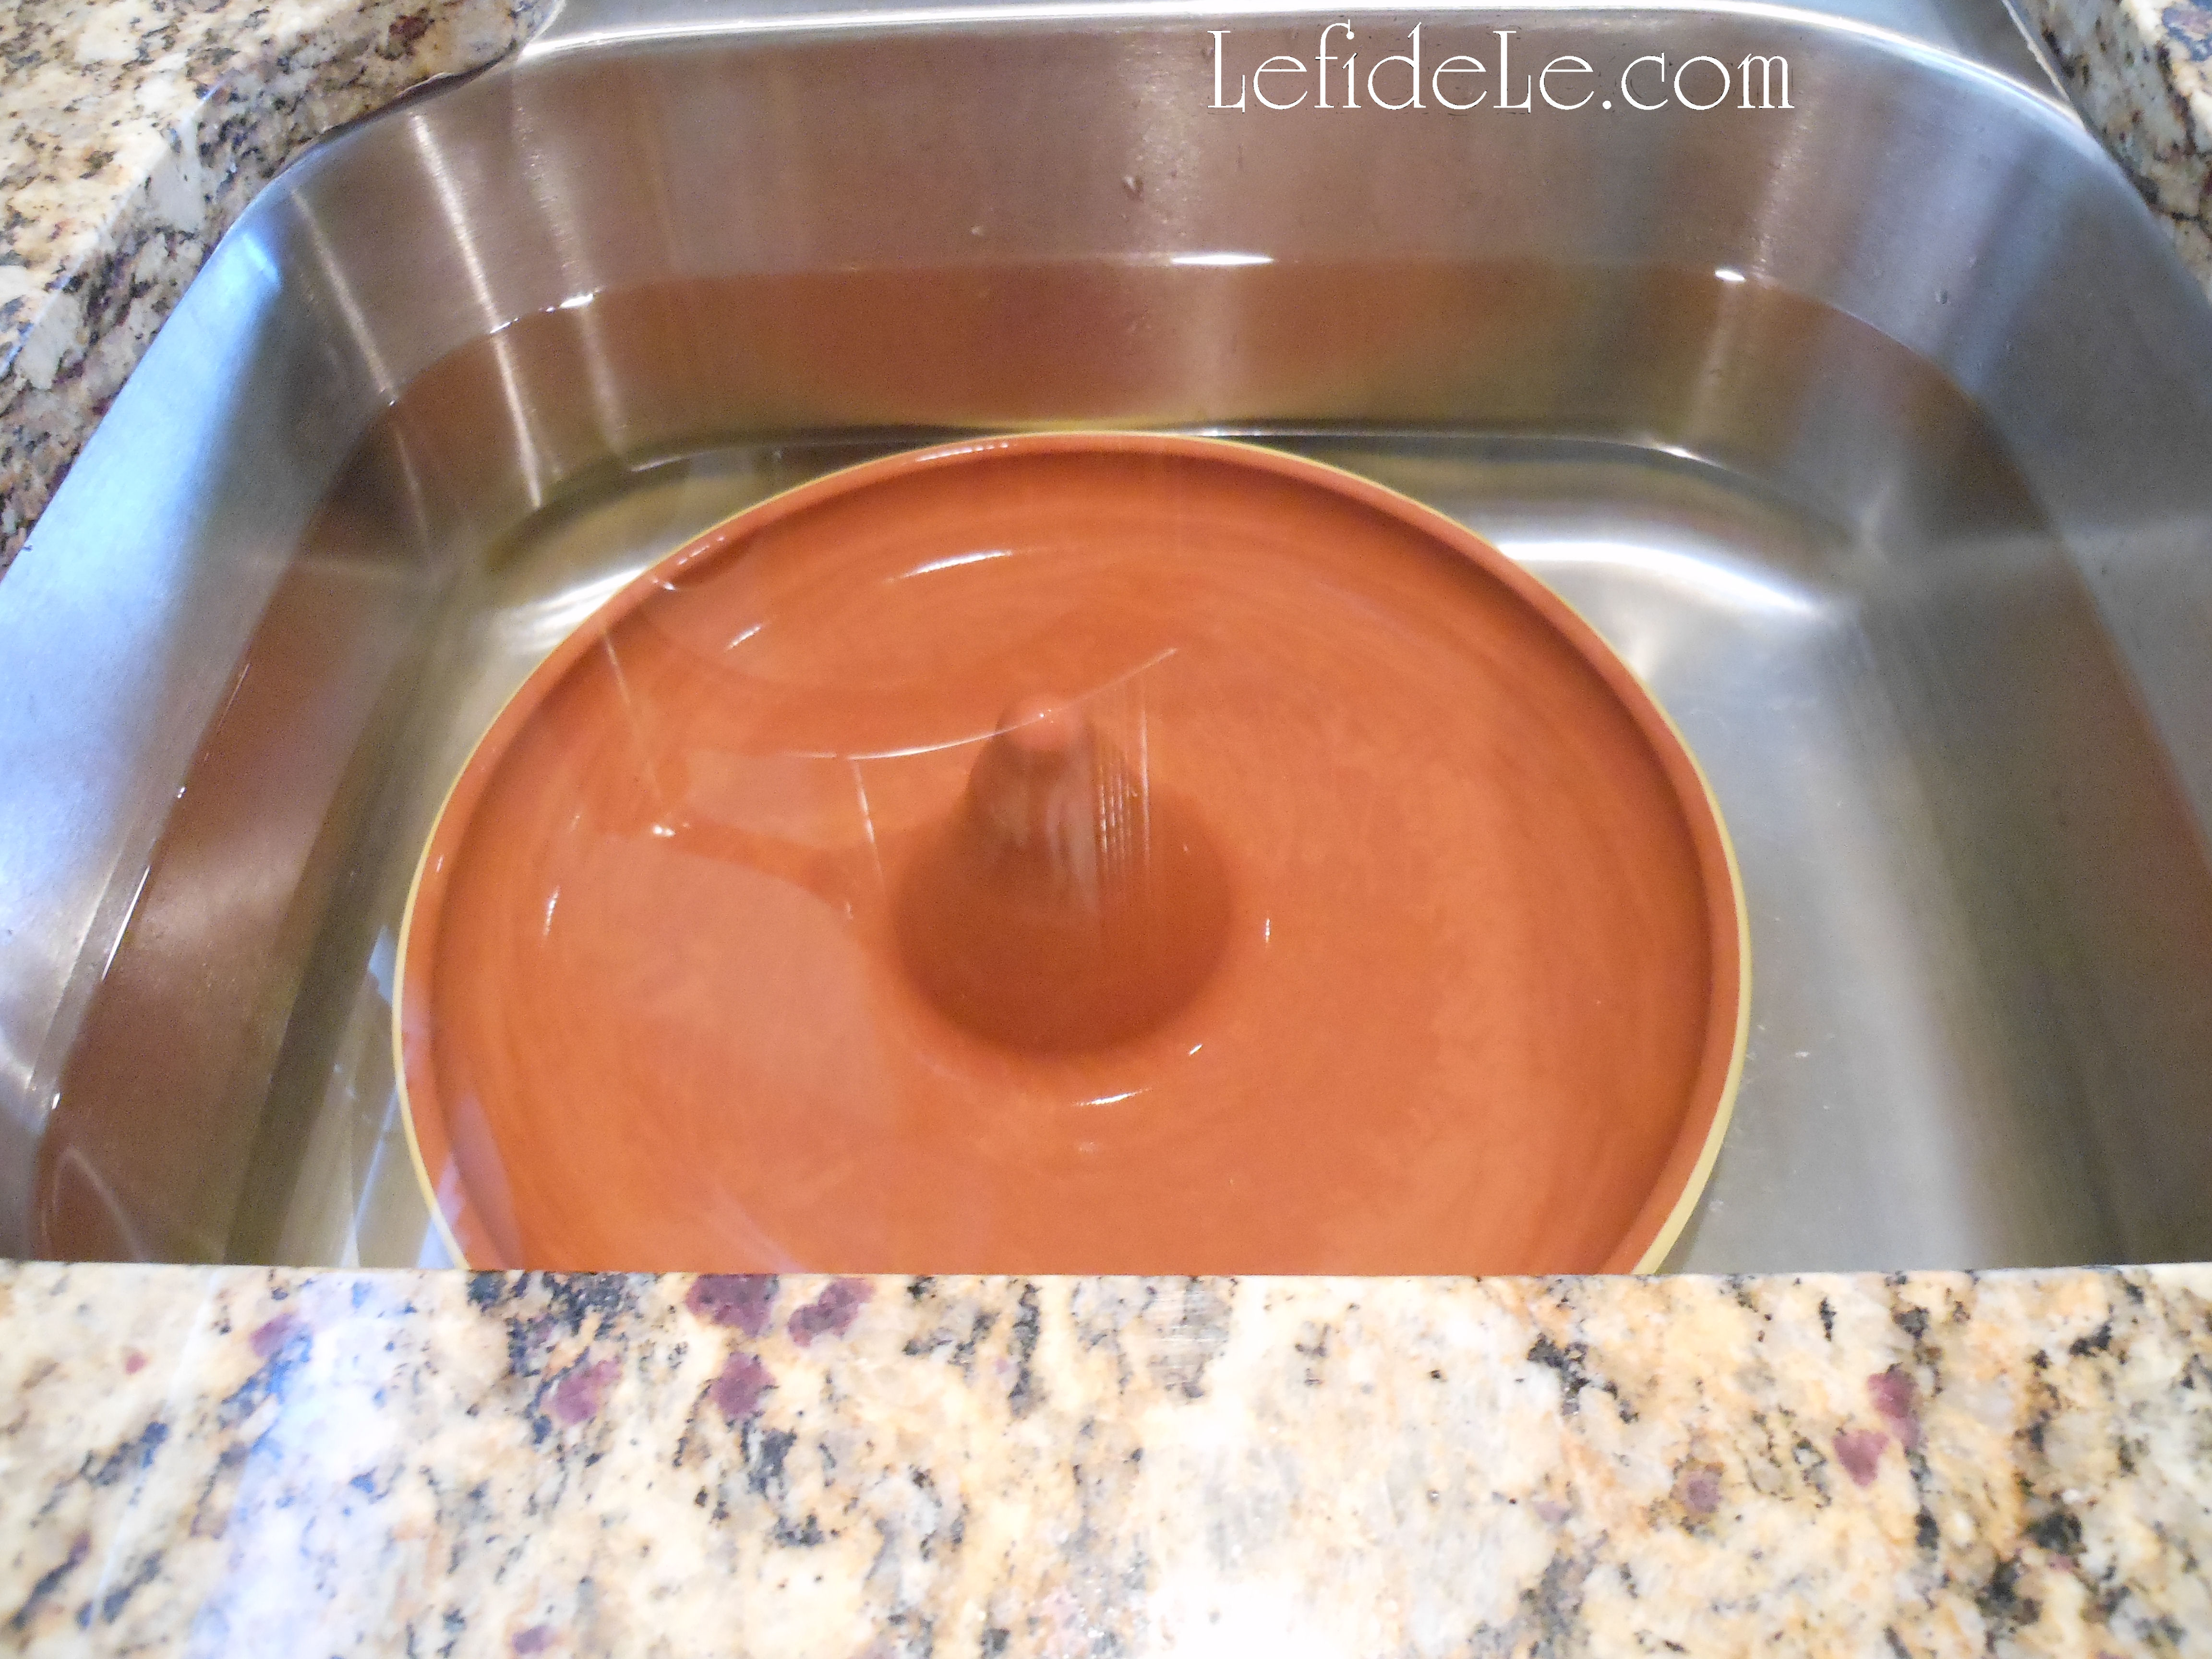
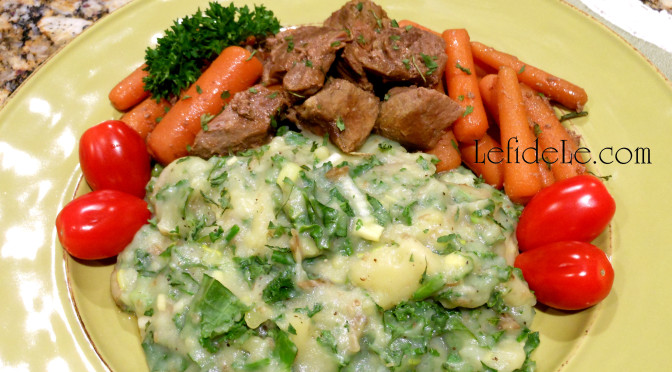
…Or you can serve them in a casserole dish. The traditional look is to make a well of butter in the middle, but I elected to top ours with browned gluten-free breadcrumbs. (= yummier & healthier!)

112Leigh

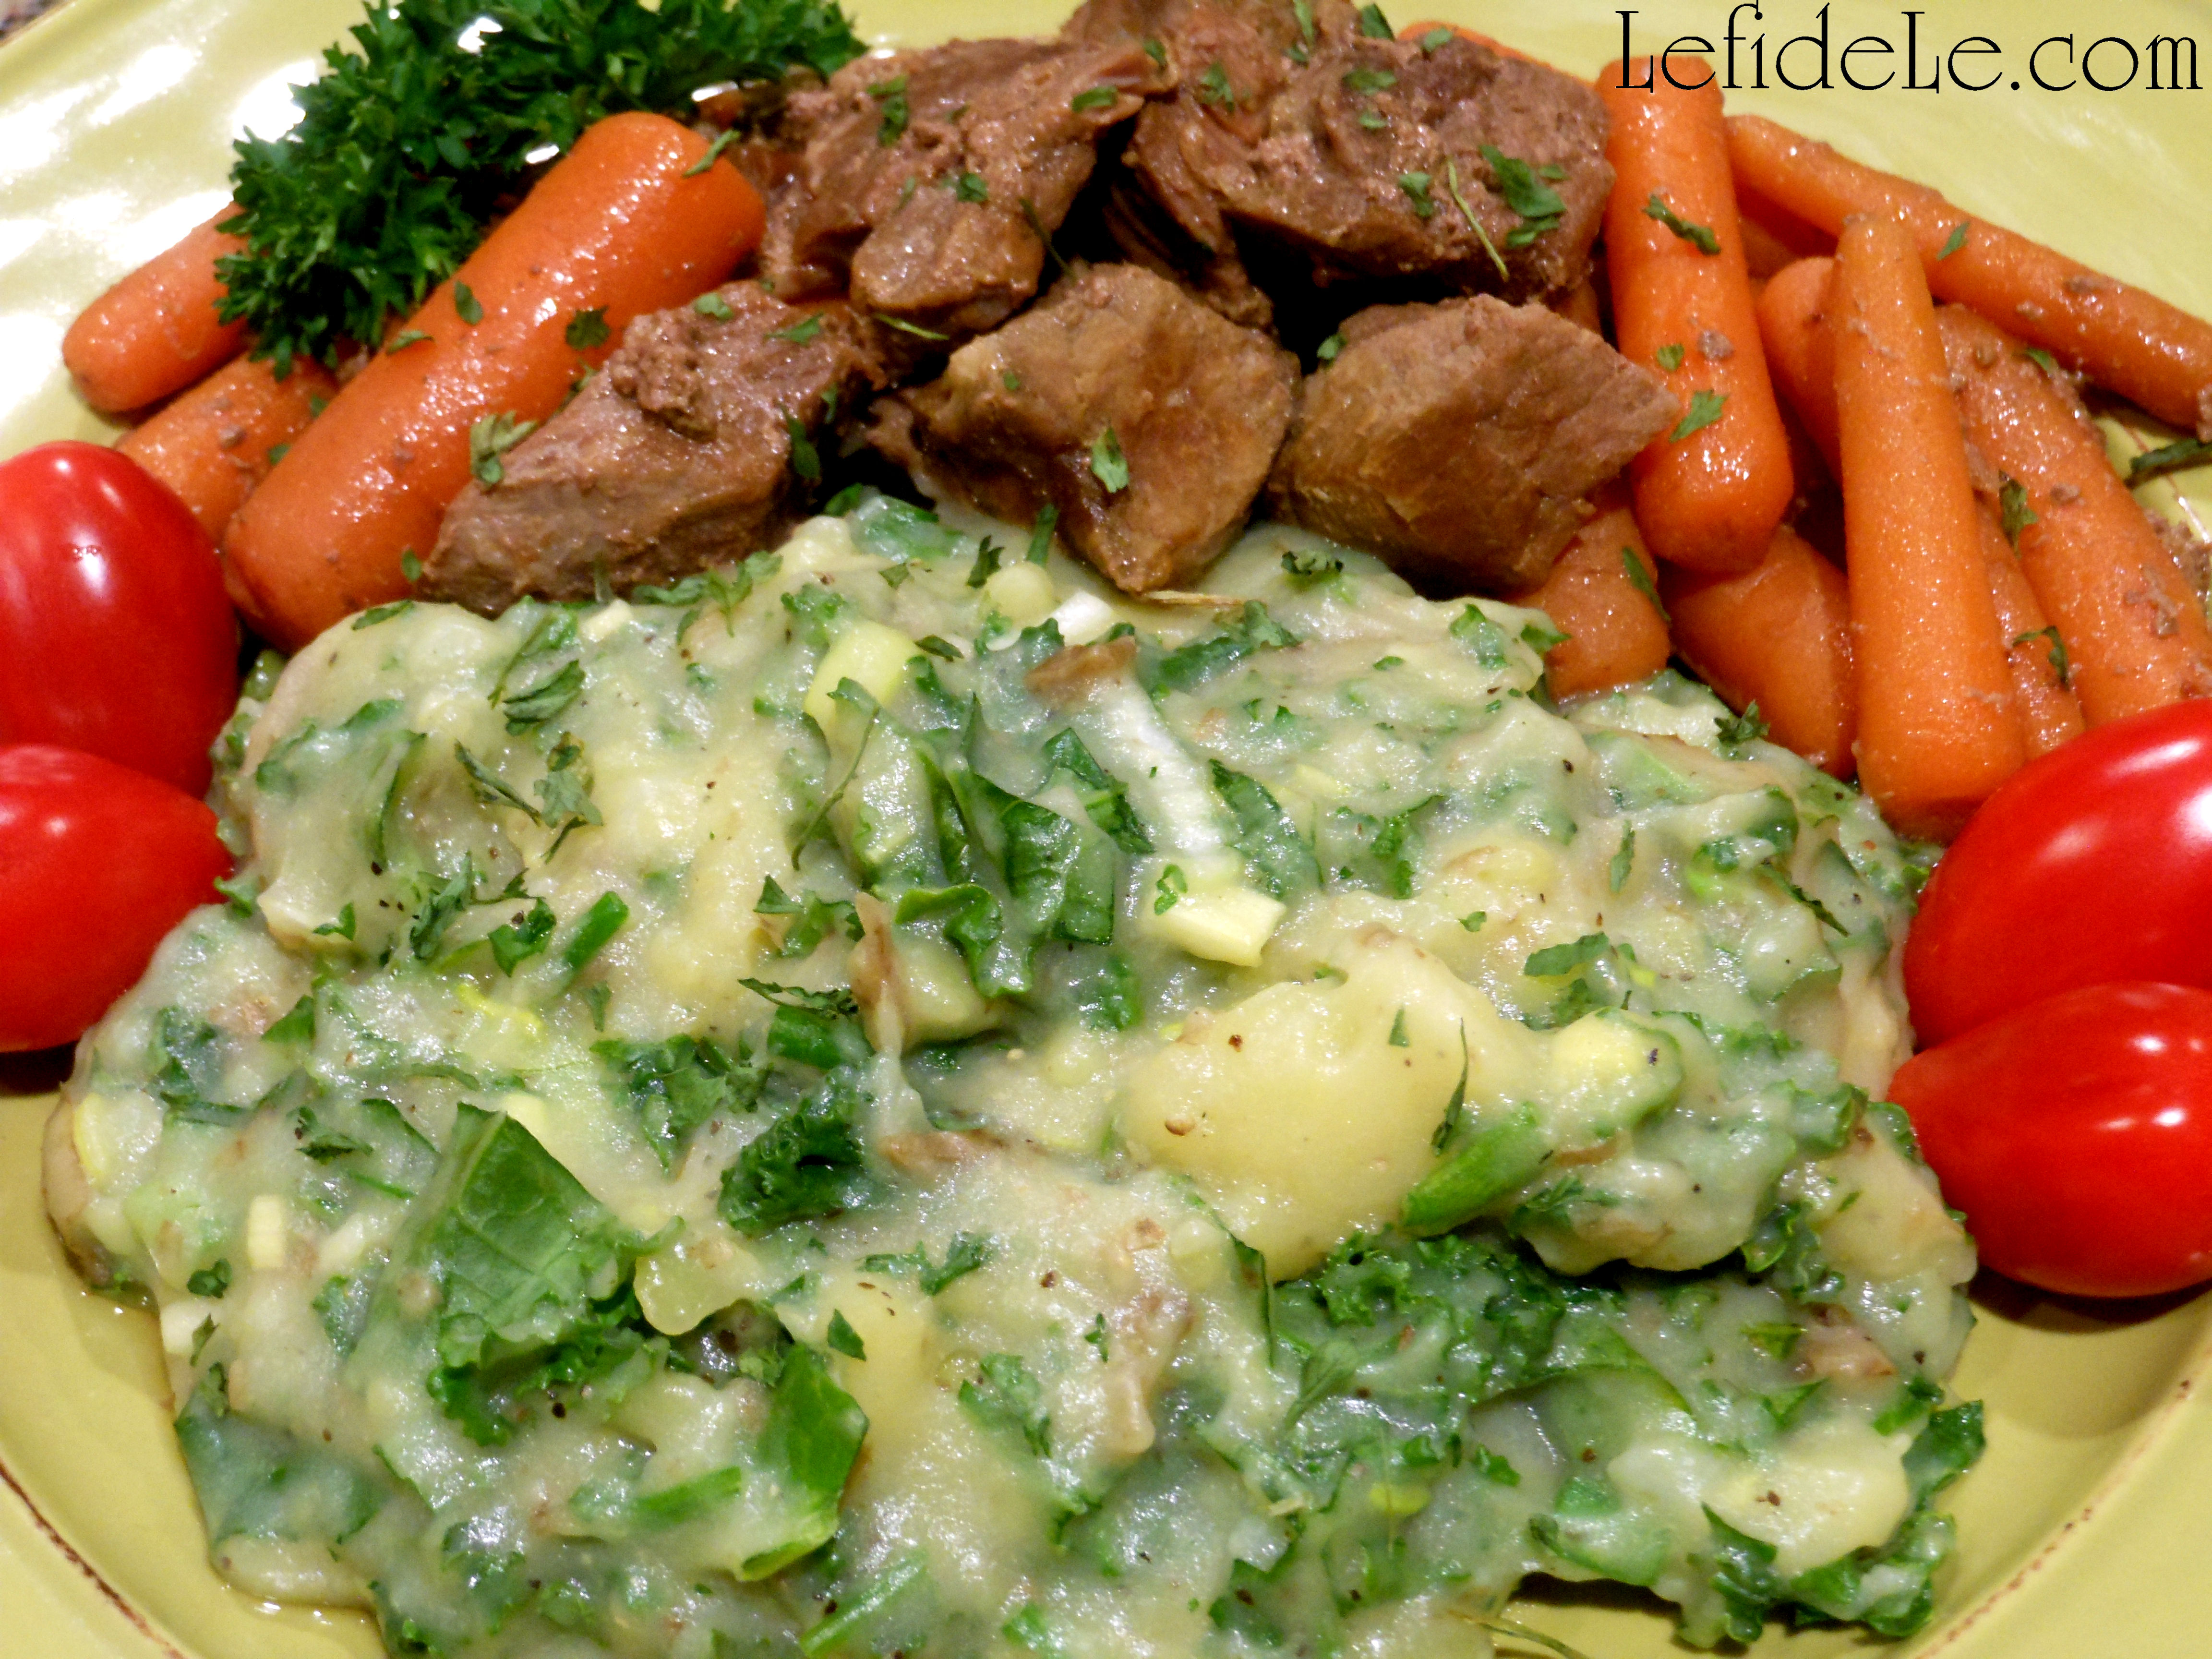
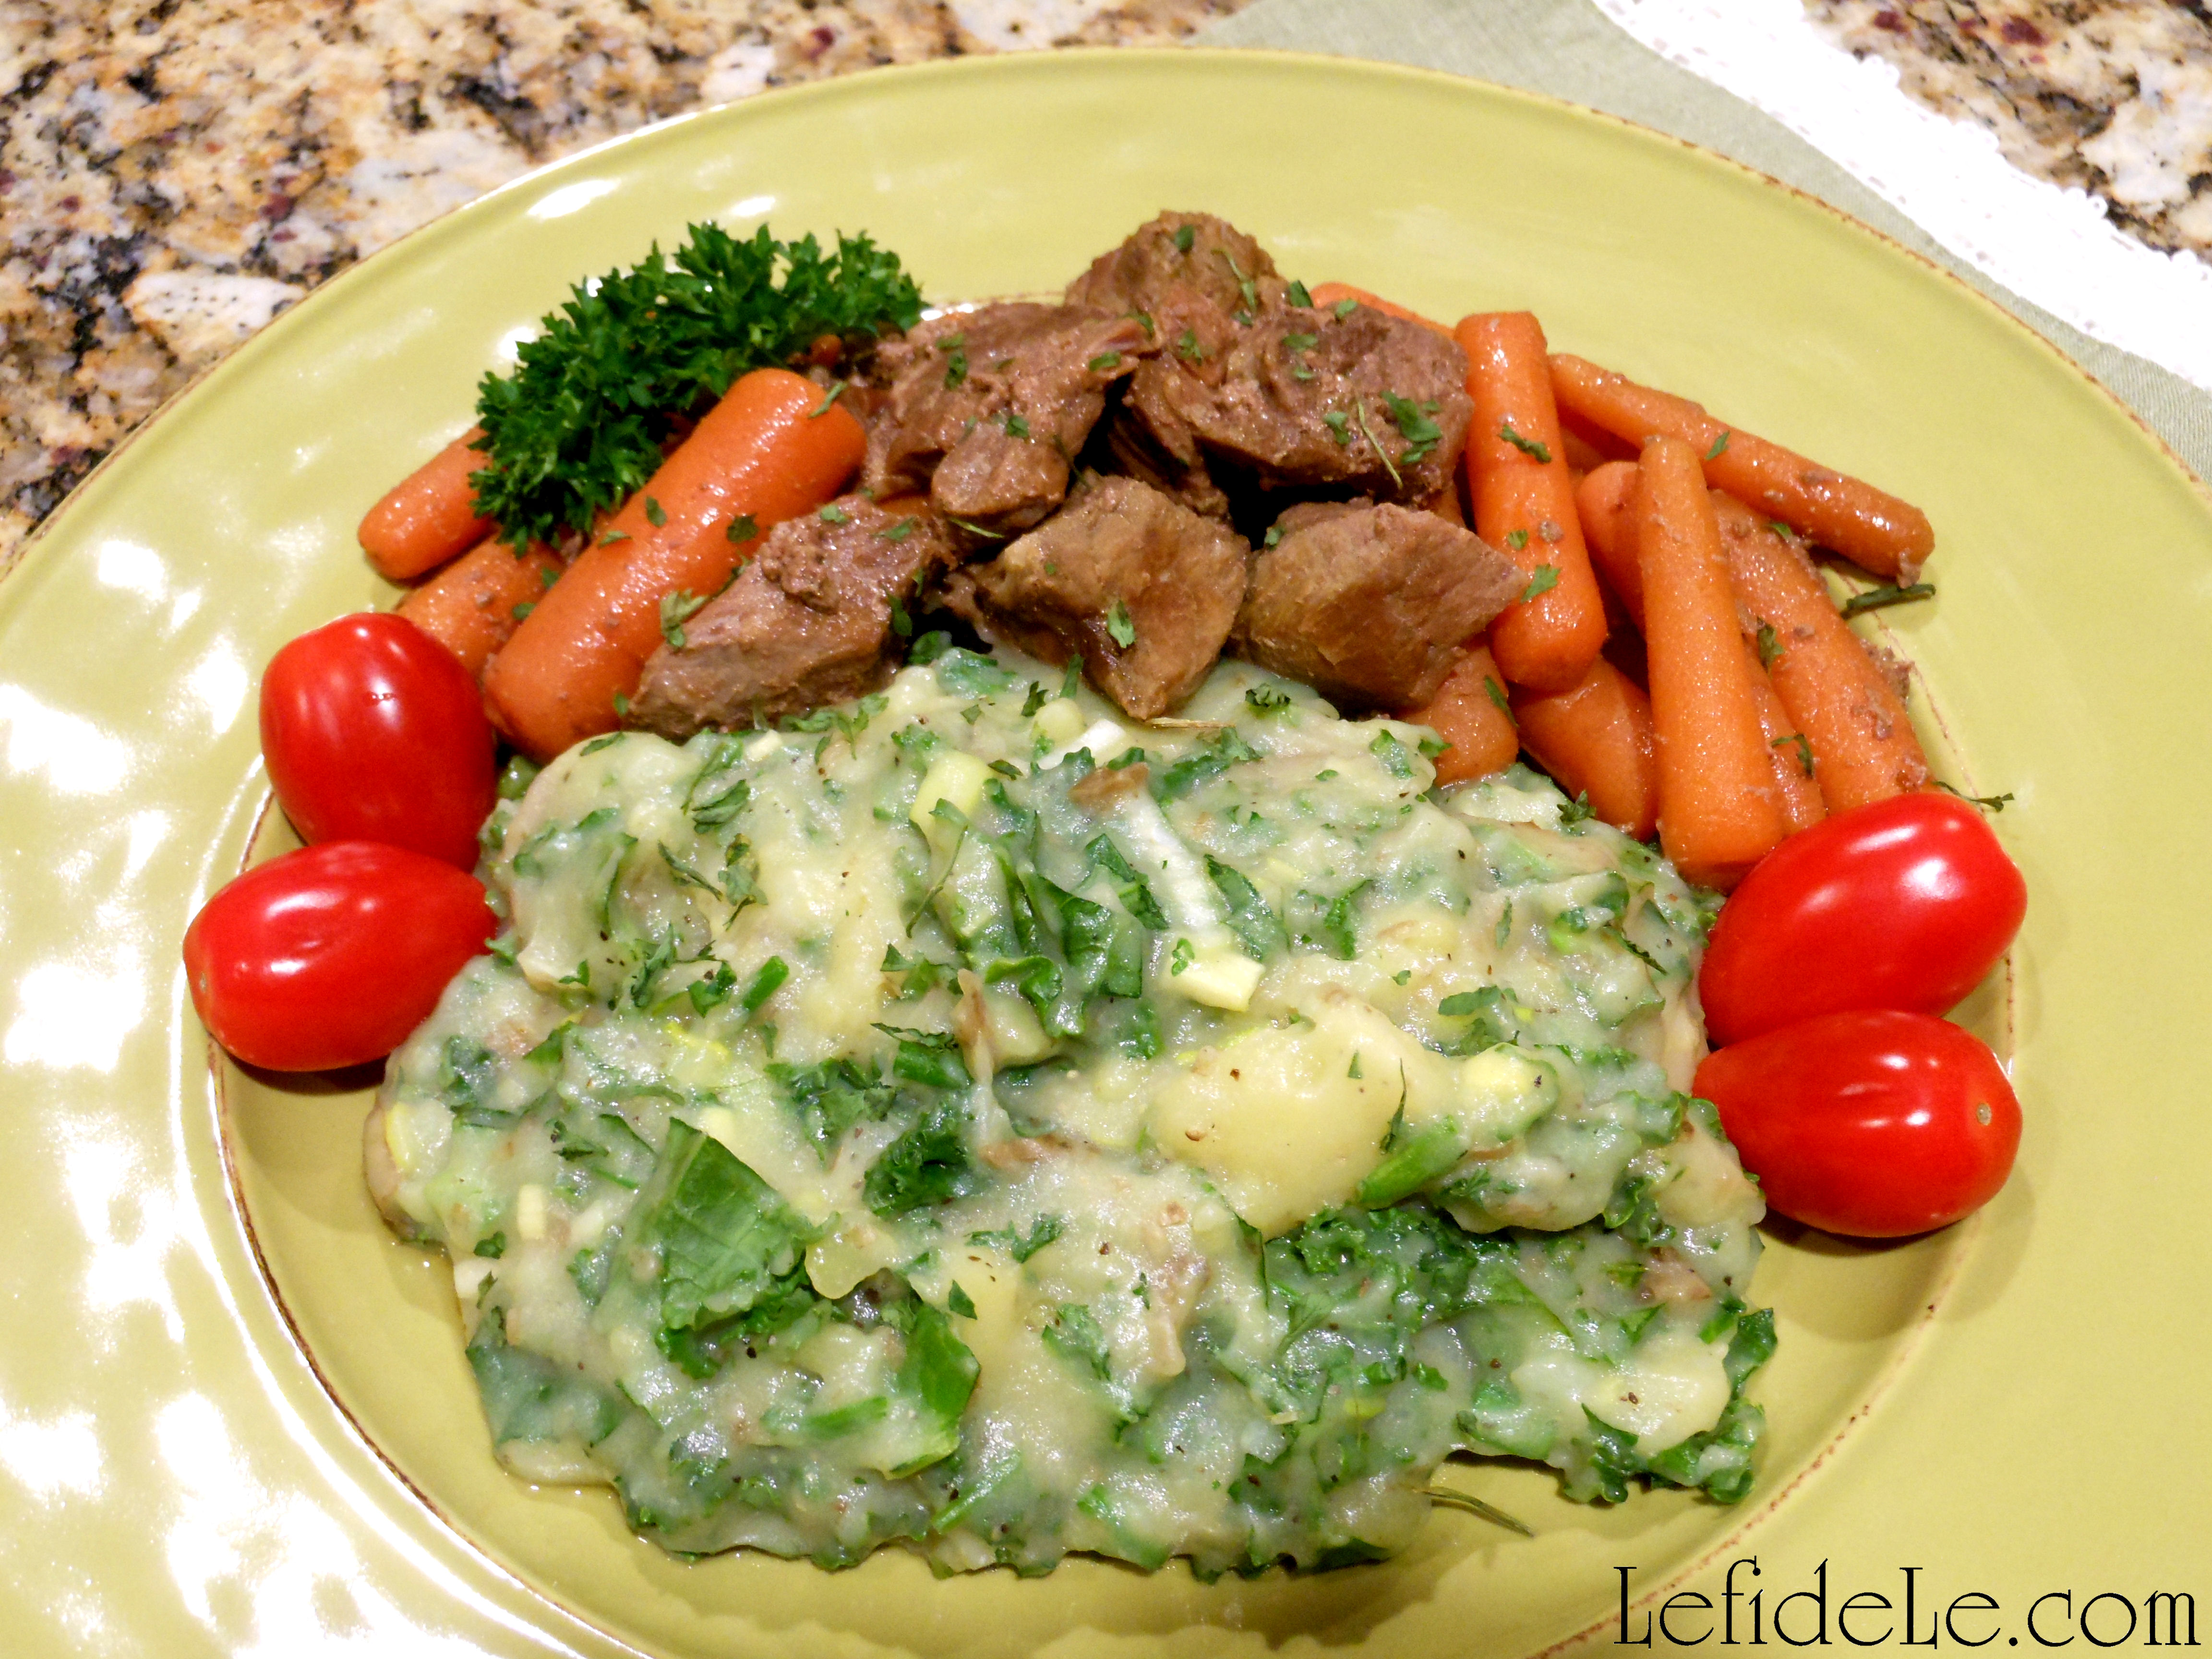
Colcannon is traditionally served with ham or bacon, but we went with slow-cooked stew beef and carrots here. (I will so be mixing in turkey bacon pieces next time!)

110Leigh

This recipe earned “Wows” from my non-vegan picky eaters and did not last long at all… and I’m hoping it won’t with your family either!

Faithfully Yours,

Leigh

090Leigh

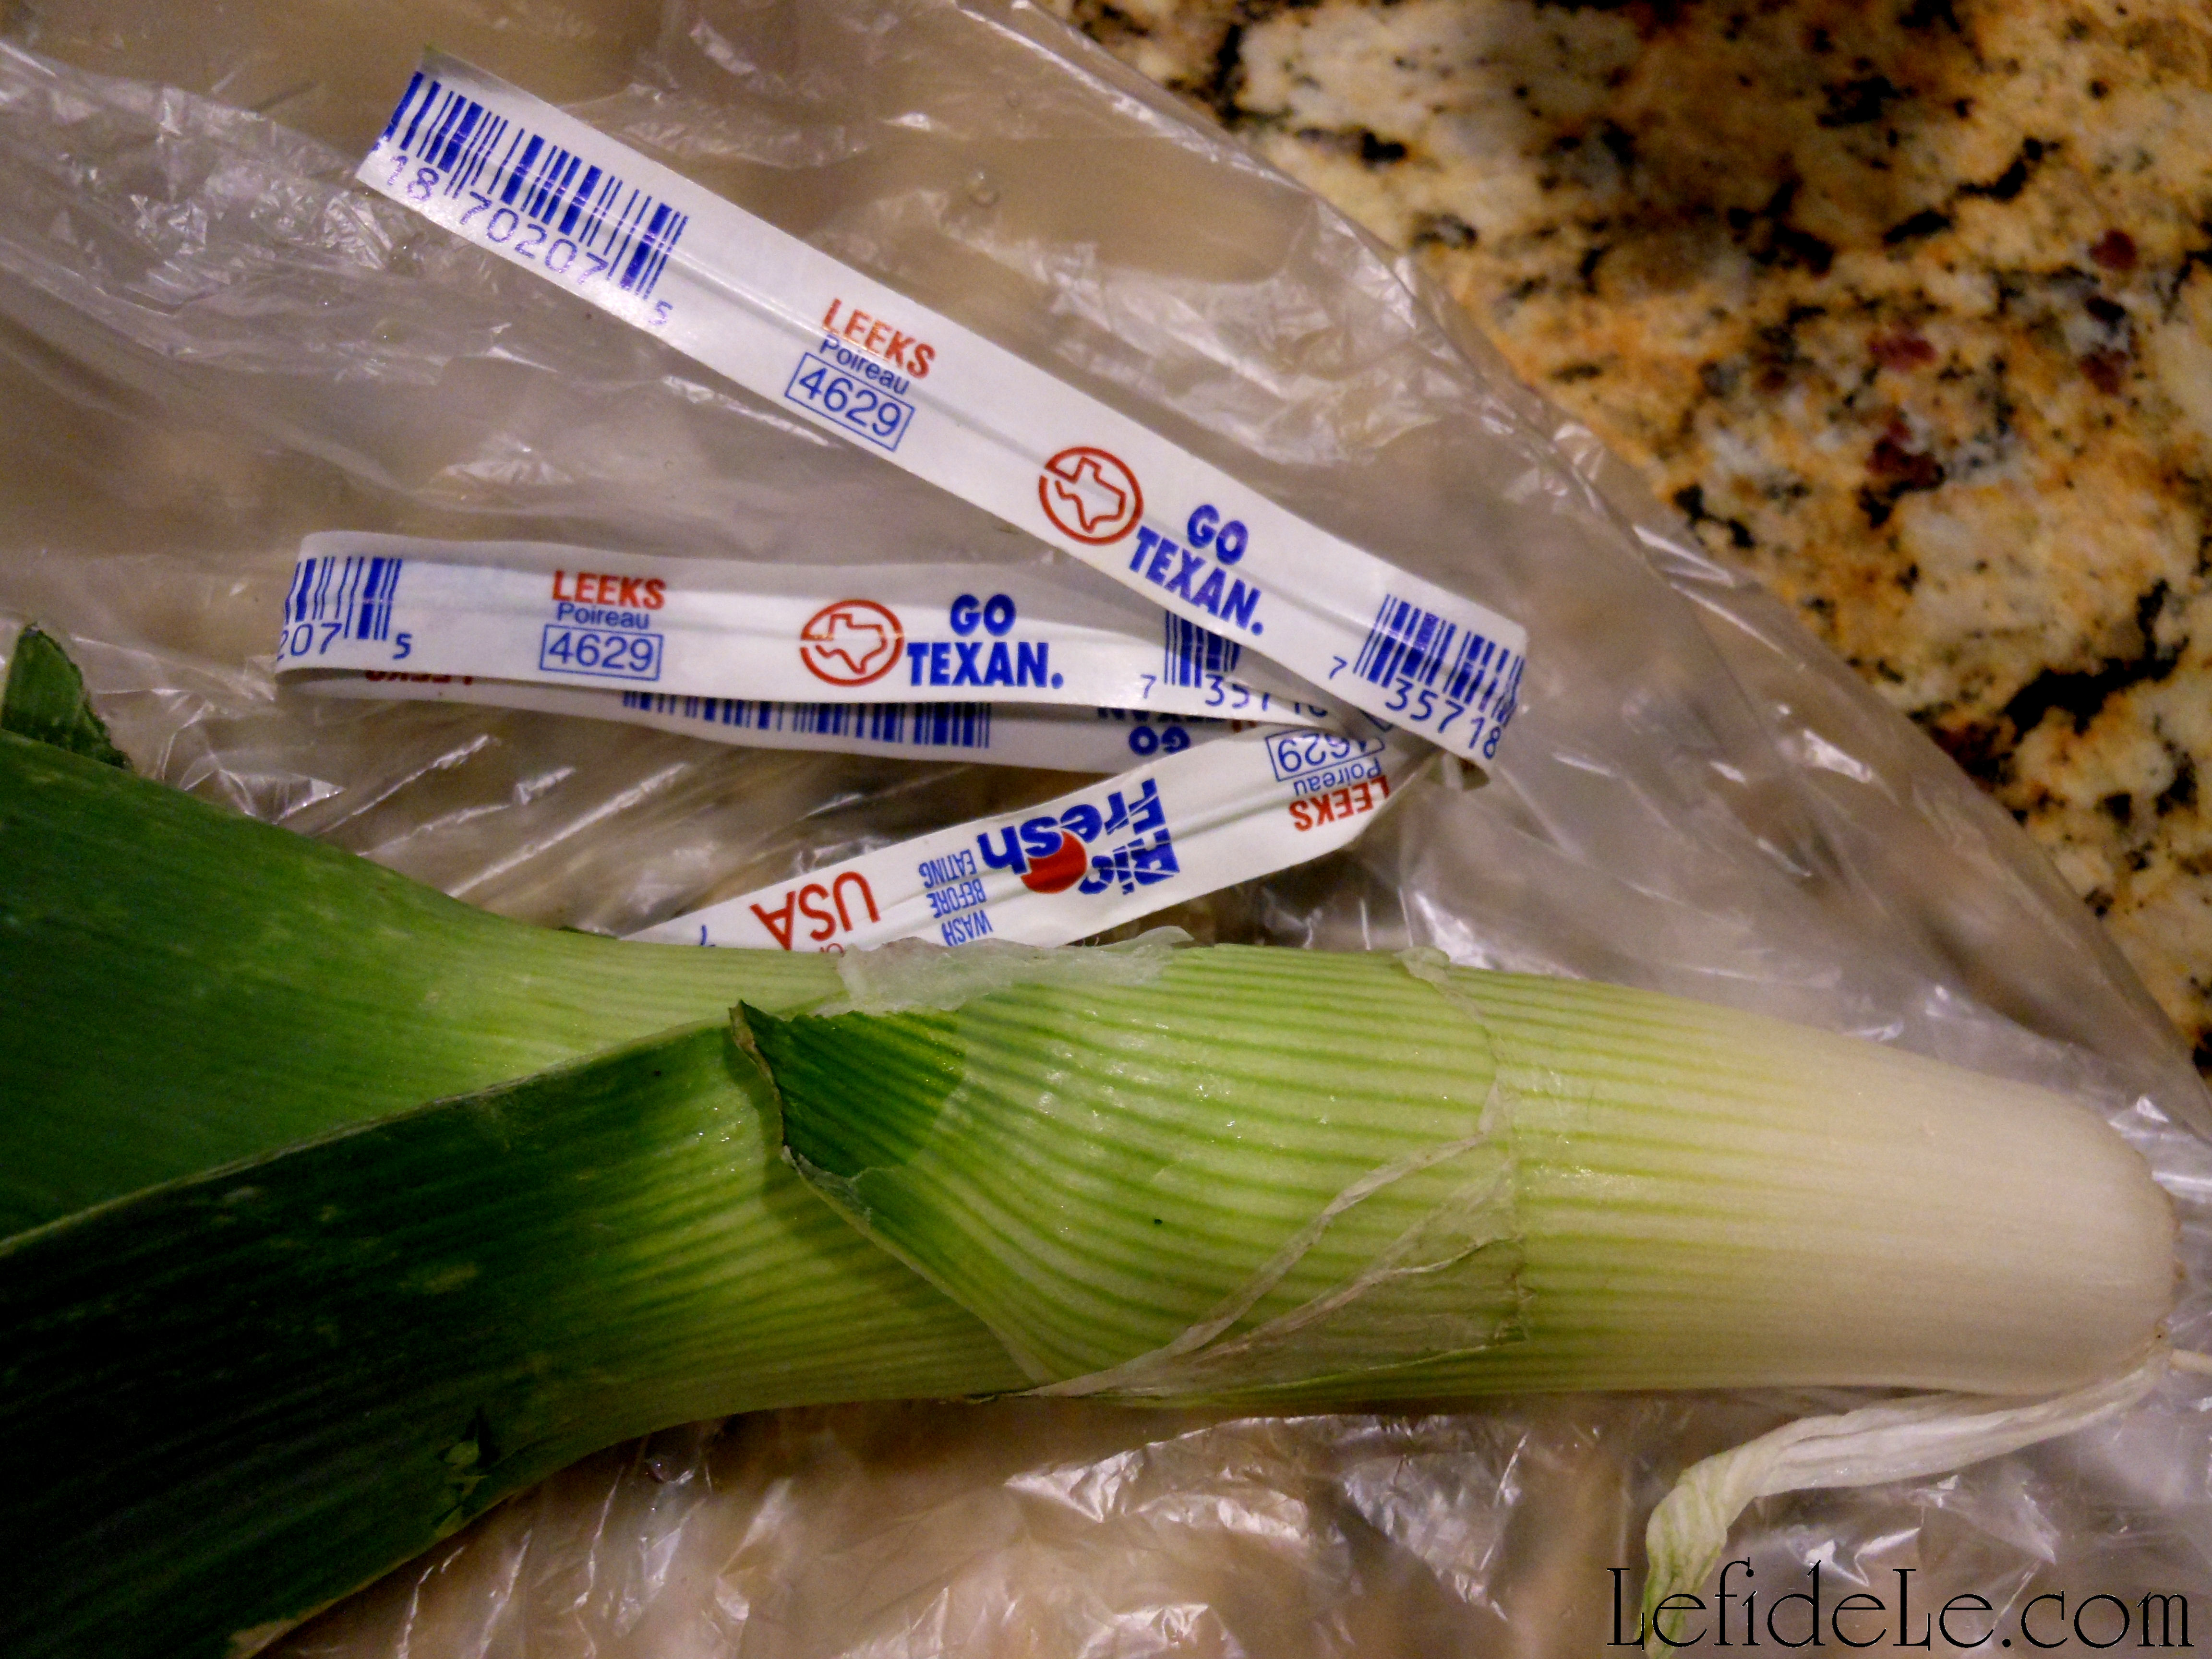
P.S. I love buying like a locavore! If you can’t take advantage of area farmer’s markets, look for your states labeling like the one on my leeks that said “Go Texan.”

Chinese Steamed Dumplings Recipe (Allergy Friendly, Gluten-Free, & Soy-Free)

184Leigh

Steamed Dumplings are an absolute must serve “lucky” dish for the Chinese New Year, but unfortunately they were also a dish I must not have… and I know I wasn’t the only unlucky one. Different restaurants have varied recipes for them, but nearly all make them with allergens. So I decided to make my own recipe that played on the basics but omitted the soy sauce, pig lard, pork, shellfish, mushrooms, etc. Plus, by using my optional substitutions, just about everyone can enjoy these delightfully delicious dumplings!


Shell Ingredients: (note that ~ means approximately)

  • ~ 3½ cups sweet rice flour + a good bit more for rolling (a.k.a. glutinous rice flour… that is 100% gluten free!)
  • ~ ⅔ cup boiling water
  • ~ ⅓ cold water

Filling Ingredients:

  • ~ ¾ pound ground chicken (or turkey… or minced water chestnuts/mushrooms/tofu for vegan)
  • 3 tablespoons sesame oil (or another flavored oil of your choice)
  • 2 tablespoons Coconut Aminos (a.k.a. soy sauce that is 100% soy free… or soyu if you like)
  • 2 teaspoons minced ginger root (or garlic)
  • ¼ cup minced leeks (or spring onions, bamboo shoots, shredded cabbage, etc.)

Filling Seasoning: (I used these, but add whatever you like adapting it to your tastes.)

  • 2 teaspoons sea salt
  • 1 teaspoon ground coriander (try adding 1 tsp. ground ginger if not using minced)
  • 3 teaspoons of Eden Shake + more for garnish (a.k.a. black & white sesame seeds plus pickled redshiso leaf… Anyone with sesame allergies can use hemp seeds which are the perfect high protein substitute.)

162Leigh

↑ This is a picture from my grandmother’s old recipe book that called for pig lard, soy, and the other things I spoke of earlier. I’m sure it was a tasty recipe, but I changed every ingredient but the rice flour… which I increased the portion of because the dough was too sticky to roll as it was. Note that even more flour than this will be needed as you roll.


Instructions:

168Leigh

First mince the ginger and leeks. Then mix all of the filling ingredients well.

172Leigh

The ground meat will absorb all of the liquids, but you can tell when it is well mixed when the minced ingredients seem well dispersed. Let this marinate in the refrigerator until you’re ready to fill the dough.

174Leigh

Place your measured rice flour into a larger mixing bowl.

177Leigh

Boil about a cup of water then use just a ⅔ cup of it. This is the easiest way to ensure the right amount. Mix it into the flour well, making a gooey paste. Then add the other portion of water, and mix it well. Let this sit about 15 minutes while you get everything else ready for your dumpling preparation… rolling pin, pastry mat, steamer, dumpling mold if you have one, etc.

180Leigh

Mix the dough again by hand and see if it’s the right consistency for rolling. Note that it will be much stickier than any wheat based dough, but you should be able to dust your hands with sticky rice flour and roll little 1 inch balls of dough in your palms. Mix in more flour if you need to. Take each ball and smash it flat with a floured palm into a floured surface. You will be making little pancakes. Then roll them out with a floured rolling pin into about 3 inch diameter circles, like tiny tortillas. In fact, this is exactly how I would make wheat based tortillas growing up. Working gluten-free is admittedly a bit trickier though.

192Leigh

Use the smallest size dumpling mold, if you have one. Molds are a speedy way to make perfect portions, but don’t fret if you don’t own one. Either way, you just spoon about a teaspoons worth of filling into the center of the circle. Close the mold tightly and remove the excess dough… or close the circle by hand into a half moon shape over the filling, and pinch pleat the rounded edges together. You could even use a fork to press the edges like you would a pie crust.

184Leigh

Inexpensive bamboo steamers are widely available, but here I’ve used a stainless one that sets onto my wok base. I love this thing! I actually made enough dumplings to fill it twice with this recipe. If using metal, use cooking spray on the top portion that the dough will rest on. If using bamboo, the Chinese recipe advises lining the bottom with a cloth.

194Leigh

Place the dumpling portion over already boiling water set on high. The Chinese recipe advises 15 minutes steaming, but I intentionally overcooked mine because I left the chicken filling out a good while during rolling… and no one wants salmonella. I actually left the second group on almost 30 minutes and they were fine, so just use your judgment.

189Leigh

Any leftover dough and filling can be combined into meatballs (like these that are uncooked), and baked at 325° for about 30 minutes.

197Leigh

Use two forks to plate your dumplings, or just bring a bamboo steamer to the table. Next time, I think I’ll roll mine out thicker and use a bit less filling. They seemed to expand as they cooked. I garnished these with more Eden shake because I love the flavor, but you can serve them with any sauce.

201Leigh

Here are the leftovers reheated in the microwave with marinara to morph them into an Italian ravioli fusion! They were fantastic this way! I just garnished them with parsley. You can even try adding rice based parmesan if you avoid dairy.

132Leigh

See more pictures of dumplings from my Chinese New Year of the Sheep / Ram Party here. Those I garnished with diced spring onion and small tomatoes and set over a bed of Bibb lettuce. The Quick Pickled Cucumber Recipe can be seen here.

175Leigh

Though more work than an everyday food, these little dumplings are worth the effort… especially when other family members help by making a chatty assembly line. It’s a great way to gather for a holiday!

Faithfully Yours,

Leigh

Quick & Easy Overnight Pickled Cucumbers Recipe (for Chinese New Year or Anytime)

This quick and easy recipe was inspired by a Chinese Travel Website that described the traditional foods of various regions. I was delighted to see that pickled cucumbers were listed… because who in the world doesn’t love a good pickle? Quick pickling makes this a great side dish for any occasion because it can be prepped overnight, and everyone really needs a good last minute dish. Just change up the spices, acids, and sweetener to suit your taste or event theme. It’s perfect for a Chinese New Year Celebration because it’s a light and green food to add to all the traditionally starchy New Year’s foods like longevity noodles, moon cakes, spring rolls, and dumplings. What’s more is that you can control the amount of sodium and sugar you put into it… so that family member with high blood pressure can still enjoy a good pickle without cheating with the jarred stuff!

132Leigh


Ingredients:

  • 2 cucumbers (I used the English hothouse variety because no peeling is needed.)
  • 1 tablespoon sea salt (Adjust the amount according to taste & dietary needs.)
  • 3 tablespoons Ume plum vinegar (Use any type of vinegar or lemon juice.)
  • 1 tablespoon turbinado sugar (Use any sweetener such as honey, agave, stevia, etc.)
  • ~ 1 teaspoon each of various spices (Try ground peppercorns, coriander, marjoram, ginger, etc.)

Instructions:

101Leigh

Wash your cucumbers well. There is no need to peel English Cucumbers, as pictured here, but the traditional waxed variety can have a bitter peel so it’s better to remove it. (The hothouse types are prettier with the 2 green tones, and we are making quick pickles… so the quicker the better, right?) A traditional looking dish has “cukes” that are split down the middle twice, so that you’re left with 4 long sections. Then cut these into approximately 2 inch chunks.

105Leigh

Salt the cucumber chunks, and stir them well. Refrigerate them covered overnight.

109Leigh

Rinse the cucumber chunks several times in water to remove excess sodium. (I just run water right into the casserole dish they’re already in, and place the top back on. I hold the top and bottom together, and turn them to the side letting the water drain out, leaving the washed cucumbers behind. Not having to wash a colander makes quick pickles even quicker!)

116Leigh

Add your acidic liquid such as lemon juice or vinegar. (I chose Ume plum vinegar because its flavor was a perfect complement for the other Chinese New Year dishes being served.) Also mix in your choice of spices. (After reading through about a dozen of my grandmother’s vintage Chinese cookbooks, I’ve come to the conclusion that there is no such thing as a traditional recipe. Everyone has their own spin, which means that you should feel free to make up your own concoction too!)

175Leigh

Mix your flavored cukes well, and refrigerate until it’s time to plate and garnish for serving. (The pickles pictured here are garnished with diced spring onions and whole roma tomatoes. Click here to see more of the Chinese New Year Party of the Sheep/Ram.)

161Leigh

I hereby confess that I don’t actually measure anything when preparing these little gems. I just go with my creative cooking instincts and prevailing mood to judge the flavor… which is exactly what is fun about this. They always seem to turn out just right. I do, of course, use less salt when making them for my grandmother, and less spice for my mother’s bland preferences. So, those pictured here were decidedly less flavorful than what I typically produce, yet they still tasted fantastic. The take home message is this, don’t be afraid to experiment with flavor. Have fun and enjoy not only the end result but the process as well!

Faithfully Yours,

Leigh

“Heartbeats” (Heart Shaped Beet Root Chips / Croutons) & “Lettuce Turnip the Beet” (Pink Savory Herbed Avocado Yogurt Dip / Salad Dressing) Recipe (Healthy, Gluten-Free, Dairy-Free, Vegan) AKA- Undercover Valentine Veggies!

056Leigh

This is the perfect Valentine savory snack for the picky eater who turns away from anything green or labeled as a healthy vegetable. Who can turn down trying an adorable hot pink heart chip, even if it is an undercover veggie! The avocado’s green is also disguised as pink and creamy yumminess thanks to a couple of healthy secrets, and the seasoning can be adjusted to any taste. It’s also easy to spoon out a bit of the dip into another bowl then turn up the flavor in the first one (hence the “let us turn up the beat” veggie pun in the title). Enjoy them as a healthy chip and dip combo, or make smaller “heartbeats” to use as croutons in a salad flavored by the dip as creamy dressing!

66Leigh


Heartbeat Chip Ingredients:

  • 3 beet roots (or as many as you’d like to make)
  • olive oil (enough to drizzle, & try any oil you prefer)
  • salt & pepper to sprinkle atop (or garlic salt, lemon pepper, no-salt seasoning, cinnamon & sugar, etc.)

Lettuce Turnip the Beet Dip Ingredients:

  • 1 ripe avocado
  • 8 ounces unsweetened vegan coconut yogurt (or any unflavored yogurt, but note that “unsweetened” is less sweet than “plain”)
  • 1 ⅟₂ teaspoons lemon juice
  • 1 tablespoon beet juice (or pomegranate juice)
  • herbs & spices according to taste, on this particular day I chose…

♥ ⅟₂ teaspoon ground white pepper

♥ ⅓ ground ginger

♥ ⅓ teaspoon ground coriander

♥ ⅓ teaspoon ground thyme

♥ 1 teaspoon granulated garlic

♥ ⅓ teaspoon salt

♥ + lots of cracked red peppercorns & black carbon sea salt for fiery garnish

… but you might want to omit the ginger, coriander, & thyme for a more traditional taste experience J


“Heartbeats” Chip Instructions:

1Leigh

First wash the beets roots thoroughly, and cut off the plant tops.

8Leigh

Then remove the tough outer part with a veggie peeler.

12Leigh

The best way to prepare beet chips is to use a mandolin kitchen tool to cut really thin slices. I have a beautiful stainless steel one that can be cleaned in the dishwasher, but I wanted to make sure that you could make these at home using a knife, cutting board, and old fashioned elbow-grease! It does take a little longer, but as you can see they turned out beautifully. They also took longer to bake because the slices were thicker. If you’re trying it this way, try to cut them as thin and uniformly as possible. You can also try cutting them with a food processor.

14Leigh

Once you have those cut, you can use cookie cutters to press shapes into the slices. I wanted hearts for Valentine’s Day, but you can choose any shape that will fit. Tiny flowers would make delightful pink chips and look lovely atop a spring salad like healthy croutons!Take the leftover bits and dice them further to spike another meal with vitamins. You can bake these into croutons for soup or salad, or steam them with some olive oil and seasoning to add to a pilaf or veggie mix.

26Leigh

Toss your cut out shapes (or plain slices) with olive oil in a bowl. Then spread out your lovelies on a parchment lined cookie sheet. Bake these in a 375ᵒ oven, to preserve the vitamins in your veggies, for 45 minutes to an hour. If you’ve cut these thicker, by hand, add cooking time. Thinner mandolin cuts will of course finish faster. Either way, I would advise checking on them often (by turning on the oven light, not opening the door).

33Leigh

About halfway through the cooking time, when the top side looks fairly done like this picture, take out the tray and flip them over before returning it to continue baking. If utilizing a dehydrator, cook them at 145ᵒ for 45 minutes then reduce heat to 115ᵒ for 24 hours until crunchy.

36Leigh

They’re done when crispy but not brittle. Blot these with a paper towel and sprinkle with your preferred seasonings. I used the same ones (cracked red peppercorns in a mill and black carbon sea salt) that I garnished the dip with. These not only showed up beautifully on the chips but also gave them an amazing fiery zing. You can even make sweet chips by sprinkling with cinnamon and sugar like a pink veggie buñuelo!

056Leigh

Enjoy the heartbeat chips by themselves or prepare this Avocado yogurt dip while they’re baking…


“Lettuce Turnip the Beet” Dip Instructions:

23Leigh

Wash and cut open a lovely ripe avocado. They’re best when just slightly softened to the touch. The easiest way to get the seed out is to whack it with a knife, twist, and pull it out in one motion. Slice the flesh into tiny crosshatch squares right in the shell, and then squeeze it into the bowl. (I do this all the time when making my “minute guacamole”, because it can then be smashed with a spoon into the side of the bowl very easily and quickly.)

18Leigh

Add the lemon juice and plain yogurt into the bowl along with your favorite mix of spices… or try my crazy combination. I love to cook by adding different flavors until it just tastes right… just remember to use different spoons with each tasting. No double dipping people! J If making this into a salad dressing, just add more yogurt, lemon juice… or both.

25Leigh

I used an immersion blender to completely emulsify and thicken the dip, but any good blender should be fine. Of course the “smash-against-the-side-of-the-bowl-with-the-back-of-a-big-spoon” method also works… it just burns more calories.

31Leigh

Spoon into a pretty dish and refrigerate until ready to eat. Garnish with a contrasting seasoning like these (cracked red peppercorns in a mill and black carbon sea salt) that also serve to turn up the flavor.

64Leigh

I have to admit that I enjoyed this recipe so much that I would have eaten the whole thing by myself (guilt-free) had I been alone. Next time, I will be making so much more!

42bLeigh

Happy Heartbeating!

Faithfully Yours,

Leigh

P.S. What are your favorite seasonings to add to dips & dressings? Tell me how you like to “turn up the flavor” in the comments section, and I may use them in a future recipe!

Quick & Easy Chocolate Bark & Dipped Strawberries with Toppings Recipe for Your Valentine (Gluten-Free, Vegan)

161Leigh

If you’re looking to make some sweets for your sweetheart but haven’t got a lot a time to get organized for a complicated recipe, then these Valentine concoctions are a sure bet. The fool-proof process is so quick and easy, that it really needs no hard-fast formula in order to turn out so delicioso! I tend to make both of the confections at the same time because they use identical shelf-stable ingredients (save one), but make two very different desserts that coordinate beautifully.  (If trying this, simply make the strawberries first then make bark out of the leftover ingredients.) Best of all, these are simple enough to be prepared by little ones, and can be made gluten-free and allergy-friendly for everyone to enjoy!

151Leigh


Ingredients:

  • 1 bag of semi-sweet or dark chocolate chips- preferably gluten-free vegan (or candy coating chips in any color)
  • 1 basket of fresh strawberries to dip (or try dried pieces to place into bark)
  • any toppings you like (oven-toasted coconut, chopped pistachios or walnuts, sugar sprinkles, dried fruit, crushed peppermints, even a contrasting colored chocolate chip, etc…)

Instructions:

77Leigh

Fill a heat-proof vessel with the chocolate chips of your choice. (Candy coating turns out a bit smoother, but isn’t as healthy or allergy-friendly as gluten-free vegan chocolate morsels. It really is a matter of personal preference.)

78Leigh

Either stir the chips in a pot on the stove (as I did at this link for Quick & Easy Chocolate Coconut Fondue Recipe (Vegan, Gluten-Free, Dairy-Free) where I write more about the available forms of chocolate) or microwave the chips in a bowl in 30 second bursts, stirring in between each.

83Leigh

I used the stove for the fondue and the microwave for the bark… again it’s up to you and how much time you have.


For the Chocolate Bark:

152Leigh

When the chips are completely melted to a liquid state, pour onto an aluminum lined cookie sheet.

154Leigh

Sprinkle your choice of toppings onto the still warm chocolate.

155Leigh

Gently press the larger toppings like coconut into the chocolate with the back of your fingers. (Smaller bits like sprinkles don’t need any pressing.) Either allow this to harden on the counter or in the refrigerator.

157Leigh

This is the fun part… when it’s solid to the touch, take one end and break it by attempting to fold it in half.

161Leigh

Repeat this with all sections until you’re left with decent sized chunks of yumminess then plate it for company… after reserving a few bites for immediate consumption!


For the Chocolate-Dipped Strawberries:

108Leigh

Wash the strawberries well, then let them air dry on a paper towel, or pat them dry completely before dipping.

148Leigh

When the chips are melted thoroughly with no chucky bits left, merely hold your strawberries by the green tops and dip into the chocolate. After completely enrobing it, turn the wrist to let the last drip catch back onto the fruit.

114Leigh

Then spoon chopped toppings or sprinkles over the still warm chocolate. Gently press any large chunks into place, and then set it aside to dry and harden.

139Leigh

You can either place the completed strawberries onto aluminum foil and transfer them to a pretty plate later, or do as I’ve done and save a step by dishing them immediately to dry on the platter they will be served on. I always begin with the prettiest of the berries, and when I find that the platter is full… eat the rest!

151Leigh


🙂 Happy Chocolate err… Valentine’s Day!

Faithfully Yours,

Leigh

P.S. A personal note on washing strawberries to dispel any old-fashioned notions regarding such… I promise that cleansing them of dirt and germs will in no way injure the fruit. In fact, they look even lovelier when truly clean. Wiping them with a towel only serves to redistribute bacteria. (The same can be said of mushrooms, which are often grown in actual manure.) For those of you who are thinking, “Well of course I wash my produce”… I’ve actually had this disagreement with a chef from a very popular up-scale restaurant that only reuses a towel on strawberries and mushrooms. (I hear they don’t wash the salad greens either, and never the lemons before cutting them.) So please forgive me, but with the recent listeria outbreak on caramel apples, I felt compelled to write a little about this now. Here are a few links for anyone who doesn’t want to take my word for it:

http://www.foodsafety.gov/keep/types/fruits/tipsfreshprodsafety.html

http://www.fsis.usda.gov/wps/portal/fsis/topics/food-safety-education/get-answers/food-safety-fact-sheets/safe-food-handling/washing-food-does-it-promote-food-safety/washing-food

http://www.fsis.usda.gov/wps/portal/fsis/topics/food-safety-education/get-answers/food-safety-fact-sheets/safe-food-handling/washing-food-does-it-promote-food-safety/washing-food

Healthy “One-Pot” Cocorico Roasted Chicken (or Turkey) & Root Vegetables Recipe

Making healthy roasted chicken and root vegetables is so easy with a Cocorico Roaster. I love to use mine as an easy “one-pot” wonder that presents beautifully from oven-to table. The night before a long day, I can peel the veggies and add herbs so it only needs to put it in the oven for a hardy home-cooked meal. Larger roasters will also accommodate a small turkey for the holidays.

125Leigh


Ingredients:
  • 1 roasting chicken (or turkey, in a size that will fit your Cocorico roaster)
  • 2 teaspoons thyme
  • 2 teaspoons rosemary
  • 1 fresh lemon
  • 1 teaspoon sea salt (or to taste)
  • Olive oil (enough to coat chicken & drizzle a little over veggies)

Multicolored root vegetables in season (enough to fill the cocorico base):

  • ~1 pound carrots
  • ~3 beets
  • ~2 parsnips
  • ~1 bunch radishes
  • ~1 or 2 pounds fingerling (or new) potatoes
  • (& turnips if you have better luck than I did finding good ones)

Instructions:

Cocorico roasters in glazed terra cotta are available locally and online. I ordered mine from Napa Style because it was the biggest I’ve seen, and also had a larger turkey cone that fit over the chicken cone. Soak the whole thing under water at least 30 minutes before cooking. This prevents any heat damage to the vessel. I saturate mine in a bleached clean sink.

2Leigh

Preheat your oven to 400ᵒ, while you soak the roaster and prep your veggies. There are a beautiful variety of purple, orange, red, and white root vegetables available. Peel and cut them into about 2 inch chunks to ensure even cooking. Some recipes will advise you boil potatoes ahead of roasting, but I’ve found that to be completely unnecessary if you buy small fingerlings. They roast just like baked fries. They’re prettier, easier, and quicker… so save the big ones for baked potatoes. Radishes may seem like an odd choice for roasting, but they completely change character after cooking. They mellow out, losing their sharpness and spicy heat. I really do prefer them this way.

4Leigh

Place these in a bowl with herbs and add just the smallest drizzle of olive oil. (The chicken juices will flow over the veggies while cooking thus providing more flavor.) Squeeze a little of your lemon over the veggies, and save the rest to place inside the chicken cavity before setting over the roasting cone. Add sea salt and toss to coat everything well. This may be done ahead of time, just cover the bowl and refrigerate it until needed.

13Leigh

Many recipes will also instruct you to wash chicken inside and out before cooking, but I read a study that found it only served to spread dangerous bacteria all over your kitchen. Thorough cooking will kill bacteria while rinsing will not. Drain the fluid and remove any extra gifts left in the cavity (neck, gizzard, giblets). Then set the chicken onto the soaked Cocorico. Other recipes will also say to do this with the legs up and trussed, but this is really subjective to the size of your roasting cone versus the size of your bird. I used a smaller chicken in the pictures, which would have been physically impossible to set upside down. It cooked beautifully and tasted great. Just place the chicken whichever way you can get it onto the cone. It’s really hard to mess up dinner with a Cocorico!

21Leigh

Roast in the oven at 400ᵒ for about 15 minutes, and then reduce it to 375ᵒ for an hour longer (for ~4 lb chicken). Because every oven heats differently, the safest way to cook is with a meat thermometer. Place it in the thickest part of the thigh, but not to the bone. www.foodsafety.gov says 165ᵒ is poultry’s magic number! I’ve also read to rotate the Cocorico every 15 minutes. Thinking of how heavy it was, how that would let heat escape, what else I could spend my time accomplishing, and burn potential… I decided to forgo that. Once again, the simplest way proved itself. The chickens turned out exactly the same.

127Leigh

Use a serving spoon to gently toss the roasted veggies, so that the juices are fully distributed. It’s easiest to serve the veggies first and then carve into the meat, using the newly empty well to hold the pieces. Or it can all be transferred to other serving dishes… but I prefer to avoid washing extra tableware, and the filled Cocorico looks so lovely. If trying this, be sure to use adequate hot pads beneath it.

35RoosterVotive-Leigh

In the past, I’ve saved time by omitting the oil and placing the roots directly into the Cocorico. When it finished cooking, I would sprinkle fresh herbs and orange juice over the top, stirring it right in the roaster. Whichever way you chose to prepare it, with whatever vegetables, with either chicken or turkey, and legs cooked up or down… Cocorico roasters make it all turn out so beautifully! (See this for yourself at the link: Last Minute Cocorico Rooster Theme Dinner Party Décor Ideas.) So think about getting one for yourself, and leave the “beer-can chicken” to the tailgaters! 🙂

157Leigh

Faithfully Yours,

Leigh

Easy No Cook Layered (N)ice-Cream Pie with Nut Crust Recipe (Vegan, Dairy-Free, Gluten-Free)

This super easy no cook recipe can be made well in advance of any gathering, or just made to enjoy a slice at a time straight from the freezer. It’s also a great alternative to the parade of traditional office birthday cakes. It has a gluten-free nut crust that may be enjoyed by almost everyone, which is also why it’s written with dairy-free ice cream. It can easily be made with traditional dairy… but in this way vegans, allergy sufferers, and the lactose intolerant may happily partake. For this occasion, I used pint sizes of coconut milk “ice-cream”. (A mint chocolate chip pint was used here for the bottom layer, chocolate for the middle layer with the cherries, and coconut for the top layer with the chocolate chunks.) It’s richer than the almond milk variety (which is also tasty), and it always surprises people when I tell them it’s dairy-free. Previously, I’ve even used a gallon sized regular Neapolitan ice-cream and just split up the colors for the layers. You can use whatever you have left in the freezer or even add more layers! Add multiple kinds of nuts, chips, or chunks… whatever is in your pantry. For this recipe, no rules are just right! 69Leigh


Ingredients:
  • 3 cups pecans (or pistachios, walnuts, macadamia nuts…)
  • 10 tablespoons extra-virgin coconut oil (or regular butter, dairy-free butter…)
  • 1 tablespoon turbinado sugar (or coconut sugar, brown sugar…)
  • 1 teaspoon cinnamon
  • 1 bag frozen sweet pitted cherries (or pitted fresh, 15 oz can in sugar syrup…)
  • 1 bag vegan dark chocolate mini-chunks (or dairy-free, traditional chocolate chips…)
  • 3 flavors/pints (here I used mint chocolate chip, chocolate, and coconut) dairy-free coconut milk “ice-cream” (or almond milk, soy milk, sugar-free, dairy milk ice cream…)

8Leigh


Instructions:

11Leigh Place the cherries in a strainer over a bowl, and set aside to drain. (The leftover cherry juice makes a great sweetener so you can add more greens to a smoothie!) 2Leigh Place the pecans in a quart size freezer bag (because it’s stronger than sandwich bags) and break them up using a kitchen-mallet/meat-tenderizer. It’s so much more fun than chopping! 3Leigh   Microwave the coconut oil in a glass bowl just until it softens. (Extra-virgin coconut oil is so good for the skin that it can even be found in the vitamin section of Whole Foods as a supplement.) 4Leigh Then add the crushed pecans, sugar, and cinnamon. 5Leigh Mix well, then pour/push into the bottom of a coconut oil “greased” springform pan. Smooth it out evenly with a spatula so that the entire bottom is covered. 7Leigh Place in freezer for at least 30 minutes, or until it feels frozen and solid. During this time, take out the mint chocolate chip to soften it. (Keep in mind that regular ice-cream melts quicker than vegan “ice-cream”, so if using the traditional stuff- take it out later!) 12Leigh When the nut crust is frozen and the quart has melted enough, smooth the “ice-cream” over the crust evenly with a spatula. Freeze the pan and take out the chocolate pint to melt. 013Leigh Spread the chocolate pint on when the previous layer has refrozen solid. Gently push the drained cherries into the “ice-cream” (= chocolate covered cherries). Freeze the pan again, and take out the coconut pint. 16Leigh When everything’s ready, spread on the last layer. Top this with the chocolate chunks & softly press them into the coconut “ice-cream”. 26Leigh Cover it and keep it frozen until it’s almost time for dessert. (Cutting through it is easier if you run the knife under hot water first.) 74Leigh It’s always great to have a stand-by gluten-free vegan desert recipe, so no one has to be left out of the fun. This easy one is a lot of fun to make with kiddos, as it has very little to measure and requires no knives until serving time. Any leftovers can be stored in the freezer and wrapped as individual slices for an occasional sweet-treat! Happy Un-birthday! 🙂 73Leigh Faithfully Yours,

Leigh 70NiceCreamPie-Leigh

Quick & Easy Informal Gathering Fondue Dessert Party Idea

One may easily spend the fall and winter bouncing from one holiday into the next, and often those celebrations are hosted at someone else’s abode. Why not extend thanks by inviting those friends and family to a small gathering that doesn’t involve candy, pumpkins, or trees. This easy fondue theme can be quickly pulled together the evening before. See my accompanying Quick & Easy Chocolate Coconut Fondue Recipe here. It takes about 5 minutes to prepare just before everyone arrives. It is vegan, gluten-free, and dairy-free so no one has to be left out. (Just be sure to buy or prepare gluten and dairy-free items to dip also.) An informal dessert party can accommodate a larger number of people without adding more work, which is great not only during the busy holidays but at any time of year.

230Leigh

I chose the warm and inviting colors of purple and green in order to distance my theme from those traditionally used for the holidays. They were a lovely contrast to the ivory dishware and dark brown of the chocolate and leather. Color accents were seen in the throw pillows, trays, glassware, dishes, and even the foliage. It extended to the cloth napkins that were set on the coffee table and lazy-Susan. Adding the rotating tier not only eased food accessibility, but also created separation between the serving and eating areas which was visually more appealing.

200Leigh

Seated on an end table was a painted tray that contained a basket of coordinating napkins in wood beaded rings, a glass holding fondue skewers, and Portmeirion Pomona plates.

251Leigh

I only used the plates with the pear and fig motif because they matched so perfectly, but even pretty paper plates would be fine for such an informal gathering.

208Leigh

Another table held a larger tray with purple bubble glasses and a matching pitcher seated on a wooden riser. An ice bucket was placed on a taller stand behind that. A cloth napkin was draped to preemptively contain any spills. Preserved lavender sat in a painted pot to soften the visual edges.

231Fondue-Leigh

All of the furniture was rotated, for the evening, in order to accommodate an easy flow. An ottoman and a ceramic stool added seating to the arrangement, without blocking pathways. Pillows in coordinating colors were pulled from other rooms, to temper the masses of brown leather. For a smaller group, one could even pull furniture from the room, and just use stacked floor cushions around a coffee table.

192Leigh

Even the rock fireplace was included as a focal point with the addition of candles on green glass. These were placed at varying levels by means of a trunk and upturned basket. Statuary, a birdcage, and small trees added height and interest. Why not switch accessories for a night?

205Leigh

The serving pieces are actually comprised of two different sets of dishware. The center group is a small fondue set placed on a wooden stand for height. The ring of dishes surrounding that was actually meant to coordinate with a plain bowl for hors d’oeuvres, but worked beautifully to present a larger volume of food. Round bowls would also have been lovely surrounding the chocolate center.

204Leigh

Whether you choose to serve on paper plates or fine china, change up your décor or leave it all the same, bake your sweet treats or buy them at the store… your guests will be treated to a relaxing evening filled with delightful confections and camaraderie.

86Fondue-Leigh

Faithfully Yours,

Leigh

Quick & Easy Chocolate Coconut Fondue Recipe (Vegan, Gluten-Free, Dairy-Free)

This super easy yet delectable fondue recipe takes about 5 minutes to prepare from ingredients you probably already have in your pantry. It can be made last minute just before your guests arrive. It is vegan, gluten-free, and dairy-free so no one has to be left out. (Just be sure to buy or prepare gluten and dairy-free items to dip also.) It’s so quick and tasty that it’s great for a family movie night, and you can make it as healthy or sinful as you like with your choice of foods to dip into it. You might even want to make some just for yourself. The coconut is great for your skin, so it’s less guilt rousing than breaking into that stash of Rocky Road!


Ingredients:

~ 12 oz bag vegan semi-sweet chocolate chips (vegan = no milk fat added, but you can use whatever kind of chocolate chips you have on hand)

~ 2/3 cup coconut cream (from 1 can coconut milk, preferably organic)


Instructions:

There are a variety of chocolate chips to choose from, but the healthiest are the vegan varieties because they omit milk and butter fat (artery clogging and potential allergens). They are just as yummy… seriously. Many well-known companies add cheap sweeteners like corn syrup and milk fat solids to trick your taste buds into believing you’re getting more chocolate than you actually are. But chocolate ingredient labels may be used like “decoder rings” to tell you in advance just how authentic the product really is. Personally, I want to pay for real sugar and real chocolate, and not worry about anyone’s allergies.

72Leigh

Use your favorite brand of canned coconut milk to obtain the cream needed. Some recipes will advise you to refrigerate a can overnight, in order to separate the cream solids, but I’ve found that unnecessary unless you’ve stored it in a hot garage or had it in the trunk of your car. I just open it straight from the pantry and spoon out the thick part, leaving the liquid behind. For this recipe, don’t worry about strict amounts. Adding some liquid or using a few less chips won’t harm the taste (which is good because who can’t help “sampling” the chips before cooking).

75Leigh

Using coconut milk means not needing to bother with a double-boiler. Just use a ceramic or nonstick green pot because it helps dramatically with clean-up. Simply spoon in the coconut cream and stir constantly over low heat. It will liquefy when warmed.

77Leigh

Now add the chocolate, a little at a time, until it has melted down. Keep stirring to the bottom of the pot. It will thicken as all the chips are completely melted and mixed in.

78Leigh

Pour into the bowl of your fondue set. It will stay a thick warm dip so long as you keep a tea-light candle lit under it.

83Leigh

You may use any fruit or baked good you like, but please note that gluten-free is an all or nothing situation. Any glutinous crumbs left in the chocolate will contaminate it for any guests with celiac or wheat allergies. If you’d like to have both types of foods, you would need to separate a small bowl of fondue to keep it safely wheat-free. Although it’s become unfortunately popular to chide those going gluten-free, many are doing so without a choice. Serious health concerns must trump jokes made by uneducated individuals. Taking a little time in order to preserve the safety of a guest is a gracious blessing to anyone with allergies, and that concern is worth far more than any store bought gift.

84Leigh

Fruits such as sliced bananas, grapes, cherries, and strawberries are magnificent when dipped in chocolate and are a great alternative to the higher calorie baked goods. It’s an extra treat to include toasted coconut and chopped nuts to spoon onto the chocolate coated confections. (Just remember to ask your guests about tree nut allergies ahead of time.)

86Fondue-Leigh

Most grocery stores have a gluten-free section, so it’s easy to include allergy free cookies that are ready-made. You can see two yummy varieties from “Enjoy-Life” pictured here. The brownies were quickly made from a gluten-free mix using shelf-stable “Ener-G Egg-Replacer” (1 egg = 1.5 teaspoons + 2 tablespoons warm water). Aside from being allergy friendly, the best thing about having replacer on hand is not running out of eggs, wondering if they’ve gone bad, or having to clean up potential salmonella germs. There are also many brands of gluten-free cake mix that may be baked successfully with egg-replacer. Just mix it, bake it, and cut it into dippable cubes. Or easier still… ask the bakery what they have available. Bon appétit!

205Leigh

See more from my Quick & Easy Informal Gathering Fondue Dessert Party Idea here!

Faithfully Yours,

Leigh

Quick & Easy “Shortcut” Cauliflower Mashed Potatoes Recipe (Heart-Healthy & Dairy-Free)

Just about everyone likes mashed potatoes, but not everyone can enjoy eating them guilt-free. And who has time to gather and prepare all the ingredients then boil and mash the potatoes into smooth perfection? This super quick and easy recipe uses mostly shelf-stable pantry items, so it can be made last minute. It takes into account allergies and other health concerns by omitting all the saturated fats from dairy… which will satisfy the gluten-free vegans as well. Calories are also cut dramatically by adding cauliflower. This recipe for “Short-Cut Cauli-Potatoes” even fooled my Grandmother into eating her veggies. She’s enjoyed eating her way to losing about 70 pounds!


Ingredients:
  • 1 head cauliflower
  • 2 cups water
  • 1 tablespoon dehydrated chopped onion (= shortcut)
  • ¼ teaspoon garlic powder (= shortcut)
  • 1 tablespoon dried parsley (+ more for garnish = shortcut)
  • 1 teaspoon salt (adjust for taste or health needs)
  • 1 tablespoon extra-virgin olive oil (heart healthy)
  • 1 cup Potato Buds (secret ingredient shortcut = dehydrated potatoes in a box)

 Instructions:

Separate the cauliflower head into small sections and wash well. Place in a pot with 2 cups of water. (This amount is important because we do not drain it, which also helps retain the vitamins.) Add the onion as well.

1Leigh

Place covered over medium heat for about 15 minutes (or until cauliflower is soft and tender).

3Leigh

Use an immersion blender to “soupify” the veggies. Mix in the potato buds a little at a time, until thoroughly blended. Add the rest of your spices and olive oil.

8CauliPotatoes-Leigh

Place in a pretty covered dish and garnish with more parsley. No one had ever guessed they’re made from dehydrated potatoes, but I guess my secret shortcut is out now! Just don’t tell Grandma 🙂 Bon appétit!

197Leigh

Pictured is another great recipe for Fall, my Quinoa Pilaf Stuffed Patty Pan “Mini” Squash Recipe (Healthy, Gluten-Free & Dairy Free) 🙂

And see more of my Fall Leaves & Pumpkins Themed Thanksgiving Tablescape Décor Ideas here.

Faithfully Yours,

Leigh