Tag Archives: Tablescape

Star-Spangled Independence Day Patriotic Party Décor Ideas (& All-American Burger Bar)

333Leigh

Every year on the fourth of July, families across the country gather in jubilant celebration of the birth of our proud democracy. We join together to commemorate our forefathers’ defiant stand to secure those inalienable rights we enjoy today, and to venerate that hard-won freedom. Take part in a tour of my star-spangled Independence Day event for décor ideas to plan your own patriotic party with!

358Leigh

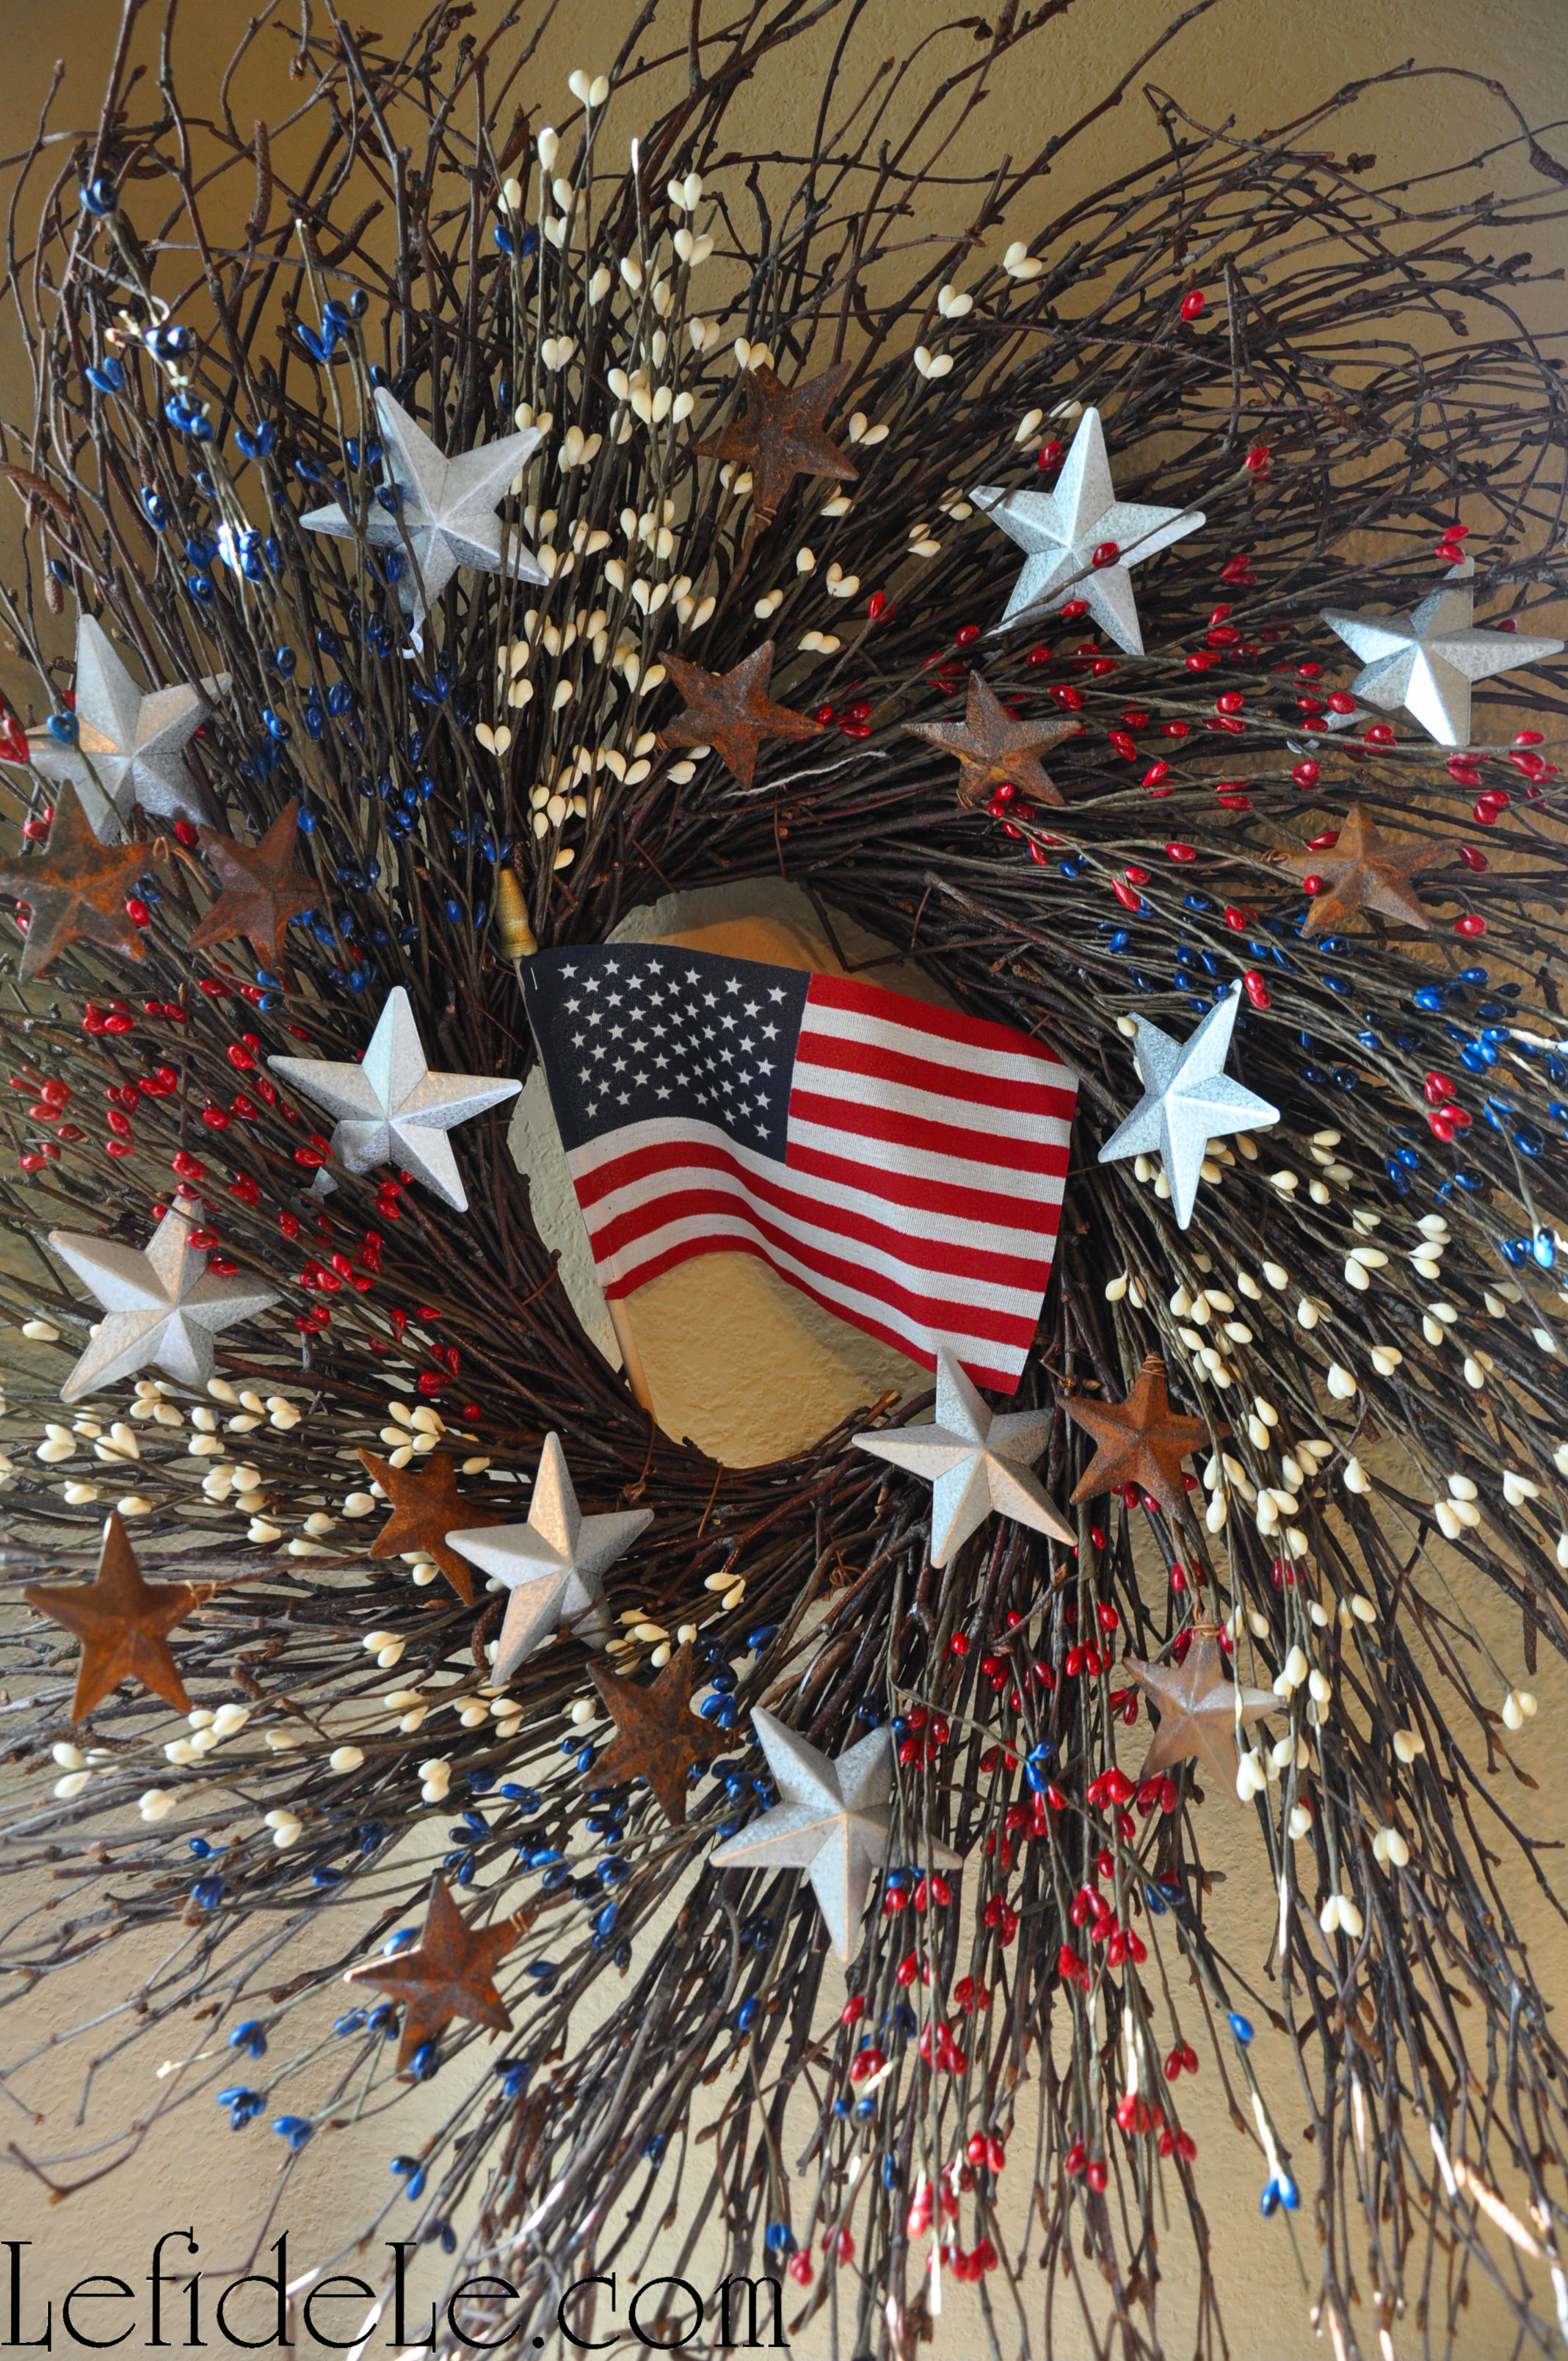
History was heralded with a welcoming wreath spangled with bright steel stars and the broad stripes of old glory… denoting a gallantly streaming flag hailed through the perilous fight.

368Leigh

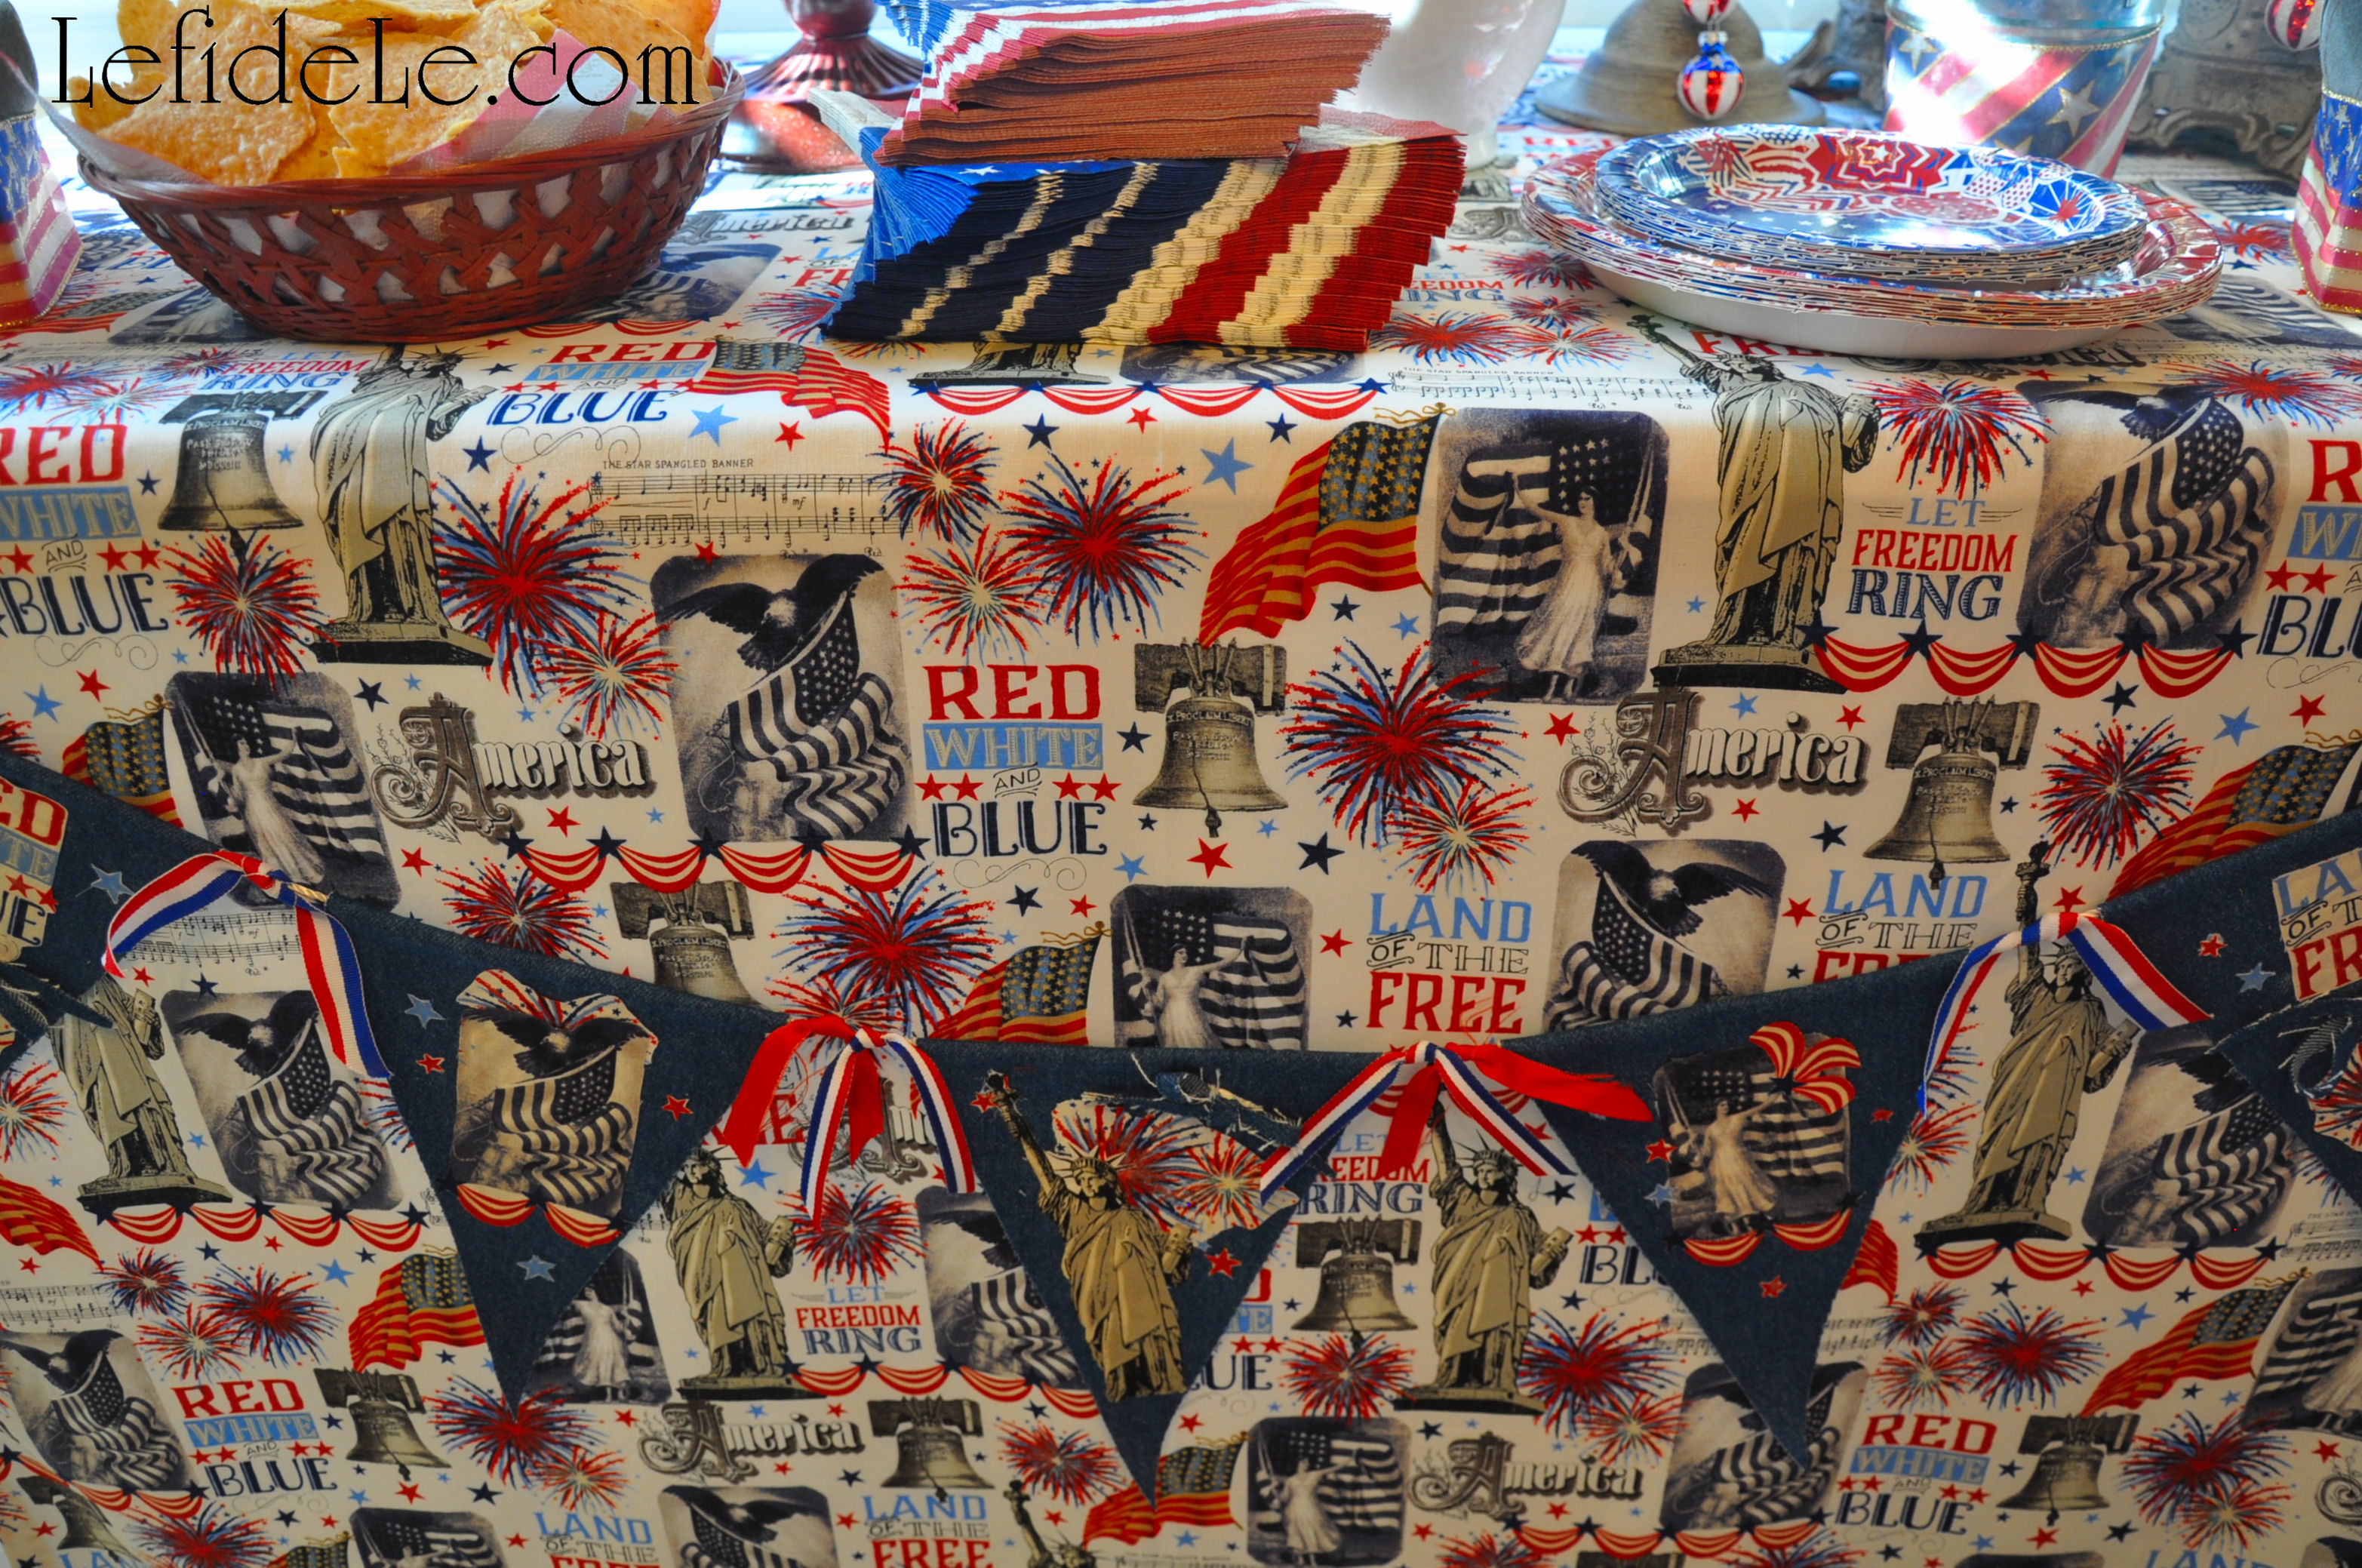
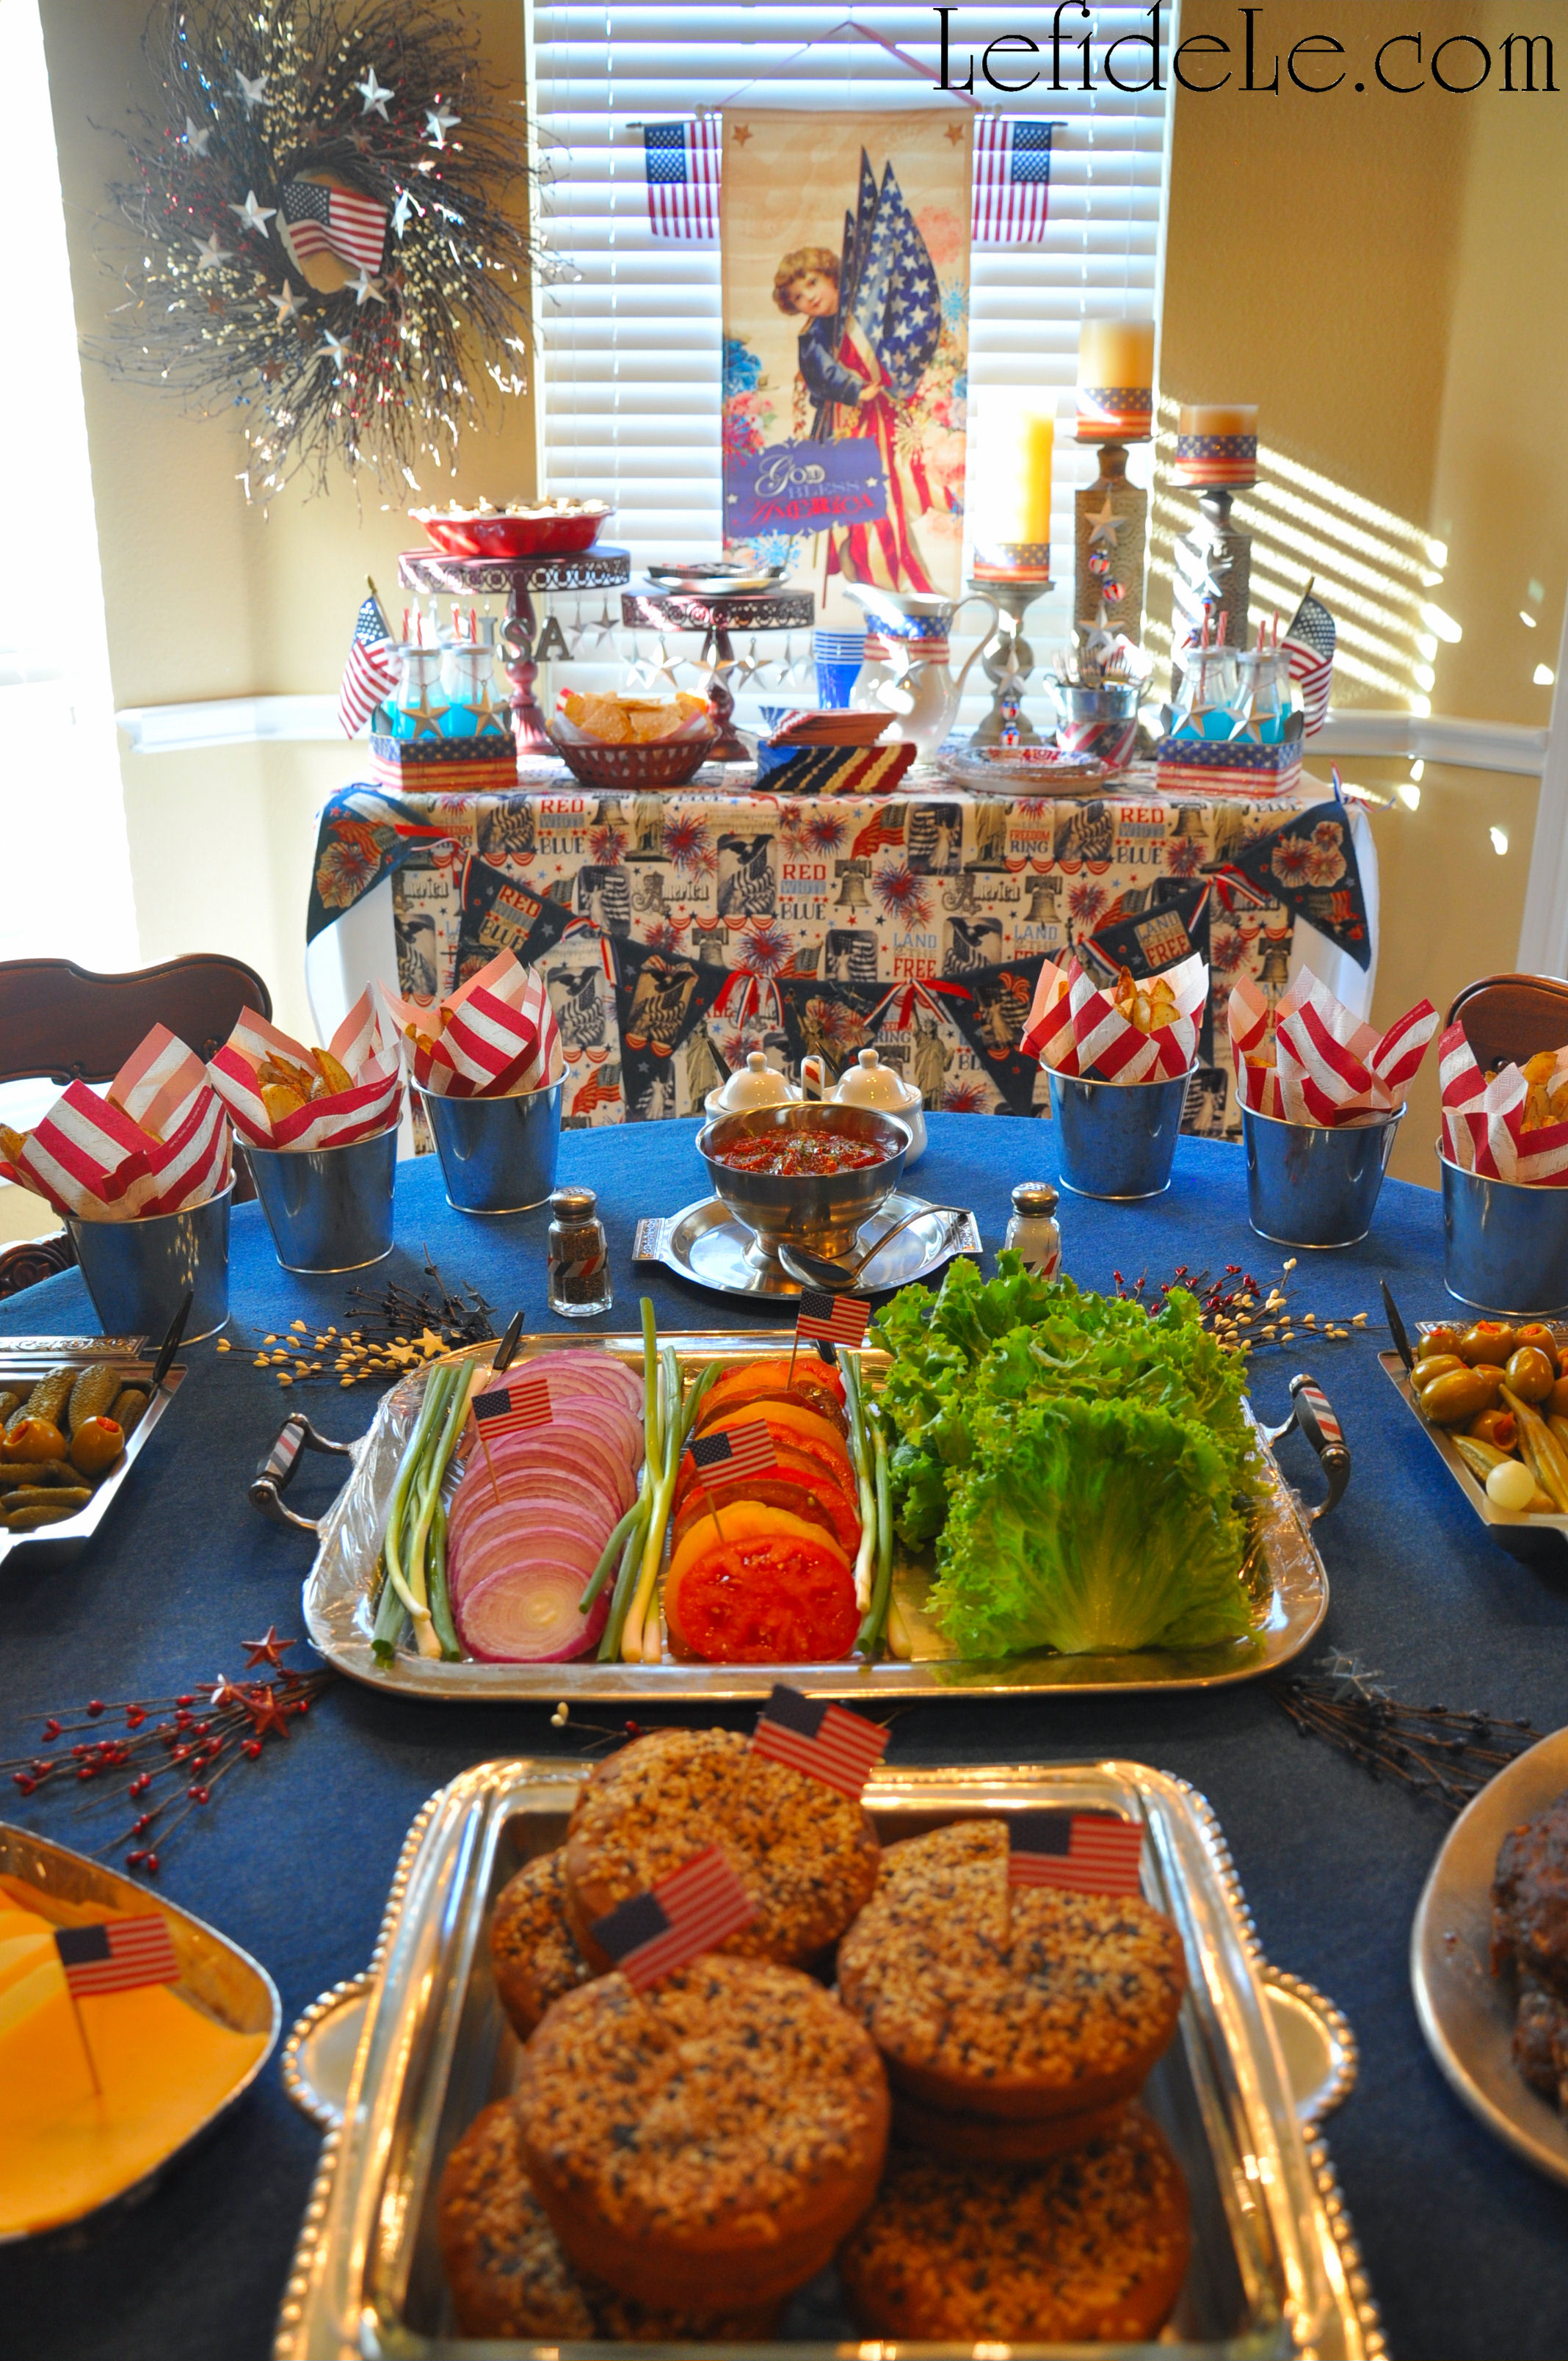
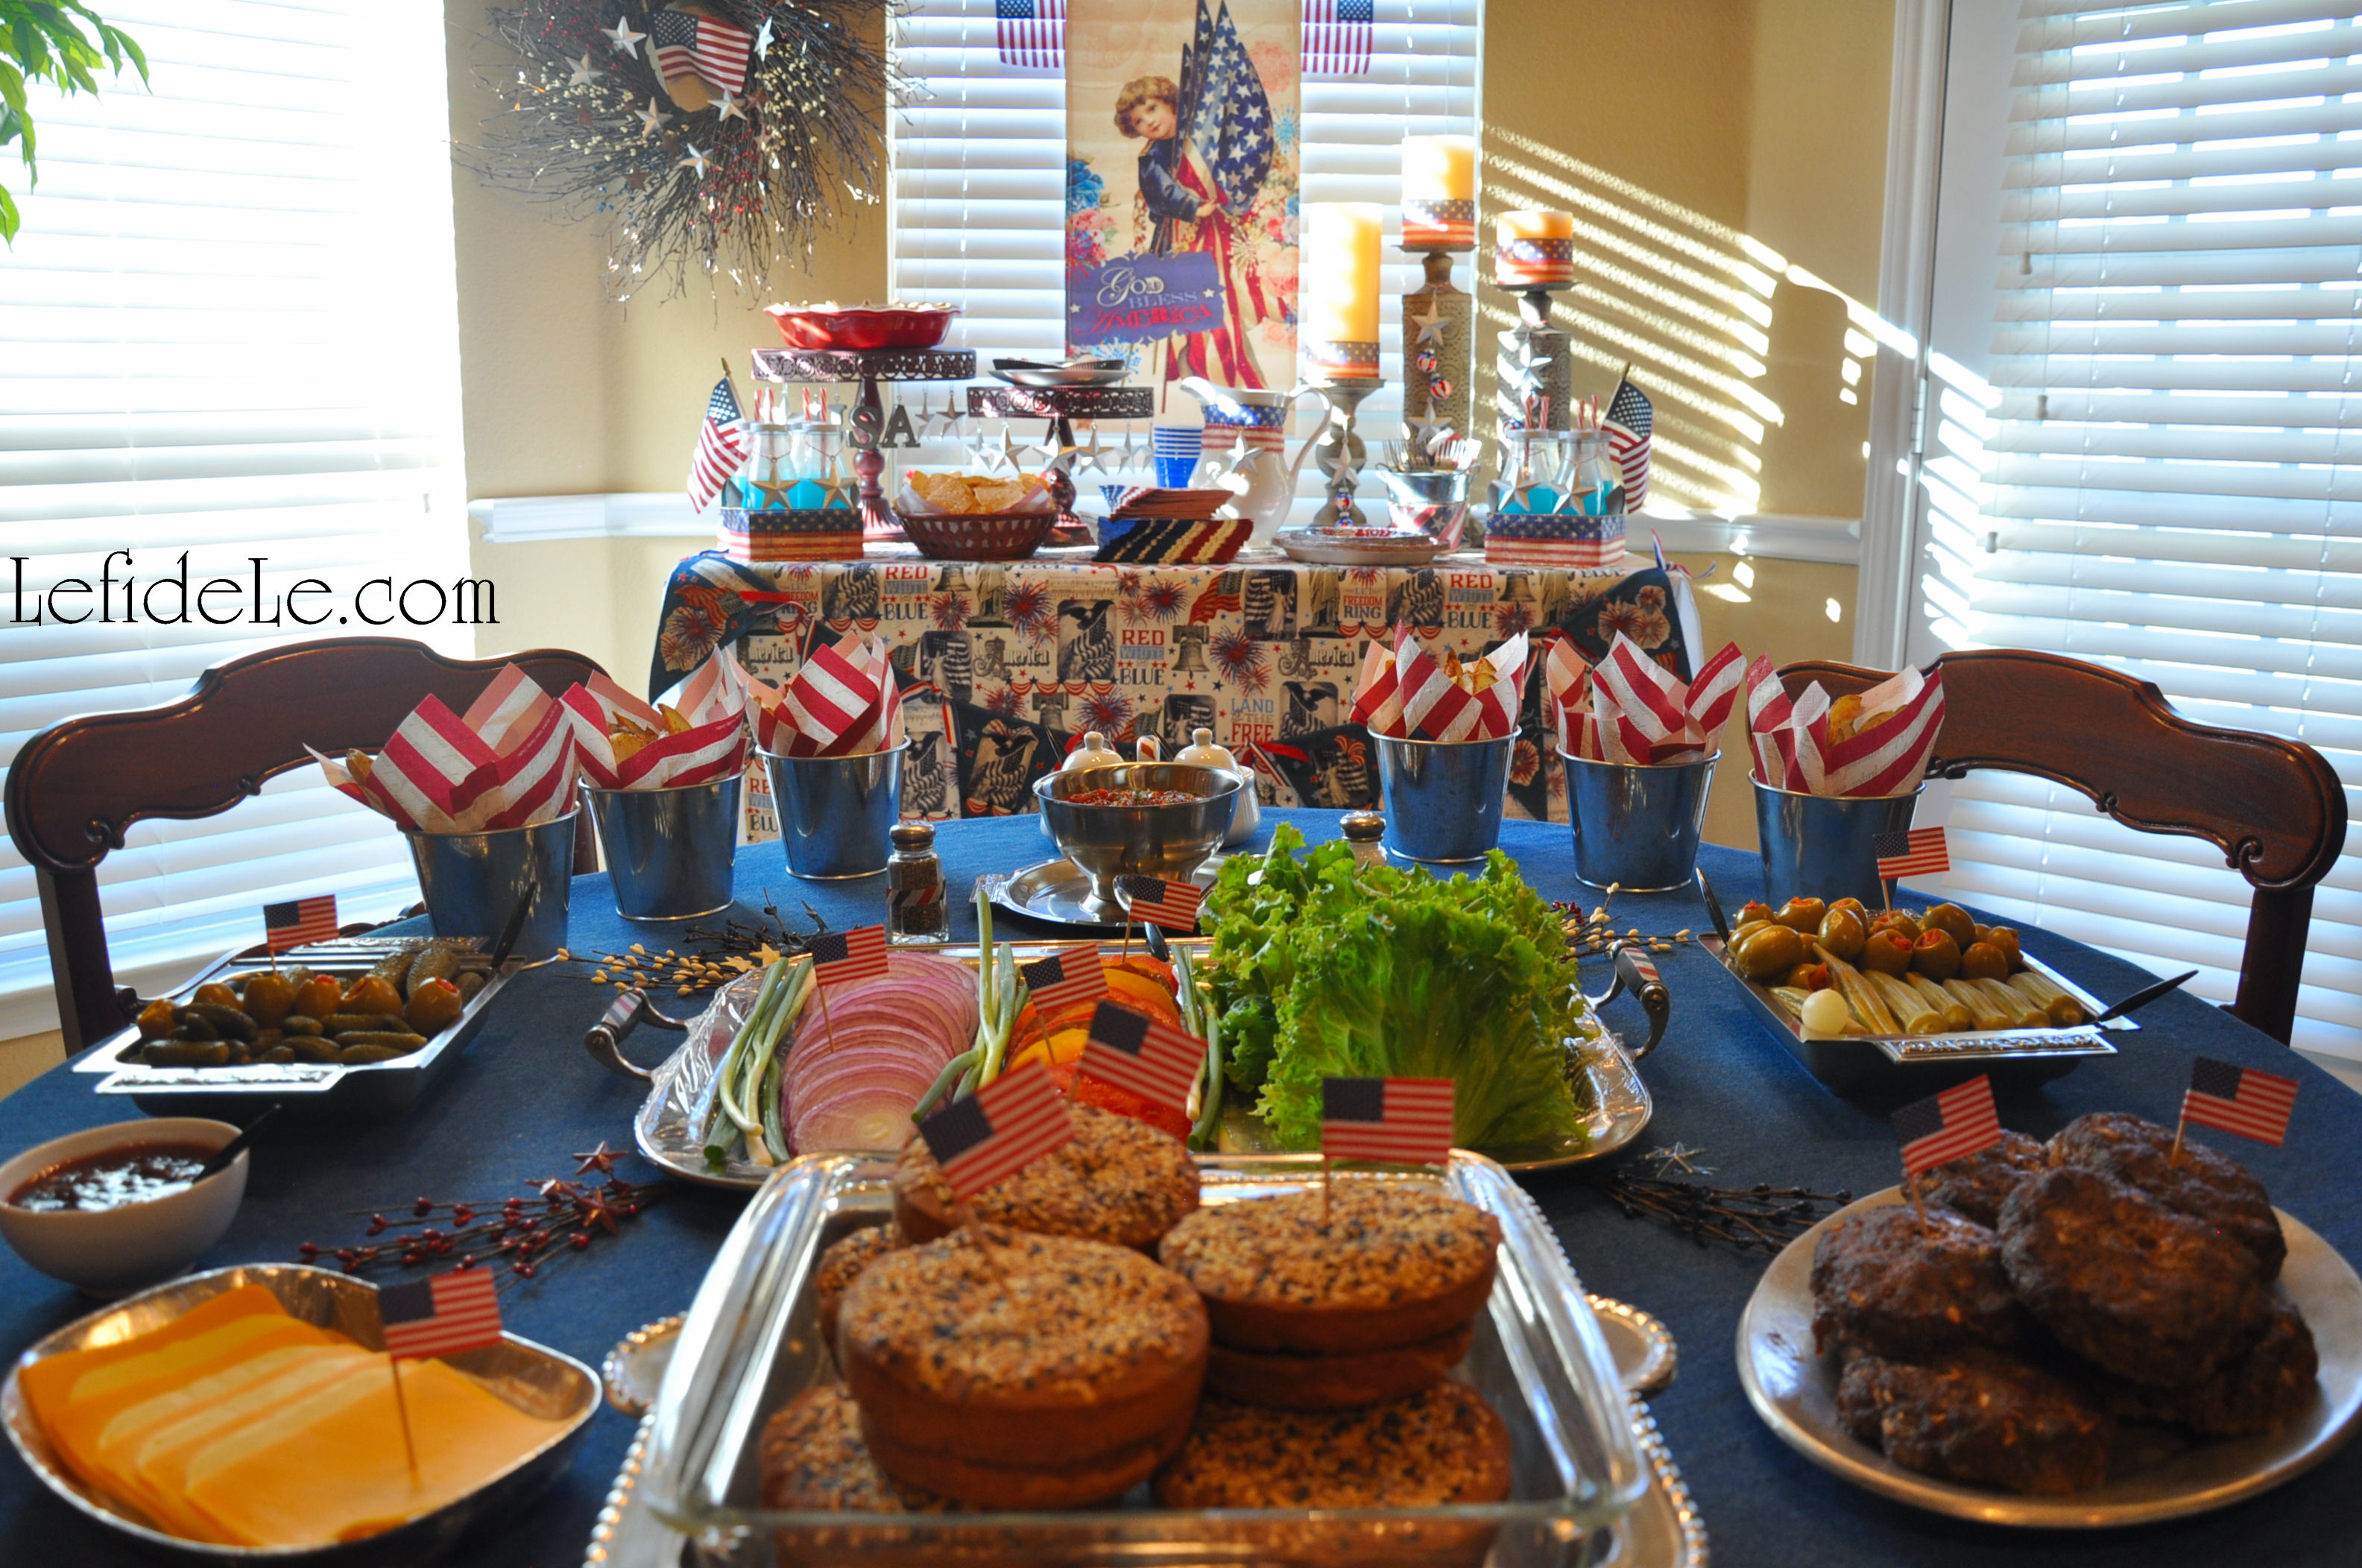
A table  in the aft zone was layered with patriotically printed fabric atop a white tablecloth… symbolizing the purchase of peace. The table’s façade was treated as a frontispiece with a star-spangled banner collage featuring iconic imagery in the appliqués cut from the same patriotic print fabric. (Find my no-sew craft tutorial on it here.)

362Leigh

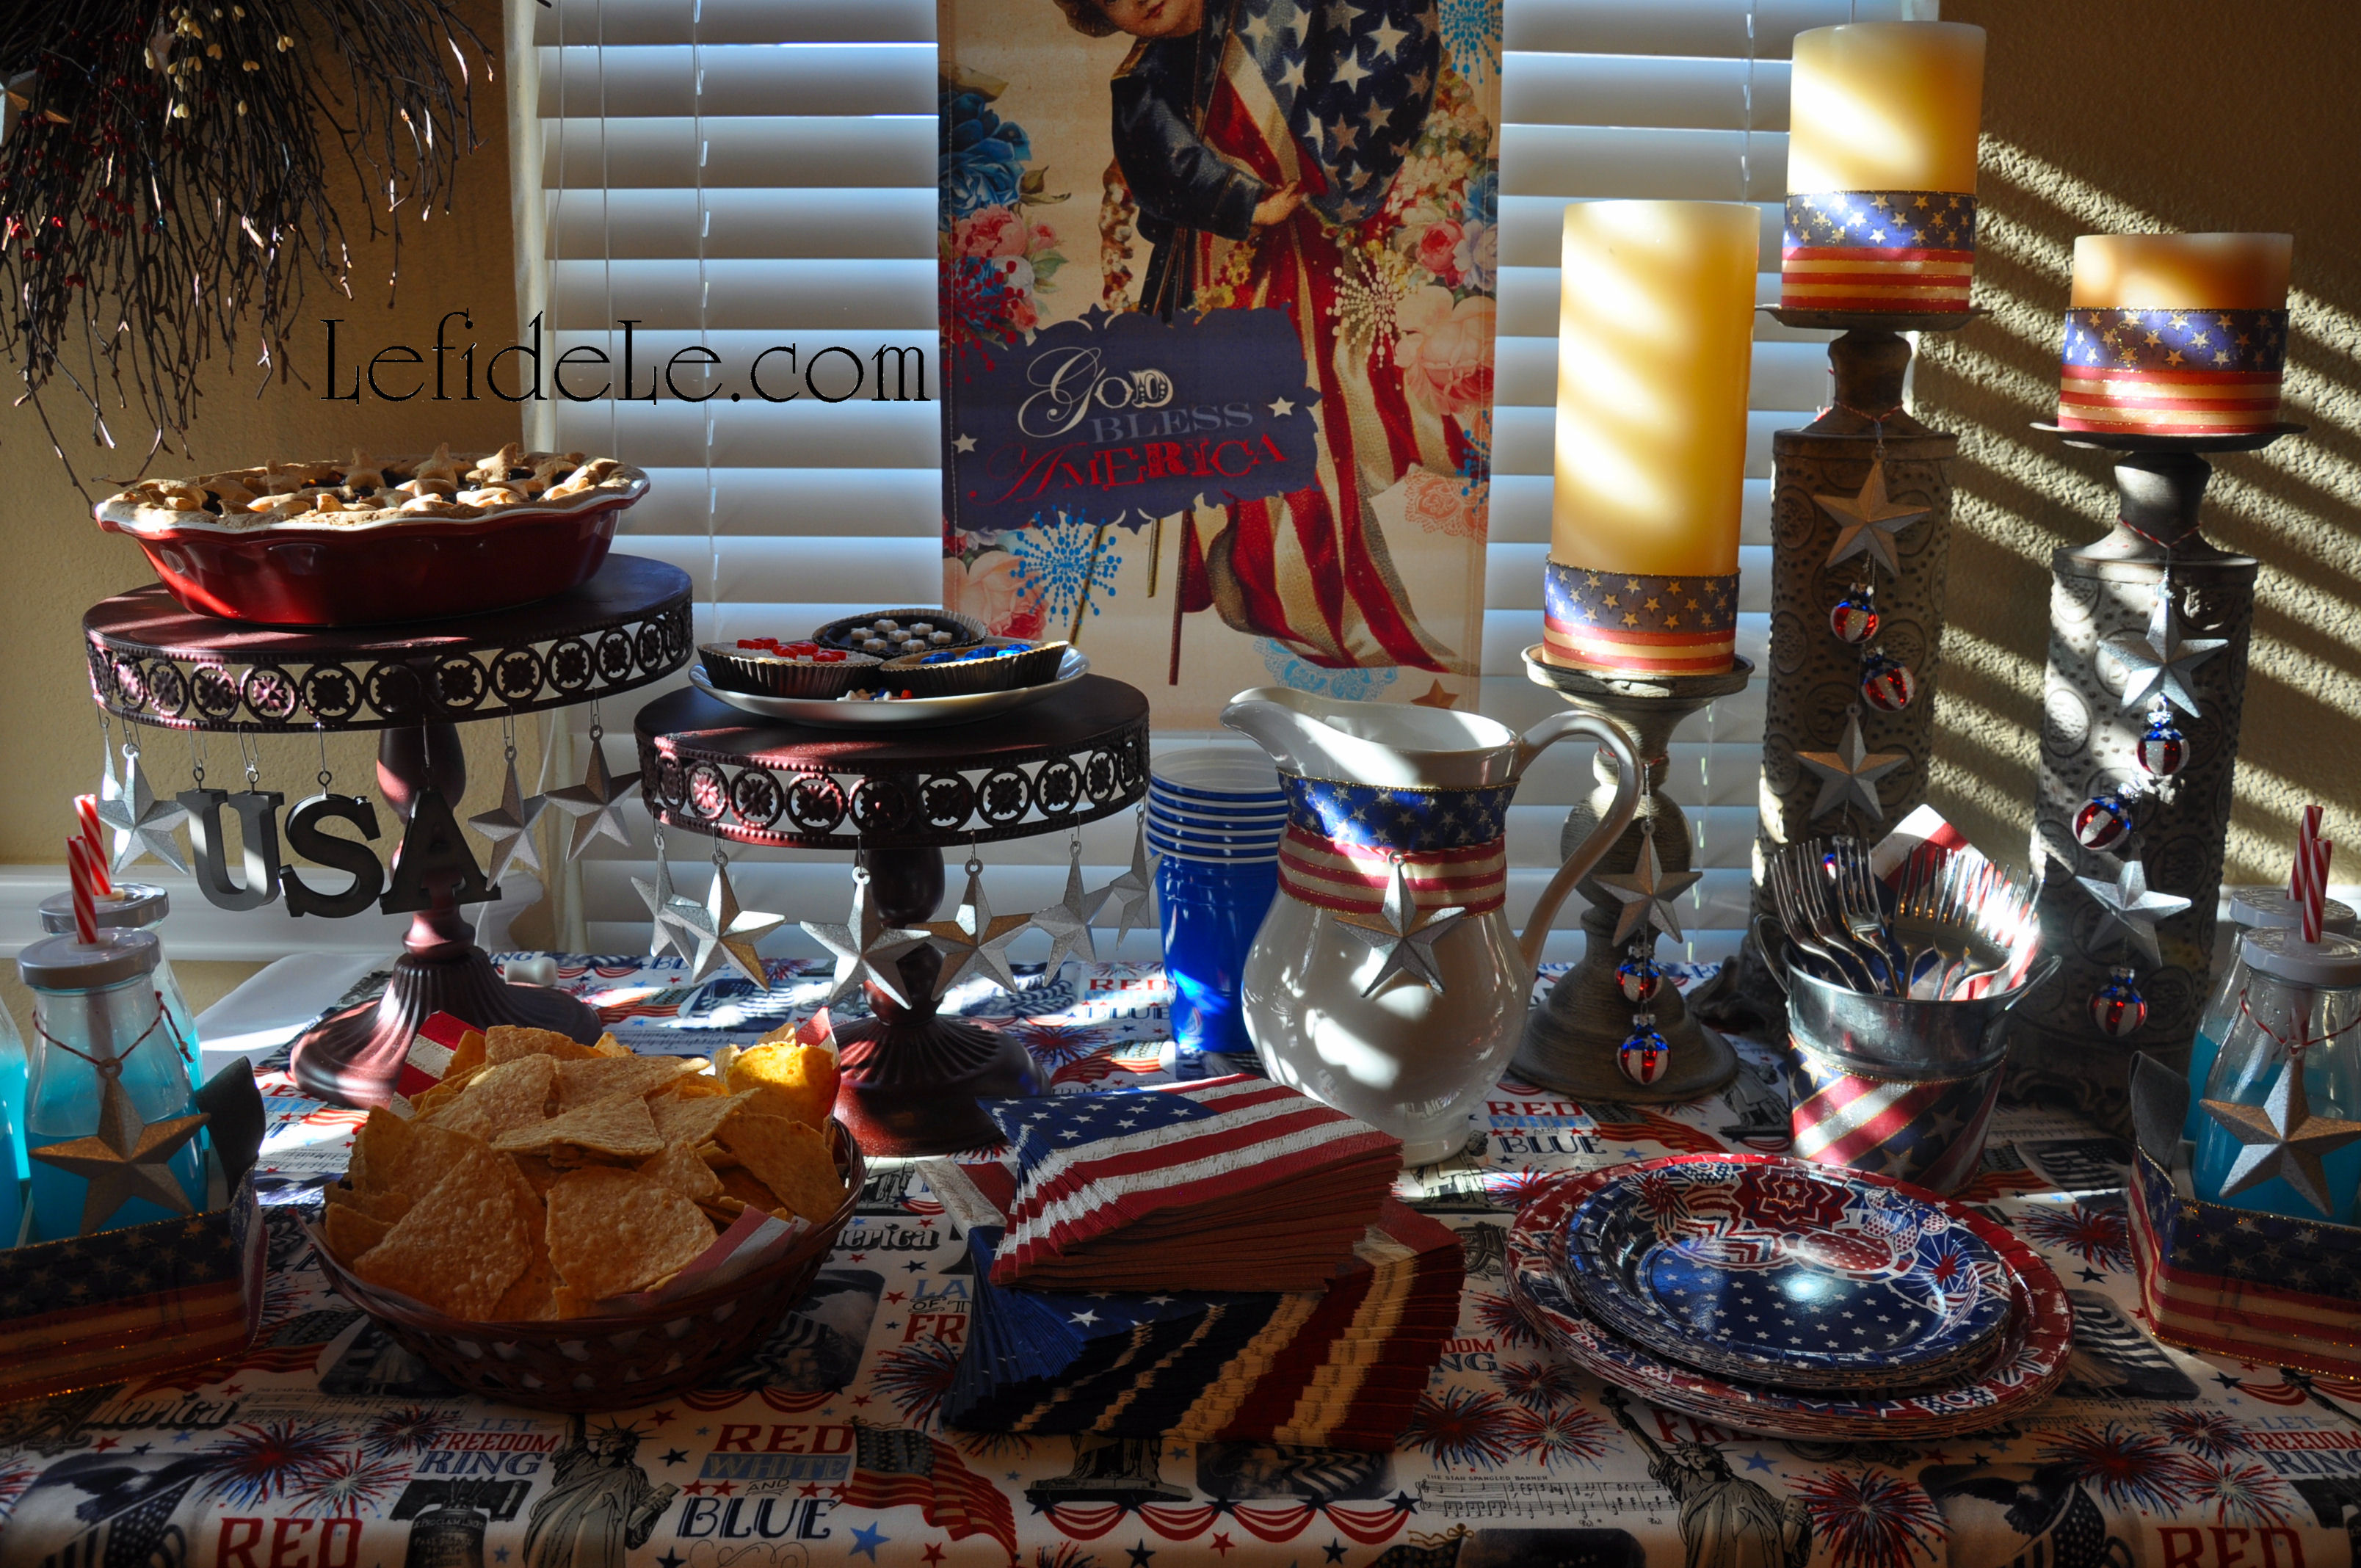
The theatre’s horizon displayed a dazzling banner of classic Americana exclaiming, “God Bless America”. An explosion of color extended to thematic paper plates, blue cups, and flag printed napkins. A plain white vintage water pitcher was adorned with the sparkle of a steel star and flag ribbon.

014Leigh

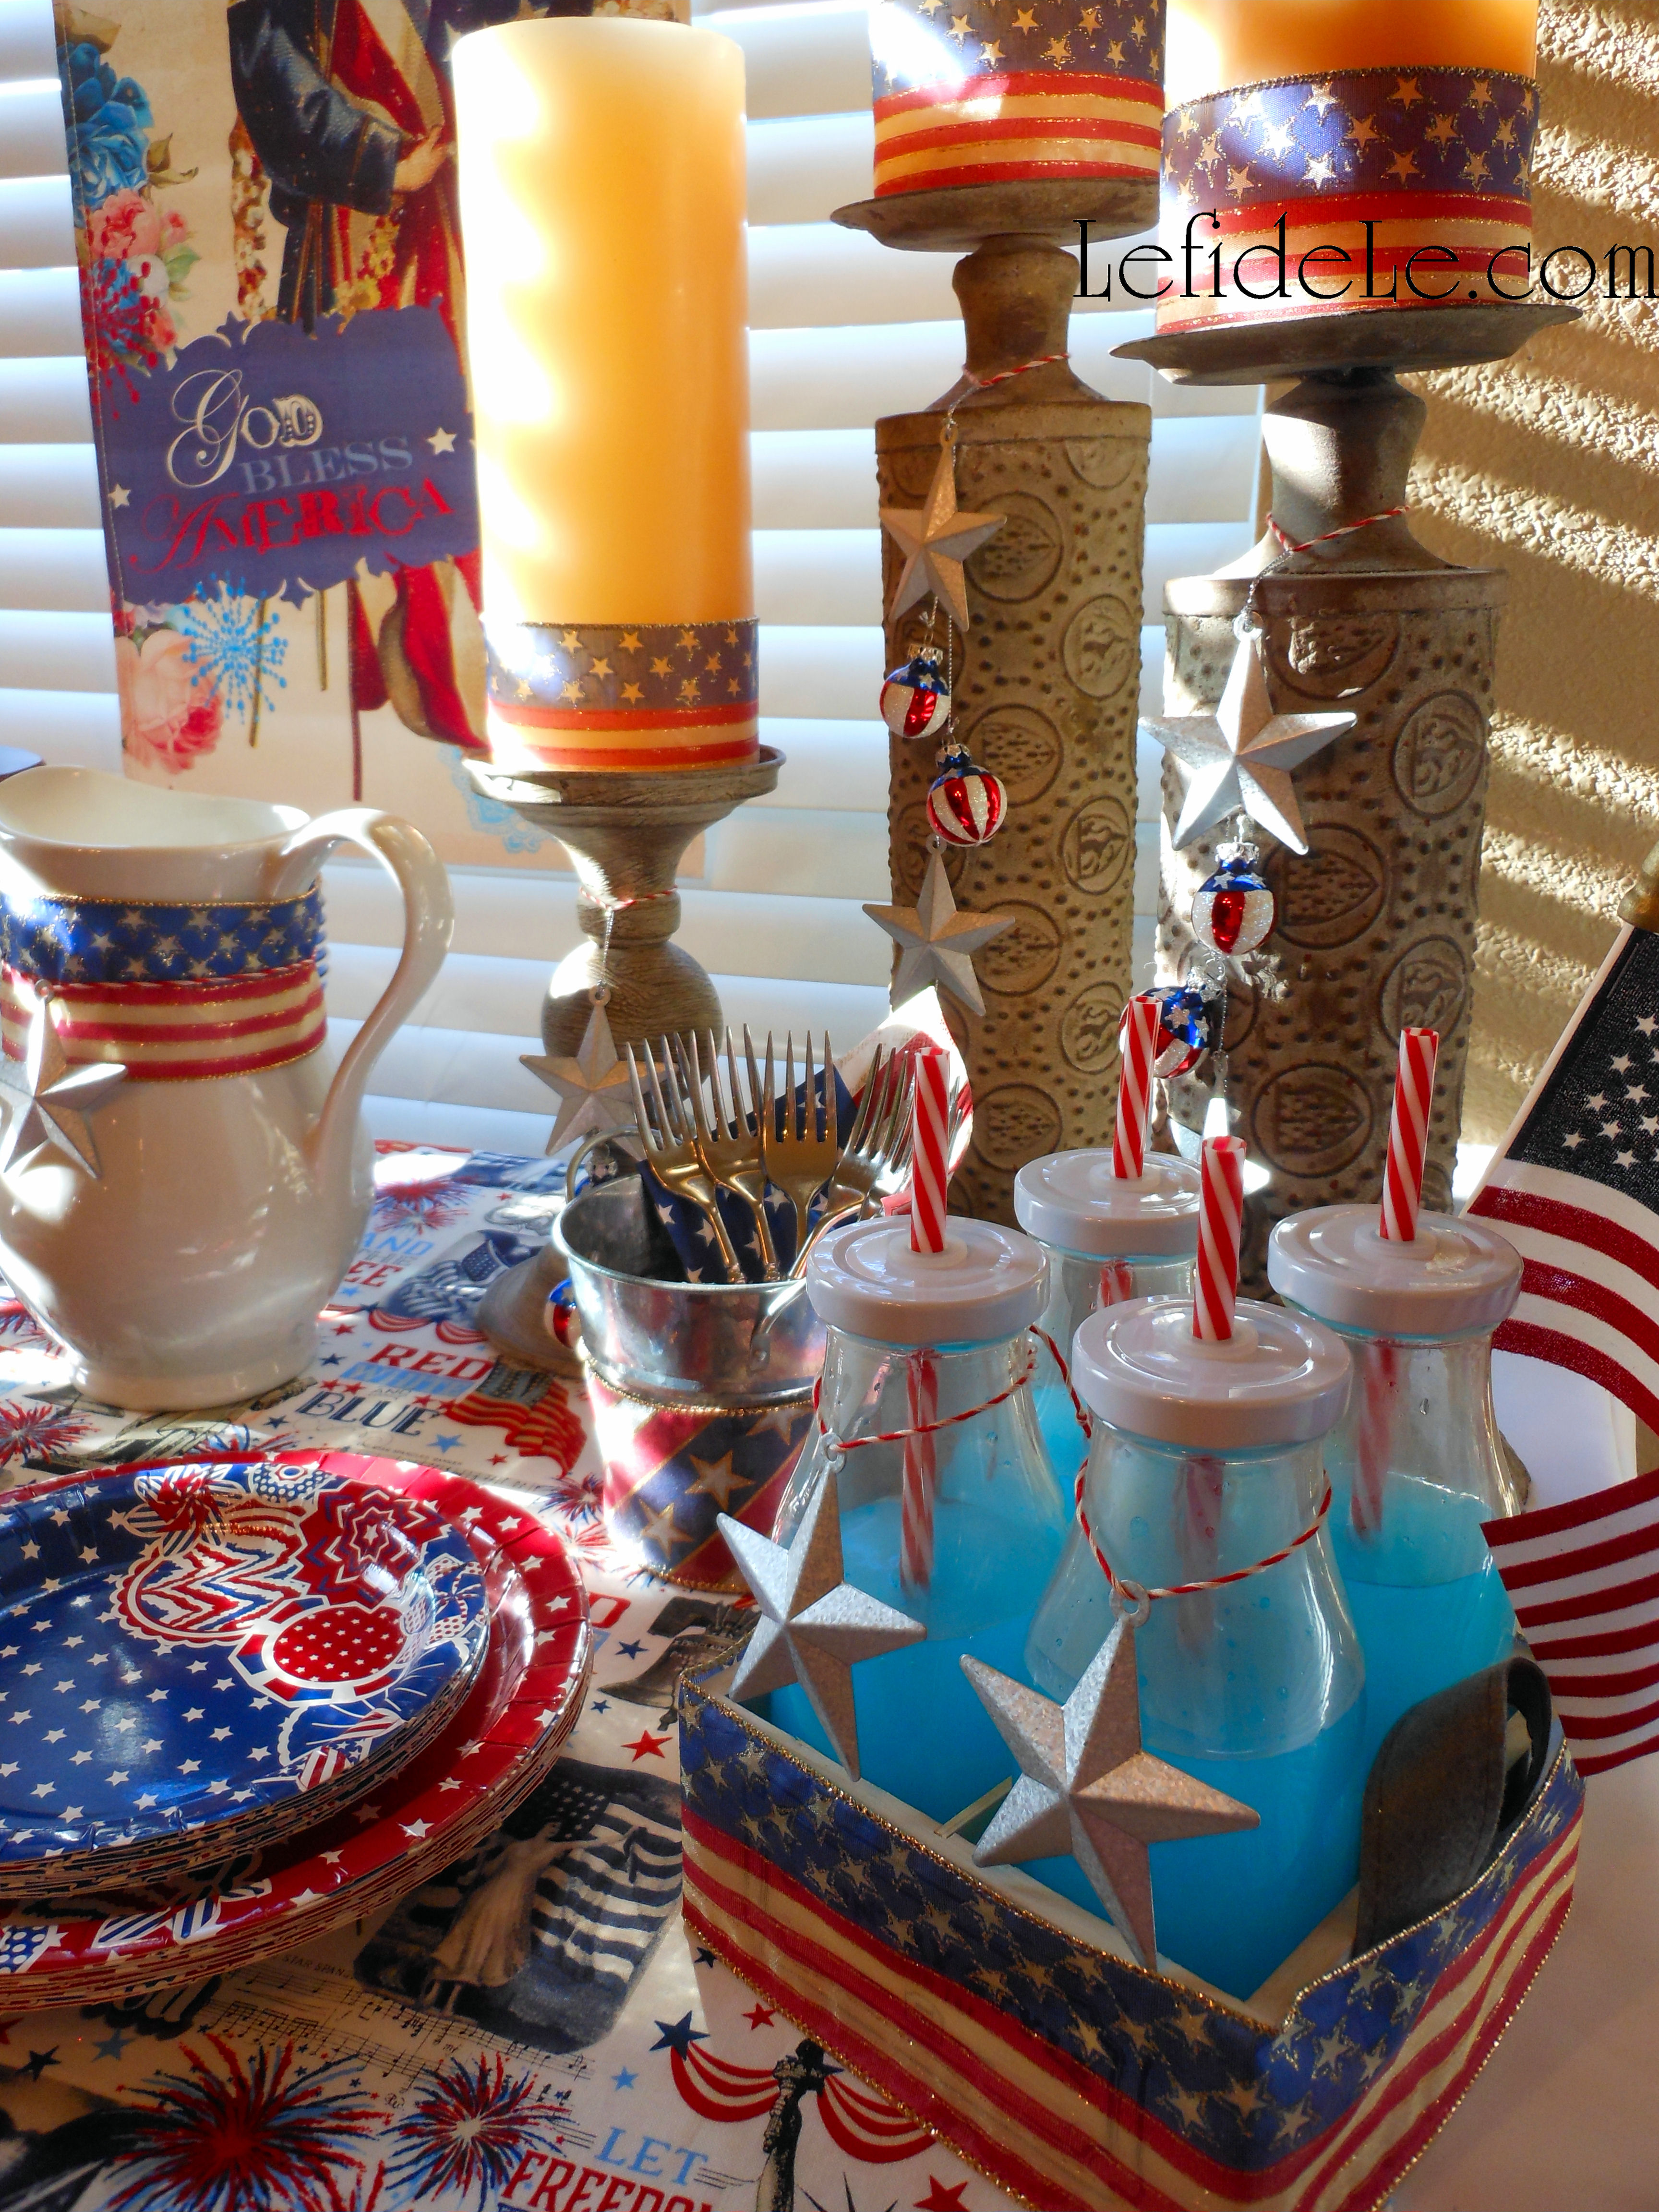
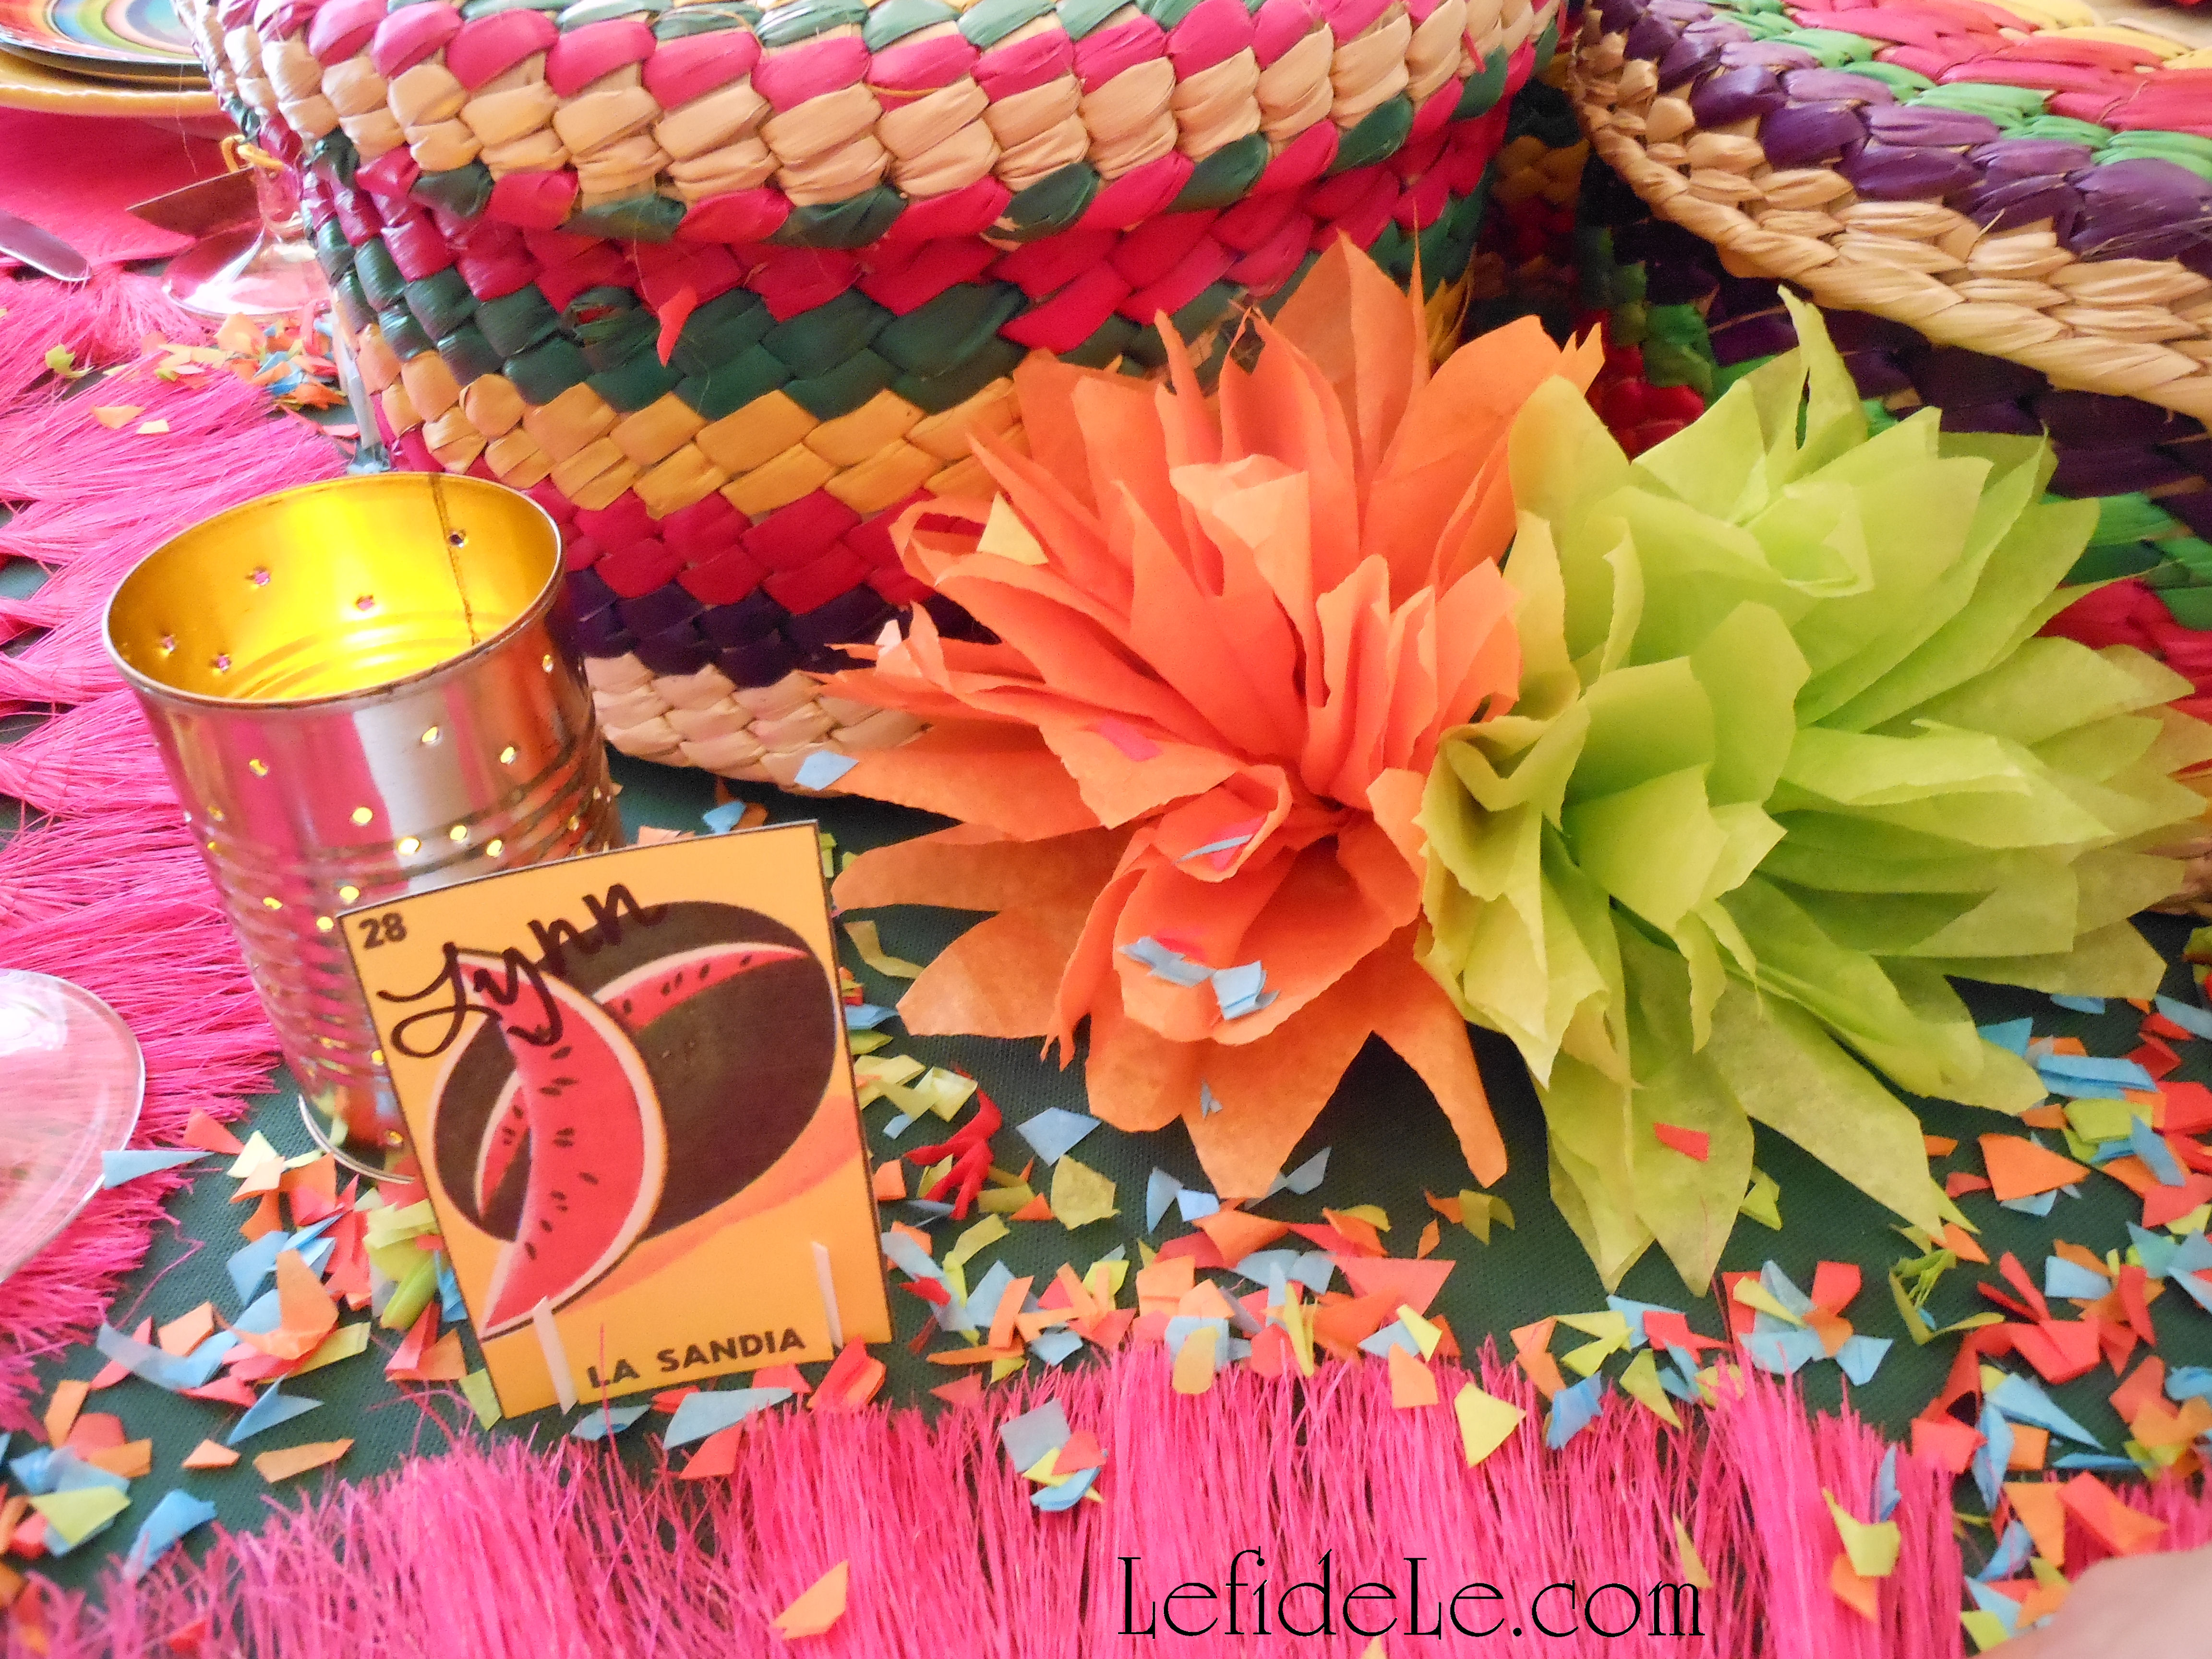
Decorating rebellion manifested itself with a centerpiece, placed off-center, of beribboned candles atop vintage ceiling tile candlesticks… all to represent Lady Liberty’s torch. Hanging from them were steel stars and flag painted Christmas ball ornaments… representing bombs bursting in air and the flag that was still there. A galvanized pail held utensils set for dessert.

021Leigh

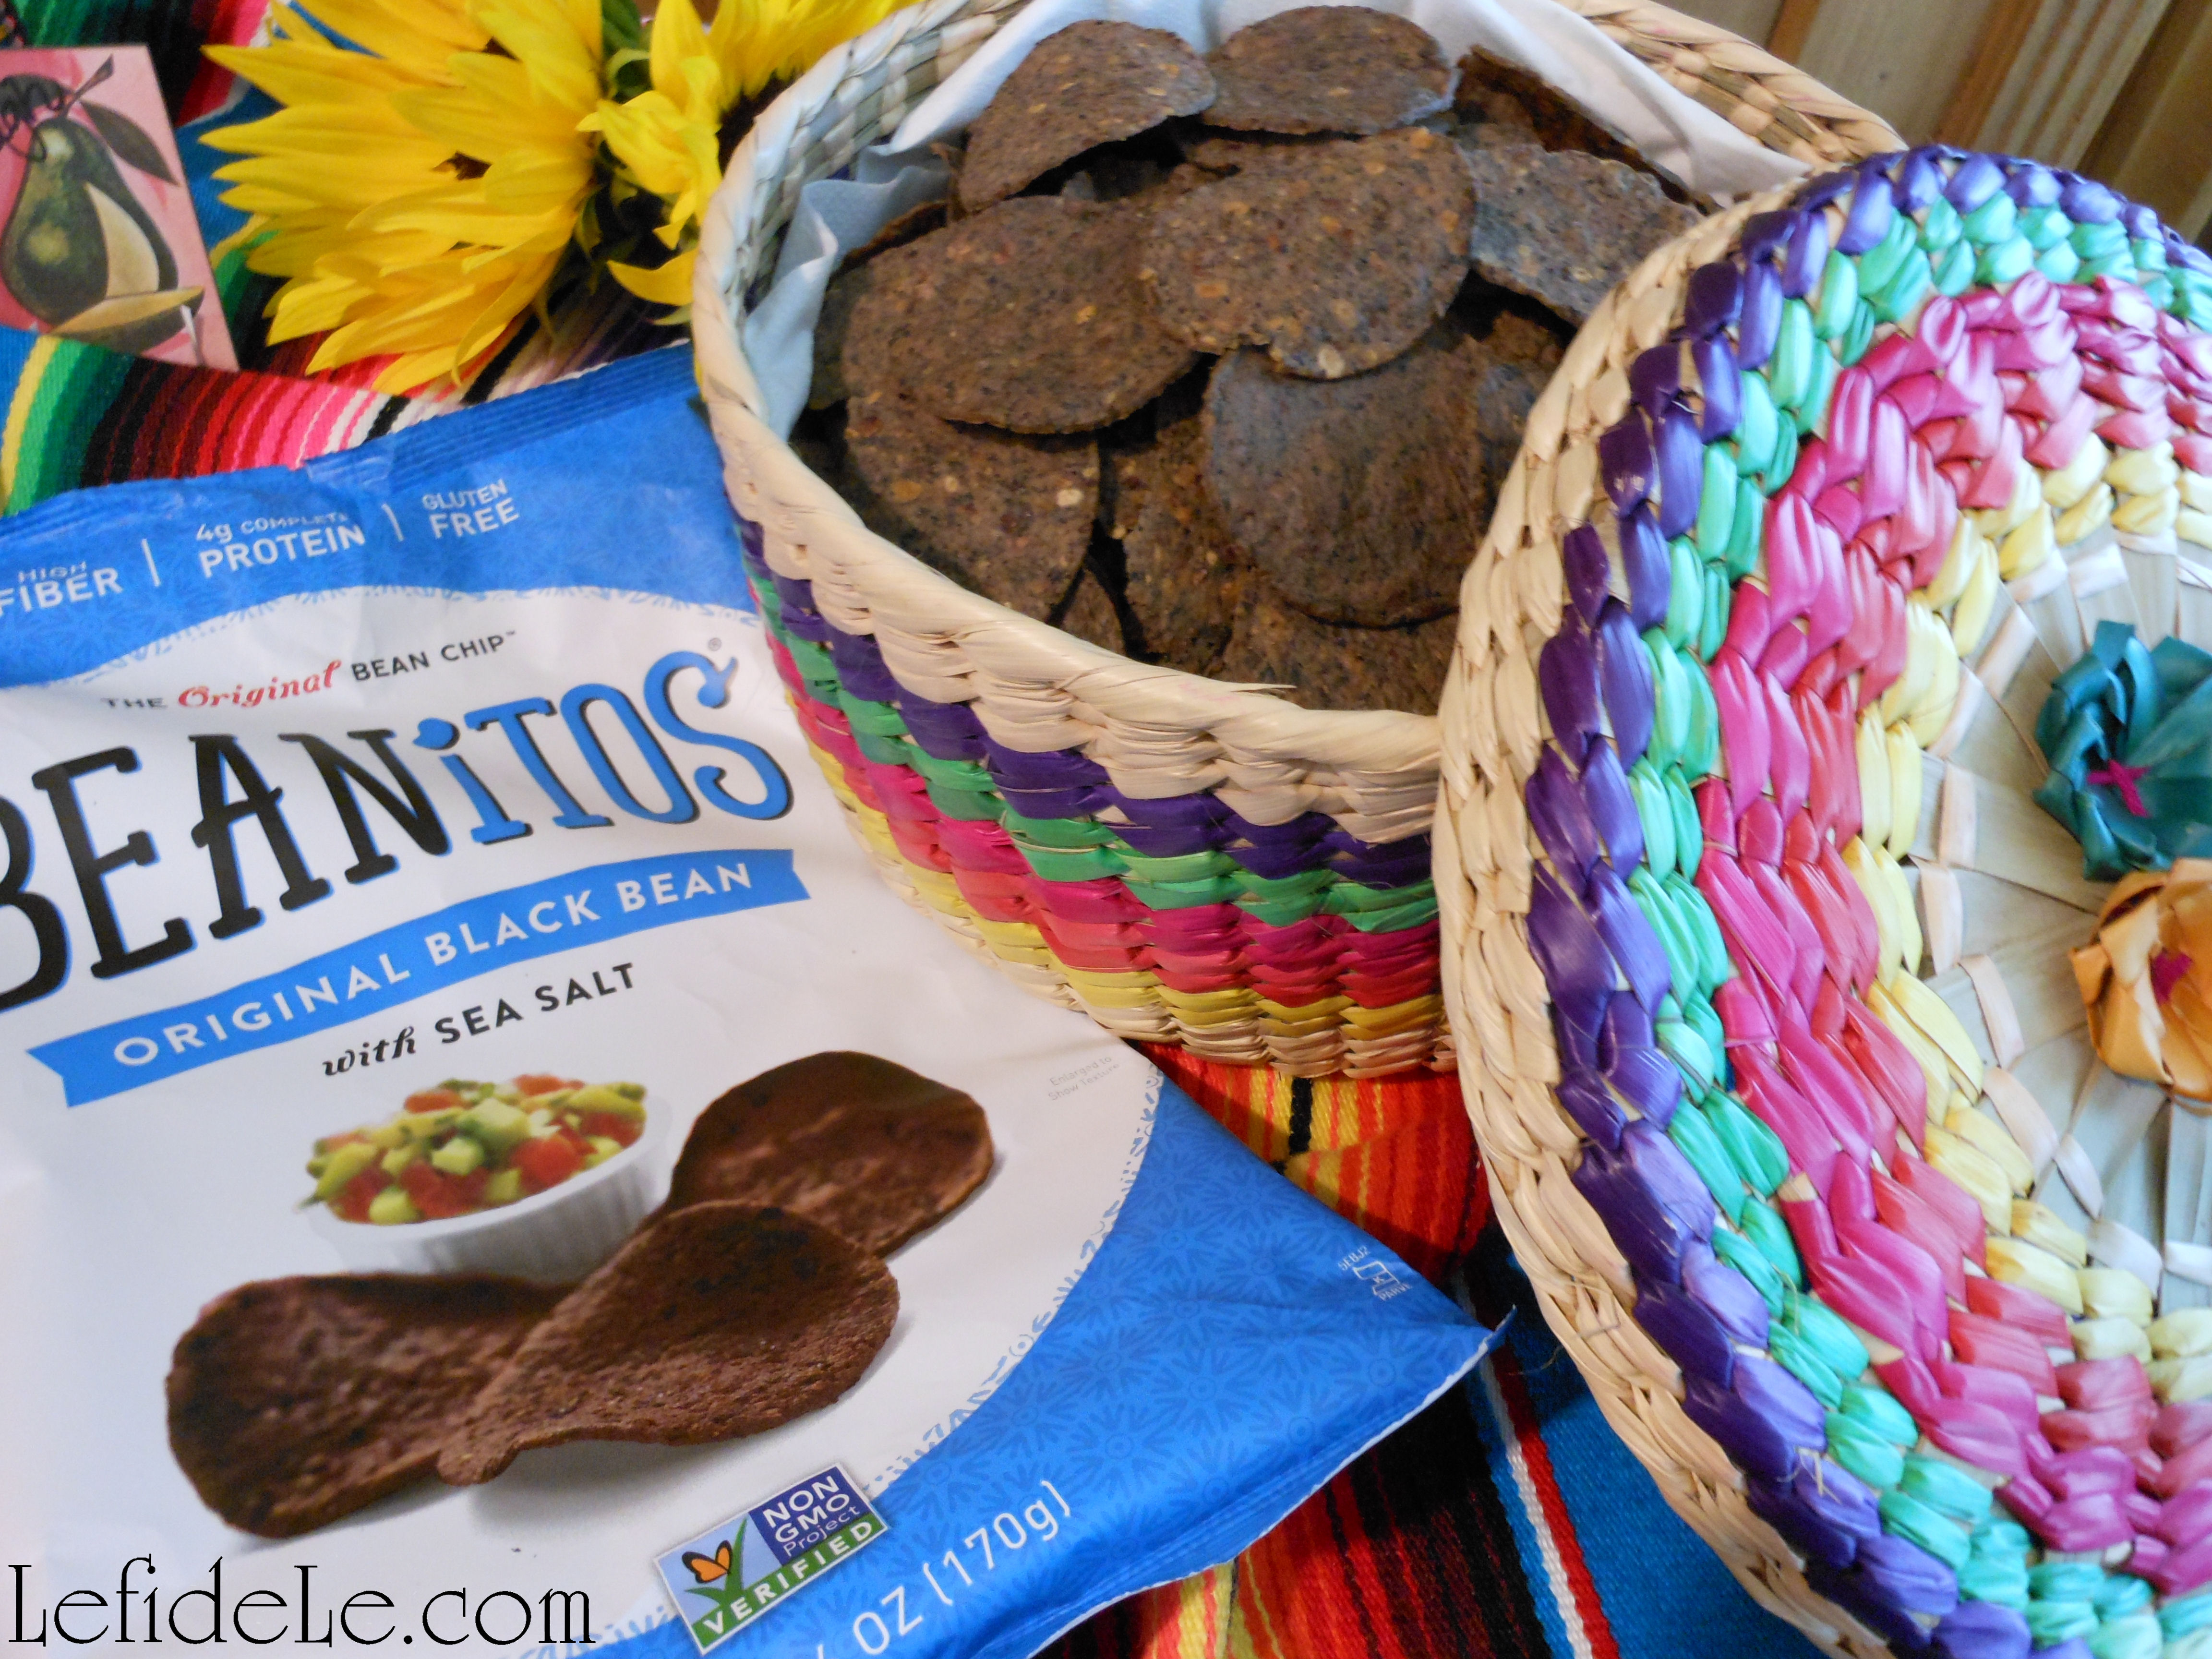
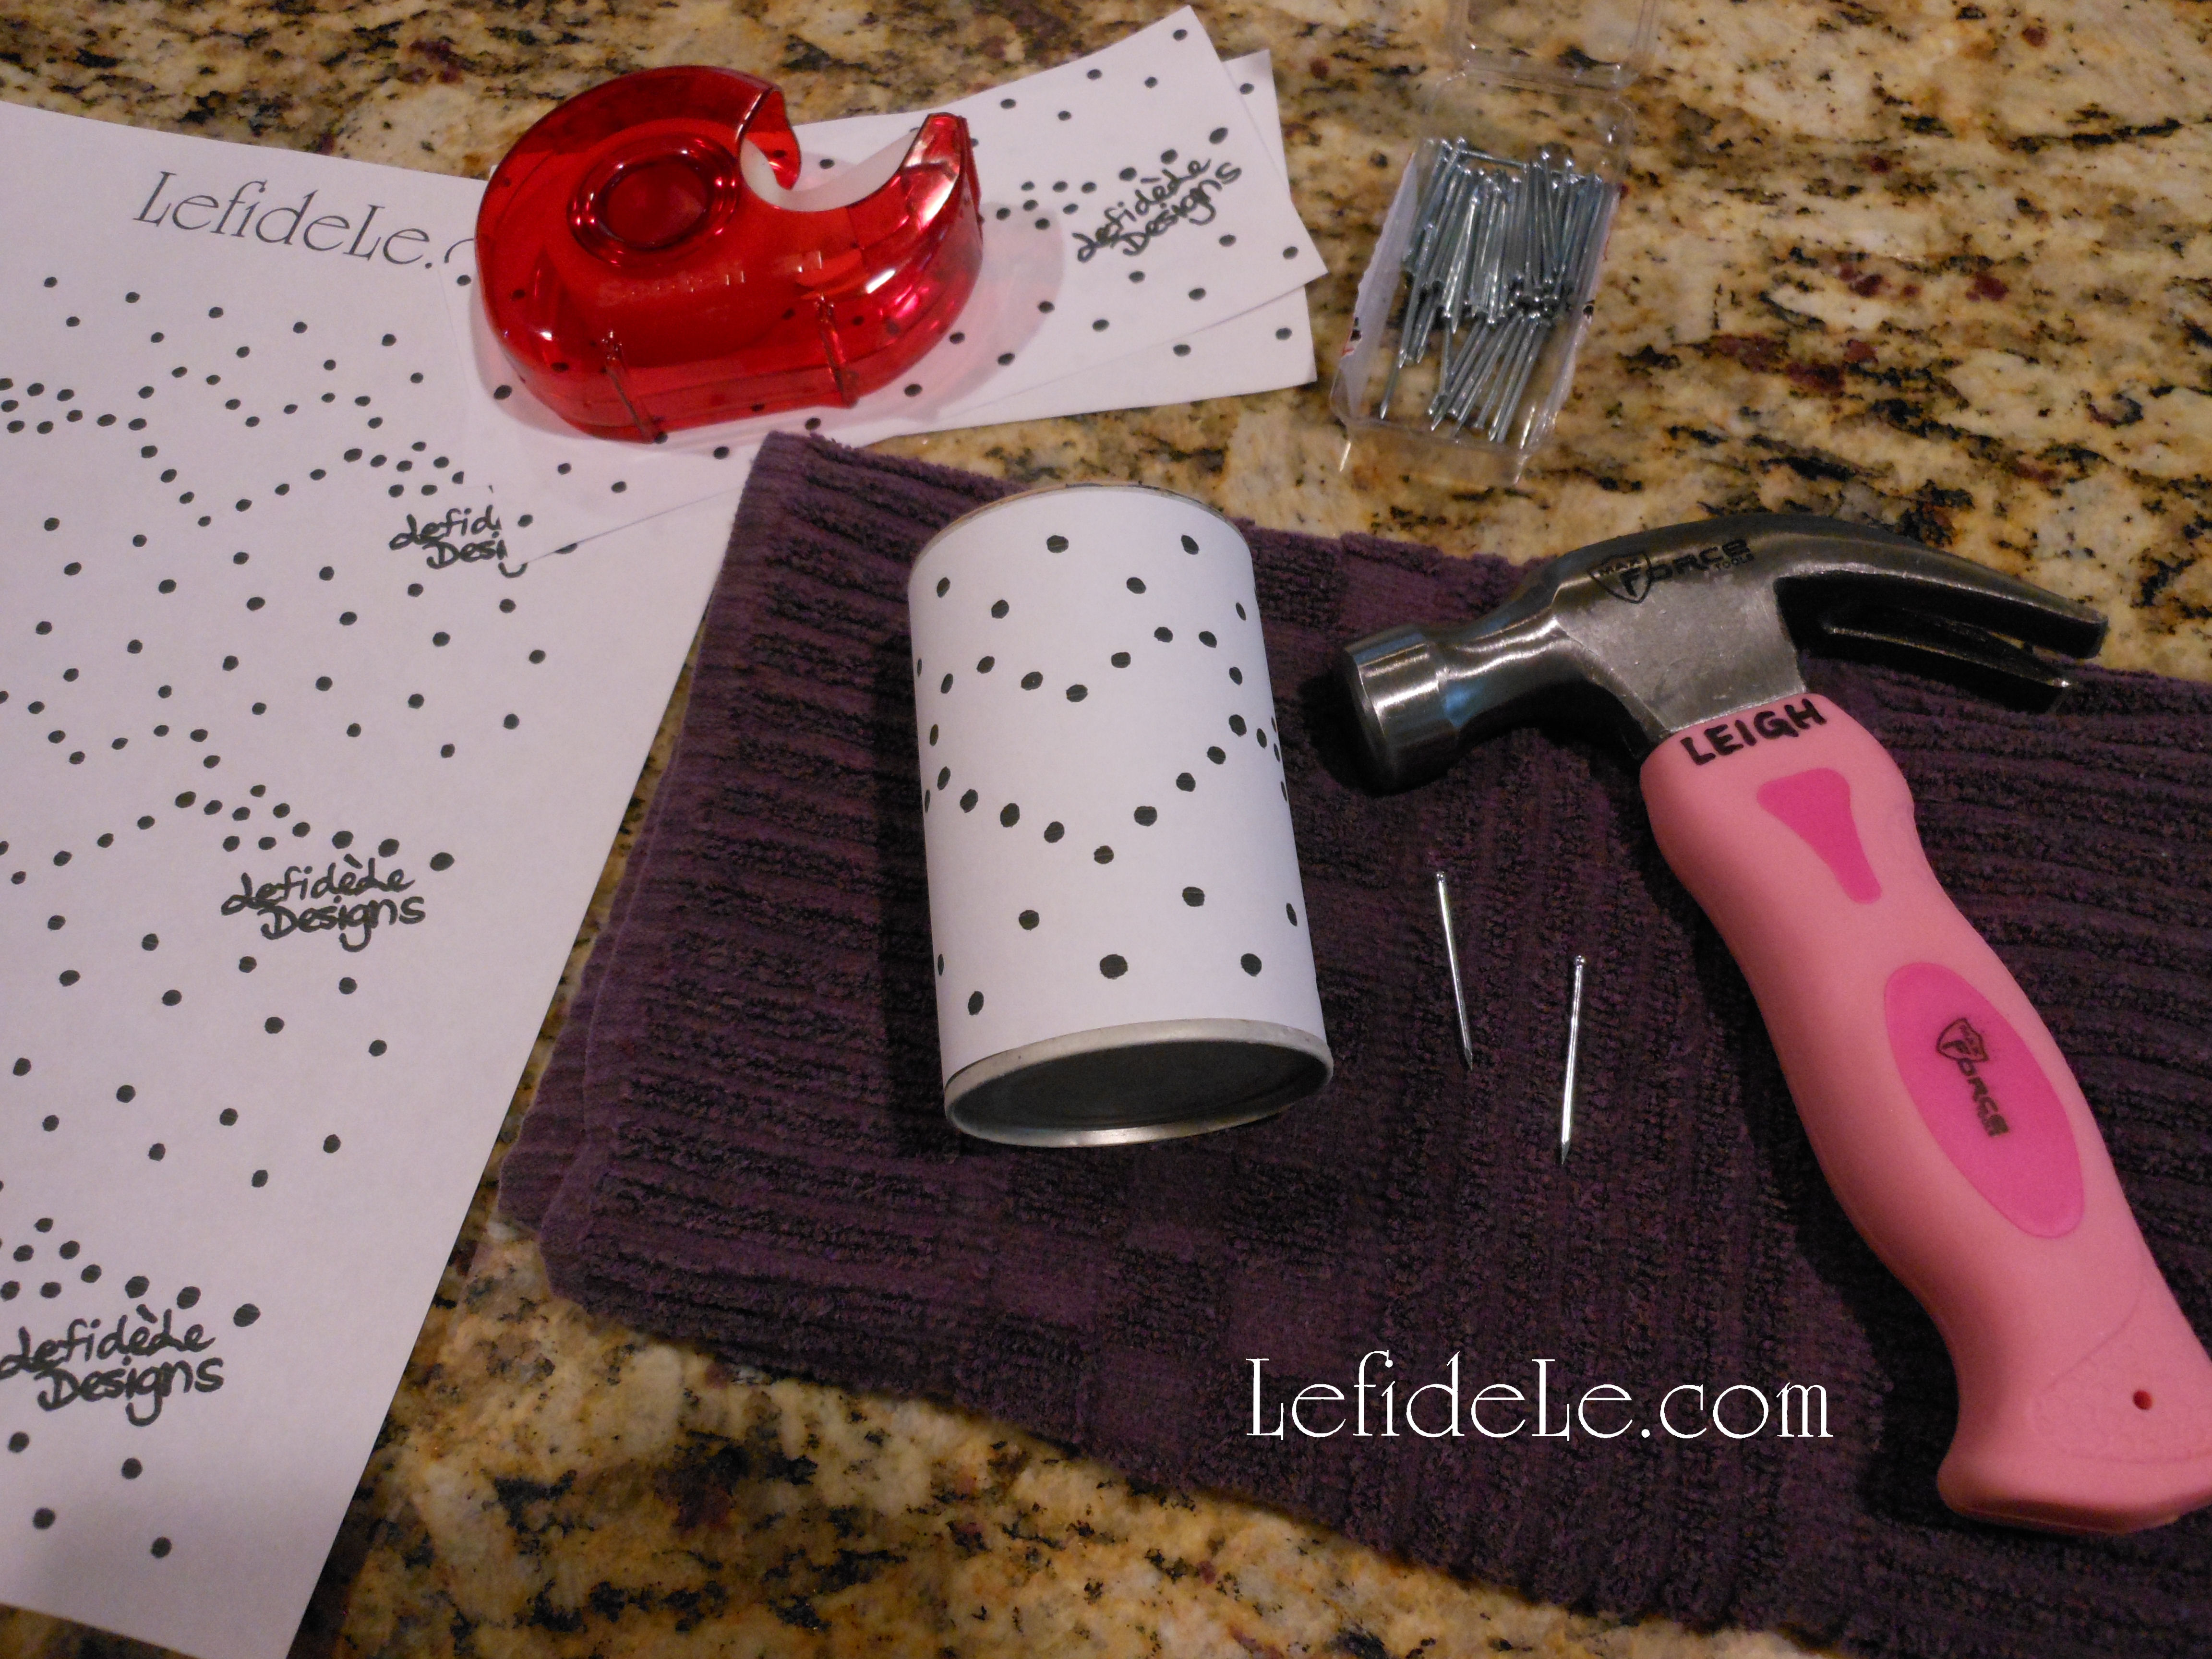
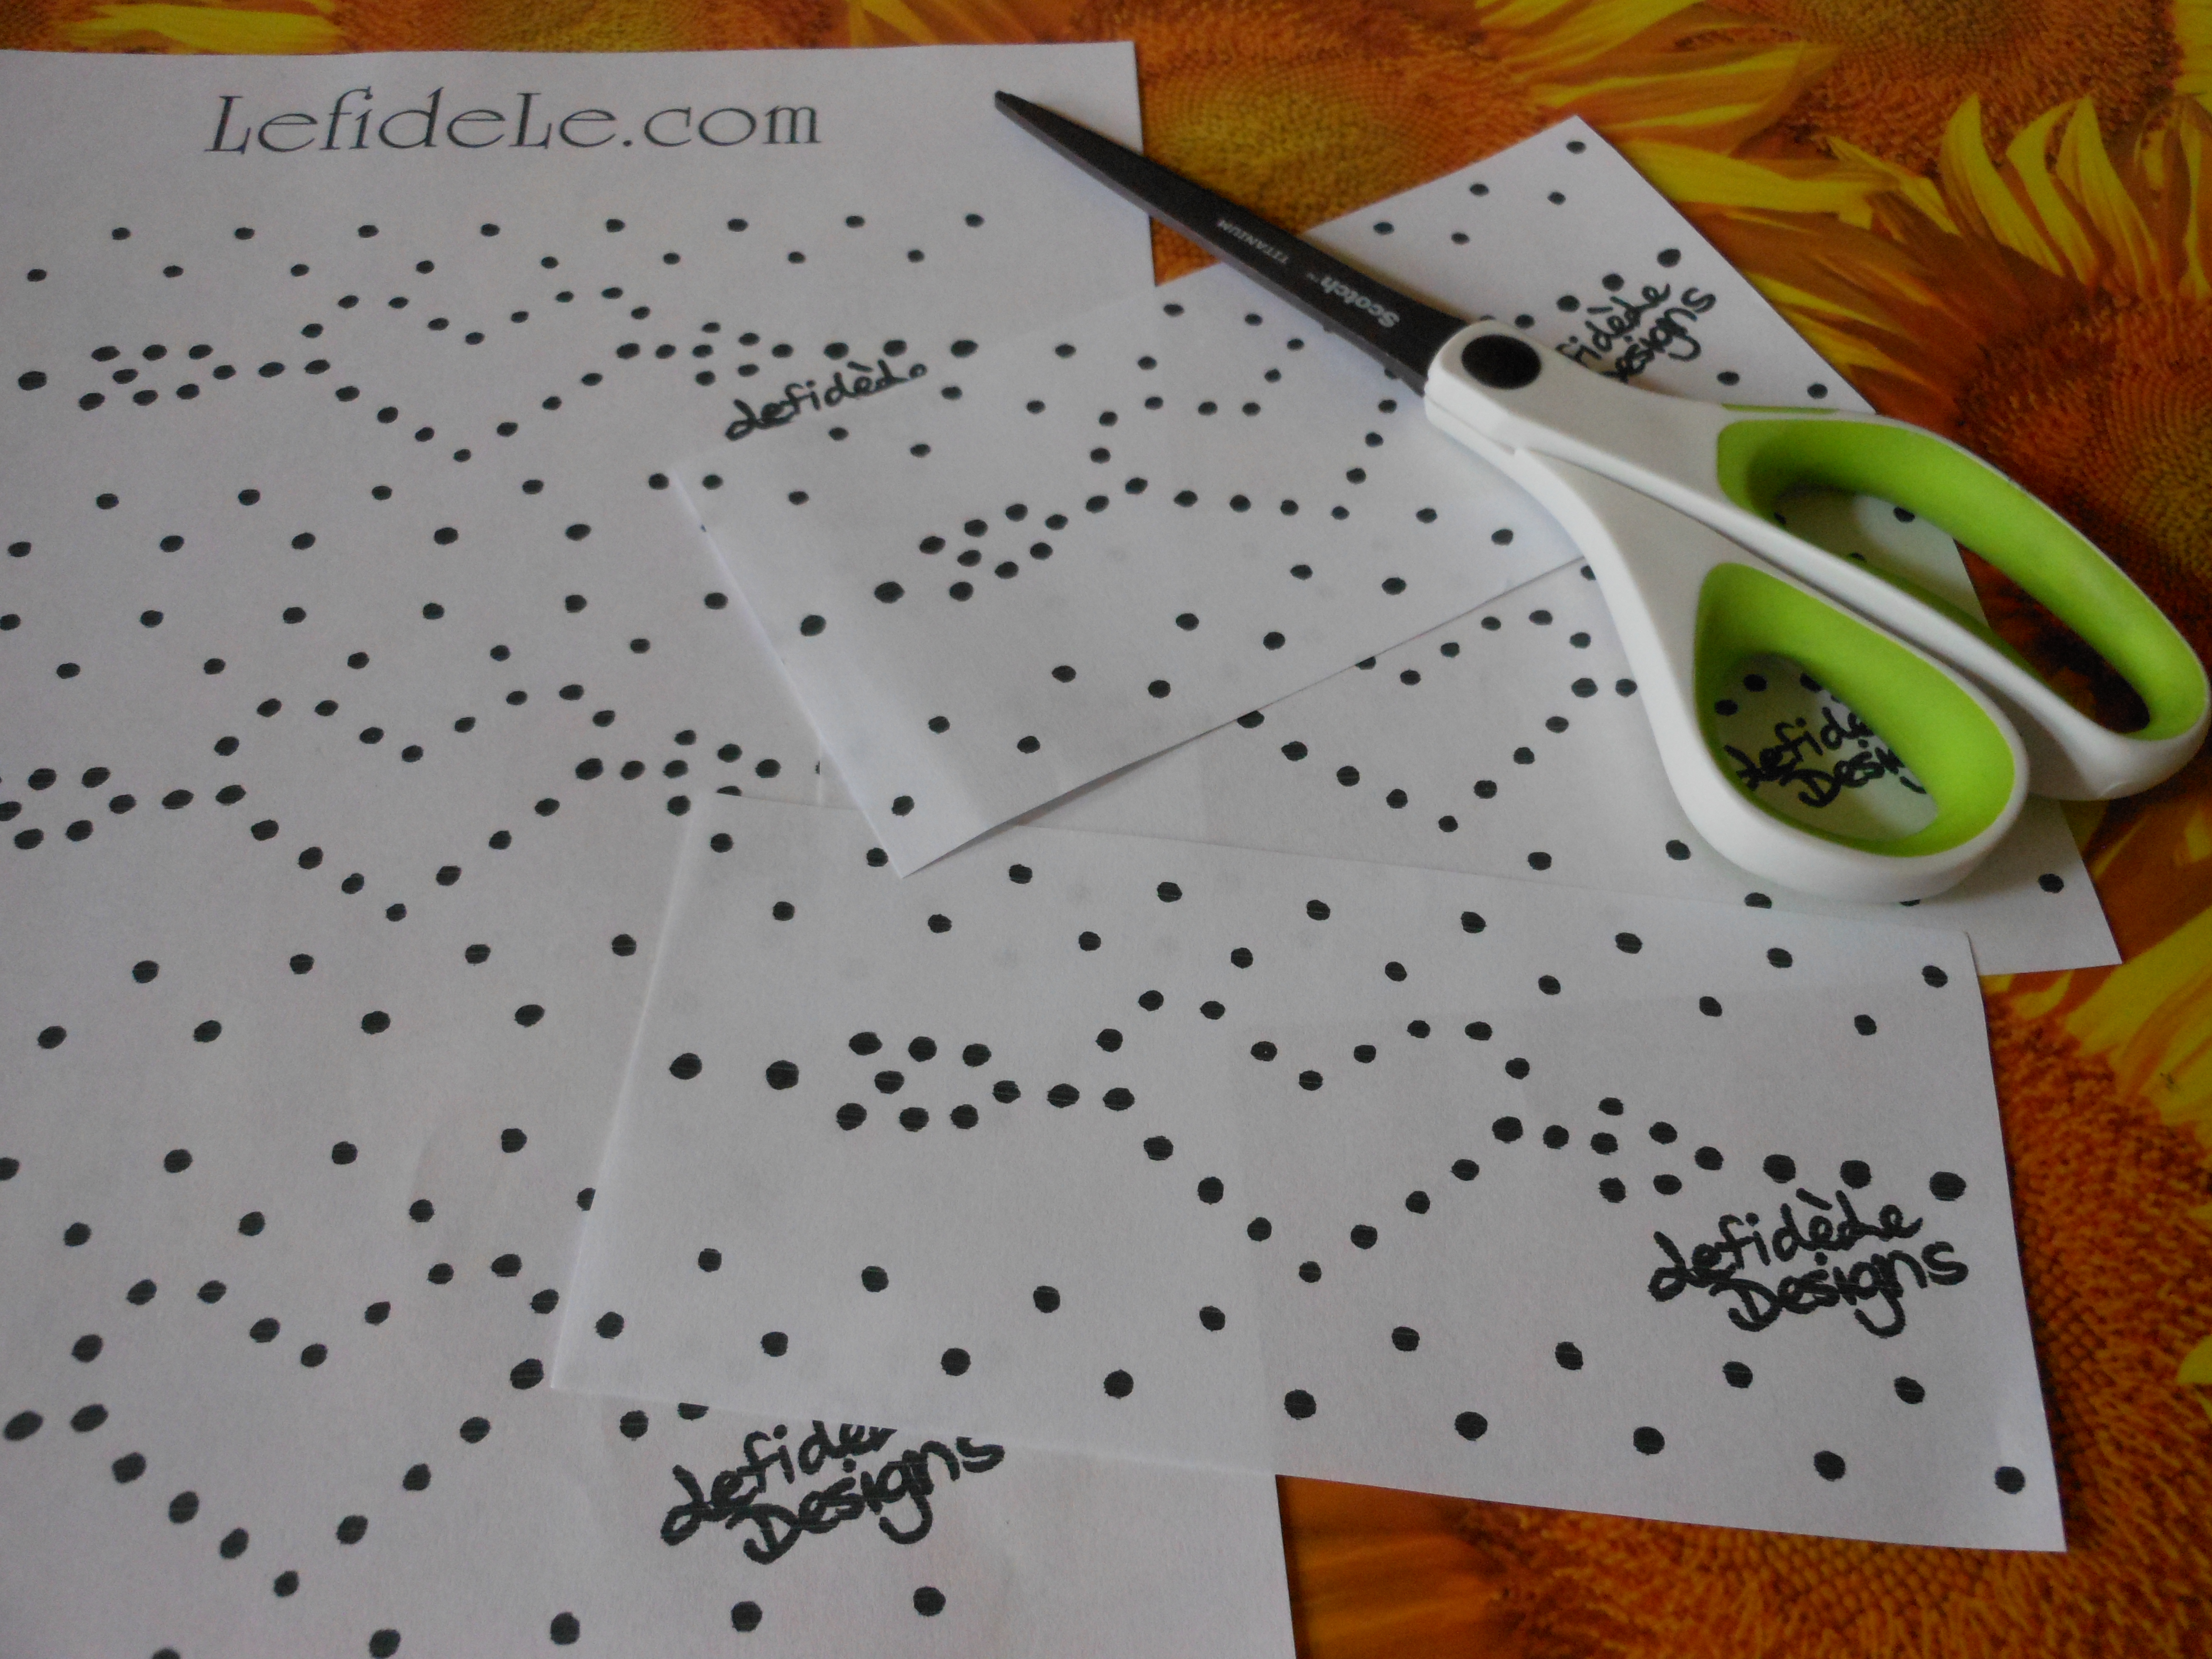
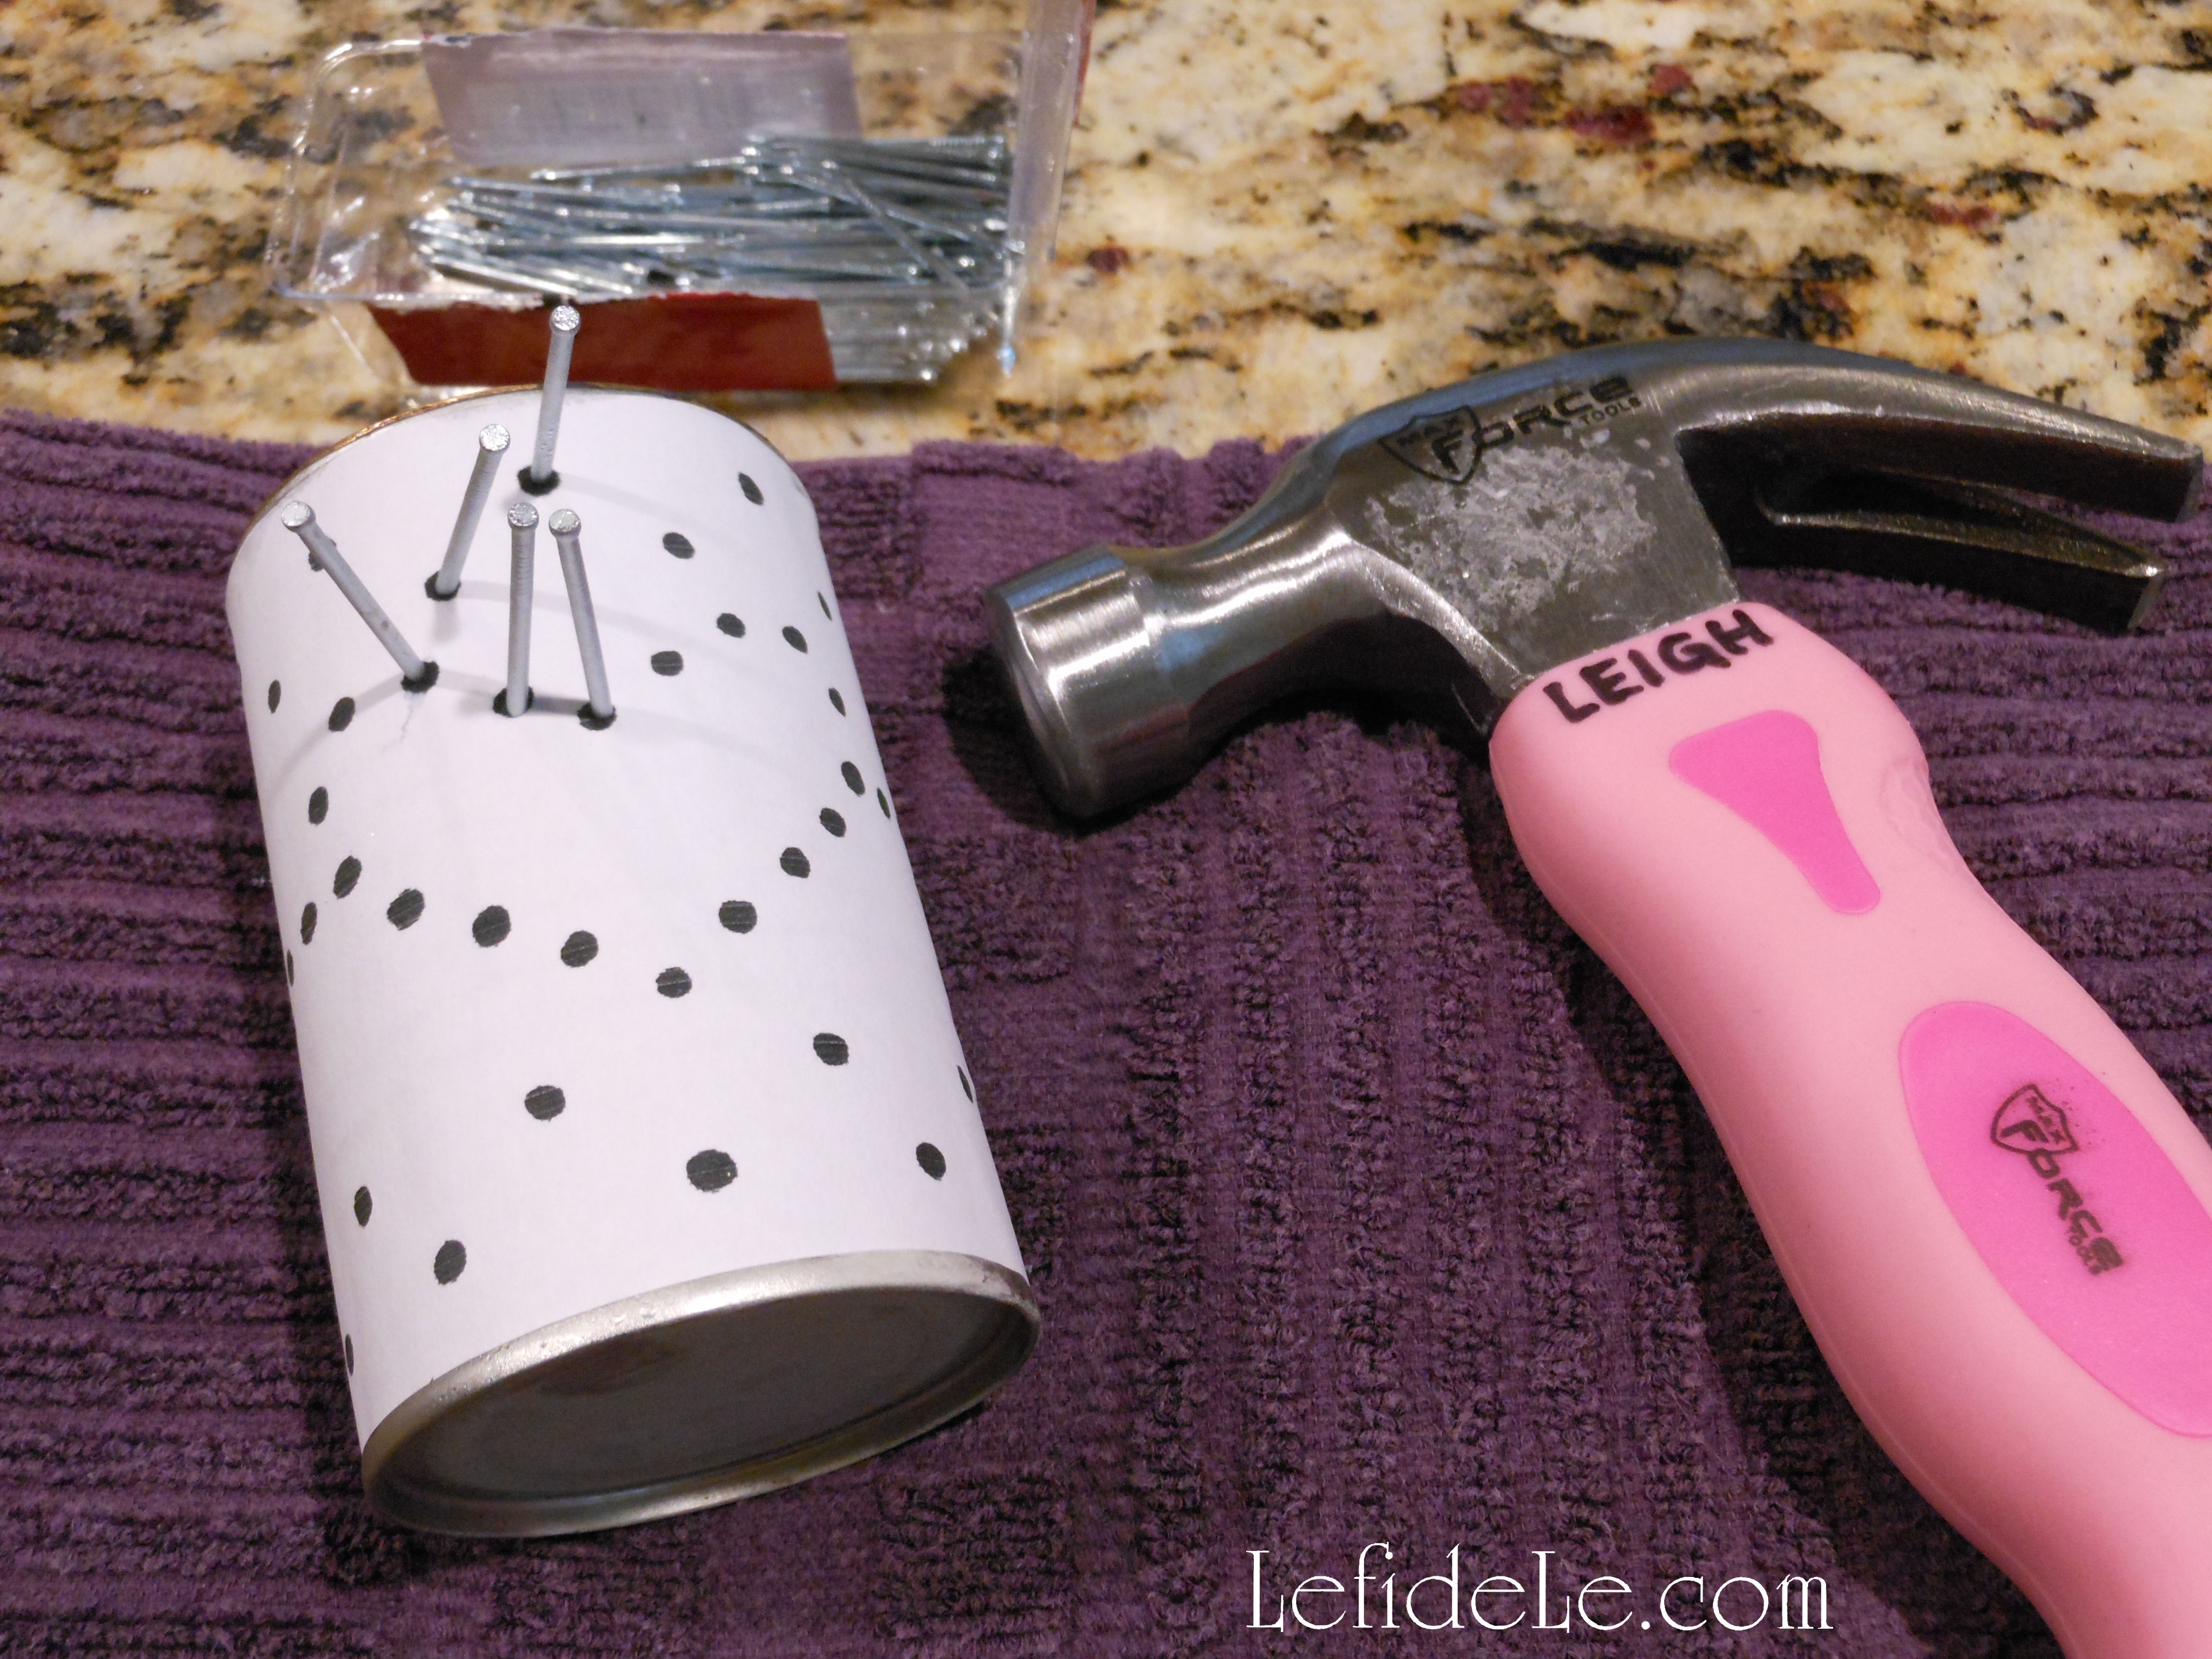
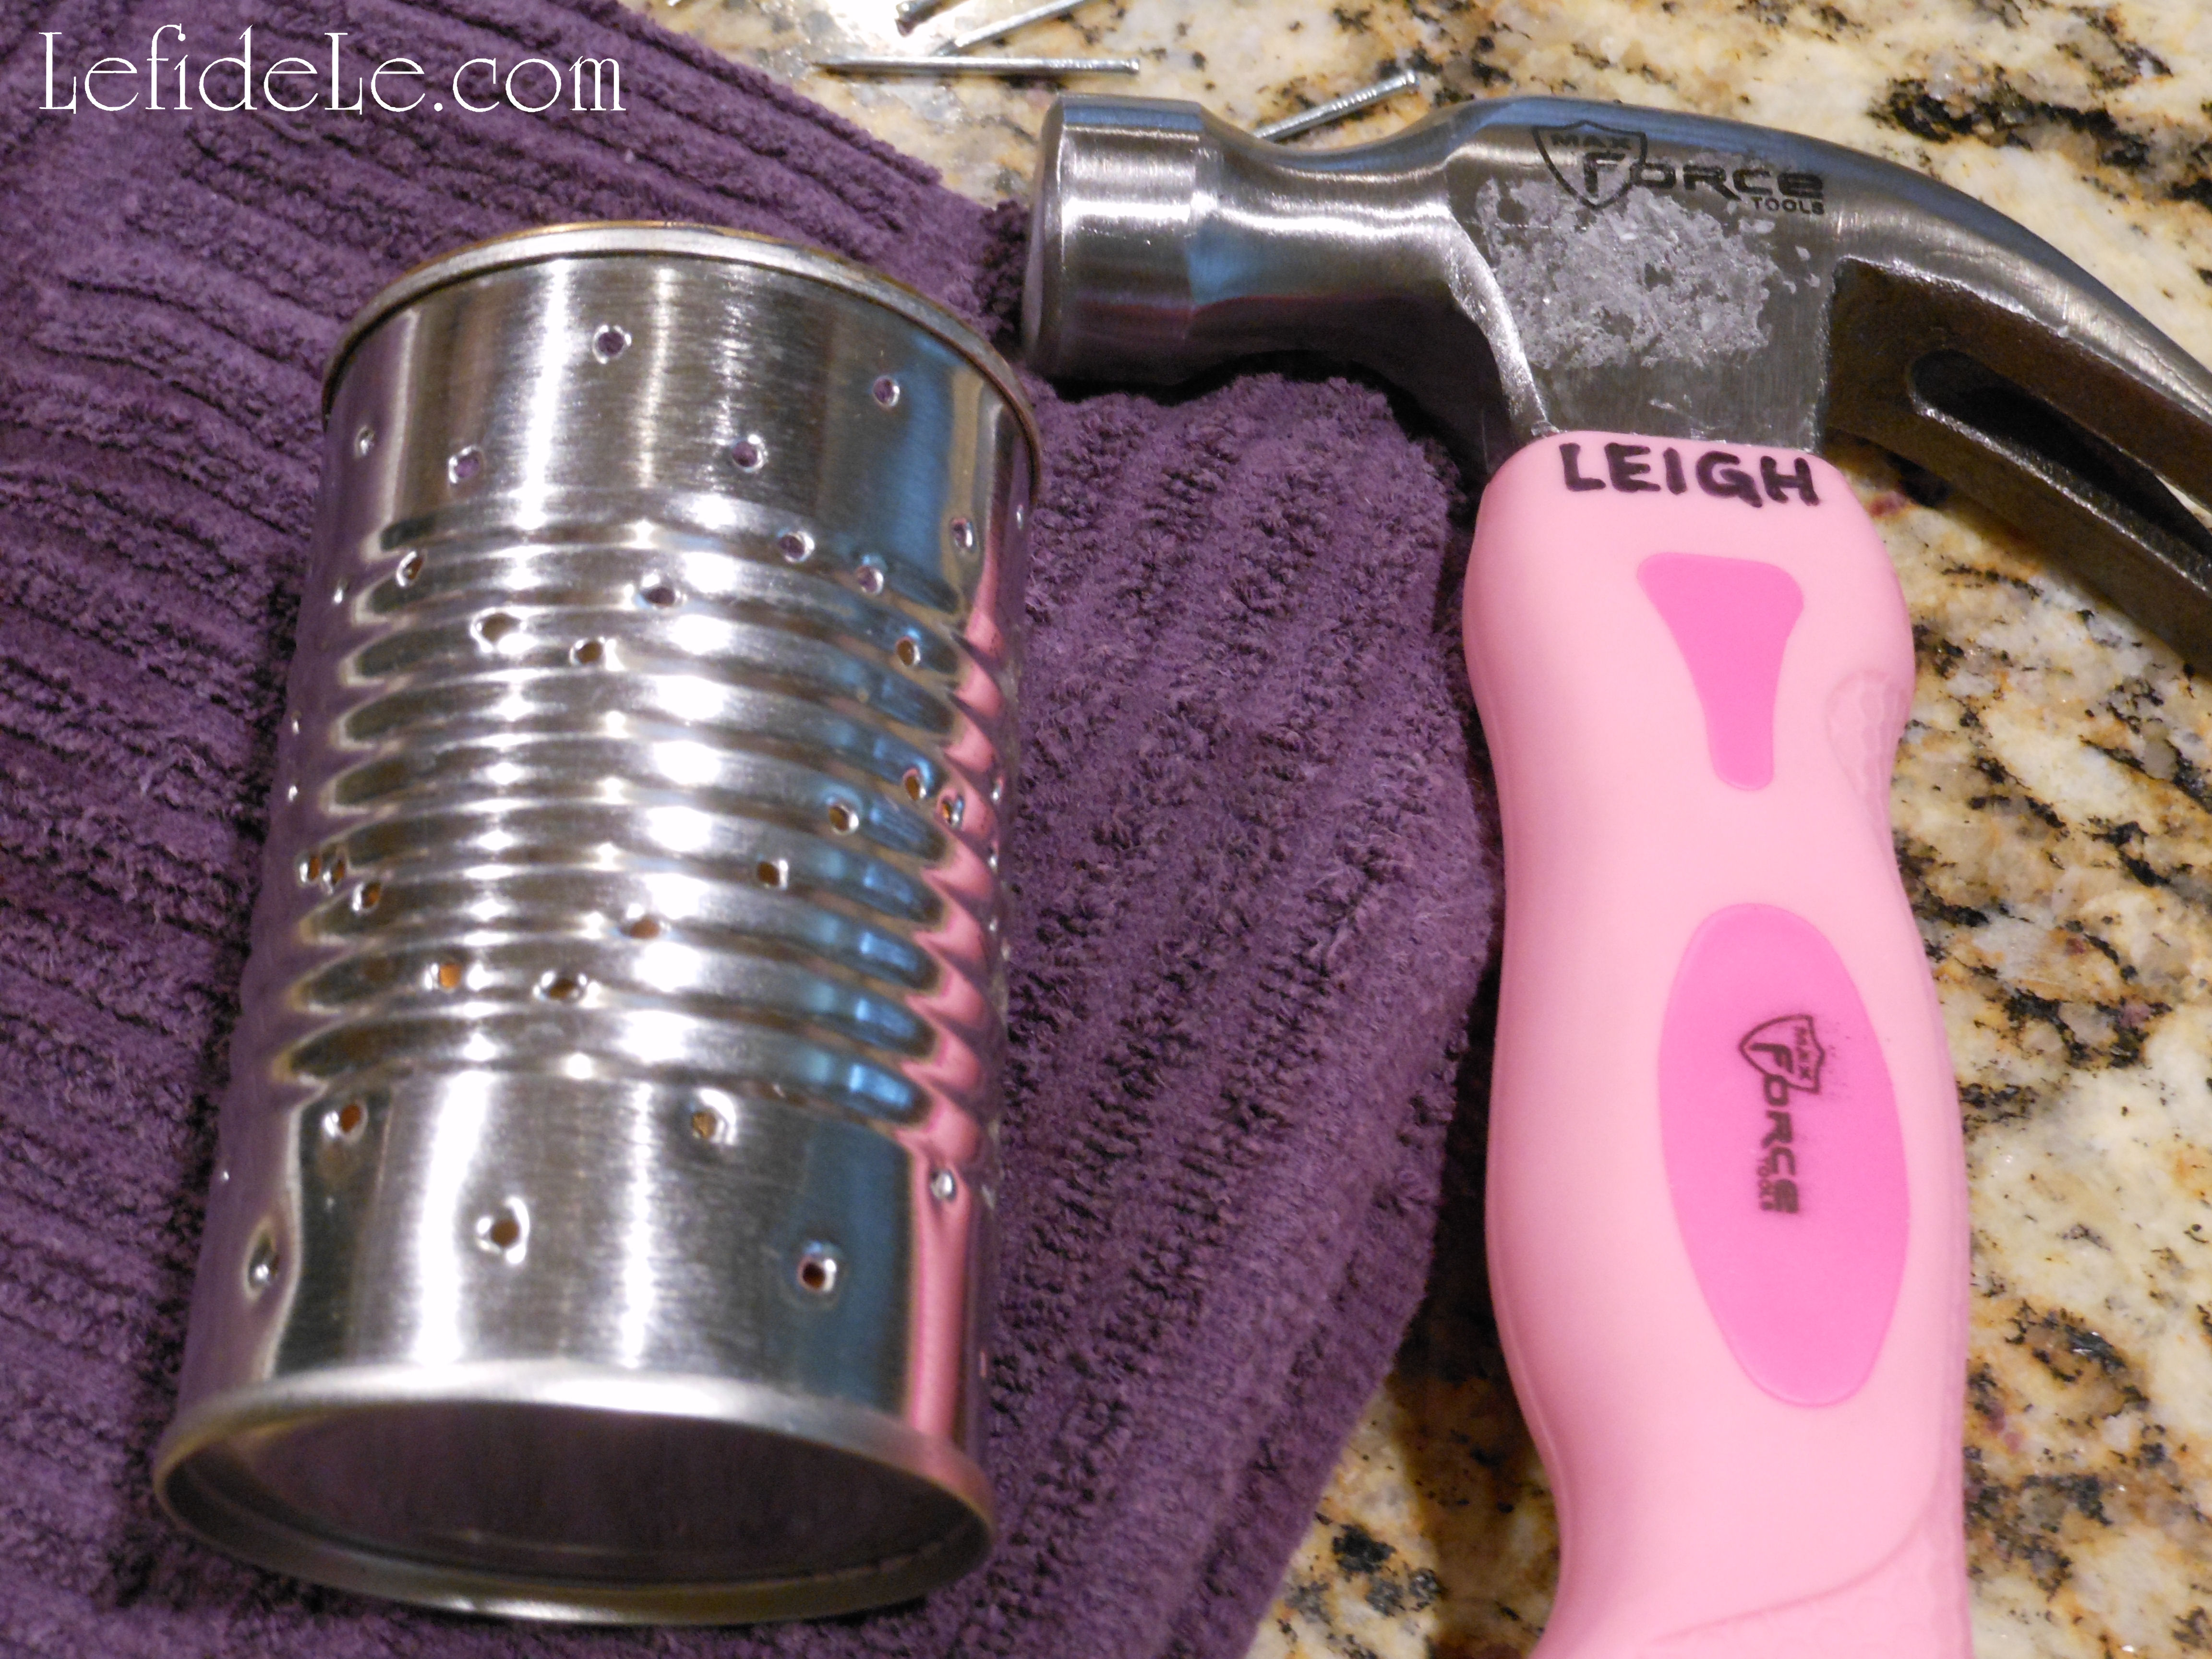
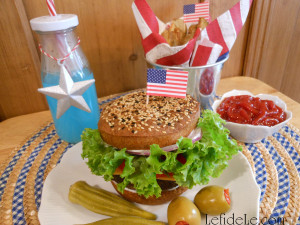
Revelers were offered the refreshment of blue patriot punch held in sustainable vessels festooned with stars and stripes. Further sustenance was provided with chips in a red painted basket (from the Beanitos brand made in the USA).

363Leigh

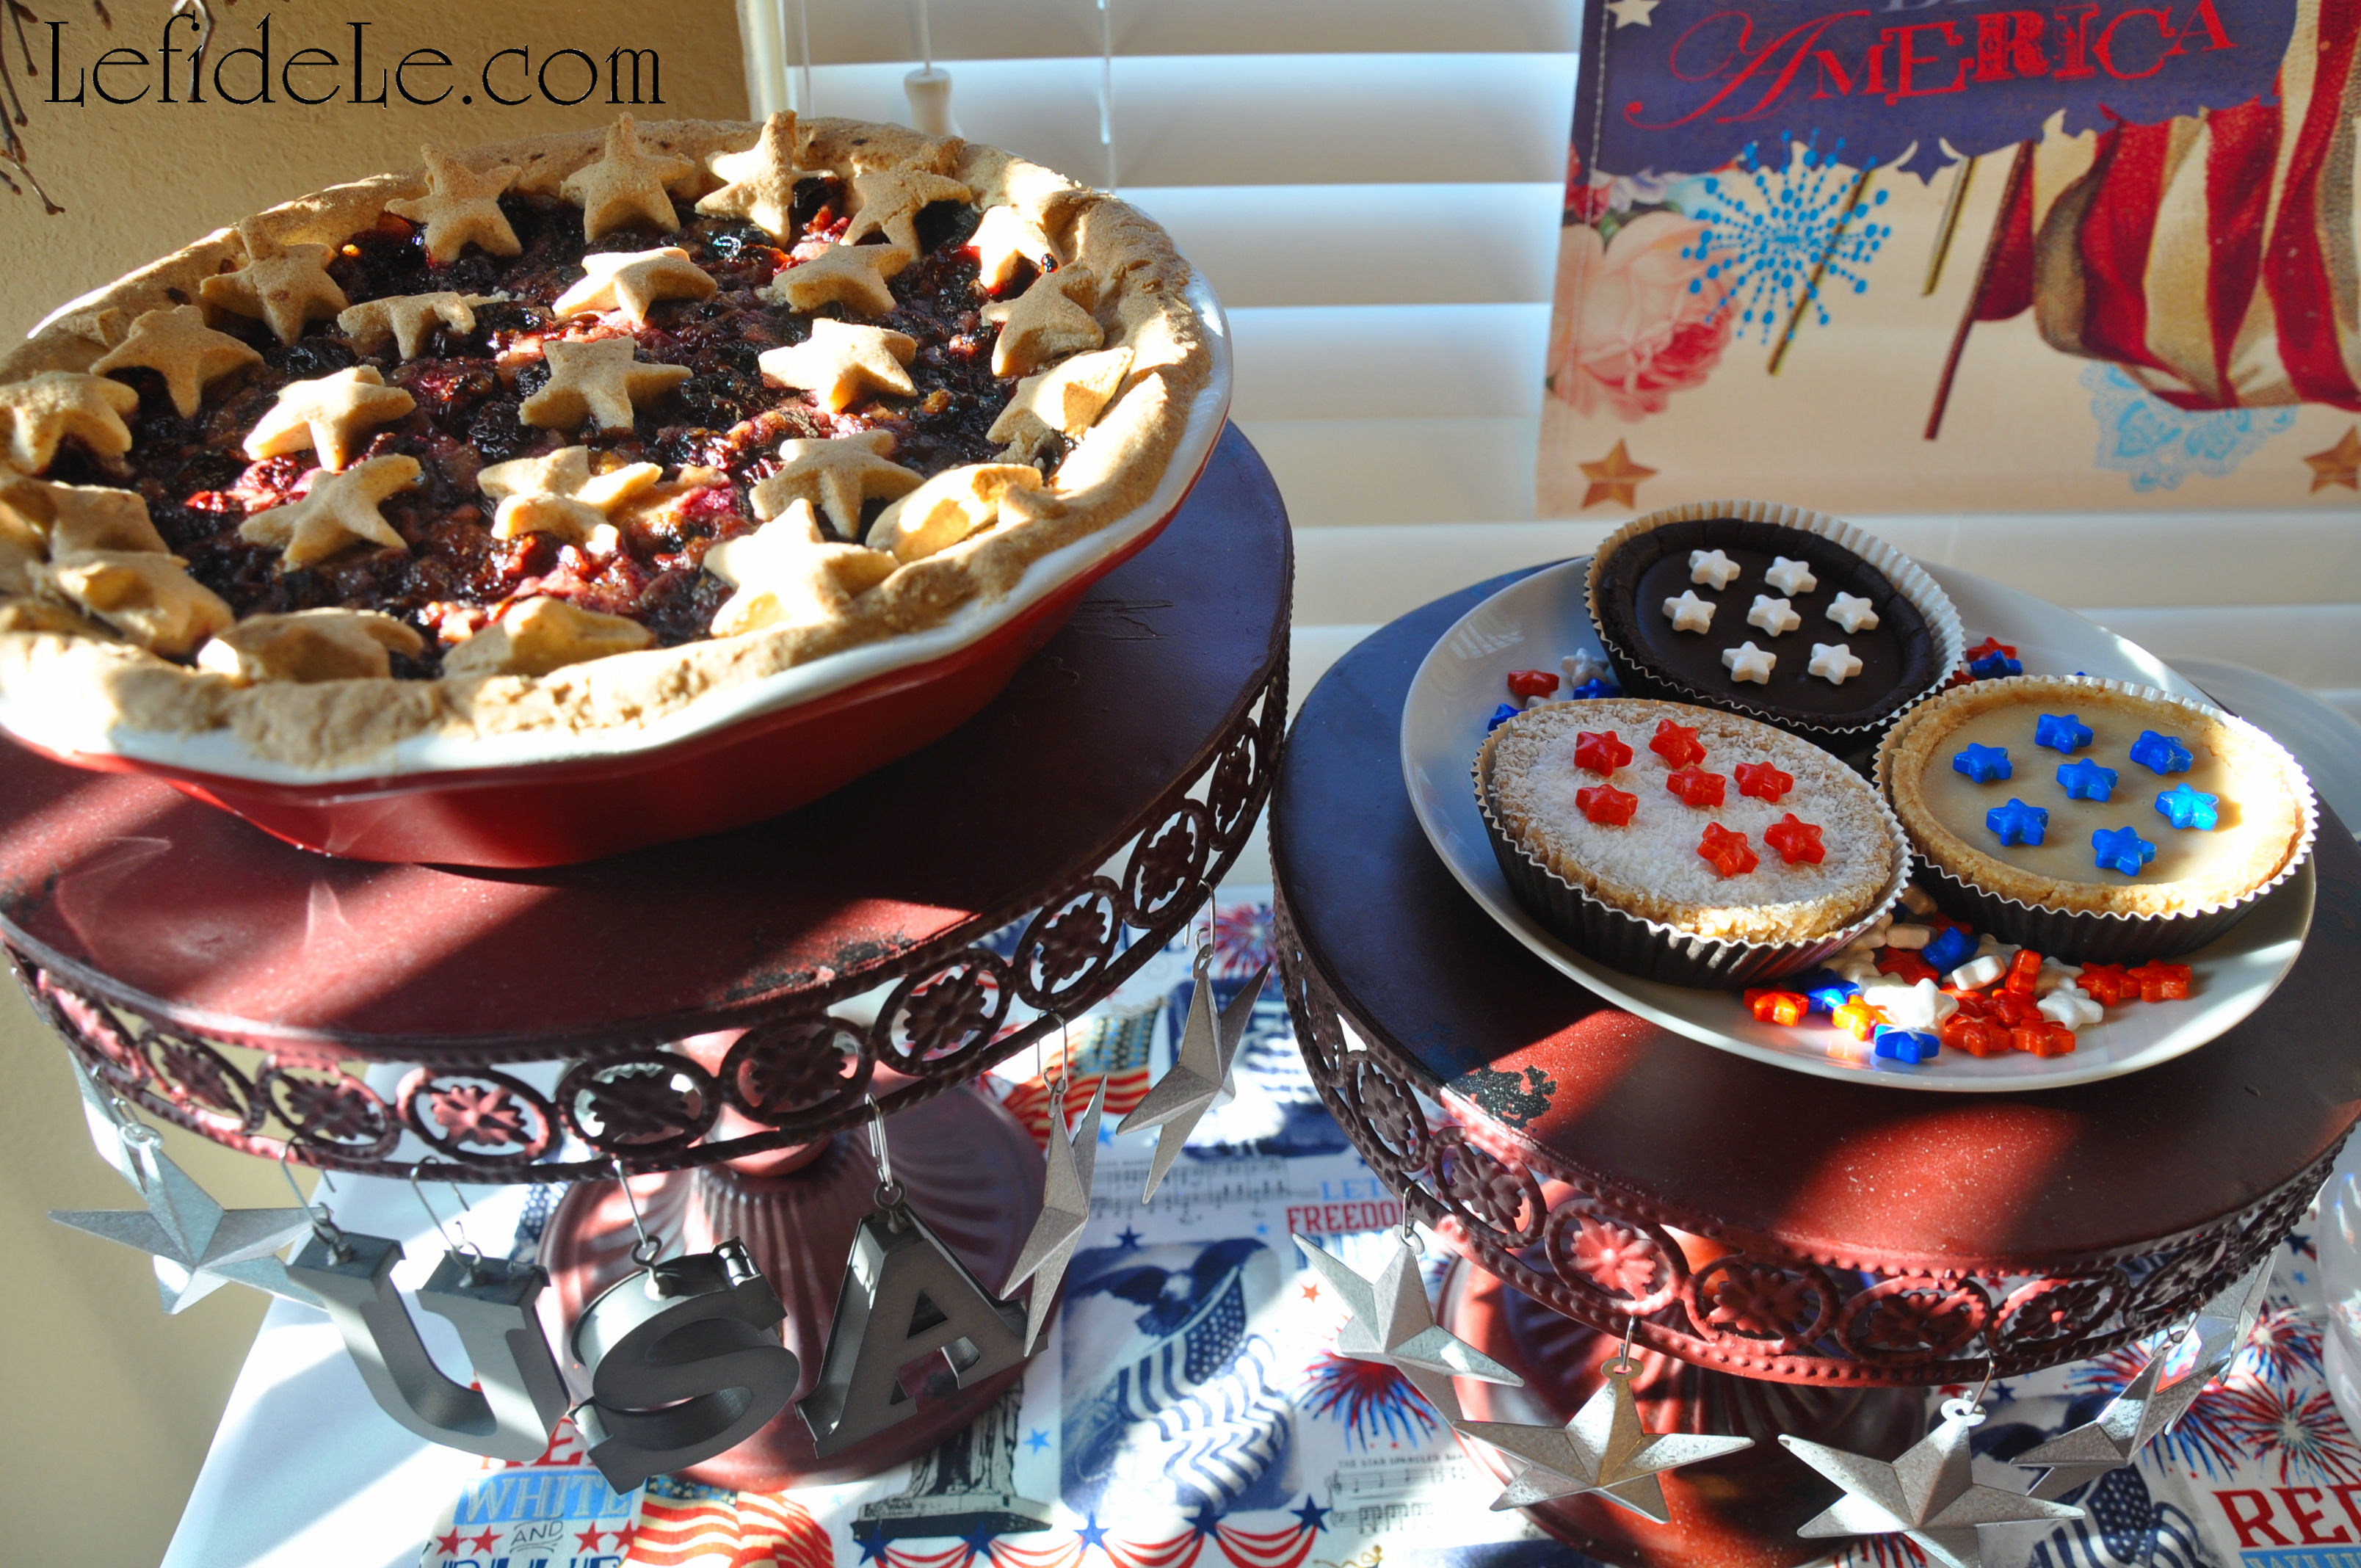
The memory of George Washington was honored with “truthful cherry patriotic pie” (of my own upcoming gluten-free vegan recipe) held high in esteem upon a metal pillar spelled with zinc USA letters. Sweet vegan tarts crowned with candy stars (from another American brand Hail Merry) topped a second pillar swathed in more stars.

333Leigh

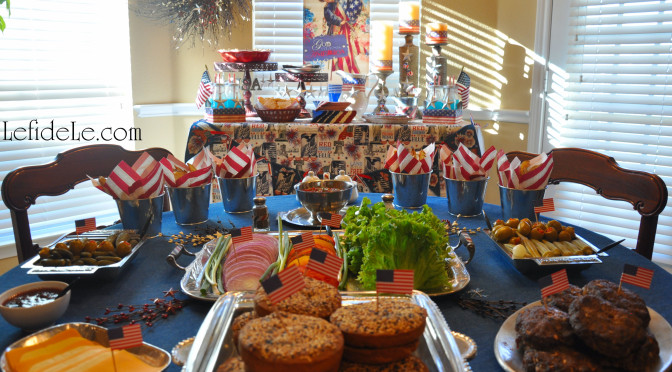
The fore-field was set as an all American build a burger bar over the classic American staple of blue jean cloth set over a red tablecloth. Blasts of star spray shot out from beneath a centermost tray… connoting embattled fireworks.

373Leigh

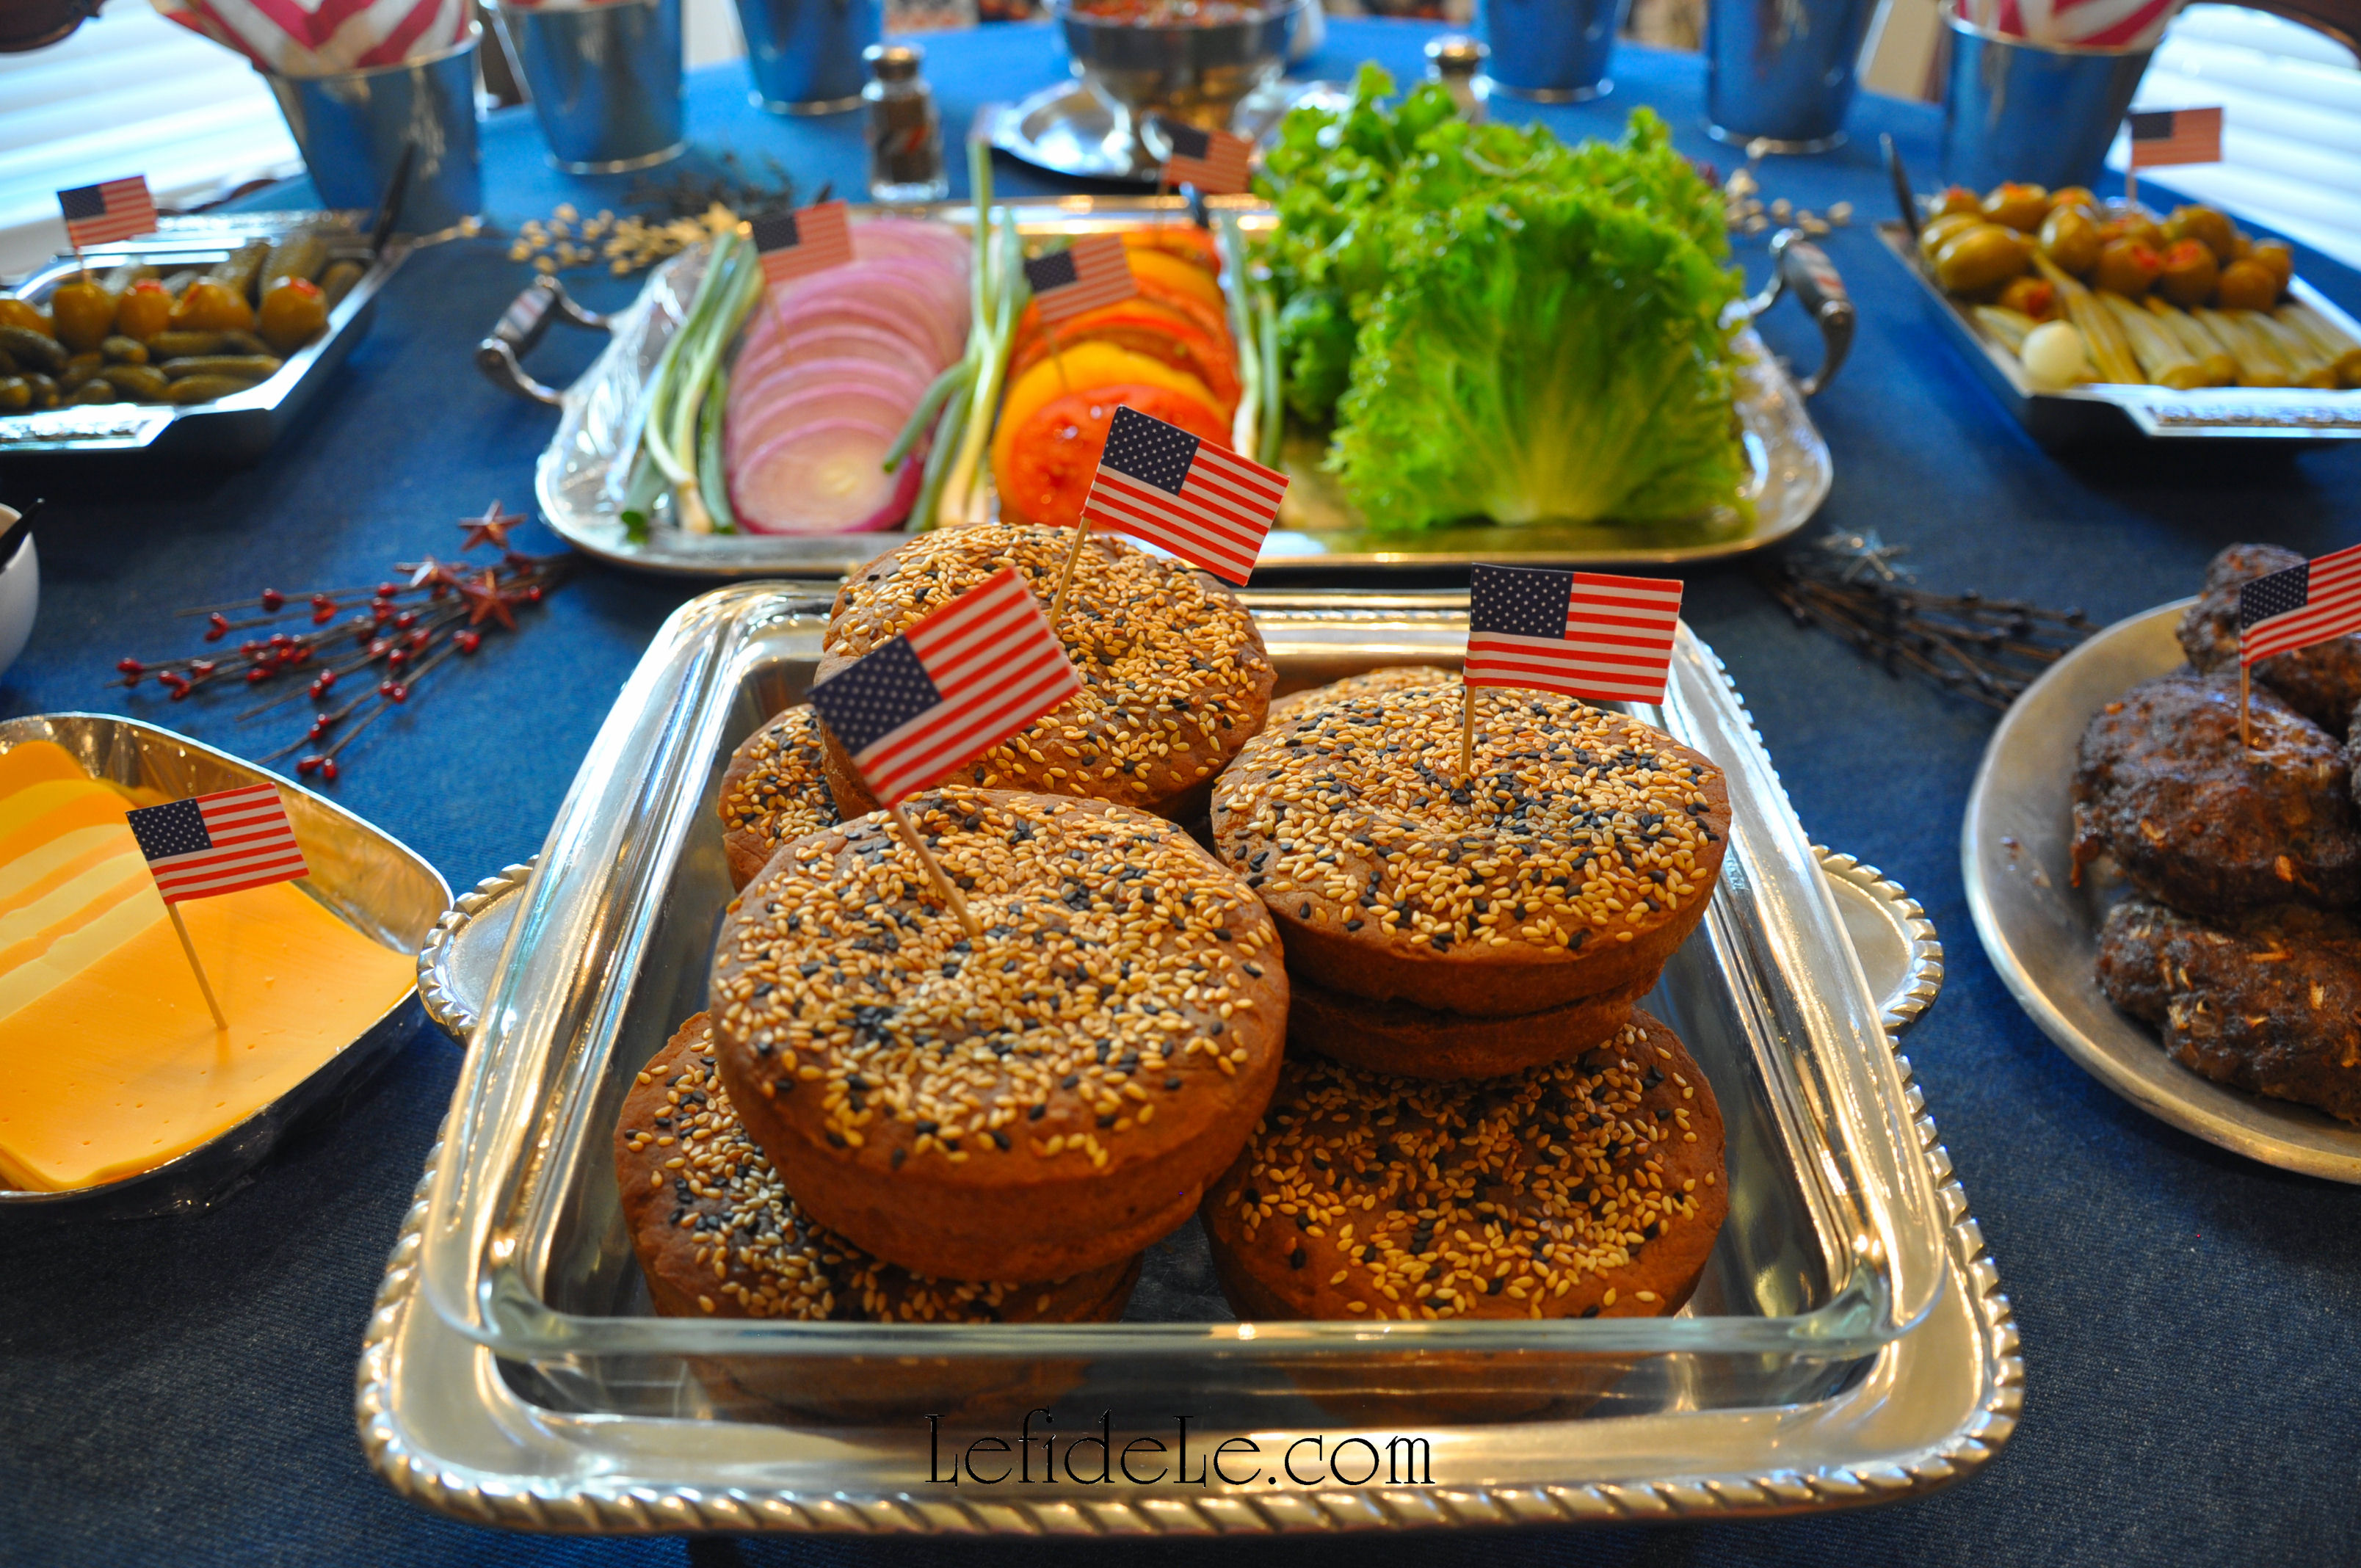
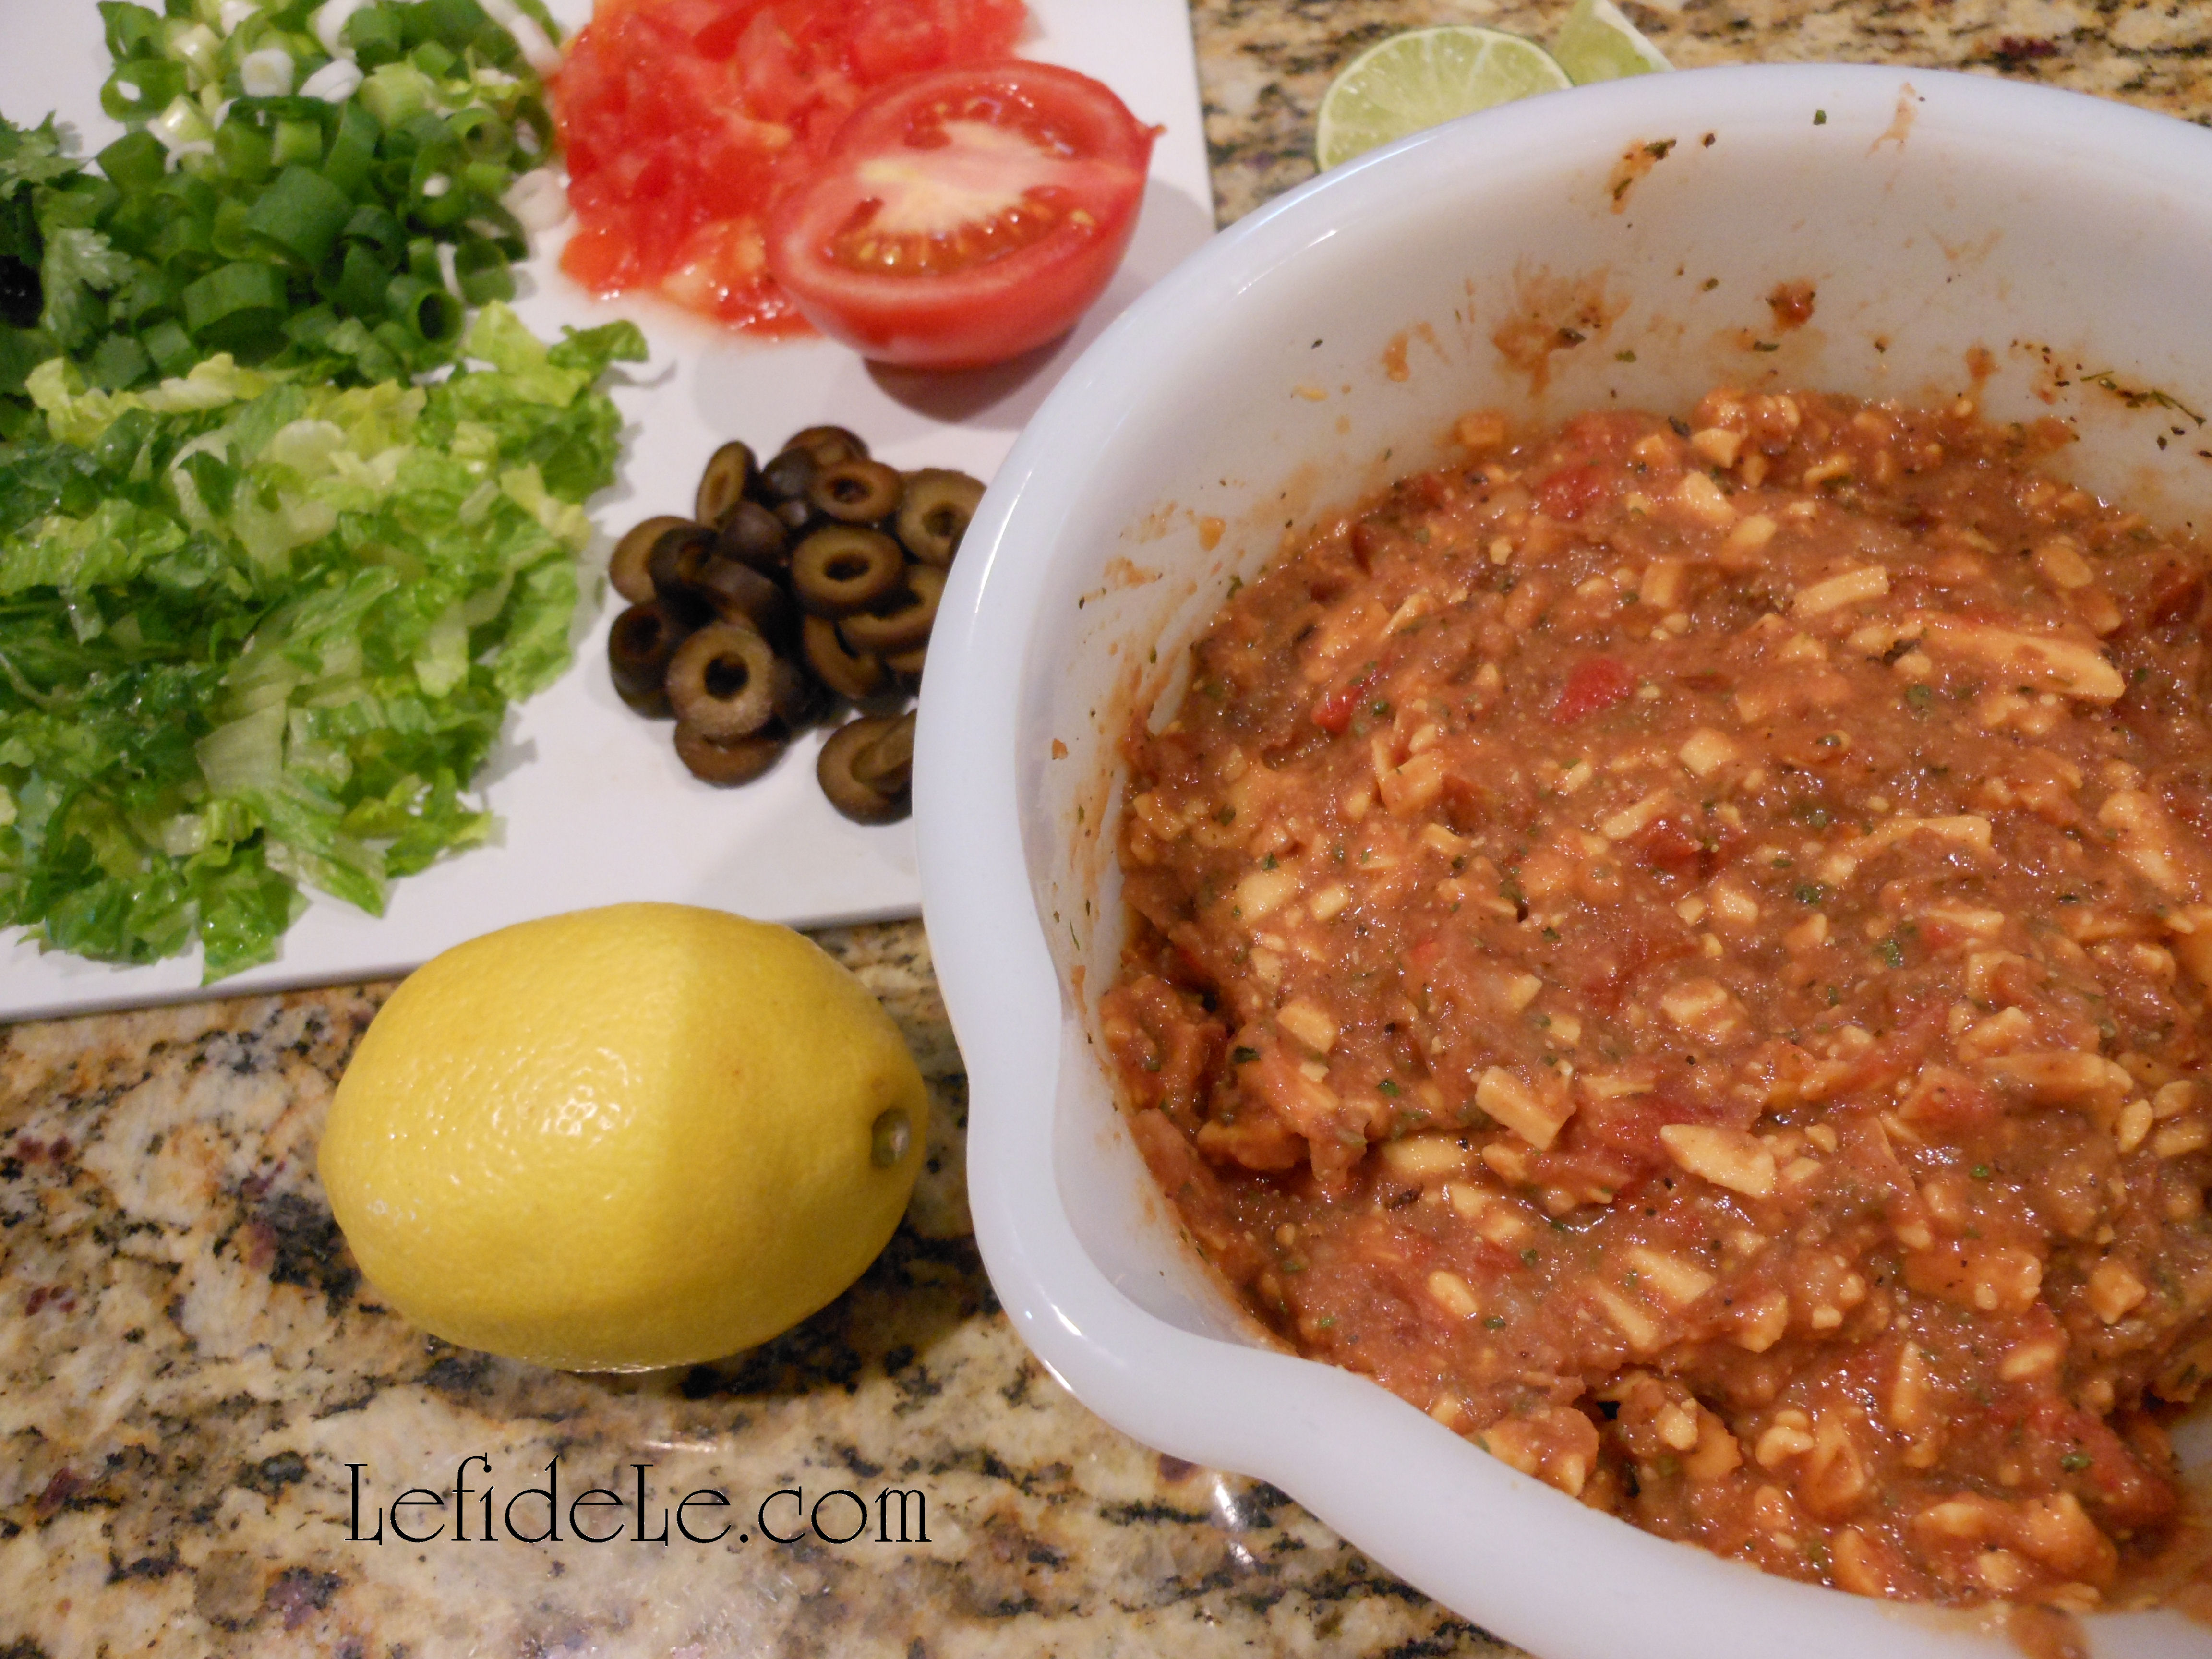
Homemade burger buns (of my own upcoming gluten-free vegan recipe) were displayed in a pewter dish. Behind that sat a vintage tray offering hamburger accompaniments… like heirloom tomato slices, organic green onion, artisan leaf lettuce, and locally grown red onion slices.

375Leigh

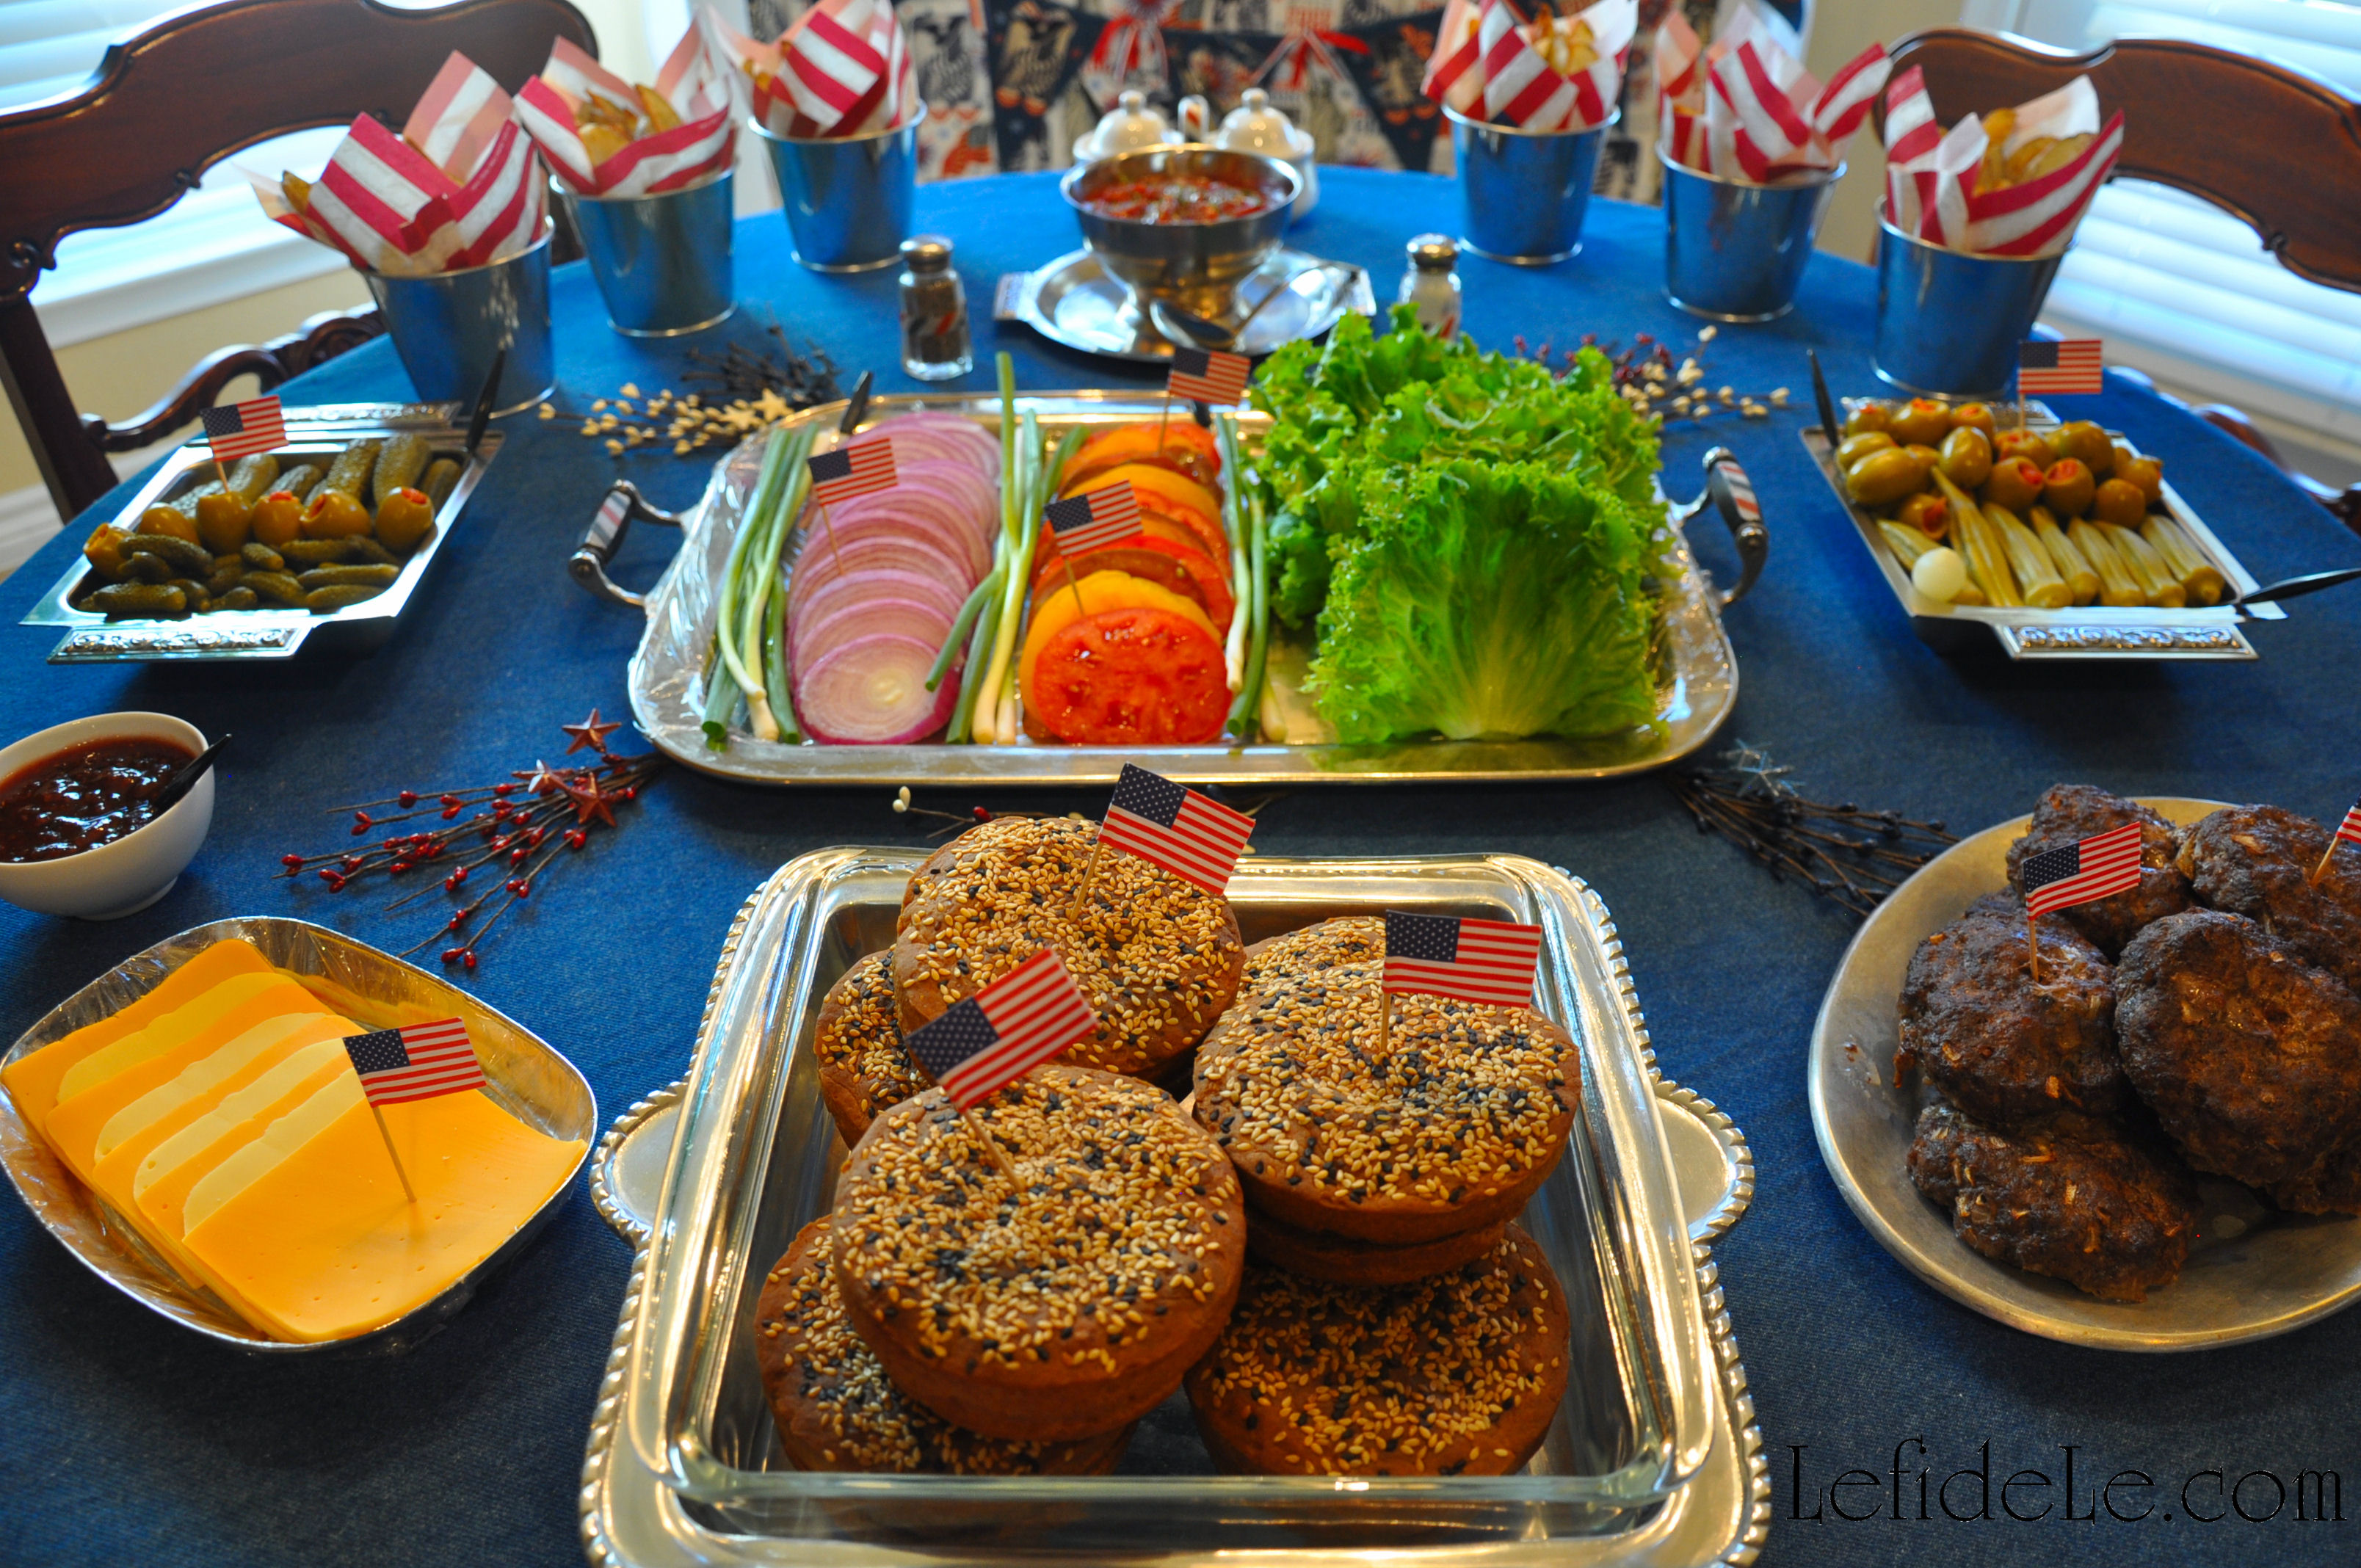
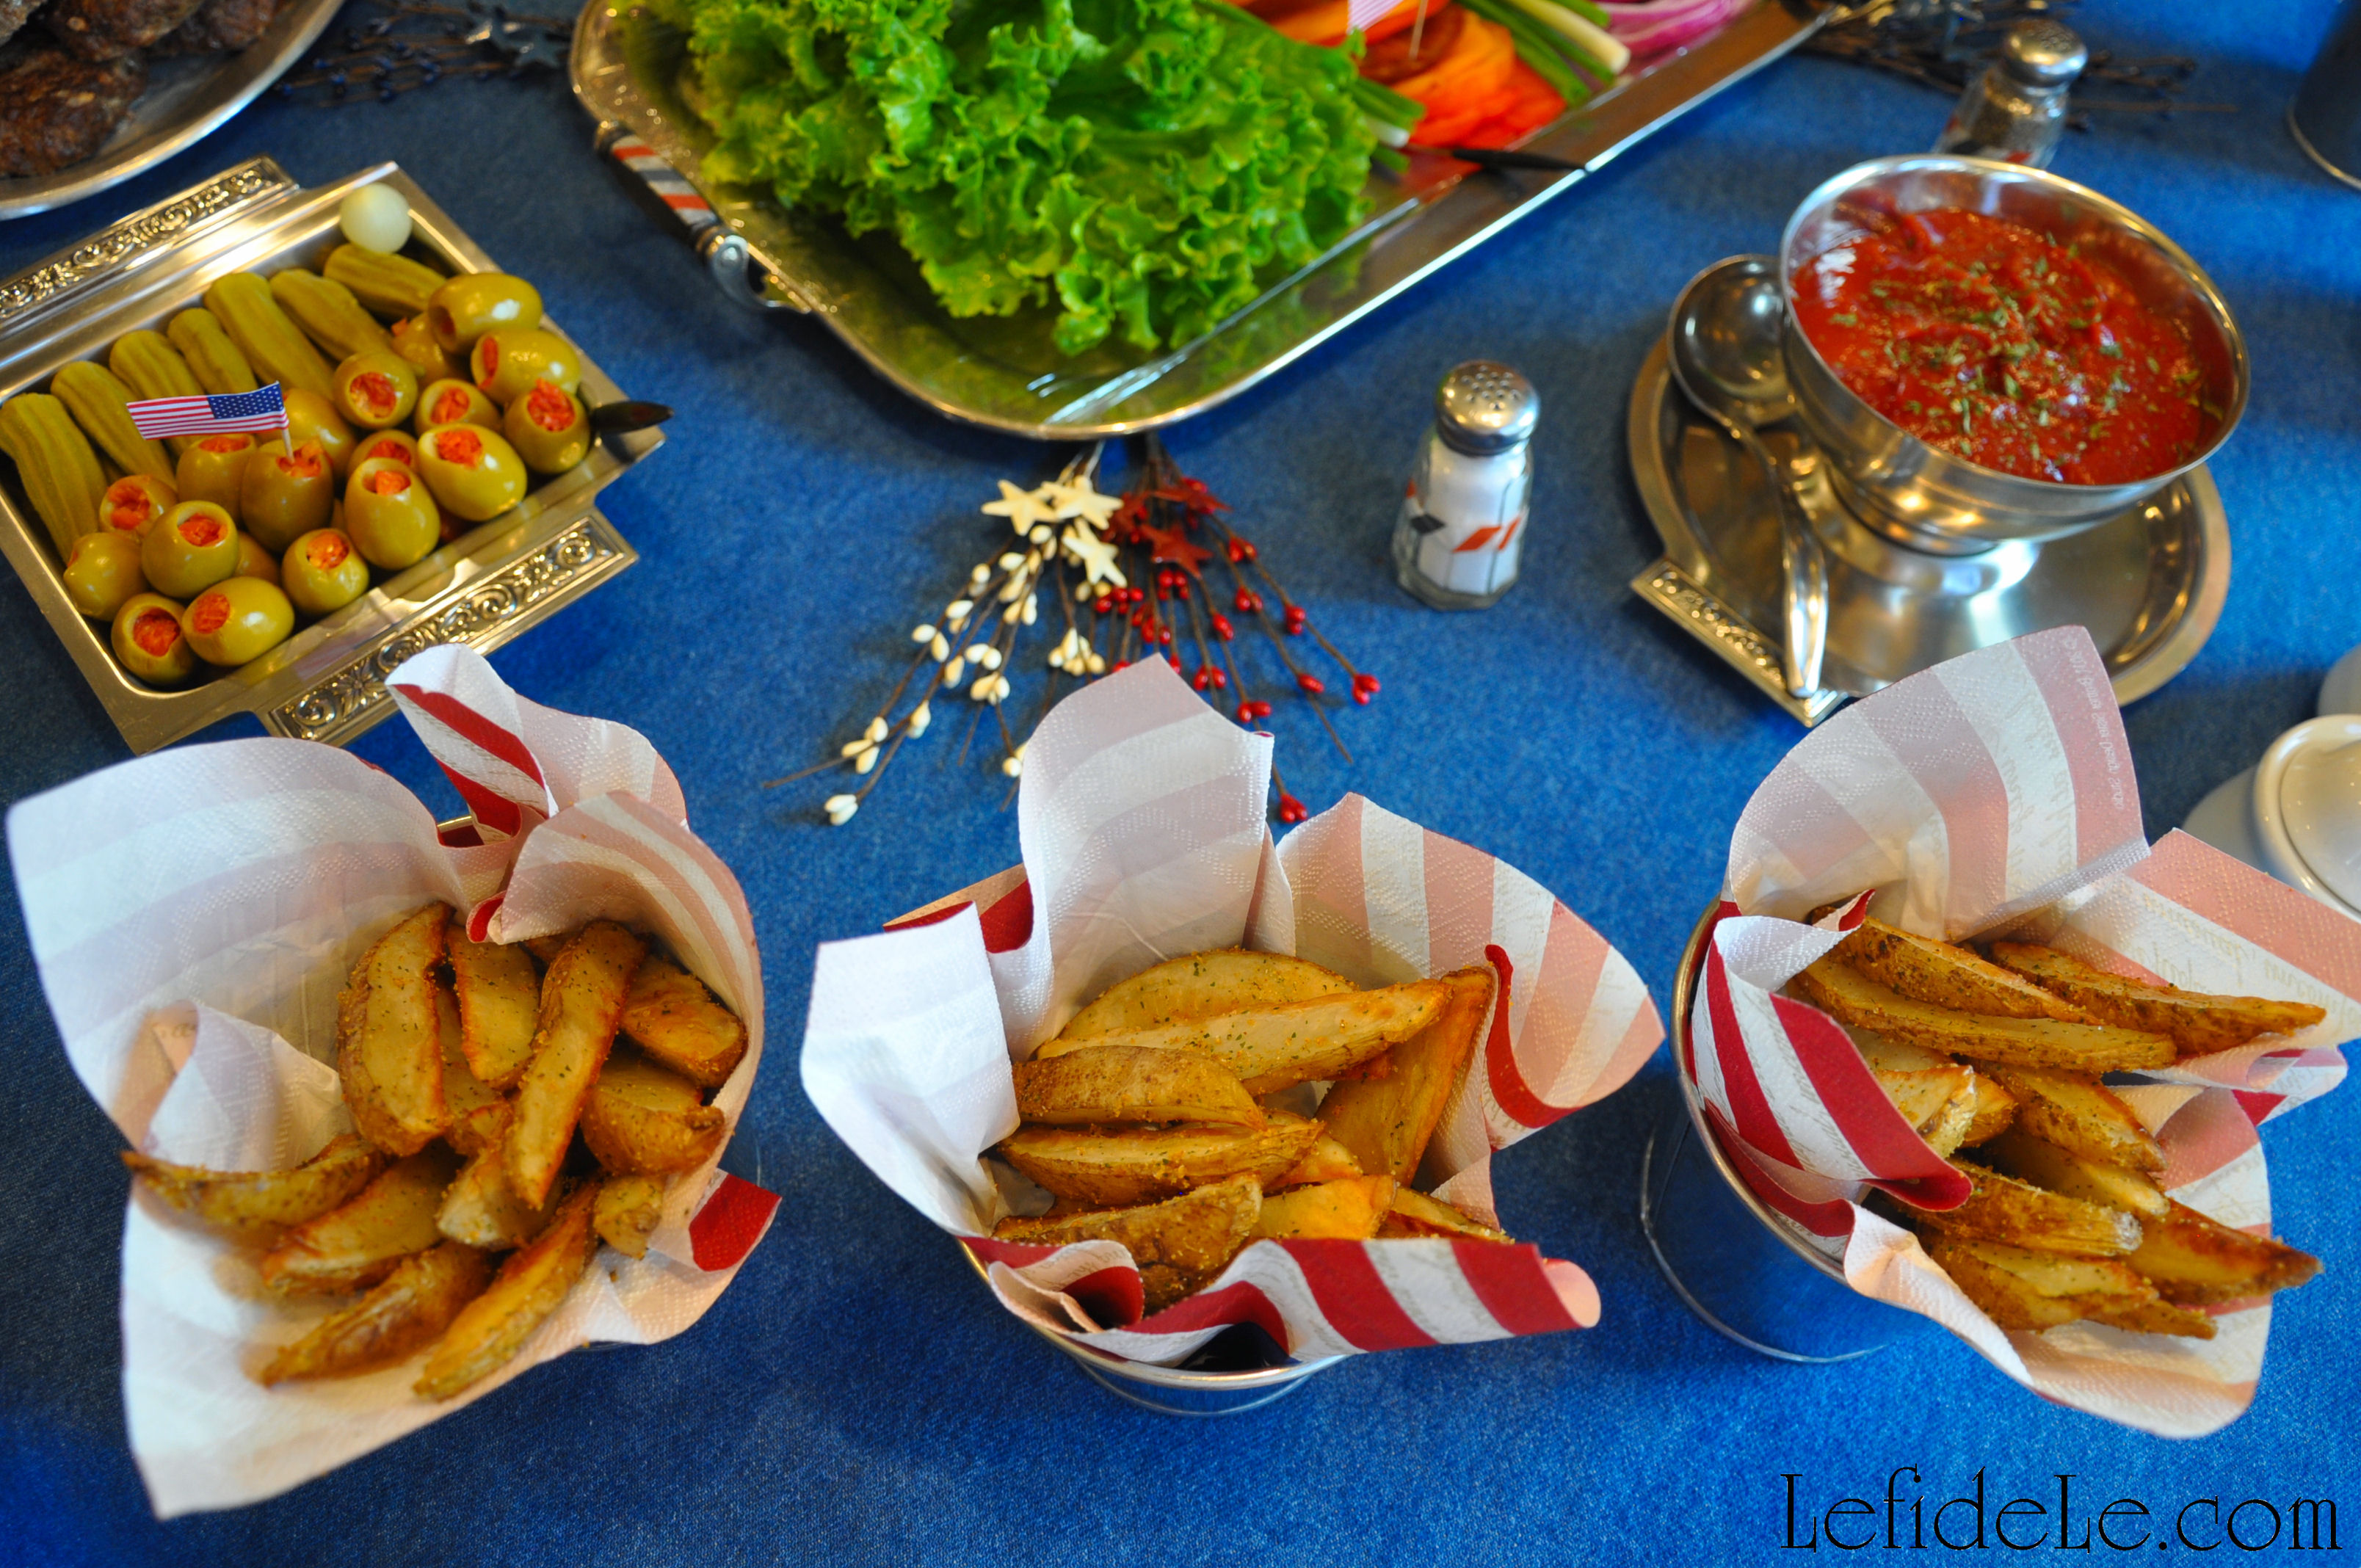
An additional vintage pewter dish served onion loaded beef patties (another of my upcoming recipes). Slices of soy-free vegan cheese (from USA brand Follow Your Heart) were stamped with an American Flag seal of approval. Deep square vintage steel dishes presented pickled okra, onion, cornichons, gherkins, and sun-dried tomato stuffed green olives.

353Leigh

Galvanized metal buckets lined with flag napkins made admirable single-serving fry baskets bursting with seasoned steak fries (see my upcoming recipe). Old-school salt and pepper shakers got the patriotic washi treatment. More vintage dishes contained soy-free veganaise, paprika-free mustard, and corn-syrup-free ketchup… so that no allergy got served.

351Leigh

As the July 4th night sky blazes with the flash of celebratory fireworks, may we all seek to reflect upon the valorous sacrifices made for our collective liberty.

374Leigh

Faithfully Yours,

Leigh

P.S. Keep checking in on my Recipes Page for the latest postings on Gluten-Free & Egg-Free Pies, Fries, & Hamburger Buns! I’m launching a new on-going series of Burger Creations that is set to grow increasingly creative with time!

044Leigh

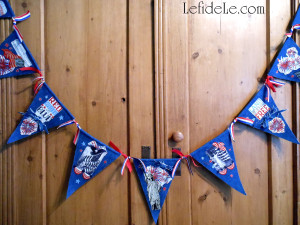
Be sure check out my article for a DIY July 4th Denim No-Sew Appliqué Collage Star-Spangled Banner Craft Tutorial for Independence Day here!

163Leigh

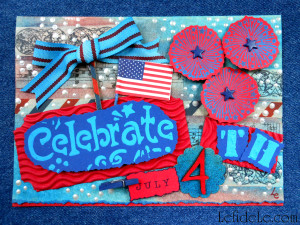
And this article for July 4th Altered Art Greeting Card as Mailable Mixed Media Independence Day Décor (DIY Collage Art Tutorial)here!

120Leigh

Fresh Herb Garden Luncheon Tablescape Décor Ideas (with Parsley Pesto Pasta Recipe & DIY + Printable Links)

099Leigh

You’re invited to a luncheon at the secret garden where the aroma of fresh herbs will guide you to feast of parsley pesto pasta featured in a vibrant tablescape.

244Leigh

Find your name scrolled upon a seed card herb marker set into an herbaceous culinary plant. Delight in the knowledge that this gift will season many future meals. Remember the seed card imagery from the invitation you previously received.

225Leigh

Feel the warmth of the sun on your face as you take a seat upon an intricately carved wooden chair. Free a cloth napkin from its handcrafted textile ring to place in your lap.

253Leigh

Sip the cool Sparking Italian Pomegranate Soda held within a washi decorated goblet, and notice that the flatware and salad bowl bear the same detail.

264Leigh

Realize the radishes in the mesclun salad are echoed by the motif in the salt and pepper shakers.

232Leigh

Find more of them shaped into flowers sitting perched atop aromatic parsley pesto pasta garnished with extra pine nuts.

224Leigh

Appreciate that the tempting pasta meal has been raised to centerpiece status with its elevation by another inverted salad bowl. Recognize that the fabric square sandwiched between the two bowls matches the checked table topper of pinks, ivory, and sage greens.

082Leigh

As you harvest mounds of mouthwatering pasta into your hand-painted bowl, recognize the plant spray depicted as that of the very same spicy sprout bearing your name. Dust the zesty pasta with a dose of parmesan scooped by a tiny vintage serving spoon.

265Leigh

Taste the scrumptious pasta and refuse to believe that this is a healthy meal free of gluten and dairy. Take a crunchy breadstick contained in a terracotta pot wrapped with the same fabric as the napkin rings. Observe tinier pots propagated with candles sitting encircled with further washi.

252Leigh

Note that every element was placed with regard to creating a pleasurable gathering for you and your friends… and smile, knowing you are cared for.

69Leigh

Faithfully Yours,

Leigh

P.S. Learn how to recreate elements of this secret herb garden tablescape in your own home here:

250Leigh

Healthy Herb Garden Fresh Parsley Pesto Pine Nut Pasta Recipe (Gluten-Free, Dairy-Free, Soy-Free, Vegan)

204Leigh

DIY Herb Garden Fabric Napkin Rings, Free Basil Seed Card Printables (Invitations, Place-cards, Food Tents, Menus, Herb Markers) & How to Customize a Table Setting with Washi Tape

DIY Herb Garden Fabric Napkin Rings Craft, Free Basil Seed Card Printables (Invitations, Place-cards, Food Tents, Menus, Herb Markers) & How to Customize a Table Setting with Washi Tape

253Leigh

Bring the splendor of the herb garden to an indoor tablescape resplendent with free basil seed card printables for invitations, place-cards, food tents, menus, and even herb markers. Craft matching napkin rings with herb printed fabric, and then learn how to effortlessly customize a table setting with washi tape. Practically zero budget is needed to create a splendiferous luncheon with every element detailed… what a splendid way to grow a party!

104Leigh

Let’s begin with crafting the herb garden napkin rings. Find a fabric with a lovely herb motif. Cut it into 6 inch long strips about 1 ⅜ inch wide.

106Leigh

Mark an empty wrapping paper roll (or use a paper tower tube) into 1 inch sections. Cut through these sections to make the ring bases.

107Leigh

Hot glue the fabric strips onto the paper roll sections. (The ends should overlap a little.)

108Leigh

Glue the fabric flaps down to the inside of each roll. (This will make a nice edge that won’t fray in the future.)

110Leigh

Tie on a thin ribbon that coordinates to the darkest color of your fabric, and knot it closed. Trim the loose ends to about an inch long each.

254Leigh

Now your rings are ready to use and are reusable too! Fill them with cloth napkins and place them next to flatware customized with washi tape. It’s a great way to accent your look without having to buy new dishes or utensils, and it’s better for the environment than resorting to the disposable stuff.

197Leigh

Simply cut small inch sections of a coordinating paper tape and wrap onto anything you want to embellish. It won’t leave any residue when you peel it off, so clean-up is a breeze!

225Leigh

Utensils, goblets, and even a salad bowl have been effortlessly washi-ed to wonderful.

214Leigh

I even added washi to tiny terracotta pots filled with candles. The easiest way to make your own is to slip a tea-light candle into one. (We had no burning incident, but if you’re worried about fire… try an flameless LED tea-light instead.)

248Leigh

Now let’s make basil seed card invitations, menus, food tents cards, place-cards, and even herb markers for your tablescape. (Please note that my seed card printables are free for your personal use only.)

200Leigh

Simply right click on a small image below and select print. Choose color and photo settings for the best results. Print them on a thick paper cardstock that won’t curl.

HerbPlacecardsLeighHerbInviteLeighHerbMarkersLeigh

Cut them out by the lines, and fold the pieces that need them into tents.

244Leigh

I taped the flat herb markers to toothpicks and wrote names on them to use as place-cards. The herbs they were stuck into then became lovely take home gifts for the name bearers.

224Leigh

The herb pots were lovely to set around a centerpiece of parsley pesto pine nut pasta elevated by an inverted serving bowl. (A piece of cloth, sandwiched in between, ensured no slippage while serving.)

252Leigh

See the recipe for my Healthy Herb Garden Fresh Parsley Pesto Pine Nut Pasta Recipe (Gluten-Free, Dairy-Free, Soy-Free, Vegan) here.

204Leigh

Race you to the craft room!

Faithfully Yours,

Leigh

“Nacho Average Fiesta Dip” & Spicy Nachos Compuesto (Dairy, Corn, Red Pepper, & Gluten-Free) Easy Appetizer for Cinco de Mayo Fiesta

254Leigh

My “nacho average fiesta dip” is the main ingredient for my spicy nachos compuesto, and it proves that you don’t need to add red pepper to get a spicy kick out of Tex-Mex. And they make perfecto Cinco de Mayo appetizers because they’re not only quick and easy to make, but are also free of other allergens (like dairy, corn, and gluten) that are so typical of Mexican cuisine. So feel free to indulge without feeling indulgent… & ¡Fiesta forever!


“Nacho Average Fiesta Dip” Ingredients:

  • 7 ounces canned vegan refried black beans (the vegan varieties have no lard added… or try pintos, or make fresh)
  • 7 ounces canned fire roasted crushed tomatoes (or use freshly chopped and roasted)
  • 8 ounce package gourmet soy-free vegan cheddar shreds (this kind doesn’t have canola, soy, or milk casein protein… but use any variety of cheese you prefer)
  • 1 tablespoon lemon juice (or lime)
  • 1 teaspoon ground ginger
  • 1 teaspoon onion powder (or 1 tablespoon fresh)
  • 1 teaspoon garlic powder (or minced fresh)
  • 1 teaspoon ground peppercorns
  • 1 teaspoon sea salt (or salt substitute)
  • 2 teaspoons dried cilantro (or 1 tablespoon fresh)
  • chips, crackers, or veggies for dipping (try a corn & gluten-free alternative like bean and rice chips)

Spicy Nachos Compuesto Ingredients:

  • diced green onion
  • diced tomatoes
  • fresh cilantro
  • sliced black olives
  • shredded lettuce
  • chips (try corn-free bean and rice chips like these Beanitos)
  • prepared “Nacho Average Fiesta Dip”
  • optional: vegan yogurt or sour cream
  • optional: guacamole (try my spicy recipe that’s red pepper free here)

“Nacho Average Fiesta Dip” Instructions:

243Leigh

Gather all your ingredients and mix them together.

246Leigh

Heat the mixture until the cheese melts. (I used a microwave on 80% power stirring every 2 minutes, for a total of 8 minutes… but a saucepan on a stovetop works well too.)

250Leigh

Blend the hot mix until the cheese is indistinguishable from the beans and rice. (I, of course, used my handy-dandy immersion blender.)

256Leigh

Transfer to a serving dish and garnish with sliced olives, cilantro, and fresh ground peppercorns.248Leigh

Serve with freshly cut veggies, crackers, or your favorite chips. (I used beautifully dark “Beanitos” made in Austin because the bean and rice combo make a complete protein, at 4 grams per serving… plus they’re yummy.)

254Leigh


Spicy Nachos Compuesto Instructions:

274Leigh

Arrange an overlapping layer of chips onto a dish, and spoon hot “Nacho Average Fiesta Dip” over the top. Add the remaining ingredients in amounts that suit your taste-buds.

277Leigh

I had yogurt on hand and guacamole already made, but the nachos didn’t even need them. The Fiesta Dip had all the flavor I craved. Try tasting the chip-dip combo before loading yours up.

269Leigh

All of that salad-like part (lettuce, tomato, olives, green onion, and cilantro) that makes up the compuesto part of the nachos transforms this recipe from a snack into a meal… and therefore a guilt-free indulgence.

279fLeigh

¡Yo quiero spicy nachos!

Faithfully Yours,

Leigh

238Leigh

P.S. Try my Healthy Tex-Mex Cilantro Chicken Spinach Quesadilla Recipe (Dairy, Red Pepper, Corn, & Gluten-Free) Easy Appetizer for Cinco de Mayo Fiesta as well!

Cinco de Mayo Fiesta Tablescape Party Décor Ideas (with Easy DIY Craft Links)

Take an armchair vacation to Texas and join me for a Cinco de Mayo celebración exploding with color. Then recreate the fabuloso fiesta in your own home for any occasion calling for mirth and margaritas! So slip on your serapes and sombreros ‘cause we’re gonna have a hot time in the old town tonight!

020Leigh

Sunlight streams through the vibrant papel picado banners crisscrossing the window. Handmade tissue paper flowers hang between each cut panel.

029Leigh

A burro piñata presides over the extravagancia, standing atop a small serape adorned with its own bouquet.

021Leigh

Extrema pink and green fiesta flowers drip from the chandelier in an overhead centerpiece that leaves room on the table for brillante woven baskets.

073Leigh

Tortilla, chip, and buñuelo baskets sit squarely at the center of the celebración flanked by paper flower buds and upcycled luminarias providing illuminación.

030Leigh

Vivid confetti outlines the fringed caliente pink placemats bordered with Mexican Lotería game place-cards.

044Leigh

Paper parasol toting wine glasses, tied with yellow jute and Lotería charms, await sangria sipping.

357Leigh

Exuberante cloth napkins are ringed with handcrafted sombrero capped raffia rings ornamented with red chilis.

045Leigh

Brillantes yellow plates evoking the sun are topped with multi-hued dishes suggesting serape patterns.

064Leigh

Even the chairs participate in the festividad by wearing their own serapes belted with rope.

041Leigh

Now tie a serape on yourself and sip some sangria for your own dose of party perfección!

046Leigh

¡Feliz fiesta ya’ll!

Faithfully Yours,

Leigh

P.S. For details on just how to fuel your own fabuloso fiesta, see my other Cinco de Mayo articles:

DIY Upcycled Can Tea-light Luminarias (+ Free Printable Template) & Tissue Paper Flowers Crafts (for Cinco de Mayo Fiesta Décor)

291Leigh

DIY Sombrero Napkin Rings & Serape Invitations + Loteria Wine Glass Charms & Place Cards Crafts (for Cinco de Mayo Fiesta Tablescape)

238Leigh

Healthy Tex-Mex Cilantro Chicken Spinach Quesadilla Recipe (Dairy, Red Pepper, Corn, & Gluten-Free) Easy Appetizer for Cinco de Mayo Fiesta

274Leigh

“Nacho Average Fiesta Dip” & Spicy Nachos Compuesto (Dairy, Corn, Red Pepper, & Gluten-Free) Easy Appetizer for Cinco de Mayo Fiesta

254Leigh

Easy DIY Upcycled Can Tea-light Luminarias (+ Free Printable Template) & Tissue Paper Flowers Crafts (for Cinco de Mayo Fiesta Décor)

321Leigh

Light the Cinco de Mayo night by upcycling cans into tea-light luminarias (easy with the help of my free printable template), and adorn your tablescape with DIY fiesta tissue paper flowers. These crafts are perfect to bring the whole family in on, with luminarias for the strong folks and flowers for the kiddos. So hang on to your sombreros senoritas… we’re about to craft a fiesta!

300Leigh

As a kid, I was delighted by long rows of luminarias lighting the way to fiestas. I wanted to bring some of that enchantment inside by making miniature versions with tea-lights for the table.

016bLeigh

I love upcycling free elements into something useful… and I do mean free because this project cost me nothing as the cans were just a leftover bonus from my dinner menu. The project made perfect use of the small tomato paste cans used in my recipes. (See my Meatloaf Cupcakes here, and my Nacho Average Fiesta Dip Here.) Waste not, want not… right?!

186Leigh

The best way to open the cans is by using an opener that doesn’t create a sharp edge, but rather a smooth top separated from the sides. Several well known brands sell this type of safe can opener. After washing the cans well, fill them with water, and place in the freezer overnight. Yes, you read that correctly. The ice is so much easier to hammer into rather than the traditional wooden branch.

SmallLuminariaPatternsLeigh

While they’re freezing, print my piercing template (free for personal use). To do this, right click on the small image and select print. (You can also forgo employing the template, and use a permanent marker to freehand draw your own shapes onto cans before the freezing step.)

183Leigh

My mother actually came up a great tip for keeping your paper’s ink from getting soggy… try wrapping the iced can in clear plastic wrap before wrapping with the paper template. ¡Gracias Mamá!

152

Cut out the 3 identical templates featuring arrow pierced hearts and festive zigzag patterns. Wrap each one around an ice filled can and tape the edge.

190Leigh

Use identically sized nails to hammer into each dot on the template. (This is what makes it a good craft for the hombres in your life!) You only need to hammer the nails in far enough to make a hole, leaving them in or pulling them out as you go. Begin with the top of the pattern, because ice will chip out as you work on it. If too much pops out, simply add water and refreeze.

193Leigh

When the dots are done, so are you! Let the ice melt out into the sink then dry the can well. (Just be careful not to cut yourself on the sharp edges on the inside of the cans.) Now light them up compadre!

274Leigh

The luminarias add ambiance to a lunch of Tex-Mex Nachos made with my Nacho Average Fiesta Dip Recipe.

238Leigh

They also look lovely with another one of my recipes, Gluten & Dairy Free Chicken Spinach Quesadilla.

011Leigh

Here they’re featured in an upcoming San Antonio styled Fiesta tablescape next to some cascarones I’ll demonstrate how to make.

327Leigh

I think they look really lovely next to my fiesta flowers too… let’s make them together now!

094Leigh

Use any new store bought tissue paper, or upcycle some former gift bag tissue into something spectacular.

127Leigh

The size of the sheet you use will equate to the size of the flower you end up with.

096Leigh

Here I’m beginning with one sheet cut into two halves, one placed over the other.

121Leigh

You can actually stack as many layers of tissue as you like to add fullness. Here is a fuller flower next to one made with less layers.

113Leigh

Accordion fold these into a fan, short side to short side. (This part is a great hand-eye craft for the kiddos!)

100Leigh

Next, fold the bar over in half.

102Leigh

Cut an upside down V into the ends… this will make a prettier flower.

128Leigh

Take those trimmings and cut them into tiny pieces, then separate the layers. You just made matching confetti for the table… for free. You can also use this confetti for cascarones crafting in the future!

104Leigh

Green fuzzy pipe cleaner sticks make the perfect stems.

105Leigh

Wrap one around the folded portion and twist. You will be able to use the stem to hang the flowers with later.

108Leigh

Next pull apart all the layers.

116Leigh

Pull these slightly taut, in an arrangement that appears pleasing to the eye.

123Leigh

Wrap one end of the fuzzy stick around the base to secure your arrangement of the petals.

350Leigh

I tied some of them between panels of traditional papel picado in a fiesta banner for the window. The light streaming through them was much prettier in person.

029Leigh

I also used them to further adorn a burro piñata decorating a side table.

053Leigh

The larger flowers were easily strung onto a chandelier as an overhead centerpiece, leaving room for tortilla, chip, and buñuelo baskets on the table.

291Leigh

Now complete your tablescape with my Easy DIY Sombrero Napkin Rings & Serape Invitations + Loteria Sangria / Wine Glass Charms & Place Cards Crafts (for Cinco de Mayo Fiesta Tablescape).

041Leigh

Time to go ¡Fiesta! forever…

Faithfully Yours,

Leigh

Easy DIY Sombrero Napkin Rings & Serape Invitations + Loteria Sangria / Wine Glass Charms & Place Cards Crafts (for Cinco de Mayo Fiesta Tablescape)

¡Fiesta! Forever… or for at least one fantastic evening with easy décor crafts for your Cinco de Mayo tablescape. Toast the party with sangria filled glasses fitted with DIY wine glass charms featuring traditional Mexican Loteria images. Then, use those same images to make place-cards for the table. Dress colorful cloth napkins with handmade sombrero napkin rings, and craft matching serape invitations that shout, “Grab your sombreros for a Cinco de Mayo that’s nacho average fiesta!”

357Leigh

One inexpensive Mexican Loteria game will provide you with loads of craft material for the future. I’ve previously made beads with them (see how to do this here in my Halloween Necklace Craft)… glued them into collages and assemblages (see how to do this here in my Valentine Gift Assemblage Art Tutorial)… and I have some easy crafts up my sleeve to demonstrate in the future.

130Leigh

All you need to begin is a single game card sheet, scissors, a hole-punch, and Plaid Mod Podge Dimensional Magic. Cut the game card into single images as pictured.

134Leigh

Punch holes into a top corner of each piece.

137Leigh

Drizzle the Magic stuff over one side of all the pieces, then let it dry overnight. (Set it on some form of plastic to keep it from adhering to your surface.)

140Leigh

Flip them over and drizzle the other side, then dry overnight.

180Leigh

If needed, trim off any dripped over edges, and attach small metal rings to the holes.

314Leigh

Instead of using a jumbo jump ring to attach the charms to the glasses, I simply tied them on with jute bows. You can also skip the first metal ring, and just tie these if you’d like less dangling.

030Leigh

Here they are featured on a clear glass vessel topped with a paper umbrella.

106Leigh

The same charm and umbrella look different when placed on a purple goblet (from my upcoming San Antonio styled Fiesta tablescape).

219fLeigh

The charm is an easy addition for a charming lunch of my Gluten & Dairy Free Chicken Spinach Quesadilla Recipe.

298Leigh

Matching Loteria place-cards for the table are really quick and easy to make.

141Leigh

Use the actual game cards or make a color copy of a set of them to cut out. I chose the latter so that I can remake them whenever I like… without buying a new game.

143Leigh

Cut paper cardstock strips to use as easel supports, and fold in half to make a V.

146Leigh

Then cut two slits to either side of the Spanish words. Slip a V strip into the slots you cut.

316Leigh

Then simply write your guests names on them with a marker. These would also make great food labeling cards for a buffet.

327Leigh

The Loteria cards add extra pops of color to the tablescape… and you can never have too much color at a fiesta!

294Leigh

The sombrero napkin rings are some of the cutest in my collection, yet were some of the quickest to make. Craft them yourself with braided raffia ribbon and tiny doll straw hats.

154Leigh

Transform the hats into sombreros with strips of fabric and dollhouse chili peppers. (I never use chilis in my recipes, but they do make delightful décor.) Use hot glue to attach a few peppers, and then wrap a fabric strip as a band.

158Leigh

Cut a six inch length of raffia ribbon for each ring. Slightly overlap the edges then hot glue them.

160Leigh

Glue the sombrero over the seam covering it completely.

063Leigh

Fill the rings with colorful fabric napkins.

044Leigh

I think they look really adorable on the tablescape… if I do say so myself!

274Leigh

Here the card and napkin ring add color to a lunch of Tex-Mex Nachos made with my Nacho Average Fiesta Dip Recipe.

223Leigh

They bring additional ambiance to another meal with my Gluten & Dairy Free Chicken Spinach Quesadilla Recipe.

164Leigh

Make fiesta invitations to match your napkin rings easily by following the earlier steps to turn a straw doll hat into a sombrero. Cut a 5.5 x 8.5 inch piece of textured cardstock and a 4.5 x 7.5 size of serape scrapbook paper. Print or write invitation instructions on vellum, then cut it to a size smaller than the scrapbook paper (like 4 x 7).

004Leigh

Hot glue the layers at the center of the top, and then glue the sombrero over it. I made some of these for a bridal shower years ago, and they mailed just fine. I got such a glowing response from the project that I decided to show you how to craft them yourself.

321Leigh

Next, bring more light and color to the celebración with my Easy DIY Upcycled Can Tea-light Luminarias (+ Free Printable Template) & Tissue Paper Flowers Crafts (for Cinco de Mayo Fiesta Décor).

041Leigh

¡Viva la fiesta!

Faithfully Yours,

Leigh


Leaping Bunny Topiary Spring Indoor Garden Party Décor Ideas for Easter or even Showers, Luncheons, & Brunches

256Leigh

Say goodbye to winter storms and hello to spring splendor with a vivacious indoor garden party resplendent with leaping bunny topiaries! Put away the pastels and embrace vibrant carrot oranges and greens echoing this time of growth. Add apropos messages spelled out in hedgerow letters declaring the true reason for the Easter season. Give lettuce-edged napkins the bunny ear treatment as a tongue-in-cheek homage to all those cherished family photos. Layer chevron patterning with textural fibers to modernize the fête’s décor, forming an ensemble proclaiming, “Hello Spring!”

252Leigh

Crisp orange and white chevron fabric awakens the senses, making it the perfect underpinning for this little soiree. (My mother actually made this tablecloth, which is amazing for someone who has repeatedly stated, “I don’t sew.”)

255Leigh

Layered on that are round raffia mats placed as chargers. Rustic sage green plates are topped with orange salad bowls filled with fresh garden salads of baby greens like kale, spinach, and chard, with orange heirloom cherry tomatoes, English cucumbers, fresh parsley, sprouted pumpkin seeds, and crunchy carrot croutons. (Find the easy recipe for it here.)

149Leigh

Daily flatware is used, with the exception of the knives which have been exchanged with lovely patterned versions. (Mixing patterns is not only okay, but fantastic!)

139Leigh

Orange burlap bunny ears napkin rings hold lettuce-edge napkins matching the sage plates. (Learn how to easily make your own rings here.)

220Leigh

Understated water glasses were chosen as the only simple elements on the tablescape. Carrot lollipops with jute bows sit in place of dessert spoons. (Find them on sale at affiliate Oriental Trading Company. The link in the side bar adds a coupon with free shipping to your cart automatically.)

158Leigh

Baby leaping bunny topiaries sprout from burlap covered carrot pots above each place setting. (Learn how to craft them easily here.) Tiny printable carrots act as place-cards for each invitee. (Snag my free printables here.)

287Leigh

Big bunny mama springs from the center of the table in declaration of a beautiful life.

257Leigh

Orange twine wrapped Easter eggs sit on the grass beneath her. Twine and crepe carrots suggest growth of one’s soul.

294Leigh

Faith stands as the center of the celebration both literally and figuratively. (The hedgerow letters are bandaged with burlap and jute symbolizing that one may be battered, but not broken when one has such faith.)

063Leigh

The side table holds another hedgerow spelling Believe. It sits with an additional egg enmeshed in a swirl of vibrant chevrons and burlap lilies.

198Leigh

A green trunk elevates another bunny constructed of grapevines holding both faux farm eggs and green bird eggs.

183Leigh

Above that a carrot wreath with my topiary printable hangs next to my banner. (Find the carrot wreath at affiliate Cost Plus World Market whose sale link is in the sidebar.)

209Leigh

The end of my printable bunny and carrot banner sits close to a burlap carrot sign extending an honest welcome to all enter. (Get my free printables here.)

253Leigh

Take an idea or two, or use all of my craft tutorials and free printables for your own indoor garden party that declares, “Hello Spring!”

Faithfully Yours,

Leigh

P.S. The Easter Bunny approves this message.

WildBackyardBunnyLeigh

(This is one of the wild backyard bunnies visiting my porch!)

Easy DIY Leaping Bunny Topiary Craft Tutorials with Free Banner, Wreath, Place-card, Invitation, & Thank You Note Printables (for Easter, Showers, Luncheons, & Brunches)

253Leigh

Make your own tabletop garden full of leaping bunnies for your next indoor garden party. DIY these easy projects 3-dimensionally or with my free printables… or mix and match the crafts as I’ve done here. Choose your own color and theme to embellish the bunnies with, or follow my lead and make burlap carrot pots to sprout your menagerie from. Better yet, keep the wraps, rosettes, and ribbons nonpermanent so the bunnies may be used again for another theme. Let these rascally rabbits transform your spring fling into a colossal cute –fest today!

256Leigh

I’ve seen faux foliage covered bunny and bird ornaments as well as topiary picks at several stores locally, and online the choices are endless. Using one of these ready-mades is the quickest way to craft a 3-dimensional creature topiary. (I’ll tell you how to make 2 other types later.)

020Leigh

Wrap small terra cotta pots with burlap fabric or ribbon, and cut after the overlap. Use dots of hot glue to adhere one side to the other. Avoid gluing the burlap to the pot if you’d like to reuse these with another theme, as I’ll be sure to do in the future. Trim the excess length off with scissors so that the pots sit flat on the table.

023Leigh

Add a length of ribbon around the top and tie it in a taut bow. This is not only decorative, but is a trick to keep the burlap securely in place without having to glue it permanently.

005Leigh

Fill each pot with a chunk cut to fit, from a large block of stryofoam. Wedge little chunks of stryofoam in between the large block and the wall of the pot until the large block has no wiggle room. This keeps your creation from drooping later.

006Leigh

Glue ground cover to the top of your moss. Do this by cutting the green edges to fit the pot, and gluing those edges to the rim. I used faux earth meant for a table runner, but I’ve seen similar stuff in the form of placemats as well. Other options are faux Easter grass, moss ribbon, Astroturf, green burlap, or grass printed scrapbook paper (for the printable topiary).

010(2)Leigh

Cut stems, sticks, or dowels to jab into your ornaments, and wrap them with brown floral tape. If your animals are already on sticks, simply cut them to size with good sheers.

013 (2)Leigh

It’s easier to embellish your bunnies before potting them. Double-wrapped a length of jute (or yarn, ribbon, twine) around each bunny neck and knot it loosely. Slip a burlap rosette under the jute so that it sits securely without glue.

014 (2)Leigh

Make a pilot hole into the center of the green stuff. Do this carefully with any sharp point from an awl to a screwdriver. (I used a scissor side… but I have a tendency toward crafting dangerously.) Lastly, jab the bunny stick into the pilot hole.

134Leigh

Continue crafting the rest of your rascally rabbits.

287Leigh

Another option is cover a carved styrofoam shape with moss, as I have done with the larger bunny centerpiece. I’m not going to cover that in detail here because it took a lot more time, energy, and patience. If you choose to go that route, you can either purchase a ready-made animal shape, or carve one from a block of stryofoam yourself. Foam cutting knives are available that will make the job slightly easier.

257Leigh

One way to add foliage is to cover your creation with moss ribbon as I have done. This is a kind of moss covered carpet tape. Cut it into pieces and round the edges, so that the animal shape may be completed in an unseen patchwork. Adhere the patches with hot glue, pressing firmly.

130Leigh

 Embellish it with a burlap ribbon collar and flower, and pot it in the same way as I showed you earlier. I wanted to reuse the bunny topiary again for future themes, so I did not glue the collar to the bunny. I simply glued the flower to one end of a length of ribbon, and then wrapped the ribbon around the neck. I began with the blank end and looped it underneath. The weight of the flower resting on top of the opposite ribbon end kept it firmly in place. It will look completely different with a another color of base wrap and type of collar embellishment.

183Leigh

The following are my leaping bunny printables (free for noncommercial use). Right click on the image you want to use, and select print. Choose color and photo settings for your printer, and print them on sturdy white cardstock.

BigBunnyTopiaryCraftLeighBunnyTopiaryCraftLeigh2BunnyTopiary5x7LeighCarrotsCraftLeigh


To make a paper topiary from my printables, begin by printing and cutting out the two opposite facing bunnies.

034Leigh

Glue them together, back to back with a stick or popsicle stick in between. Pot the stick, as shown previously, and embellish it further with paper rosettes and ribbons.

129Leigh

Cut out the carrots to use as place-cards that rest on your newly crafted topiaries. I printed mine, 2 sheets to a piece of cardstock, so that they would be smaller than the banner carrots.

158Leigh

Another option for folded place-cards, is to print out the 5×7 invitations / thank you cards and fold them in half. Embellish them with tiny bows or paper flowers, and write guests’ names on them.

198Leigh

Adding my leaping bunny topiary printable to the center of an existing wreath is an easy way to update a piece you already own and make it fit perfectly to your theme. (This carrot wreath came from Le fidèLe Design’s affiliate Cost Plus World Market. Find a link to them with up to date coupons in the side bar.)

032Leigh

Make a banner with the bunnies and carrots by simply arranging them in a pleasing manner and taping the backs to jute, ribbon, twine, or yarn. I chose to criss-cross the carrots between the bunnies.

209Leigh

A loop at each end makes it easy to hang with clear thumbtacks.

113Leigh

You can also attach the carrots to readymade treat bags like the orange chevron one here. It’s filled with sprouted pumpkin seeds as a part of a healthy and tasty lunch. (See more of this along with the recipe here.)

090Leigh

(Find the bunny ears napkin ring tutorial here.)

Faithfully Yours,

Leigh

P.S. The Easter Bunny approves this message.

WildBackyardBunnyLeigh

(This is one of the wild backyard bunnies visiting my porch!)

Fast & Easy DIY Burlap Ribbon Bunny Ears Napkin Rings Craft Tutorial (Perfect for Easter, Showers, Luncheons, & Brunches)

139Leigh

Why buy a set of bunny ears napkin rings when you can make your own for a fraction of the cost that suits your décor perfectly? This was the thought that sparked one of my cutest projects. 12 feet of 1 inch wide orange burlap ribbon was enough to make 6 rascally rabbit rings for my leaping bunny topiary theme, but many other ribbons would have worked just fine. Hot glue, scissors, and a ruler were the only tools needed to finish the napkin creatures in half an hour. What a perfect project for a spring “crafternoon”!

017 (2)Leigh

Each bunny will use about 2 feet of ribbon, so plan accordingly. Note that one inch wide ribbon is the perfect size for this project. Cut 2 lengths of 7 inch strips for each ring… or 12 strips for a half dozen rings.

019 (2)Leigh

Cut 2 lengths of 5 inch strips for each set of ears… or 12 strips for a half dozen rings.

020 (2)Leigh

Fold each 5 inch strip in half, and press a crease into the folded edge. Lay down a thin strip of hot glue along each vertical side edge, in order to glue the fold into place permanently. (Try using a cool temp hot glue gun to avoid burning your fingers with the hole-filled burlap.) Leave the bottom non-folded edges unglued, forming a tiny sack. At the top folded edge, take the right corner and fold it over toward the center. Then take the top left corner, and fold it over the right one. It will make the top of each ear. Glue the folds into place with a dot of glue, under the left corner and over the right.

023 (2)Leigh

With all your ears made, assembly line fashion, get started on attaching them to the rings. Take one of the 7 inch strips and fold it in half to locate its center. Cut centimeter length slits, about a centimeter away from that fold, perpendicular to the fold. (You just made two ear canals.) Fold the bottom open edge of an ear in half, and slip it into a slit opening. You should see about a half centimeter sticking out.

024 (2)Leigh

Glue the outside of this protruding portion to the 7 inch ring strip. It should fan outward. Repeat with the other ear, making sure they’re facing the same direction.

026Leigh

Take another 7 in strip of ribbon and glue it to the flat side of the bunny eared strip. The easiest way to begin is by gluing one end and tapping it into place. Continue on until the whole strip is joined. Make sure the ribbons are curved the same direction for a less troublesome experience.

037Leigh

Form the ring by gluing one end of the long strip to the other, by slightly overlapping the edges. (You just made a bunny face.)

170Leigh

Repeat this process until your rabbit warren is complete. (Know that they get easier after making the first one.)

149Leigh

I used sage green cloth napkins with a seam that is actually called a lettuce edge. These folded beautifully into a roll with a top that resembled a small head of lettuce.

252Leigh

These are perfect for an Easter party. (See more of the leaping bunny garden party here.)

090Leigh

They’re also great to pull out for a spring lunch. (Find the carrot croutons / “bacon” bits recipe here.)

166Leigh

I wanted orange bunnies to coordinate with my carrot décor, which no one even sells, so I made them with fall clearance ribbon… making the grand total for this project a whopping buck fifty!

220Leigh

The best part of all, was receiving the genuine compliment that they were so much cuter than the stores’ versions. I hope you think so too. (Get the topiary craft tutorial and printables here.)

073Leigh

Faithfully Yours,

Leigh

P.S. The Easter Bunny approves this message.

WildBackyardBunnyLeigh

(This is one of the wild backyard bunnies visiting my porch!)