Tag Archives: Fast

Fast & Easy DIY Burlap Ribbon Bunny Ears Napkin Rings Craft Tutorial (Perfect for Easter, Showers, Luncheons, & Brunches)

139Leigh

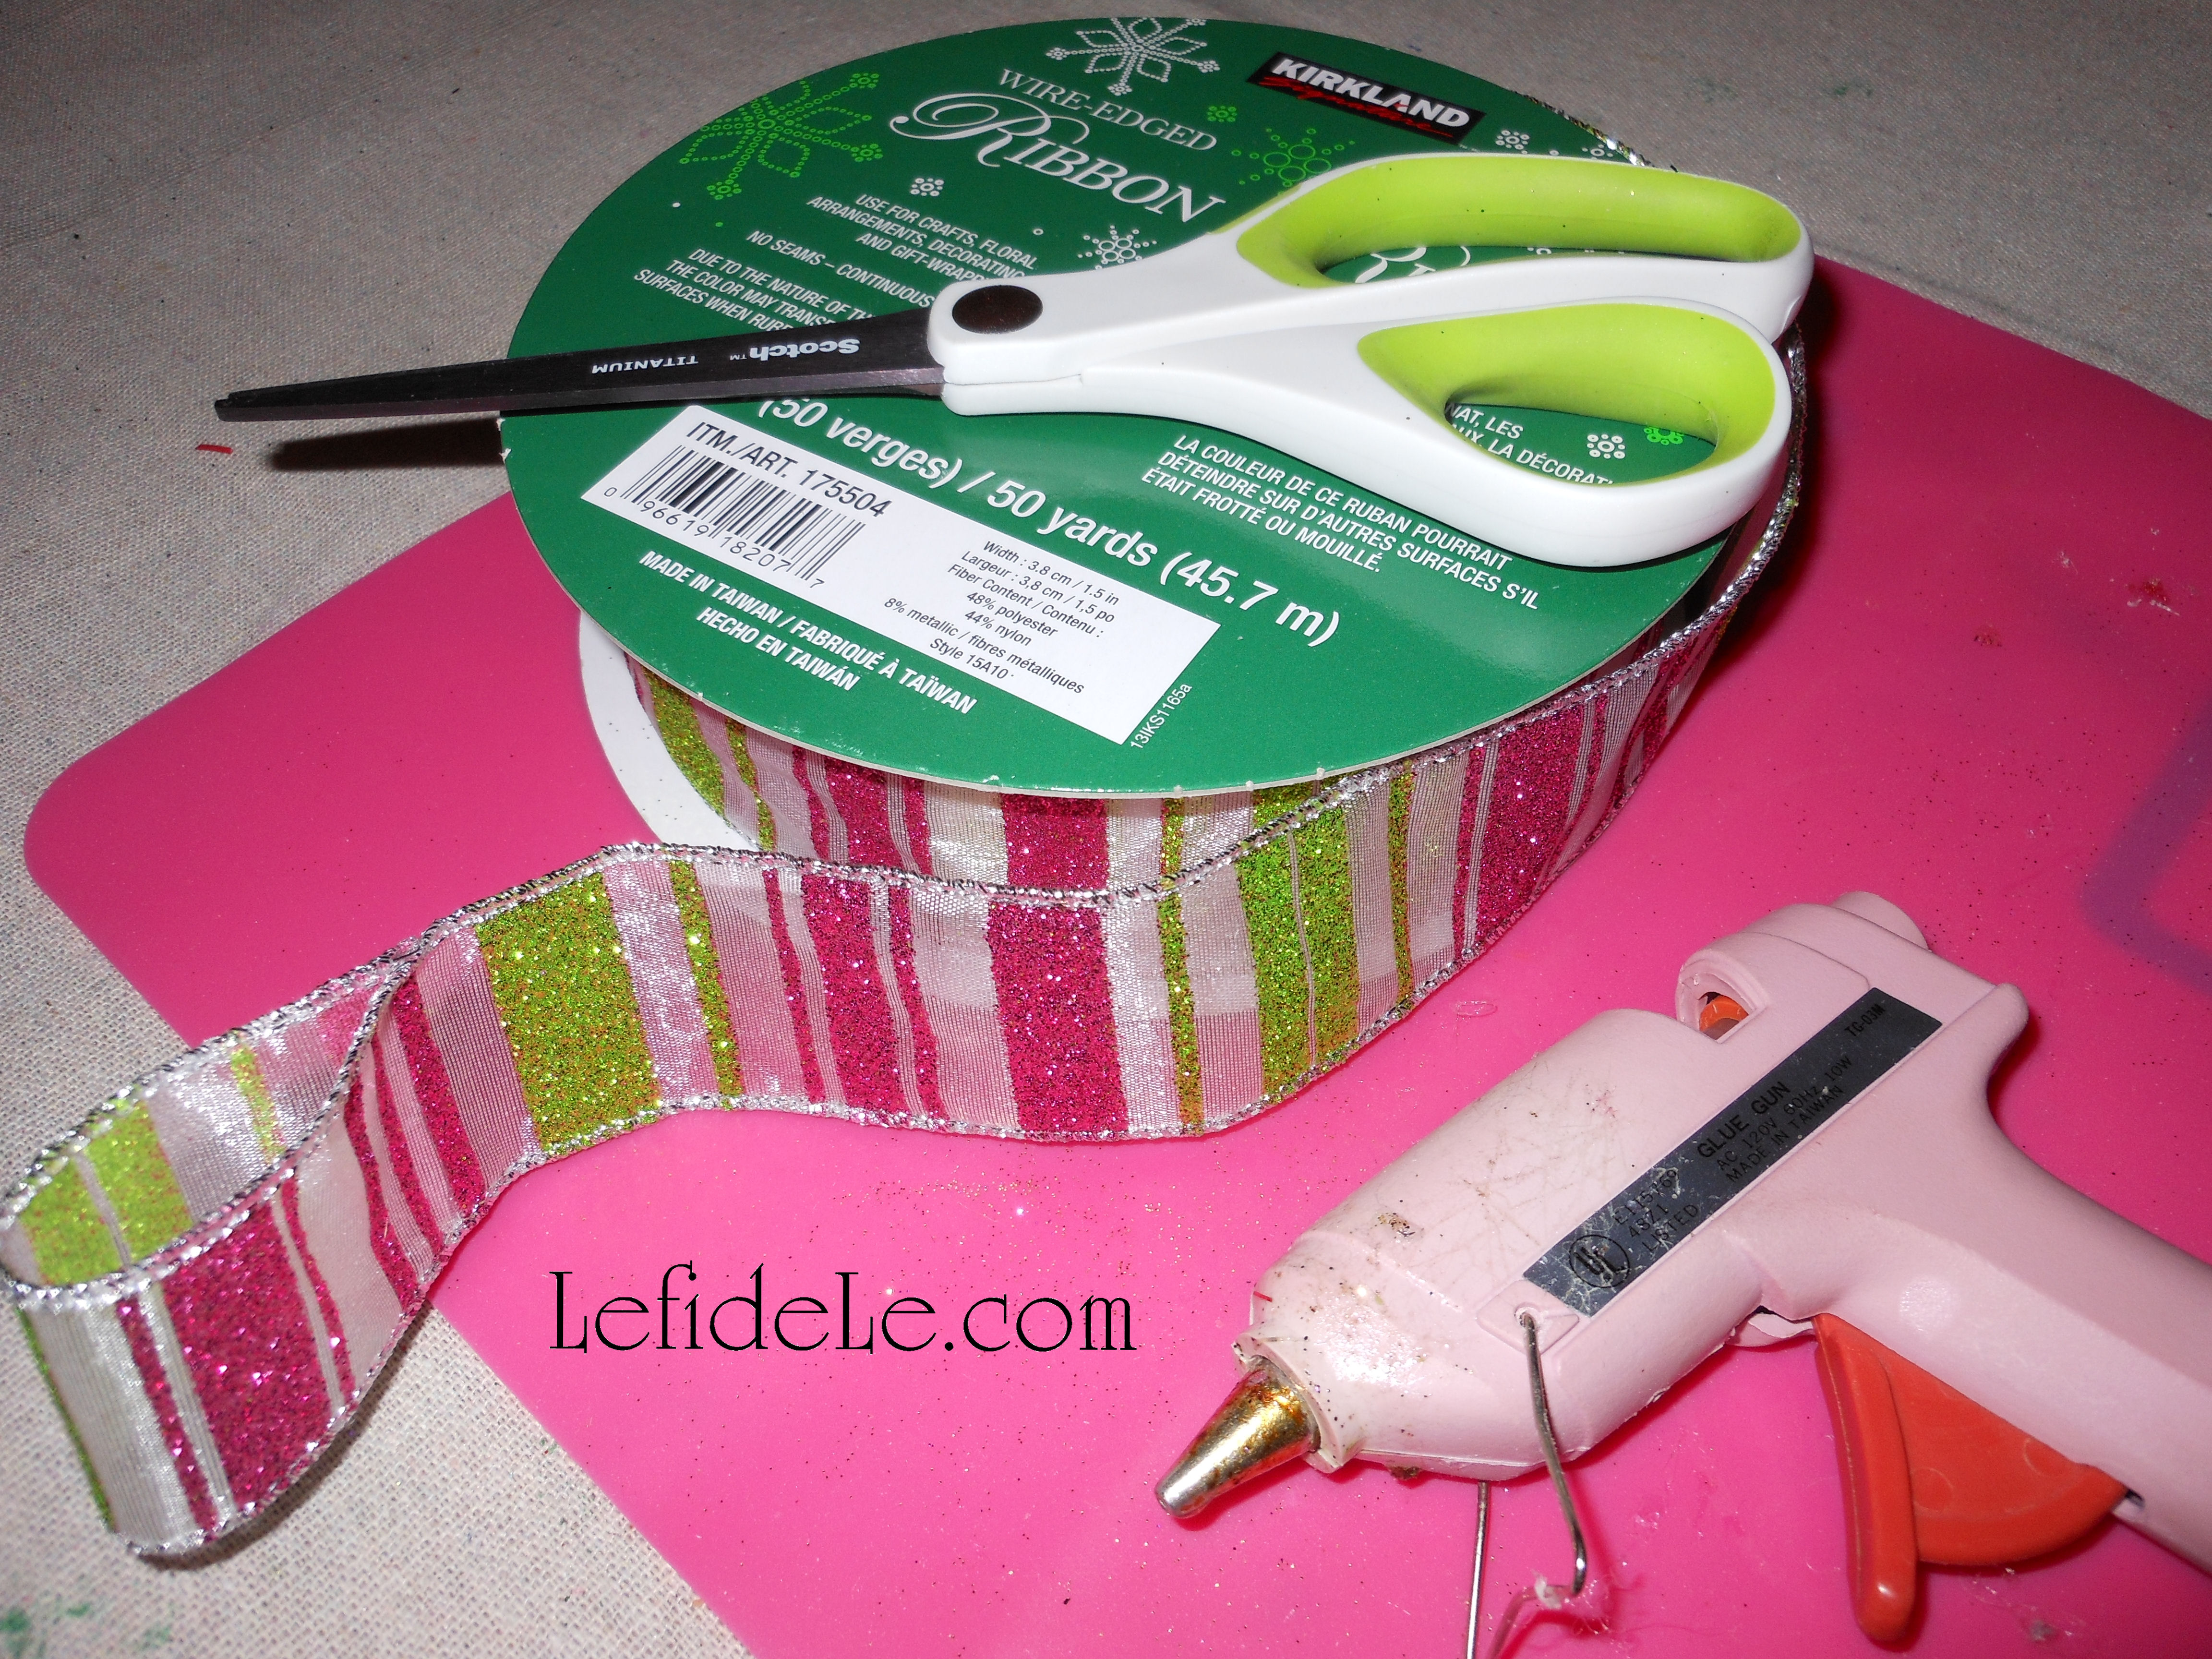
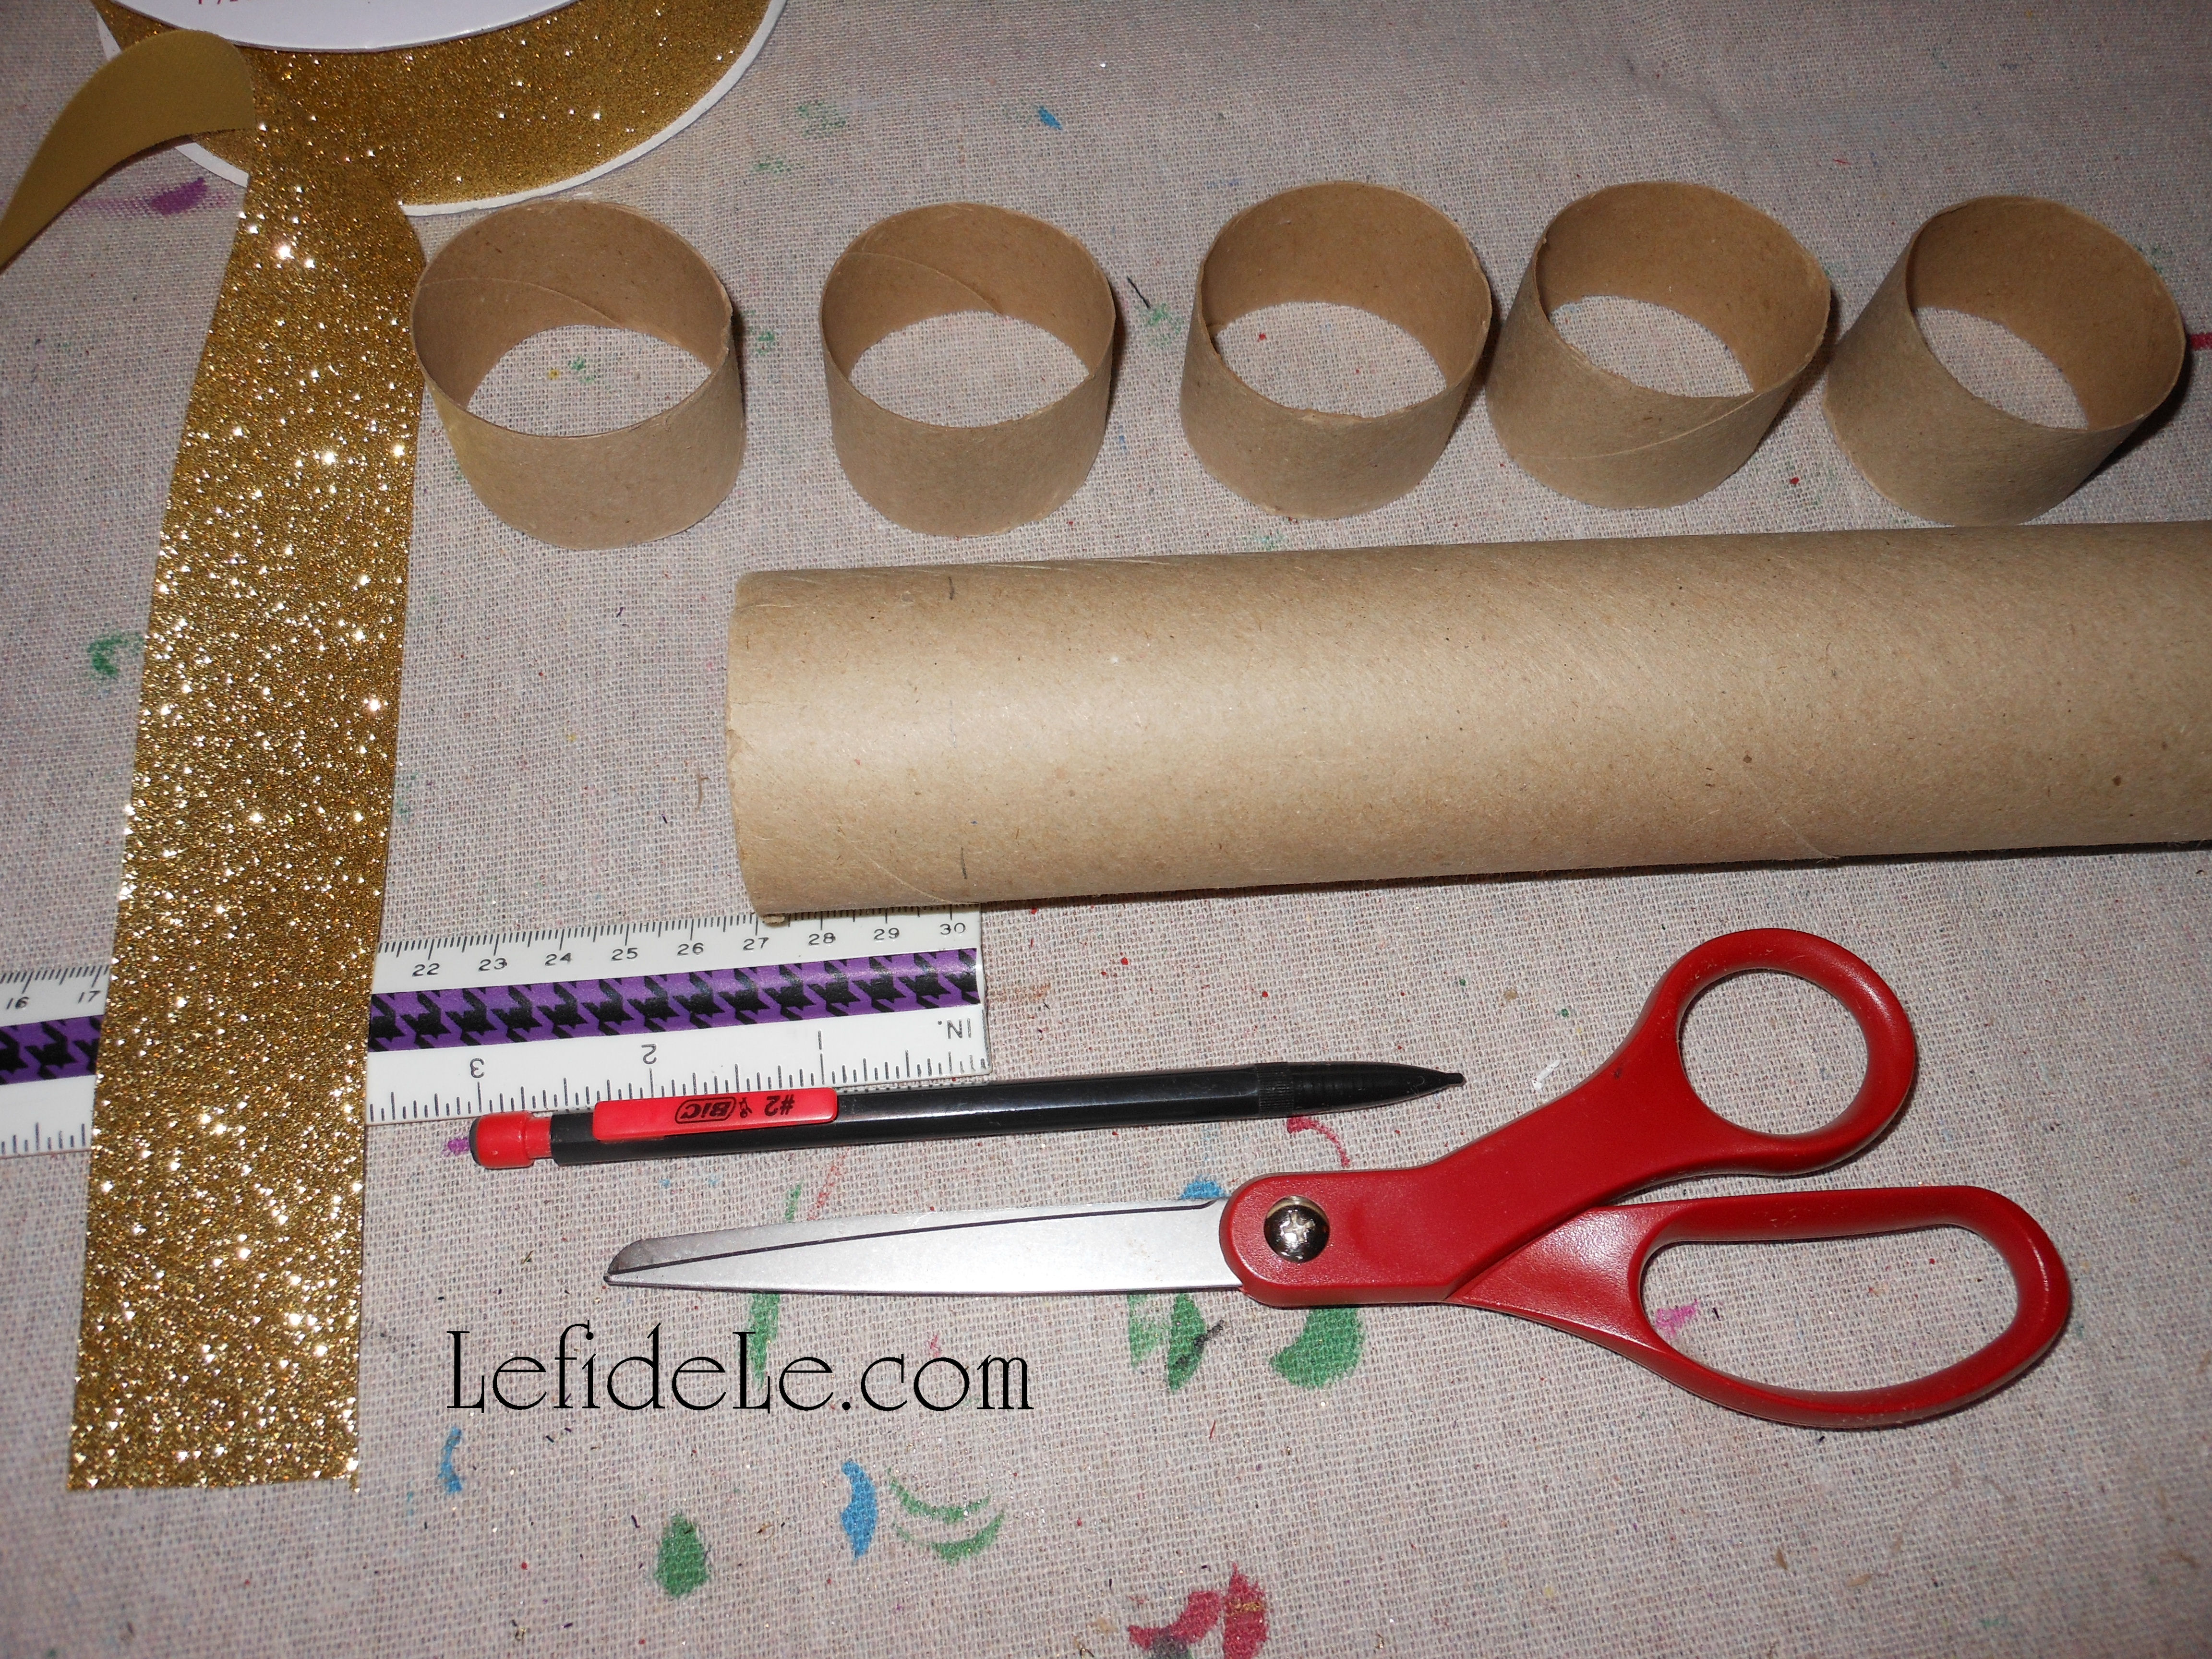
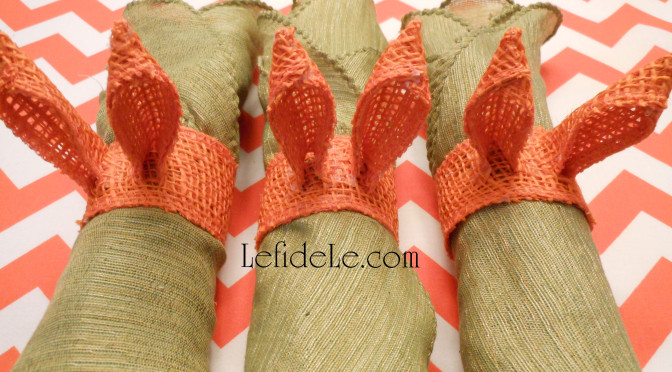
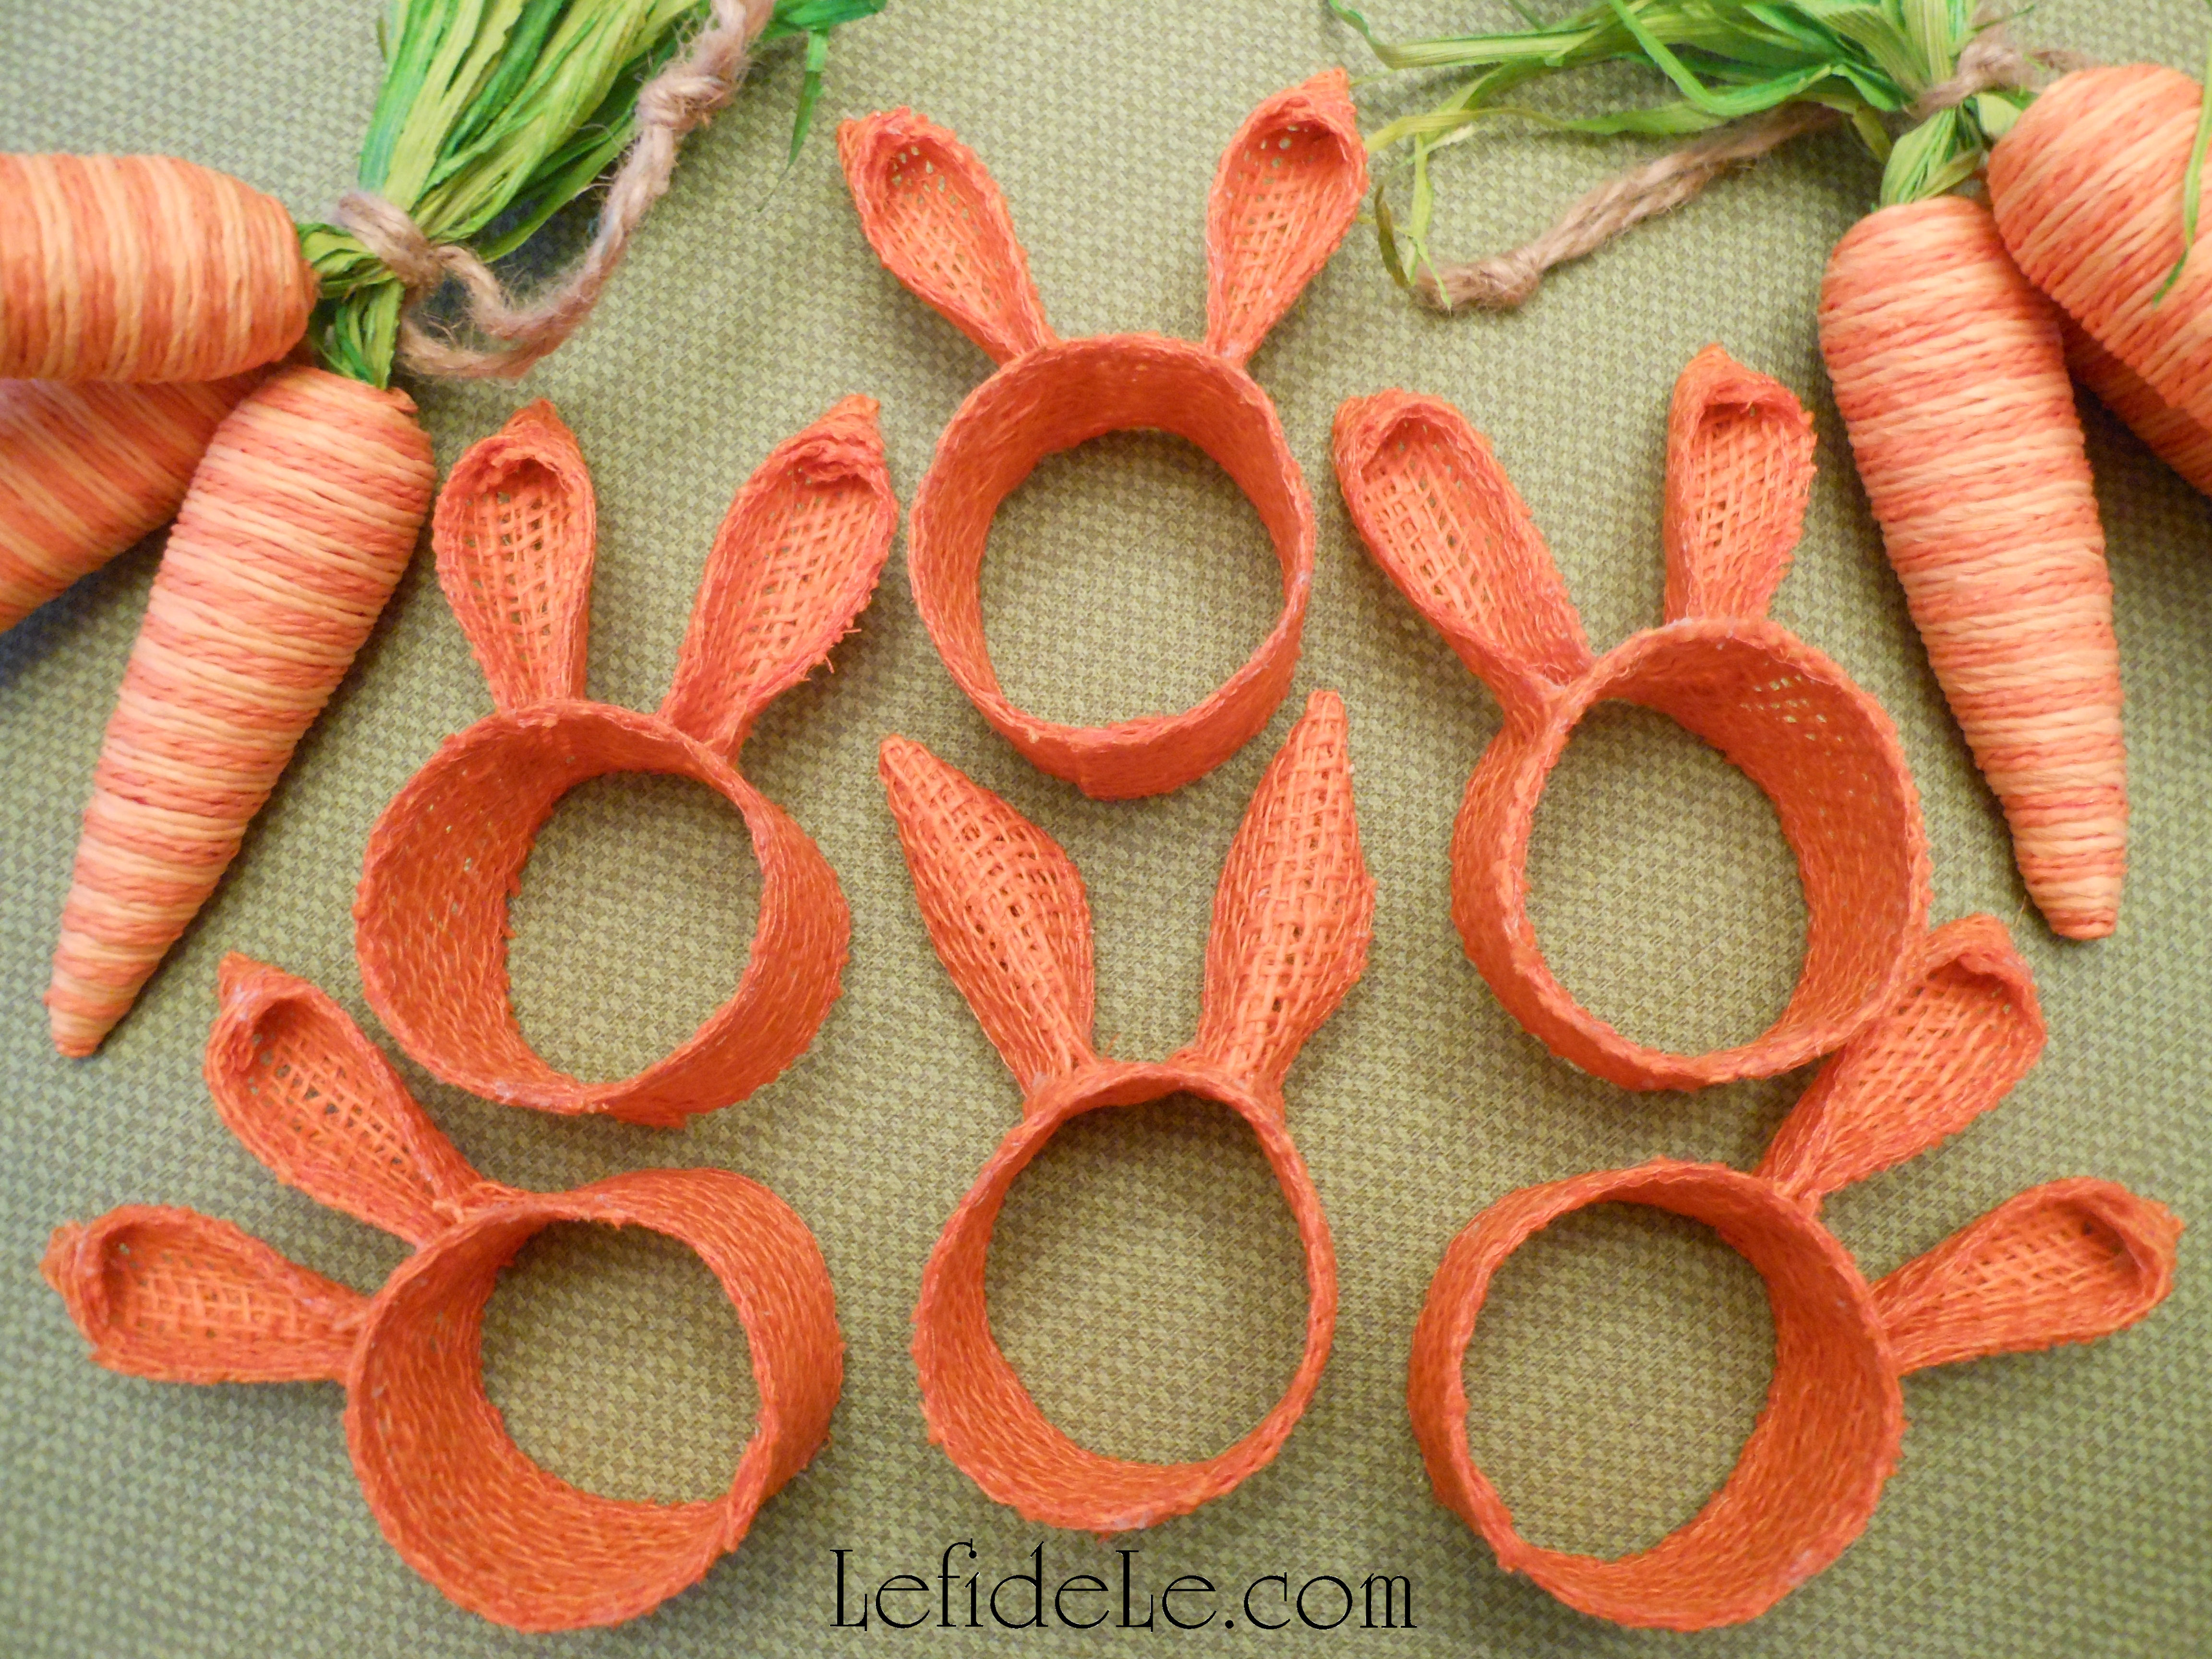
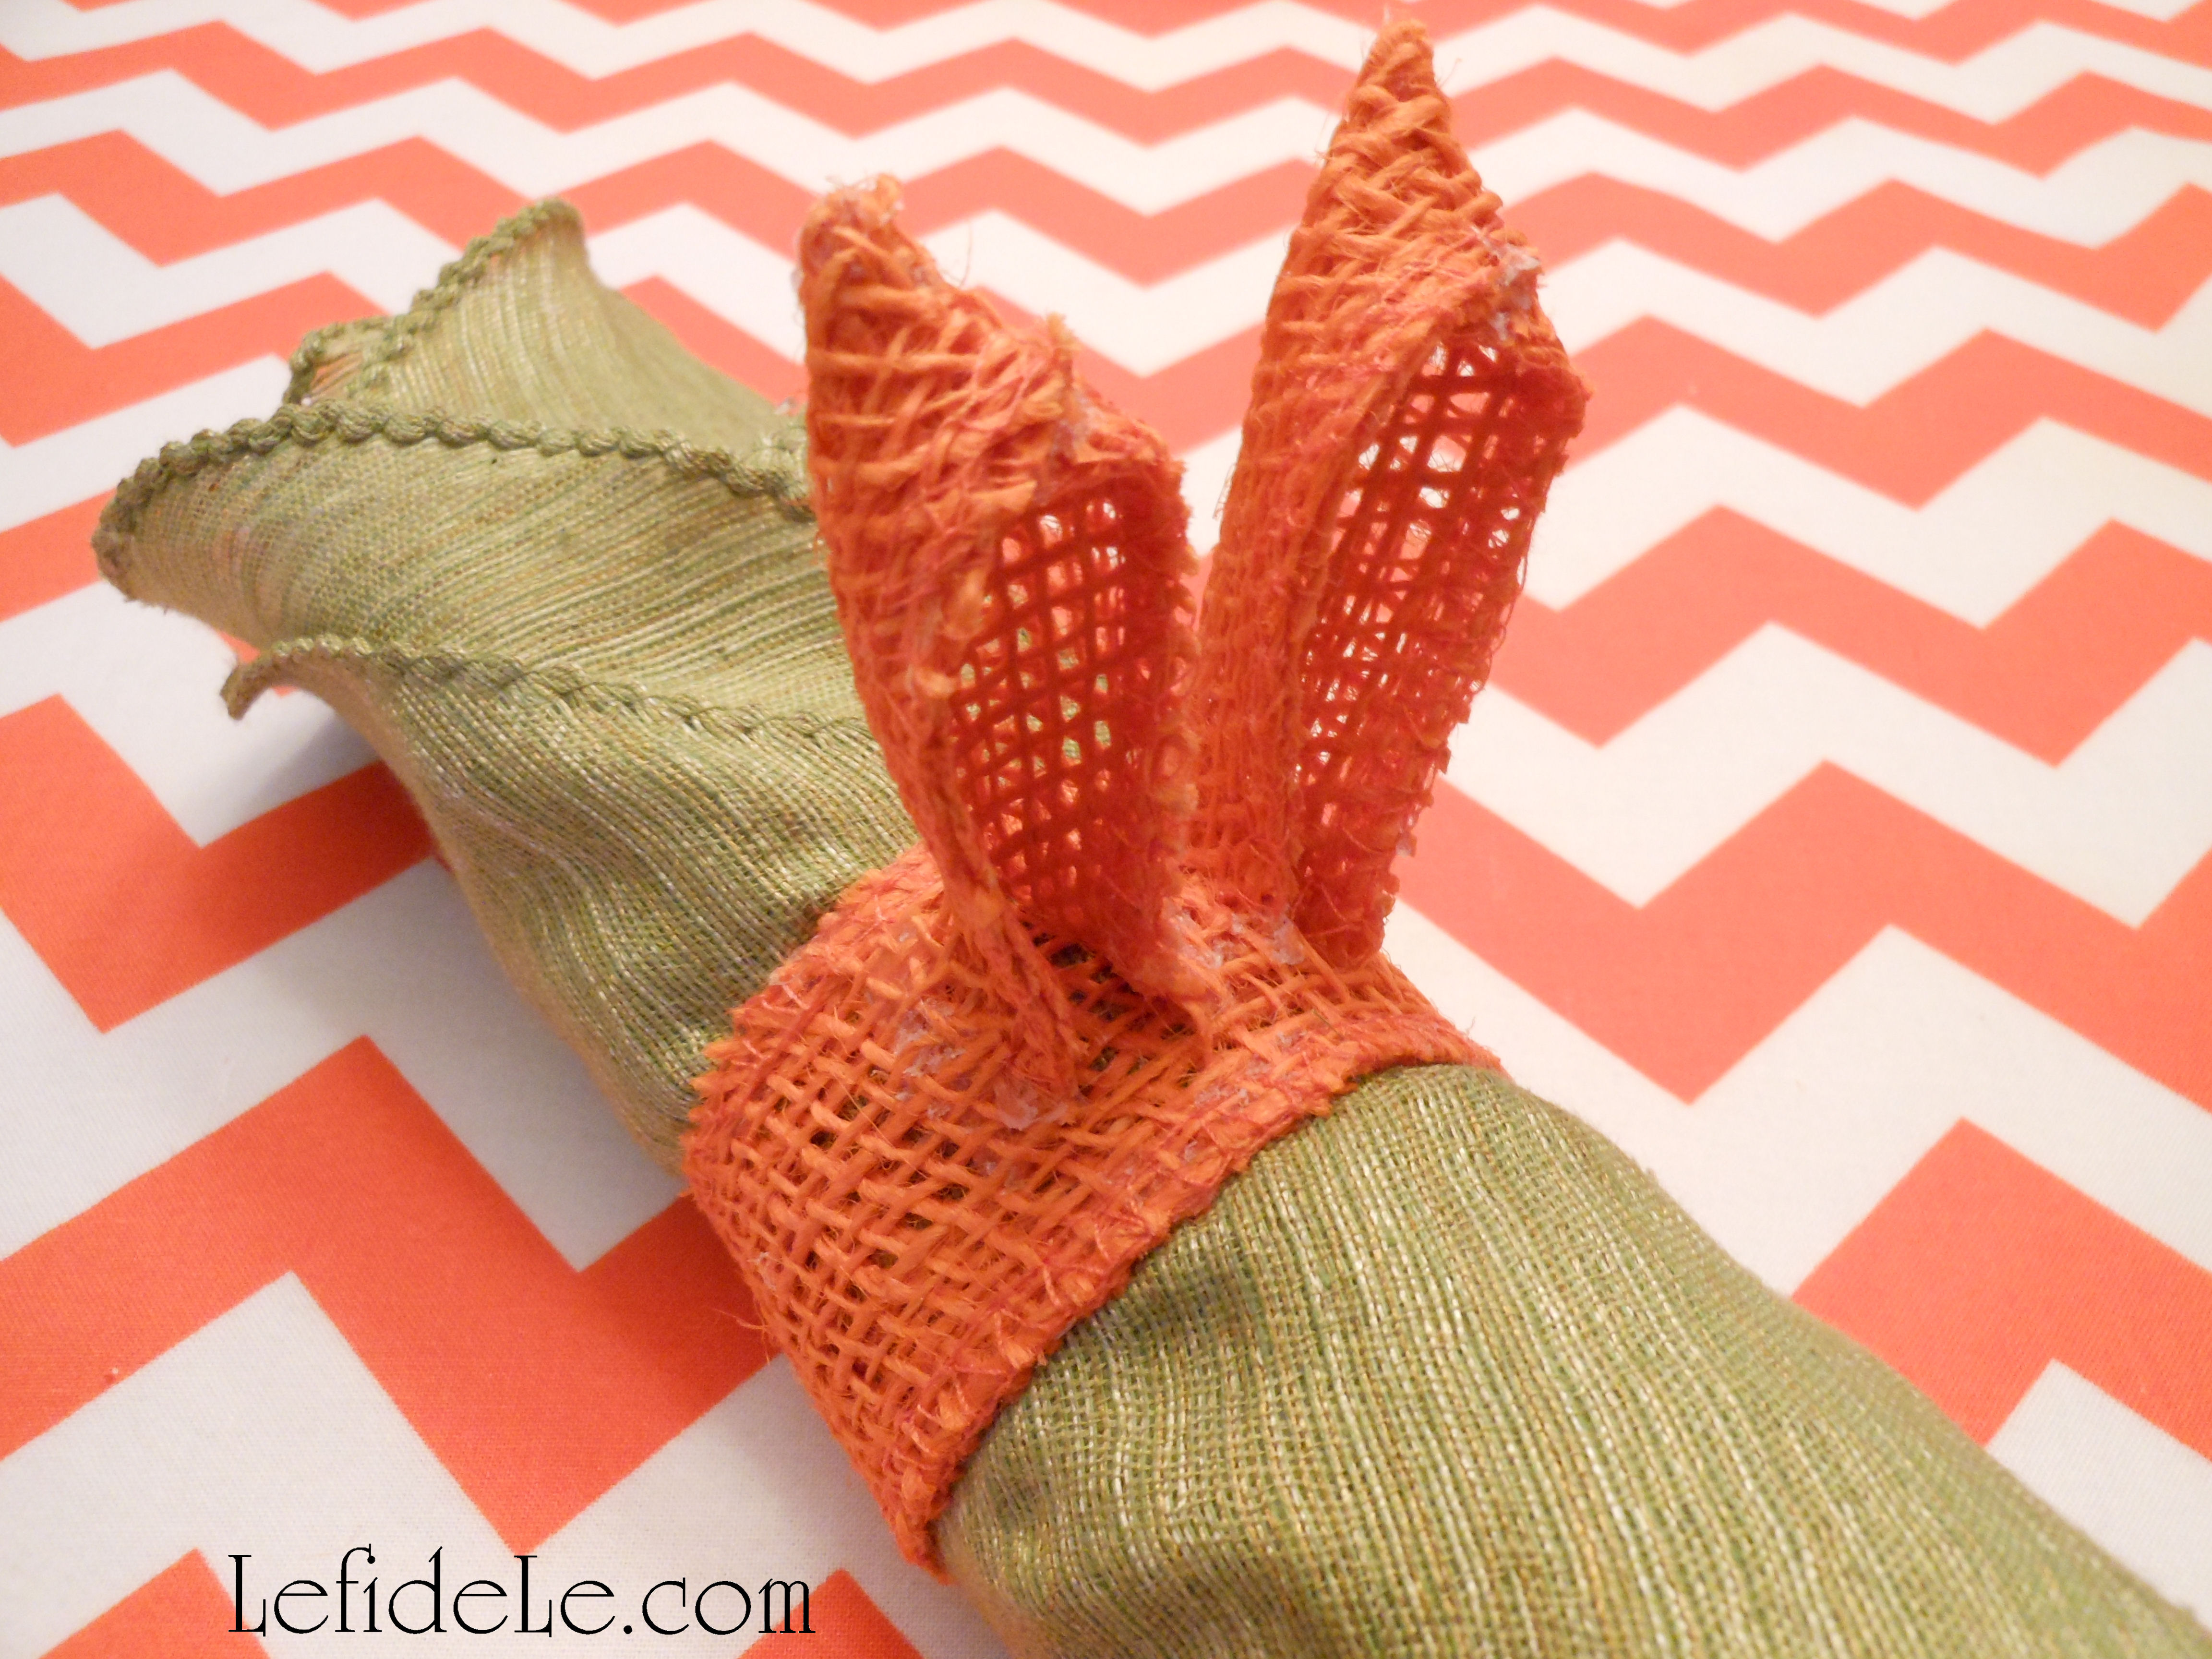
Why buy a set of bunny ears napkin rings when you can make your own for a fraction of the cost that suits your décor perfectly? This was the thought that sparked one of my cutest projects. 12 feet of 1 inch wide orange burlap ribbon was enough to make 6 rascally rabbit rings for my leaping bunny topiary theme, but many other ribbons would have worked just fine. Hot glue, scissors, and a ruler were the only tools needed to finish the napkin creatures in half an hour. What a perfect project for a spring “crafternoon”!

017 (2)Leigh

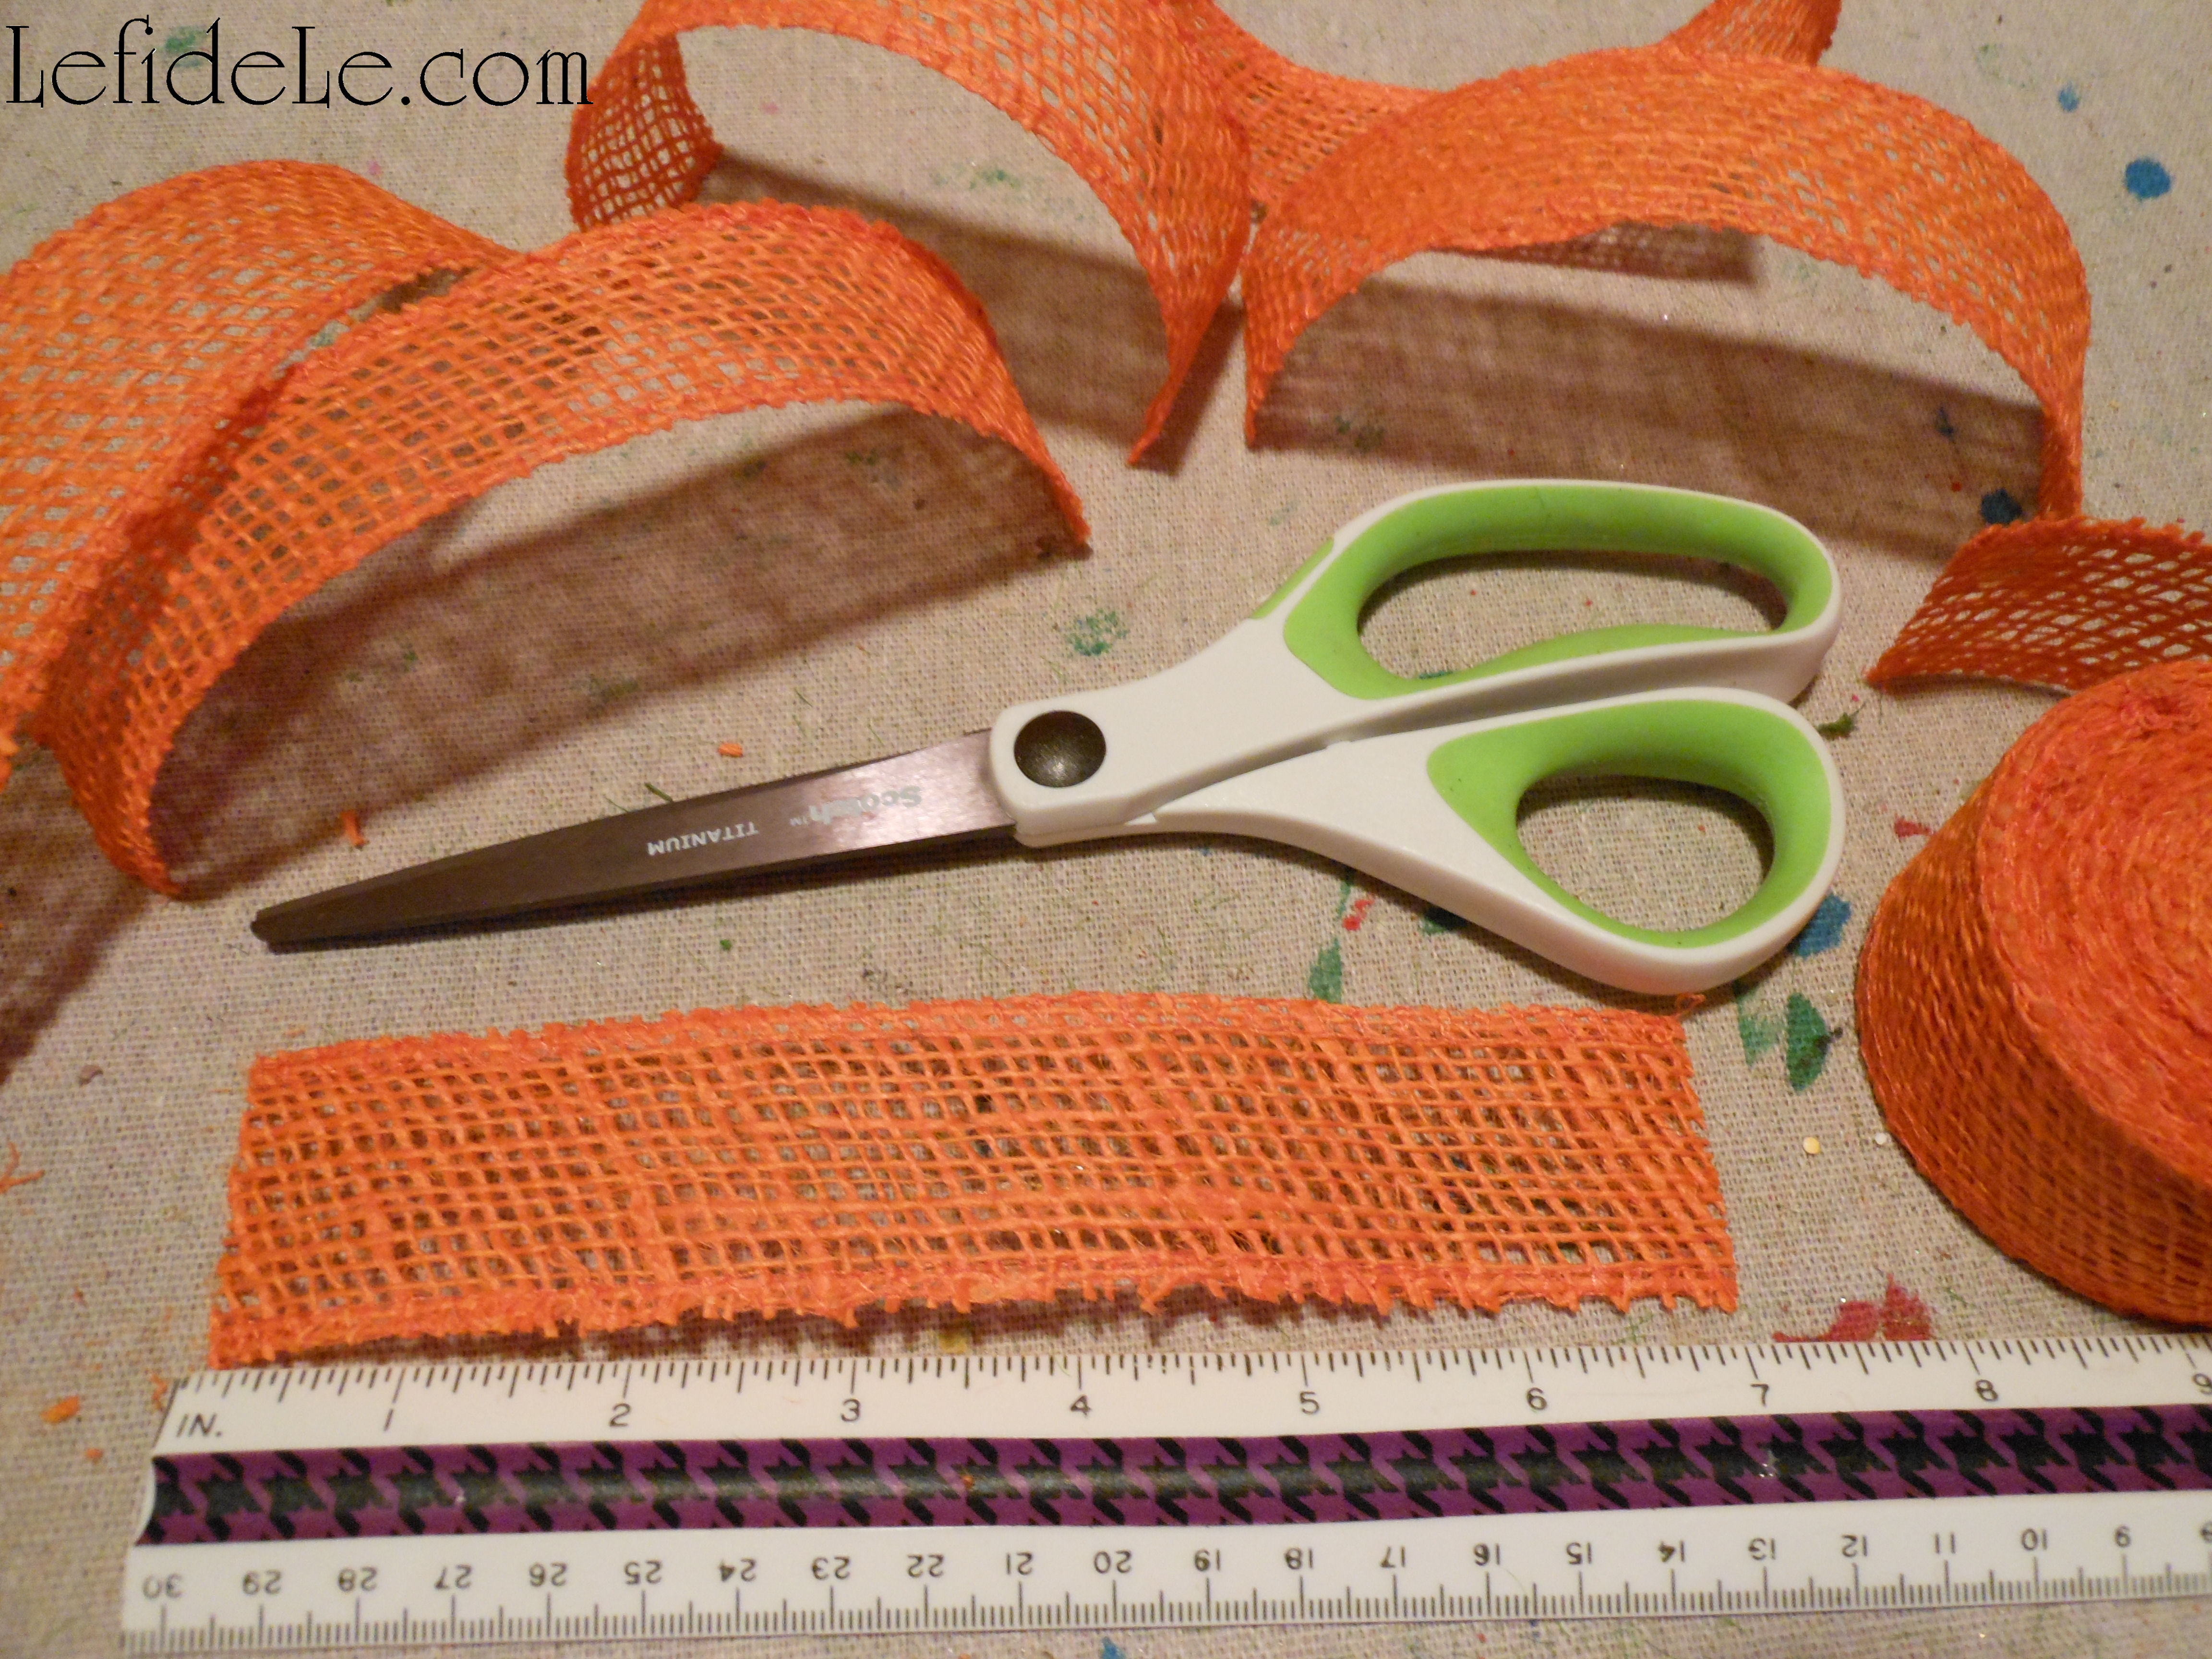
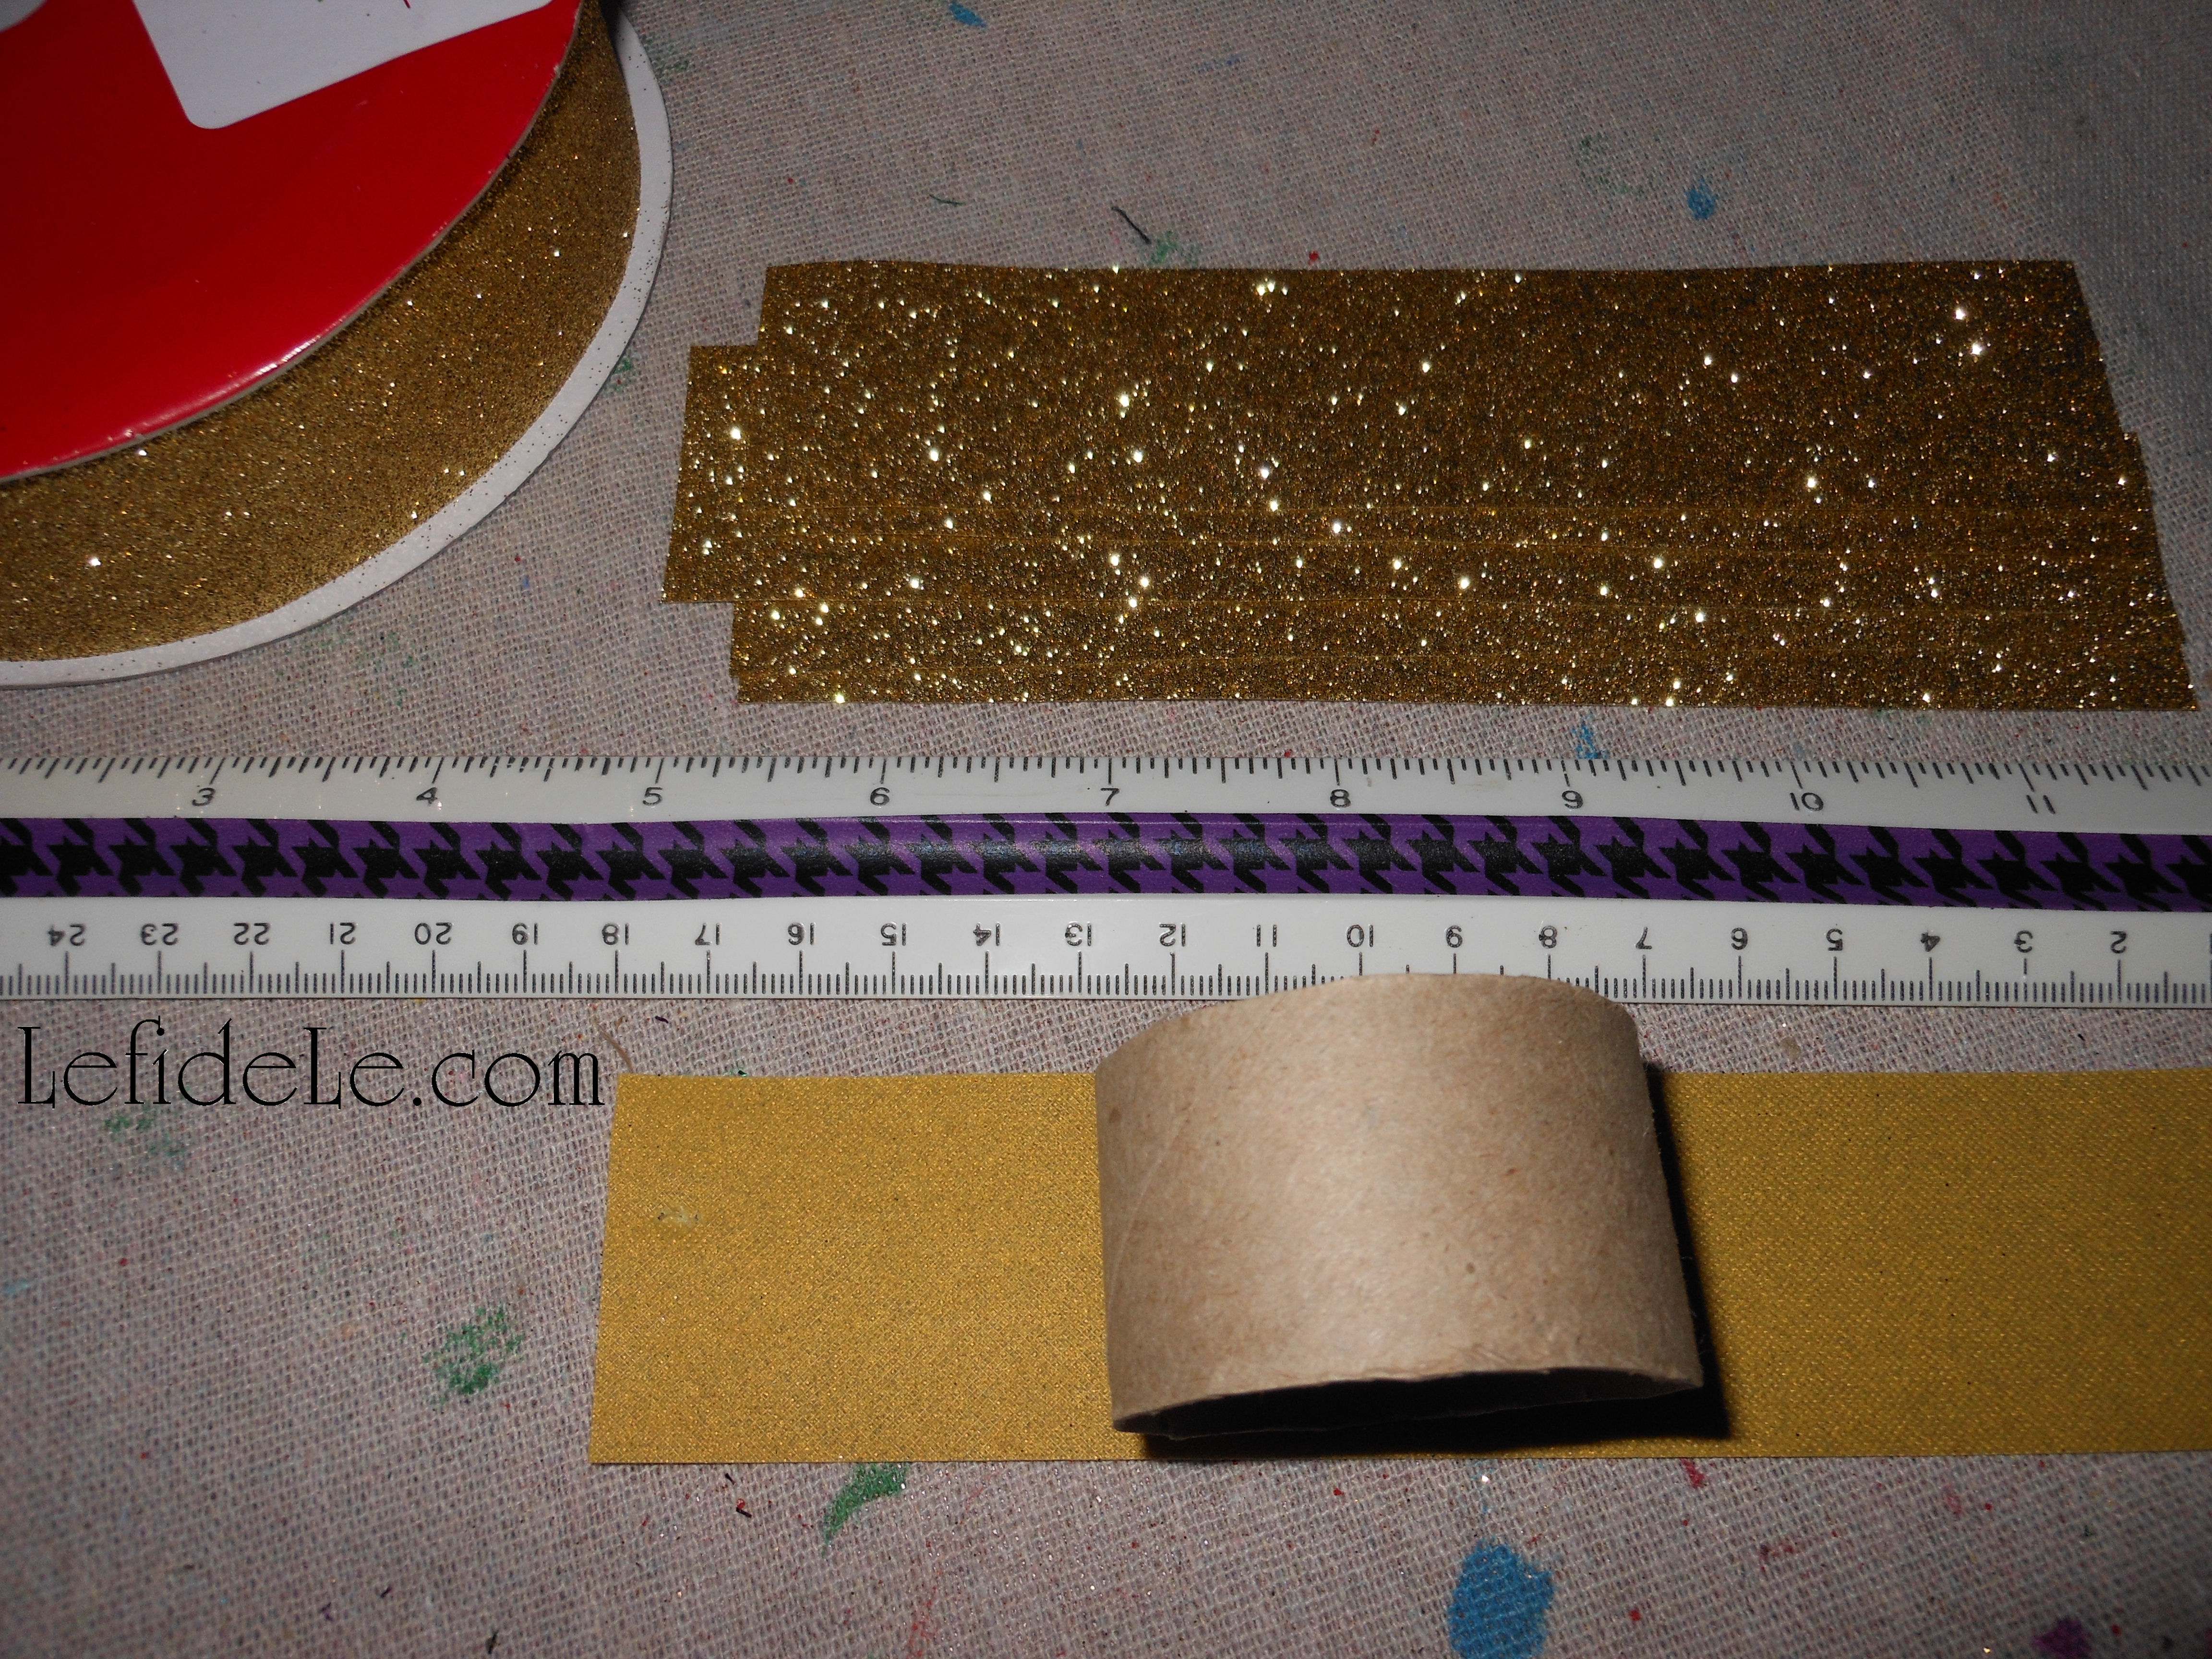
Each bunny will use about 2 feet of ribbon, so plan accordingly. Note that one inch wide ribbon is the perfect size for this project. Cut 2 lengths of 7 inch strips for each ring… or 12 strips for a half dozen rings.

019 (2)Leigh

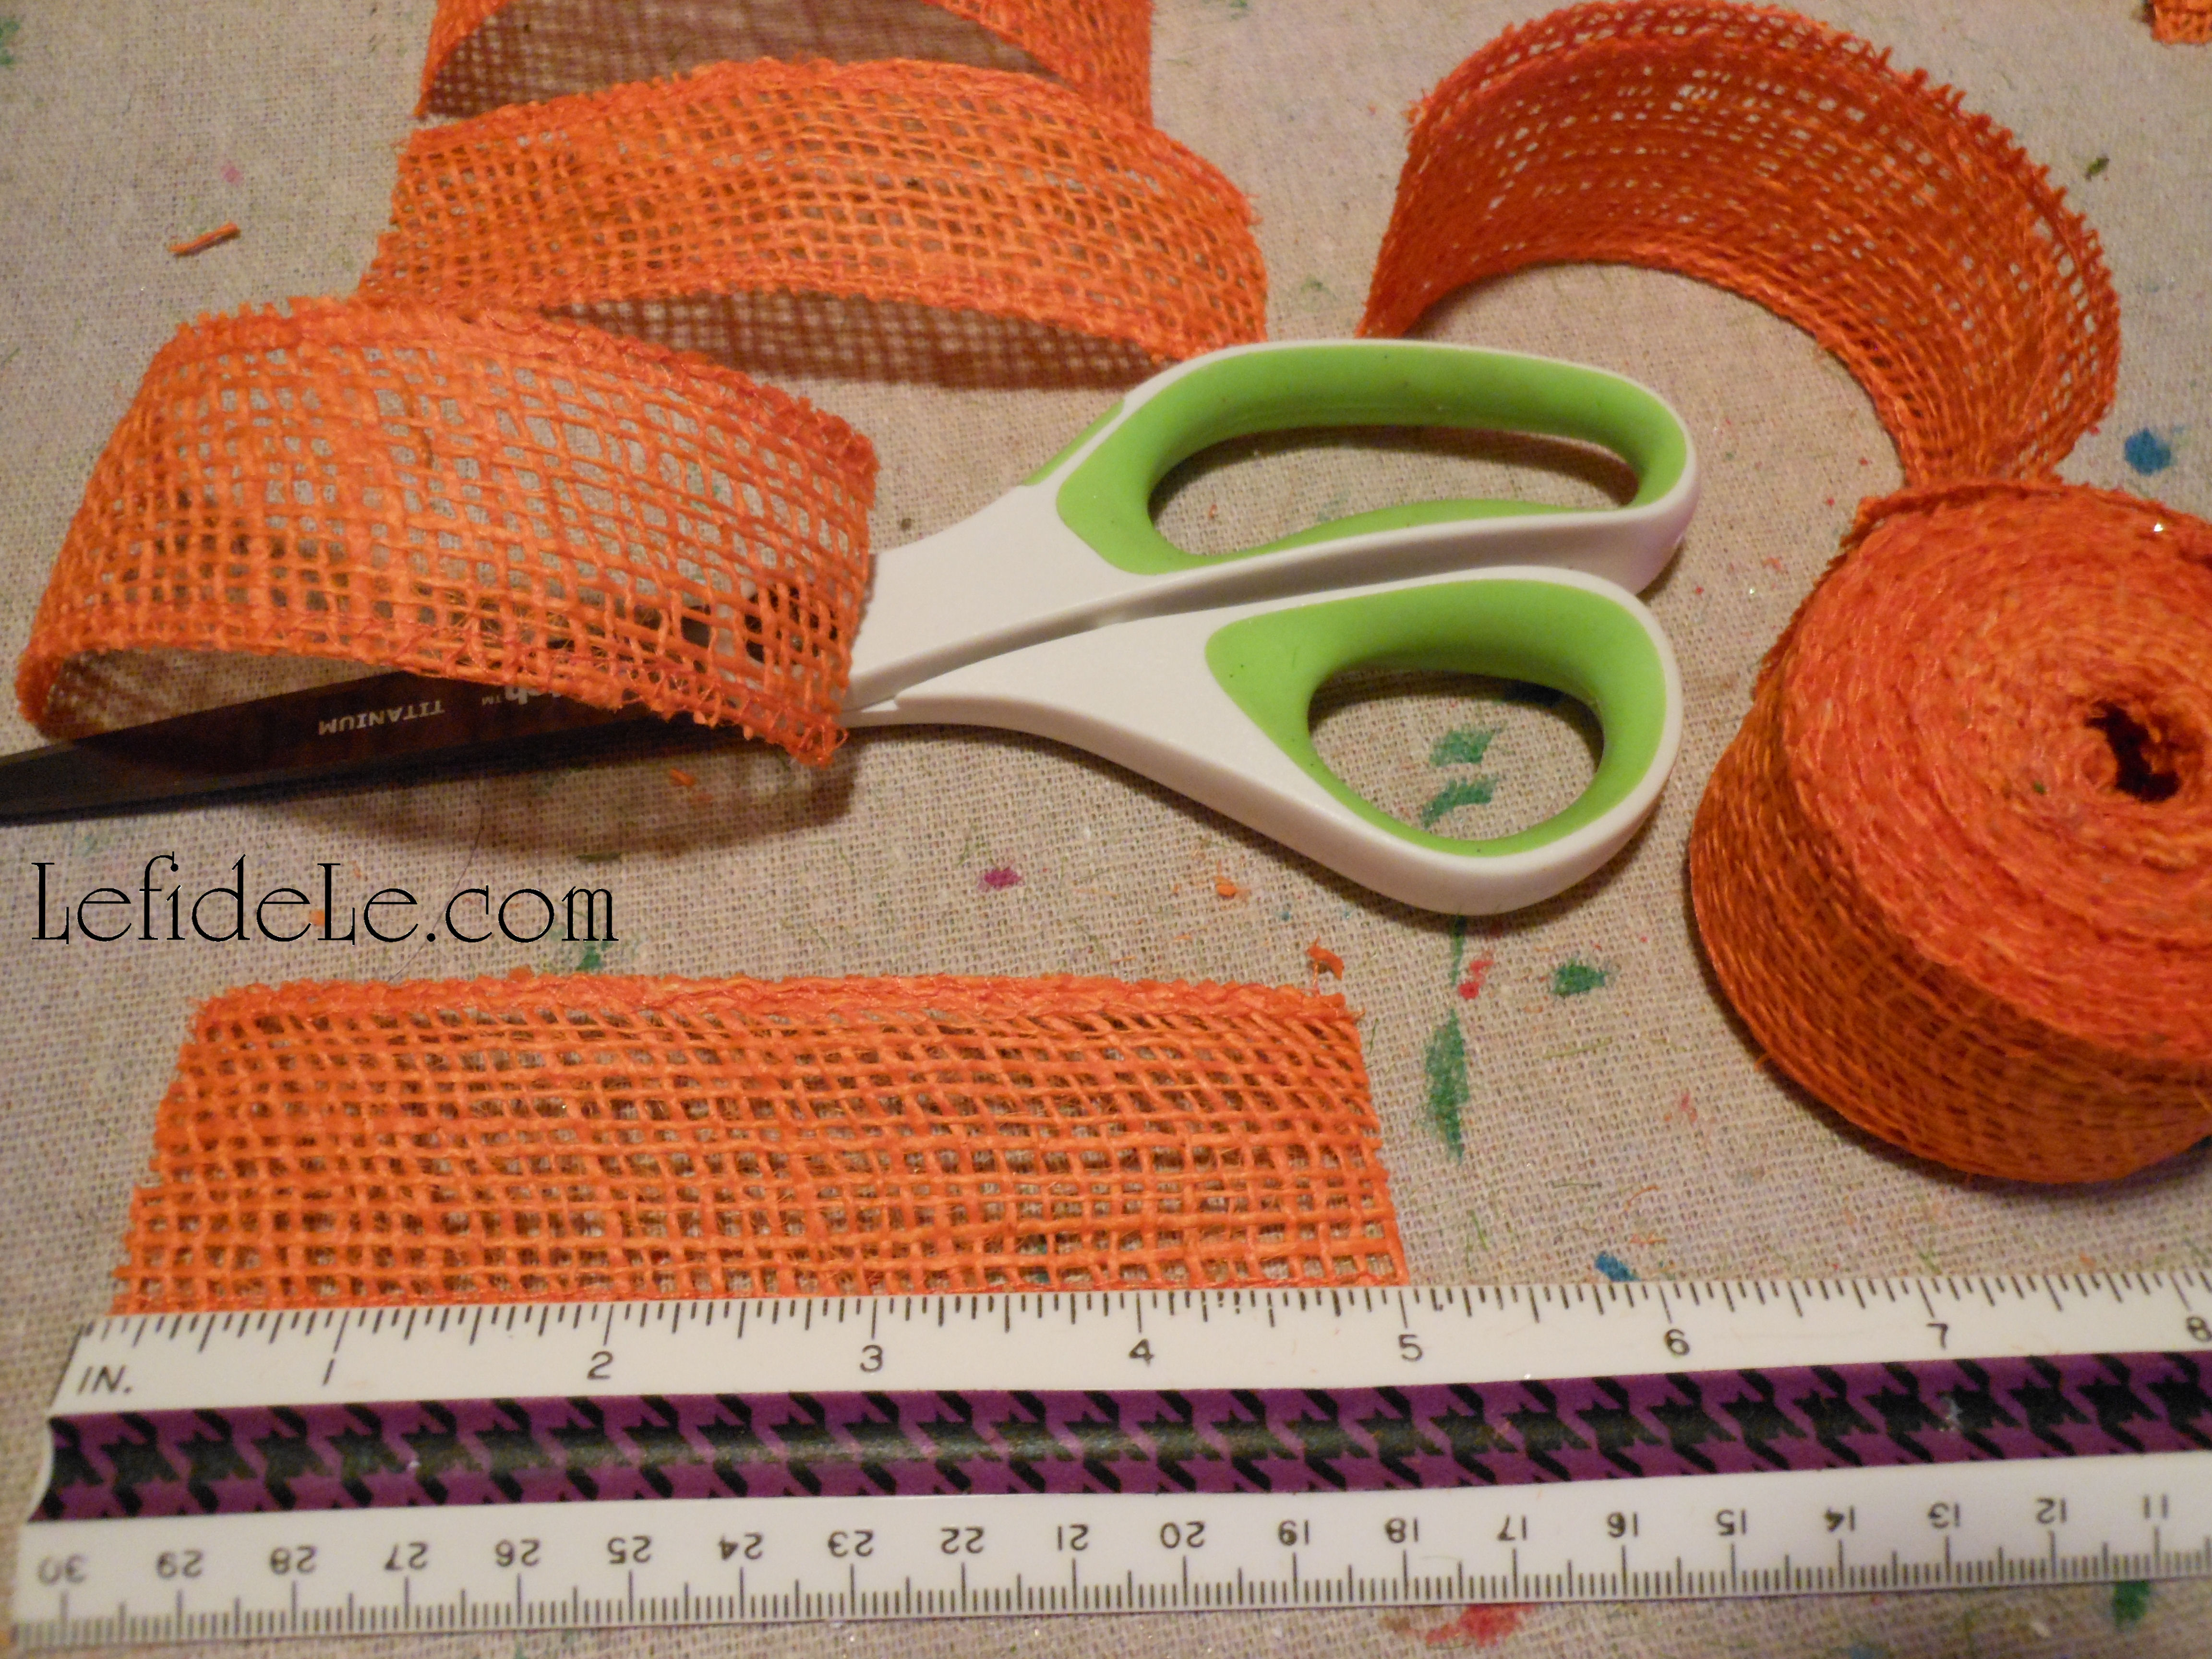
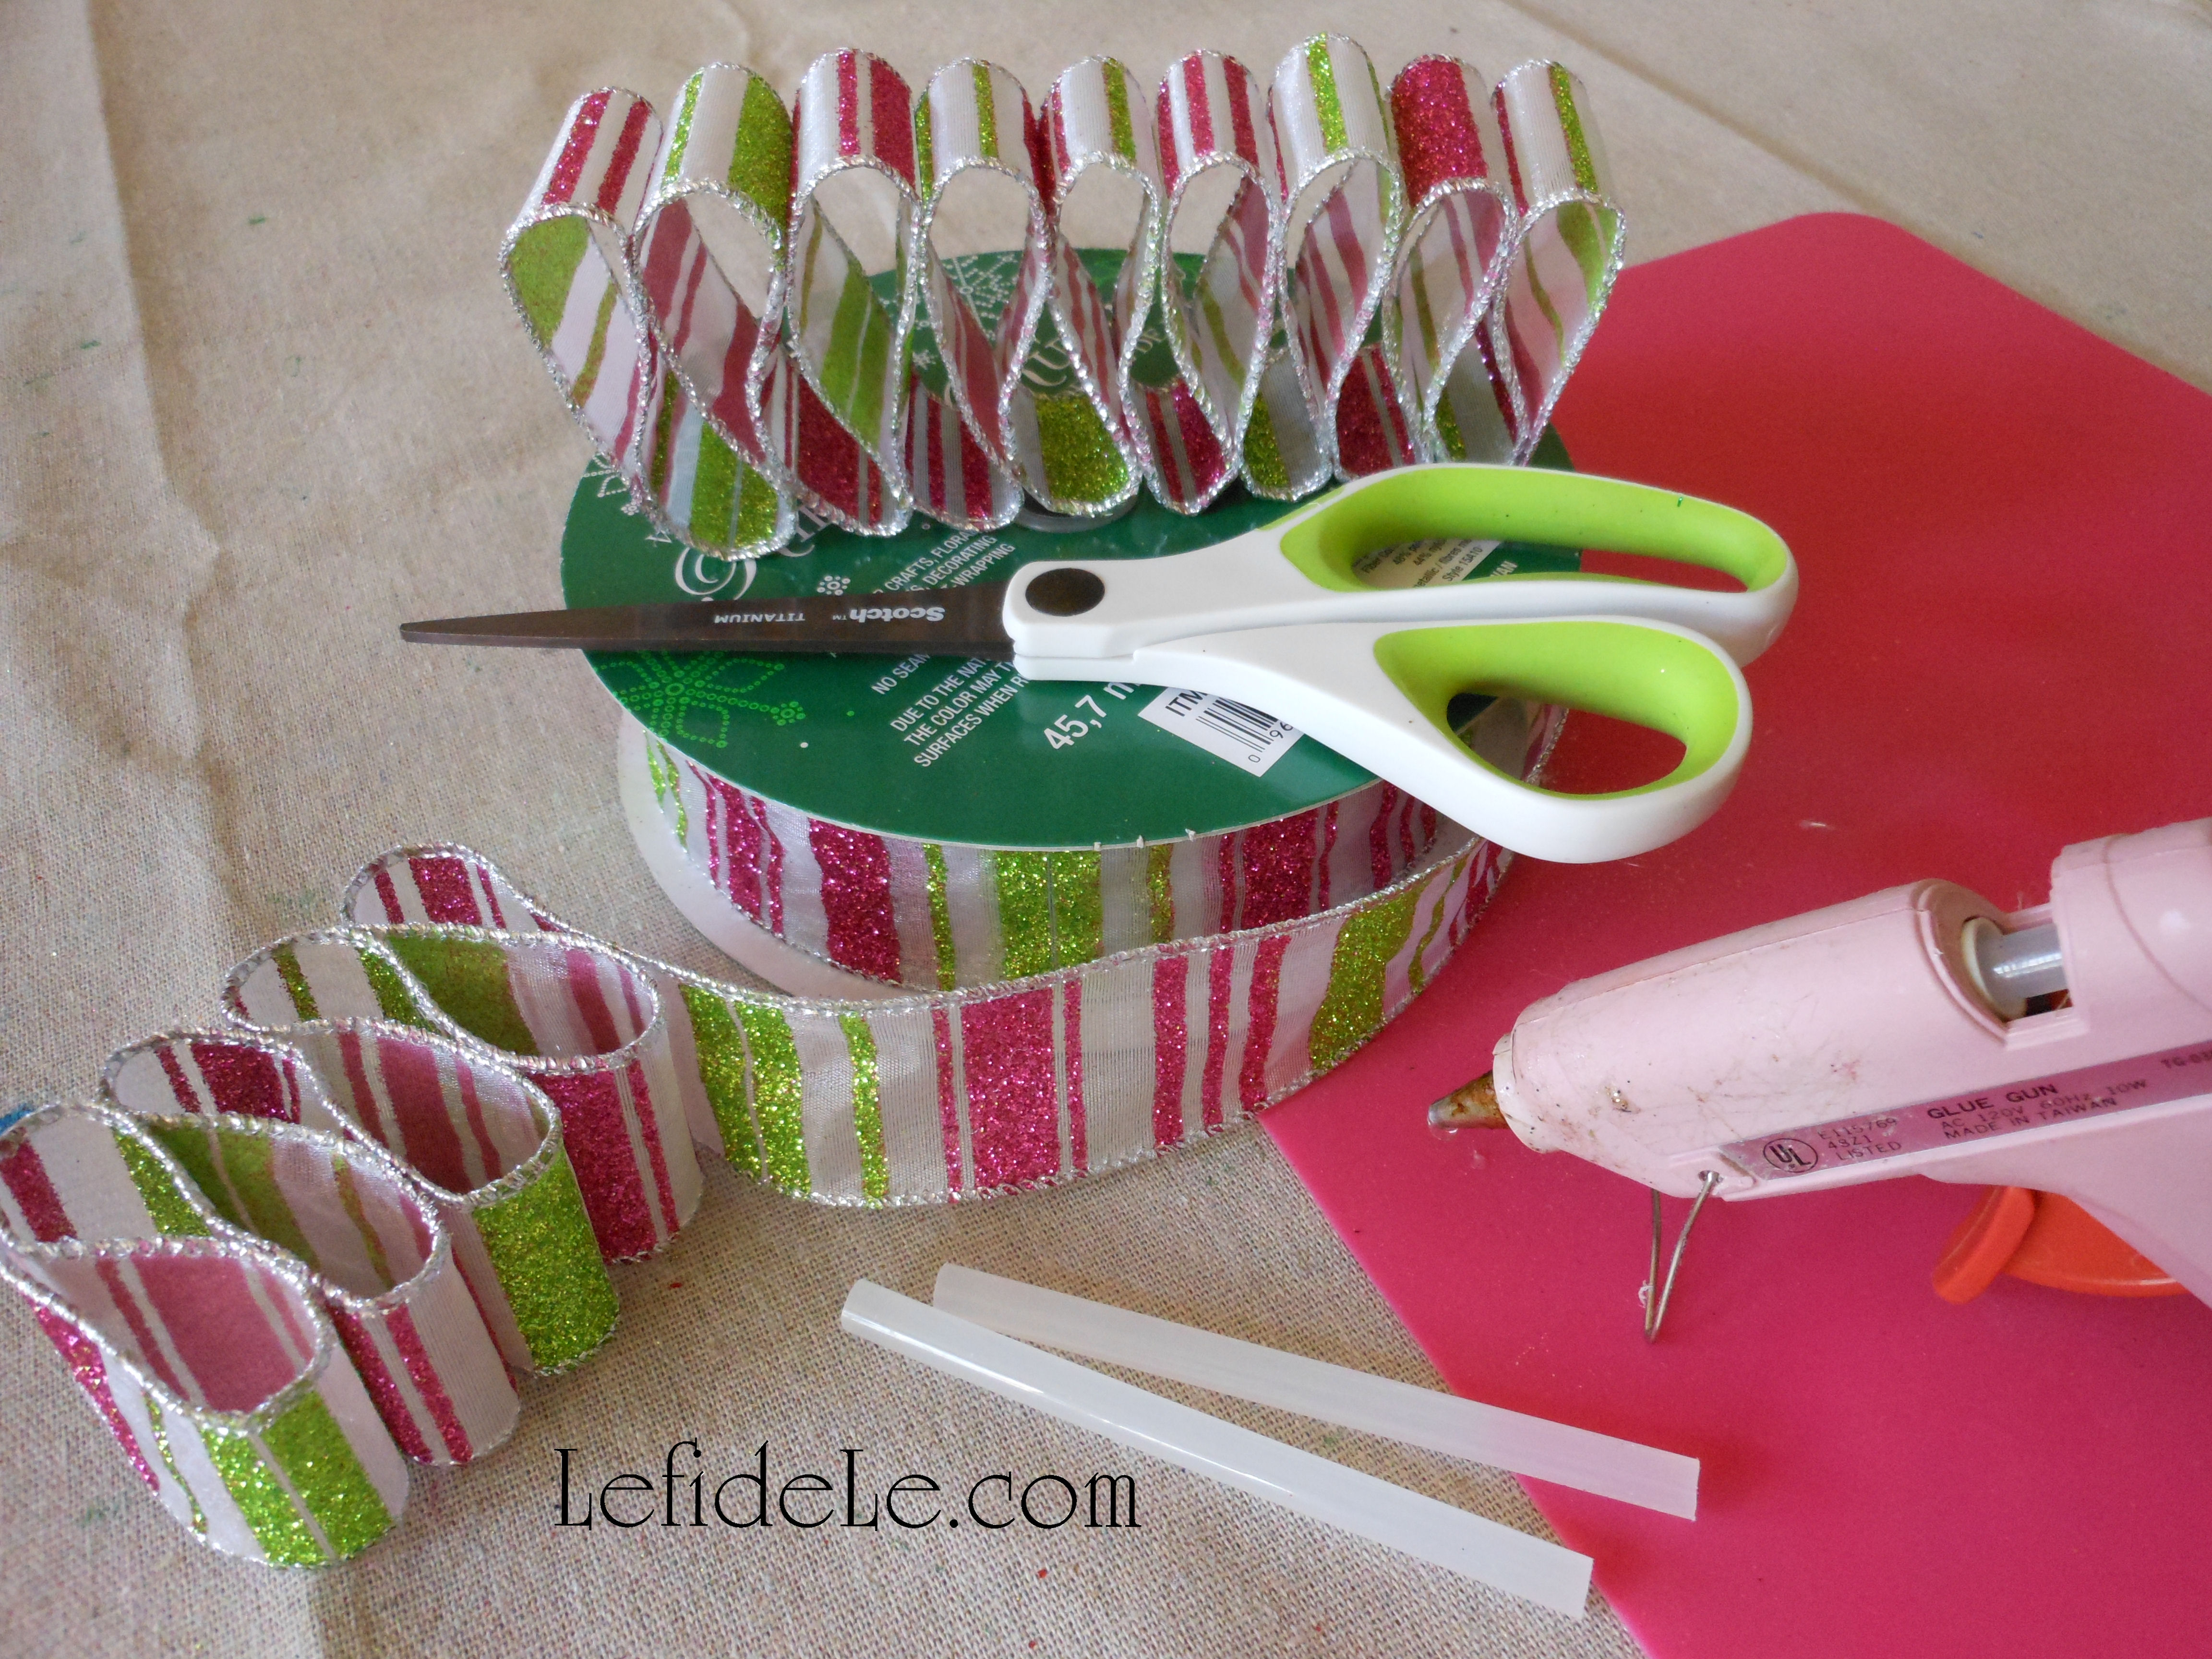
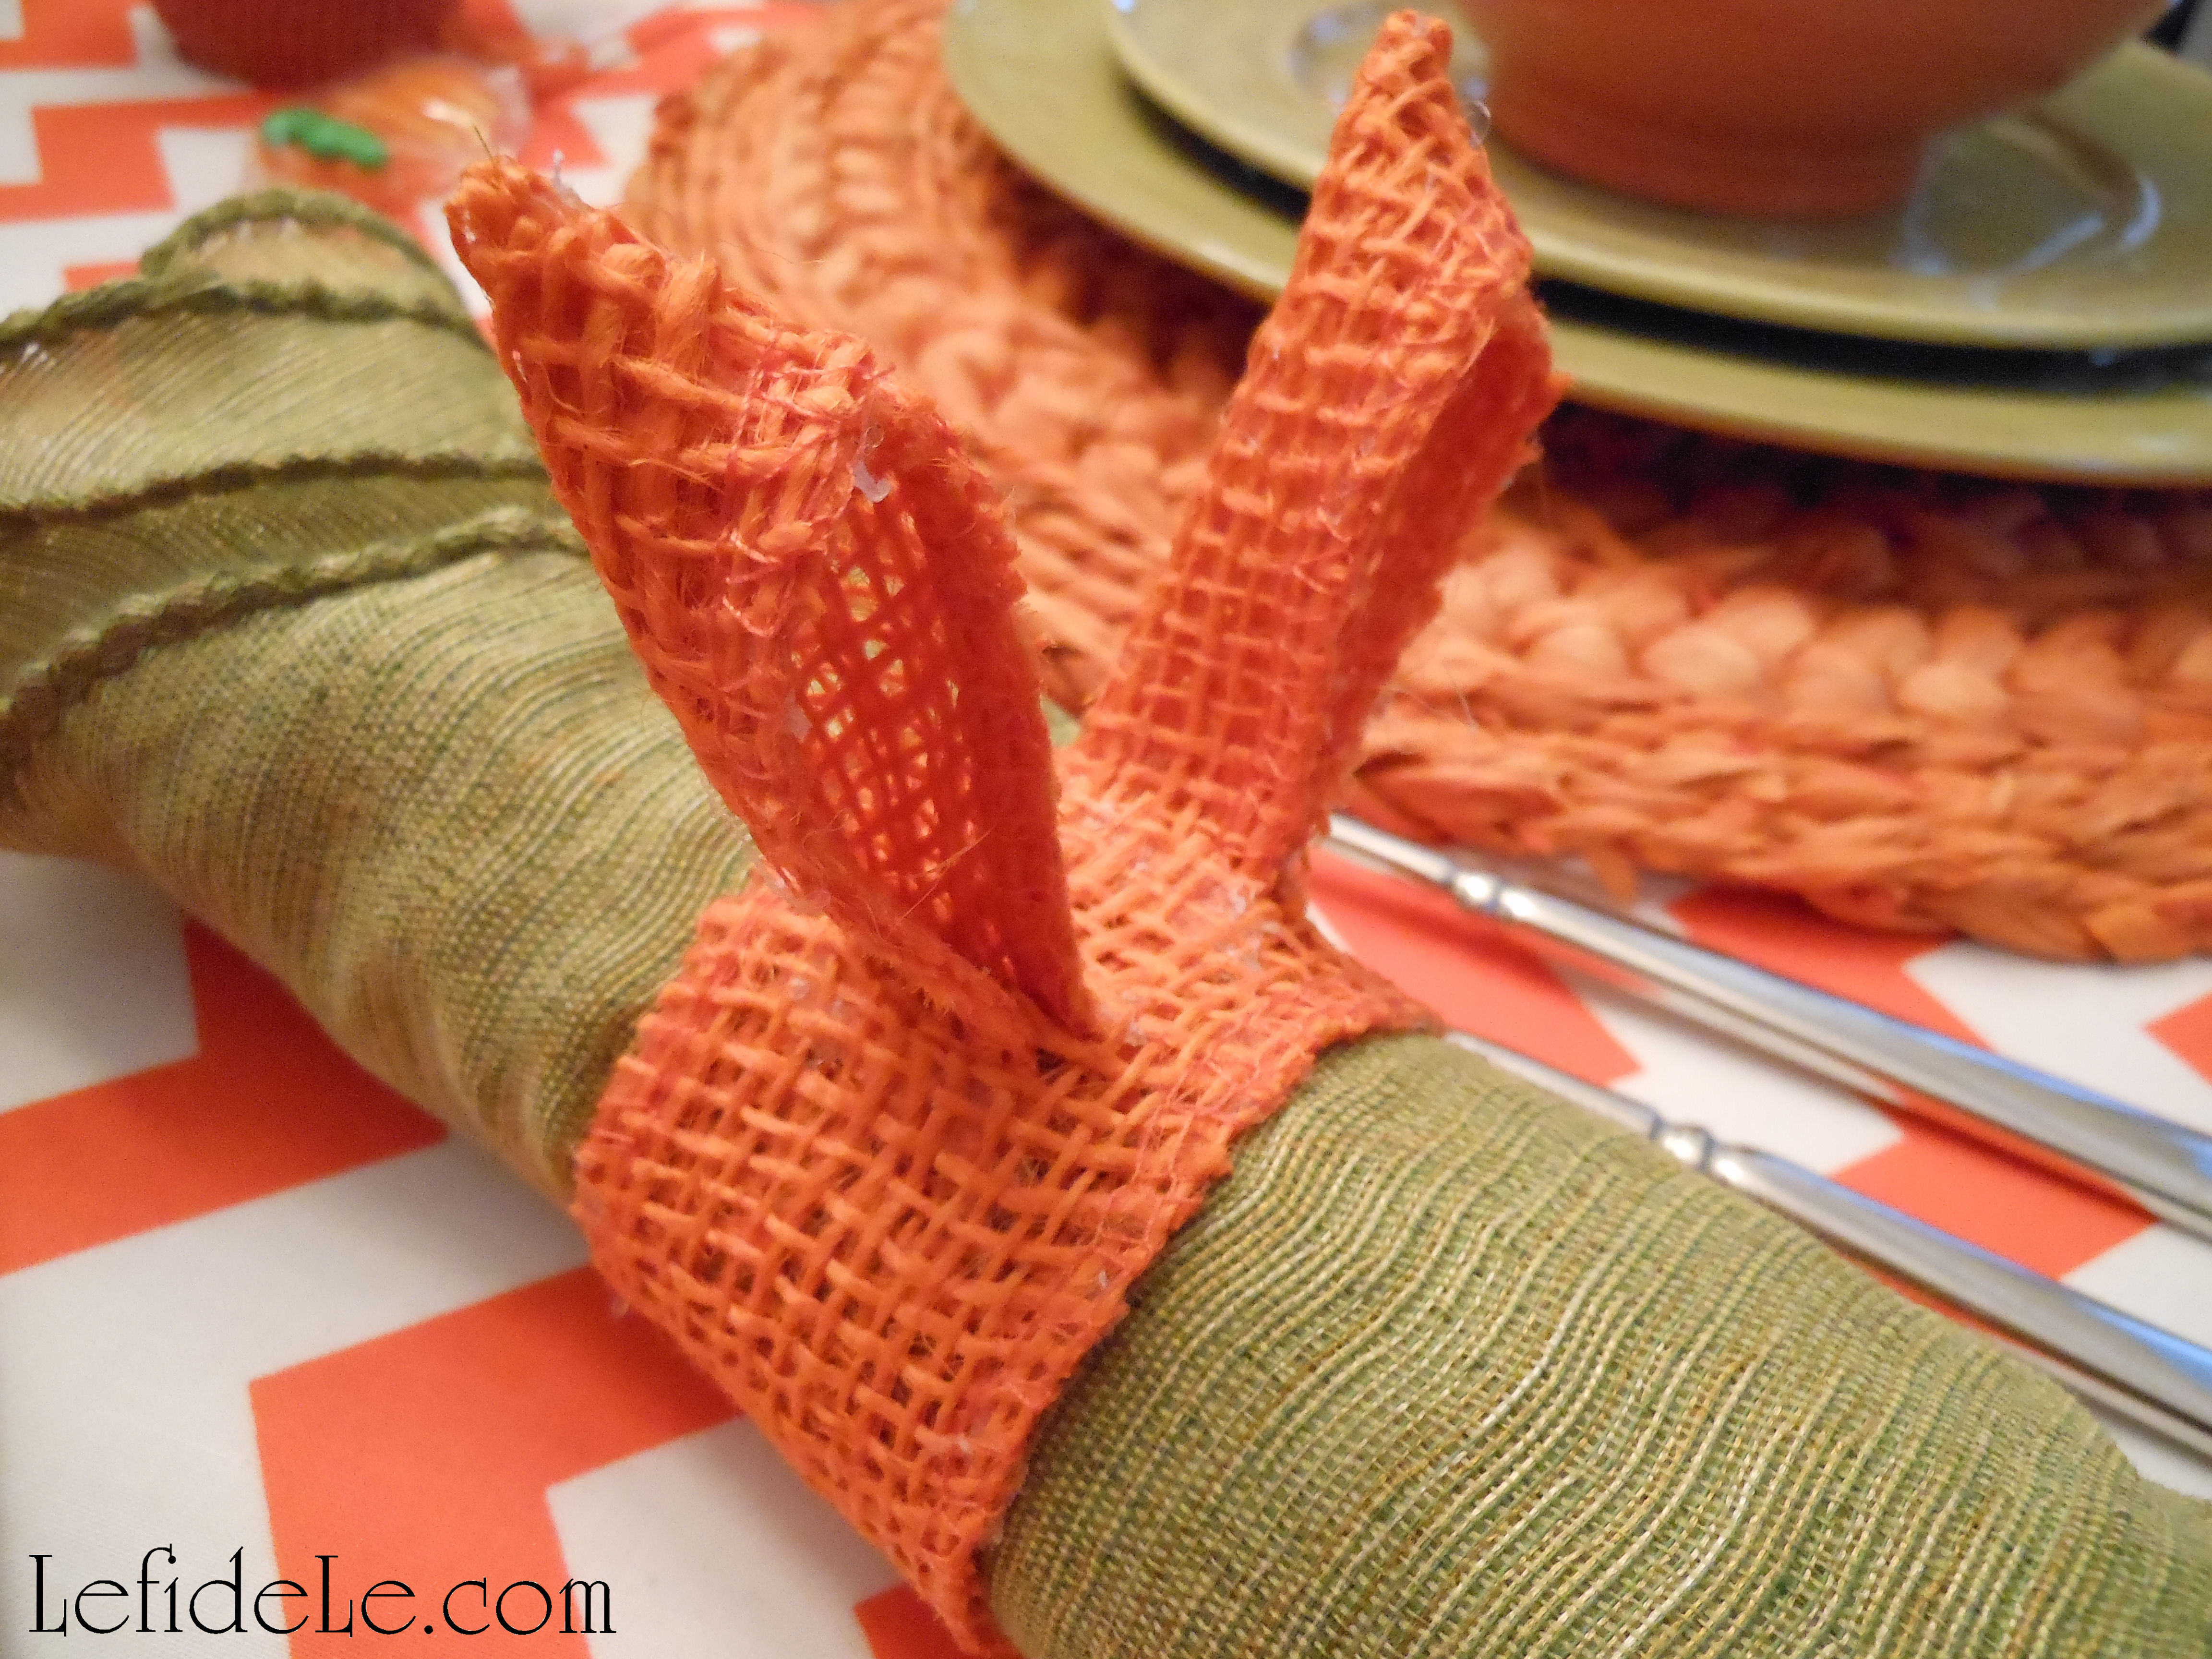
Cut 2 lengths of 5 inch strips for each set of ears… or 12 strips for a half dozen rings.

020 (2)Leigh

Fold each 5 inch strip in half, and press a crease into the folded edge. Lay down a thin strip of hot glue along each vertical side edge, in order to glue the fold into place permanently. (Try using a cool temp hot glue gun to avoid burning your fingers with the hole-filled burlap.) Leave the bottom non-folded edges unglued, forming a tiny sack. At the top folded edge, take the right corner and fold it over toward the center. Then take the top left corner, and fold it over the right one. It will make the top of each ear. Glue the folds into place with a dot of glue, under the left corner and over the right.

023 (2)Leigh

With all your ears made, assembly line fashion, get started on attaching them to the rings. Take one of the 7 inch strips and fold it in half to locate its center. Cut centimeter length slits, about a centimeter away from that fold, perpendicular to the fold. (You just made two ear canals.) Fold the bottom open edge of an ear in half, and slip it into a slit opening. You should see about a half centimeter sticking out.

024 (2)Leigh

Glue the outside of this protruding portion to the 7 inch ring strip. It should fan outward. Repeat with the other ear, making sure they’re facing the same direction.

026Leigh

Take another 7 in strip of ribbon and glue it to the flat side of the bunny eared strip. The easiest way to begin is by gluing one end and tapping it into place. Continue on until the whole strip is joined. Make sure the ribbons are curved the same direction for a less troublesome experience.

037Leigh

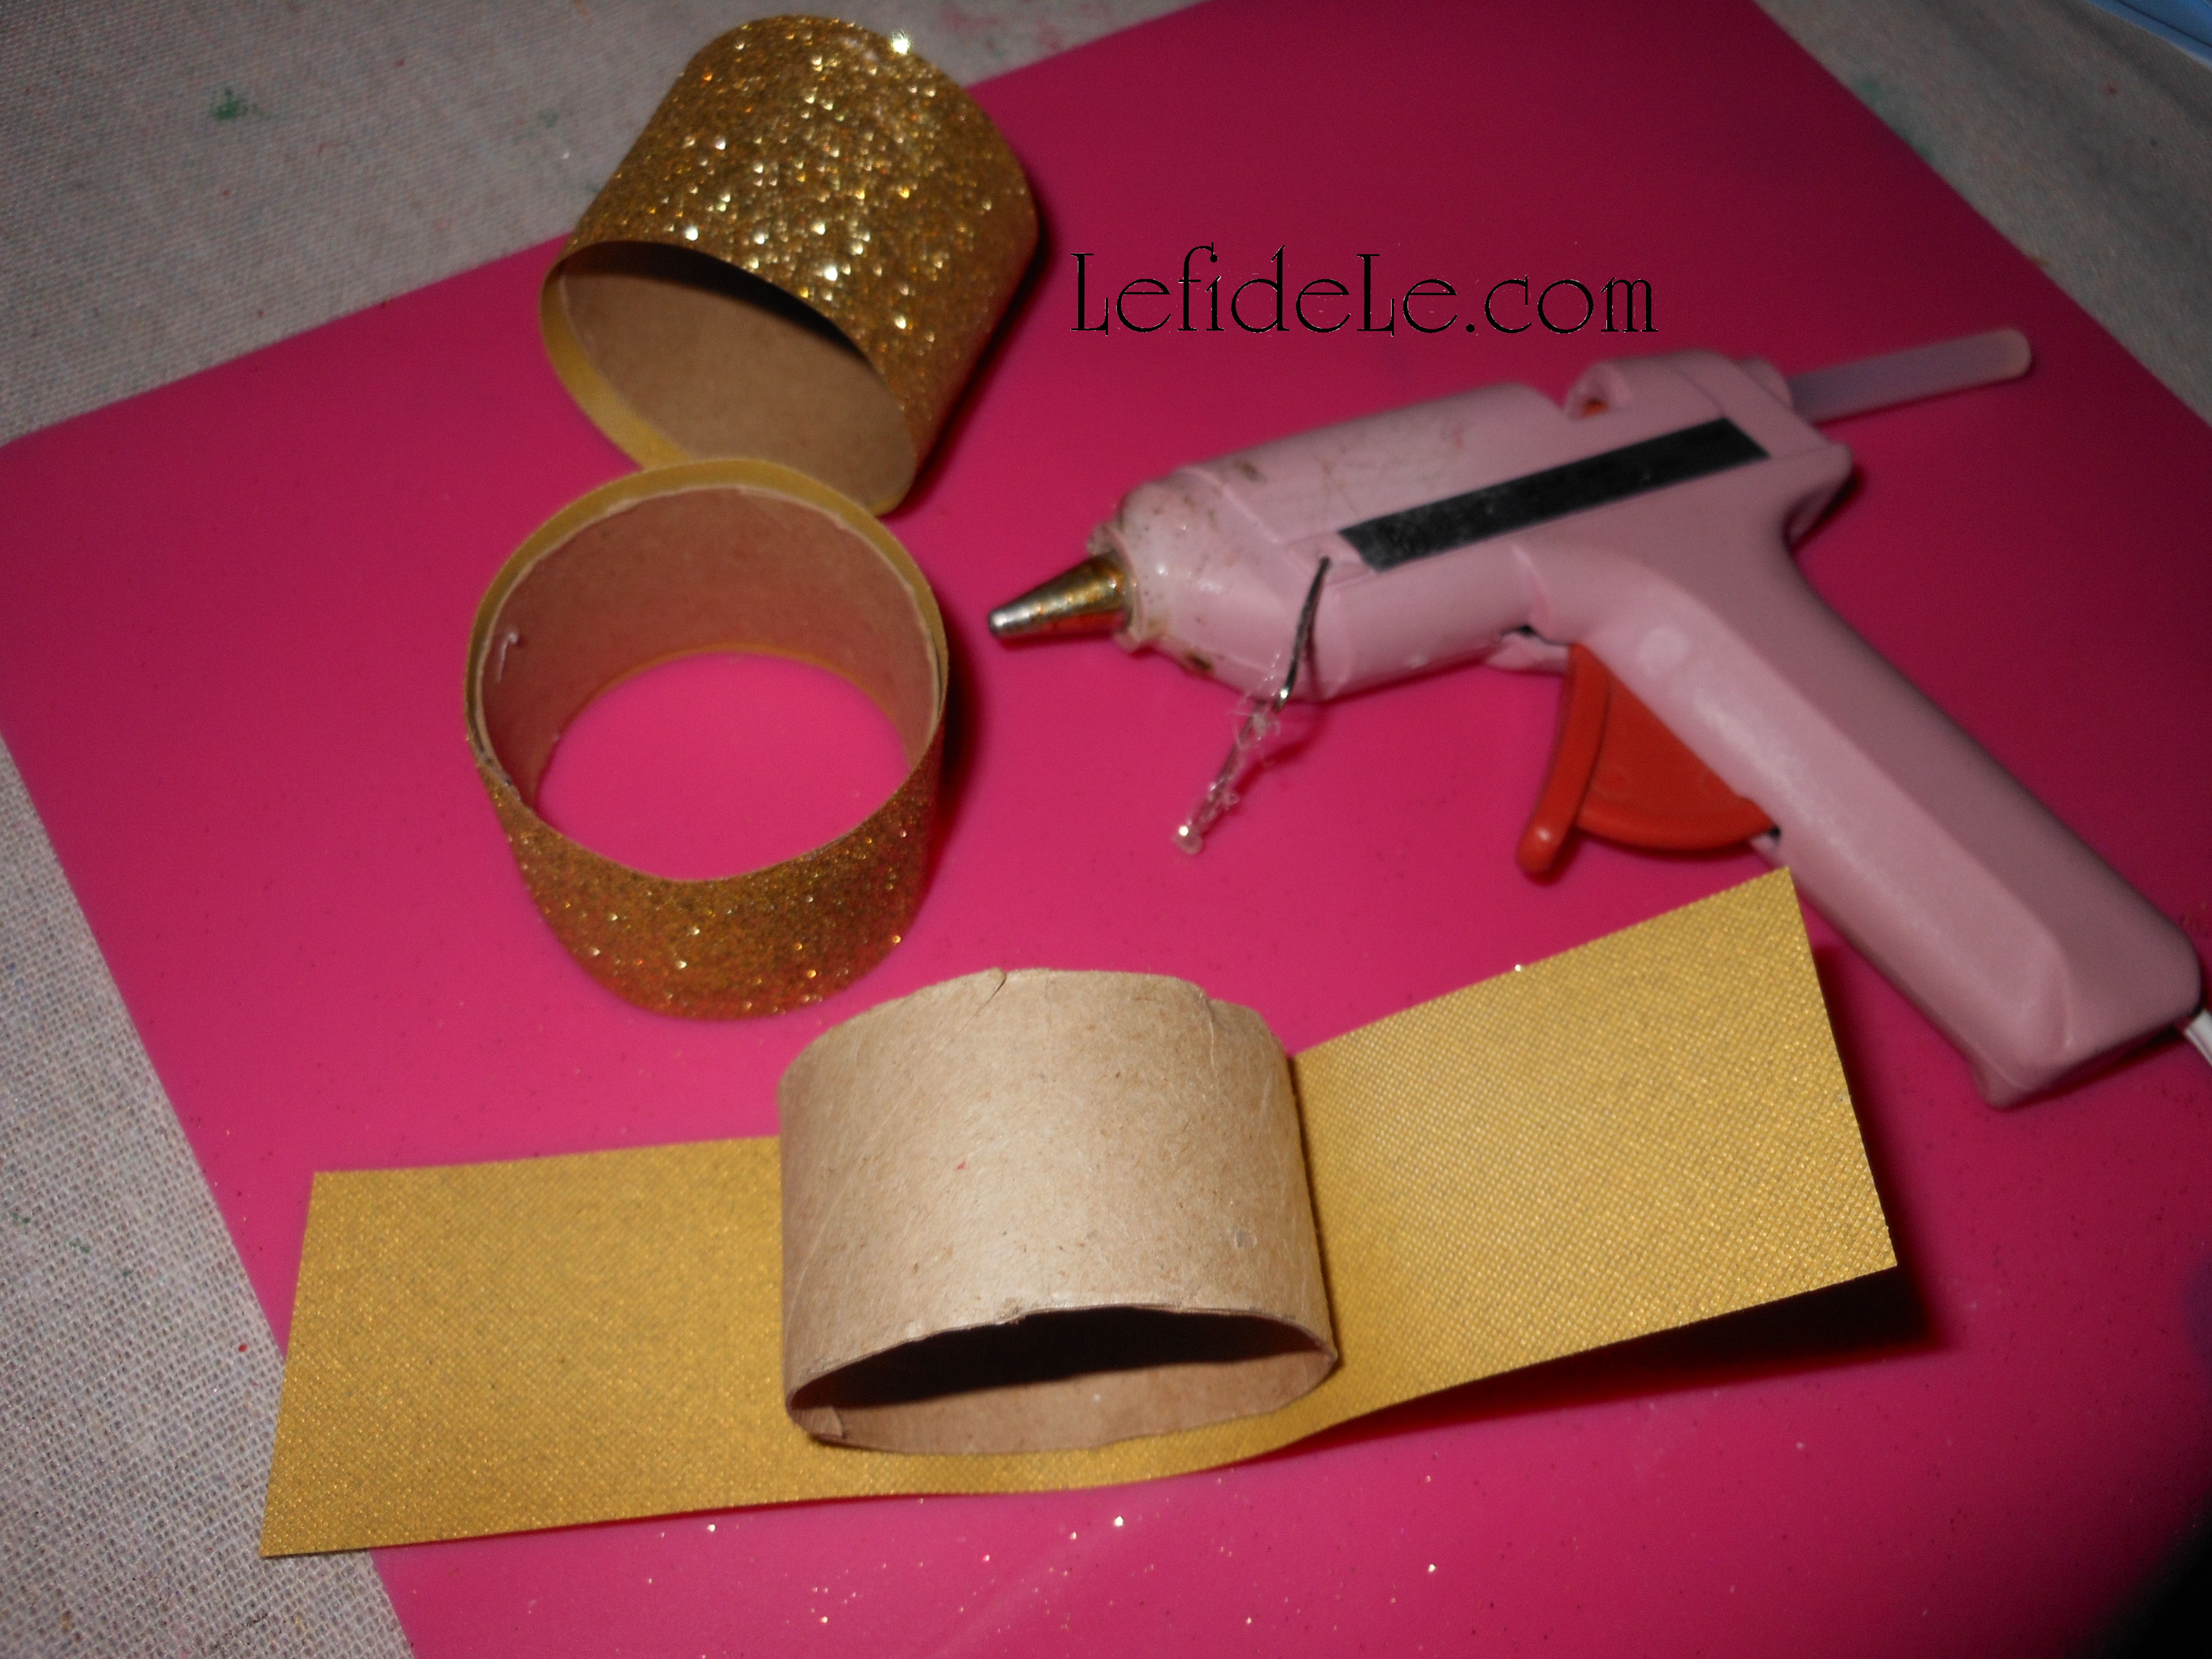
Form the ring by gluing one end of the long strip to the other, by slightly overlapping the edges. (You just made a bunny face.)

170Leigh

Repeat this process until your rabbit warren is complete. (Know that they get easier after making the first one.)

149Leigh

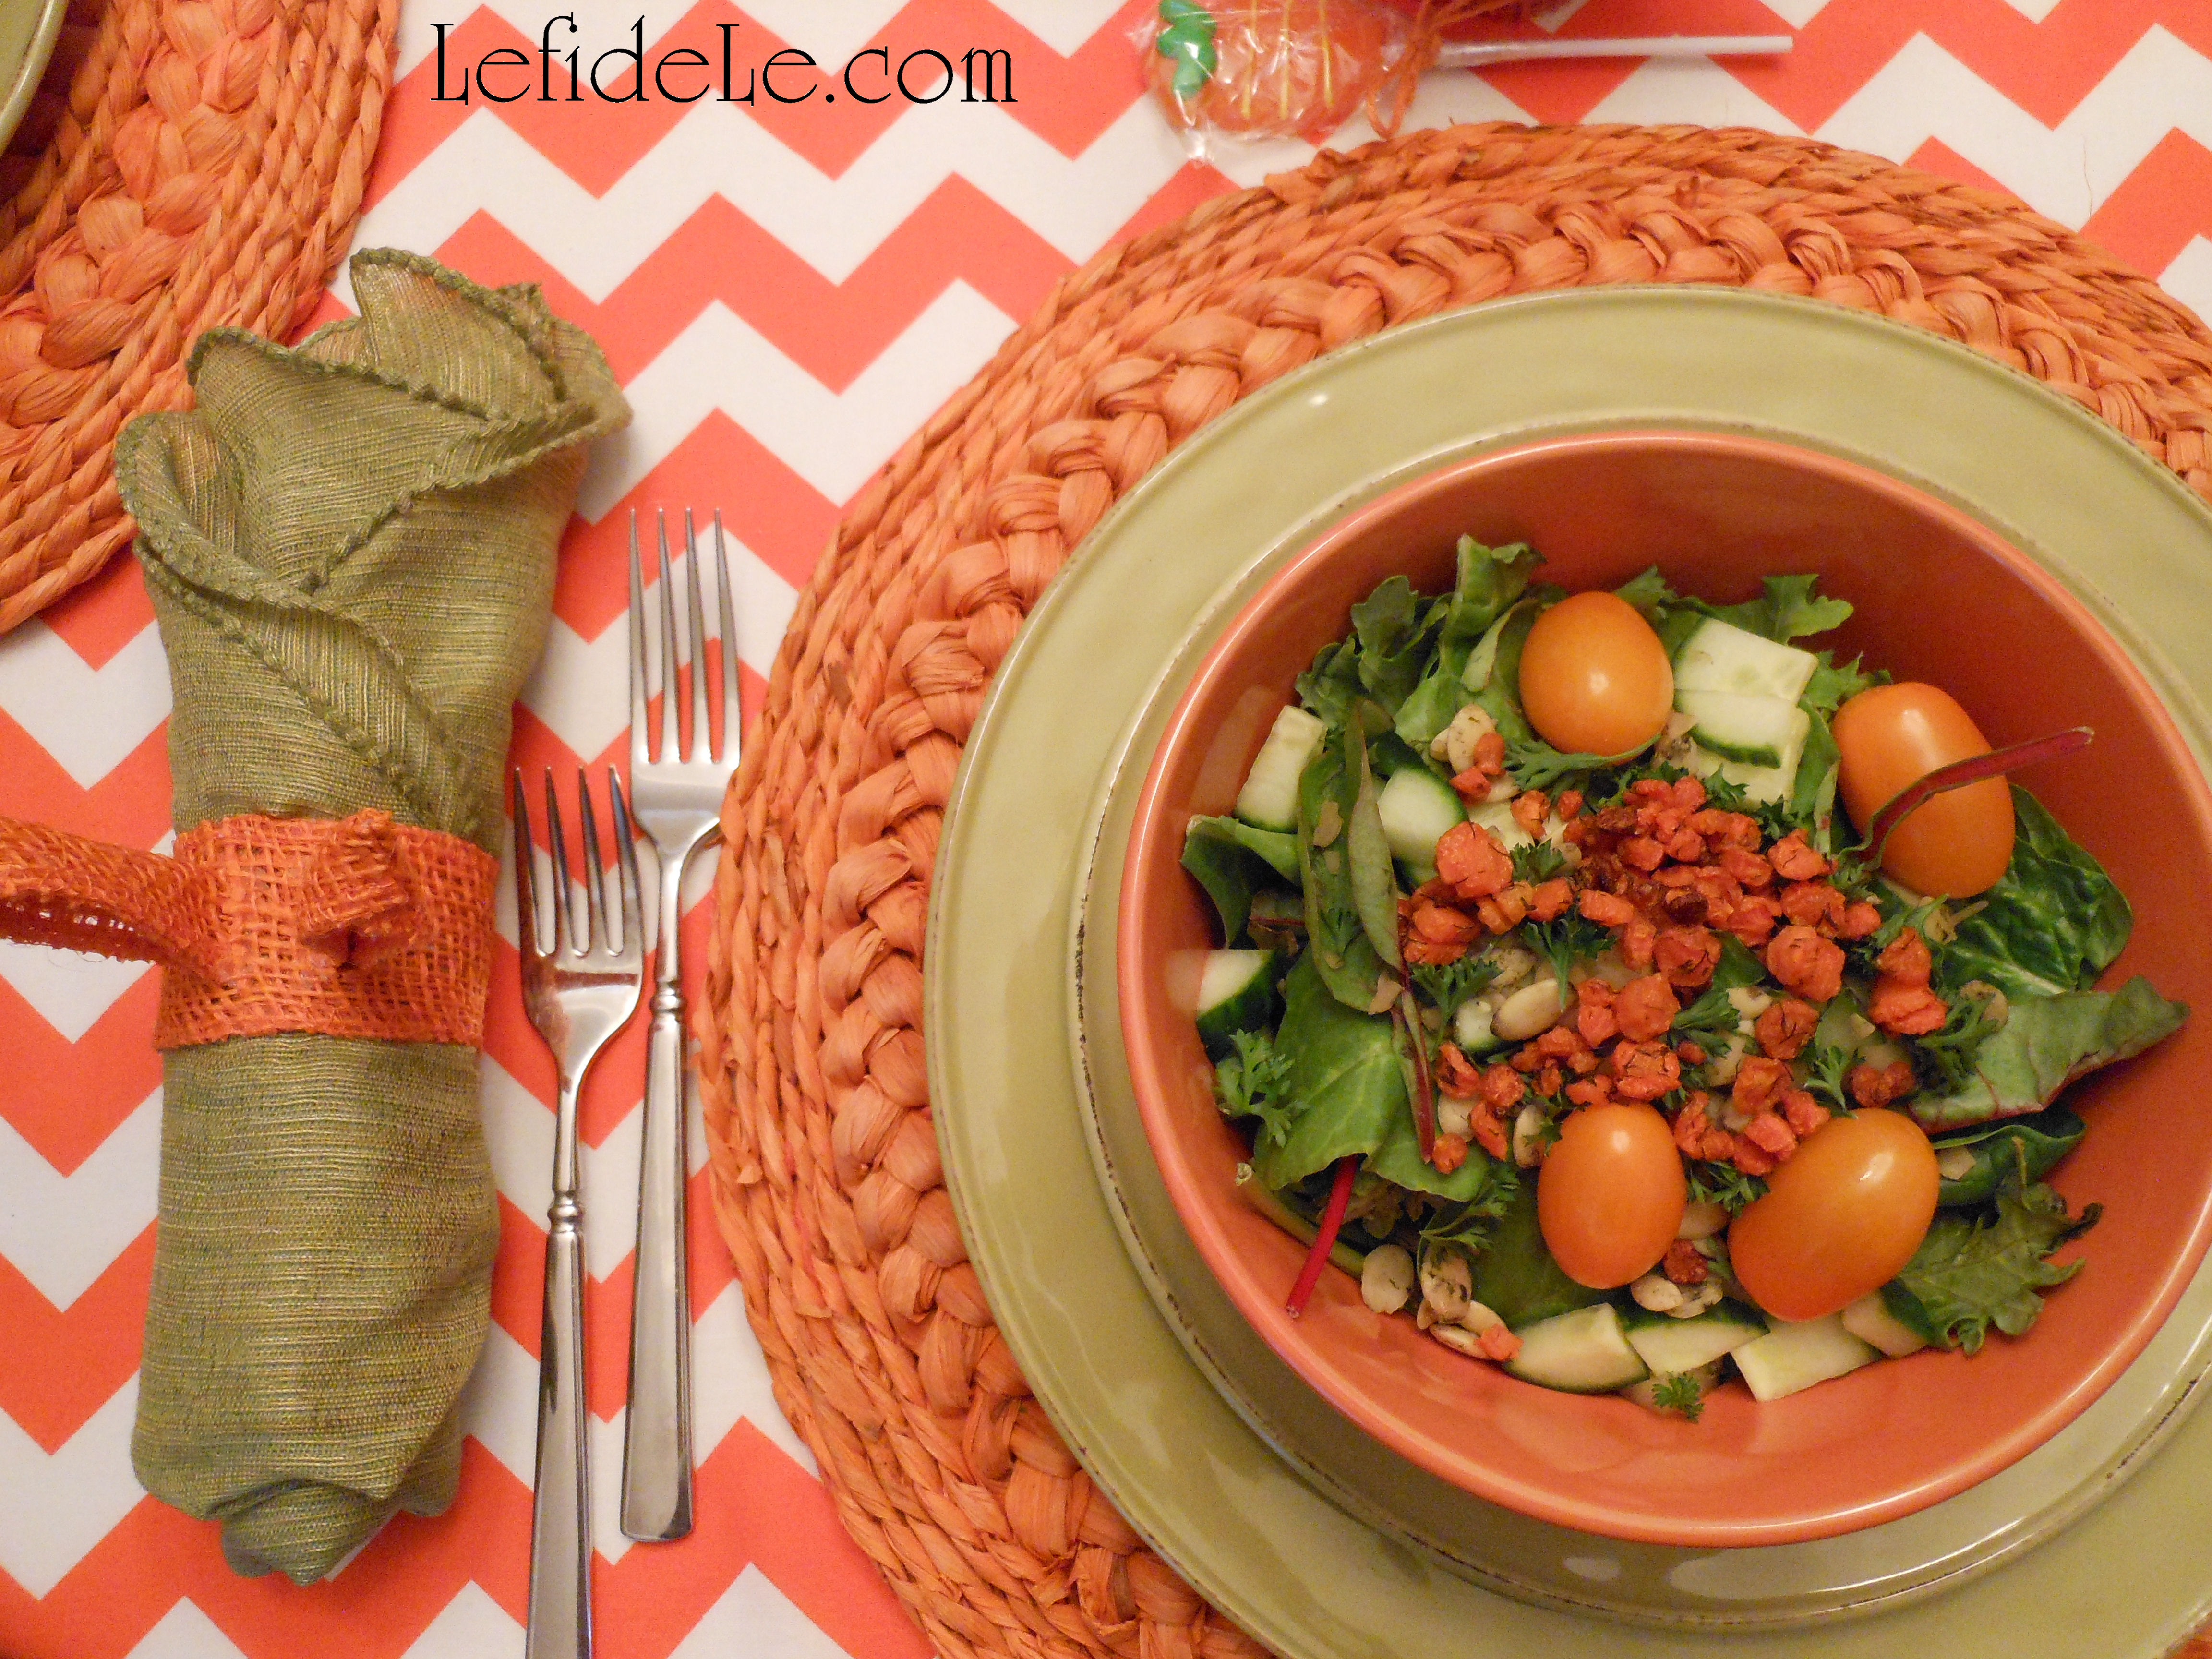
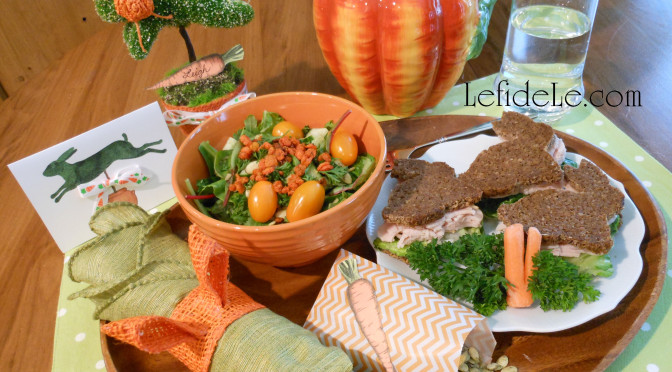
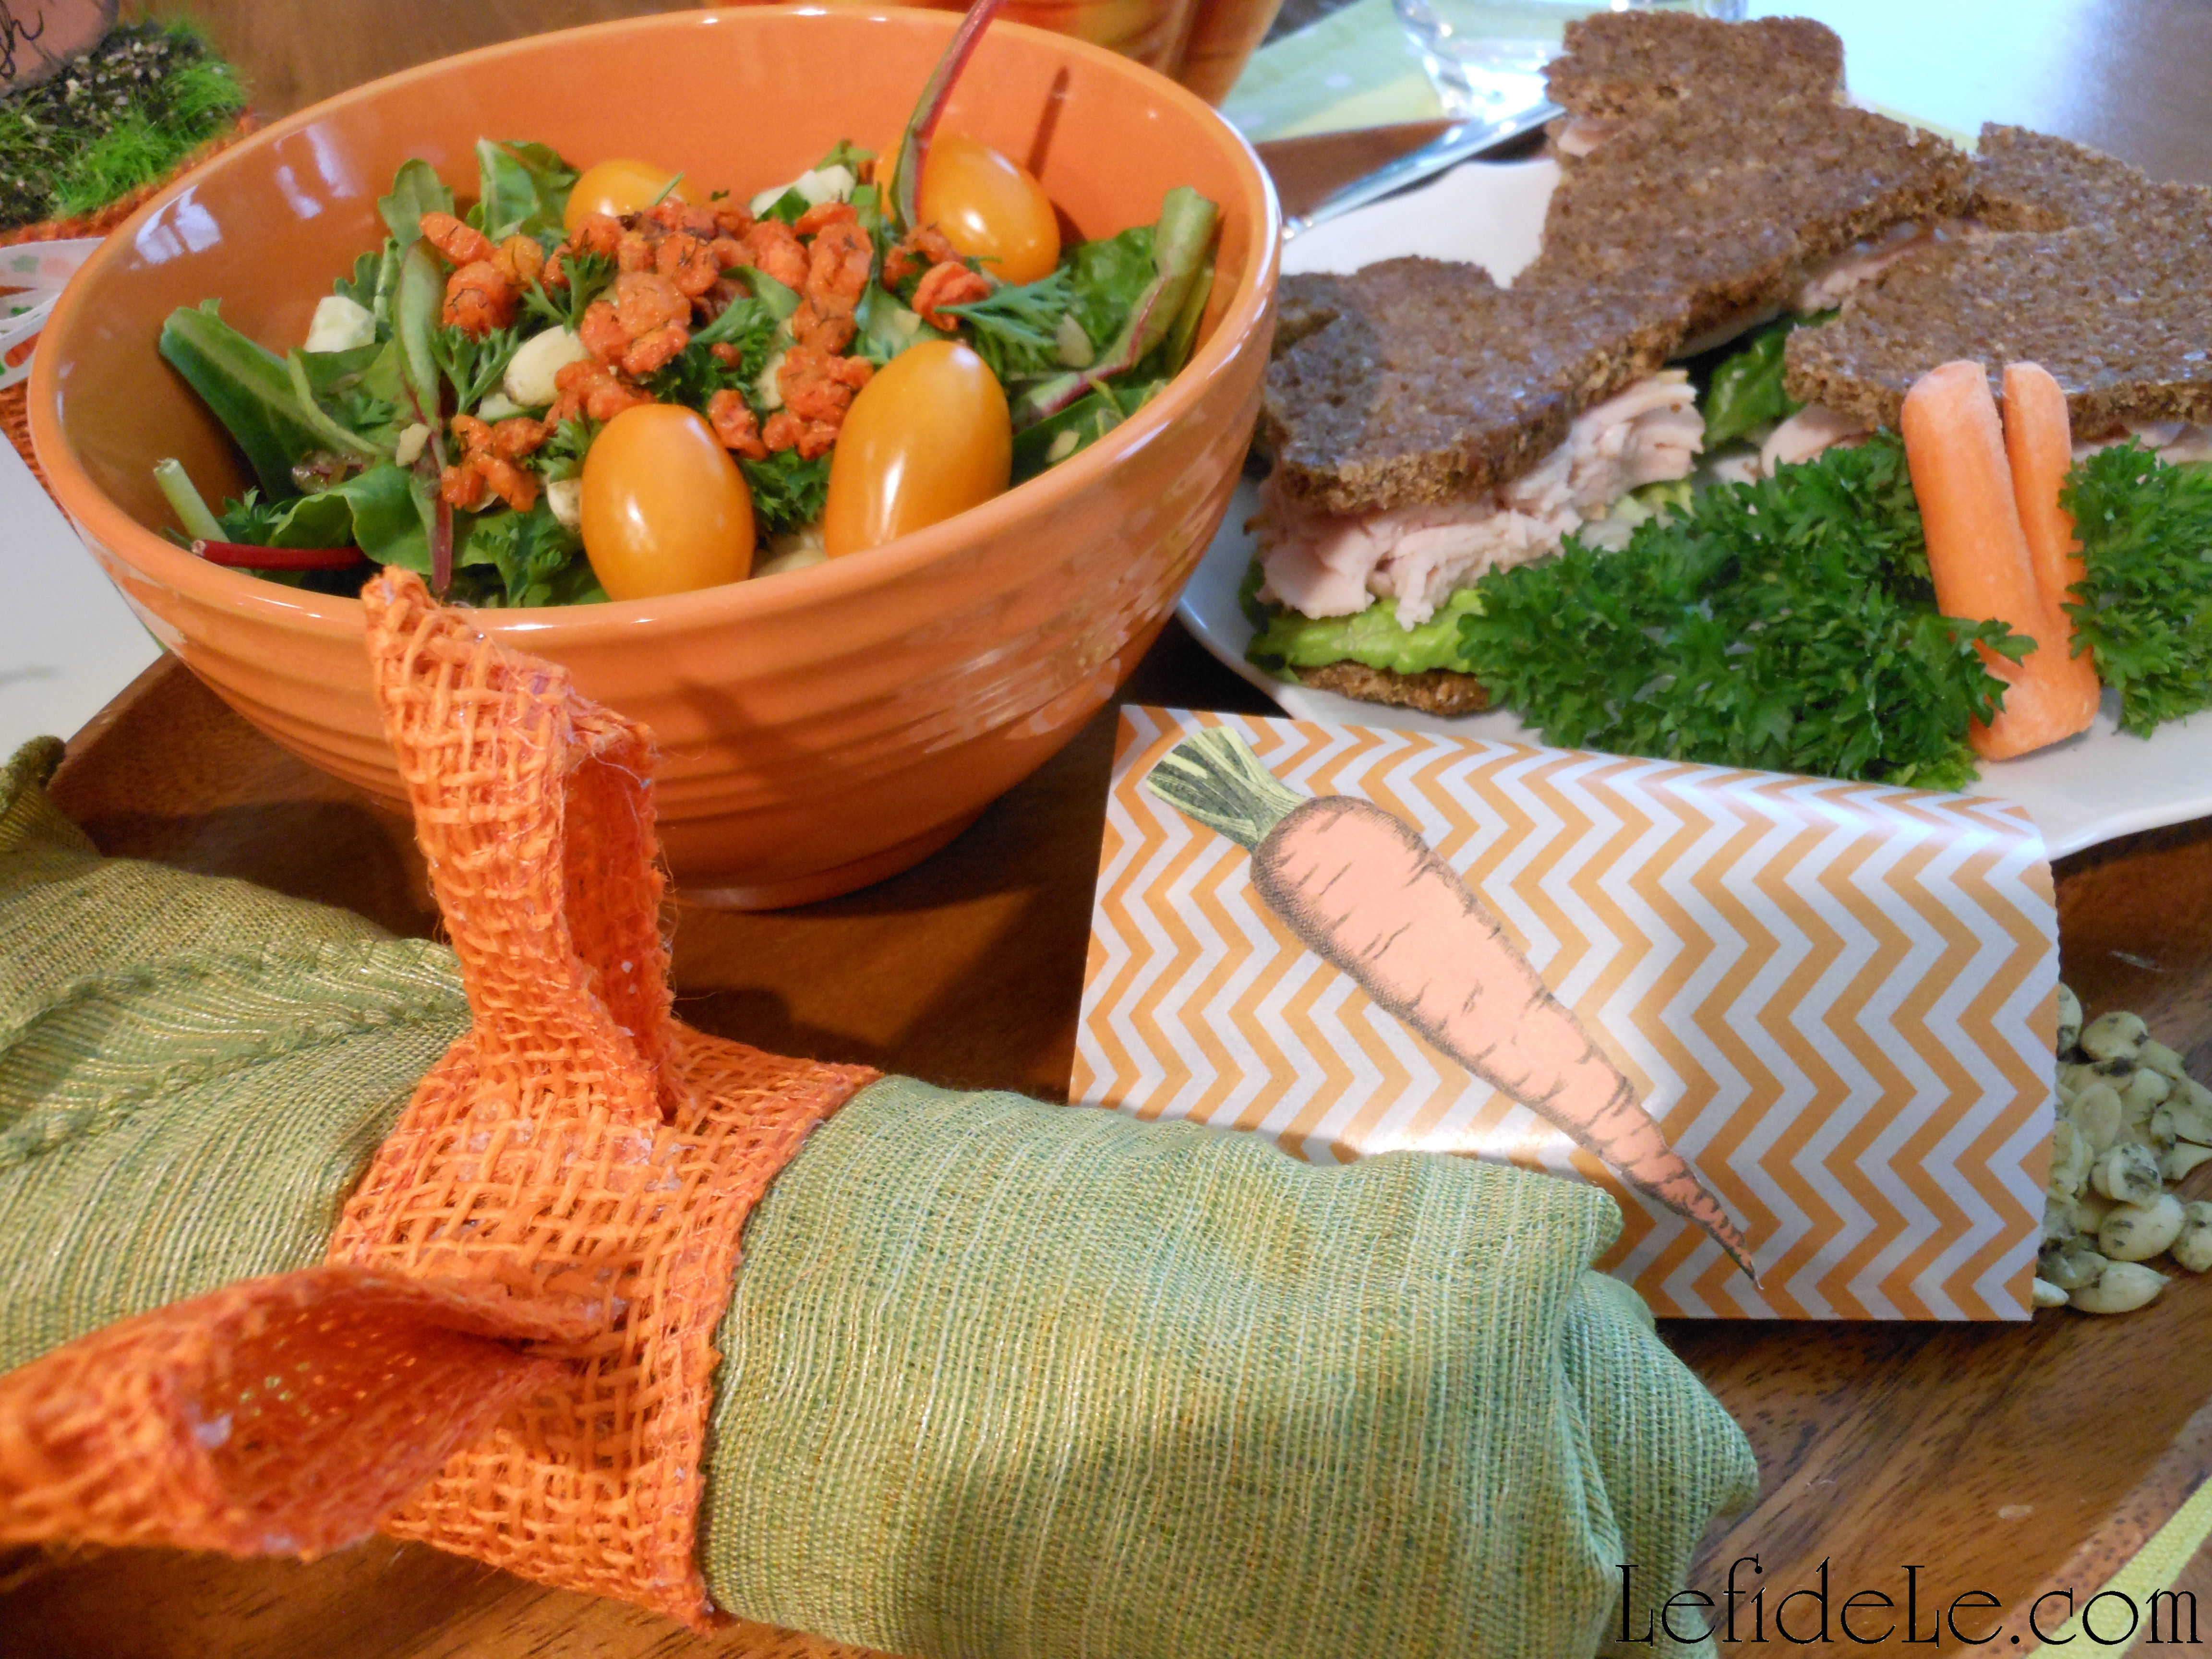
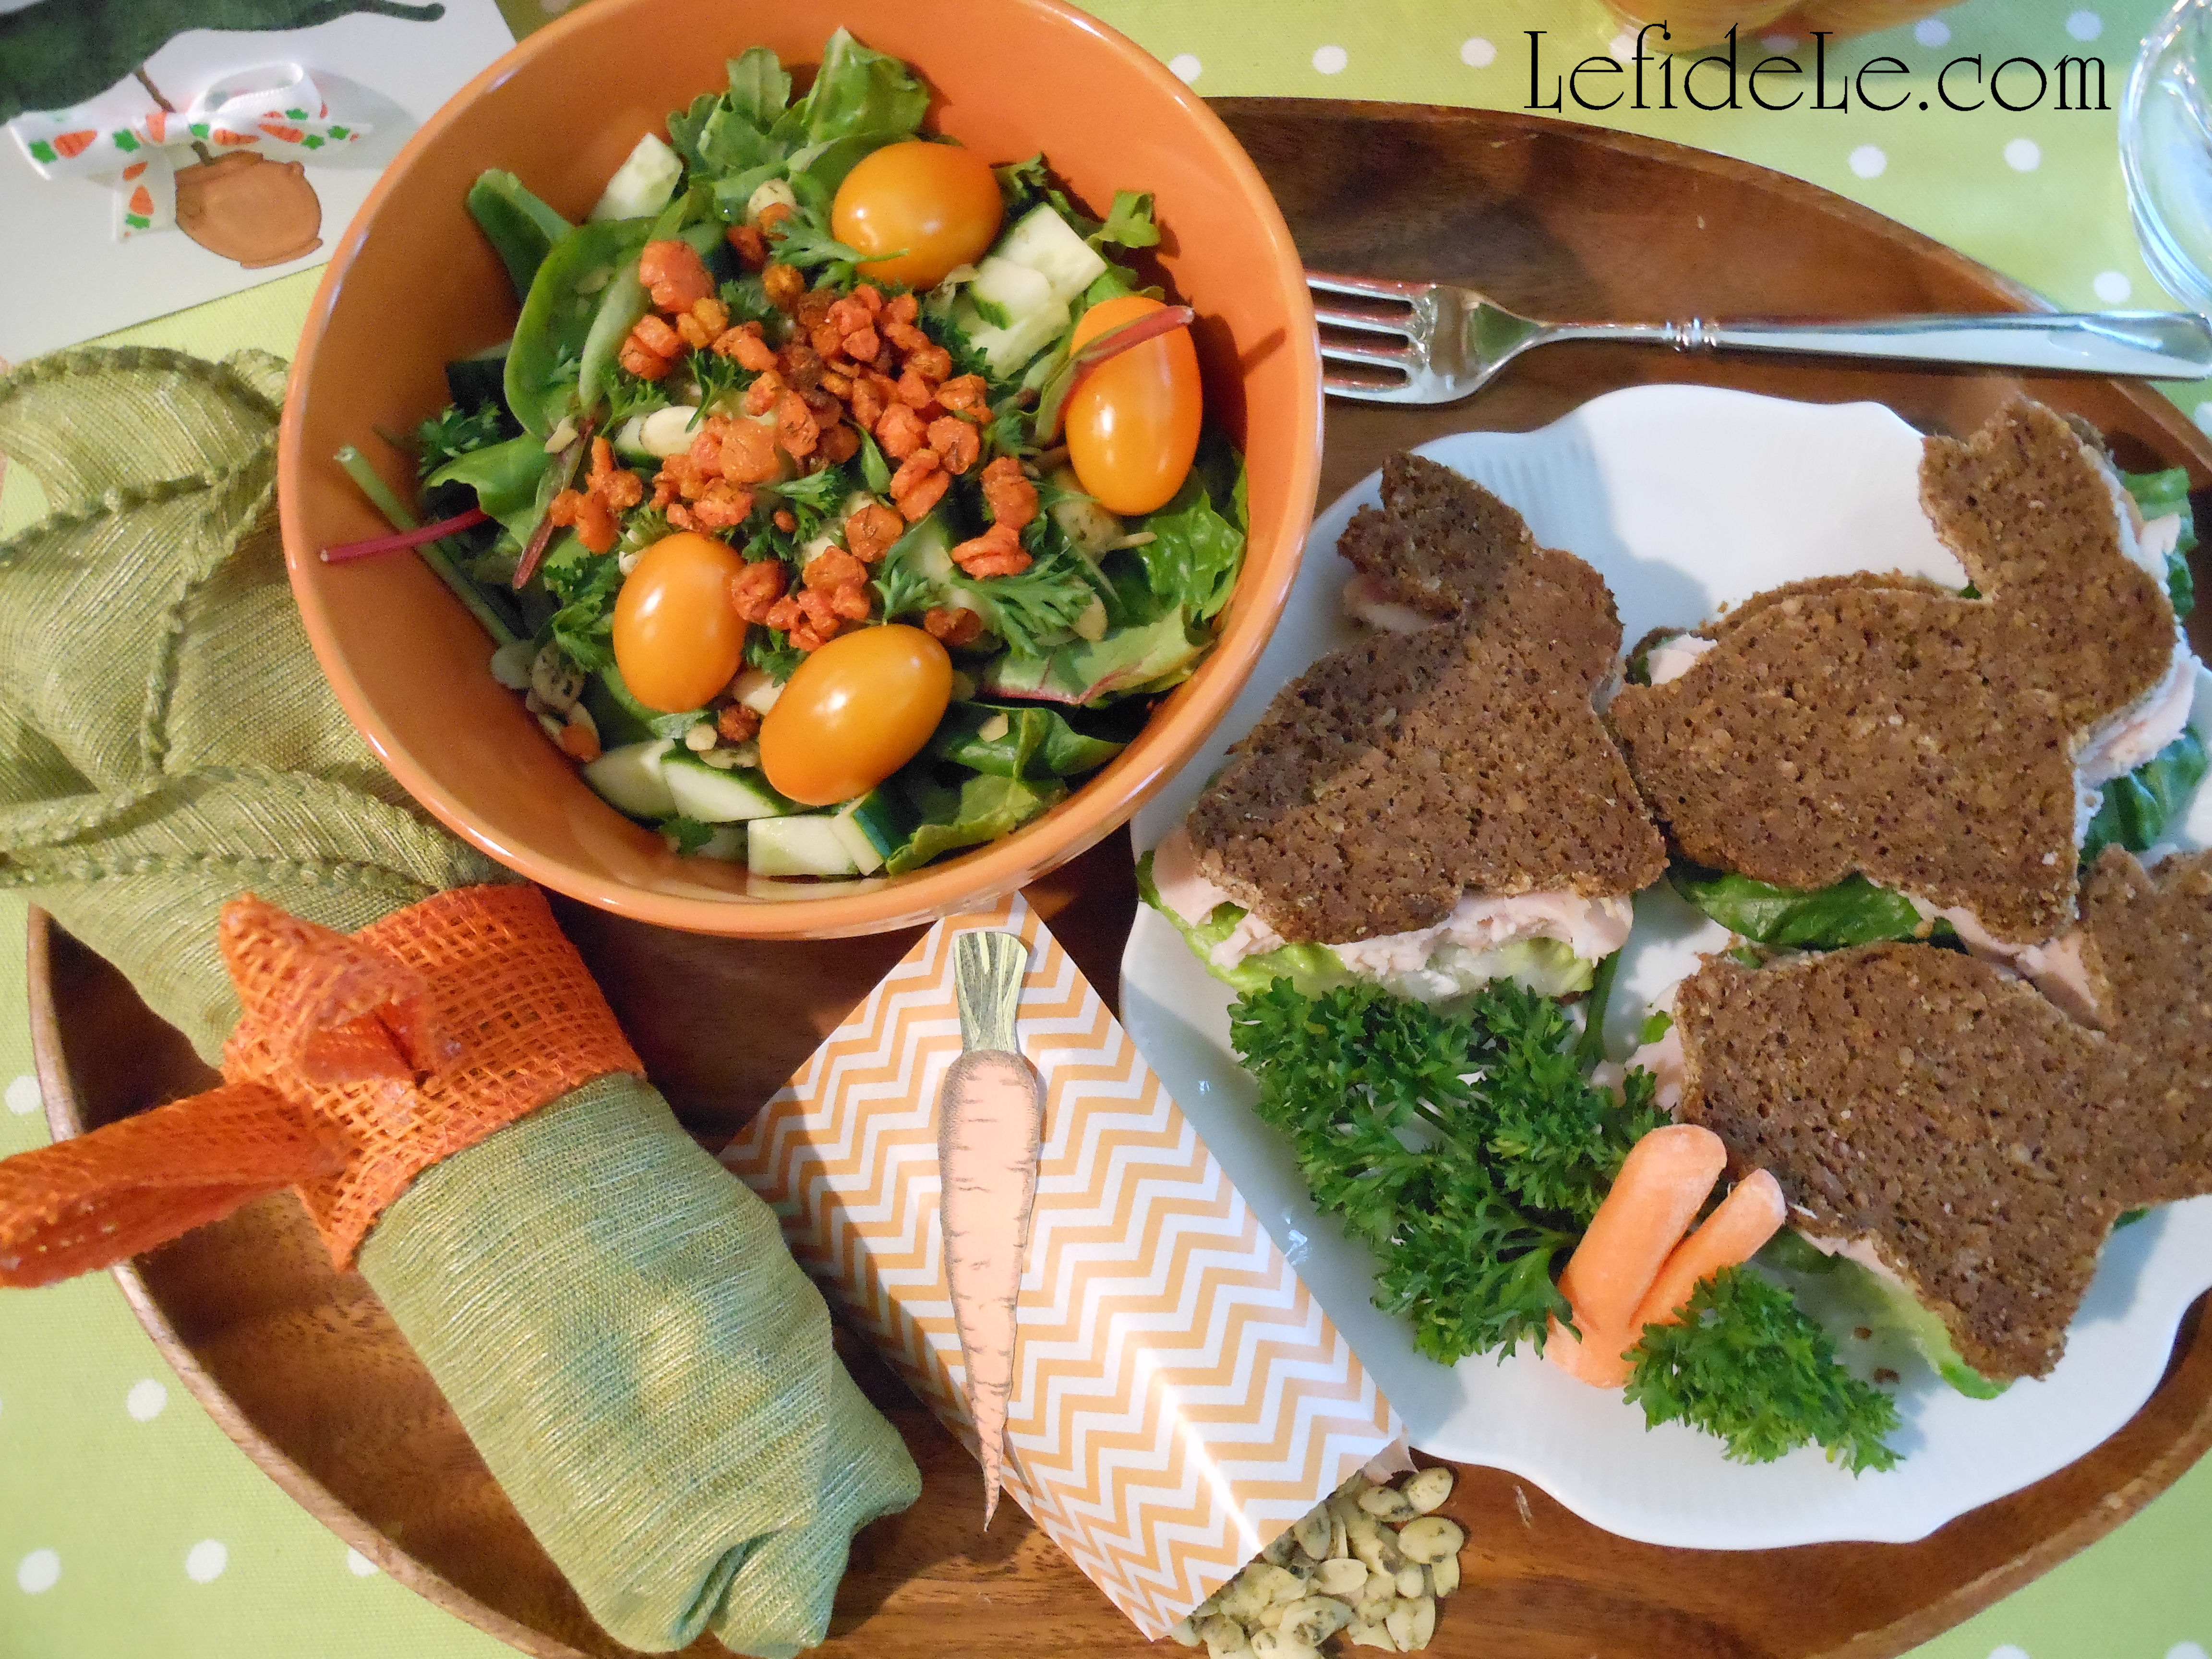
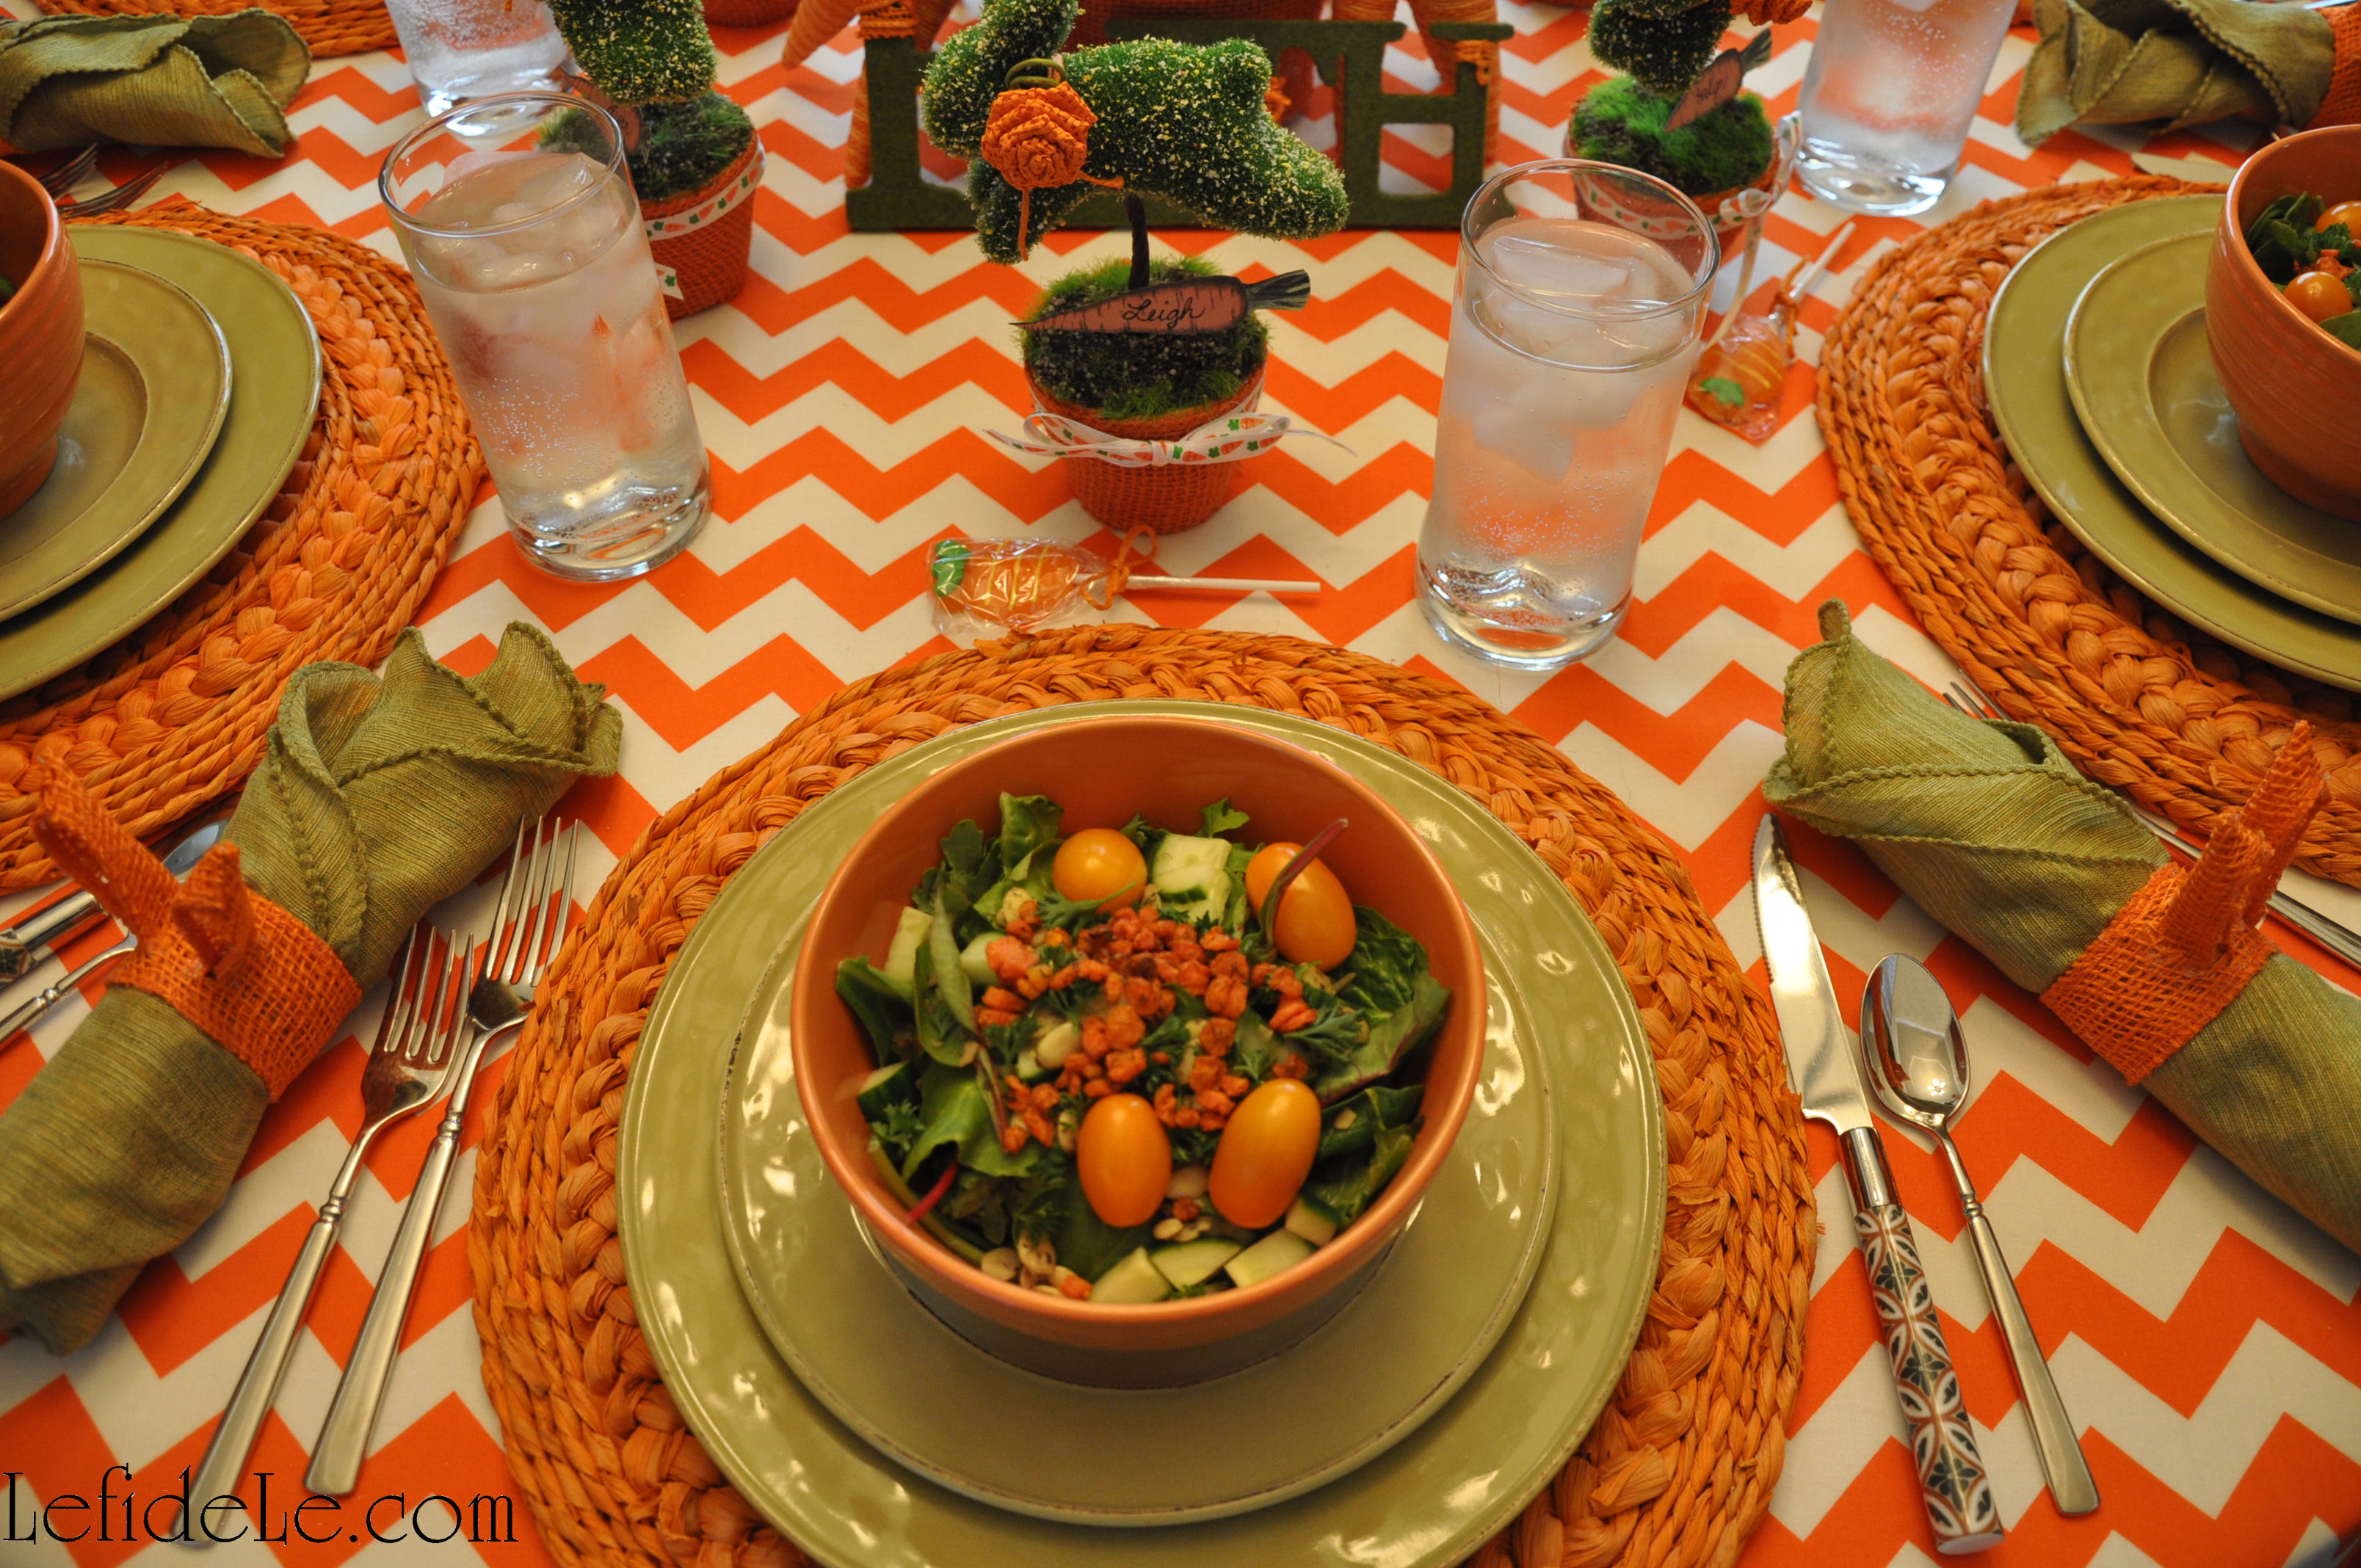
I used sage green cloth napkins with a seam that is actually called a lettuce edge. These folded beautifully into a roll with a top that resembled a small head of lettuce.

252Leigh

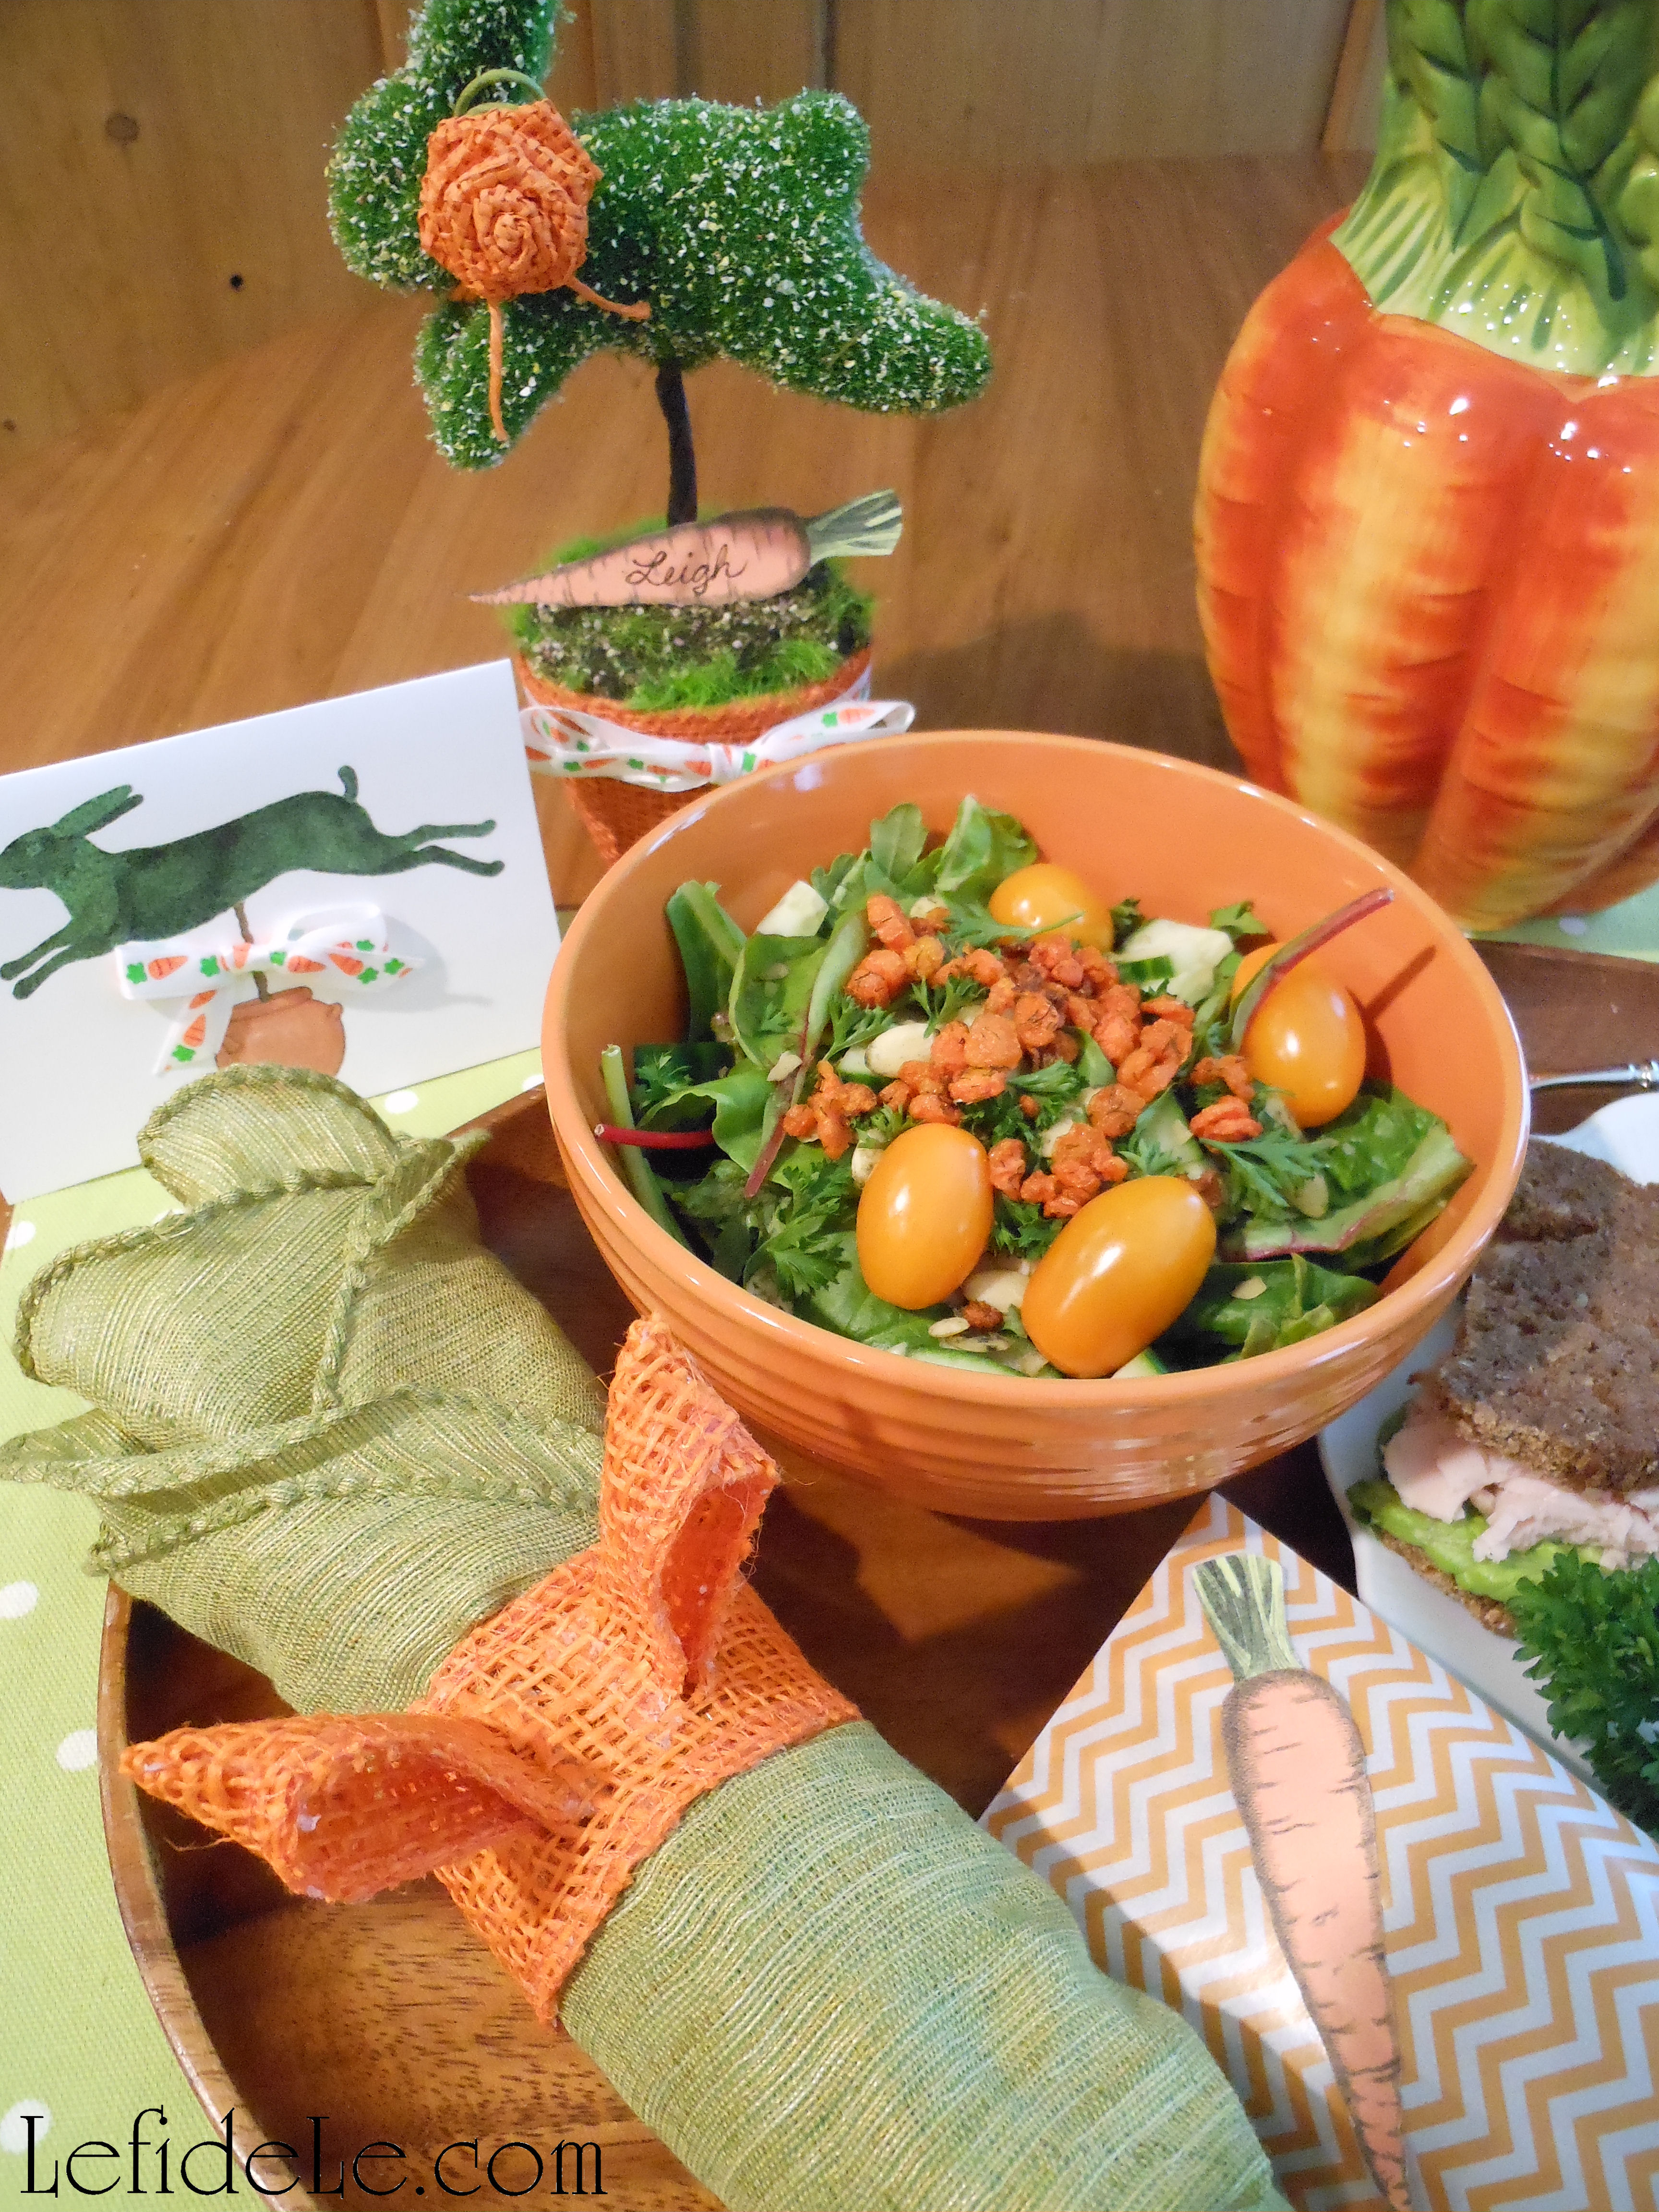
These are perfect for an Easter party. (See more of the leaping bunny garden party here.)

090Leigh

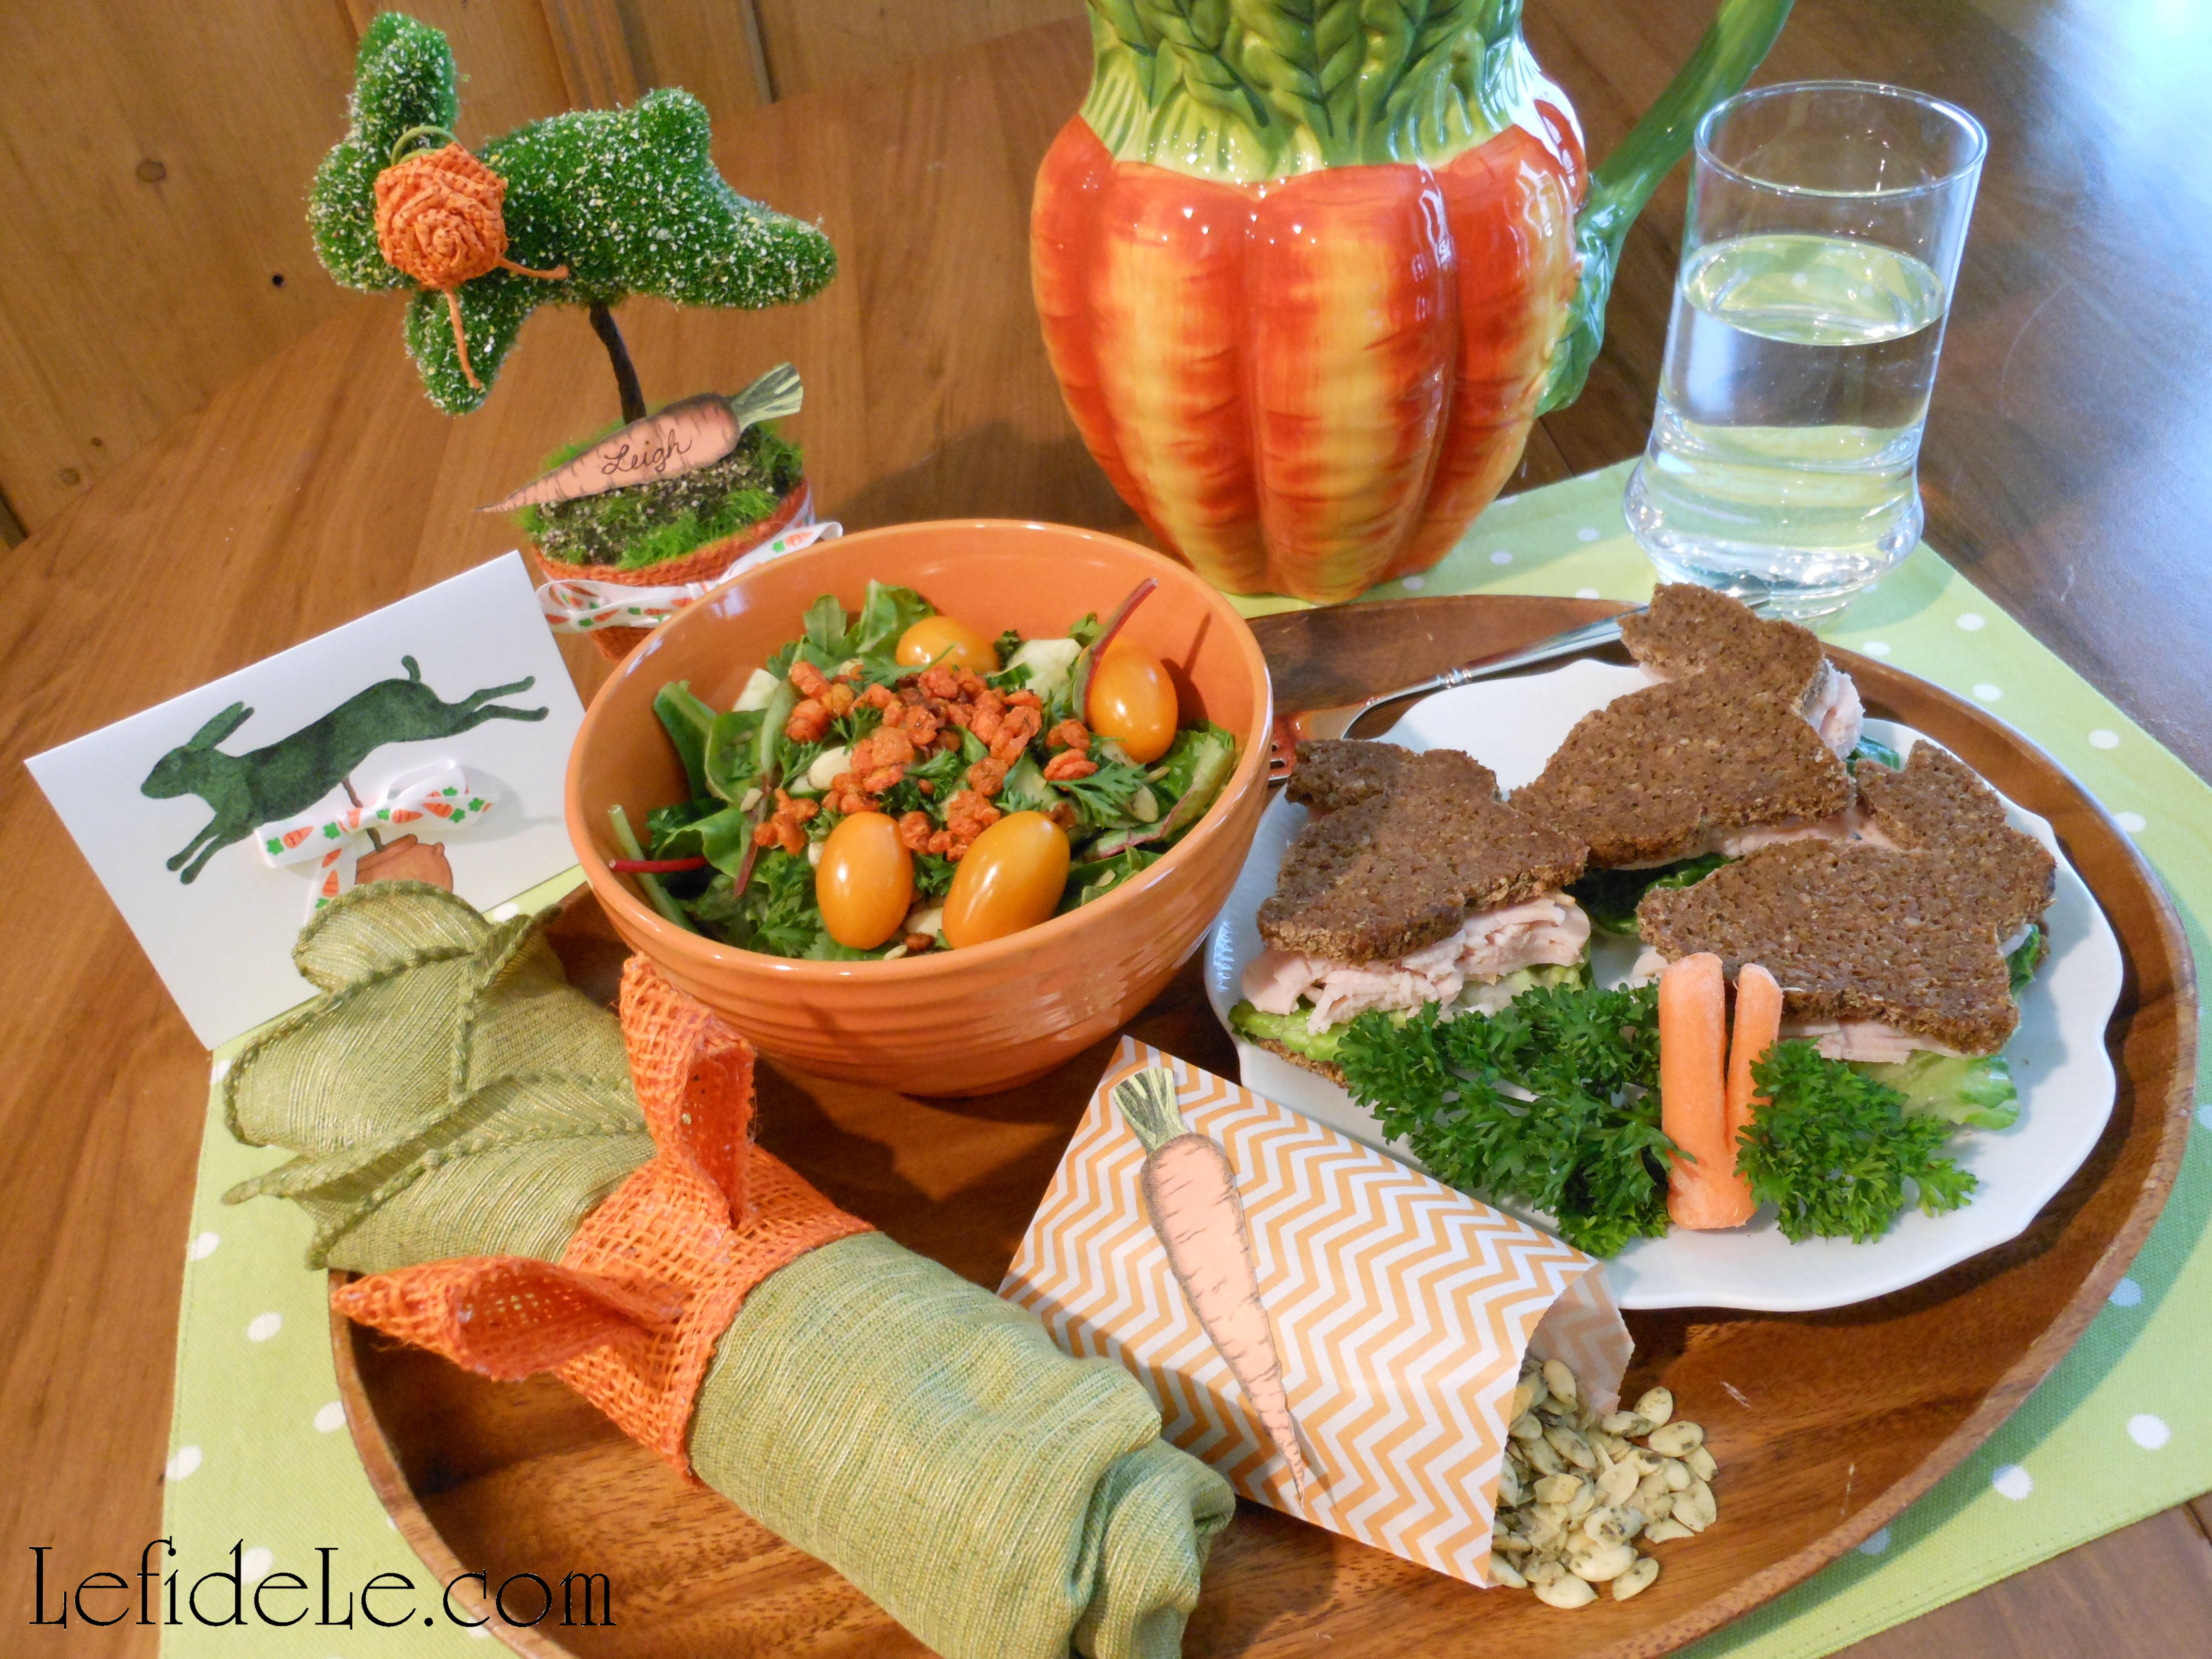
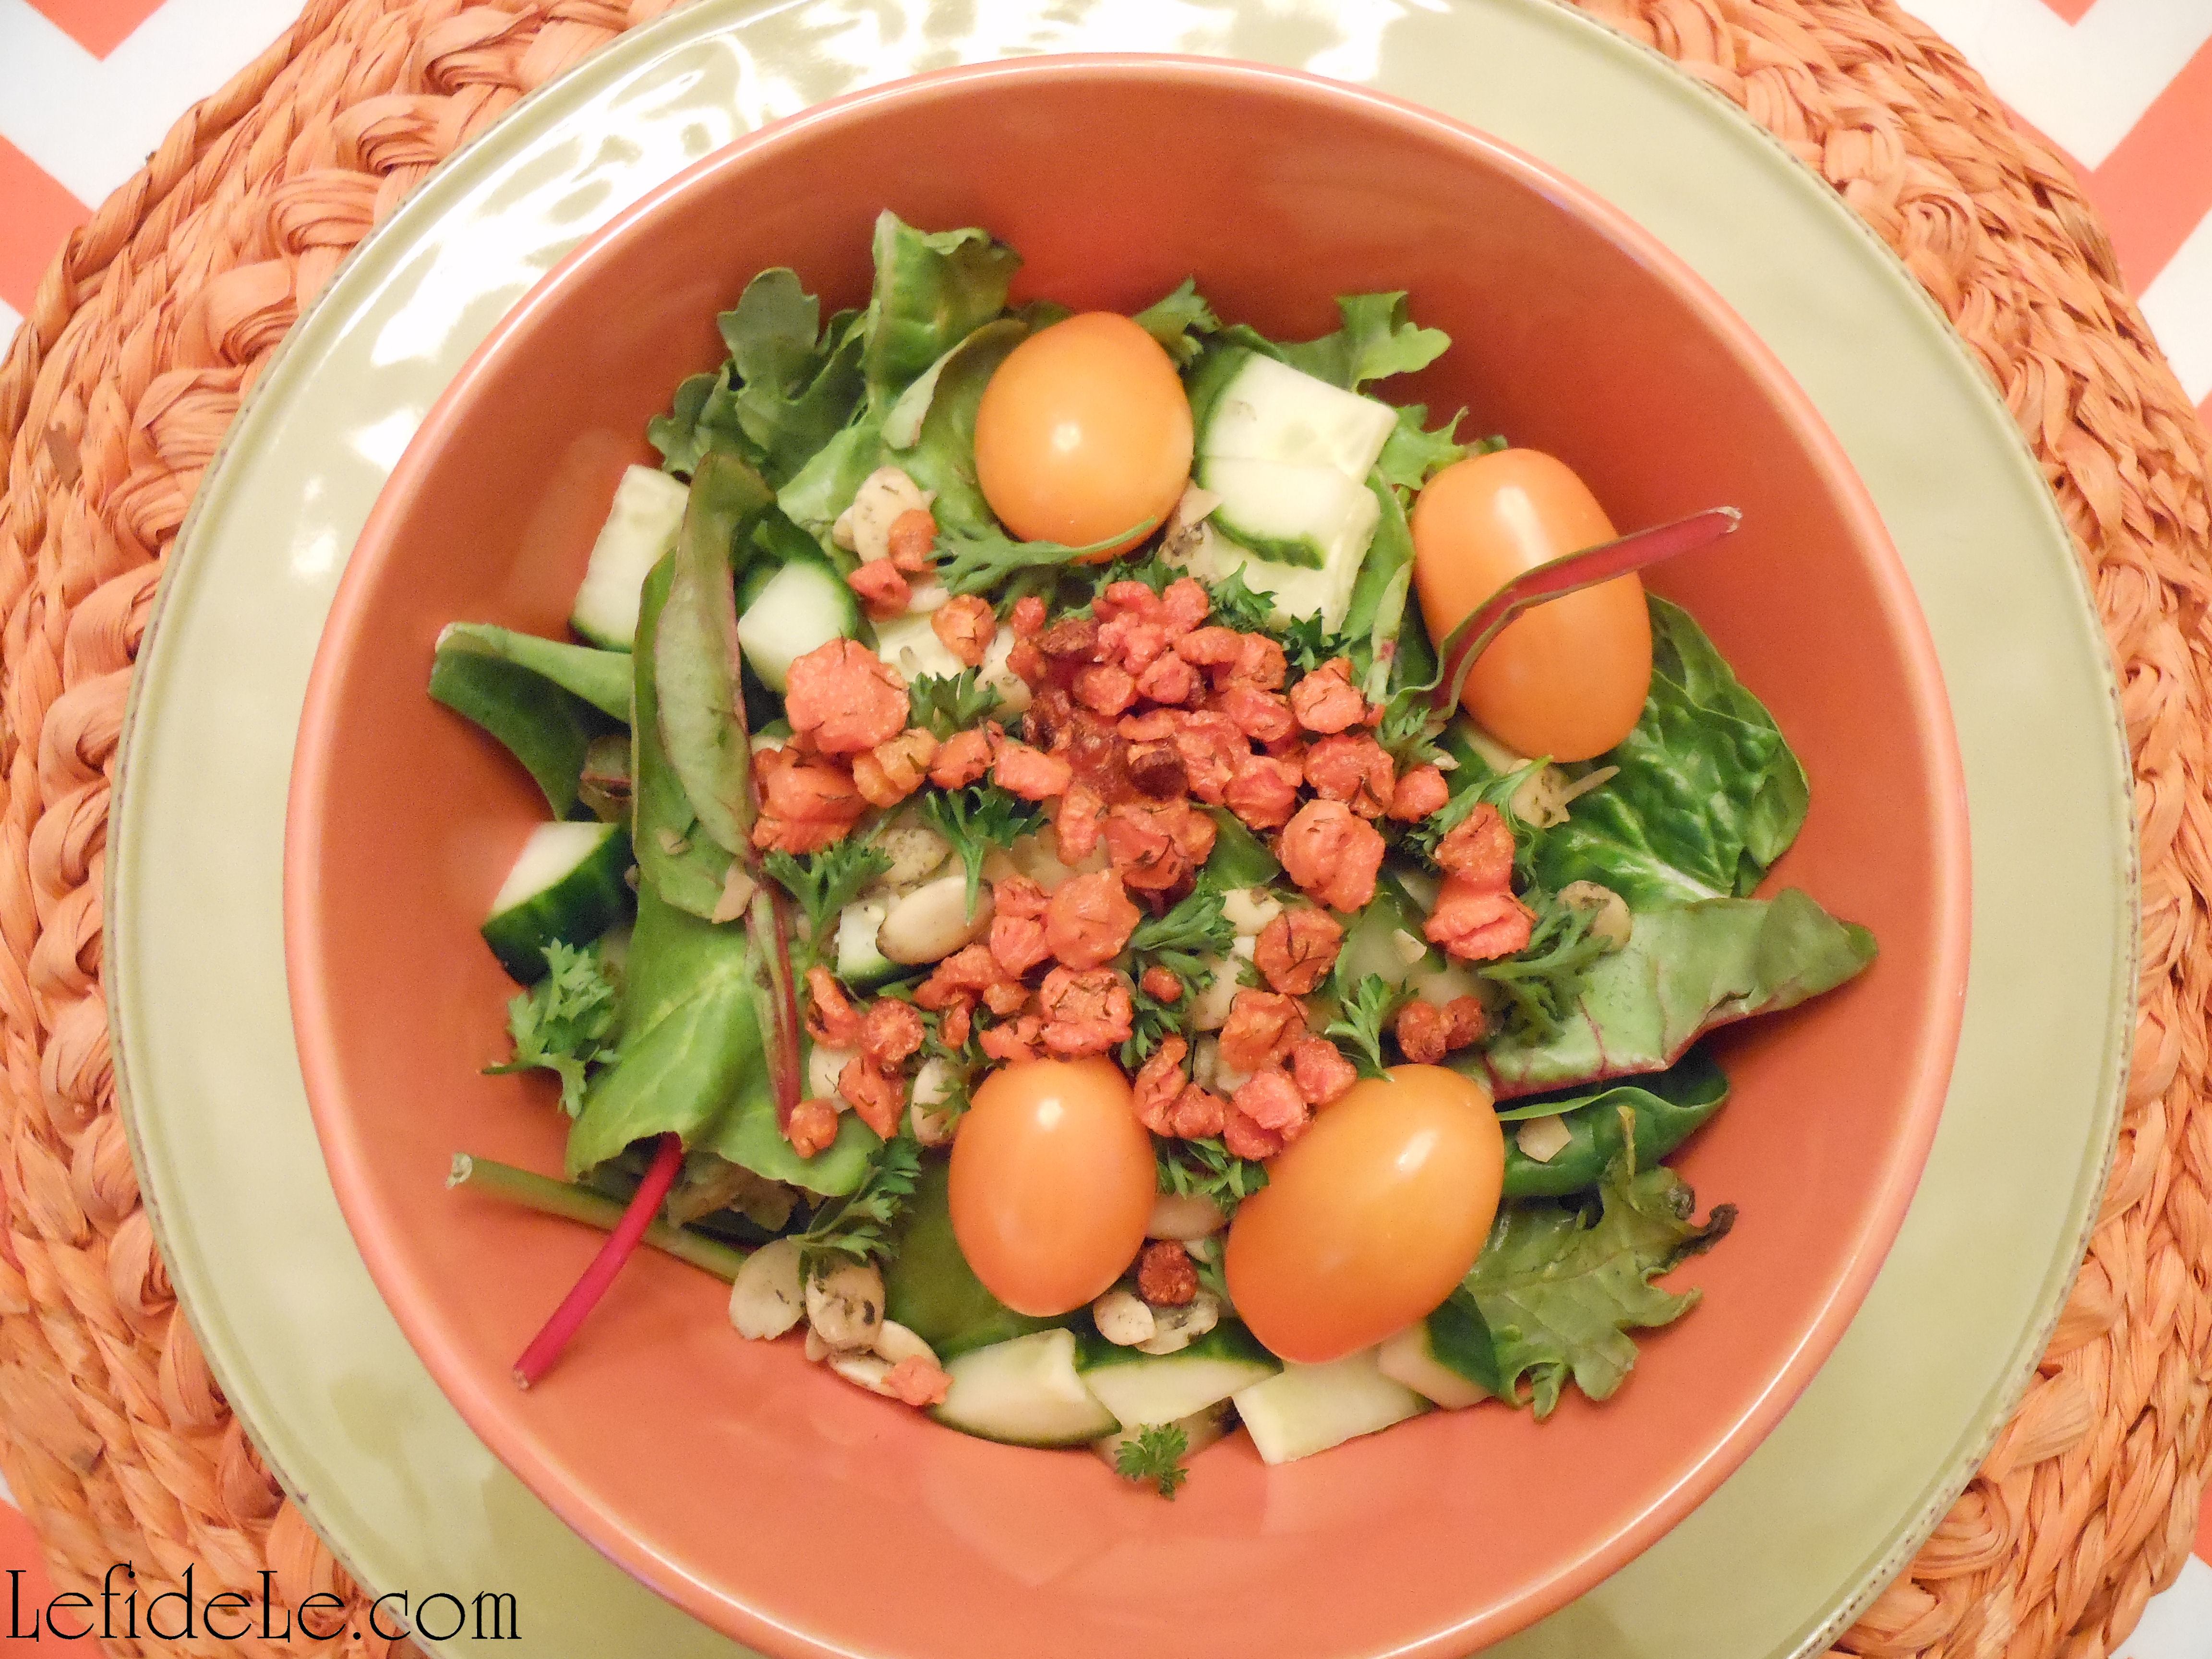
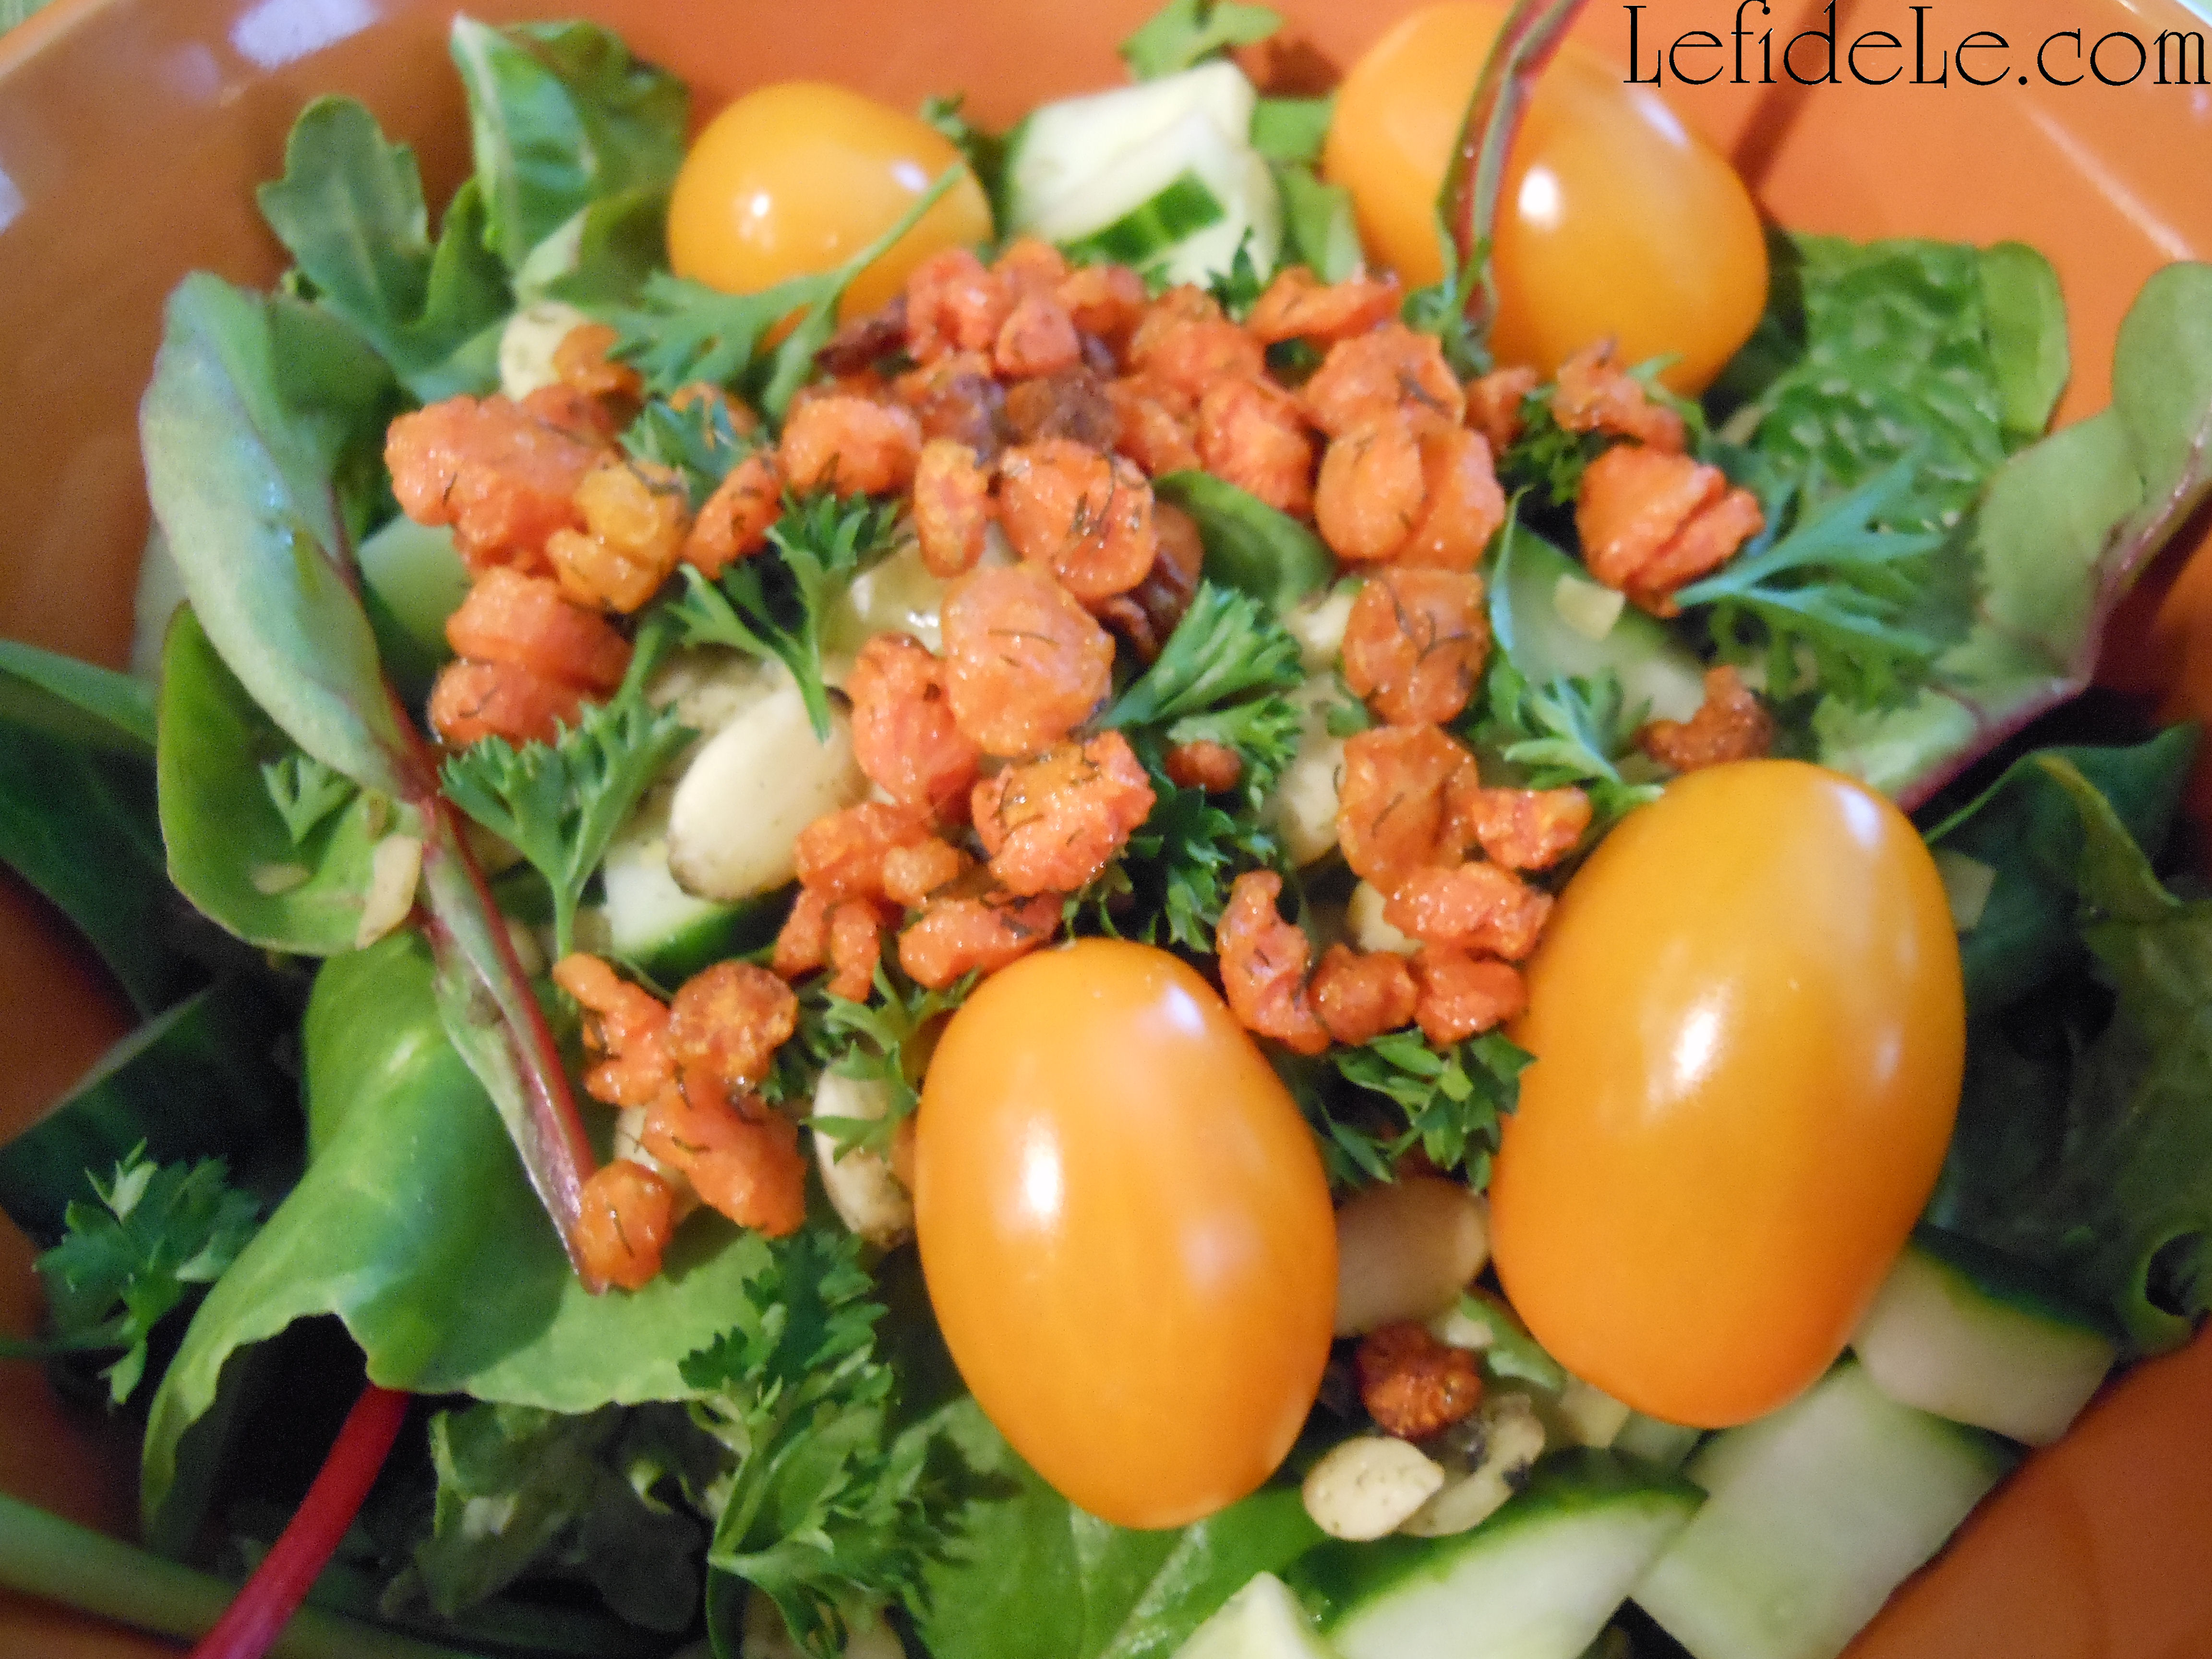
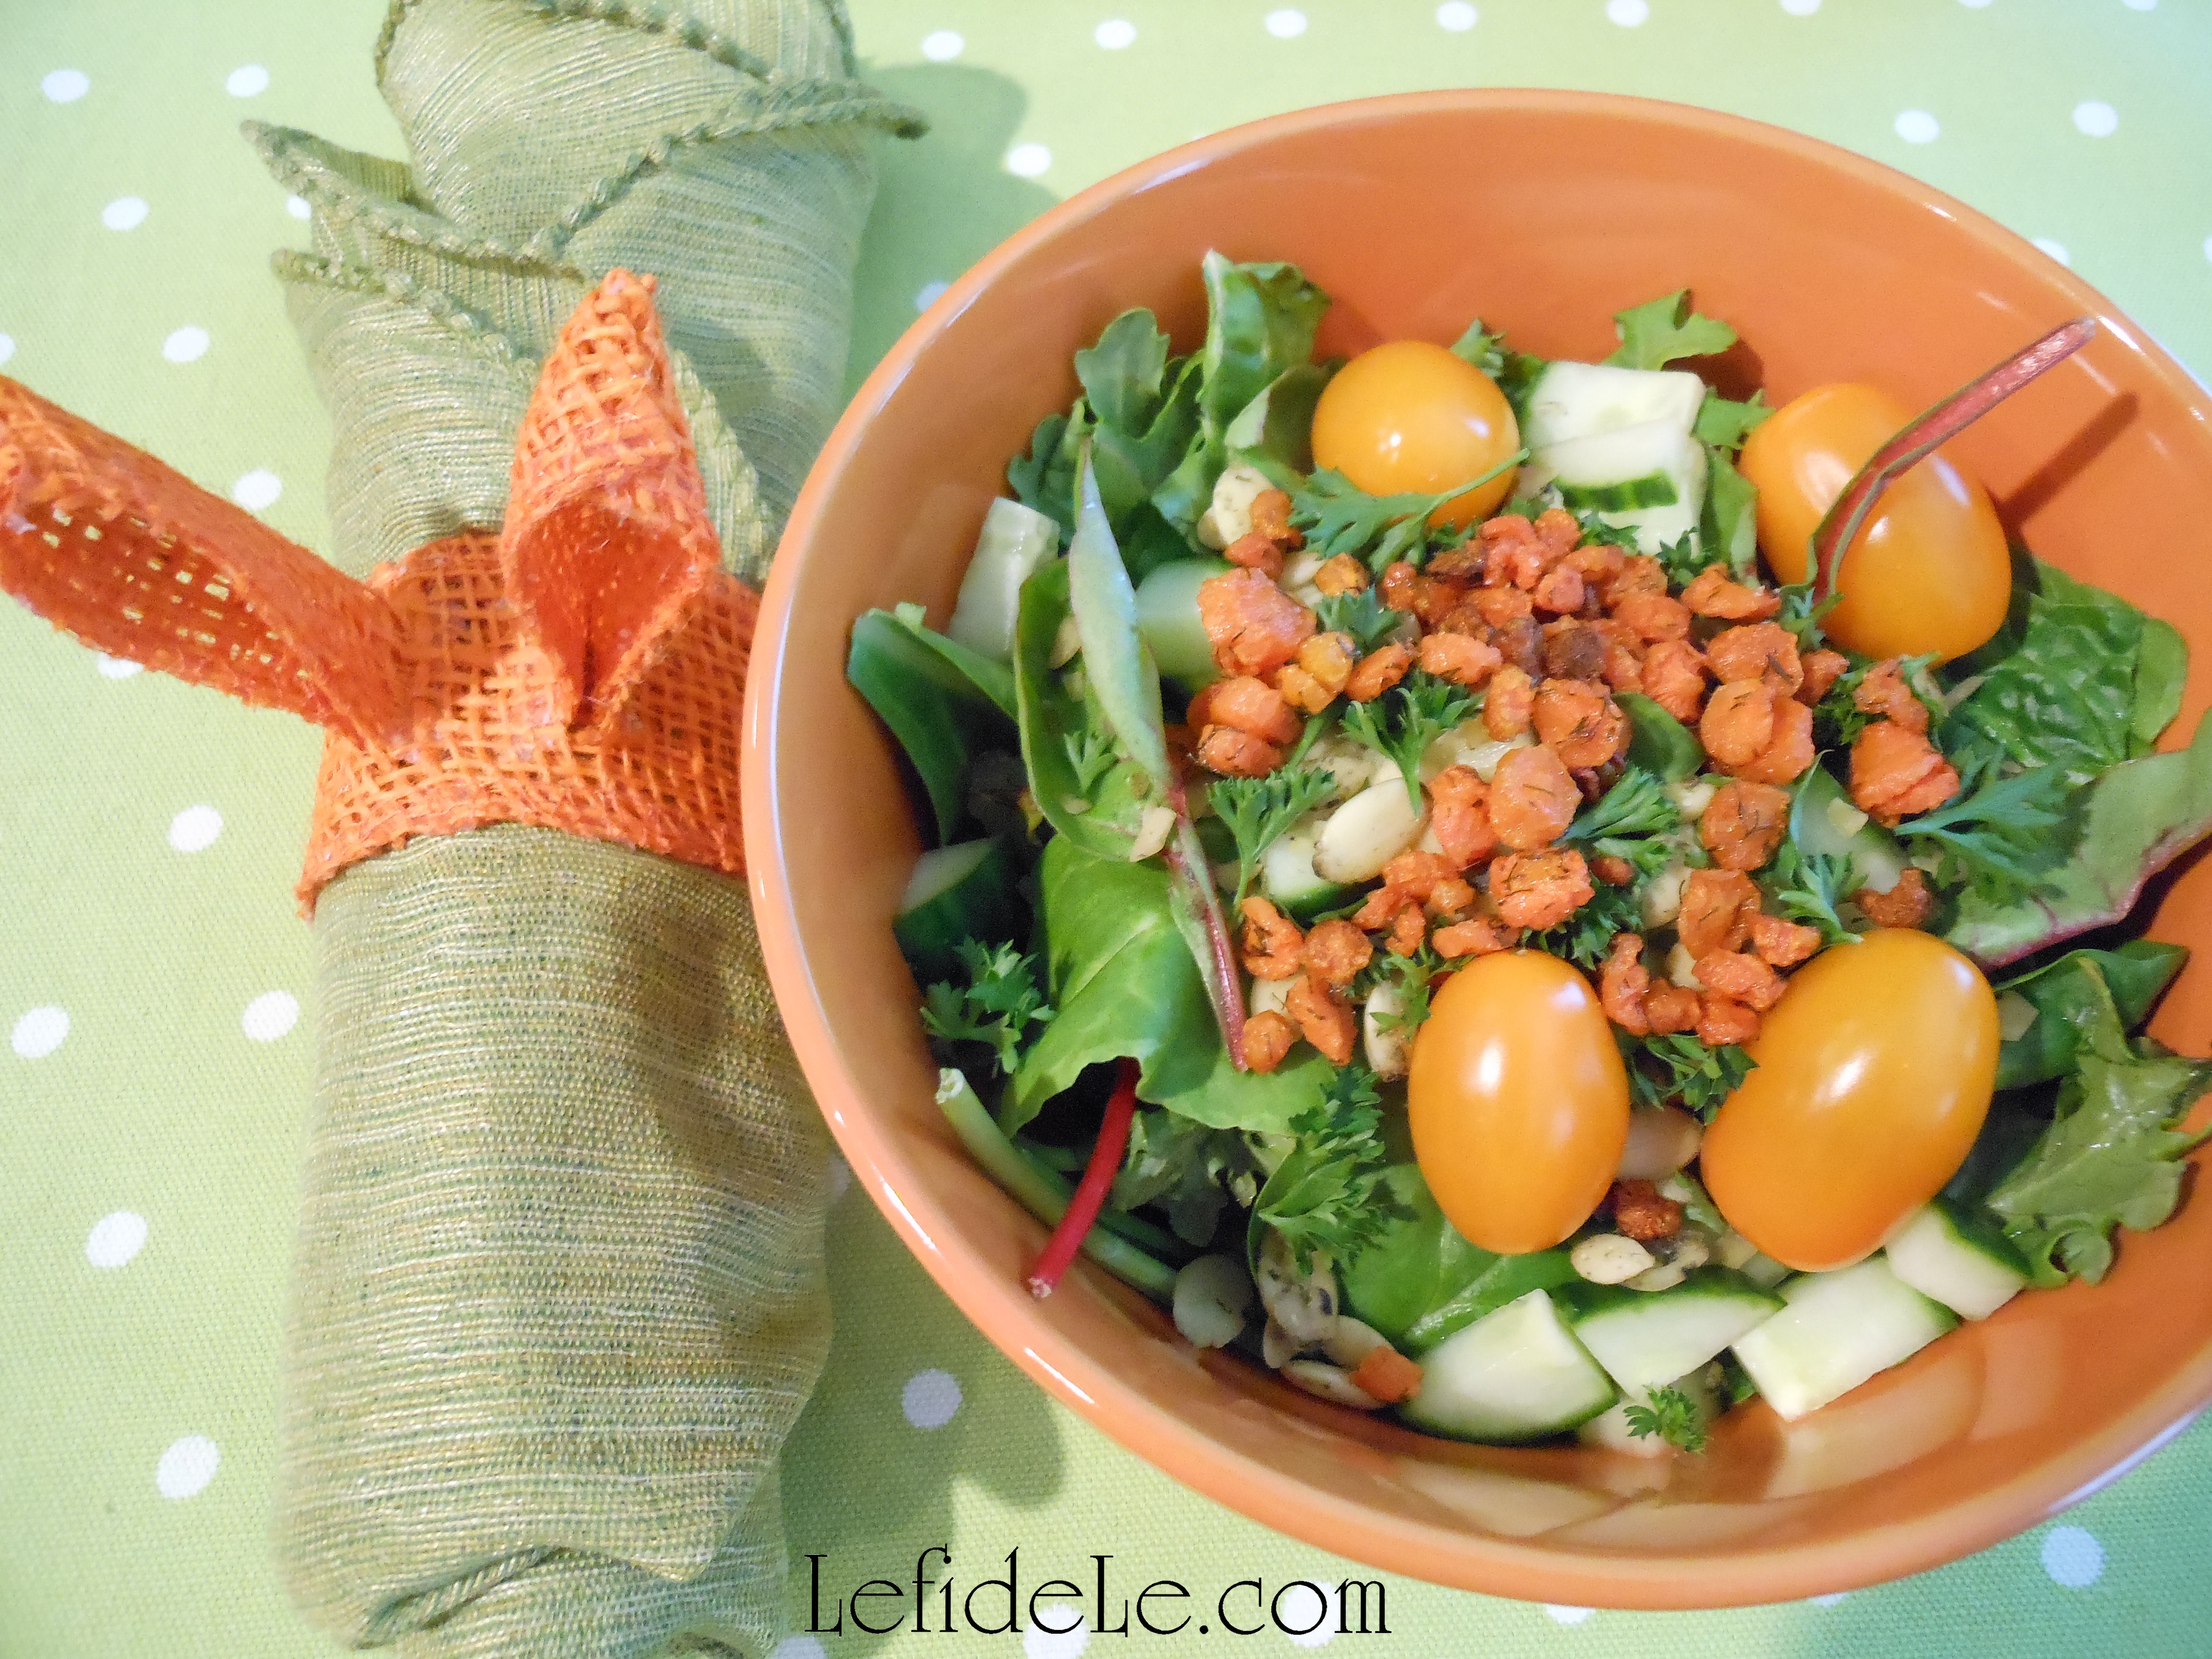
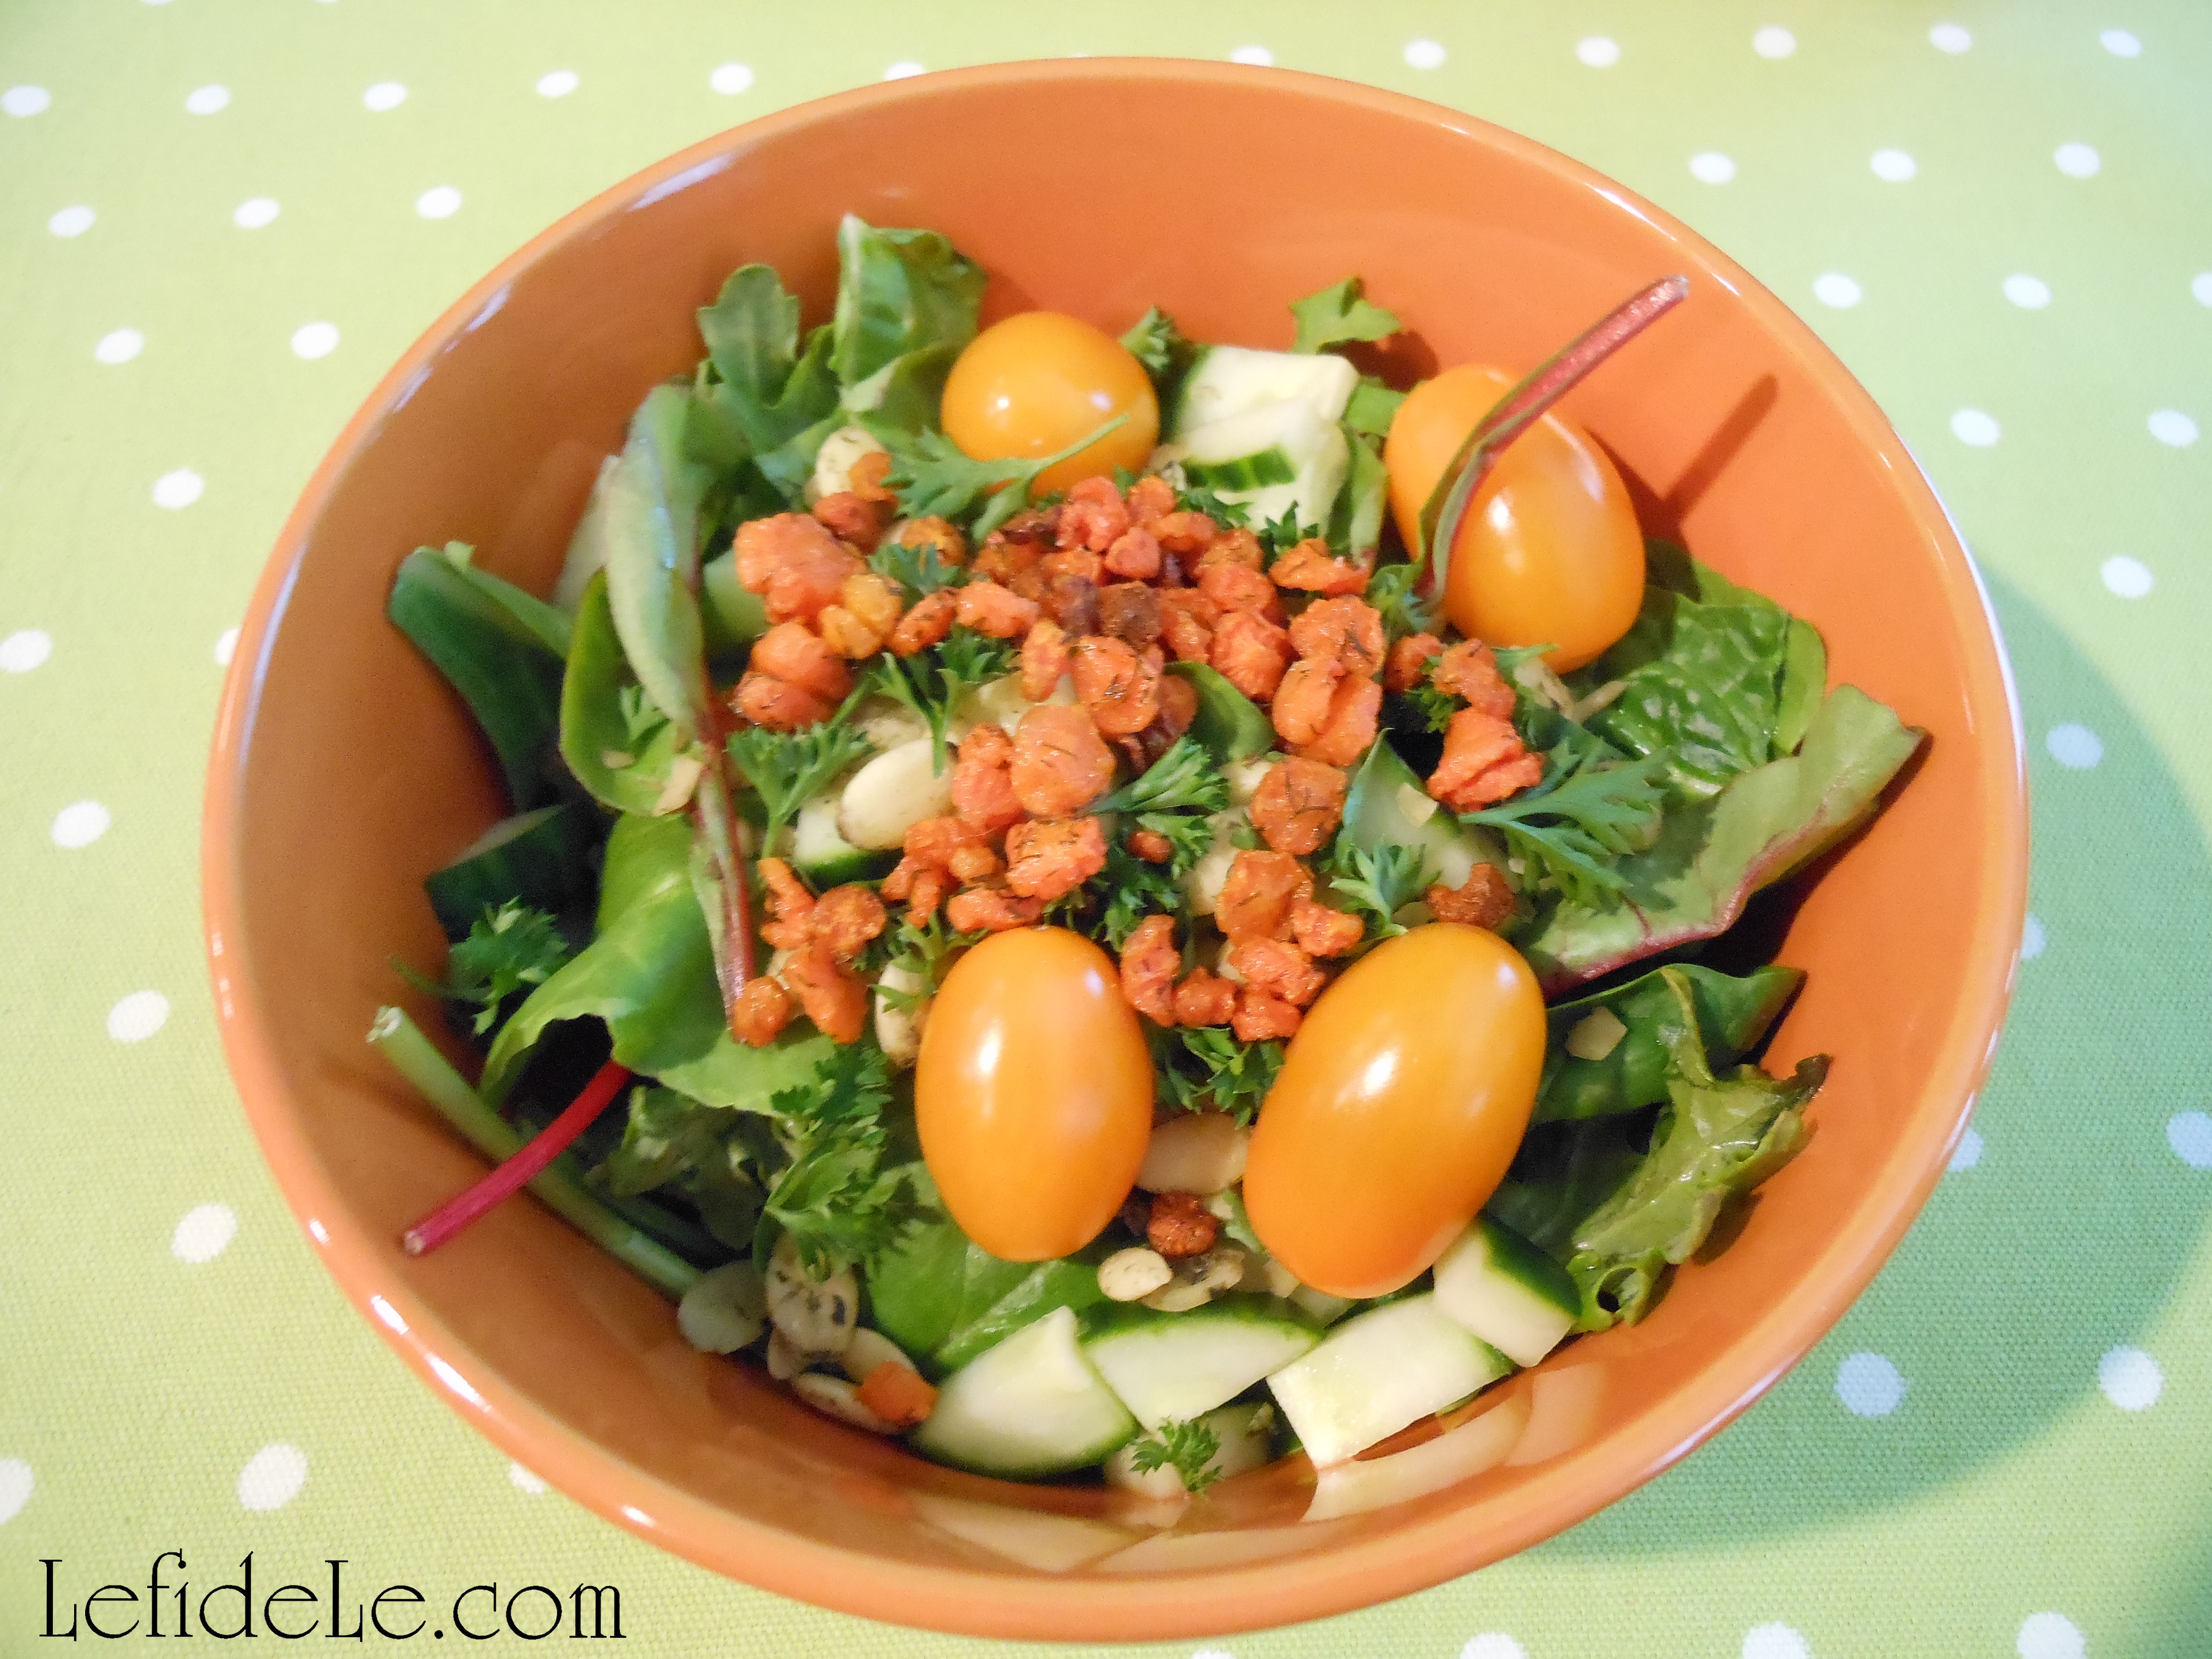
They’re also great to pull out for a spring lunch. (Find the carrot croutons / “bacon” bits recipe here.)

166Leigh

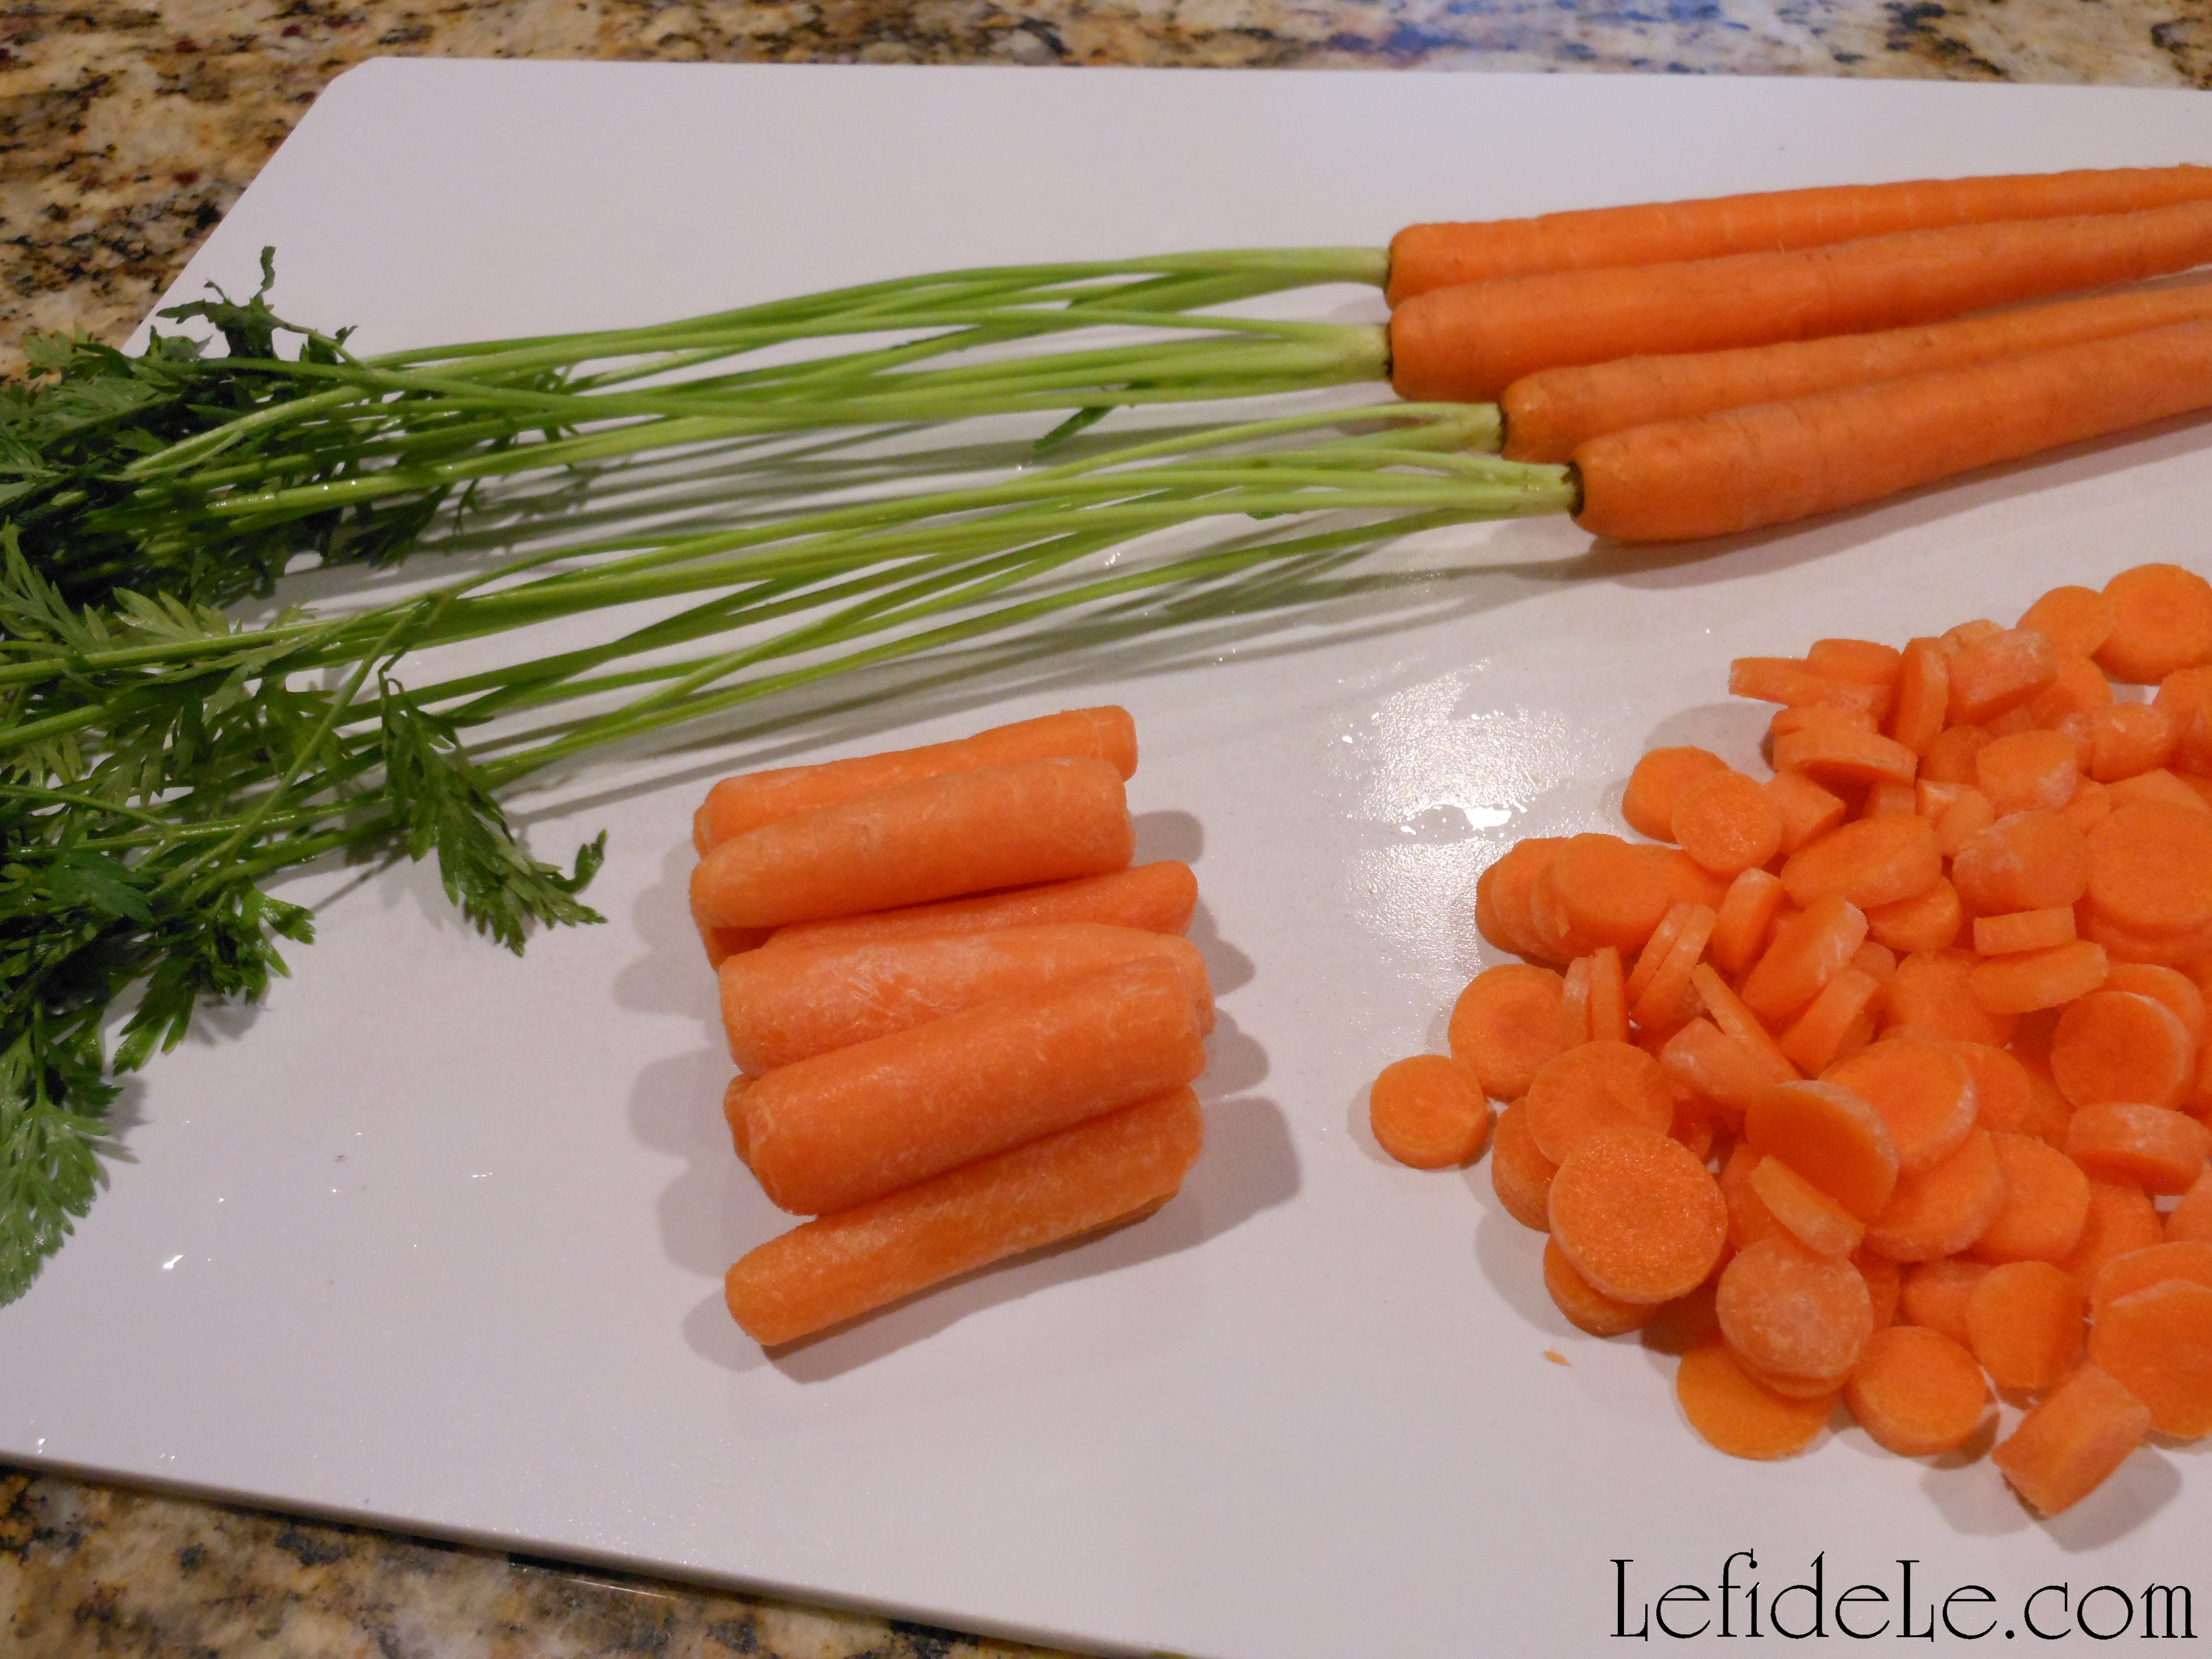
I wanted orange bunnies to coordinate with my carrot décor, which no one even sells, so I made them with fall clearance ribbon… making the grand total for this project a whopping buck fifty!

220Leigh

The best part of all, was receiving the genuine compliment that they were so much cuter than the stores’ versions. I hope you think so too. (Get the topiary craft tutorial and printables here.)

073Leigh

Faithfully Yours,

Leigh

P.S. The Easter Bunny approves this message.

WildBackyardBunnyLeigh

(This is one of the wild backyard bunnies visiting my porch!)

Healthy Gluten-Free Carrot Croutons / Vegan “Bacon” Bits Recipe for Spring Garden Salads (Perfect for Easter, Showers, Luncheons, & Brunches)

150bLeigh

This easy recipe for colorful carrot croutons transforms any spring garden salad into a healthy gluten-free creation. Roasting carrot slices enhances their inherent sweetness while herbs and olive oil impart crouton flavor. Use baby carrot slices for healthy vegan “bacon” bit crunch with no cholesterol. This modern twist on old favorites is a continuation of the undercover veggie series, which makes it simple to get your little bunny to eat her carrots!

113Leigh


Ingredients:

  • sliced carrots (large carrots make crouton chips, while baby carrots make bits)
  • extra virgin olive oil (to drizzle over carrot slices before roasting)
  • your favorite dried herbs & seasoning (to sprinkle before roasting, I used sea salt and dill, but try grilling spices for bits)
  • fresh garden salad (I used baby kale, baby chard, baby spinach, diced English cucumber, orange heirloom cherry tomatoes, sprouted pumpkin seeds, & chopped fresh parsley)
  • dressing of choice (try a lemon vinaigrette with a 3 to 1 ratio of extra virgin olive oil to lemon juice plus herbs like dill & parsley)

126Leigh


Instructions:

078Leigh

Wash the carrots, and peel the large varieties. These baby carrots are a peel-free shortcut to orange vegan “bacon” bits. Slice as many as you like, keeping in mind that they will shrink with roasting. (A cookie sheet full is enough to top 6 side salads.)

082Leigh

Disperse the sliced carrots over a parchment lined cookie sheet. Drizzle them with olive oil, or generously spray them with a Misto. Sprinkle dried herbs and seasoning over them. (I chose sea salt with dill for a light garden fresh taste, but grilling spices with black pepper would be more bacon bit like.)

087leigh

Roast in a 350ᵒ oven for about half an hour… this will vary greatly depending on carrot size and oven temperament! Just keep an eye on them once the edges brown, with the oven light on. (If utilizing a dehydrator, cook them at 145ᵒ for 30 minutes, and then reduce heat to 115ᵒ for 24 hours until crunchy.)

149Leigh

Spoon the crunchy carrot bits over any variety of fresh garden salad.

124Leigh

Roasting makes them more flavorful than regular old carrot slices. (Find the bunny ears napkin ring craft tutorial here.)

109Leigh

Bunny sandwiches are the perfect accompaniment for a carrot topped garden salad. (Cut the bread shapes with a cookie cutter before filling them.)

220Leigh

The colorful carrots are a beautiful way to coordinate with any existing orange elements in your menu or décor. (See more from the leaping bunny garden party here.)

122Leigh

These are not only gluten-free, but also guilt-free… because no pigs or waist lines are harmed by consumption!

103Leigh

For more undercover veggies and a creamy dressing, see my Heartbeats Recipe here.

42bLeigh

Faithfully Yours,

Leigh

P.S. The Easter Bunny approves this message.

WildBackyardBunnyLeigh

(This is one of the wild backyard bunnies visiting my porch!)

Candyland Themed Party Décor Ideas (for Baby Showers, Children’s Birthdays, or Christmas Decorating)

409Leigh

This Candyland theme was inspired by Mary, a dear lady who passed on long ago, but left her inimitable words of wisdom with me, “life is uncertain, eat dessert first,”…and she always did! So it is with her spirit of joie de vivre, that I unbound that creative kid within me that clamored for a sensory sugar high. To release your inner child, follow my 3 part DIY party decorating series (with easy project tutorials and free printables) as it’s a sure path to crafting your way to classic Candyland cuteness! Using some or all of the décor ideas (befitting kid’s birthdays, baby showers, and Christmas parties), you’ll be sure to delight the inner-child in your guests as well! While you’re at it, use my allergy friendly recipes and serving suggestions to fill your candy buffet quickly and easily. For now, let us escape to Candyland…

338Leigh

A Candyland village of (glittered) gingerbread houses sits nestled atop an icing laden hillside (of buffalo snow batting) dotted with (pom-pom) sprinkles.

308Leigh

(Faux) lollipop trees spring forth from gumball forest floors (in speckled metal pails) and (real) candy-cane thickets abound.

302Leigh

Gingerbread people (treat boxes) populate the village, travelling amongst the wellsprings of jellybean pools (in pink plastic pails).

321fLeigh

A few “gingies” guard a fenced supply of the village’s juice-milk stores.

361Leigh

Gingerbread (banner) clouds float high amid skyscraping treat towers holding abundant soirees offering peppermint candied almonds, twisty marshmallows, pastel taffy, and (healthy) spicy guacamole shooters with pink pomegranate potato chips.

317 (2)Leigh

The towers’ penthouse floors encircle trios of cotton candy “cream” sodas with peppermint striped straws.

295Leigh

Round rainbow swirled plates and napkins stand by to serve Candyland visitors.

318 (2)Leigh

Boxed and wrapped candies sit ready for shipment to their final destinations.

356Leigh

Gingerbread peep billboards pop up to signal the way to gastronomical paradise.

351Leigh

Gingerbread (cookie) ladies and gentlemen hold snowball (cookie) fights in the village round, whist the tiniest of “gingie” tots toddle home with gumball treats over candy-cane cobblestones lain over pink velvet (cupcake) roads.

341Leigh

A low gingerbread fog sinks below the sugary iced hills perched above a pink (cloth) cliffside.

381Leigh

Around the bend, pink hard candy (lanterns) shine high above big rock candy mountains.

366Leigh

Glowing with hard candy (ornaments), they burst forth with pyroclastic explosions of candy treats spilling over pillowy white icing.

393Leigh

Hard candy (ornament) boulders tumble amid (faux) ribbon candy bushes and flowing streams of (real mega) candy buttons.

395 (2)Leigh

(LED) peppermint light posts illuminate the scene.

370Leigh(Real) candy-cane thickets and (faux) cupcake bushes dot the camping site where gingerbread residents roast marshmallows in the midst of the pink (tablecloth) countryside.

386Leigh

A rainbow lollipop (lantern) arcs above the distant rock candy mountain (tree).

388Leigh

A lone home defiantly stands amidst the candy (ornament) strewn mountainside adjacent to a fallen (faux) ice cream cone log.

384Leigh

Waterfall (faux mega) candy buttons stream down the embankments whose vistas shout, “Welcome to Candyland!”

333Leigh

Wishing you a sweet life of seized moments in eating desserts first!

Faithfully Yours,

Leigh

P.S. Learn how easy it is to construct your very own Candyland village in these 5 articles:

182Leigh

DIY Candyland Party Themed Craft Tutorial: Gingerbread People Banner, Treat Gifts Boxes, & Printable

380Leigh

DIY Candyland Party Themed Craft Tutorial: Hard Candy Lanterns, Candy Ornaments, & Conversation Heart Garland

179Leigh

DIY Candyland Party Themed Craft Tutorial: Game Board Treat Tower & Easy Buffet Display

231Leigh

Quick & Easy Candyland Confection Ideas: Pink Almond Milk Juice “Recipe”, Cotton Candy “Cream” Sodas, & Gingerbread Peep Pops

170Leigh

Spicy Guacamole Shooters / Avocado Appetizers Recipe (Allergy-Friendly & Nightshade Free = No Red Pepper or Tomatoes)

DIY Candyland Party Themed Craft Tutorial: Game Board Treat Tower & Easy Buffet Display

308Leigh

Craft your way to classic Candyland cuteness befitting birthdays, baby showers, and Christmas décor.  This tutorial for a game board treat tower and easy buffet display are part three of a DIY party decorating series with easy projects and free printables. Using some or all of the ideas, you’ll be sure to delight the inner-child in all of your guests. Sweet!

179Leigh

These simple crafts all utilize the same teacher’s bulletin board banner strips in a licensed Candyland board-game pattern. I made two towers, wrapped six pots, covered two milk corrals and a bunch of food picks… and I still have many strips left over! All of this is from one package of super-cute and inexpensive banners that could not fit my theme more perfectly.

7(2)Leigh

To cover food crates, all you need to do is measure the front width and cut a length off. Double a piece of tape onto itself to hold the cardstock in place during the party. Remove it to reuse later for another craft. One idea is to let the kiddos make thank you cards out of it.

6(2)Leigh

Wrap a length of the banner to coordinate a plain metal bucket to your theme. Simply cut and tape the ends together.

351Leigh

These can be used to hold candy and prop up Gingerbread Peep Pops (see the Candyland Confections article here).

120Leigh

Make food picks by simply cutting the leftover banner end bits into colored squares.

122Leigh

Tape toothpicks or popsicle sticks behind them. These can also be used for place-cards if you like.

109Leigh

My treat towers begin with ordinary cupcake stands that are transformed into darling 3-D gaming creations.

069Leigh

To make your own, first find a commercially packaged stand in a matching color palette.

394Leigh

Cut the teacher’s border into two sections (so that they’re small enough to allow food to be placed once it’s completed).

117Leigh

I just followed the natural curve of the game path pattern.

072Leigh

Put the stand together as per the package instructions.

105Leigh

Hot glue the underside if you really want it to be super-sturdy.

095Leigh

Hot glue a strip to the outside rim of each level. Cut off the excess length.

099Leigh

If your ends don’t match up perfectly, just trim off the top edge to make them appear seamlessly adjoined.

101Leigh

These are what the towering creations look like when laden with sweet treats galore! (See my allergy-friendly Spicy Guacamole Shooters Recipe here.)

317 (2)Leigh

Check out the rest of my Candyland craft series: Gingerbread People Banner, Treat Gift Boxes, & Printables and Hard Candy Lanterns, Candy Ornaments, & Conversation Heart Garland as well as the final party post on Candyland Themed Party Décor Ideas.

302Leigh

Faithfully Yours,

Leigh

DIY Candyland Party Themed Craft Tutorial: Hard Candy Lanterns, Candy Ornaments, & Conversation Heart Garlands

409Leigh

Craft your way to classic Candyland cuteness befitting birthdays, baby showers, and Christmas décor.  This tutorial for hard candy lanterns, candy ornaments, and conversation heart garlands are part two of a DIY party decorating series with easy projects and free printables. Using some or all of the ideas, you’ll be sure to delight the inner-child in all of your guests. Sweet!

049Leigh

Old-school paper lanterns may easily evolve into supersized hard candy confections with a few simple steps. Begin with any variety of sizes and colors (but choose lighter versions if you wish to light them). You can even find some in a candy swirl pattern like these red and white striped kinds in graduated sizes… or just start with white and add your own stripes. Craft paint is quicker, but marker works as well. Tie a loop of twine, ribbon, or fishing line to the top of each lantern to hang them by later.

039Leigh

Use a theme coordinating color of gift basket cellophane to wrap around each lantern. Be sure the ends overlap before cutting. I used opalescent pink so that the red stripes would show through as hot pink. This way I can reuse the lanterns later with a clear wrap as peppermint candies or without wrapping as striped beach balls in summer.

042Leigh

Tie a length of twine or ribbon to gather the cellophane at the lantern’s base. I actually used a pink and white yarn that mimics baker’s twine but is less expensive.

043Leigh

Pull the hanging cord straight out from the top of the lantern, and gather the cellophane around it. Pull the wrap taut around the sphere (like you would make a ponytail). Tie another bow around this end to secure it. (Note that you can now throw in some lit LED tea-light candles before closing it, but read on to find an easier way to light them.)

045Leigh

Cut off the excess cellophane from the “candy” ends so that it appears to be the right proportion.

381Leigh

You can set these on a table, integrate them into a display, or hang a grouping of various sizes to make a hanging centerpiece. I opted to hike up the chain of my chandelier with an S-hook to shorten it. (See a picture of how to do this here: Frozen Winter Wonderland Themed Christmas & New Year’s Eve Dinner Parties.) Then I attached the twine loops with a couple inches of wire to the chandelier at different levels. I turned the light on, and was immediately awash in a pink candy glow as the light filtered through the lanterns and cellophane. A plug-in up-light aimed squared at the lanterns will also cause them to glow in any location of your choosing. It’s much easier to do this rather than wait to light, close, and then hang your lanterns at the last minute. Of course, another option would be to purchase a light kit for each lantern then plug all those cords in… but who needs more trouble and expense?

232fLeigh

The exact same method was employed to craft the hard candy ornaments using, well… ball ornaments.

062Leigh

The only difference was that I didn’t tie on twine hangers, because I elected to use them for table display instead. They would have been lovely hanging though. I can always add twine to string them on a tree or centerpiece later, because I intentionally left the round hanging eye stick out of the gathered wrap. It’s visually concealed by the cellophane.

384Leigh

I made “big rock candy mountains” out of lit white Christmas trees that appeared to glow from within. I then placed the “candy”ornaments on and around them.

393Leigh

Ribbon candy ornaments are another simple décor craft that can utilize bits of leftover ribbon or even old package wrapping for an eclectic mix. I used a portion of a giant roll from Costco that is actually reserved for another project. Real ribbon candy doesn’t have glitter and has stripes facing the other way, but I thought they were adorable anyway.

124Leigh

To make these, just hot glue a line onto the ribbon’s end, and tap it down to form a loop.

130Leigh

Keep repeating this action, forming more and more loops, until you reach a size that seems proportionate to a candy dimension.

126Leigh

Cut off the end, and glue it down to form the last loop.

137Leigh

Next, add a hanger if you’d like to. I used the same thin ribbon as the banner in part one of the Candyland craft series. Make a loop through one loop end of the “candy” and tie a knot. (This seems to be a much safer option, than metal hooks, around small children and pets.)

388Leigh

Hang these from Christmas trees, add them to a candy lantern display, or set them around a centerpiece like my “big rock candy mountains”. The “icing” bases in the picture were comprised of blankets of buffalo snow batting.

057fLeigh

The last craft for the tree is a conversation heart garland that would serve equally as well as a banner for a Valentine’s celebration.

054Leigh

It’s so simple and inexpensive because it utilizes foam craft hearts and yarn (or thin ribbon, or baker’s twine if you like).

064Leigh

Begin by simply setting out your hearts according to color, so that you can string them in a pleasing order.

067Leigh

Use a ruler (or just “eyeball” it) in order to hot glue them back to back spaced 3 inches apart, sandwiching the yarn in-between.

386Leigh

Cut the yarn after the last “foamie”, and knot the ends to prevent fraying. (Click here to see the same method used on my kid-friendly “Glitter-ween” garland.)

395 (2)Leigh

Check out the rest of my Candyland craft series: Gingerbread People Banner, Treat Gift Boxes, & Printables and Game Board Treat Tower & Easy Buffet Display as well as the final party post on Candyland Themed Party Décor Ideas.

Faithfully Yours,

Leigh

DIY Candyland Party Themed Craft Tutorial: Gingerbread People Banner, Treat Gift Boxes, & Printables

295Leigh

Craft your way to classic Candyland cuteness befitting birthdays, baby showers, and Christmas décor.  This tutorial for gingerbread people banners and treat gift boxes are part one of a DIY party decorating series with easy projects and free printables. Using some or all of the ideas, you’ll be sure to delight the inner-child in all of your guests. Sweet!

179Leigh

Every Candyland village needs to be populated with gingerbread people, and it can be accomplished by more than just the menu. Gift your guests with take-home treat boxes that also serve to decorate your buffet.

260Leigh

Begin with readymade gingerbread people shaped paper maché boxes. These are widely available in stores beginning in the fall, and may be purchased online the remainder of the year. (Find discounts for online craft merchants in the side bar from Le fidèLe Design’s affiliates.) I found mine on sale at half off, making them 50 cents each. Use an acrylic paint color in a shimmery brown so that a top coat is unnecessary. (I used DecoArt’s elegant finish espresso metallic paint, because I already owned it, and it coordinated with my banner.)

277Leigh

Separate the tops from the bases, and paint the little guys. I set them rim side down onto a plastic bag, so that I could just peel them off when they dried. (On other surfaces, the paint sometimes acts as glue.)

318Leigh

Allow them to dry overnight, then use hot glue to adhere tiny pom-poms. They make the cutest dimensional eyes, nose, and buttons! I chose colors that would coordinate with my other décor elements, and tried to intentionally randomize the combinations on each “gingie”.

356Leigh

Fill your goodie boxes with candy, tiny toys, or even candy flavored lip gloss and intersperse them in your treat town.182Leigh

Another idea is to fill them with numbered papers that correspond to larger gifts or game elements.

353Leigh

Make a banner of gingerbread people adjoined in jubilant Candyland solidarity, using one of the two following methods.

2Leigh

Foam gingerbread people shapes may be located at just about every craft store in the fall and winter, and may be purchased online the rest of the year. You can choose from many sizes in matte and glitter. I wanted to use the glitter guys to match my houses.

3Leigh

Glue on tiny pom-poms that coordinate with your décor. Use hot glue in the same eyes, nose, and button pattern with which you made the treat boxes.

6Leigh

Punch a hole in each hand of the “gingies” in order to string it into a banner.

9Leigh

Make a loop of thin ribbon through holes in two “gingies”, and tie a knot to connect them. I alternated between three different colors from the same spool of clearance ribbon.

193LeighWM


The second method is to right click on my printable image above (free for noncommercial use), and select print. Then print them in color and photo settings on sturdy cardstock (so that they don’t curl when strung). Cut them out, and punch holes into the white circles in the arms. Choose to leave them as is, or add more glitter to the images. Then tie on ribbons to join them (as in the previous method). You can also glue pom-poms over the images in the prints to add dimension to your project.

193singleWMLeigh


Use the gingerbread person image without white holes for other décor or signage. Simply adjust your printing sizes to make smaller “gingies”. Do this by printing at a smaller percentage (i.e. at 50%) or by printing them as photos (i.e. wallet size). Or… you can get Kinko’s to do it for you! These little guys also make cute kid’s craft puppets when taped to a popsicle stick, so you can utilize them as a party activity for the little ones.

361Leigh

Check out the rest of my Candyland craft series: Hard Candy Lanterns, Candy Ornaments, & Conversation Heart Garlands and Game Board Treat Tower & Easy Buffet Display as well as the final party post on Candyland Themed Party Décor Ideas.

341Leigh

Faithfully Yours,

Leigh

Quick & Easy Candyland Confection Ideas: Pink Almond Milk Juice “Recipe”, Cotton Candy “Cream” Sodas, & Gingerbread Peep Pops

219Leigh

These Candyland party confections are so simple that I thought I’d just combine them into one article… if only to pass along a few easy ideas that can be prepped at the last minute. The versatile juice milk is a great way to colorize and disguise calcium while adding a flavorful kick, which is great for anyone with a picky eater. While sugary cotton candy isn’t known for its health benefits, it is a yummy once in while party-treat that looks adorable when served as ice cream sodas. And Peep pops are the fastest pop you can prop into a candy buffet! Just look for the sugar-free varieties if diabetic or avoiding corn syrup. They’re still just as yummy and cute!

341Leigh


Pink Almond Milk Juice Ingredients:

  • ½ gallon Silk almond milk (or any variety of milk like cashew, hemp, rice, oat, soy, or even cow’s)
  • 17 ounce bottle lingonberry juice concentrate (or any pink juice like pomegranate, black cherry, raspberry, cranberry, etc… or try blueberry, grape, or even orange for a liquid creamscicle!)
  • Optional: agave to taste… if needed to sweeten the more acidic juices, because it mixes well into cold liquids & is low glycemic

136Leigh135Leigh133Leigh127Leigh

Pink Almond Milk Juice Instructions:

Gather any variety of pink juices and your choice of milk to test which combination you like best in a small glass. I quickly realized that I preferred the lingonberry and pomegranate juices with the original 60 calorie per cup Silk almond milk. Though I typically love the black cherry concentrate, I did not care for it when combined with milk. I also didn’t care for the combo with the 30 calorie Silk, but it’s a fantastic option if you’re looking to cut the numbers. Use your own taste buds to discern your favorite, and let me know what you came up with!

137Leigh

Mix a crowd sized amount in a jug, and test the flavor before pouring into individual servings. The easiest one to one ratio was the Silk’s half gallon and Ikea’s 17 ounce lingonberry concentrate, but I realize this taste profile isn’t for everyone. The most liked version does seem to be the orange creamscicle.

179Leigh

For the Candyland theme, I served the juiced milk in these super cute jugs with washable reusable straws. Another adorable option would be to use trendy jars as drinking vessels. (Find some at Le fidèLe Design’s affiliate Ball Fresh Preserving Store at the link in the side bar.)


Cotton Candy “Cream” Sodas Ingredients:

  • 1 package of readymade cotton candy (with sugar & not corn syrup that color coordinates with your theme)
  • small vessels that resemble soda glasses or ice cream dishes
  • 1 package of theme coordinating paper straws (or thick half straws as pictured)

366Leigh

Cotton Candy “Cream” Sodas Instructions:

This is the cutest and easiest way to serve cotton candy to a crowd… which is the perfect last minute fill-in for a Candyland theme. Find the yummy stuff packaged anywhere from convenience stores to grocery marts. (You can even find some at Le fidèLe Design’s affiliate Cost Plus World Market at the link in the side bar, they even have solid colors like a green in watermelon flavor.)

159CottonCandySodasLeigh

Starting with clean and well dried hands, pinch sections of cotton candy large enough to fit into the base of each dish. Keep layering until you reach the top, and stick a straw (or one cut in half) into the side of it. Take a section of cotton candy and gently ball it into a rounded mound to set on top. Gently tap it into place. (Your hands will be coated in spun sugar… but I’m thinking that’s where the phrase “finger lickin’ good” came from!)

183Leigh

These are especially adorable when perched atop a treat tower, like this one I crafted for the Candyland theme.


Gingerbread Peep Pops Ingredients:

  • 1 package of gingerbread peeps (or any theme coordinating variety, note that the sugar-free varieties don’t have corn syrup)
  • 1 package of color coordinated paper straws

338Leigh

Gingerbread Peep Pops Instructions:

It literally takes 2 seconds to make a Peep Pop, so it’s a last minute treat that looks absolutely precious. You can find so many varieties of the darling confections just about anywhere (and online year round), so it’s easy to add them to any candy buffet.

77Leigh

Simply poke a hole in each peep base with a skewer or toothpick, and wiggle it side to side to widen that hole. Slowly push in a straw until it feels securely held, yet doesn’t disfigure the peep.

356Leigh

Prop it into a cake pop holder or vessel filled with non-sticky candy like gumballs or jellybeans.

209Leigh

See more Peep Pops in action from another themes by clicking the following link: Chalkboard & Glitter Hearts Themed Valentine’s Day Party Buffet Décor Ideas (+ DIY & Printable Links)

214Leigh

For a tasty yet healthy snack to add to your Candyland theme, try my Spicy Guacamole Shooters / Avocado Appetizers Recipe (Allergy-Friendly & Nightshade Free = No Red Pepper or Tomatoes).

Faithfully Yours,

Leigh

DIY Fast & Easy Mardi Gras Glittered Napkin Rings Craft Tutorial (+ Ribbon Votives, Centerpiece, Free Place-card & Invitation Printables)

012Leigh

Create your own elegant Mardi Gras themed glittered napkin rings for mere pennies with this fast and easy craft. The tutorial includes how to embellish votives to match your theme, free masquerade place-card and invitation printables, plus more details on the centerpiece from the Mardi Gras Masquerade Themed “Fat Tuesday” Dinner Party Tablescape Décor Ideas. These DIY projects are an easy and inexpensive way to bring the look of an authentic Krewe’s fête to your own crew!

304Leigh

The secret element to an inexpensive napkin ring form is the core of a wrapping paper roll. You can’t do better than free! Mark and cut sections that are smaller than the ribbon you choose to cover it with.

308Leigh

Then cut lengths of ribbon long enough to wrap around those cores.

309Leigh

Use hot glue to adhere a strip of ribbon around each core. Here I’ve chosen gold glitter ribbon to coordinate with my Mardi Gras theme. (You can see the same technique used on the rings in my Herb Themed Luncheon by viewing the picture in the Upcoming Projects Gallery in the sidebar.)

311Leigh

Next, I cut and attached layers of green and purple glitter washi tape in different widths atop the gold base. Layers of ribbon would have also worked well, but I already owned the perfect sized tape.

313Leigh

Read how to make your own fleur-de-lis shapes with napkins at the article on Mardi Gras Masquerade Themed “Fat Tuesday” Dinner Party Tablescape Décor Ideas.

024Leigh

I made all six napkin rings for way less than a dollar, in a matter of minutes, and they coordinated perfectly with my theme’s décor… Awesome!

299Leigh

Now for those ribbon votives… simply start with any type of votive holder or small jar. You can leave them plain or apply glitter paint to them. I went with gold glittered glass. Cut lengths of coordinating ribbon long enough to wrap around them and overlap. You can attach one end to the other with a dot of glue or double stick tape. Because my ribbon was wired, I merely twisted one side over the other like a twist-tie. (See more twisty ribbon action here on my DIY Rusted Rooster Chicken Wire Votive Holder Craft.)

303Leigh

In this way, I can unwrap the ribbons and reuse both them and the votives for a future holiday in a different way. I think they turned out great, and they literally took me minutes to complete… Yea!

392Leigh

Create a dramatic centerpiece without a lot of drama by merely starting with a basic tree form from another holiday. (For example, use a black one from Halloween or a white one from Easter.) I used a metal votive holding tree that I had previously painted gold from its earlier pewter and bronze incarnations. (See how to use paint to change the color of metal and to age a piece in my upcoming lion fu-dog décor for Chinese New Year.)

393Leigh

I wrapped it with trim from my Glitter-ween Party Décor (see it here) then added a few new sprigs.

235Leigh

I painted simple purple ball ornaments with a glitter mist (not the blast variety) to impart both gloss and glitter shine to the previously satin sheen.

236Leigh

I set these onto the rings that would normally hold the votive holders. (You’ll likely see these in a future article.)

053Leigh

I hung embroidered Christmas crown ornaments, snapped up at 10 cent clearance, along with glittered musical instruments, green mirror balls, and a mask garland. I even hung the same sequin fleur-de-lis masks used at each table setting as ornaments. I try to plan all my holiday themes I advance of the after Christmas sales to snag a year’s worth of décor deals at 90% off. I keep my theme collections in labeled bins that I add to as I accumulate finds so that I’m ready to craft and decorate when each holiday arrives.

091Leigh

Though it’s hard to tell from the pictures, the tree centerpiece actually didn’t obstruct any person to person viewing. This is why I only draped the bottom with some Mardi Gras necklaces and wrapped the trunk with the same ribbon I used on the votive holders.

120Leigh

The base of the tree was then swathed in the same purple fabric remnant from Glitter-ween’s spooky tree and draped with yards of Mardi Gras trim. (See how to hike up a chandelier to accommodate a tall centerpiece here.)

043Leigh

Surrounding that are 4 standing glittered metal masks that I scored at a post-holiday clearance sale for less than 2 dollars each… no kidding folks. I couldn’t have made them for less. To do as I did, scope out this year’s merchandise then pounce as soon as it gets marked down. The purple mercury glass crown votive holders were also found this way for less than a dollar for all 3… Score!

009Leigh

Last but definitely not least, are my free printable Mardi Gras masquerade place-cards which may also be used as invitation cards!

mardi-gras-placecards-leigh

Simple right click on this small picture and select print. Print these in best color photo on thick cardstock.

004Leigh

Then simply cut on the solid black lines to separate the images for invitations. For place-cards, use the pictures a guide for how to cut out the top and crown while still making a tent folding card that will stand upright.

039Leigh

Poke a point into the paper just above the crown with a pointy pen, or compass point, etc. Use that as a starting point for your scissors to cut a V shape above the picture. Then cut one side close to the top and crown next to the image. Don’t cut all the way to the ends. Stop where the curve meets the flat top. Those flat parts are what join the front and back together. Then fold it in half. Cut through both pieces around the image. Again, a picture speaks a thousand words… use it as a visual guide.

028Leigh

Simply write names on the bottom with a gold sharpie marker or paint pen… Voila!

104Leigh

See more of my Mardi Gras Masquerade Themed “Fat Tuesday” Dinner Party Tablescape Décor Ideas here for more holiday inspiration!

070Leigh

Let the good times roll!

Faithfully Yours,

Leigh

Fast & Easy Glitter Heart Wand Centerpiece, Foam Ornaments, & Faux Chalkboard Valentine’s Day Décor Craft Tutorials (+ Printable)

205Leigh

This mélange of fast and easy crafts were made to decorate a Valentine’s Day Party, but you can adapt them for any purpose you like. The faux chalkboard craft is an inexpensive way to decorate for the holiday, but also makes a quick Valentine for a love one. The chalkboard idea can also be extended to other favors quite easily. The glitter heart wands effortlessly gather into a dramatic centerpiece, and can be taken home as favors by each Valentine princess at the party. (Make these with foam hearts or my free printable from the Valentine’s Day banner craft.) Also, make Valentine ornaments with the kiddos in your life using foam Conversation hearts in a matter of minutes.

61Leigh

Let’s begin with the simplest project first, making Valentine ornaments out of foam conversation hearts from the craft store. (I used the white ones only, so as to coordinate with my theme colors, and reserved the other pastels for the candy-land themed party which will appear in an upcoming article.)

81Leigh

You can either glue the hearts back to back, sandwiching twine or thin ribbon between them, or simply tape twine loops to the heart backs. The latter is the quickest way to make them, and the easiest for a little one to help with.

80Leigh

(See these similarly on the How to Make an Assemblage Sculpture (= 3D Collage) for Your Valentine (Art Instruction / Craft Tutorial).)

168Leigh

The next project is a faux chalkboard sign, that also makes an inexpensive Valentine, using the unexpected material of a paper party plate. The square metallic disposable plates are lovely yet extremely budget friendly. Why not pick some up for the party and reserve one or two to fill in as décor.

45Leigh

Merely use dots of glue to layer square doilies onto the plates. Simply trim down the doilies to fit the smaller plate sizes.

47Leigh

Then cut a square of matte black cardstock to size, and glue atop the doily.

50Leigh

Use a white paint marker to write whichever sentiment, poem, or quote you wish.

55Leigh

Use a hole-punch to add 2 openings with which to slip a strand of coordinating ribbon through. Simply tie the two ends in a bow, which also serves to further decorate the sign.

21Leigh

Similarly, cut squares of black cardstock to adorn gift bags and boxes, using the same white paint marker to write your sentiment in “chalk”.  If the writing doesn’t seem clear enough, simply go over the letters until they do. The uneven edges make them look even more like chalk, but won’t come off on your clothing while delivering them to your recipient.

208Leigh

Moreover, in this way you can ride the chalkboard trend without spending as much on readymade tags, stickers, or chalkboard paint. (The bags I made were machine cut from construction paper then adorned.)

215Leigh

The last project is a centerpiece of glittery hearts meant to be taken home as party favors at the end of an event. You can even print, cut, and glue these onto tiny wooden dowels using my free printable at the end of the article.

34Leigh

I sandwiched a thin dowel between 2 glittered foam hearts with the aid of hot glue. The thinnest dowels are really easy to just snap in half where you want to section them. Trim with a bow of glitzy ribbon if you like. I used readymade glittered bows from an after Christmas clearance sale.

10Leigh

The open hearts were made from inexpensive styrofoam and red glitter blast spray. For the largest ones, I simply jabbed in a cut section of wire hanger as a handle, but a thin dowel would be better if gifting them. I added glittery bows to some of these as well. All of them will sit securely arranged in a vase filled with marbles. This way they can be easily pulled out one by one at the end of the celebration as favors. I just pilled on an unraveled skein of glittery red yarn atop the marbles to hide them.

206Leigh

♥ Happy Sweetheart’s Day!

213Leigh

Faithfully yours,

Leigh

V-dayHearts-Leigh

P.S. Here is the Glitter-Doily Heart Printable. Simply right click on the image and select Print. Print them in the best color photo setting.

2 Fast & Easy Valentine’s Day Banner Décor Craft Tutorials (Doily & Glitter Hearts + Printable)

229Leigh

These Valentine’s Day banner crafts are so fast and easy that even the busiest mama can make them with her little ones. The glitter heart and doily printable only needs the addition of letters to spell out any message you wish. The second banner is comprised of layered doilies and extra valentines. Both are so inexpensive yet add a lot of heartfelt sentiment and party atmosphere. Plus, they’re lightweight enough to stick in a big envelope and send to a loved one whose away for the holiday. You can even use the printables as stand-alone Valentine Cards!

176Leigh

First let’s make the doily valentine banner. This is a great project to use up any leftover schoolroom Valentine cards from your kiddo’s class. You can even save the received ones to make banners for next year’s celebration.

175Leigh

One only needs to add some low-cost paper doilies in varying sizes. I used leftovers from last year along with some Holly-Hobby Valentine Cards from my childhood.

51Leigh

Merely use dots of glue to layer the doilies and Valentines. Then add a ribbon bow for dimension.

54Leigh

Tie circles of twine, yarn, or ribbon through the holes in the doilies and knot together. Hang it up and enjoy!

171Leigh

The glitter heart and doily banner is one that can be easily made by two different methods. You can print and cut out all the glitter doily hearts you need, using my printable at the end of the article. You can also use inexpensive glittered foam hearts from the craft store, and use hot glue to layer white doily hearts onto them.

26Leigh

Either way, the next step is add letters spelling out any sentiment you’d like. I cut out letters with a machine from black card stock to coordinate with my chalkboard theme. You can also use a stencil to trace and hand cut them, or buy them readymade at the craft store. (Michaels has them in every color and texture you can think of. Click on the affiliate link in the side bar to snatch the latest coupons.) I added a knot of ribbon to each dip in the heart to further tie in with my theme’s color palette. Feel free to add any other elements you’d like from paper roses to stickers. (You can even skip the letters and let a kiddo color in pictures to use the printables as Valentine Cards.)

38Leigh

Next add holes to both sides of each heart with a hole-punch. Then use ribbon or twine to string them together. Add a loop at each end to hang the banners by. Voila!

224Leigh

♥ Happy Heart’s Day!

Faithfully yours,

Leigh

V-dayHearts-Leigh

P.S. Here is the Glitter-Doily Heart Printable. Simply right click on the image and select Print. Print them in the best color photo setting.