Tag Archives: Centerpiece

Bavarian Oktoberfest Party Décor Ideas for a Fall Tablescape

048Leigh

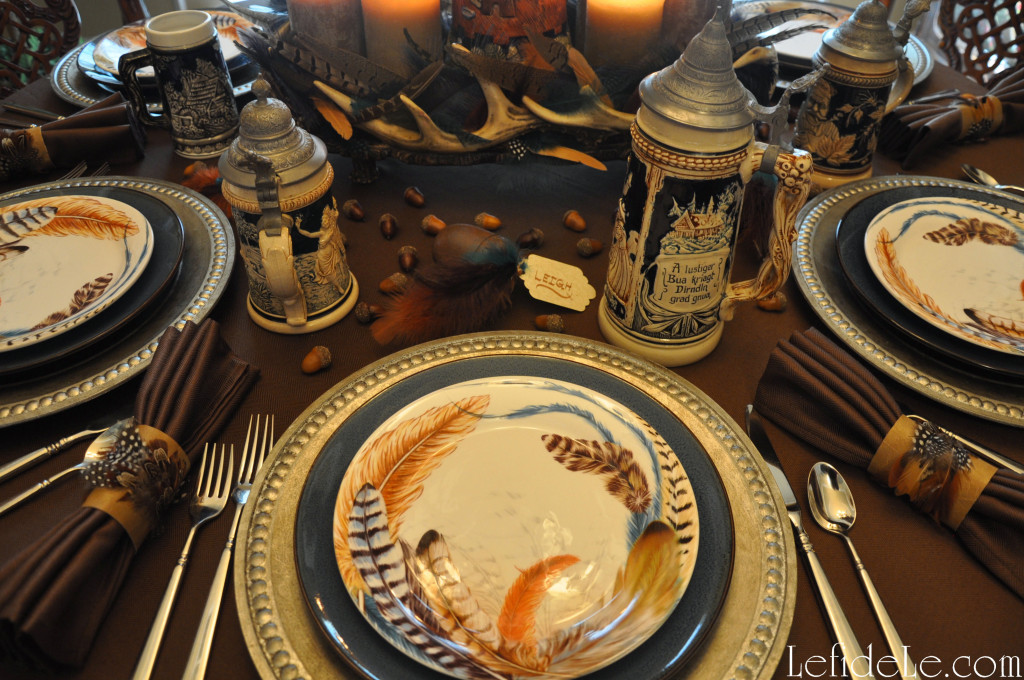
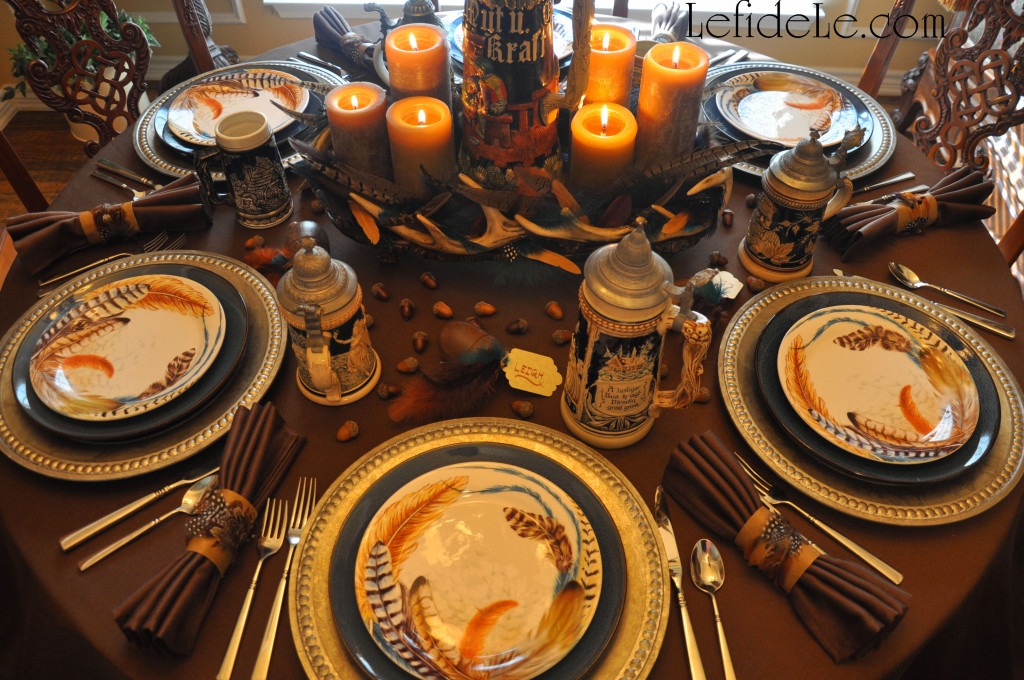
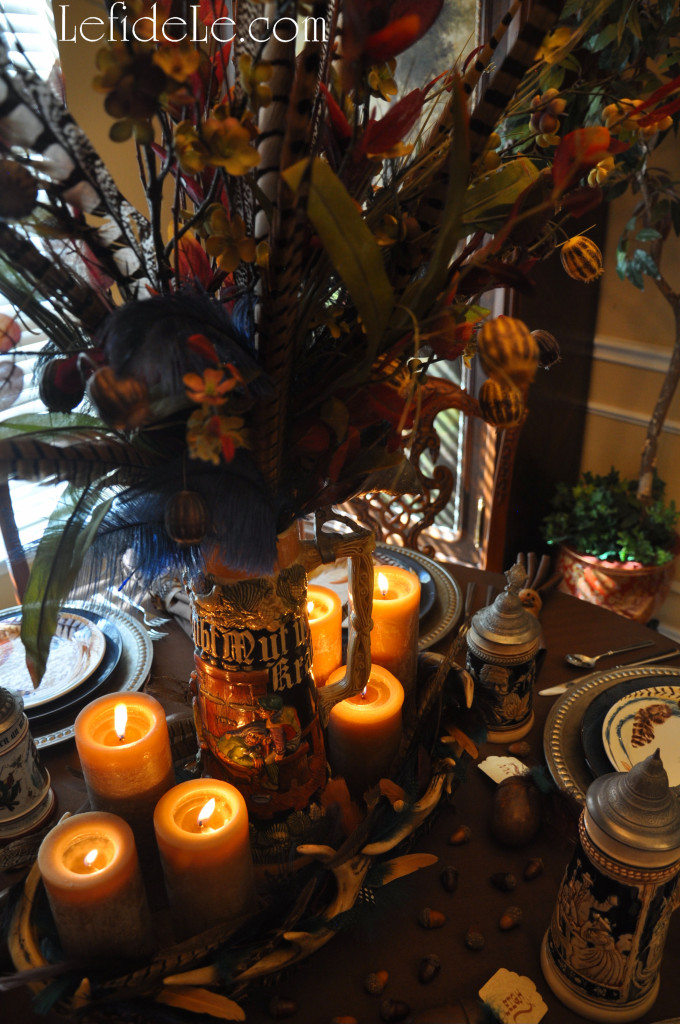
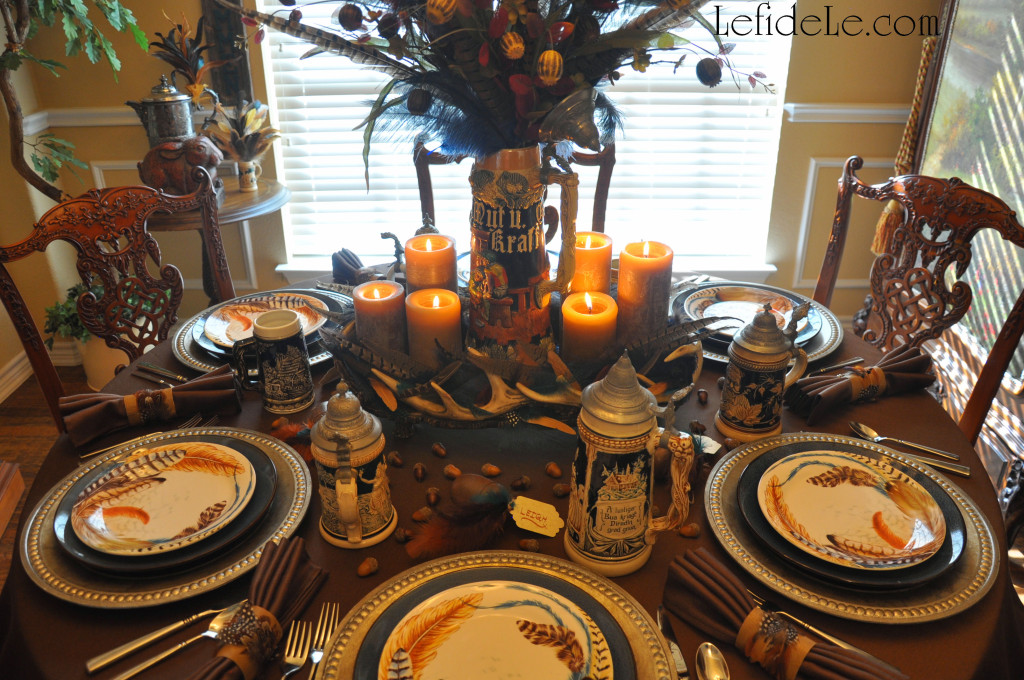
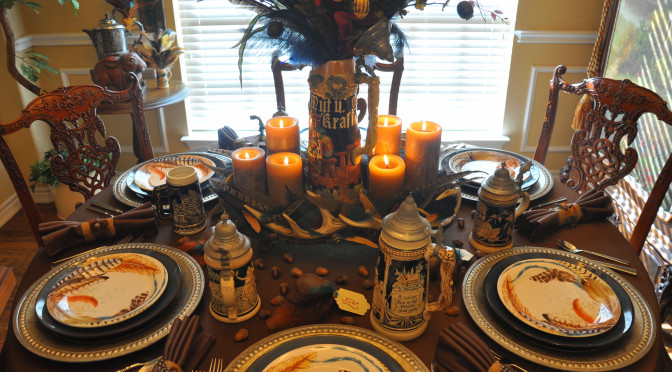
Willkommen to an Oktoberfest party where the tablescape décor will transport you to a fanciful Bavarian hunting lodge straight out of Grimm’s fairy tales. So don your dirndls or lederhosen, fill your bier steins, and raise prost to a chorus of “Ein Prosit” for a wunderbar family folk fest!

002Leigh

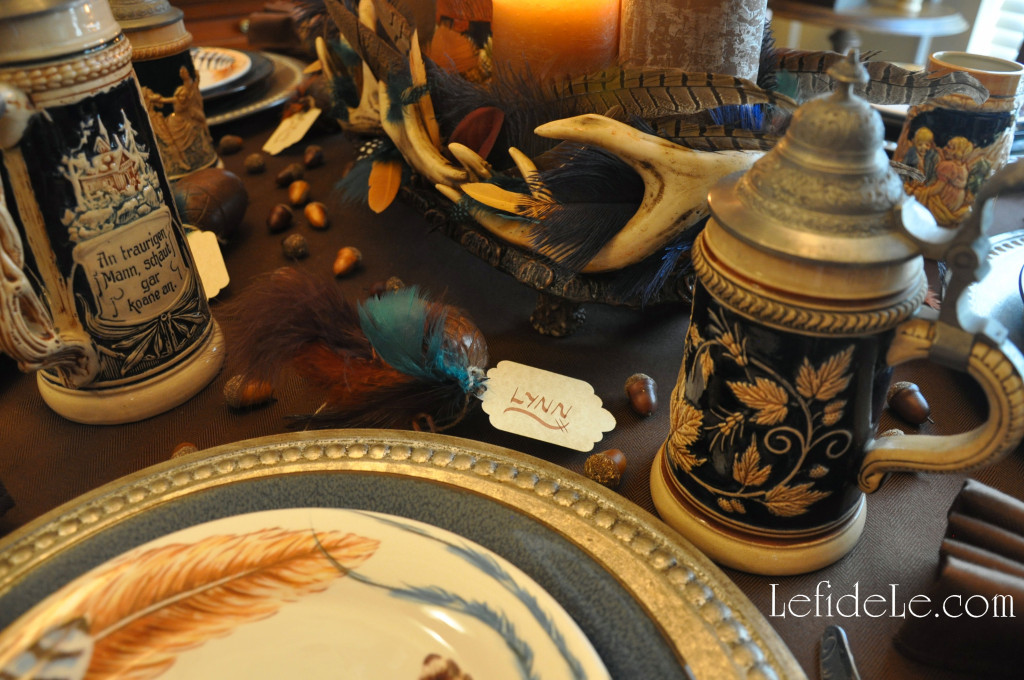
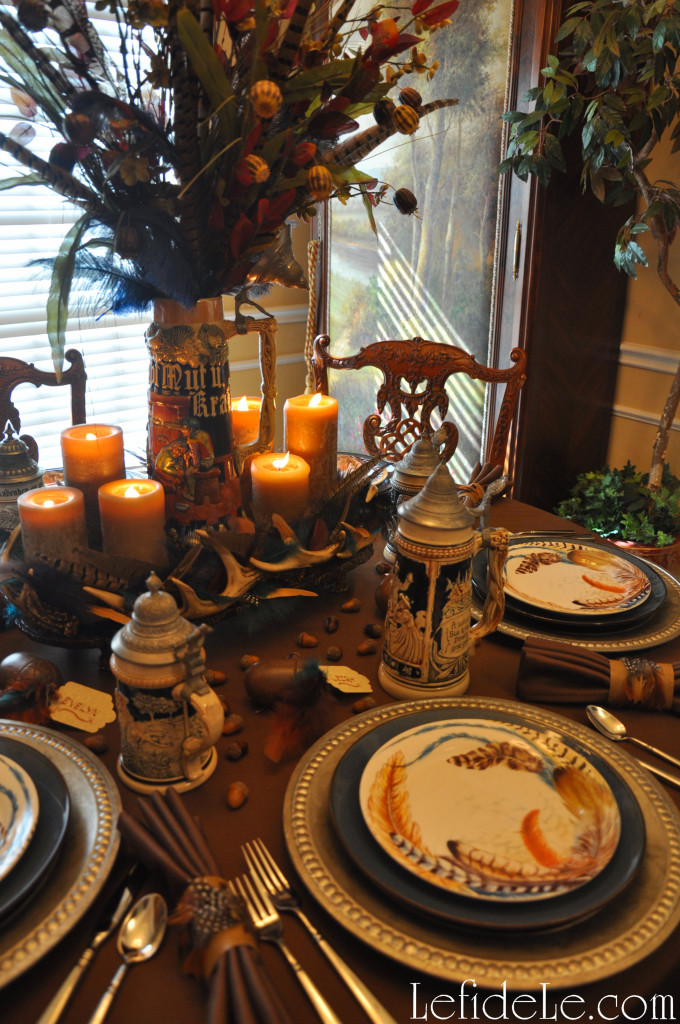
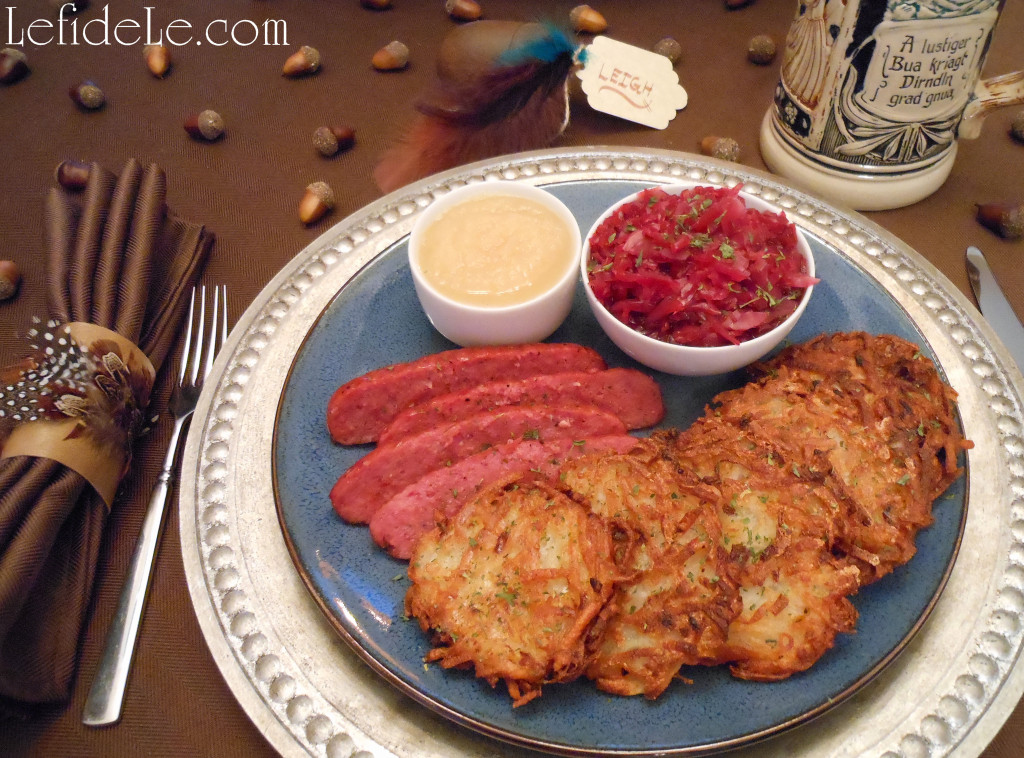
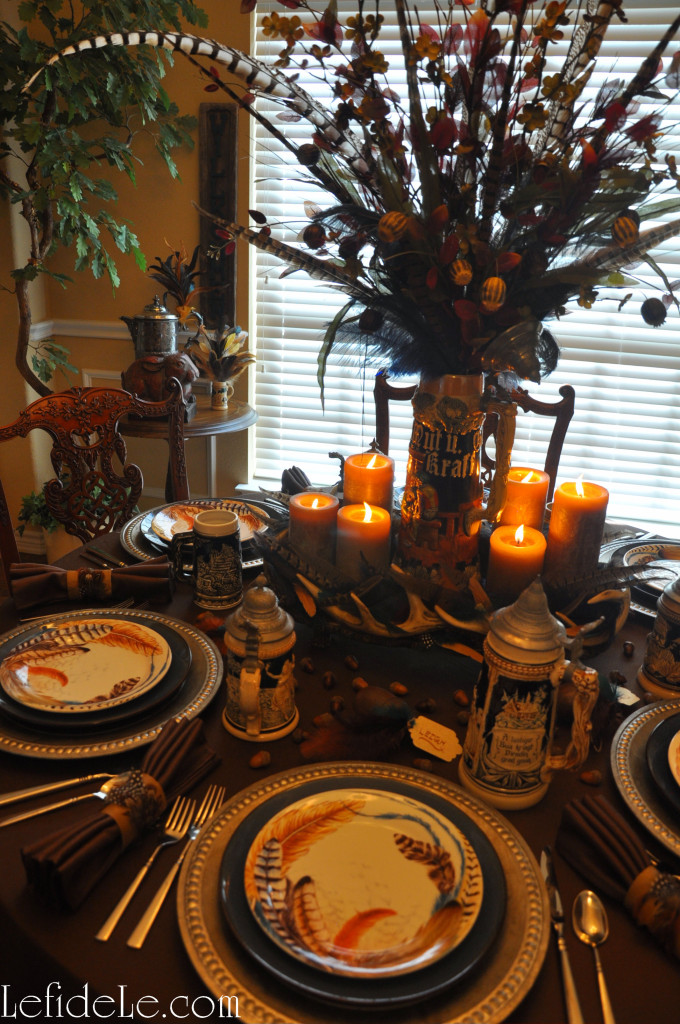
Dark brown tablecloths reminiscent of solid Alpine earth ground the tablescape. Nail-head trimmed pewter chargers topped with true blue dishes echo the pewter hinged lids and stoneware glazing of the steinkrugs. A feather motif dances around the edges of ivory salad plates.

93Leigh

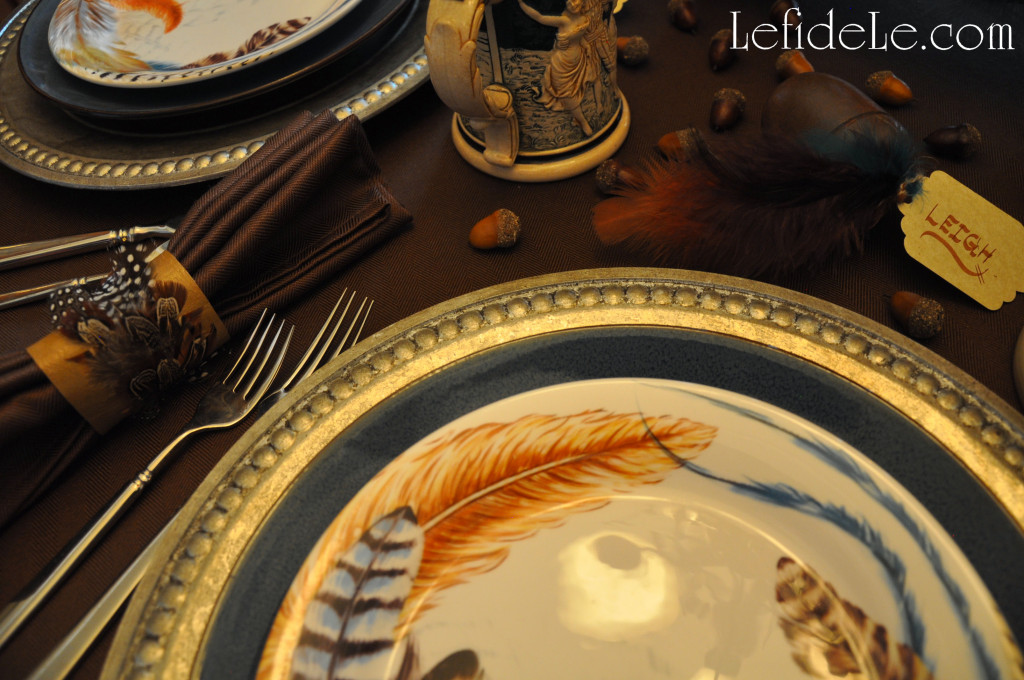
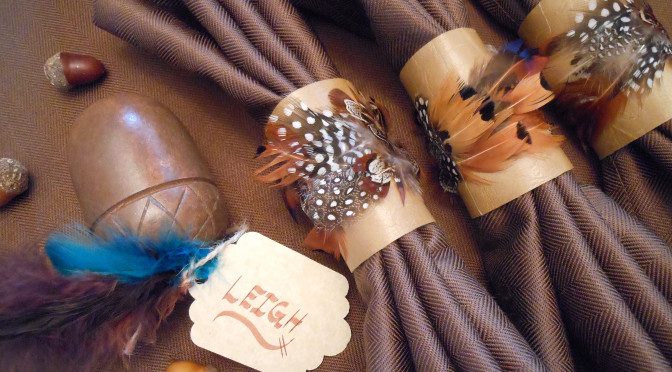
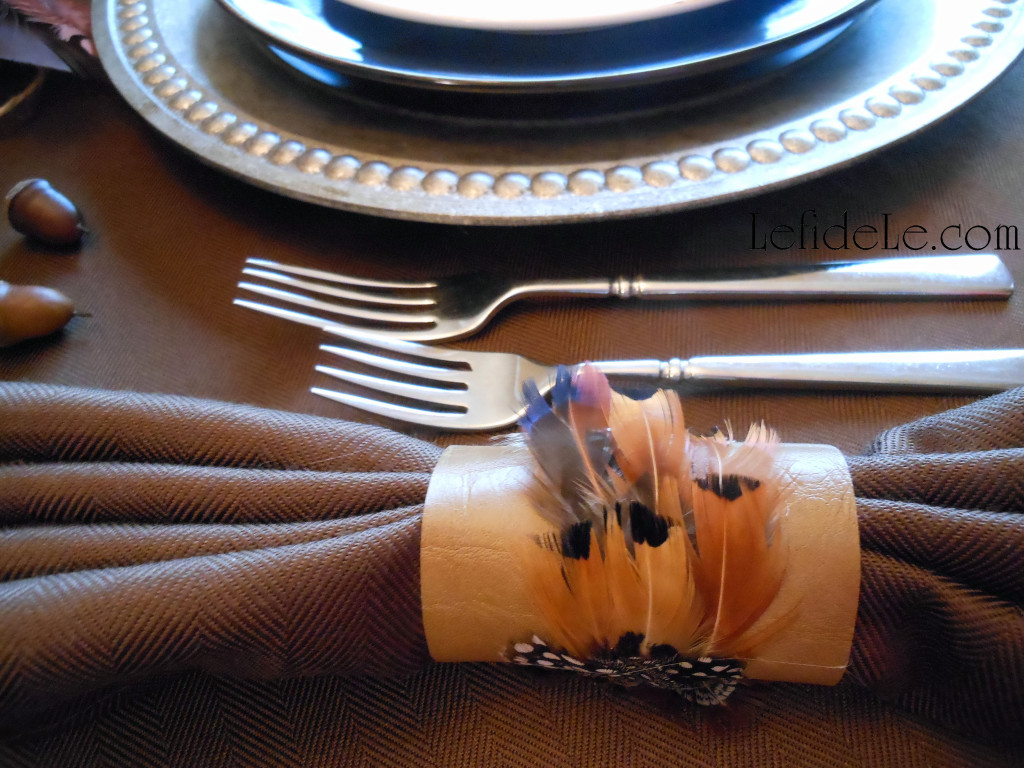
Feathers encircle “leather” rings containing lederhosen protecting cloth. (Find the napkin ring craft tutorial here.)

039Leigh

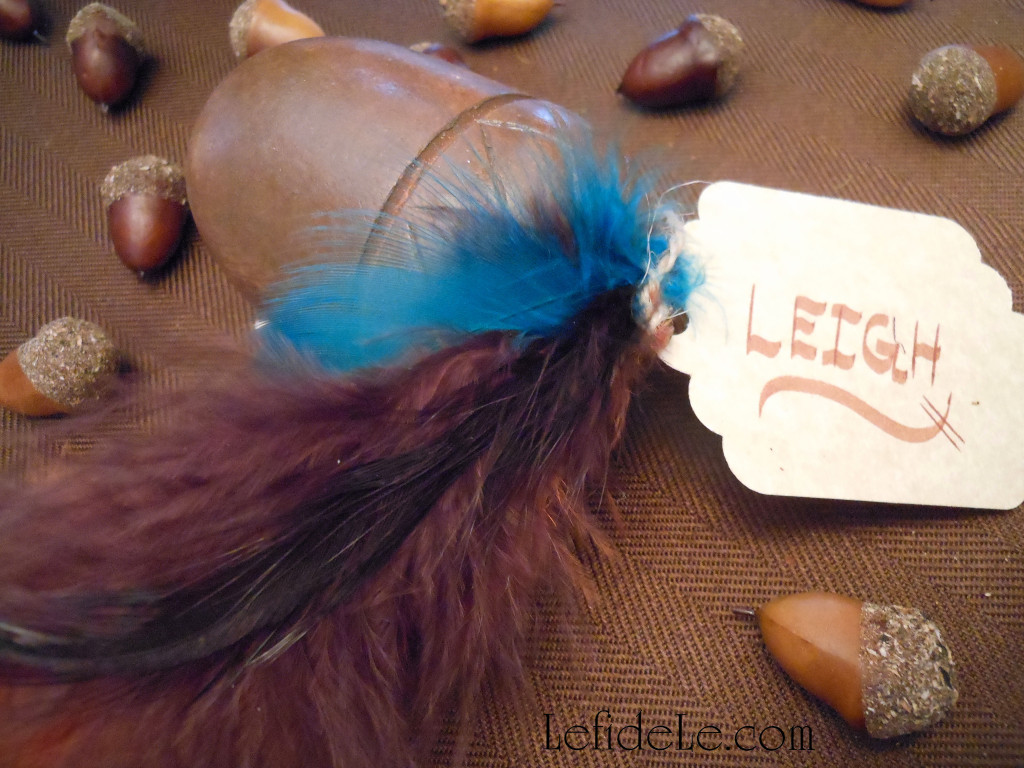
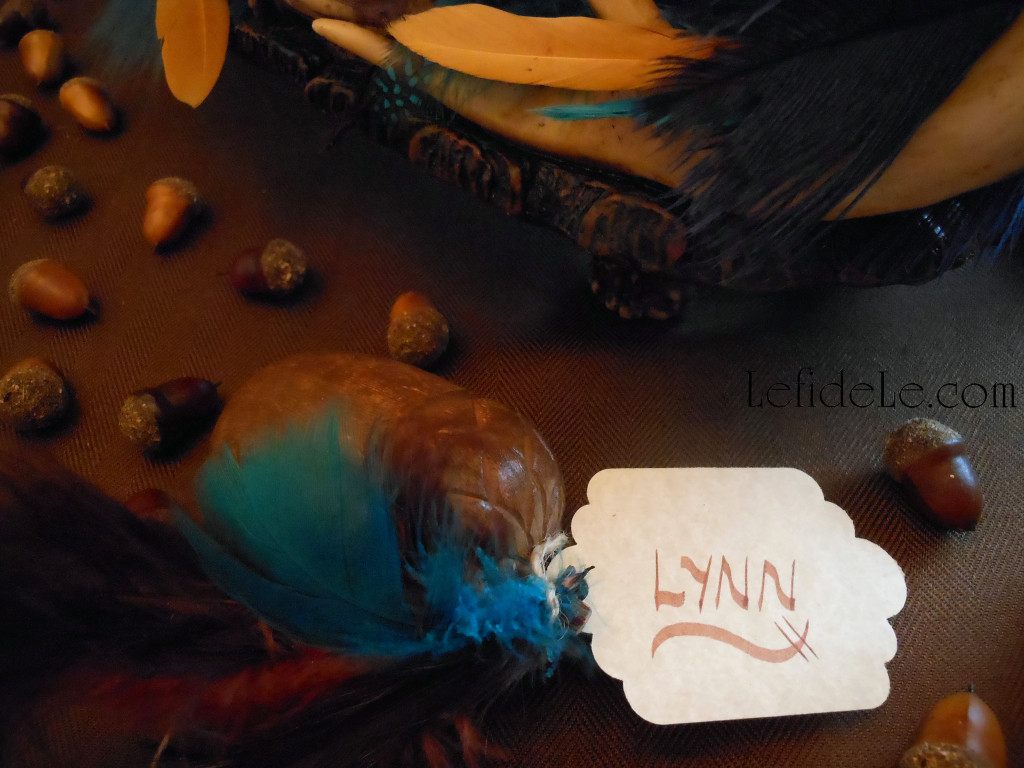
Carved wooden acorns tied with feathers and nametags direct polka dancers to their seats. (Find the place-card craft tutorial here.)

070Leigh

Tiny acorns scatter across the table acting as yesteryear confetti.

058Leigh

An Alpine “horned” tray befits the base of a centerpiece glowing with candles, scattered feathers, and a large vintage steinkrug of gathered fall branches and long feathers. (Find the centerpiece tutorial here.)

052Leigh

Green foliaged trees and a one-of-a-kind European armoire, refit with a placid oil painting, set the background scenery.

019Leigh

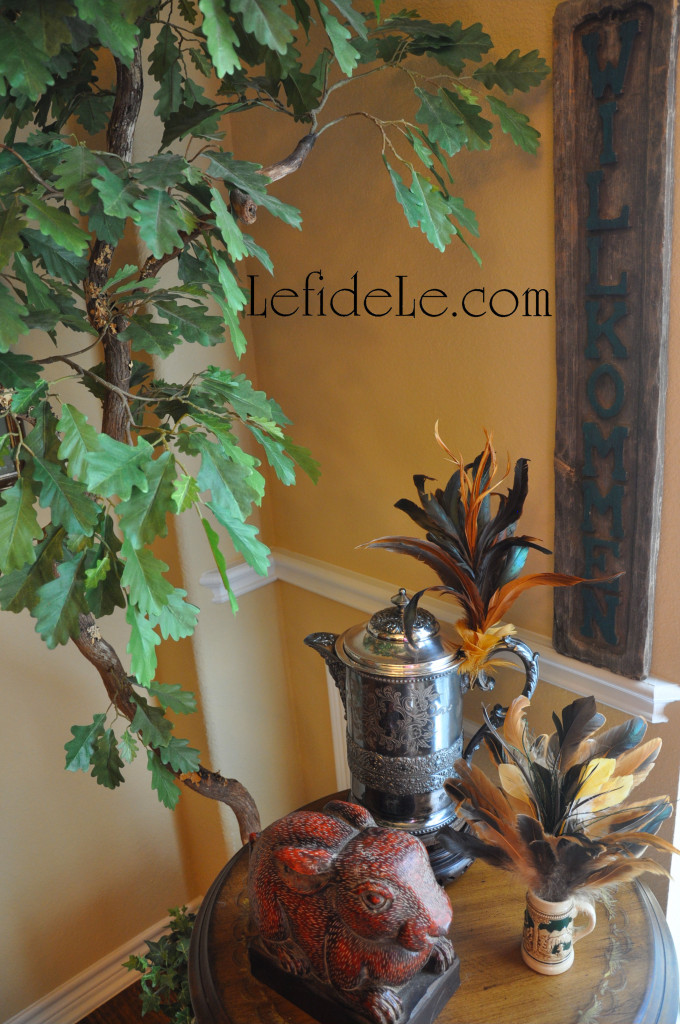
A vintage wooden sign carved with a German message of welcome stands in greeting. A carven hare guards an antique pewter pitcher festooned with colorful plumes. A tiny bierkrug sits feather-filled alongside it.

090Leigh

A toast is proposed… may our hearts forever be filled with merriment just as the kartoffelpuffers, knackwurst, sauerkraut, and apfel sauce fill our bellies this very evening! Gemütlichkeit!

Faithfully Yours,

Leigh

122Leigh

P.S. Wondering how to prepare such a hearty meal for your own wunderbar gathering? Try my Gluten-Free & Egg-Free Potato Pancake (aka- Kartoffelpuffer, Latke, hash brown cups, etc.) Recipe with Baked & Fried Versions for Oktoberfest!

Feather & Vegan Leather Napkin Ring Craft Tutorial + Easy DIY Centerpiece & Fall Place-card Holders for Oktoberfest

070LeighMaking your own feather and vegan leather napkin rings is an inexpensive way to bring an element of elegance to any gathering, but especially an Oktoberfest celebration of German heritage. Use a stein as a vase for feathers and fall foliage along with feathered wooden acorns to transport your guests to a fanciful fairytale version of a Bavarian hunting lodge. Then reuse the rings and acorns with a different centerpiece for Thanksgiving!

001Leigh

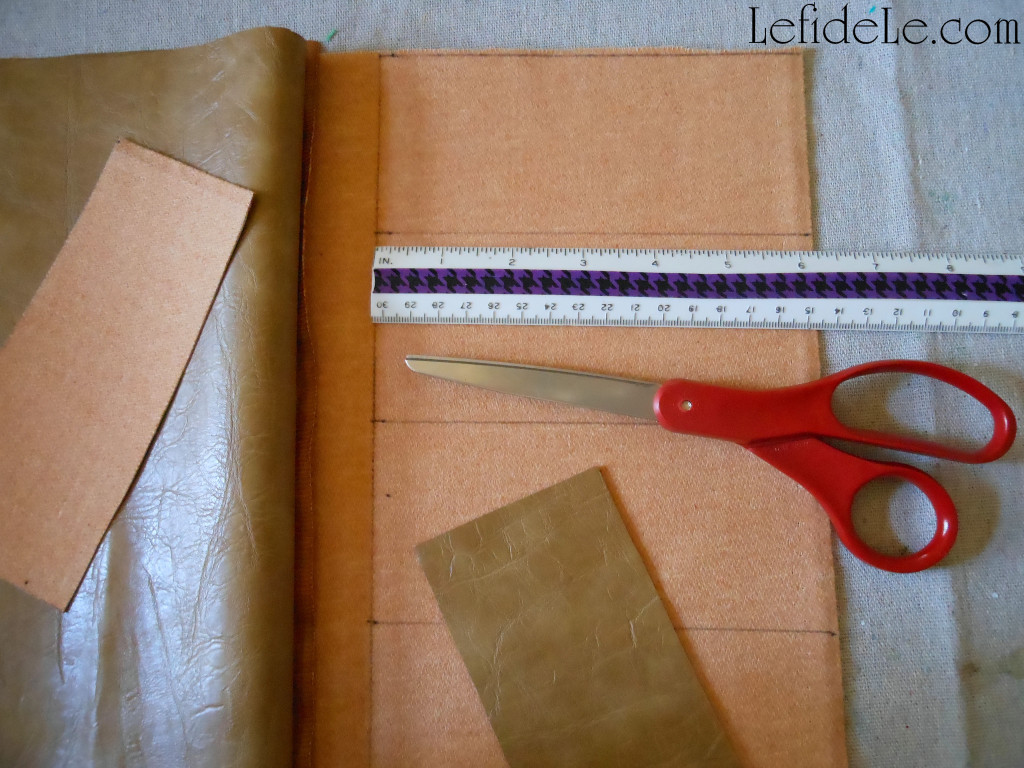
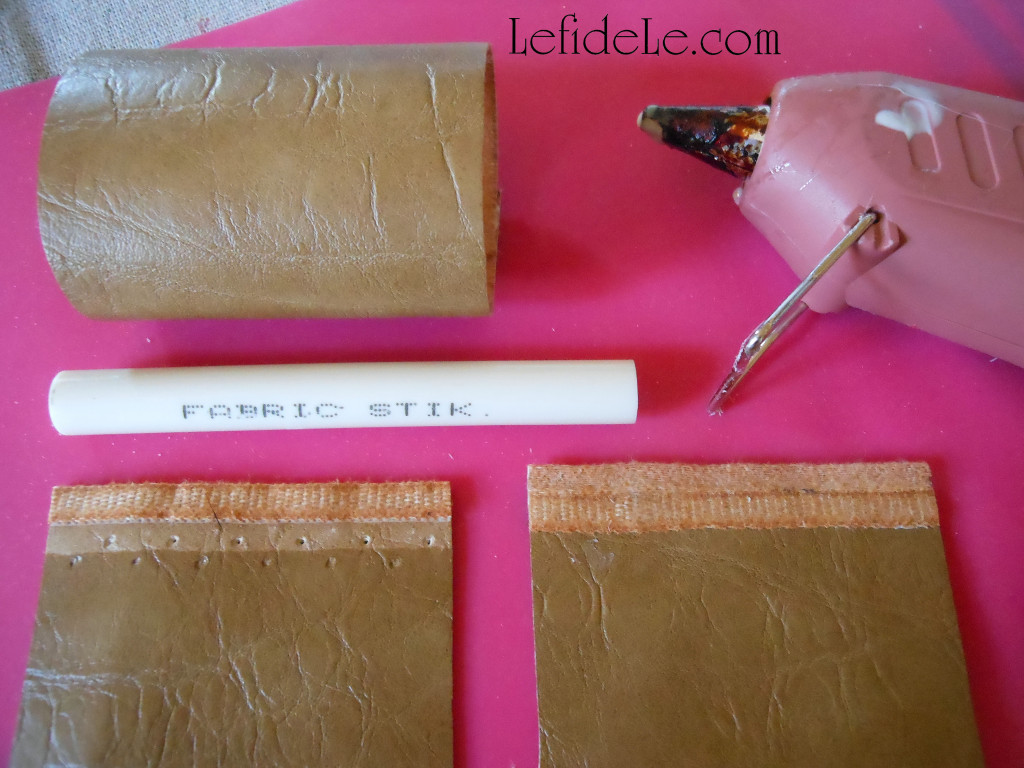
Start with finding a remnant of realistic appearing vegan leather and feather ribbon trim (these are available from Le fidèLe Design’s fabric affiliates whose links appear in the sidebar). Use a pen to mark the underside of the fabric into 6 inch long strips that are about 2¾ inches wide (vary according to the width of your feather ribbon). Cut them carefully to make a smooth self-sealing edge.

006Leigh

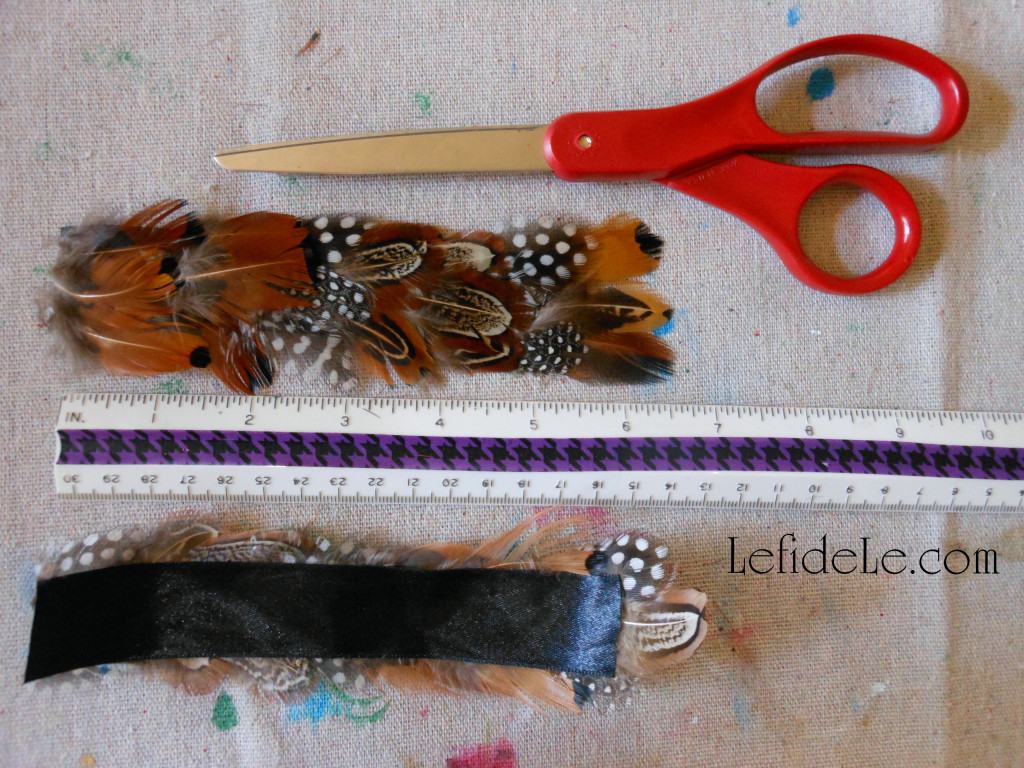
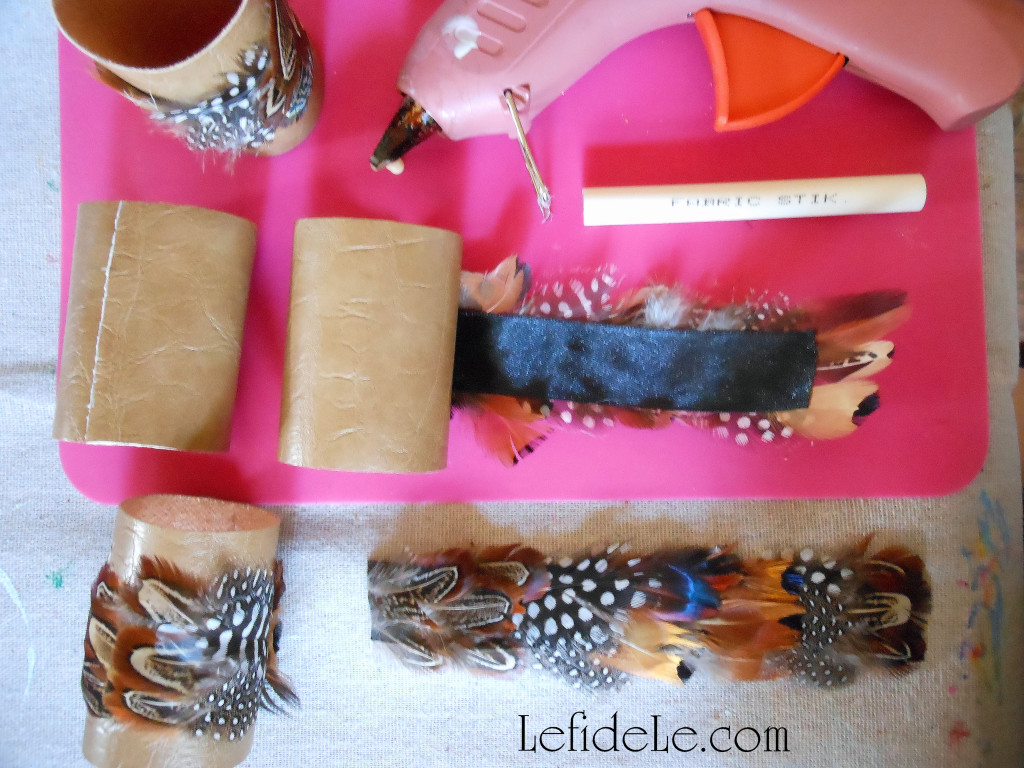
Cut the feather ribbon into 6 inch strips as well. (If you’re feeling super-crafty… you make this from scratch by gluing individual feathers onto a strip of ribbon, overlapping them as you go.)

007Leigh

Use fabric hot glue to adhere one end of the vegan leather to the other end, forming a ring.

013Leigh

Lastly, glue a feather ribbon strip around the middle section of the ring you just made. (How easy was that?!)

034Leigh

This would’ve cost so much more if purchased from a department store or boutique!

038Leigh

Next, make place-card holders using simple decorative acorns. (I found these carved wooden types in a 6 pack at 40% off this summer.) I’ve seen various types from burlap and fabric to glittered and beaded… just pick those which suit your linens and dishware best.

035Leigh

Use a punch cutter to make small gift tags from a parchment-like cardstock, and punch a hole in them (or just buy readymade tags). Use a brown calligraphy pen to scroll on the names of your guests.

039Leigh

Use a few inches of jute cord (I get mine super-cheap at the hardware store) to tie the name tag and a small handful of feathers onto the stem of the acorn. (Think about adding brighter feathers to the typical fall colors… so that your ensemble doesn’t resemble mulch. I included some teal feathers to tie in with my other décor.)

002Leigh

Set them into place, and you’re done! The best part is that they can be reused with a different theme because the feather decoration and tag slip right off… however, feel free to glue them into place for a permanent set.

058Leigh

Make a centerpiece by simply using a steinkrug in place of a vase. (I used my grandfather’s, but a new one would look great too!) Fill it with a few boughs of natural or faux fall foliage and some gathered branches. Tuck in long feathers from the local craft store.

93Leigh

I set this onto a faux horned tray and placed shorter candles around it. (I got the tray 90% off because it had some broken tips which were easily camouflaged with paint.) Any decorative tray can visually contain the elements into a cohesive appearing centerpiece.

052Leigh

I then distributed feathers around the outer edge of the tray to coordinate with the others. (Look in the children’s craft section of your local craft store to find a larger quantity of bagged feathers much cheaper than those in other aisles.)

090Leigh

Time to go download some “oom-pah” music… so kidding! (Click here to see more Bavarian Oktoberfest Party Décor Ideas for a Fall Tablescape)

Faithfully Yours,

Leigh


Simple Origami Lotus / Waterlily Flower Arts & Crafts Tutorial (Perfect for Pan Asian Themed Décor, Place-cards, & Chopstick Rests)

010Leigh

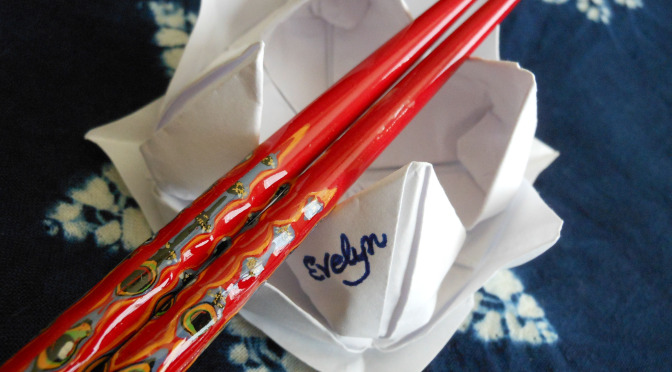
This arts and crafts tutorial for an origami lotus flower, also known as a waterlily, is really very simple. I first learned the method from a book in elementary school, and I’ve been making them ever since. I’ve been known to leave them as calling cards, get well messages, love tokens, etc. They also make elegant yet inexpensive table décor because they can be upcycled from any paper. Just write a name on a petal to use them as place-cards then allow them to double as disposable chopstick rests… but expect some to be taken home as mementos from the evening.

001Leigh

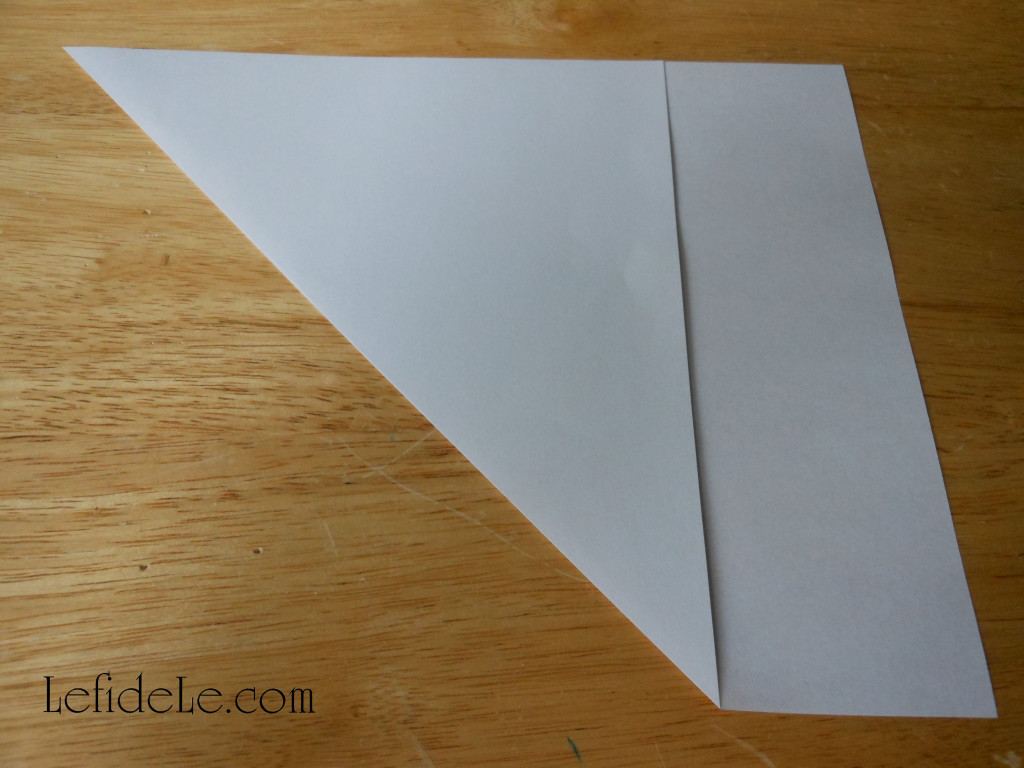
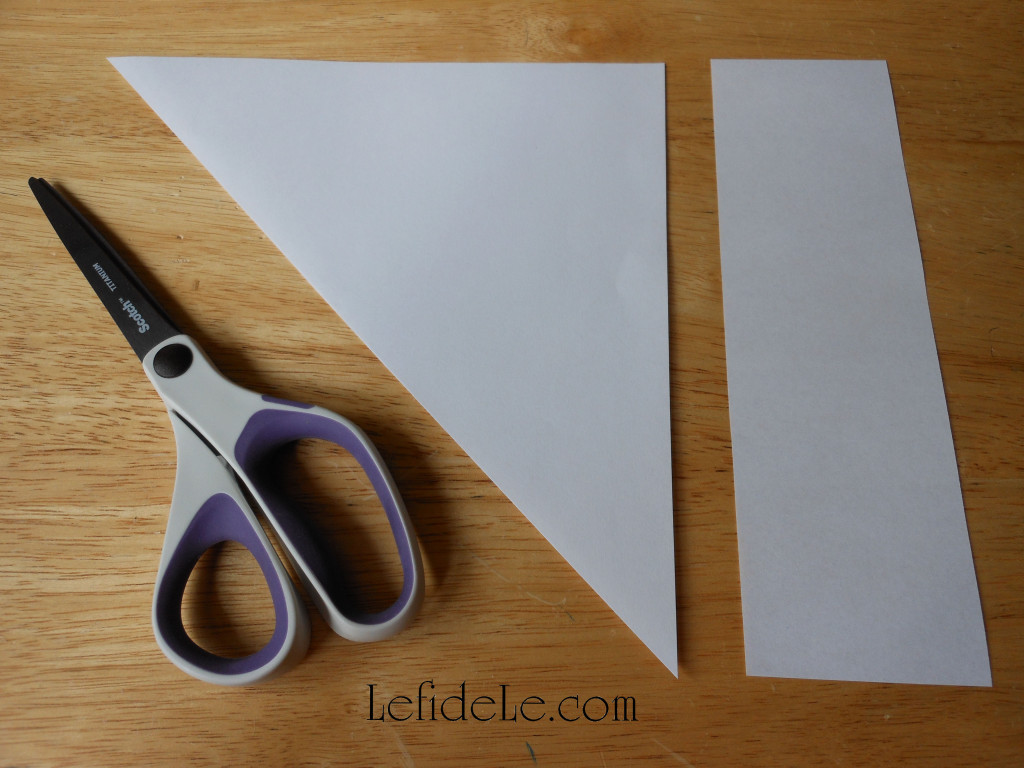
Use any paper you like from traditional origami paper from the craft store, to economical white printer paper like this. (Read my origami crane tutorial to read how to use wrapping paper.) Fold one corner over until it meets the opposite side, and press the crease down flat.

002Leigh

Cut off the uncovered portion of paper cleanly, using the folded paper’s edge as a guide. You have just made a perfect square without using a ruler.

003Leigh

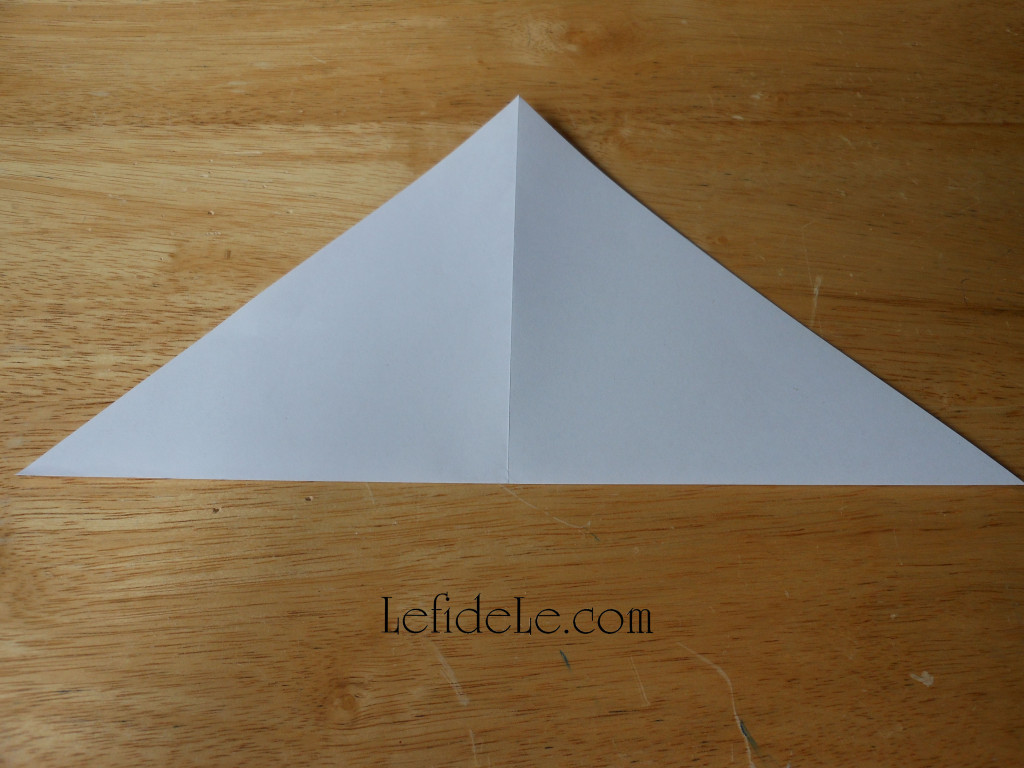
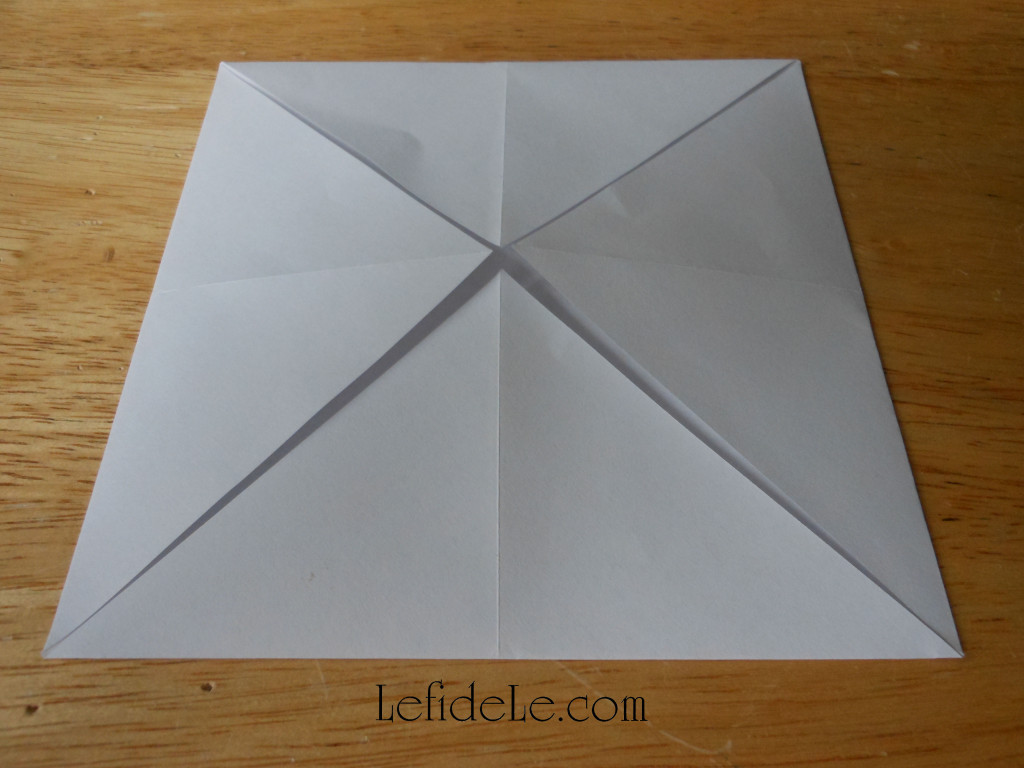
Unfold the triangle you’ve cut free, and then refold it using the opposite corners. Now unfold it, you should see an X crease into the square of paper.

004Leigh

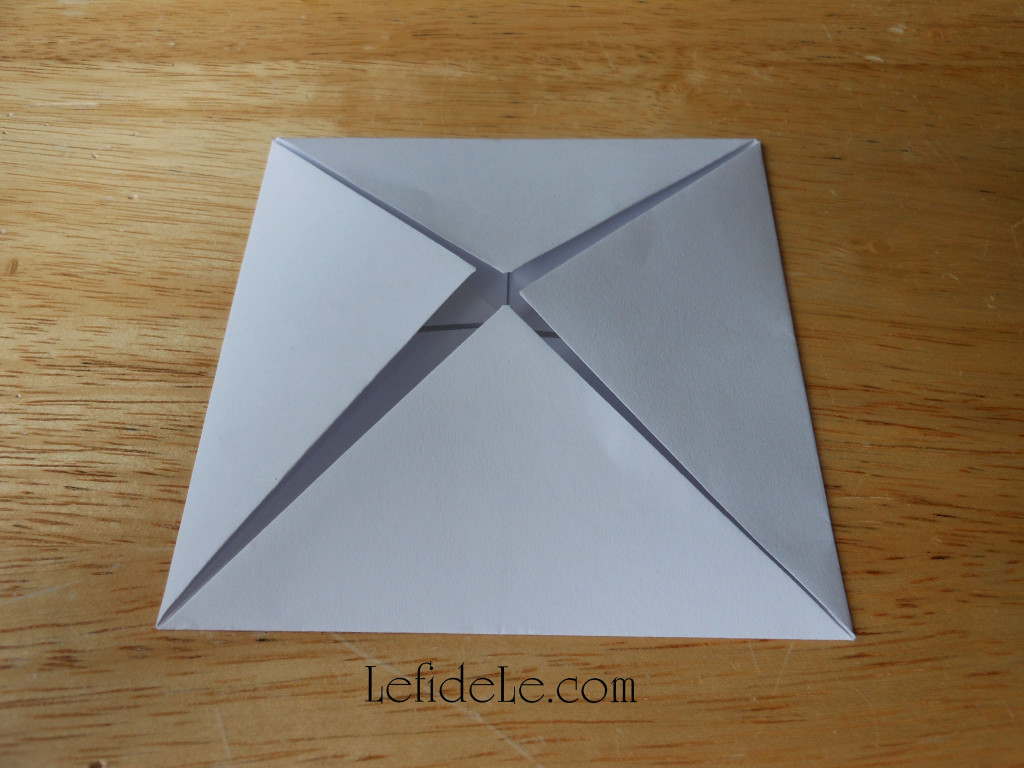
Next take each corner and fold it into the middle, using the X crease as a guide. You just made a smaller square shape.

005Leigh

Repeat this 4 corner folding again, making an even smaller square.

006Leigh

Repeat this again, making an even tinier square.

007Leigh

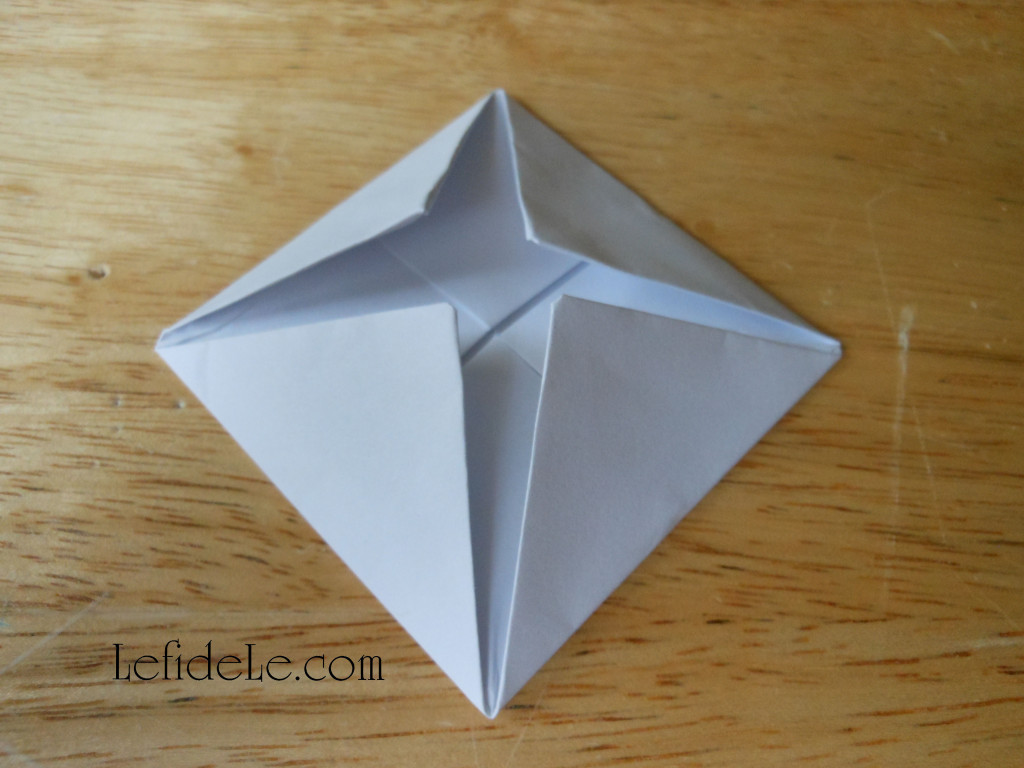
Now flip it over, and then repeat the 4 corner folding into the center one last time.

008Leigh

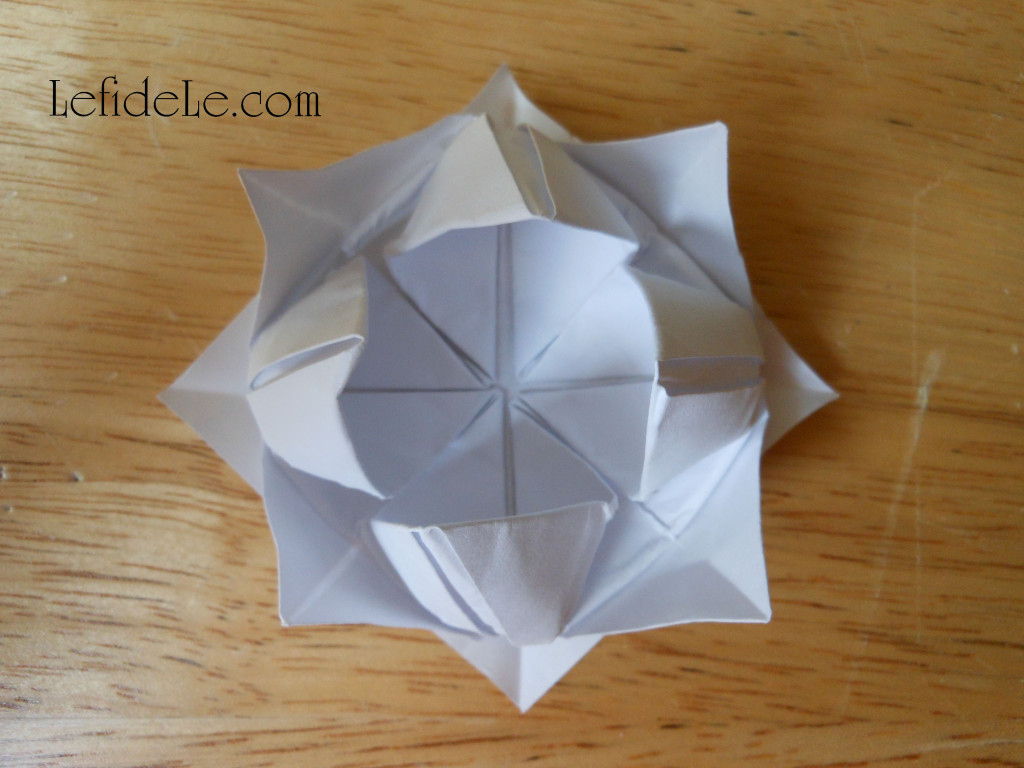
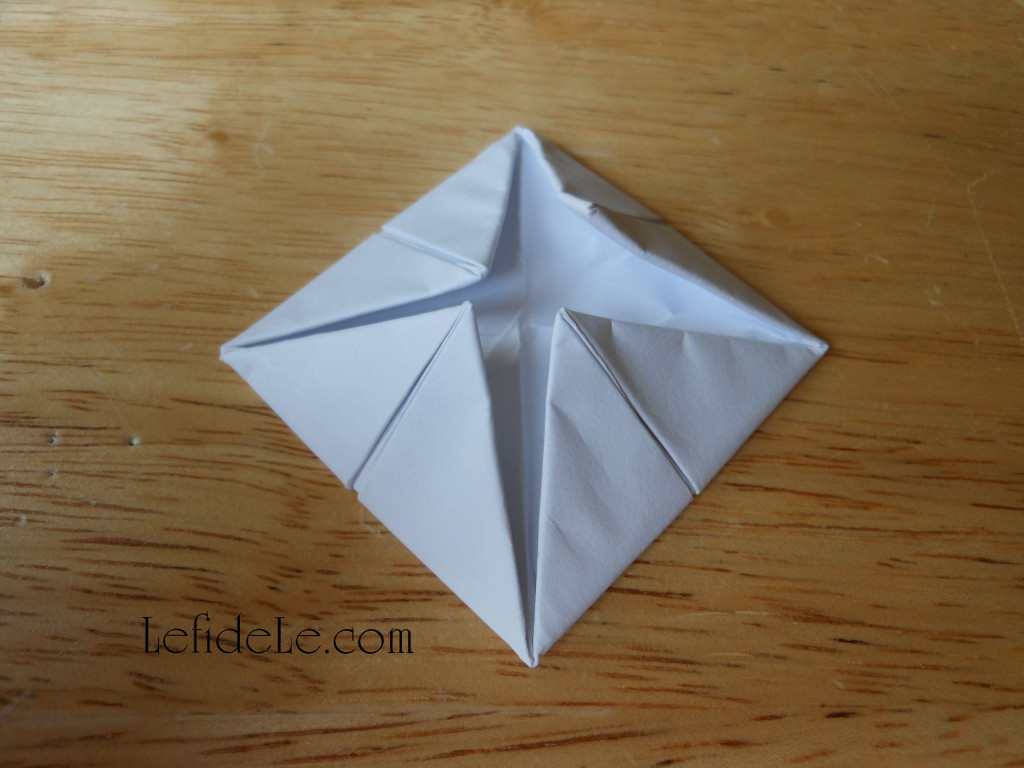
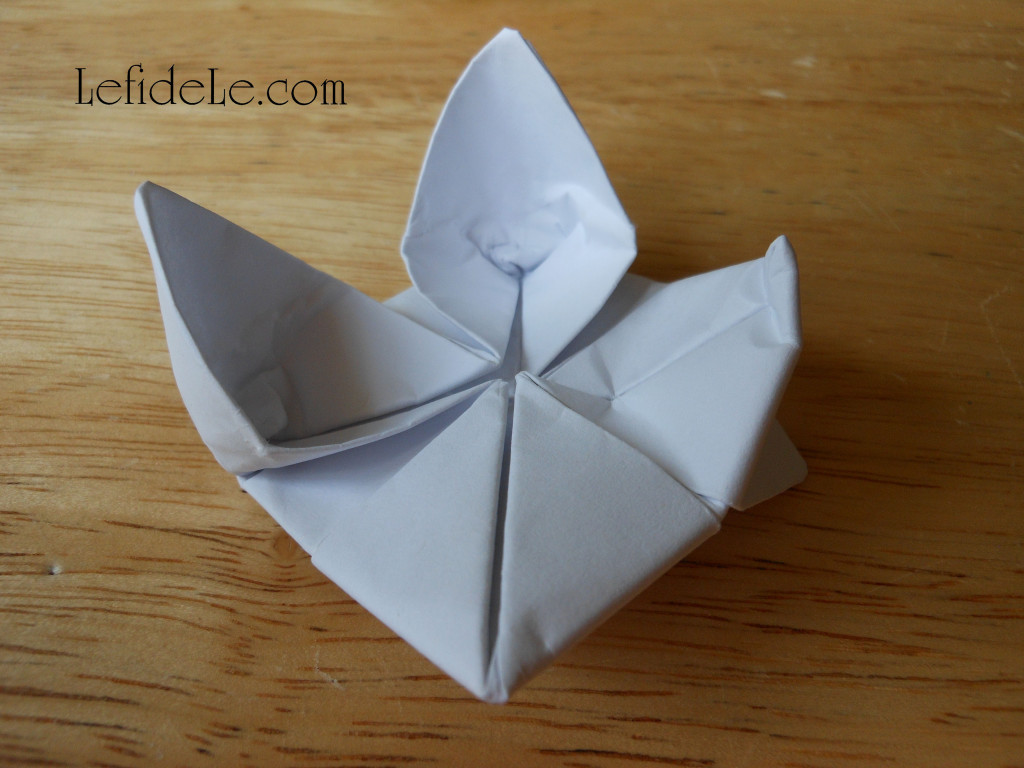
This is the tricky part… place your thumb into one corner of the square, and place the other fingers under the lipped point underneath it. Push in the corner with your thumb while gently pulling the underneath point out. It will flip up and over into a sort of petal. (The right petal in the picture is only halfway done. You can keep pulling gently until it looks like the left petal.) Stop pushing and pulling once the petal has a solid form with a rounded outside edge. Repeat this petal making on all corners.

009Leigh

Now pull out the four hidden points from beneath.

010Leigh

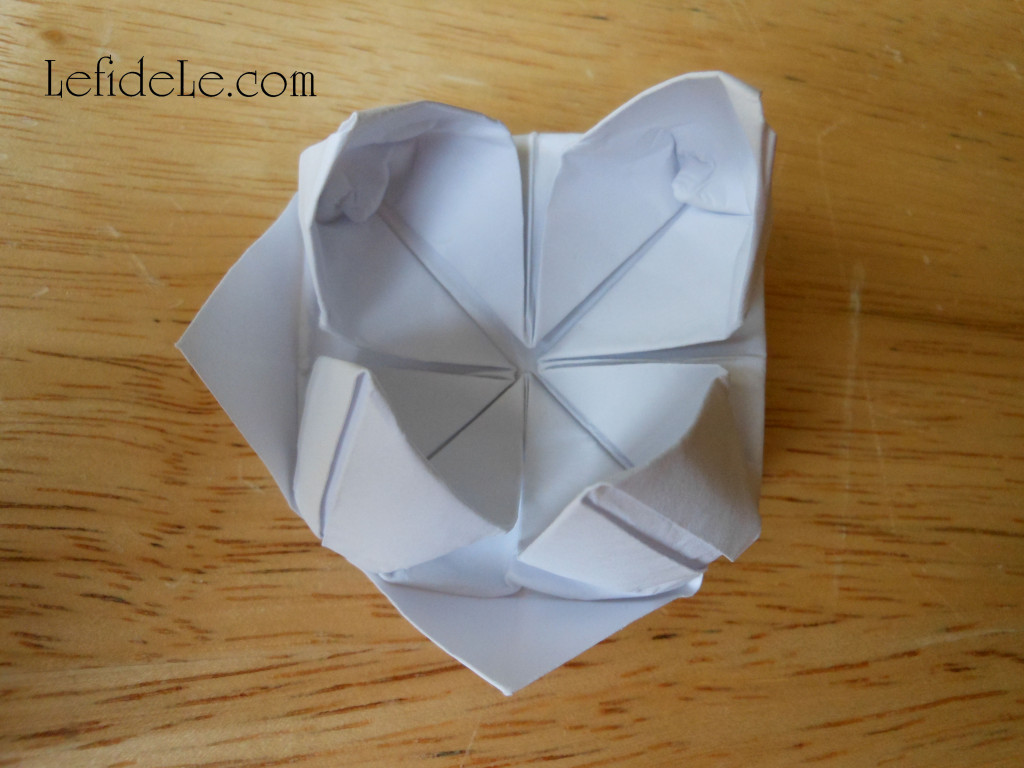
This is what it’s supposed to look like, but it may take a few blooms to get the hang of petal pulling.

011Leigh

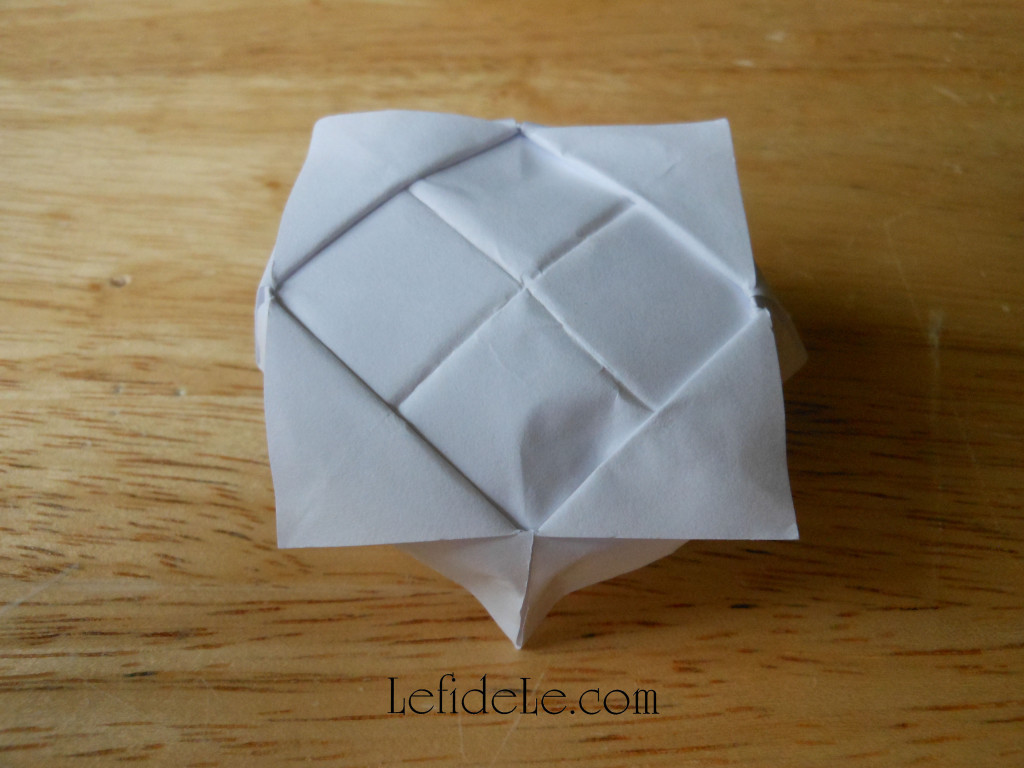
This is what the underside should look like. (It’s the perfect place to write a little message.)

14ChopstickRest-Leigh

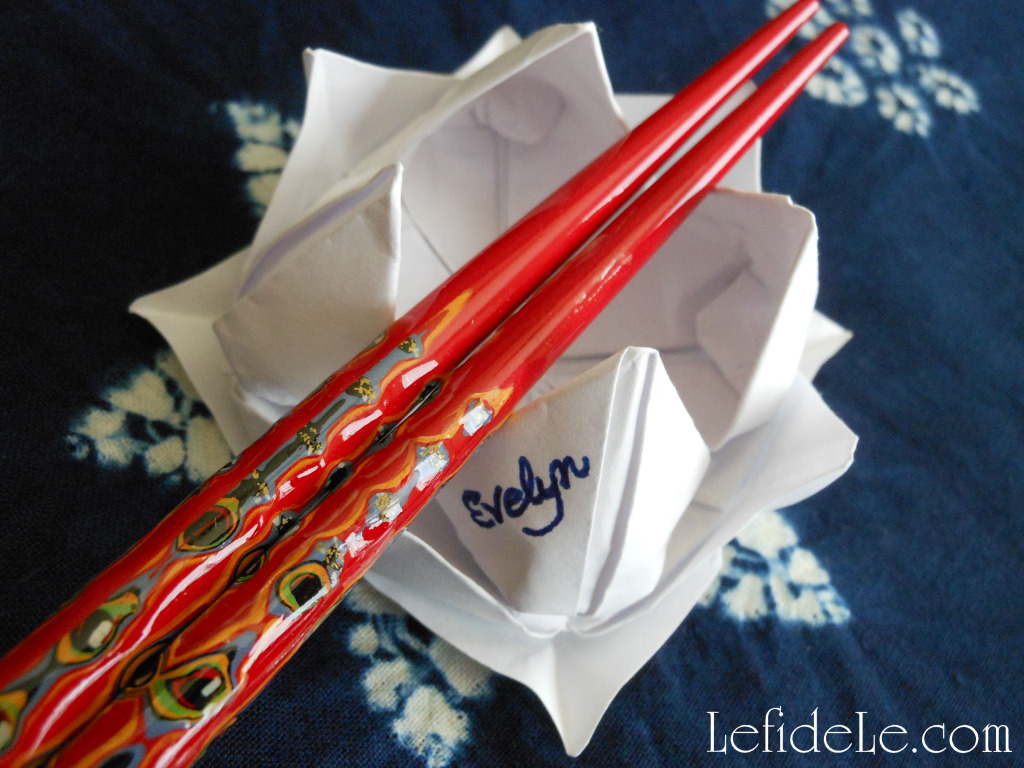
This is one of my origami waterlilies being used as a place-card holder/ chopstick rest. See it in action in my Pan Asian Inspired Indigo Shibori & Wooden Themed Tablescape (Perfect for Luncheons & Informal Dinners).

227Leigh

Bloom where you are planted!

Faithfully Yours,

Leigh

Pan Asian Inspired Indigo Shibori & Wooden Themed Tablescape (Perfect for Luncheons & Informal Dinners)

120Leigh

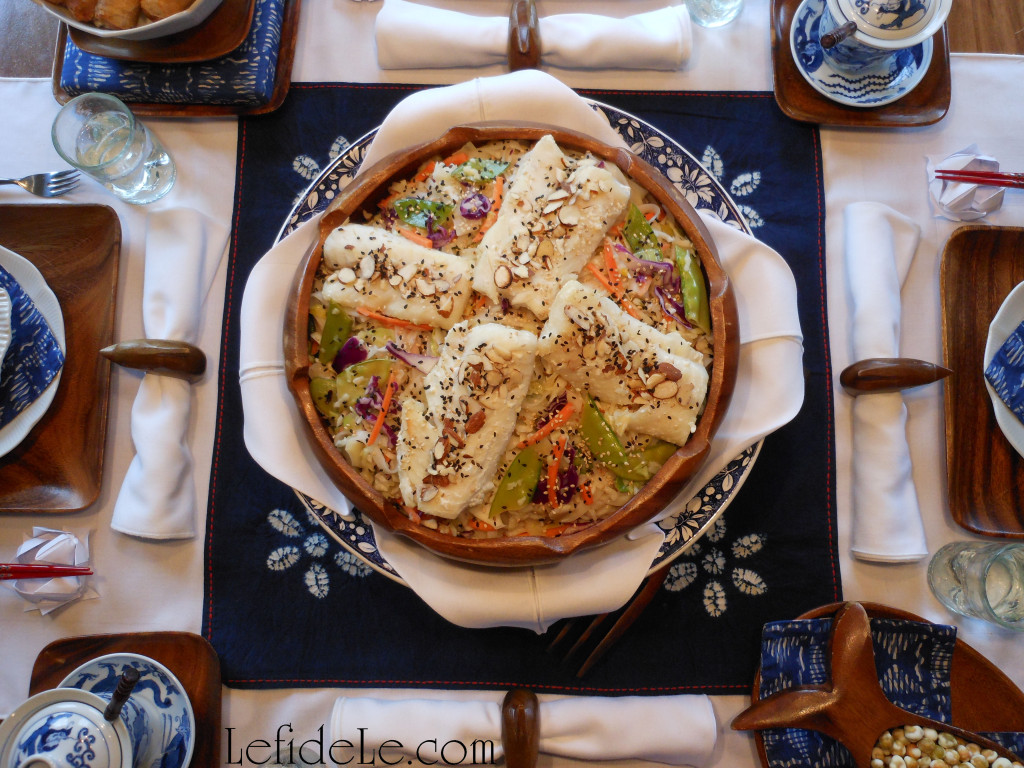
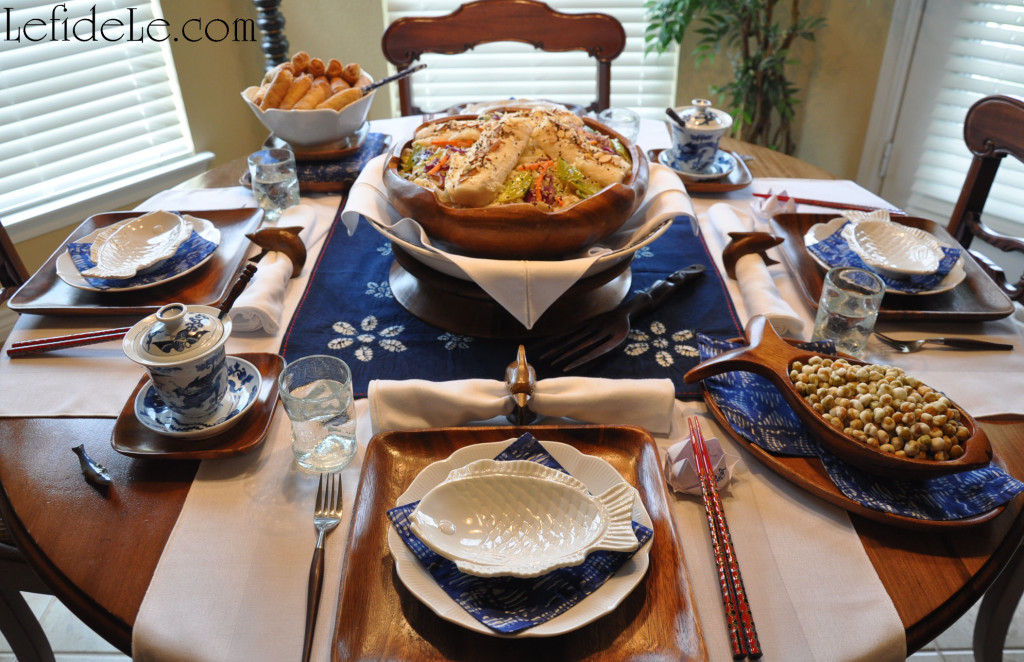
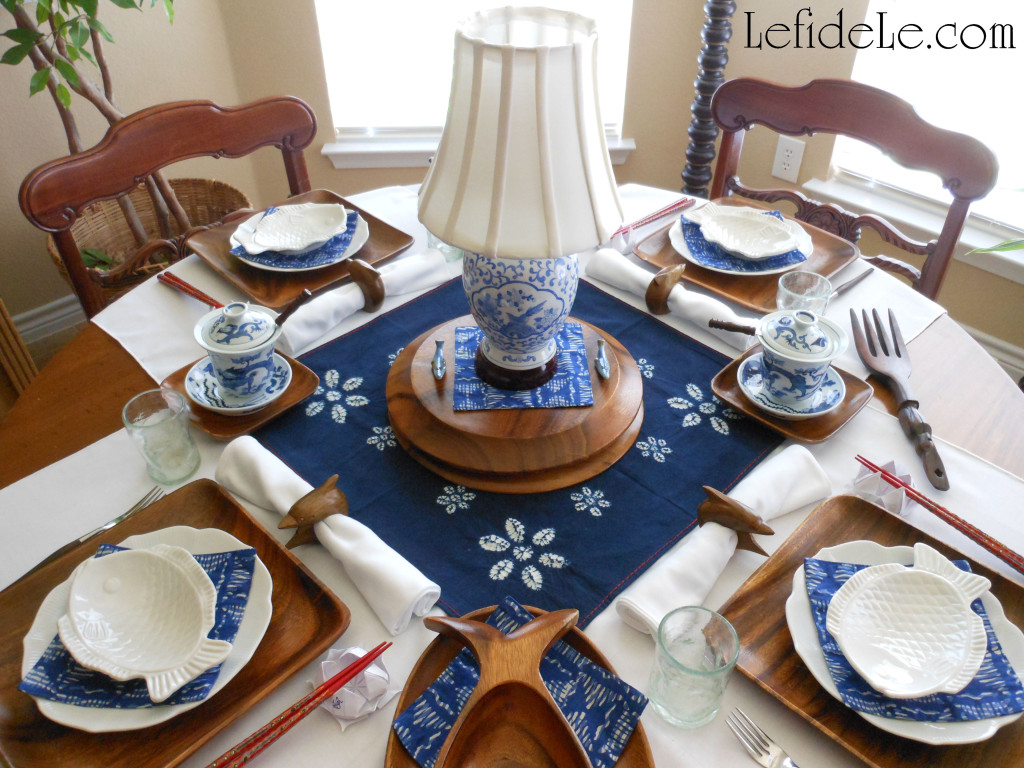
This Pan Asian tablescape makes the perfect theme for the fall transition when hot outside air temps still feel like summer. It was inspired by thoughts of wooden fishing boats sailing upon cool serene indigo waters. Make my Pan Asian Rice Noodle dish as a centerpiece, or just use a small lamp as ambiance for takeout. With origami waterlilies serving as décor, place-cards, and chopstick rests… it’s easy and inexpensive to put together a last minute luncheon or informal dinner.

228Leigh

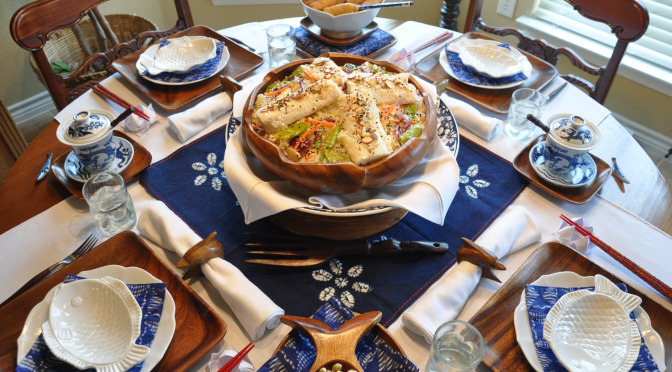
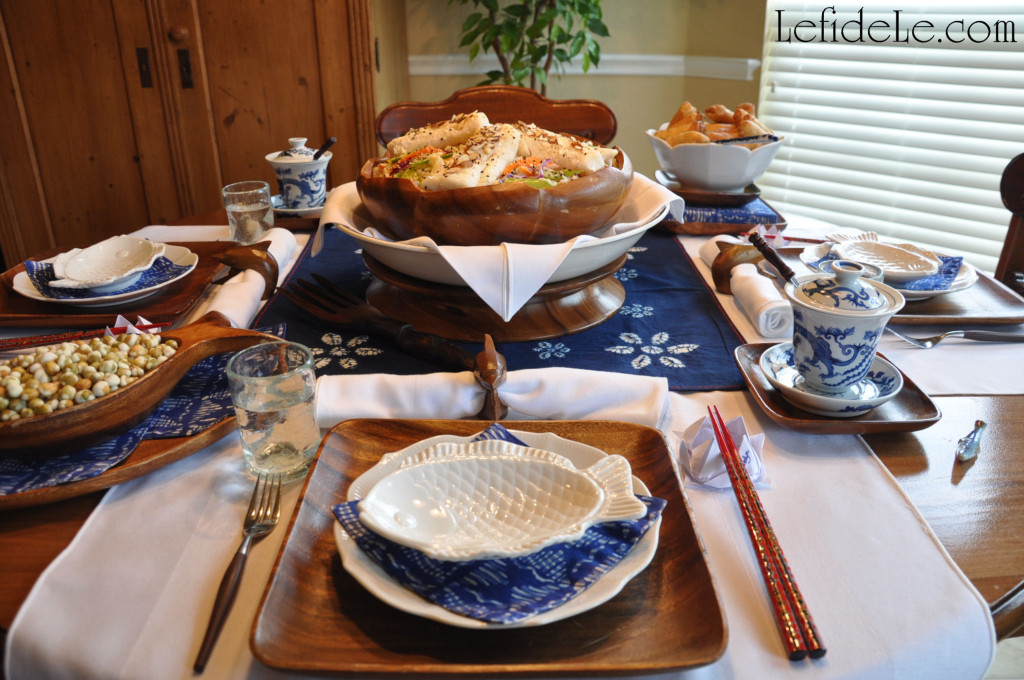
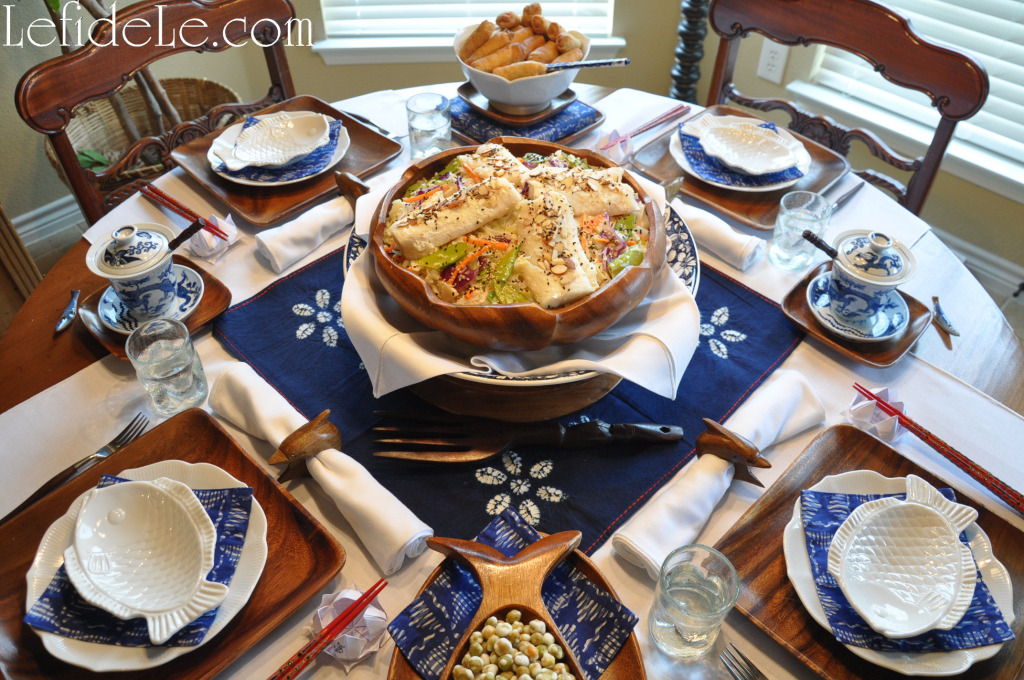
The traditional Japanese method of hand-dying cloth with indigo, known as Shibori, has produced a lovely piece to represent serene waters stacked with wooden dishware symbolizing hand hewn boats delivering the sea’s bounty. The vintage carved salad bowl was laden with Pan Asian rice noodles with veggies and creamy coconut milk sauce with cod fish (find my allergy-friendly recipe here). This was set into a blue and white ceramic bowl layered with folded white cloth placed upon an upturned wooden plate as pedestal. A large carved wooden vintage fork stood ready for serving.

207Leigh

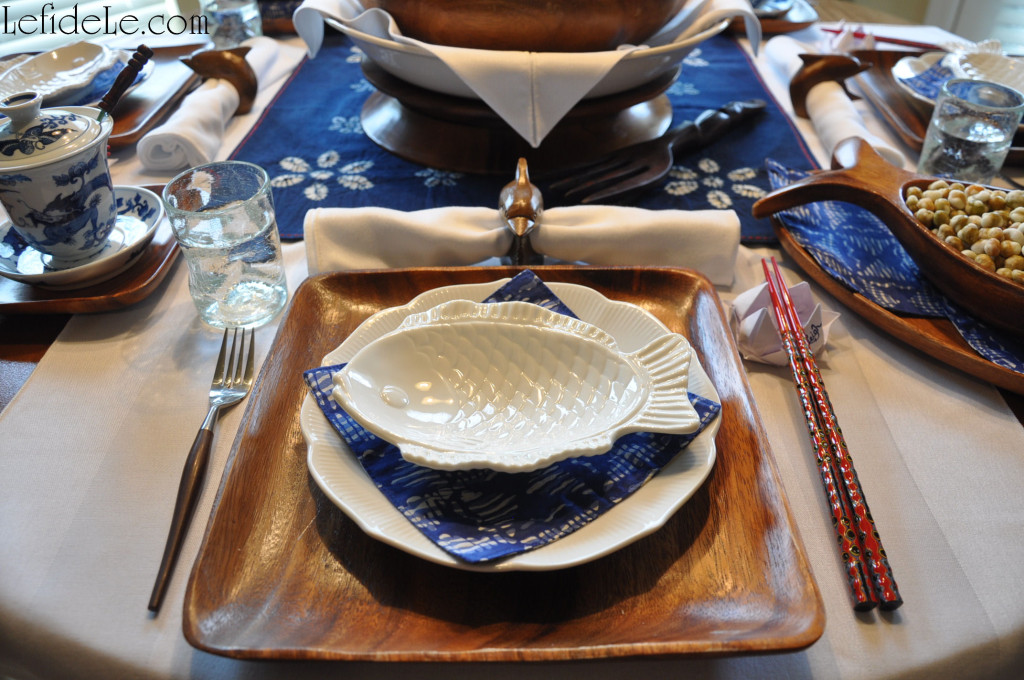
White cloth napkins rested out-of-place inside vintage Philippines carved wooden dolphin napkin rings. The pristine cloth squares also functioned as placemats. Square wooden plates from the same region held lotus blossom and fish plates softened with dyed cloth coaster napkins signifying blue waters. Small vintage crystal glasses with sides that undulated like waves crackled with patterns that emulated the splash of tides.

227Leigh

Vintage wooden handled forks were presented as an alternative to the colorfully painted chopsticks that rested upon origami lotus / waterlily blooms (see the craft tutorial here) that were marked to double as place-cards.

14ChopstickRest-Leigh

Blue patterned and lidded tea cups were transformed into sauce containers when fitted with small wooden spoons and once infusion cups were removed. These were each placed upon small wooden plates as coasters. Oven-baked spring rolls were offered from a ceramic lotus bowl resting upon a batik box fit into a small wooden plate. Blue patterned serving chopsticks were placed horizontally (to avoid the suggestion of funerary incense). Crunchy wasabi peas were cradled by a carved Philippine fish bowl over more cloth coaster napkins layered upon an oblong wooden plate.

024Leigh

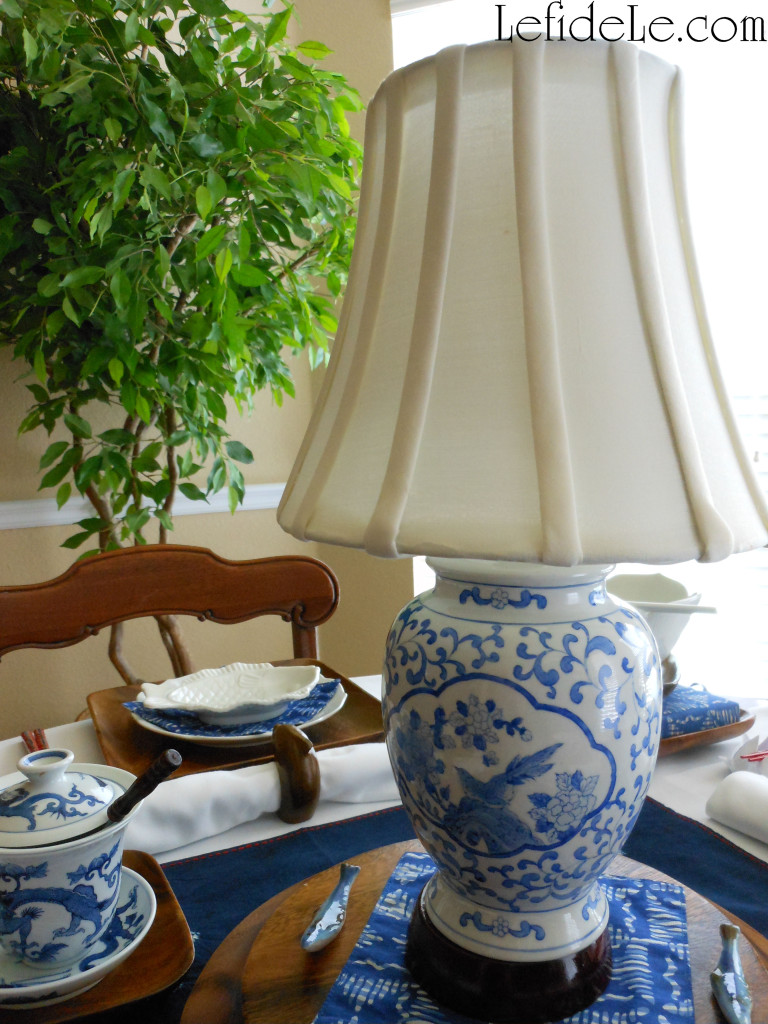
An alternative to a family style setting with the main dish at the center is one with a simple matching lamp sitting as centerpiece. The cord lies hidden by a wooden plate beneath a serving bowl, so that it stays hidden even when the bowl is passed around. For elevation, the small lamp is placed onto a cloth coaster over upturned wooden plates as pedestal. (This kind of arrangement is great to have waiting for an after-work gathering fueled by everyone’s favorite takeout.)

027Leigh

ありがとうございます。= “arigatou gozaimasu” (= thank you very much in Japanese)

223PanAsian-Leigh

Faithfully Yours,

Leigh

Colorful Indoor Picnic Party Tablescape Perfect for Rainy Days or Texas Temps!

272Leigh

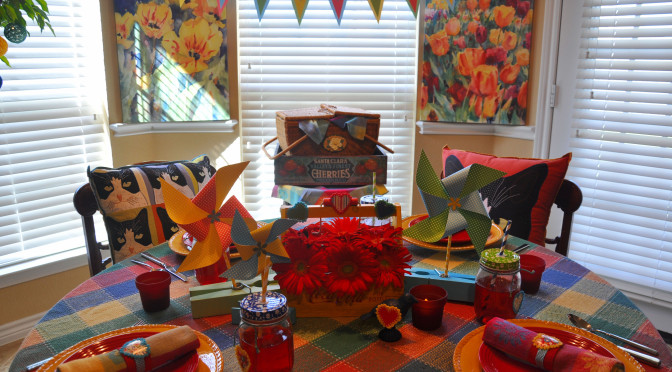
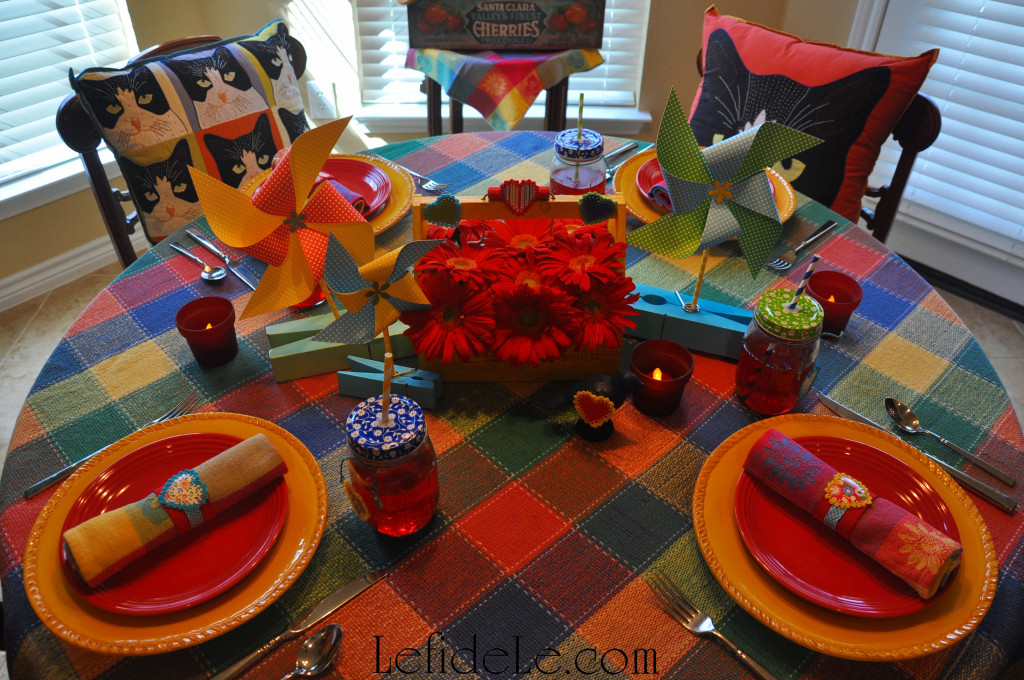
This colorful indoor picnic tablescape makes a party perfect on rainy days or in soaring Texas temps. As a matter of fact, that is exactly what brought this vibrant alfresco celebration inside. No one really wanted to sit on dry itchy grass with hot dusty wind from triple digit heat laminating one’s face with excessive humidity. The risk of West Nile tainted mosquitos, fire ants, pesky flies, even thunderstorms rolling in led to the request of a placid gathering soothed with the luxuries of air conditioning and comfy chairs. Admittedly, the modification made for the loveliest of afternoons in cheerful celebration of summer.

274Leigh

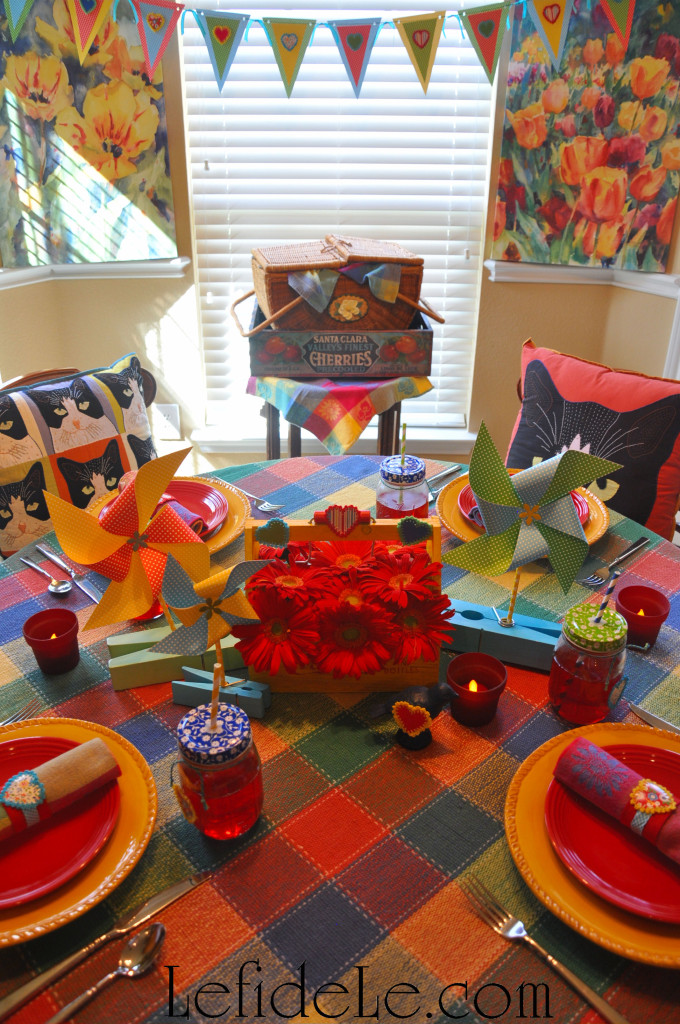
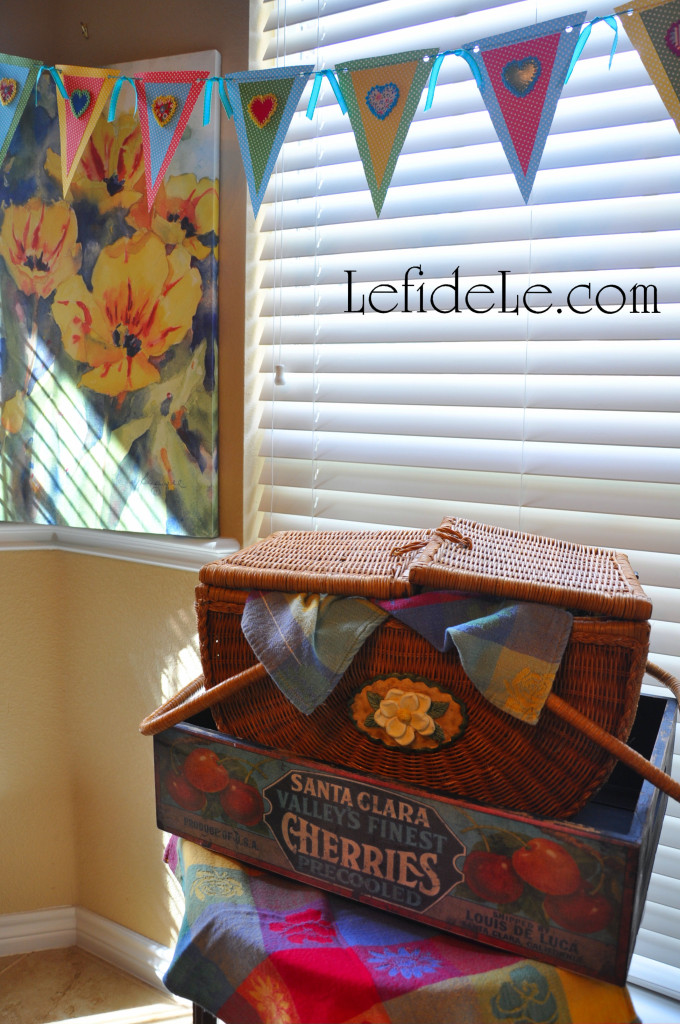
Large prints of watercolor paintings brought the brilliant colors of sprightly blooms inside.

249Leigh

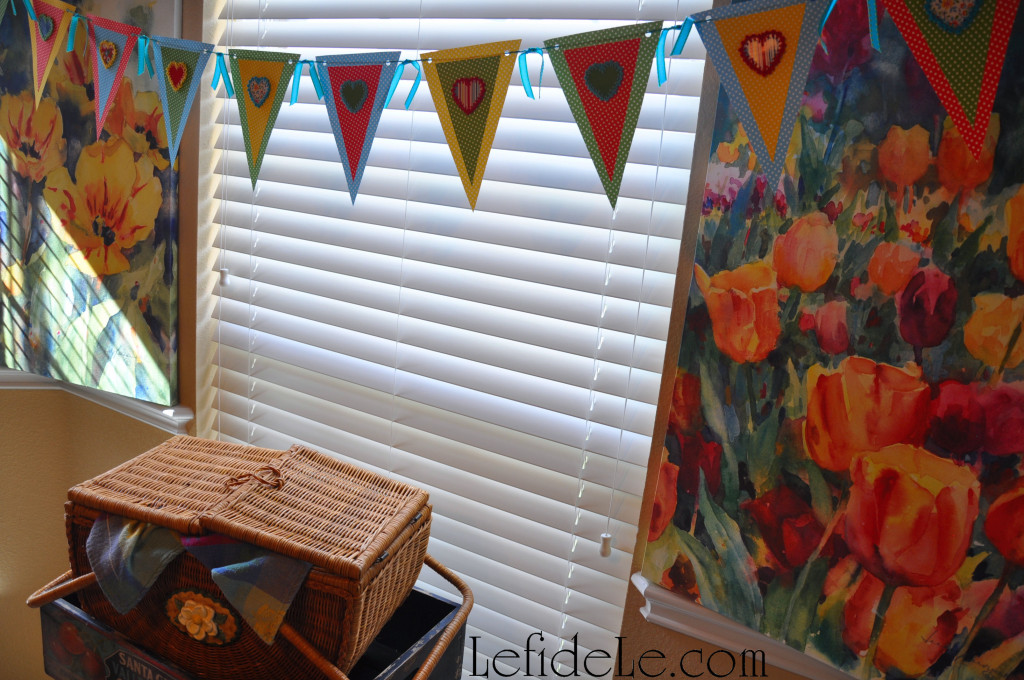
A handcrafted banner (click here for tutorial & template) set a playful mood aloft a side table topped with madras plaid napkins and a fruit crate that secured a vintage woven picnic basket filled with the surprises of sweet treats for dessert.

252Leigh

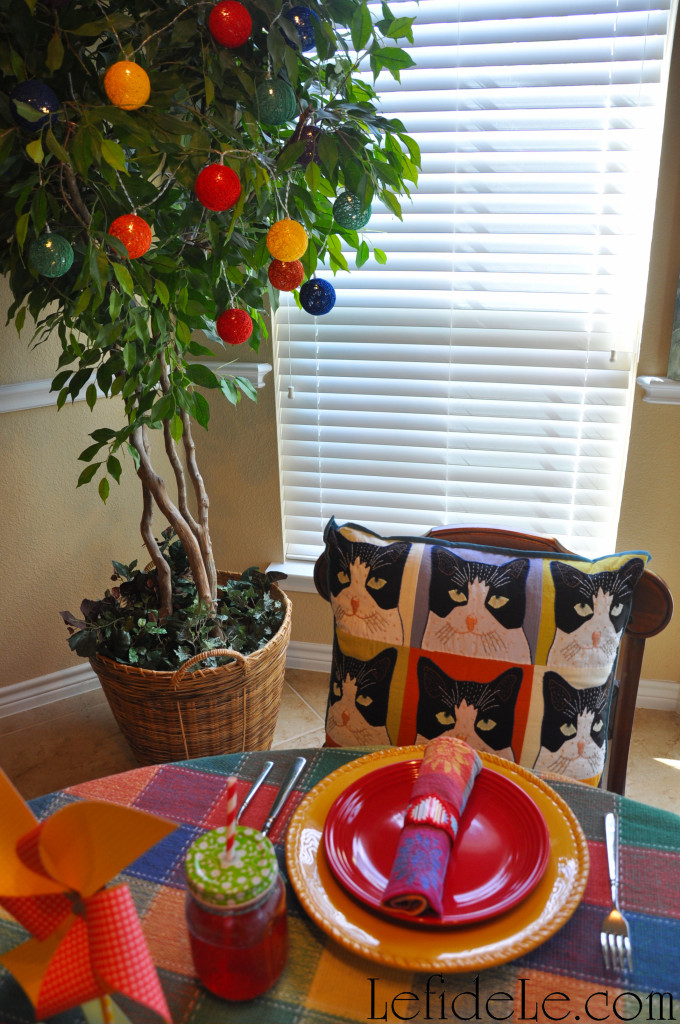
An indoor ficus tree was delightfully strung with lights of multi-colored string orbs just as one would trim a courtyard. Embroidered patchwork tuxedo cat pillows in Warhol tradition honored a beloved friend who passed on.

233Leigh

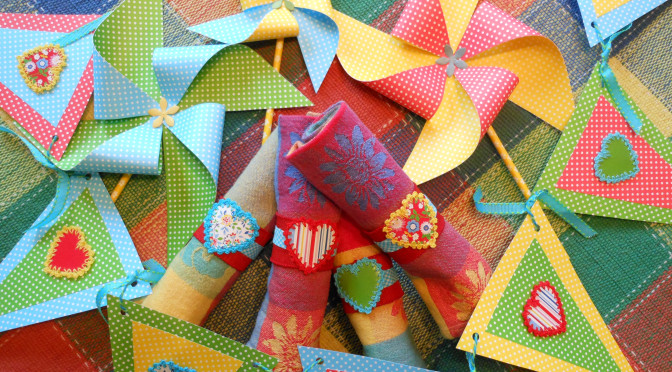
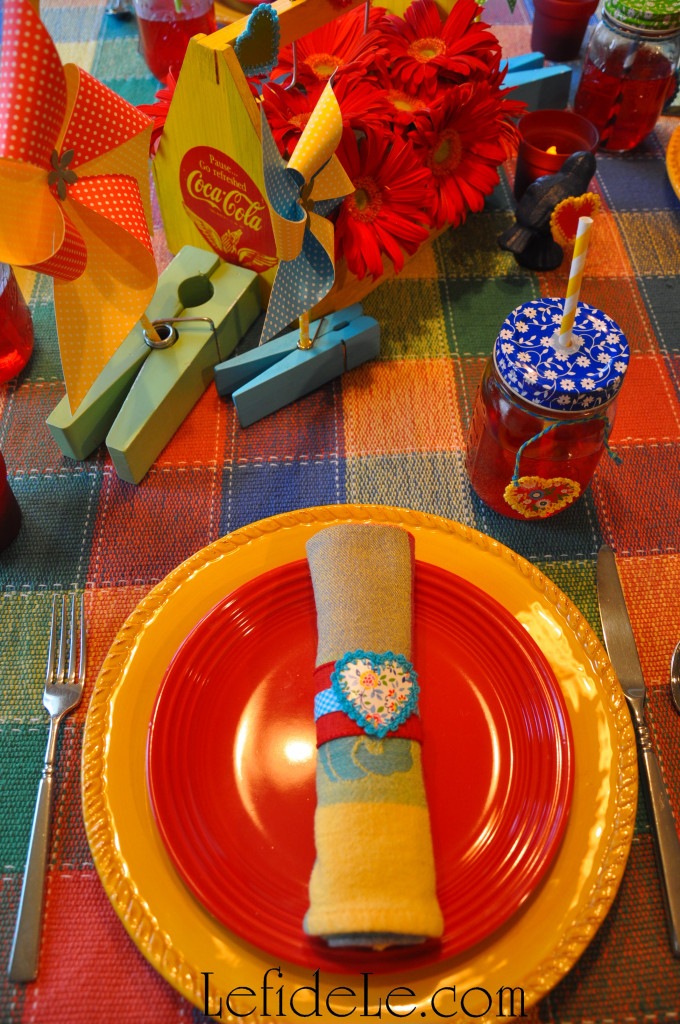
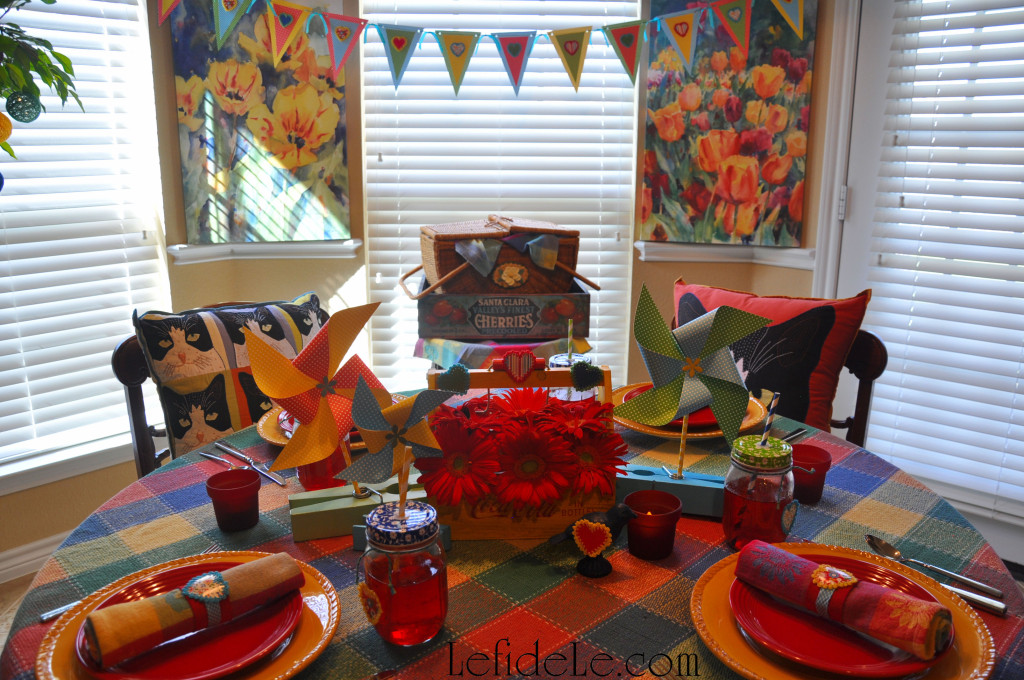
A brightly woven picnic blanket was employed as a tablecloth and set with yellow dinner plates that shined like midsummer suns. Appetite stimulating red salad plates and handmade napkin rings (see the tutorial here) filled with more madras plaid napkins were layered atop that. Coordinating crocheted hearts adorned glass drinking jars fitted with purposely mismatched lids and paper straws.

237Leigh

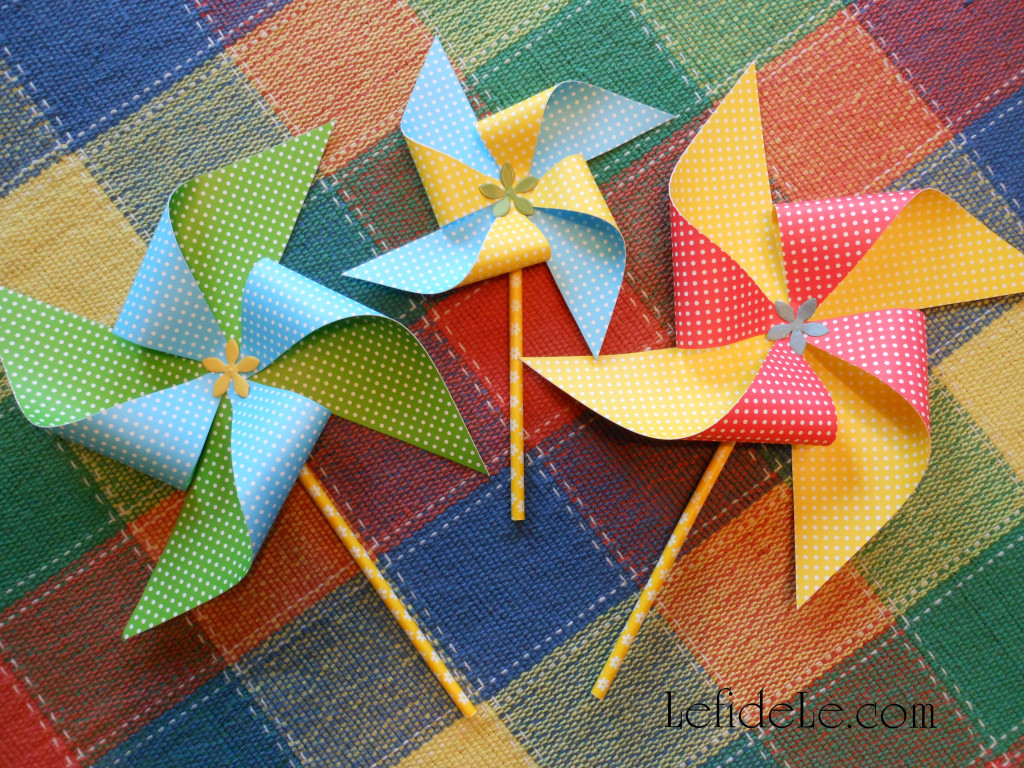
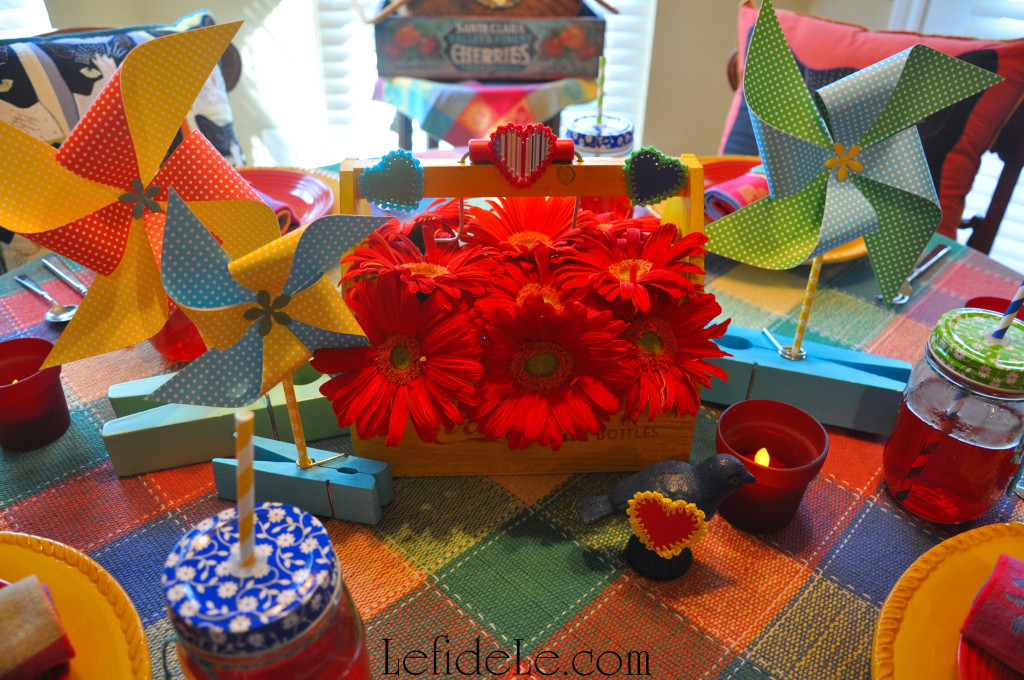
Delightfully oversized clothespins supported banner matching pinwheels (click here for tutorial & template) which contributed to the illusion of a cool circulating wind. A cast iron bluebird of happiness, wearing its heart on its sleeve, sang away the blues amidst glowing red votives filled with LED tea-lights. Completing the centerpiece was a coke bottle carrier repurposed with tiny vases to hold fresh red gerbera daisies.

211Leigh

Remember when foul weather spawns, just to keep calm and picnic on!

263Leigh

Faithfully Yours,

Leigh

P.S. For allergy-friendly picnic food try these recipes:

012Leigh

Creamy Macaroni Salad Recipe (Gluten-Free, Vegan, Egg-Free, Dairy-Free, Soy-Free, Nut-Free, Pepper-Free)

061Leigh

Creamy Broccoli Salad Recipe with Vegan & Turkey Bacon Options (Gluten-Free, Egg-Free, Dairy-Free, Soy-Free, Nut-Free, Pepper-Free)

013Leigh

Creamy Salad Dressing Recipe (For Green Salad, Broccoli Salad, Macaroni Salad) Gluten-Free, Vegan, Egg-Free, Dairy-Free, Soy-Free, Nut-Free, Pepper-Free


DIY Picnic Heart Napkin Rings & Customizable Banner + Pinwheel Craft Tutorials (+ Free Printable Templates)

Craft your own colorful indoor picnic party quickly and inexpensively with scrapbooking paper, ribbon, and dimensional stickers! Use them to create your own customizable banner and pinwheels with my free printable templates, and then make DIY heart napkin rings to up the ante…. taking your picnic from average to outstanding!
091Leigh

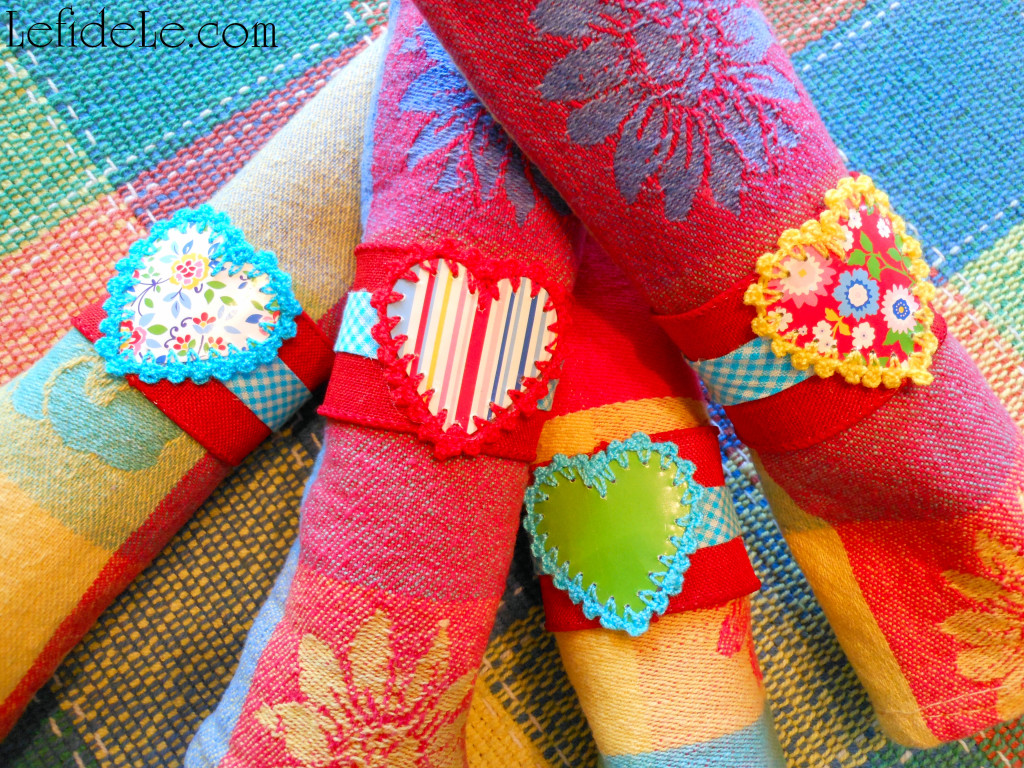
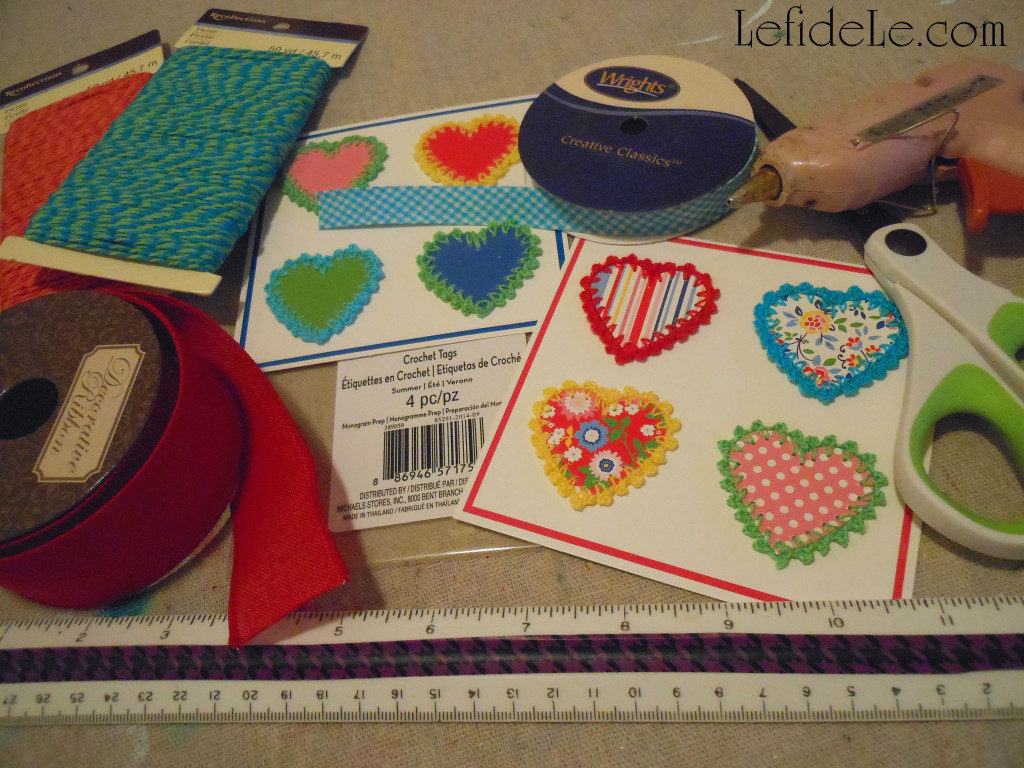
My heart napkin rings utilize dollar bin dimensional chipboard stickers that were decoratively crocheted (which I actually purchase half-price at Le fidèLe Design’s affiliate Michaels). The scrapbooking section of your local craft store always has items such as these which are made with sturdy materials, whose pretty looks belie their price points.
213Leigh

Find coordinating colors of wire ribbon and bias tape to tie together the set of differing stickers. (It’s like using different photos with matching frames to give a cohesive look to a home gallery.)
215Leigh

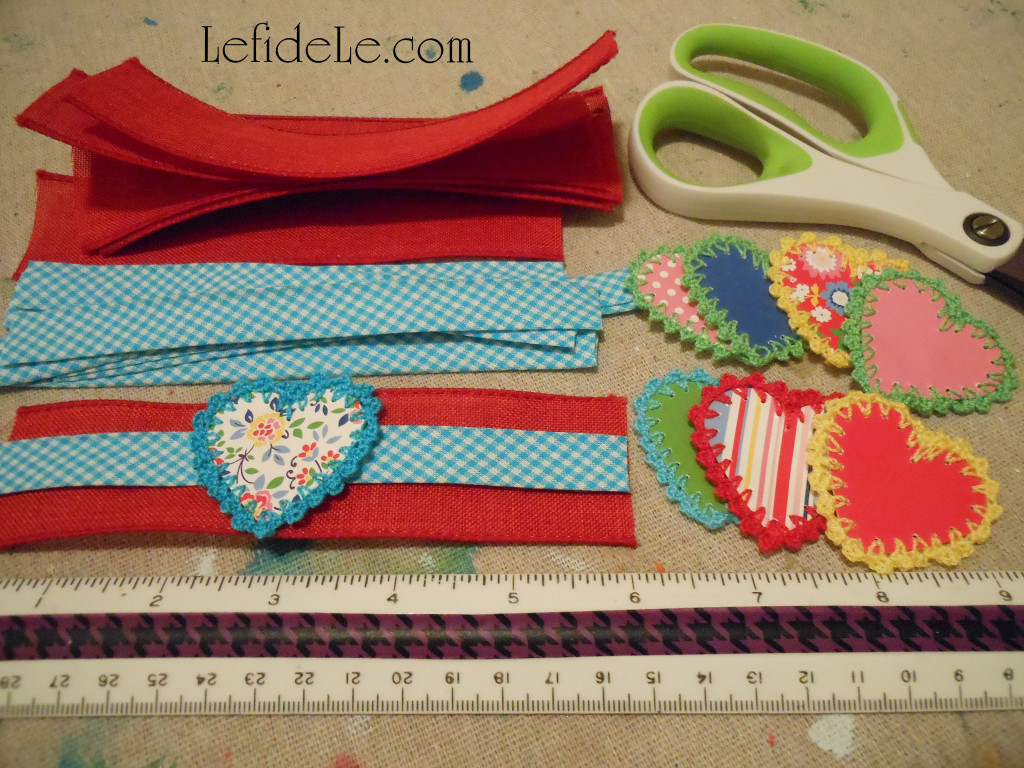
Cut 6 inch lengths of both the ribbon and bias tape. (Bias fabric tape is a sewing product, but makes a beautiful trim for this project. You can also use a thin ribbon in its place.) Pull the sticky dots off of the sticker backs. (Place them on plastic packaging to reuse for dimensional card-making later.)
219Leigh

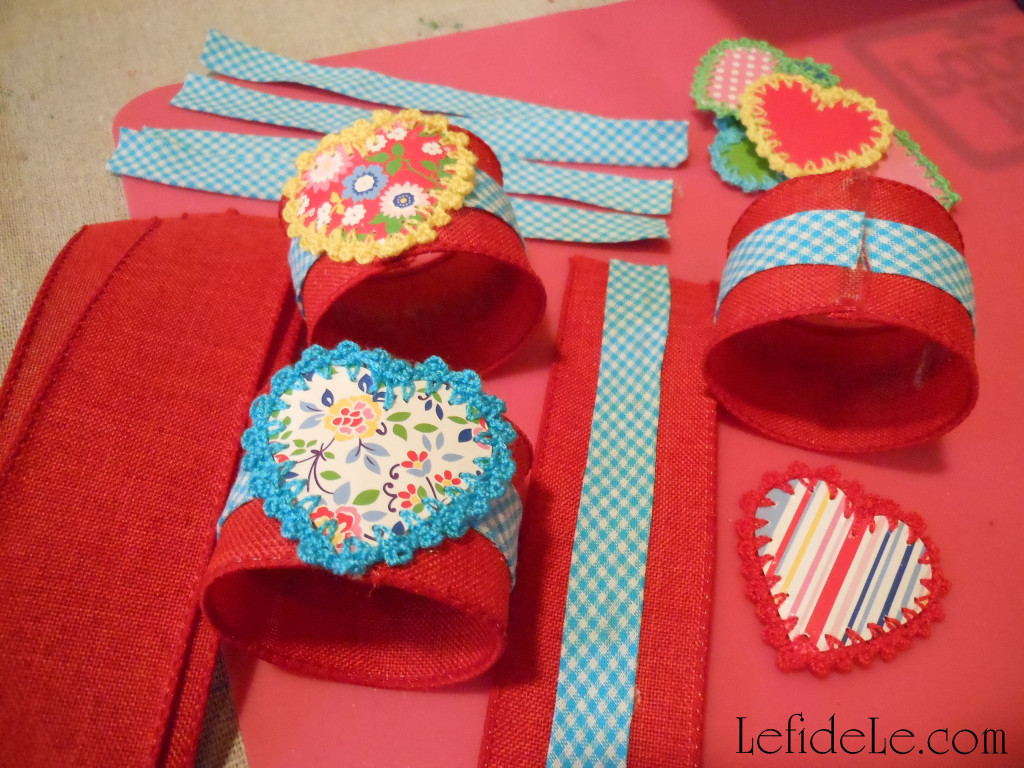
Glue the bias tape across the center of each wired ribbon strip, making sure the tape doesn’t have a flap open… if so, glue it down too. Next, glue one end to the other by laying down a thin line of glue onto one short-side edge, and then press the other end onto it. (Press it down hard… using silicone finger cots if utilizing hot glue. I’ve use hot glue, fabric hot glue, fabric glue, tacky glue, universal glue… and it all worked beautifully.)
077Leigh

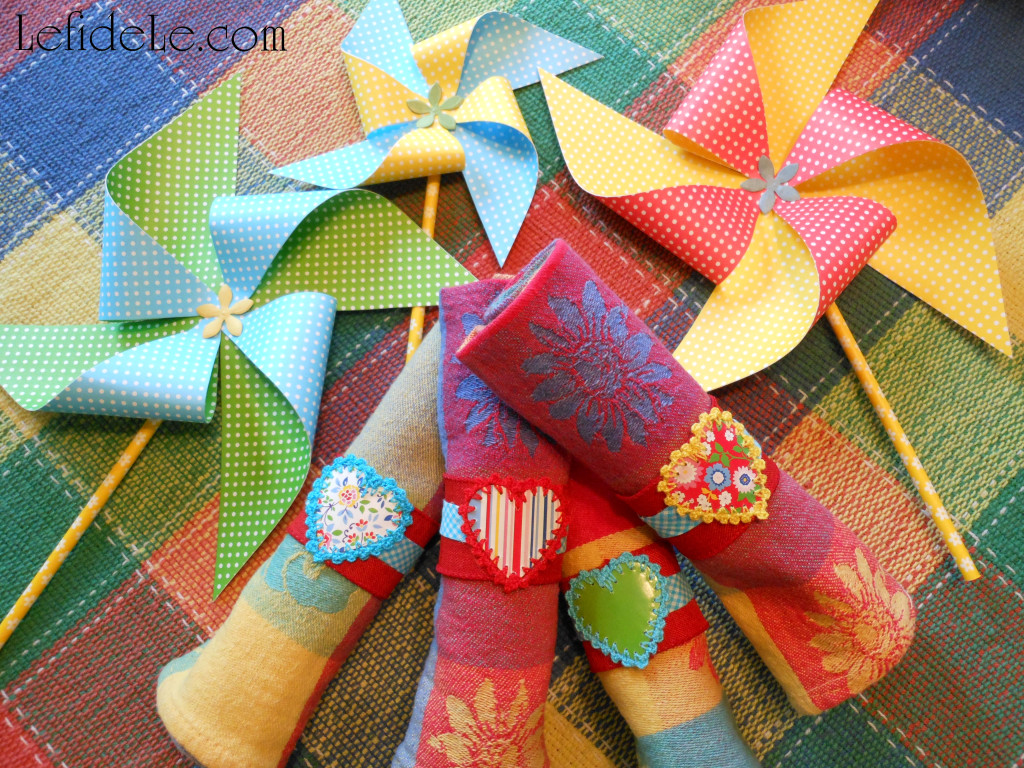
Take advantage of the wired ribbon’s staying power to form perfectly round circles for your rolled fabric napkins to slide right into. (Wired ribbon is the perfect base as it has a clean finished edge without needing to fold and glue.)
228Leigh

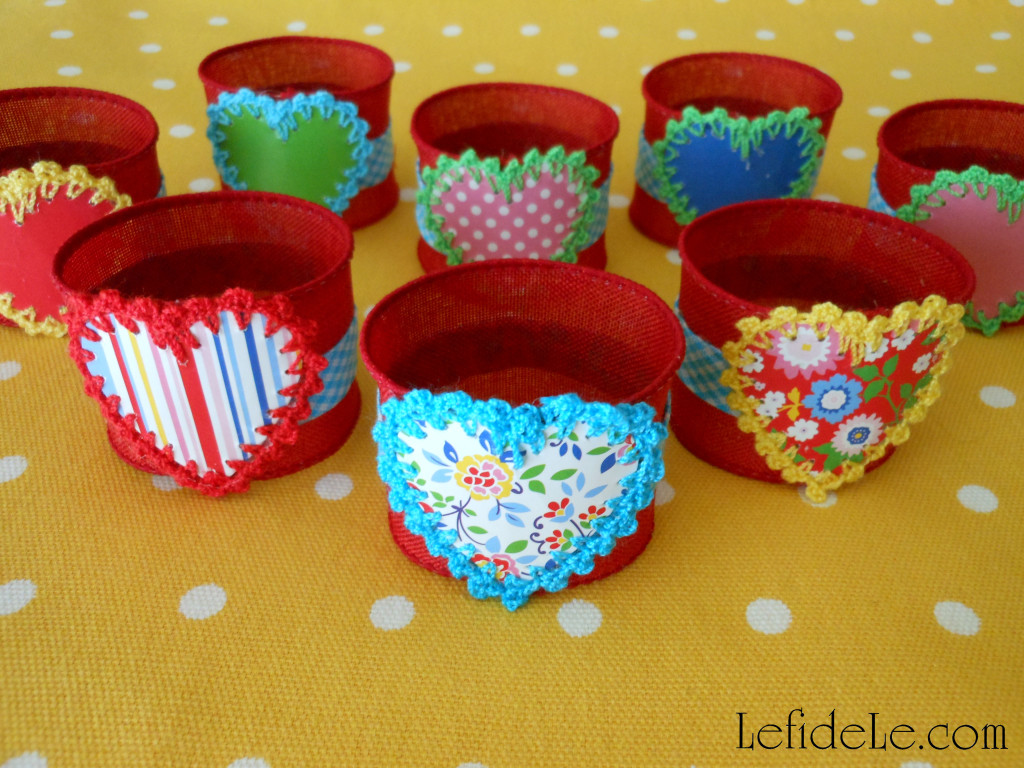
I made a set of 8 different heart napkin rings to mix and match according to my tablescapes (and it only cost me a few dollars).
233Leigh

Here they are featured in my Colorful Indoor Picnic Party Tablescape Perfect for Rainy Days or Texas Temps, because in my world, a picnic is the perfect excuse for crafting! (Note the heart stickers were also placed on the drinking jars.)
274Leigh

Make your own banners quickly using my free printable template to cut perfectly precise pennants from any scrapbook paper matching your theme décor. Finish them of with chipboard stickers like those I used on my heart napkin rings.
BannerTriangleTemplatesLeigh

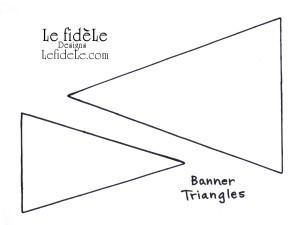
Print the template by first clicking on the picture above. Next right click on the image and select print. Choose a text or black and white setting to conserve ink. Cut out the two triangles.
001Leigh

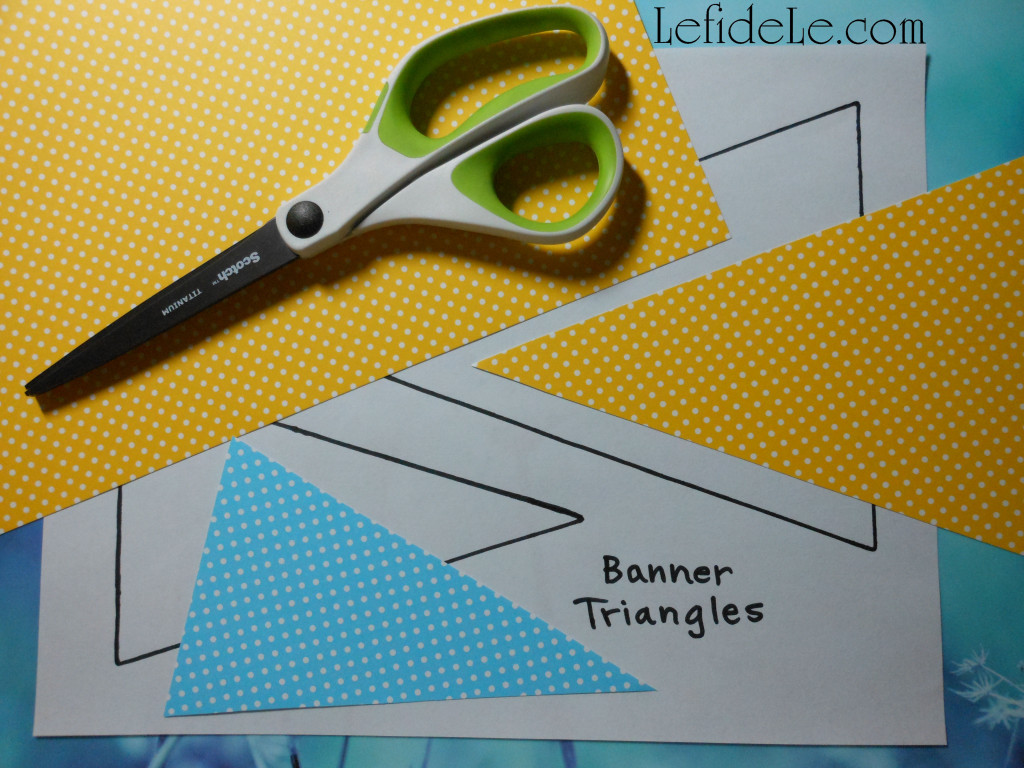
Trace around the triangles with a pencil onto the back of the scrapbook paper. (Use them to conserve paper by flipping them until you maximize the number of triangles per sheet.) Now cut out these triangles. (Save the leftover bits for card-making later.)
003Leigh

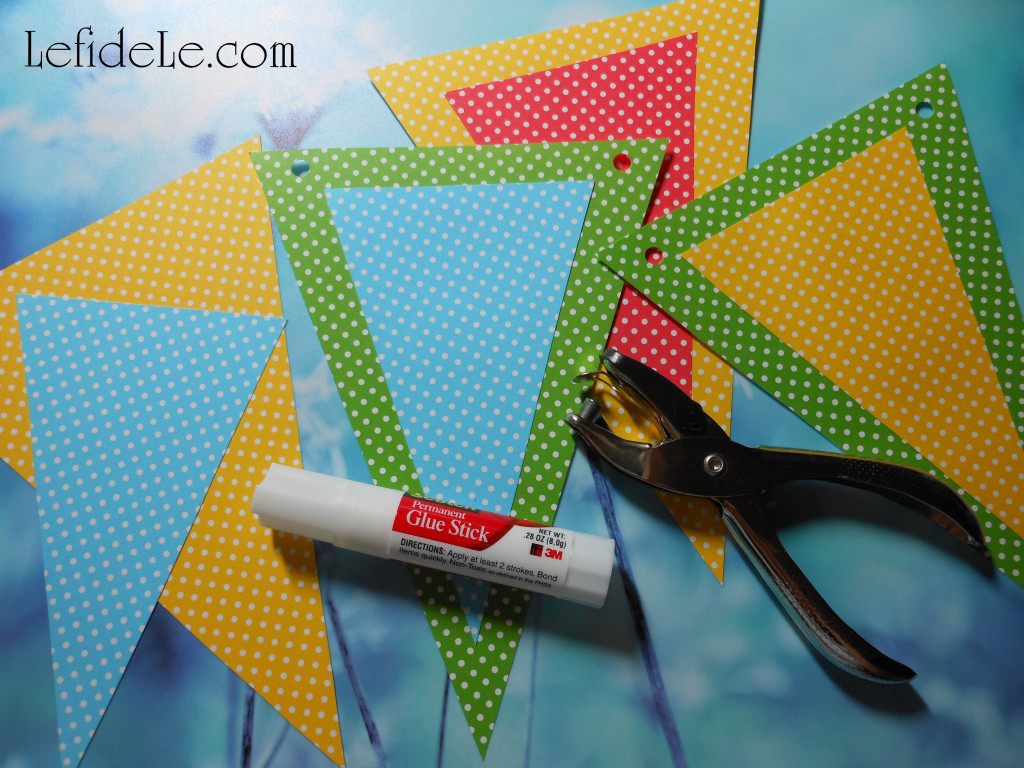
Glue a smaller triangle to the center of a larger one of a contrasting color. (A permanent glue stick works beautifully with less mess.) Punch a hole next to each top point of a glued pennant.
006Leigh

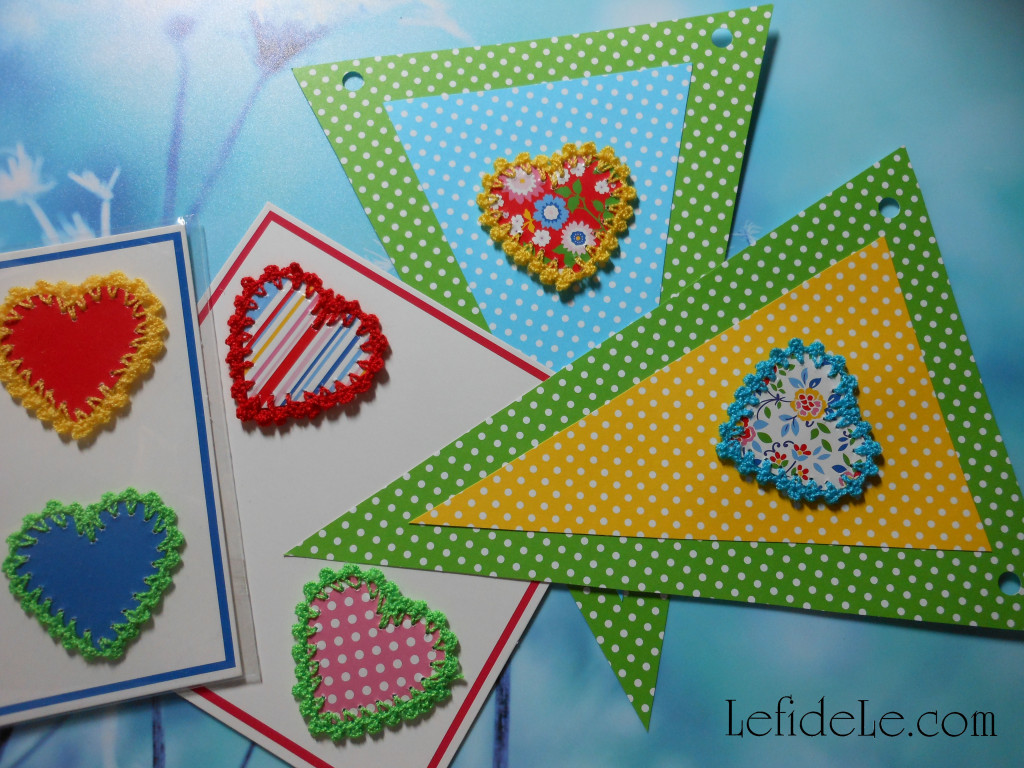
Place a dimensional sticker onto the center of each pennant. (Try to use contrasting colors to make a more visually interesting combination.)
010Leigh

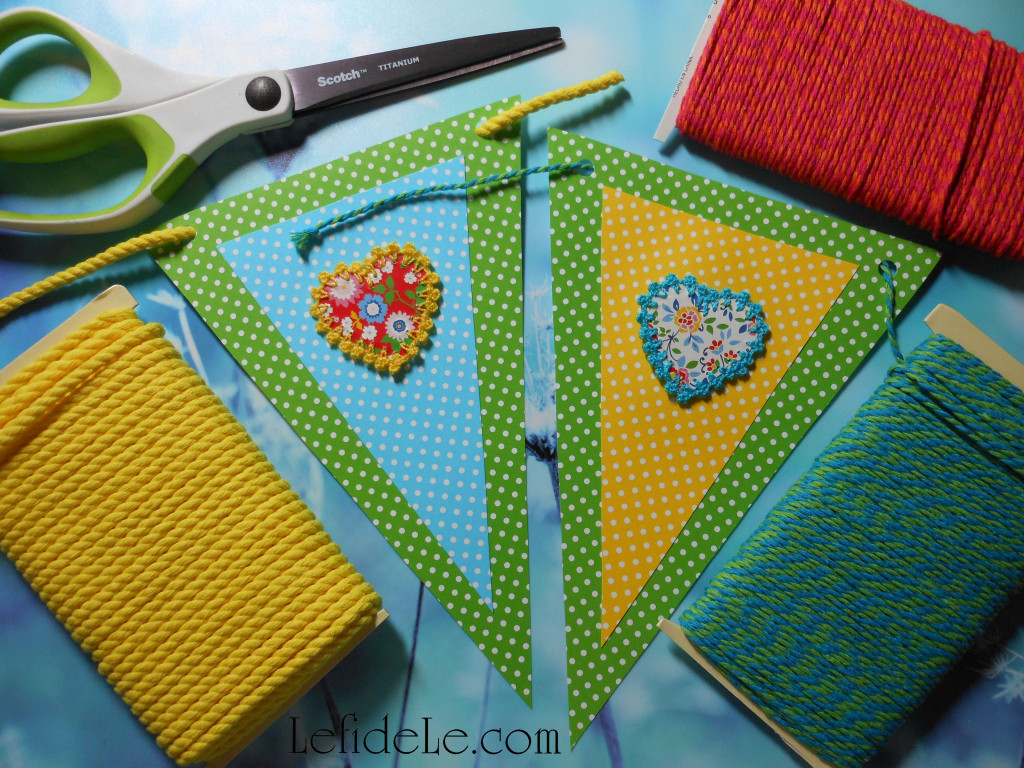
Use any variety of string, twine, yarn, or ribbon to run through the punched holes. Knot each end into a loop to hang them by. (To do this, form a loop then make a simple overhand knot.)
019Leigh

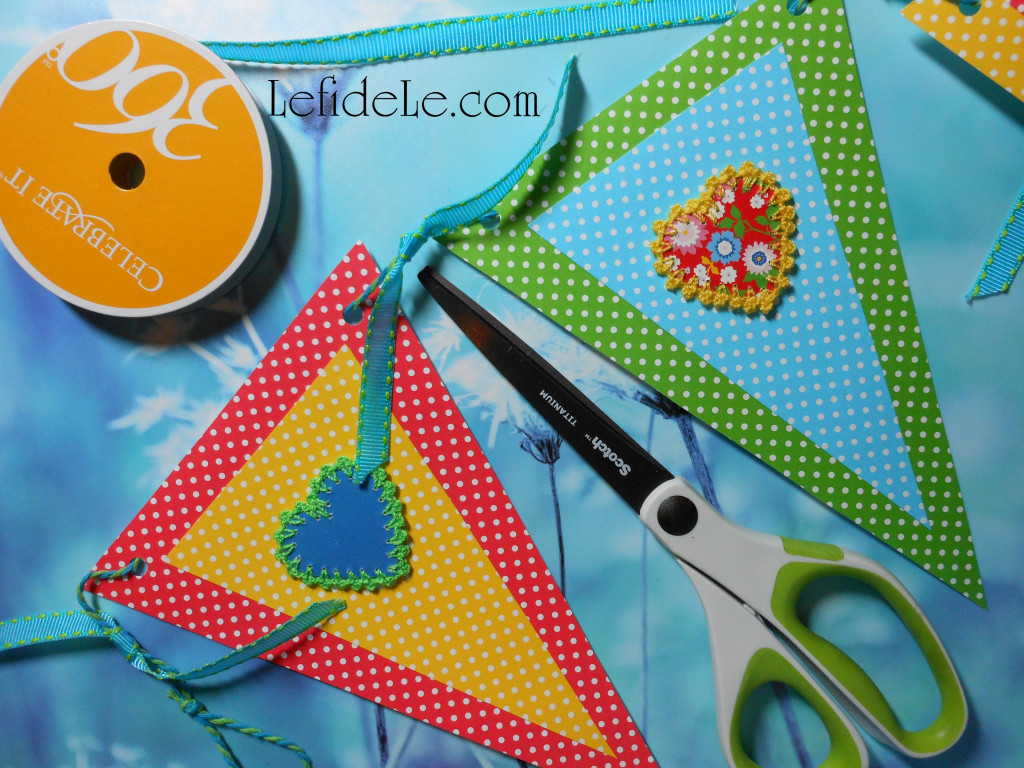
For additional flair, tie small lengths of thin ribbon in between each pennant. Hang it up for an extra dose of cheerful festiveness!
096Leigh

Next, let’s make matching pinwheels for décor or children’s play.
PinwheelTemplatesLeigh

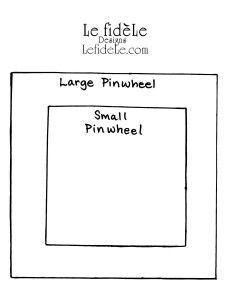
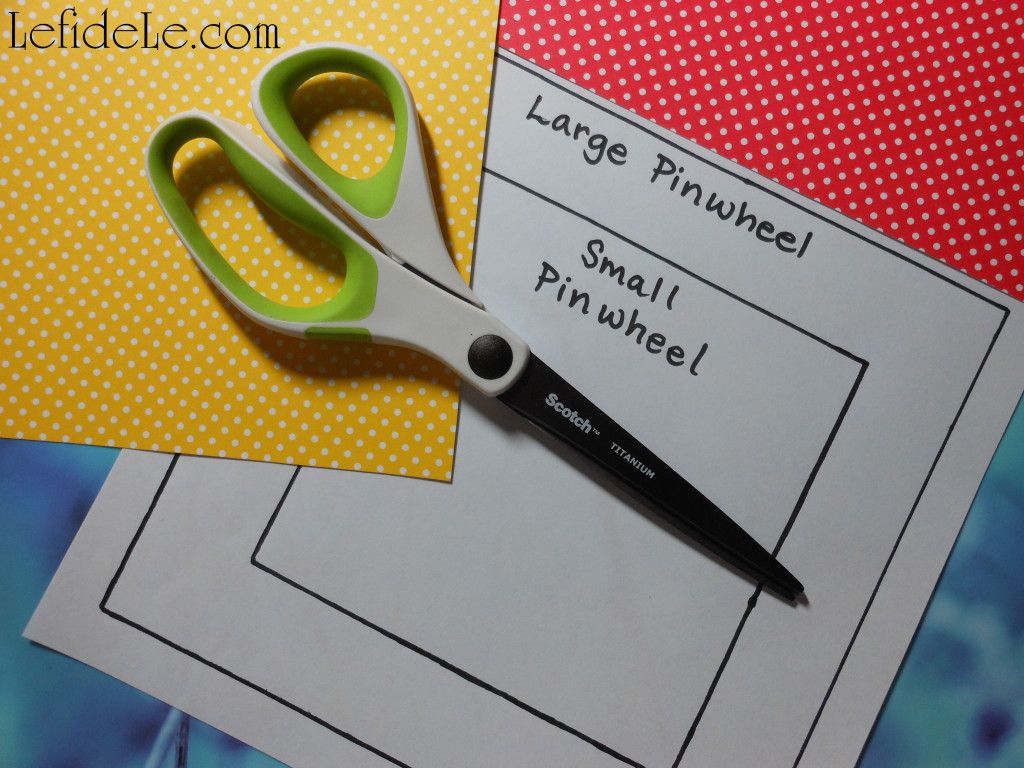
Either fold over an edge of scrapbook paper to form a box that can be cut out, or… print a template to quickly churn out pinwheel bases. (The templates are great to enhance a young kiddo’s tracing skills.) Click on the picture above, then right click on the resulting image and select print. Choose text or black and white settings to conserve ink.
012Leigh

Cut out a single square from double-sided paper, or cut 2 squares of the same size for single-sided paper.
015Leigh

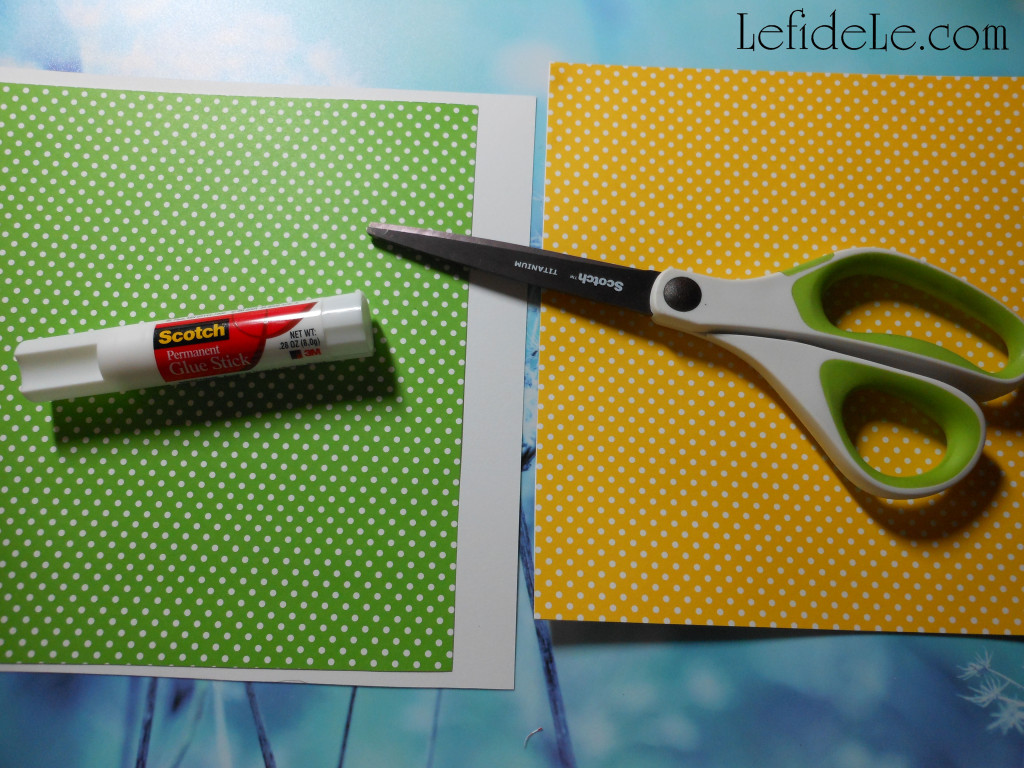
If using single-sided scrapbooking paper, glue them back to back with a permanent glue stick. Or, you can do as I’ve done here by cutting one piece, gluing it to the plain side of another, and then cutting around the box… which I think is easier.
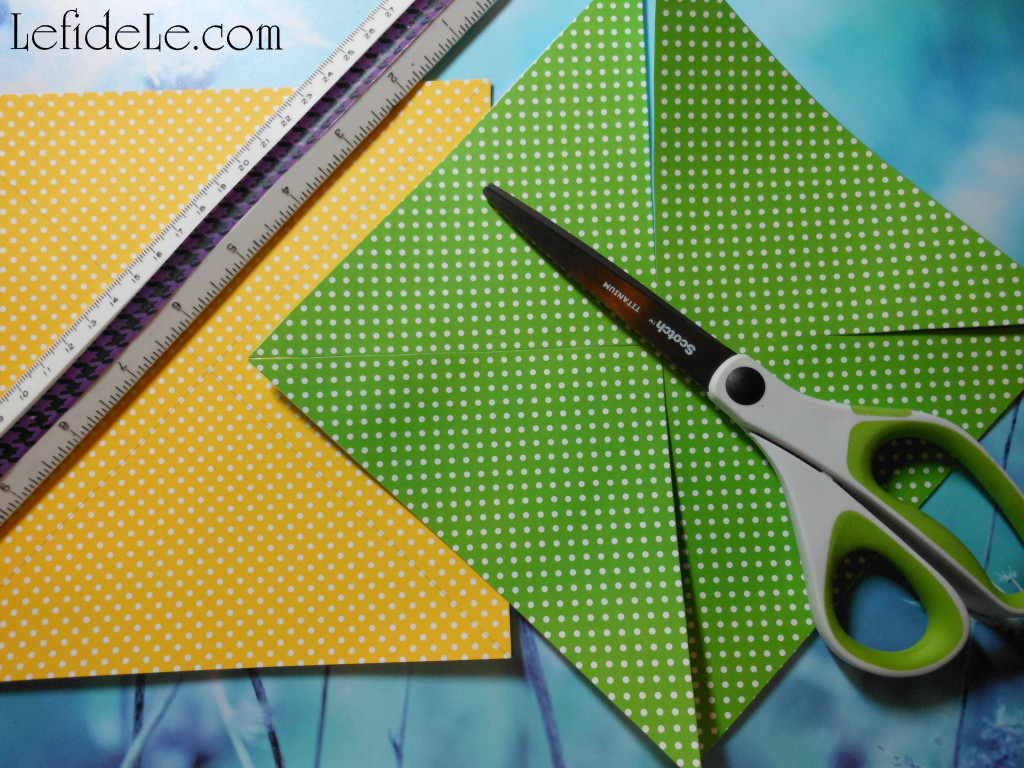
016Leigh

Next use a ruler to draw a line with a pencil, from one corner across to the other. Cut along this line, but leave a half inch or so at the center making 4 flaps.
020Leigh

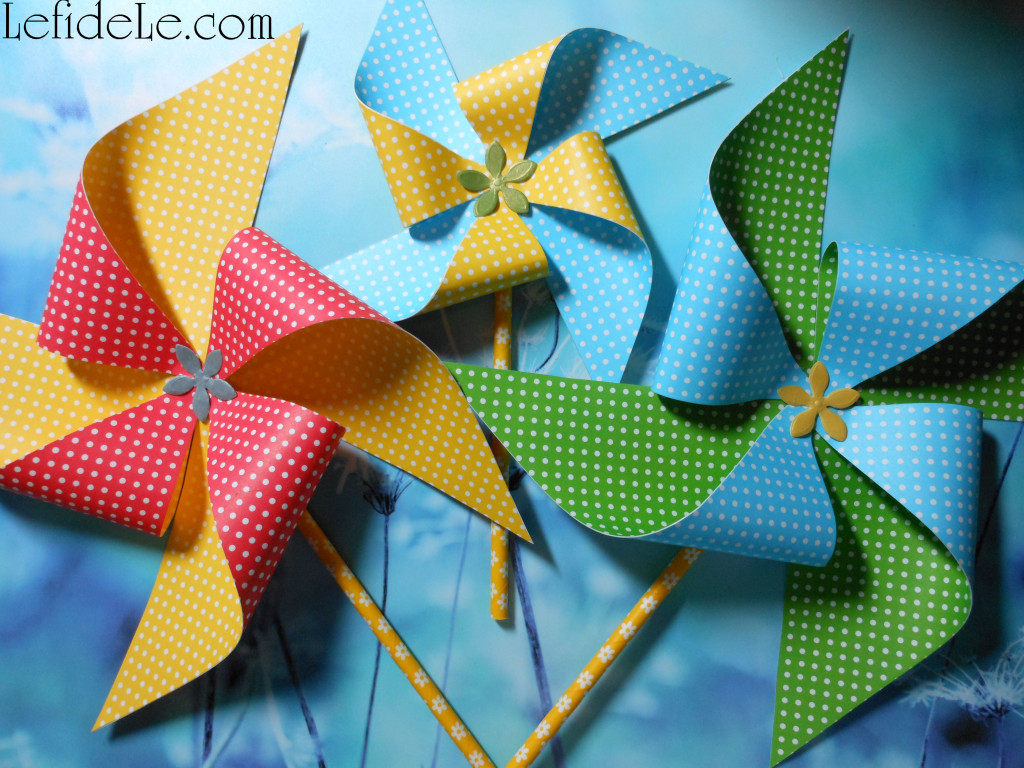
Take the right corner of each flap and glue it onto the center. Decide if you want them to be functional or just décor. For décor, use cardstock and hot glue the whole thing onto a paper straw then glue a paper flower onto the center… and call it a day. For functional pinwheels, use thinner paper and weaker glue. Push a tack into a thin wooden dowel cut about a foot long… not pushing it in all the way in order to leave some room for the paper wheel to turn on.
237Leigh

‘Cause nothing says happy picnic like a pinwheel!

Faithfully Yours,

Leigh
263Leigh

P.S. See all of these projects in action in my Colorful Indoor Picnic Party Tablescape Perfect for Rainy Days or Texas Temps!
Star-Spangled Independence Day Patriotic Party Décor Ideas (& All-American Burger Bar)

333Leigh

Every year on the fourth of July, families across the country gather in jubilant celebration of the birth of our proud democracy. We join together to commemorate our forefathers’ defiant stand to secure those inalienable rights we enjoy today, and to venerate that hard-won freedom. Take part in a tour of my star-spangled Independence Day event for décor ideas to plan your own patriotic party with!

358Leigh

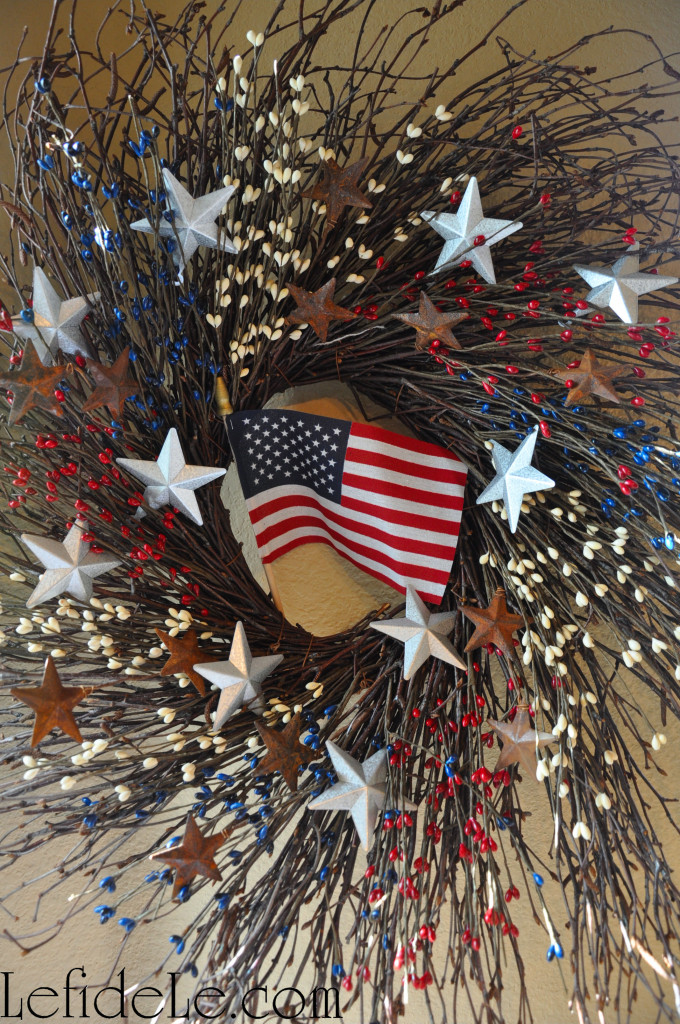
History was heralded with a welcoming wreath spangled with bright steel stars and the broad stripes of old glory… denoting a gallantly streaming flag hailed through the perilous fight.

368Leigh

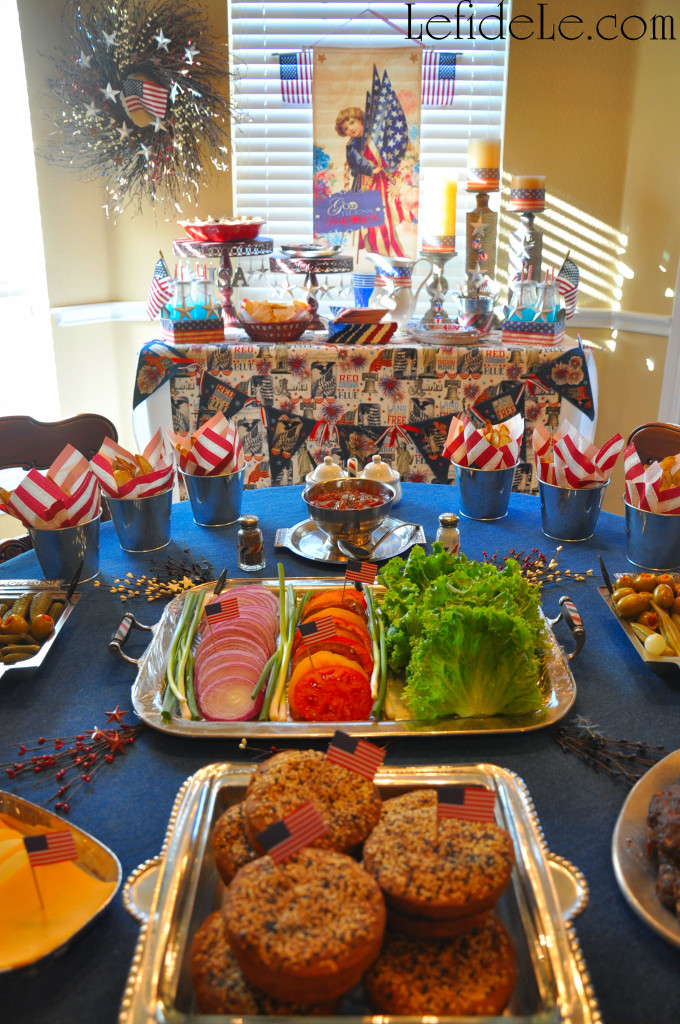
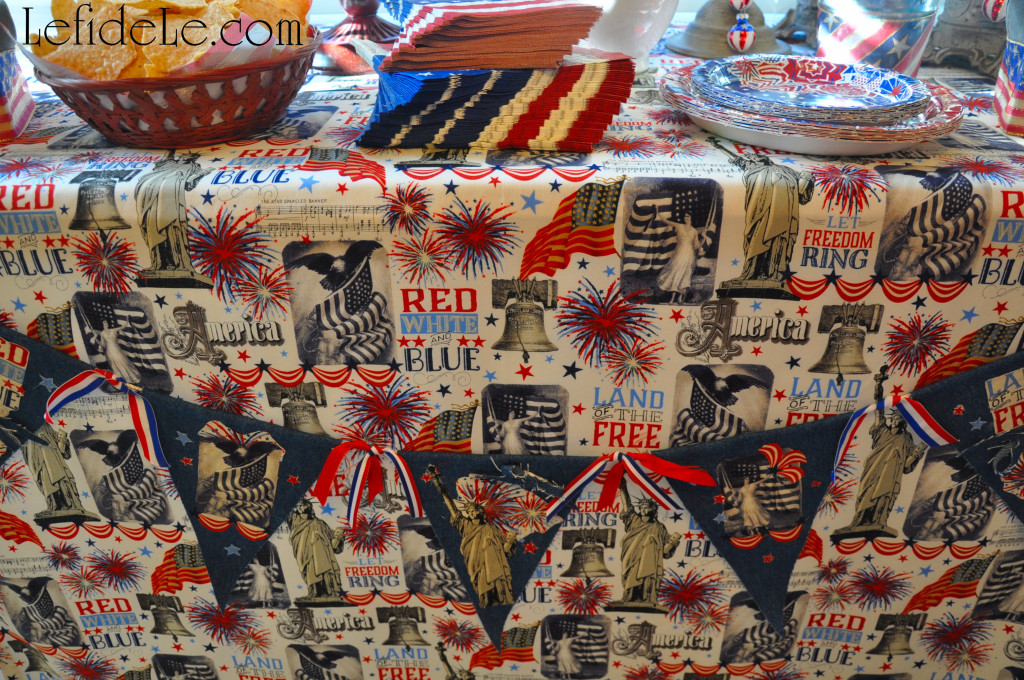
A table  in the aft zone was layered with patriotically printed fabric atop a white tablecloth… symbolizing the purchase of peace. The table’s façade was treated as a frontispiece with a star-spangled banner collage featuring iconic imagery in the appliqués cut from the same patriotic print fabric. (Find my no-sew craft tutorial on it here.)

362Leigh

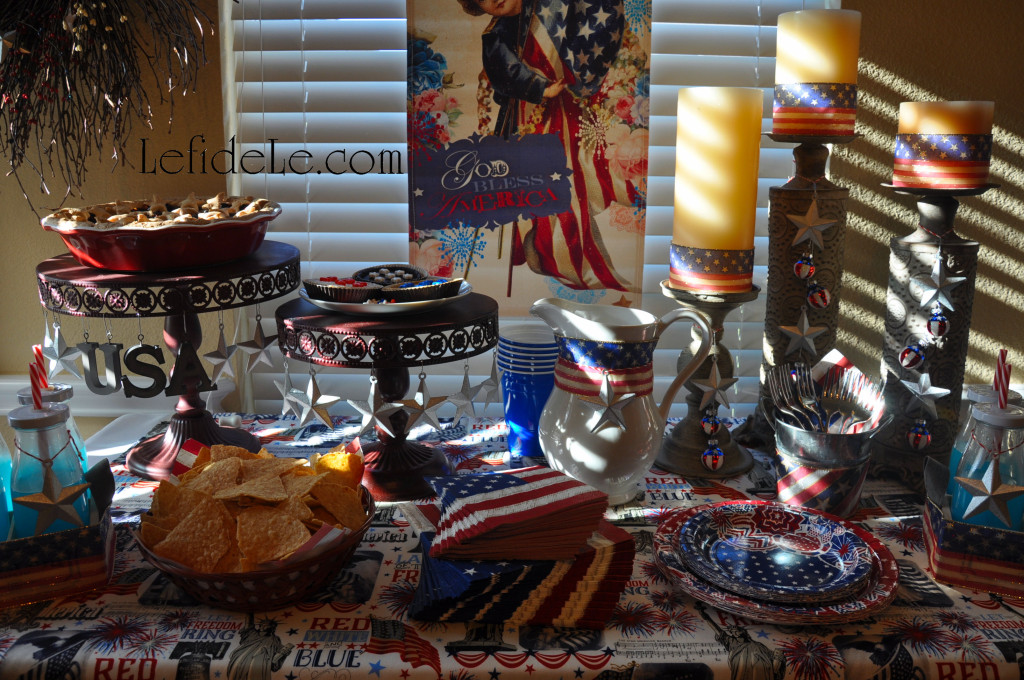
The theatre’s horizon displayed a dazzling banner of classic Americana exclaiming, “God Bless America”. An explosion of color extended to thematic paper plates, blue cups, and flag printed napkins. A plain white vintage water pitcher was adorned with the sparkle of a steel star and flag ribbon.

014Leigh

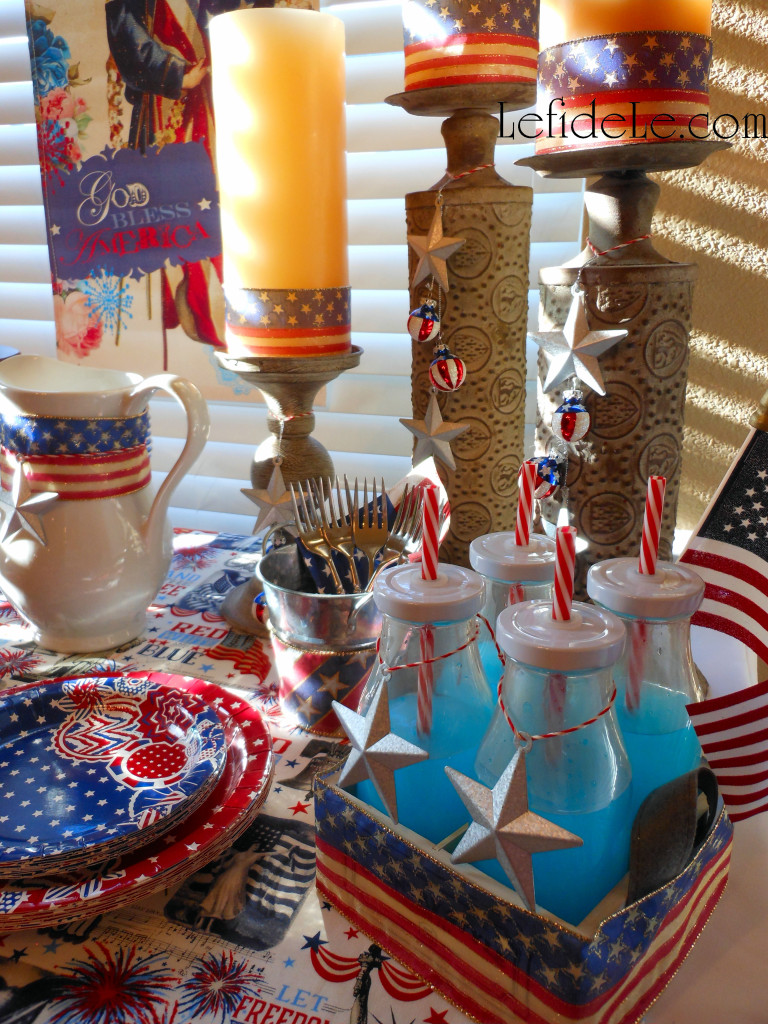
Decorating rebellion manifested itself with a centerpiece, placed off-center, of beribboned candles atop vintage ceiling tile candlesticks… all to represent Lady Liberty’s torch. Hanging from them were steel stars and flag painted Christmas ball ornaments… representing bombs bursting in air and the flag that was still there. A galvanized pail held utensils set for dessert.

021Leigh

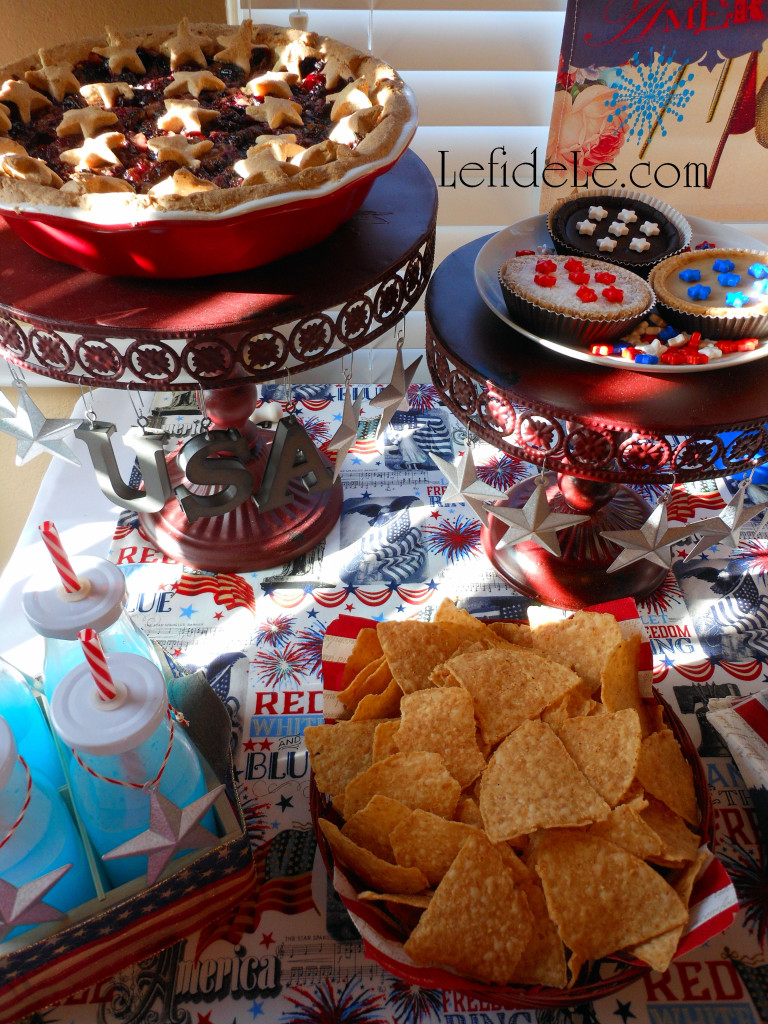
Revelers were offered the refreshment of blue patriot punch held in sustainable vessels festooned with stars and stripes. Further sustenance was provided with chips in a red painted basket (from the Beanitos brand made in the USA).

363Leigh

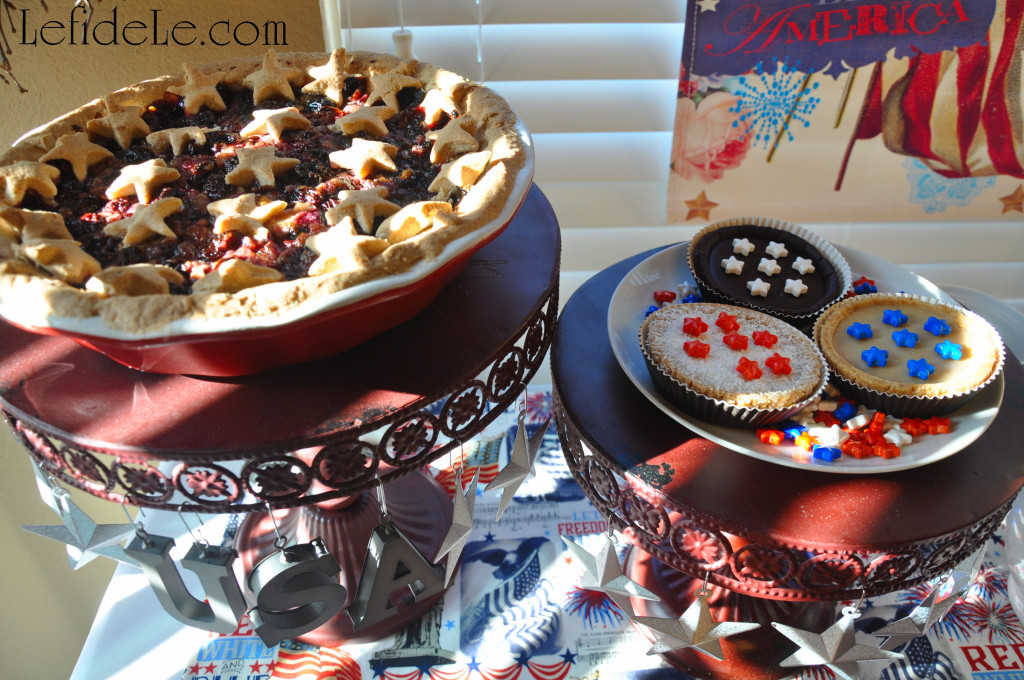
The memory of George Washington was honored with “truthful cherry patriotic pie” (of my own upcoming gluten-free vegan recipe) held high in esteem upon a metal pillar spelled with zinc USA letters. Sweet vegan tarts crowned with candy stars (from another American brand Hail Merry) topped a second pillar swathed in more stars.

333Leigh

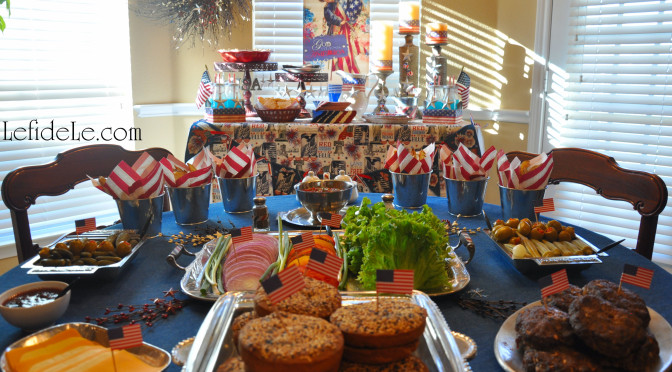
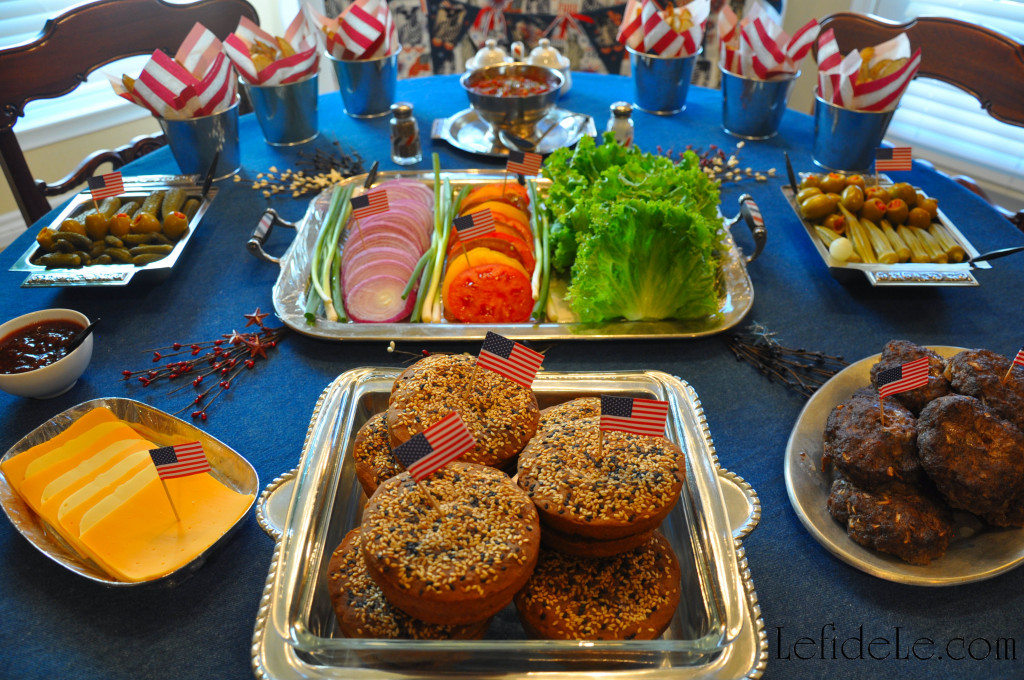
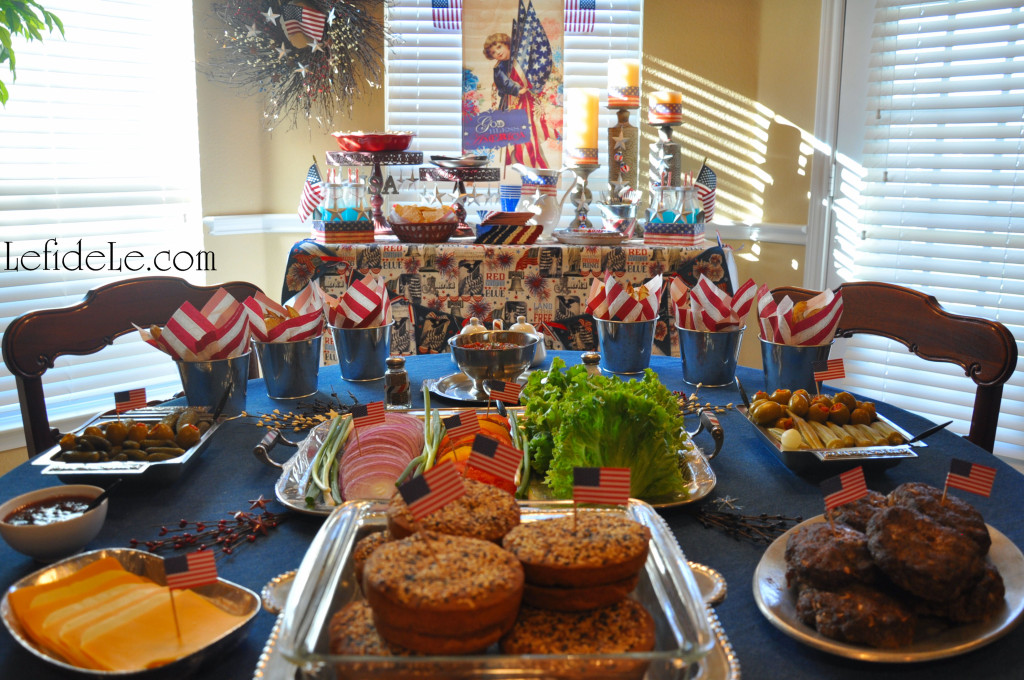
The fore-field was set as an all American build a burger bar over the classic American staple of blue jean cloth set over a red tablecloth. Blasts of star spray shot out from beneath a centermost tray… connoting embattled fireworks.

373Leigh

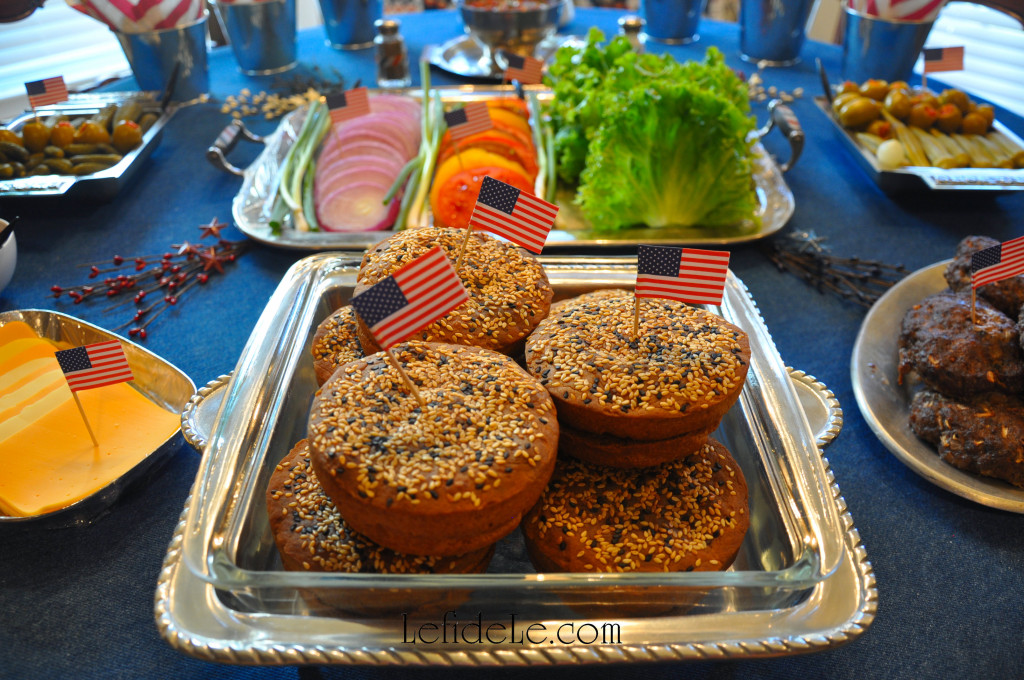
Homemade burger buns (of my own upcoming gluten-free vegan recipe) were displayed in a pewter dish. Behind that sat a vintage tray offering hamburger accompaniments… like heirloom tomato slices, organic green onion, artisan leaf lettuce, and locally grown red onion slices.

375Leigh

An additional vintage pewter dish served onion loaded beef patties (another of my upcoming recipes). Slices of soy-free vegan cheese (from USA brand Follow Your Heart) were stamped with an American Flag seal of approval. Deep square vintage steel dishes presented pickled okra, onion, cornichons, gherkins, and sun-dried tomato stuffed green olives.

353Leigh

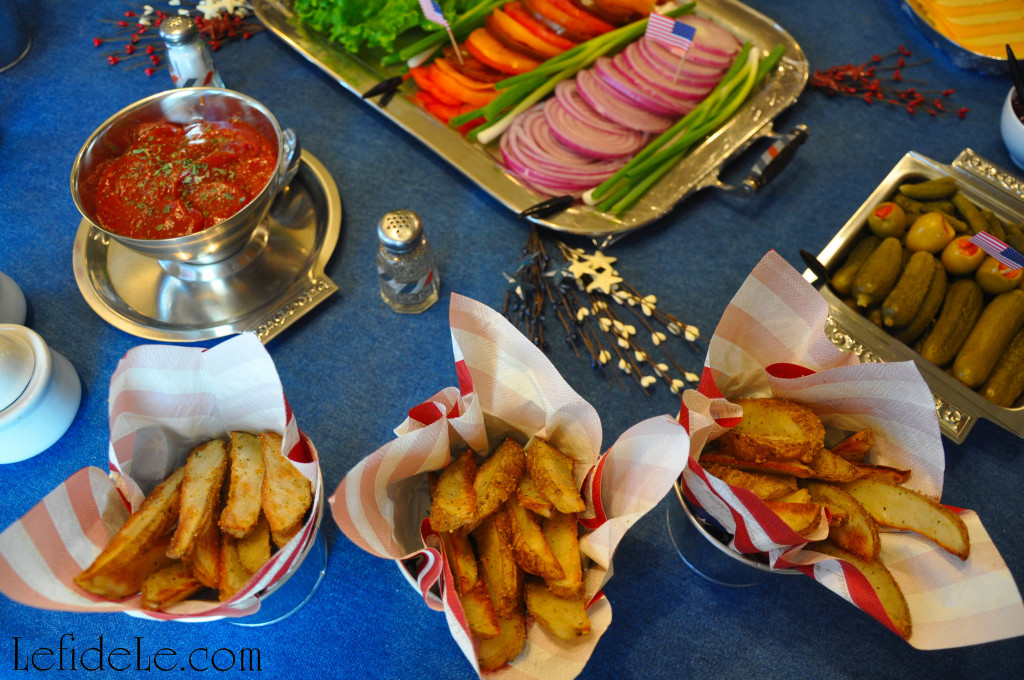
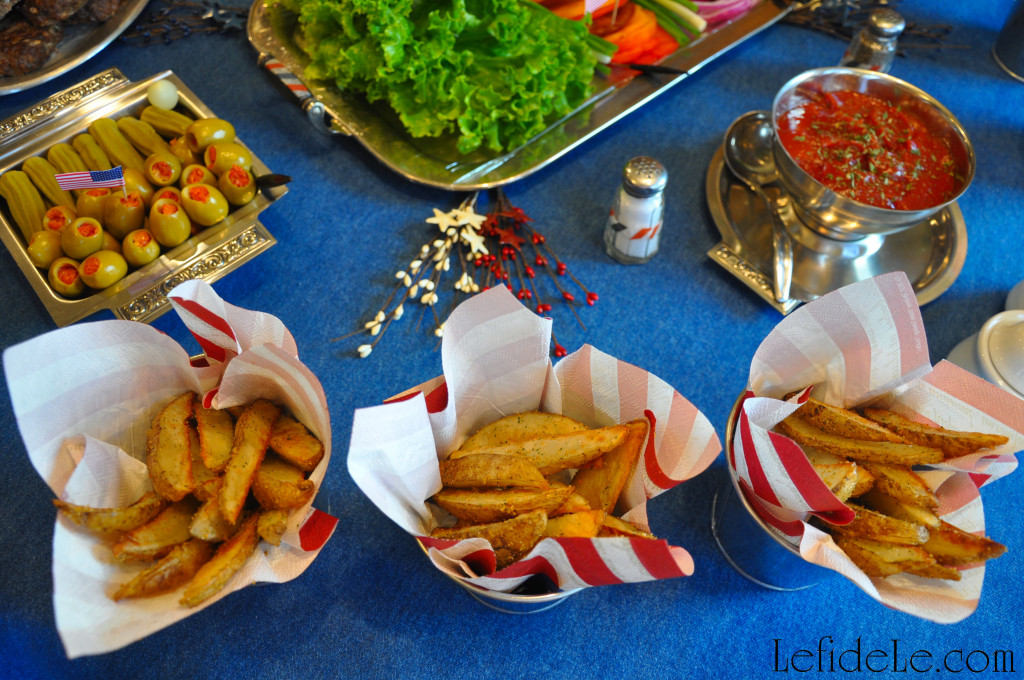
Galvanized metal buckets lined with flag napkins made admirable single-serving fry baskets bursting with seasoned steak fries (see my upcoming recipe). Old-school salt and pepper shakers got the patriotic washi treatment. More vintage dishes contained soy-free veganaise, paprika-free mustard, and corn-syrup-free ketchup… so that no allergy got served.

351Leigh

As the July 4th night sky blazes with the flash of celebratory fireworks, may we all seek to reflect upon the valorous sacrifices made for our collective liberty.

374Leigh

Faithfully Yours,

Leigh

P.S. Keep checking in on my Recipes Page for the latest postings on Gluten-Free & Egg-Free Pies, Fries, & Hamburger Buns! I’m launching a new on-going series of Burger Creations that is set to grow increasingly creative with time!
044Leigh

Be sure check out my article for a DIY July 4th Denim No-Sew Appliqué Collage Star-Spangled Banner Craft Tutorial for Independence Day here!

163Leigh

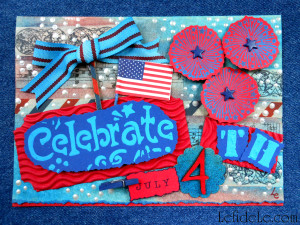
And this article for July 4th Altered Art Greeting Card as Mailable Mixed Media Independence Day Décor (DIY Collage Art Tutorial)here!

120Leigh

Spring Garden Mother’s Day Tea Party Tablescape Décor Ideas (+ Free Printable Card & Invitation)

002Leigh

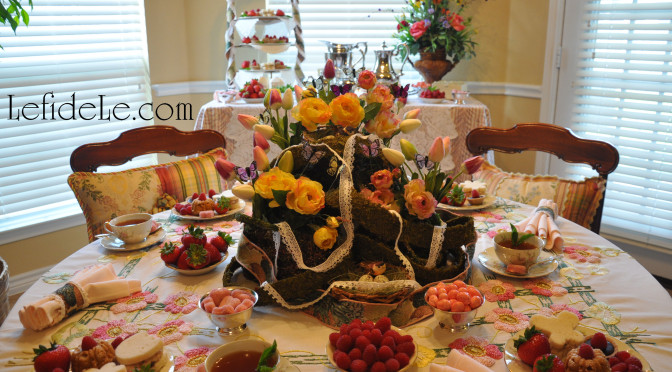
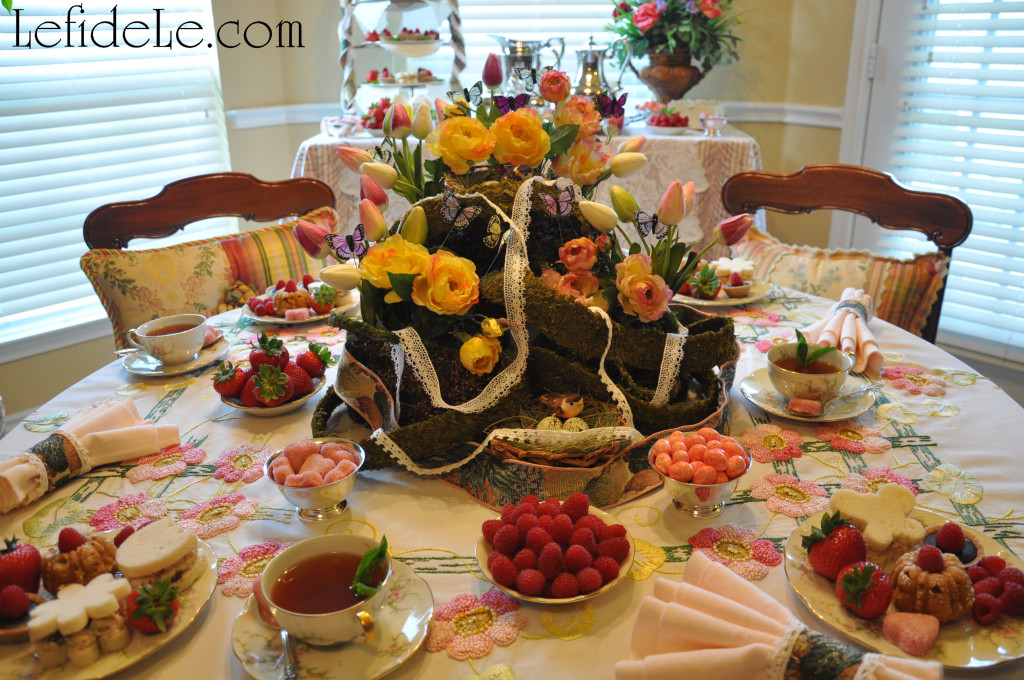
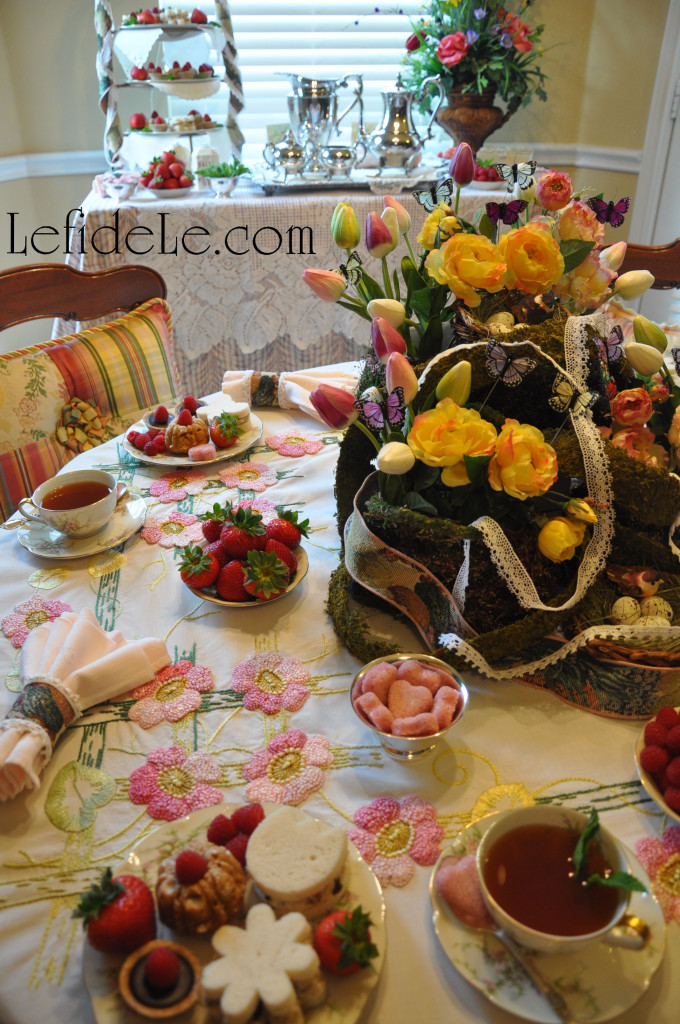
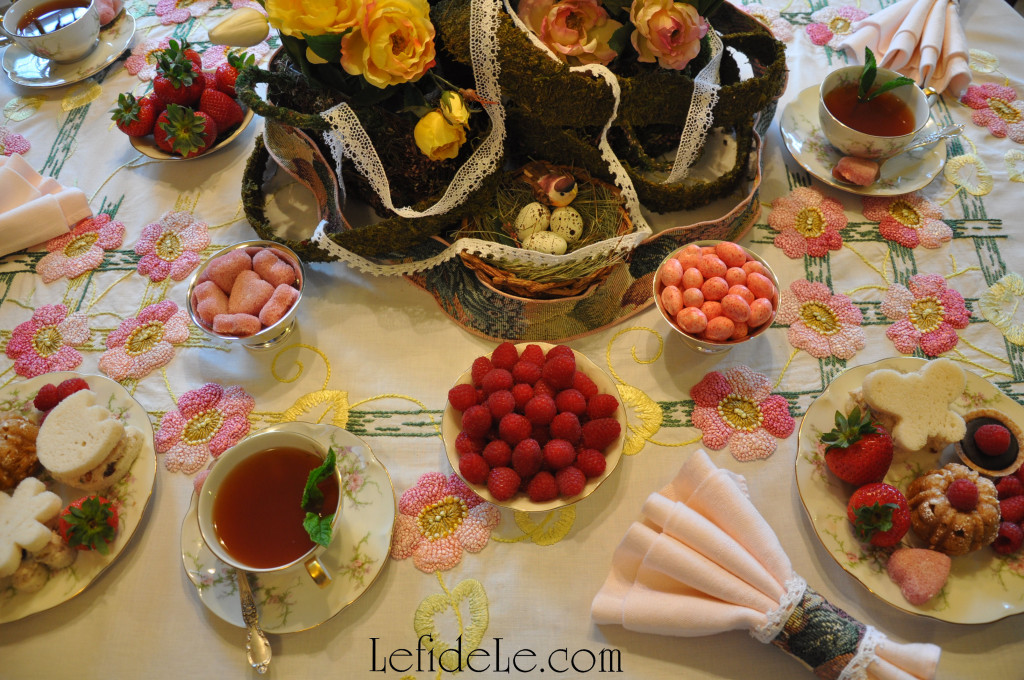
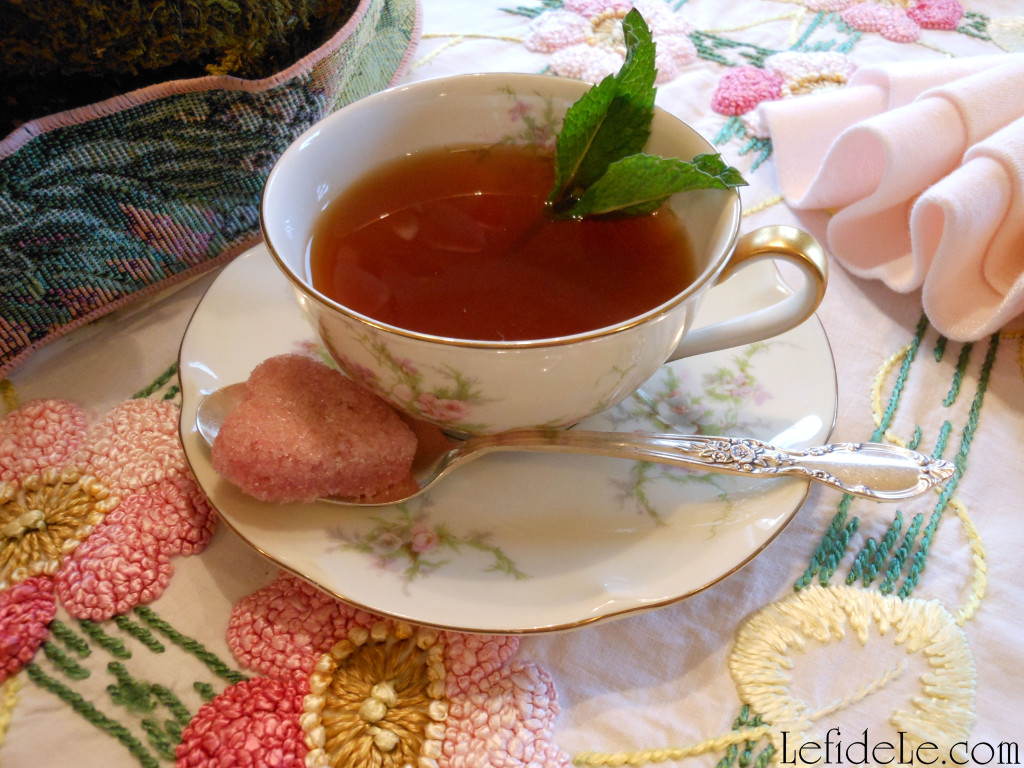
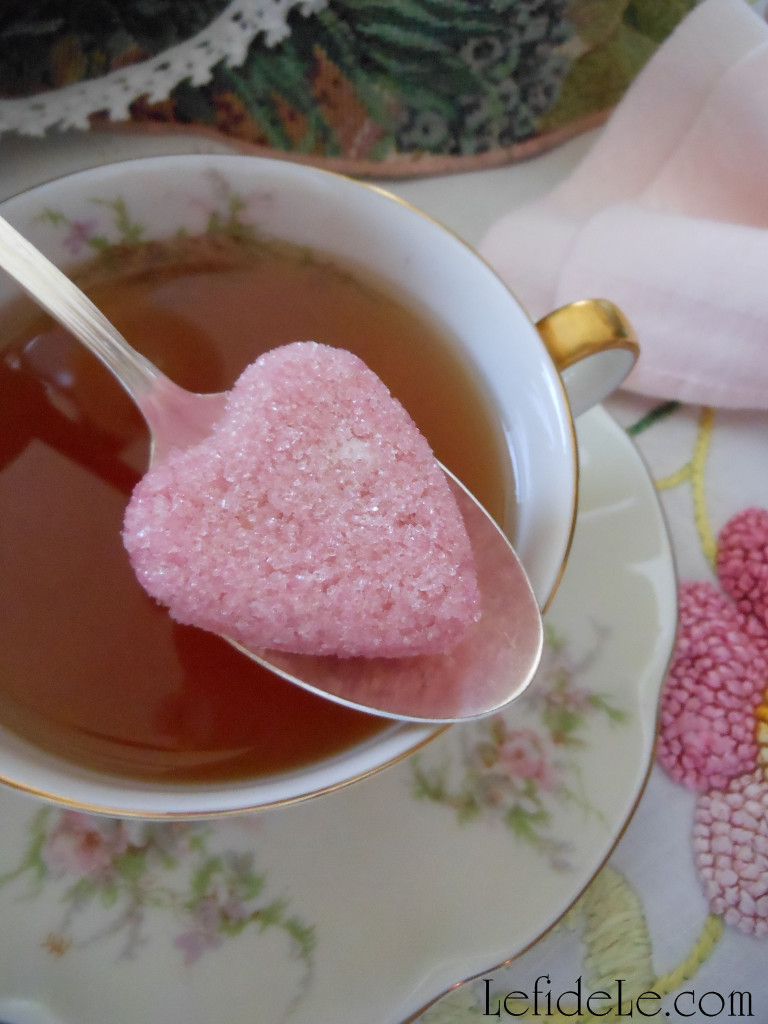
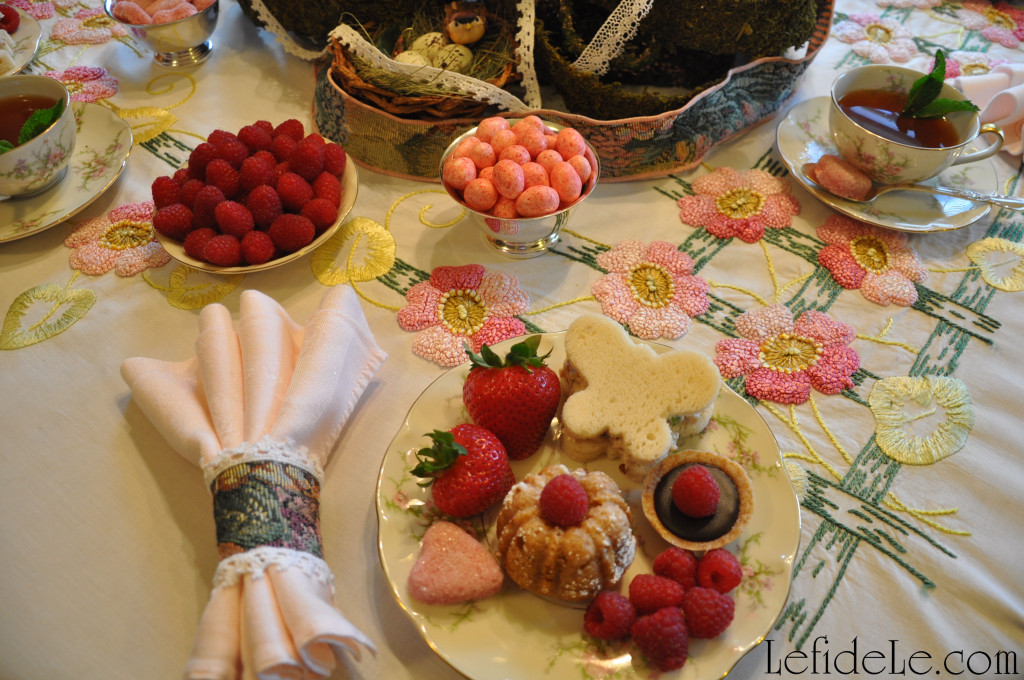
You’re invited for tea at my nest where enchanting tablescape décor awaits, where butterflies will carry you to a flower filled spring garden complete with the melody of birdsong. Delight upon delectable teacakes, treats, tarts, and tea sandwiches while sipping mint scented tea sweetened with pink sugar sweethearts. Celebrate with handmade gift crafts conveying heartfelt sentiments along with free printable invitations and cards sending your warmest wishes for a beautiful Mother’s Day!

022Leigh

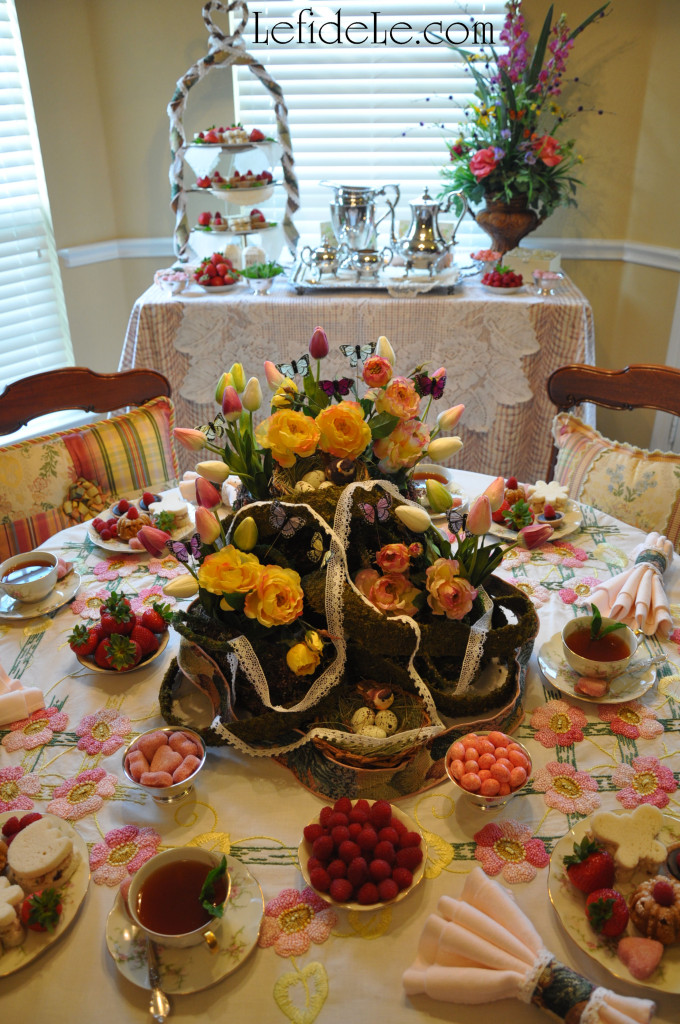
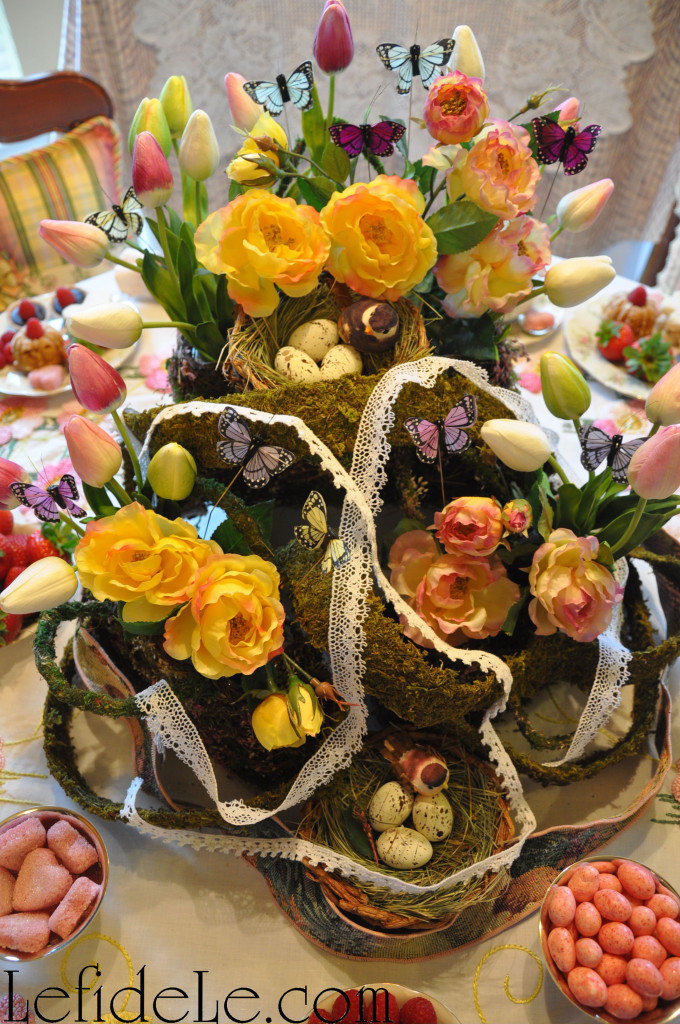
Harken your ears to the call of birds whistling a merry tune of invitation to the spring garden. Two nests double the blessings bestowed upon the day as finding even one is said to be the harbinger of prosperity.

036Leigh

Notice the greeting of butterflies rising from moss laden purses filled with the yellow roses of friendship and tulips representing strength and life itself.

035Leigh

Take a seat cushioned with pastel patchwork pillows provided for your comfort.

028Leigh

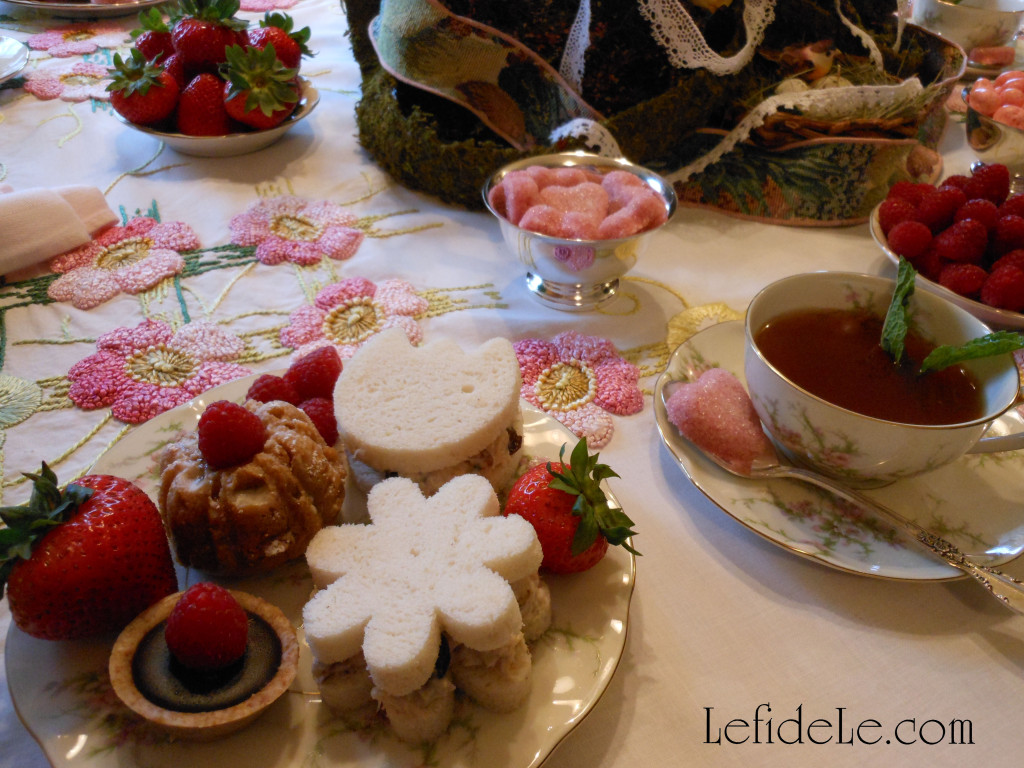
Touch the threaded texture of a tablecloth hand embroidered generations ago.

380Leigh

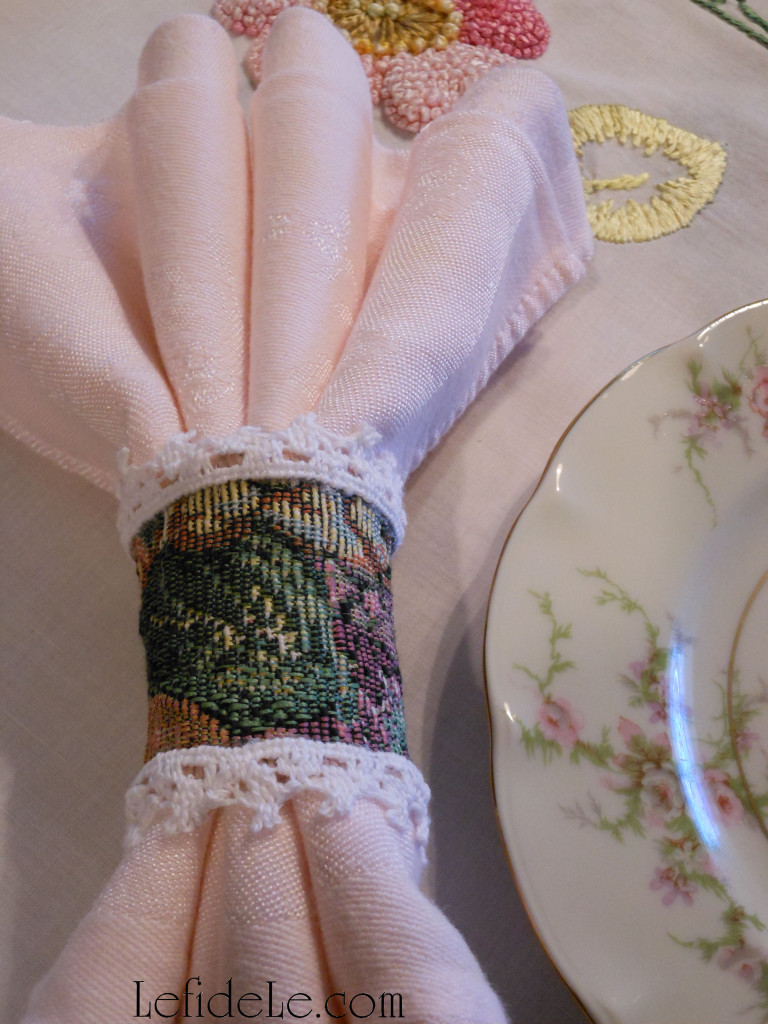
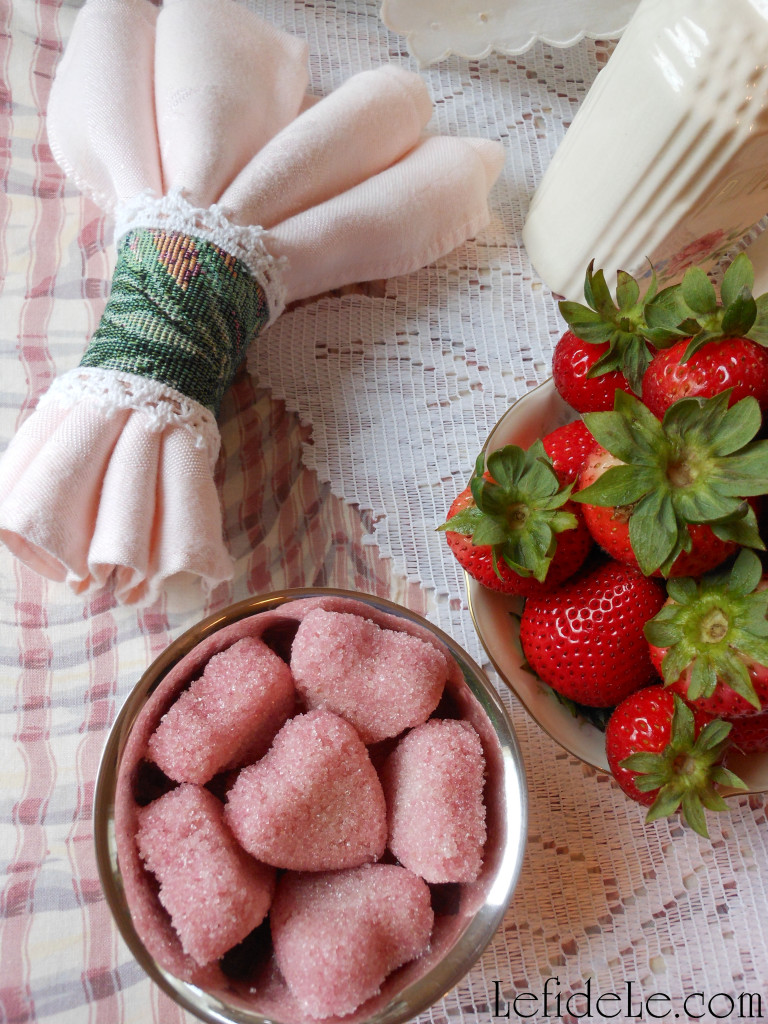
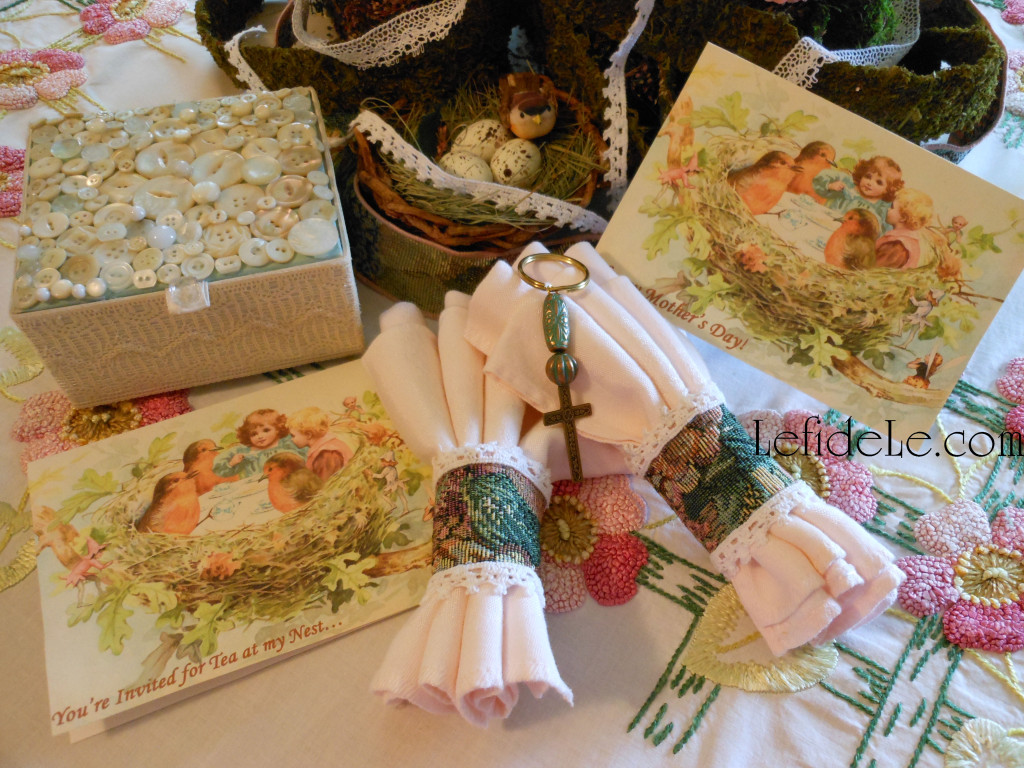
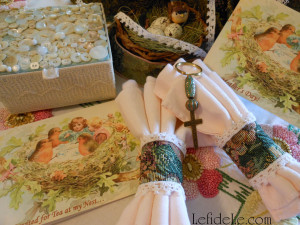
Release baby pink vintage napkins from their handcrafted tapestry and lacework rings.

125Leigh

Sip mint scented tea from delicate vintage china teacups ornamented with floral motif.

136Leigh

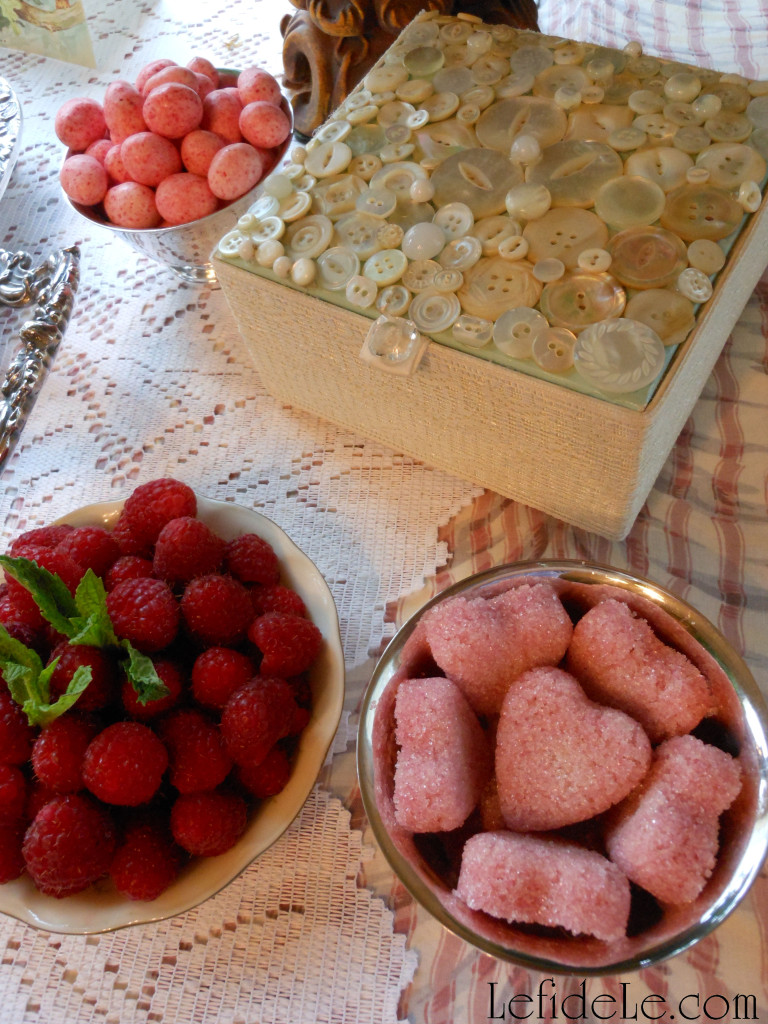
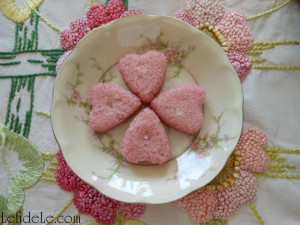
Sweeten your tea with pink sugar sweethearts delivering a spoonful of sugar in the perfect dose.

122LeighStir in flavor with silver tea spoons that have been lovingly held by previous generations.

082Leigh

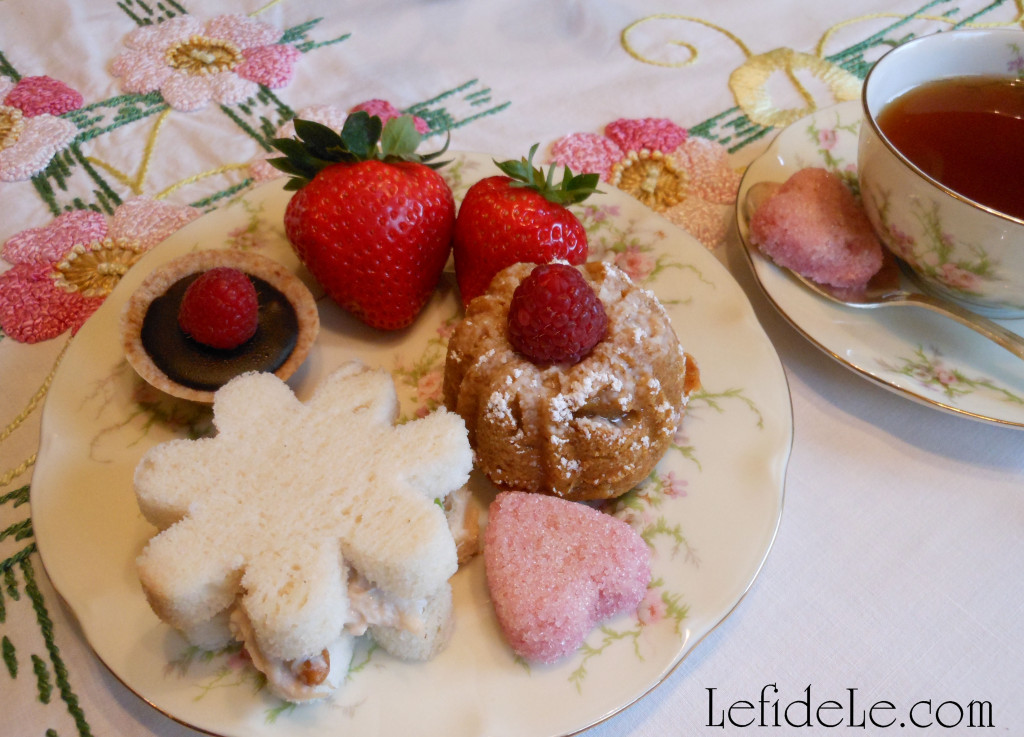
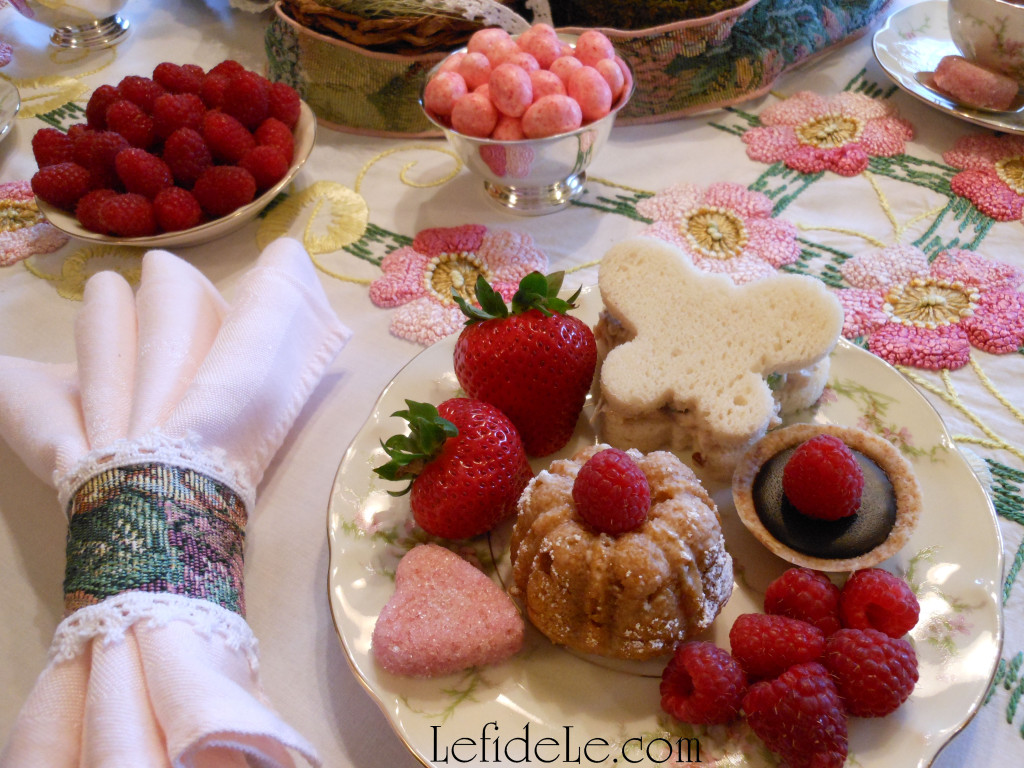
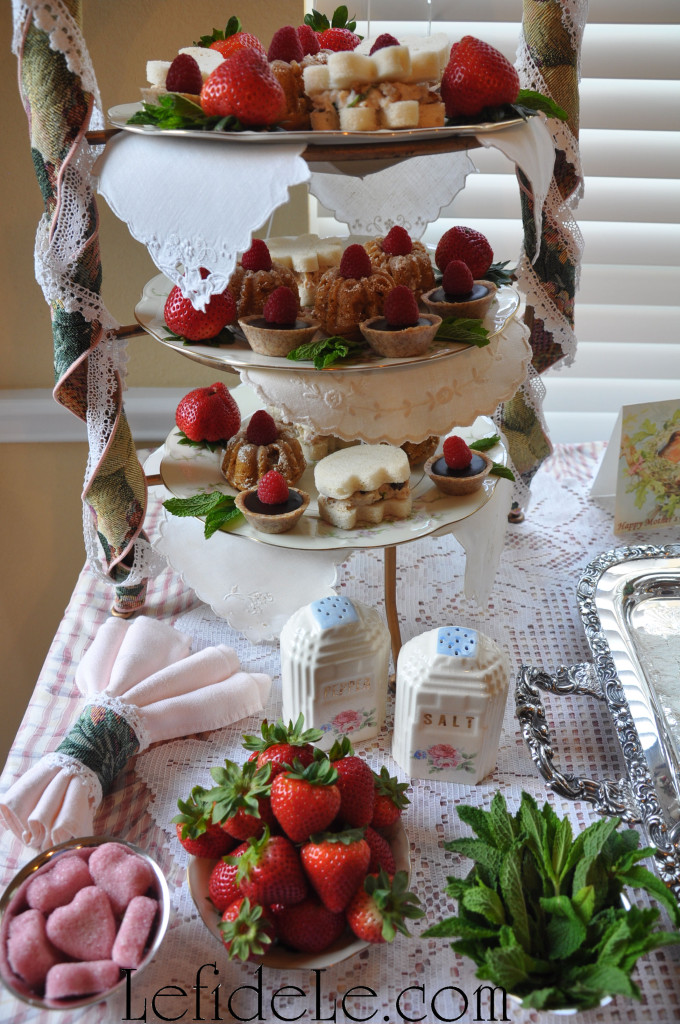
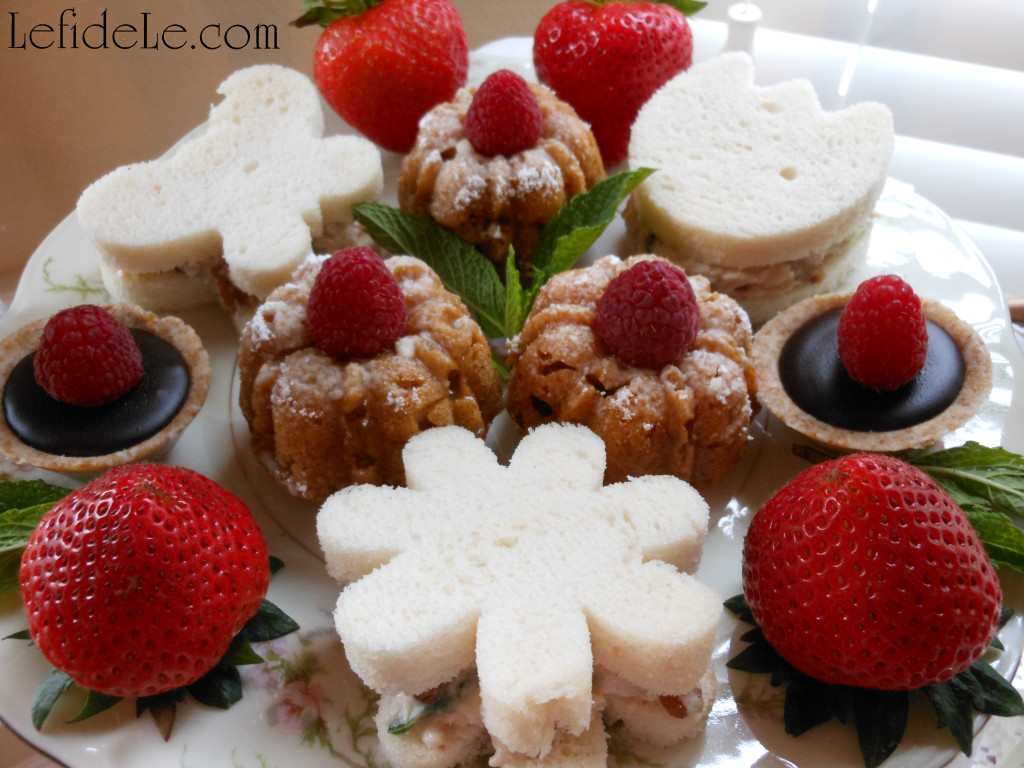
Sup on tea sandwiches packed with cherry pecan chicken salad, whose butterfly and floral shapes echo the garden’s delights.

130Leigh

Try almond crusted chocolate tarts balanced with healthy red raspberry fruit.

128Leigh

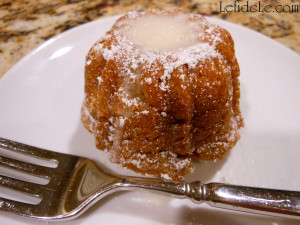
Taste pumpkin pear teacakes dripping with lemon icing, dusted with confectioner’s sugar, and topped with more fruit.

029Leigh

Cleanse your palette with pink peppermint almonds held in small antique silver bowls.

105Leigh

Sink your teeth into juicy plump strawberries offered amid vintage salt and pepper shakers.

051Leigh

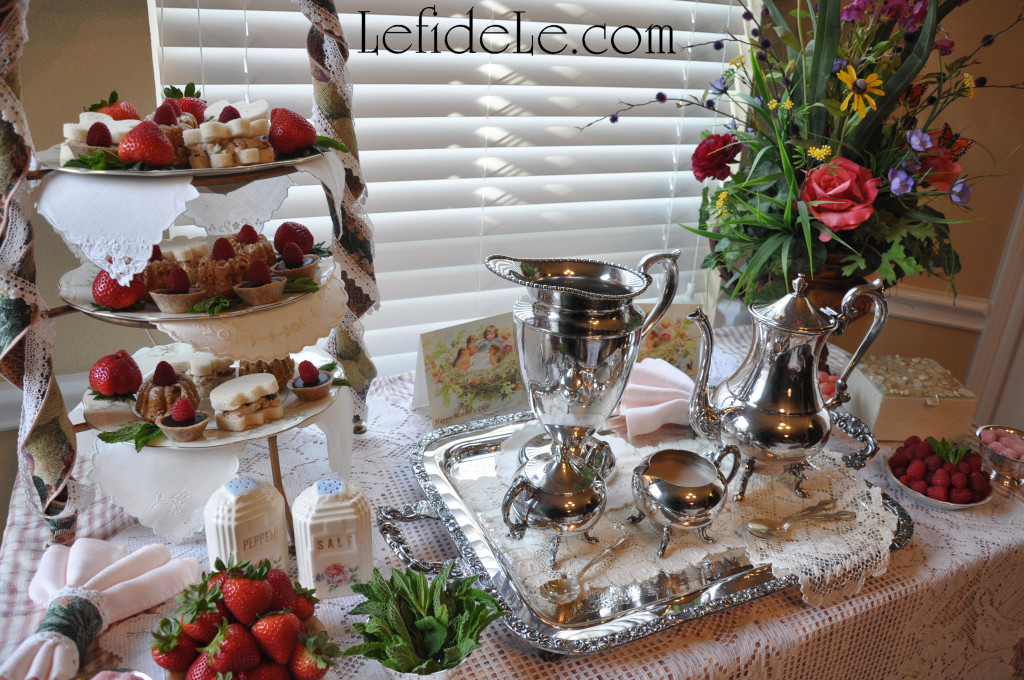
Replenish your china plate from a grapevine heart topped tower of treats wrapped in lengths of tapestry and lace.

064Leigh

Gaze upon sunlight reflected from gleaming antique silver service layered with vintage doilies atop layers of vintage lace and patterned cloth.

097Leigh

Feel the impressions of vintage buttons encrusting a jewelry box gift sheltered by a lofty spring floral arrangement.

004fLeigh

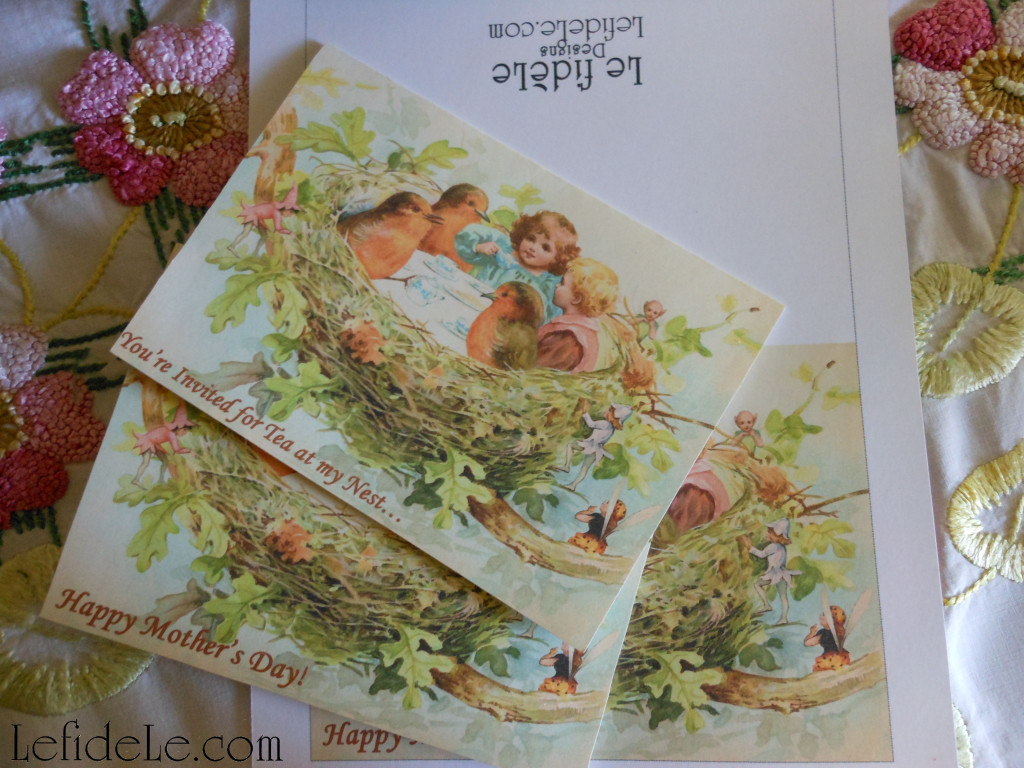
And at last, read the Mother’s Day card that will hold the memory of the cherished event for years to come.

Sincerely wishing you the happiest of Mother’s Days!
Faithfully Yours,

Leigh

6FreePrintCardLeigh

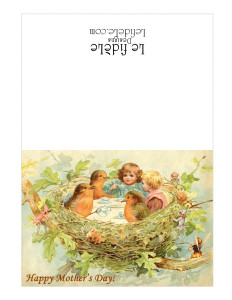
P.S. Right click on the small image below, and select print to make your own invitations (at the left) and cards (at the right) free (for personal use only). Print them on photo and color settings for the best results.

5x7NestTeaInviteLeigh5x7MothersNestCardLeigh

P.P.S. Click on the links below for teacake, chicken salad, and sweetheart recipes as well as crafting instructions for the jewelry box, keychain, and napkin rings.

001Leigh

Quick & Easy Tapestry Napkin Rings, Upcycled Button Jewelry Box, & Keychain Gift Crafts Tutorial (for Mother’s Day Tea)

118Leigh

Easy to Mold Naturally Colored Pink Sugar Shapes Sweethearts Recipe = a Spoonful of Sugar for Your Mother’s Day Tea

47cakelette-Leigh

Lemon Glazed Pumpkin Pear Teacakes (Gluten-Free Vegan, Dairy-Free, Egg- Free) for Mother’s Day Tea

017Leigh

Cherry Pecan Chicken Salad (Soy-Free / Egg-Free with Stuffed Tomato & Gluten-Free Shaped Finger Sandwich Options) for Mother’s Day Tea

Easy DIY Upcycled Can Tea-light Luminarias (+ Free Printable Template) & Tissue Paper Flowers Crafts (for Cinco de Mayo Fiesta Décor)

321Leigh

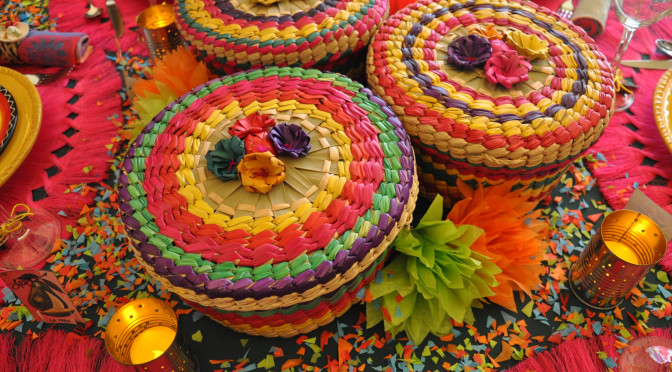
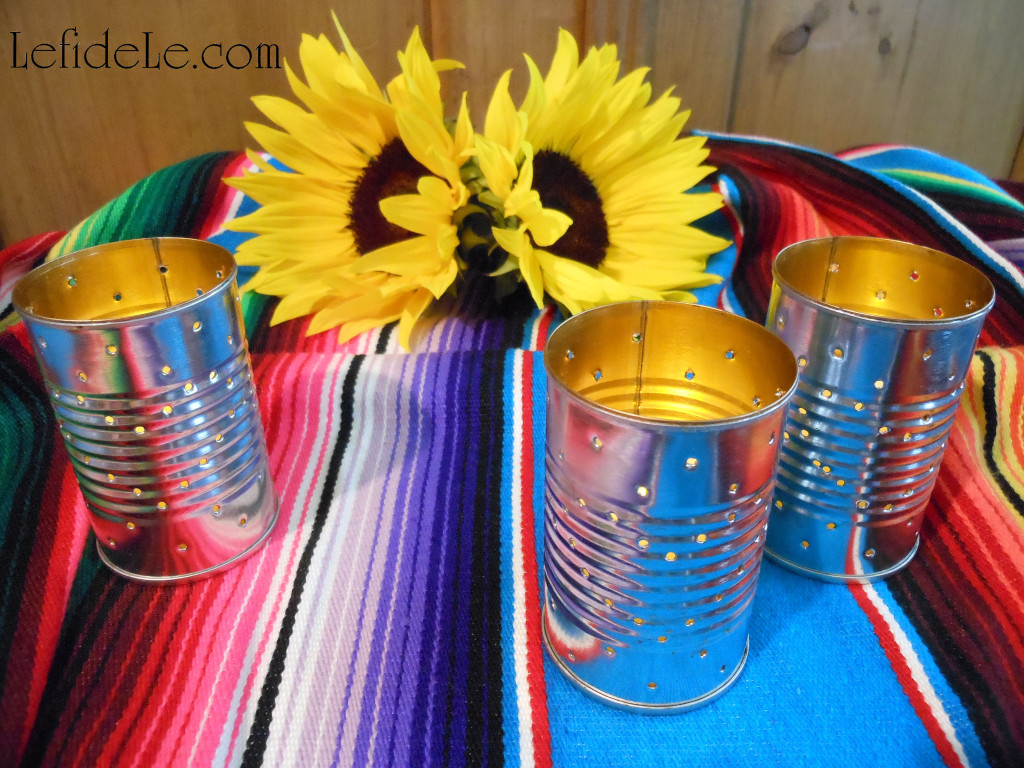
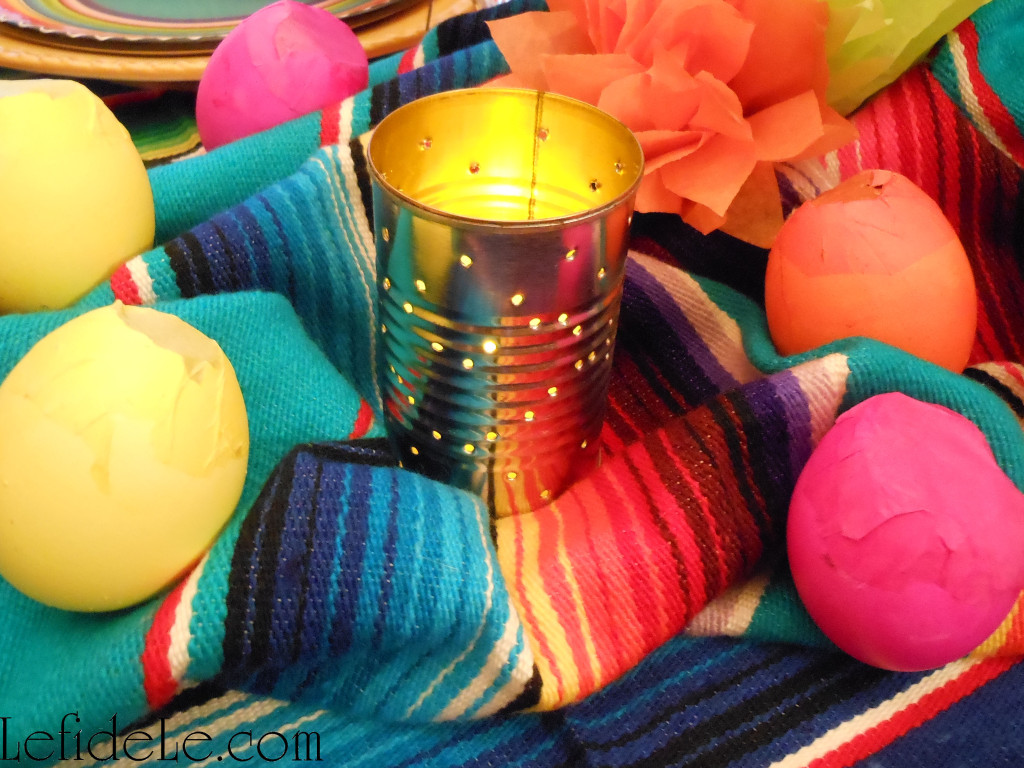
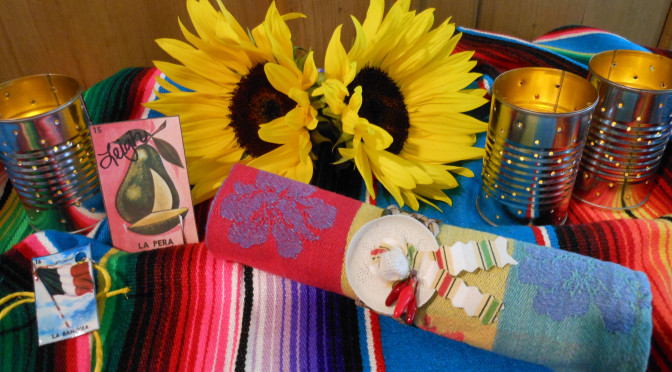
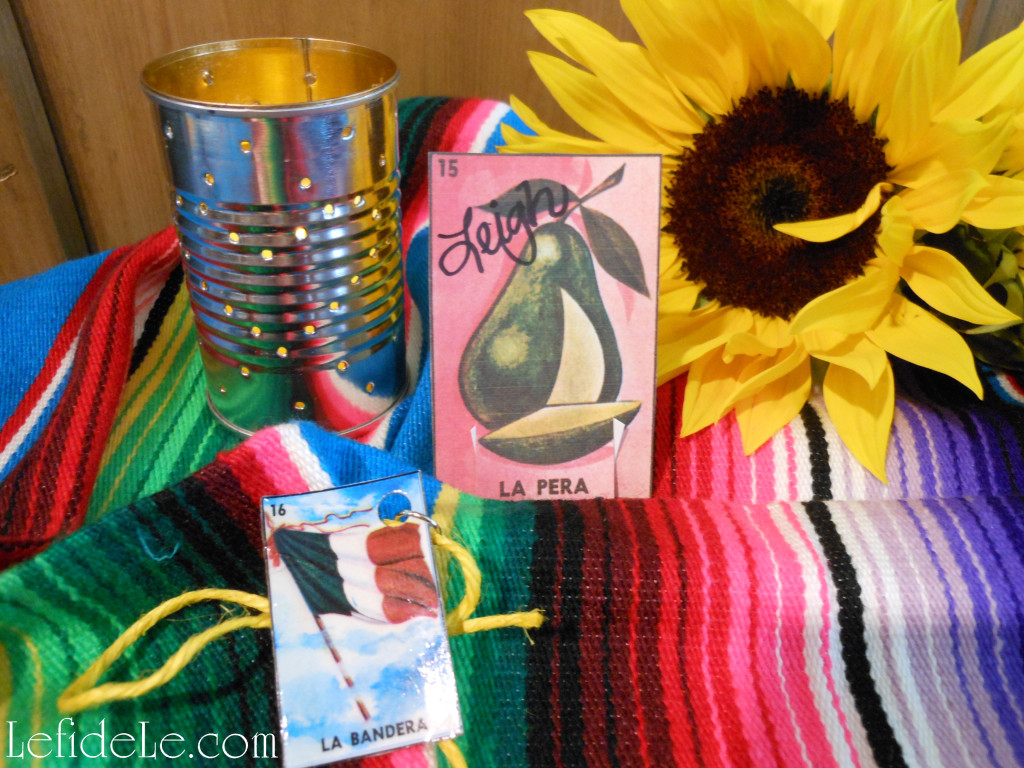
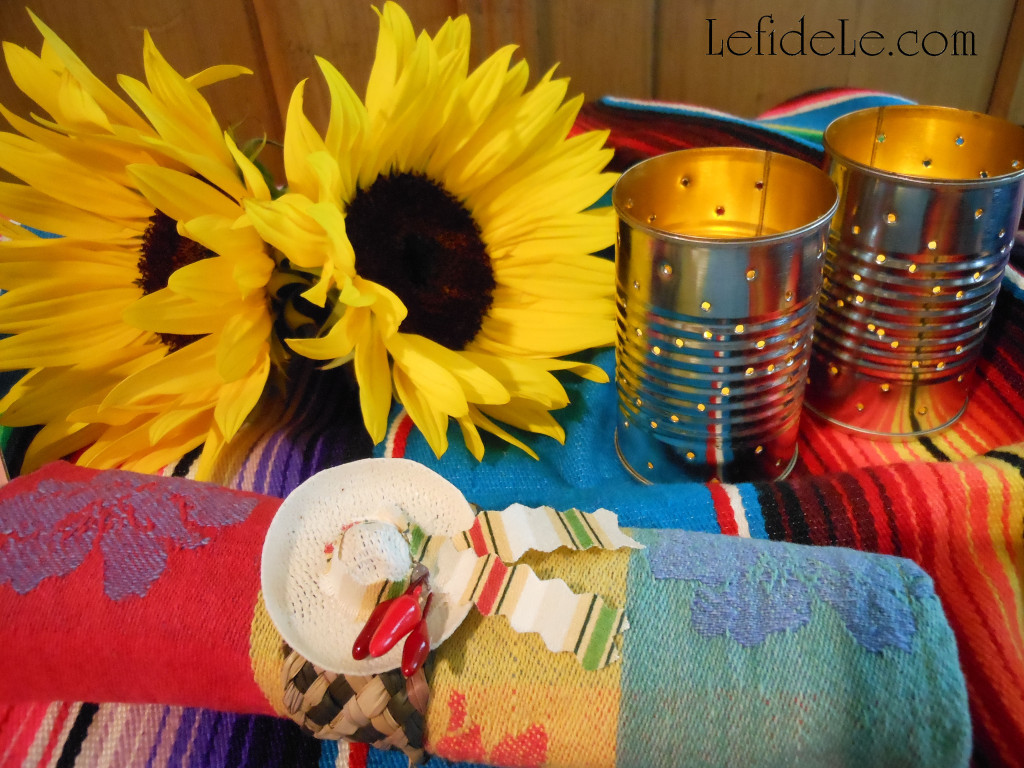
Light the Cinco de Mayo night by upcycling cans into tea-light luminarias (easy with the help of my free printable template), and adorn your tablescape with DIY fiesta tissue paper flowers. These crafts are perfect to bring the whole family in on, with luminarias for the strong folks and flowers for the kiddos. So hang on to your sombreros senoritas… we’re about to craft a fiesta!
300Leigh

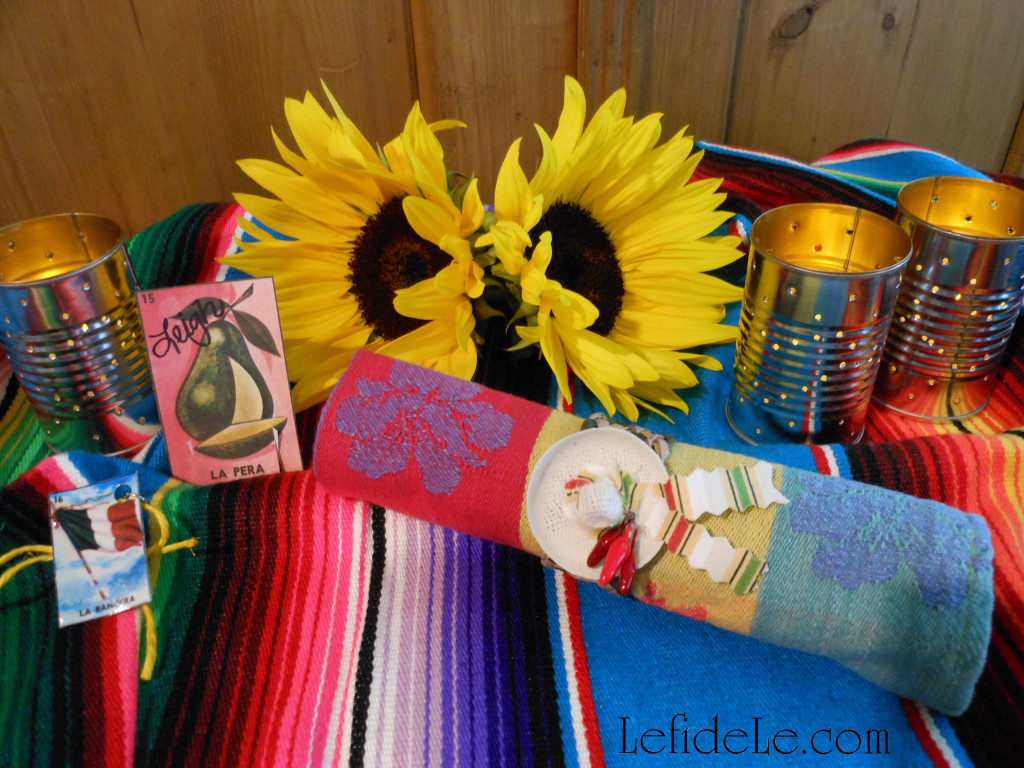
As a kid, I was delighted by long rows of luminarias lighting the way to fiestas. I wanted to bring some of that enchantment inside by making miniature versions with tea-lights for the table.

016bLeigh

I love upcycling free elements into something useful… and I do mean free because this project cost me nothing as the cans were just a leftover bonus from my dinner menu. The project made perfect use of the small tomato paste cans used in my recipes. (See my Meatloaf Cupcakes here, and my Nacho Average Fiesta Dip Here.) Waste not, want not… right?!

186Leigh

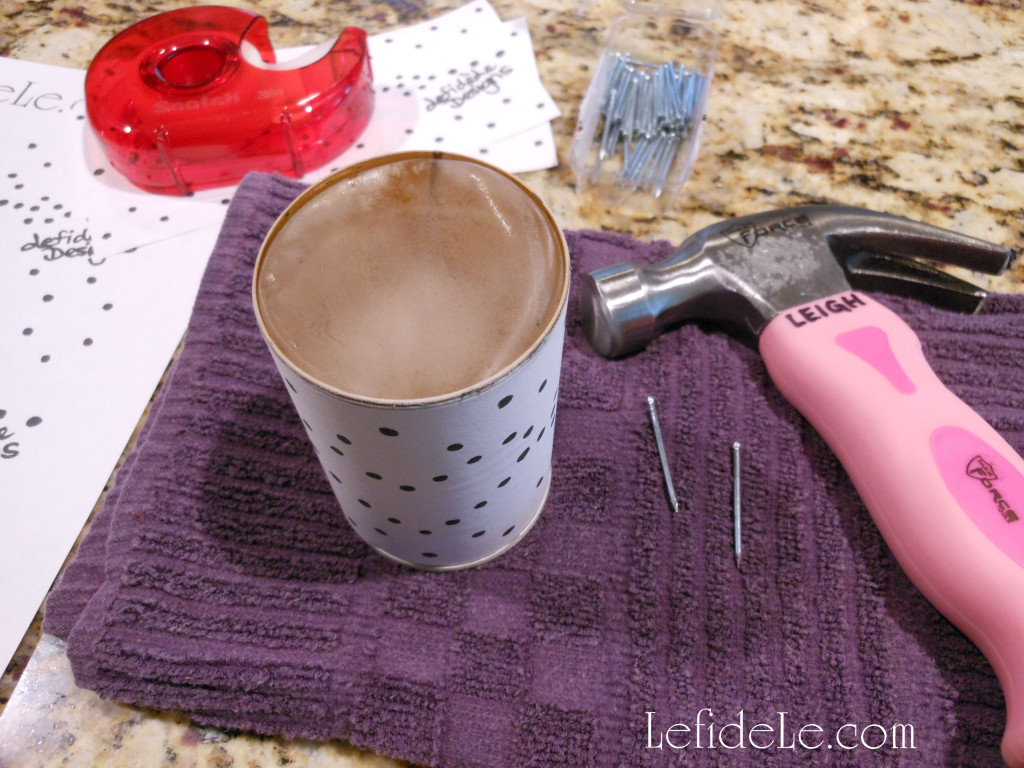
The best way to open the cans is by using an opener that doesn’t create a sharp edge, but rather a smooth top separated from the sides. Several well known brands sell this type of safe can opener. After washing the cans well, fill them with water, and place in the freezer overnight. Yes, you read that correctly. The ice is so much easier to hammer into rather than the traditional wooden branch.

SmallLuminariaPatternsLeigh

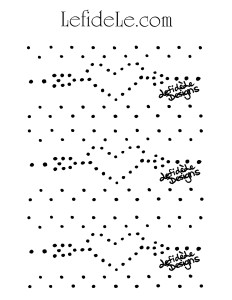
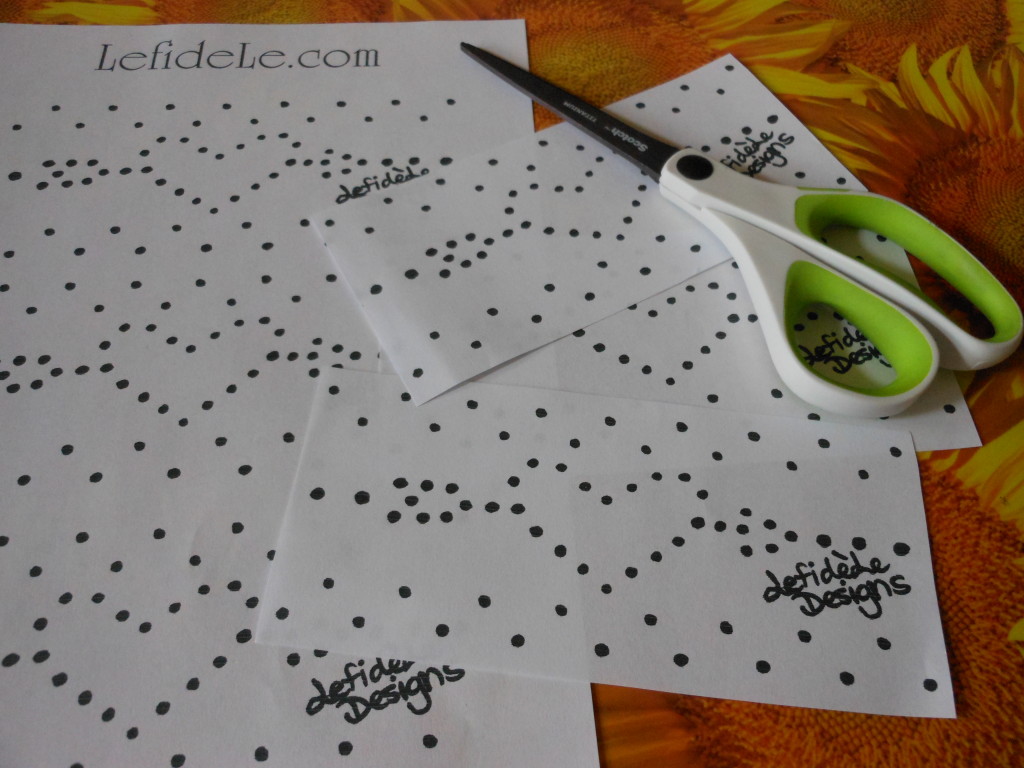
While they’re freezing, print my piercing template (free for personal use). To do this, right click on the small image and select print. (You can also forgo employing the template, and use a permanent marker to freehand draw your own shapes onto cans before the freezing step.)

183Leigh

My mother actually came up a great tip for keeping your paper’s ink from getting soggy… try wrapping the iced can in clear plastic wrap before wrapping with the paper template. ¡Gracias Mamá!

152

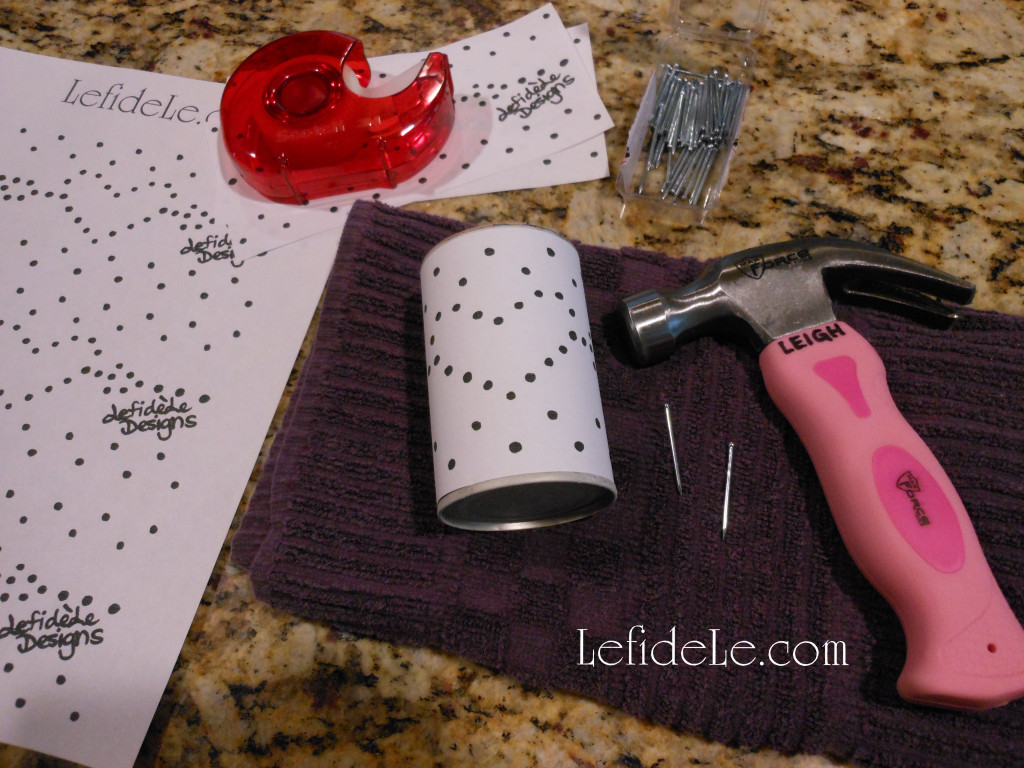
Cut out the 3 identical templates featuring arrow pierced hearts and festive zigzag patterns. Wrap each one around an ice filled can and tape the edge.

190Leigh

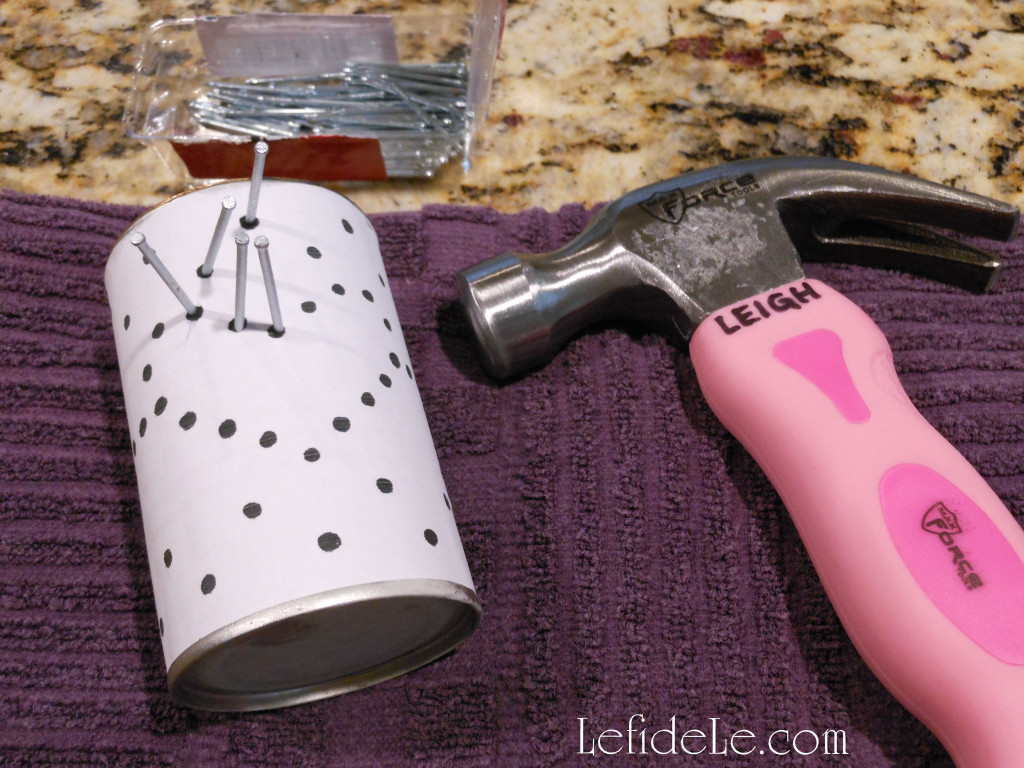
Use identically sized nails to hammer into each dot on the template. (This is what makes it a good craft for the hombres in your life!) You only need to hammer the nails in far enough to make a hole, leaving them in or pulling them out as you go. Begin with the top of the pattern, because ice will chip out as you work on it. If too much pops out, simply add water and refreeze.

193Leigh

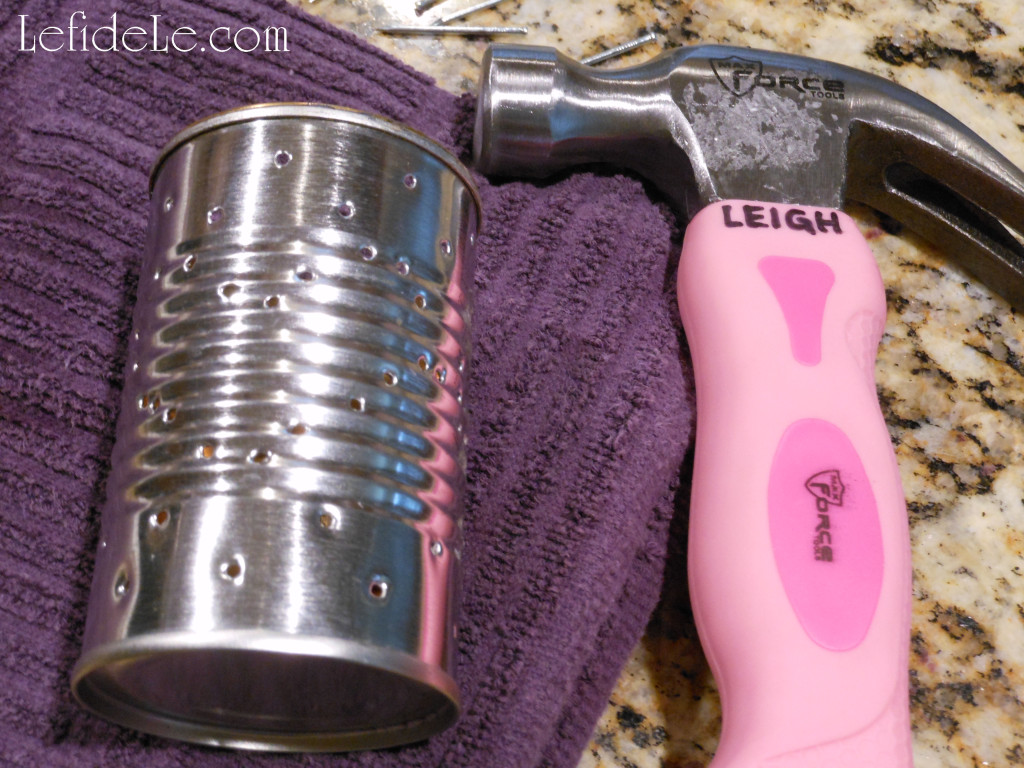
When the dots are done, so are you! Let the ice melt out into the sink then dry the can well. (Just be careful not to cut yourself on the sharp edges on the inside of the cans.) Now light them up compadre!

274Leigh

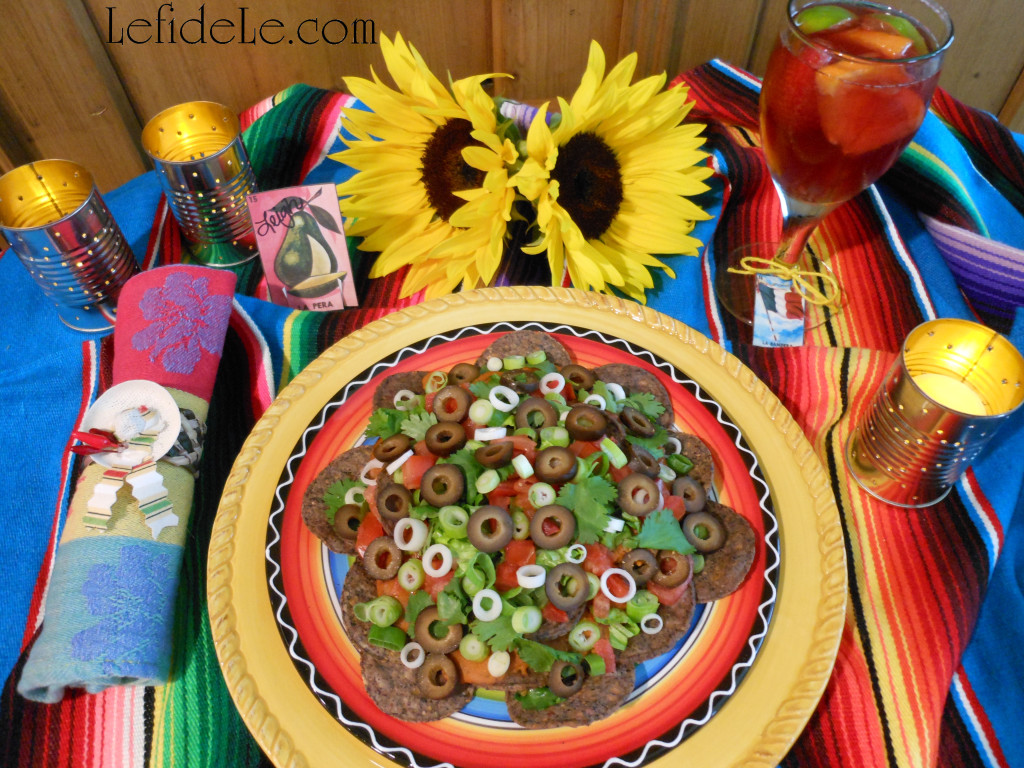
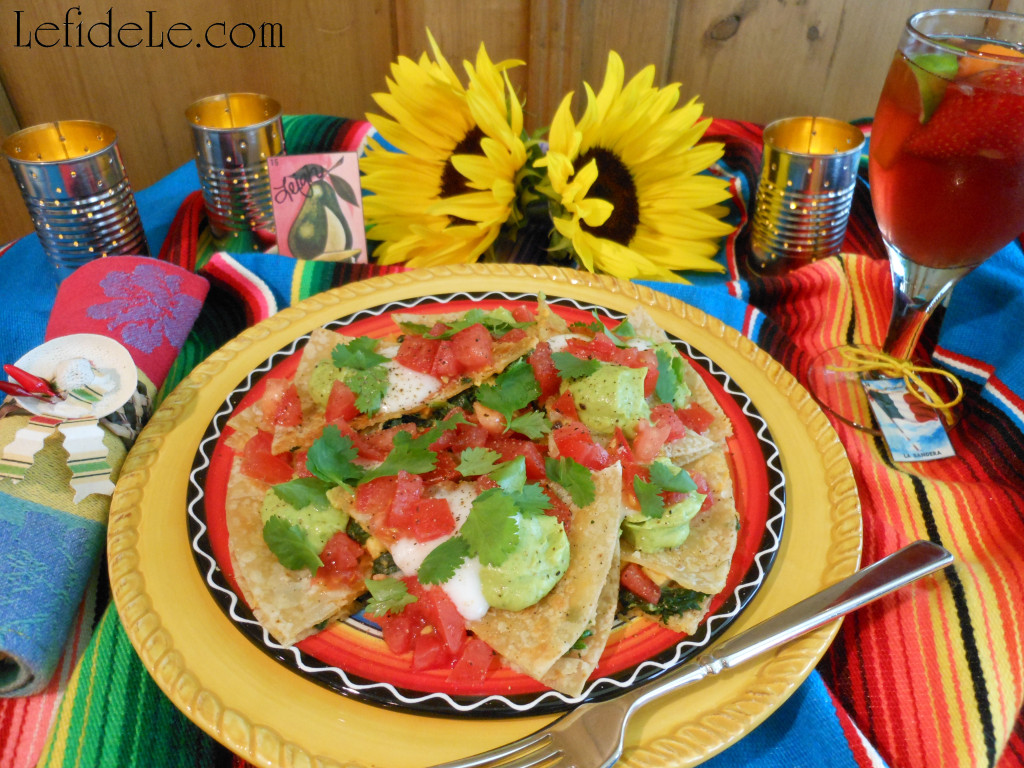
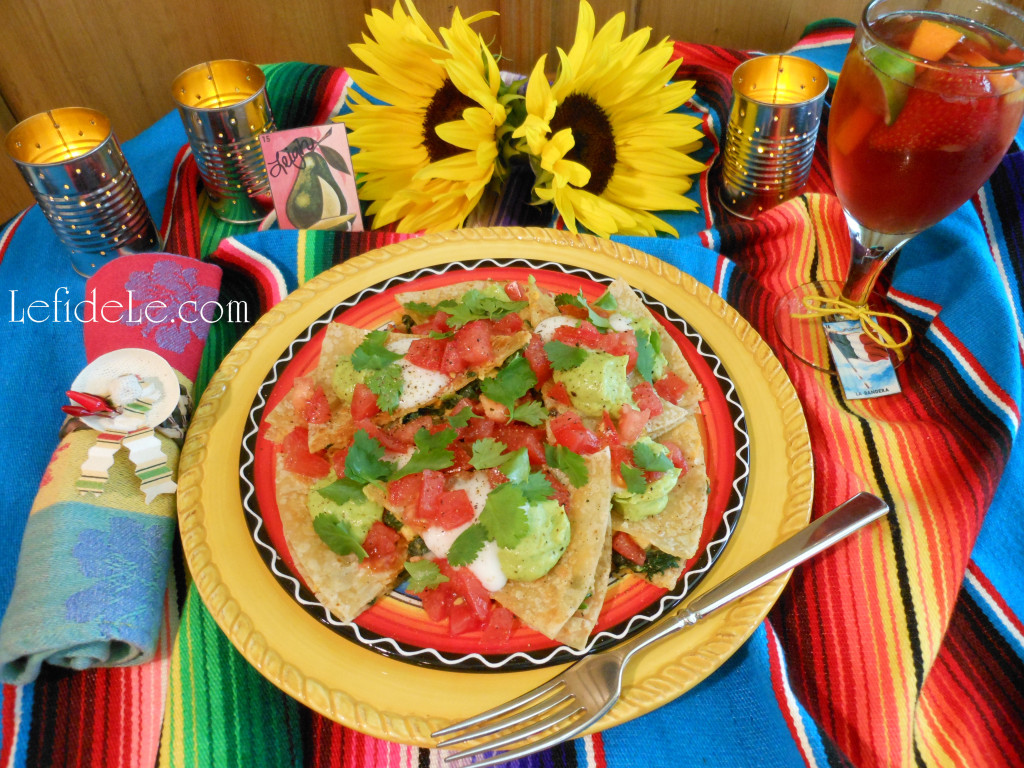
The luminarias add ambiance to a lunch of Tex-Mex Nachos made with my Nacho Average Fiesta Dip Recipe.

238Leigh

They also look lovely with another one of my recipes, Gluten & Dairy Free Chicken Spinach Quesadilla.

011Leigh

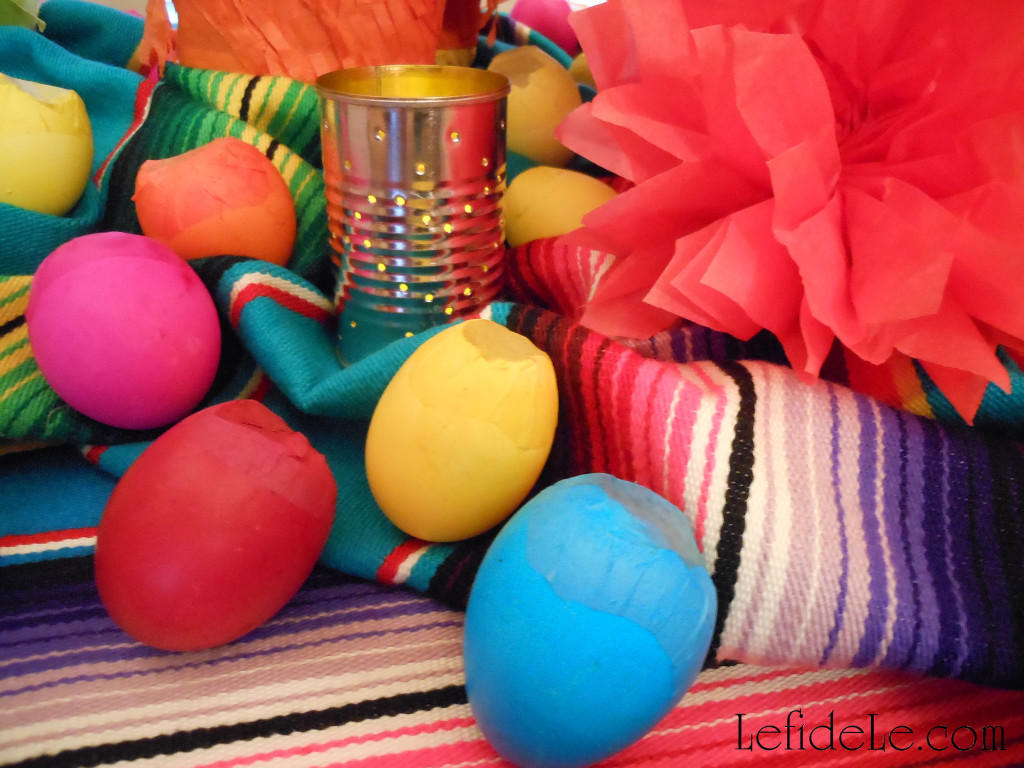
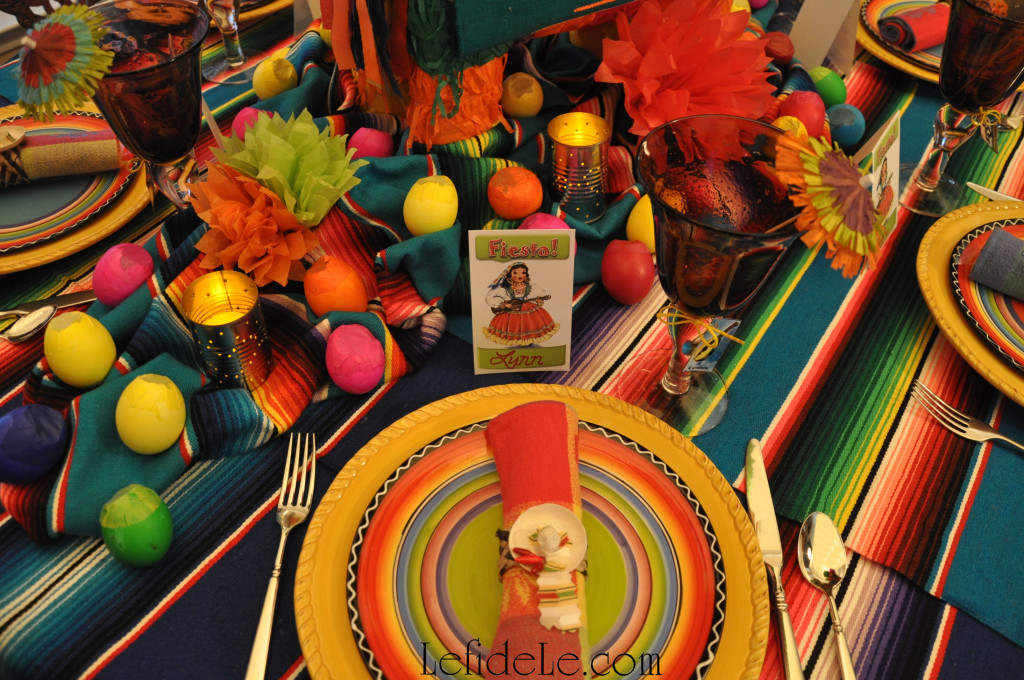
Here they’re featured in an upcoming San Antonio styled Fiesta tablescape next to some cascarones I’ll demonstrate how to make.

327Leigh

I think they look really lovely next to my fiesta flowers too… let’s make them together now!

094Leigh

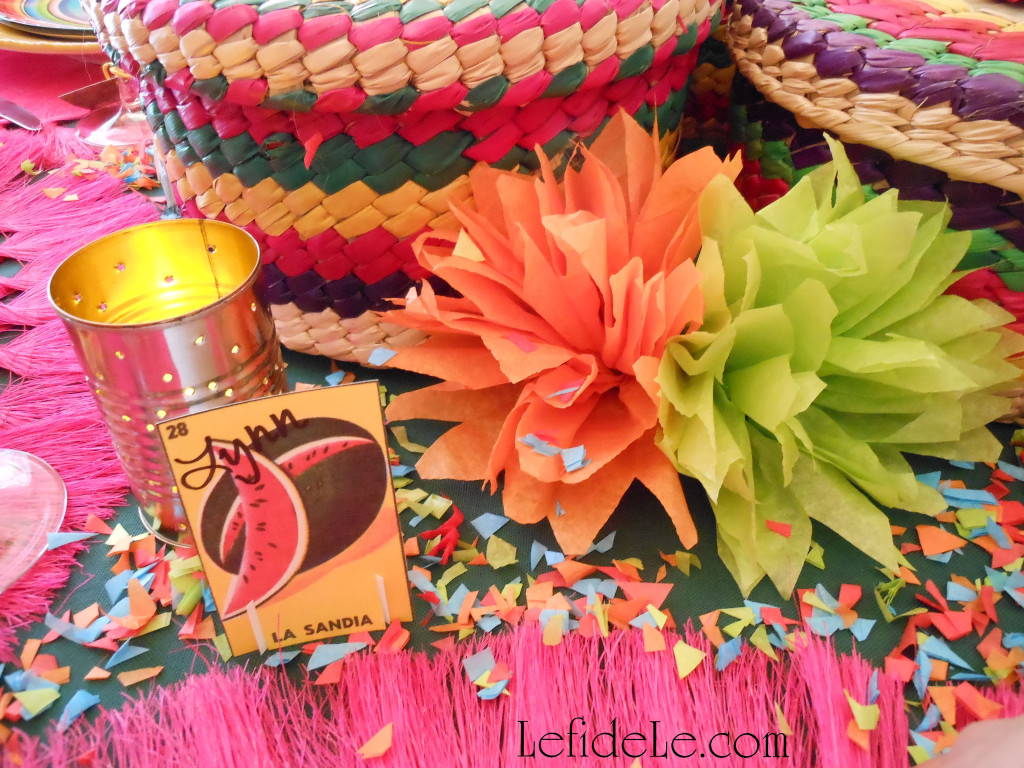
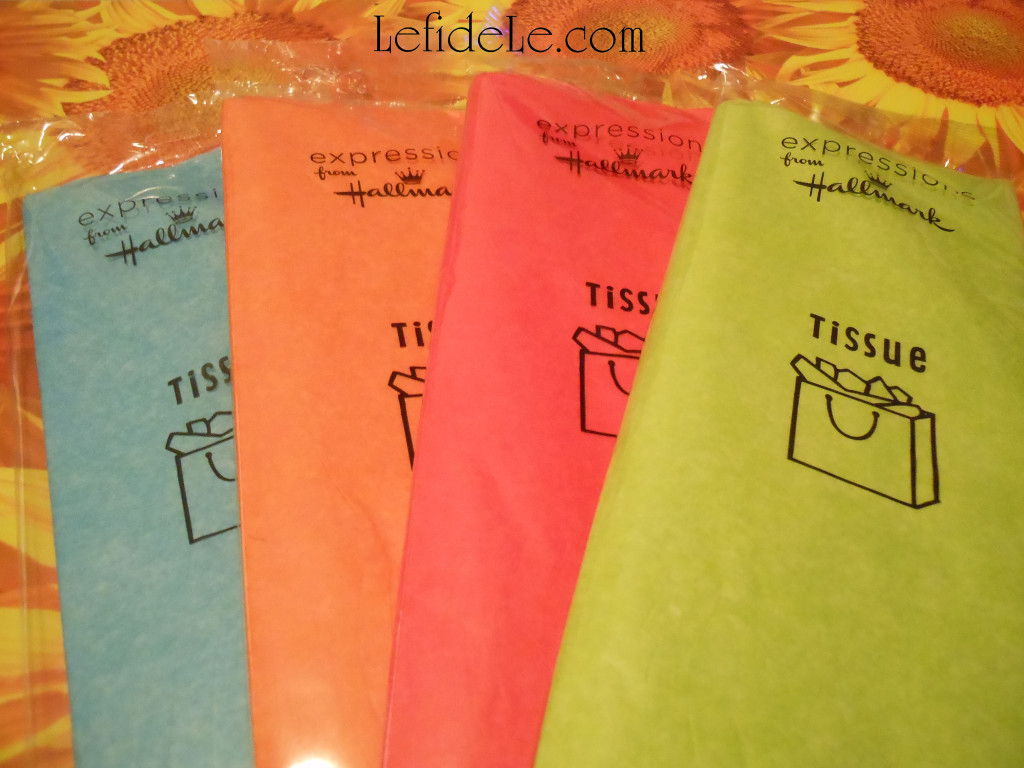
Use any new store bought tissue paper, or upcycle some former gift bag tissue into something spectacular.

127Leigh

The size of the sheet you use will equate to the size of the flower you end up with.

096Leigh

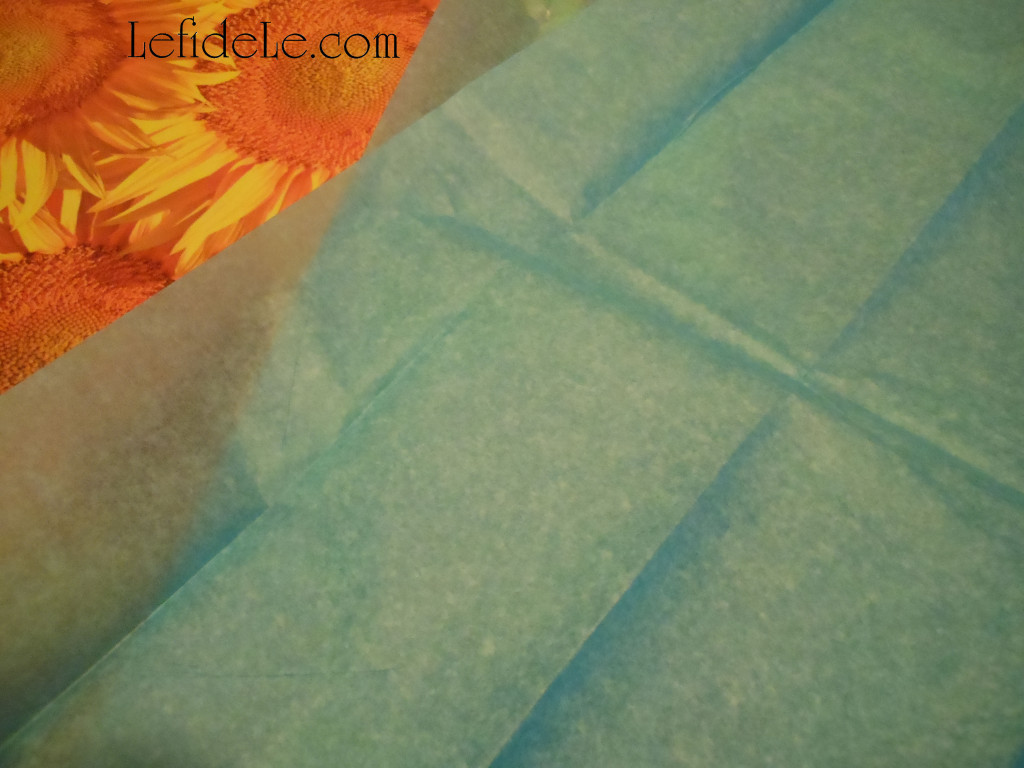
Here I’m beginning with one sheet cut into two halves, one placed over the other.

121Leigh

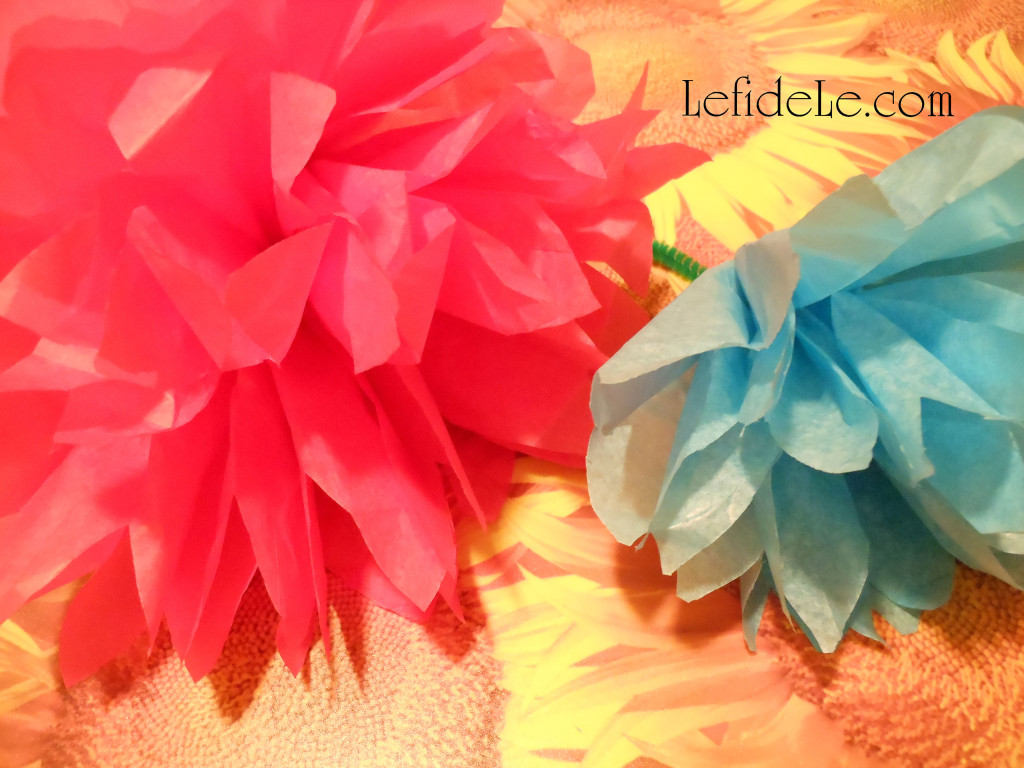
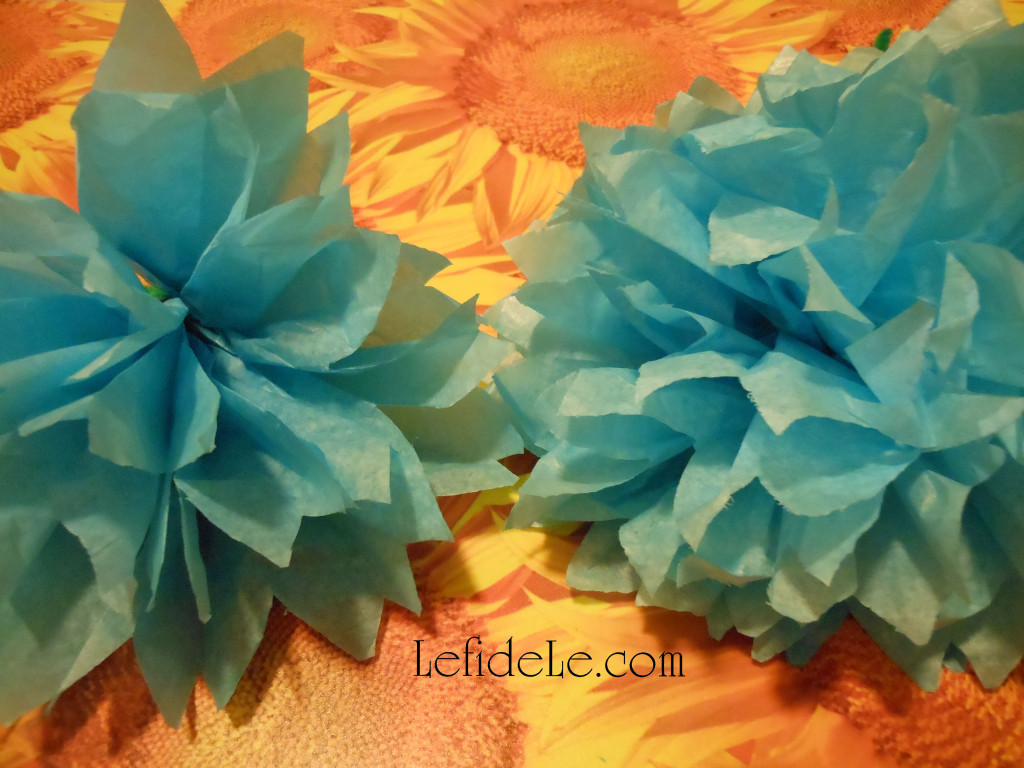
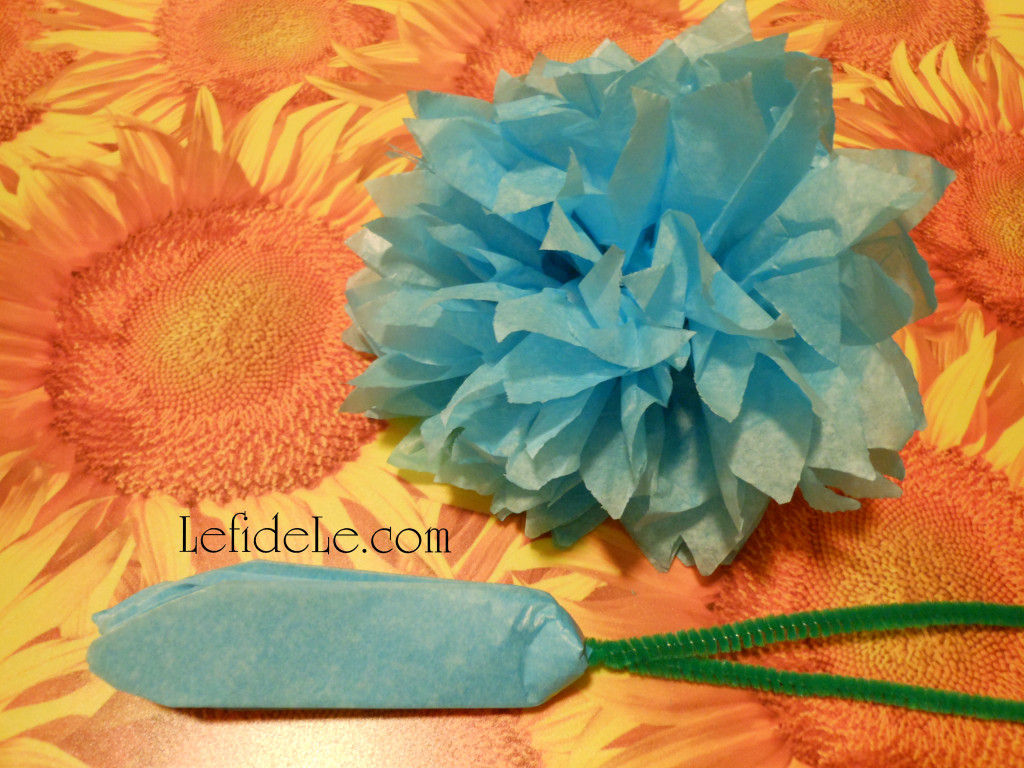
You can actually stack as many layers of tissue as you like to add fullness. Here is a fuller flower next to one made with less layers.

113Leigh

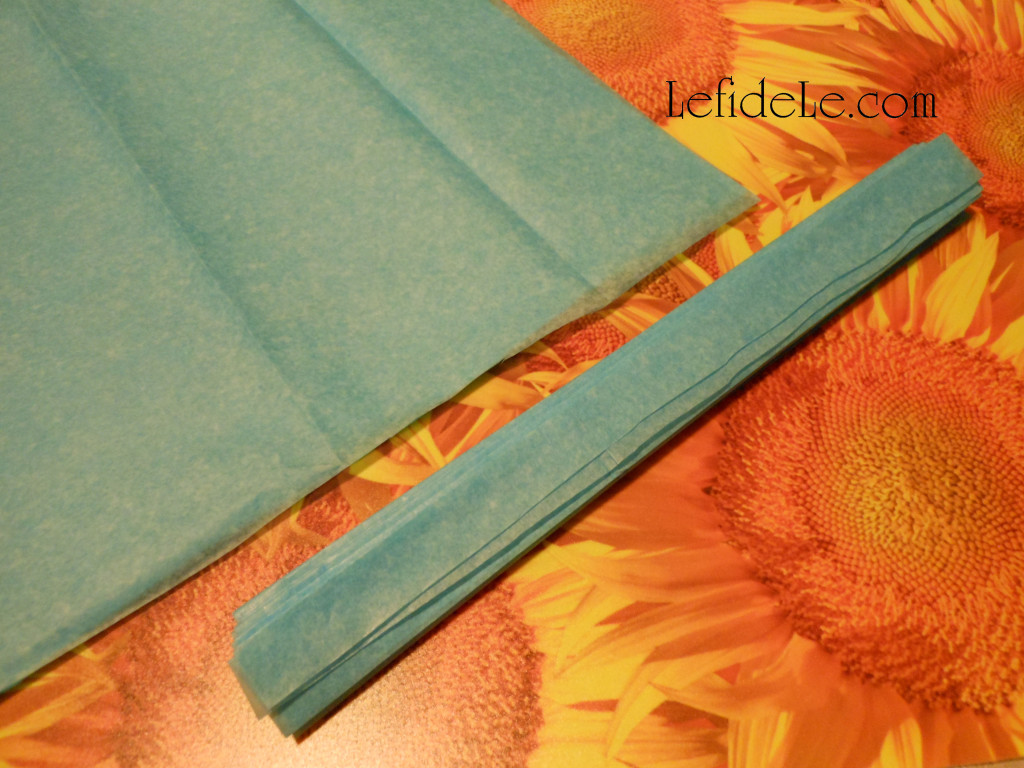
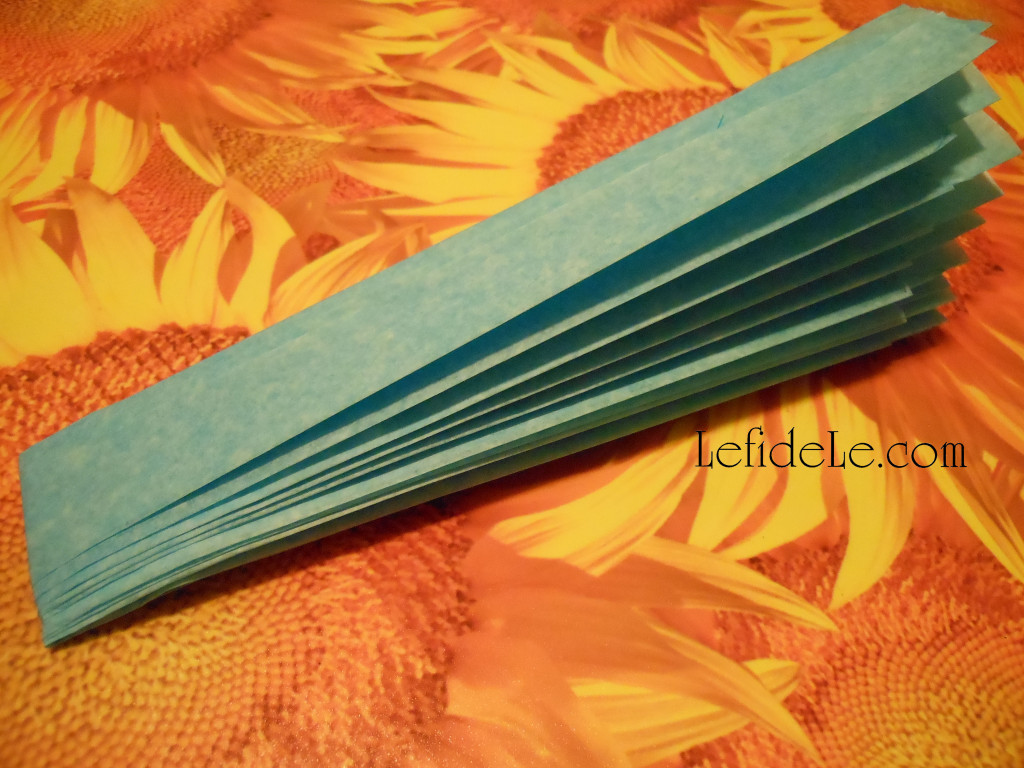
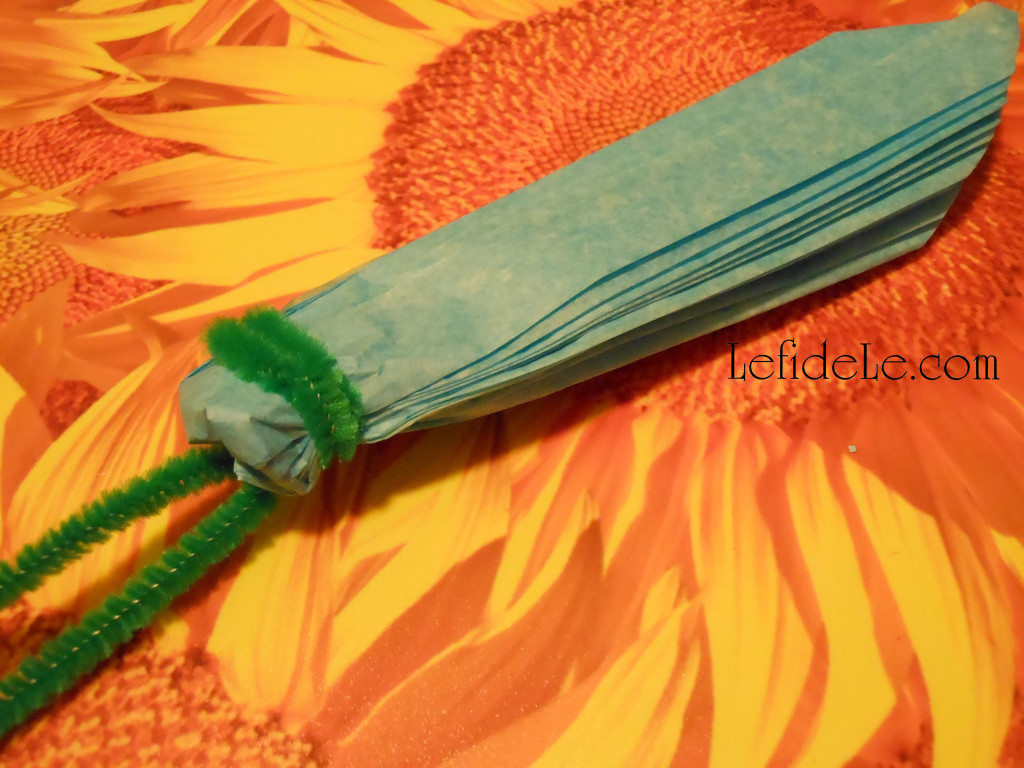
Accordion fold these into a fan, short side to short side. (This part is a great hand-eye craft for the kiddos!)

100Leigh

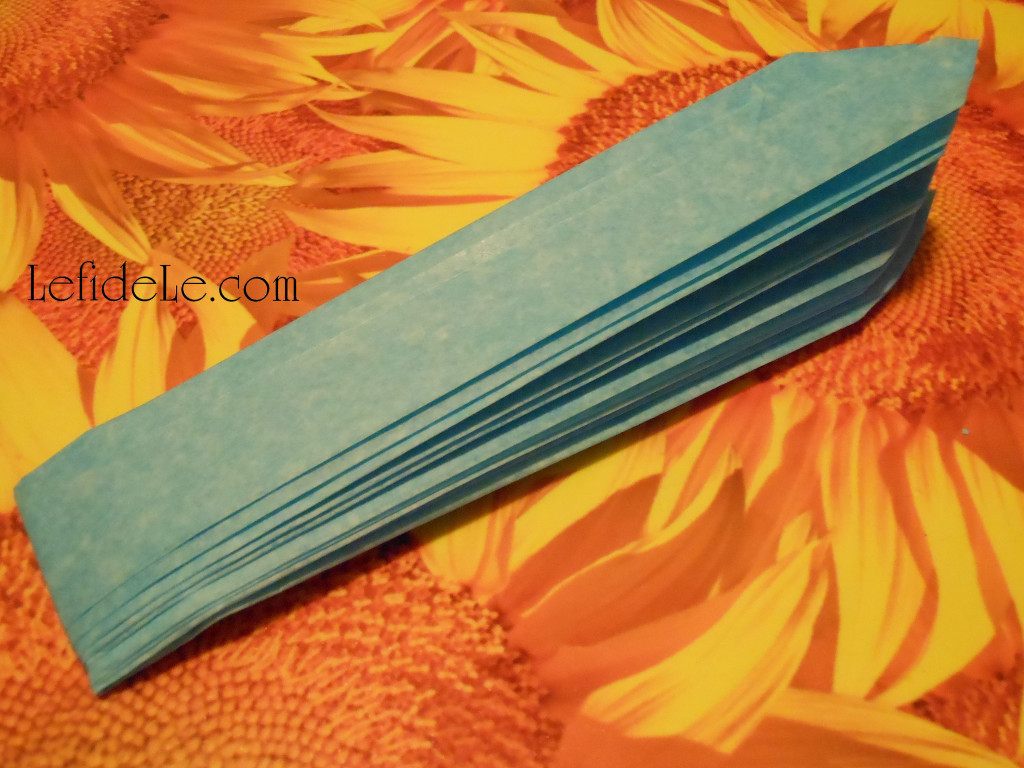
Next, fold the bar over in half.

102Leigh

Cut an upside down V into the ends… this will make a prettier flower.

128Leigh

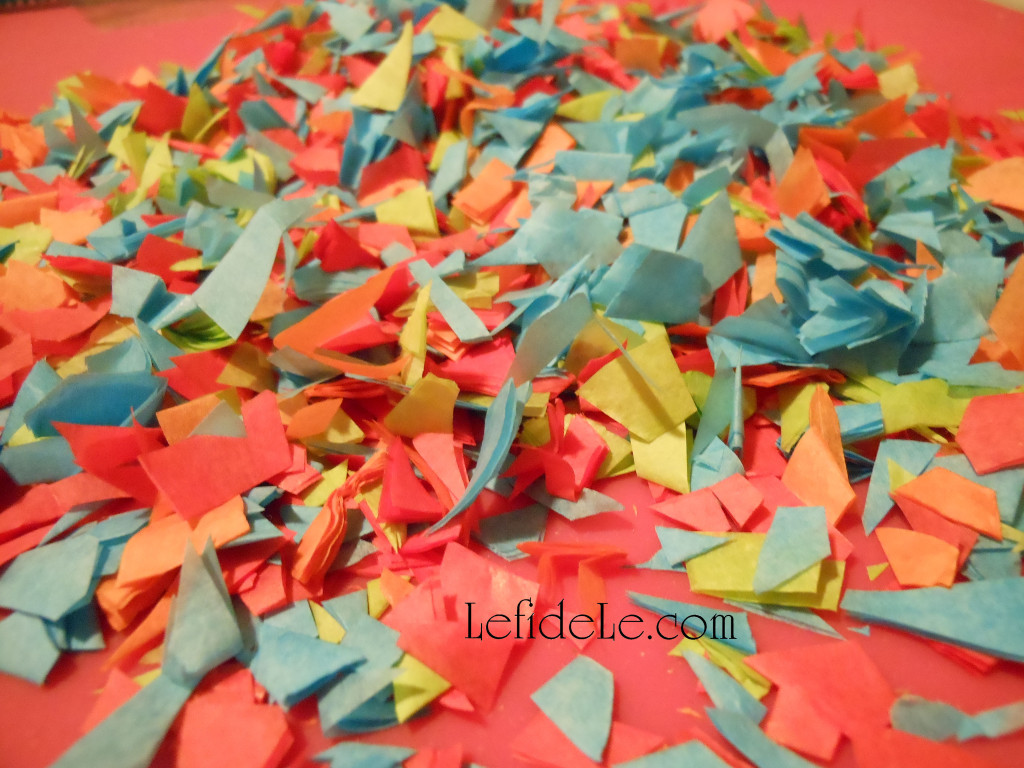
Take those trimmings and cut them into tiny pieces, then separate the layers. You just made matching confetti for the table… for free. You can also use this confetti for cascarones crafting in the future!

104Leigh

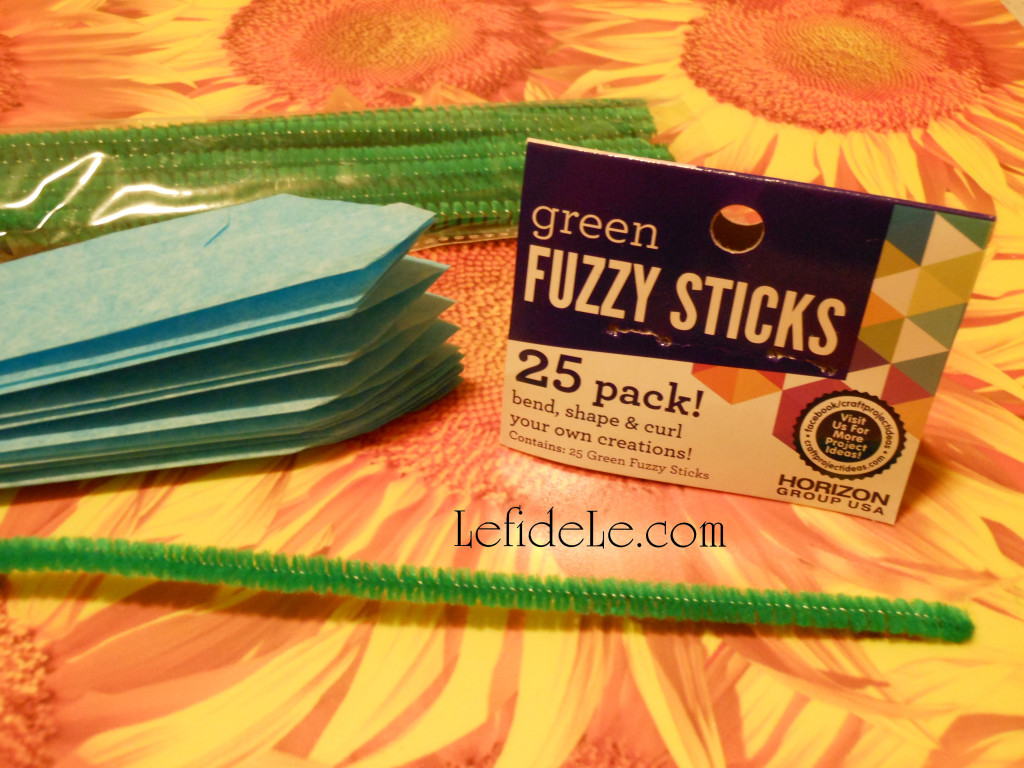
Green fuzzy pipe cleaner sticks make the perfect stems.

105Leigh

Wrap one around the folded portion and twist. You will be able to use the stem to hang the flowers with later.

108Leigh

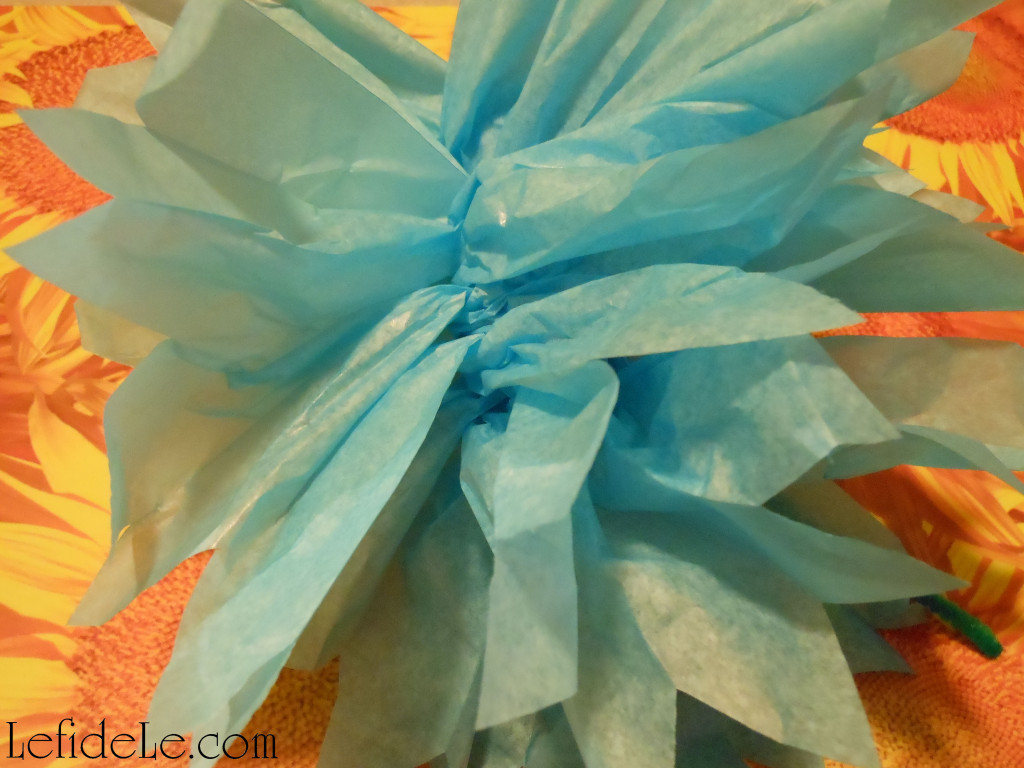
Next pull apart all the layers.

116Leigh

Pull these slightly taut, in an arrangement that appears pleasing to the eye.

123Leigh

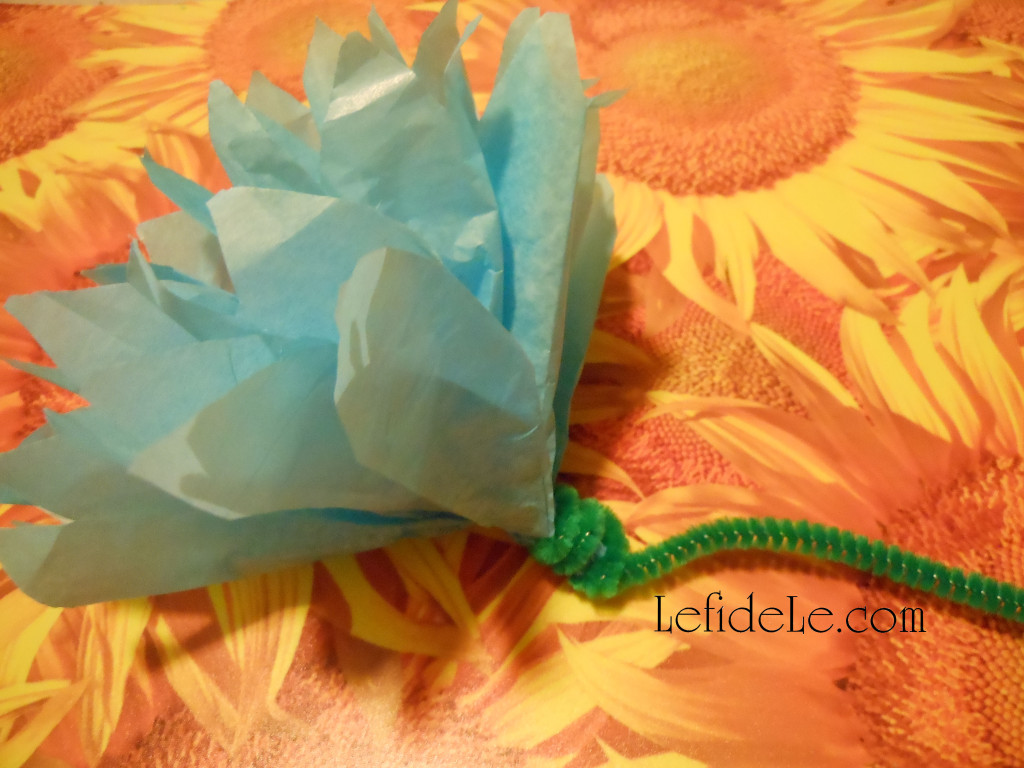
Wrap one end of the fuzzy stick around the base to secure your arrangement of the petals.

350Leigh

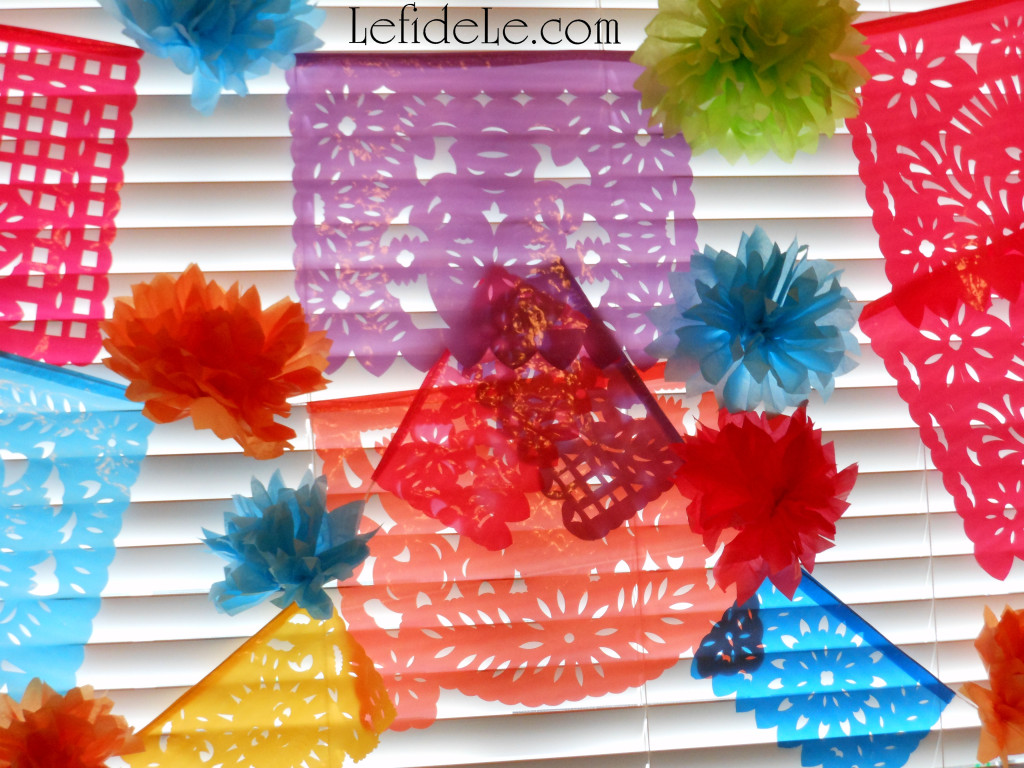
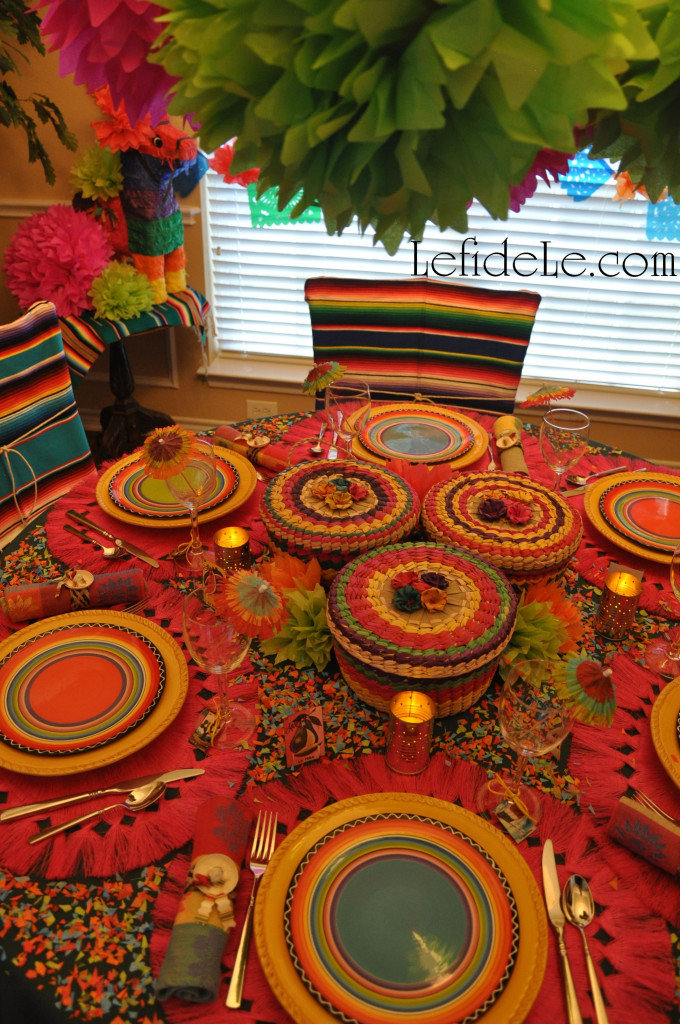
I tied some of them between panels of traditional papel picado in a fiesta banner for the window. The light streaming through them was much prettier in person.

029Leigh

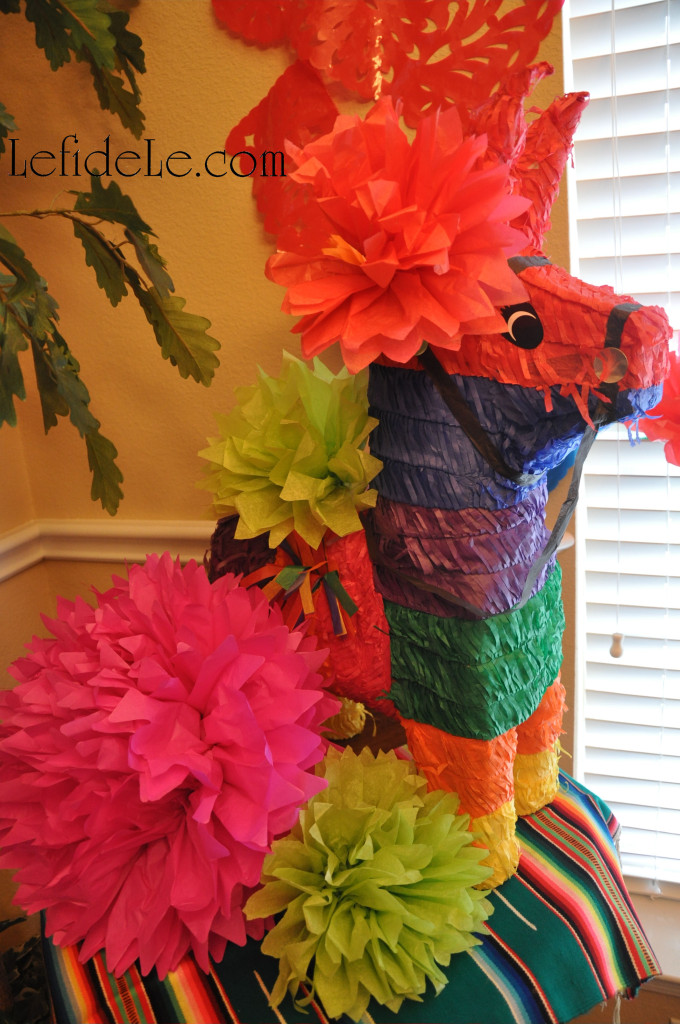
I also used them to further adorn a burro piñata decorating a side table.

053Leigh

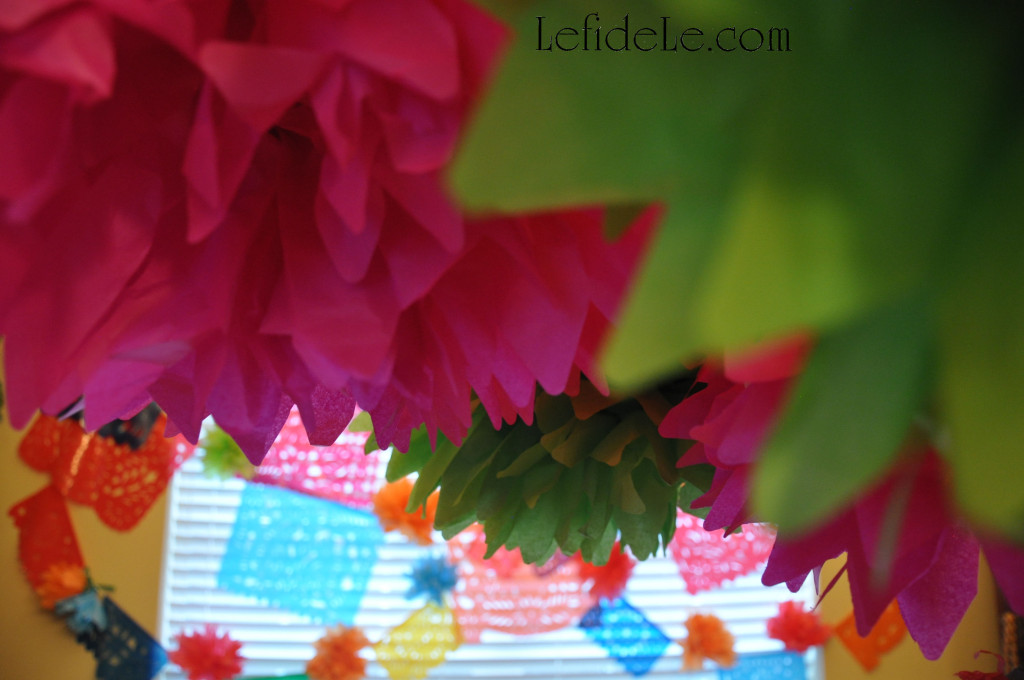
The larger flowers were easily strung onto a chandelier as an overhead centerpiece, leaving room for tortilla, chip, and buñuelo baskets on the table.

291Leigh

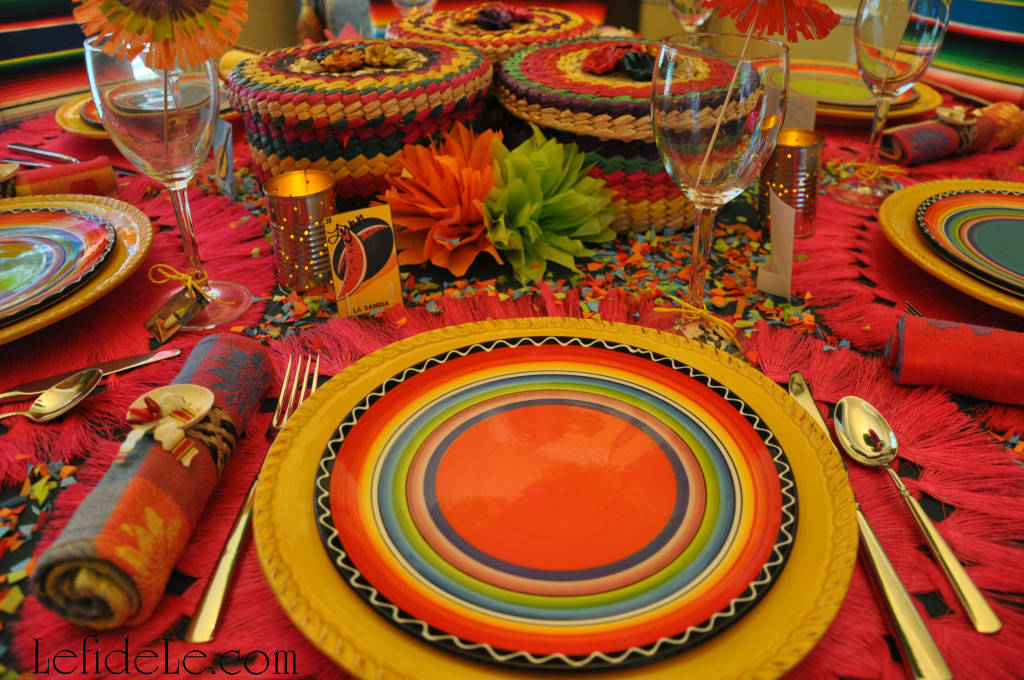
Now complete your tablescape with my Easy DIY Sombrero Napkin Rings & Serape Invitations + Loteria Sangria / Wine Glass Charms & Place Cards Crafts (for Cinco de Mayo Fiesta Tablescape).

041Leigh

Time to go ¡Fiesta! forever…

Faithfully Yours,

Leigh

Easy DIY Sombrero Napkin Rings & Serape Invitations + Loteria Sangria / Wine Glass Charms & Place Cards Crafts (for Cinco de Mayo Fiesta Tablescape)

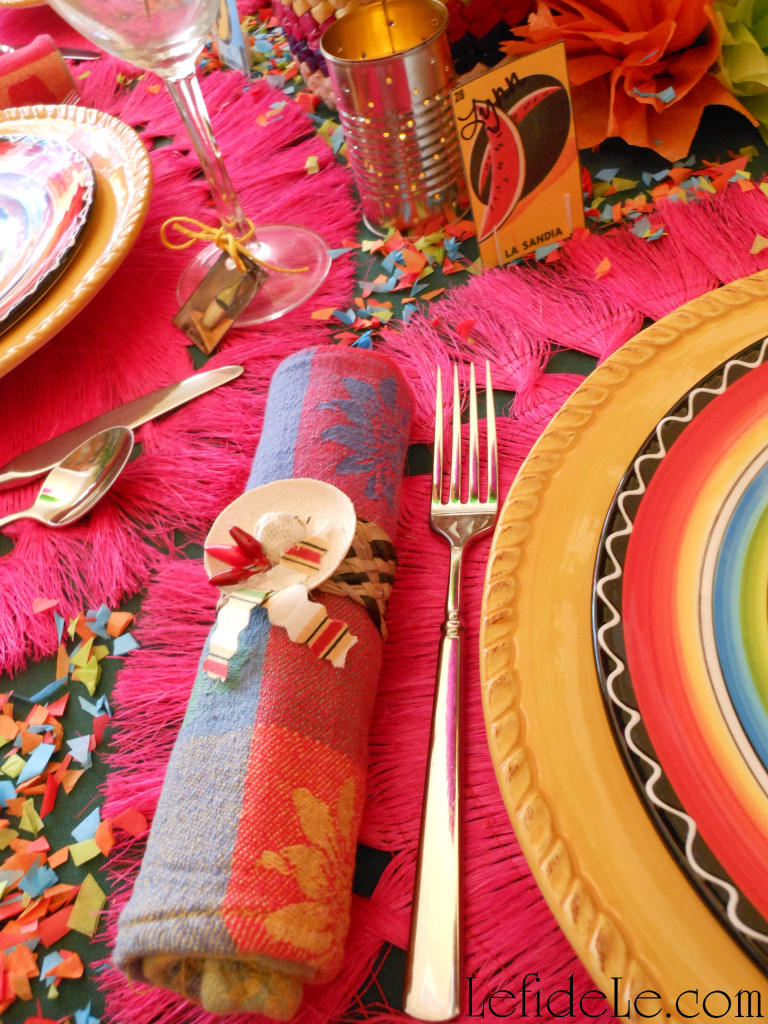
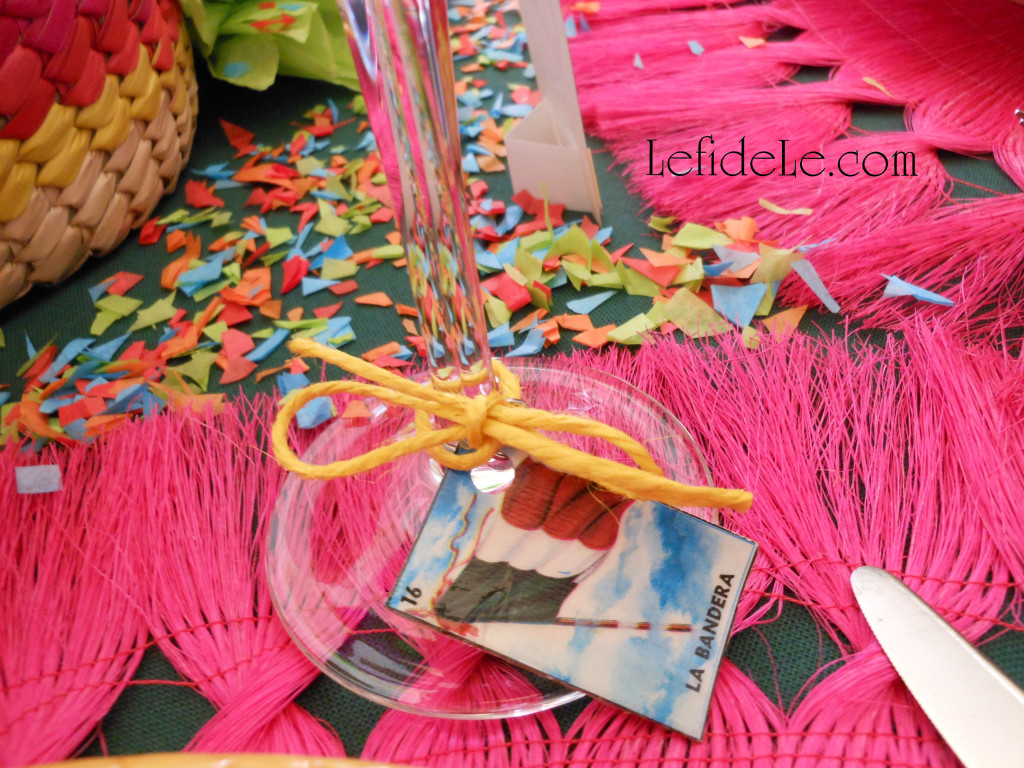
¡Fiesta! Forever… or for at least one fantastic evening with easy décor crafts for your Cinco de Mayo tablescape. Toast the party with sangria filled glasses fitted with DIY wine glass charms featuring traditional Mexican Loteria images. Then, use those same images to make place-cards for the table. Dress colorful cloth napkins with handmade sombrero napkin rings, and craft matching serape invitations that shout, “Grab your sombreros for a Cinco de Mayo that’s nacho average fiesta!”

357Leigh

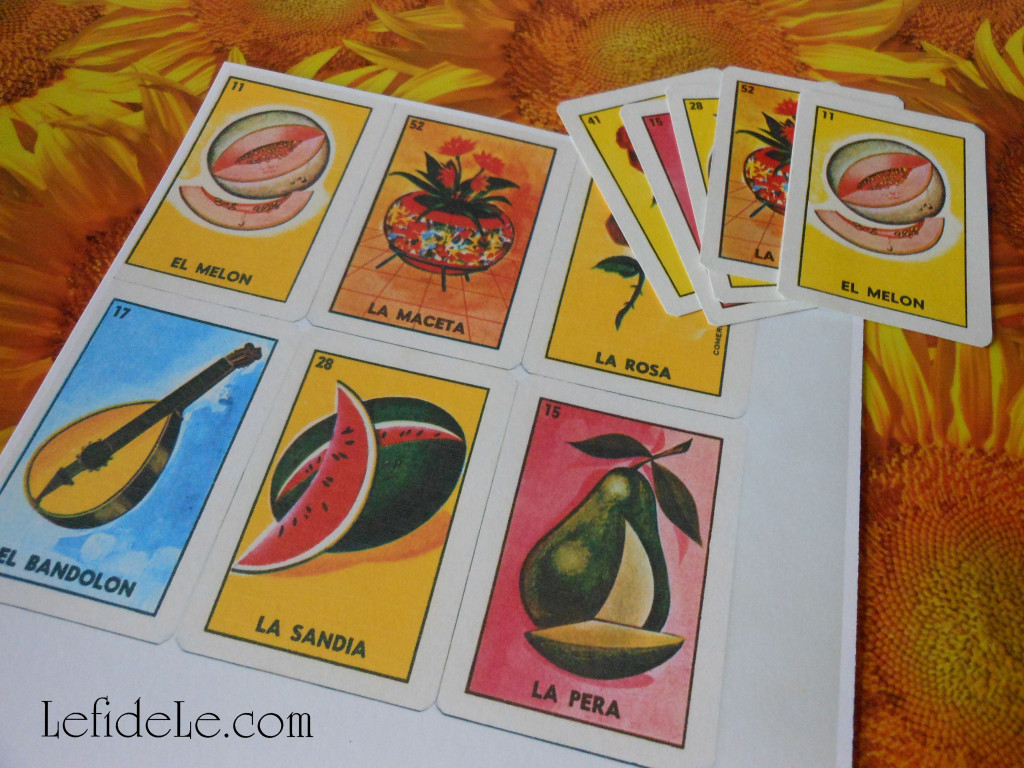
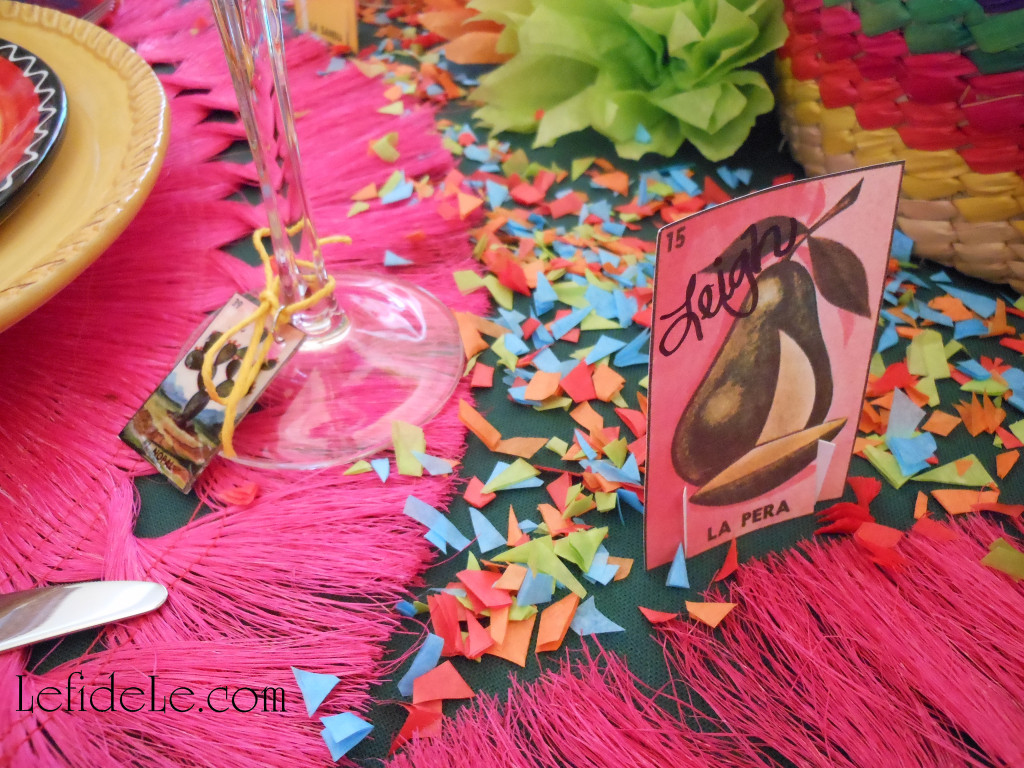
One inexpensive Mexican Loteria game will provide you with loads of craft material for the future. I’ve previously made beads with them (see how to do this here in my Halloween Necklace Craft)… glued them into collages and assemblages (see how to do this here in my Valentine Gift Assemblage Art Tutorial)… and I have some easy crafts up my sleeve to demonstrate in the future.

130Leigh

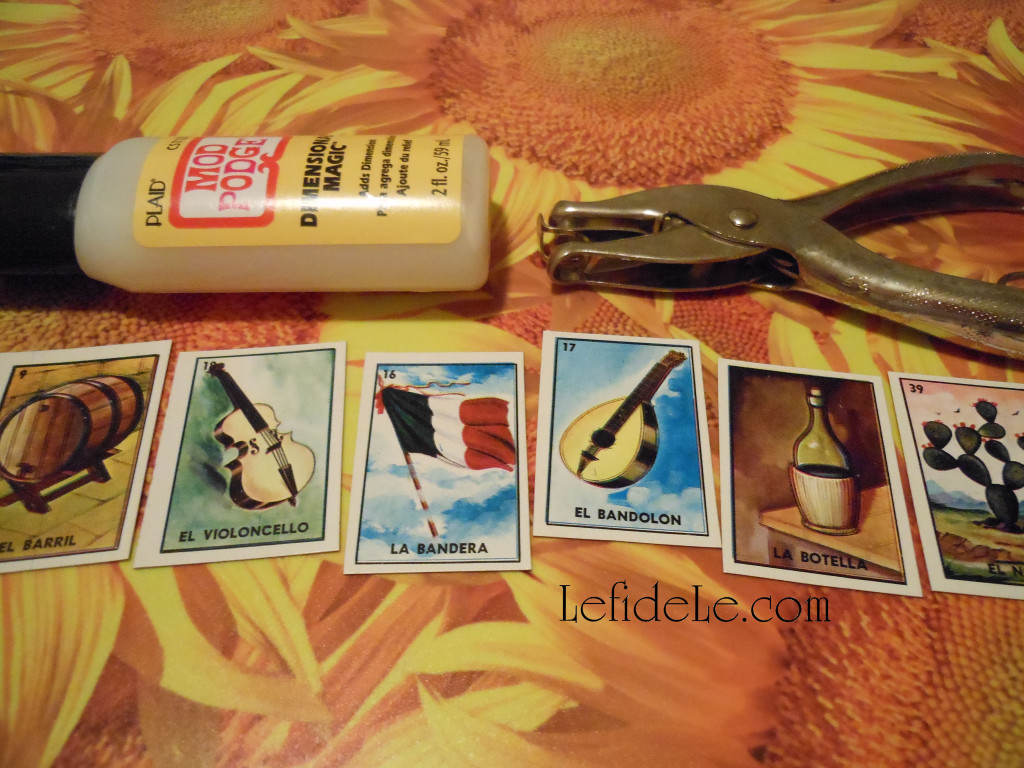
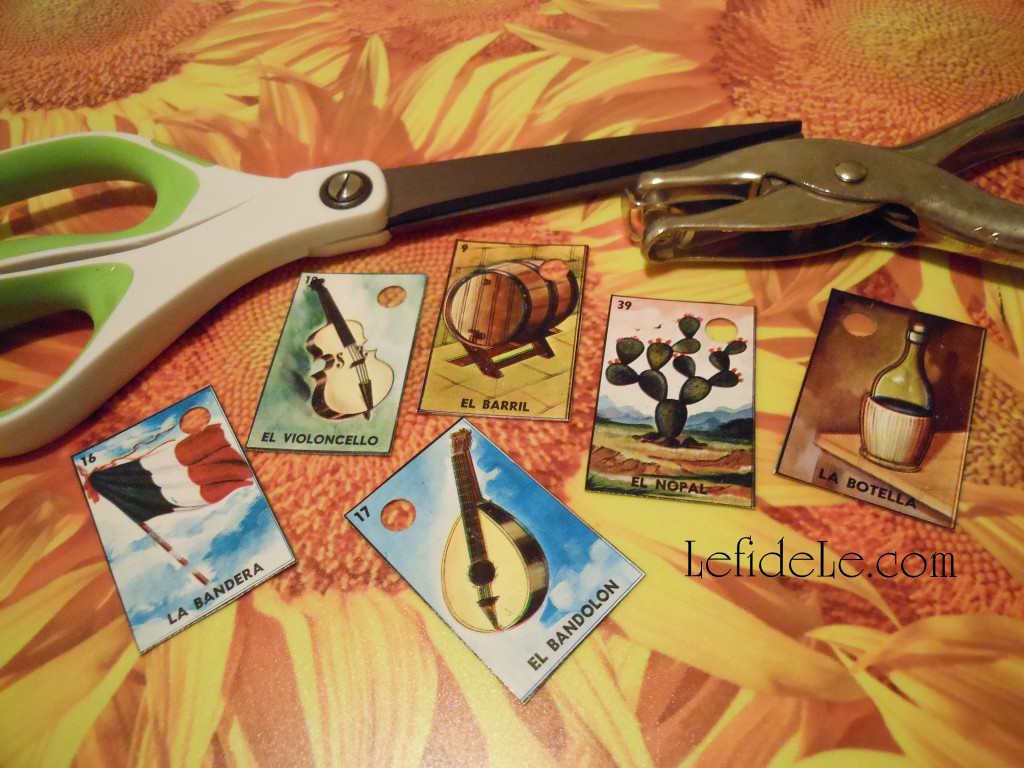
All you need to begin is a single game card sheet, scissors, a hole-punch, and Plaid Mod Podge Dimensional Magic. Cut the game card into single images as pictured.

134Leigh

Punch holes into a top corner of each piece.

137Leigh

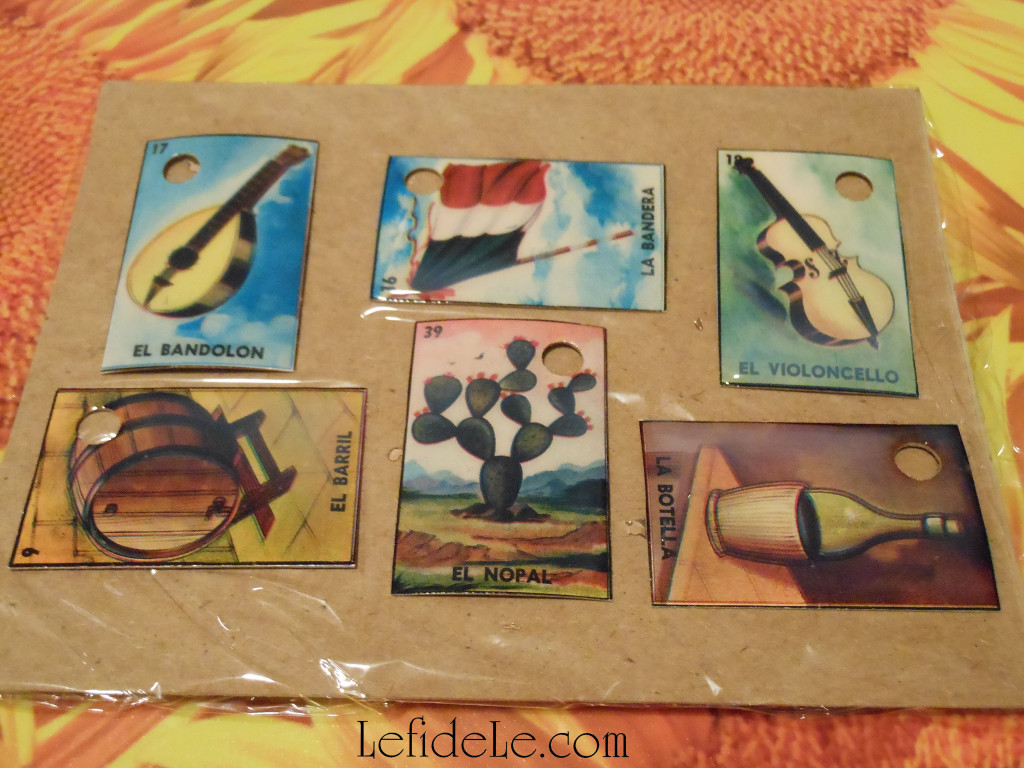
Drizzle the Magic stuff over one side of all the pieces, then let it dry overnight. (Set it on some form of plastic to keep it from adhering to your surface.)

140Leigh

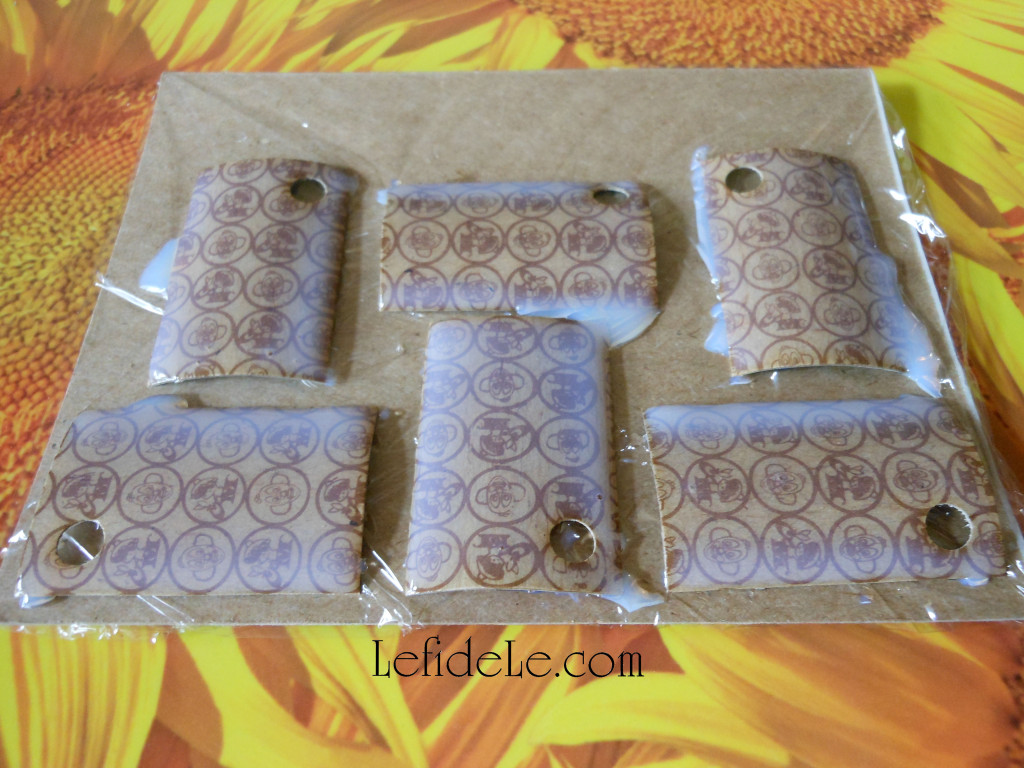
Flip them over and drizzle the other side, then dry overnight.

180Leigh

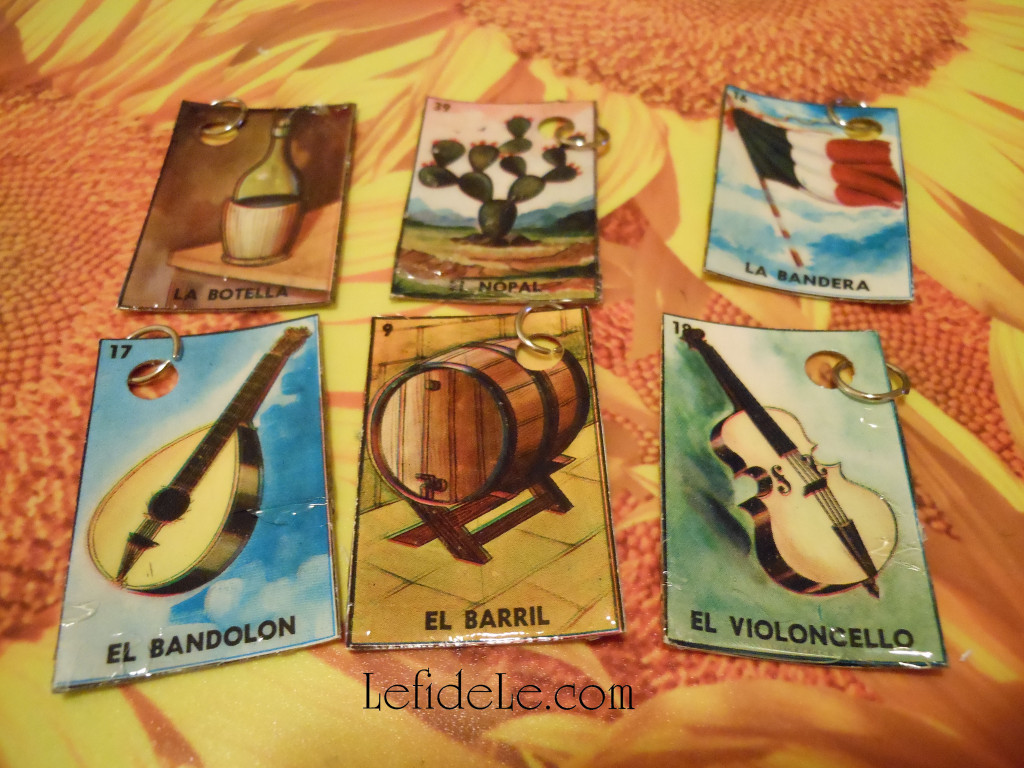
If needed, trim off any dripped over edges, and attach small metal rings to the holes.

314Leigh

Instead of using a jumbo jump ring to attach the charms to the glasses, I simply tied them on with jute bows. You can also skip the first metal ring, and just tie these if you’d like less dangling.

030Leigh

Here they are featured on a clear glass vessel topped with a paper umbrella.

106Leigh

The same charm and umbrella look different when placed on a purple goblet (from my upcoming San Antonio styled Fiesta tablescape).

219fLeigh

The charm is an easy addition for a charming lunch of my Gluten & Dairy Free Chicken Spinach Quesadilla Recipe.

298Leigh

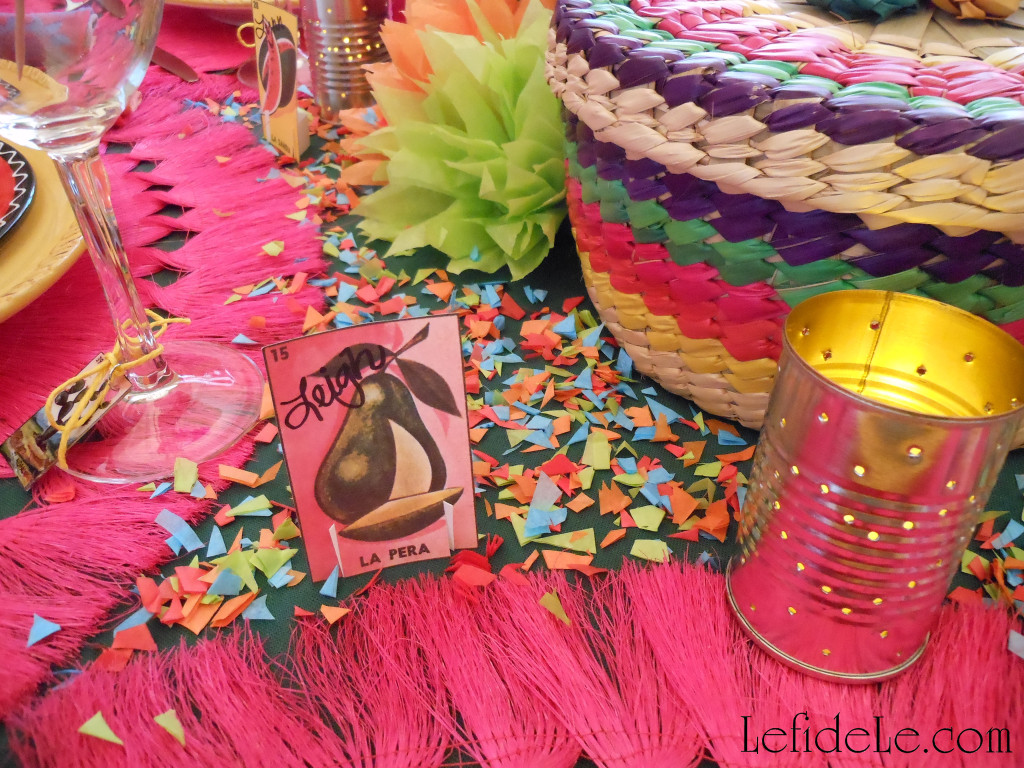
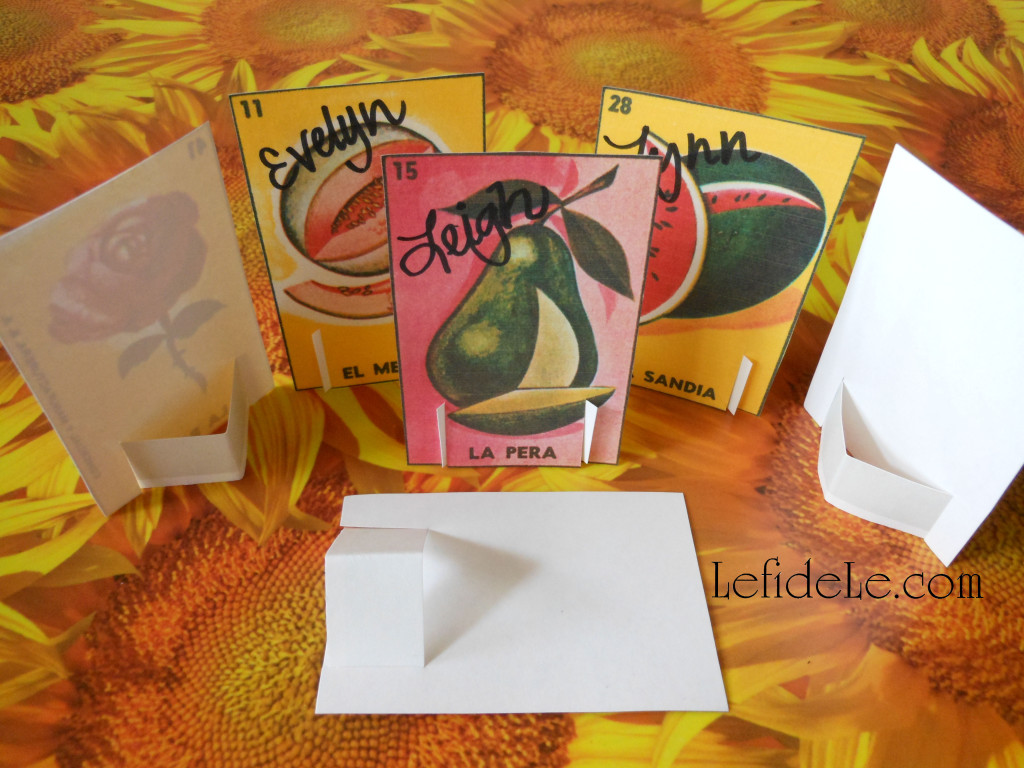
Matching Loteria place-cards for the table are really quick and easy to make.

141Leigh

Use the actual game cards or make a color copy of a set of them to cut out. I chose the latter so that I can remake them whenever I like… without buying a new game.

143Leigh

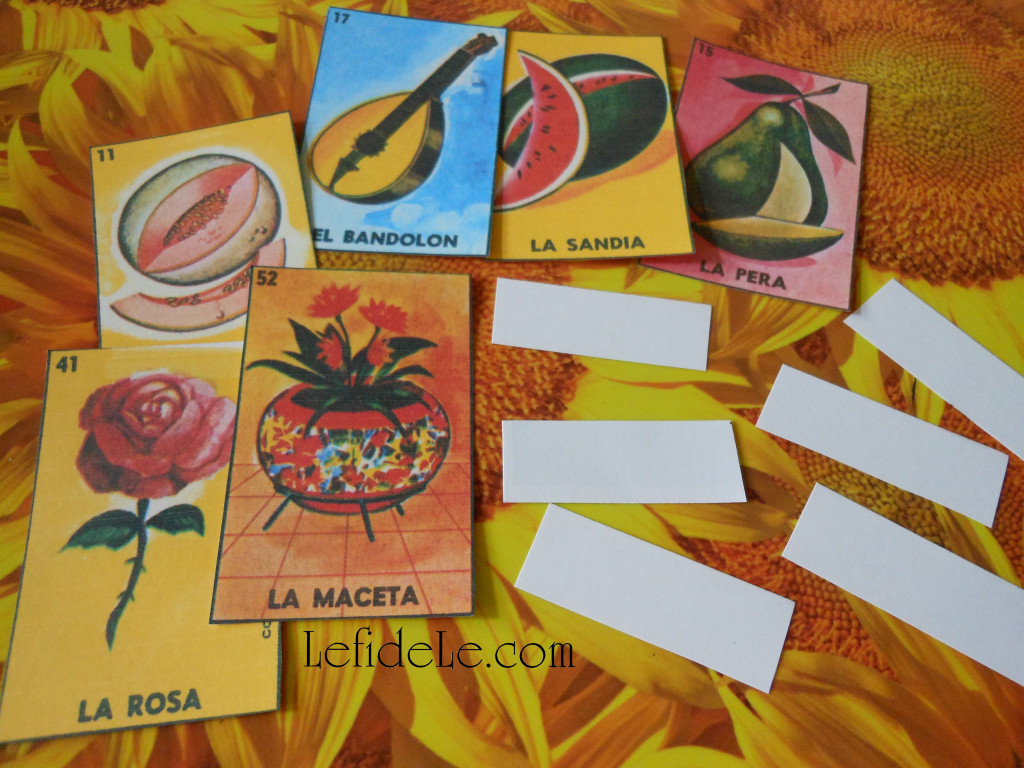
Cut paper cardstock strips to use as easel supports, and fold in half to make a V.

146Leigh

Then cut two slits to either side of the Spanish words. Slip a V strip into the slots you cut.

316Leigh

Then simply write your guests names on them with a marker. These would also make great food labeling cards for a buffet.

327Leigh

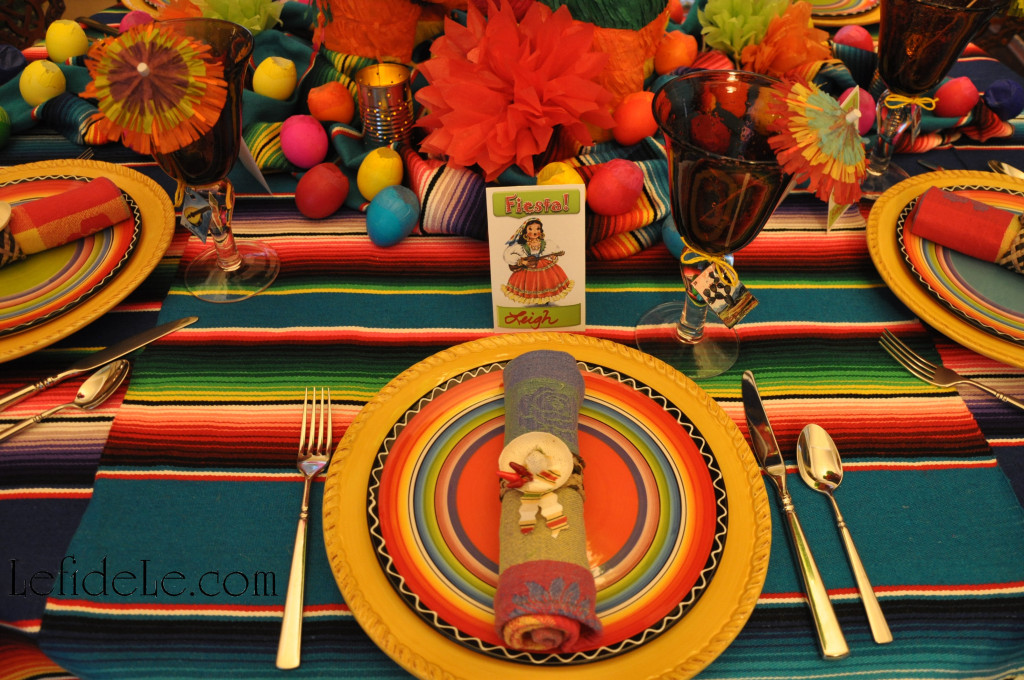
The Loteria cards add extra pops of color to the tablescape… and you can never have too much color at a fiesta!

294Leigh

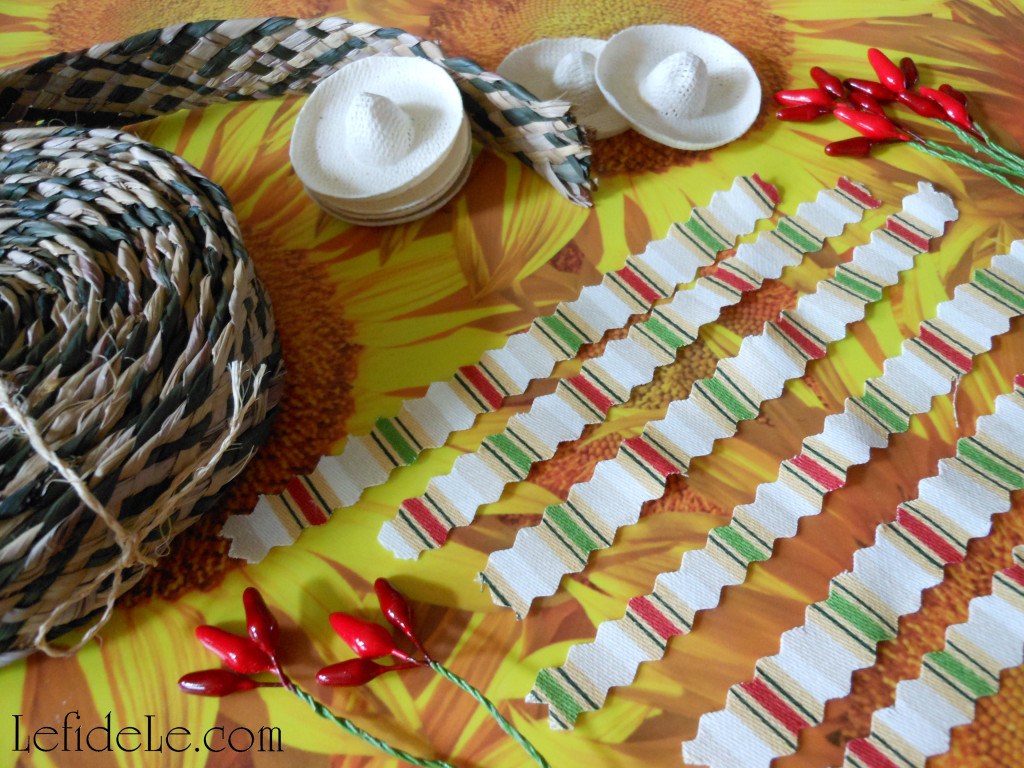
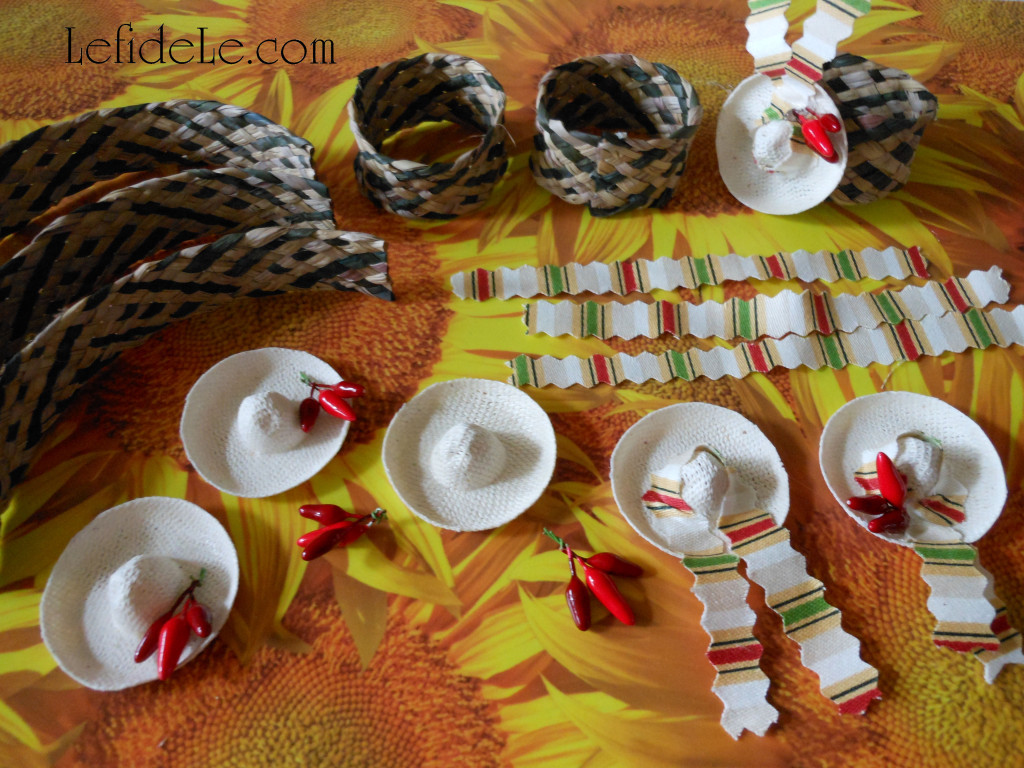
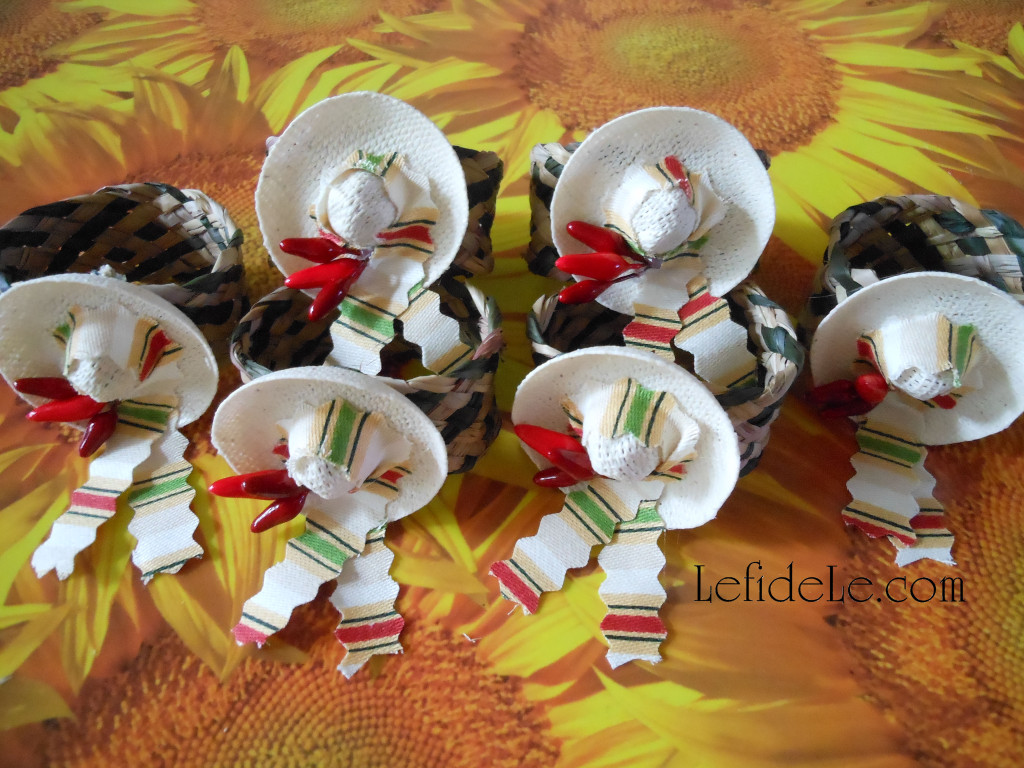
The sombrero napkin rings are some of the cutest in my collection, yet were some of the quickest to make. Craft them yourself with braided raffia ribbon and tiny doll straw hats.

154Leigh

Transform the hats into sombreros with strips of fabric and dollhouse chili peppers. (I never use chilis in my recipes, but they do make delightful décor.) Use hot glue to attach a few peppers, and then wrap a fabric strip as a band.

158Leigh

Cut a six inch length of raffia ribbon for each ring. Slightly overlap the edges then hot glue them.

160Leigh

Glue the sombrero over the seam covering it completely.

063Leigh

Fill the rings with colorful fabric napkins.

044Leigh

I think they look really adorable on the tablescape… if I do say so myself!

274Leigh

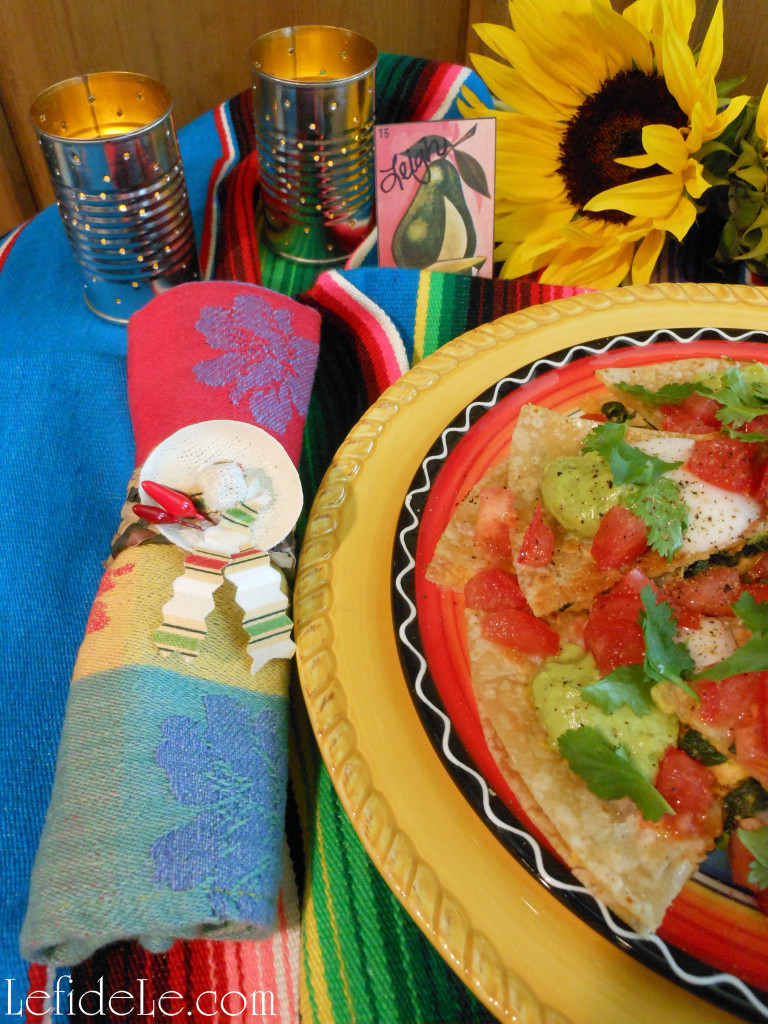
Here the card and napkin ring add color to a lunch of Tex-Mex Nachos made with my Nacho Average Fiesta Dip Recipe.

223Leigh

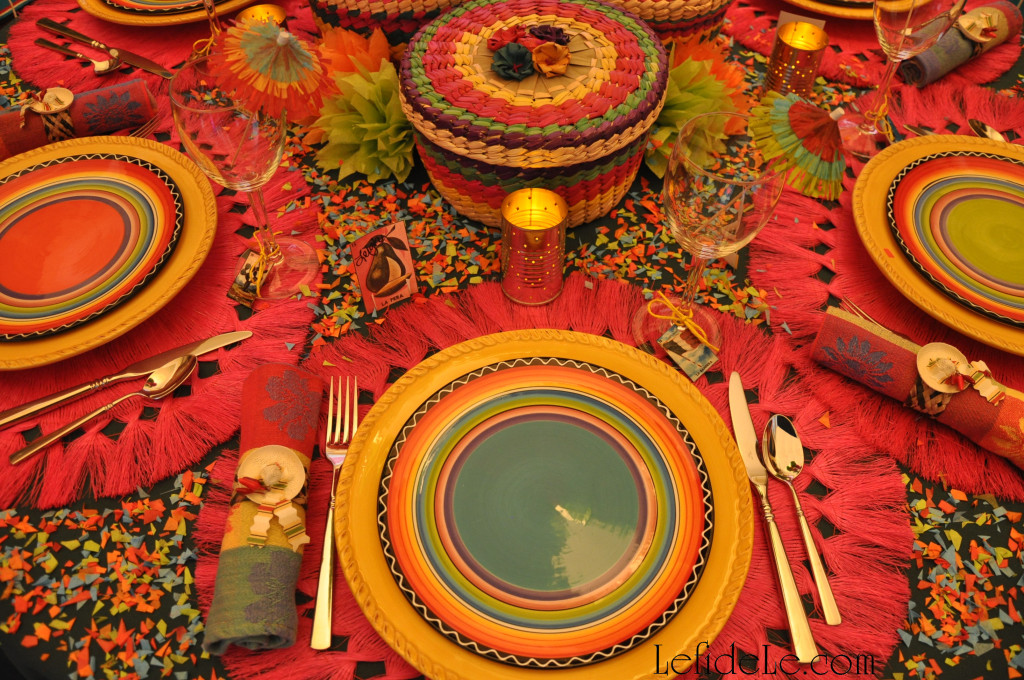
They bring additional ambiance to another meal with my Gluten & Dairy Free Chicken Spinach Quesadilla Recipe.

164Leigh

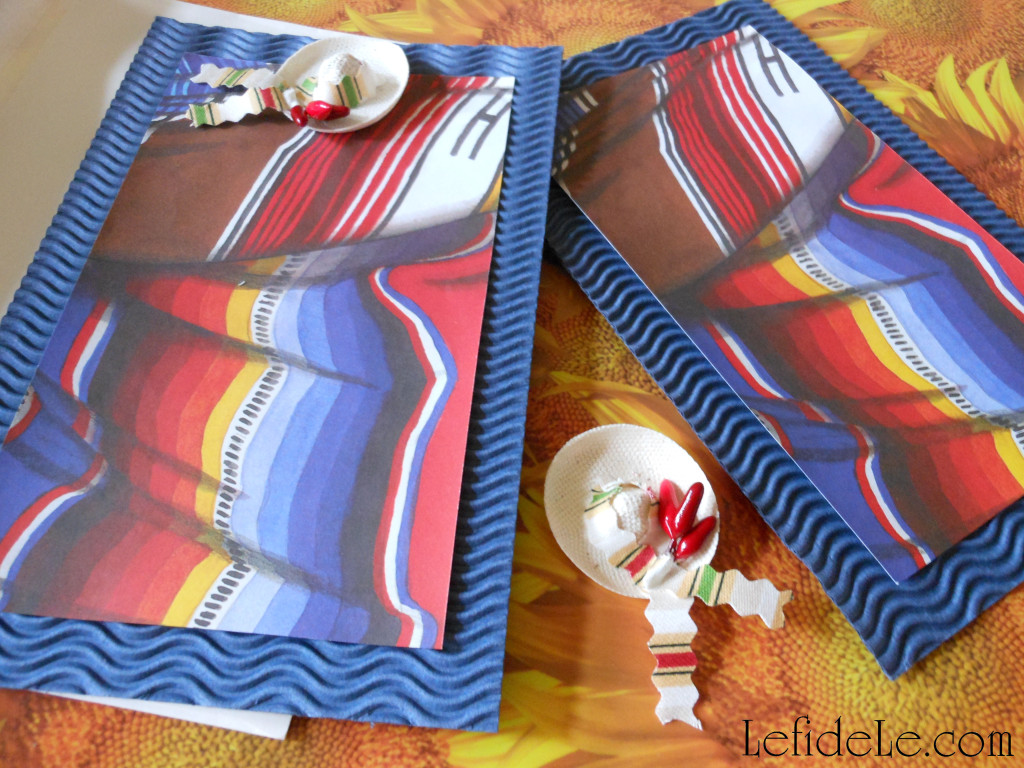
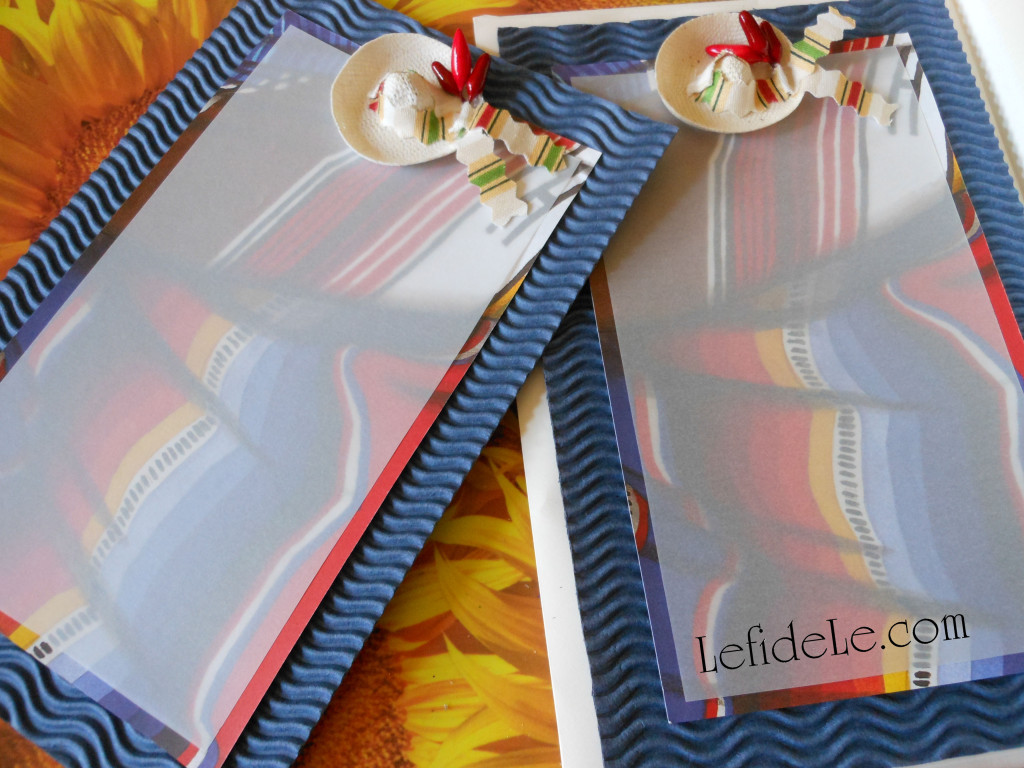
Make fiesta invitations to match your napkin rings easily by following the earlier steps to turn a straw doll hat into a sombrero. Cut a 5.5 x 8.5 inch piece of textured cardstock and a 4.5 x 7.5 size of serape scrapbook paper. Print or write invitation instructions on vellum, then cut it to a size smaller than the scrapbook paper (like 4 x 7).

004Leigh

Hot glue the layers at the center of the top, and then glue the sombrero over it. I made some of these for a bridal shower years ago, and they mailed just fine. I got such a glowing response from the project that I decided to show you how to craft them yourself.

321Leigh

Next, bring more light and color to the celebración with my Easy DIY Upcycled Can Tea-light Luminarias (+ Free Printable Template) & Tissue Paper Flowers Crafts (for Cinco de Mayo Fiesta Décor).

041Leigh

¡Viva la fiesta!

Faithfully Yours,

Leigh