Fall Leaves & Pumpkins Themed Thanksgiving Tablescape Décor Ideas

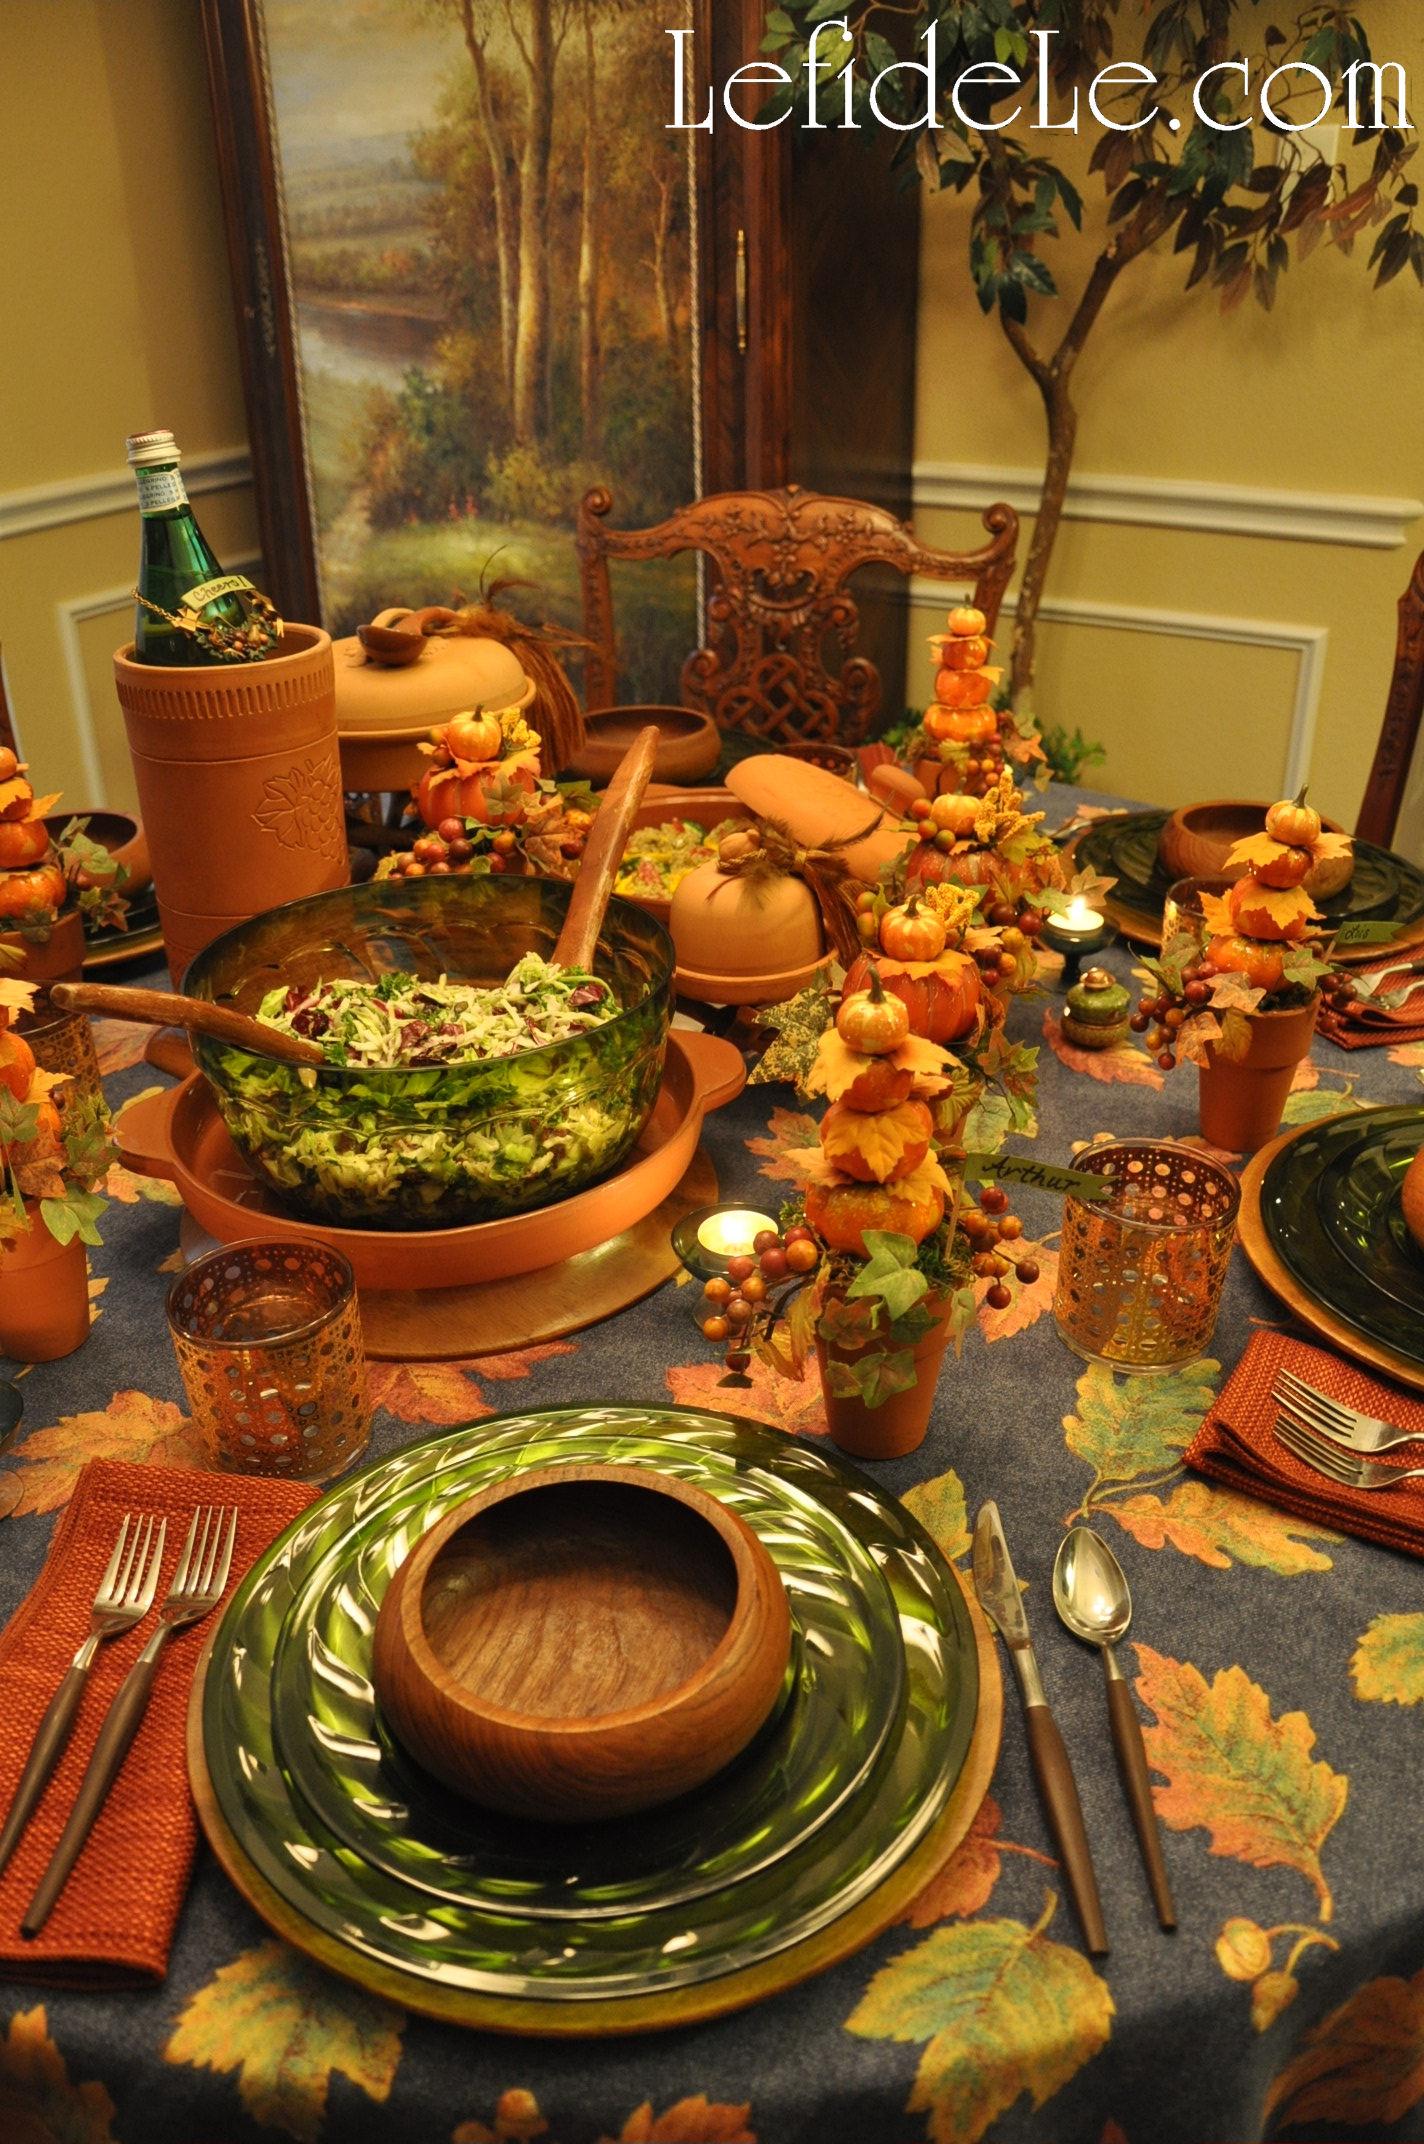
When I think of fall, images of brightly colored leaves and plump pumpkins immediately fill my mind’s eye. This was the initial inspiration behind this tablescape for Thanksgiving.

194fLeigh

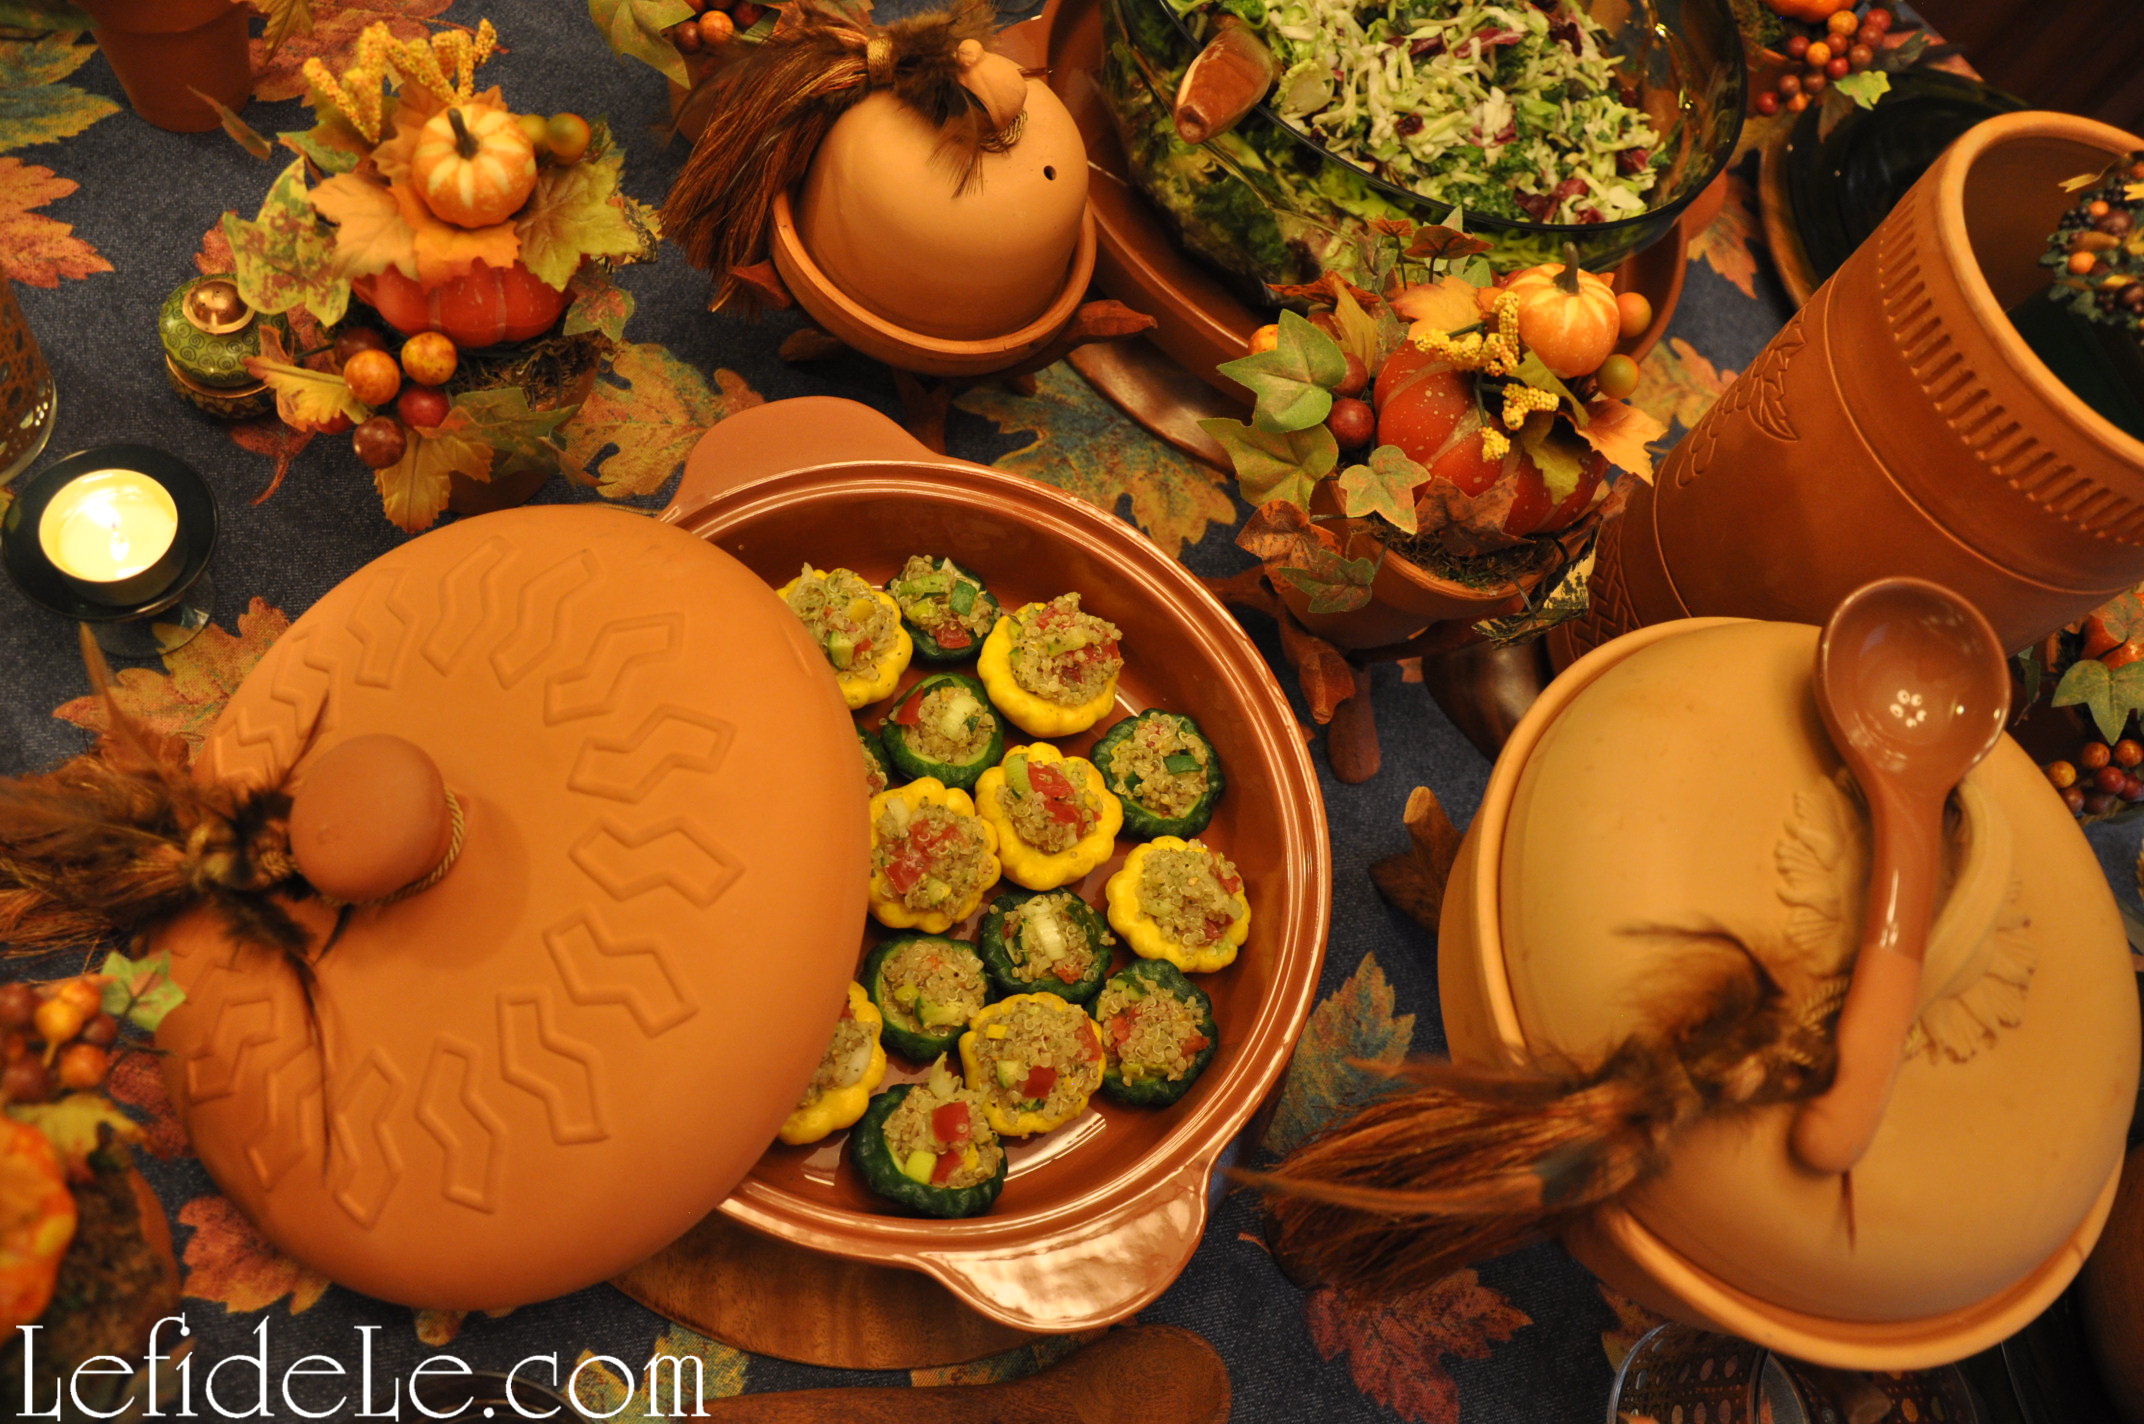
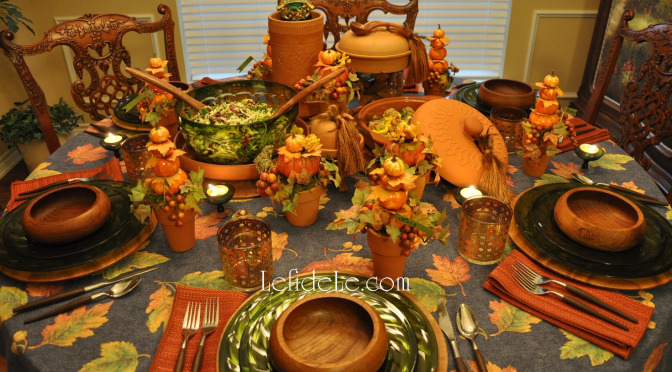
I craved more color than is typically seen in fall décor, and so added a tablecloth with a denim background.

76Leigh

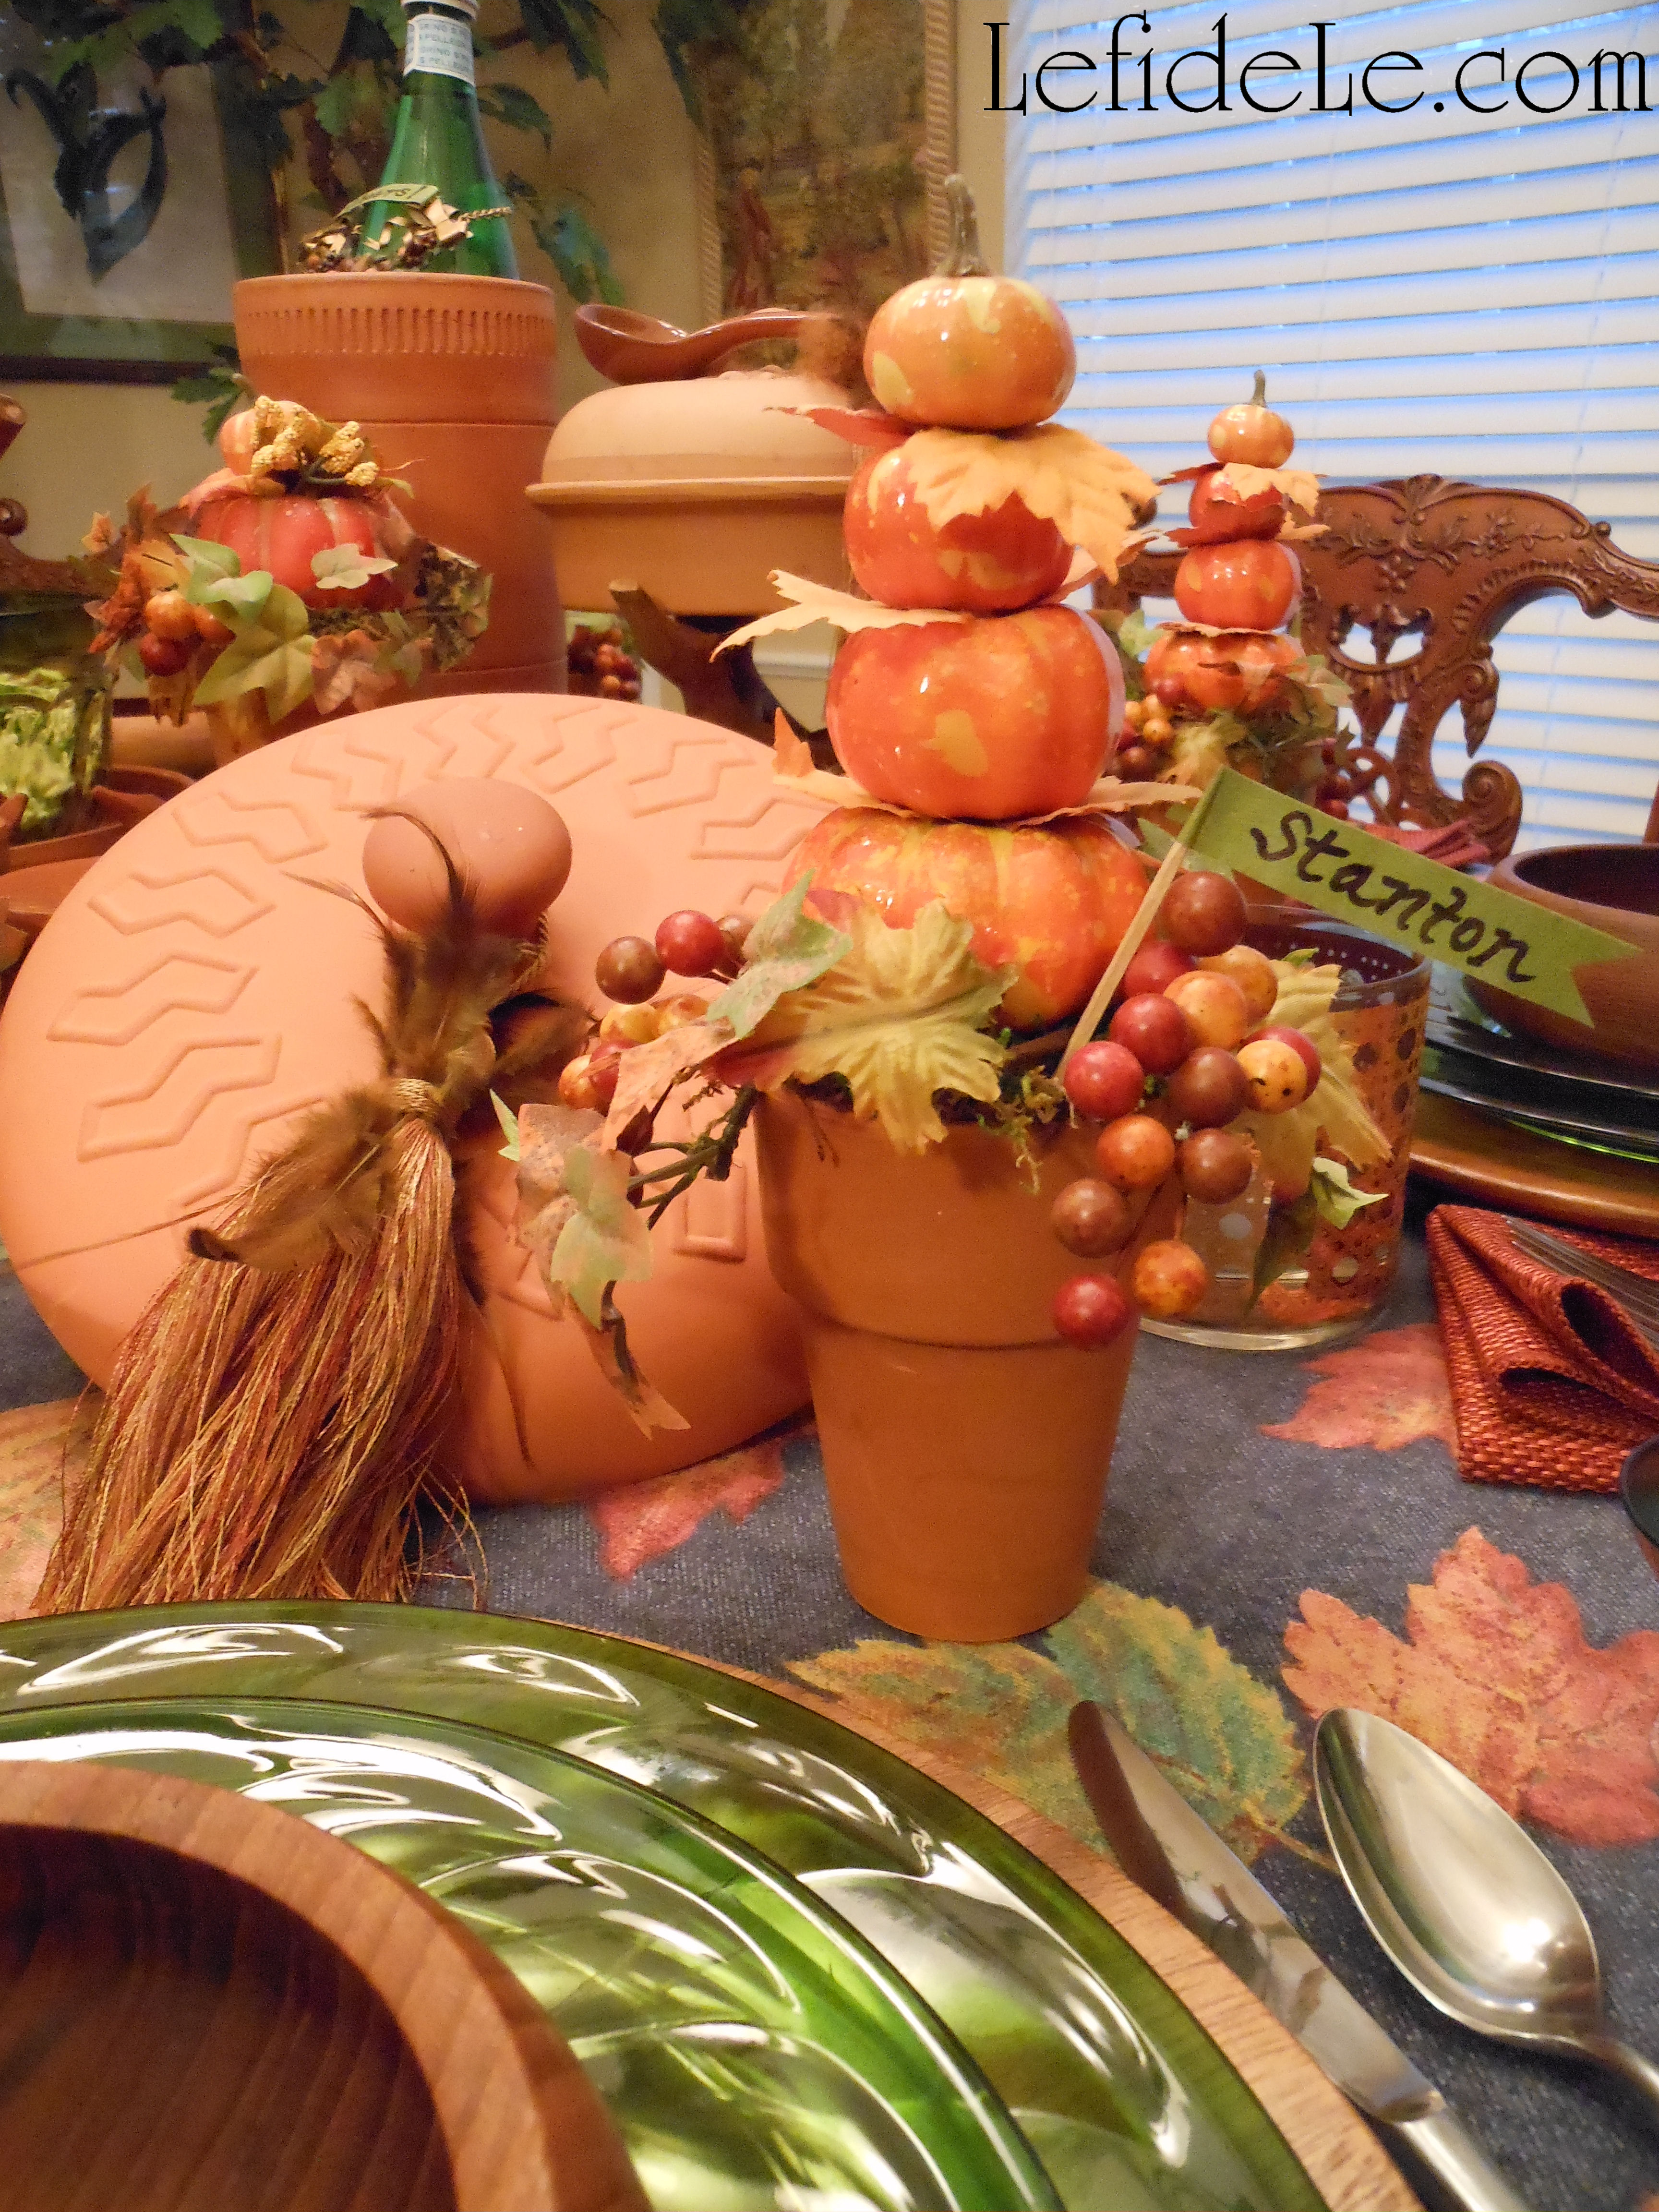
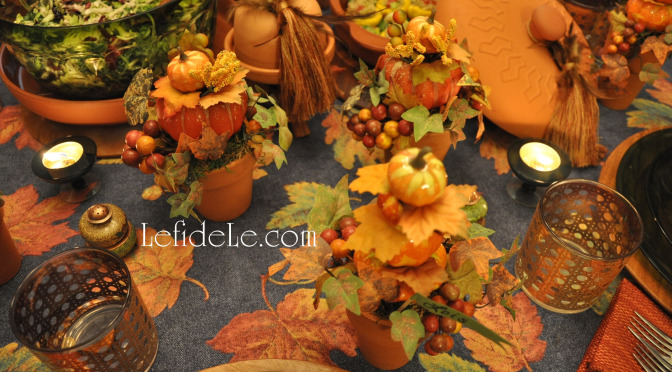
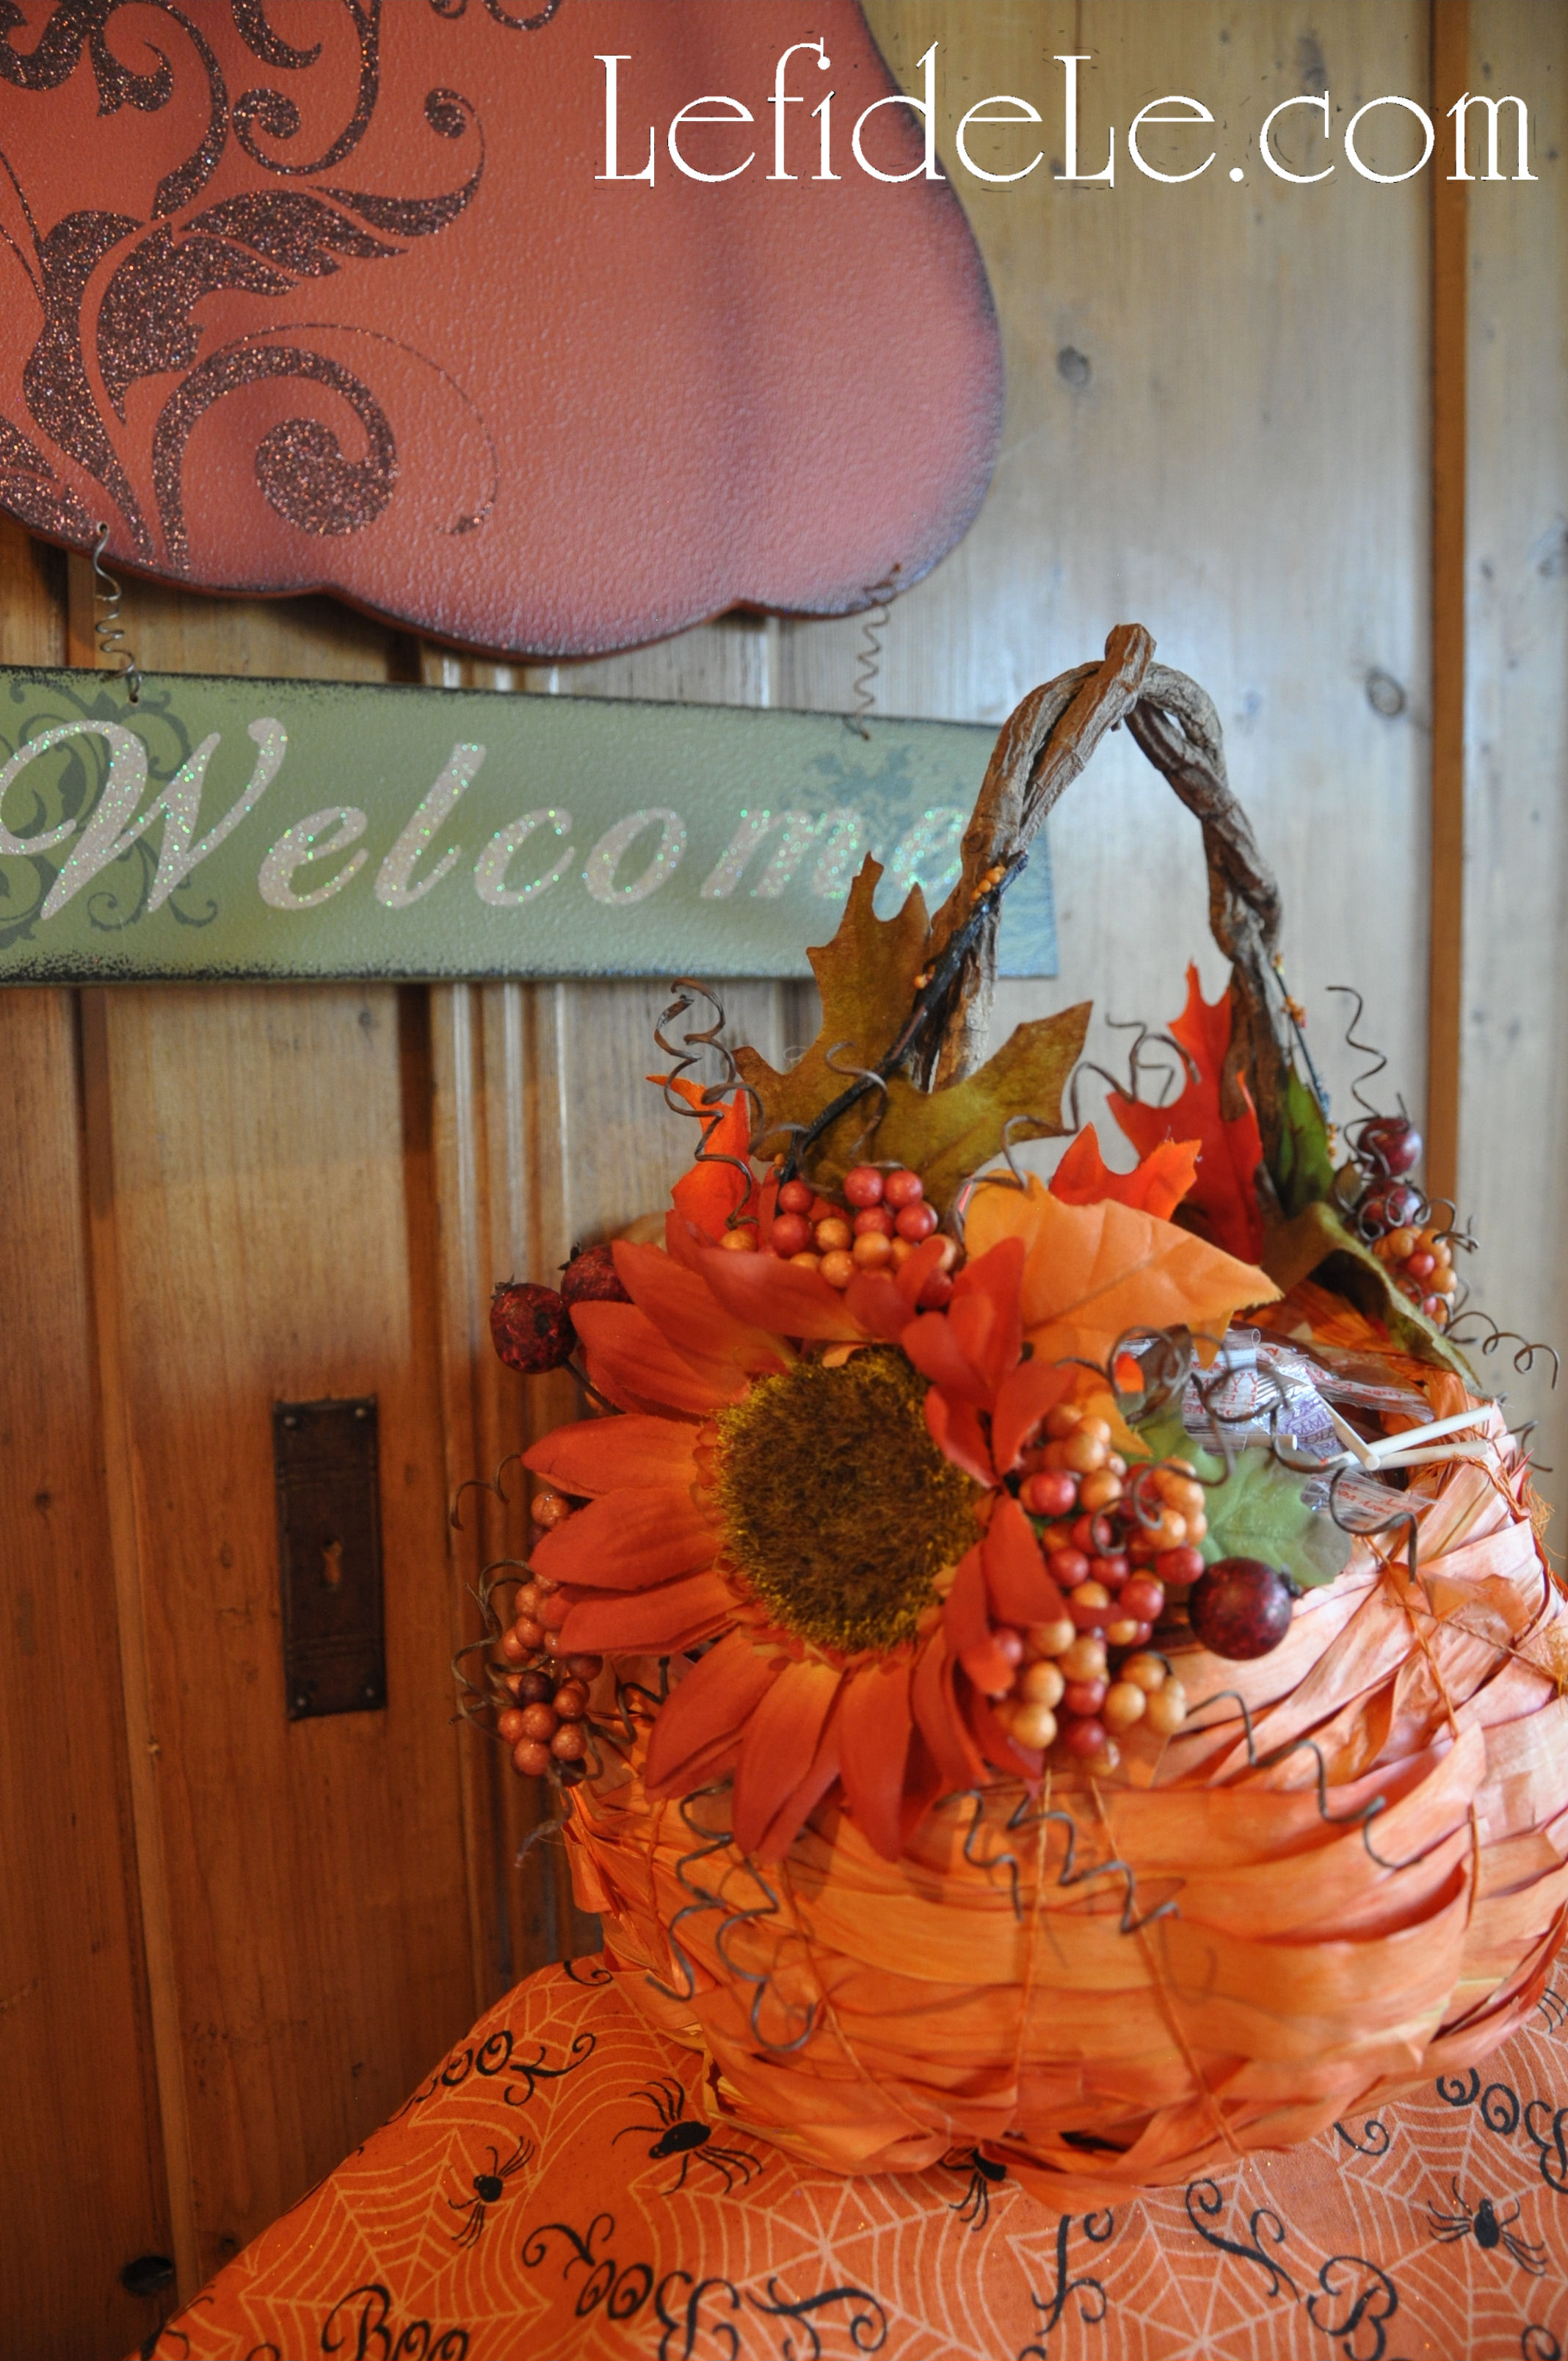
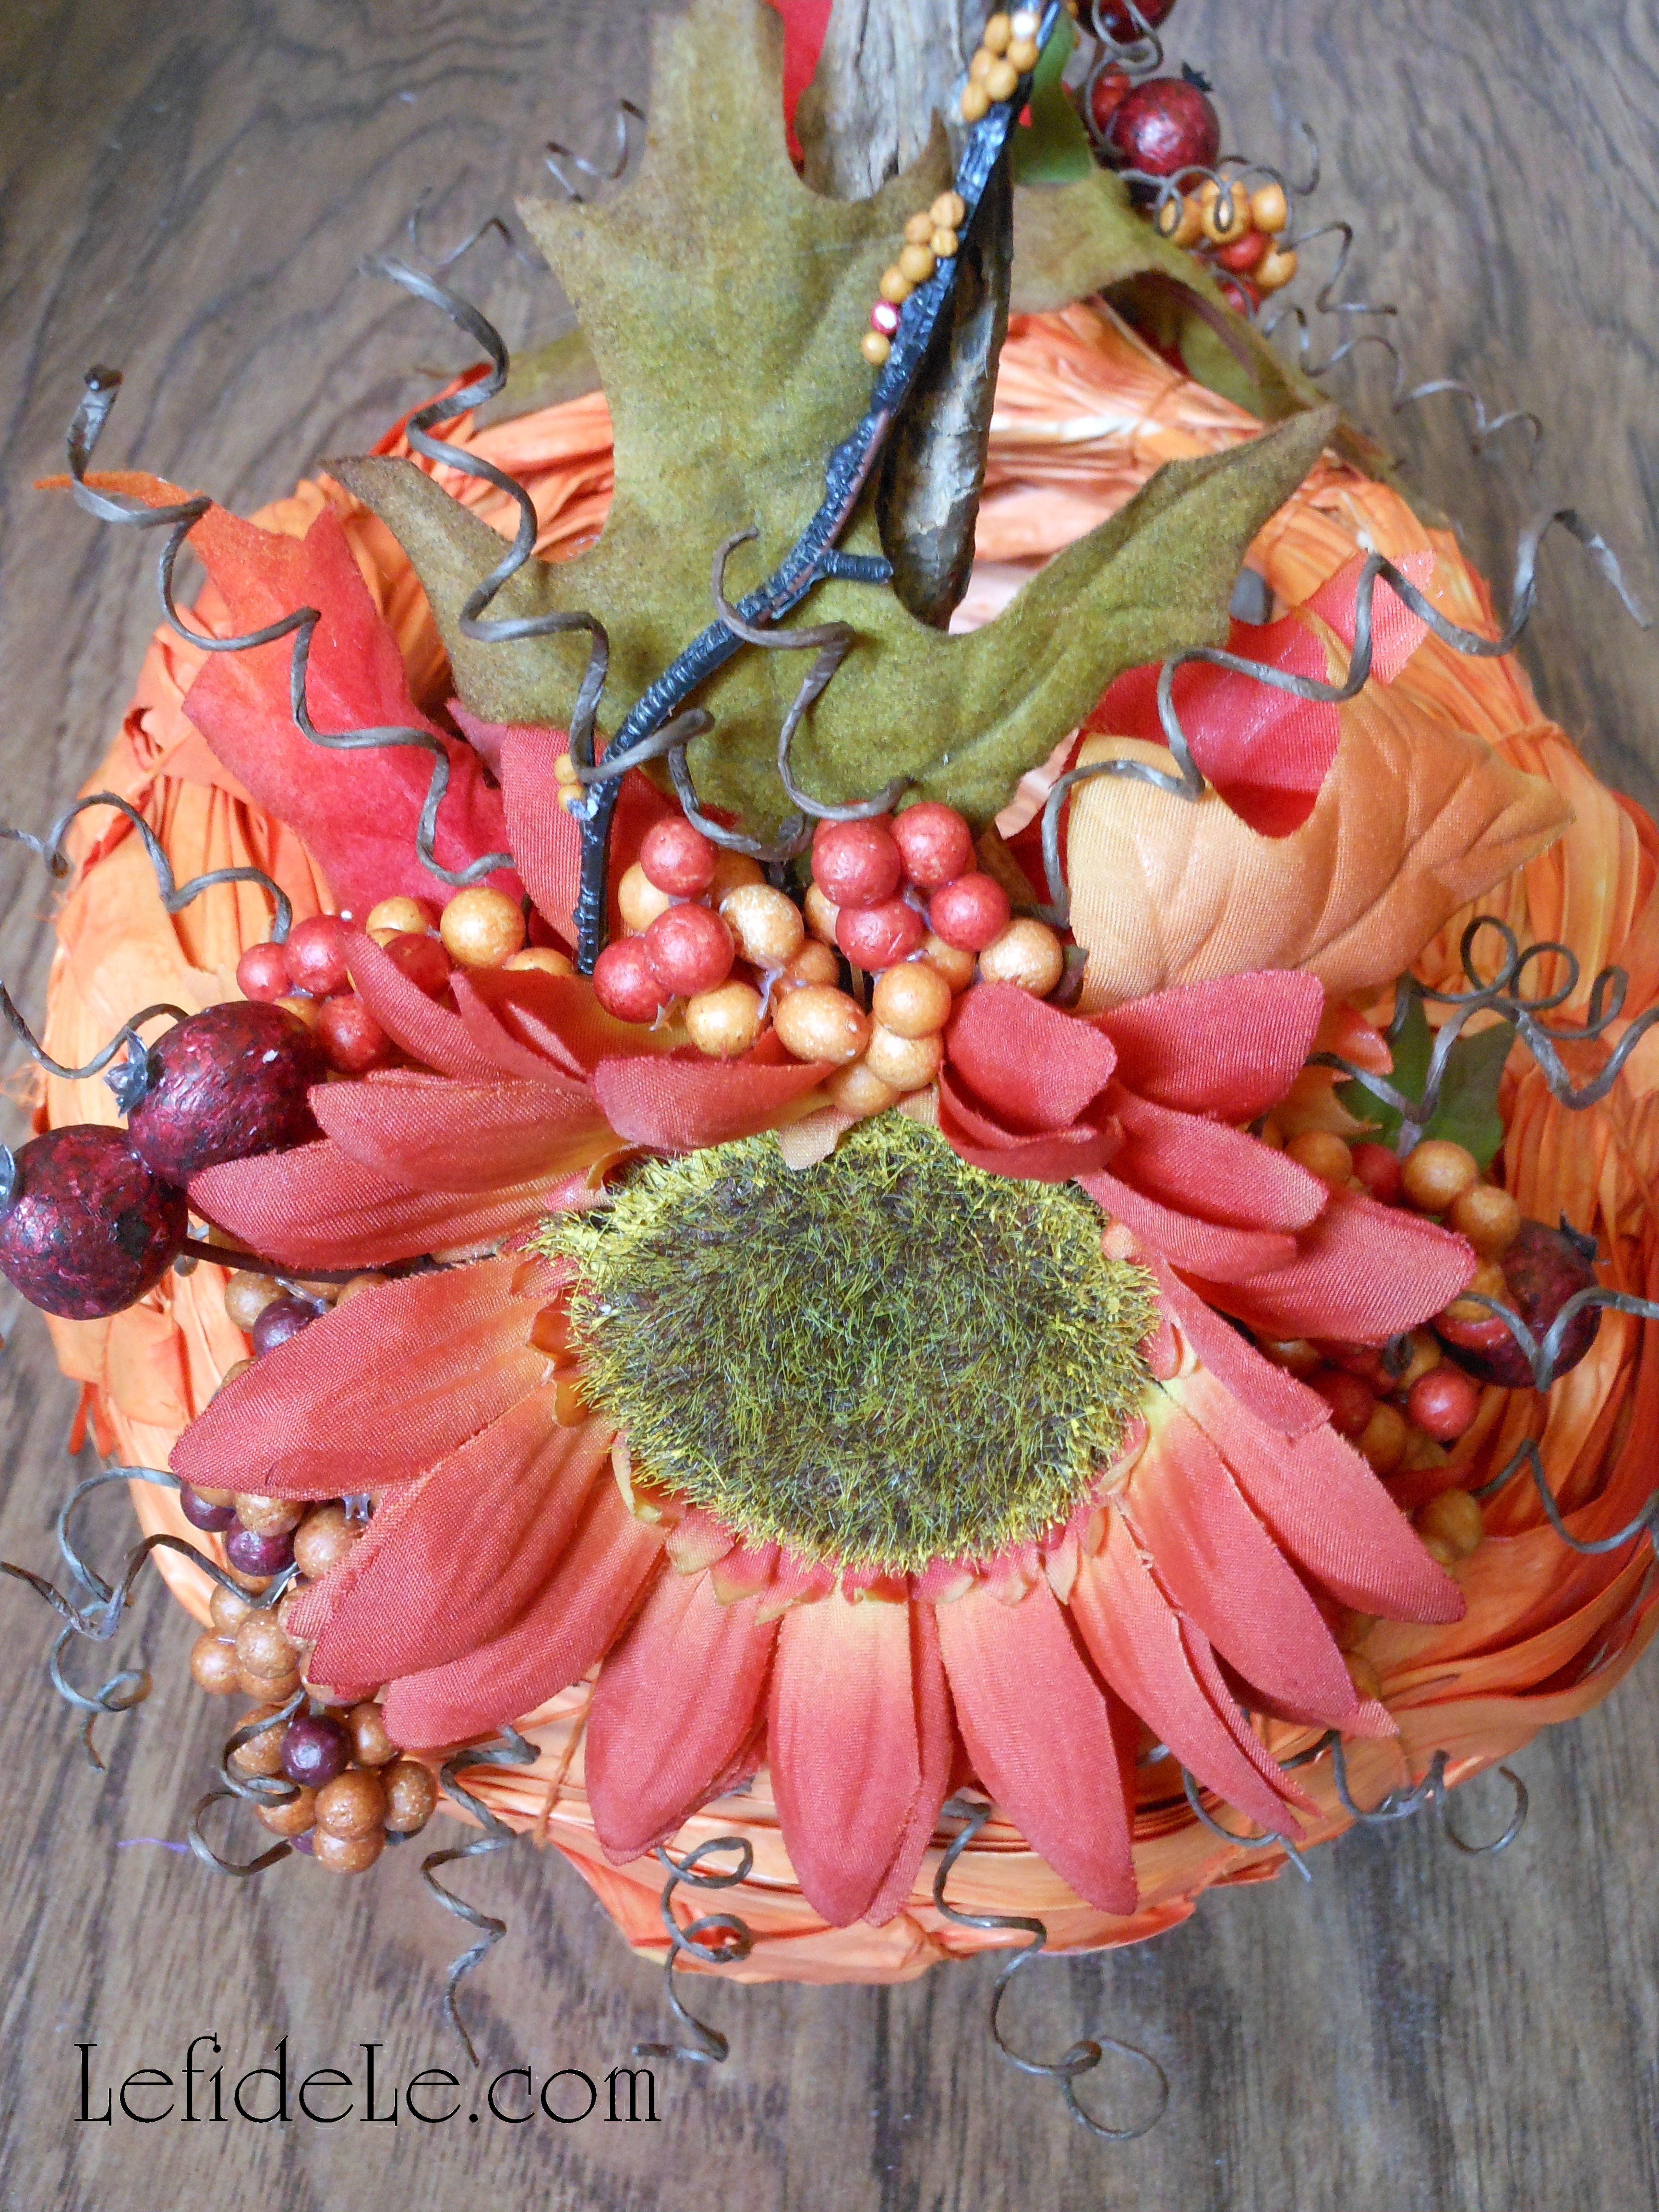
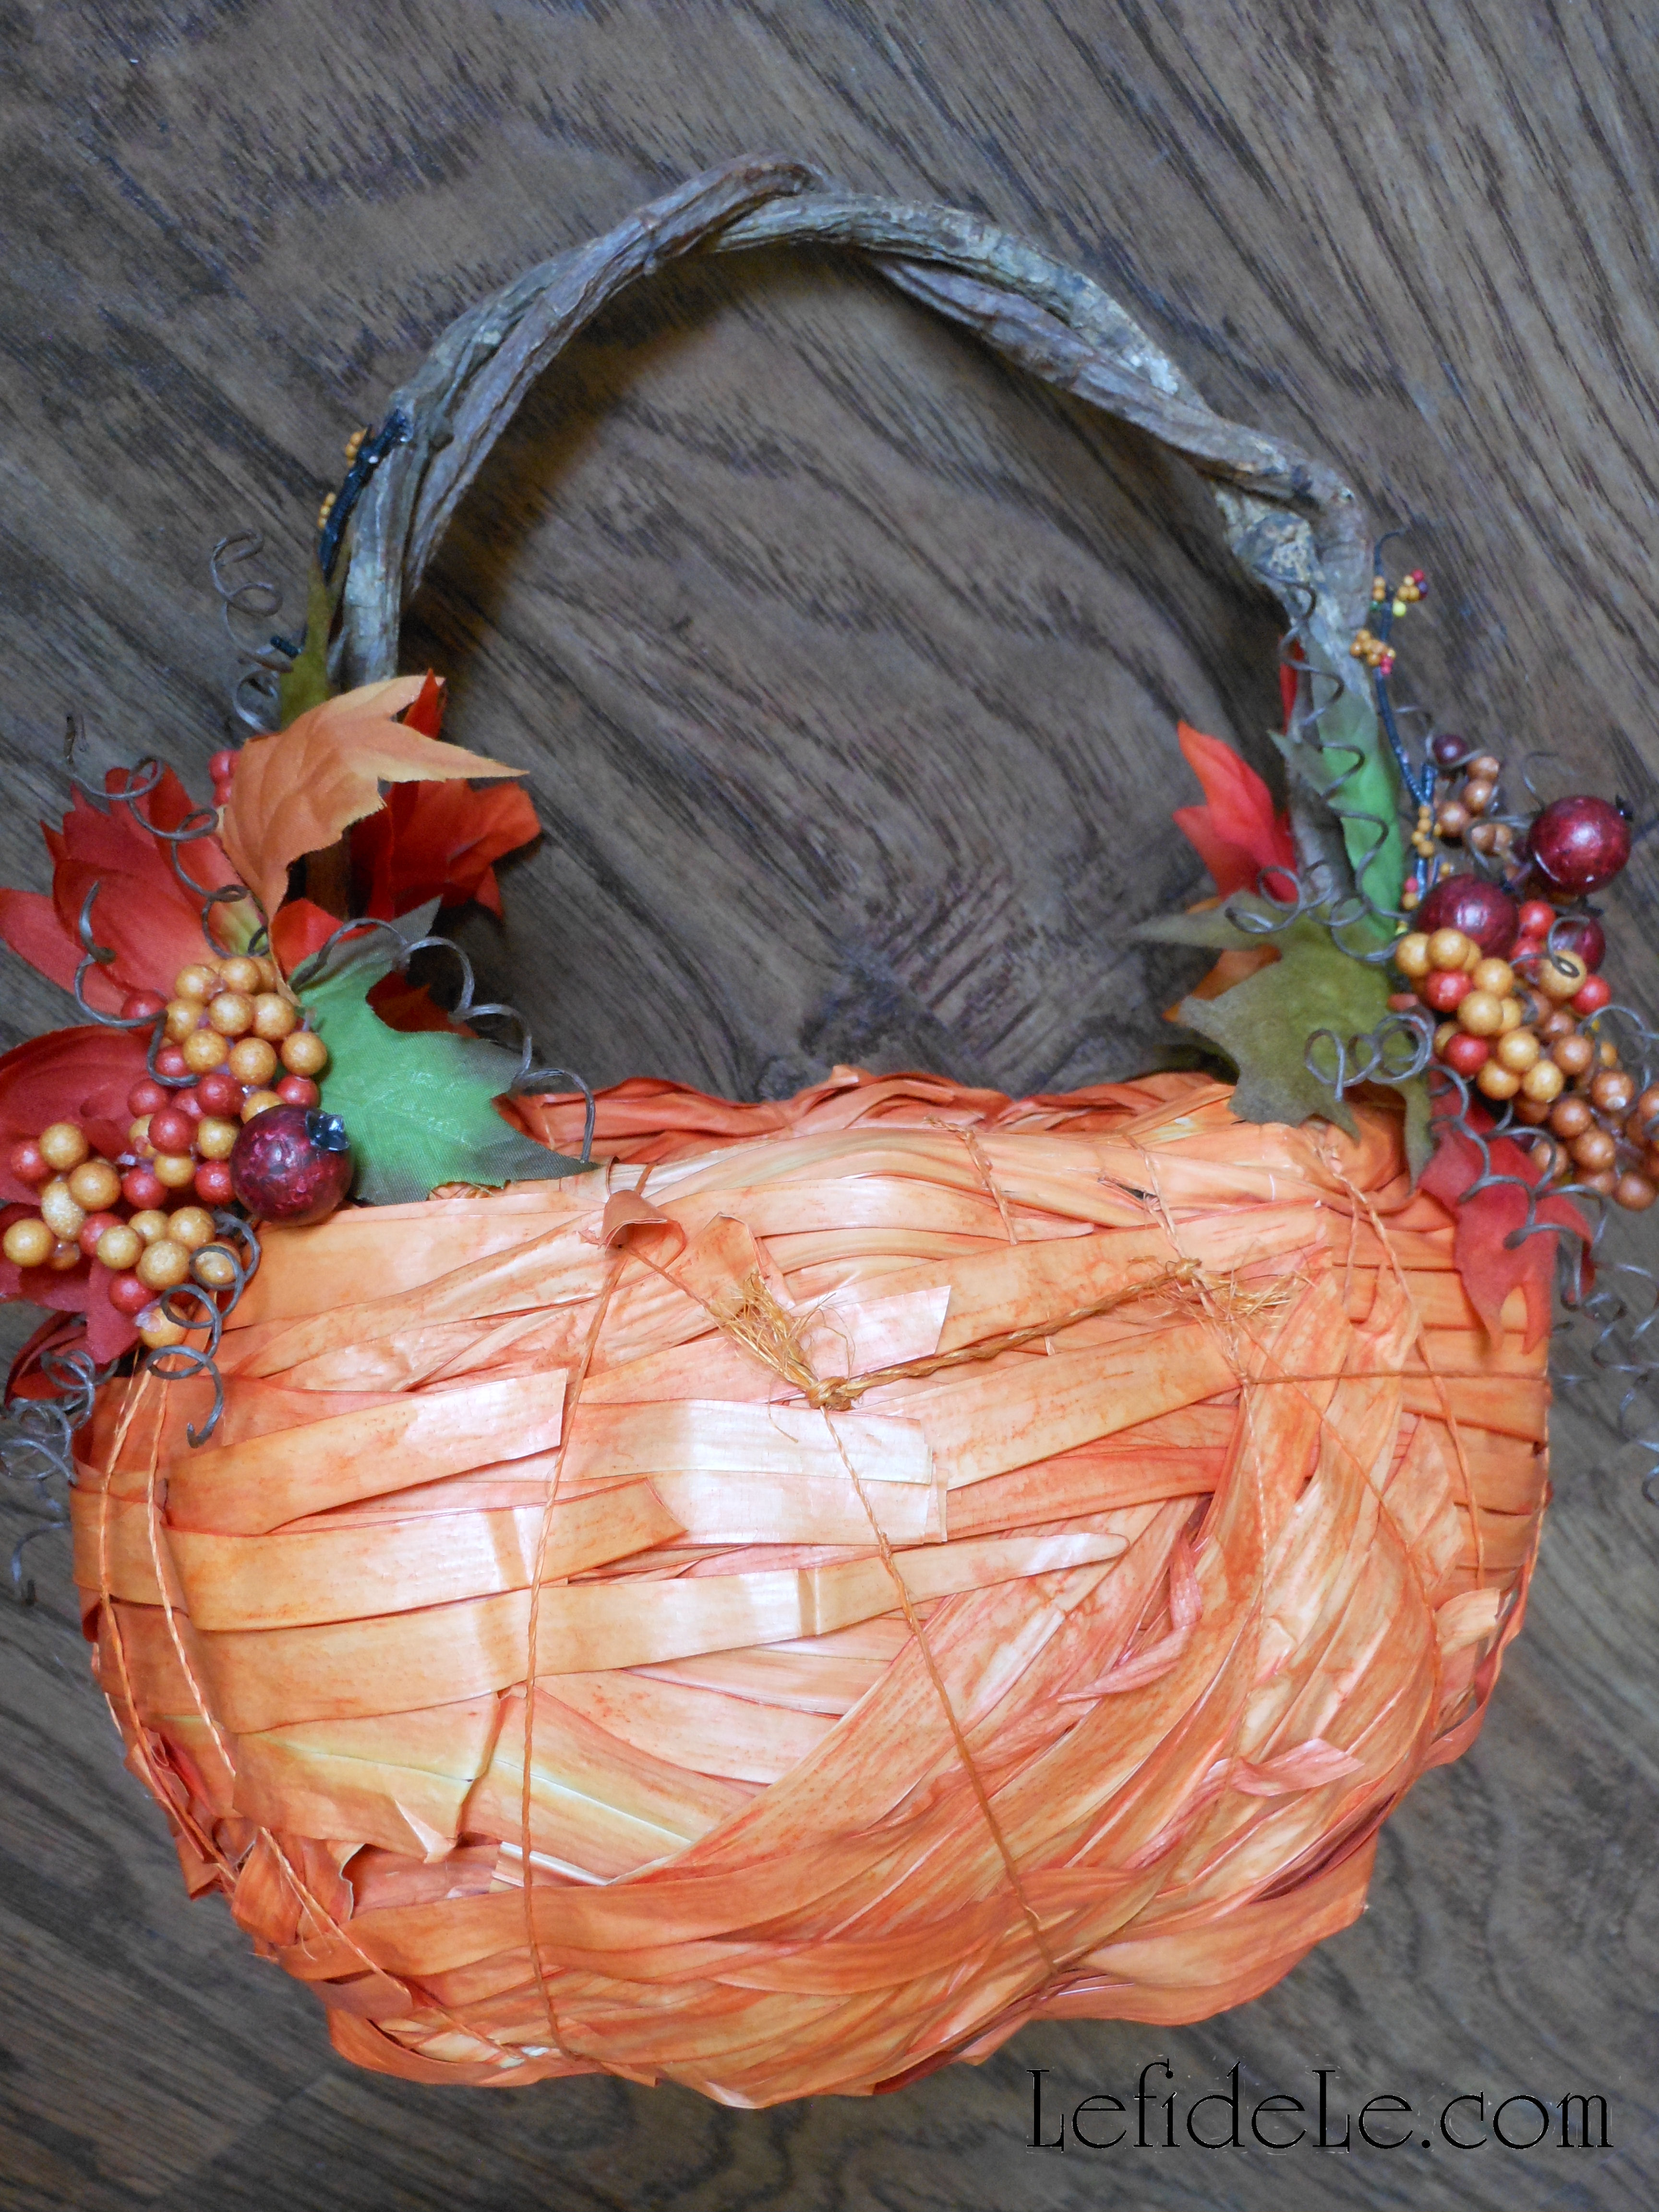
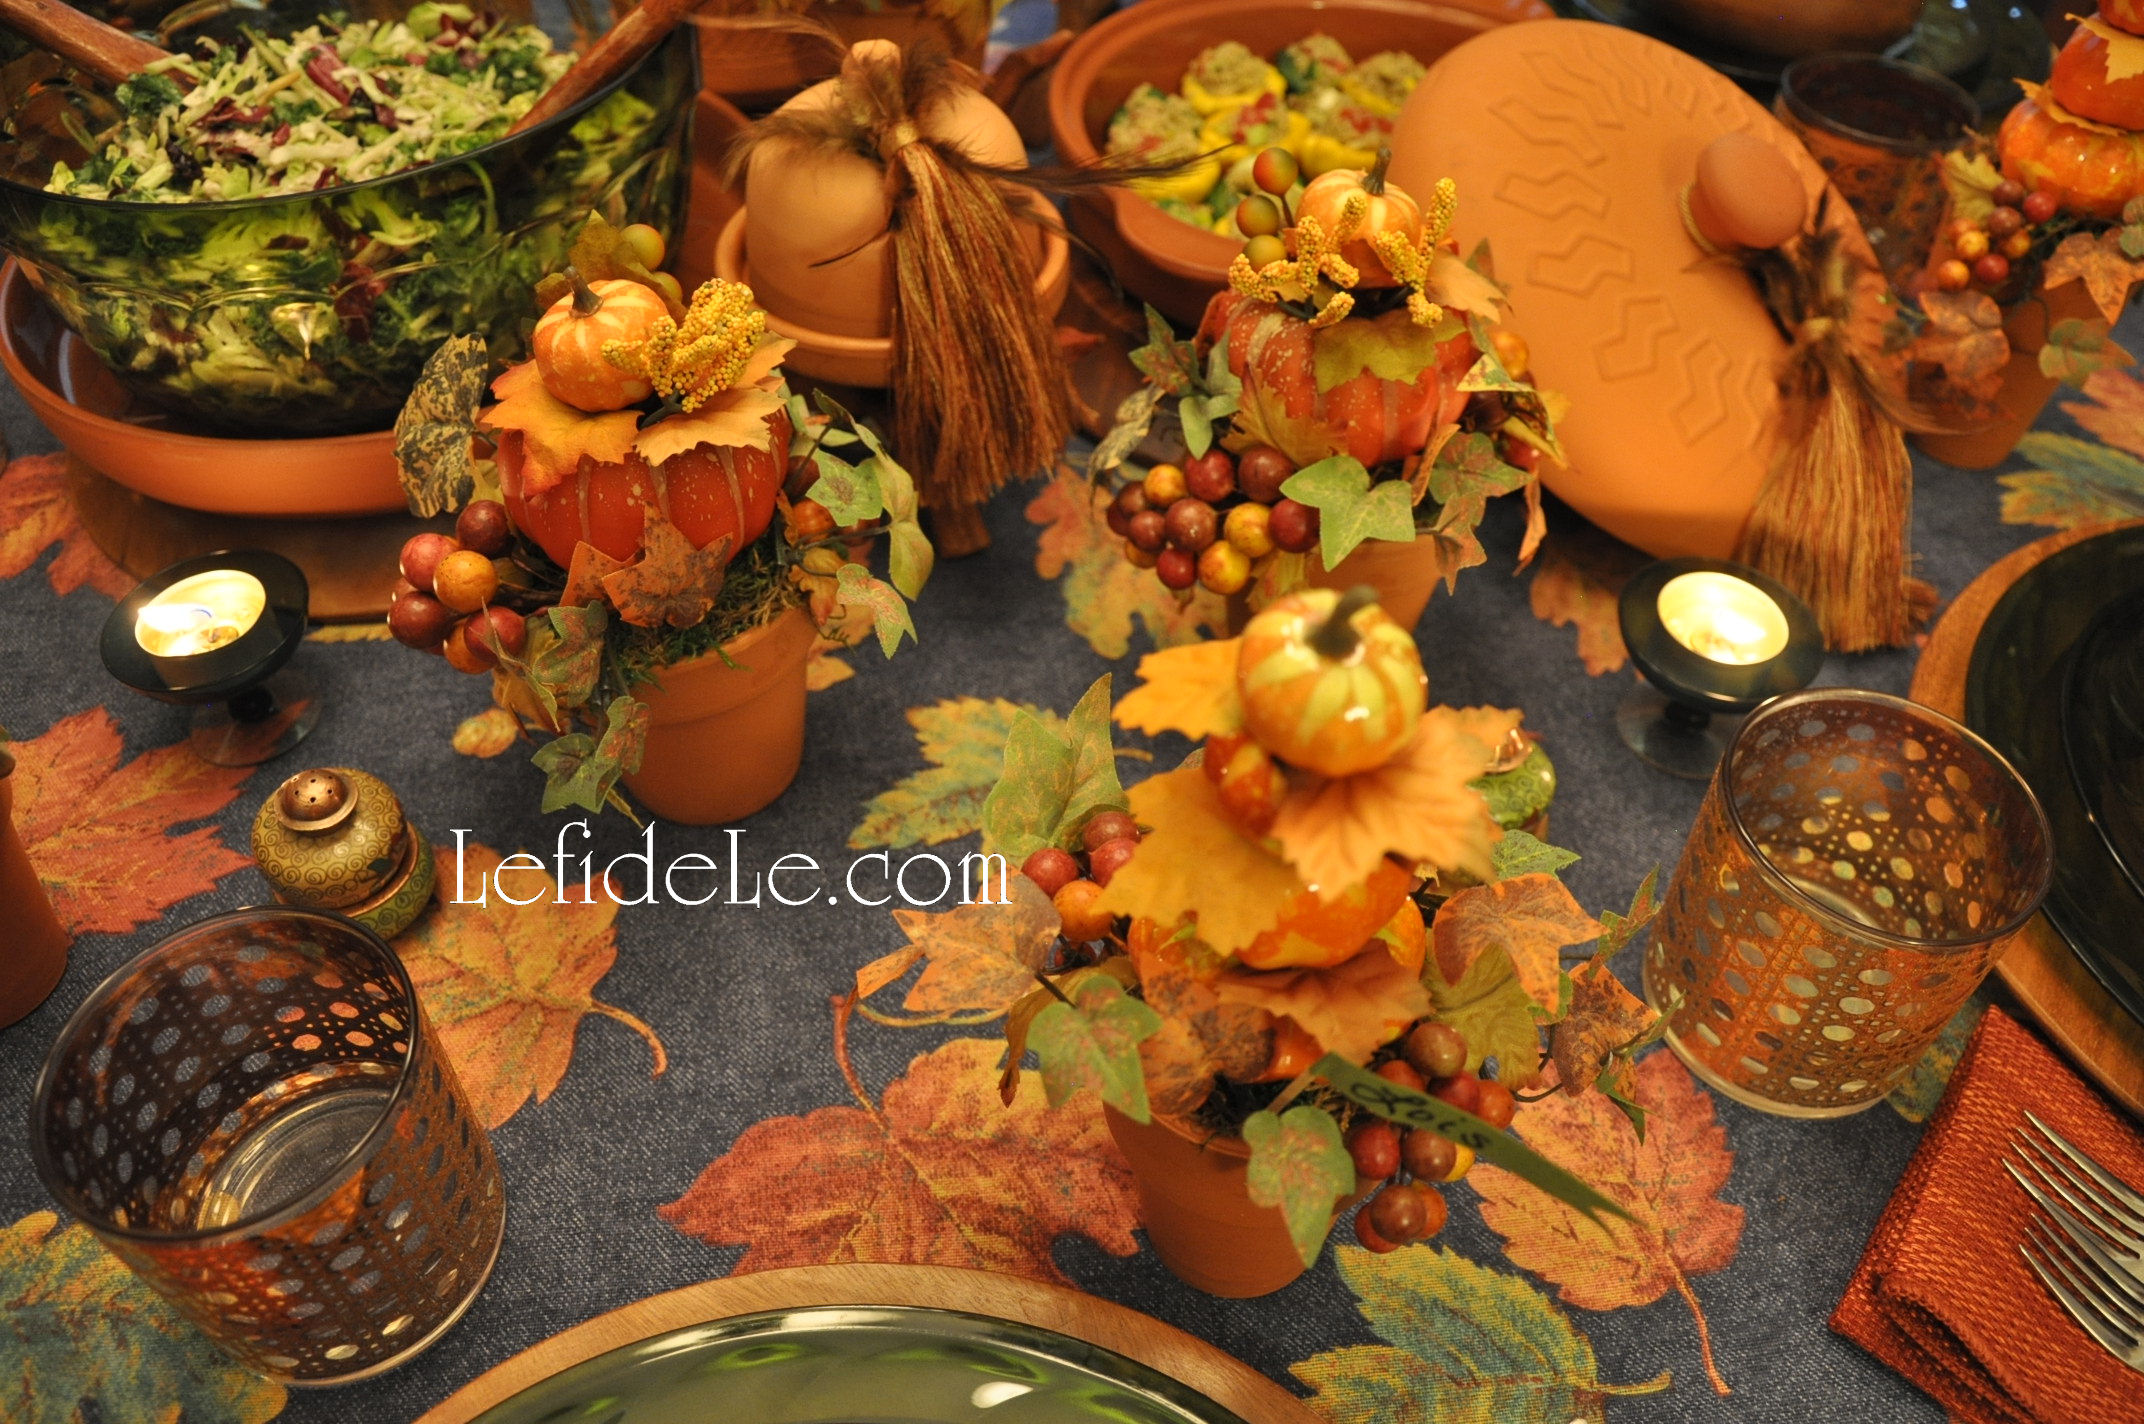
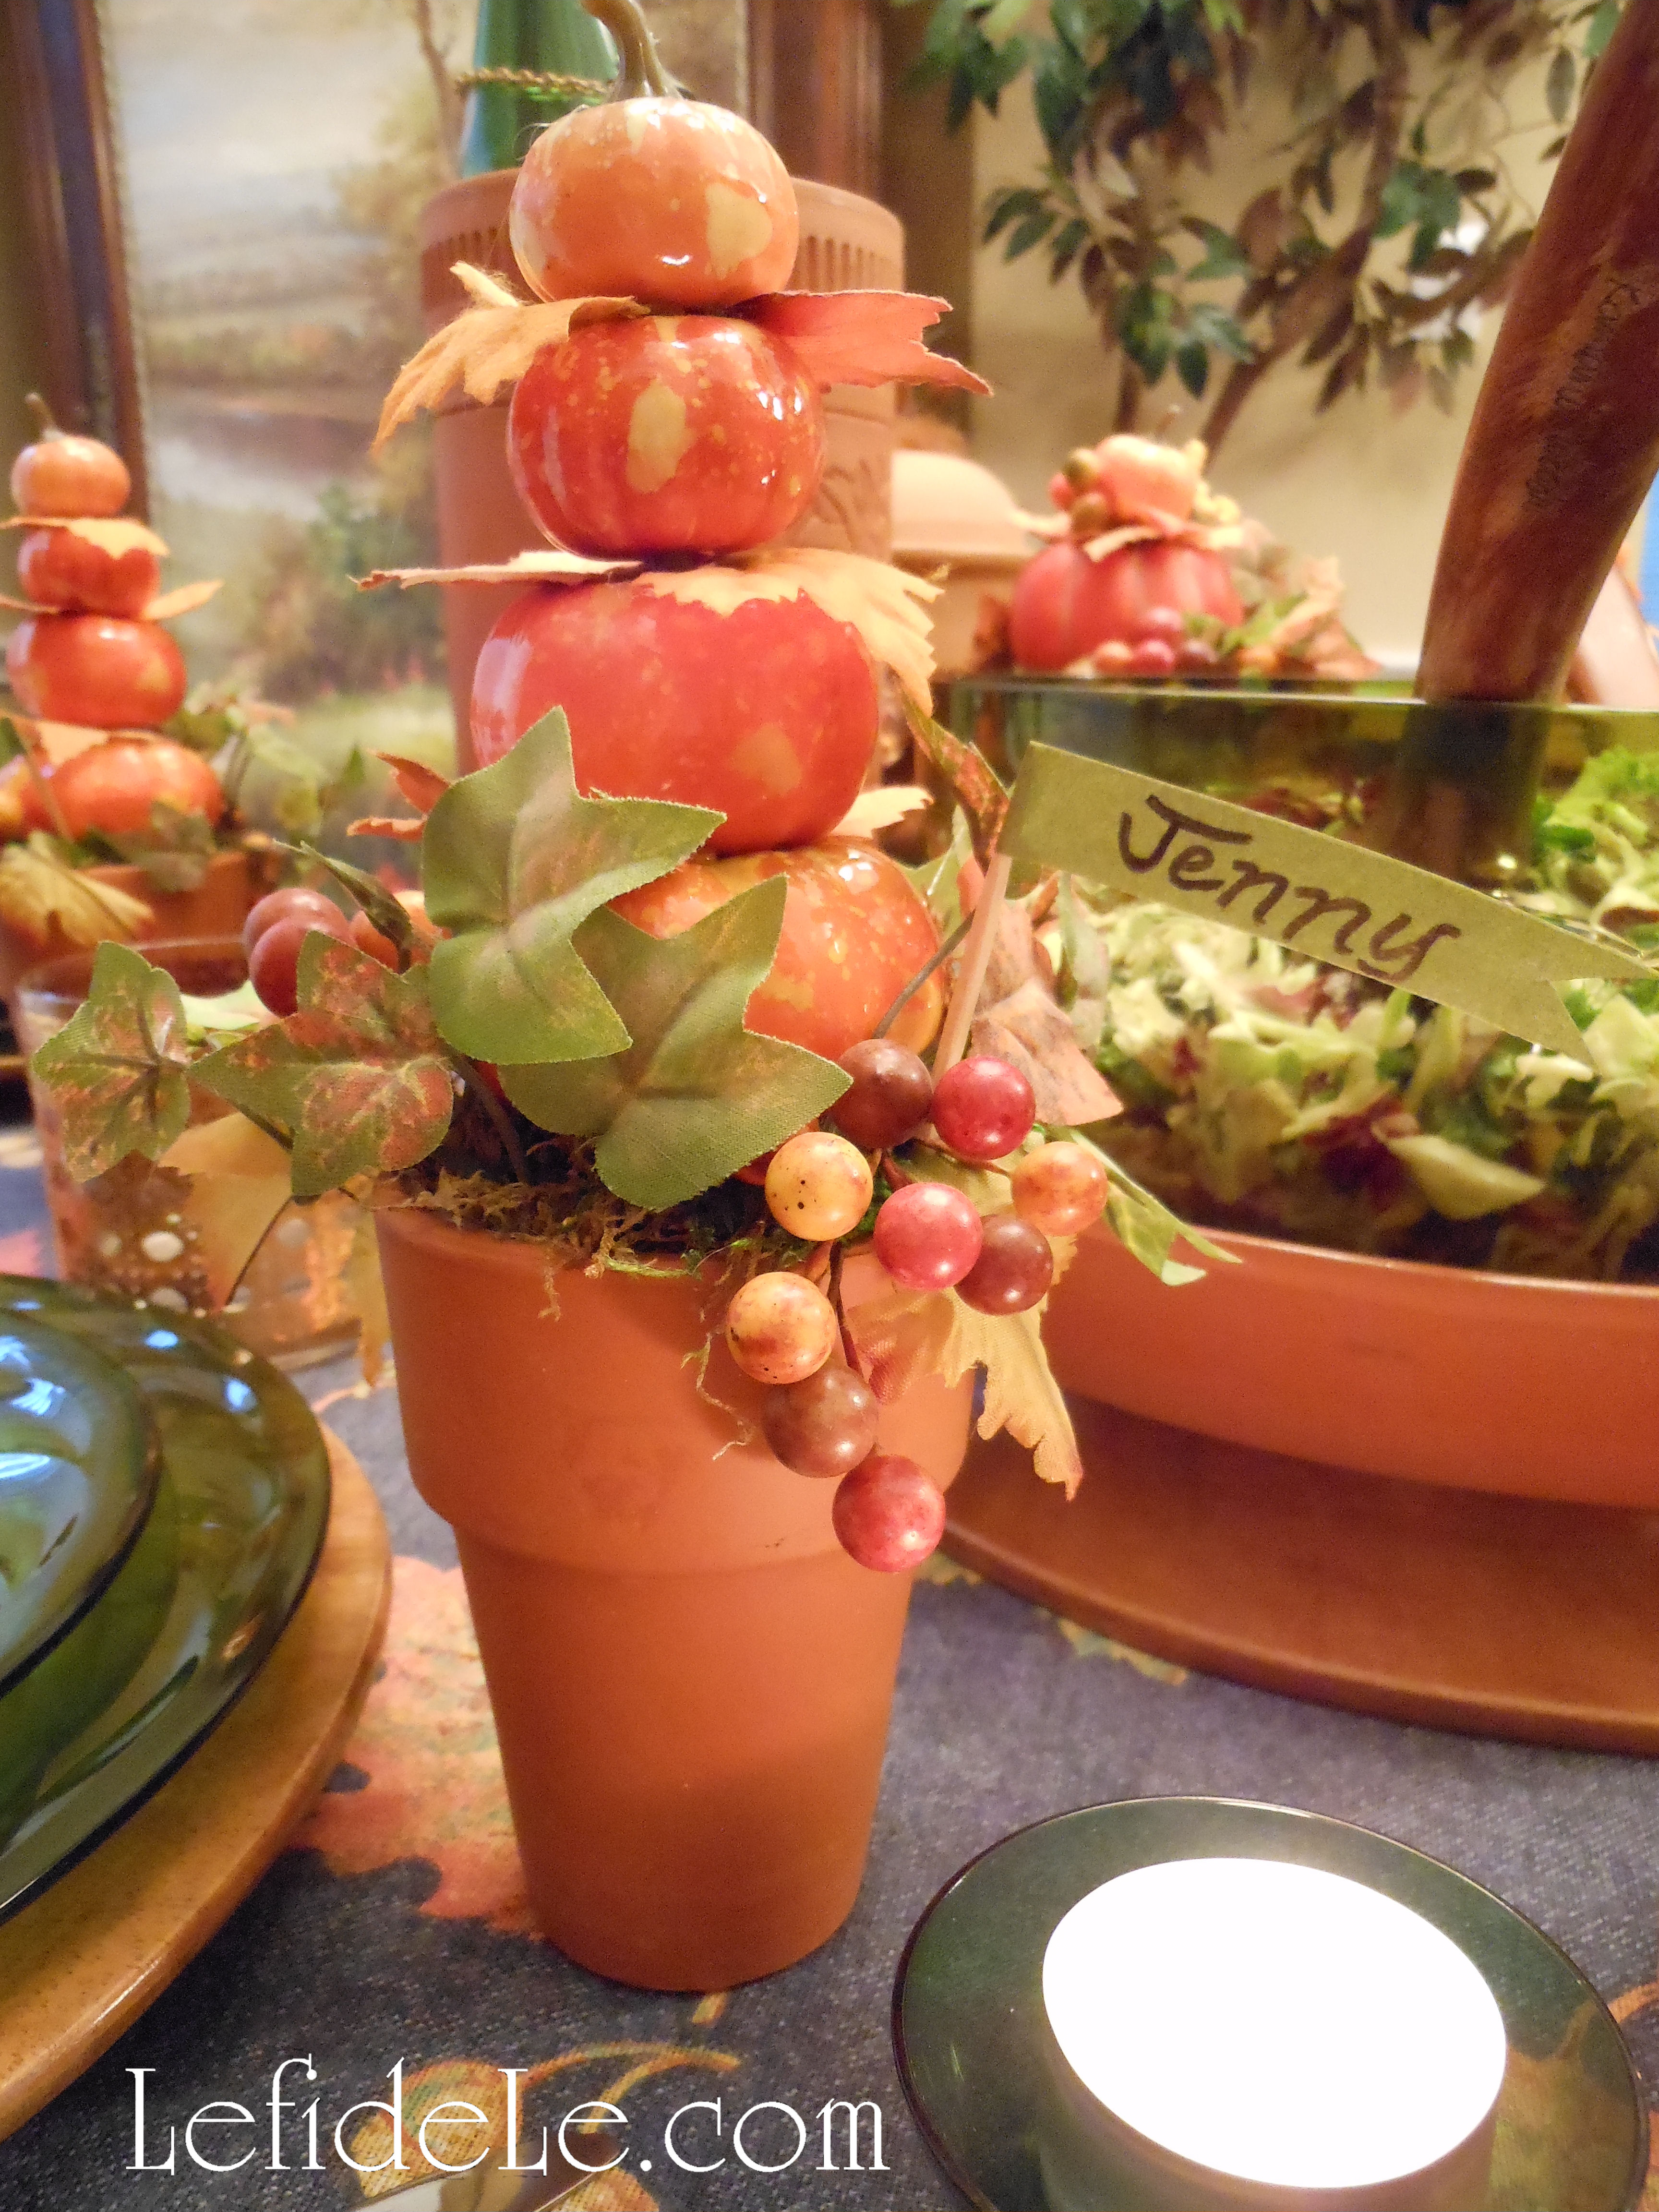
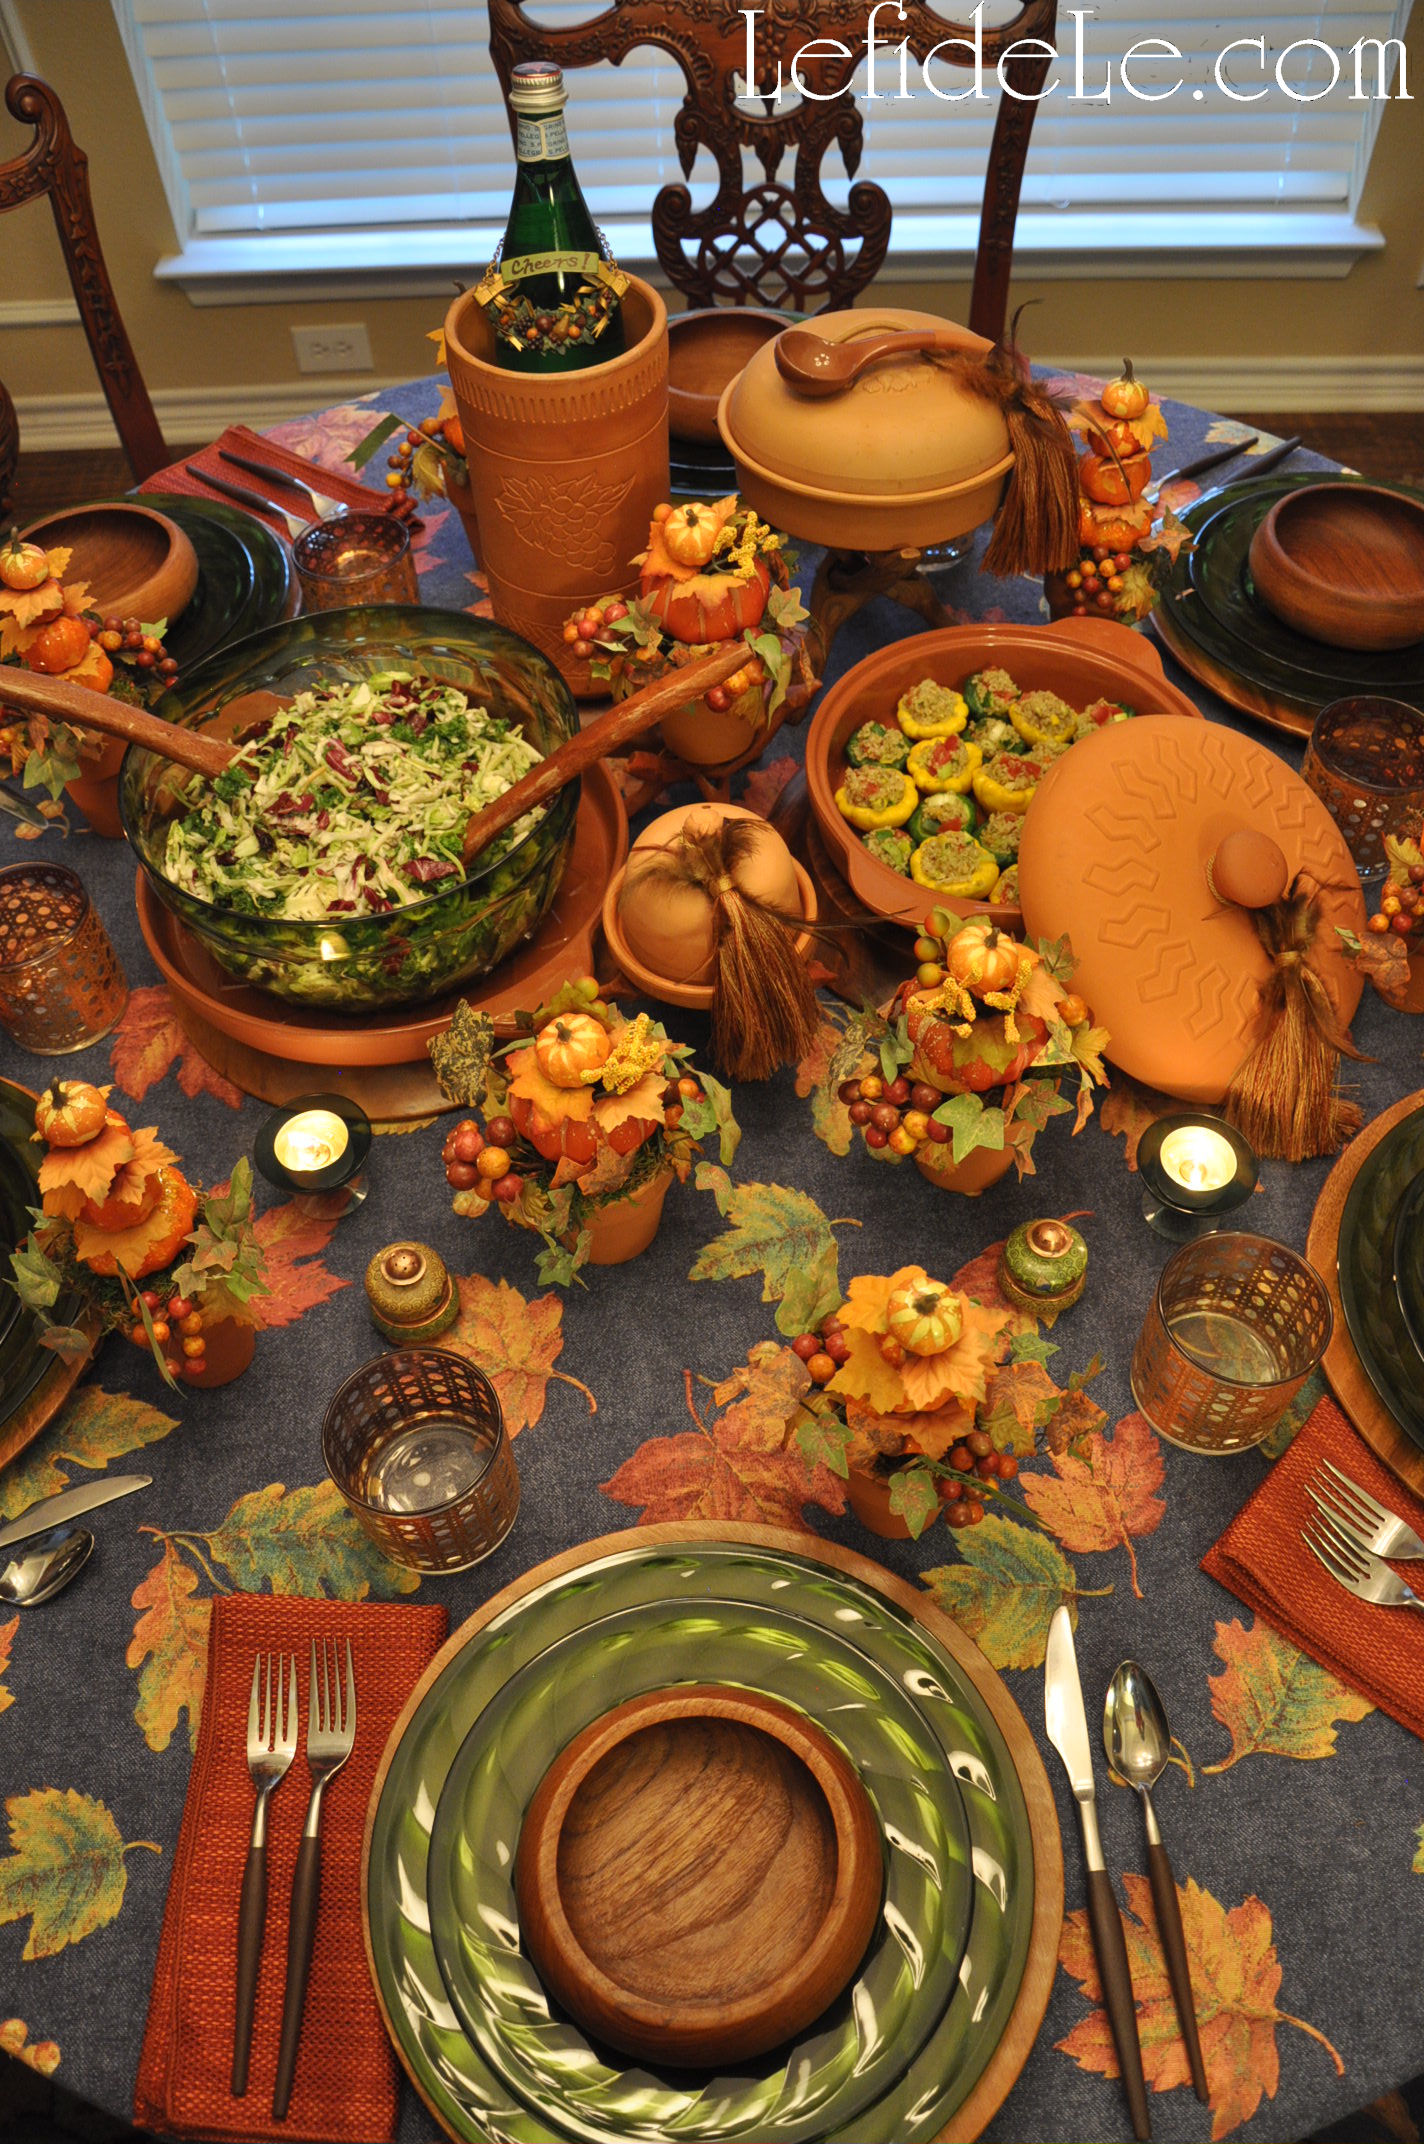
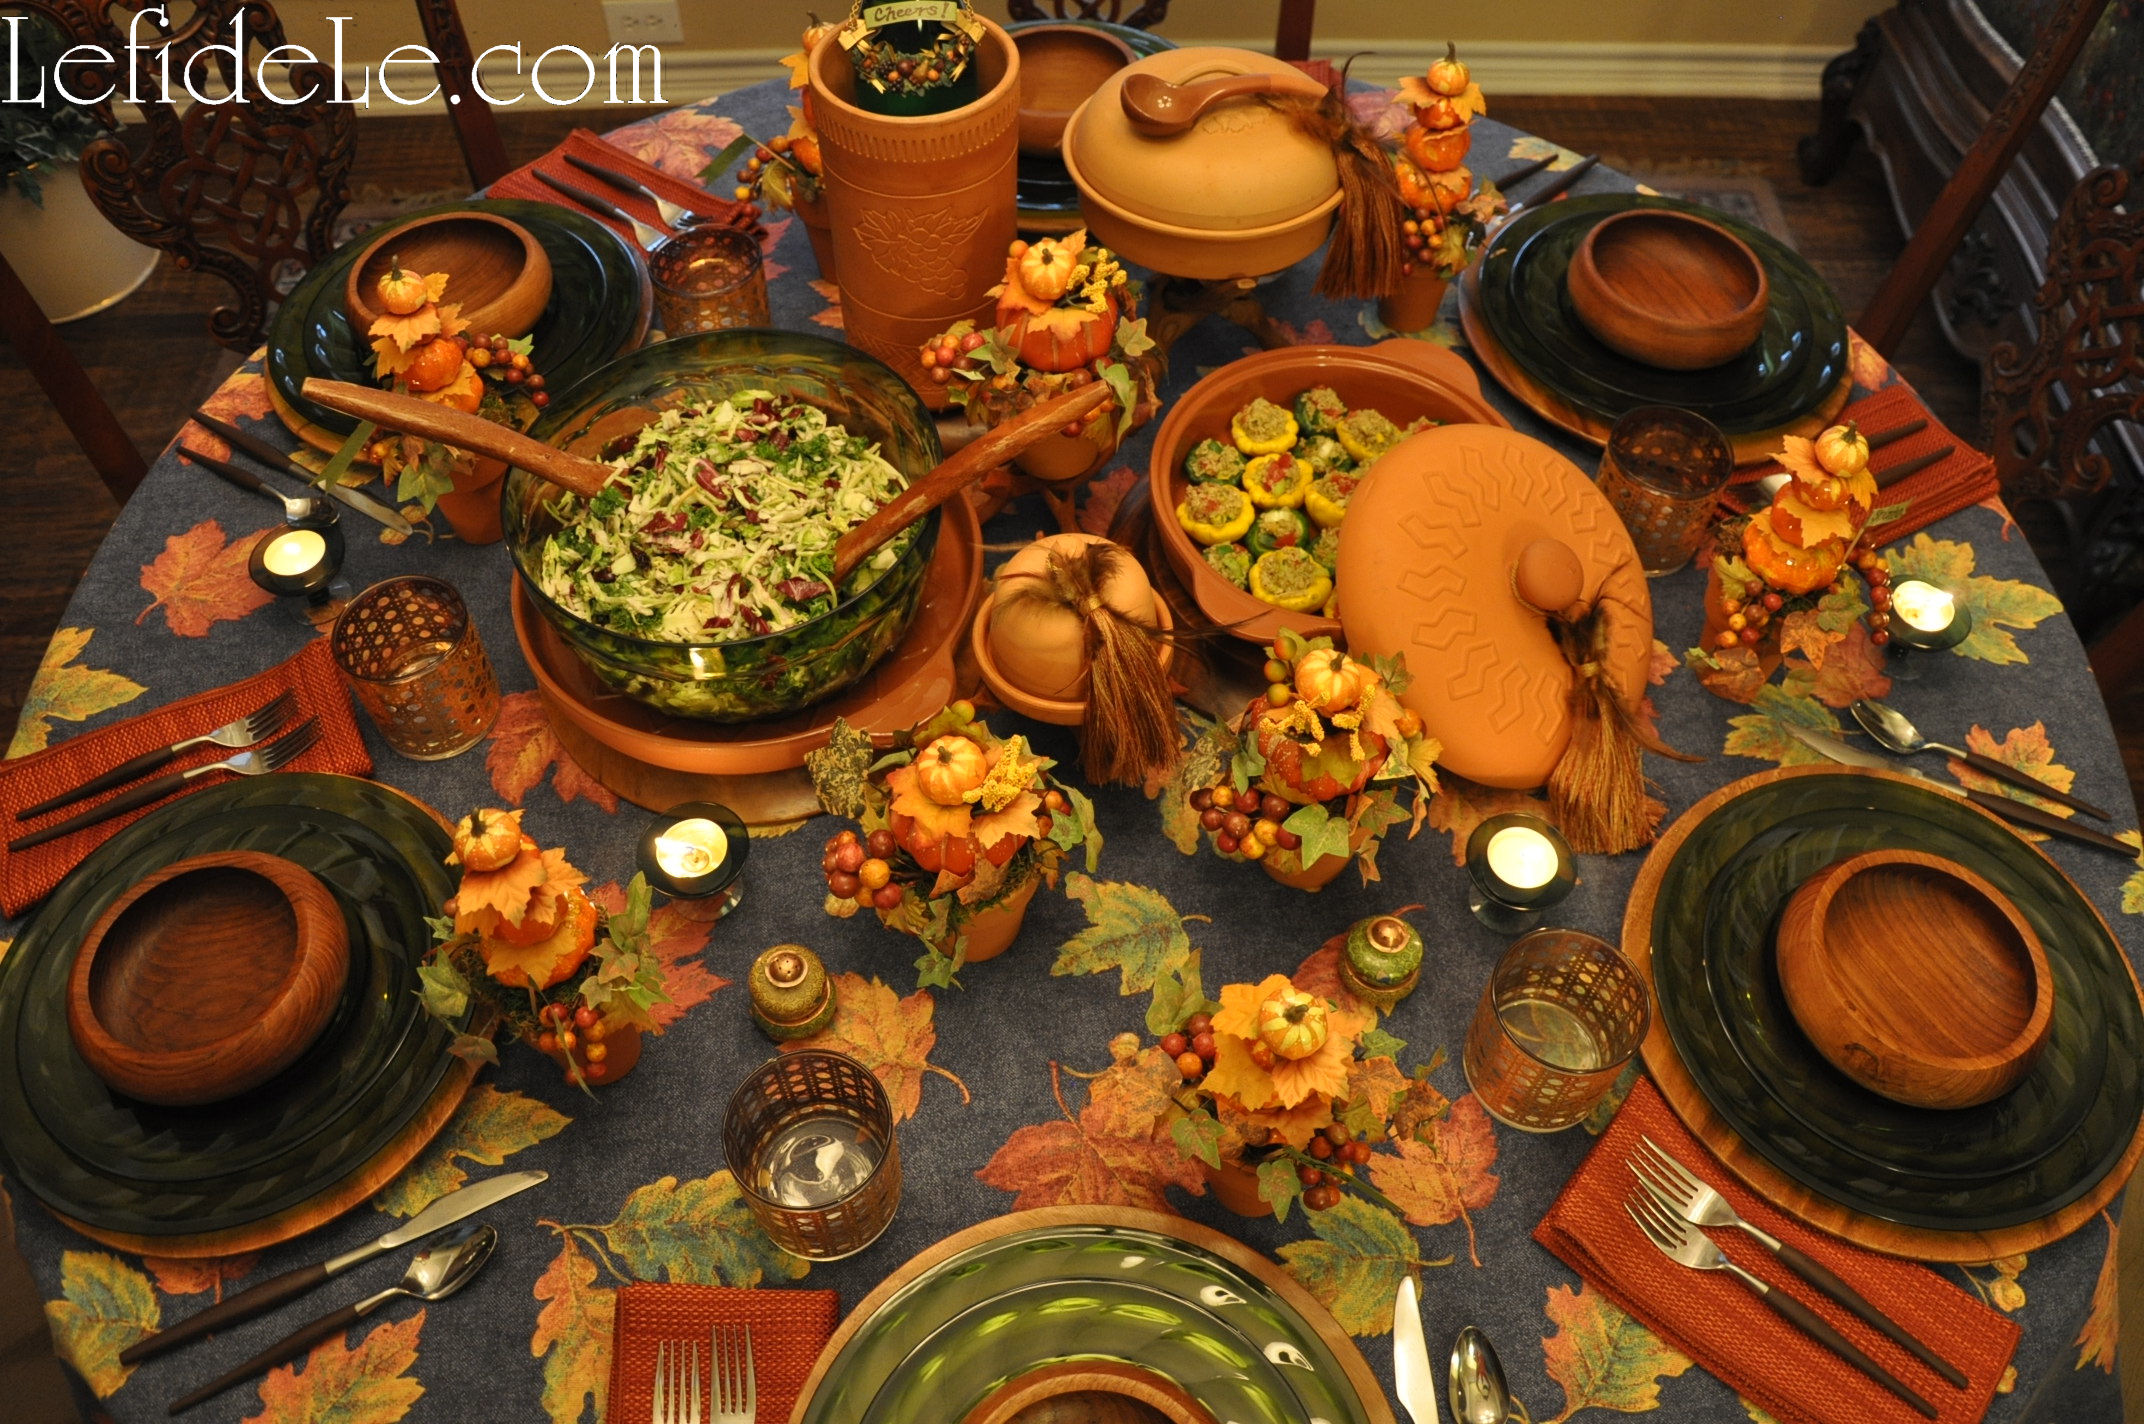
The blue color perfectly balanced the orange of my pumpkin topiary crafts that I made for place-card holders.

75PumpkinTopiaries-Leigh

More color was added with green plates and green crystal votive holders.

148PumpkinTopiaries-Leigh

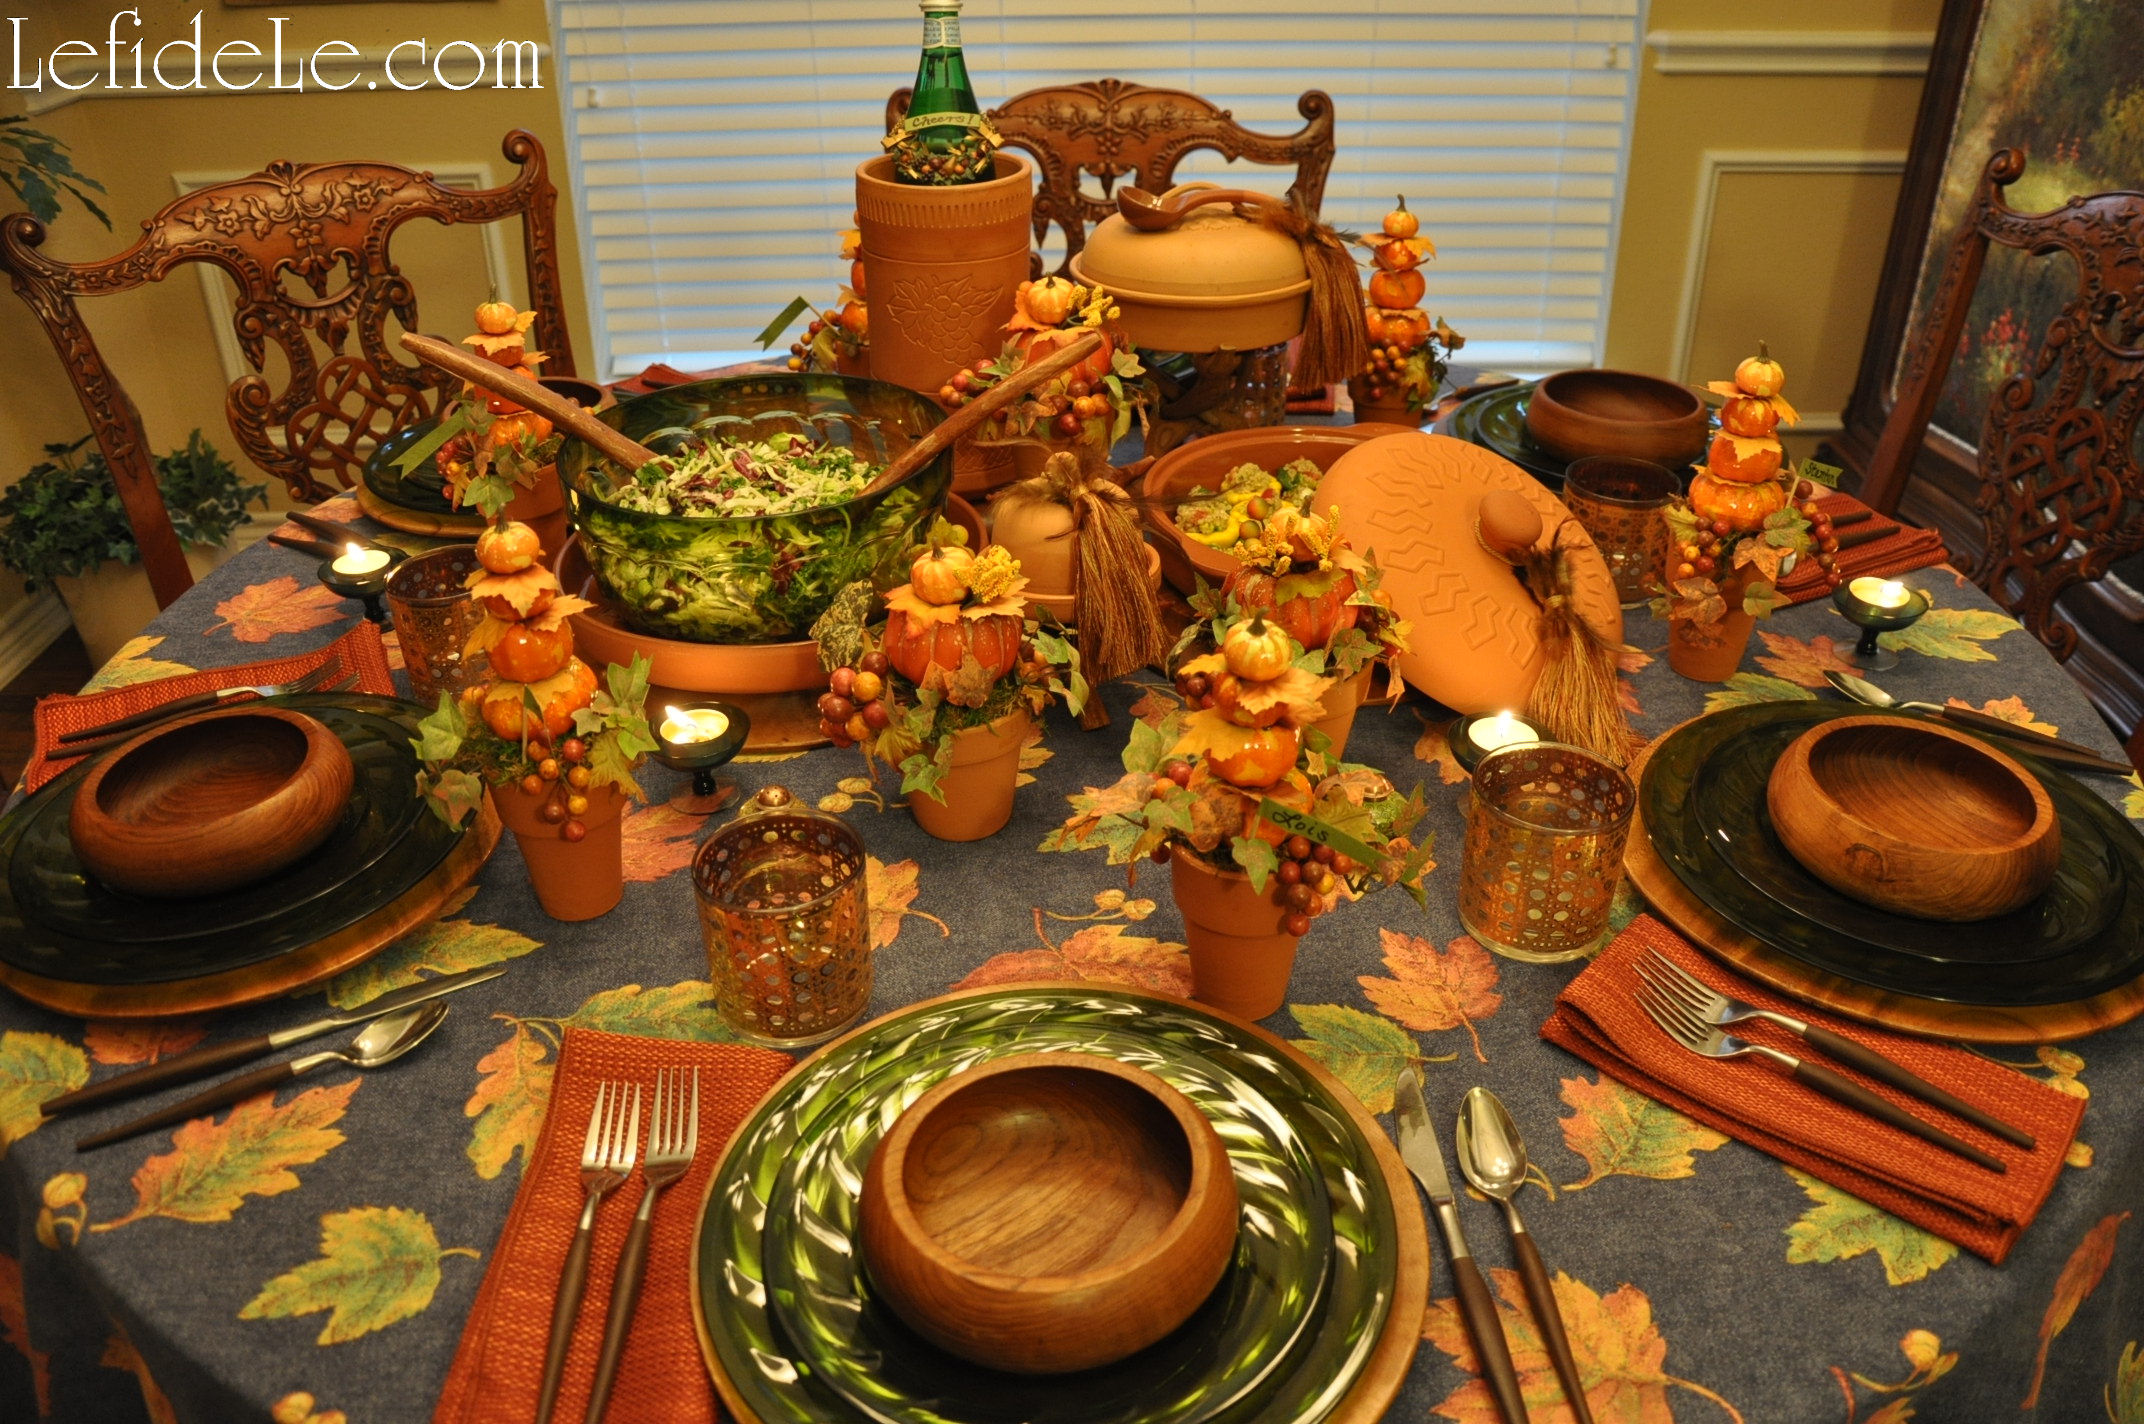
Deeply stained wooden bowls and chargers were utilized to reflect nature. Turning some upside down made stable pedestals for serving pieces.

141Leigh

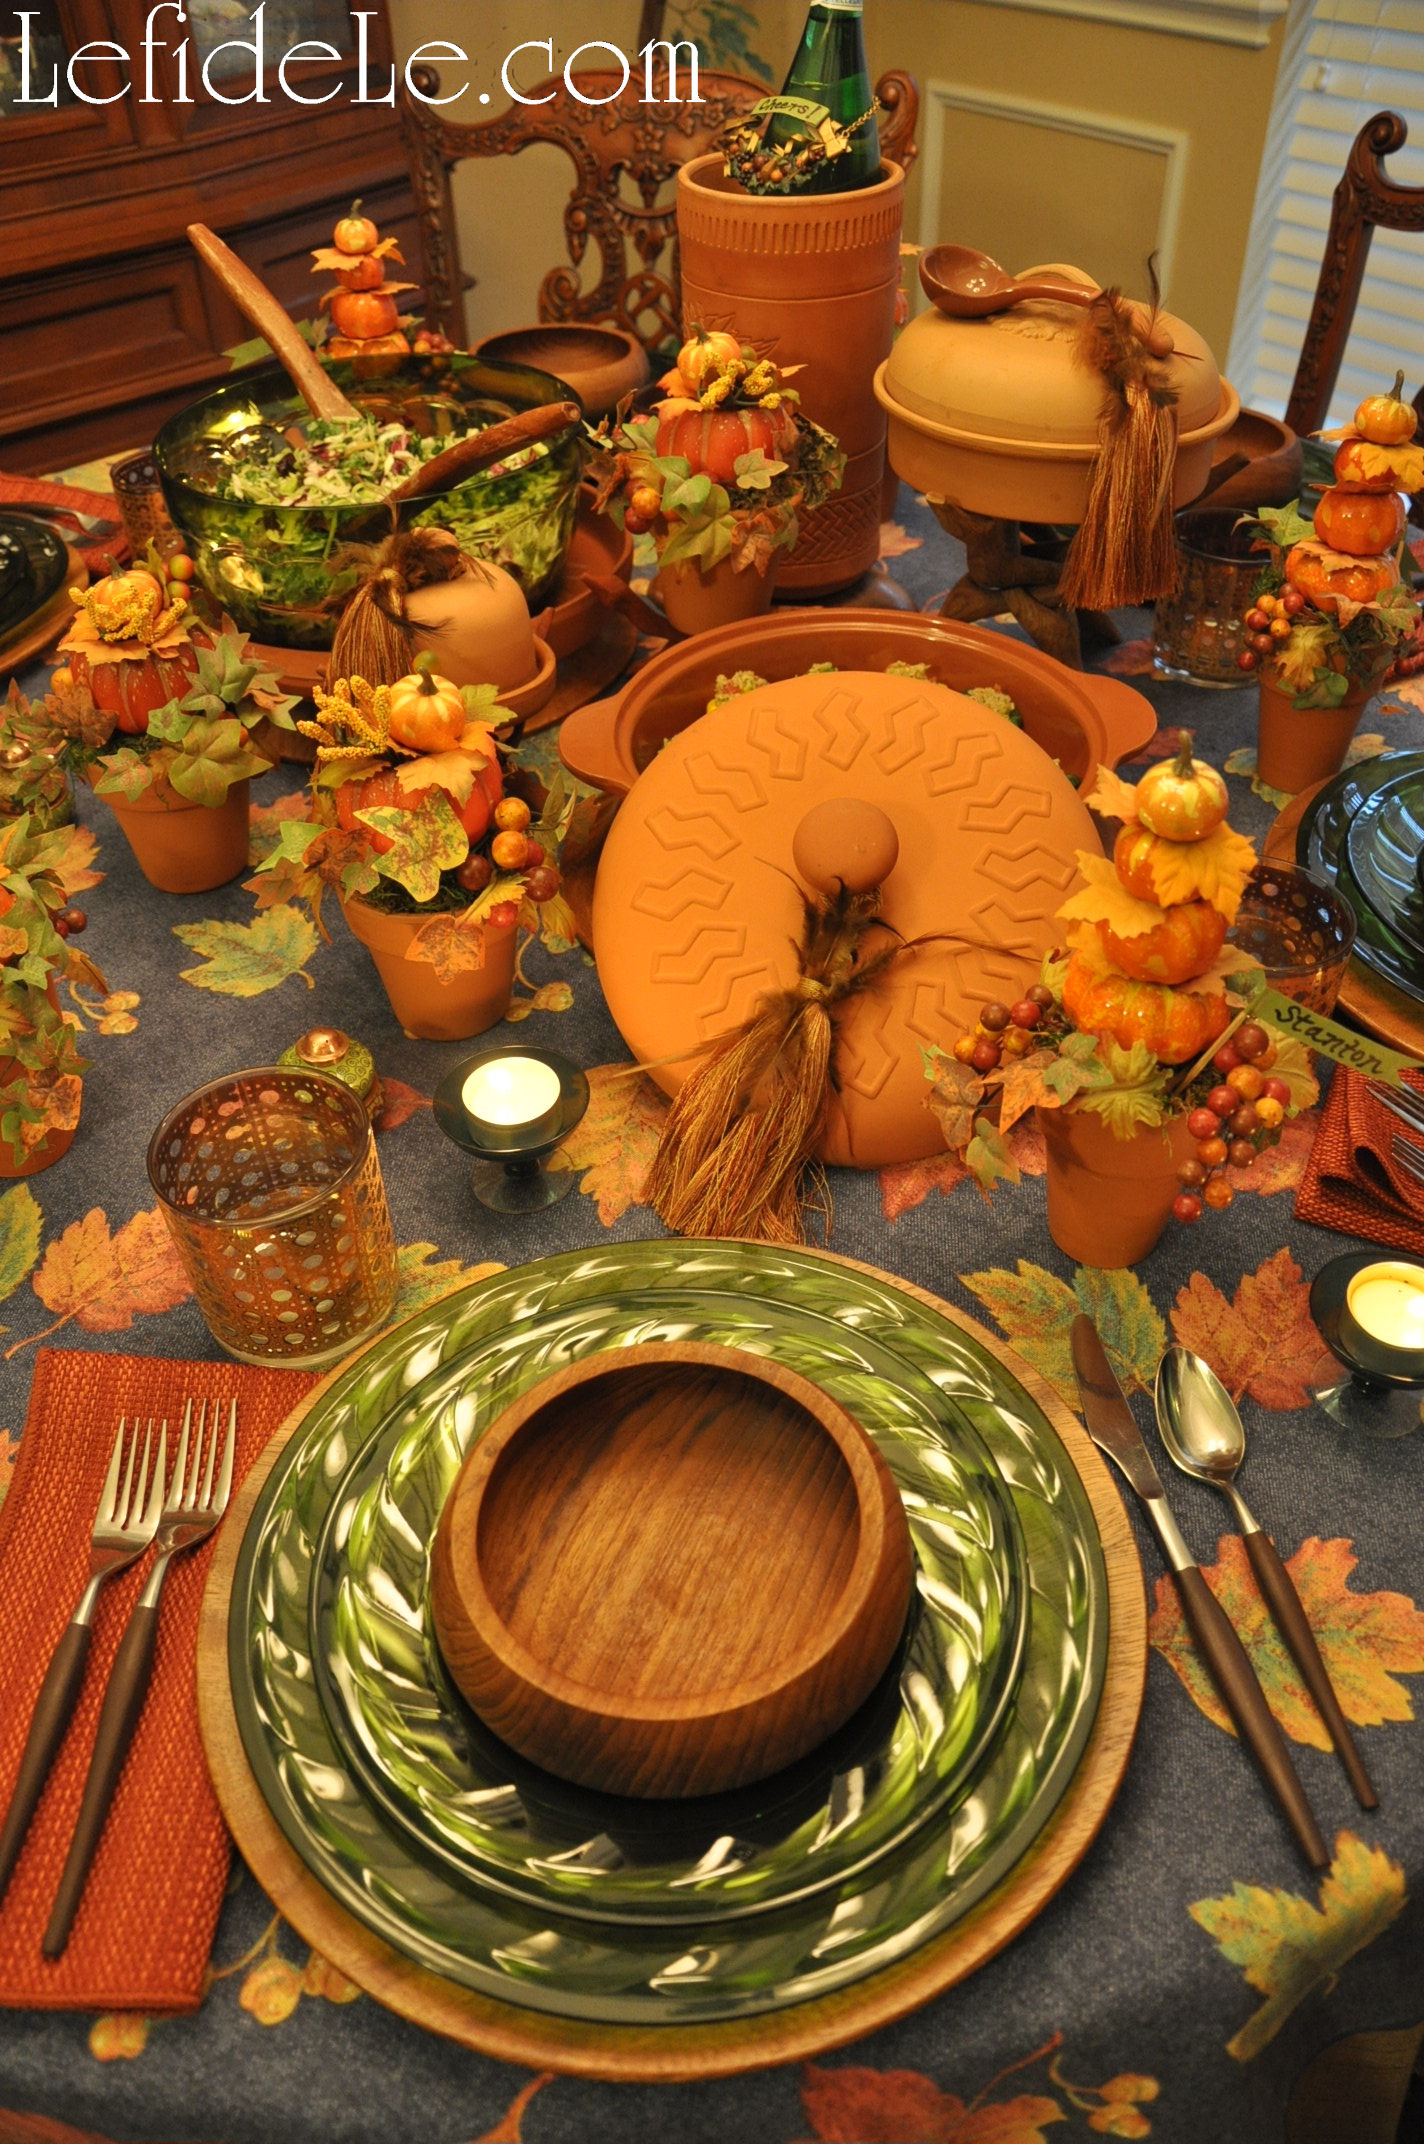
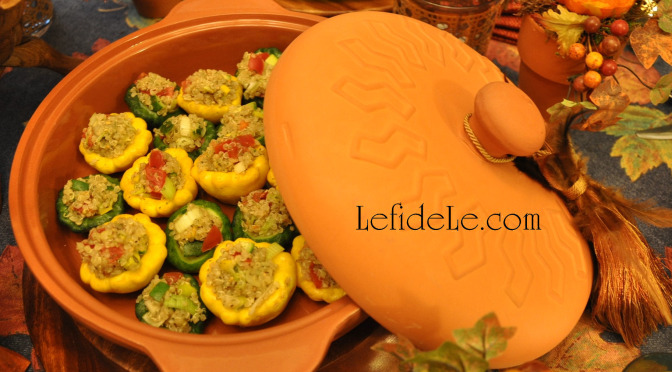
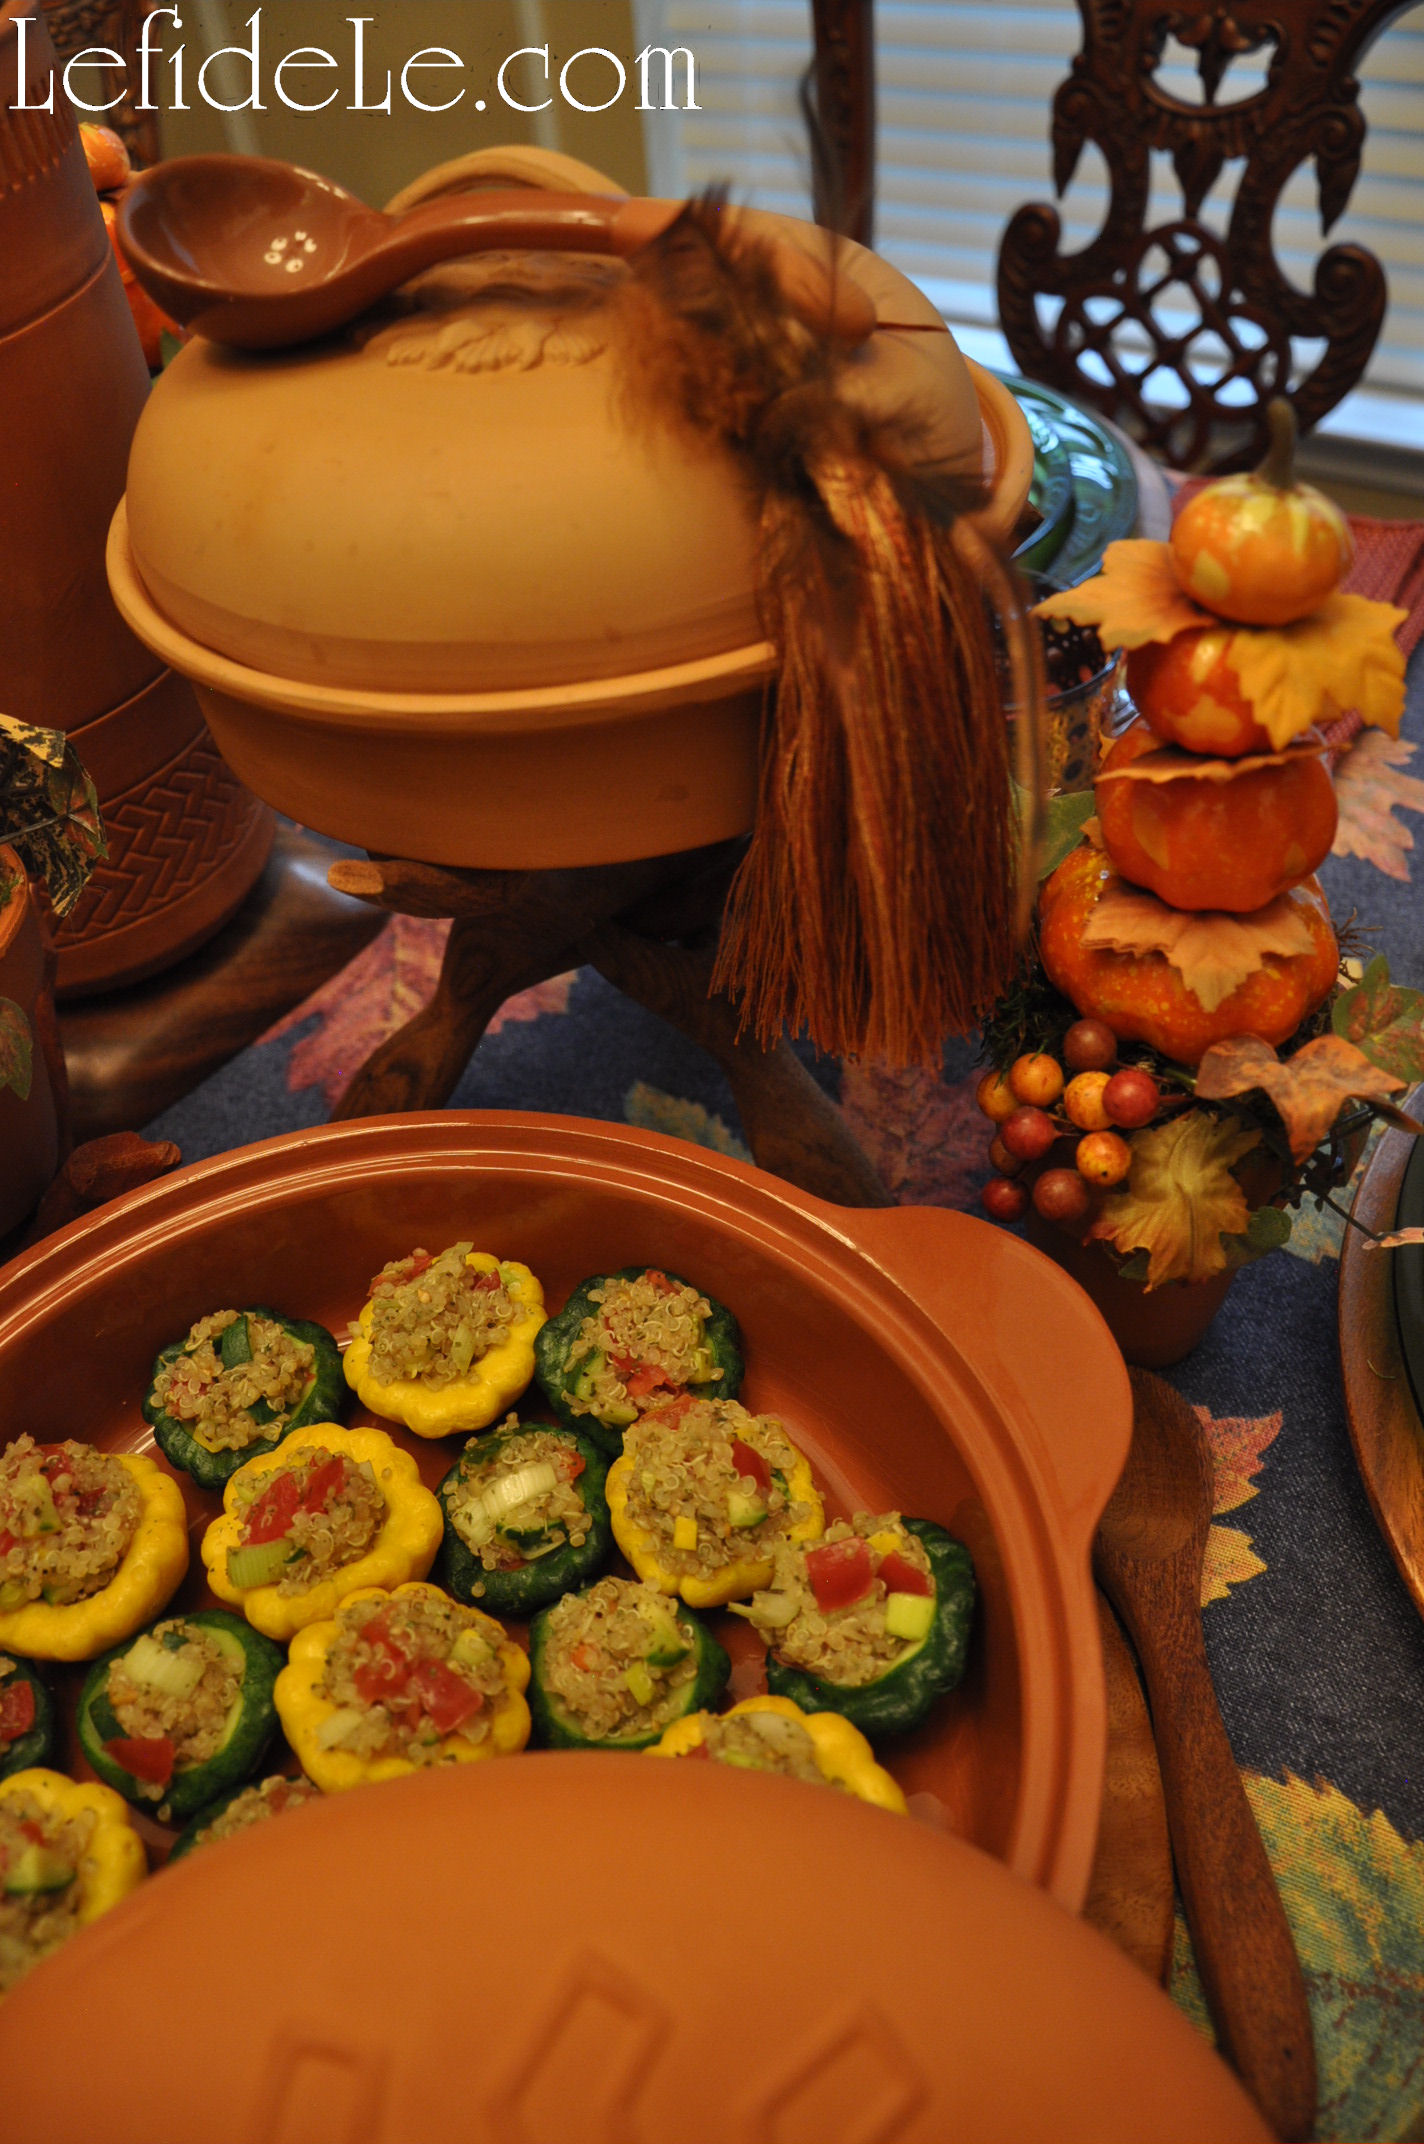
I chose terra cotta to echo the pots of the topiaries and because the covered dishes would better retain the warmth of the meal. Little tassels tied to the handles softened the hard look of the pottery.

197Leigh

Wooden stands added interest and height to the tableware, thereby making the food the centerpiece. Bringing the floral out and the food in, contributed further to my untraditional Tablescape.

187Leigh

The silverware and golden basket weave glasses provided the finishing touches for the table, just as one would finish an outfit with jewelry.

143Leigh

After the salad course was served, the wooden pedestal hosted turkey slices that had been carved in the kitchen. This is a lovely alternative for round tables where the turkey would make up the entire centerpiece otherwise. This way, no one has to look at the carcass for the remainder of the meal, which is a blessing to any vegans who were invited.

174QuinoaSquash-Leigh

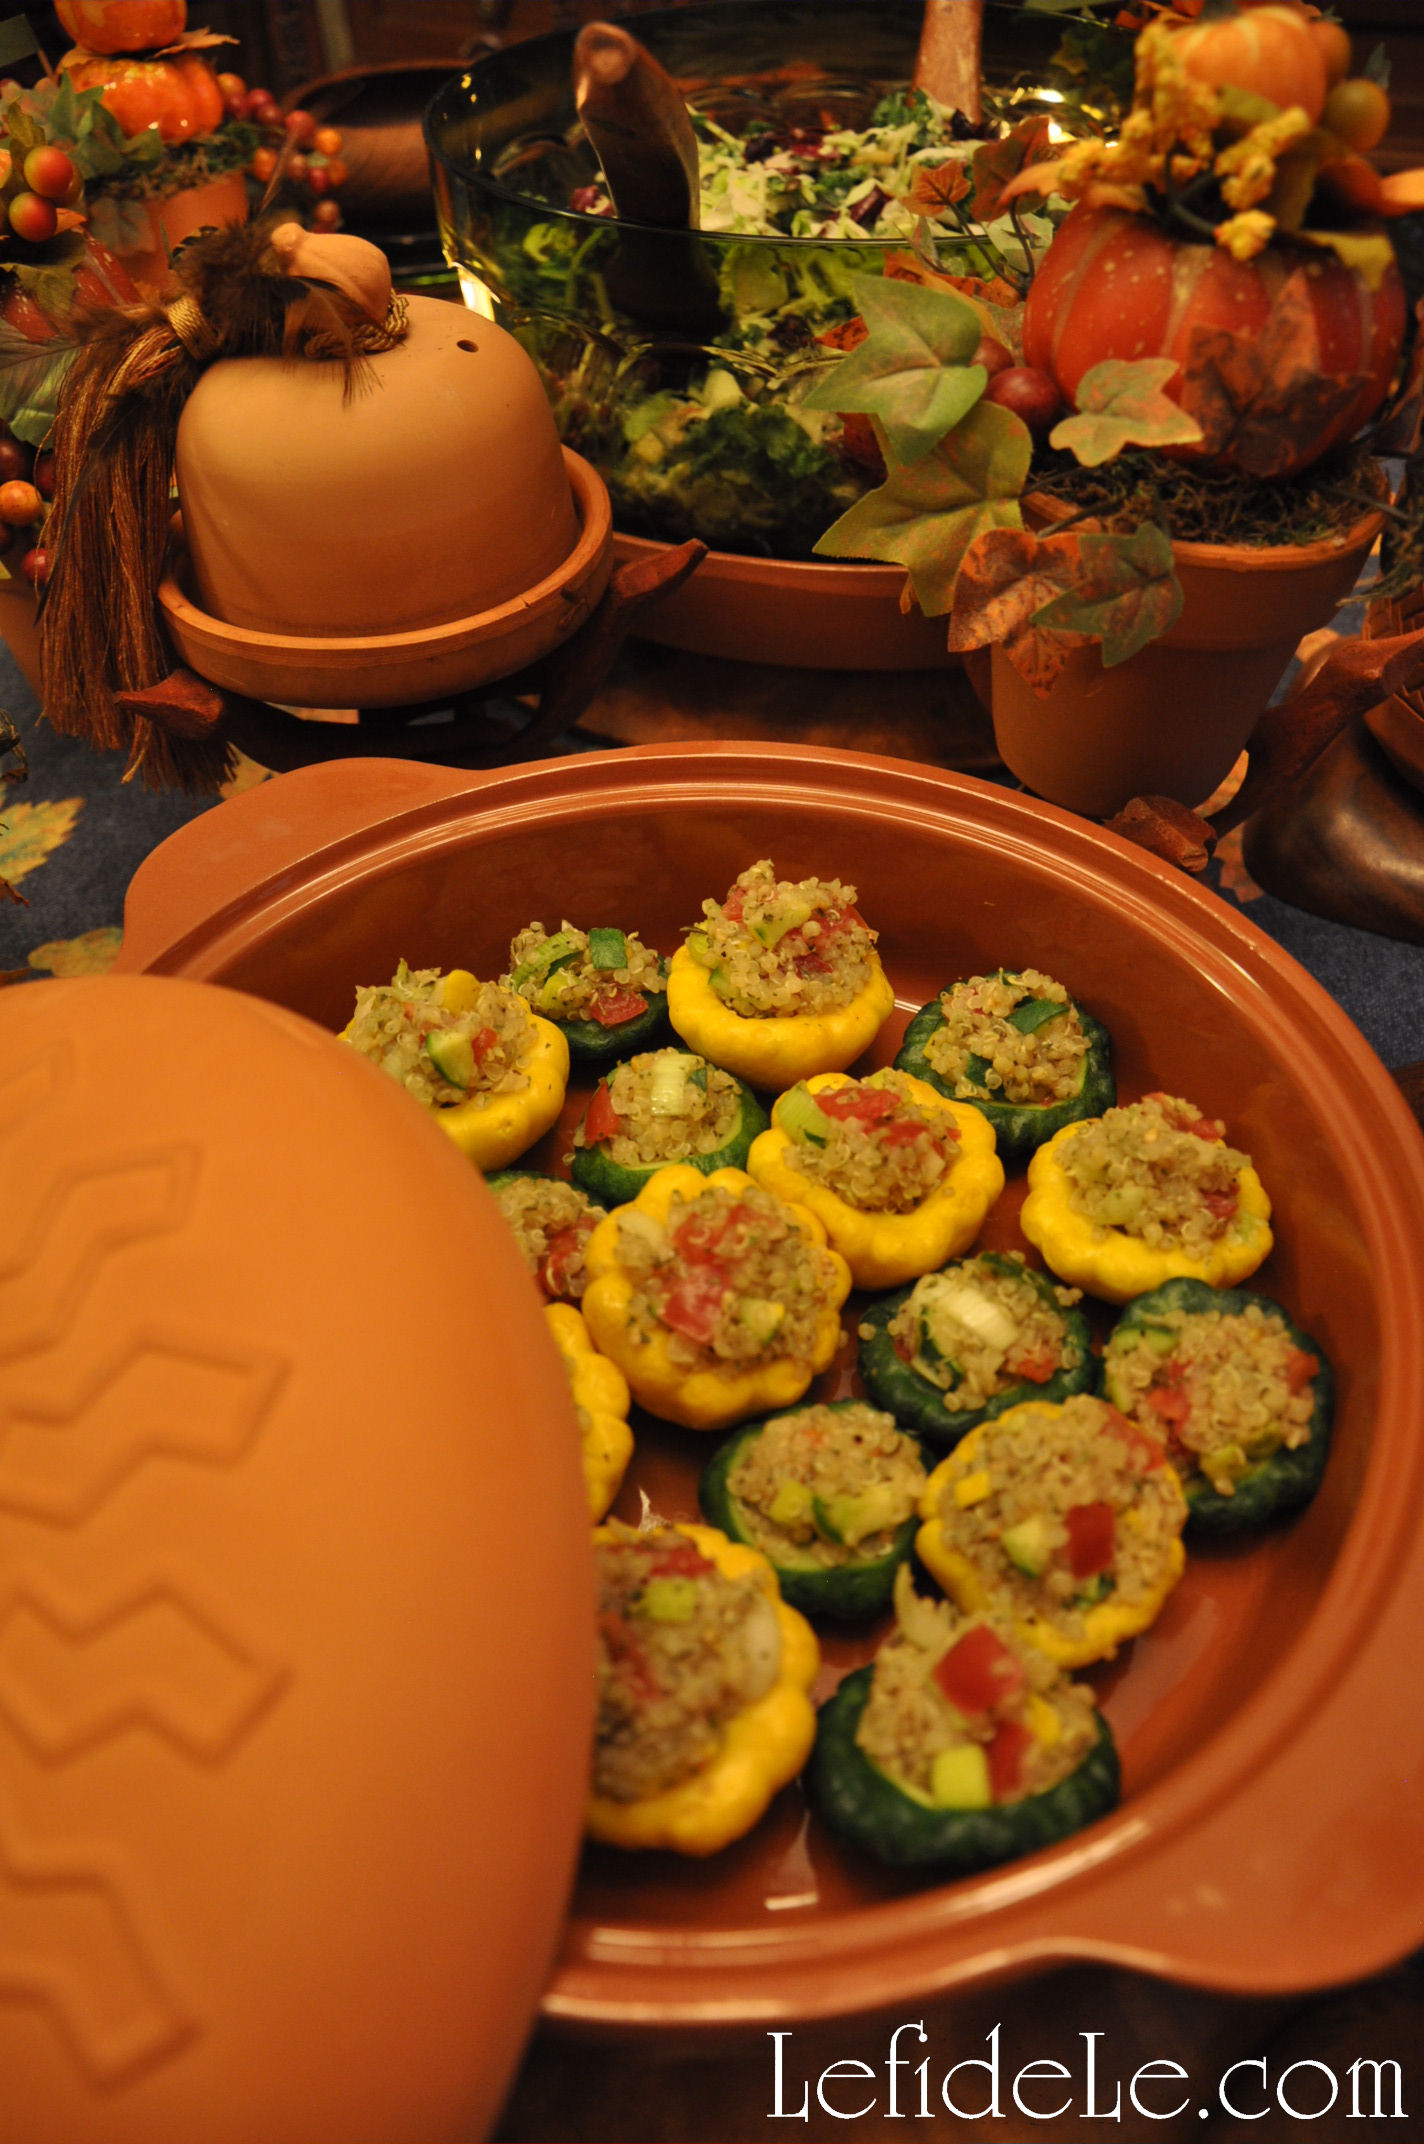
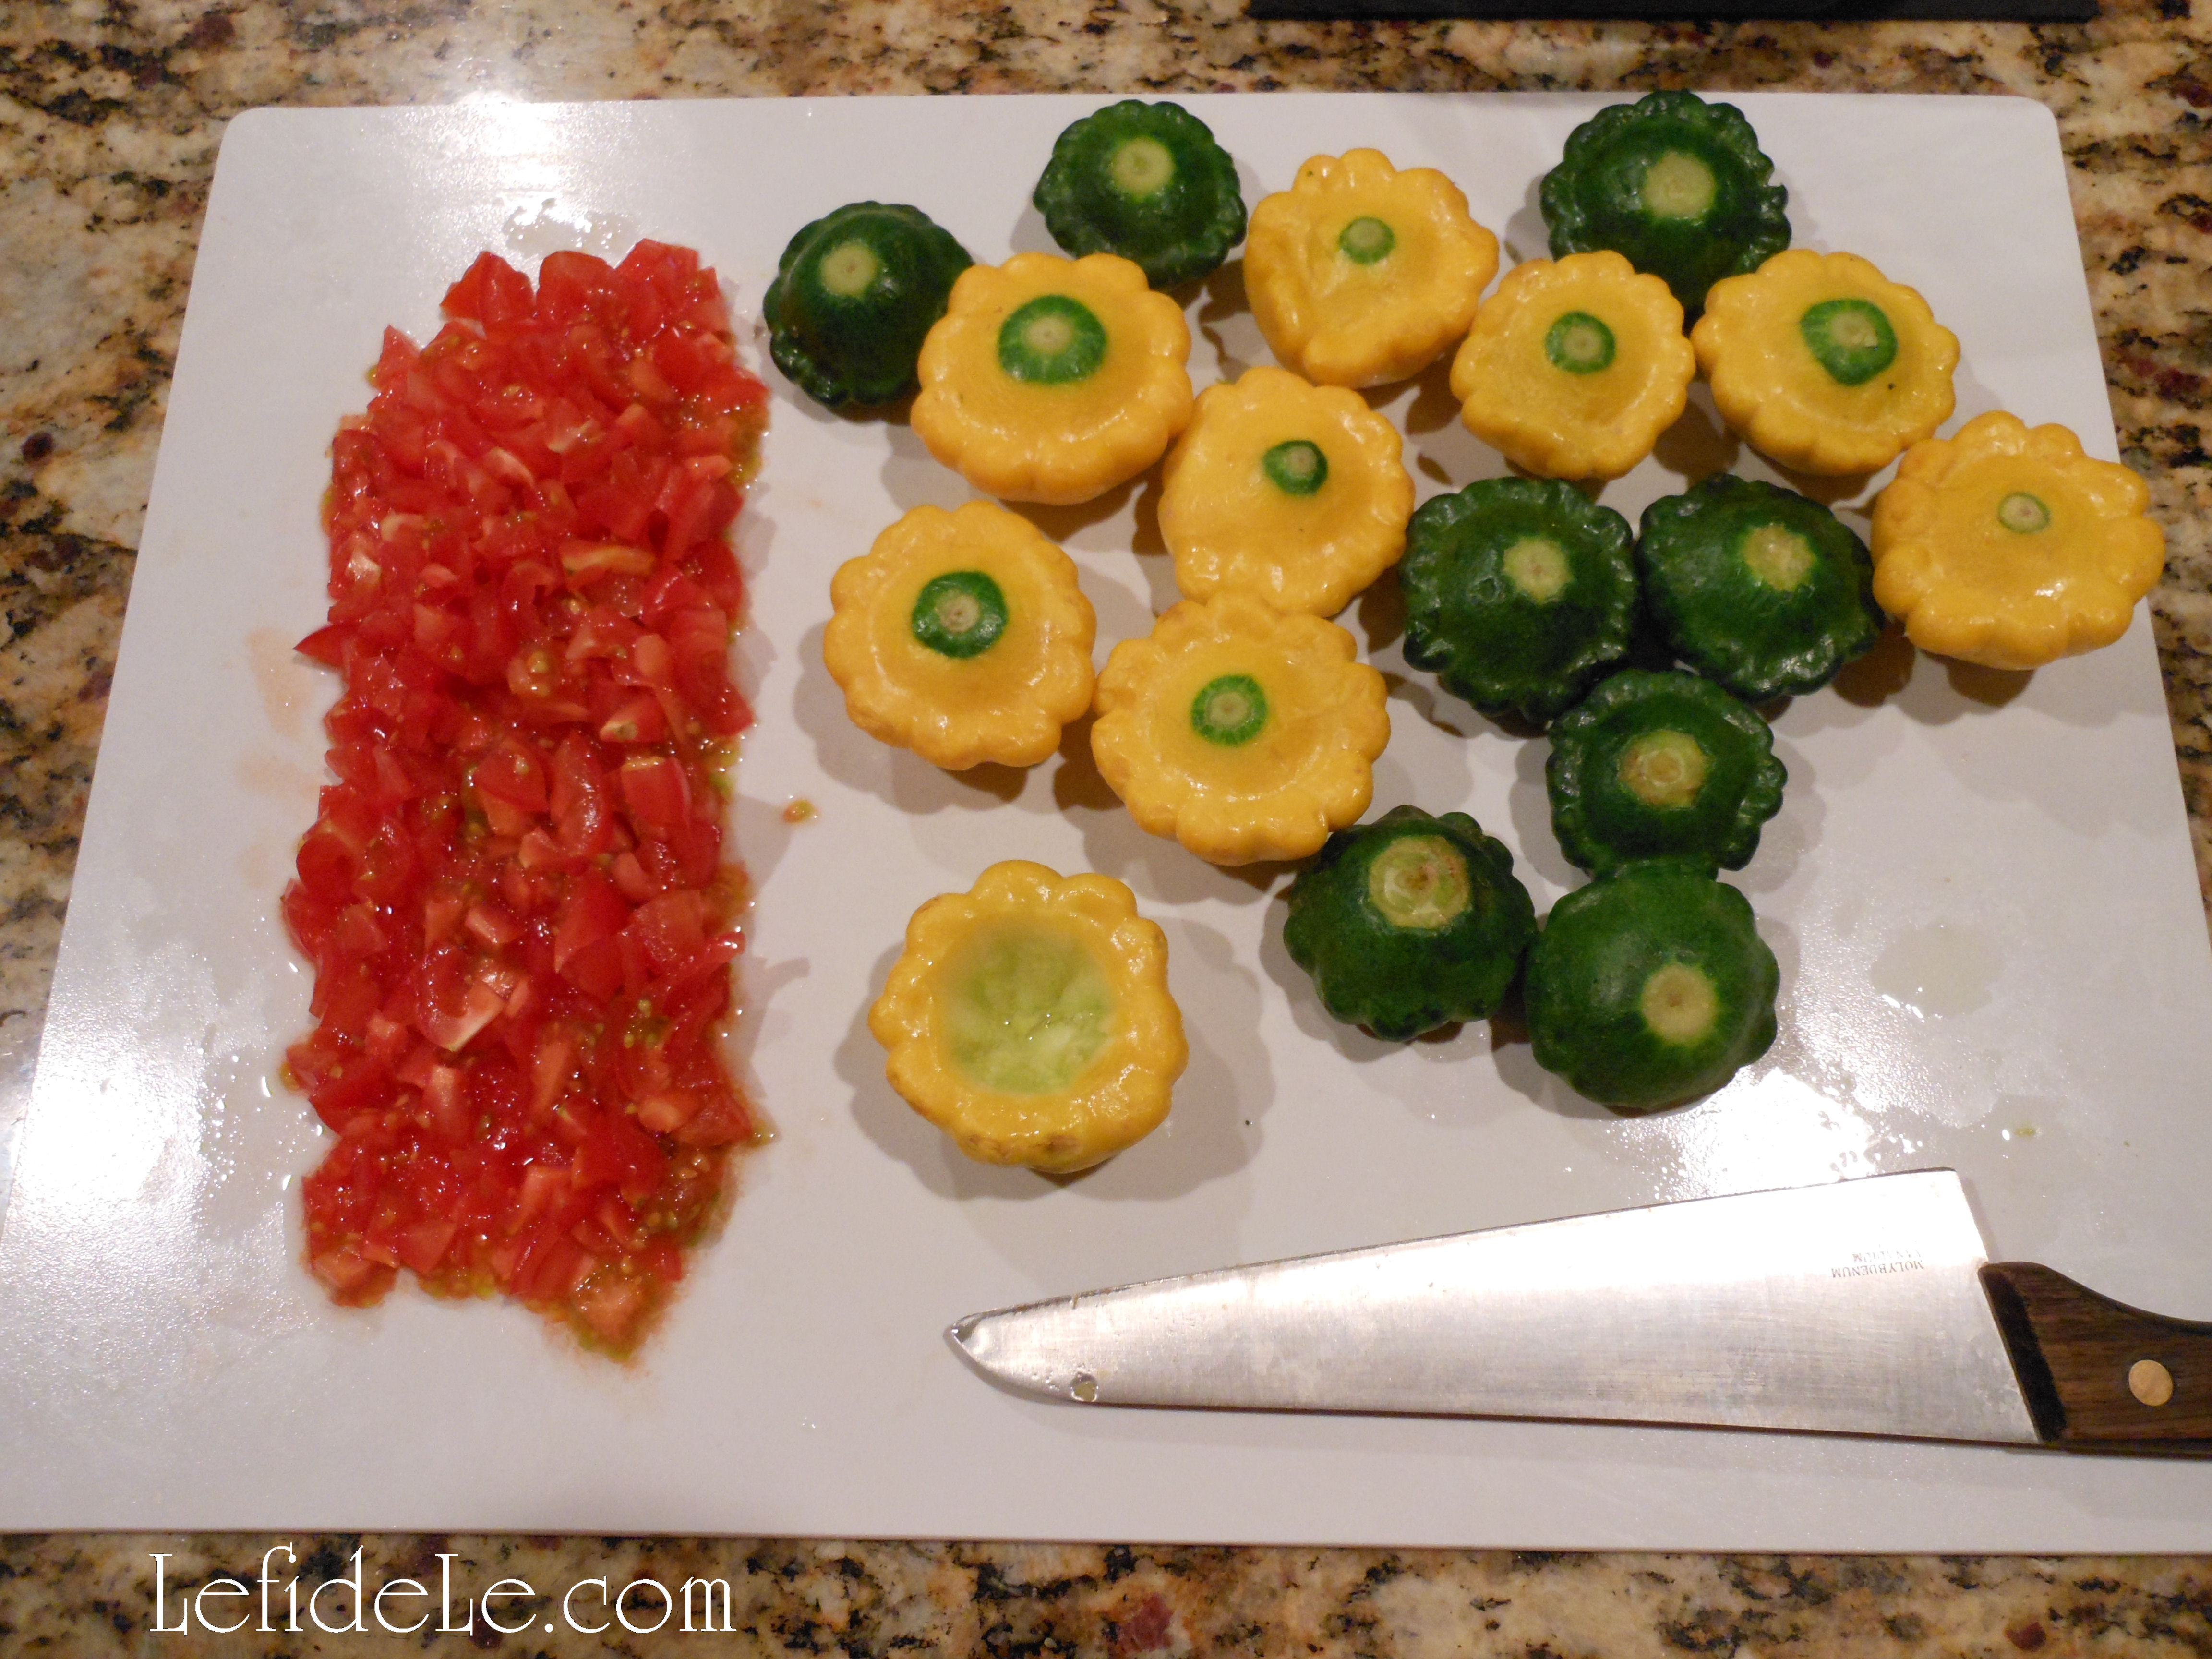
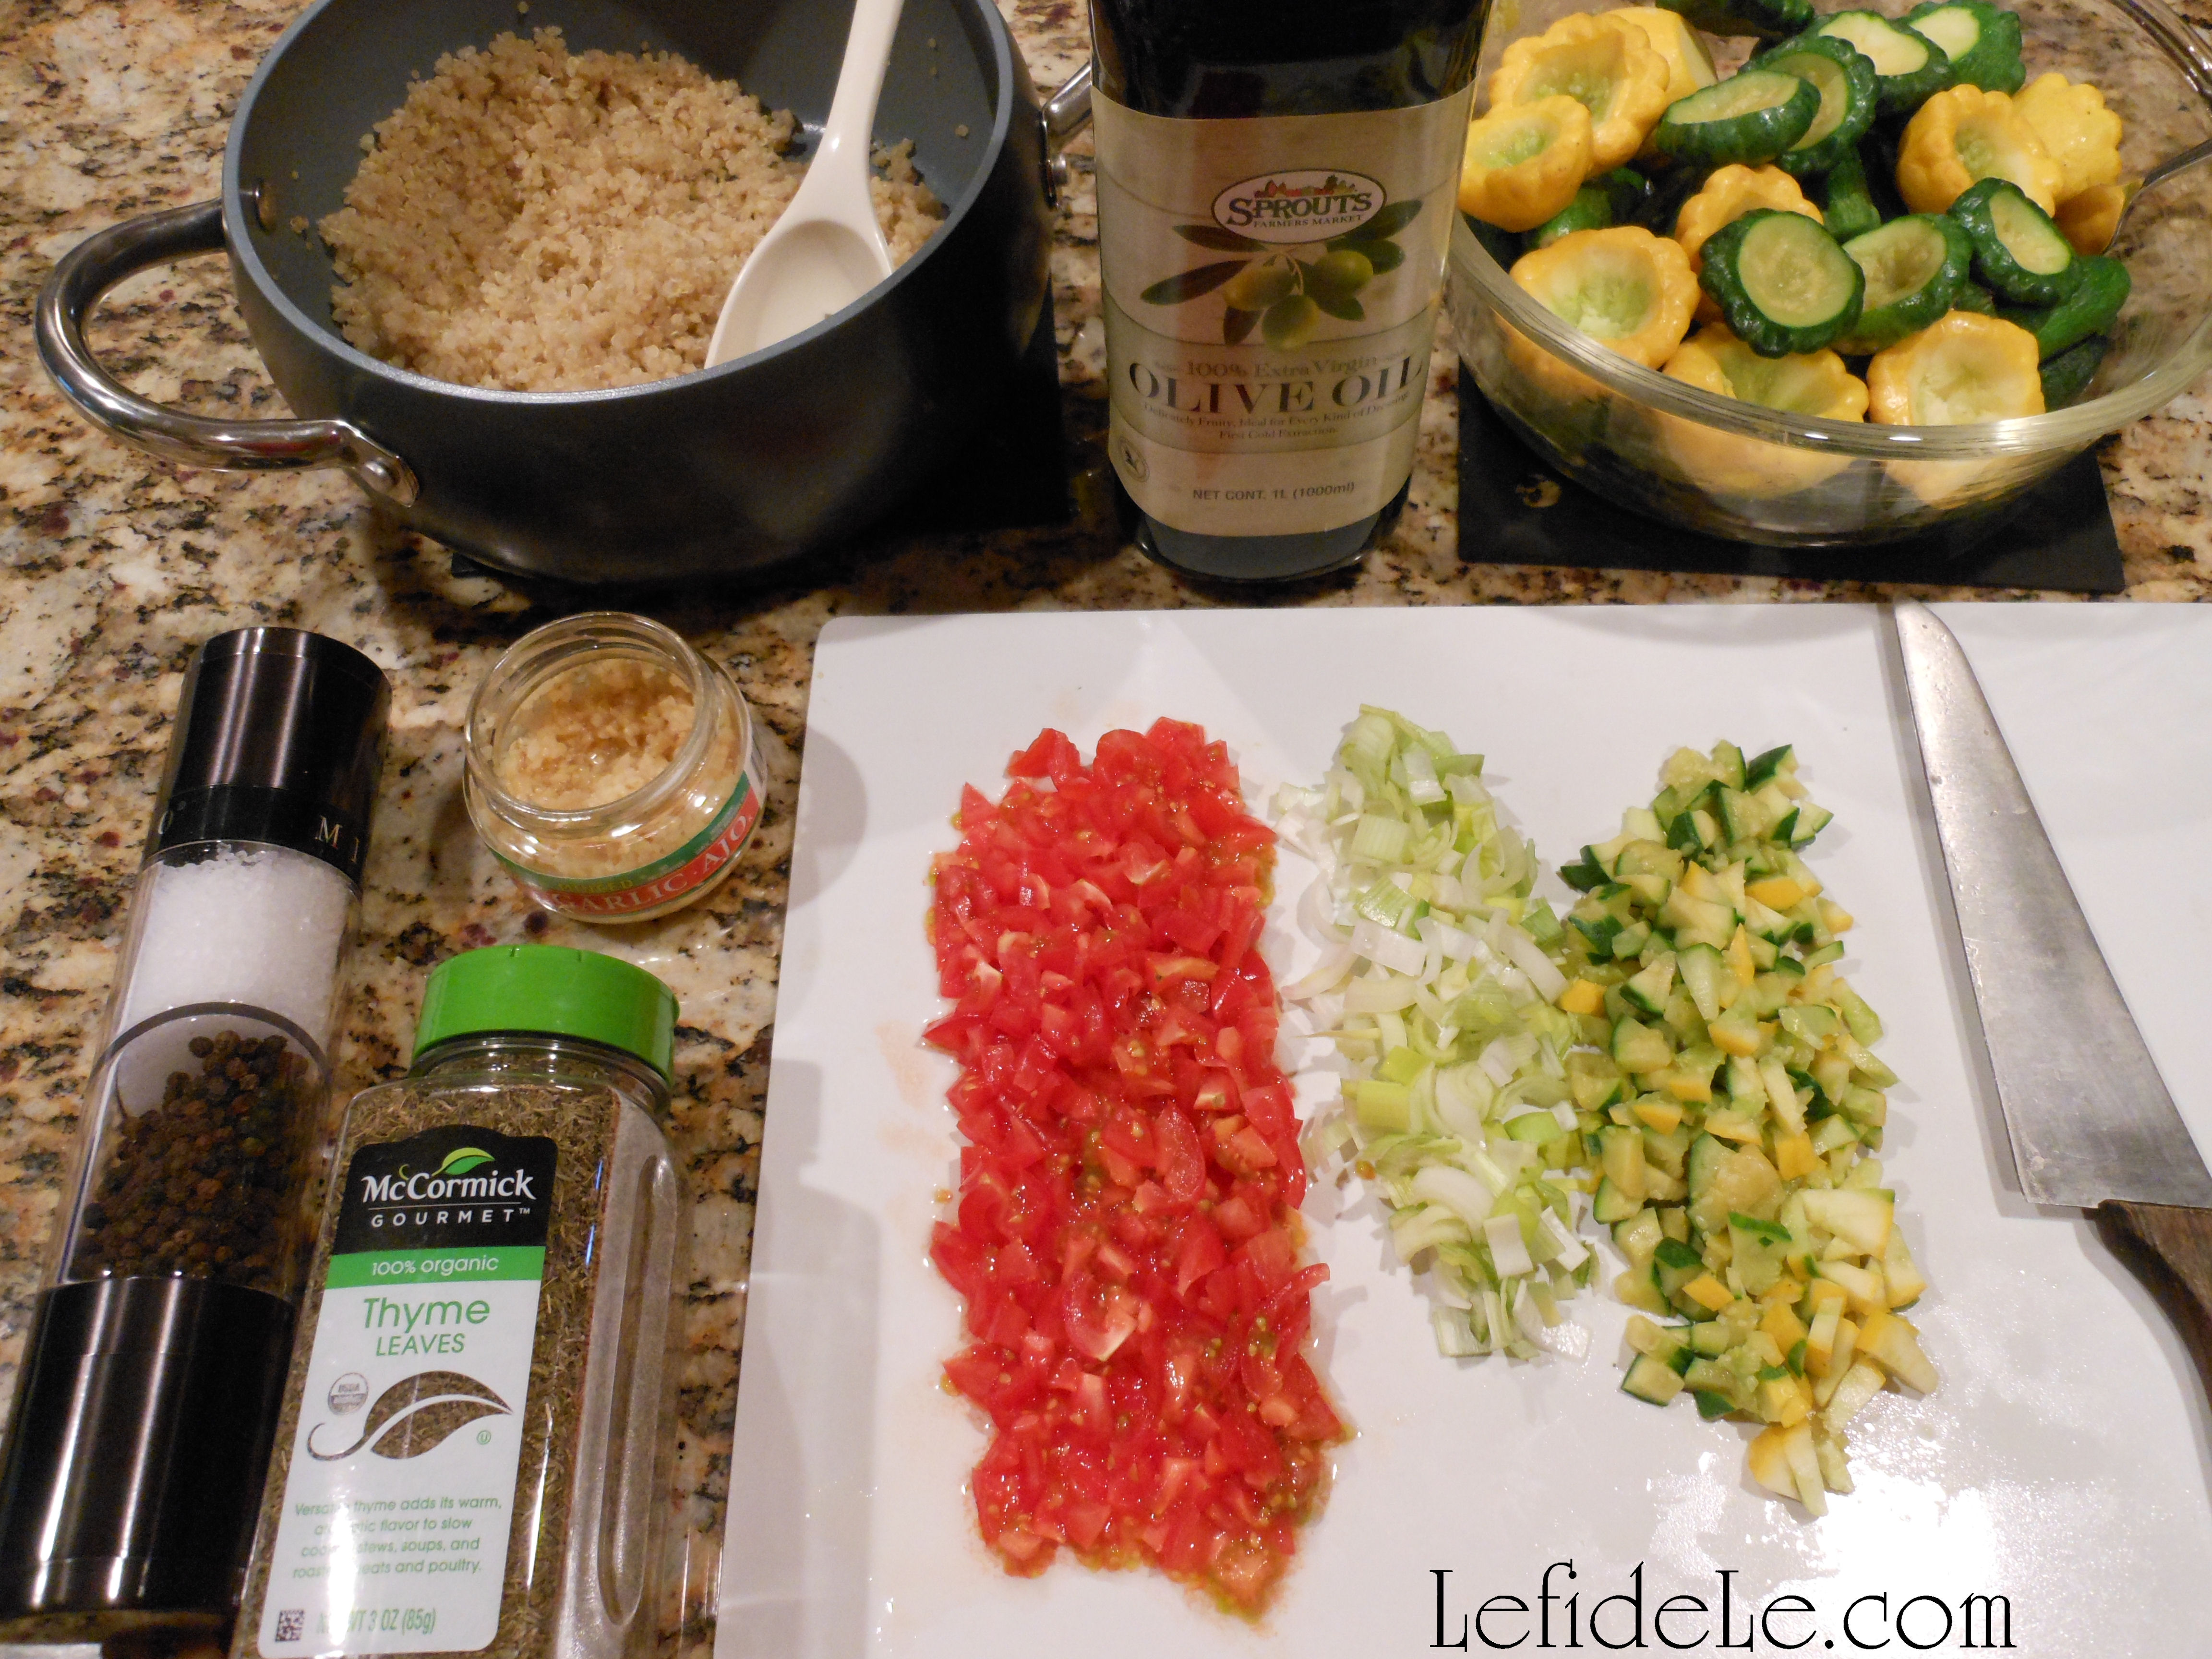
This is my healthy quinoa pilaf stuffed patty pan “mini” squash recipe which is Gluten-Free and Dairy-Free so that everyone may happily partake of the meal. Ground meat may also be added to make a complete meal.

8CauliPotatoes-Leigh

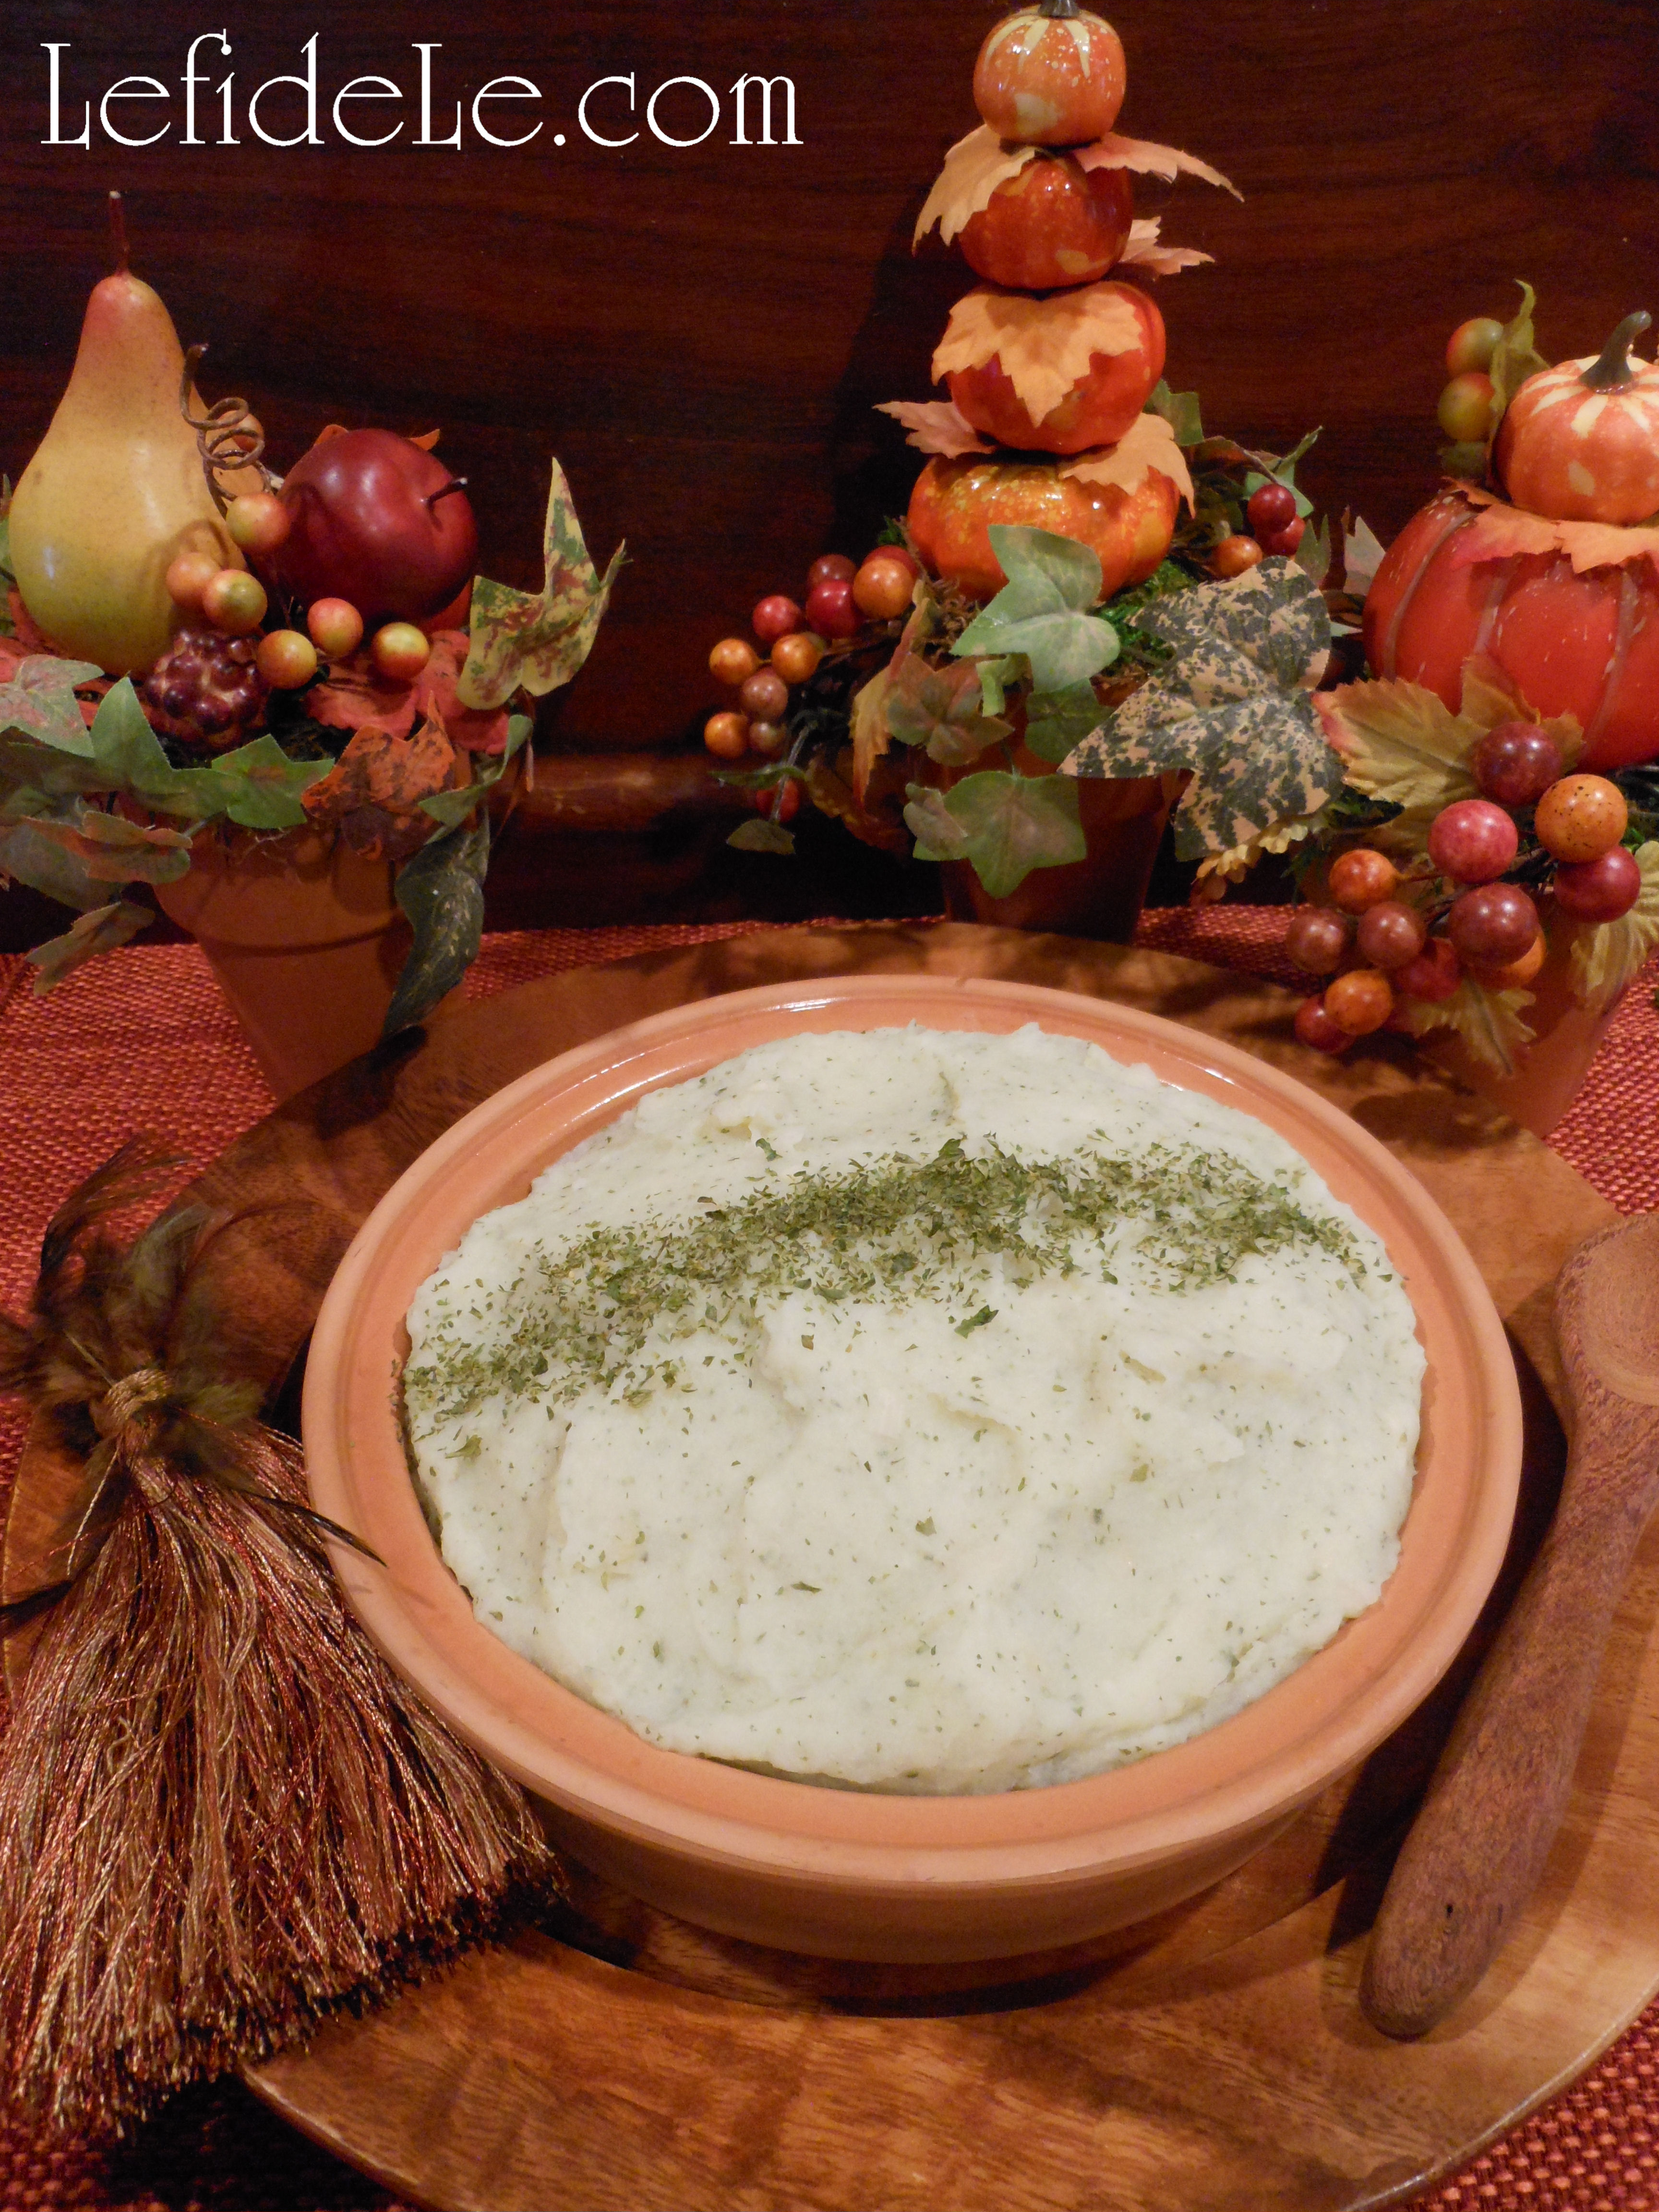
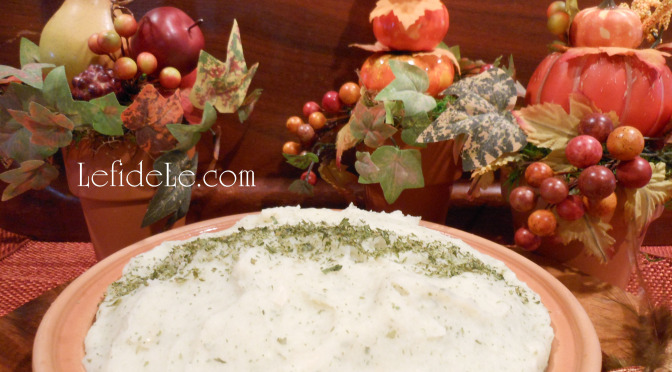
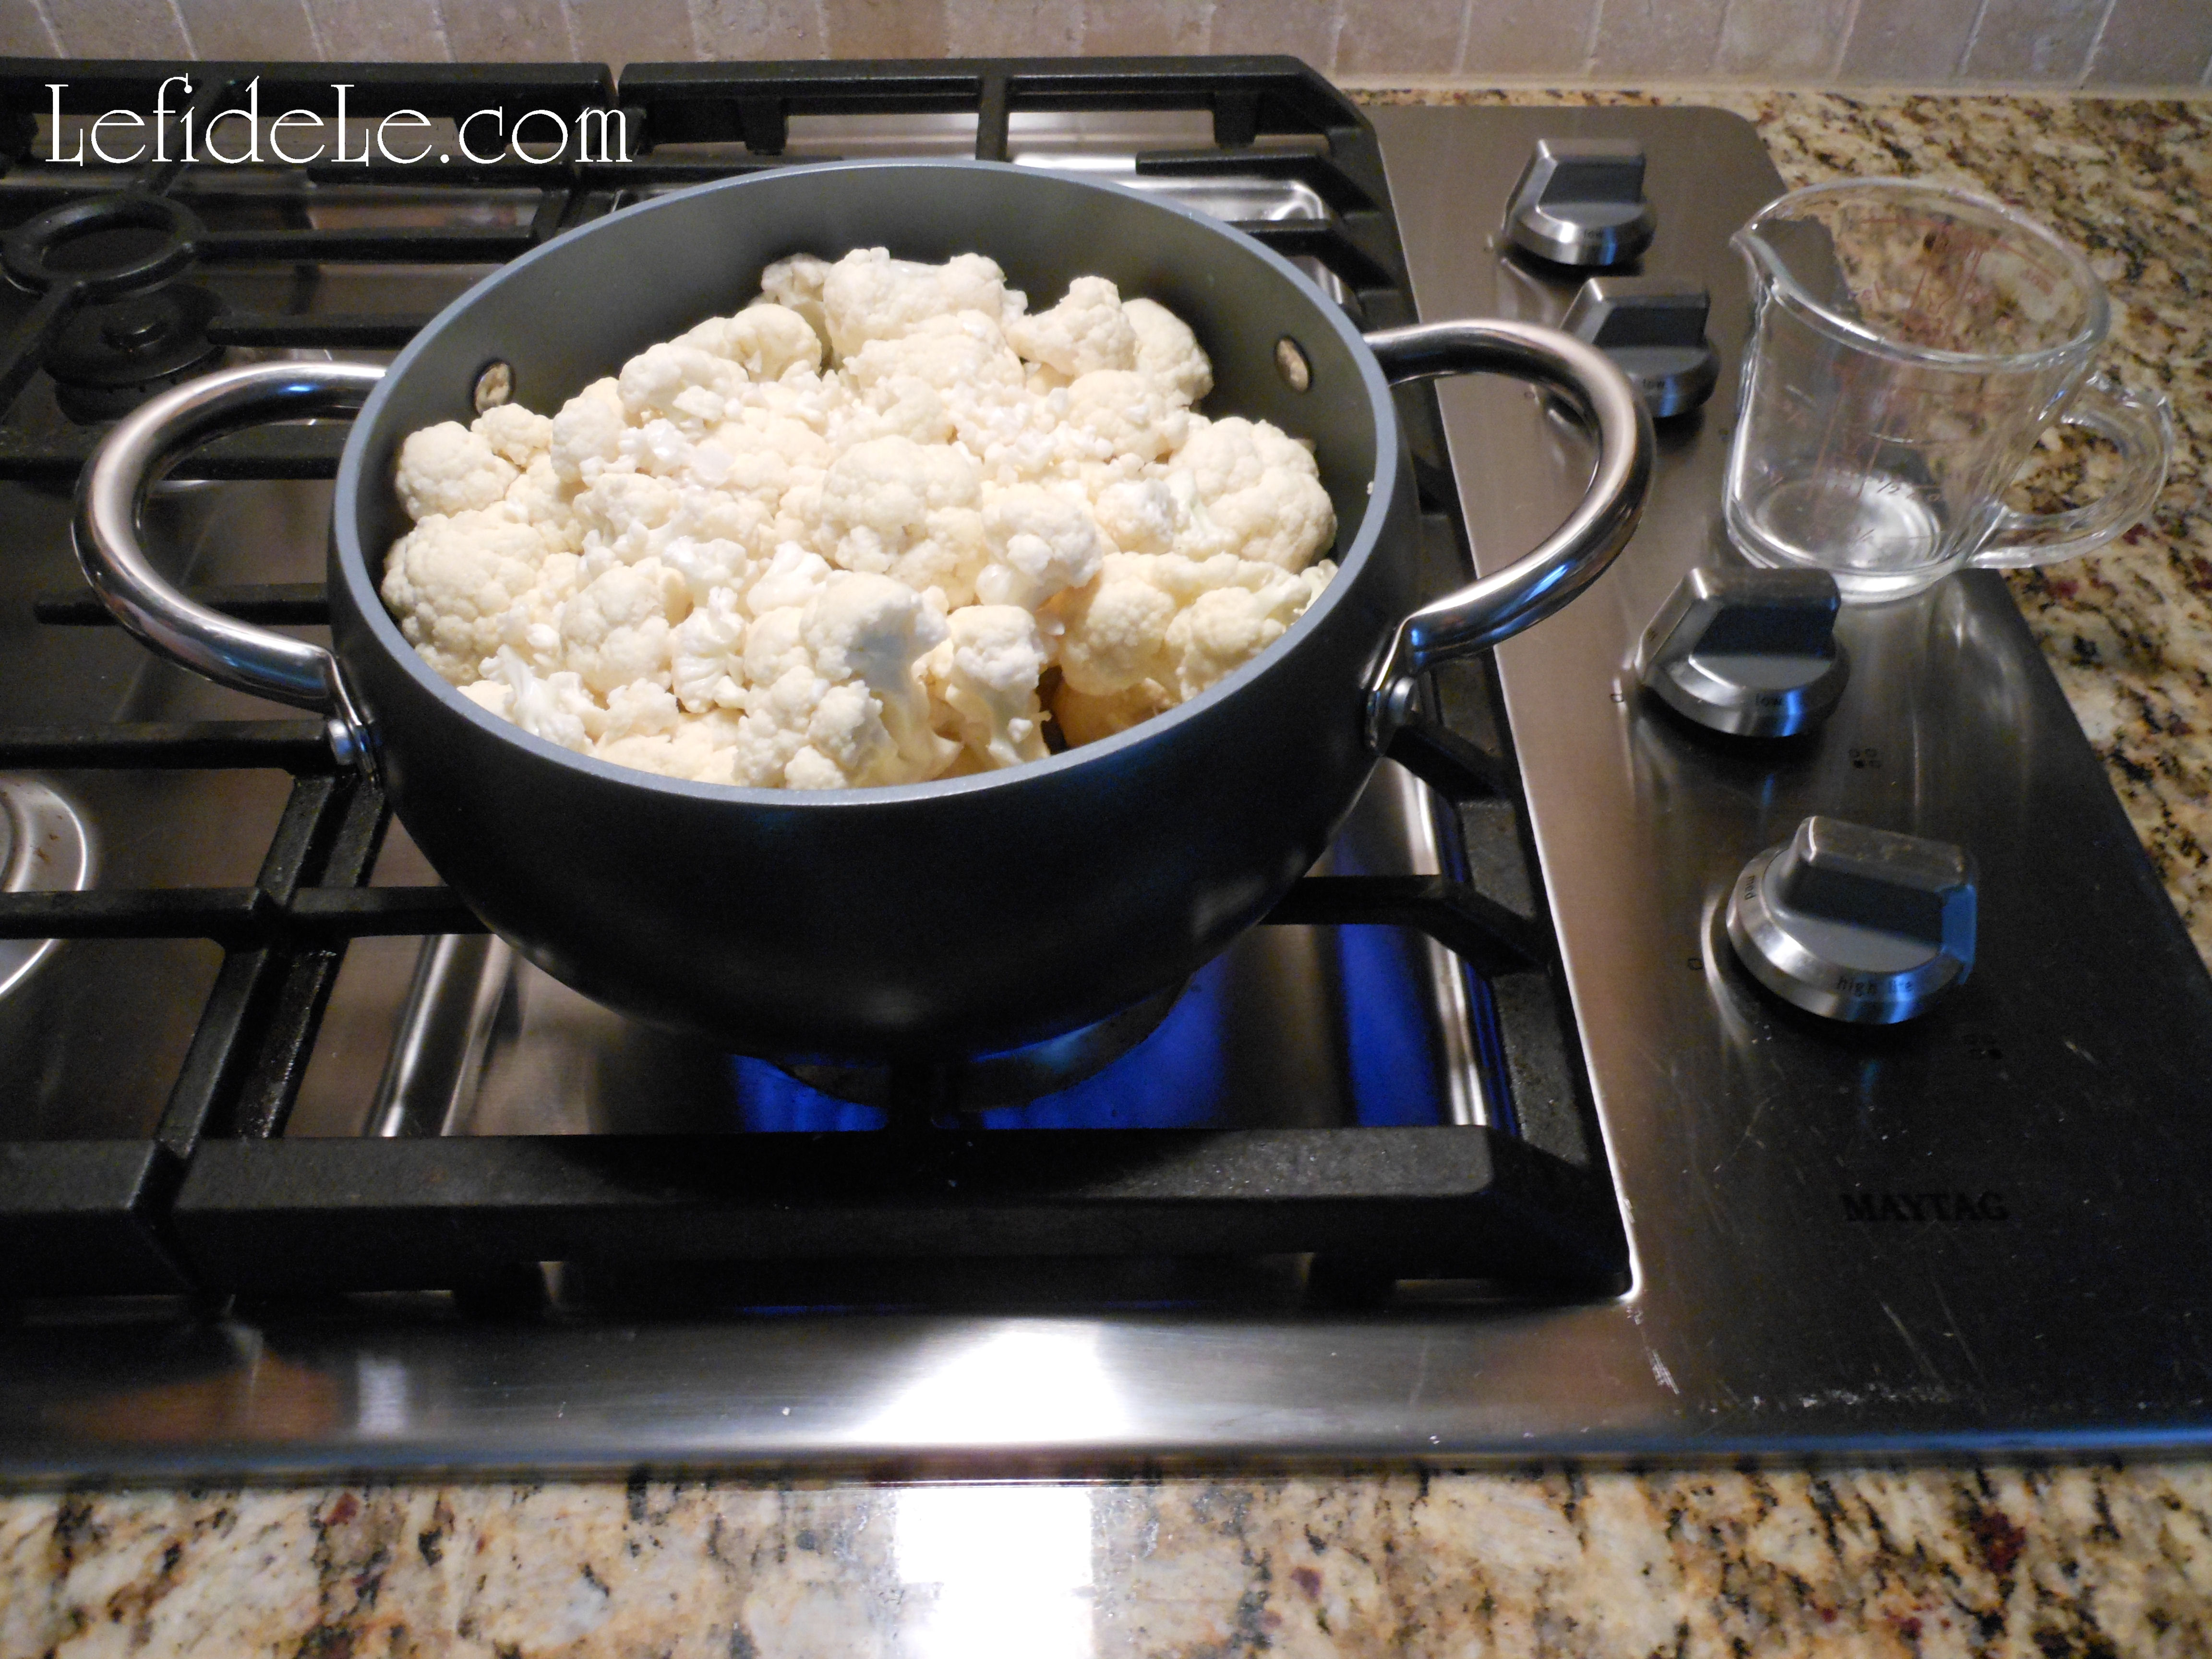
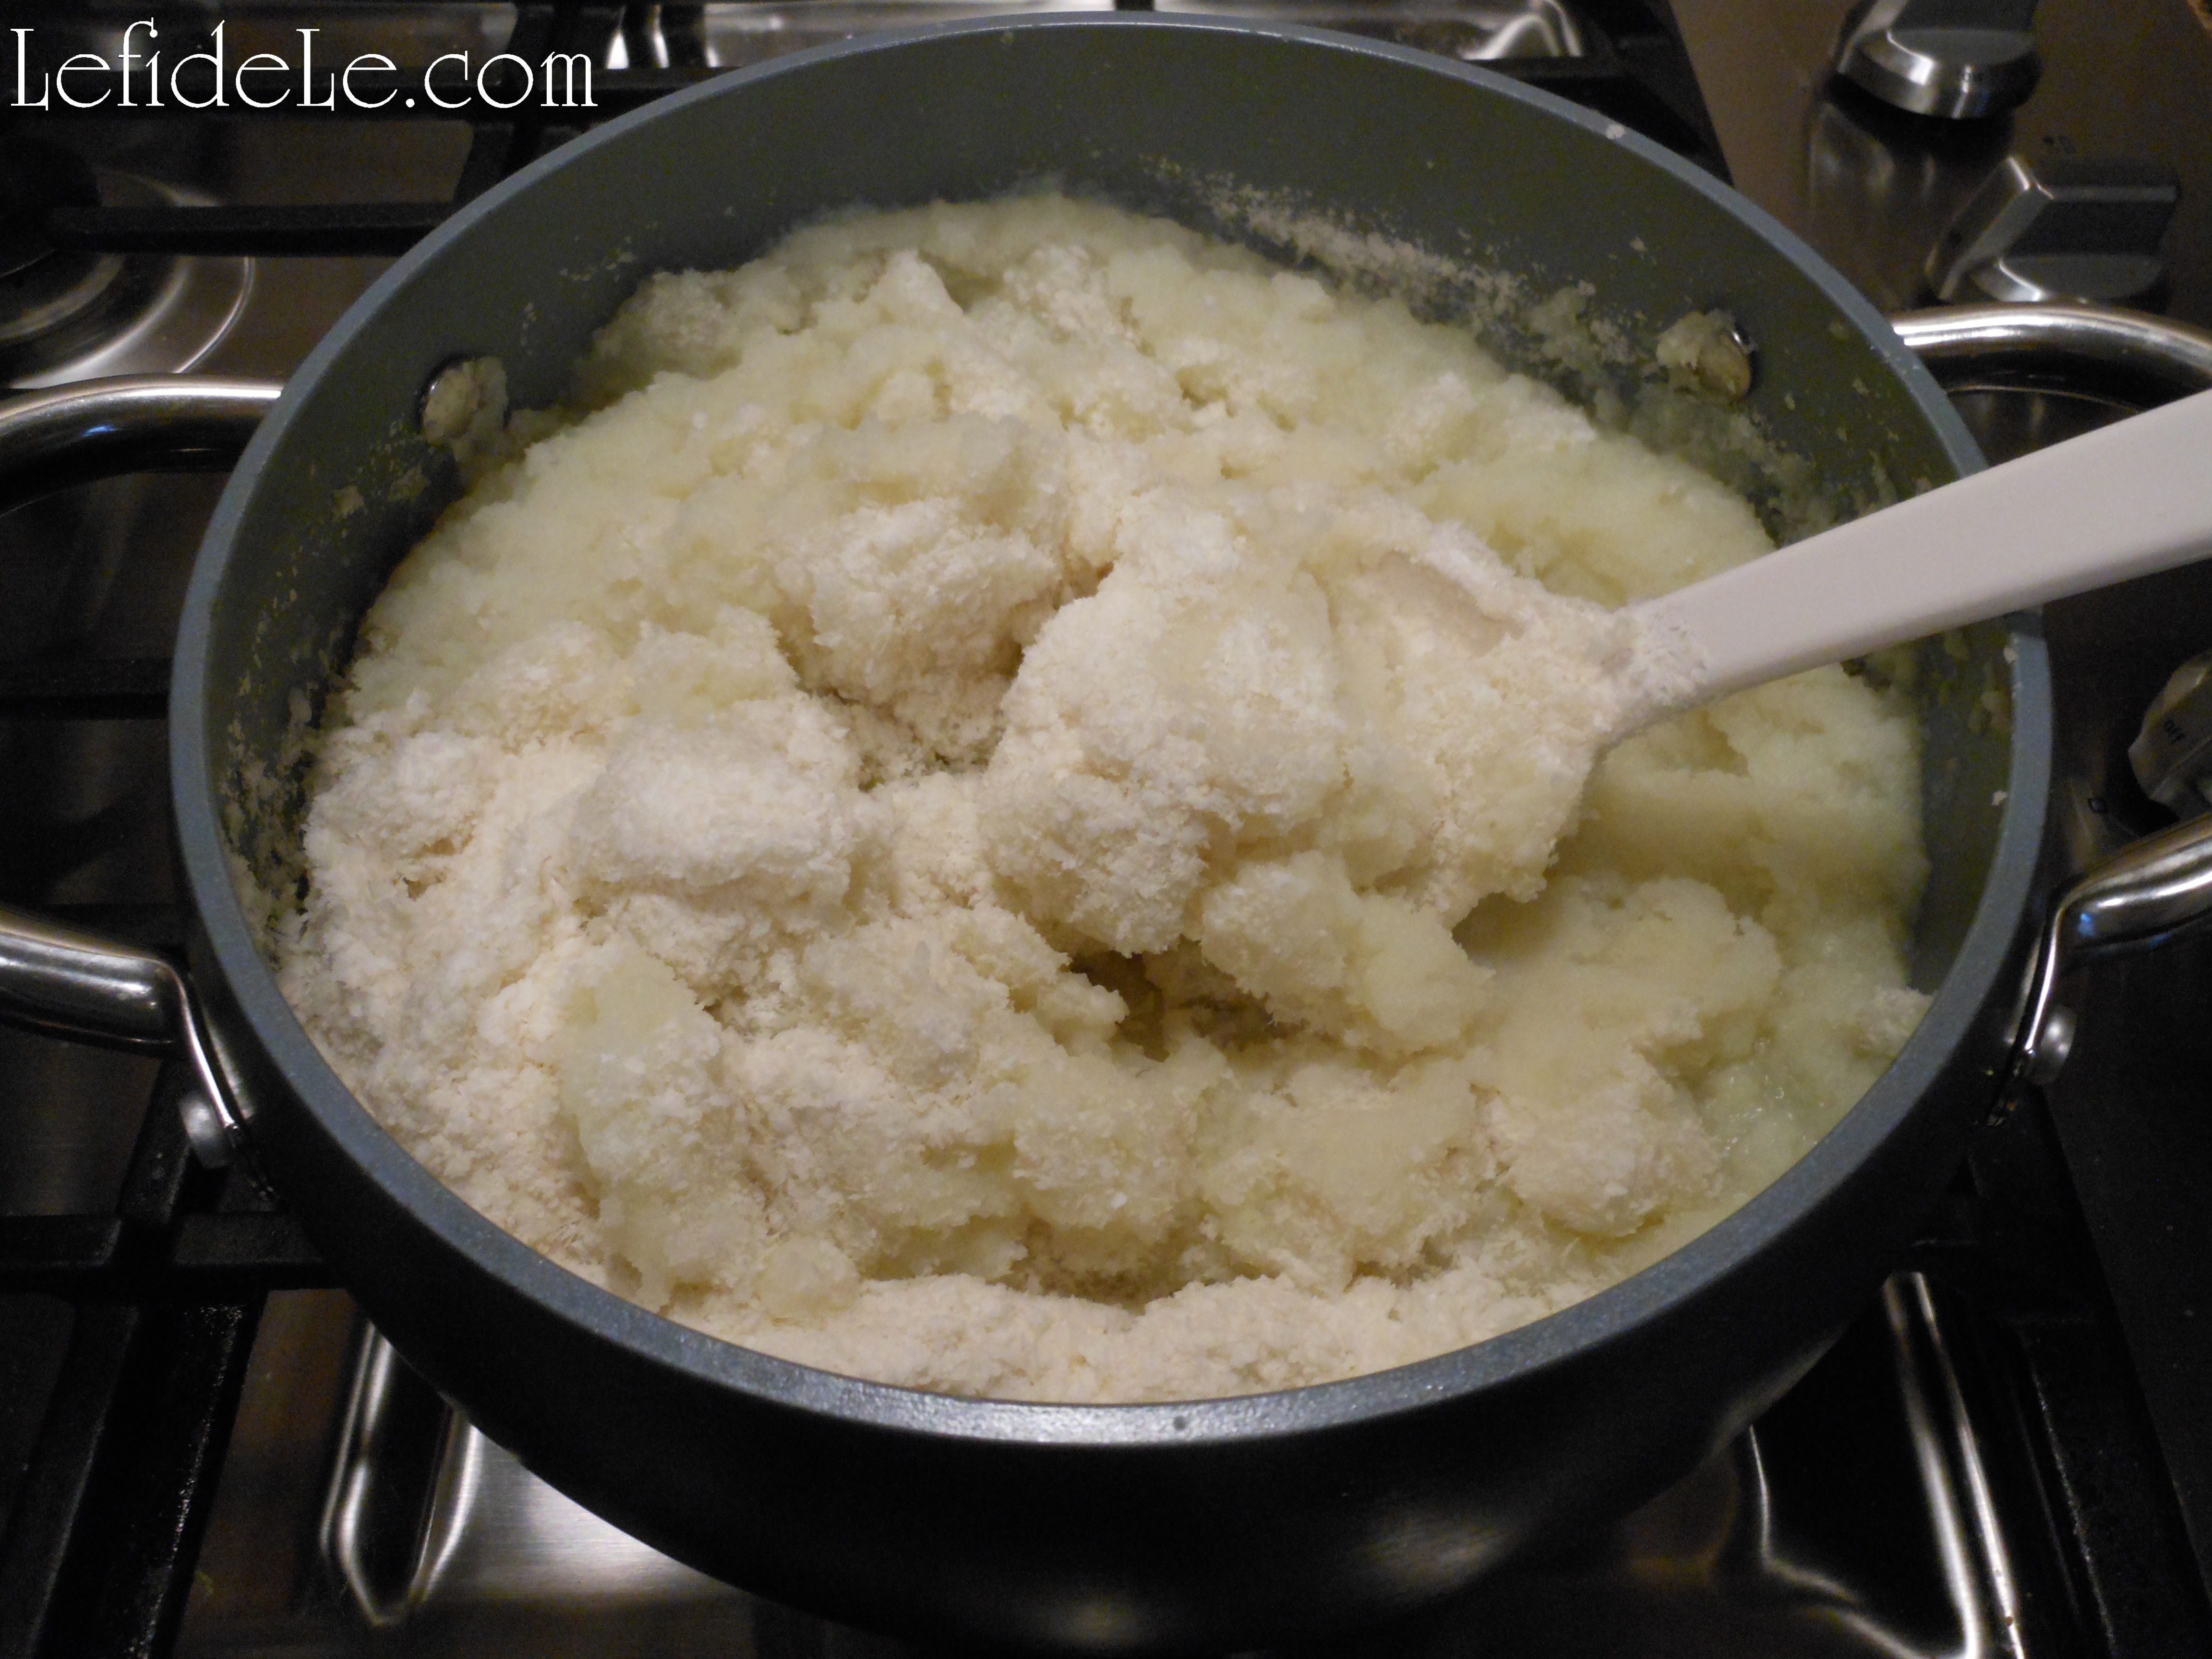
This is my quick and easy heart-healthy “shortcut cauli-potatoes” recipe that is also Gluten-Free and Dairy-Free. It’s great year round because it’s so healthy and so fast to prepare.

160Leigh

Happy Thanksgiving!

Faithfully Yours,

Leigh

Fabulous Fall Leaf & Pumpkin Décor Crafts (Place-card Holders & Easy Remade Basket)

354PumpkinBasket-Leigh

I’m combining what are essentially two projects, because they entail exactly the same easy process of hot gluing your way to a fabulous fall! With so many beautiful options in faux foliage available, you can keep your creations to display again. The pumpkin topiaries may be placed throughout your home or office as small floral elements, or used as place-card holders as I have for my Fall Leaves & Pumpkins Themed Thanksgiving Tablescape. And though I used a vintage pumpkin shaped basket, I’ve seen similar variations of it at several craft and party stores that are just begging for embellishment.

314Leigh

For those of you who are brand new to this kind of thing… always buy fall foliage on sale (and there is always a sale somewhere). There are a plethora of leaves, sunflowers, berries, twigs, and mini-pumpkins available in fall colors. Rip off (or cut) the pretty bits from the largest stem.

313Leigh

Make curlicue vines by first wrapping brown floral tape around wire (pulling as you go). Then take that and twirl it around a pen. Pull the pen out, and you’re ready to use your newly made vine.

316Leigh

Now glue, glue, glue to your heart’s content. For the basket, start with leaves in order to form a base platform (at the junction between the handle and bowl of the basket). Then glue the larger elements on top of that blanket of leaves (without covering them completely).

317Leigh

Add smaller elements like berries, by dropping glue onto the stem ends, then tucking them in behind the biggest center element. Lastly, glue the vine ends (in the same way as the berries) and tuck those in wherever you see empty spaces.

320Leigh

It’s just that easy! You may now fill your creation with anything from candy to potpourri. To see it action, check out my “Glitter-Ween” Halloween Party Theme Decorating Ideas (With DIY Links).

194Leigh

As for the pumpkin topiaries… simply start with small terra cotta rose pots (because they are taller than regular pots). Fill these with floral styrofoam cut to size (not squishy “oasis” as that is made for wet arrangements). Next, hot glue a stack of tiny pumpkins (with a leaf in-between each) onto the top’s center. Cover the styrofoam with a layer of green moss. Then add a leaf or stem of berries here and there. Voila!

01Leigh

If you’d like to turn these into place-card holders… simply make flags out of toothpicks and washi tape, by using a ruler as a guide to cutting similar lengths.

75PumpkinTopiaries-Leigh

Or… you can use floral tape, like I did, so long as you stretch it as you smash it between your fingers. A permanent marker writes the name well. You can also do this for your décor, to add a message like, “Happy Fall Y’all!”

76Leigh

See more of these here: Fall Leaves & Pumpkins Themed Thanksgiving Tablescape Décor Ideas.

Faithfully Yours,

Leigh


Quinoa Pilaf Stuffed Patty Pan “Mini” Squash Recipe (Healthy, Gluten-Free & Dairy Free)

Growing up, I would eat any vegetable that my mother said was of the cute “baby” variety. Broccoli became baby trees, Brussel sprouts were baby cabbages, and patty pans renamed baby squashes. Now that I’m an adult, I make those adorable mini squashes into a healthy yet beautiful dish that’s actually really easy to make… it just looks like it took work. It will satisfy the vegans when made this way, as a side dish, but you can add ground meat to the pilaf to make it a complete meal. And as it’s a gluten-free and dairy-free recipe, everyone at the table can enjoy it. This makes it perfect for this time of year when folks gather to celebrate together in the spirit of Thanksgiving. See more of the Fall Leaves & Pumpkins Themed Thanksgiving Tablescape Décor Ideas here.

165Leigh


Ingredients:
  • ½ cup cooked quinoa (or brown rice) with 1 cup water
  • I container of patty pan squash
  • ½ cup chopped leeks (or onion)
  • ½ cup diced tomatoes
  • ½ teaspoon minced garlic
  • 2 teaspoons olive oil
  • ½ teaspoon dried thyme
  • 1 teaspoon dried parsley
  • ¼ teaspoon salt (or to taste)
  • dash of ground peppercorns

Instructions:

Cook the quinoa (or brown rice) according to package instructions. (If you’re just making this for yourself… it’s the perfect way to spruce up leftover grains.) Steam the squash about 4 or 5 minutes or until bright, soft, and tender. (Time will vary depending on method… electric steamer, in a steamer basket on the stove, microwave.)

47Leigh

Chop, mince, and measure while you’re steaming. Combine all of the ingredients in a bowl. When the patty pans are cool enough to touch, cut an inverted cone shaped depression into each squash (like you would cut the top out of a strawberry).

48Leigh

Set these into your serving dish. Dice the cut-out squash bits, and mix this into the rest of your ingredients. Spoon this quinoa pilaf into each squash and serve immediately. (If you need to prepare this ahead of time, the pilaf stuffed squash reheats beautifully.) Bon appétit!

174QuinoaSquash-Leigh

Another great recipe for Fall is my Quick & Easy “Shortcut” Cauliflower Mashed Potatoes Recipe (Heart-Healthy & Dairy-Free) 🙂

Faithfully Yours,

Leigh

Quick & Easy “Shortcut” Cauliflower Mashed Potatoes Recipe (Heart-Healthy & Dairy-Free)

Just about everyone likes mashed potatoes, but not everyone can enjoy eating them guilt-free. And who has time to gather and prepare all the ingredients then boil and mash the potatoes into smooth perfection? This super quick and easy recipe uses mostly shelf-stable pantry items, so it can be made last minute. It takes into account allergies and other health concerns by omitting all the saturated fats from dairy… which will satisfy the gluten-free vegans as well. Calories are also cut dramatically by adding cauliflower. This recipe for “Short-Cut Cauli-Potatoes” even fooled my Grandmother into eating her veggies. She’s enjoyed eating her way to losing about 70 pounds!


Ingredients:
  • 1 head cauliflower
  • 2 cups water
  • 1 tablespoon dehydrated chopped onion (= shortcut)
  • ¼ teaspoon garlic powder (= shortcut)
  • 1 tablespoon dried parsley (+ more for garnish = shortcut)
  • 1 teaspoon salt (adjust for taste or health needs)
  • 1 tablespoon extra-virgin olive oil (heart healthy)
  • 1 cup Potato Buds (secret ingredient shortcut = dehydrated potatoes in a box)

 Instructions:

Separate the cauliflower head into small sections and wash well. Place in a pot with 2 cups of water. (This amount is important because we do not drain it, which also helps retain the vitamins.) Add the onion as well.

1Leigh

Place covered over medium heat for about 15 minutes (or until cauliflower is soft and tender).

3Leigh

Use an immersion blender to “soupify” the veggies. Mix in the potato buds a little at a time, until thoroughly blended. Add the rest of your spices and olive oil.

8CauliPotatoes-Leigh

Place in a pretty covered dish and garnish with more parsley. No one had ever guessed they’re made from dehydrated potatoes, but I guess my secret shortcut is out now! Just don’t tell Grandma 🙂 Bon appétit!

197Leigh

Pictured is another great recipe for Fall, my Quinoa Pilaf Stuffed Patty Pan “Mini” Squash Recipe (Healthy, Gluten-Free & Dairy Free) 🙂

And see more of my Fall Leaves & Pumpkins Themed Thanksgiving Tablescape Décor Ideas here.

Faithfully Yours,

Leigh


“Glitter-Ween” Halloween Party Theme Decorating Ideas (With DIY Links)

This year’s Halloween party theme was “Glitter-Ween”! This gave me a plausible excuse to paint, spray, or glue… orange, purple, green, and black glitter to my heart’s content… at least until February that is. Here are some decorating ideas from my glitter-splosion event!

192cLeigh

The black painted console was the perfect stage for the “candy-bar” buffet. One small glittered bell wreath kept it from appearing too top heavy. An orange spider-web runner lined and protected the painted top.

202cGlitterween-Leigh

My glitter garland remade craft filled in the background of the smorgasbord. Candlesticks held glittered pumpkins at visible heights behind witch-cats who guarded the sweets.

110Leigh

Theme colored candy filled bowls were accented with pumpkins, ghosts, and bats from my foam puppet / food pick craft. LED candles eerily lit the scene safely, where no normal candle would have dared been set.

108Leigh

Spiders climbed the treat tower hung with their “spider-web” doilies.

32Leigh

Monochromatic jelly bean cups sat next to a variety of cupcakes on various lifts and levels.

157Leigh

Glittered brooms camouflaged another treat tower’s sides while a shimmering welcome beckoned at the top.

253Leigh

In the breakfast room, a wooden tree painted black, was trimmed with my garlands craft and my ornaments from scraps craft. The tree skirt of shimmering purple fabric was repurposed from Mardi-Gras. The tablecloth had hand-sewn bead and fringe trimming.

231Leigh

The centerpiece tree was flanked with hand-painted papier-mâché witch hats, and the felt ones featured favors from my foam shapes craft.

223Glitterween-Leigh

The chandelier was trimmed with ribbon and my friendly bats craft, and then draped with my pumpkin tassels craft.

288-Leigh

Another pumpkin tassel dangled from lamp. The pictured pumpkin basket will be featured in an article very soon.

260Leigh

Glittered pumpkins sat snugly in a ficus tree, next to a window hung with glittered “BOO” signs.

349Leigh

Another window framed my suspended “BOO” wreath craft that featured some of the same glittered shapes as the garland in the living room. (It was merely outlined in the photos due to conditional backlighting which is why this picture is here.)

263Leigh

A side table held a glitter pick arrangement and pumpkin lamp that’s been glowing since my childhood. Fabric witch feet were tucked into a vintage basket held with treats. My foam shape sign craft hung in the background.

209Leigh

Another surface in the room featured more of the friendly witch menagerie guarding one of my mixed media paintings. Changing up your artwork seasonally is a great way to feature your whimsical creations.

42Leigh

The ceramic pumpkin was made before I was born. It’s easy to add personal touches with mementos by nestling them into your themed décor.

105HalloweenStairs-Leigh

Even the staircase was decorated with foot wide green mesh ribbon, more glittered garlands, glowing luminarias, flying bats, and crawling spiders.

137cLeigh


Have a Safe and Happy “Glitter-Ween”!

Faithfully Yours,

Leigh


DIY Easy Last Minute Halloween Ornament Décor Remade From Scraps Craft

Is your spooky Halloween tree décor looking a tad too bare, and your budget’s already blown on candy and costumes? Then do what I did and use ribbon scraps, felt stickers, plastic rings, $1 felt garland, cupcake picks, and felt from a card found around the house to craft cute ornaments! So easy that it can be done last minute, and it makes an interesting artistic scavenger hunt for the kiddos… “Find as many things as you can, in 10 minutes, to turn into ornaments.”

109Leigh

Take a dollar bin felt garland, and cut the ribbon joining the shapes into sections. Tie a knot to form a hanging loop. You can stop there, or add bows made from glittery ribbon (also from the dollar bin) or from leftover pieces from your other crafts. Cut the ring part off the plastic spiders (that outnumber those treat bags).

0112Leigh

Hot glue those elements, at various angles, onto your new one-of-a-kind ornaments.

0117Leigh

Remove felt decorations (in this case a house shape) from cards. Cut the spikes off of leftover plastic cupcake picks. Pull the sticks out of floral arrangement decorations (the pumpkin people in the picture). Cut lengths of ribbon or tinsel twine to serve as hanging loops. These don’t stick into tiny fingers like hooks would, and they pack better too!

206Leigh

Hot glue the ends of the ribbons to the back of the shapes to make loops. Glue any decorations to the front sides. Then take fabric or ribbon (or in this case the thick orange paper that came with a floral arrangement) and glue the ornaments onto it. (The stickers will obviously just stick to it.)This makes for a prettier back that hides the hanging loop ends.

207Leigh

Hang your newly crafted ornaments as proof positive that cute doesn’t have to mean expensive or time intensive!

75Leigh

Happy Halloween!

Faithfully Yours,

Leigh

DIY Easy Last Minute Halloween Décor Kid Friendly Foam Shape Crafts

This project began with the question, “What on earth do I do with that sack of foam shapes that didn’t get used up in that last project?” My answer was to make holiday signs, spooky garlands, not-so-scary ornaments, favor necklaces, and puppet favor / food picks! So without further ado, here are some quick and easy kid friendly craft ideas that are great for last minute fill-ins for your décor this Halloween.

112Leigh

Glue colored twine in between two foam shapes to make any length garland you chose. Adults can use hot glue and a ruler as a distance guide. Kiddos can use foam glue and make it as crazy as they like!

297Leigh

Drape it along a spooky Halloween tree, or loop the ends and hang them on the wall with tacks.

291Leigh

Using the same technique, make favor necklaces for the little ones. Wrap them around mini felt witch hats for party hat dress up that doubles as décor. A barrette turns them into a grown-up witchy fascinator.

113Leigh

Glue the shapes back to back with a new popsicle sticks in-between.

79Leigh

Stick those little puppet favors into candy stashes for an extra dose of Halloween fun.

327Leigh

Some shapes can double as letters for a thrifty but cute holiday sign.

115Leigh

A block of wood or small canvas backed with a ghost cut-out, may be topped with eyehooks for a wire handle.

117Leigh

Glue on small letters plus pumpkins for O’s, armed ghosts for T’s and K’s (when an arm is cut and added as the kick in the K). Bats can just swarm the whole project!

118Leigh

A coat of glitter paint (or glue) unifies the whole project, making the foam indistinguishable from other materials. The whole thing can actually dry on the wall (so long as wee fingers are out of reach).

121Leigh

Thread an intentionally random mix of seed beads to a thick wire handle, and twist securely into a hole or eyehook.

56Leigh

Voila, super-cute… super-cheap… super-fun!

253Leigh

Happy Halloween!

Faithfully yours,

Leigh


DIY Glitter “BOO” Wreath Halloween Decoration Craft

This year’s glitter explosion of kid-friendly Halloween party decorations needed an accompanying wreath, because every holiday deserves its own wreath… right?! I chose to make this one out of the same materials I had already been using. It contains a “BOO” sign, which you’ll see more of in my “Glitter-ween” Party article appearing soon. (You can find this type of thing at most craft stores.) I also used a pair of felt bat wings that were cut using my template from a previous craft, and some of the glitter shapes I set aside from my garland remade craft. (You can use any glitter shape made out of foam or wood.) Lastly, I used some of the same Halloween ribbon I had decorating various other elements in my home. This is why you should always buy extra rolls of matching ribbon. You never know when the crafting-bug will strike!

119Leigh

The best way to make a ribbon wreath is to use a hay or Styrofoam wreath form as a base. Just start by gluing the ribbon end at a 45 angle to the base. Then just pull tautly as you wrap the ribbon at the same angle around the form. I hot glue dots to the underside as I go, but that’s just because I’m a stickler for solid construction. It’s really not necessary until you reach the end of the underside. Then all you need to do is cut the ribbon and fold it over, for a clean finish, then glue it down. Though there’s no need to fold it over if you’re including a ribbon hanger.

0120Leigh

To add a convenient built in hanger, simply cut a length of ribbon in relation to the size of your wreath. (Use the photo as a visual guide.) Glue it well to the underside, forming a loop.

0121Leigh

Cut a piece of floral wire, and then twist the loose section of ribbon. Give it a couple of turns, and tie it off with the wire (like you would a twist tie on a bag of chips). Don’t worry about how it looks as this will be covered by a bow later.

123Leigh

Now use my template to cut out bat wings from stiff felt or craft foam. Place your “BOO” sign (or individual letters) next to the top area… so it’s easier to judge where to place those wings. Once you’ve found your placement, glue them down.

124Leigh

Arrange your shapes in the way you like best, because enjoying your own creation is the most important part. Since the shape openings didn’t show up well on the black glittery ribbon, I made some “eyes” from brighter pieces. I merely glued the lengths onto the underside of the shapes.

127Leigh

To add more visual interest, glue more loops of bright ribbons around the base in between the shapes. Now make a bow and layer it with several types and colors of ribbon. You can either make it by tying several ribbons together at once, or by gluing additional ribbons to a bow. Glue all of that visual smorgasbord to the base then top it off with the “BOO” sign.

0130Leigh

If you like, use coordinating glitter glue to add faces or fill in shape openings, but wait a day to hang it up. I added extra glitter dots to cover the sparse areas of the “BOO”.

349Leigh

The last step is to hang it up and enjoy your handiwork! Have a Happy Halloween!

Faithfully Yours,

Leigh


Superfast Glitter Halloween Shapes Garland Remade Craft

This superfast Halloween project is so easy that I more than hesitated to call it a craft. It’s more like a… remake something bland into something beautiful endeavor. Hence the name “remade craft”. I had three inexpensive pre-manufactured garlands that had cute shapes, but were boring in that they just contained one image and color per strand of generic ribbon. I just had to mix them up. I’m writing this as encouragement to look for the creative possibilities in everyday materials… but if you like the look of the completed piece, why not buy some glittered shapes and string them in the same way that I restrung these glittered wooden ones.

337Leigh

I always see glittered foam shapes like these in the craft stores, but if you’re feeling really crafty you can buy precut wooden shapes and glitter paint them yourself.

339Leigh

Remove all traces of cheap and twisted dull generic ribbon. Find some pretty sparkly yarn in a contrasting color that coordinates with your party color scheme.

340Leigh

Arrange the shapes in a pleasing order, and string them along. (But set aside some shapes to use on a Halloween wreath, article will follow.)

341Leigh

That’s just so much better.

343Leigh

I draped them along the staircase railing, using green floral wire to tie them on. See the Easy DIY Kid Friendly Bat Halloween Décor Craft from an earlier article.

105HalloweenStairs-Leigh

I think they made a terrific backdrop for my “Glitter-Ween” Party!

202cGlitterween-Leigh

Faithfully Yours,

Leigh

Easy DIY Kid Friendly Bat Halloween Décor Craft

This super easy DIY Halloween décor craft makes kid friendly bats that are lightweight enough to hang anywhere you like. All you need to make them are glue, google eyes, stiff felt sheets (or craft foam), and big pompoms. In fact, the idea came from my mother bringing me a bag full of sparkly pompoms saying, “They were on clearance, and I thought you could make something out of them.” Challenge accepted. I already had some giant friendly spiders, but couldn’t find any similar looking not-so-scary bats. The pompoms would be perfect for constructing my own.

336Leigh

To create your own, first print out the template image at the end of the article. (Simply right click the template image on your computer then select print.) You can even set your printer to a different scale if you are using different sized pompom centers.

322Leigh

Cut out the template and trace the image onto the felt. I used a silver Sharpie marker so that I could see the lines later. This is a great time to get the kiddos involved.

323Leigh

Cut just inside the lines, unless you prefer an outlined look.

329Leigh

Glue on the google eyes and wings. Try doing this at different angles to simulate various stages of flight. I used hot glue because it bonds immediately, but you should use something else if little ones are helping. Cheap clothespins make great clamps to hold items while glue dries.

330Leigh

I already had spiders, but it’s easy to make your own by simply gluing the ends of pipe cleaners to the pompoms. Those are purple tinsel ones in the picture. You can also find them in a thicker variety that would look better on the larger centers. See pictures of them “crawling” over my tablescapes and staircase in the upcoming “Glitter-ween” party article.

335bLeigh

In order to hang the little guys later, slide a piece of thin wire through the back of the pompom and twist the ends together. If you’re using a different type of pompom, you can always glue a loop on. I prefer enclosed circles rather than hooks to prevent anyone from getting their fingers stuck. Also, they pack better after the holidays without sticking into each other.

139Leigh

These hung really well from the round wall of my spiral staircase. They looked like they were flying to the second floor. Spooky shadows were created by luminarias beneath them on the stairs.

88Leigh

I wrapped a chandelier in spider-web ribbon, then added the bats. One set down right in the center, another three looped right onto the metal tops holding the light shades, and only one needed to be wired onto the chain.

223Glitterween-Leigh

Hang them anywhere and everywhere, and have a Happy Halloween!

Faithfully yours,

Leigh

lefideledesignsbatwingtemplate


Living Faithfully ~ Embracing Creativity