Tag Archives: Le fidèLe

Easy DIY Antique Looking Napkin Rings with Crochet Trim Craft Tutorial + Free Turkey & China Thanksgiving Printables (for Place-cards, Hostess Gift Tags, Thank You Notes, Doggie Bag Tags, Food Tent Cards, etc.)

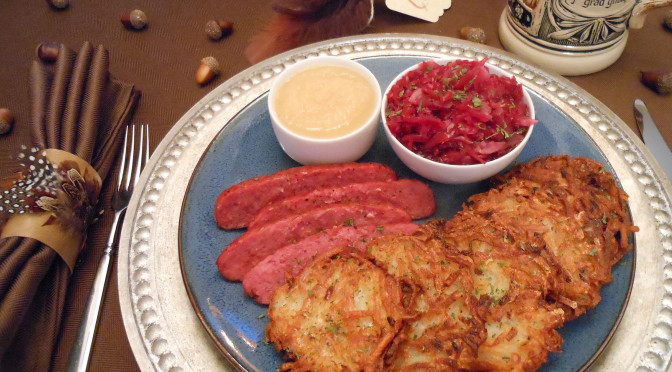
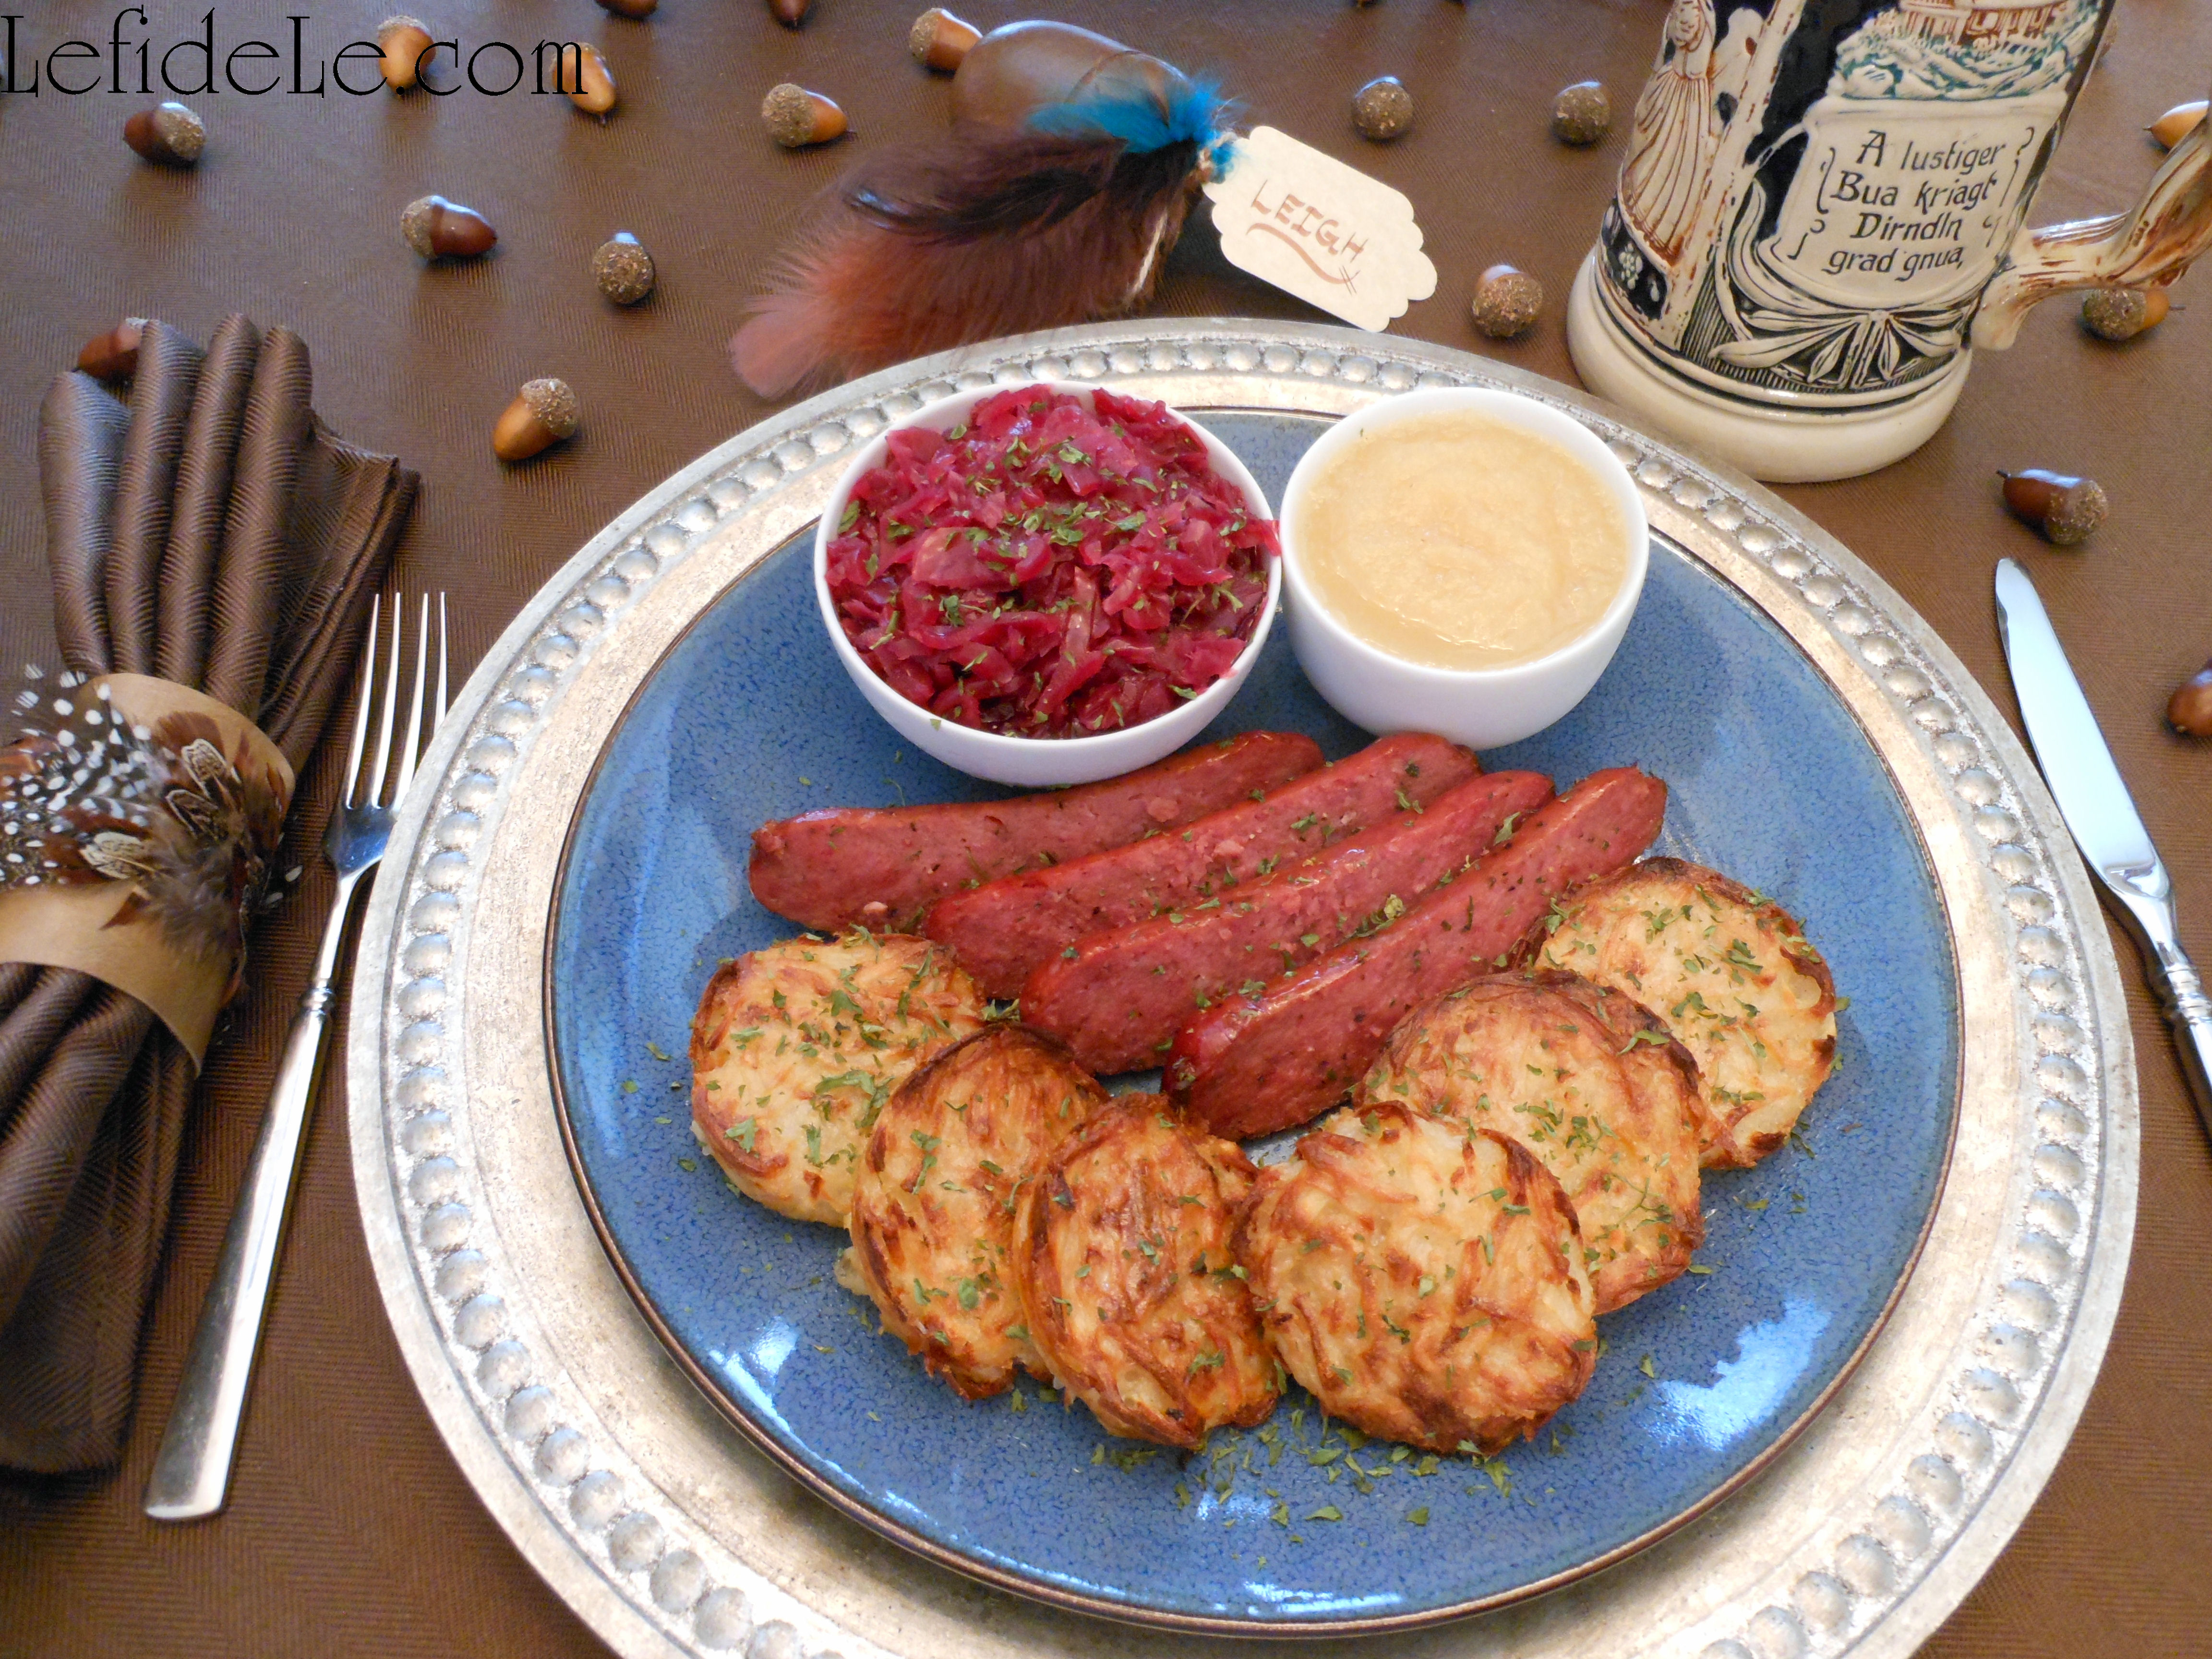
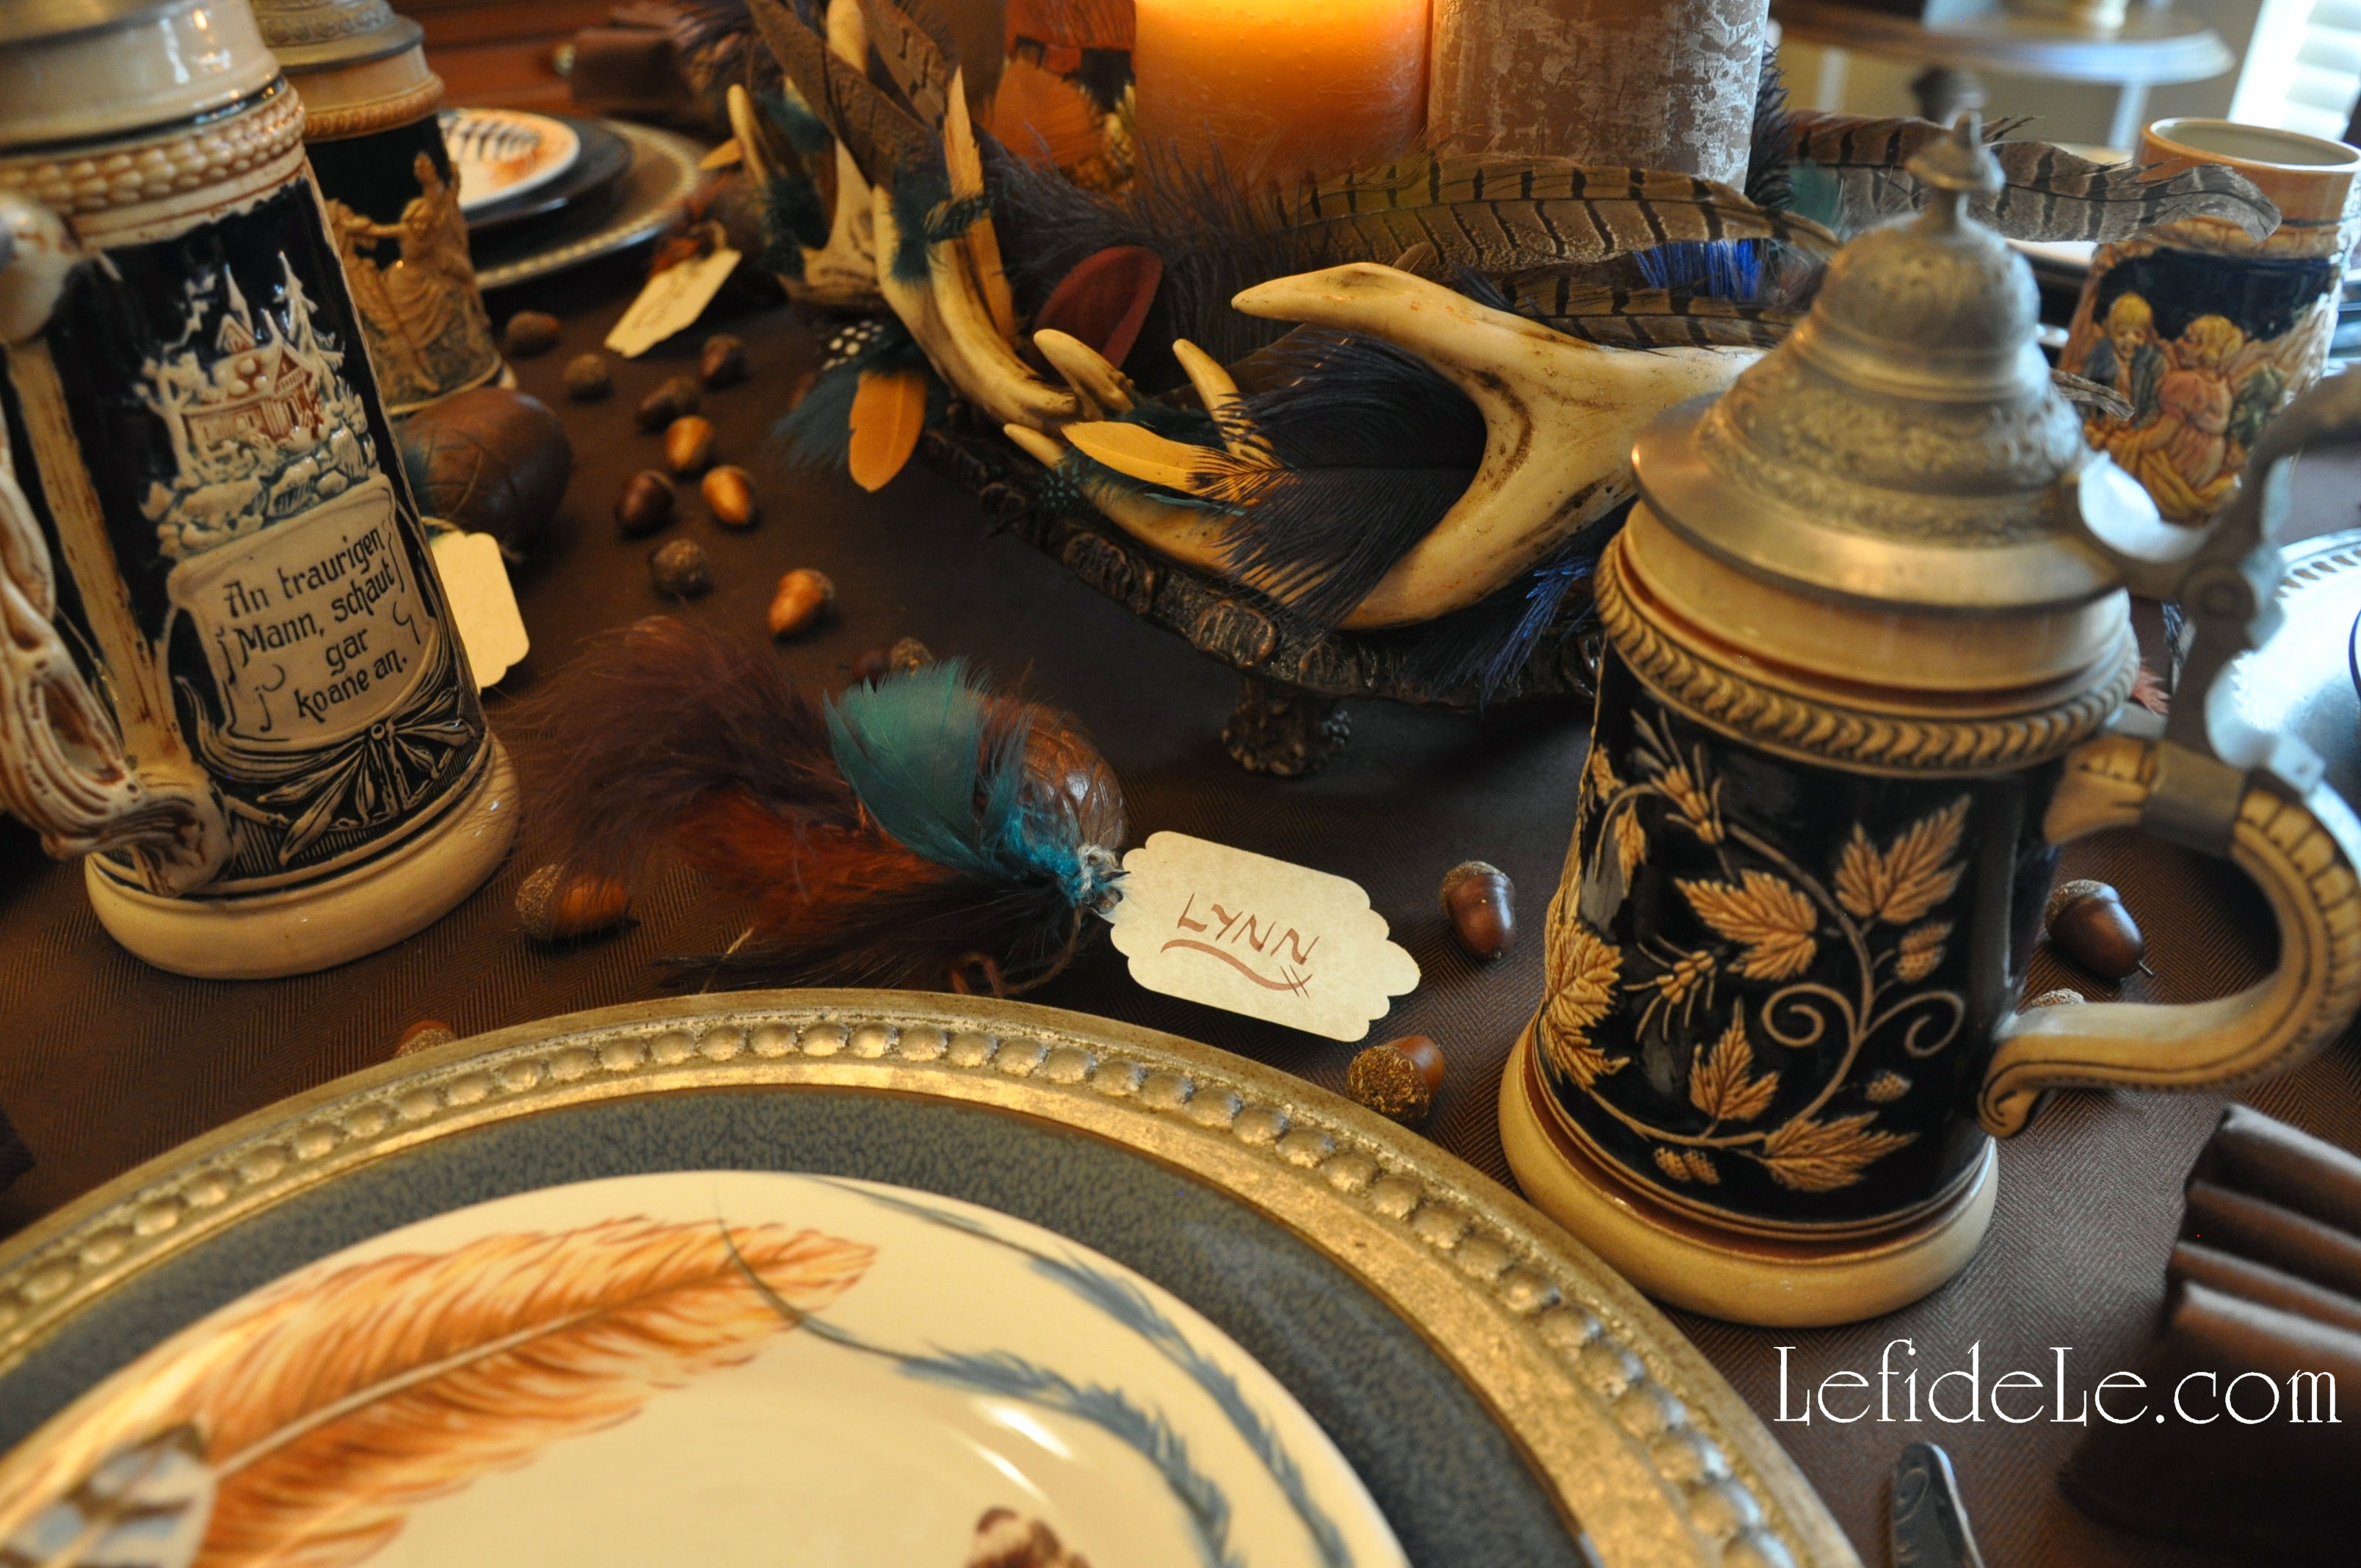
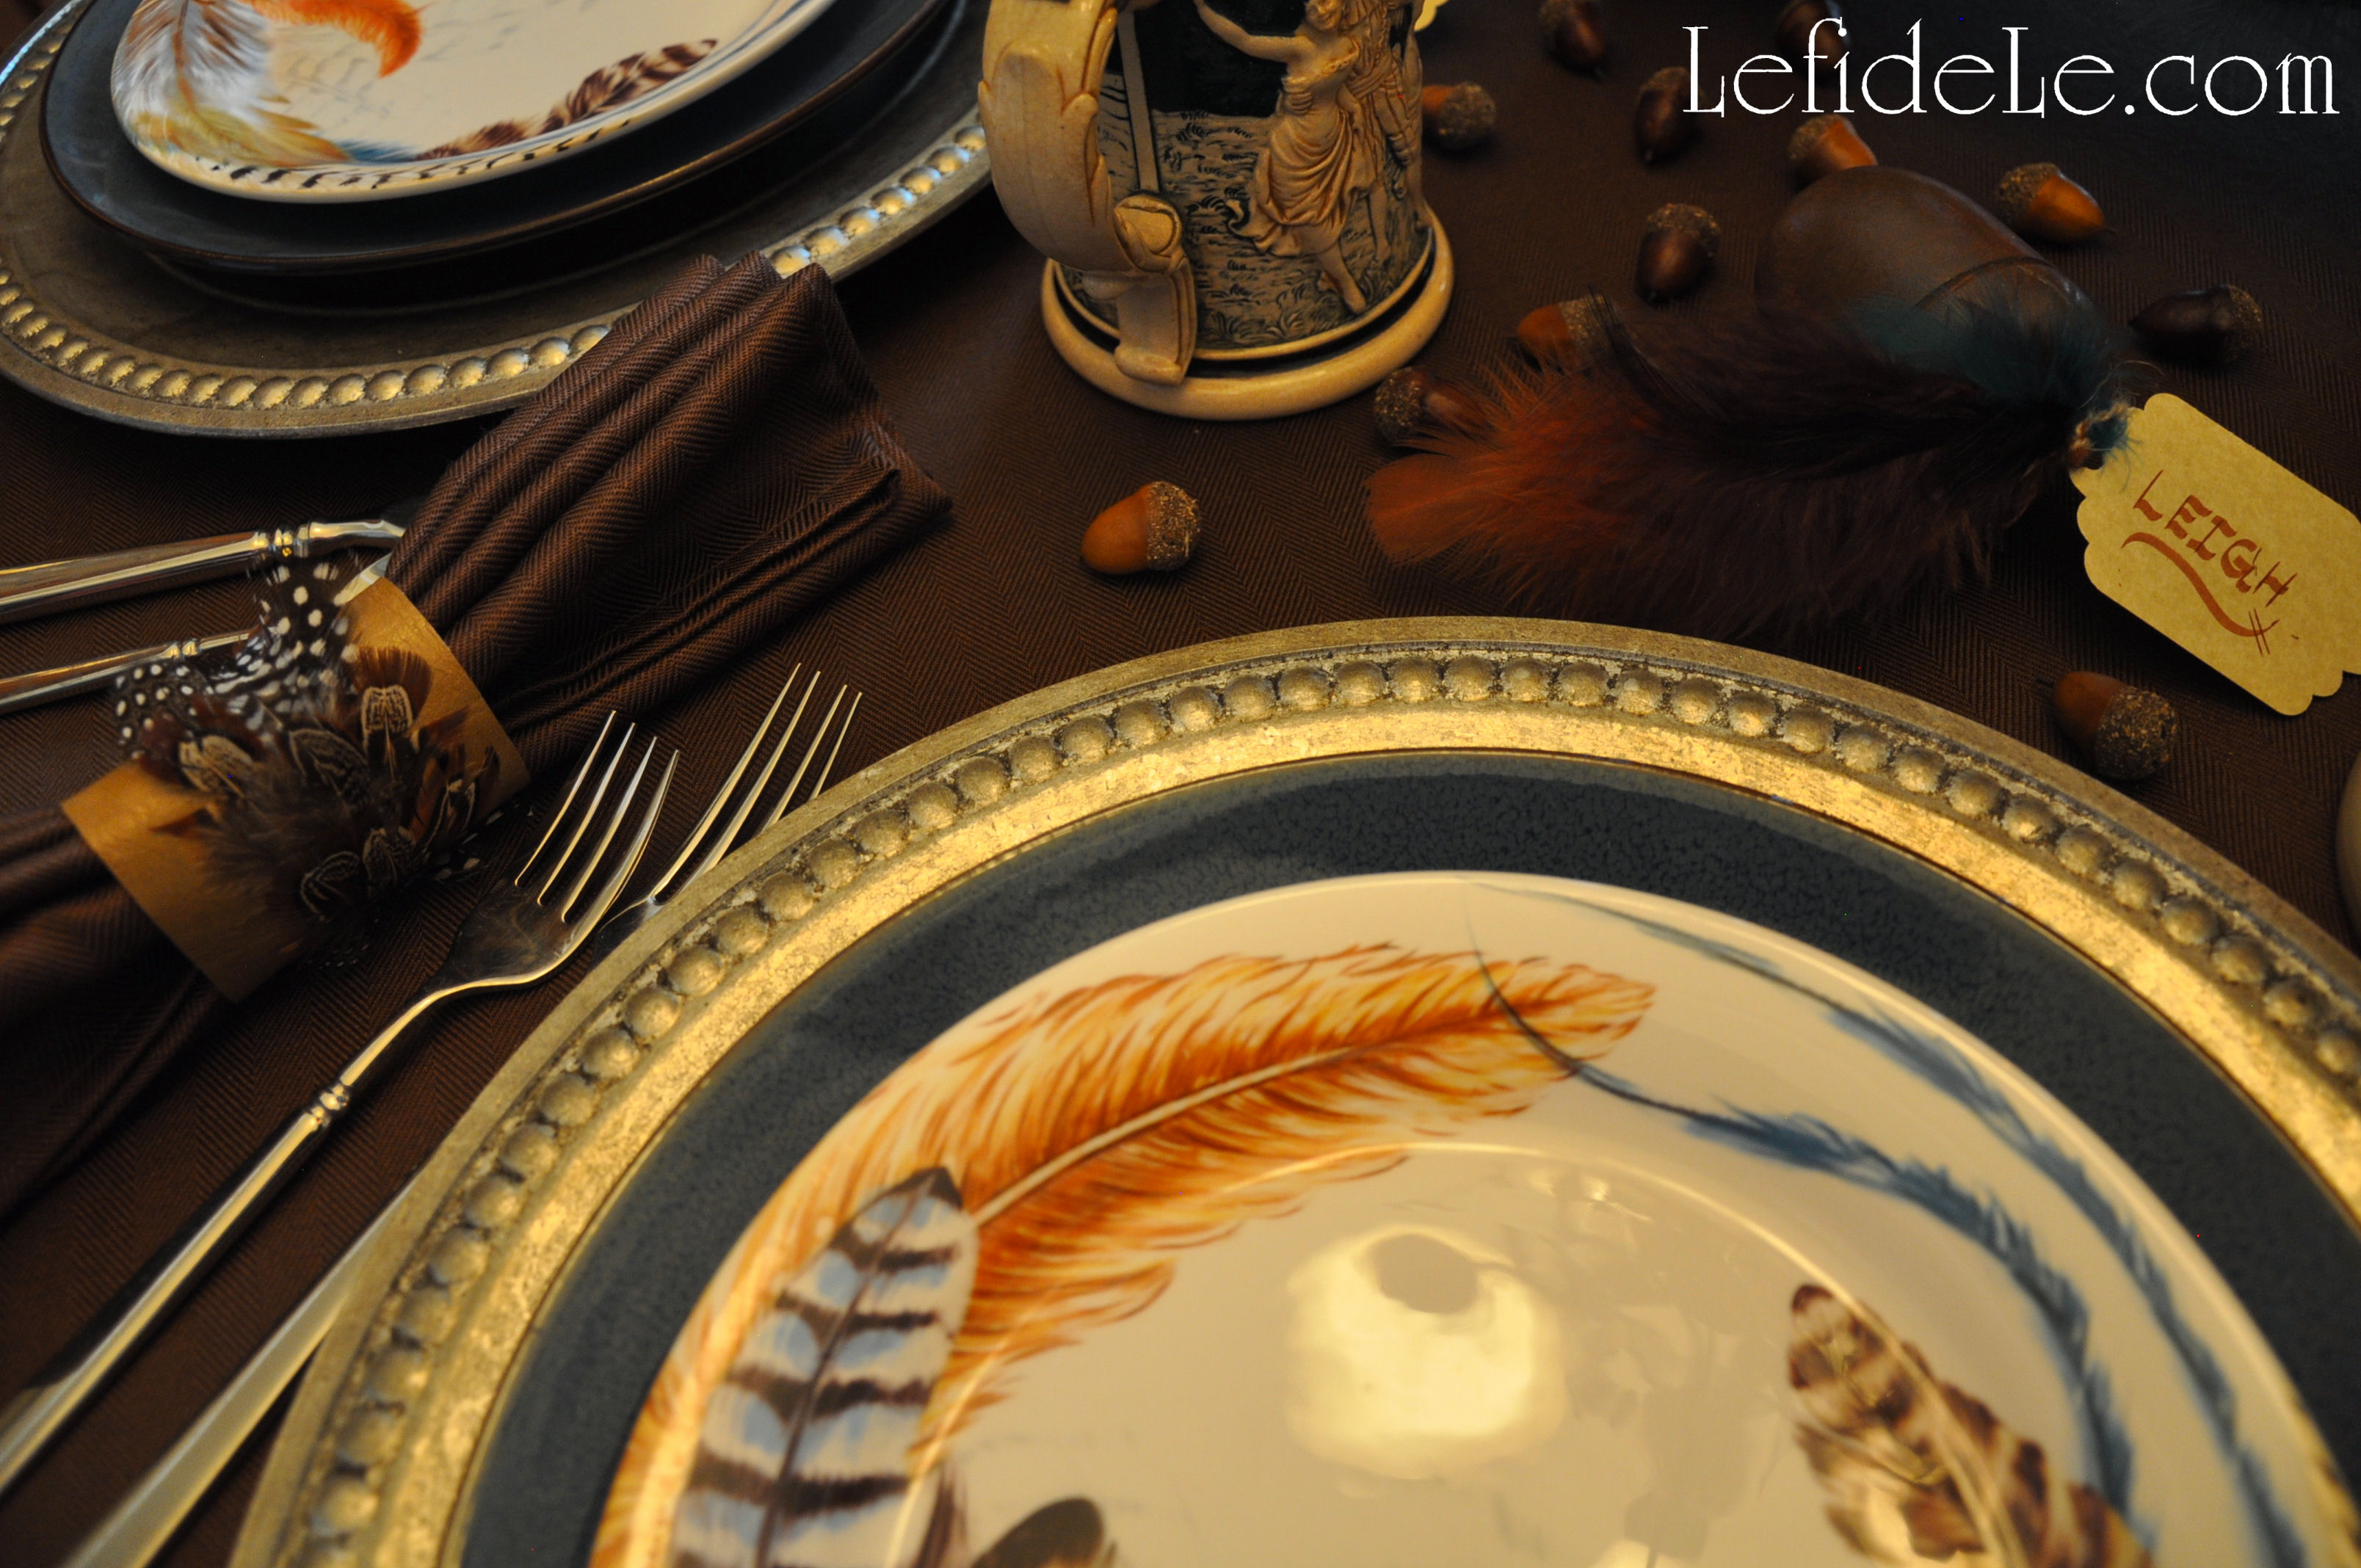
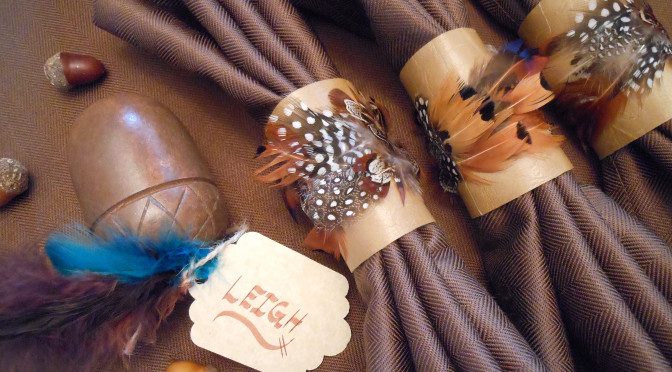
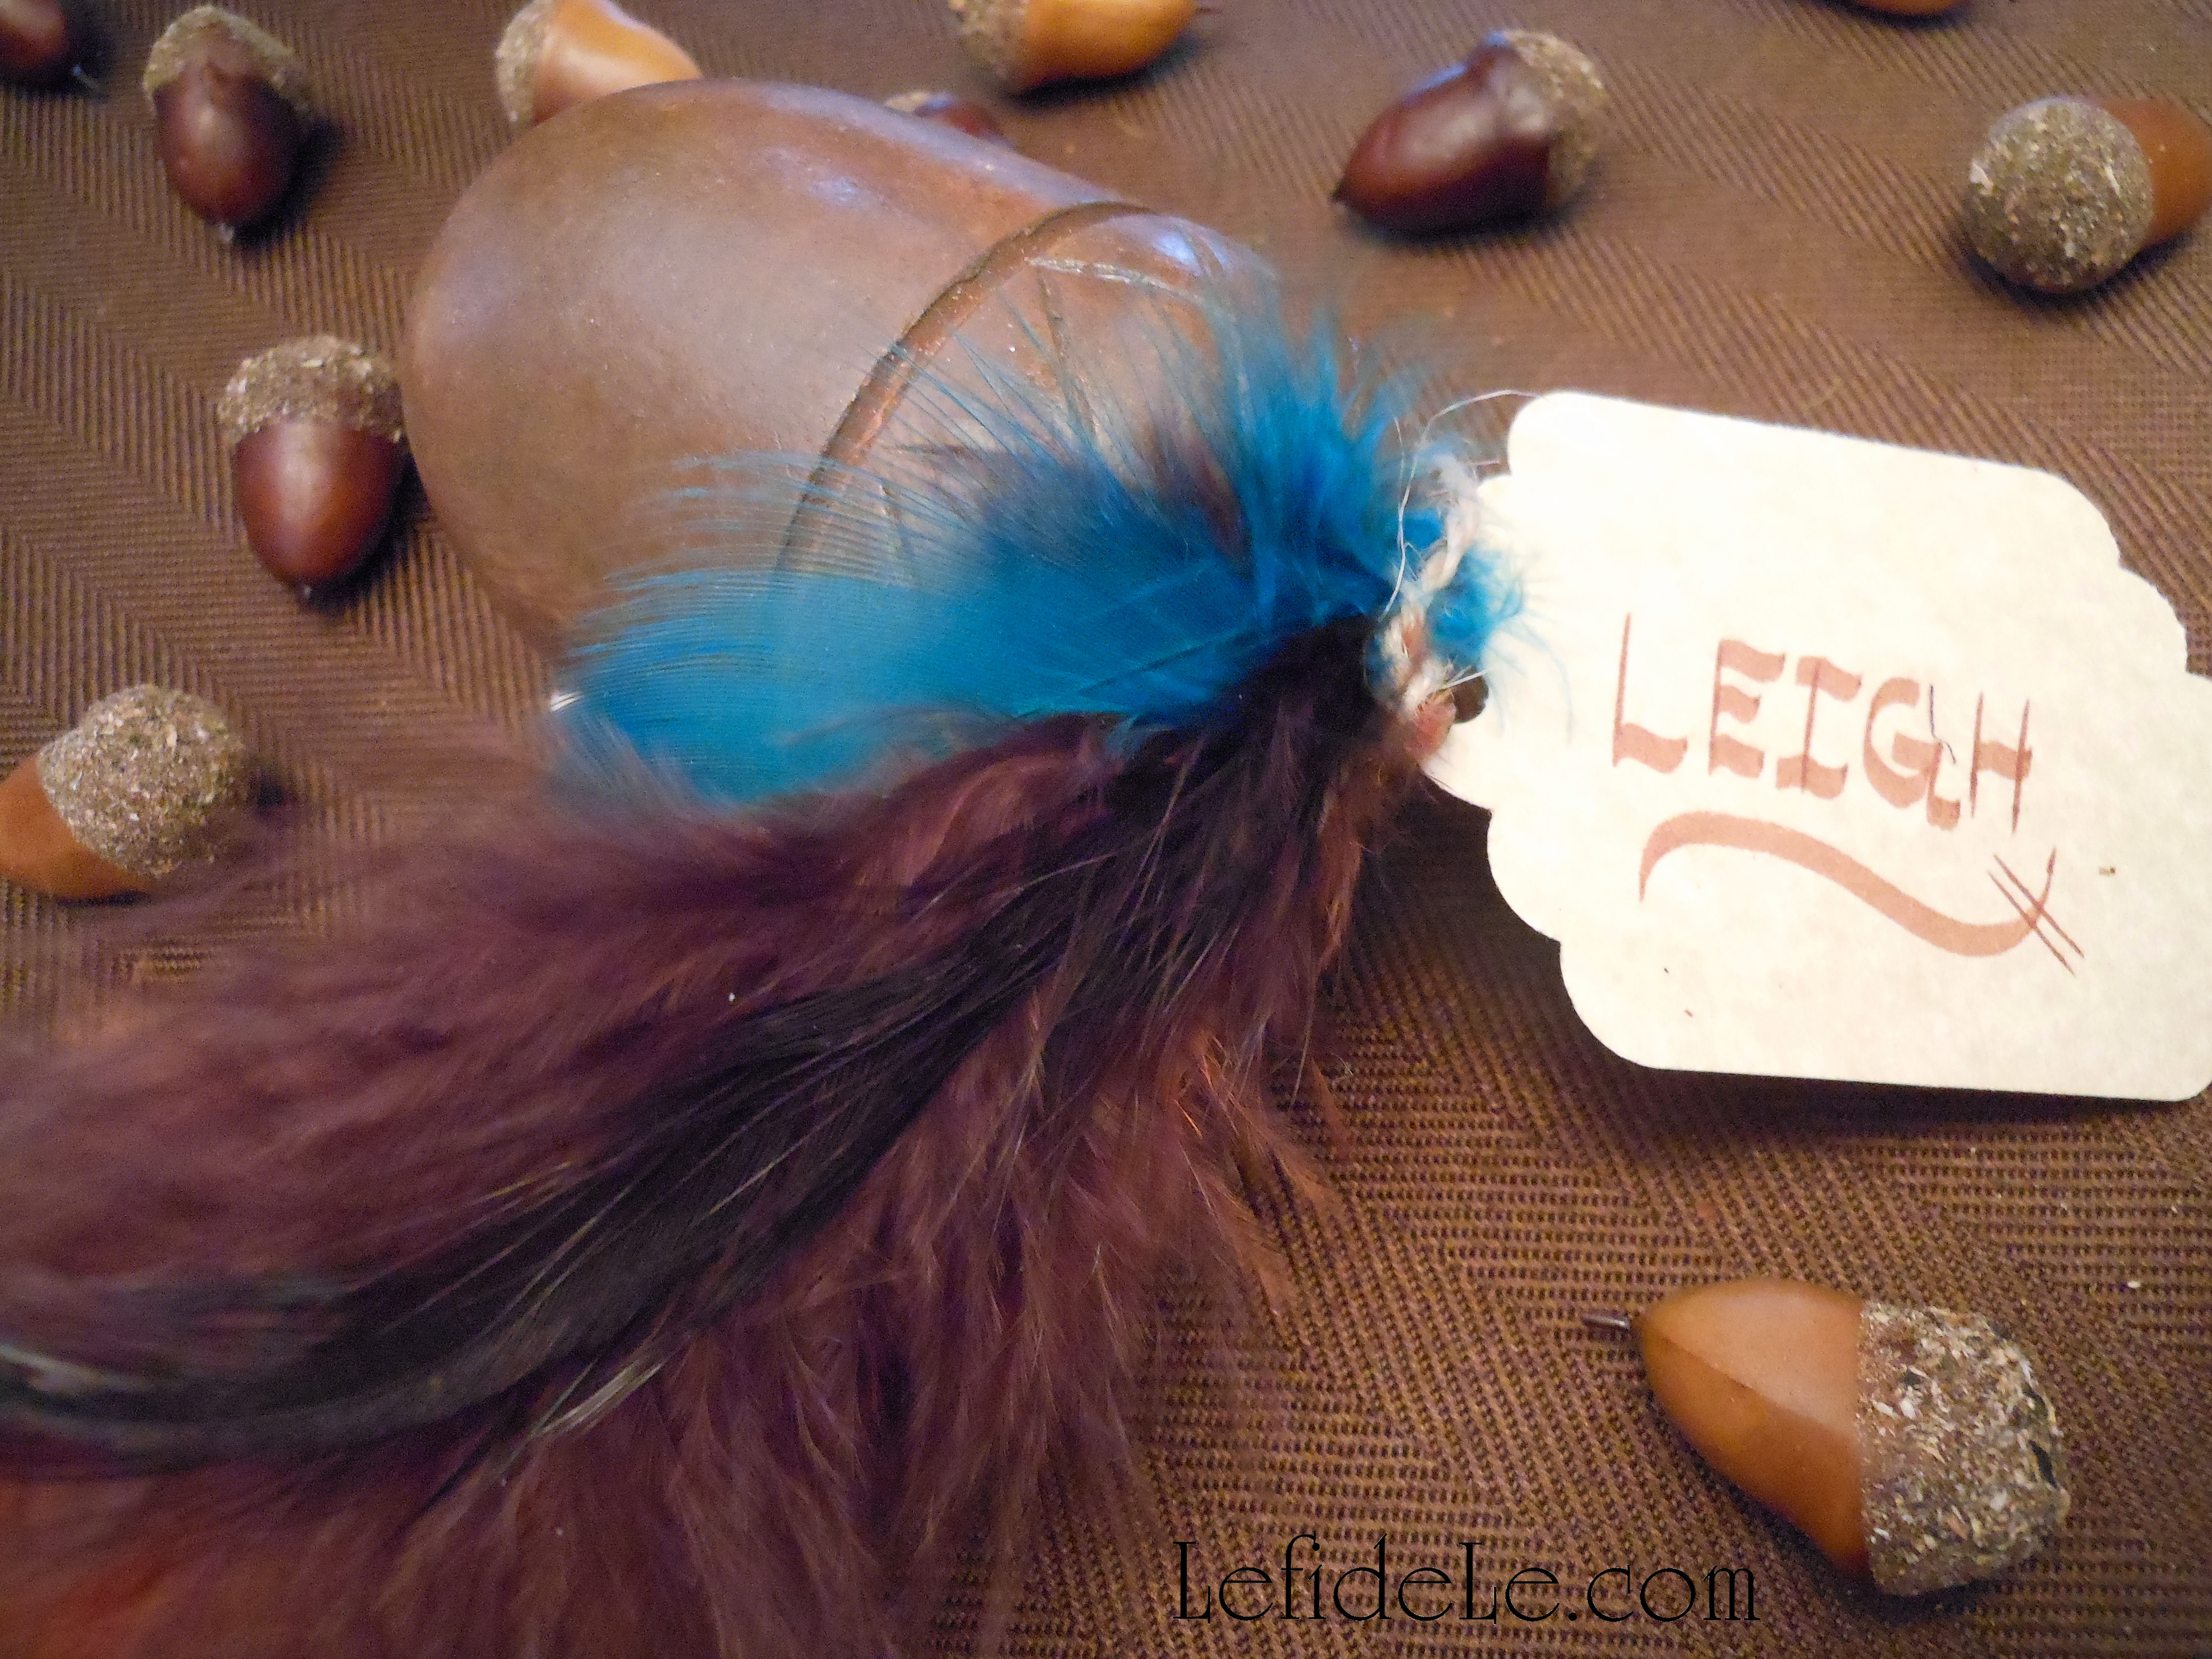
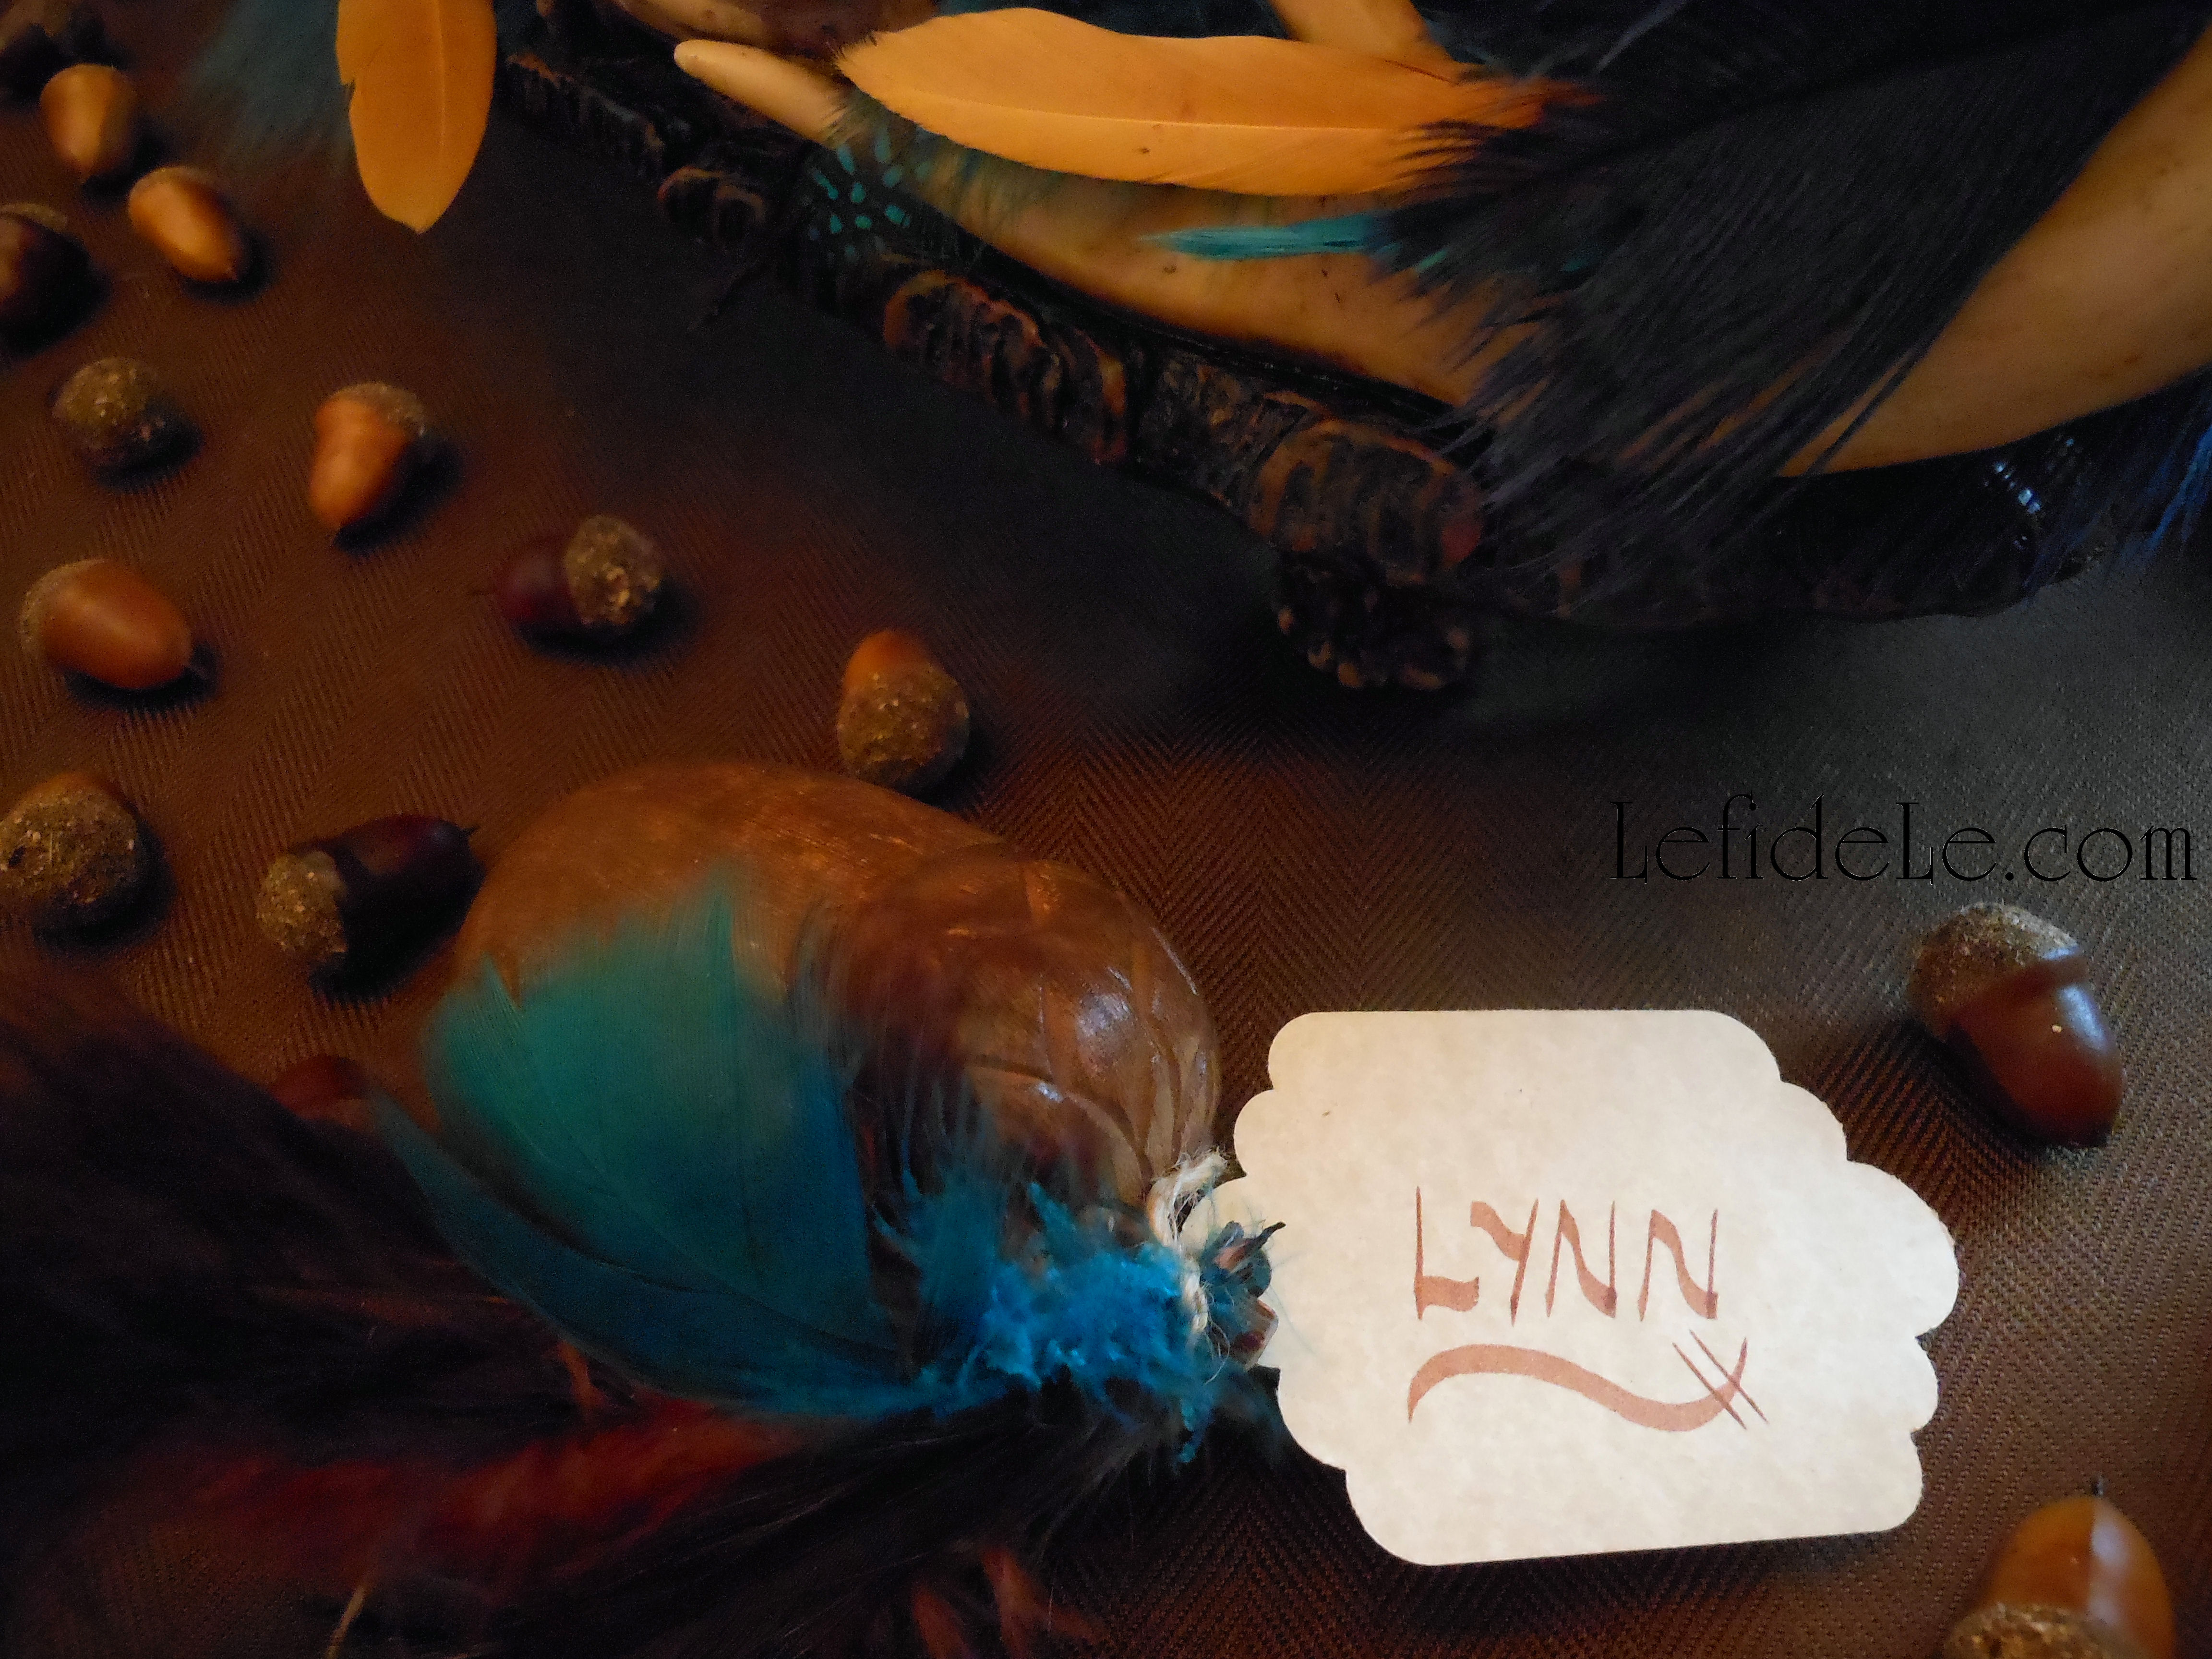
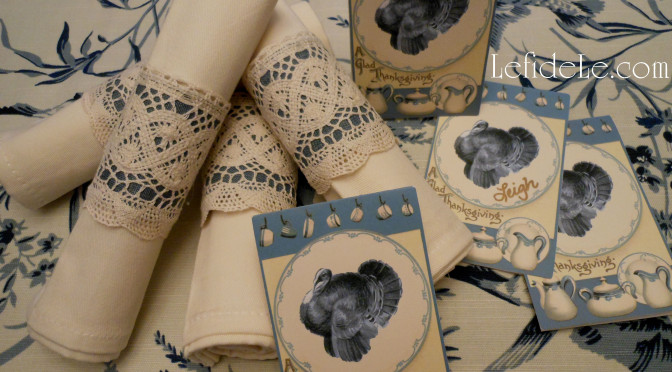
Easily DIY your own antique looking napkin rings crafted with crochet trim to coordinate beautifully with any china pattern for your Thanksgiving. Then make place-cards using my free turkey and china printables that will double a doggie bag tags when the evening closes. Also, print some to use as food tents cards to identify pies or even as thank you notes or tags for hostess gifts.

20151019_602Leigh

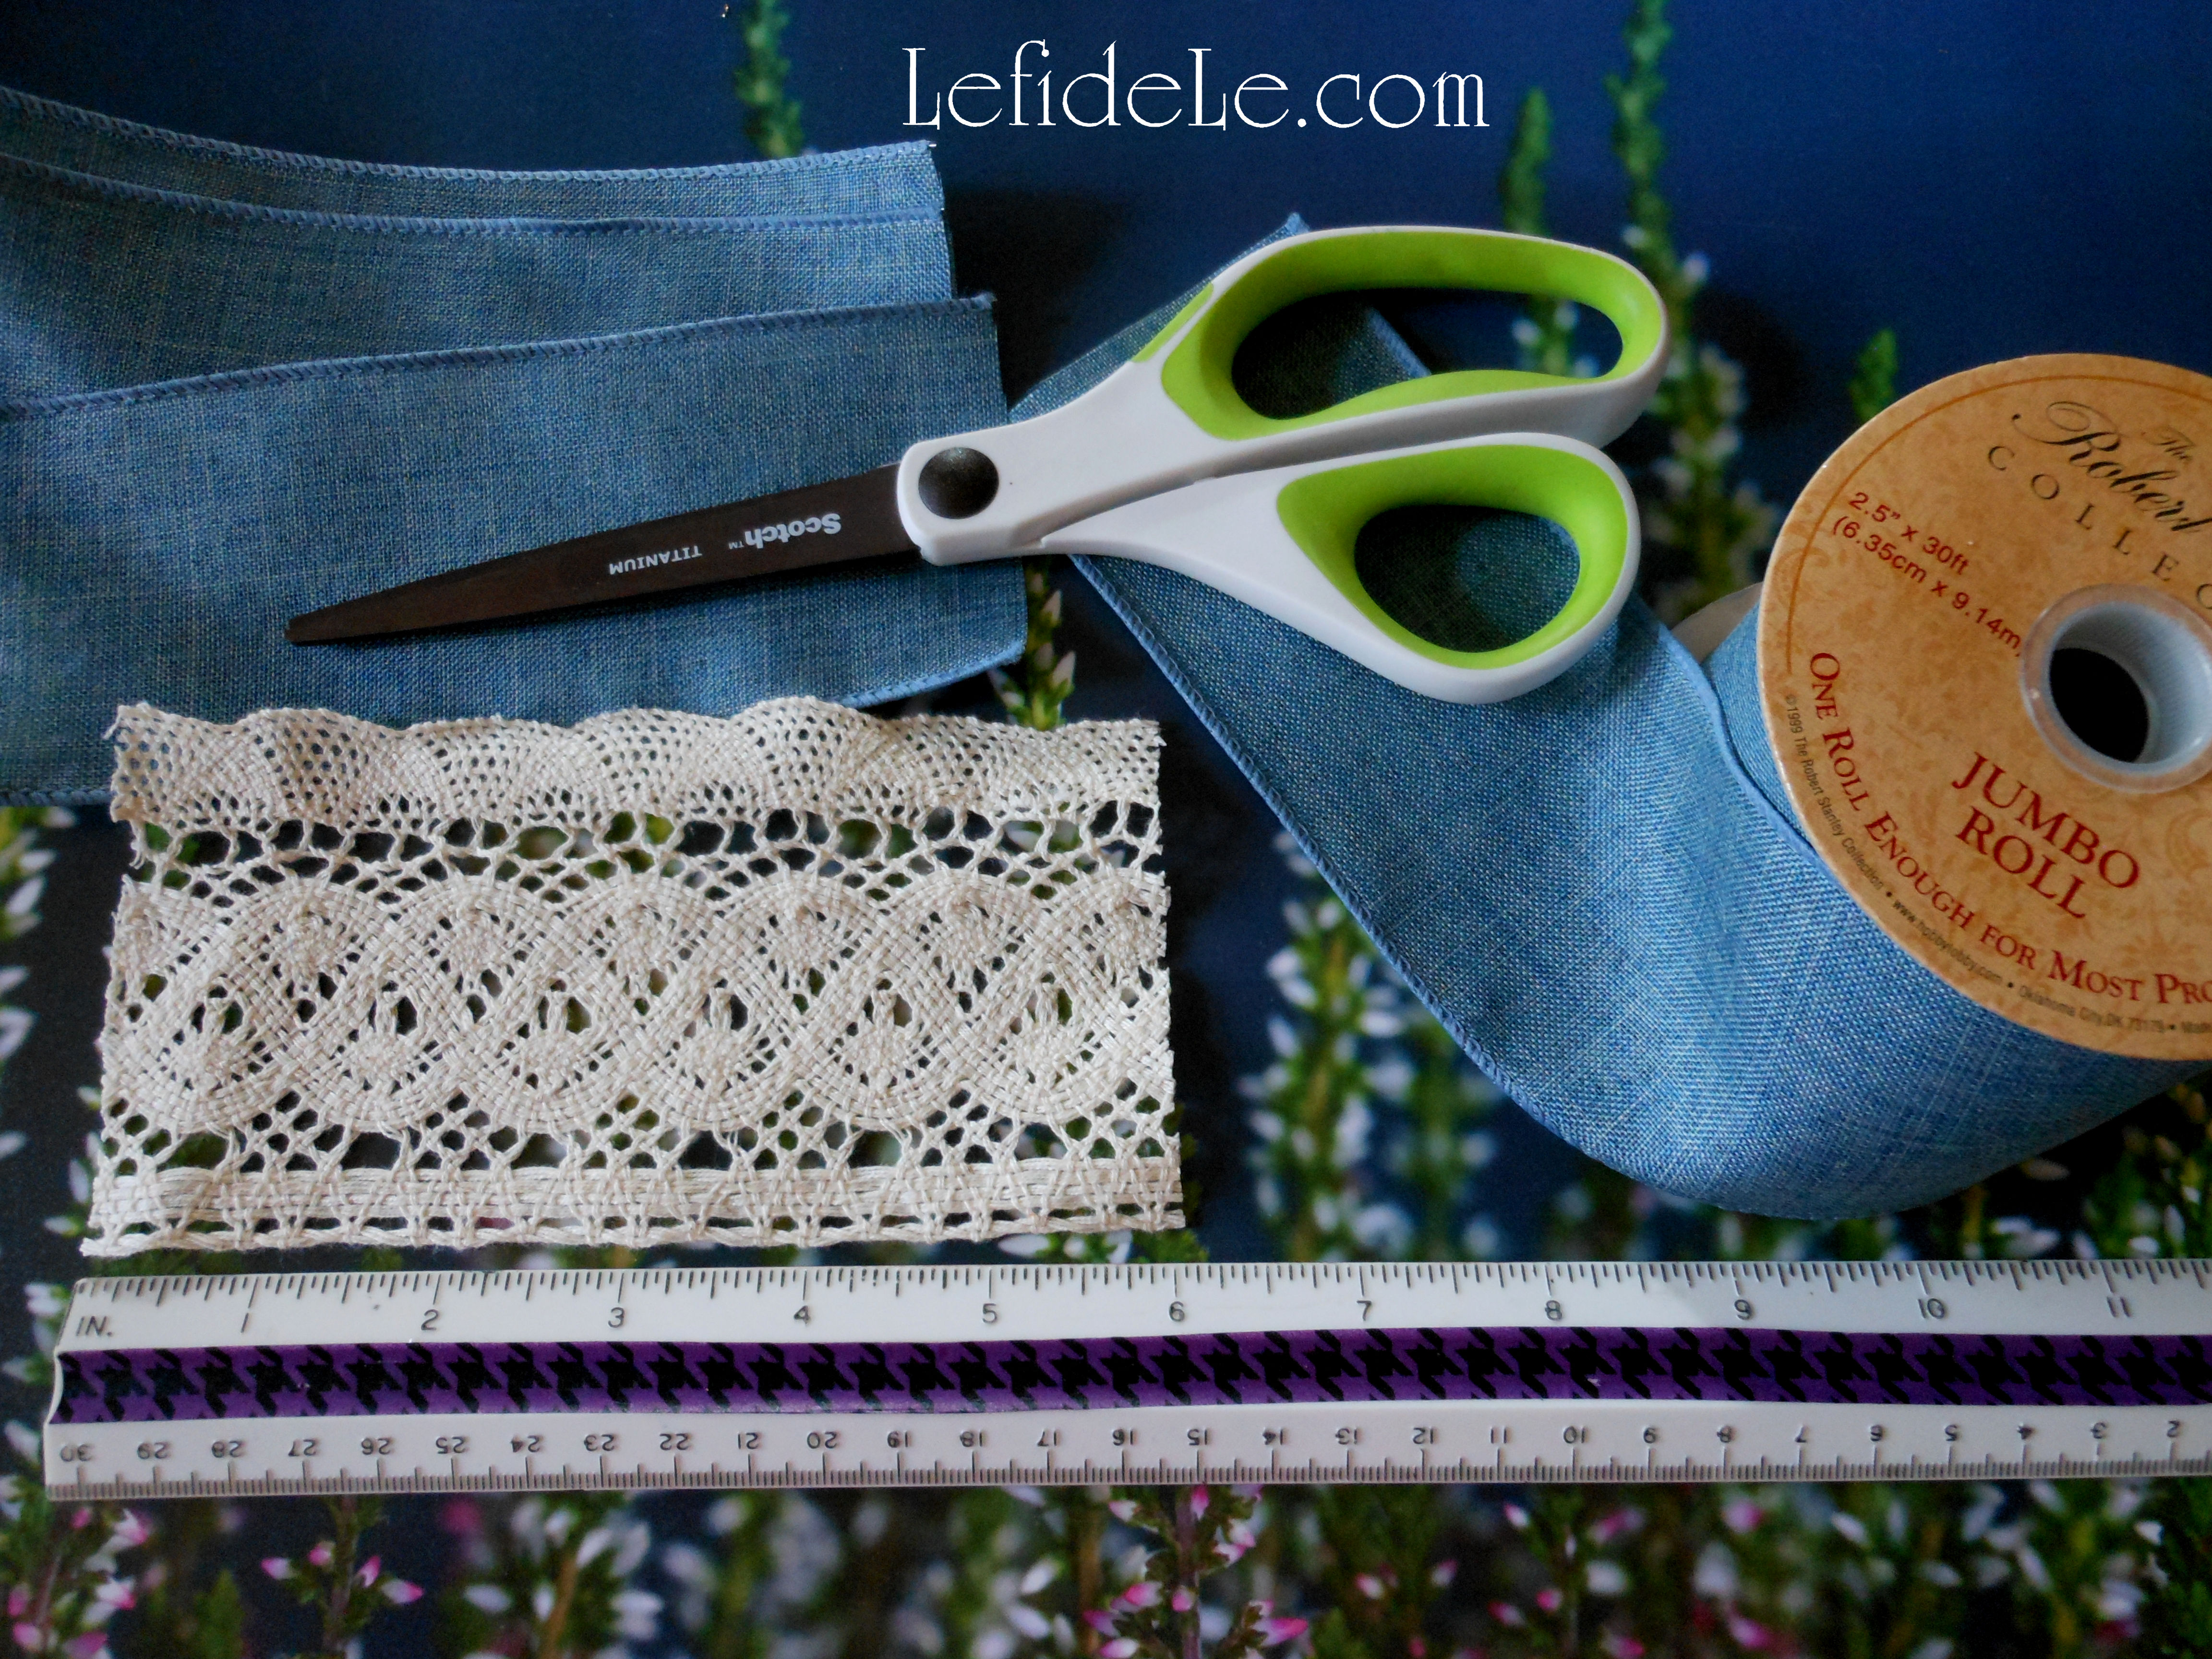
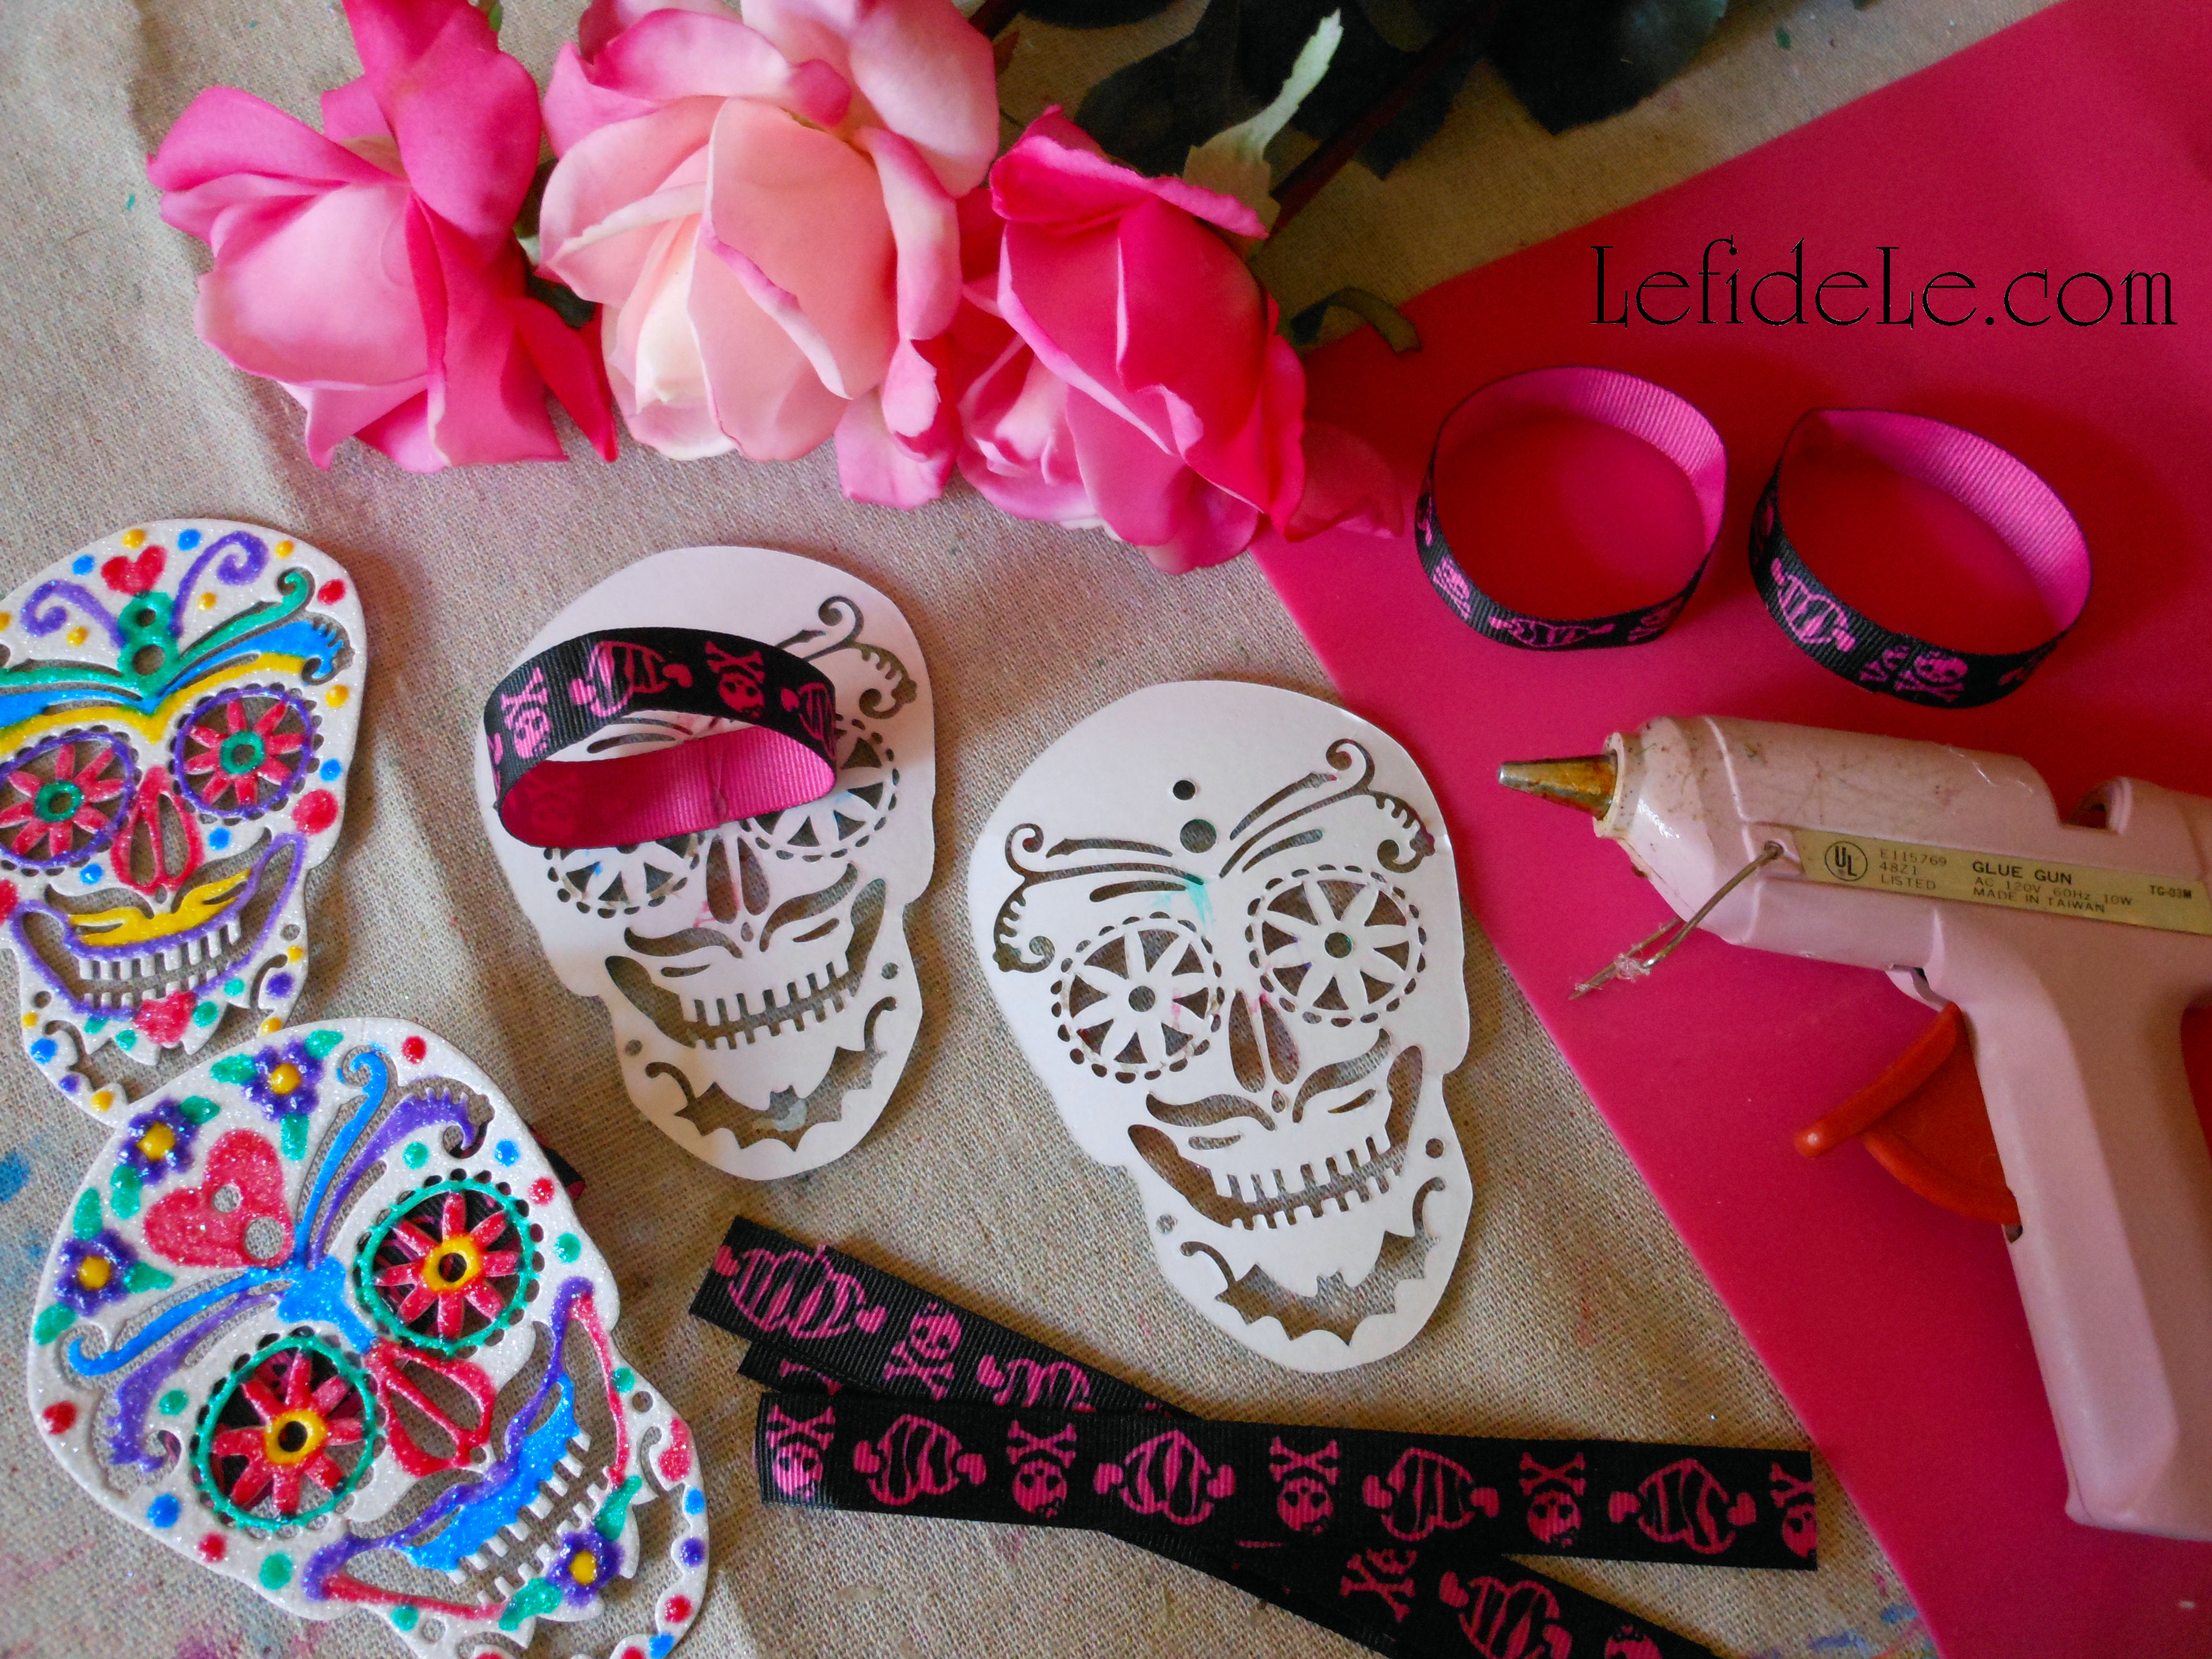
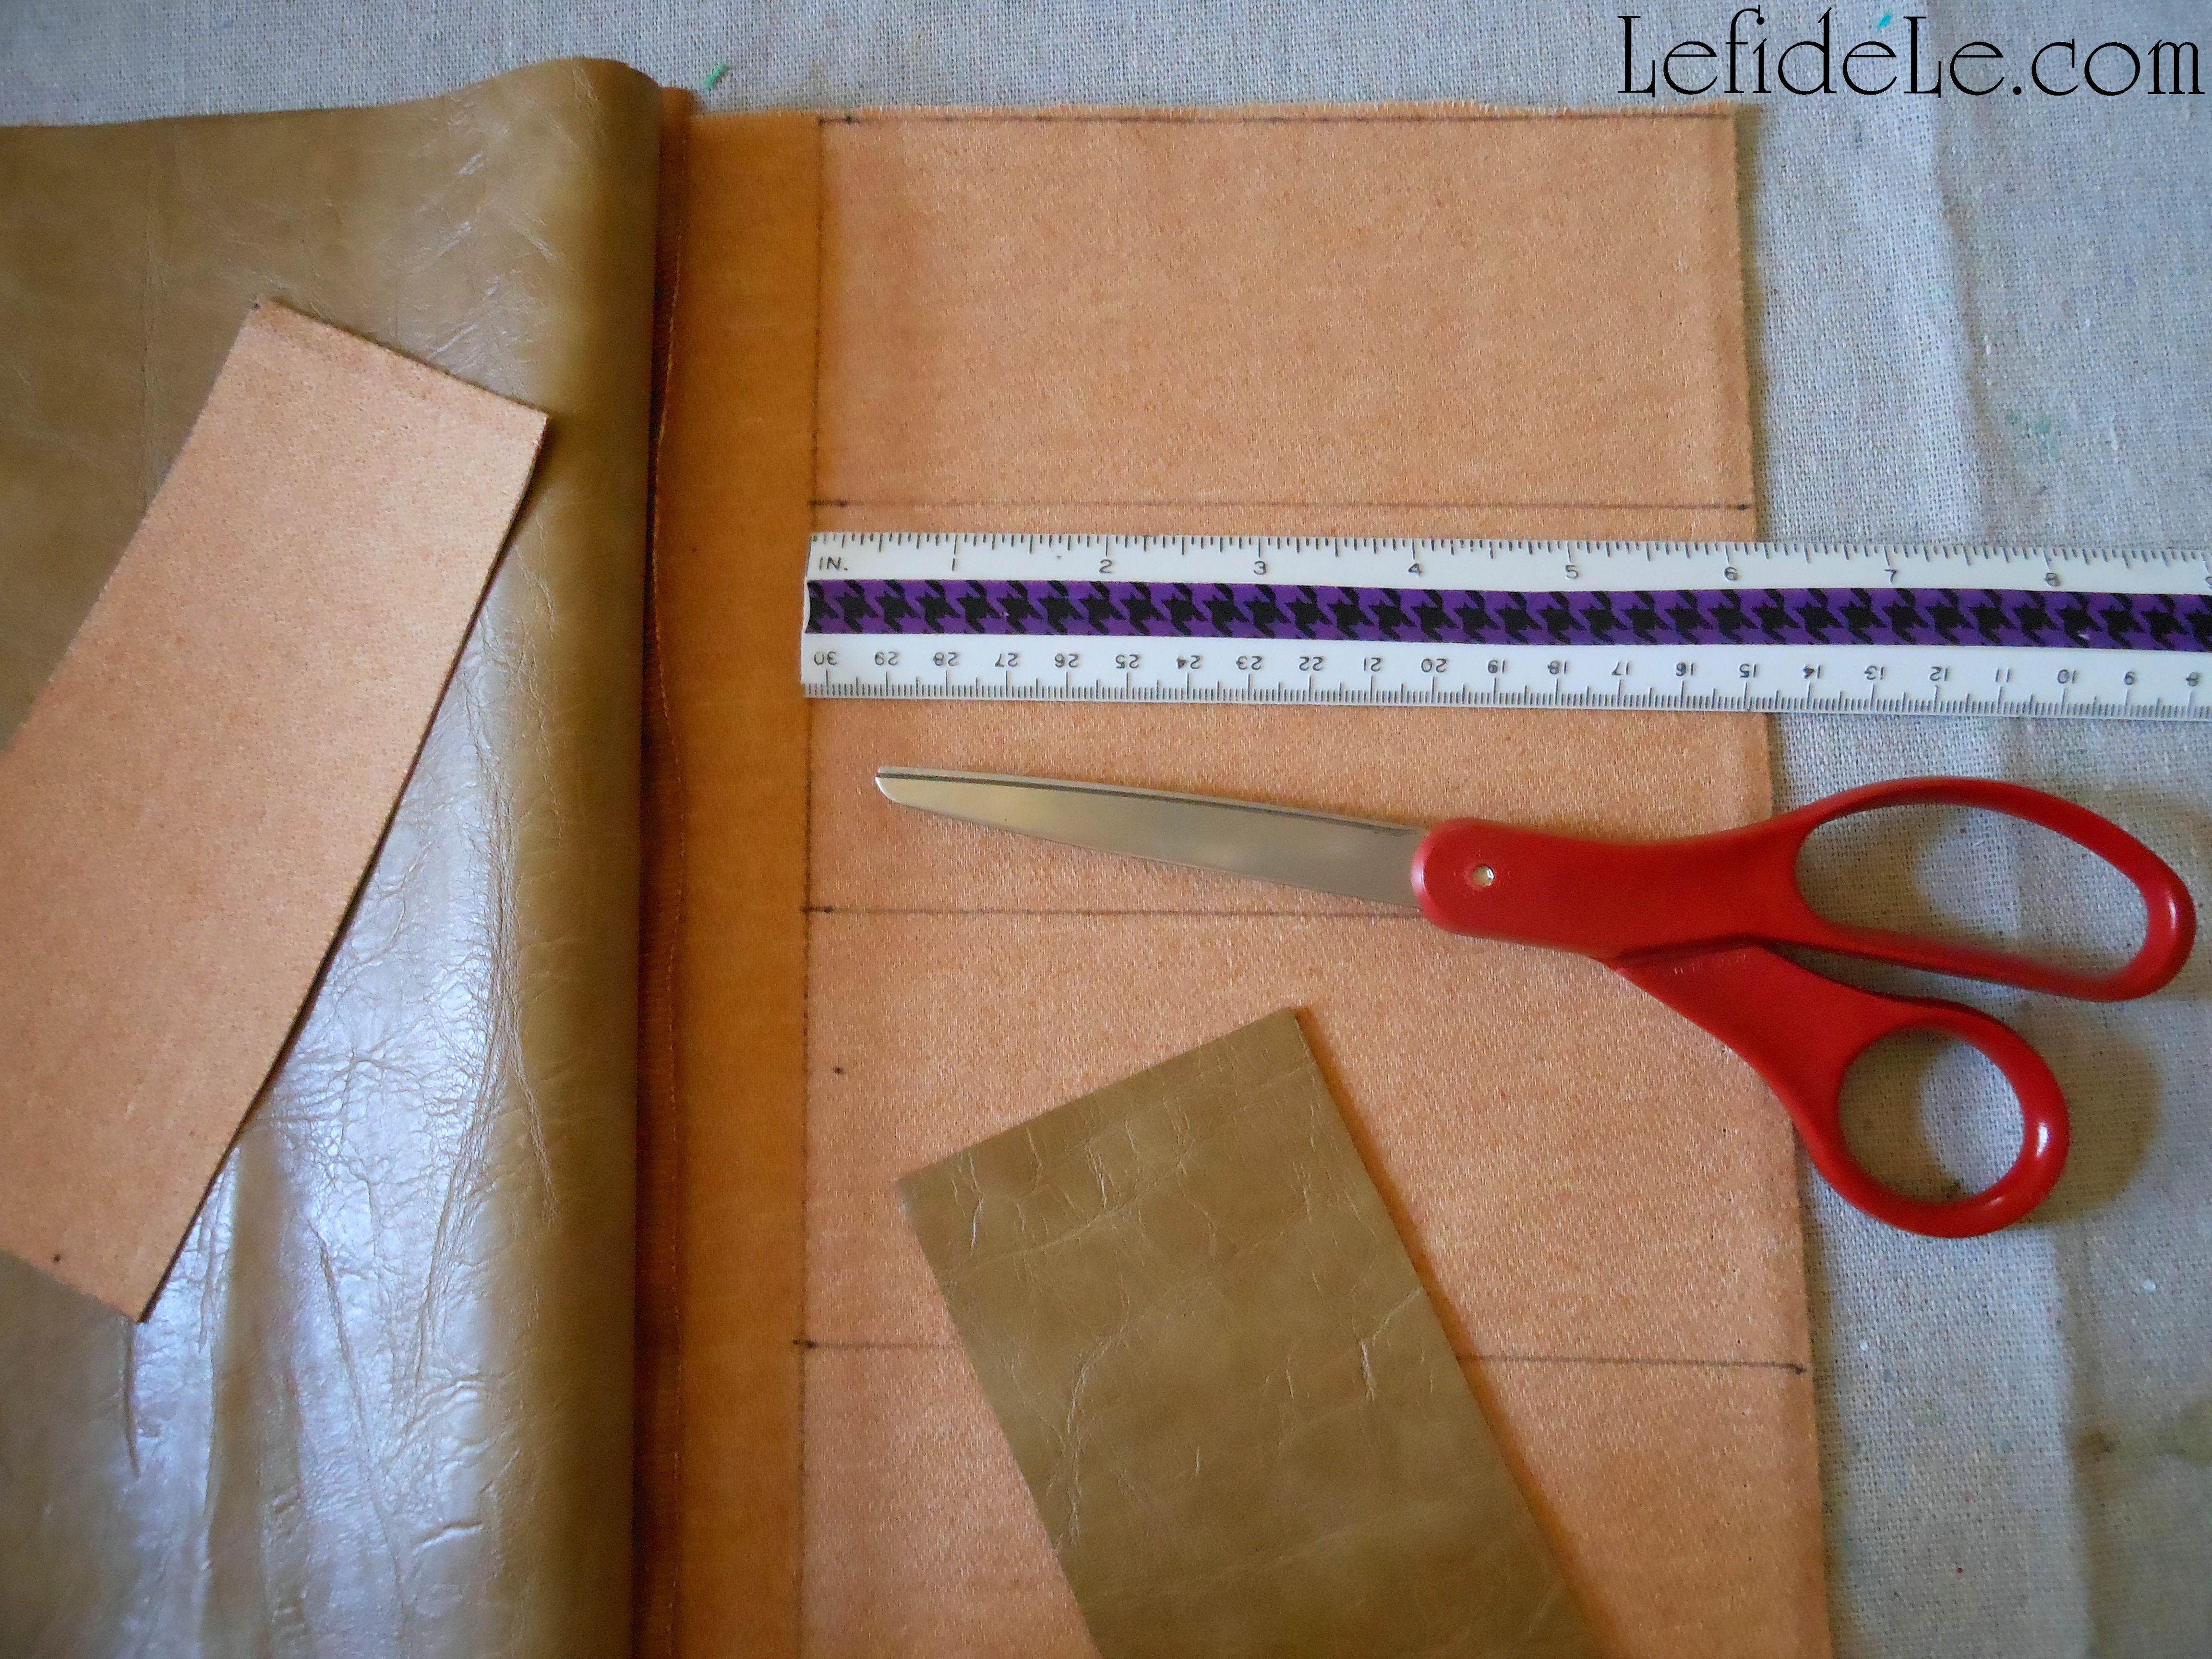
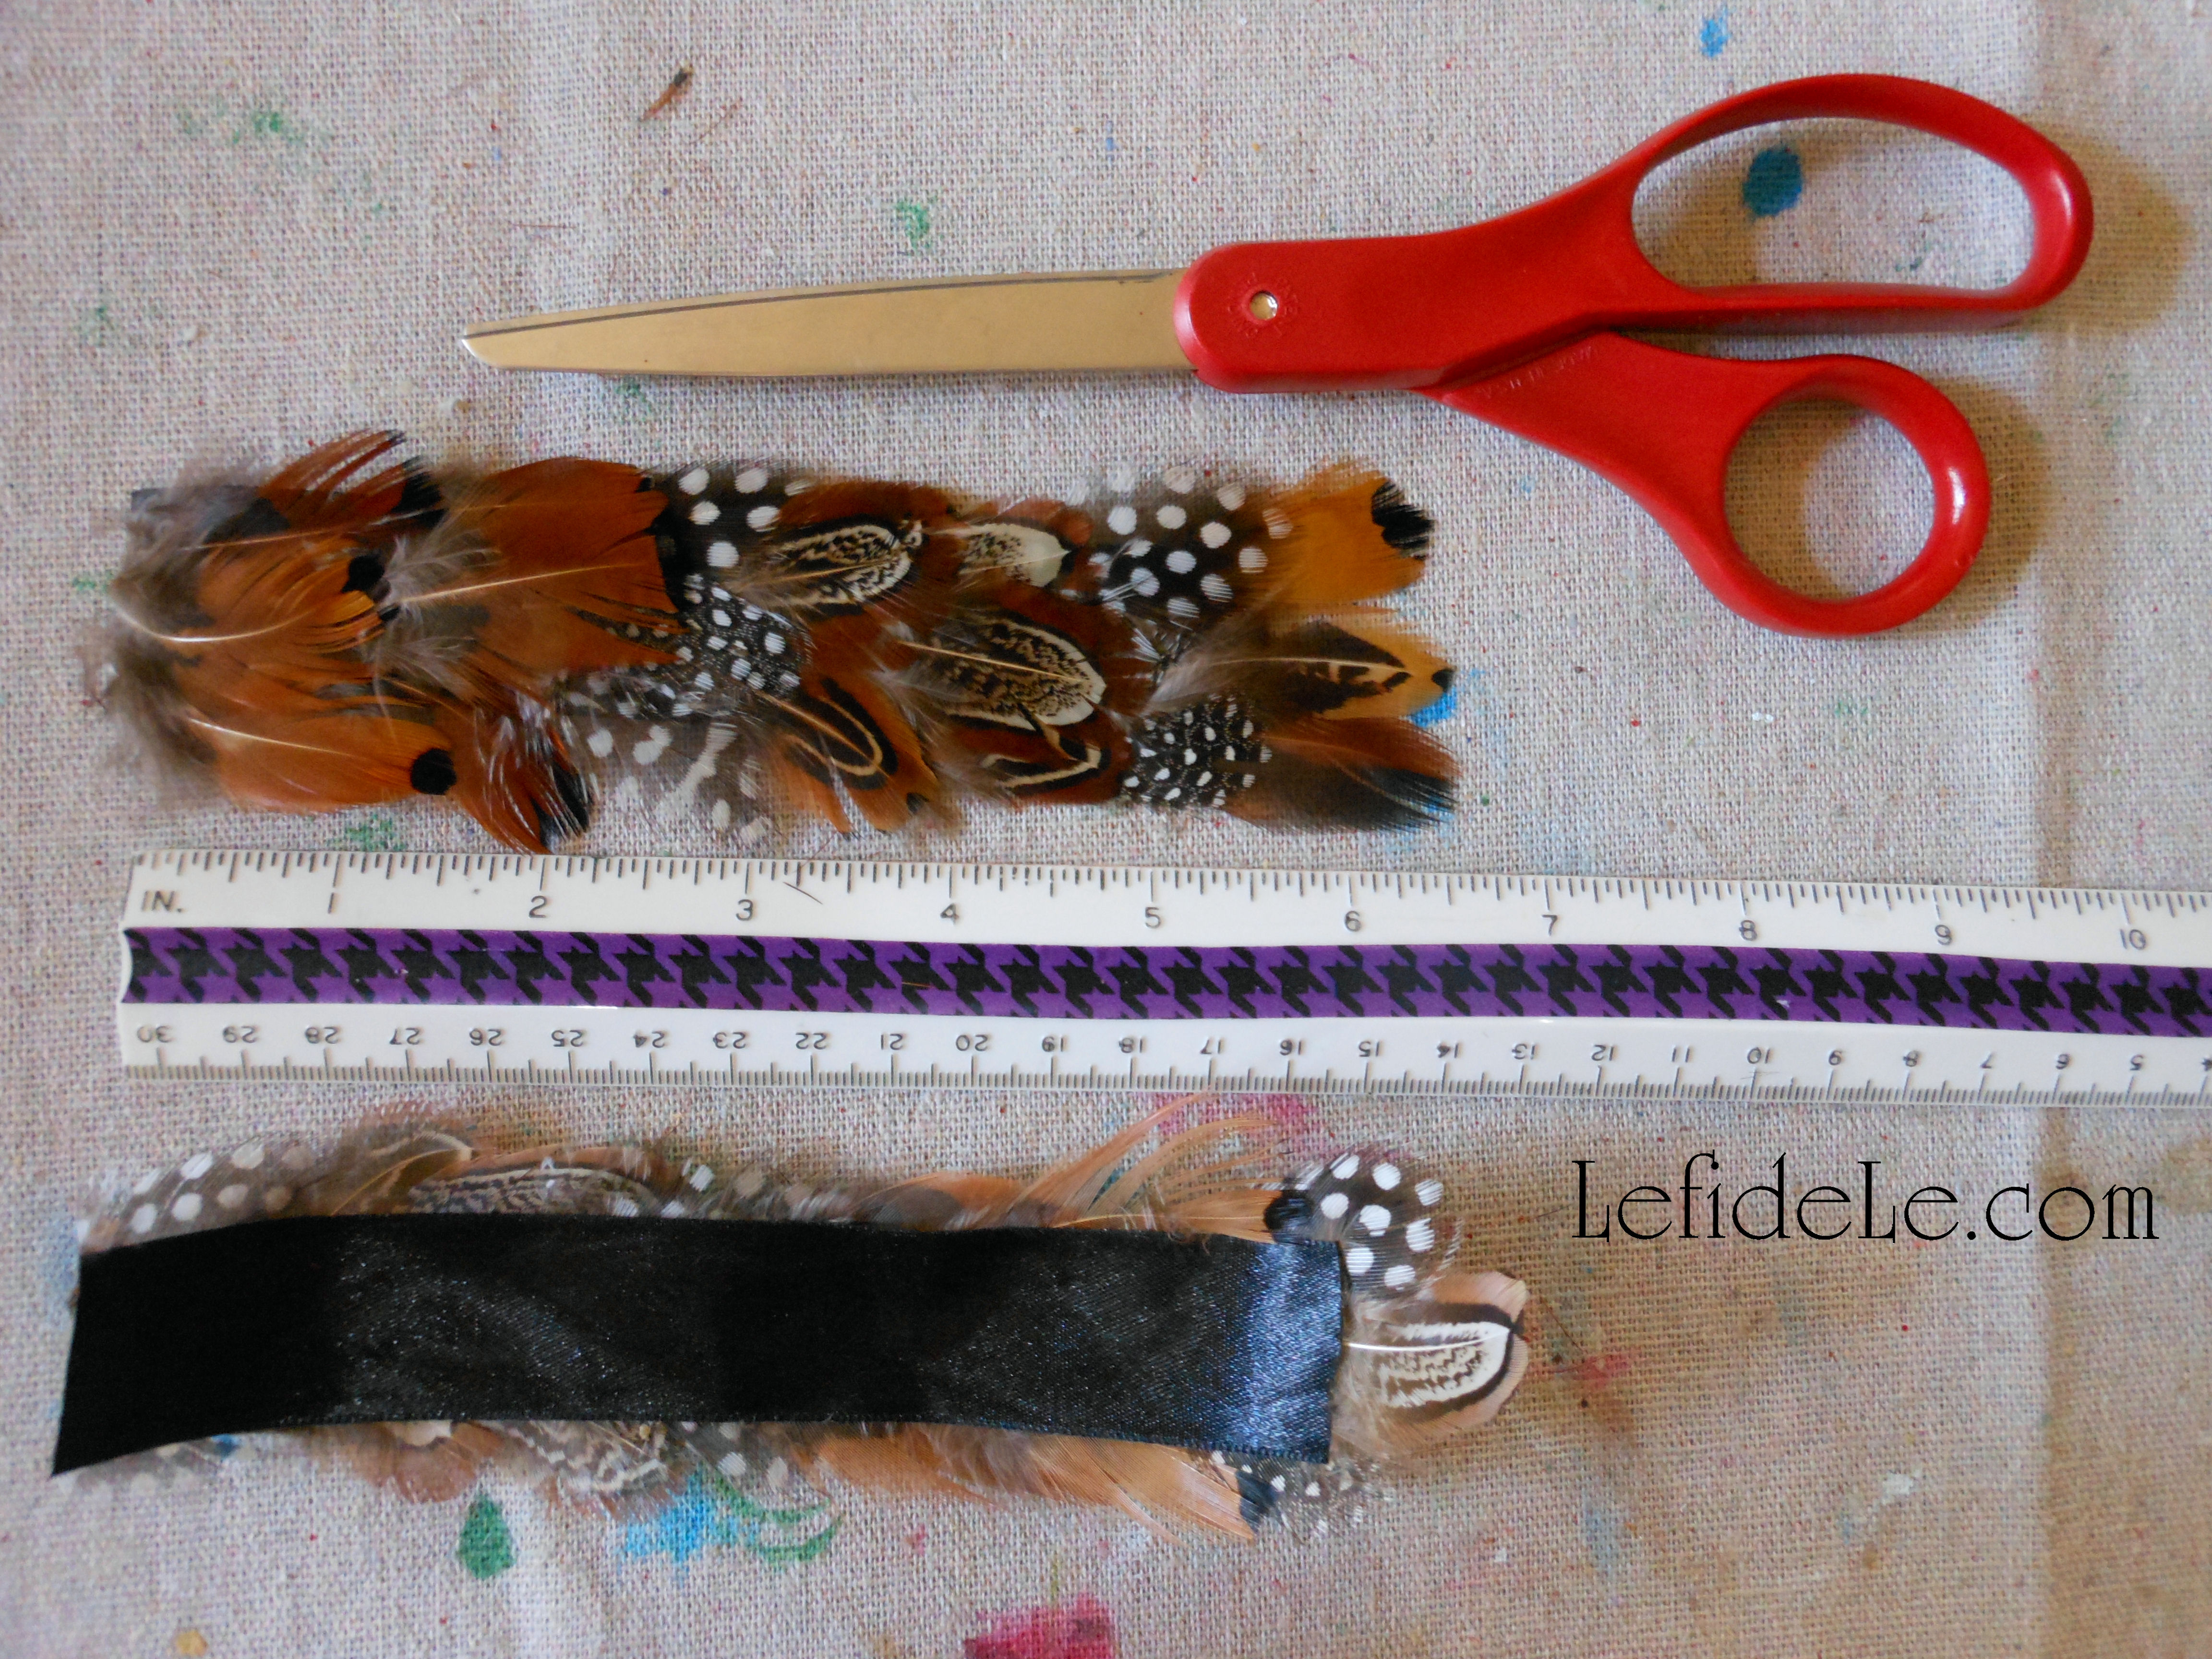
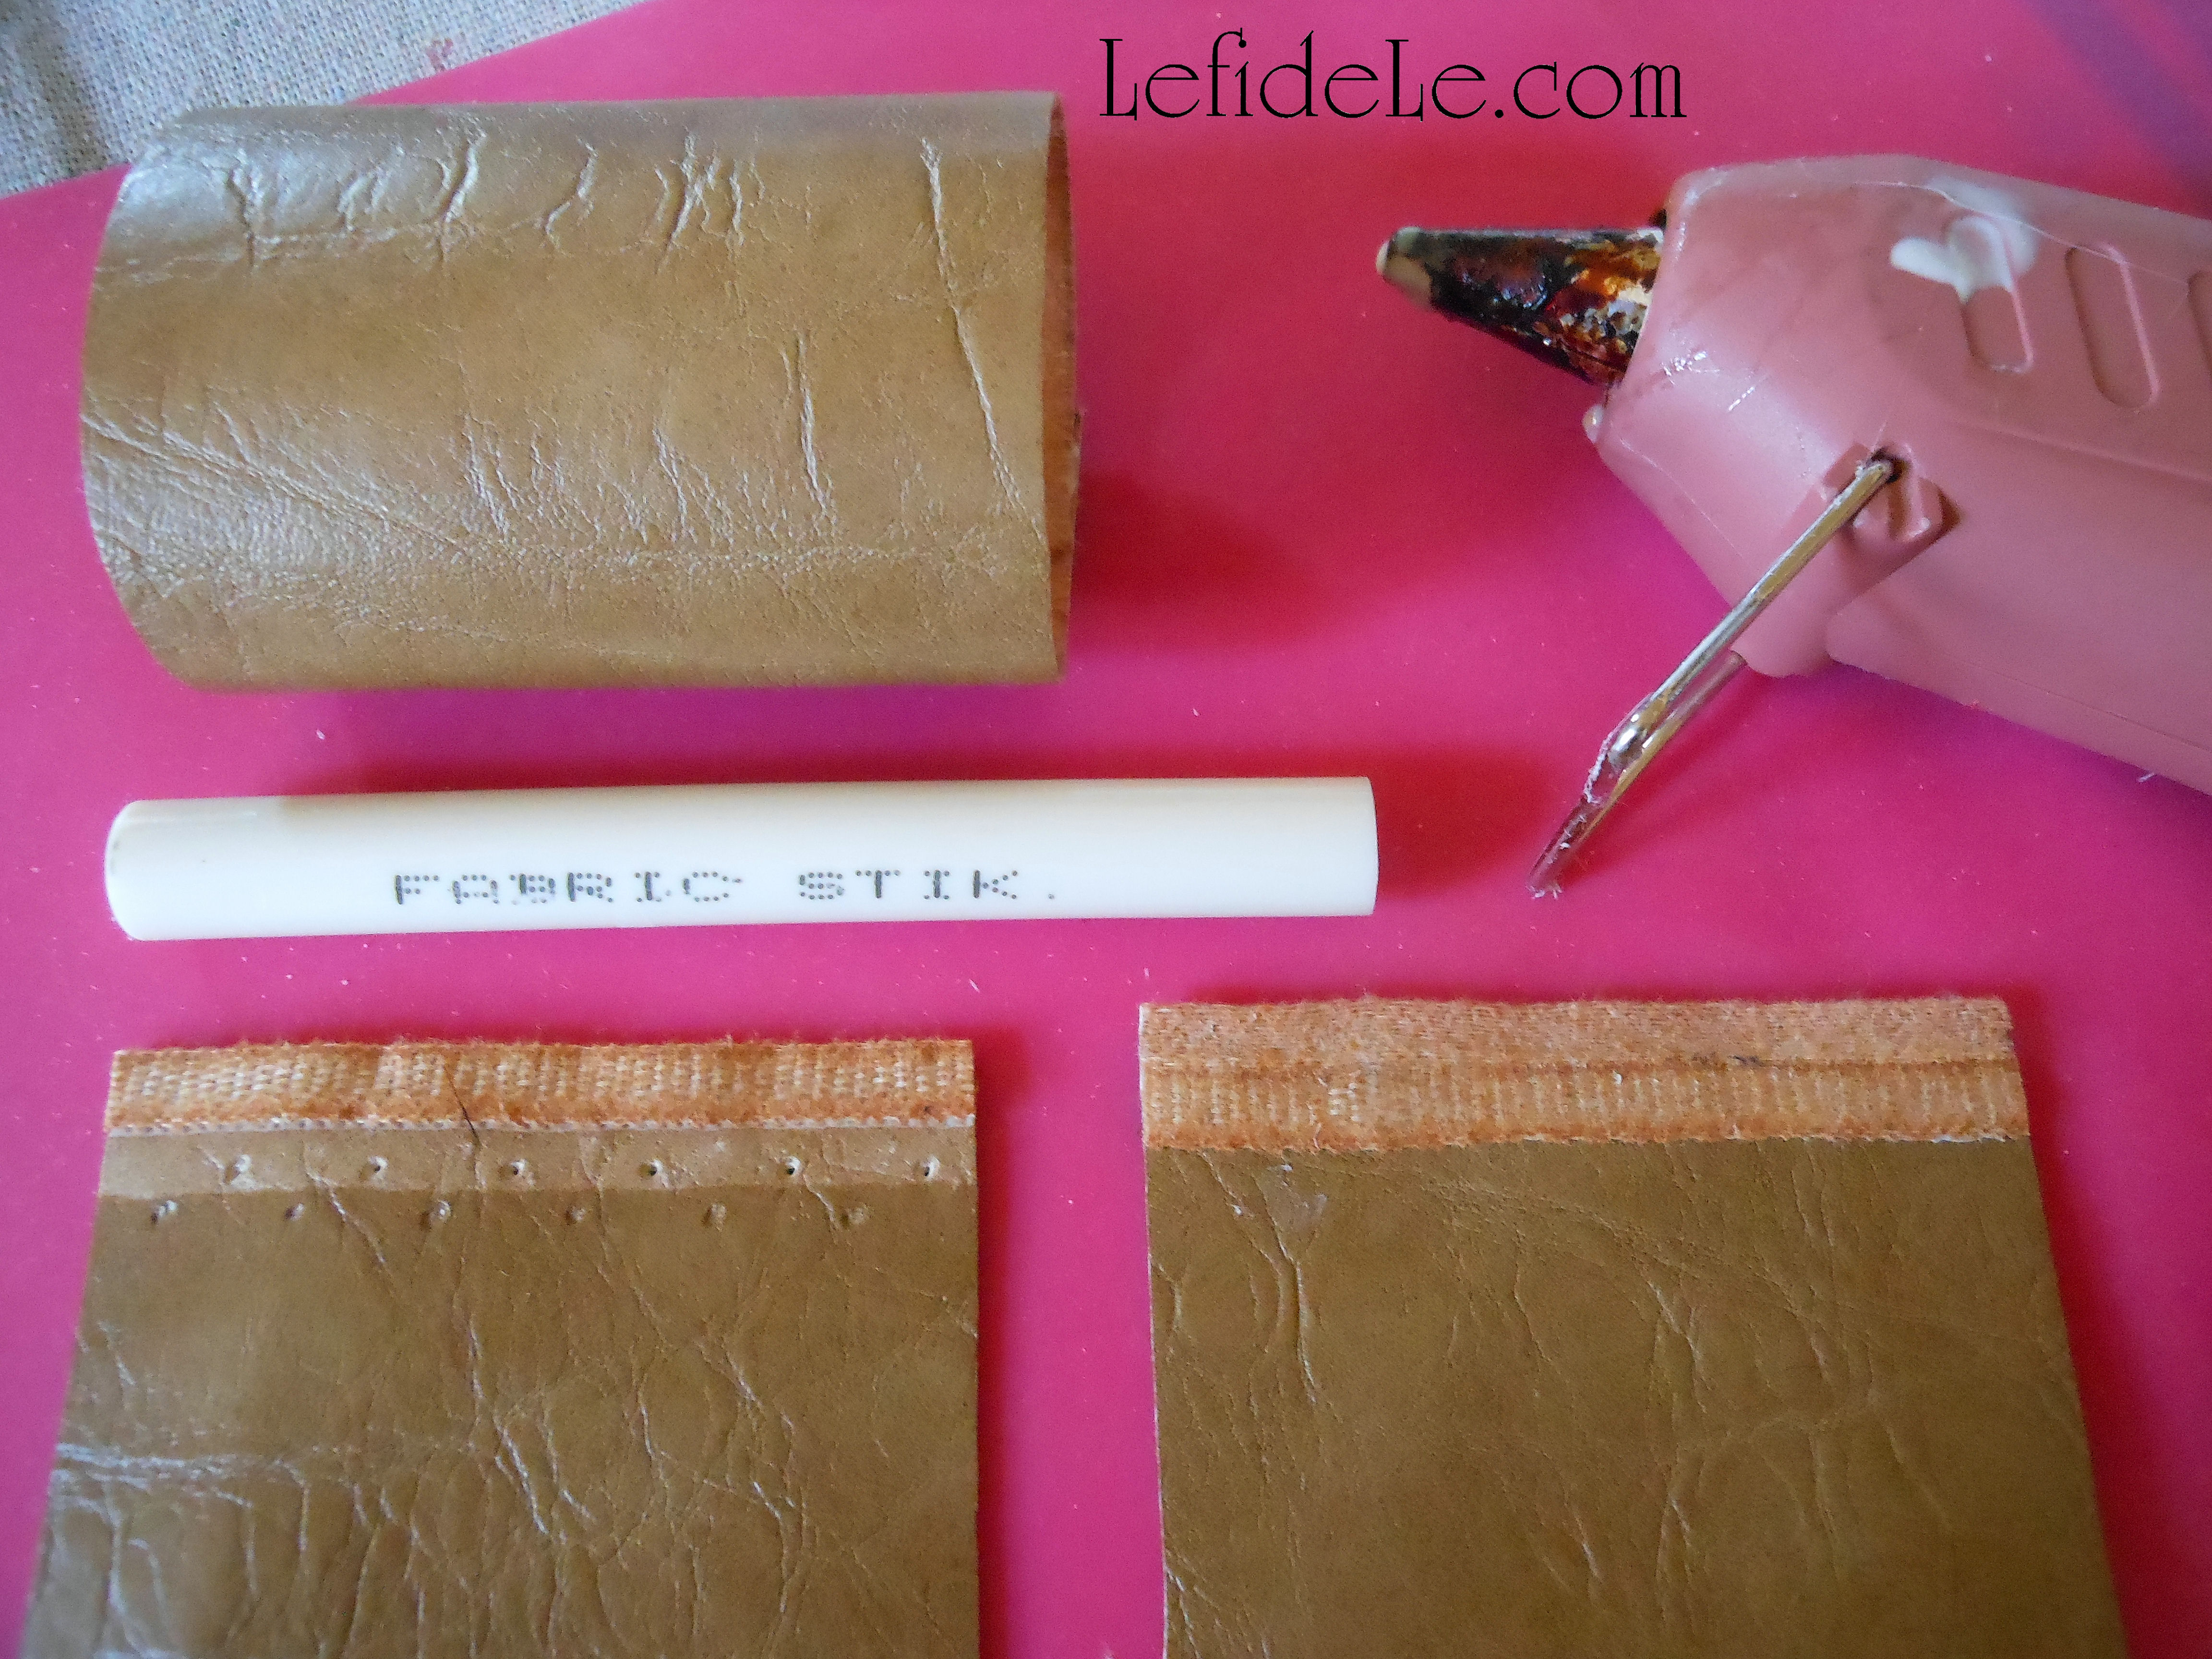
To make each napkin ring, you will need to cut 6 inch sections of wide ribbon in a solid color that coordinates with your dishware or linens. (For a 6 place setting that equates to 36 inches, or 3 feet, which is the size of many standard ribbon rolls.) You will need to cut the same size lengths of crochet trim, which may be found in the sewing section of craft stores. (Ivory matches beautifully with most china patterns.)

20151019_622Leigh

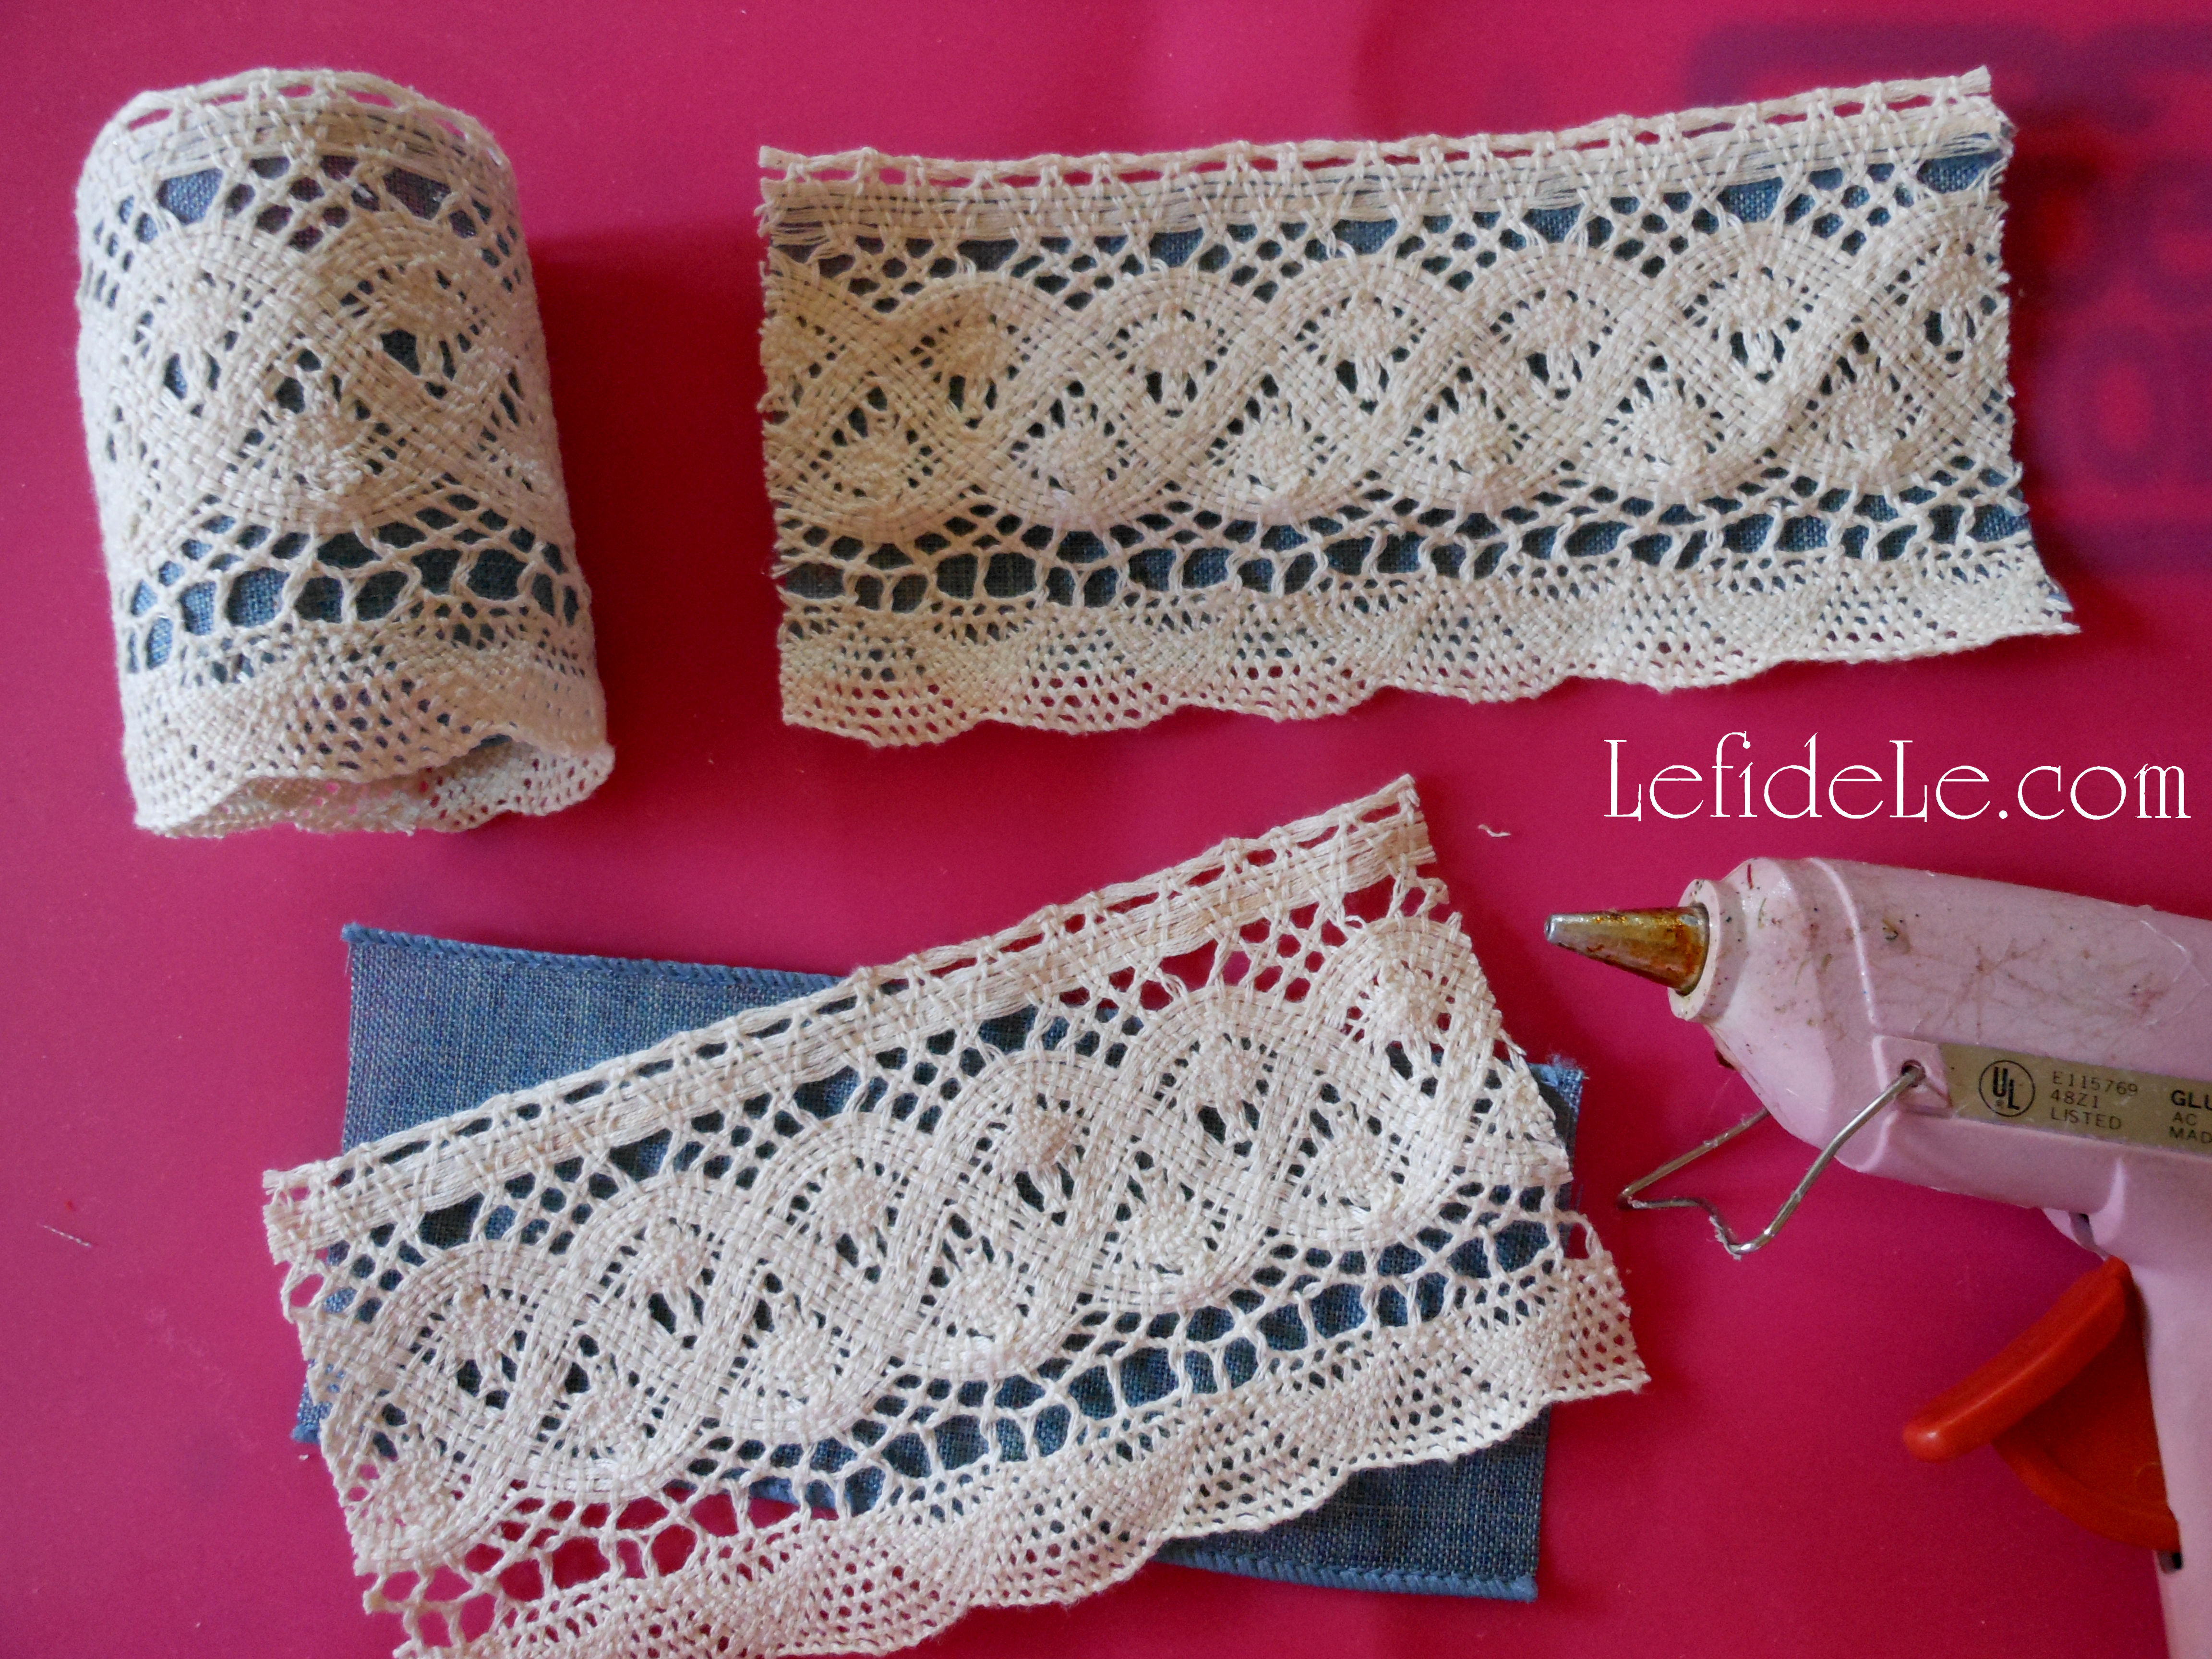
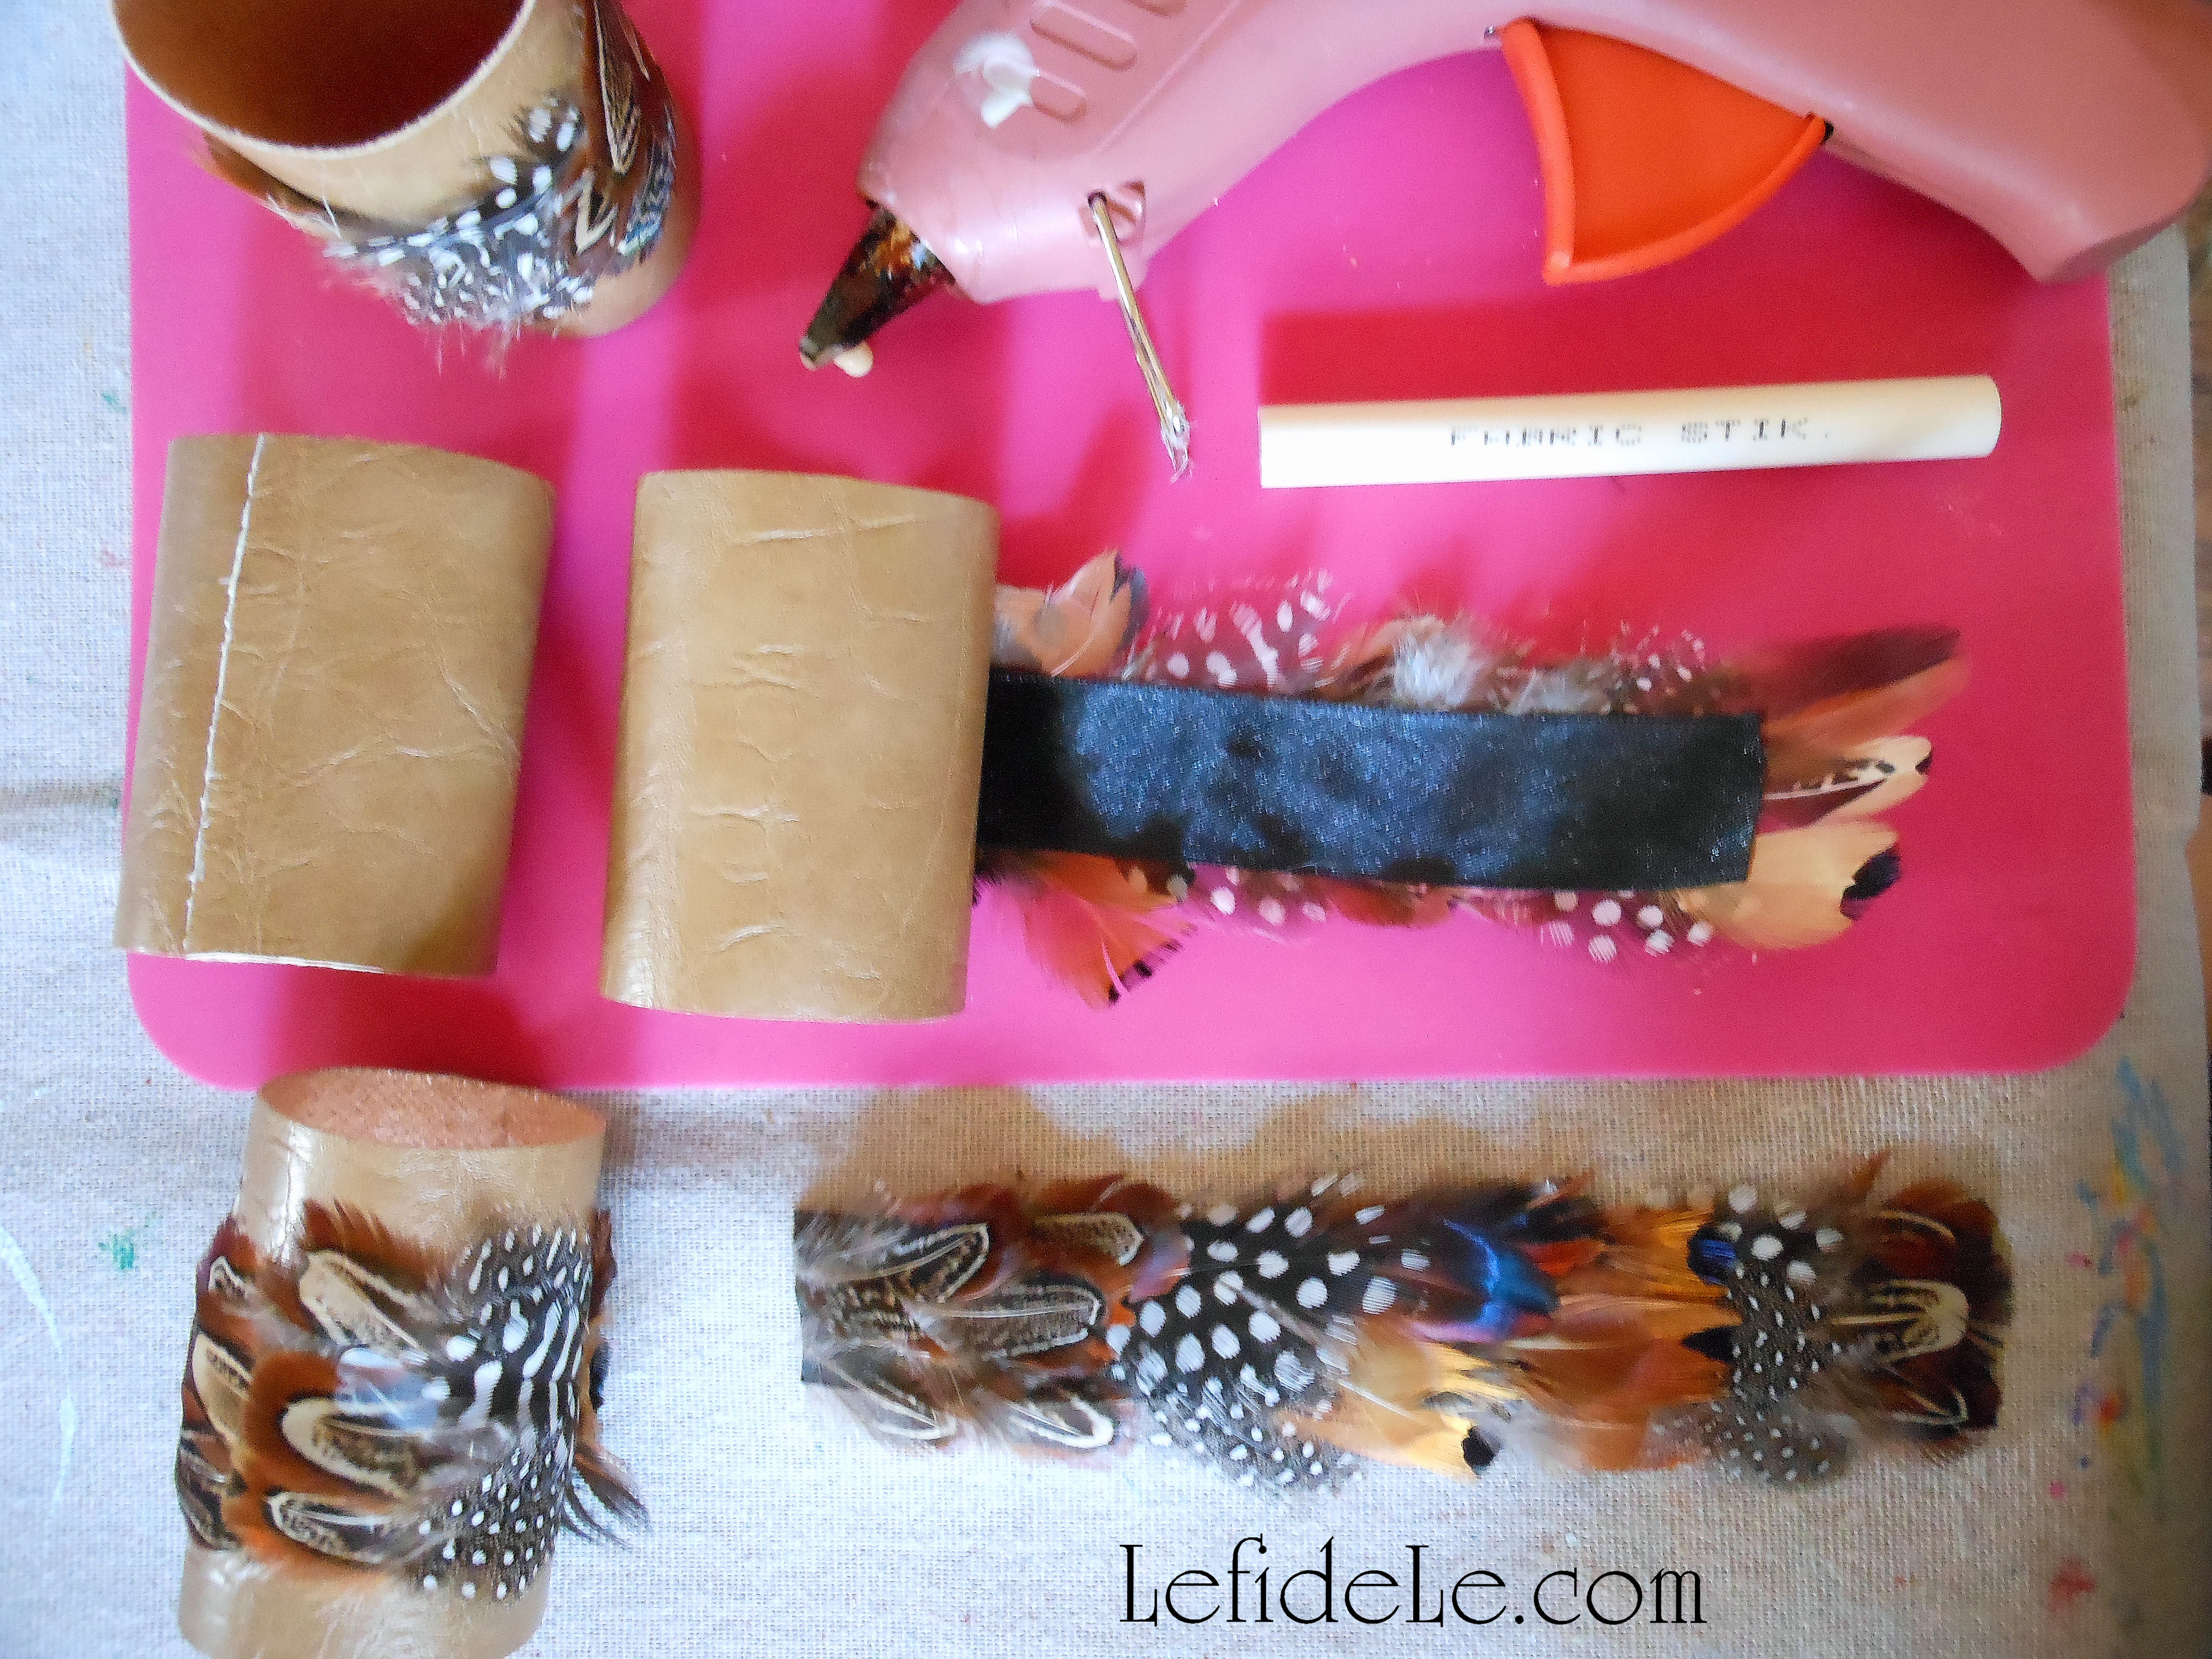
Next, lay a line of hot glue (or liquid fabric glue) onto all edges of the base ribbon. Lay the crochet trim over it in a way that showcases the pretty edges. (If using liquid glue, let this dry completely before forming the ring.) Then just form a ring and connect the edges with a single line of glue on one side. (Clothes pins will need to be used as clamps when using liquid glue.)

DSCN0887Leigh

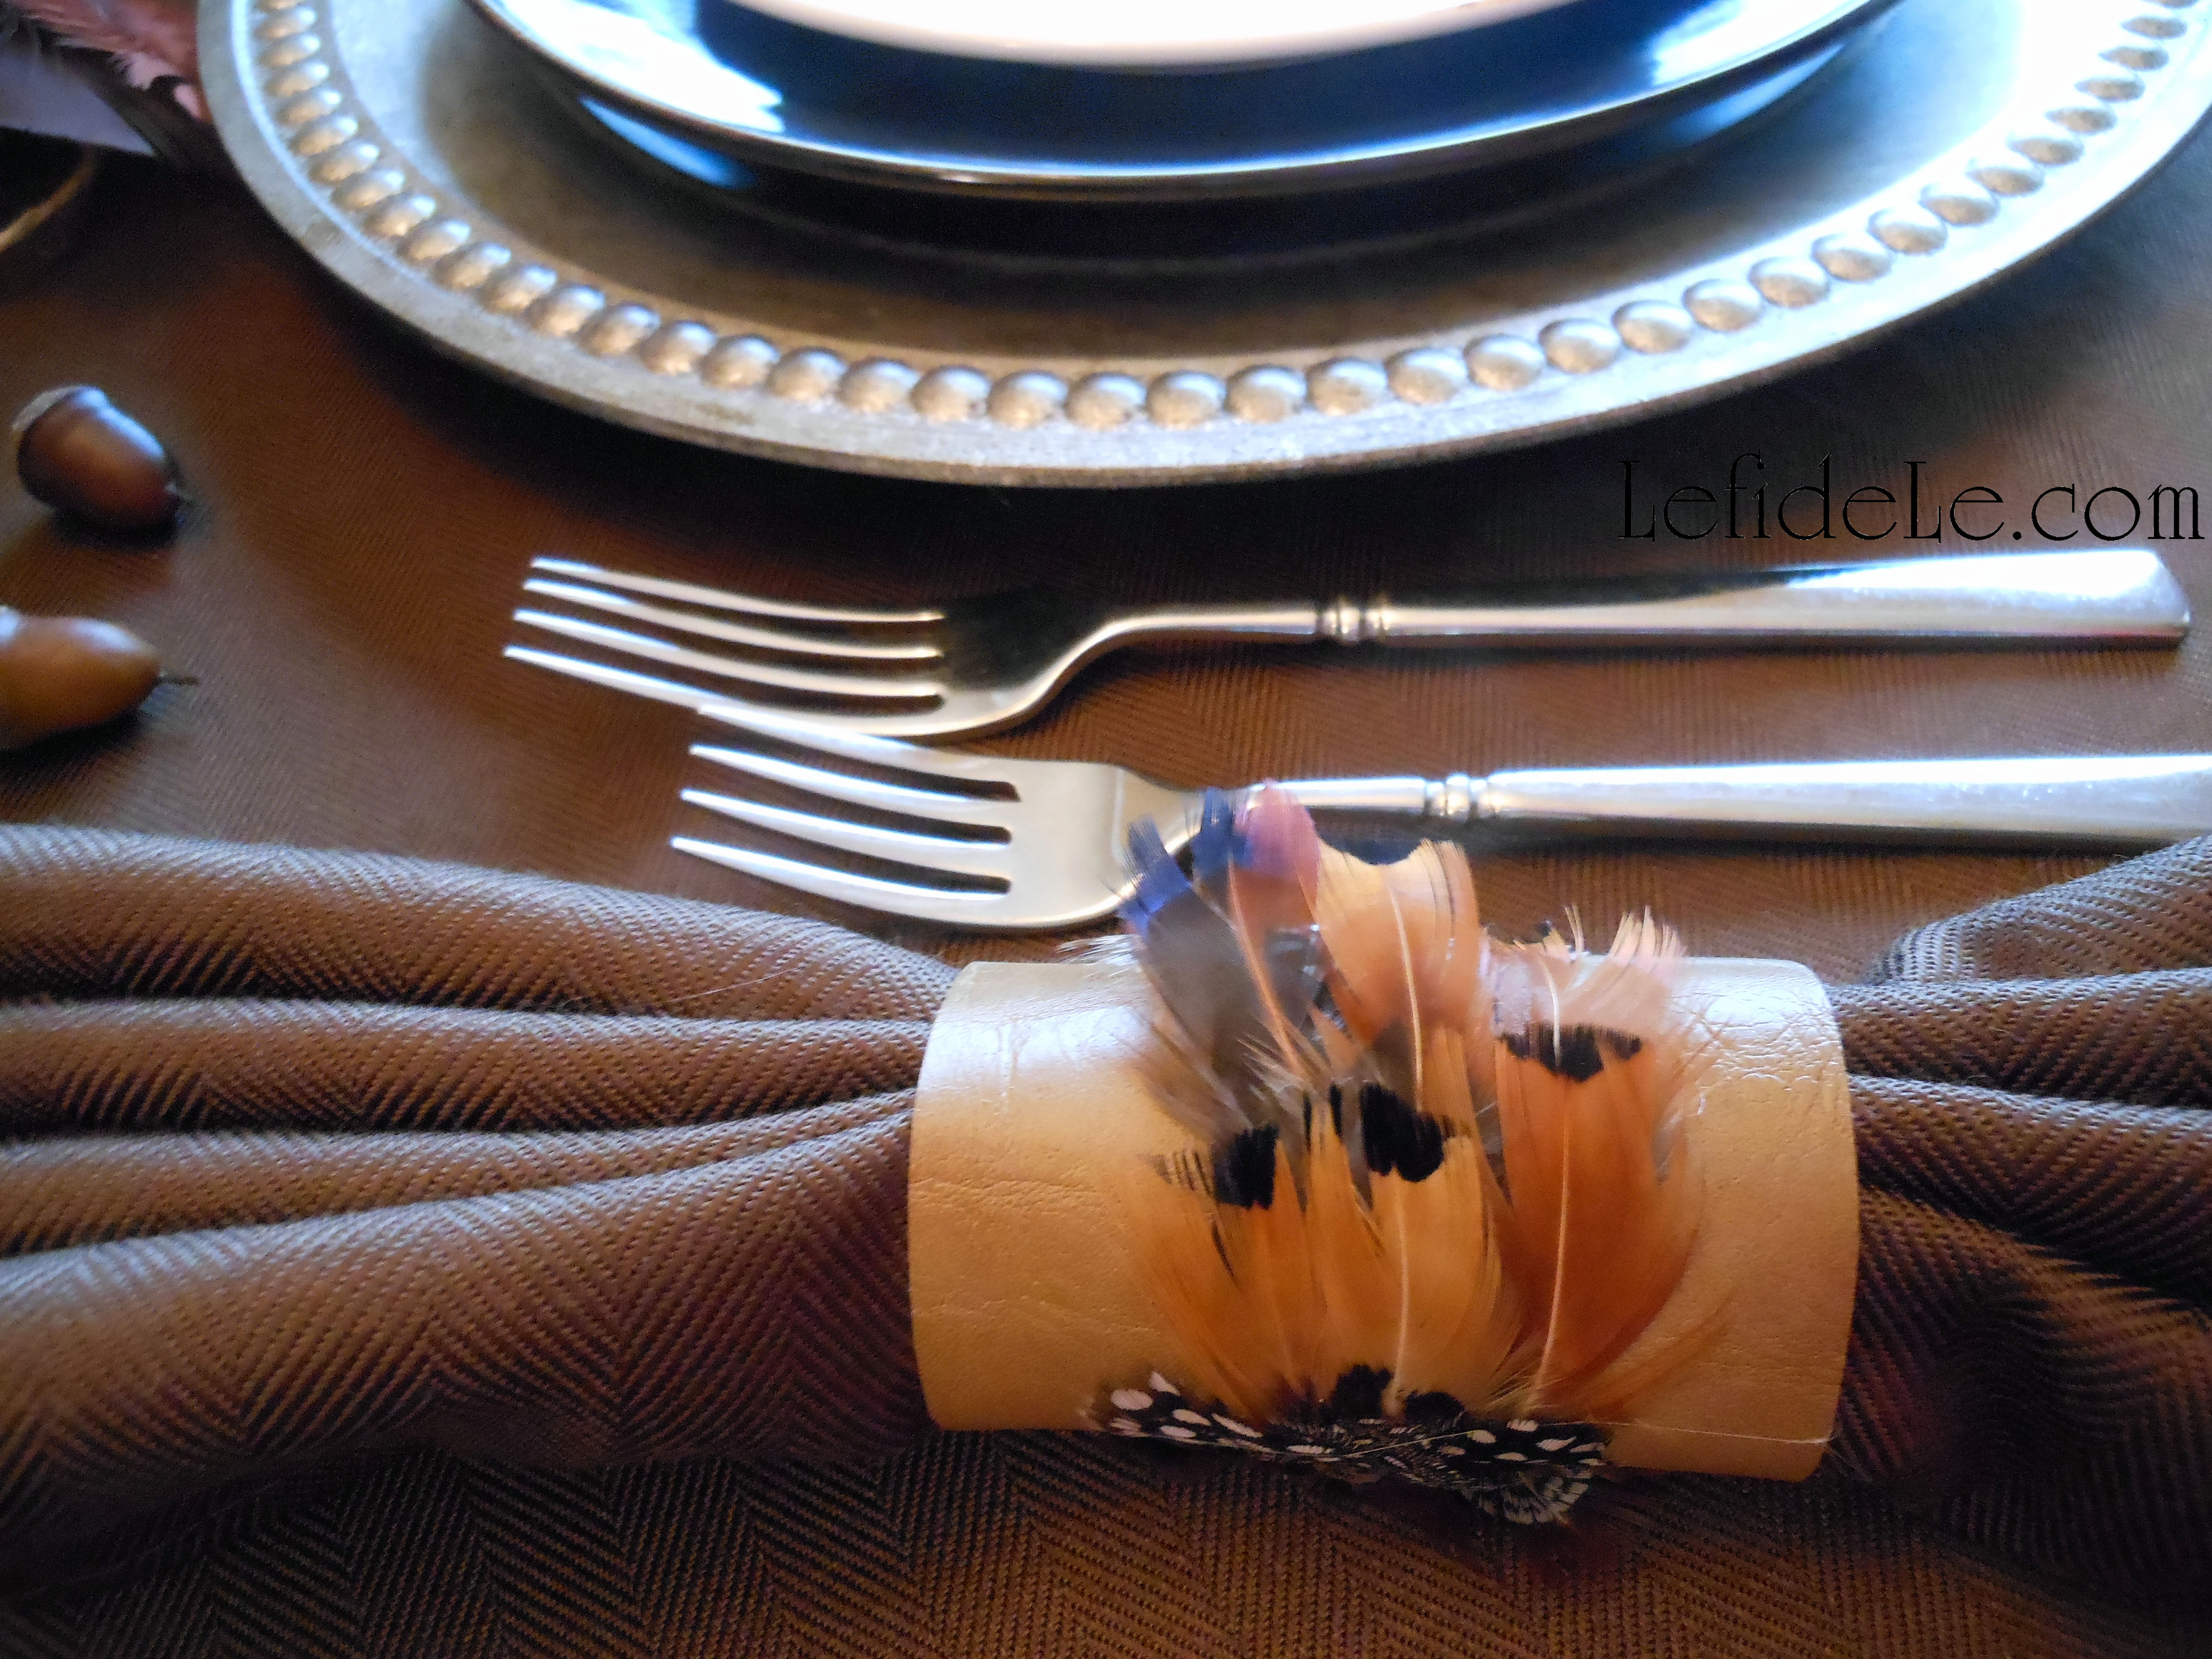
These really look like they could have been inherited, but took mere minutes to make.

DSCN0902Leigh

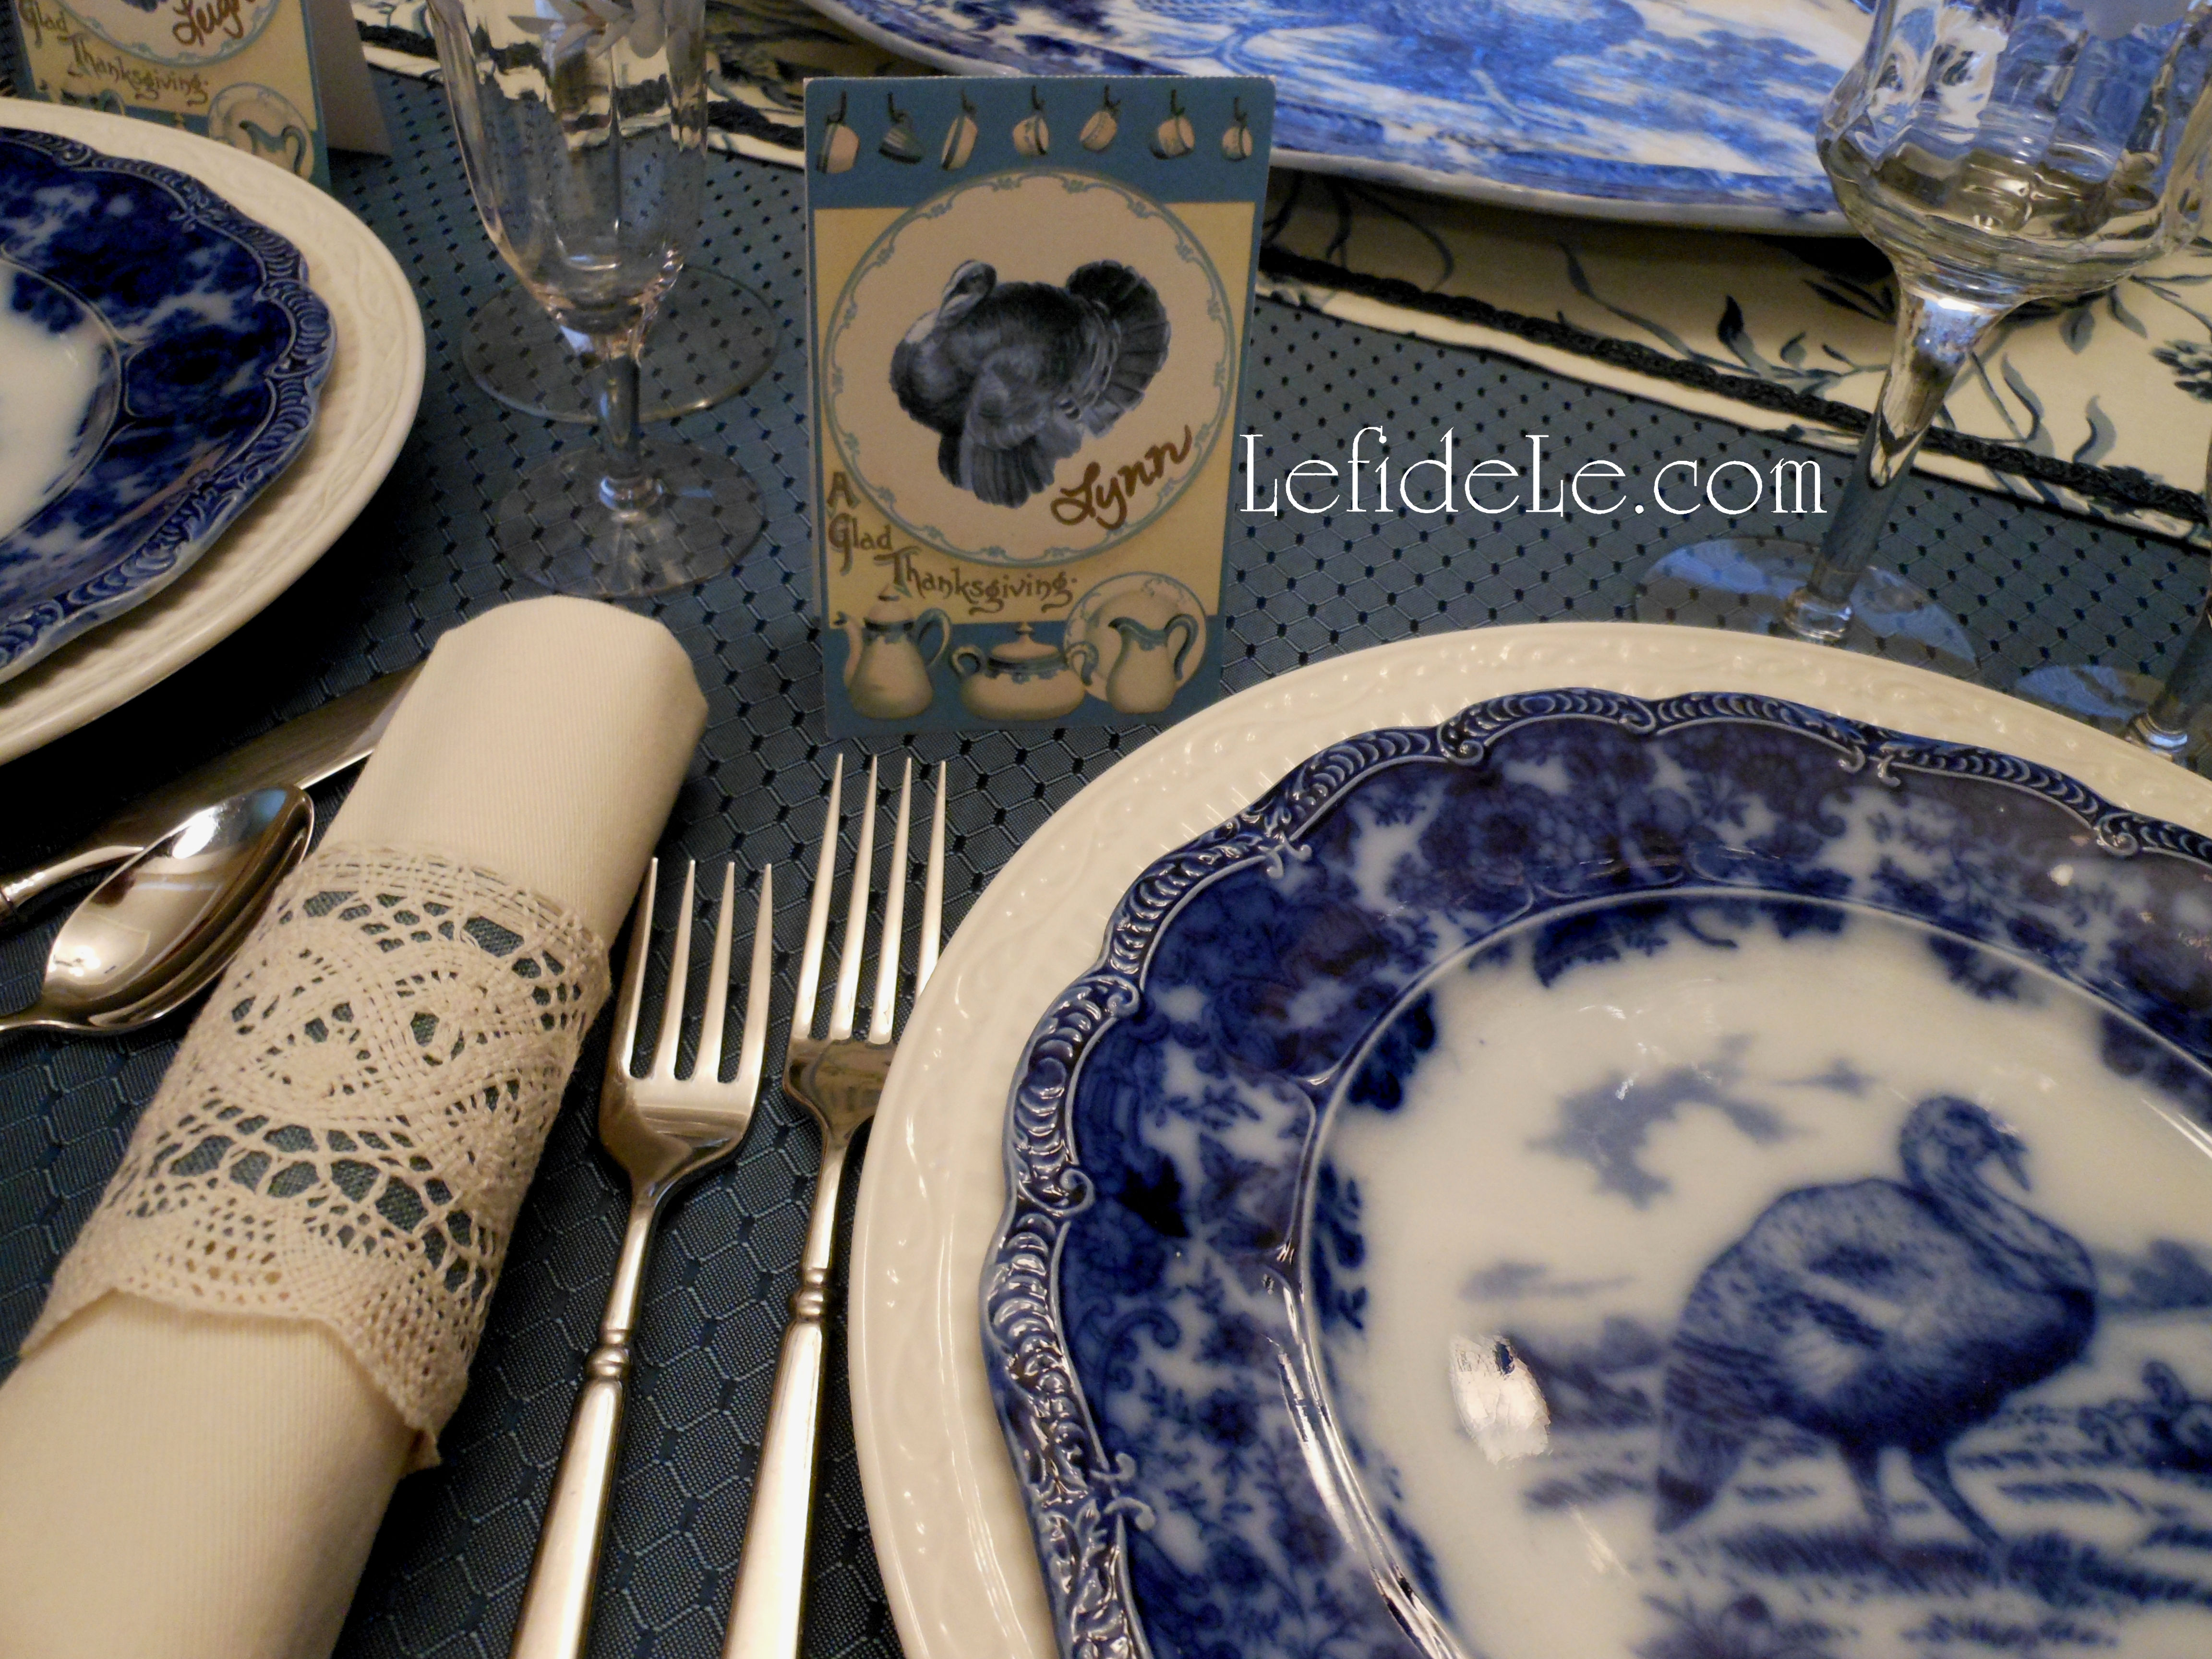
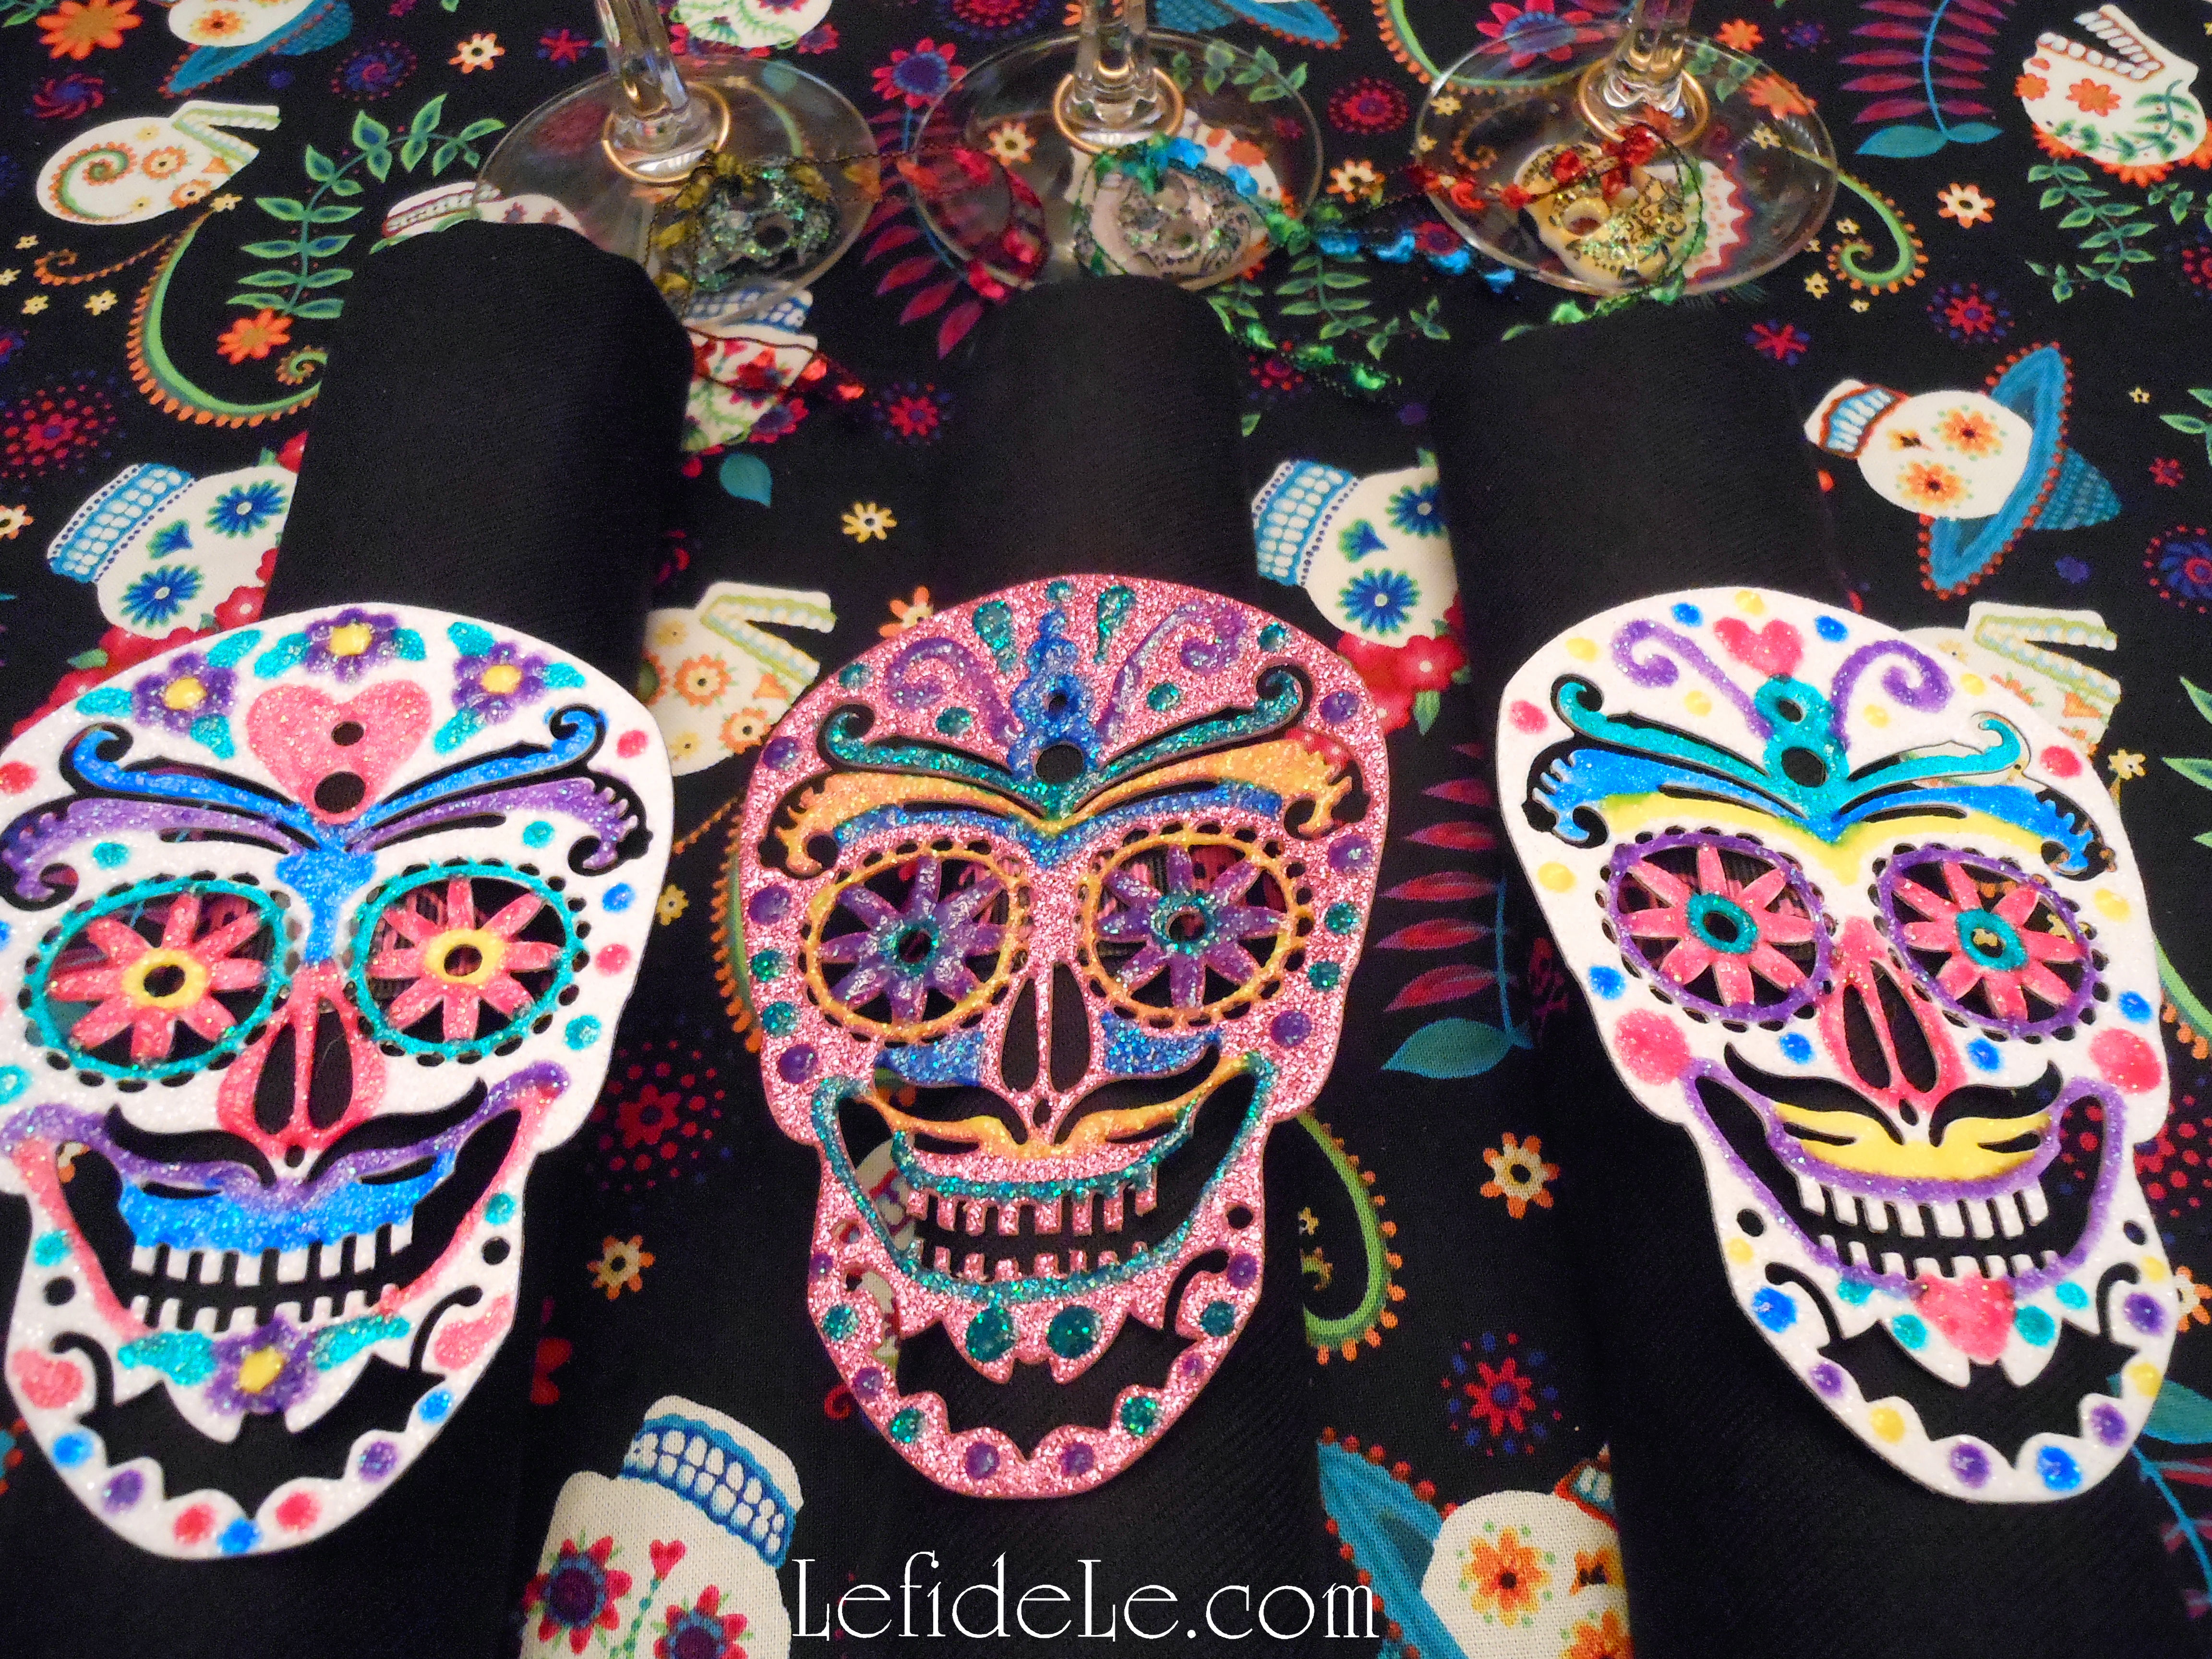
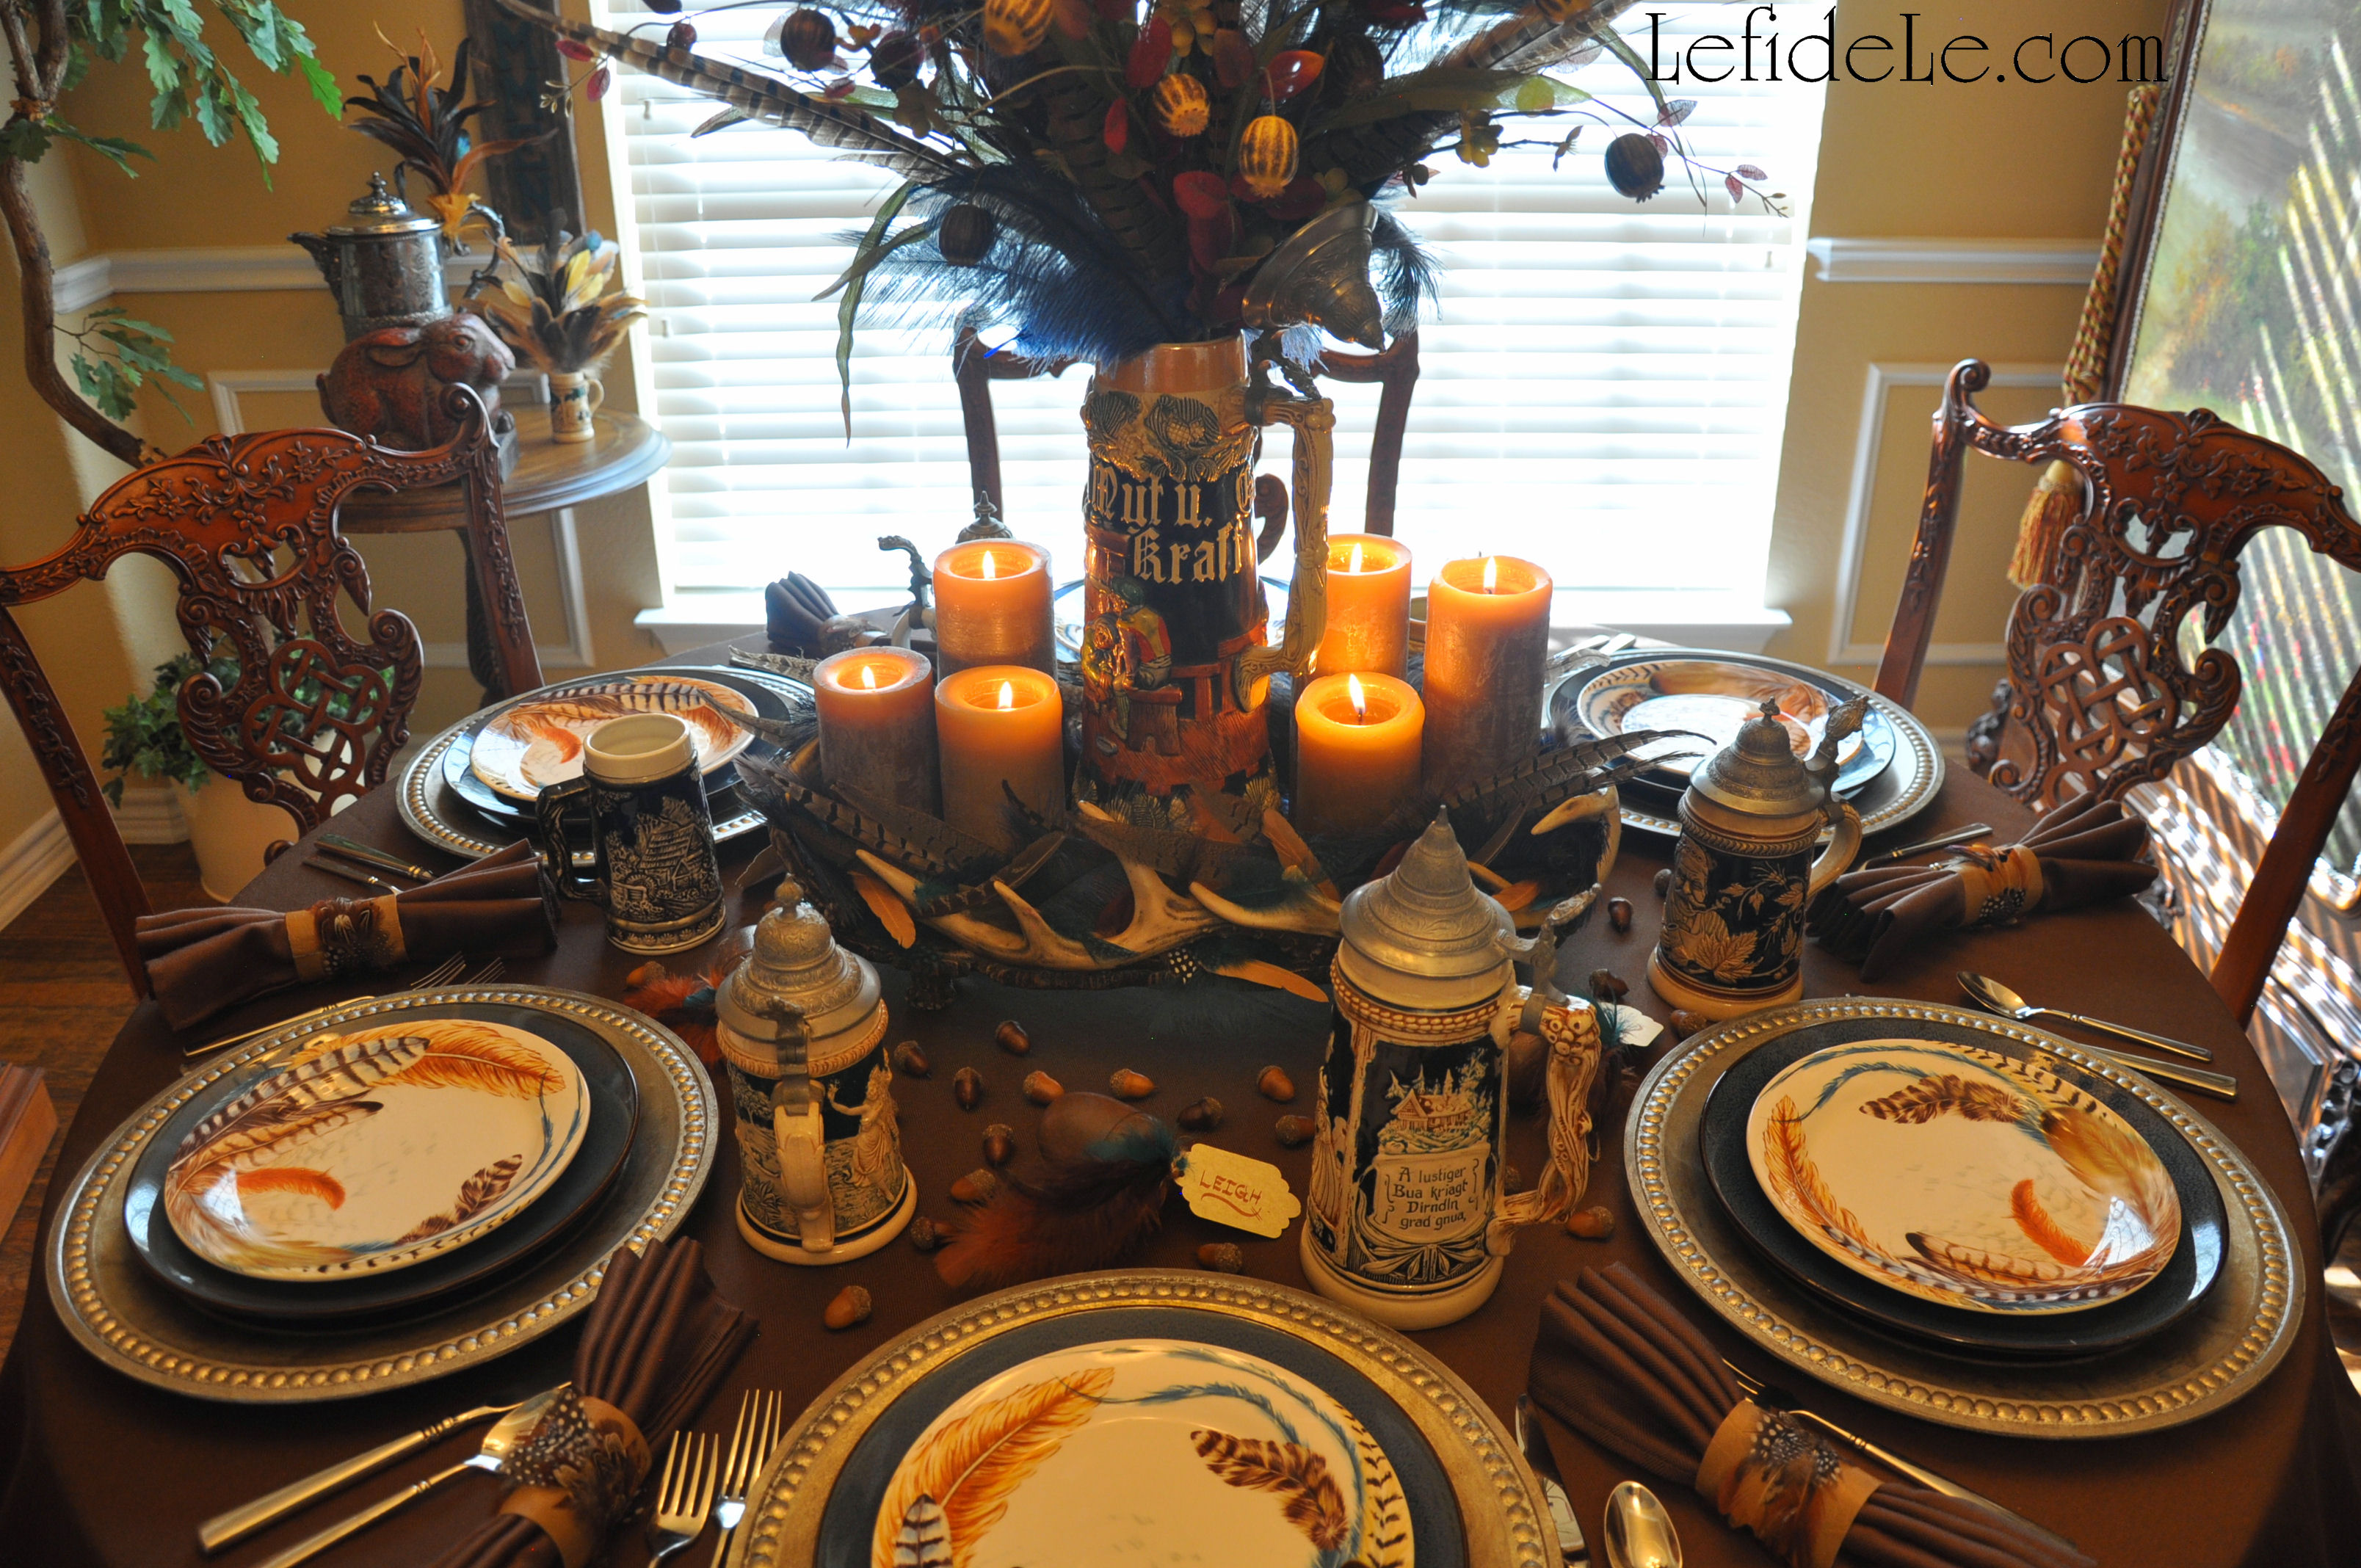
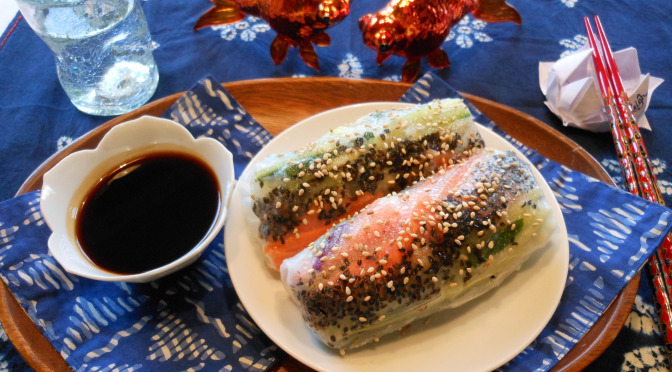
The napkin rings serve as a beautiful bridge coordinating my antique china with my modern linens, and they can do the same for you too!

20151019_80Leigh

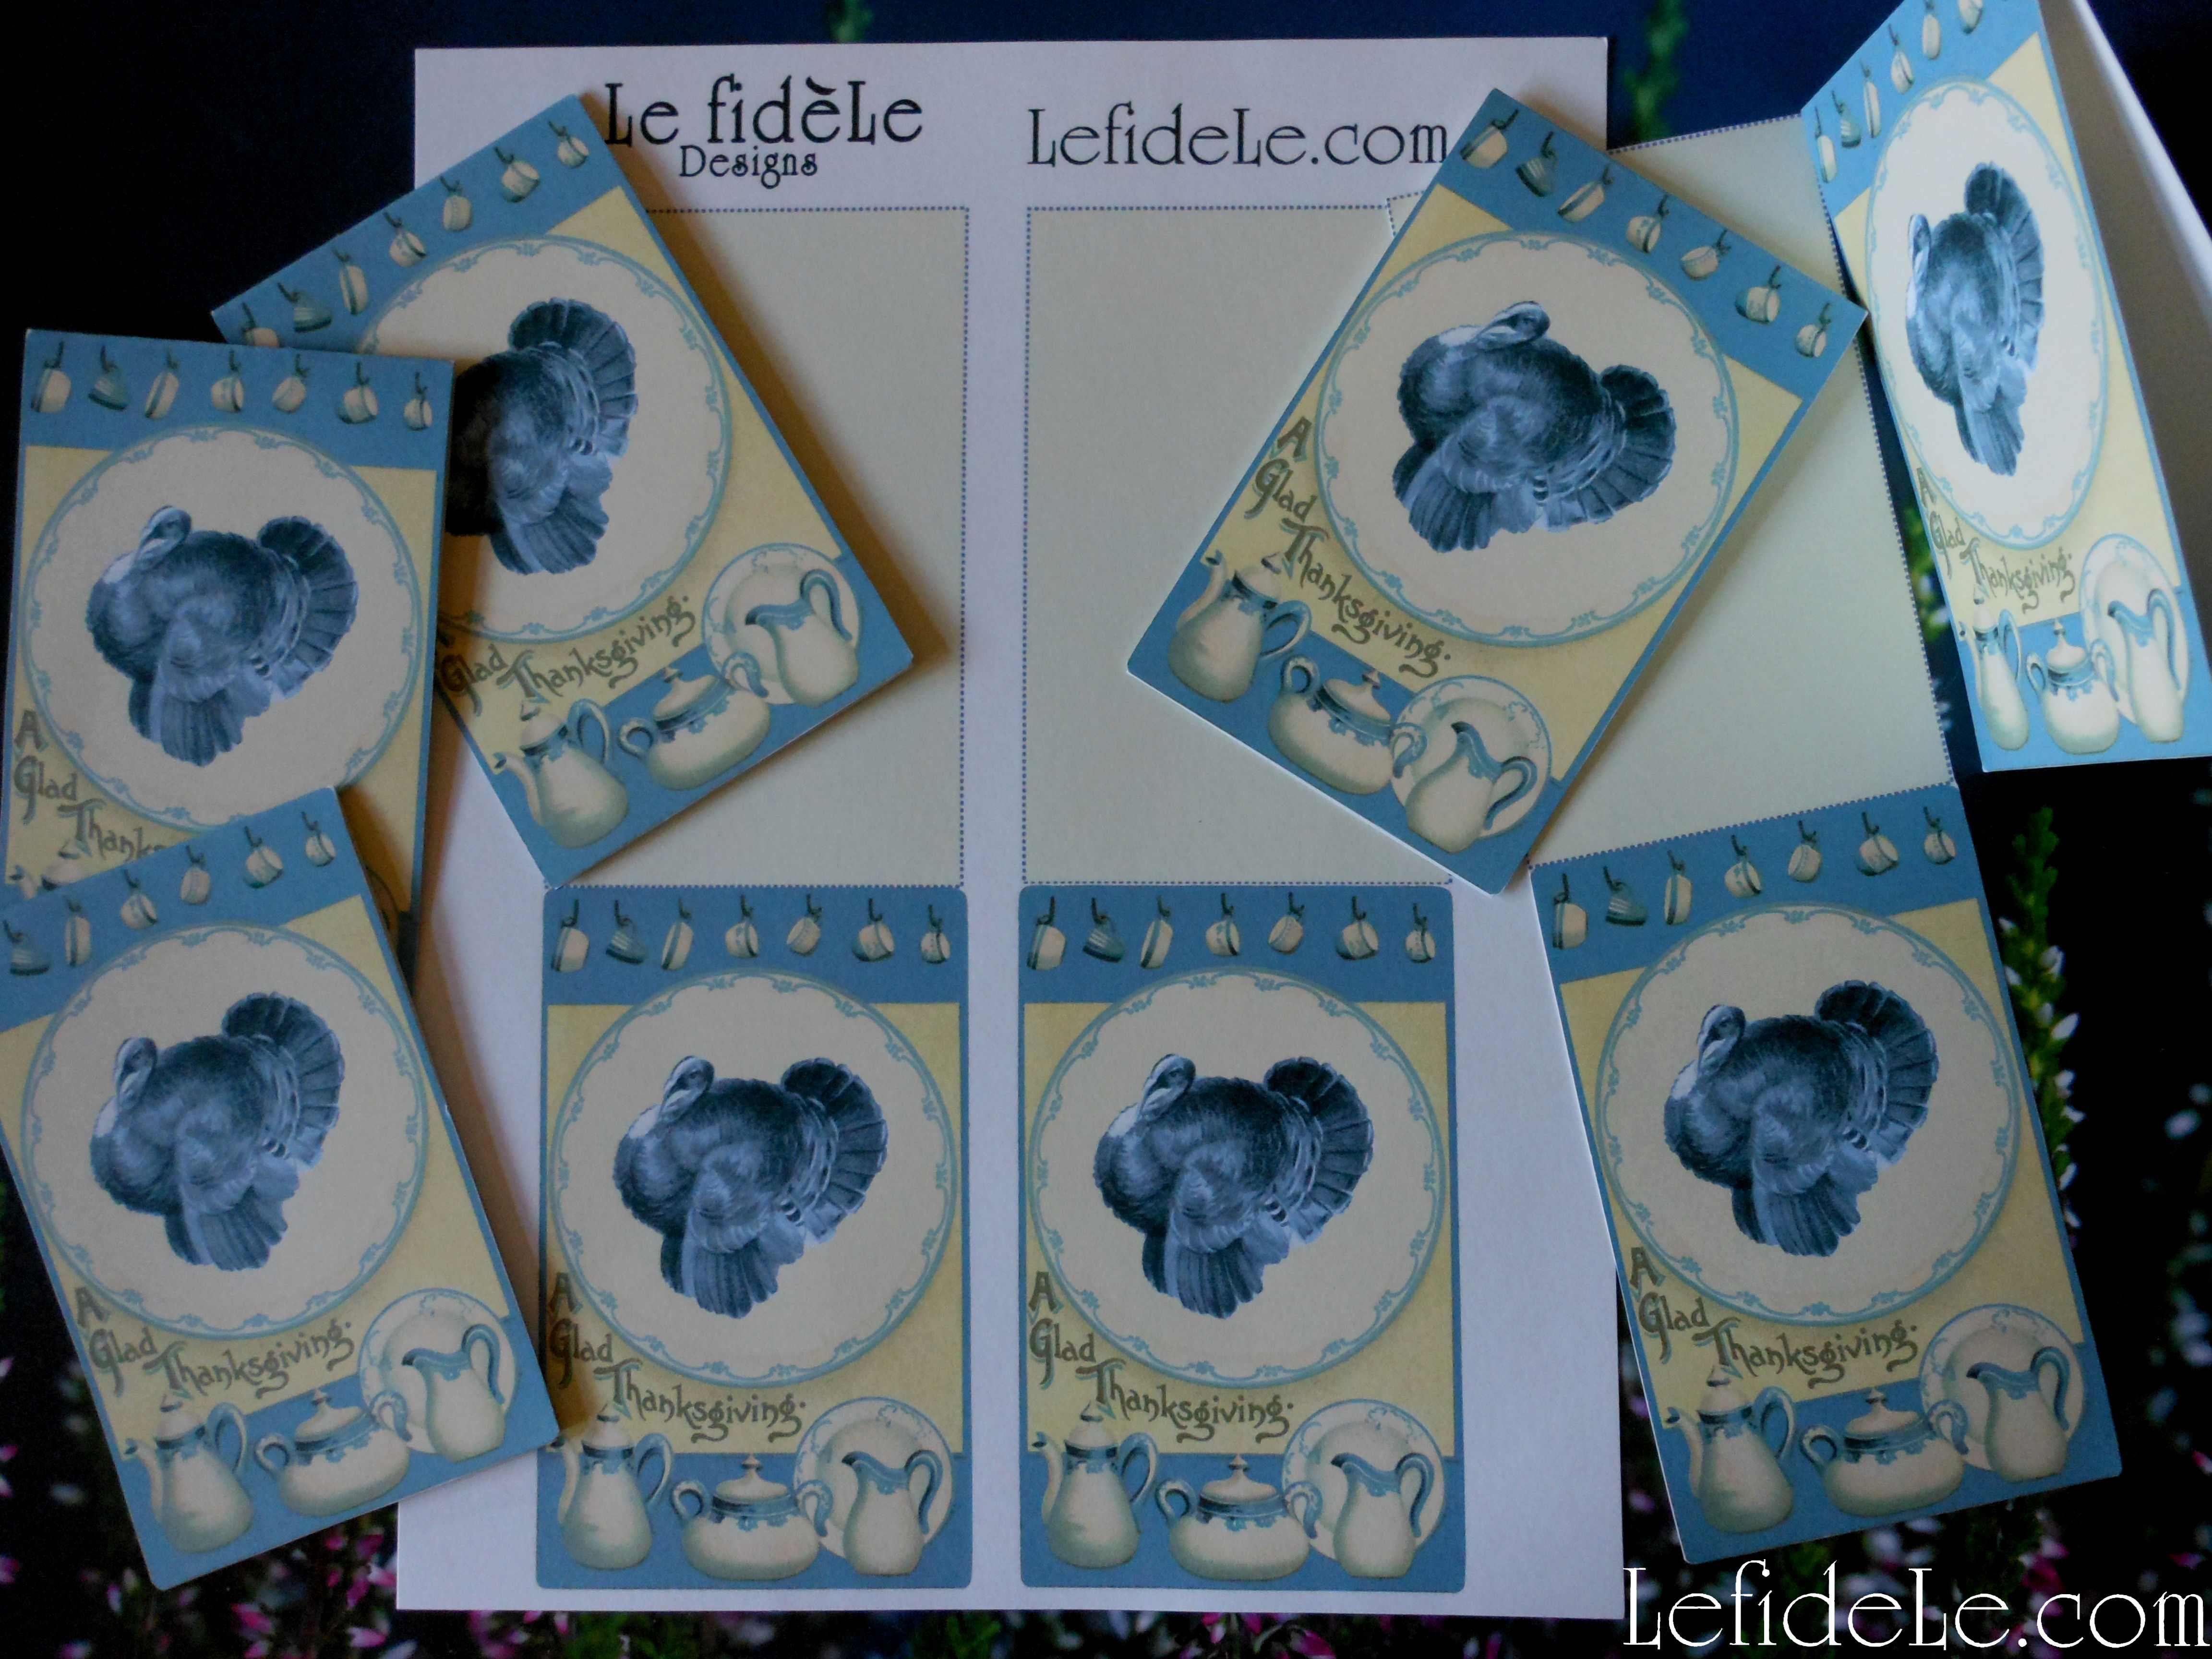
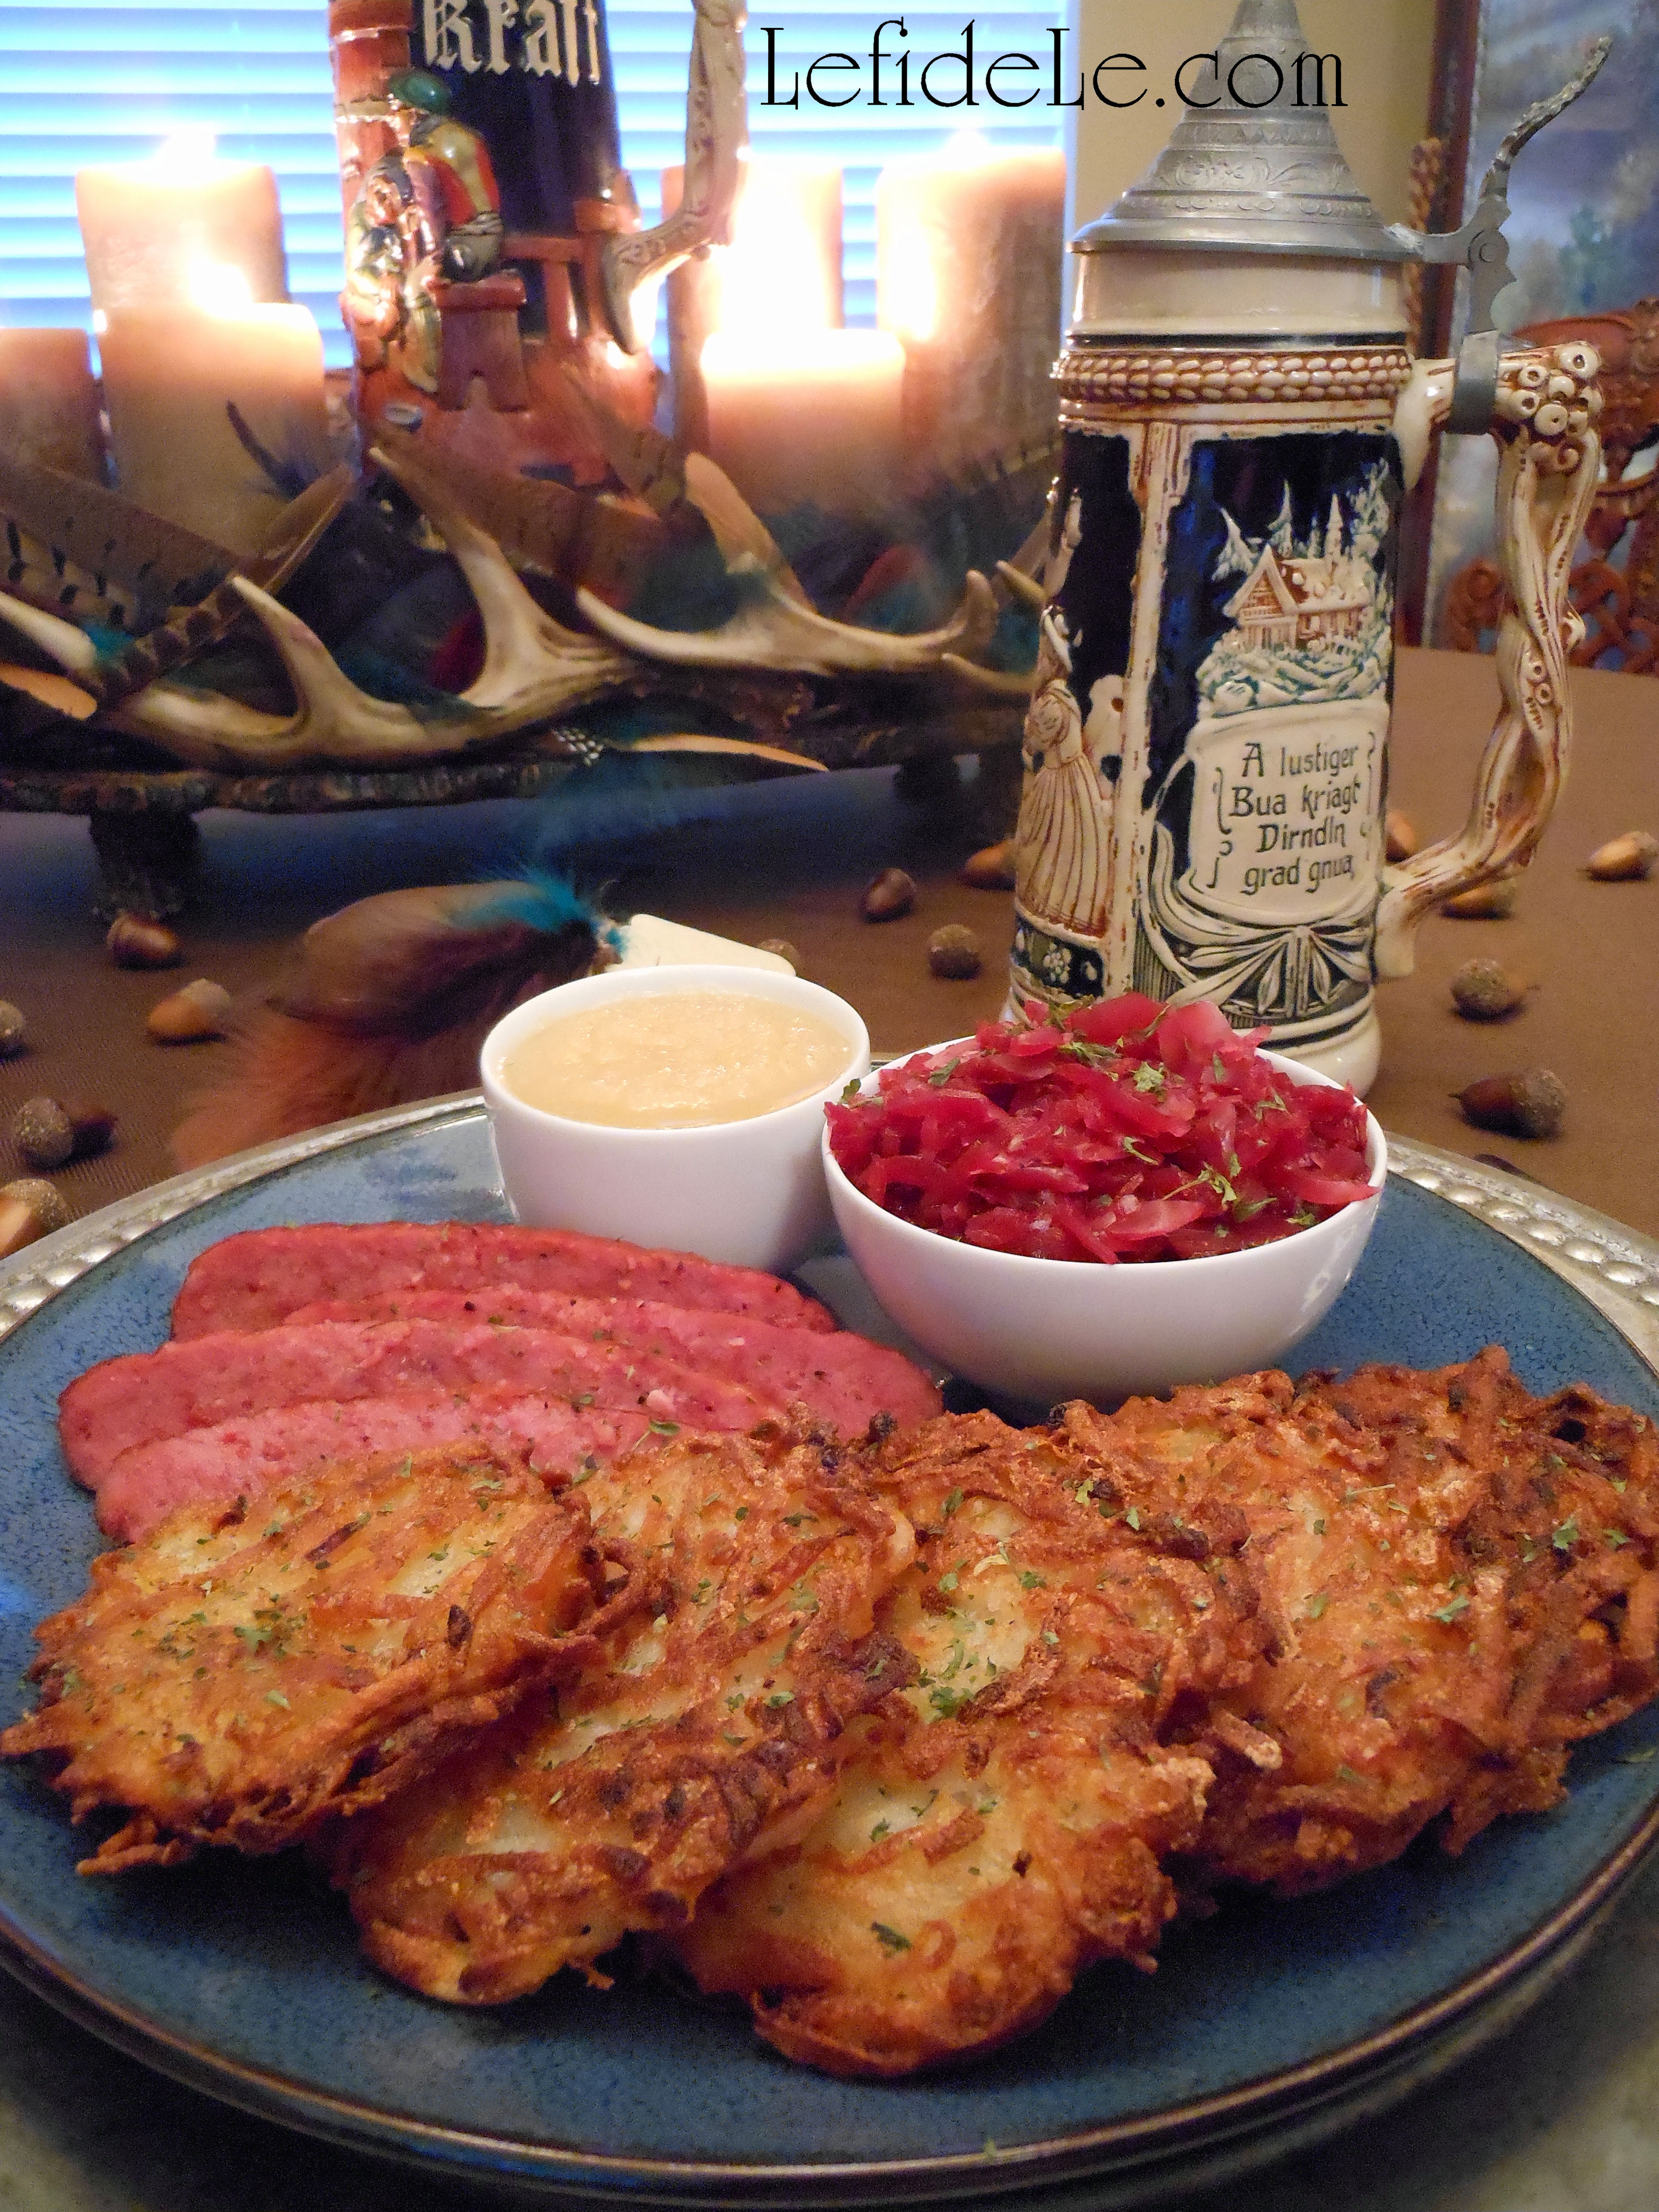
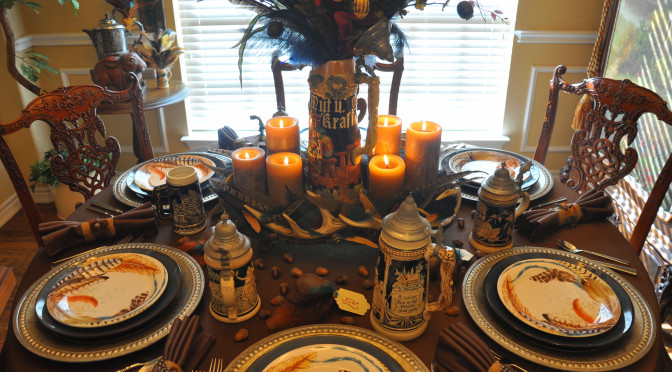
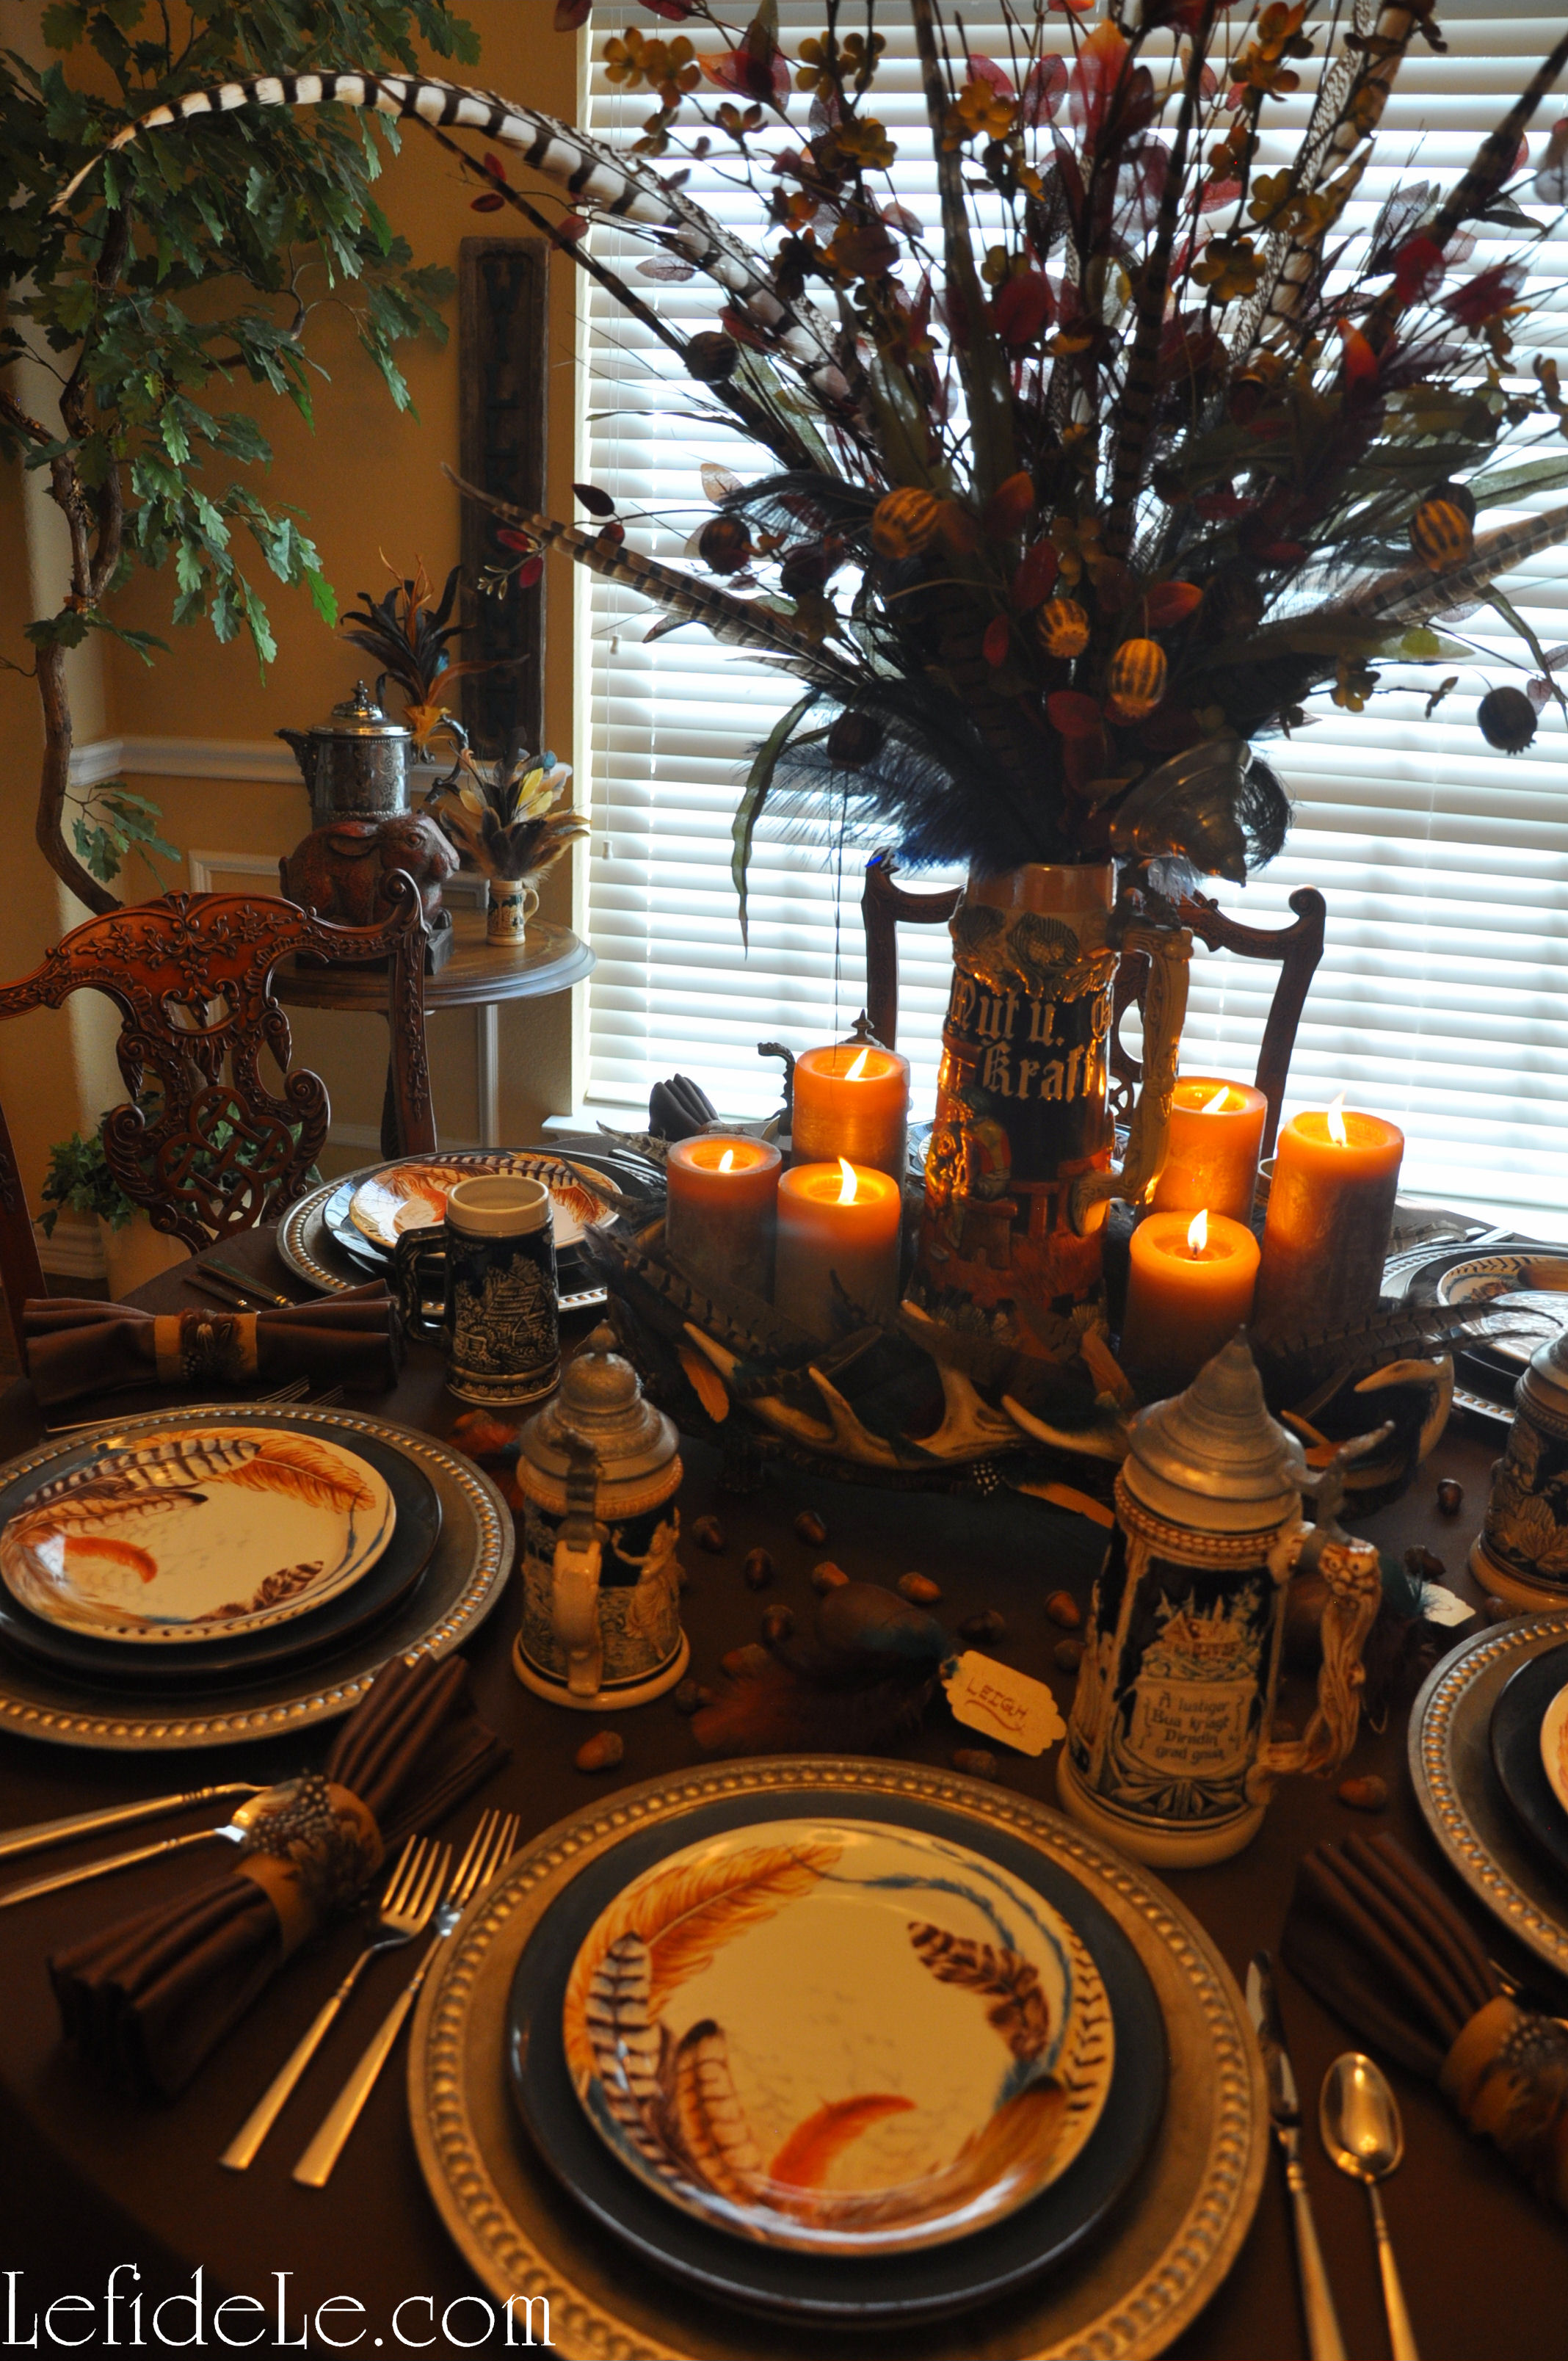
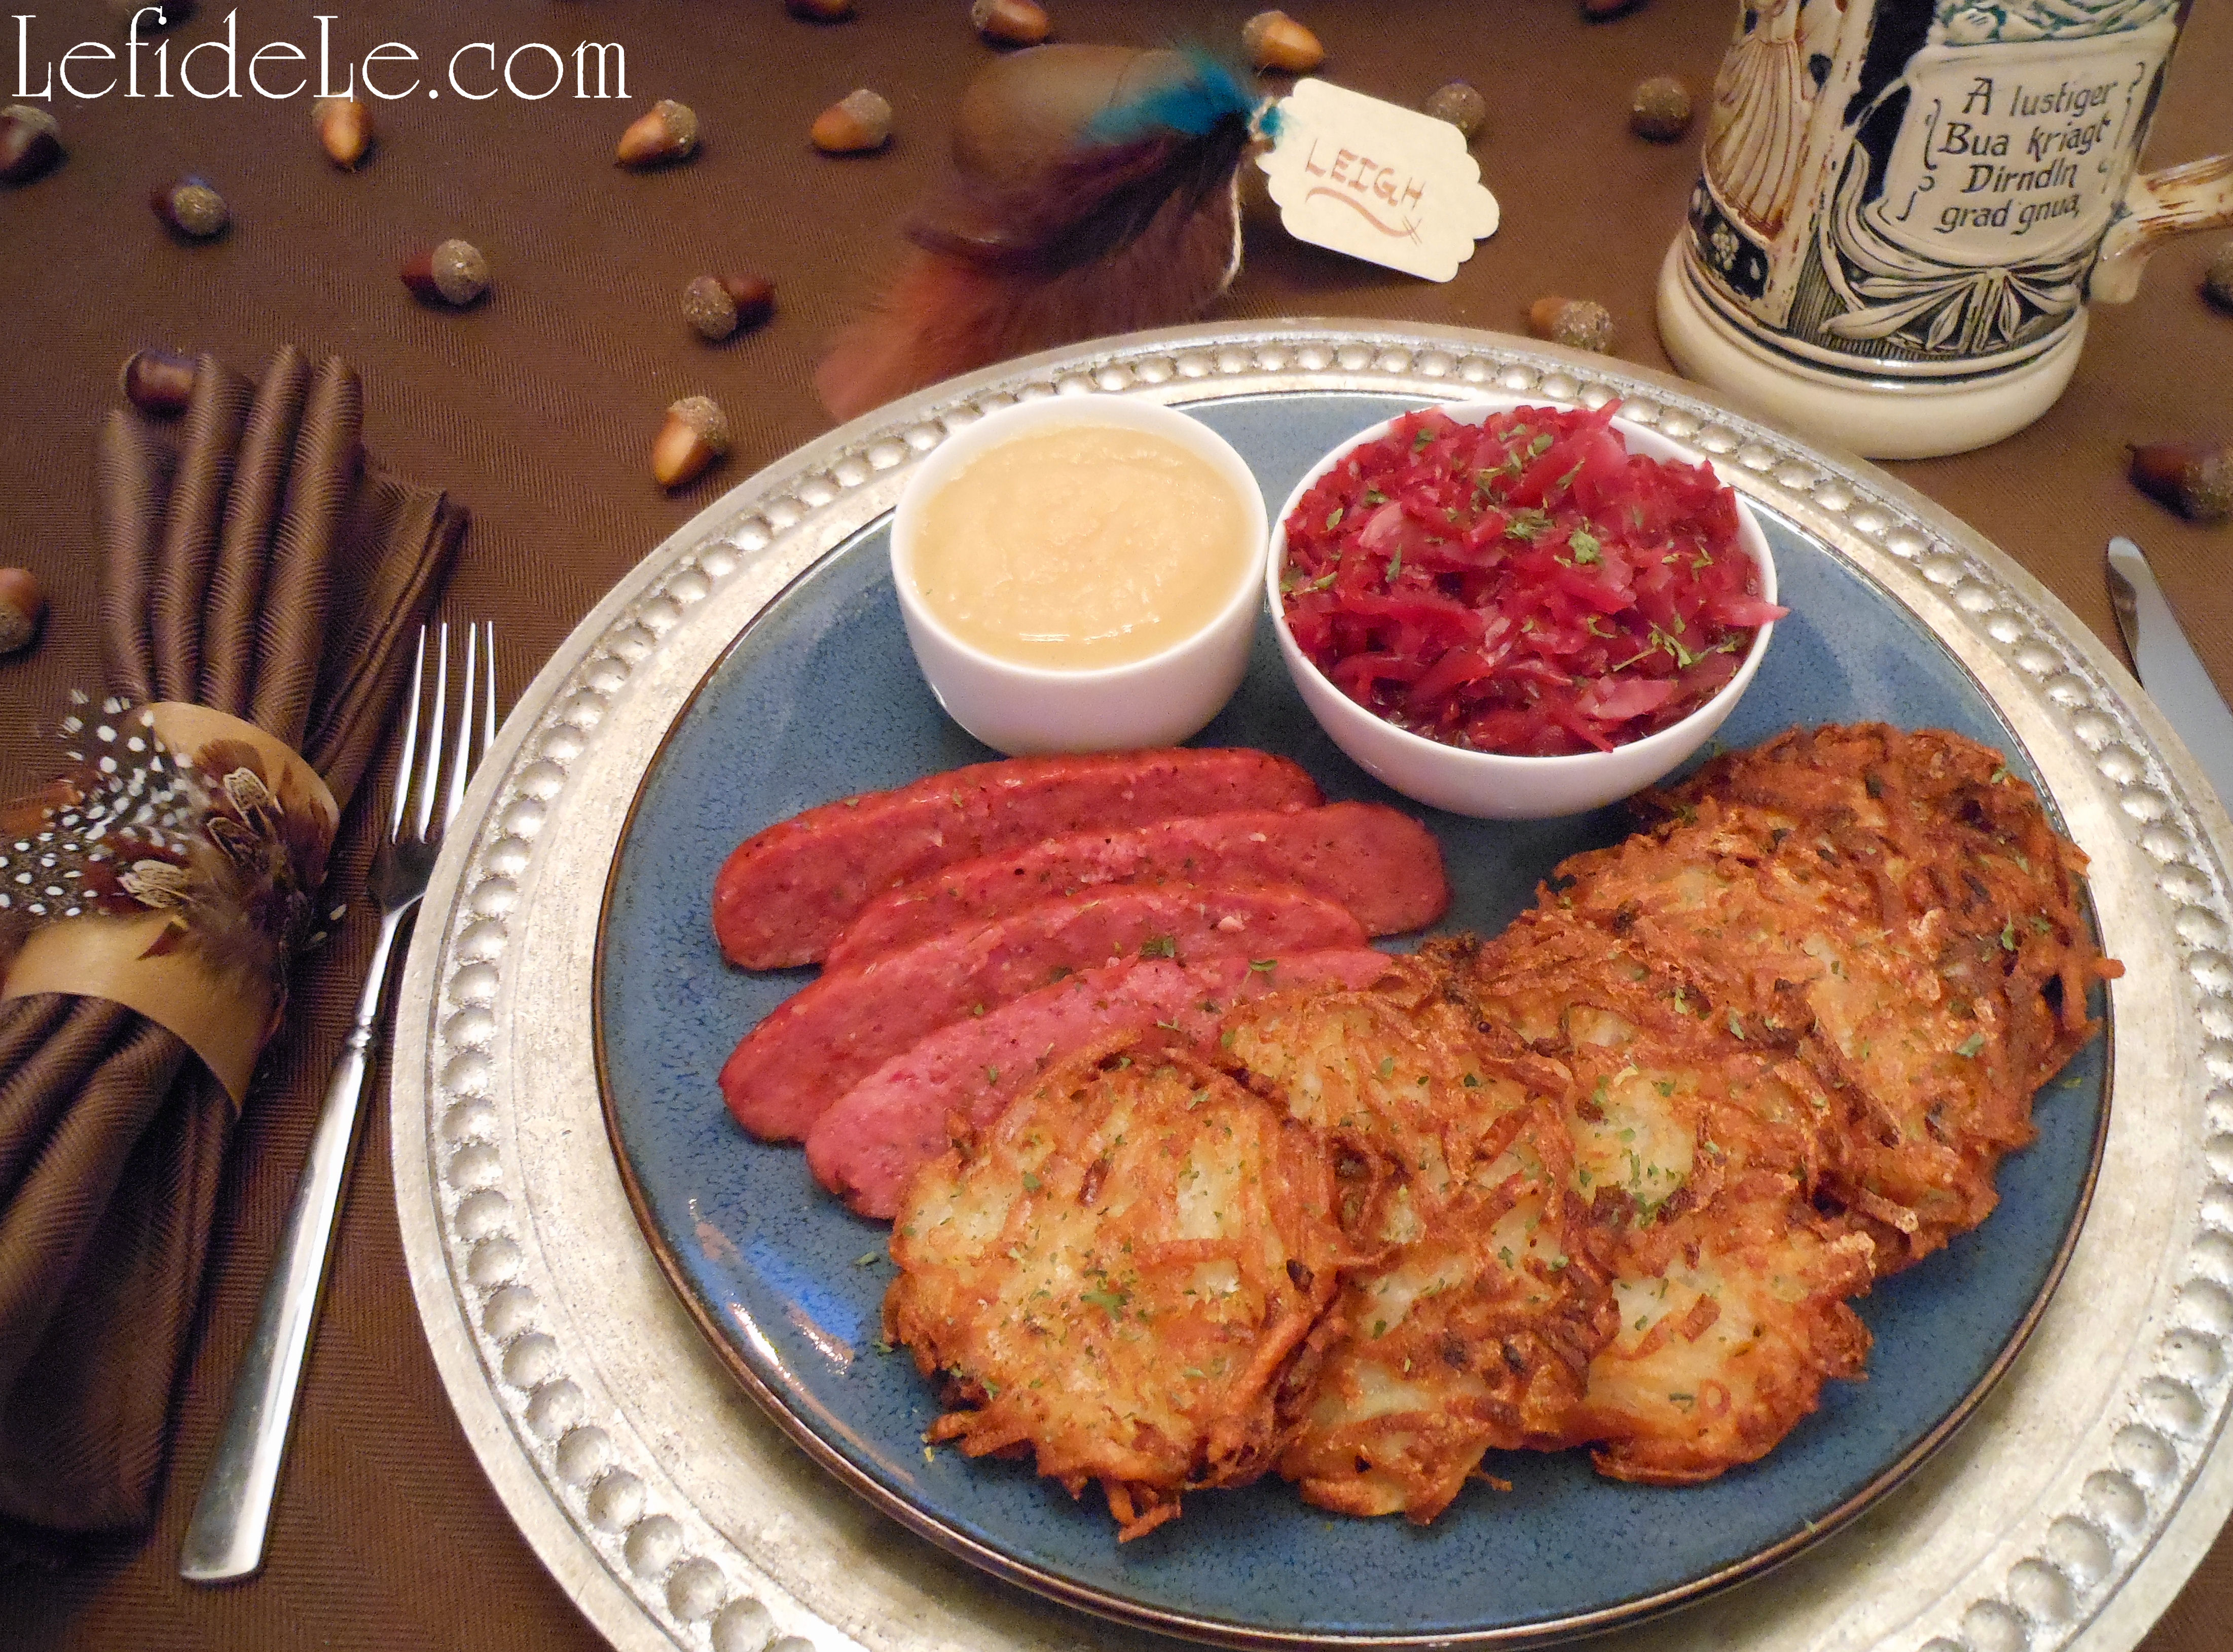
My Thanksgiving printables (free for personal use only) feature vintage dishware and a wild tom turkey in a fresh hued theme that honors the true blue loved ones we’re thankful for this holiday. (See more of my true blue thanksgiving dinner party by clicking here!)

BlueThanksgivingLeigh

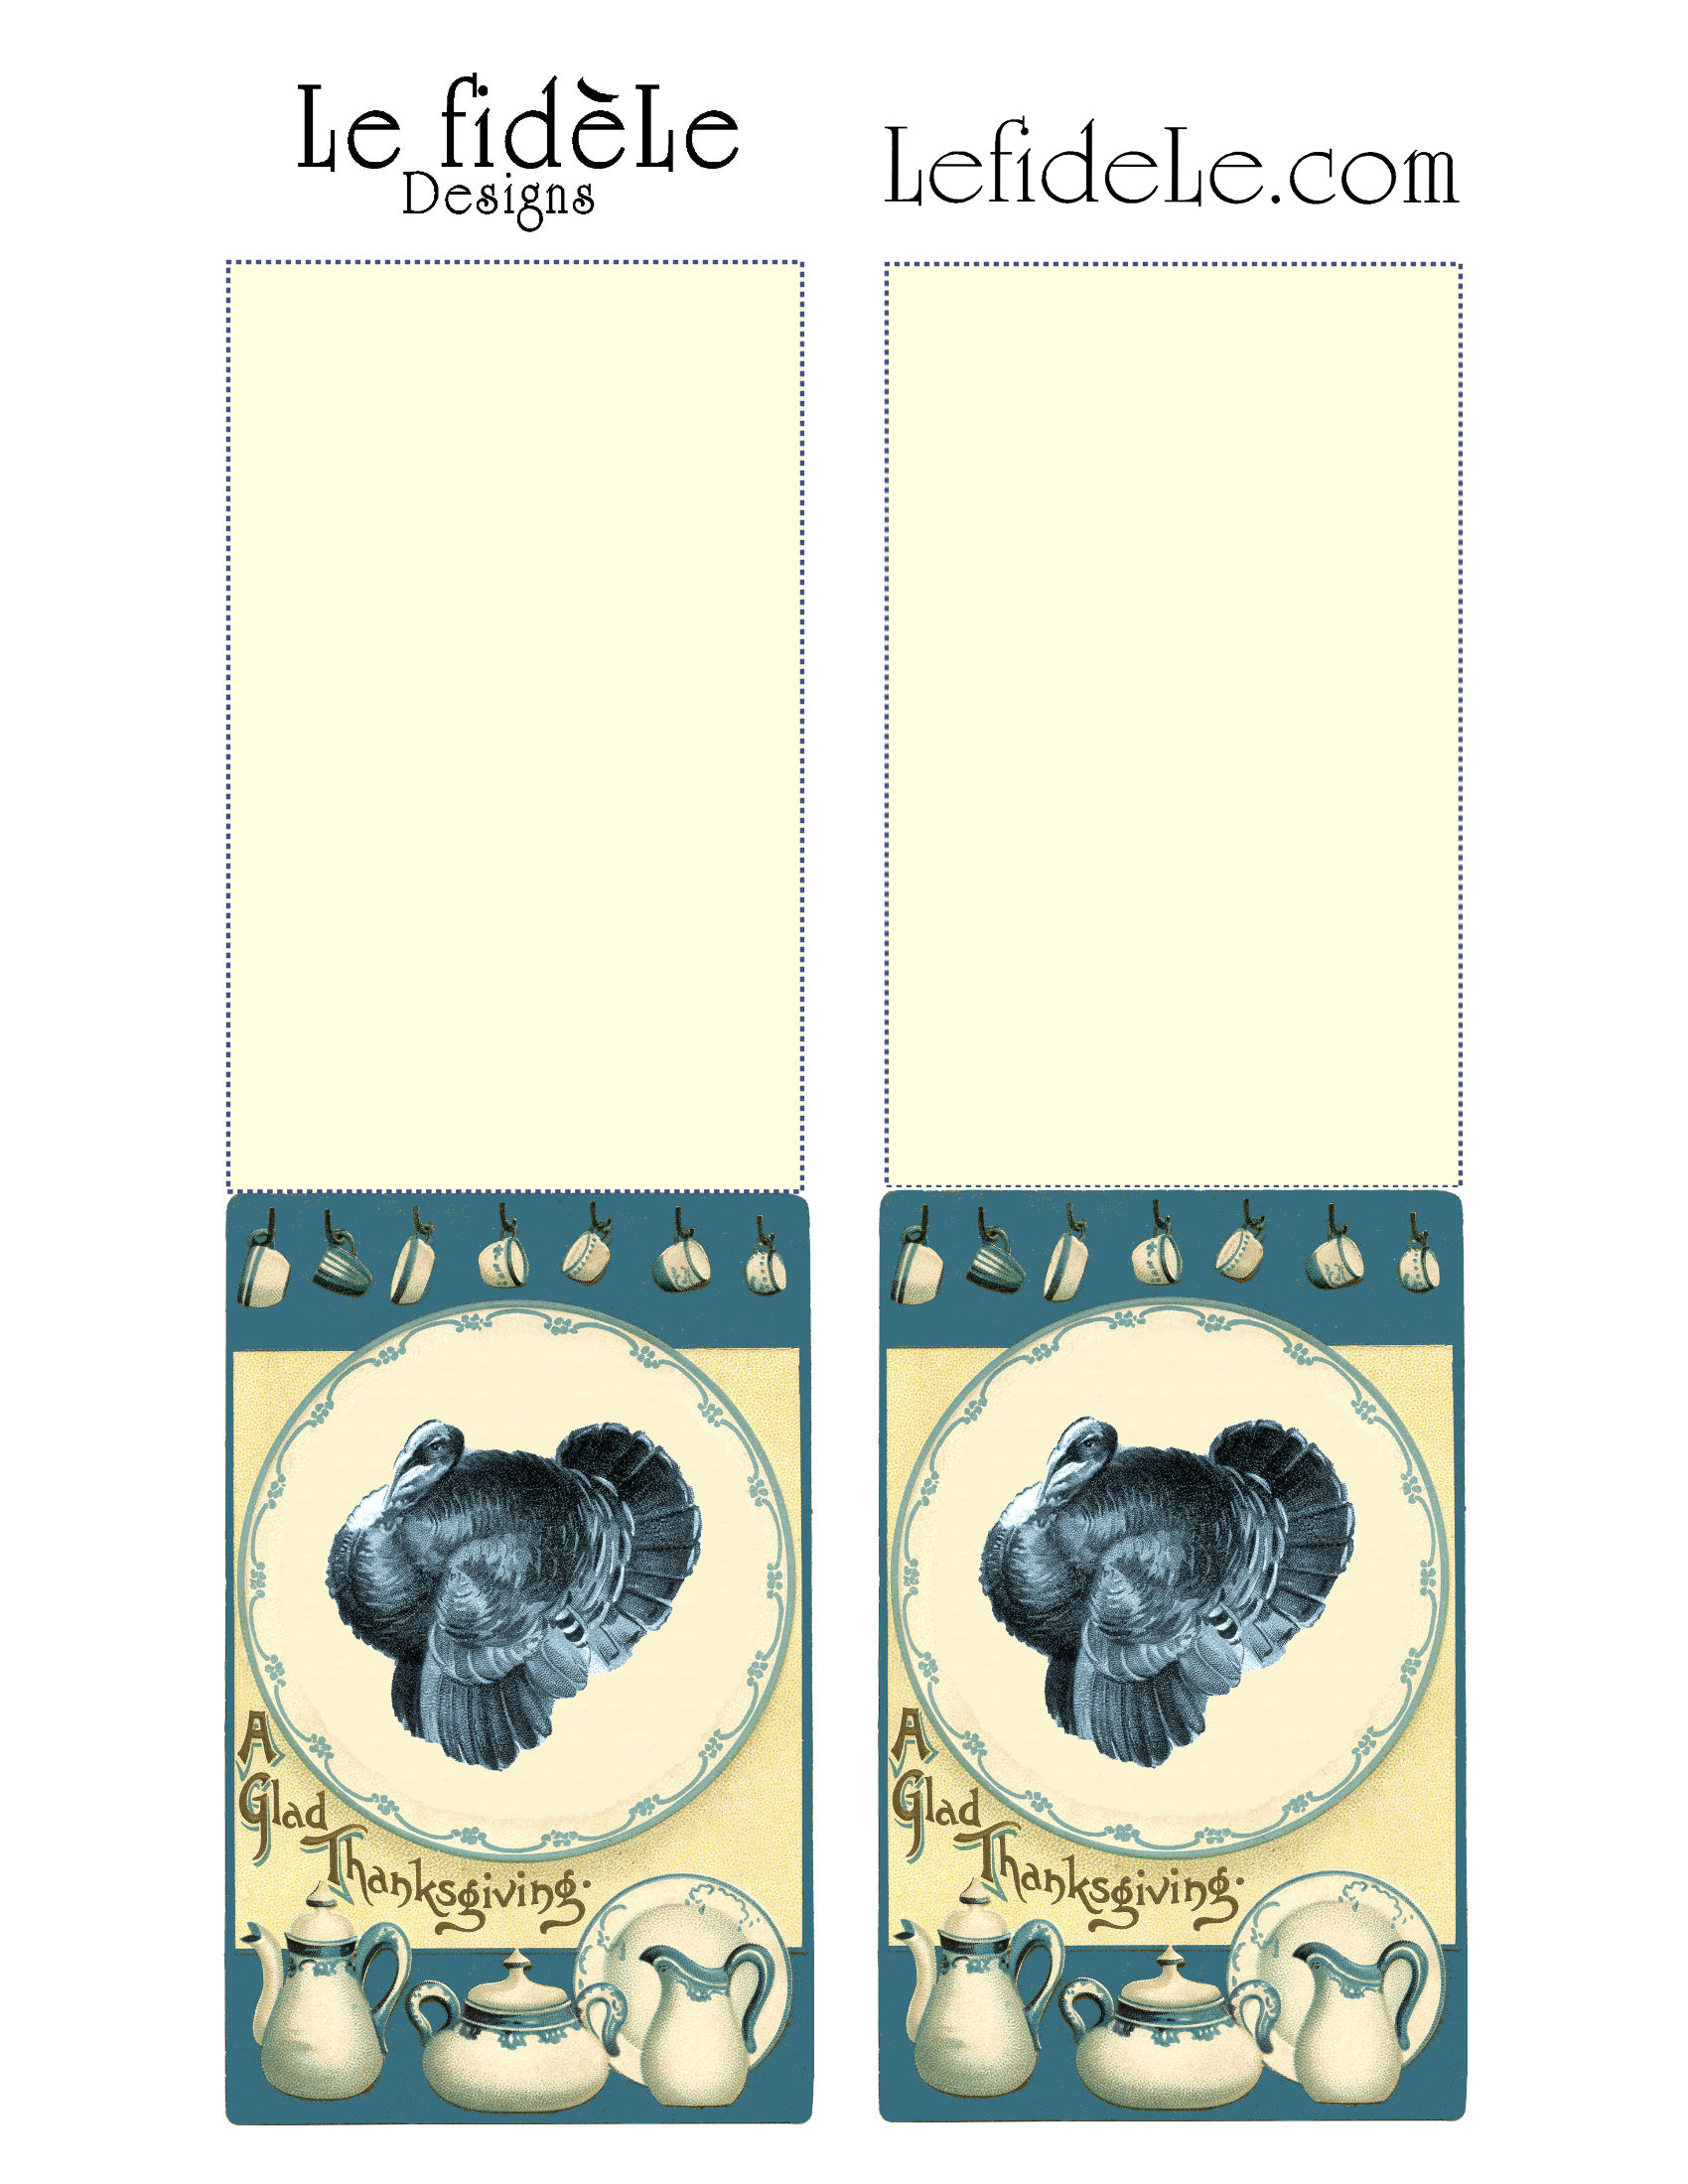
To make your own, right click on the image above and select print. Choose color and photo settings, and print them on sturdy cardstock paper. Cut along the image edges and dotted lines (or coax a relative into helping) then fold in half. Voila!

DSCN0897Leigh

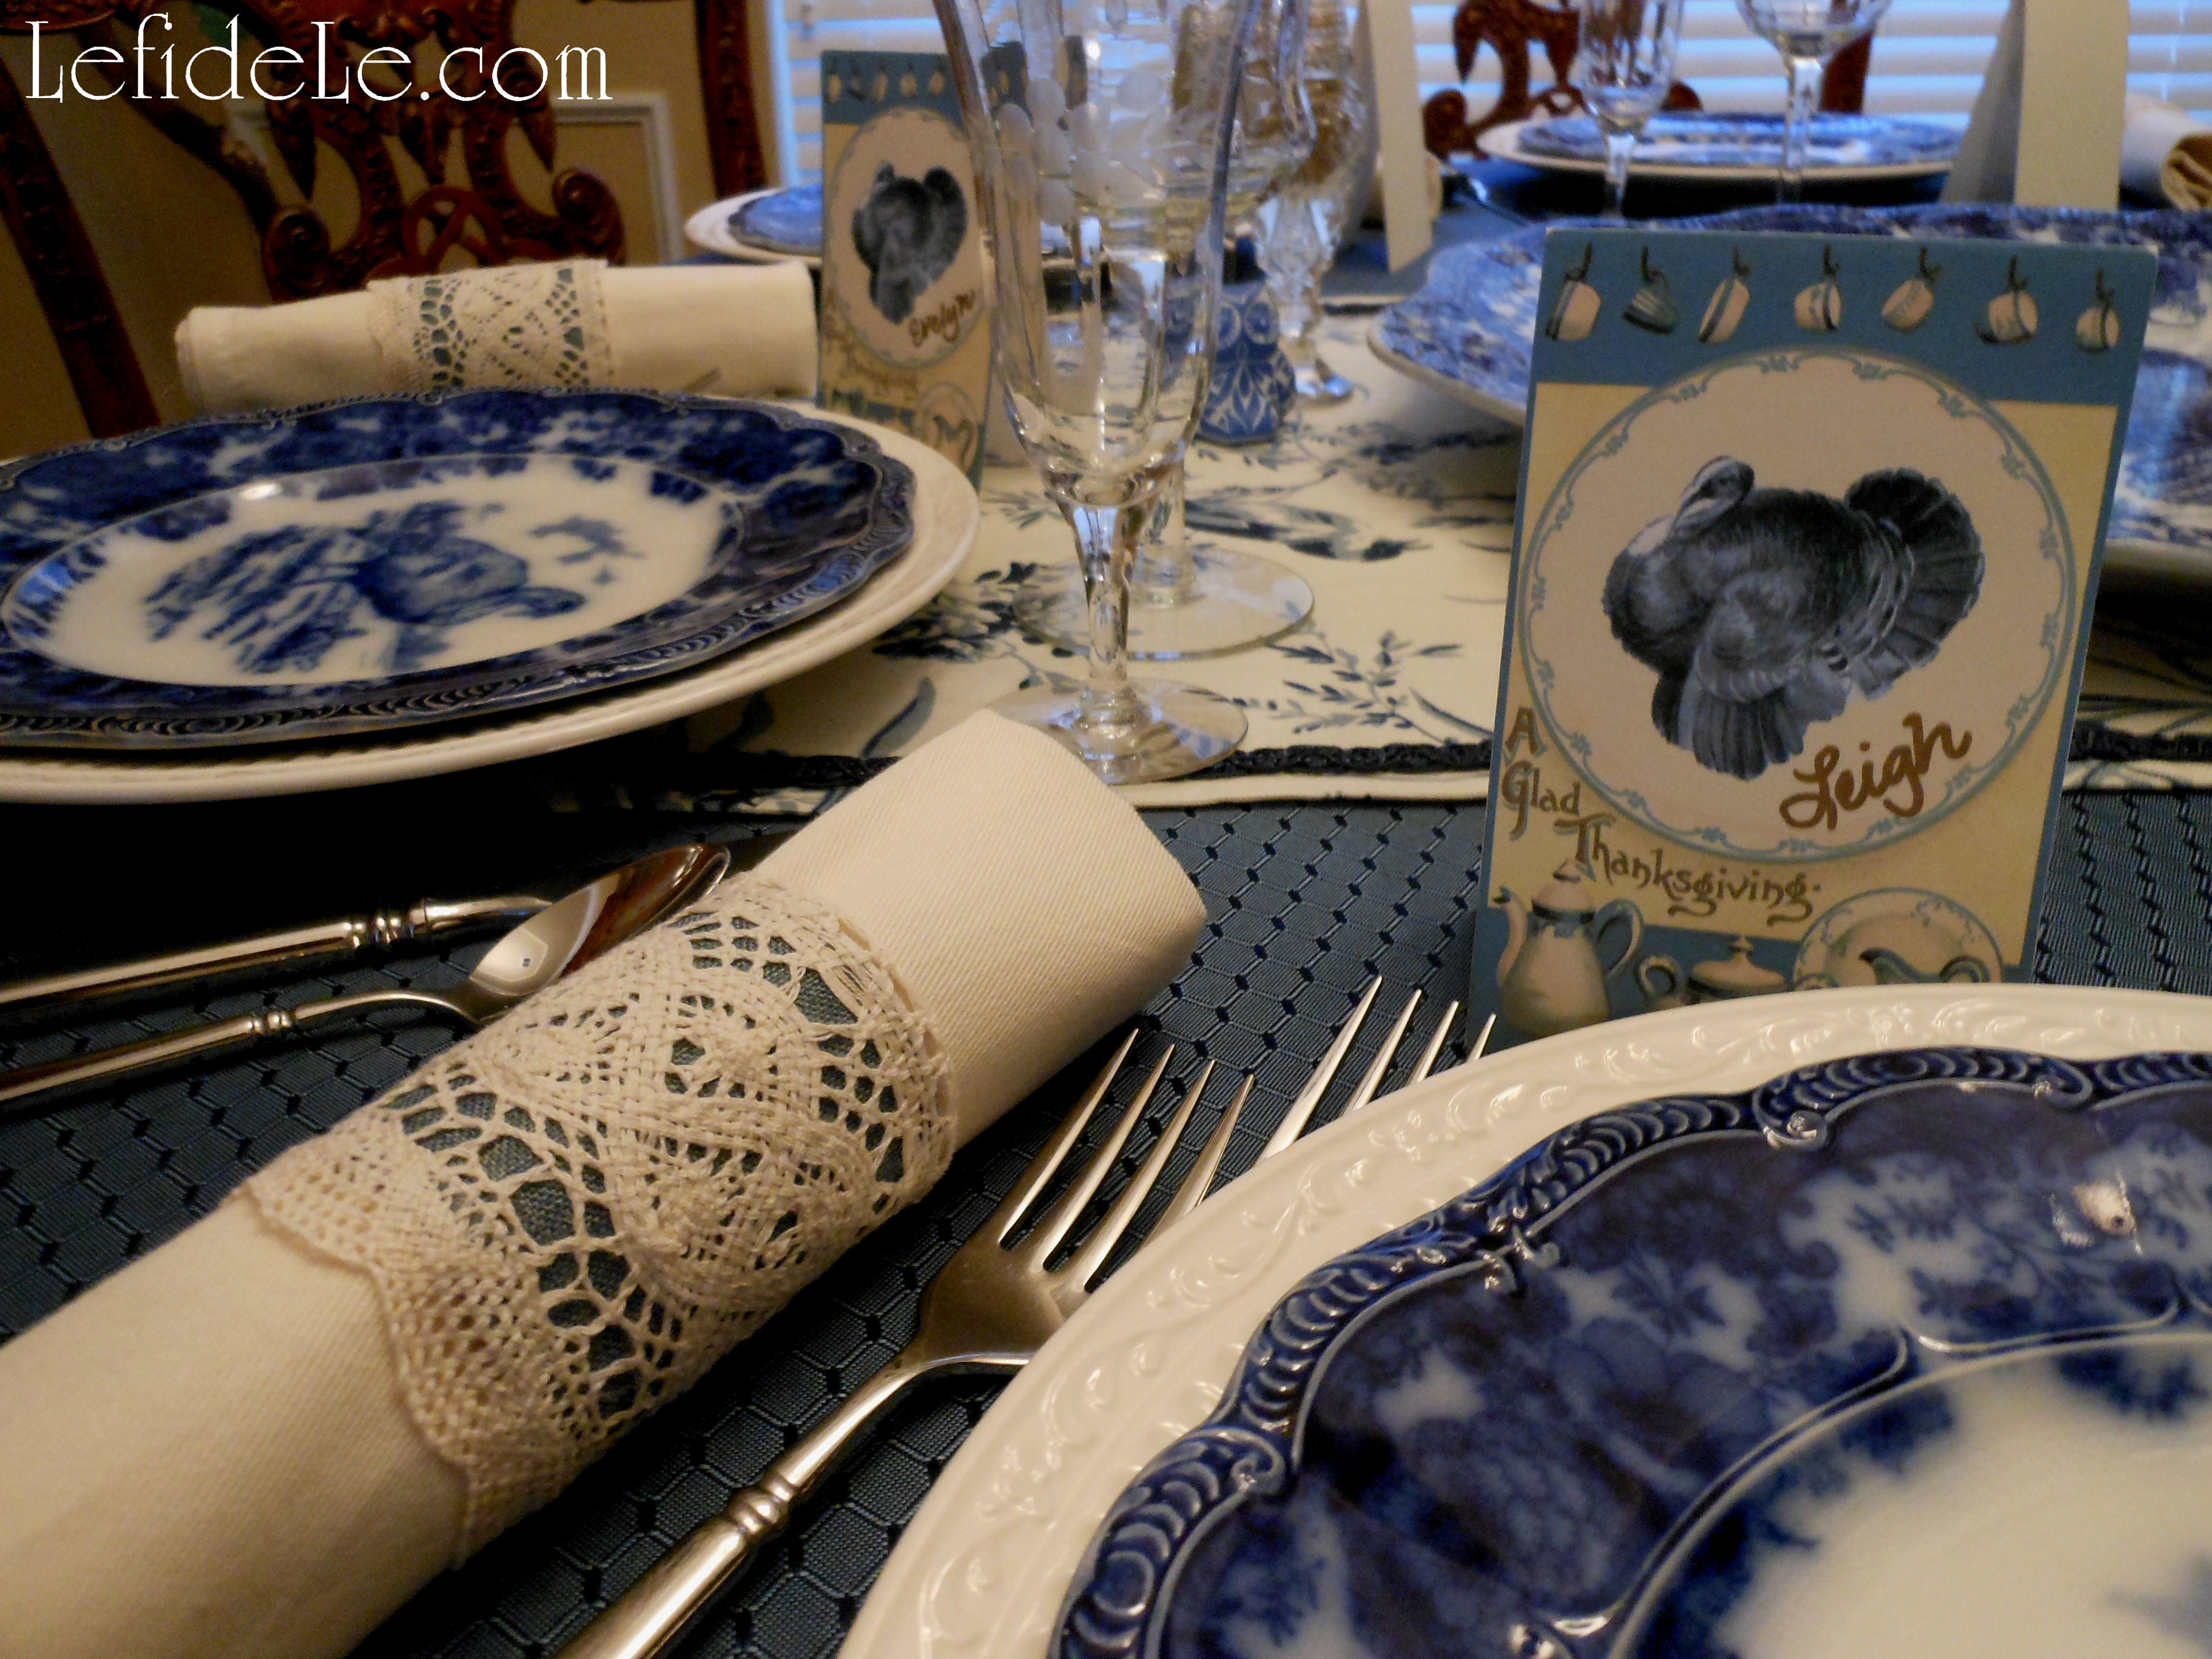
Use these as place-cards during the meal (to strategically place guests for mealtime peace), and then attach them as labels for individual pie boxes or doggie bags (to ensure the holiday pounds are well distributed).

DSCN0905Leigh

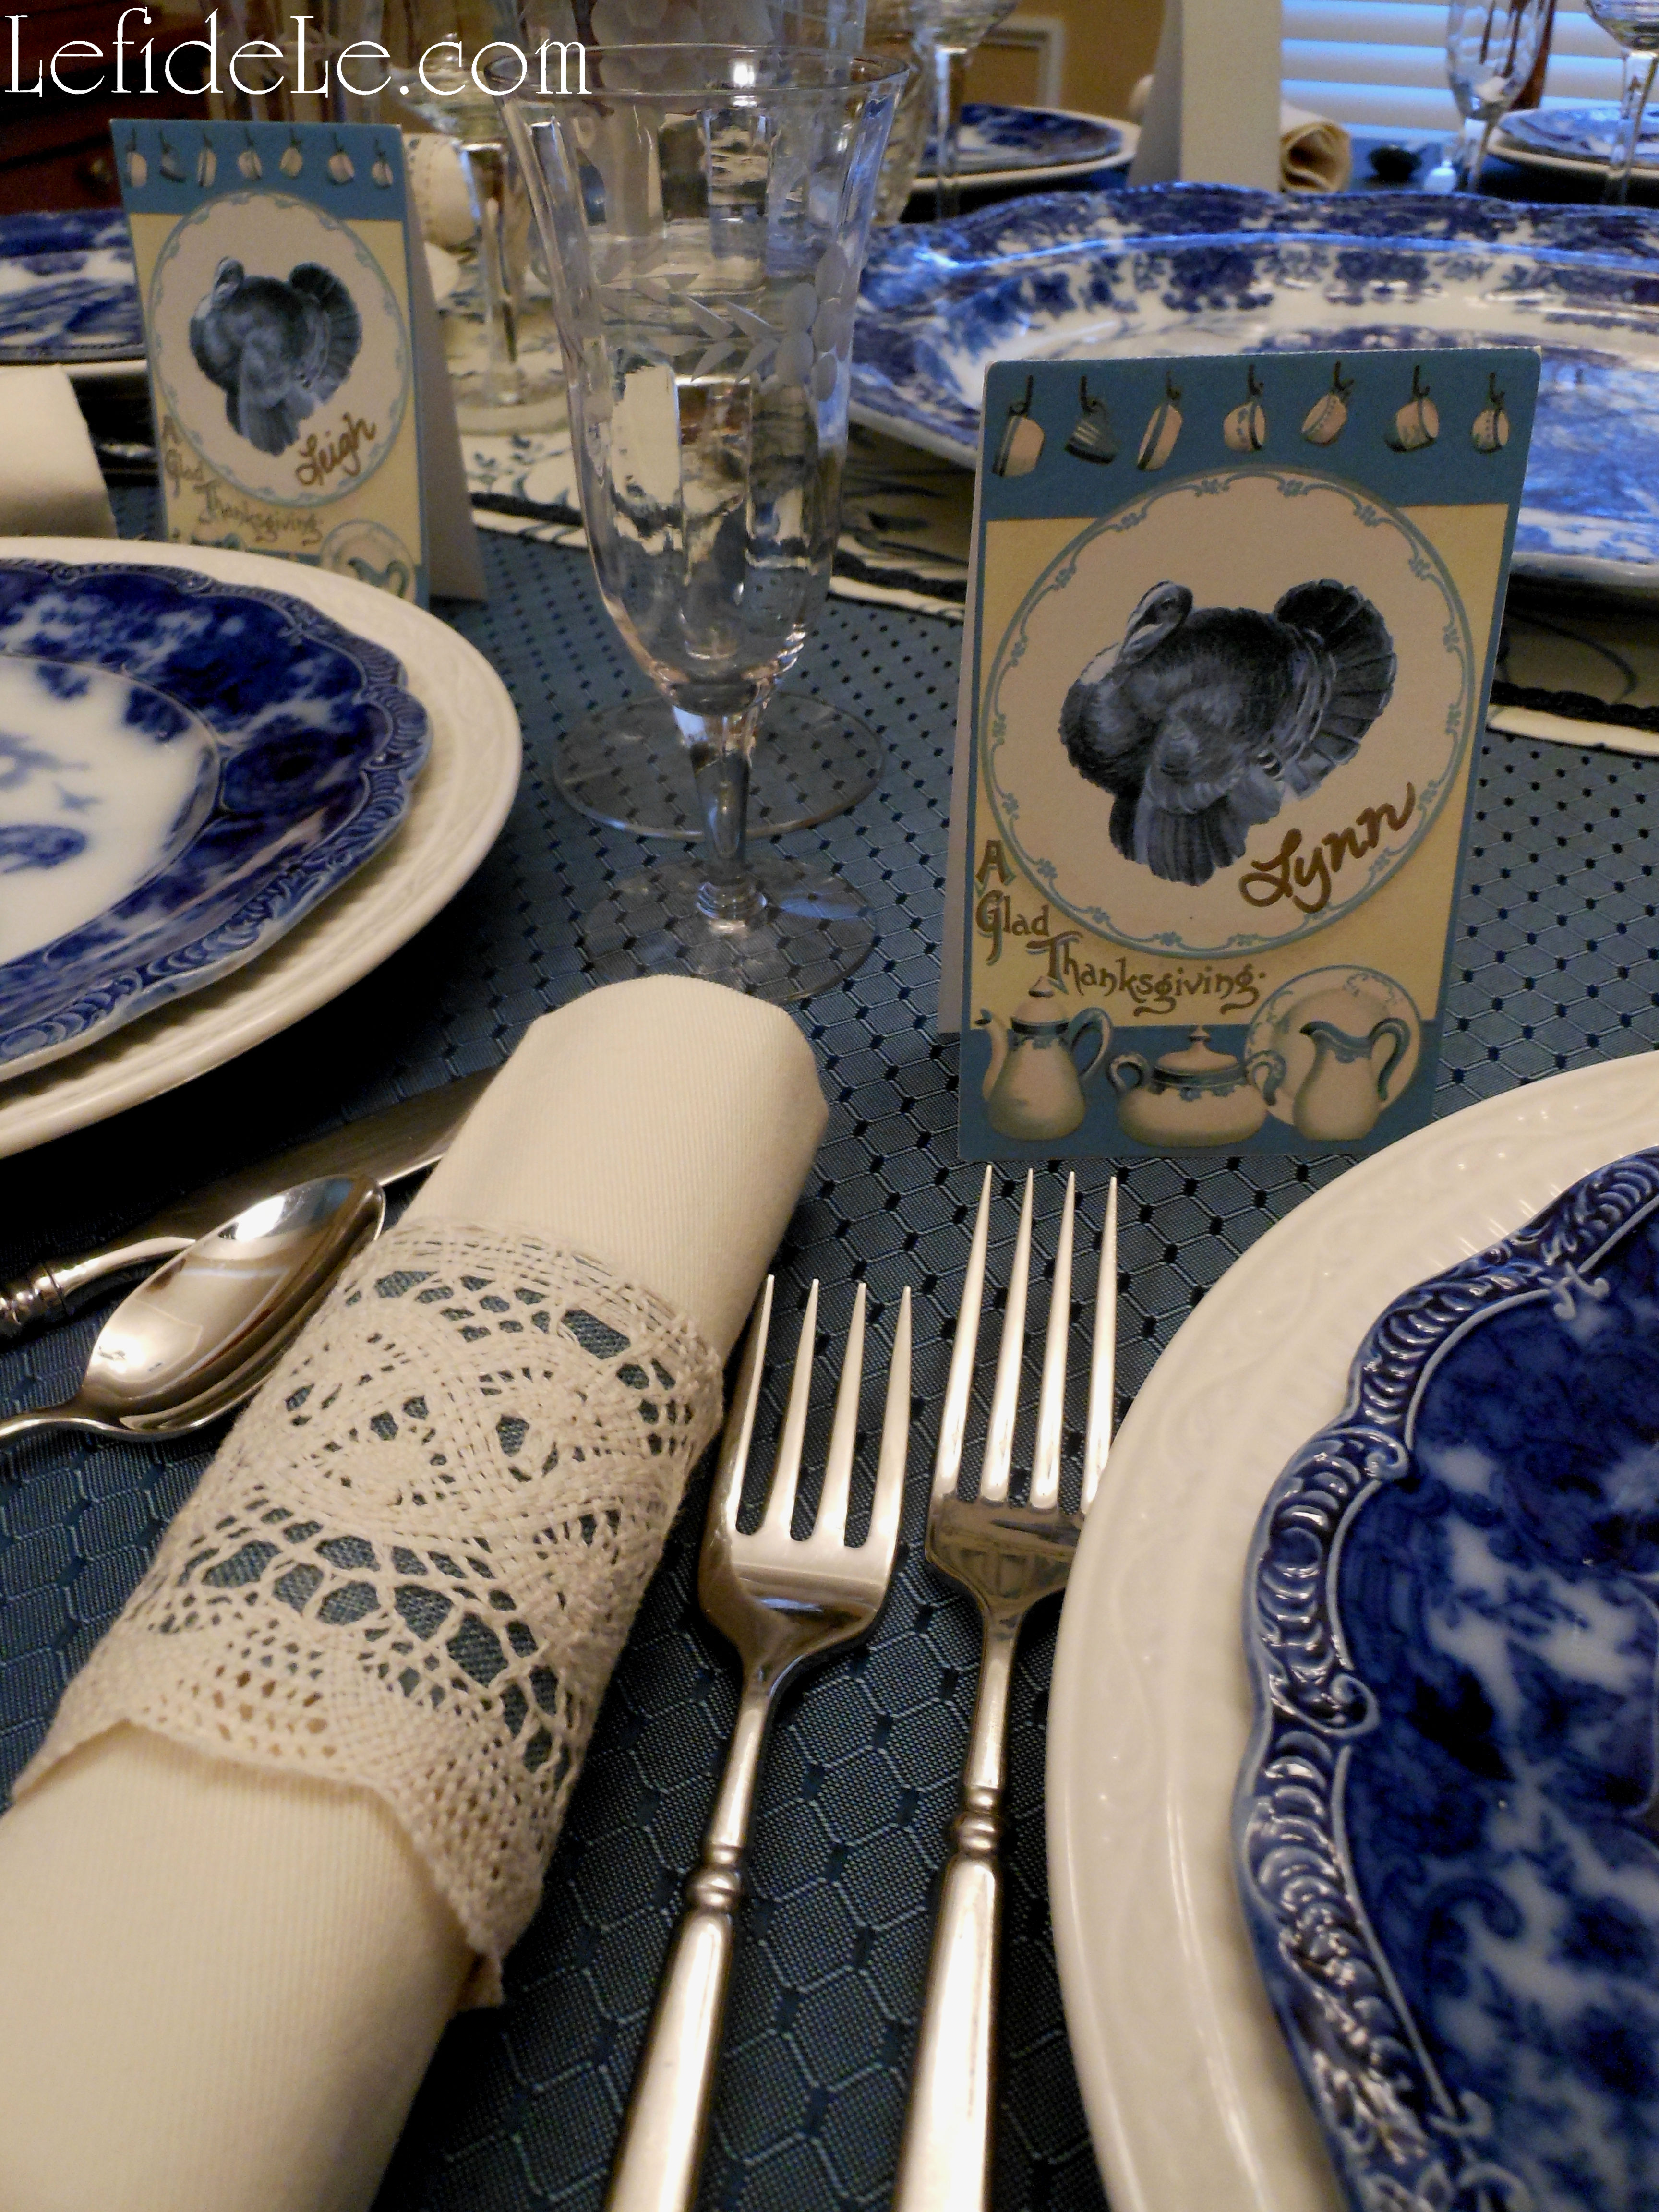
These also make great hostess gift tags, thank you notes, or even food tent cards (to properly identify the mysterious pie everyone keeps asking about… in my family that would be Chess Pie).

Happy Turkey Day Y’all!

Faithfully Yours,

Leigh

Calaveras de Azucar (Sugar Skulls) Edible Folk Art & Egg-Free Vegan Candy Recipe for Dia de los Muertos (Day of the Dead) or Halloween

067Leigh

Calaveras de azucar (sugar skulls) are a folk art originating from southern Mexico for Dia de los Muertos (Day of the Dead). The sugar (azucar in Español) is said to balance the bitterness of death (muerte), and the small calaveras (skulls) are traditionally offered on All Saint’s Day (November 1) to beloved departed children (angelitos / inocentes) as one would leave flowers graveside. Because this recipe is an egg-free edible version that doesn’t use meringue powder or royal icing, it makes the perfect allergy-friendly, vegan, and low-calorie candy for a themed Halloween celebration!


Ingredients:

  • 2 cups granulated white sugar
  • 4 teaspoons water
  • Wilton ready-to-use icing multi-pack of 4 primary colors (not gel)
  • Wilton 3D skulls candy mold

Instructions:

022Leigh

Wash and dry the plastic mold. Measure a perfect cup of glistening white sugar (azucar in Español).

025Leigh

Use a small silicone spatula to mix 4 teaspoons of water (agua) into a bowl filled with the white sugar. (The key to sugar skull success is patient and thorough mixing to yield slightly damp sugar the consistency of sand.) Use the spatula to scoop globs of damp sugar into the mold, and also to pat it down compactly into each cavity. Smooth the top of each to flatten the sugar to sit evenly with the mold. (This helps later when combining the pieces to make 3D skull shapes.)

026Leigh

Place a cookie sheet on top of the mold. Flip them over while holding them together. The mold will now sit inverted on the cookie sheet. Carefully lift the plastic mold off to leave the sugar shapes on the sheet. (If some of them stick, gently flex two opposite corners of the mold in different directions. The remaining sugar shapes should pop out without breaking if you hover right over the sheet.) Make a second set of sugar shapes the same way. Let these dry at least 5 hours. (I left mine overnight, and decorated them the next day.) Another option is to bake these 5 to 10 minutes in a 200ᵒ oven. (Make sure to observe them closely in case your oven’s temperature is off.)

029Leigh

“Glue” a set of front and back skull (calavera) pieces together using Wilton ready to use icing. (This is an easy allergy-friendly egg-free alternative to a royal icing of meringue that hardens for the same traditional look, but note that they do contain corn. I found a 4 pack of primary colors in-store at Michaels that are the same size of a gel icing… but don’t use a gel because it doesn’t harden in the same way so that it may be handled when dry.) Press each shape together firmly and set aside.

031Leigh

You may leave these as Halloween skull candies or decorate them as a Mexican folk art. Add traditional decorative icing (glaseado) details like smile lines, hearts, flowers, swirls, dots, and marks that look like apostrophes. (The small icing tubes have a small tip built in that’s perfect adding small details to the skulls.) Let these sit overnight to harden thoroughly.

088Leigh

Wilton’s helpful hotline declared that the icing never really goes bad and may be used years later if capped tightly after use… good to know, but I doubt the small tubes will last long! Once dry, the sugar skulls (calaveras de azucar) may be handled without damaging them.

067Leigh

They may even be eaten as candy, which is wonderful considering most sugar skulls are inedible. (And so are the most popular recipes for them.) Since sugar is only 15 calories per teaspoon… I’m guessing that these are only about 35 calories each!

072Leigh

Set these sugar skulls out in a traditional Day of the Dead (Dia de los Muertos) offrenda, Halloween candy buffet, in the center of a October dinner table as edible decoration in lieu of after dinner mints!

8(3)Leigh

Be sure to check out my article on Dia de los Muertos (Day of the Dead) Themed Halloween Dinner Party Décor and the 2 on DIY sugar skull crafts… costume mask, banner, vase, napkin rings, and wine glass charms!

Ahora, comer con gusto!

Faithfully Yours,

Leigh

Dia de los Muertos (Day of the Dead) Themed Halloween Dinner Party Décor + DIY Décor & Recipe Links

75(2)Leigh

Celebrate Halloween with a Dia de los Muertos (Day of the Dead) themed dinner party filled with decorative sugar skulls (calaveras de azucar in Español) that embrace the lighthearted American holiday while still honoring Mexican traditions. Sugar (azucar) is said to balance the bitterness of death (muerte), and calaveras are traditionally offered on All Saint’s Day (November 1) to departed loved ones as one would leave flowers graveside. As Halloween serves to poke fun at all things scary, Dia de los Muertos is intended as a way to accept death as inevitable… and also to honor dearly departed loved ones. Representational calacas (colloquial term for skeletons) symbolize the idea of life being inextricably linked with death, and have migrated north from Mexico into American Halloween celebrations as themed décor. By using one celebration as a theme for the other, the two concepts combine to poke a little fun at death as not being so scary!

27(2)Leigh

The vivacious tablecloth was made from fabric printed with customary Dia de los Muertos imagery in vibrant illustrations over a black background. (Purchase the cloth, glass candles, & large decorative skulls from Le fidèLe Designs affiliate Joann Fabric & Crafts whose clickable ad appears in the sidebar.)

20(2)Leigh

Exotically painted salad plates sit atop solid purple dishes to evoking the brightly embroidered dresses of Mexico. (Purchase the salad plates from Le fidèLe Designs affiliate Cost Plus World Market whose clickable ad appears in the sidebar.) Lustrously glittered napkin rings of sugar skulls hold death black napkins in their icy grip. (Learn how to craft the napkin rings here: DIY Calaveras de Azucar (Sugar Skulls) Napkin Rings, Wine Glass Charms, & Vase Craft Tutorial.)

9(2)Leigh

Crafted sugar skull wine glass charms embellish virgin sangria (fruity wine beverage known by the Spanish name for blood) filled vessels. (Learn how to easily make the charms here: DIY Calaveras de Azucar (Sugar Skulls) Napkin Rings, Wine Glass Charms, & Vase Craft Tutorial.)

49(2)Leigh

The tablescape is illuminated with Catholic religious candles (as a nod to All Saint’s Day) not decorated with santos (saints) but with Dia de los Muertos imagery. Small homemade luminarias (lanterns) filled with tea-light candles are tied with the same multi-colored yarn of the banners, charms, and vase. (Learn how to inexpensively make these here: Easy DIY Upcycled Can Tea-light Luminarias + Free Printable Template & Tissue Paper Flowers Crafts.)

36(2)Leigh

A clear square vase, decorated with crystals depicting Day of the Dead imagery, is filled with black glass marbles holding a tightly packed arrangement of cempasuchil (wild marigolds) which are typically left for the departed as ofrendas (offerings at altars or graves). (Learn how to quickly make the vase here: DIY Calaveras de Azucar (Sugar Skulls) Napkin Rings, Wine Glass Charms, & Vase Craft Tutorial.)

8(3)Leigh

Small edible sugar skulls serve as both customary folk art décor and sweet after dinner treat. (Get the easy recipe here: Calaveras de Azucar (Sugar Skulls) Edible Folk Art & Egg-Free Candy Recipe.)

67(2)Leigh

A polychromatic Mexican serape (wool shawl) covers lifts which elevate central elements of the centerpiece unseen. Ornamental calavera (skull) novios (brides and grooms) ceremoniously occupy the centerpiece. (Calacas, skeletons, dressed in wedding attire are a common theme describing the circle of life.)

43(2)Leigh

Awaiting a guest of honor, is a handcrafted Mexican parade mask portraying la calavera catrina (which is an iconic image of a wealthy Euro-Mexican lady from the 1800’s). When worn, ½ of the face is covered with a skull representation it symbolizes the idea of life being inextricably linked with death. Banners of traditional papel picado (pierced paper) and painted sugar skulls of novios adorn the background of the festive tablescape. (Learn how to easily craft the mask and banner here: DIY La Calavera Catrina Costume Mask & Calaveras de Azucar (Sugar Skulls) Banner for a Dia de los Muertos (Day of the Dead) Themed Halloween.)

54(2)Leigh

Feliz Dia de los Muertos!

Faithfully Yours,

Leigh

DIY La Calavera Catrina Costume Mask & Calaveras de Azucar (Sugar Skulls) Banner for a Dia de los Muertos (Day of the Dead) Themed Halloween

090Leigh

This tutorial will help you to inexpensively craft your own one-of-a-kind la calavera catrina costume mask in the Dia de los Muertos (Day of the Dead) style, and then easily DIY a Calaveras de Azucar (Sugar Skulls) banner to decorate your Halloween party. Sugar (azucar in Español) is said to balance the bitterness of death (muerte), and calaveras (skulls) are traditionally offered on All Saint’s Day (November 1) to departed loved ones as one would leave flowers graveside. These calacas (colloquial term for skeletons) have migrated north from Mexico into American Halloween celebrations as themed décor. In this same way, traditional parade skull masks have become party costumes. As Halloween serves to poke fun at all things scary, Dia de los Muertos is intended as a way to accept death as inevitable… and also to honor dearly departed loved ones. The Mexican ½ face parade masks symbolize this idea of life being inextricably linked with death. So when you don this half skull mask for Halloween, be sure to make up the lower half of your face as a beautiful representation of life… and poke a little fun at death as not being so scary!

1(2)Leigh

To craft the calaveras de azucar (sugar skulls) banner, begin with either a package of glittered skulls or cut your own shapes from glittered paper. Another option is upgrade a readymade skull banner. (All of these items are available at Le fidèLe Designs craft supply affiliates Michaels and/or Joann whose clickable ads may be found in the sidebar.)

6(2)Leigh

Attack black floral mesh squares to half of the skulls. Glue one end to the top of the front and the rest to the underside so that it looks like a lacy veil.

001Leigh

Next, glue paper rosettes to cover the front edge of the veils.

006Leigh

To decorate these with the traditional sugar skull designs of flowers, hearts, swirls, and apostrophe type marks, I utilized Tulip brand Crystals (= glittery like sugar) T-shirt paint. It works really well on many materials besides cotton. The small tips allow the paint to come out just like icing does on real sugar skulls. If you prefer the control of a paintbrush, just squeeze some out onto a paper plate to use as a palette. Let these dry overnight to cure.

015Leigh

Next cut lengths of colorful yarn or ribbon to string the banner on. If your skulls don’t have the right holes to string them through, just use a hole punch… or even poke some with an ice pick!

082Leigh

Hang them in the background of a themed party or over a candy buffet.

004Leigh

To make your own catrina mask, purchase a plain plastic one to embellish. (This Mardi Gras type can be found at Michaels for about $2, and Joann has some as well.)

011Leigh

Use the same T-shirt paint leftover from the sugar skull banner to cover the mask with. (I just used my finger to smear it around.) Let this layer dry well.

016Leigh

Begin using other colors to add designs to the mask. Dots are the easiest to make with these paints, but make an upside down heart for a nose decoration. (I made a girlier version than can be typically found at the Halloween stores by using softer colors than red and black and by making the eye sockets flowers instead of black rings.) Let this layer dry well too.

037Leigh

Cut a length of lace at about 10 inches across and at a length that will cover most of the hair of the recipient.

039Leigh

Glue the 10 inch edge to the top of the mask, pressing the fabric into the glue. Make small gathers to take up the width. This veil will expand over the head to better cover the hair.

042Leigh

Now pull off faux rose heads from their stems. Glue these on top of the lace, and hold them down until they don’t feel like they will slip off.

44Leigh

Further definition may be added to the edges of the paint lines with a fine tip sharpie permanent marker. (I think a little black helps to tie in the veil’s color.)

103Leigh

Try wearing this with a traditionally embroidered Mexican dress and a black lace shawl.

113Leigh

It may also be used as décor for a themed Halloween celebration.

107Leigh

Viva la celebration!

Faithfully Yours,

Leigh

DIY Calaveras de Azucar (Sugar Skulls) Napkin Rings, Wine Glass Charms, & Vase Craft Tutorial for Dia de los Muertos (Day of the Dead) Themed Halloween Dinner Party Décor

079Leigh

This tutorial will help you to inexpensively craft your own jeweled vase in the Dia de los Muertos (Day of the Dead) style to fill with traditional wild marigolds (cempasuchil), and then easily DIY calaveras de azucar (sugar skulls) napkin rings and wine glass charms to decorate your Halloween dinner party table with. Sugar (azucar in Español) is said to balance the bitterness of death (muerte), and calaveras (skulls) are traditionally offered on All Saint’s Day (November 1) to departed loved ones as one would leave flowers graveside. As Halloween serves to poke fun at all things scary, Dia de los Muertos is intended as a way to accept death as inevitable… and also to honor dearly departed loved ones. Representational calacas (colloquial term for skeletons) symbolize the idea of life being inextricably linked with death, and have migrated north from Mexico into American Halloween celebrations as themed décor. By using one celebration as a theme for the other, the two concepts combine to poke a little fun at death as not being so scary!

1(2)Leigh

To craft the calaveras de azucar (sugar skulls) napkin rings, begin with either a package of glittered skulls or cut your own shapes from glittered paper. Another option is upgrade a readymade skull banner. (All of these items are available at Le fidèLe Designs craft supply affiliates Michaels and/or Joann whose clickable ads may be found in the sidebar.)

4(2)Leigh

To decorate these with the traditional sugar skull designs of flowers, hearts, swirls, and apostrophe type marks, I utilized Tulip brand Crystals (= glittery like sugar) T-shirt paint. It works really well on many materials besides cotton. The small tips allow the paint to come out just like icing does on real sugar skulls. If you prefer the control of a paintbrush, just squeeze some out onto a paper plate to use as a palette. Let these dry overnight to cure, and ensure that no unwanted marks are impressed into the paint.

034Leigh

Cut 6 inch lengths of grosgrain ribbon to serve as the ring. (I found this skull printed roll on clearance, and didn’t find out until much later that it’s a “Monster High” motif. Oh well, it worked!)

036Leigh

Hot glue each end of a ribbon length onto the center underside of a skull.

085Leigh

Ring a ding ding, look who made a napkin ring!

003Leigh

To create wine glass charms, begin with Jolee’s Boutique dimensional scrapbooking stickers. Pull the plastic fronts away from the flat backings.

009Leigh

Use the same T-shirt paint in white to add a layer of sugary glitter to them. These will dry clear. (To make this easier, I made a finger loop of masking tape to hold them while I dotted on the paint, and then just slipped them off onto the table to dry overnight.)

013Leigh

Tie these onto jumbo jump rings with a strand of colorful yarn or ribbon. (I used the same yarn on all my Dia de los Muertos crafts for continuity.)

078Leigh

Since the skulls come in colored sets of 2, why not color-code the drinks by kissing couples!?

018Leigh

Quickly create a calavera vase by upcycling an old vase with crystal stickers or by gluing crystals on. You can use a complete picture, lay on crystals individually, or both. (If you need to use a pattern, just tape a coloring page to the inside of the vase and adhere crystals to the outside of it over the lines.)

020Leigh

Tie on a length of ribbon to coordinate with the other crafts, and fill the vase with black marbles.

67(2)Leigh

Fill it with traditional wild marigolds to use as a centerpiece surrounded by more calaveras.

Happy Day of the Dead!

Faithfully Yours,

Leigh

Gluten-Free & Egg-Free Potato Pancake (aka- Kartoffelpuffer, Latke, Hash Brown Cakes, etc.) Vegan Recipe with Baked & Fried Versions for Oktoberfest

151Leigh

Willkommen to a wunderbar meal of potato pancakes made without gluten or eggs! This allergy-friendly recipe is based on the fried kartoffelpuffers I grew up eating at Wurstfest in a small German town in the Texas Hill Country. Known the world over by many different names, these hash brown cakes can also be baked as a healthy and easy make-ahead dish. Serve up these tasty latkes with a variety of sweet and salty toppings for a hearty brunch buffet. Be warned… always make way more than you’ll think you need, and never expect any leftovers!


Ingredients:

  • 6 medium or 5 large potatoes
  • 1 onion
  • 1 cup gluten-free flour blend (I used Namaste brand this time)
  • 3 teaspoons sea salt (adjust according to sodium needs)
  • 4 servings Ener-G brand egg substitute (= 8 tablespoons warm water + 6 teaspoons powder… or just use 3 chicken eggs)
  • grapeseed oil for fried version… or olive oil for baked version
  • Optional: sweet or salty toppings like apple sauce, sour cream, sauerkraut, cottage cheese, mixed berries, cheese, fruit syrup, goulash, sugar & cinnamon, etc…

Instructions:

016Leigh

Wash and peel the potatoes and onion.

017Leigh

Grate the potatoes and onion. (I’ve previously made these the hard way with an old-school grater and the easy way with an electric food processor. On this occasion, I went the eco-conscious direction with a vintage hand-crank shredder contraption that has actually been passed down 3 generations… and it still works beautifully!)

023Leigh

Soak the grated goodies in a bowl of cold water. (This reduces the starch content and adds crispness to the finished product.)

033Leigh

Mix 6 teaspoons egg substitute powder well with 8 tablespoons of warm water, until it becomes opaque white (or just crack and whip 3 eggs).

086Leigh

Mix this with the salt and flour. (I add salt to the batter, but if you have a family with vastly differing sodium requirements, just omit it in this step and salt them individually after cooking.)

022Leigh

Drain the potatoes (squeezing / pressing all the water out of it), and then add in the “egg” and flour blend. Mix this up really well.

091Leigh

Tastier Fried Version: Heat the oil and drop spoonfuls of batter into it. (Grapeseed oil is best for frying because of its high smoke point and neutral flavor.) Spread them flat with the back of a spoon. Flip them over when the edges have browned well. Drain them on clean cloth or paper towels before serving.

093Leigh

Healthier Baked Version: Fill oiled muffin cups ¾ full, and then brush or spray olive oil onto the top. (Olive oil is great for baking and will some impart flavor which isn’t infused the same way as with frying.) Convection bake them in a 350ᵒ oven for 35 minutes, and then broil them for 10 more minutes to brown and crisp the tops.

137Leigh

As a make-ahead breakfast test… I filled a 6 muffin cup pan with batter, covered it with clear wrap, and refrigerated it. (The rest of the batter was fried up on the stove.) The next day, I baked the batter filled tin in a toaster oven. It made perfect little hash brown cakes for breakfast without any morning effort.

101Leigh

Though the fried version is admittedly tastier, I’m thinking that baking a whole oven full would a be much easier way to prepare them for a brunch crowd.

141Leigh

These kartoffelpuffers were served with all beef knackwurst sausages made in Texas, Bavarian style sauerkraut, and homemade applesauce… and pretty parsley garnish.

132Leigh

Wunderbar!

163Leigh

Faithfully Yours,

Leigh

Bavarian Oktoberfest Party Décor Ideas for a Fall Tablescape

048Leigh

Willkommen to an Oktoberfest party where the tablescape décor will transport you to a fanciful Bavarian hunting lodge straight out of Grimm’s fairy tales. So don your dirndls or lederhosen, fill your bier steins, and raise prost to a chorus of “Ein Prosit” for a wunderbar family folk fest!

002Leigh

Dark brown tablecloths reminiscent of solid Alpine earth ground the tablescape. Nail-head trimmed pewter chargers topped with true blue dishes echo the pewter hinged lids and stoneware glazing of the steinkrugs. A feather motif dances around the edges of ivory salad plates.

93Leigh

Feathers encircle “leather” rings containing lederhosen protecting cloth. (Find the napkin ring craft tutorial here.)

039Leigh

Carved wooden acorns tied with feathers and nametags direct polka dancers to their seats. (Find the place-card craft tutorial here.)

070Leigh

Tiny acorns scatter across the table acting as yesteryear confetti.

058Leigh

An Alpine “horned” tray befits the base of a centerpiece glowing with candles, scattered feathers, and a large vintage steinkrug of gathered fall branches and long feathers. (Find the centerpiece tutorial here.)

052Leigh

Green foliaged trees and a one-of-a-kind European armoire, refit with a placid oil painting, set the background scenery.

019Leigh

A vintage wooden sign carved with a German message of welcome stands in greeting. A carven hare guards an antique pewter pitcher festooned with colorful plumes. A tiny bierkrug sits feather-filled alongside it.

090Leigh

A toast is proposed… may our hearts forever be filled with merriment just as the kartoffelpuffers, knackwurst, sauerkraut, and apfel sauce fill our bellies this very evening! Gemütlichkeit!

Faithfully Yours,

Leigh

122Leigh

P.S. Wondering how to prepare such a hearty meal for your own wunderbar gathering? Try my Gluten-Free & Egg-Free Potato Pancake (aka- Kartoffelpuffer, Latke, hash brown cups, etc.) Recipe with Baked & Fried Versions for Oktoberfest!

Feather & Vegan Leather Napkin Ring Craft Tutorial + Easy DIY Centerpiece & Fall Place-card Holders for Oktoberfest

070LeighMaking your own feather and vegan leather napkin rings is an inexpensive way to bring an element of elegance to any gathering, but especially an Oktoberfest celebration of German heritage. Use a stein as a vase for feathers and fall foliage along with feathered wooden acorns to transport your guests to a fanciful fairytale version of a Bavarian hunting lodge. Then reuse the rings and acorns with a different centerpiece for Thanksgiving!

001Leigh

Start with finding a remnant of realistic appearing vegan leather and feather ribbon trim (these are available from Le fidèLe Design’s fabric affiliates whose links appear in the sidebar). Use a pen to mark the underside of the fabric into 6 inch long strips that are about 2¾ inches wide (vary according to the width of your feather ribbon). Cut them carefully to make a smooth self-sealing edge.

006Leigh

Cut the feather ribbon into 6 inch strips as well. (If you’re feeling super-crafty… you make this from scratch by gluing individual feathers onto a strip of ribbon, overlapping them as you go.)

007Leigh

Use fabric hot glue to adhere one end of the vegan leather to the other end, forming a ring.

013Leigh

Lastly, glue a feather ribbon strip around the middle section of the ring you just made. (How easy was that?!)

034Leigh

This would’ve cost so much more if purchased from a department store or boutique!

038Leigh

Next, make place-card holders using simple decorative acorns. (I found these carved wooden types in a 6 pack at 40% off this summer.) I’ve seen various types from burlap and fabric to glittered and beaded… just pick those which suit your linens and dishware best.

035Leigh

Use a punch cutter to make small gift tags from a parchment-like cardstock, and punch a hole in them (or just buy readymade tags). Use a brown calligraphy pen to scroll on the names of your guests.

039Leigh

Use a few inches of jute cord (I get mine super-cheap at the hardware store) to tie the name tag and a small handful of feathers onto the stem of the acorn. (Think about adding brighter feathers to the typical fall colors… so that your ensemble doesn’t resemble mulch. I included some teal feathers to tie in with my other décor.)

002Leigh

Set them into place, and you’re done! The best part is that they can be reused with a different theme because the feather decoration and tag slip right off… however, feel free to glue them into place for a permanent set.

058Leigh

Make a centerpiece by simply using a steinkrug in place of a vase. (I used my grandfather’s, but a new one would look great too!) Fill it with a few boughs of natural or faux fall foliage and some gathered branches. Tuck in long feathers from the local craft store.

93Leigh

I set this onto a faux horned tray and placed shorter candles around it. (I got the tray 90% off because it had some broken tips which were easily camouflaged with paint.) Any decorative tray can visually contain the elements into a cohesive appearing centerpiece.

052Leigh

I then distributed feathers around the outer edge of the tray to coordinate with the others. (Look in the children’s craft section of your local craft store to find a larger quantity of bagged feathers much cheaper than those in other aisles.)

090Leigh

Time to go download some “oom-pah” music… so kidding! (Click here to see more Bavarian Oktoberfest Party Décor Ideas for a Fall Tablescape)

Faithfully Yours,

Leigh


Pan Asian Fresh Spring Roll with Veggies & Optional Cod Fish Recipe (Gluten-Free, Egg-Free, Soy-Free, Corn-Free, Peanut-Free, Nightshade Free, & Vegan Option)

This allergy-friendly recipe for Pan Asian fresh spring rolls is a healthy alternative to the commercially available fried versions filled with little more than cabbage. It uses many of the same ingredients as my recipe for rice noodles with veggies and creamy coconut sauce (see it here), so its ingredients can be set aside without adding prep time. This makes it perfect for the next day’s lunch. It’s gluten-free, egg-free, soy-free, corn-free, peanut-free, nightshade-free, and it’s easy to make vegan and fish versions at the same time… so everyone gets what they want without worry or fuss!


Ingredients (for each fresh spring roll):

  • 2 snow peas
  • 1 teaspoon diced water chestnuts
  • 2 tablespoons coleslaw mix (or shredded cabbage)
  • 1 tablespoon diced cucumber
  • 1 tablespoon matchstick cut carrots
  • 1 teaspoon diced leeks (or onion)
  • 1 rice paper wrapper + soaking water
  • 2 peas sized dollops of fresh grated ginger (or chopped pickled ginger)
  • ume plum vinegar (or rice wine vinegar)
  • black or white sesame seeds (if allergic use hemp seeds)
  • Optional: 2 tablespoons sautéed wild-caught cod fillets
  • Serve with dipping sauces like teriyaki, coconut aminos, soyu, Chinese mustard, sweet & sour, etc…

Instructions:

Here I’ve laid out the ingredients for two fresh spring rolls (for those visually inclined individuals like myself). A big serving spoon is about a tablespoon in quantity (depending on your pattern style), but is much easier to measure long ingredients like matchstick cut carrots. One third of a serving spoon is about a teaspoon. (As an added bonus, it goes in the dishwasher!)

095Leigh

Spread a pea sized amount of grated ginger onto each snow pea, and be sure place them apart from each other in the wrapper… this keeps you from feeling concentrated ginger hellfire! (Check out my Pan Asian rice noodle recipe for a picture of my oh so necessary ginger grater that makes quick work out of any root!)

097Leigh

Soak each rice paper wrapper individually in warm water for about 5 seconds… until soft and pliable. Lift the wrap and lay it over a new plate. Sprinkle black sesame seeds onto the center of the wrap, and then layer on the fillings. (You can also sprinkle sesame seeds over the top once it’s finished.) Sprinkle some ume plum vinegar over the veggies.

125PanAsianWrap-Leigh

Next, wrap it like you would a burrito… the two ends fold toward the center, and then the long sides fold one over the other. (It’s great cooking for crafters because it’s like kitchen origami… where it’s okay to play with your food!) Place it in the refrigerator for about 1 hour to settle in before chowing down with your favorite dipping sauce. Enjoy!

Faithfully Yours,

Leigh

P.S. You can also totally just ignore my list of ingredients and throw in whatever you feel like… as in leftover take out combined with bagged salad!

Pan Asian Rice Noodles with Veggies & Creamy Coconut Milk Sauce + Optional Cod Fish Recipe (Gluten-Free, Egg-Free, Soy-Free, Corn-Free, Peanut-Free, Nightshade-Free, & Vegan Option)

120Leigh

This allergy-friendly recipe of Pan Asian rice noodles is loaded with veggies that are made delicious with the addition of creamy coconut milk sauce. Sautéed wild-caught cod is an easy addition for the non-vegans to devour. It makes a dish lovely enough for company, but is also healthy enough to serve to family alone. Just be sure to save some of the ingredients for fresh spring rolls for the next day’s lunch (see my recipe here). It’s also gluten-free, egg-free, soy-free, corn-free, peanut-free, and nightshade-free for everyone to enjoy without worry!


Sauce Ingredients:

  • 14 ounce can coconut milk (liquids & solids mixed, if allergic use plain yogurt)
  • ⅓ cup granulated sugar (cane, white, coconut, etc.)
  • 4 tablespoons ume plum vinegar (or rice wine vinegar)
  • 1½ tablespoons lemon juice (or lime)
  • ½ inch knob of fresh grated ginger (or chopped pickled ginger)
  • 2 teaspoons sea salt (adjust for taste or sodium needs)

Other Ingredients:

  • 8 ounce can bamboo shoots
  • 5 ounce can sliced water chestnuts
  • 28 ounces coleslaw mix (or shredded cabbage)
  • 1½ cups snow peas
  • 1½ cups diced cucumber
  • 1 cup matchstick cut carrots
  • 1 cup diced leeks (or onion)
  • 16 ounce box rice stick noodles (or other variety)
  • Optional: 4 pieces wild-caught cod fillets (or other white fish) + grapeseed oil for sautéing + sliced almond garnish

Instructions:

Wash, dice, and grate everything that needs it. (Note my oh so necessary ginger grater that makes quick work out of any root!)

093Leigh

Cook the rice stick noodles according to the package instructions… being careful not to overcook them into mush. (These are also known as banh pho, and are gluten-free as well as vegan because they’re made with only rice flour and water.)

102Leigh

Dear vegans: skip this part… Sear the cod fillets on both sides, and then lower the heat and sauté 4-5 minutes in grapeseed oil… until the flesh is opaque and flakes easily. (Grapeseed oil is great for any stovetop cooking because it has a neutral flavor and a high smoke point that will not become carcinogenic with high temps like many other oils.) Sprinkle with sliced almonds and sesame seeds if desired.

103Leigh

Make the sauce by dissolving the sugar in the vinegar and lemon juice over low heat. Add in the coconut milk (all portions of liquid and solid from the can) and mix well. Next add the salt and grated ginger, and mix well. Then add all of the veggies, stirring well.

105Leigh

When the rice noodles have finished cooking, drain them into a colander, and then place them back into the same warm pot. Next pour in the sauce veggie mix, and stir well.

223PanAsian-Leigh

Serve it right from the stove, or transfer it to a pretty dish layering the fish atop the pasta. Here it’s served family style as a centerpiece in my Pan Asian Inspired Indigo Shibori & Wooden Themed Tablescape (Perfect for Luncheons & Informal Dinners). Enjoy!

109PanAsian-Leigh


Faithfully Yours,

Leigh

P.S. Don’t forget to set aside some of the above ingredients for a healthy and tasty lunch like this one tomorrow!

125PanAsianWrap-Leigh