Tag Archives: Banner

Celebrate Halloween with Colorful Day of the Dead (Dia de los Muertos) Party Décor Inspired by Traditional Ofrenda Symbolism (+ DIY Craft Tutorials & Candy Recipe)

65leigh

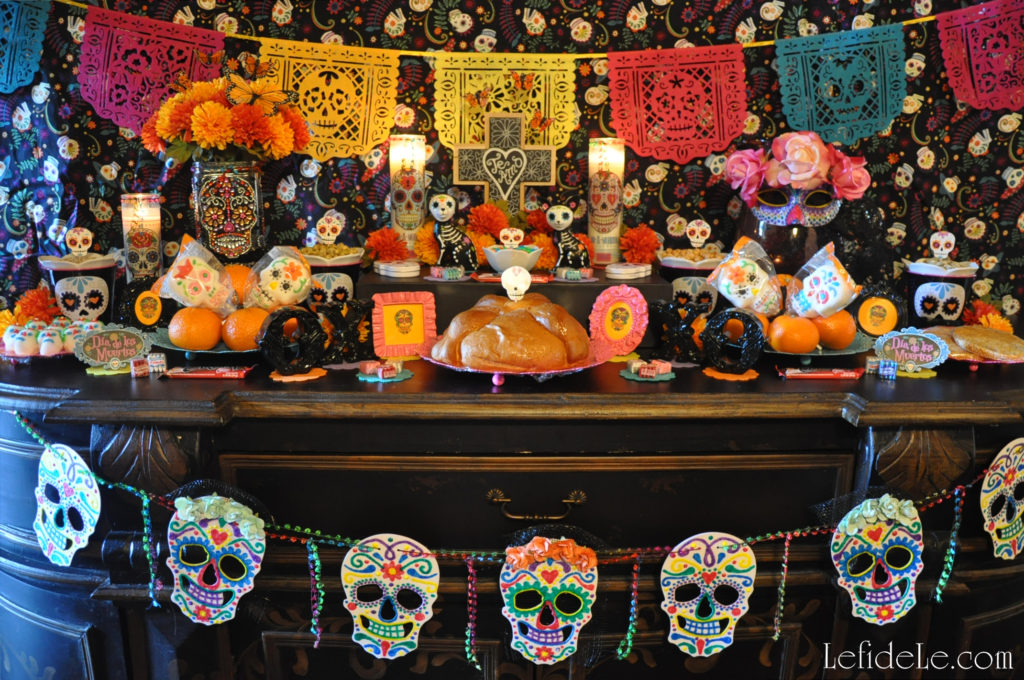
Celebrate Halloween with colorful Dia de los Muertos (Day of the Dead) party décor inspired by traditional ofrenda symbolism. It is an edifying means of incorporating both traditions into an event that seeks to cultivate an atmosphere of cultural understanding. By recognizing the universal conditions of love, life, and death through festivity, we can be united as one people comprised of a beautiful mosaic of ethnic tradition. In this way, revelry becomes a means of dispelling the negative cultural bias that plagues the nation, so that we may move forward together in celebration.
133leigh

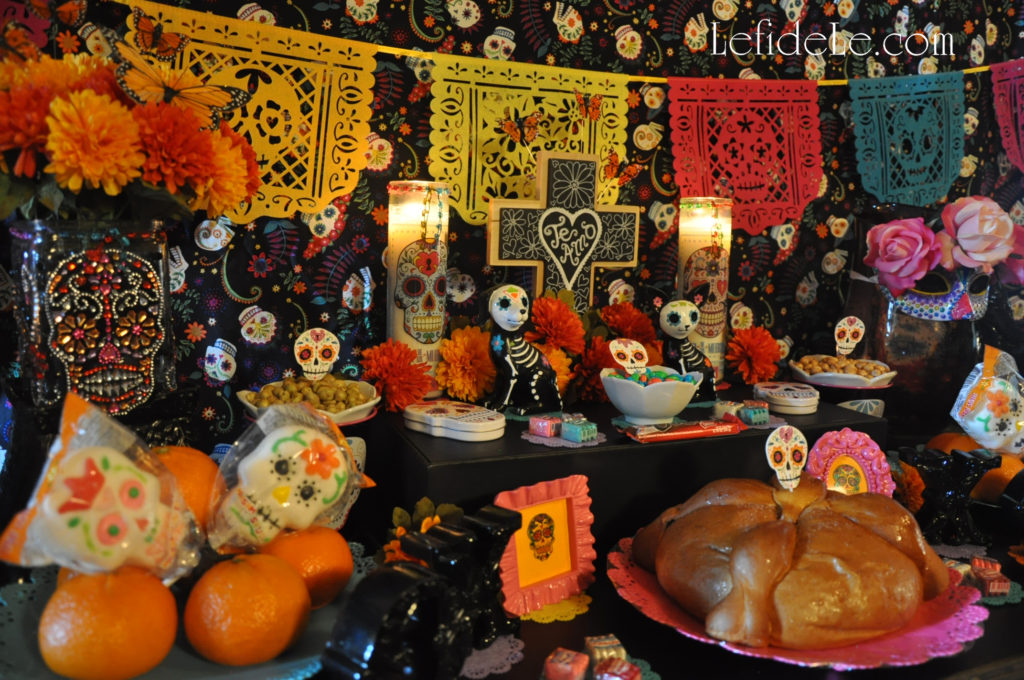
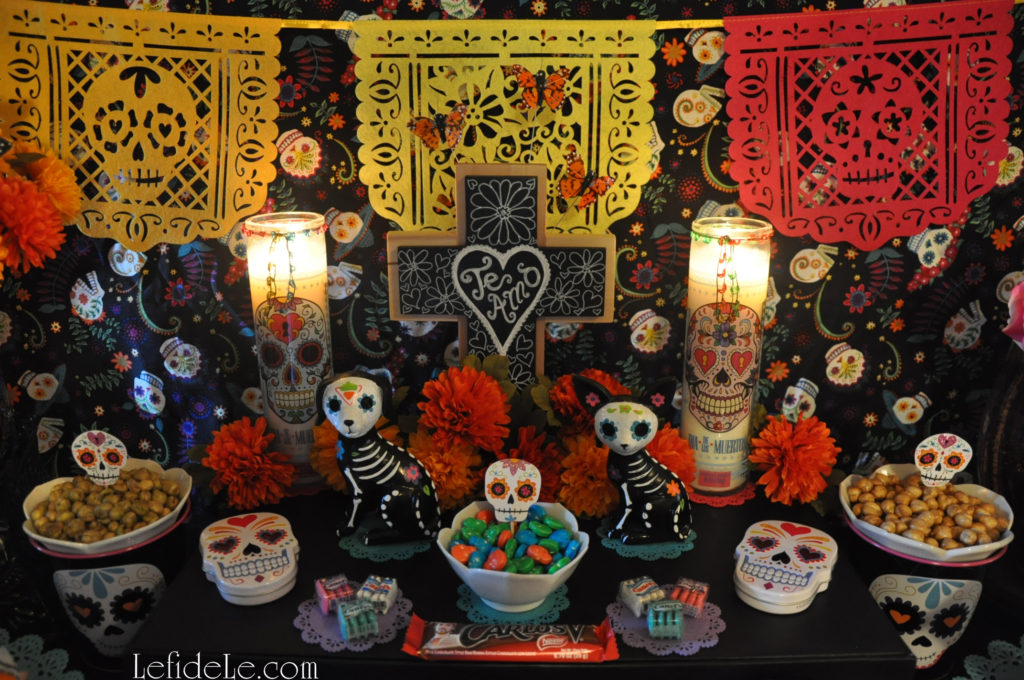
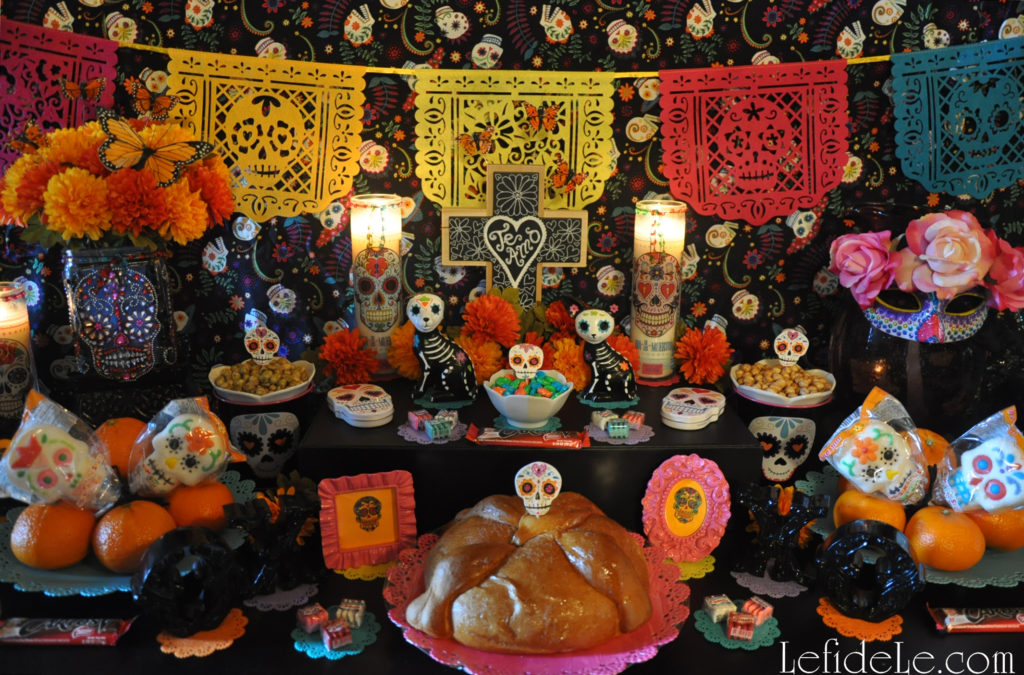
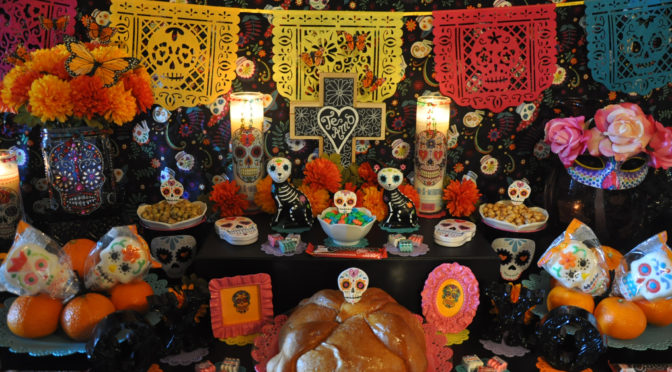
Dia de los Muertos (Day of the Dead) coincides with All Saints Day and All Souls Day in both tradition and calendar. In this regard, a traditional ofrenda (offering) has a higher central tier honoring a deceased loved one. Taking the place of a photograph is another traditional element, that of a religious symbol. It takes the form of a chalkboard cross that has been inscribed with flowers and the Spanish words, “Te Amo” (“I love You”). A vase upcycled with crystal appliques holds a floral offering in keeping with gravesite ritual. See how easy this is to make in my tutorial here: DIY Calaveras de Azucar (Sugar Skulls) Napkin Rings, Wine Glass Charms, & Vase Craft Tutorial for Dia de los Muertos (Day of the Dead) Themed Halloween Dinner Party Décor.
104leigh

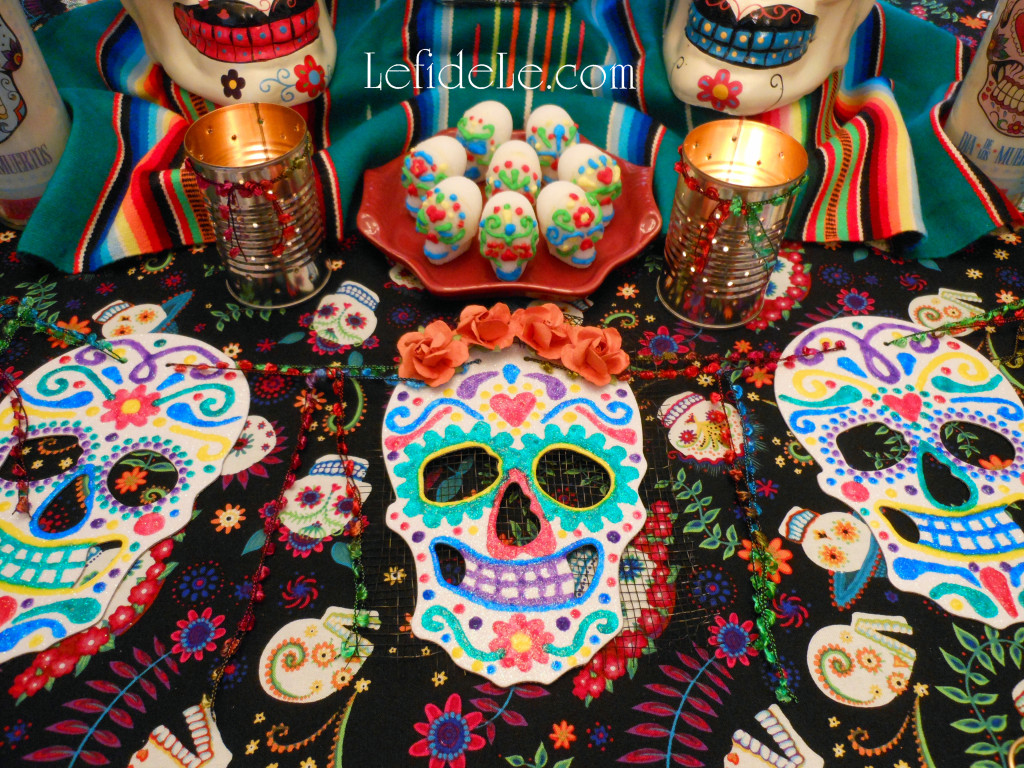
Lit candles are said to illuminate the path for the visiting spirits of loved ones. Representing fire, these may be in the form of Catholic religious candles depicting santos (saints), luminarias (lanterns) made of pierced paper bags or cans, or plain wax candles. Perritos (little dog figurines) are presented in symbolic gesture regarding the idea that dogs guided ancestral spirits to the afterlife. (Because surely “all dogs go to Heaven”!) Mariposas monarcha (monarch butterflies), that migrate to Mexico through Texas in the fall, represent visiting ancestors. Wild yellow and orange Mexican marigolds (cempasúchil) are known as the flor de muerto (flower of the dead). They may be linked into garlands, shaped into crosses, or placed decoratively. A fun way to incorporate these elements is make your own luminarias and flowers. The traditional crafts are easy to make using my tutorial here: Easy DIY Upcycled Can Tea-light Luminarias (+ Free Printable Template) & Tissue Paper Flowers Crafts (for Cinco de Mayo Fiesta Décor). Another essential item is a papel picado (cut paper) banner which signifies the fragility of life.
109leigh

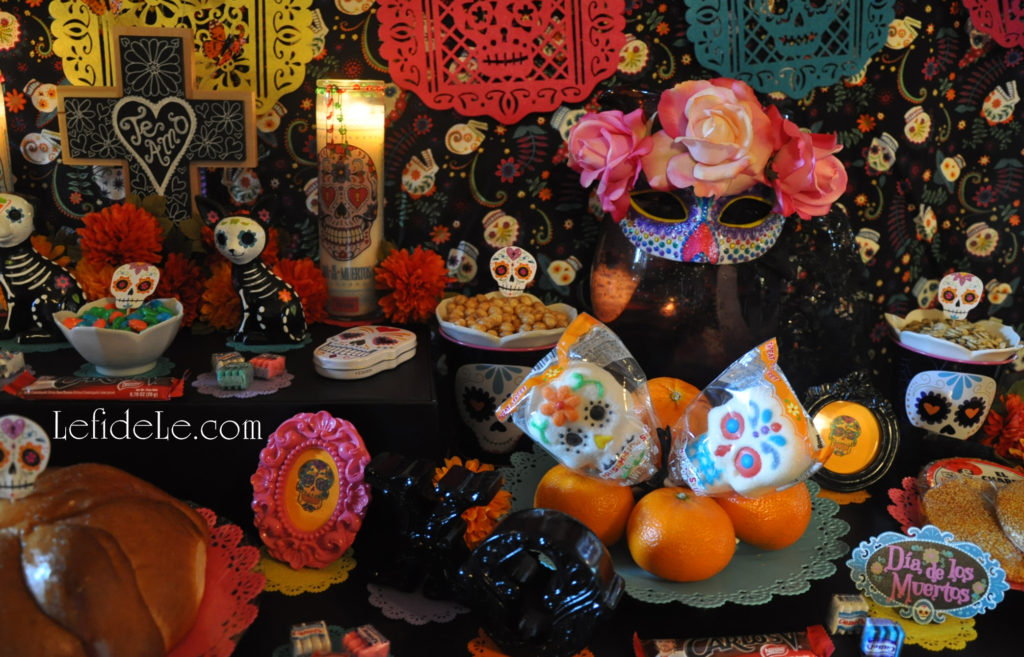
Representing water is a Mexican bubble glass pitcher bearing a traditional mask of la calavera catrina (iconic image of a wealthy 1800’s era Euro-Mexican lady). When worn as a parade mask, half of the face is covered with a skull representation symbolizing life as inextricably linked with death. Make your own with the help of my tutorial here: DIY La Calavera Catrina Costume Mask & Calaveras de Azucar (Sugar Skulls) Banner for a Dia de los Muertos (Day of the Dead) Themed Halloween. Other decorative elements are multi-colored doilies beneath figures of X’s & O’s(kisses & hugs), and little signs naming the holiday. Small sugar skull tins replace toys, and framed sugar skull images replace ancestors’ photos in this lighthearted nod to tradition.
79leigh

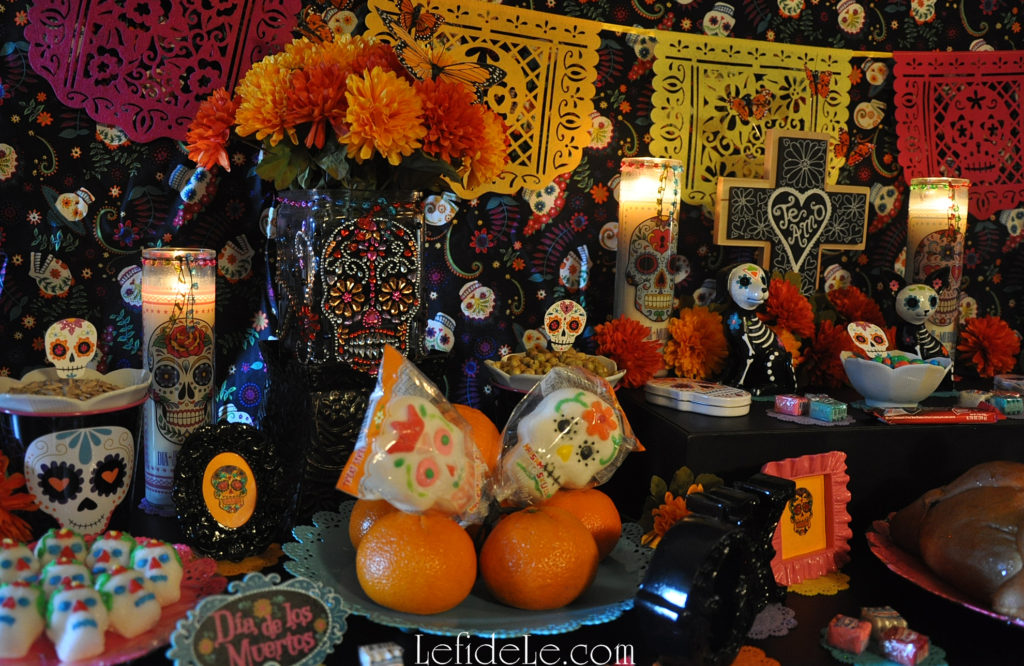
Calaveritas de azucar (little sugar skulls) are necessary offerings as its sweetness (representing life) is said to balance the bitterness of muerte (death). Easily make these with my recipe here: Calaveras de Azucar (Sugar Skulls) Edible Folk Art & Egg-Free Vegan Candy Recipe for Dia de los Muertos (Day of the Dead) or Halloween. Seeds (with an obvious connection to life) originally decorated skulls in place of sugar. They are still offered as a traditional component, with food representing the element earth. Here they are contained in floral dishes nested into decorative tin pails. Sprouted pepitas or semillas de Calabaza (pumpkin seeds), pipas (sunflower seeds), and fried green peas as well as roasted chick peas (garbanzo beans) are adorned here with glittered skull cupcake picks. A trio of palanqueta de ajonjoli disks (sesame seed candy) are another sweet form of seed offering. (Nut brittle is a form of this kind of candy.) Sugared marshmallow pops are propped into stacks of customary naranjas (oranges). (The pops were purchased at Fiesta Mart, but they may also be found at Le fidèLe affiliates Michaels & World Market whose coupon links are in the left side bar or below on a smart phone.) Pan de muerto (bread of the dead) sits front and center of the ofrenda as it denotes human life in its round skull-like form with an X of raised dough like cross-bones. It is a pan dulce (sweet bread) flavored with anise and orange peel. Candies, Mexican chocolate, and chicle (chewing gum) are also customary offerings.
93leigh

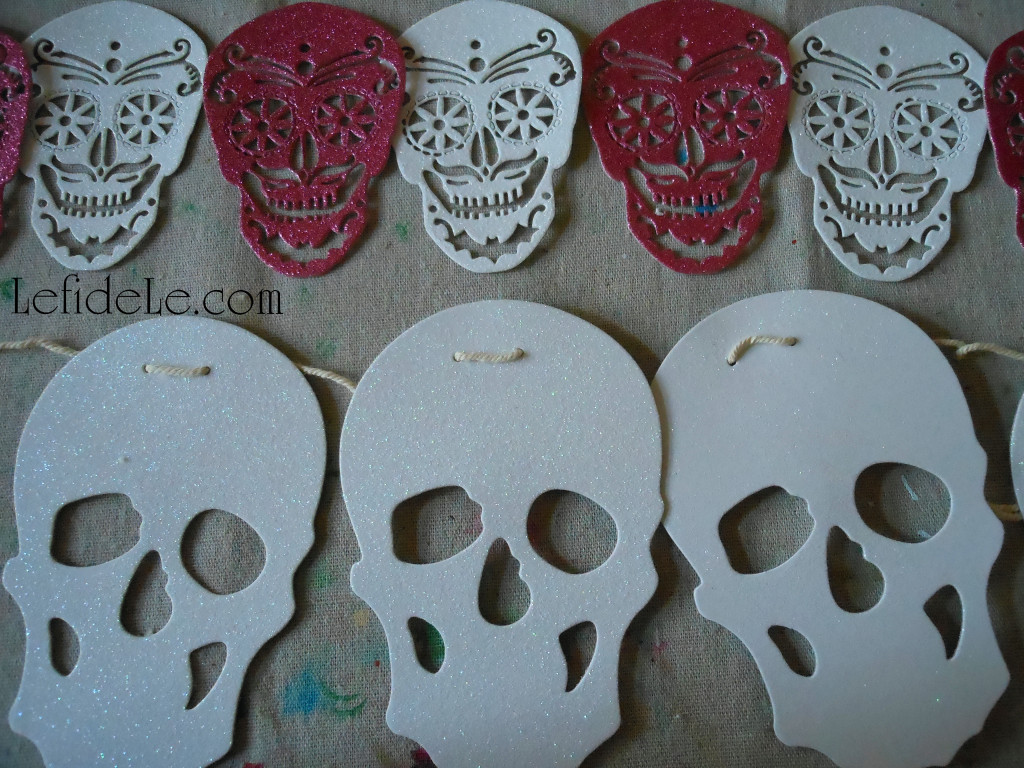
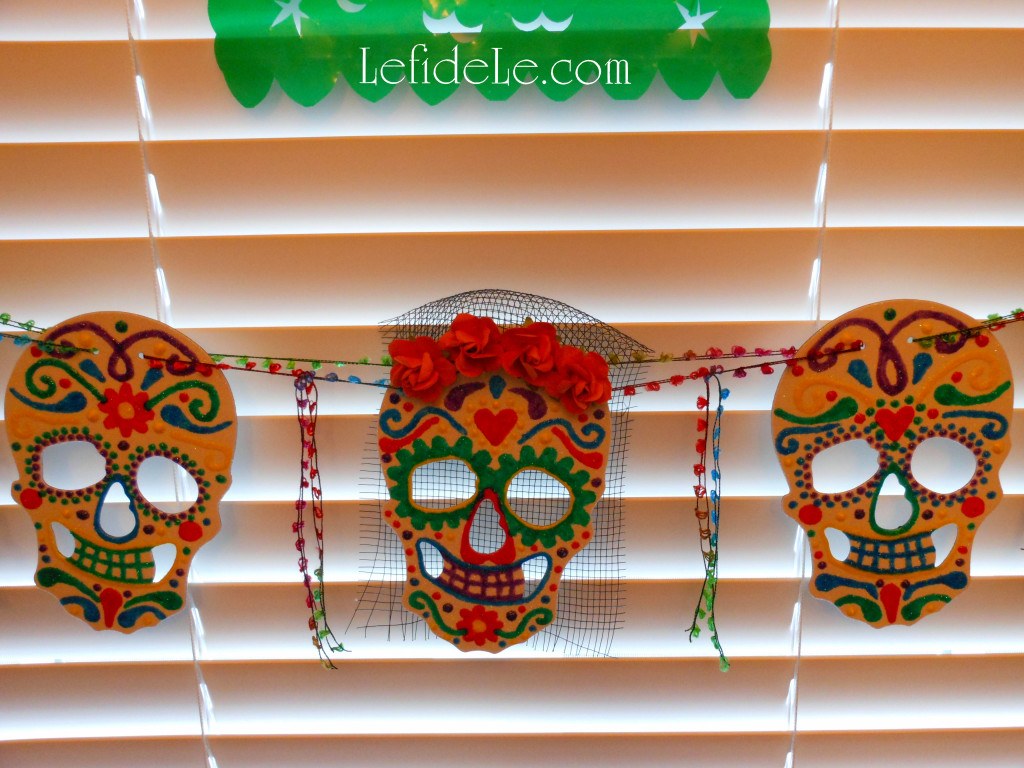
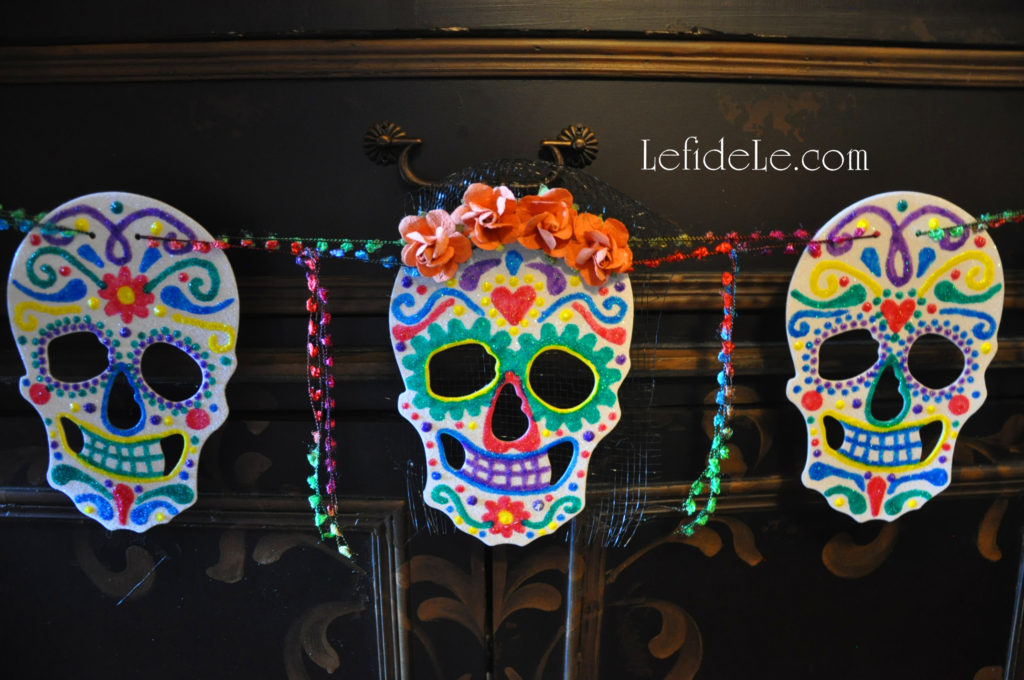
White glittered skull shapes may be decorated and strung as another craft honoring the holiday. Read how to make the banner here: DIY La Calavera Catrina Costume Mask & Calaveras de Azucar (Sugar Skulls) Banner for a Dia de los Muertos (Day of the Dead) Themed Halloween.
602leigh

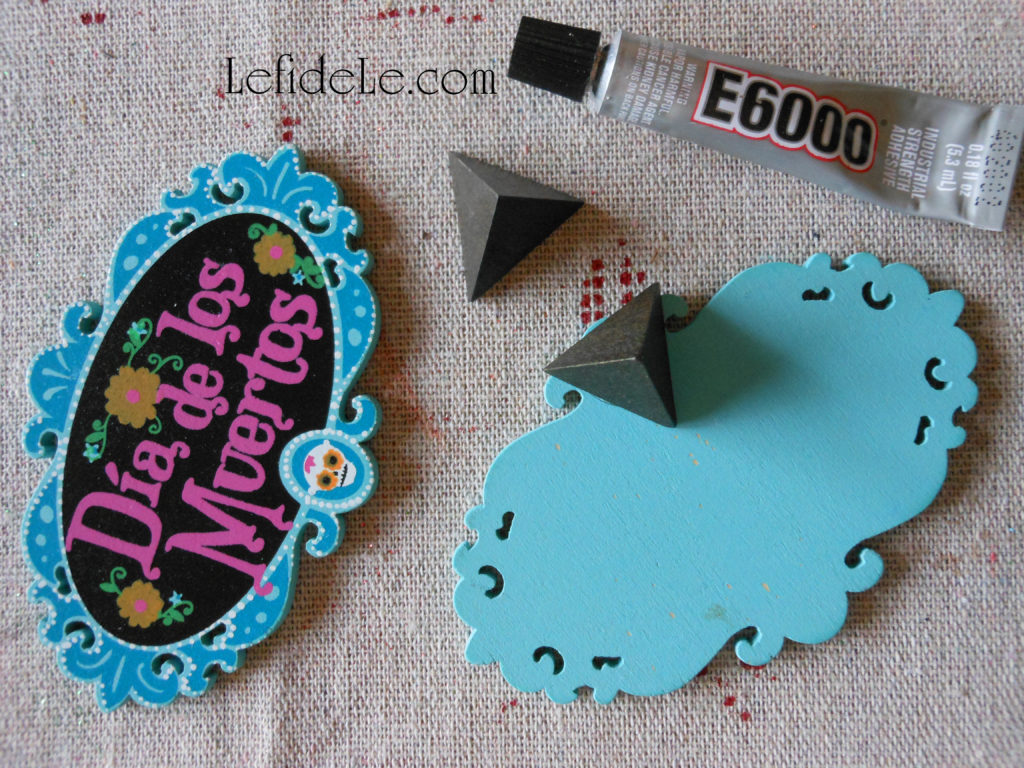
Make your own stand-up signs with dollar wooden shapes from the craft store. These prepainted shapes came from Le fidèLe Design’s affiliate Michaels (see the coupon link in the left side bar or scroll down on a smart phone), but any blank shape may be decorated easily with paint pens. Simply glue a wooden bead or shape (like these pyramids) to the base of the back.
492leigh

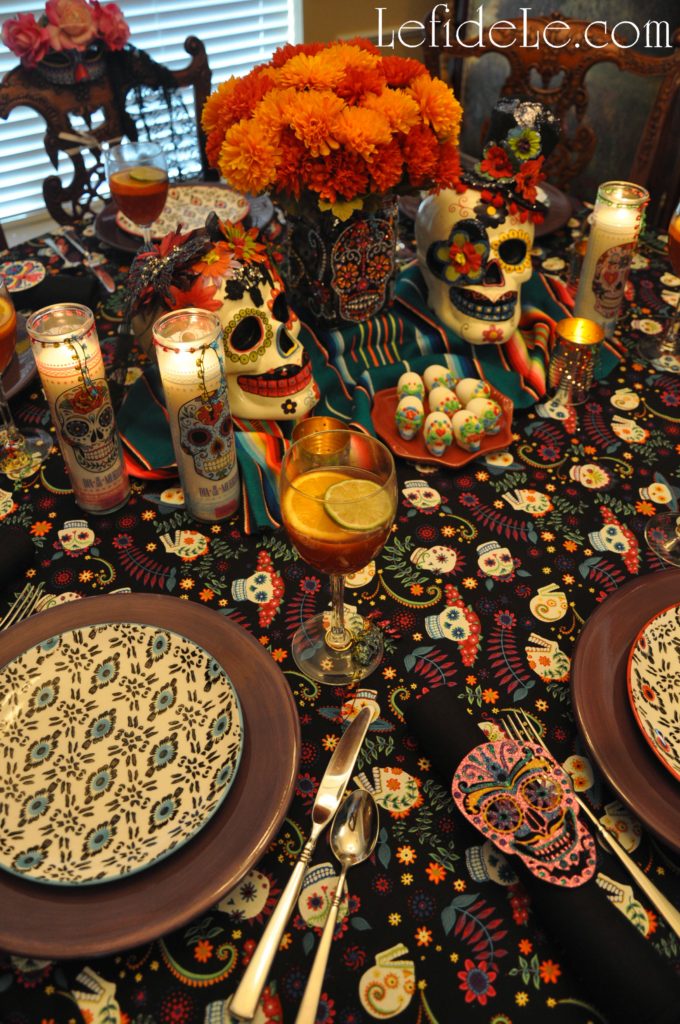
The background fabric for the ofrenda was once used as a tablecloth for a dinner party. (It can be purchased at Le fidèLe affiliate Joann whose coupon link is in the left sidebar, or below on a smart phone.) See it in this capacity in my previously posted article using this theme for a grown-up Halloween tablescape here: Dia de los Muertos (Day of the Dead) Themed Halloween Dinner Party Décor + DIY Décor & Recipe Links. Learn how to make your own wine glass charms and napkin rings for the dinner party here: DIY Calaveras de Azucar (Sugar Skulls) Napkin Rings, Wine Glass Charms, & Vase Craft Tutorial for Dia de los Muertos (Day of the Dead) Themed Halloween Dinner Party Décor.
76leigh

Feliz Dia de los Muertos!

Faithfully Yours,

Leigh
Reverential Memorial Day, Veterans Day, or Independence Day Tablescape Décor Ideas Honoring American Forces

075Leigh

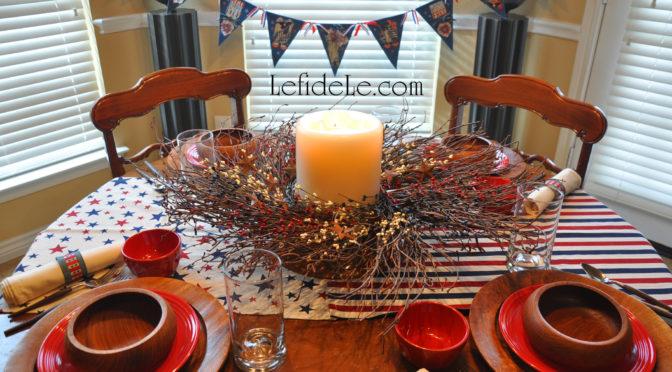
These reverential Memorial Day, Veterans Day, or Independence Day tablescape décor ideas are a tangible manner for honoring American forces by setting aside a time to remember the sacrifices made for our collective freedom. This carries on a fine tradition dating to just after the civil war when families would gather with picnics upon hallowed cemetery grounds. Our ancestors and loved ones may be gone but are never forgotten so long as we continue to commemorate the dear price they paid for our united peace.

072Leigh

“Sleep, comrades, sleep and rest On this Field of the Grounded Arms, Where foes no more molest, Nor sentry’s shot alarms!“

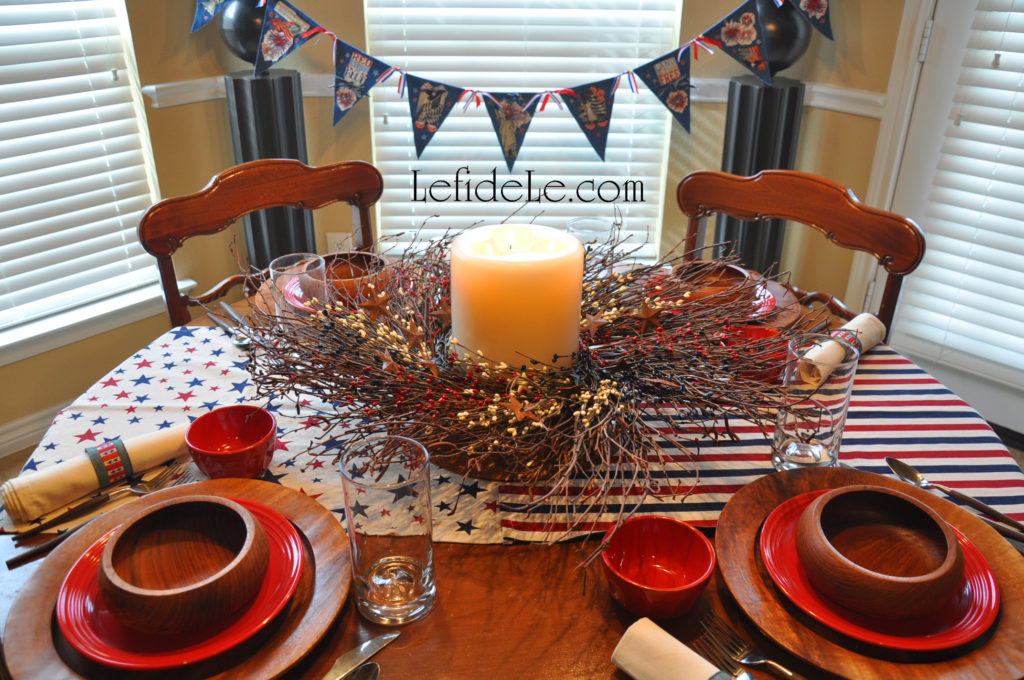
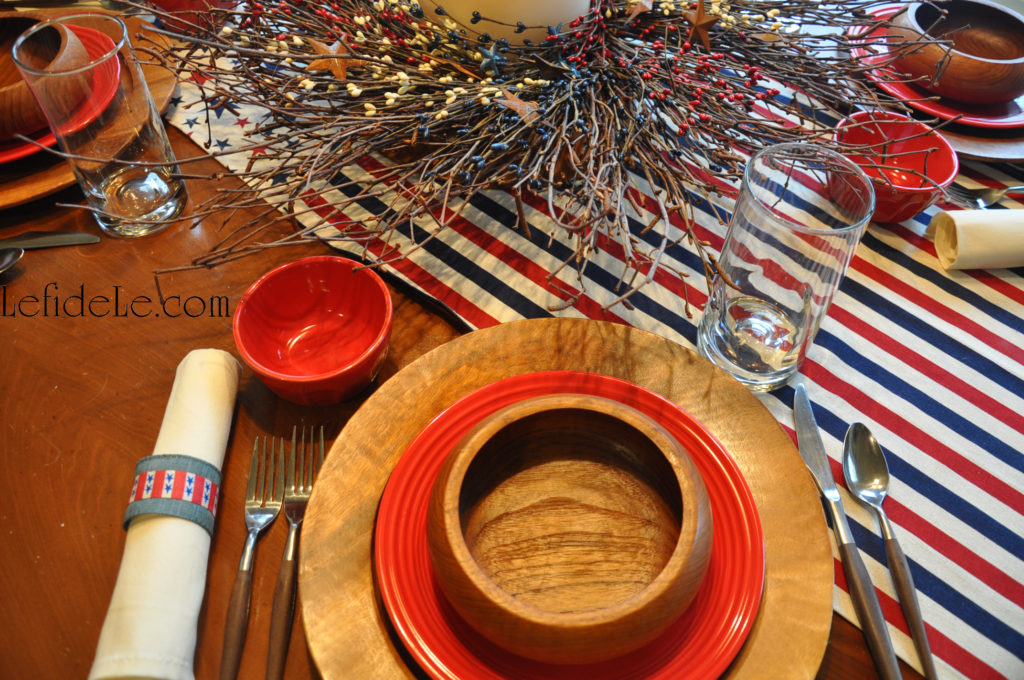
A bare wooden table denotes the now barren fields of battles past.

089Leigh

“Ye have slept on the ground before, And started to your feet At the cannon’s sudden roar, Or the drum’s redoubling beat.”

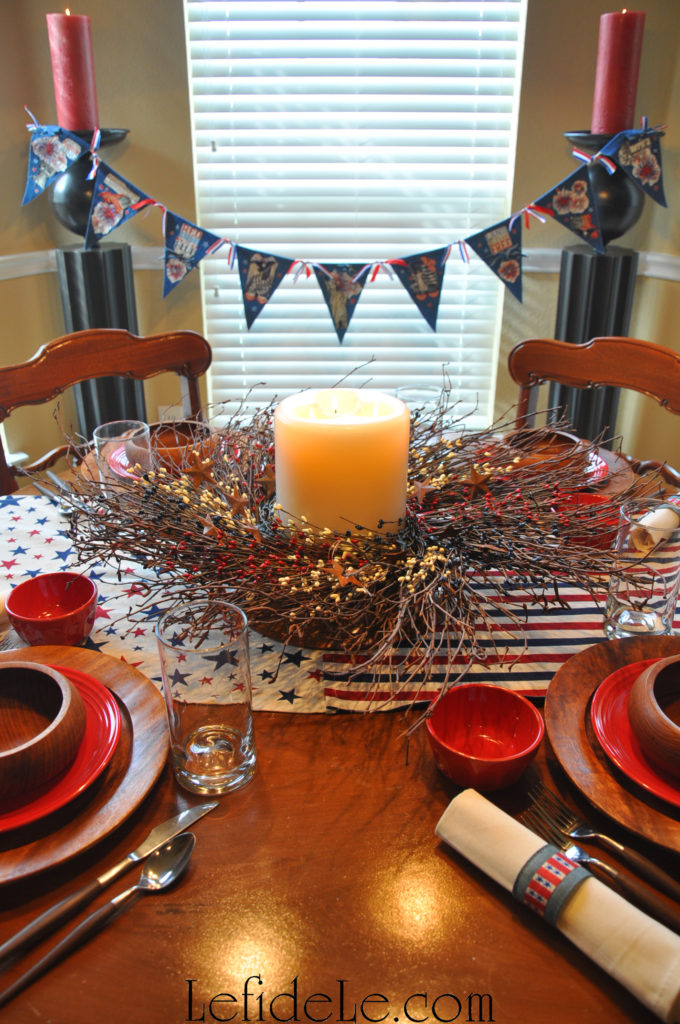
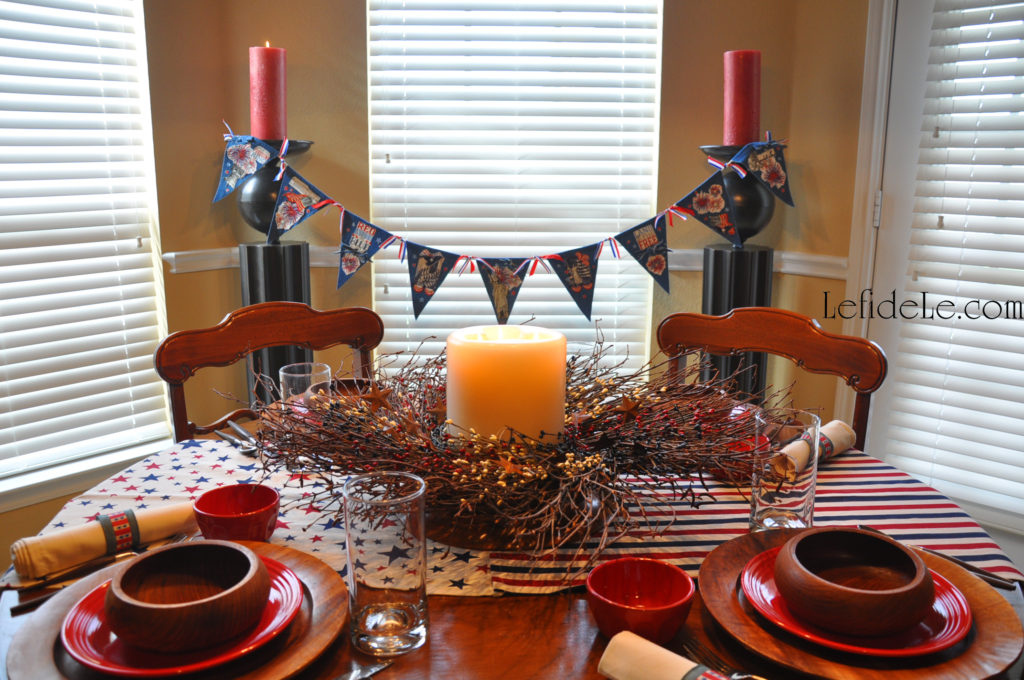
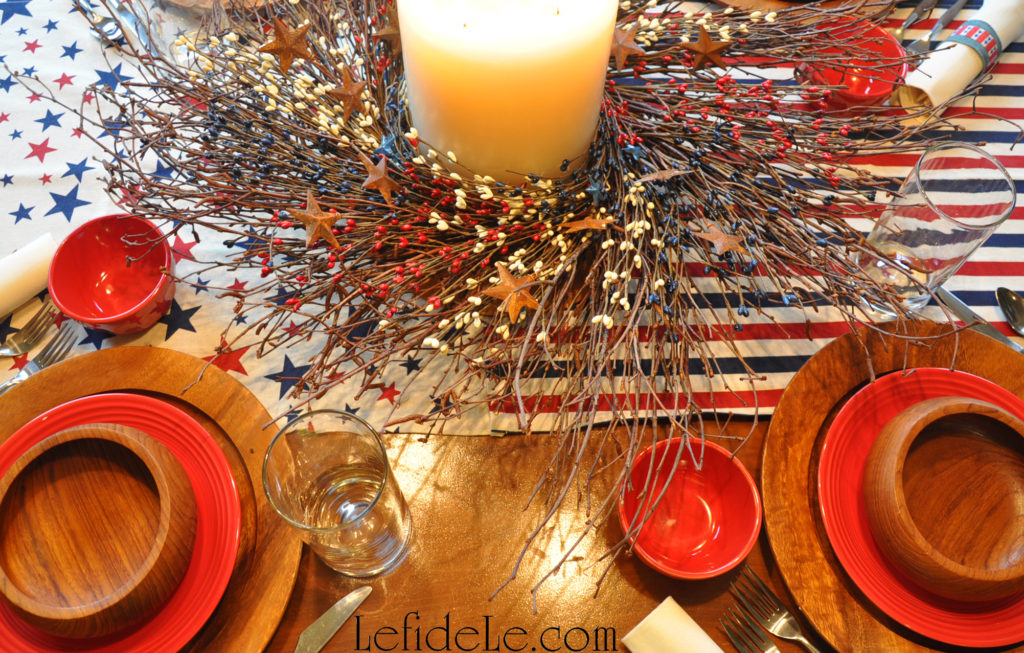
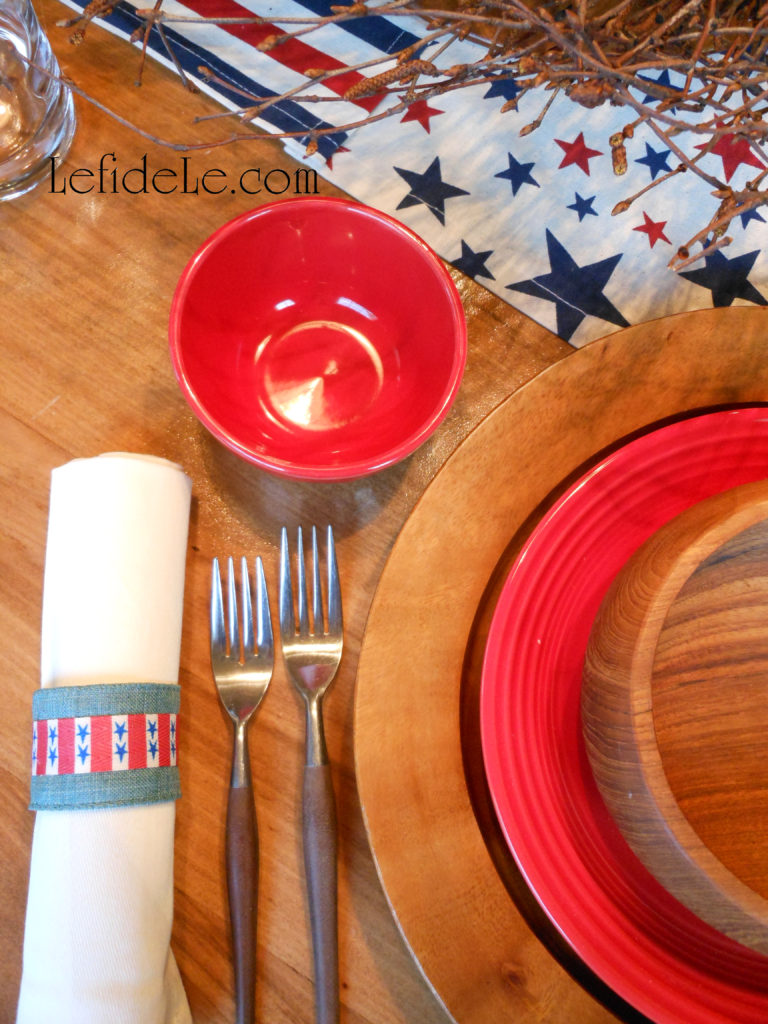
Canvas cloth stars and stripes lay the groundwork for the start of a serene supper. Handcrafted ribbon napkin rings encompass cloth napkins rolled as bandages once were.

106Leigh

“But in this camp of Death No sound your slumber breaks; Here is no fevered breath, No wound that bleeds and aches.”

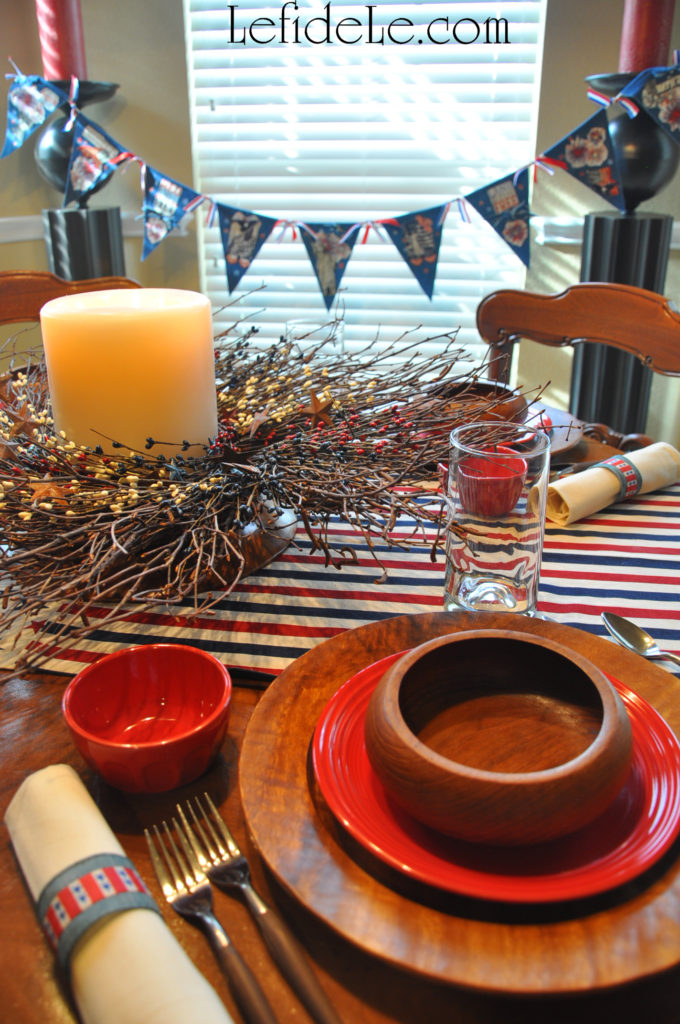
A seat at the table of peace procures red merely with ceramic vessels set among wooden ones, as wood handled metal flatware convey the firearms of yore.

133Leigh

“All is repose and peace, Untrampled lies the sod; The shouts of battle cease, It is the Truce of God!”

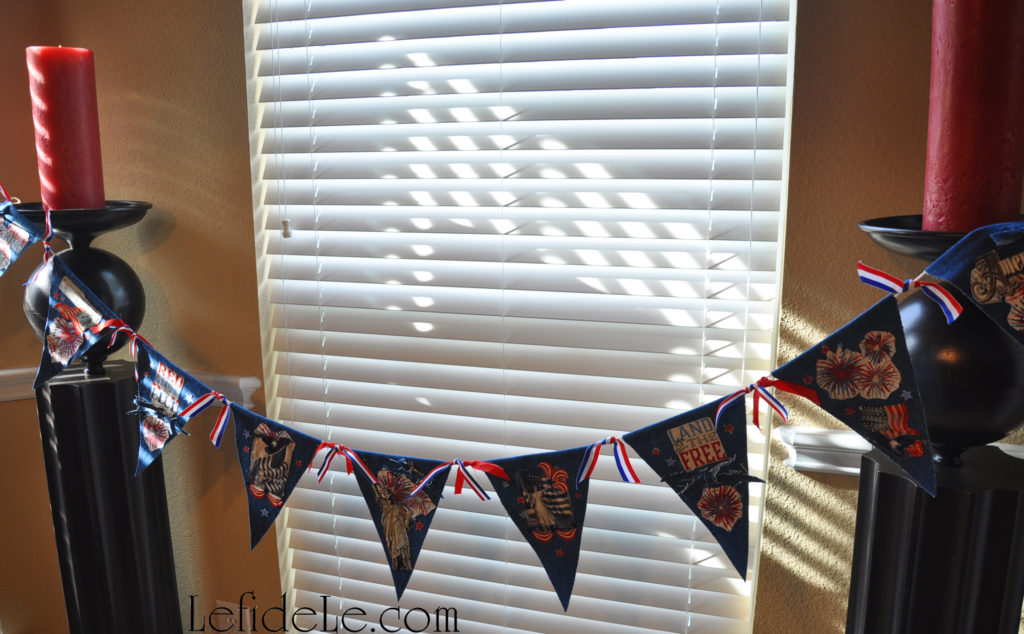
This day’s flag of peace is a handmade banner of fabric collage celebrating the triumphal peace of war’s cessation.

111Leigh

“Rest, comrades, rest and sleep! The thoughts of men shall be As sentinels to keep Your rest from danger free.”

Flag bearing bronze columns hold pillar candles aflame while standing as the evening’s sentinels.

103Leigh

“Your silent tents of green We deck with fragrant flowers; Yours has the suffering been, The memory shall be ours.”

A memorial wreath encircling a solemn flame rests at the table’s focal point as our minds focus with somber reverence.

Faithfully Yours,

Leigh

P.S. The poem quoted is “Decoration Day” written in 1882 by Henry Wadsworth Longfellow. (Memorial Day has evolved from post-civil war’s Decoration Day.)

P.P.S. ⇓ Learn how to make your own patriotic banner here:

DIY July 4th Denim No-Sew Applique Collage Star-Spangled Banner Craft Tutorial for Independence Day

⇓ Find the patriotic ring tutorial plus more crafting here:

Faux Metal Stars Paper Mache Craft Tutorial & DIY Napkin Rings for Memorial Day, Veterans Day, or Independence Day

Faux Metal Stars Paper Mache Craft Tutorial & DIY Napkin Rings for Memorial Day, Veterans Day, or Independence Day

539Leigh

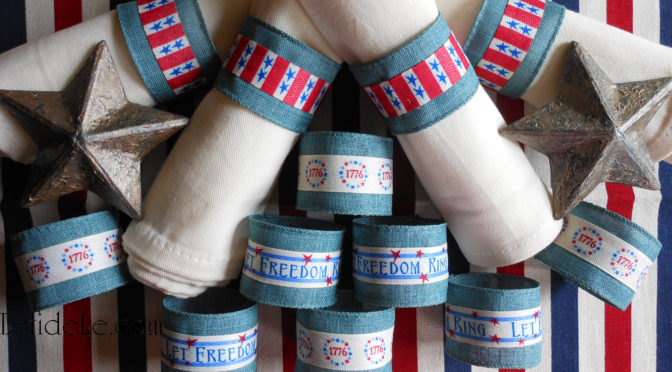
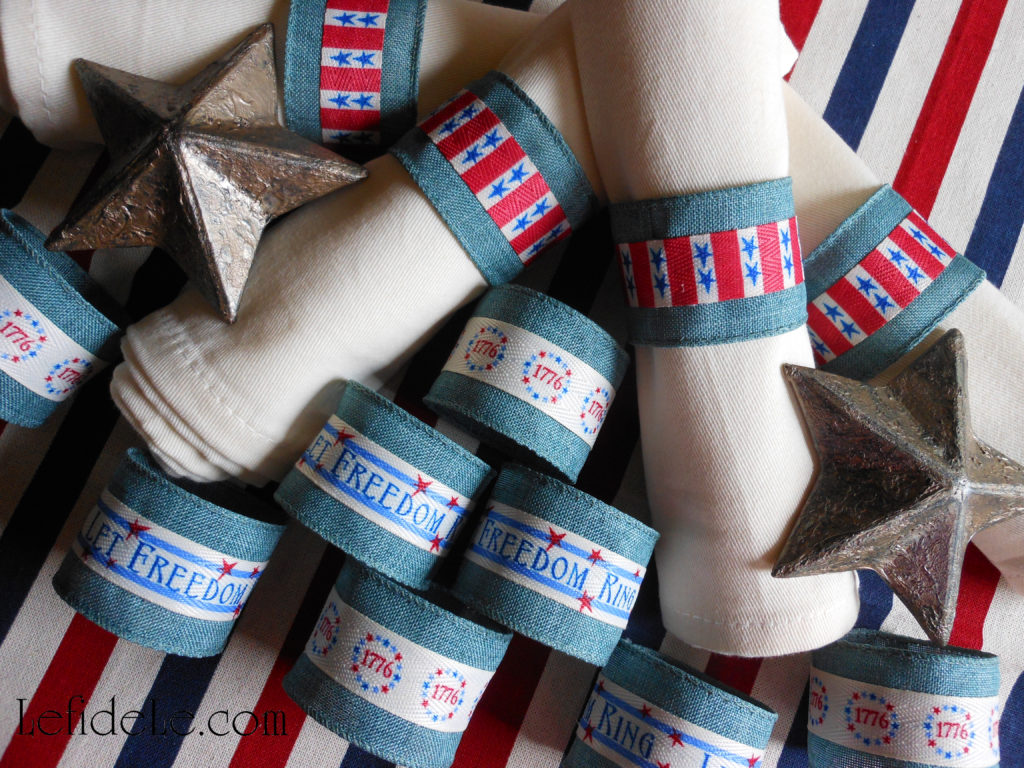
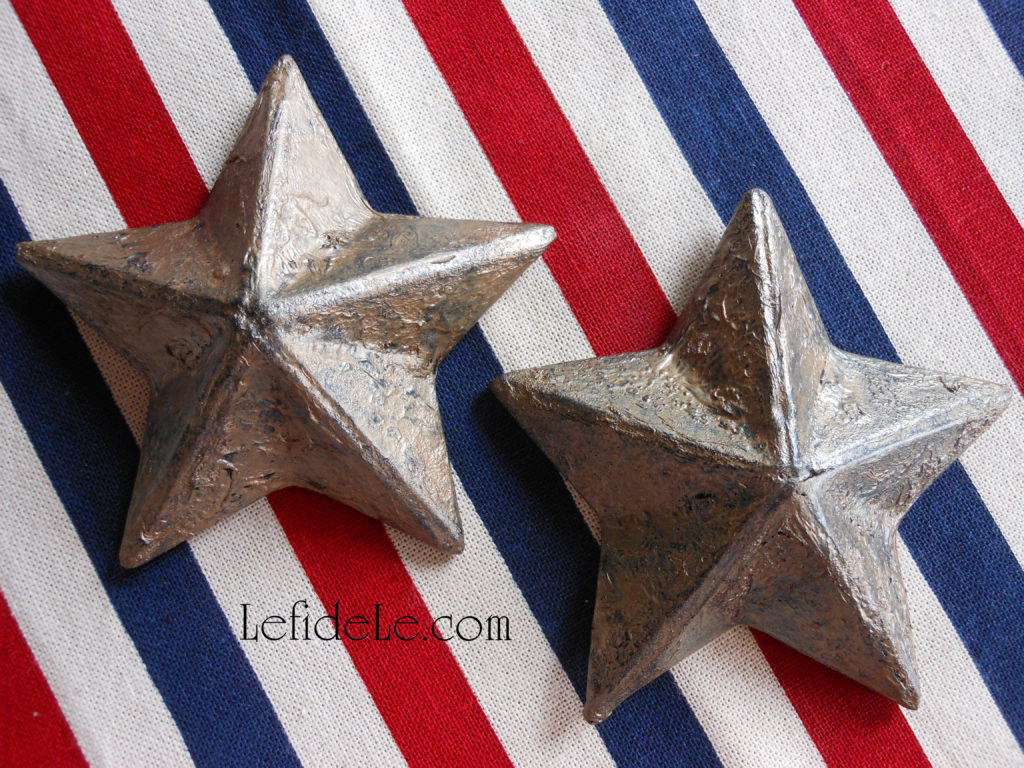
Make your own faux metal stars inexpensively out of paper maché ornaments with this craft tutorial, and then easily DIY custom patriotic napkin rings for Memorial Day, Veterans Day, or Independence Day. Use these to perfectly coordinate with your existing holiday décor for a high end look on a shoestring budget. These hefty appearing textured “metal” stars are actually lightweight enough to be used in so many more applications. And they really do fool everyone… until they’re touched!

545Leigh

It’s astonishingly easy to turn inexpensive paper maché ornament stars (found in craft stores nearly year round) into expensive looking one-of-a-kind textured metallic pieces to embellish any project you can think of.

510Leigh

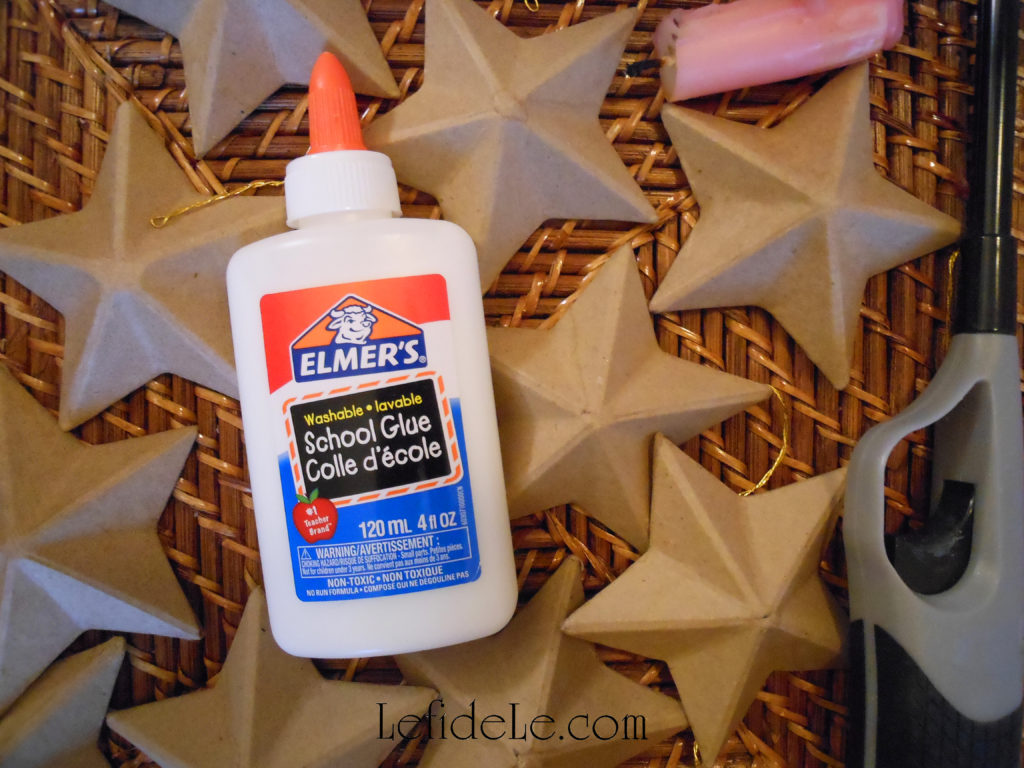
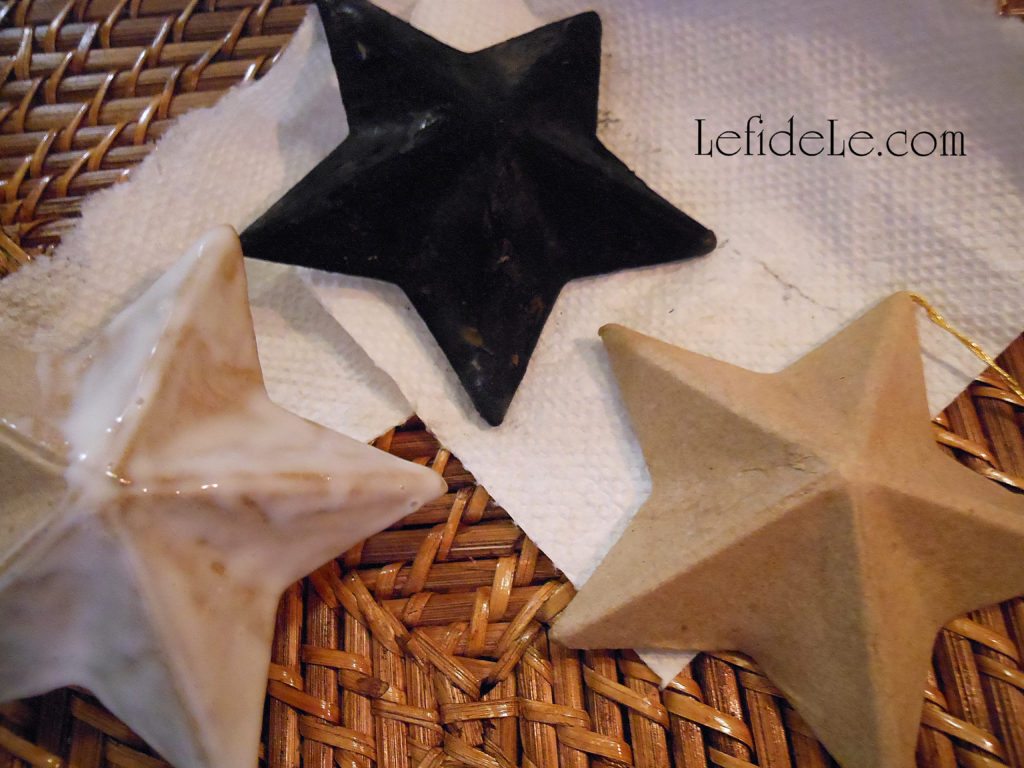
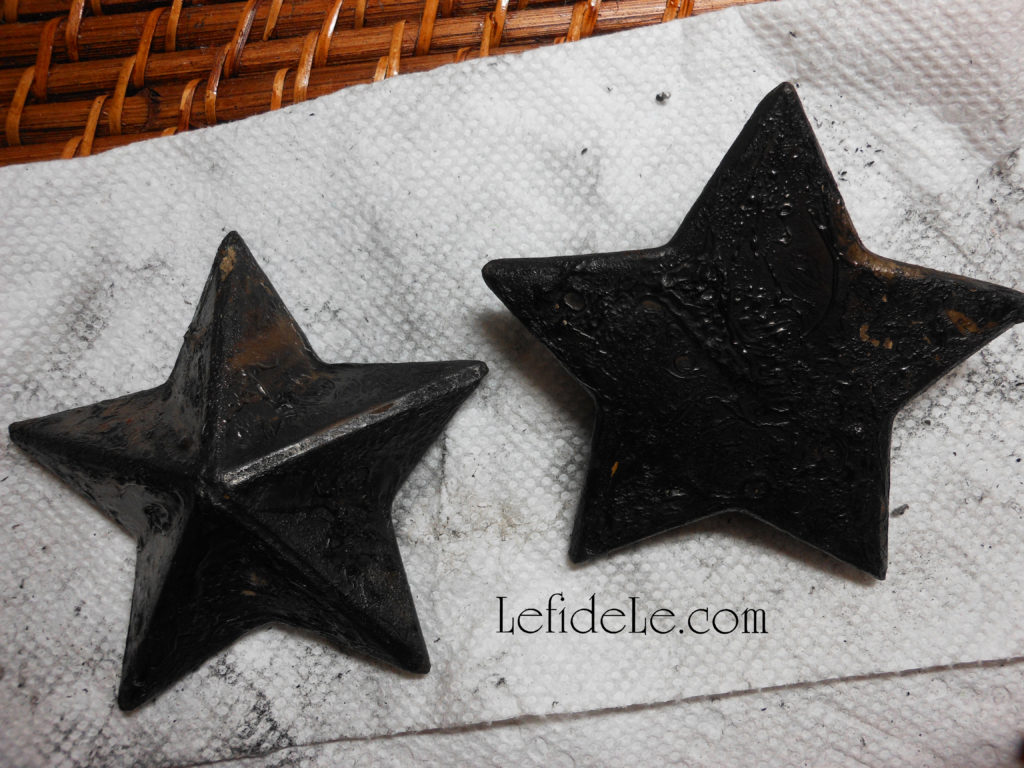
Grab a bag of star ornaments, some cheap white school glue, a lighter or match, and a candle. (I like to use up the last chunks of tall or broken candles to use on these kinds of projects, because candles flames do work better than lighter flames… just don’t ask me why. I stuck this pink leftover into an empty glass soda bottle to hold it in place… as is necessary to prevent wax drip burns.)

513Leigh

Cover a portion of a star completely in white glue. Hold it into the flame until the glue becomes hard with a dusty charcoal layer over it. (Don’t hold it over the bare paper because it will burn! If a flame does spark, just blow it out like a candle. Cover that area with more glue, and then burn on.)

521Leigh

Rub off the dirty charcoal layer with a clean rag or paper towel. (You’ll start seeing a smooth sheen appear.)

523Leigh

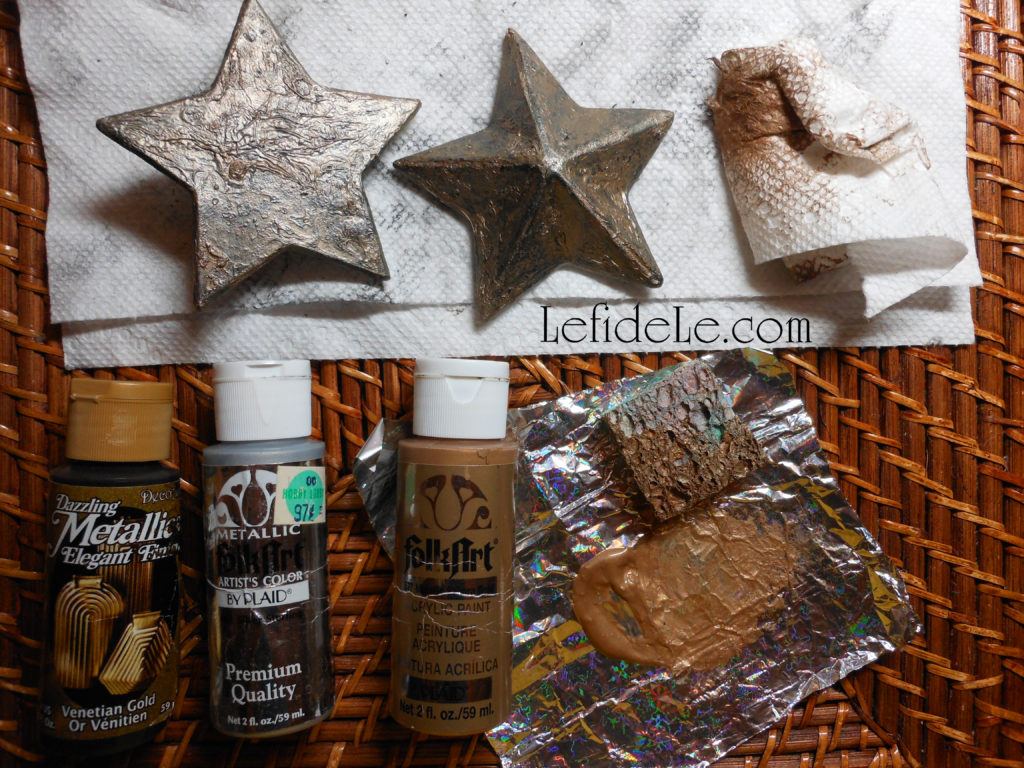
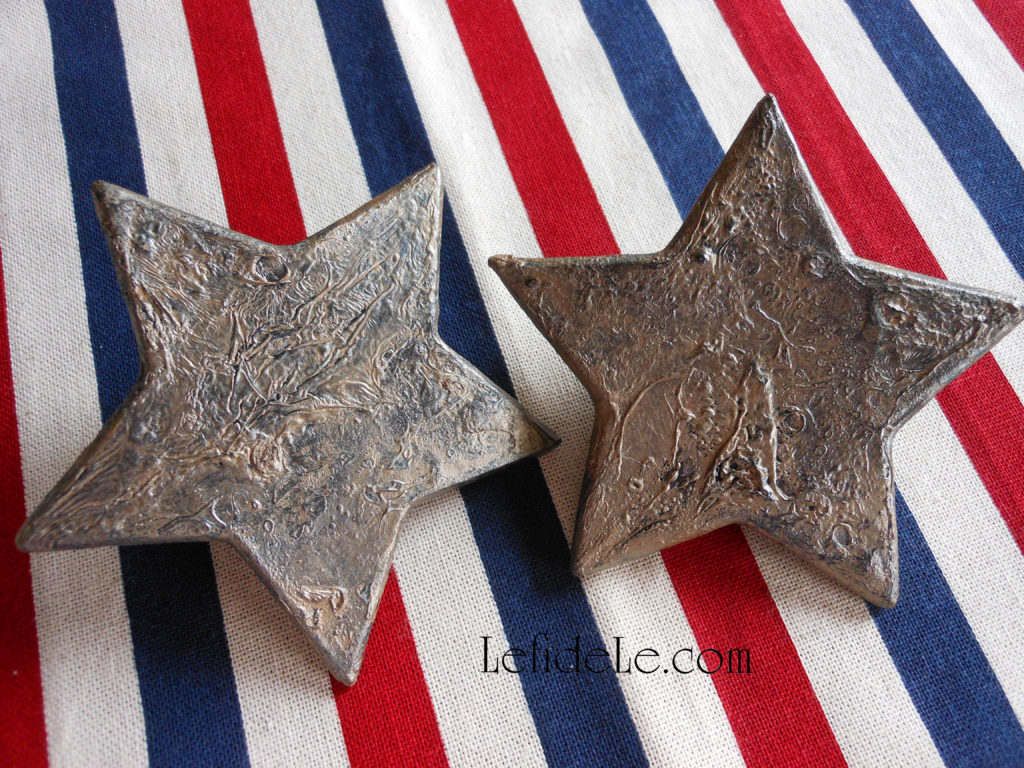
You can leave them as is or rub a light wash of metallic paint over them (cheap acrylic craft paint works well). It’s an easy way to add verdigris or to switch between silver and gold. I use a sponge square to dab on paint, and then quickly wipe some of it away (it does dry really fast).

549Leigh

You can really see the detail of the texture on the star’s undersides. (There’s no need to finish the base if you plan on gluing them onto something else.)

501Leigh

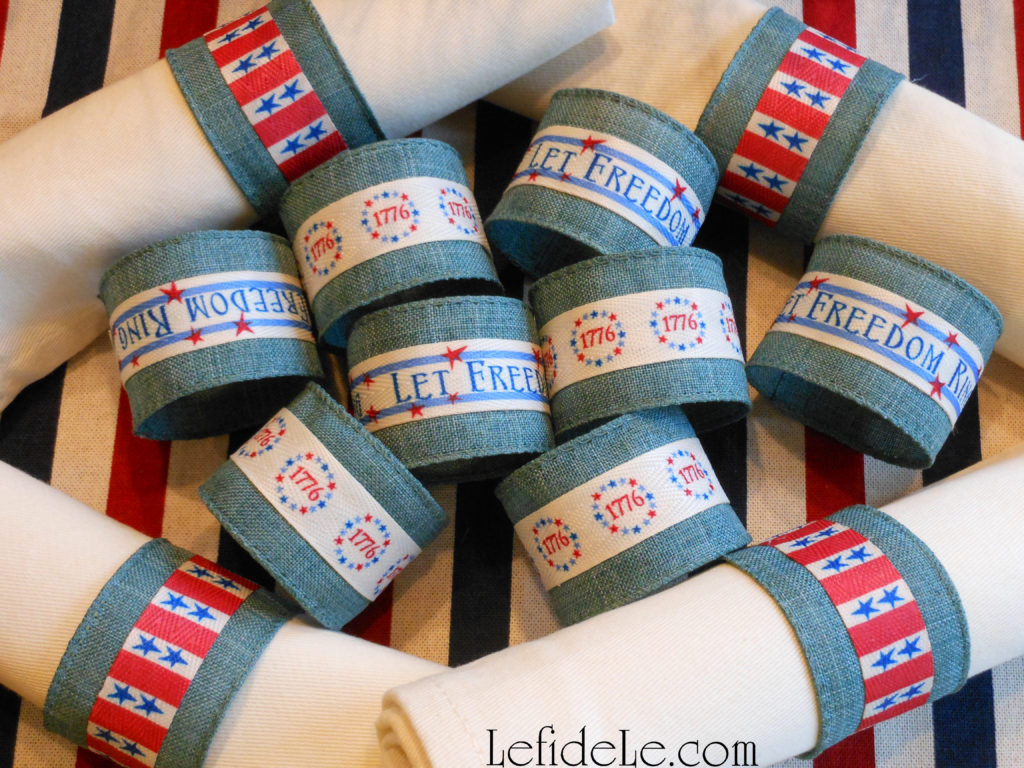
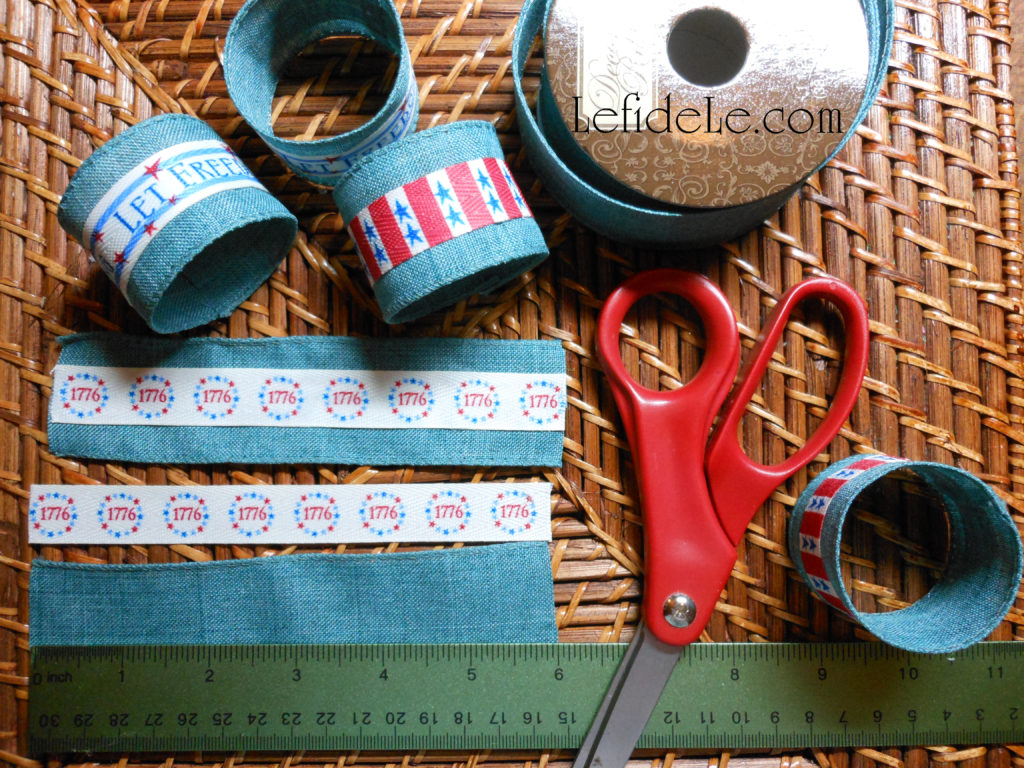
Now let’s make mix-and-match patriotic napkin rings using 1 roll of clearance chambray wired ribbon and some lengths of various American themed twill ribbon.

405Leigh

First, cut 6 inch lengths of ribbon (1 chambray and 1 twill for each ring). Then hot glue the twill across the center of the larger chambray. Next, glue one short end over the other, overlapping them slightly.

484Leigh

Check out the patriotic rings in action here: Reverential Memorial Day, Veterans Day, or Independence Day Tablescape Décor Ideas Honoring American Forces

111Leigh

Learn how to make a matching patriotic banner here: DIY July 4th Denim No-Sew Applique Collage Star-Spangled Banner Craft Tutorial for Independence Day

Happy 4th of July fire-working!

Faithfully Yours,

Leigh
Easy DIY Valentine’s Day Countdown Calendar / Treat Bag Banner & Love Letter Napkin Rings Craft Tutorials

1661Leigh

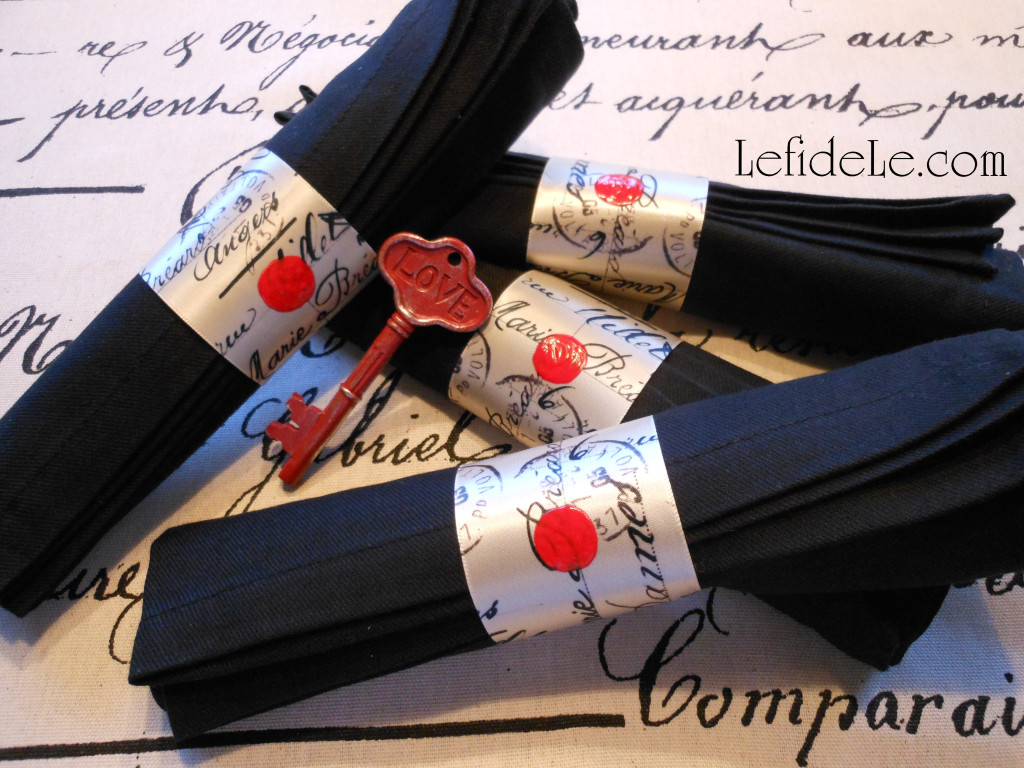
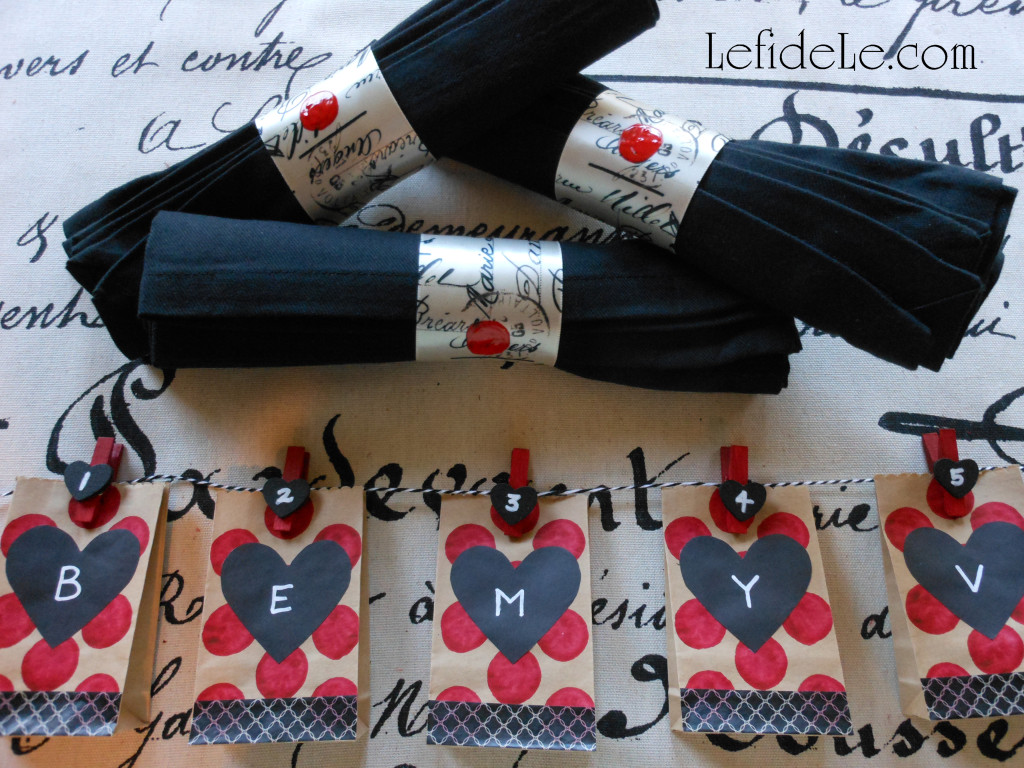
This easy DIY Valentine’s Day countdown calendar plus treat bag banner and love letter napkin rings craft tutorial comprises three of my favorite things to make… banners, napkin rings, and advent calendars. The latter project arose from the questions, “Why are countdown calendars typically made for Christmas advent and not for other holidays?” and, “Why not expand the celebration with 2 weeks of excitement leading up to Valentine’s Day?” This works well for either children or adults depending on what’s placed inside the bags. As for the love letter themed napkin rings, they perfectly fit a romantic Valentine’s theme… though this one is for adults only!

1638Leigh

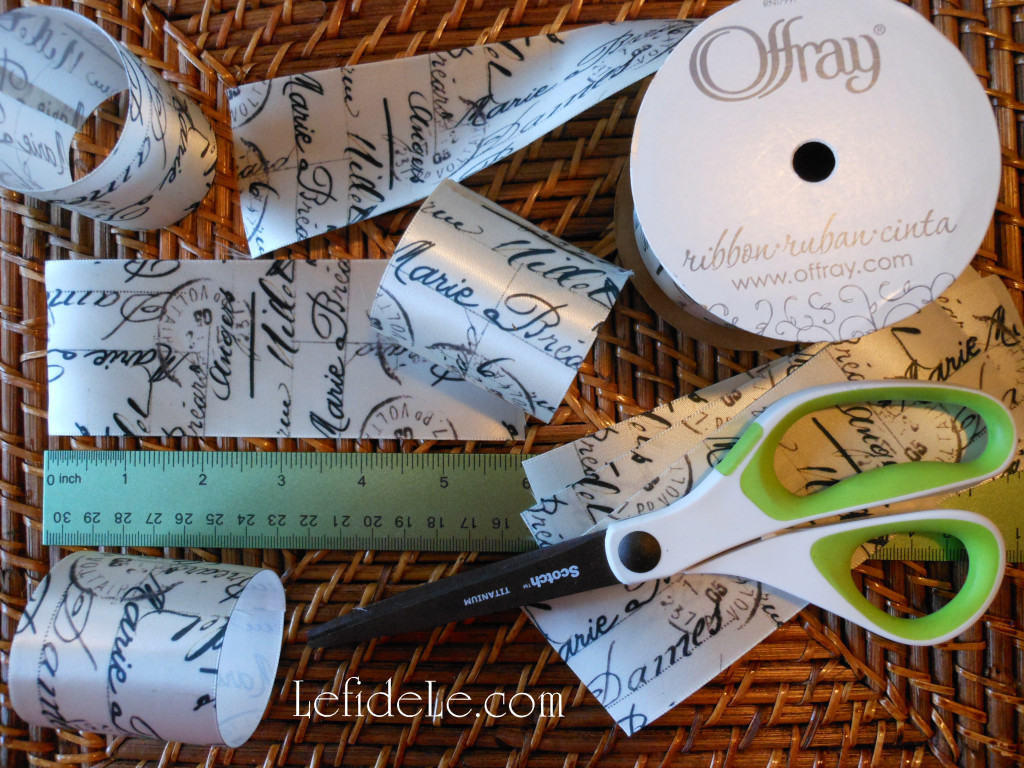
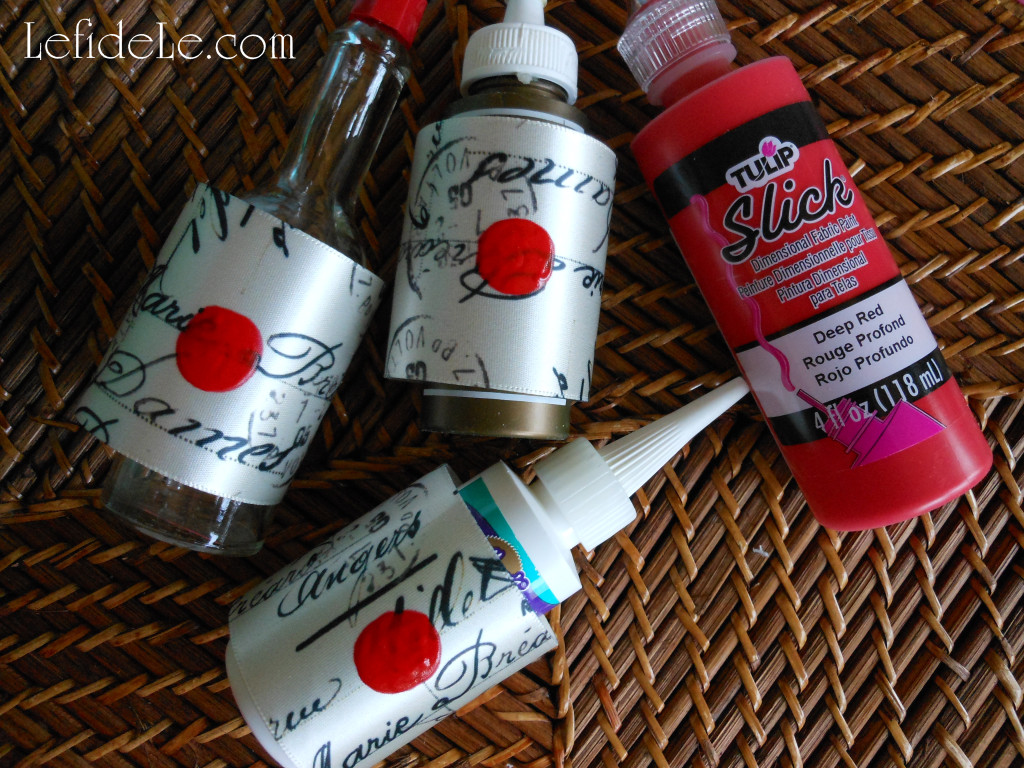
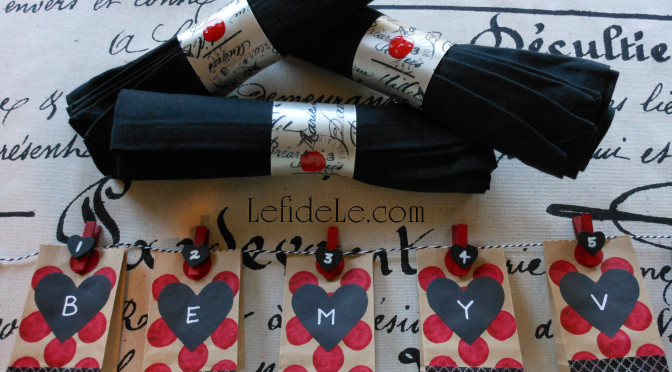
Let’s begin with the napkin rings. You’ll need a roll of Offray Brand Ribbon in a script pattern. (I purchased this ½ price with a coupon from Joann Craft & Fabric Stores. There’s a link for them in the sidebar.)

1647Leigh

You can make 12 rings and still have enough left over for a gift package bow if you like. You’ll also need either hot glue or liquid fabric glue and fabric paint in red (because it works on so much more than just T-shirts).

1216Leigh

Measure and cut a 6 inch length of ribbon for each ring you wish to make (use sharp sewing scissors to prevent fraying ends). If using hot glue, bond the ends with one side overlapping the other and press them together tightly. For liquid fabric glue, use a plastic clothes pin as a clamp or secure with a straight pin… and allow them to dry completely.

1243Leigh

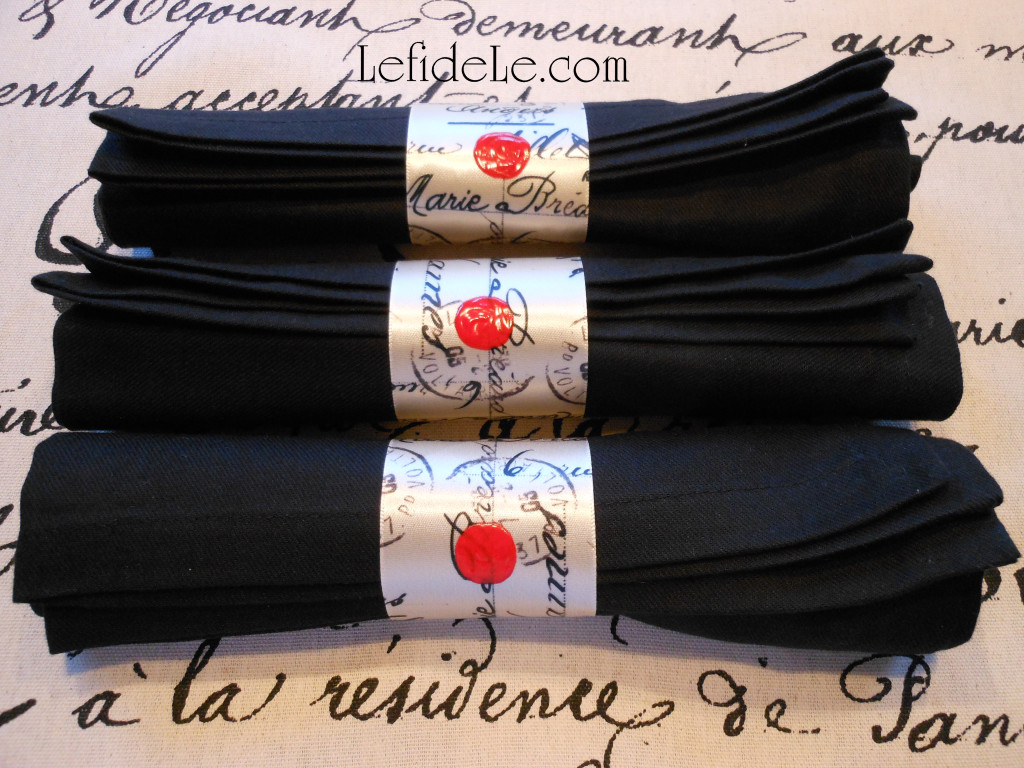
Next, make a faux sealing wax impression with the red paint. Either use the fabric paint tip to draw a circle and fill it in, or just squeeze some onto a plate and use a brush. Allow these to dry completely before handling. (Hot sauce bottles, glue bottles, and paint tubes placed inside the rings will prevent rolling and paint smears.)

83Leigh

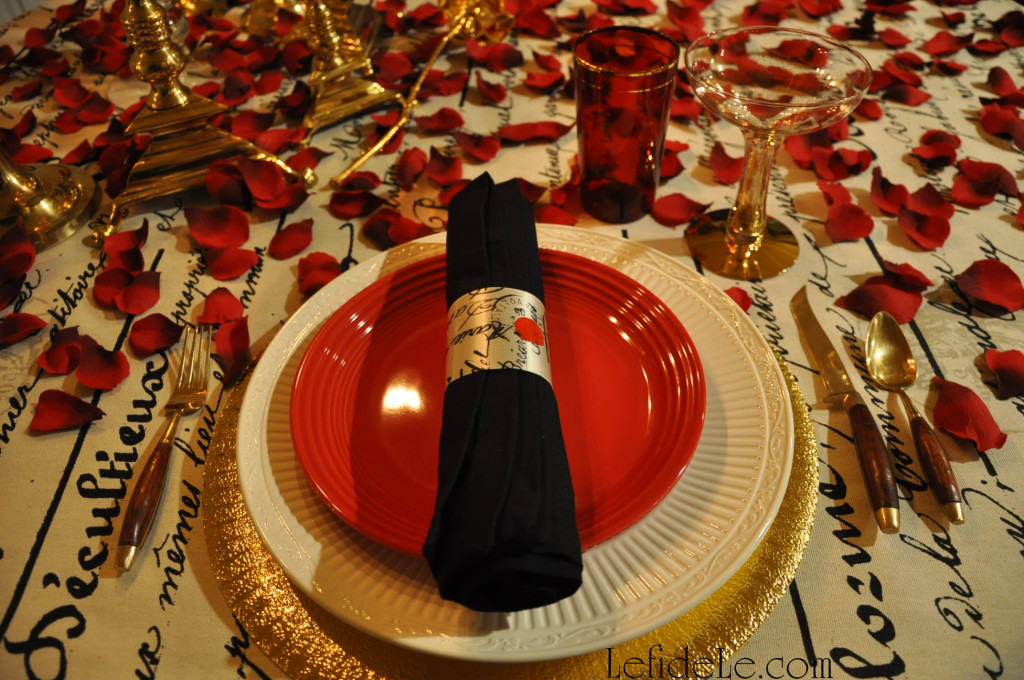
These napkin rings were so quick and easy to craft, and they were a great little touch to add to the Love Letter Themed Tablescape (Perfect for Valentine’s Day, Romantic Date Night, or Anniversary Dinner).

1617Leigh

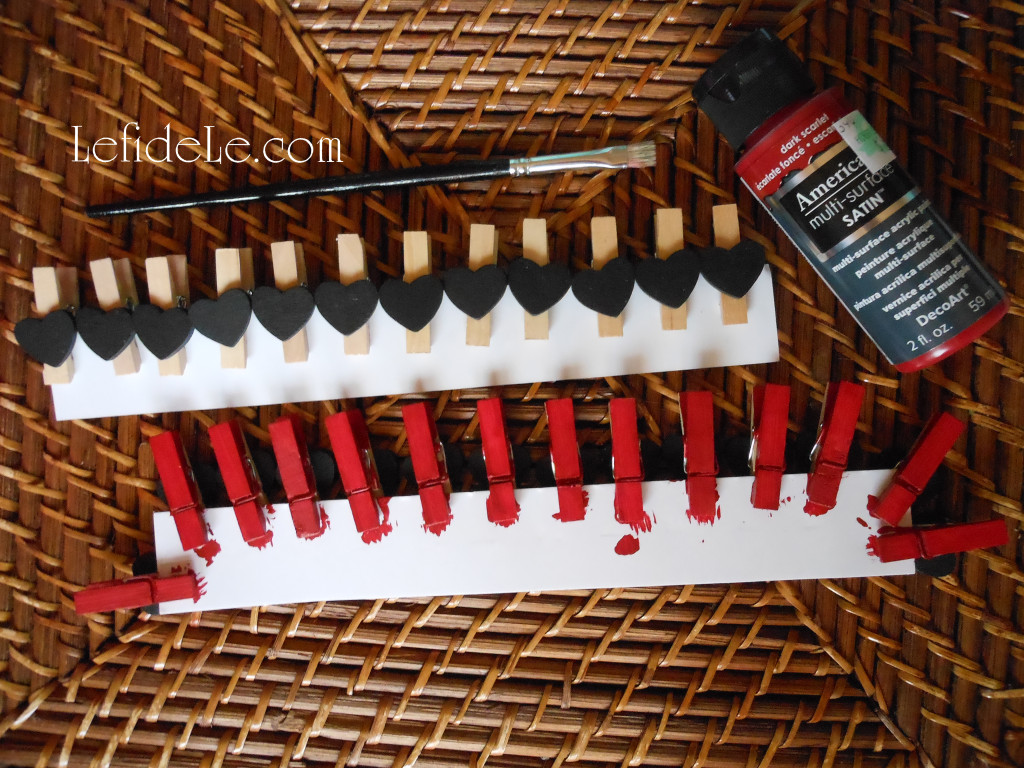
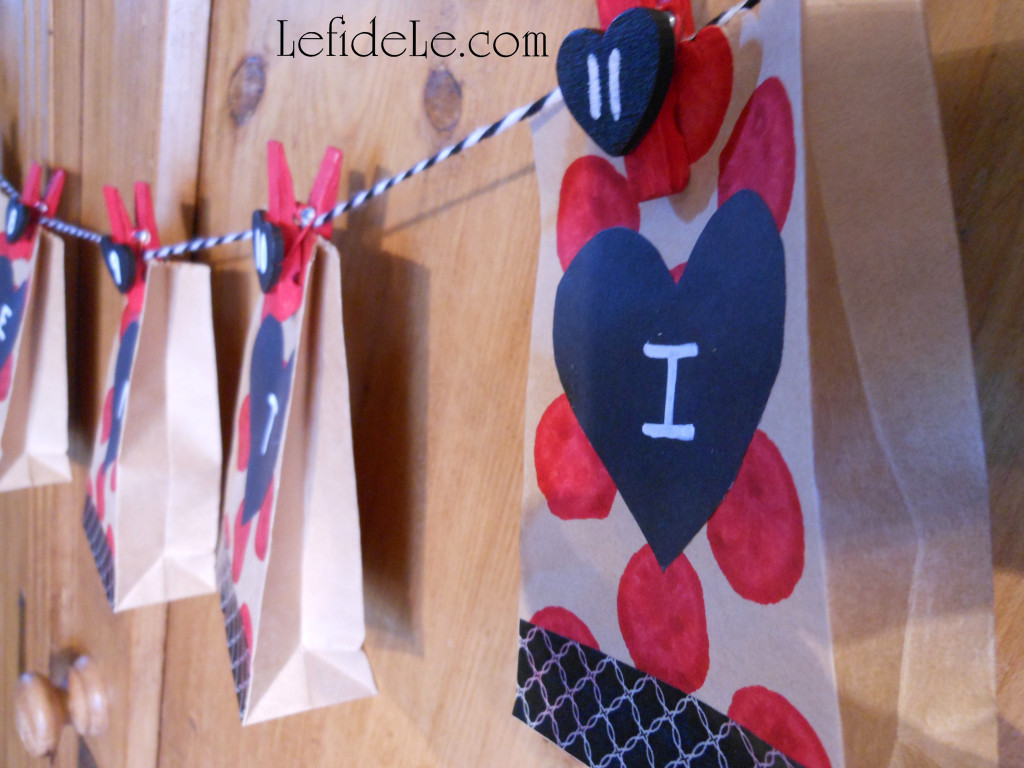
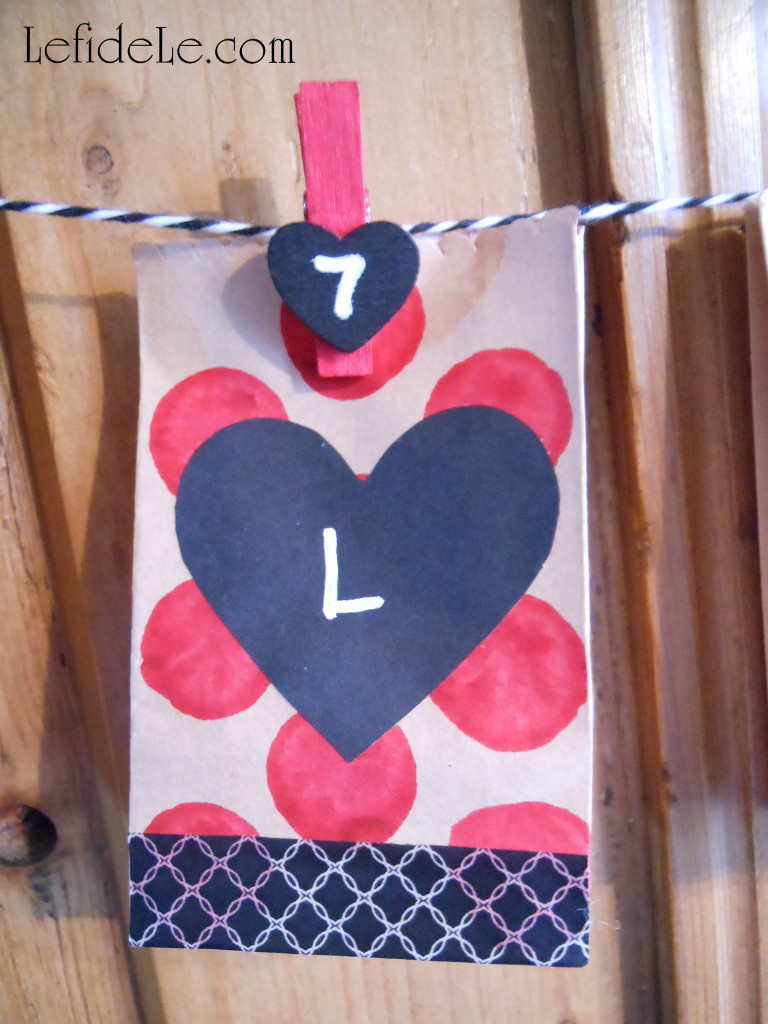
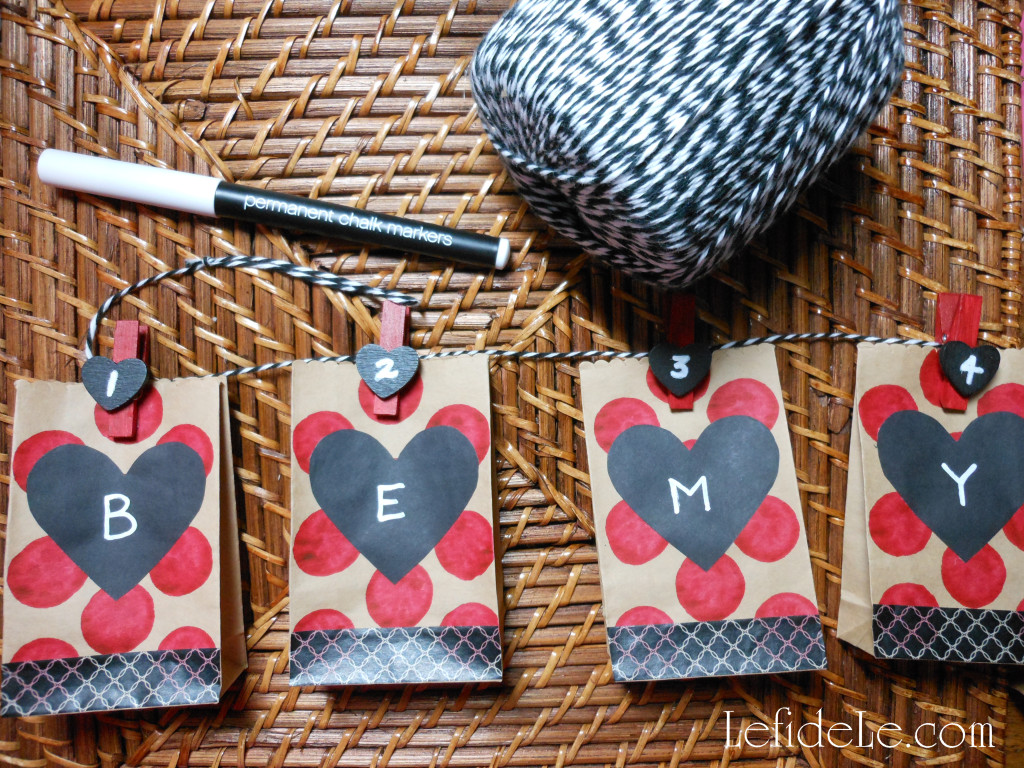
Now let’s make a Valentine’s Day countdown calendar and treat bag banner. (This is an easy enough project for the kiddos in your life to make too.) Begin by purchasing 14 mini clothespins complete with chalkboard hearts (these were 12 for $1 at the Target bargain bins). You can also buy the clothespins plainly and easily attach small flat wooden hearts with wood glue or hot glue… yes, hot glue does work on wood. Then all you need to do is paint the hearts with chalkboard paint. (All of the major craft stores carry the hearts. There are sidebar links for my favorite stores that carry coupon codes with them!)

1547Leigh

If you like, paint the remaining portion of the clothespins in your choice of red or pink… though the natural wood tone would look fine with the paper bags if you’re short on time. (I used dark scarlet multi-surface acrylic paint from DecoArt, because it matches my spice racks.) It’s easiest to clip them onto cardboard and just paint one side, leaving them to dry before flipping them over and completing the opposite side.

1552Leigh

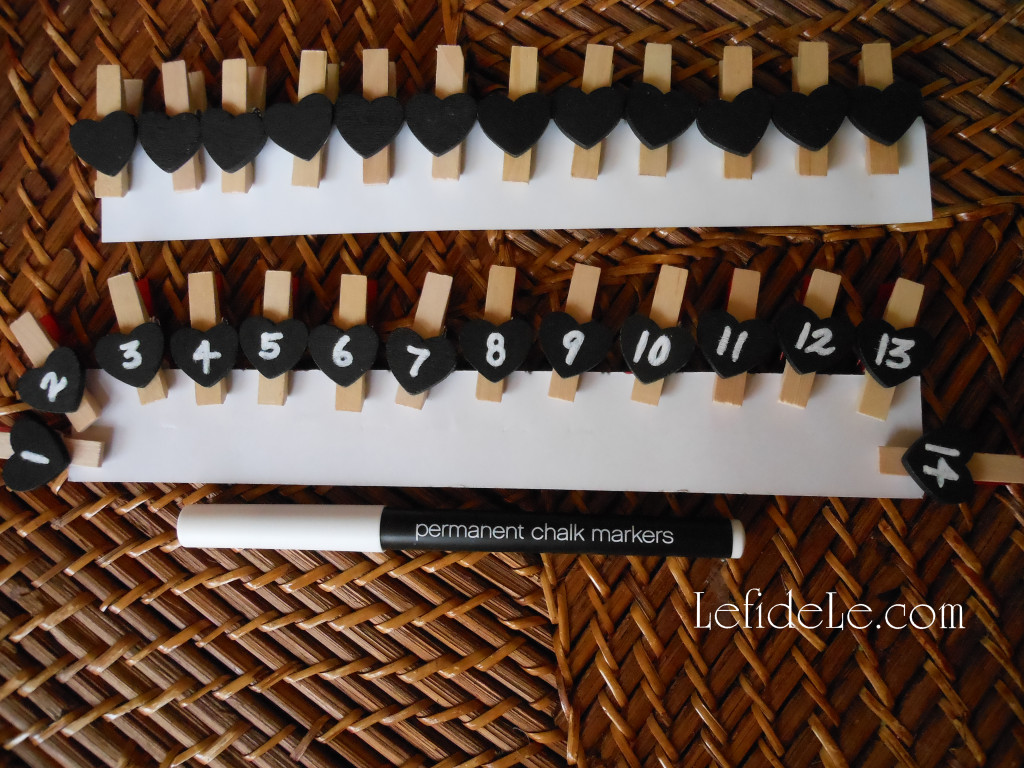
You have the option of writing the 14 day numbered countdown with actual chalk (so that they may utilized in another capacity after the holiday) or with a permanent chalk marker that can’t be rubbed off.

1555Leigh

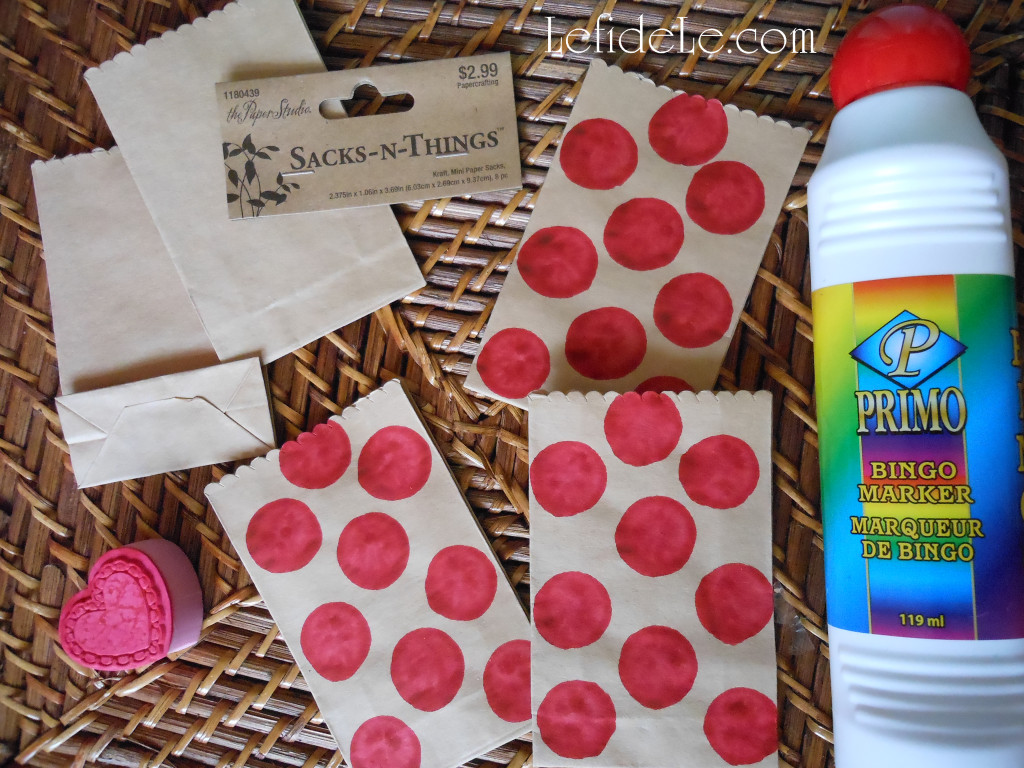
While those are drying, decorate your treat bags. (These plain little sacks were purchased cheaply for ½ off, but you can purchase printed ones if you’d like to speed up the process.) I used a red bingo marker to stamp dots in a polka dot pattern. (See more about this, along with other project ideas in my article on Fast & Easy DIY Hand-stamped Polka-dot Gift Wrap & Matching Gift Crafts.)Let these dry completely before the next step. (You also have the option of stamping a pattern onto the bags with ink or paint.)

1560Leigh

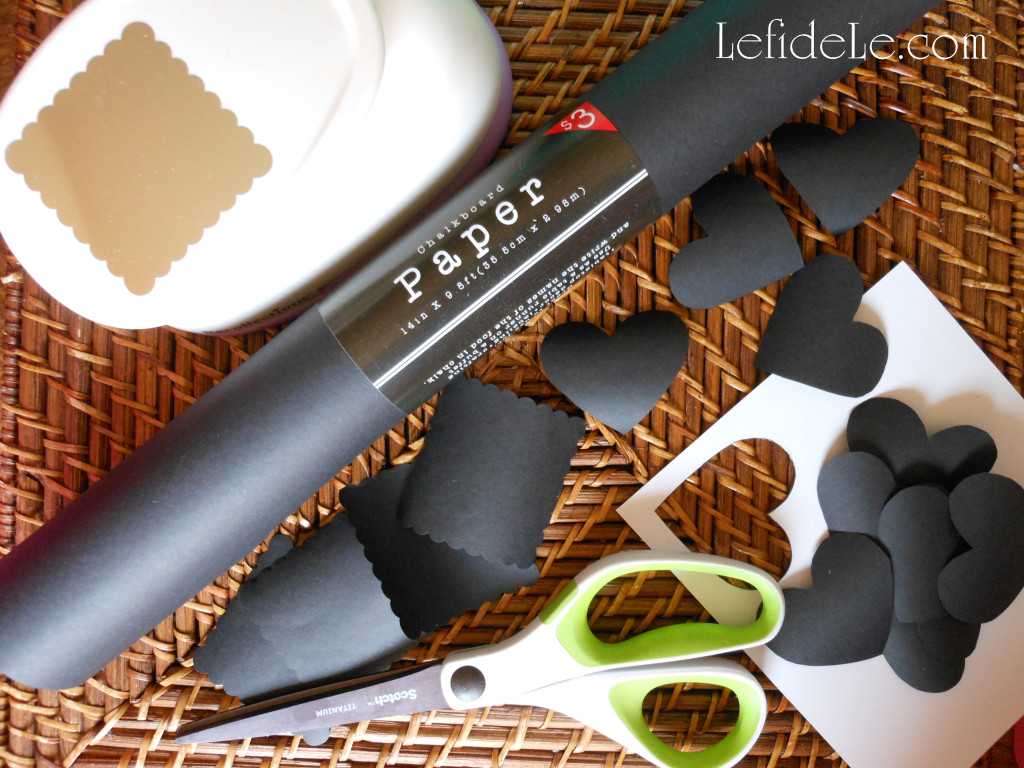
Next, cut out hearts from black chalkboard paper, or use a paper punch in any shape you like, or speedily use readymade chalkboard sticker labels.

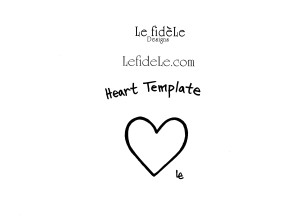
heart template

Here is my handy little template to print free at home then cut out to trace around. It’s an easy way to make the same exact heart shape repeatedly. (Just right click the small image above and select print.)

1564Leigh


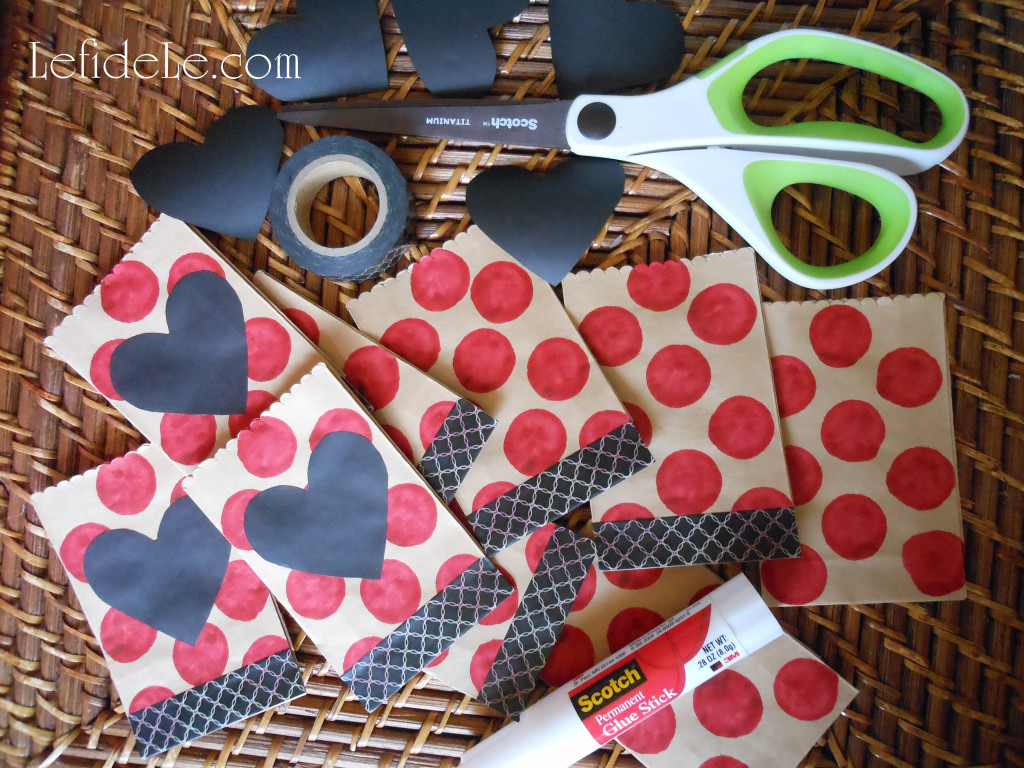
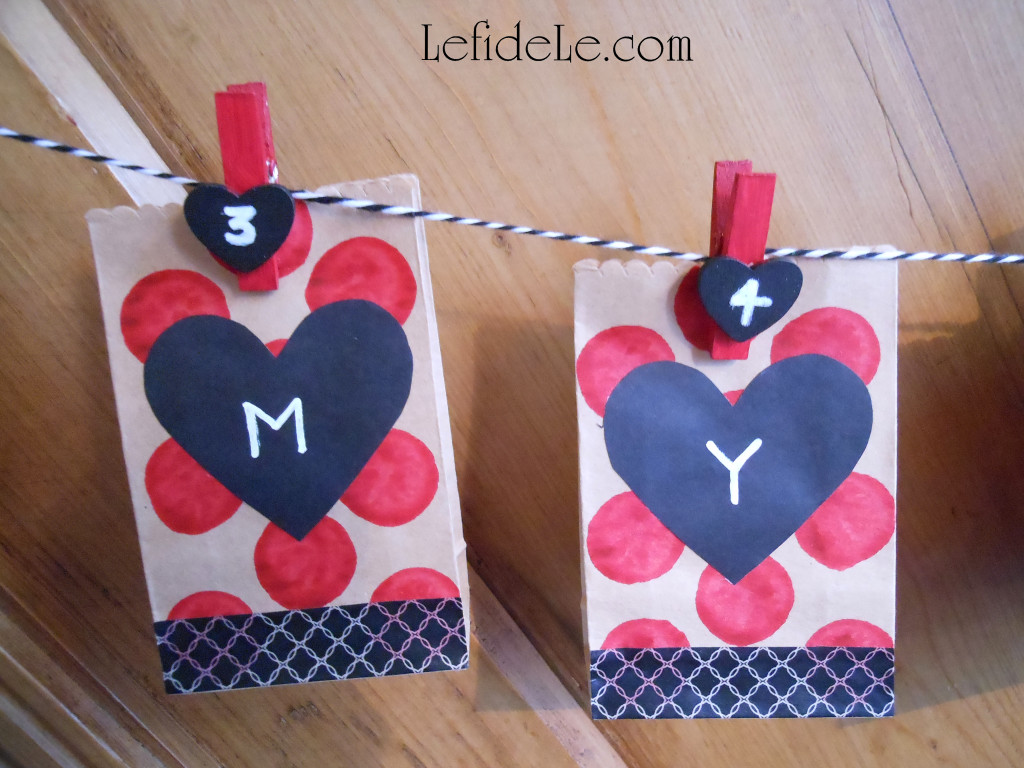
Adhere the paper hearts onto the bags with a permanent glue stick. Then run a strip of matching washi tape along the base for easily added flair.

1571Leigh

String the dry clothespins onto ribbon, string, jute, cording, twine, or yarn. (I used yarn that looks like twine because three times the amount can be purchased for ⅓of the price.) Once again, use either permanent white marker or actual chalk to write on each heart.

1623Leigh

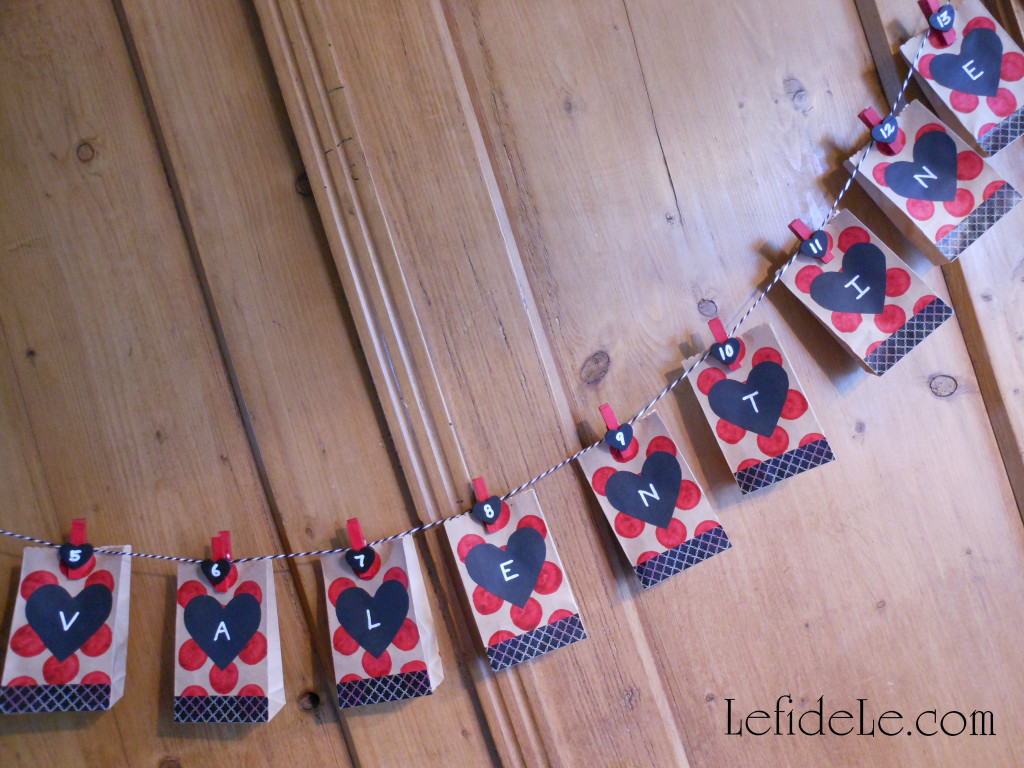
I chose to write “Be my Valentine!” but “Valentines Day!” or “Happy Hearts Day” would also have fit on the 14 bags. You can also write the names of individual recipients like friends, classmates, or even alternate the names of family members.

1635Leigh

Fill the little bags with anything you like… you can make it as inexpensive or extravagant as you like.

1629Leigh

For kiddos: try candy, stickers, stamps, tiny toys, erasers, inexpensive jewelry… or silly printed jokes you won’t mind hearing over and over again. On the 14th day, think about directions leading to a larger gift like a stuffed animal.

1628Leigh

For adults: try printing faux fortunes, poems, romantic quotes, movie or event tickets, or even homemade coupons for “honey-do” chores or special treats. On the 14th day, think about directions leading to a larger gift like a dozen roses, box of chocolates… or something uber masculine like the latest power tool at home depot.

1661Leigh

This makes a super cute banner decoration as well, and it can be strung just about anywhere using either tape, 2 extra clothespins, or by tying knotted loops at each end of the string.

I ♥ Crafting… Don’t you?!

Faithfully Yours,

Leigh
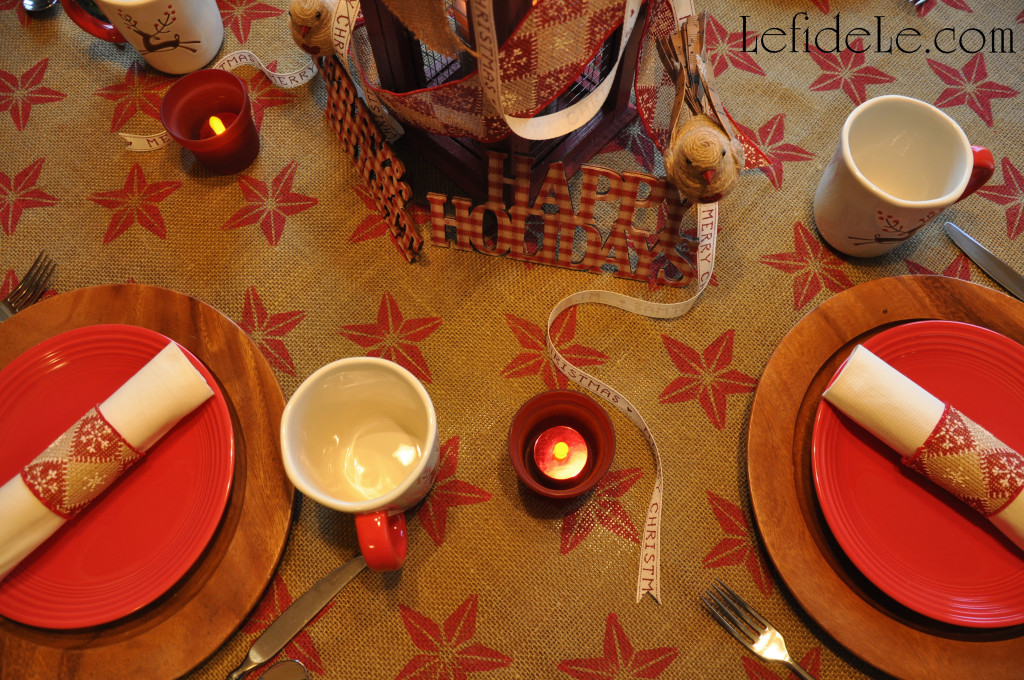
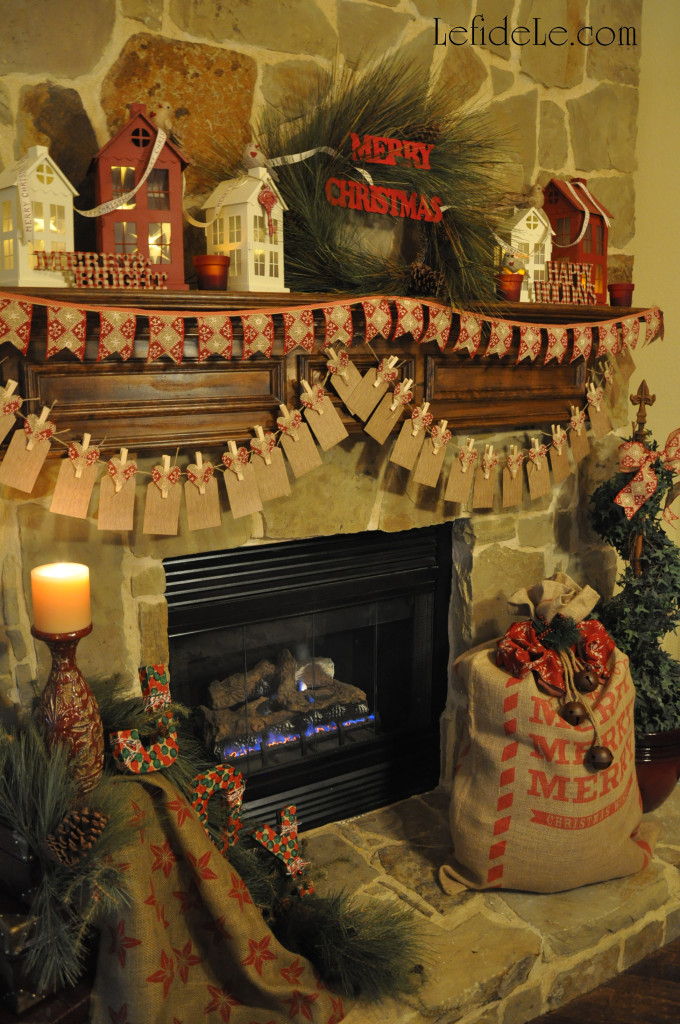
Create a Homespun Holiday of Barn Red & Burlap with Christmas Tablescape & Mantle Décor Ideas

917Leigh

Why prepare for Christmas by waiting in long lines at overcrowded stores when you can create heartfelt moments with loved ones while crafting a homespun holiday that harkens back to simpler times. Deck the halls without breaking the bank using my easy craft tutorials for DIY décor that harmonizes perfectly with the season’s traditional crafts of gingerbread houses and strung cranberries or popcorn. Have friends over for a cookie decorating or gift wrapping party, and then move the décor over to the mantel in time for a cozy Christmas. In this way, we can all celebrate togetherness in the real spirit of the season!

943Leigh

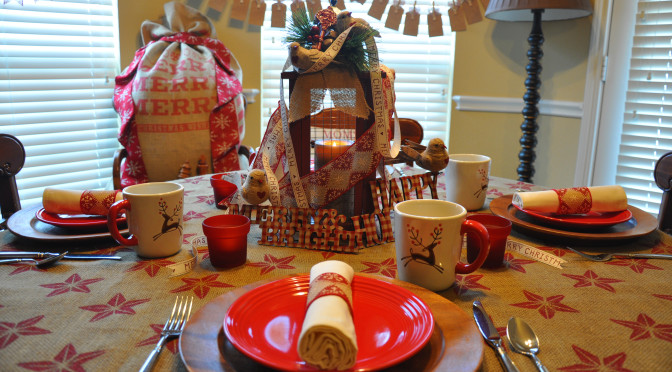
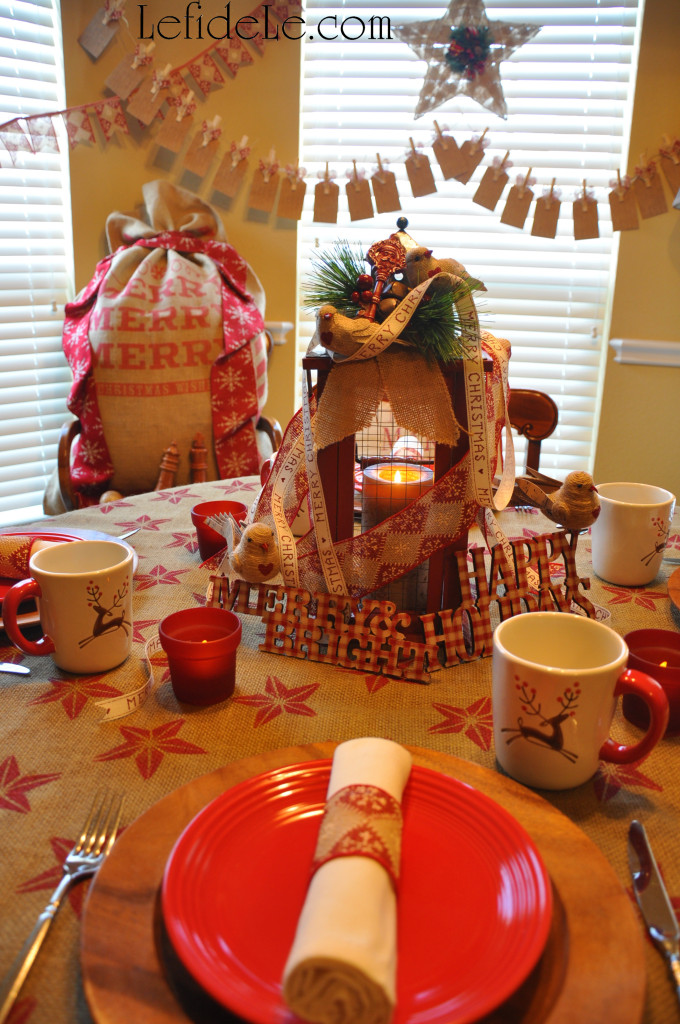
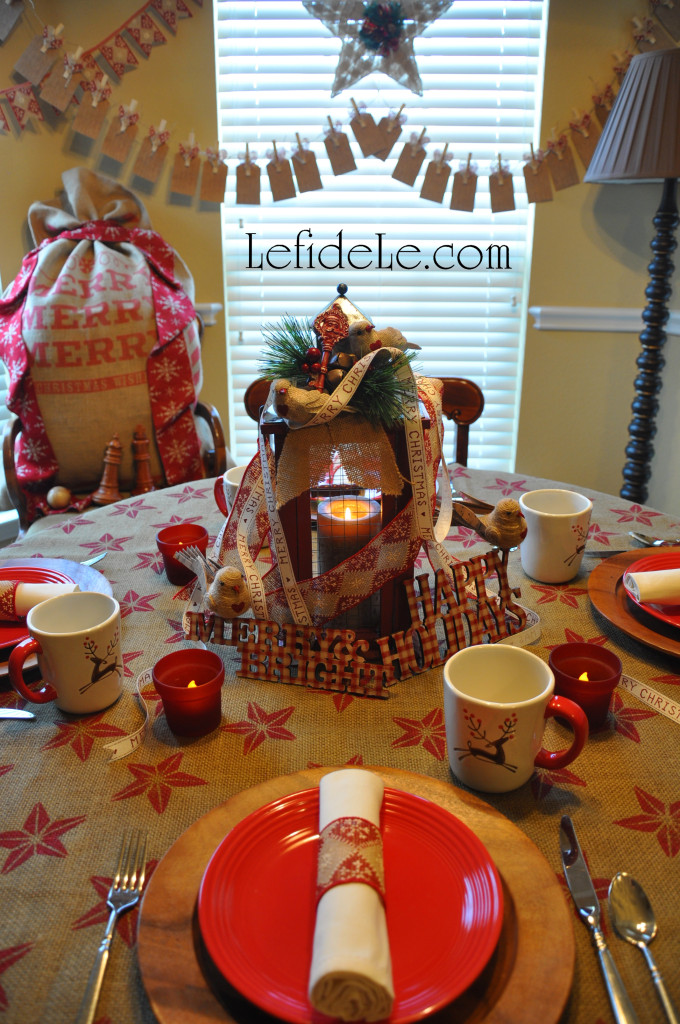
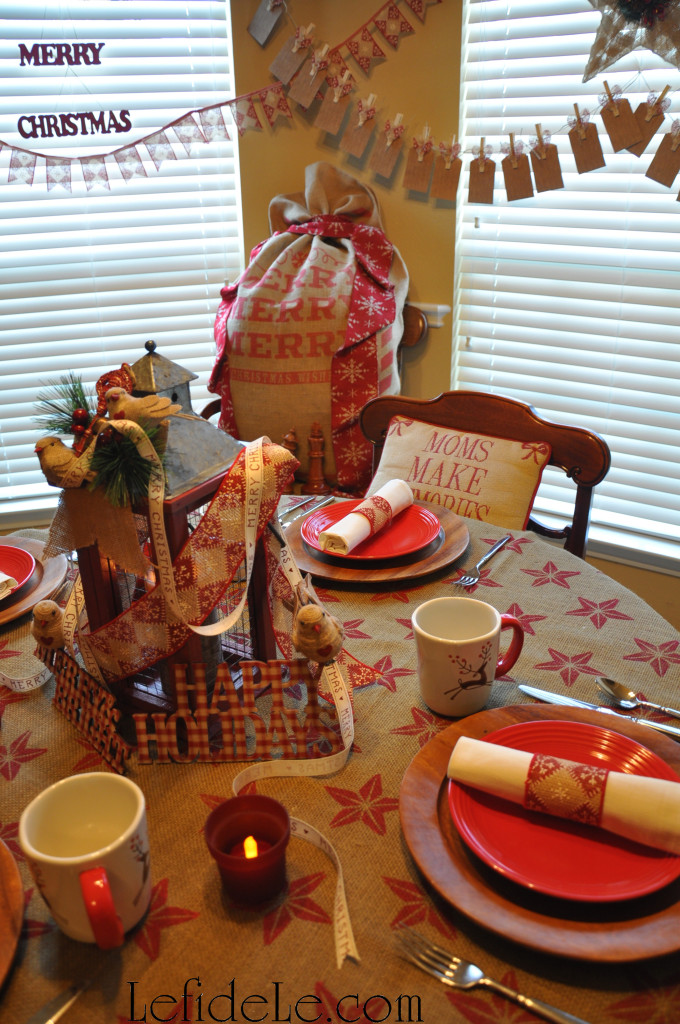
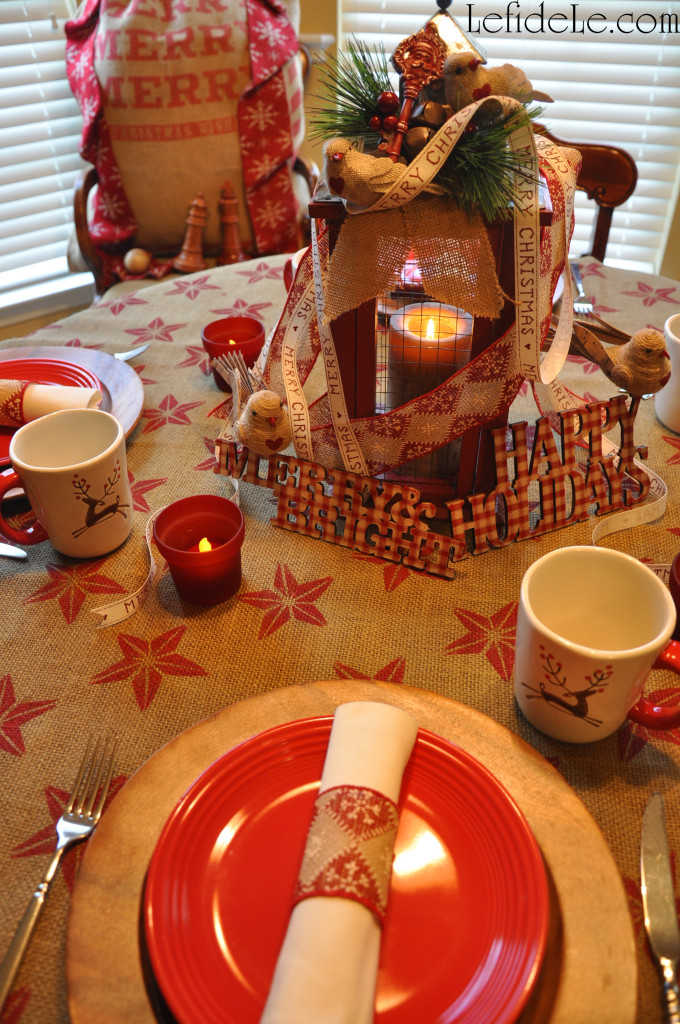
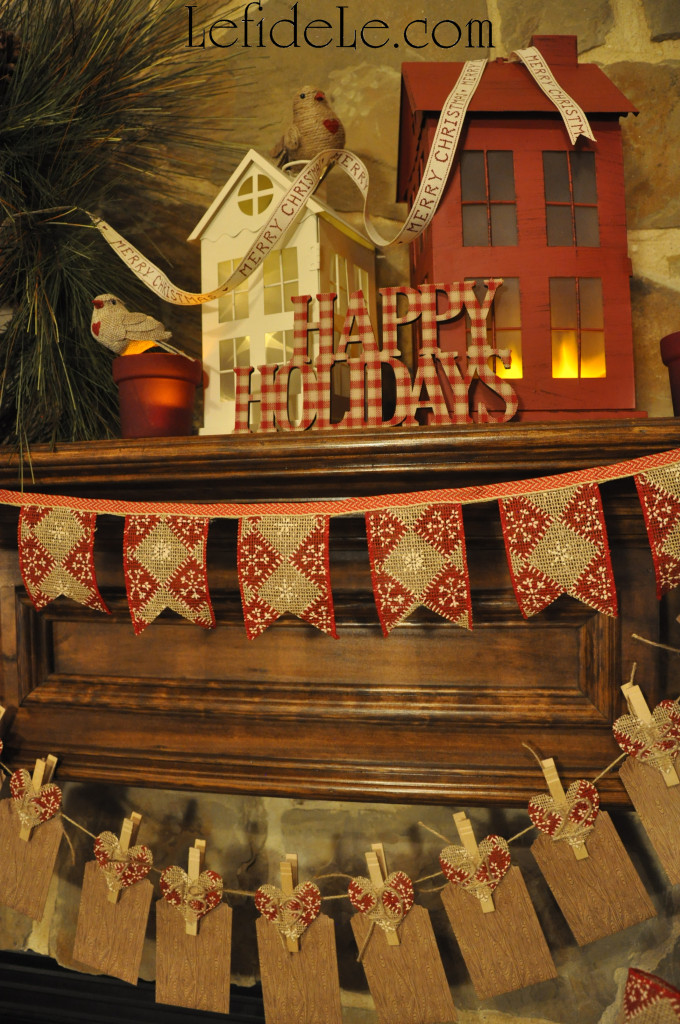
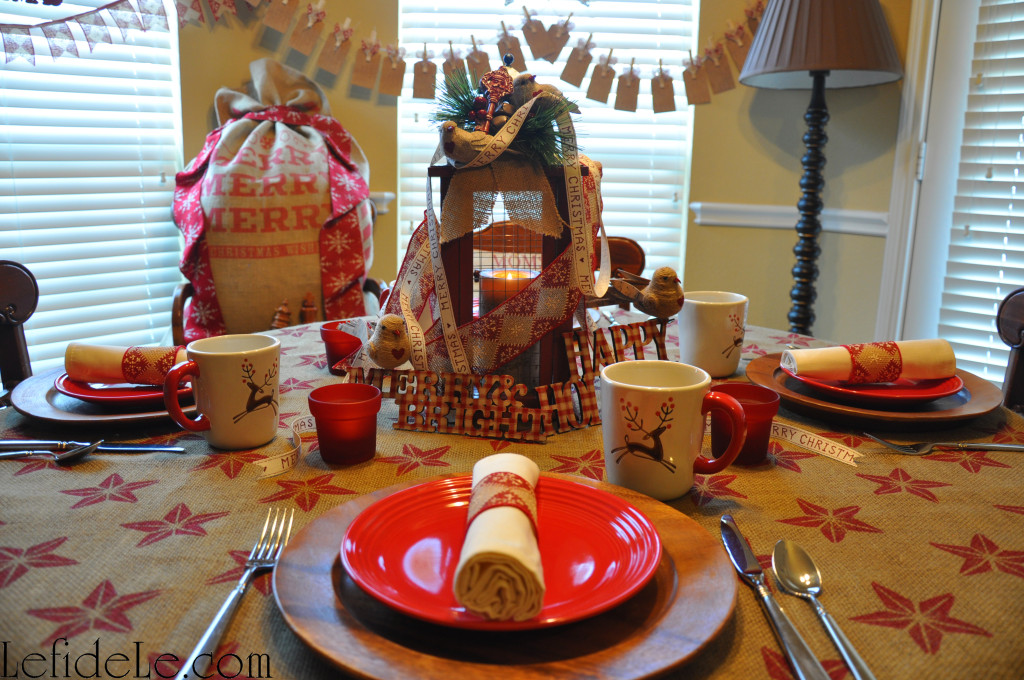
“Deck the halls with boughs of holly“ and a one-of-a-kind burlap tablecloth painted with stamps and matching napkin rings which set a delightful tone for a homespun holiday gathering. (Learn how easy it is to make these here!)

928Leigh

“’Tis the season to be jolly” and nosh on gluten-free vegan gingerbread cake served upon red ceramic plates over wooden chargers accompanied by holiday reindeer mugs filled with steaming cups of hot chocolate and homemade marshmallows.

936Leigh

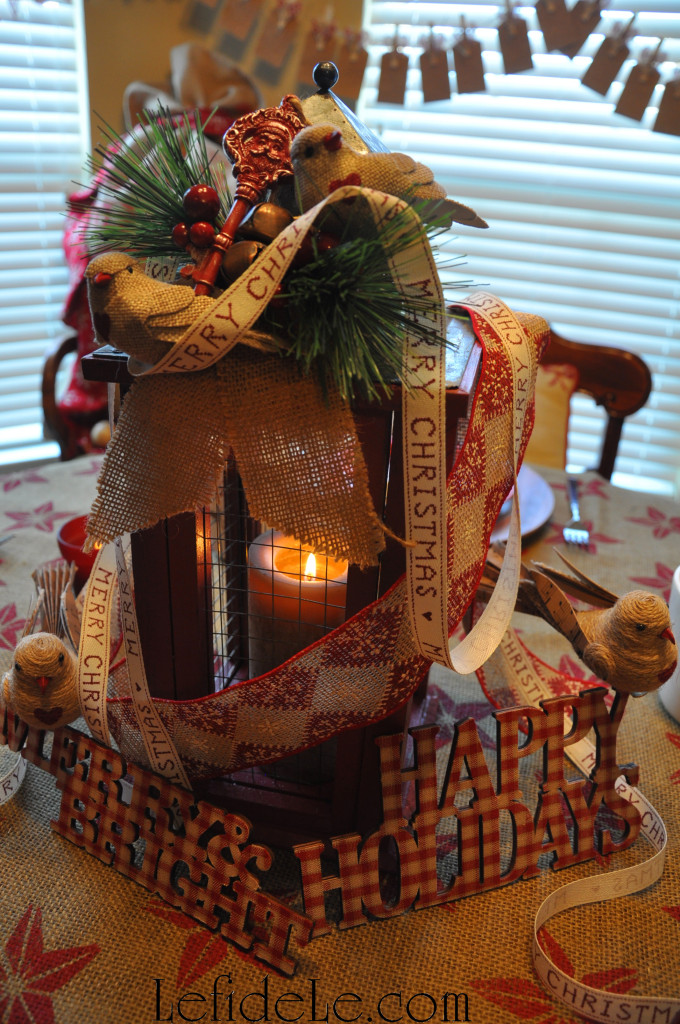
“Follow me in merry measure” to a table lit by barn red lantern bedecked with ribbons and merry-making birds. (See more about the birdies here!)

941Leigh

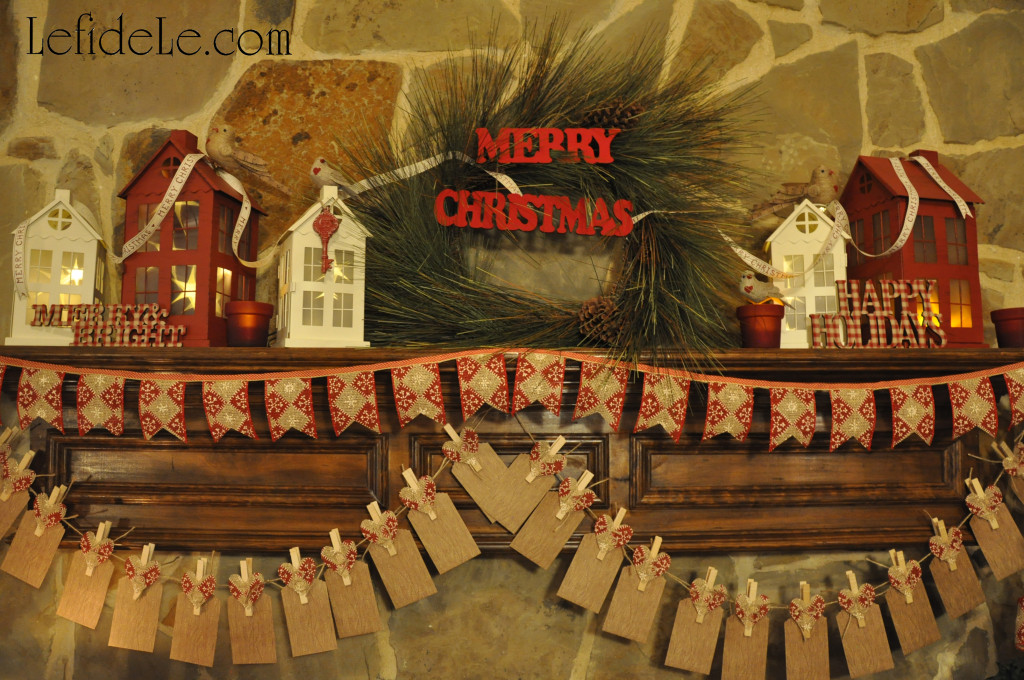
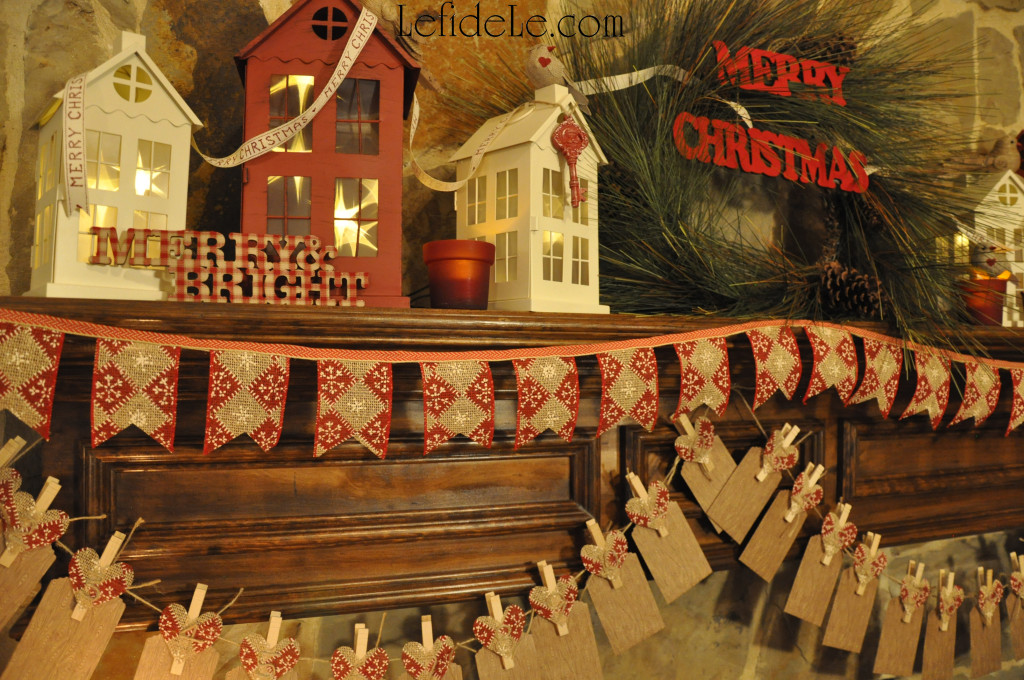
“While I tell of Yule-tide treasure” held in handcrafted advent calendars alongside festive banners and signs trimming the windows in the background. (Find out how to make these here!)

58Leigh

“See the blazing Yule before us” and the apropos message of J-O-Y spelling out the holiday sentiment. (Learn how easily these were made here!)

67Leigh

“Strike the harp and join the chorus” of pretty burlap birds perched perfectly upon tiny tin houses. (See this quick project here!)

918Leigh

“Sing we joyous, all together, heedless of the wind and weather.

Fa-La-La-La-La-La-La-La-La!”

Faithfully Yours,

Leigh
Easy DIY Burlap Ribbon Holiday Banner & Christmas Countdown Advent Calendar Craft Tutorials (+ Free Printable Heart Template)

75Leigh Why prepare for Christmas by waiting in long lines at overcrowded stores when you can create heartfelt moments with loved ones while crafting a homespun holiday that harkens back to simpler times. Deck the halls without breaking the bank with easy DIY advent calendars and holiday banners made from burlap, ribbon, jute or twine, and clothes pins. Nothing is more festive than a banner, and the countdown to Christmas is even more exiting when it’s accompanied with a daily treat. In this way, we can all celebrate togetherness in the real spirit of the season!

946Leigh

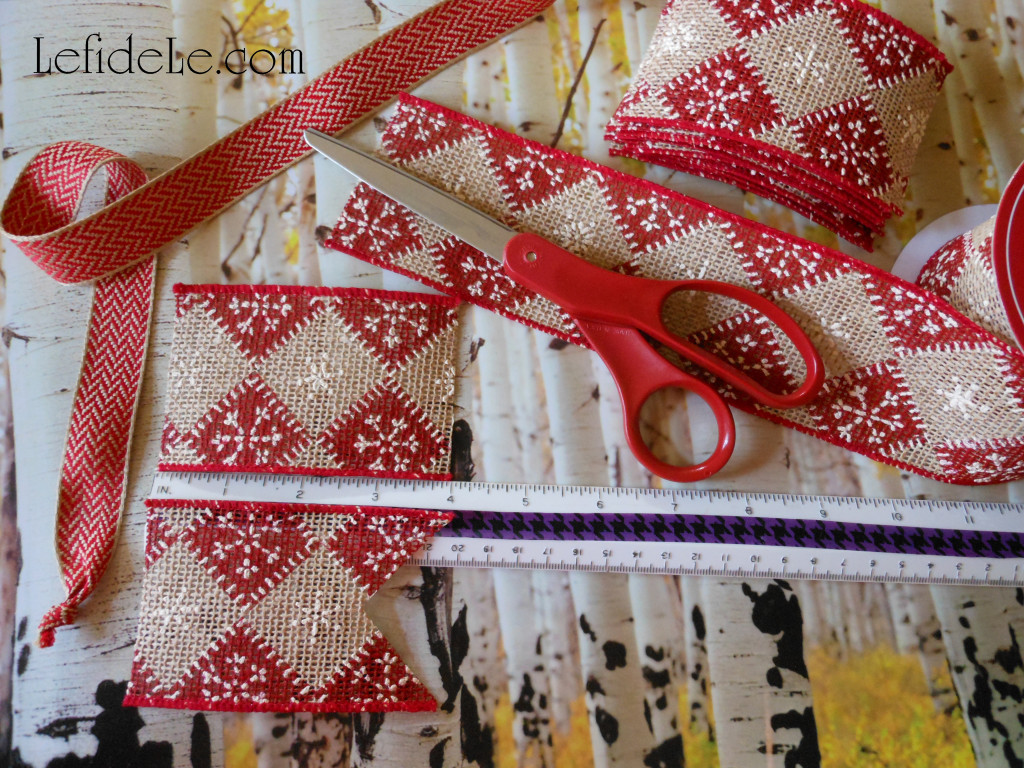
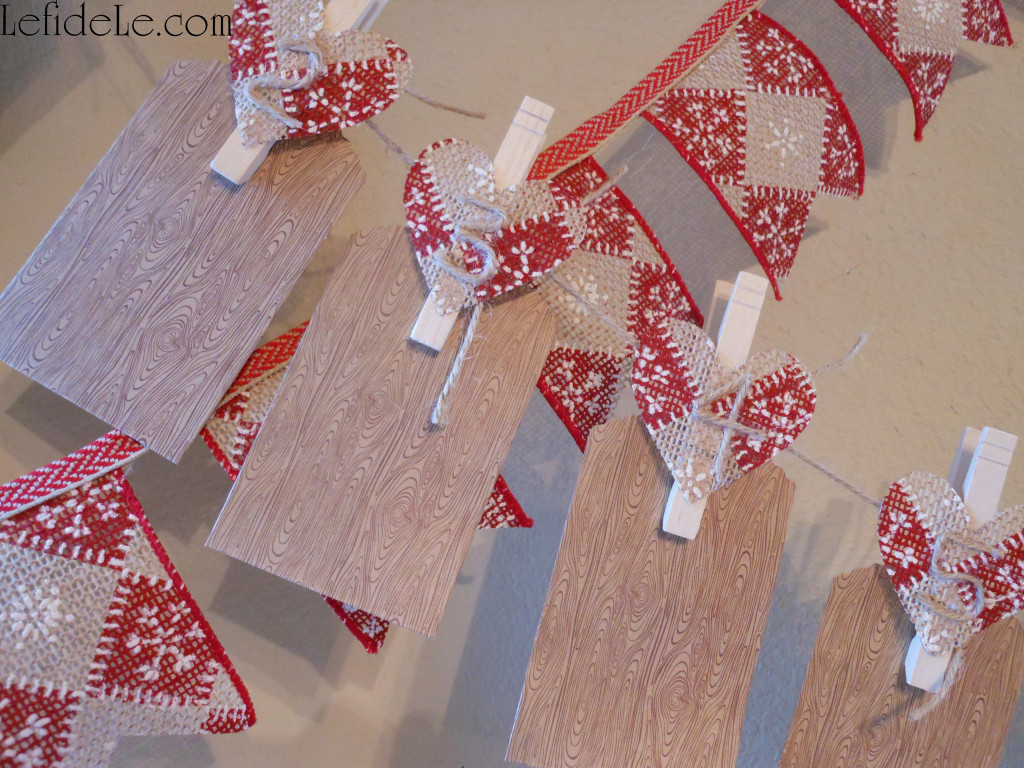
To make a simple yet adorable Christmas banner, use a wired ribbon (like patterned burlap) and a thinner flat woven ribbon. Cut the woven ribbon as long as you want your banner to be (like the length of your mantel).

624Leigh

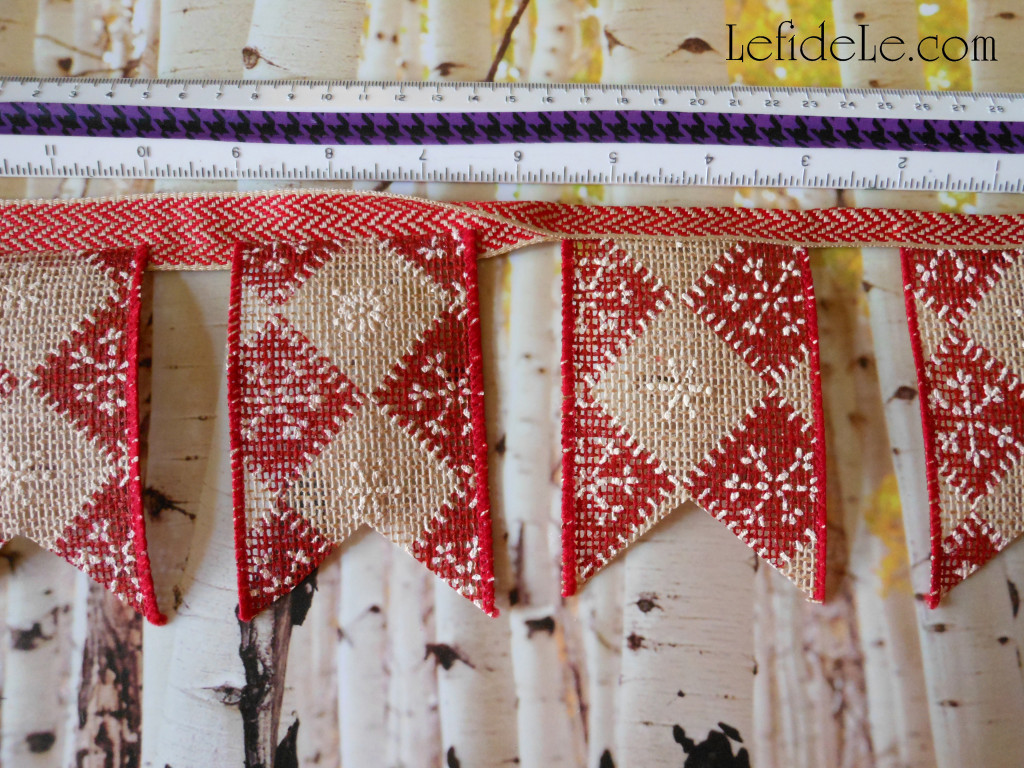
To make the little flags, cut enough 4 inch lengths of the wired ribbon to fill the length of the banner. Next cut 1 inch V-notches out of one end of each (by folding in half lengthwise and making a straight cut at a diagonal angle).

628Leigh

Hot glue the straight sides of the cut flags to the center of the long woven strand (spacing them a little apart). Now add a line of glue to the top of the long ribbon and fold in half over the cut ribbons. (Press this down for better adherence.) Do this in sections of a few flags at a time (so the hot glue doesn’t have time to cool before pressing).

923Leigh

Try hanging it on a stairway or as a festive backdrop in your breakfast room. (I even have one hanging across my spice racks as I write this.)

84Leigh

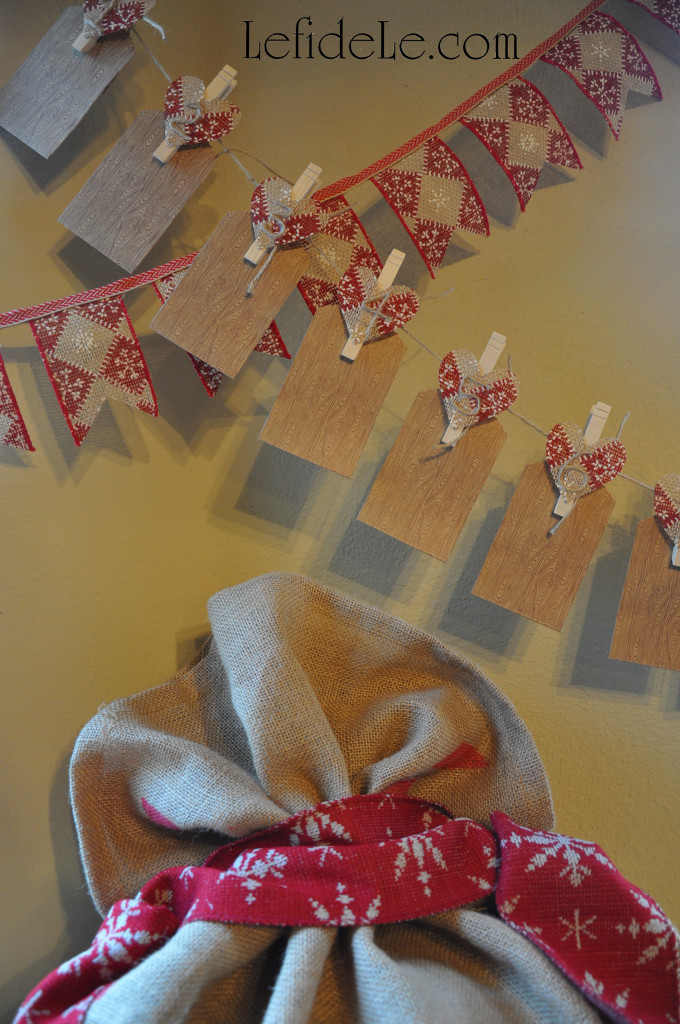
To make an original yet inexpensive advent calendar use 25 clothespins, 25 tiny paper bags, jute or twine, and some leftover ribbon or burlap.

heart template

Print my heart stencil, and cut it out to use as an easy template to trace uniform shapes quickly. (Just right click on the image above, and select print.)

653Leigh

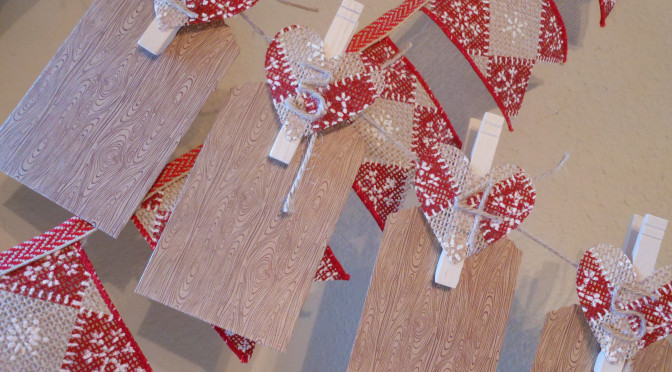
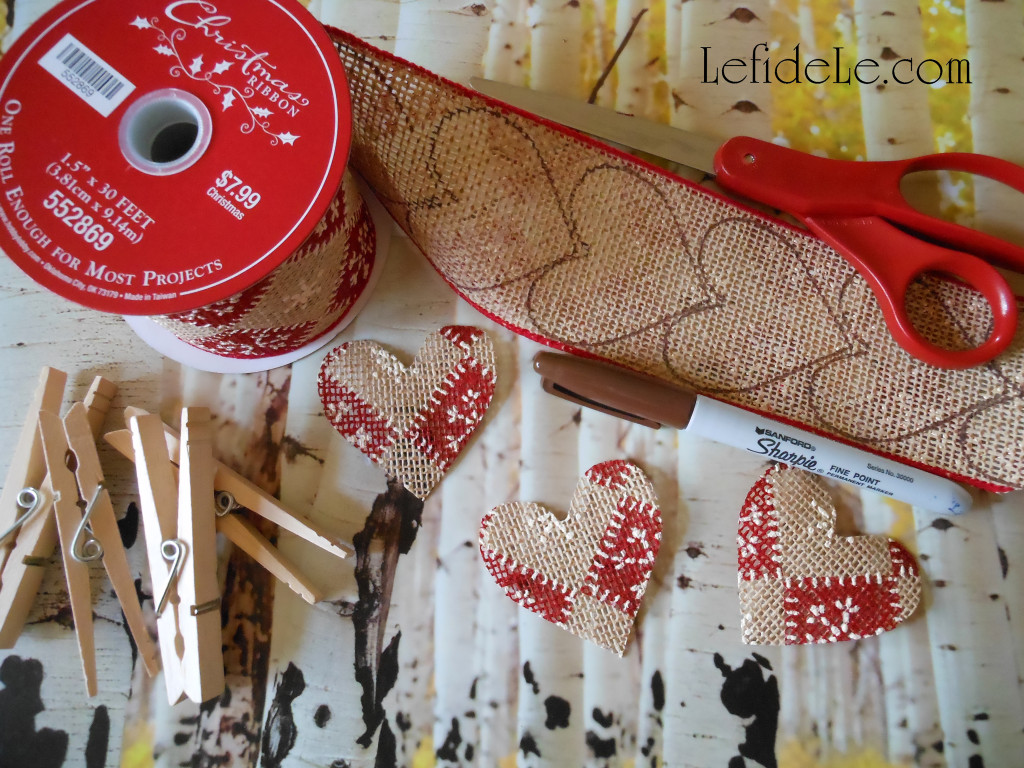
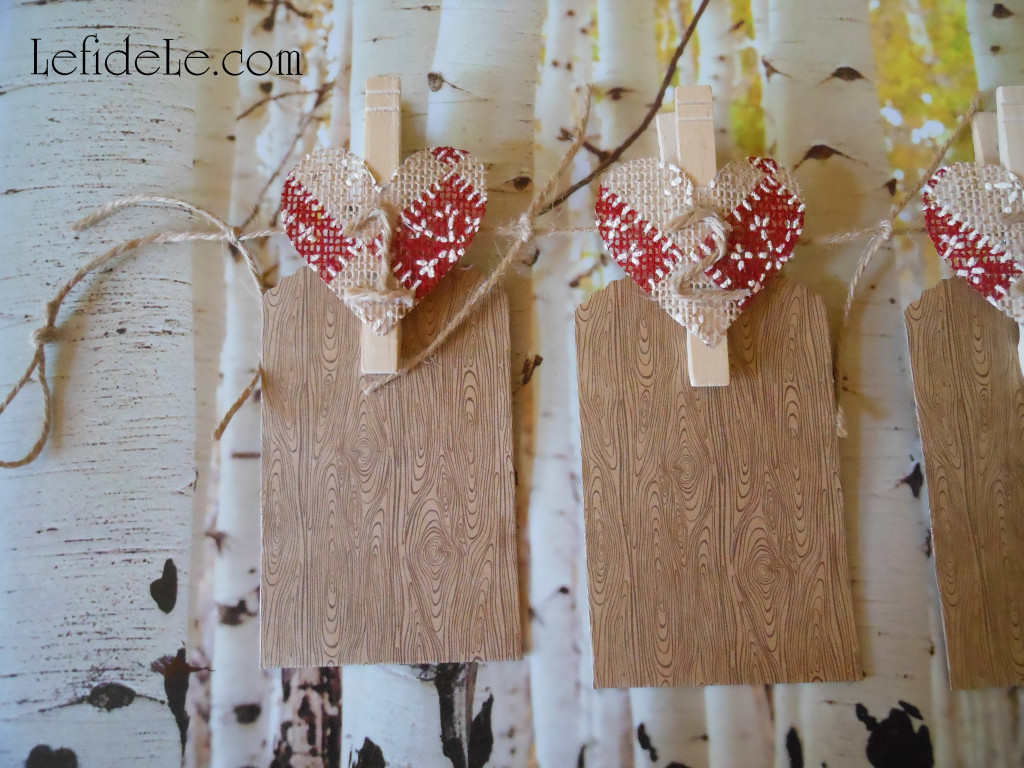
Trace the hearts (or make stars, trees, circles, etc.) onto the underside of your choice of ribbon, fabric, paper, or burlap. Cut 25 of the shapes out.

663Leigh

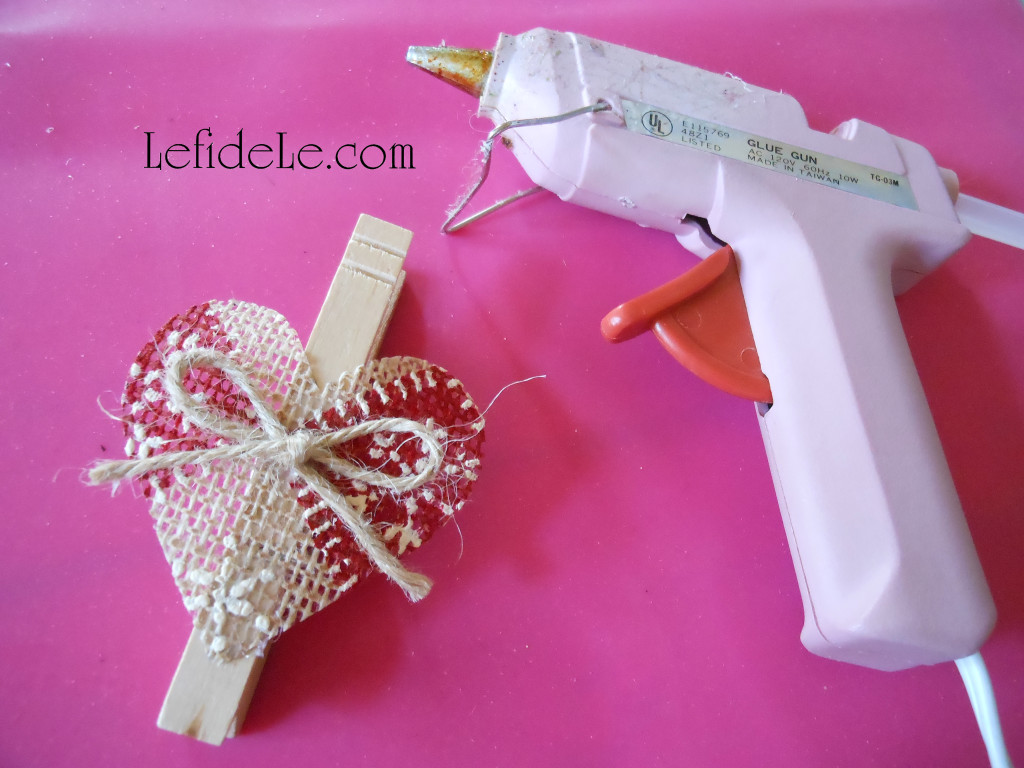
Then hot glue a shape to each clothespin. Next, you have the choice of gluing a ready-made number onto each heart, or simply adding a bow. (This is really cute when using them as a mantle-less stocking holder line. You can also add a strong magnet to the back, and stick it on the fridge.)

2Leigh

I chose to hot glue jute in the shape of numbers onto each heart. (It is easier than it looks, but it was a bit more time consuming.)

706Leigh

Be sure to knot small lengths of twine in between each clothespin at regular intervals (so that they don’t all end up in the center once they’re hung up).

58Leigh

A few ideas for daily treats are… gum or candy, jewelry or cufflinks, holiday fortunes without the cookies, gift cards from favorite stores, love notes or poetry, cash or coins, seasonal jokes, flash drives loaded with holiday movies or music, sewing goods like thimbles or embroidery floss, special recipes with a promise to make, barrettes or keyrings, homemade certificates for things like breakfast in bed or car-washing, lip gloss or chap-stick, scavenger hunt clues for large items, scrapbooking stickers or components, and tickets for movies, concerts, events, or travel. Or for the crafty person… try putting one piece of a crafting kit into each packet which can be completed when the holiday’s over. You can even assign odd and even days to different family members.

67Leigh

Why have one day of a filled stocking that competes with big presents, when you spread the joy of Christmas into 25 days of surprises!

Fa La La La La Lovin’ It!

Faithfully Yours,

Leigh
P.S. Check out my other coordinating homespun holiday craft tutorial HERE, and the full results all of the heartfelt crafting HERE!


DIY La Calavera Catrina Costume Mask & Calaveras de Azucar (Sugar Skulls) Banner for a Dia de los Muertos (Day of the Dead) Themed Halloween

090Leigh

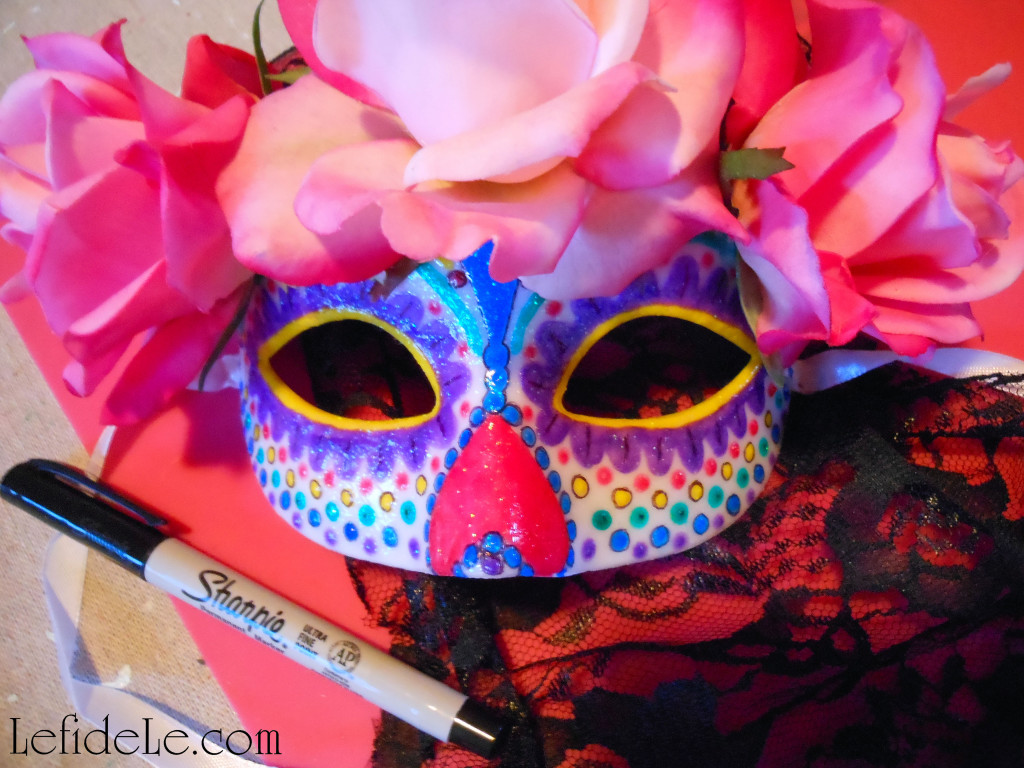
This tutorial will help you to inexpensively craft your own one-of-a-kind la calavera catrina costume mask in the Dia de los Muertos (Day of the Dead) style, and then easily DIY a Calaveras de Azucar (Sugar Skulls) banner to decorate your Halloween party. Sugar (azucar in Español) is said to balance the bitterness of death (muerte), and calaveras (skulls) are traditionally offered on All Saint’s Day (November 1) to departed loved ones as one would leave flowers graveside. These calacas (colloquial term for skeletons) have migrated north from Mexico into American Halloween celebrations as themed décor. In this same way, traditional parade skull masks have become party costumes. As Halloween serves to poke fun at all things scary, Dia de los Muertos is intended as a way to accept death as inevitable… and also to honor dearly departed loved ones. The Mexican ½ face parade masks symbolize this idea of life being inextricably linked with death. So when you don this half skull mask for Halloween, be sure to make up the lower half of your face as a beautiful representation of life… and poke a little fun at death as not being so scary!

1(2)Leigh

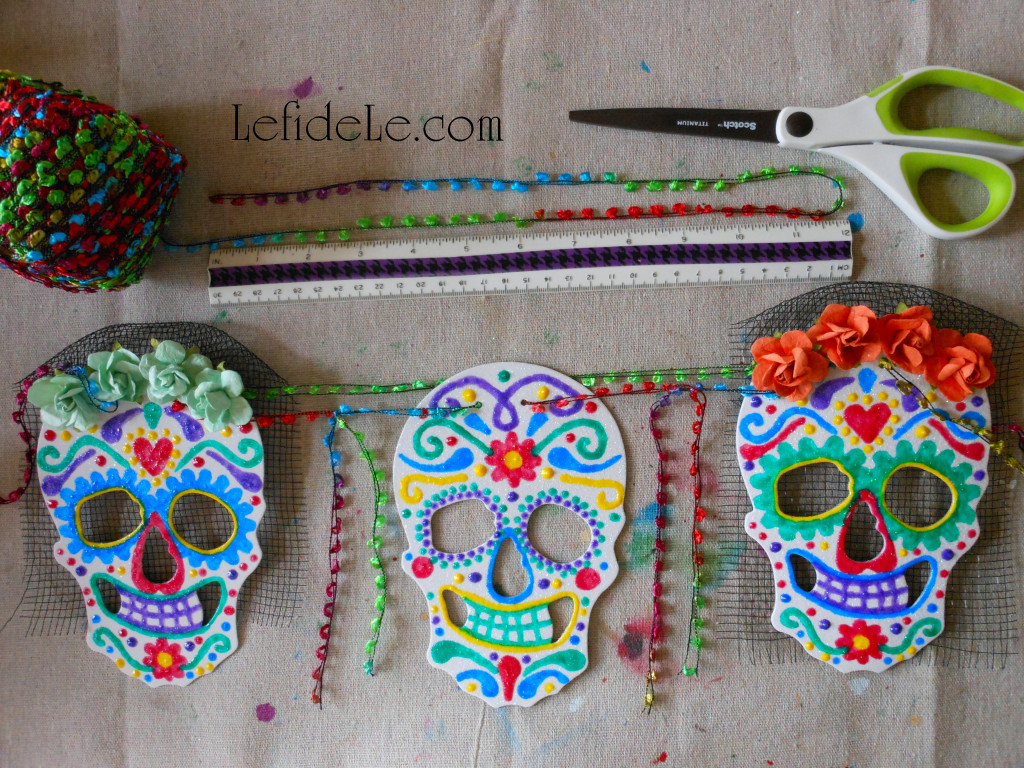
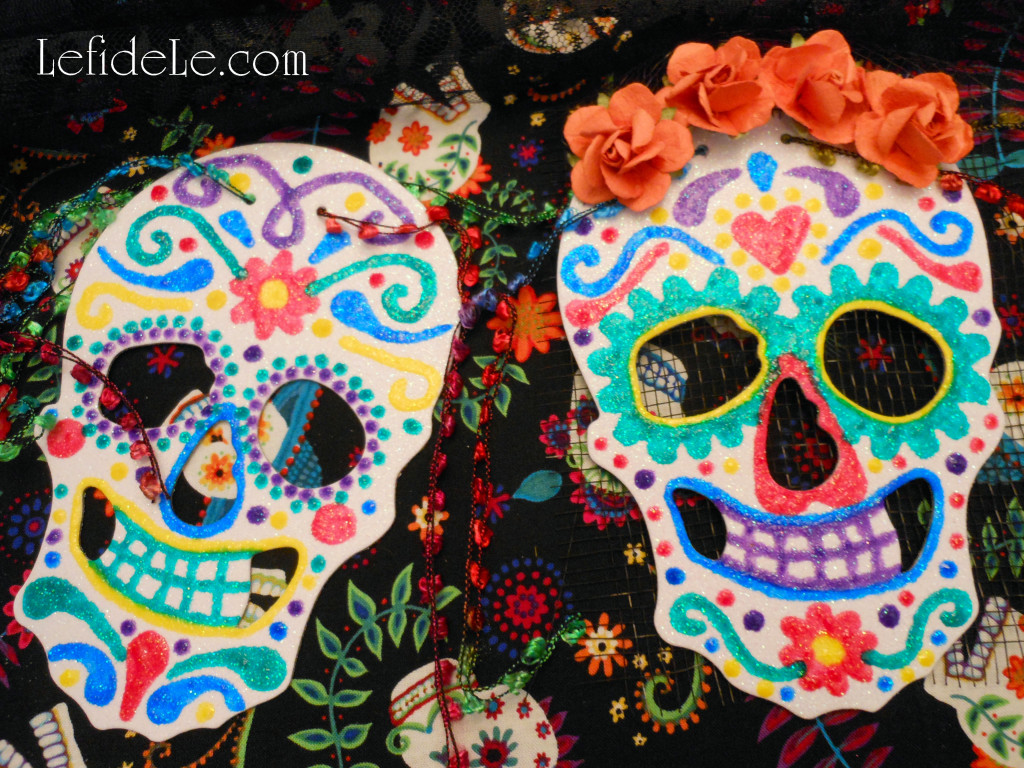
To craft the calaveras de azucar (sugar skulls) banner, begin with either a package of glittered skulls or cut your own shapes from glittered paper. Another option is upgrade a readymade skull banner. (All of these items are available at Le fidèLe Designs craft supply affiliates Michaels and/or Joann whose clickable ads may be found in the sidebar.)

6(2)Leigh

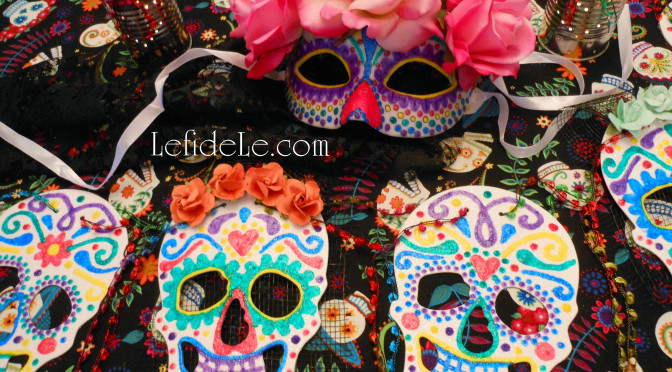
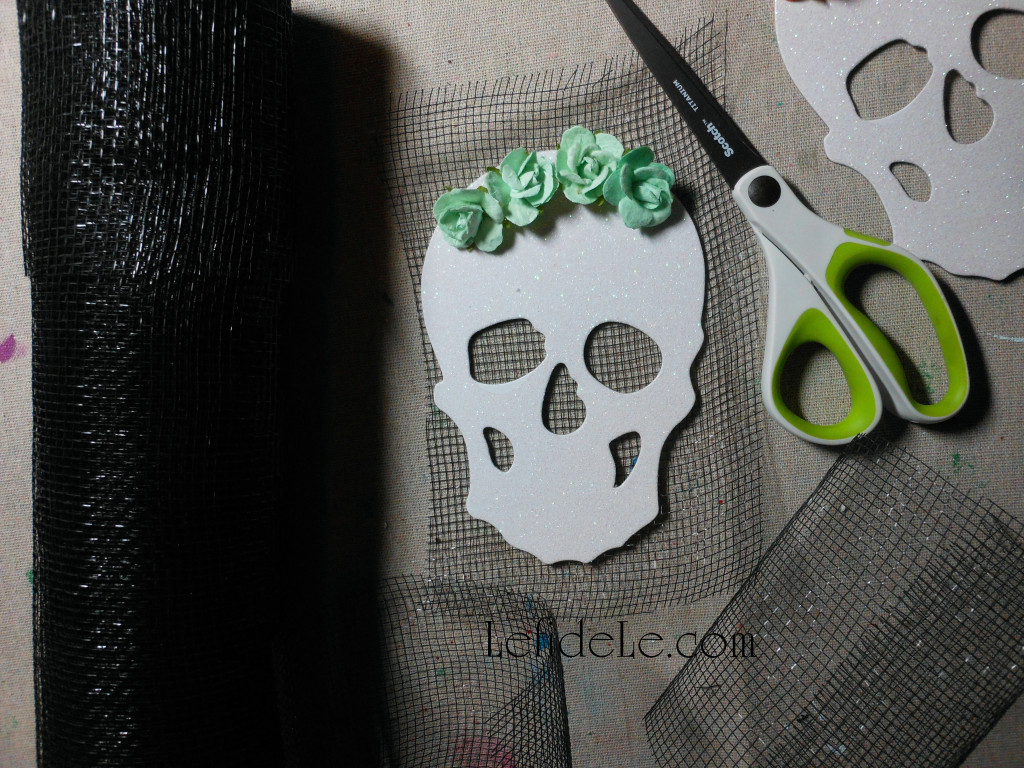
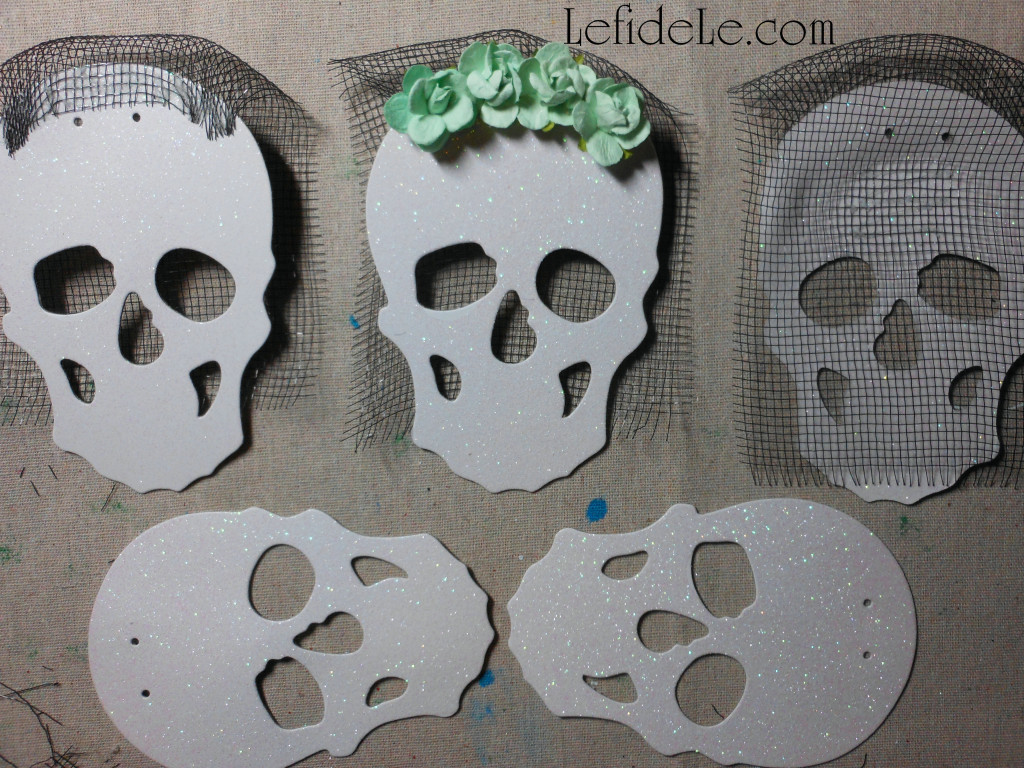
Attack black floral mesh squares to half of the skulls. Glue one end to the top of the front and the rest to the underside so that it looks like a lacy veil.

001Leigh

Next, glue paper rosettes to cover the front edge of the veils.

006Leigh

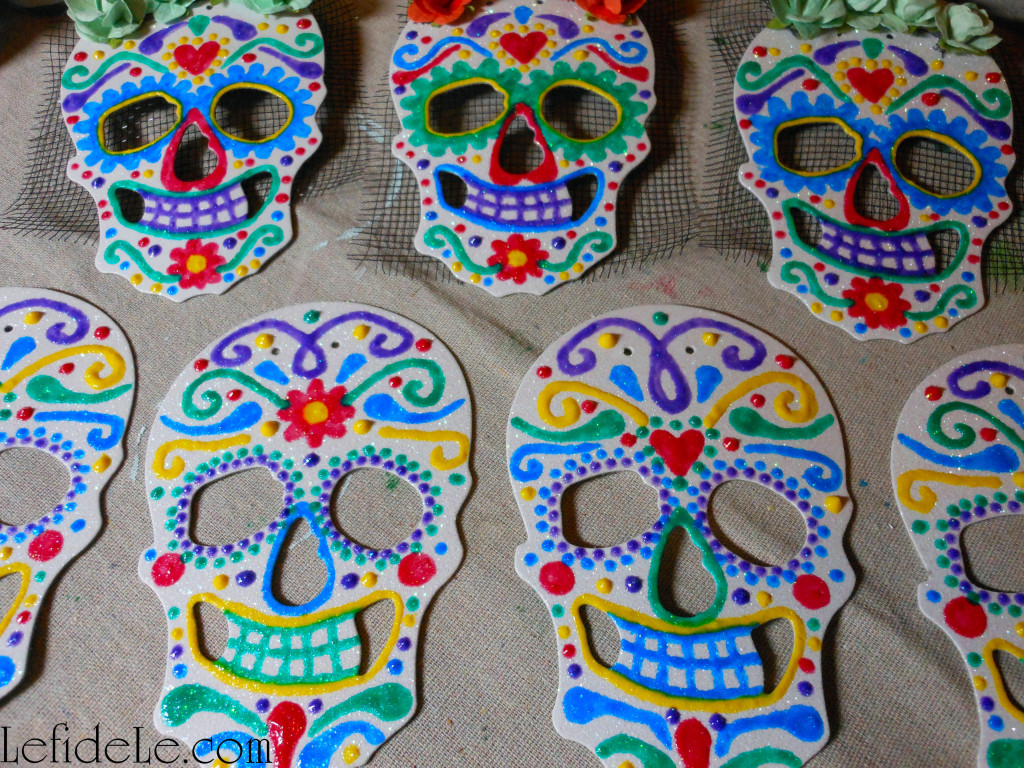
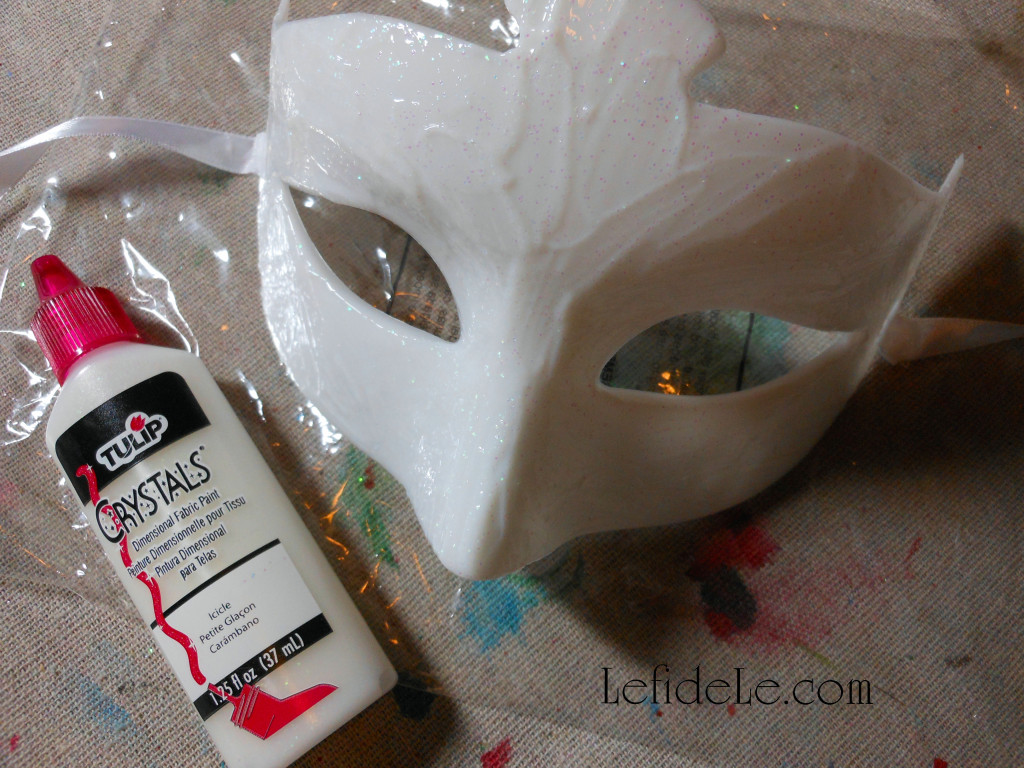
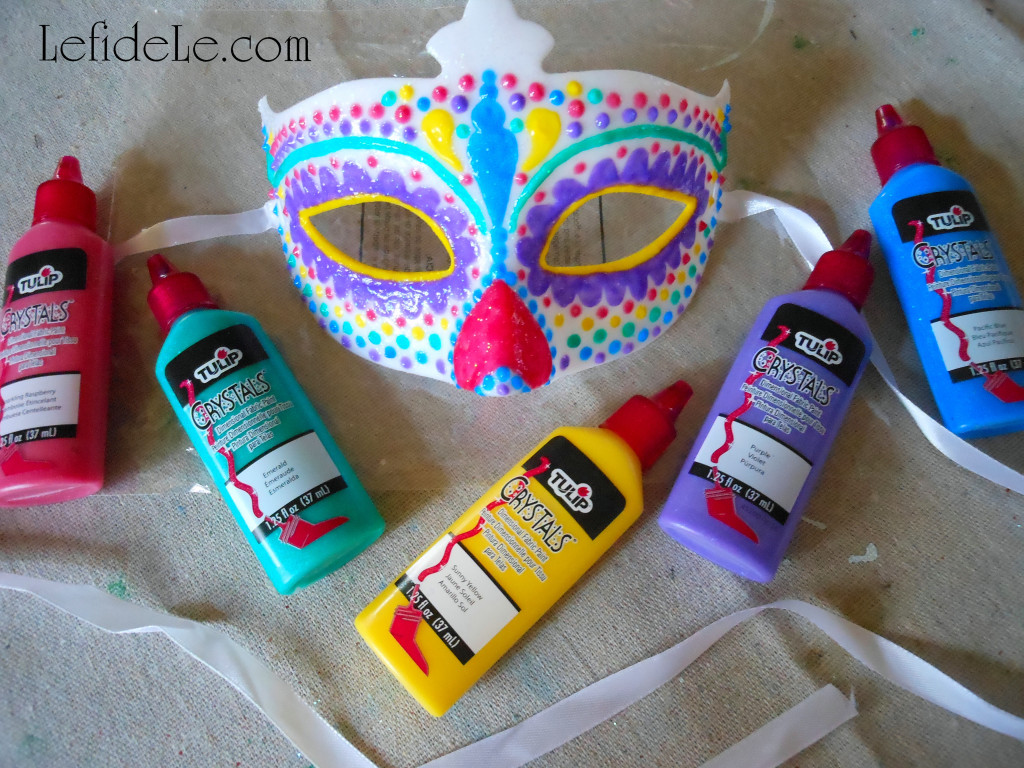
To decorate these with the traditional sugar skull designs of flowers, hearts, swirls, and apostrophe type marks, I utilized Tulip brand Crystals (= glittery like sugar) T-shirt paint. It works really well on many materials besides cotton. The small tips allow the paint to come out just like icing does on real sugar skulls. If you prefer the control of a paintbrush, just squeeze some out onto a paper plate to use as a palette. Let these dry overnight to cure.

015Leigh

Next cut lengths of colorful yarn or ribbon to string the banner on. If your skulls don’t have the right holes to string them through, just use a hole punch… or even poke some with an ice pick!

082Leigh

Hang them in the background of a themed party or over a candy buffet.

004Leigh

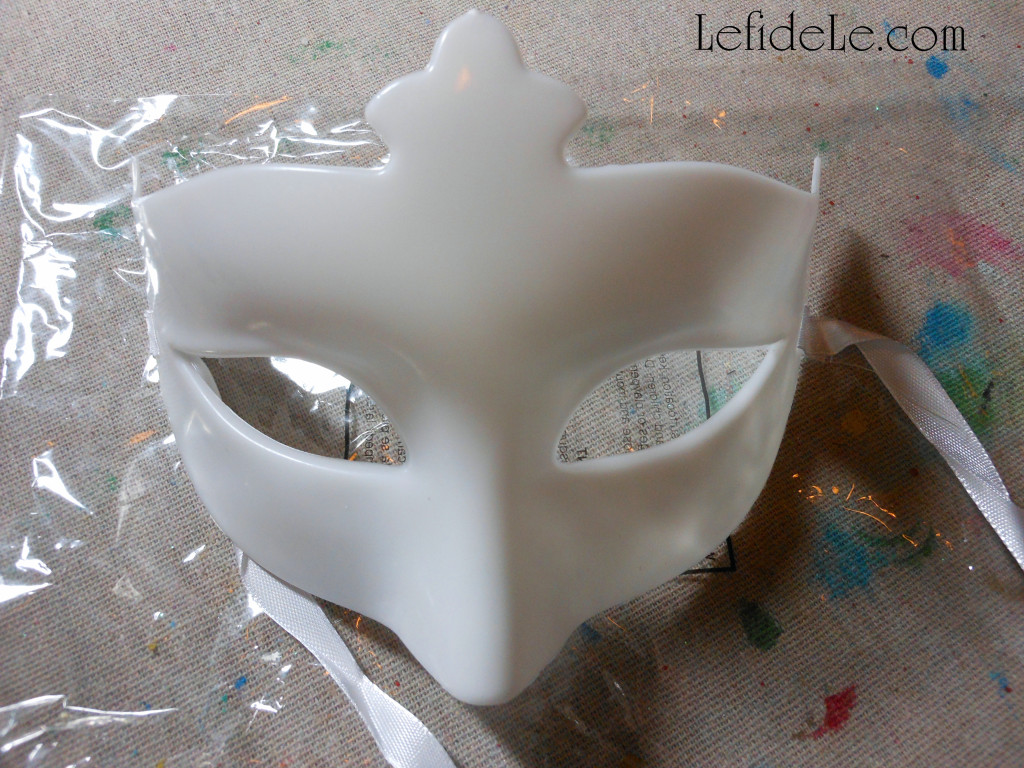
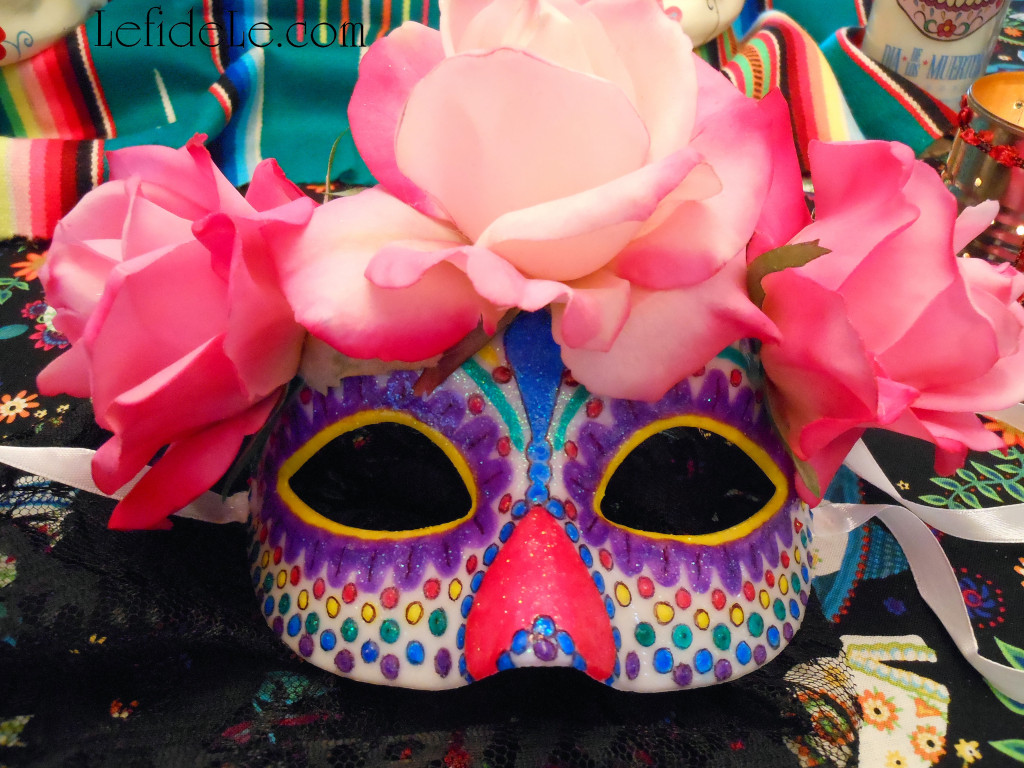
To make your own catrina mask, purchase a plain plastic one to embellish. (This Mardi Gras type can be found at Michaels for about $2, and Joann has some as well.)

011Leigh

Use the same T-shirt paint leftover from the sugar skull banner to cover the mask with. (I just used my finger to smear it around.) Let this layer dry well.

016Leigh

Begin using other colors to add designs to the mask. Dots are the easiest to make with these paints, but make an upside down heart for a nose decoration. (I made a girlier version than can be typically found at the Halloween stores by using softer colors than red and black and by making the eye sockets flowers instead of black rings.) Let this layer dry well too.

037Leigh

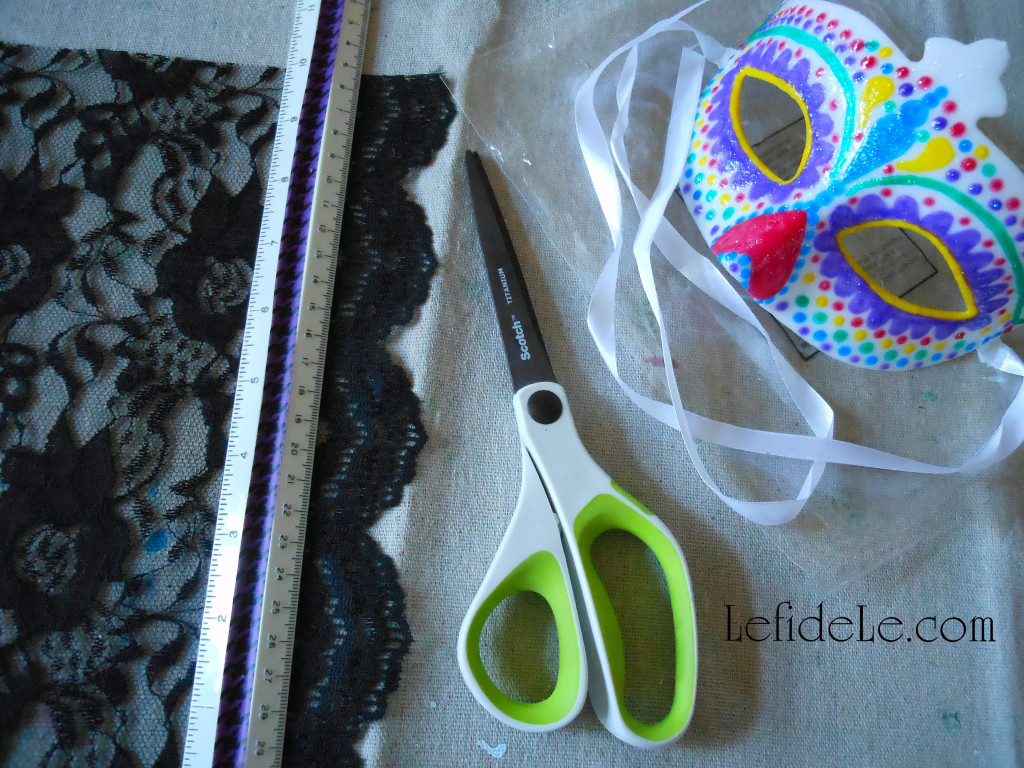
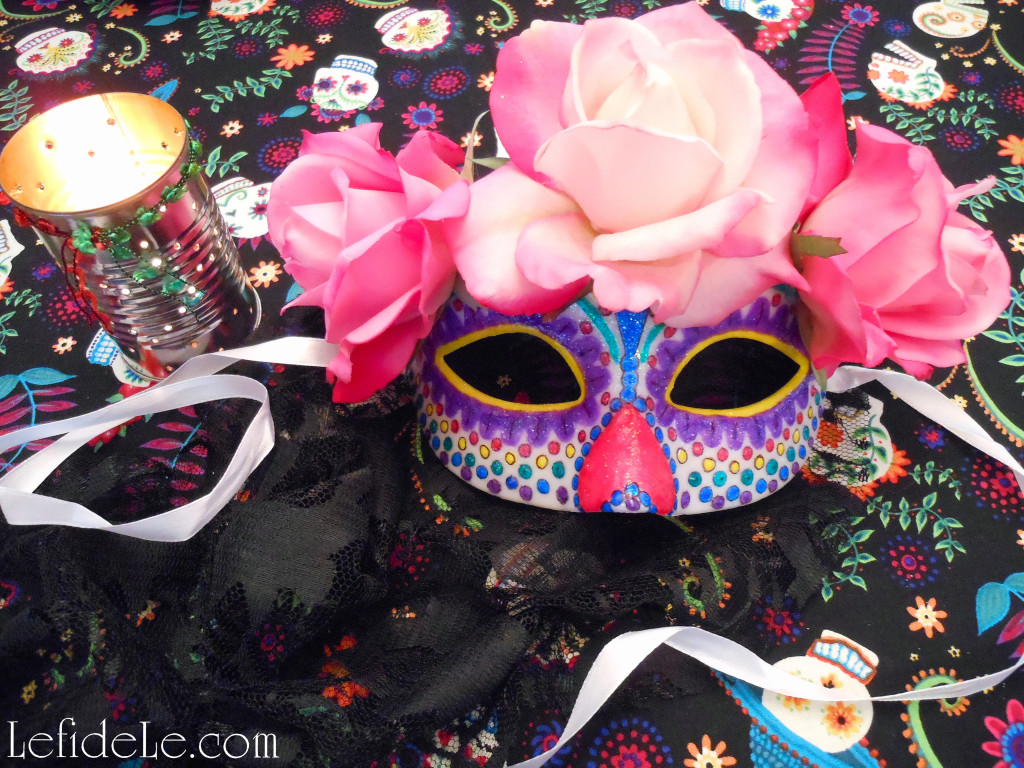
Cut a length of lace at about 10 inches across and at a length that will cover most of the hair of the recipient.

039Leigh

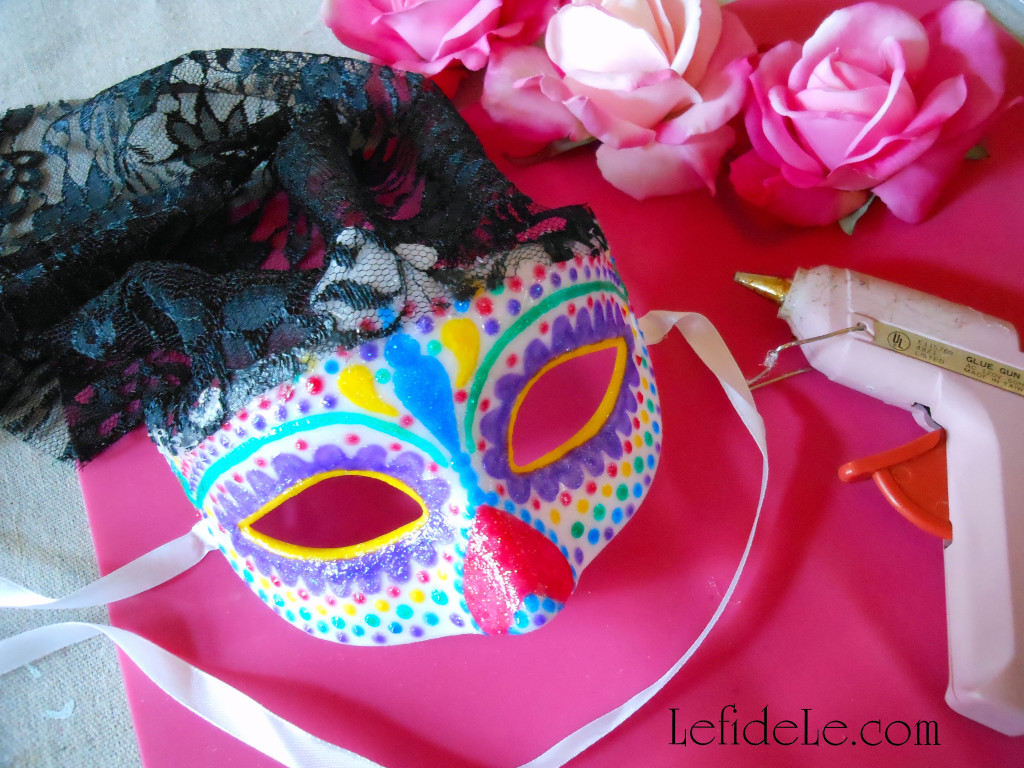
Glue the 10 inch edge to the top of the mask, pressing the fabric into the glue. Make small gathers to take up the width. This veil will expand over the head to better cover the hair.

042Leigh

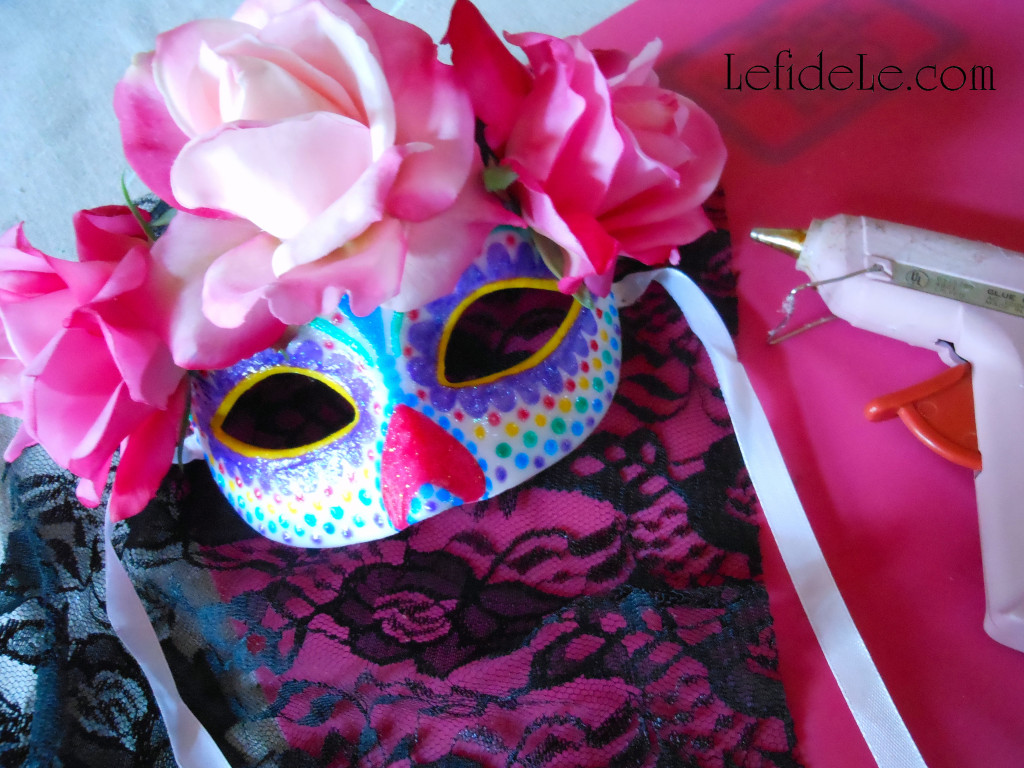
Now pull off faux rose heads from their stems. Glue these on top of the lace, and hold them down until they don’t feel like they will slip off.

44Leigh

Further definition may be added to the edges of the paint lines with a fine tip sharpie permanent marker. (I think a little black helps to tie in the veil’s color.)

103Leigh

Try wearing this with a traditionally embroidered Mexican dress and a black lace shawl.

113Leigh

It may also be used as décor for a themed Halloween celebration.

107Leigh

Viva la celebration!

Faithfully Yours,

Leigh
Colorful Indoor Picnic Party Tablescape Perfect for Rainy Days or Texas Temps!

272Leigh

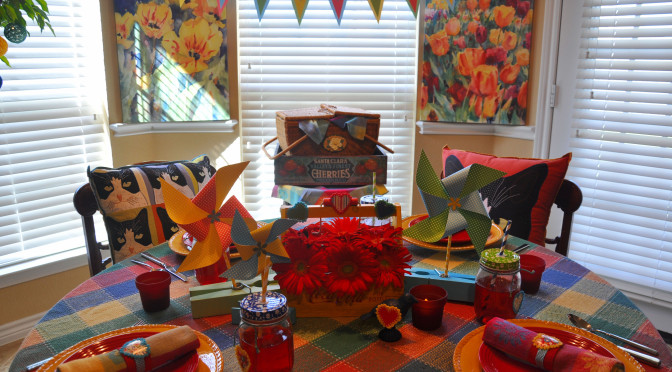
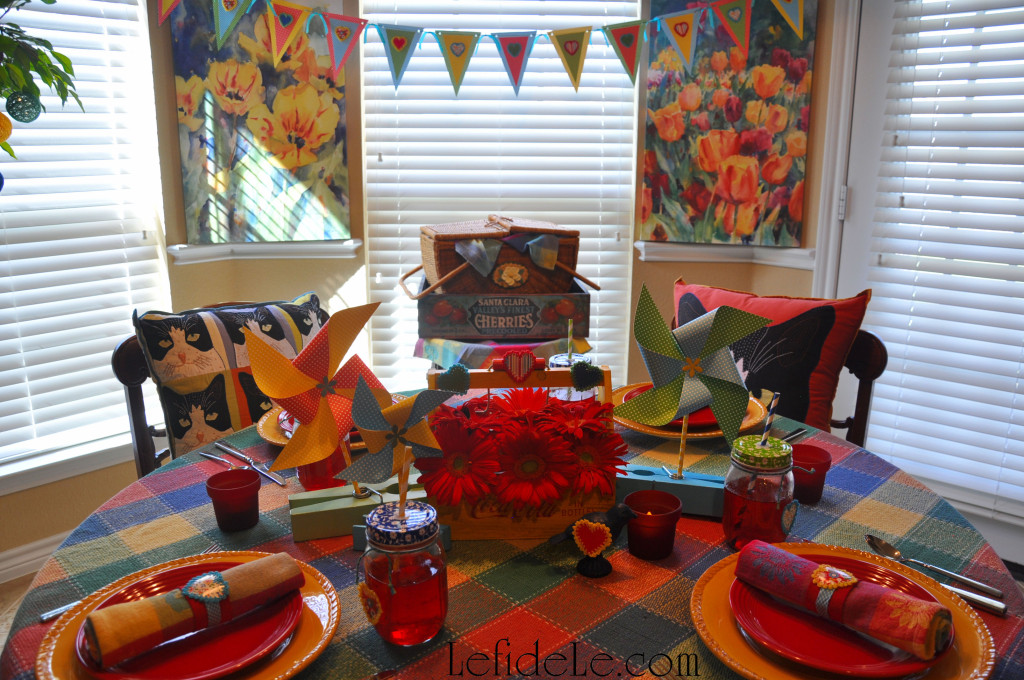
This colorful indoor picnic tablescape makes a party perfect on rainy days or in soaring Texas temps. As a matter of fact, that is exactly what brought this vibrant alfresco celebration inside. No one really wanted to sit on dry itchy grass with hot dusty wind from triple digit heat laminating one’s face with excessive humidity. The risk of West Nile tainted mosquitos, fire ants, pesky flies, even thunderstorms rolling in led to the request of a placid gathering soothed with the luxuries of air conditioning and comfy chairs. Admittedly, the modification made for the loveliest of afternoons in cheerful celebration of summer.

274Leigh

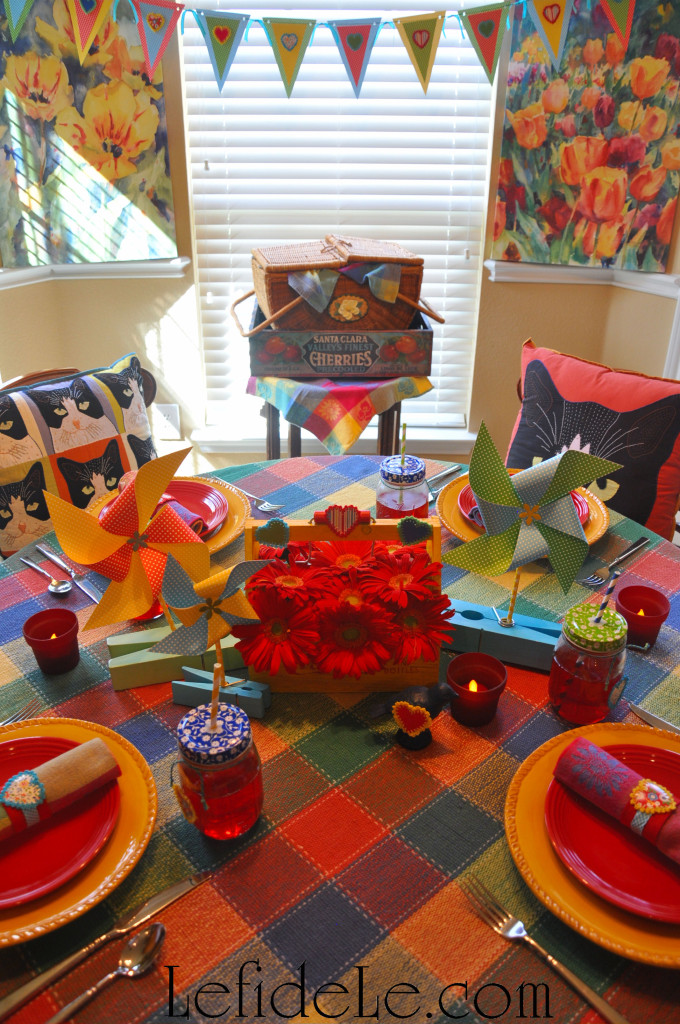
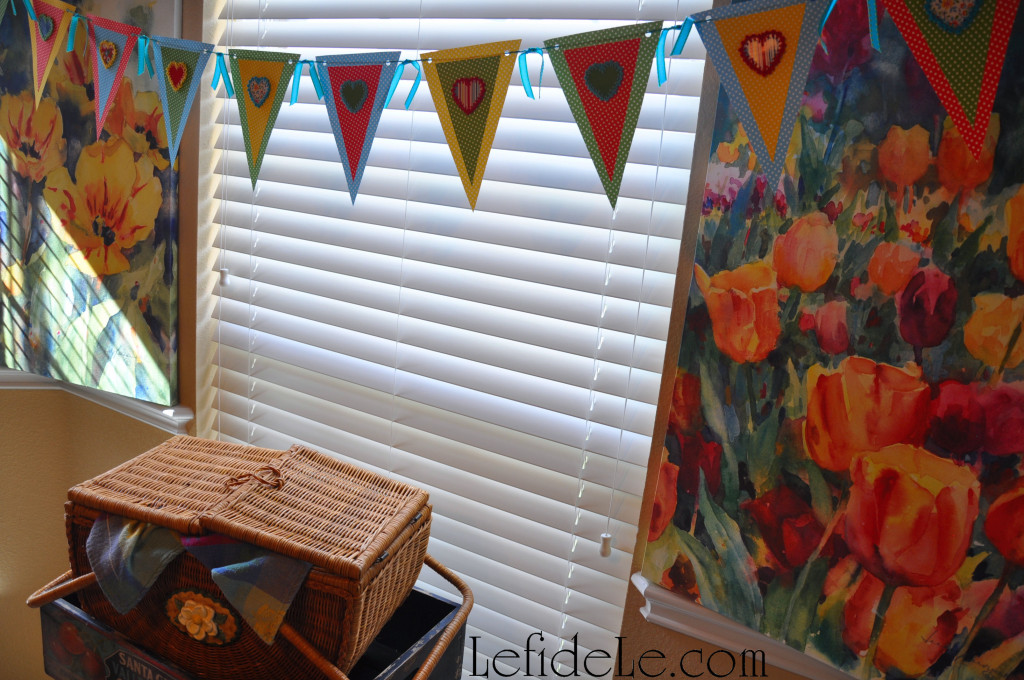
Large prints of watercolor paintings brought the brilliant colors of sprightly blooms inside.

249Leigh

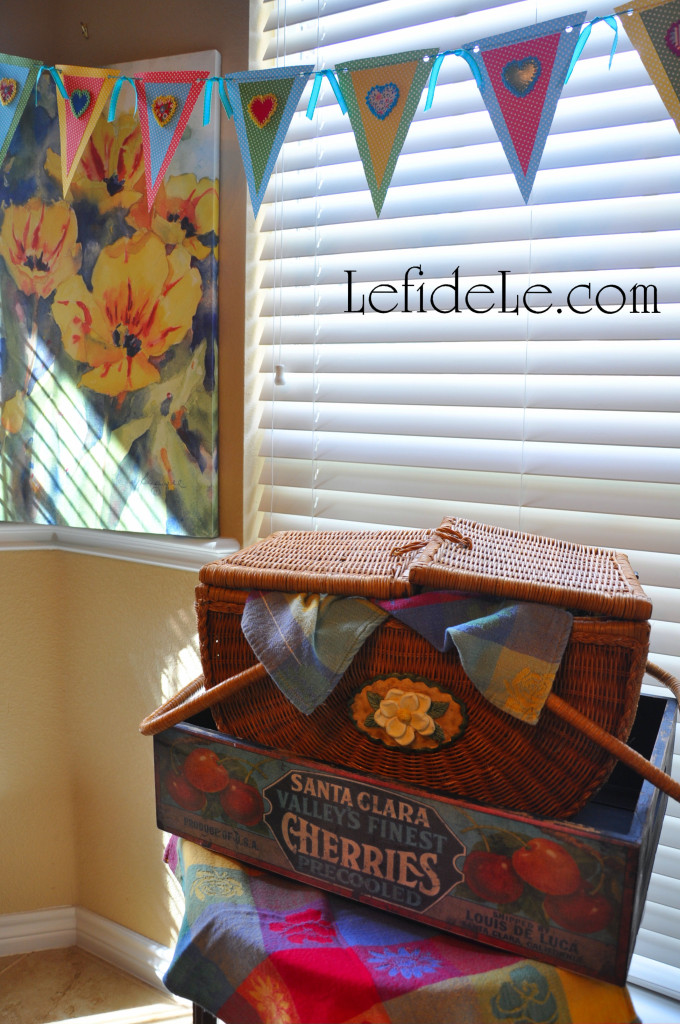
A handcrafted banner (click here for tutorial & template) set a playful mood aloft a side table topped with madras plaid napkins and a fruit crate that secured a vintage woven picnic basket filled with the surprises of sweet treats for dessert.

252Leigh

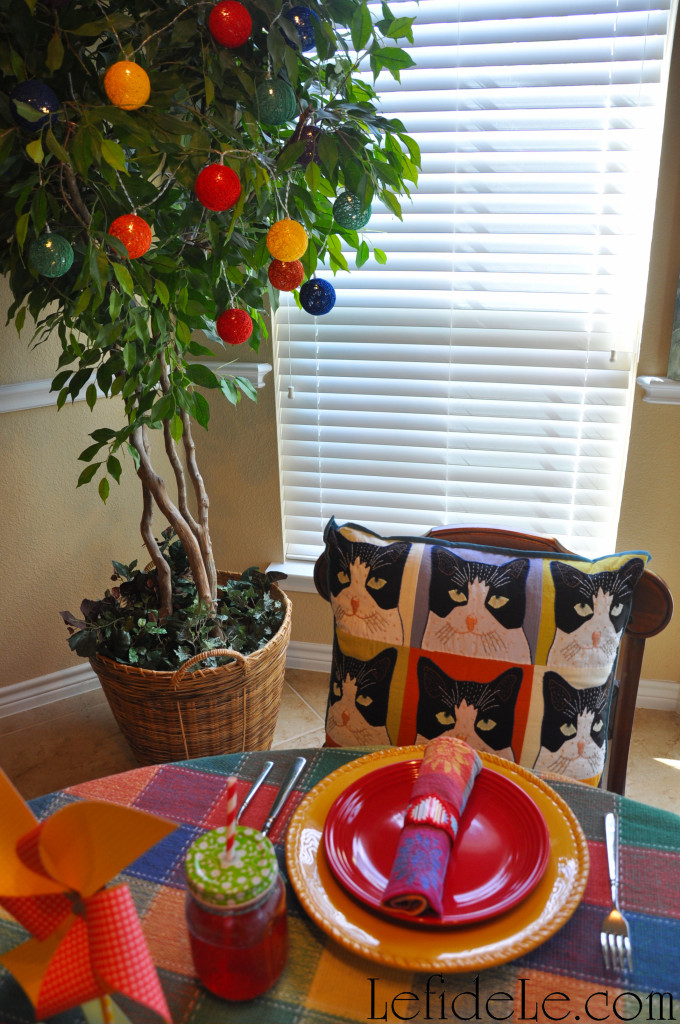
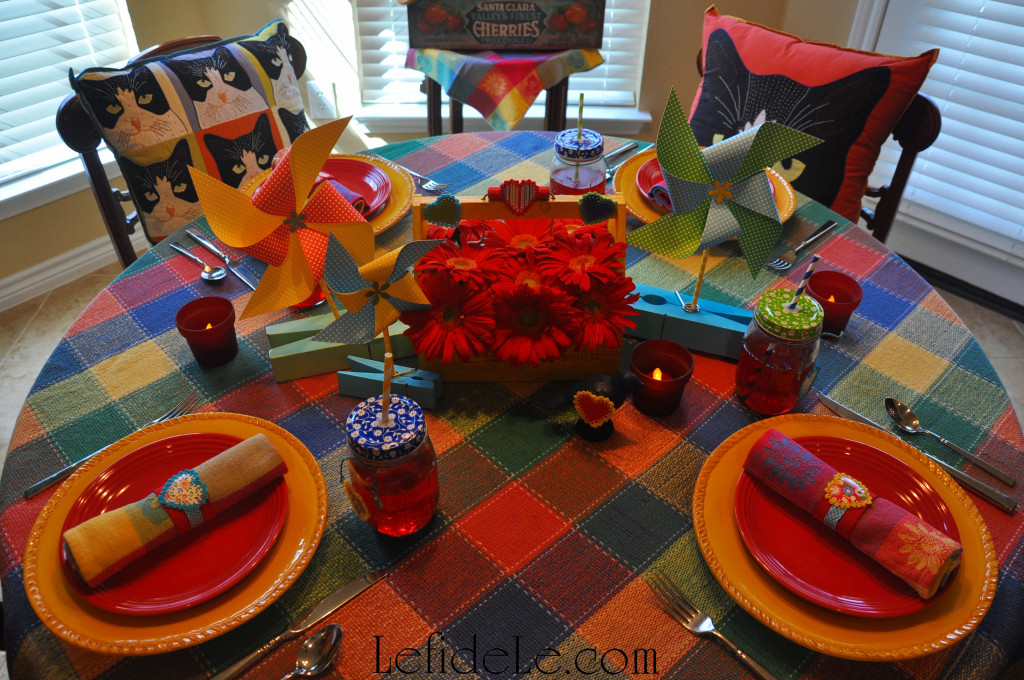
An indoor ficus tree was delightfully strung with lights of multi-colored string orbs just as one would trim a courtyard. Embroidered patchwork tuxedo cat pillows in Warhol tradition honored a beloved friend who passed on.

233Leigh

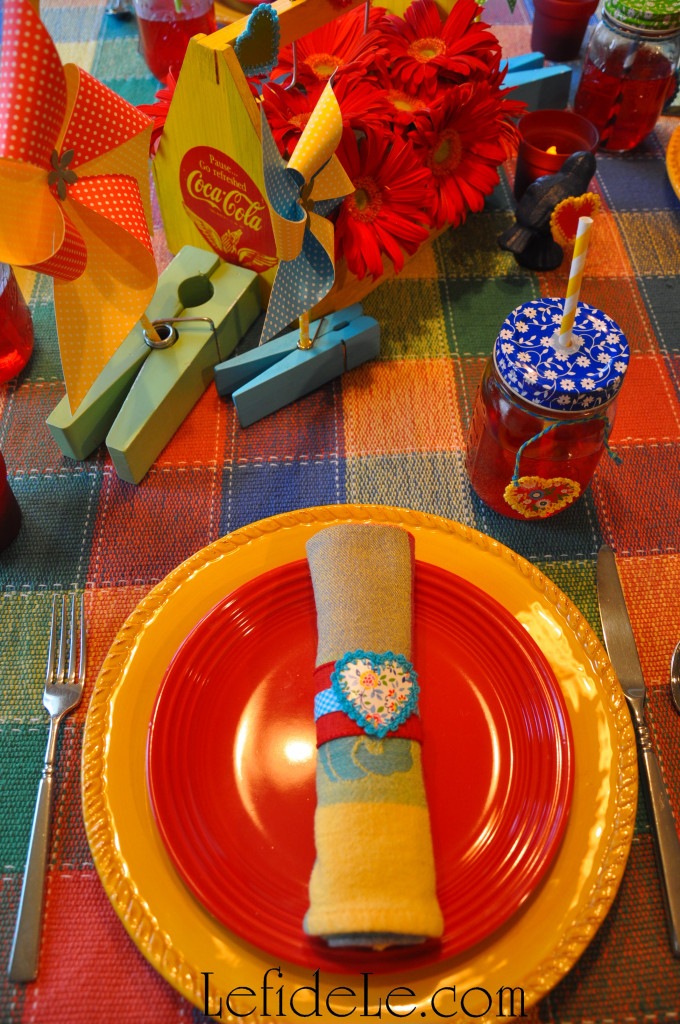
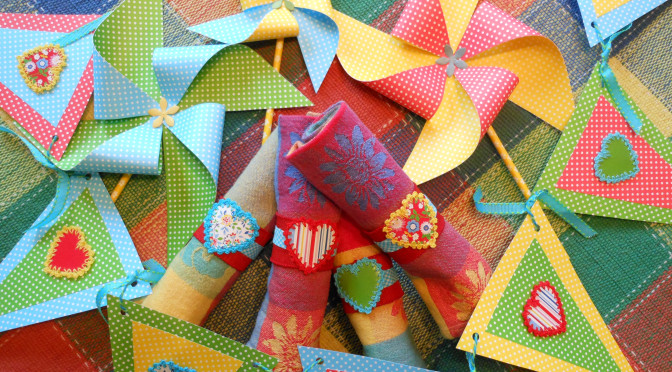
A brightly woven picnic blanket was employed as a tablecloth and set with yellow dinner plates that shined like midsummer suns. Appetite stimulating red salad plates and handmade napkin rings (see the tutorial here) filled with more madras plaid napkins were layered atop that. Coordinating crocheted hearts adorned glass drinking jars fitted with purposely mismatched lids and paper straws.

237Leigh

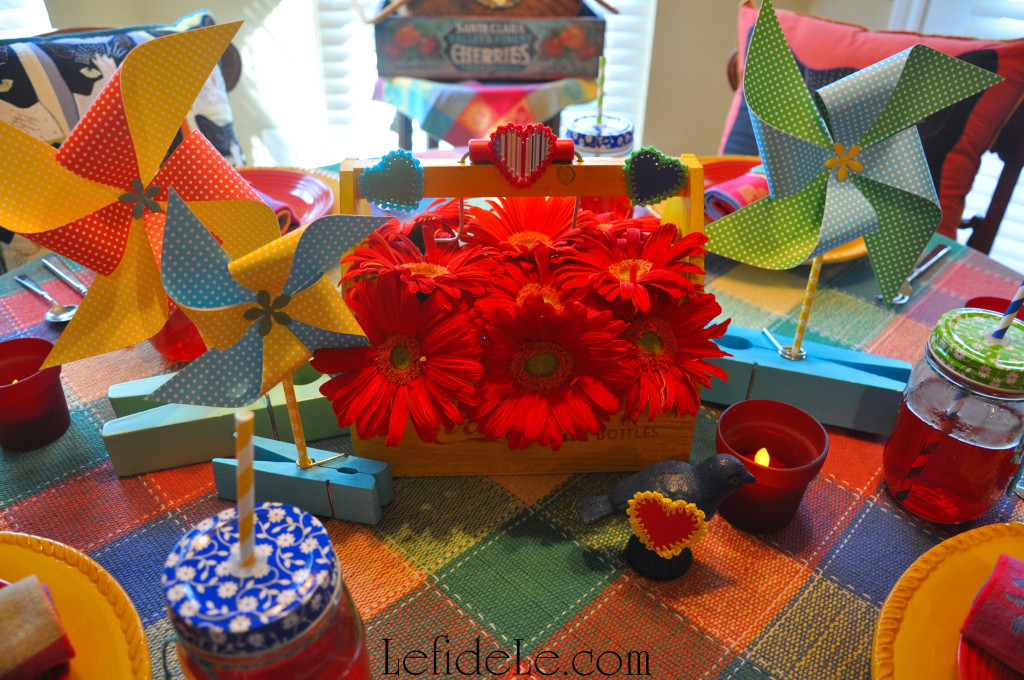
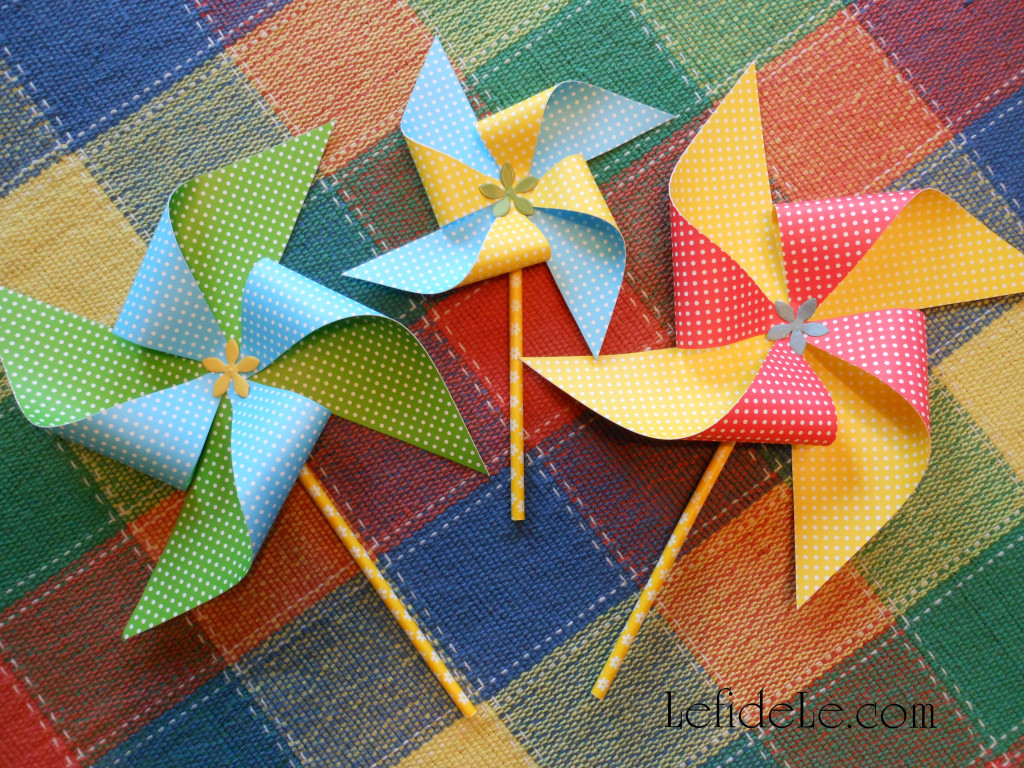
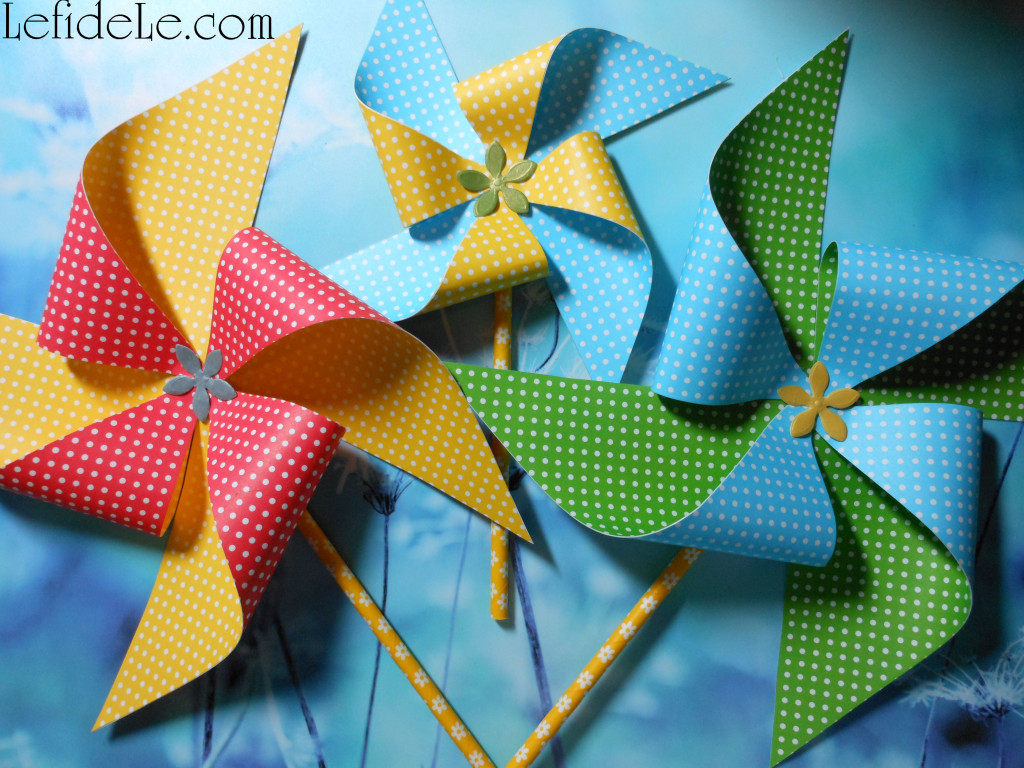
Delightfully oversized clothespins supported banner matching pinwheels (click here for tutorial & template) which contributed to the illusion of a cool circulating wind. A cast iron bluebird of happiness, wearing its heart on its sleeve, sang away the blues amidst glowing red votives filled with LED tea-lights. Completing the centerpiece was a coke bottle carrier repurposed with tiny vases to hold fresh red gerbera daisies.

211Leigh

Remember when foul weather spawns, just to keep calm and picnic on!

263Leigh

Faithfully Yours,

Leigh
P.S. For allergy-friendly picnic food try these recipes:

012Leigh

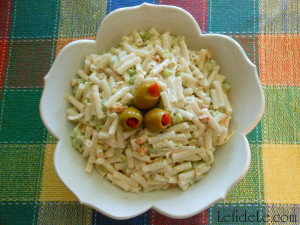
Creamy Macaroni Salad Recipe (Gluten-Free, Vegan, Egg-Free, Dairy-Free, Soy-Free, Nut-Free, Pepper-Free)

061Leigh

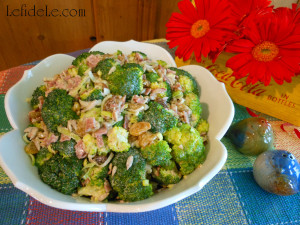
Creamy Broccoli Salad Recipe with Vegan & Turkey Bacon Options (Gluten-Free, Egg-Free, Dairy-Free, Soy-Free, Nut-Free, Pepper-Free)

013Leigh

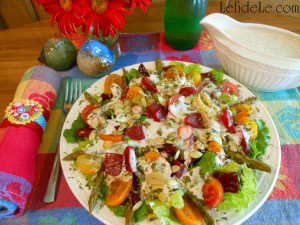
Creamy Salad Dressing Recipe (For Green Salad, Broccoli Salad, Macaroni Salad) Gluten-Free, Vegan, Egg-Free, Dairy-Free, Soy-Free, Nut-Free, Pepper-Free


DIY Picnic Heart Napkin Rings & Customizable Banner + Pinwheel Craft Tutorials (+ Free Printable Templates)

Craft your own colorful indoor picnic party quickly and inexpensively with scrapbooking paper, ribbon, and dimensional stickers! Use them to create your own customizable banner and pinwheels with my free printable templates, and then make DIY heart napkin rings to up the ante…. taking your picnic from average to outstanding!

091Leigh

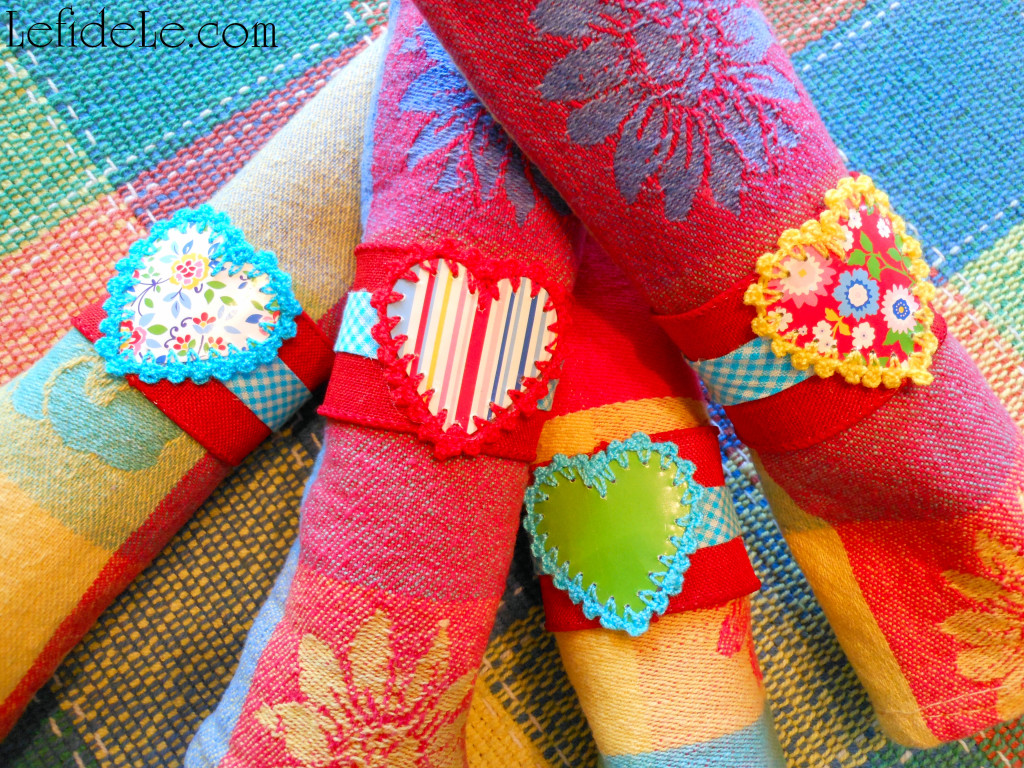
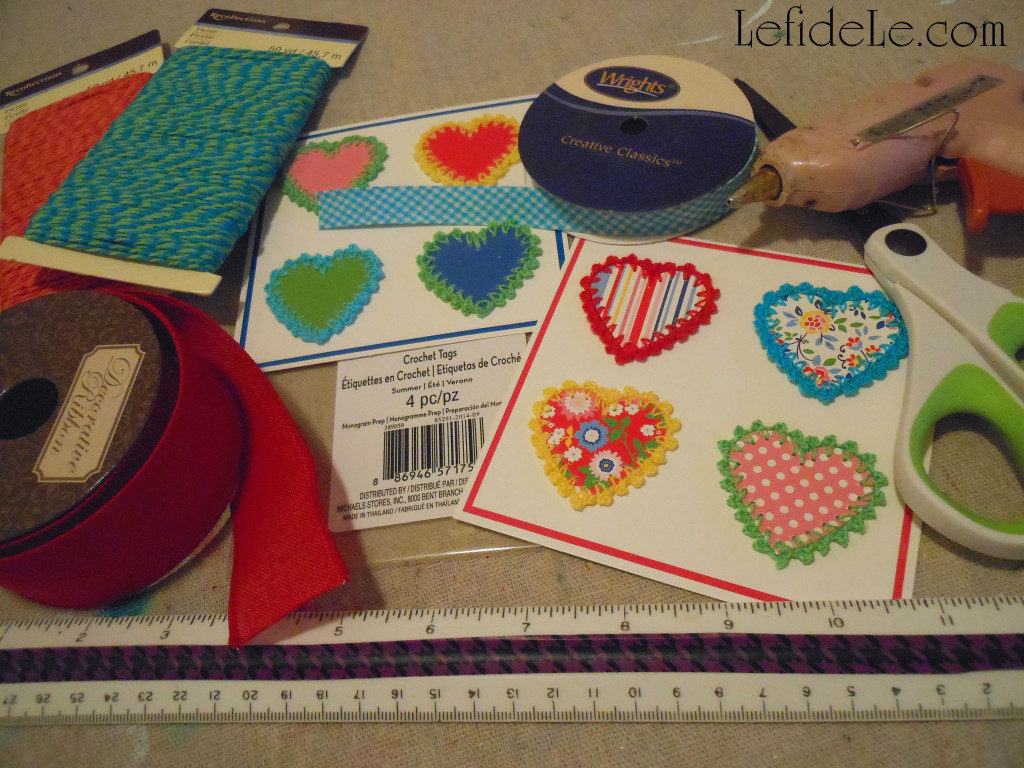
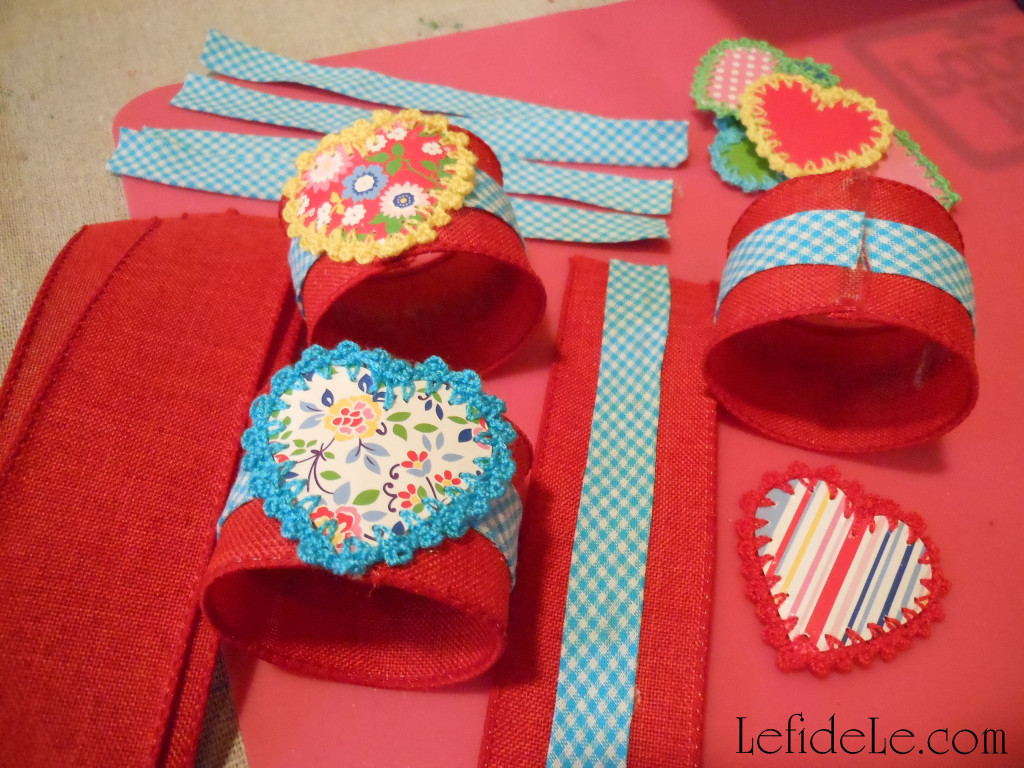
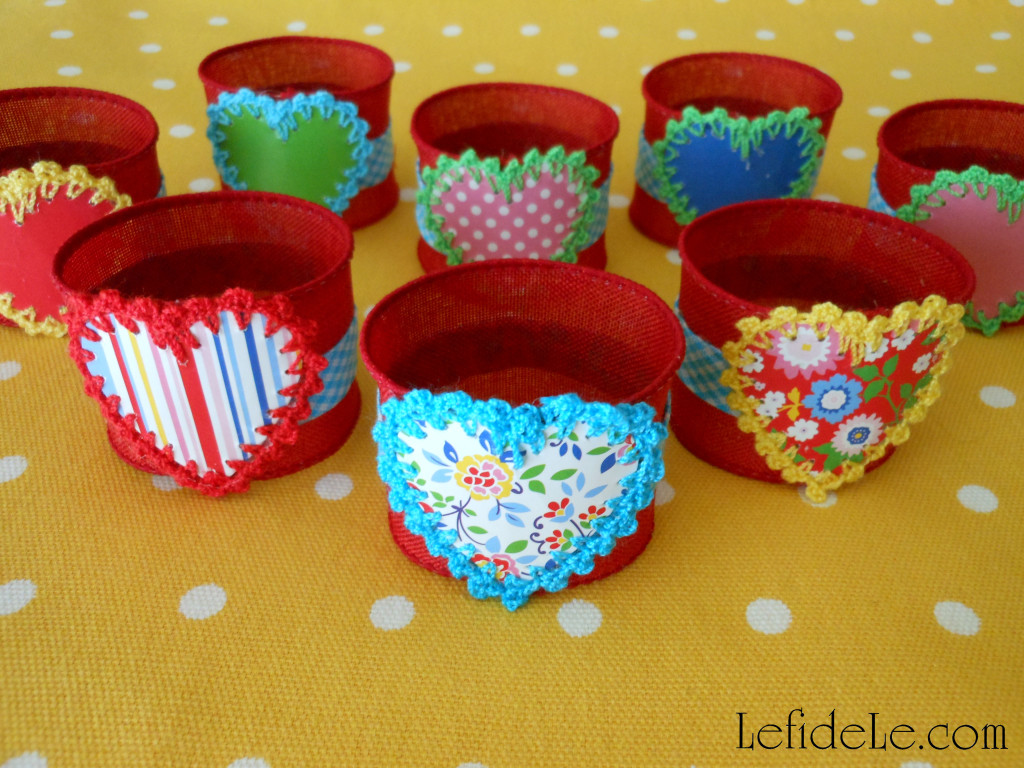
My heart napkin rings utilize dollar bin dimensional chipboard stickers that were decoratively crocheted (which I actually purchase half-price at Le fidèLe Design’s affiliate Michaels). The scrapbooking section of your local craft store always has items such as these which are made with sturdy materials, whose pretty looks belie their price points.

213Leigh

Find coordinating colors of wire ribbon and bias tape to tie together the set of differing stickers. (It’s like using different photos with matching frames to give a cohesive look to a home gallery.)

215Leigh

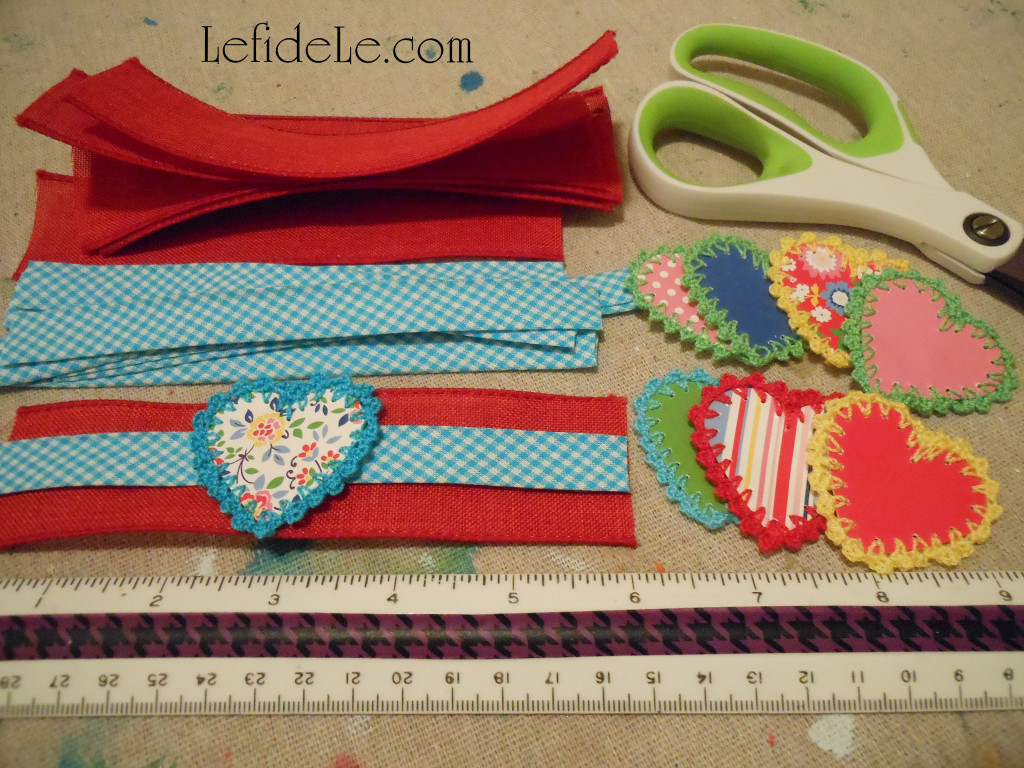
Cut 6 inch lengths of both the ribbon and bias tape. (Bias fabric tape is a sewing product, but makes a beautiful trim for this project. You can also use a thin ribbon in its place.) Pull the sticky dots off of the sticker backs. (Place them on plastic packaging to reuse for dimensional card-making later.)

219Leigh

Glue the bias tape across the center of each wired ribbon strip, making sure the tape doesn’t have a flap open… if so, glue it down too. Next, glue one end to the other by laying down a thin line of glue onto one short-side edge, and then press the other end onto it. (Press it down hard… using silicone finger cots if utilizing hot glue. I’ve use hot glue, fabric hot glue, fabric glue, tacky glue, universal glue… and it all worked beautifully.)

077Leigh

Take advantage of the wired ribbon’s staying power to form perfectly round circles for your rolled fabric napkins to slide right into. (Wired ribbon is the perfect base as it has a clean finished edge without needing to fold and glue.)

228Leigh

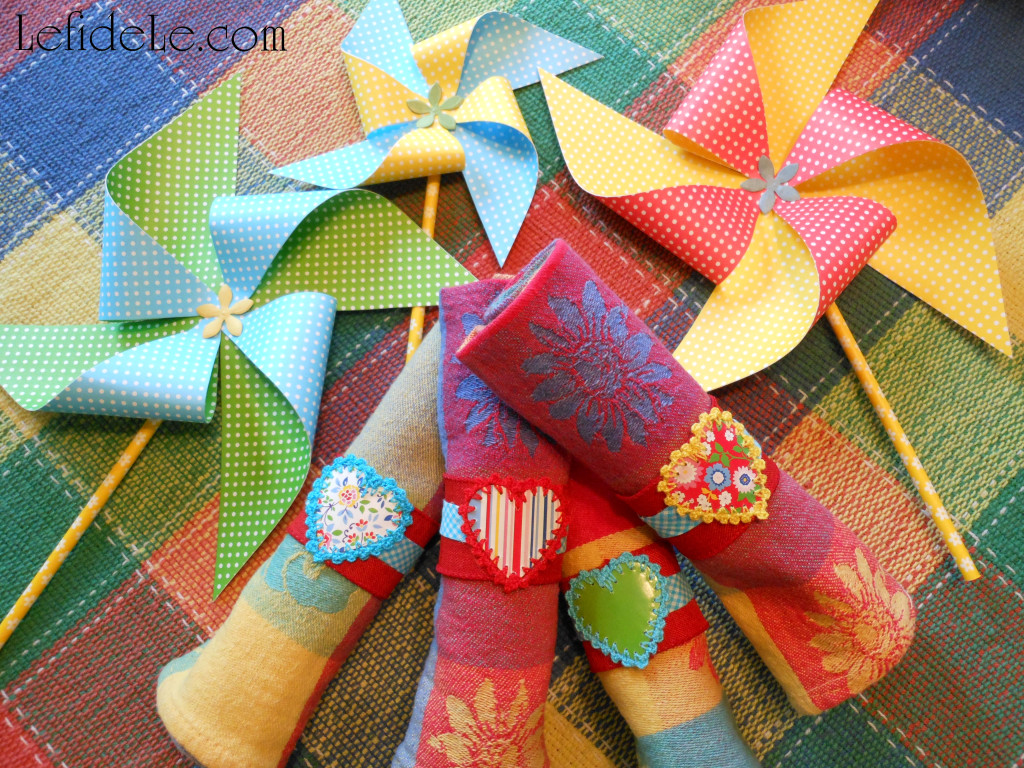
I made a set of 8 different heart napkin rings to mix and match according to my tablescapes (and it only cost me a few dollars).

233Leigh

Here they are featured in my Colorful Indoor Picnic Party Tablescape Perfect for Rainy Days or Texas Temps, because in my world, a picnic is the perfect excuse for crafting! (Note the heart stickers were also placed on the drinking jars.)

274Leigh

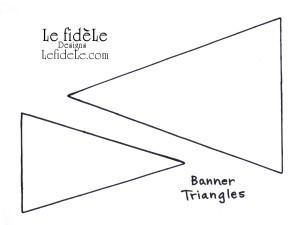
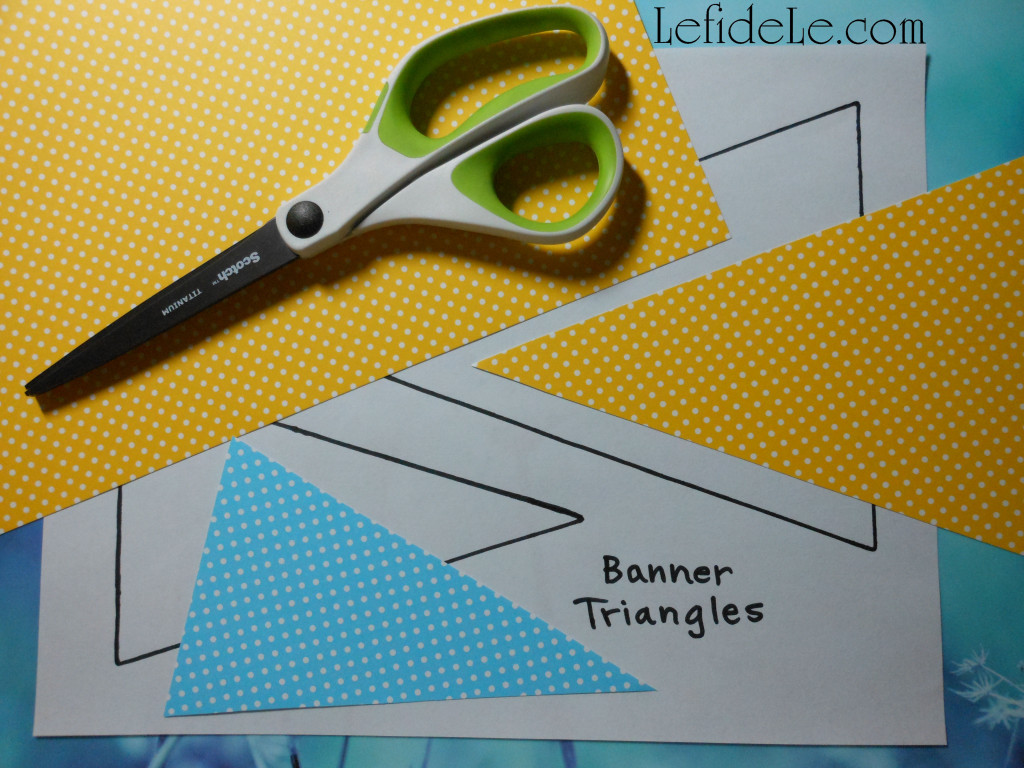
Make your own banners quickly using my free printable template to cut perfectly precise pennants from any scrapbook paper matching your theme décor. Finish them of with chipboard stickers like those I used on my heart napkin rings.

BannerTriangleTemplatesLeigh

Print the template by first clicking on the picture above. Next right click on the image and select print. Choose a text or black and white setting to conserve ink. Cut out the two triangles.

001Leigh

Trace around the triangles with a pencil onto the back of the scrapbook paper. (Use them to conserve paper by flipping them until you maximize the number of triangles per sheet.) Now cut out these triangles. (Save the leftover bits for card-making later.)

003Leigh

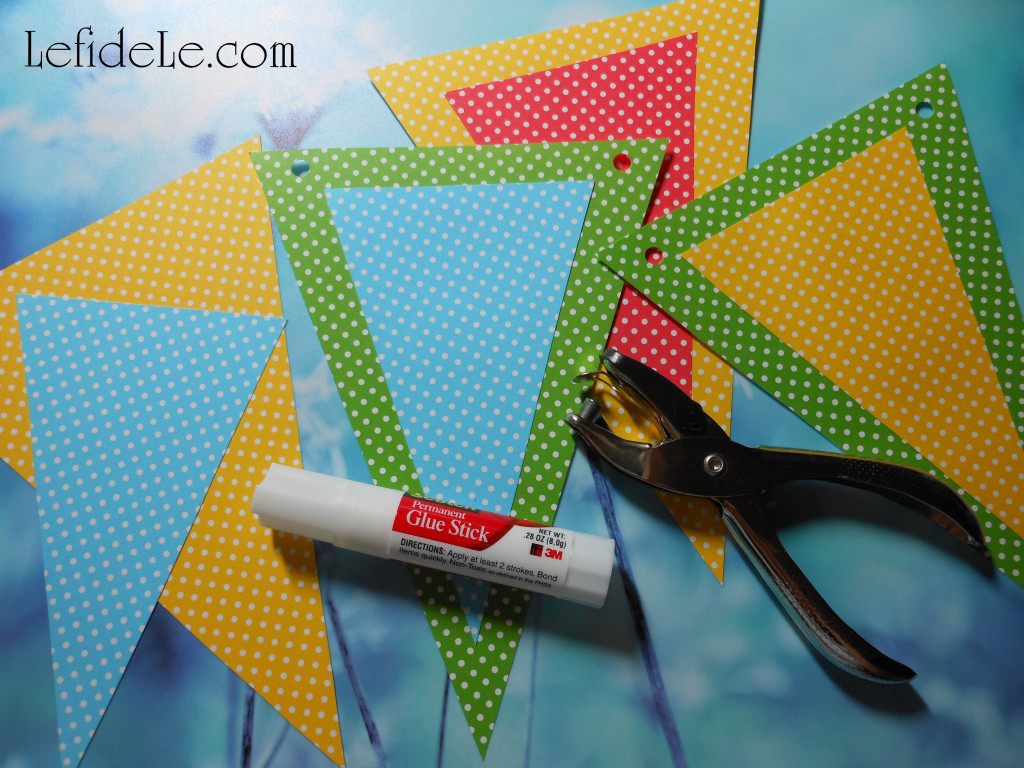
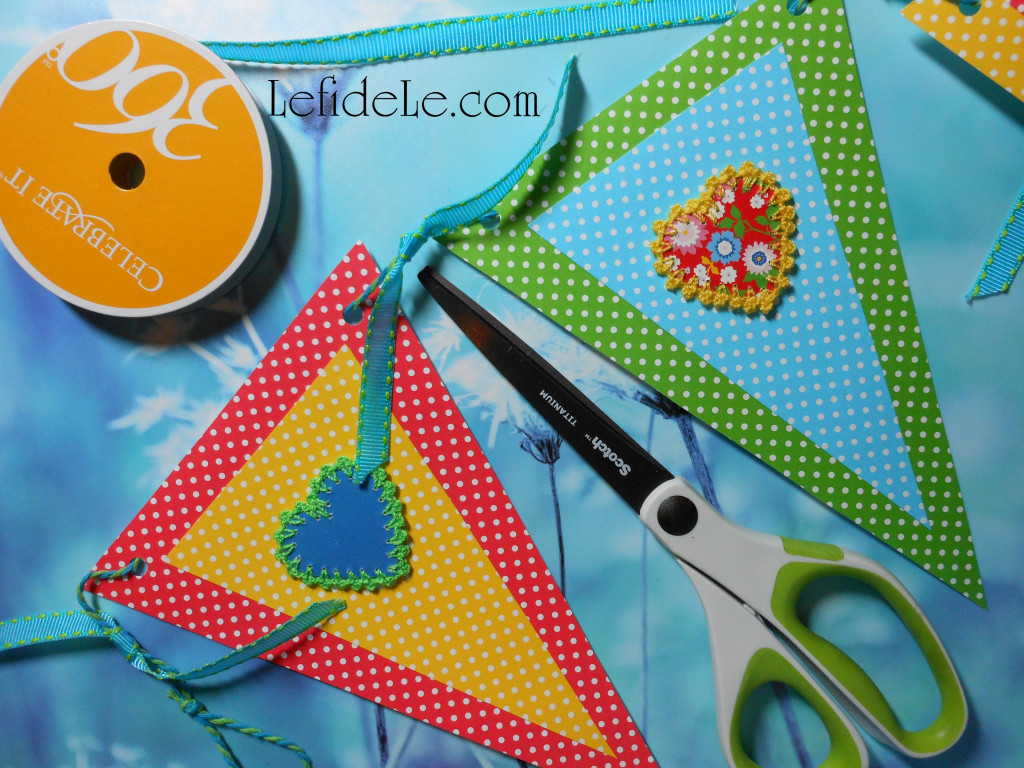
Glue a smaller triangle to the center of a larger one of a contrasting color. (A permanent glue stick works beautifully with less mess.) Punch a hole next to each top point of a glued pennant.

006Leigh

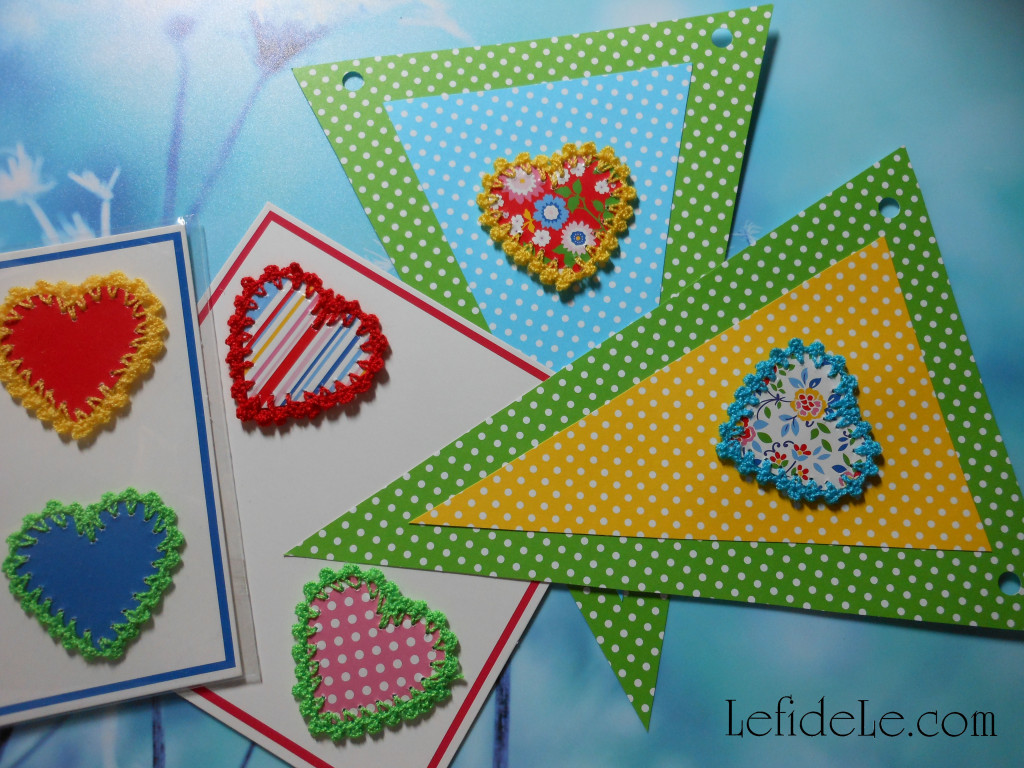
Place a dimensional sticker onto the center of each pennant. (Try to use contrasting colors to make a more visually interesting combination.)

010Leigh

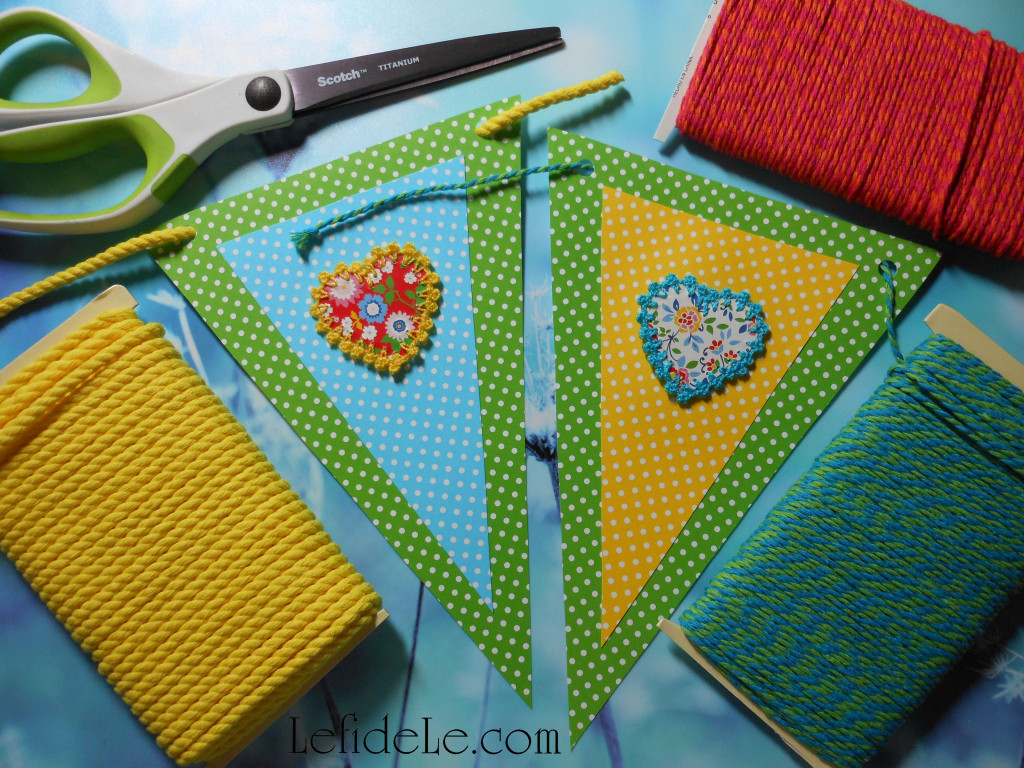
Use any variety of string, twine, yarn, or ribbon to run through the punched holes. Knot each end into a loop to hang them by. (To do this, form a loop then make a simple overhand knot.)

019Leigh

For additional flair, tie small lengths of thin ribbon in between each pennant. Hang it up for an extra dose of cheerful festiveness!

096Leigh

Next, let’s make matching pinwheels for décor or children’s play.

PinwheelTemplatesLeigh

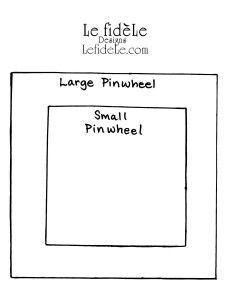
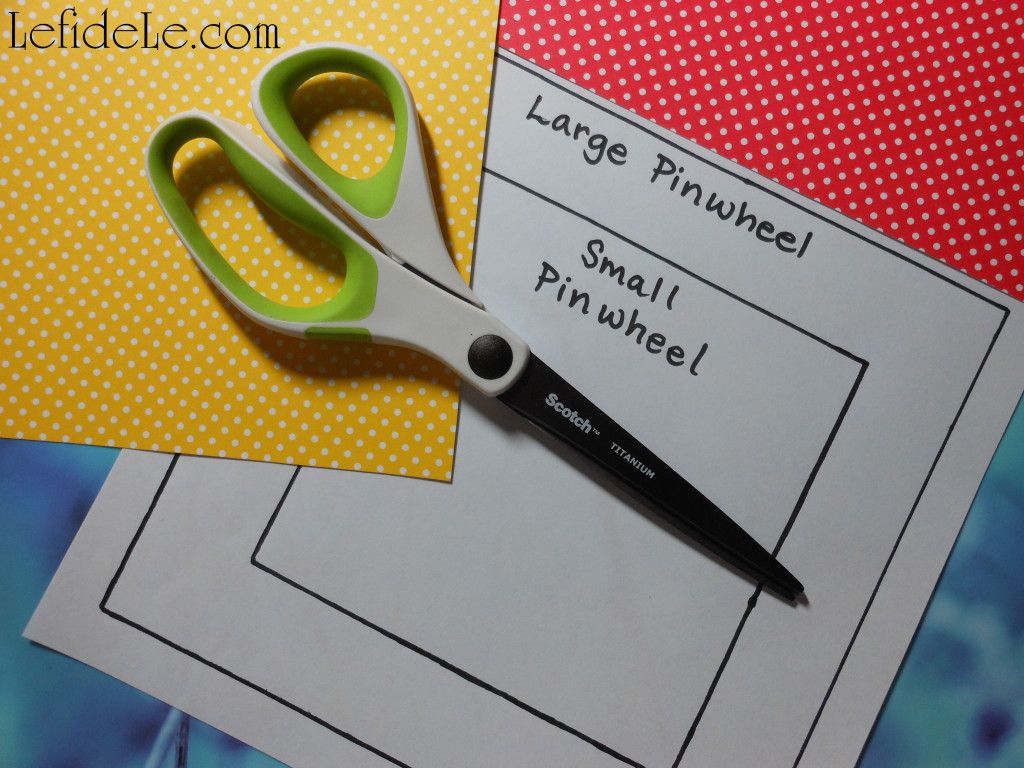
Either fold over an edge of scrapbook paper to form a box that can be cut out, or… print a template to quickly churn out pinwheel bases. (The templates are great to enhance a young kiddo’s tracing skills.) Click on the picture above, then right click on the resulting image and select print. Choose text or black and white settings to conserve ink.

012Leigh

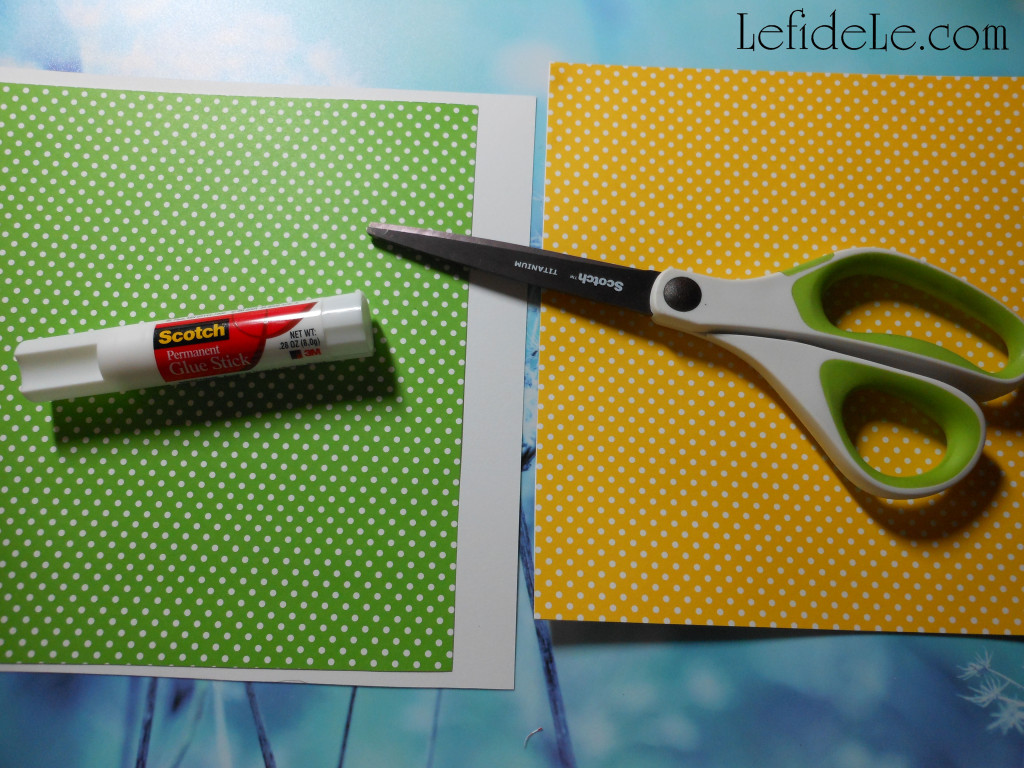
Cut out a single square from double-sided paper, or cut 2 squares of the same size for single-sided paper.

015Leigh

If using single-sided scrapbooking paper, glue them back to back with a permanent glue stick. Or, you can do as I’ve done here by cutting one piece, gluing it to the plain side of another, and then cutting around the box… which I think is easier.

016Leigh

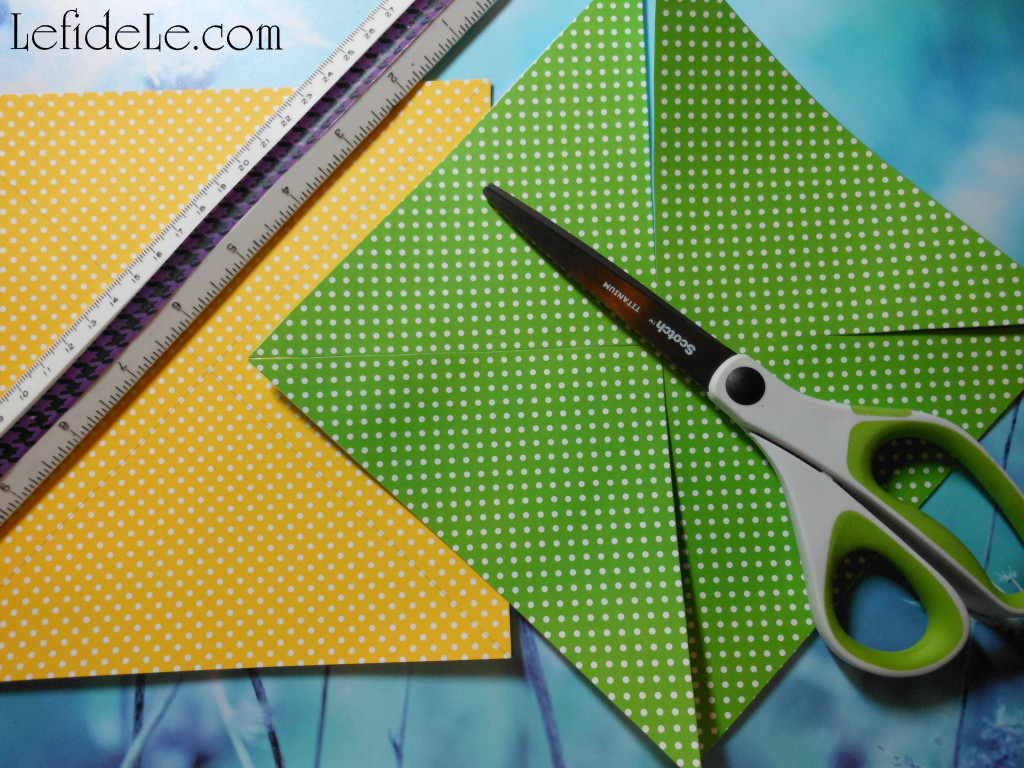
Next use a ruler to draw a line with a pencil, from one corner across to the other. Cut along this line, but leave a half inch or so at the center making 4 flaps.

020Leigh

Take the right corner of each flap and glue it onto the center. Decide if you want them to be functional or just décor. For décor, use cardstock and hot glue the whole thing onto a paper straw then glue a paper flower onto the center… and call it a day. For functional pinwheels, use thinner paper and weaker glue. Push a tack into a thin wooden dowel cut about a foot long… not pushing it in all the way in order to leave some room for the paper wheel to turn on.

237Leigh

‘Cause nothing says happy picnic like a pinwheel!

Faithfully Yours,

Leigh
263Leigh

P.S. See all of these projects in action in my Colorful Indoor Picnic Party Tablescape Perfect for Rainy Days or Texas Temps!

Star-Spangled Independence Day Patriotic Party Décor Ideas (& All-American Burger Bar)

333Leigh

Every year on the fourth of July, families across the country gather in jubilant celebration of the birth of our proud democracy. We join together to commemorate our forefathers’ defiant stand to secure those inalienable rights we enjoy today, and to venerate that hard-won freedom. Take part in a tour of my star-spangled Independence Day event for décor ideas to plan your own patriotic party with!

358Leigh

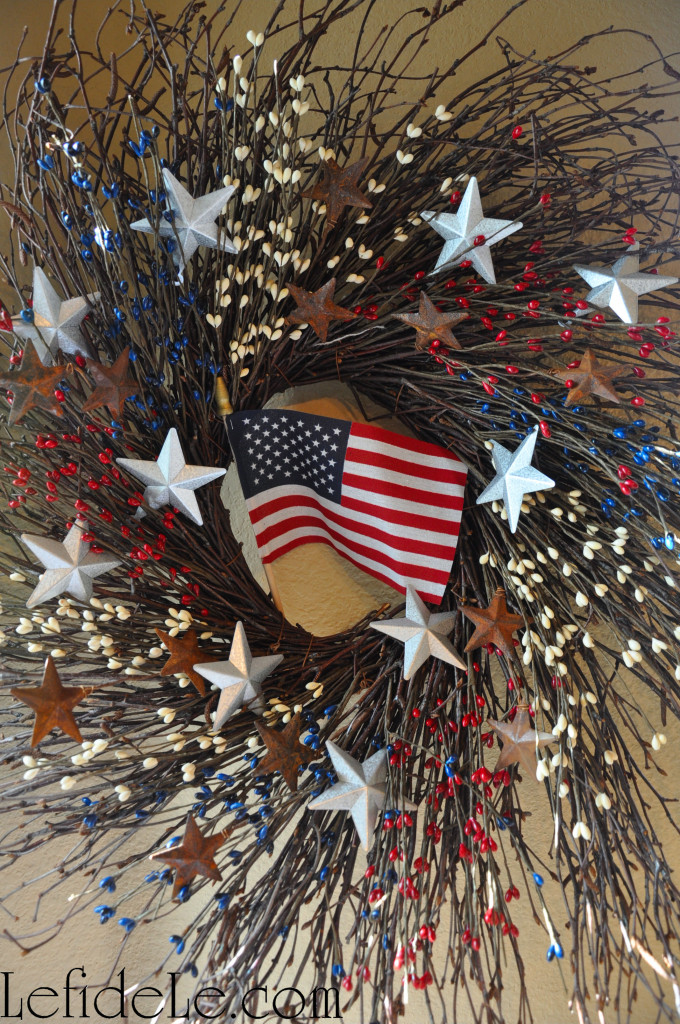
History was heralded with a welcoming wreath spangled with bright steel stars and the broad stripes of old glory… denoting a gallantly streaming flag hailed through the perilous fight.

368Leigh

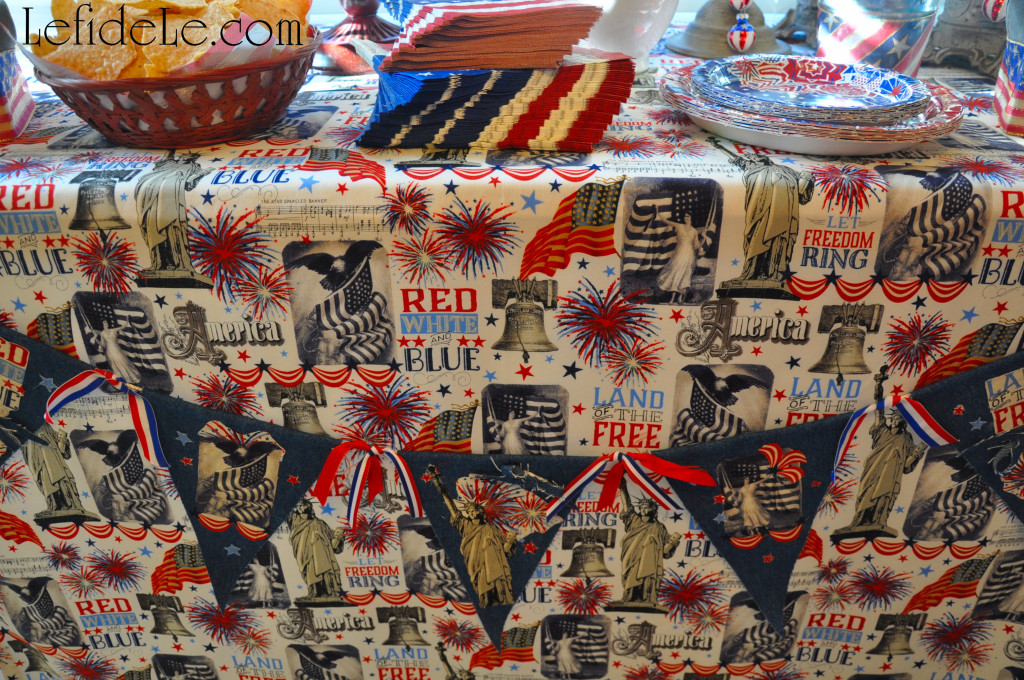
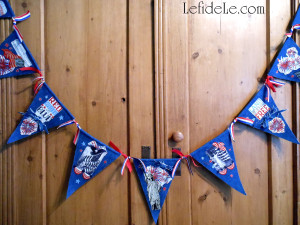
A table  in the aft zone was layered with patriotically printed fabric atop a white tablecloth… symbolizing the purchase of peace. The table’s façade was treated as a frontispiece with a star-spangled banner collage featuring iconic imagery in the appliqués cut from the same patriotic print fabric. (Find my no-sew craft tutorial on it here.)

362Leigh

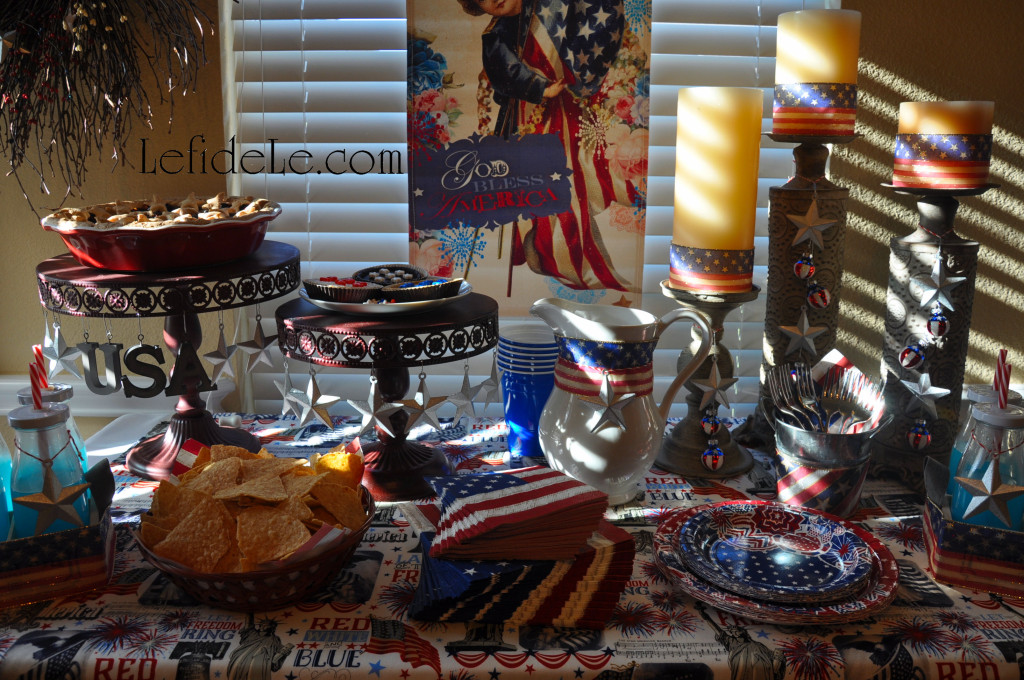
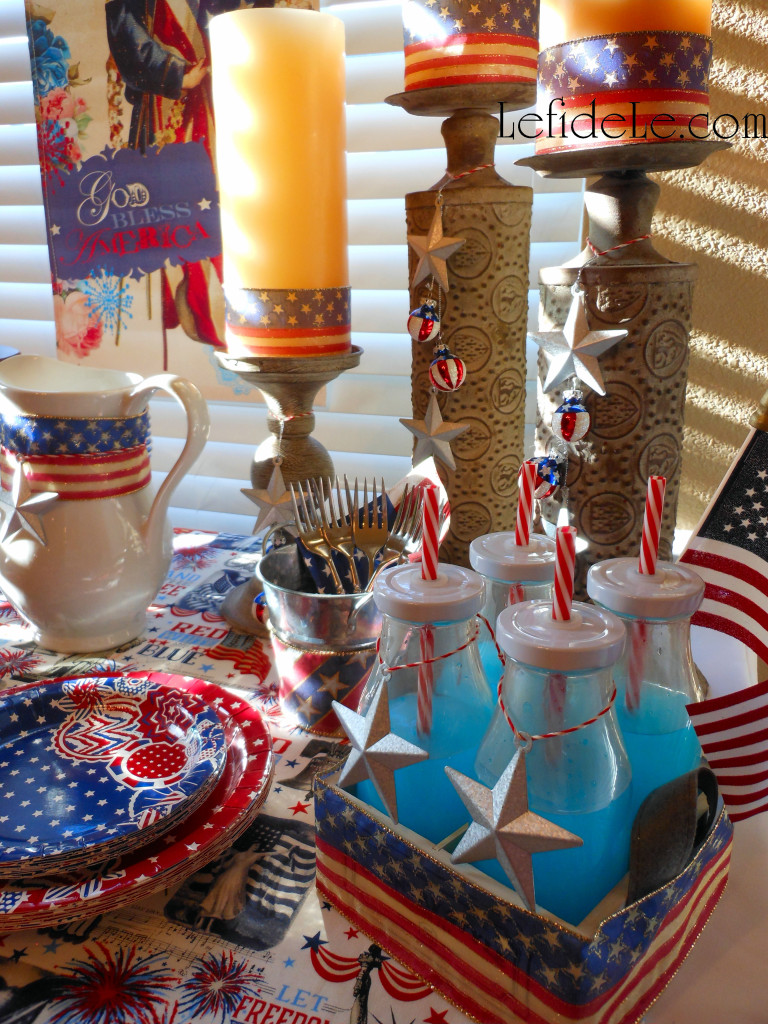
The theatre’s horizon displayed a dazzling banner of classic Americana exclaiming, “God Bless America”. An explosion of color extended to thematic paper plates, blue cups, and flag printed napkins. A plain white vintage water pitcher was adorned with the sparkle of a steel star and flag ribbon.

014Leigh

Decorating rebellion manifested itself with a centerpiece, placed off-center, of beribboned candles atop vintage ceiling tile candlesticks… all to represent Lady Liberty’s torch. Hanging from them were steel stars and flag painted Christmas ball ornaments… representing bombs bursting in air and the flag that was still there. A galvanized pail held utensils set for dessert.

021Leigh

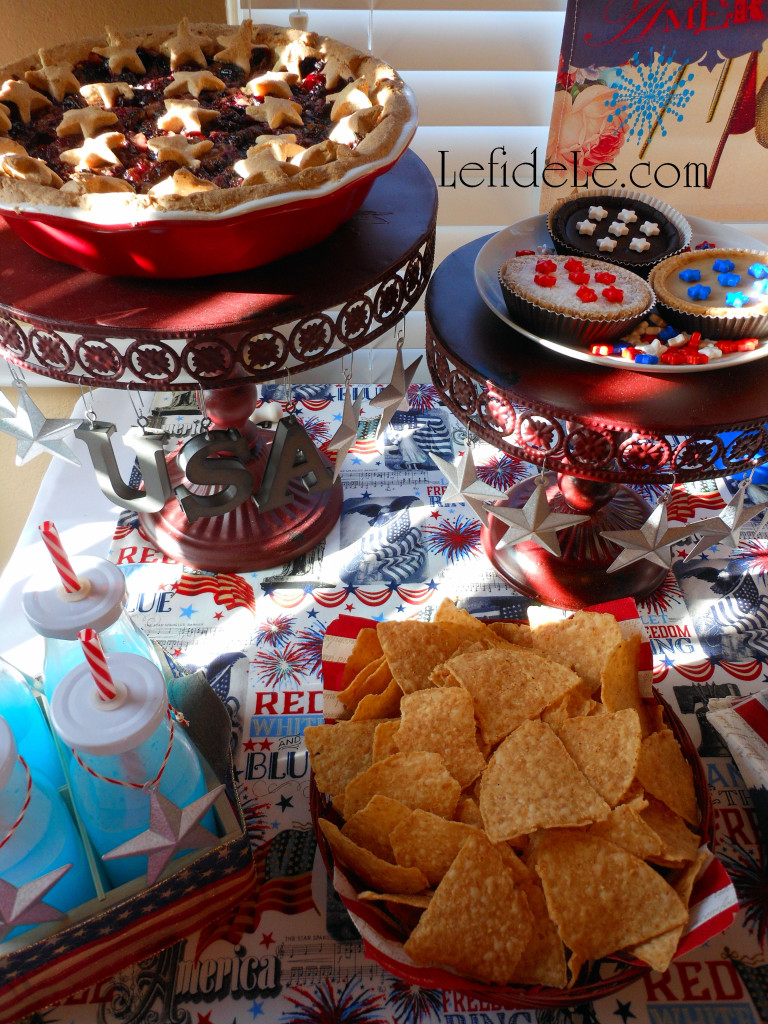
Revelers were offered the refreshment of blue patriot punch held in sustainable vessels festooned with stars and stripes. Further sustenance was provided with chips in a red painted basket (from the Beanitos brand made in the USA).

363Leigh

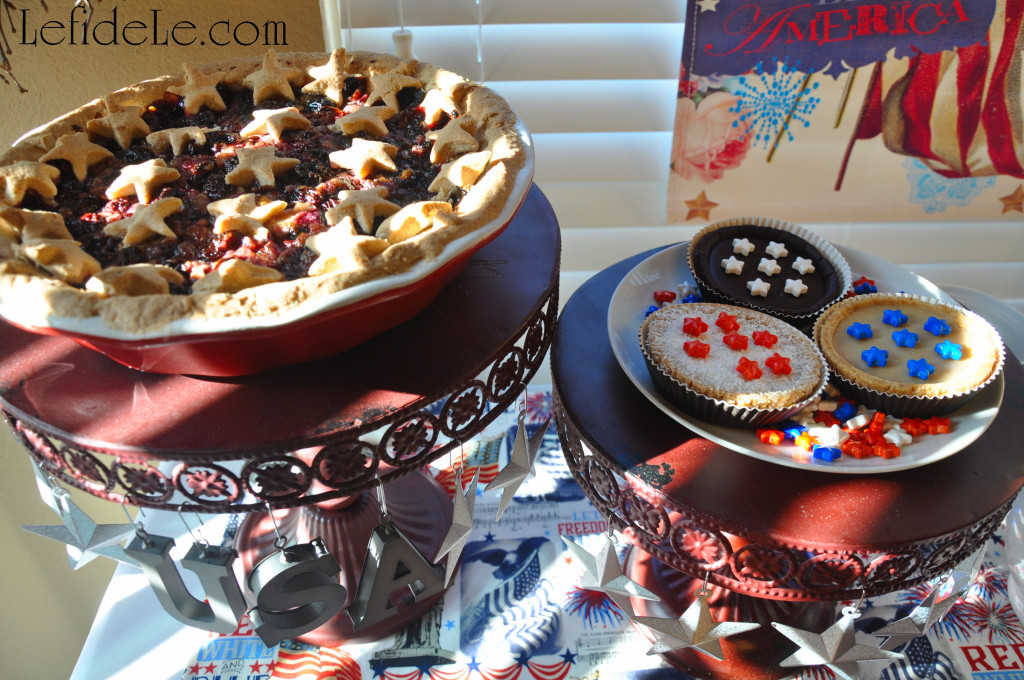
The memory of George Washington was honored with “truthful cherry patriotic pie” (of my own upcoming gluten-free vegan recipe) held high in esteem upon a metal pillar spelled with zinc USA letters. Sweet vegan tarts crowned with candy stars (from another American brand Hail Merry) topped a second pillar swathed in more stars.

333Leigh

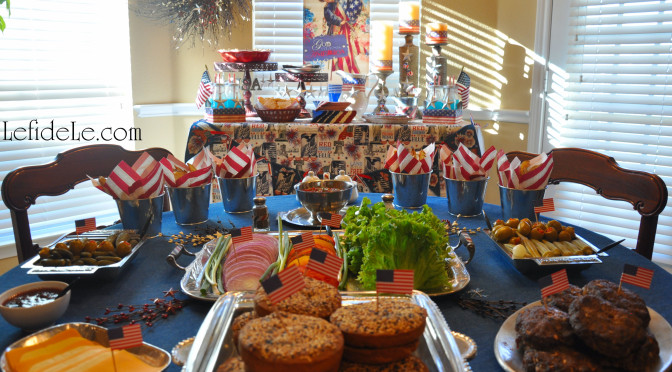
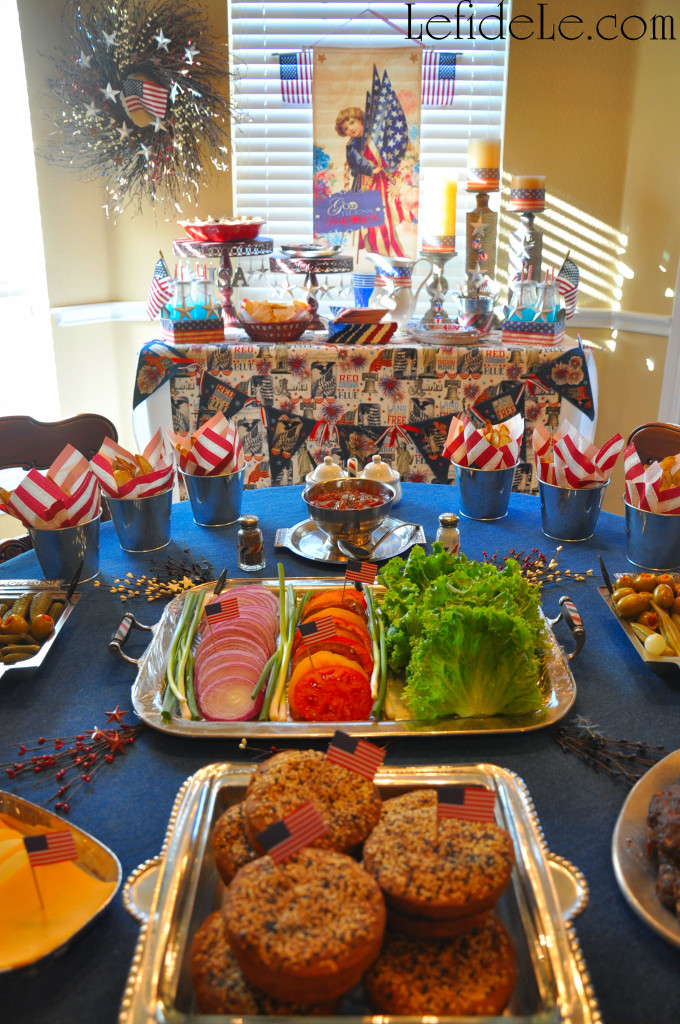
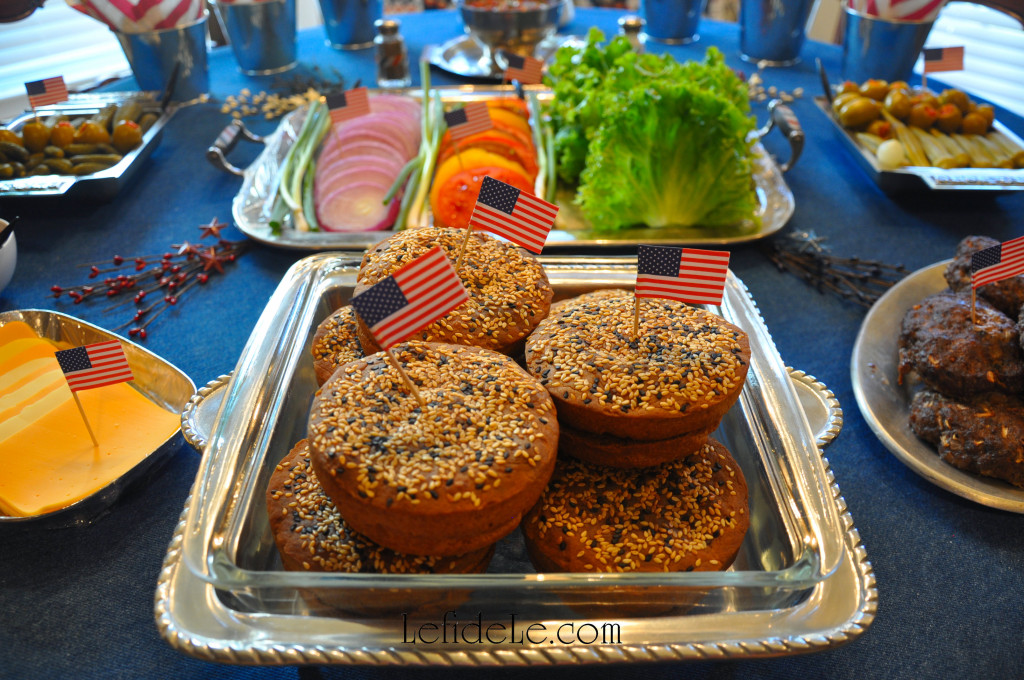
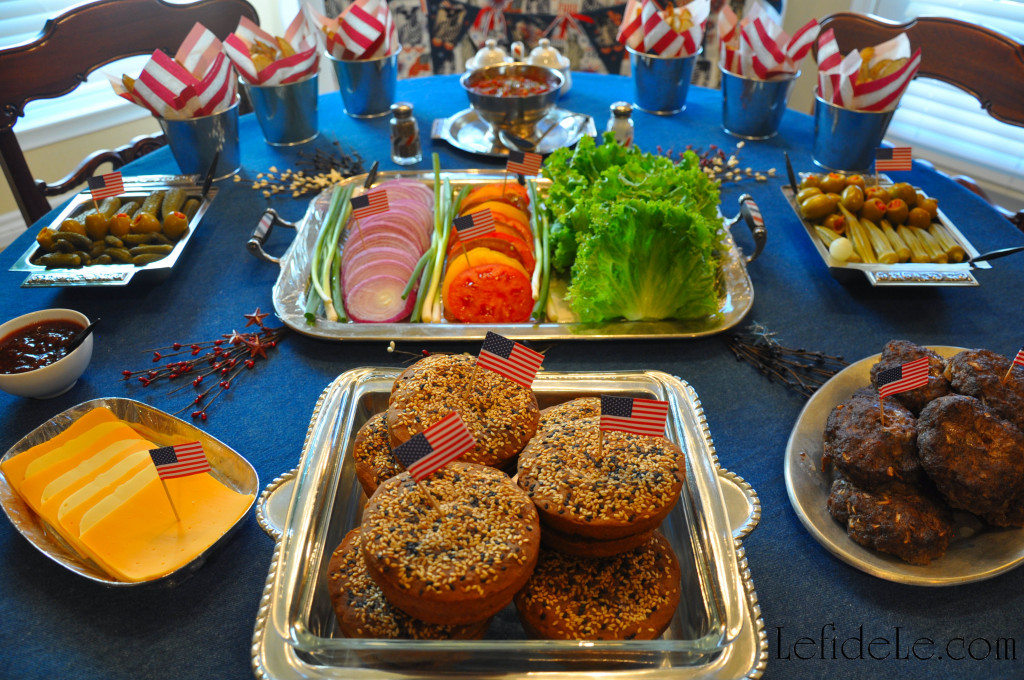
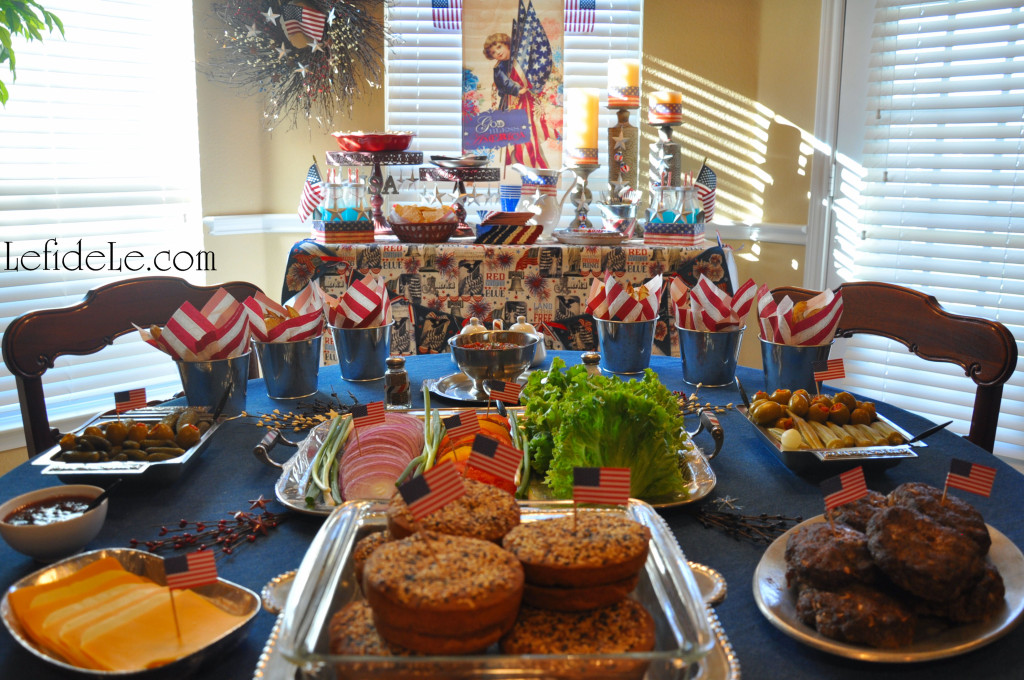
The fore-field was set as an all American build a burger bar over the classic American staple of blue jean cloth set over a red tablecloth. Blasts of star spray shot out from beneath a centermost tray… connoting embattled fireworks.

373Leigh

Homemade burger buns (of my own upcoming gluten-free vegan recipe) were displayed in a pewter dish. Behind that sat a vintage tray offering hamburger accompaniments… like heirloom tomato slices, organic green onion, artisan leaf lettuce, and locally grown red onion slices.

375Leigh

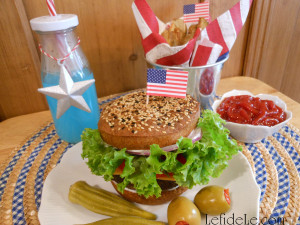
An additional vintage pewter dish served onion loaded beef patties (another of my upcoming recipes). Slices of soy-free vegan cheese (from USA brand Follow Your Heart) were stamped with an American Flag seal of approval. Deep square vintage steel dishes presented pickled okra, onion, cornichons, gherkins, and sun-dried tomato stuffed green olives.

353Leigh

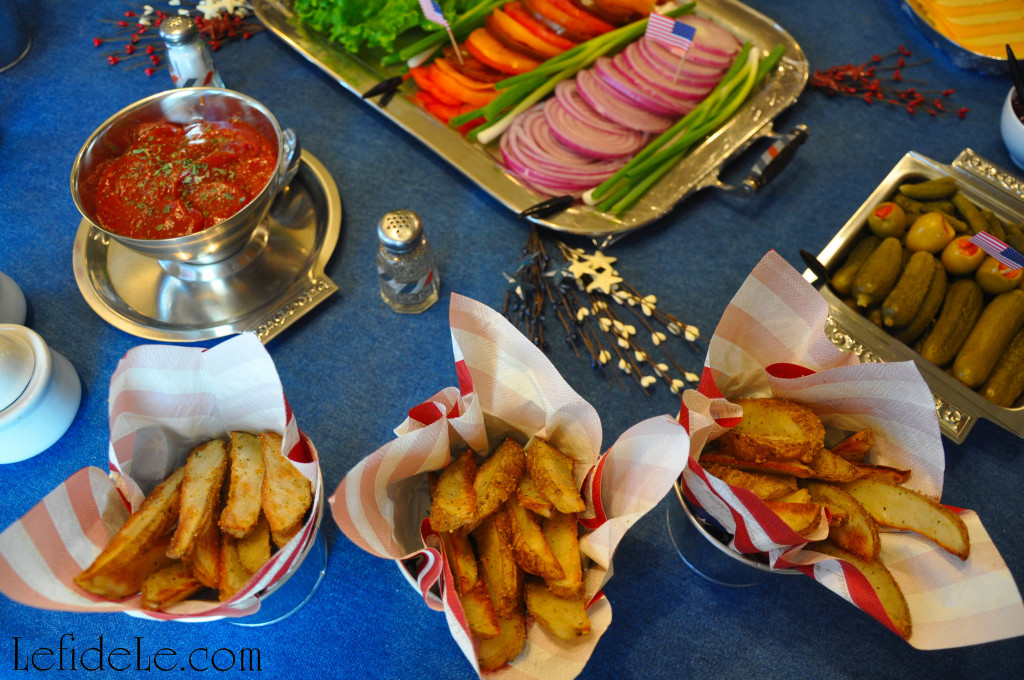
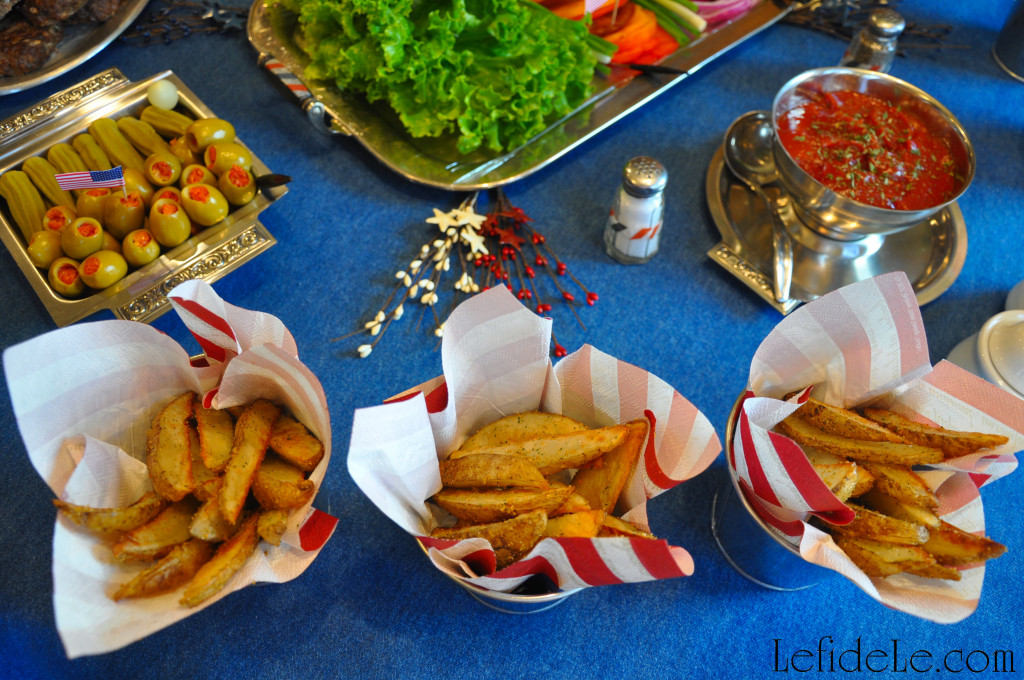
Galvanized metal buckets lined with flag napkins made admirable single-serving fry baskets bursting with seasoned steak fries (see my upcoming recipe). Old-school salt and pepper shakers got the patriotic washi treatment. More vintage dishes contained soy-free veganaise, paprika-free mustard, and corn-syrup-free ketchup… so that no allergy got served.

351Leigh

As the July 4th night sky blazes with the flash of celebratory fireworks, may we all seek to reflect upon the valorous sacrifices made for our collective liberty.

374Leigh

Faithfully Yours,

Leigh
P.S. Keep checking in on my Recipes Page for the latest postings on Gluten-Free & Egg-Free Pies, Fries, & Hamburger Buns! I’m launching a new on-going series of Burger Creations that is set to grow increasingly creative with time!

044Leigh
Be sure check out my article for a DIY July 4th Denim No-Sew Appliqué Collage Star-Spangled Banner Craft Tutorial for Independence Day here!

163Leigh
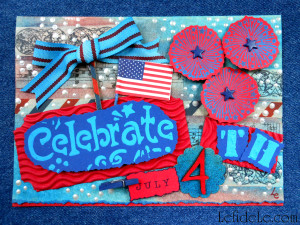
And this article for July 4th Altered Art Greeting Card as Mailable Mixed Media Independence Day Décor (DIY Collage Art Tutorial)here!
120Leigh