Tag Archives: Candy

Calaveras de Azucar (Sugar Skulls) Edible Folk Art & Egg-Free Vegan Candy Recipe for Dia de los Muertos (Day of the Dead) or Halloween

067Leigh

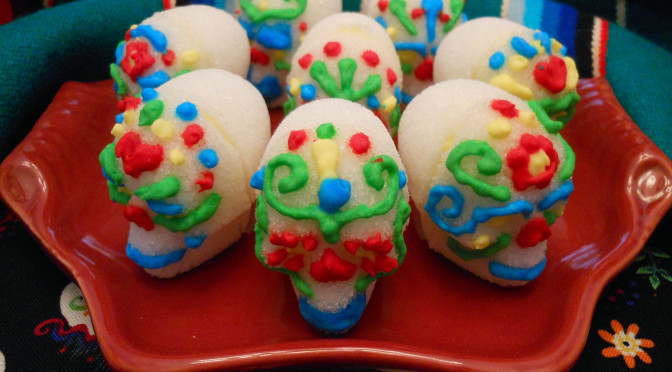
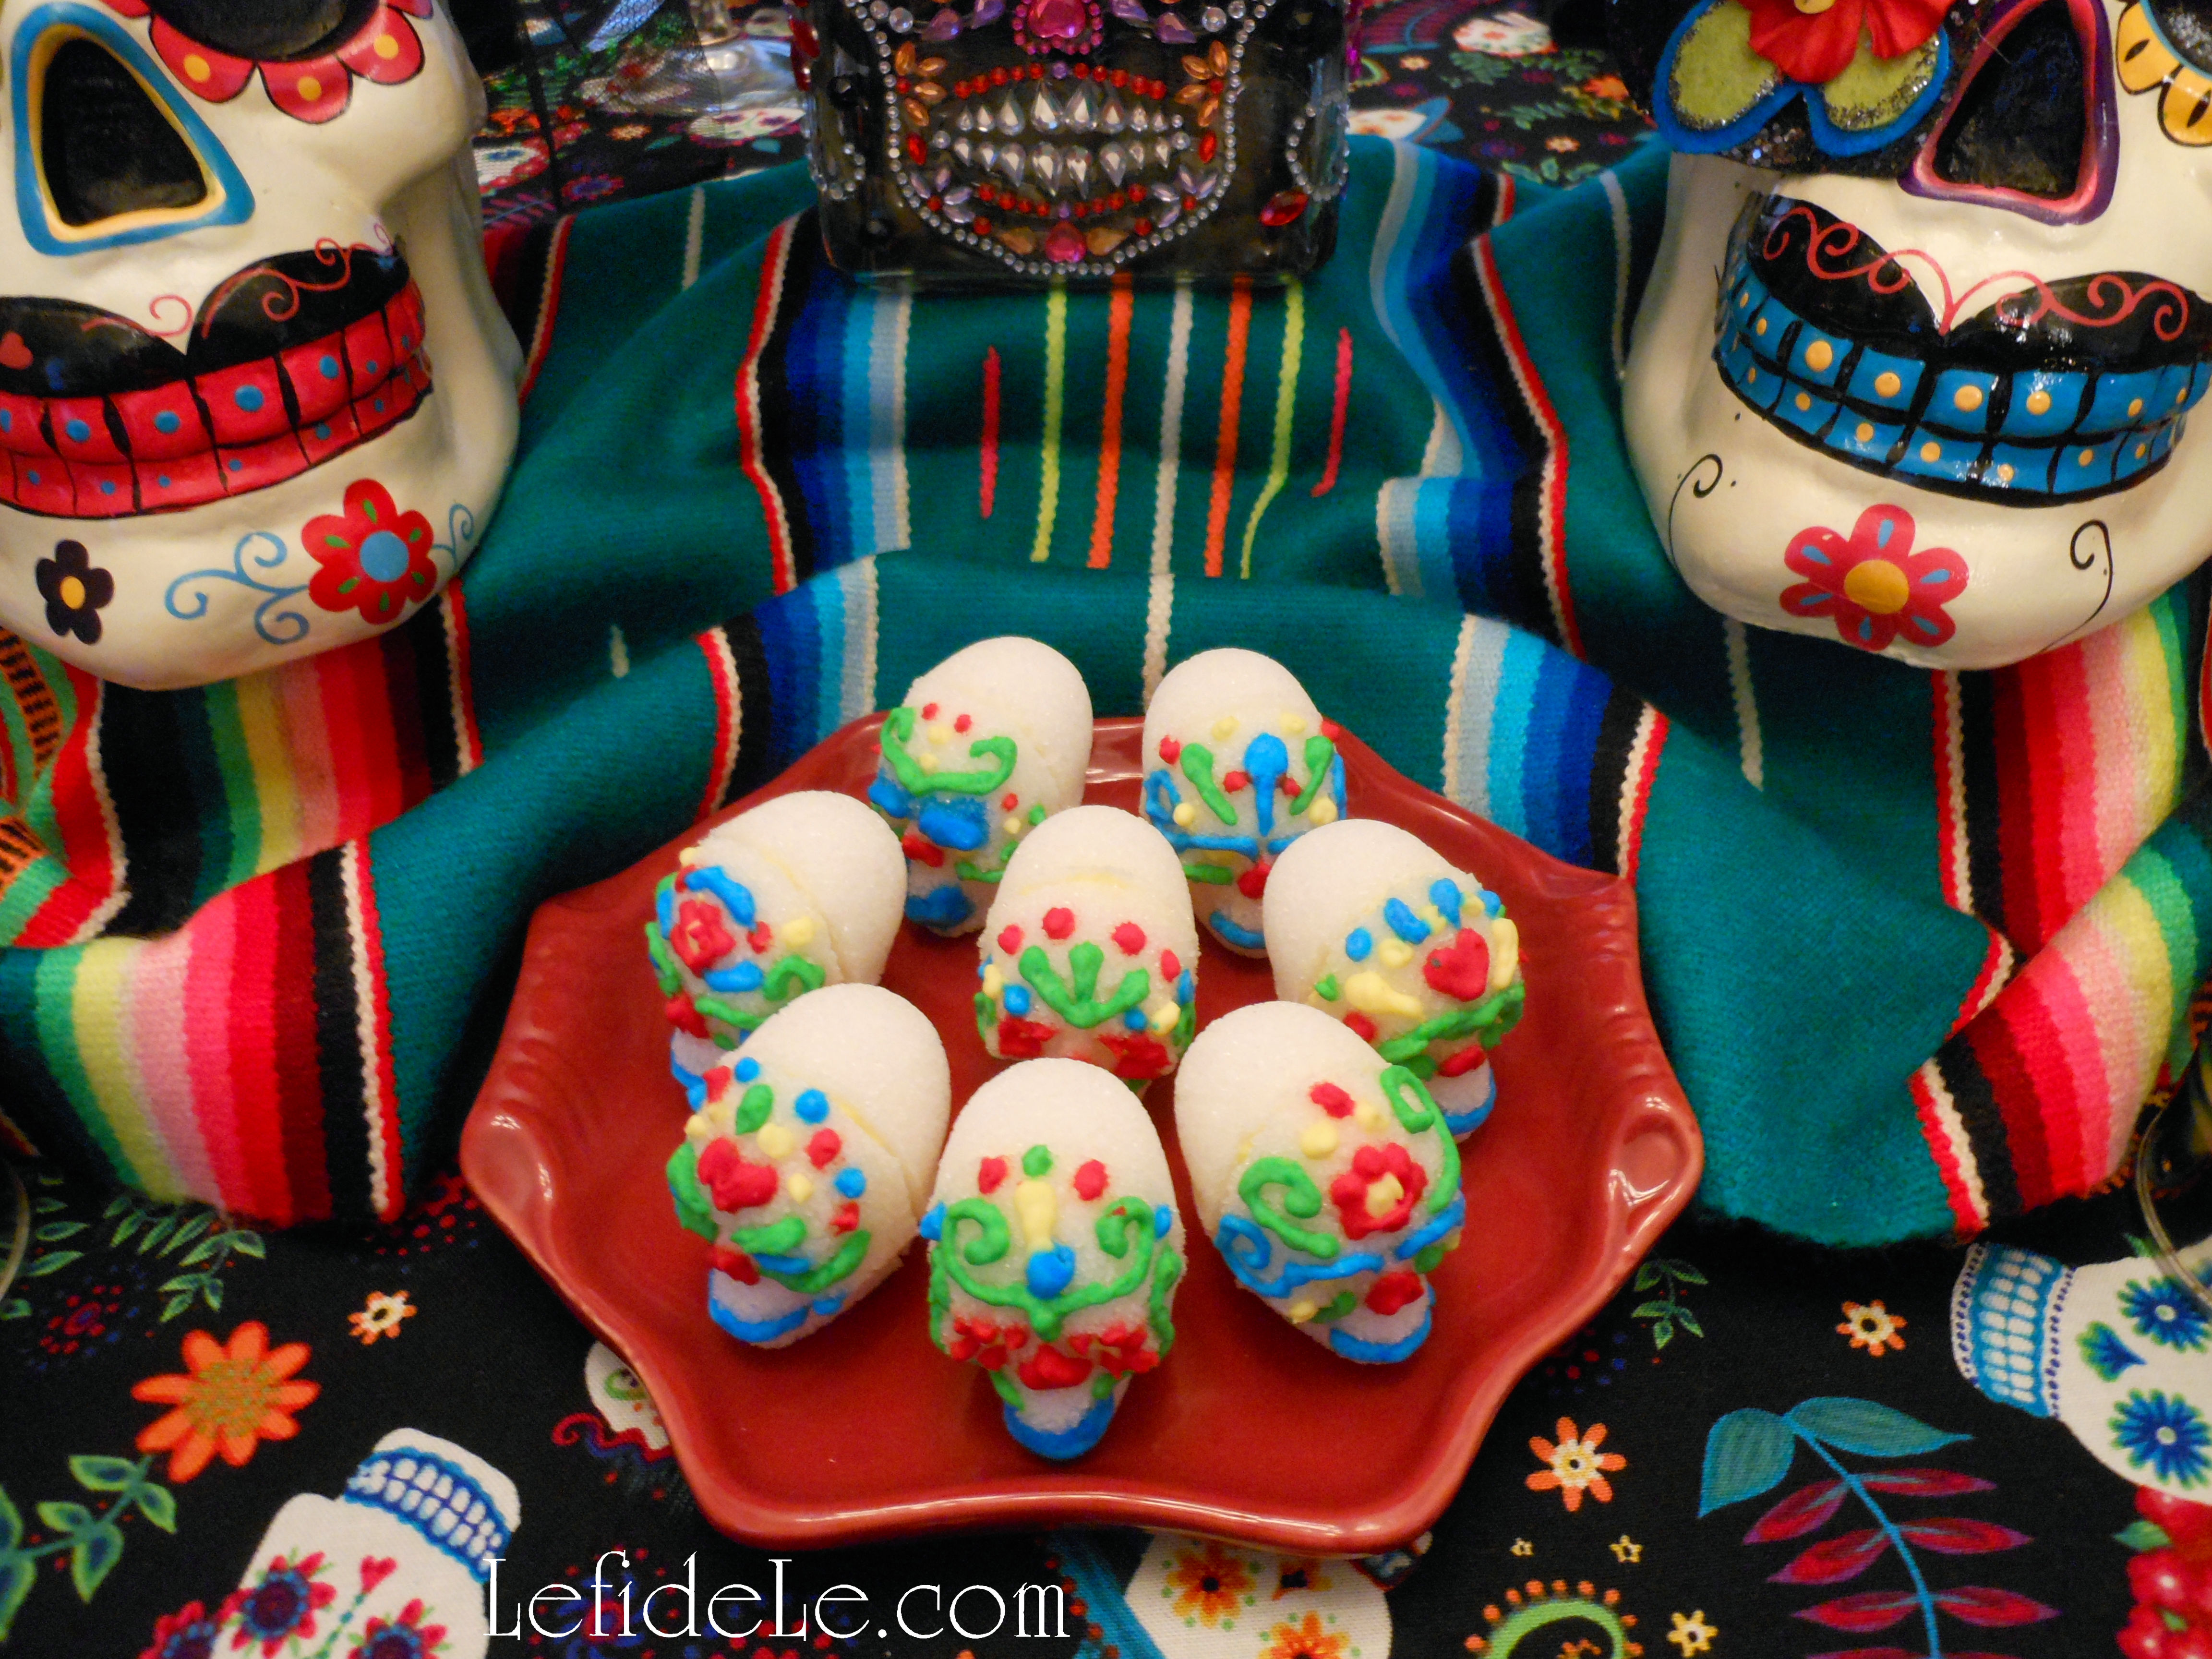
Calaveras de azucar (sugar skulls) are a folk art originating from southern Mexico for Dia de los Muertos (Day of the Dead). The sugar (azucar in Español) is said to balance the bitterness of death (muerte), and the small calaveras (skulls) are traditionally offered on All Saint’s Day (November 1) to beloved departed children (angelitos / inocentes) as one would leave flowers graveside. Because this recipe is an egg-free edible version that doesn’t use meringue powder or royal icing, it makes the perfect allergy-friendly, vegan, and low-calorie candy for a themed Halloween celebration!


Ingredients:

  • 2 cups granulated white sugar
  • 4 teaspoons water
  • Wilton ready-to-use icing multi-pack of 4 primary colors (not gel)
  • Wilton 3D skulls candy mold

Instructions:

022Leigh

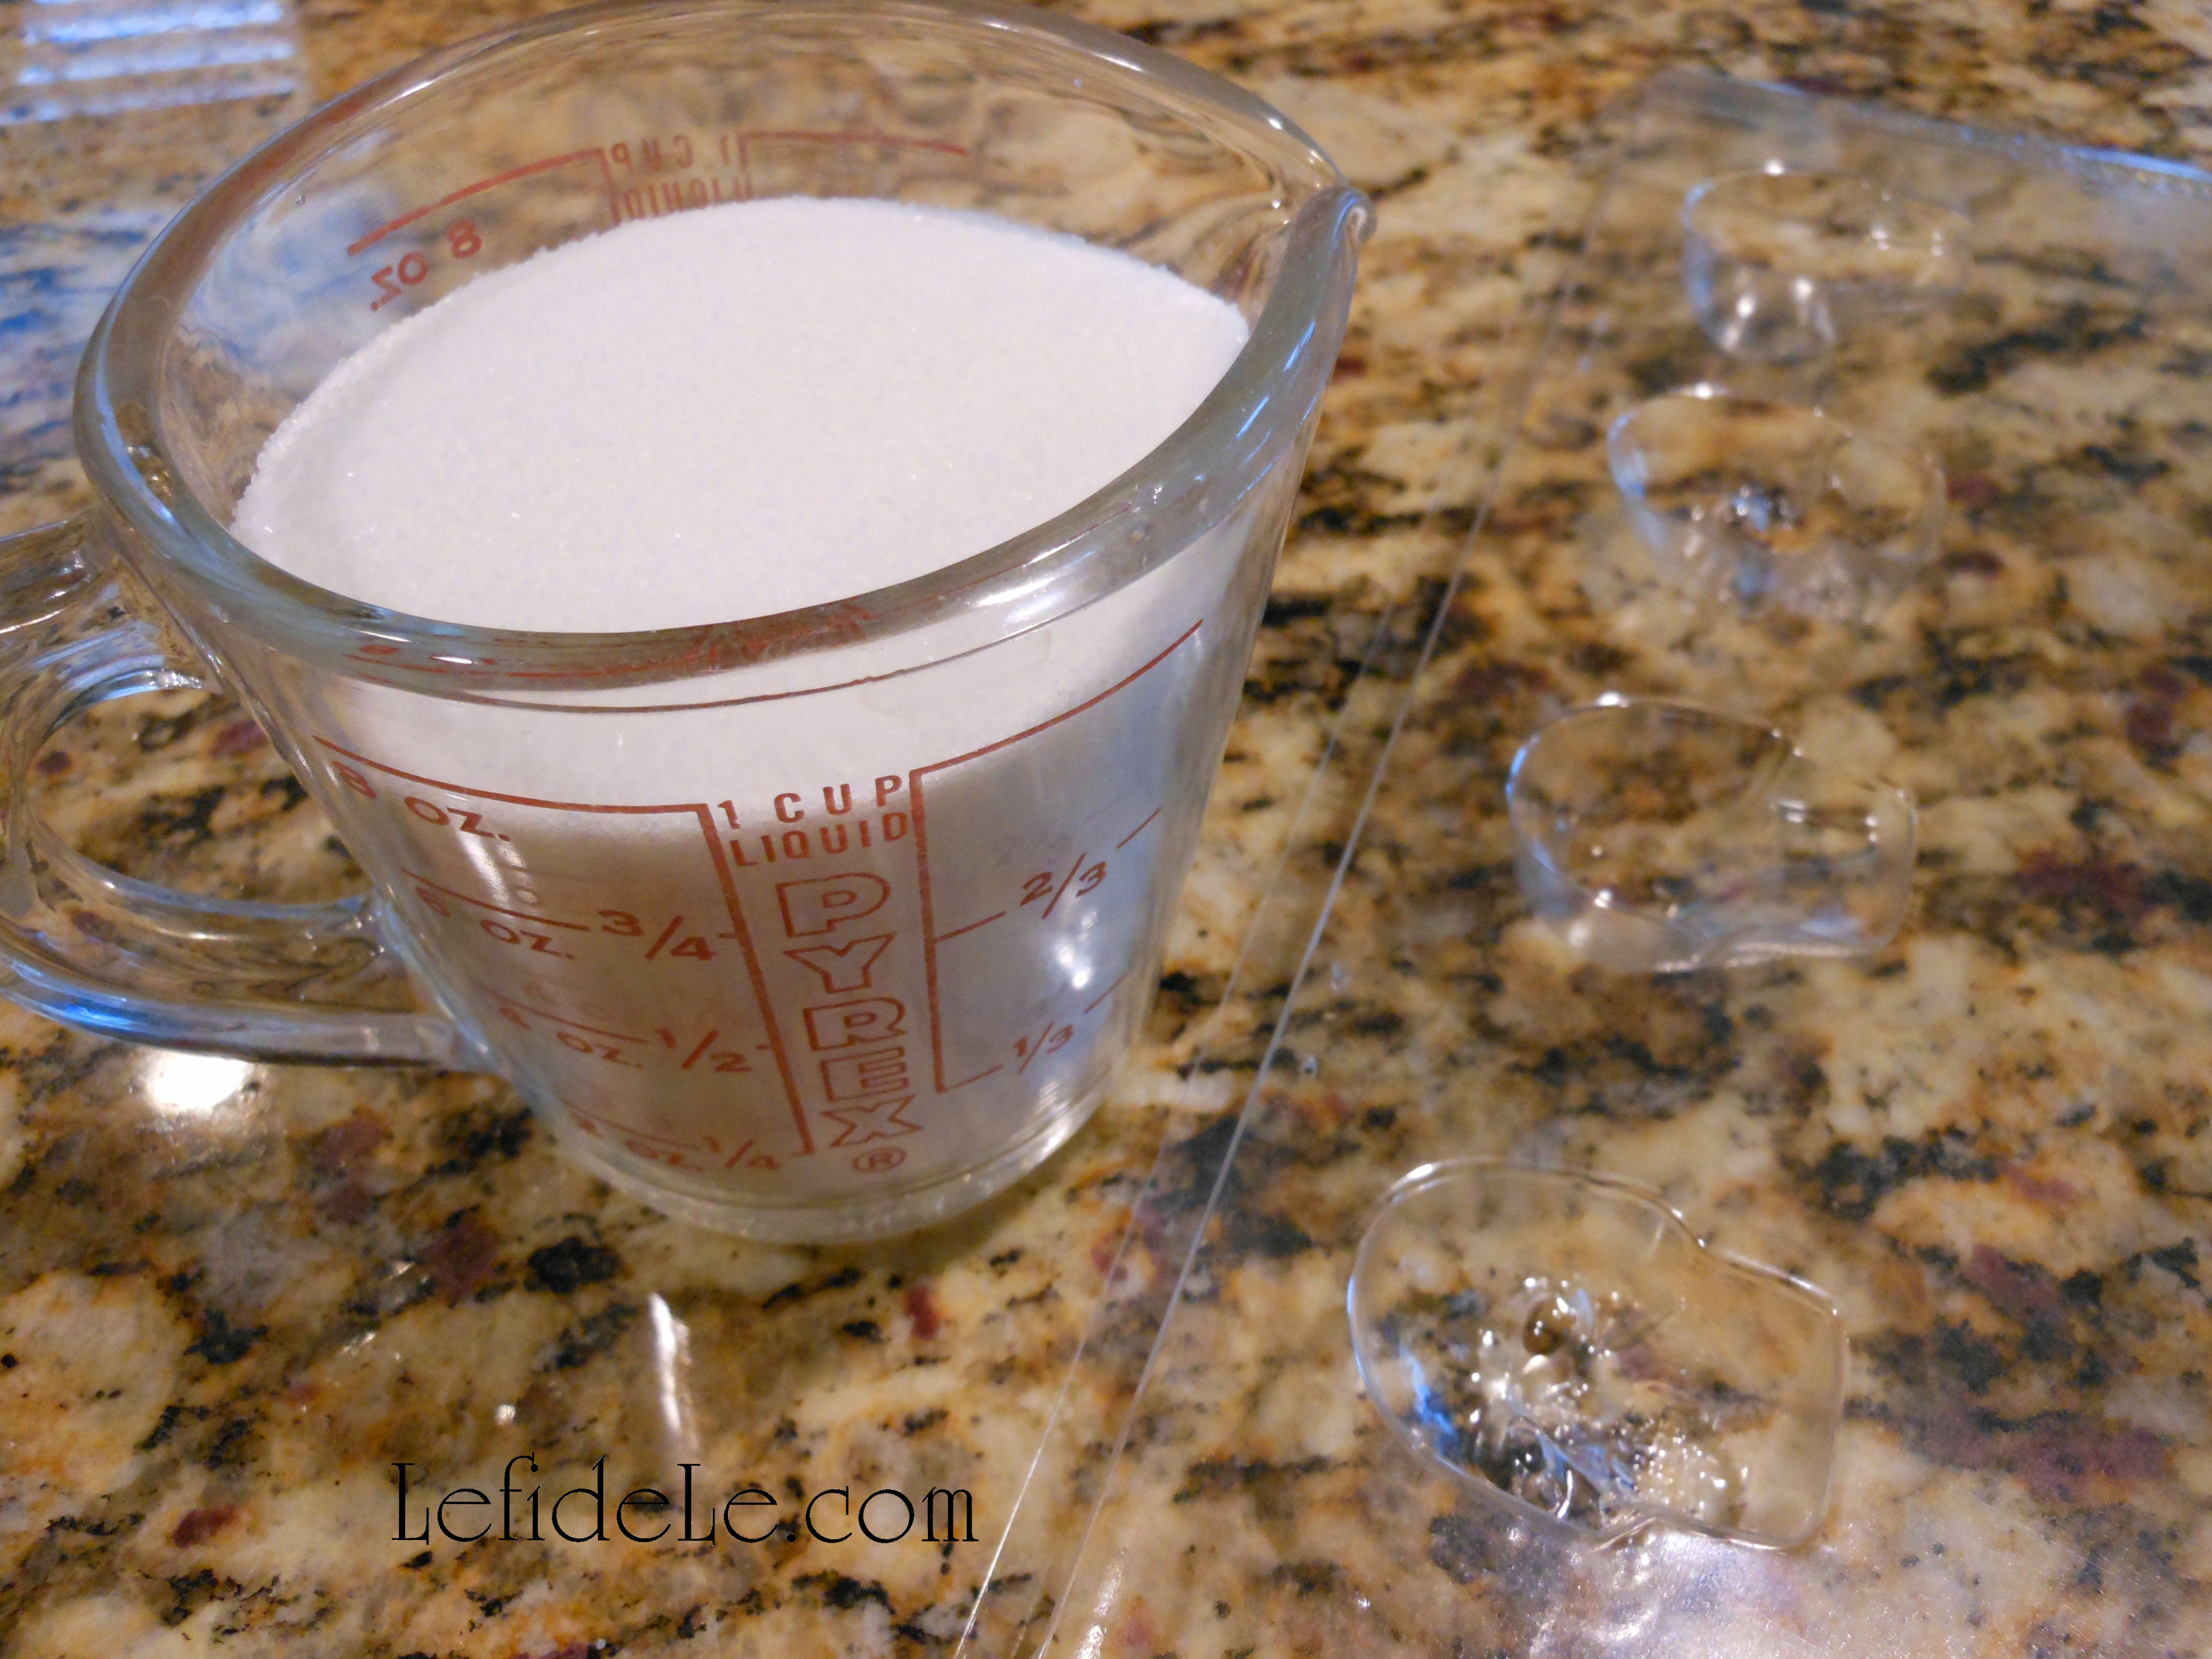
Wash and dry the plastic mold. Measure a perfect cup of glistening white sugar (azucar in Español).

025Leigh

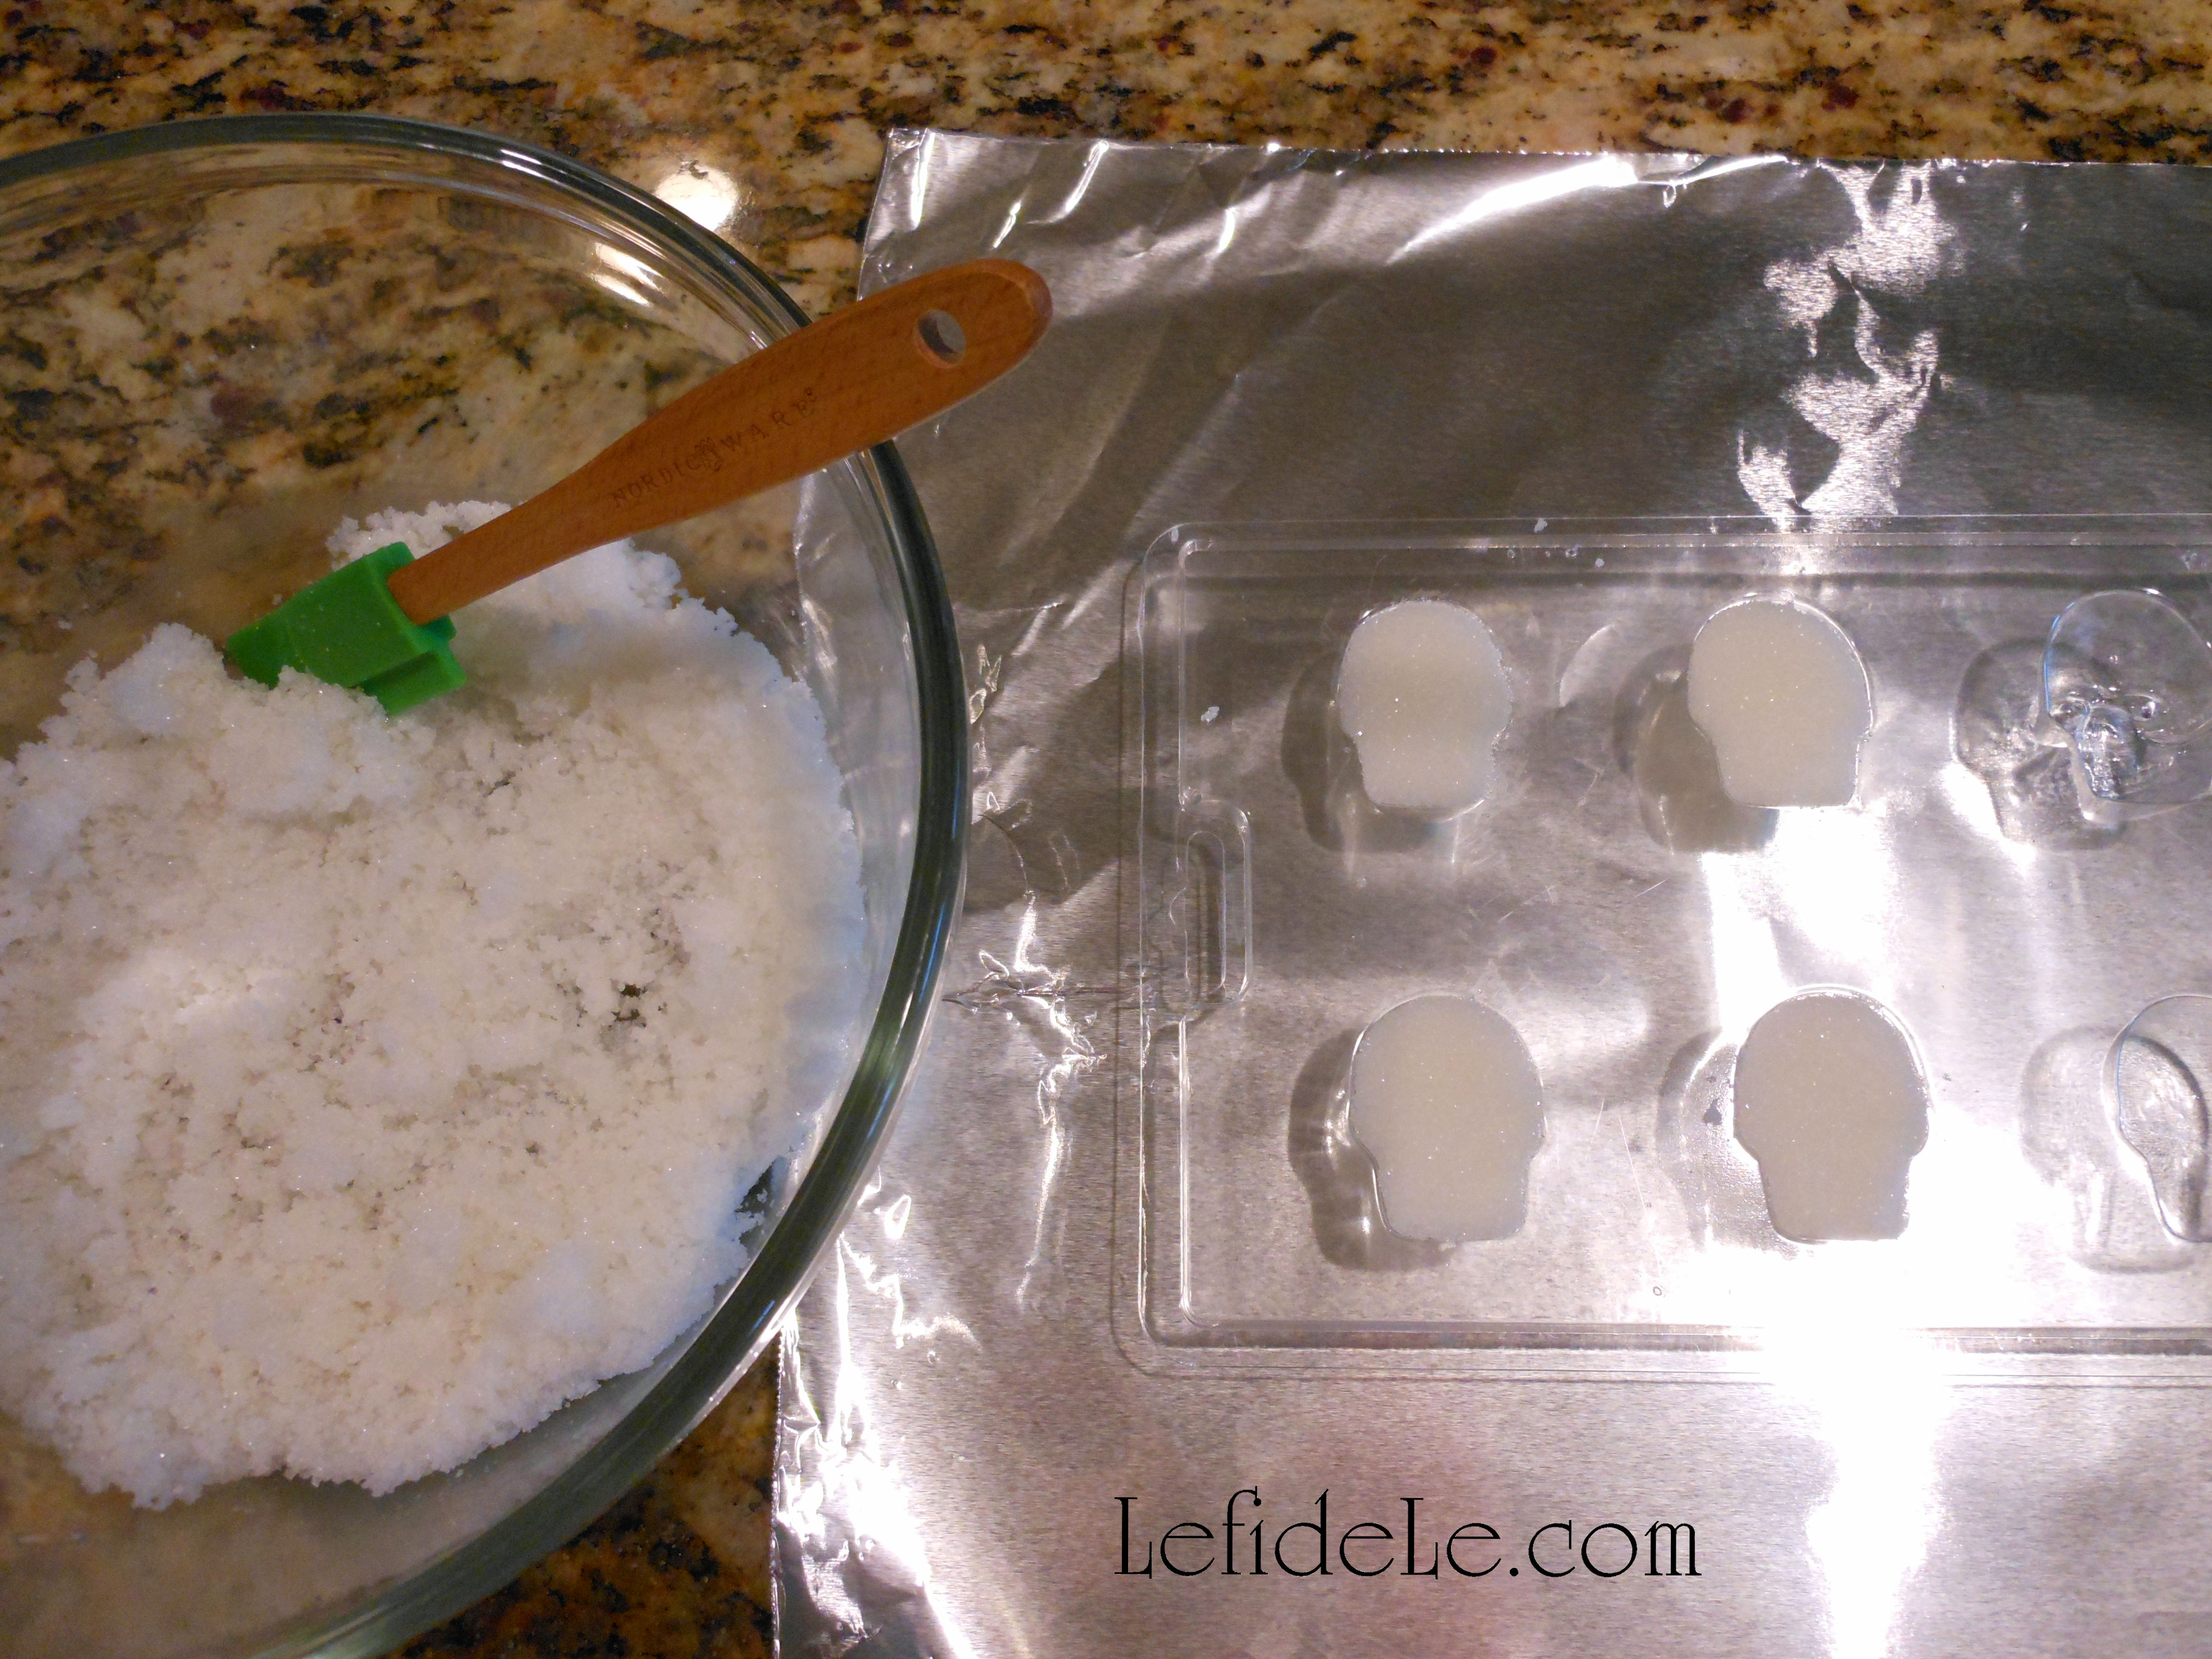
Use a small silicone spatula to mix 4 teaspoons of water (agua) into a bowl filled with the white sugar. (The key to sugar skull success is patient and thorough mixing to yield slightly damp sugar the consistency of sand.) Use the spatula to scoop globs of damp sugar into the mold, and also to pat it down compactly into each cavity. Smooth the top of each to flatten the sugar to sit evenly with the mold. (This helps later when combining the pieces to make 3D skull shapes.)

026Leigh

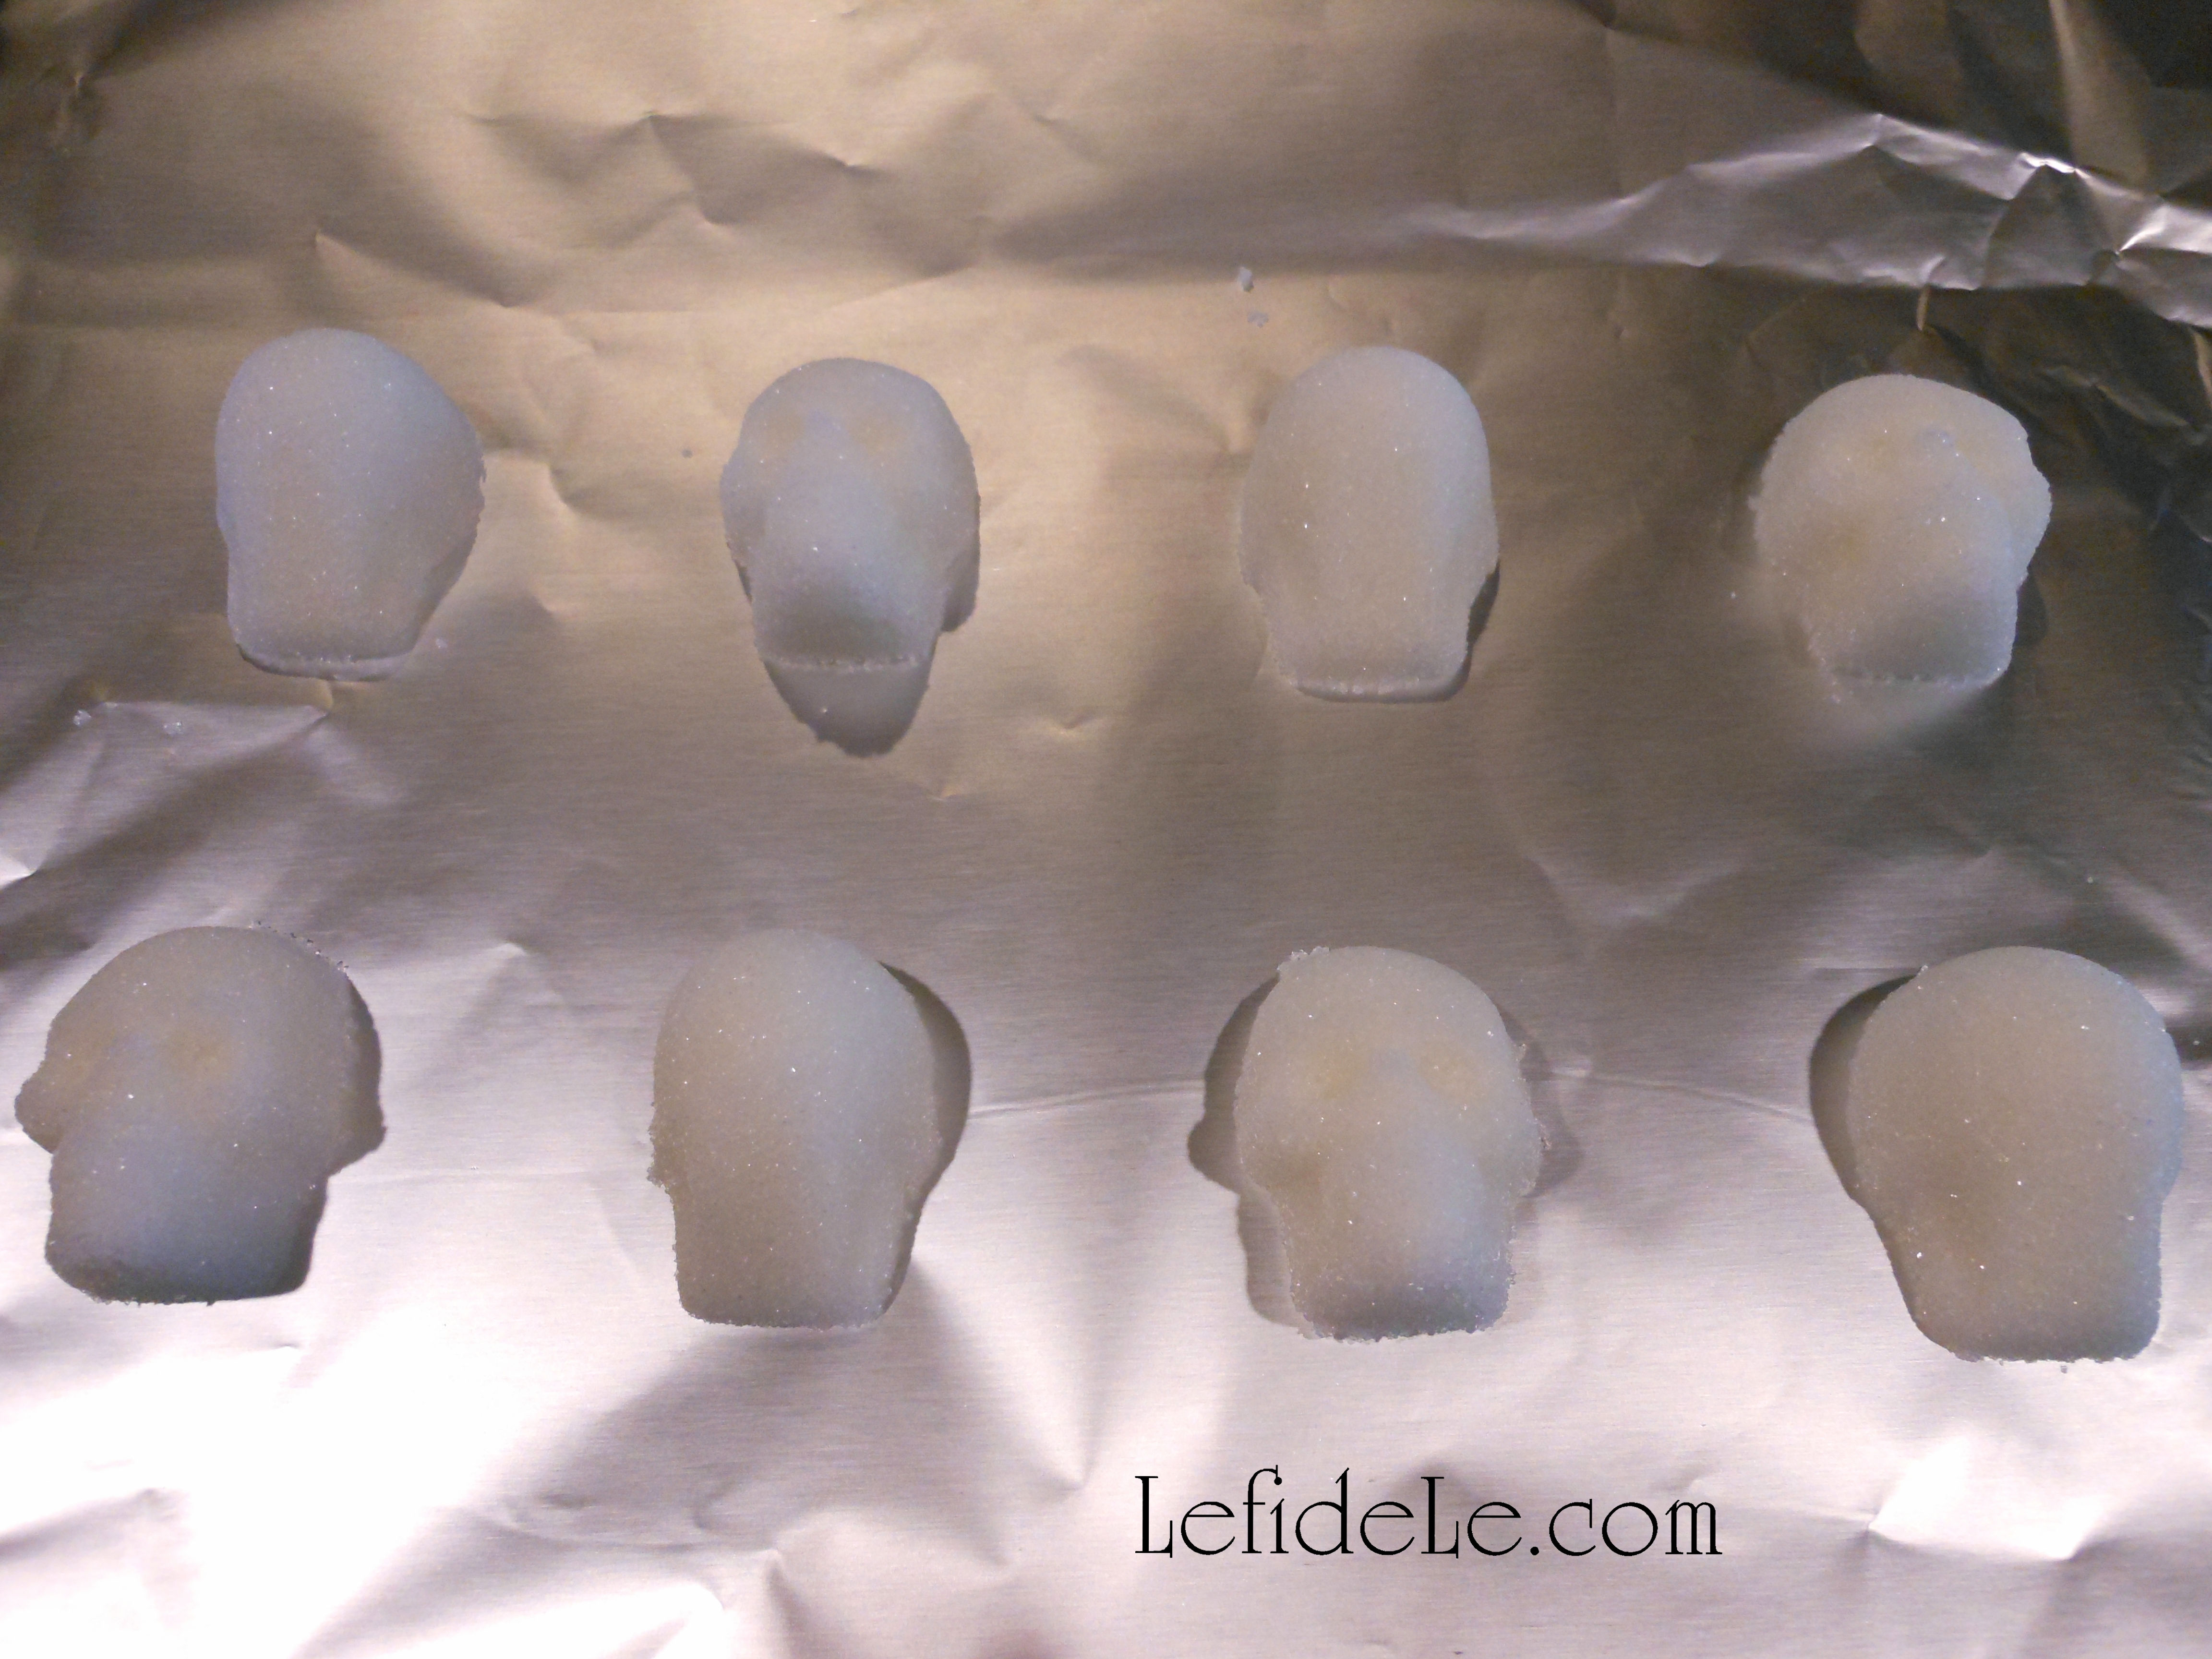
Place a cookie sheet on top of the mold. Flip them over while holding them together. The mold will now sit inverted on the cookie sheet. Carefully lift the plastic mold off to leave the sugar shapes on the sheet. (If some of them stick, gently flex two opposite corners of the mold in different directions. The remaining sugar shapes should pop out without breaking if you hover right over the sheet.) Make a second set of sugar shapes the same way. Let these dry at least 5 hours. (I left mine overnight, and decorated them the next day.) Another option is to bake these 5 to 10 minutes in a 200ᵒ oven. (Make sure to observe them closely in case your oven’s temperature is off.)

029Leigh

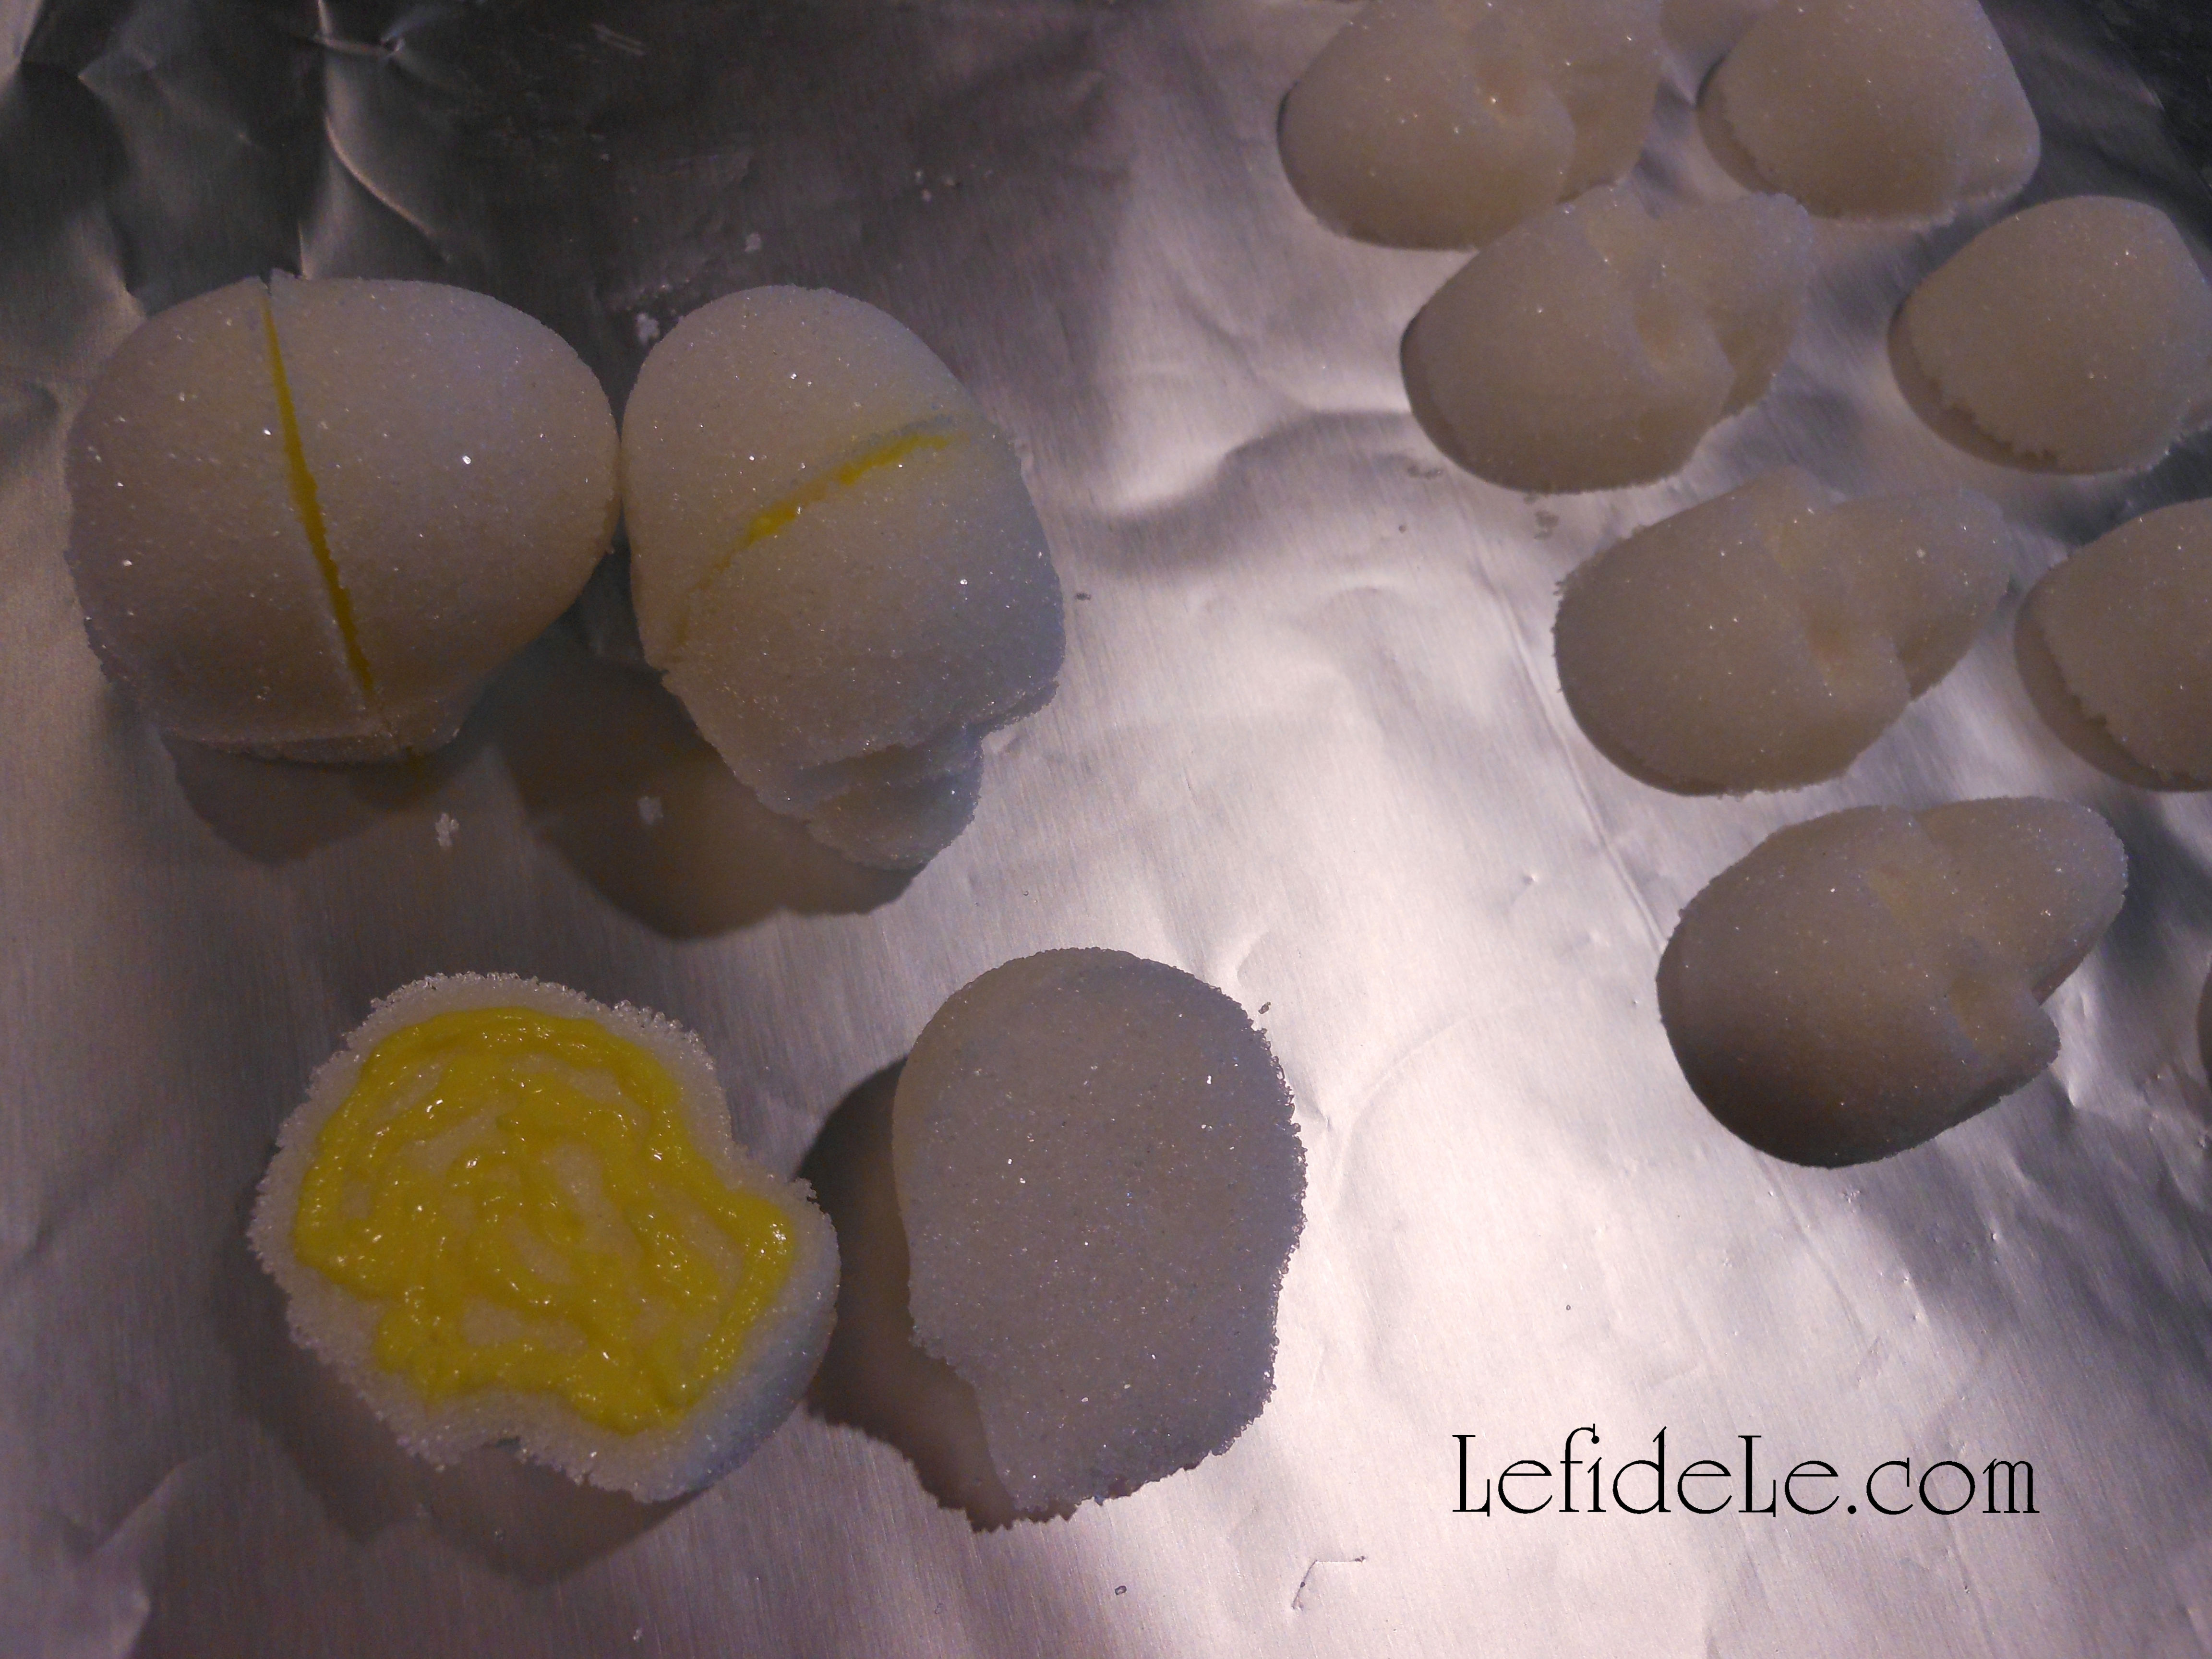
“Glue” a set of front and back skull (calavera) pieces together using Wilton ready to use icing. (This is an easy allergy-friendly egg-free alternative to a royal icing of meringue that hardens for the same traditional look, but note that they do contain corn. I found a 4 pack of primary colors in-store at Michaels that are the same size of a gel icing… but don’t use a gel because it doesn’t harden in the same way so that it may be handled when dry.) Press each shape together firmly and set aside.

031Leigh

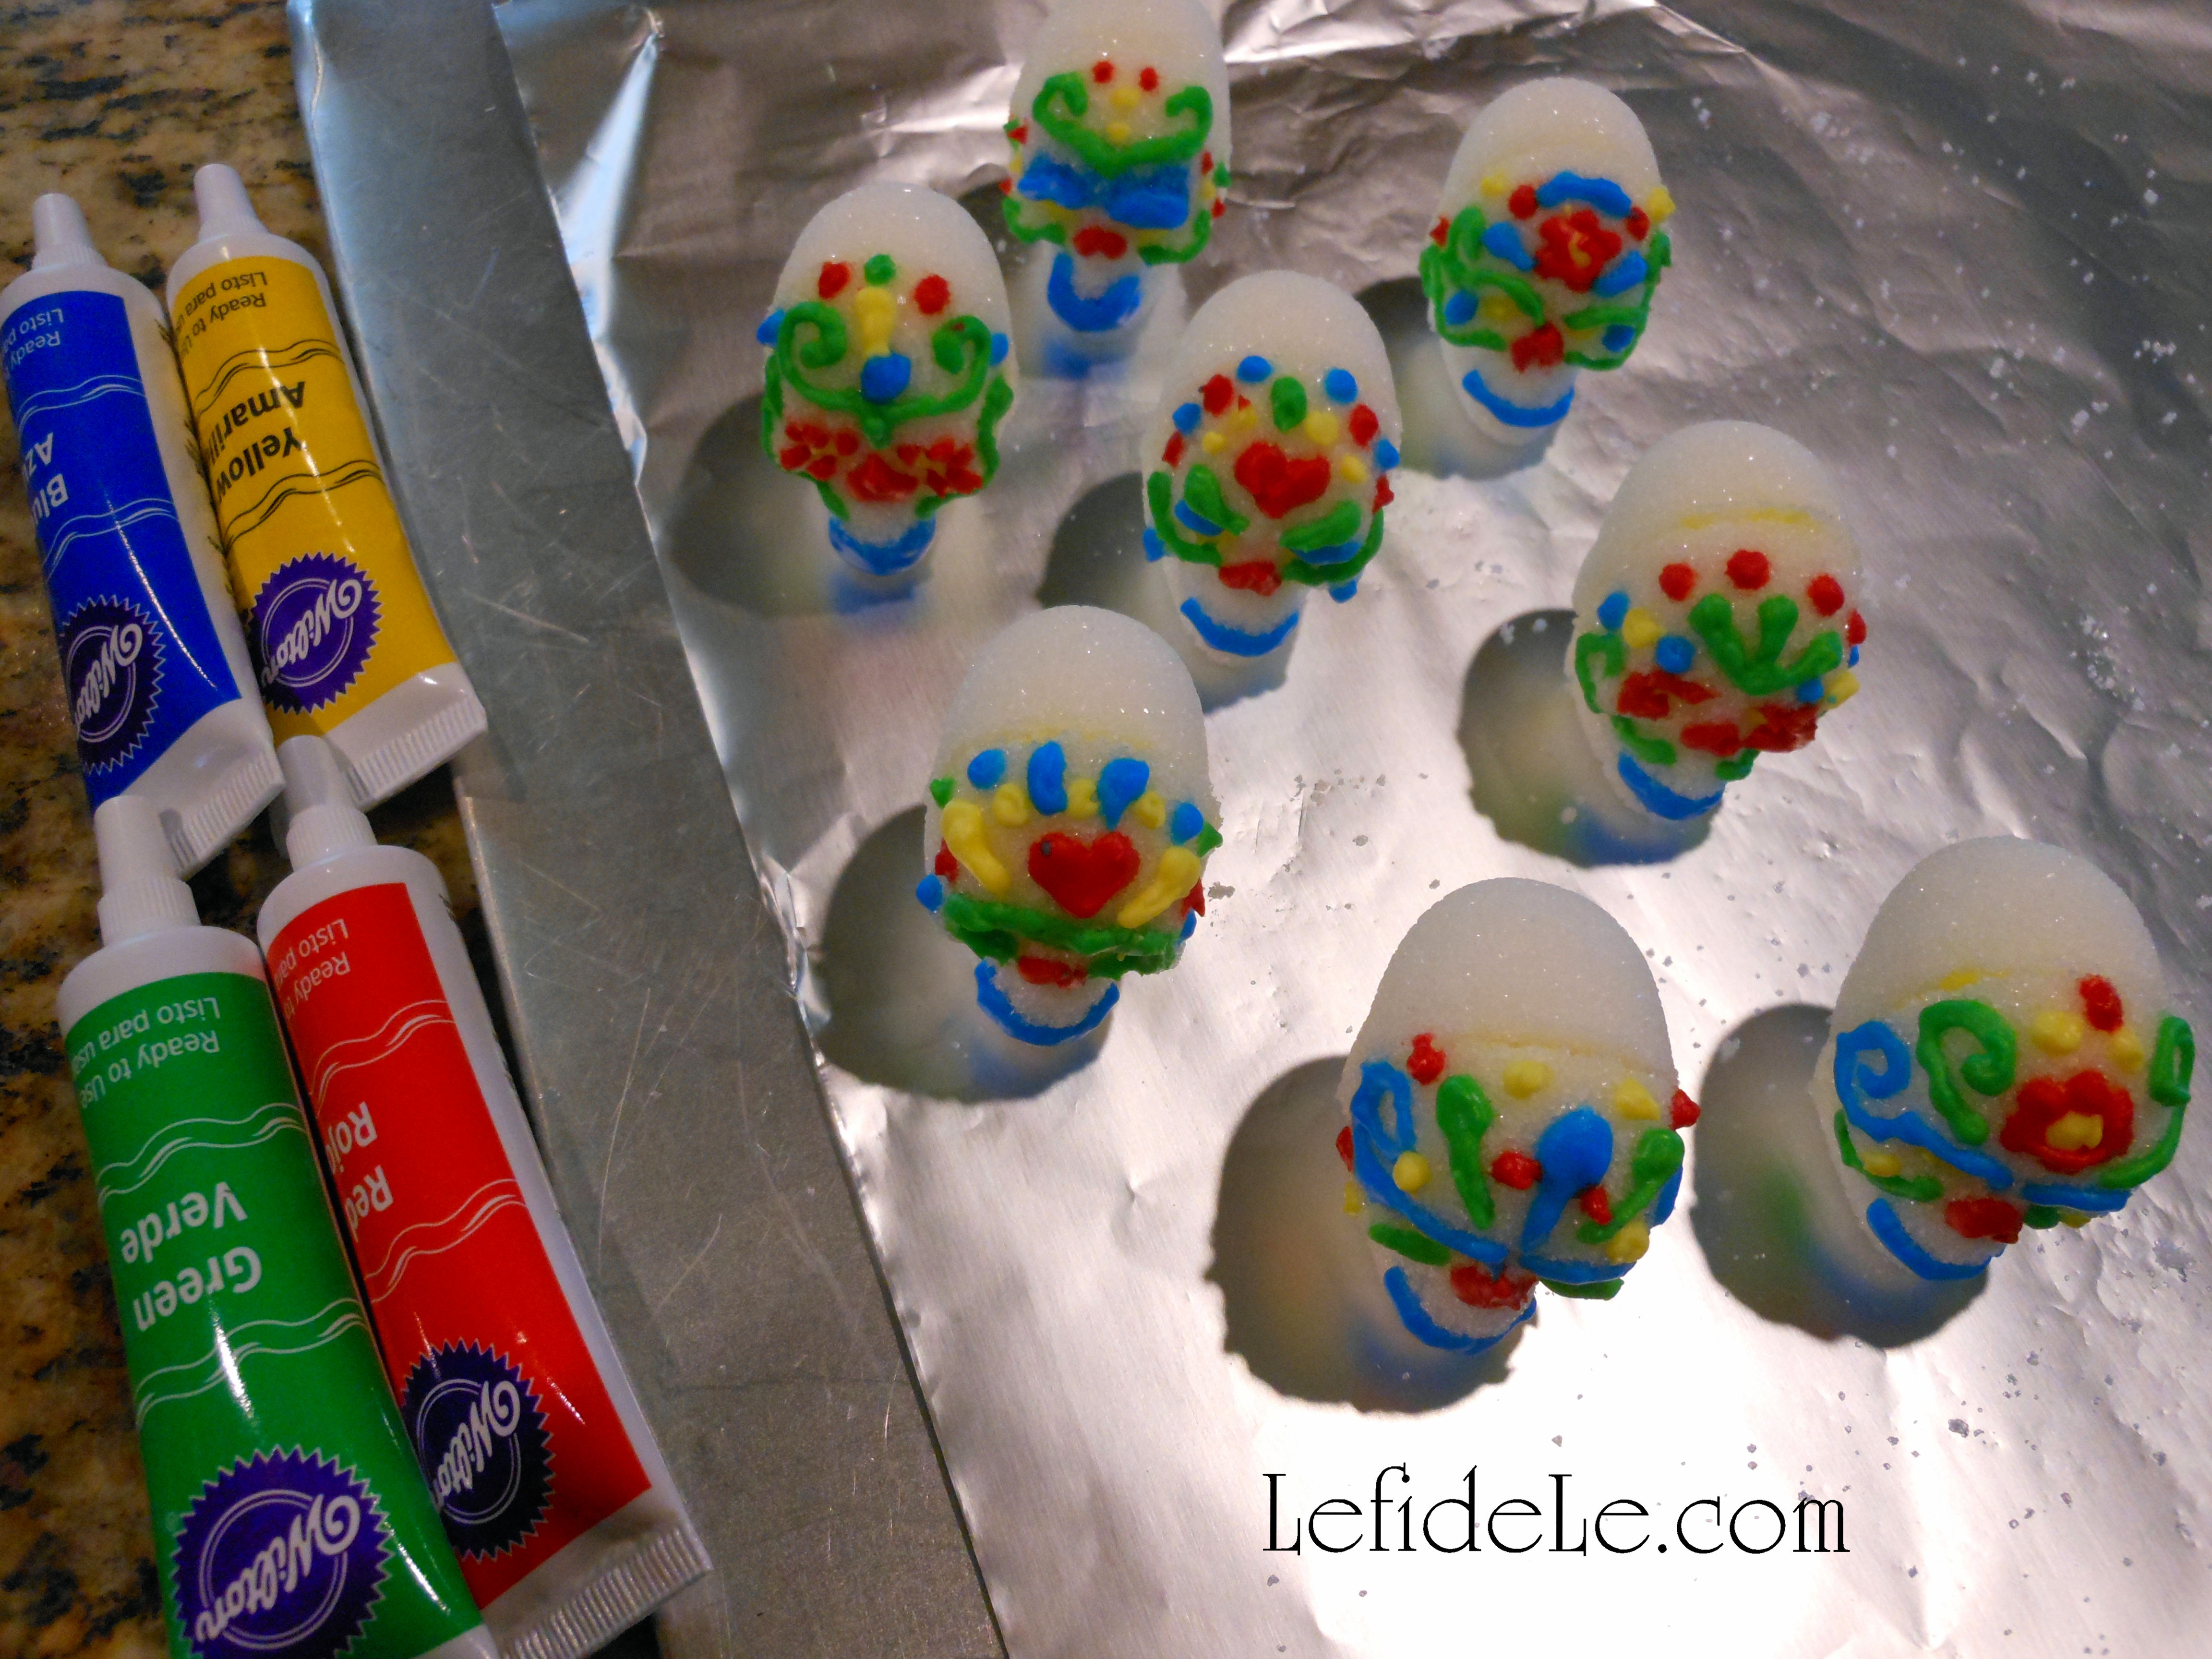
You may leave these as Halloween skull candies or decorate them as a Mexican folk art. Add traditional decorative icing (glaseado) details like smile lines, hearts, flowers, swirls, dots, and marks that look like apostrophes. (The small icing tubes have a small tip built in that’s perfect adding small details to the skulls.) Let these sit overnight to harden thoroughly.

088Leigh

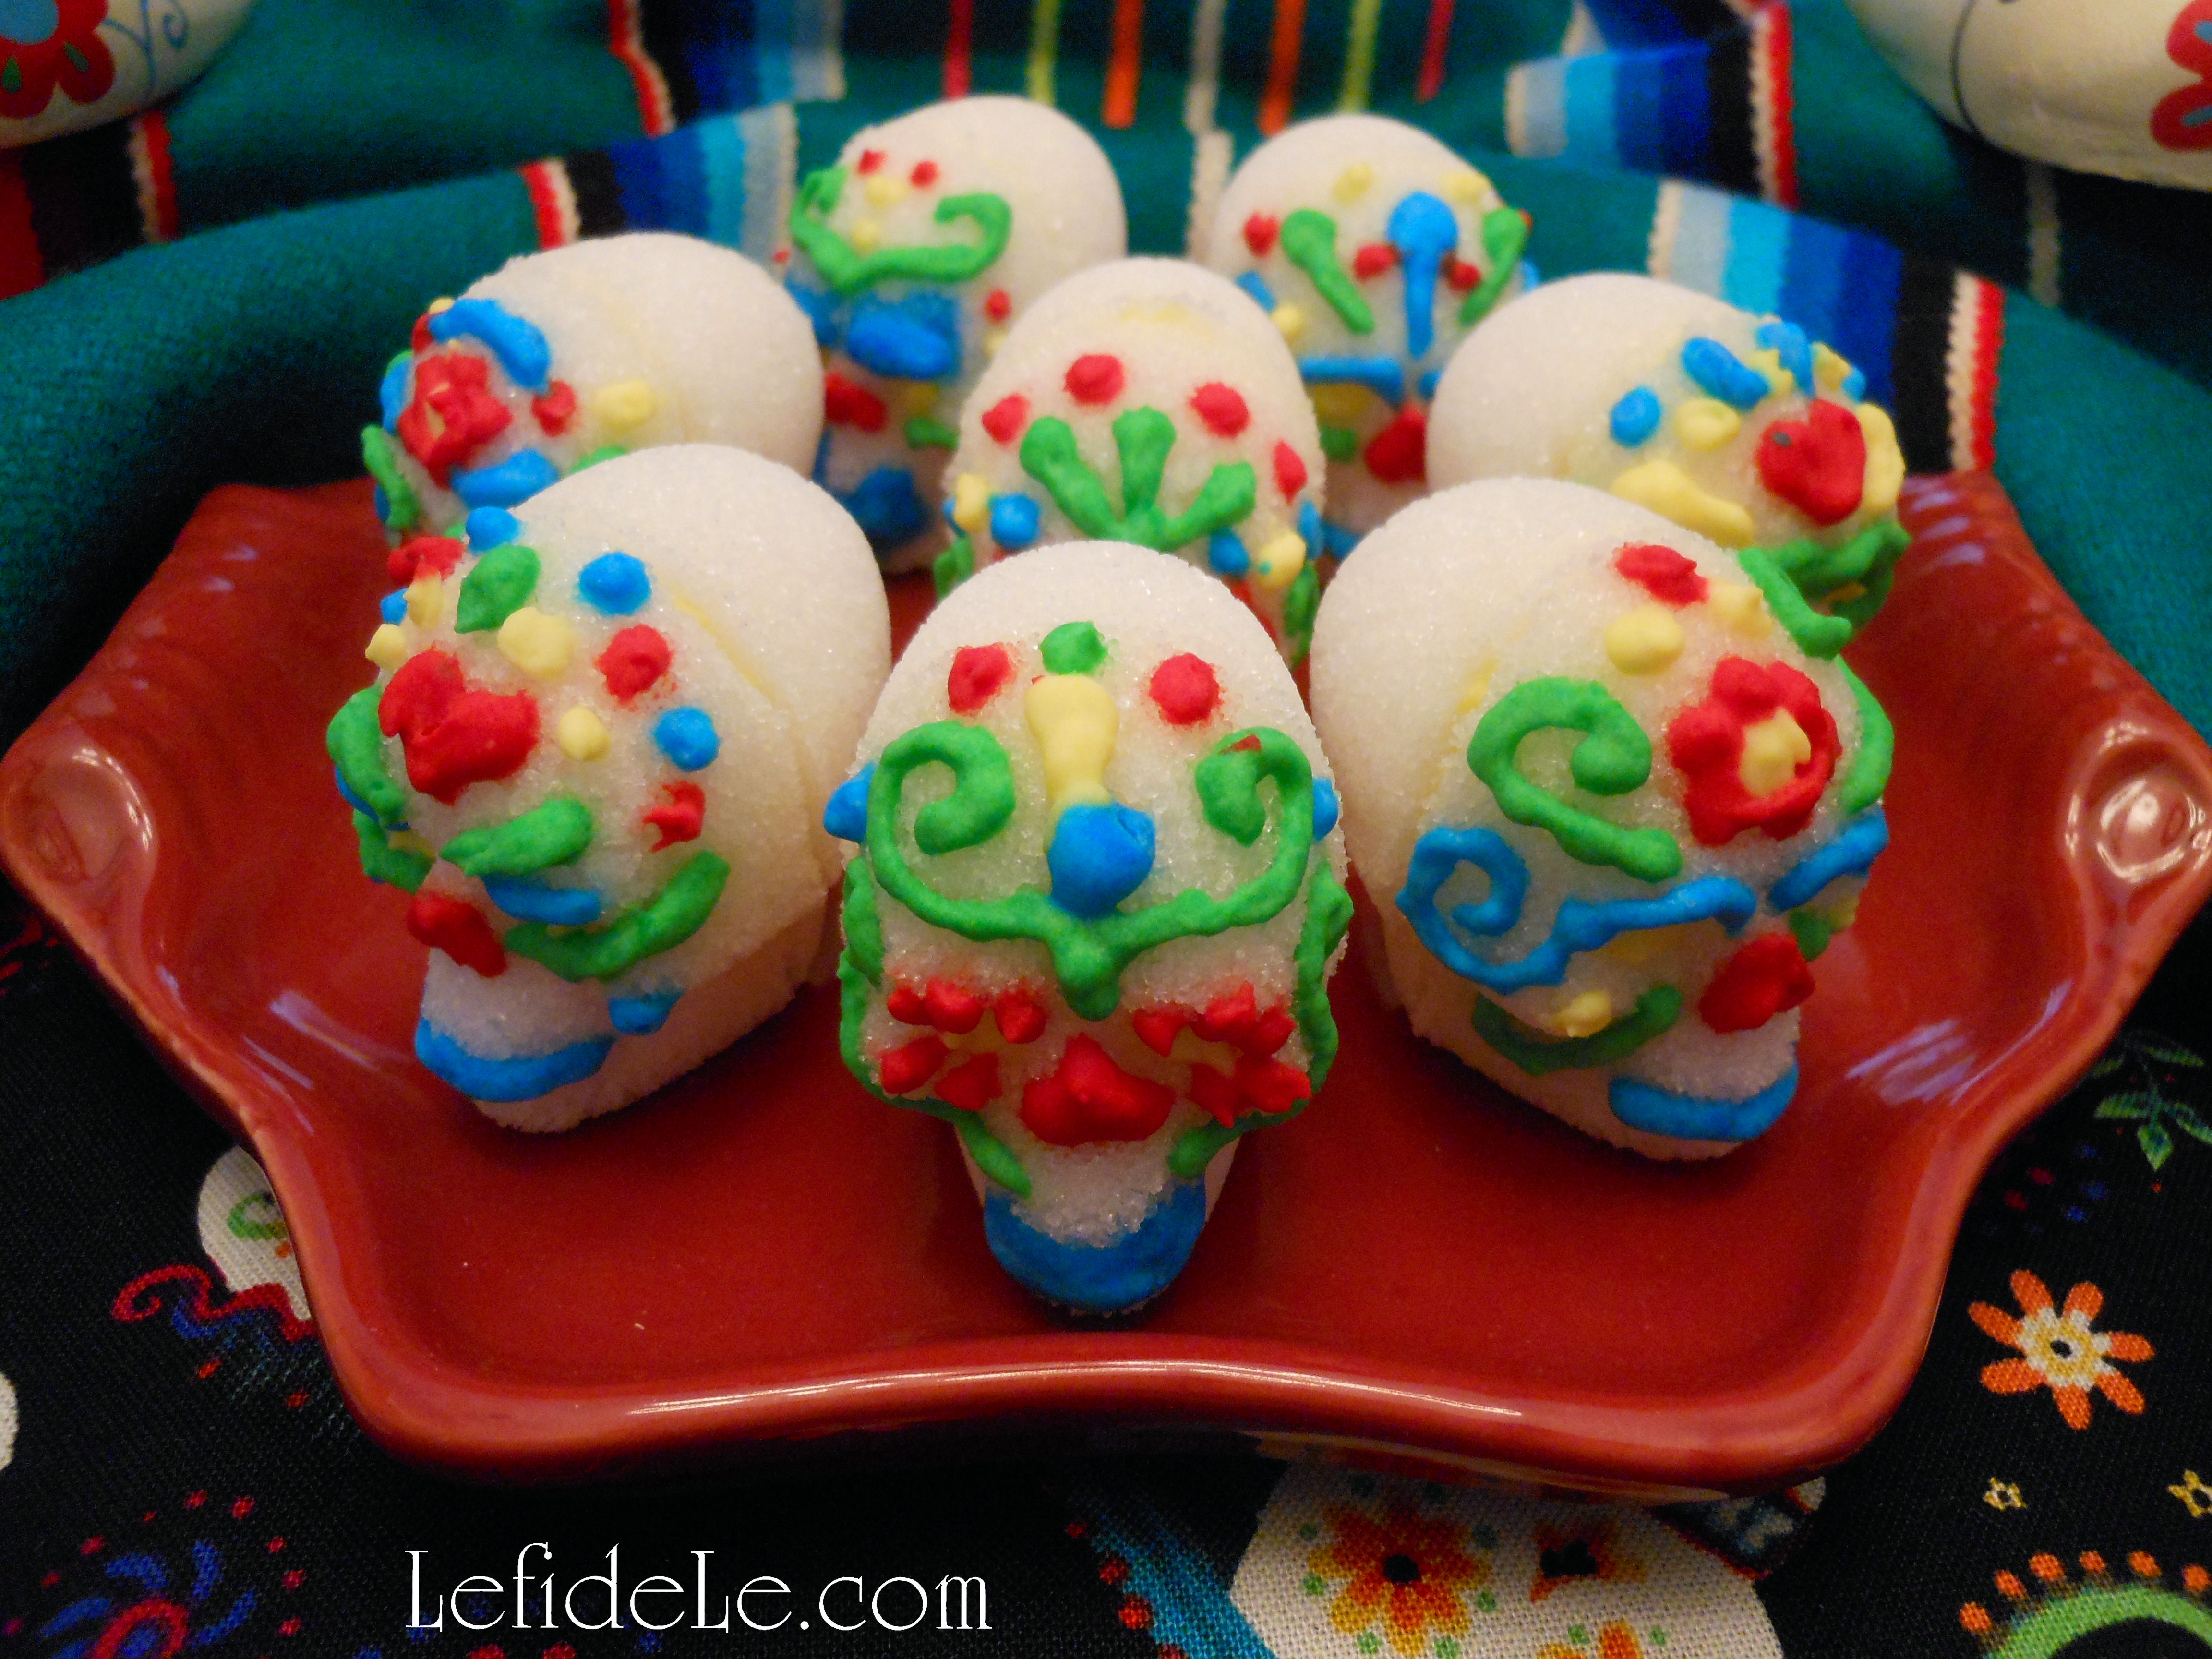
Wilton’s helpful hotline declared that the icing never really goes bad and may be used years later if capped tightly after use… good to know, but I doubt the small tubes will last long! Once dry, the sugar skulls (calaveras de azucar) may be handled without damaging them.

067Leigh

They may even be eaten as candy, which is wonderful considering most sugar skulls are inedible. (And so are the most popular recipes for them.) Since sugar is only 15 calories per teaspoon… I’m guessing that these are only about 35 calories each!

072Leigh

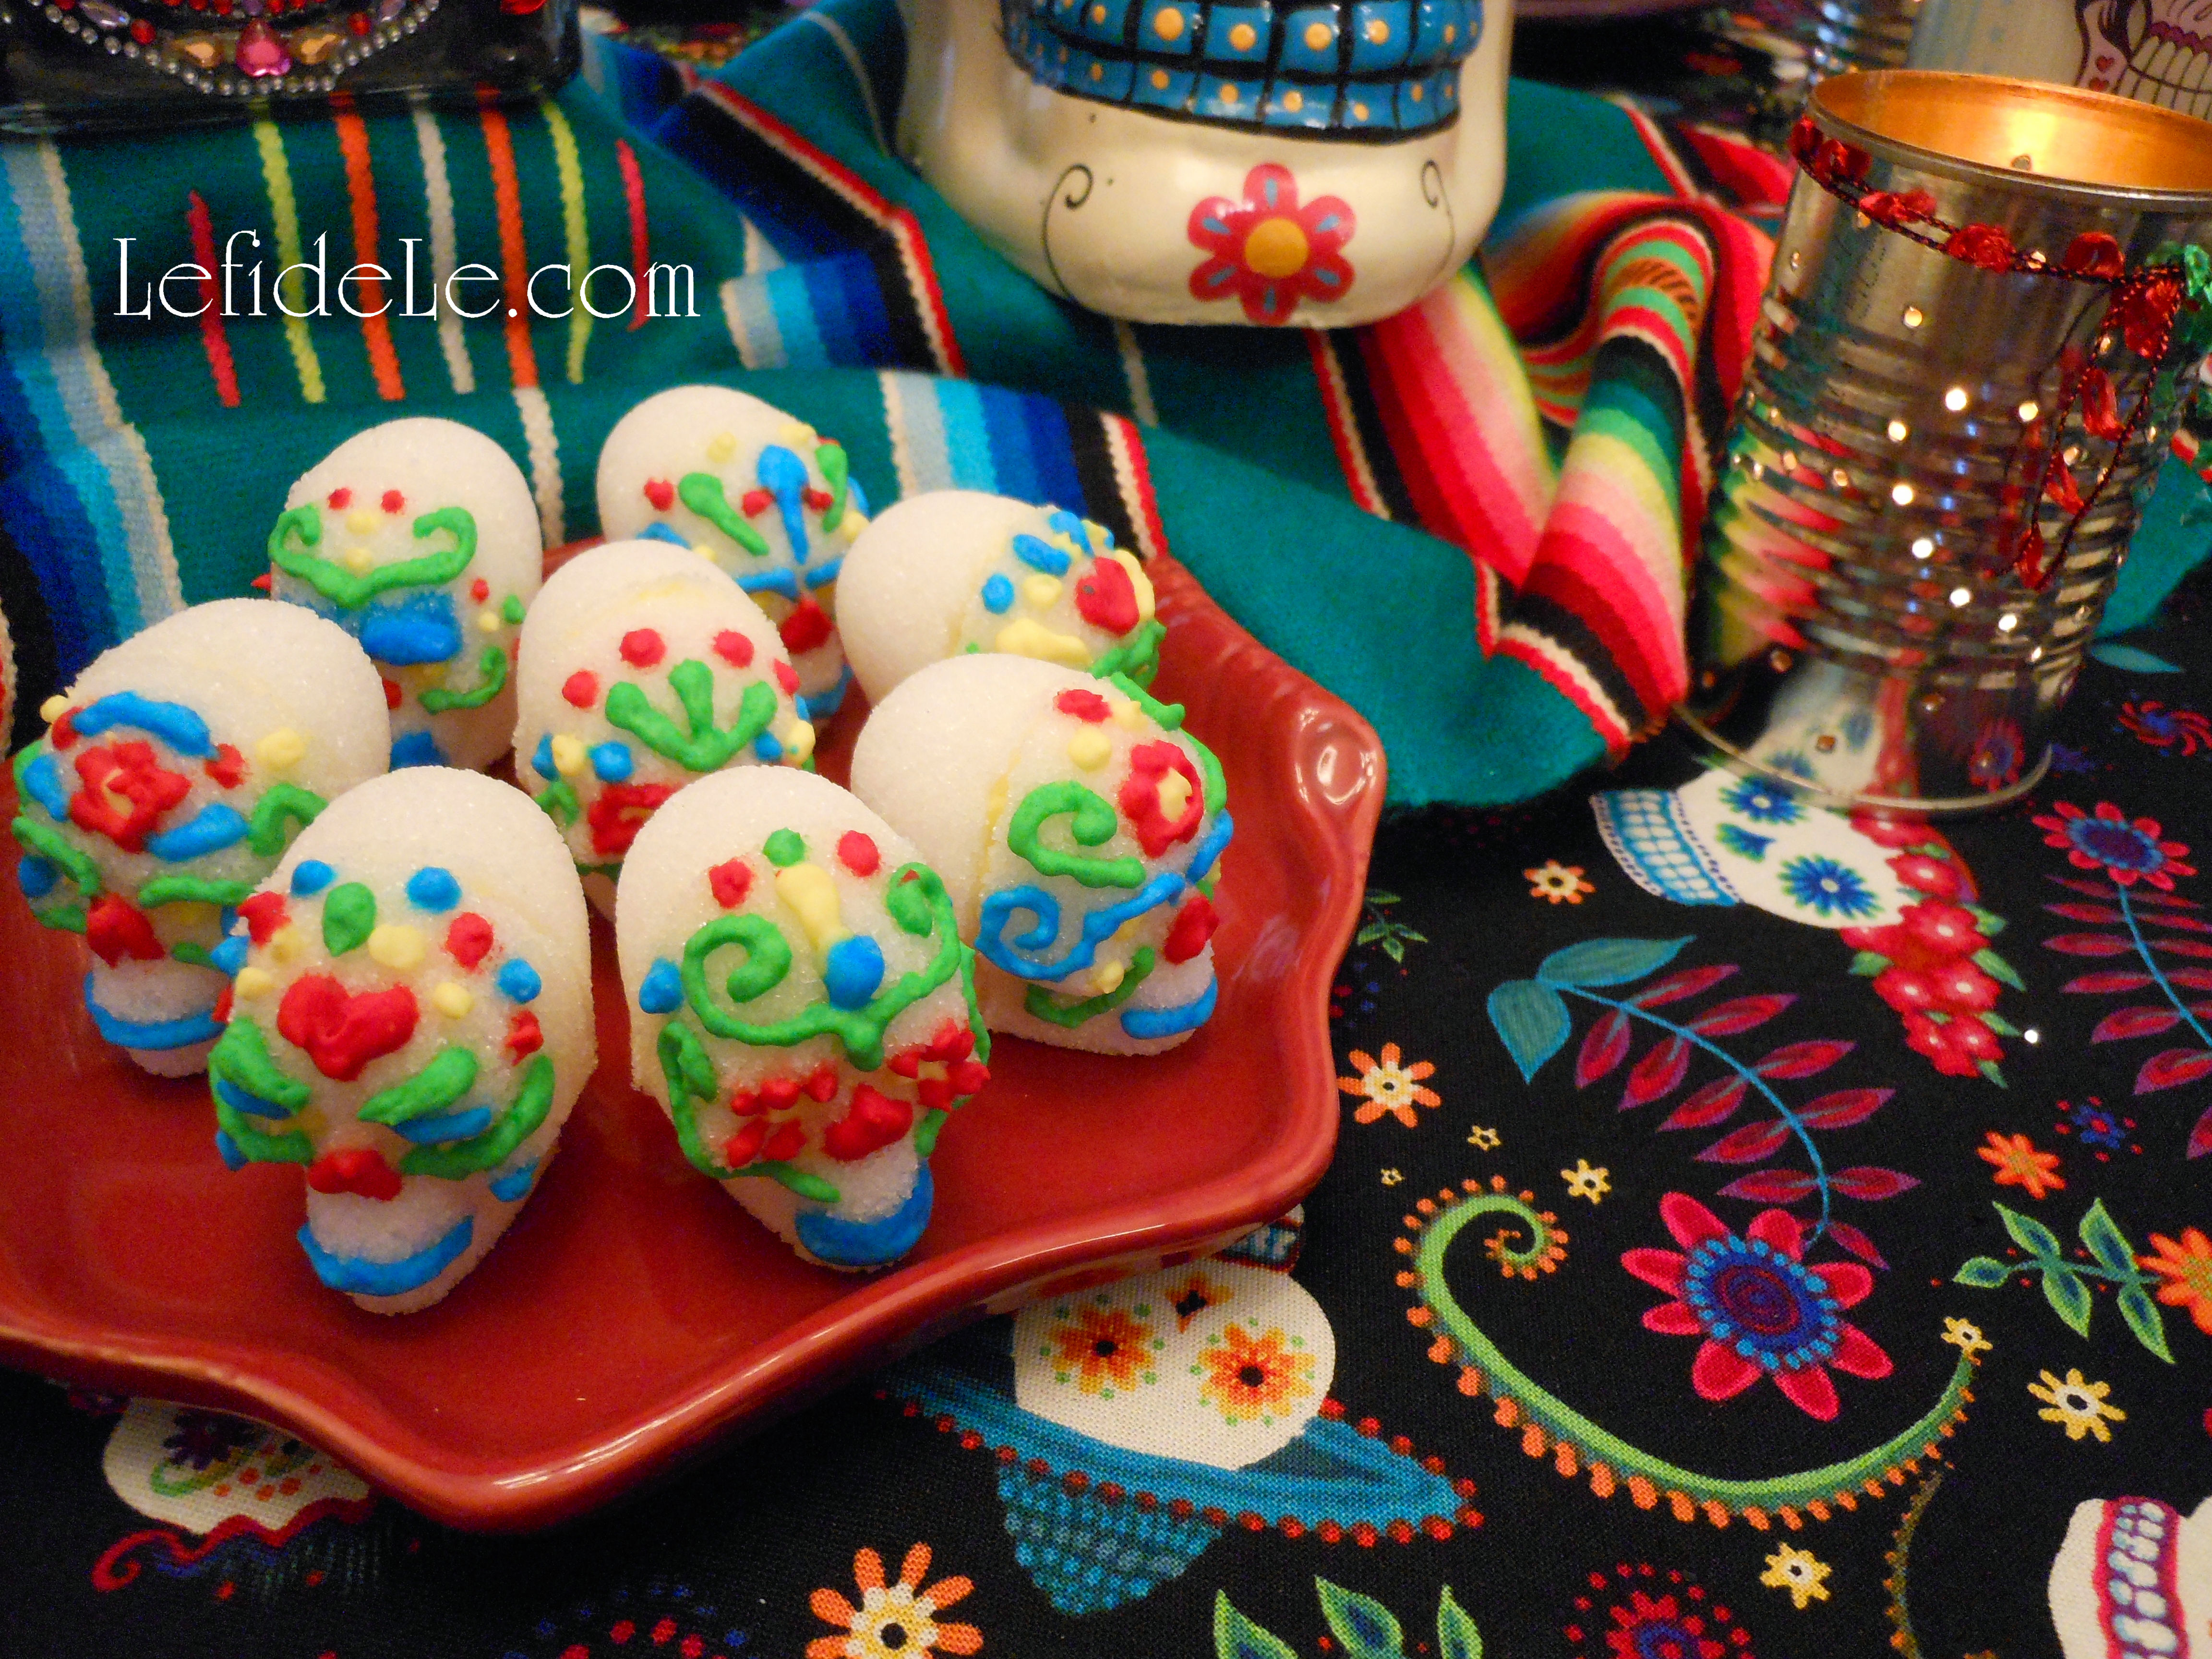
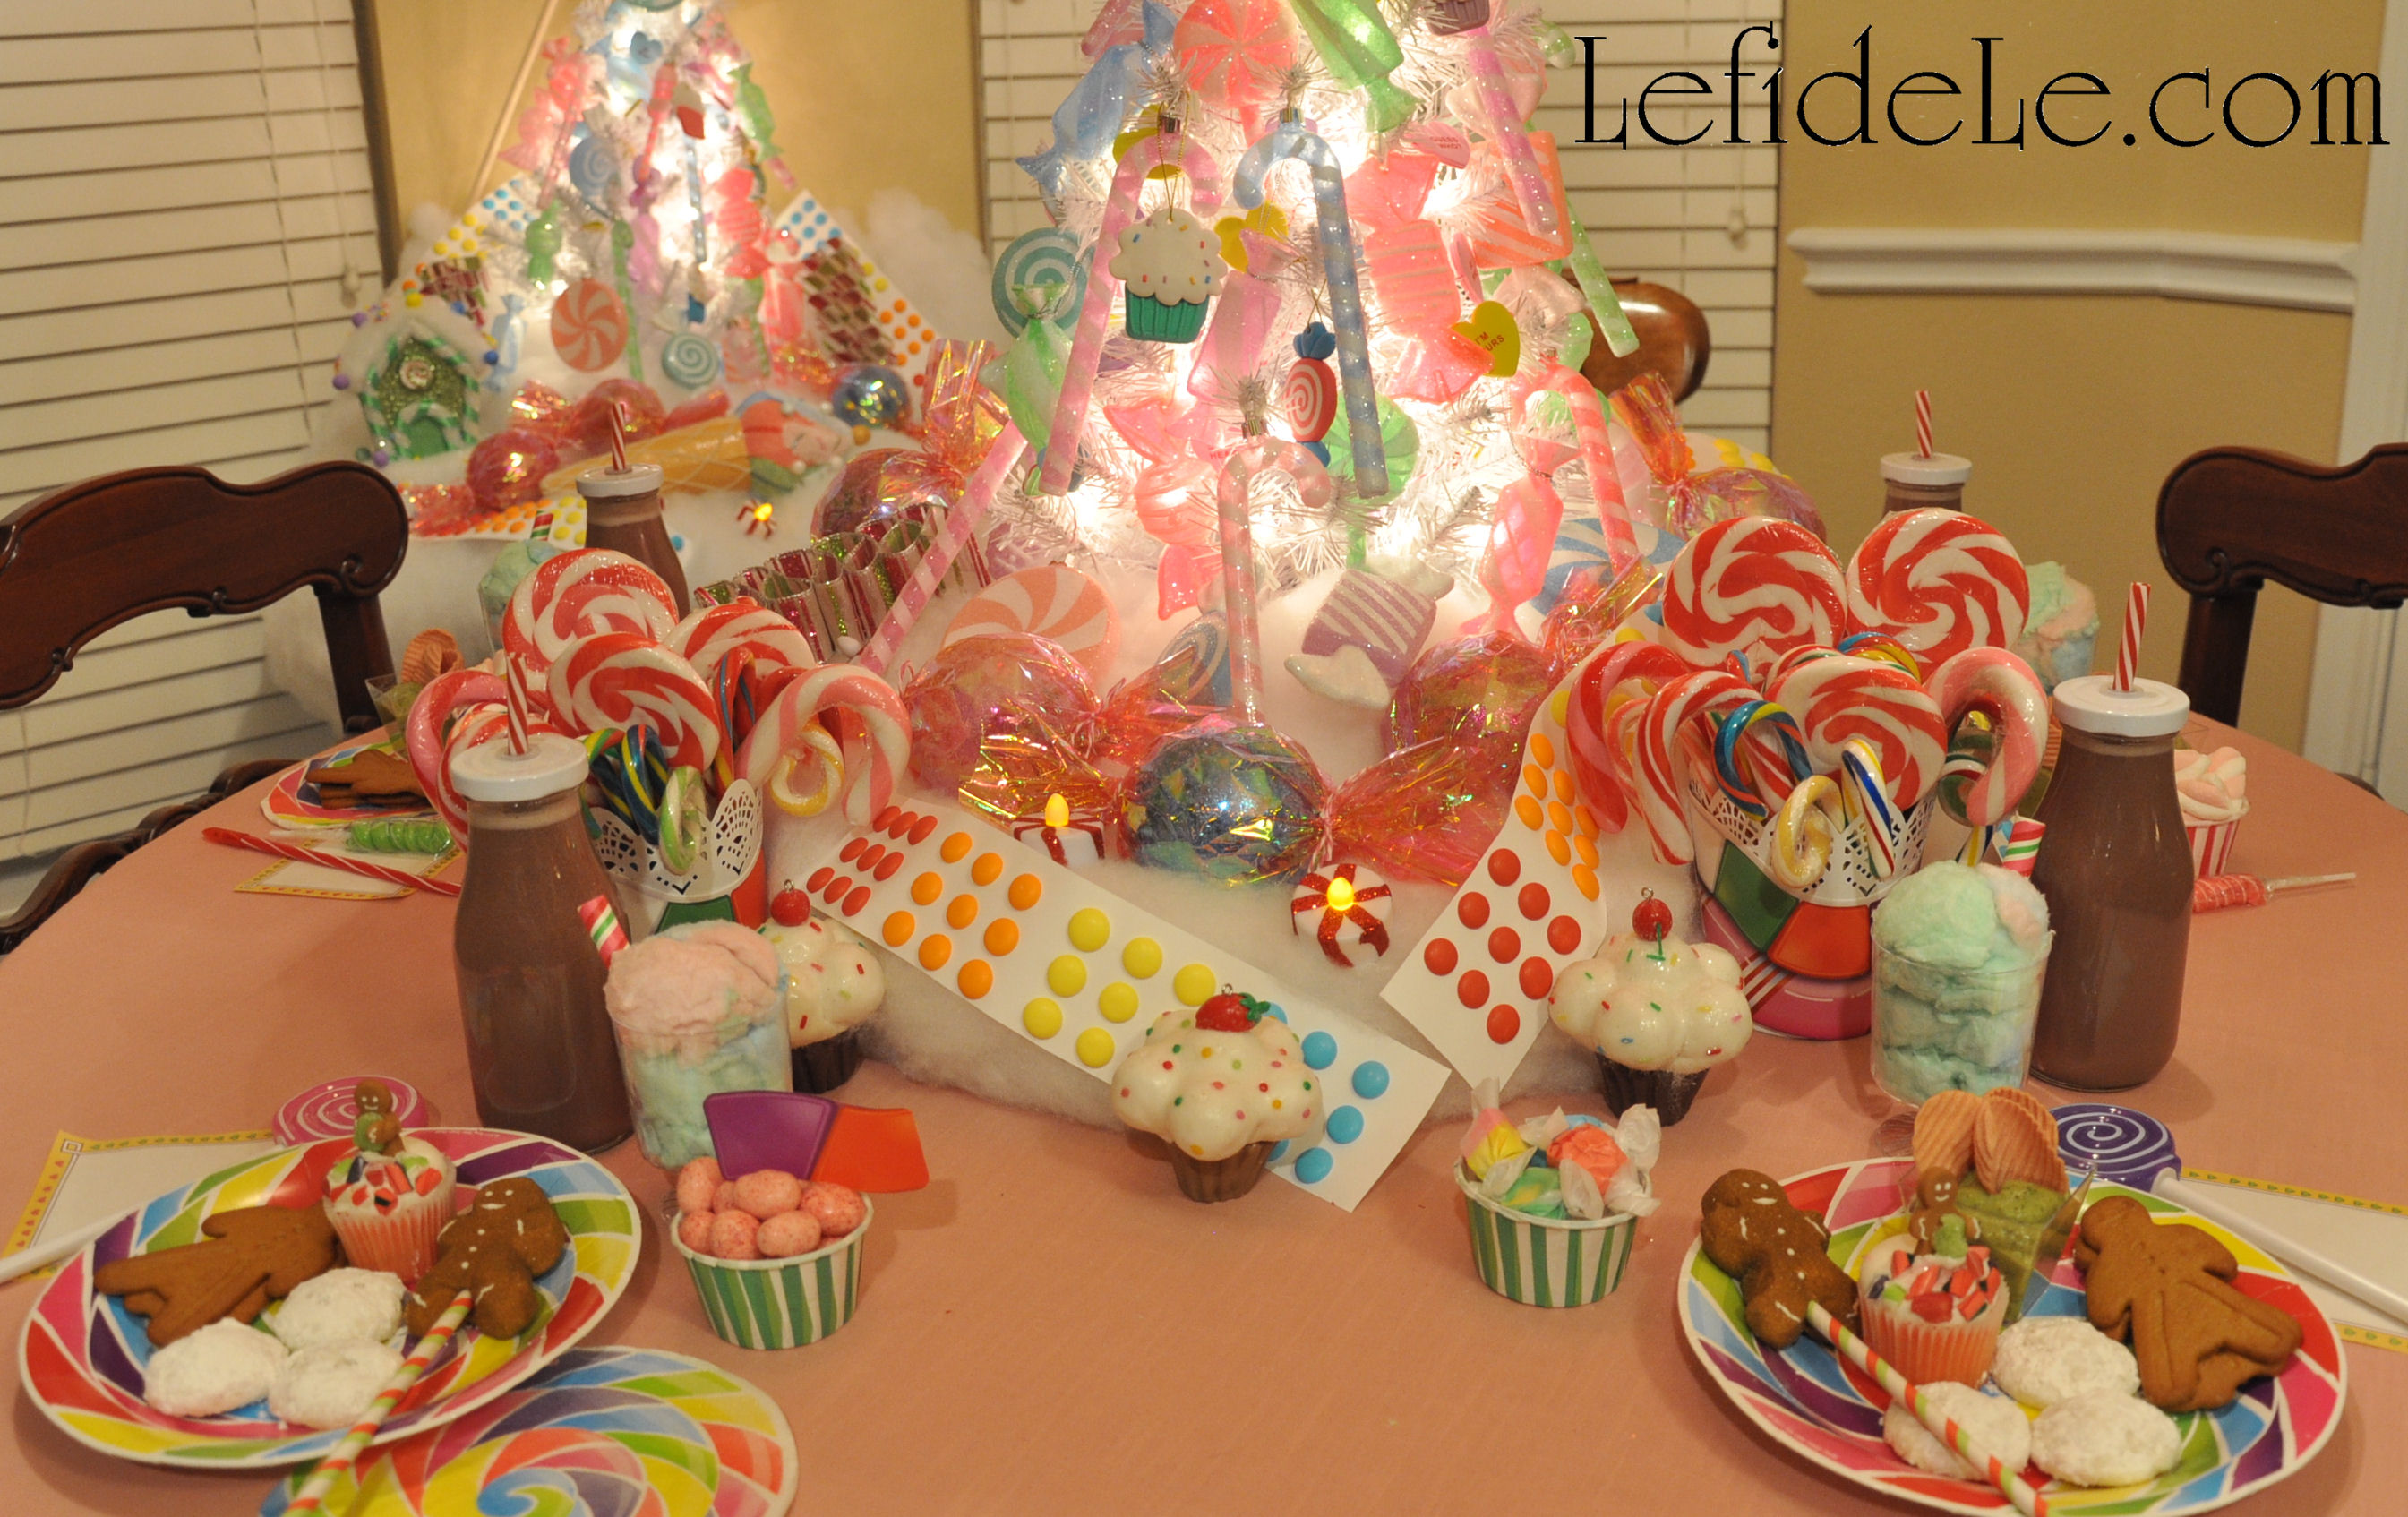
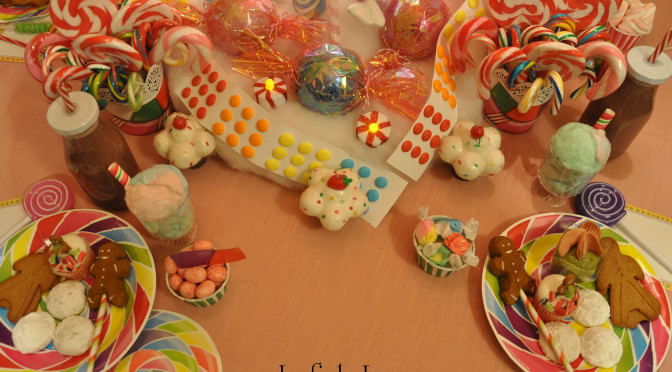
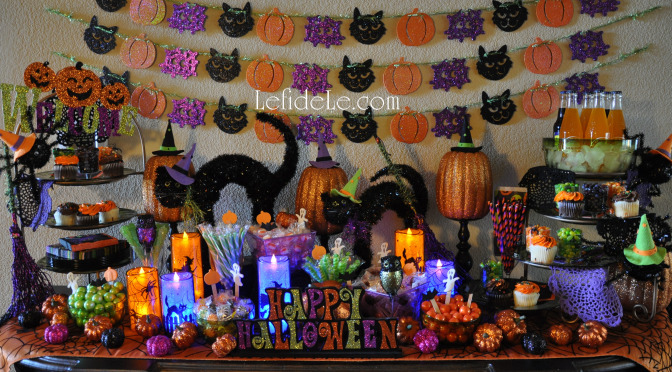
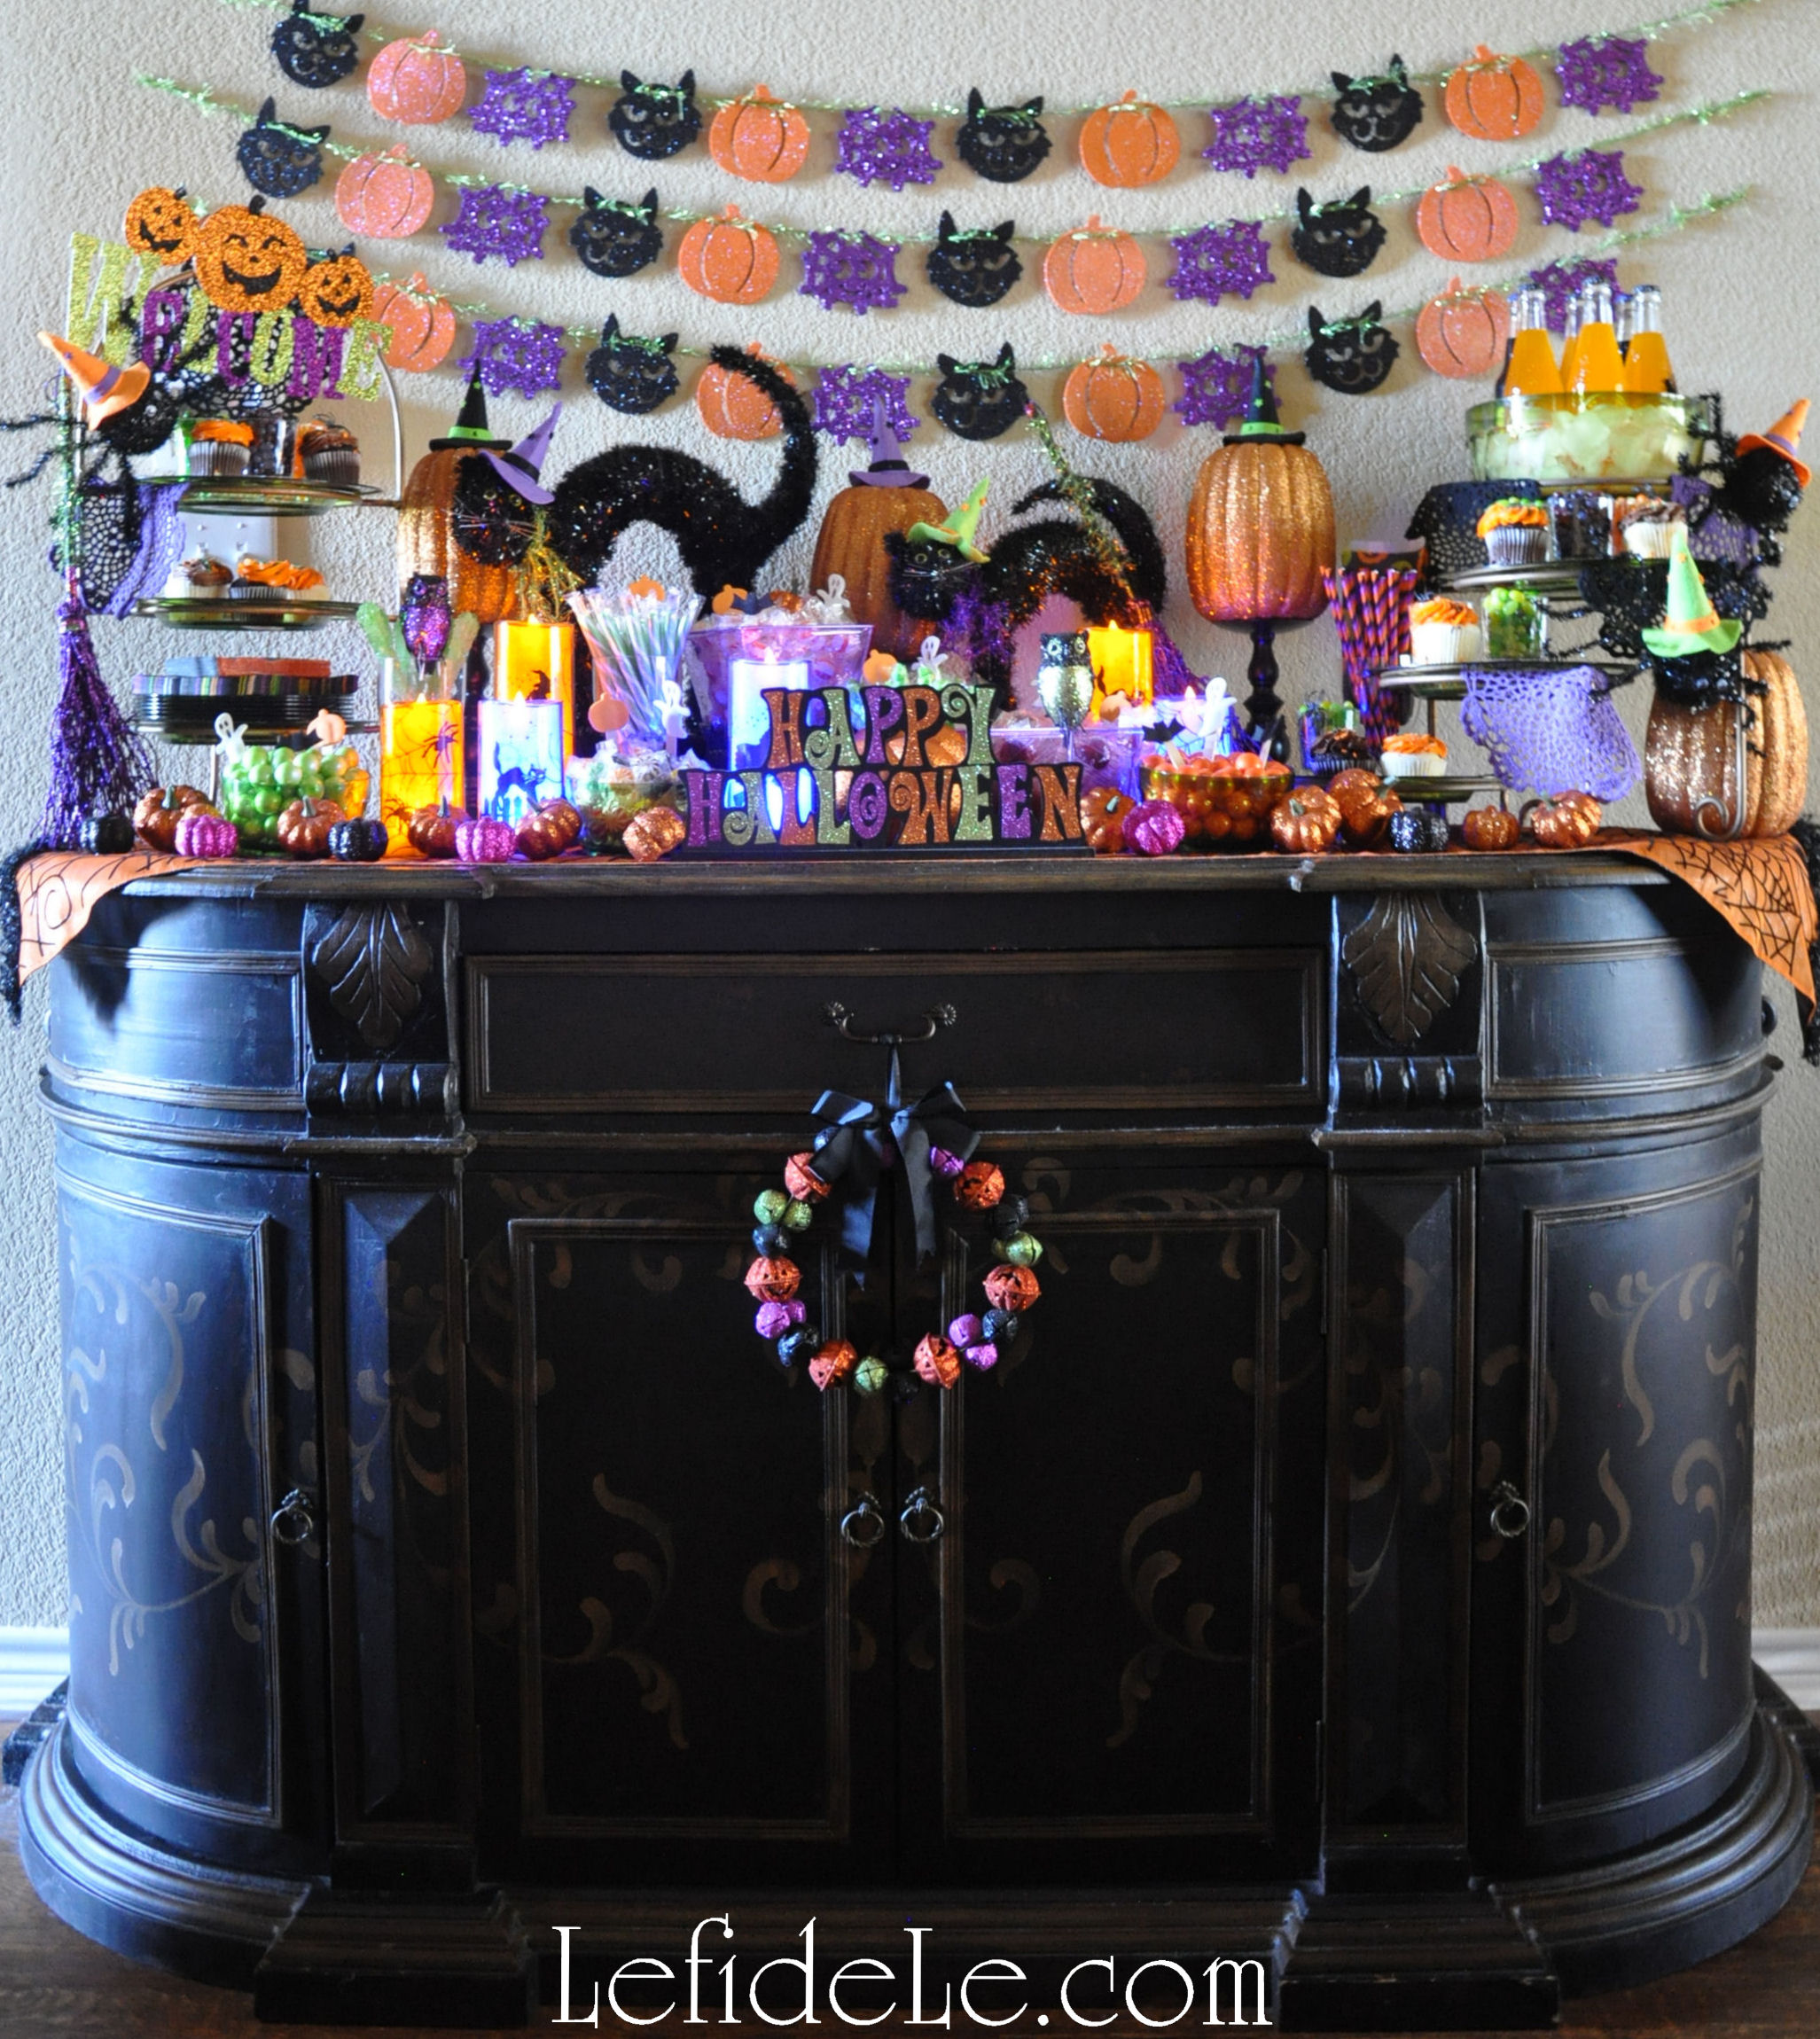
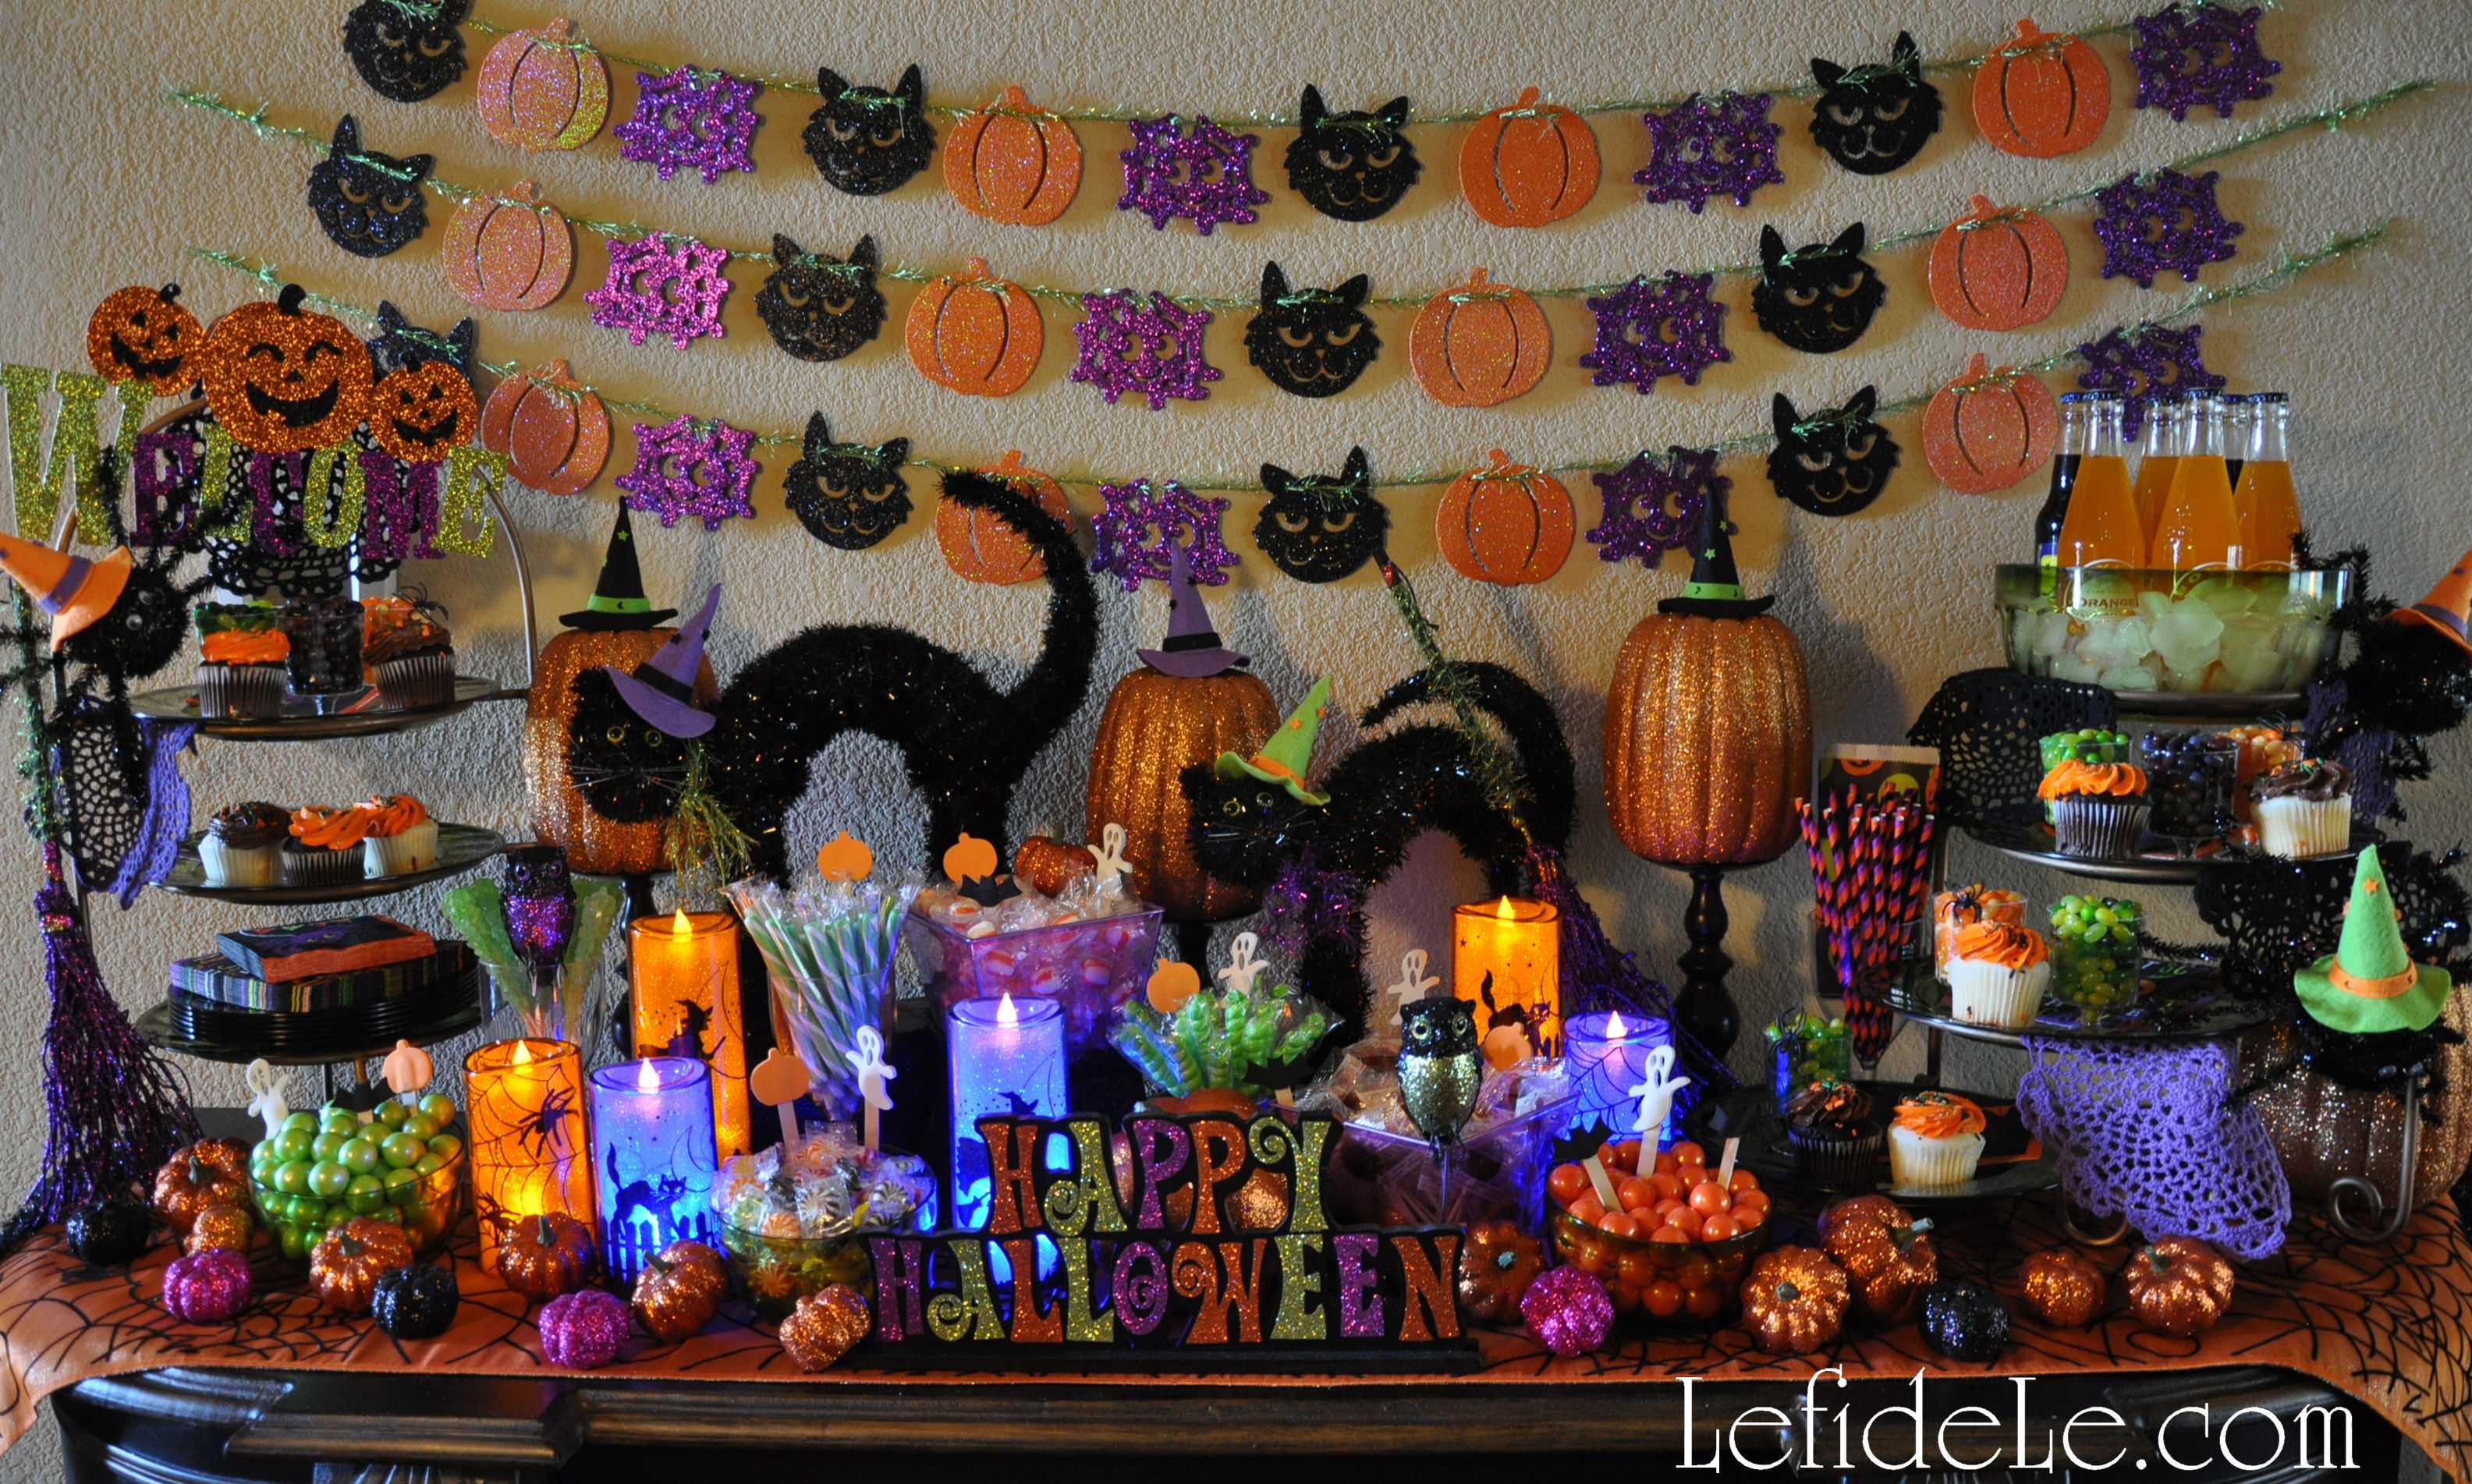
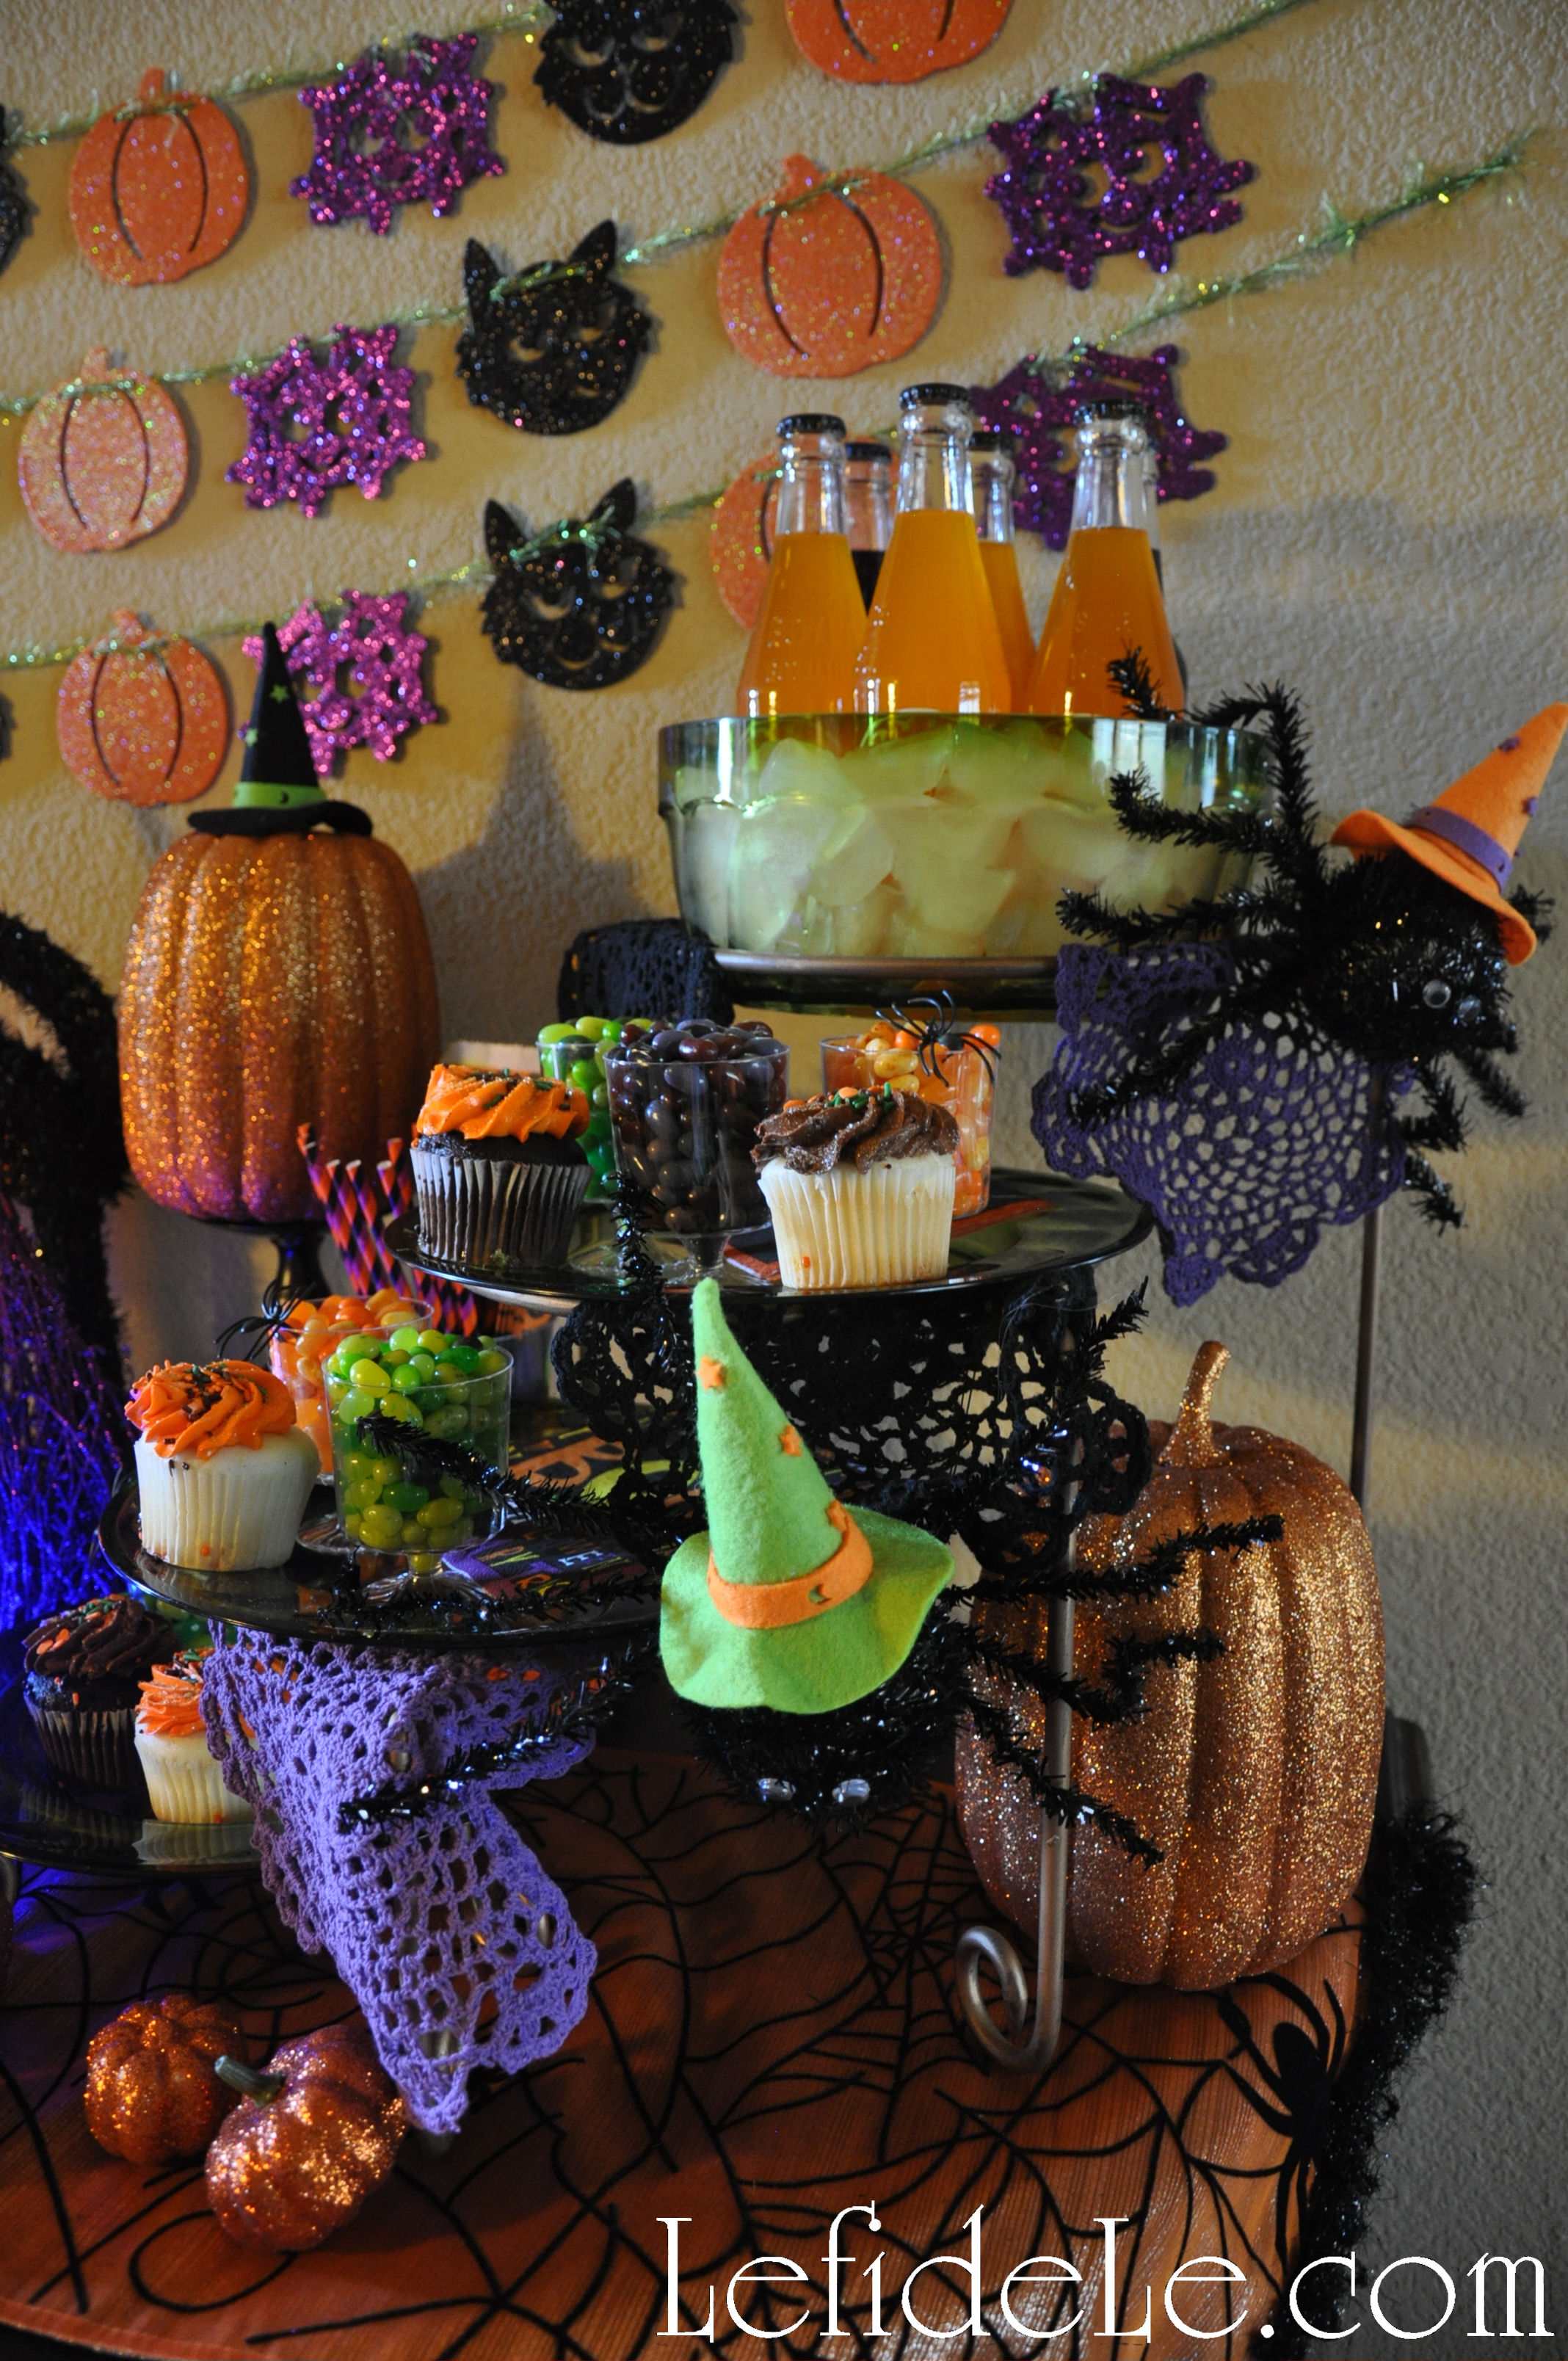
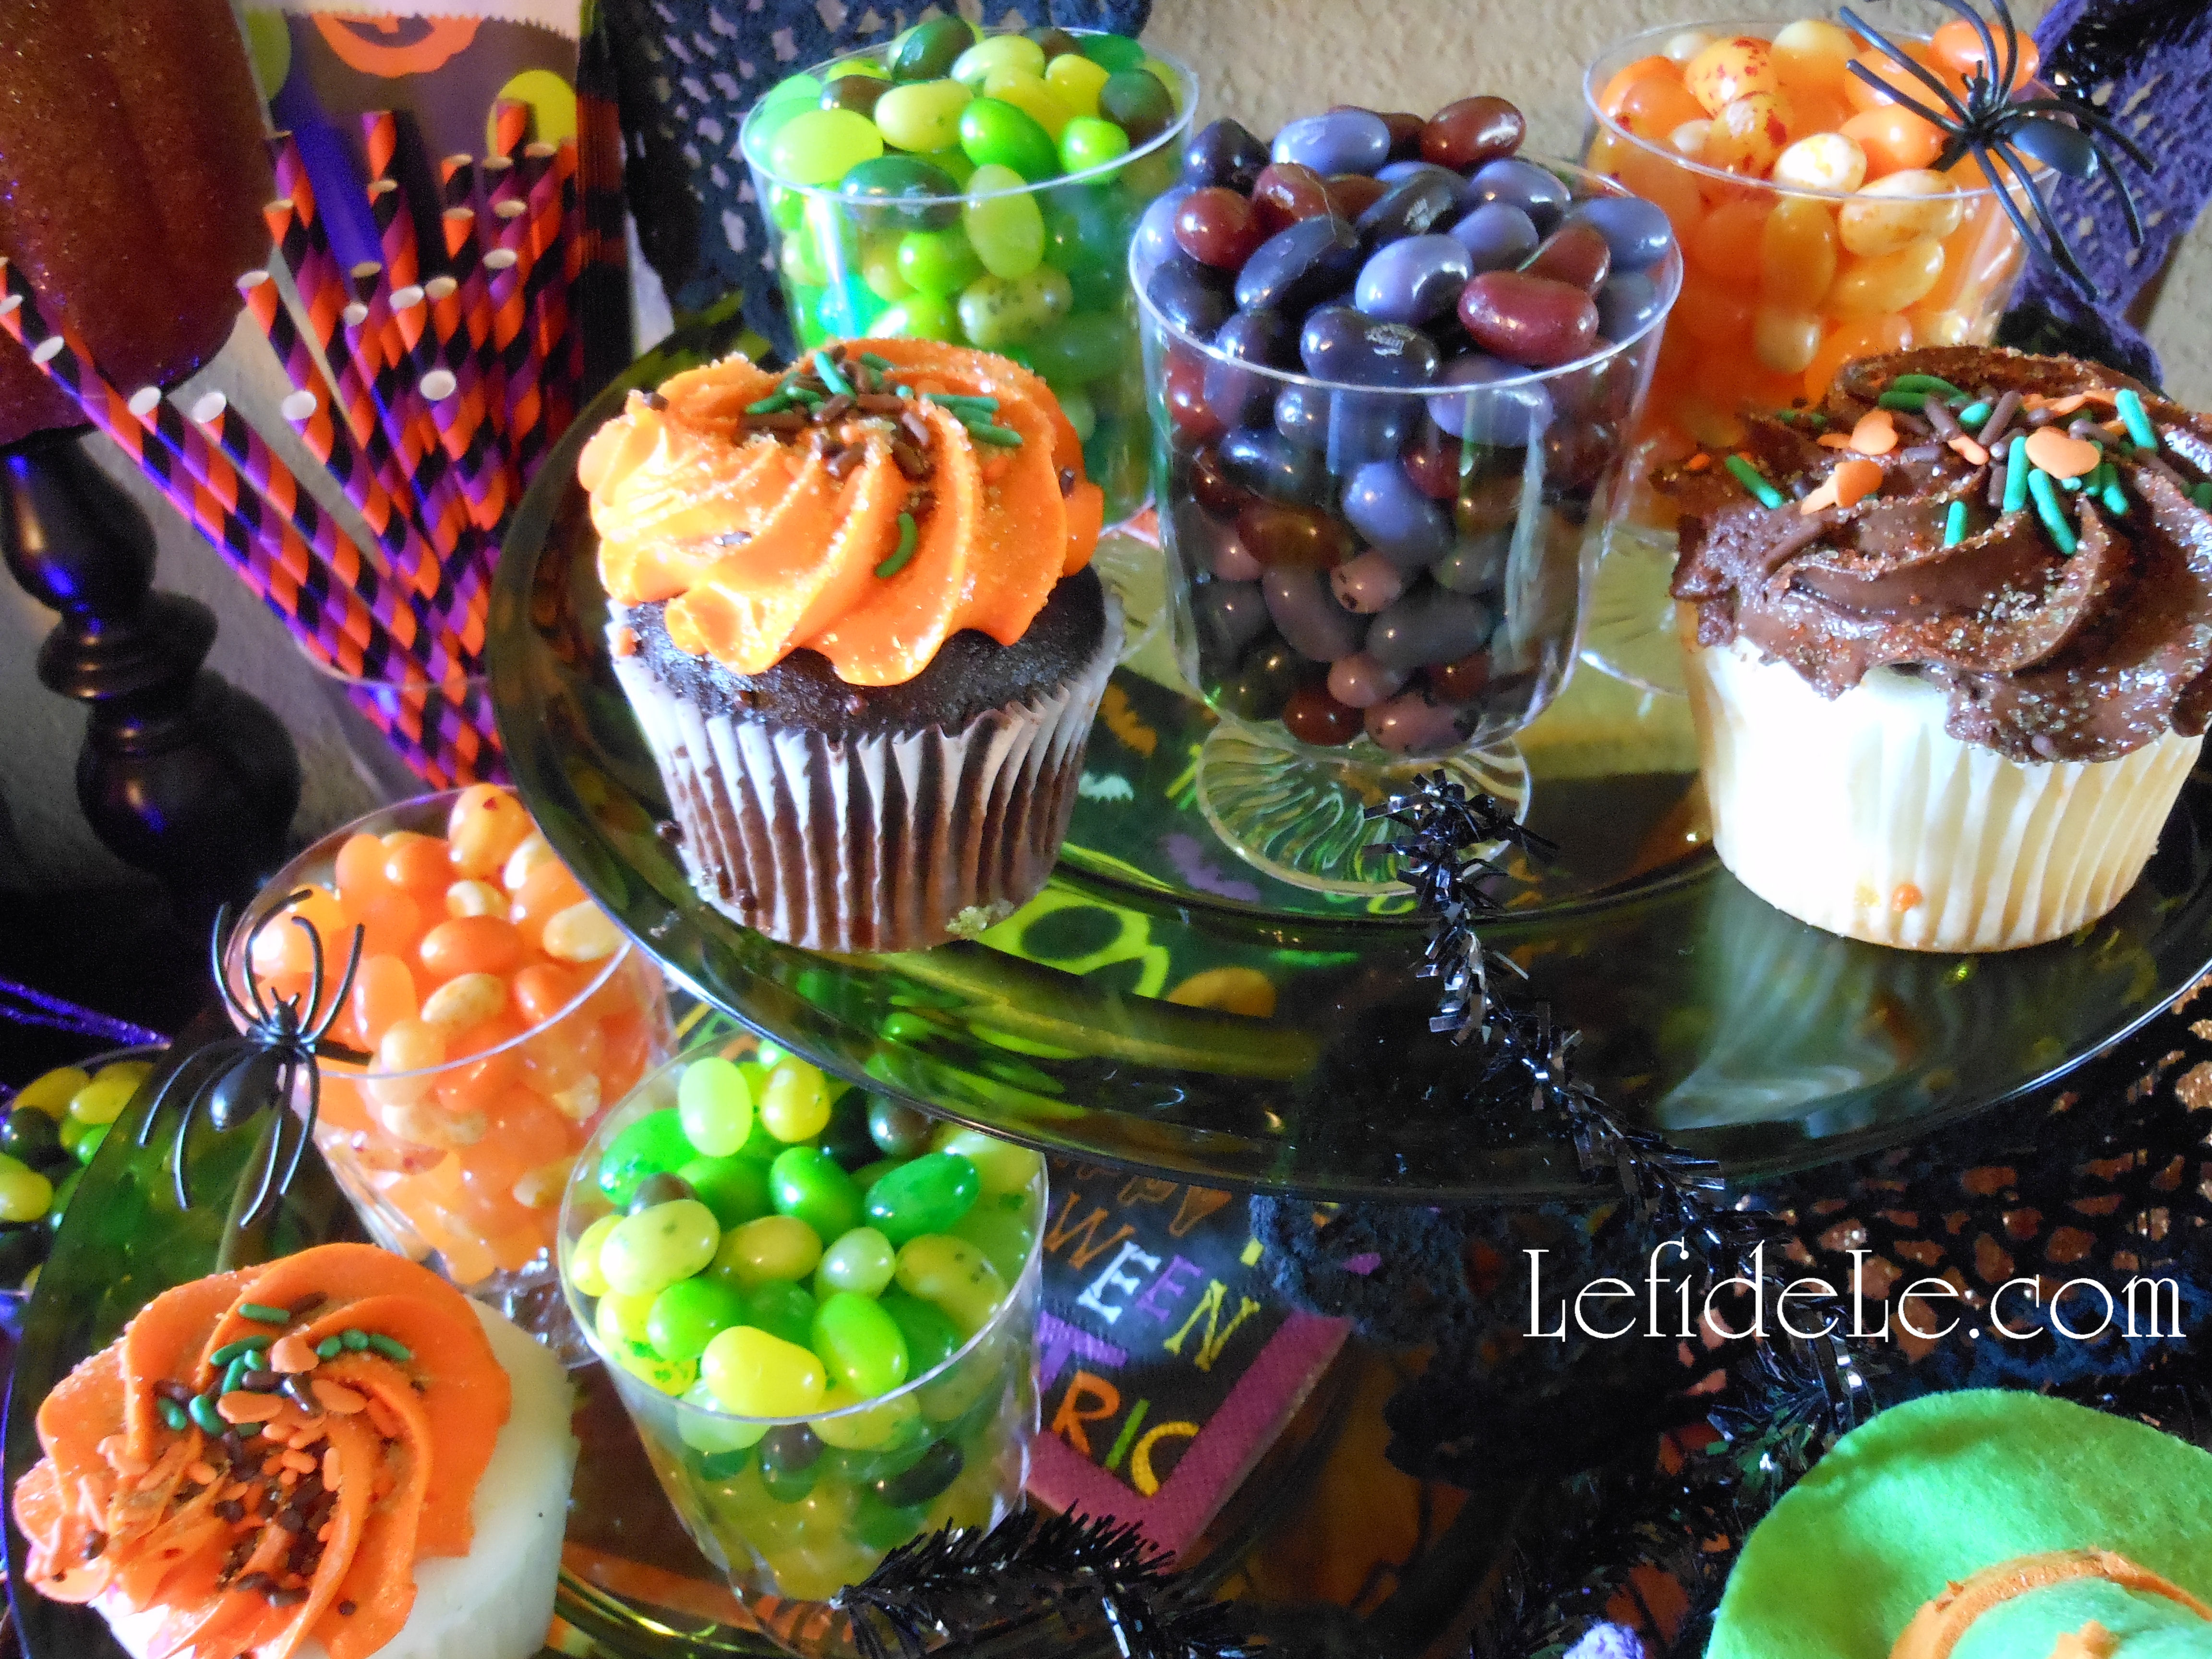
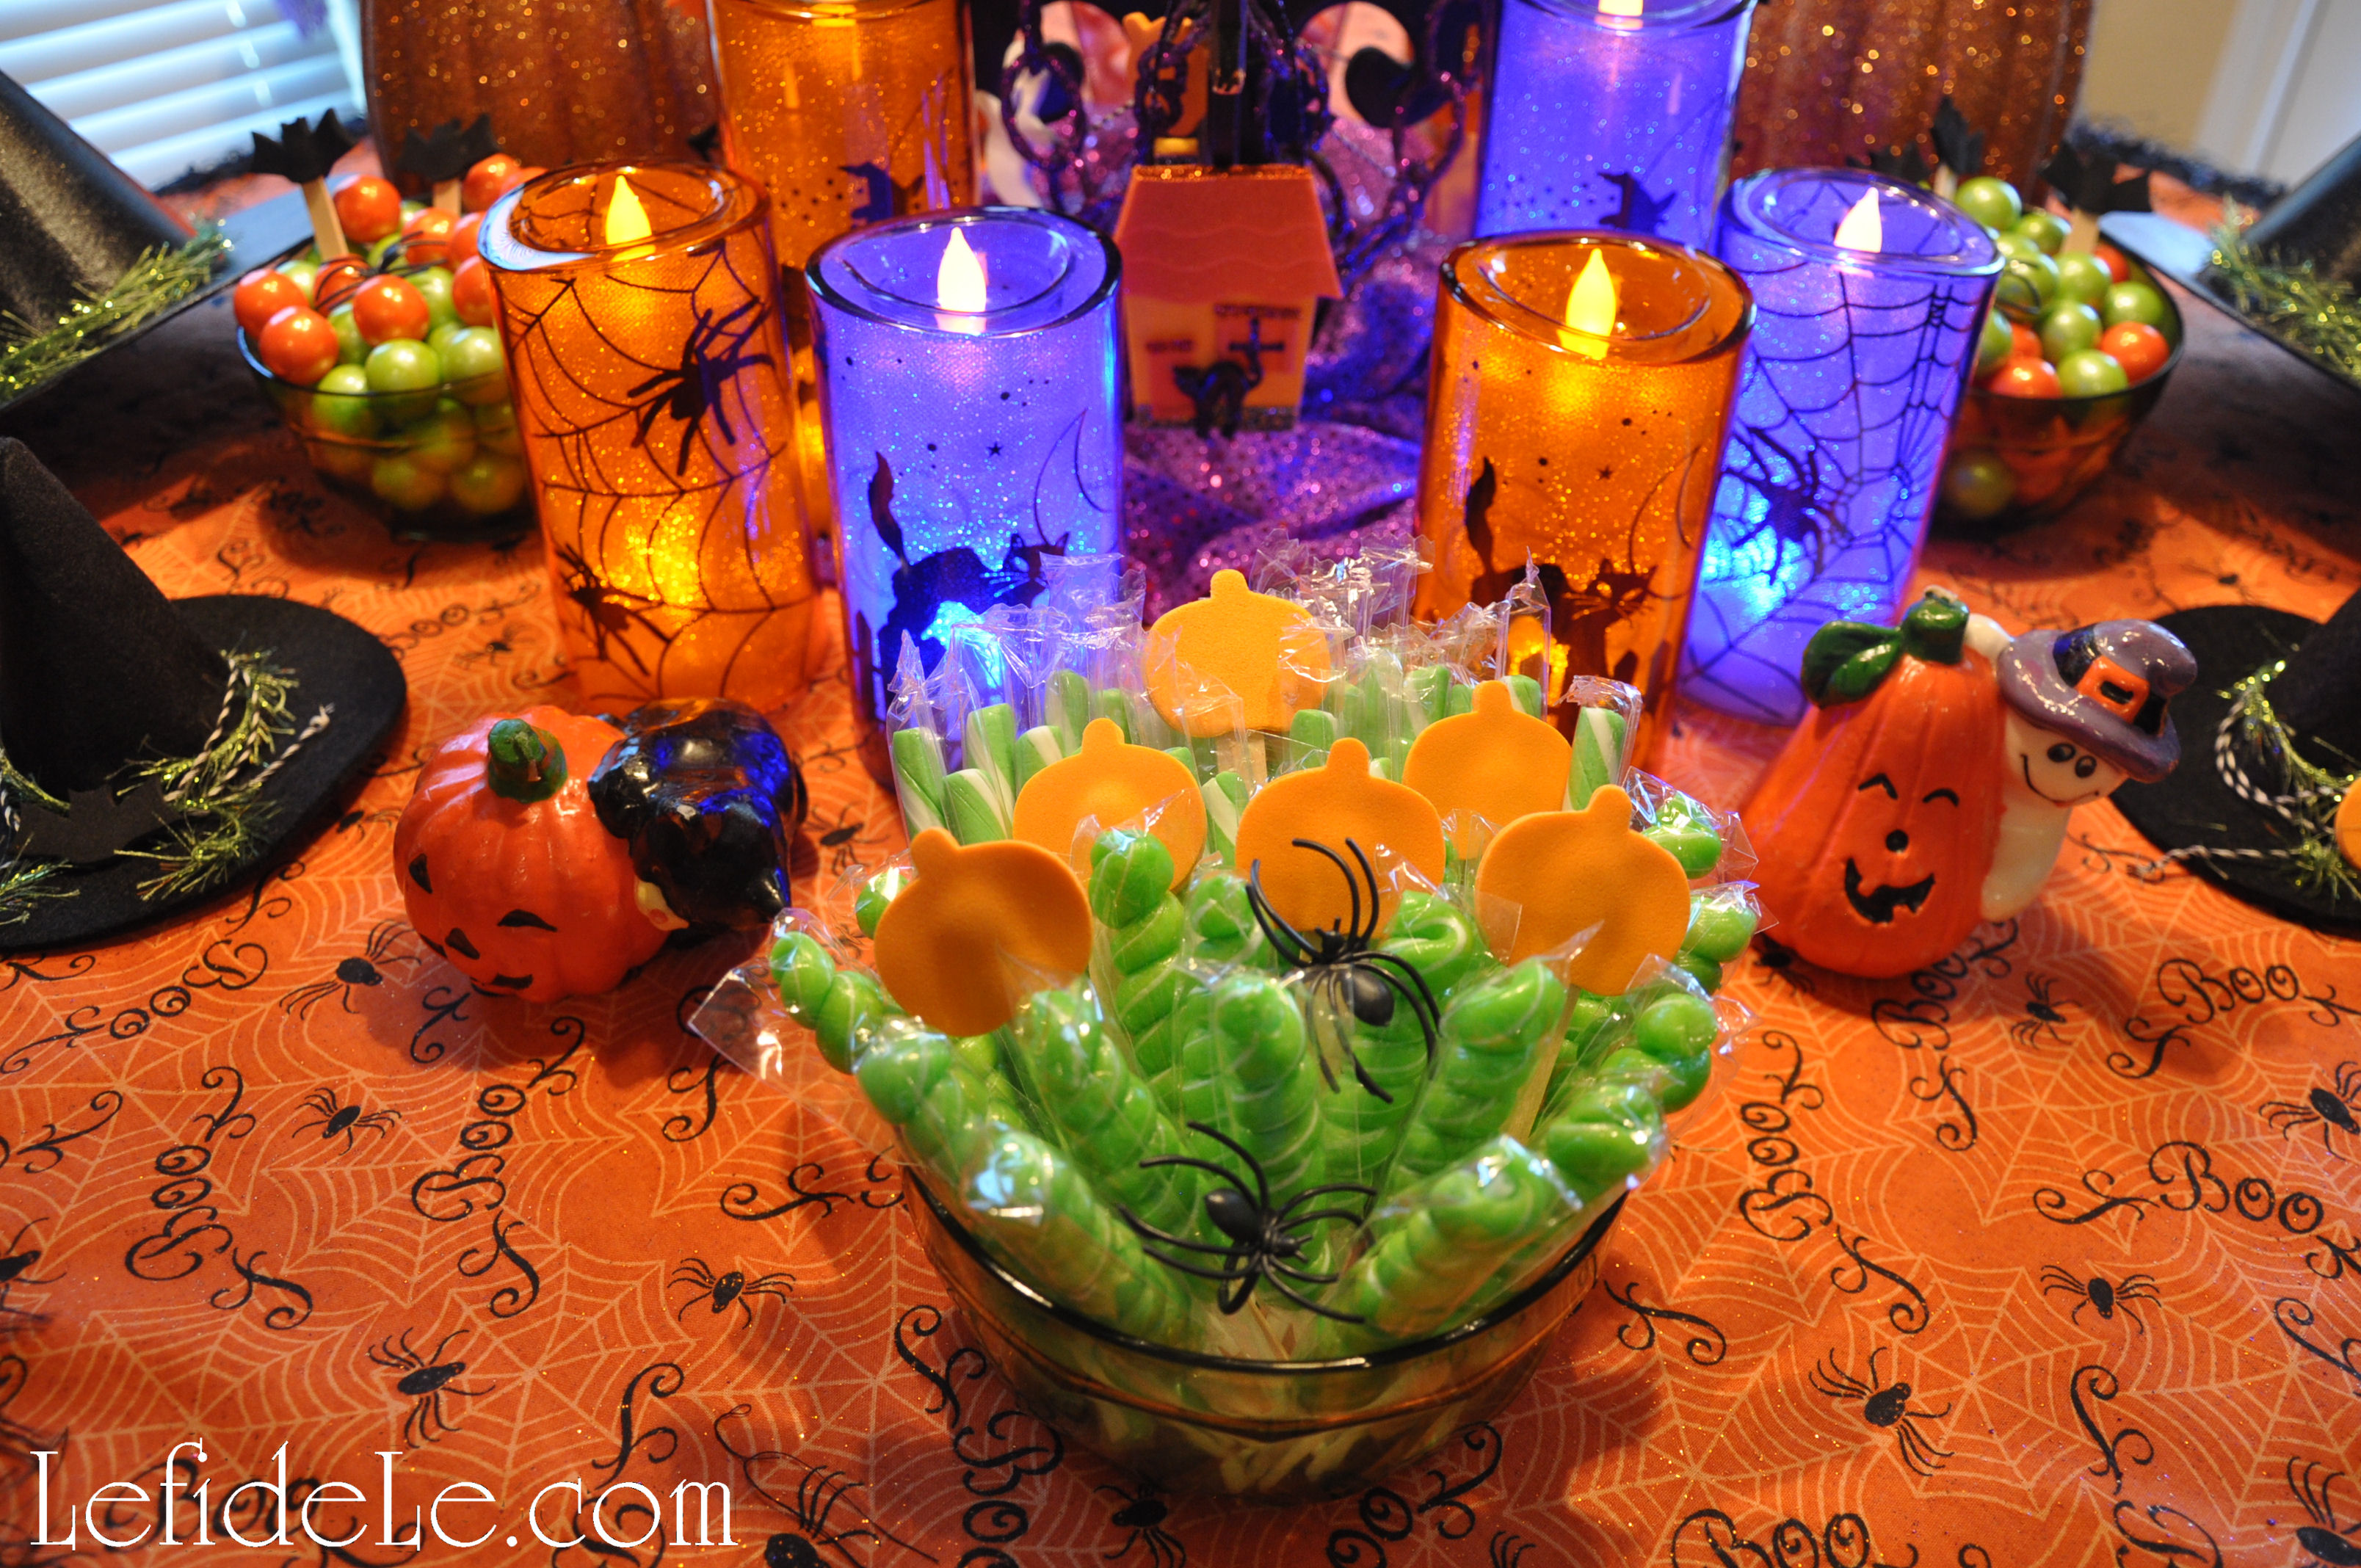
Set these sugar skulls out in a traditional Day of the Dead (Dia de los Muertos) offrenda, Halloween candy buffet, in the center of a October dinner table as edible decoration in lieu of after dinner mints!

8(3)Leigh

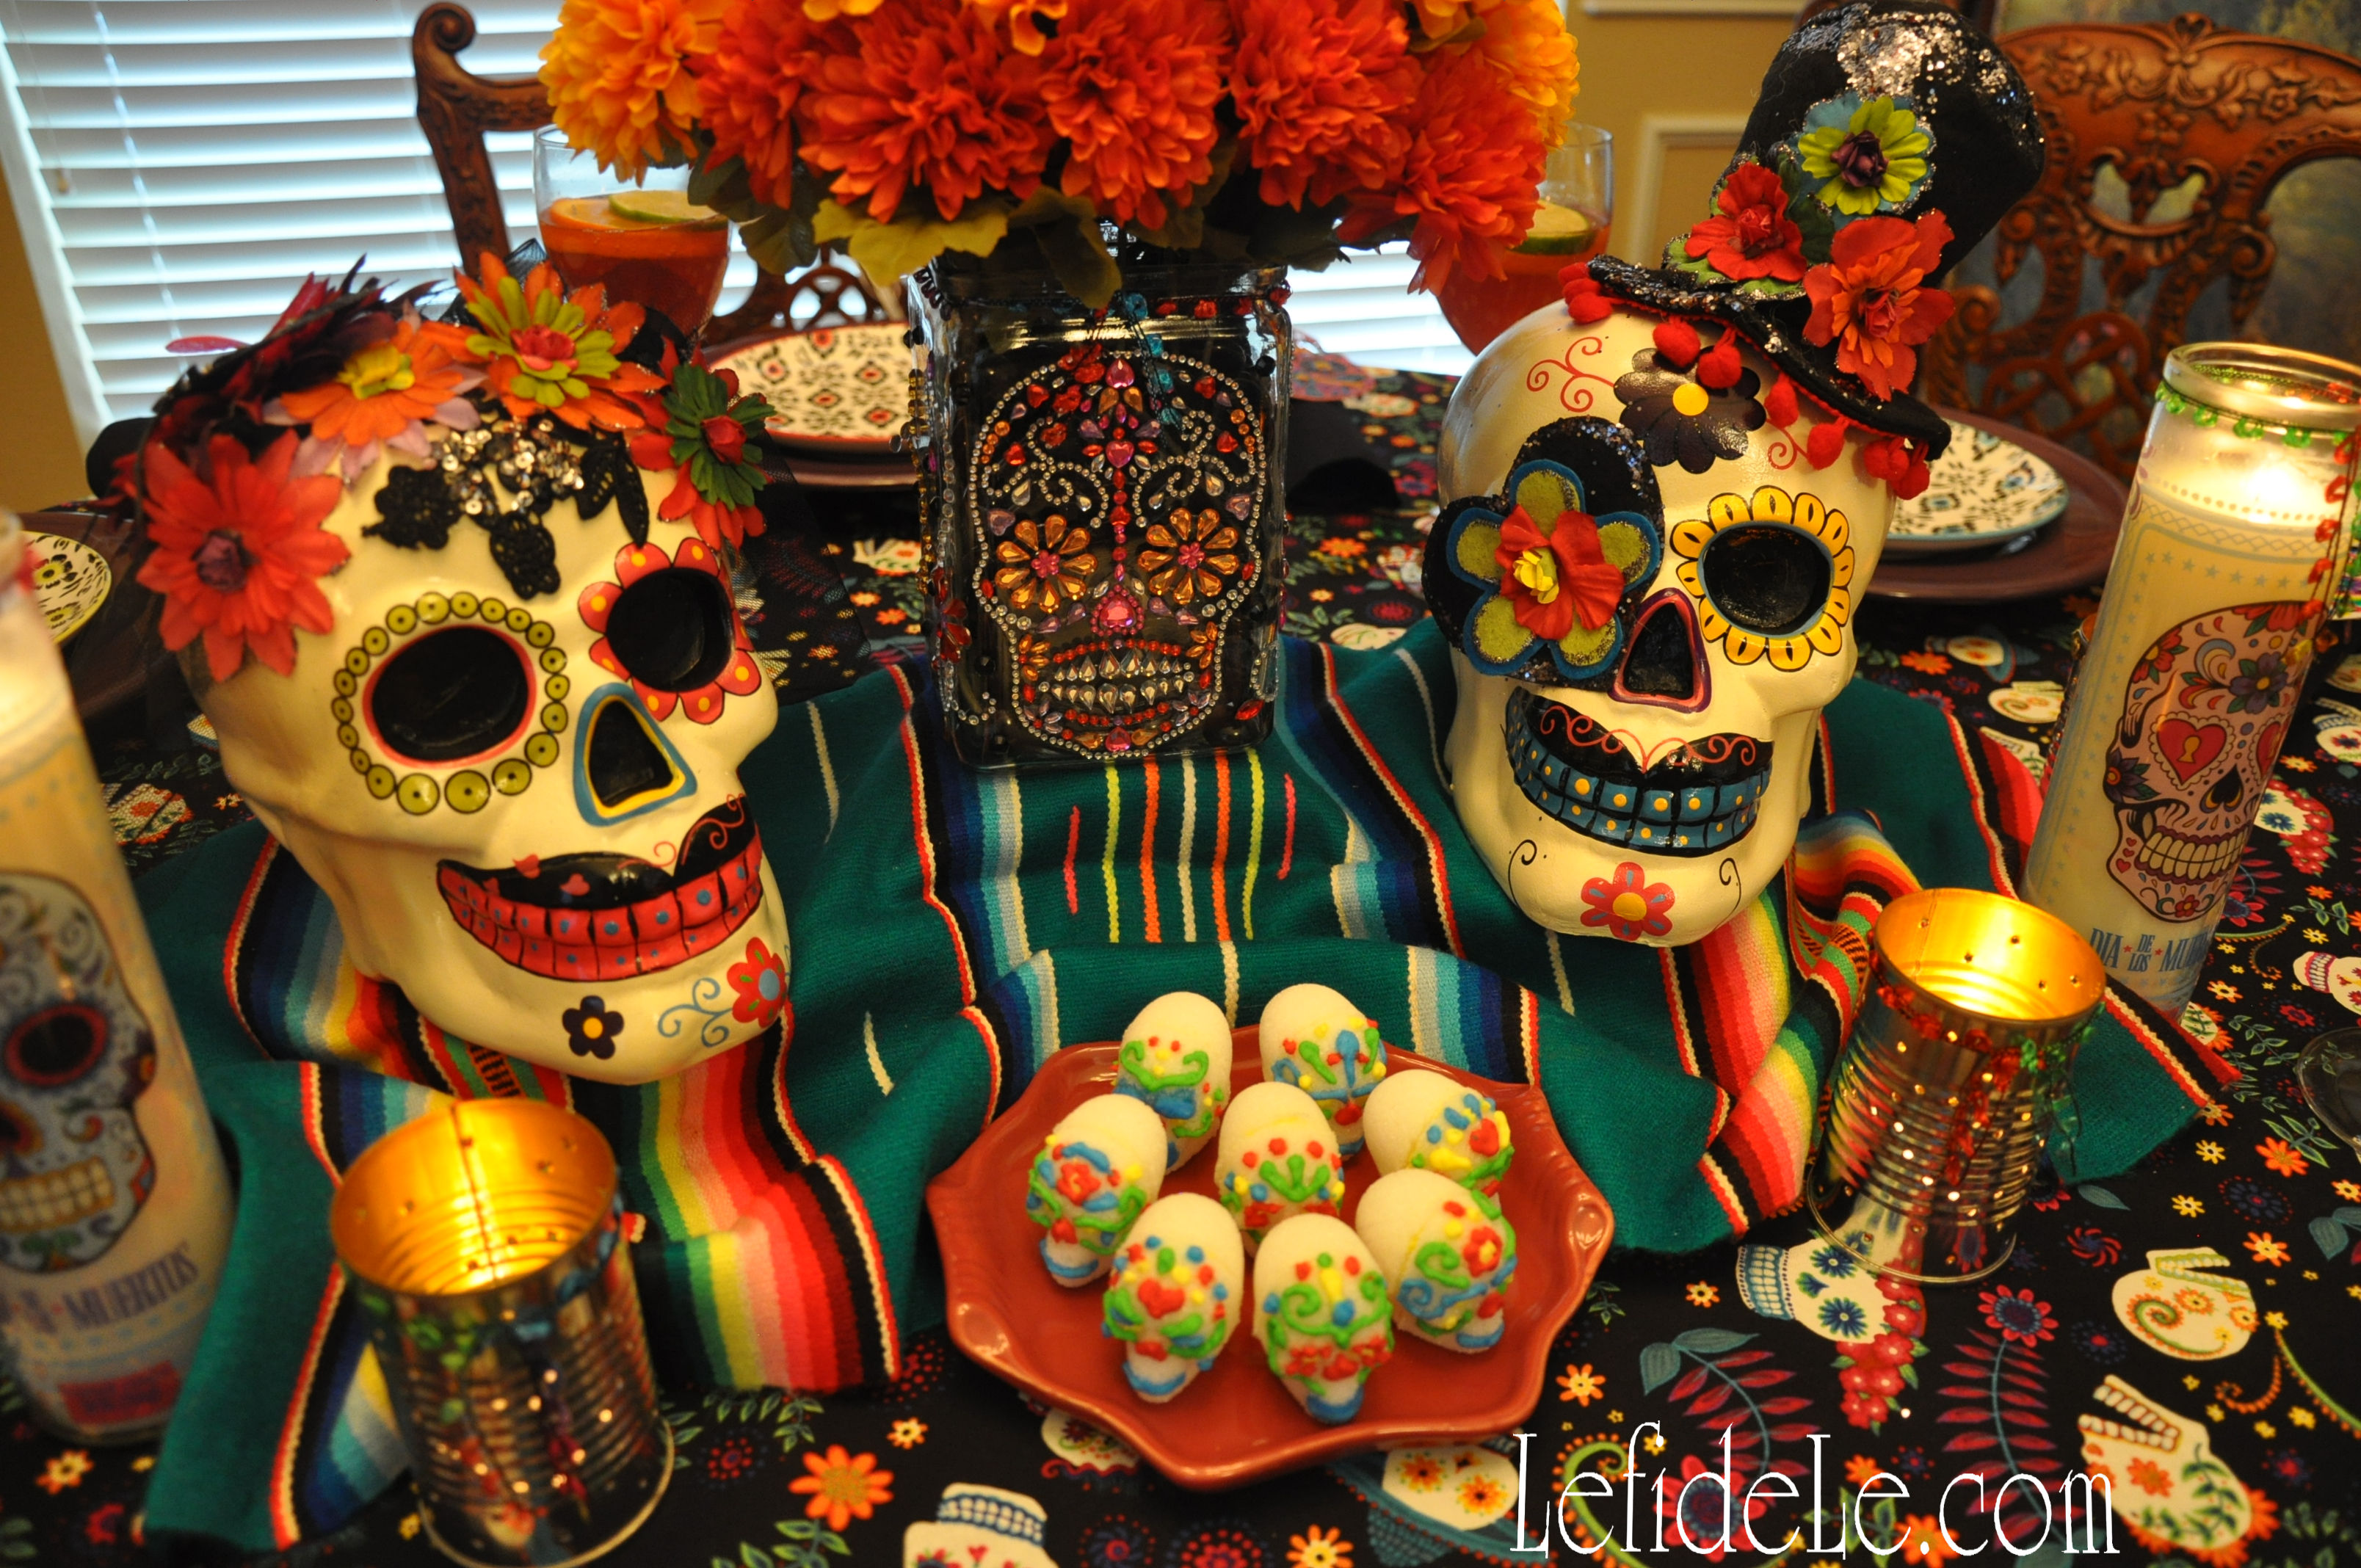
Be sure to check out my article on Dia de los Muertos (Day of the Dead) Themed Halloween Dinner Party Décor and the 2 on DIY sugar skull crafts… costume mask, banner, vase, napkin rings, and wine glass charms!

Ahora, comer con gusto!

Faithfully Yours,

Leigh

Candyland Themed Party Décor Ideas (for Baby Showers, Children’s Birthdays, or Christmas Decorating)

409Leigh

This Candyland theme was inspired by Mary, a dear lady who passed on long ago, but left her inimitable words of wisdom with me, “life is uncertain, eat dessert first,”…and she always did! So it is with her spirit of joie de vivre, that I unbound that creative kid within me that clamored for a sensory sugar high. To release your inner child, follow my 3 part DIY party decorating series (with easy project tutorials and free printables) as it’s a sure path to crafting your way to classic Candyland cuteness! Using some or all of the décor ideas (befitting kid’s birthdays, baby showers, and Christmas parties), you’ll be sure to delight the inner-child in your guests as well! While you’re at it, use my allergy friendly recipes and serving suggestions to fill your candy buffet quickly and easily. For now, let us escape to Candyland…

338Leigh

A Candyland village of (glittered) gingerbread houses sits nestled atop an icing laden hillside (of buffalo snow batting) dotted with (pom-pom) sprinkles.

308Leigh

(Faux) lollipop trees spring forth from gumball forest floors (in speckled metal pails) and (real) candy-cane thickets abound.

302Leigh

Gingerbread people (treat boxes) populate the village, travelling amongst the wellsprings of jellybean pools (in pink plastic pails).

321fLeigh

A few “gingies” guard a fenced supply of the village’s juice-milk stores.

361Leigh

Gingerbread (banner) clouds float high amid skyscraping treat towers holding abundant soirees offering peppermint candied almonds, twisty marshmallows, pastel taffy, and (healthy) spicy guacamole shooters with pink pomegranate potato chips.

317 (2)Leigh

The towers’ penthouse floors encircle trios of cotton candy “cream” sodas with peppermint striped straws.

295Leigh

Round rainbow swirled plates and napkins stand by to serve Candyland visitors.

318 (2)Leigh

Boxed and wrapped candies sit ready for shipment to their final destinations.

356Leigh

Gingerbread peep billboards pop up to signal the way to gastronomical paradise.

351Leigh

Gingerbread (cookie) ladies and gentlemen hold snowball (cookie) fights in the village round, whist the tiniest of “gingie” tots toddle home with gumball treats over candy-cane cobblestones lain over pink velvet (cupcake) roads.

341Leigh

A low gingerbread fog sinks below the sugary iced hills perched above a pink (cloth) cliffside.

381Leigh

Around the bend, pink hard candy (lanterns) shine high above big rock candy mountains.

366Leigh

Glowing with hard candy (ornaments), they burst forth with pyroclastic explosions of candy treats spilling over pillowy white icing.

393Leigh

Hard candy (ornament) boulders tumble amid (faux) ribbon candy bushes and flowing streams of (real mega) candy buttons.

395 (2)Leigh

(LED) peppermint light posts illuminate the scene.

370Leigh(Real) candy-cane thickets and (faux) cupcake bushes dot the camping site where gingerbread residents roast marshmallows in the midst of the pink (tablecloth) countryside.

386Leigh

A rainbow lollipop (lantern) arcs above the distant rock candy mountain (tree).

388Leigh

A lone home defiantly stands amidst the candy (ornament) strewn mountainside adjacent to a fallen (faux) ice cream cone log.

384Leigh

Waterfall (faux mega) candy buttons stream down the embankments whose vistas shout, “Welcome to Candyland!”

333Leigh

Wishing you a sweet life of seized moments in eating desserts first!

Faithfully Yours,

Leigh

P.S. Learn how easy it is to construct your very own Candyland village in these 5 articles:

182Leigh

DIY Candyland Party Themed Craft Tutorial: Gingerbread People Banner, Treat Gifts Boxes, & Printable

380Leigh

DIY Candyland Party Themed Craft Tutorial: Hard Candy Lanterns, Candy Ornaments, & Conversation Heart Garland

179Leigh

DIY Candyland Party Themed Craft Tutorial: Game Board Treat Tower & Easy Buffet Display

231Leigh

Quick & Easy Candyland Confection Ideas: Pink Almond Milk Juice “Recipe”, Cotton Candy “Cream” Sodas, & Gingerbread Peep Pops

170Leigh

Spicy Guacamole Shooters / Avocado Appetizers Recipe (Allergy-Friendly & Nightshade Free = No Red Pepper or Tomatoes)

DIY Candyland Party Themed Craft Tutorial: Game Board Treat Tower & Easy Buffet Display

308Leigh

Craft your way to classic Candyland cuteness befitting birthdays, baby showers, and Christmas décor.  This tutorial for a game board treat tower and easy buffet display are part three of a DIY party decorating series with easy projects and free printables. Using some or all of the ideas, you’ll be sure to delight the inner-child in all of your guests. Sweet!

179Leigh

These simple crafts all utilize the same teacher’s bulletin board banner strips in a licensed Candyland board-game pattern. I made two towers, wrapped six pots, covered two milk corrals and a bunch of food picks… and I still have many strips left over! All of this is from one package of super-cute and inexpensive banners that could not fit my theme more perfectly.

7(2)Leigh

To cover food crates, all you need to do is measure the front width and cut a length off. Double a piece of tape onto itself to hold the cardstock in place during the party. Remove it to reuse later for another craft. One idea is to let the kiddos make thank you cards out of it.

6(2)Leigh

Wrap a length of the banner to coordinate a plain metal bucket to your theme. Simply cut and tape the ends together.

351Leigh

These can be used to hold candy and prop up Gingerbread Peep Pops (see the Candyland Confections article here).

120Leigh

Make food picks by simply cutting the leftover banner end bits into colored squares.

122Leigh

Tape toothpicks or popsicle sticks behind them. These can also be used for place-cards if you like.

109Leigh

My treat towers begin with ordinary cupcake stands that are transformed into darling 3-D gaming creations.

069Leigh

To make your own, first find a commercially packaged stand in a matching color palette.

394Leigh

Cut the teacher’s border into two sections (so that they’re small enough to allow food to be placed once it’s completed).

117Leigh

I just followed the natural curve of the game path pattern.

072Leigh

Put the stand together as per the package instructions.

105Leigh

Hot glue the underside if you really want it to be super-sturdy.

095Leigh

Hot glue a strip to the outside rim of each level. Cut off the excess length.

099Leigh

If your ends don’t match up perfectly, just trim off the top edge to make them appear seamlessly adjoined.

101Leigh

These are what the towering creations look like when laden with sweet treats galore! (See my allergy-friendly Spicy Guacamole Shooters Recipe here.)

317 (2)Leigh

Check out the rest of my Candyland craft series: Gingerbread People Banner, Treat Gift Boxes, & Printables and Hard Candy Lanterns, Candy Ornaments, & Conversation Heart Garland as well as the final party post on Candyland Themed Party Décor Ideas.

302Leigh

Faithfully Yours,

Leigh

DIY Candyland Party Themed Craft Tutorial: Hard Candy Lanterns, Candy Ornaments, & Conversation Heart Garlands

409Leigh

Craft your way to classic Candyland cuteness befitting birthdays, baby showers, and Christmas décor.  This tutorial for hard candy lanterns, candy ornaments, and conversation heart garlands are part two of a DIY party decorating series with easy projects and free printables. Using some or all of the ideas, you’ll be sure to delight the inner-child in all of your guests. Sweet!

049Leigh

Old-school paper lanterns may easily evolve into supersized hard candy confections with a few simple steps. Begin with any variety of sizes and colors (but choose lighter versions if you wish to light them). You can even find some in a candy swirl pattern like these red and white striped kinds in graduated sizes… or just start with white and add your own stripes. Craft paint is quicker, but marker works as well. Tie a loop of twine, ribbon, or fishing line to the top of each lantern to hang them by later.

039Leigh

Use a theme coordinating color of gift basket cellophane to wrap around each lantern. Be sure the ends overlap before cutting. I used opalescent pink so that the red stripes would show through as hot pink. This way I can reuse the lanterns later with a clear wrap as peppermint candies or without wrapping as striped beach balls in summer.

042Leigh

Tie a length of twine or ribbon to gather the cellophane at the lantern’s base. I actually used a pink and white yarn that mimics baker’s twine but is less expensive.

043Leigh

Pull the hanging cord straight out from the top of the lantern, and gather the cellophane around it. Pull the wrap taut around the sphere (like you would make a ponytail). Tie another bow around this end to secure it. (Note that you can now throw in some lit LED tea-light candles before closing it, but read on to find an easier way to light them.)

045Leigh

Cut off the excess cellophane from the “candy” ends so that it appears to be the right proportion.

381Leigh

You can set these on a table, integrate them into a display, or hang a grouping of various sizes to make a hanging centerpiece. I opted to hike up the chain of my chandelier with an S-hook to shorten it. (See a picture of how to do this here: Frozen Winter Wonderland Themed Christmas & New Year’s Eve Dinner Parties.) Then I attached the twine loops with a couple inches of wire to the chandelier at different levels. I turned the light on, and was immediately awash in a pink candy glow as the light filtered through the lanterns and cellophane. A plug-in up-light aimed squared at the lanterns will also cause them to glow in any location of your choosing. It’s much easier to do this rather than wait to light, close, and then hang your lanterns at the last minute. Of course, another option would be to purchase a light kit for each lantern then plug all those cords in… but who needs more trouble and expense?

232fLeigh

The exact same method was employed to craft the hard candy ornaments using, well… ball ornaments.

062Leigh

The only difference was that I didn’t tie on twine hangers, because I elected to use them for table display instead. They would have been lovely hanging though. I can always add twine to string them on a tree or centerpiece later, because I intentionally left the round hanging eye stick out of the gathered wrap. It’s visually concealed by the cellophane.

384Leigh

I made “big rock candy mountains” out of lit white Christmas trees that appeared to glow from within. I then placed the “candy”ornaments on and around them.

393Leigh

Ribbon candy ornaments are another simple décor craft that can utilize bits of leftover ribbon or even old package wrapping for an eclectic mix. I used a portion of a giant roll from Costco that is actually reserved for another project. Real ribbon candy doesn’t have glitter and has stripes facing the other way, but I thought they were adorable anyway.

124Leigh

To make these, just hot glue a line onto the ribbon’s end, and tap it down to form a loop.

130Leigh

Keep repeating this action, forming more and more loops, until you reach a size that seems proportionate to a candy dimension.

126Leigh

Cut off the end, and glue it down to form the last loop.

137Leigh

Next, add a hanger if you’d like to. I used the same thin ribbon as the banner in part one of the Candyland craft series. Make a loop through one loop end of the “candy” and tie a knot. (This seems to be a much safer option, than metal hooks, around small children and pets.)

388Leigh

Hang these from Christmas trees, add them to a candy lantern display, or set them around a centerpiece like my “big rock candy mountains”. The “icing” bases in the picture were comprised of blankets of buffalo snow batting.

057fLeigh

The last craft for the tree is a conversation heart garland that would serve equally as well as a banner for a Valentine’s celebration.

054Leigh

It’s so simple and inexpensive because it utilizes foam craft hearts and yarn (or thin ribbon, or baker’s twine if you like).

064Leigh

Begin by simply setting out your hearts according to color, so that you can string them in a pleasing order.

067Leigh

Use a ruler (or just “eyeball” it) in order to hot glue them back to back spaced 3 inches apart, sandwiching the yarn in-between.

386Leigh

Cut the yarn after the last “foamie”, and knot the ends to prevent fraying. (Click here to see the same method used on my kid-friendly “Glitter-ween” garland.)

395 (2)Leigh

Check out the rest of my Candyland craft series: Gingerbread People Banner, Treat Gift Boxes, & Printables and Game Board Treat Tower & Easy Buffet Display as well as the final party post on Candyland Themed Party Décor Ideas.

Faithfully Yours,

Leigh

DIY Candyland Party Themed Craft Tutorial: Gingerbread People Banner, Treat Gift Boxes, & Printables

295Leigh

Craft your way to classic Candyland cuteness befitting birthdays, baby showers, and Christmas décor.  This tutorial for gingerbread people banners and treat gift boxes are part one of a DIY party decorating series with easy projects and free printables. Using some or all of the ideas, you’ll be sure to delight the inner-child in all of your guests. Sweet!

179Leigh

Every Candyland village needs to be populated with gingerbread people, and it can be accomplished by more than just the menu. Gift your guests with take-home treat boxes that also serve to decorate your buffet.

260Leigh

Begin with readymade gingerbread people shaped paper maché boxes. These are widely available in stores beginning in the fall, and may be purchased online the remainder of the year. (Find discounts for online craft merchants in the side bar from Le fidèLe Design’s affiliates.) I found mine on sale at half off, making them 50 cents each. Use an acrylic paint color in a shimmery brown so that a top coat is unnecessary. (I used DecoArt’s elegant finish espresso metallic paint, because I already owned it, and it coordinated with my banner.)

277Leigh

Separate the tops from the bases, and paint the little guys. I set them rim side down onto a plastic bag, so that I could just peel them off when they dried. (On other surfaces, the paint sometimes acts as glue.)

318Leigh

Allow them to dry overnight, then use hot glue to adhere tiny pom-poms. They make the cutest dimensional eyes, nose, and buttons! I chose colors that would coordinate with my other décor elements, and tried to intentionally randomize the combinations on each “gingie”.

356Leigh

Fill your goodie boxes with candy, tiny toys, or even candy flavored lip gloss and intersperse them in your treat town.182Leigh

Another idea is to fill them with numbered papers that correspond to larger gifts or game elements.

353Leigh

Make a banner of gingerbread people adjoined in jubilant Candyland solidarity, using one of the two following methods.

2Leigh

Foam gingerbread people shapes may be located at just about every craft store in the fall and winter, and may be purchased online the rest of the year. You can choose from many sizes in matte and glitter. I wanted to use the glitter guys to match my houses.

3Leigh

Glue on tiny pom-poms that coordinate with your décor. Use hot glue in the same eyes, nose, and button pattern with which you made the treat boxes.

6Leigh

Punch a hole in each hand of the “gingies” in order to string it into a banner.

9Leigh

Make a loop of thin ribbon through holes in two “gingies”, and tie a knot to connect them. I alternated between three different colors from the same spool of clearance ribbon.

193LeighWM


The second method is to right click on my printable image above (free for noncommercial use), and select print. Then print them in color and photo settings on sturdy cardstock (so that they don’t curl when strung). Cut them out, and punch holes into the white circles in the arms. Choose to leave them as is, or add more glitter to the images. Then tie on ribbons to join them (as in the previous method). You can also glue pom-poms over the images in the prints to add dimension to your project.

193singleWMLeigh


Use the gingerbread person image without white holes for other décor or signage. Simply adjust your printing sizes to make smaller “gingies”. Do this by printing at a smaller percentage (i.e. at 50%) or by printing them as photos (i.e. wallet size). Or… you can get Kinko’s to do it for you! These little guys also make cute kid’s craft puppets when taped to a popsicle stick, so you can utilize them as a party activity for the little ones.

361Leigh

Check out the rest of my Candyland craft series: Hard Candy Lanterns, Candy Ornaments, & Conversation Heart Garlands and Game Board Treat Tower & Easy Buffet Display as well as the final party post on Candyland Themed Party Décor Ideas.

341Leigh

Faithfully Yours,

Leigh

Quick & Easy Candyland Confection Ideas: Pink Almond Milk Juice “Recipe”, Cotton Candy “Cream” Sodas, & Gingerbread Peep Pops

219Leigh

These Candyland party confections are so simple that I thought I’d just combine them into one article… if only to pass along a few easy ideas that can be prepped at the last minute. The versatile juice milk is a great way to colorize and disguise calcium while adding a flavorful kick, which is great for anyone with a picky eater. While sugary cotton candy isn’t known for its health benefits, it is a yummy once in while party-treat that looks adorable when served as ice cream sodas. And Peep pops are the fastest pop you can prop into a candy buffet! Just look for the sugar-free varieties if diabetic or avoiding corn syrup. They’re still just as yummy and cute!

341Leigh


Pink Almond Milk Juice Ingredients:

  • ½ gallon Silk almond milk (or any variety of milk like cashew, hemp, rice, oat, soy, or even cow’s)
  • 17 ounce bottle lingonberry juice concentrate (or any pink juice like pomegranate, black cherry, raspberry, cranberry, etc… or try blueberry, grape, or even orange for a liquid creamscicle!)
  • Optional: agave to taste… if needed to sweeten the more acidic juices, because it mixes well into cold liquids & is low glycemic

136Leigh135Leigh133Leigh127Leigh

Pink Almond Milk Juice Instructions:

Gather any variety of pink juices and your choice of milk to test which combination you like best in a small glass. I quickly realized that I preferred the lingonberry and pomegranate juices with the original 60 calorie per cup Silk almond milk. Though I typically love the black cherry concentrate, I did not care for it when combined with milk. I also didn’t care for the combo with the 30 calorie Silk, but it’s a fantastic option if you’re looking to cut the numbers. Use your own taste buds to discern your favorite, and let me know what you came up with!

137Leigh

Mix a crowd sized amount in a jug, and test the flavor before pouring into individual servings. The easiest one to one ratio was the Silk’s half gallon and Ikea’s 17 ounce lingonberry concentrate, but I realize this taste profile isn’t for everyone. The most liked version does seem to be the orange creamscicle.

179Leigh

For the Candyland theme, I served the juiced milk in these super cute jugs with washable reusable straws. Another adorable option would be to use trendy jars as drinking vessels. (Find some at Le fidèLe Design’s affiliate Ball Fresh Preserving Store at the link in the side bar.)


Cotton Candy “Cream” Sodas Ingredients:

  • 1 package of readymade cotton candy (with sugar & not corn syrup that color coordinates with your theme)
  • small vessels that resemble soda glasses or ice cream dishes
  • 1 package of theme coordinating paper straws (or thick half straws as pictured)

366Leigh

Cotton Candy “Cream” Sodas Instructions:

This is the cutest and easiest way to serve cotton candy to a crowd… which is the perfect last minute fill-in for a Candyland theme. Find the yummy stuff packaged anywhere from convenience stores to grocery marts. (You can even find some at Le fidèLe Design’s affiliate Cost Plus World Market at the link in the side bar, they even have solid colors like a green in watermelon flavor.)

159CottonCandySodasLeigh

Starting with clean and well dried hands, pinch sections of cotton candy large enough to fit into the base of each dish. Keep layering until you reach the top, and stick a straw (or one cut in half) into the side of it. Take a section of cotton candy and gently ball it into a rounded mound to set on top. Gently tap it into place. (Your hands will be coated in spun sugar… but I’m thinking that’s where the phrase “finger lickin’ good” came from!)

183Leigh

These are especially adorable when perched atop a treat tower, like this one I crafted for the Candyland theme.


Gingerbread Peep Pops Ingredients:

  • 1 package of gingerbread peeps (or any theme coordinating variety, note that the sugar-free varieties don’t have corn syrup)
  • 1 package of color coordinated paper straws

338Leigh

Gingerbread Peep Pops Instructions:

It literally takes 2 seconds to make a Peep Pop, so it’s a last minute treat that looks absolutely precious. You can find so many varieties of the darling confections just about anywhere (and online year round), so it’s easy to add them to any candy buffet.

77Leigh

Simply poke a hole in each peep base with a skewer or toothpick, and wiggle it side to side to widen that hole. Slowly push in a straw until it feels securely held, yet doesn’t disfigure the peep.

356Leigh

Prop it into a cake pop holder or vessel filled with non-sticky candy like gumballs or jellybeans.

209Leigh

See more Peep Pops in action from another themes by clicking the following link: Chalkboard & Glitter Hearts Themed Valentine’s Day Party Buffet Décor Ideas (+ DIY & Printable Links)

214Leigh

For a tasty yet healthy snack to add to your Candyland theme, try my Spicy Guacamole Shooters / Avocado Appetizers Recipe (Allergy-Friendly & Nightshade Free = No Red Pepper or Tomatoes).

Faithfully Yours,

Leigh

“Glitter-Ween” Halloween Party Theme Decorating Ideas (With DIY Links)

This year’s Halloween party theme was “Glitter-Ween”! This gave me a plausible excuse to paint, spray, or glue… orange, purple, green, and black glitter to my heart’s content… at least until February that is. Here are some decorating ideas from my glitter-splosion event!

192cLeigh

The black painted console was the perfect stage for the “candy-bar” buffet. One small glittered bell wreath kept it from appearing too top heavy. An orange spider-web runner lined and protected the painted top.

202cGlitterween-Leigh

My glitter garland remade craft filled in the background of the smorgasbord. Candlesticks held glittered pumpkins at visible heights behind witch-cats who guarded the sweets.

110Leigh

Theme colored candy filled bowls were accented with pumpkins, ghosts, and bats from my foam puppet / food pick craft. LED candles eerily lit the scene safely, where no normal candle would have dared been set.

108Leigh

Spiders climbed the treat tower hung with their “spider-web” doilies.

32Leigh

Monochromatic jelly bean cups sat next to a variety of cupcakes on various lifts and levels.

157Leigh

Glittered brooms camouflaged another treat tower’s sides while a shimmering welcome beckoned at the top.

253Leigh

In the breakfast room, a wooden tree painted black, was trimmed with my garlands craft and my ornaments from scraps craft. The tree skirt of shimmering purple fabric was repurposed from Mardi-Gras. The tablecloth had hand-sewn bead and fringe trimming.

231Leigh

The centerpiece tree was flanked with hand-painted papier-mâché witch hats, and the felt ones featured favors from my foam shapes craft.

223Glitterween-Leigh

The chandelier was trimmed with ribbon and my friendly bats craft, and then draped with my pumpkin tassels craft.

288-Leigh

Another pumpkin tassel dangled from lamp. The pictured pumpkin basket will be featured in an article very soon.

260Leigh

Glittered pumpkins sat snugly in a ficus tree, next to a window hung with glittered “BOO” signs.

349Leigh

Another window framed my suspended “BOO” wreath craft that featured some of the same glittered shapes as the garland in the living room. (It was merely outlined in the photos due to conditional backlighting which is why this picture is here.)

263Leigh

A side table held a glitter pick arrangement and pumpkin lamp that’s been glowing since my childhood. Fabric witch feet were tucked into a vintage basket held with treats. My foam shape sign craft hung in the background.

209Leigh

Another surface in the room featured more of the friendly witch menagerie guarding one of my mixed media paintings. Changing up your artwork seasonally is a great way to feature your whimsical creations.

42Leigh

The ceramic pumpkin was made before I was born. It’s easy to add personal touches with mementos by nestling them into your themed décor.

105HalloweenStairs-Leigh

Even the staircase was decorated with foot wide green mesh ribbon, more glittered garlands, glowing luminarias, flying bats, and crawling spiders.

137cLeigh


Have a Safe and Happy “Glitter-Ween”!

Faithfully Yours,

Leigh