Tag Archives: Make

DIY Candyland Party Themed Craft Tutorial: Game Board Treat Tower & Easy Buffet Display

308Leigh

Craft your way to classic Candyland cuteness befitting birthdays, baby showers, and Christmas décor.  This tutorial for a game board treat tower and easy buffet display are part three of a DIY party decorating series with easy projects and free printables. Using some or all of the ideas, you’ll be sure to delight the inner-child in all of your guests. Sweet!

179Leigh

These simple crafts all utilize the same teacher’s bulletin board banner strips in a licensed Candyland board-game pattern. I made two towers, wrapped six pots, covered two milk corrals and a bunch of food picks… and I still have many strips left over! All of this is from one package of super-cute and inexpensive banners that could not fit my theme more perfectly.

7(2)Leigh

To cover food crates, all you need to do is measure the front width and cut a length off. Double a piece of tape onto itself to hold the cardstock in place during the party. Remove it to reuse later for another craft. One idea is to let the kiddos make thank you cards out of it.

6(2)Leigh

Wrap a length of the banner to coordinate a plain metal bucket to your theme. Simply cut and tape the ends together.

351Leigh

These can be used to hold candy and prop up Gingerbread Peep Pops (see the Candyland Confections article here).

120Leigh

Make food picks by simply cutting the leftover banner end bits into colored squares.

122Leigh

Tape toothpicks or popsicle sticks behind them. These can also be used for place-cards if you like.

109Leigh

My treat towers begin with ordinary cupcake stands that are transformed into darling 3-D gaming creations.

069Leigh

To make your own, first find a commercially packaged stand in a matching color palette.

394Leigh

Cut the teacher’s border into two sections (so that they’re small enough to allow food to be placed once it’s completed).

117Leigh

I just followed the natural curve of the game path pattern.

072Leigh

Put the stand together as per the package instructions.

105Leigh

Hot glue the underside if you really want it to be super-sturdy.

095Leigh

Hot glue a strip to the outside rim of each level. Cut off the excess length.

099Leigh

If your ends don’t match up perfectly, just trim off the top edge to make them appear seamlessly adjoined.

101Leigh

These are what the towering creations look like when laden with sweet treats galore! (See my allergy-friendly Spicy Guacamole Shooters Recipe here.)

317 (2)Leigh

Check out the rest of my Candyland craft series: Gingerbread People Banner, Treat Gift Boxes, & Printables and Hard Candy Lanterns, Candy Ornaments, & Conversation Heart Garland as well as the final party post on Candyland Themed Party Décor Ideas.

302Leigh

Faithfully Yours,

Leigh

DIY Candyland Party Themed Craft Tutorial: Hard Candy Lanterns, Candy Ornaments, & Conversation Heart Garlands

409Leigh

Craft your way to classic Candyland cuteness befitting birthdays, baby showers, and Christmas décor.  This tutorial for hard candy lanterns, candy ornaments, and conversation heart garlands are part two of a DIY party decorating series with easy projects and free printables. Using some or all of the ideas, you’ll be sure to delight the inner-child in all of your guests. Sweet!

049Leigh

Old-school paper lanterns may easily evolve into supersized hard candy confections with a few simple steps. Begin with any variety of sizes and colors (but choose lighter versions if you wish to light them). You can even find some in a candy swirl pattern like these red and white striped kinds in graduated sizes… or just start with white and add your own stripes. Craft paint is quicker, but marker works as well. Tie a loop of twine, ribbon, or fishing line to the top of each lantern to hang them by later.

039Leigh

Use a theme coordinating color of gift basket cellophane to wrap around each lantern. Be sure the ends overlap before cutting. I used opalescent pink so that the red stripes would show through as hot pink. This way I can reuse the lanterns later with a clear wrap as peppermint candies or without wrapping as striped beach balls in summer.

042Leigh

Tie a length of twine or ribbon to gather the cellophane at the lantern’s base. I actually used a pink and white yarn that mimics baker’s twine but is less expensive.

043Leigh

Pull the hanging cord straight out from the top of the lantern, and gather the cellophane around it. Pull the wrap taut around the sphere (like you would make a ponytail). Tie another bow around this end to secure it. (Note that you can now throw in some lit LED tea-light candles before closing it, but read on to find an easier way to light them.)

045Leigh

Cut off the excess cellophane from the “candy” ends so that it appears to be the right proportion.

381Leigh

You can set these on a table, integrate them into a display, or hang a grouping of various sizes to make a hanging centerpiece. I opted to hike up the chain of my chandelier with an S-hook to shorten it. (See a picture of how to do this here: Frozen Winter Wonderland Themed Christmas & New Year’s Eve Dinner Parties.) Then I attached the twine loops with a couple inches of wire to the chandelier at different levels. I turned the light on, and was immediately awash in a pink candy glow as the light filtered through the lanterns and cellophane. A plug-in up-light aimed squared at the lanterns will also cause them to glow in any location of your choosing. It’s much easier to do this rather than wait to light, close, and then hang your lanterns at the last minute. Of course, another option would be to purchase a light kit for each lantern then plug all those cords in… but who needs more trouble and expense?

232fLeigh

The exact same method was employed to craft the hard candy ornaments using, well… ball ornaments.

062Leigh

The only difference was that I didn’t tie on twine hangers, because I elected to use them for table display instead. They would have been lovely hanging though. I can always add twine to string them on a tree or centerpiece later, because I intentionally left the round hanging eye stick out of the gathered wrap. It’s visually concealed by the cellophane.

384Leigh

I made “big rock candy mountains” out of lit white Christmas trees that appeared to glow from within. I then placed the “candy”ornaments on and around them.

393Leigh

Ribbon candy ornaments are another simple décor craft that can utilize bits of leftover ribbon or even old package wrapping for an eclectic mix. I used a portion of a giant roll from Costco that is actually reserved for another project. Real ribbon candy doesn’t have glitter and has stripes facing the other way, but I thought they were adorable anyway.

124Leigh

To make these, just hot glue a line onto the ribbon’s end, and tap it down to form a loop.

130Leigh

Keep repeating this action, forming more and more loops, until you reach a size that seems proportionate to a candy dimension.

126Leigh

Cut off the end, and glue it down to form the last loop.

137Leigh

Next, add a hanger if you’d like to. I used the same thin ribbon as the banner in part one of the Candyland craft series. Make a loop through one loop end of the “candy” and tie a knot. (This seems to be a much safer option, than metal hooks, around small children and pets.)

388Leigh

Hang these from Christmas trees, add them to a candy lantern display, or set them around a centerpiece like my “big rock candy mountains”. The “icing” bases in the picture were comprised of blankets of buffalo snow batting.

057fLeigh

The last craft for the tree is a conversation heart garland that would serve equally as well as a banner for a Valentine’s celebration.

054Leigh

It’s so simple and inexpensive because it utilizes foam craft hearts and yarn (or thin ribbon, or baker’s twine if you like).

064Leigh

Begin by simply setting out your hearts according to color, so that you can string them in a pleasing order.

067Leigh

Use a ruler (or just “eyeball” it) in order to hot glue them back to back spaced 3 inches apart, sandwiching the yarn in-between.

386Leigh

Cut the yarn after the last “foamie”, and knot the ends to prevent fraying. (Click here to see the same method used on my kid-friendly “Glitter-ween” garland.)

395 (2)Leigh

Check out the rest of my Candyland craft series: Gingerbread People Banner, Treat Gift Boxes, & Printables and Game Board Treat Tower & Easy Buffet Display as well as the final party post on Candyland Themed Party Décor Ideas.

Faithfully Yours,

Leigh

DIY Candyland Party Themed Craft Tutorial: Gingerbread People Banner, Treat Gift Boxes, & Printables

295Leigh

Craft your way to classic Candyland cuteness befitting birthdays, baby showers, and Christmas décor.  This tutorial for gingerbread people banners and treat gift boxes are part one of a DIY party decorating series with easy projects and free printables. Using some or all of the ideas, you’ll be sure to delight the inner-child in all of your guests. Sweet!

179Leigh

Every Candyland village needs to be populated with gingerbread people, and it can be accomplished by more than just the menu. Gift your guests with take-home treat boxes that also serve to decorate your buffet.

260Leigh

Begin with readymade gingerbread people shaped paper maché boxes. These are widely available in stores beginning in the fall, and may be purchased online the remainder of the year. (Find discounts for online craft merchants in the side bar from Le fidèLe Design’s affiliates.) I found mine on sale at half off, making them 50 cents each. Use an acrylic paint color in a shimmery brown so that a top coat is unnecessary. (I used DecoArt’s elegant finish espresso metallic paint, because I already owned it, and it coordinated with my banner.)

277Leigh

Separate the tops from the bases, and paint the little guys. I set them rim side down onto a plastic bag, so that I could just peel them off when they dried. (On other surfaces, the paint sometimes acts as glue.)

318Leigh

Allow them to dry overnight, then use hot glue to adhere tiny pom-poms. They make the cutest dimensional eyes, nose, and buttons! I chose colors that would coordinate with my other décor elements, and tried to intentionally randomize the combinations on each “gingie”.

356Leigh

Fill your goodie boxes with candy, tiny toys, or even candy flavored lip gloss and intersperse them in your treat town.182Leigh

Another idea is to fill them with numbered papers that correspond to larger gifts or game elements.

353Leigh

Make a banner of gingerbread people adjoined in jubilant Candyland solidarity, using one of the two following methods.

2Leigh

Foam gingerbread people shapes may be located at just about every craft store in the fall and winter, and may be purchased online the rest of the year. You can choose from many sizes in matte and glitter. I wanted to use the glitter guys to match my houses.

3Leigh

Glue on tiny pom-poms that coordinate with your décor. Use hot glue in the same eyes, nose, and button pattern with which you made the treat boxes.

6Leigh

Punch a hole in each hand of the “gingies” in order to string it into a banner.

9Leigh

Make a loop of thin ribbon through holes in two “gingies”, and tie a knot to connect them. I alternated between three different colors from the same spool of clearance ribbon.

193LeighWM


The second method is to right click on my printable image above (free for noncommercial use), and select print. Then print them in color and photo settings on sturdy cardstock (so that they don’t curl when strung). Cut them out, and punch holes into the white circles in the arms. Choose to leave them as is, or add more glitter to the images. Then tie on ribbons to join them (as in the previous method). You can also glue pom-poms over the images in the prints to add dimension to your project.

193singleWMLeigh


Use the gingerbread person image without white holes for other décor or signage. Simply adjust your printing sizes to make smaller “gingies”. Do this by printing at a smaller percentage (i.e. at 50%) or by printing them as photos (i.e. wallet size). Or… you can get Kinko’s to do it for you! These little guys also make cute kid’s craft puppets when taped to a popsicle stick, so you can utilize them as a party activity for the little ones.

361Leigh

Check out the rest of my Candyland craft series: Hard Candy Lanterns, Candy Ornaments, & Conversation Heart Garlands and Game Board Treat Tower & Easy Buffet Display as well as the final party post on Candyland Themed Party Décor Ideas.

341Leigh

Faithfully Yours,

Leigh

How to Make an Assemblage Sculpture (= 3D Collage) for Your Valentine (Art Instruction / Craft Tutorial)

34Leigh

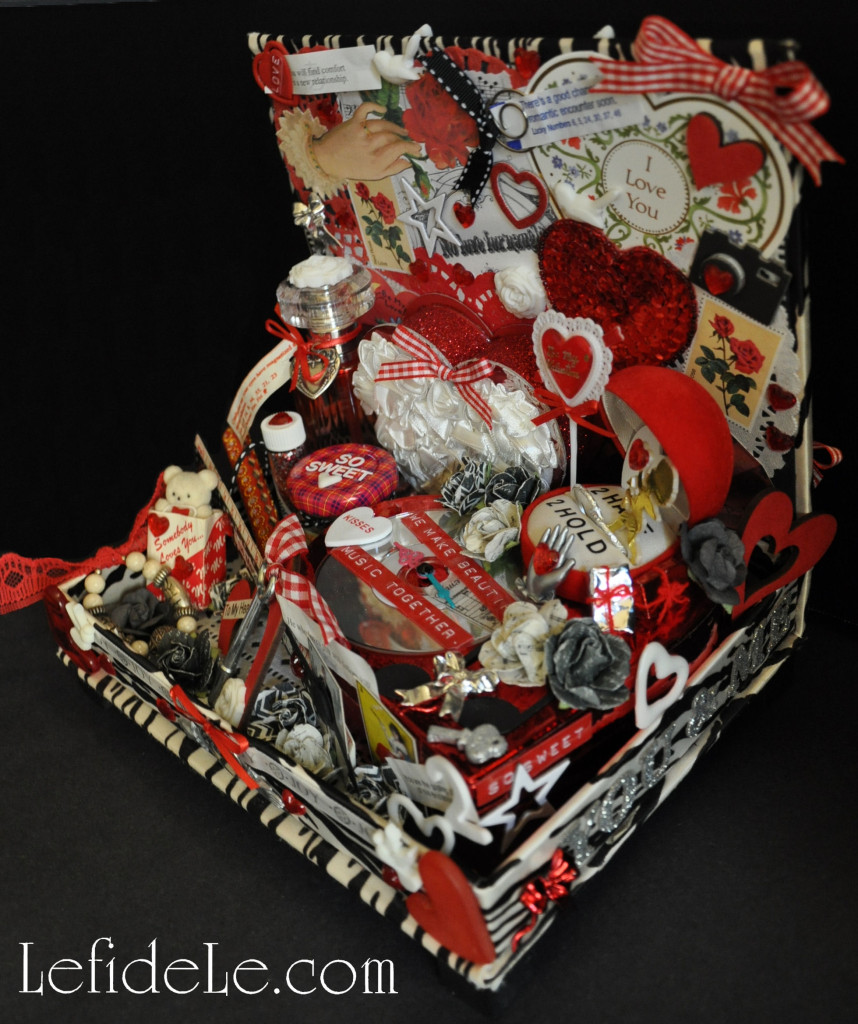
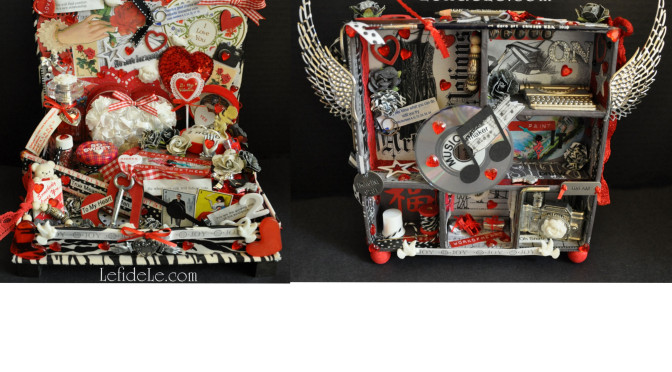
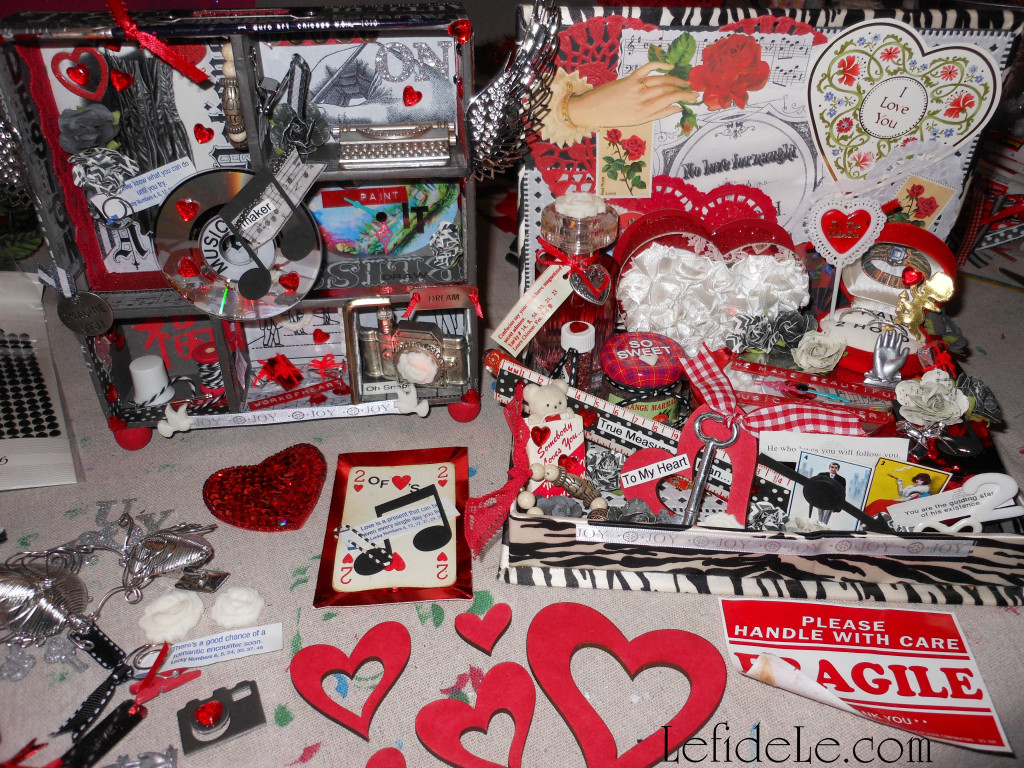
In honor of Valentine’s Day, I’ve made 2 assemblage sculptures (which are the 3-dimensional versions of collages), one honoring romantic spirits and the other creative kindred spirits. With photographic examples of the steps, along with some basic instruction, I’m sure you’ll be able to create your own. This project is the perfect Valentine gift because you can incorporate little bits of ephemera like ticket stubs and cards from your romance, or you can celebrate a creative spirit with little items that symbolize the recipient’s talents. It’s an inexpensive way to demonstrate affection in a memorable one-of-a-kind way… and they’re so much fun to make!

20Leigh

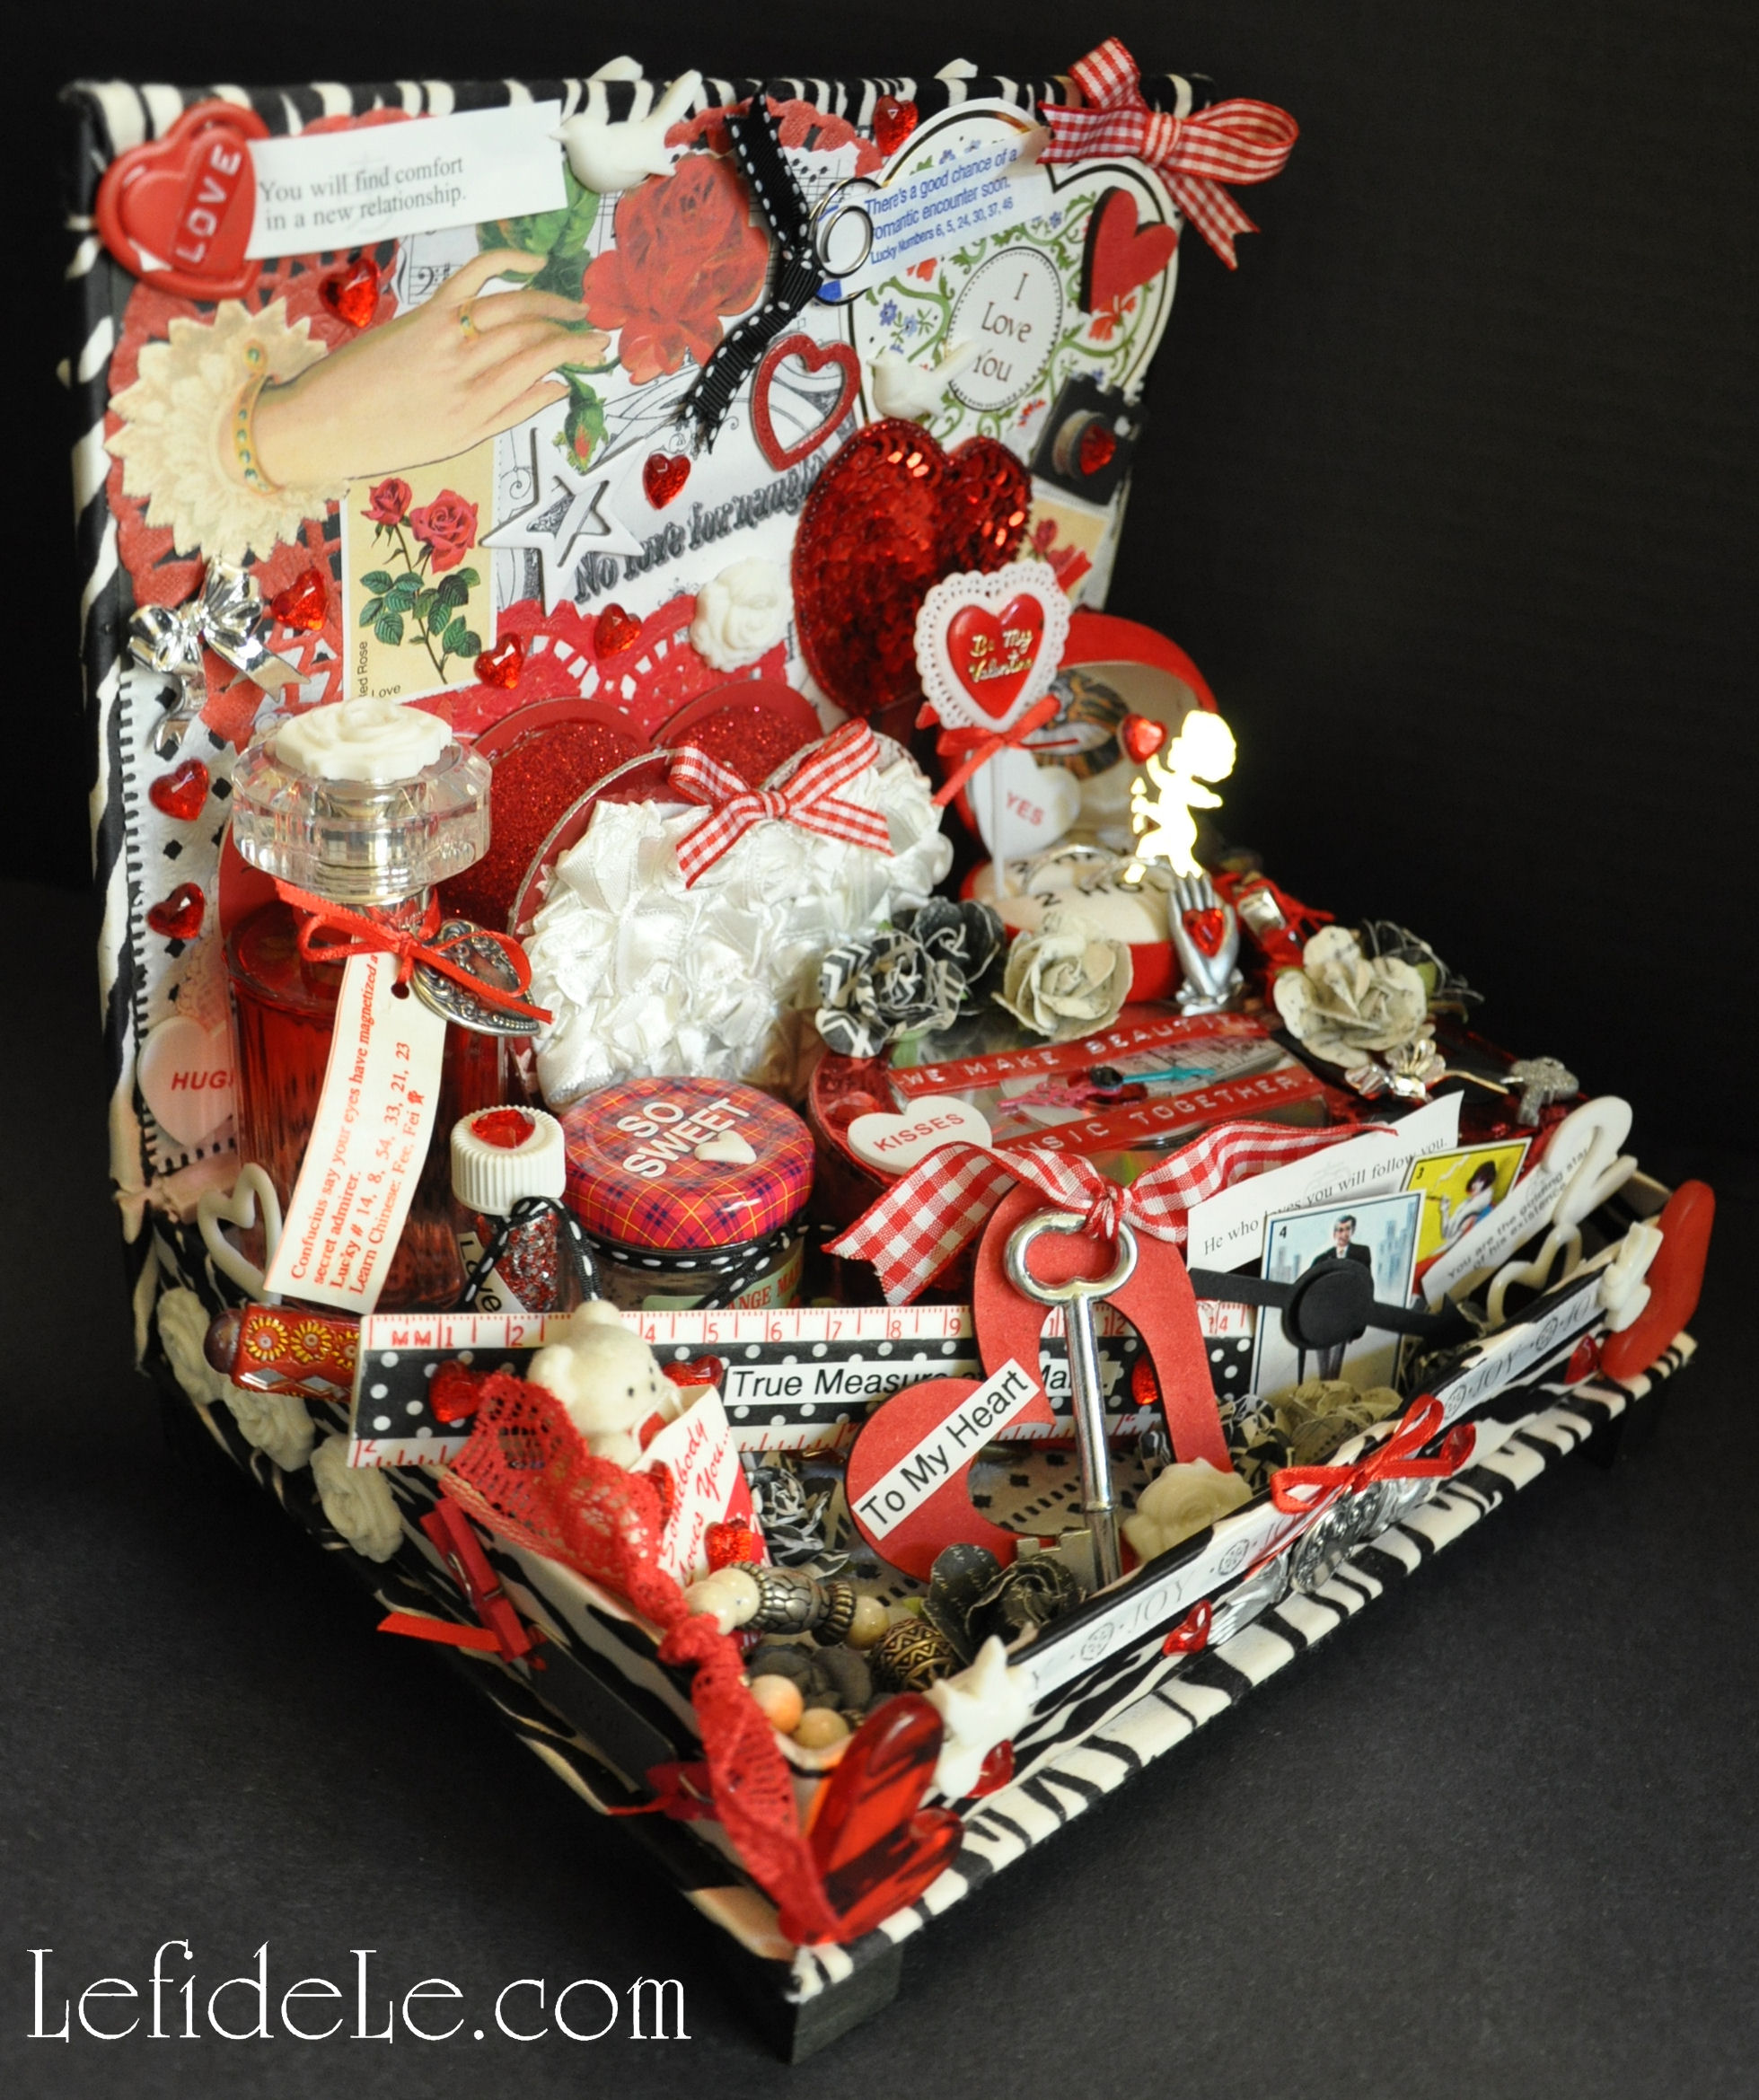
Let’s start with the basics… assemblage sculptures are really just 3D collages. Instead of merely cutting and gluing flat pieces of paper images to a larger sheet of paper, solid ephemera (like perfume bottles) are glued to a base (like a book box). As with any sculpture, they are viewed from 360ᵒ and so should be layered on all sides. In this way, they really are more challenging to make and more interesting to look at. Completed pieces are best viewed close up and in person like one would inspect the contents of a tiny dollhouse.

26Leigh

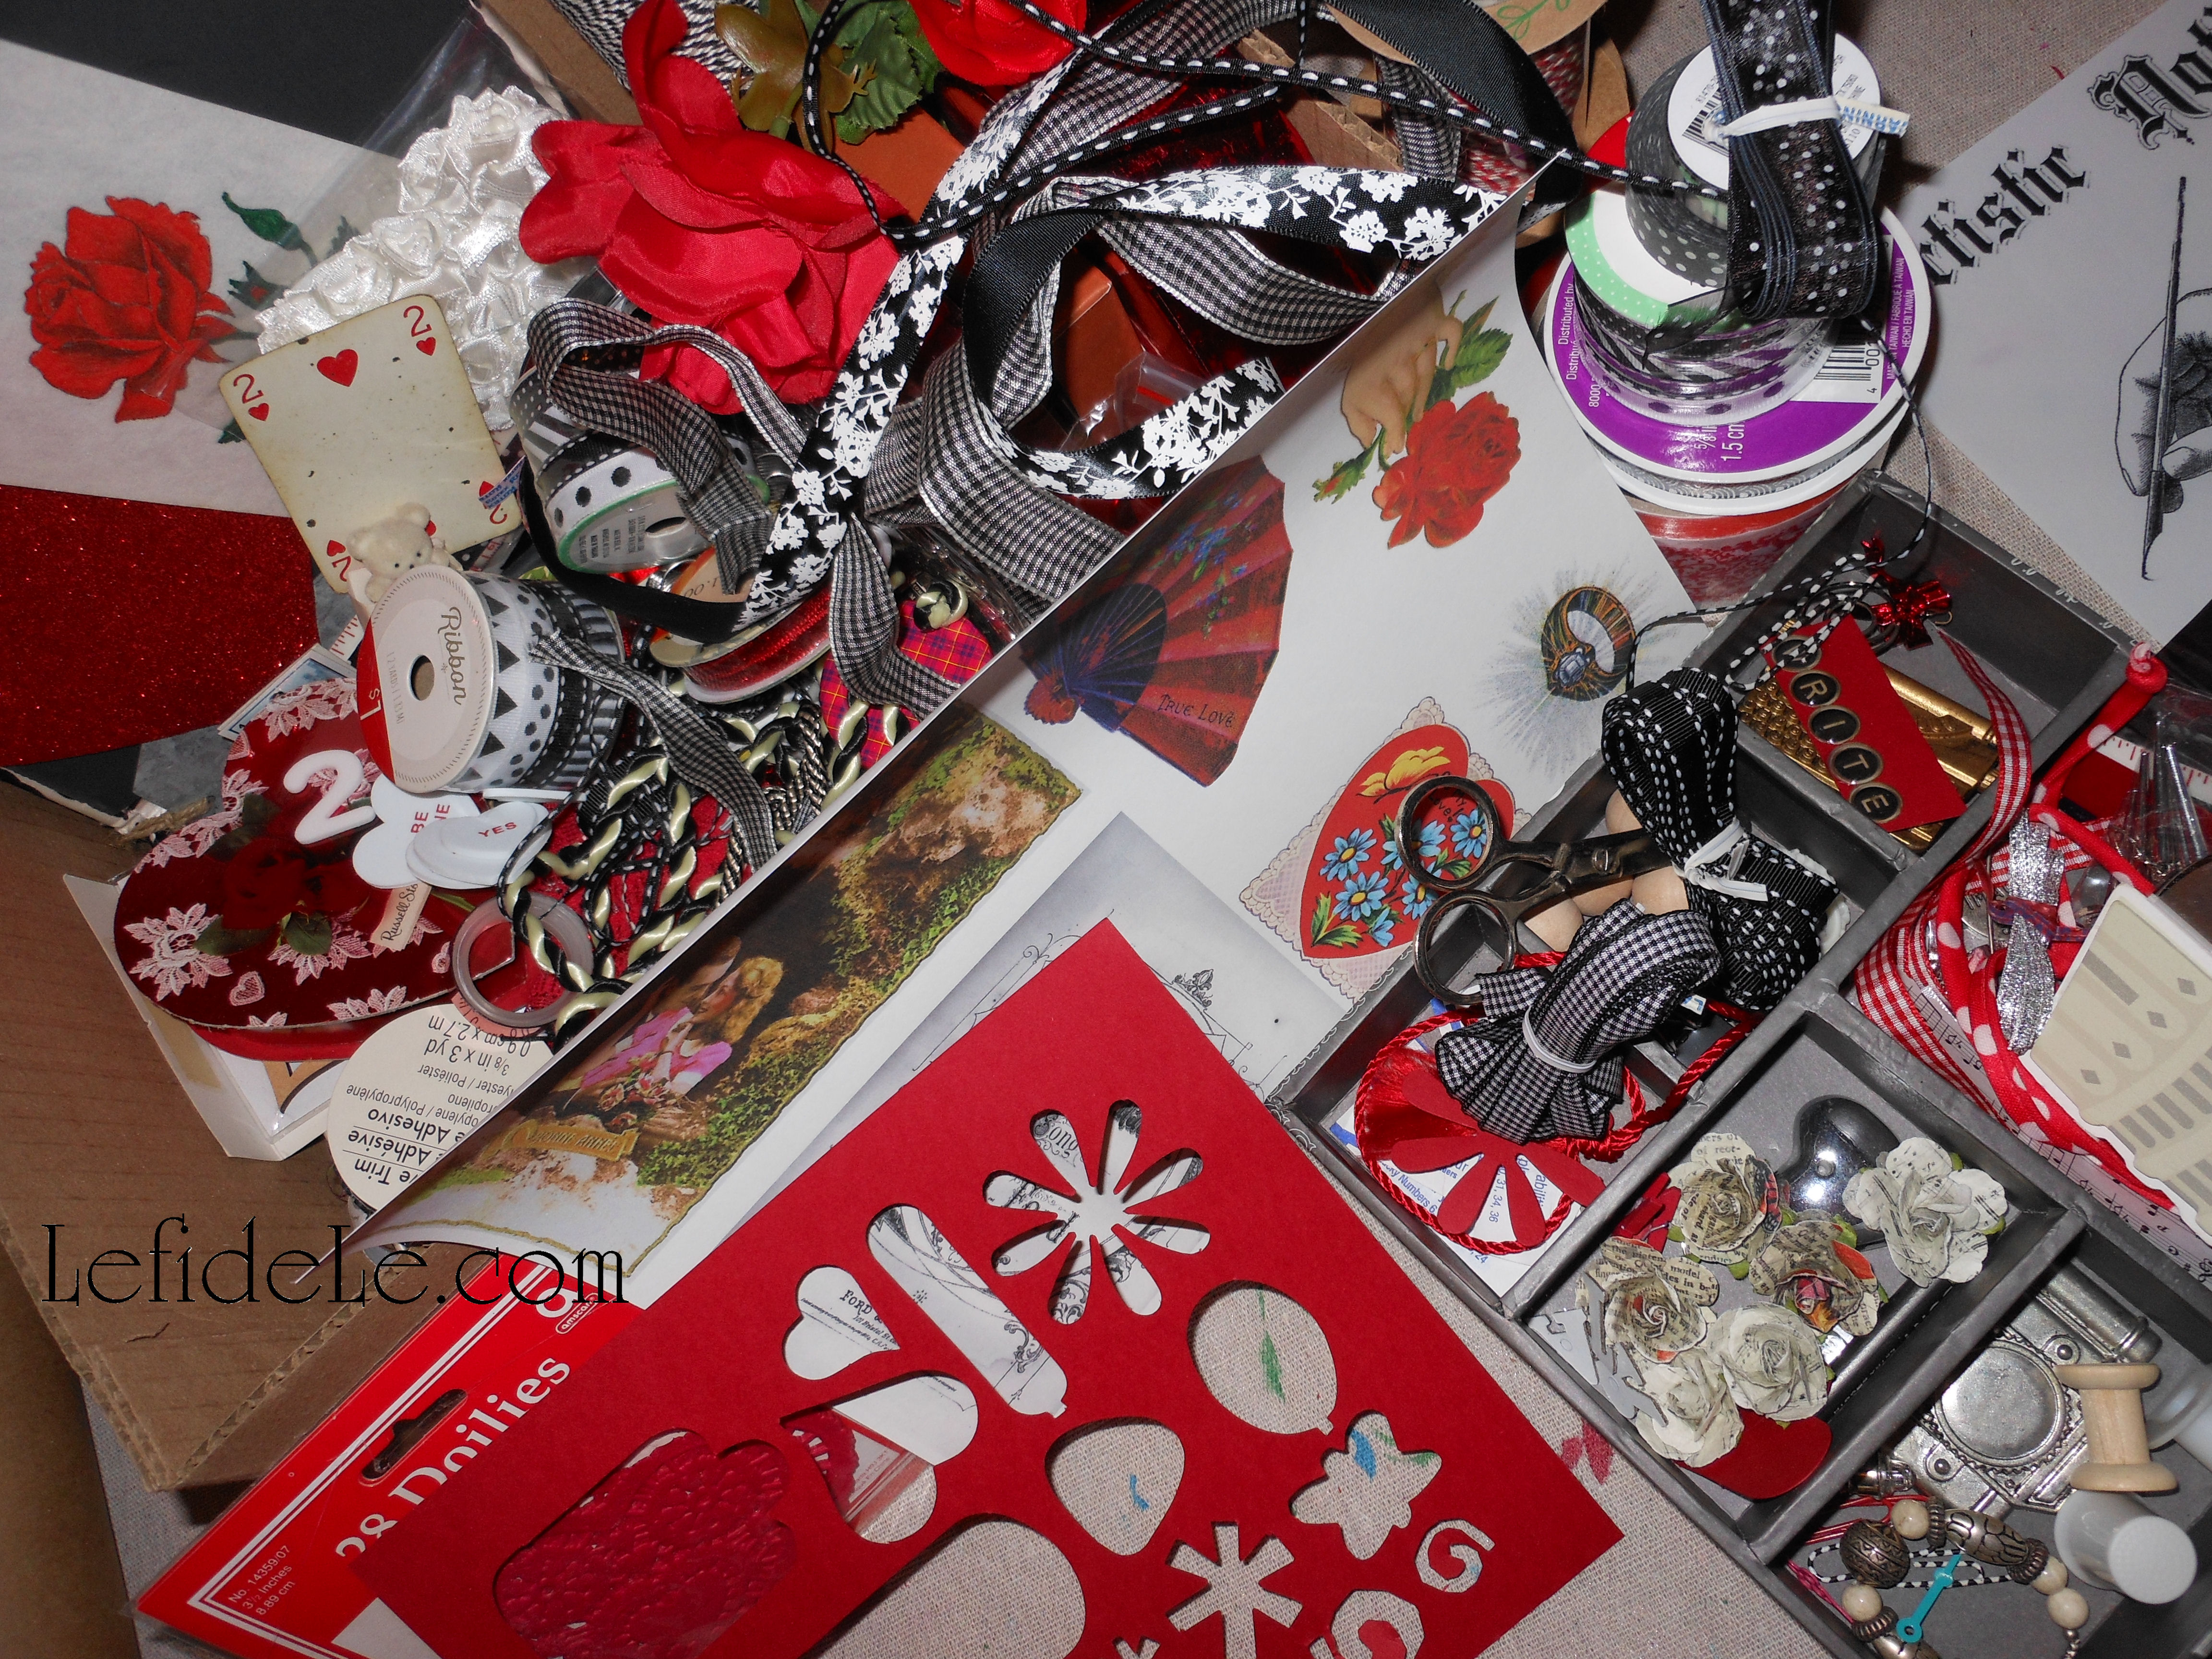
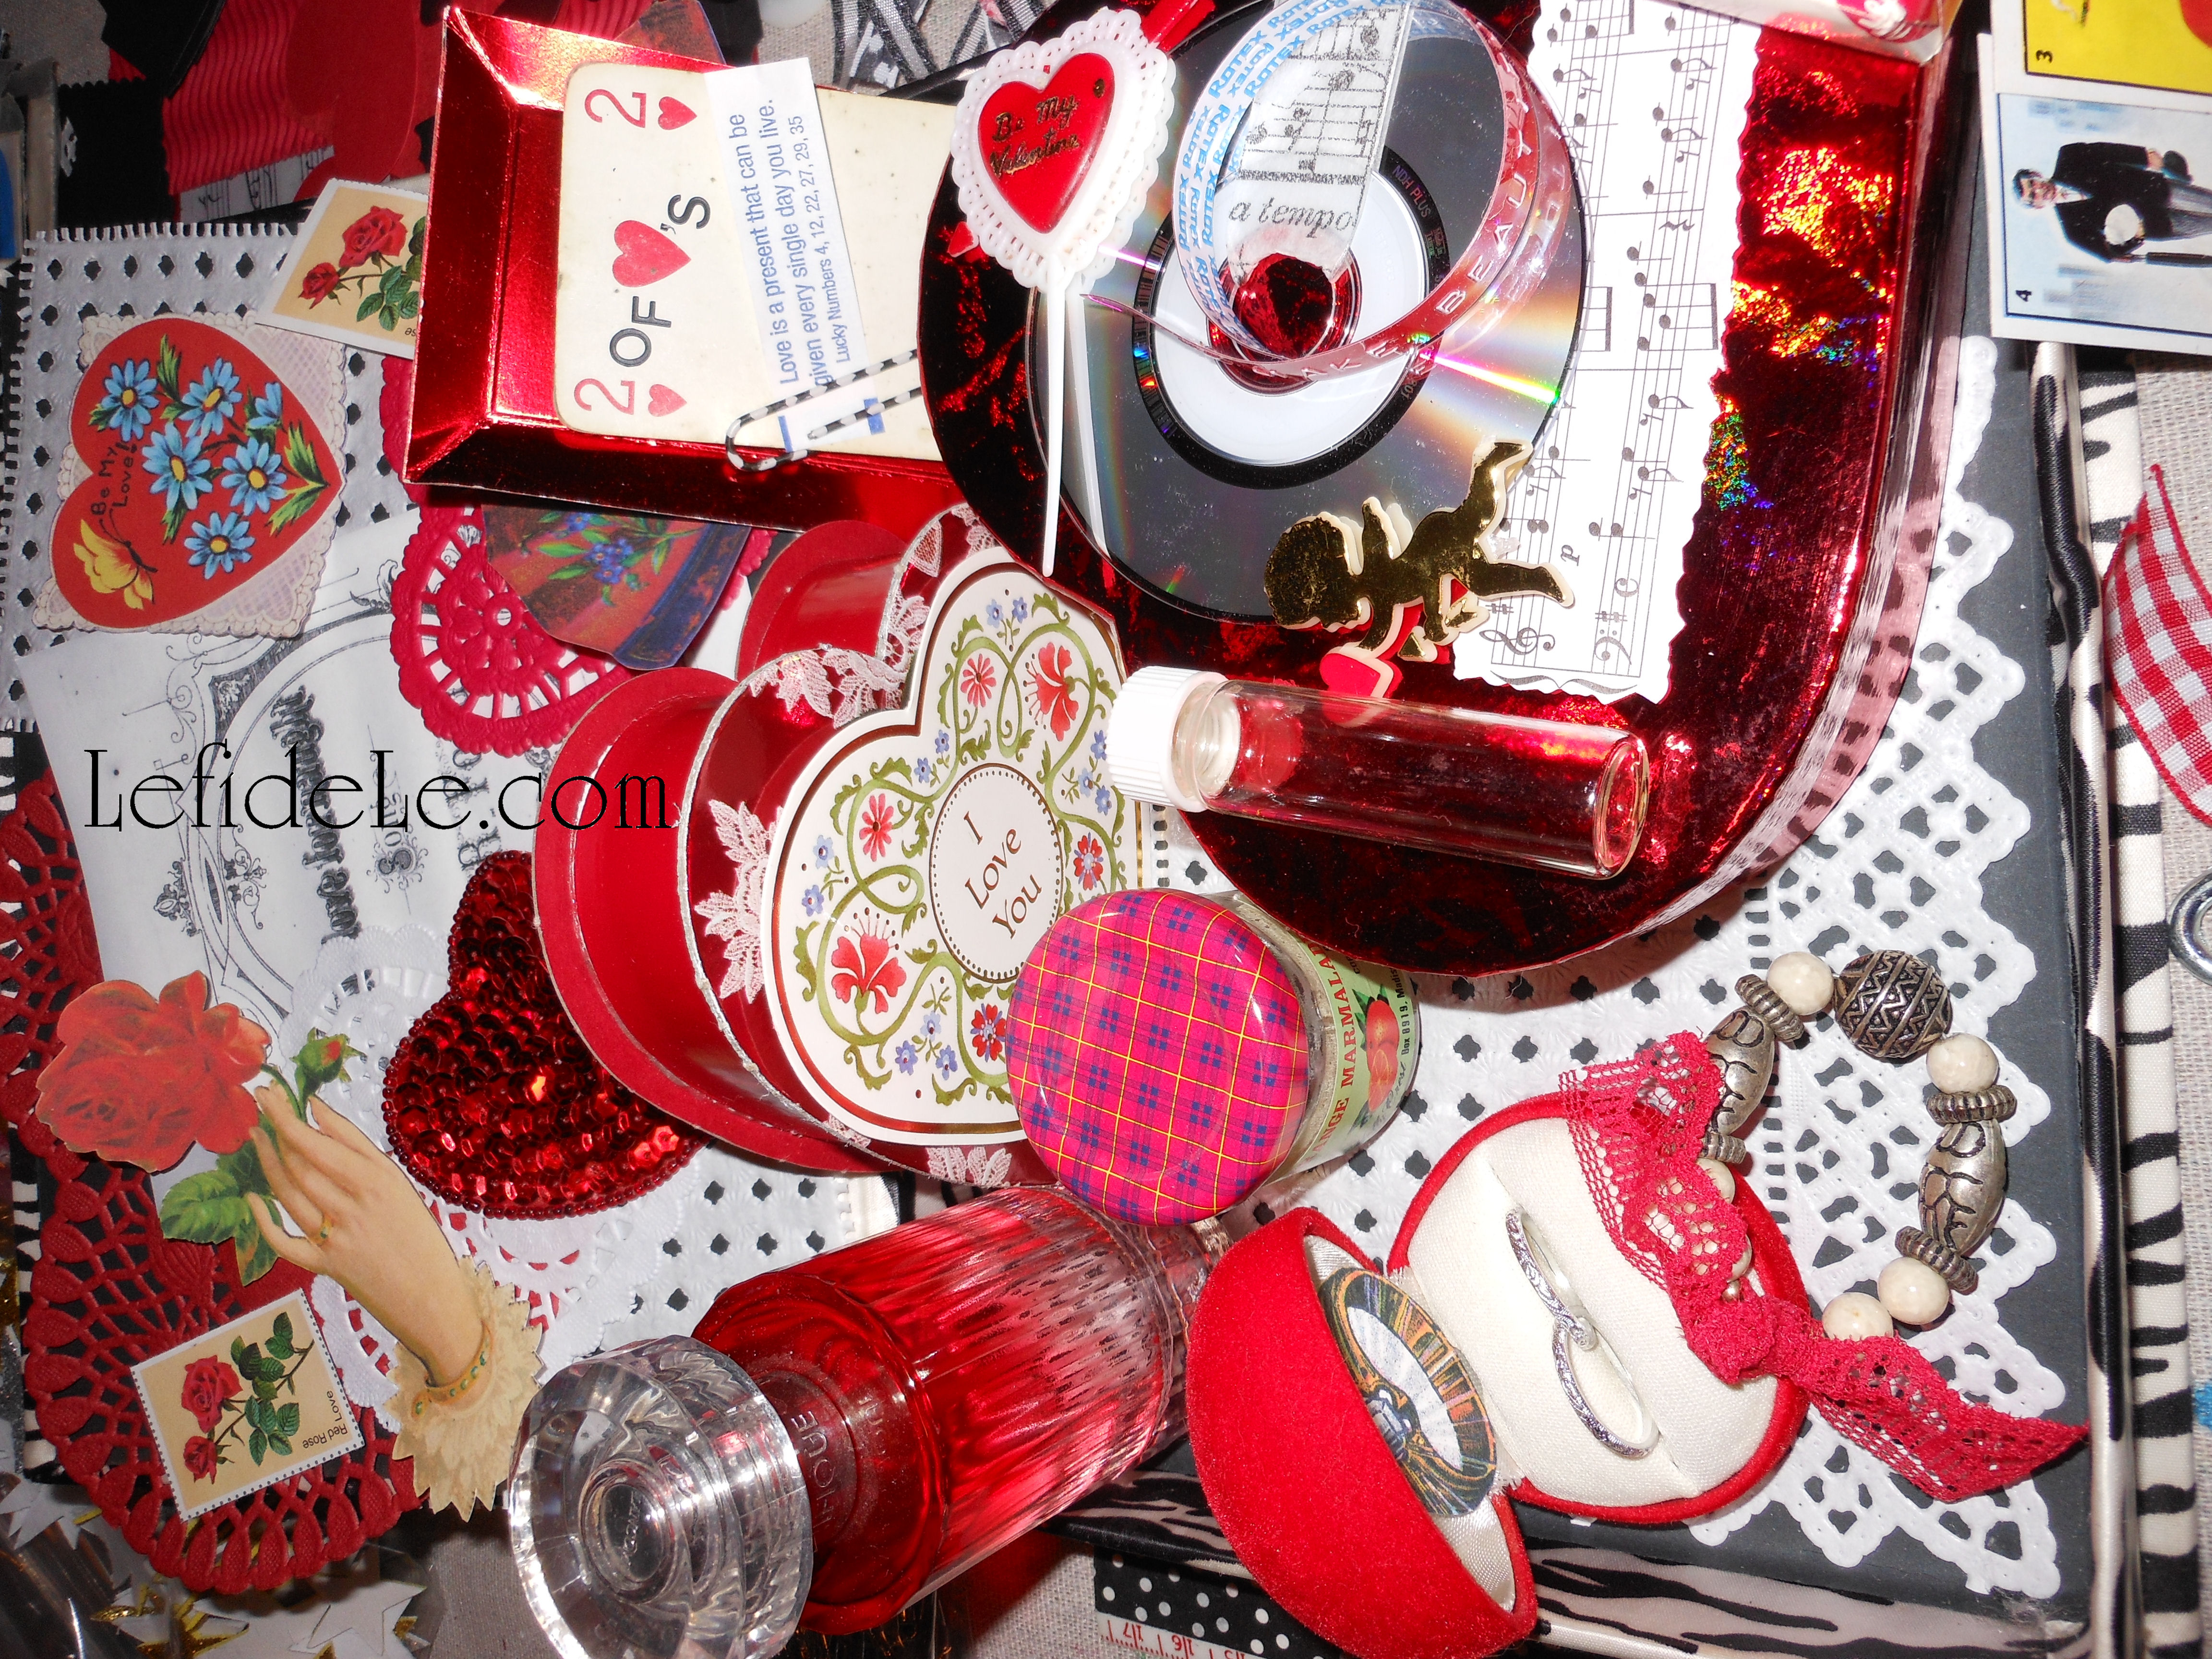
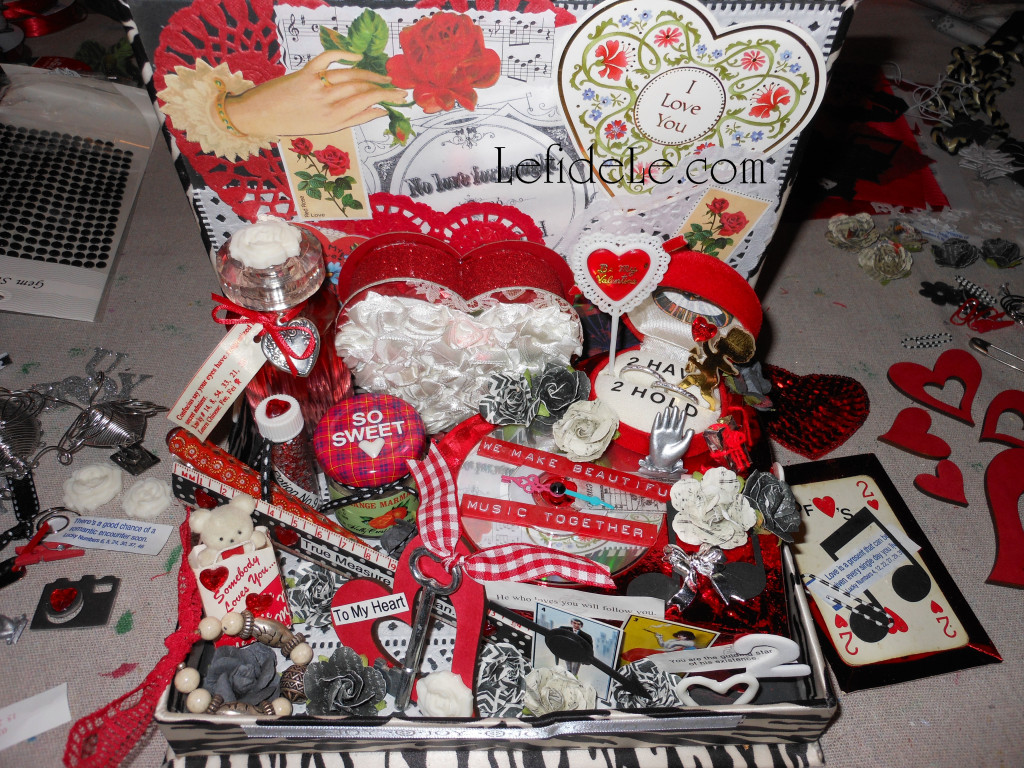
I’ve made two at the same time in order to demonstrate more fully just how to complete such a project. They have very different themes, but utilize the same color scheme and even some of the same items like crystal hearts. In one artwork these symbolize romantic affection while in the other representing the love of craft. Personally, I find that it’s best to begin by gathering all the important ephemera you’d like to use first.

1Leigh

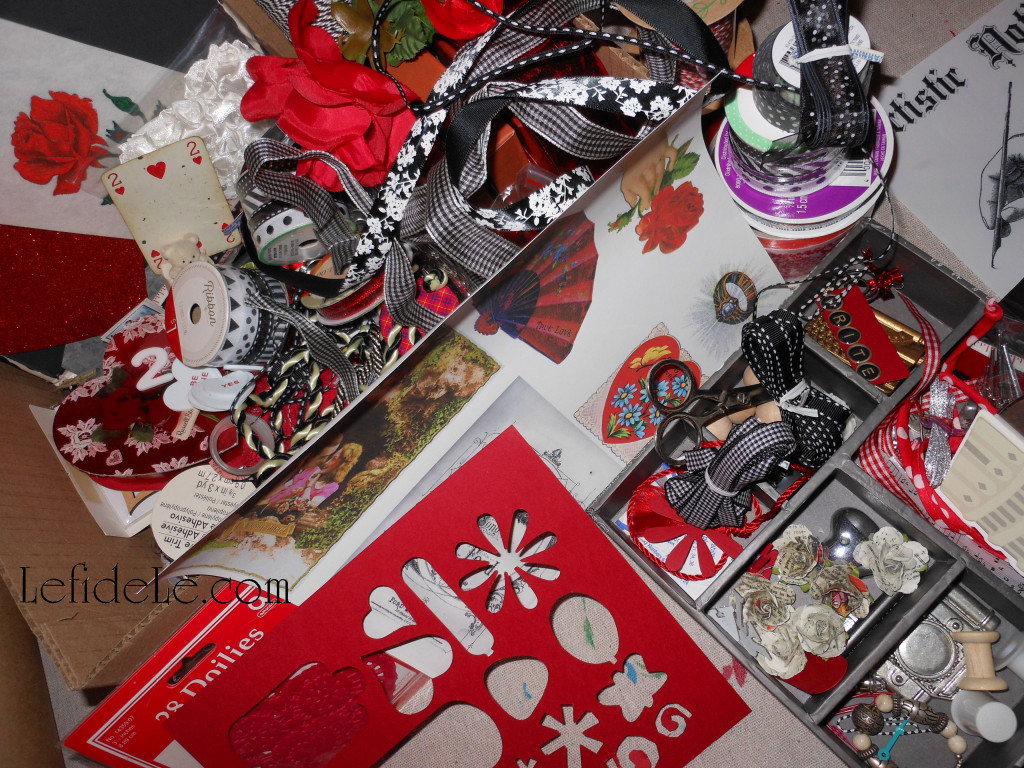
Think of it like an exaggerated version of scrapbooking. Add things that depict cherished memories or even inside jokes. Another way to begin is make a list of things you want to portray, and then look for elements that would render those. And, let’s just say that you don’t have the right memento from that beach trip… well, just go buy a lovely shell and write a date on it in permanent marker. It really is that simple.

45Leigh

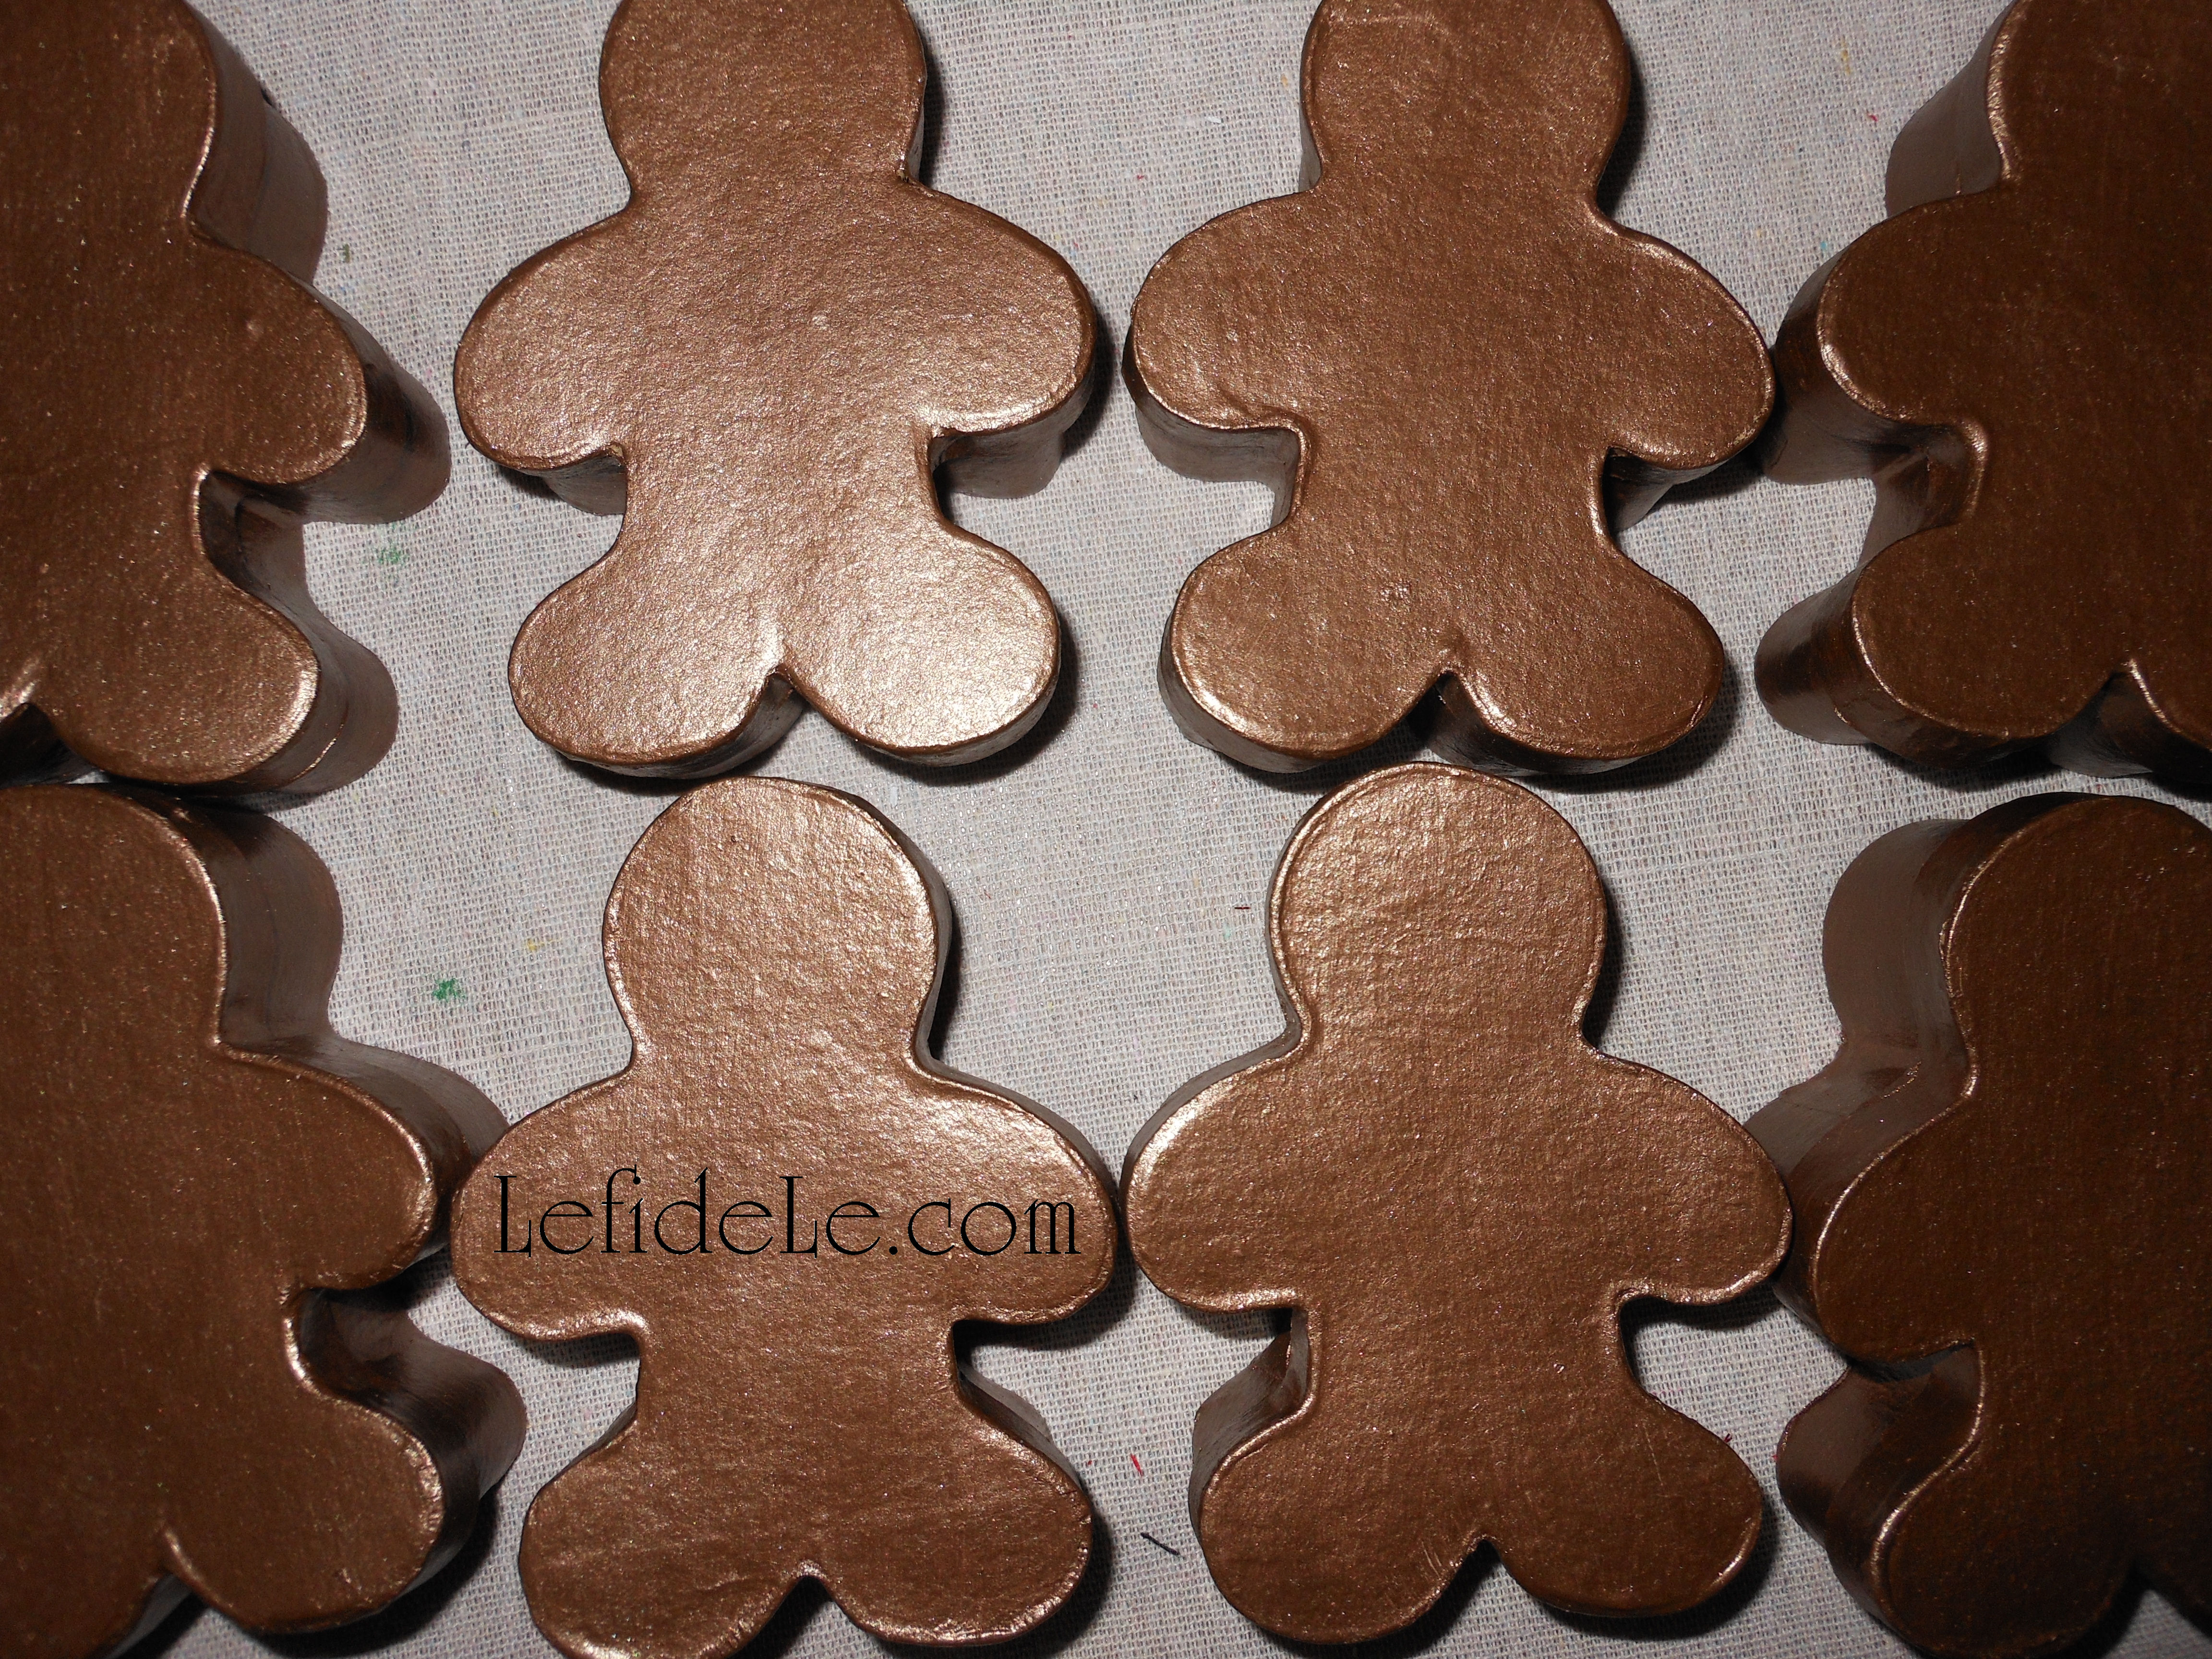
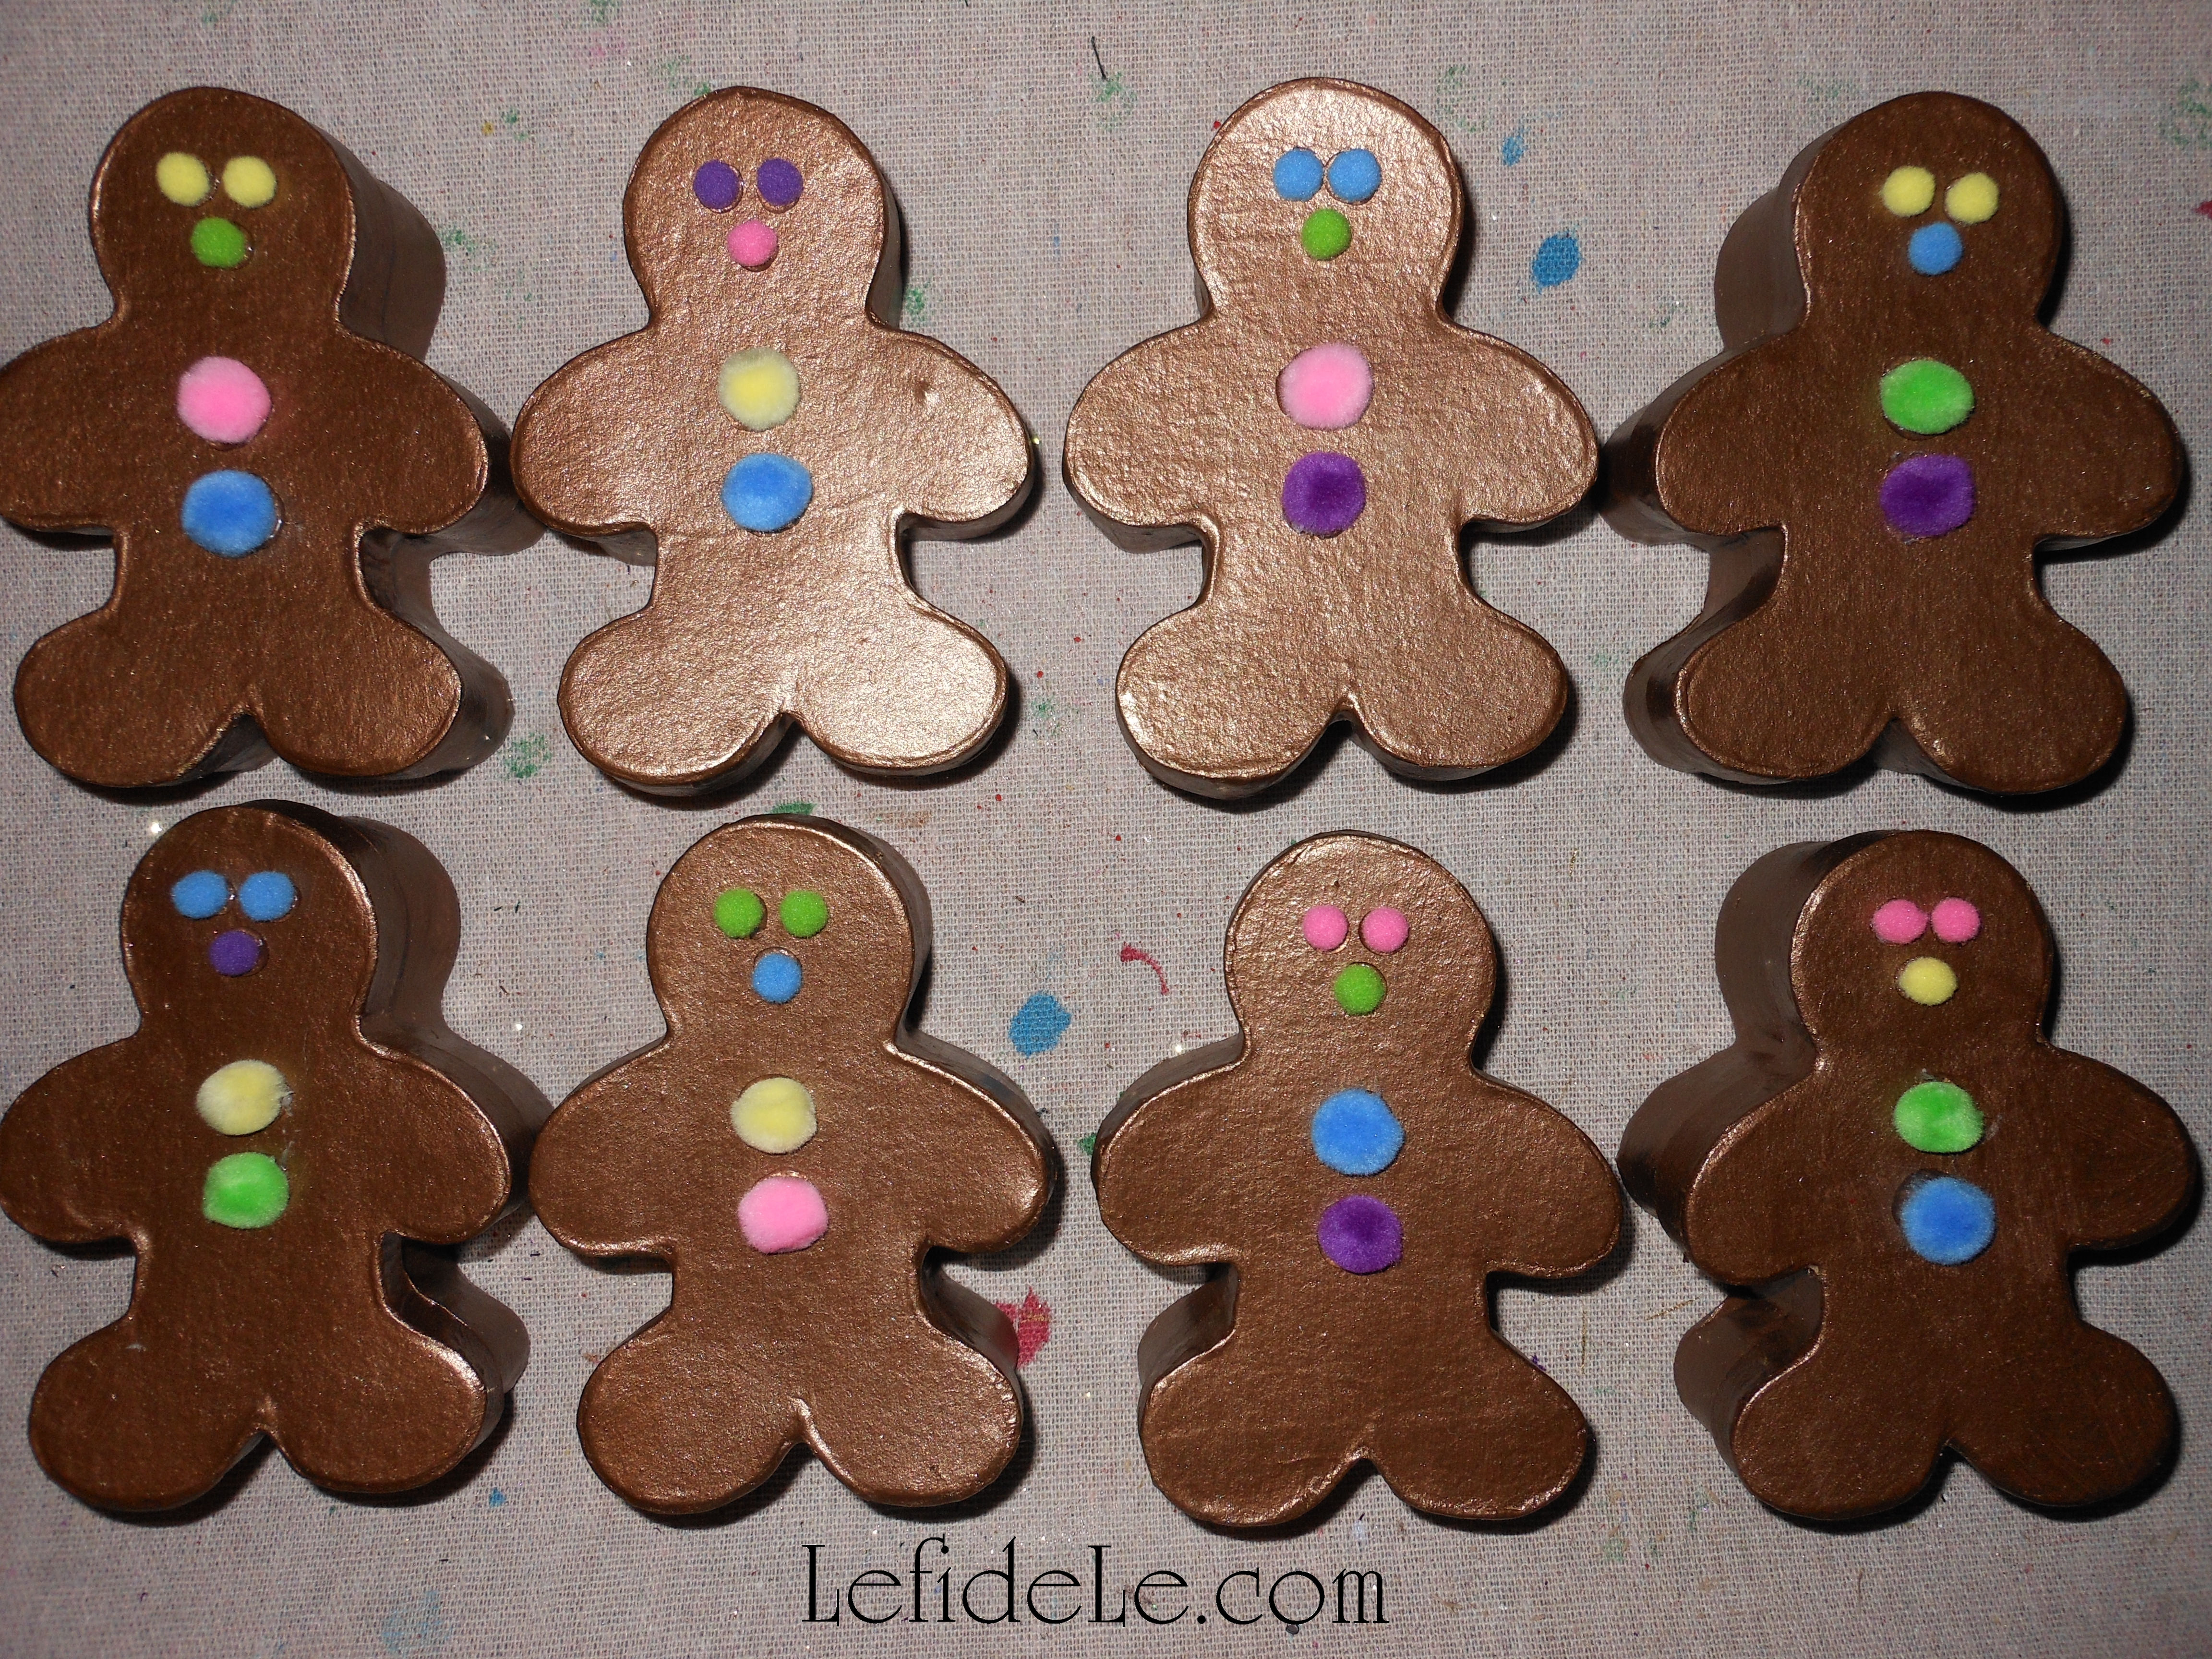
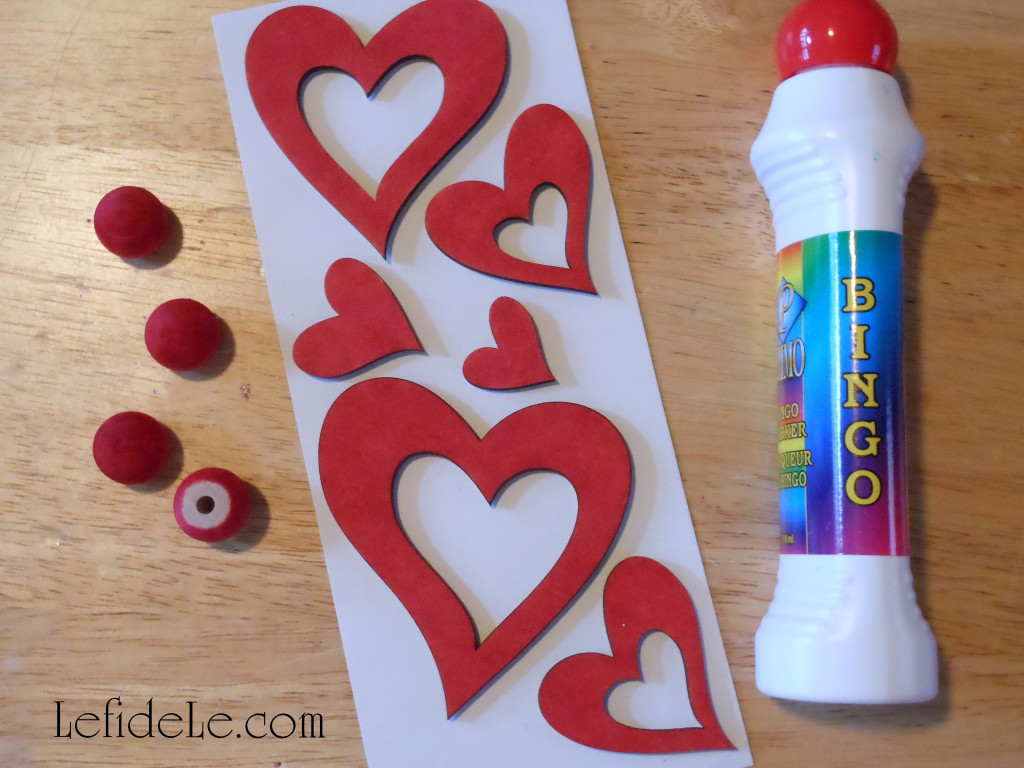
Observe the collected items to see which colors are repeated most. Allow this to dictate your color scheme. Any pieces that clash with that scheme can be altered to blend in seamlessly. Paint, stain, glitter, glue, ribbon, and tape can change a tchotchke to suit your palette. Here I’ve use a bingo marker to stain some pale wooden heart cutouts and potential base feet. (See more about the possibilities of bingo markers in my article: Fast & Easy DIY Hand-stamped Polka-dot Gift Wrap & Matching Gift Crafts.)

25-2Leigh

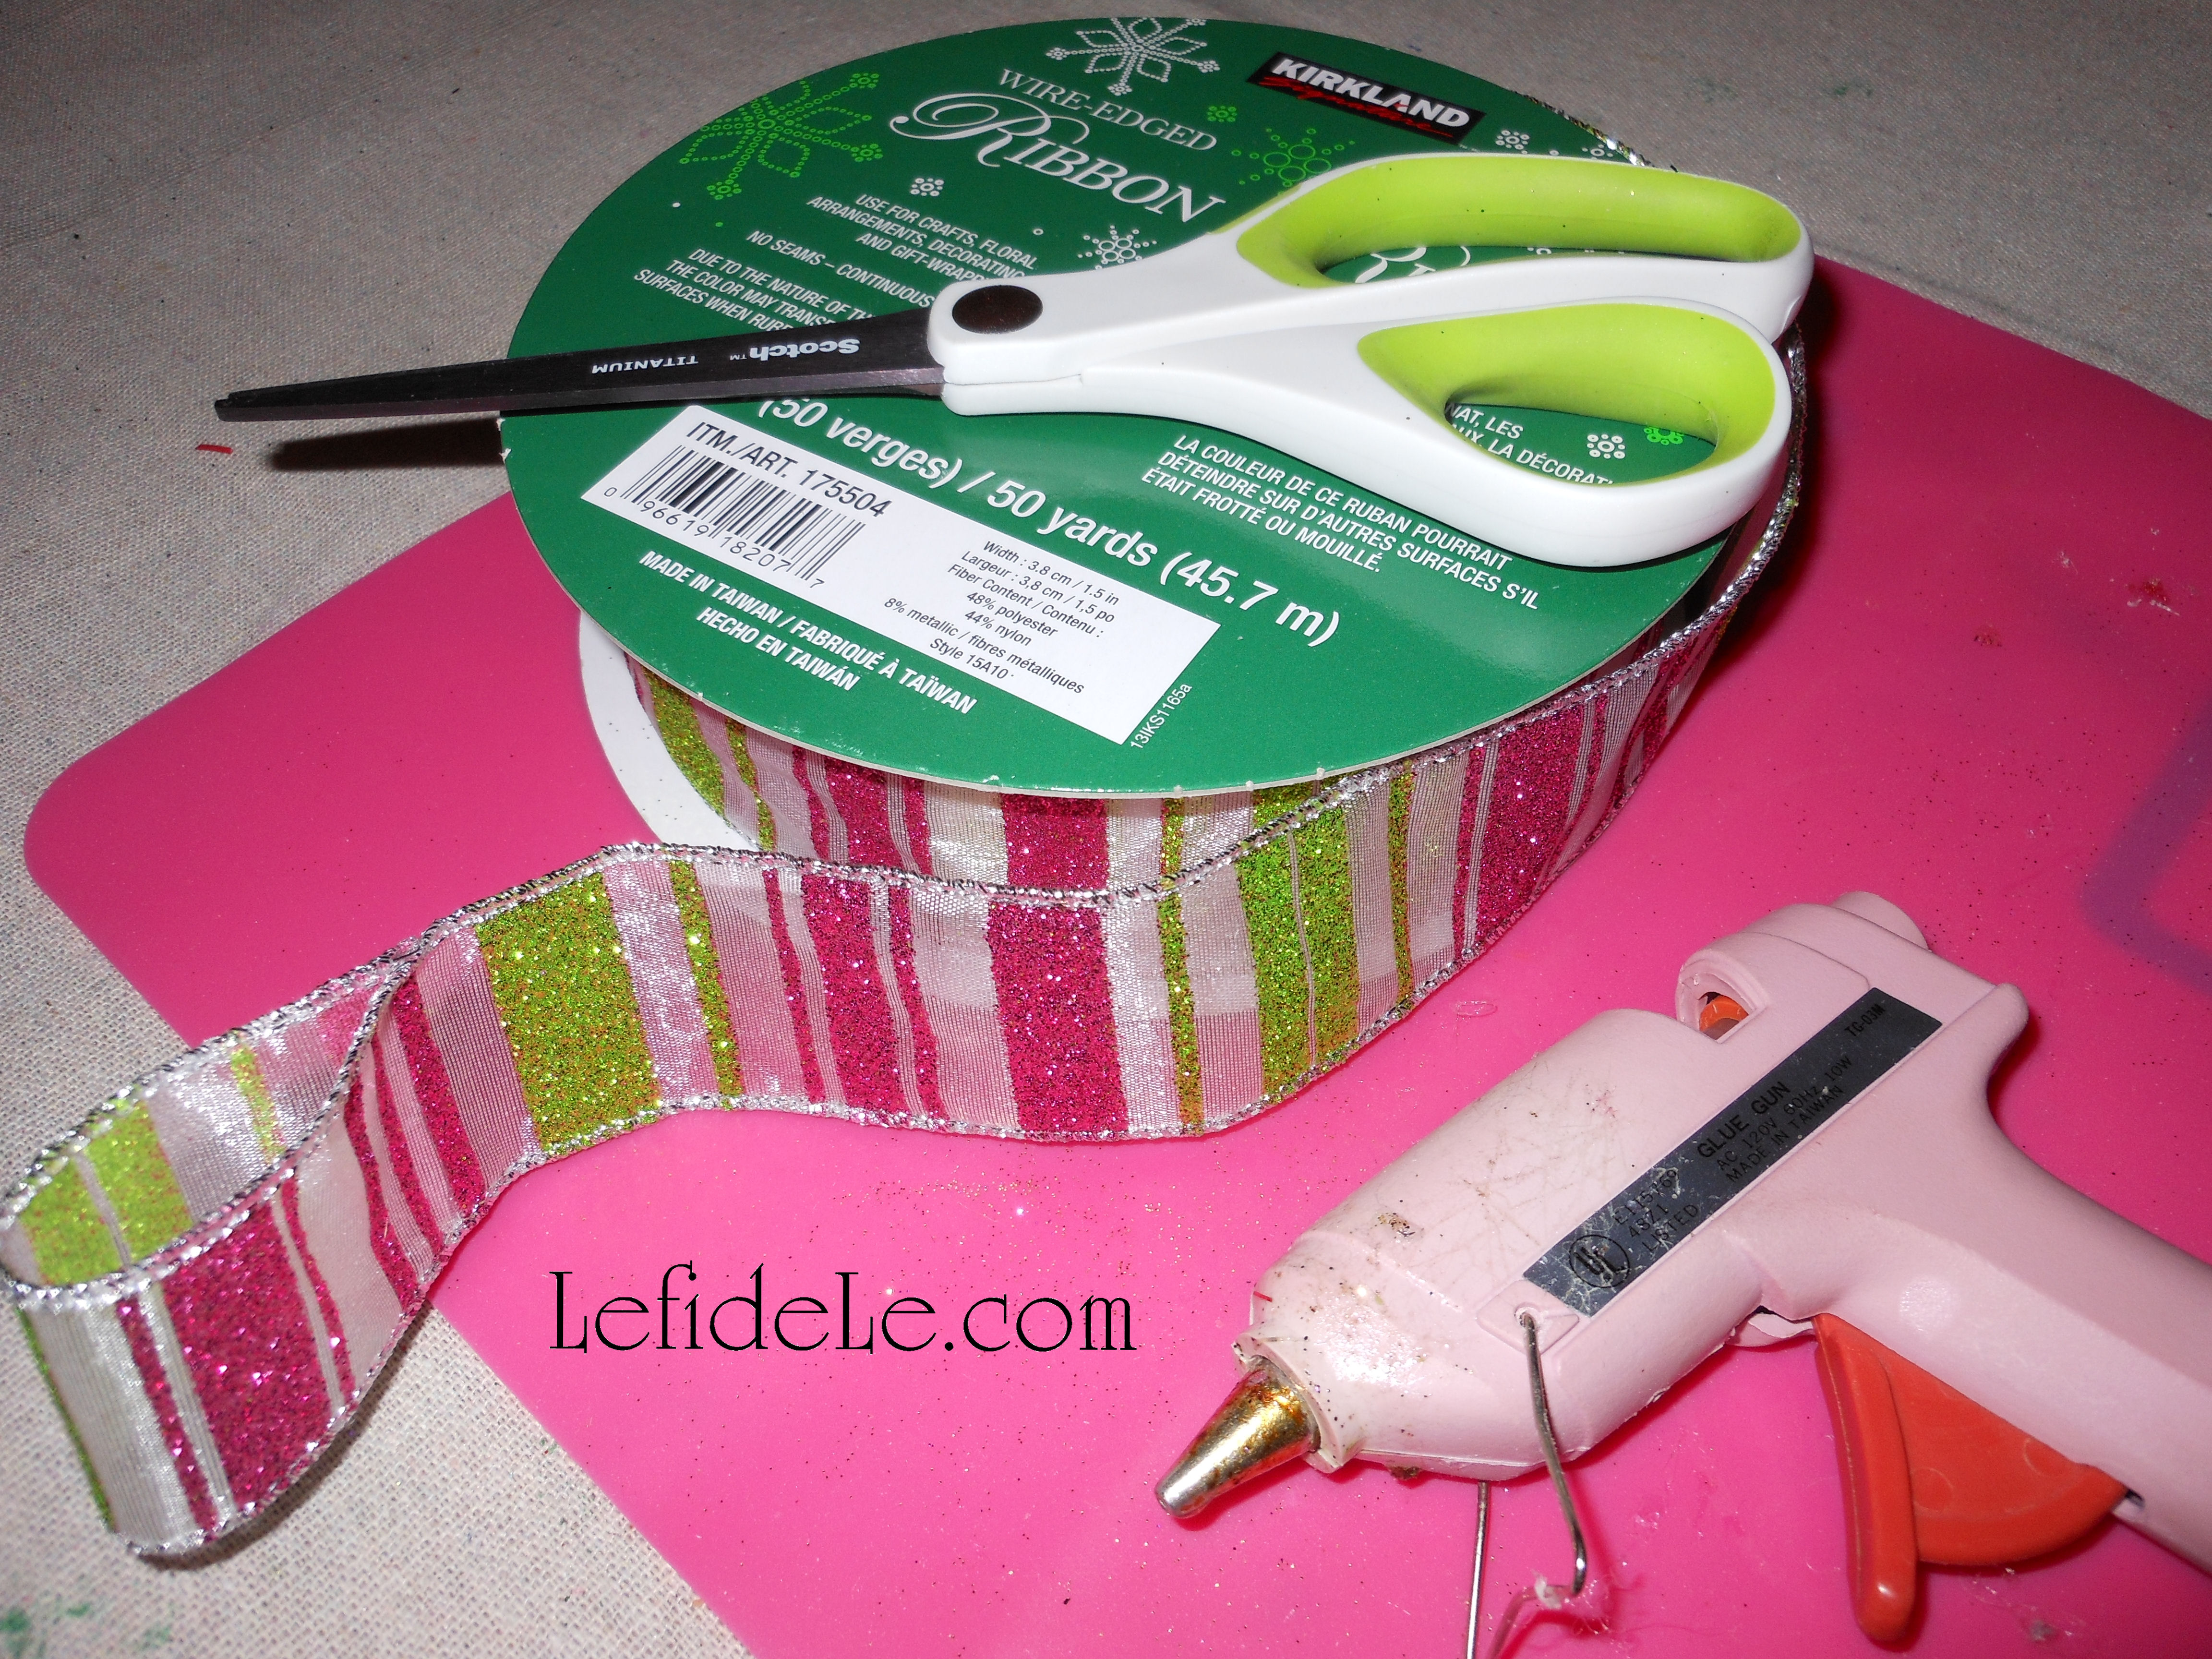
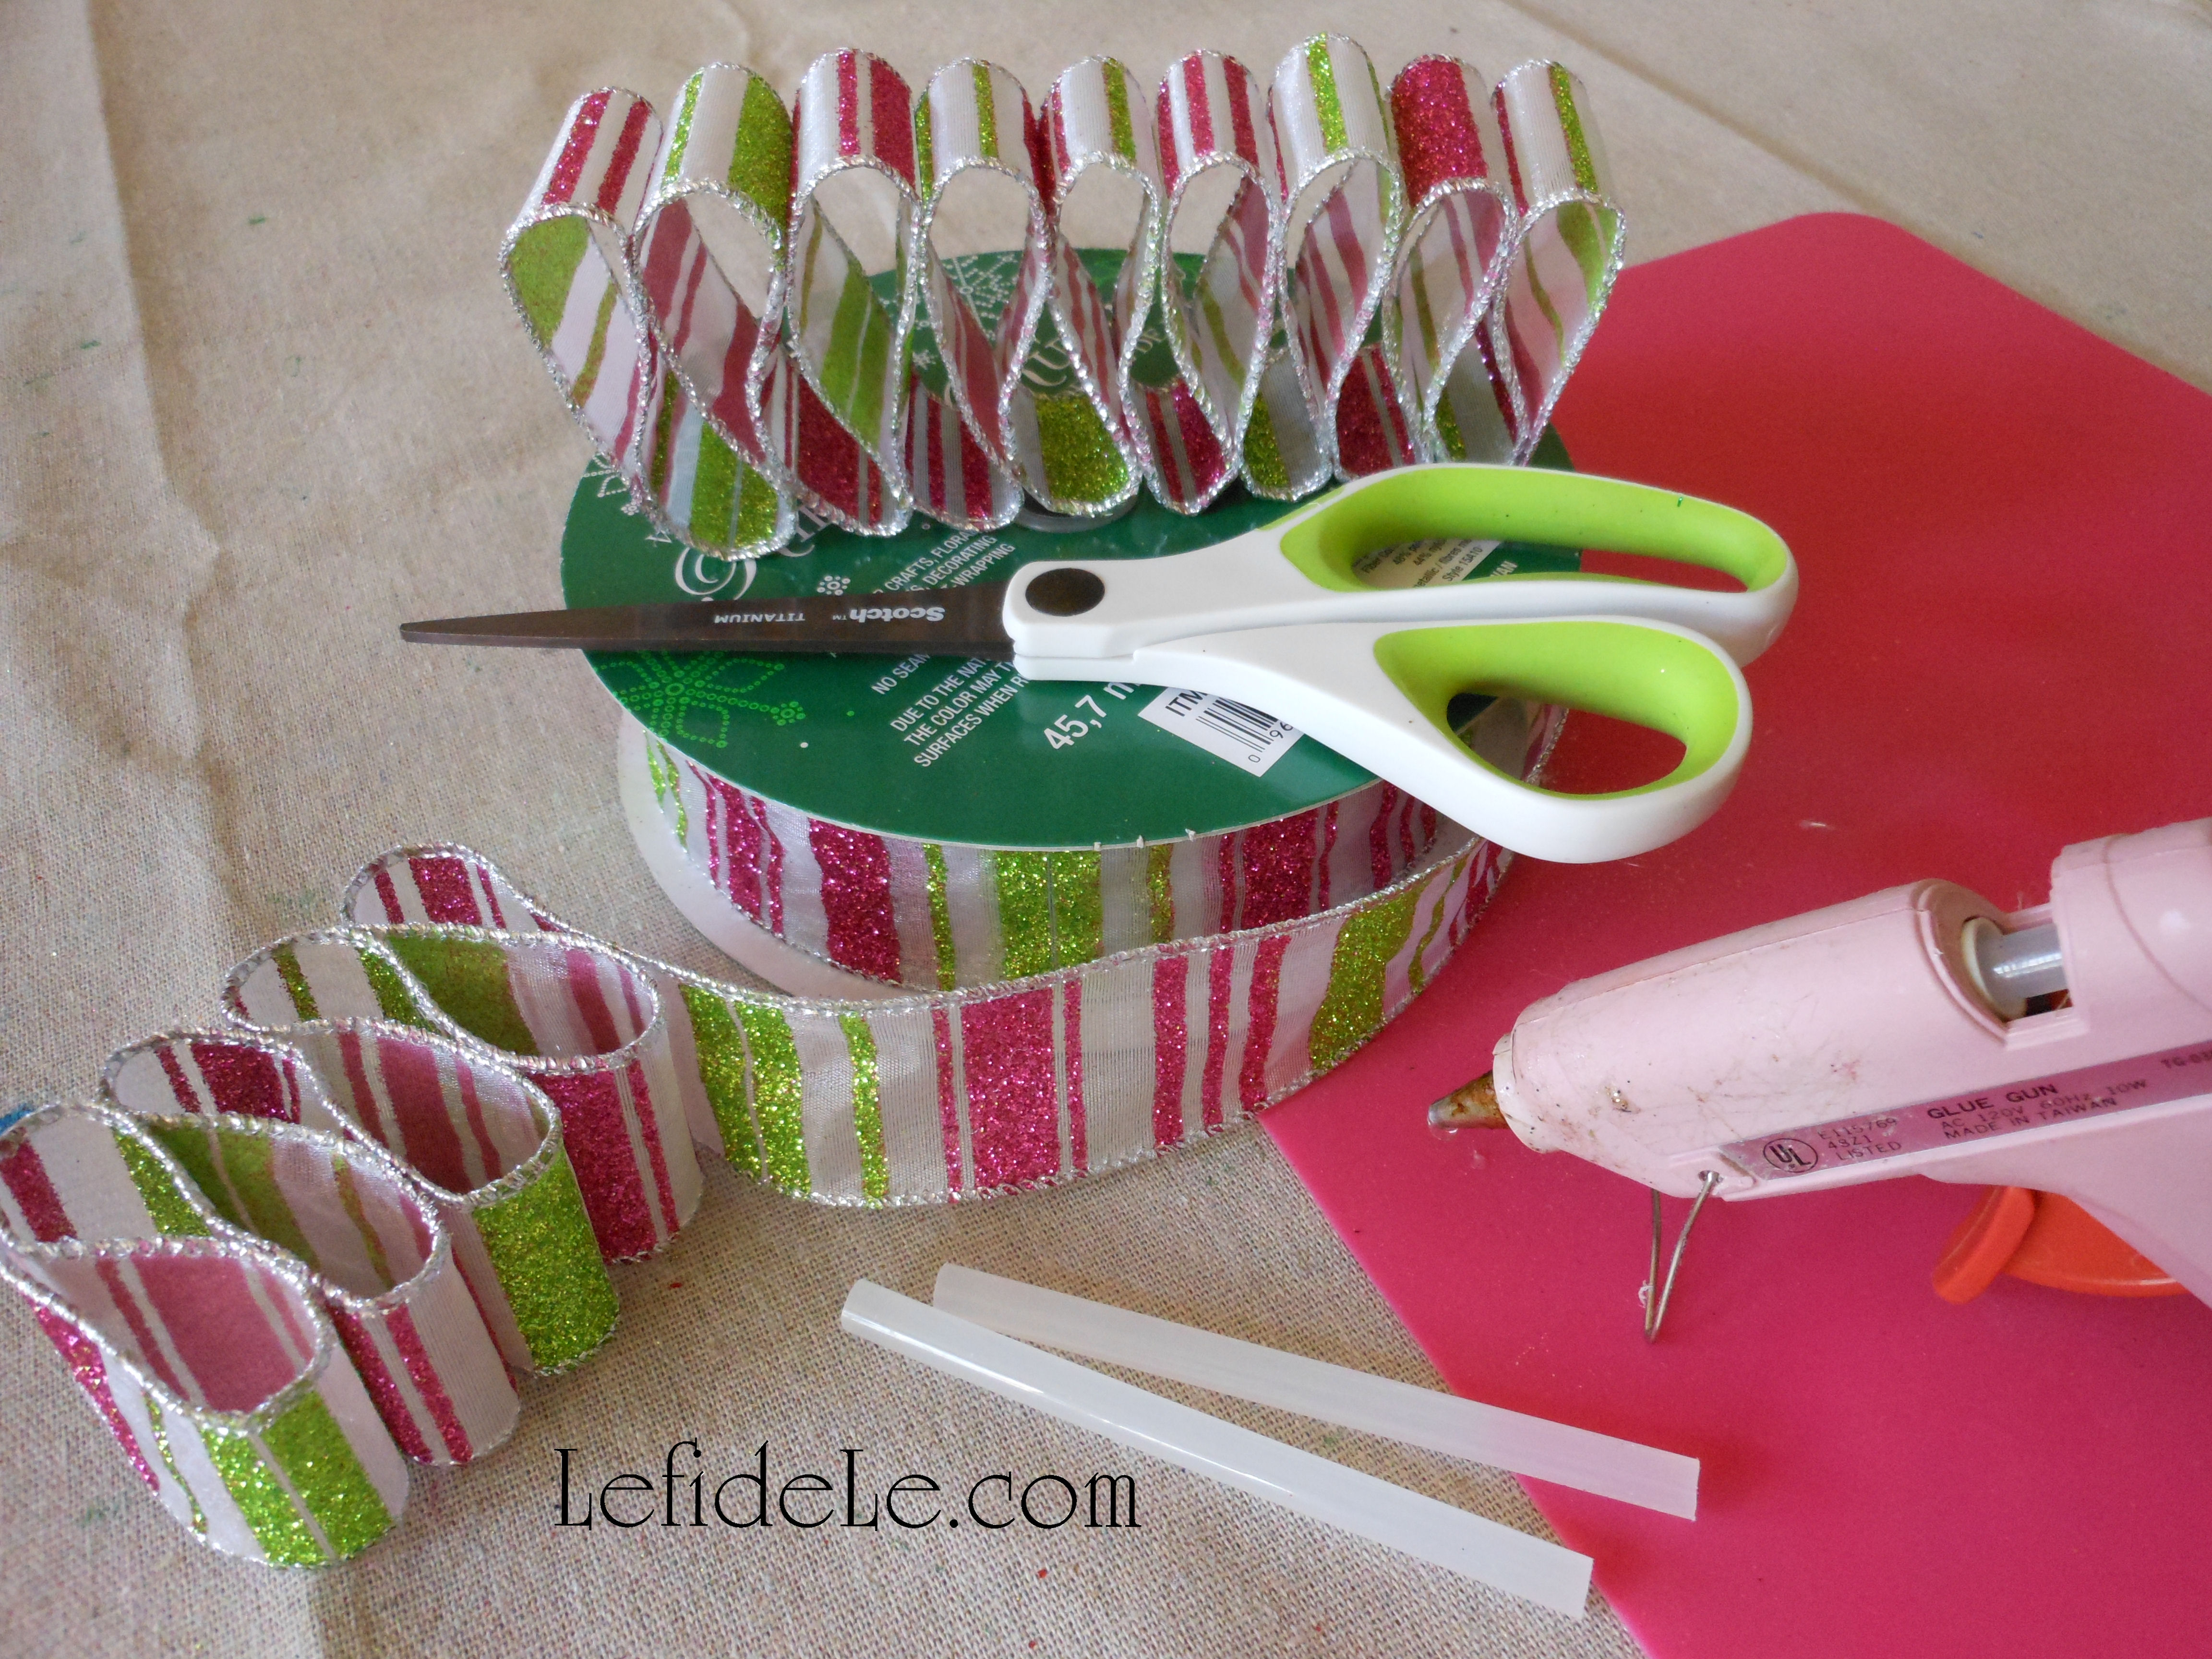
The next step is to go to your craft area, local craft store, or even online to search for coordinating bits of ribbon, washi tape, or even feathers to fill in the empty portions of your project. (A few of my affiliates offer great rotating discounts on art and craft supplies. Check them out in the sidebars and footer.) How much you use is a matter of personal artistic preference. I intentionally load some assemblages up to the hilt, while in others I designate empty voids as a design element in and of itself. (This is called “negative space” in “art-speak”.)

48Leigh

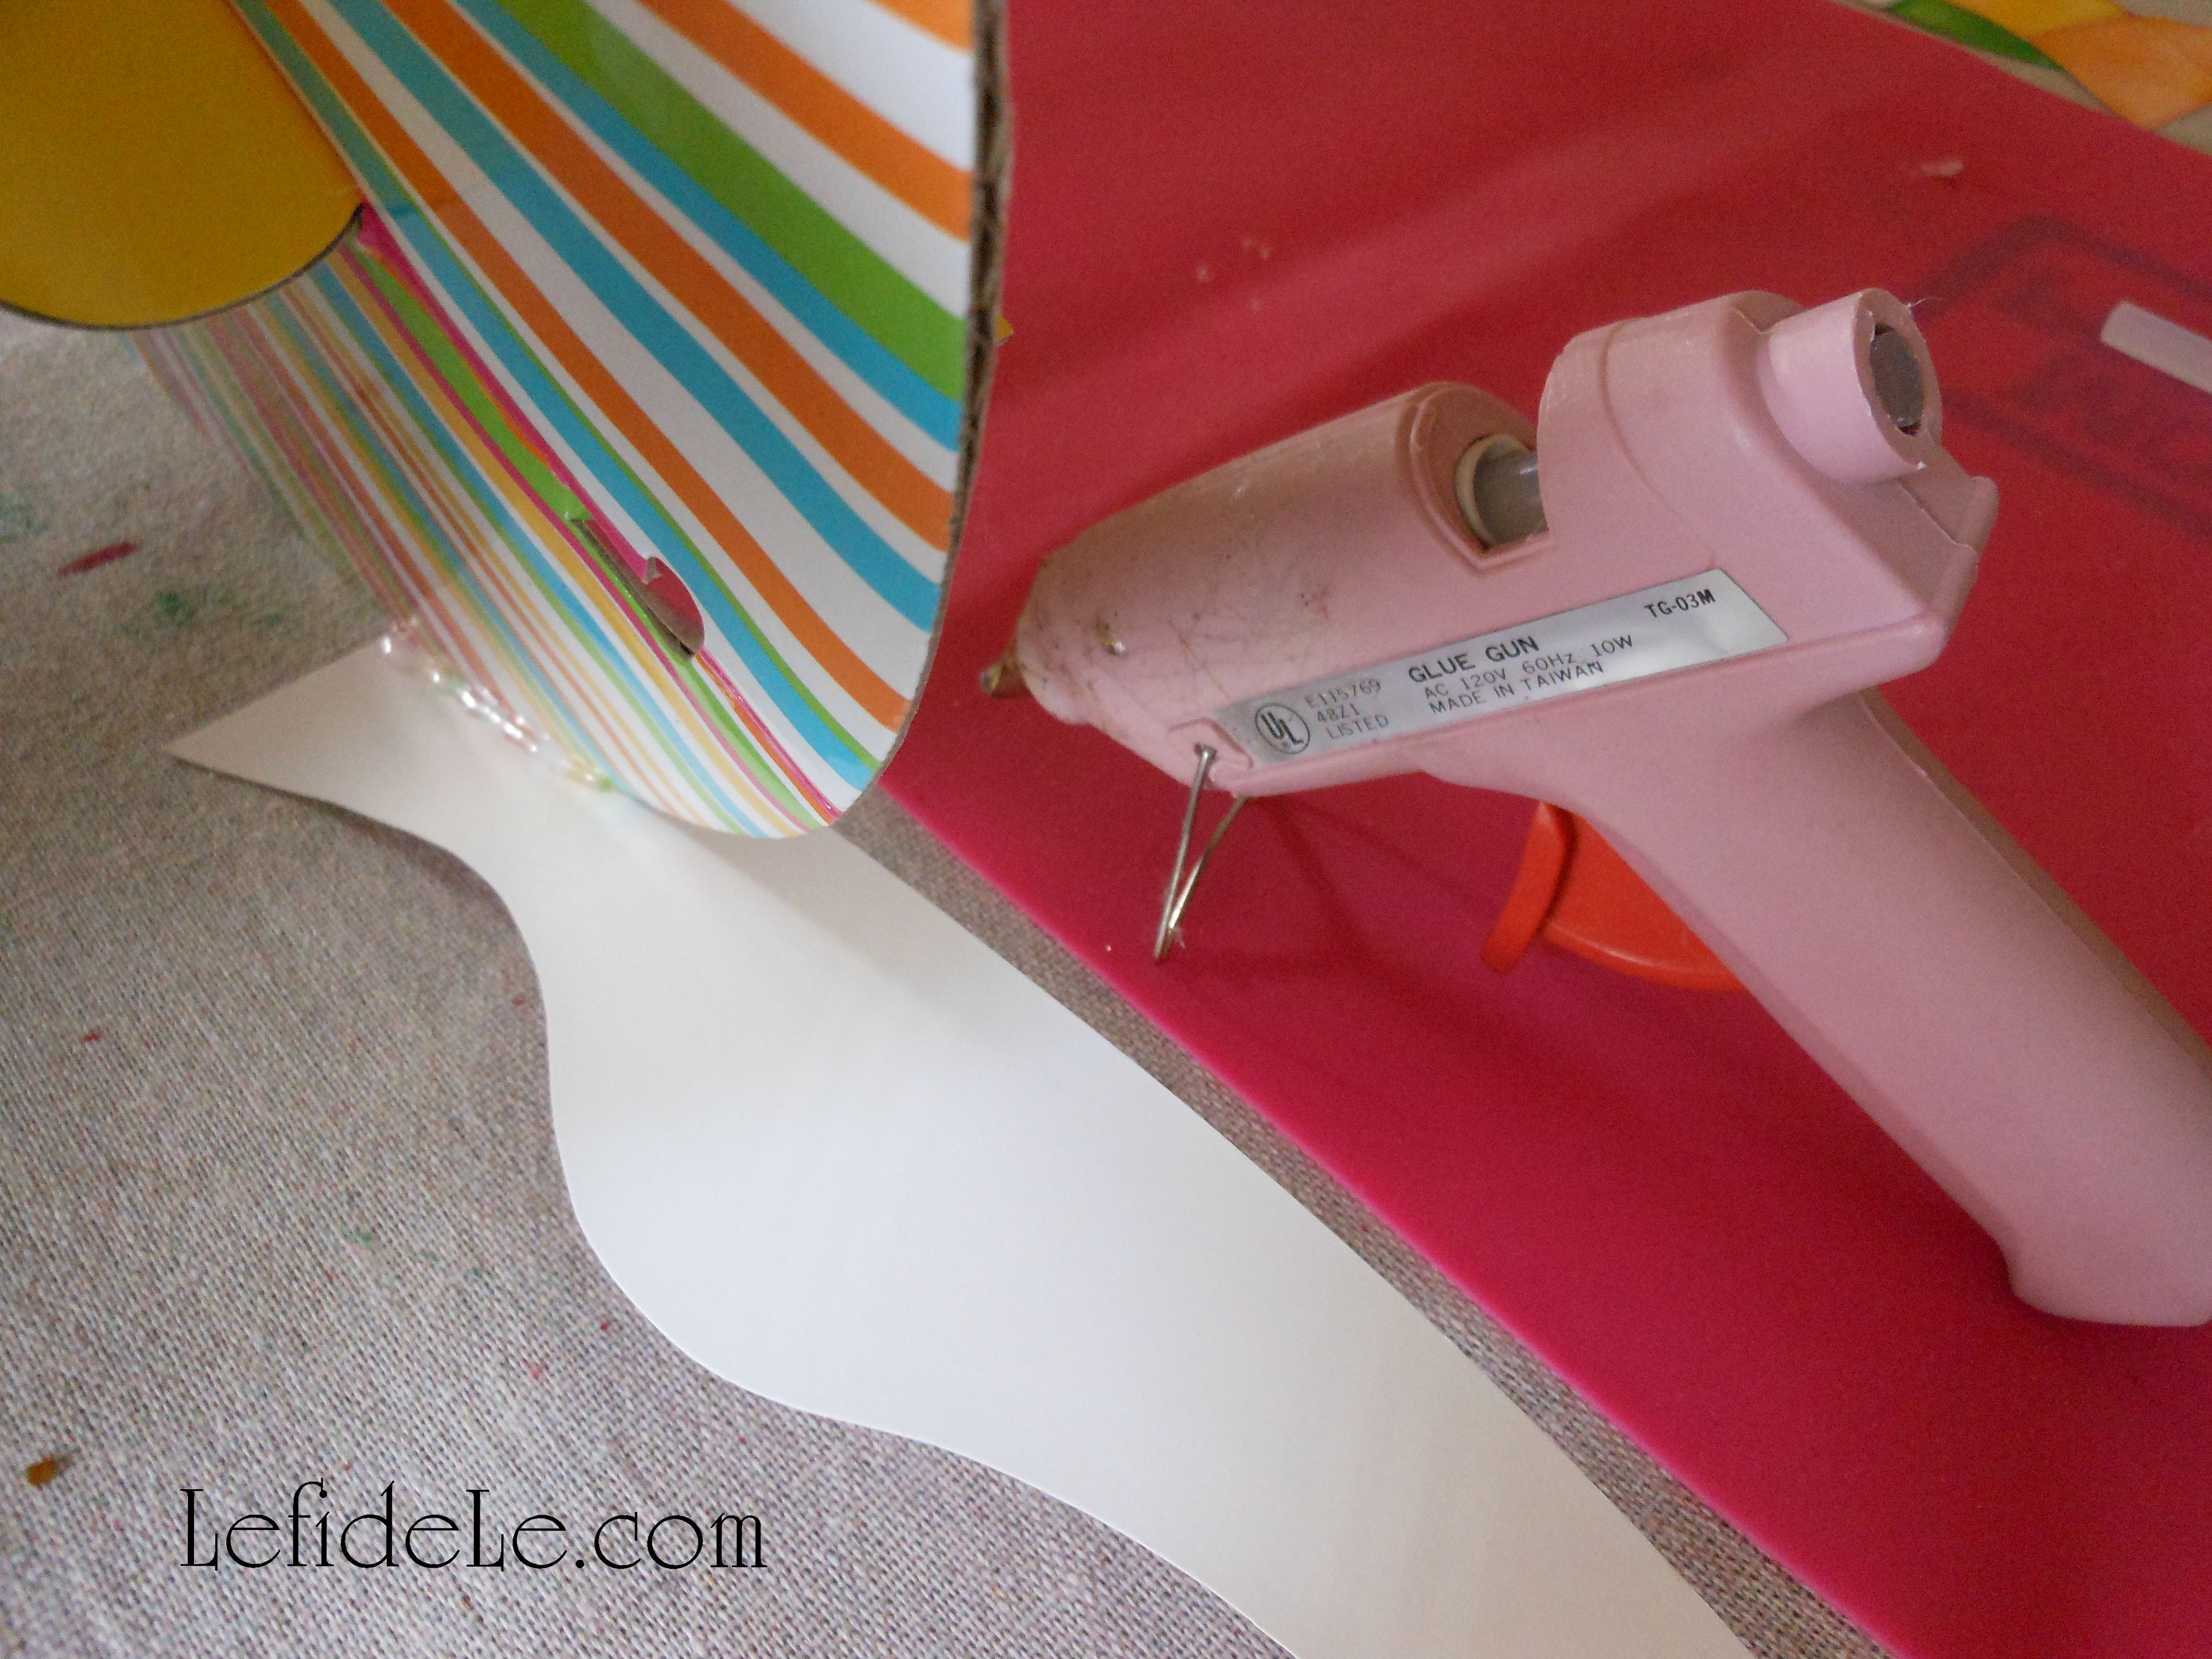
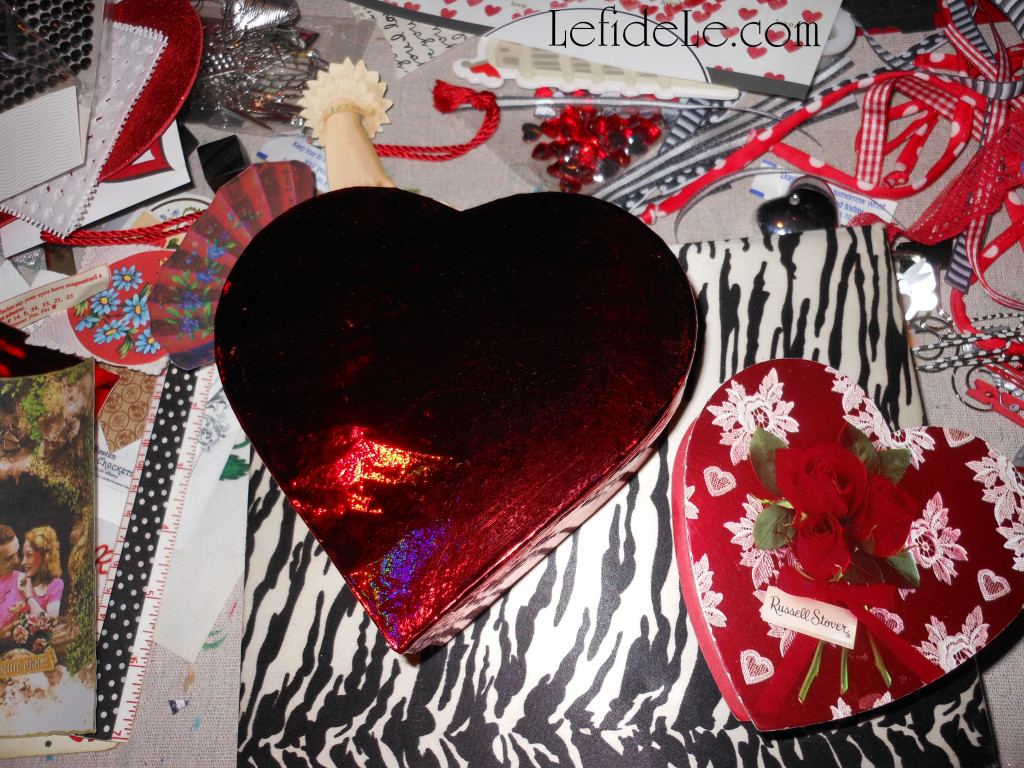
Choose an appropriate sized base object according to the size and amount of your collected ephemera, and by how you would like to display them. (Of course, I’ve also started with a really awesome base then collected items after. For a Valentine project though, the most important elements are the collected ones.) You can use a tiny chocolate box if you only have a few key items and are short on time. Or, you can use that chocolate box as a pedestal inside a bigger box (just remember to glue the little box together before adhering it to the base).

7Leigh

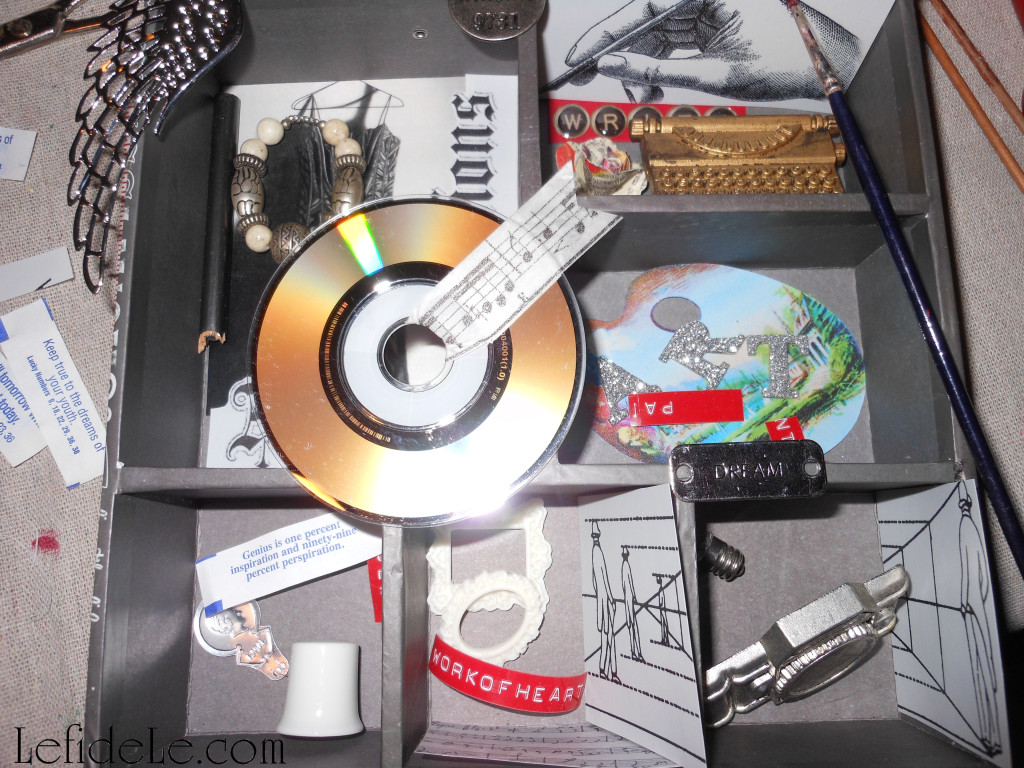
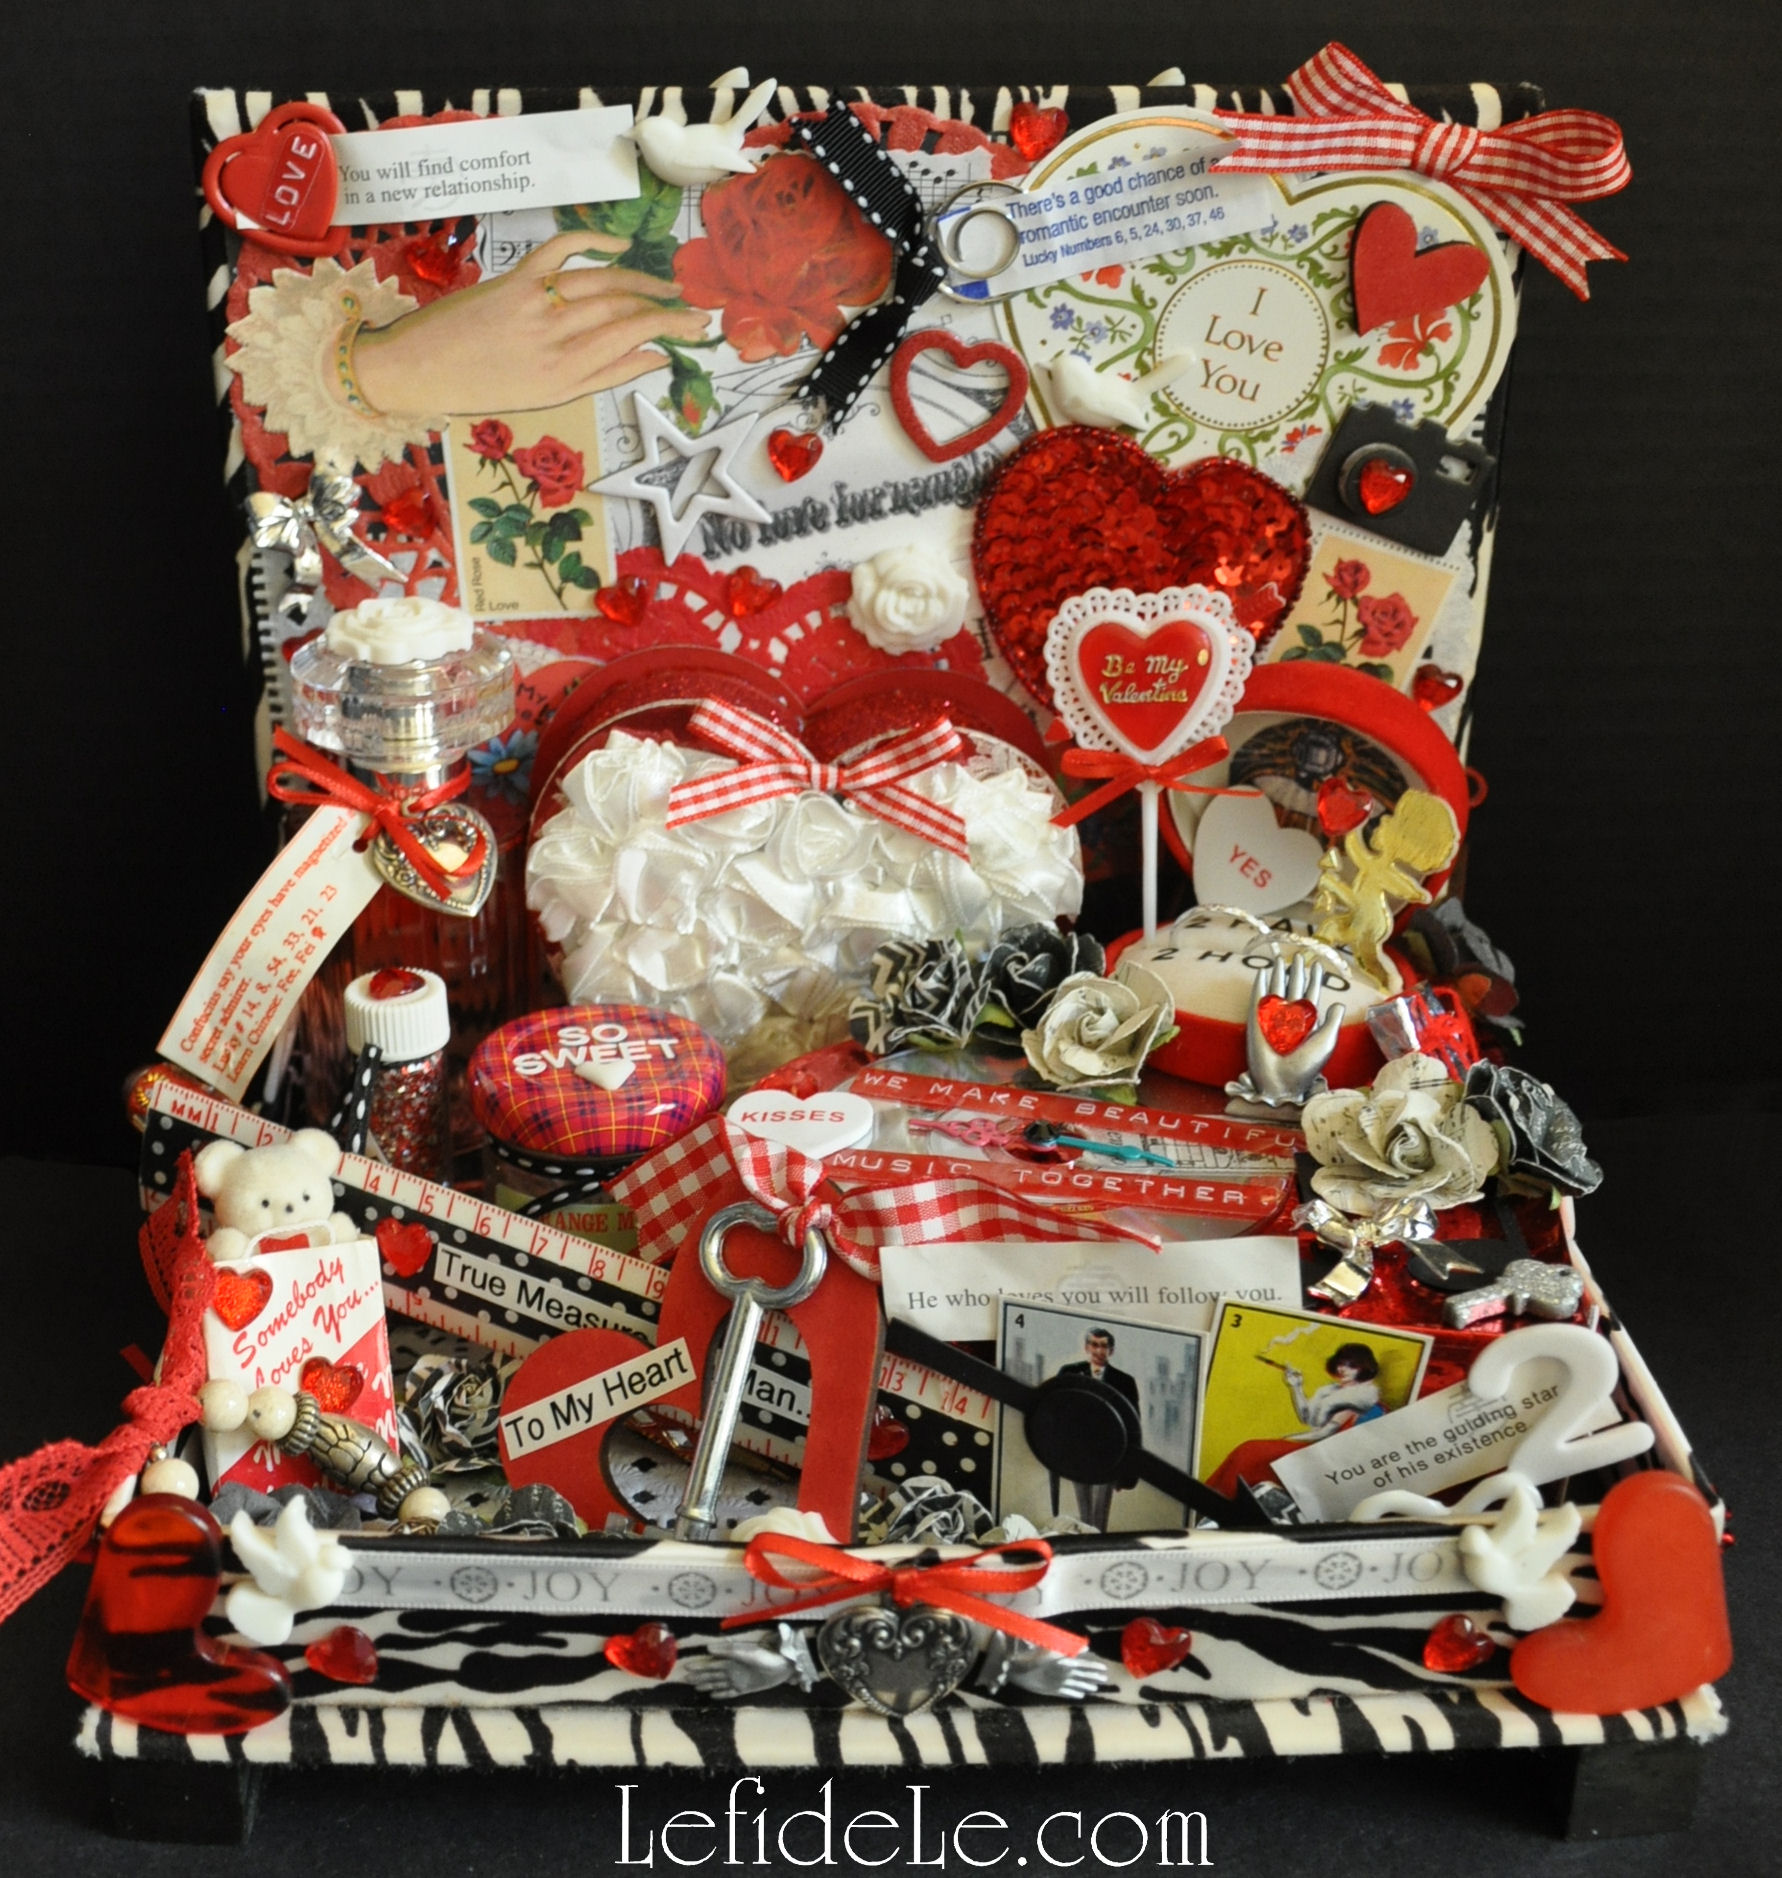
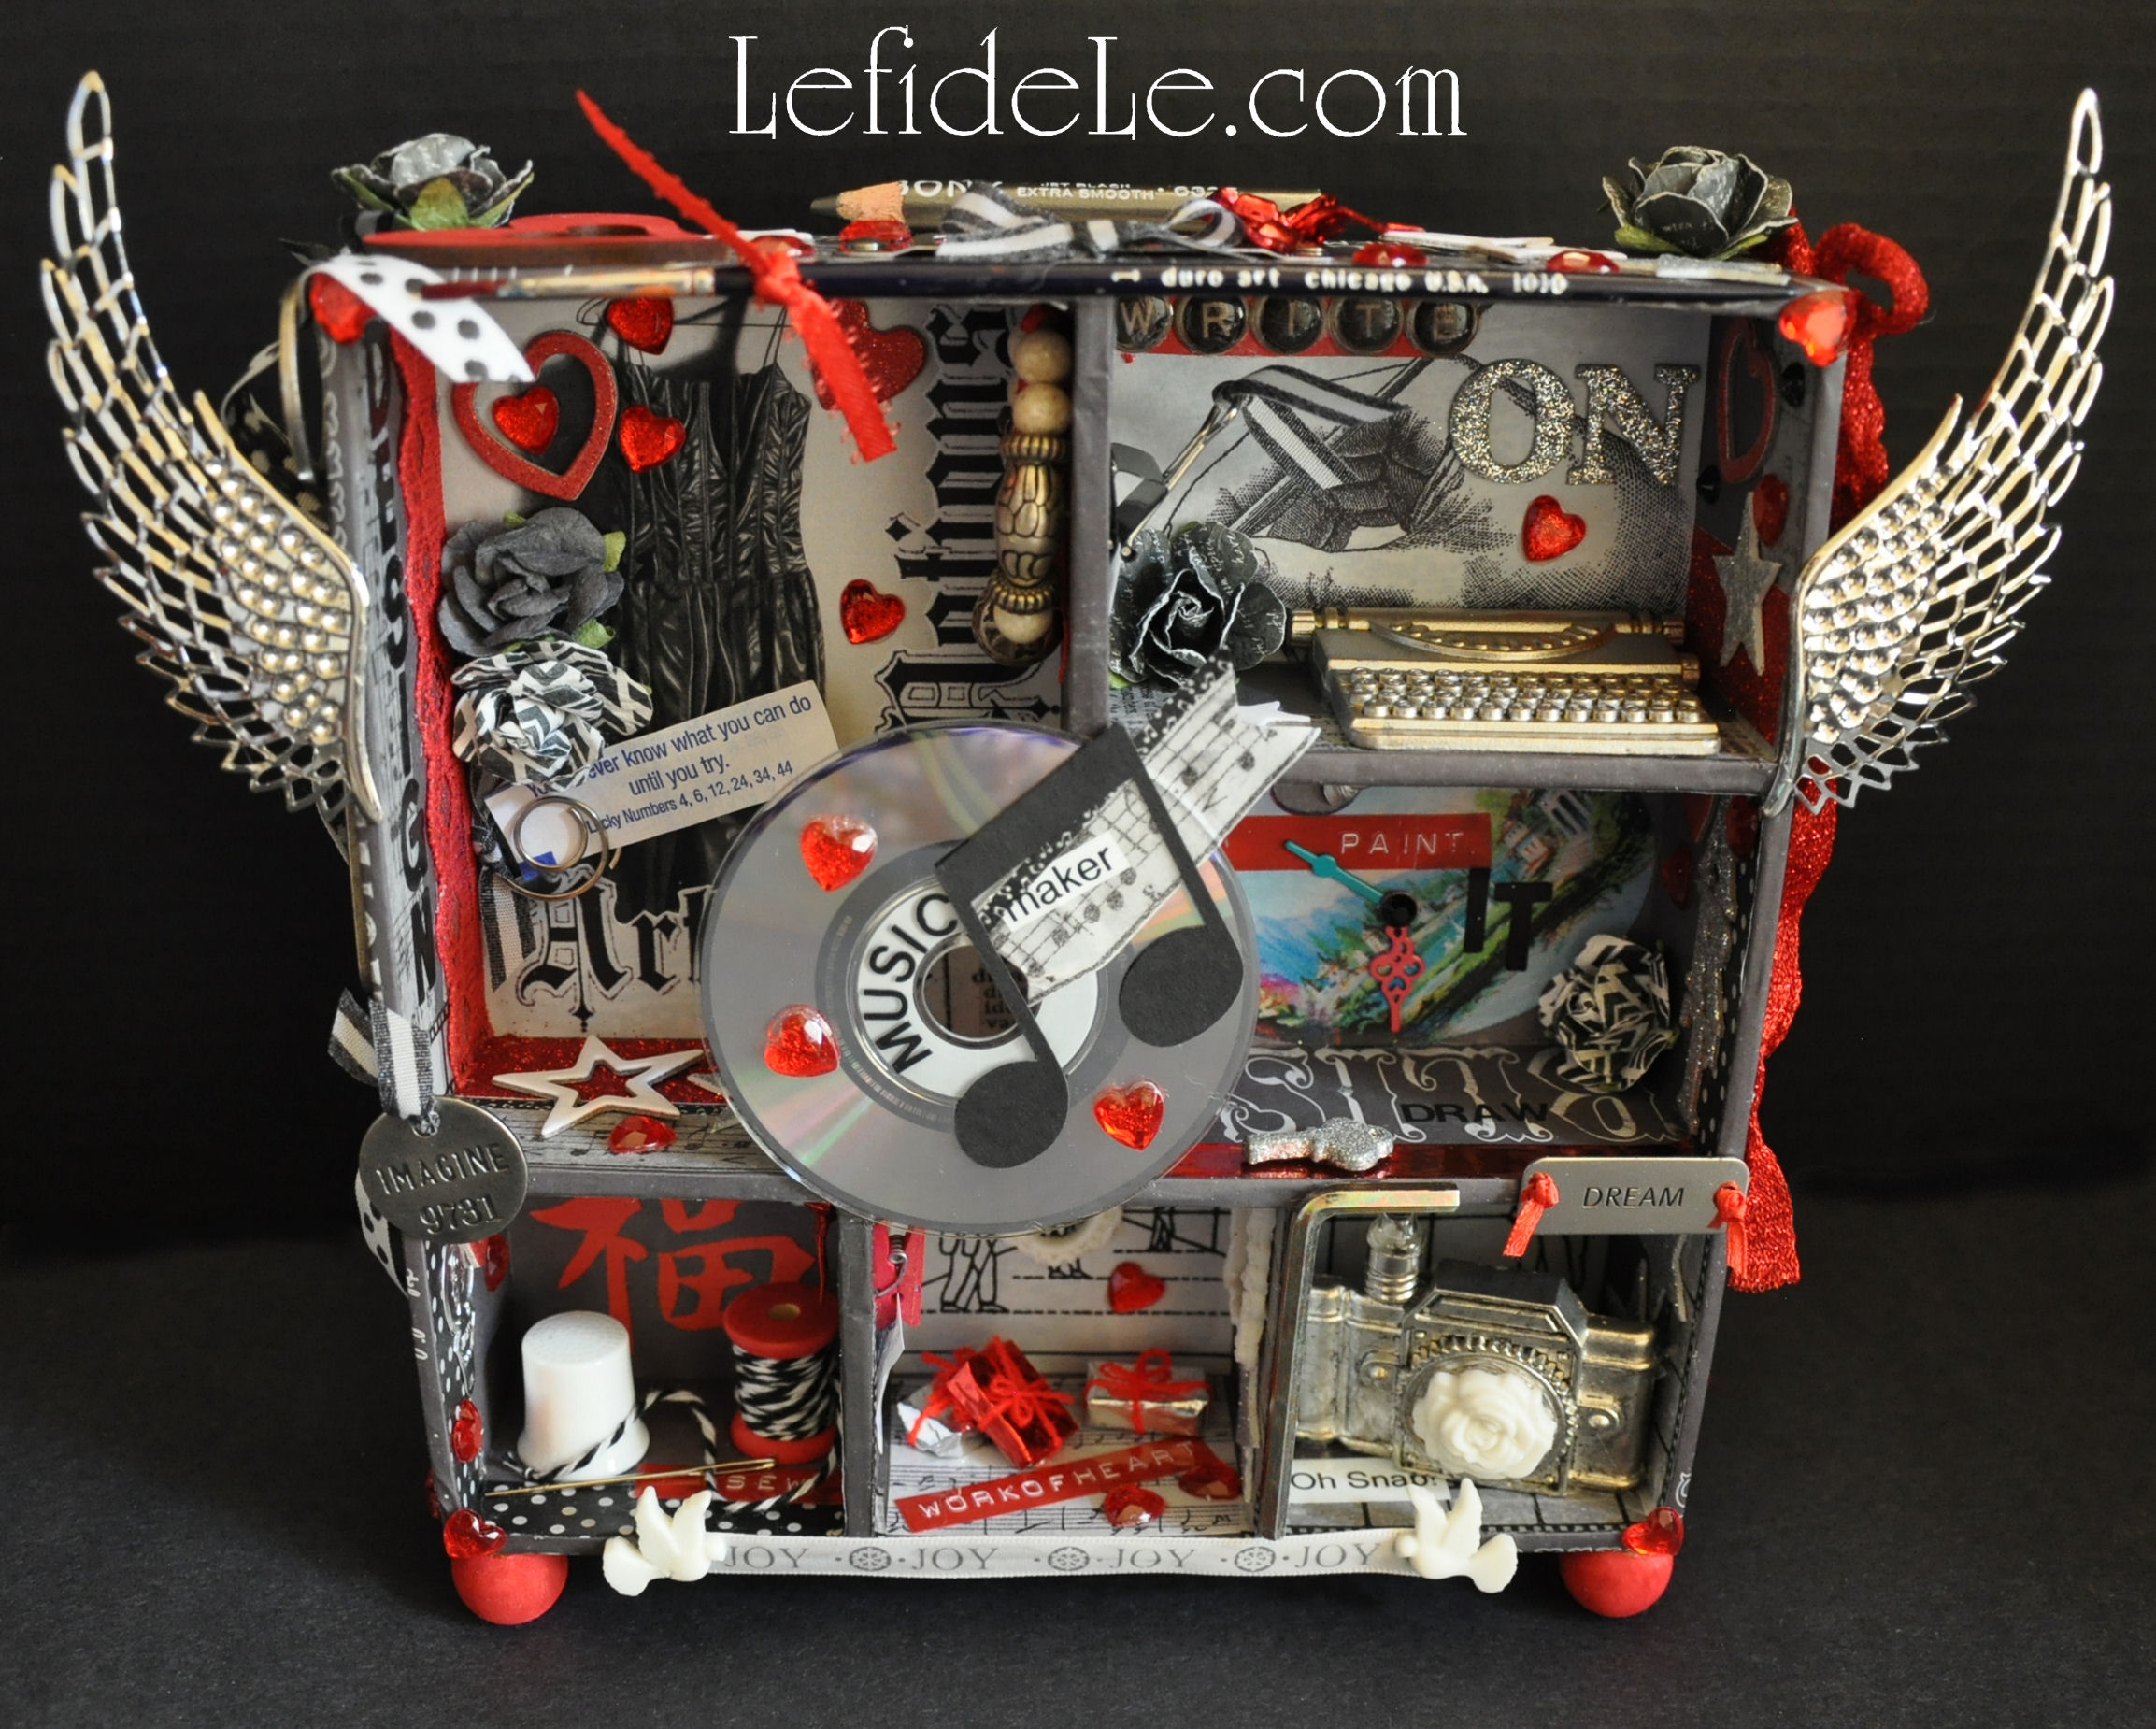
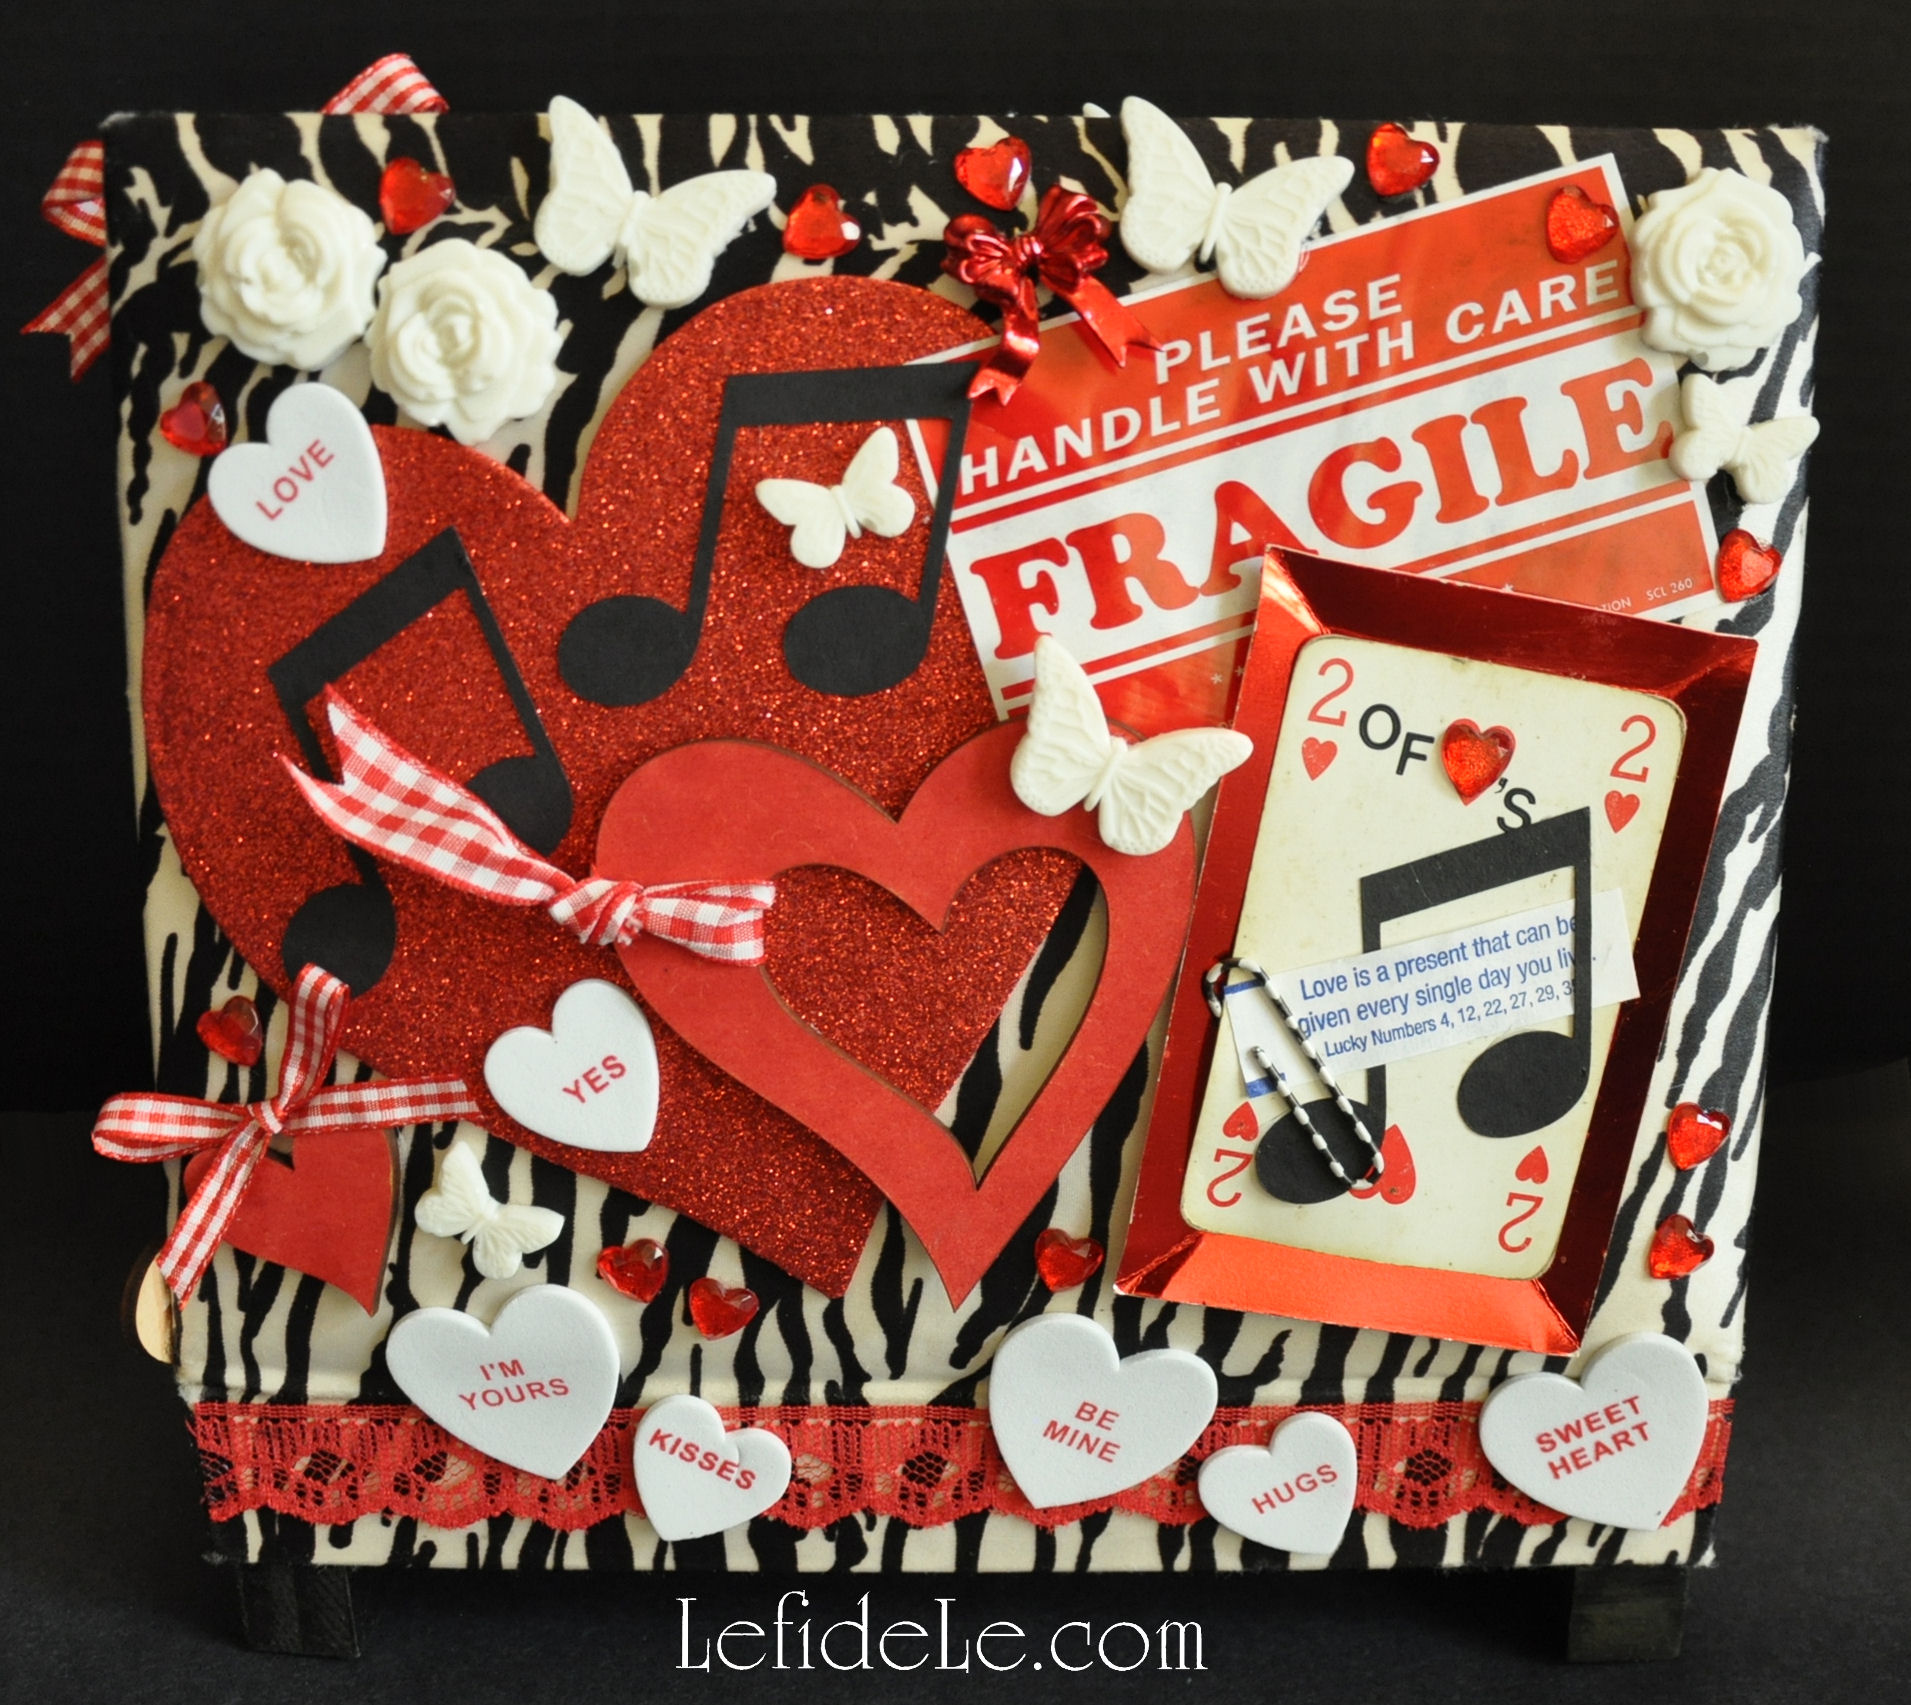
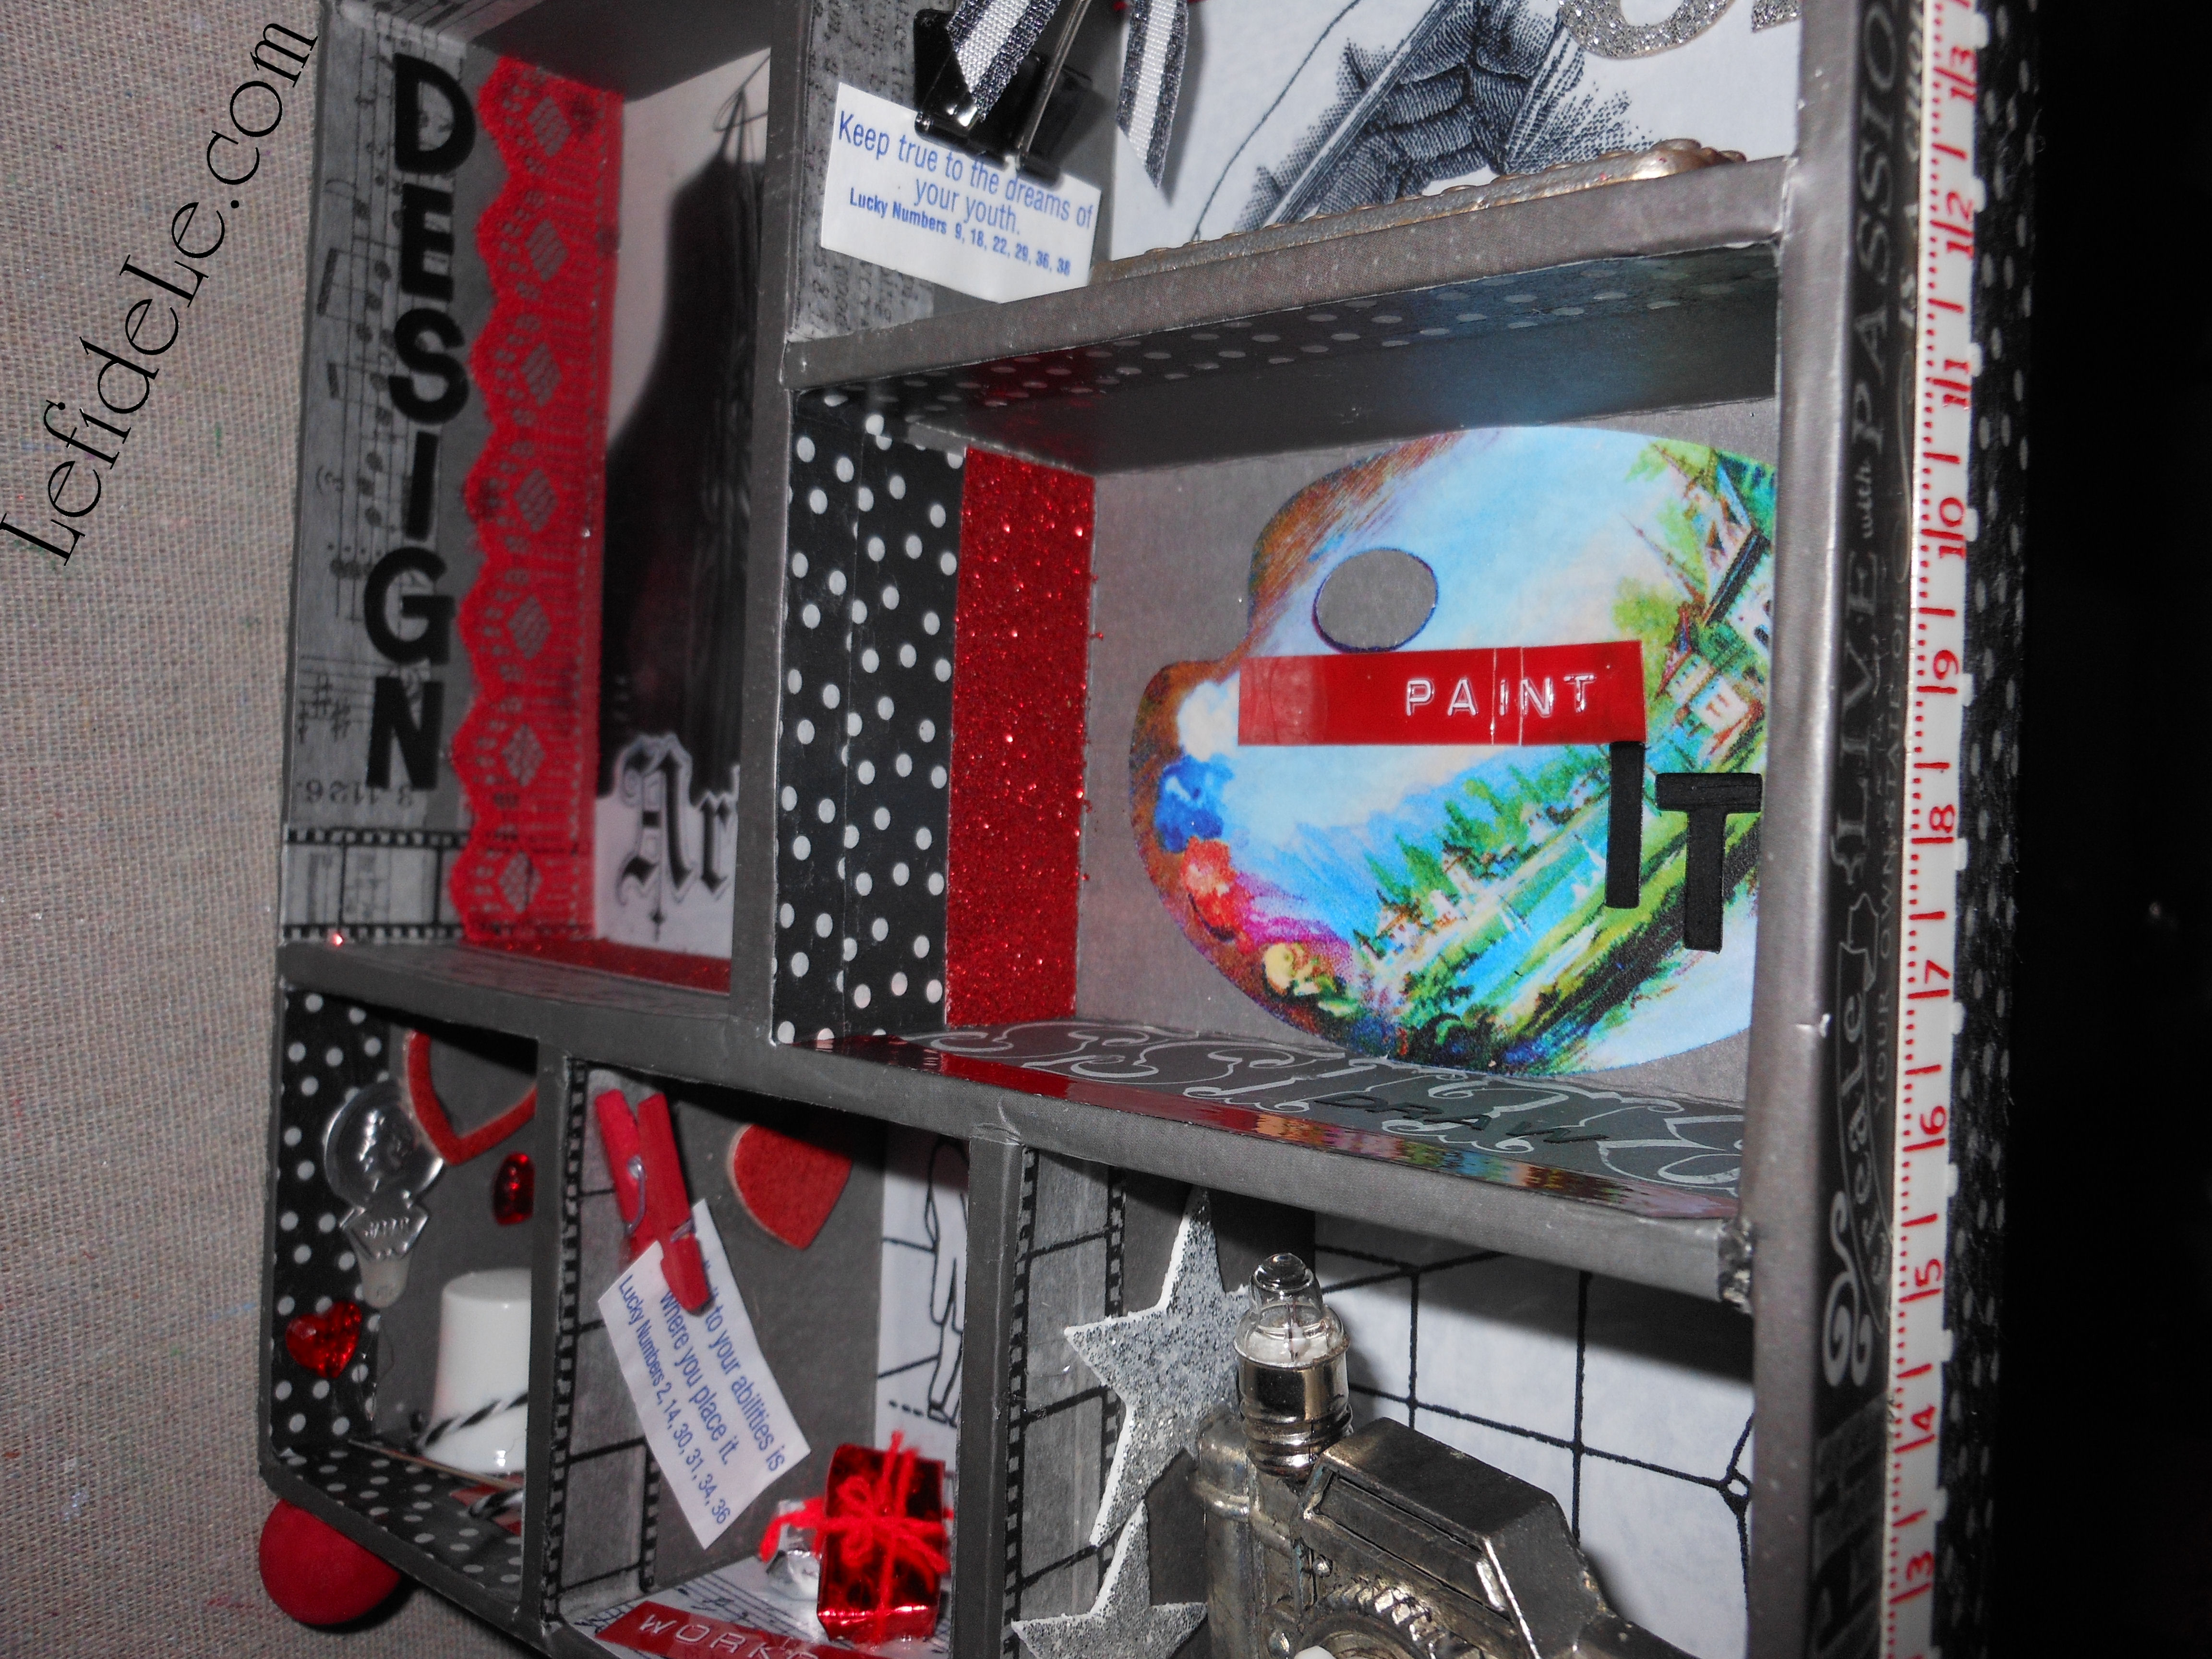
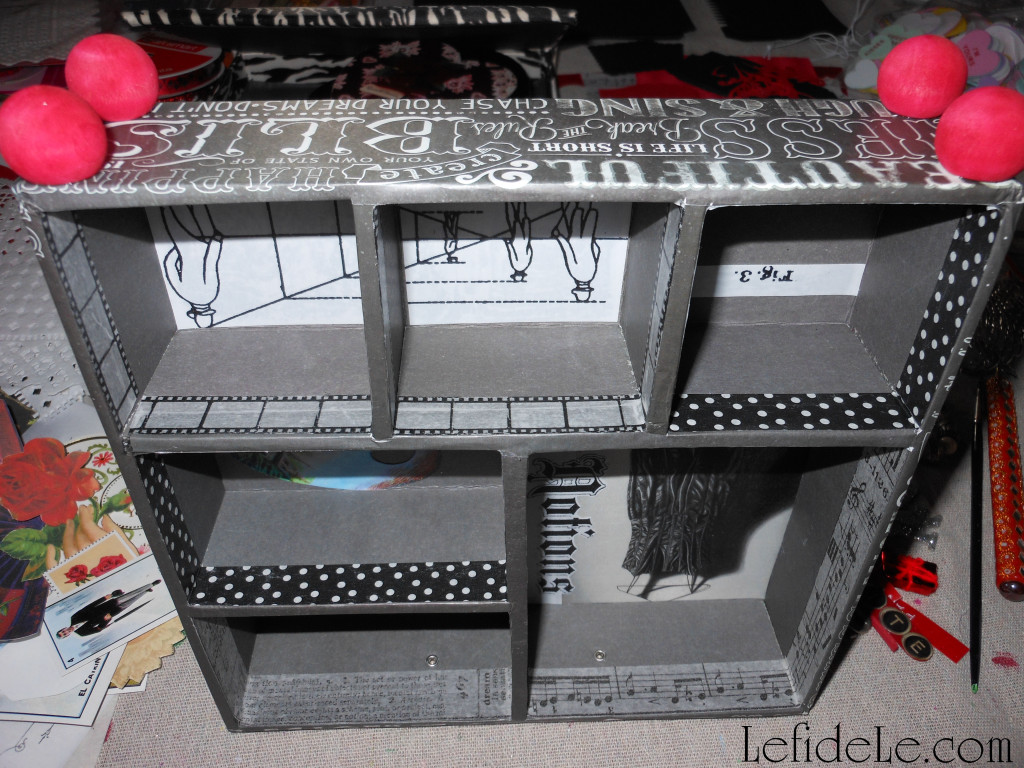
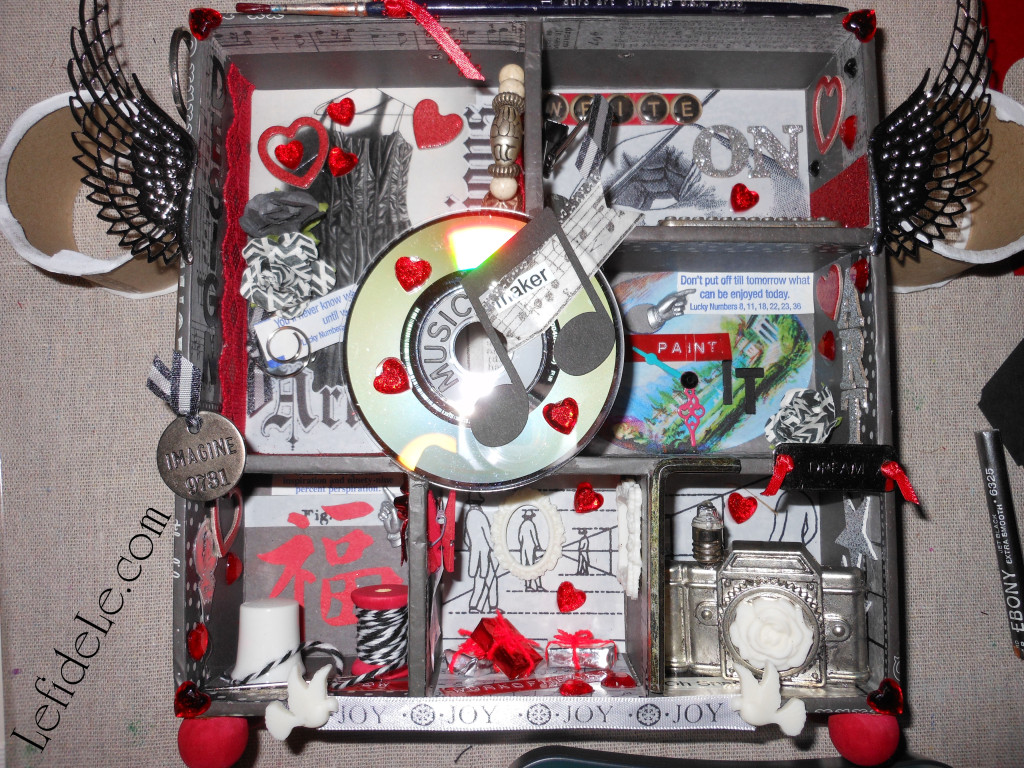
I used a vintage fabric covered book box for the “Sweet-Heart” assemblage. I love using old pieces off-book so to speak. I thought a drawer organizer box would be perfect for the “Creative-Heart” project. I just turned it on its side to make a kind of display case out of it. You can even use a plain paper-mache box, and decorate to suit your theme.

51Leigh

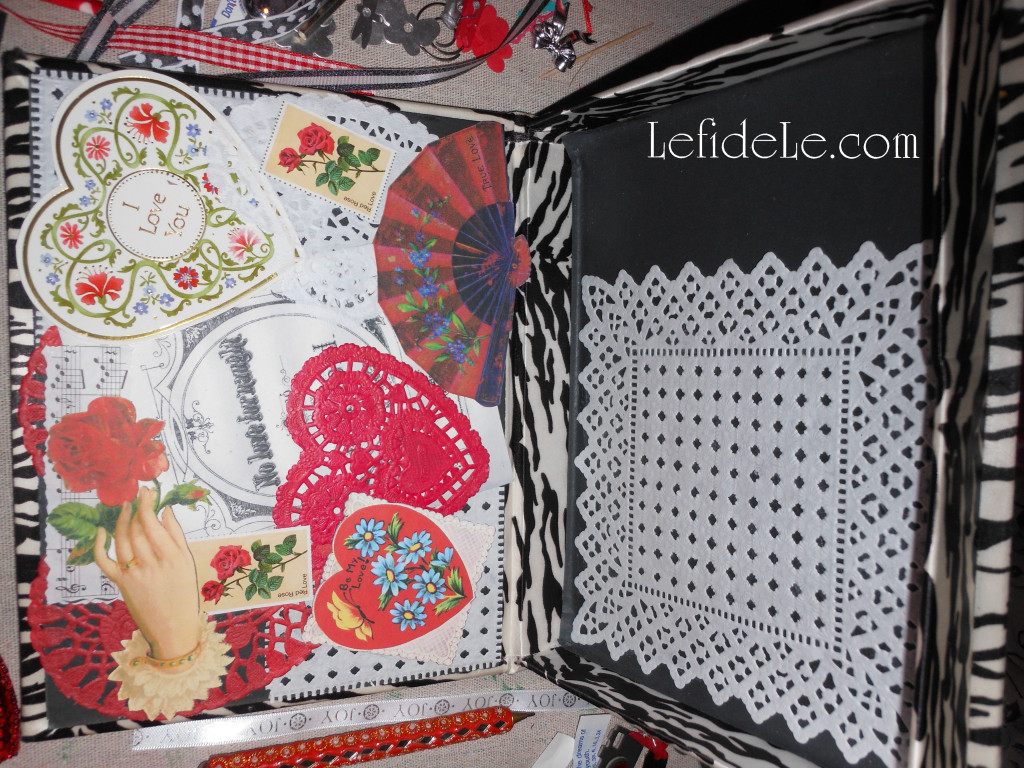
Lay out the items you’d like to use to see how it looks best arranged. Move things around until you find it visually appealing. Eventually it will just look right. You can lock this into your memory, or even take a photo to reference it while you glue things down. Use a permanent glue stick to adhere the paper pieces in layers to the base.

73Leigh

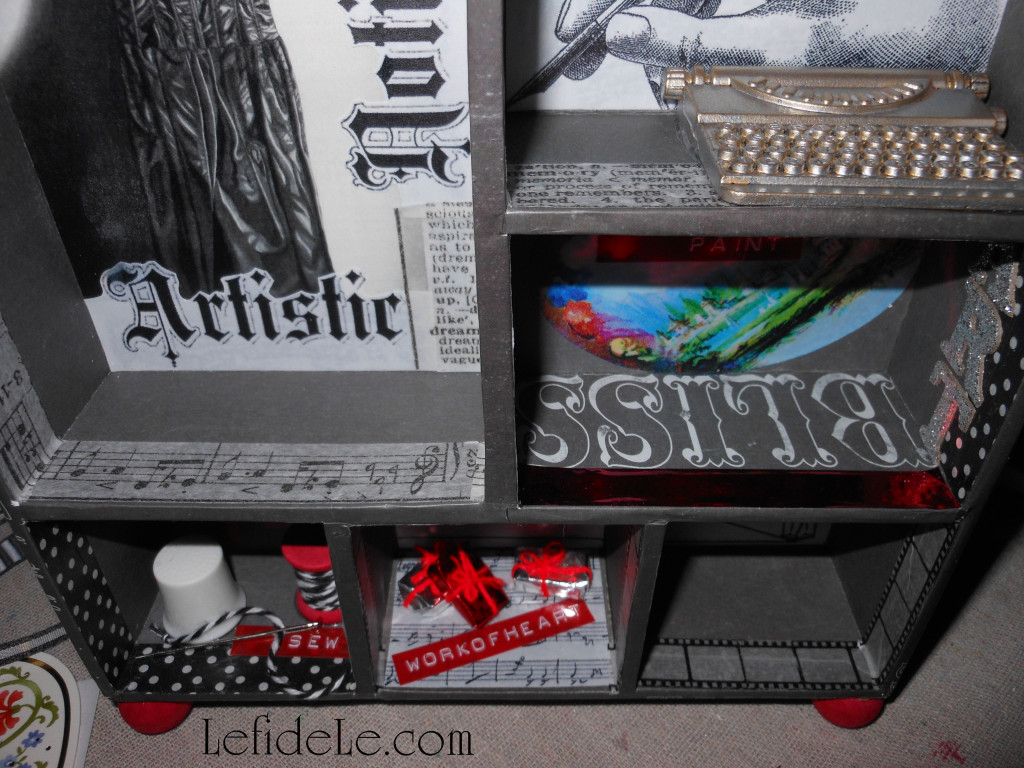
Here I’ve added washi, glitter, and foil tape to add visual interest to the plain centers of the “Creative-Heart” assemblage. Then I glued paper pieces to the backs like a papered wall.

39Leigh

Use a clear glue with more staying power for heftier pieces like glass bottles and metal pieces. (I placed some great glue varieties in the curated art supplies gallery box in the sidebar. Just click on them to read the specs.)

59-2Leigh

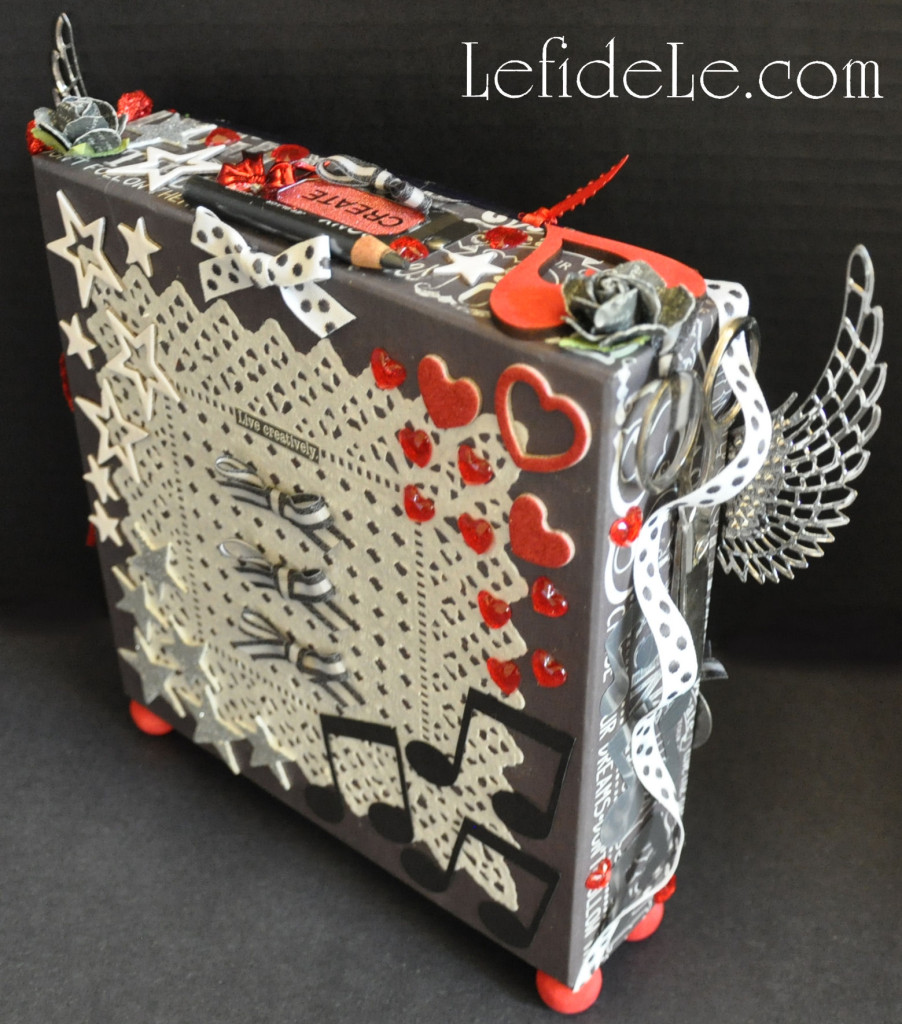
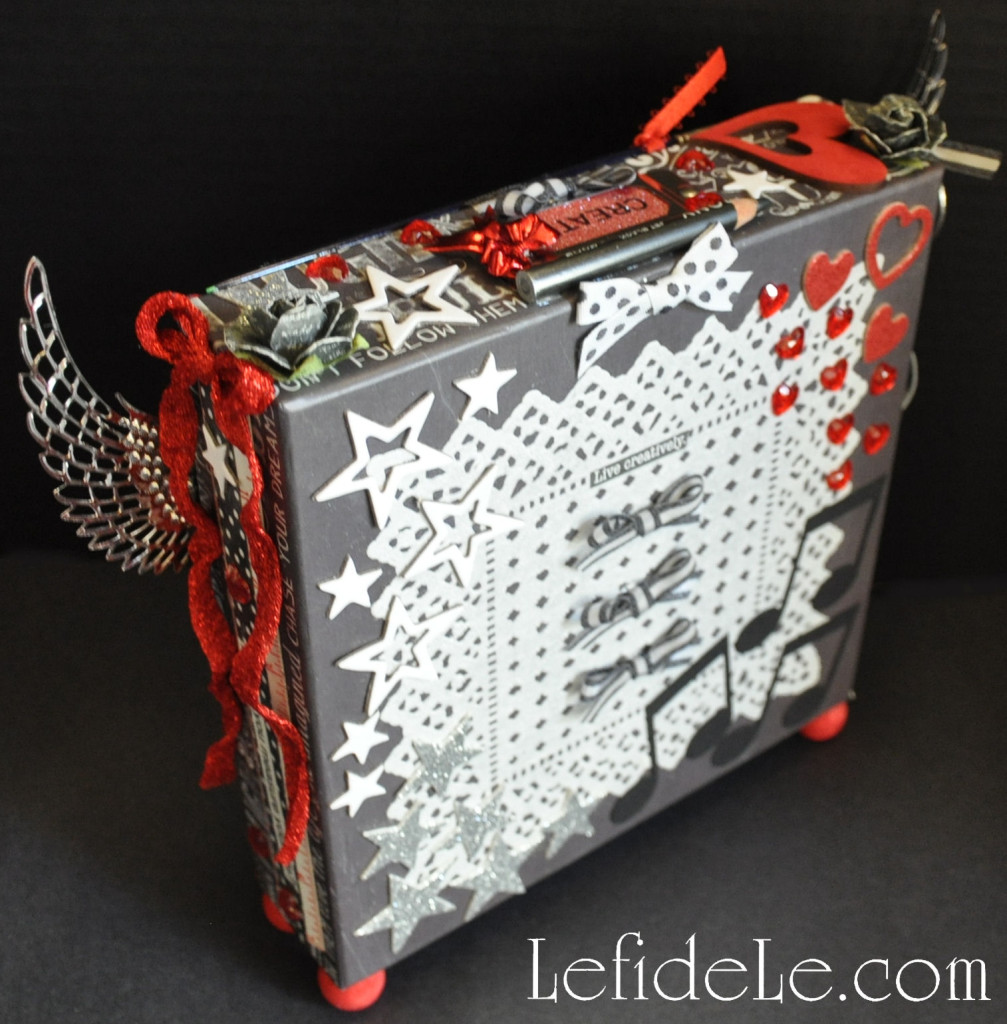
I glued small stained wooden shapes to the bases to serve as feet (those shown earlier). This is the most inexpensive way to both elevate and protect the artwork. You also use more ornate metal feet specifically made for assemblages or even small silicone stickers.

57Leigh

Rotate bases to glue all of the heavier objects onto that side, and then let them set to dry. Continue to rotate and glue various edges. Of course, try to position the bigger more important pieces before filling in with the tiny ones.

54Leigh

Think about adding meaningful words, phrases, questions, or quotes to impart further meaning to your elements. I added these using printed label tape, dymo tape, vinyl lettering, glittered chipboard letters, a Chinese character, and even fortune cookie papers. Apply these directly onto your pieces and to the base itself.

50Leigh

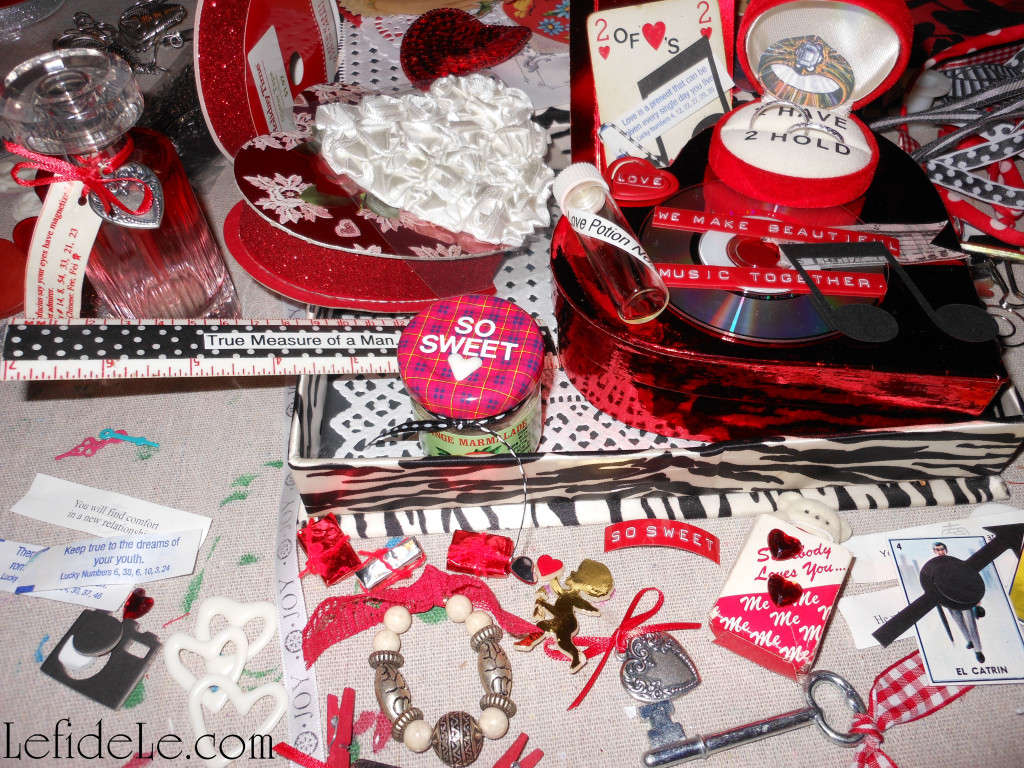
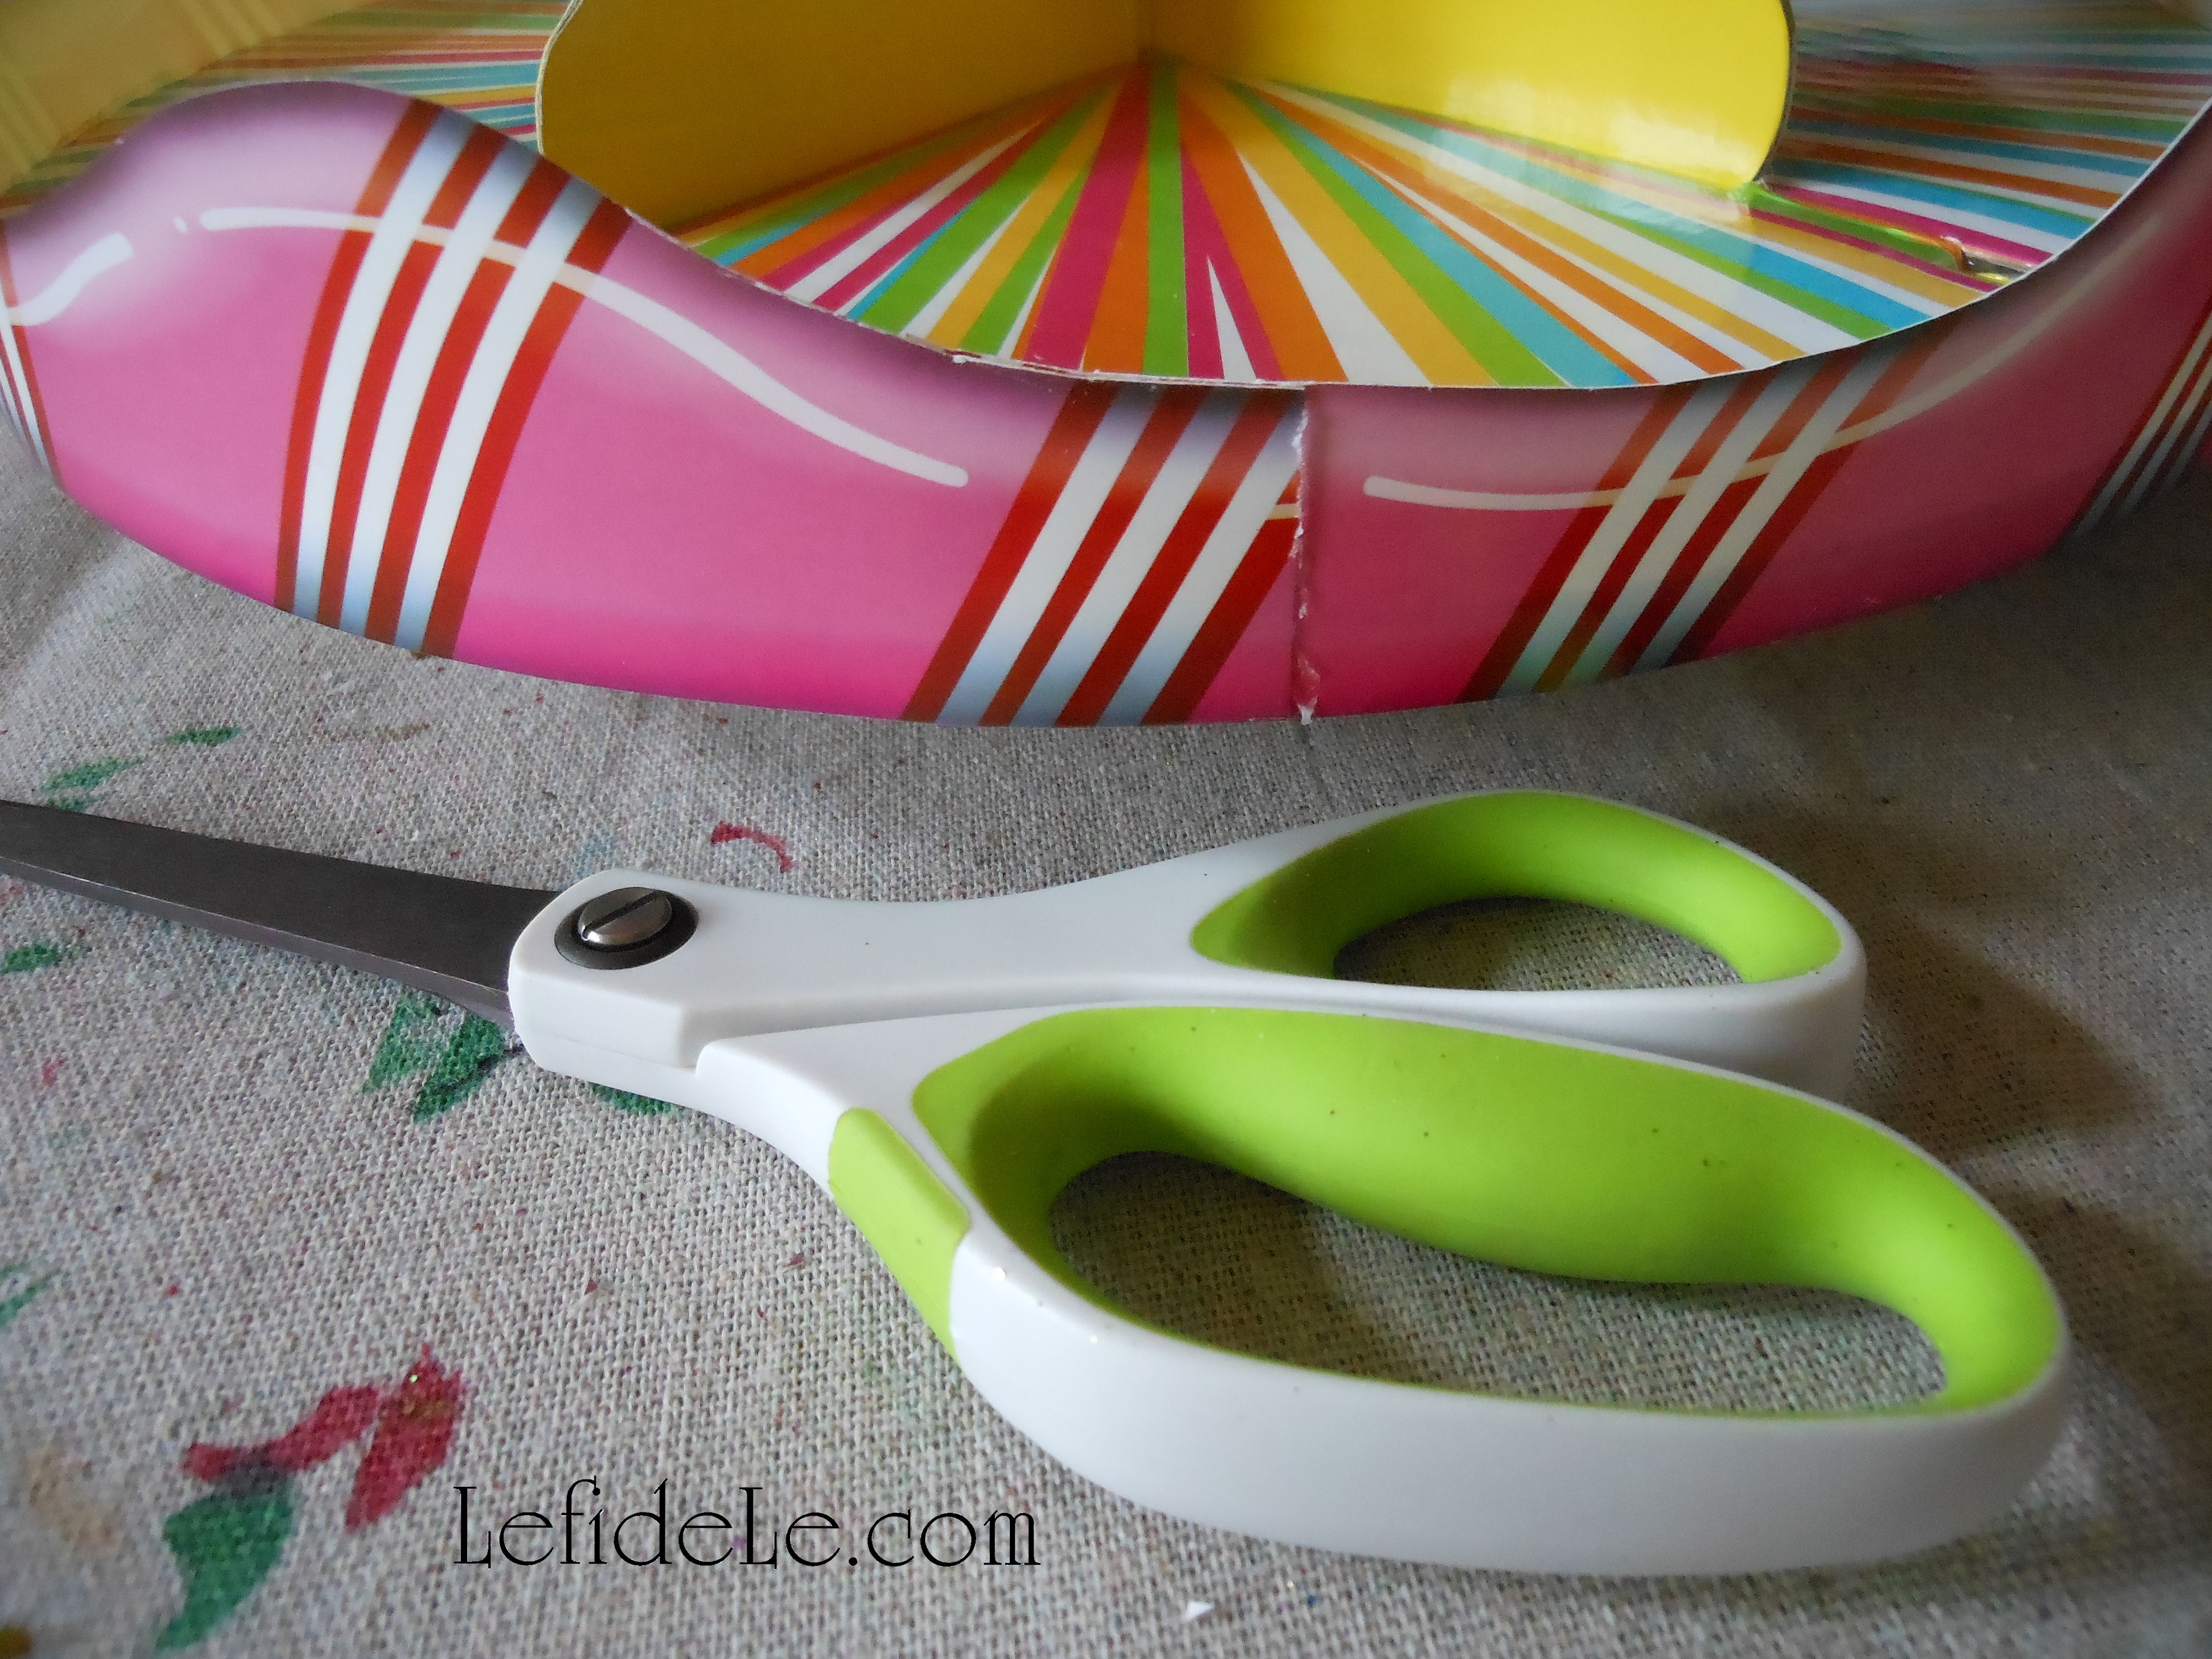
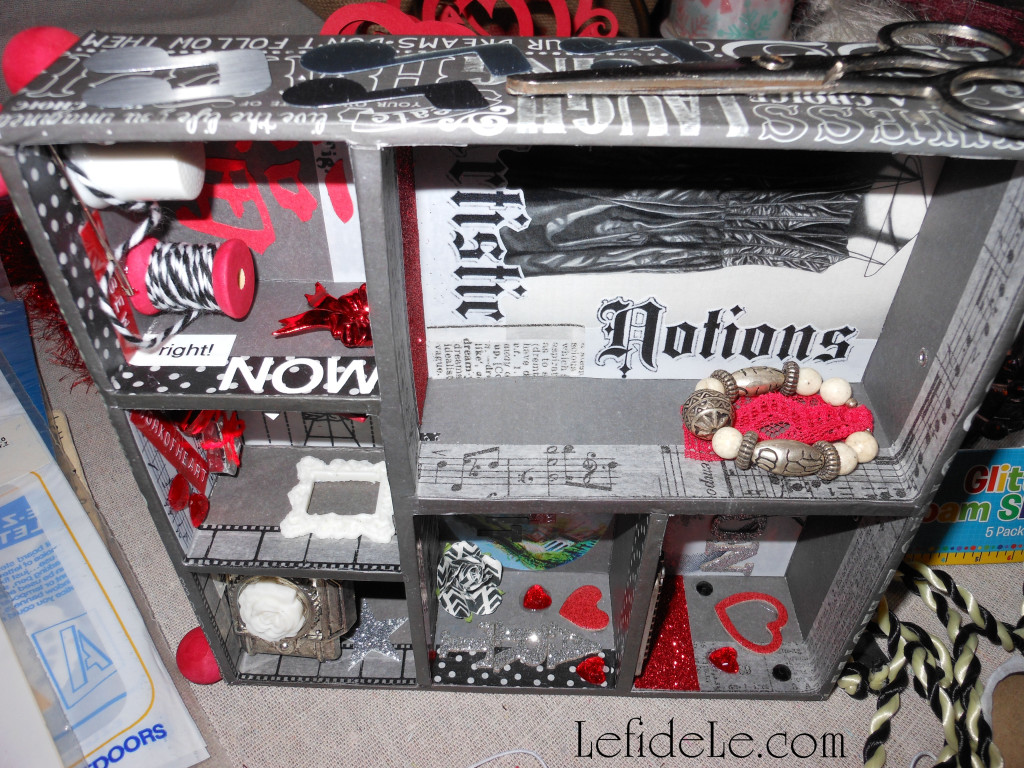
I also made ivory shapes using Plaid Mod Molds. (These have been added to the curated gallery too.) I love being able to quickly make whatever element I feel needs to be included. I included metal jewelry charms, painted paper clips, mini-CDs, Spanish bingo cards, old keys, rulers, scissors, paper rosettes, ornaments, cupcake picks, playing cards, spools, thimbles, magnets, paintbrushes, crystals, glass vials and jars, etc.

56Leigh

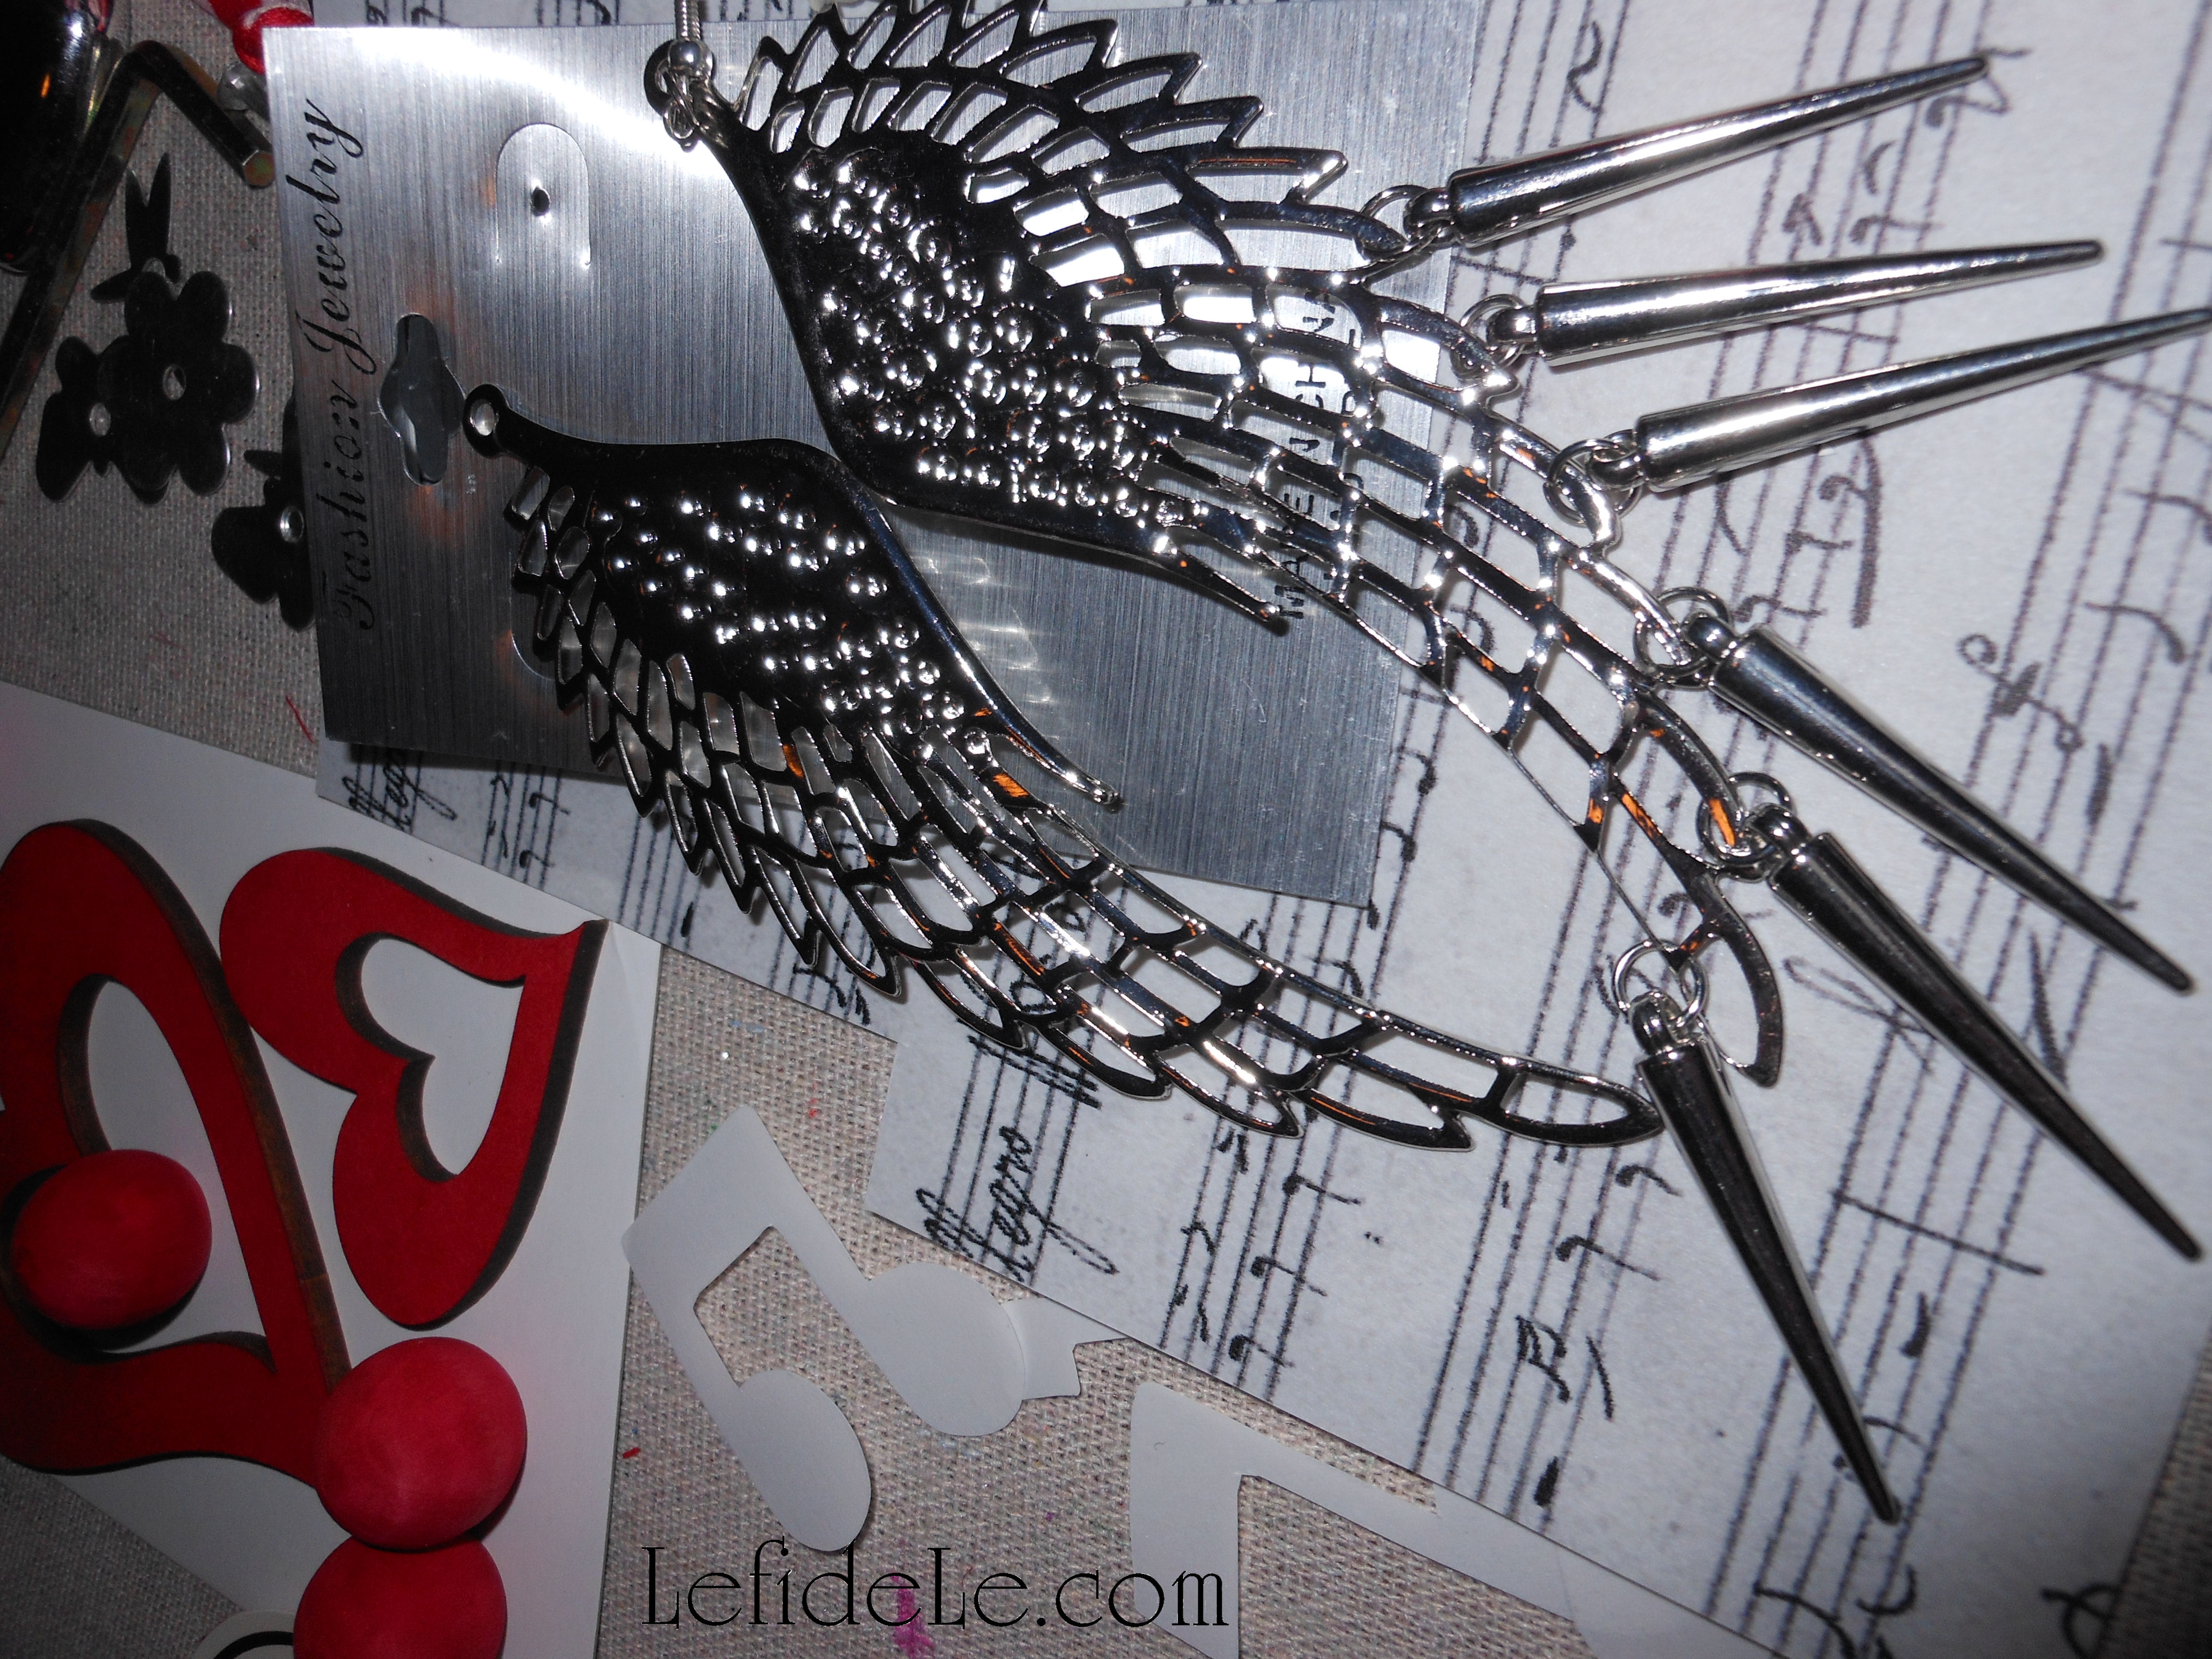
Here is a pair of giant winged earrings that I’ve modified for the project. I even cut out music notes from the shiny display card. You never really know where something’s come from in one of my pieces. I generally use a lot of vintage elements and scraps that I modify. I’m lucky enough to have a grandma that collected a lot of random stuff that I can now use, but you can find a lot of knickknacks both online and in antique shops. Let your creativity run wild and use anything that can be altered and glued down!

3Leigh

55Leigh

Just keep layering your pieces into the base like you would to complete a puzzle. It’s done when you think adding anything else will mess it up… the Goldilocks moment of when it’s just right. Of course, there will always be critics, but you didn’t make it for them. If your recipient appreciates the care that went into it, and if you enjoyed making it…. well, isn’t that just the point of making a homemade gift?

17Leigh

18Leigh

Have fun & tell stupid Cupid you’ve got it covered!

Faithfully Yours,

Leigh

27Leigh

37Leigh

Last Minute Cocorico Rooster Theme Dinner Party Décor Ideas (+ Free Printables)

175Leigh With the winter season so turkey saturated for the holidays, I thought I’d utilize my overabundance of rooster décor and host a cozy dinner party by the fire. I used my Healthy “One-Pot” Cocorico Roasted Chicken (or Turkey) & Root Vegetables Recipe as a family-style centerpiece of food. And with my printable place-cards, it’s an easily emulated dinner party that offers a warm welcome for out-of-towners in for the holidays! 157Leigh I love the idea of taking dinner out of the dining room, especially in winter when there is a cozy fire available. So, my first task was to move the couches into a dining configuration. I have a large round antique coffee table that is mechanized to pop up to dining height. To accommodate more guests, I topped it with a $12 precut 4’ x 4’ plywood square from a chain hardware store. The edges of this were taped to avoid snagging the tablecloth. A card table is another easy option. 65Leigh Layering fabrics is a quick and easy way to add warmth to a gathering, so I draped layers of tablecloths over the square. The first layer was chocolate brown, then beige burlap with added trim, and a fall paisley print over the top. 106Leigh I exchanged the usual living room décor with various bits of rooster ephemera. I set a ceramic chicken on a side table next to cranberry colored candlesticks, and tucked feather tassels under the large candles. 49Leigh By the fireplace, I placed a rooster painting on an easel atop an old burgundy leather suitcase. Another served as a base for a spiral topiary. It was housed in an inexpensive and lightweight cranberry pot meant to simulate glazed pottery. In front of that, I positioned a small vintage brass rooster doorstop. I actually have many more roosters, but I was able to (somewhat) contain myself. 158Leigh I gathered sage and chocolate colored throw pillows to coordinate with the linens and dishes. These softened the deep chocolate leather sofas. Switching out small elements of your décor for an evening is an easy way to experience a change of scenery without breaking the bank. 143Leigh I set the table with wood-handled flatware and layers of dishware in various patterns. This included wooden plates as chargers, sage green bordered dinner plates, and a selection of chicken and rooster plates. Though completely untraditional, I figured these could be set to the side for bread later… they just looked too cute stacked this way! I actually found these little gems for $3 clearance at Dillards. Now they’re a part of my last minute rooster dinner party arsenal. 156Leigh My other go-to elements are antique chicken salt and pepper shakers from my grandmother, and vintage multicolor rooster stemmed glassware from my mother. 45Leigh It’s really great to have coordinating pieces that can be thrown together without much forethought, while having the appearance of effort. In this way, a simple chicken dinner is elevated to a special evening. Make a point of collecting what you like, and pull it out for your get-togethers. 44Leigh Another component which you can make for yourself is my DIY Rusted Rooster Chicken Wire Votive Holder Craft. Because they were so easy, I actually made many more than I used in the pictures. (These can be made with any shape you like, fall leaves for example.) They really added a beautiful glow to the table. 32Leigh I transformed, recolored, combined, and resized vintage images to make 3 free printables for invitations, labels, signs, menus, food tents, name place-cards, recipe cards, etc… (These are free for personal use only.)

  24Leigh These are available at the end of the article (simply right click on each image, and print in color and on photo settings on cardstock). Then just cut out your place-cards as needed… or enlist a significant other or kiddo to do it while you prep for dinner! 25Leigh The last step was to add the food… artisanal rosemary bread in terra cotta to compliment the Cocorico, compound butter in a rooster dish, mixed olives seasoned in flavored oil and spices, and the off-center centerpiece of roasted chicken and multi-colored root vegetables of carrots, beets, parsnips, radishes, and fingerling potatoes. 125Leigh Cocorico roasters are perfect “one-pot” wonders that deliver beautifully from oven-to-table. Root veggies may be peeled and seasoned the day prior to an after-work gathering if need be. Simply pick up bread and dessert to accompany your meal. Or, try out my Easy No Cook Layered (N)ice-Cream Pie with Nut Crust (Vegan, Dairy-Free, Gluten-Free) which may also be made with traditional ice cream, and can be made and frozen well in advance. 160Leigh Happy Fall Y’all! (…I couldn’t resist.) 168Cocorico-Leigh Faithfully Yours,

Leigh

Cocorico3x3labels-flatcards

Cocorico5x5cards-labelsLeigh

CocoricoTent-PlacecardsLeigh