Tag Archives: Washi

Traditional Chinese Good Luck Knot Craft Tutorial with DIY Plaited Napkin Rings & Washi Tape Decorated Chopsticks for Chinese New Year

1735Leigh

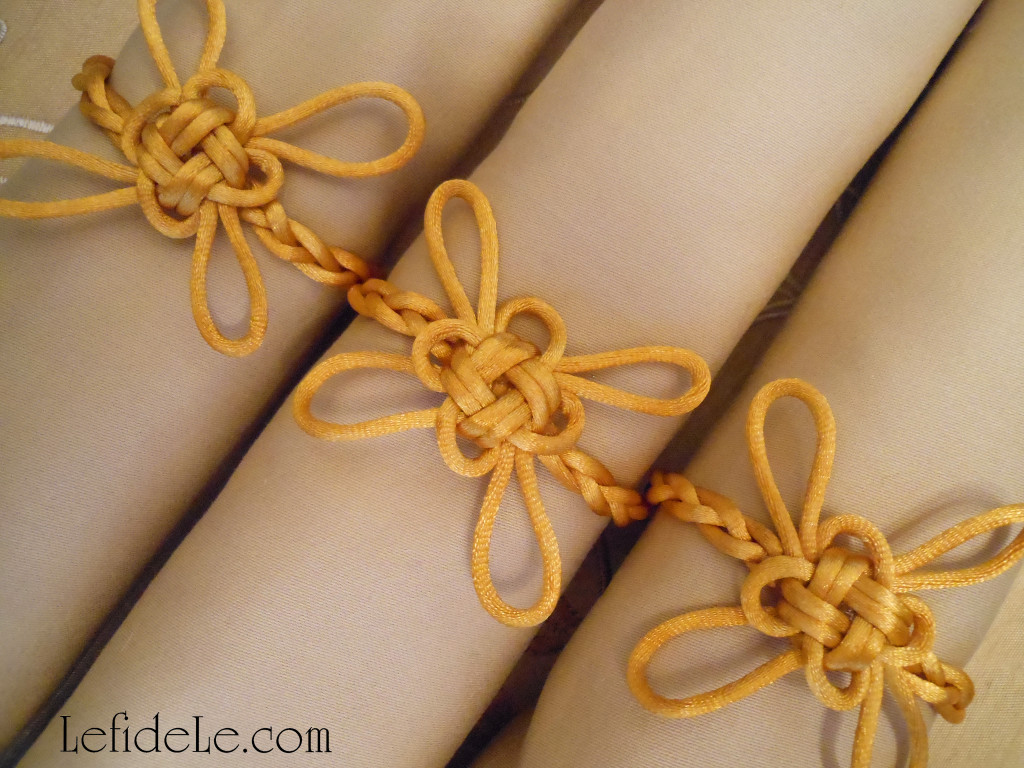
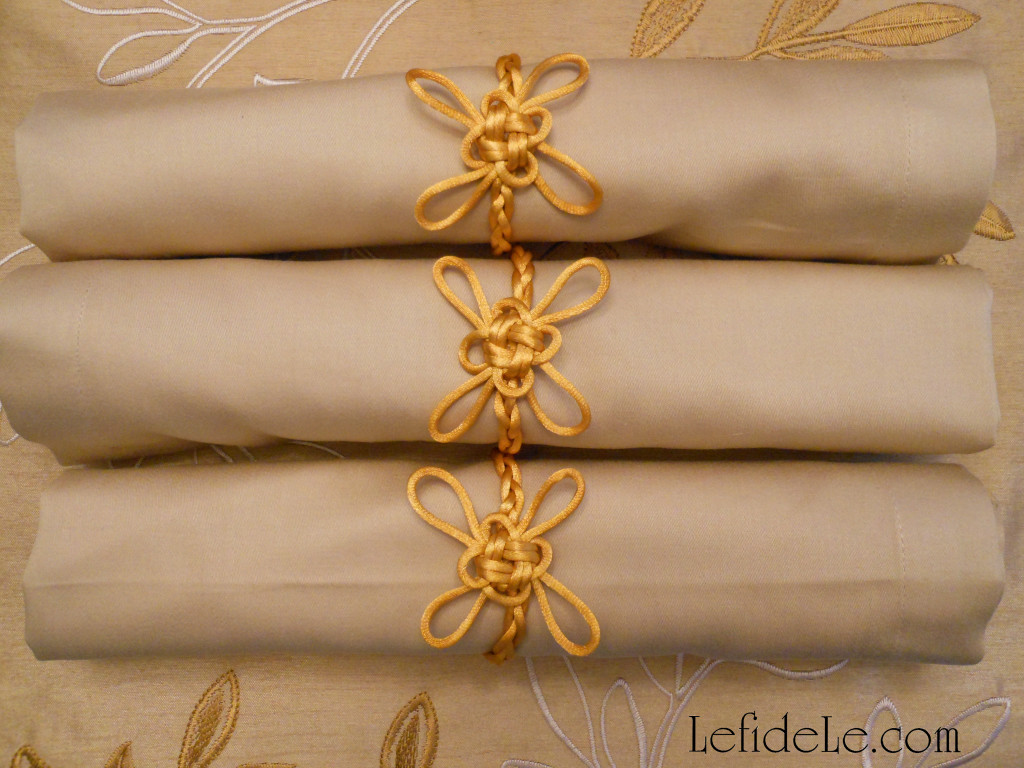
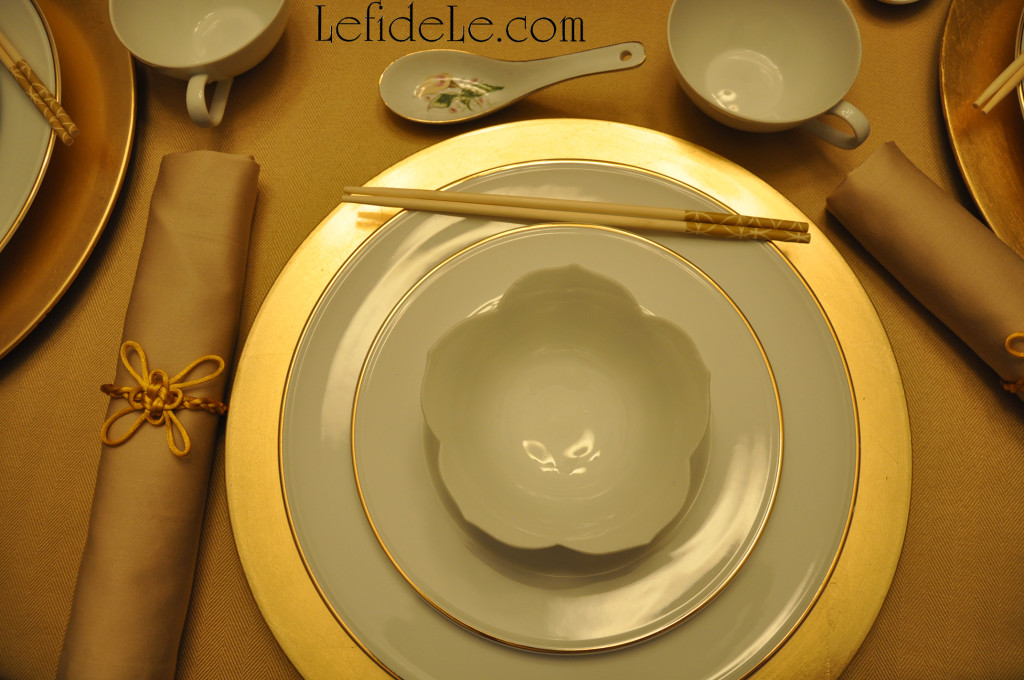
This craft tutorial for traditional Chinese good luck knots makes the perfect adornment for DIY plaited napkin rings which set an elegant tone for Chinese New Year along with quick washi tape decorated chopsticks. The knot demonstrated here is known by various names among diverse Asian cultures… Good Luck, Auspicious, Chrysanthemum, and One Mind. As a traditional Chinese folk art, decorative knots have been made in the same manner for well over a thousand years, though they originated in prehistoric times. These creations have been used to decorate homes, jewelry, clothing, and have functioned as stand-alone gifts as good luck charms. Knot, 中国结 or Jie in Chinese, translates as vigor, harmony, and unification. Therefore, they have been regarded as a token of blessing when gifted for friendship or love and for special occasions like weddings. This sentiment has led to many being passed down through the generations. As the Chinese New Year is a time for provoking good fortune, and yellow is regarded as a lucky royal color as it was once reserved only for use by the emperor, a yellow gold cording was chosen for the napkin rings so that guests will dine as royalty in the burgeoning of a prosperous year.
1508Leigh

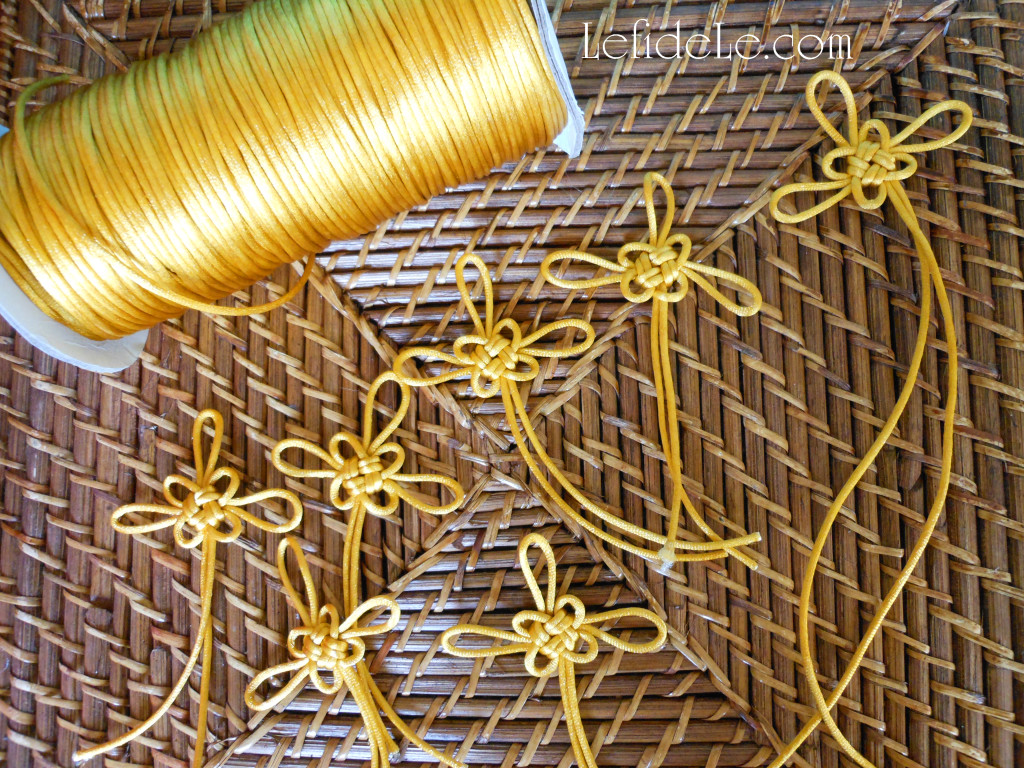
Begin by purchasing enough cord in silk or satin (in a “rattail” width) to complete the project. You’ll need 21 inches for each plaited ring (126” for 6) and 26 inches for each good luck knot (156” for 6)… totaling 47 inches for each ring with knot (almost 4 feet) or 182” for 6 (23½ feet). (I got mine inexpensively in bulk size from Fire Mountain Gems, whose sale link is in the sidebar, which is a great source for all types of cording in varying quantities.)
1748Leigh

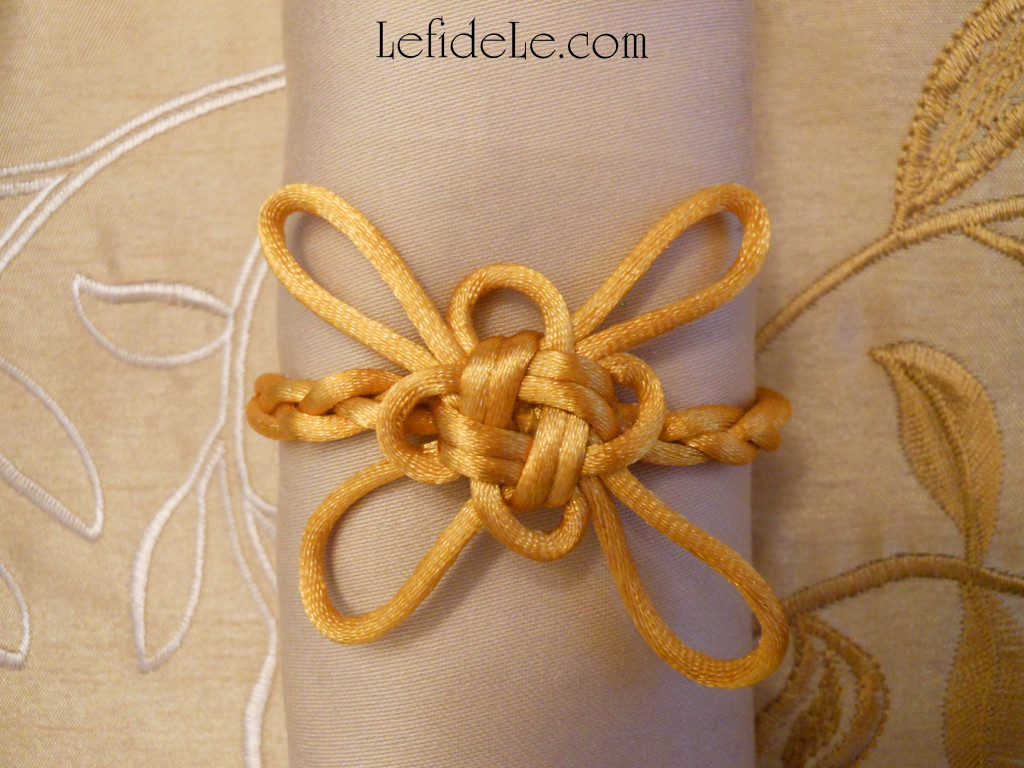
I’m demonstrating the good luck knot here by pinning the cords to a cork plant saucer, because it makes clear photography of the process easier. You may find it easier to make a symmetric knot this way, but it can be easily made without pinning anything down. Don’t get discouraged if your first knot looks askew, just untangle the cord and try again. It will get easier with each knot you make. Practice does indeed make perfect!
1576Leigh

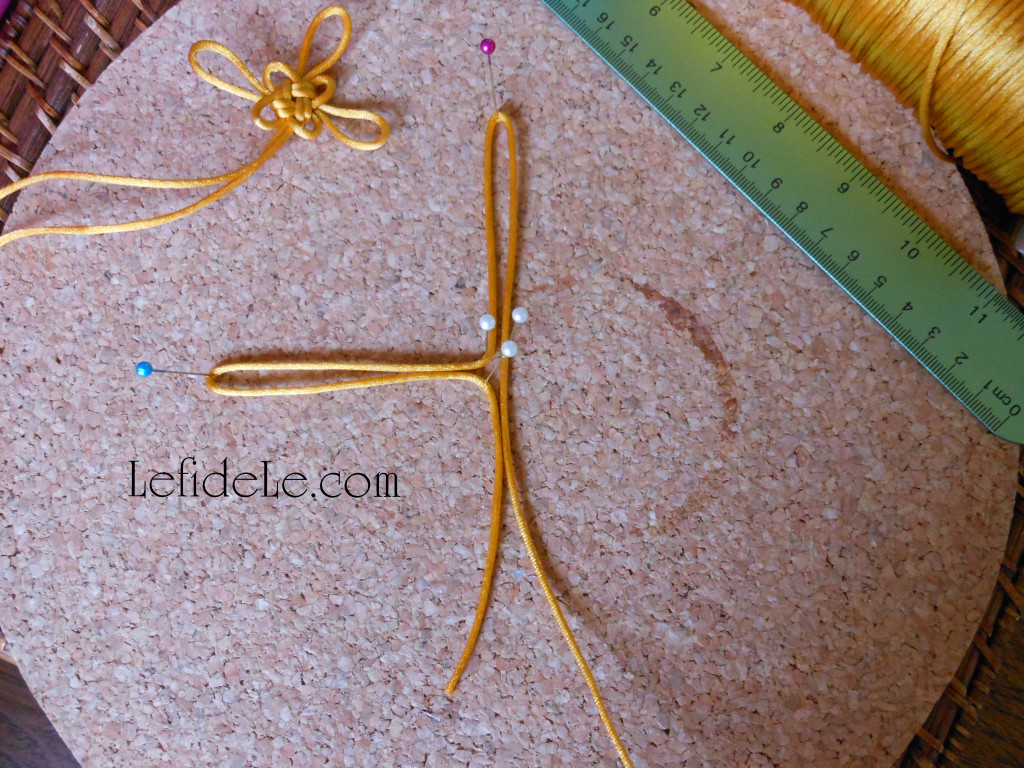
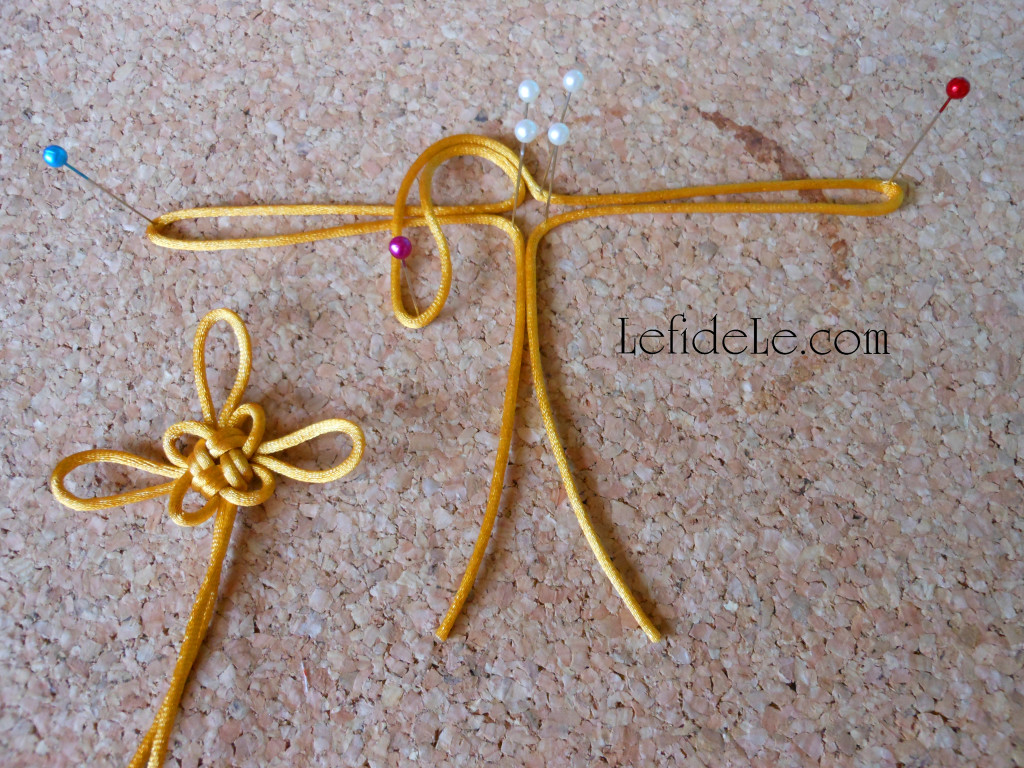
Start by cutting a 26 inch length of cord with sharp scissors to prevent fraying. Fold this in half to find the center point, which becomes the middle of the top loop (pinned in purple). Fold the left strand to find its center which becomes the middle of the left loop (blue pin). Repeat this on the right strand (red pin in the next picture). Note that I’ve pinned the very center in neutral white to keep the central points flat. The cording should resemble a cross at this point.
1579Leigh

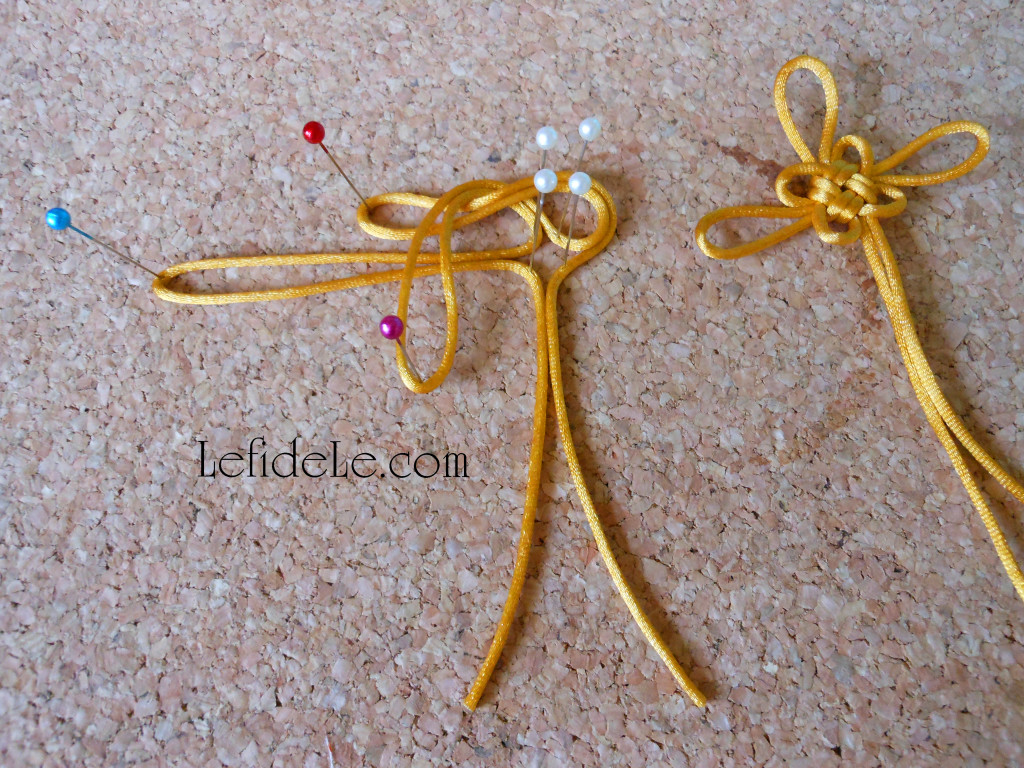
Next, fold the top (purple pin) loop over the left side (blue pin). It should now appear as a person with bowed head and outstretched arms.
1580Leigh

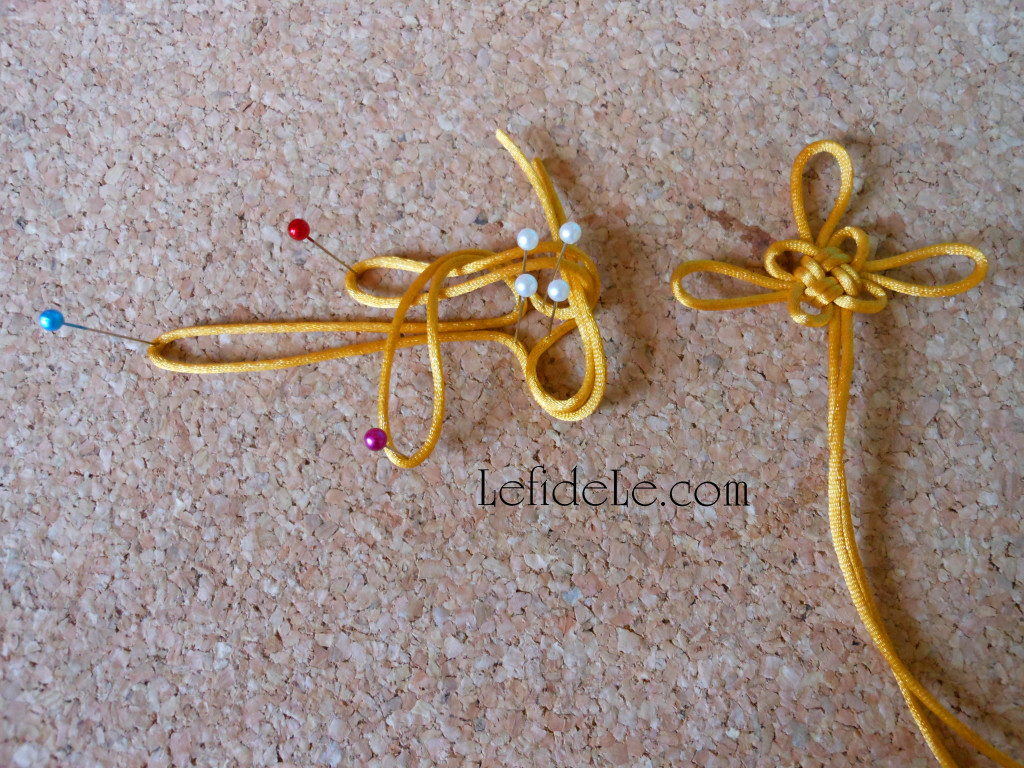
Then, take the right loop (red pin) and slip it under the top fold-over (purple pin). It should now give the impression of a windswept girl with arms down at sides.
1585Leigh

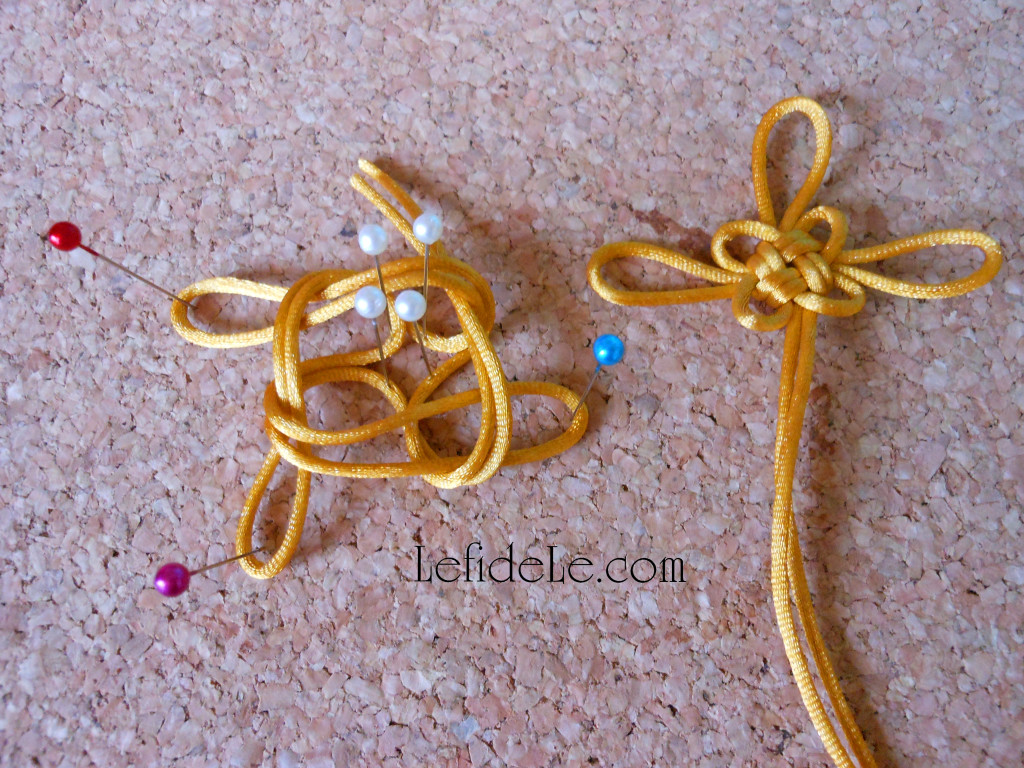
Now take the bottom two straight strands (no pin yet) and slip them under the fold-over above it (red pin). It should look a bit like a yoga contortion at this point.
1588Leigh

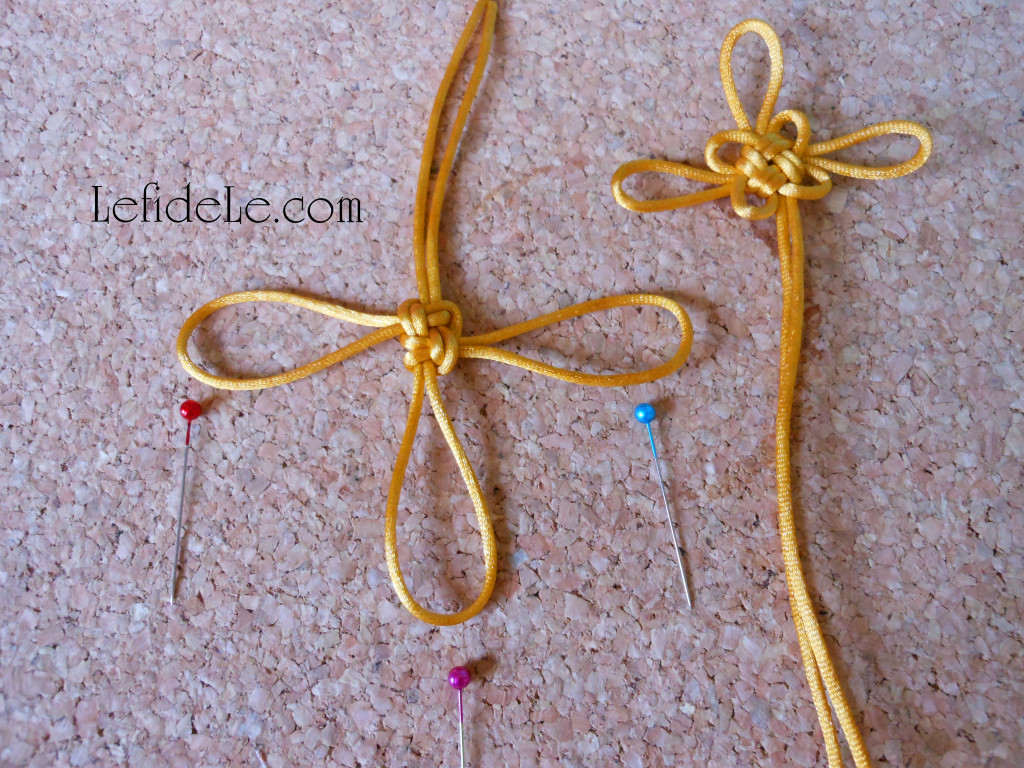
Next, fold the left loop (blue pin) over what was once the top loop (purple pin), and then slip it under what was previously the bottom strands (no pin yet). It should now bring to mind a game of twister.
1589Leigh

Pull all of the outside loop ends outwardly, a little at a time, until the center is taut. It should look like an upside down cross.
1594Leigh

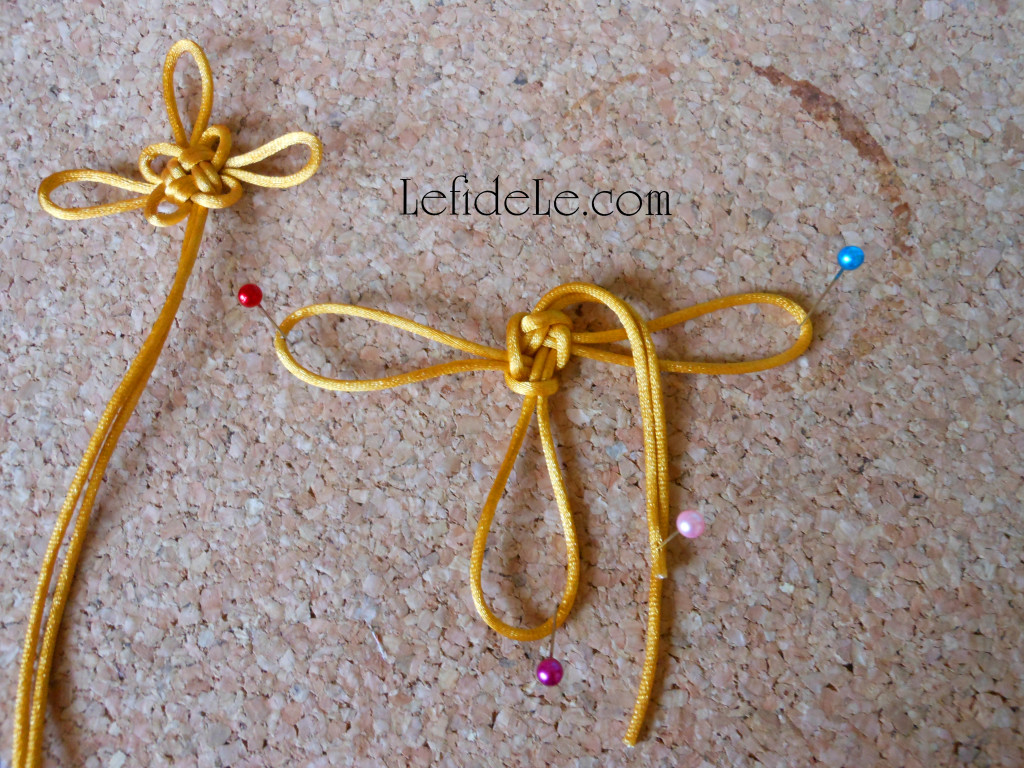
Repeat the previous fold-overs going clockwise. Fold the top loose strands (now a pink pin) over the right loop (blue pin). It should give the idea of a girl with really long hair.
1598Leigh

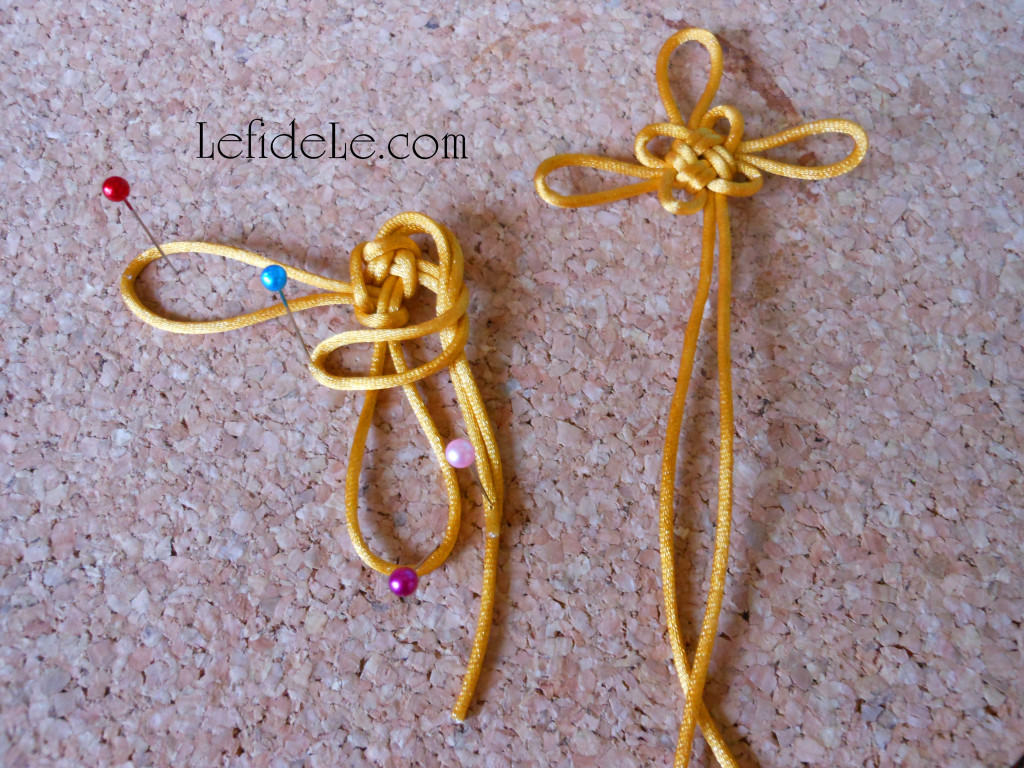
Next, fold the right loop (blue pin) over the loose strands (pink pin). It should bring to mind a girl with really long hair, bowing with one arm outstretched and one crossing the abdomen.
1600Leigh

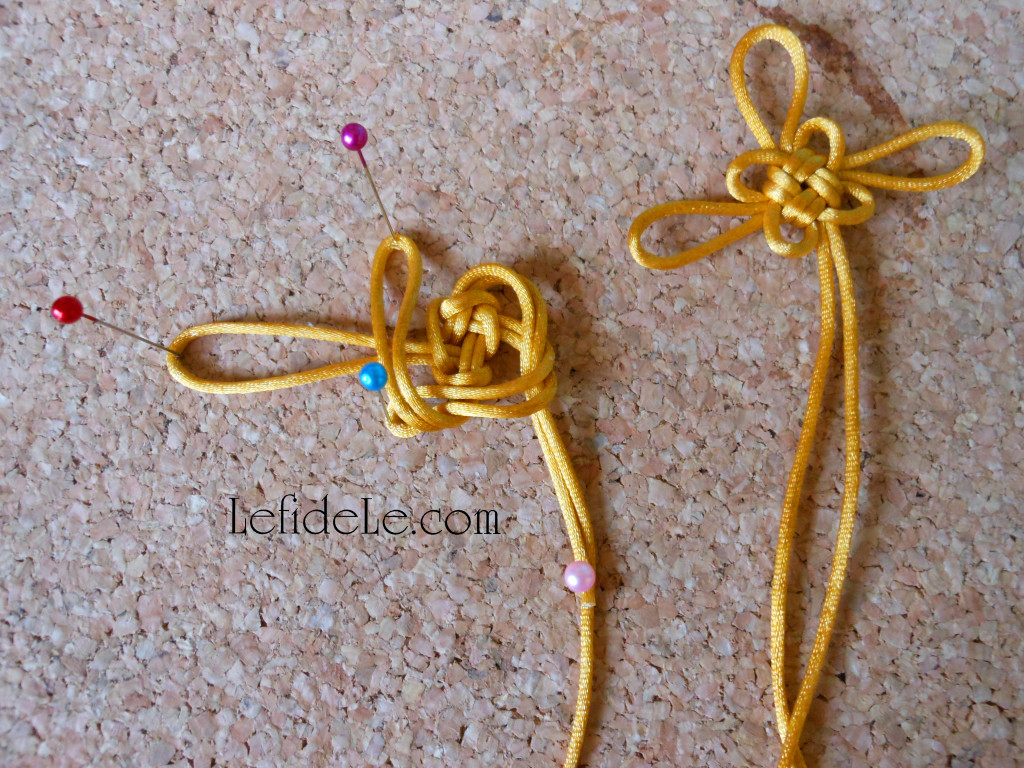
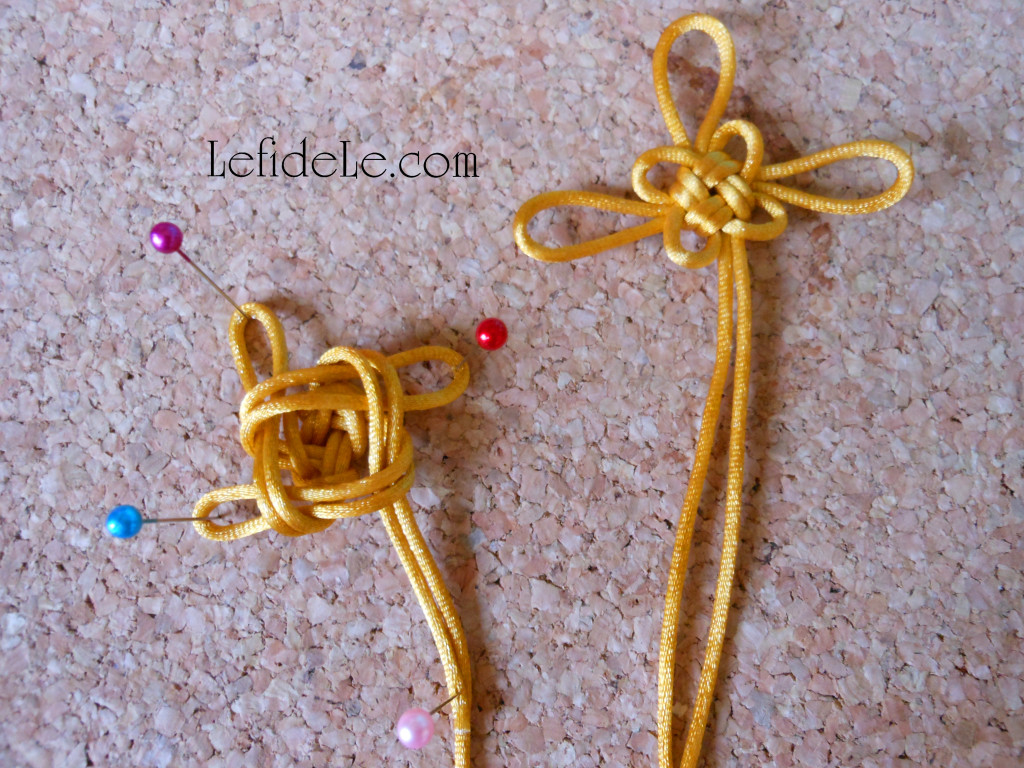
Now fold the bottom loop (purple pin) over the left loop (red pin). It should appear similar to a squashed bug.
1607Leigh

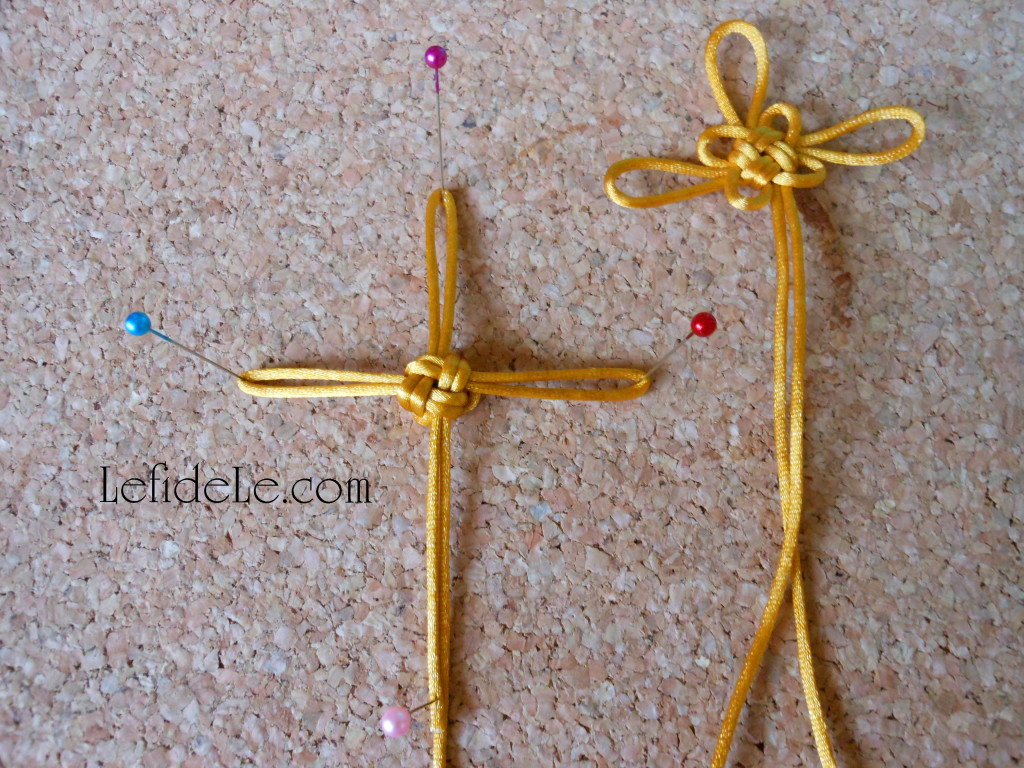
Take the left loop and fold it over what was once the bottom loop (now the top, purple pin) and slip under what was once the top strands (now the bottom, pink pin).It should bear a resemblance to an unfortunate wad of hair matted in bubble gum.
1610Leigh

Pull the ends straight out from the center. It should form another upright cross.
1611Leigh

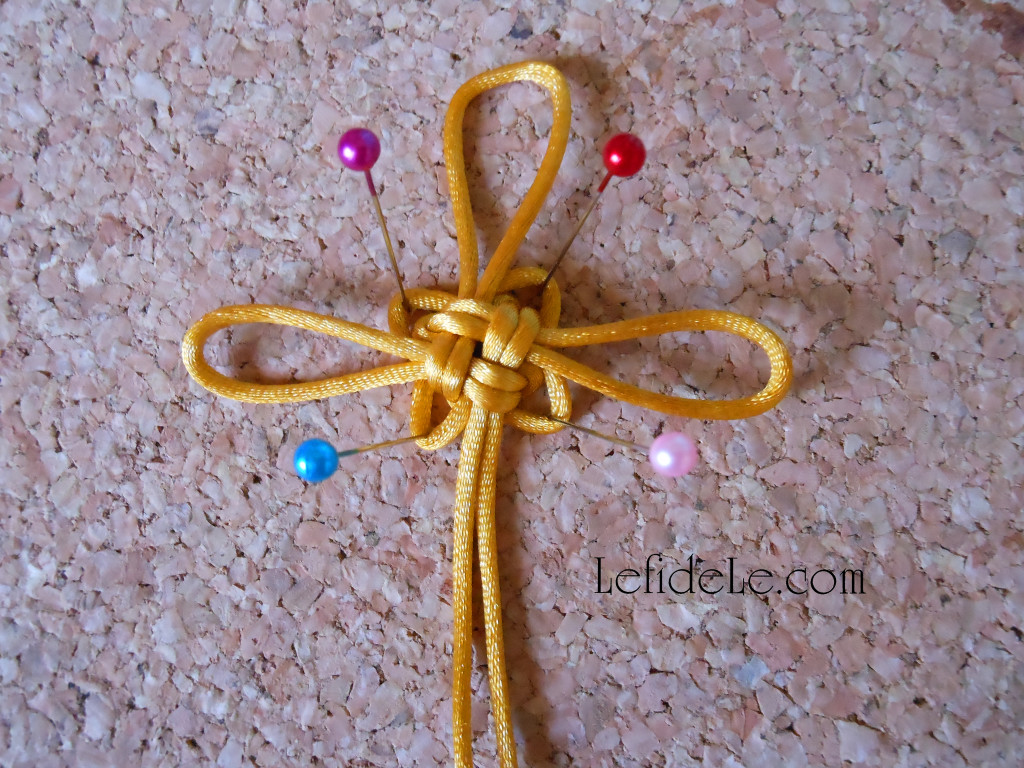
Lastly for the knot, pull the smallest loops outwardly until it forms petal-like structures of equal size. It should now seem more like a Celtic cross. (If it doesn’t look right to you, just pull the whole thing apart and try again. No harm done!)
1518Leigh

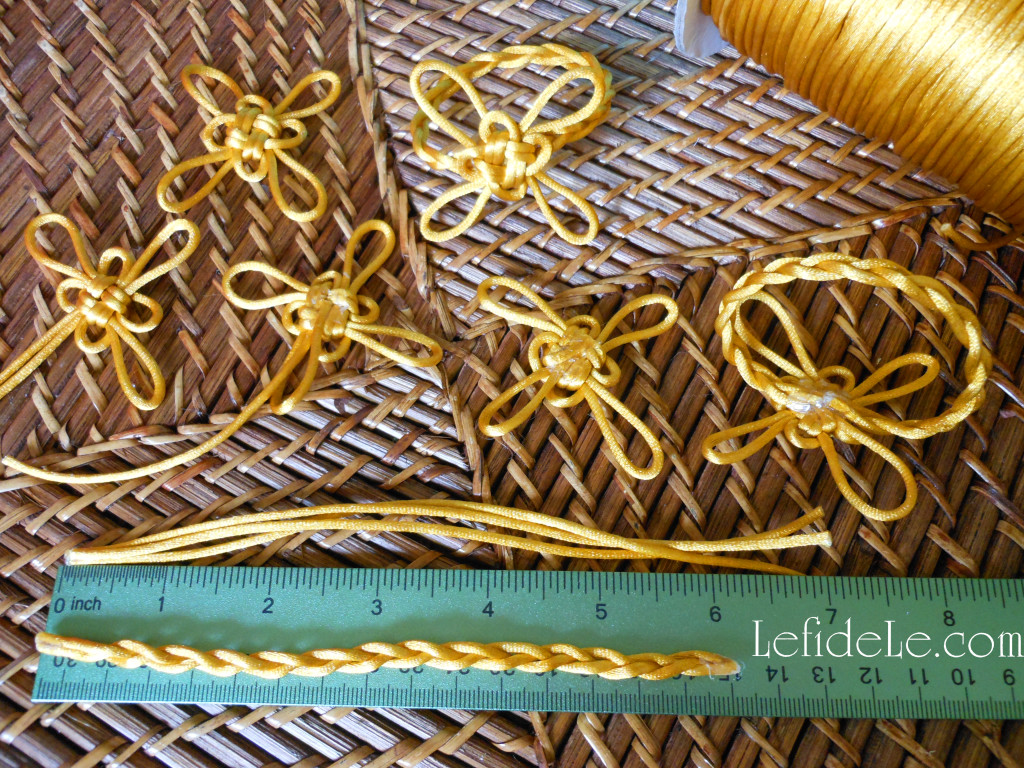
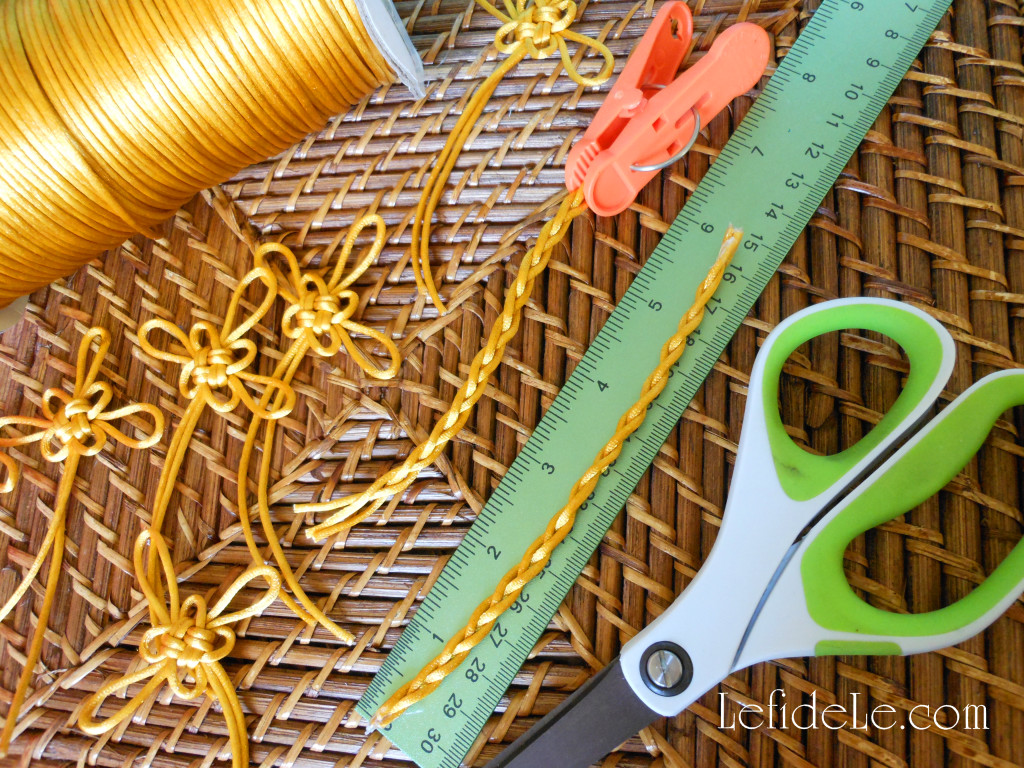
For the plaited napkin rings, cut 3 pieces of cord (7 inches long) for each ring. Hot glue one end of each piece together like a tripod.
1517Leigh

Clip the glued end onto something sturdy for easier braiding (like a small pail full of pens). Make a classic 3 part braid, and then glue the ends together forming a strand. (A classic 3 part braid is like a simple hair braid… made by folding the left strand over the center, then the right strand over the new center, then the new left strand over the new center, then the new right strand over the new center… over and over again until you get to the end.)
1521Leigh

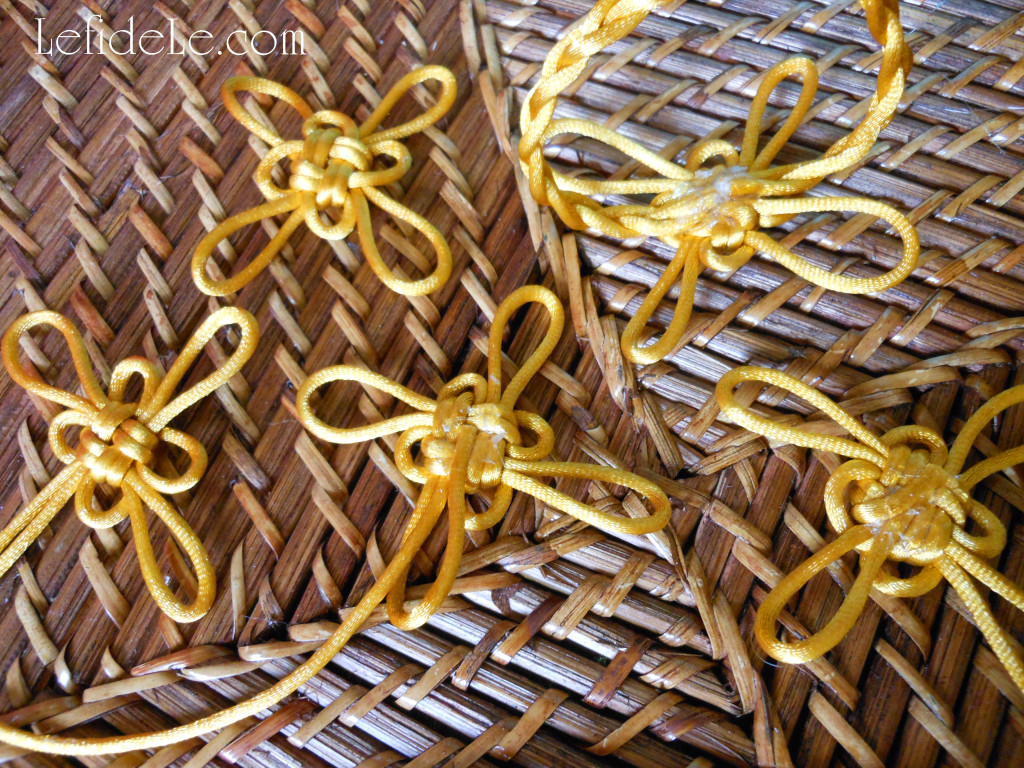
For these napkin rings, the knots will need 4 equal loops. To easily do this, just fold one loose strand over to the underside center until it forms the right size. Cut it to the center of the knots back, and then glue it down. Next, take the last loose strand and fold it over tightly against the knot without any gaps. Also cut this strand at the center-point and glue it down. Now take a braided strand and glue each end to this same gluey underside of the knot (without overlapping the ends).
1724Leigh

Finally, flip it over and look at your amazing creation!
1701Leigh

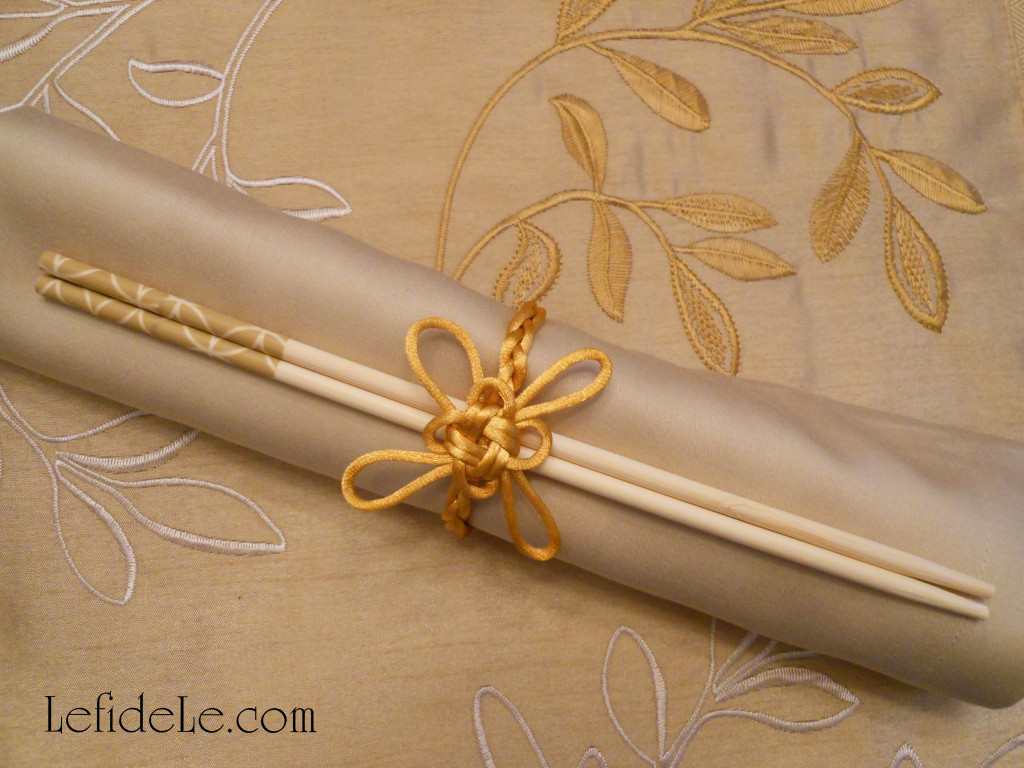
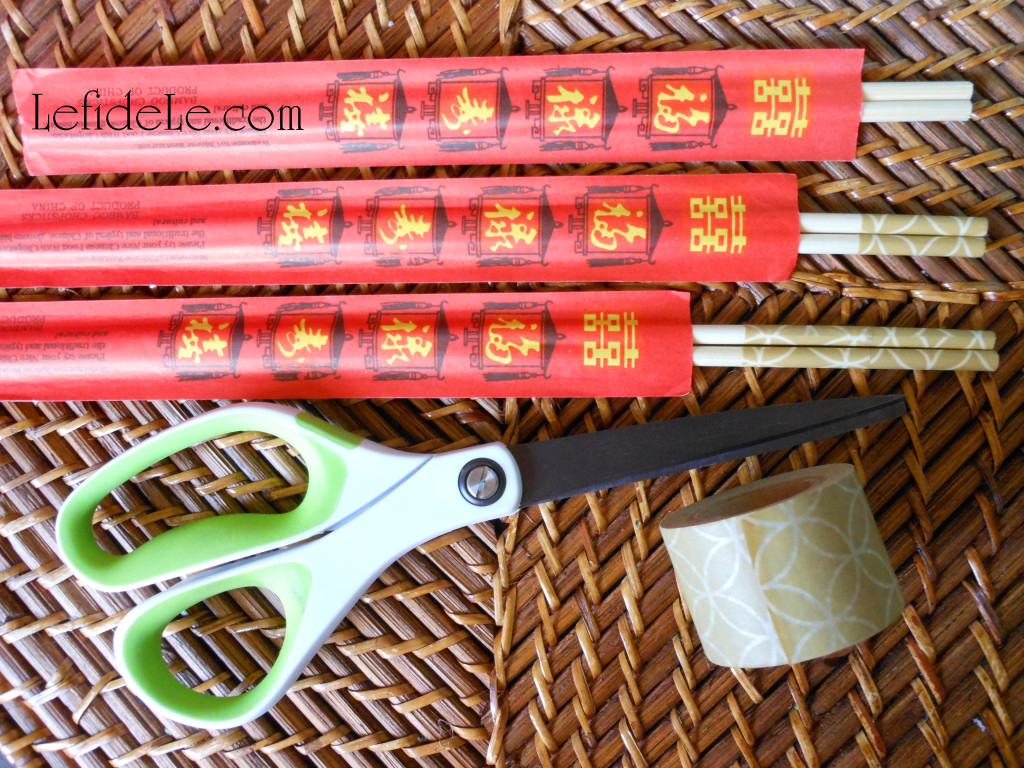
I saved the easiest project for last. Any inexpensive chopsticks can be made beautiful in a just few seconds with the addition of washi tape. You can even take some extra chopsticks home for free along with your takeout. (These came from the grocery store sushi counter.) They are disposable like plastic utensils, but are so much more environmentally friendly.
1563Leigh

Simply adhere the top corner of a piece of the paper tape to the top of the stick. Wrap it around until it overlaps, and then cut it. Press it down hard to make sure it doesn’t unwrap at the dinner table. Use as many layers of it in as many styles as you like. (I used thick neutral tape twice over which matched my table runner.)
61Leigh

See more of these projects in action in my Elegant Chinese New Year of the Monkey Dinner Party Tablescape Décor Ideas Article.

Kung Xee Fa Chai… Congratulations & may you be prosperous!

Faithfully Yours,

Leigh
DIY Herb Garden Fabric Napkin Rings Craft, Free Basil Seed Card Printables (Invitations, Place-cards, Food Tents, Menus, Herb Markers) & How to Customize a Table Setting with Washi Tape

253Leigh

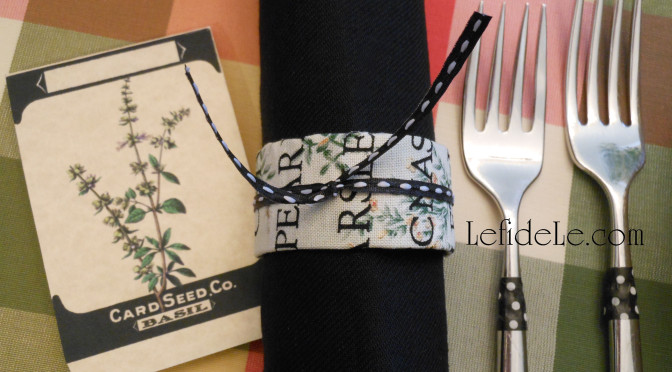
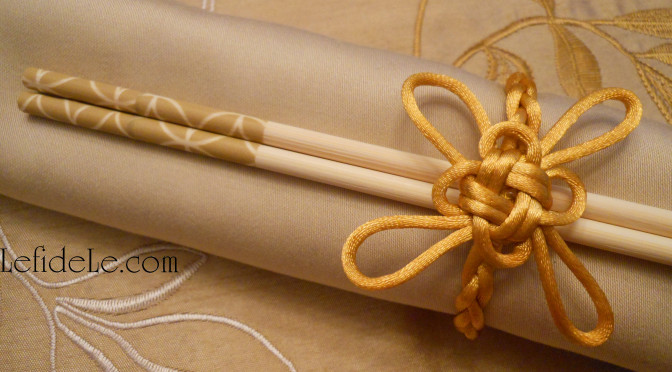
Bring the splendor of the herb garden to an indoor tablescape resplendent with free basil seed card printables for invitations, place-cards, food tents, menus, and even herb markers. Craft matching napkin rings with herb printed fabric, and then learn how to effortlessly customize a table setting with washi tape. Practically zero budget is needed to create a splendiferous luncheon with every element detailed… what a splendid way to grow a party!

104Leigh

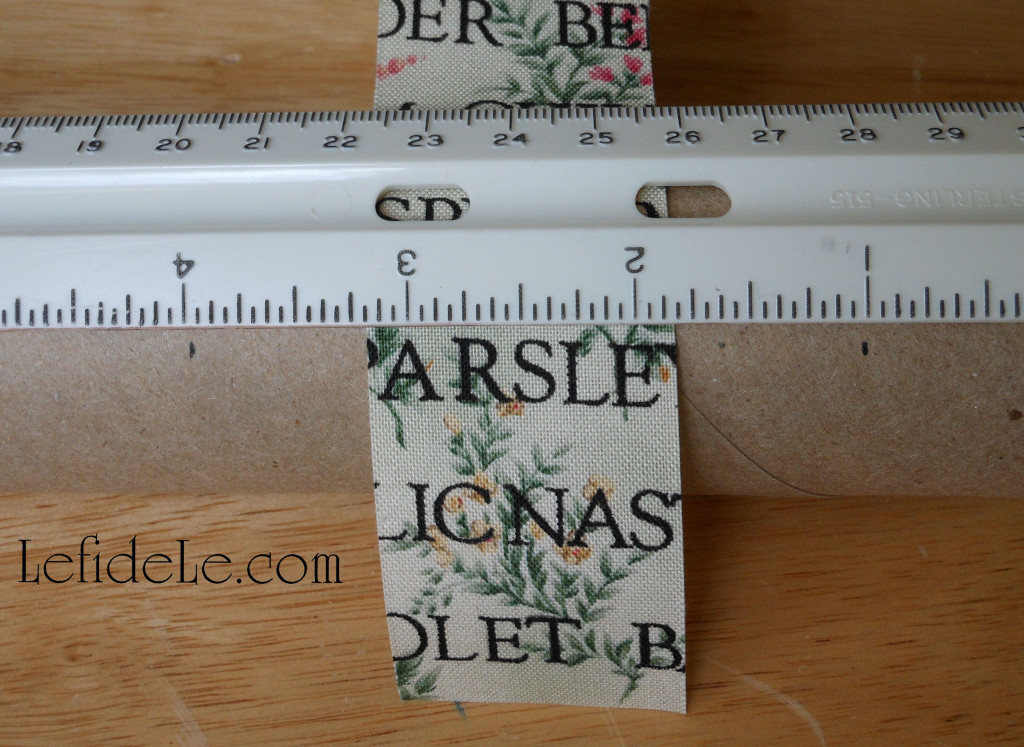
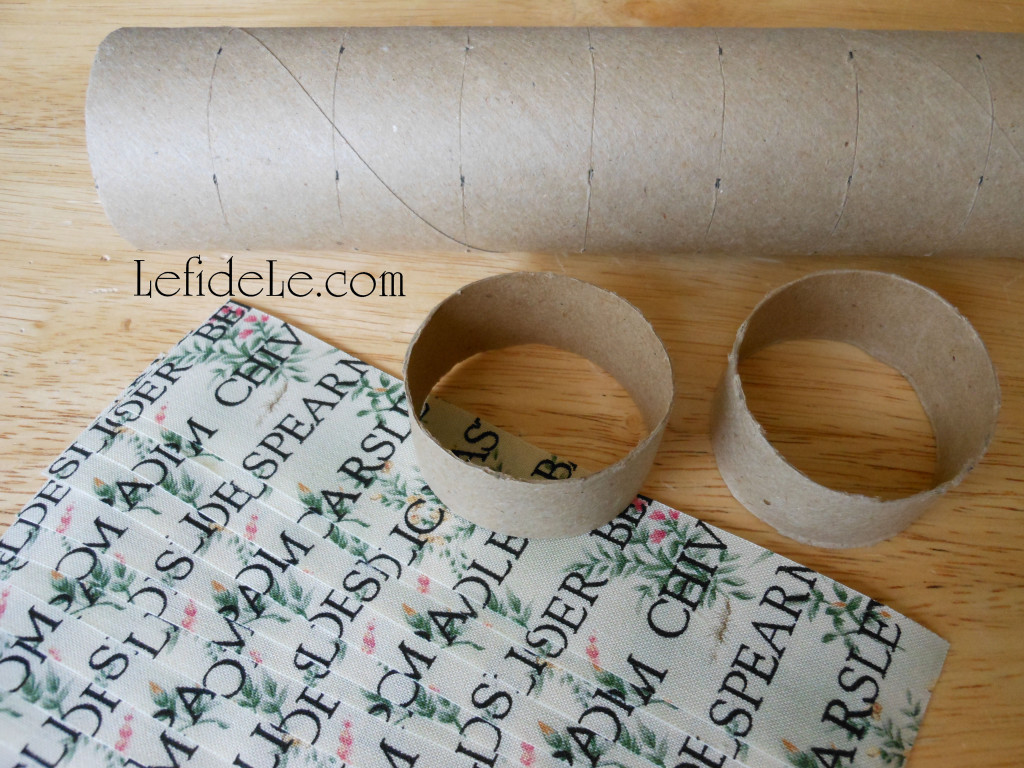
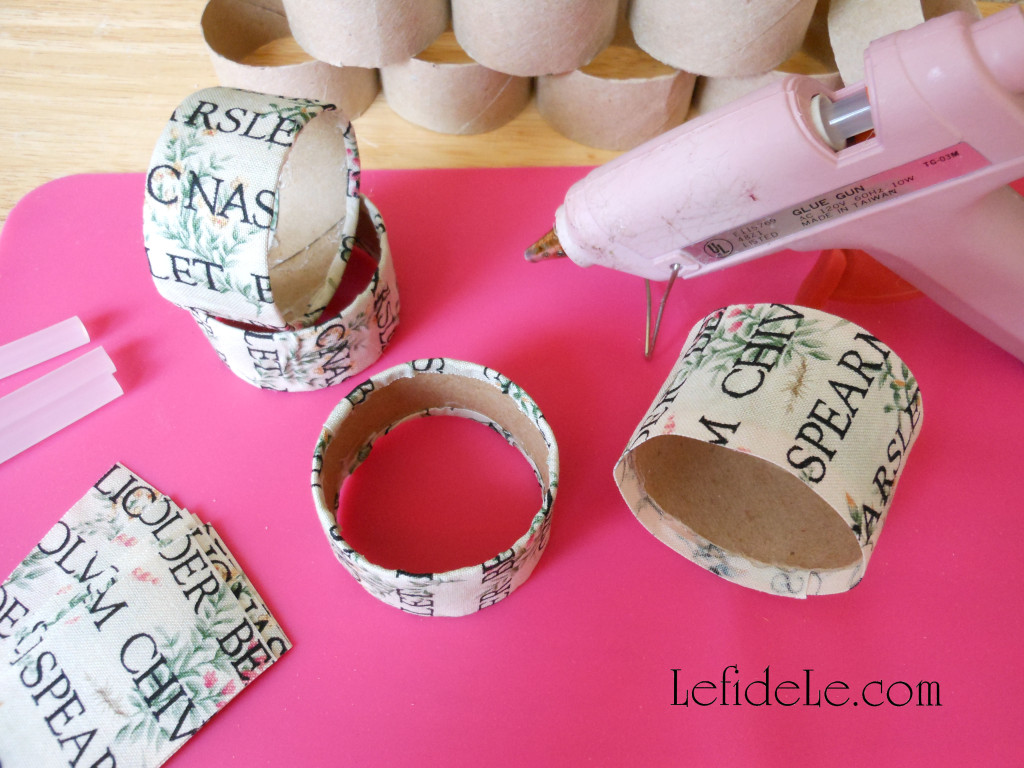
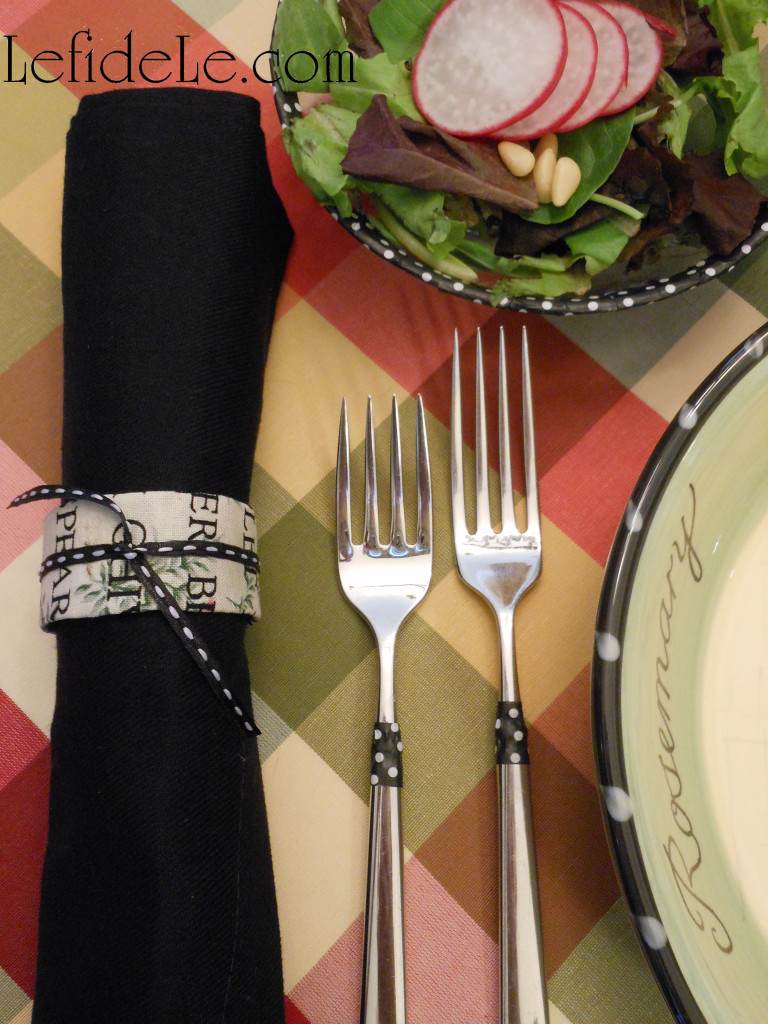
Let’s begin with crafting the herb garden napkin rings. Find a fabric with a lovely herb motif. Cut it into 6 inch long strips about 1 ⅜ inch wide.

106Leigh

Mark an empty wrapping paper roll (or use a paper tower tube) into 1 inch sections. Cut through these sections to make the ring bases.

107Leigh

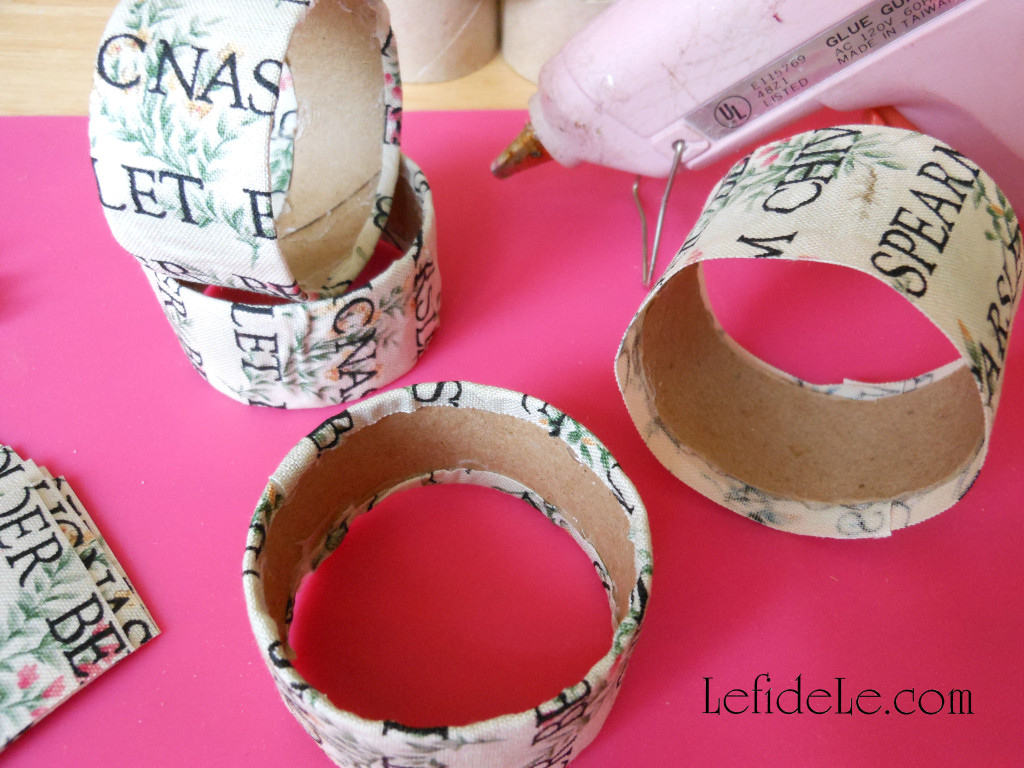
Hot glue the fabric strips onto the paper roll sections. (The ends should overlap a little.)

108Leigh

Glue the fabric flaps down to the inside of each roll. (This will make a nice edge that won’t fray in the future.)

110Leigh

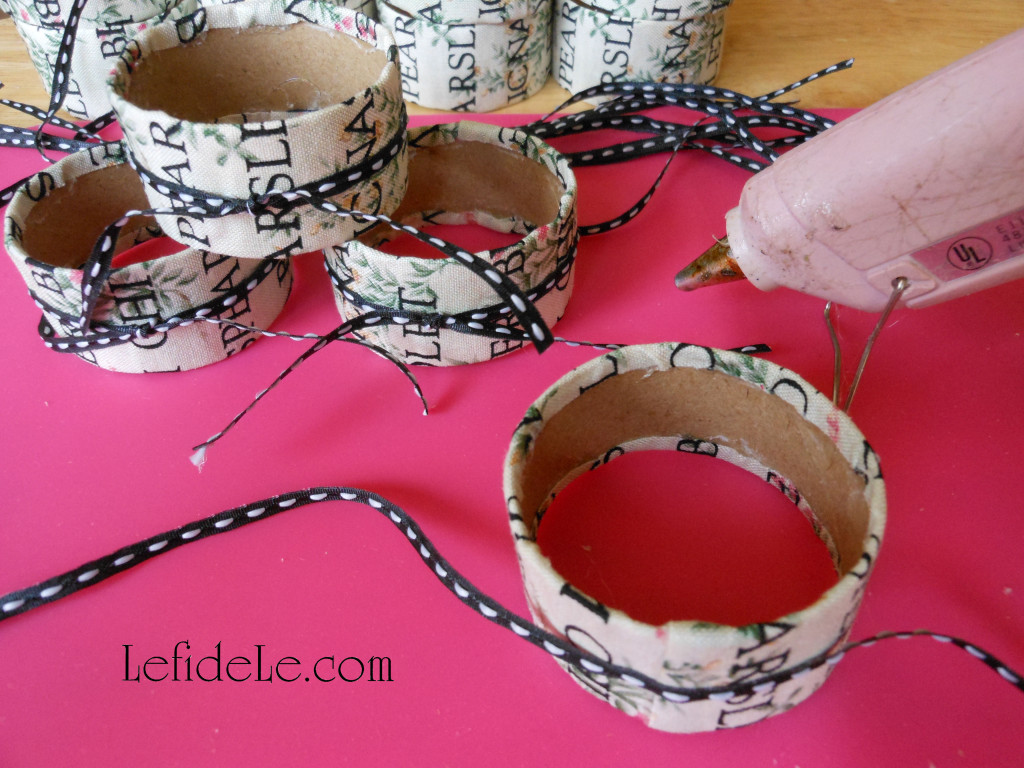
Tie on a thin ribbon that coordinates to the darkest color of your fabric, and knot it closed. Trim the loose ends to about an inch long each.

254Leigh

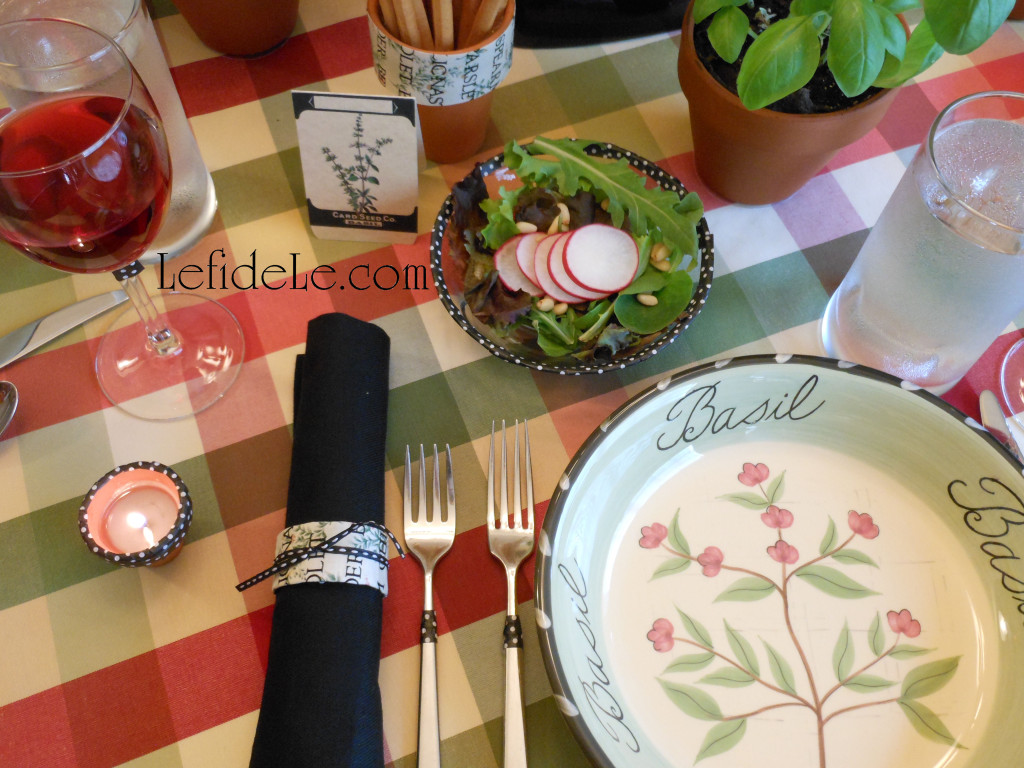
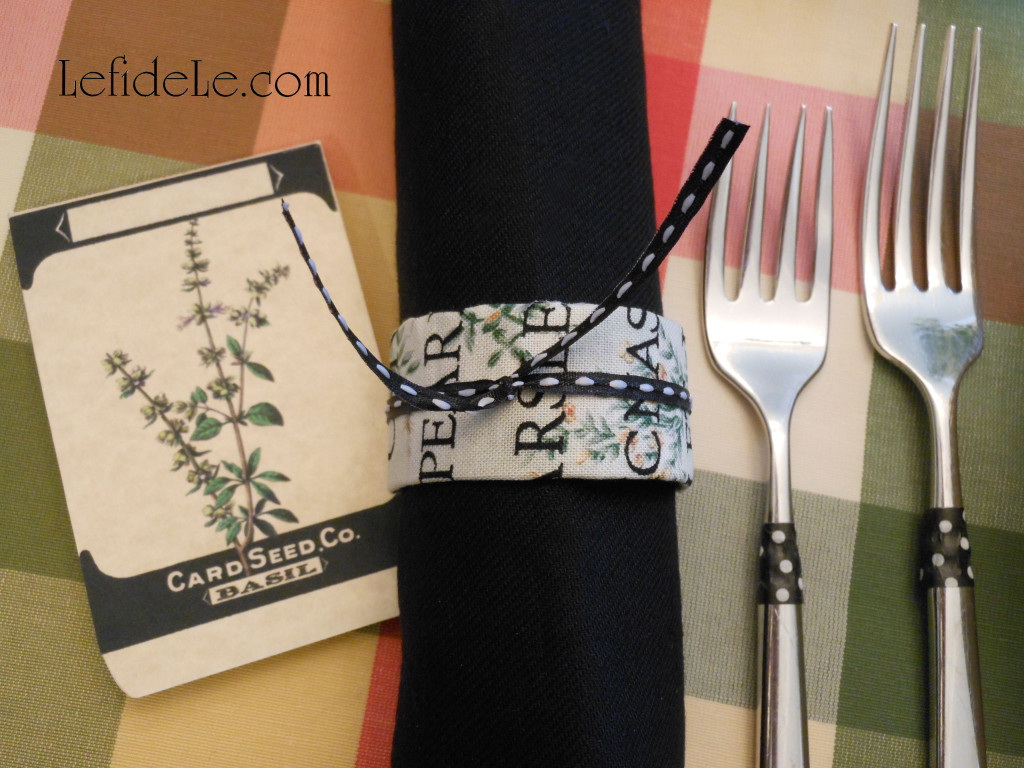
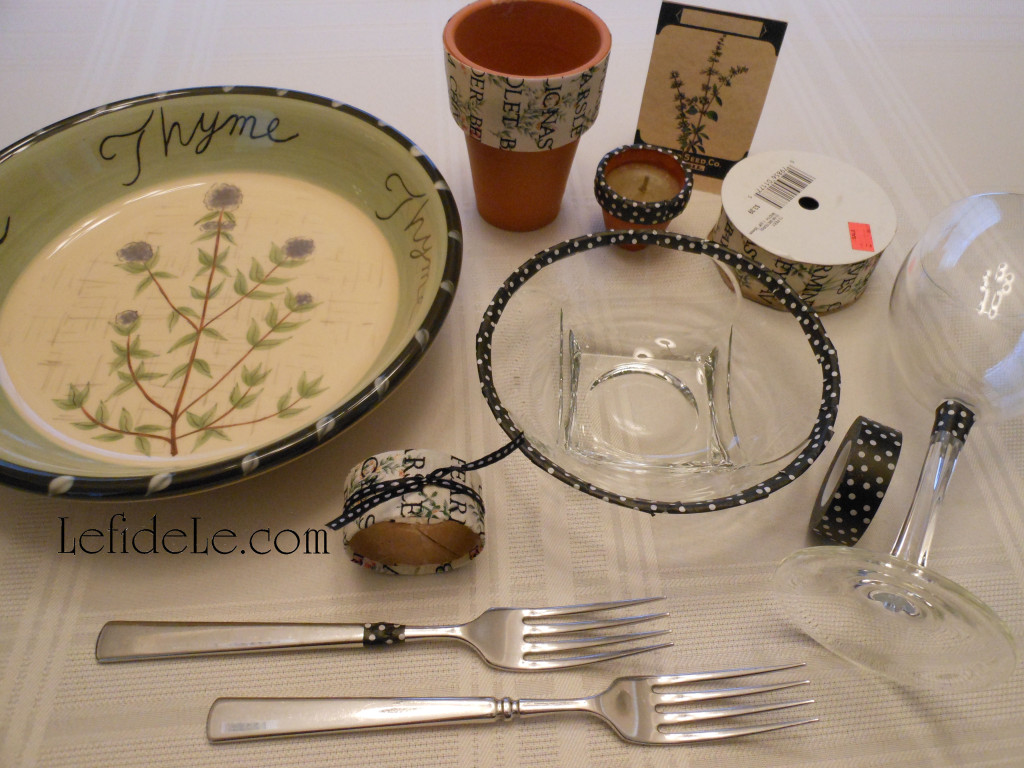
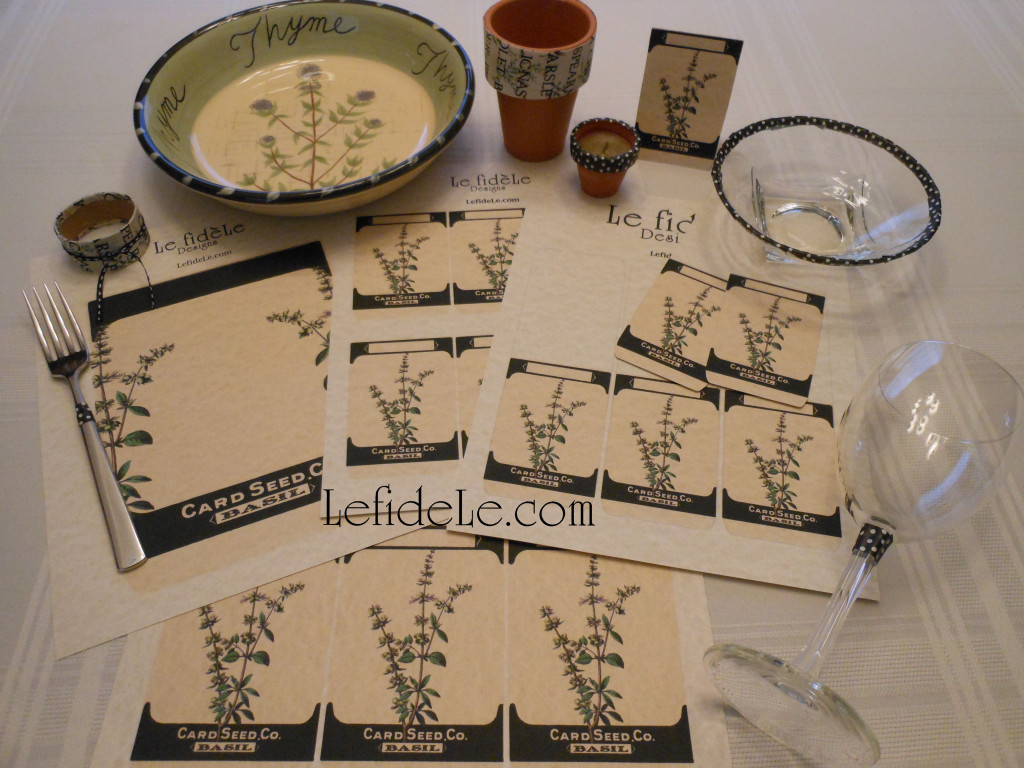
Now your rings are ready to use and are reusable too! Fill them with cloth napkins and place them next to flatware customized with washi tape. It’s a great way to accent your look without having to buy new dishes or utensils, and it’s better for the environment than resorting to the disposable stuff.

197Leigh

Simply cut small inch sections of a coordinating paper tape and wrap onto anything you want to embellish. It won’t leave any residue when you peel it off, so clean-up is a breeze!

225Leigh

Utensils, goblets, and even a salad bowl have been effortlessly washi-ed to wonderful.

214Leigh

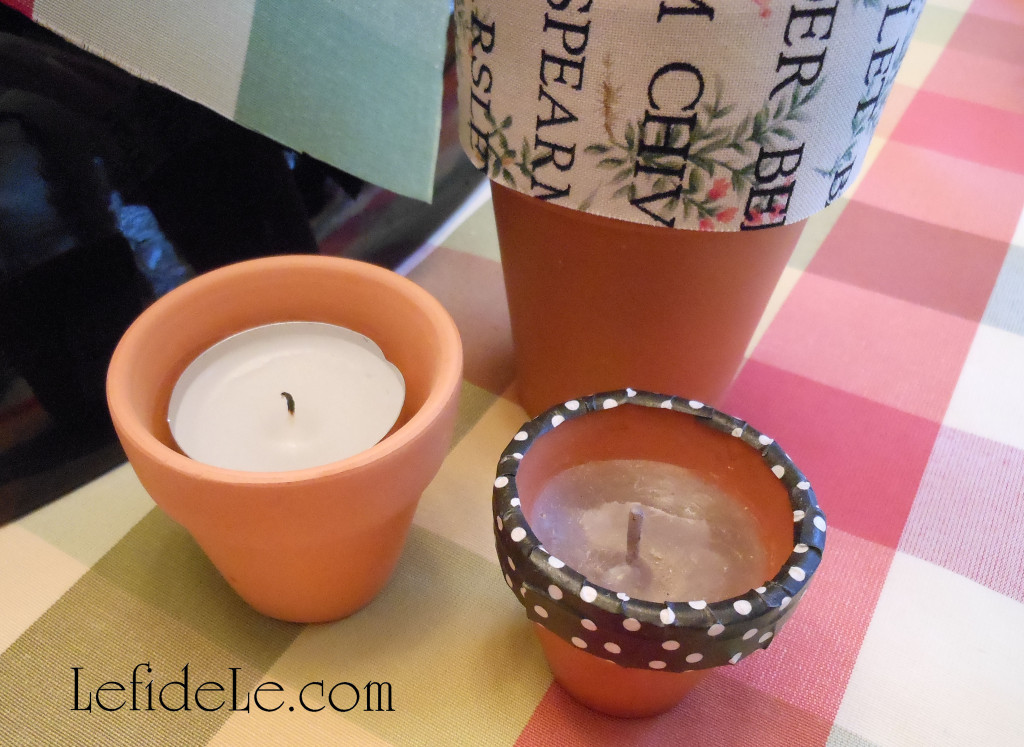
I even added washi to tiny terracotta pots filled with candles. The easiest way to make your own is to slip a tea-light candle into one. (We had no burning incident, but if you’re worried about fire… try an flameless LED tea-light instead.)

248Leigh

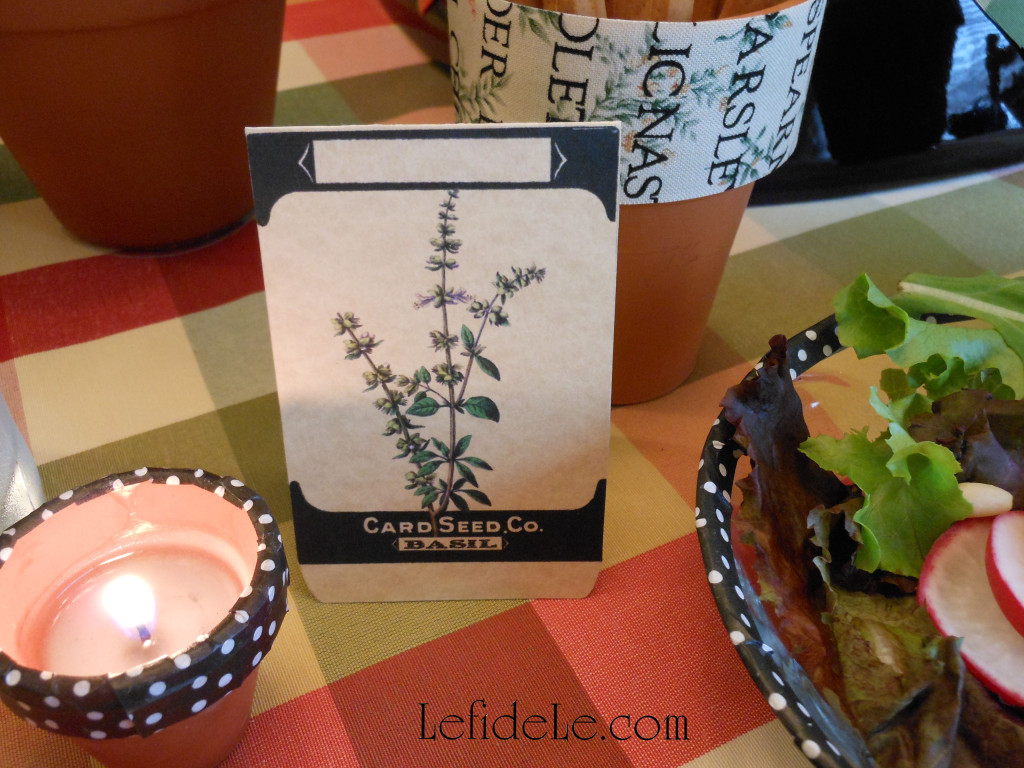
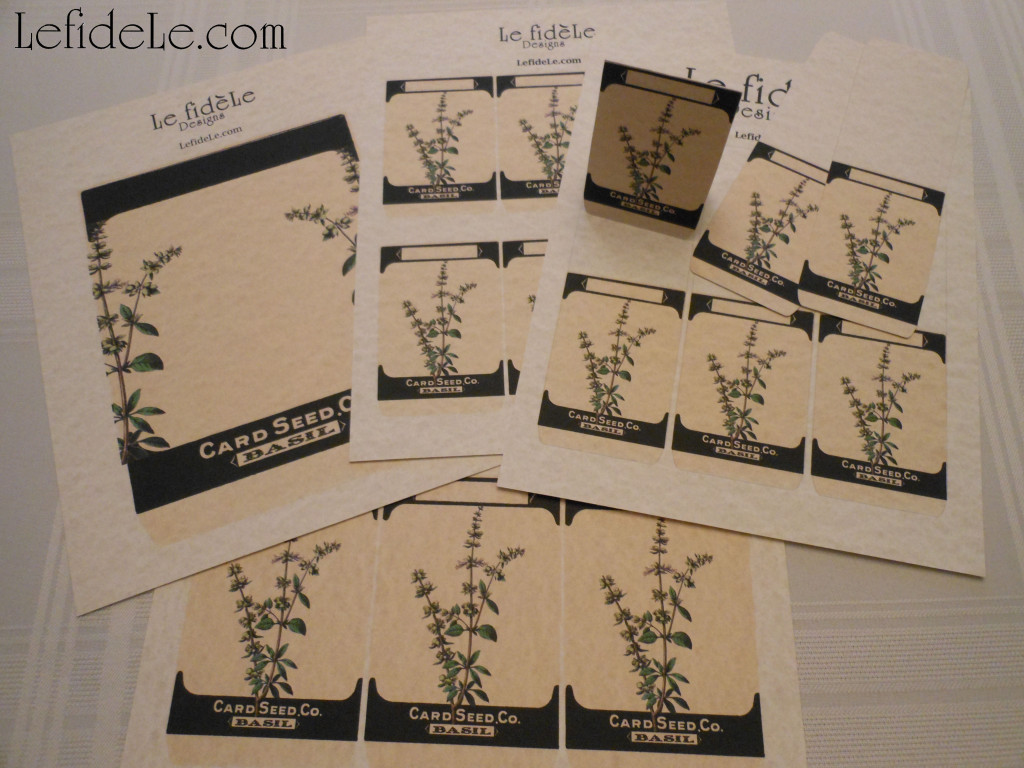
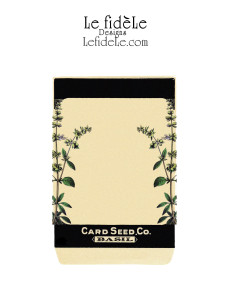
Now let’s make basil seed card invitations, menus, food tents cards, place-cards, and even herb markers for your tablescape. (Please note that my seed card printables are free for your personal use only.)

200Leigh

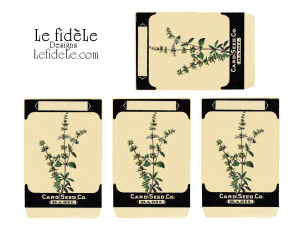
Simply right click on a small image below and select print. Choose color and photo settings for the best results. Print them on a thick paper cardstock that won’t curl.

HerbPlacecardsLeighHerbInviteLeighHerbMarkersLeigh

Cut them out by the lines, and fold the pieces that need them into tents.

244Leigh

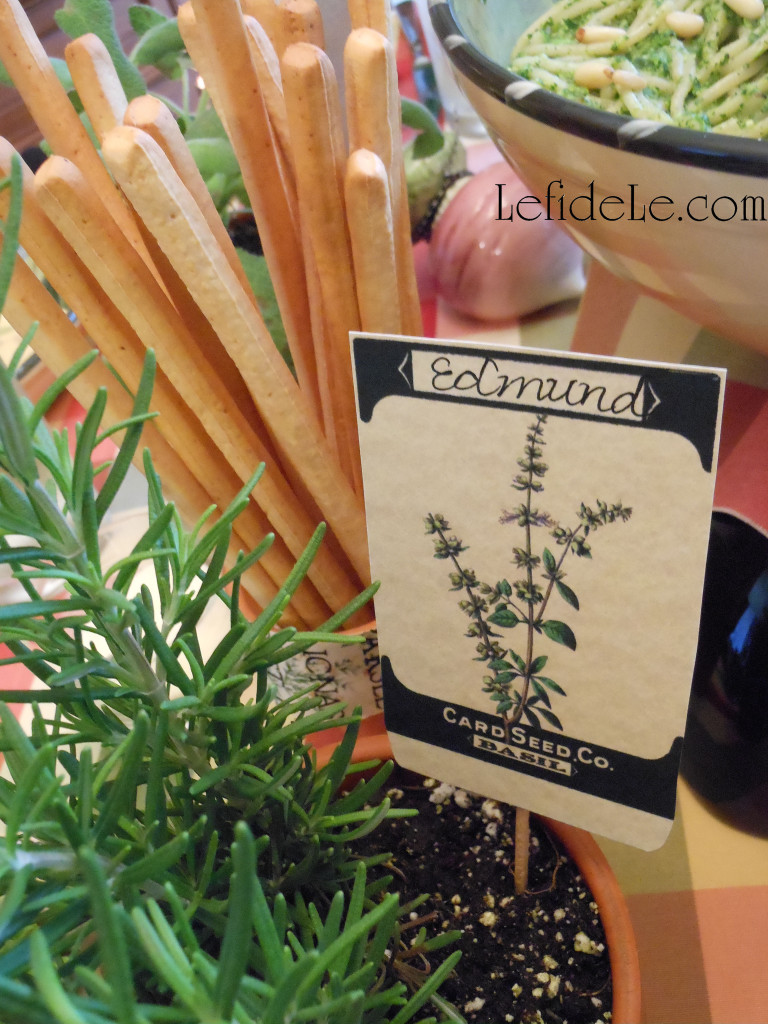
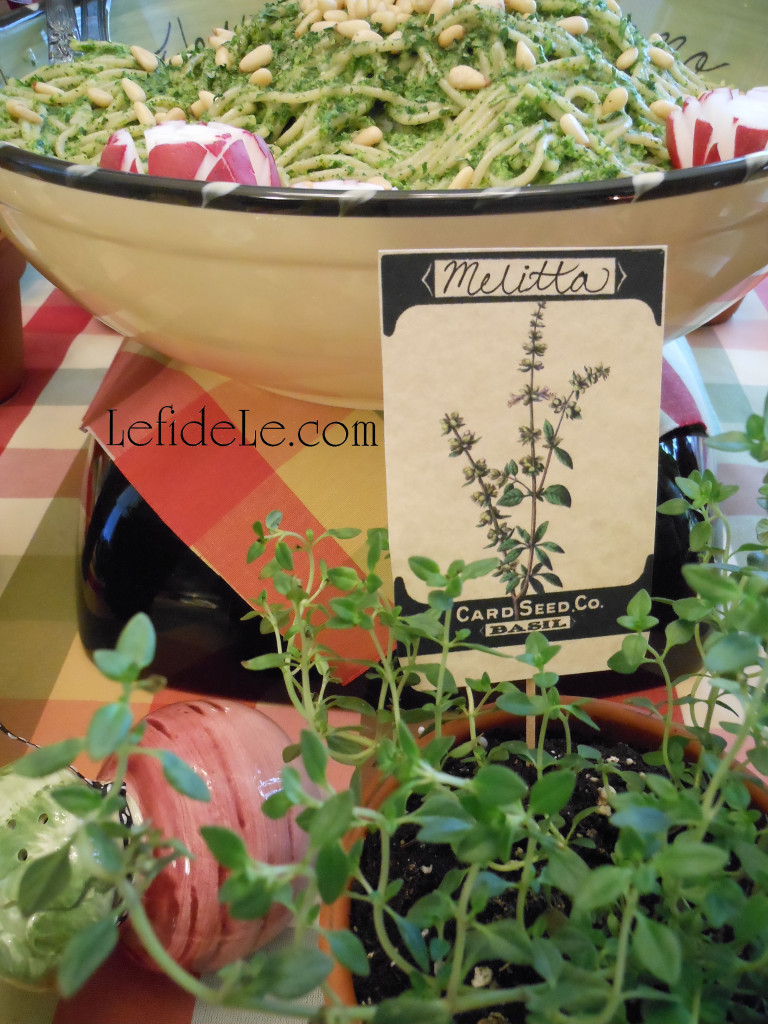
I taped the flat herb markers to toothpicks and wrote names on them to use as place-cards. The herbs they were stuck into then became lovely take home gifts for the name bearers.

224Leigh

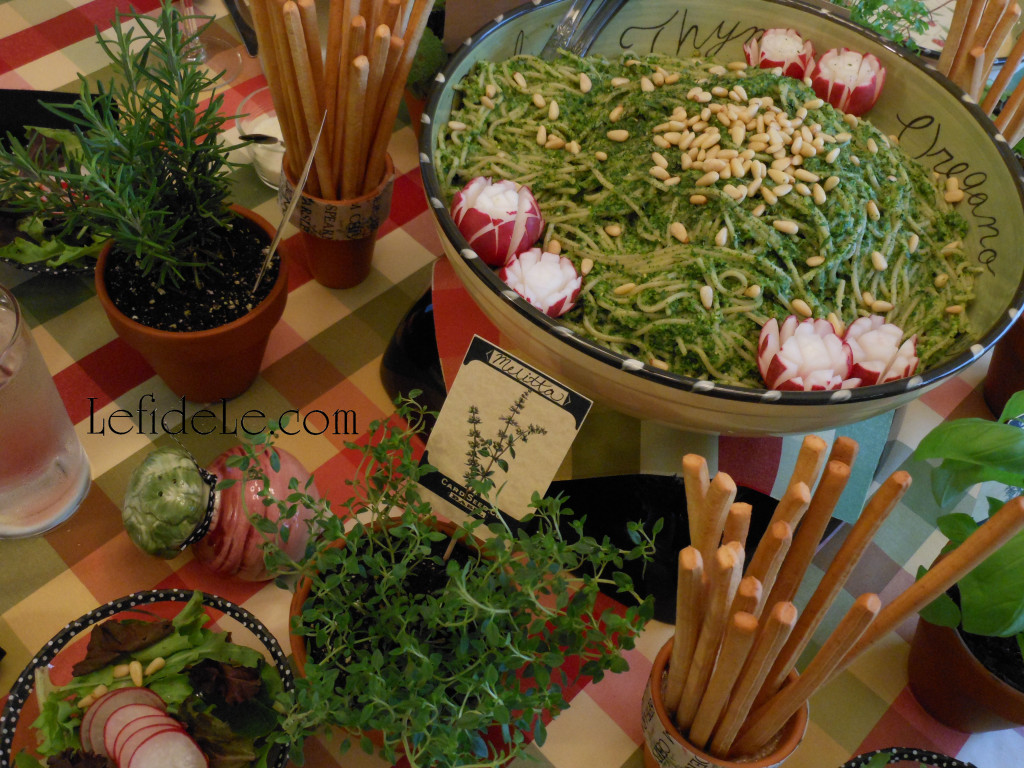
The herb pots were lovely to set around a centerpiece of parsley pesto pine nut pasta elevated by an inverted serving bowl. (A piece of cloth, sandwiched in between, ensured no slippage while serving.)

252Leigh

See the recipe for my Healthy Herb Garden Fresh Parsley Pesto Pine Nut Pasta Recipe (Gluten-Free, Dairy-Free, Soy-Free, Vegan) here.

204Leigh

Race you to the craft room!

Faithfully Yours,

Leigh
DIY Fast & Easy Mardi Gras Glittered Napkin Rings Craft Tutorial (+ Ribbon Votives, Centerpiece, Free Place-card & Invitation Printables)

012Leigh

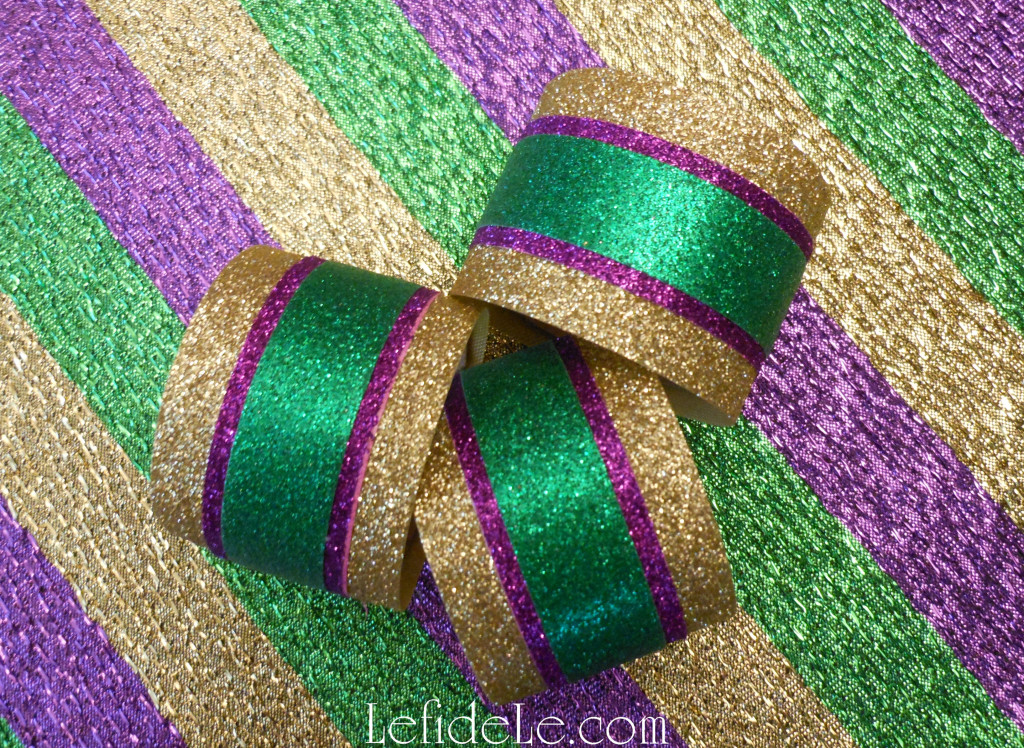
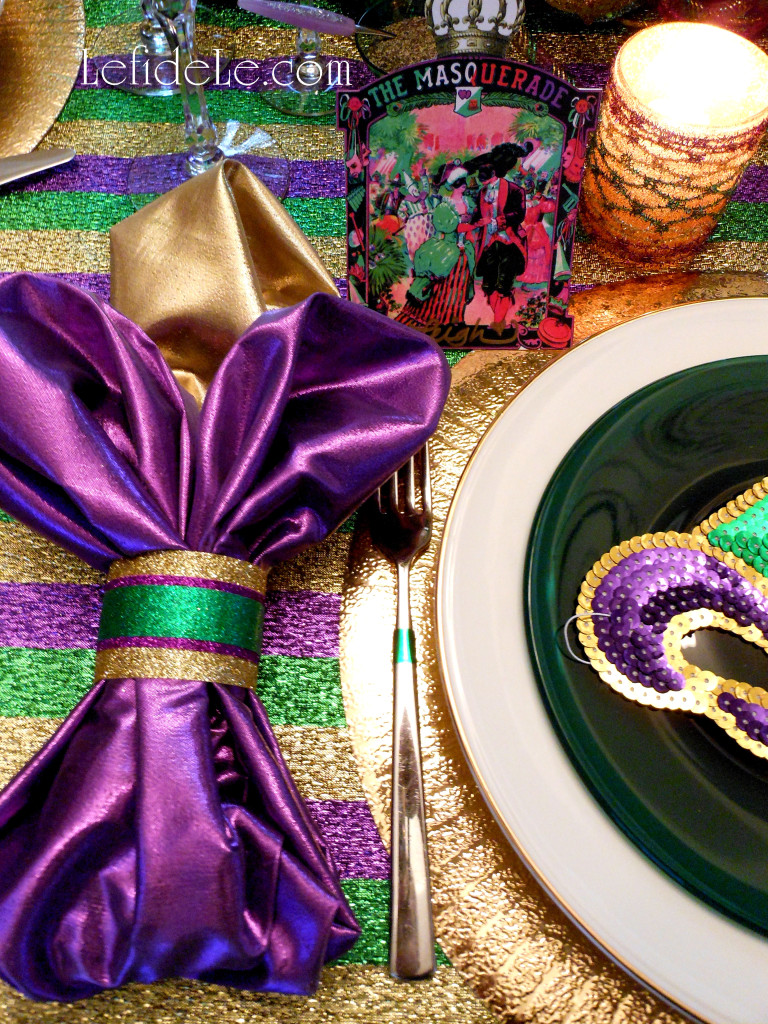
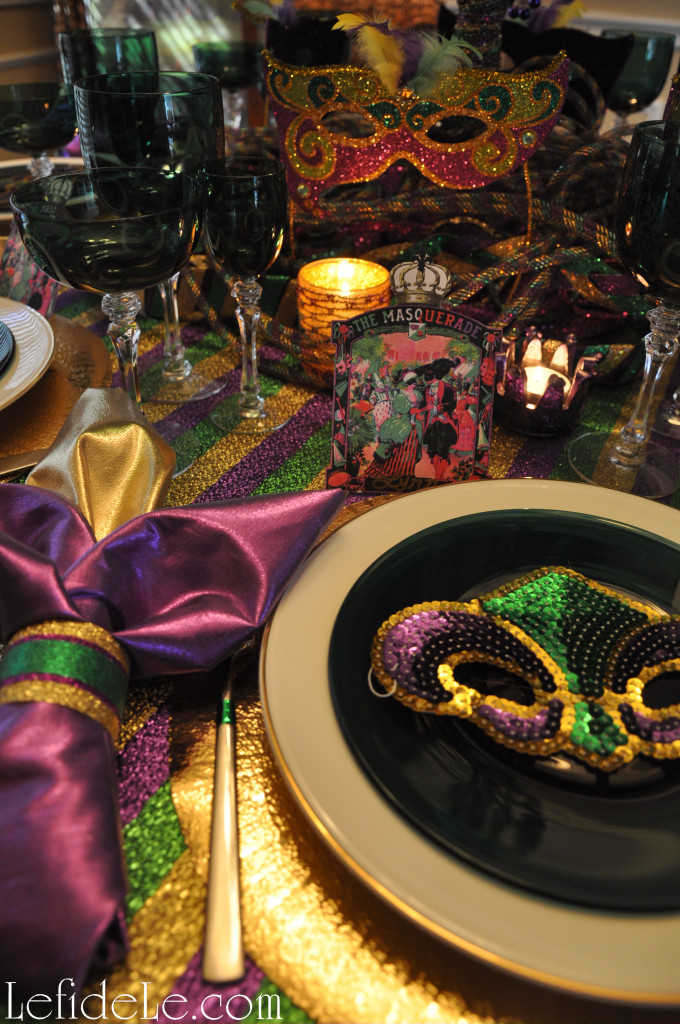
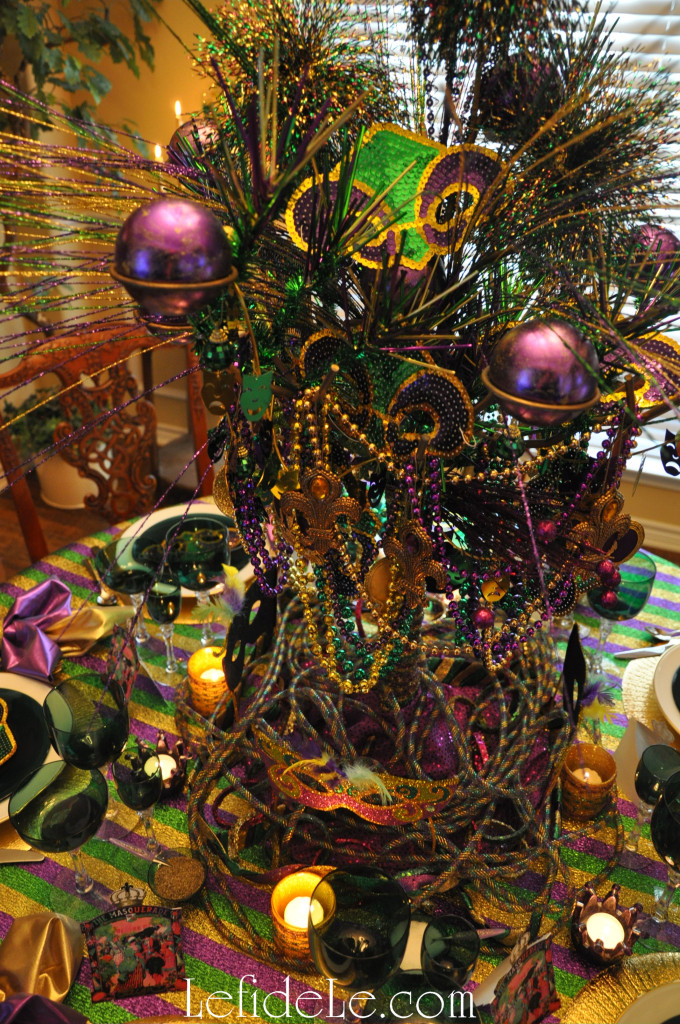
Create your own elegant Mardi Gras themed glittered napkin rings for mere pennies with this fast and easy craft. The tutorial includes how to embellish votives to match your theme, free masquerade place-card and invitation printables, plus more details on the centerpiece from the Mardi Gras Masquerade Themed “Fat Tuesday” Dinner Party Tablescape Décor Ideas. These DIY projects are an easy and inexpensive way to bring the look of an authentic Krewe’s fête to your own crew!

304Leigh

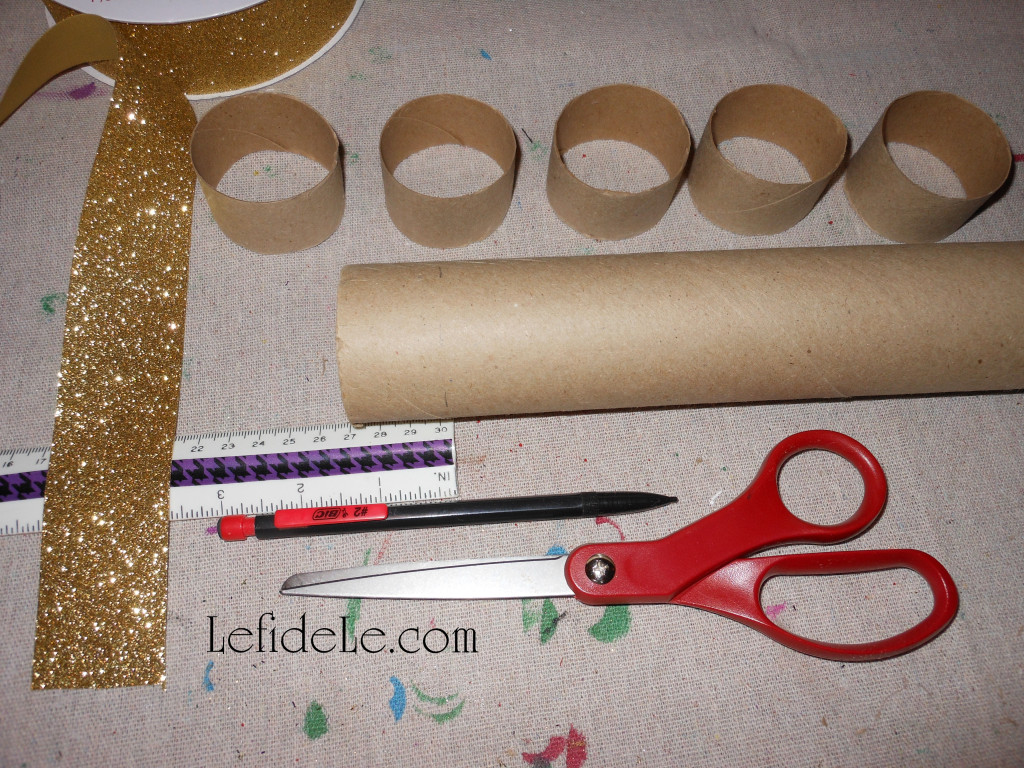
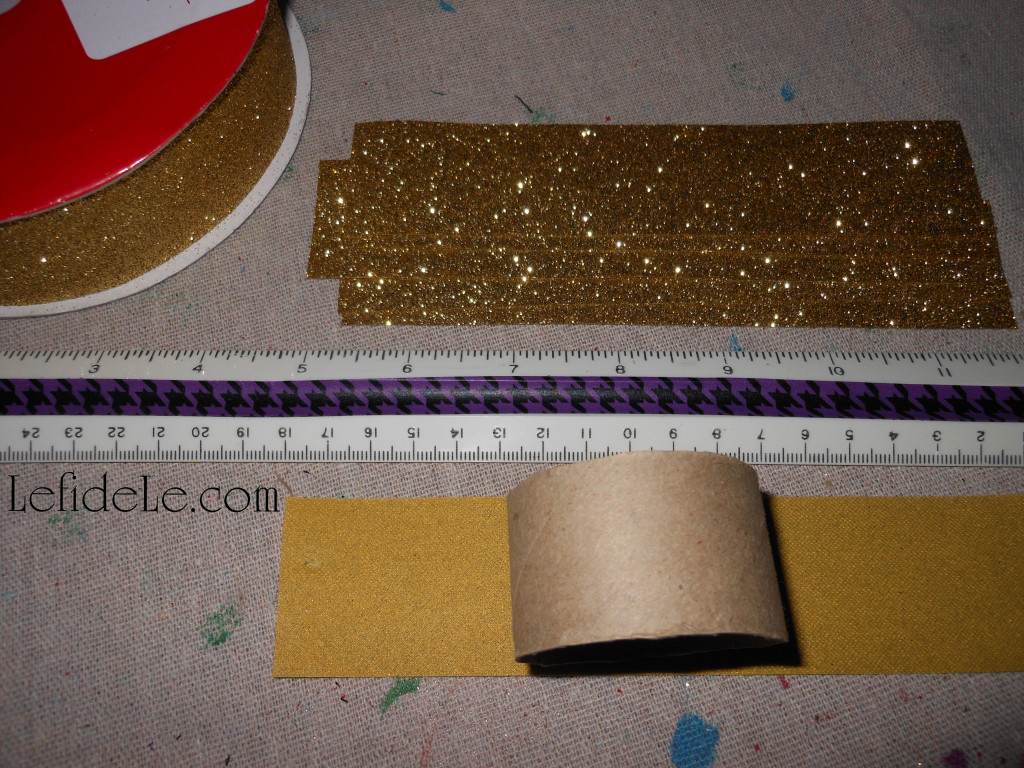
The secret element to an inexpensive napkin ring form is the core of a wrapping paper roll. You can’t do better than free! Mark and cut sections that are smaller than the ribbon you choose to cover it with.

308Leigh

Then cut lengths of ribbon long enough to wrap around those cores.

309Leigh

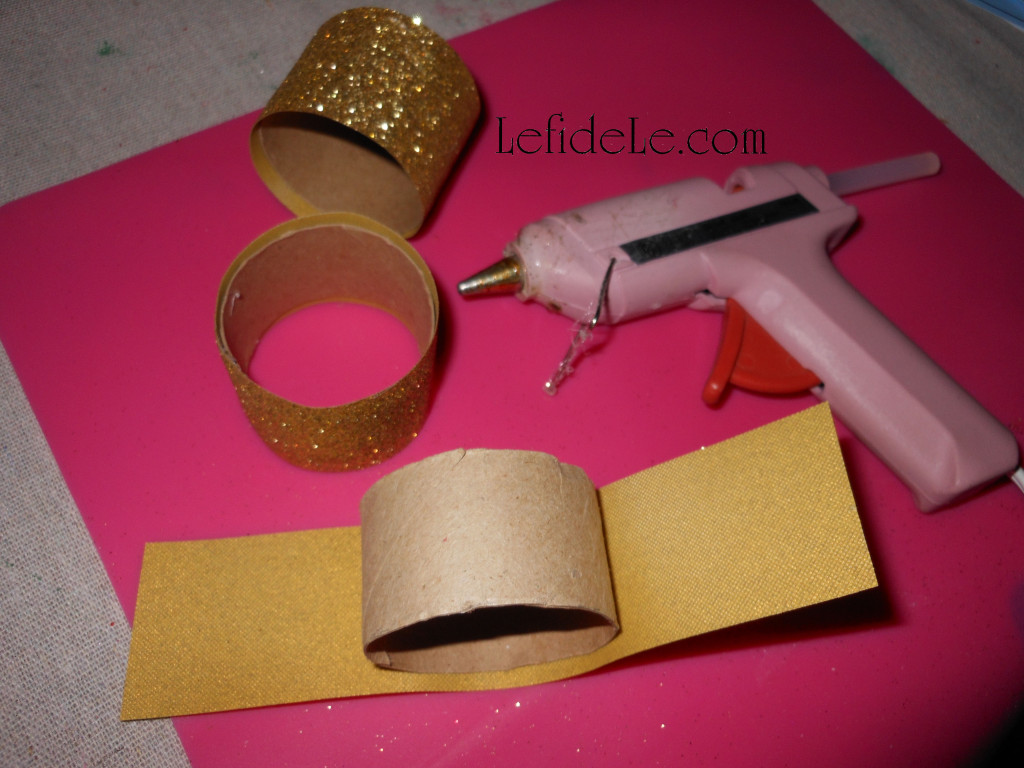
Use hot glue to adhere a strip of ribbon around each core. Here I’ve chosen gold glitter ribbon to coordinate with my Mardi Gras theme. (You can see the same technique used on the rings in my Herb Themed Luncheon by viewing the picture in the Upcoming Projects Gallery in the sidebar.)

311Leigh

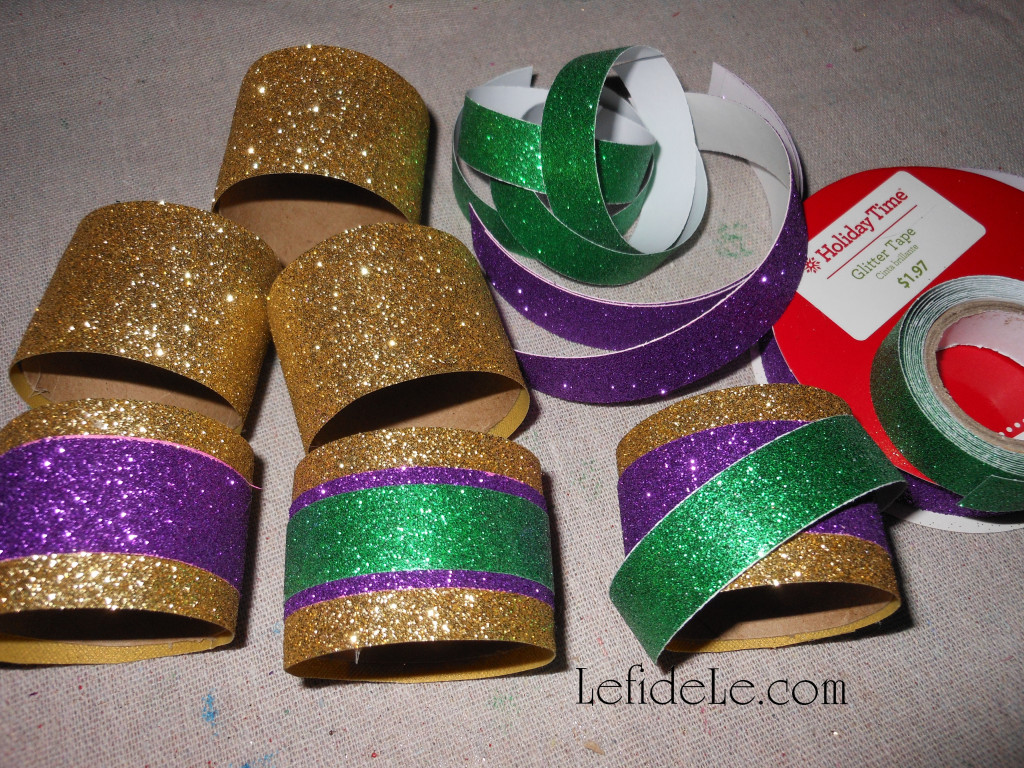
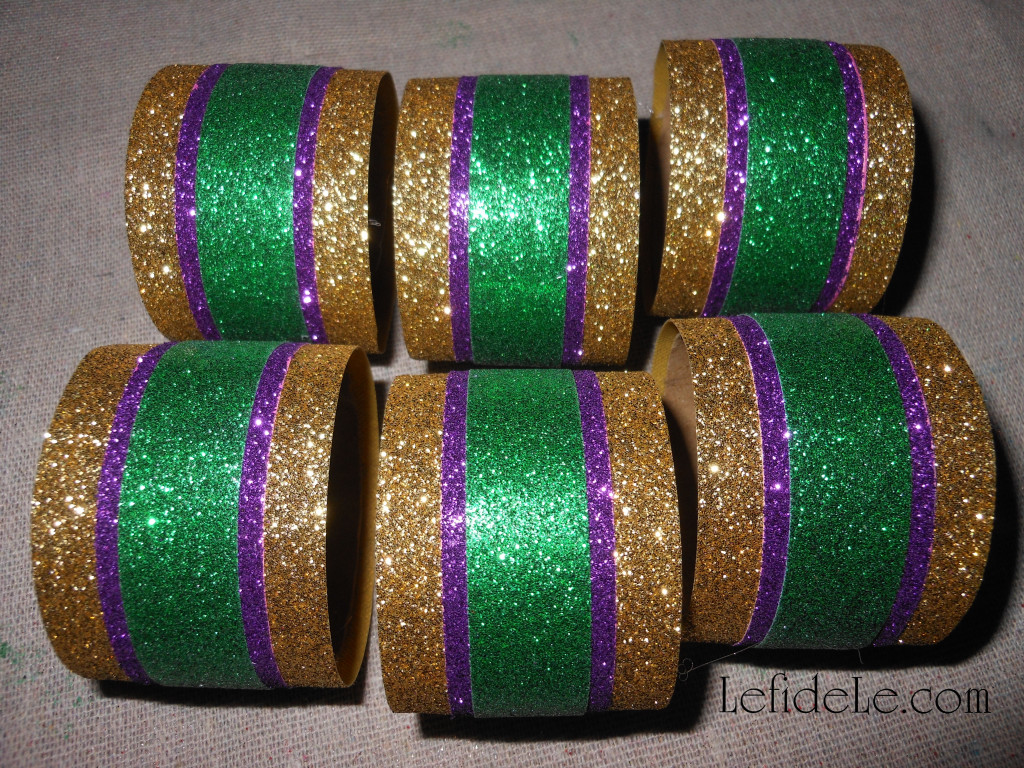
Next, I cut and attached layers of green and purple glitter washi tape in different widths atop the gold base. Layers of ribbon would have also worked well, but I already owned the perfect sized tape.

313Leigh

Read how to make your own fleur-de-lis shapes with napkins at the article on Mardi Gras Masquerade Themed “Fat Tuesday” Dinner Party Tablescape Décor Ideas.

024Leigh

I made all six napkin rings for way less than a dollar, in a matter of minutes, and they coordinated perfectly with my theme’s décor… Awesome!

299Leigh

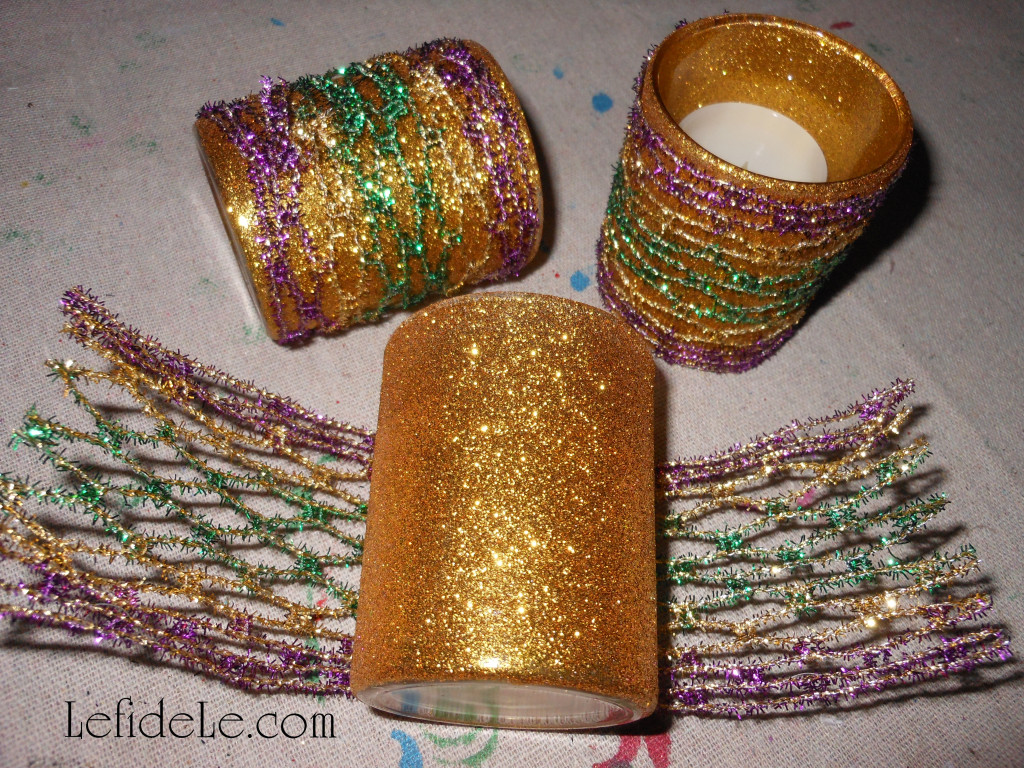
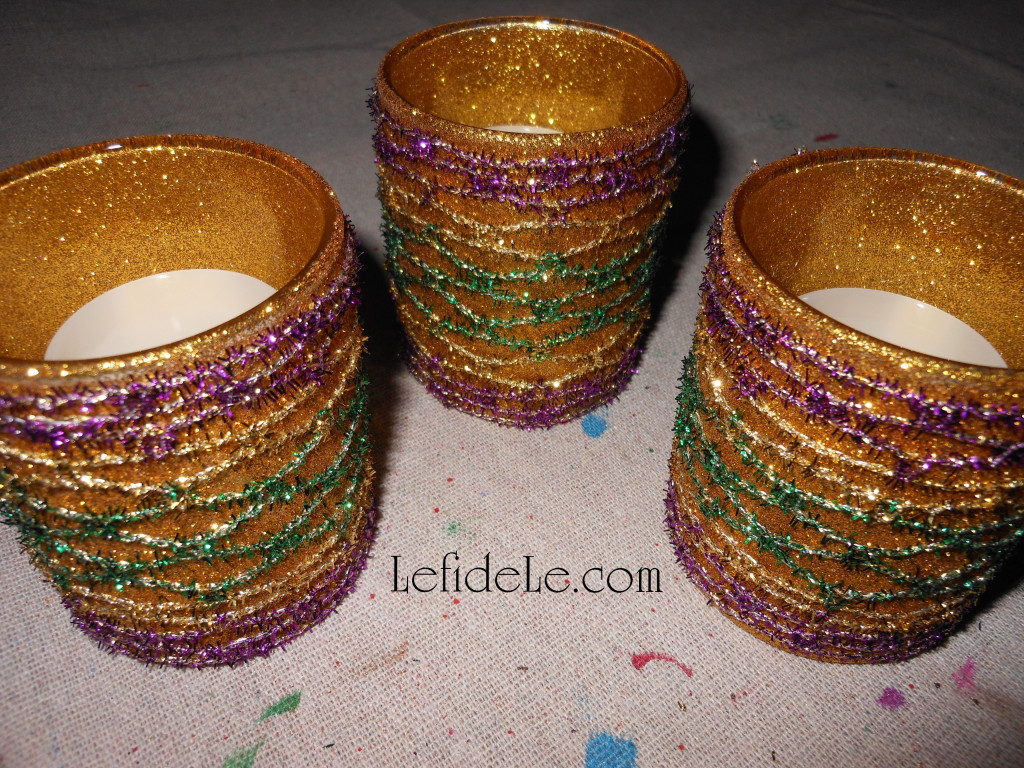
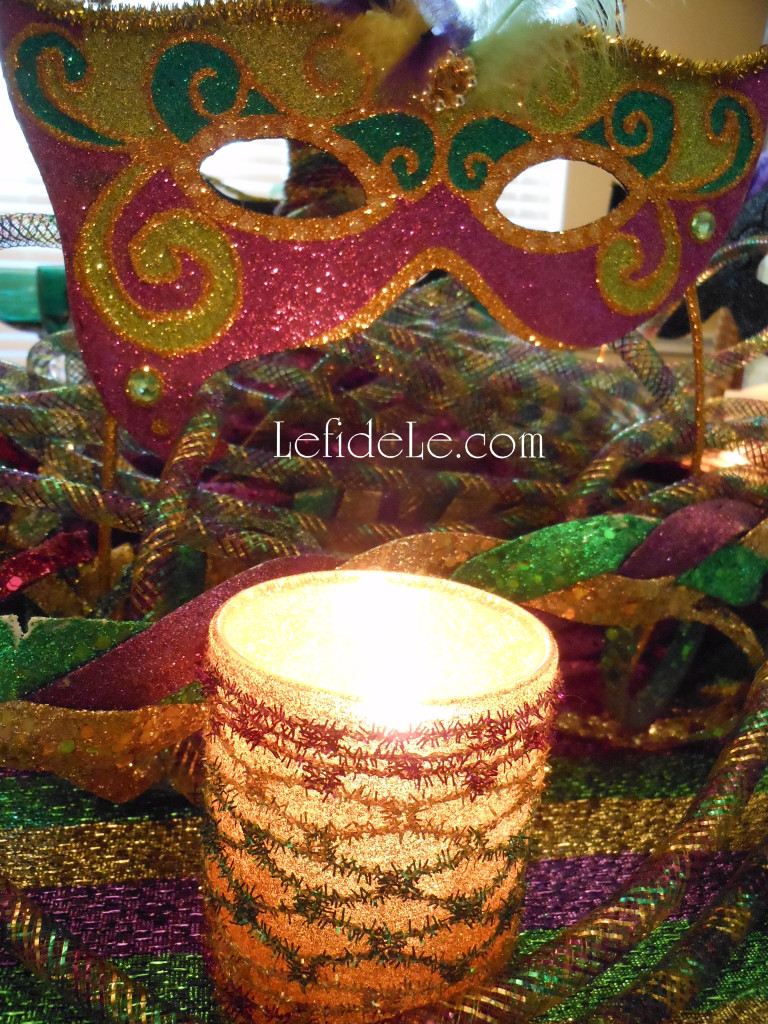
Now for those ribbon votives… simply start with any type of votive holder or small jar. You can leave them plain or apply glitter paint to them. I went with gold glittered glass. Cut lengths of coordinating ribbon long enough to wrap around them and overlap. You can attach one end to the other with a dot of glue or double stick tape. Because my ribbon was wired, I merely twisted one side over the other like a twist-tie. (See more twisty ribbon action here on my DIY Rusted Rooster Chicken Wire Votive Holder Craft.)

303Leigh

In this way, I can unwrap the ribbons and reuse both them and the votives for a future holiday in a different way. I think they turned out great, and they literally took me minutes to complete… Yea!

392Leigh

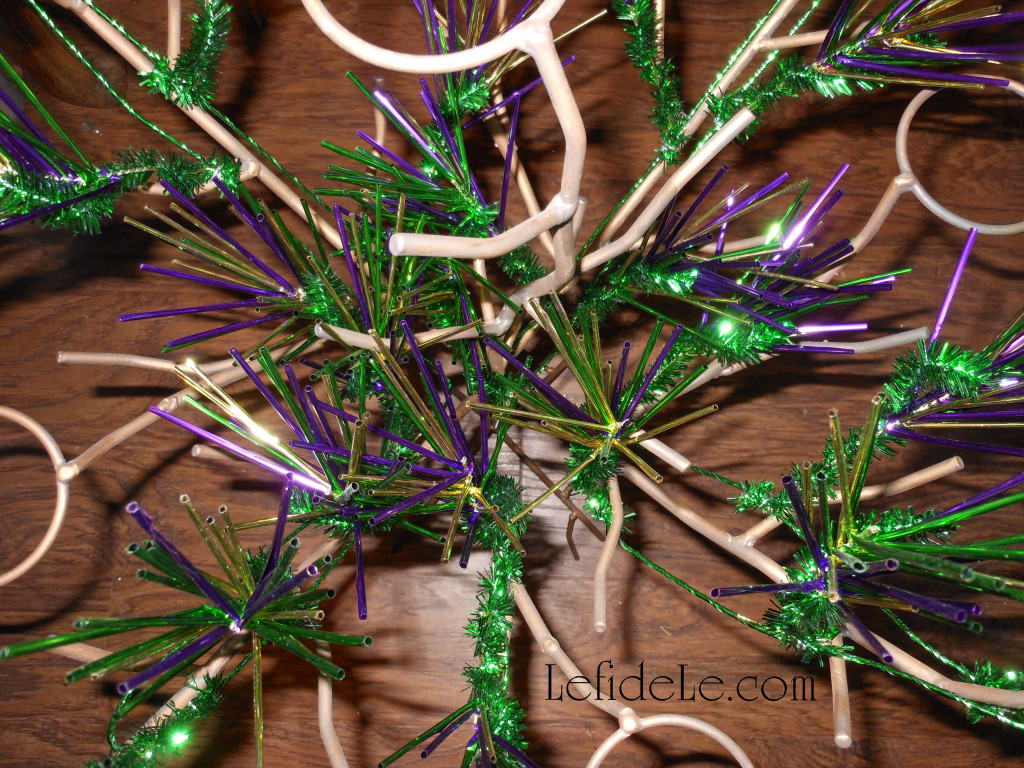
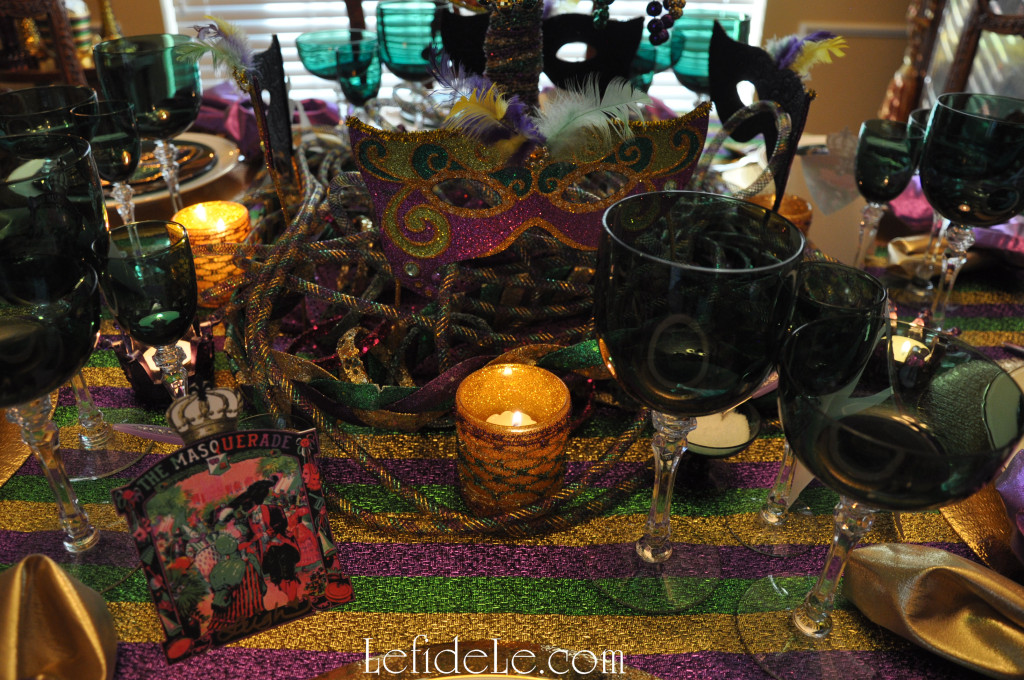
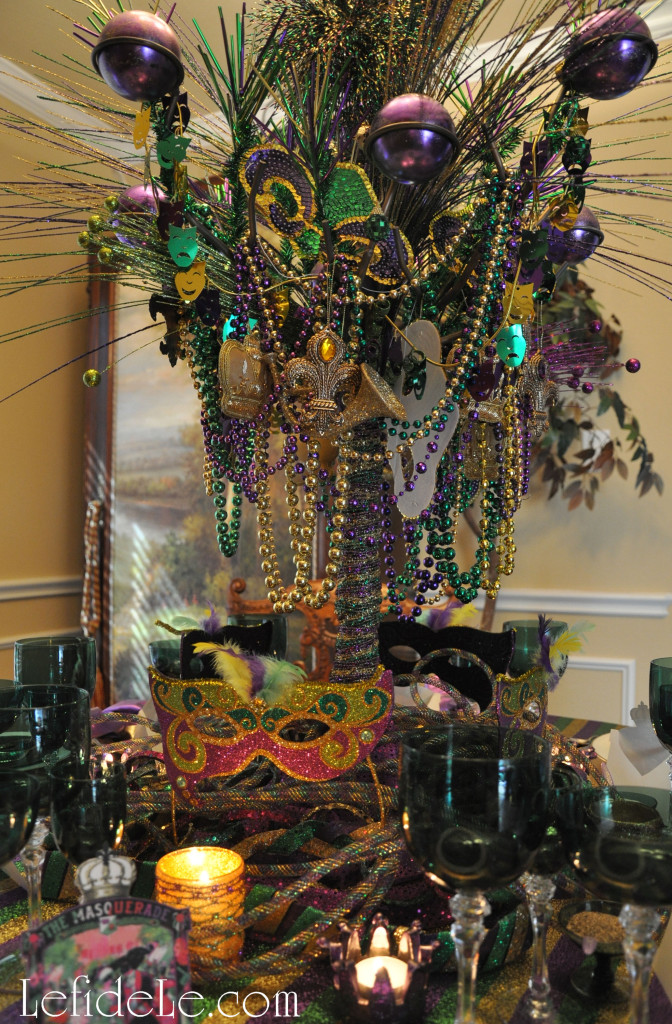
Create a dramatic centerpiece without a lot of drama by merely starting with a basic tree form from another holiday. (For example, use a black one from Halloween or a white one from Easter.) I used a metal votive holding tree that I had previously painted gold from its earlier pewter and bronze incarnations. (See how to use paint to change the color of metal and to age a piece in my upcoming lion fu-dog décor for Chinese New Year.)

393Leigh

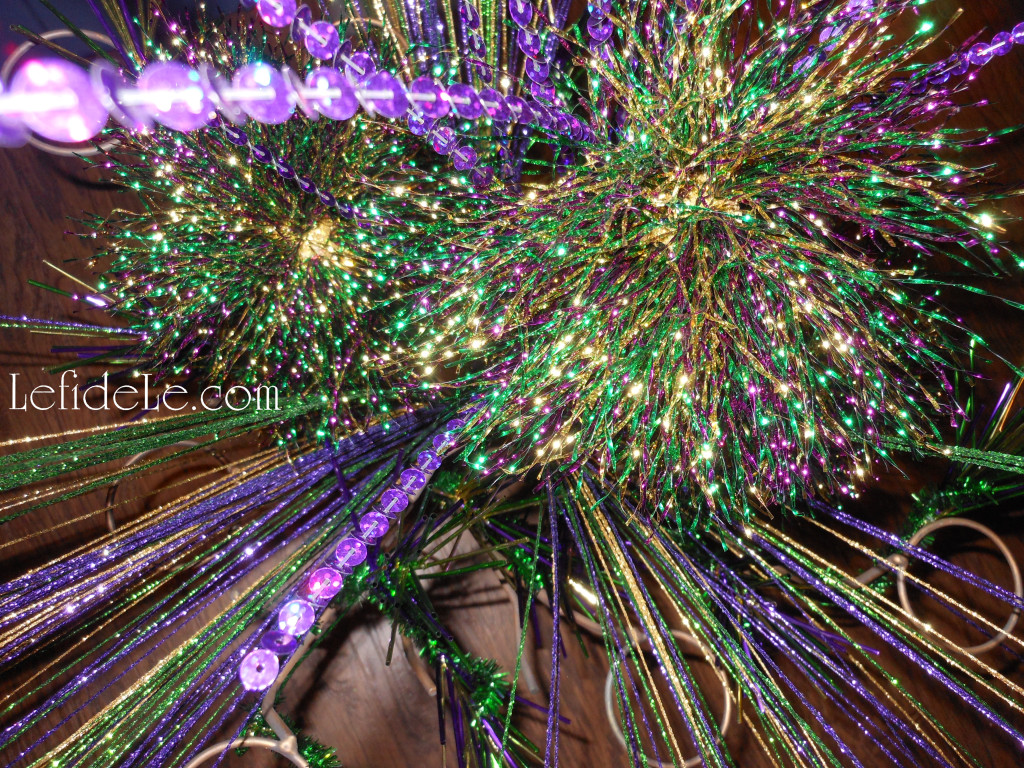
I wrapped it with trim from my Glitter-ween Party Décor (see it here) then added a few new sprigs.

235Leigh

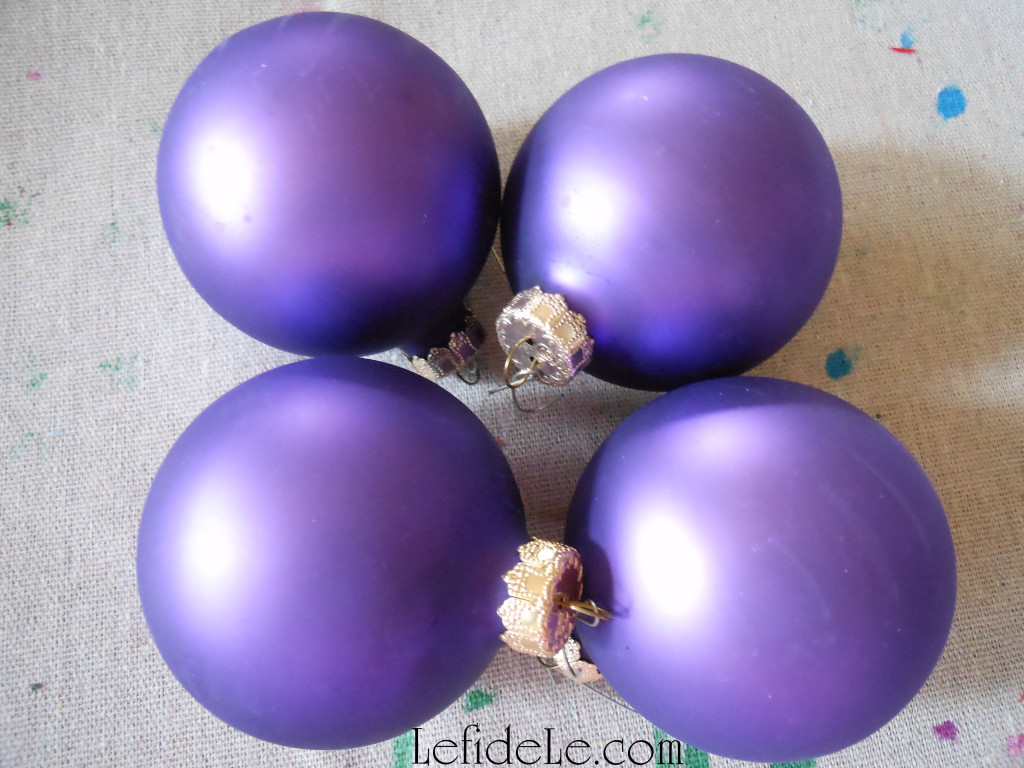
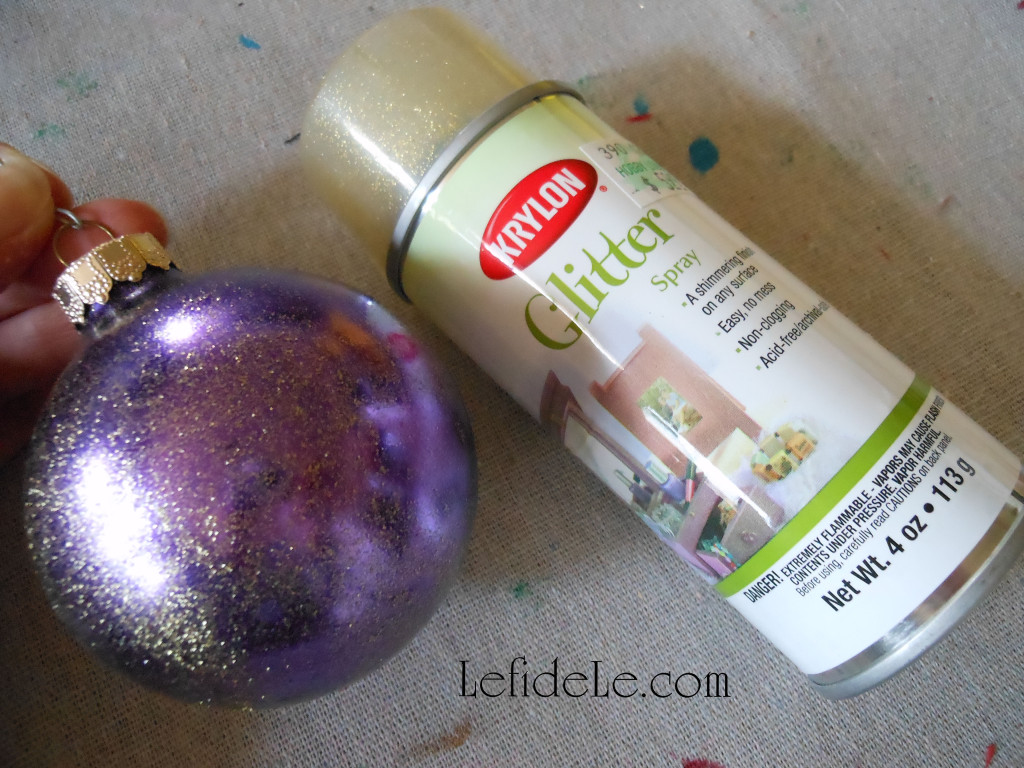
I painted simple purple ball ornaments with a glitter mist (not the blast variety) to impart both gloss and glitter shine to the previously satin sheen.

236Leigh

I set these onto the rings that would normally hold the votive holders. (You’ll likely see these in a future article.)

053Leigh

I hung embroidered Christmas crown ornaments, snapped up at 10 cent clearance, along with glittered musical instruments, green mirror balls, and a mask garland. I even hung the same sequin fleur-de-lis masks used at each table setting as ornaments. I try to plan all my holiday themes I advance of the after Christmas sales to snag a year’s worth of décor deals at 90% off. I keep my theme collections in labeled bins that I add to as I accumulate finds so that I’m ready to craft and decorate when each holiday arrives.

091Leigh

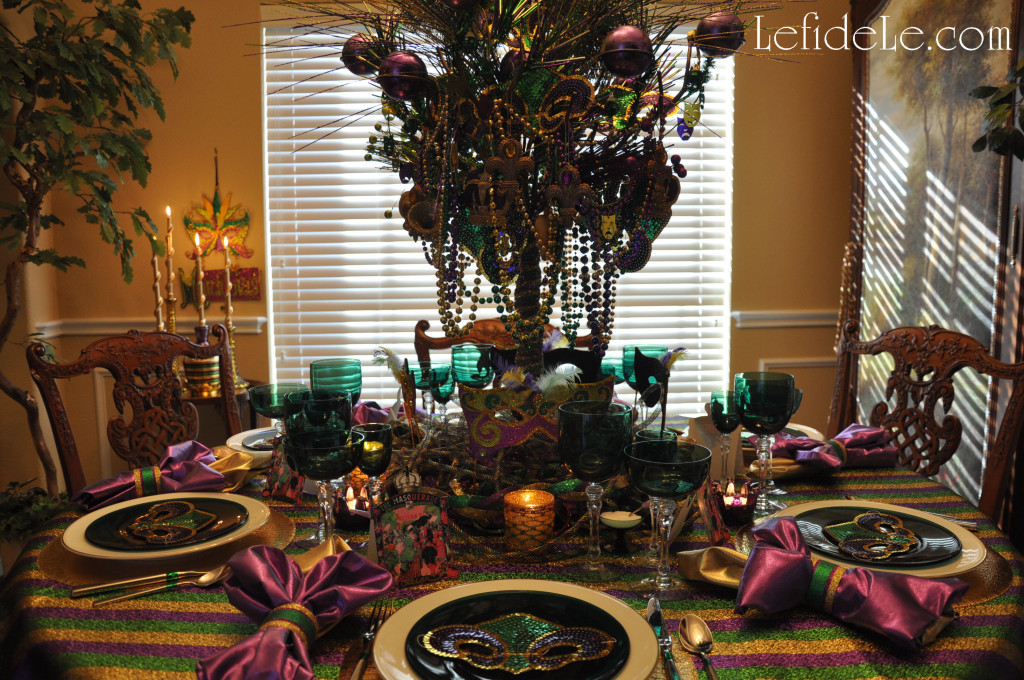
Though it’s hard to tell from the pictures, the tree centerpiece actually didn’t obstruct any person to person viewing. This is why I only draped the bottom with some Mardi Gras necklaces and wrapped the trunk with the same ribbon I used on the votive holders.

120Leigh

The base of the tree was then swathed in the same purple fabric remnant from Glitter-ween’s spooky tree and draped with yards of Mardi Gras trim. (See how to hike up a chandelier to accommodate a tall centerpiece here.)

043Leigh

Surrounding that are 4 standing glittered metal masks that I scored at a post-holiday clearance sale for less than 2 dollars each… no kidding folks. I couldn’t have made them for less. To do as I did, scope out this year’s merchandise then pounce as soon as it gets marked down. The purple mercury glass crown votive holders were also found this way for less than a dollar for all 3… Score!

009Leigh

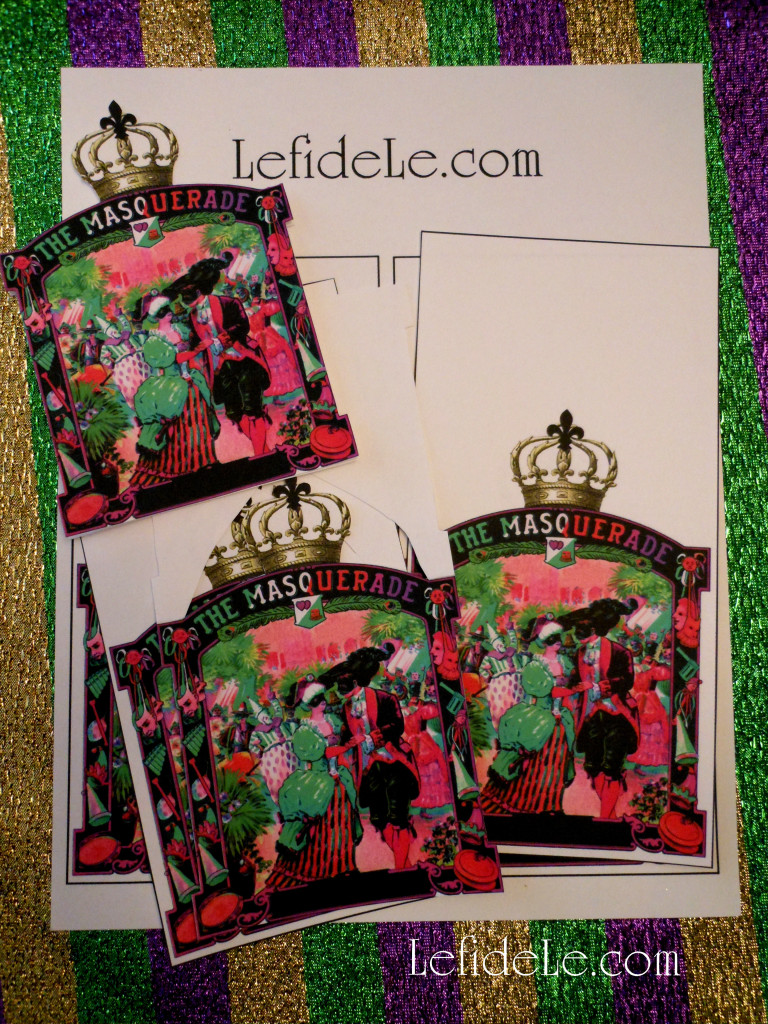
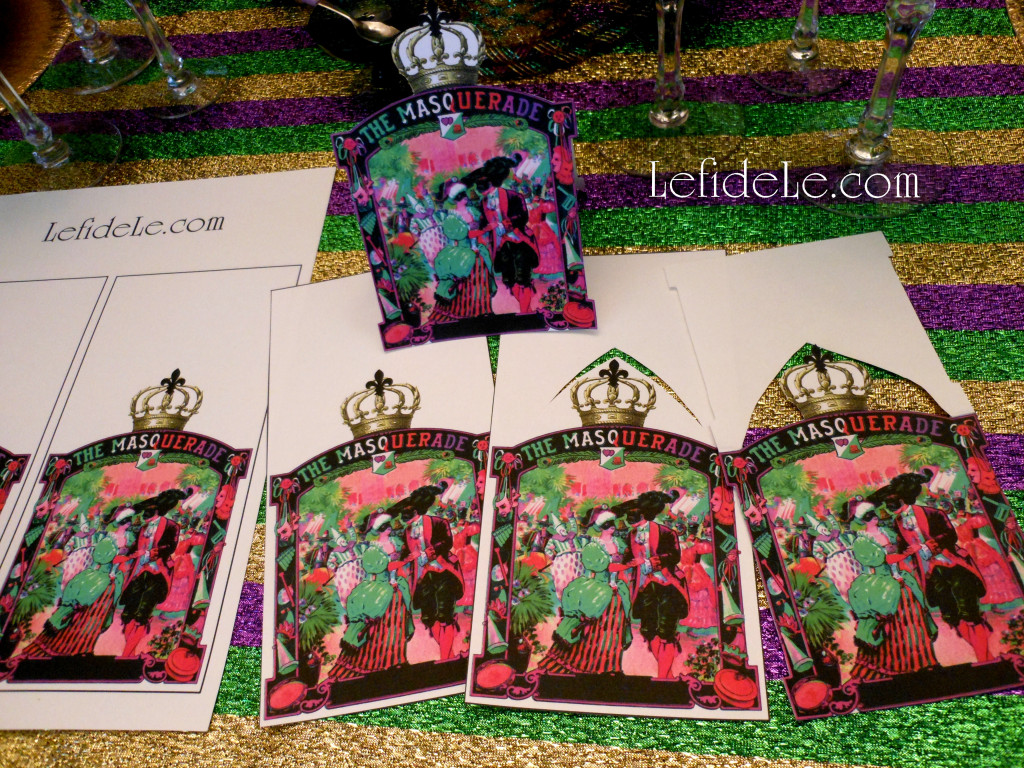
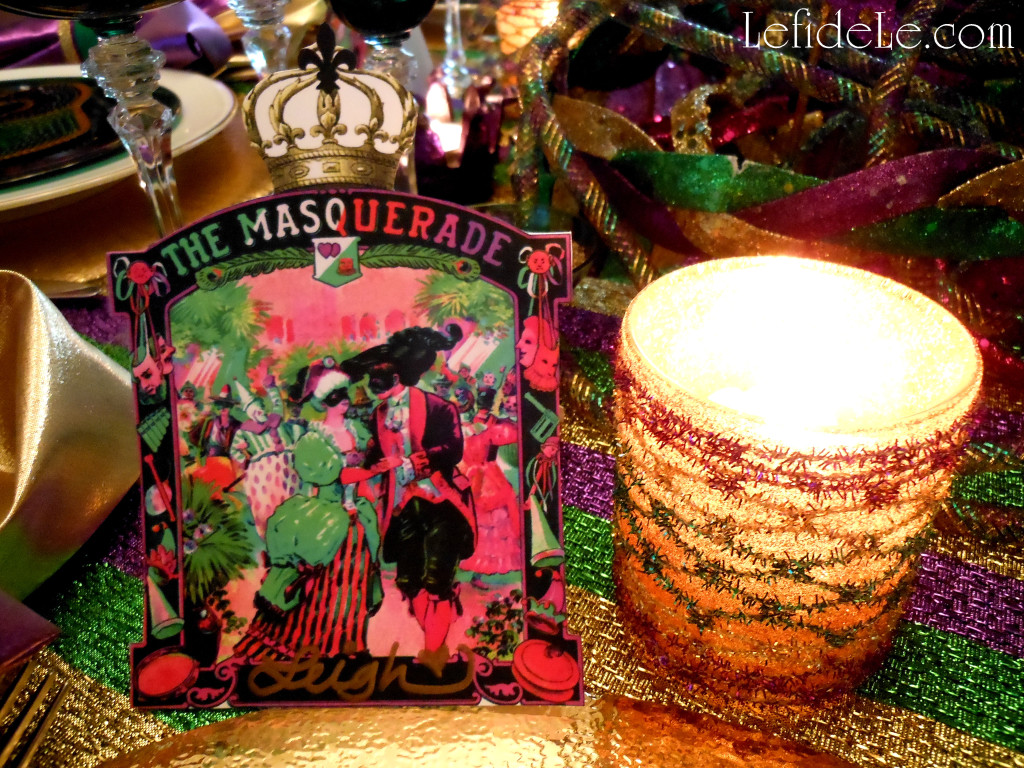
Last but definitely not least, are my free printable Mardi Gras masquerade place-cards which may also be used as invitation cards!

mardi-gras-placecards-leigh

Simple right click on this small picture and select print. Print these in best color photo on thick cardstock.

004Leigh

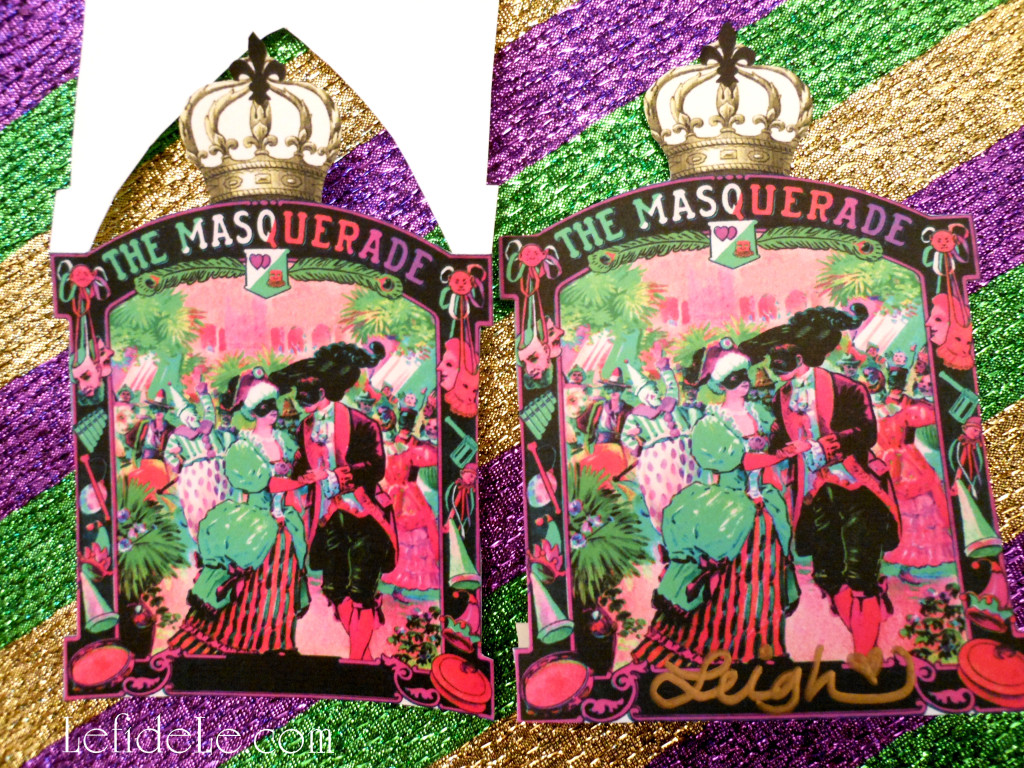
Then simply cut on the solid black lines to separate the images for invitations. For place-cards, use the pictures a guide for how to cut out the top and crown while still making a tent folding card that will stand upright.

039Leigh

Poke a point into the paper just above the crown with a pointy pen, or compass point, etc. Use that as a starting point for your scissors to cut a V shape above the picture. Then cut one side close to the top and crown next to the image. Don’t cut all the way to the ends. Stop where the curve meets the flat top. Those flat parts are what join the front and back together. Then fold it in half. Cut through both pieces around the image. Again, a picture speaks a thousand words… use it as a visual guide.

028Leigh

Simply write names on the bottom with a gold sharpie marker or paint pen… Voila!

104Leigh

See more of my Mardi Gras Masquerade Themed “Fat Tuesday” Dinner Party Tablescape Décor Ideas here for more holiday inspiration!

070Leigh

Let the good times roll!

Faithfully Yours,

Leigh
Fabulous Fall Leaf & Pumpkin Décor Crafts (Place-card Holders & Easy Remade Basket)

354PumpkinBasket-Leigh
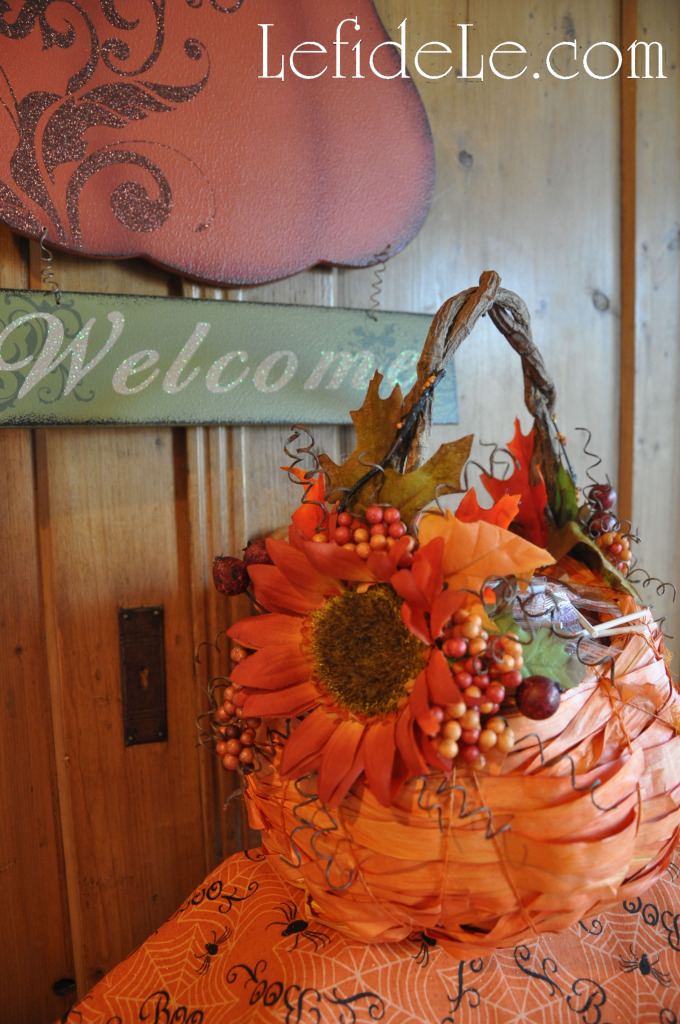
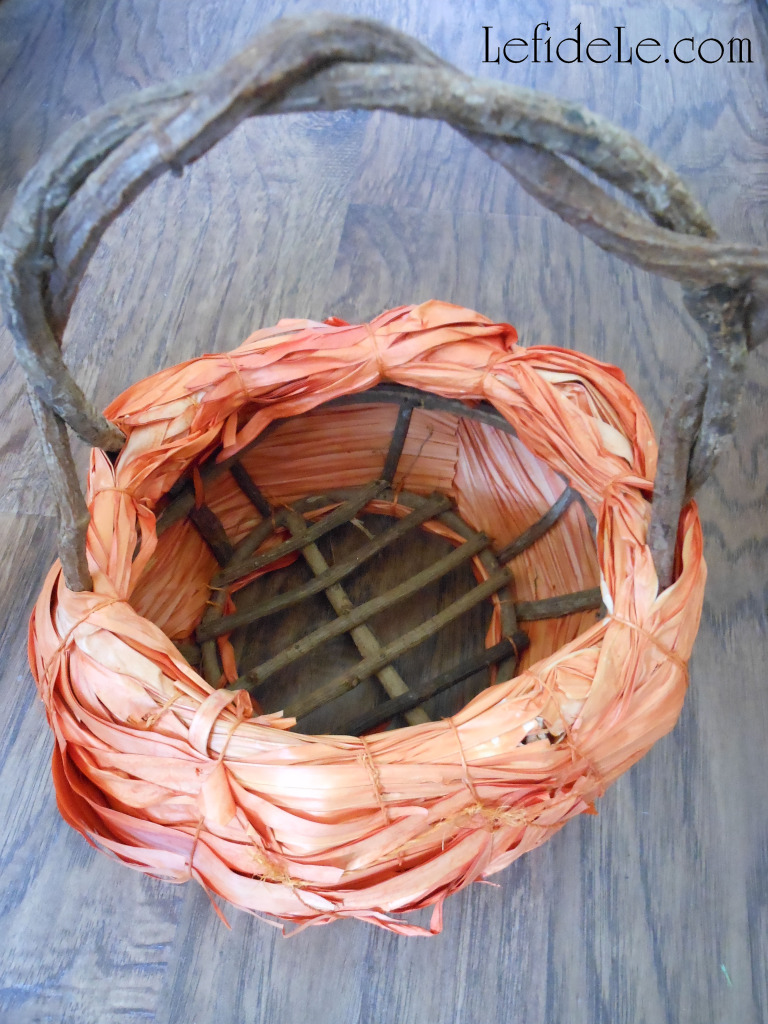
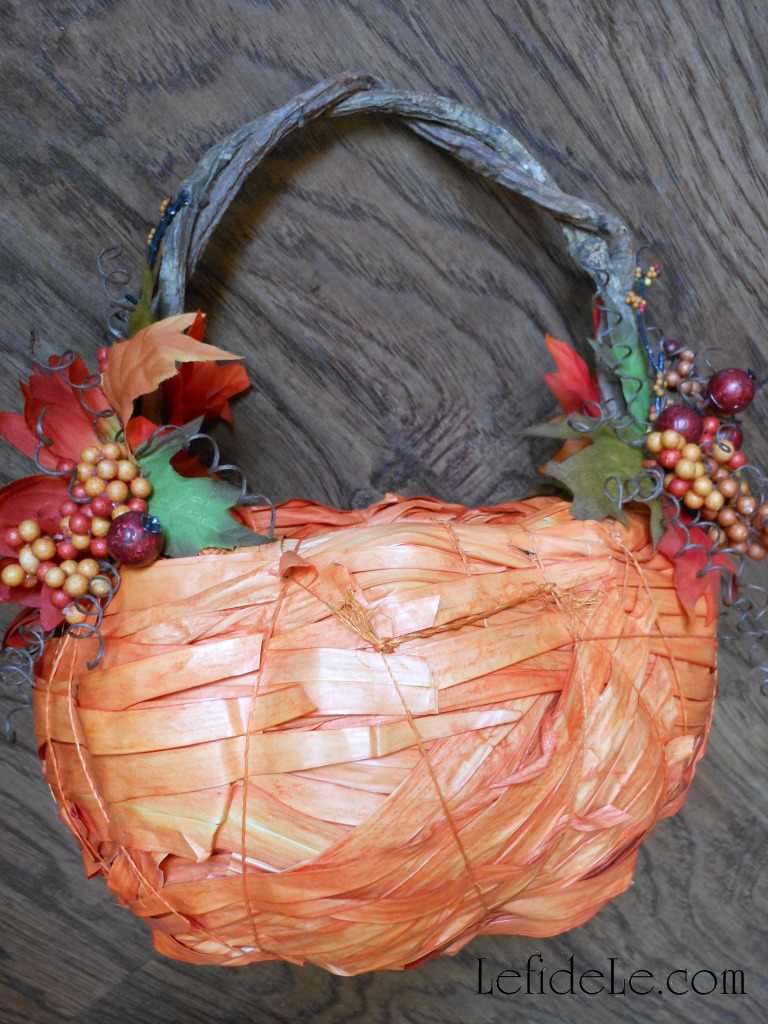
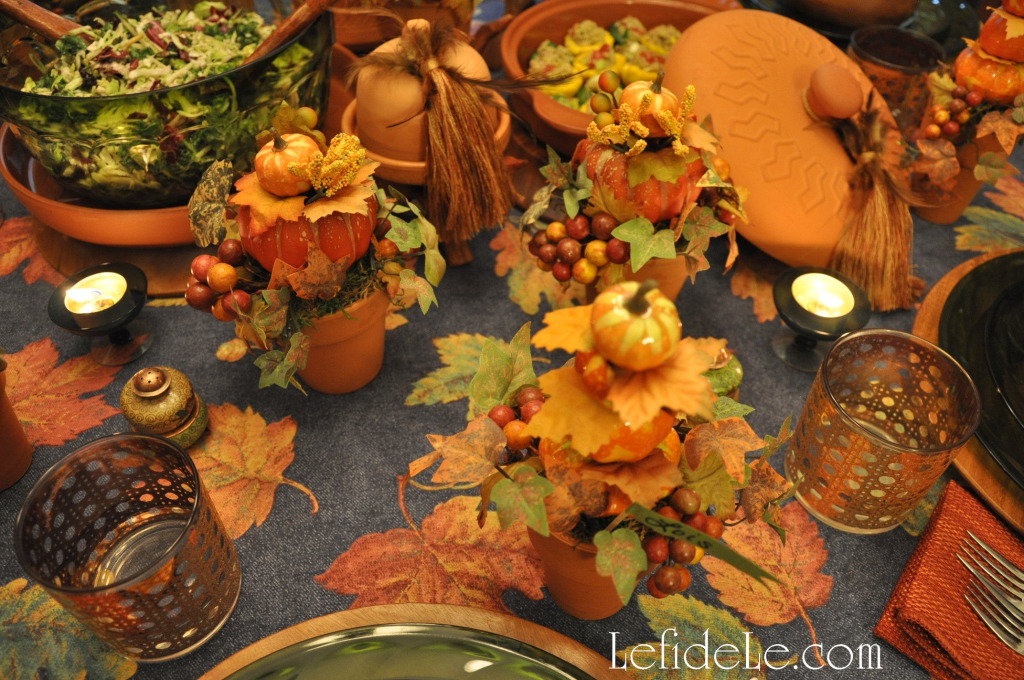
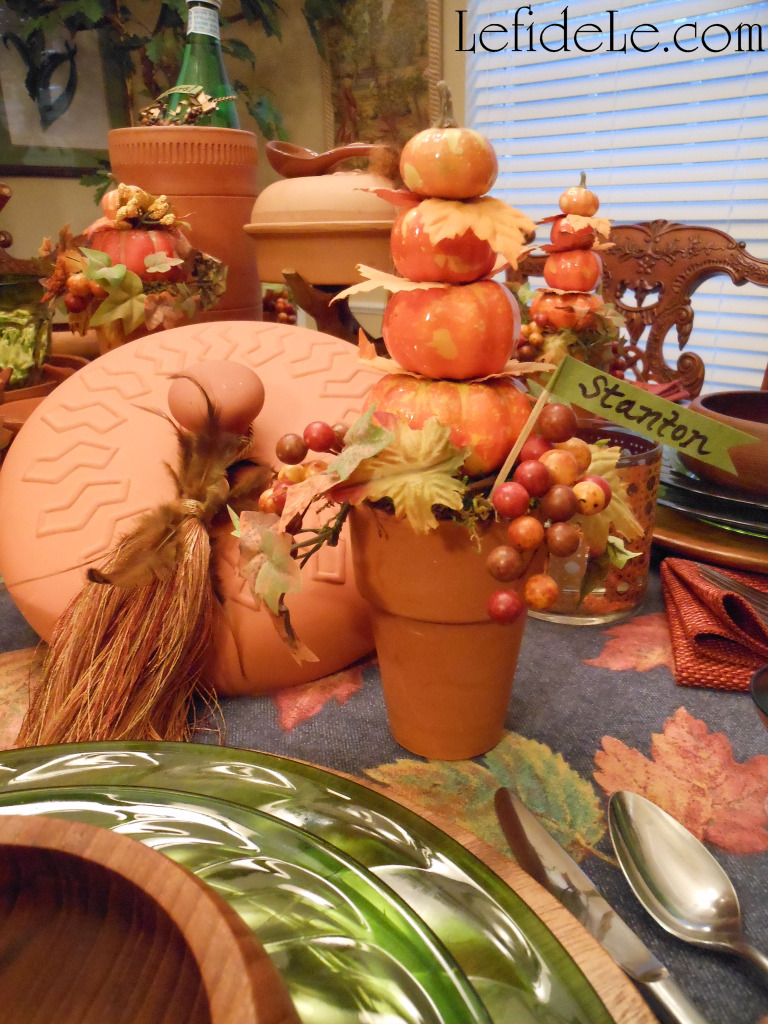
I’m combining what are essentially two projects, because they entail exactly the same easy process of hot gluing your way to a fabulous fall! With so many beautiful options in faux foliage available, you can keep your creations to display again. The pumpkin topiaries may be placed throughout your home or office as small floral elements, or used as place-card holders as I have for my Fall Leaves & Pumpkins Themed Thanksgiving Tablescape. And though I used a vintage pumpkin shaped basket, I’ve seen similar variations of it at several craft and party stores that are just begging for embellishment.

314Leigh
For those of you who are brand new to this kind of thing… always buy fall foliage on sale (and there is always a sale somewhere). There are a plethora of leaves, sunflowers, berries, twigs, and mini-pumpkins available in fall colors. Rip off (or cut) the pretty bits from the largest stem.

313Leigh
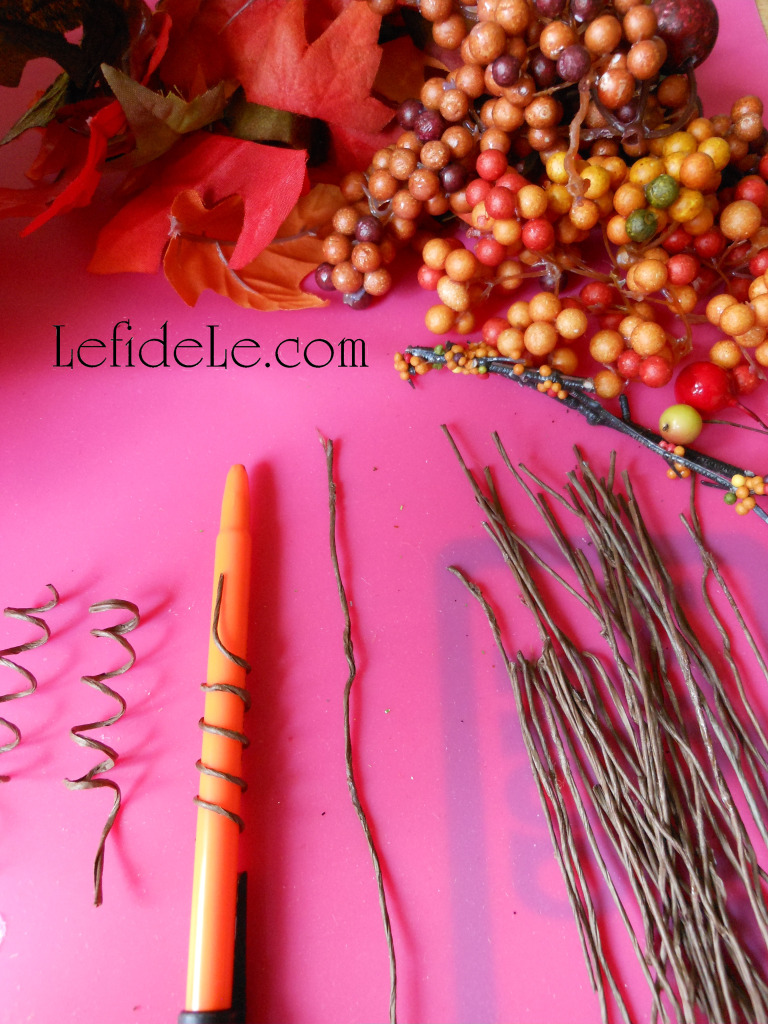
Make curlicue vines by first wrapping brown floral tape around wire (pulling as you go). Then take that and twirl it around a pen. Pull the pen out, and you’re ready to use your newly made vine.

316Leigh
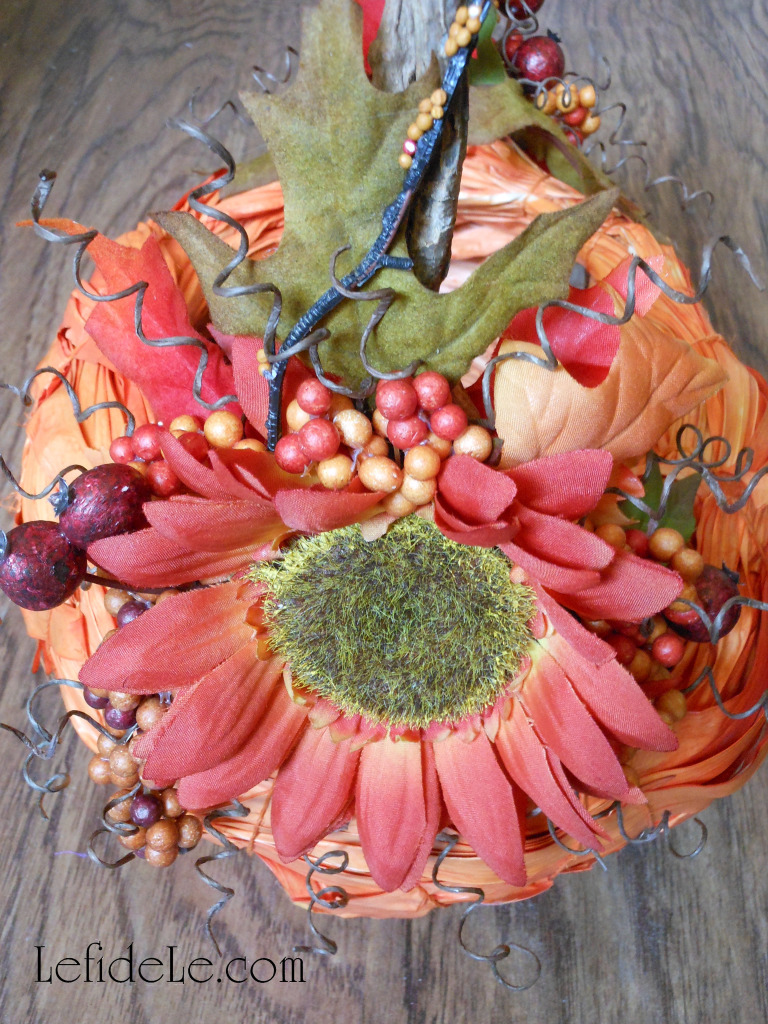
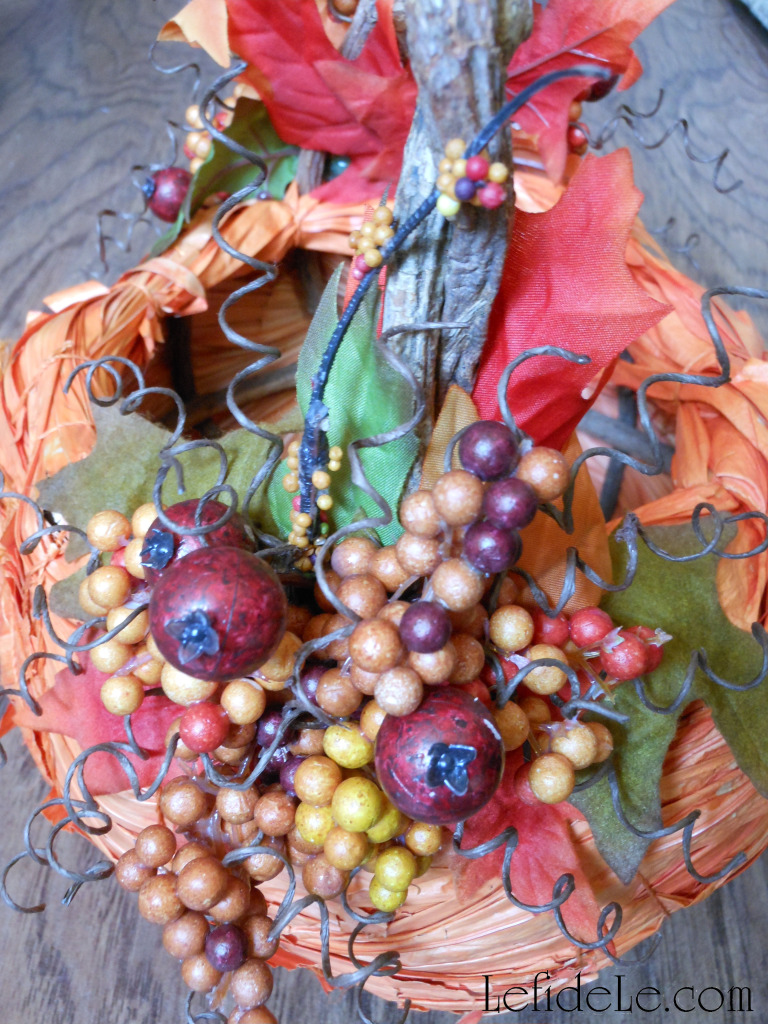
Now glue, glue, glue to your heart’s content. For the basket, start with leaves in order to form a base platform (at the junction between the handle and bowl of the basket). Then glue the larger elements on top of that blanket of leaves (without covering them completely).
317Leigh

Add smaller elements like berries, by dropping glue onto the stem ends, then tucking them in behind the biggest center element. Lastly, glue the vine ends (in the same way as the berries) and tuck those in wherever you see empty spaces.

320Leigh

It’s just that easy! You may now fill your creation with anything from candy to potpourri. To see it action, check out my “Glitter-Ween” Halloween Party Theme Decorating Ideas (With DIY Links).

194Leigh

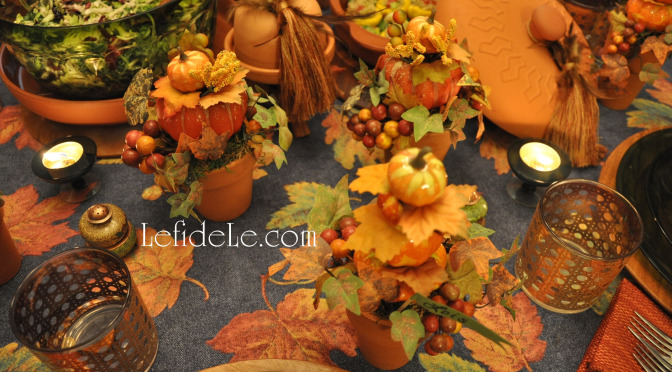
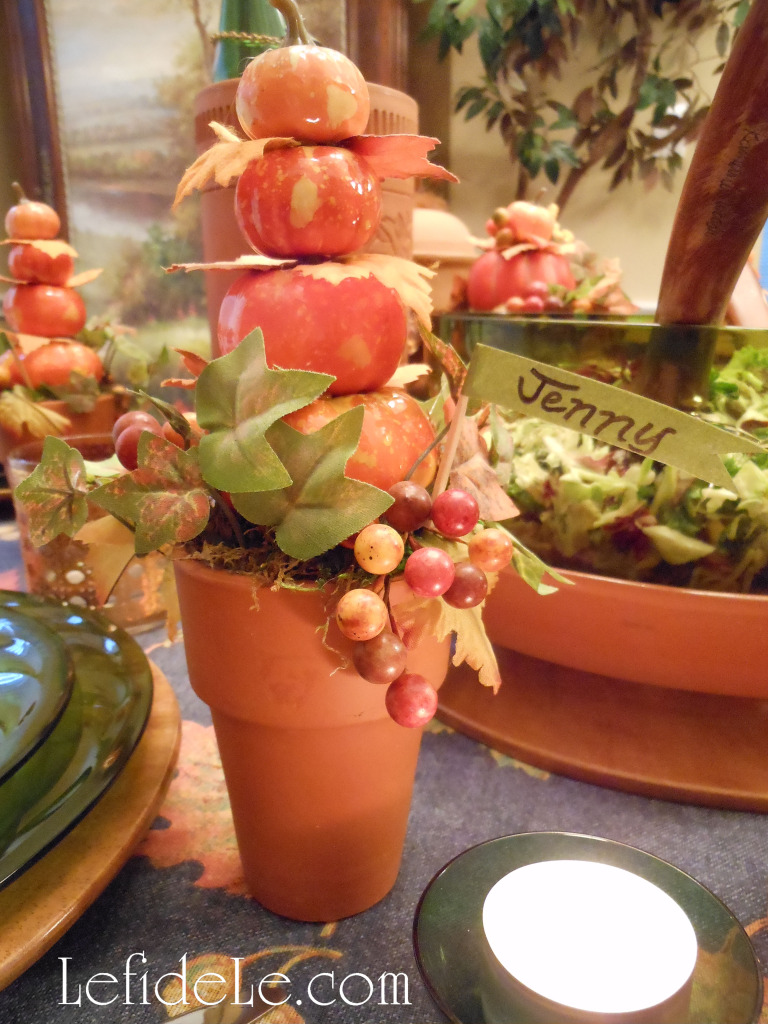
As for the pumpkin topiaries… simply start with small terra cotta rose pots (because they are taller than regular pots). Fill these with floral styrofoam cut to size (not squishy “oasis” as that is made for wet arrangements). Next, hot glue a stack of tiny pumpkins (with a leaf in-between each) onto the top’s center. Cover the styrofoam with a layer of green moss. Then add a leaf or stem of berries here and there. Voila!

01Leigh

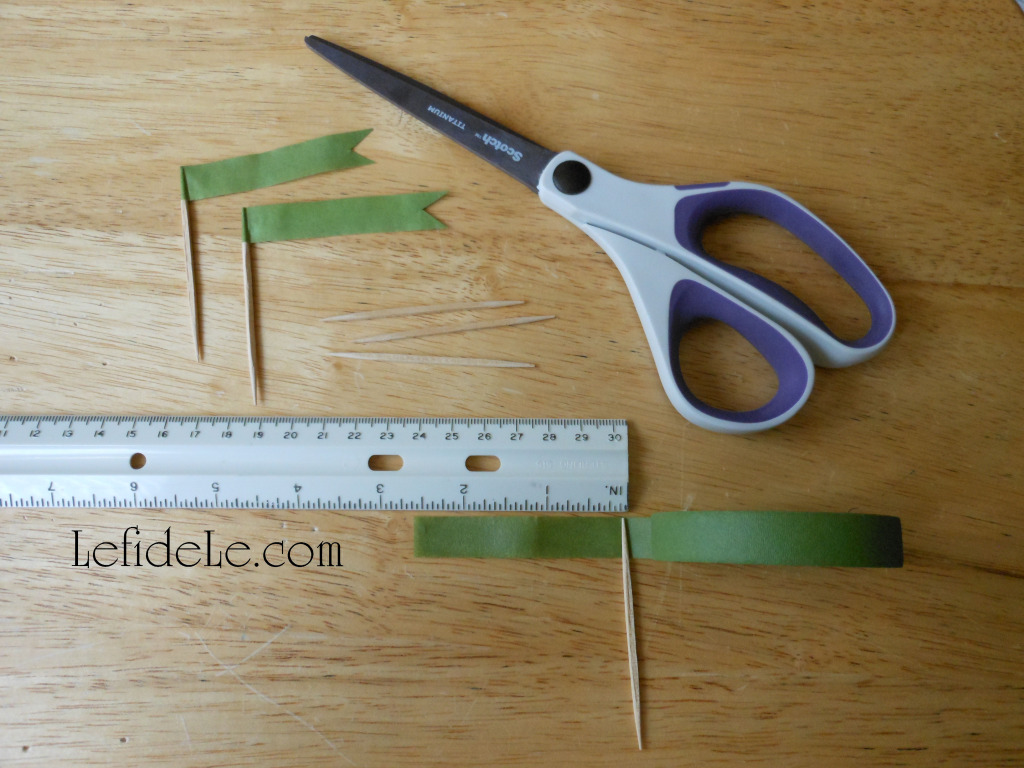
If you’d like to turn these into place-card holders… simply make flags out of toothpicks and washi tape, by using a ruler as a guide to cutting similar lengths.

75PumpkinTopiaries-Leigh

Or… you can use floral tape, like I did, so long as you stretch it as you smash it between your fingers. A permanent marker writes the name well. You can also do this for your décor, to add a message like, “Happy Fall Y’all!”

76Leigh

See more of these here: Fall Leaves & Pumpkins Themed Thanksgiving Tablescape Décor Ideas.

Faithfully Yours,

Leigh