Tag Archives: Leaping

Leaping Bunny Topiary Spring Indoor Garden Party Décor Ideas for Easter or even Showers, Luncheons, & Brunches

256Leigh

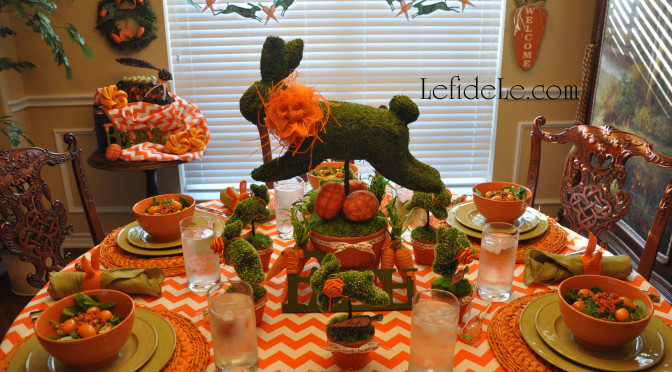
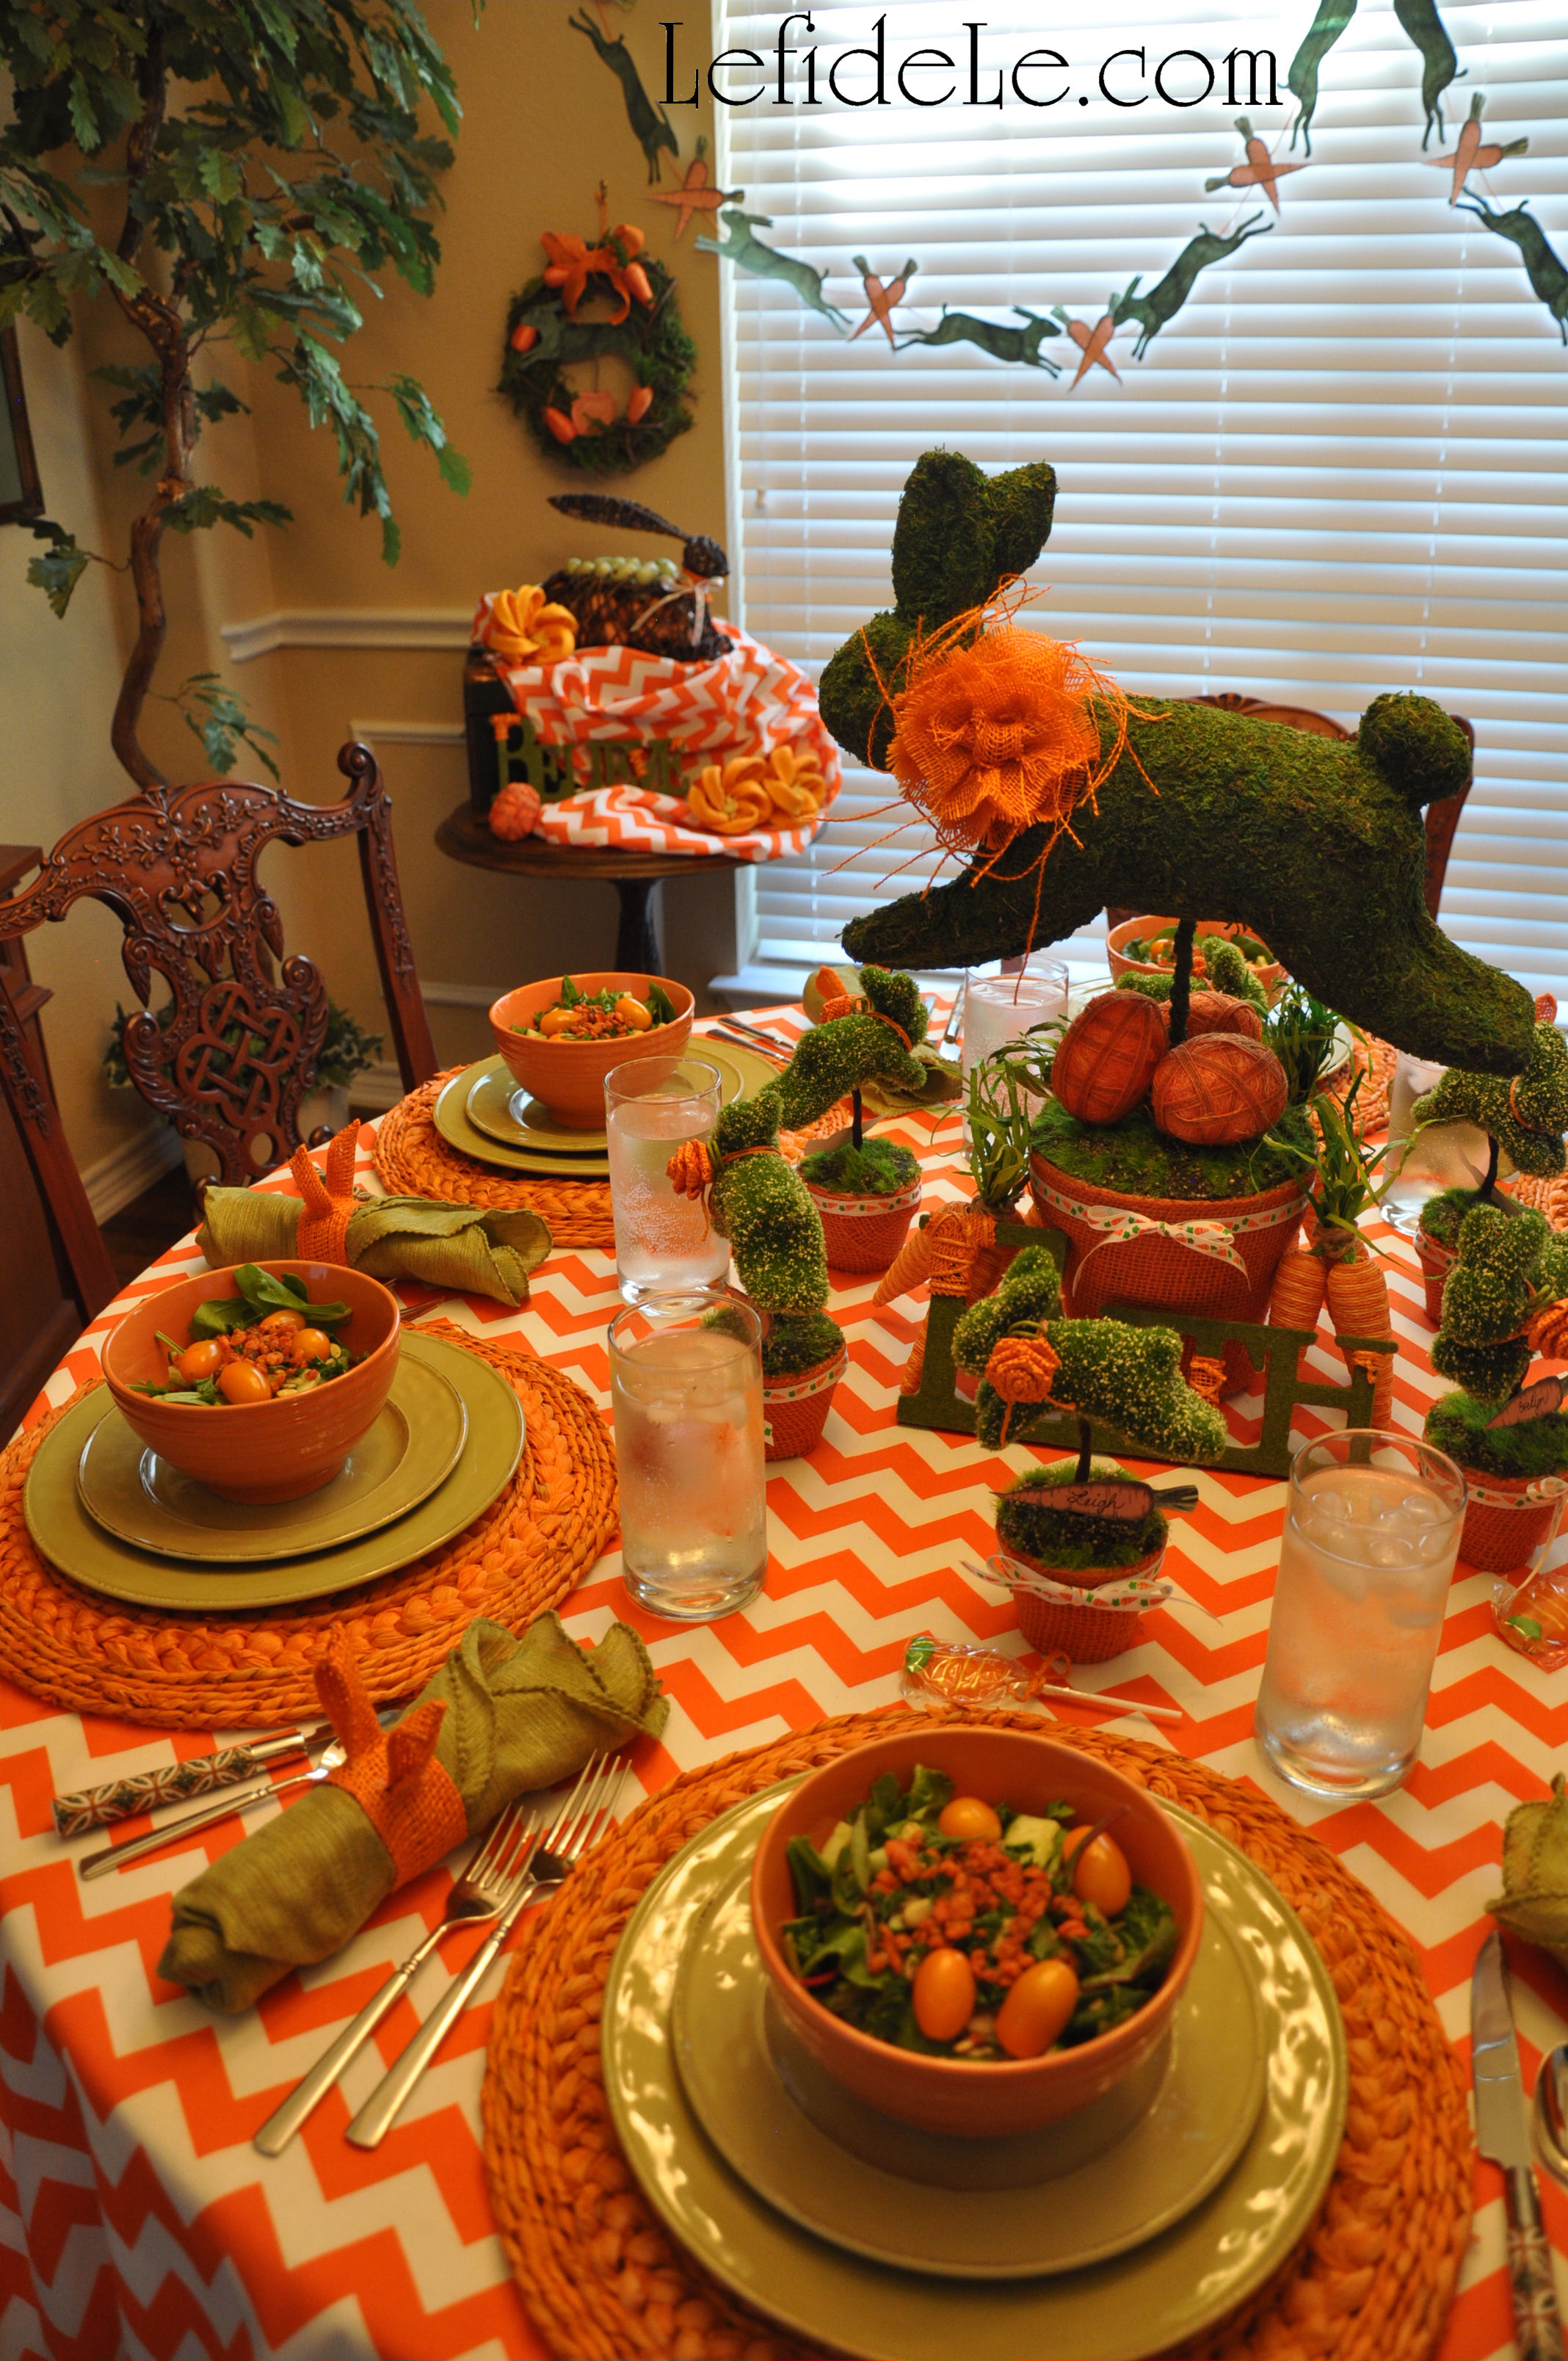
Say goodbye to winter storms and hello to spring splendor with a vivacious indoor garden party resplendent with leaping bunny topiaries! Put away the pastels and embrace vibrant carrot oranges and greens echoing this time of growth. Add apropos messages spelled out in hedgerow letters declaring the true reason for the Easter season. Give lettuce-edged napkins the bunny ear treatment as a tongue-in-cheek homage to all those cherished family photos. Layer chevron patterning with textural fibers to modernize the fête’s décor, forming an ensemble proclaiming, “Hello Spring!”

252Leigh

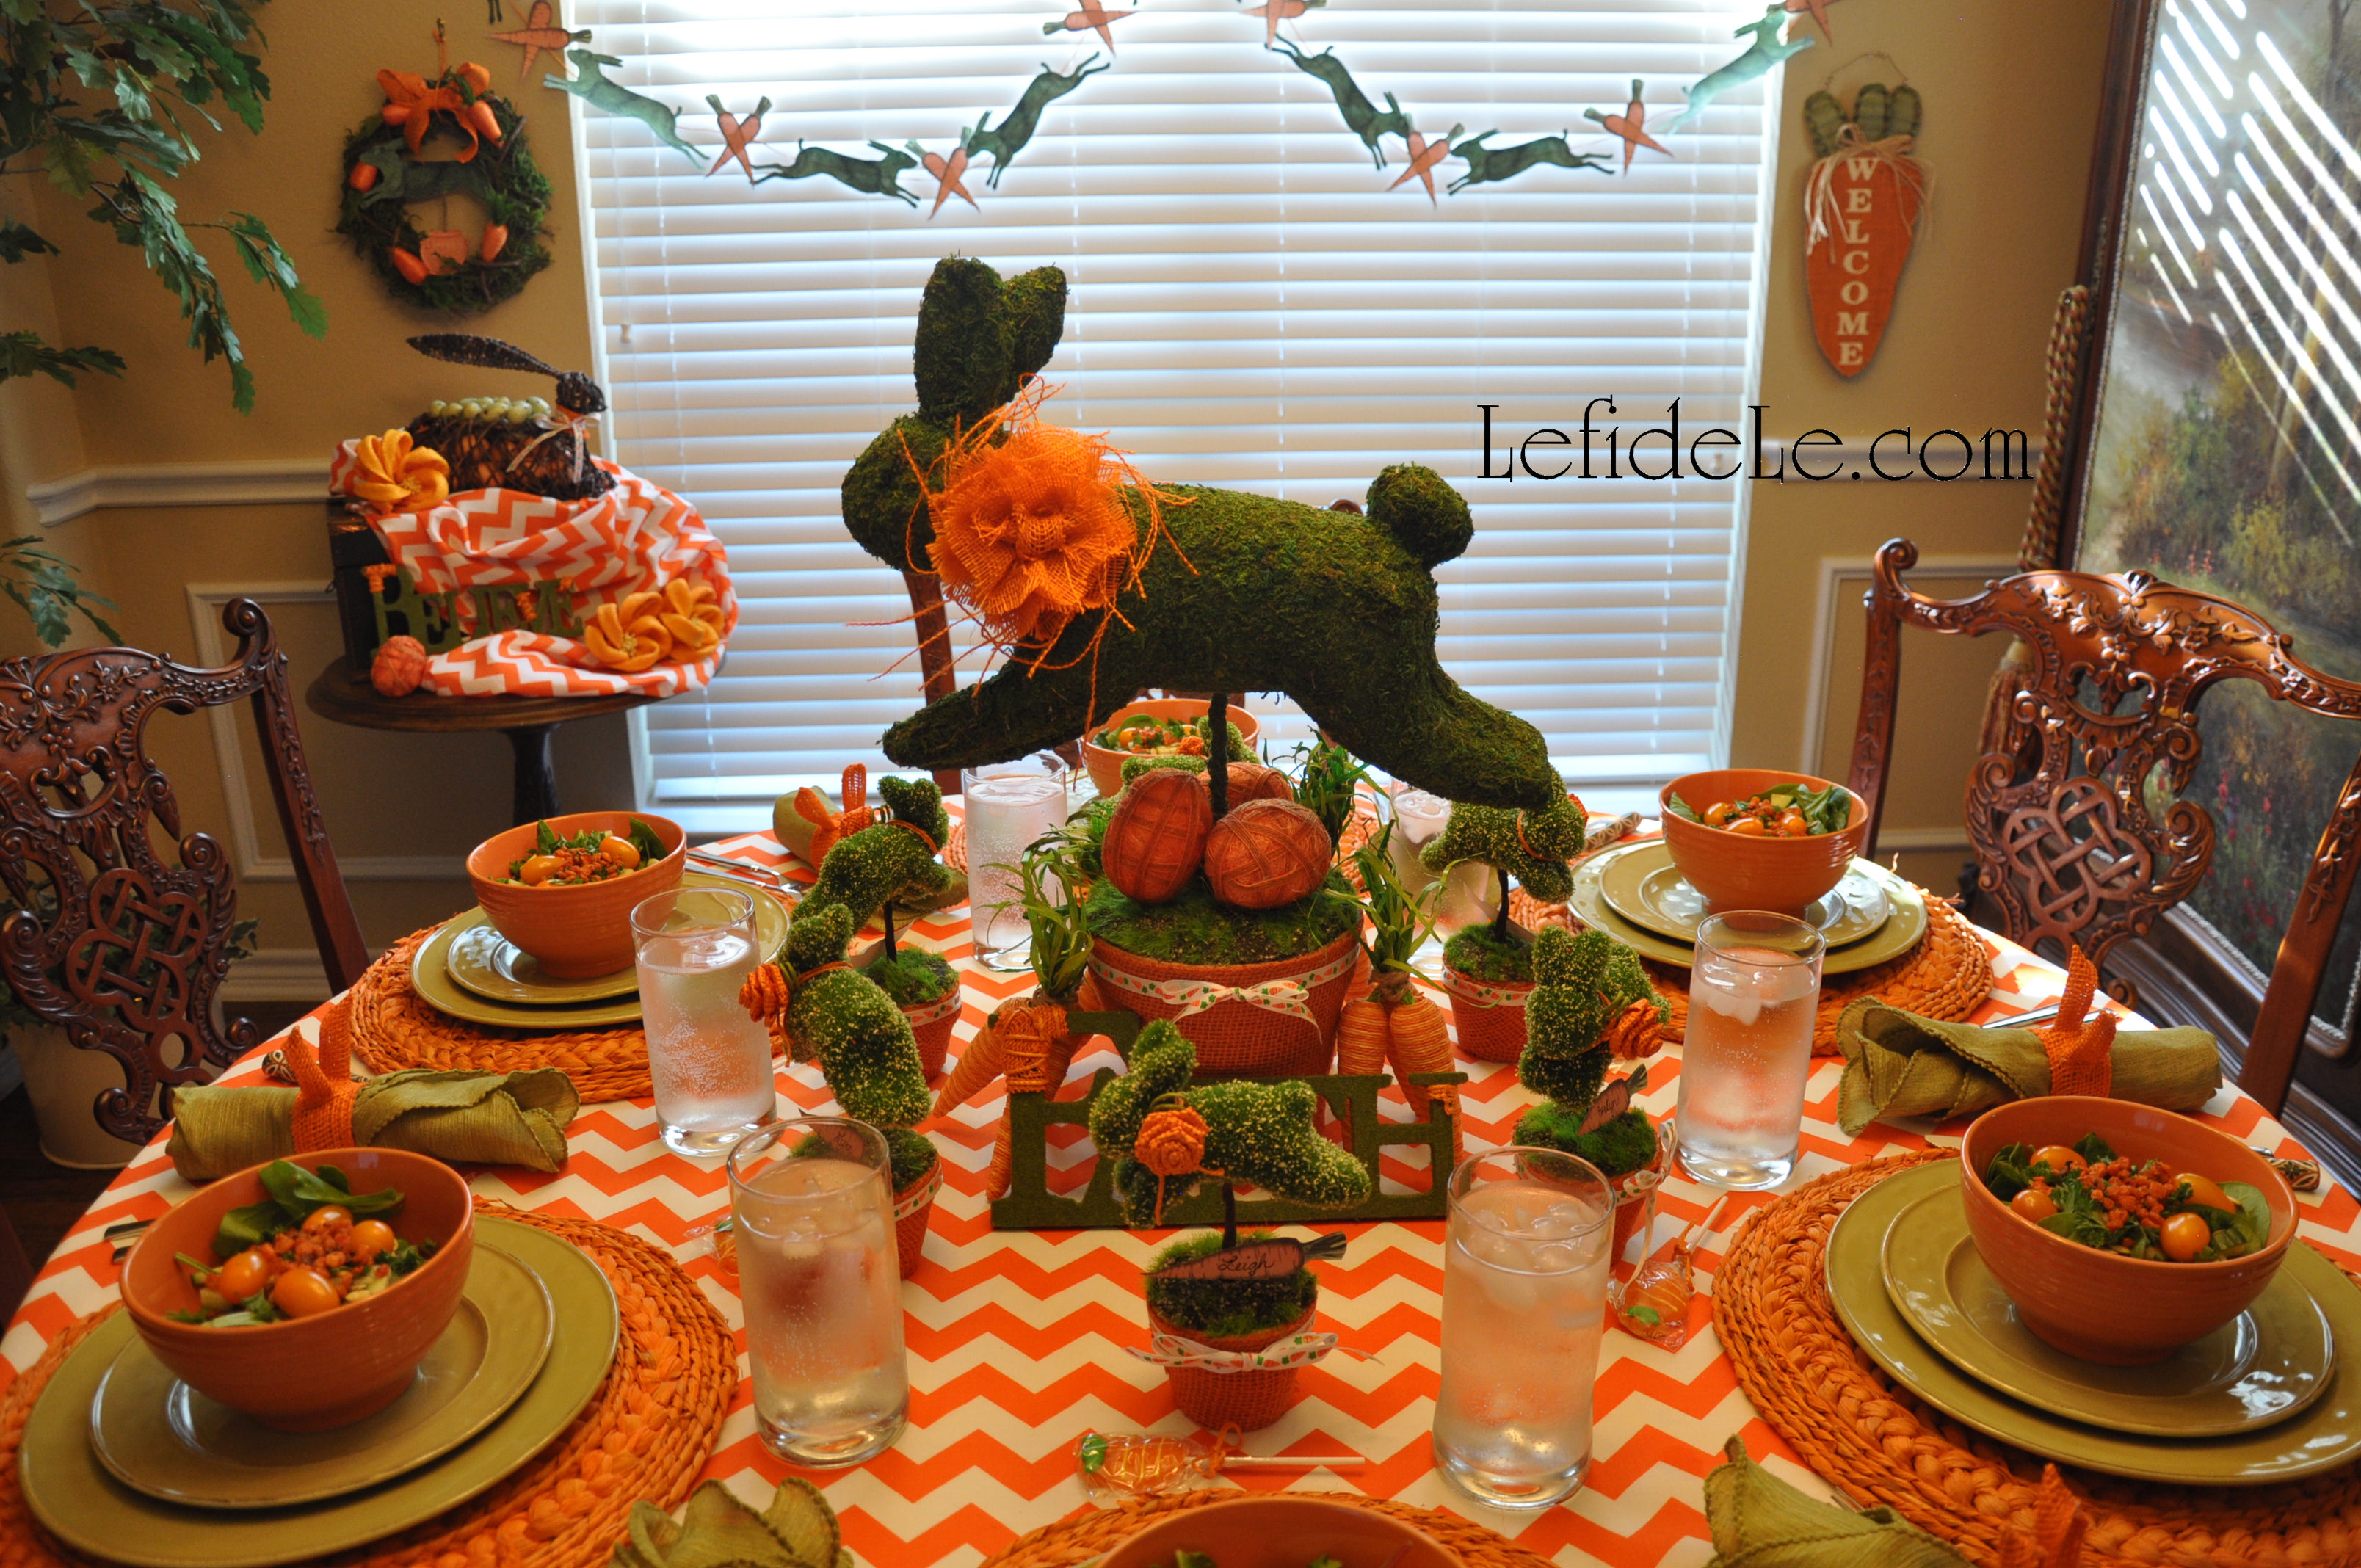
Crisp orange and white chevron fabric awakens the senses, making it the perfect underpinning for this little soiree. (My mother actually made this tablecloth, which is amazing for someone who has repeatedly stated, “I don’t sew.”)

255Leigh

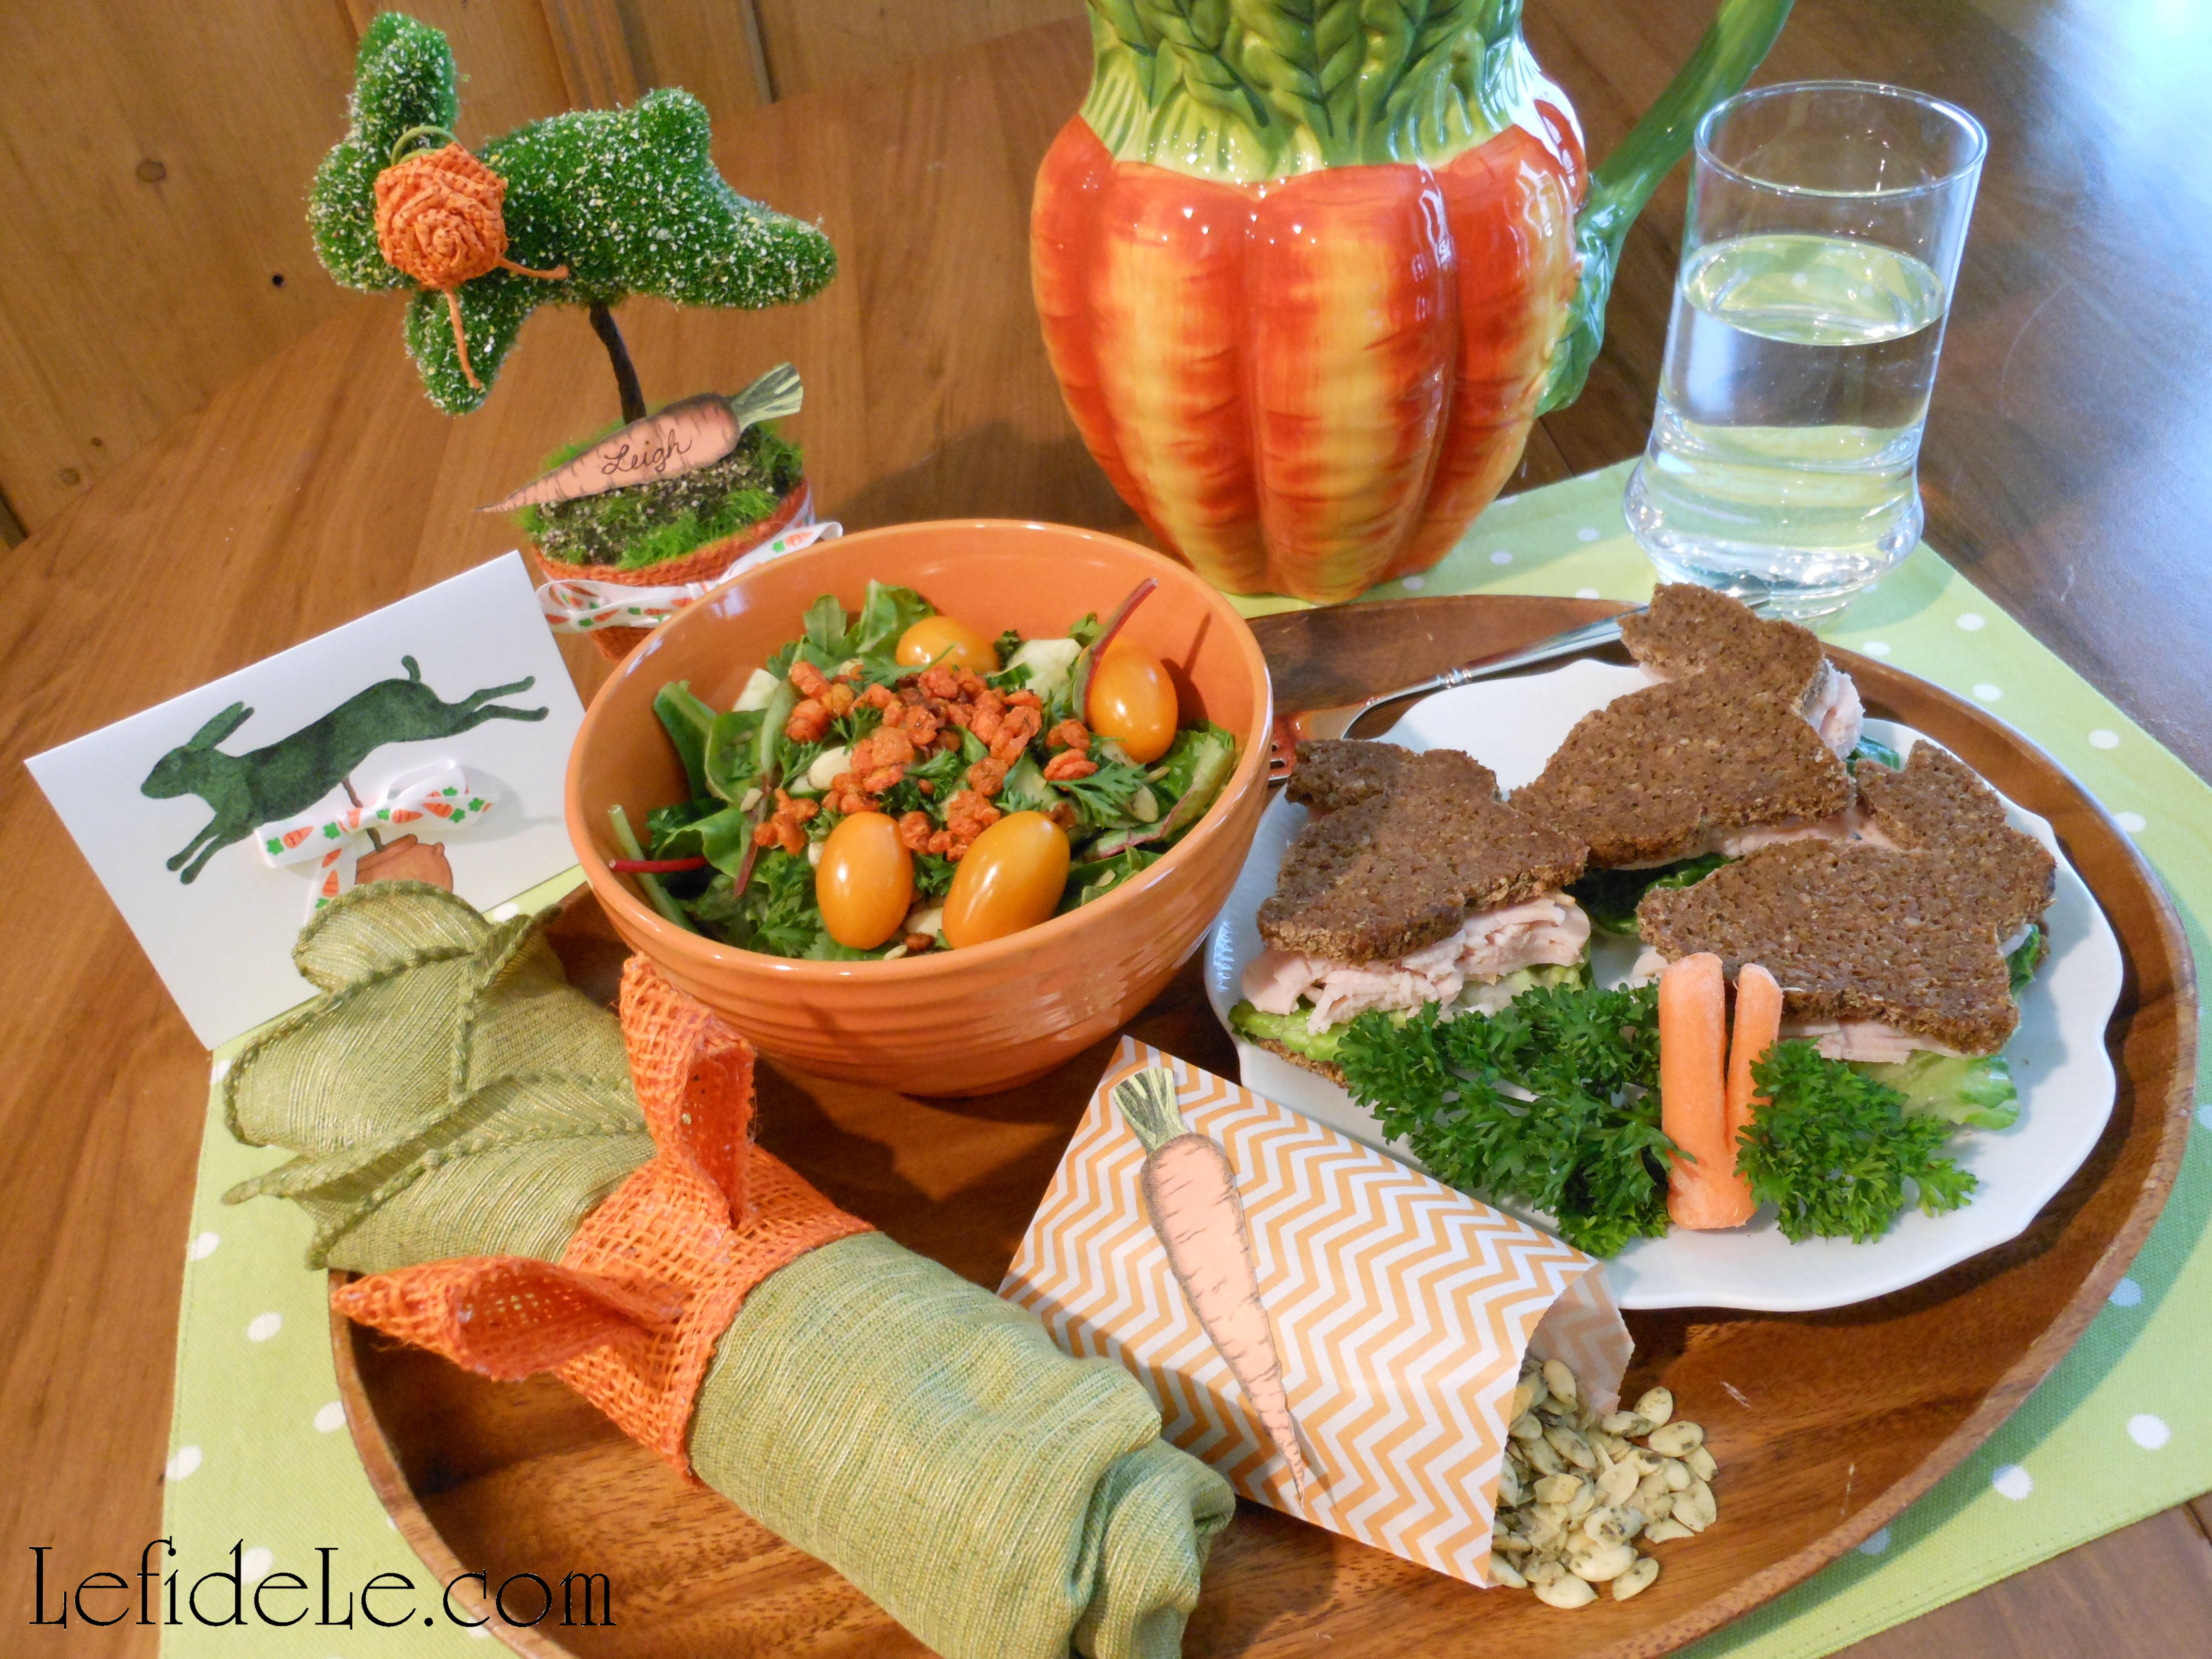
Layered on that are round raffia mats placed as chargers. Rustic sage green plates are topped with orange salad bowls filled with fresh garden salads of baby greens like kale, spinach, and chard, with orange heirloom cherry tomatoes, English cucumbers, fresh parsley, sprouted pumpkin seeds, and crunchy carrot croutons. (Find the easy recipe for it here.)

149Leigh

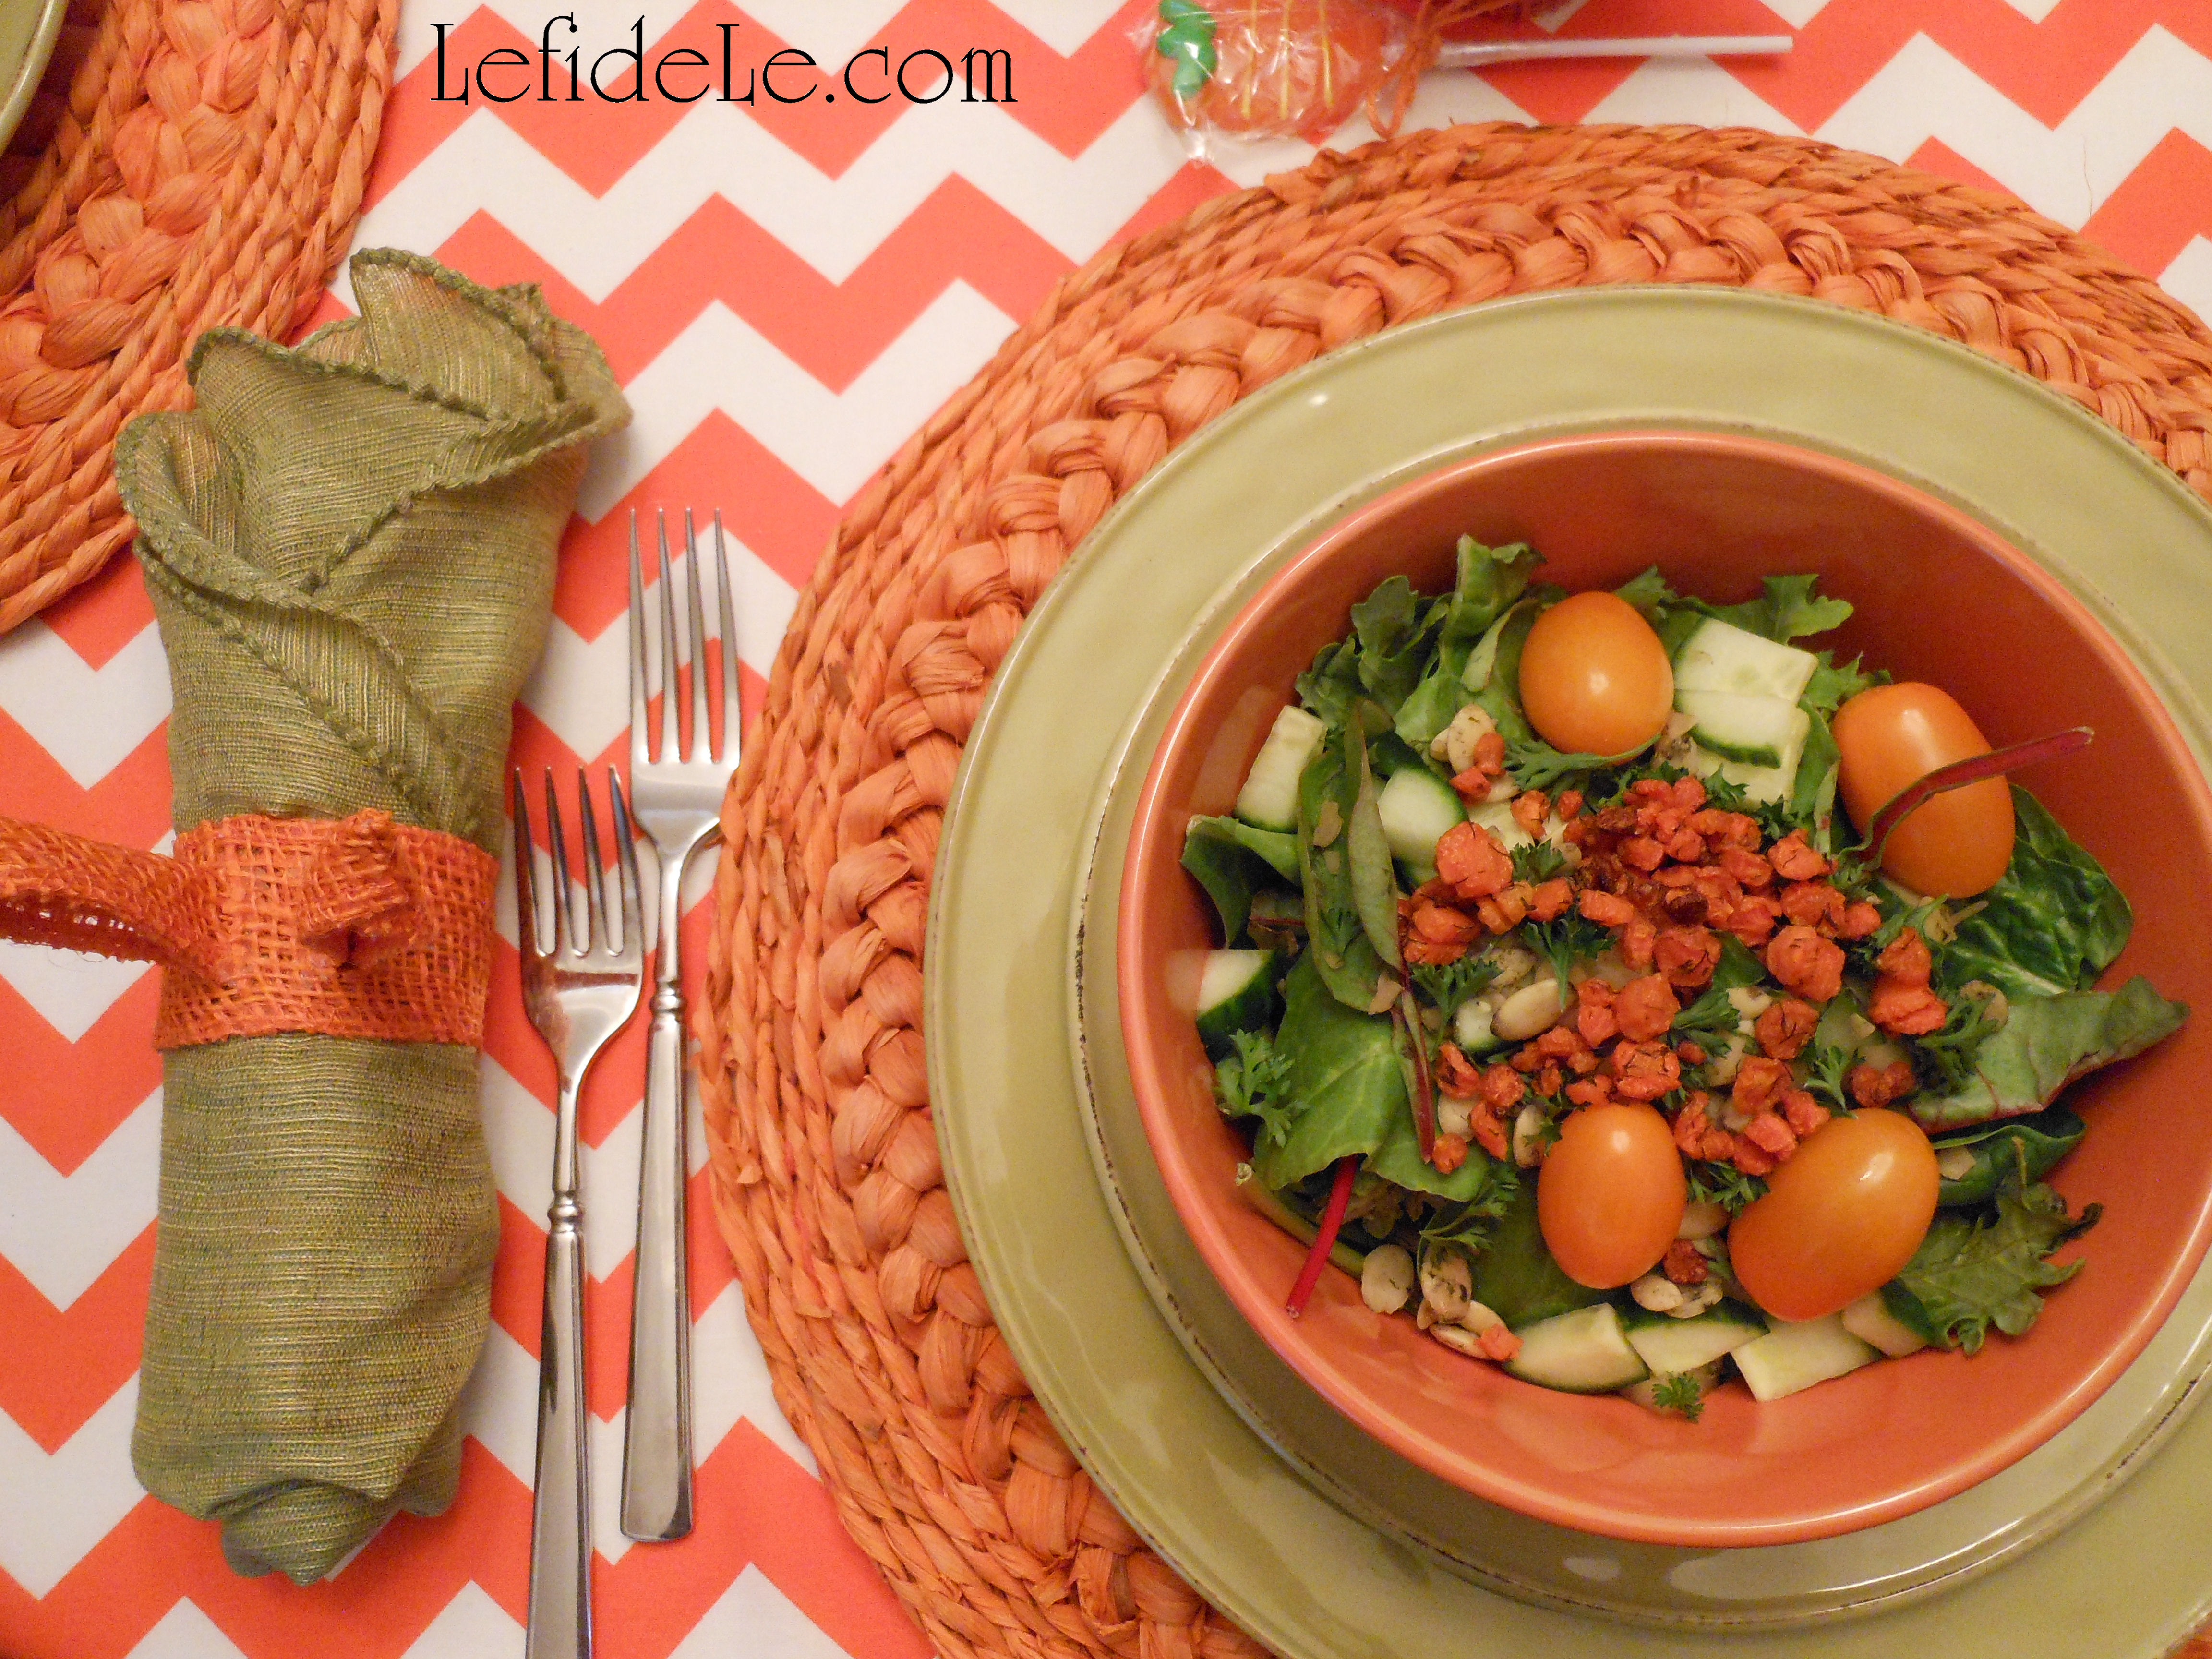
Daily flatware is used, with the exception of the knives which have been exchanged with lovely patterned versions. (Mixing patterns is not only okay, but fantastic!)

139Leigh

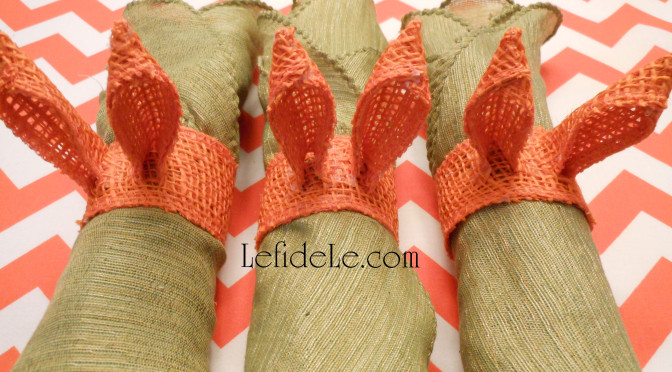
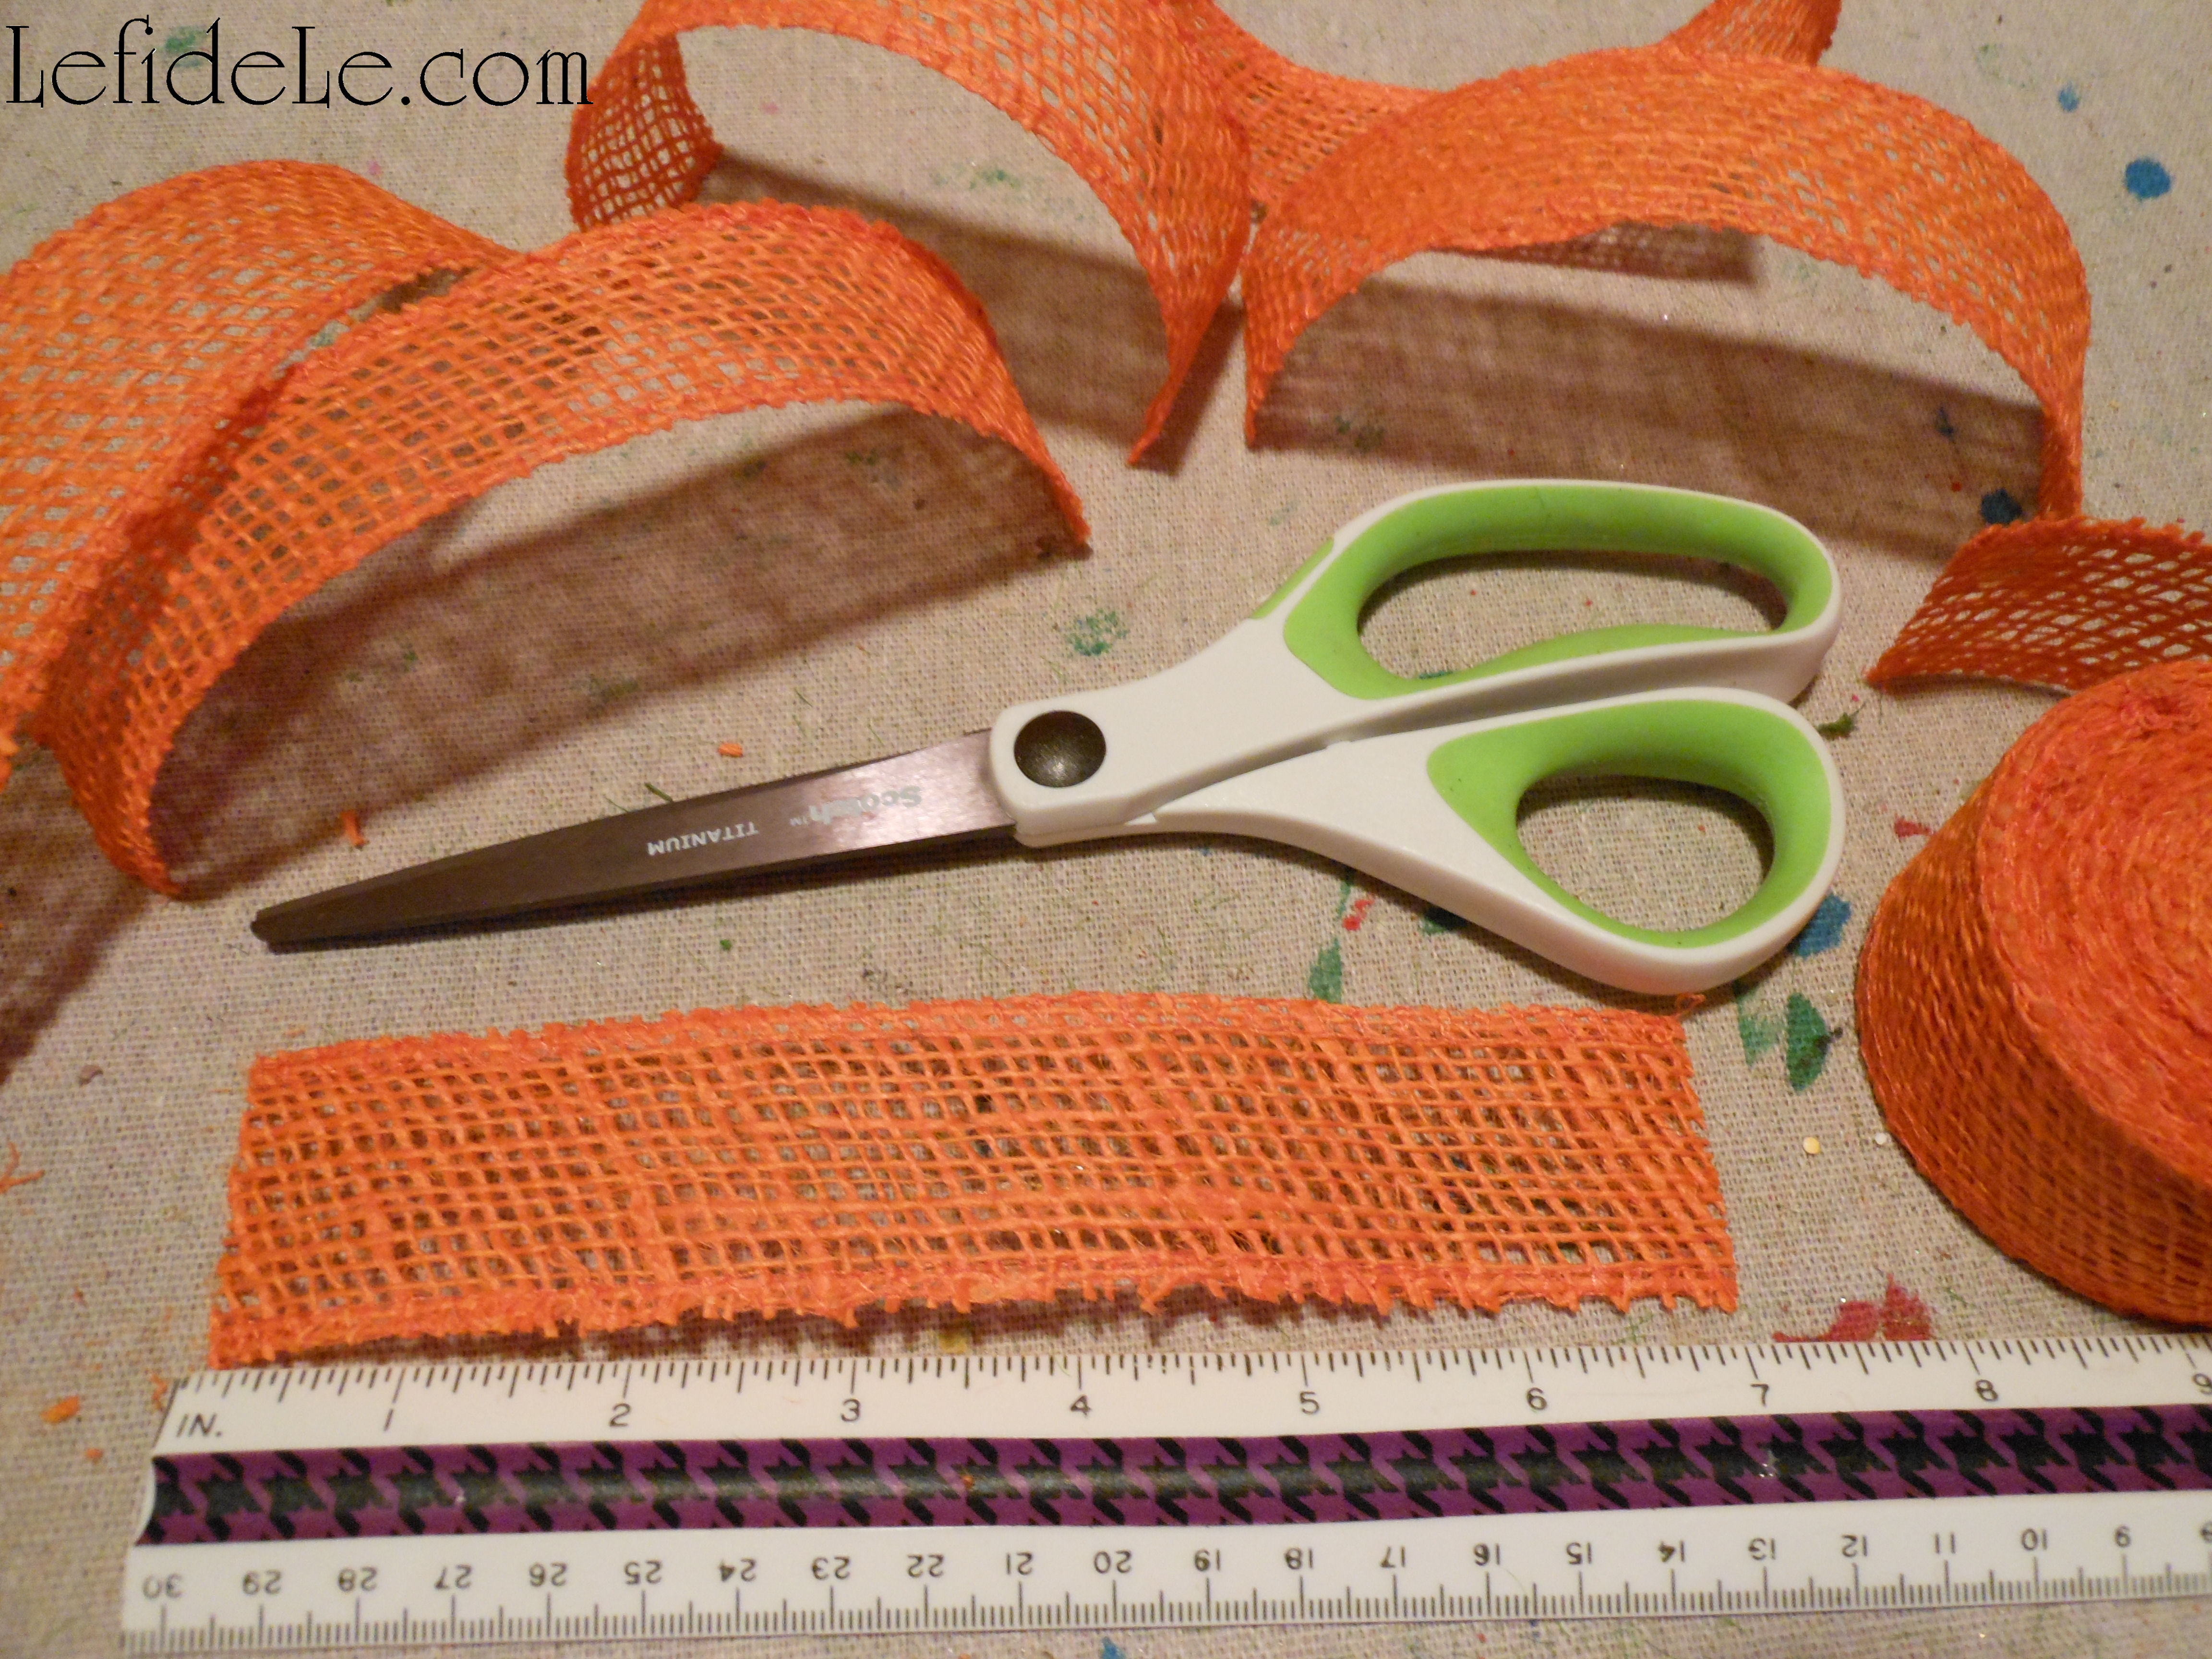
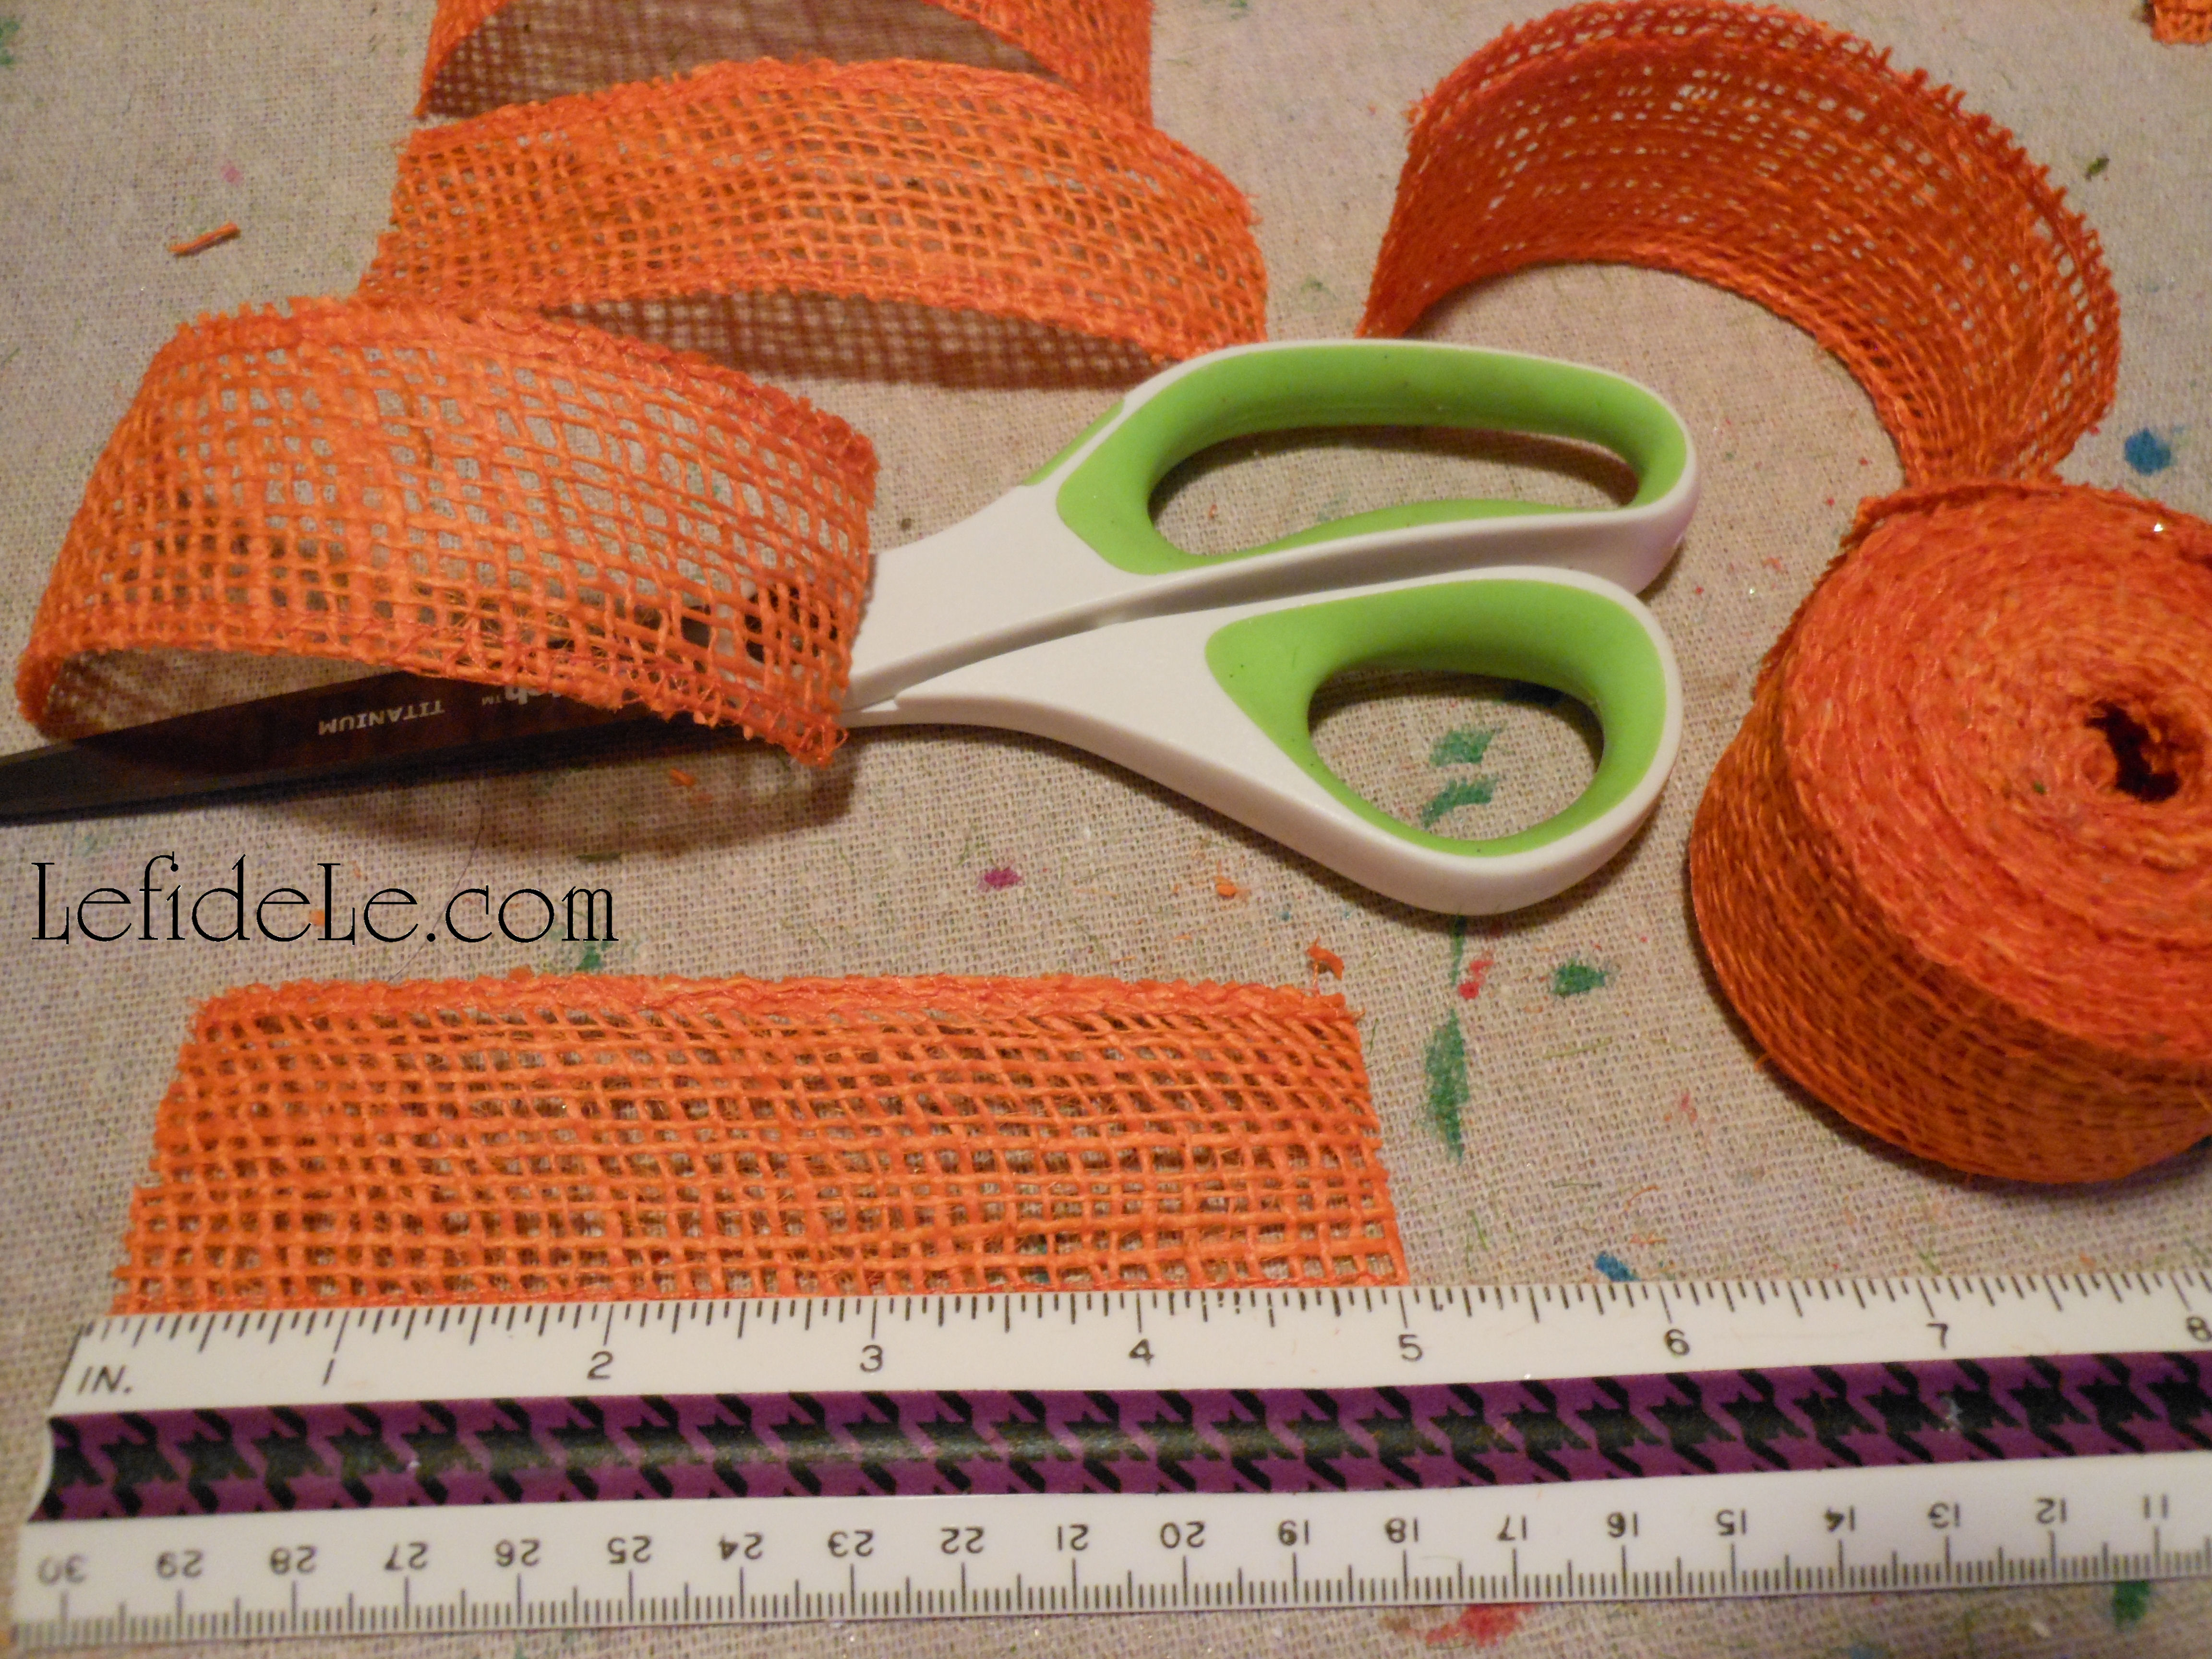
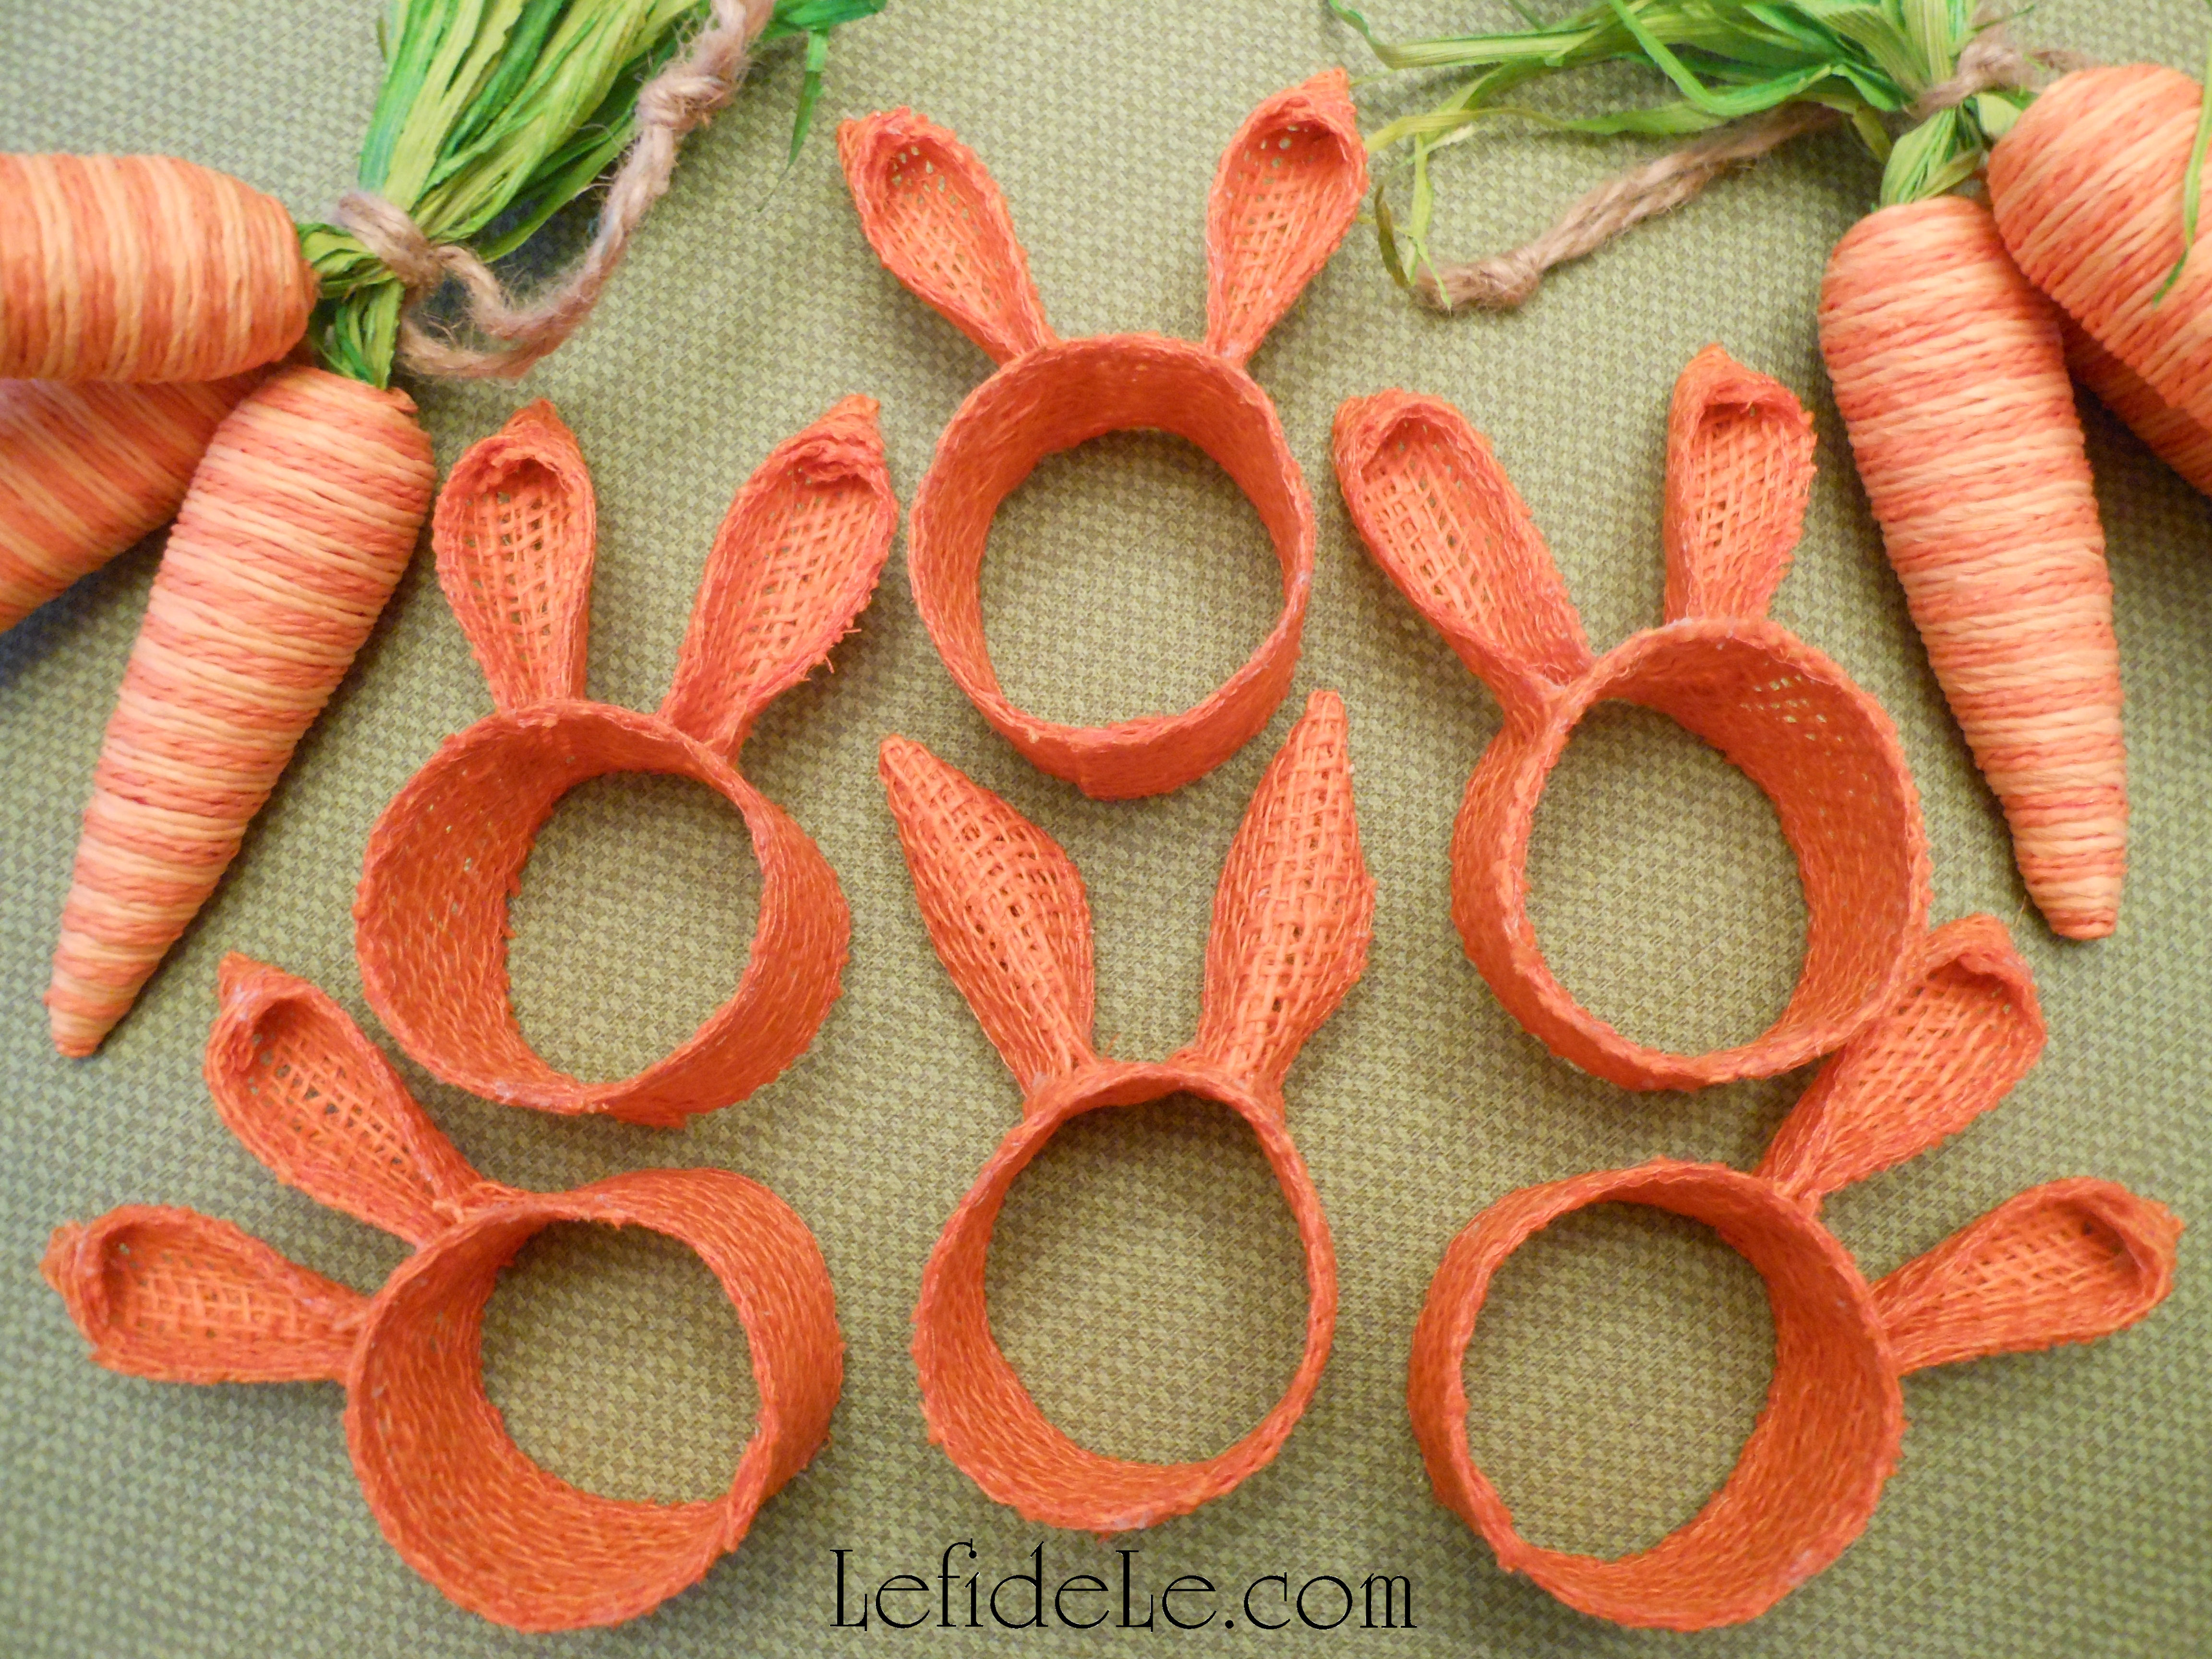
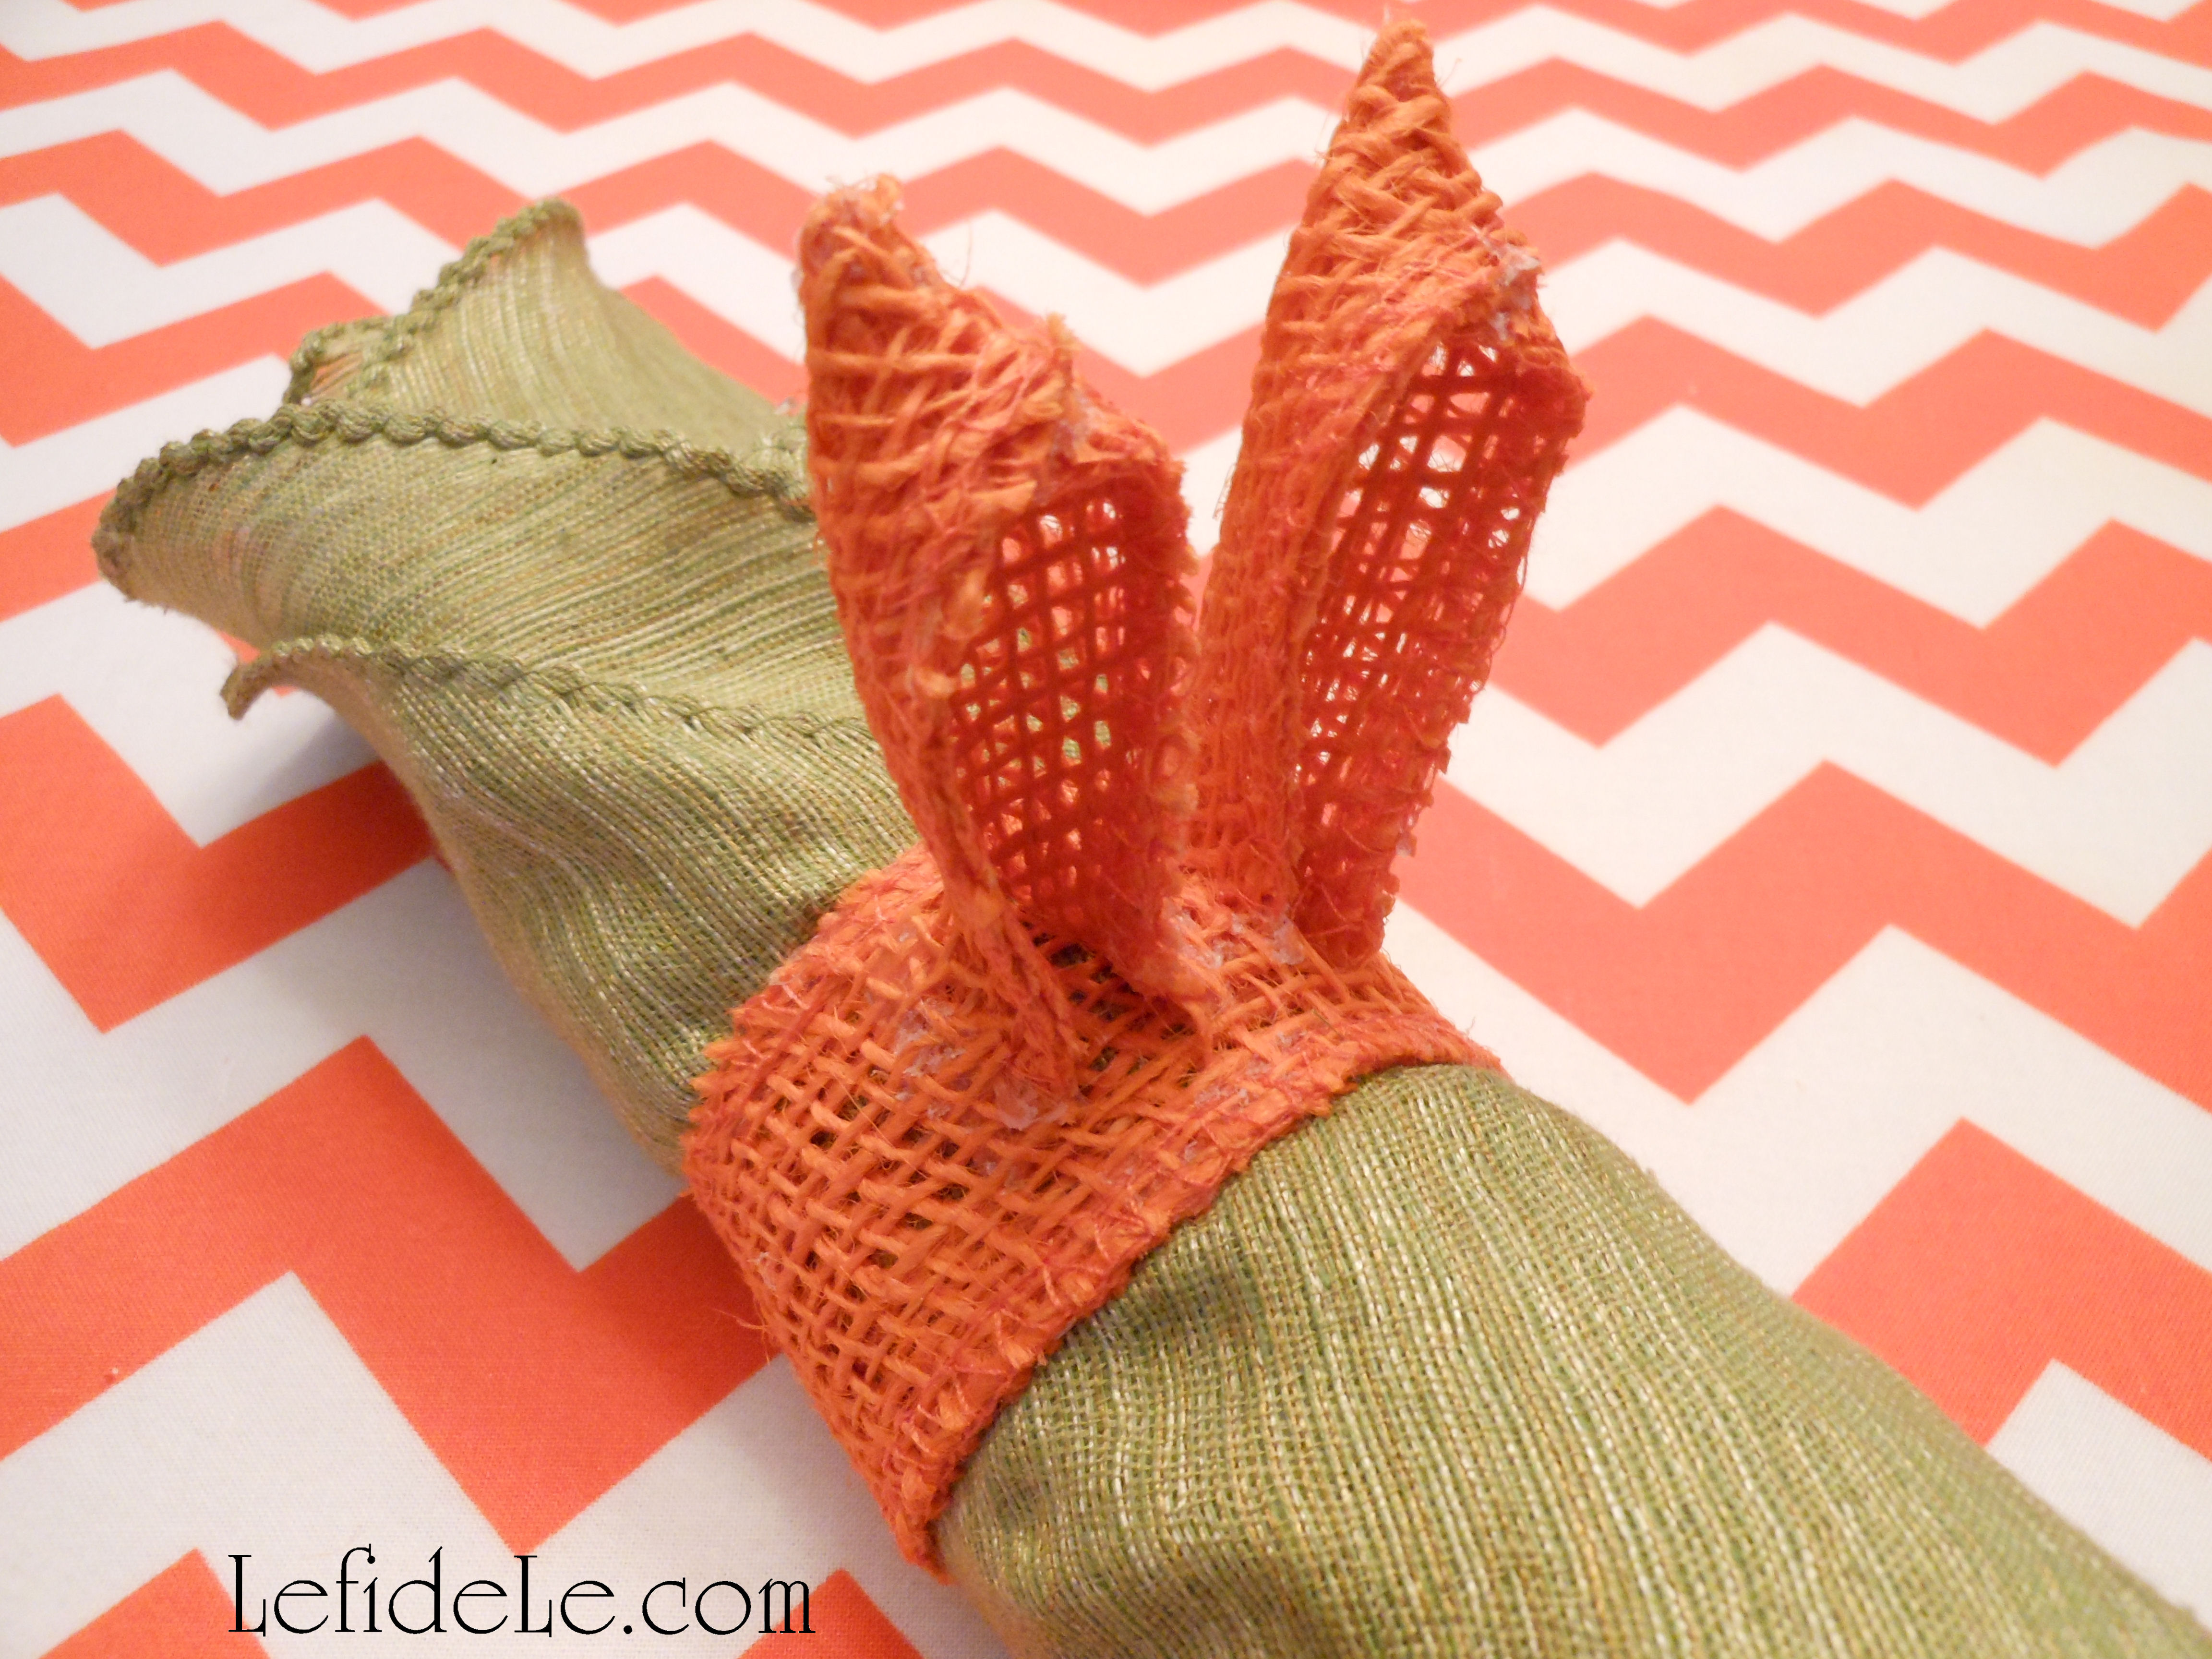
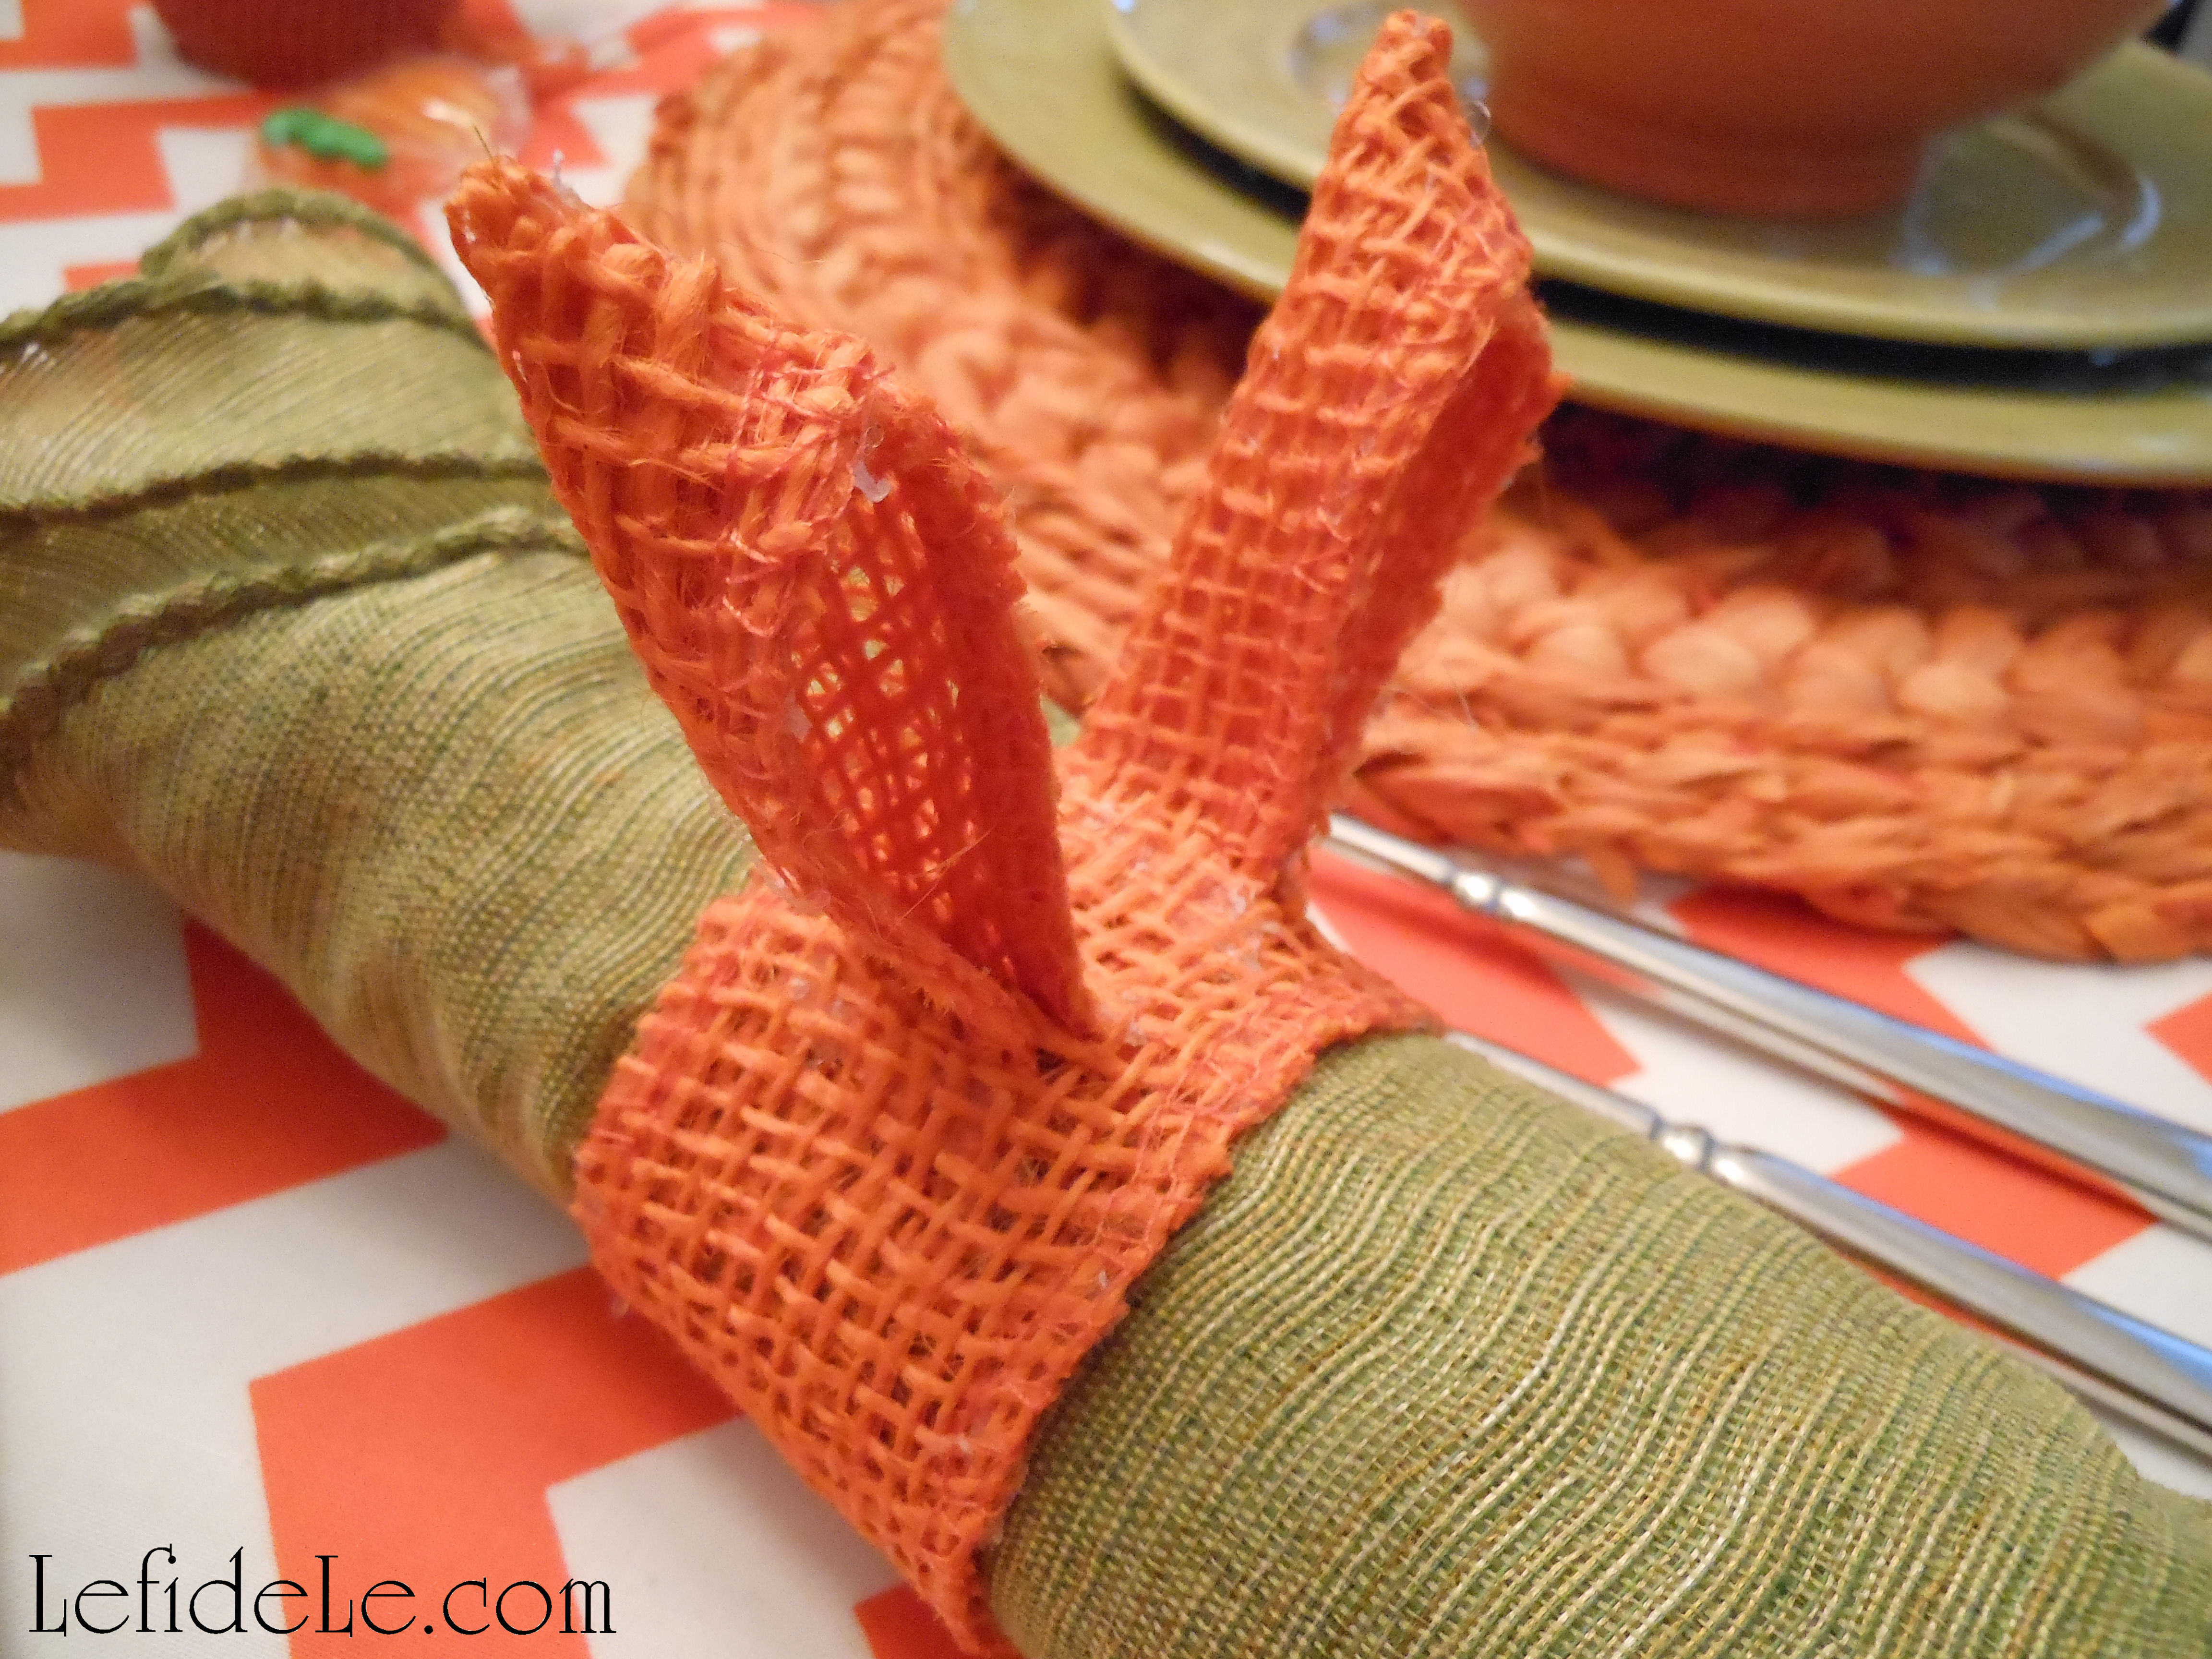
Orange burlap bunny ears napkin rings hold lettuce-edge napkins matching the sage plates. (Learn how to easily make your own rings here.)

220Leigh

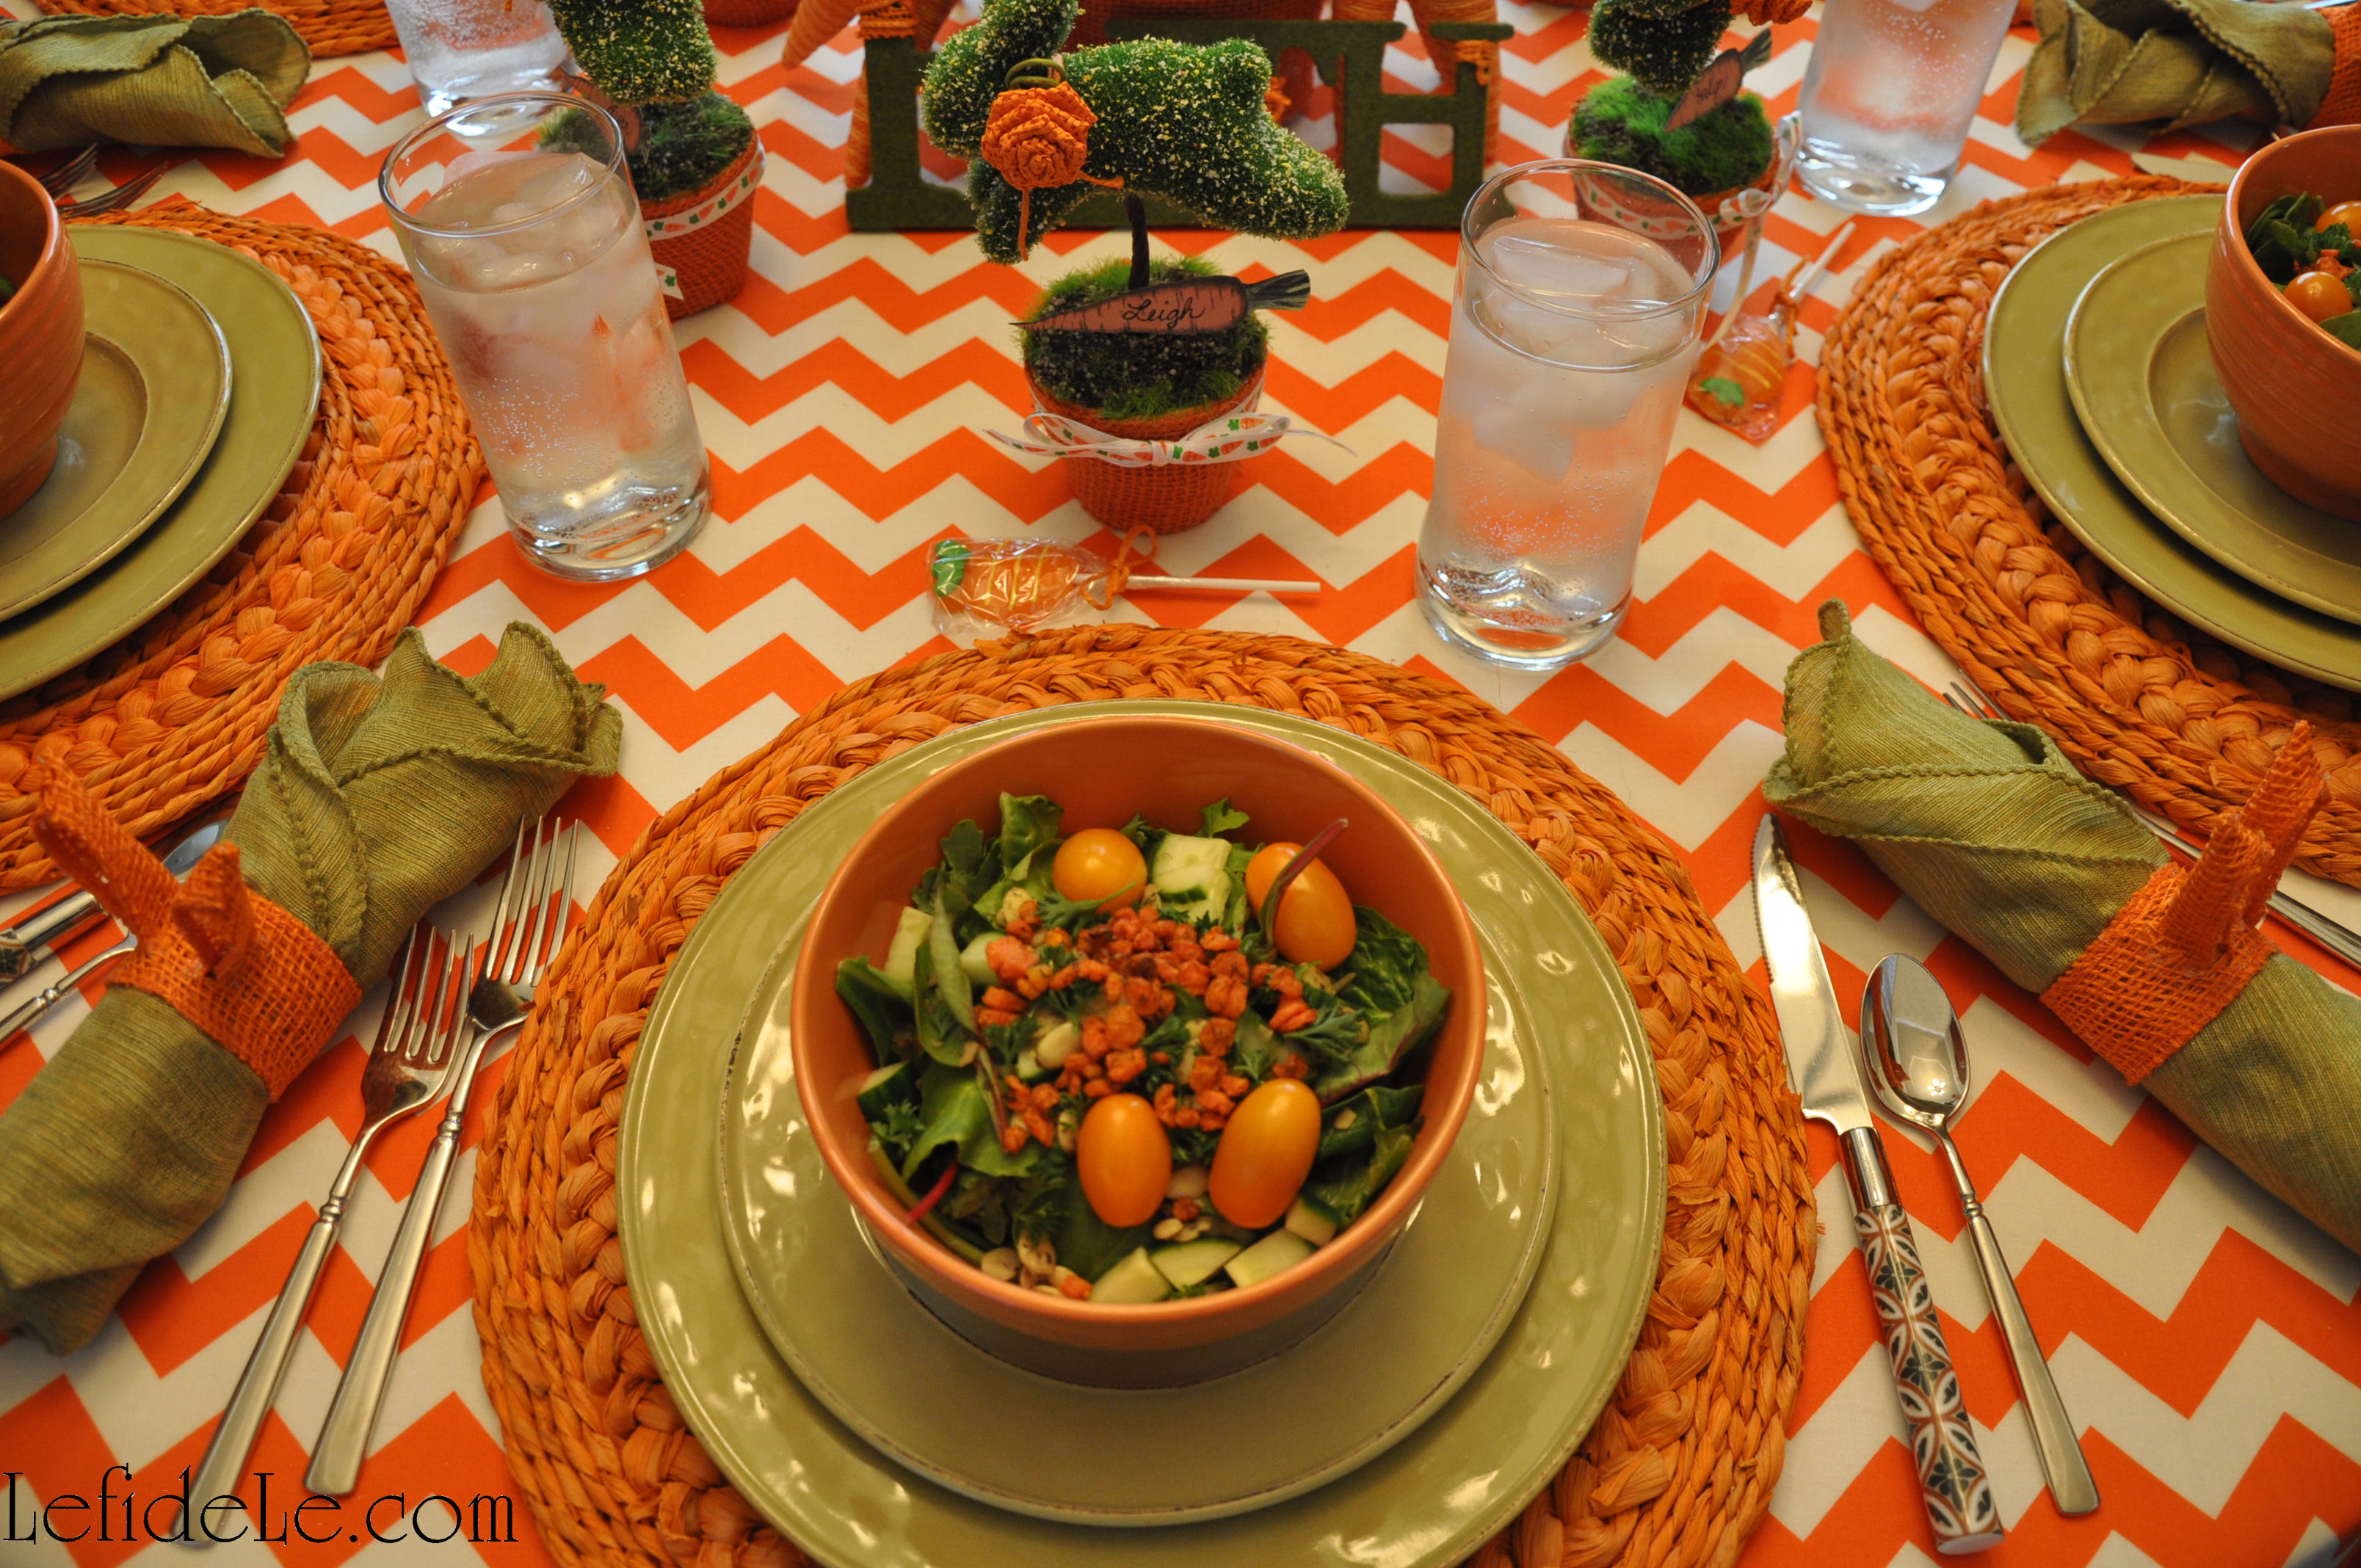
Understated water glasses were chosen as the only simple elements on the tablescape. Carrot lollipops with jute bows sit in place of dessert spoons. (Find them on sale at affiliate Oriental Trading Company. The link in the side bar adds a coupon with free shipping to your cart automatically.)

158Leigh

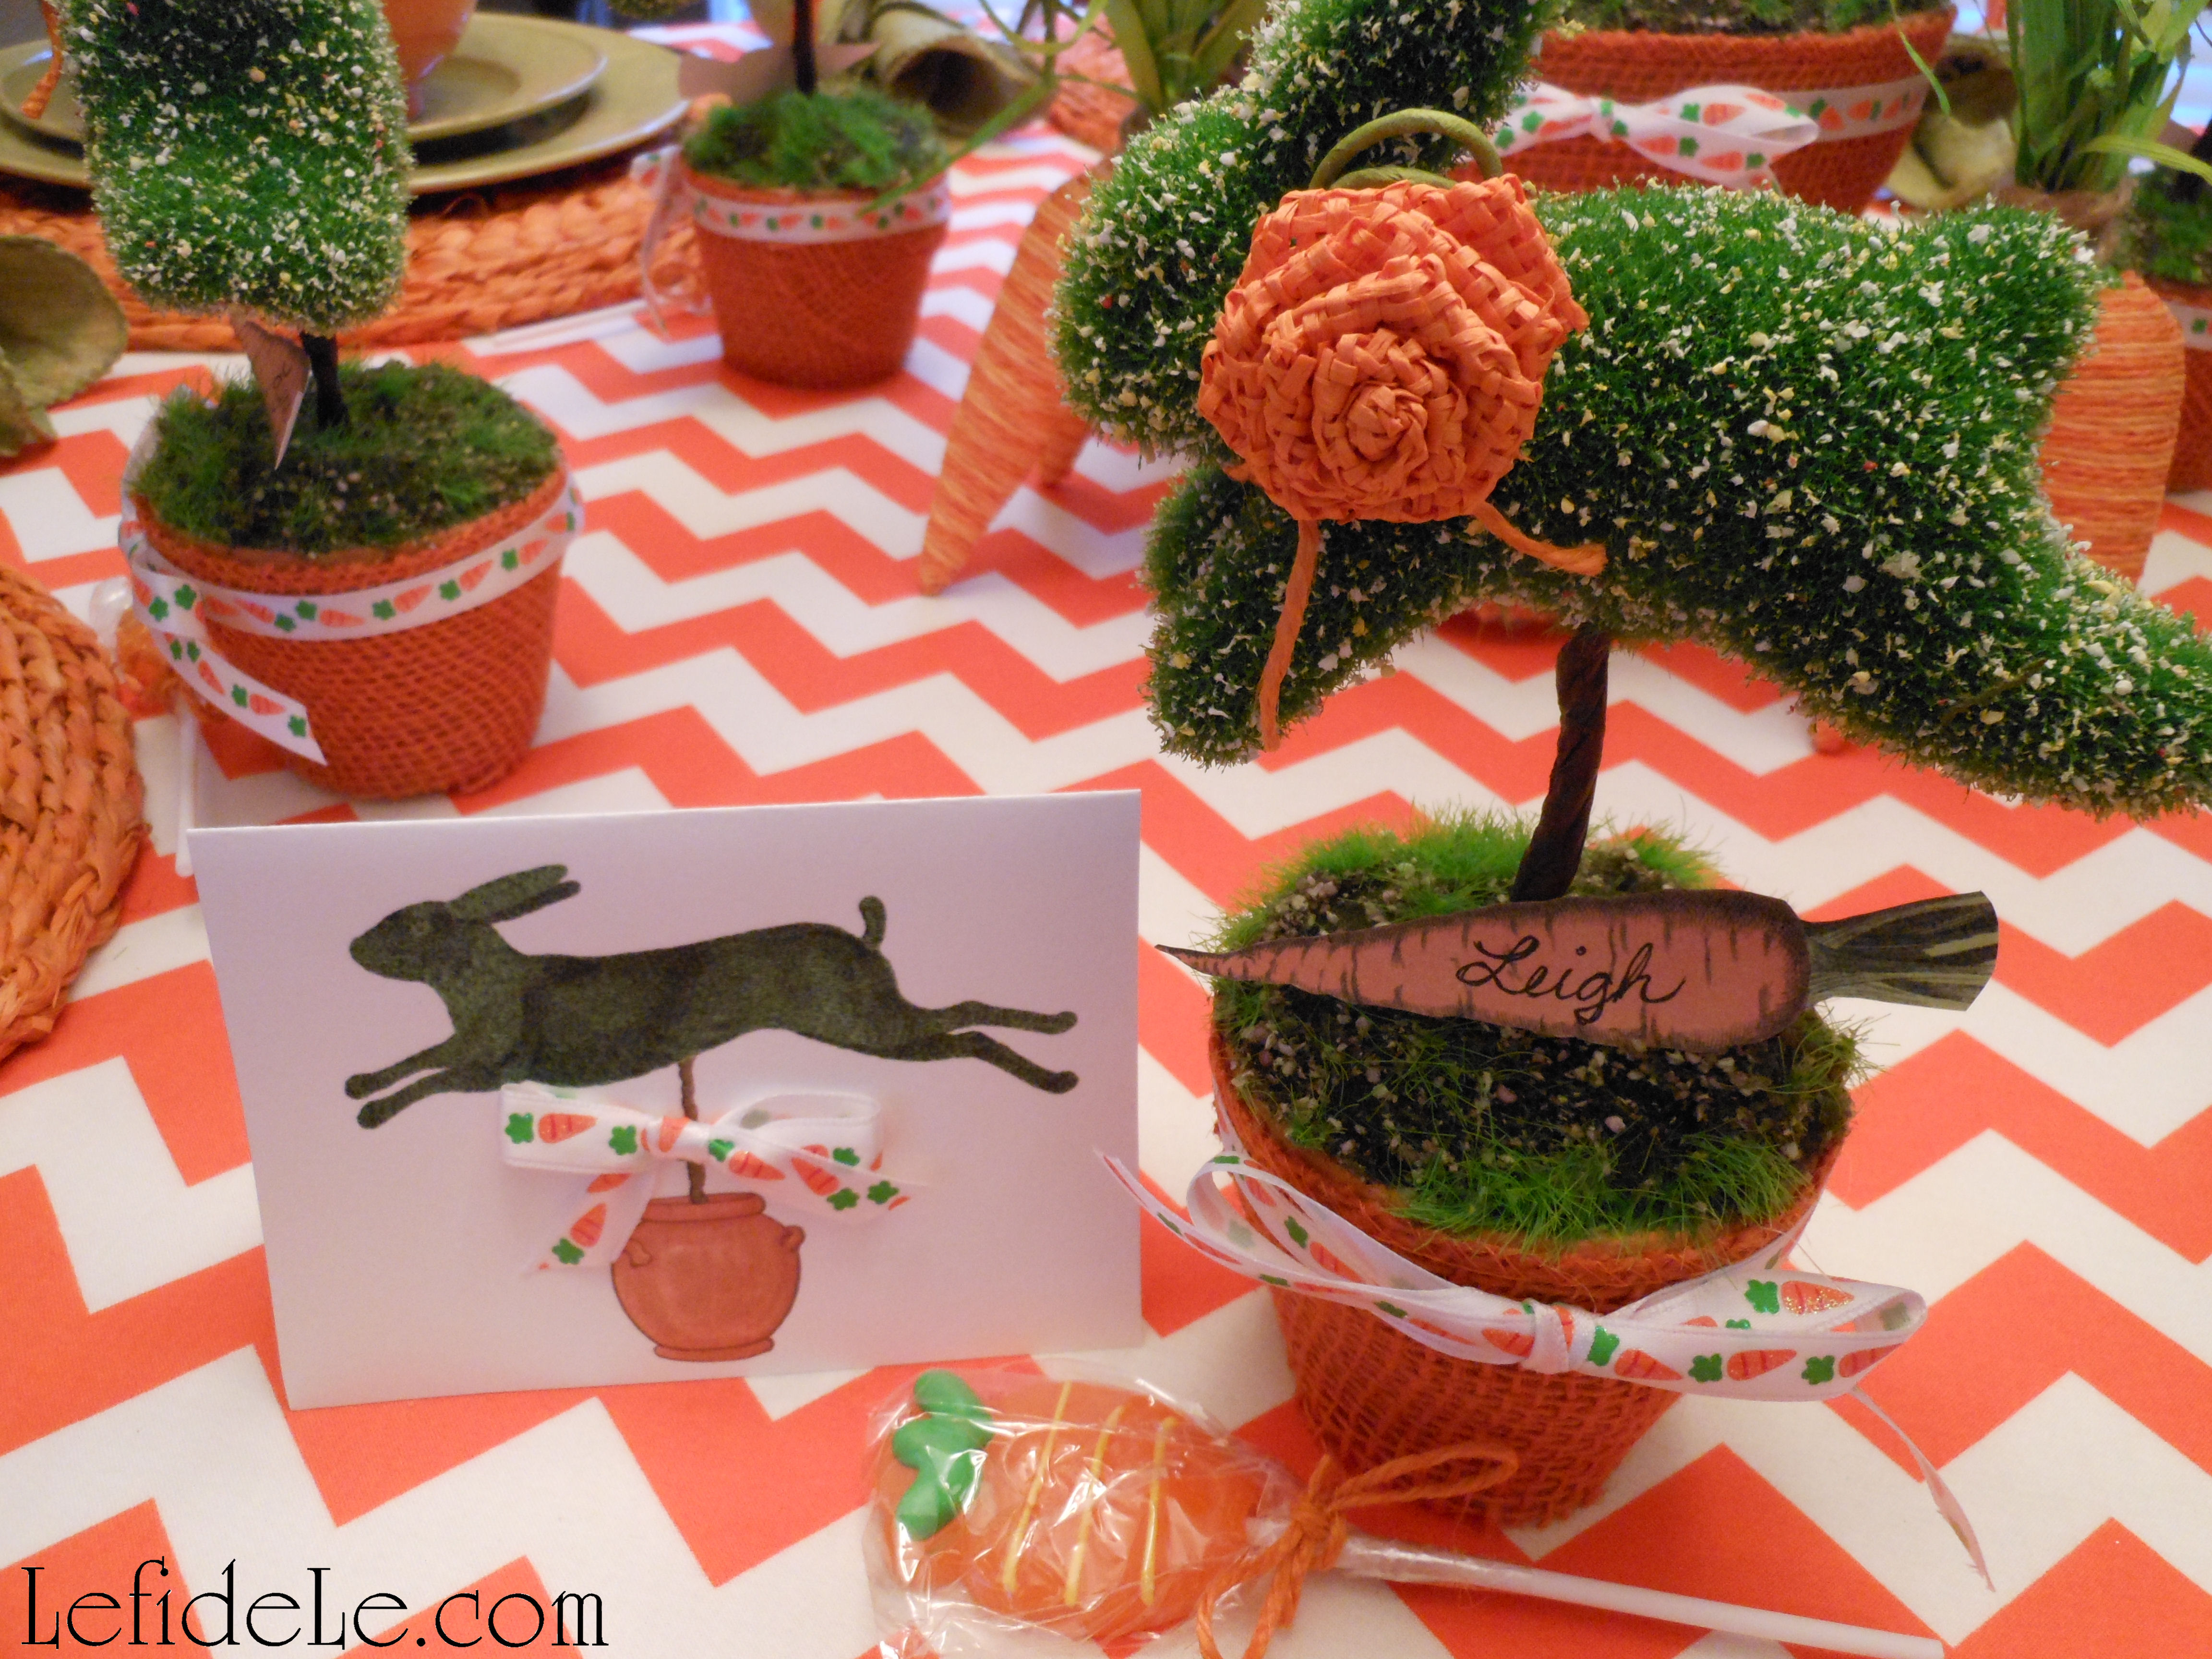
Baby leaping bunny topiaries sprout from burlap covered carrot pots above each place setting. (Learn how to craft them easily here.) Tiny printable carrots act as place-cards for each invitee. (Snag my free printables here.)

287Leigh

Big bunny mama springs from the center of the table in declaration of a beautiful life.

257Leigh

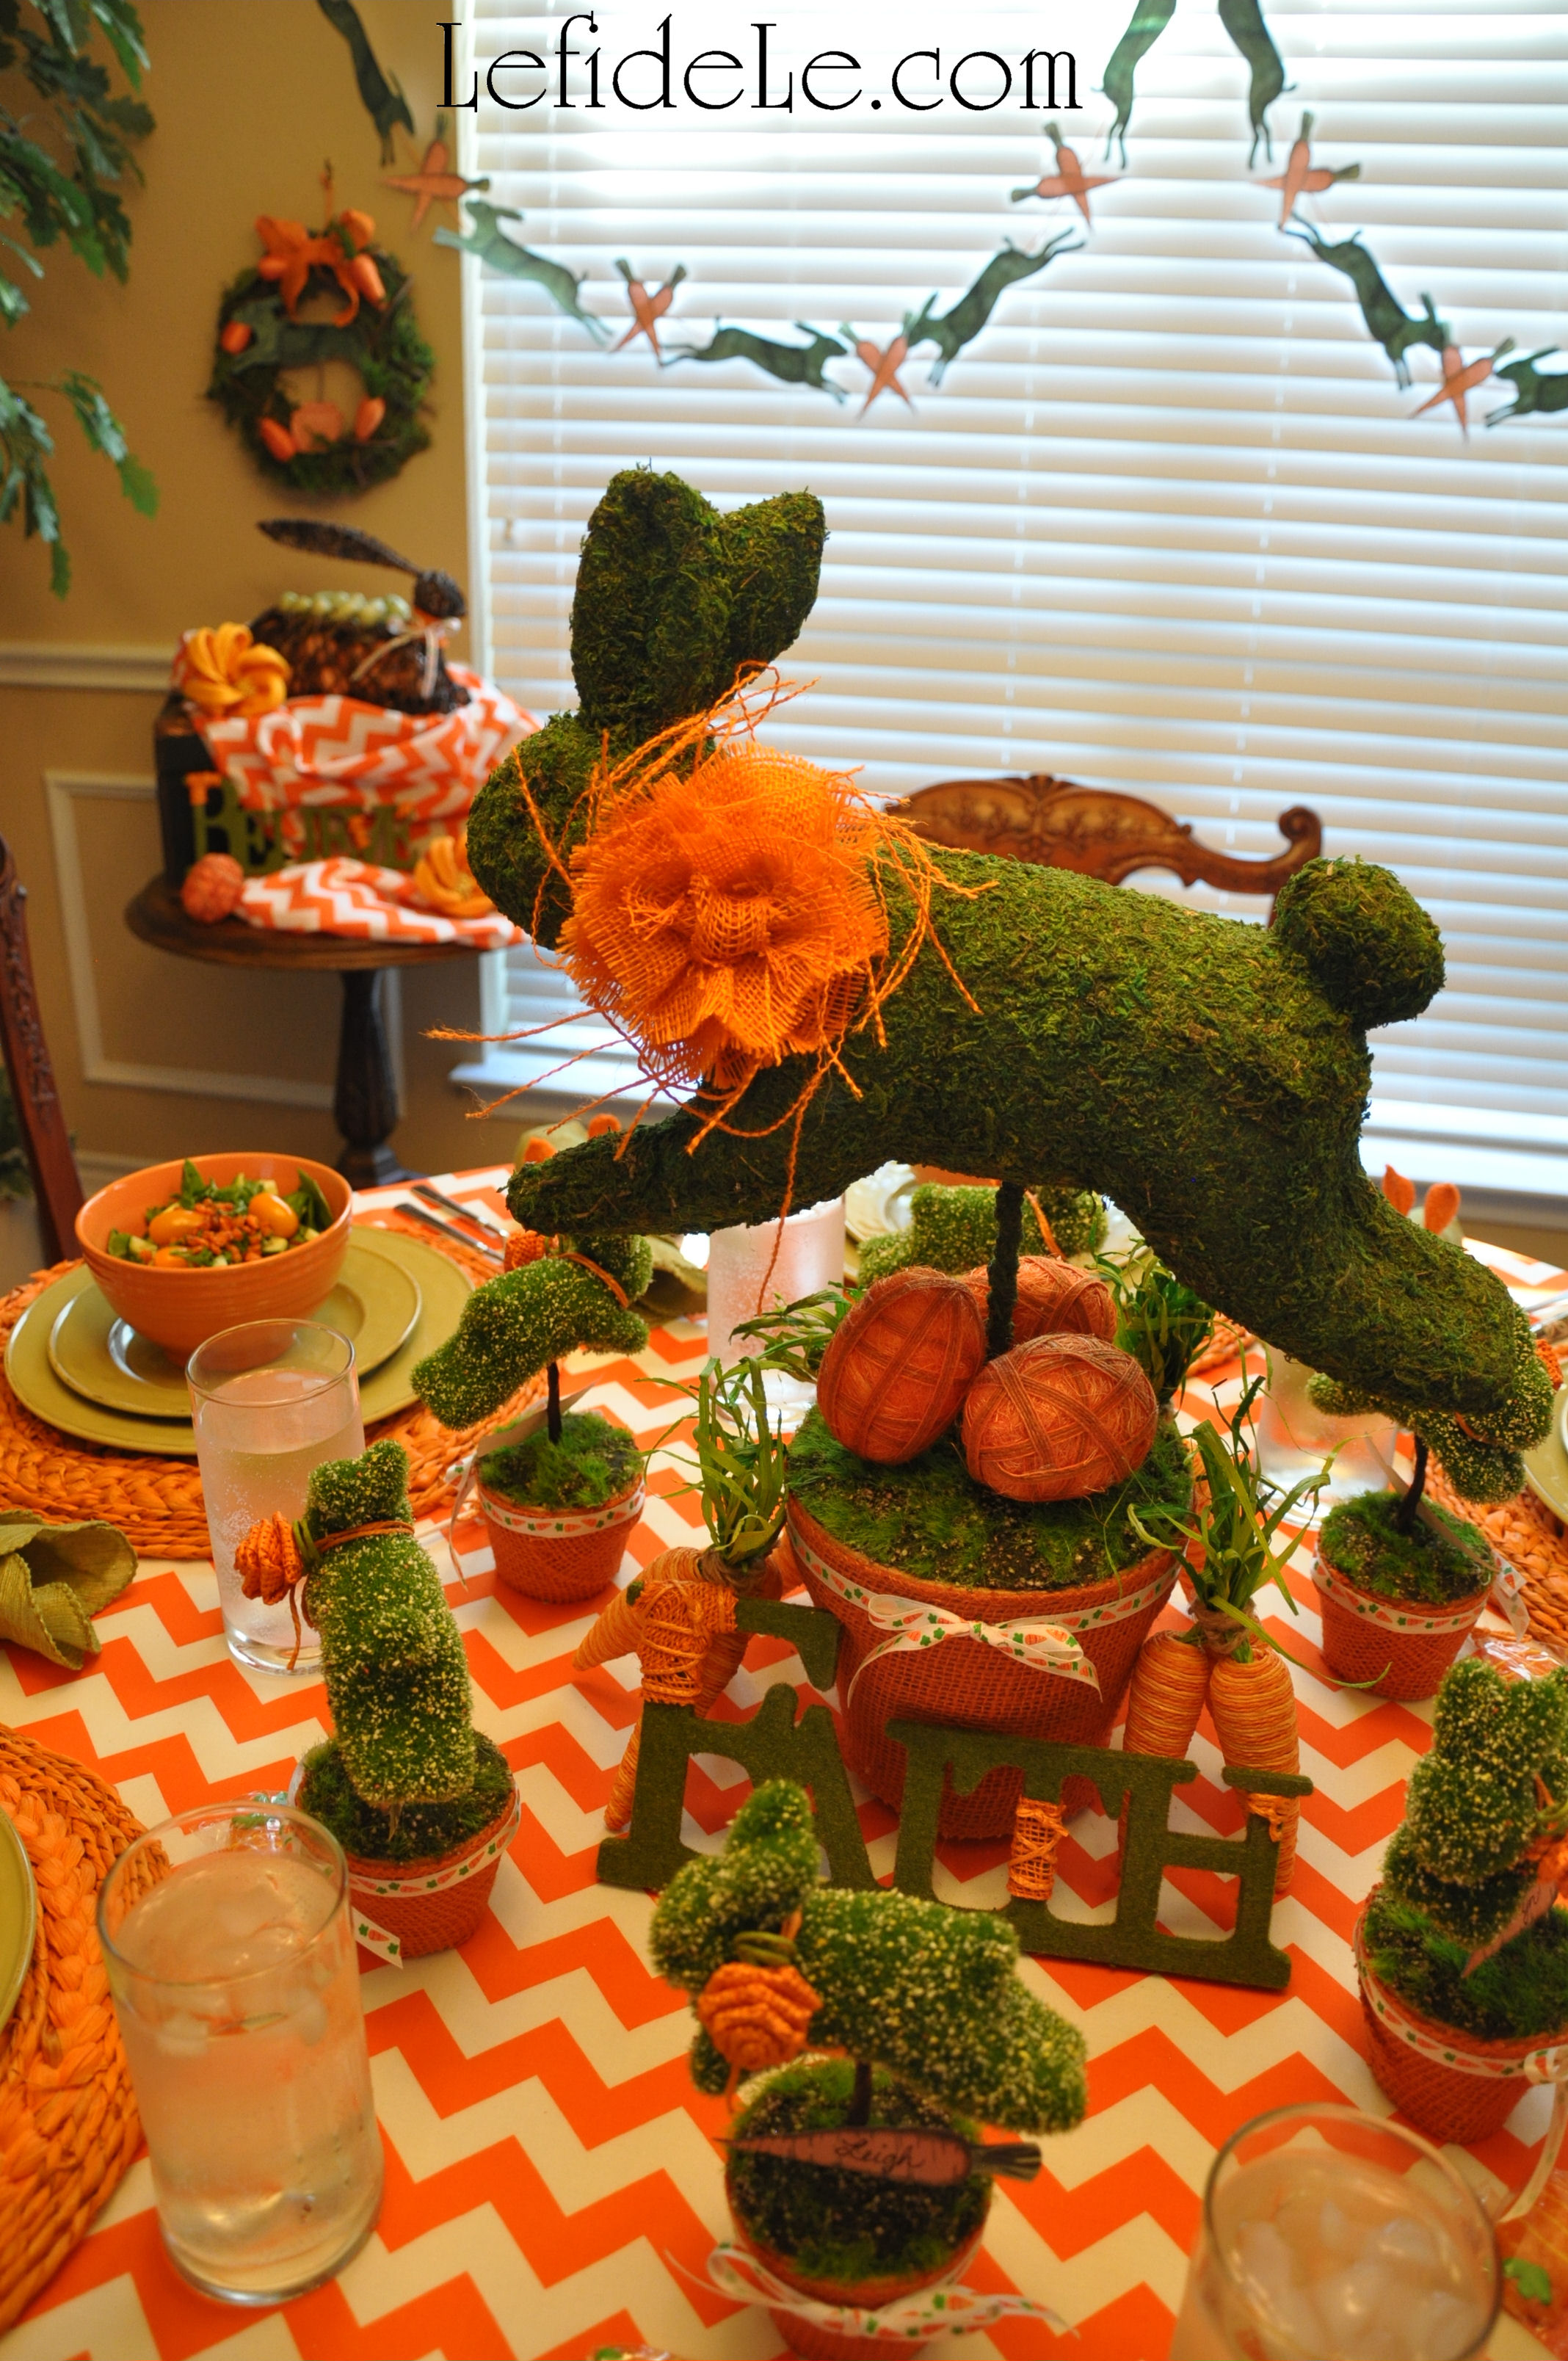
Orange twine wrapped Easter eggs sit on the grass beneath her. Twine and crepe carrots suggest growth of one’s soul.

294Leigh

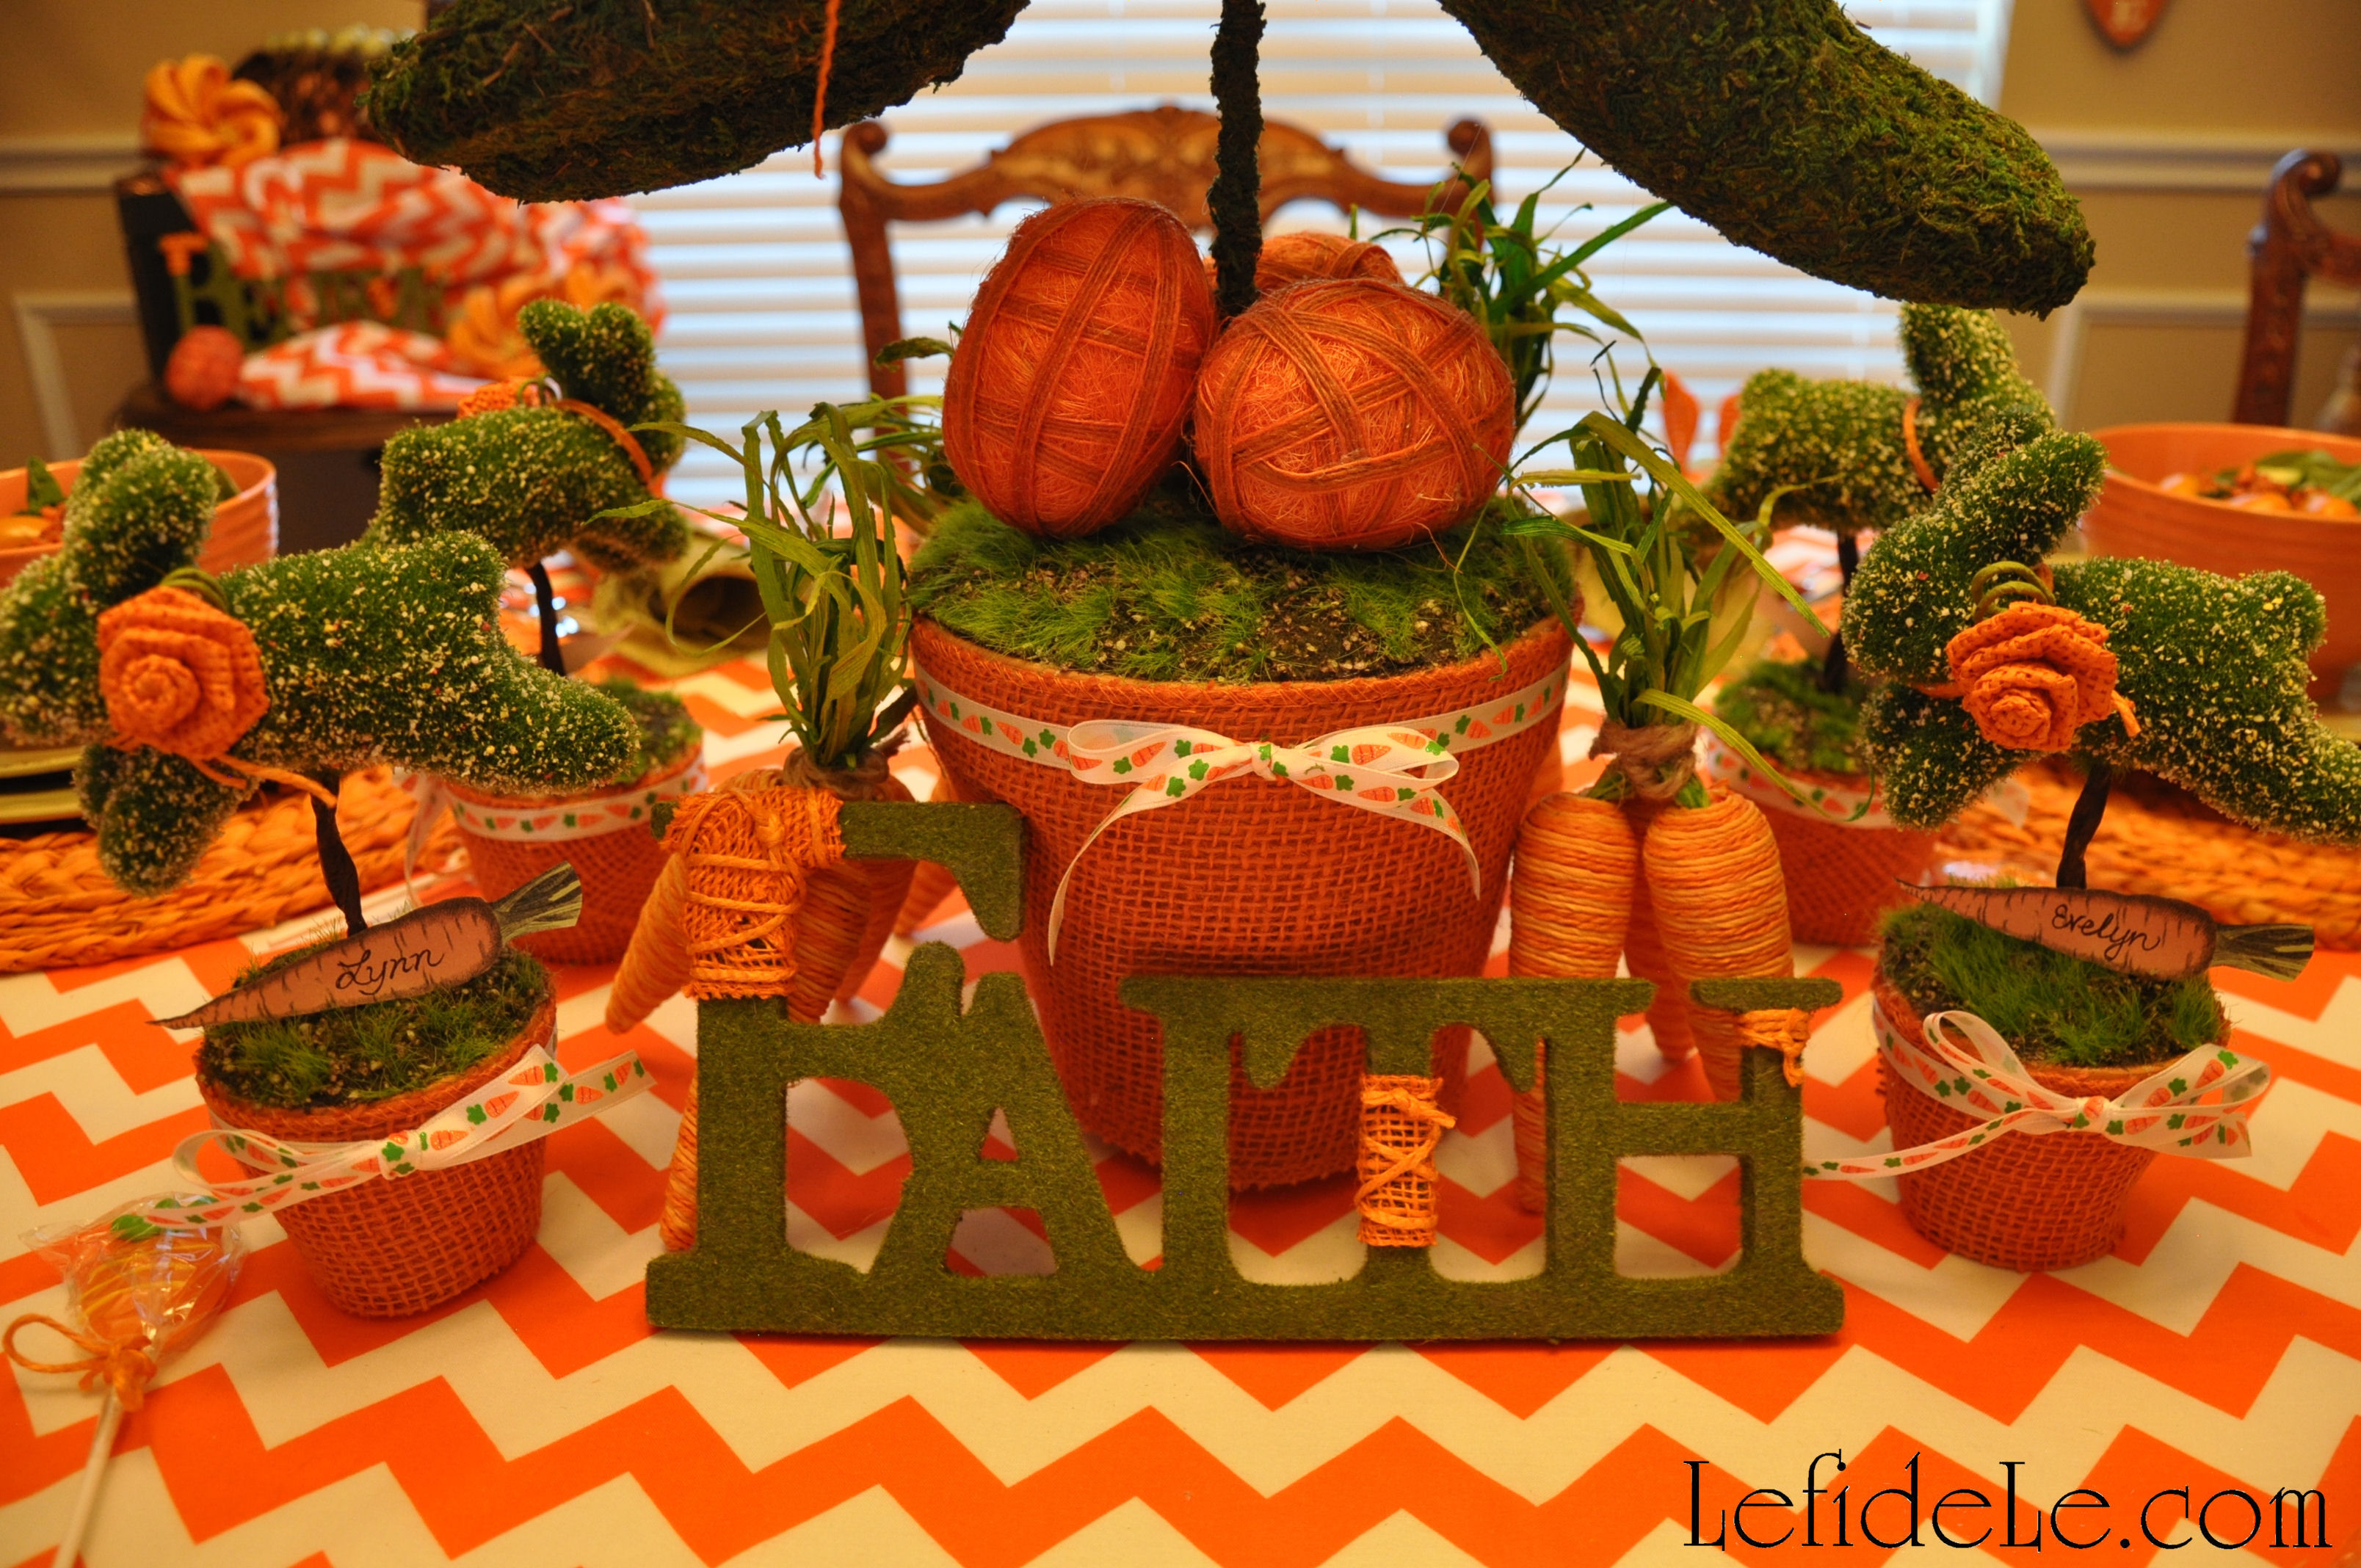
Faith stands as the center of the celebration both literally and figuratively. (The hedgerow letters are bandaged with burlap and jute symbolizing that one may be battered, but not broken when one has such faith.)

063Leigh

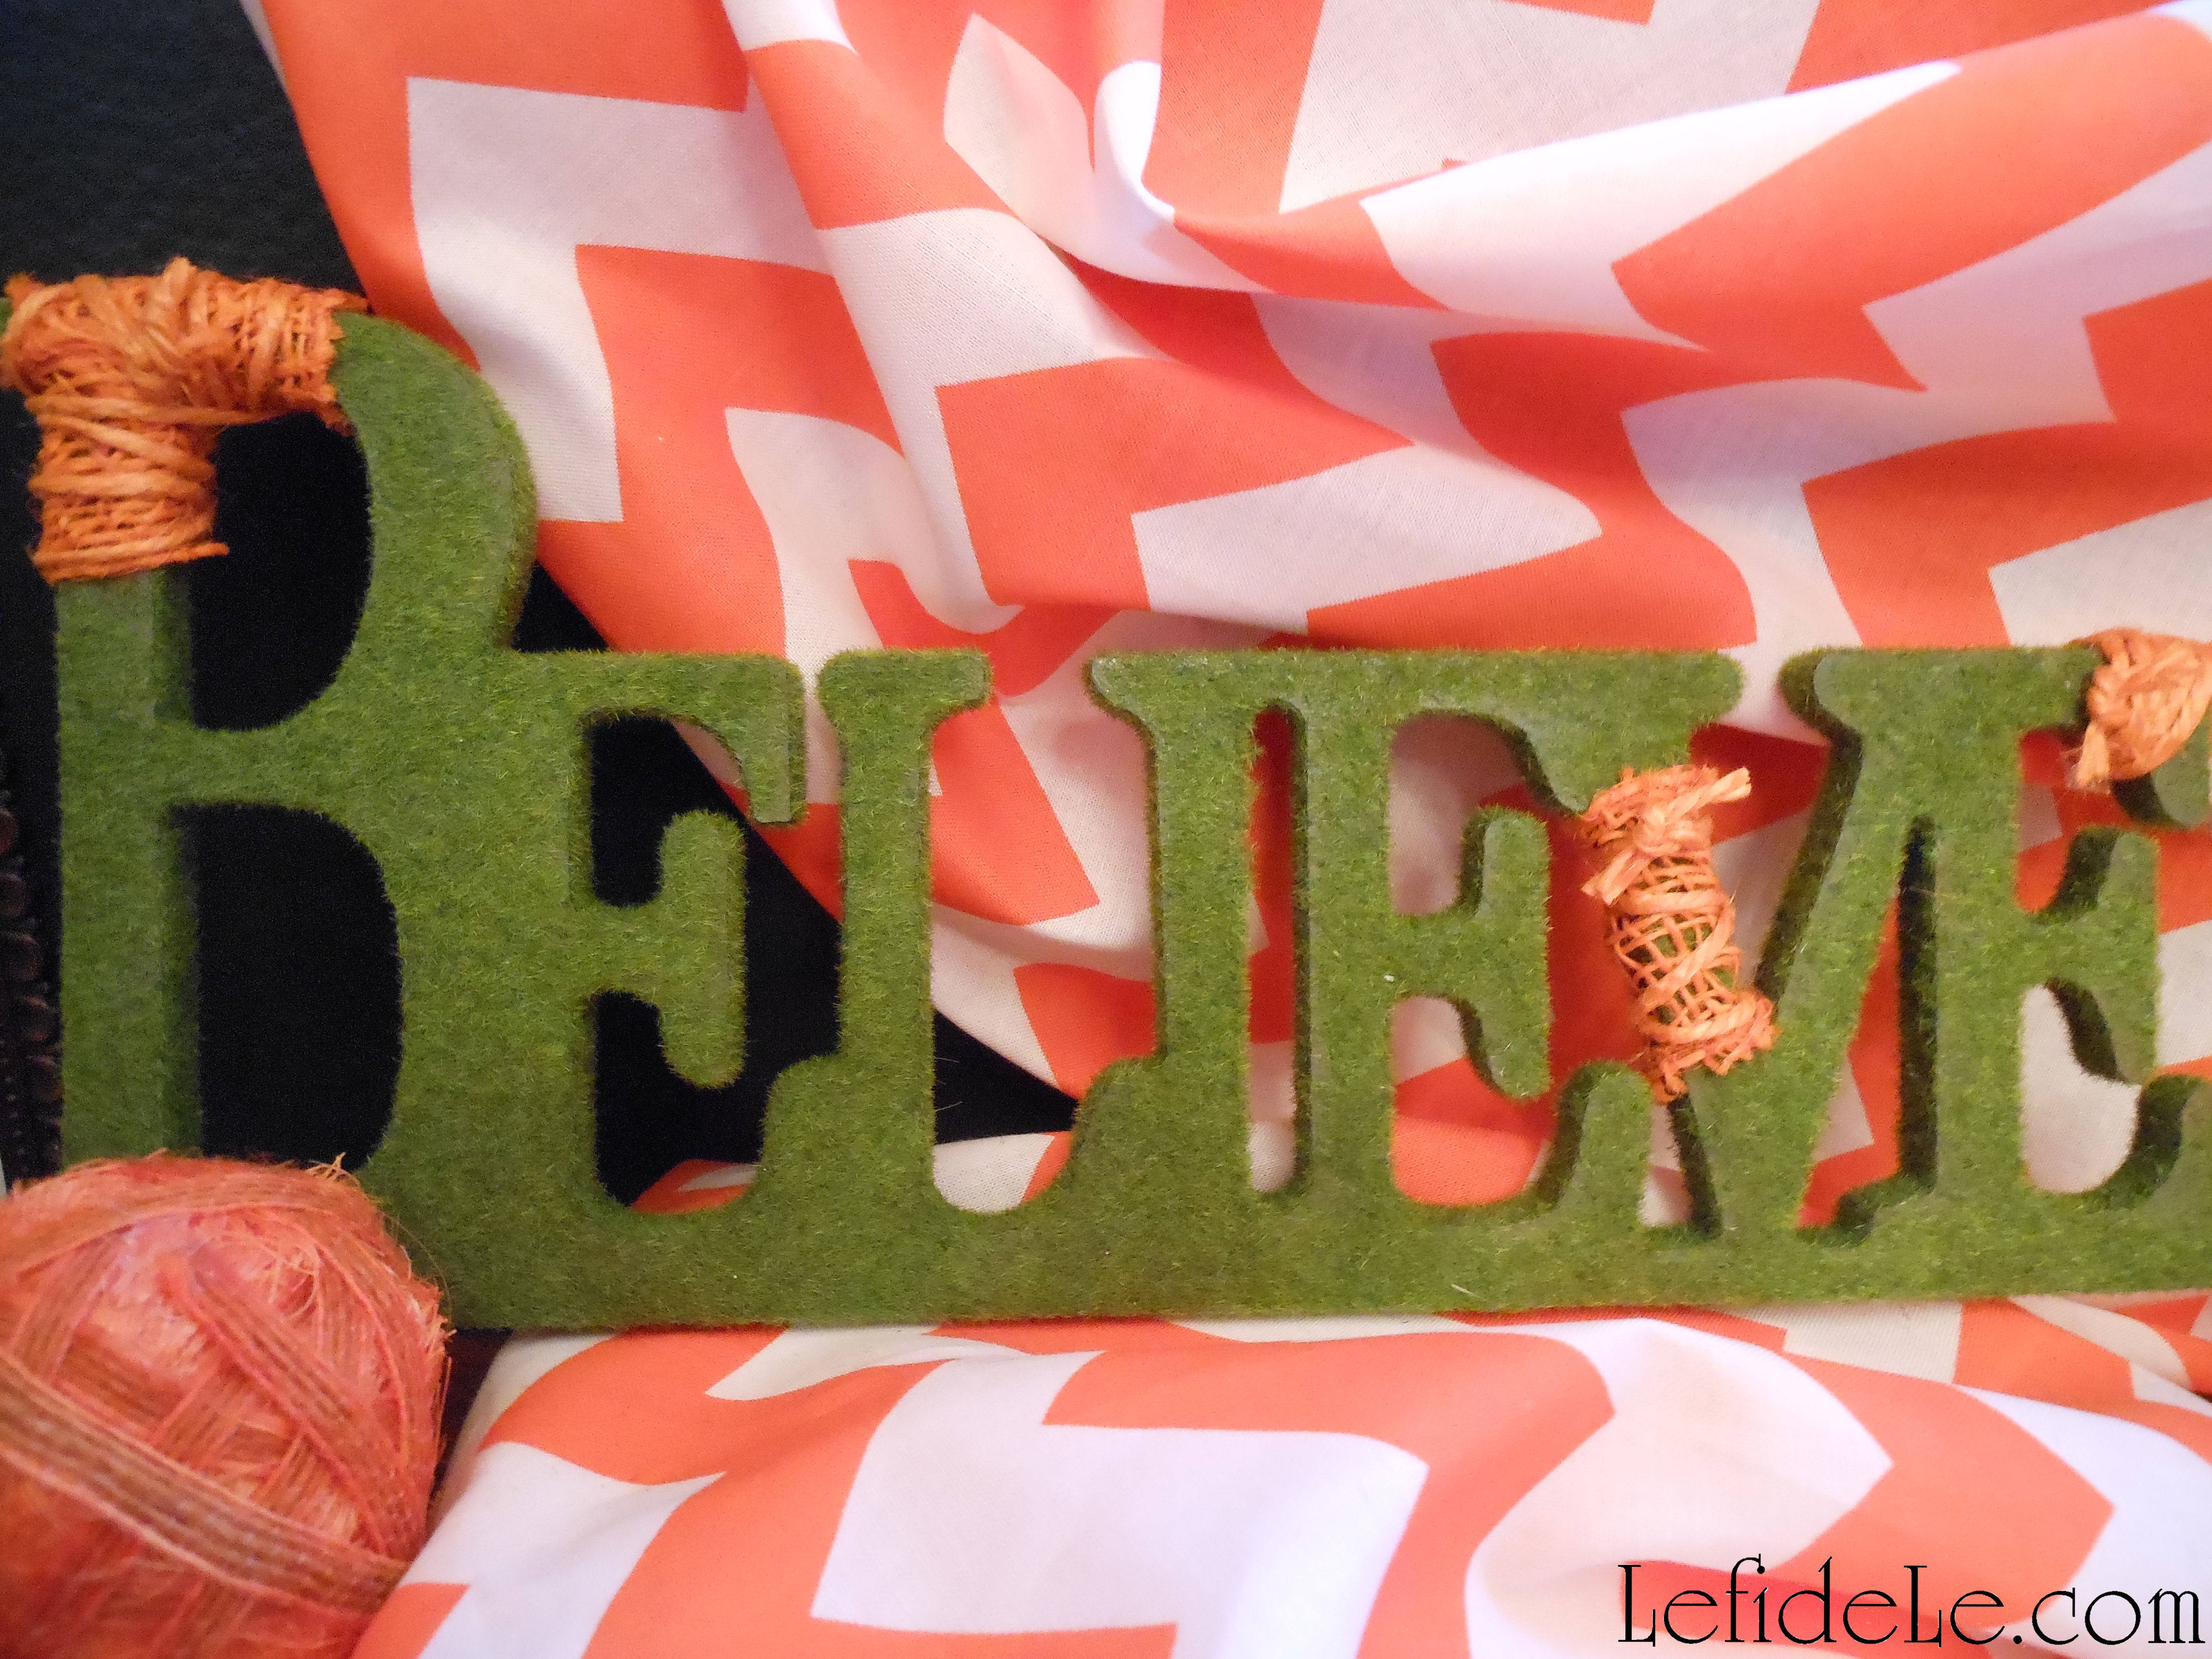
The side table holds another hedgerow spelling Believe. It sits with an additional egg enmeshed in a swirl of vibrant chevrons and burlap lilies.

198Leigh

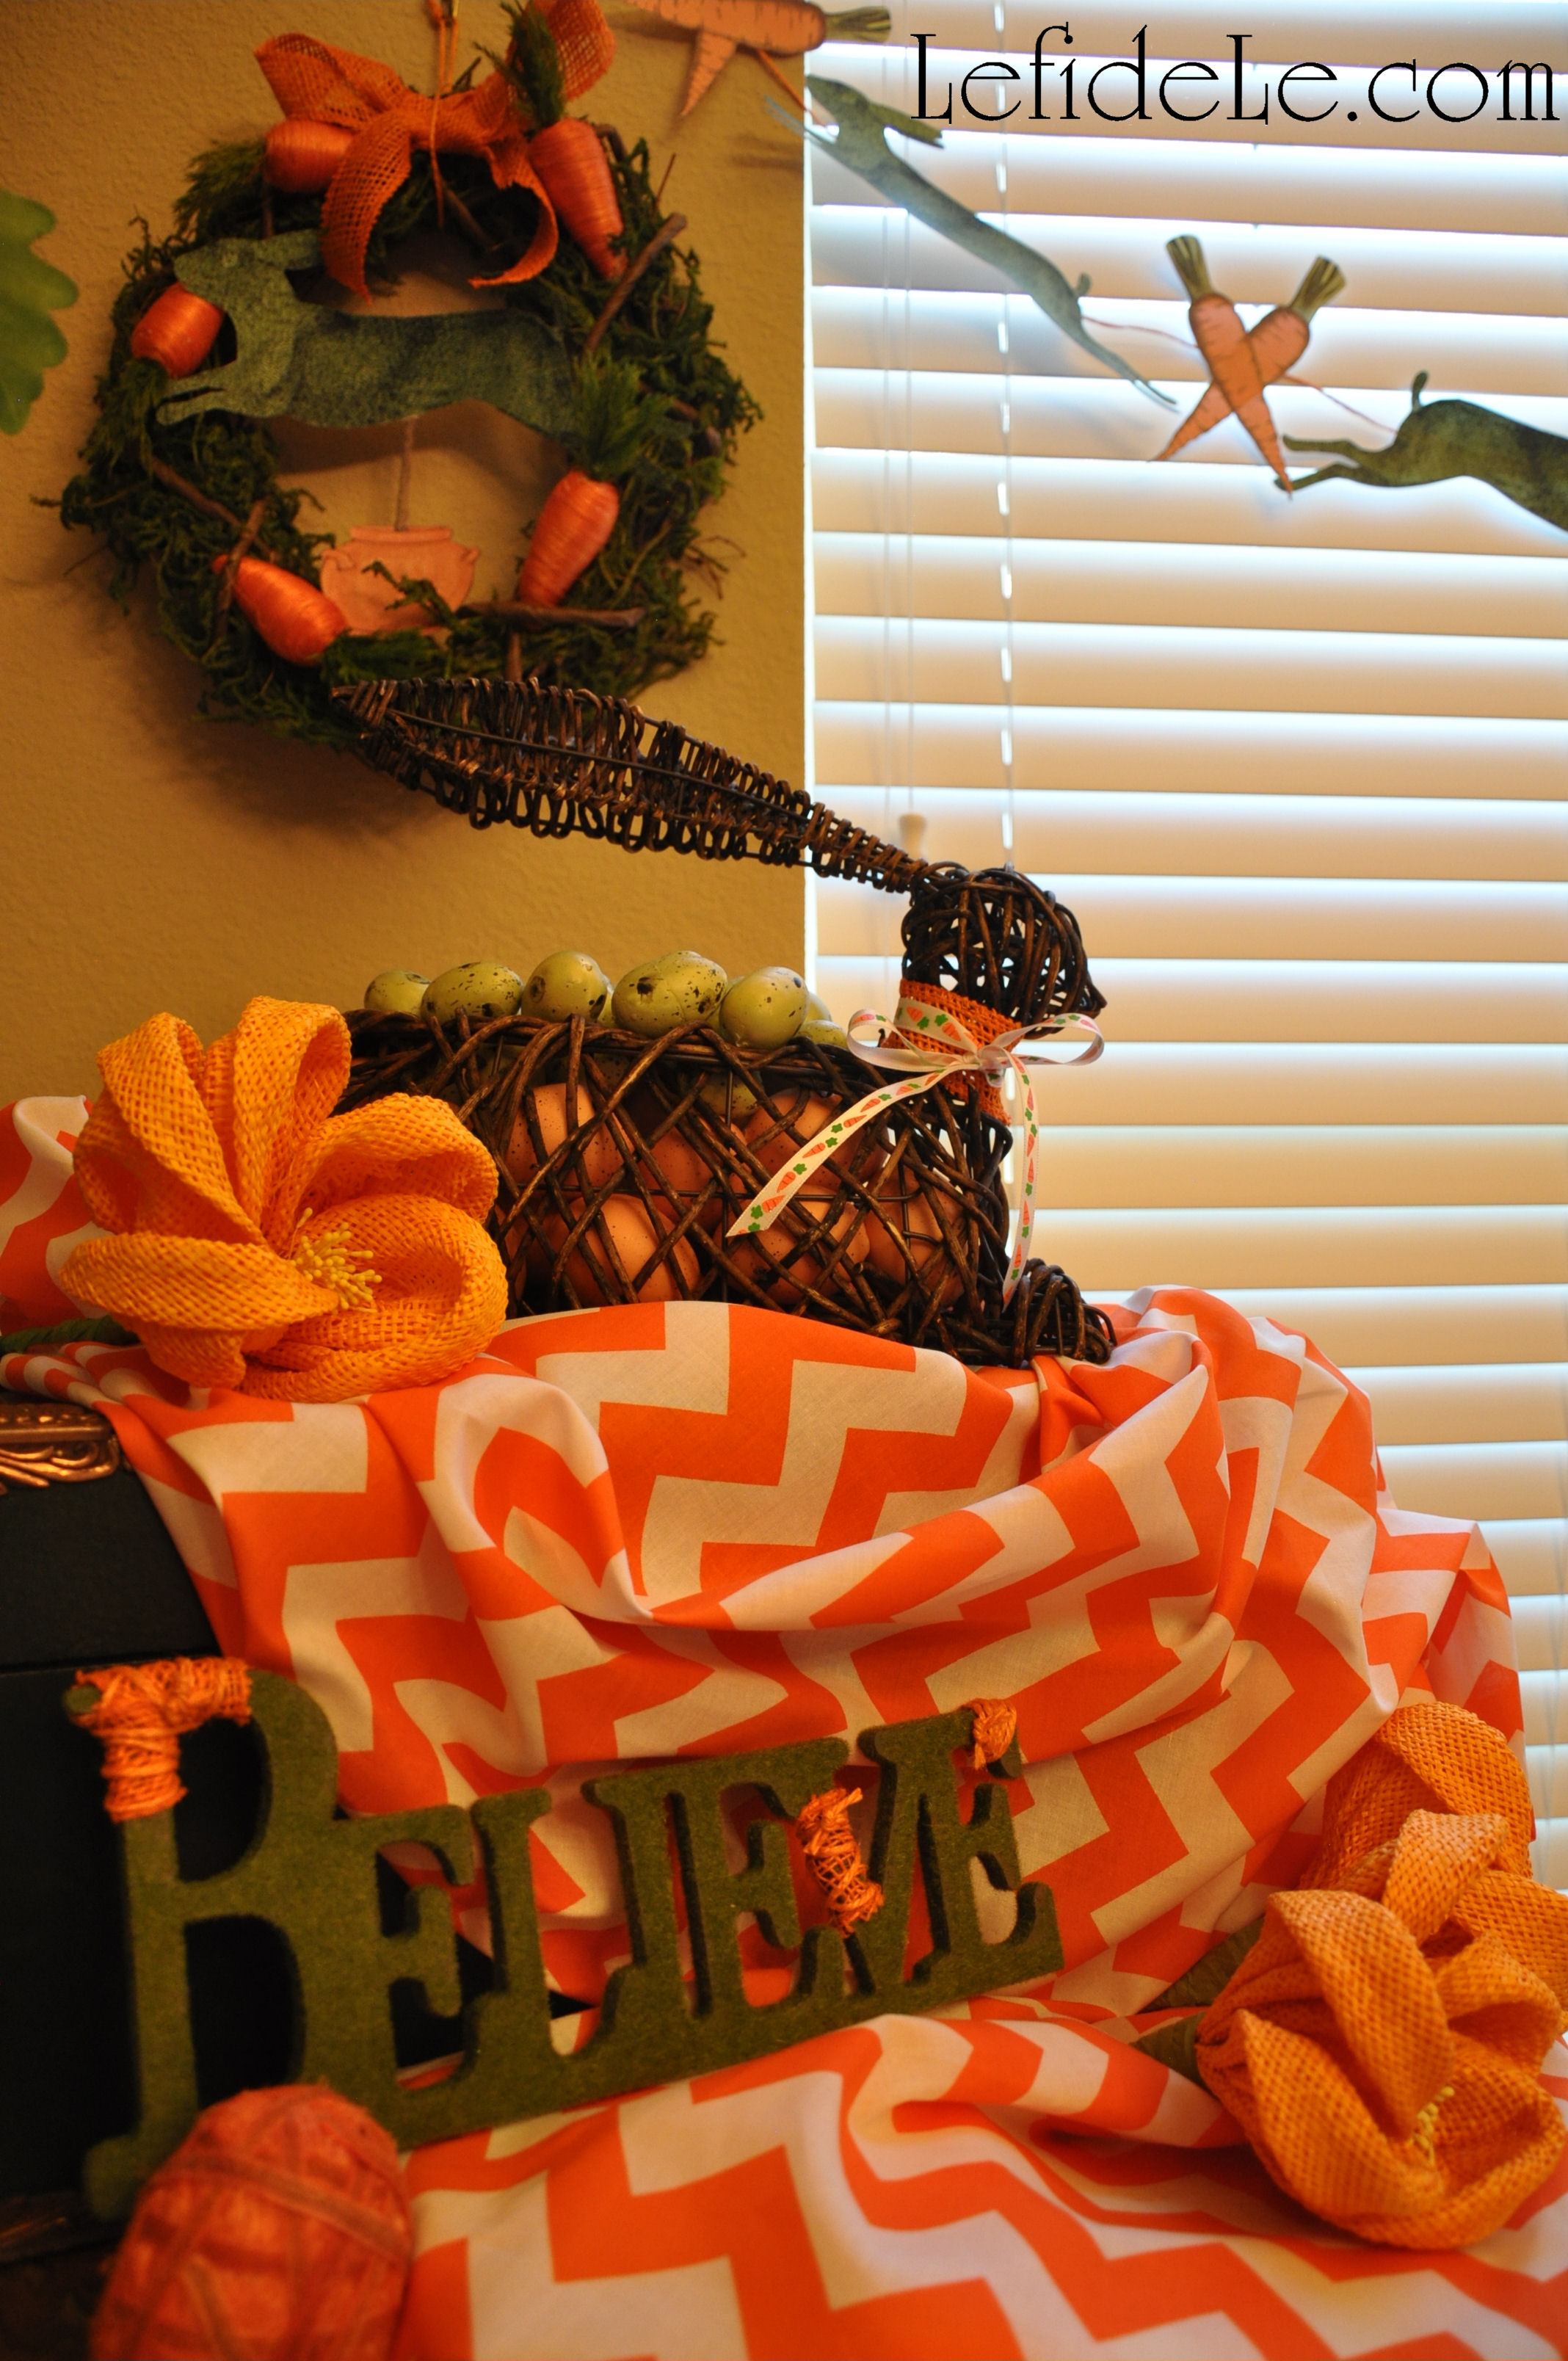
A green trunk elevates another bunny constructed of grapevines holding both faux farm eggs and green bird eggs.

183Leigh

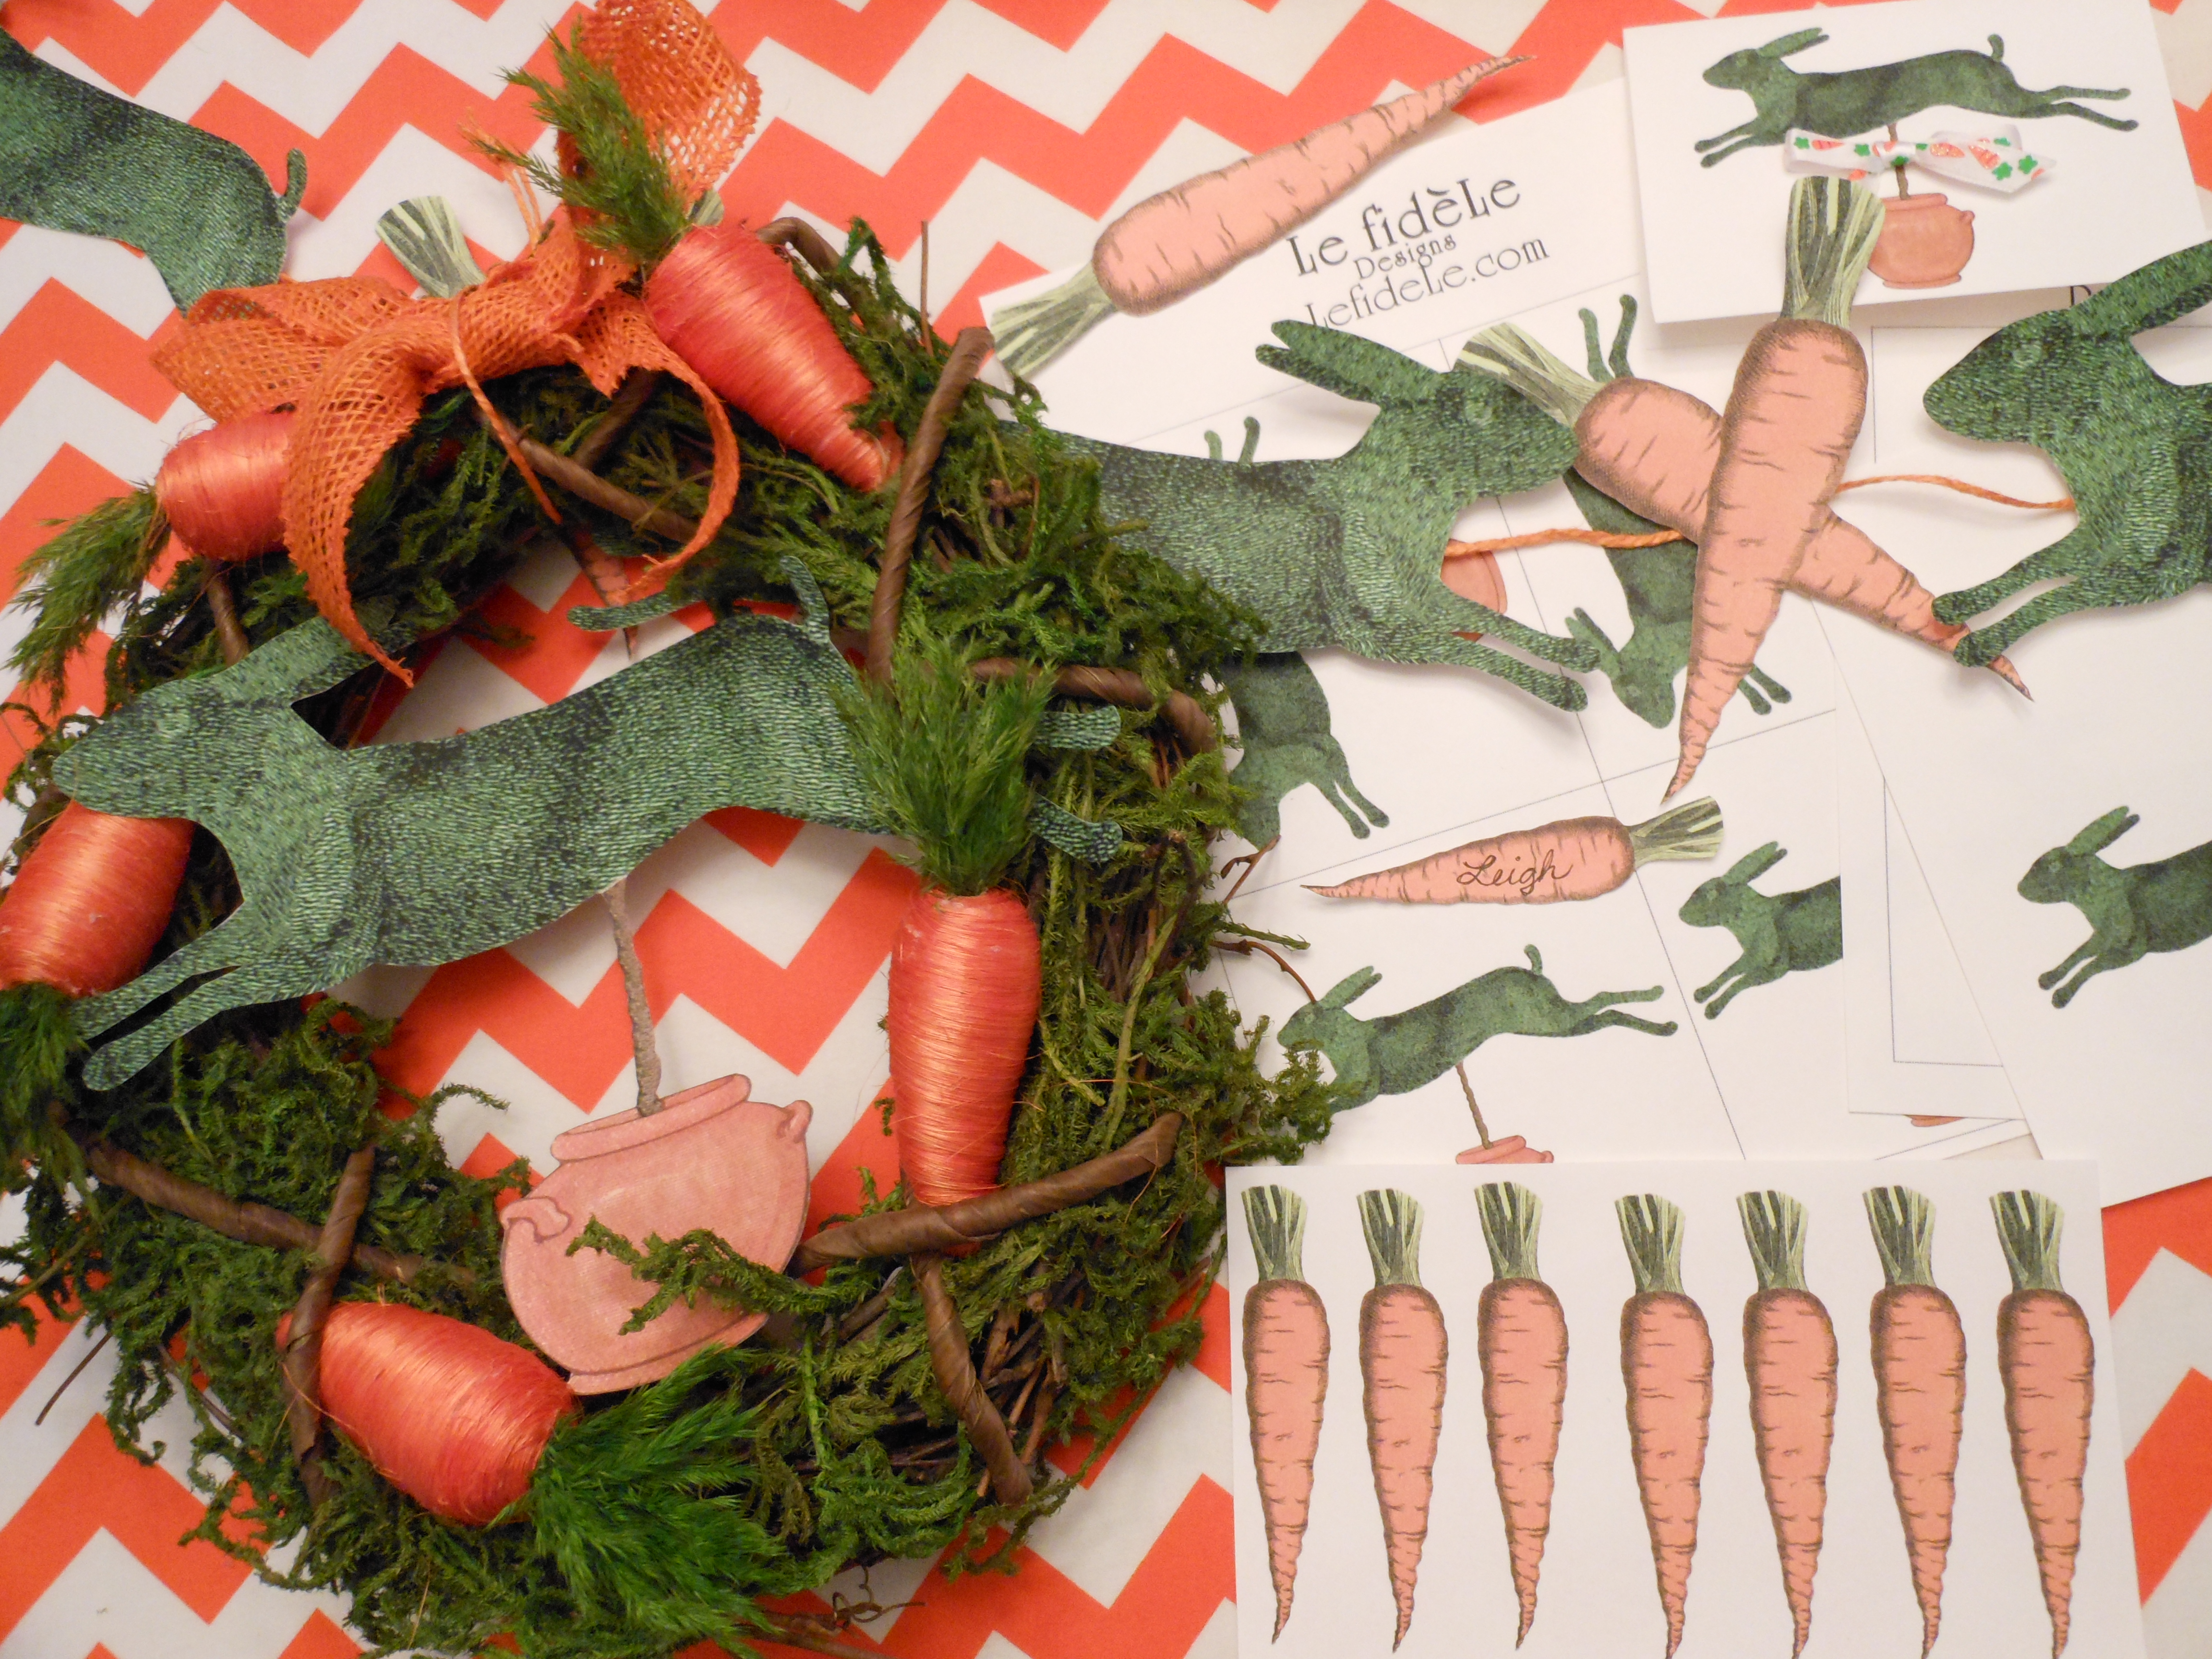
Above that a carrot wreath with my topiary printable hangs next to my banner. (Find the carrot wreath at affiliate Cost Plus World Market whose sale link is in the sidebar.)

209Leigh

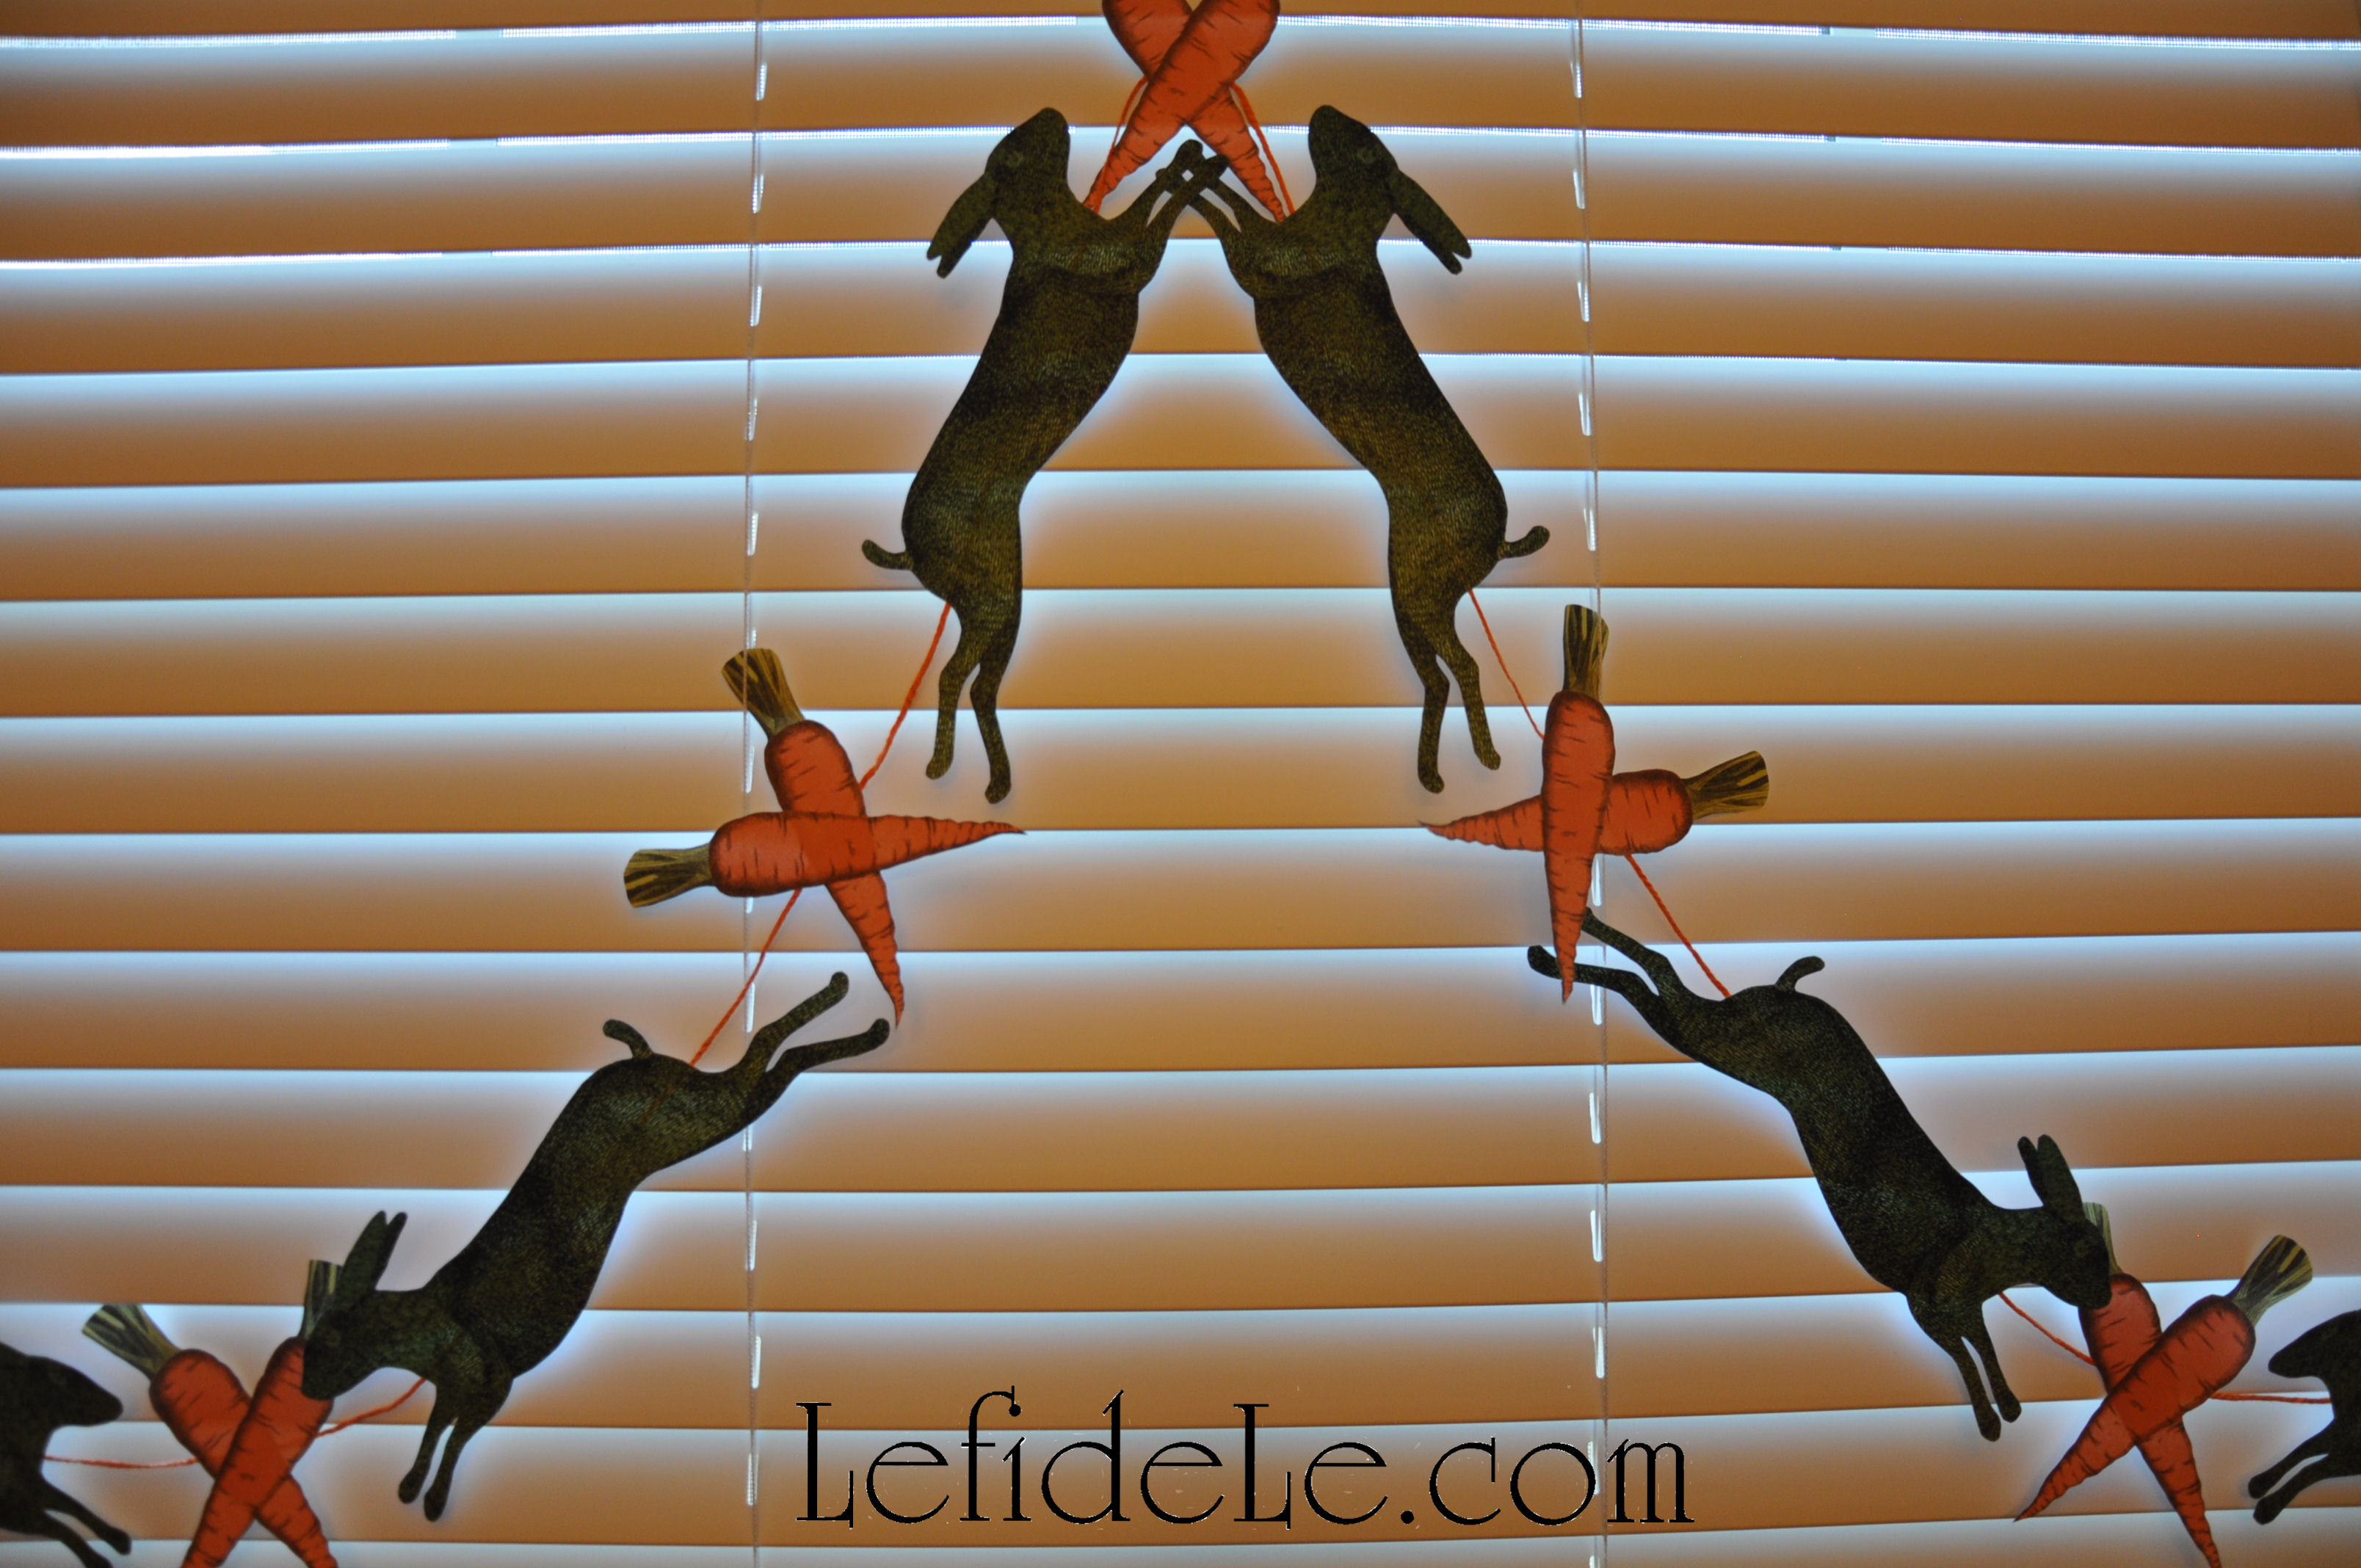
The end of my printable bunny and carrot banner sits close to a burlap carrot sign extending an honest welcome to all enter. (Get my free printables here.)

253Leigh

Take an idea or two, or use all of my craft tutorials and free printables for your own indoor garden party that declares, “Hello Spring!”

Faithfully Yours,

Leigh

P.S. The Easter Bunny approves this message.

WildBackyardBunnyLeigh

(This is one of the wild backyard bunnies visiting my porch!)

Fast & Easy DIY Burlap Ribbon Bunny Ears Napkin Rings Craft Tutorial (Perfect for Easter, Showers, Luncheons, & Brunches)

139Leigh

Why buy a set of bunny ears napkin rings when you can make your own for a fraction of the cost that suits your décor perfectly? This was the thought that sparked one of my cutest projects. 12 feet of 1 inch wide orange burlap ribbon was enough to make 6 rascally rabbit rings for my leaping bunny topiary theme, but many other ribbons would have worked just fine. Hot glue, scissors, and a ruler were the only tools needed to finish the napkin creatures in half an hour. What a perfect project for a spring “crafternoon”!

017 (2)Leigh

Each bunny will use about 2 feet of ribbon, so plan accordingly. Note that one inch wide ribbon is the perfect size for this project. Cut 2 lengths of 7 inch strips for each ring… or 12 strips for a half dozen rings.

019 (2)Leigh

Cut 2 lengths of 5 inch strips for each set of ears… or 12 strips for a half dozen rings.

020 (2)Leigh

Fold each 5 inch strip in half, and press a crease into the folded edge. Lay down a thin strip of hot glue along each vertical side edge, in order to glue the fold into place permanently. (Try using a cool temp hot glue gun to avoid burning your fingers with the hole-filled burlap.) Leave the bottom non-folded edges unglued, forming a tiny sack. At the top folded edge, take the right corner and fold it over toward the center. Then take the top left corner, and fold it over the right one. It will make the top of each ear. Glue the folds into place with a dot of glue, under the left corner and over the right.

023 (2)Leigh

With all your ears made, assembly line fashion, get started on attaching them to the rings. Take one of the 7 inch strips and fold it in half to locate its center. Cut centimeter length slits, about a centimeter away from that fold, perpendicular to the fold. (You just made two ear canals.) Fold the bottom open edge of an ear in half, and slip it into a slit opening. You should see about a half centimeter sticking out.

024 (2)Leigh

Glue the outside of this protruding portion to the 7 inch ring strip. It should fan outward. Repeat with the other ear, making sure they’re facing the same direction.

026Leigh

Take another 7 in strip of ribbon and glue it to the flat side of the bunny eared strip. The easiest way to begin is by gluing one end and tapping it into place. Continue on until the whole strip is joined. Make sure the ribbons are curved the same direction for a less troublesome experience.

037Leigh

Form the ring by gluing one end of the long strip to the other, by slightly overlapping the edges. (You just made a bunny face.)

170Leigh

Repeat this process until your rabbit warren is complete. (Know that they get easier after making the first one.)

149Leigh

I used sage green cloth napkins with a seam that is actually called a lettuce edge. These folded beautifully into a roll with a top that resembled a small head of lettuce.

252Leigh

These are perfect for an Easter party. (See more of the leaping bunny garden party here.)

090Leigh

They’re also great to pull out for a spring lunch. (Find the carrot croutons / “bacon” bits recipe here.)

166Leigh

I wanted orange bunnies to coordinate with my carrot décor, which no one even sells, so I made them with fall clearance ribbon… making the grand total for this project a whopping buck fifty!

220Leigh

The best part of all, was receiving the genuine compliment that they were so much cuter than the stores’ versions. I hope you think so too. (Get the topiary craft tutorial and printables here.)

073Leigh

Faithfully Yours,

Leigh

P.S. The Easter Bunny approves this message.

WildBackyardBunnyLeigh

(This is one of the wild backyard bunnies visiting my porch!)